HOLIDAY DONATION DRIVE - SUPPORT MSW - DO YOUR PART TO KEEP THIS GREAT FORUM GOING! (Only 68 donations so far out of 49,000 members - Can we at least get 100? C'mon guys!)
×


AndyMech
-
Posts
363 -
Joined
-
Last visited
Content Type
Profiles
Forums
Gallery
Events
Everything posted by AndyMech
-
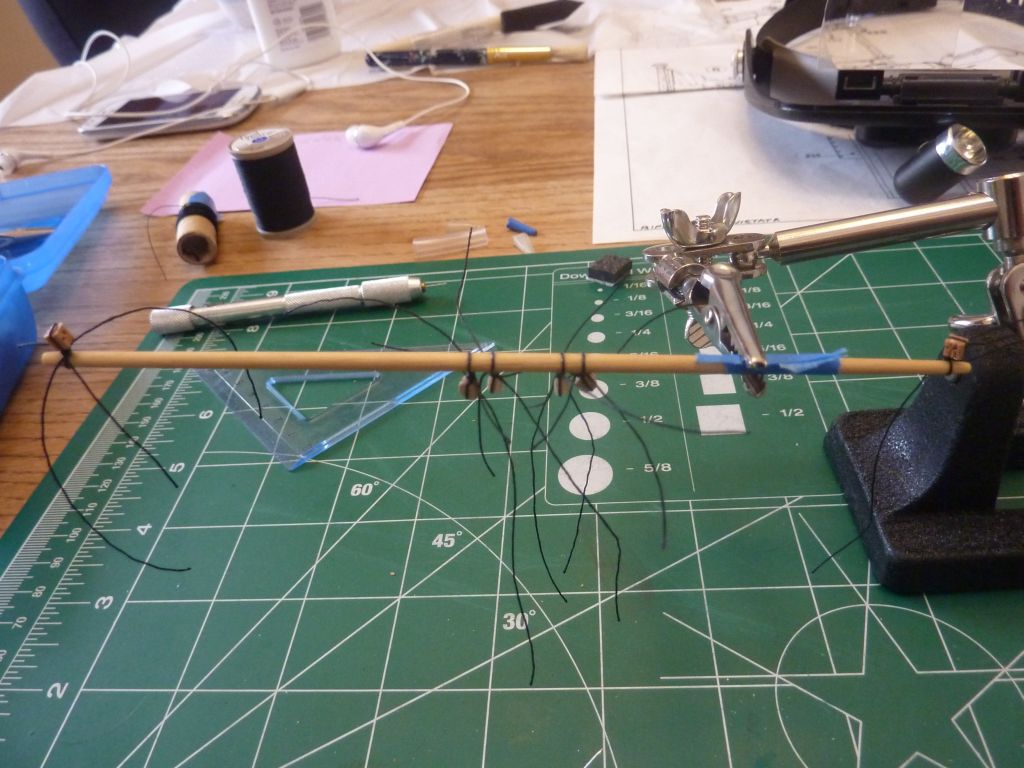
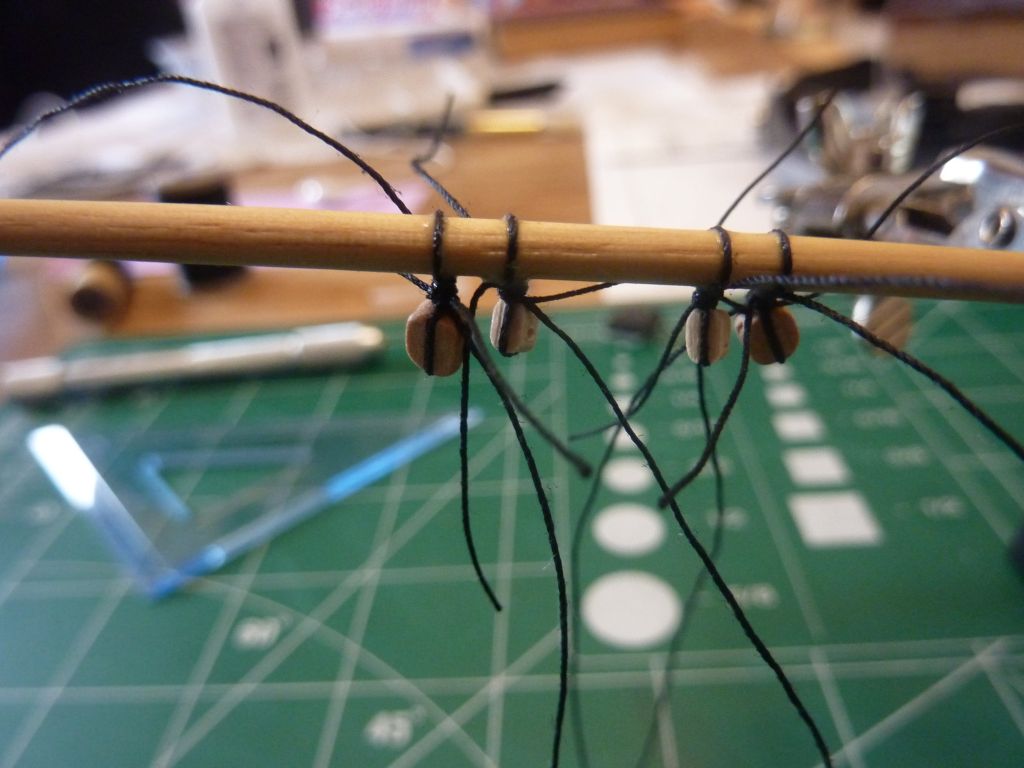
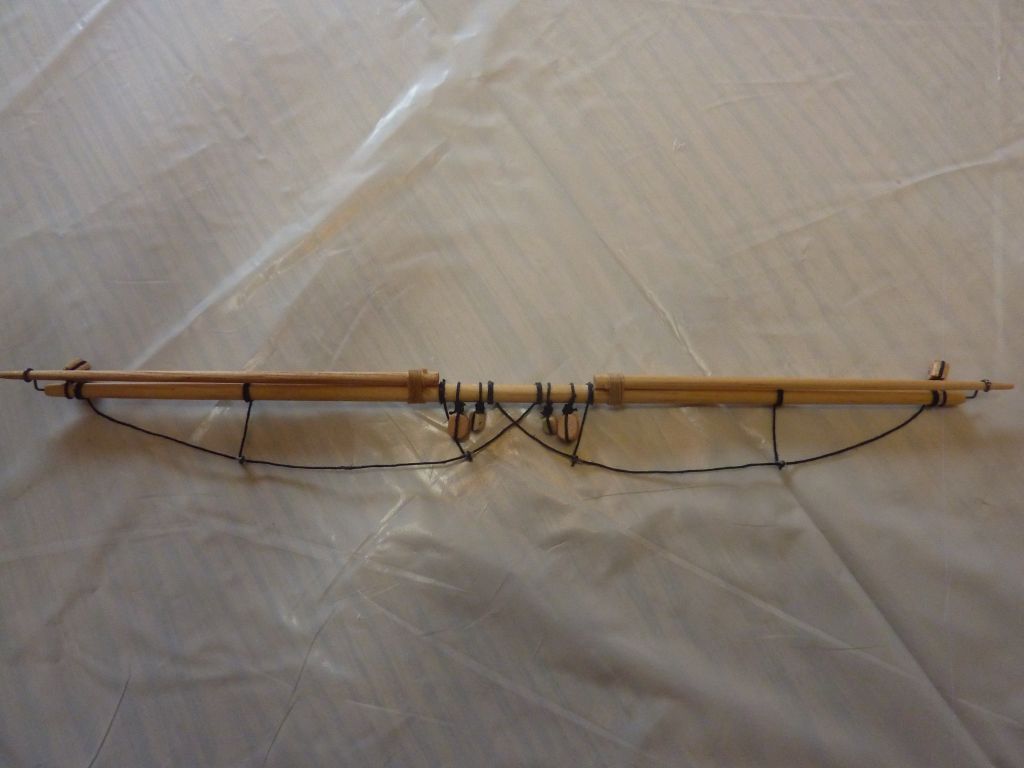
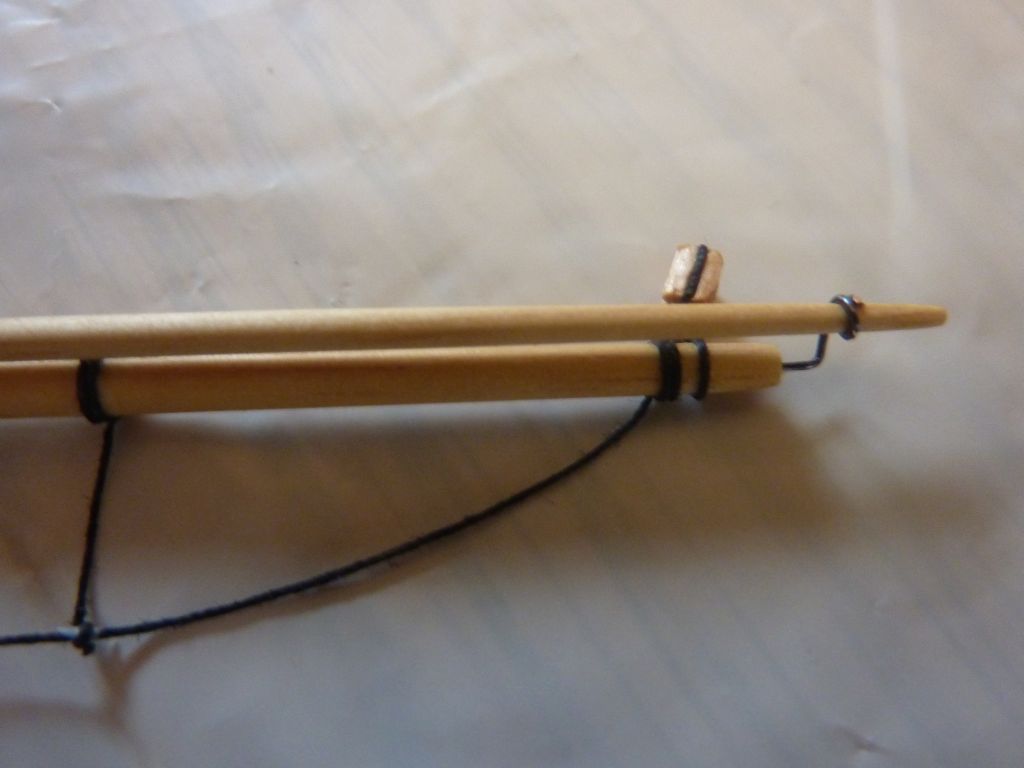
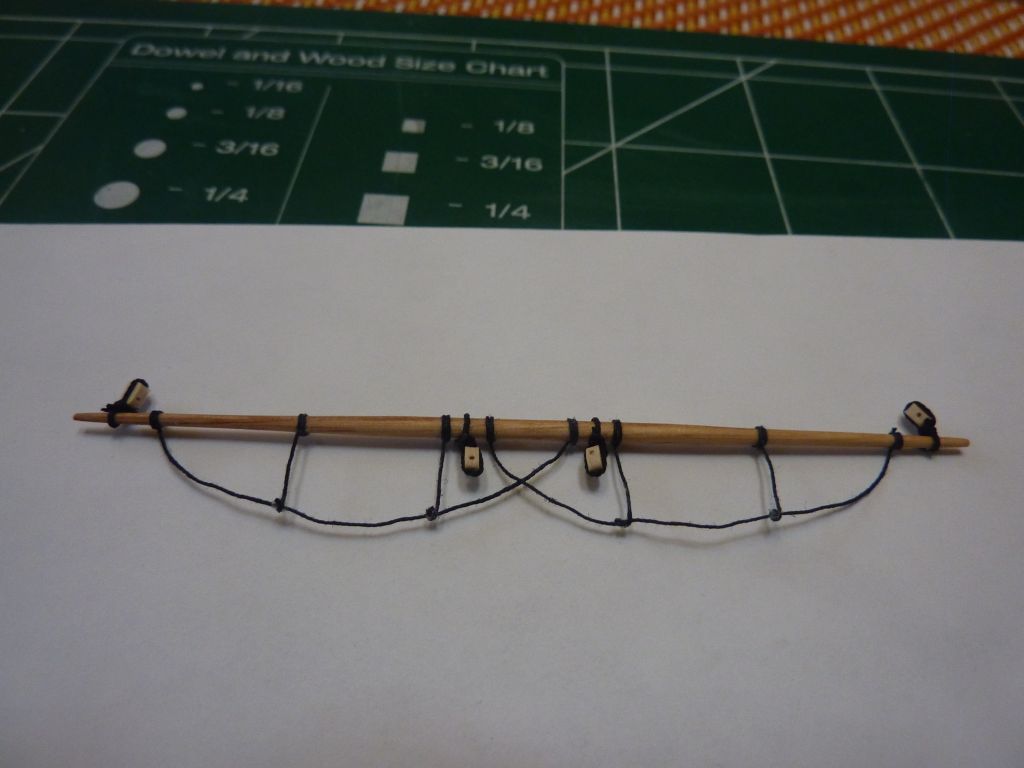
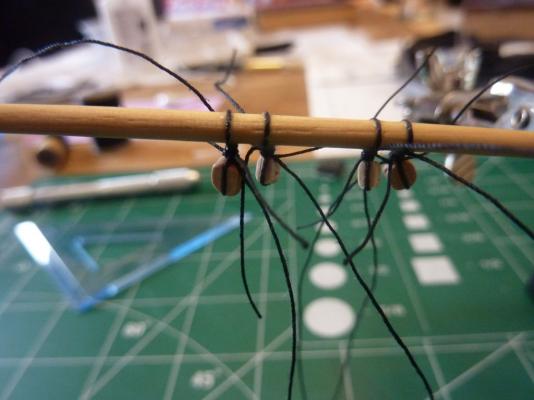
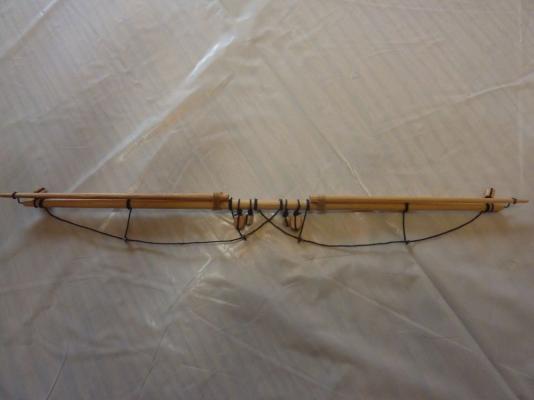
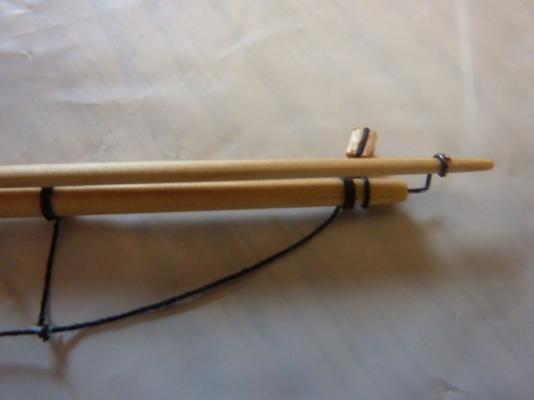
Well, I got the new blocks from the Syren Ship Company - the difference in quality is pretty amazing. After I got the blocks, I spent a lot of time last weekend tying them to the main mast. It's so much easier to tie them on prior to setting the mast into the hull. I didn't take any photos of that yet though. Today, I worked on assembling the yard - attaching my new blocks, and the spars (this is the 3rd yard up - I forget the name). Tying the blocks prior to trimming the thread ends. Final yard with spar tied in as well.

- 188 replies
-
- 2
-

-
- constitution
- mamoli
- (and 2 more)
-
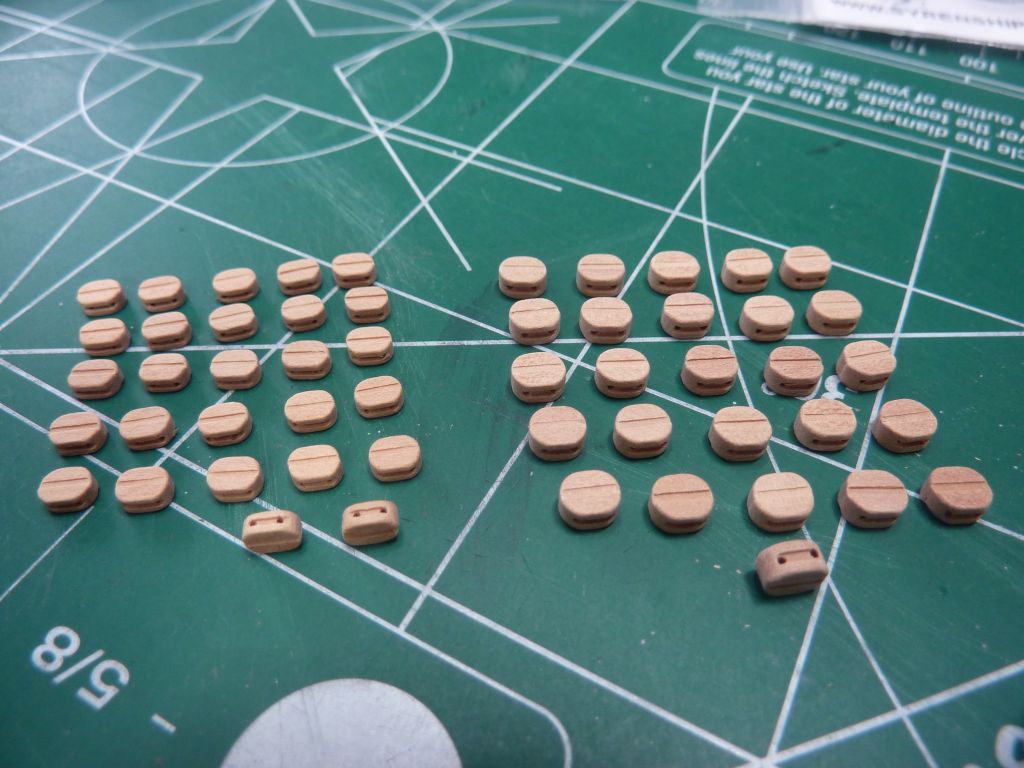
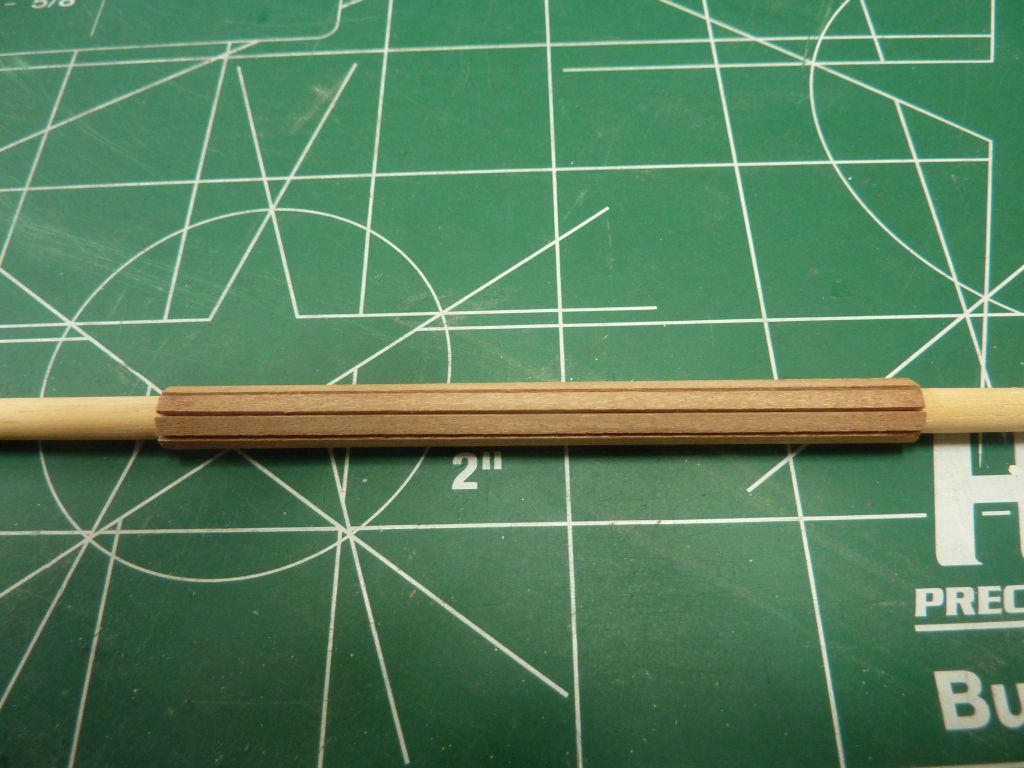
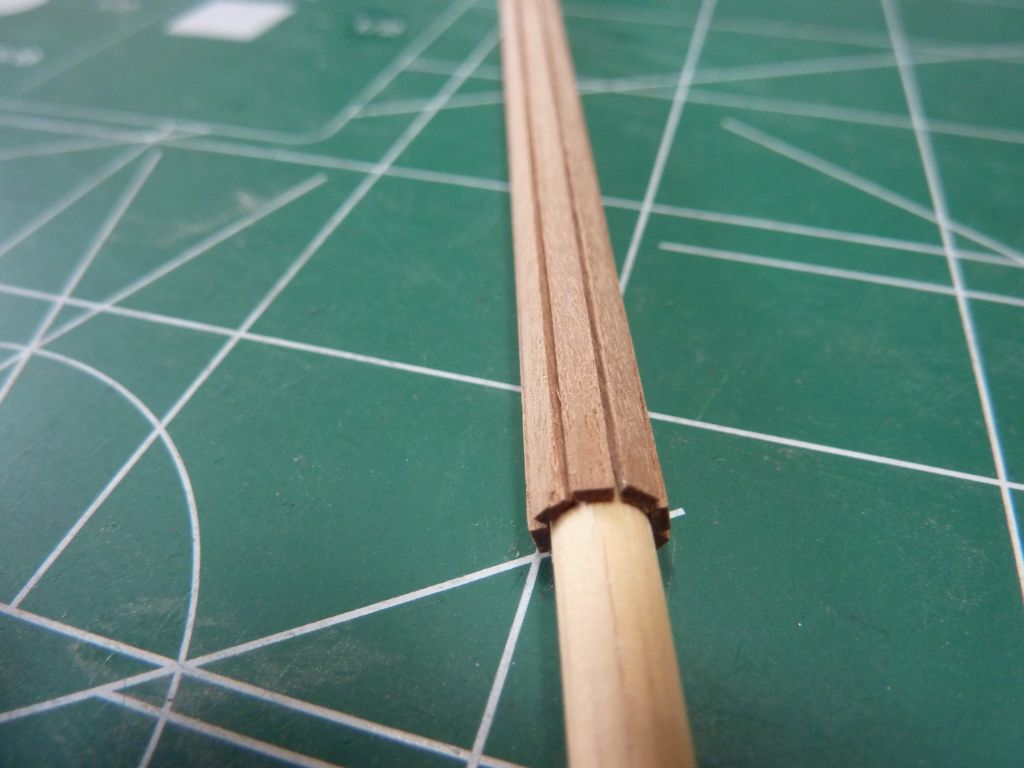
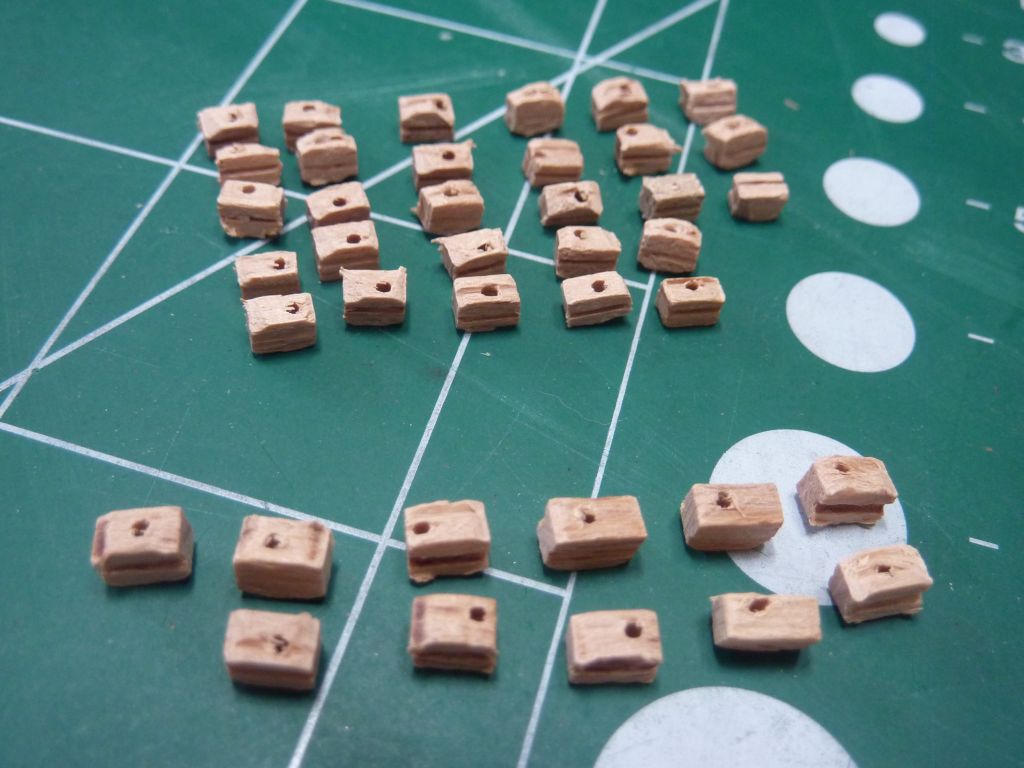
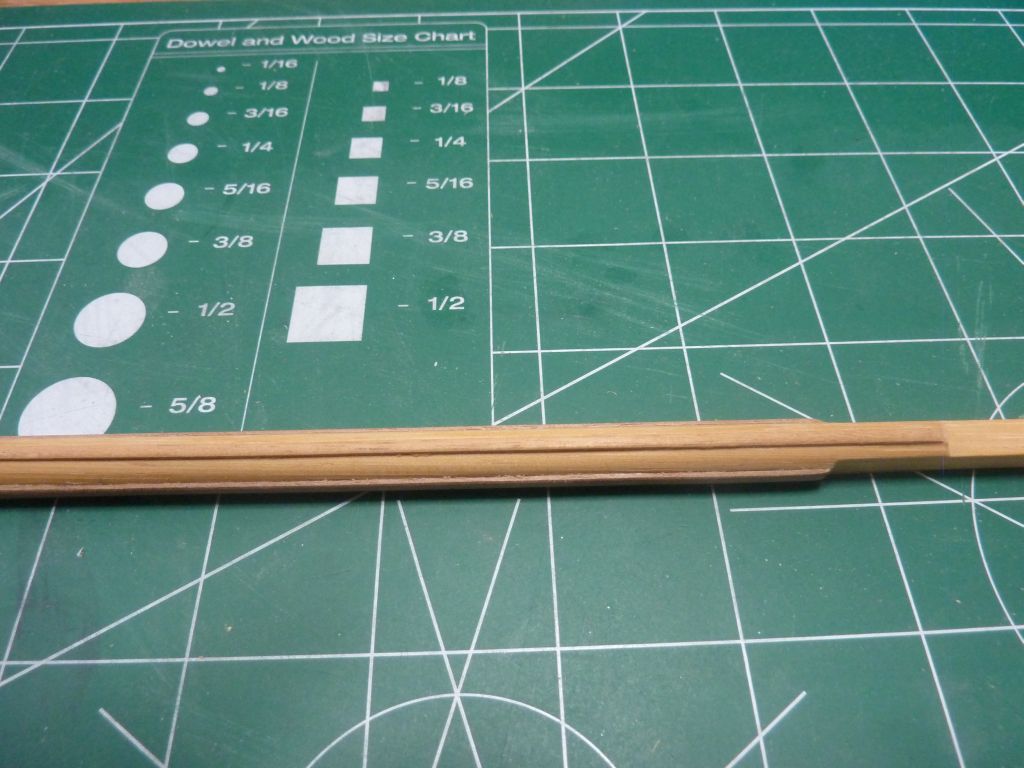
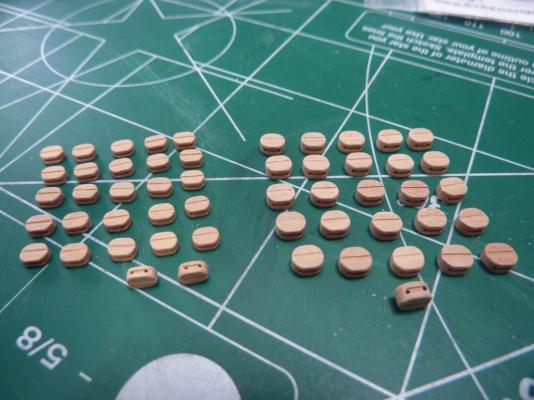
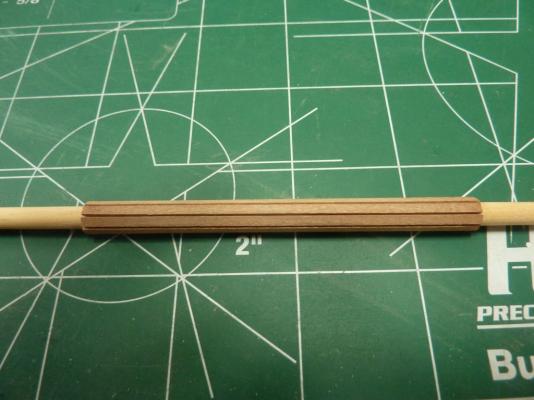
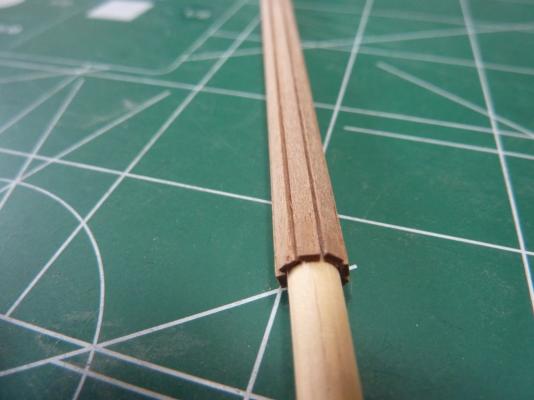
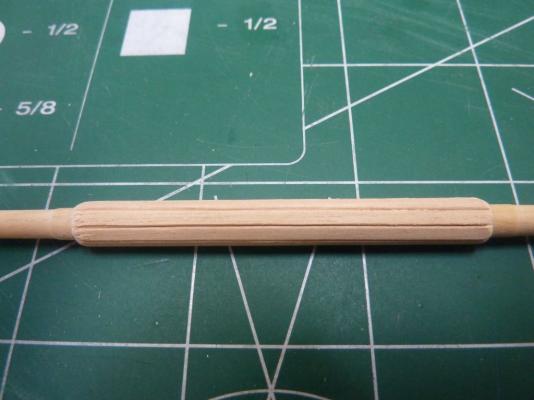
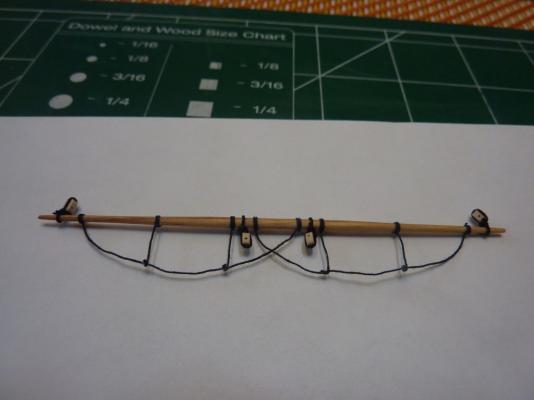
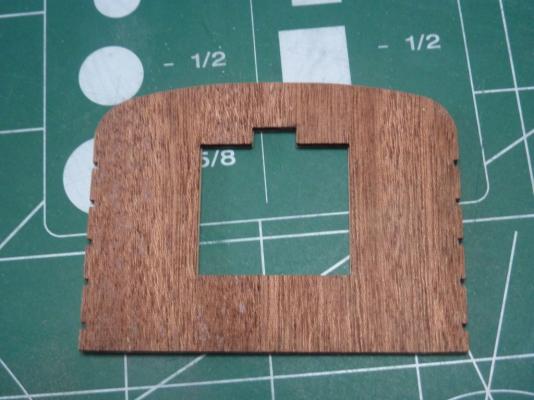
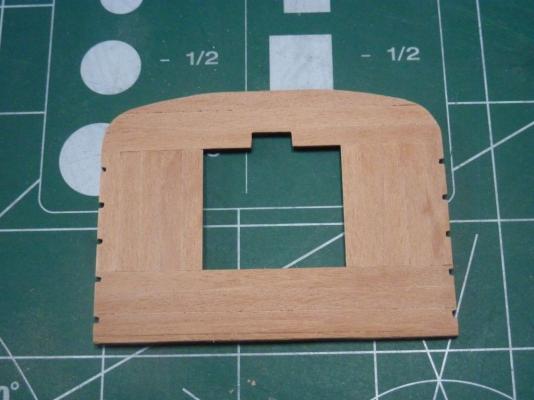
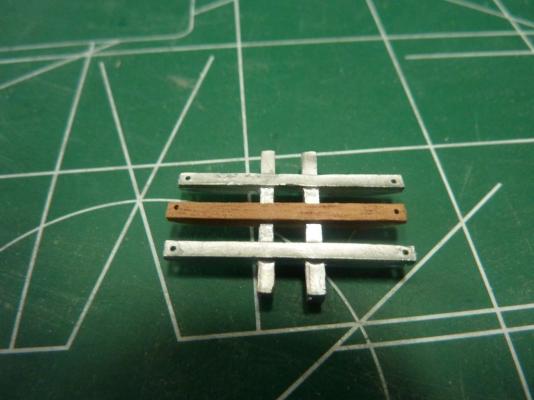
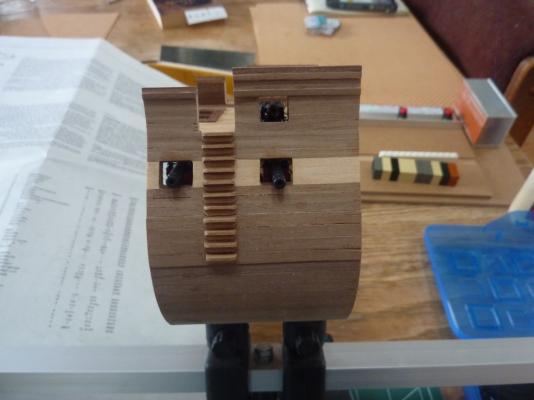
Well, I decided to work on the yards. First was to add the ribbing to the 2 lowest (and largest) yards. The plans indicated to use walnut 1x2 (mm) to create the ribbing, but I only had enough wood for the main yard. I had to use some 1x4 wood for the upper yard, after splitting it in half to create 1x2 pieces. These are rough pictures before final sanding. I've also added 3 coats of wipe-on-poly and they will be painted black. Next, I wanted to construct the topmost yard, as it's the simplest. First though, I needed to figure out which blocks to attach to it. After reading through the plans, it was determined that the kit comes with 3 sizes of single sheave blocks - 3mm, 4mm and 5mm. The 3mm ones go on the highest yard (makes sense), they were pretty good quality. The 4mm and 5mm blocks that the kit provided were, well, here's a photo: The thought of trying to sand these monstrosities filled me with despair. Instead, I order a batch of 4mm and 5mm blocks from Chuck's Syren Ship Company. I'll have to wait until they arrive before proceeding with the larger block install. I could, however, use the 3mm blocks and I tied them to the topmost yard and added the footropes: Andy.

- 188 replies
-
- 1
-
-
- constitution
- mamoli
- (and 2 more)
-
Thanks Antony, I appreciate the comment. Next up in the build is avoidance . I need to either assemble and yards with rigging, blocks, etc. or install the main mast and most likely add the shrouds. Avoidance means I'm scared to put the mast in - I'll glue it to the mast support in the lower hull, but I probably only get one chance to get it right as it's a tight fit through the holes in the decks. So, I'll probably start on the yards - adding stirrups and blocks. Much poring over plans is required to understand all the blocks to tie. The plans are pretty difficult here as well, hence more hesitation. Some days, it feels like all I do is study the plans for 3 hours, then do one little thing. At some point, I need to dive in and do it. Hopefully you'll see an update this weekend... Andy.
- 188 replies
-
- 2
-
-
- constitution
- mamoli
- (and 2 more)
-
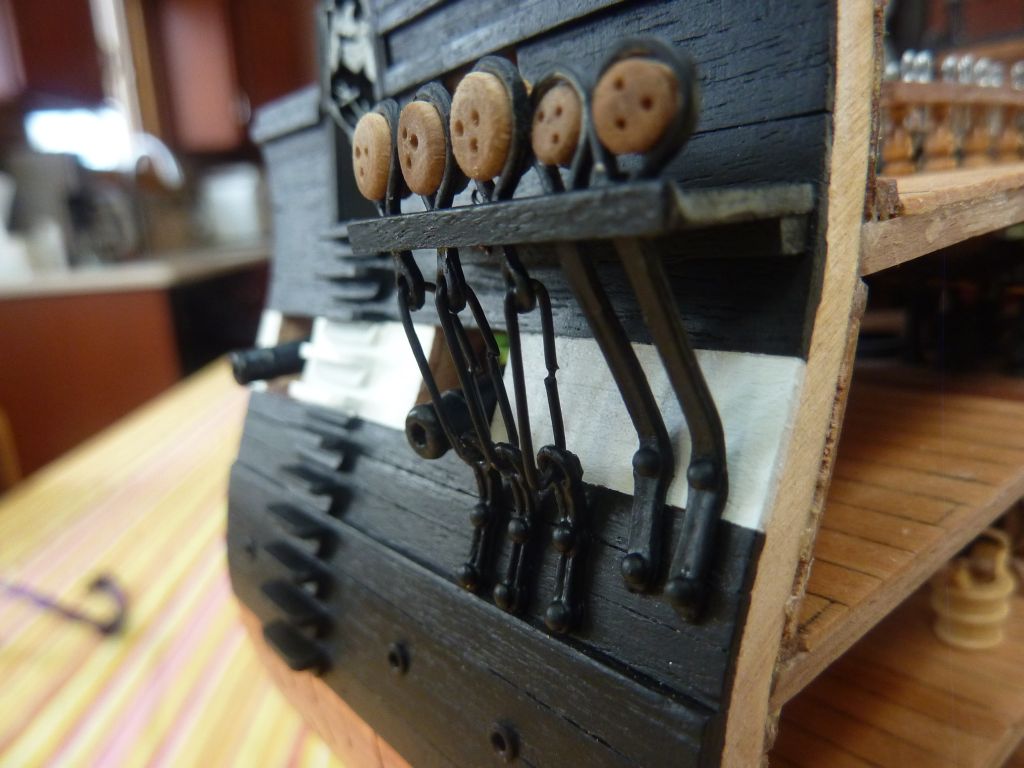
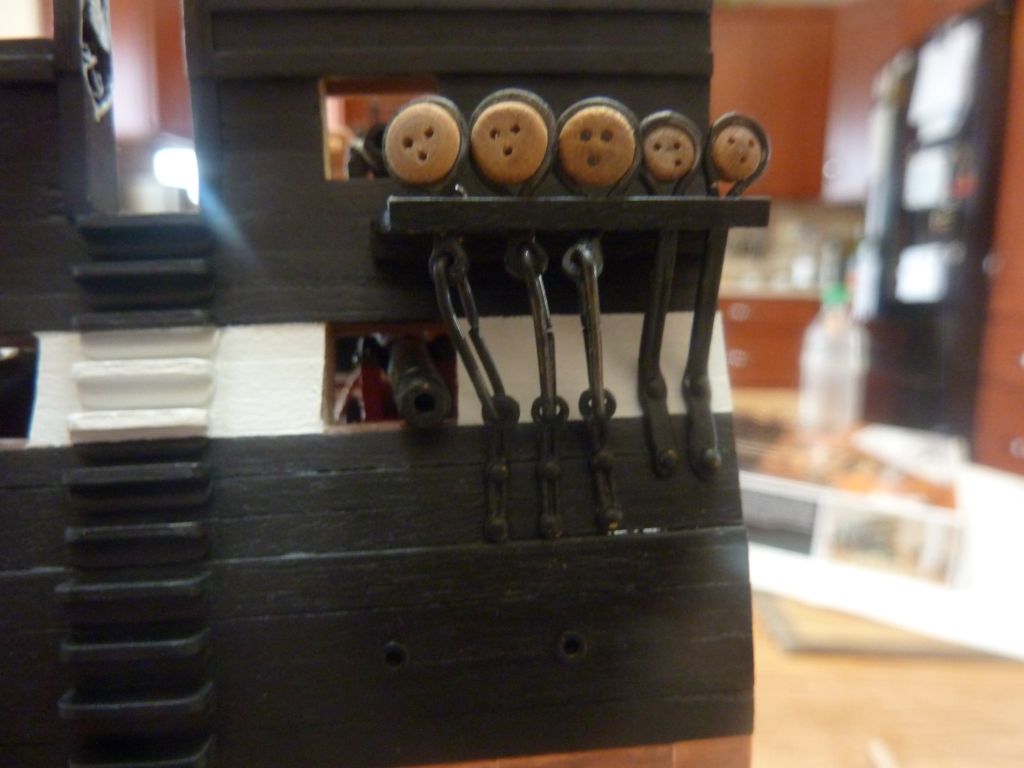
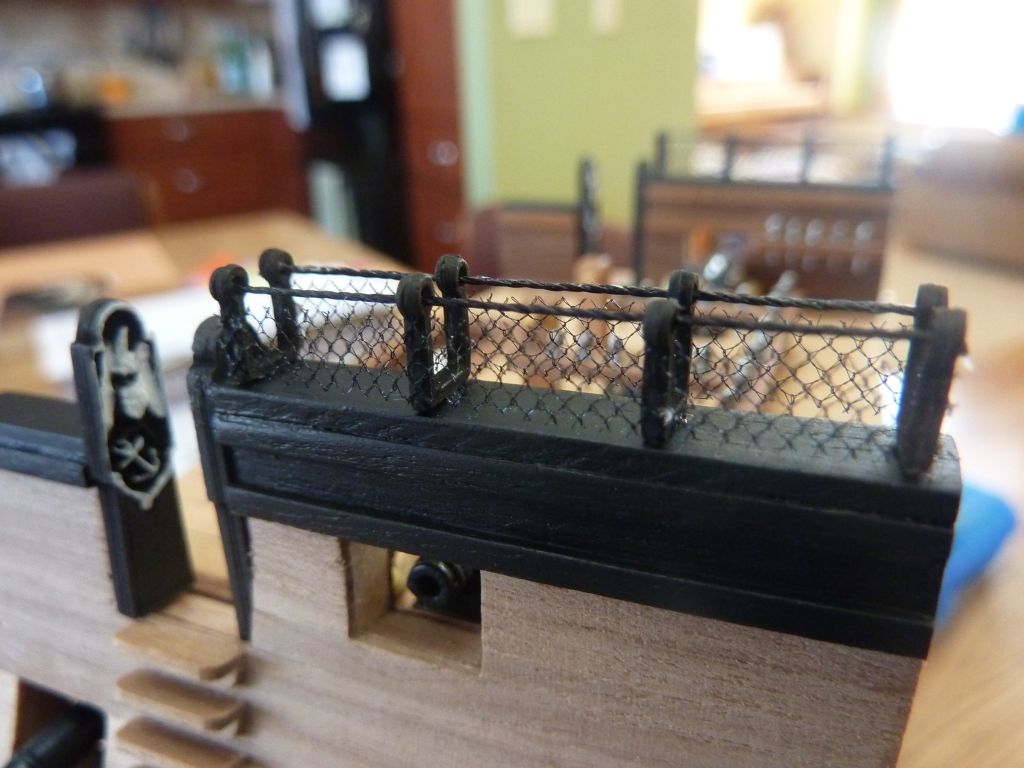
Not much time this weekend, but I finished re-doing the chain links with the new wire. I'm not super happy with the final result, but it will have to do. Ripping them out again would probably do more damage than leaving them in. Andy.
- 188 replies
-
- 5
-
-
- constitution
- mamoli
- (and 2 more)
-
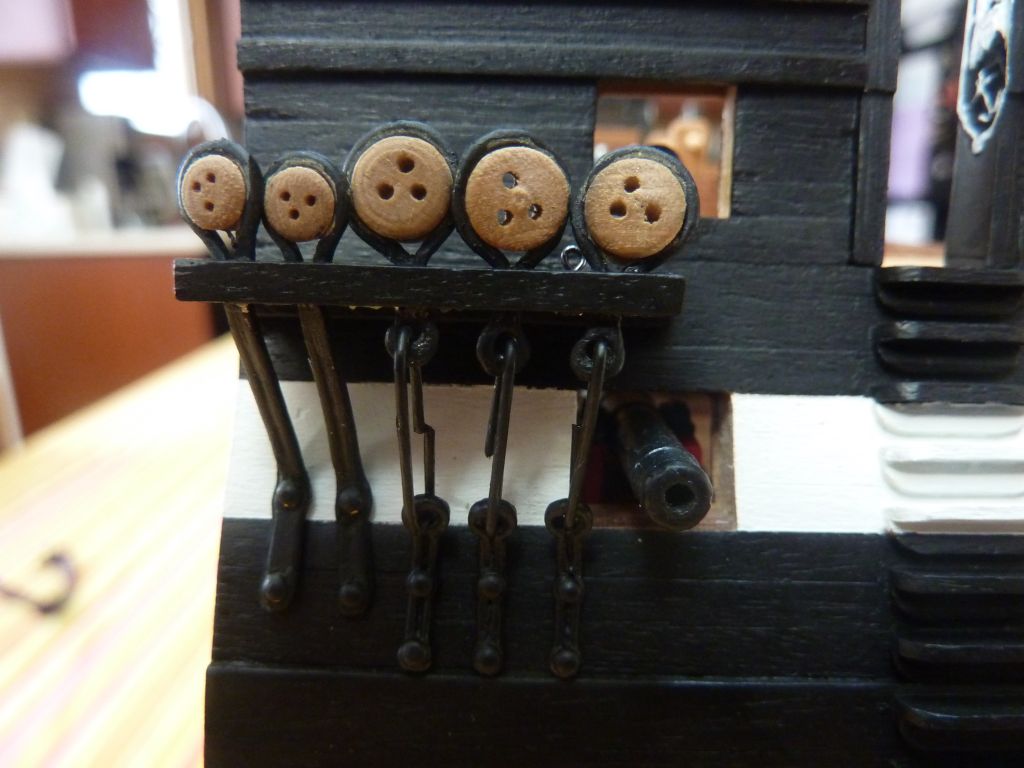
Thanks Geoff, much appreciated. I've decided to remove the chain links I installed over the weekend. The kit-supplied ones were too large, even though the photos might not show it, they stuck up above the deadeye shroud and looked strange. I bought some 0.025inch "music wire" from a hobby shop, as I couldn't find decent wire anywhere else - using 28-gauge wire seemed far too small and flimsy. I'm currently in process of bending the new wire to the correct size and putting it in place. I probably won't have time to finish until this weekend. Expect new photos then, and you all can decide if I've improved the model or not. Hah. Probably not, as this wire is super strong and hard to bend, but it should really hold those deadeyes in place once it's in. Andy.
-
Thanks, Tim. I'm glad I'm not the only one unhappy with the kit at this point. Hopefully this is the worst of it, and I can proceed with yards next. Andy
-
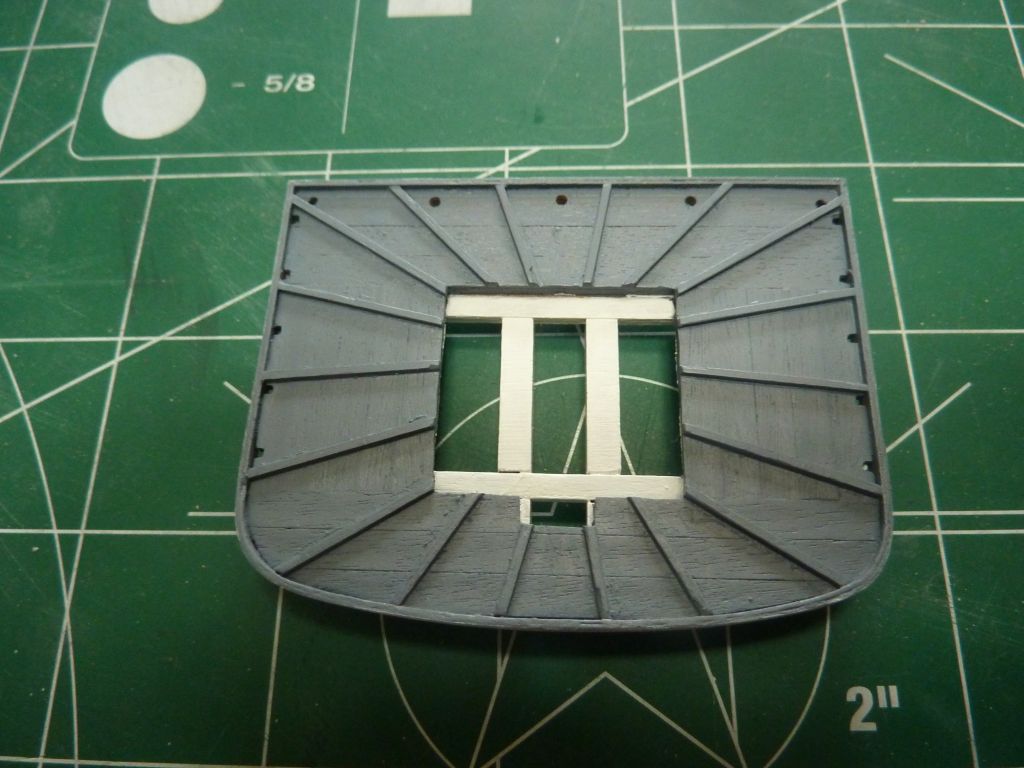
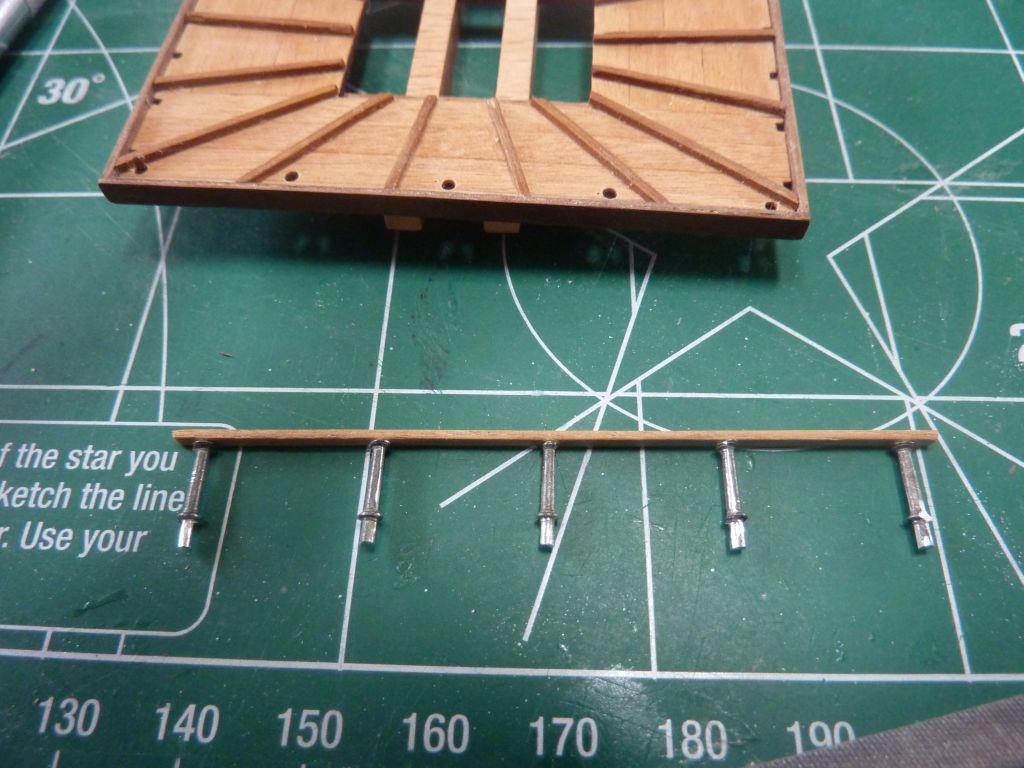
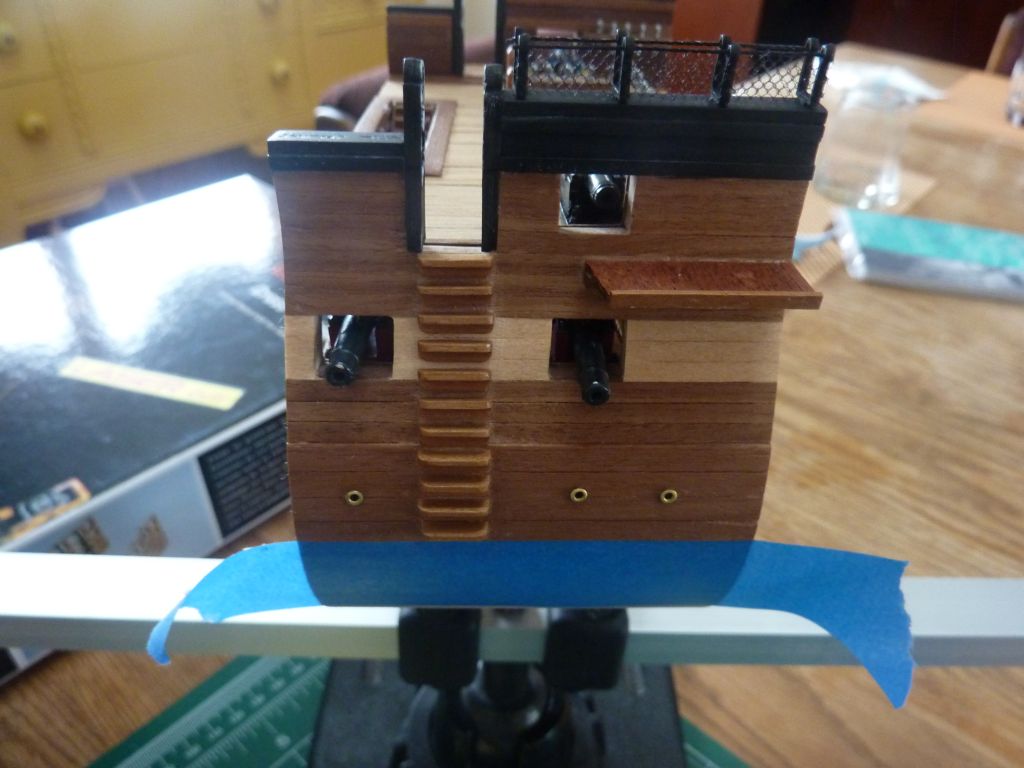
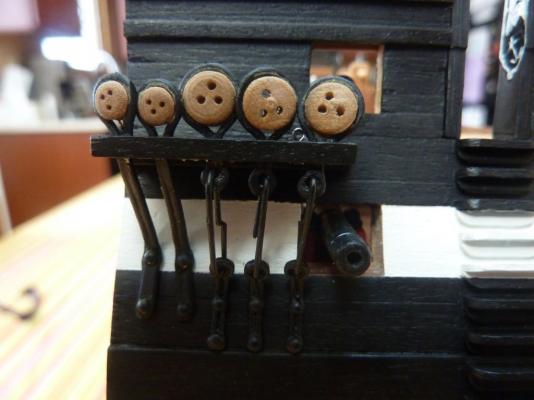
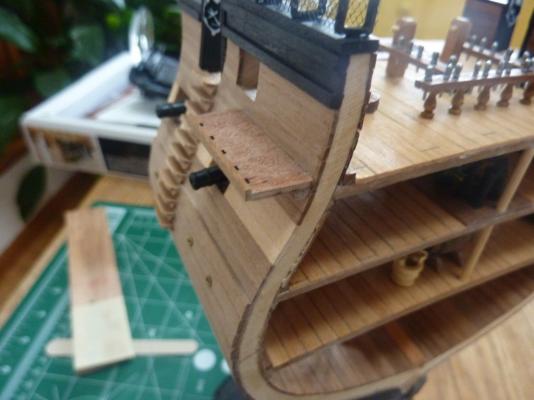
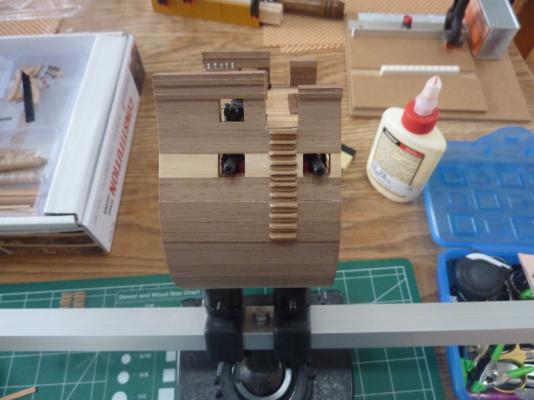
Ok, now that my mast is done, I didn't really know what to tackle next. My first thought was to work on the yards and spars - adding some center ribbing on the lower yards, etc. Then, I noticed that the channels for my limited number of deadeyes seemed way too small for the metal ring that surrounds the deadeye to go through. Sure enough, following the directions in this case was totally the wrong thing to do. So, I spend the weekend fixing it, as best I could. First, I removed the channel plank that is at the end - so I could get access to the slots. Then, I filed them to be larger, and attempted to fit them all in. I tried blackening the metal deadeyes, with the wood block in place, with no luck, and ended up just painting them. Also, the kit puts these deadeyes too close together, so I had to file the ends just to make them fit (see photo). Overall, I was very frustrated with this step, and am not really happy with the kit design here or my result. I will add some wipe-on-poly to the deadeyes to make them look better, but anyone working on this kit should be aware of this at some point. So, next, I guess I'll return to the yards - it's either that or set the mast and install the shrouds and I'm not sure I'm up for that yet. Andy.

- 188 replies
-
- 1
-
-
- constitution
- mamoli
- (and 2 more)
-
Thanks for the comments. Much appreciated. Today, I painted the mast pieces white where appropriate, and then assembled and glued them all together. Here's the lower mast, partially painted. I used a Testors masking tape in a very narrow width to simulate the bands, which look pretty good once painted. It's difficult to notice here, but the fighting top was not level once I glued it on. I had to break the glue bond, scrape away some material on the support, and re-glue. I'll take a photo once the glue dries and I re-paint the white. Andy.

-
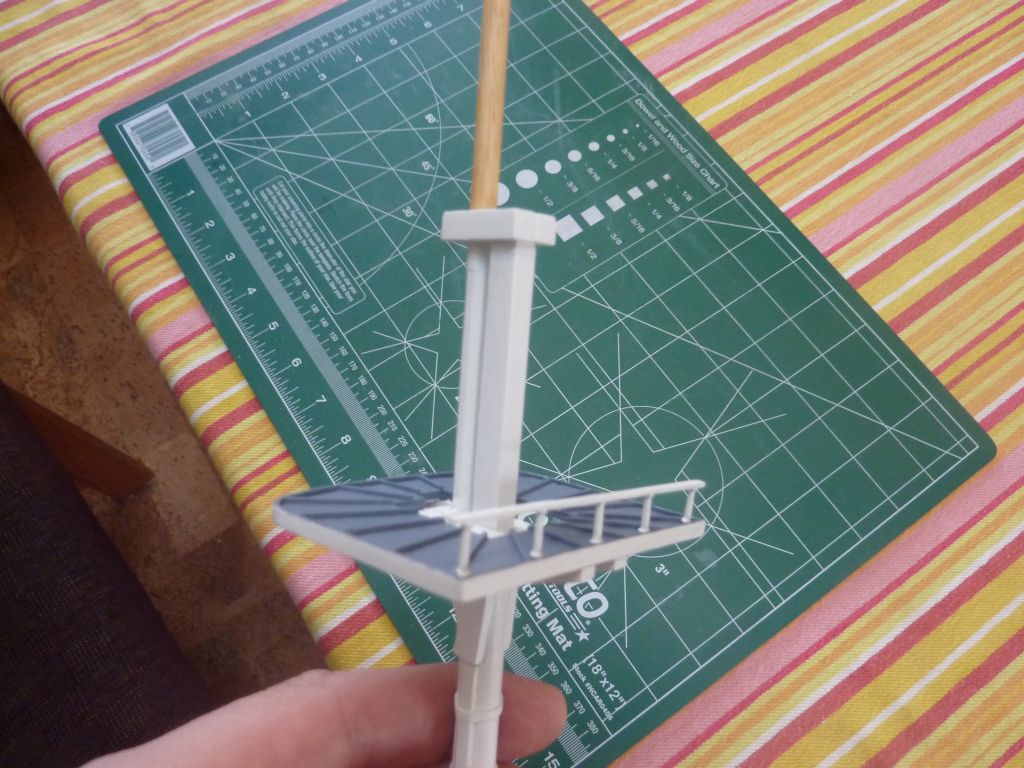
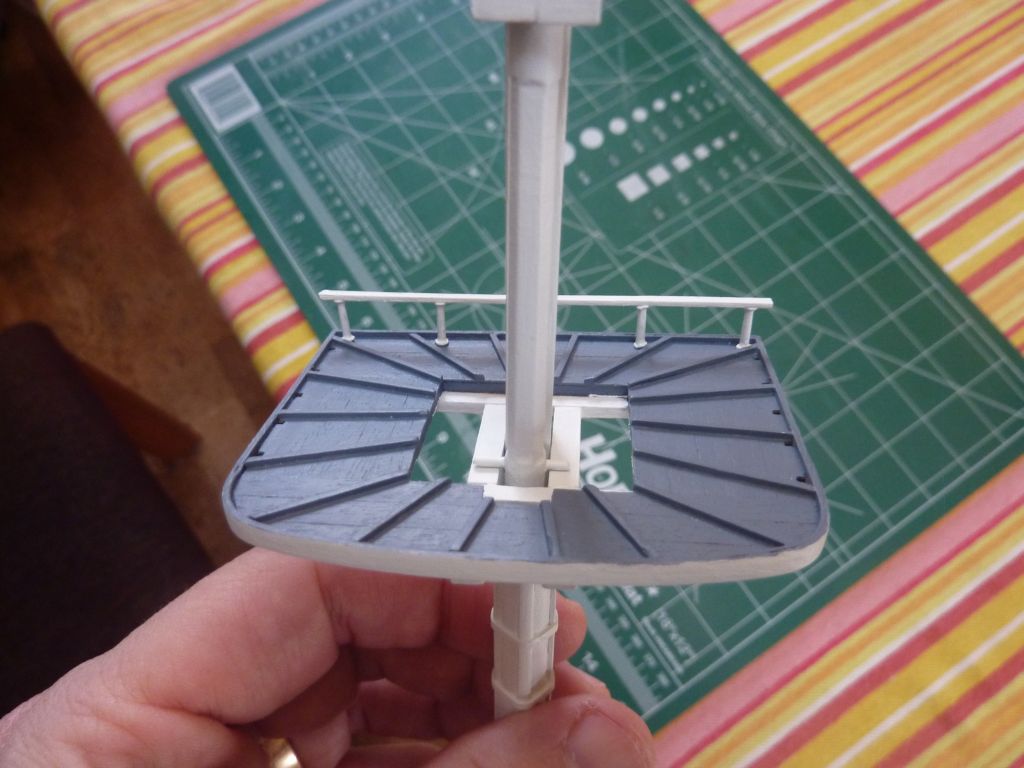
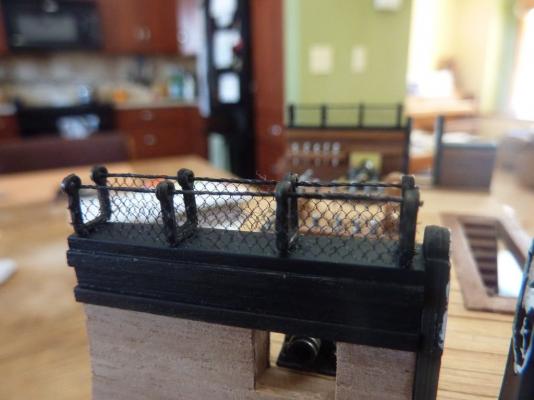
Today I painted the fighting top and added it's railing. I did the inside floor of it gray, which matches my Revell Constitution, and I like the contrast with the white elsewhere. The gray took only 3 coats to cover, while the white takes about 9-10. It could be my white paint has been thinned too often, but at least the end results are ok. Tomorrow, I paint the lower mast - you guessed it - white. It will probably take all day. Andy.

- 188 replies
-
- 3
-
-
- constitution
- mamoli
- (and 2 more)
-
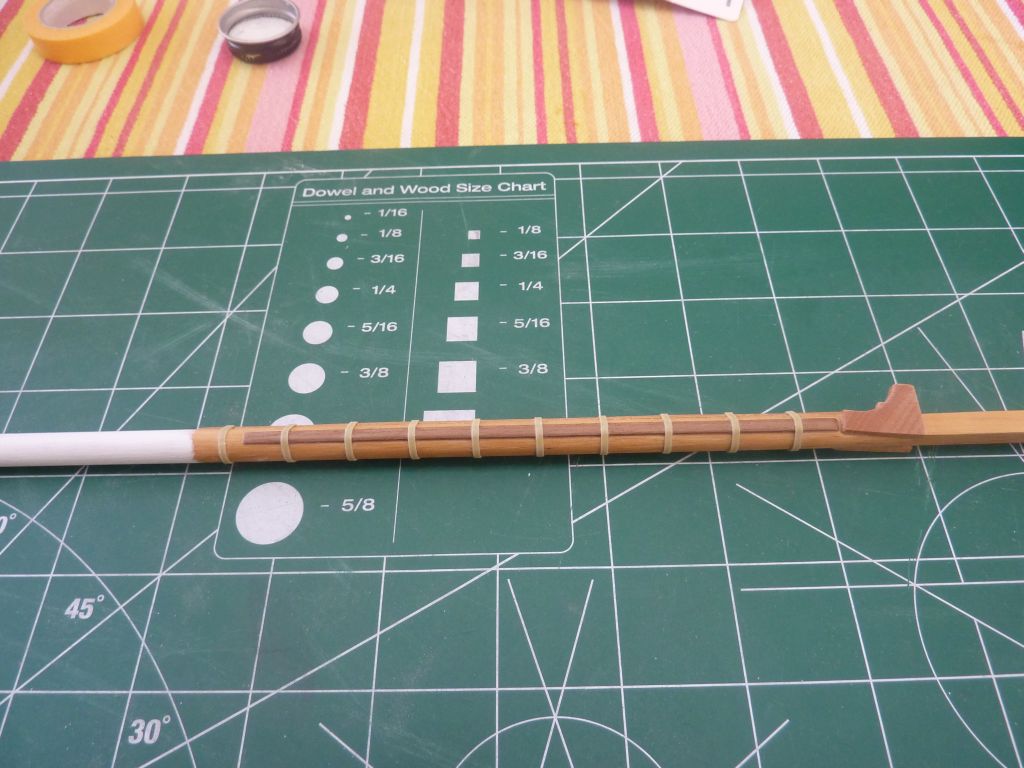
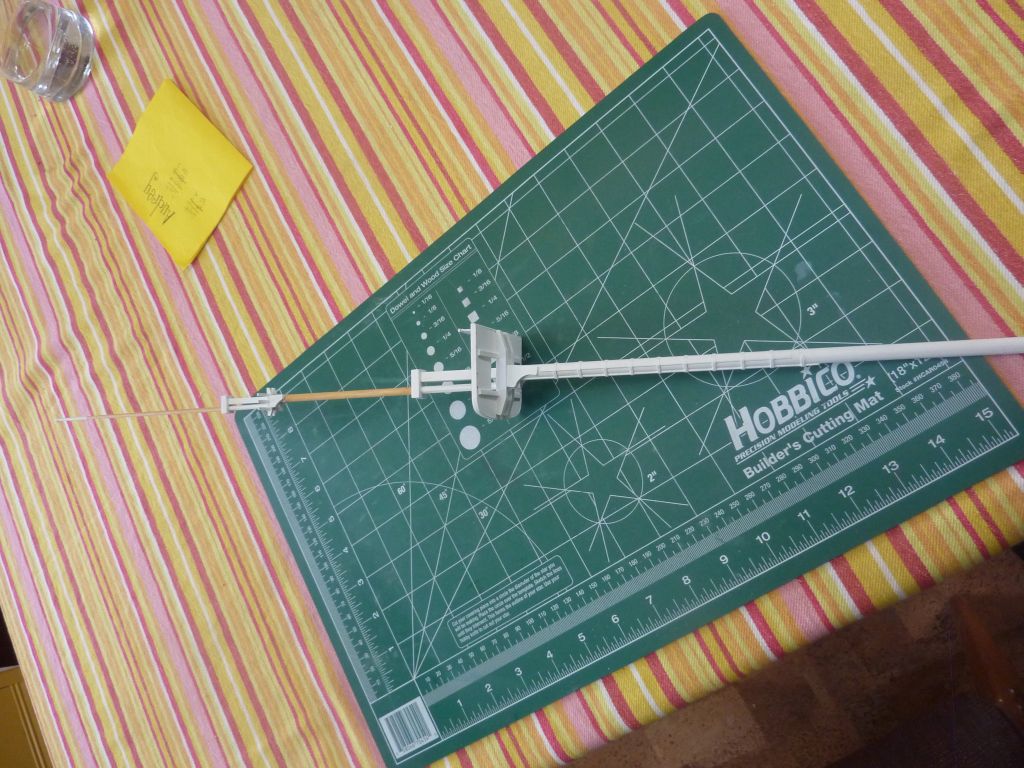
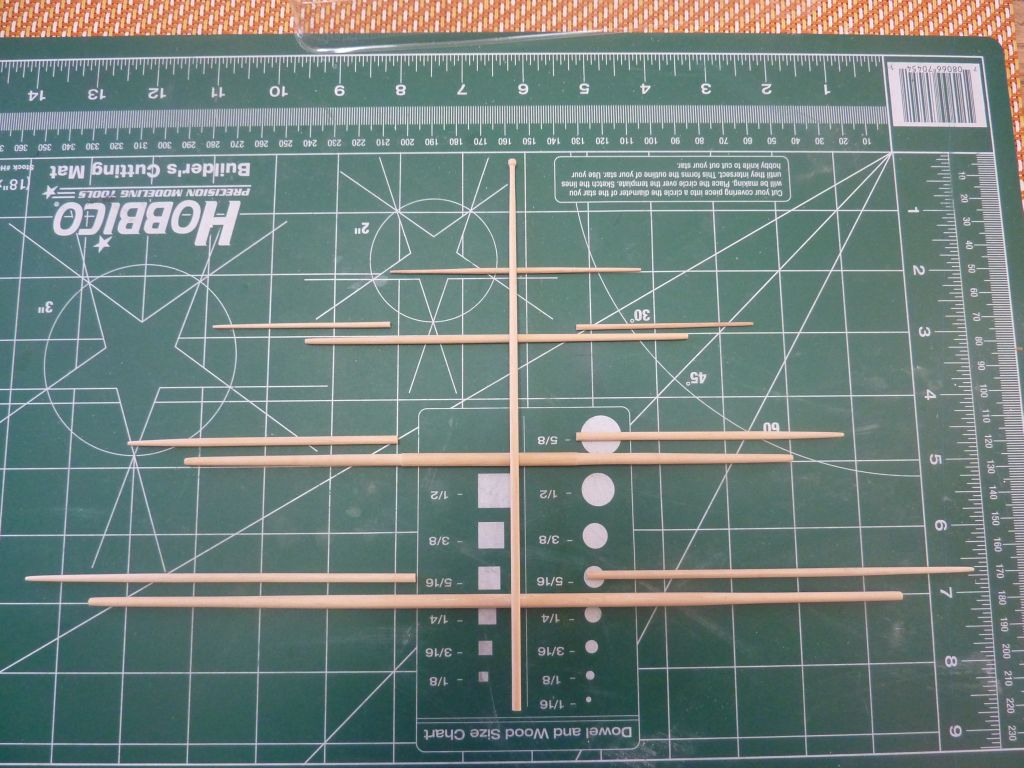
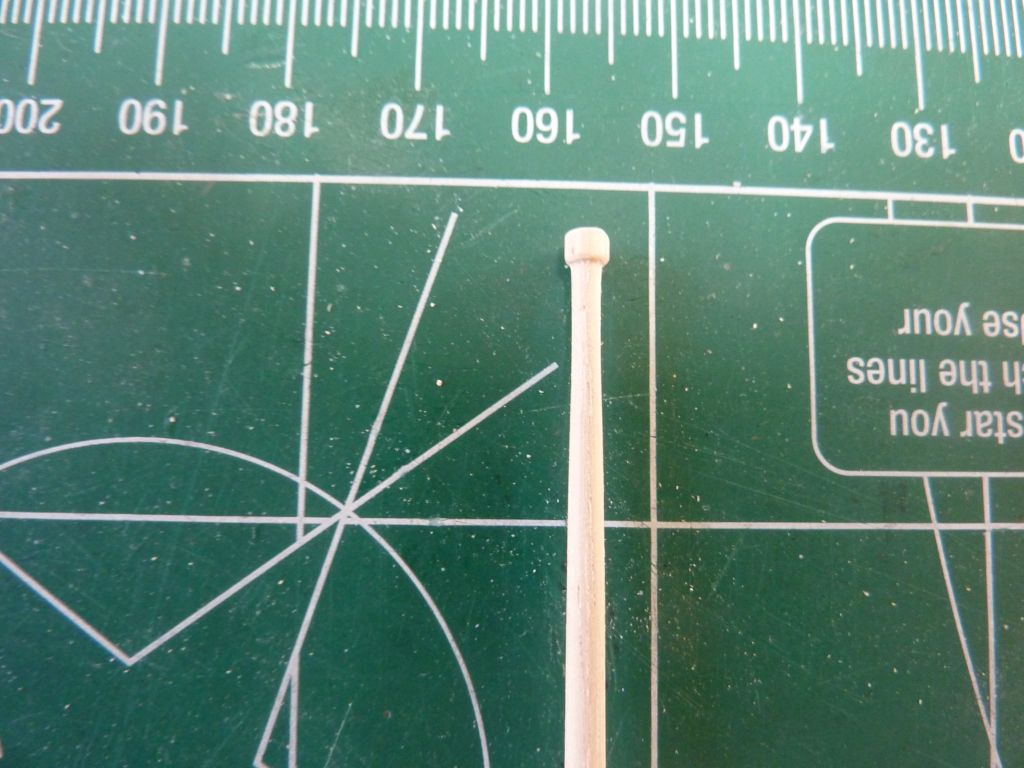
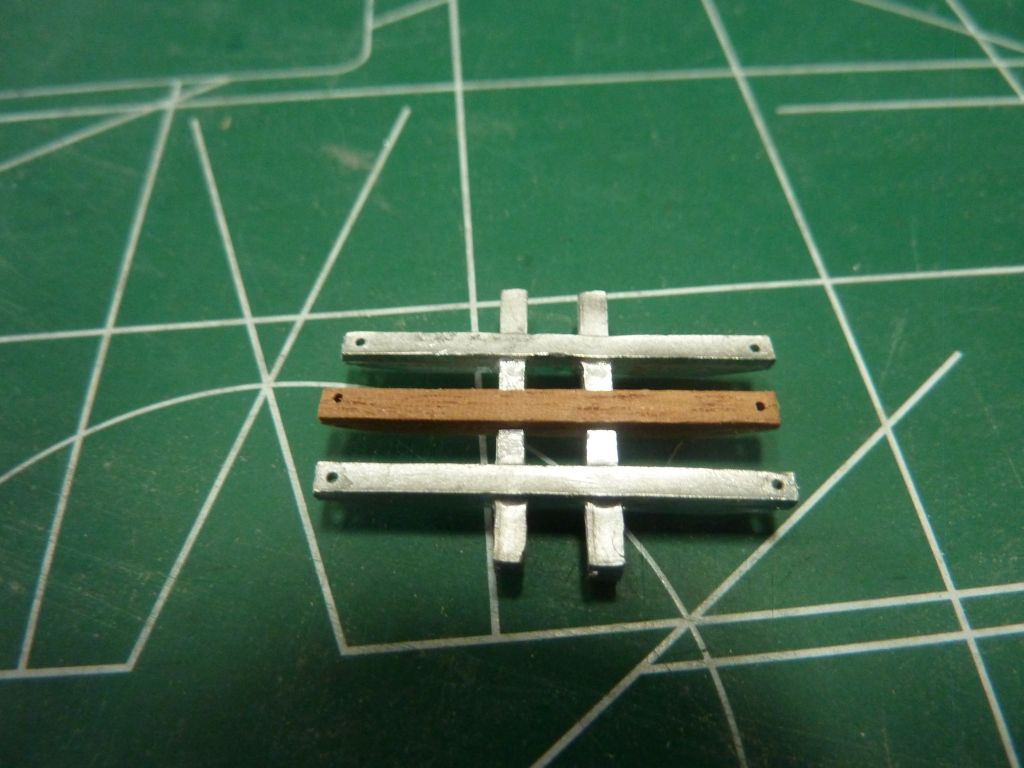
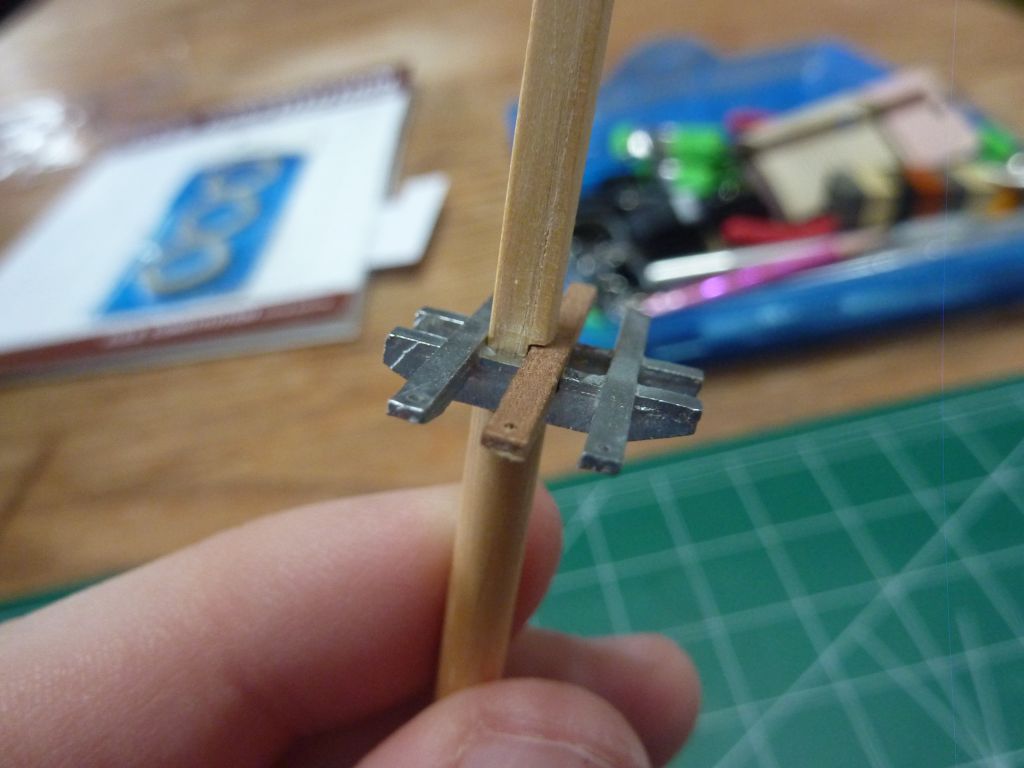
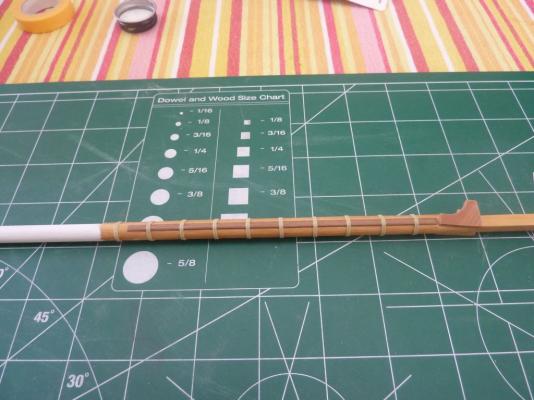
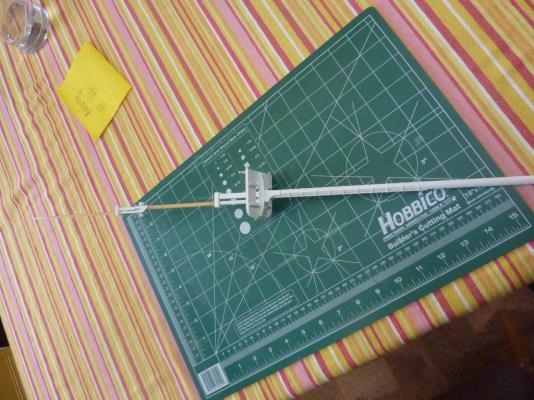
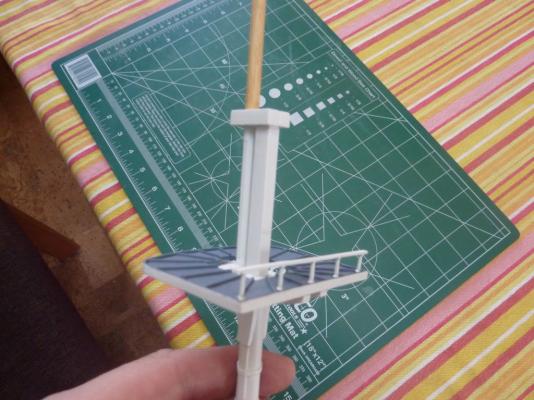
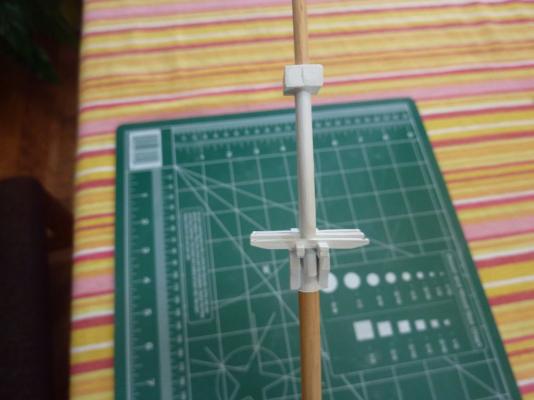
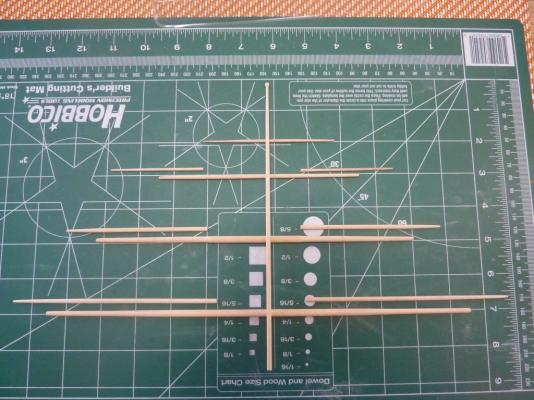
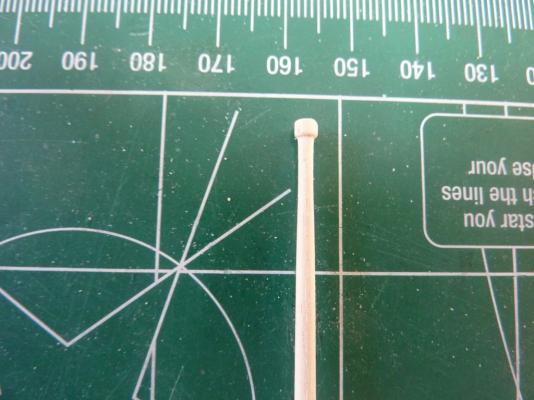
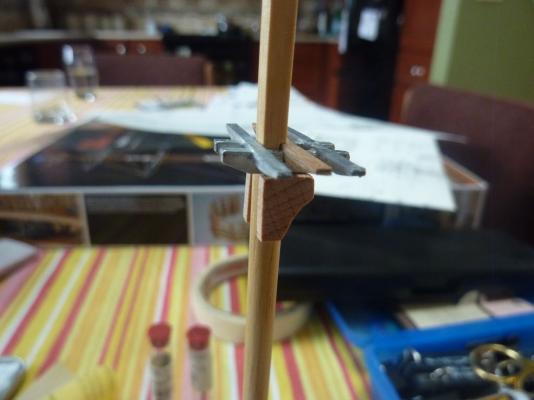
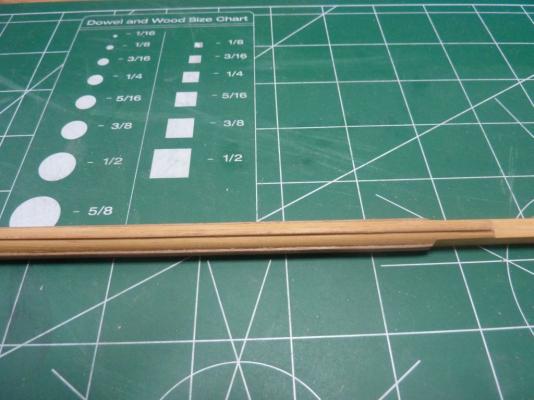
The latest work has been all about prepping the mast pieces. I tapered all the yards and spars last Friday, using the drill and sandpaper method - worked pretty well, but took all day for all 11 pieces. I also created the topgallant part of the main mast, the same way: I spent most of today making the railing for the fighting top - drilling holes and filing etc. Nothing is glued yet - I plan to use CA to glue the wood to metal, so I want to paint first. Which will be tomorrow. This is the Fid for the top mast - a piece of piano wire left over from my last project. I'll paint all this white as the mast is white here. Finally, the top mast is glued into place with the supports. Andy.


- 188 replies
-
- 4
-
-
- constitution
- mamoli
- (and 2 more)
-
Thanks for all the responses - I haven't yet assembled the full mast, so I've time to think about what I want to do here. I'm leaning to putting in a fid, black, and having it rest on the crosstrees. Andy.
-
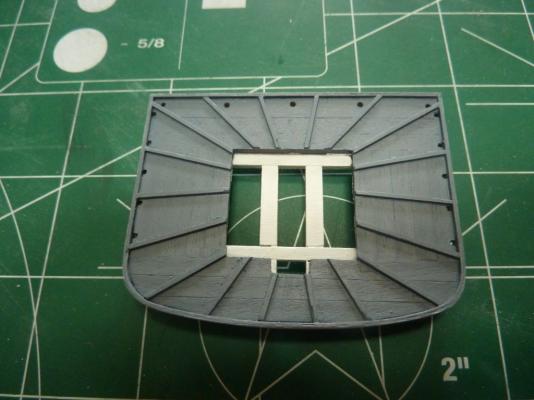
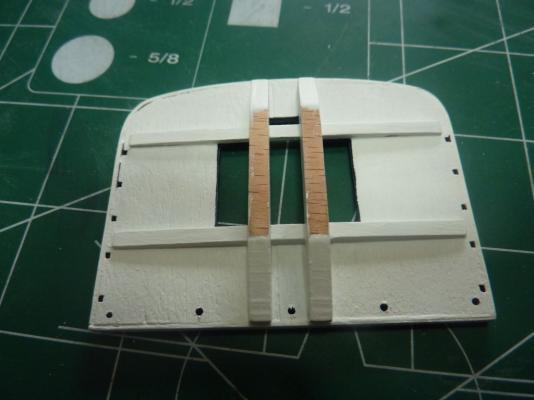
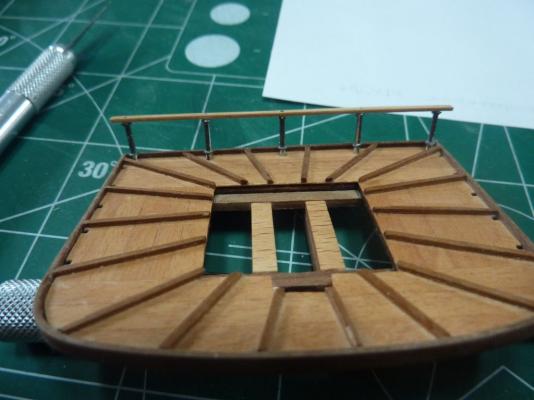
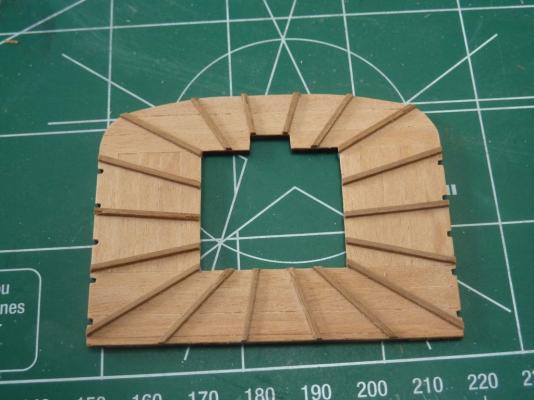
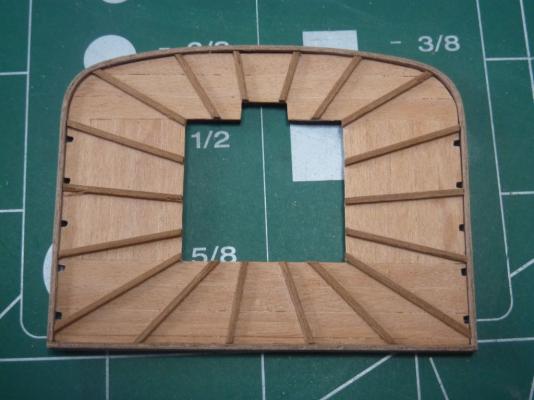
Ok, I finally took some pictures to show the fighting top contruction and the mast shaping. First, the fighting top: Here's the bare plywood - it was fairly warped, but I got it as flat as I could with soaking and pressing between plates of glass. Next, is planking on the top side, adding the ribs and finally the edging - two planks of 0.5mm walnut bent around the edge. While I was working on the top, I also started on the mast shaping. I squared off the top of the lower mast by clamping in a vise and sanding down each of the 4 sides. I also added cheeks and the fish, deviating slightly from the plans here, but it matches better my Revell Constitution. This is also pretty similar to the method on the Syren. Next up, I need to add in the mast bands (I've bought some thin tape), and paint it all white. Last bit of work was the crosstrees higher on the mast - I squared off the upper mast, but it wasn't even close to fitting through the crosstrees. So, I used a dremel to remove the center metal piece, and fabricated a wood one. Then, I notched the mast top so I could slide the new piece in. These are just dry-fitted, but when glued I think it'll be nice and strong.

- 188 replies
-
- 1
-
-
- constitution
- mamoli
- (and 2 more)
-
I built Midwest's Peterboro Canoe, and this part of the construction looks similar. What worked wonders for me was beveling the lower edge of each new plank as you add it. I did it by hand, by sanding the plank on the thin edge at an angle and it made all the difference. It will especially important as you move over the curve toward the keel. One thing I had trouble with was conforming well enough to that curve to meet the keel properly - the planks really wanted to go higher than the keel. If you fight that battle early (keeping each plank on the bulkhead), it might be easier as your reach the keel. Good luck. Andy.
- 18 replies
-
- 2
-
-
- maine peapod
- midwest products
- (and 1 more)
-
I must say, I love the format and the detail you are putting into your log - explaining how you did something, in addition to the result, goes a long way toward others learning how to build ship models. My own kit of the Syren is sitting in storage, waiting for me to finish the Constitution Cross Section. By the time I get it out, you log will be far enough ahead I'll never catch up -- and that's a good thing. Andy.
-
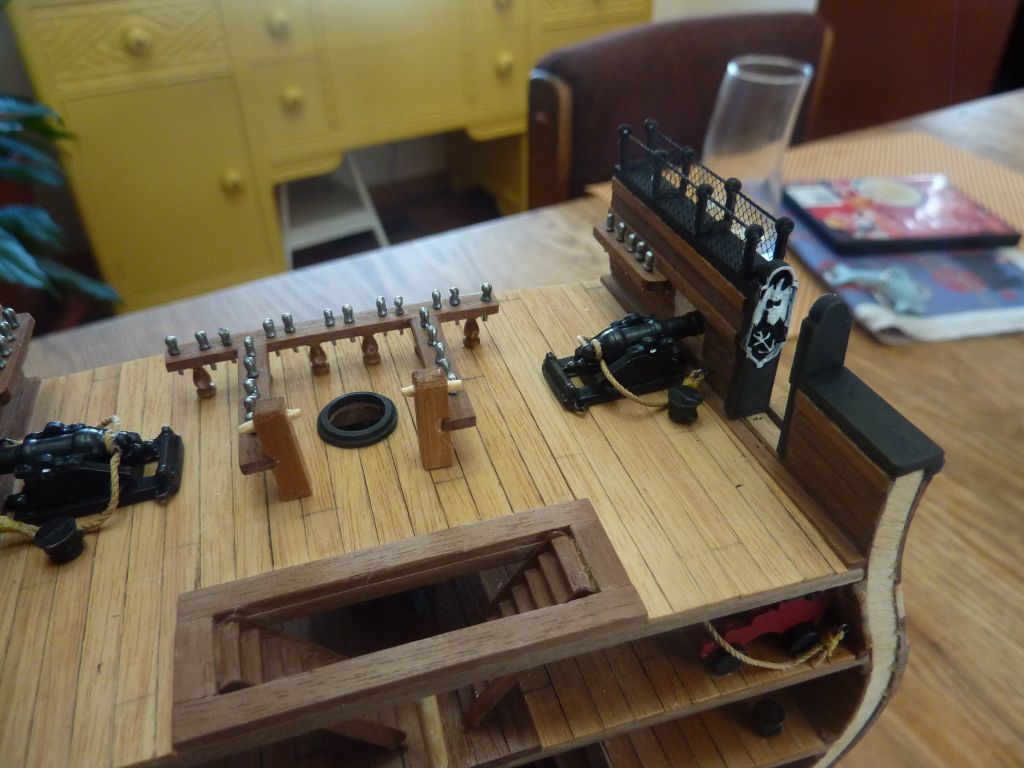
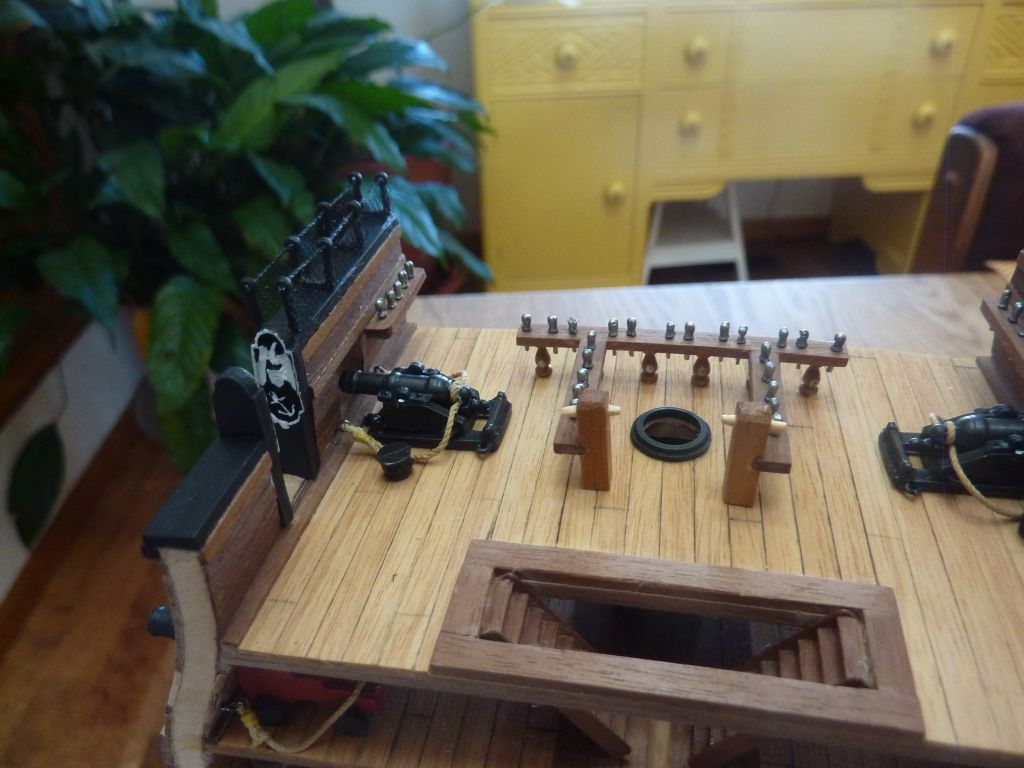
Let me also add an update to the log, but without photos. After the coppering, decided to postpone 3 steps: Adding the ballast rocks - I want the painted mast to be inserted first so that the rocks and glue won't interfere with seating the mast. The stanchions on the top deck which hold the ropes over the hatchway - my first issue is that my kit only came with 7 stanchions, and it calls for 8. I emailed Mamoli about it, but got no reply. I will probably end up using 6 instead, as I have no idea how to fabricate a metal looking stanchion that matches the other 7. (I'm open to ideas here!) I also want to hold off on this because they will be fragile and I don't want to knock them about when doing the rigging. They also should be easy enough to add later as they're on the outside of the top deck and there shouldn't be any interfering elements (shrouds, for example) The gun-port lids - again, I'm holding off on these mainly because I don't want to break them off during masting and rigging. The should be easy enough to paint (white) and CA on after everything else is done. So, with all that on hold, I started crafting the mast. Purchased a vise which allowed me to square off the end of the lower mast, I've been building the fighting top (which was horribly warped out of the box - so I've soaked and clamped it several times to get the warp out), and fitting the cross-trees together. I had to file away part of the upper crosstree to fit the mast, etc, then make a new one. I added different cheeks and a fish to the lower mast to match my Revell Constitution, and still need to add the bands and paint the whole thing. This is the part of the build where Mamoli's instructions really get sparse - I've spend a lot of time figuring out what to do next and trying to see how it all fits together. Thanks to MSW, there's plenty of info out there to help. I'll post some photos when I get a chance - work continues! Andy.
-
Hi, and thanks for looking into my build. I'm new to wood modeling as well, and using this kit to get a feel for working with wood. Ask anything you like - there are a lot of options and alternatives for doing most everything, but you got to start somewhere. Glue -- I use Titebond Original (has a red label). It will soften with water or IPA (isopropal alcohol) if it needs to be undone. I will also use "thick" viscosity CA (super glue) for gluing metal to metal or metal to wood. I'll also use dilute Elmer's white glue for the rigging knots. Tools - my tool collection is growing, but only as I need stuff. I find using a X-acto chisel blade works really well for cutting planks (very sharp and has a long enough edge to cut perpendicular). Using a #11 blade works too. I use a short metal ruler a lot for straight edges, and tweezers of course. Specialized tools - I bought a "True Sander" recently for squaring off edges, a miter box (metal) with a razor saw for cutting dowels and thicker planks that the chisel won't work on. I recently got a suction-mounted vise - I have no toolbench area, but it mounts securely to a glass-topped table in the house. Some files and sandpaper as well. I use sandpaper much more than files, but that might be because I bought cheap files and they don't work very well. Emery boards are super cheap and useful for sanding as well. Also, a variety of clamps are essential (binder clips, clothespins, pinch clamps, etc.) Oh! and a pin-vise for drilling very small (<1mm) holes. I also have a Amati Keel Clamp which is very useful for holding the work in progress, but it's expensive (I convinced certain people in the house that it would make a good birthday gift). My best advice is to start work, and get the tools as you need them. Good luck and don't hesitate to ask me anything. Andy.
-
Russ, my apologies. I was concentrating so much in getting the terminology of the other mast pieces correct, I failed on the fid. :-) Anyway, sounds like a fid is a standard piece of the masting - so a followup question - which may not be answerable: How the heck did Mamoli intend that mast to stay up? They make no reference to a fid, and no reference at all as to how the mast is supposed to stay up. How do other kit builders (especially the Mamoli cross-section ones) build their masts? Thanks for the replies - I'll install a fid using a toothpick or something. Andy.
-
I'm currently in progress building the main mast for the Mamoli USS Constitution cross section kit, and have a question. This may apply to a lot of ships and kits, so I'll post it here rather than my build log. The mast is made from 3 sections - pretty standard: the lower mast, top mast and upper mast/pole. What I don't understand is what keeps the top mast and the upper mast in place? For example, the top mast goes through the fighting top, between the trestle trees. Yet, in the plans, the lower mast diameter is 6mm and the trestle trees should be 6mm apart ,but the top mast is only 5mm in diameter. The bibbs that support the fighting top are also 6mm apart (as they are attached to the lower mast), so they line up with the trestle trees. The top mast fits between them as it goes through the fighting top, and then continues upward through the mast cap, but is too skinny to glue to the bibbs or the trestle trees. It doesn't seem that the mast cap would provide enough support for the entire top mast, which also supports the topgallant (upper mast/pole). I assume the mast cap is primarily for alignment of the mast - to keep it straight? Then what supports it against the weight of all the yards/sails/etc.? The Mamoli kit plans show nothing on how this is to be supported. I looked up the plans for the Syren, and it uses a "FIB" - a dowel of sorts that is drilled through the top mast and rests on the trestle trees. Should I install a FIB for my Constitution? Andy.
-
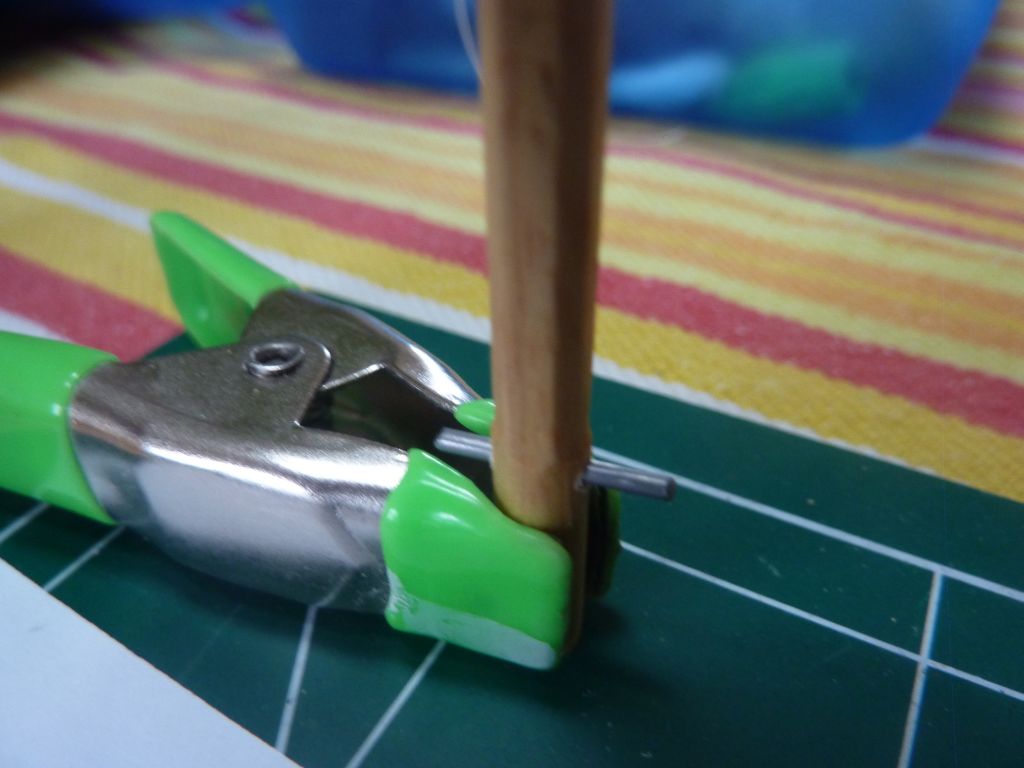
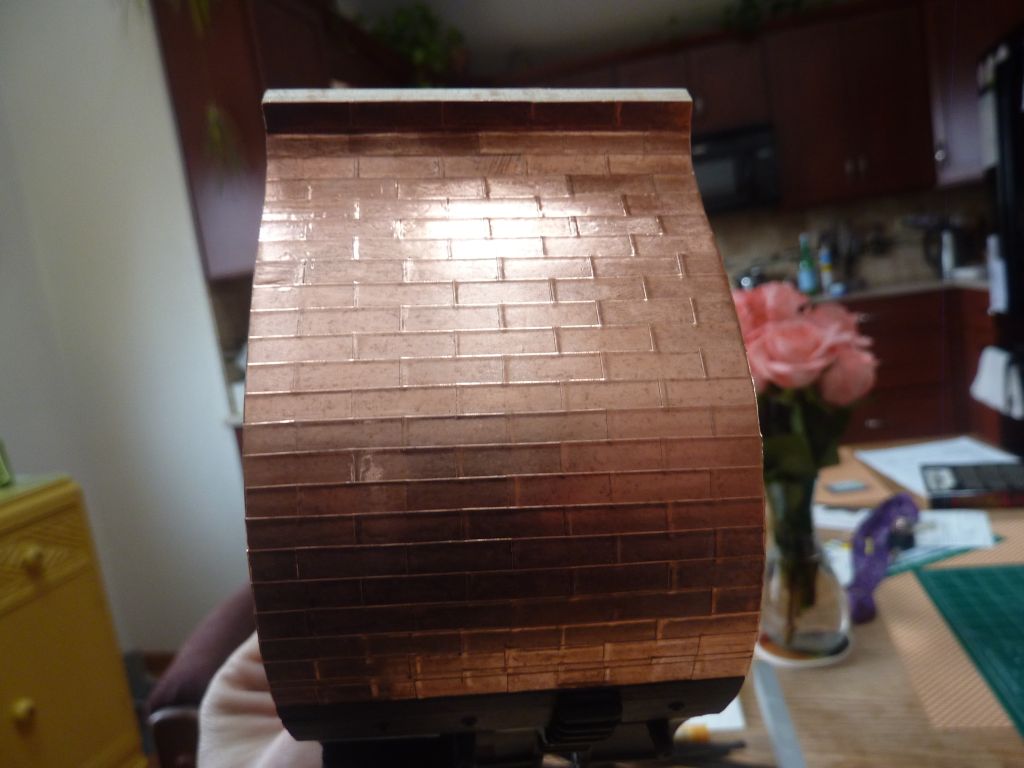
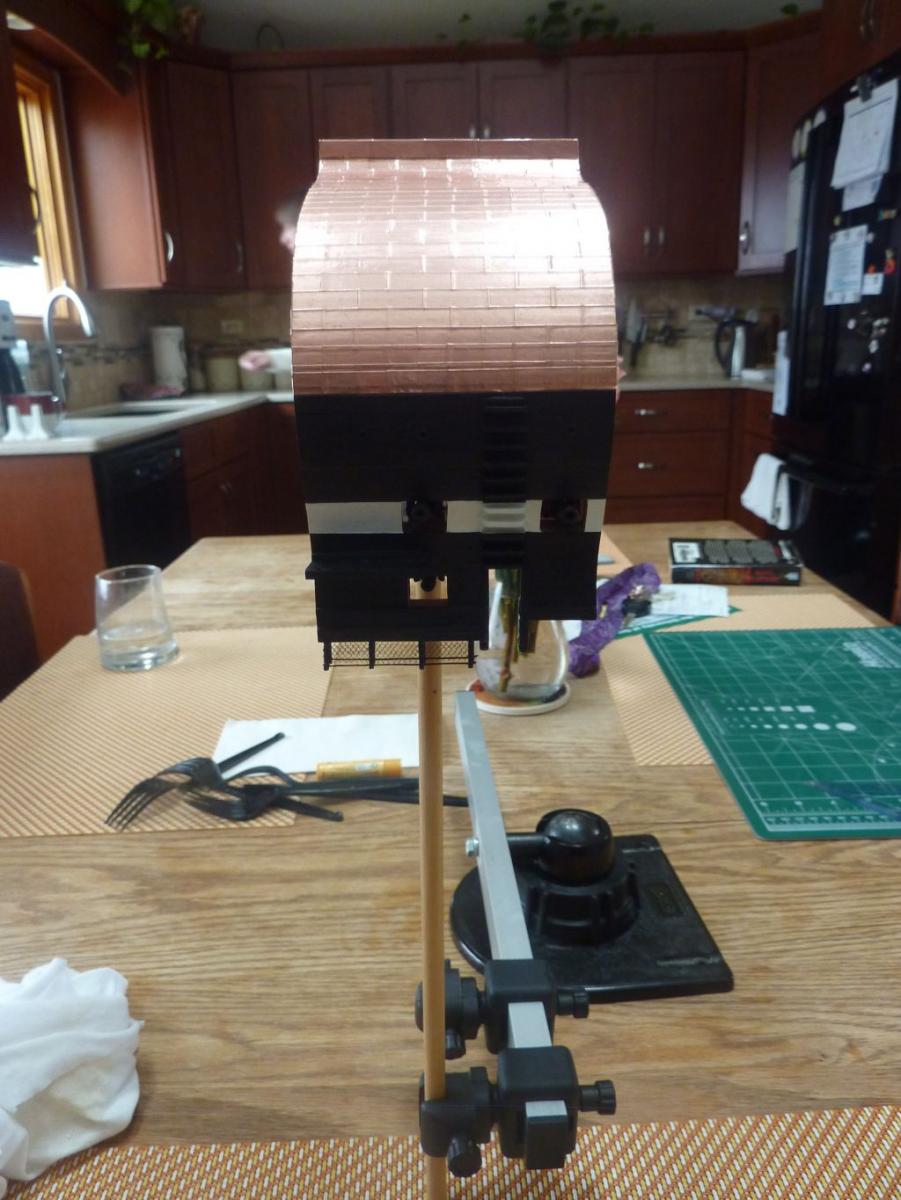
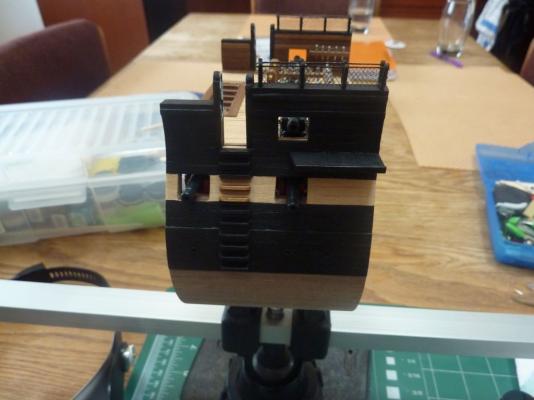
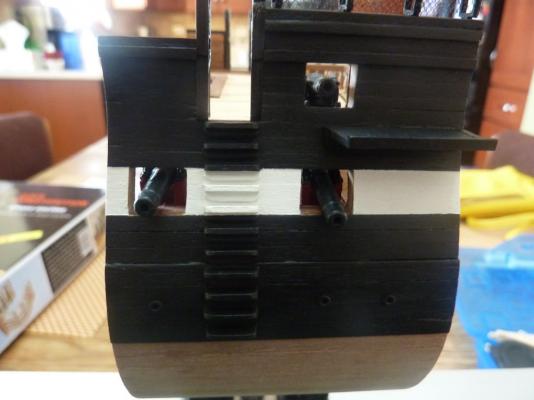
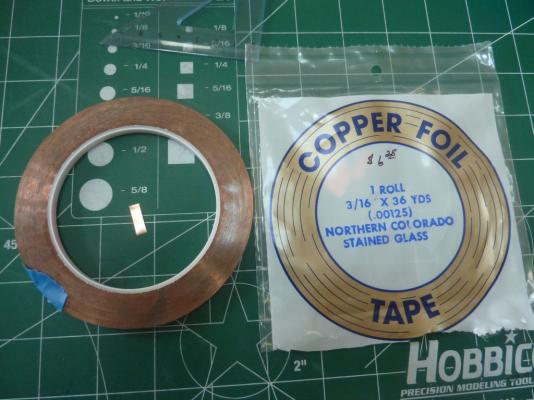
The last two weekends have been spent on the outside hull - painting and coppering. First: painting. I prepped the hull with 3 coats of wipe-on-poly (WOP) sanding in between each coat with 400 grit sandpaper. The first two coats must have soaked into the wood, as the poly was evident, but not very thick. The last coat provided the base that I expected - it was a very different feel to the wood after that one. I used acrylic paint - ModelMaster Acryl (left over from my Revell Constitution), and I thinned it down quite a bit with plain water. The plan was to put on as many thin coats as needed to get good coverage while still hoping the wood grain would show through a bit. I did the black first, then masked it off with Tamiya tape and then painted the white. Here are the results. Next was the bottom of the hull - copper. The kit provided a bunch of wood pieces that are a mottled green - I think they are going for the weathered patina that copper will eventually take. I wanted to practice coppering with copper tape instead. First, I found some nice 3/16" wide (about 4mm) tape with adhesive backing from a local stained glass hobby shop. I cut a whole lot of 15mm long strips from the roll and put them on one-by-one, overlapping from stern to bow, up keel to deck. This took a lot longer than I thought it would - both the cutting and placing. I used a pencil erasure to rub them onto the wood (at first I used a hobby knife handle, but that left a lot of creases on the tape - which are still evident on some plates near the keel). After it was all done, I gave it a cleaning using lemon juice and salt - that worked really really well - removed all fingerprints and tarnish that had already started to appear and I didn't have to go out and buy a commercial polish or use acetone (which is nasty smelling). (This first photo is prior to cleaning with lemon juice): (This is interesting - how I secured the hull for the coppering process. I had already installed the hammock netting, so couldn't rest the hull on the table top. I inserted the main mast into the hull, and clamped it upside down using my keel clamp. Worked very well - I could still rotate the hull toward me to get the angles I needed to get the tape on.) Next up is finishing the ballast in the lower hull - painting barrels, adding rocks, etc. Then, I think, starting on the mast and spars. Andy.


- 188 replies
-
- 5
-
-
- constitution
- mamoli
- (and 2 more)
-
My usual weekend progress - I get a few hours per weekend day to do what I can. On Saturday, it was 2 steps forward, one step back. The steps forward were to install the portholes. The step back was I crunched the hammock netting with my headband magnifier. To fix it, I removed a couple of the supports, applied some wood putty, let it dry, then re-drilled the hole for the support, painted it and re-glued the support. The end result was nice - very difficult to tell it was damaged in the first place. Today, I put in the channel supports on the side of the ship, and applied 3 coats of wipe on poly. Next up will be painting the upper hull. Andy.

- 188 replies
-
- 1
-
-
- constitution
- mamoli
- (and 2 more)
-
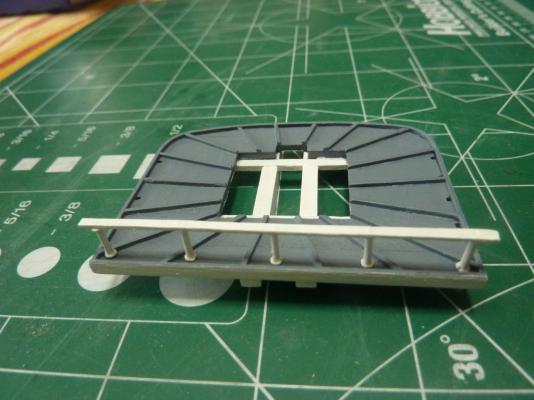
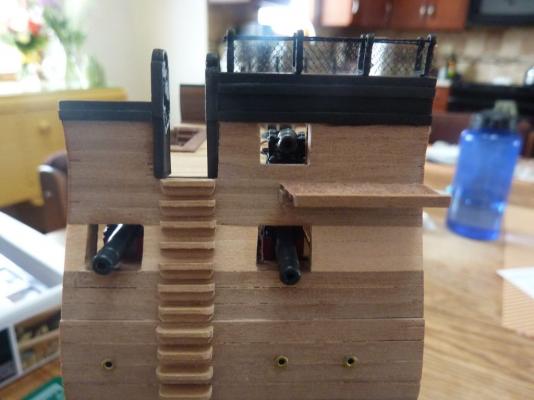
More progress this weekend - lots of snow here, so not any distractions. I made the ladder on both sides of the hull - the kit provides 3x3mm right angle wood, which I cut into 10mm lengths, sanded off the square corners and glued into place with 1mm spacing in between. Next, I blackened the braces for the hammock netting and the end-pieces. Those, I also painted a bit of the highlight. I used black tulle for the hammock netting, like on my last Connie, and I still think it looks pretty good. Andy.


- 188 replies
-
- 5
-
-
- constitution
- mamoli
- (and 2 more)
-
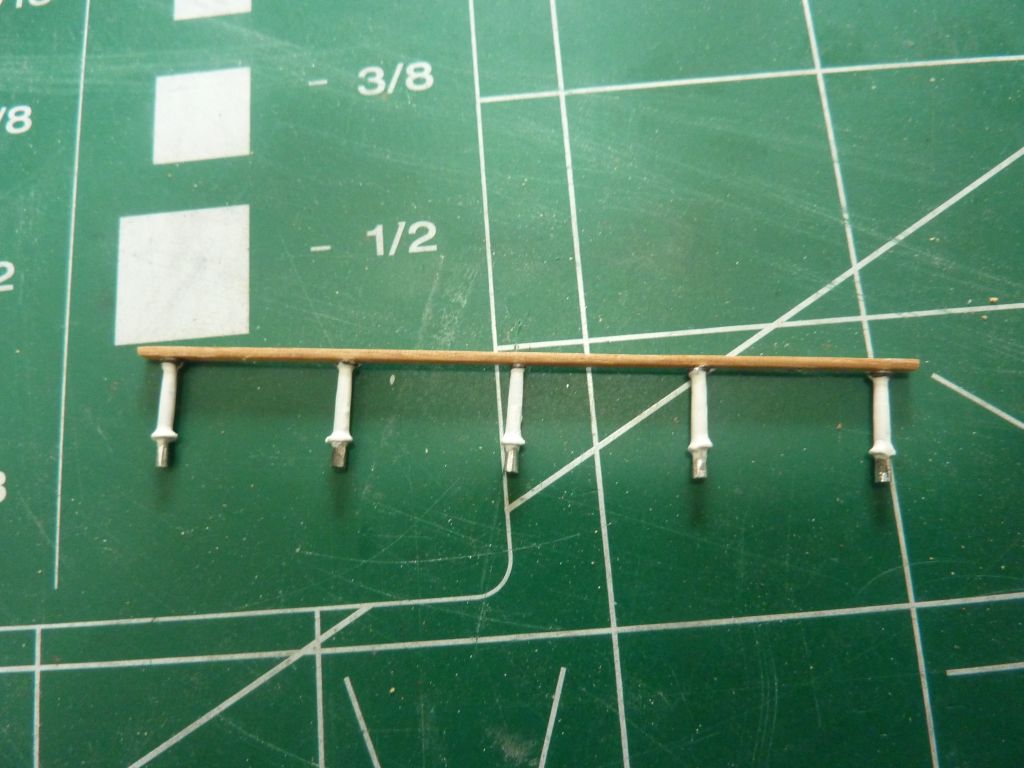
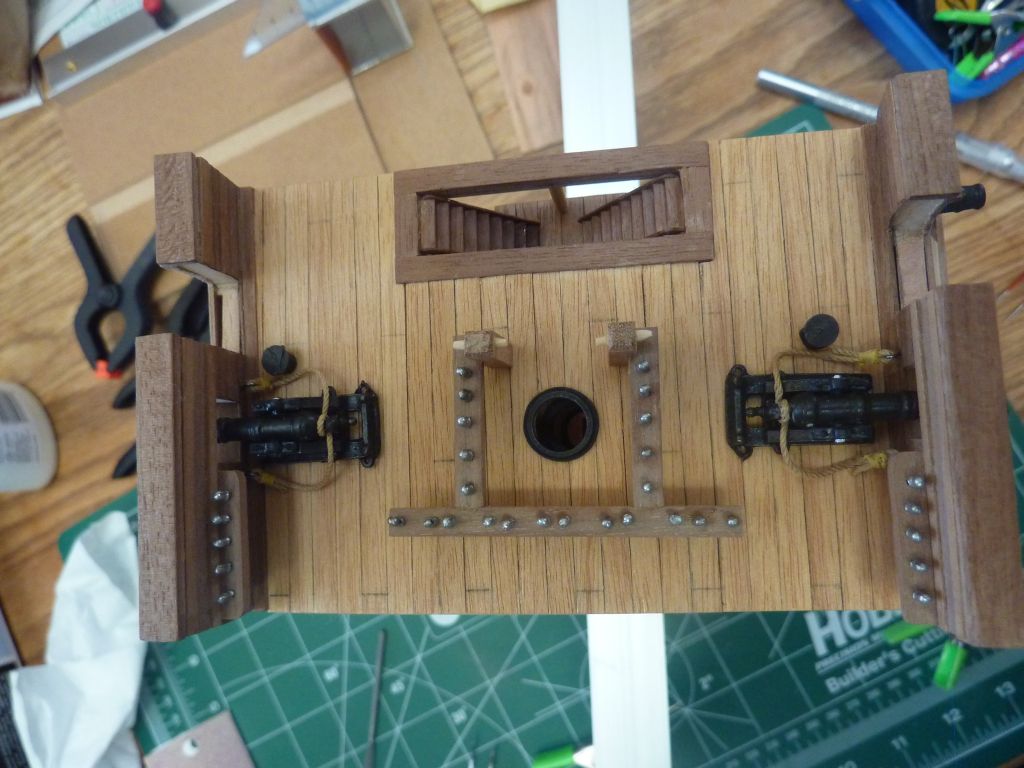
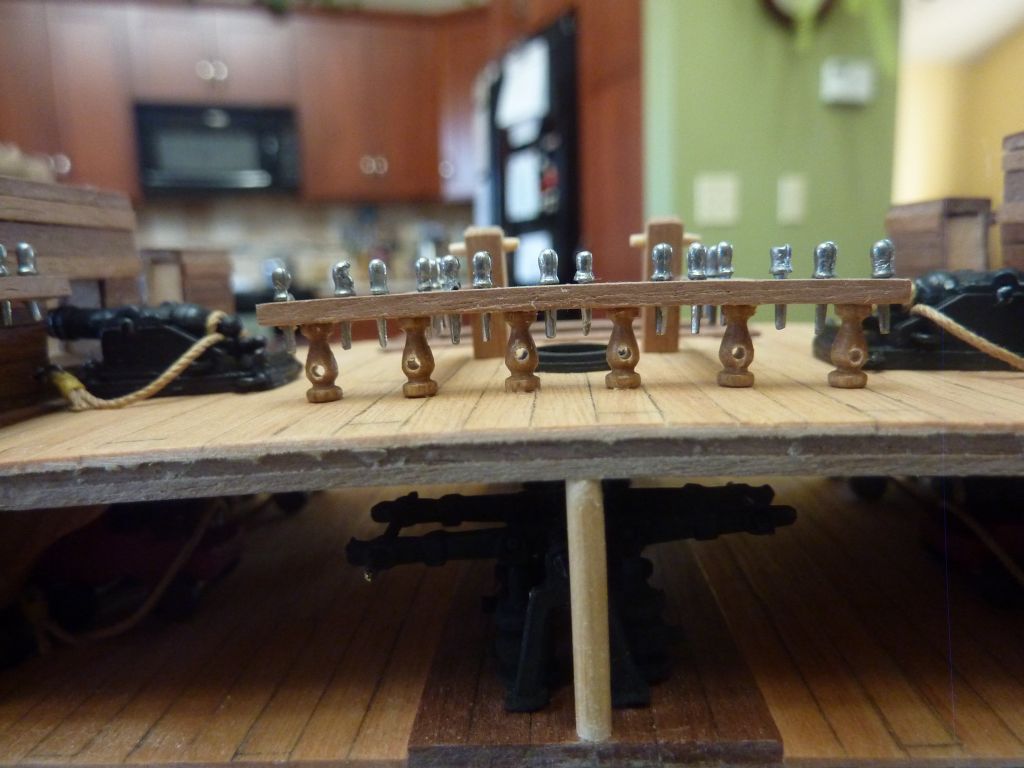
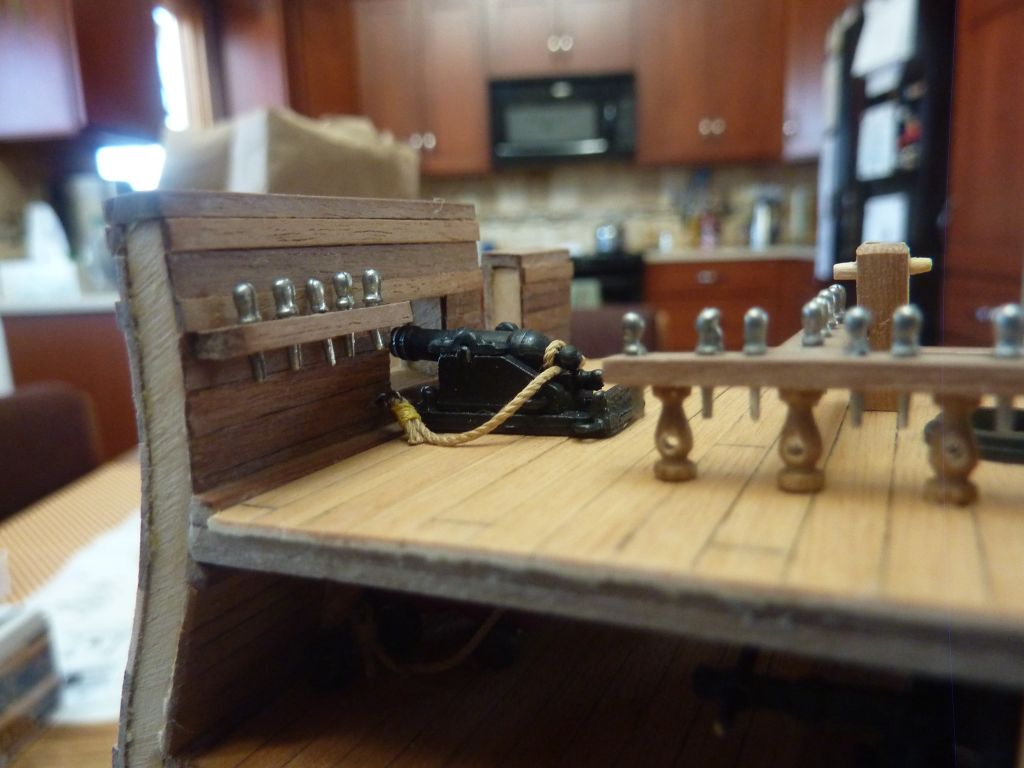
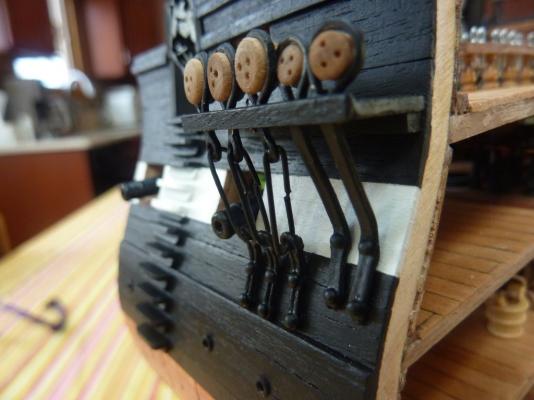
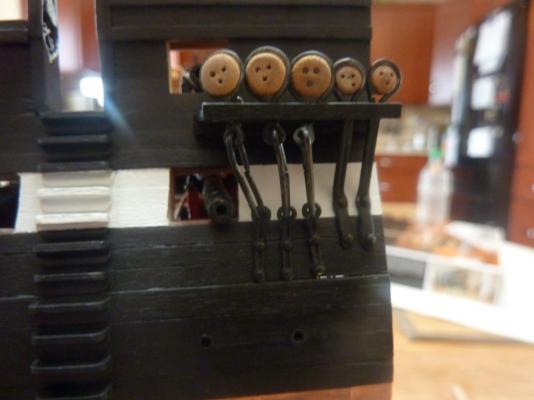
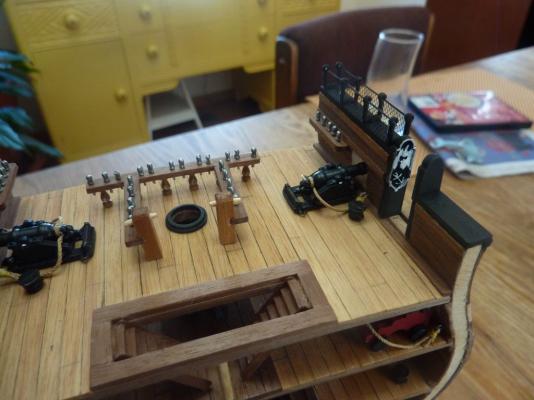
I did the pin rails, both the one surrounding the mast and some side cleats. Overall, I found this to be easy (must be learning something), if I go slow and careful. The more difficult part was drilling the larger holes in the pin rail supports - the wood wanted to splinter. I ended up sanding down the 2mm dowel so it would fit in the 1.5 mm hole I prepared. I also found the need to file down every one of the pins so I didn't force them into the 1mm holes I drilled. If forced, the would crack the wood in two. I used a bit of diluted white glue to "secure" the pins - just enough so they don't fall out - the lines should hold them in just fine. And, finally, I realize the white metal of the pins probably isn't the right color. I could, I suppose, paint them a wood color, but perhaps the lines, once belayed, will cover them up pretty well. Thanks to everyone who's looked and commented - I really do appreciate it, even if I don't have time to respond individually. Andy.


- 188 replies
-
- 8
-
-
- constitution
- mamoli
- (and 2 more)
-
Hi Antony, Thanks for looking in - yes the wood supplied all came with the kit. The majority that I've worked with so far is walnut, with the decks being tanganyka. I find the walnut splinters easily, but overall I'm pleased with the wood quality. Andy.
-
Thanks John. The wood vs. plastic is an interesting contrast - different skills required for sure. I had virtually no wood experience after my Revell, so I made the canoe (you can see in the first page) as a training. I'm finding the most mistakes I'm making are symmetrical - the center line where the mast goes, down to the keel is not exactly center with the bulwarks - sometimes I'm off by as much as 2-3mm. It emphasizes the need to really be careful when putting the frames together. I thought I was doing it correctly, on the plans, etc., but I guess not. The good news is, I can cover up and adjust for the errors with the deck planking and I don't think it's overly visible, even to the expert eyes MSW provides. (If anyone has noticed, I am prepared to be highly impressed). I'm expecting that plank-on-bulwark will be easier to keep centered, as I will probably do that type of ship next (whether it's the Syren or a smaller ship, I don't know yet). Andy.
- 188 replies
-
- 1
-
-
- constitution
- mamoli
- (and 2 more)
-
Thanks. Right now, I plan on putting this cross-section into the same case as my Revell plastic Constitution to make a nice dual-display. There will be differences between the two models, of course, as I've not painted the interior of the cross section (bulwarks). I plan on painting the exterior to match, but I'm still debating how to copper the lower hull. I can use the kit's paper and paint it copper or find and use some copper tape instead. I'm tempted to do the latter if I can find tape in the proper scale width. Andy.
- 246 replies
-
- 1
-
-
- revell
- constitution
- (and 2 more)