HOLIDAY DONATION DRIVE - SUPPORT MSW - DO YOUR PART TO KEEP THIS GREAT FORUM GOING! (Only 68 donations so far out of 49,000 members - Can we at least get 100? C'mon guys!)
×


AndyMech
-
Posts
363 -
Joined
-
Last visited
Content Type
Profiles
Forums
Gallery
Events
Everything posted by AndyMech
-
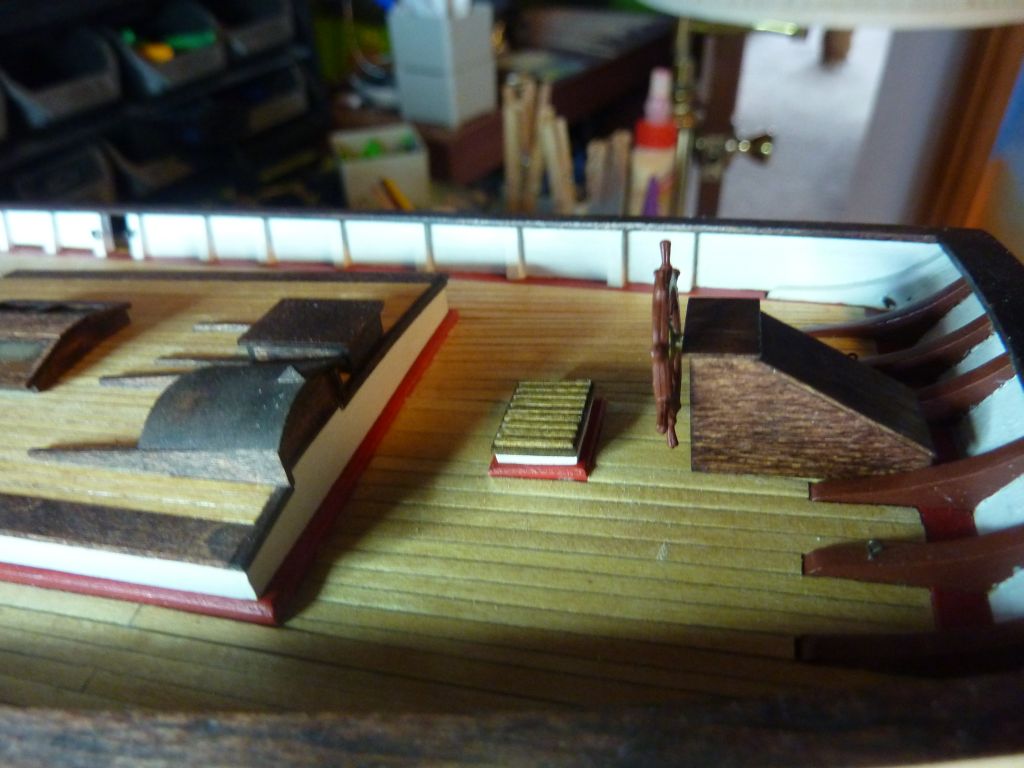
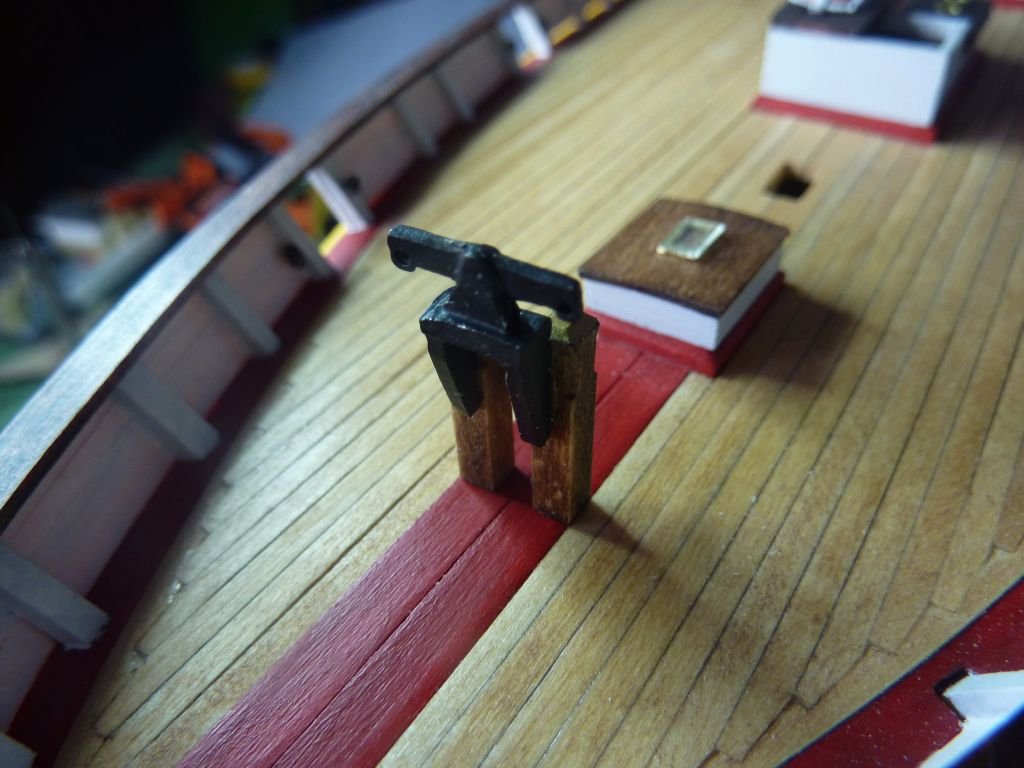
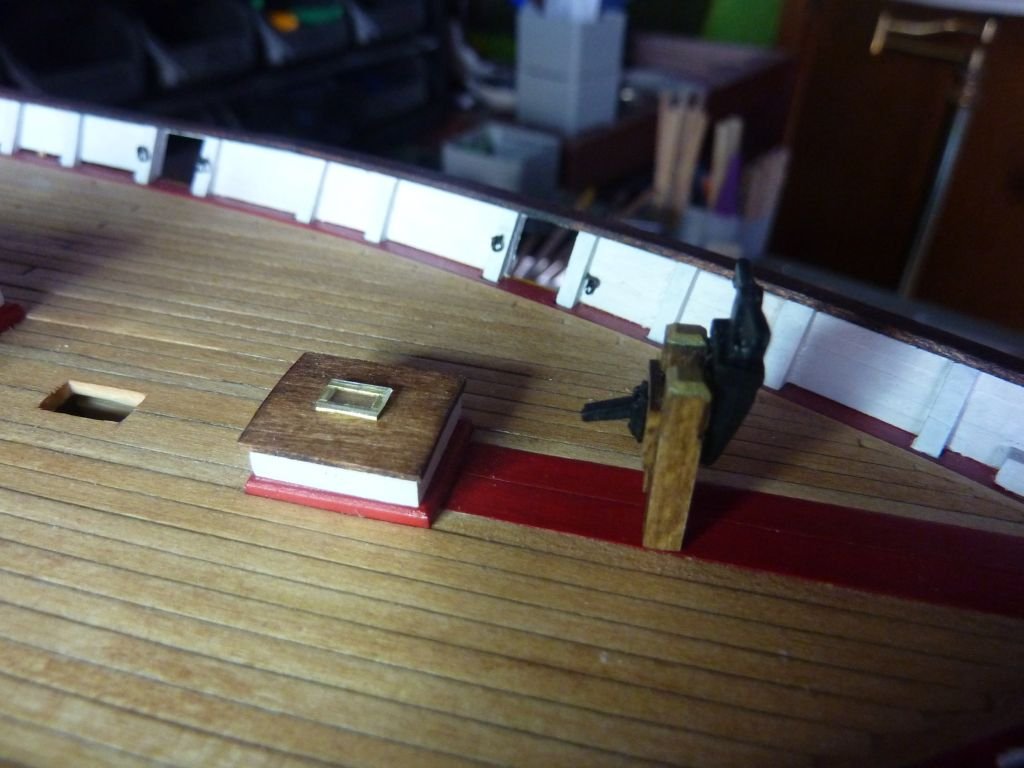
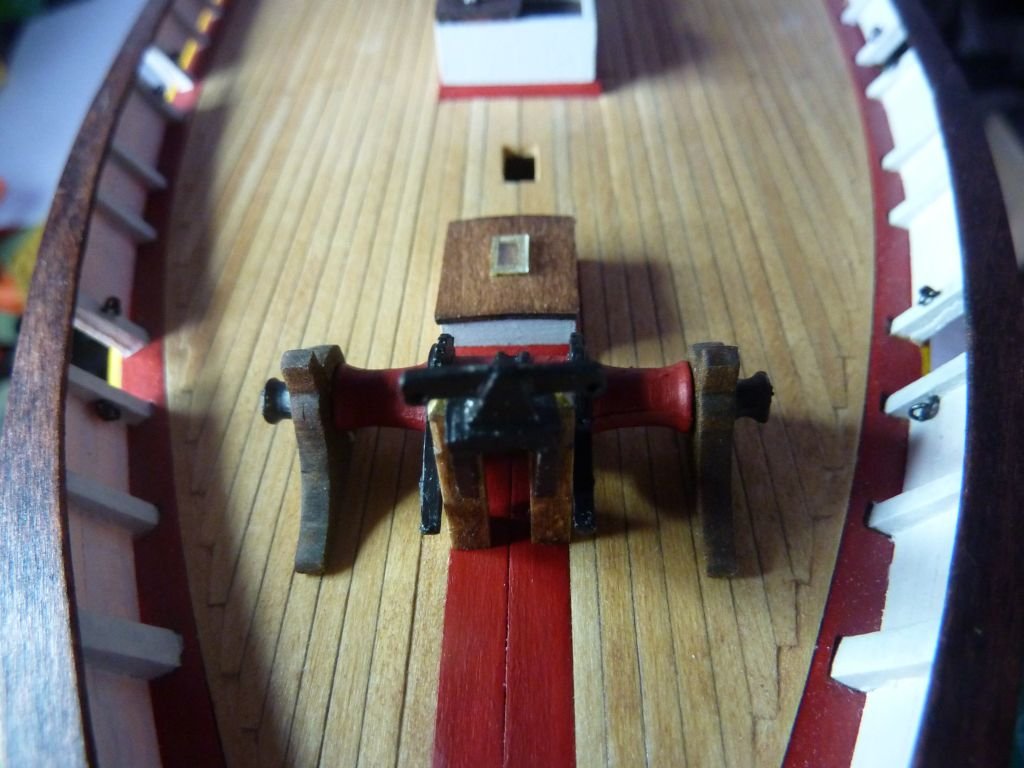
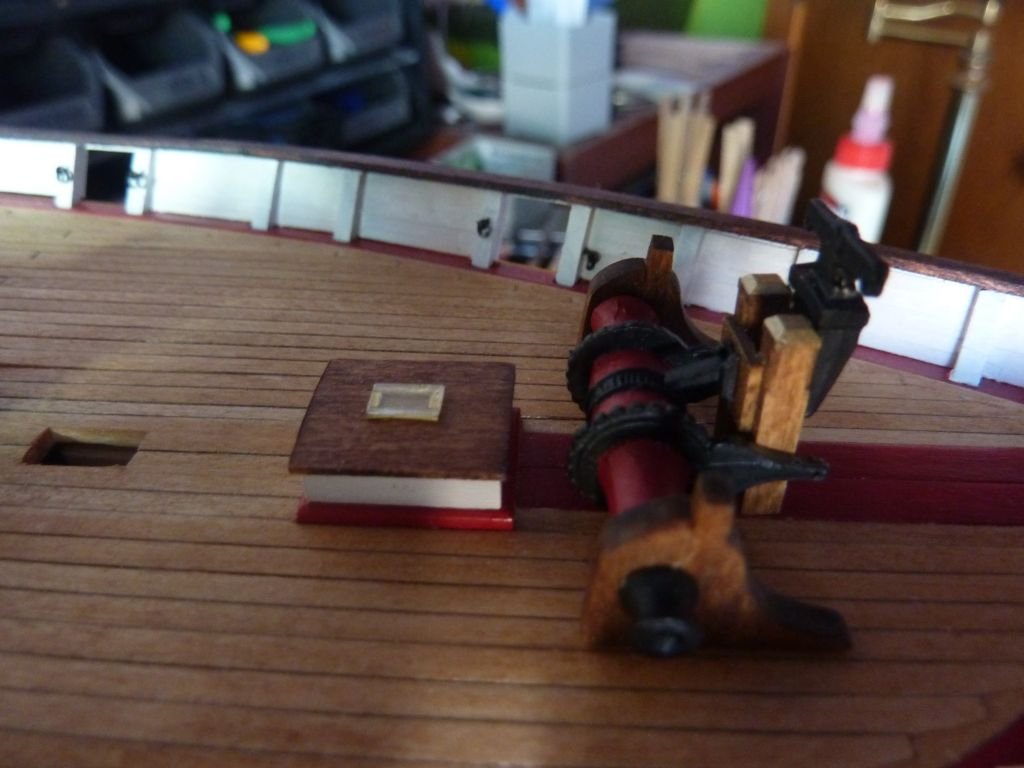
Finally some more progress - I've created and installed the sampson posts and the windlass. Both are glued on deck. I would like to run black thread down from the pump handles to the windlass to simulate the wire, but it's fairly tricky work. Maybe I can blacken some brass wire for the same effect and glue in place.
-
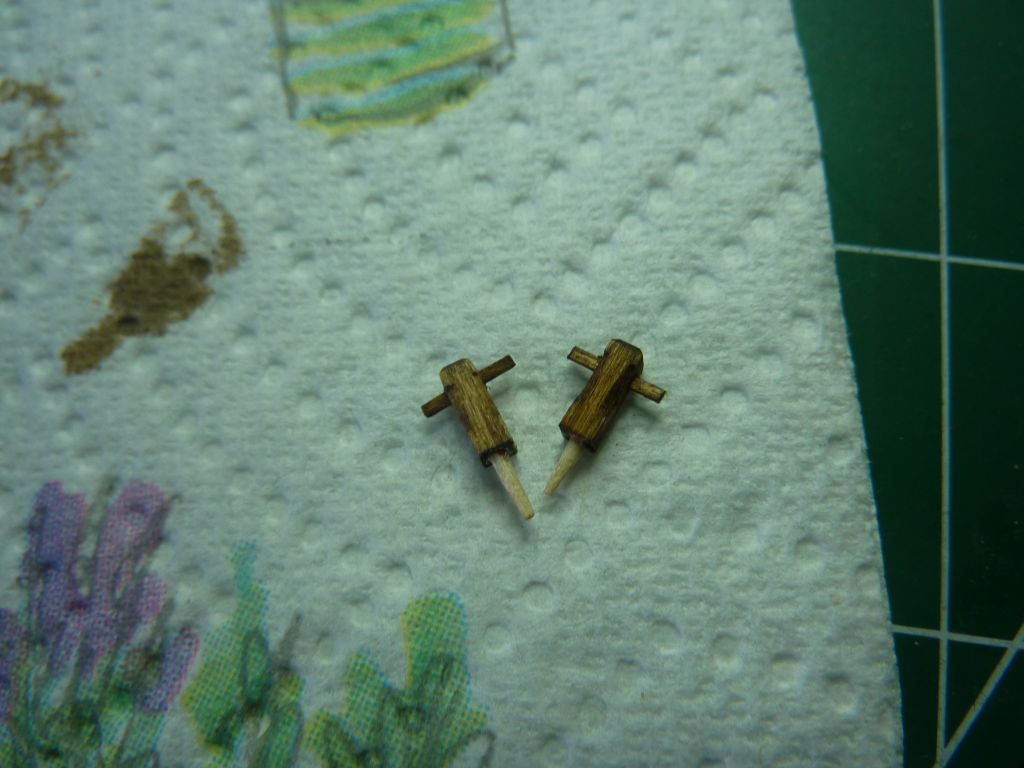
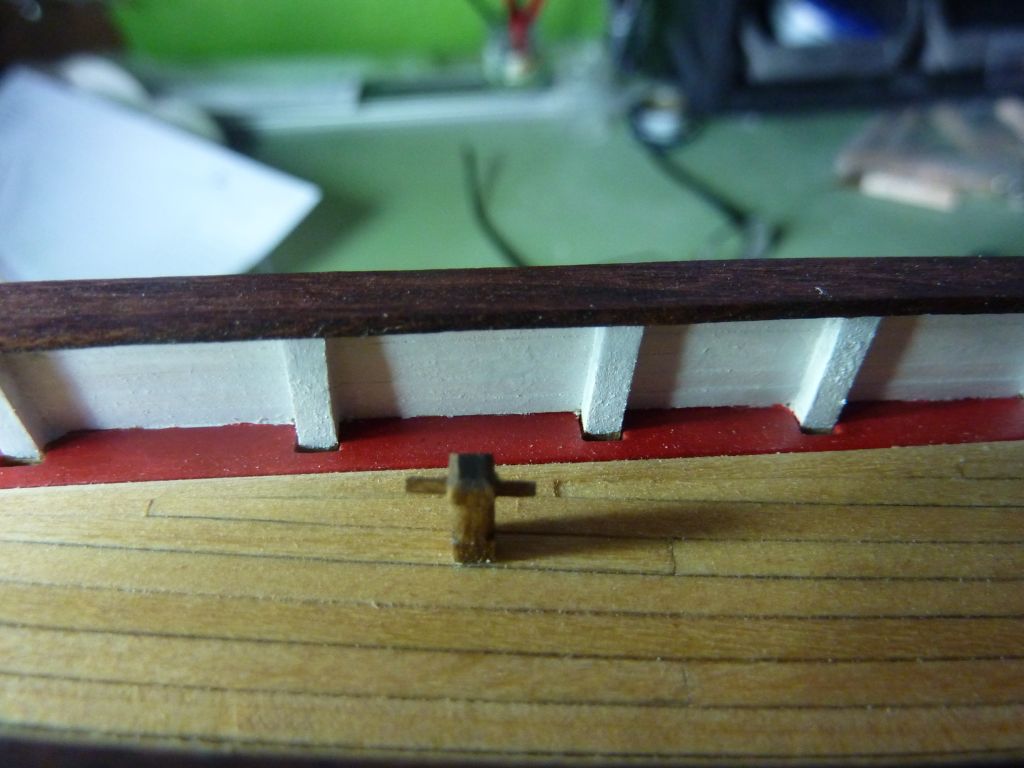
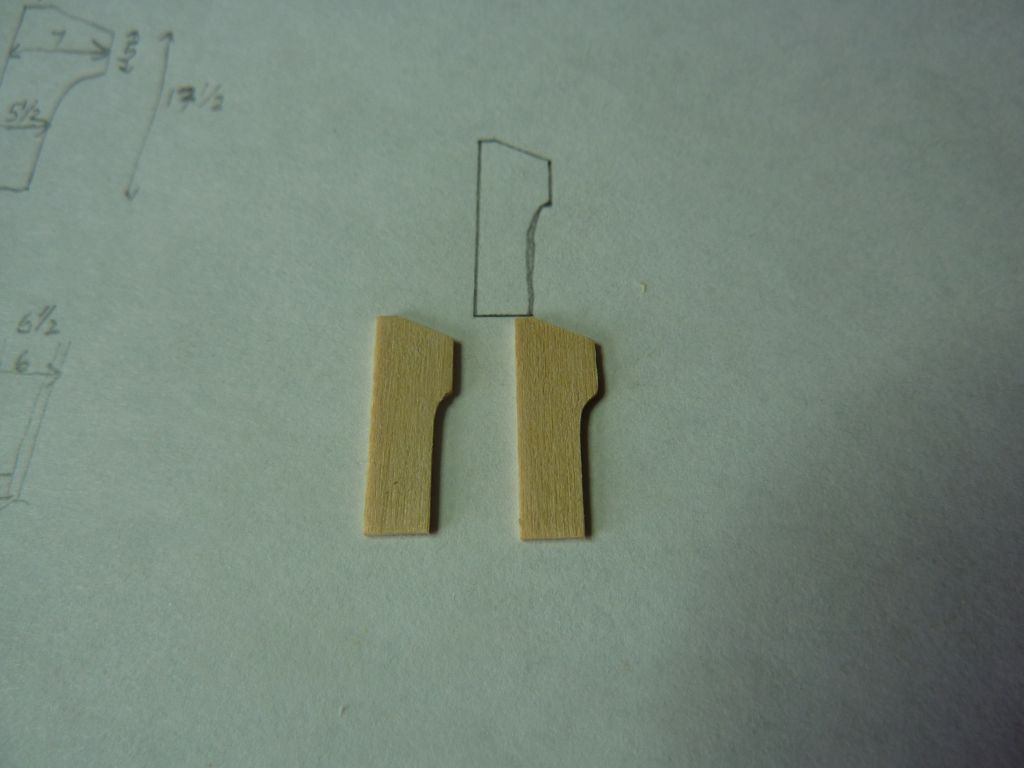
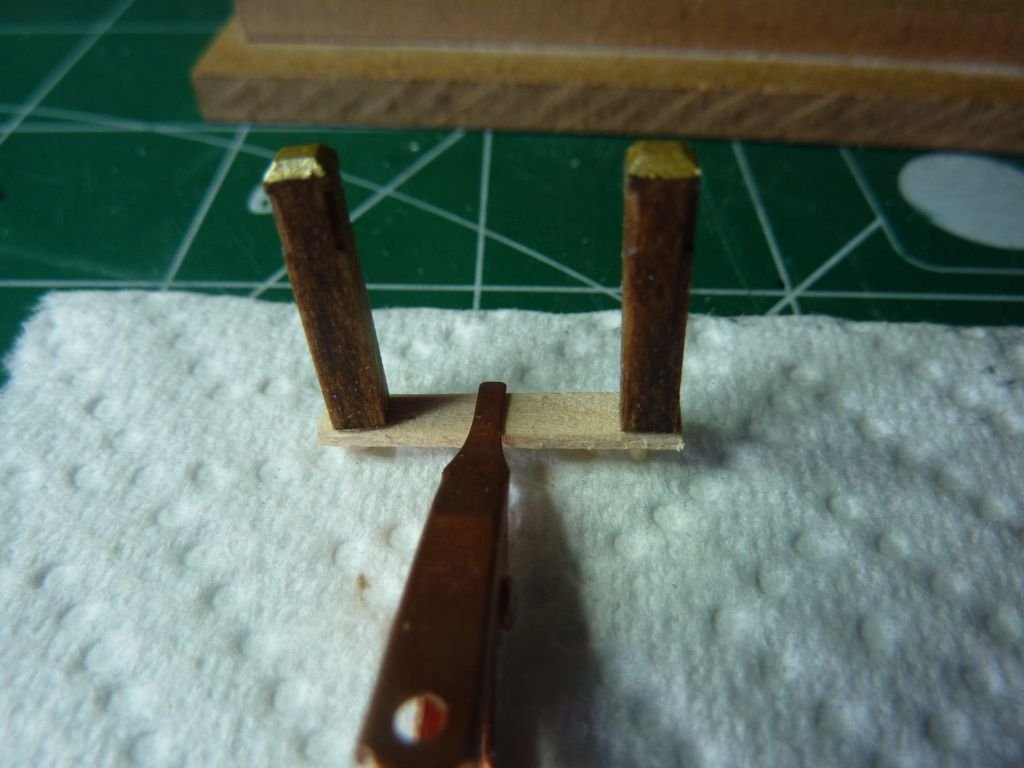
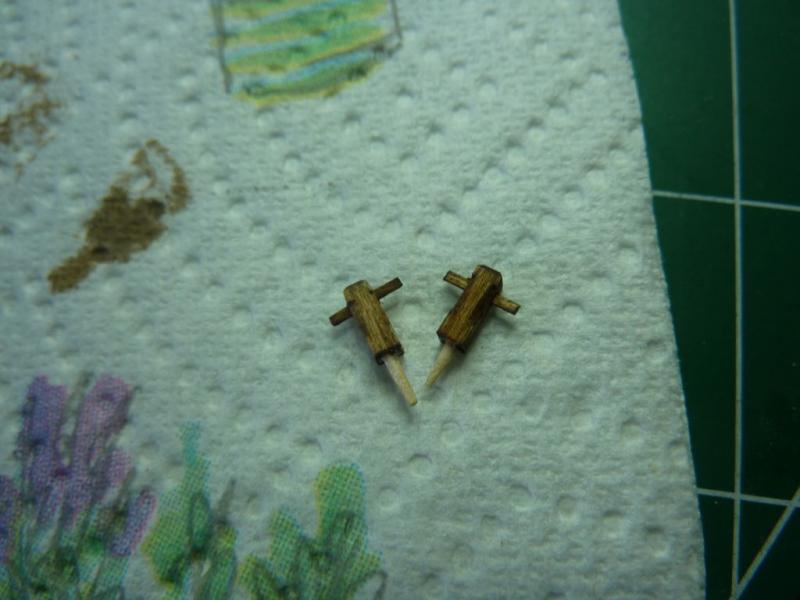
Hi Russ, thanks for the suggestion. I never think of using paper, although I've see it used quite effectively in many build logs. Oh well, a thought for the future. I finished the port and starboard bitts. These are made from 3/32" square stock and I used some leftover 1/32x1/64 from the previous boxes to make the cross part. The dowel in the bottom is just the end of a toothpick. Andy.

-
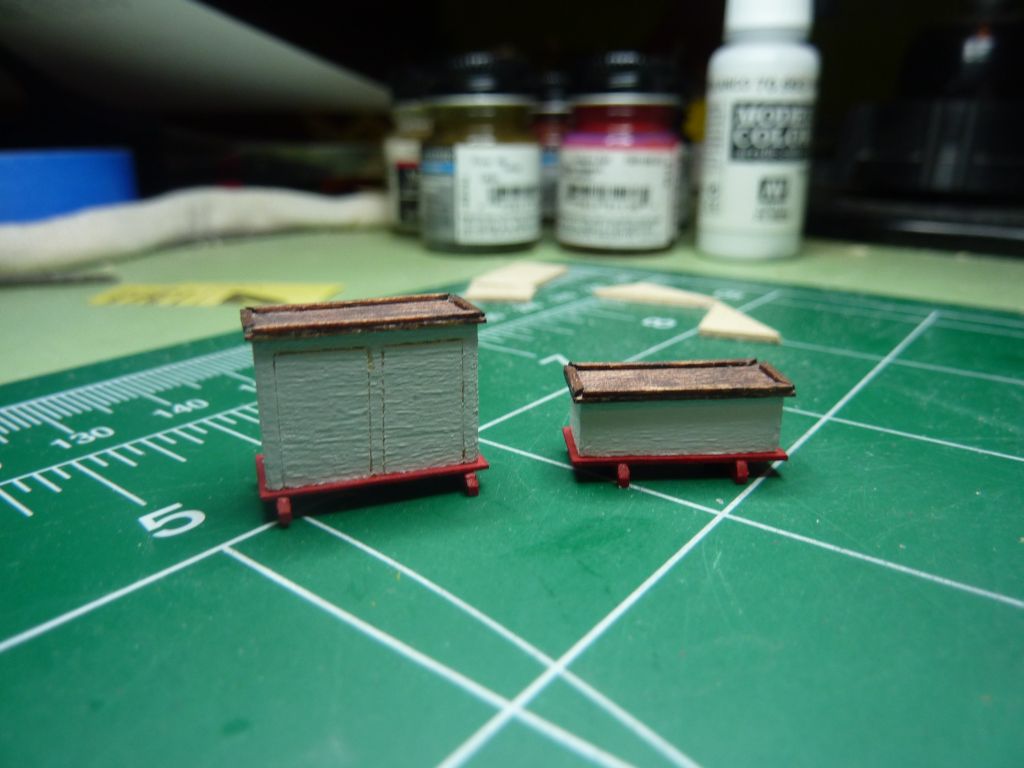
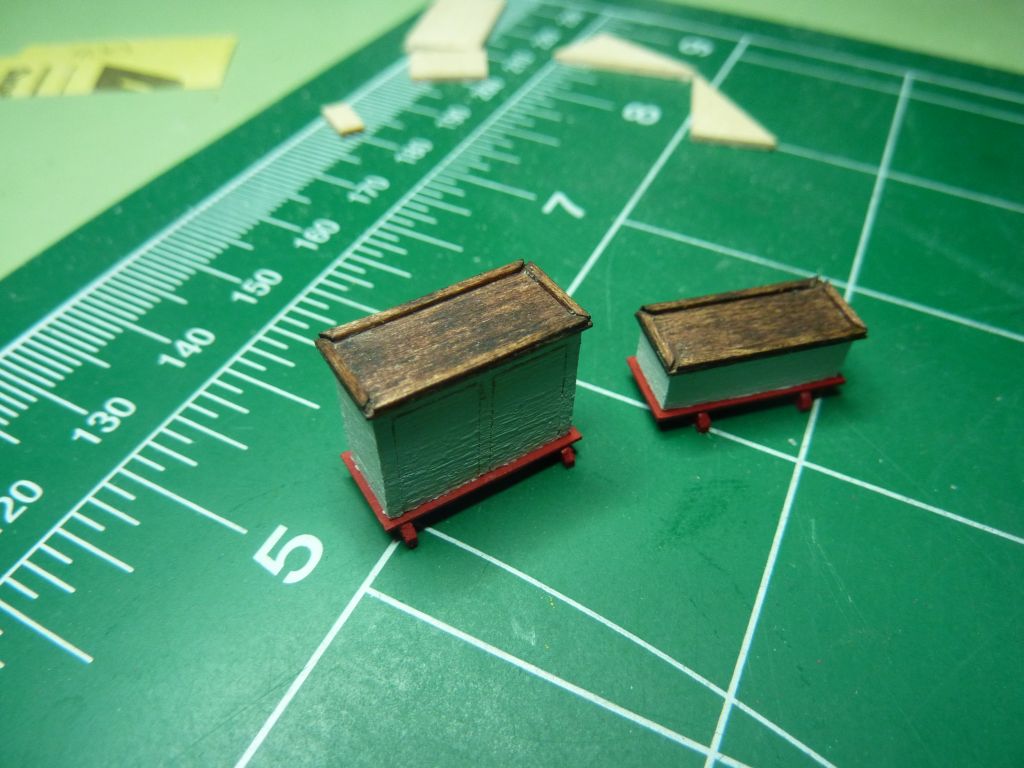
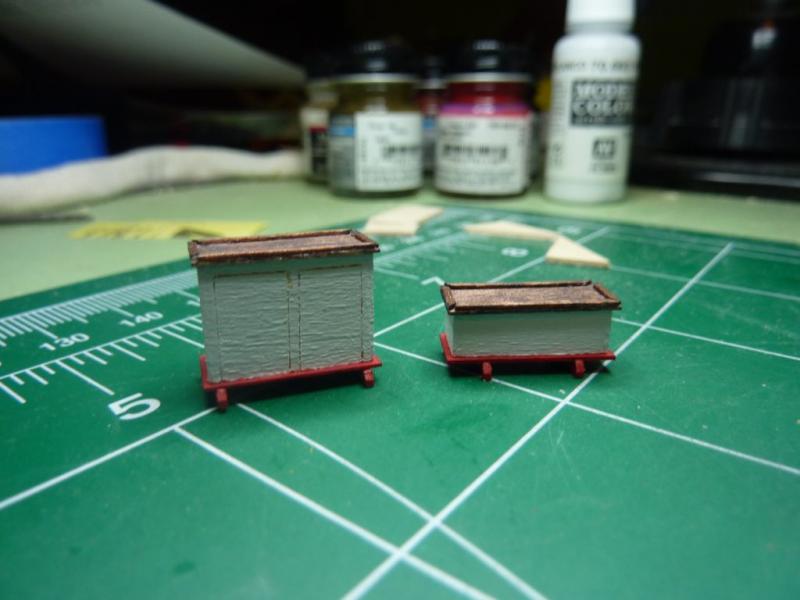
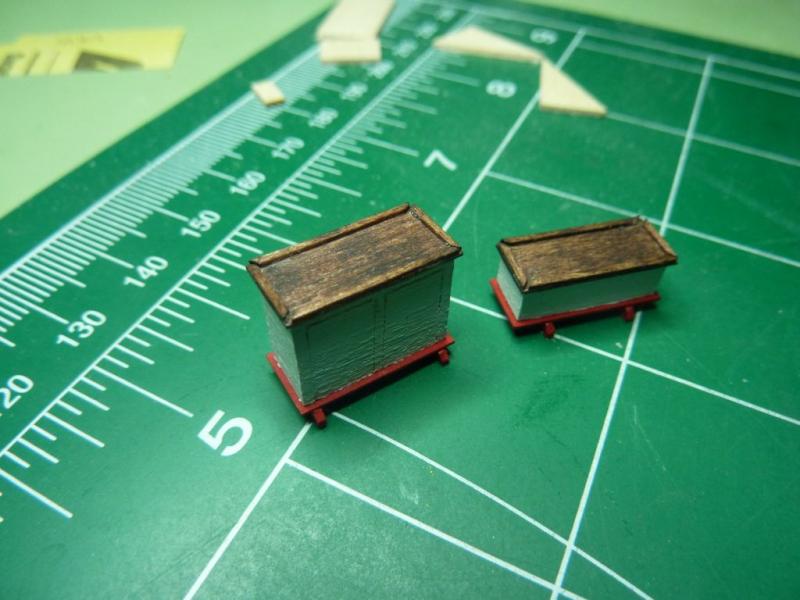
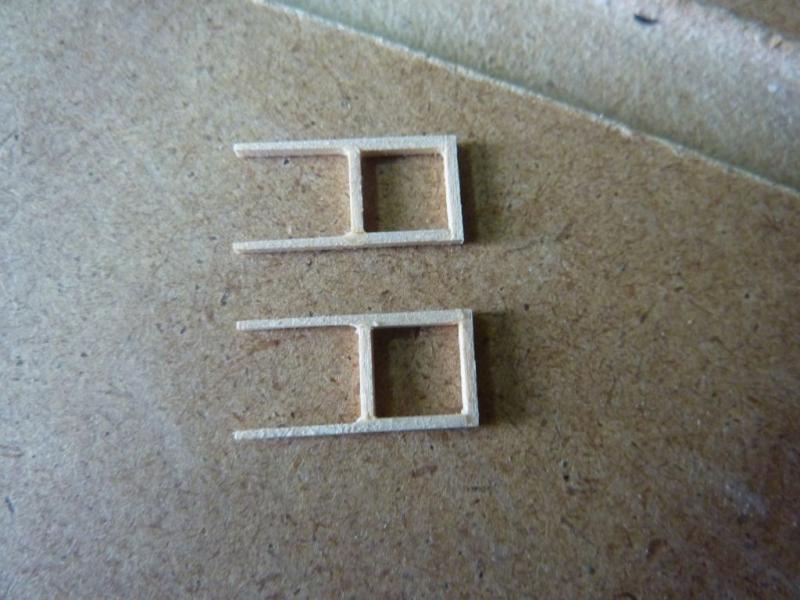
It's been a couple of weeks, but here's a quick post showing the final two deck boxes I did a week or so ago. Pretty straightforward, the only tricky bit are framing on the top - those are tiny - 1/32" by 1/64. Next up, and in progress, are two deck bitts and the sampson posts. Hopefully and update next week. Andy
-
Ok, I decided to take a look at improving the main hatch issue. For reference, here's what it looked like after my initial work: Today, I removed the hatch, which wasn't too difficult. I use a water-soluble glue, so a little water loosened it right up. I masked the area under the hatch and painted the planks black: Here's final result. I did not add anything to the clear panes at this point. I didn't glue it back together yet, so I have some time to consider how I like it. Andy.
-
Jean-Pierre, thanks for the comment. And, you're right - the skylight is one of those elements I'm not 100% happy with. Other suggestions would be to add a tinted cellophane to the clear windows. My issue at the moment is - I've already glued the skylight to the roof, so getting at it would require unglueing it and I'm afraid I would also damage or unglue the planks in the process. I've left it alone for now, but will re-visit it when I complete the rest of the deck lockers. Thanks for the suggestion, I welcome ideas to improve the build. Andy.
-
Oh, I have a quick response related to the hinges. First, thanks for the tip - the metallic painted paper is a really good idea! Second, and this is more of an overall approach to my build - there are a ton of little details included in the kit and the plans. Things like the extra pads when doing the deck planking, the skylights embedded in the deck, the hinges on the boxes, the fire hose on one of the deck hatches, etc. I've deliberately left a lot of those out - some I may add later, but many I may not. I appreciate the accuracy of those parts, but I also want my build to have cleaner look and not have so many little details that they seem to clutter the overall model. I'm certainly not criticizing those folks that put them in - they have more skill than I do to pull them off anyway. But, I feel there's also some value in leaving some of those off as well. Or I'm just lazy! For example, I've not drilled hawse holes at the bow. I may never do that - for one, I'm hesitant to drill into my painstakingly planked deck and wales. I know it would inaccurate to leave them out, but aesthetically I may prefer it that way. Mind is not made up, I may still do it, but it's an example. Andy.
-
Hi Chris, Good luck on the Baltimore when you get it. And thanks for the compliments. If you have questions about your Baltimore, please don't hesitate to ask. I started this build so long ago, but I have lots more photos than I post here and have learned from other builders and my own mistakes. Unsolicited word of advice - yes, this build (any build really) feels overwhelming when you open the box, look at the parts and check out the plans for the first time. I know I did with this one. Break it down, do one thing at a time, plan out that thing, and then do that as best you can. I am following the instruction booklet pretty closely, also so I don't forget to do something! On this build, I've tried very very hard to follow my own advice and to not be my own worst critic. Of course my build isn't perfect, I doubt anyones is (although I've seen a few here that are close), but I do feel I've done the best work I'm capable of when I did it. I rarely do a part over - something miserly about my consumption of the kit materials I suppose, so I try to go slow and careful. That's why it took all weekend to make one and half boxes like in my last update. But, you know, I'm ok with that: I have other things to do during my free time, and overall I'm pretty dang happy with how my ship is turning out. So, I appreciate it when others feel the same. Thanks! Andy.
-
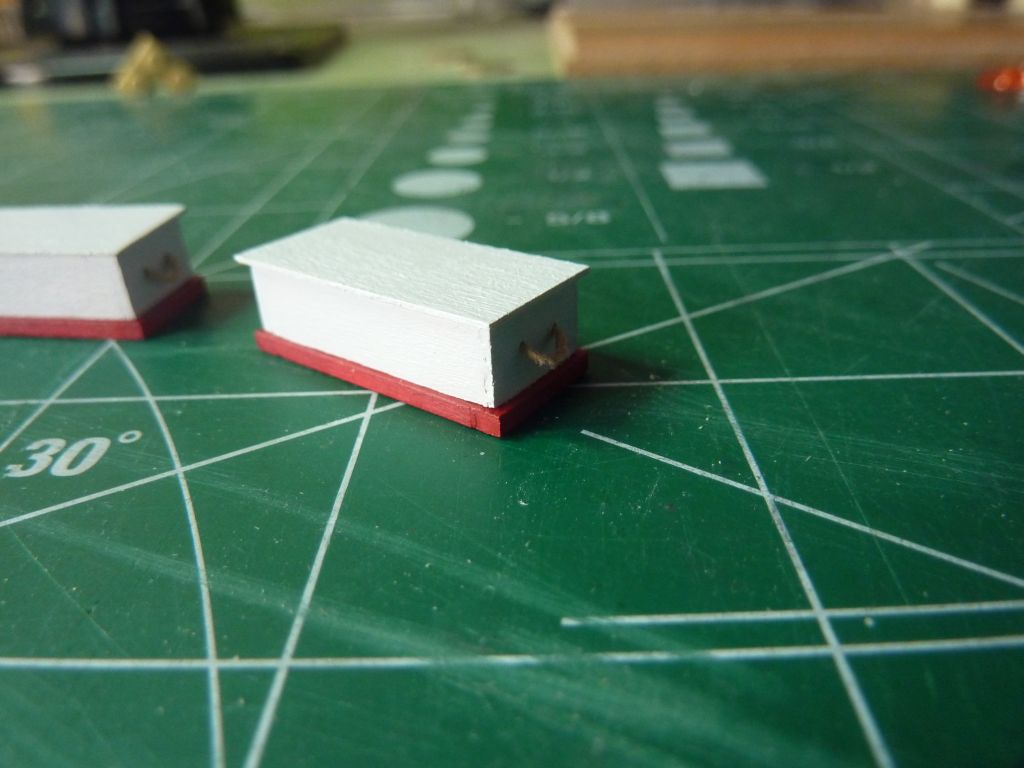
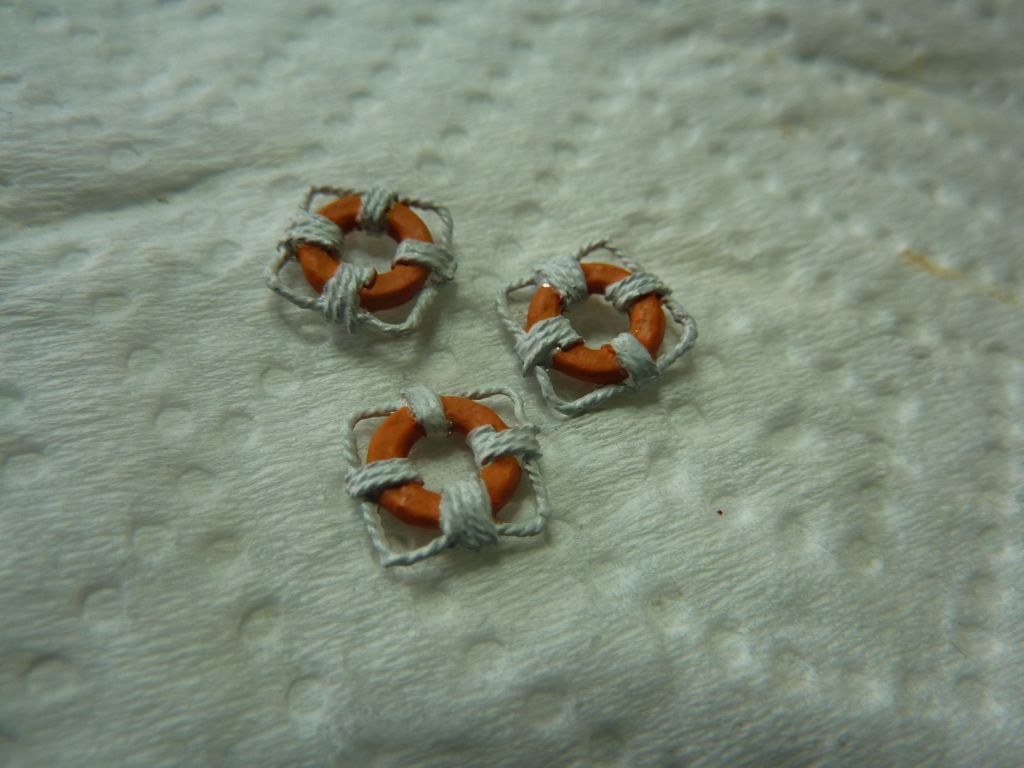
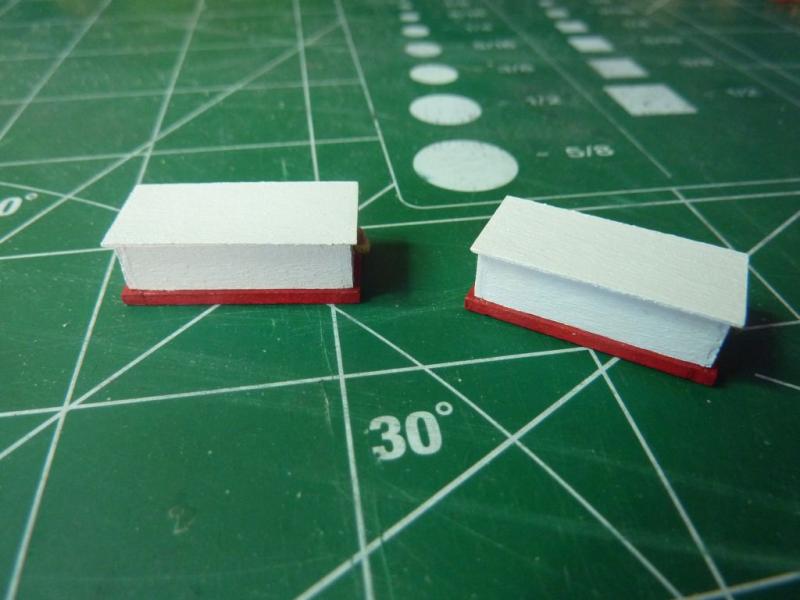
I started working on what I hope are the last of the deck furniture little boxes. There are 5 boxes in this set, and I've completed 3 - the life jacket locker, the rope locker and the diesal pump parts locker. These share common attributes - red solid base, as opposed to feet, white tops and rope handles. Simple to make, mostly, as I left out the hinges. I have no idea how to make hinges of this size! These are not yet glued to the deck, so aren't lined up perfectly yet. I will also add I really enjoyed making the rope handles - must remind me of rigging which I also like and haven't had a chance to do in a while. Andy.

-
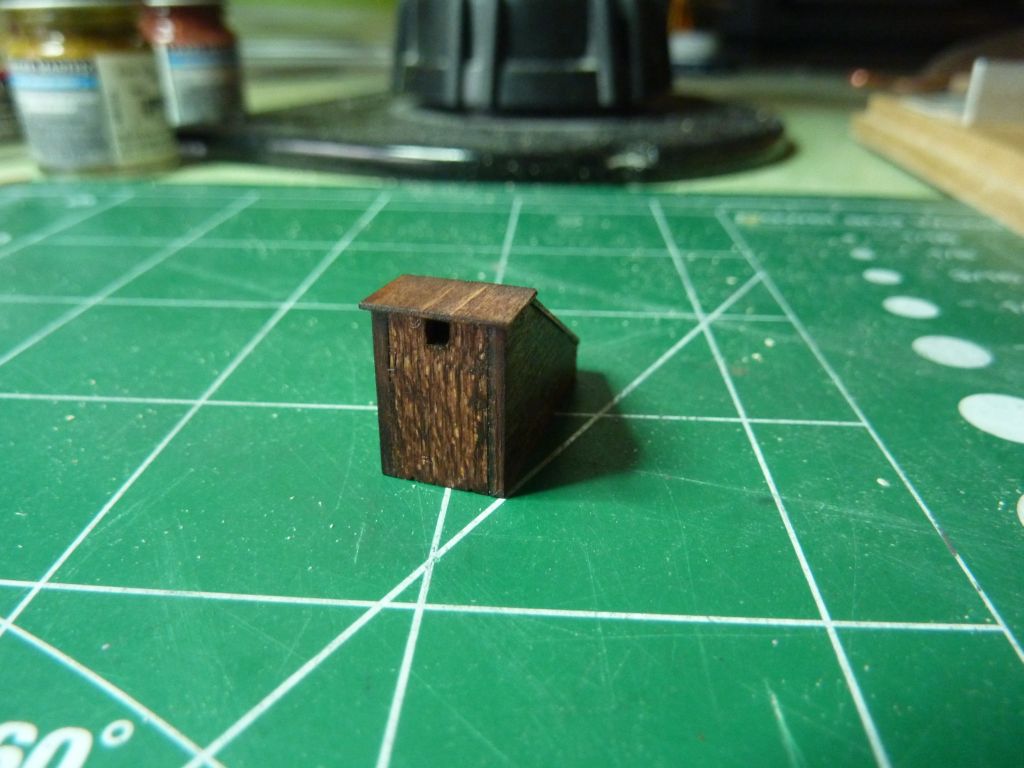
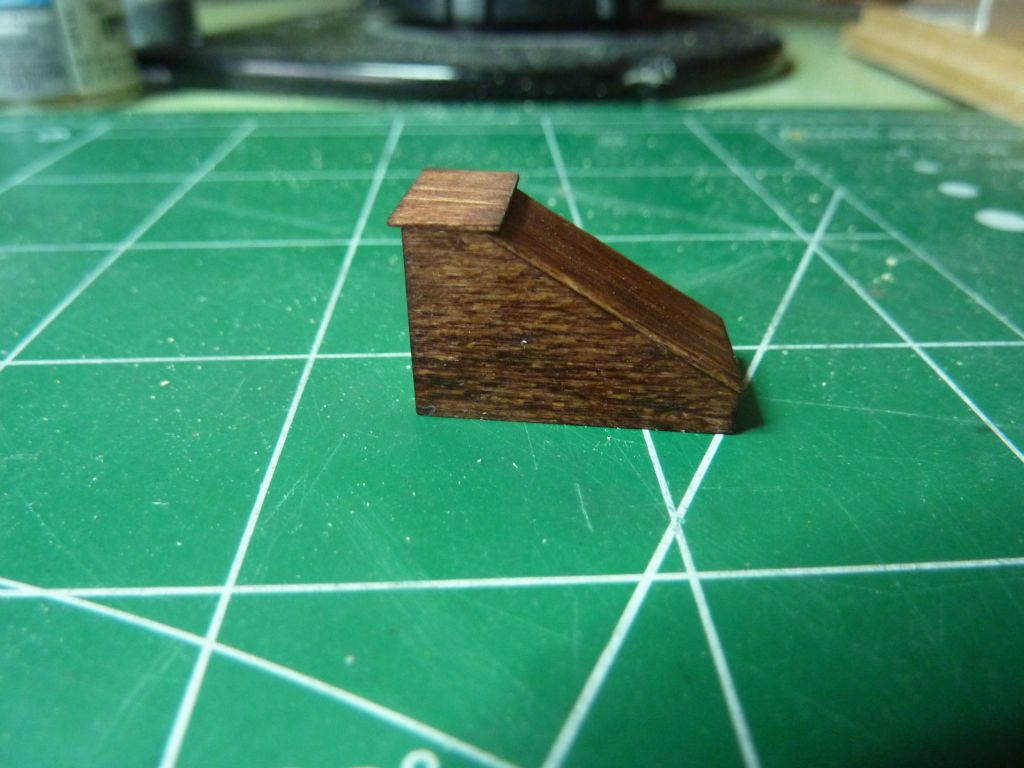
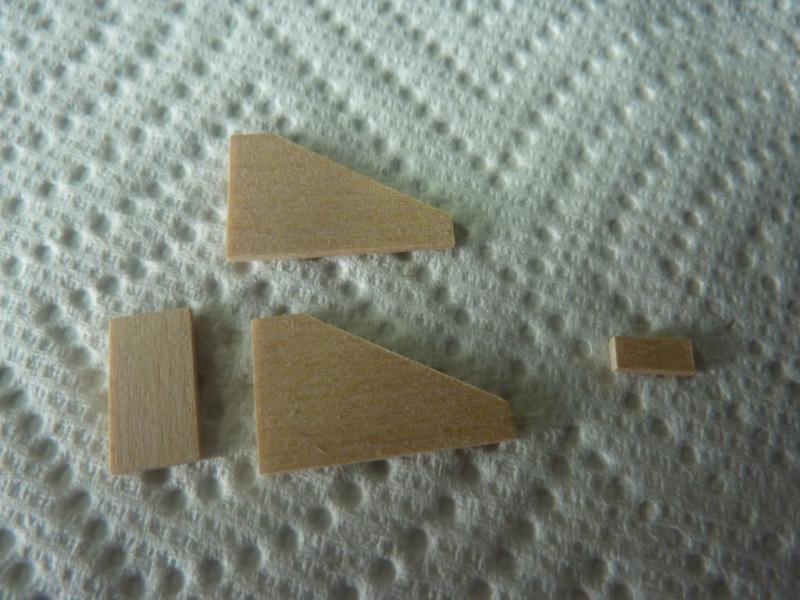
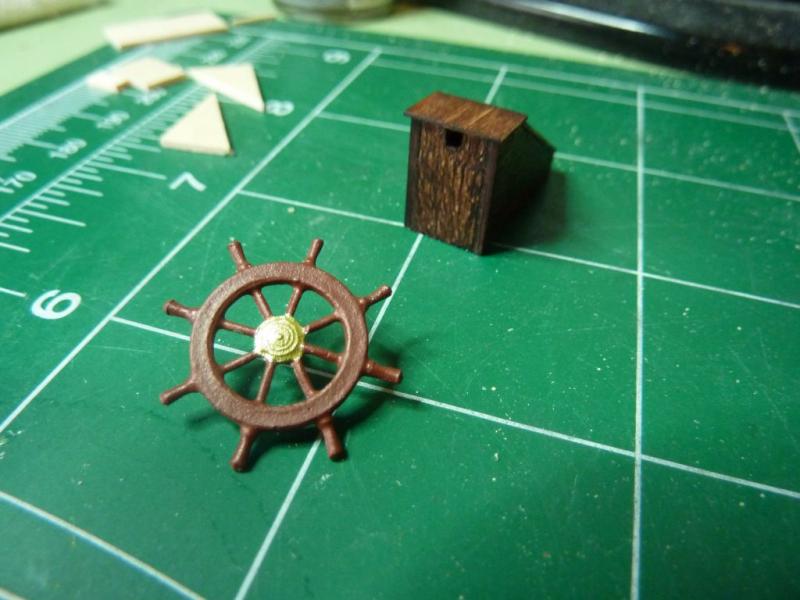
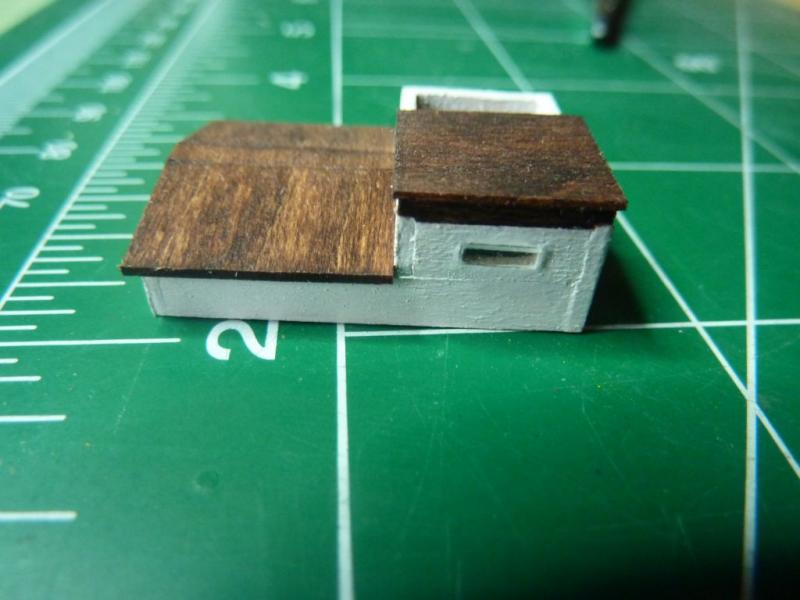
The wheel box was next. I constructed the body out of 3/64" thick wood and the tops are both 1/64" thick, or close enough. I finally drug out my only powered tool - a pencil sander - to thin the top pieces. I had been doing it by hand for other deck elements, but the results were uneven. The sander was easier to get an even thinning. The wheel is painted burnt sienna and brass. I might be getting decent at making these box-like pieces, but I have to admit its getting a little repetitive. That's ok, I'm such a slow builder that if I get bored, I just take a break for a day or two and get back to it. Andy.


-
Steve, as for the hull finish, that is a good question. I did apply a layer or two of wipe-on poly to it, just to protect it while I work on the rest. I usually paint over wipe-on poly anyway, so doing that doesn't preclude me from painting it. Probably does prevent me from staining it though, now that I think about it. I haven't really looked it at recently, as I've been focused on the deck furniture, and one of the other Baltimore builders regretted (at least initially) his painting of the hull green, so I really don't know at this point. Andy.
-
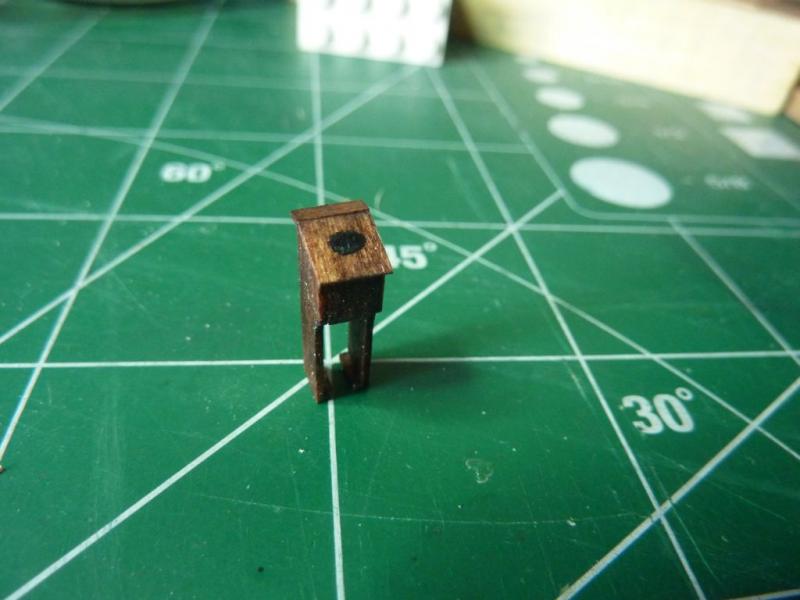
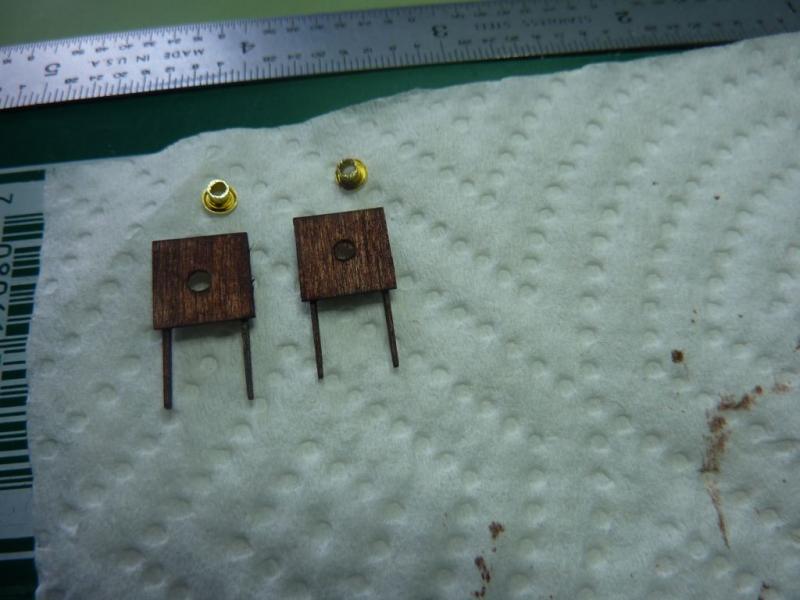
My understanding is the compass is housed in the binnacle, and the hole is glass covered to keep the compass protected while allowing it to be viewed. Cutting the hole now, once assembled and glued is likely too damaging for me to attempt. One of my goals for this build was to experiment with different techniques to see how they work out, so this was one of those experiments. Andy
-
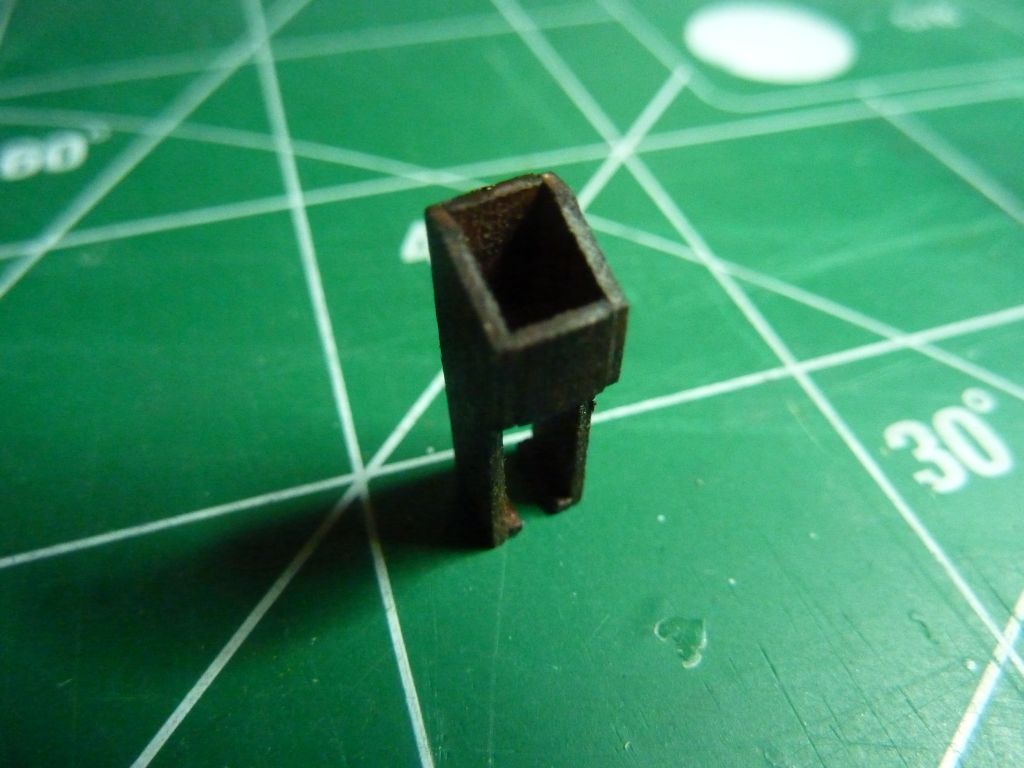
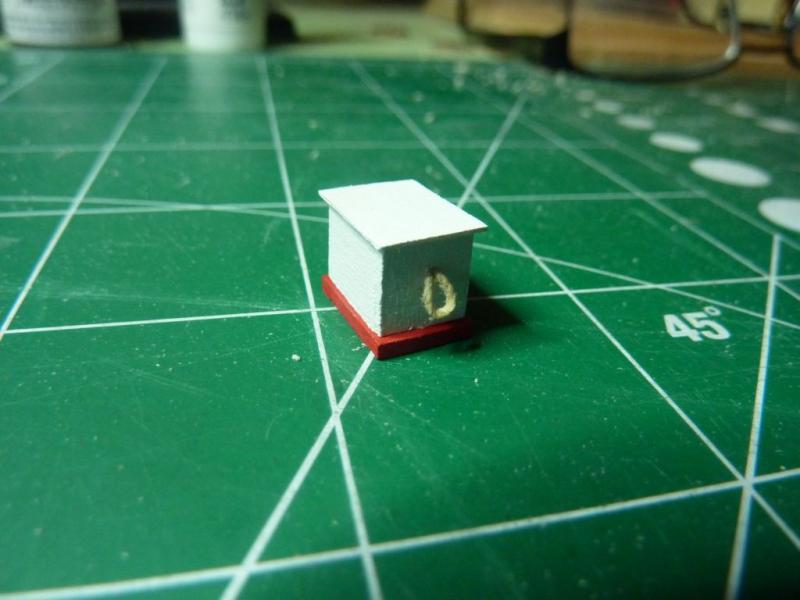
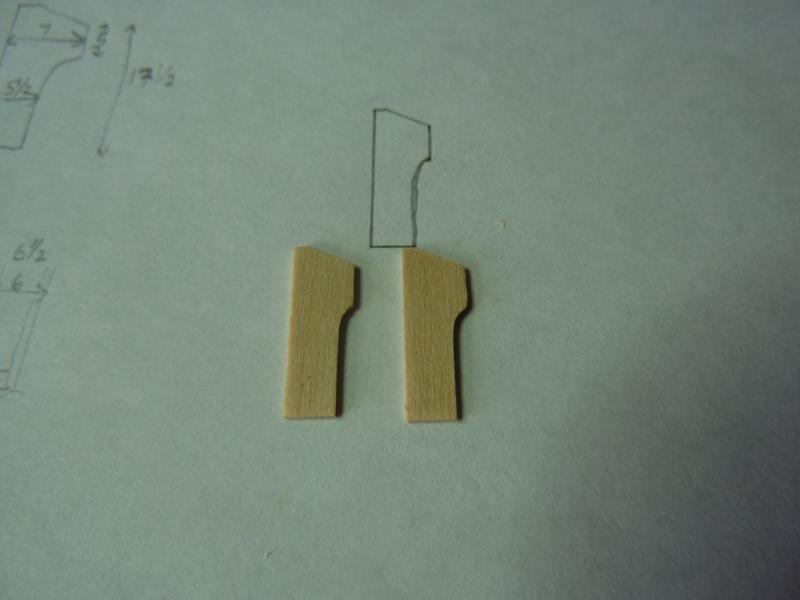
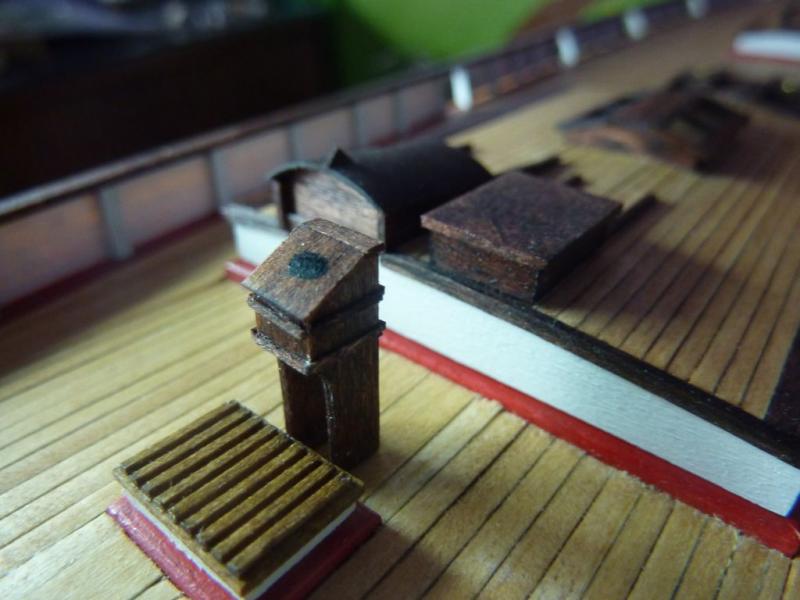
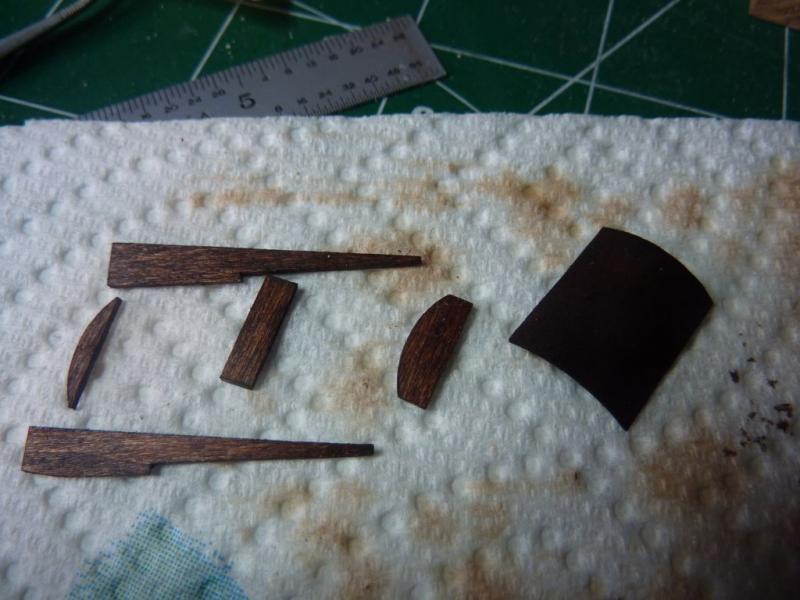
Next in the instruction manual is the binnacle. This is very small - it's difficult to work with wood and glue at these sizes. Instead of carving a hole, I just painted a black oval to simulate it. Also, the ribbing was made by taking a 1/32" square piece and cutting it in half twice to make 1/64" square rods, which were then stained, cut and glued around in two bands. Crazy. Next up is the wheel box, which feels gigantic in comparison. Andy.


-
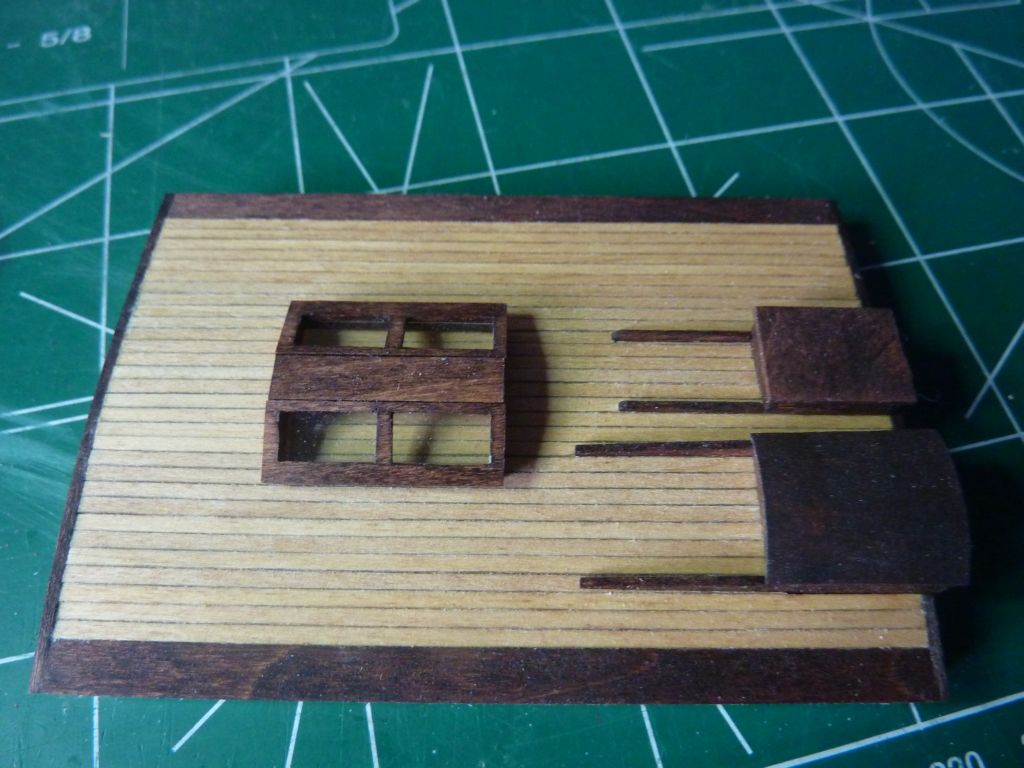
Popeye: the skylight has already been glued down - prematurely I suppose. I'll keep my eye open for a good solution. I suppose I could unglue it, but generally I hate to do that -it causes more work and mars the wood and I would be concerned of the planks also coming unglued. I could also remove the planking from below the skylight as the whole unit is not glued to the coamings, that will allow for access to the underside. We'll see. Moving forward: There are 2 vent boxes in the plans - without coamings, but with little feet bolted to the deck. It looks like, from photos of the actual ship that something has changed and there are coamings now, but I went with the plans and used the feet instead. These are just placed at the moment, not glued as there are other pieces of deck furniture to add. I think I'll create all the rest of the furniture before permanently placing on deck. Andy.

-
Popeye, I like the idea of using a tinted plastic or film, I'll keep my eye open for something like that. It should be easy enough to apply on top, likely won't even need to glue it. Good idea, thanks. Andy
-
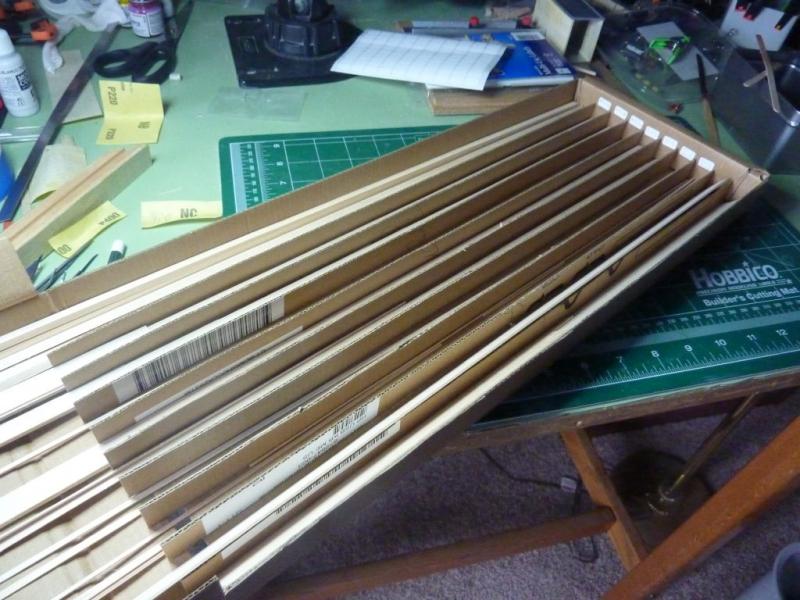
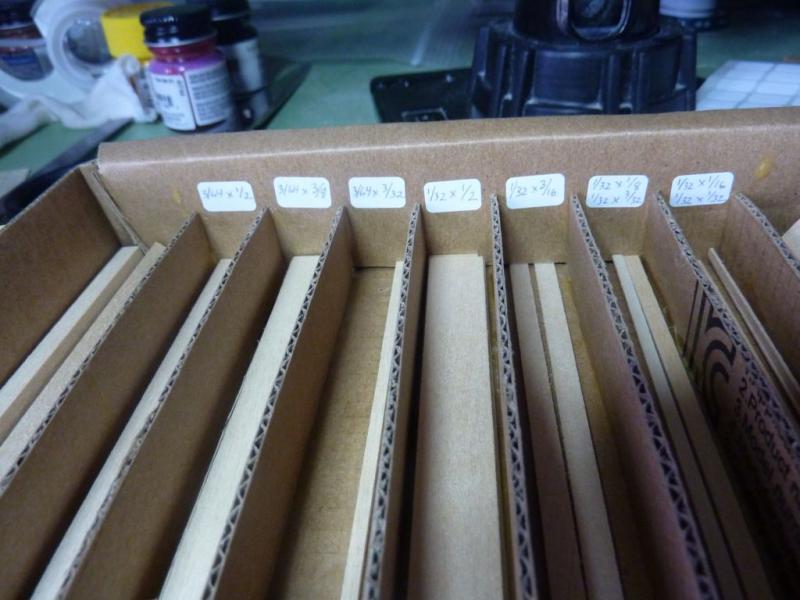
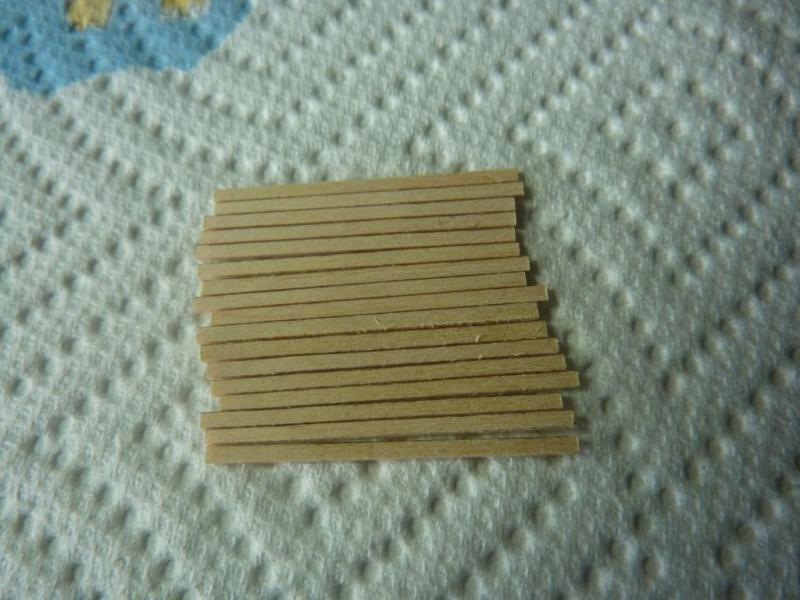
Here's a method of sorting and storing wood I came up with over the holidays: At work, I found a cardboard box that was used to ship a computer keyboard - it's long and not too tall. I cut the top lid off, and then cut that lid into strips about an inch wide. Then, I glued those strips into the bottom of the box to create channels - apply some labels and most of my wood is sorted. Cheap and quick to create. If I find another box, I can make a second one and just stack them together.
- 13 replies
-
- 11
-

-
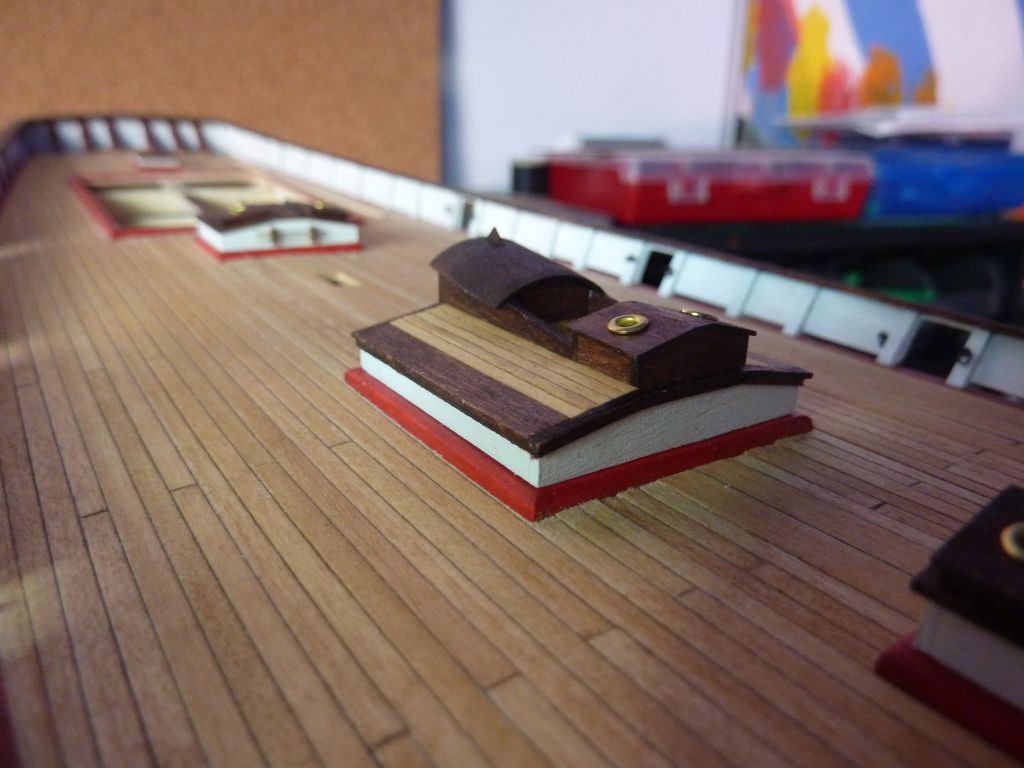
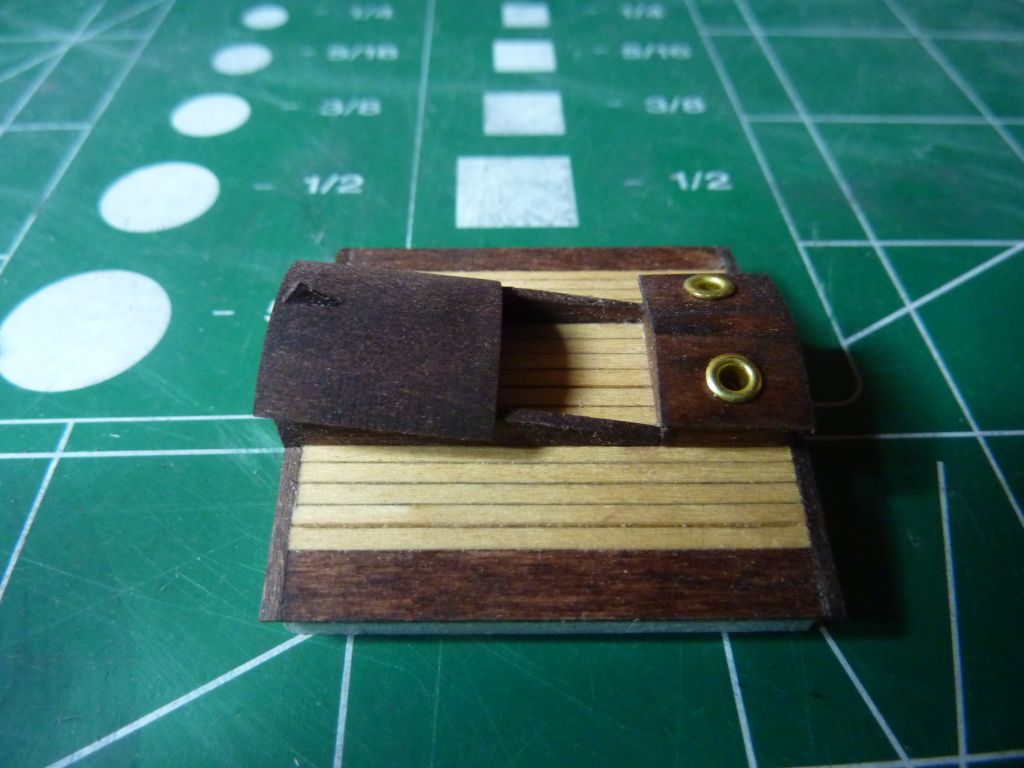
After a few weeks of work, the main salon trunk is finished. I will leave the bell to later as I need some bronze paint for the currently-silver bell and it shouldn't be too difficult to add it later. The progression of photos shows the construction order, I used clear plastic for the hatch windows even though you can clearly see the planks underneath it. For some reason, that doesn't bother me overly at the moment. Andy.


-
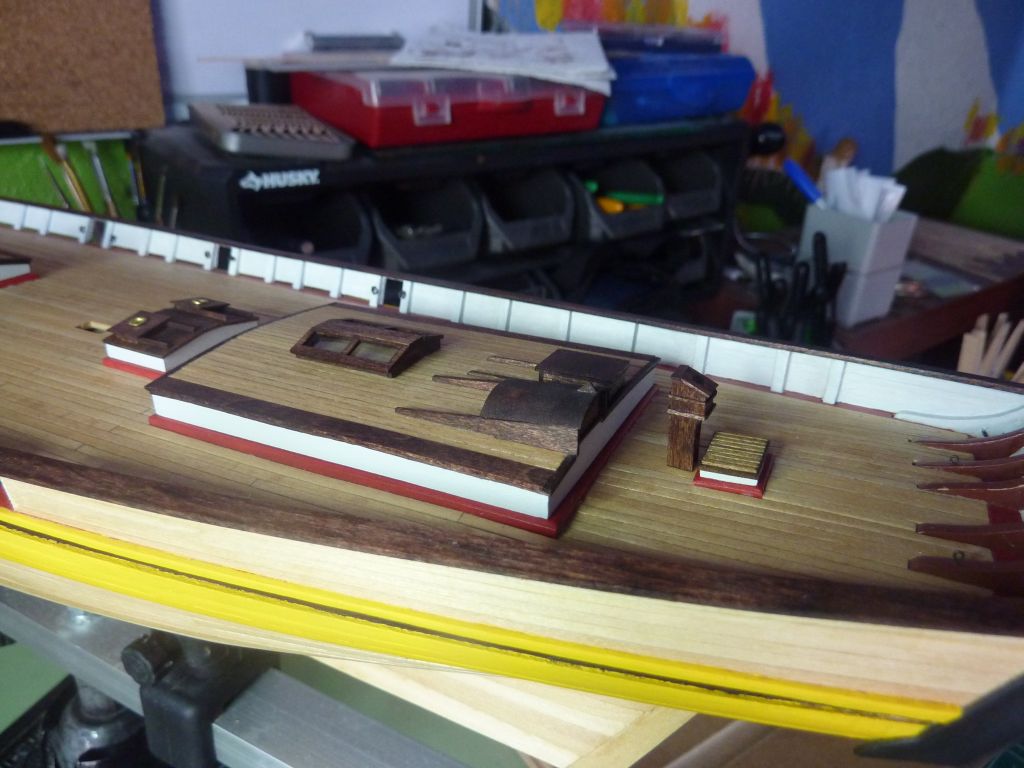
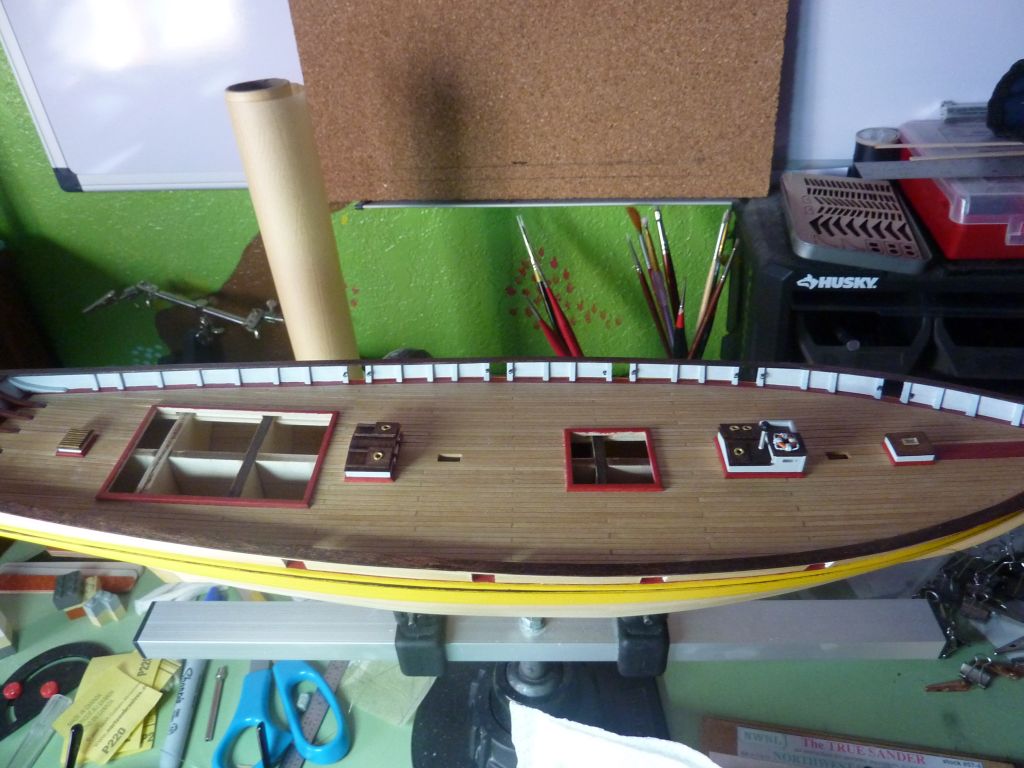
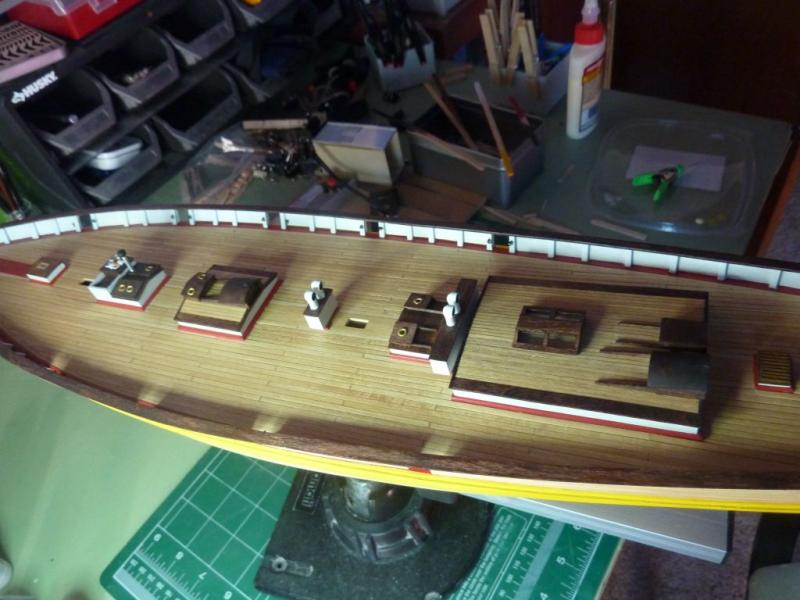
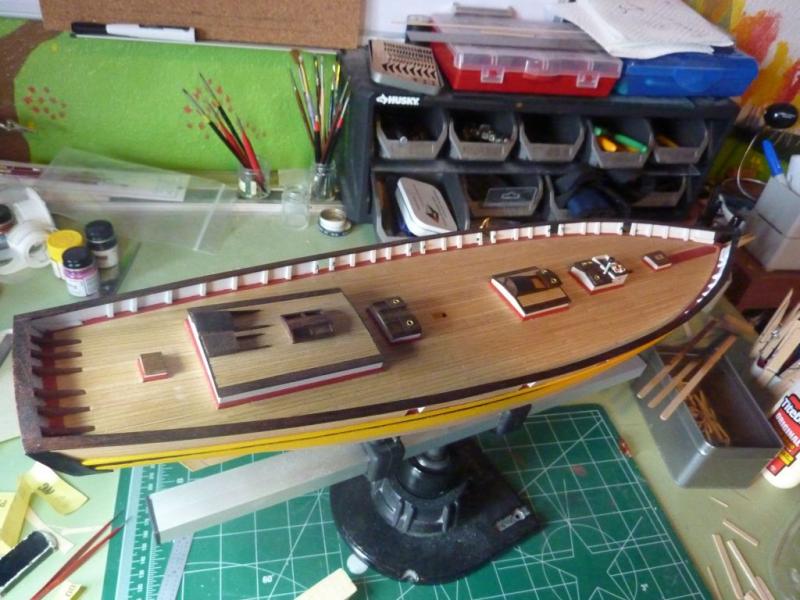
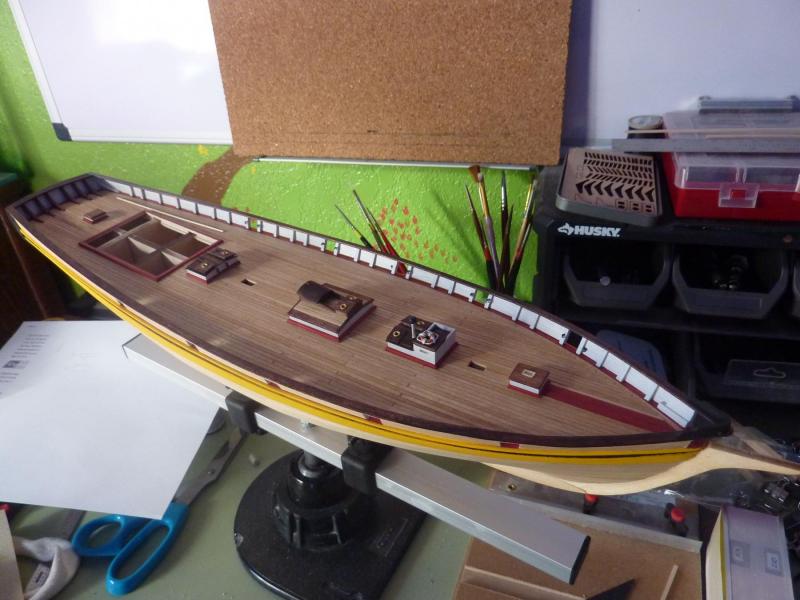
Finally, I thought I'd post a larger picture of the current full profile length of my Baltimore: Andy.
-
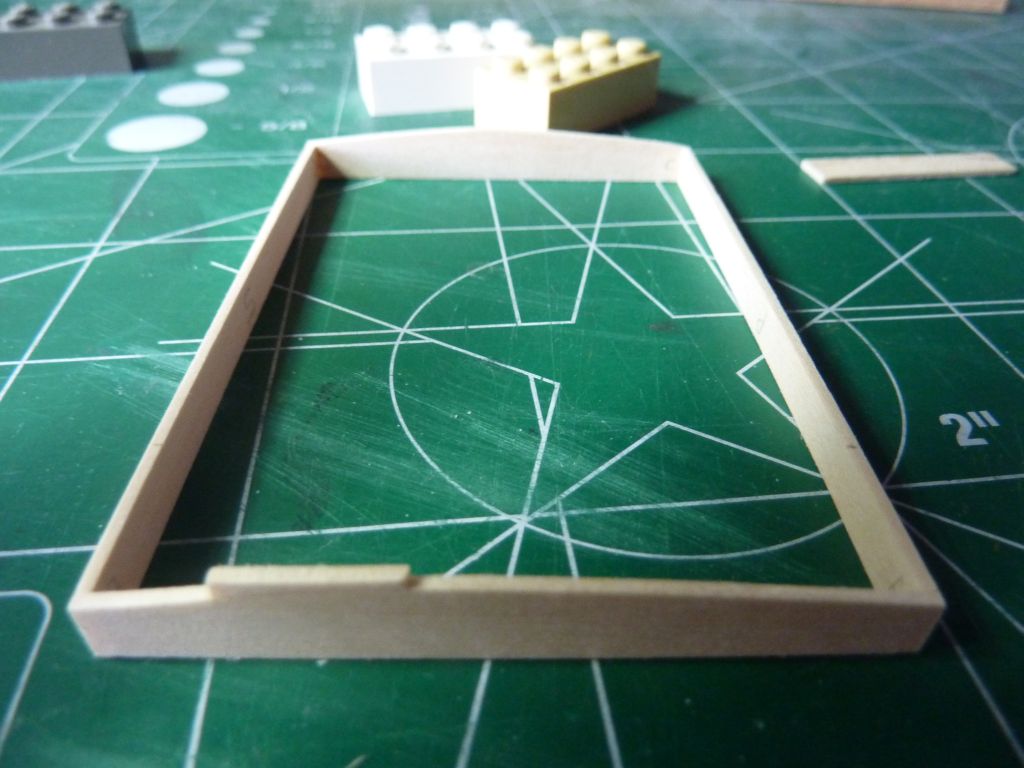
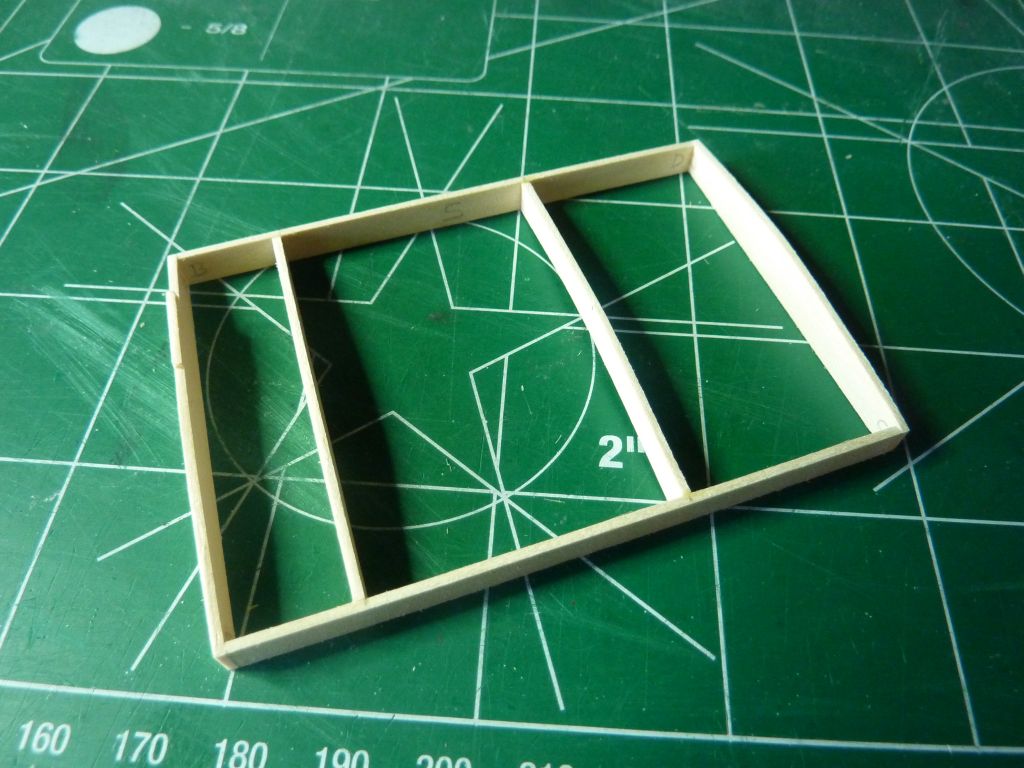
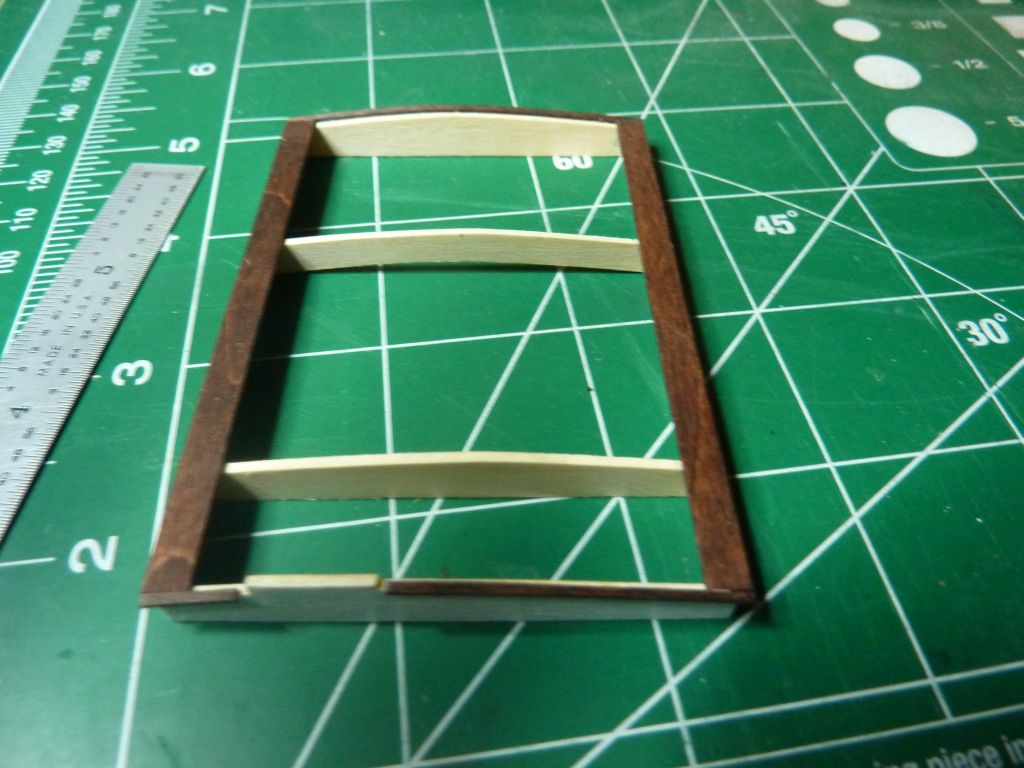
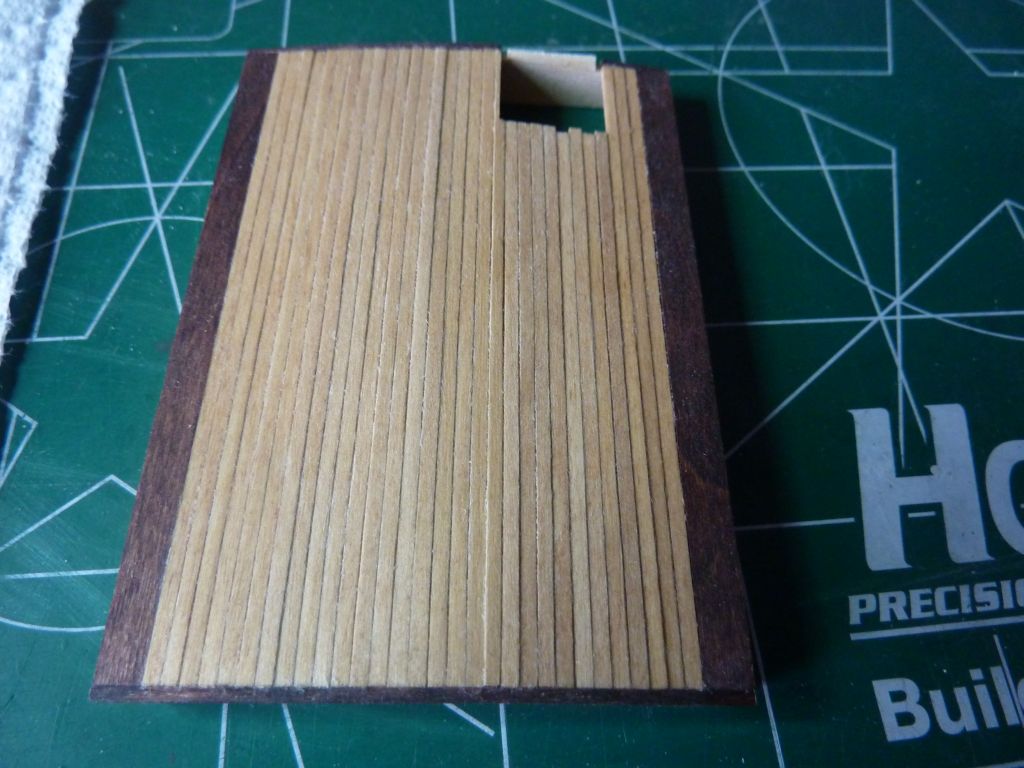
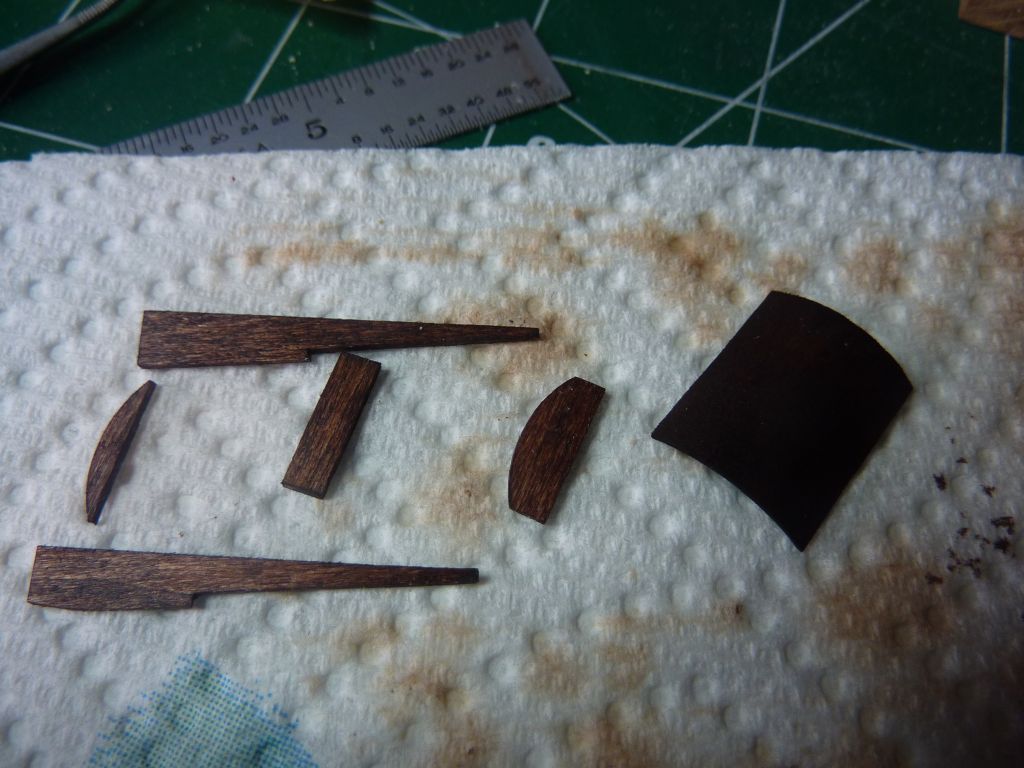
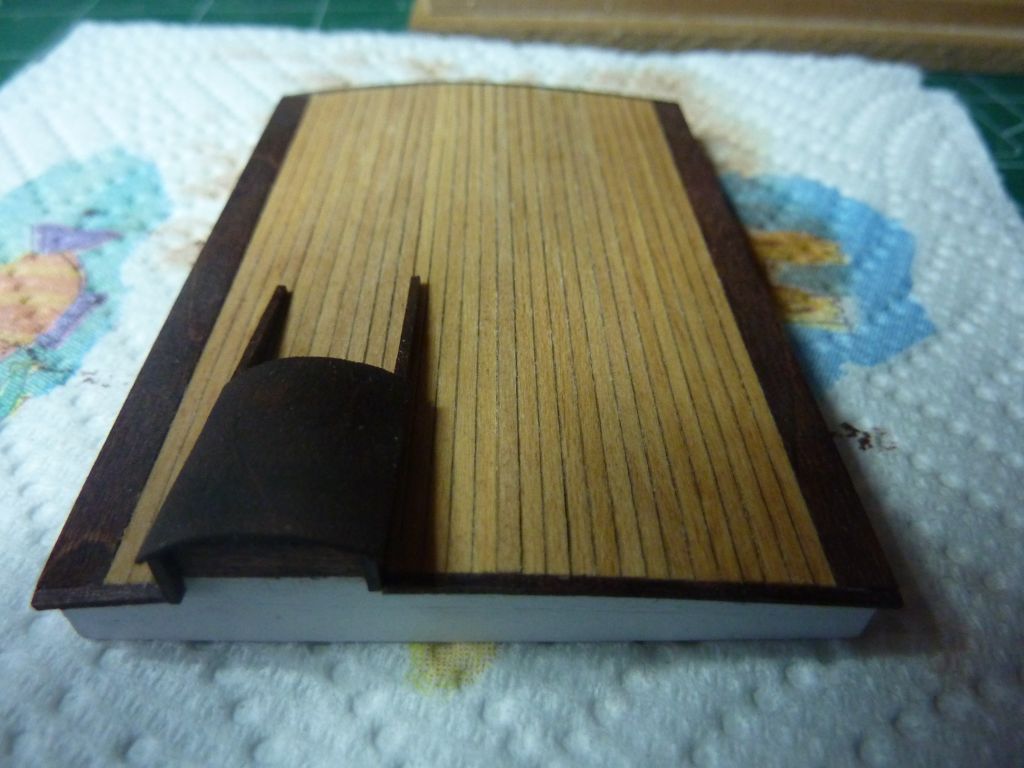
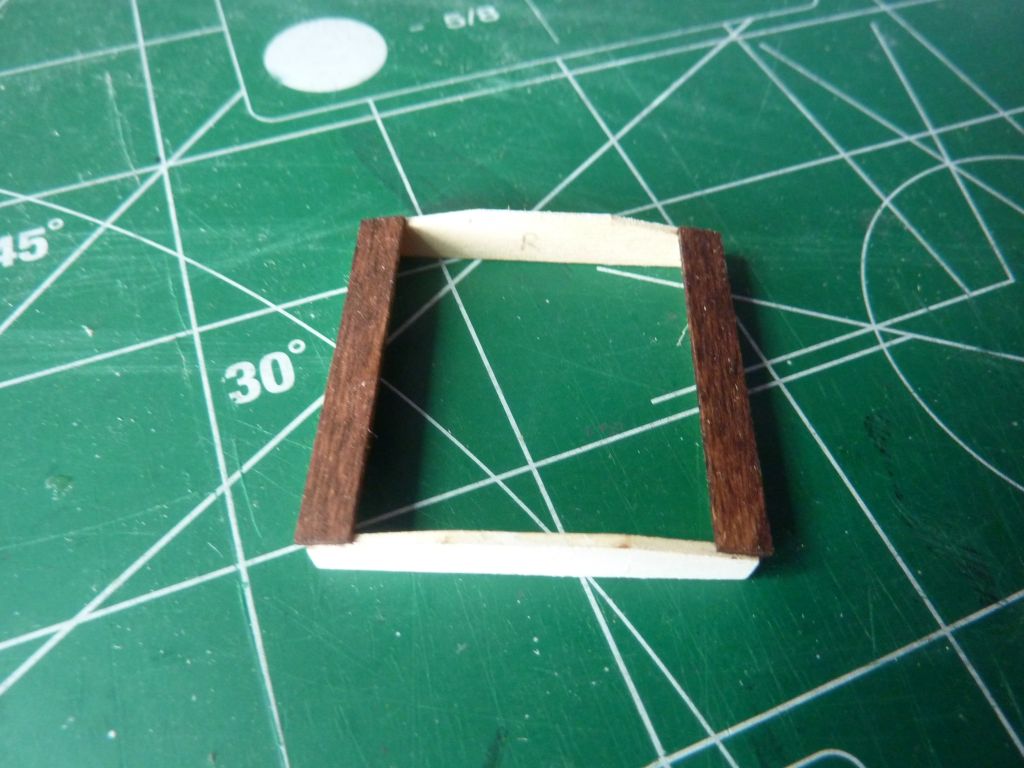
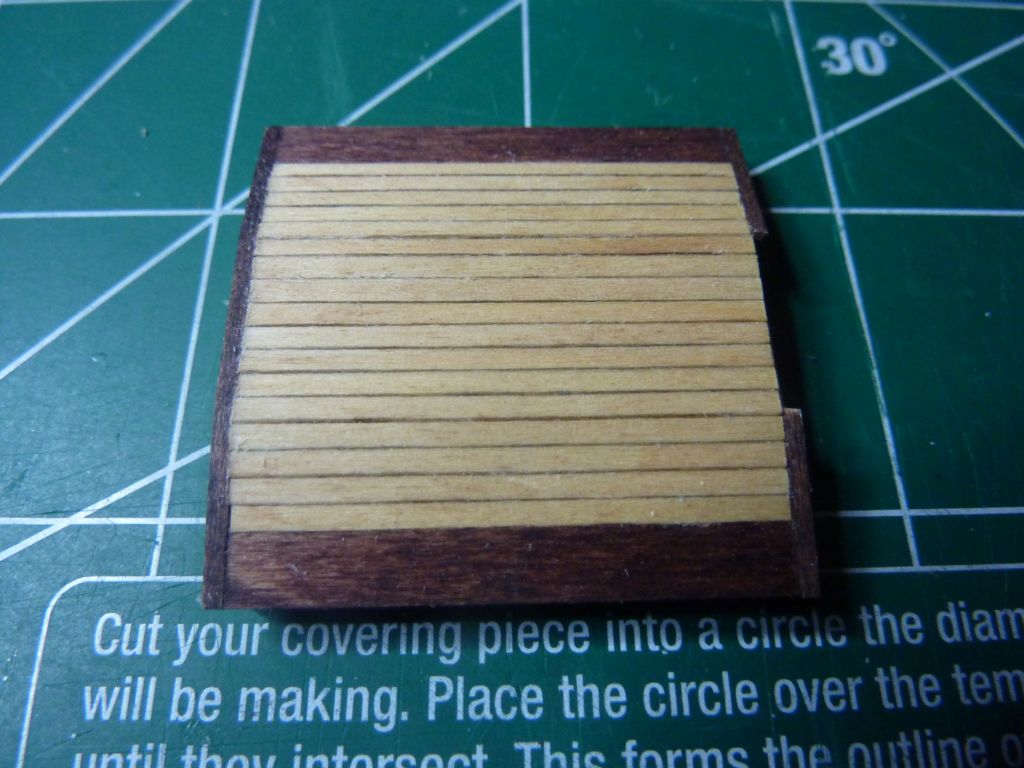
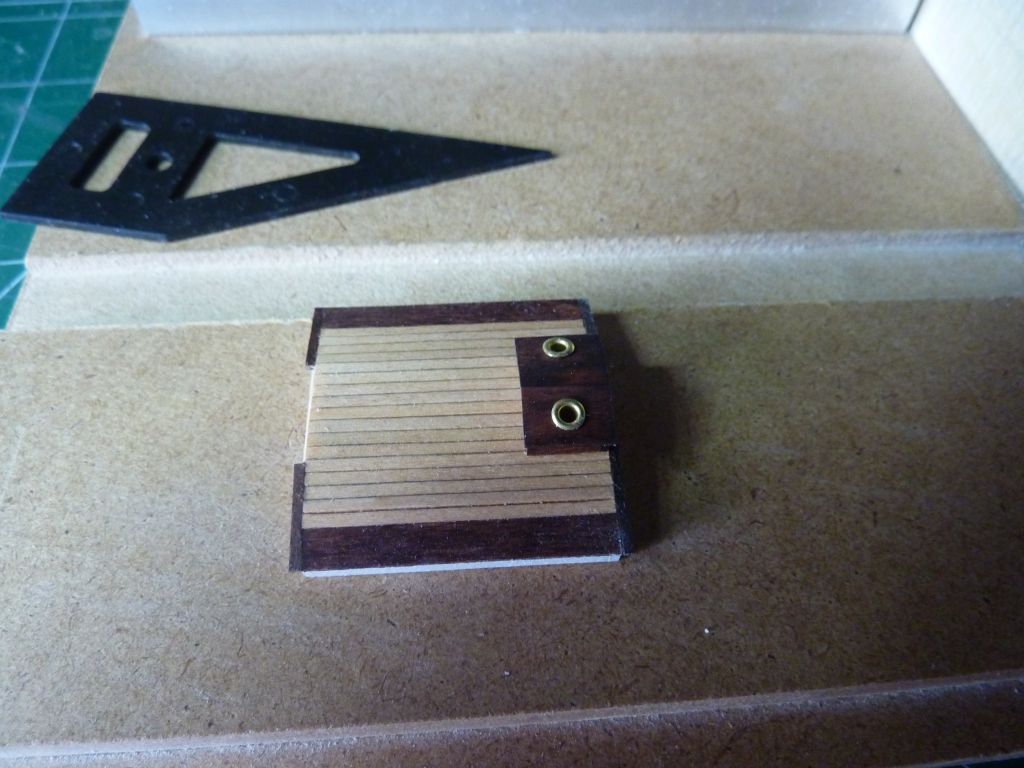
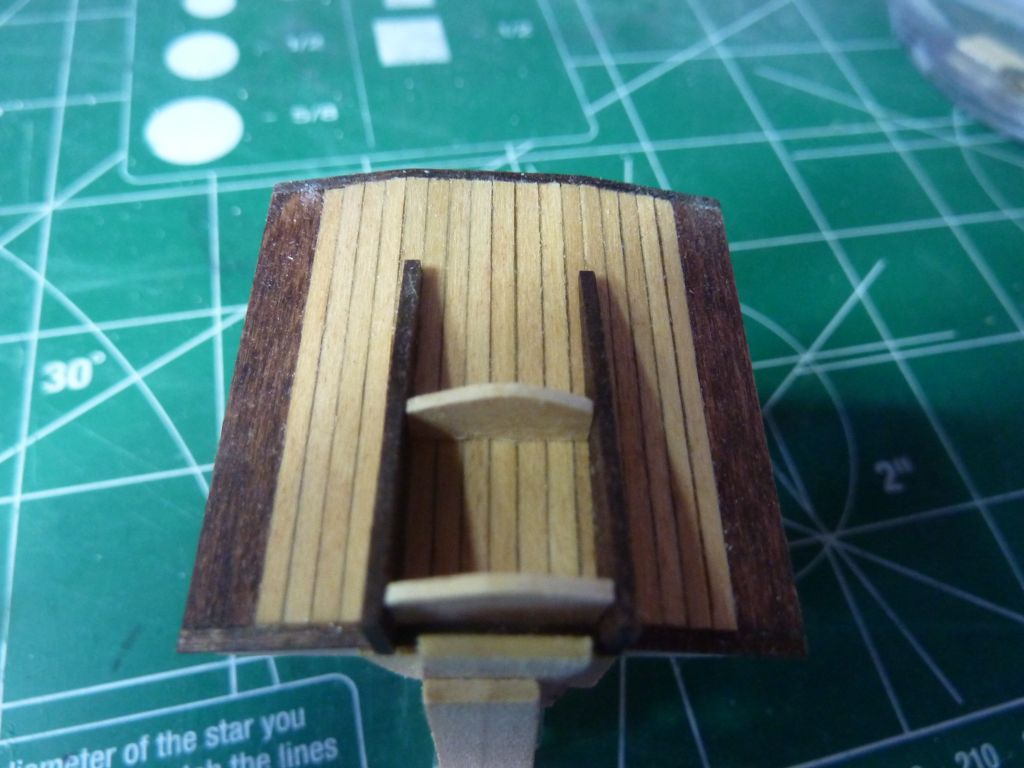
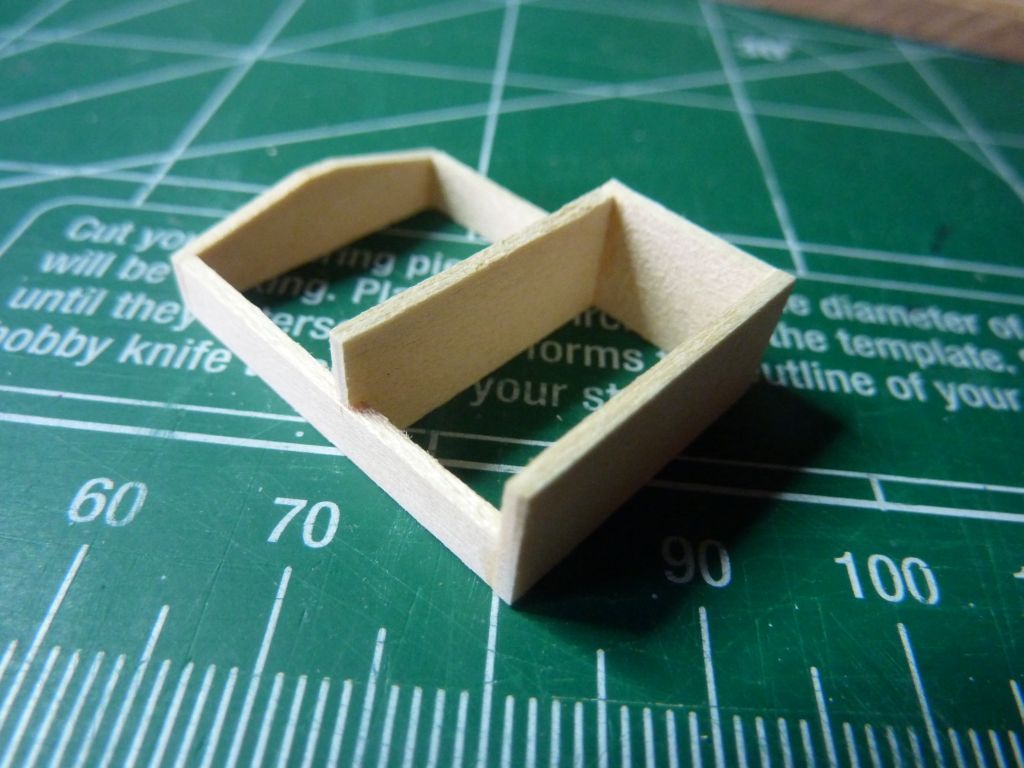
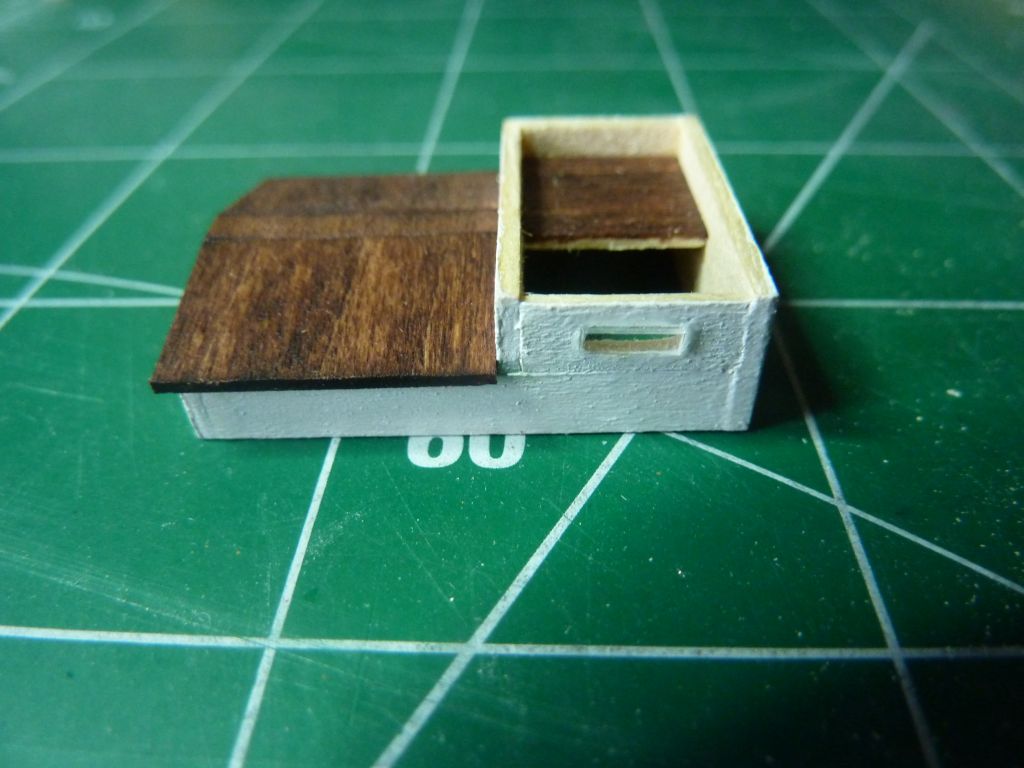
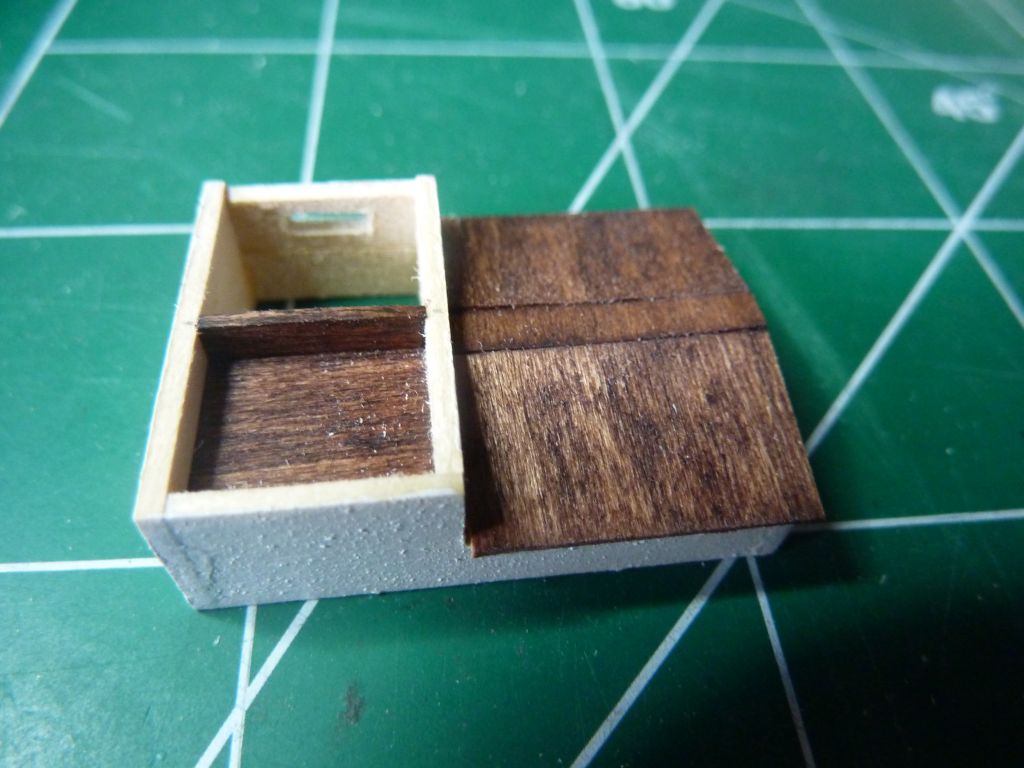
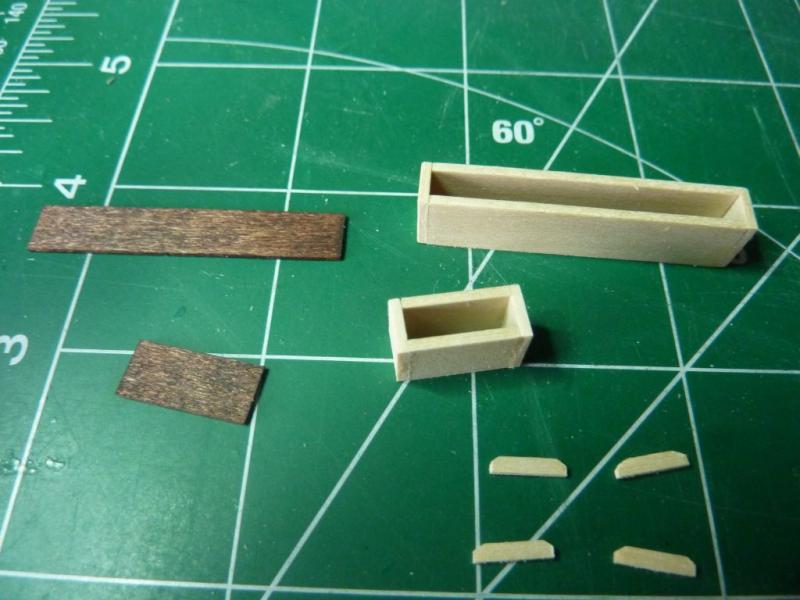
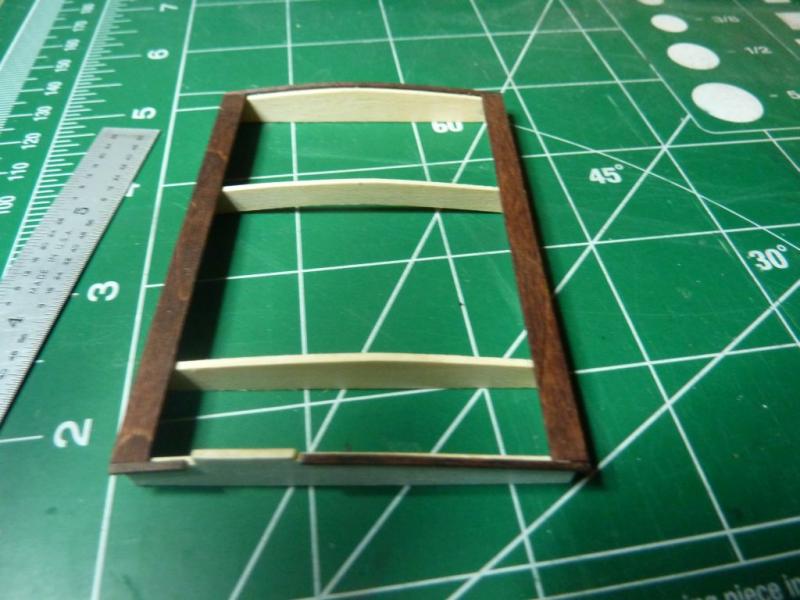
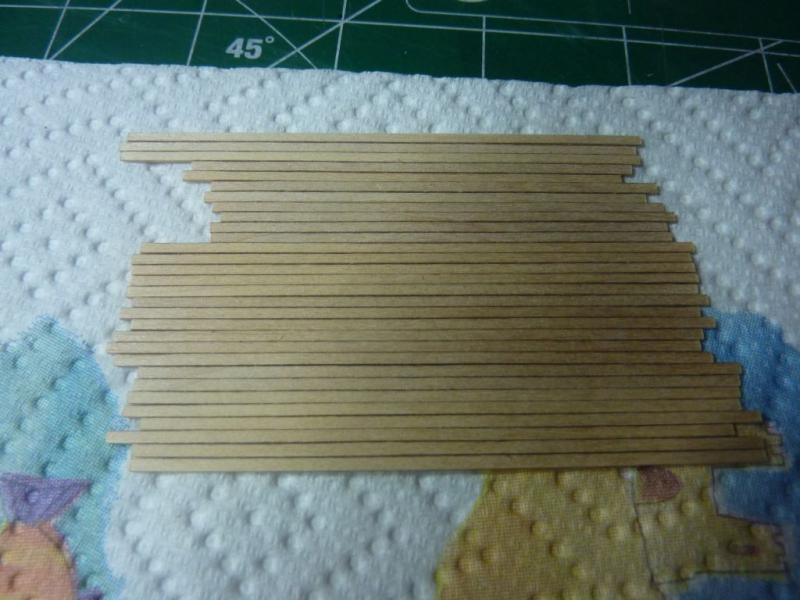
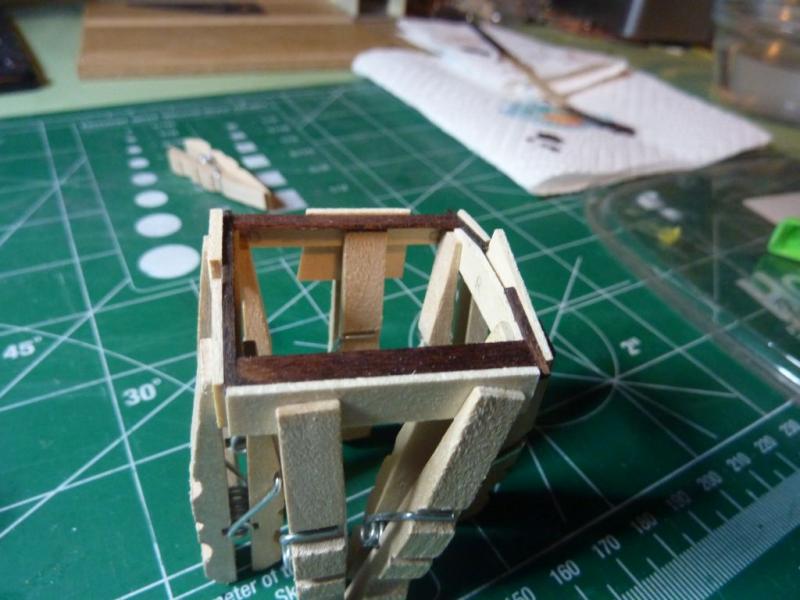
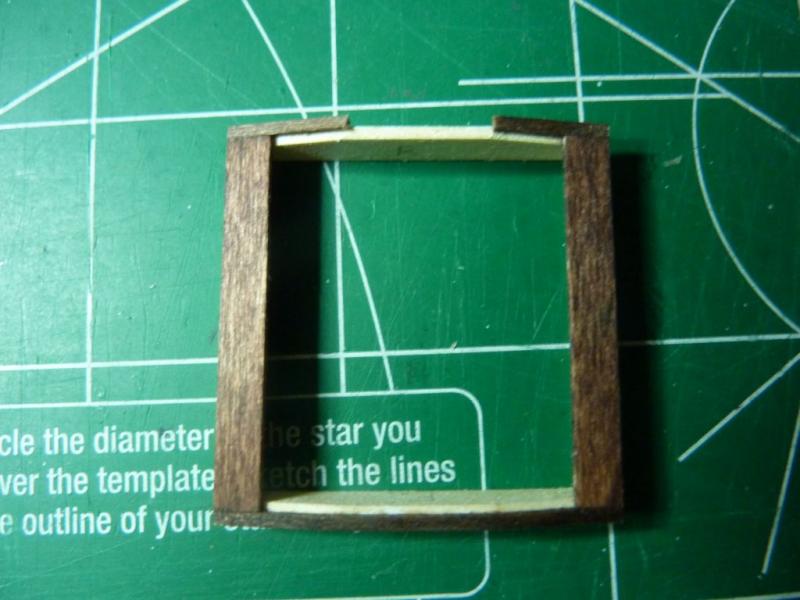
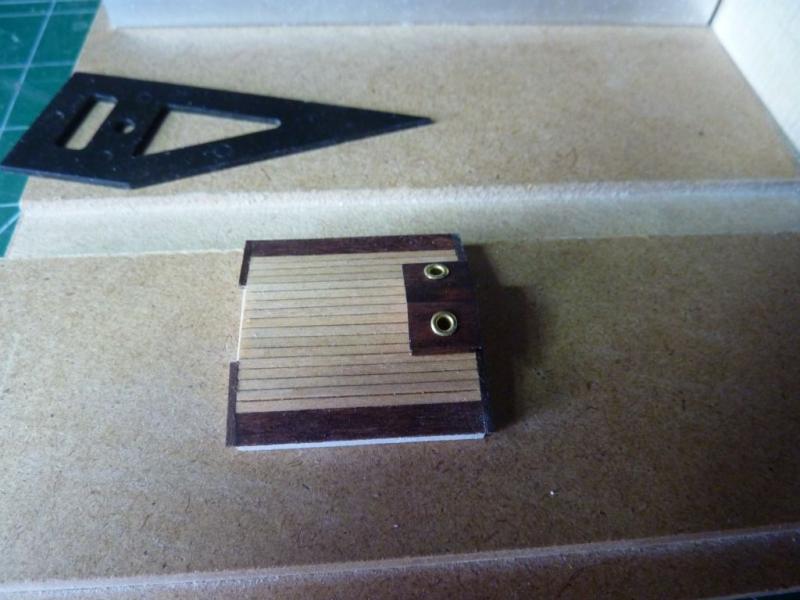
Next up is the 2nd largest hatch - the main salon companion way and trunk. This took me a little over 2 weeks to complete, it's the first to have a planked top and some very small and thin molding. The main issue I had, after creating the initial box, was to get the edges to overhang by 1/32". I wanted this to be as precise and consistent as possible. The box itself is created with 3/64" thick walls, which one the forward and aft edges, meant there was only 1/64" of available gluing space for the 1/32" frame. Here was my solution: I used clips to sandwich a 1/32" thick scrap piece between the edge of the frame and another piece to mark the edge of the piece to glue. I did this on all 4 sides, then glued in the larger of the edge pieces first: With those in place, I managed to glue the thinner fore/aft edging: Now, I made each plank to fit the newly formed frame, labeled them and stained them before gluing. The rest is more-or-less straightforward: plank the top, create the sliding hatch and small access hatch with portlights: Here it is on the ship: Also, I did add 1/32" x 1"64" molding below the top by sanding down a 1/16" x "1/32 to 1/64" thick and the slicing it in half. The resulting pieces are super fragile and difficult to manipulate, but I was able to glue them in well. I hope to repeat these techniques for the final, largest hatch, at least for the framing and planking. The hatches on top will be different, but no new skills required, I hope. Andy.


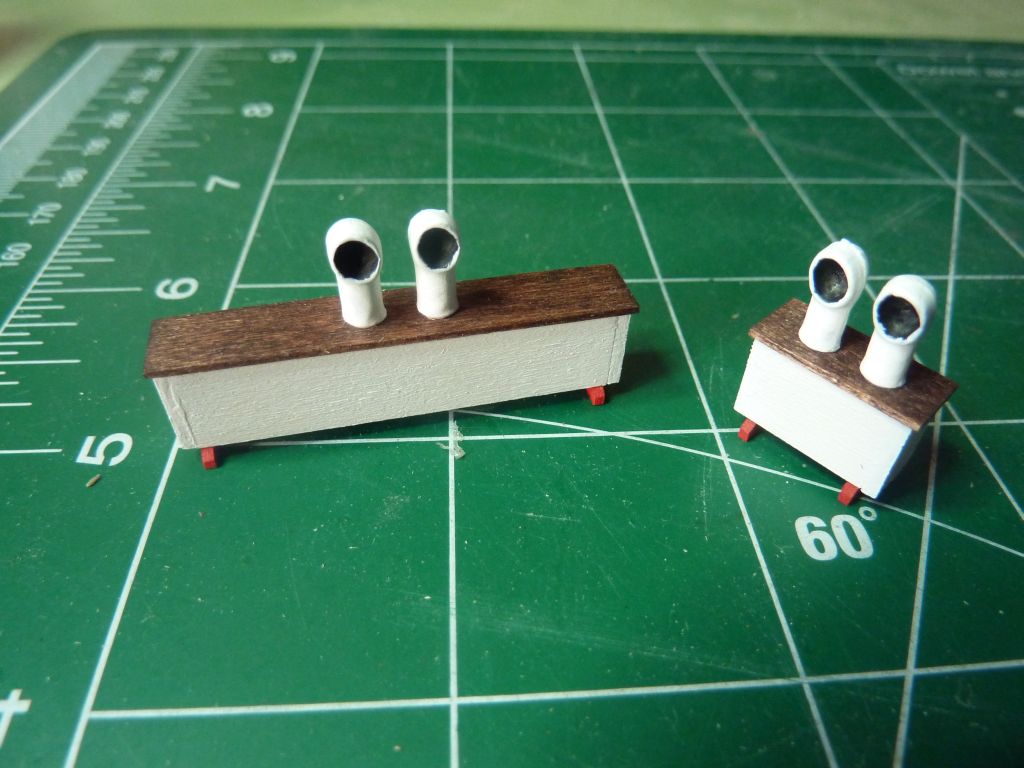
-
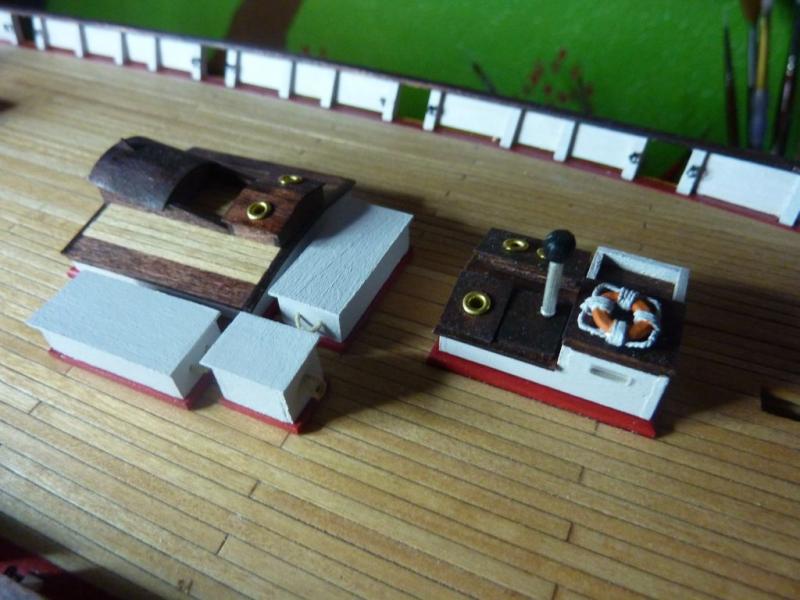
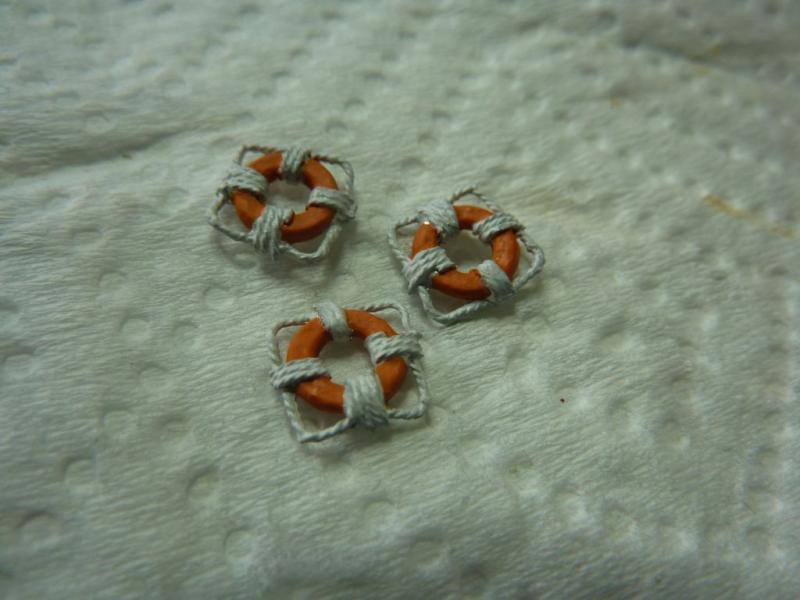
Next up in the hatch parade is the crew access/galley hatch. This is a little more intricate, but not too bad. Took me two weeks to complete. First, I framed up the walls, added the stained roof pieces and some inner walls. My sliding hatch doesn't move, so everything is glued down tight. Next, hatches were added to the top - there are 3 here: a long, dual portlight hatch on the left side, a single smaller one on the right and frame for the galley stack also on the right. A life ring is placed on the sliding flat portion. I mixed my own orange color from the ship's yellow and red (too little paint to go out and purchase), and I also left the galley stack chimney the base metal color - seems to match the ship better than the bronze the instructions called for. Finally, a shot of the ship as it stands right now, before I continue onto the next largest hatch: Andy


-
Hi Karl - you're doing super work, as I predicted you've easily caught up to me on my build and now I can use yours as a reference! One question - I notice you didn't install the coamings before planking your deck, so I was wondering how you put in the completed deck hatches with coamings on top of the deck planking? Since the deck has a camber and the coaming/hatches are flat (I presume) - wouldn't there be gaps at the edges? Or did you cut into the deck to sink the comings into it? I'm curious - I know the instructions make it an option to install the coamings pre-planking or post-planking, but I couldn't figure out how to do it post-planking like you did without doing a lot of cutting, which I didn't have confidence in. Andy.
-
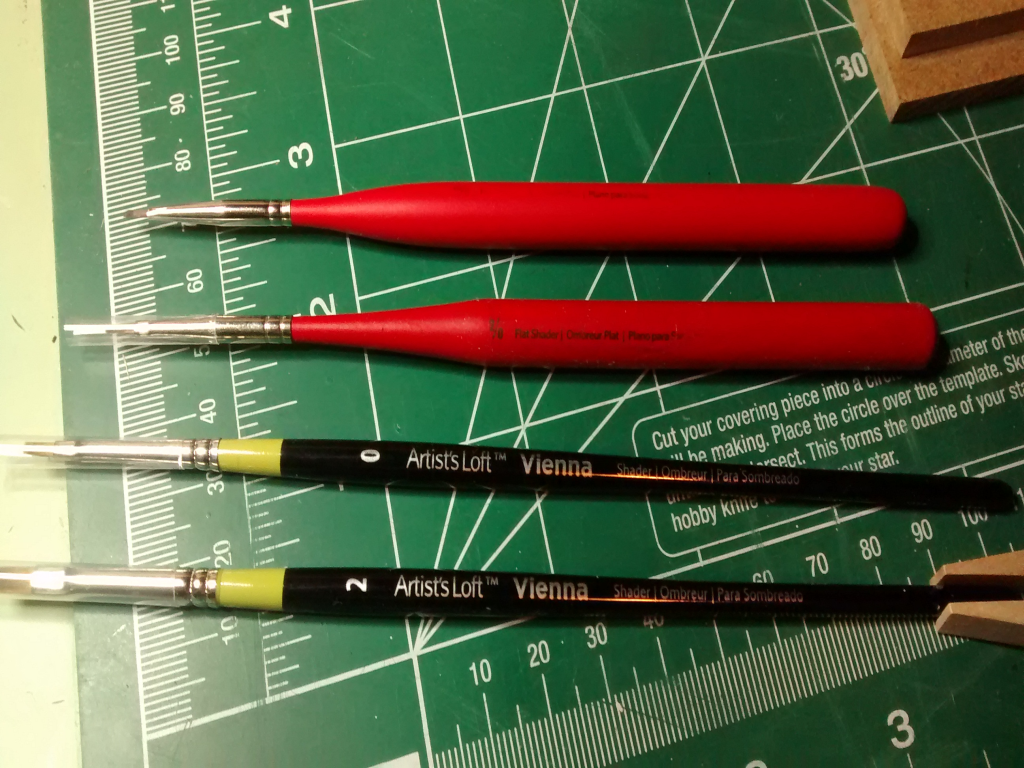
Hi, My paint brushes are nothing special - I bought a series of 4 at Michaels (local craft shop). They sort them into different quality, so I got the highest available. I also wanted to get flat "shader" brushes instead of rounder, pointed ones so I could do more precise work. The 4 are all of different sizes, the smallest is the red one at the top : 4/0 I think. The label has rubbed off. Here's a photo -- I typically use the smallest head so far, but will use the larger on the bigger surfaces. I hope this is the info you are looking for. If not, I'd be happy to answer any other questions... Andy.

-
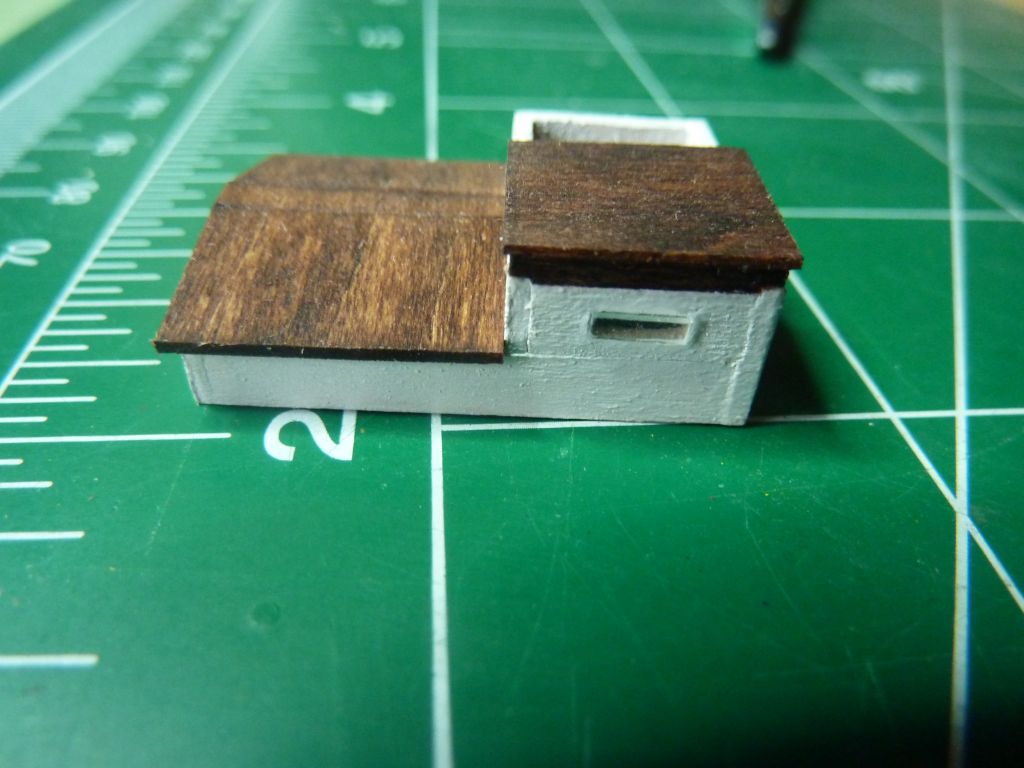
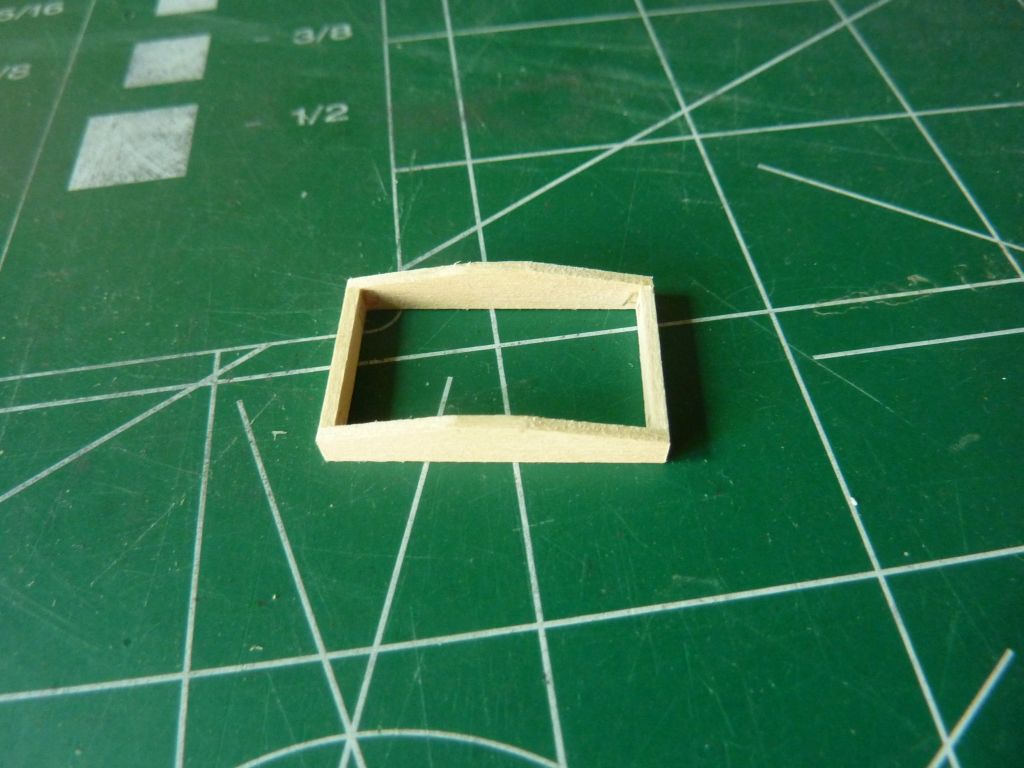
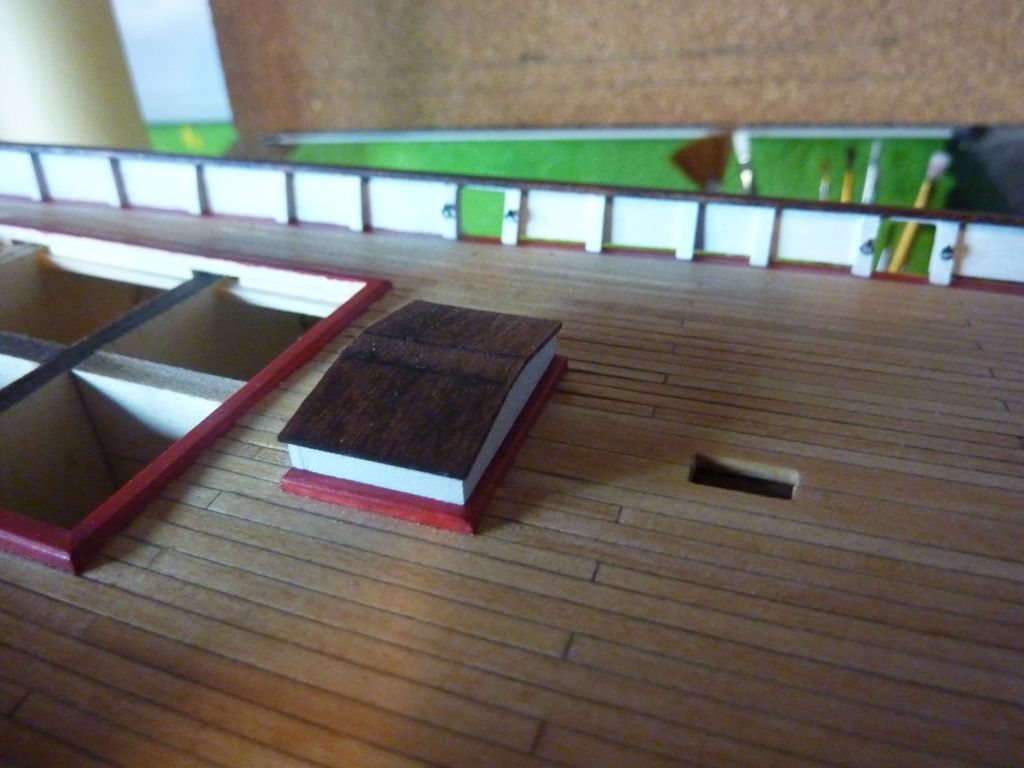
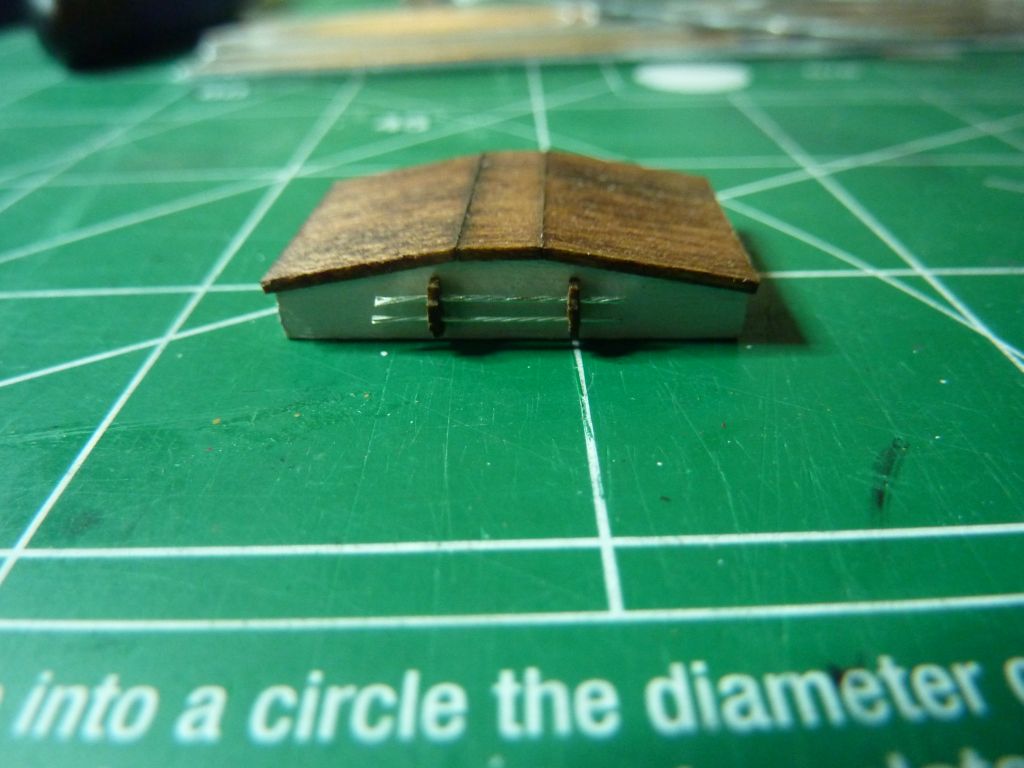
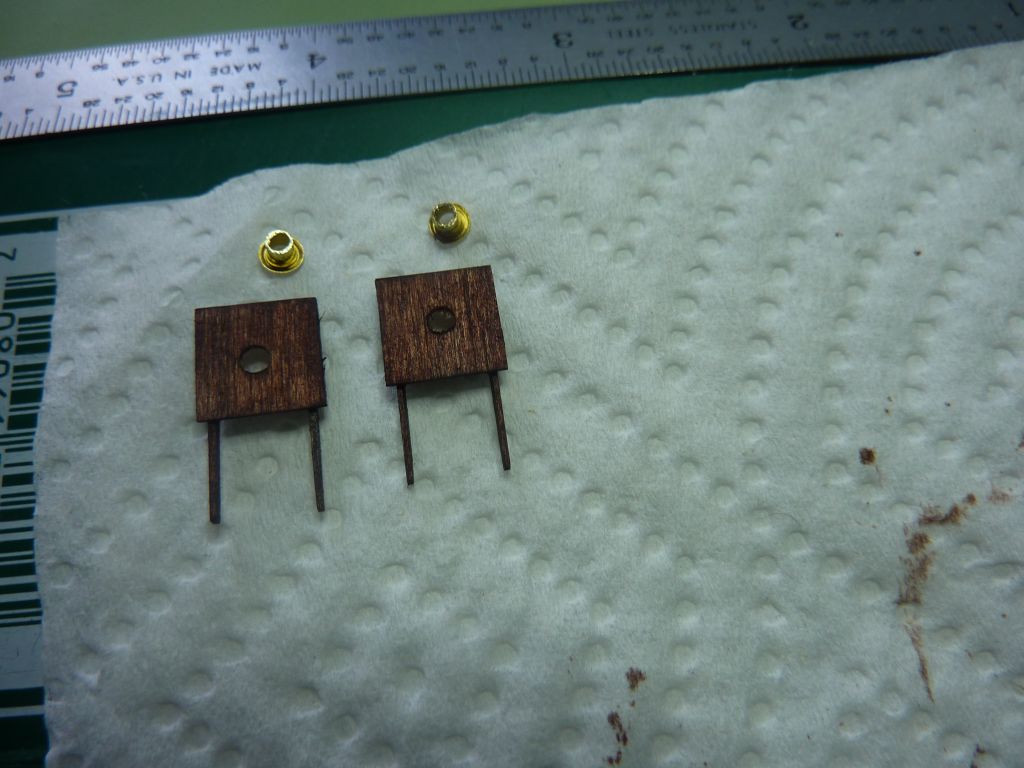
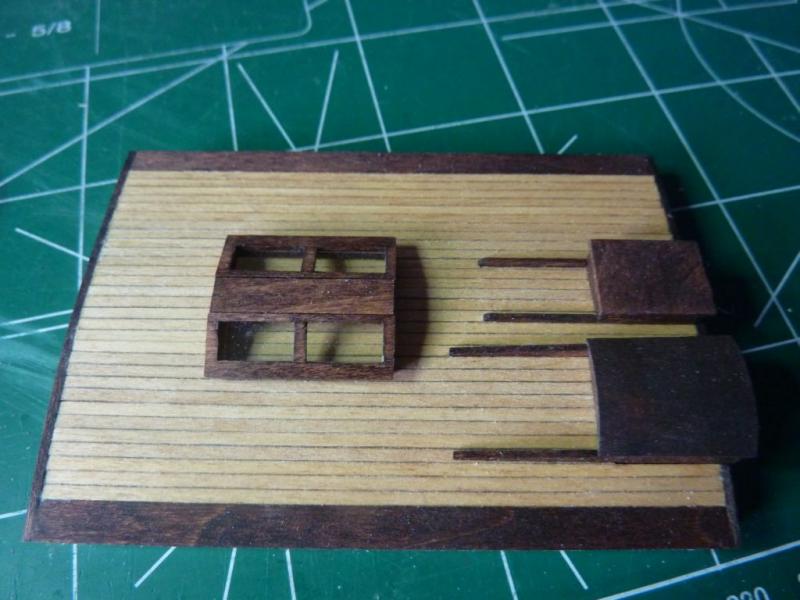
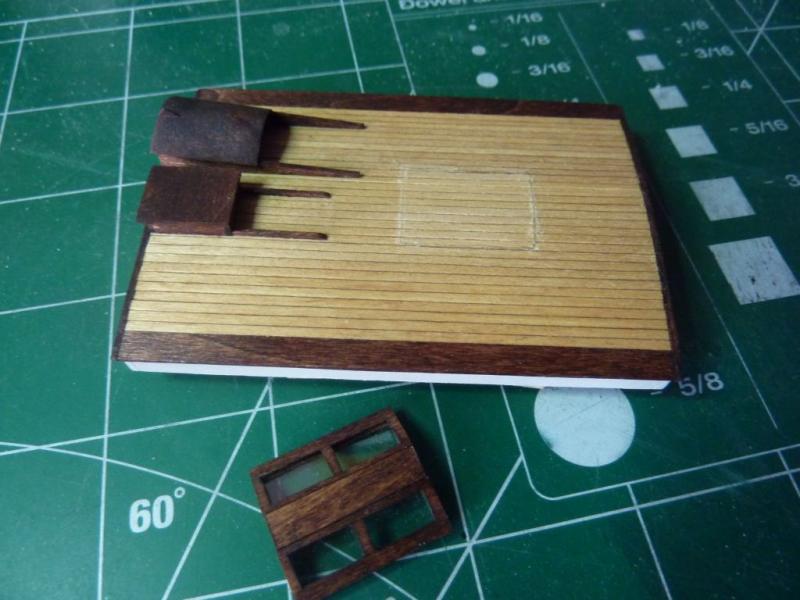
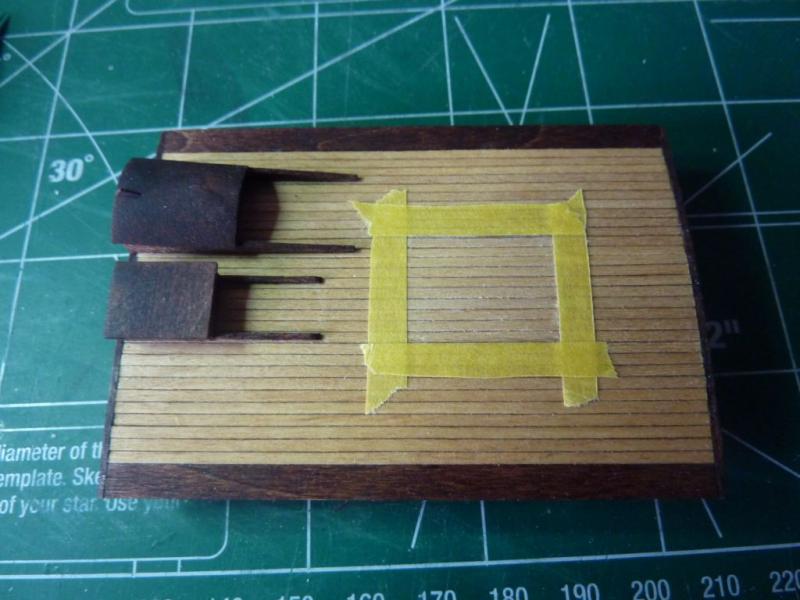
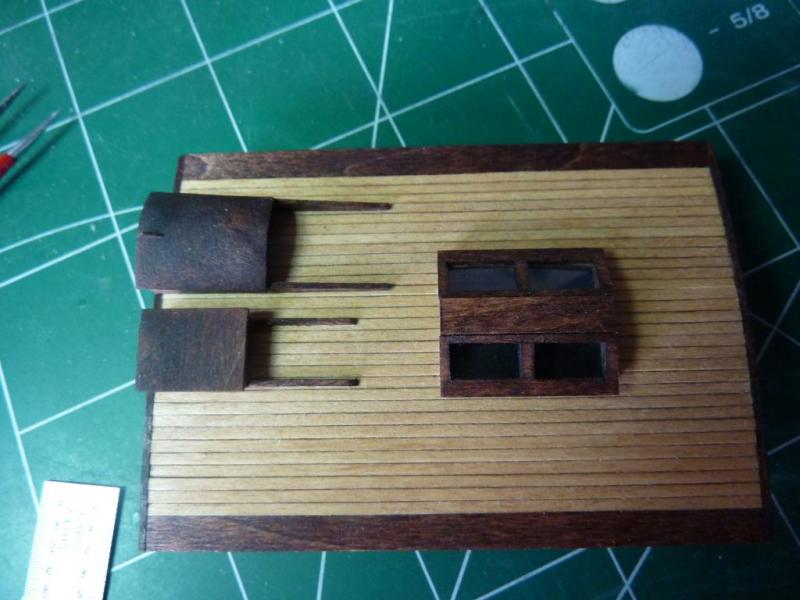
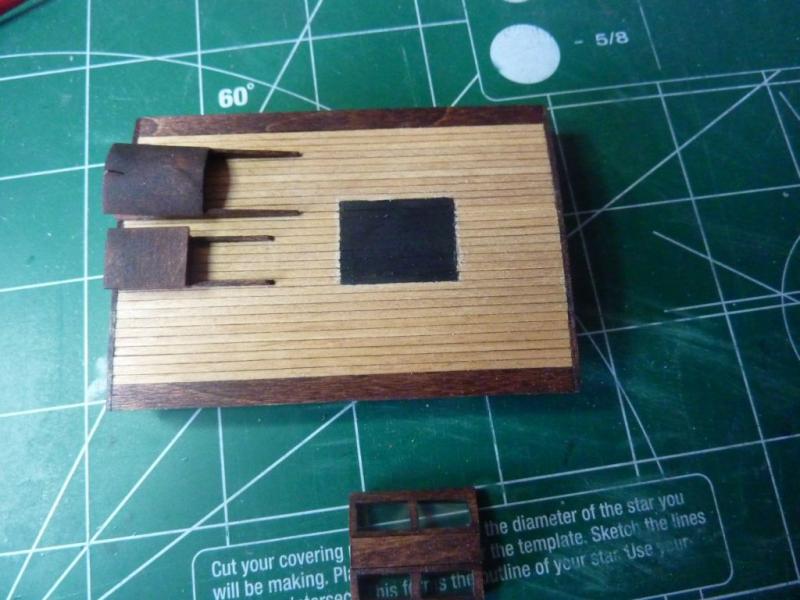
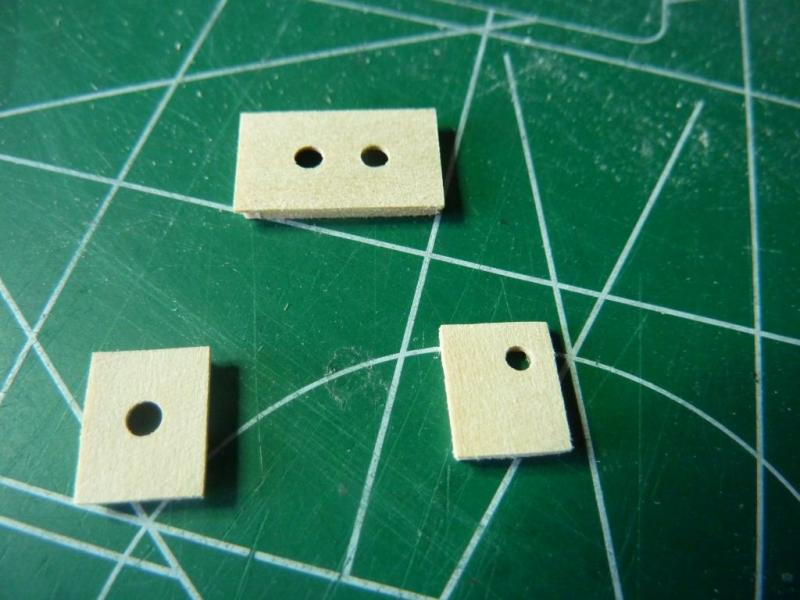
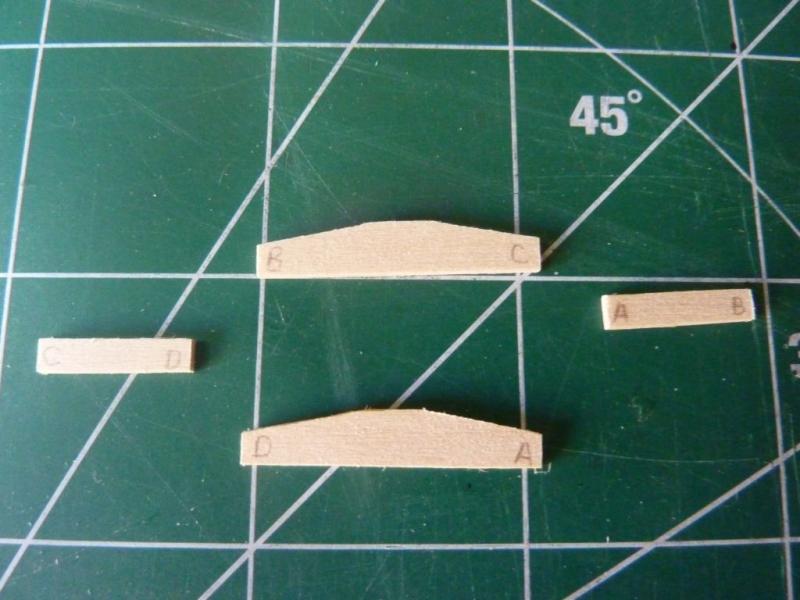
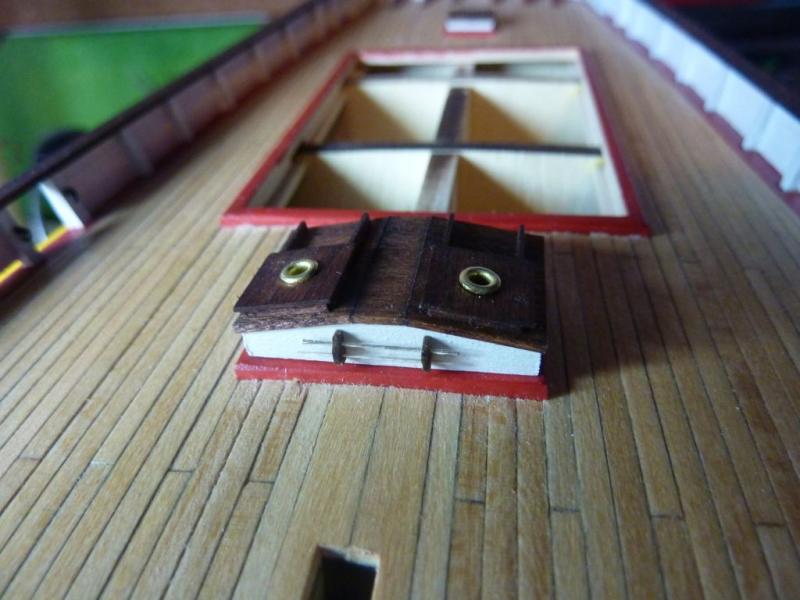
Ok, this weekend I finished up the Engine Access hatch. First, I created the 4 sides, lettering them to know which to glue to which: I added a thin 1/32" roof, and stained and glued it to the frame, after painting the frame. The plans call for 2 small 1/64" steel rods to be hung by some very very small mounts on the side of the hatch. I used 26 gauge electrical wire from work, and made the wood mounts with lots of careful filing and sanding. Finally, the top hatches - one on each side, and each has a portlight installed at the top. I used 1/32" inch wood for this, and sanded the extensions down to 1/64 as best I could. The top hatch covers were also sanded down to 1/64" thickness. Andy.


-
It's pretty amazing you got the color match so precise, especially on the wood colored text. Thanks for sharing that tip. Andy.
- 164 replies
-
- 1
-
-
- Model Shipways
- Finished
- (and 1 more)
-
The lettering looks pretty good - did you print it on a transparent adhesive? I'm curious to know more details on how you got it from the computer to the ship. andy.
- 164 replies
-
- 1
-
-
- Model Shipways
- Finished
- (and 1 more)
-
Thanks for all the comments. I made a little progress over the weekend, working on the Engineer Access hatch. I seem to be ordering the hatches in order from most simple to more complex. I will post photos when the portlights are complete. Thanks to all for following my build - I wish I had more time to work faster. Andy.