HOLIDAY DONATION DRIVE - SUPPORT MSW - DO YOUR PART TO KEEP THIS GREAT FORUM GOING! (Only 68 donations so far out of 49,000 members - Can we at least get 100? C'mon guys!)
×


AndyMech
-
Posts
363 -
Joined
-
Last visited
Content Type
Profiles
Forums
Gallery
Events
Everything posted by AndyMech
-
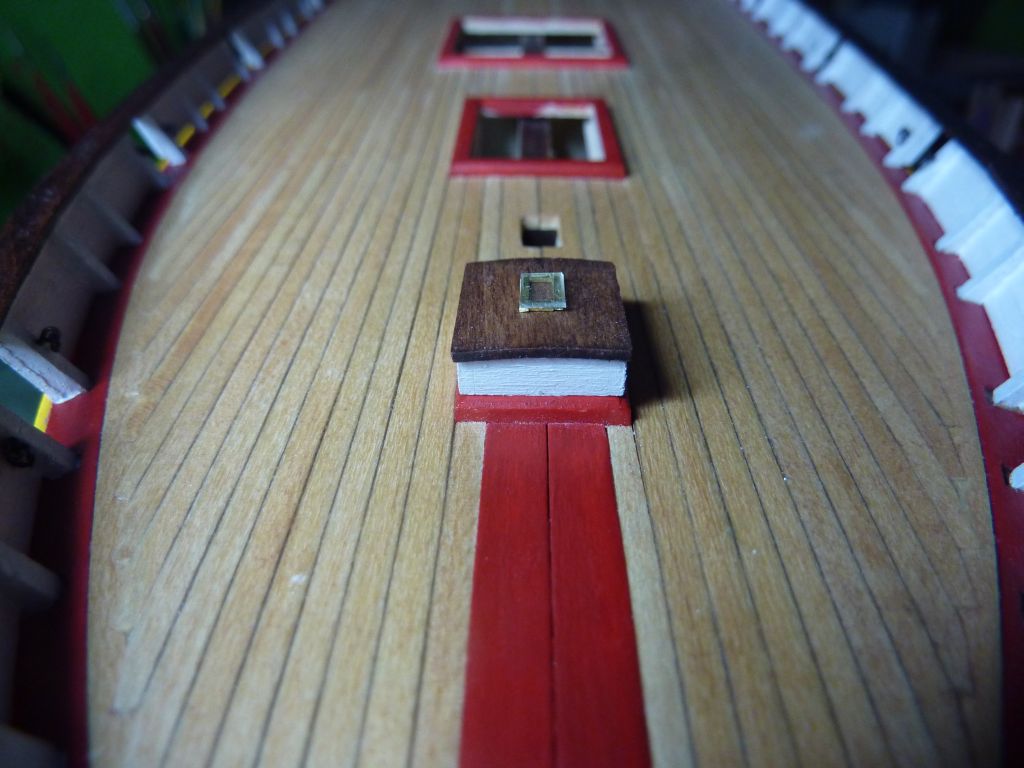
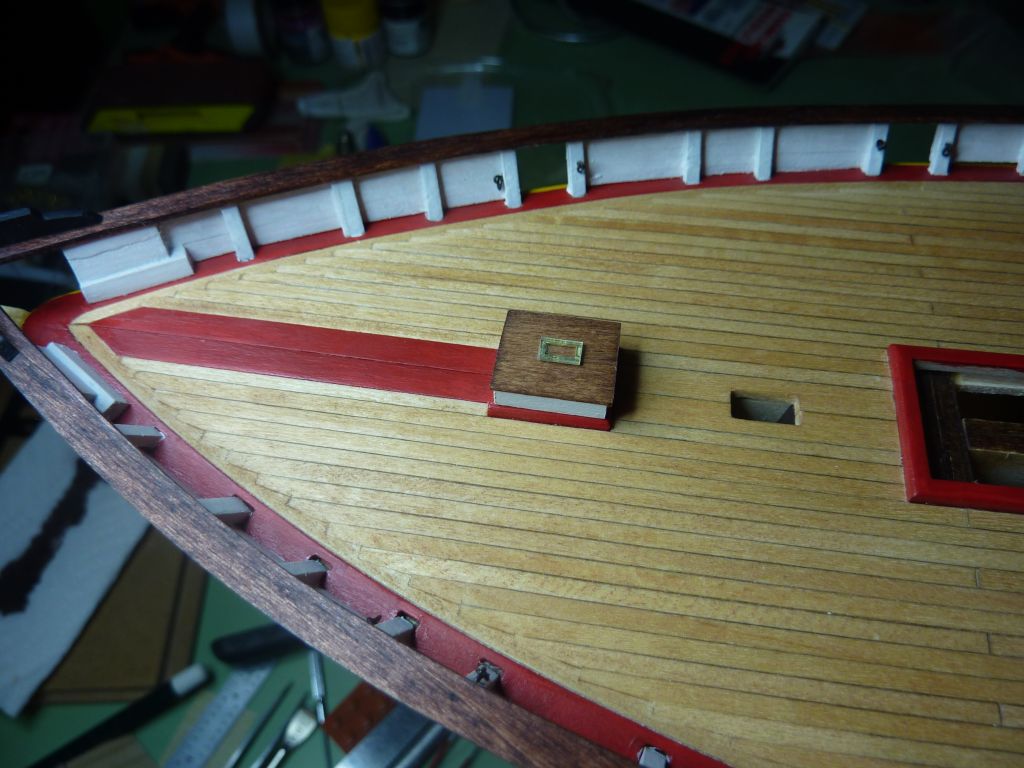
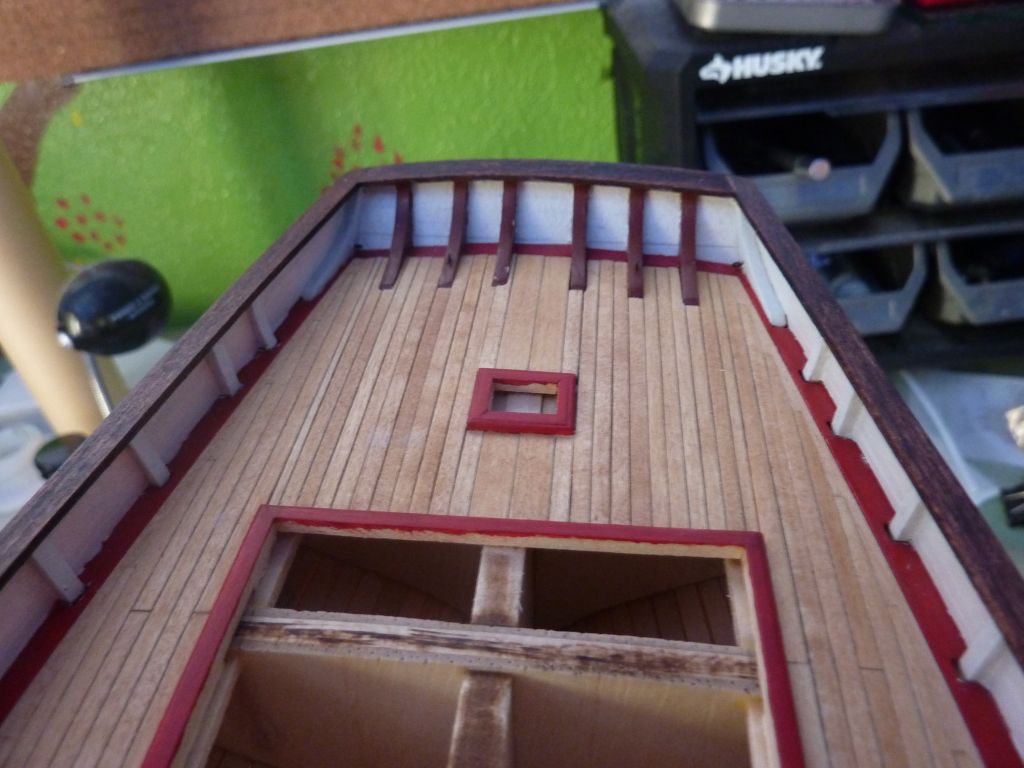
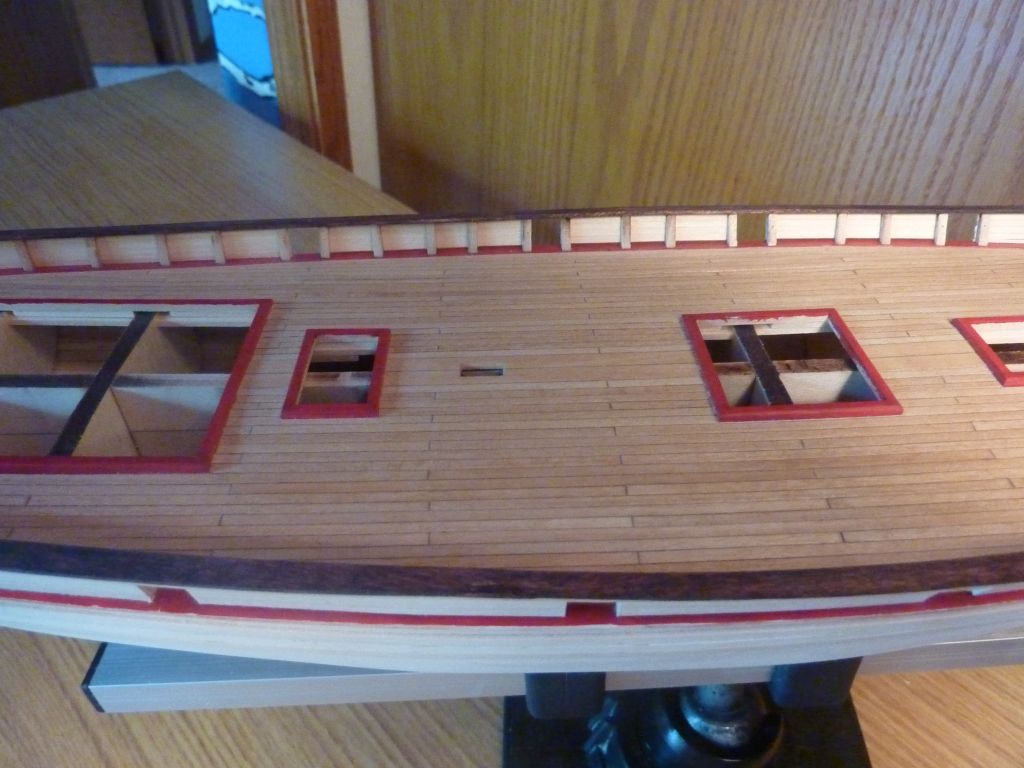
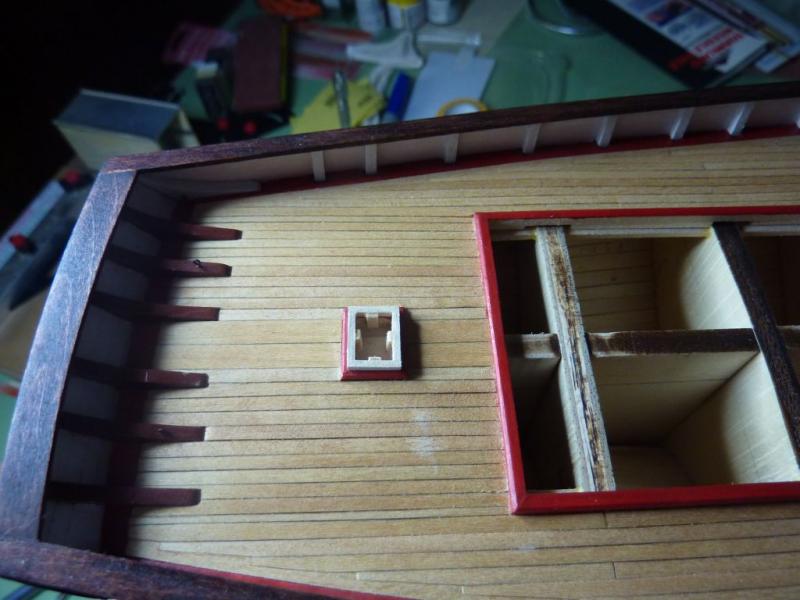
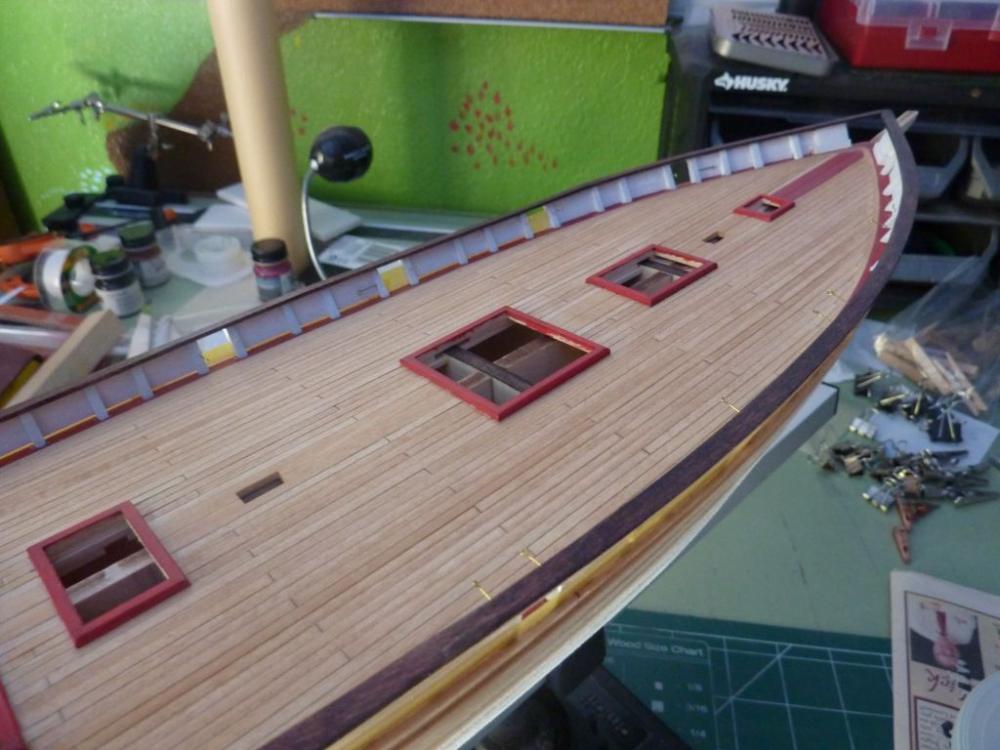
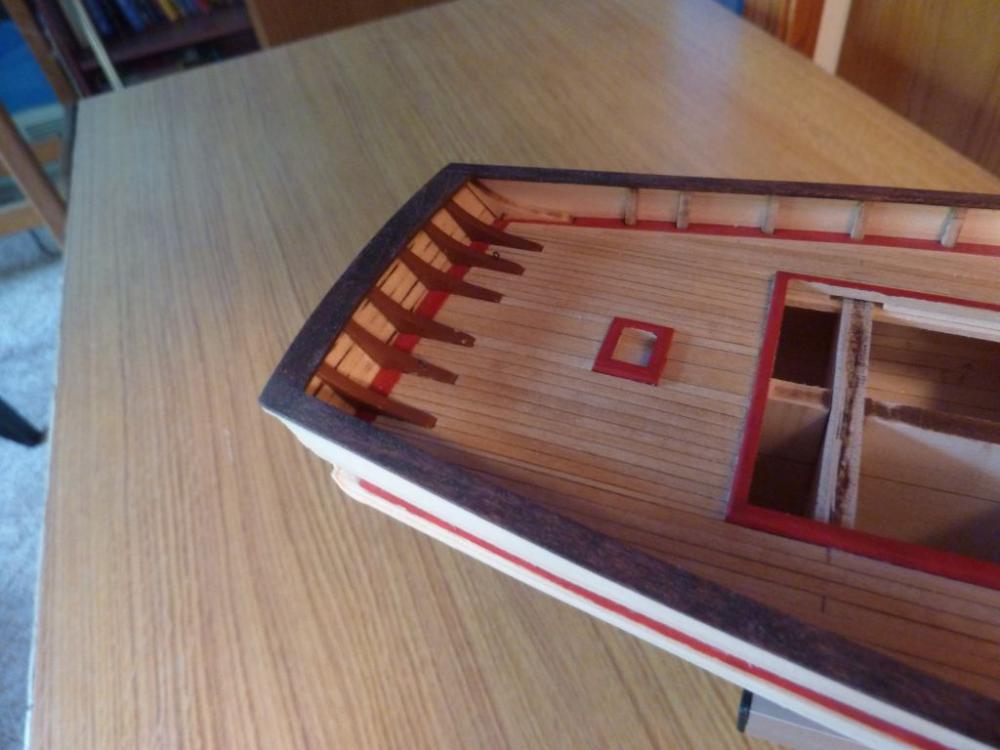
Today, I added the foc'sl hatch. This is the 2nd smallest hatch, close to the bow. Like the lazarette hatch, it could be made to open, but I chose not to do that. The window on top is made from some small brass strips and a piece of clear plastic - not the perfect window, but looks all right I think. The kit comes with thinner plastic, but I'll save that for some larger windows later. Andy.


-
Today I started on the deck furniture. The first one up is the pretty simple lazarette hatch - occupying the coaming at the most stern position. I made is about 3/64 tall, painted the side the same off-white the other hatches are supposed to be and stained the top. Adding the small wood planks on top was the hardest part - I created a 1/32" square piece and used a small metal ruler to get the spacing even. Andy.


-
Hi Karl, thanks for posting and following my build. I'll subscribe to your as well - always good to have another Baltimore builder here. My progress is slow, so I'll likely be learning from you in no time. Andy.
-
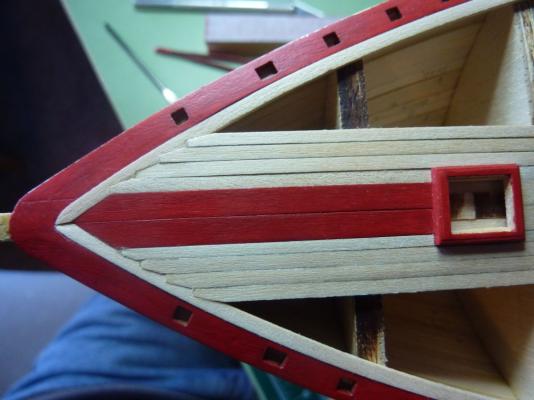
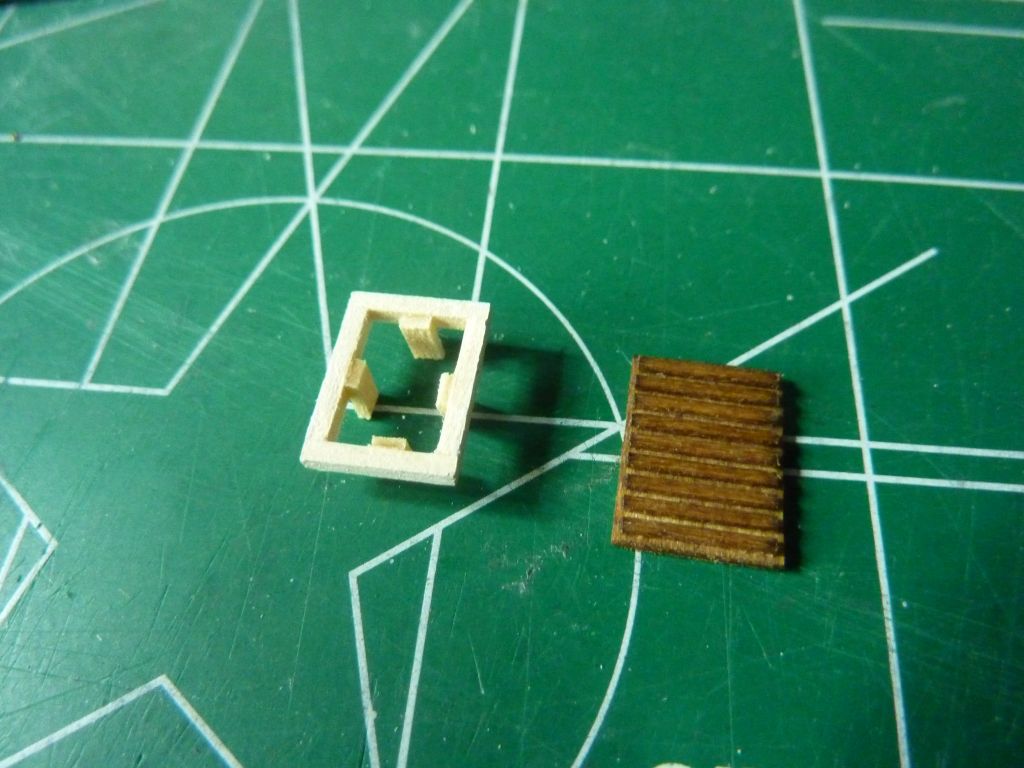
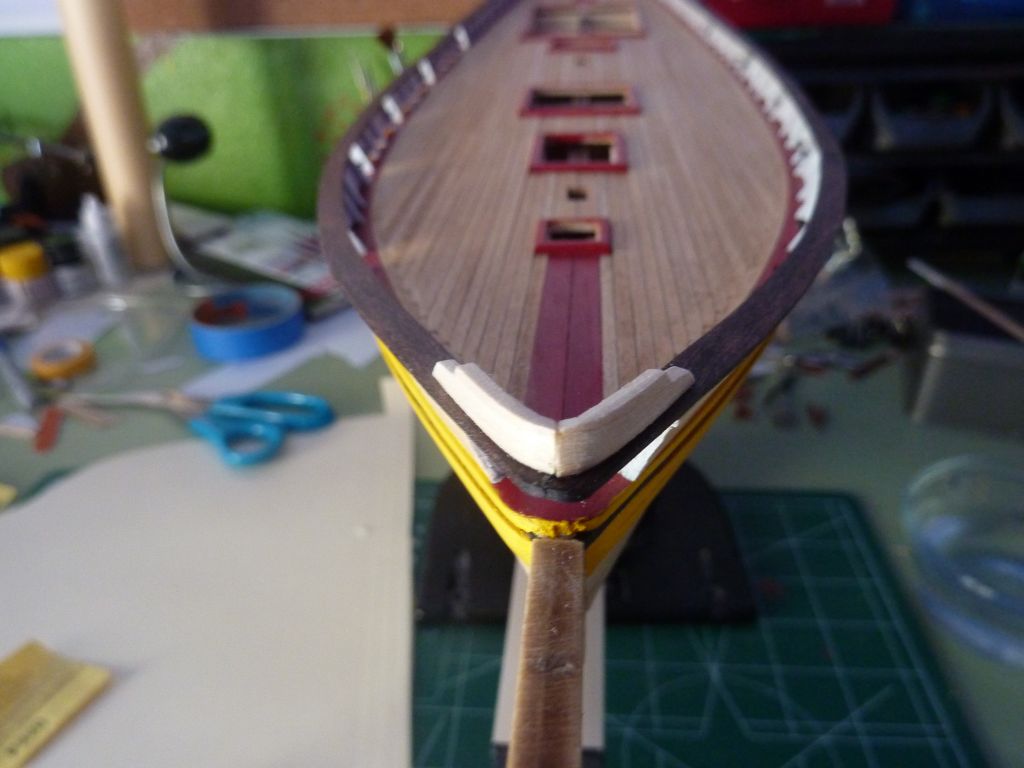
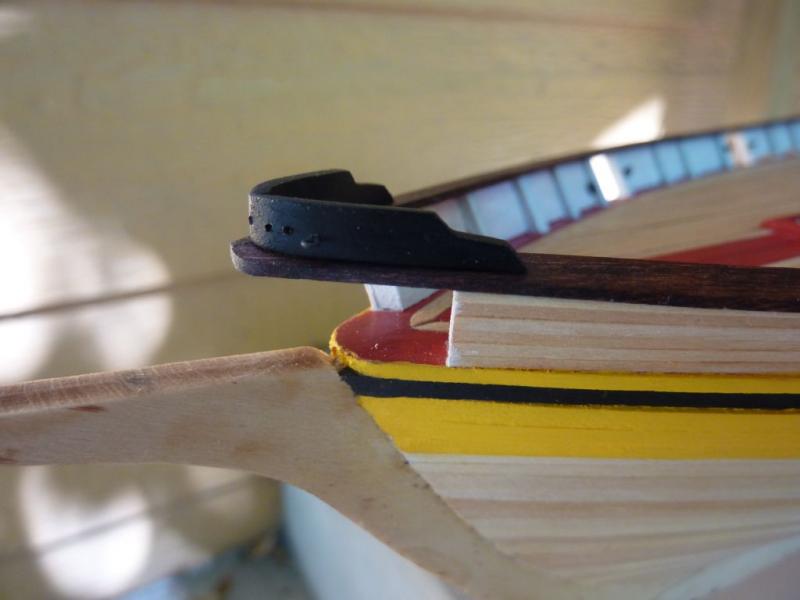
Next up, according to the instructions, after skipping the cannon port doors for now, is the fairlead. The instructions say to simply "craft this out of wood". Ok, so I tried bending a piece of wood to match the severe curve of the bow railing, and it would just split. So, instead, I bent two pieces as tightly as I could, trimmed them at their maximum curve and glued them together: Then, I painted it black, added the two blackened eyebolts and drilled the holes the lines will go through much later as the bowsprit is rigged. Andy.
-
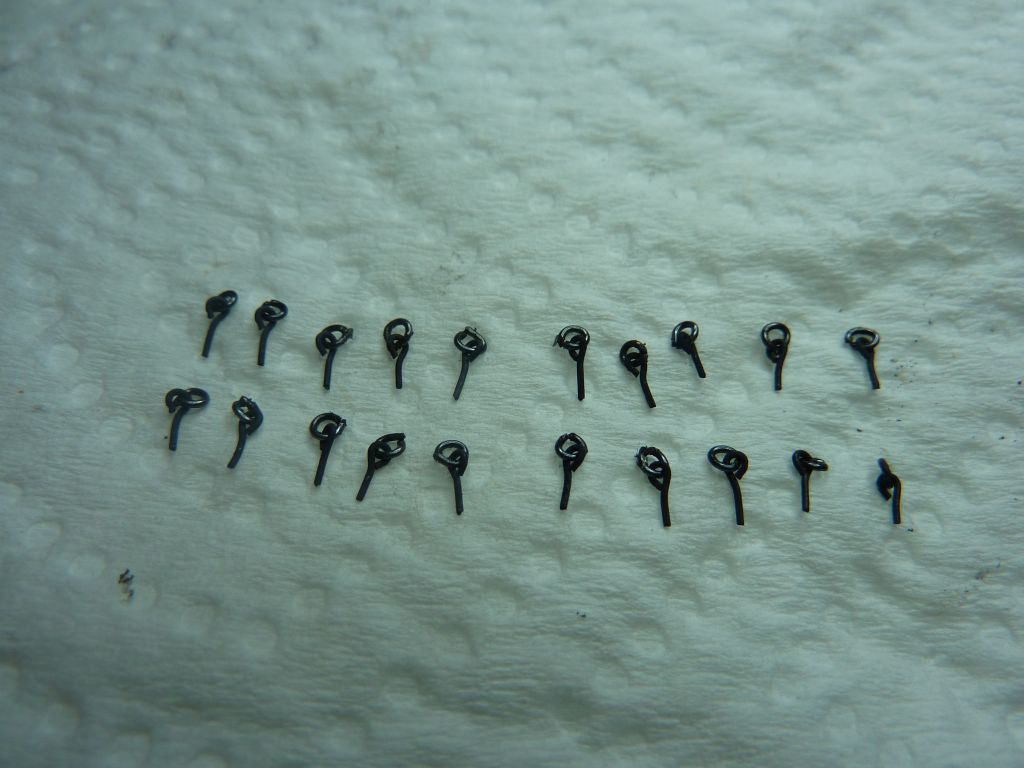
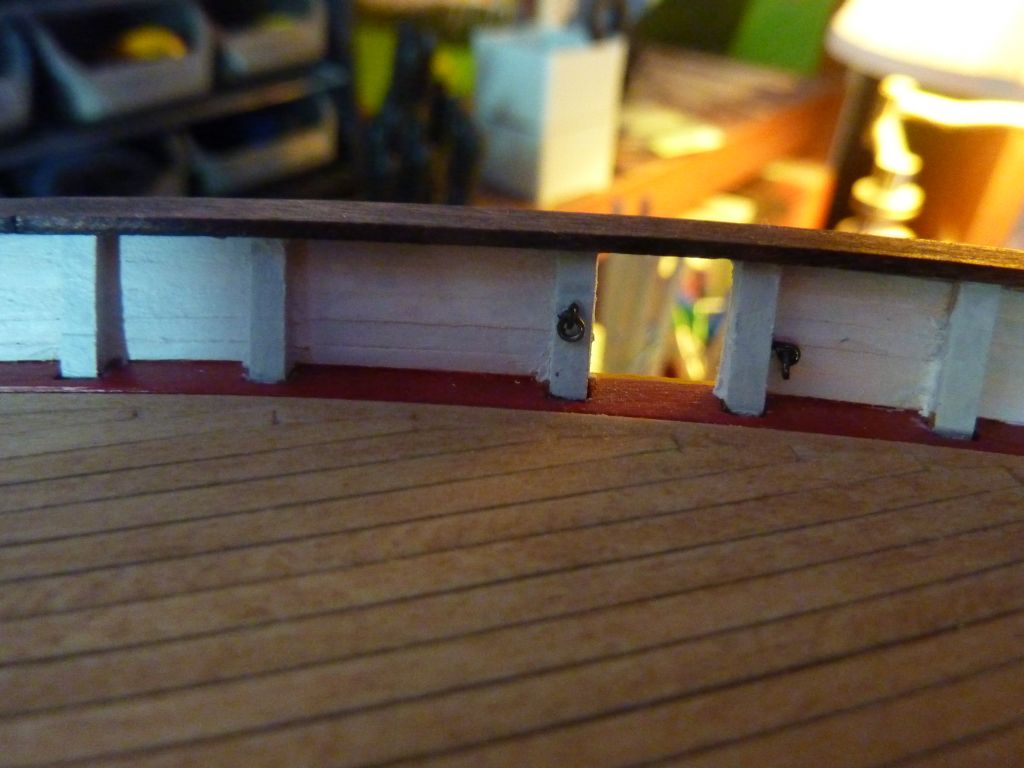
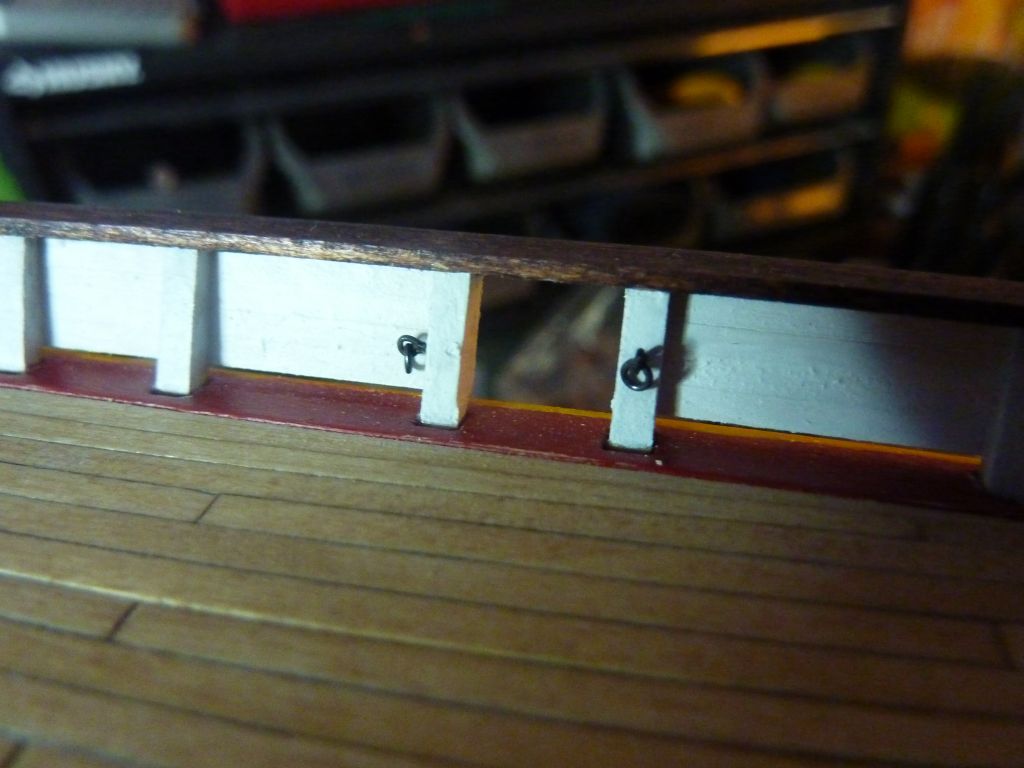
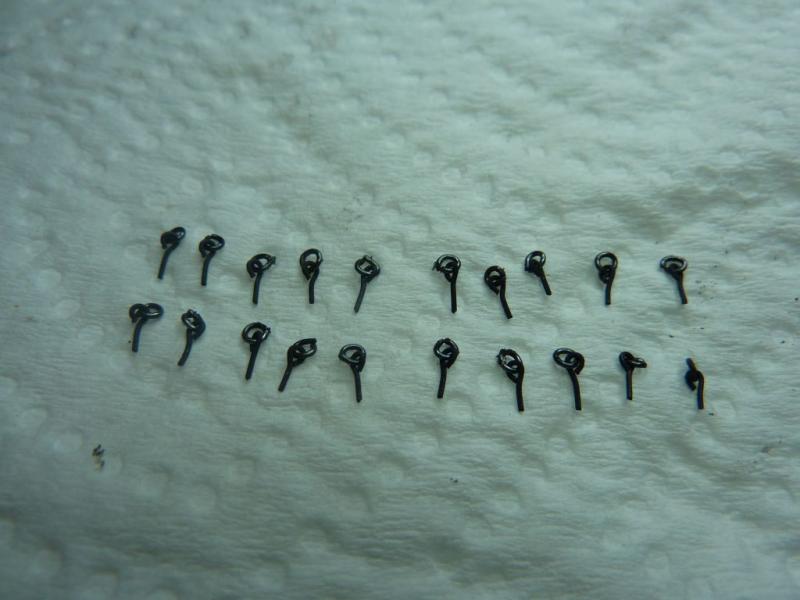
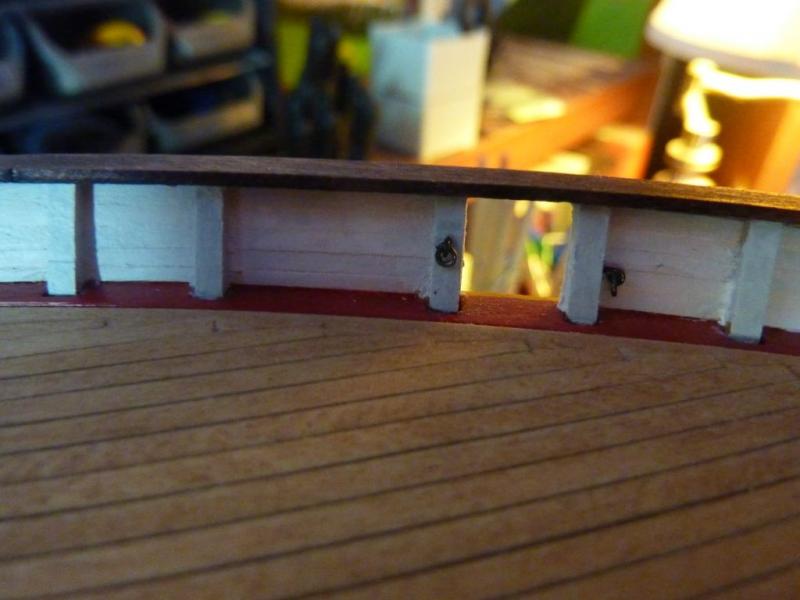
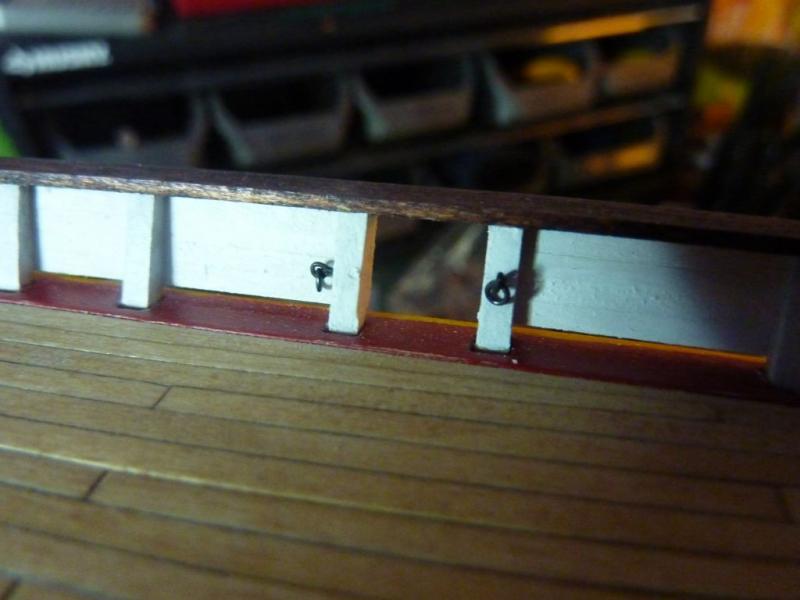
Small progress to report, but it took all weekend. I installed all the cannon eyebolts and rings. The brass rings supplied with the kit seemed too large to me, so I made my own by wrapping some small black wire around a drill bit and snipping to make a ring. Those were put on the eyebolts and then blackened. After that, it was pretty easy to glue them (CA) into the holes I pre-drilled in the stanchions. I did the sideways holes prior to planking the bulwarks to make it easier to put the 4 side ones in. Andy.
-
I'm certainly no expert, but the height of the knees looks like it might be caused by putting the knees on top of the bulwarks and deck planking instead of planking around the knees. In mine, the knees were installed first, on the base filler blocks, so that effectively drops the height of them by a significant portion. It may be too late to re-do this section (depending on your willingness), so this might be poor advice. I don't feel qualified to recommend an approach to fix it other than sanding down to try to get the height under control. Andy.
-
I'm still painting, and plan on blackening eyebolts and gluing those in soon. For now, here are the inner bulwark planks painted a "white grey", closest I could get to the cream specified by the plans: Andy.

-
Thanks, jcoby, I've not yet decided on what to do about the lettering. Maybe find some small letters at a hobby shop? I don't think my skills are up for a hand-lettered attempt - it would look terrible. I can put that off indefinitely, as there's nothing else on the transom that needs work. I've been spending a lot of time painting the inside of the bulwarks - it's got difficult access, and so it taking some time. I hope to have photos of that in a few days, then I can move on to some of the deck furniture or perhaps the gunport lids. I can also then add the blackened eyebolts once the painting is done. Andy.
-
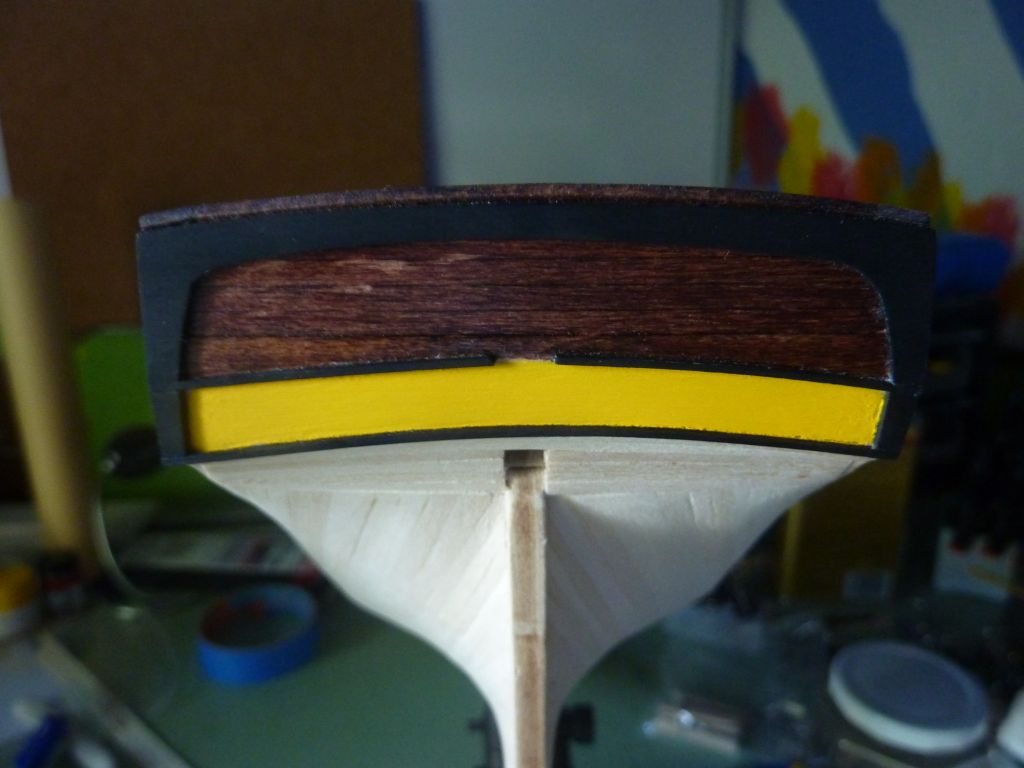
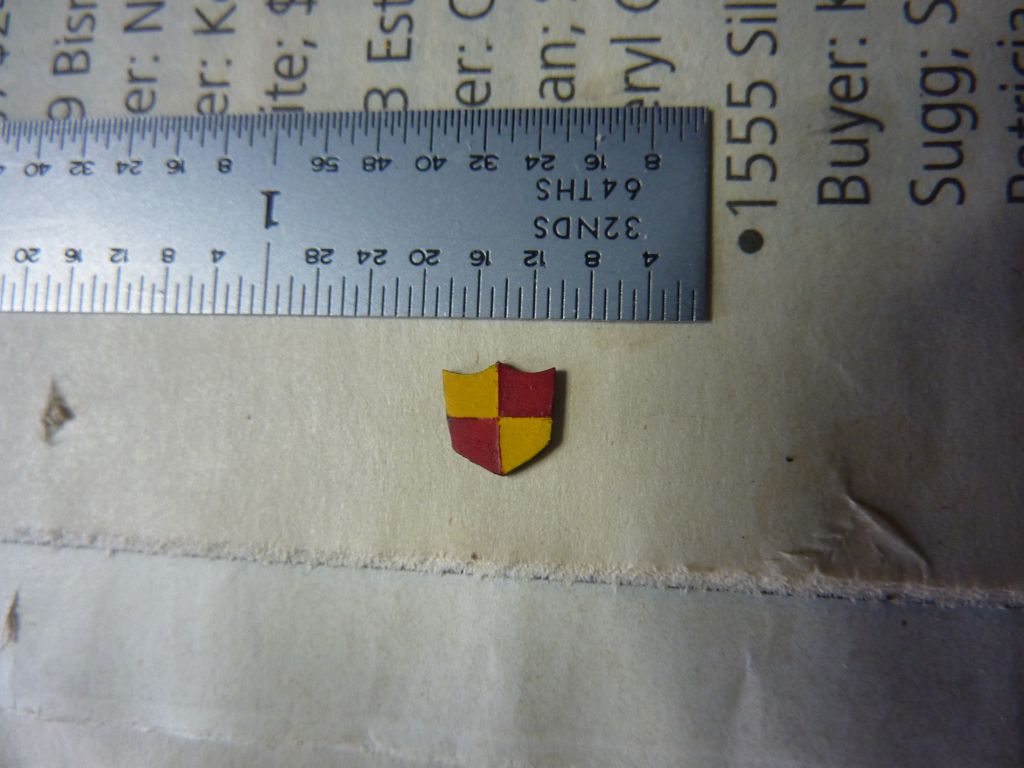
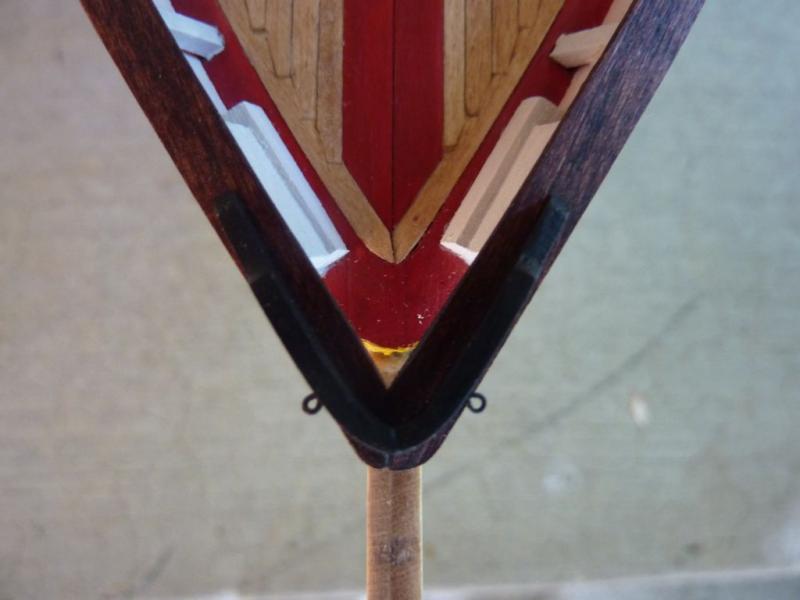
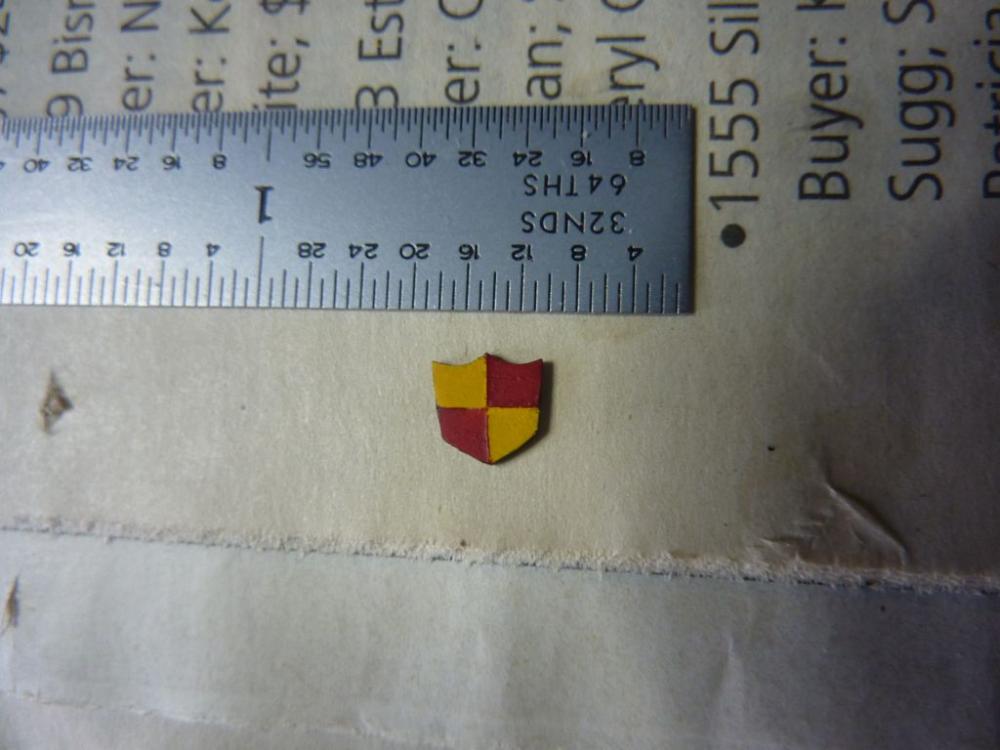
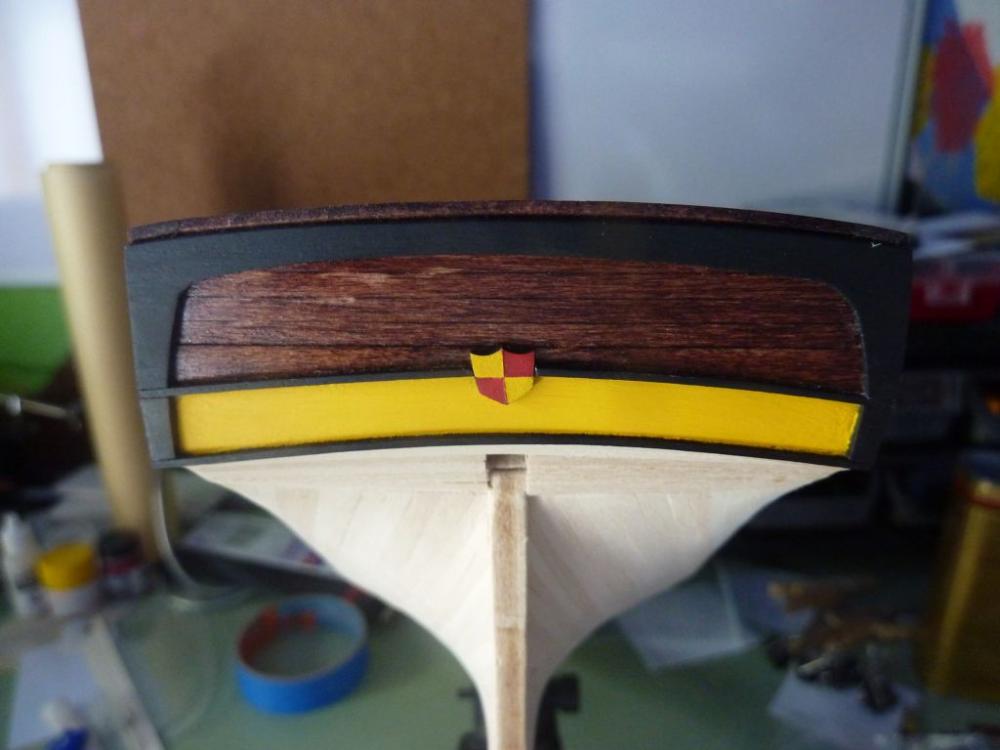
A few bits and pieces were left on the transom - The fancy piece, framing the transom, painted black - A couple of thinner, 1/32" square pieces curving around - The emblem of Maryland - looks like a shield - Finally, the "fashion" pieces port and starboard After painting the lower part a medium yellow (used a Tamiya paint for this) The detail on the emblem of Maryland is far too intricate for the size. Instead, I just did a "representative" yellow and red replacement: Here's what it looks like all assembled: And, finally, the two side fashion pieces. These are a little thicker looking than they probably should, but used the end of the waterways piece to define their size:


-
FYI, that's my photo of the galley quarters from my build of the USS Constitution, Revell kit. Thanks for including it here! Andy.
- 165 replies
-
- 3
-

-
- united states
- revell
- (and 1 more)
-
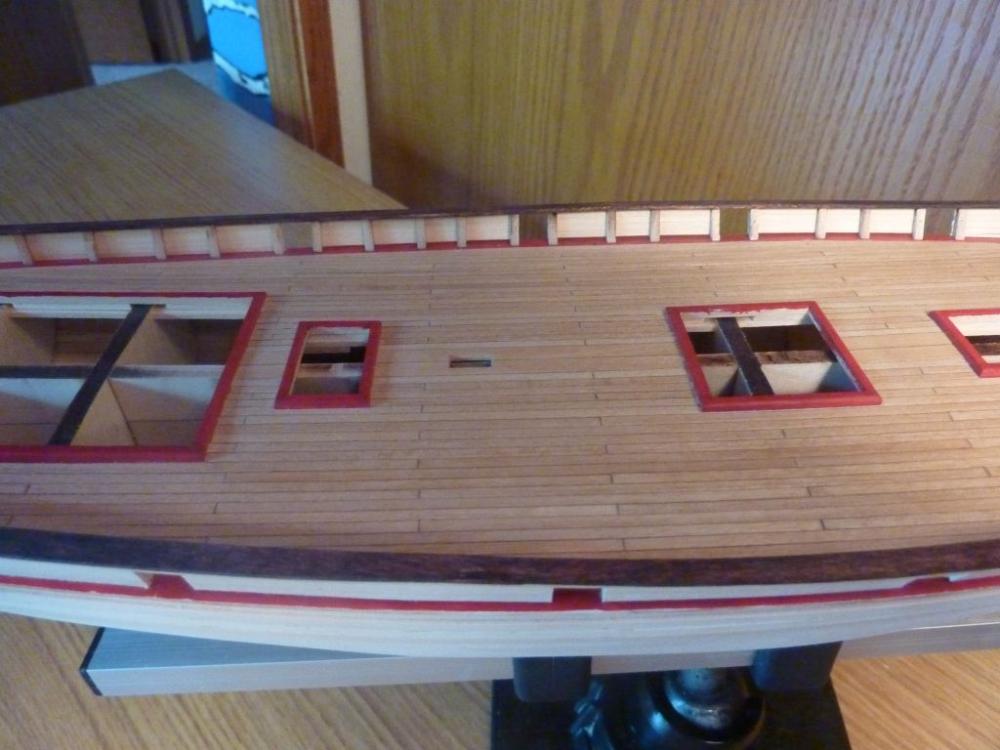
I finished planking the bulwarks today. Sorry for the poor quality of the photos, the light wasn't the greatest this afternoon. The continuous scupper between gunports 2 and 5 is at 1/32", so pretty noticeable. I also had to add a basically a stealer when doing the port planking at the transom to fill a gap, but it's barely visible. I think next would be to try and finish the transom - add the framing pieces (fancy piece) and the sides as well as the center decorations. Also, next up is some of the railing details - pin rails, add the eyebolts, ladders, etc. Andy.


-
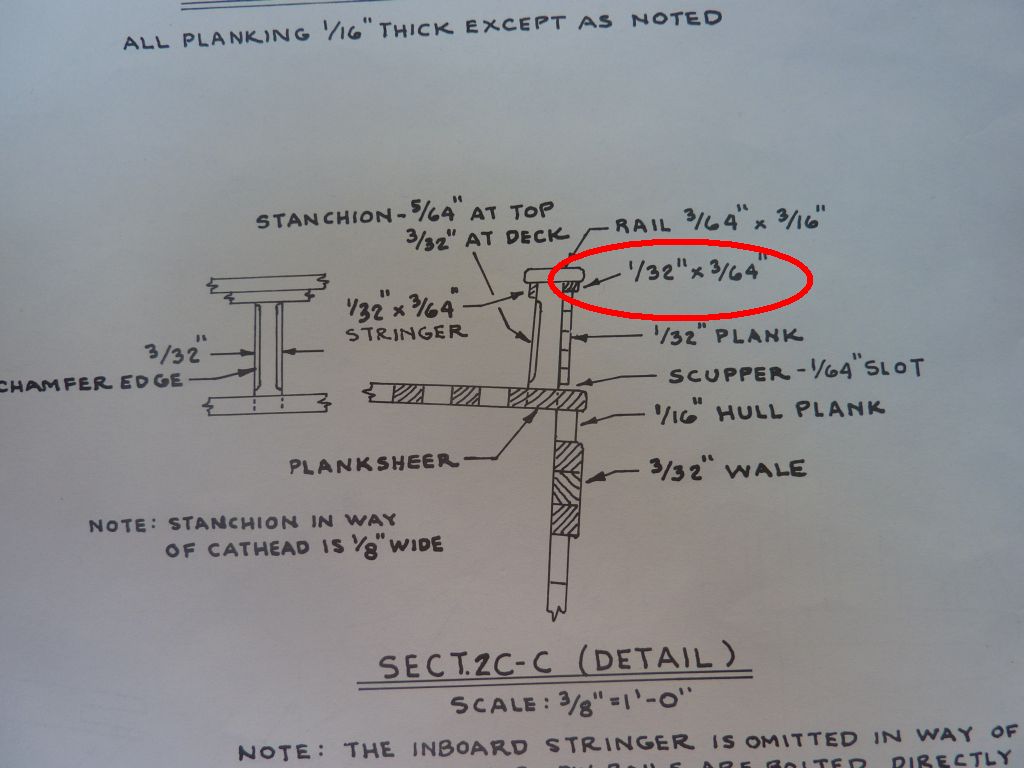
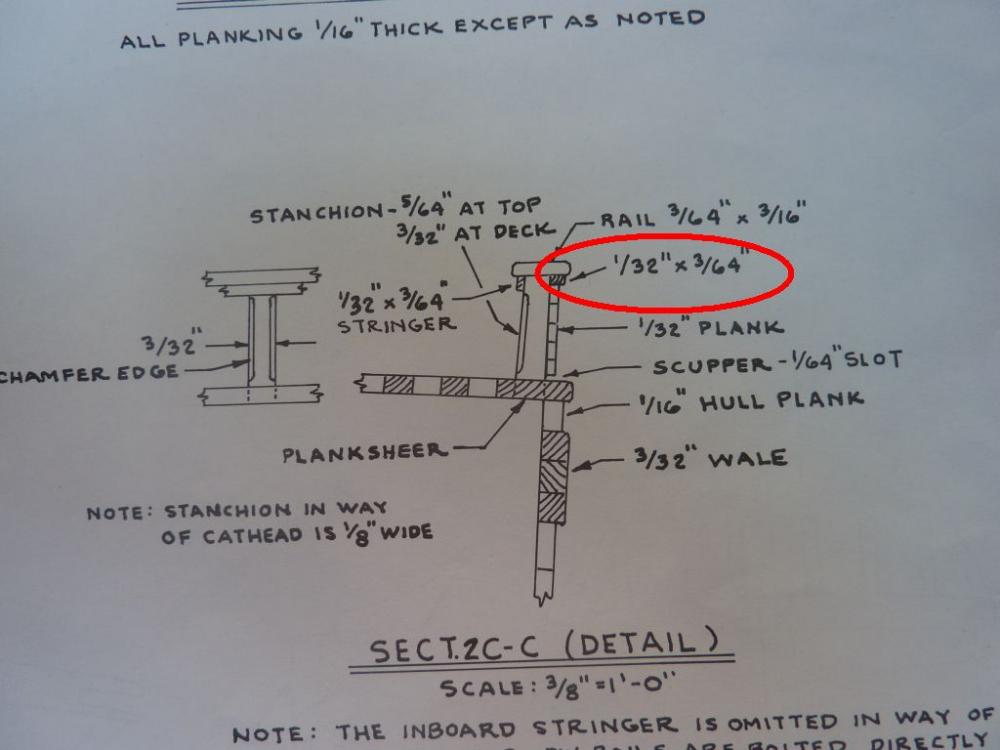
On sheet 4 of the plans, Gunport Details, it shows a "vertical piece" on the outboard diagram. And on page 19 of the instructions, it says "Apply a 1/32" -square vertical strip of wood on each side of the gunport, simply to cover the end grain of the bulwark plank (you could omit this on the model)" My current plan is to use a 1/32 x 1/16 strip and sand it down so it fits uniformly under the top rail. Since my stanchions are likely not each perfectly centered, this seems to be an approach with the best likelihood of success, although it will require a lot of sanding. I'm bending the plank now so it can be fit without a struggle once it's done being sanded. Andy
-
I've looked through the plans, and I was saving that 1/32x1/32 piece for: - framing around each of the gunports - the instructions mention using two small vertical pieces of this, but also call this as optional. That would be 20 short pieces, but overall it adds up. - in the transom, as the two curved pieces that separate the mahogany from the yellow sections Also, I have only one 1/32x1/32, and it's not long enough for both port and starboard sides. I doubt there's a local supply of wood here, so I feel compelled to use the kit's resources. Andy.
-
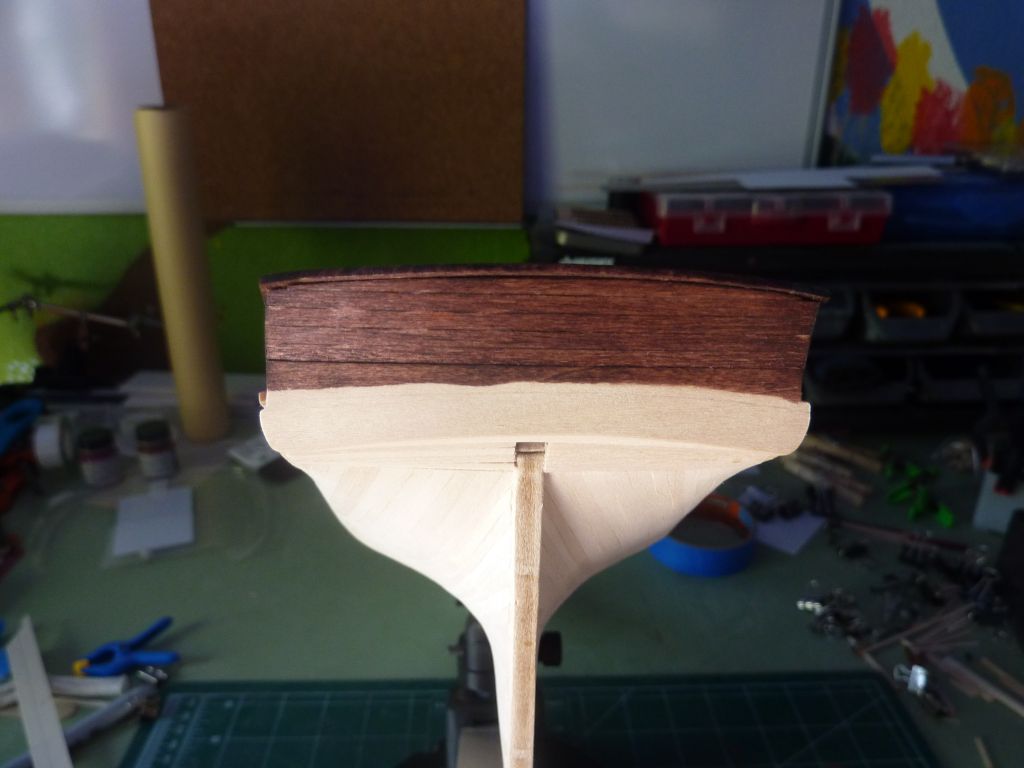
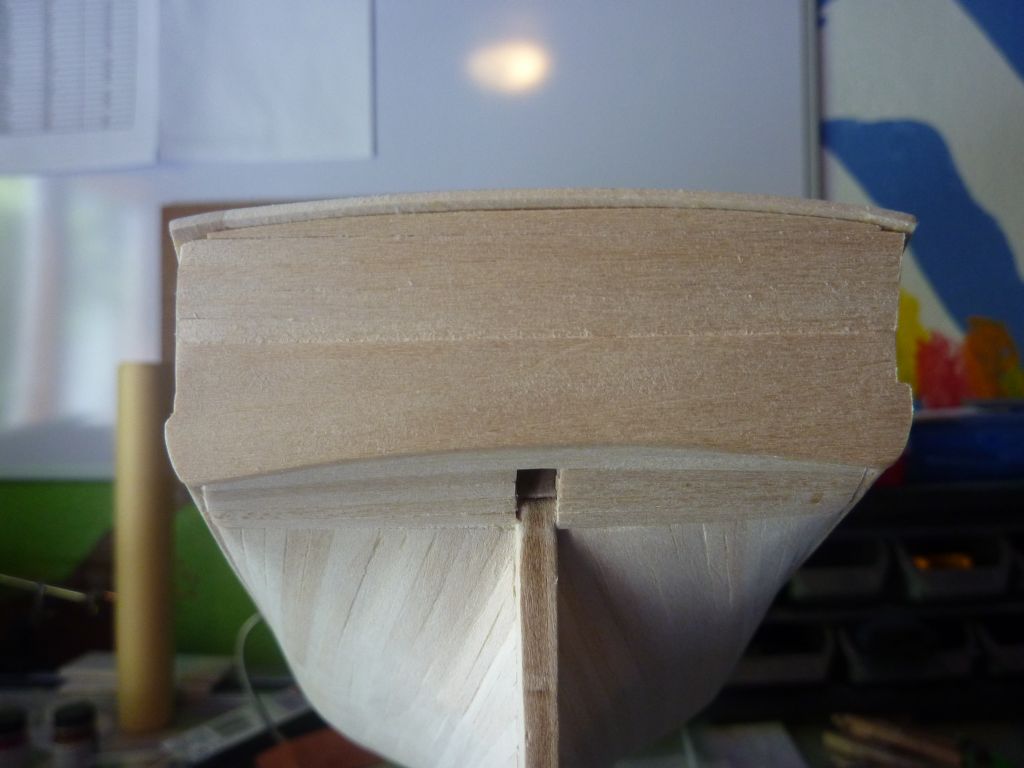
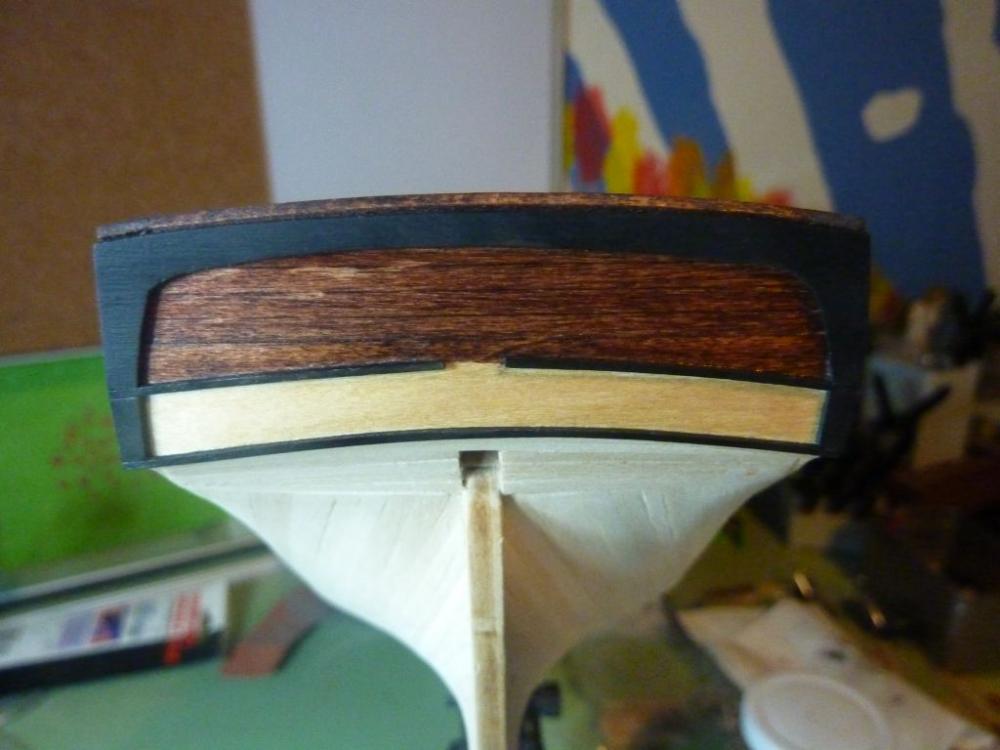
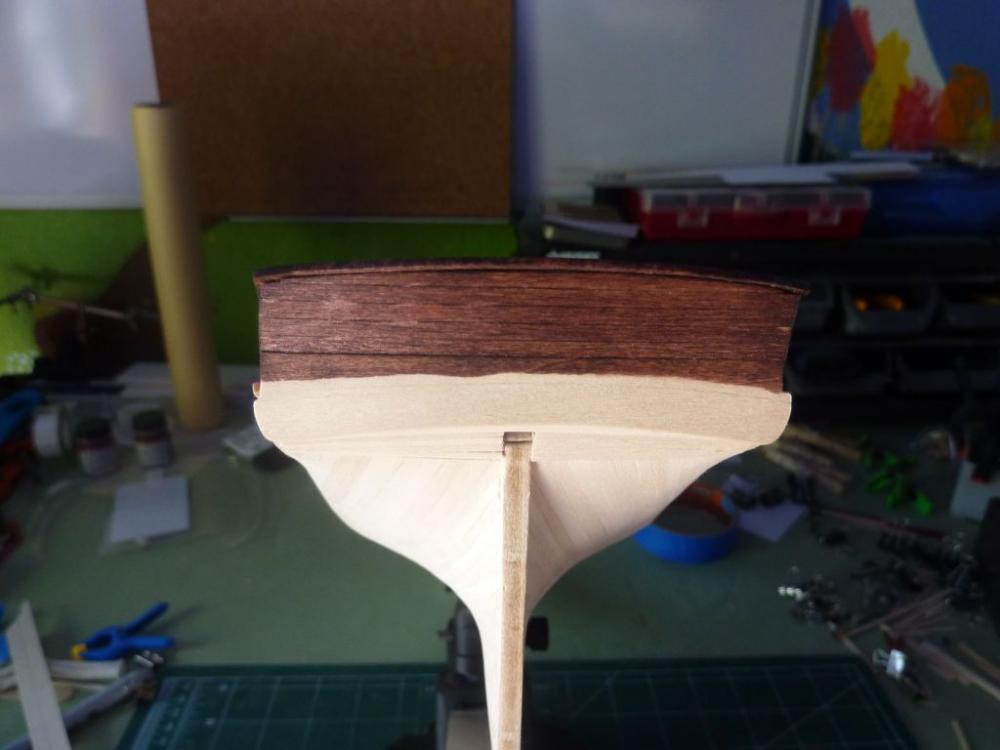
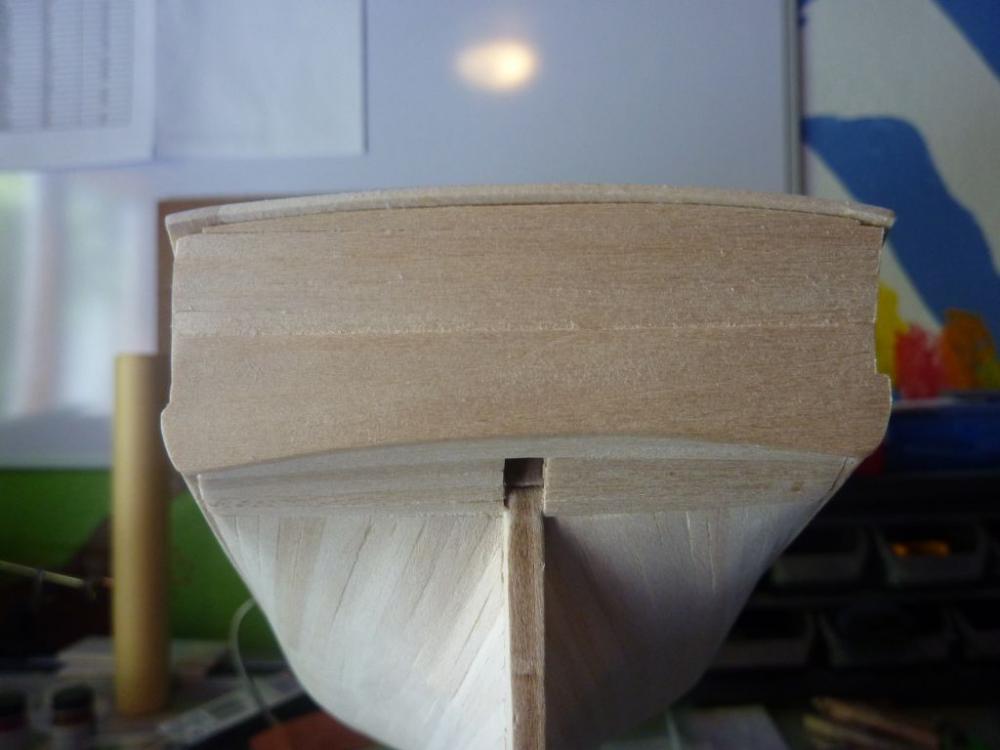
Thanks for all the comments - much appreciated. I did some work on the transom yesterday - simple planking up to the newly-installed top rail. Before, you can see a shim on the far right - I had to shim and otherwise adjust a number of the stanchions to level out the rail: After: Then I stained the upper transom and the top rail with Minwax's Mahogany Red: Next up will be the planking of the bulwarks. Question: For anyone who's done this model before, here's the instructions on the bulwark planking: The kit doesn't seem to come with a plank the size of 3/64" x 1/32". I've checked the manifest of the plank sizes. What did you do for this plank, and the inboard one as well? Should I try to cut a larger plank down to this size? Andy.

-
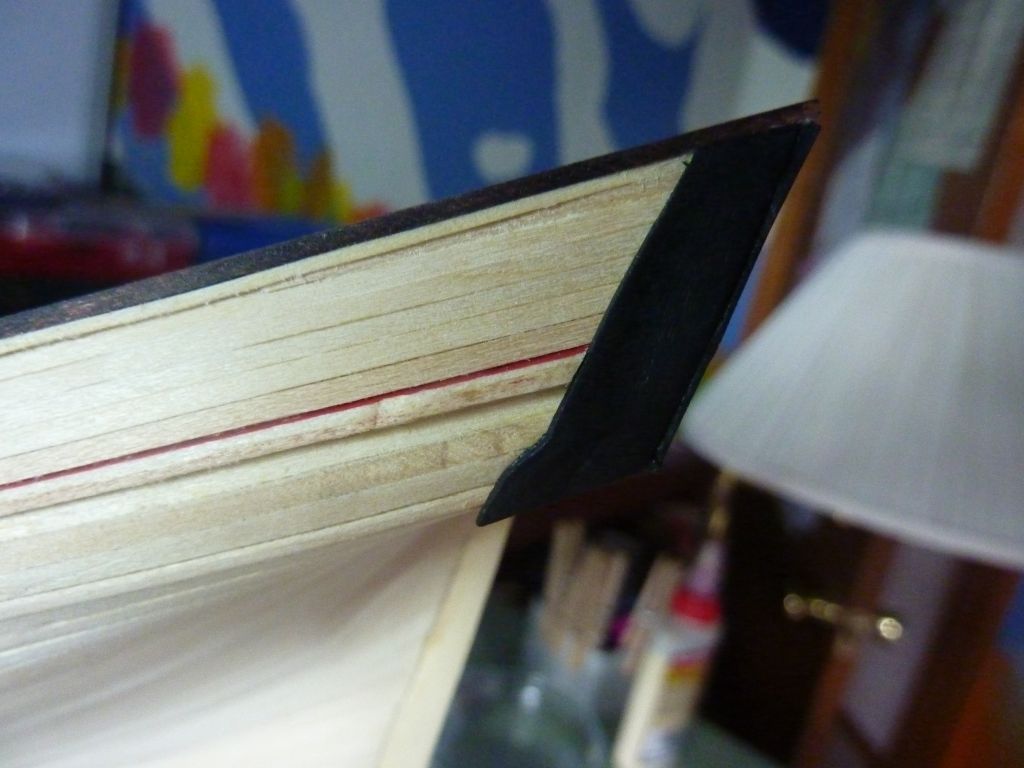
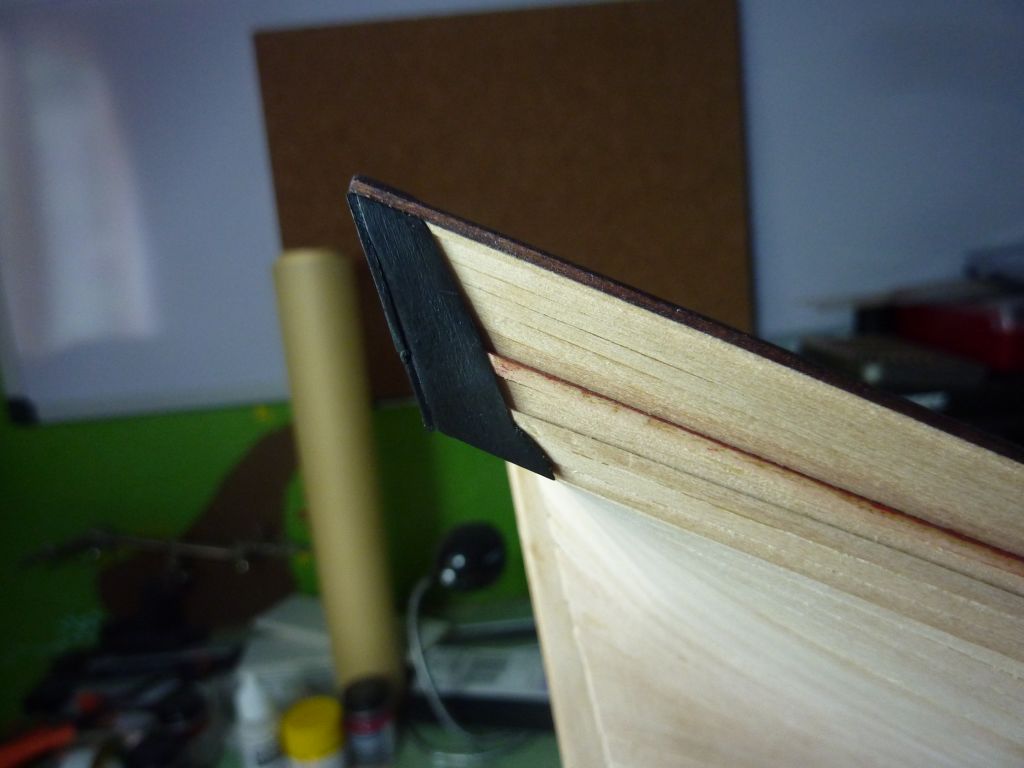
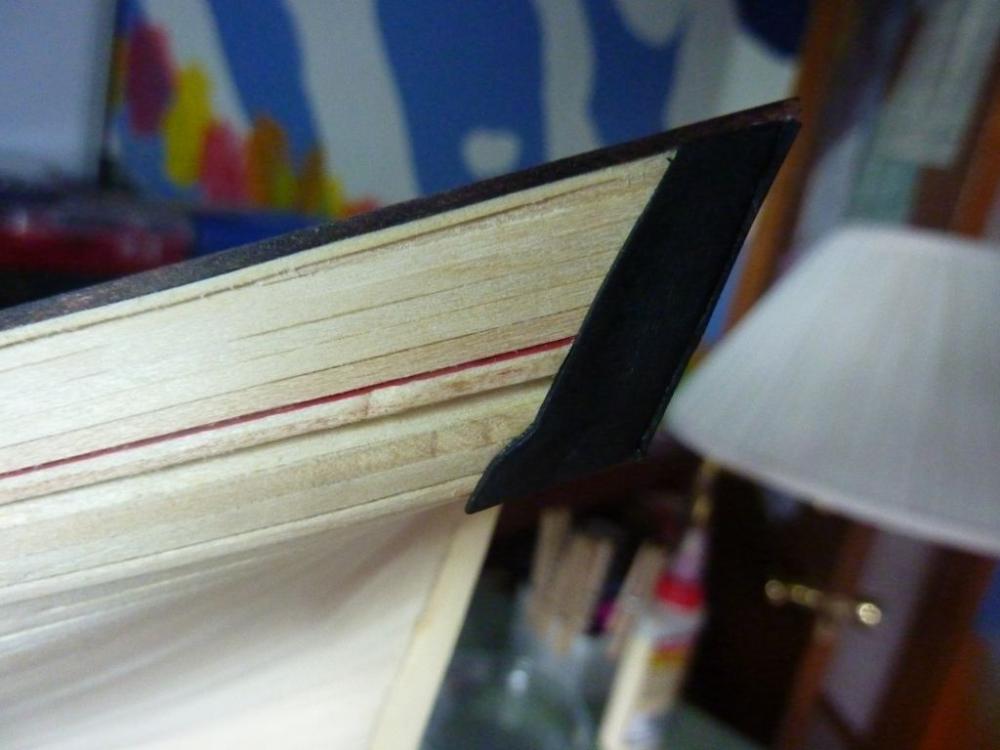
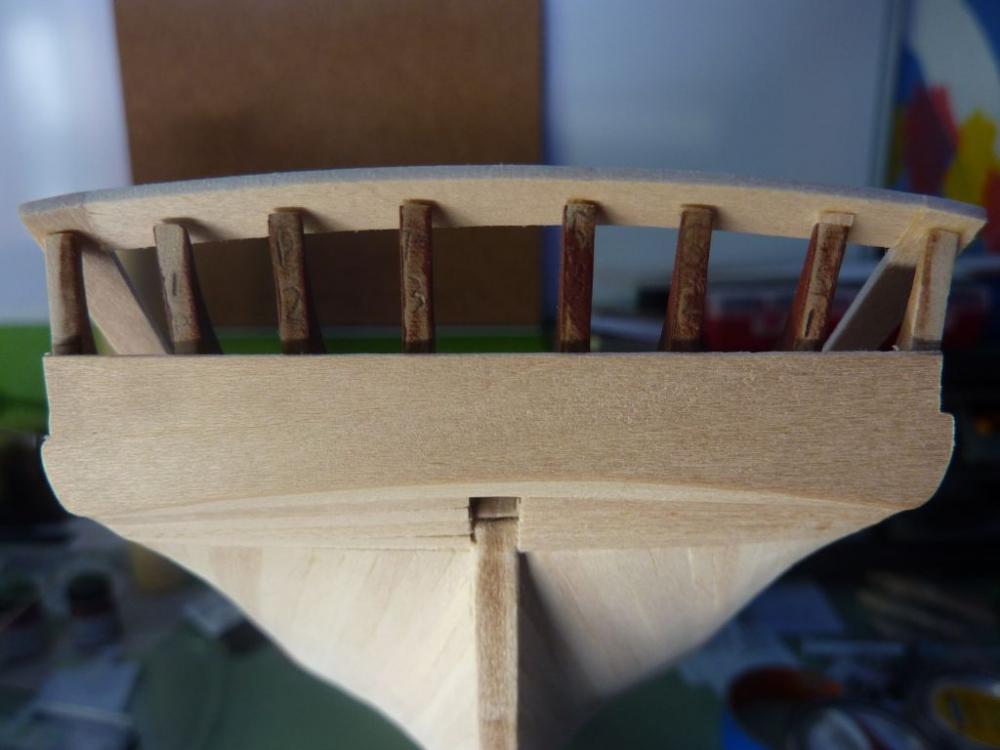
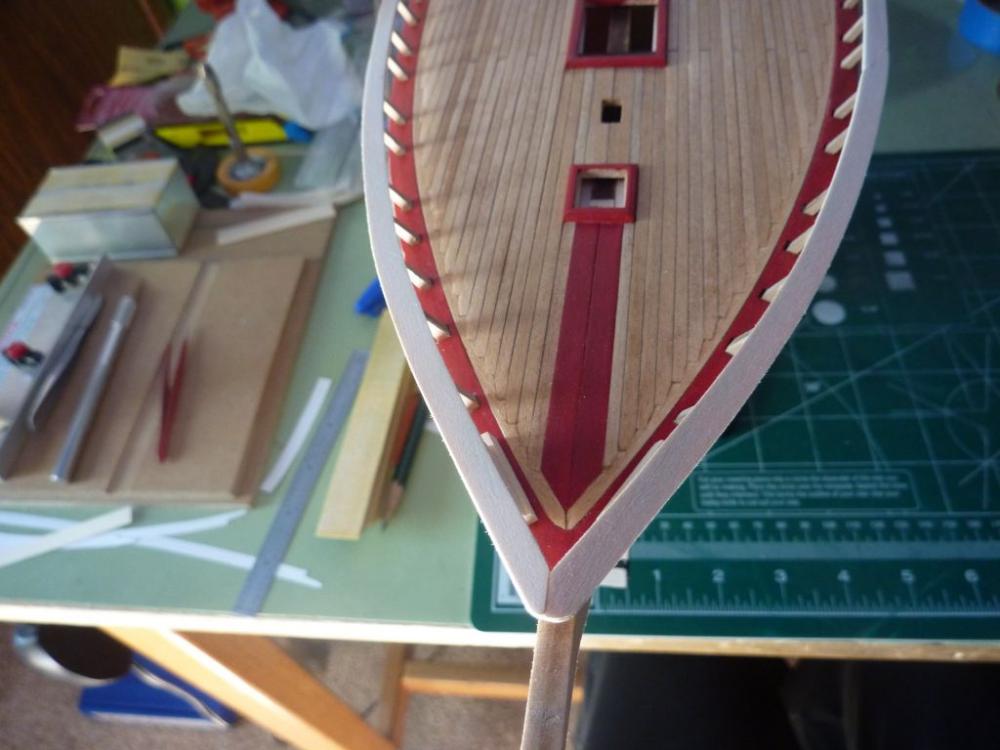
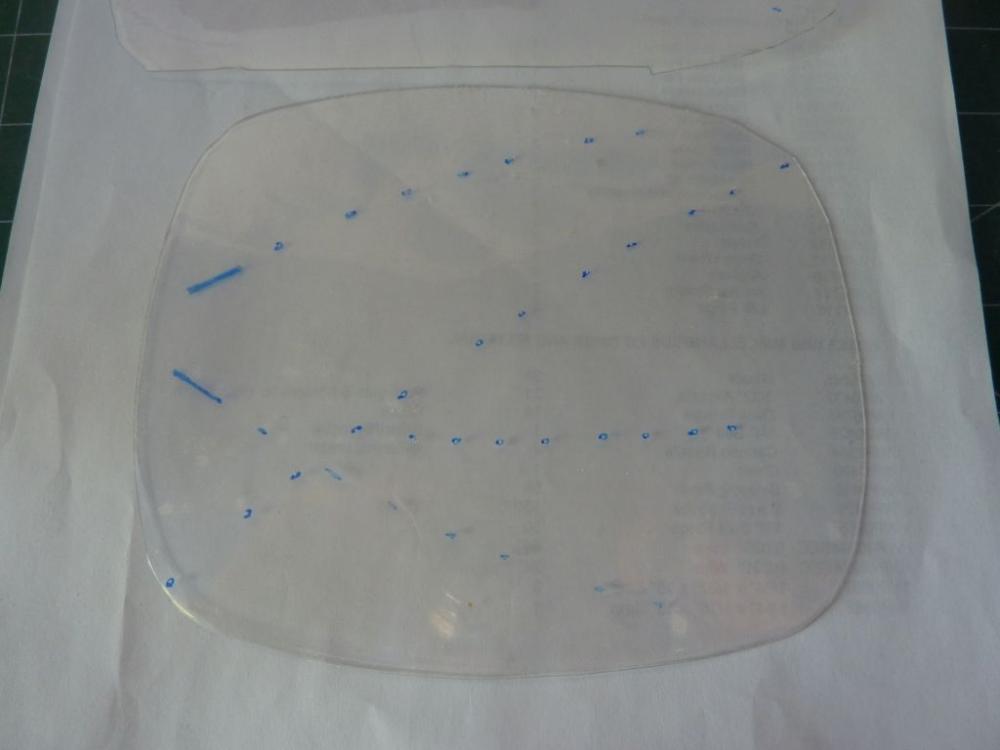
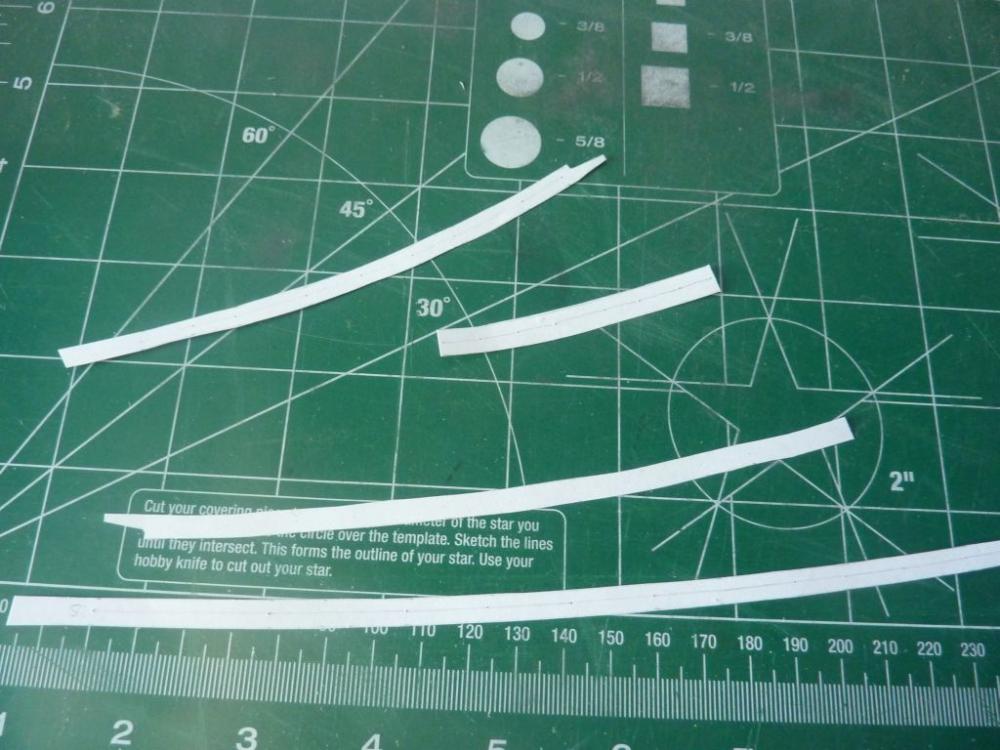
After much thought and work, I finally created the top rail and have glued it into place. I struggled a lot trying to figure out how carve a curved piece that matched the tops of the stanchions all around the hull. Here's what I finally came up with. I took the lid off a plastic grocery container - the kind that nuts or candies are sold in. These are rigid, clear pieces of plastic that I could place that on top of the stanchions, and mark the position of each one with a blue sharpie. At each position, I drilled a hole in the plastic, large enough to push a pin through. I would place the plastic on a sheet of white paper and create a small hole at each position by sticking a pin through. This left a series of dots on the paper that matched the top of each stanchion. I would then mark the width at each dot, and cut out the paper: I placed the paper template on the piece of 1/2" by 1/32" wood, trace out the shape and then cut it out carefully using a hobby knife. After sanding to get back to the proper width, making sure the stanchions were centered created the top rail pieces. I did 3 pieces per side, each one as long as I could make it given the curve of the piece and the width of the wood. I struggled with the scarf joints there the pieces come together. One of them I had to patch with some scrap. Here's the resulting rail: The stern piece was created the same way, and I manually shaped the bow: Next, I plan to plank the transom and then stain the lot with a Minwax mahogany stain. Andy.


-
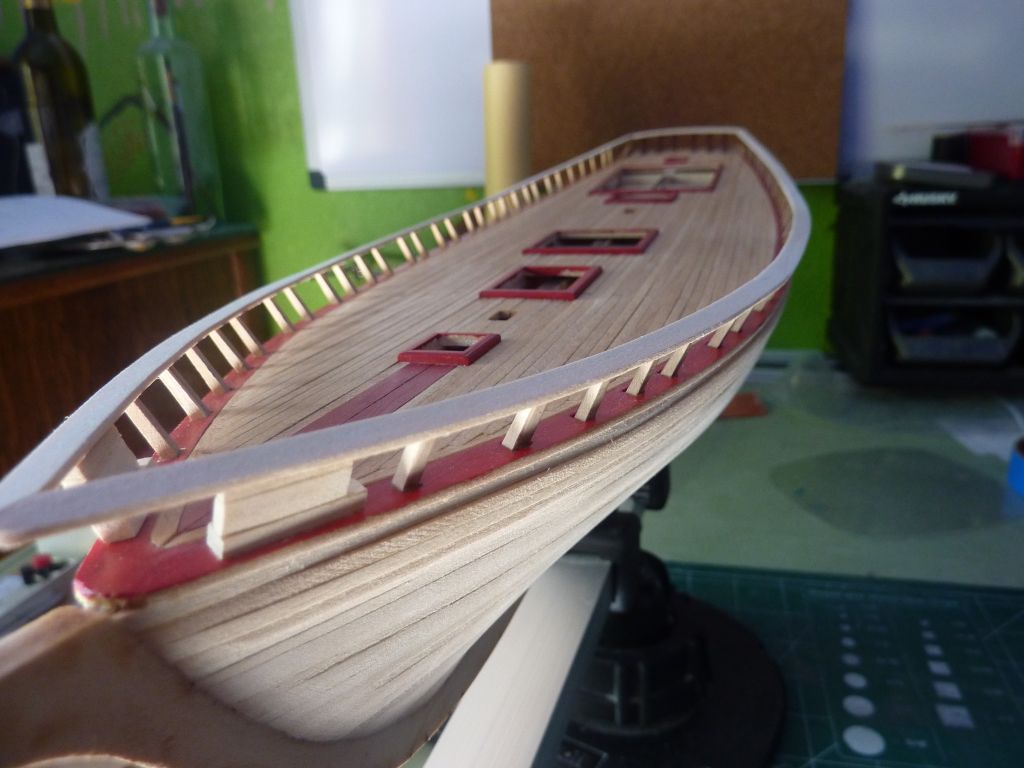
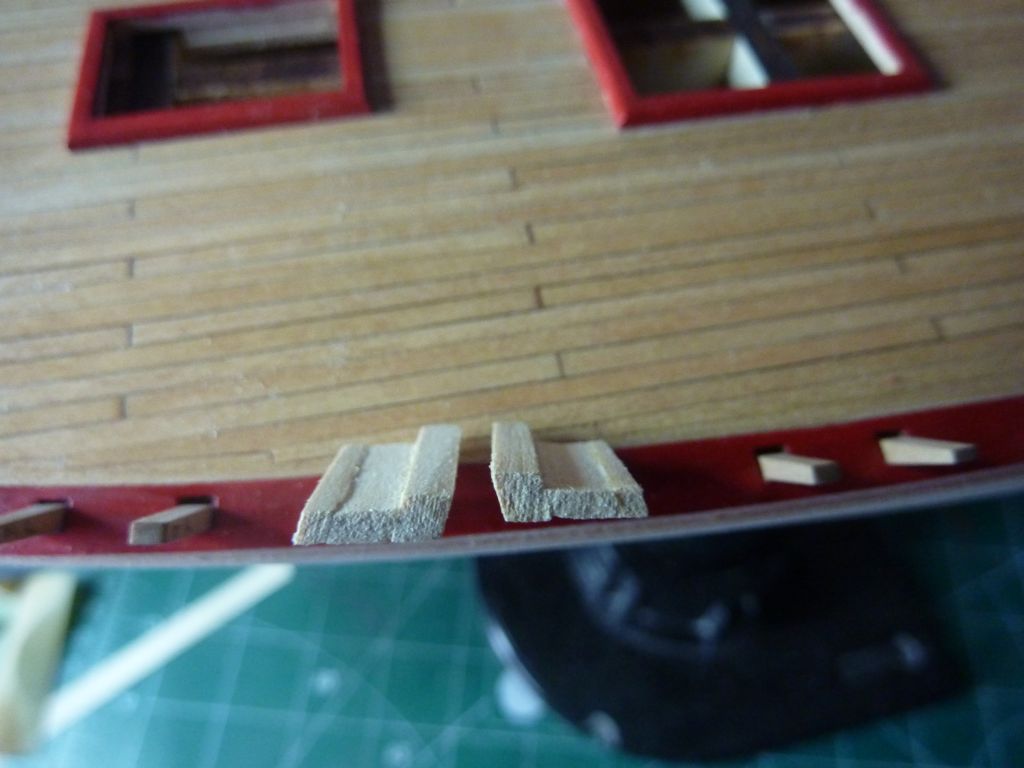
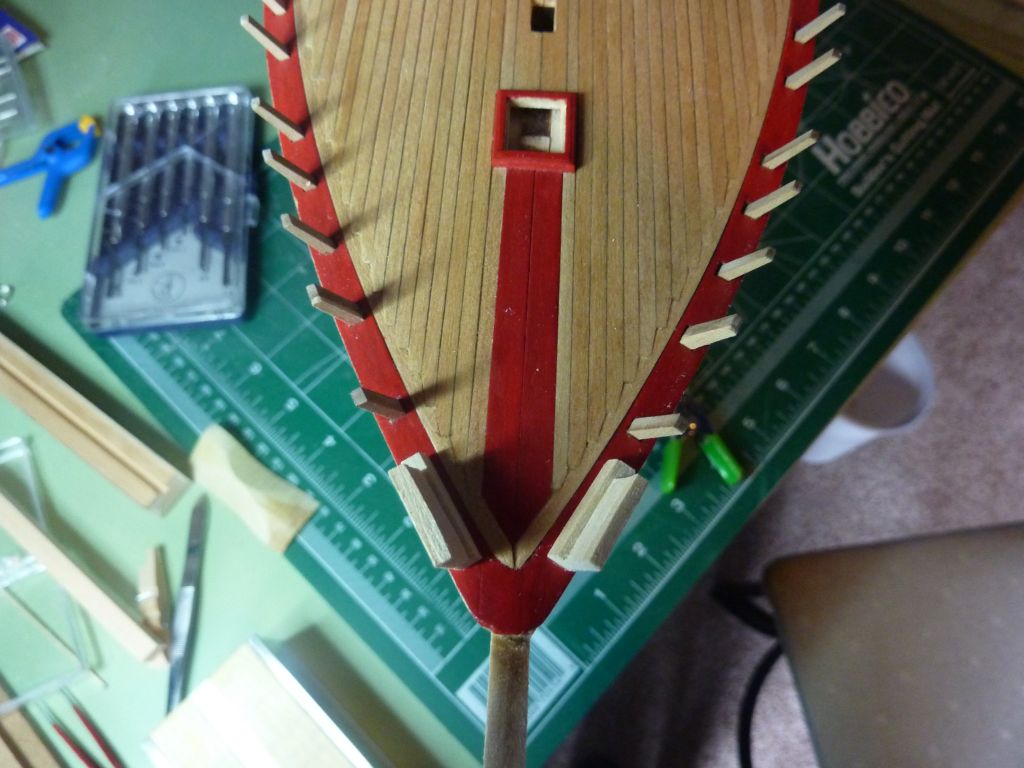
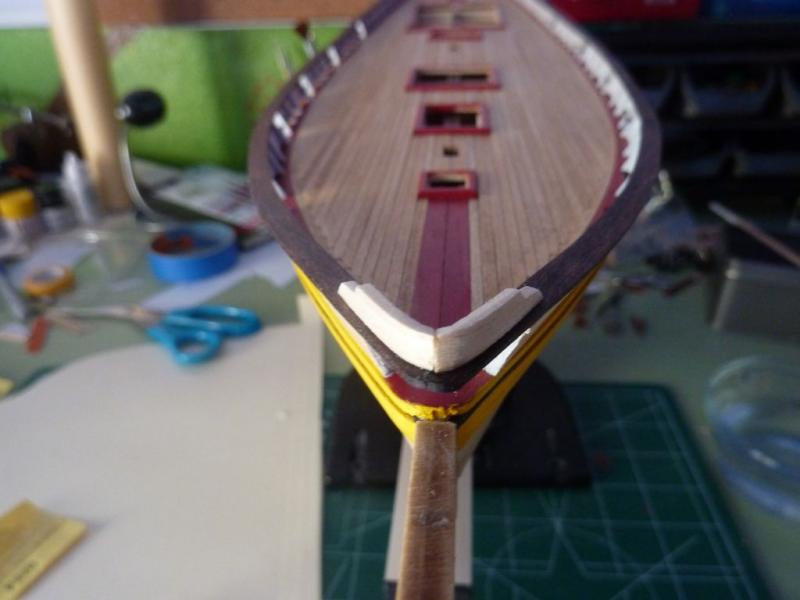
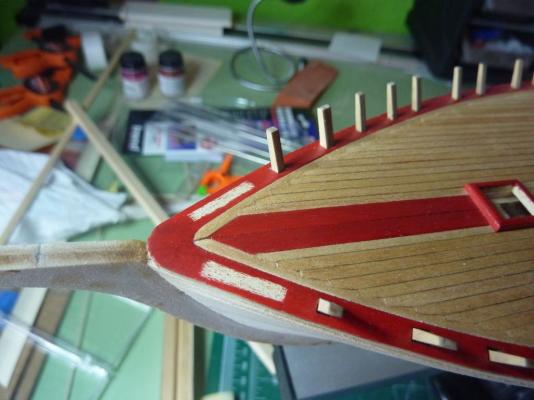
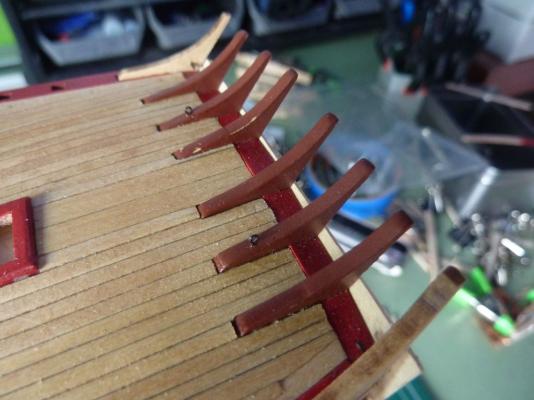
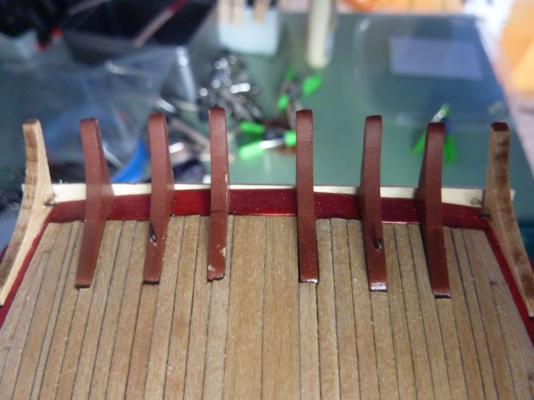
Well, I fixed the orientation of the stanchions. As should have been obvious, they flair outboard: I also spent a fair amount of time creating and installing the hawse timbers. I created them out of 3/16" square stock from the kit. First, making the lower piece, then the upper. Since it wasn't tall enough, I added a third little "cap" on top to make the height good for the top rail: I scraped off the paint at the bow where they'll go: And, finally glued them in place. I'll wait for the glue to fully dry before attempting to drill the hawse pipes. Andy.


-
Unbelievable. You are absolutely right, I had each stanchion turned 90 degrees. Thank you for pointing this out before it was too late. Looking at the plans, I thought there was a forward rake, when it is indeed an outward one. I've just removed each one and test fitted it. I'll need to clean out the leftover glue and start over again with the positioning and re-glue. I'm glad I've not yet started the port side. Thanks for speaking up! While you're here, can I ask how you fabricated the two hawse timbers, at the bow end of the bulwarks? The plans say to use 2 pieces per side, but I can't seem to find wood of the correct size in the kit. Feeling chagrined and relieved, Andy
-
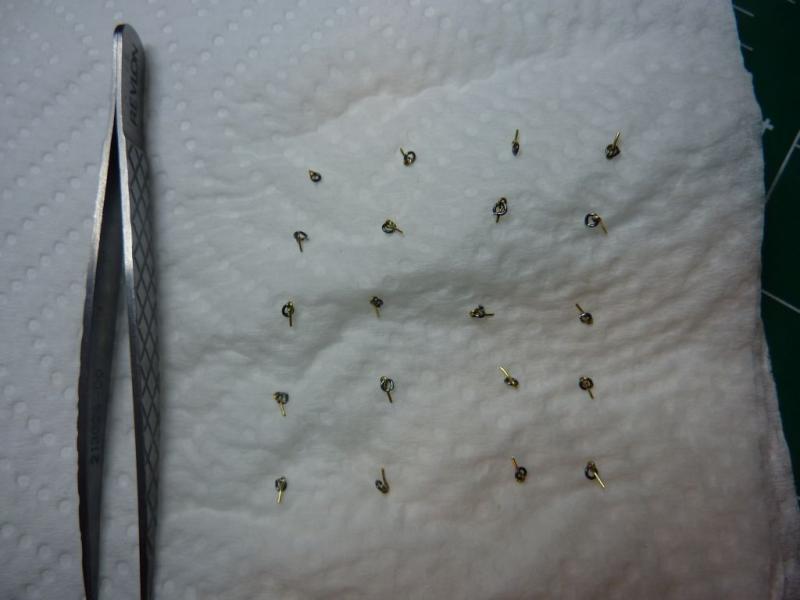
Thanks for the feedback. I got a couple of small things accomplished recently. First, I blackened 4 of the small brass eyebolts. I had used blackening on my previous build with pretty terrible results and I ended up painting the metal black. This time, it worked so much better. I used a 2-part water, 1 part Novacan black patina. Since I was doing only 4 eyebolts, I used 2ml water, 1ml solution. Before dropping the bolts into the blackening solution, I soaked them in white vinegar and brushed them clean with a toothbrush. The results were great. The brass blacken to nice dark black in 45 seconds or so. I used CA to glue 2 to the inner knees and 2 to the inside of the outer ones (thanks to jcoby for the tip - these bolts aren't referenced until later in the built, but installing them now is easy since the knees are not yet planked. Finally, I made some progress in the gluing the railing stanchions. I cut stiff paper guide, put a pencil mark at 11/32 height (the height of the 5 planks, plus an under-rail plank), and used that to align the stanchions. I'll do a few at a time, let the glue dry and if I need to adjust, I can inject a little water in there to soften the glue. Andy

-
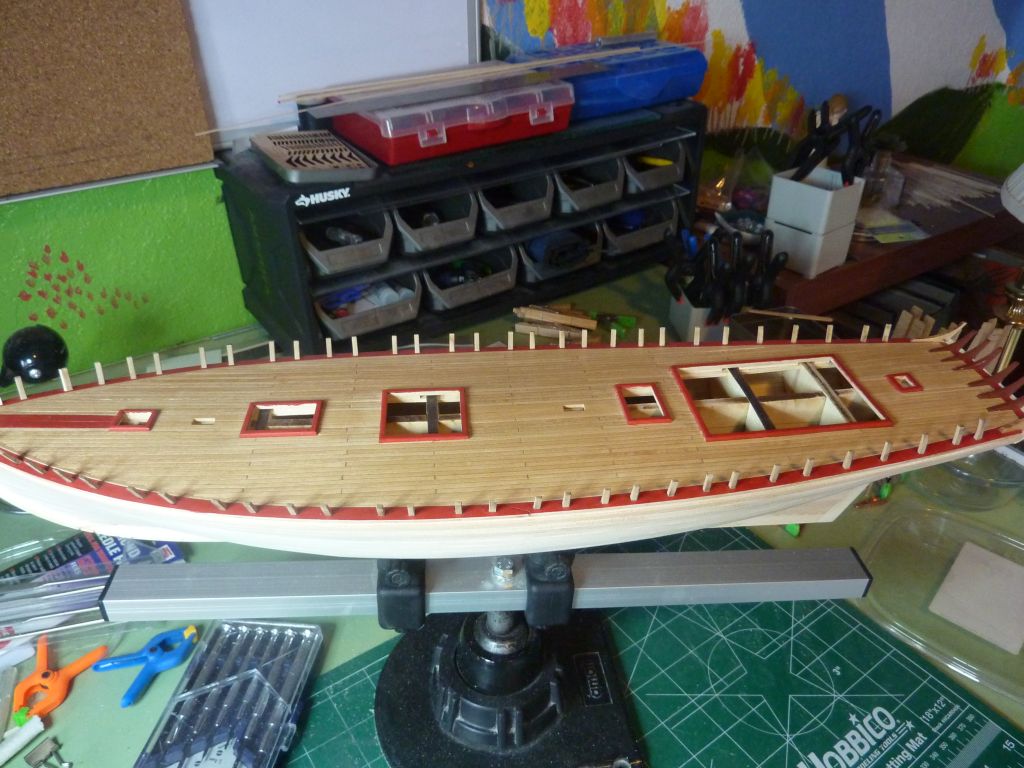
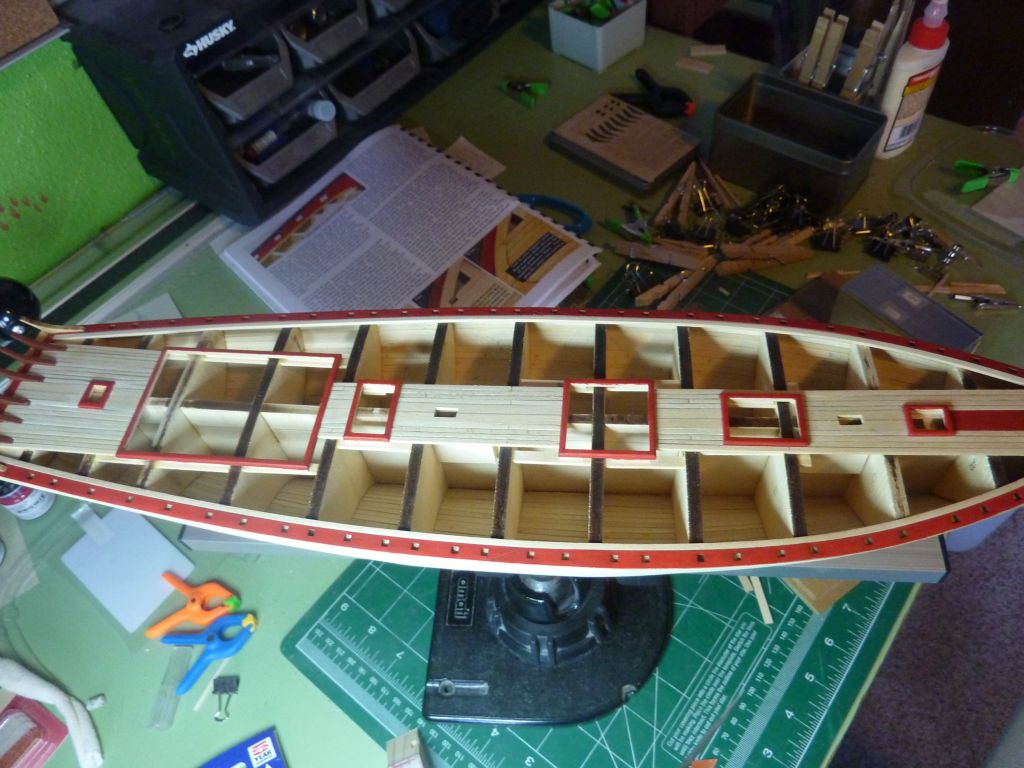
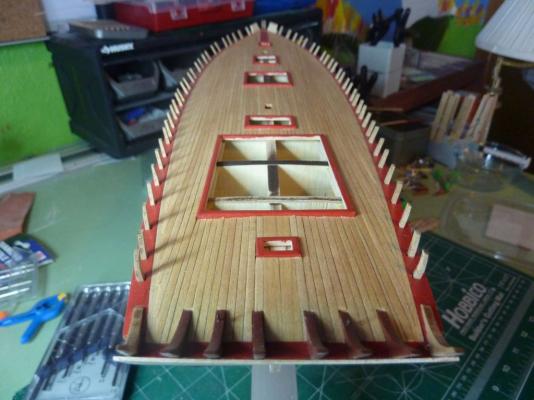
Ok, next up in the build will be the bulwarks and the top rail. The first step in that is to, I think, install the stanchions. I labeled and dry-fitted the starboard stanchions to see what I was up against. You can see in the photos that they all fit loosely into their slots in the waterways. My question for folks who have done this successfully, is there a proven technique for setting all these (and there are 29 per side) straight and level? Straight so the bulwarks planking has a nice even run. Level so the top rail touches each stanchion correctly? The instructions give a little advice (very little), but I don't trust myself to just eyeball it and get it right. Help! Andy.

-
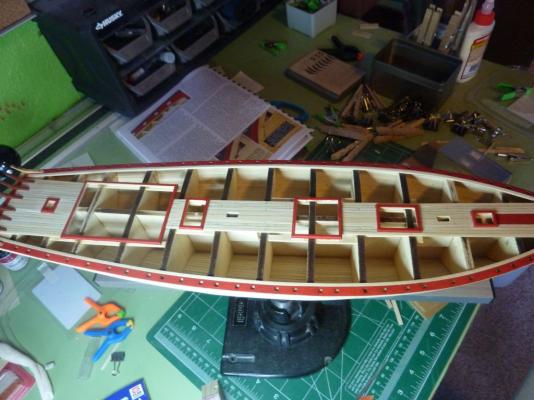
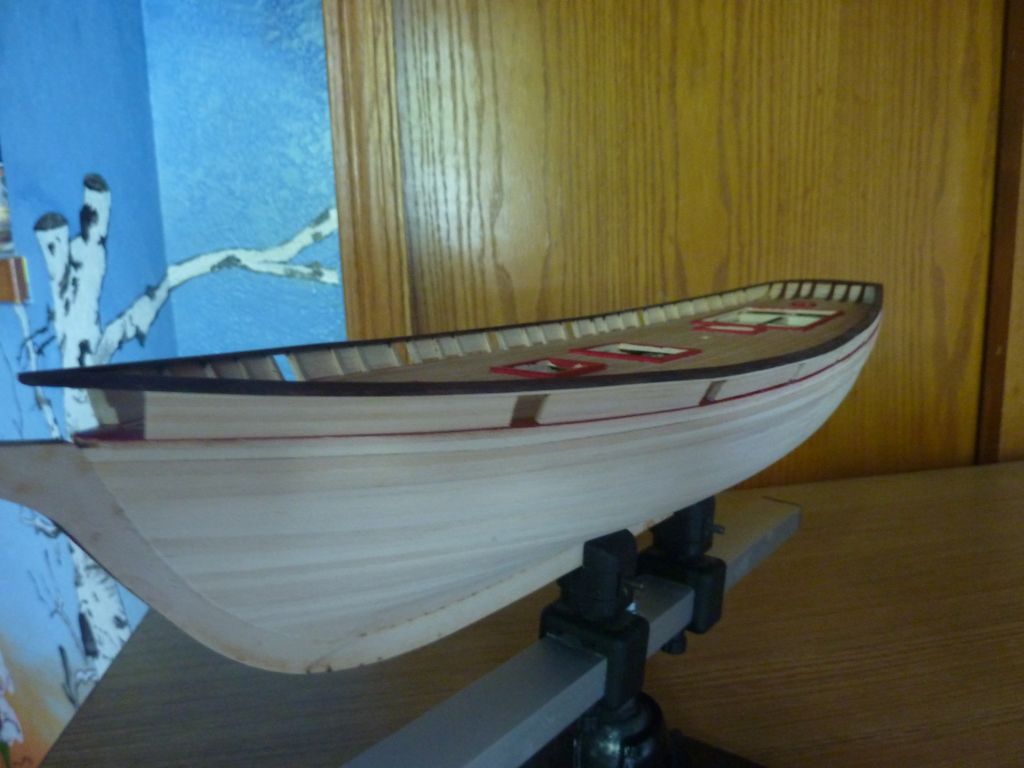
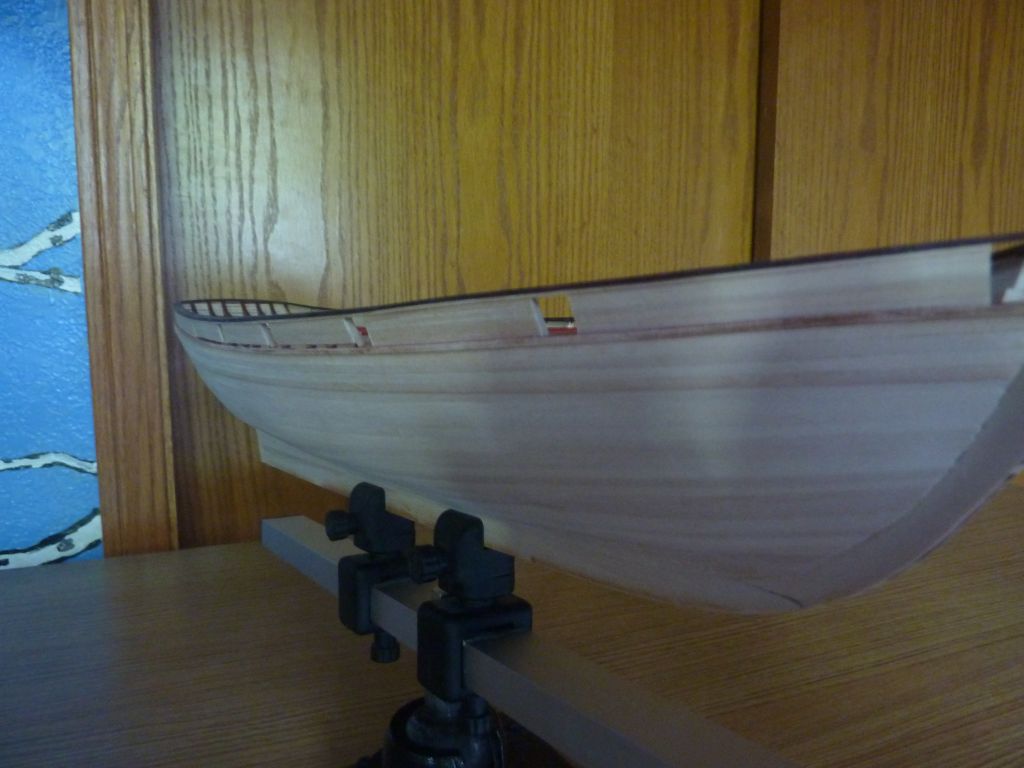
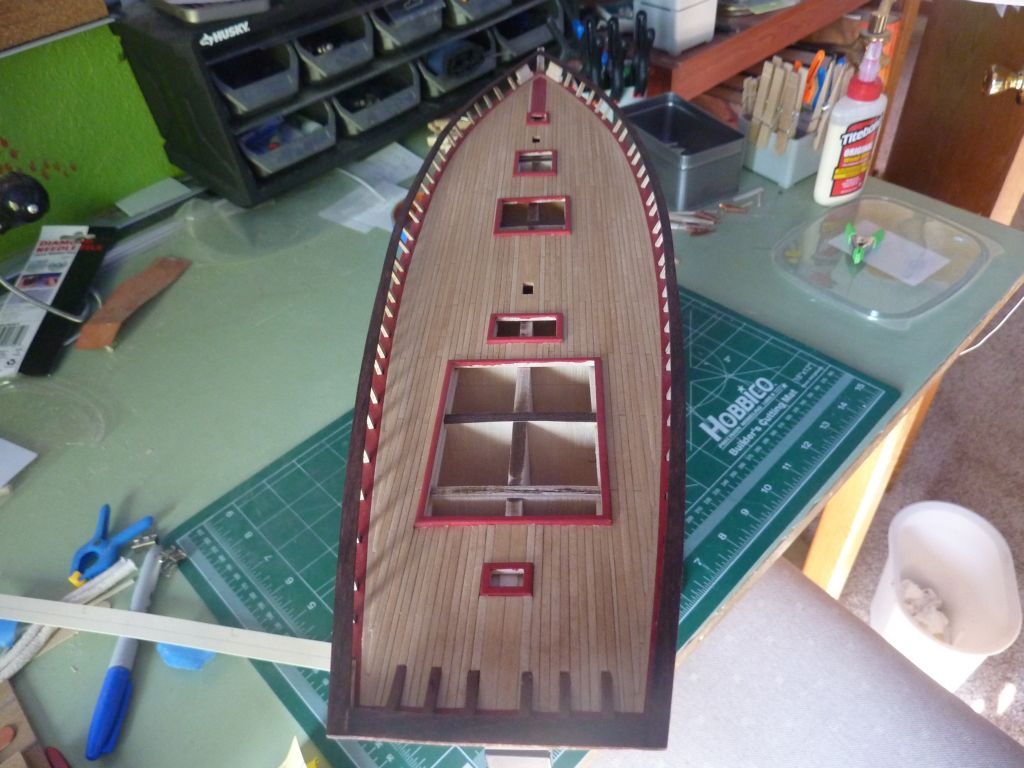
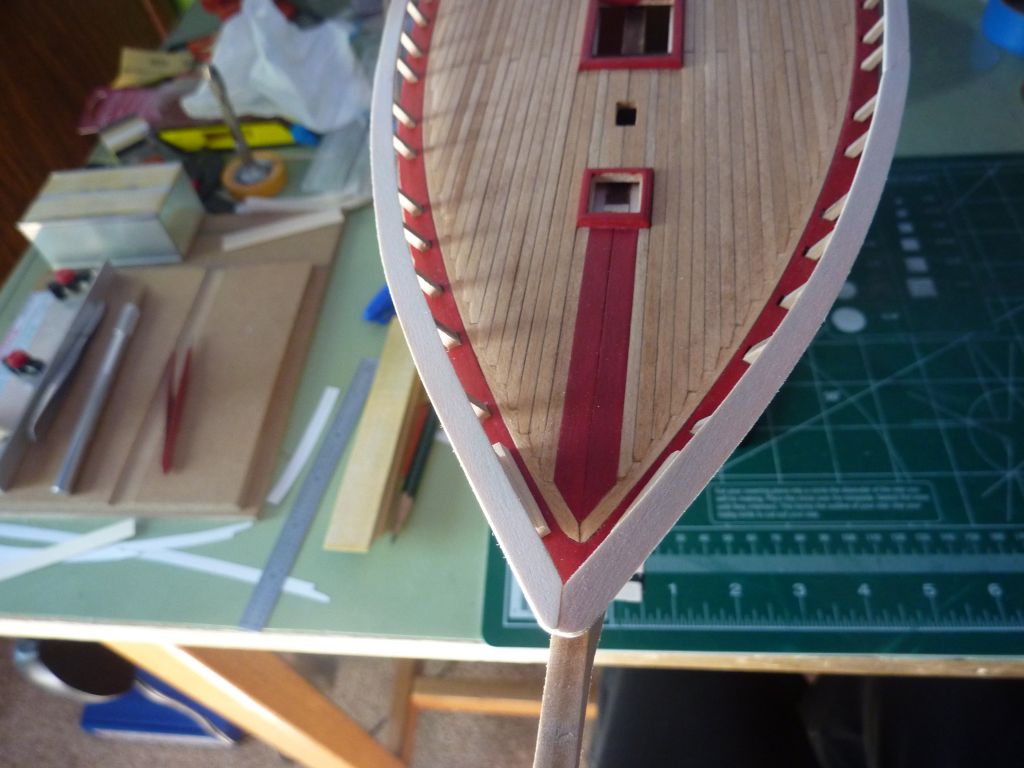
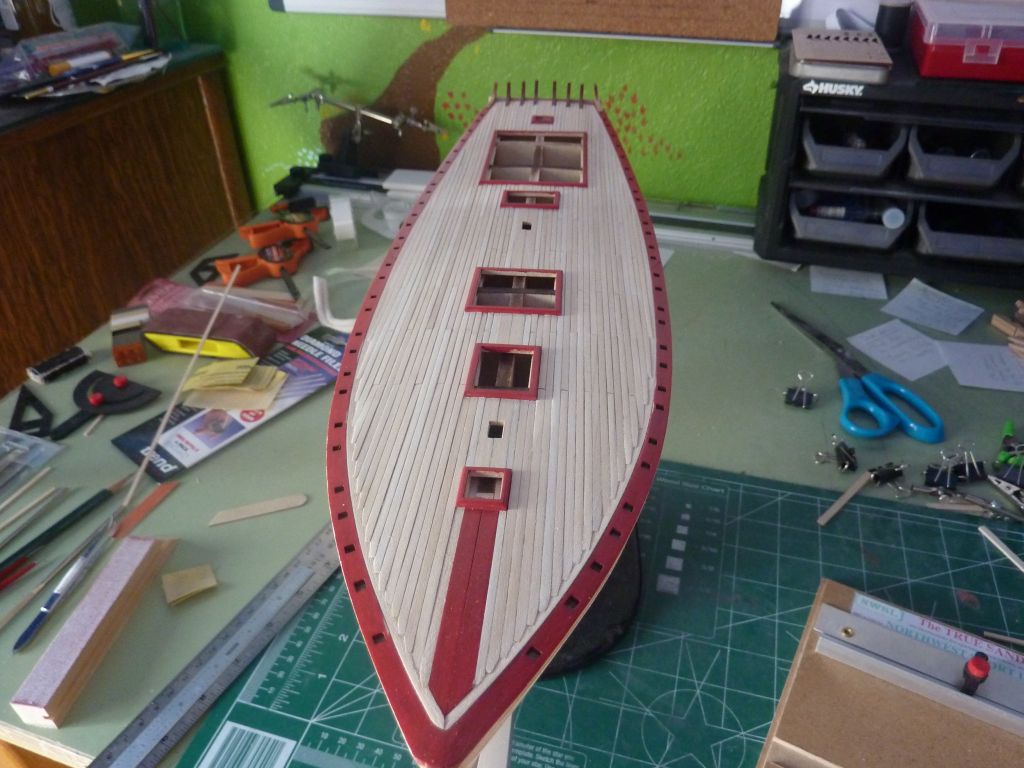
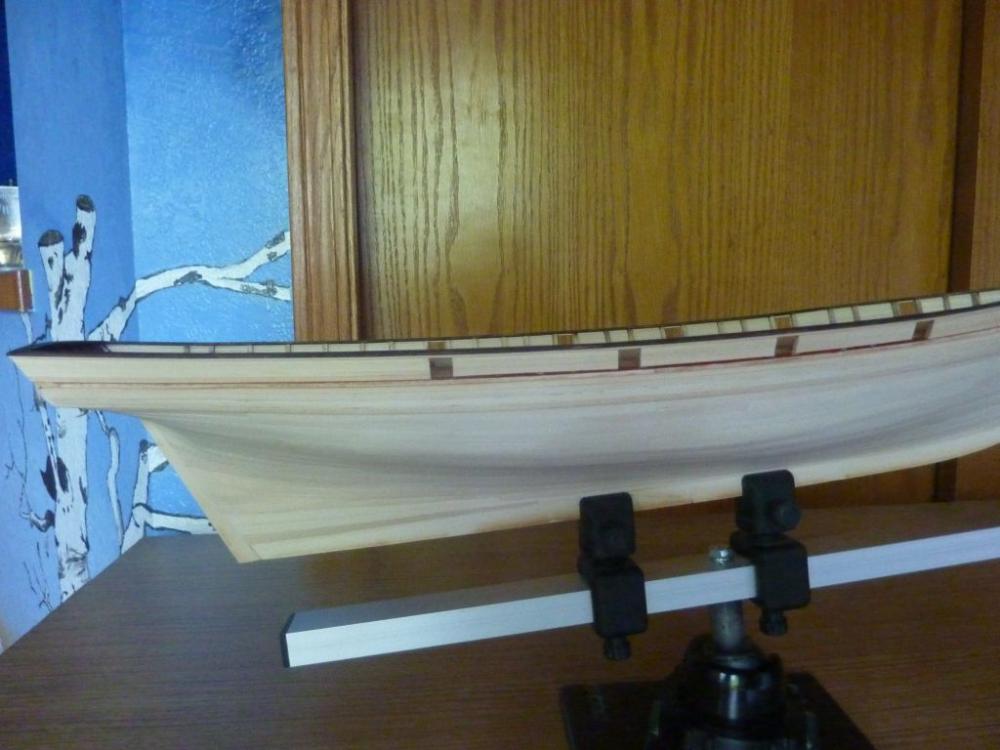
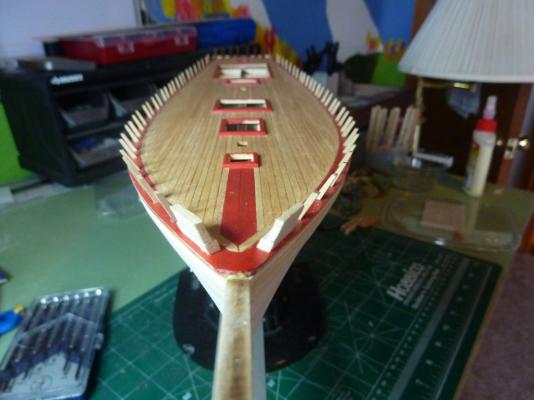
Ok, the deck has been stained - 2 applications of Ipswitch Pine and one of wipe-on poly. I used a small paintbrush to get into all the small areas and tried to keep the stain off the paint, mostly succeeding. You can see in the last picture a contrast between the unfinished hull and the stained/finished deck. I am seriously thinking of not painting the hull and staining instead. I know it's a break from the real ship, but it's a temptation after seeing how the deck turned out. I'll decide later. Andy.

-
Thanks, I'll check those plans again. I'll hope to stain this next weekend, so thanks for those tips. Andy.
-
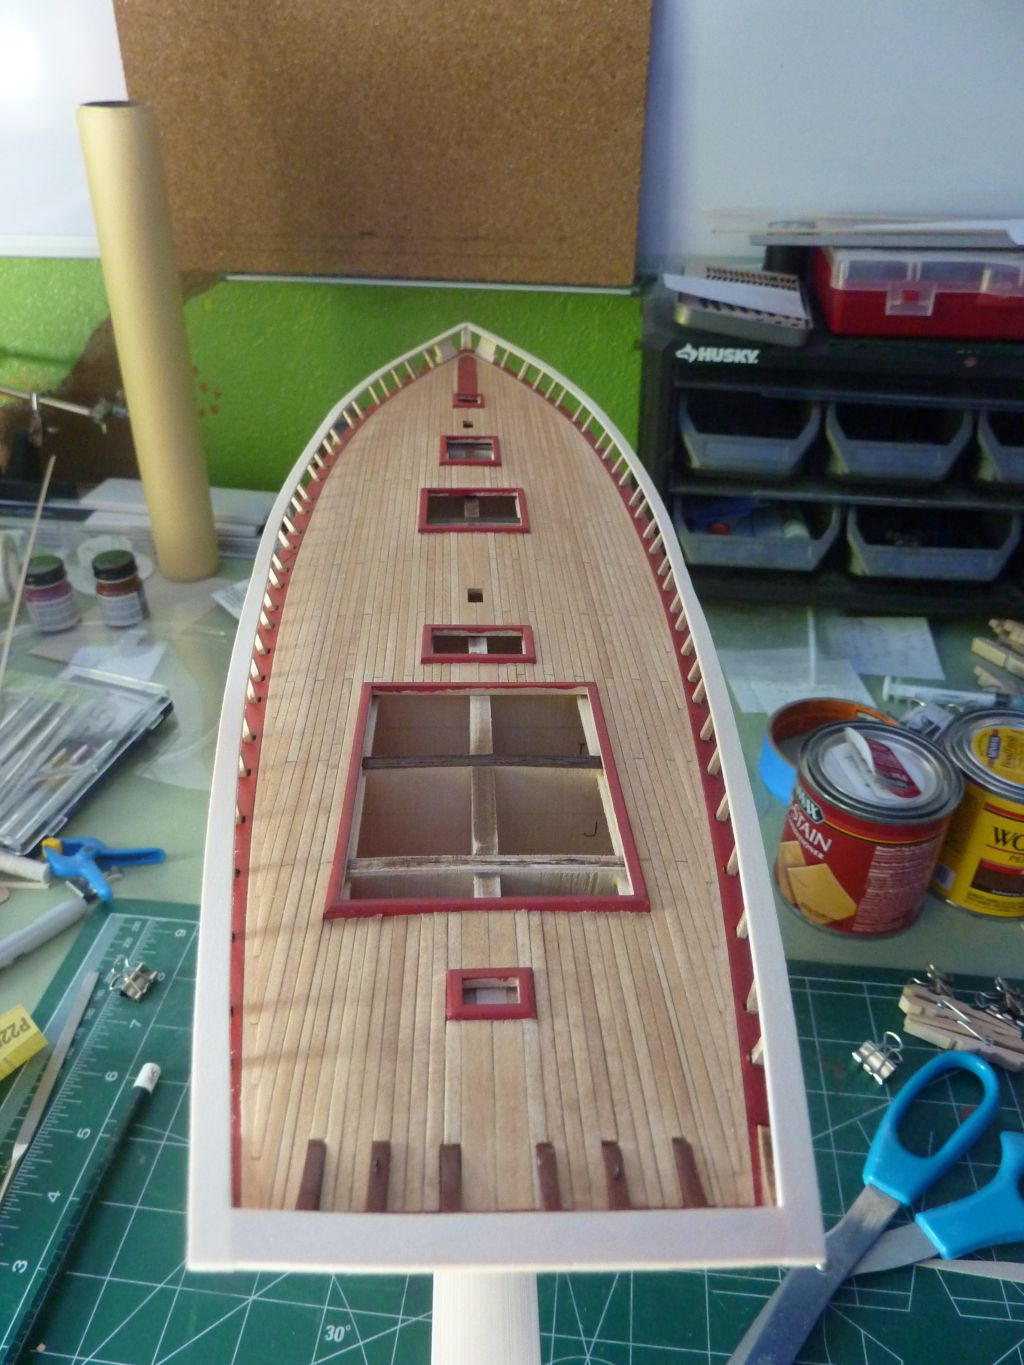
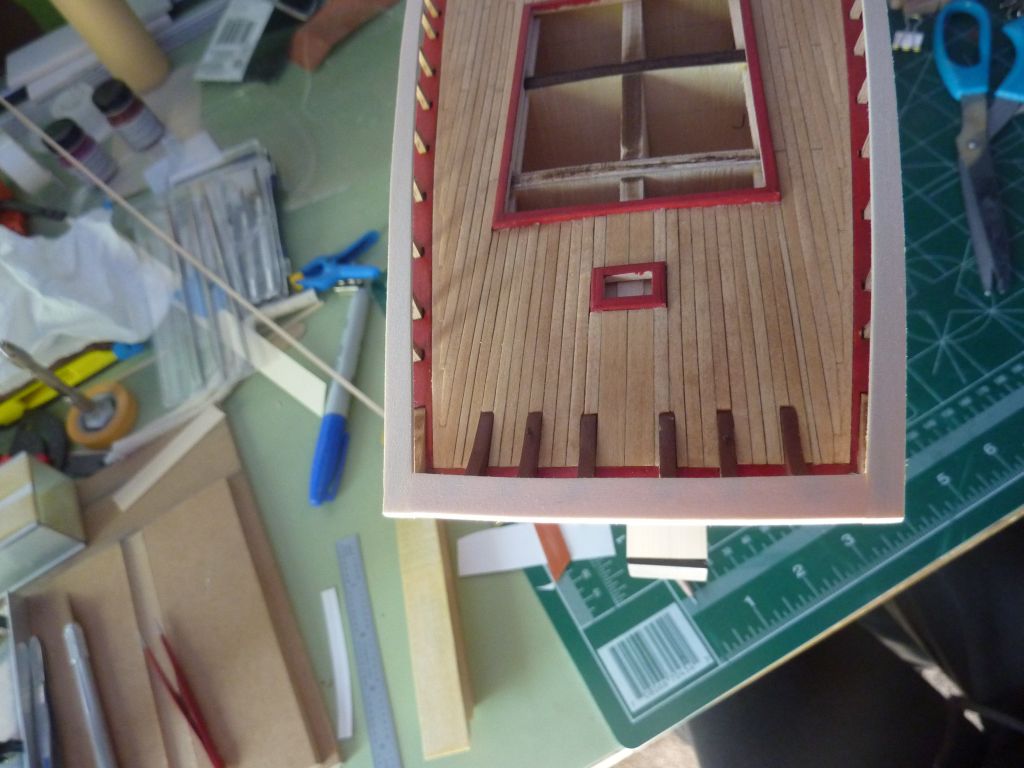
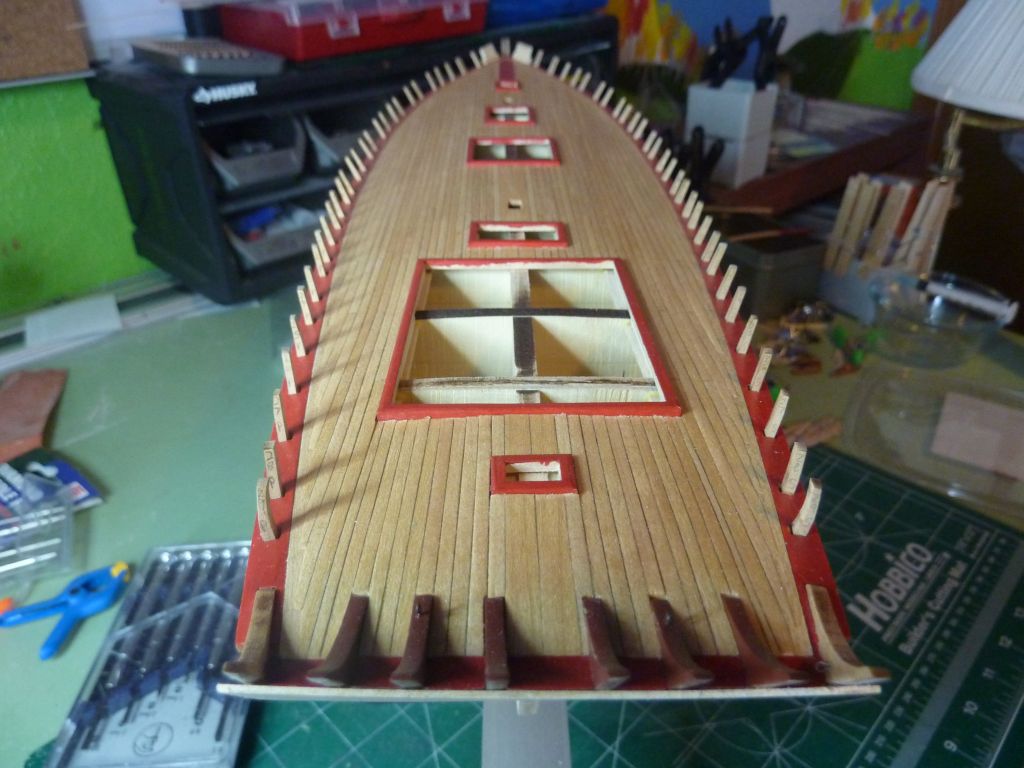
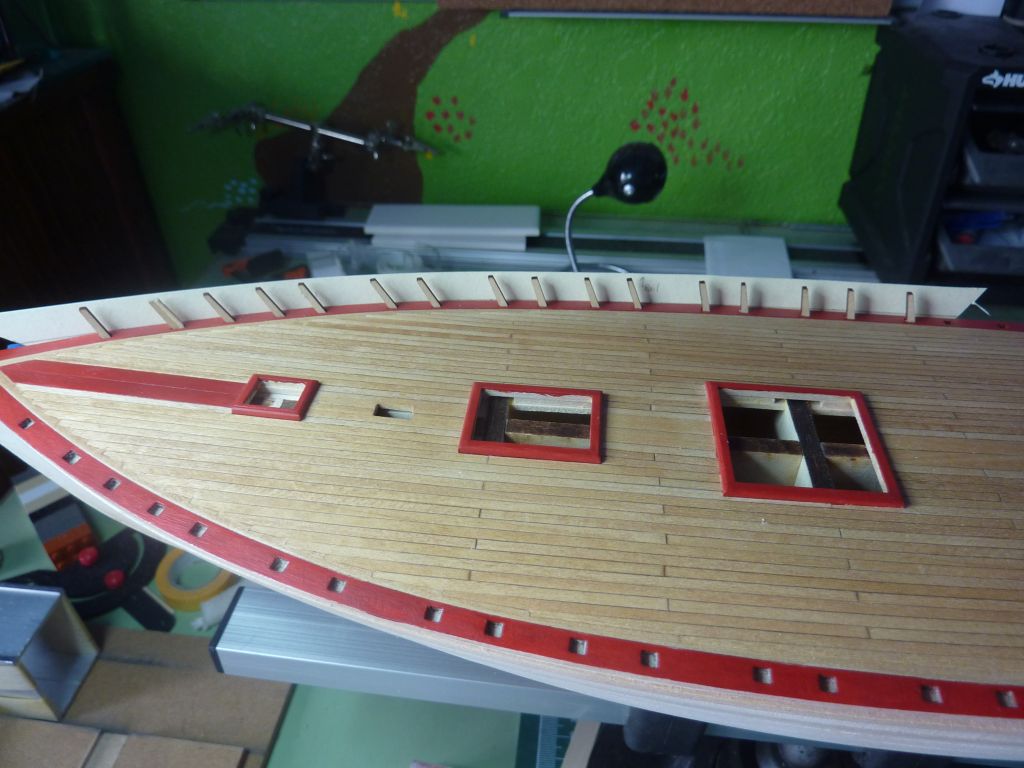
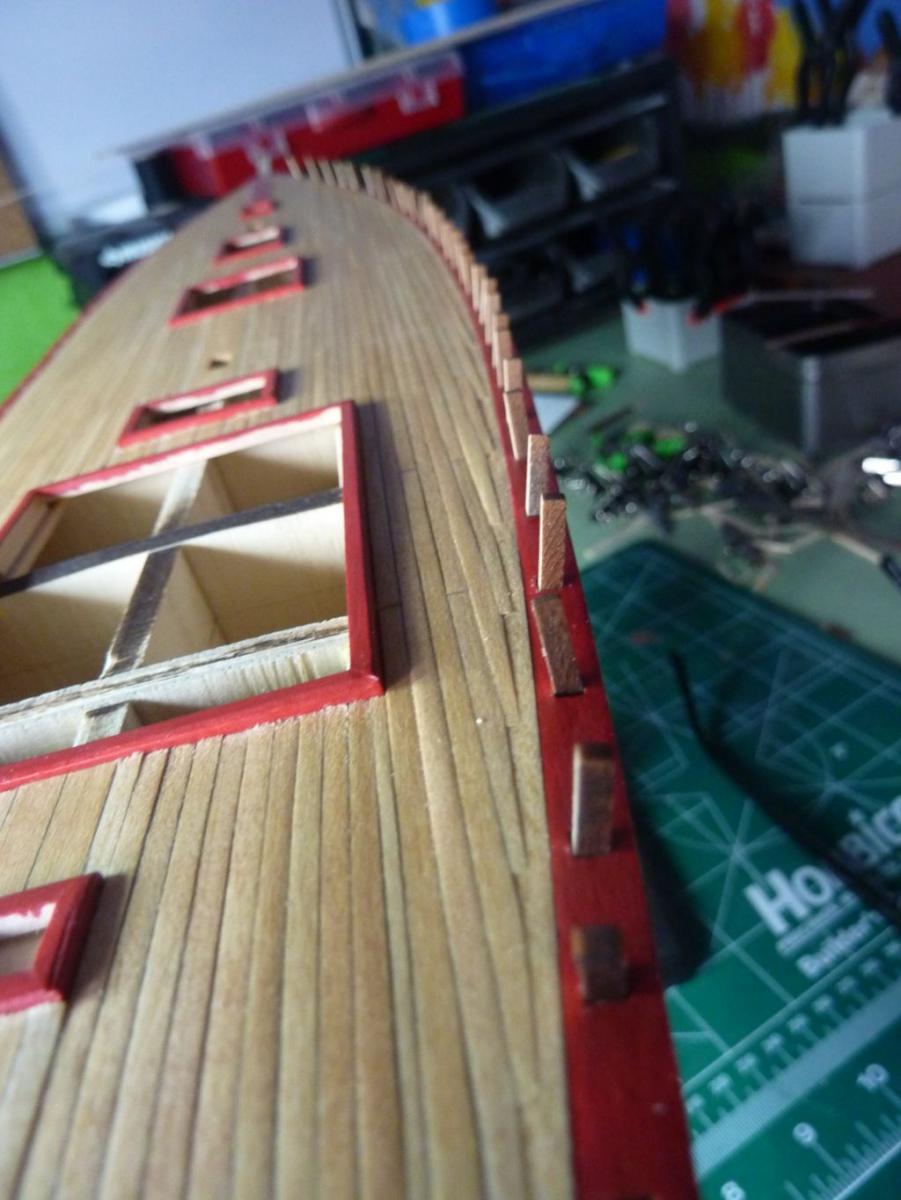
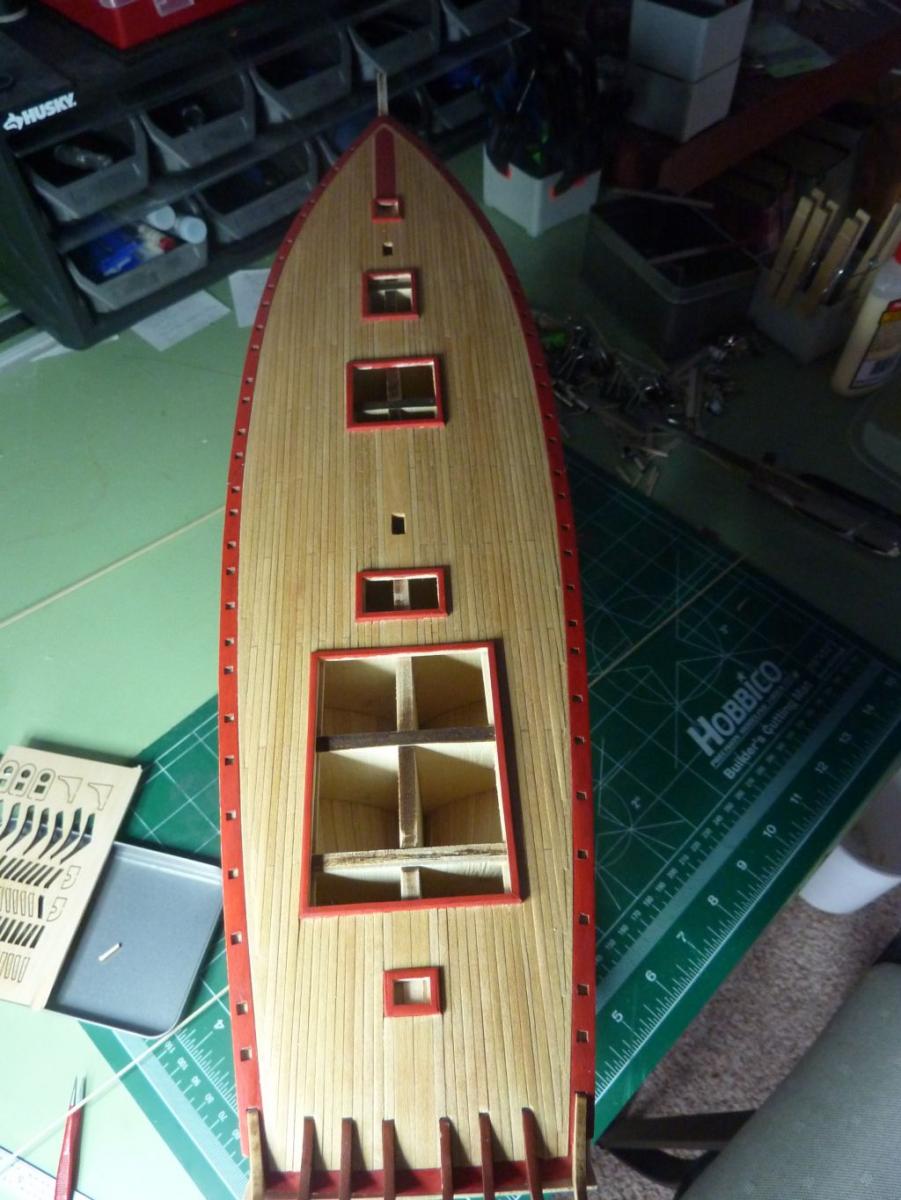
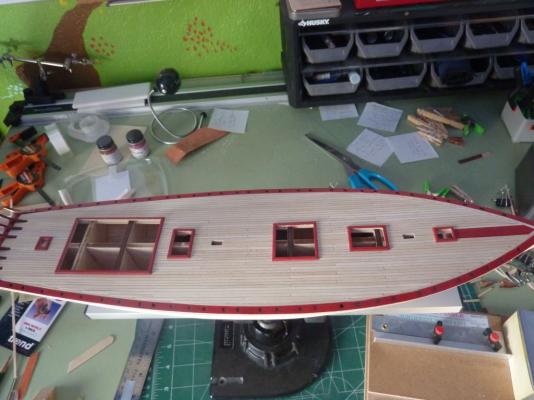
After a few weeks, I finally finished the deck planking. Overall, I found it fairly straightforward - there were issues with my deck planks not all being the exact same width, so when planking around the coamings, things got out of sync. Also, the nibbing notches were consistently difficult - some came out very good, others needed filling or other adjustments. The planks were sanded prior to installation, but not stained. I used a pencil to mimic the caulking, to reasonable effect. There are a few uneven planks, but I'm not sure how to fix them - if I sand too aggressively, I'll erase the pencil caulking marks. Also, a little red paint touch up will be done, likely after staining. Speaking of staining, I'm looking for advice on order and technique - I plan on putting a pre-stain conditioner on first, then use a Minwax oil-based stain. (Ipswitch Pine, 221) Are there issues with gluing the rest of the deck furniture down over an oil based stain? Should I apply a wipe-on poly after the staining? I need to work the stain around the waterways and coamings - what's the best way to apply it tight spots? Paintbrush? I also need to add some thicker deck planks over the windlass section, should I do that before or after staining? - I guess I'm concerned about glue still, but any advice on this is most welcome. (I feel most of the builders here know this stuff intuitively, but no advice is too small for me - I don't really have any experience with this at all!) Thanks in advance. Andy.


-
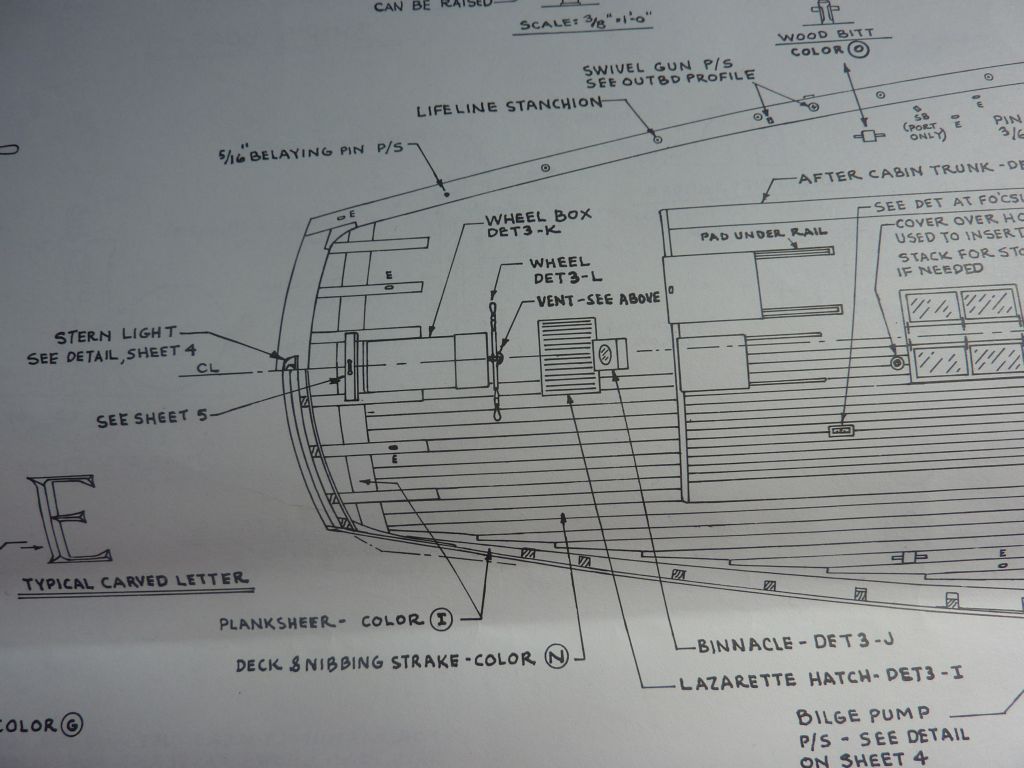
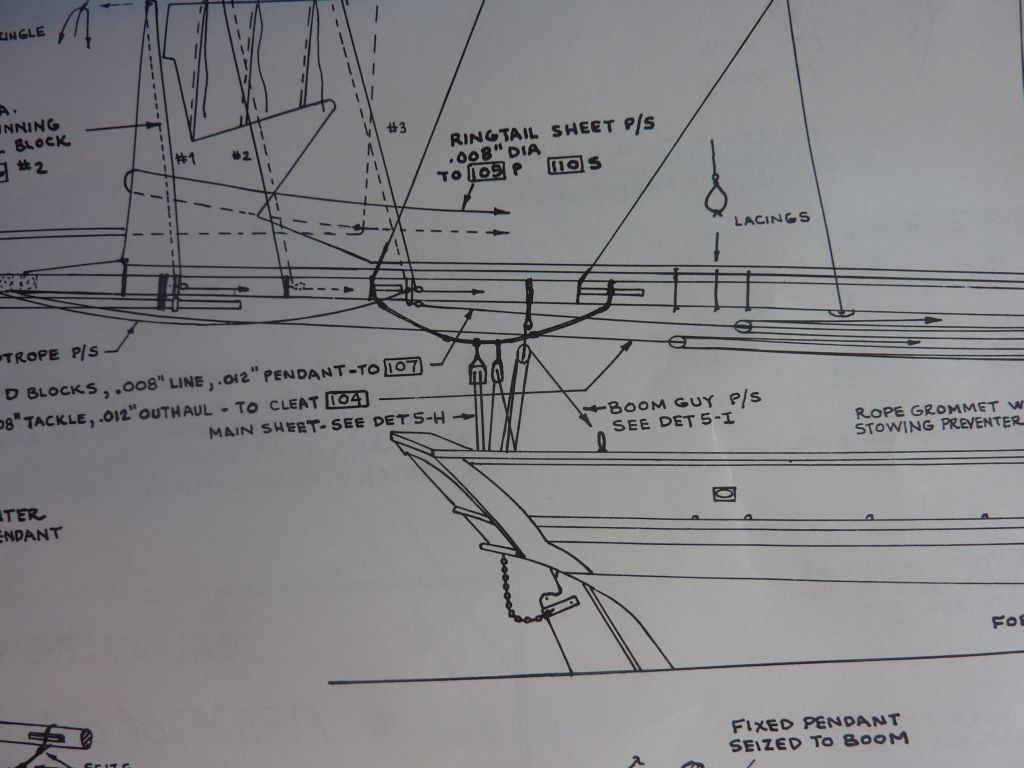
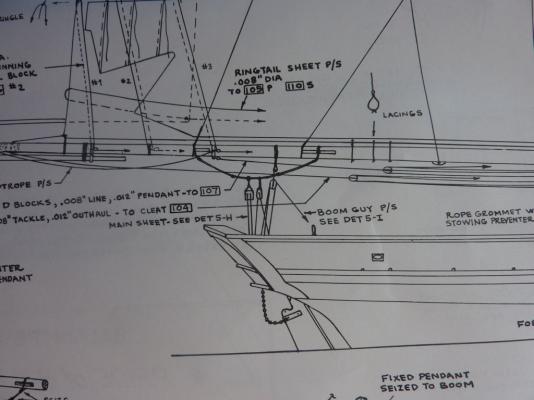
This is a followup to jcoby advice to install the port/starboard eyes for the boom. I've look at the plans, it seems that those eyes go on the railing and are not at deck level. Here's a photo of the plans: There is also a side view on sheet 5 I think that clearly shows them on railing: Maybe I'm missing something? My deck is finished planking - see next post for photos, and before I continue I want to make sure of this if I need to make things easier in the future. Andy.

-
Hi jcoby, thanks for that advice - I will need to look on the plans for those 2 eyes. After deck planking, I was planning on working on the stanchions, bulwarks and railing above the deck. So, putting these eyes in prior to that makes sense as the deck is wide open right now. I can't imagine doing the deck planking - especially the nibbing work, after the bulwarks are installed - it's hard enough to get a knife at the nibbing plank as it is now, much less if the bulwarks are in the way. Andy.
-
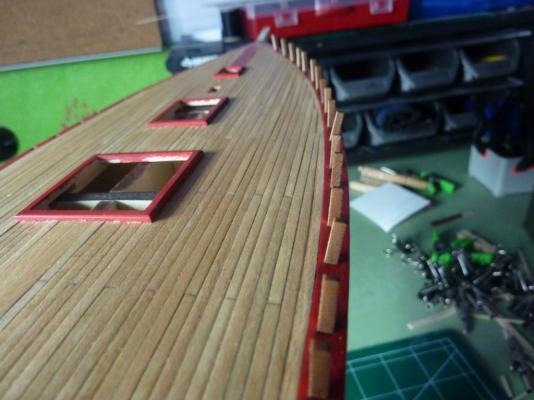
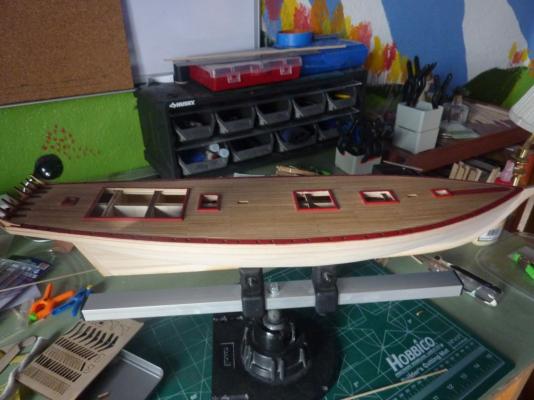
Making more progress on the nibbing of planks: And this is how the ship stands now - planking proceeding: Andy