


AndyMech
-
Posts
363 -
Joined
-
Last visited
Content Type
Profiles
Forums
Gallery
Events
Posts posted by AndyMech
-
-
To finish off the gun deck, I added the pumps. These were blackened, mostly successfully but I find the black tends to rub off pretty easily, leaving shiny bits. That happened as I assembled the pumps - putting the rods through the holes. I used a bit of touch up paint to hide the worst of the scraped off bits.

-
I'm a little behind in the updates, so I'll post a couple of replies to get caught up on the progress.
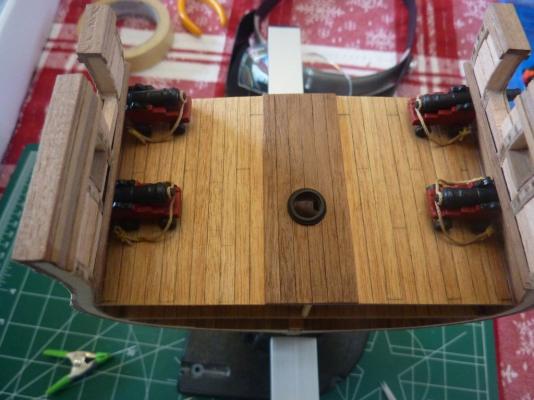
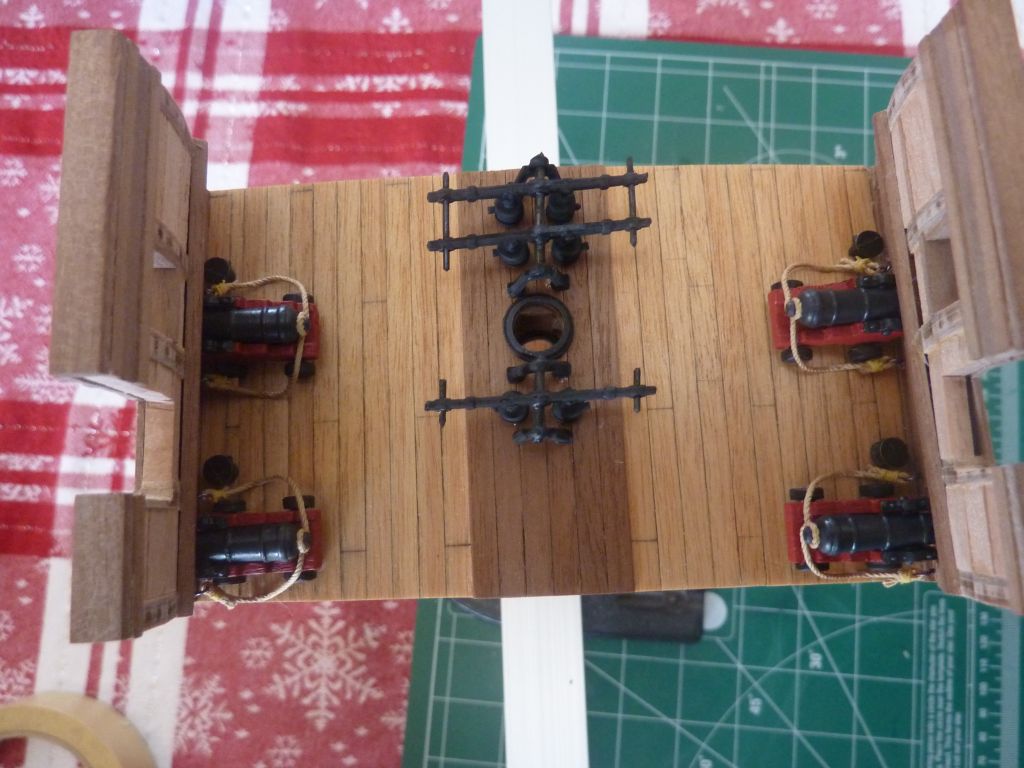
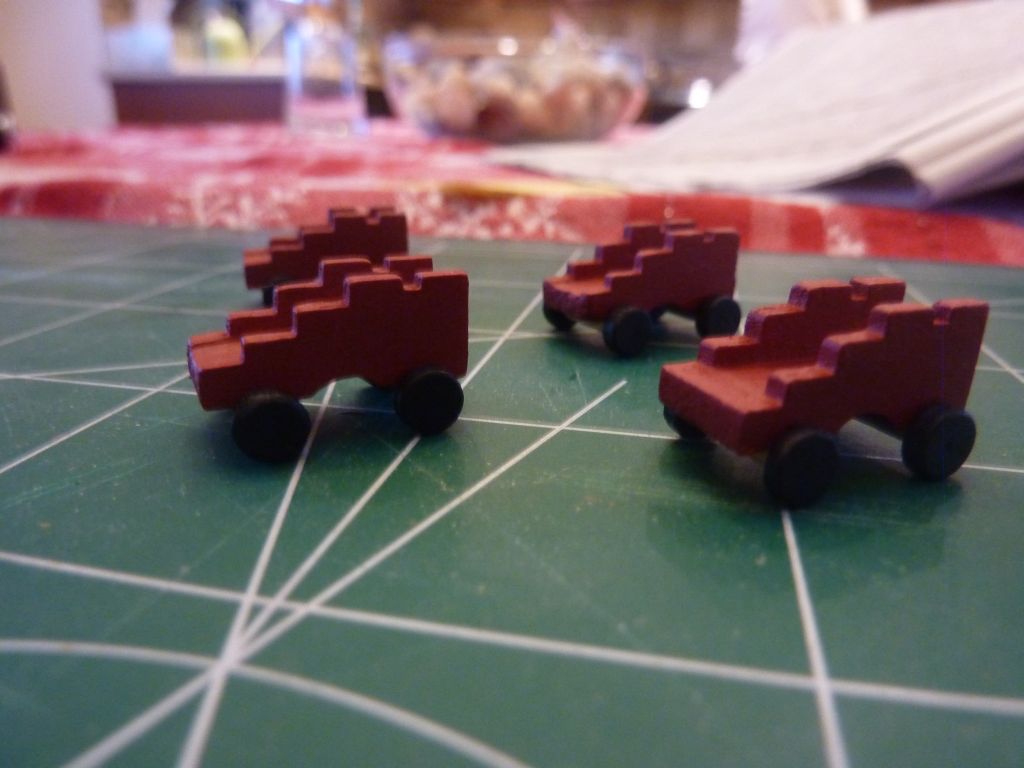
I had finished the gun deck planking and added the mast support ring. Next up were the cannons/carriages.
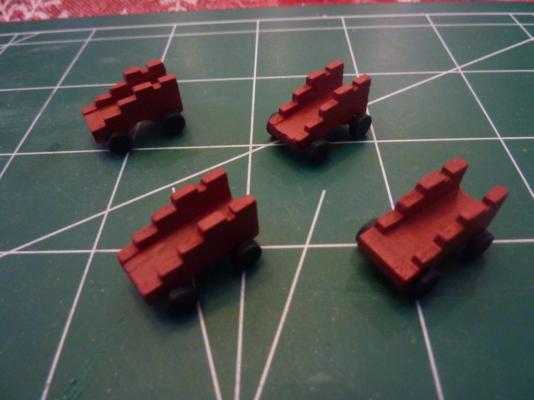
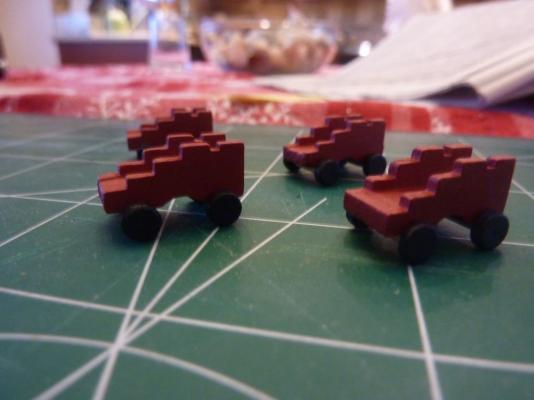
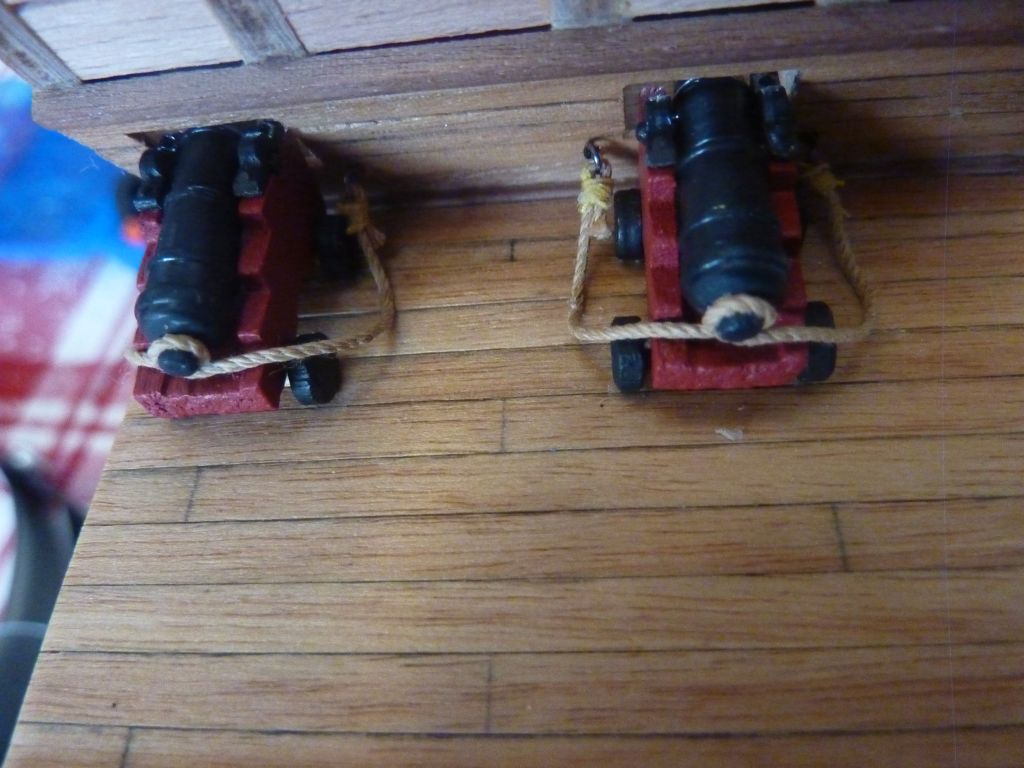
I deviated from the instructions a bit. First, I painted the carriages red, like on my Revell Constitution. I also decided to add breech ropes, but not pulleys. At this smaller scale, I didn't feel I had the skill, nor the model have the space to add both. I used a large tan thread that the kit intended (I think) for the shrouds. Shrouds should be black, so I ordered some nice thread from the Syren ship co. That left this nice tan for the cannon breechings.
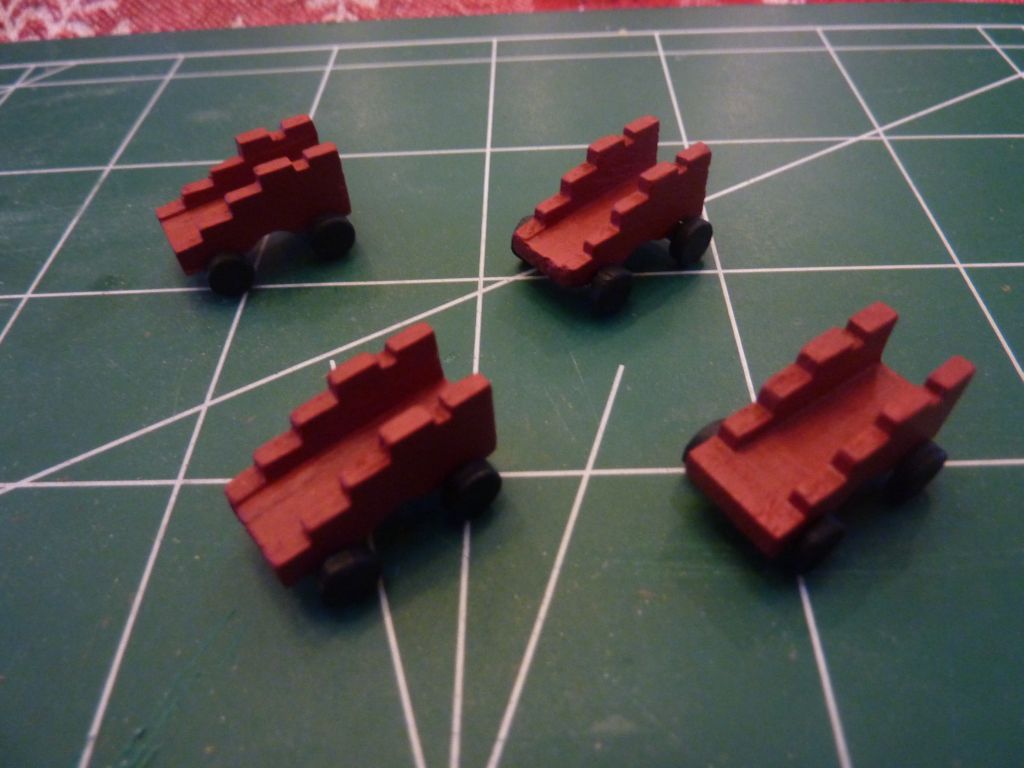
Also, the kit was short 4 of the wheel assemblies for the cannons, so I fabricated them from some dowels. Once they were painted black, I doubt anyone can tell.
The cannons themselves, I attempted to blacken, but they utterly failed - I'm guessing they are aluminum or steel. I sanded off the lousy blacken attempt and just painted them.

-
Wow, it's really been a long time since I last updated. Holidays, vacations, illness (a really bad cold) have all prevented my progress. But, I'm getting back to it.
First, I noticed that I had forgotten to put in the deck supports for the 2nd deck, and when I test fitted them, the barrels I had so carefully glued in were in the way. So, I learned how to de-bond my PVA (Titebond) with a little isopropyl alcohol, I was able to remove enough barrels to get them installed.
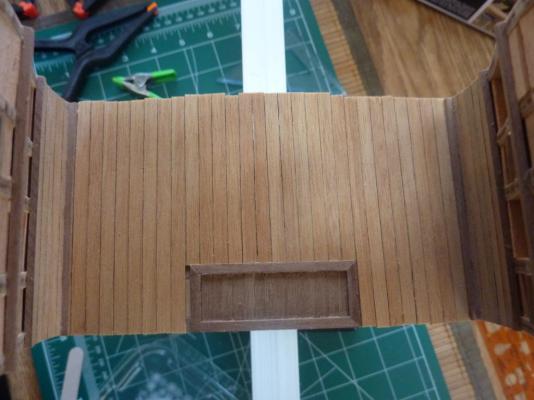
Next, was the deck planking. The center is planked with 6 2x4 (mm) walnut planks and another mast hole needs to be created. I did it half-by-half, carefully laying the first plank to make sure it's centered and orthogonal, then using that as a guide for the other.
After the first half circle was carved out and mast test fitted, just repeat on the other side.
The rest of the planks are then added. Unlike the lower deck, I wanted to add the "butt joints", but like I said in my earlier post, I was concerned about doing it exactly on the framing pieces as they didn't line up and I didn't want to have a joint over open space.
So, I merely used pencil to mark the lines after deciding on the spacing pattern. I also chose to not do treenails after some debate (with myself anyway). I don't have a small enough drill bit, so I skipped that for now.

Next up, I'm planking the bulwarks and I added the mast ring supports. Those were a soft metal that I blackened. If you remember (and who would?), I had issues with flaking on my last blackening attempt, so this time I diluted the solution (1 part water, 1 part solution) and took more care cleaning the rings. It worked out so much better - no flaking in solution, and a nice even black color.
-
Interesting. Thanks for following, and I know there haven't been many updates recently.
I did plank the gun deck yesterday and will post an update soon. On this deck, I did add butt joint markings, in pencil rather than make the actual joints. The joints wouldn't line up with frames, so I didn't want to risk the structural integrity. You can judge hoe they look.
Update coming soon.
Andy
-
I found an easy way to melt the beeswax on my line was to simply fill a water glass with near boiling water. Coat your line with wax by running it over the wax cake, then run the line against the glass that's been filled with the boiling water. Beeswax melts at a low temperature and the water-heated glass is plenty hot enough to melt the wax into the line. With the scarcity of incandescent bulbs (at least in our house), this seems like an easy solution. Plus, you're not staring into a bright light or worrying about burning the thread with a lighter.
I did end up with streaks of wax on the glass, but it washes right off.
Andy.
- bhermann, pompey2, fnkershner and 1 other
-
 4
4
-
-
-
The table and chests will just rest on the deck, so there should be no stress involved. I was thinking of trying to use the same Titebond I use for everything else, just to avoid CA if possible, but wondered about it's adherence to the poly-coated deck. I put on two very thin applications of the poly, and can hardly tell it's there, except for the richer color of the planks. Do you think piercing the location and using PVA will work too?
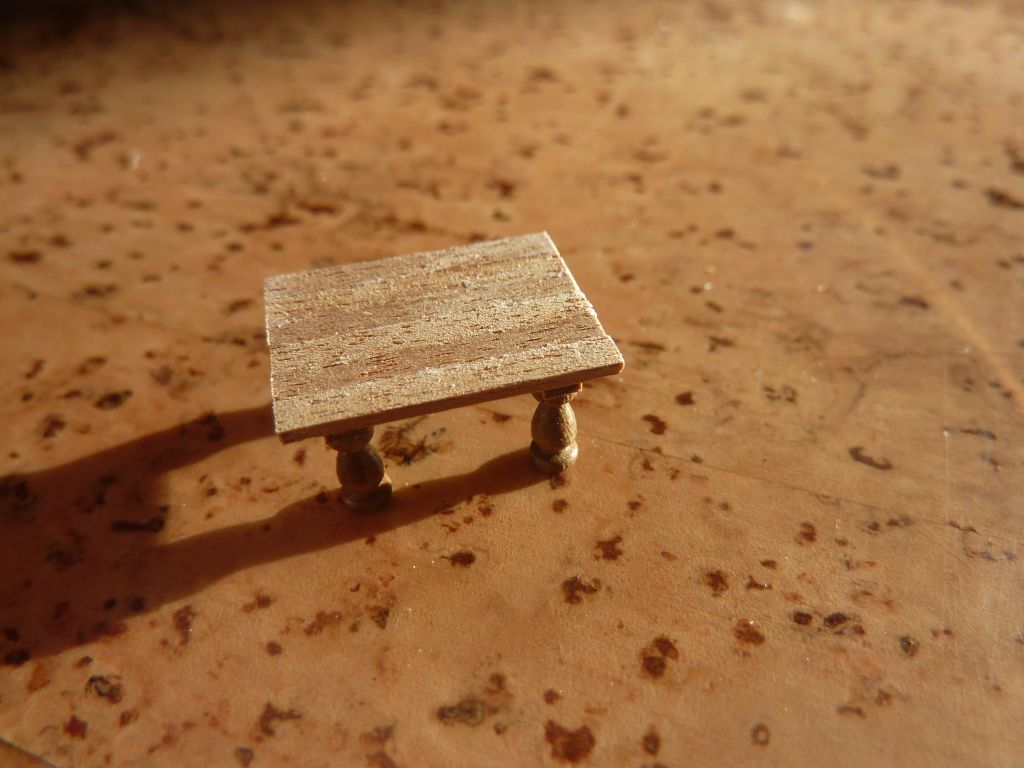
The table, for reference is about 18mm long, and it's legs are about 2mm in diameter. Very small indeed.
Oh, and thanks for the advice on the blacken - I've read about diluting, so maybe that will fix the flaking I've been seeing.
Andy.
-
Hi Dave,
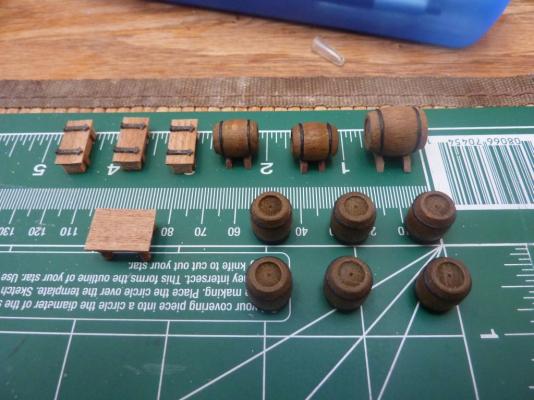
No, the barrels are part of the kit and came "pre-formed". All I did was paint the two hoops black for some contrast. The chocks I had to make from a strip of 1x4mm walnut - I sanded out the circumference, added a slight bevel and glued them in.
The hinges are a soft, white metal - I assume it's zinc? I've heard it referred to as "white metal" too. I had to snip the ends off and file it, and it's very, very soft.
Geoff, as for the blacken it - well, "blue" in my case, perhaps a scrubbing after the vinegar would have helped. I did scrub the rust colored stuff off with a toothbrush and re-soaked a couple of the pieces. I think the cleaning process was the culprit. If not, I will order some Blacken-It and see if that improves.
The hinges were nice to experiment on as I can always touch up with black paint and they're not too visible once installed on the lower deck.
Andy.
-
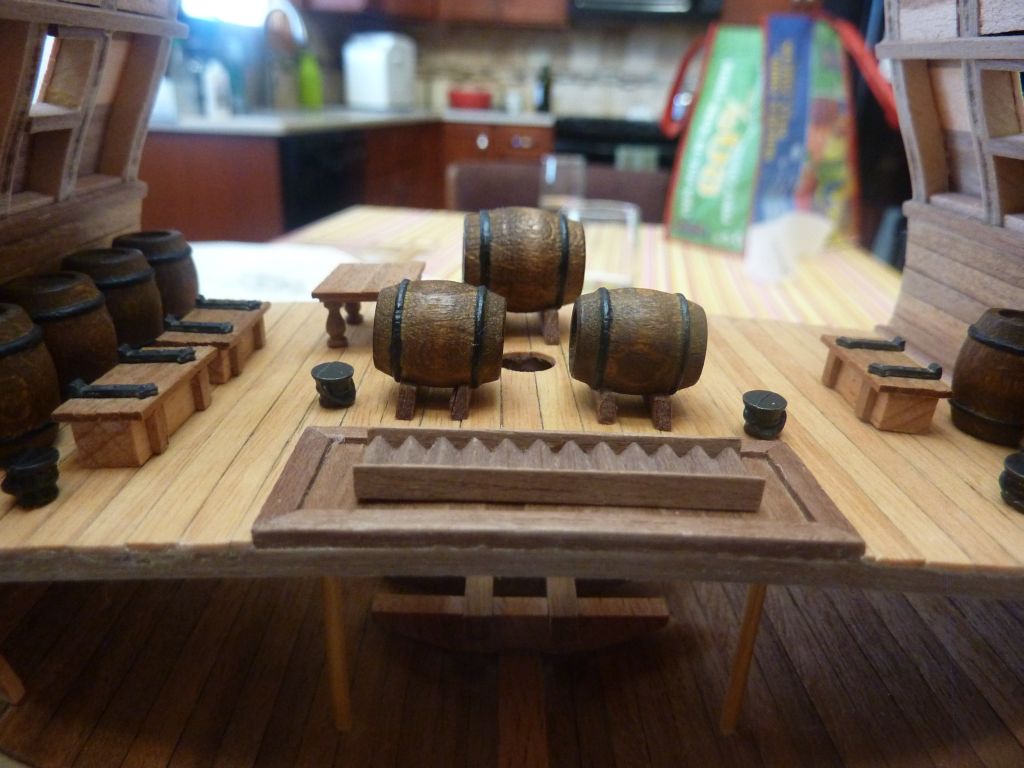
Ok, the next steps for me on the build are to prepare the furniture for the 1st deck. That includes a table, 3 chests, 3 barrels with supports and 6 upright barrels. I build the table first, painted the barrel hoops black and then did the chests.
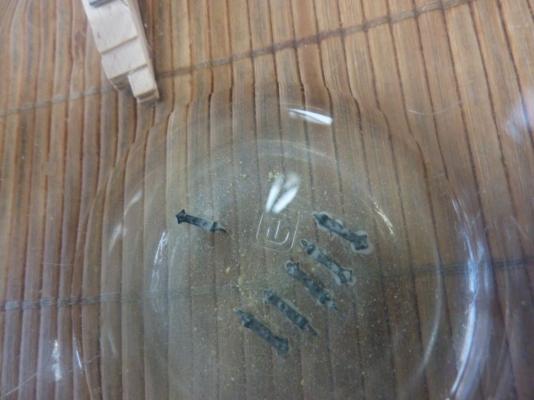
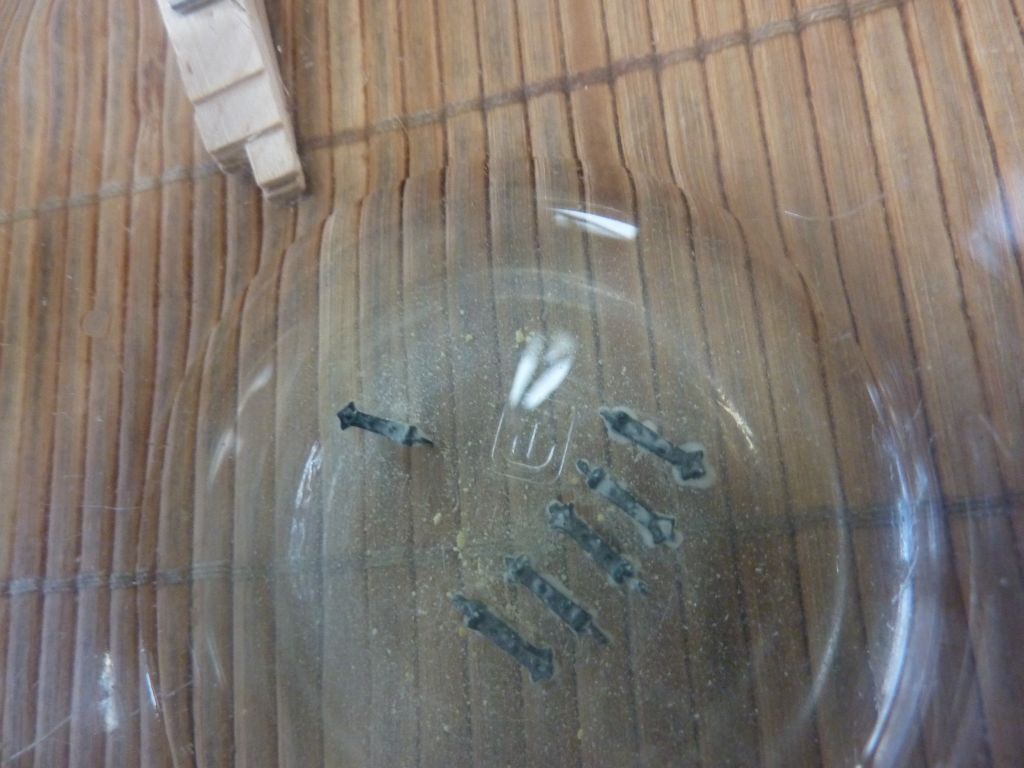
The hinges for the chests should be black, of course, so instead of painting the metal, I figured I would try blackening them. I found some Birchwood-Case gun blue at a local gunshop. I know it's for bluing steel, but I figured I would try it as it's the only stuff I could locally and didn't want to wait for an Amazom shipment.
It's ok stuff, but I wonder if their brass black or Blacken-It would work better? I soaked each hinge in some white vinegar for 10-15 minutes first, then about 20-30 minutes in the blacken solution, undiluted. These corrosive bits came off it (photo), so I wonder if it was cleaned properly, or that's just how it works?
Finally, I applied 2 coats of wipe-on-poly on the deck planking prior to gluing all these on. I'm now waiting for the poly to dry before I install everything. Any thoughts on glue, since I've treated the deck with poly? Wood glue ok or should I use CA instead?
The table caught the sun just right last week:

My blackening purchase:

In the bath:
Final hinges on their chests:

The assortment of stuff to glue on:
Andy.
-
I built the kit "as is" with the exception of the eyebolts. I do think they could be used, you would just have to be a little more careful when tying lines off so as not to break them. Making wire replacements is pretty easy though, should you choose to do so.
I also used the kit ratlines, and I think they are just OK. Real shrouds and ratlines would look much better, and be pretty easy, if tedious, to install. I had very few issues with the deadeyes, just be super careful gluing them together.
I think the only other thing I replaced was the hammock netting - you can check my log for that detail.
Andy.
-
I just went back and found the link from Augie that you mentioned. In my OWN BUILD LOG! I need to really start paying closer attention.

I do appreciate the advice and tips - like putting a piece a wood below the one I'm cutting - no advice is too obvious for me. Total neophyte.
Andy.
-
Thanks for the tool links guys. I must have missed that post from Augie (even did a search before I asked the question). Very useful to me, as I have none of this stuff and struggle to get nice cuts. Combining these miter ideas with the true sander sounds like it'll make my life easier for not much expense.
I've got an on-going bookmark folder of tool links which makes it easy to hint, hint to anyone at home willing to buy my Christmas gifts.

Andy
-
I'll bite - which one is that (looking for tools!)?
Andy.
-
That's a great explanation - and I went back to look at your log and I understand better how you did it. My mast was mortised as well, but using the template in combination with starting the hole a little small worked well for me. I also found (but didn't photograph) a plastic circle template of exactly the right size to help make the hole a perfect circle, which I could not do free-hand.
Your technique of doing half at time is nice as the mortise can still be seen to make sure all is being lined up - that's a nice benefit.
Thanks again,
Andy.
-
That really is terrific Rob. I, too, am a "kitchen table" modeler so understand exactly what you said about having to put everything away each session.
Glad you stuck with it - the result is worth it.
Andy.
-
I found that one of the big advantages of using the white glue and water mixture on my knots is that it was super easy to undo them later if I made a mistake. Just add a little water and the they come undone. I'm not saying you have to re-do them, but if you just glued the ends tied at the ship side, you might be able to.
Your ship is looking good though - keep up the good work.
Andy.
-
Hi Wes,
Thanks for the tip -- I did look at your log before doing mine, but I didn't quite get how you did it, so thanks for the explanation. If I understand you correctly, you glued some planks edge-to-edge and probably longer than you needed, then cut out the semi-circle to fit the mast? Then, when the section is fitted, you can sand the ends to fit?
I should try that on the next deck perhaps - I have two more decks to plank, so a different technique for all, eh? The next deck will have no obvious reference point, and the center is planked with different sized wood than the ends, your technique will probably work better.
I really need to get one of those true sanders - my current method just isn't getting stuff true. And it will only get worse if I have 3cm of edge to true up.
Andy.
-
You make a good point, Augie. I don't know why I saved it - probably for the same reason I save all but the tiniest splinters of wood from this kit. I'm not generally a hoarder, so it's a mystery to me.
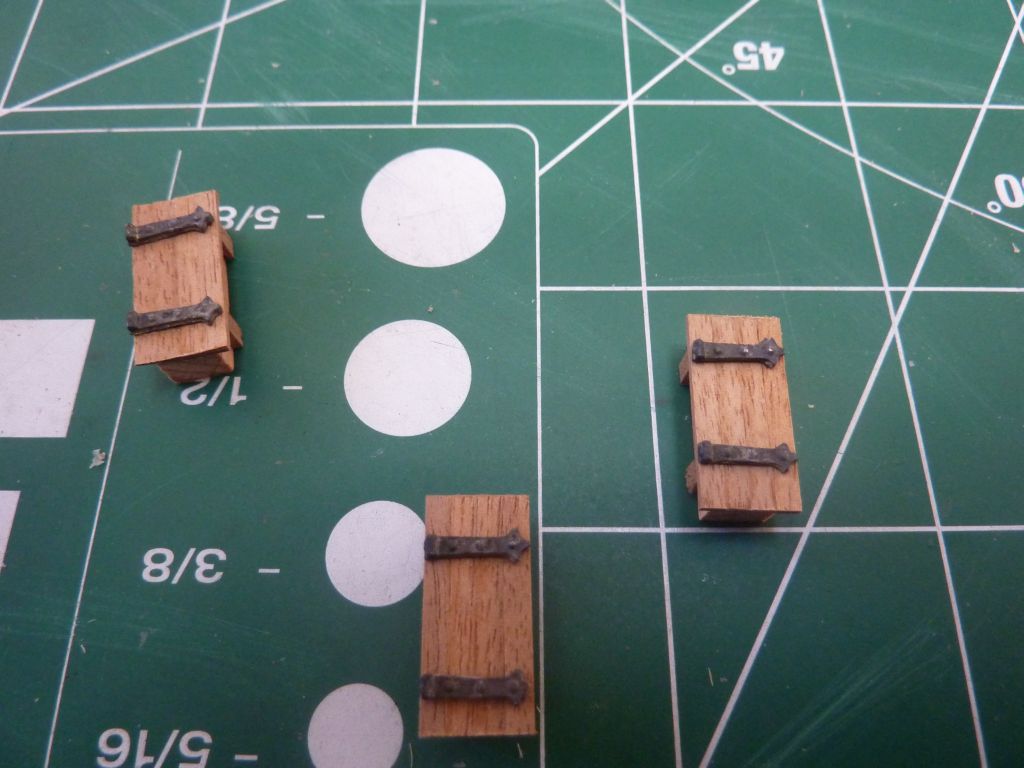
Looking ahead in the kit, I noticed I have to build a little table soon, which needs 4 legs. These are provided in the kit as 4 6mm curved supports. The top deck pinrail also uses these same shaped legs, but are supposed to be 8mm tall. Looking through the kit, I find about 15 6mm supports, and zero 8mm ones. Has anyone else found this issue with this kit? Any thoughts on how to build the pinrail then? I don't have tools to make my own curved supports. One thought would be to glue something to the 6mm ones to make them taller, but that may just look weird. Or I just use them at the shorter height, I guess.
6mm at 1:93 scale is about 55cm or 21 inches.
8mm is 77cm or 29 inches.
What would be the height of the pinrail on the real ship?
Andy
-
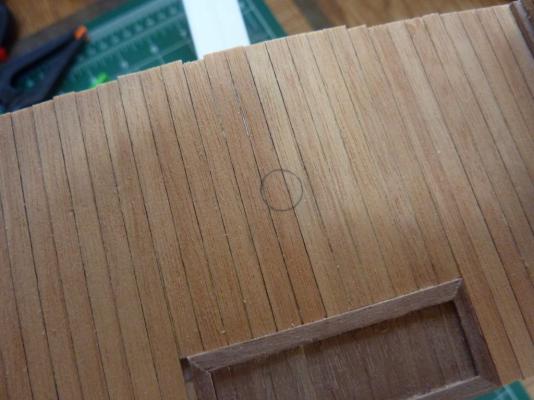
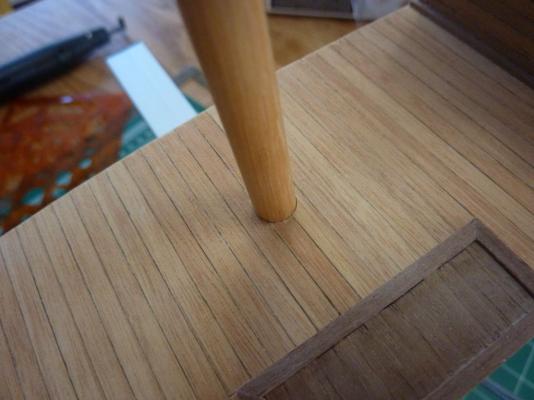
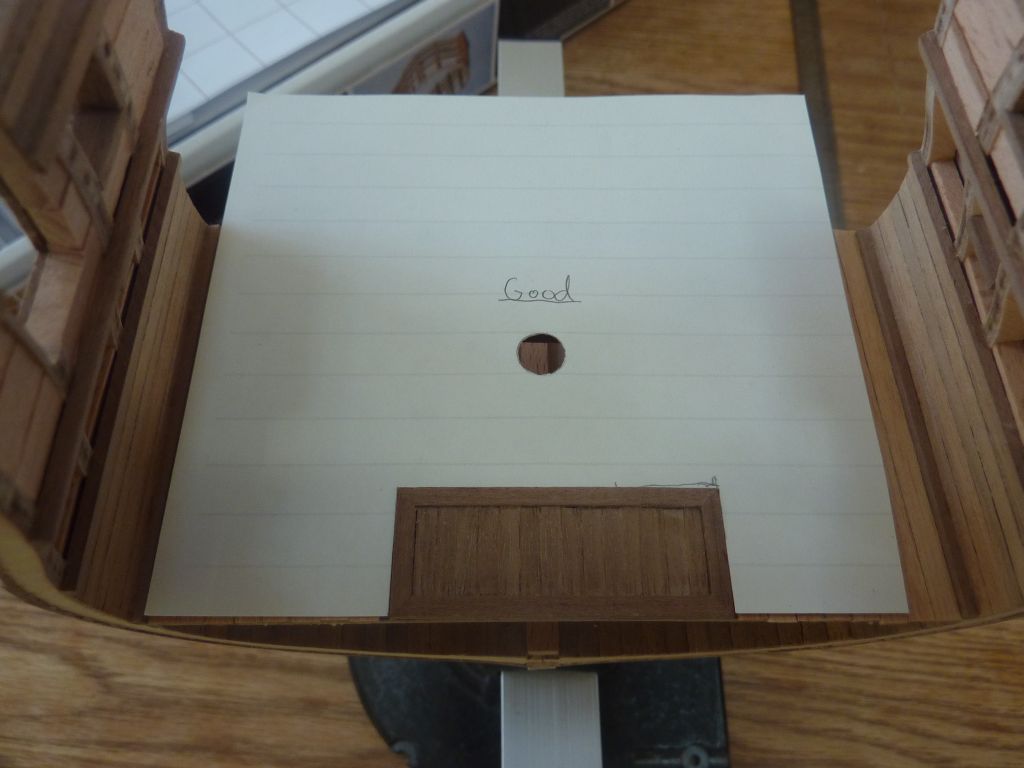
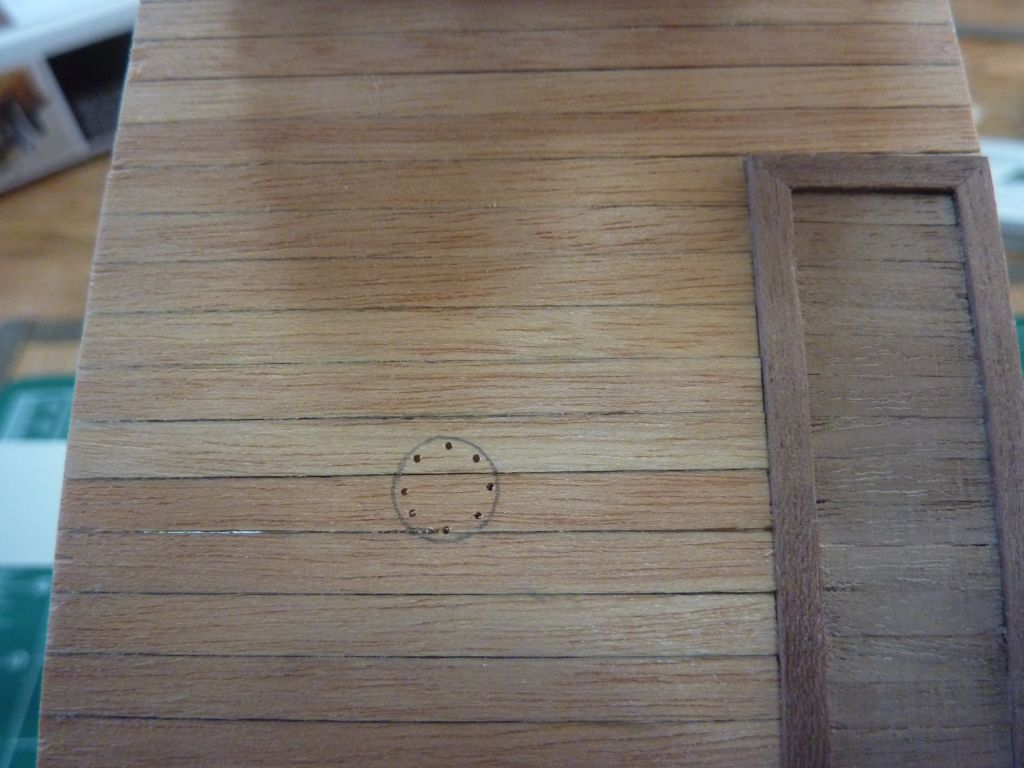
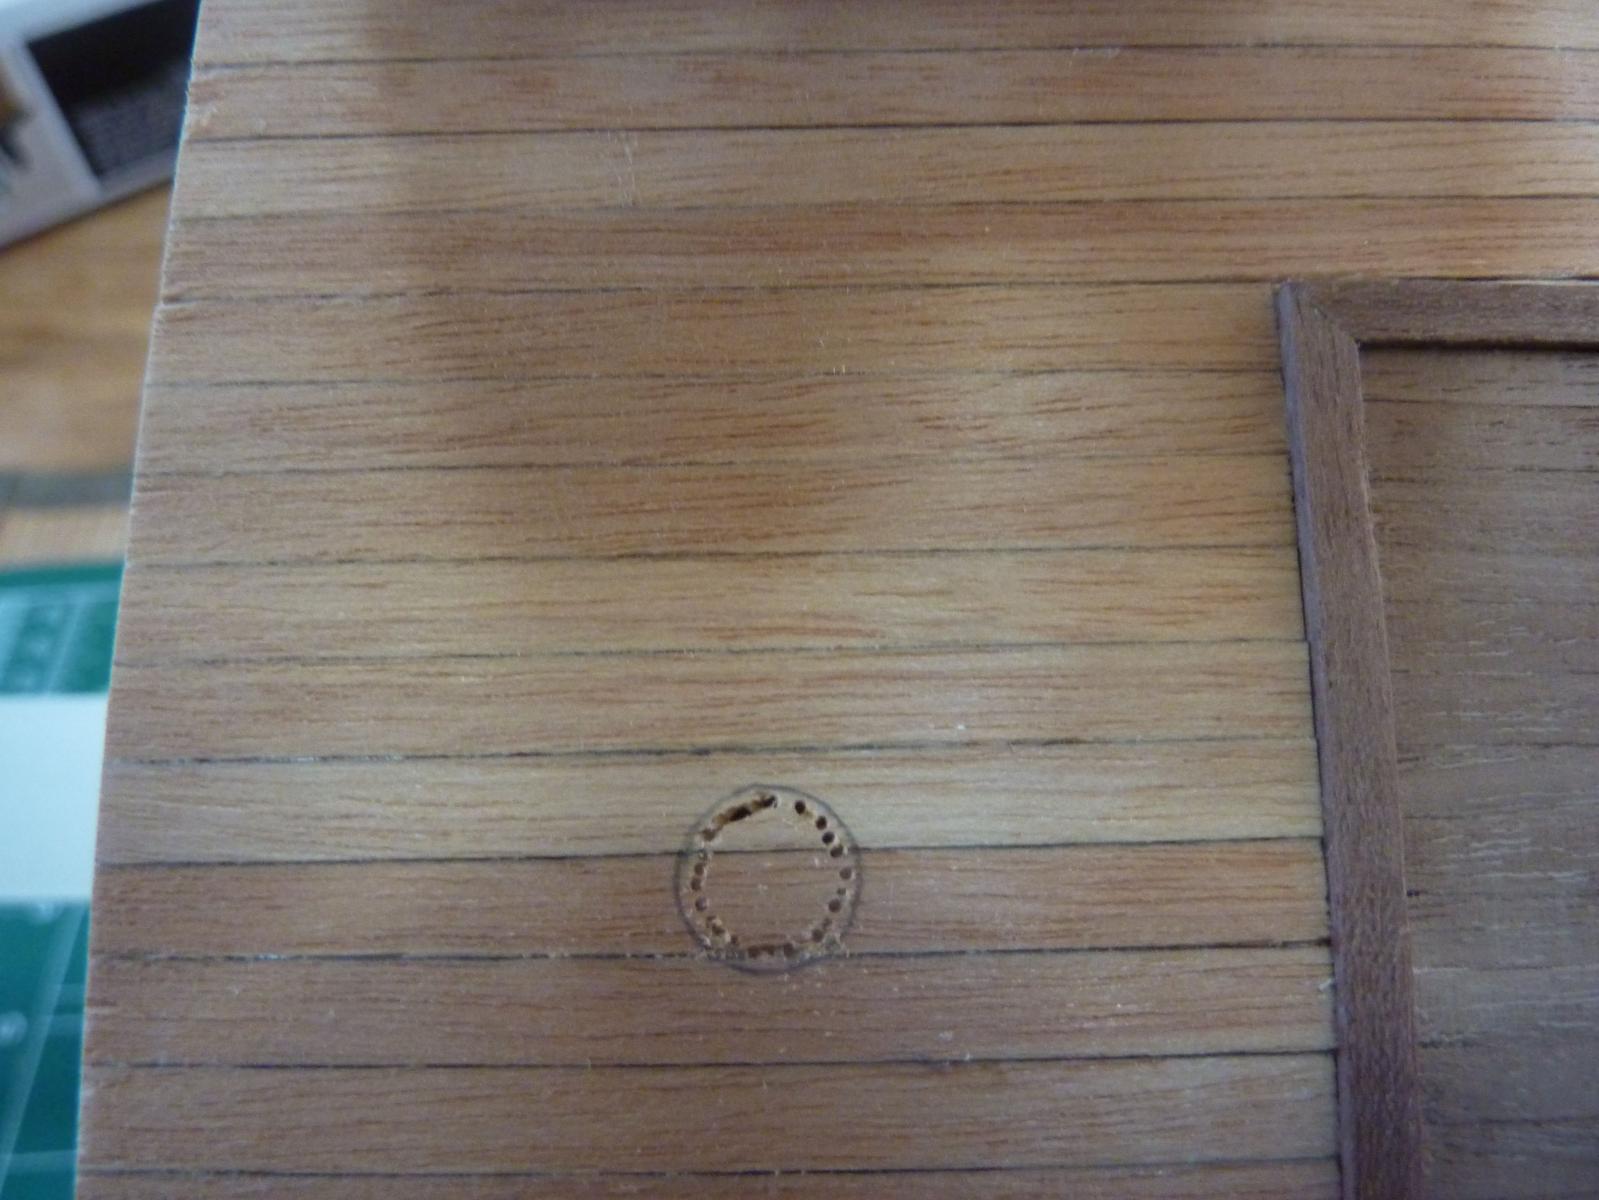
So, I was solved the issue of making the mast hole. Before planking the rest of the deck, I made a paper template of where the mast should go in relation to the hatch. After the planking, I placed the template back on the deck, and used a pencil to mark the location of the hole. Using my pin vise, I drilled a bunch of holes, removed the majority of wood and sanded to fit.
(It has the word "good" on it because the first one was off a little bit, so I marked the good one)


-
Oh, and one other question: I plan on using wipe on poly on the deck after it's planked. Should I wait until the deck furniture is glued to it before applying it or will the glue work after WOP is put on?
I suspect the glue won't work, but wanted other opinions.
Andy.
-
Hey, I plan on planking the rest of the lower deck this weekend, and have a question. I've framed out the mast location as you can see in some previous photos - leaving a square 8mm location for the mast. When I plank it, however, I like the result to be a circular hole in the planks.
What's the best way to lay the planks so my end result is a circular mast hole? Do I pre-carve the opening in each plank as it goes in, somewhat small and sand it to size? Do I fully cover the area and then drill out where the hole should reside? I'm concerned about losing the location if I fully cover it.
Andy.
-
Thanks for the ideas everyone - I guess the Admiral has a Christmas list for me after all.
Seriously, I'm happy to know there isn't just some "obvious" technique that everyone just failed to mention, you know, because it was so obvious.
Andy.
-
Thank Augie and JPett - I appreciate your thoughts. I think I will try to do the butt joints correctly on the next deck up and fix this one as best I can given it's current state. It won't be overly visible as a bunch of furniture goes in and the next deck covers it as well.
My problem with centering is that the keel is probably not center and I need the mast supports to be center to ensure a straight mast. I should have centered the hatch between the bulwarks and not centered over the keel is my guess - the difference is about 2mm, which probably isn't too visible, but affects the planks.
I should have started planking by the hatch, but when I went to plank this deck, I wanted a full plank near the hull and when I dry-fitted it, it wasn't perfectly straight, so I had to glue and clamp with a little lateral bending. Nothing really visible, but if I didn't correct it, there would have been some gaps. I realize now that the best solution would have been to place one plank at the hull, then lay planks at the hatch and move towards the hull. I'll remember that for the next decks. Funny thing, is that's what I did when planking the inside and outside of the hull, but I just forgot when doing the deck.
I still have a couple of questions regarding plank cutting techniques: I've been cutting most planks a little long with a hobby-knife chisel blade that's super sharp and long enough to cut through in one slice. Then, I sand them to fit. Most of this is freehand and I often end up with a non-square end to my plank, which would make butt-joints difficult. How best to cut and/or sand the ends to both get the exact length I need and keep it square?
Doing this is a mystery to me - especially for larger square pieces of wood - getting a flush, square end seems impossible. Is there some tool or technique that will help with this?
Andy.


USS Constitution by AndyMech - FINISHED - Mamoli - Scale 1:93 - Cross-Section
in - Kit build logs for subjects built from 1751 - 1800
Posted · Edited by AndyMech
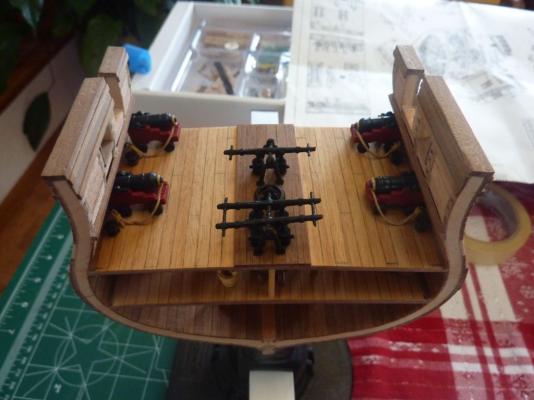
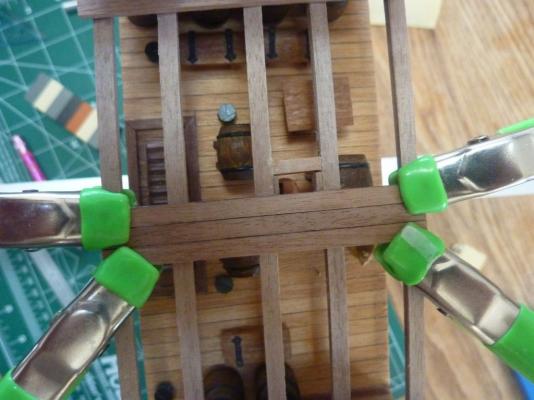
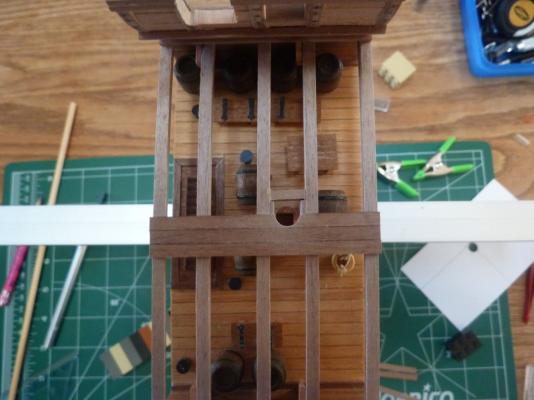
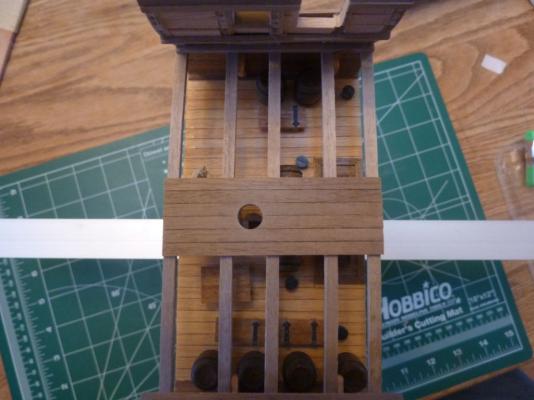
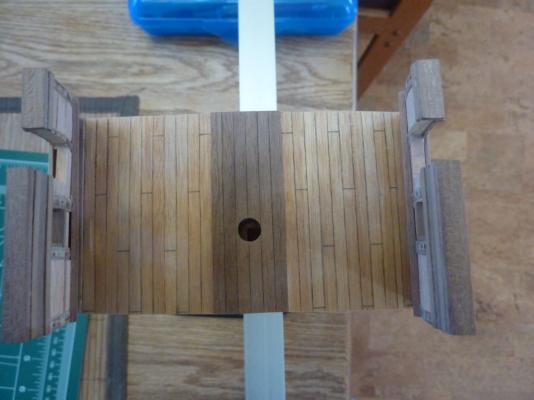
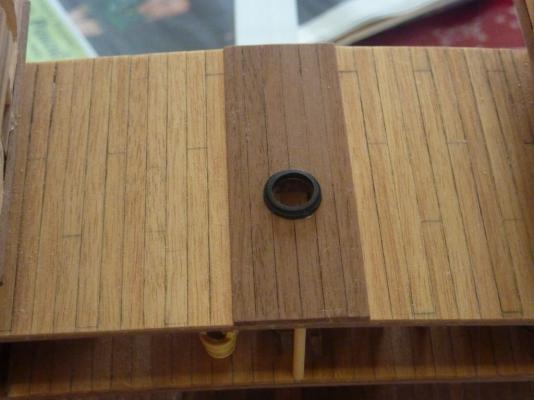
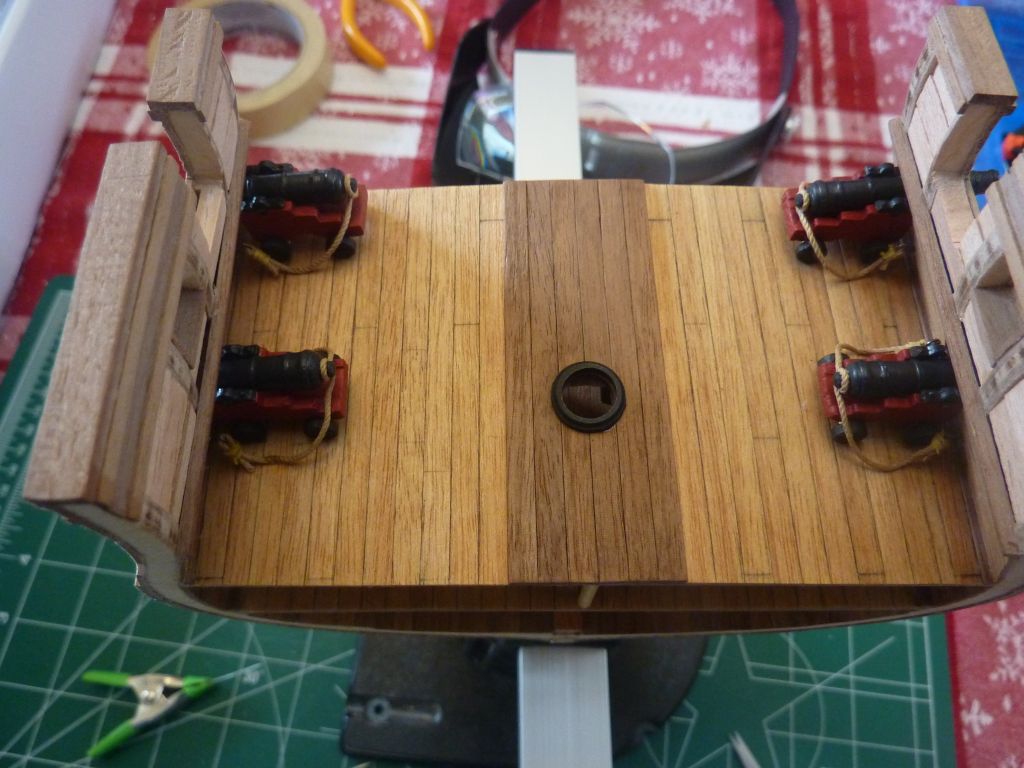
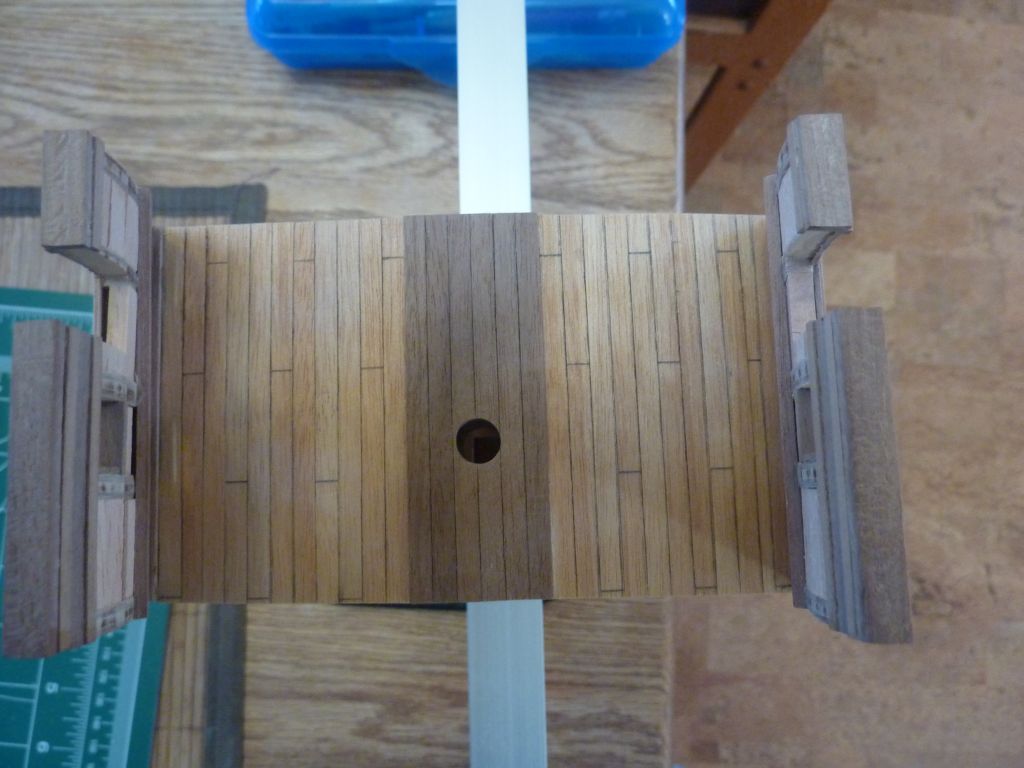
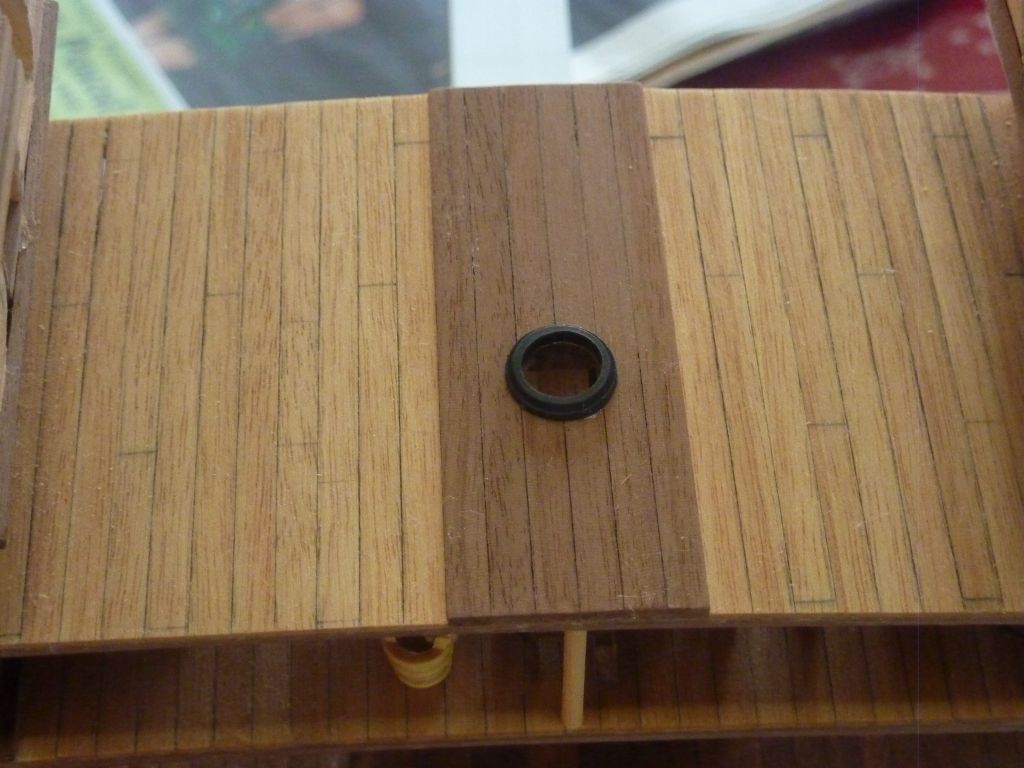
Yesterday, started work on the top deck. I had previously laid the supports, so I framed the hatchway, then planked the rest.
I again made a paper template for where the mast hole should be, and after the deck was laid, cut out the circle and added the mast ring.
Finally, today, I added breech ropes for the guns on this level. I'll leave these black instead of red as they were pre-painted by Mamoli (not the greatest reason, but they look ok to me this color).