

Scoot
-
Posts
90 -
Joined
-
Last visited
Content Type
Profiles
Forums
Gallery
Events
Posts posted by Scoot
-
-
-
Like riding a bike. That pic is 5 years before I was born. Splice looks good.
Scoot
-
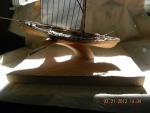
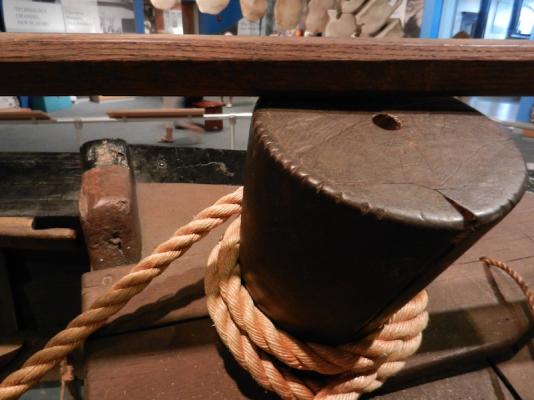
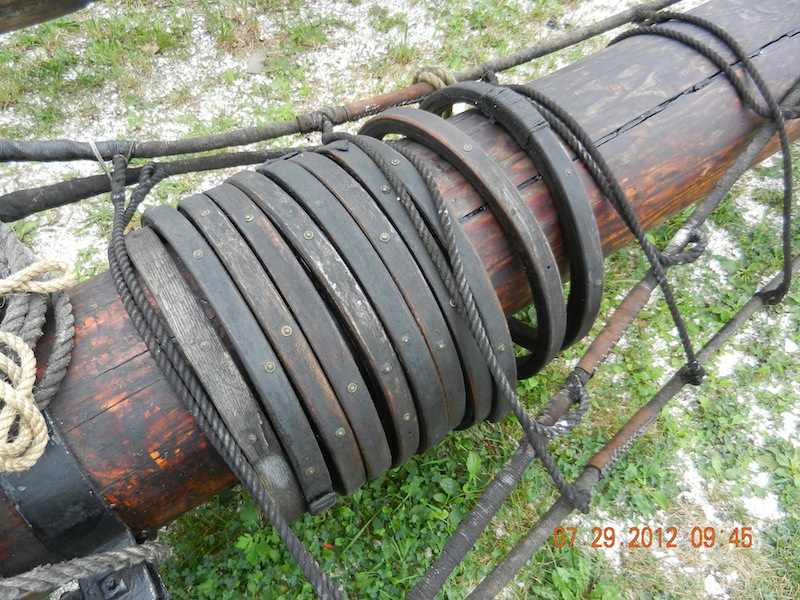
Sos. My thought is that there certainly be seat wear on the thwarts, and foot wear and tool and rope wear etc.. On my whaleboat the goal was to make it appear that the whaleboat had survived a four year stint on a whaleship. Tried to put myself in place of the boatsmen plying their trade. Fun trying to decide the different traits of the different sailors on the different oars. Attached is a pic of a loggerhead, notched to perhaps count the whales captured on this whaleboat. Pic of a authentic whaleboat in the New Bedford Whaling Museum. Enjoy.
Scoot
- Jorge Hedges, dgbot and egkb
-
 3
3
-
SoS. Model looks fine. Boat fittings look authentic. If I am correct, whaleboats came from the boat builder pretty much stripped. Hull may have been primed but I believe
most fittings and paint was done to whaleship owners, and boatsteerers specs. Many variations on types of fittings. Yours look great. Whalecraft is a lot of fun to make. Enjoying your progress.
Scoot
-
Sos. In the Model Shipways kit I received, there were four pages of prints. One of them showed a front and side view of the bulwark/crane/davit. There were no instructions for building it, and I had to really study the prints to see how everything was put together. Looking forward to watching your progress.
Scoot

-
Looks good so far SOS. Built this model a couple of years ago. Great little model, lots of details. I used the paints that came with the kit.
They are acrylics. I found a book that goes into great detail regarding the whaleboat. It is titled: "The Whaleboat, a study of design, construction and use, from 1850 - 1970, by Willits D. Ansel. There are three great museums in the area also that have original whaleboats on display: Newbedford Whaling Museum, Mystic Seaport and Nantucket Whaling Museum. All great places to go. One more book is Melvilles "Moby Dick". Melville discusses in great length The roll of the whaleboat and it's crew on a whaling ship. Enjoy the build.
Scoot
-
Ed. I think that I have posted once on the old site, and wanted to know how it felt to pick this model up and feel the heft of it, and look at the detail. Incredible model.
Will this be somewhere to be viewed? Incredible job. Great quality/skill/detail/devotion.
Scoot
-
-
Looks pretty cut and dried.
Scoot
-
Good stuff Frank. Videos are fun to watch. Build is looking good.
Enjoy checking in now and then.
Scoot
-
On the "New Bedford Whaleboat" After searching the same question. I found this as a explanation.
Scoot

-
The build I am working on. Model shipways "Charles W. Morgan" will be shown with sails, in some configuration, near her home port.
My intention will be to show her during the ritual of dismantling the "try works". Close to home, Hold full of oil, Happy men, being close to home, after four years at sea,
and perhaps the captain, letting flow some of the excess grog.
Depends on the prevailing winds and the season of the year. Long way to go before that point, but that will determine the set of the sails.
It's not just a model, but a history.
Scoot
-
Hey Tex. Glad to see someone doing the "Charles W. Morgan". I may have missed something. Is it the "Model Shipways " kit?
I have started it, but have not begun a build log yet. Have the keel laid and the bulkheads glued. next step will be fairing the bulkheads.
A few other projects to finish before getting back into it seriously.
Enjoy your build.
Scoot

-
OOPs. Pics came out in reverse order, but you get the idea.
Scoot
-
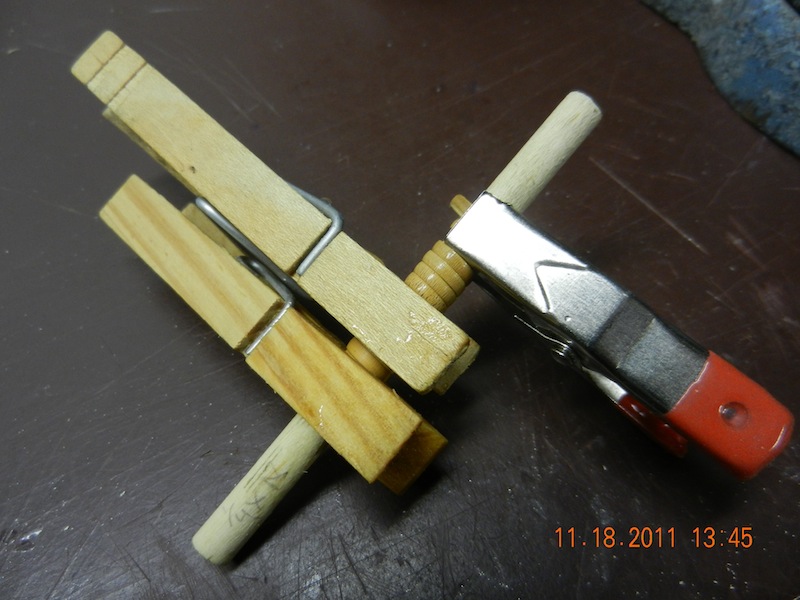
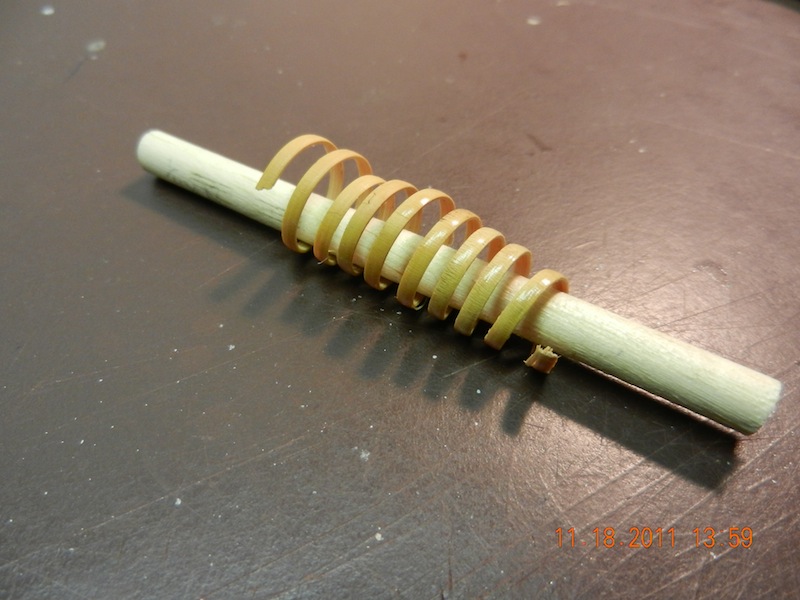
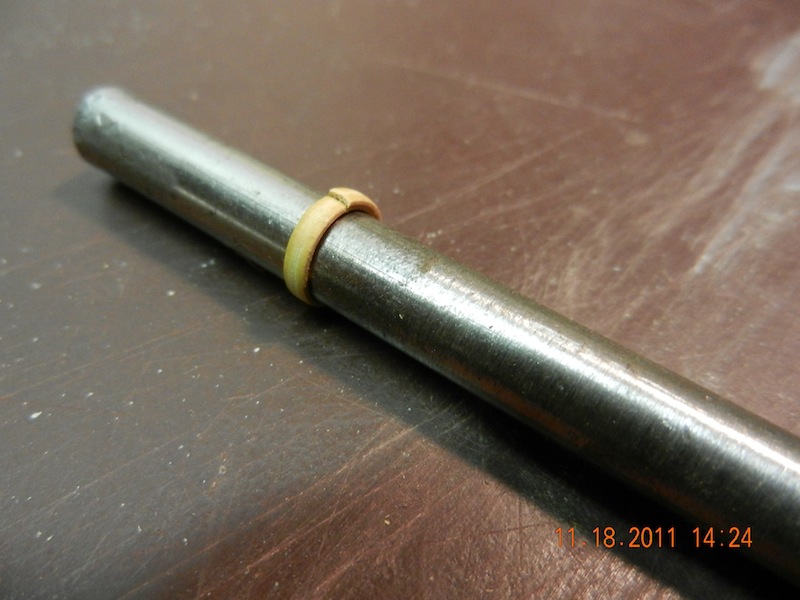
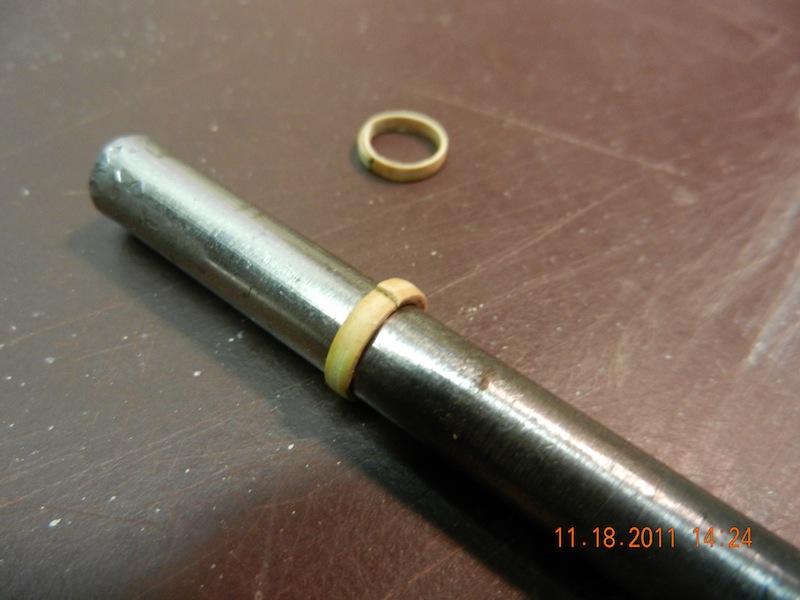
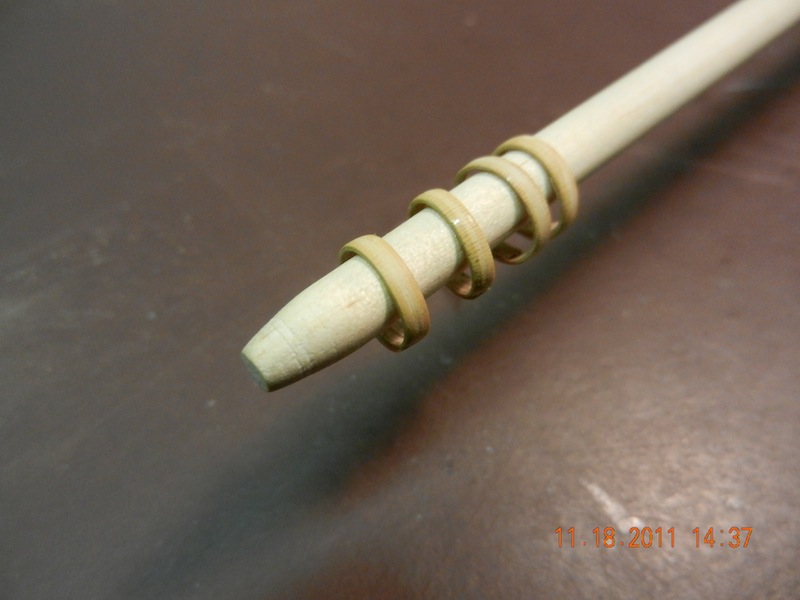
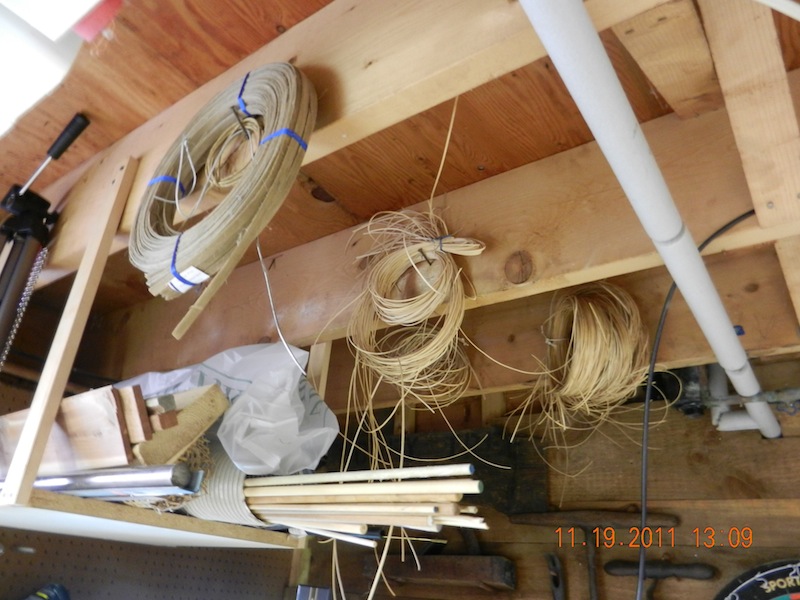
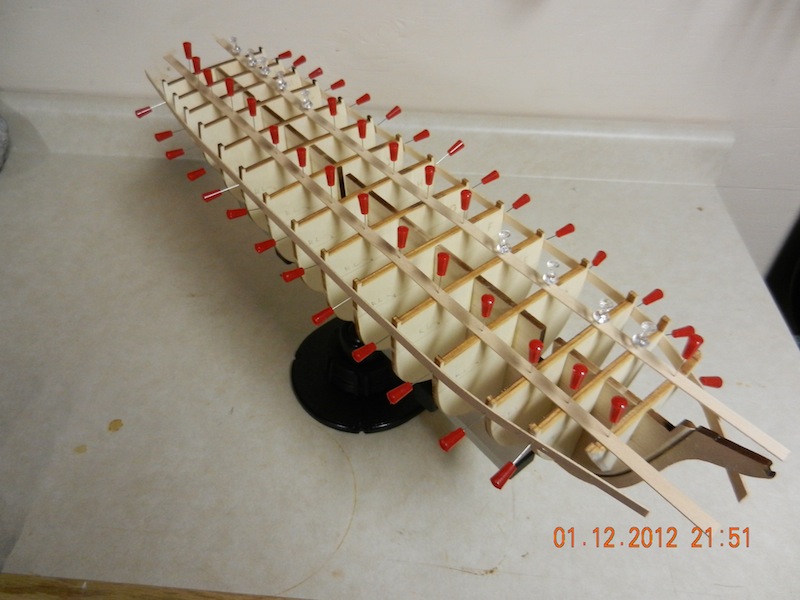
I have discovered what seems to me to be a simple technique for making mast hoops. I say discovered because I have not seen mast hoops made this way, and when I had to make some, I used the materials at hand. I cane a chair now and then and have an ample supply of cane strands hanging among the rafters of my workshop (pic1264). The material is a natural woody plant of the Rattan family. It's strength is along it's length which makes it very durable. It's woody characteristics make it great for holding stain, paint and glue. it is processed in different widths which makes it useful in many different scales. There is an inner surface and an outer surface. the outer surface is shiny and should be scuffed for good stain, paint and glue adhesion. If you have a friend that does caning or a local furniture repair/upholsterer shop nearby, it is a great place to grab a couple of five foot strands. They will last a lifetime of model making. I have not experimented posting photos on the new MSW yet, so not quite sure how this will come out.
Step 1: Soak a length of cane (depends upon diameter and quantity of hoops needed) in warm water to soften.
Step 2: Wrap cane around a dowel of appropriate diameter and clamp until dry. This will set a nice curl in the cane. Pics, 1256 and 1257.
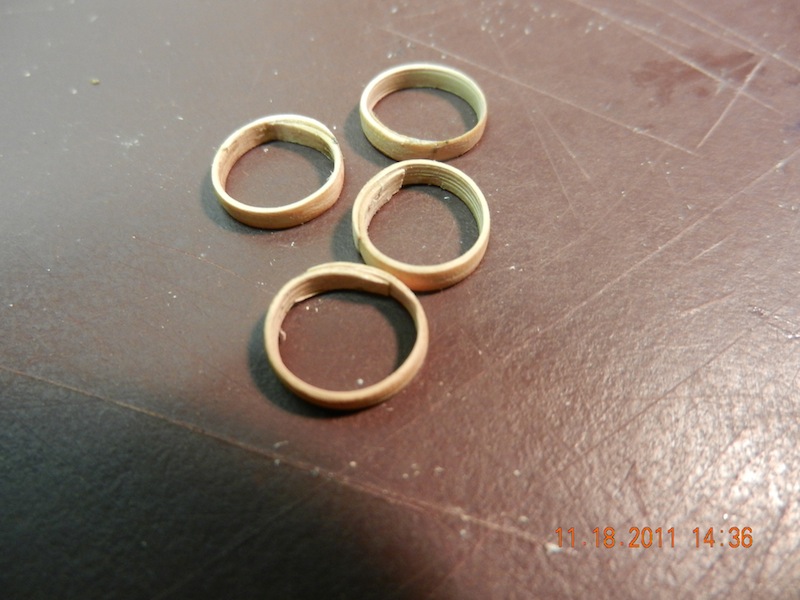
Step 3: Wrap length of cane around finished mast hoop diameter so that it overlaps perhaps 1/4 to 1/3 of diameter. Glue and clamp until it sets. Pics, 1258 and 1259.
Step 4: After glue has dried. Sand/file to taper ends of cane.
Finished product comes out pretty realistic, using minimal material and effort. Hope this is of use.
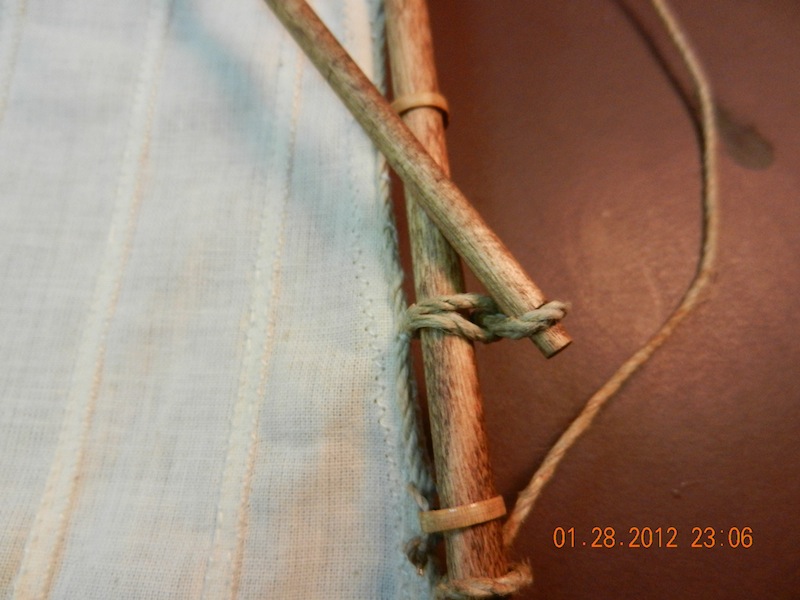


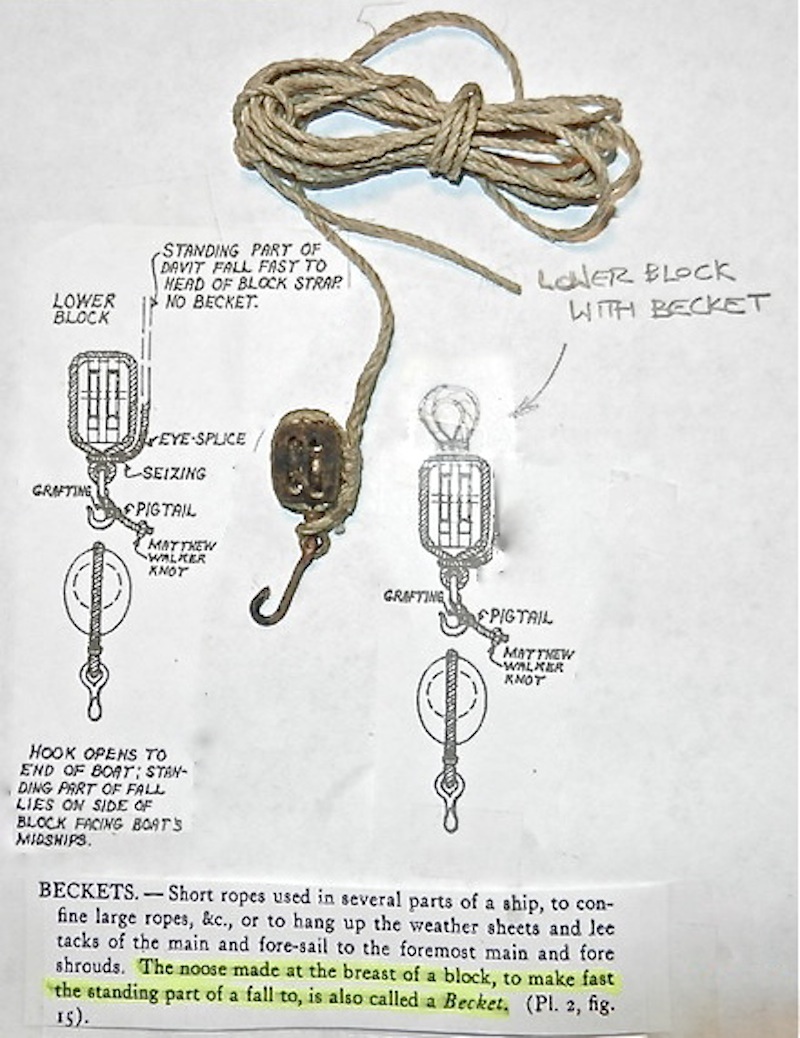
Whale boat eye splice
in Masting, rigging and sails
Posted
Handsome work.
Scoot