


CPDDET
-
Posts
1,193 -
Joined
-
Last visited
Content Type
Profiles
Forums
Gallery
Events
Everything posted by CPDDET
-

Planking disaster
CPDDET replied to sgrez's topic in Building, Framing, Planking and plating a ships hull and deck
I've seen much worse. Remember, it's only wood and can replaced or repaired as you see fit. Check out other build logs of this model and see how the planking was done. Don't get discouraged, it's a process, not an event. -
Welcome aboard. Lots to learn here and, with your experience, lots you can teach as well.
-
Welcome aboard!
-
I assume your starting with a 3# cut, like Zisnsser Bullseye, before diluting?
-
Plan on padding shellac but have a question for those experienced with shellac. If I want to apply 2-3 coats and have to wait an hour between coats, how do I keep the pad from drying out between coats? Use a new pad for each coat? Leave the pad soaking in the shellac?
-
Not sure if you want to make the investment but you can purchase chisles that small. Dockyardtoolsusa.com
-
I'm no expert but I don't beleive you need any finish over shellac. I'll be interested in following any further answers. I'm currently in the process of trying to make cherry wood look more like mahogany using tinted clear shellac.
-
Hello! New to the forum, happy to be here :)
CPDDET replied to BuckyBoo's topic in New member Introductions
Welcome! Lots of Bluenose build logs here to help you along. -
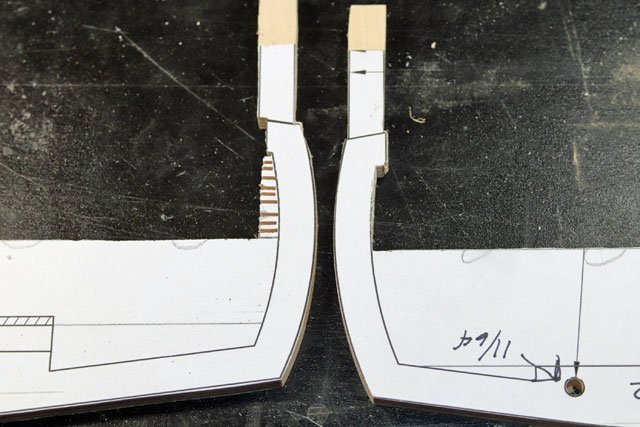
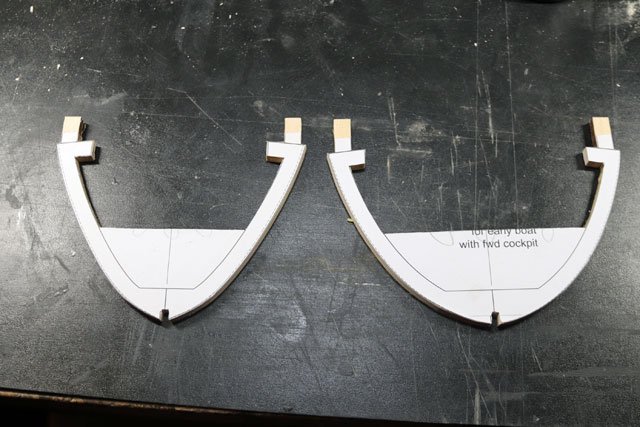
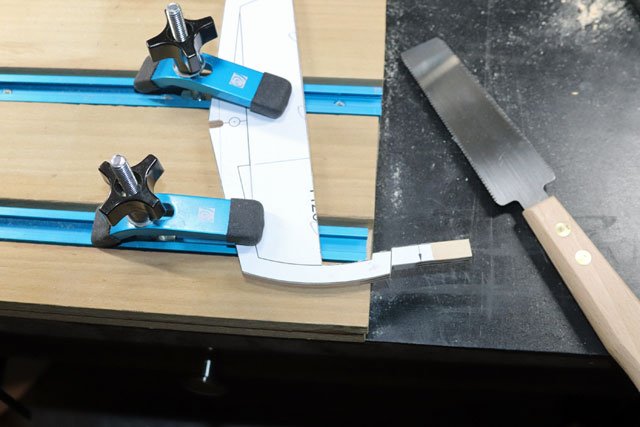
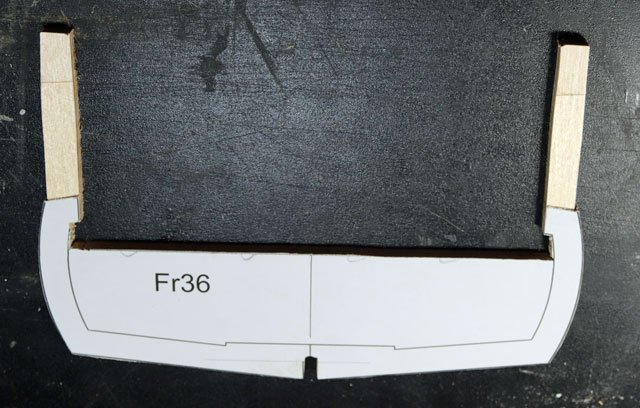
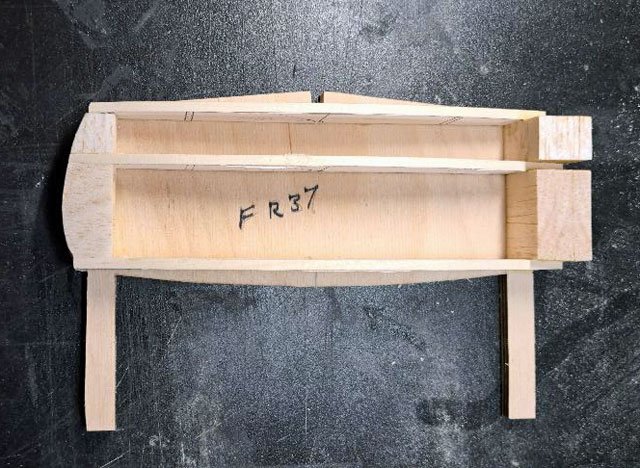
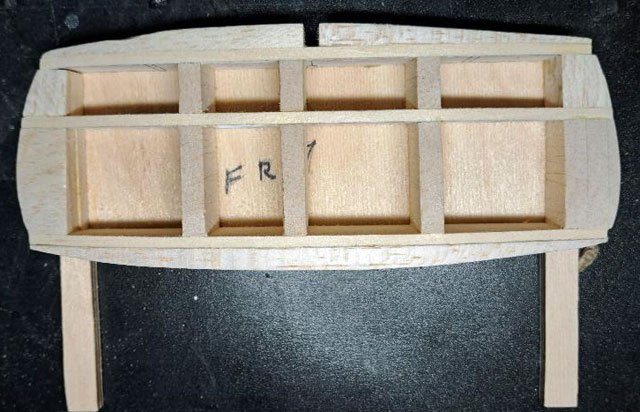
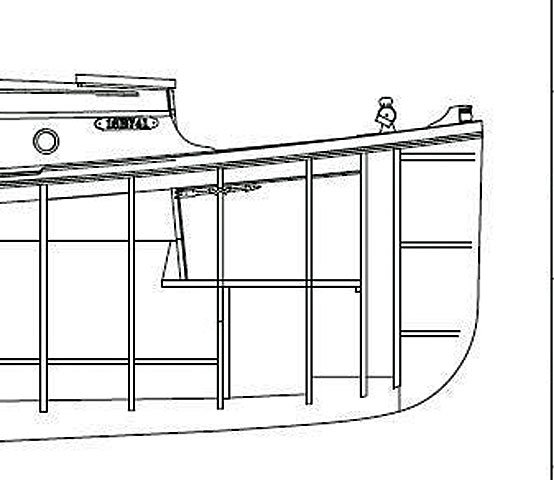
Started off by trimming bulkheads 24 through 36 to allow for the rear cockpit floor. Having the line drawing of the ship made this trimming quite easy, In order to get the undercut, I made several small cuts and then used a chisel to remove the excess material. Then I cut bulkheads 4 and 6 to accommodate the sole in the forward cockpit. While these bulkheads are right next to each other, the drawing has them numbered this way. Again, the line drawing made this quite easy to do. I decided to make a shallow cut in the bulkhead extensions where then will eventually be trimmed off. Two reasons for this. For one it will give me a slots for the saw when the time comes. Second, it will mark the trim line if the glued plan comes off or if I wish to take it off. I used a hold down board I made years ago to hold the bulkheads as I cut them with a small pull saw. Last thing I got done today was to remove the glued plan sheet from each of the bulkhead extensions on all the bulkheads. A touch of acetone made this a breeze. Next will be cutting out the keel. I have cherry wood ordered to plank the transom, something I want to do before getting it on the build board. Once I have the wood in hand I’ll do some test strips with a variety of stains and try to get it as close to mahogany as possible. Research show that the boat was built with mahogany from the deck up as well as the transom.

-
Yes, the NRG Half hull model does a good job of explaining the process.
-
Build logs of the same model are extremely helpful. Different methods to attain the same goal teach us all. Even experienced builders can, with an open mind, learn from beginners.
-
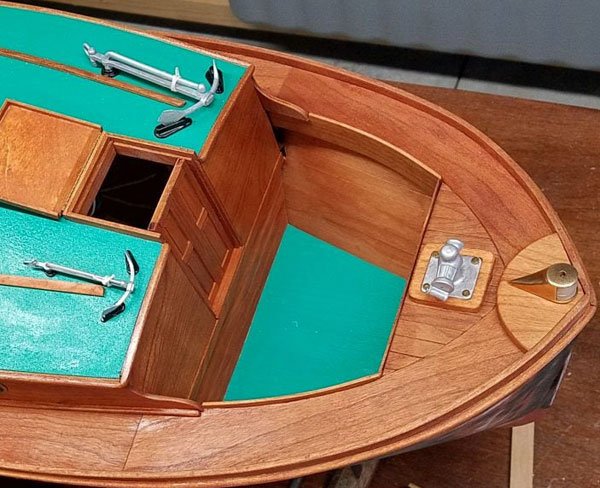
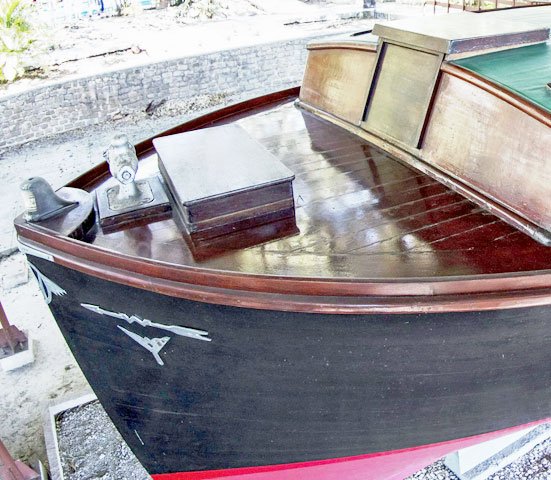
It has taken me a bit to research the building of the transom but finally got it done. Installed the upper, middle and lower transom support pieces. When Mathew built his RC model he double planked the hull and transom. So he first planked the transom vertical, which gave him plenty of surface area for the final horizontal planking. But I’m only using one layer of planking so I decided to add filler blocks to create more surface area. I used balsa wood for the filler blocks which worked really well. Never used balsa in the shipyard before but I will know keep some on hand. Cuts very easily, sands down very quickly and easy to shape. Only drawback is its softness, so have to go easy on clamping as it dents quite easily. Lucky for me all of this will be covered with cherry planking. I will plank the transom prior to installing it on the build board as the hull planking will overlap the exposed edge of the transom planks. This is easily seen on photos of the original boat in Cuba. The original boat was built with a forward cockpit as seen here in Mathew’s build. Sometime in the past it was decked over, leaving just a deck hatch. I understand that Hemingway got tired of the forward cockpit taking on water. In any case the original boat has undergone numerous repairs and modifications over the years due to wood rot, water and hurricane damage. Mathew has done extensive research on the boat and included a lot of documentation in his build log. When he was building his model he didn’t originally include the forward cockpit and decided to add it later, lucky I caught this while reading through his 32 page build log. It was a tricky thing to do but, as always, he did a beautiful job. I want to build it before planking the hull so I can get my hands in at it. I didn’t have the exact measurements but found them on the line drawing which I noticed while reading his log. For some reason I didn’t rescale and have printed Mathew’s line drawing of Pilar. So it was back to the printer to have that done. This will be a big help. Another issue caused by my decision to build this plank on bulkhead instead of plank on frame. Obviously the top of the bulkhead has to be lower in the area of the rear cockpit to accommodate the sole. I forgot to allow for this, but the line drawing will be a big help in making this adjustment on several bulkheads. I haven’t glued any bulkheads onto the build board yet, so that will make this adjustment much easier. As well as building the forward cockpit before hull and deck planking.
-
Don't know how far you want to take your hull planking but vessels were planked with either a 3 butt or 4 butt shift system.

-
Welcome, you've found a great resource!
-
The NRG Half Hull gave me a much better understanding of spiling. But still requires practice. If done correctly, very little if any clamping is required. Edge bending is a method I've yet to try but would like to master both.
-
Welcome aboard!
-
Just keeping it moving back and forth, not leaving it in one place too long may help.
-
I'm thinking 2 different things when it comes to the marks on the wood. Either the iron is too hot ( you can check that with an instant read thermometer) or there is some kind of minerals in the water causing it. You could try distilled water. Good to see you making progress!
-
Welcome!
-
hull finishing
CPDDET replied to serpe's topic in Painting, finishing and weathering products and techniques
It's your model and there are no rules to adhere to on this site. Do what brings you pleasure -
You can always send yourself an email from your phone, with photos attached and then open the email on your computer and save the images.
-
Welcome! Challenges like this are part of the learning process, we all have them.
-
Patrick did an expert job. I'm hoping to get close to his level of perfection. Going to be quite a ride!
-
OK. My iron, on a medium setting, heats to about 330 degrees. Water turns to steam at 212 so the iron is plenty hot to do that. I can apply the iron to a dry piece of basswood for more than 30 seconds, keeping it in one place, and see no signs of scorching.
-
Remember, it's the heat thats used to bend wood, not the water. Steam is used because it can heat wood without burning it. When you touch a hot iron to moist wood it creates steam which heats the wood and allows it to bend. Some people soak planks but I find that causes the wood to swell too much, at least for me. Try a few different methods and see what works best for you. I'll take a temp reading of my iron and let you know what that is. I know it dosent burn the wood and I can hear the hiss of steam when I use it.
