
ClipperFan
-
Posts
2,171 -
Joined
-
Last visited
Content Type
Profiles
Forums
Gallery
Events
Everything posted by ClipperFan
-
 Rob, Sadly America has never seemed to put much value to what we now consider priceless items. Consider the abysmal fate of the historic Yacht America. Launched in the 1850s, after setting the mark to win the 100 Guineas Cup, which has forever now been known as the America's Cup, she survived being a Confederate Blockade Runner as well as a Union Blockade enforcer during the Civil War. While the US Navy had ultimately planned to restore her, they left her poorly protected. As a result, a damn snowstorm collapsed the shed she was resting in and she became a total loss in the 1940s, when she was 90 years old. This disgraceful history of benign neglect continues to thi day. Back in the 60s, I used to love to watch Hawaii 5-0. Not only did it feature one of my favorite Montague Dawson works of art The Ariel and Taeping very often a wonderful fully restored 4 masted sailing ship the Falls of Clyde featured as a constant backdrop. Fast forward to today and that same magnificent steel ship is so neglected, she's in danger of sinking...
- 3,560 replies
-
- 4
-

-
- clipper
- hull model
- (and 2 more)
-
Rick, Believe it or not, I'm actually relieved to hear you say that. I often feel like it's a thin line to walk between offering historically accurate discoveries and insulting the work of others. My consistent goal is to be an aid in reproducing Clipper Ships, especially those of Donald McKay's as closely to the original as possible. Thanks for the compliment.
-
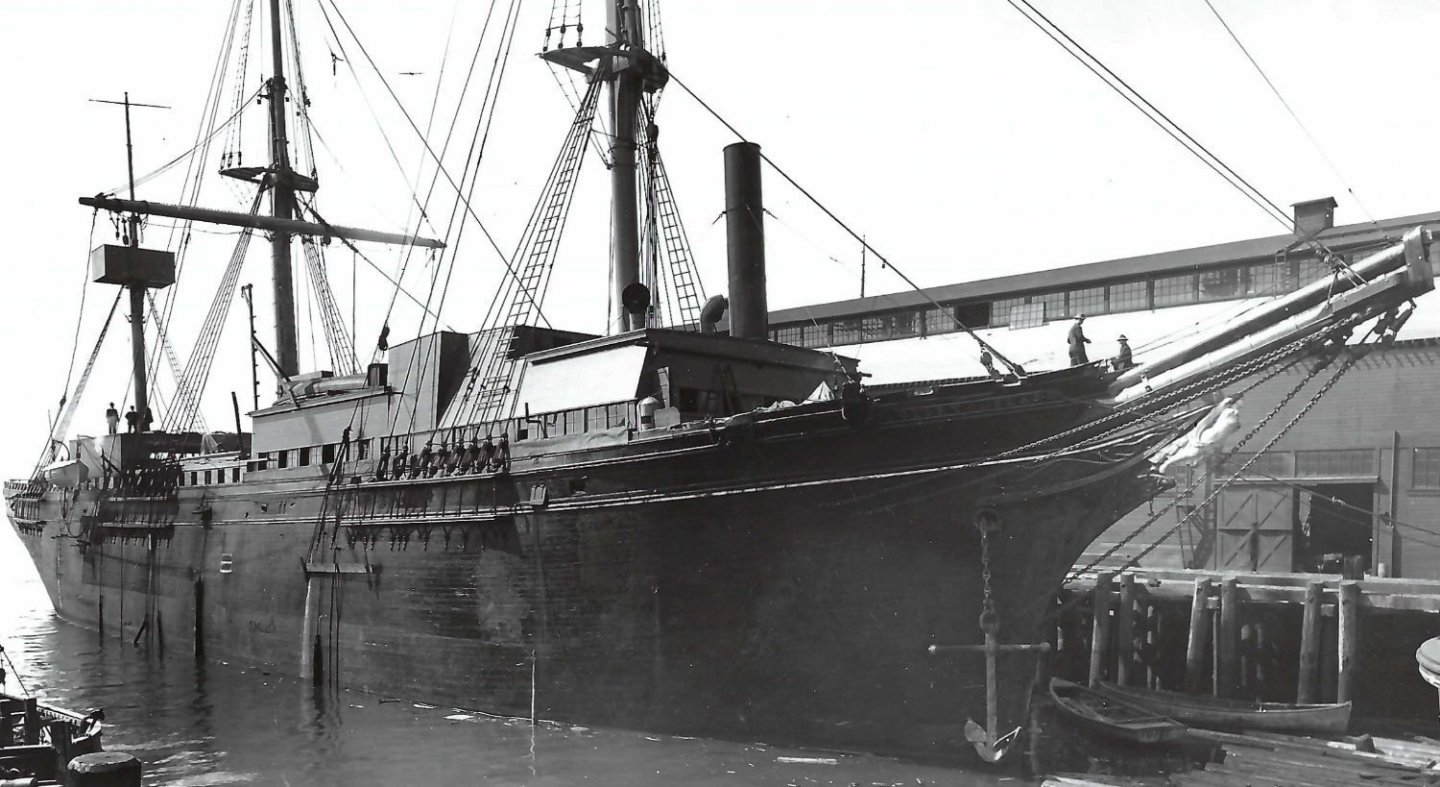
Rob, Mike has come through for us yet again. Per your specific request, here's the image of Glory of the Seas being dismantled in 1922. Mike scans these amazing images and attaches them as e-mails. They arrive with some white space surrounding the image. To maximize the image, white space has been cropped out and the image has been rotated for better viewing. The picture itself is left entirely intact.
edited2.thumb.jpg.f4c141b94bcb91216ad6738024527f6c.jpg)
- 3,560 replies
-
- 5
-
-
- clipper
- hull model
- (and 2 more)
-
Rick, actually I'm reversing my position. Two out of three of Duncan Maclean's McKay Clipper ship's are specifically referenced as having fished fore and main masts. Stag Hound his first and Flying Fish both omit any mention of a fished mizzen mast. In all cases I read, the mizzen masts were smaller in diameter than their inner bowsprit. This leads me to conclude that it's very likely the mizzens were solid sticks and not built, like I was first convinced they were.
- 602 replies
-
- 2
-
-
- Flying Fish
- Model Shipways
- (and 2 more)
-
Rick, you're welcome. I'm constantly in awe of the talent, vision and persistency you ship modelers display in these builds. Having such rare images of an actual McKay Clipper as a reference is a big help in clarifying issues like the configuration of rear coach houses. Since there's no specific mention for dimensions of that particular structure, I would leave 4' on both sides as catwalks. Being a larger ship, Glory of the Seas had 5' catwalks. Also, her rear companion was offset to her port side, not centered like the Flying Fish plans depict, which is also entirely conjectural. There's another photo of the McKay vessel Sovereign of the Seas. Her rear coach house companion is also offset to her port side.
-
George, Every time Glory of the Seas had solid lower masts, there were no iron hoops. Out of curiosity, I looked at the recently restored Whale Bark Charles W Morgan. She had all three solid lower masts, again no hoops. There apparently is no enginerring structural need of iron bands on solid masts. Despite the conflicting paintings, from Duncan MacLean's usually reliable description, it appears that Flying Fish at least as originally launched, had a solid mizzen mast.
-
George, the last thing I'd want is for you to damage any portion of your model while trying to improve scale accuracy. Looking at how large Glory's lubbers holes are leads me to believe part of the top frames must have been metal to reinforce strength.
-
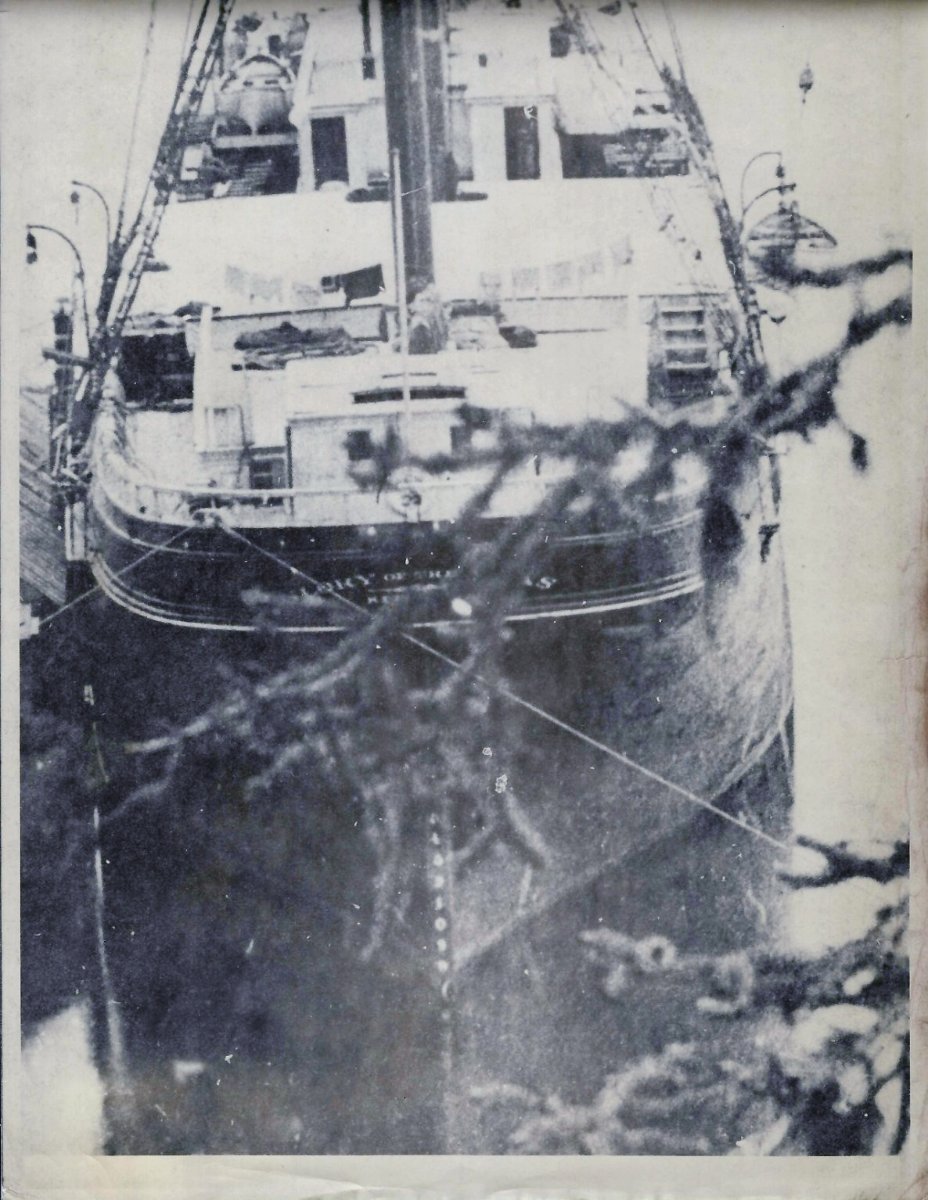
Rick, Thanks for sharing your beautiful construction techniques. I really appreciate seeing the steps illustrated so methodically. I'm actually using pictures of your completed forecastle as a visual aid in revising our Glory of the Seas deck arrangement. Meanwhile I've shared a rare stern image of her so that you can see how the rear coach house section actually curves matching the outer contours of her hull. This allows her catwalks on both sides to remain consistent from bow to sterncm for the working of the ship.

-
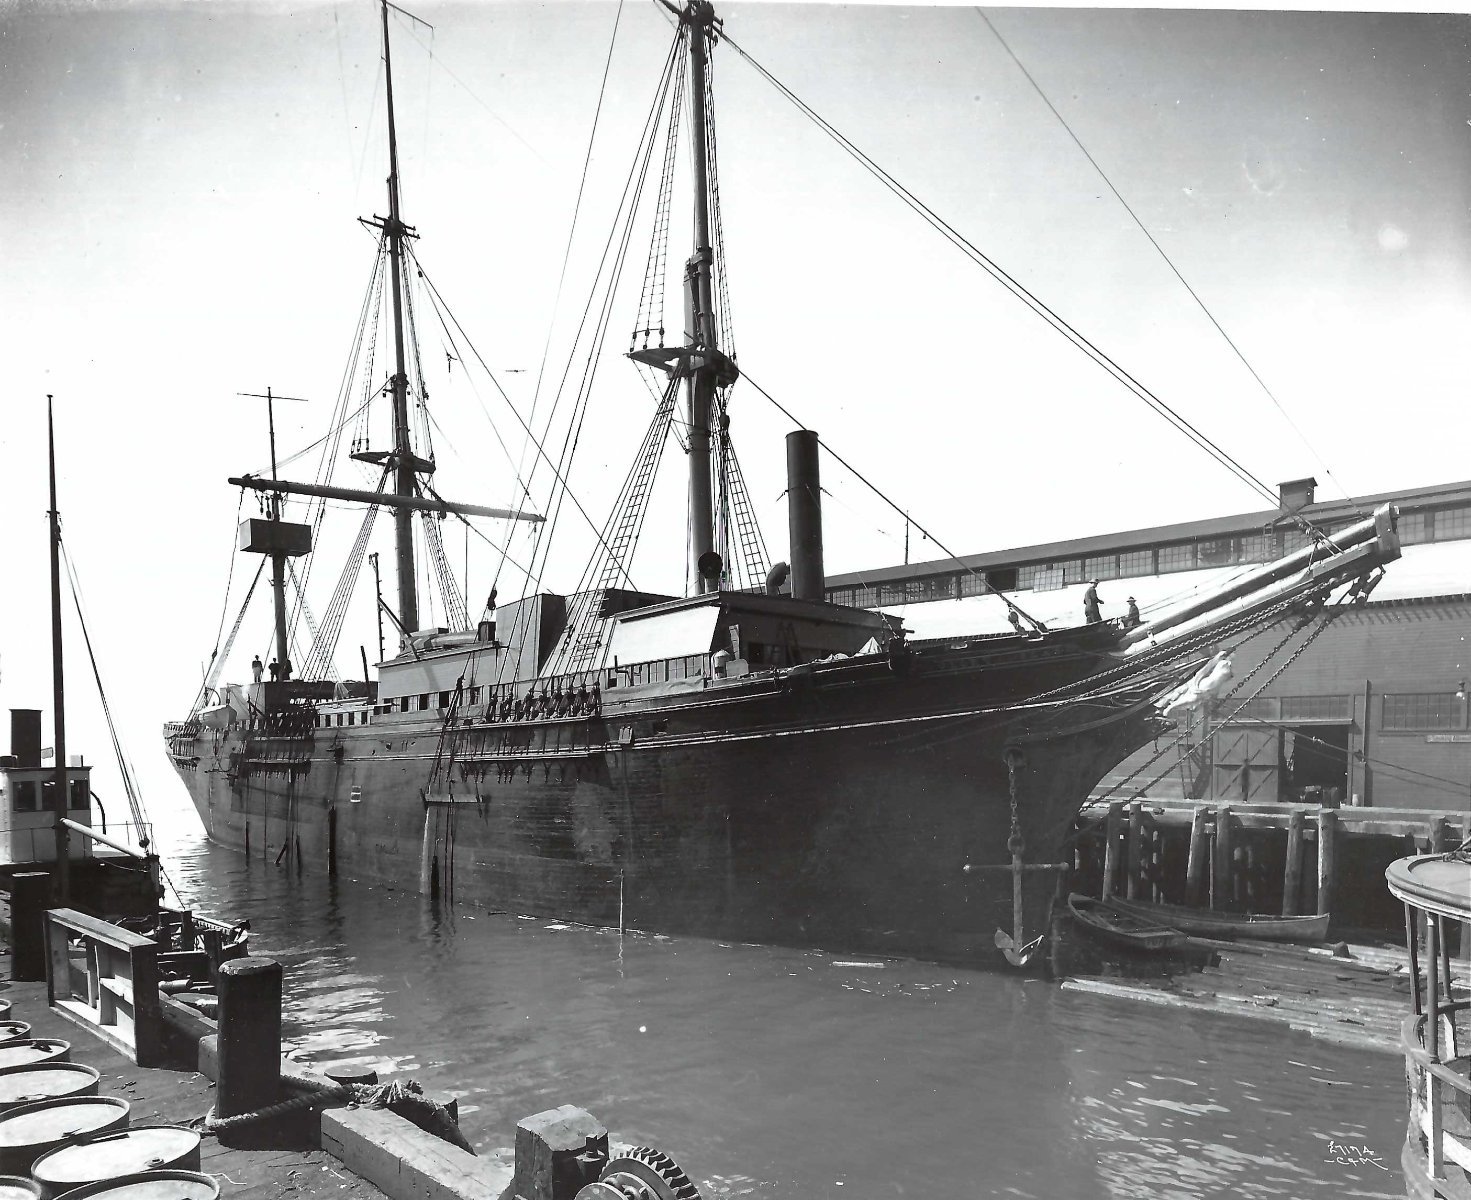
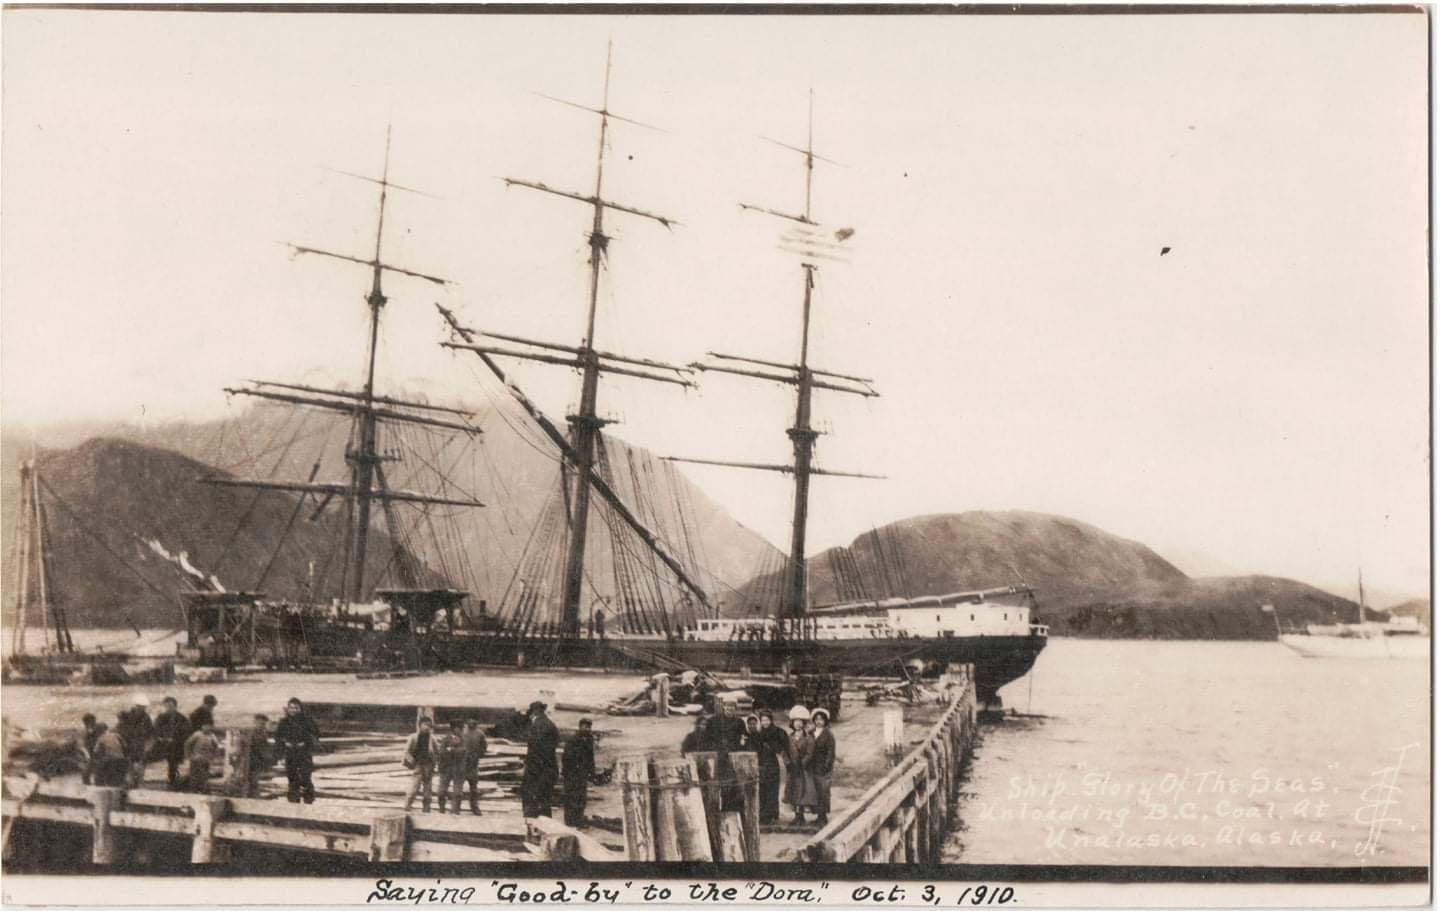
George, from the many images of Glory I've seen, it appears like these are her original tops. Here's another scene of her in dry dock from a lower starboard bow view. The lubbers holes are more visible in this one. As for the mizzen mast of Flying Fish, I reread the publicist's description and you're right. Only fore and main are described as being fished. Not only that but according to specs included, her mizzen was only 26 1/2" in diameter, slimmer than her 18' 28" bowsprit. Finally, I've included a rare stern scene of Glory docked in Alaska. The large rear coach house actually curves gracefully to accomodate dual catwalks which surround both sides. I estimated they're 5' wide and stay consistent from front to rear of the house. Since your foundation appears to be the sole part of your particular coach house, I felt you might appreciate knowing the actual configuration of this section of McKay's vessels.


-
Rob, I've learned from personal experience that it's the truly great artisans and artists who are the hardest on themselves. As for taking shortcuts or even (gasp) omitting entire systems, I know you well enough to know you won't take that route either. Since you're following a specific system, you might want to document your own final belaying points so that you can at least duplicate your own work for all three masts. Regardless, what I really appreciate seeing is the complex latticework of the myriad lines and comprehending the logic behind apparent mayhem. Good luck!
- 3,560 replies
-
- 1
-
-
- clipper
- hull model
- (and 2 more)
-
Rob, At the level of expertise that you clearly are working at, I'm pretty sure the 'errors' you're discovering are only noticeable by one individual. That's you. As for the rest of us, we're just following along in awe as McKay's long lost Clipper comes to life before our wondering eyes.
- 3,560 replies
-
- 1
-
-
- clipper
- hull model
- (and 2 more)
-
Pat, My sense is that, since we're discussing a component that is clearly visible on the latest image of Glory of the Seas supplied by Mike, we're not too far off topic for Rob's tolerance. The sketch you shared is fascinating. I've been on several large three masted sailing ships and have seen something similar but really didn't pay much attention. The illustration shows a substantial metal anchor point in the deck, then two oval-arrow shaped metal devices with a central axis implying a large roller block. My guess is the leather acts like an insulation of sorts to prevent friction chafing. Having the stay line doubled with lacing would greatly reinforce the strength of these critical lines. After all these anchor points are critical to the safety of massive lower masts. Thanks for clarifying this complex structure.
- 3,560 replies
-
- 1
-
-
- clipper
- hull model
- (and 2 more)
-
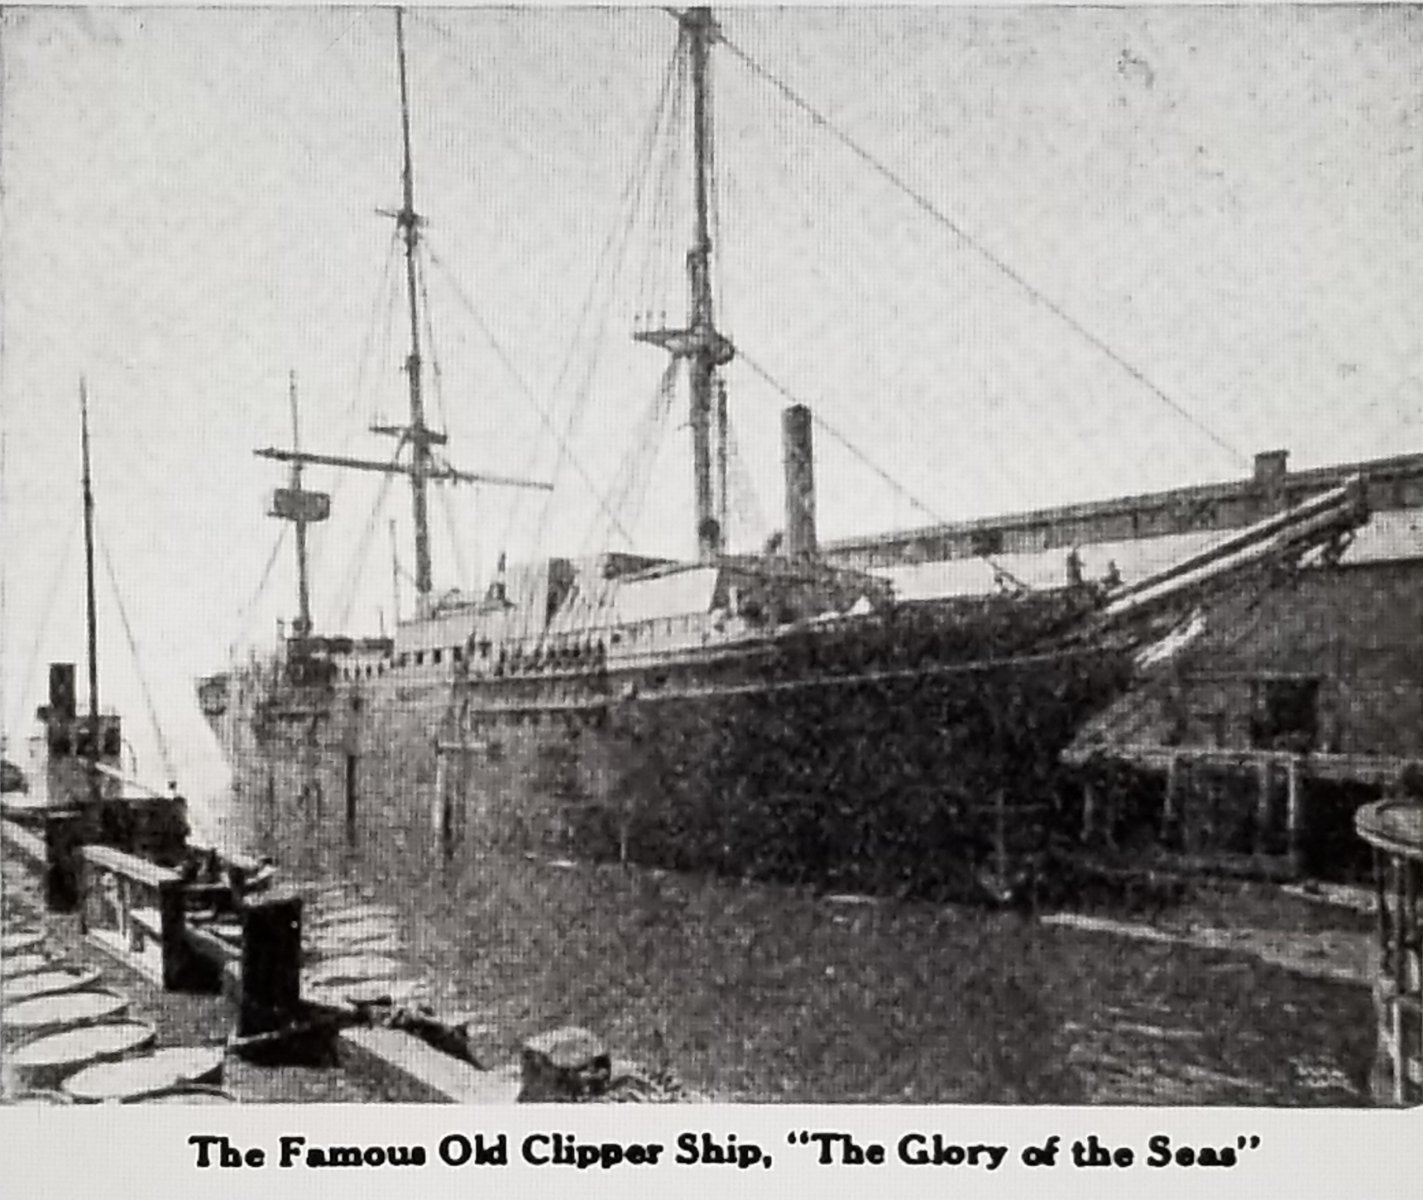
George, Thanks for your progress report. It must be a little frustrating to run out of paint in the midst of a project. Two observations. The lower mizzen mast appears to be a 'solid stick' compared to the main and fore masts. The Buttersworth piece shows the mizzen built similar to both fore and main. I may be jumping the gun and you might be planning to complete to mizzen. If so, my apologies. Lubbers openings on McKay's vessels were larger than those on your tops. Here's a picture of Glory of the Seas from 1913. If you look closely at her tops, those lubbers holes are about twice the size of your model's.
-
Pat, this is fascinating. Would that mean that most likely all 3 of Glory's stays would have been secured like this? The unknown component has an intriguing trapezoidal shape, would that be the stayplate/padeye you're referring to?
- 3,560 replies
-
- 1
-
-
- clipper
- hull model
- (and 2 more)
-
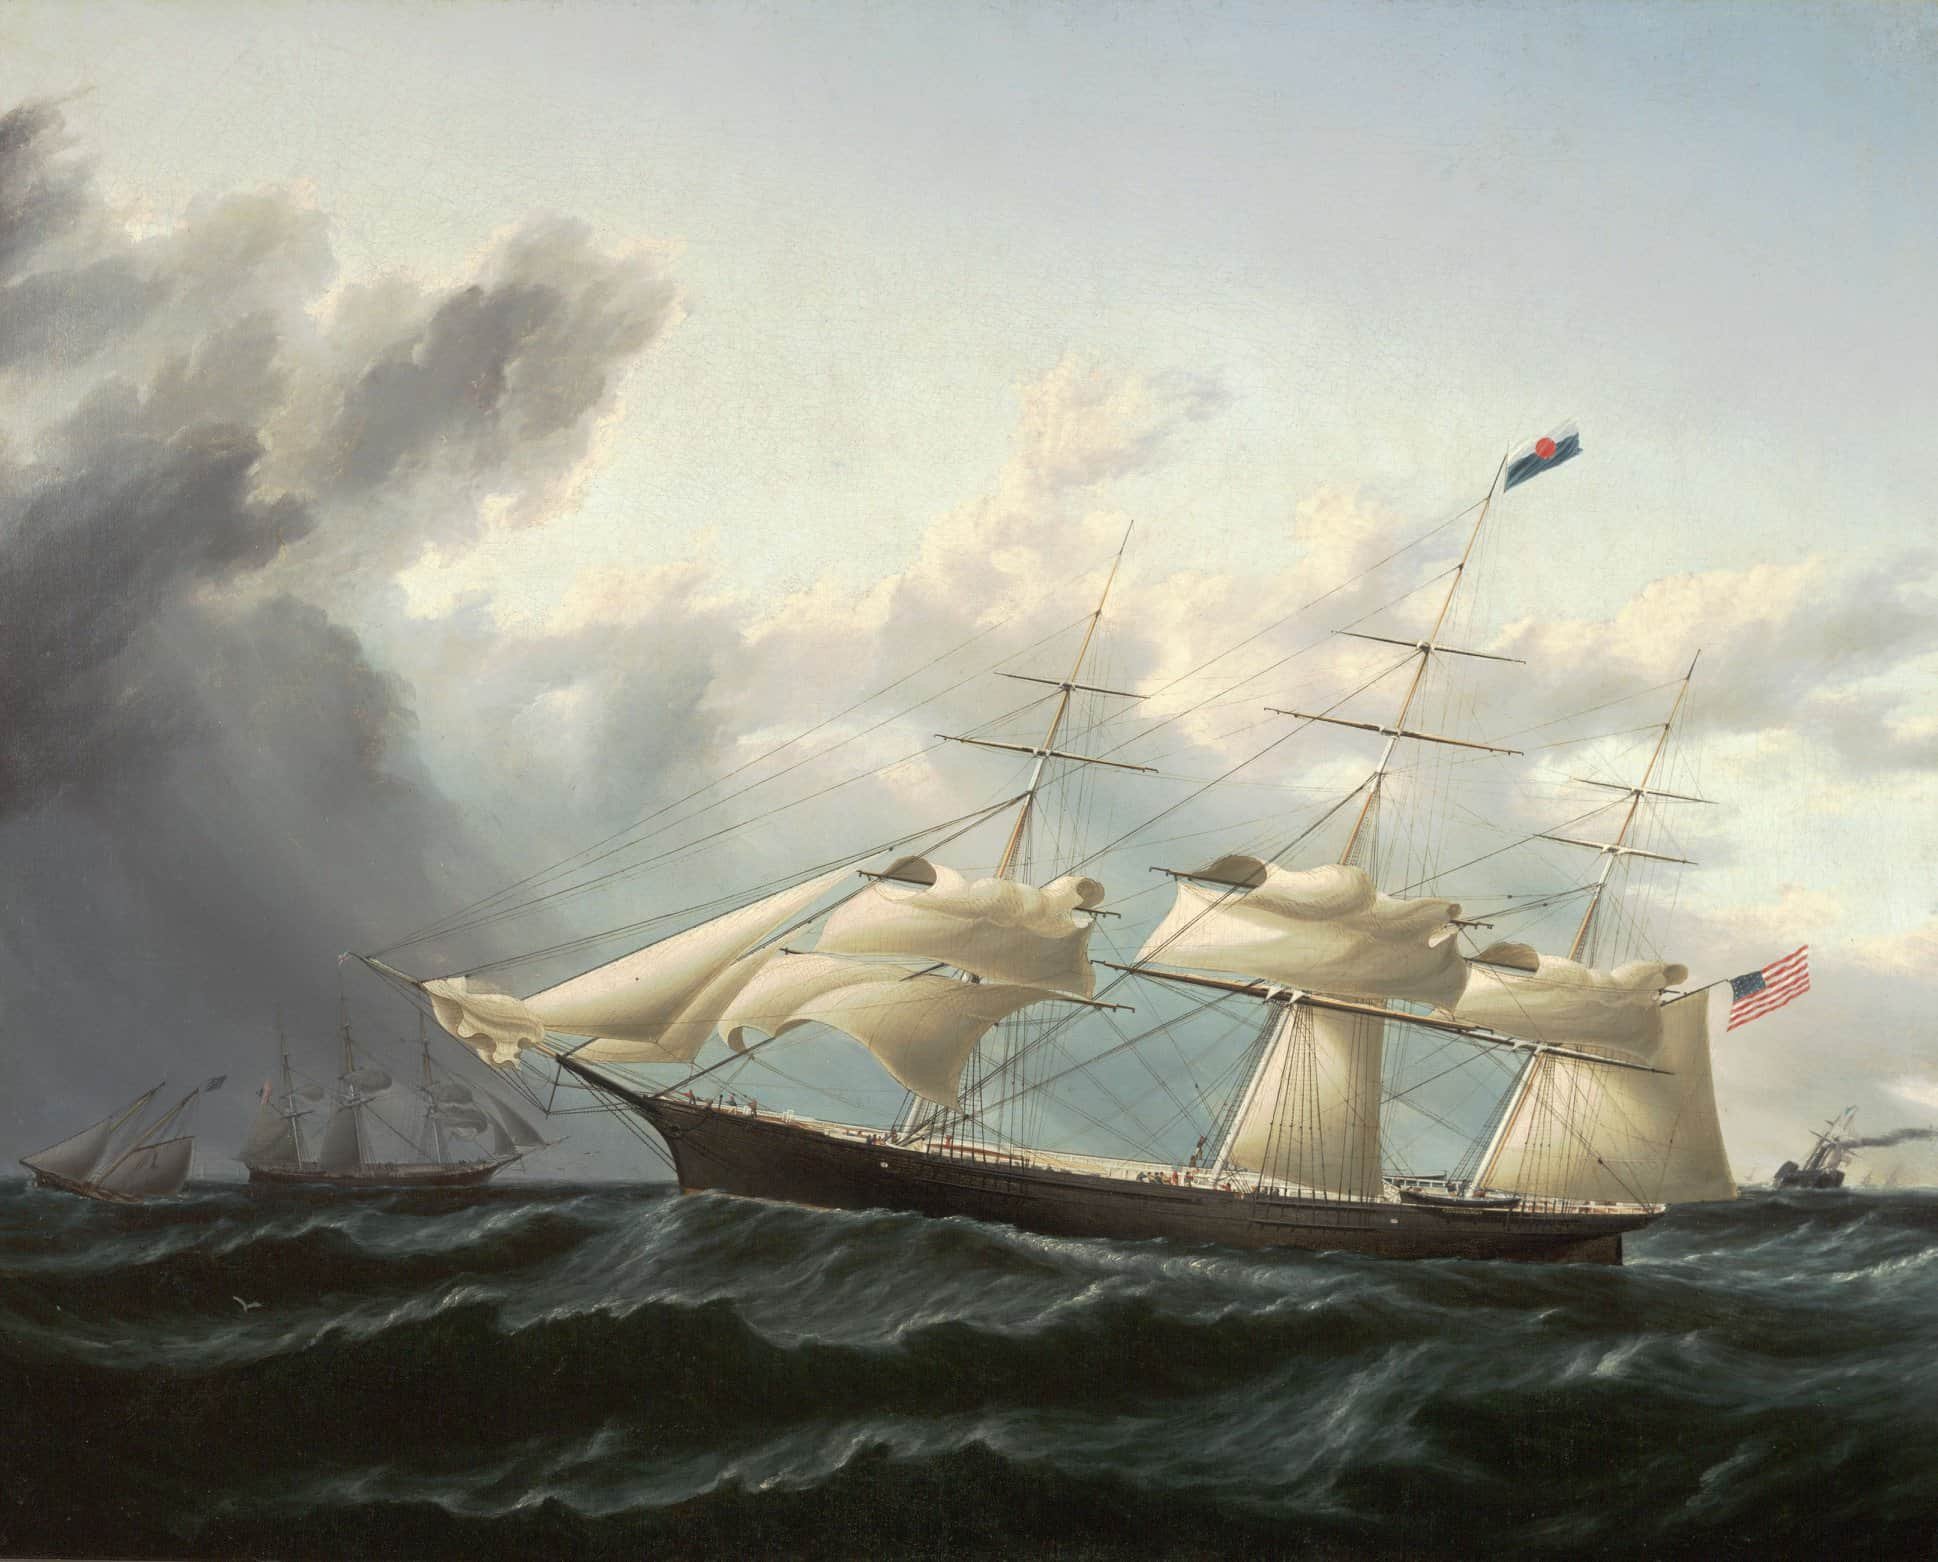
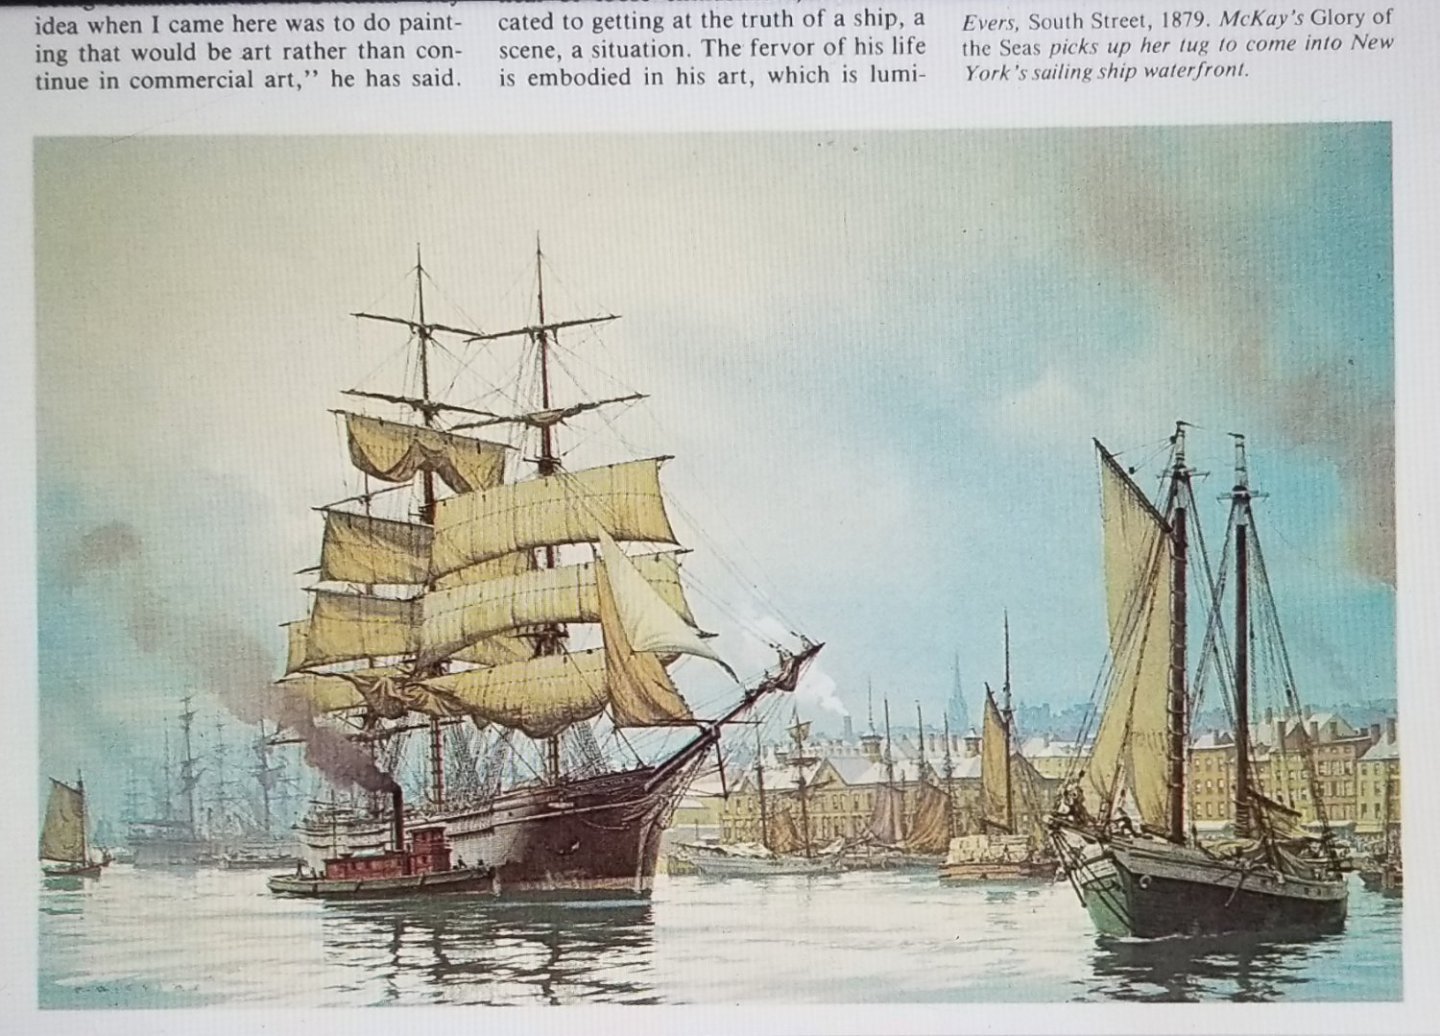
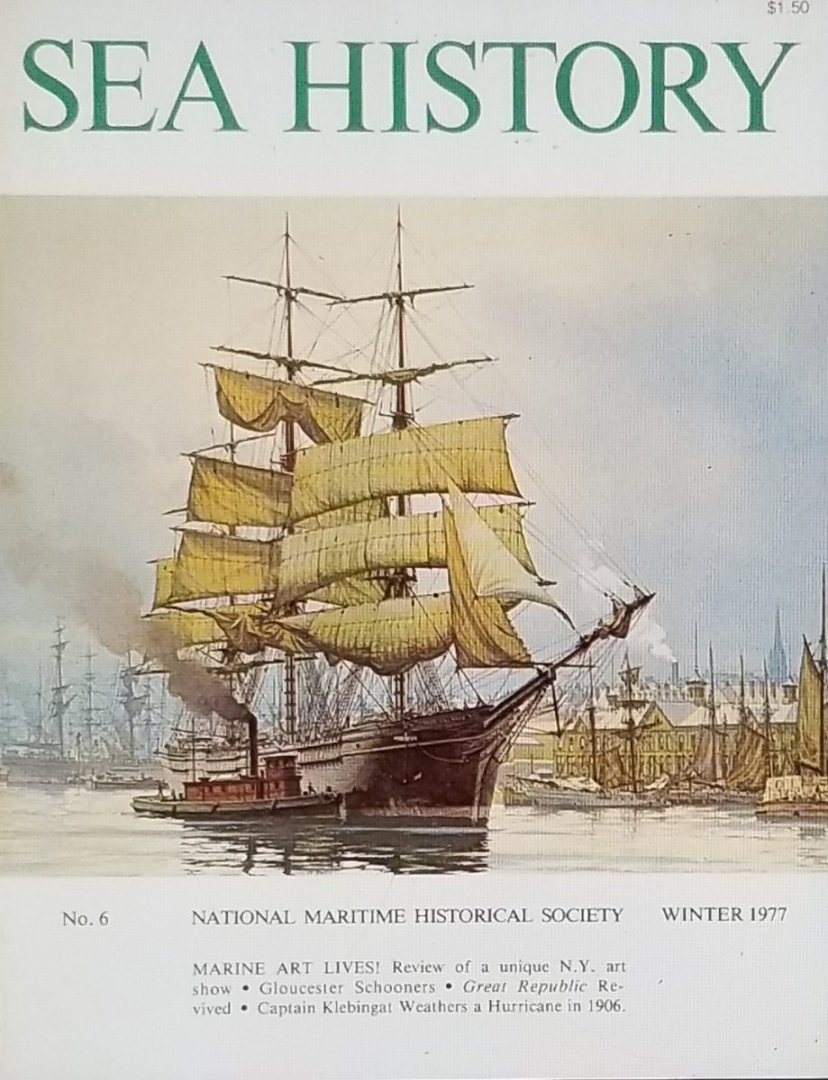
Rob, Mike sent me the same picture this morning. He mentioned Carl Everts made 3 Glory of the Seas paintings. Sea History, Winter 1977 has his 3rd work titled "South Street 1879, 'Glory of the Seas' Picking Up Her Tow in New York Harbor." Here's the magazine cover and page with Evers' entire piece inside
- 3,560 replies
-
- 2
-
-
- clipper
- hull model
- (and 2 more)
-
Rob, I'm working on completing Mike's two requests first. He asked me to do Glory's prow below the waterline using 8.3 degrees and to redraw her forecastle using Vladimir's sharper profile. It's taking me longer than I first anticipated due to the technical challenges of reimagining her upper deck profile. The revised prow is actually slightly more aggressive than the roughly 6 degrees of my large drawing. I have to admit too, that the only actual vents I'm familiar with are the large split-level structure on her wheelhouse. So I'll need a little more direction on this interesting request.
- 3,560 replies
-
- 1
-
-
- clipper
- hull model
- (and 2 more)
-
Rob, From my limited time rigging old plastic Revell & Linberg sailing ship models, I recall that most critical steps are to work inside to outside. One of our proudest accomplishments was improvising all running rigging on the French Frigate La Flore. We came up with a way to have all yardarms fully functional, through the use of blocks and tackles just like on the vessel herself. While this is the most taxing process, the rewards in scale authenticity are immense. Thanks for sharing your process.
- 3,560 replies
-
- 1
-
-
- clipper
- hull model
- (and 2 more)
-
Rob, The apparently innumerable amount of untethered lines sure looks intimidating. I know you have a reliable system to keep them all sorted out so that they arrive at their proper destination. I would appreciate some insight into your procedure, because your results are just spectacular.
- 3,560 replies
-
- 2
-
-
- clipper
- hull model
- (and 2 more)
-
It would be really neat if the 8×10 includes the entire ship. Either way, as soon as I get it, I'll share it with you here.
- 3,560 replies
-
- 1
-
-
- clipper
- hull model
- (and 2 more)
-
Hi Rob, Mike replied that he has an 8x10 print of the above scene and he'll send it to me once he locates it.
-
Rob, what really impresses me about the loftiness of Glory's masts is the fact that it's so difficult to get her entire rig in frame of the camera's lens. Unless you back up a good distance, it's impossible to see her whole rig because it's so tall. It would be interesting to calculate the scale distance required to get your whole Glory of the Seas into frame once she's completed. Maybe then we could calculate the actual great distances contemporary photos such as this have been taken from. I was reviewing this beautiful scene and noticed a significant difference in height of the group of disembarked passengers in the foreground compared to a seaman standing amid ship on Glory of the Seas in the background. Based on the relative height of the camera's viewpoint above the people, it's clear the photographer was aboard the docked passenger vessel Dora when this picture was taken. Considering by 1910 her rig had already been reduced several times, even so Glory's rig is still impressive.
-
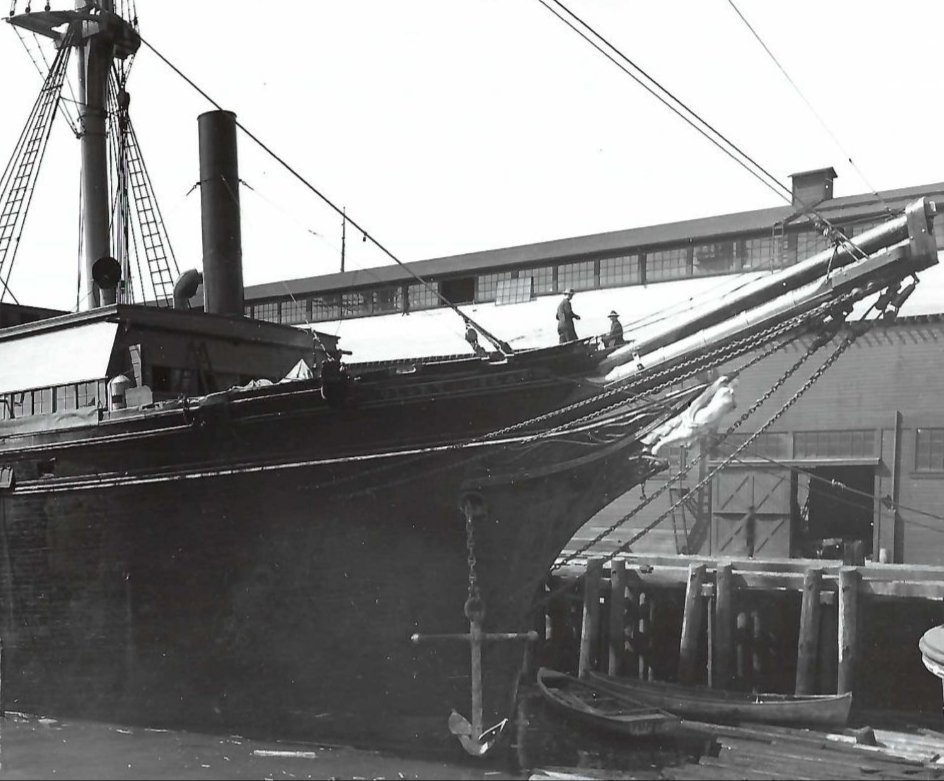
Hi Rob, I will send Mike your request. It was a great thrill to get this latest image. Mike is such a nice guy. He actually gets a kick out of how much we enjoy the beautiful images he shares. When I received this latest one, I was again struck at how simply beautiful Glory of the Seas truly was. Even though her entire superstructure is marred by the uncaring, callous factory additions, there's yet enough of her original lines observable to still imagine her classic beauty.
-
Hi Vlad, It's not stupidity. I'm sure you didn't intentionally slice open your own fingers. That's why they're called accidents. Meanwhile, do be careful while juggling with multiple sharp knives. Leave that up to the professionals.....
- 3,560 replies
-
- 1
-
-
- clipper
- hull model
- (and 2 more)
-
Hi Pat, Here's 2 more edits, each focusing on the bowsprit and the particular rigging line you requested. At least I hope this encompasses the forestay to bow Knighthead rigging that you want a closer look at. I can still get tighter if you need to, just let me know.
- 3,560 replies
-
- 3
-
-
- clipper
- hull model
- (and 2 more)
-
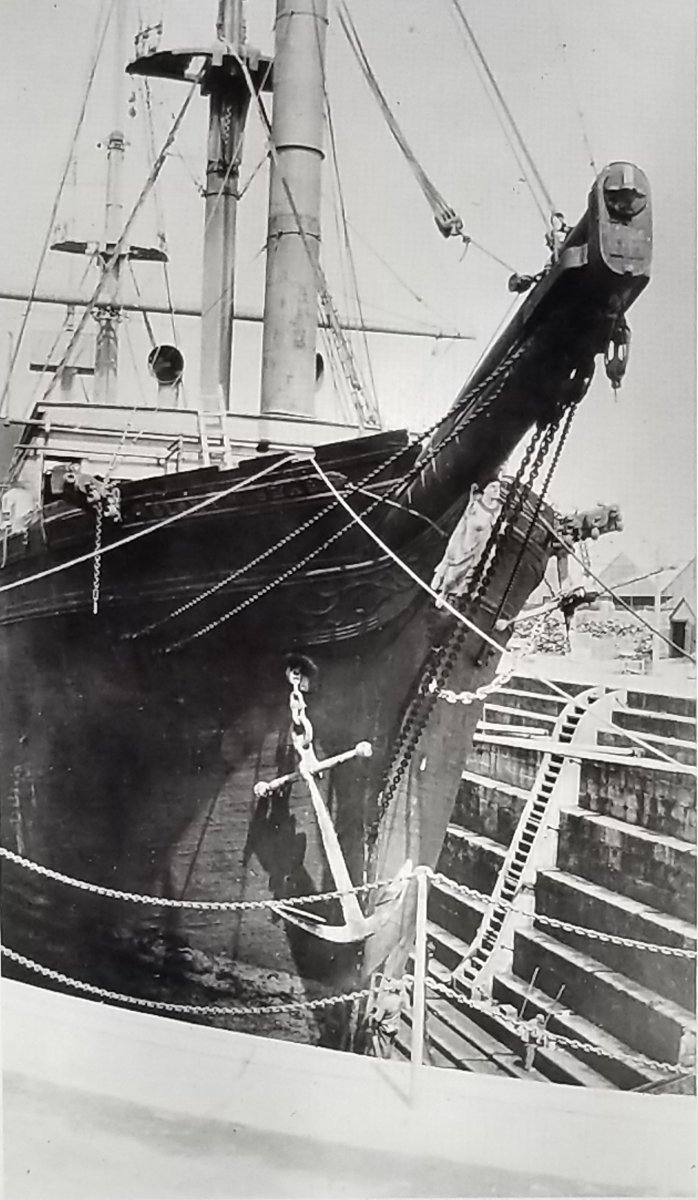
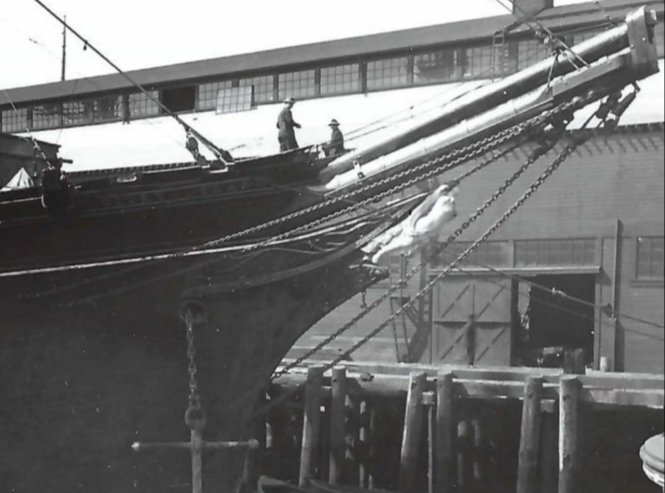
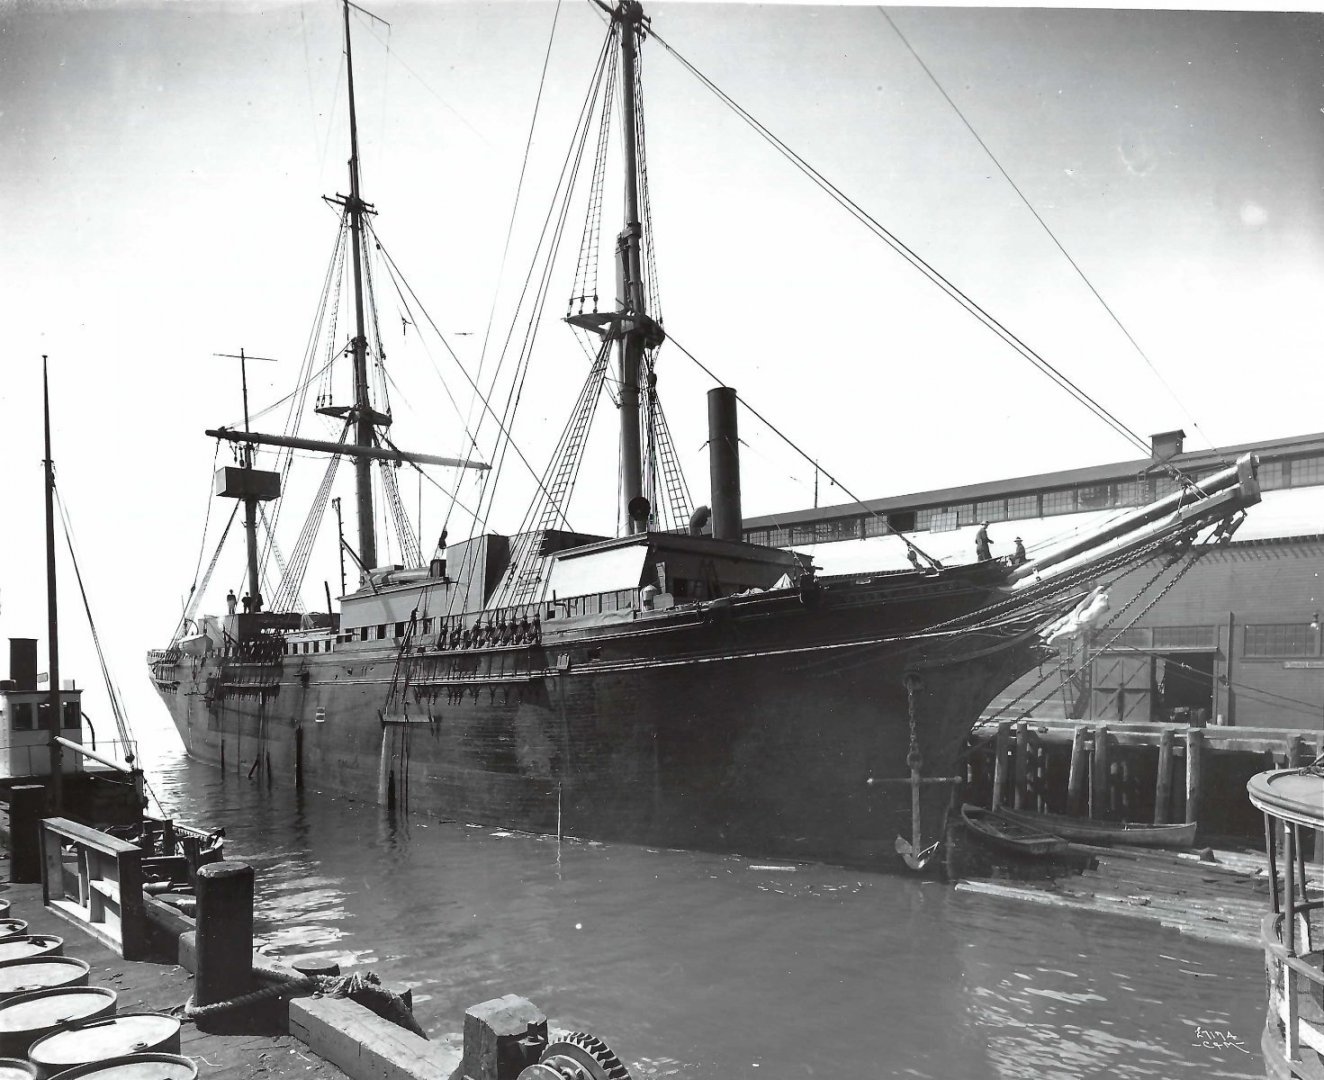
Rob, Vladimir et all, Michael Mjelde or as he prefers Mike, has come through for us again. Months ago I literally stumbled on a rare scene of the old McKay Clipper Ship Glory of the Seas depicted in a cork insulation company ad buried deep in an Insulation business magazine. I shared the third low res picture with Mike just in case he hadn't seen it before. He casually mentioned that he had an original of the same picture in his files and voila! here it is. Since the original arrived positioned vertical with slightly more surrounding white space, I rotated it and cropped some of the white, leaving the entire image intact. First pic is my 4th edit, primarily to enable her lovely Grecian goddess Athena figurehead to be seen closer. A portion of her lower left leg and entire right arm below the shoulder are both missing. As an artist, I would love to make a painting of this scene, recreating her razor sharp prow with her entire, impressively lofty rig, depicting some of her enormous sails as she's towed through the Golden Gate into her ending berth at San Francisco.


- 3,560 replies
-
- 6
-
-
- clipper
- hull model
- (and 2 more)
edited2.jpg.9175bf7292b239c4313b5c544f649af9.jpg)