HOLIDAY DONATION DRIVE - SUPPORT MSW - DO YOUR PART TO KEEP THIS GREAT FORUM GOING! (Only 13 donations so far - C'mon guys!)
×
ClipperFan
-
Posts
2,167 -
Joined
-
Last visited
Content Type
Profiles
Forums
Gallery
Events
Everything posted by ClipperFan
-
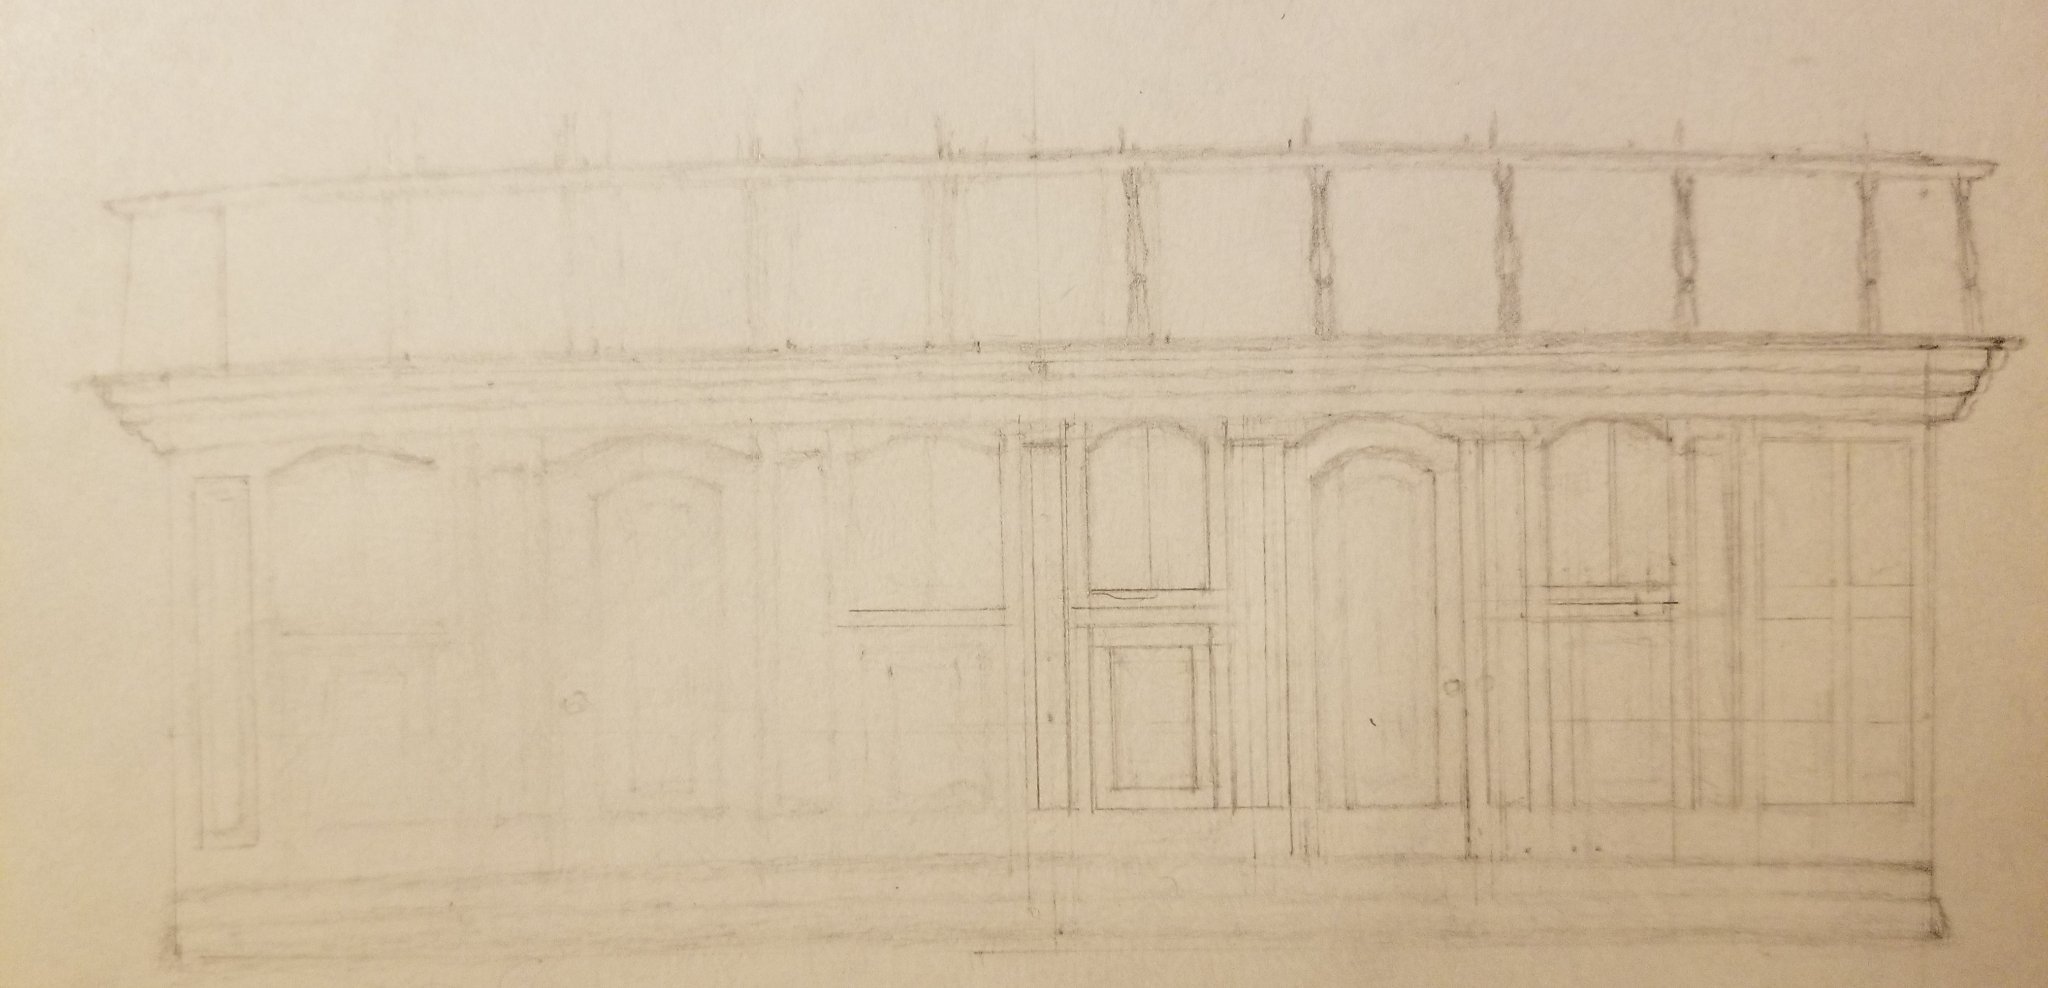
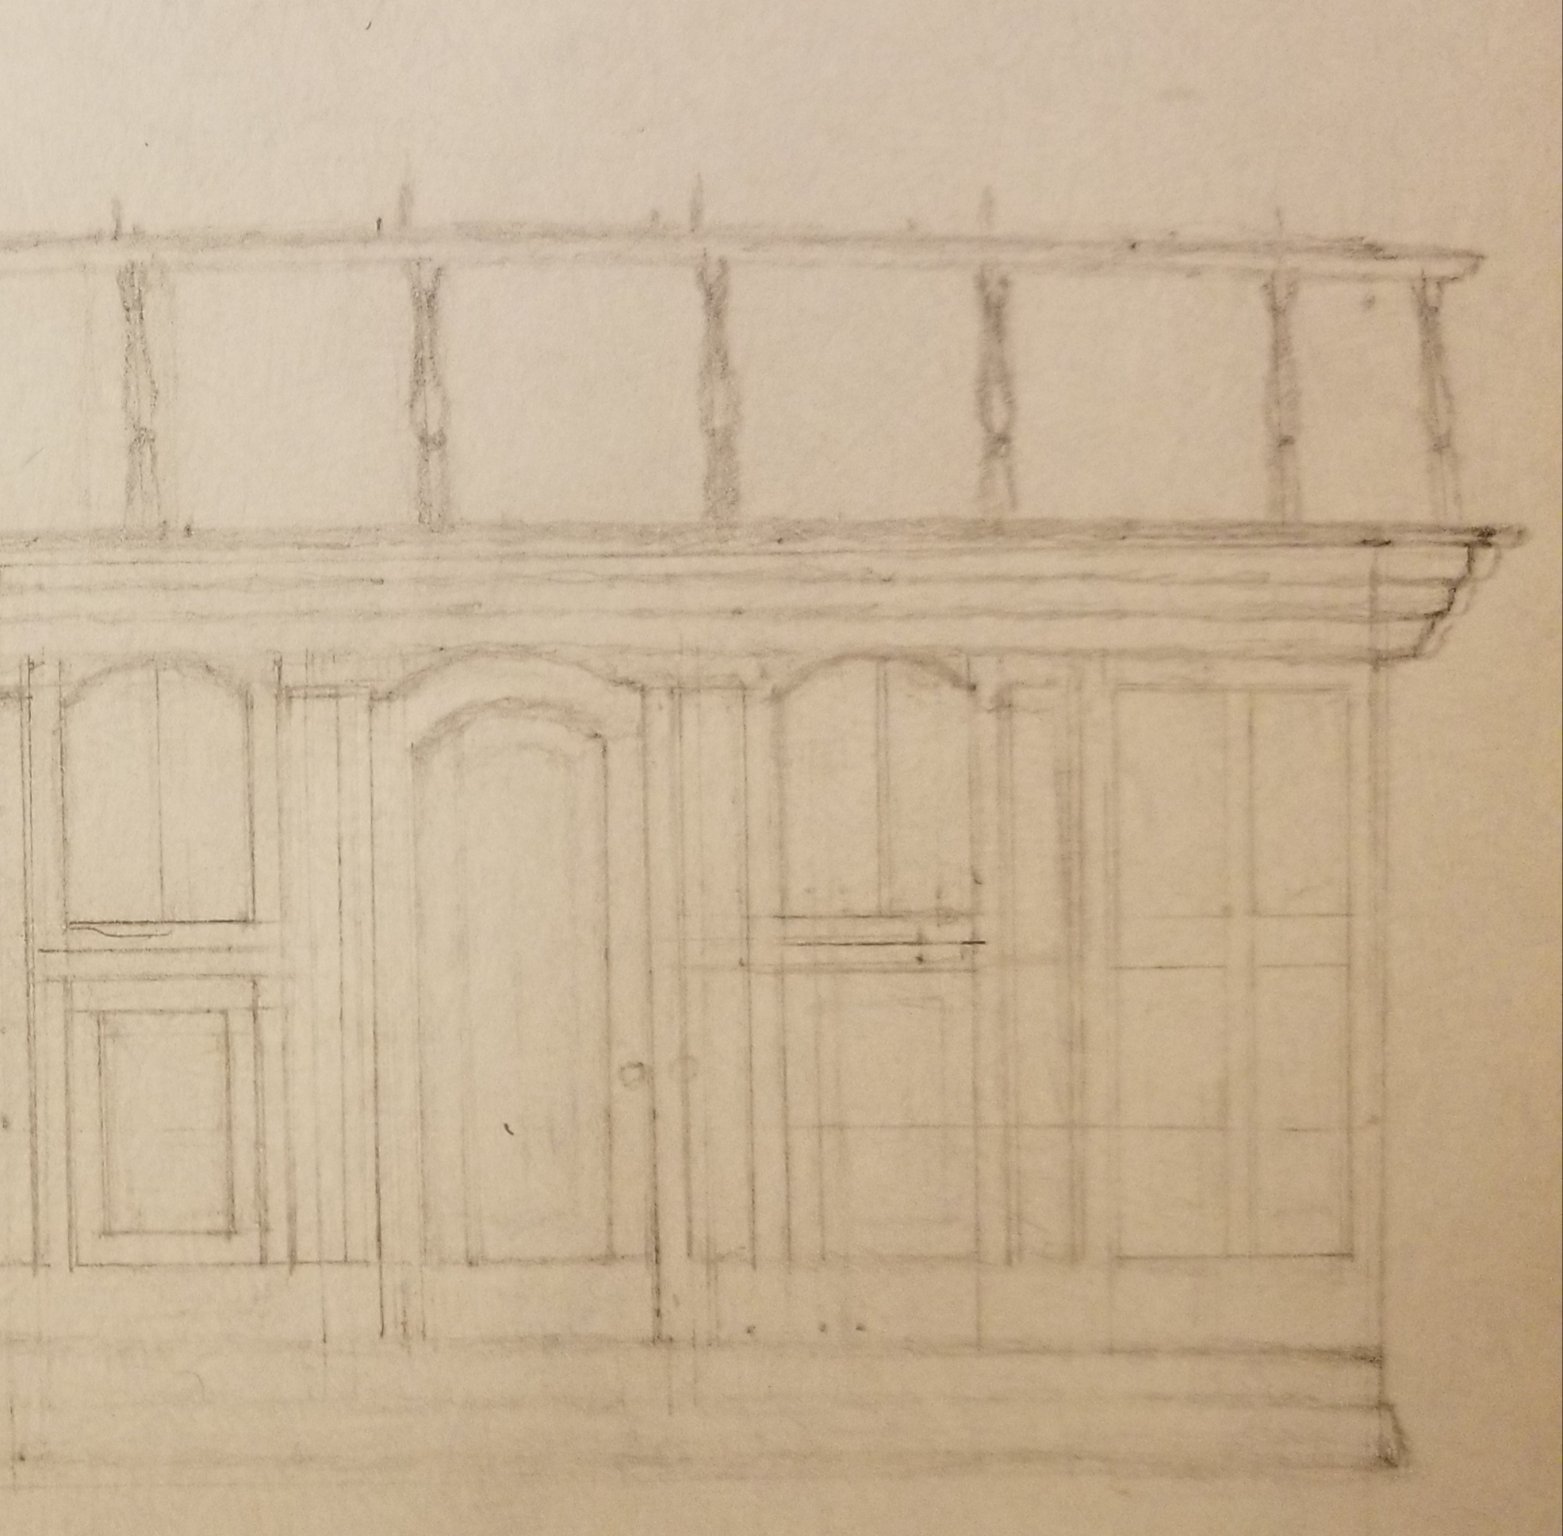
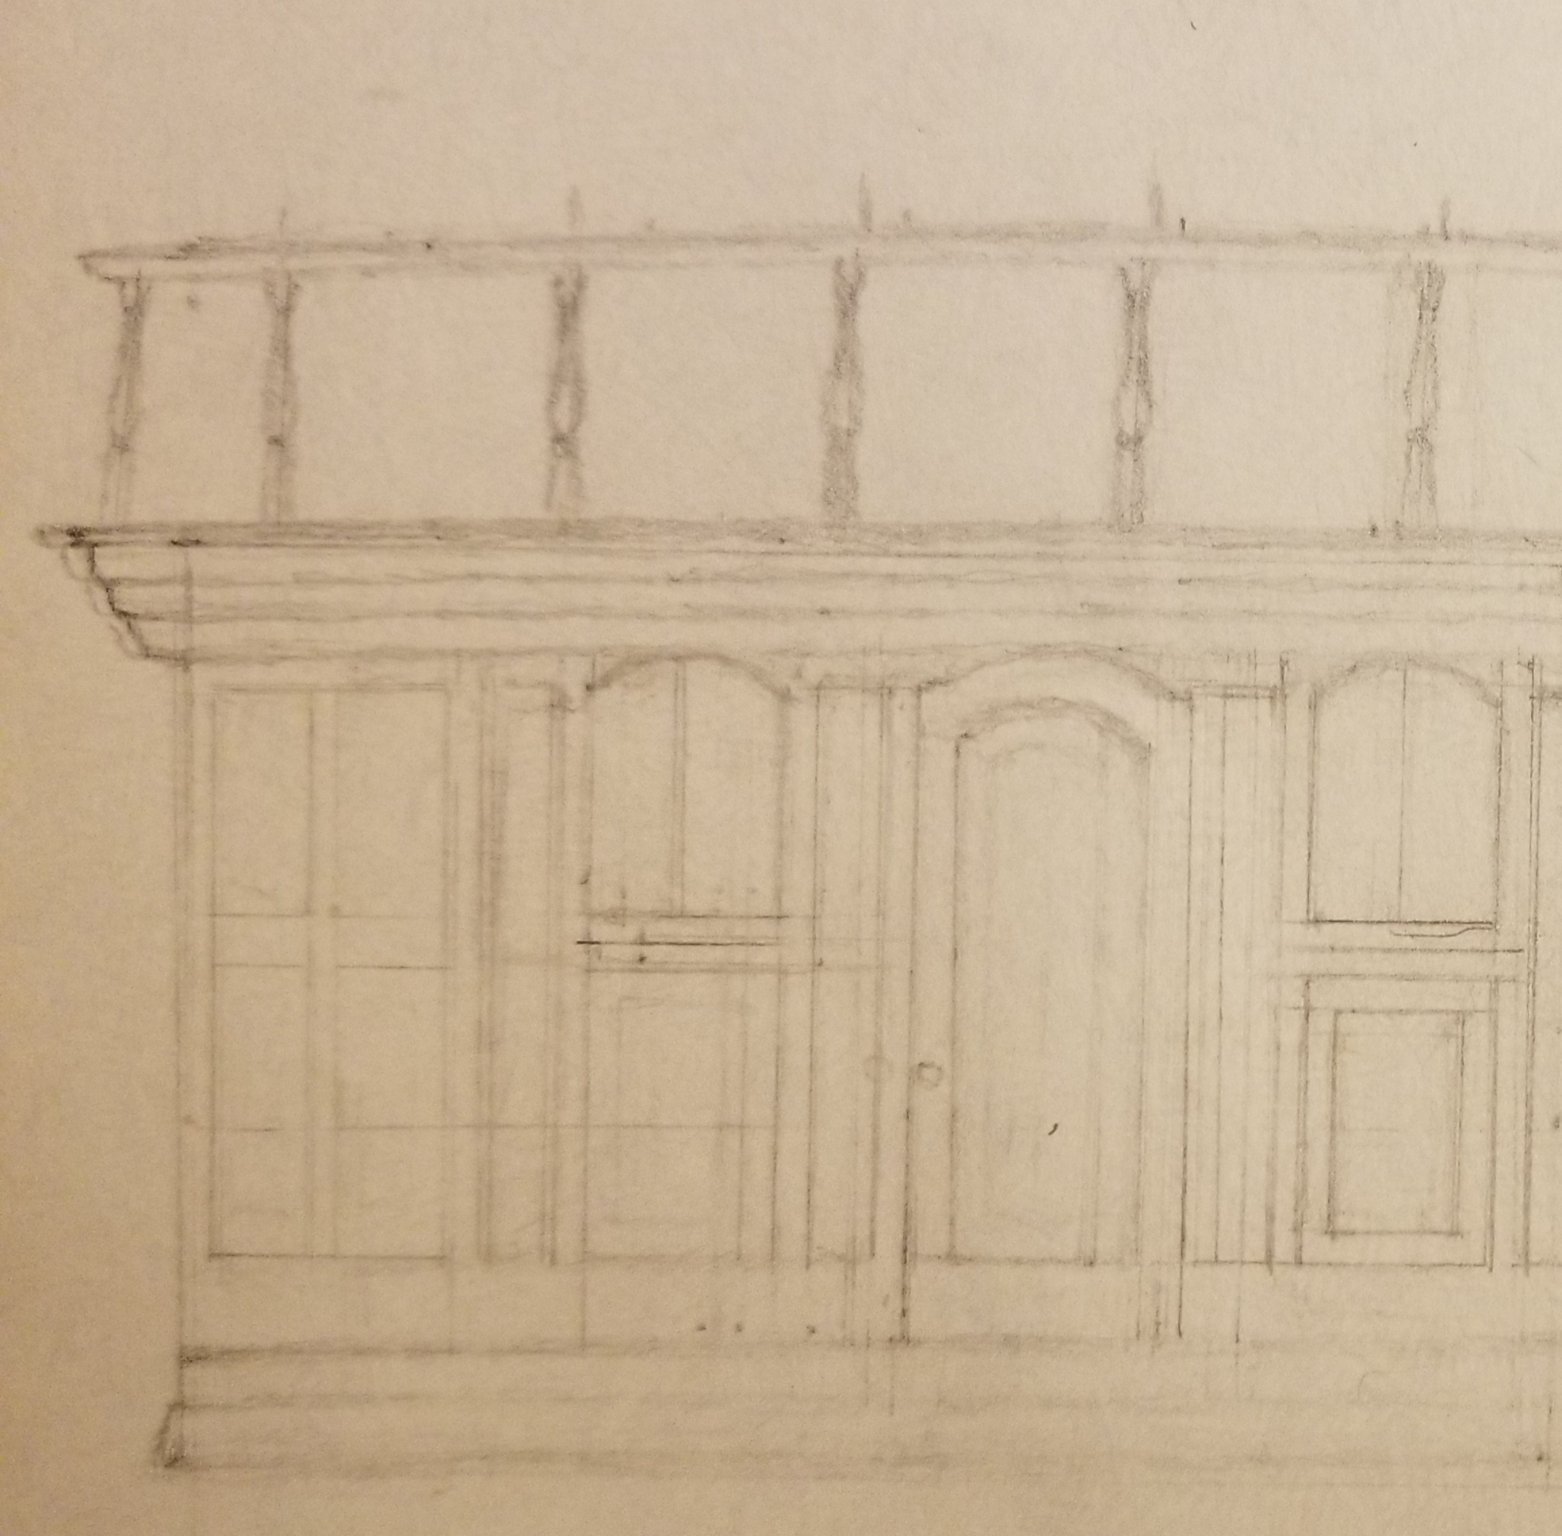
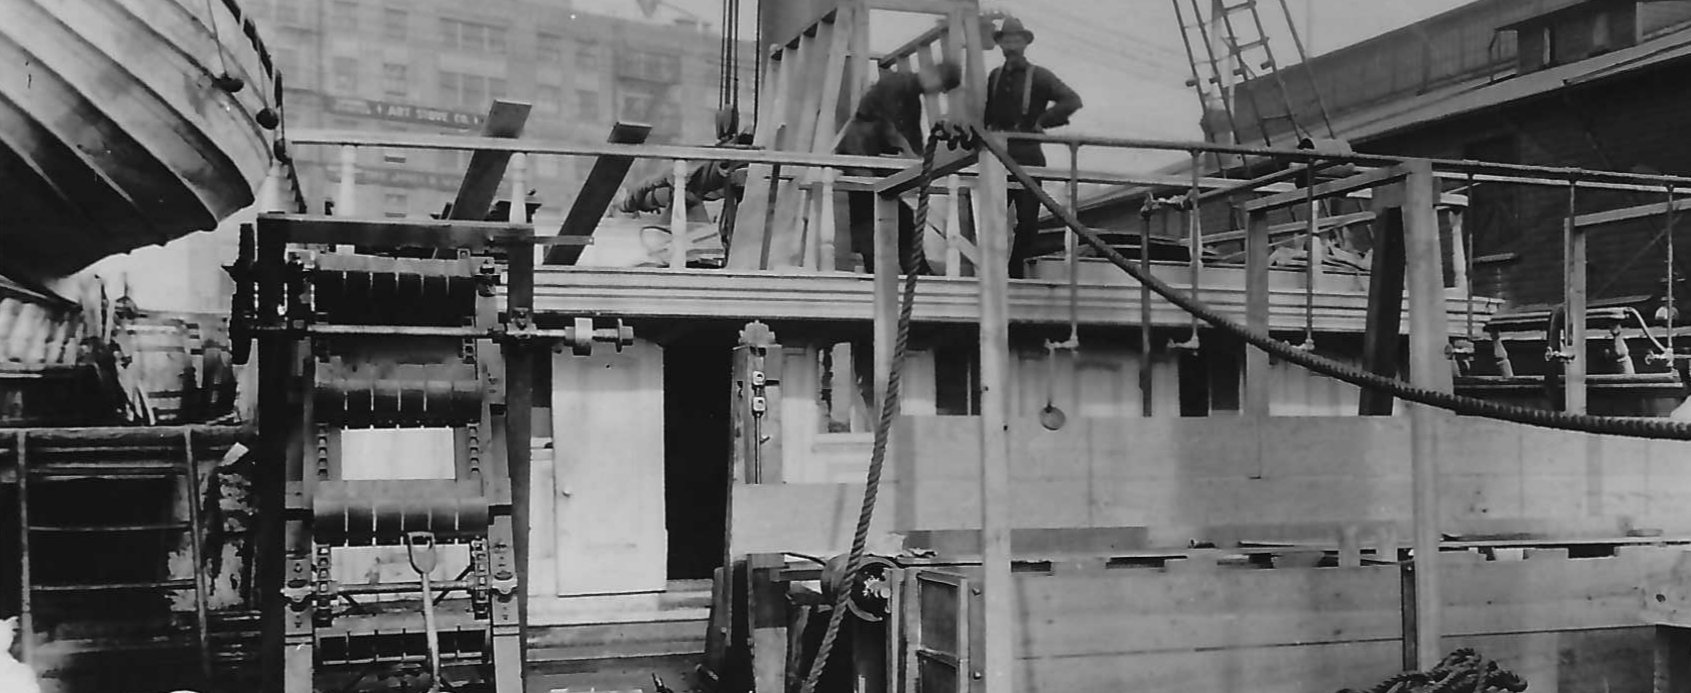
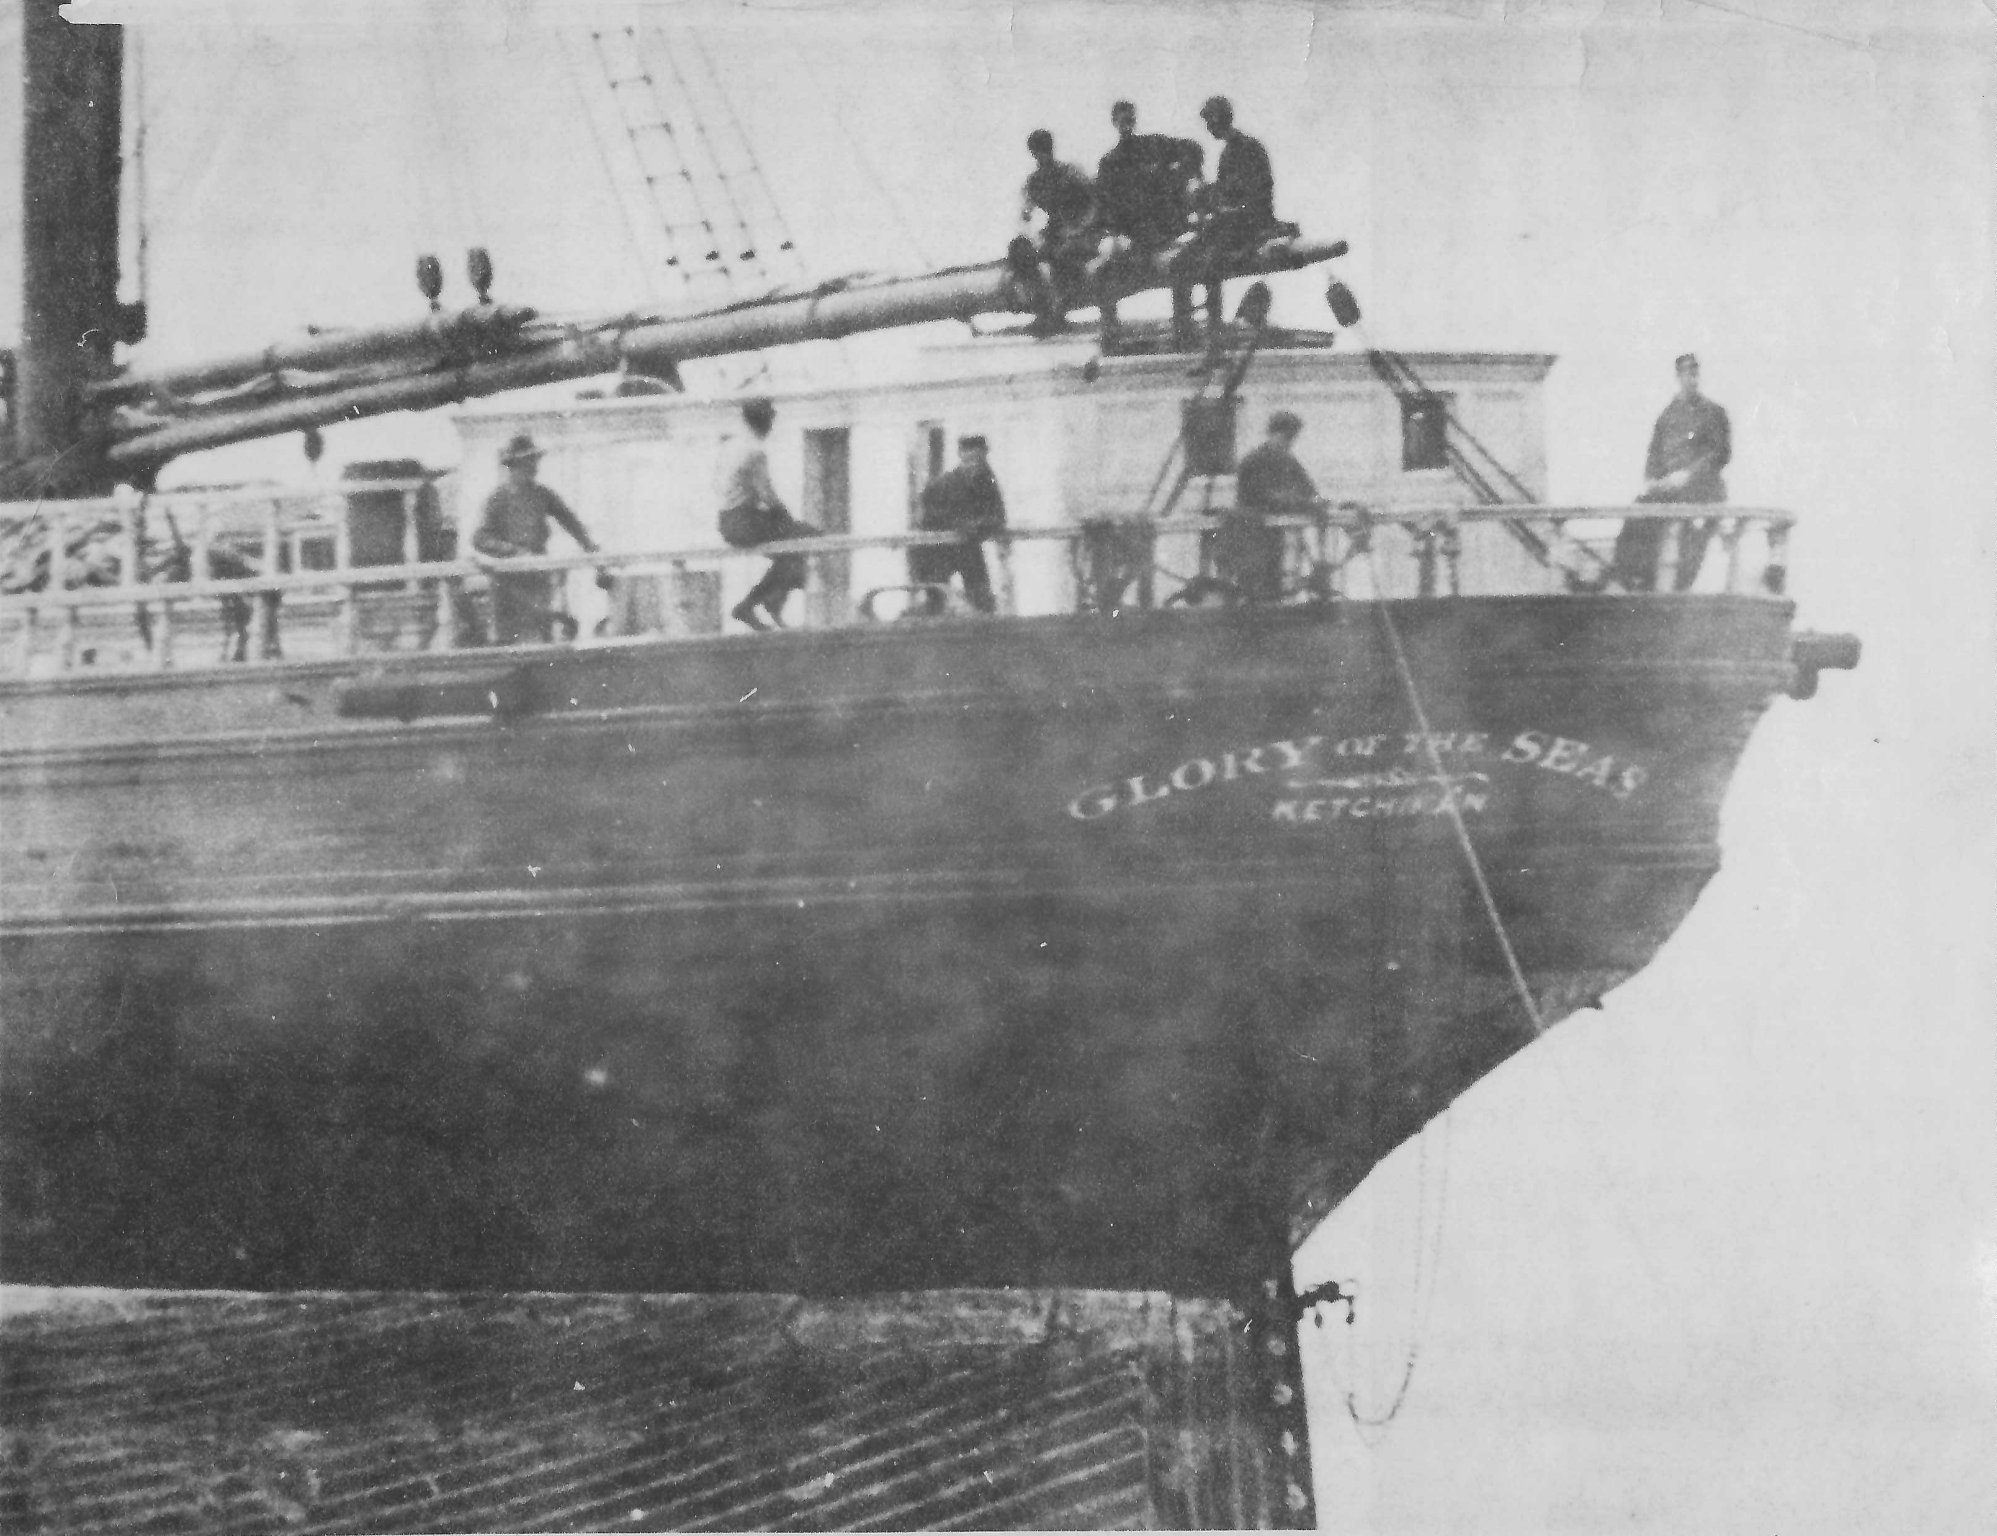
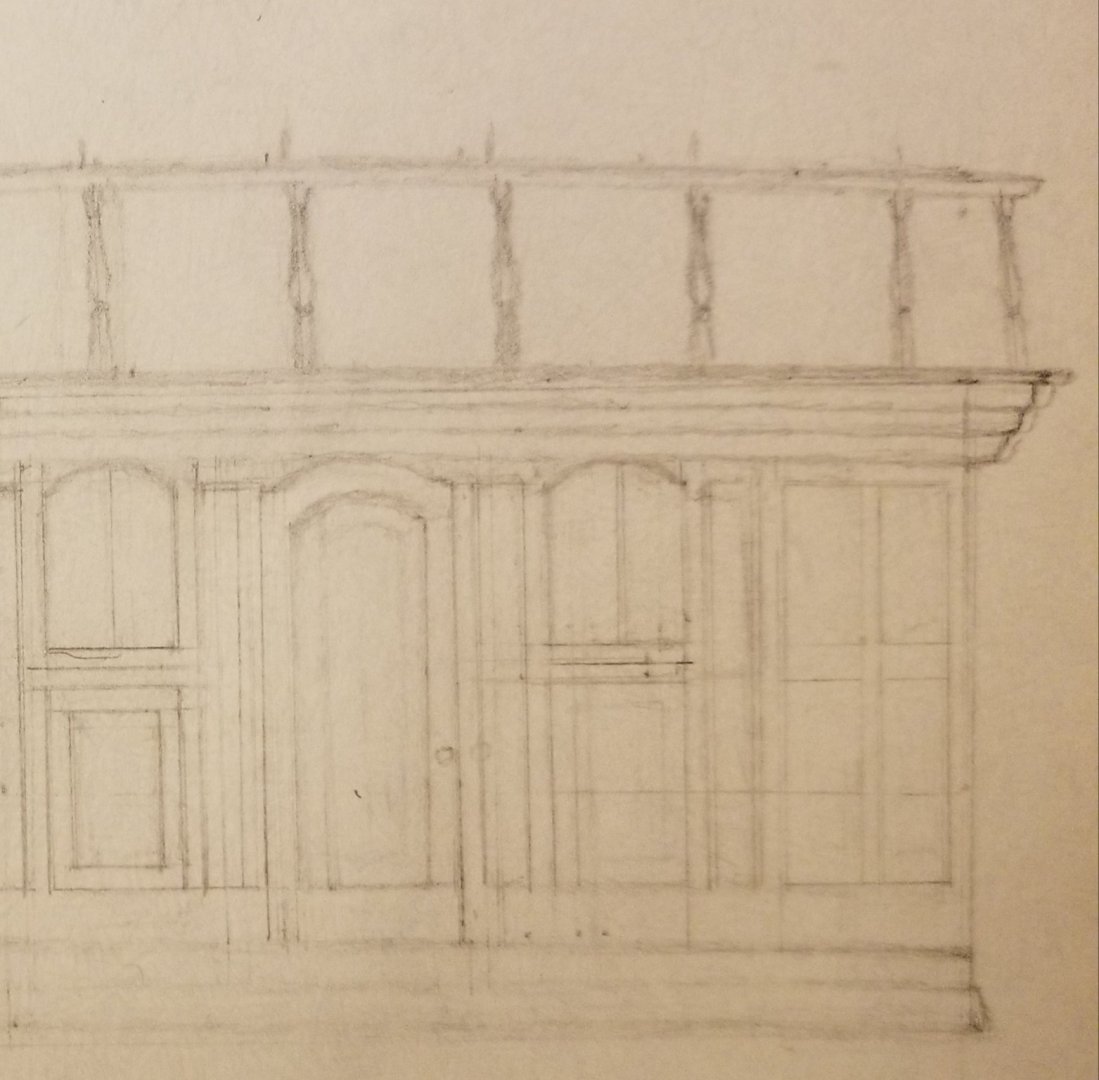
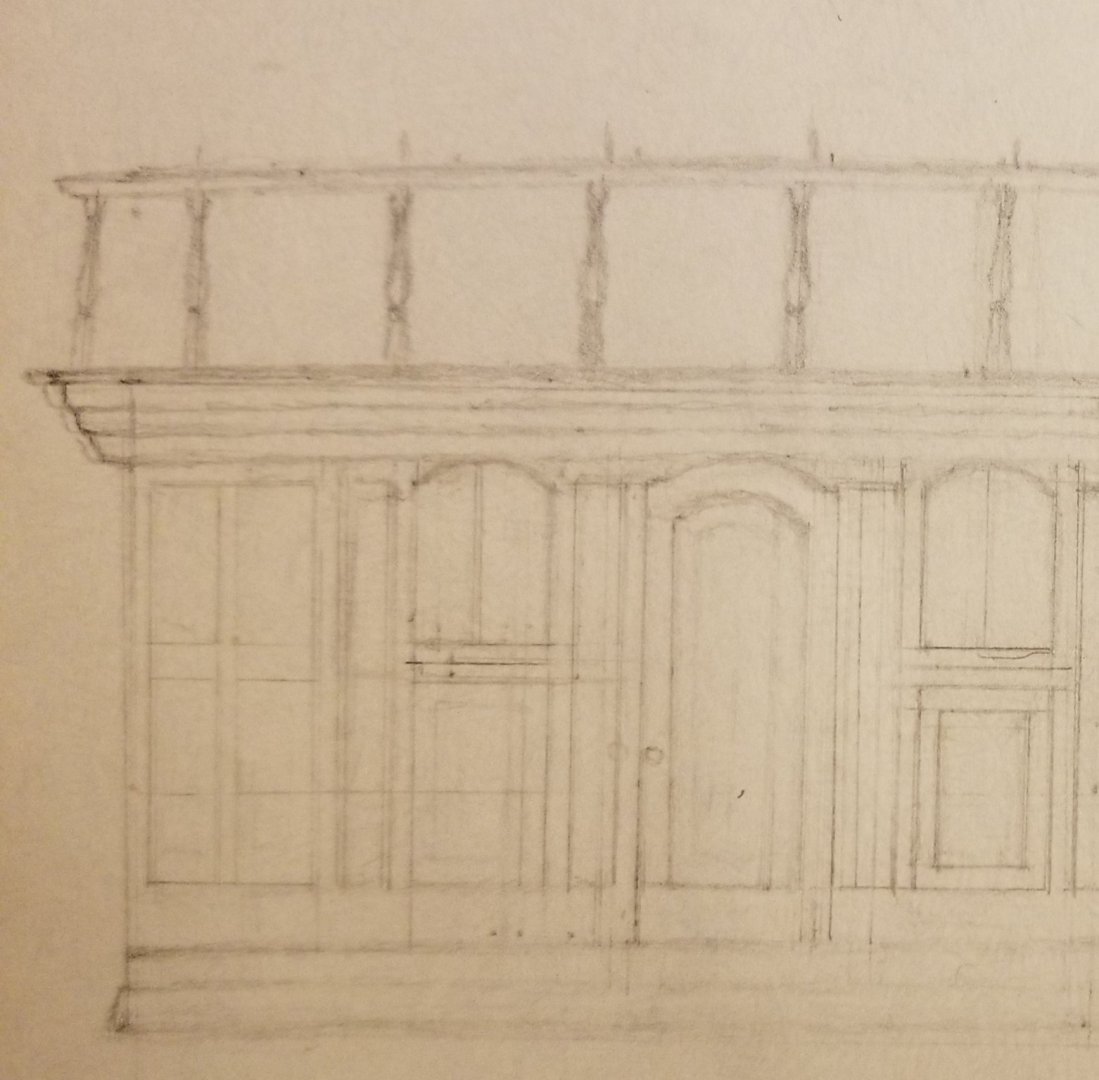
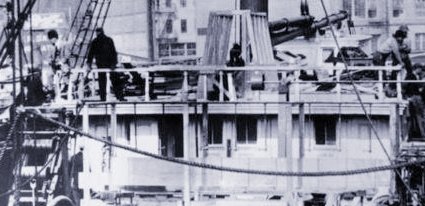
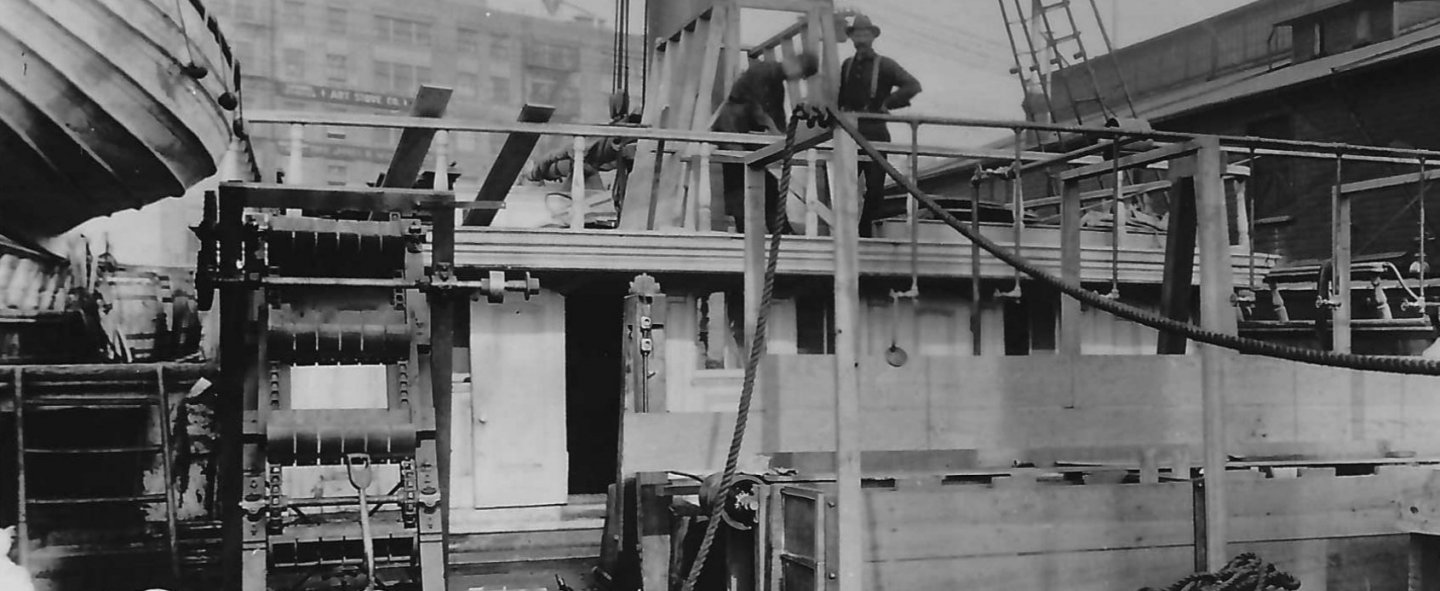
 Rob & Vladimir, here's my preliminary sketch of the somewhat ornate front face of Glory's rear 'Carriage' house with her upper turned stanchion rails. MacLean's stats say this house was 45' long x 24' wide × 8' high. Pictures show the house had a roughly 3' overhang. Contrary to expectations, the turned stanchions are not strictly verticle, nor all evenly spaced. It appears the 3 central stanchions were 2 & 1/2' apart, the remaining 6 on either side were 2 & 3/4' apart and the last 2 were 1 & 1/2 feet apart, for a total of 12 stanchions in all. The 4 windows appear to be 1 & 1/2' wide and both door seem to be sliding, not pivoting and are only 2' wide each. The left side slid out towards the left (as can be seen in this photo. I would expect the opposite door would slide out to the right. At the base is a double molding, the lowest appears to be painted blue, the upper would most likely be white, being a raised surface. All recessed areas would have been pearl and highlights white. The left side of my sketch is inaccurate, done before I realized how truly narrow the windows and doors really were. So to make things easier, I cropped the right side & flipped it to create a corresponding identical left one.
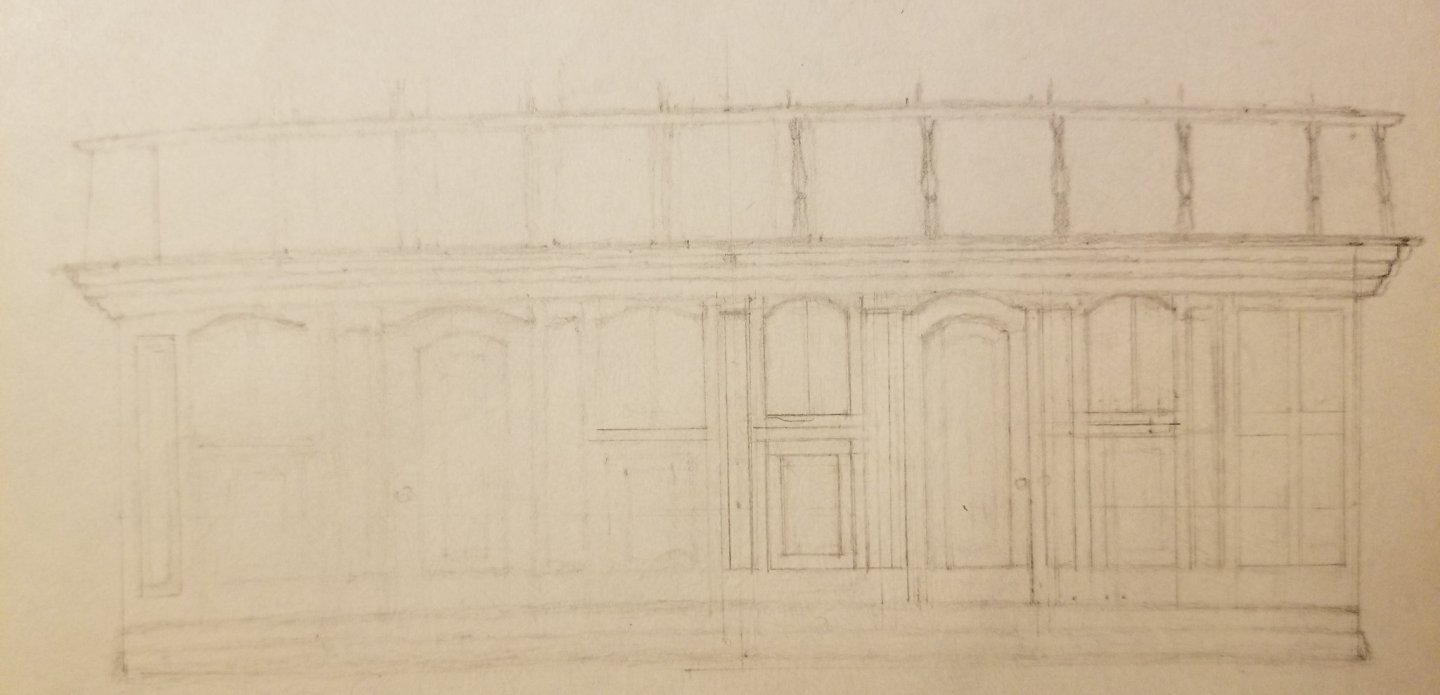
- 3,560 replies
-
- 4
-

-
- clipper
- hull model
- (and 2 more)
-
Rob, that's pretty tough for your poor wife. Give her my condolences for her difficult loss. When your last living relative passes, there's a peculiar loneliness that's attached to it.... By the way, I heard back from Mike after he received my Glory scan. He's asked for some prints so that he can send one to Ron Haug. This could get to be real interesting.....
-
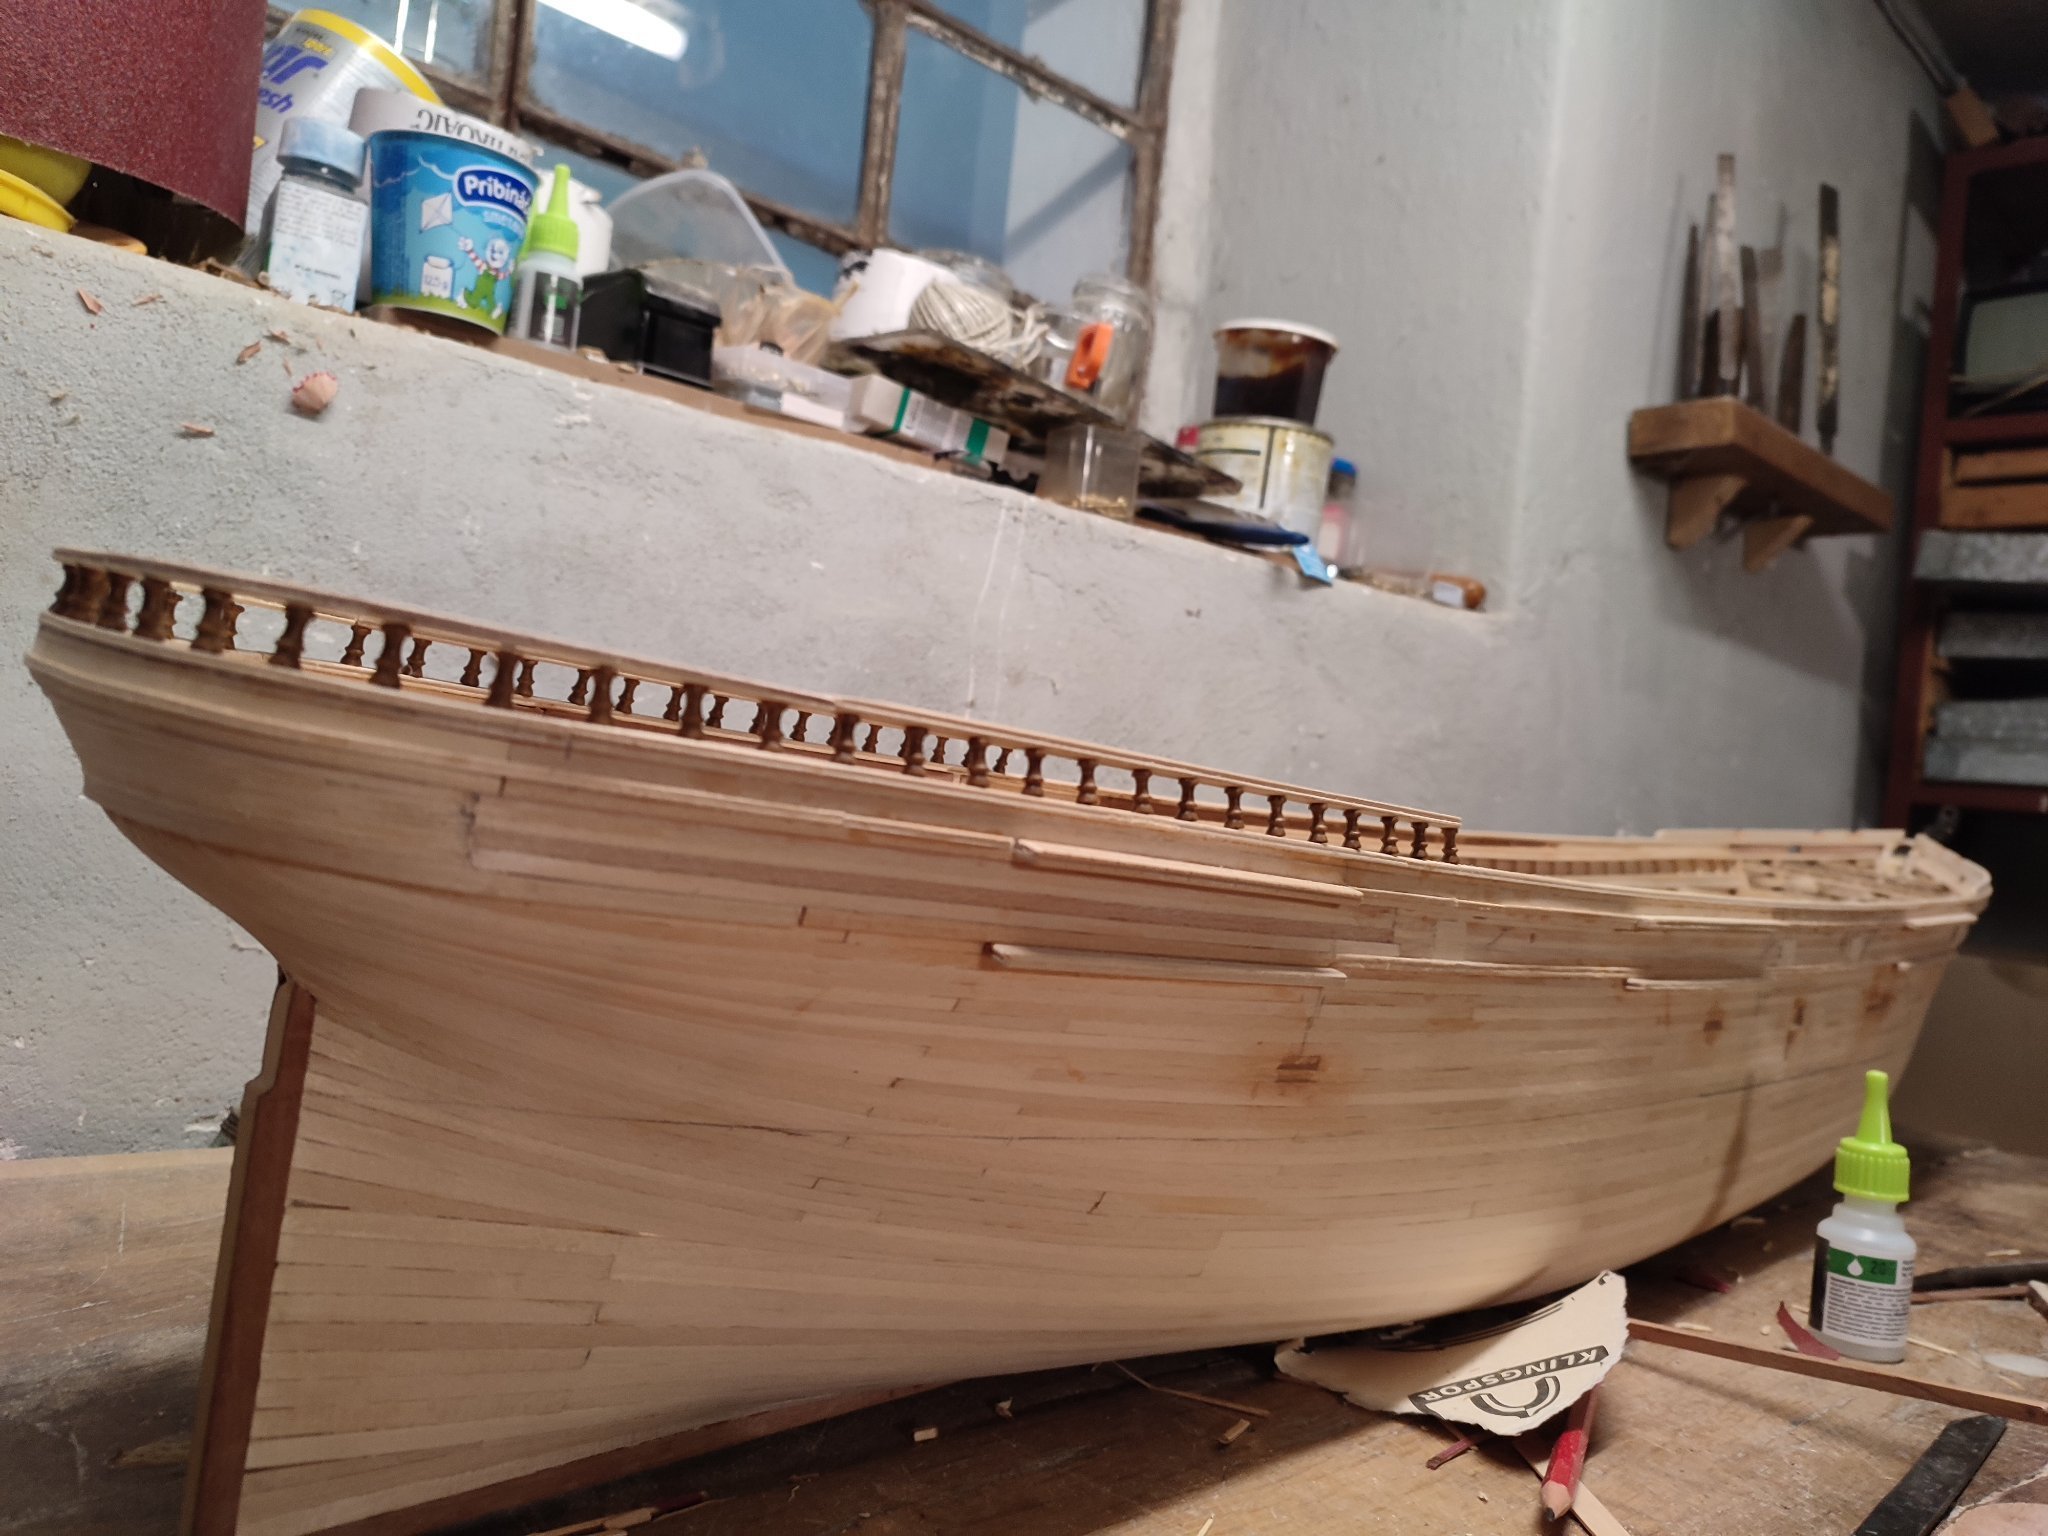
Vladimir, again, just like Rob, it's uncanny how much your miniature ship matches scenes of the actual vessel herself. Simply beautiful. Beautifully done work!
-
Vladimir, what you've illustrated would be correct, as far as I can tell. All flat surfaces would have been pearl and all raised ones would have been white. There had to be enough of a difference in contrast to justify the added investment. Donald McKay's Clippers and even his Packets were all renowned for their top of the line quality, both of craftsmanship and ship's fittings. After all, Donald McKay was the main American contributor to the British James Baines Line, supplying 4 principal vessels to his franchise. Before British Regulars embarked to India to suppress a revolt, Queen Victoria paid a Royal visit to the vessels "James Baines" and "Champion of the Seas." She's known to have marveled that the British Empire had such magnificent vessels.
-
Rob, always there to help! Actually these "pearls" are very restful shades. On another matter, does anyone know if there's a way to upload Adobe pdf files? My 1:96 scale ship's lines of Glory are done. Staples scanned them & emailed me a copy but it's on a pdf file. They made print outs. That's when I realized I mistakenly put the date as 8/20/28. Since then I've corrected it to 8/28/21 but it has to be rescanned to get that corrected date.
-
Vladimir, one last sample, Rust-o-Leum pale white pearl. You can see they all tend towards a white with hazel & a hint of pink undertones.

-
Vladimir, here's Ralph Lauren's mother of pearl paint sample.

-
Vladimir, from PPG's interior paint website: mother of pear is a pale shaded, sunny white paint color with hazel undertone. Here's their sample:

-
Vladimir, frames ARE futtocks, there's no difference. To keep it simple, raised surfaces, ie inner moldings and frames are white, recessed panels on the ship's sides (bulwarks) & houses are pearl. Incidentally "pearl" is not grey nor buff as some Ships had grey (or gray) & buff interiors and are described as such. If you look up "mother of pearl" you'll get a better idea of pearl. To me it's kind of an elegant mixture of very light pinkish tan. The color blue Rob has for the waterways would go well with that, almost a wedgewood blue but a little darker. I'd play around with some shades to see how it looks before painting your model.
-
Vladimir, frames or futtocks would have been painted white (relieved with white) to me the pearl shade would be all the flat surfaces not including blue waterways.
-
Vladimir a while ago I was curious as to exactly what "pearl" color would have looked like in the 1850s & 60s. A Google search for that era pearl resulted in this shade which I think is a good match.
-
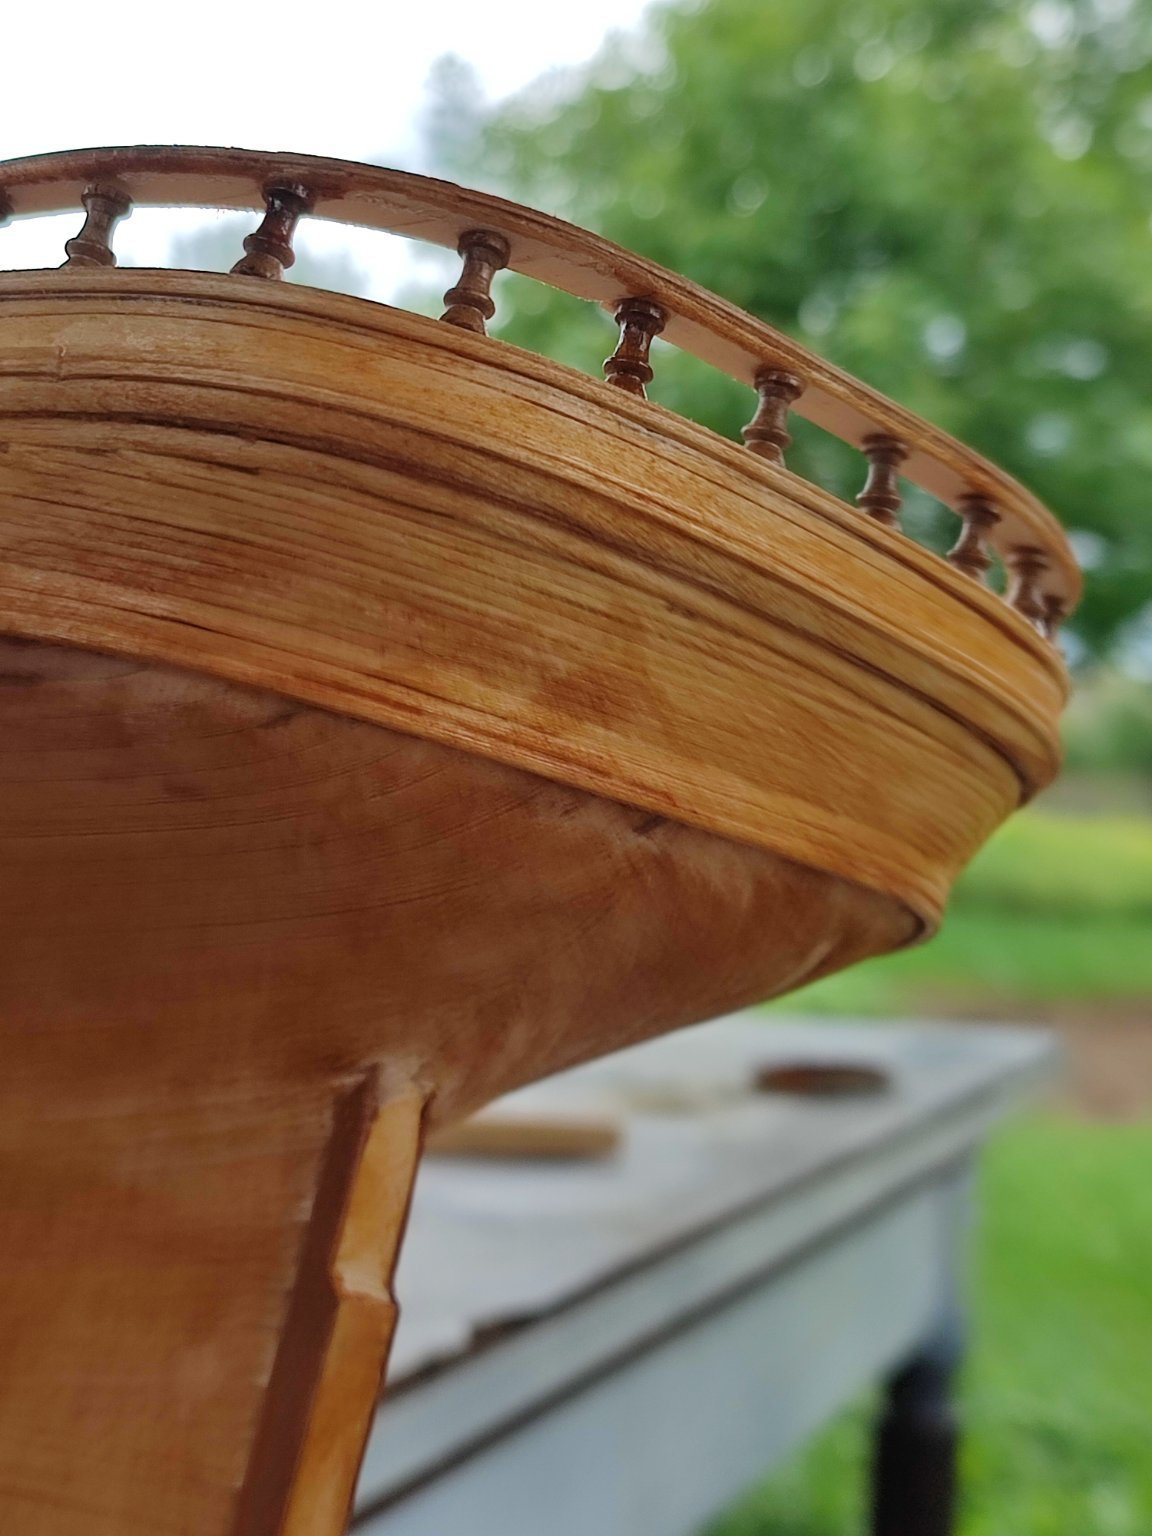
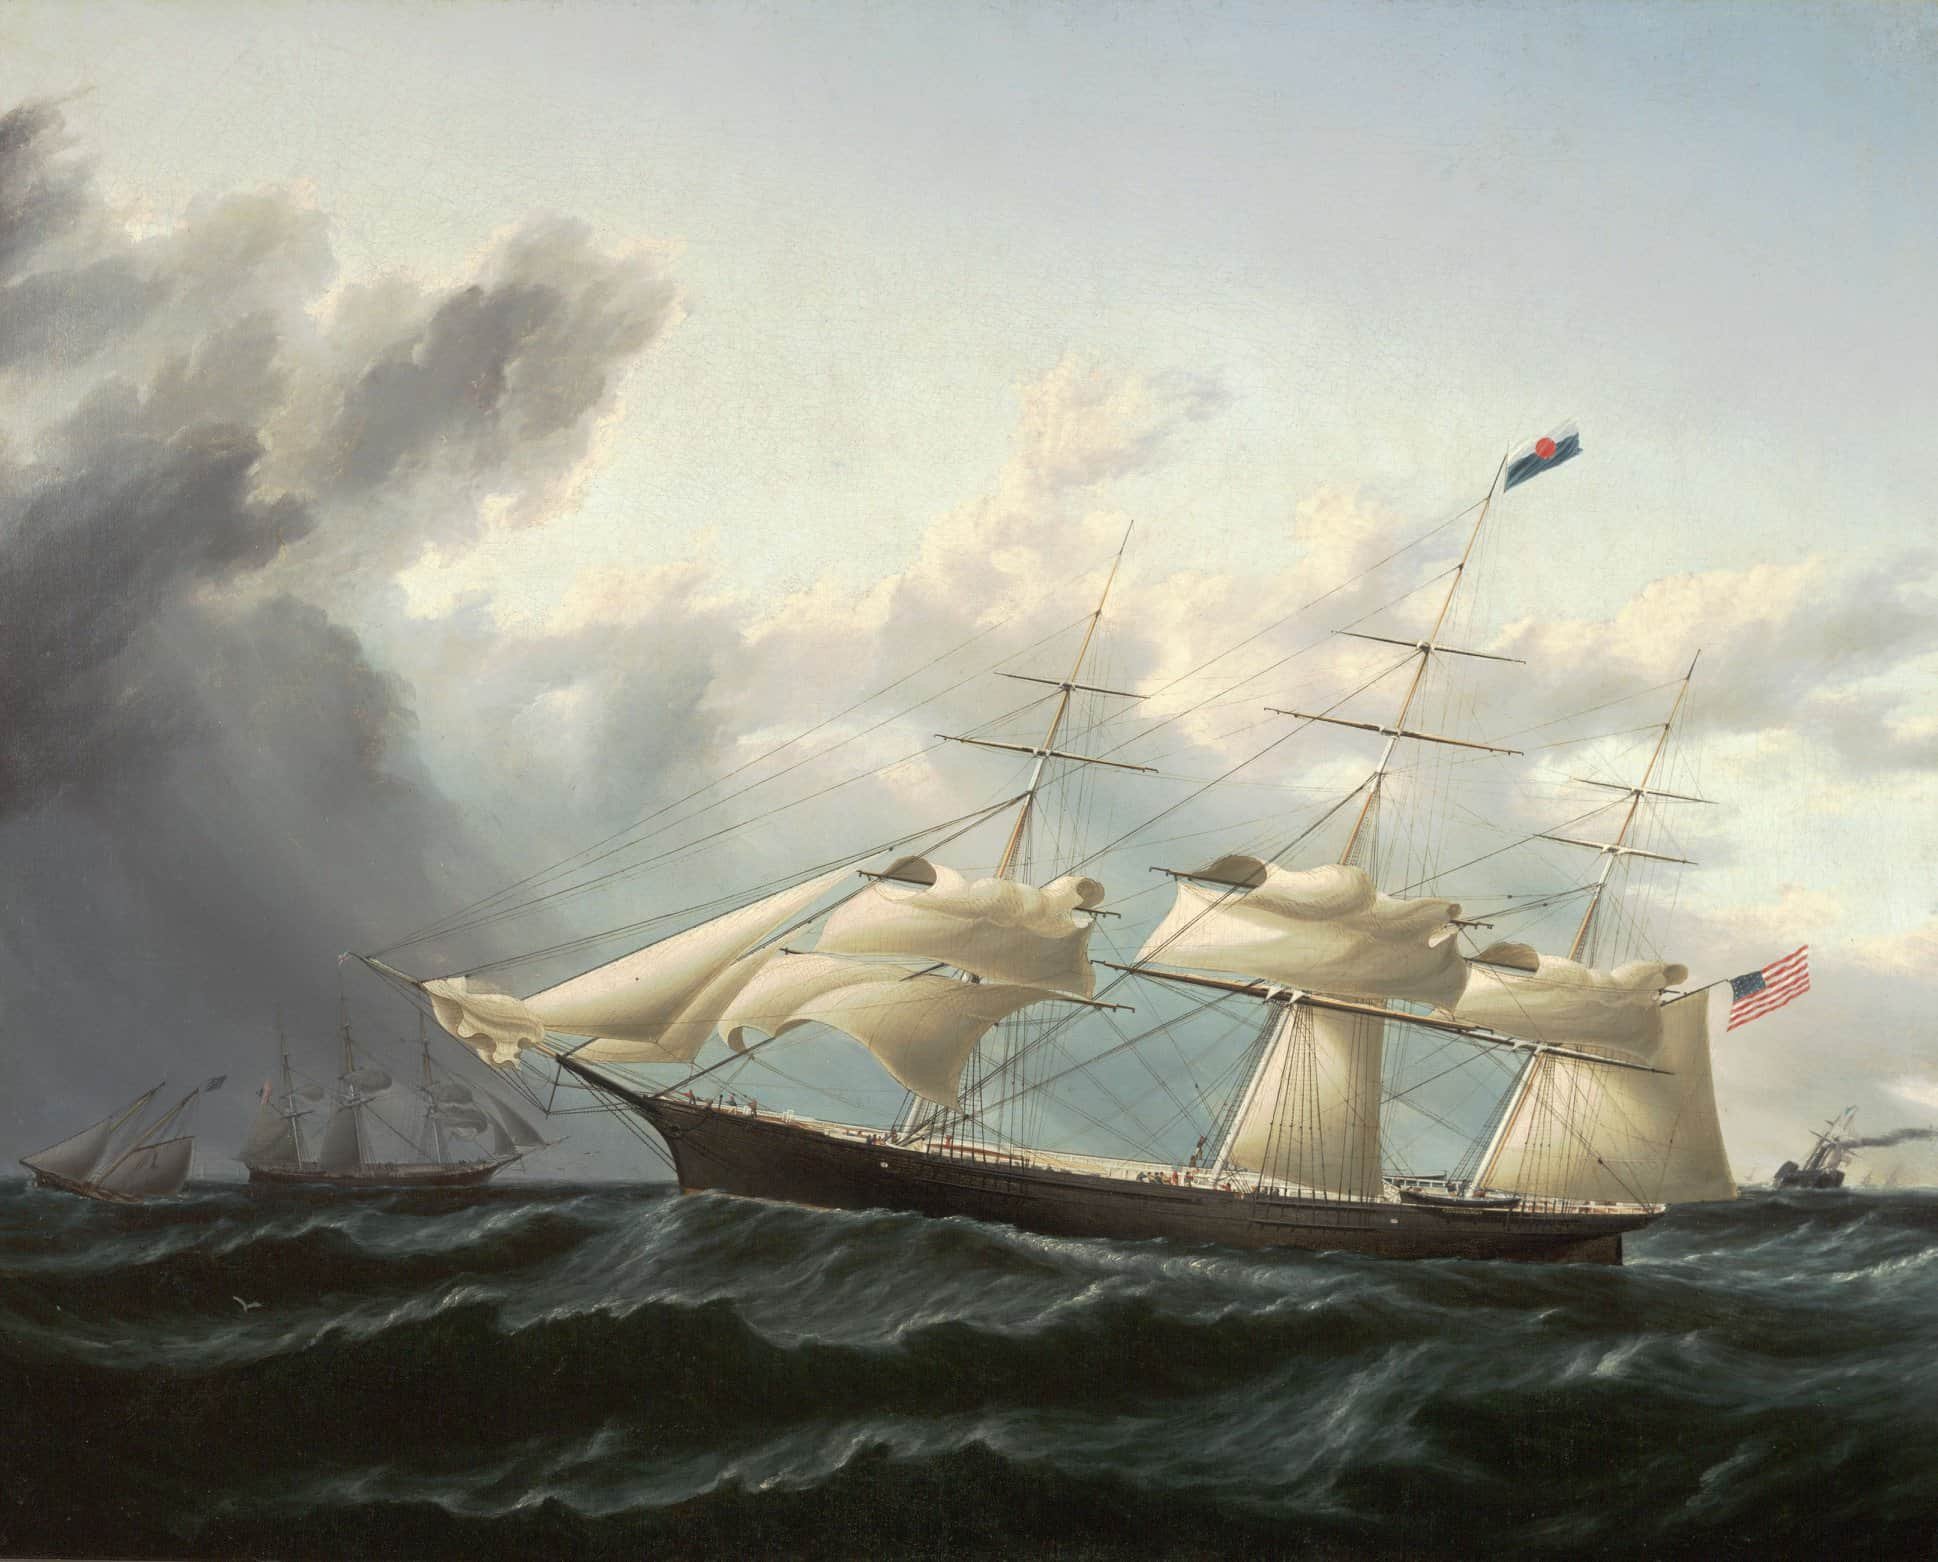
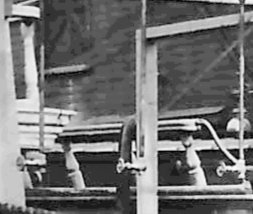
Vladimir, in nautical terms "brightwork" literally means naturally finished wood. Of course, it would actually be varnished too, in order to protect it against the elements. My guess is it would most likely be mahogany too. Since MacLean didn't distinguish between poop deck or rear house surrounding turned rails, I'd suspect all rails were left natural varnished. From my favorite painting by Samuel Walters the top of the rear house railing is white while the turned rails are brown. What's even more confusing is the ship's actual appearance from her 1869 fitting out in East Boston it looks like all turned rails including poop rails and rear house all seem to be painted white, since you can see the contrasting light shade versus the men standing behind them. Since that's clear photographic evidence I would go with that. MacLean's descriptions, I suspect were given to him by the Shipyard and the photos apparently don't match.
-
Vladimir, I love how these images of your model reflect scenes of the real vessel. Each time I see these uncanny resemblances it reinforces that we really got our homework done with a very high degree of accuracy. Well done, Vlad!


-
Rob, my condolences on your loss. Funerals are such powerfully emotional events. When you live a great distance from family, sometimes the only times you get together is either Weddings or Funerals...
- 3,560 replies
-
- 1
-
-
- clipper
- hull model
- (and 2 more)
-
Rob, here's the specs on two other McKay Clippers: 1851 "Flying Fish" All masts rake alike: 1 & 1/4" to 1' 1852 "Sovereign of the Seas" Fore: 6/8ths" to 1' Main: 7/8ths" to 1' Mizzen: 1&1/8th" to 1' It's very hard to read in Mike's 2nd book "Clipper Ship Captain" it almost looks like 96 degrees but from the near verticle pitch of all 3 masts it's got to be 98 degrees, meaning 2 degrees off verticle, since 4 degrees would be more of a rake. Incidentally "Sovereign of the Seas" registered 2,421 tons. She's described as being 11'8" 'through the backbone.' While no such specifics were given for "GLORY of the SEAS" using the same accounting method as ascribed to "Stag Hound" I was able to come up with a similar figure, very close to the Sovereign's. This is important to know for anyone planning to step Glory's masts, since they're obviously mounted above the backbone, which consisted of much more than the 29" keel and shoe alone.
-
Vladimir, I'm also sure probably more than one sailor cursed that infernal device as they either banged a knee or skinned a shin on the damn thing too! 🙂
-
Vladimir nicely done! Isn't that a unique feature of Glory? It was a pleasant surprise to literally stumble on that neat little detail. I think you've captured it just about perfectly.
-
Rob, there's nothing specified in any publication I can find about the angle of inclination for any of the masts. From photographic evidence, it's clear they're not verticle. I think I deferred to Mike's specs on that. There's plans which include that in his second book. I'll see if I can read and share them.
-
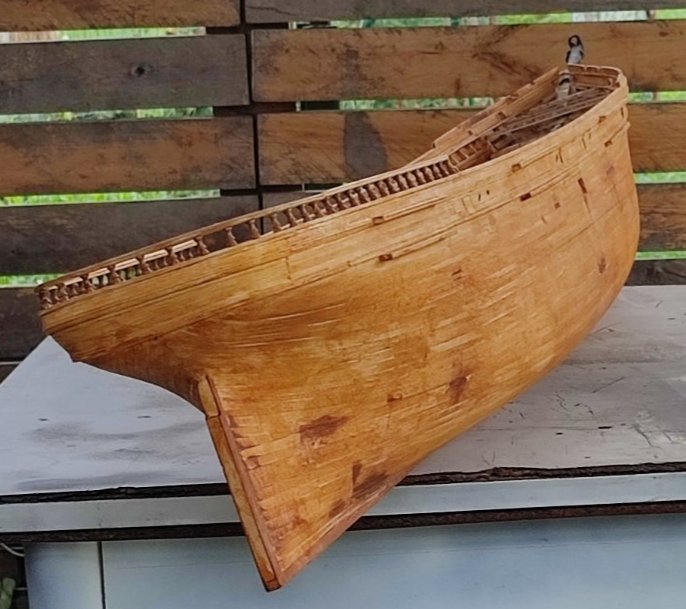
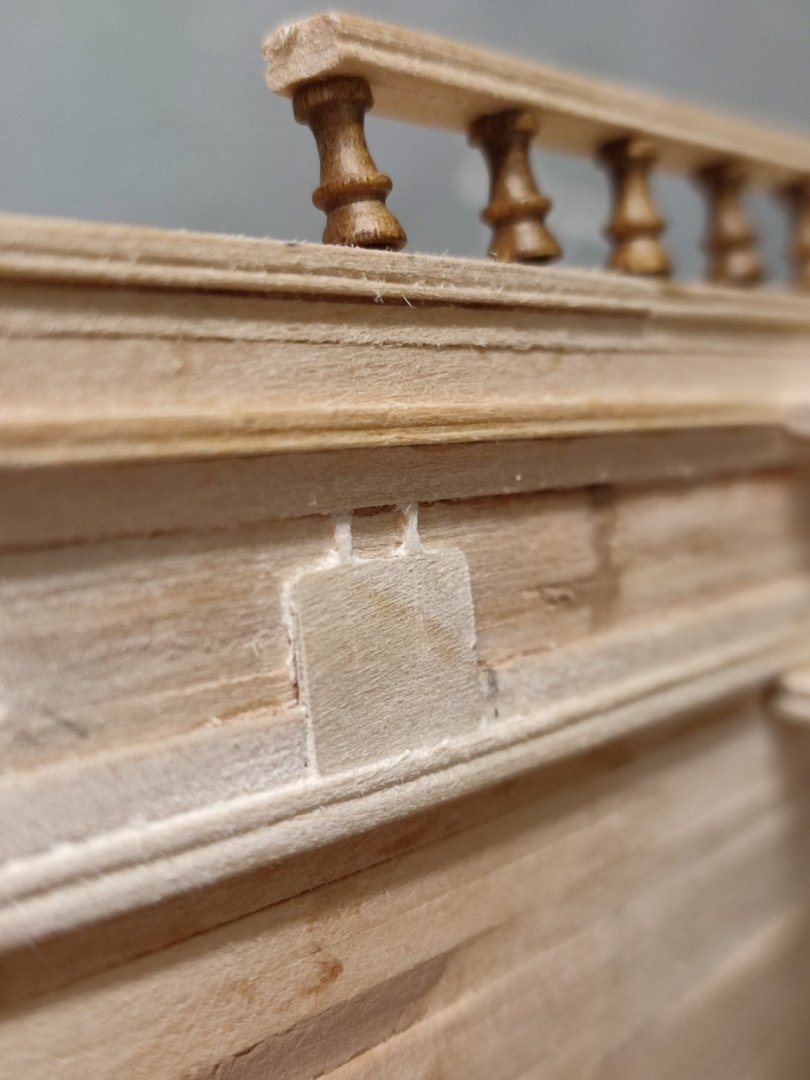
Vladimir I particularly like this view of your Glory which demonstrates her lovely sheer and really shows how long her 70' poop deck actually was. It gets lost when the 45' rear carriage house with it's own deck railings is incorporated. If you don't mind another observation, you ended your poop railing with an awkward looking cut off. If you look carefully at the image with wrought iron end piece, you'll see if is rounded much like the channels are. Otherwise, this is absolutely beautiful work.

-
Vladimir your name board is shaping up to be quite authentic. Well done!
-
Rob, your channels and chain work look top notch. I think, as I'm quite sure a lot of your fellow modeling craftsmen and women will attest, you're far more advanced than you give yourself credit for. Meanwhile, when it comes to stepping your masts, I'll give you my exact calculations taken from a compilation of the specs of Glory's "backbone" laid out by Duncan MacLean. This too may be somewhat controversial as it's about 11' much higher than Mike portrayed in his crossection. But it's right in line with McKay's other large Clipper "Sovereign of the Seas" which has that depth clearly spelled out.
- 3,560 replies
-
- 1
-
-
- clipper
- hull model
- (and 2 more)
-
Vladimir, well done on the freeing ports, that looks much more accurate. It also has the added benefit of making the entire Hull look larger, true to scale. Thanks for not biting my head off for pointing that out. Another detail which is part of Glory's poop deck railing is the curved wrought iron end piece, which adds a unique look to these poop rails.
-
Vladimir, this is a time where you may not welcome my input. Maybe this falls under "rivet counting". If so, I apologize in advance. Your freeing ports look very nicely done. Unfortunately to be technically accurate to the real Ship, these would all be flush with the Hull, not sitting on it as you have done so far. They're actually cut out and hinged just like gun ports on HMS Victory, for instance. Hopefully it shouldn't be too difficult to cut out the openings to inset your ports.
-
Rob, nice, cleanly installed work, as per your usually high standards.
- 3,560 replies
-
- 1
-
-
- clipper
- hull model
- (and 2 more)
-
Pat, well said. As for Rob's exciting results, I believe they speak eloquently for themselves.
- 3,560 replies
-
- 1
-
-
- clipper
- hull model
- (and 2 more)