


src
-
Posts
2,300 -
Joined
-
Last visited
Content Type
Profiles
Forums
Gallery
Events
Posts posted by src
-
-
John, Thank you! Always a pleasure to see new faces. I grumble a lot about things, but I am enjoying this.
Sam
-
Sjors,
I see you are feeling better, that can be a real bugger to get over. But once again I can no longer keep up with your build log.....sigh....
 Far more important that you are feeling well again, and able to travel! enjoy your get together and the museum.
Sam
ummmm...is it too soon to say this.....PICTURES?
-
Rich, your build looks great! She is really coming alive.
Hope your interview went (goes?) well.
One last word.........
BACON!

Sam
-
Just a quick update.
Havent worked on the rudder anymore, working this weekend so it most likely wont happen till next week.
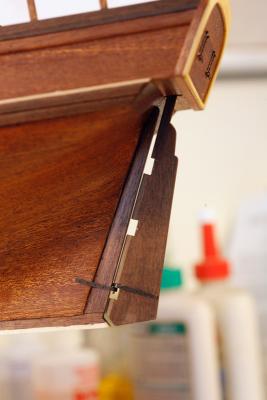
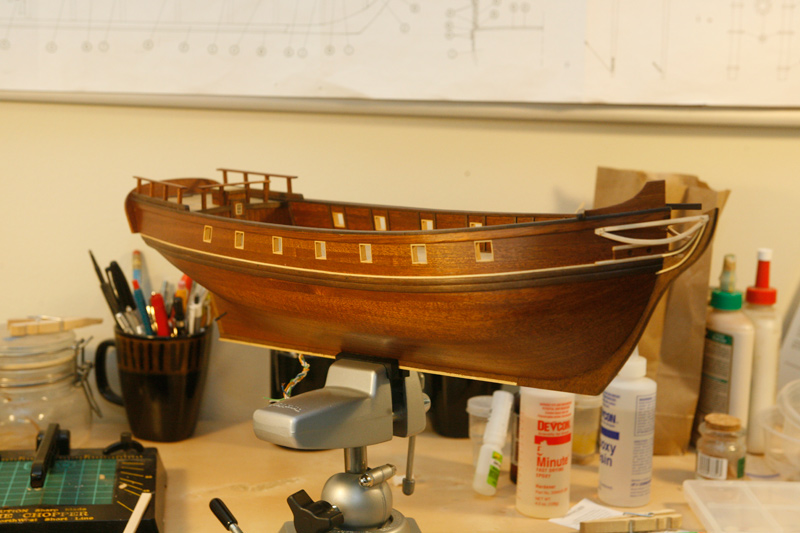
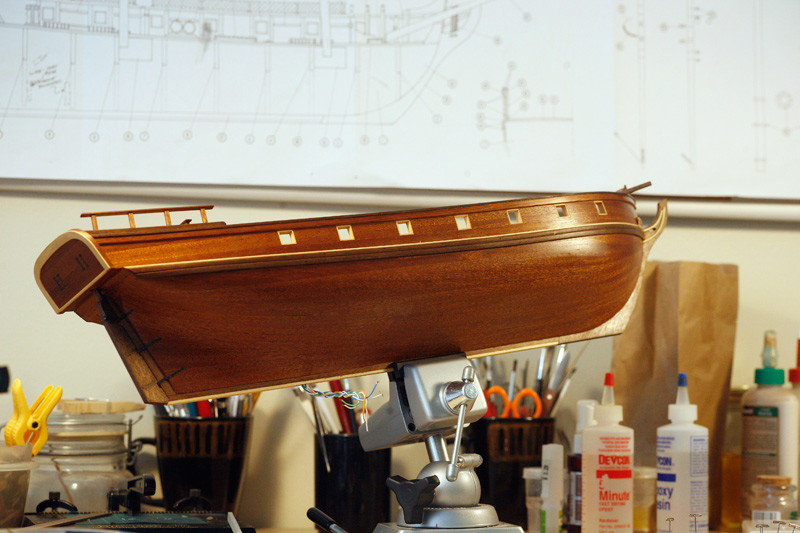
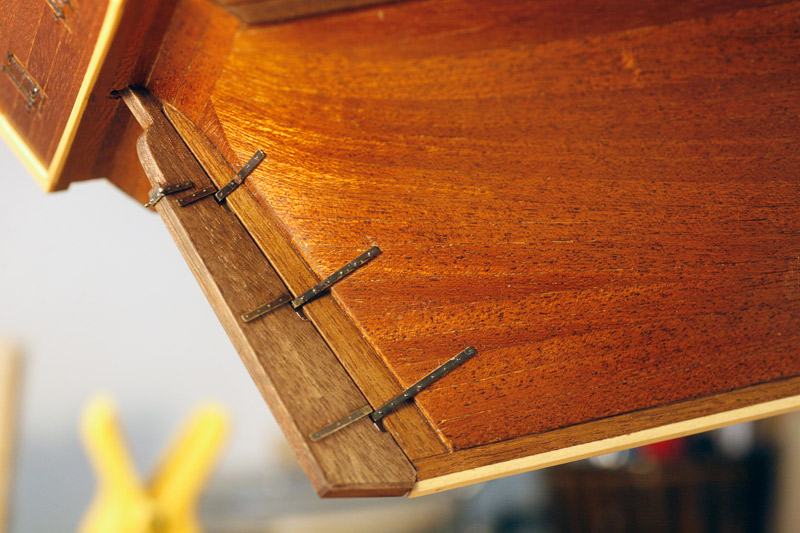
Mounted the "Head Rails" and the cabin door, ended up making the hinges with black tape. looks ok from normal viewing distance. I still have to sand and oil the Head Rails.
Assuming all goes reasonably well at work I will most likely do something mindless like the steps on the hull.

Sam
-
Robbyn, "Whatever are you complaining about? Its beautiful" Sound familiar?
Seriously, I know how you feel. Extend your building break like others have mentioned then sneak up on her and just take an open eyed look, try to leave the emotion out of it. Try to look at it from another's perspective, I think you will be very pleasantly surprised.
I have been captain grumps with my build too, but fortunately we have people here who make us take a second and look again and see what we have done really isnt as bad as we first thought. I think your doing a great job.
Hang in there!
Sam
-
Hey all, thank you for the kind words!
Russ, yea I dont want to go too far with it. I really like the aged look on the rudder pintles. Like I mentioned I was Captain grumpy when I first saw it happening, but stepped back and took a breath and looked again, it works well with the "patina" from the rubbed oil on the hull. I would like to know what caused it though; one, to avoid it in the future and two to duplicate it when I want too. I may have left the gudgeons in a couple of minutes longer than the pintles. I didnt write down the time or the temperature when I did either. Just soaked till it looked "right."
Rich I will probably give ole Edison a run for his money when it comes time to do the rigging.
Robbyn, its my furniture and cabinet making background, I cant help it it just gnaws at me. If I can get the rudder closer in tone and the steel closer in appearance I will be satisfied. Had the gudgeons worn more than the pintles I would have been fine with it, I could have said the rudder had been replaced at some point.
Brian, no shame. Wood finishing is the one thing in this hobby that I have a fair amount of experience with.
I have a couple of thoughts for the gudgeons that I will try tonight, then a bit of airbrushing if that doesnt work. But that requires a trip to the hobby store which may have to wait till the weekend or longer, we are entering our busy season at work and will be swamped till the end of November. Robbyn, if your life isnt crazy enough anymore you and your new husband are welcome to come out and show us what real overacheivers can do!!!!

Sam
-
Brian, try it you never know what you may not accomplish.....
Well, shipped my rudder last night after mounting the last of the "bolts" Overall it looked ok.
Then I oiled the rudder..... some of the blackening rubbed off. I was Captain Grump-o-licious for a minute till I stopped and really looked at it. The way the blackening rubbed of gave a very aged appearance that I started to really like. Then I excitedly oiled the hinges on the hull....and... different results.

Not sure what I am going to do now. No matter how much I have rubbed at them, the blackening wont rub off. I think I will either try to strip the linseed oil and duplicate the effect with an airbrush or just go for an oil rubbed bronze/back with the airbrush. Maybe just use a gun blue touch up pen. Got some 'sperimenting to do it looks like.
I think I may need to add a yellow/amber glaze to the rudder to bring it closer in color to the keel and stern. Probably should have done that before I mounted the pintles.


- popeye the sailor, ZyXuz and mtaylor
-
 3
3
-
Rich, The best trips always require the most unwinding/cleanup when you get back.
Sounds like you found the solution to the rings, great!
My build is slow, posting an update in a minute here. Stop by whenever you get a chance, no rush.
Sam
-
-
Slog,
Just tumbled onto your build, really clean work! Did I read correctly, this is your first build?? Wow.
I wish there were more hours in the day, I keep finding more ad more build like this one I want to follow.
sam
-
rich,
cant wait to see the deck houses in place they look good. Oh, and happy belated b-day!
Sam
-
Aldo, the planking looks really clean!. Looking forward to the second layer.
You had some rain in your world the last couple of weeks, good to see you have not needed to check your build for leaks! Stay dry.
Sam
-
the place in Dahlgren called back and said all was excellent!!! They're checking with their customer, then they'll bring me out for an actual interview as soon as next week possibly!!!!!!
 Praying all stays well!!!
 WOO HOOO!!! Good Luck!!
Now for the important question, How was the bacon?
Seriously, good luck with the job it sounds like it would be great. Radar and weapon systems, the only thing better might be to get to blow s#!t up!! Radar side note, one of my first bosses was one of the first dozen or so radar operators ever. Had some pretty wild stories to tell.
Sam
-
Robbyn, not sure what happened, I was cruising along building a kit out of the box and some how I fell down the rabbit hole. Actually I think somebody pushed me...(looks at Russ)
Send your list but I warn you, I am not as qualified for the Overachiever Award as you. Also, Mom is still waiting for her fireplace mantel I started in high school wood shop. Nope! No procrastination in MY world!
Sam
-
Thanks Russ, you're probably right. Its pretty soft, it should bend into shape ok.
Sam
-
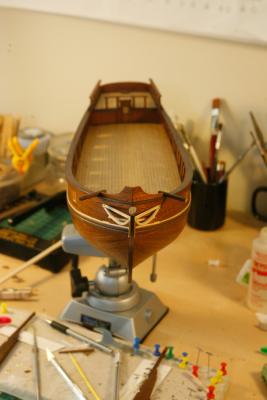
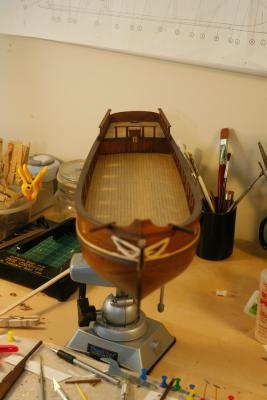
Ok, promised pictures.

Forgot I made some hoops for the rudder head. One is looking pretty tweaky, I hope it straightens out. I had to make them really soft to get a decent bend. There is a slight taper on the rudder head so when I slide the hoops down they dont scrape the finish off......I hope. If I can remember which one goes on first that would be nice too.
In the upper left is the progression of tillers. The bottom one is per the kit instructions. The next up is my second attempt, at the top is the "production" part.
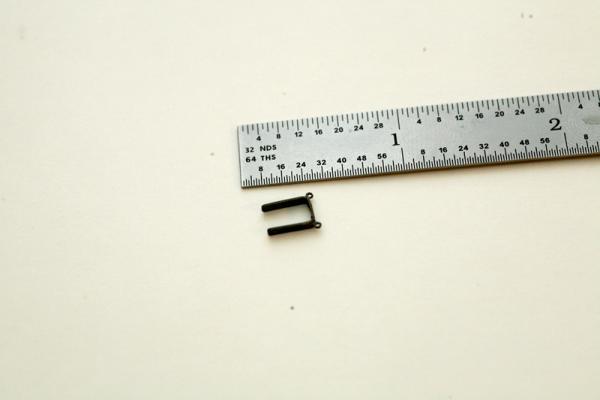
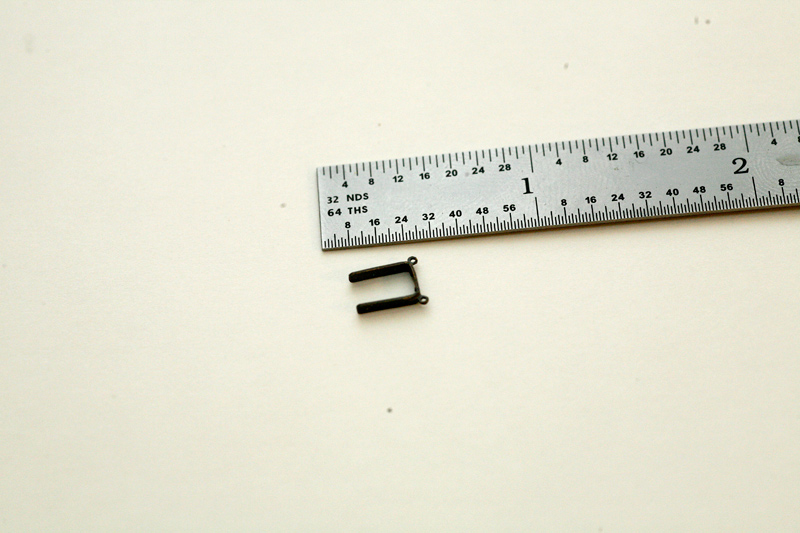
Finally a spectacle plate. that little bugger was a challenge!
It doesnt show in the pictures but the hoops and the spectacle plate both have a green patina on the inner flats. It was on all the surfaces but polished off. Not sure what caused it. I followed my same patina schedule as before; wearing
clovesgloves, file with a #4 file, wash with dish soap and rinse with distilled water, spray with a chemical degreaser, soak in muratic acid and rinse with distilled water, dunk in Blacken-It. It polishes off so I am not too worried about it.Thats is for now, gonna try to get the rudder mounted tomorrow night. Maybe in the next pictures She will look different.
Sam
-
You're all way too nice, thank you.
Aldo, the photo etching was an interesting side trip. Of all the parts I made it looks like only the hinges will go on. The mullions for the door were just way to fat, the material supplied for the decking (Mukaly?) worked fairly well.
ZyXuz, It appears they are a standard part supplied in all their kits. I probably would have just ran with them if the holes were evenly spaced to the length. I am very pleased with the new ones though.
Brian, you have set a pretty hi bar for us with your Le Petit Nella, I have no doubt you will do the same with your Enterprise.
Robbyn, it is. As you are discovering also, tools and space...
The GF left me alone for the weekend while she visits family. Considering the number of hours I spent at the work bench She looks the same today as She did yesterday. Most of the time was spent fabricating a spectacle plate and the associated pins to hold it on. Soldering the second eyelet on was fun, it wouldnt stick. I wasnt getting it clean enough. I used med. solder for the first one and extra easy for the second. Just wasnt getting all the grunge from the first solder off. Broke all three of my #80 bits drilling out 8 holes. I was fumble fingers with a drill yesterday. Its done and blackened, looks pretty good.
I made my third tiller, this last one is based on a drawing in "Fully Framed II" This book is becoming my Bible.
I will get some pictures up later today. Time to walk the dog and there is 5 lbs of tomatoes threatening to rot in my kitchen. Looks like home made meat sauce for dinner! Yum!. My GF's ex calls it gravy for some reason. Is that a southern thing?
Be back with pictures later.
Sam
-
Rich,
Looking good. How did your ring situation work out?
Sam
-
Big thumbs up on the quiet and the interview.
Good on your gf for helping out another. Hoarders, yikes! I have dealt with that before, My dads cousin and his mother.
I will join you on the quiet this weekend, my gf just left for a couple of days too. Bacon and eggs and beer-Oh My!
good luck with the interview.
Sam
-
-
Aldo,
Just dropped in for a visit, thought I would be able to take a short stroll through your build. Now I see I am going to have to pull up a chair and hang out here for a while. Very nice wrk so far.
I have nicknamed the little model builders voice we all hear "The Gremlin", lately he has been whispering in my ear to try a scratch build one day. Right at the moment he is jumping up and down on my shoulder pointing at your build going "See! See! You too!" Thanks Aldo......
Sam
-
-
Thanks Russ, it already has made a difference. There is still a bit of gap, I drilled the hole based on the kit instructions and the old rudder/hinges. I dont know if I can correct it completely but I like it better than what I had. Stupid Gremlin! What does he know? He is sitting in the corner all chuffed up over himself.

I'm finding I am enjoying these little side trips into bashing/scratch building, stupid gremlin is starting to whisper in my ear about a complete scratch build one day. Maybe after a framed kit, have to see what the future brings. Where we live right now ther is only room for two ships that I would be interested in building
Sam
-
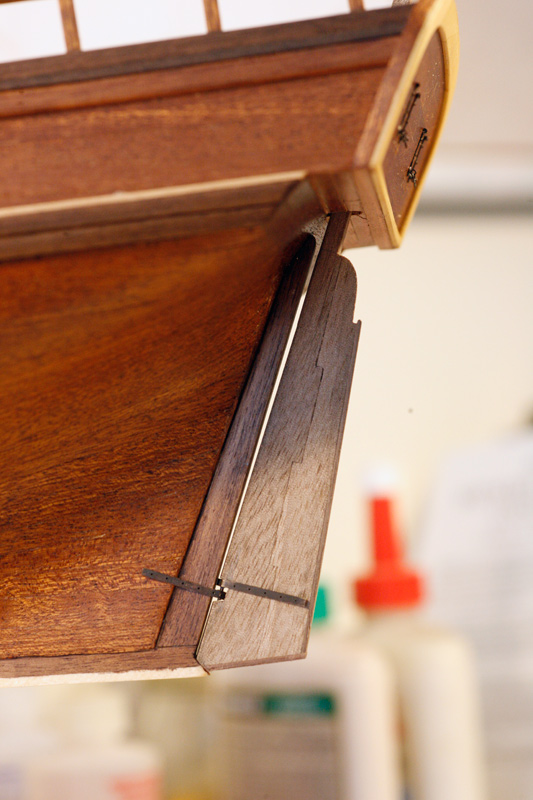
Small update. I spent Saturday whittling on the rudder and its coming along nicely. It still needs some adjustment, actually I need to adjust the hole the rudder head goes through, I am hitting the front edge. That will allow the gap at the stern to close up. I also need to trim a bit more off the lower corner and close that gap up. I am thinking that little edge will need to be chamfered like the leading edge of the rudder itself or else it wont turn.
I blackened the hinges but didnt get them cleaned properly I think, there are some places where the brass is still showing.
Old rudder.
I -The Gremlin- didnt care for the gap at the bottom edge or how the gap at the rudder head was
corkingworking out.
New Rudder
I changed the lines slightly to match what I was seeing in a couple of books and filled in the gaps better. Still needs some adjustment. Minor changes, but the Gremlin is quiet.... for now....
Sam


Enterprise by src - Constructo - 1:51 - or Lessons in Adapt Improvise and Overcome
in - Kit build logs for subjects built from 1751 - 1800
Posted
John Thank you, all my grumbling aside I am enjoying the process.
Robbyn, a triple WOW, thank you!!!