MORE HANDBOOKS ARE ON THEIR WAY! We will let you know when they get here.
×


Dsmith20639
-
Posts
254 -
Joined
-
Last visited
Content Type
Profiles
Forums
Gallery
Events
Everything posted by Dsmith20639
-
I tried to send you some info. Let me know if you got it and I will send you more. If you click on the D in a circle it will bring up a page where you can send me a personal message. Just found out how to do that. Safer than posting address. I think that's what its for.
- 39 replies
-
- 1
-

-
- billing boats
- danmark
- (and 1 more)
-
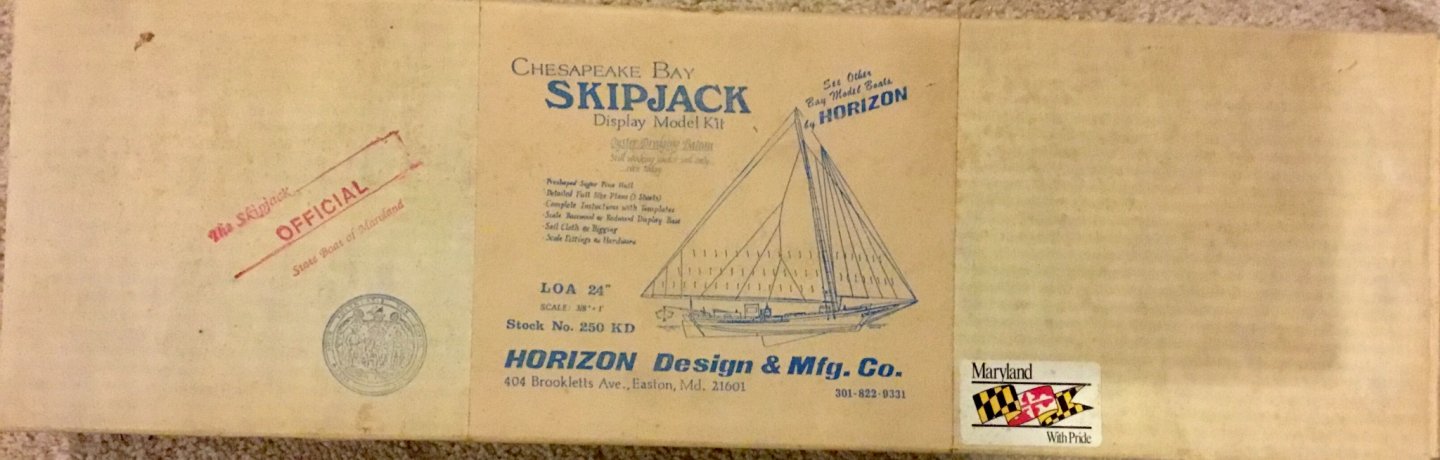
Sorry, because of space constraints and to try and minimize clutter I periodically throw out old plans and manuals after a ship has been built. If I still had them they would have been yours at no cost, but unfortunately they were discarded a couple of months ago. Hopefully the photos from my build log will be of some help. There were multiple versions of the kit produced over the years. The one I built was from a kit that was over 30 years old. Later kits had life boats instead of ship boats like mine, etc. I will be happy to try and answer any questions you may have. The build manual I had with the kit was not much help as I remember. I relied mainly on the plans. I do have some pdf files especially rigging details and construction diagrams for a later version of the kit that I can email to you if you can provide me with your email address.
- 39 replies
-
- 1
-
-
- billing boats
- danmark
- (and 1 more)
-
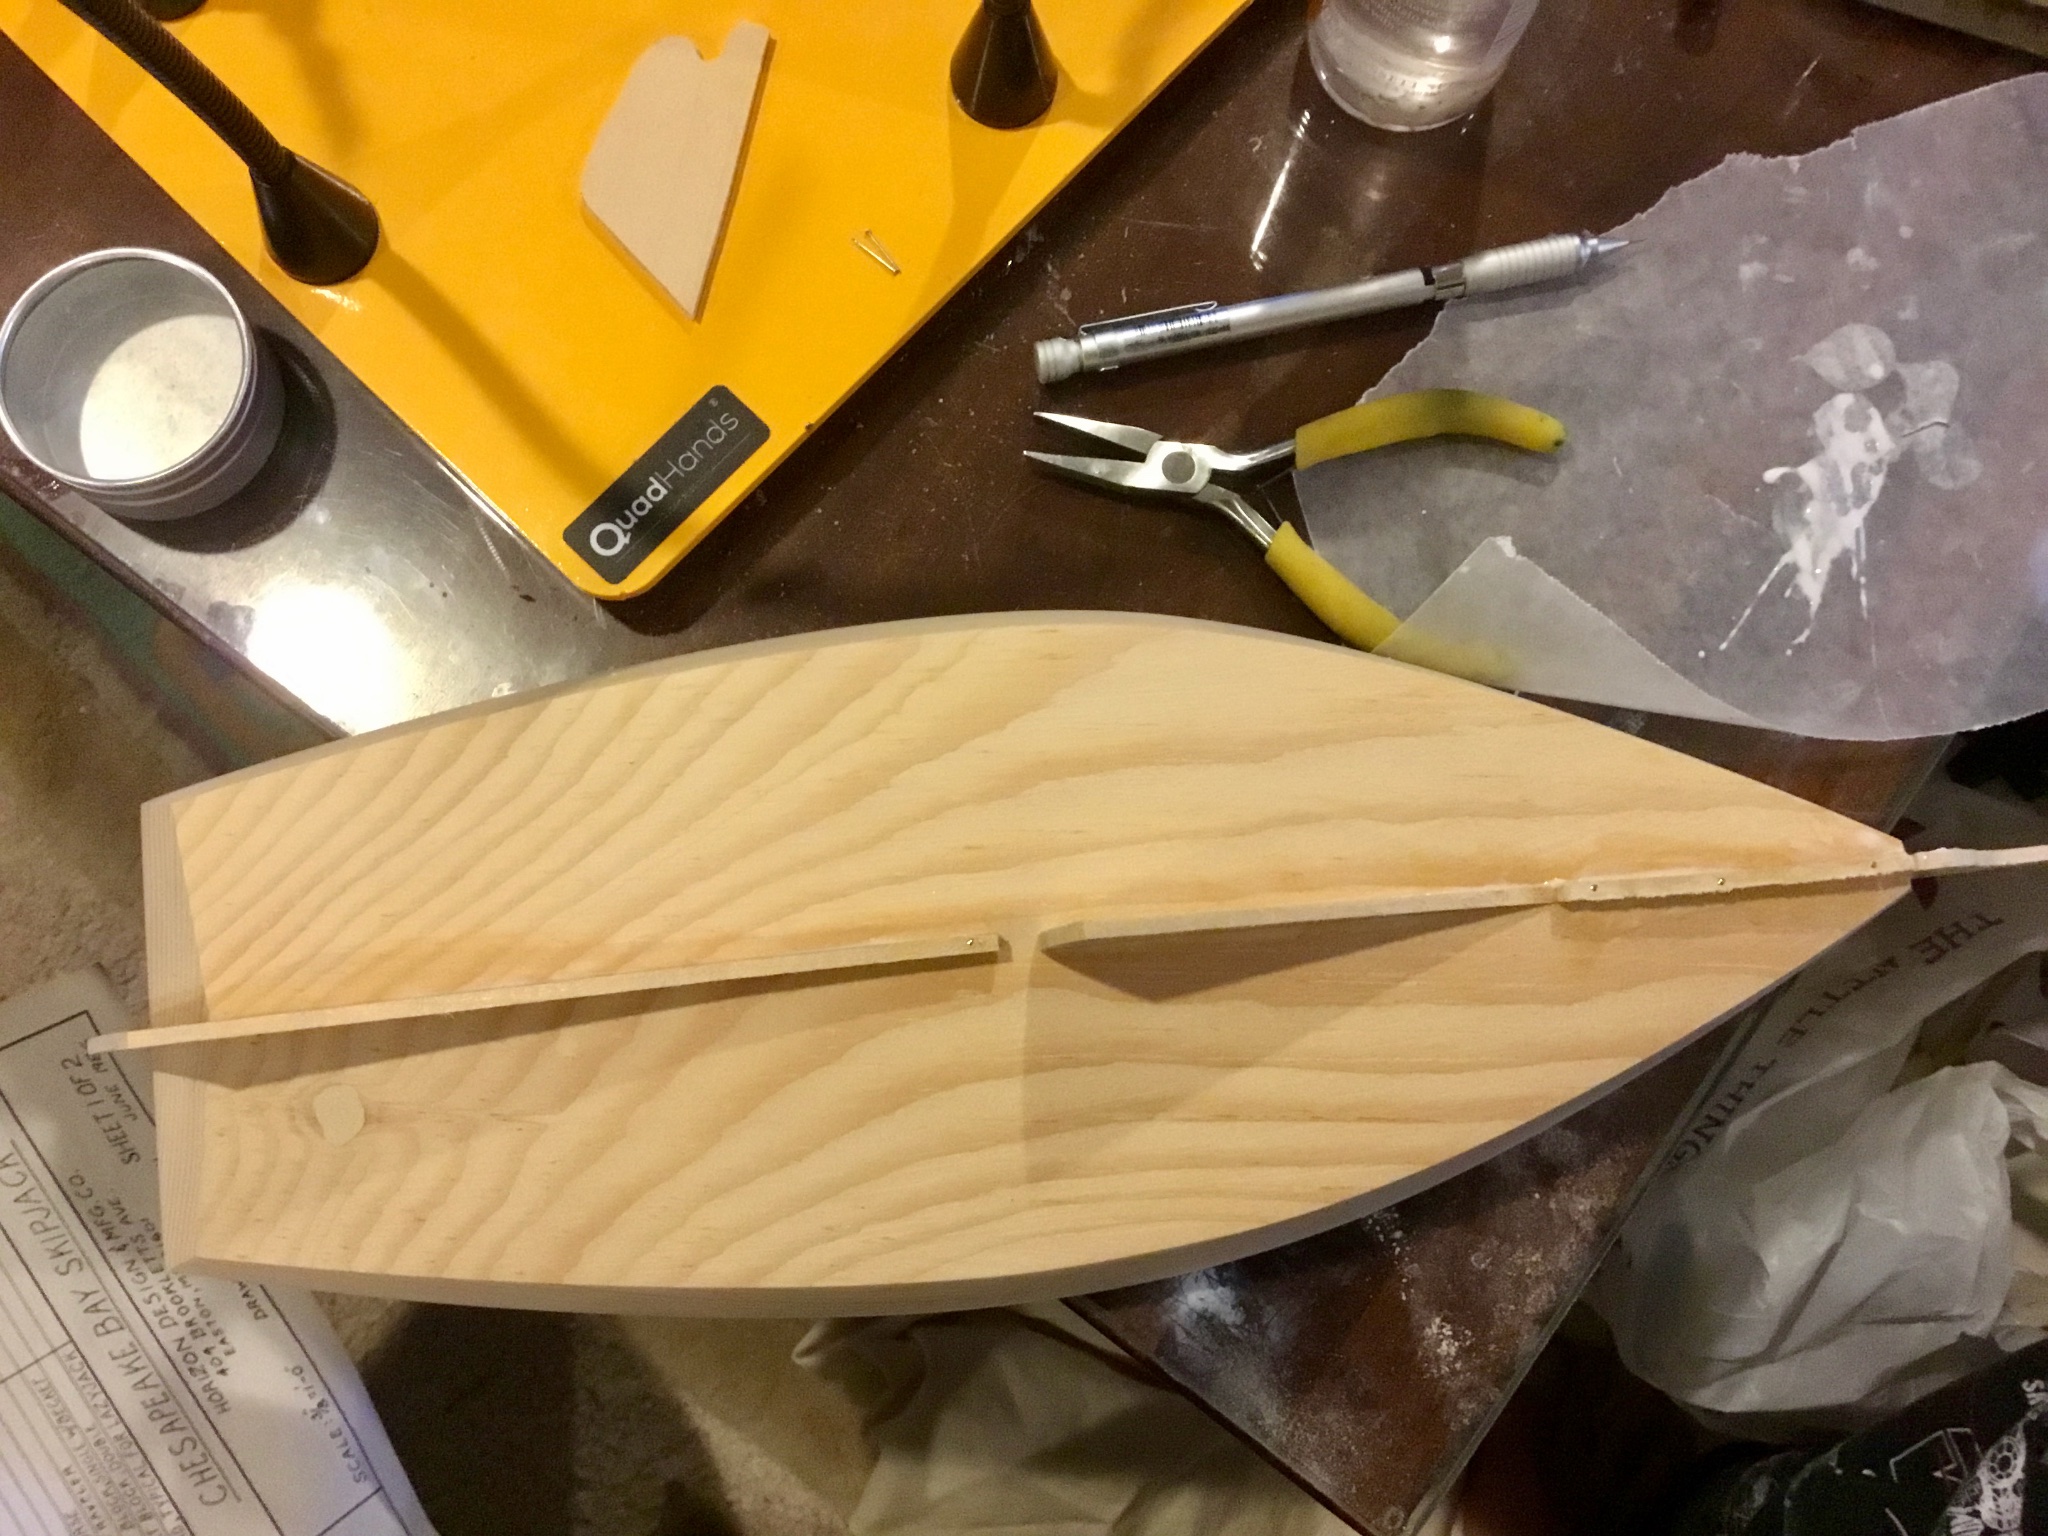
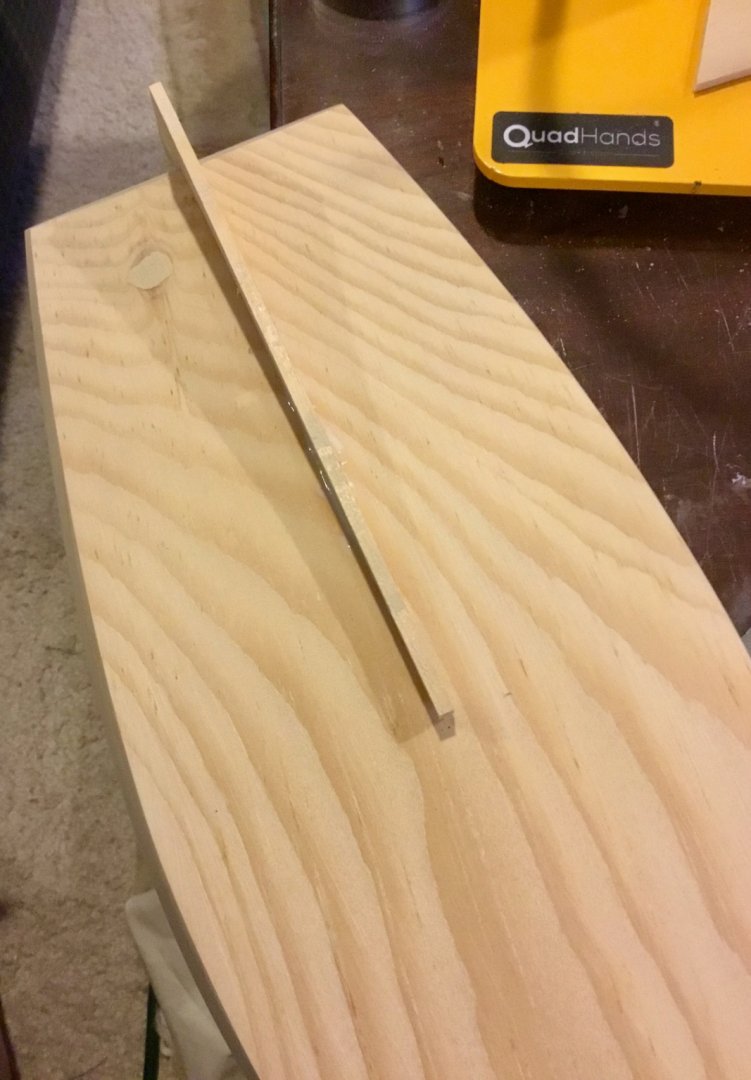
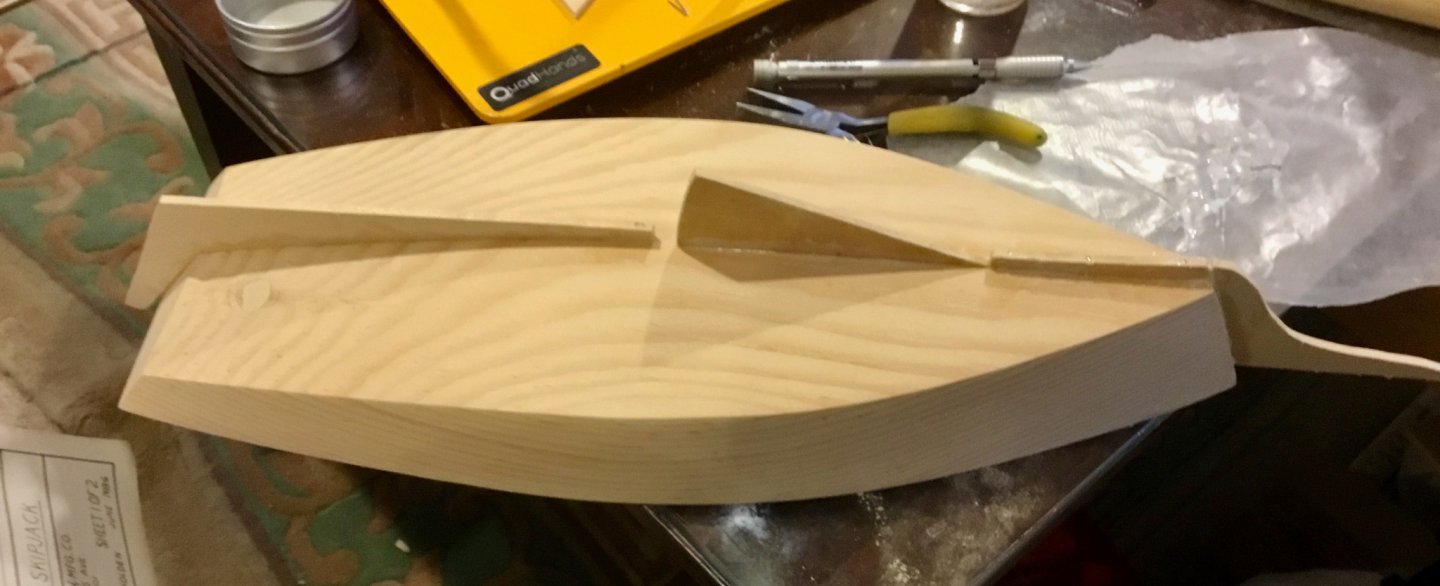
Faired the parts that were cut out with the scroll saw. Marked the transom centerline. Positioned and glued the skeg/stern post, centerboard, keel shoe and cutwater.

-
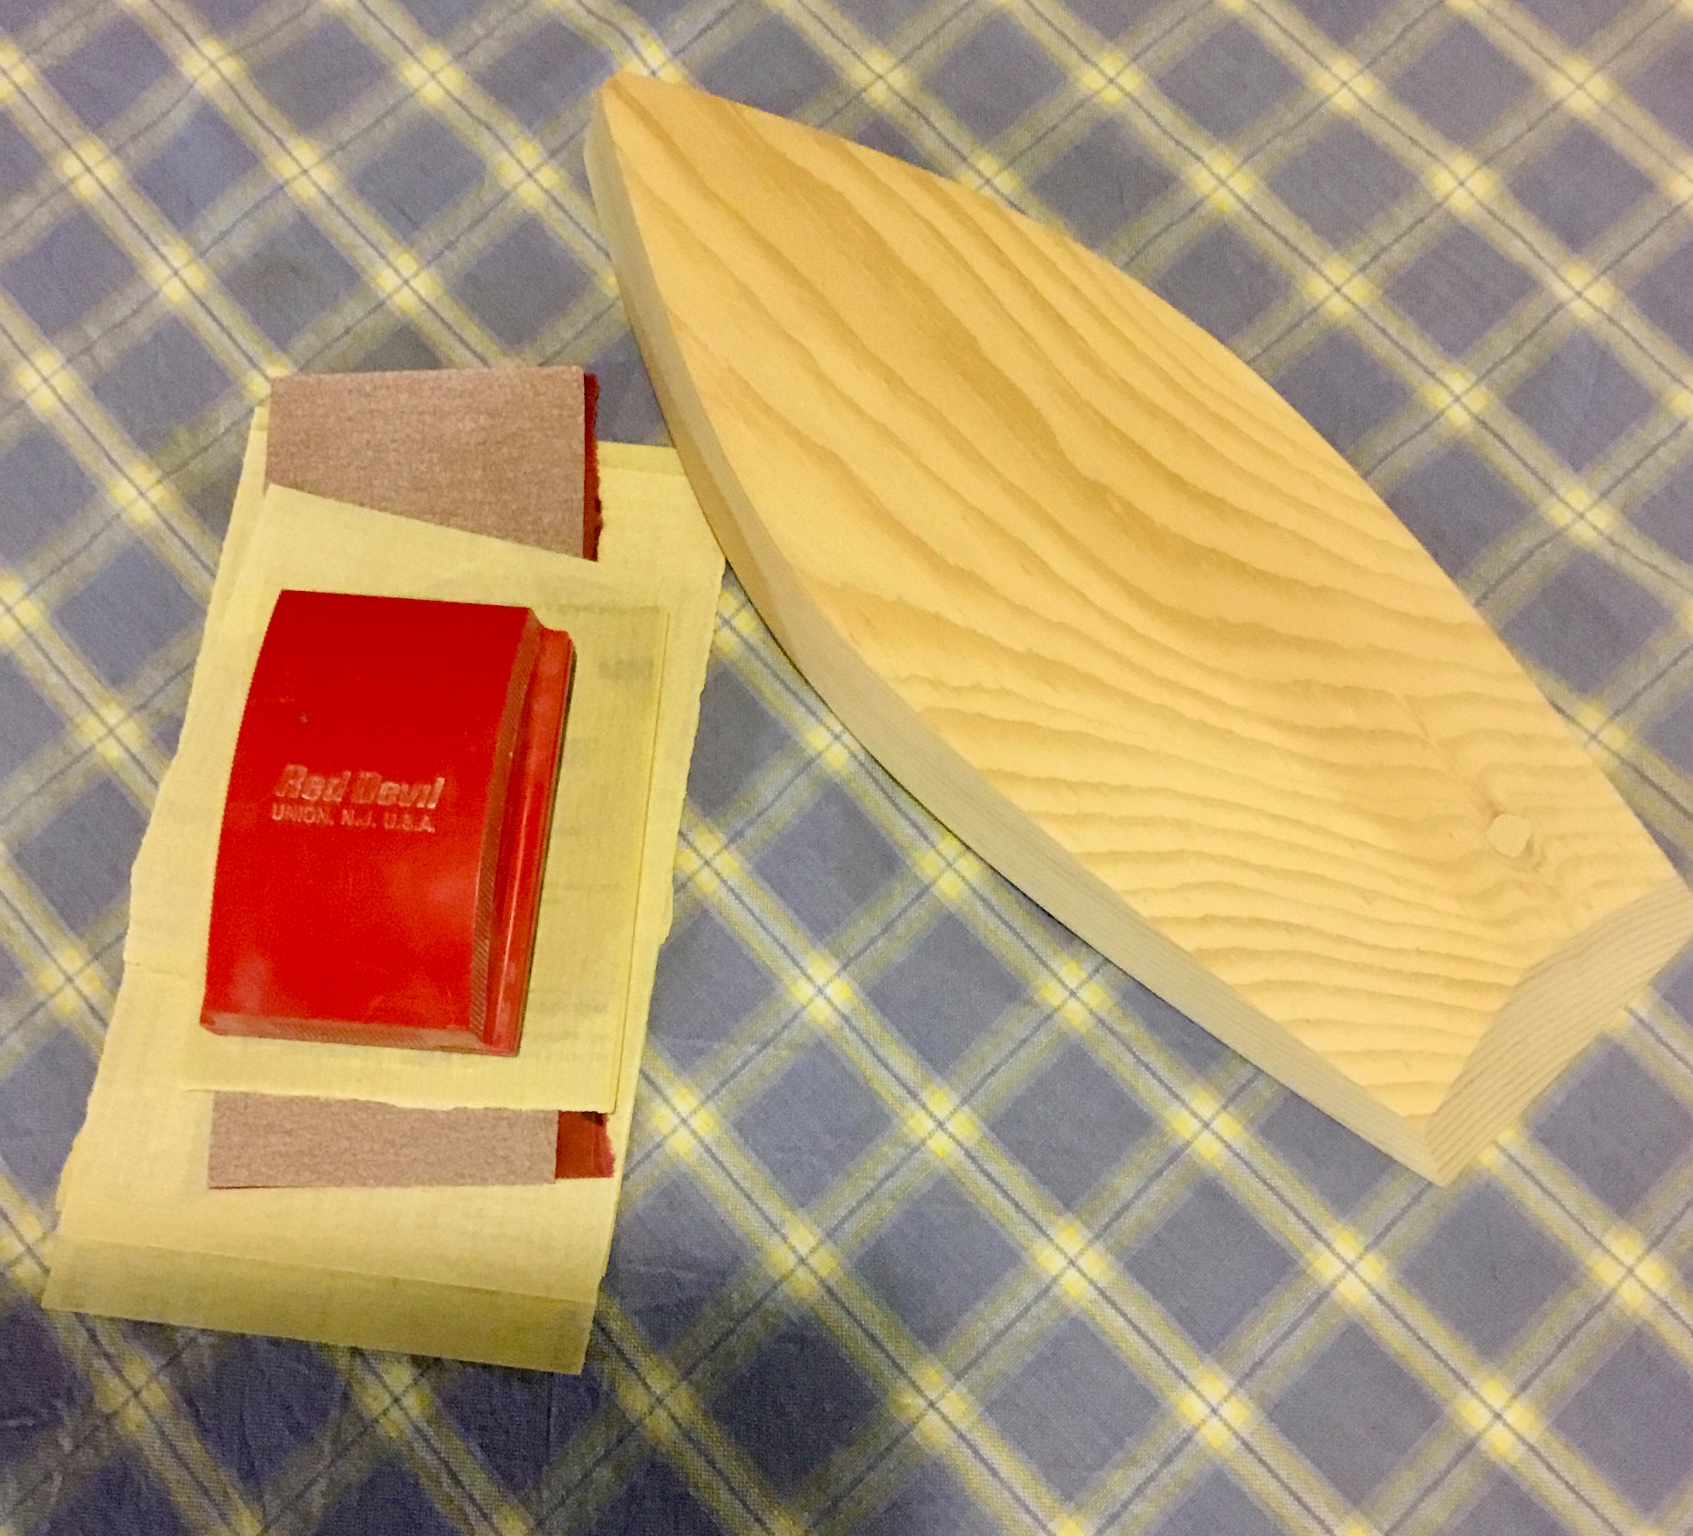
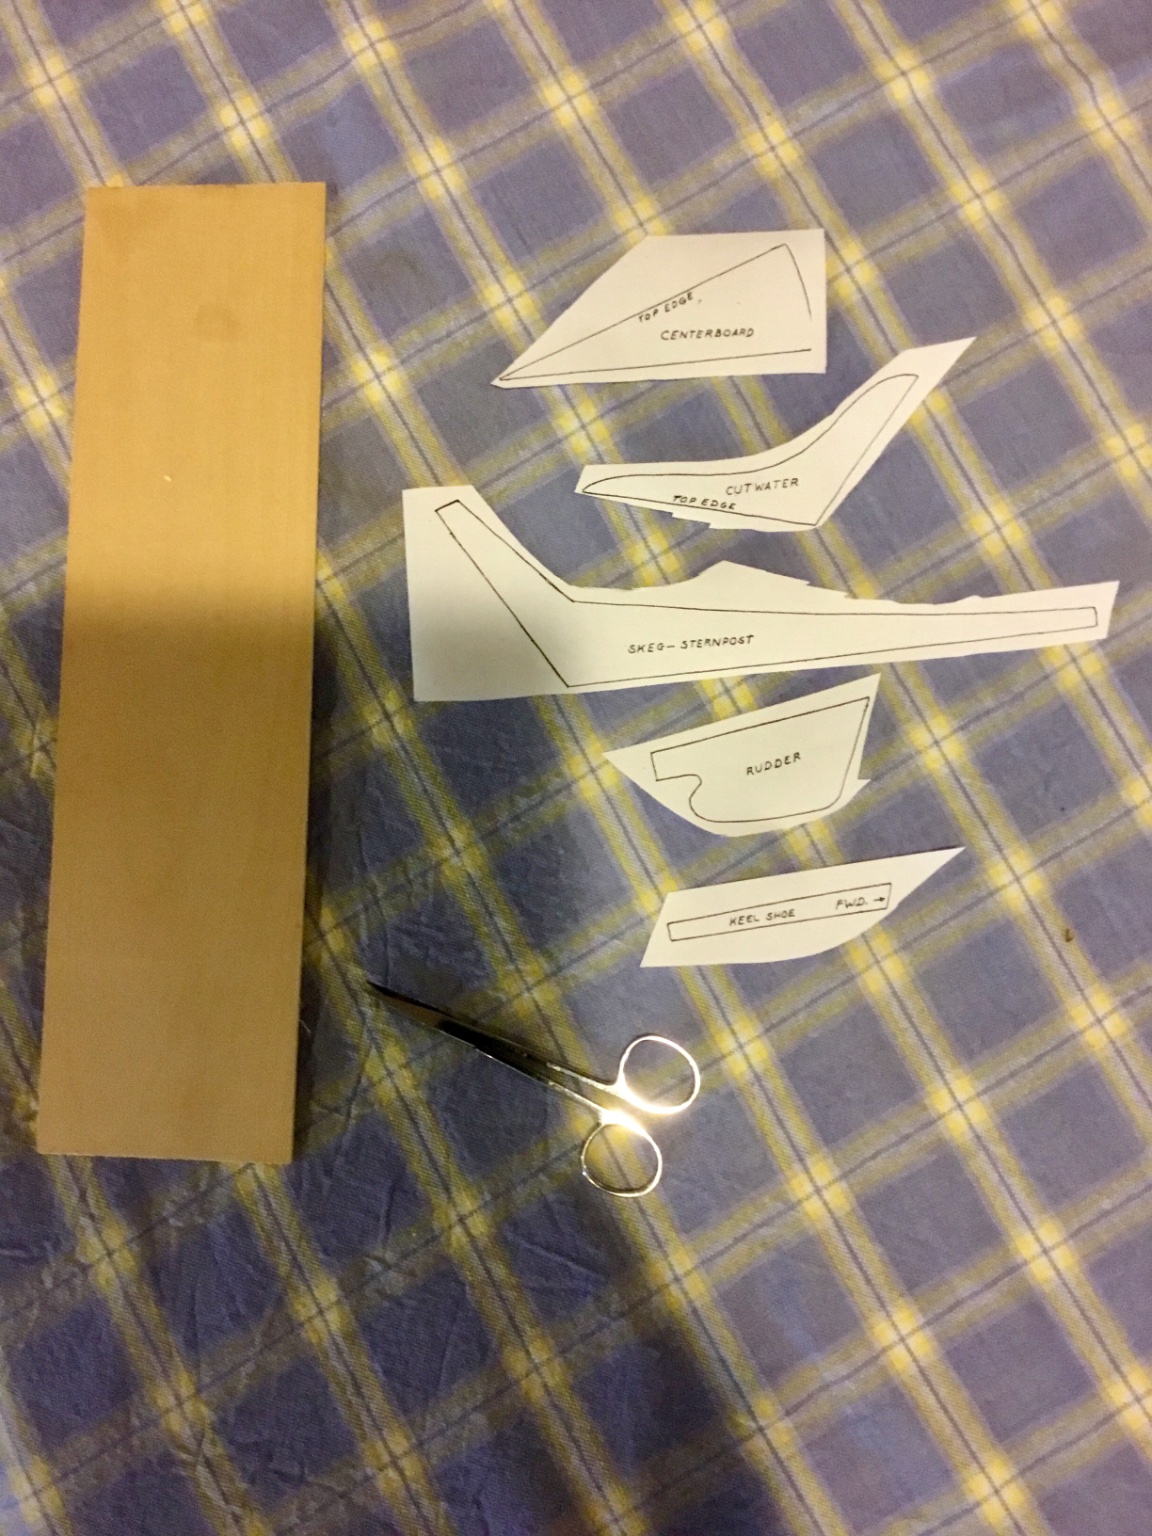
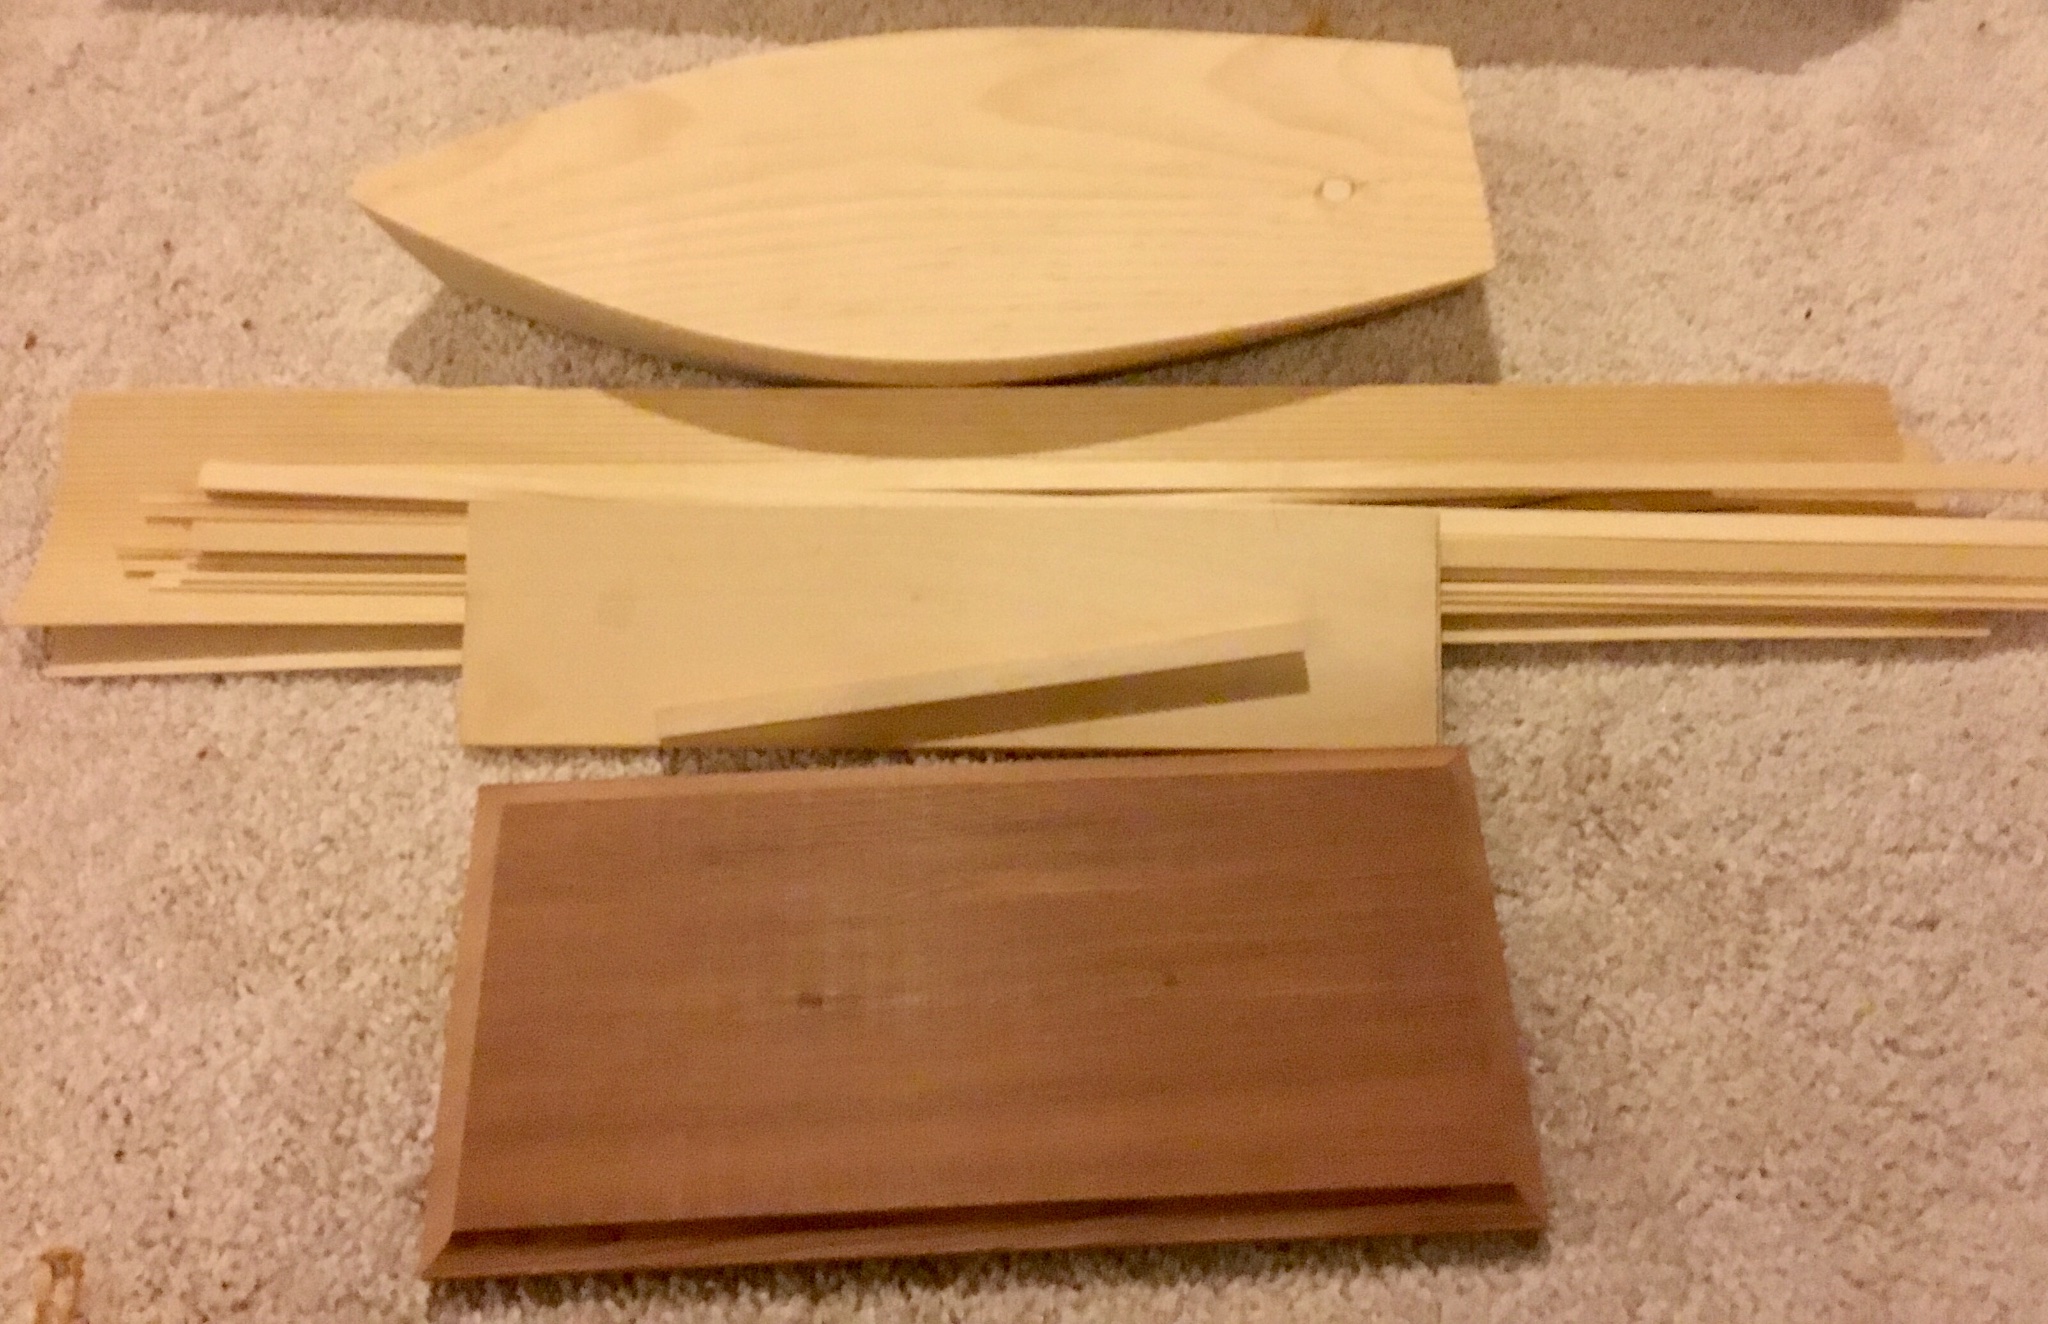
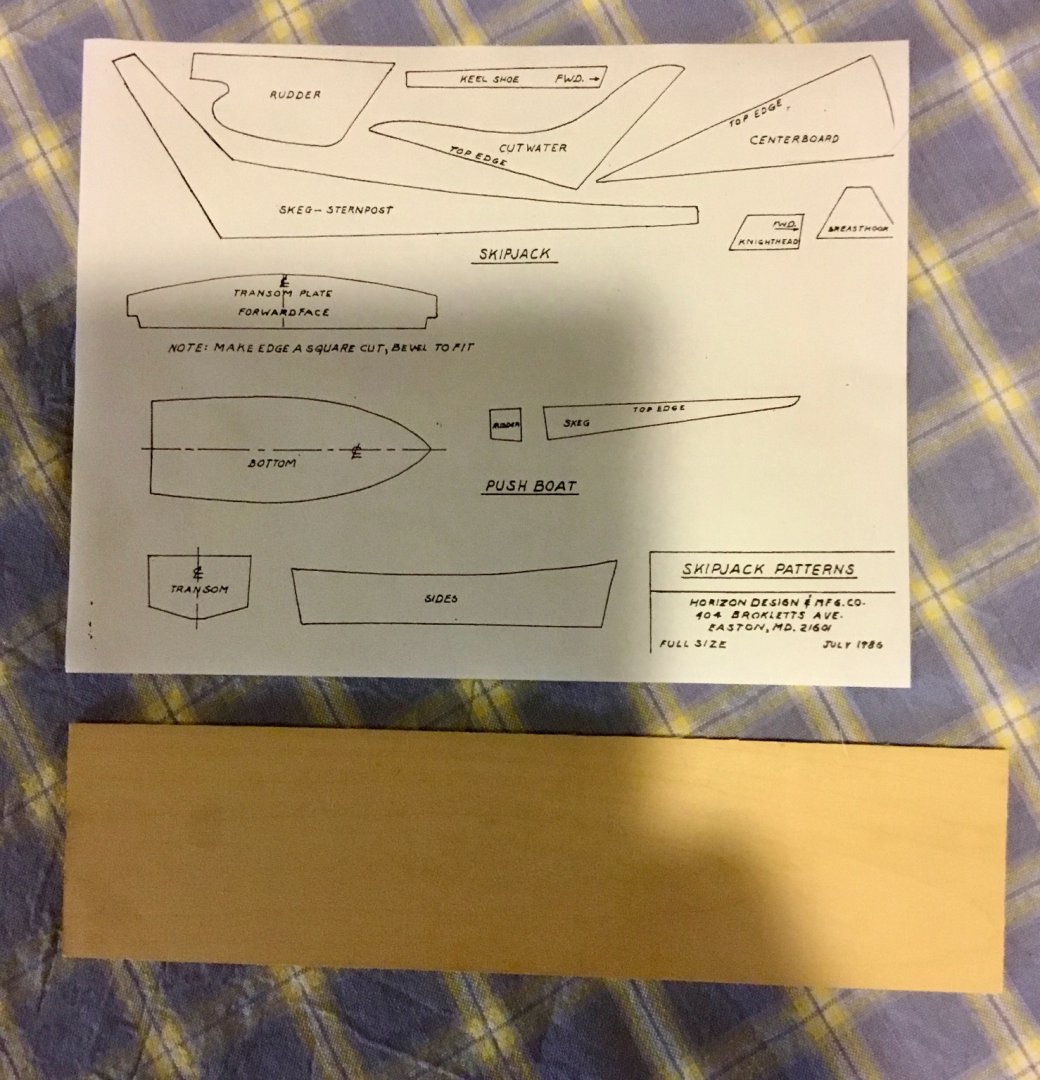
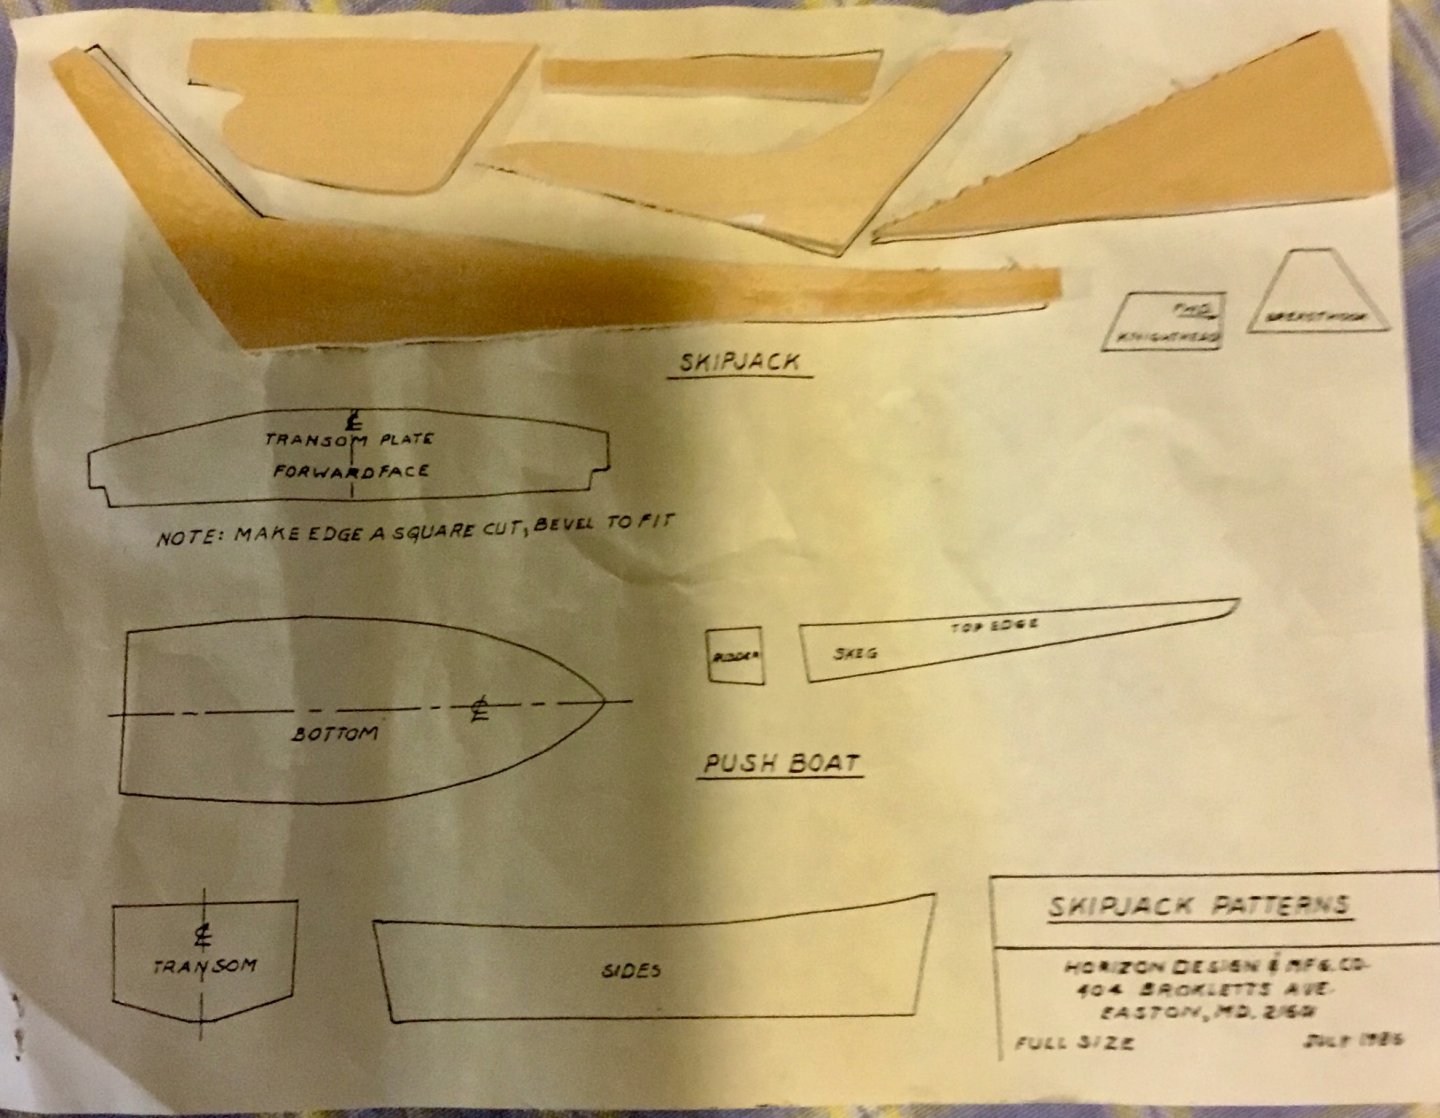
Sanded ships hull, Used scroll saw to cut out centerboard, cutwater, keg, rudder and keel shoe from 1/8 basswood.


- 22 replies
-
- 1
-
-
- Horizon
- Chesapeake Bay Skipjack
- (and 1 more)
-
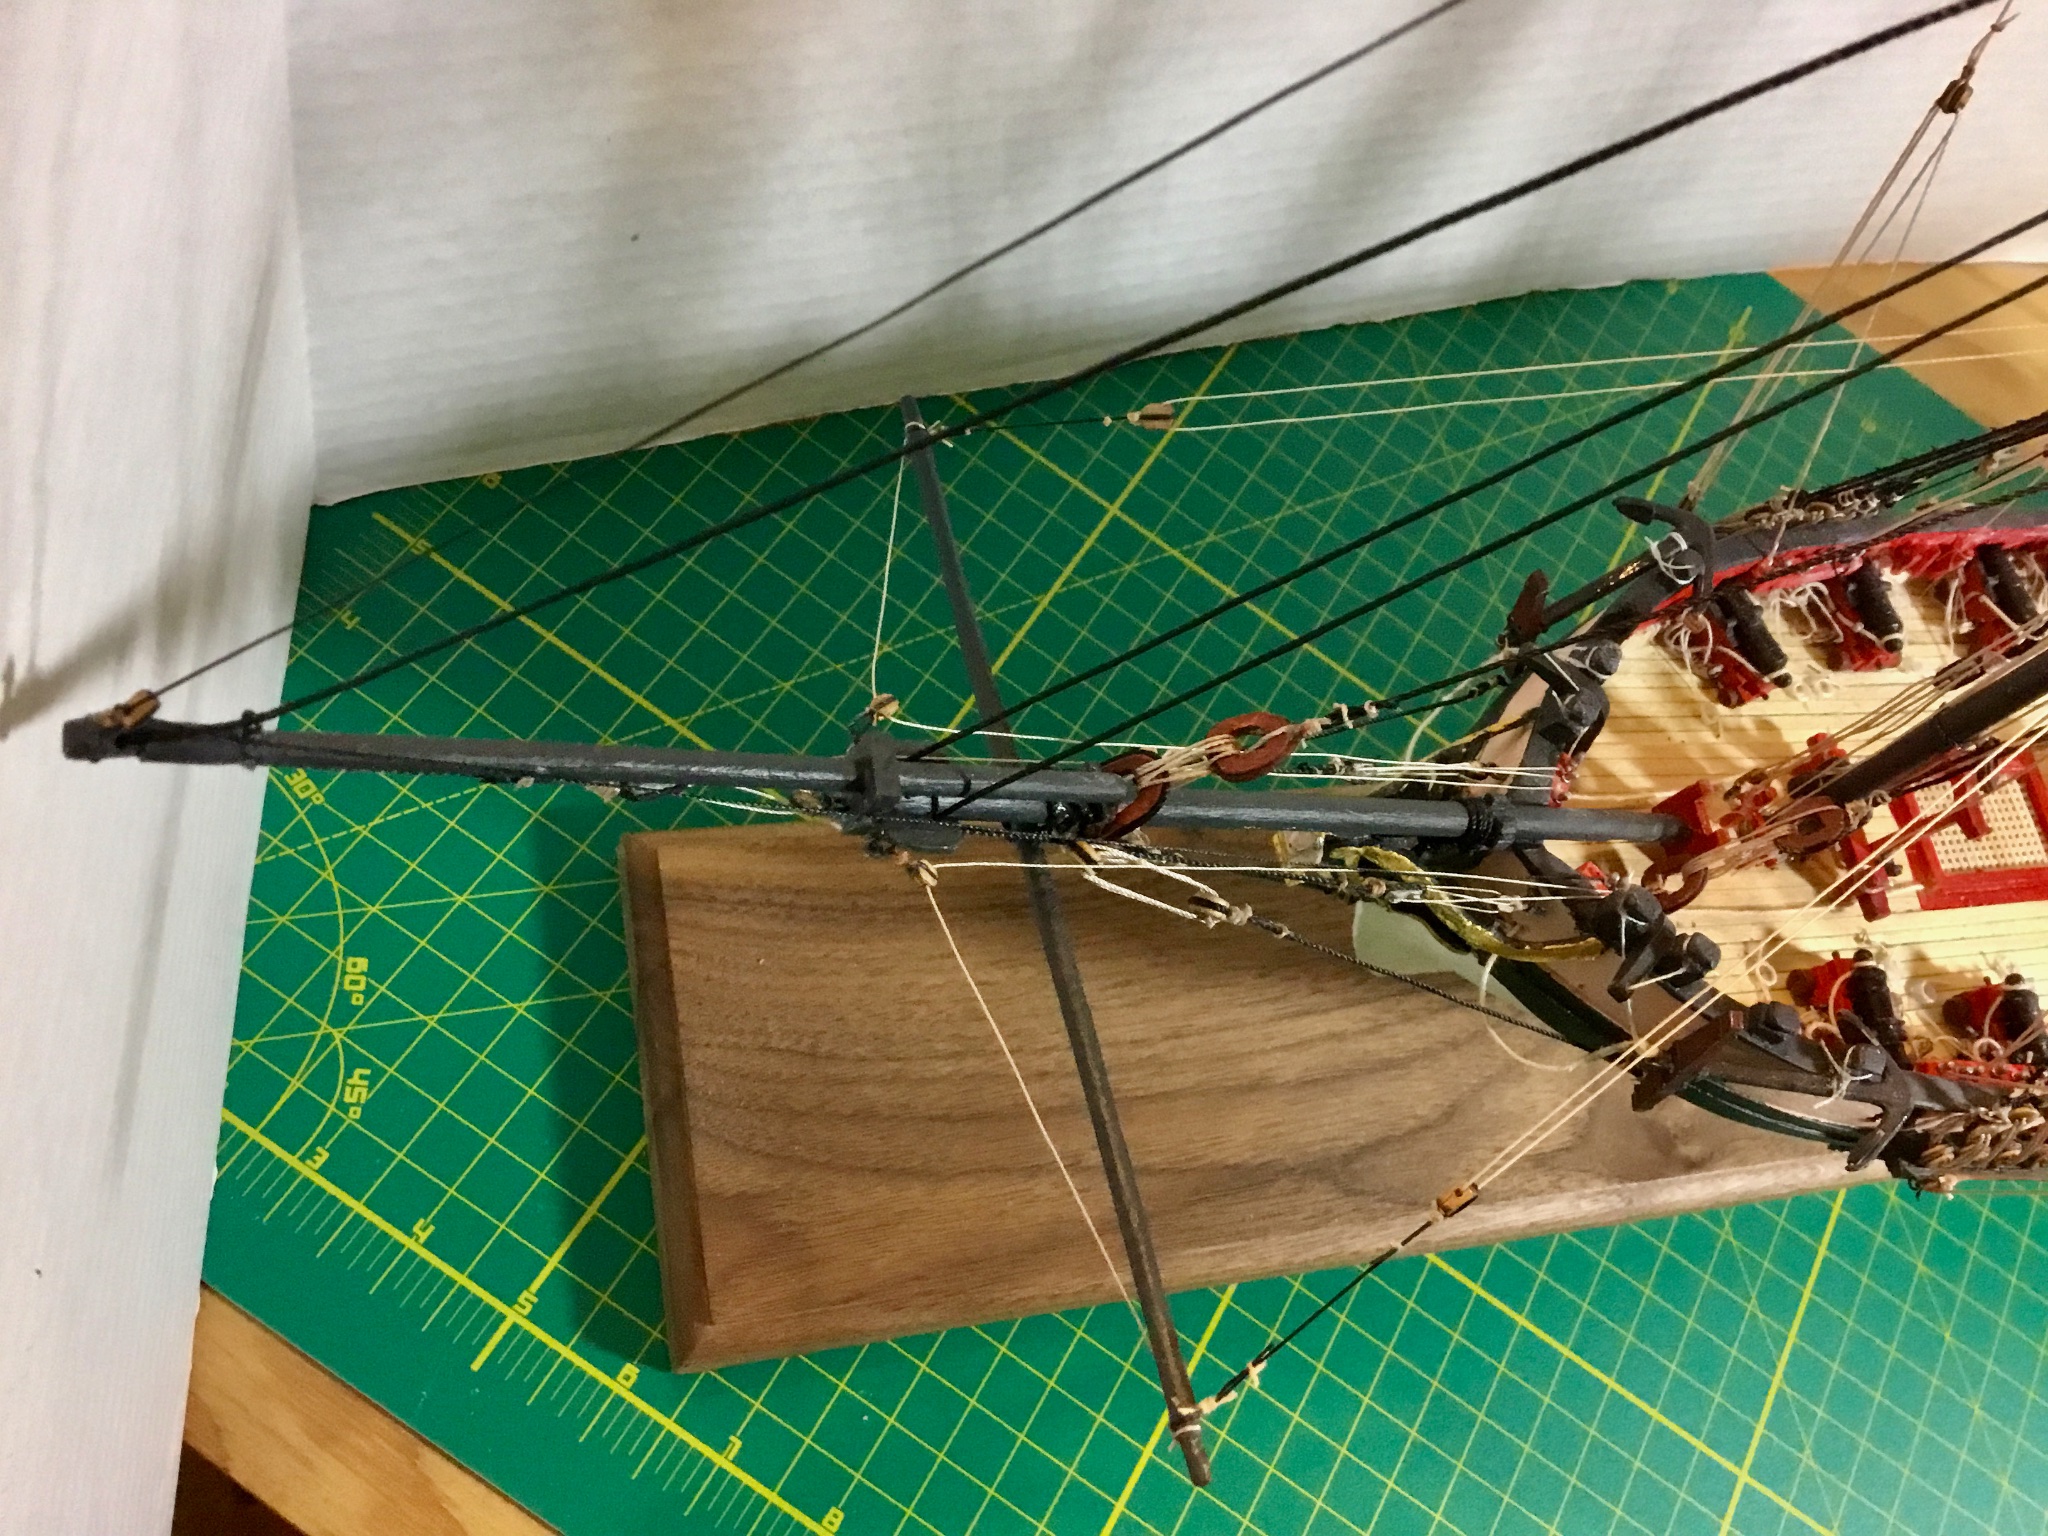
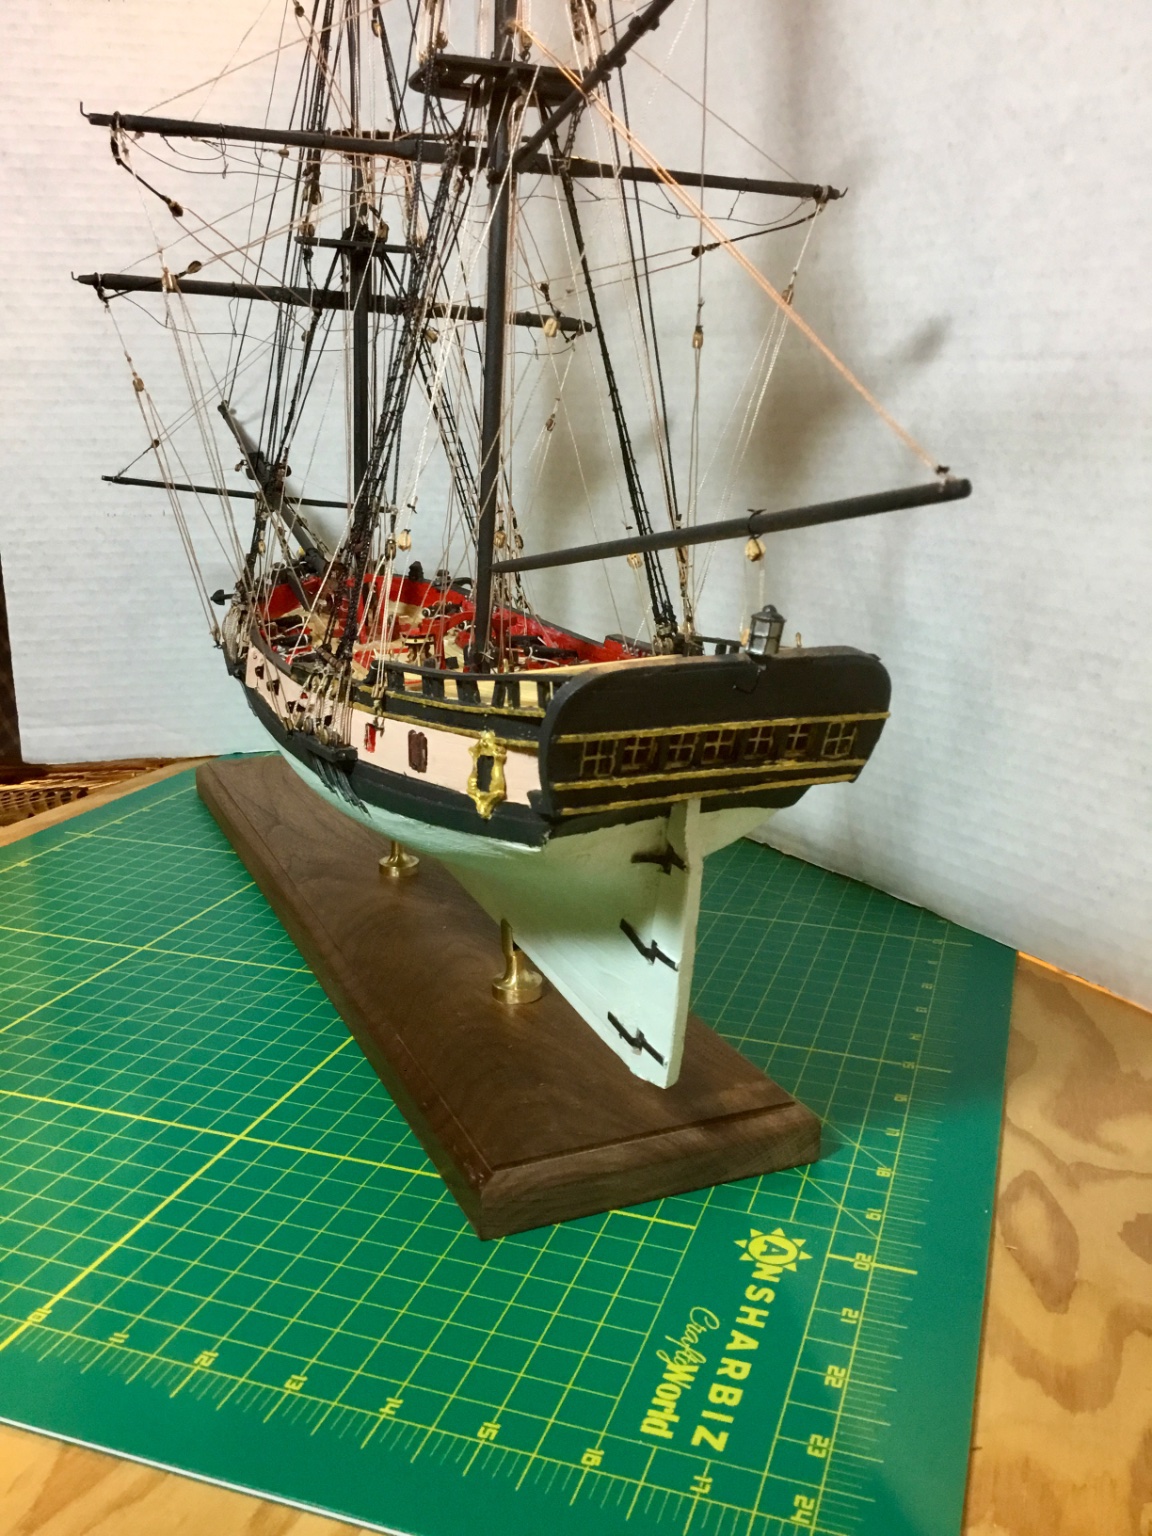
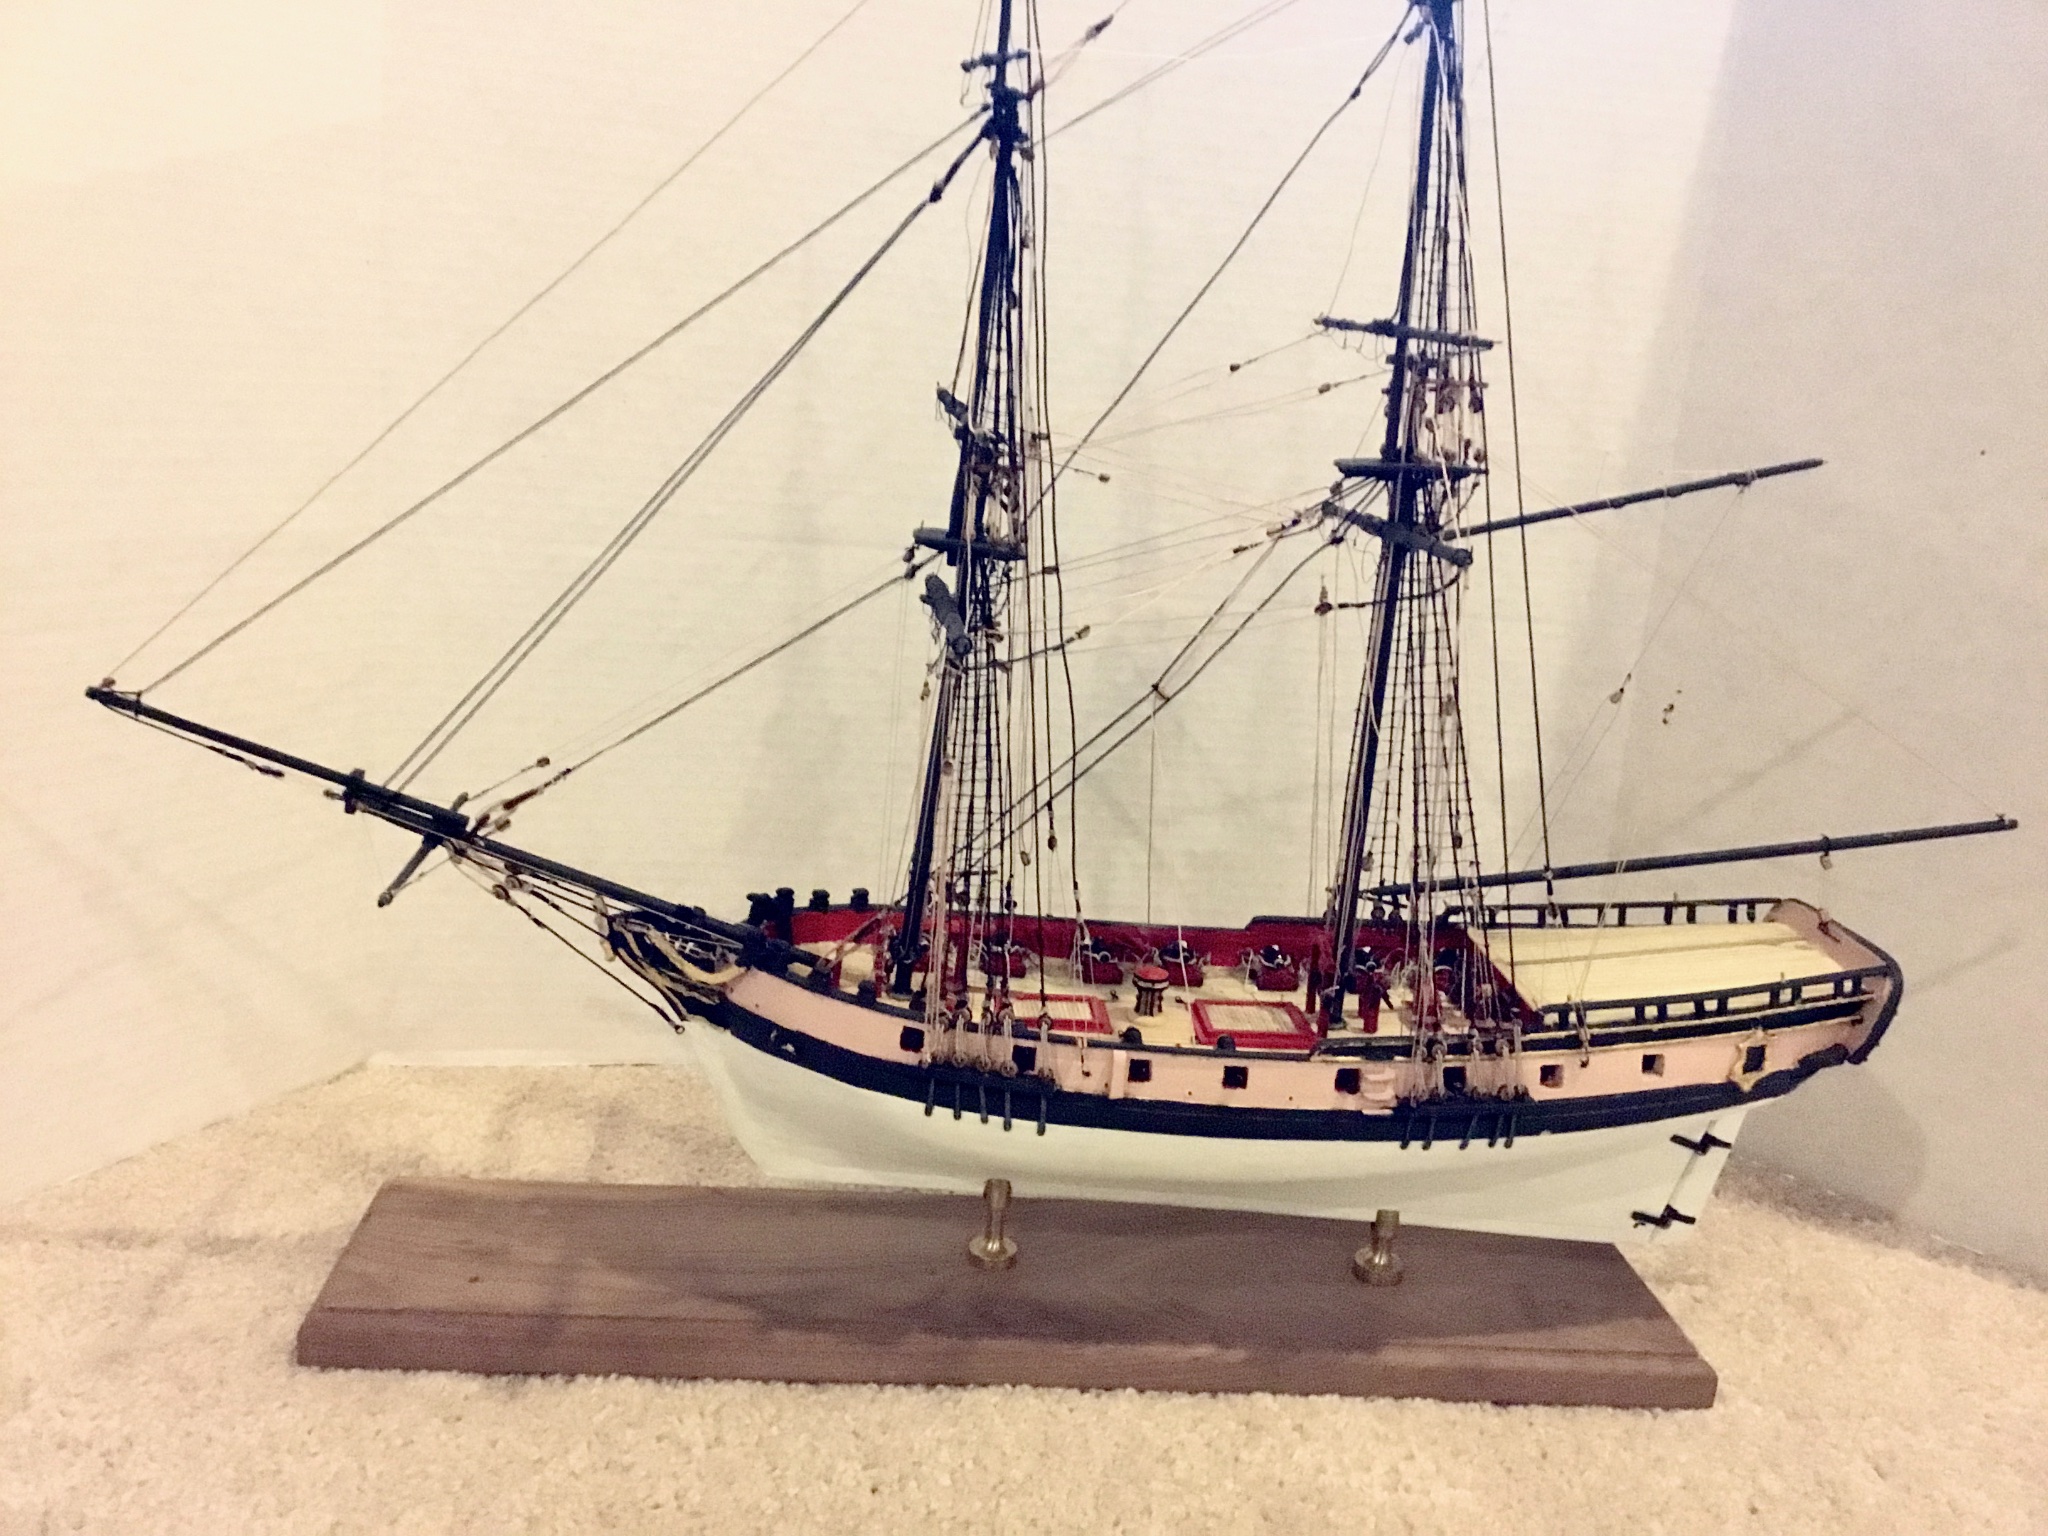
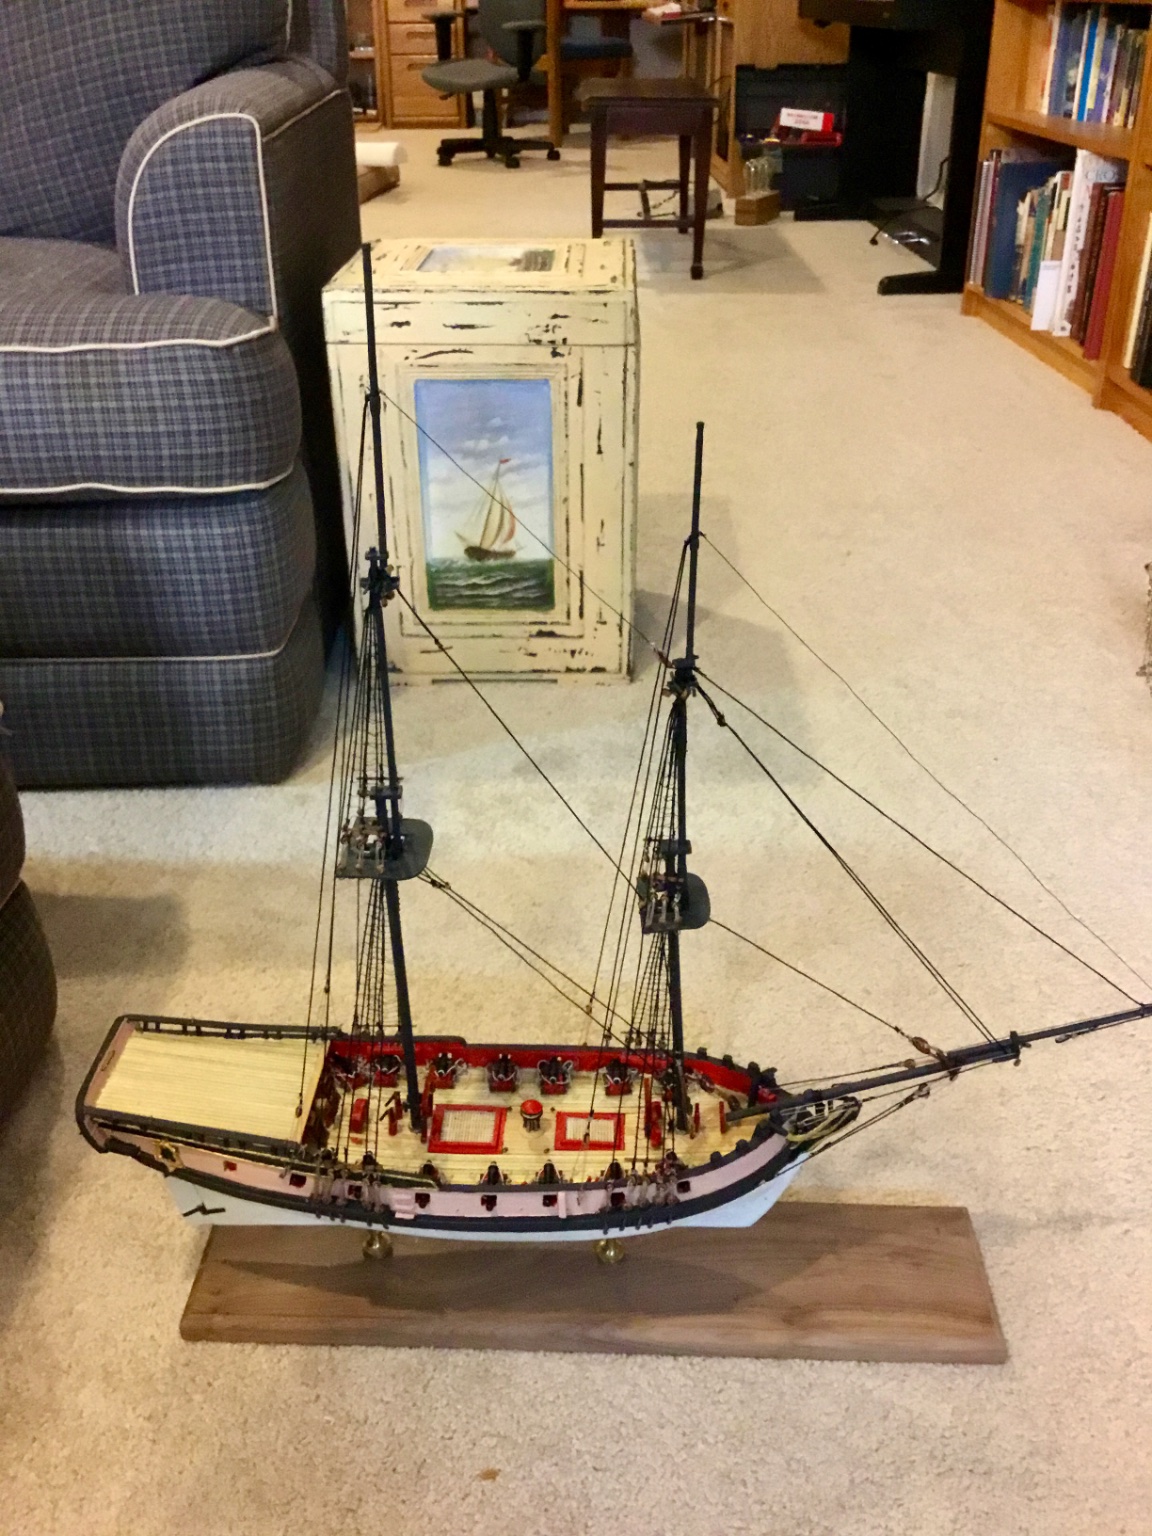
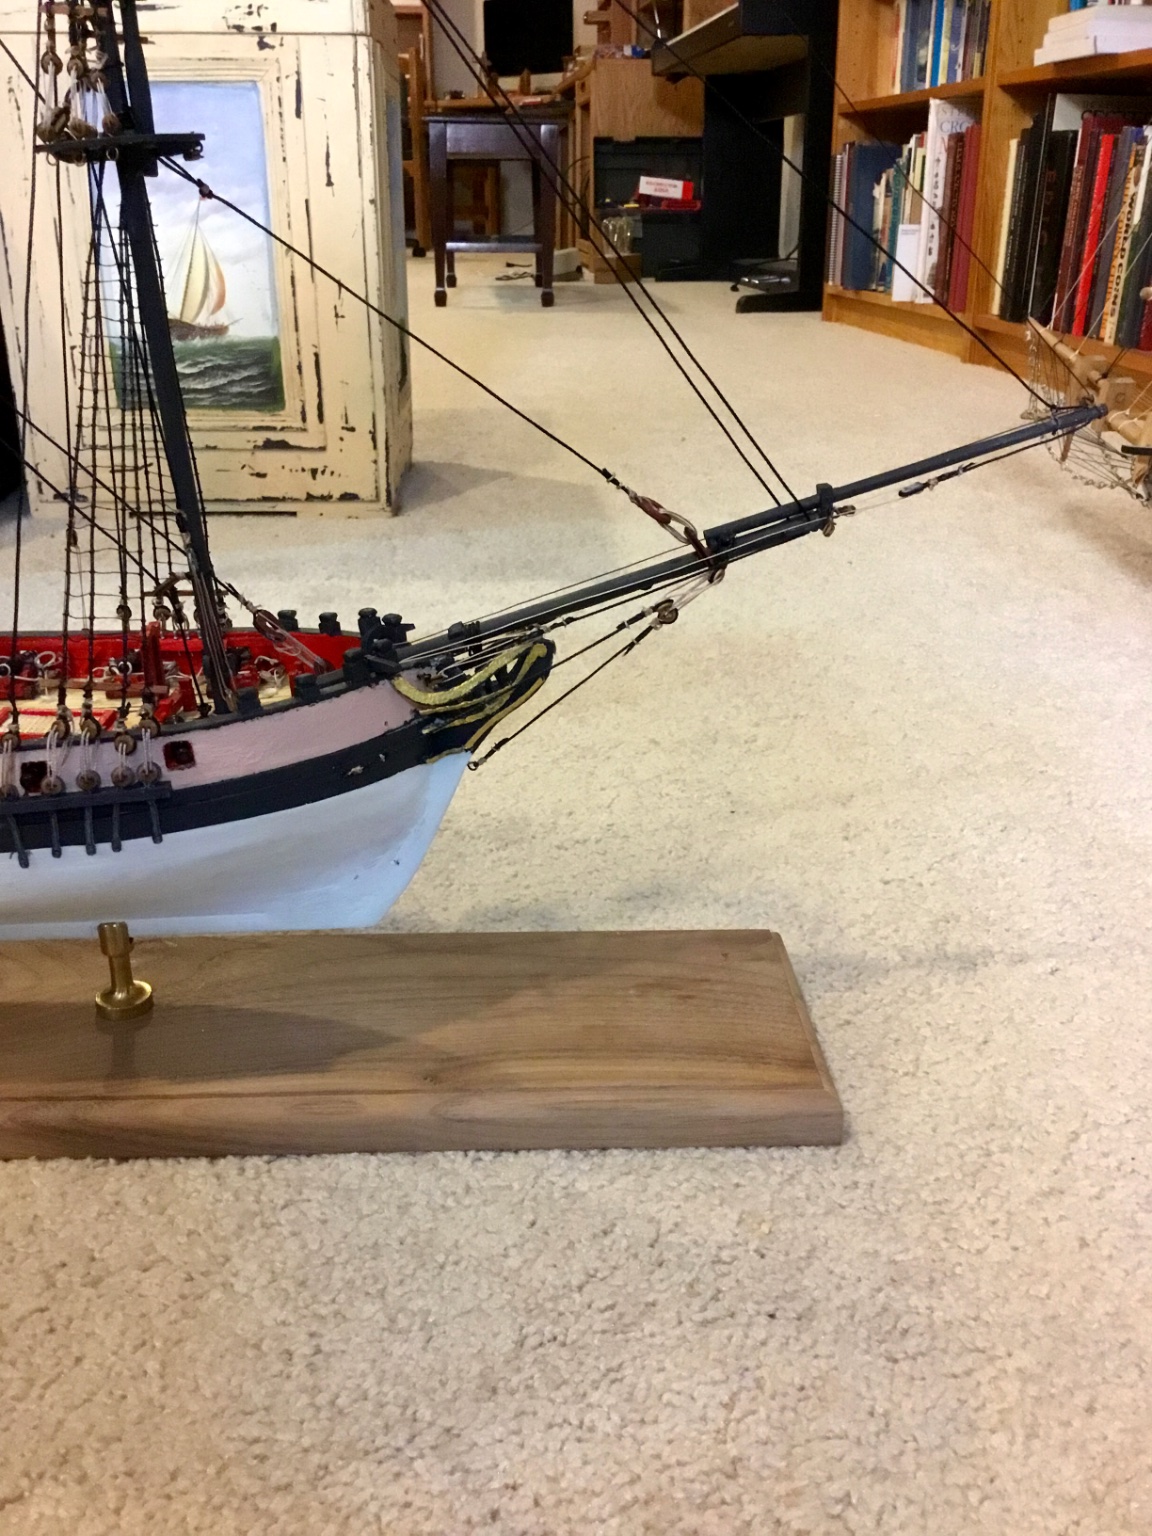
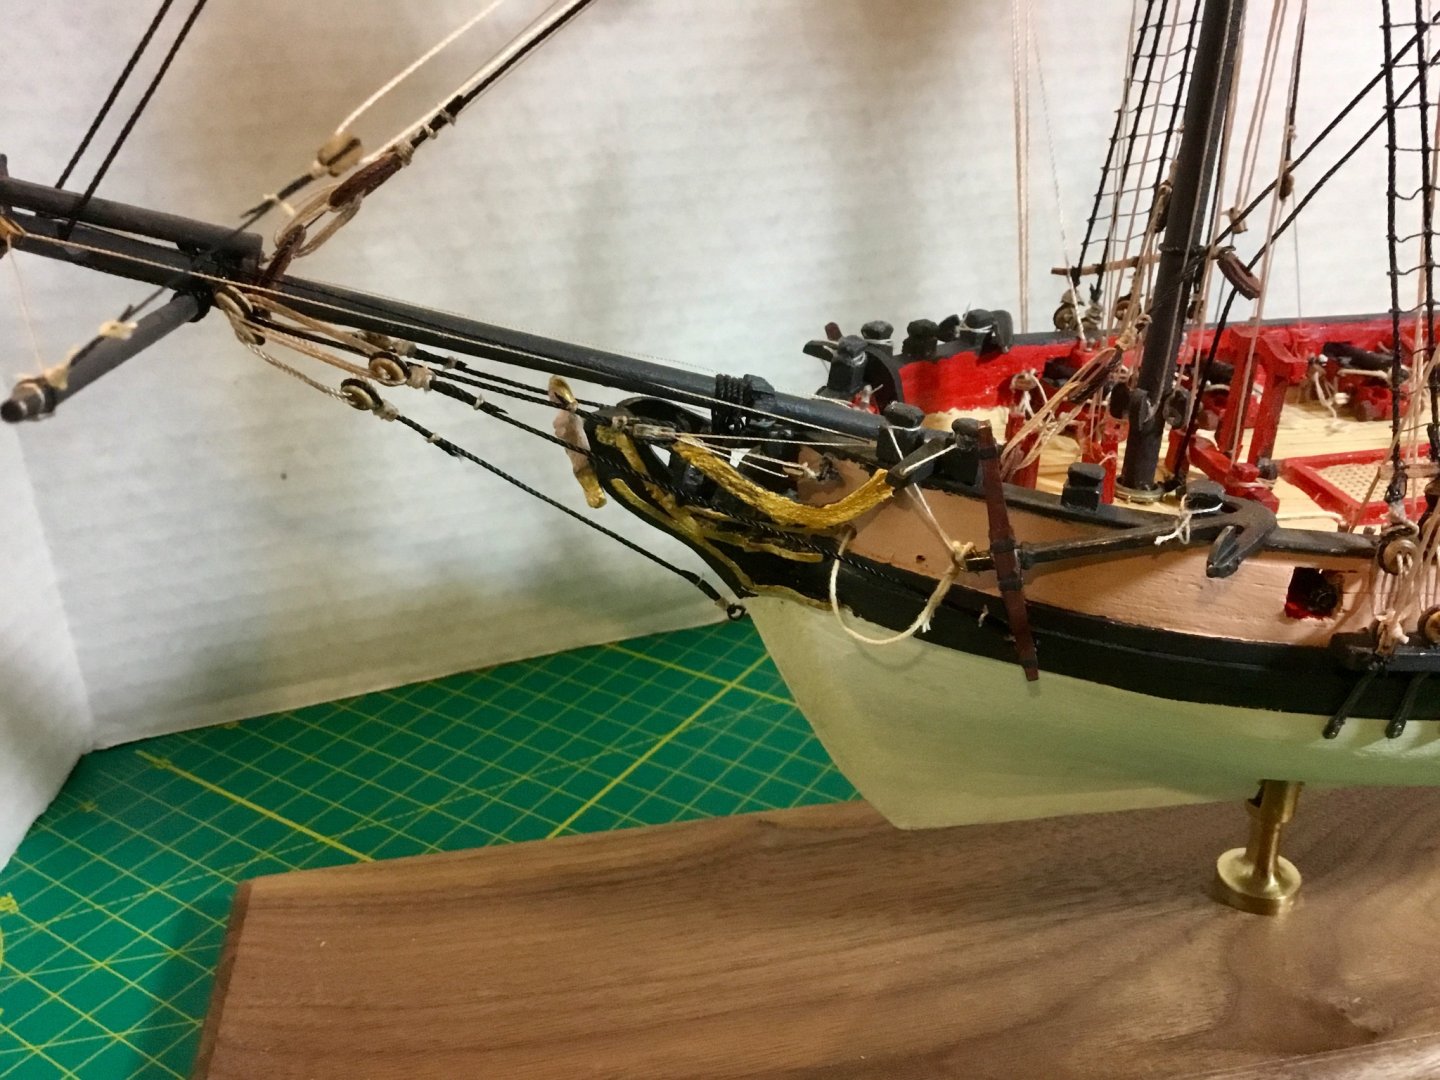
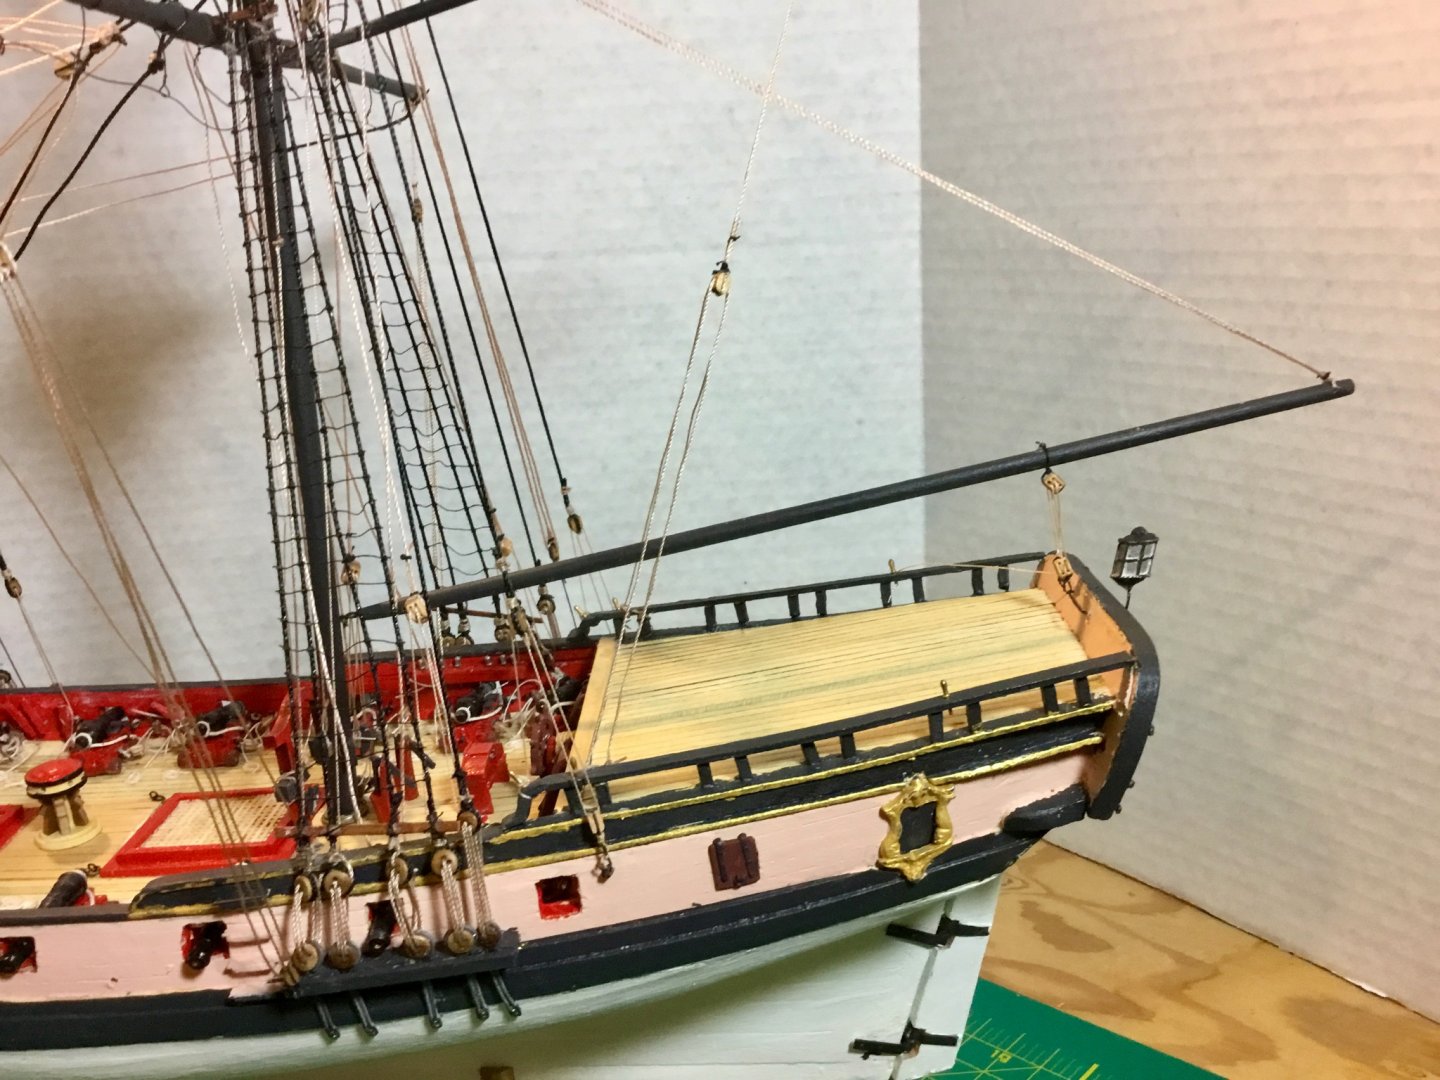
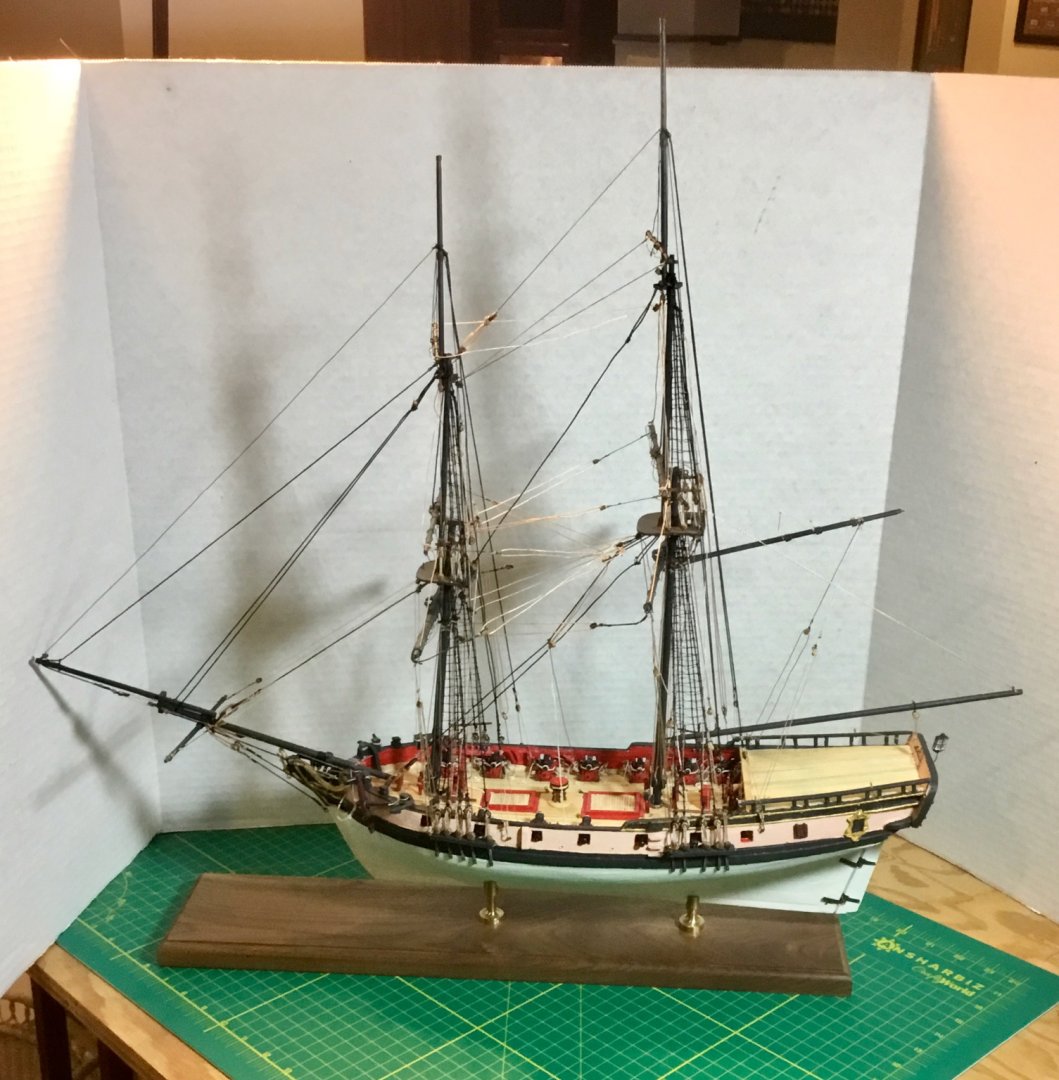
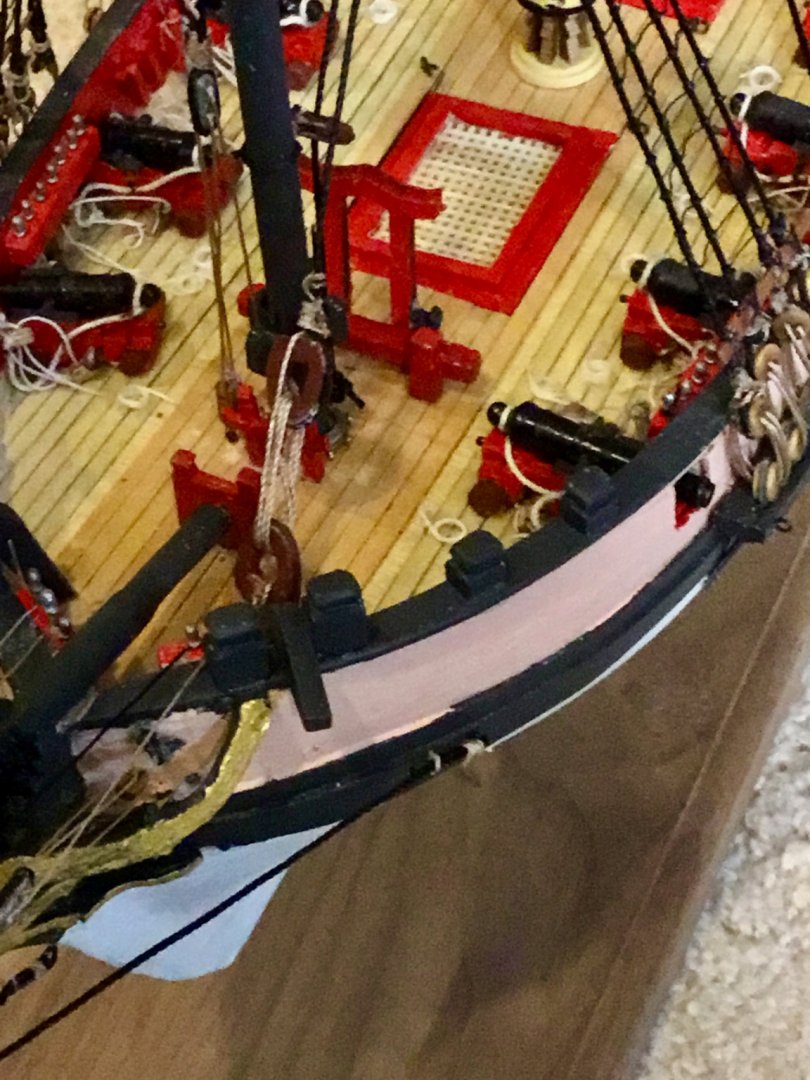
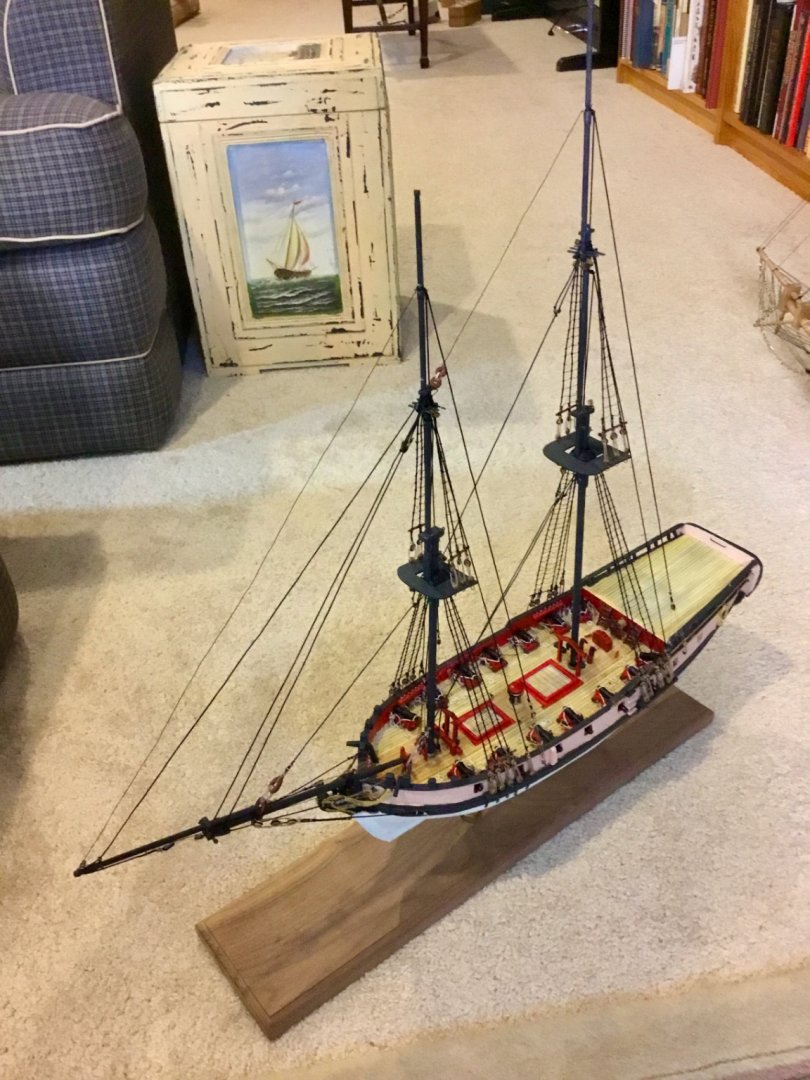
Added anchors and rear lantern. Calling this one finished.


- 24 replies
-
- 9
-
-

-
- Fair American
- Model Shipways
- (and 1 more)
-
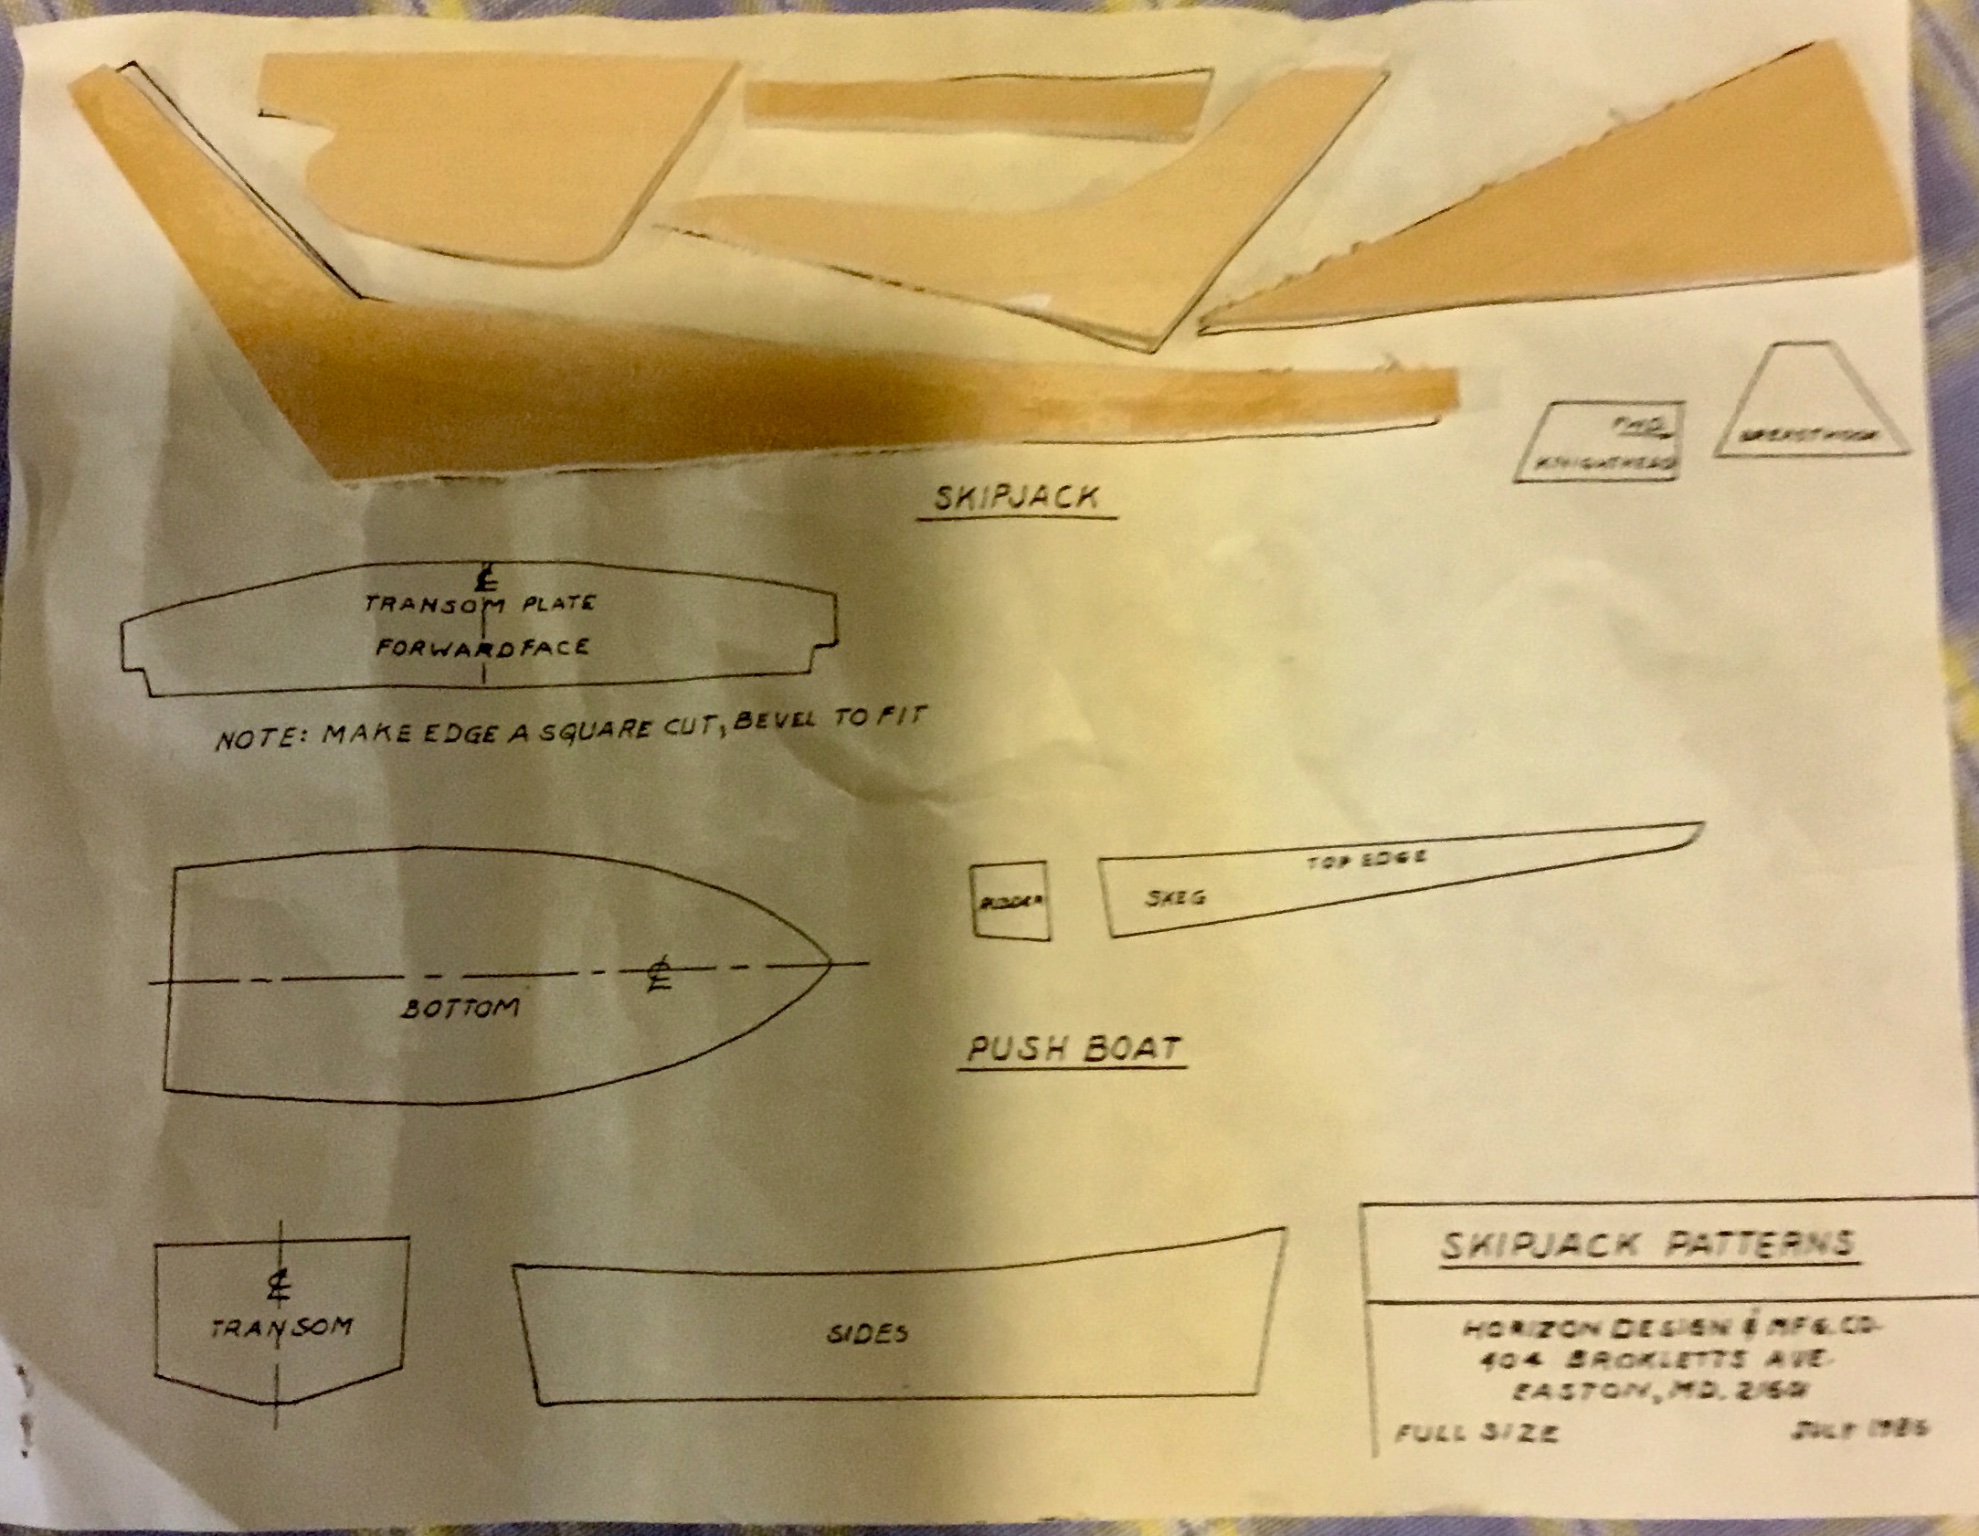
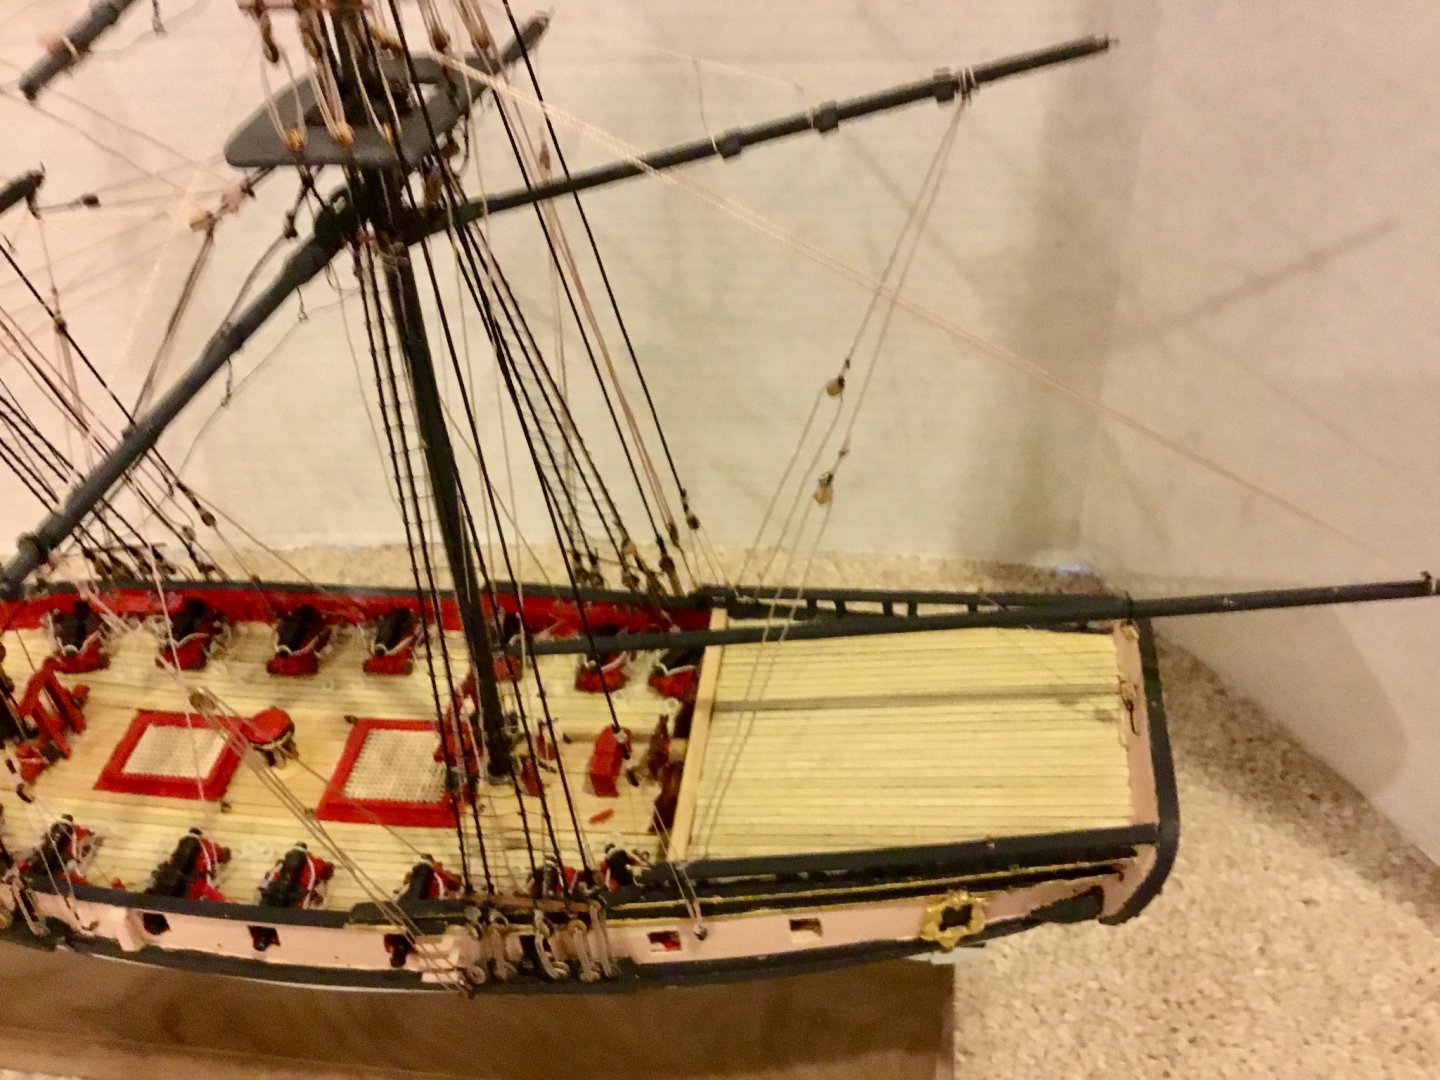
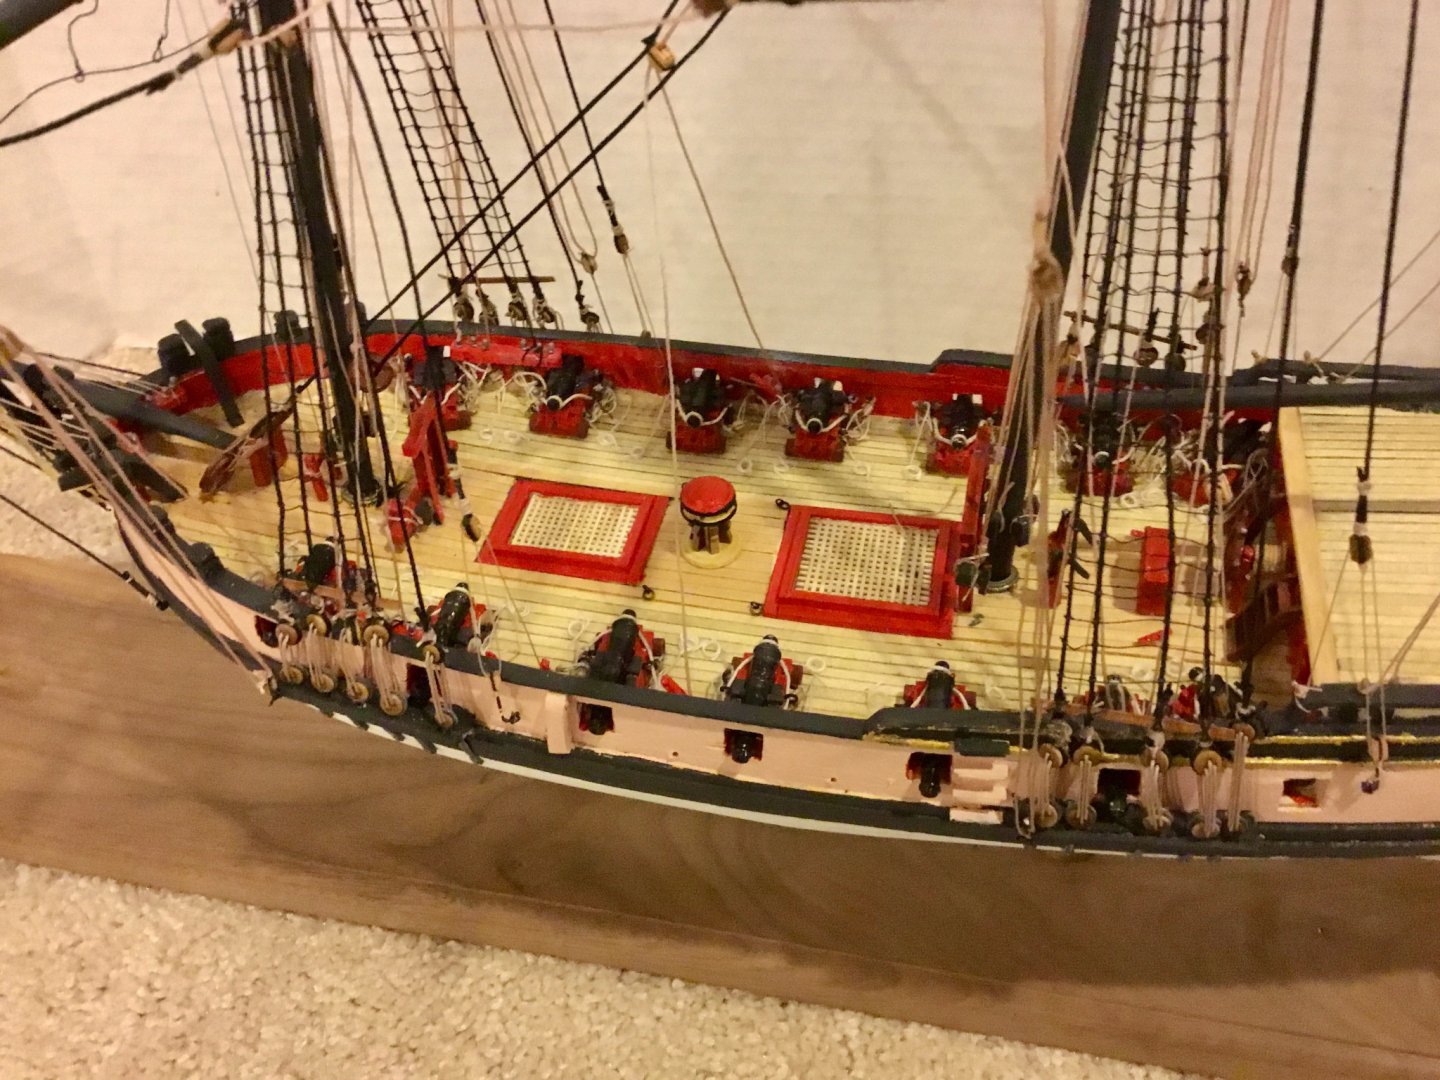
It does include sailcloth, thread, and a variety of metal fittings which I had already sorted into a plastic box before I decided to start this build log so they were not included in the photos. No laser cut parts, all deck furniture and the push boat need to be cut out using a saw after copying their shapes from the plans.
- 22 replies
-
- 4
-
-
- Horizon
- Chesapeake Bay Skipjack
- (and 1 more)
-
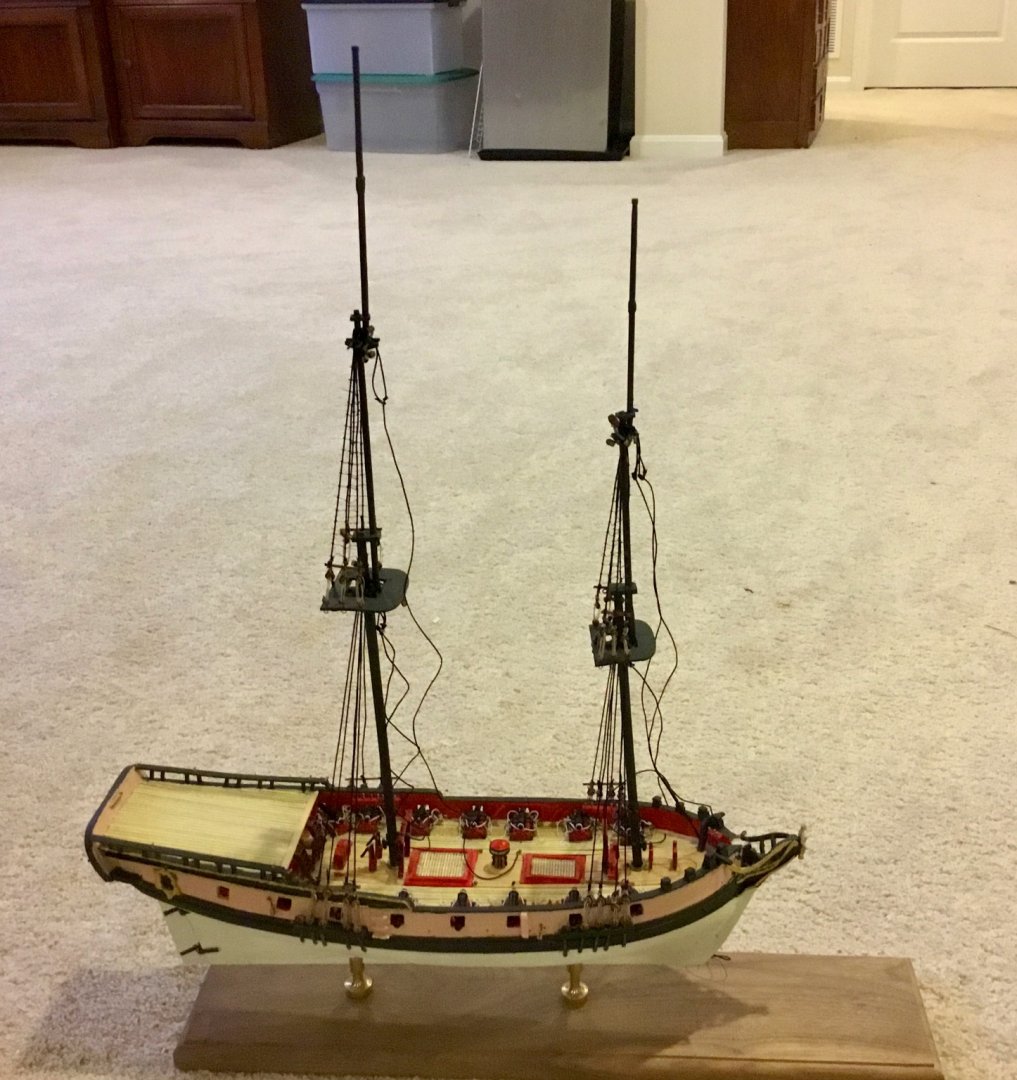
Starting an older kit manufactured in the late 1980’s, solid hull. Something different for a change of pace.

- 22 replies
-
- 4
-
-
- Horizon
- Chesapeake Bay Skipjack
- (and 1 more)
-
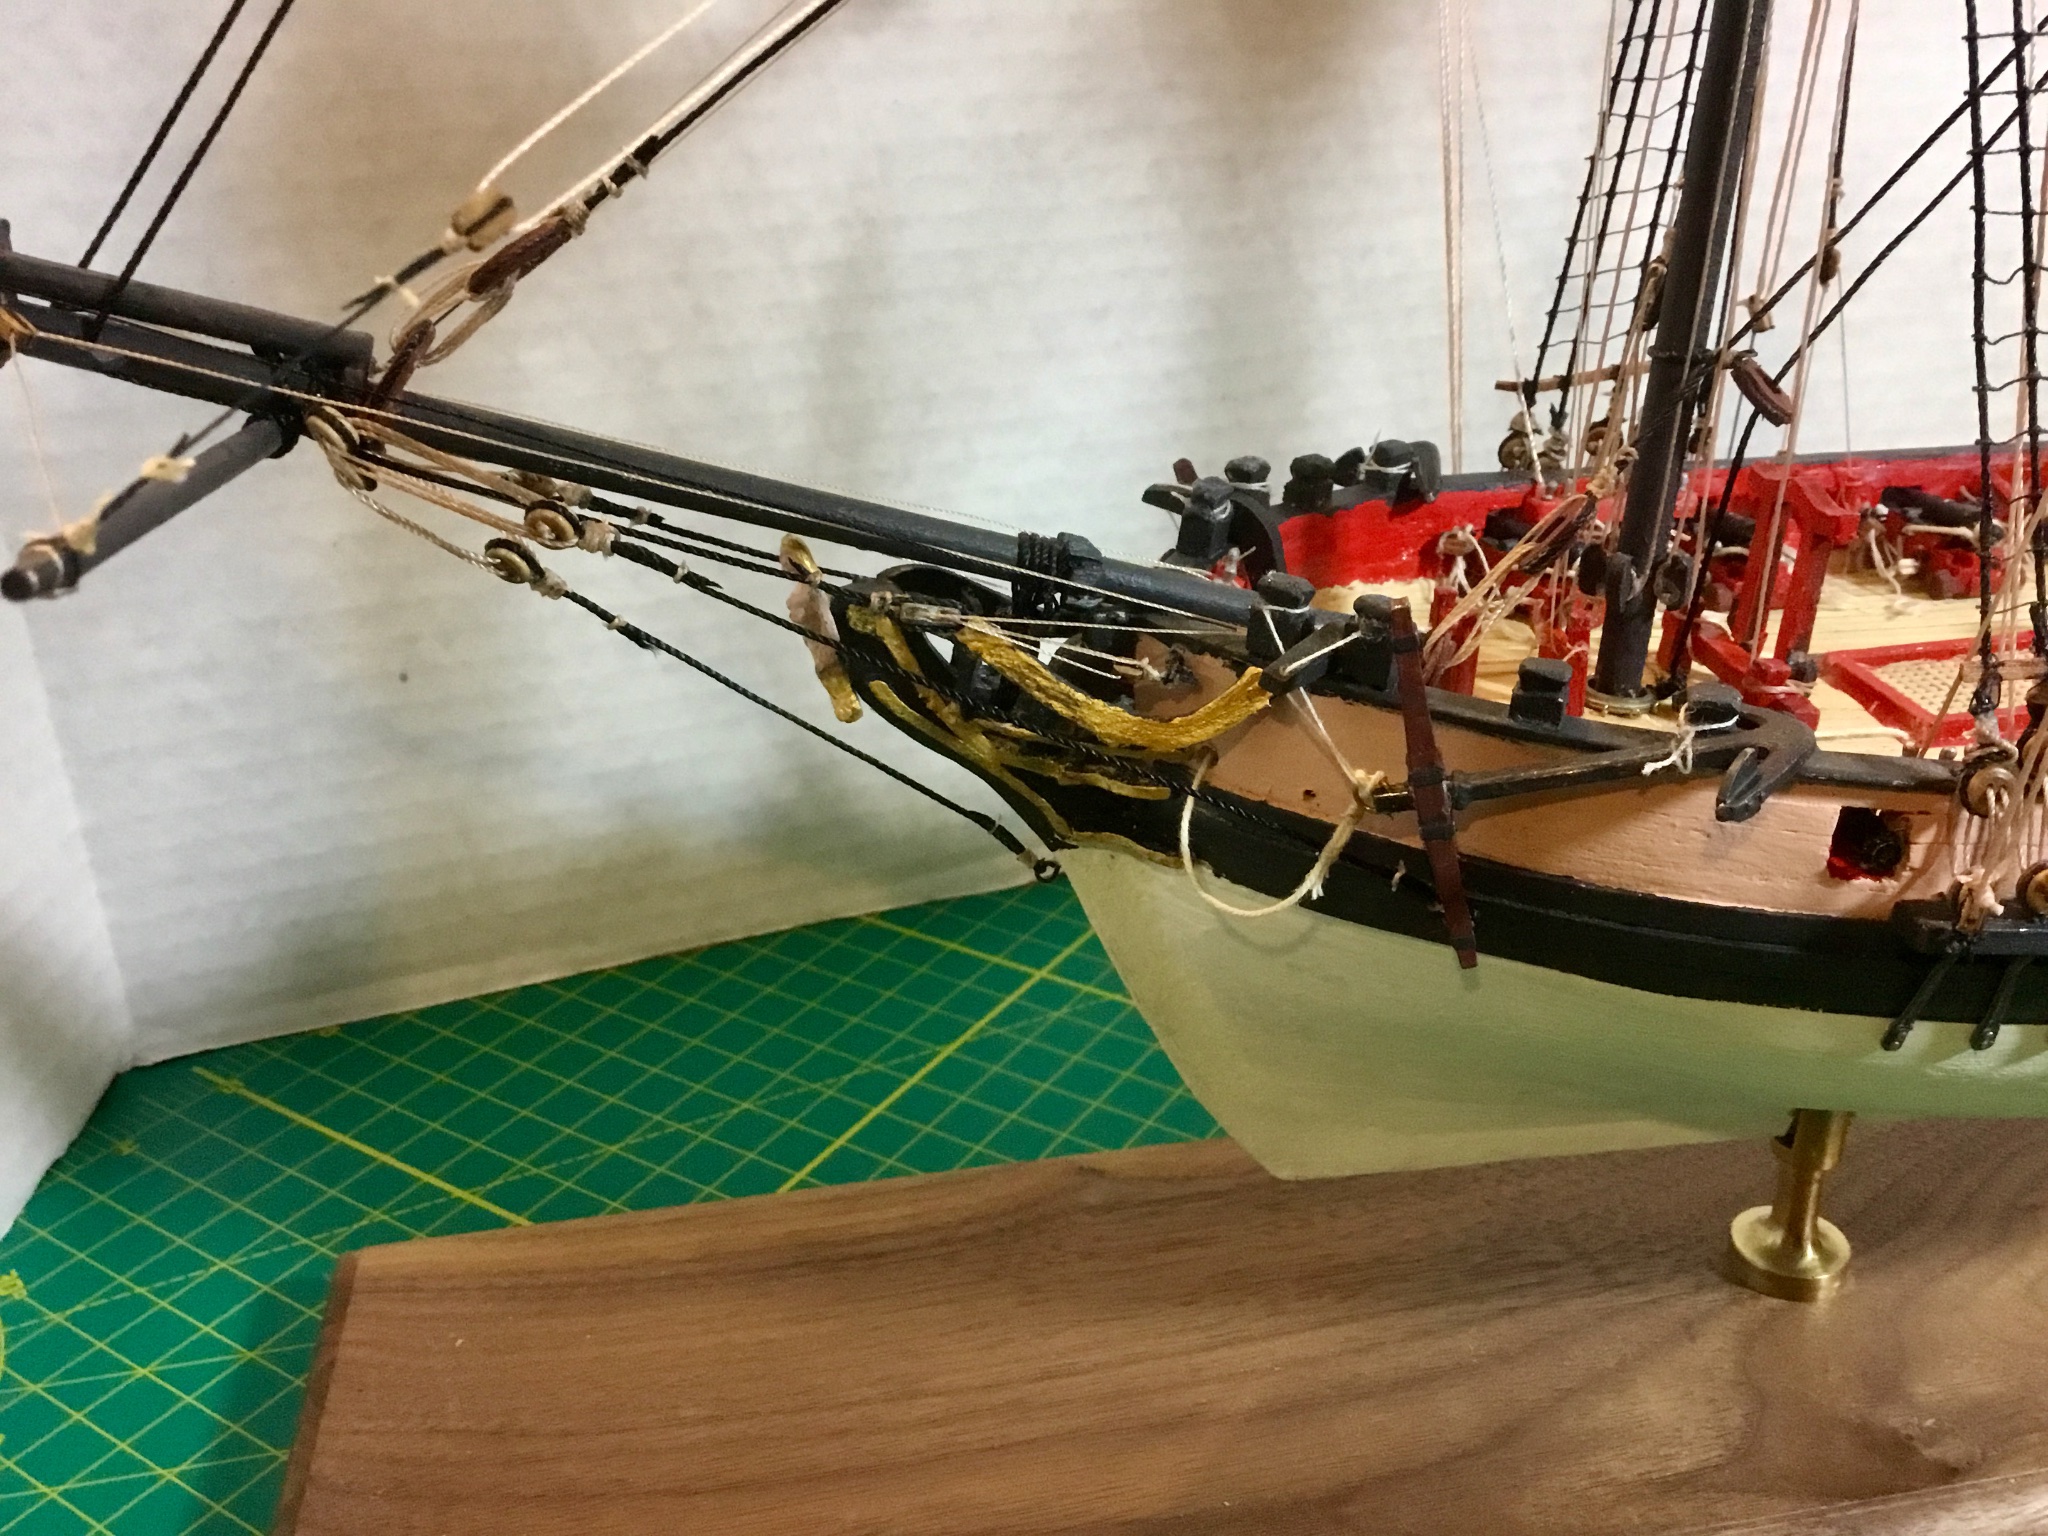
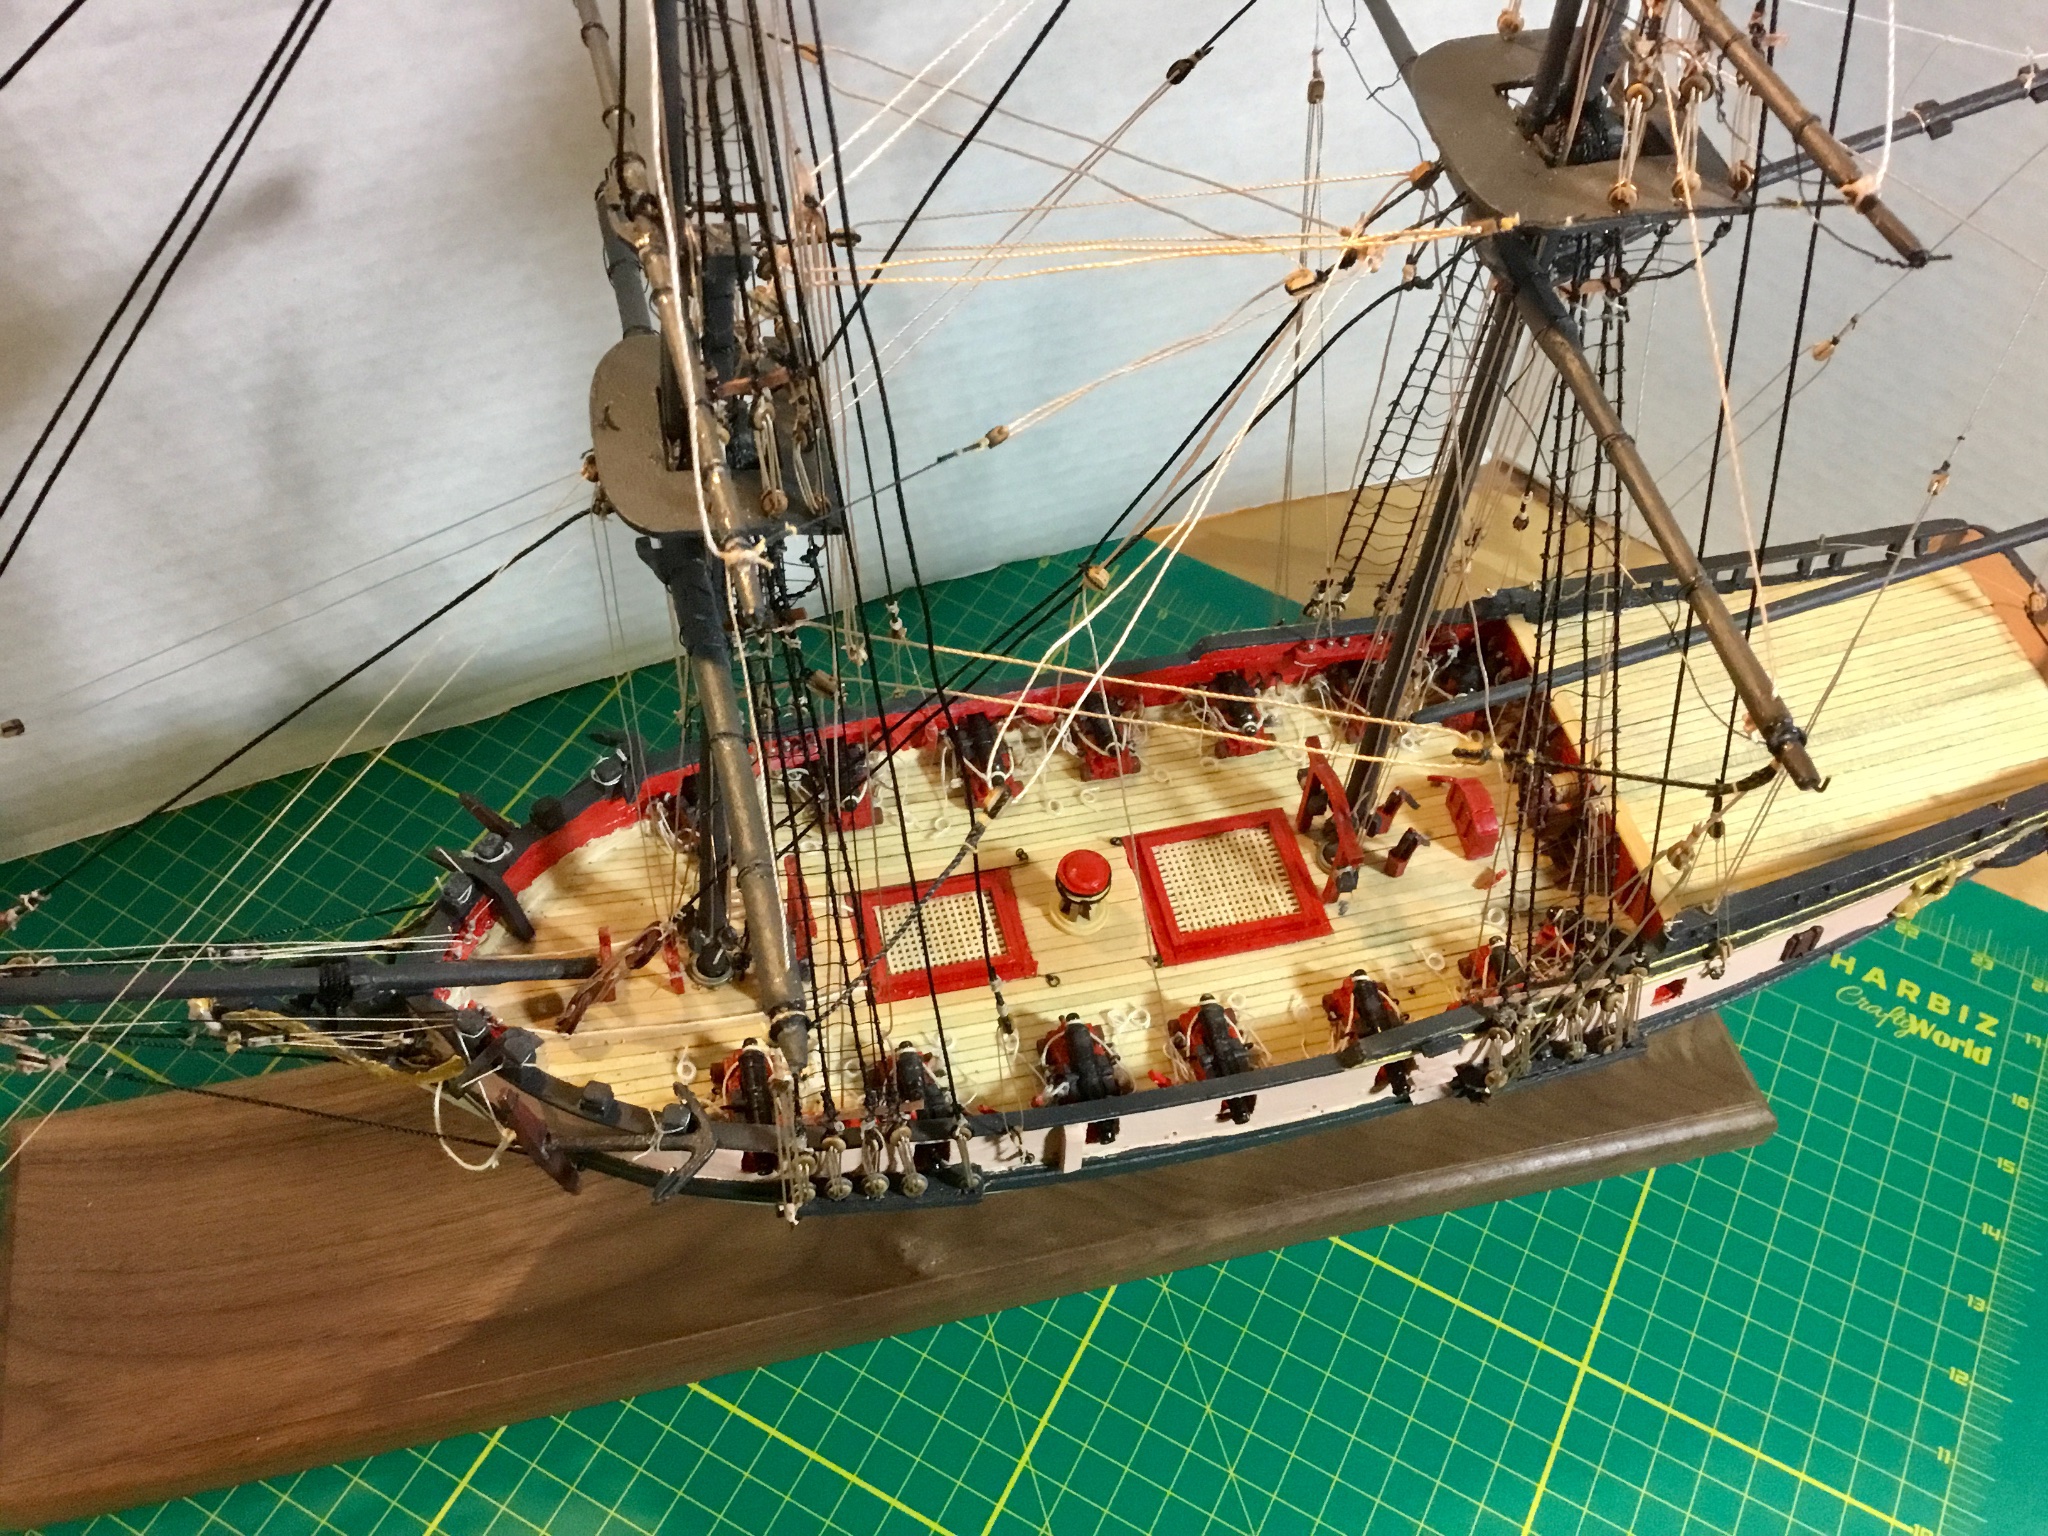
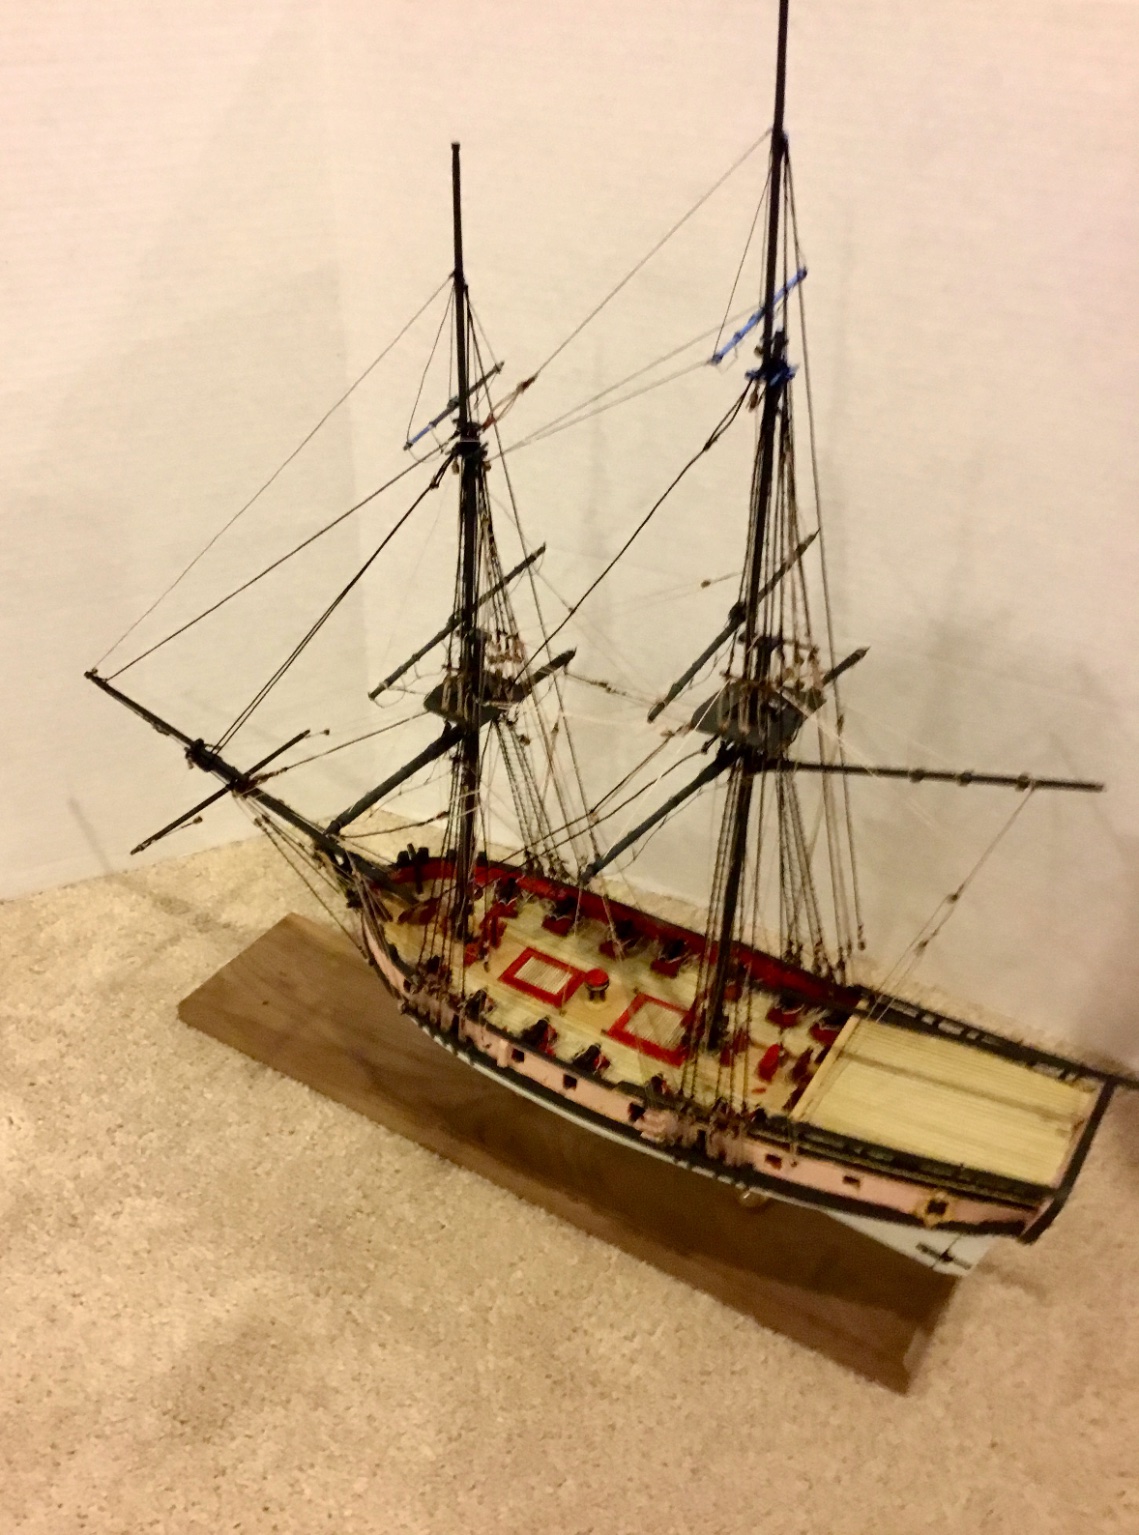
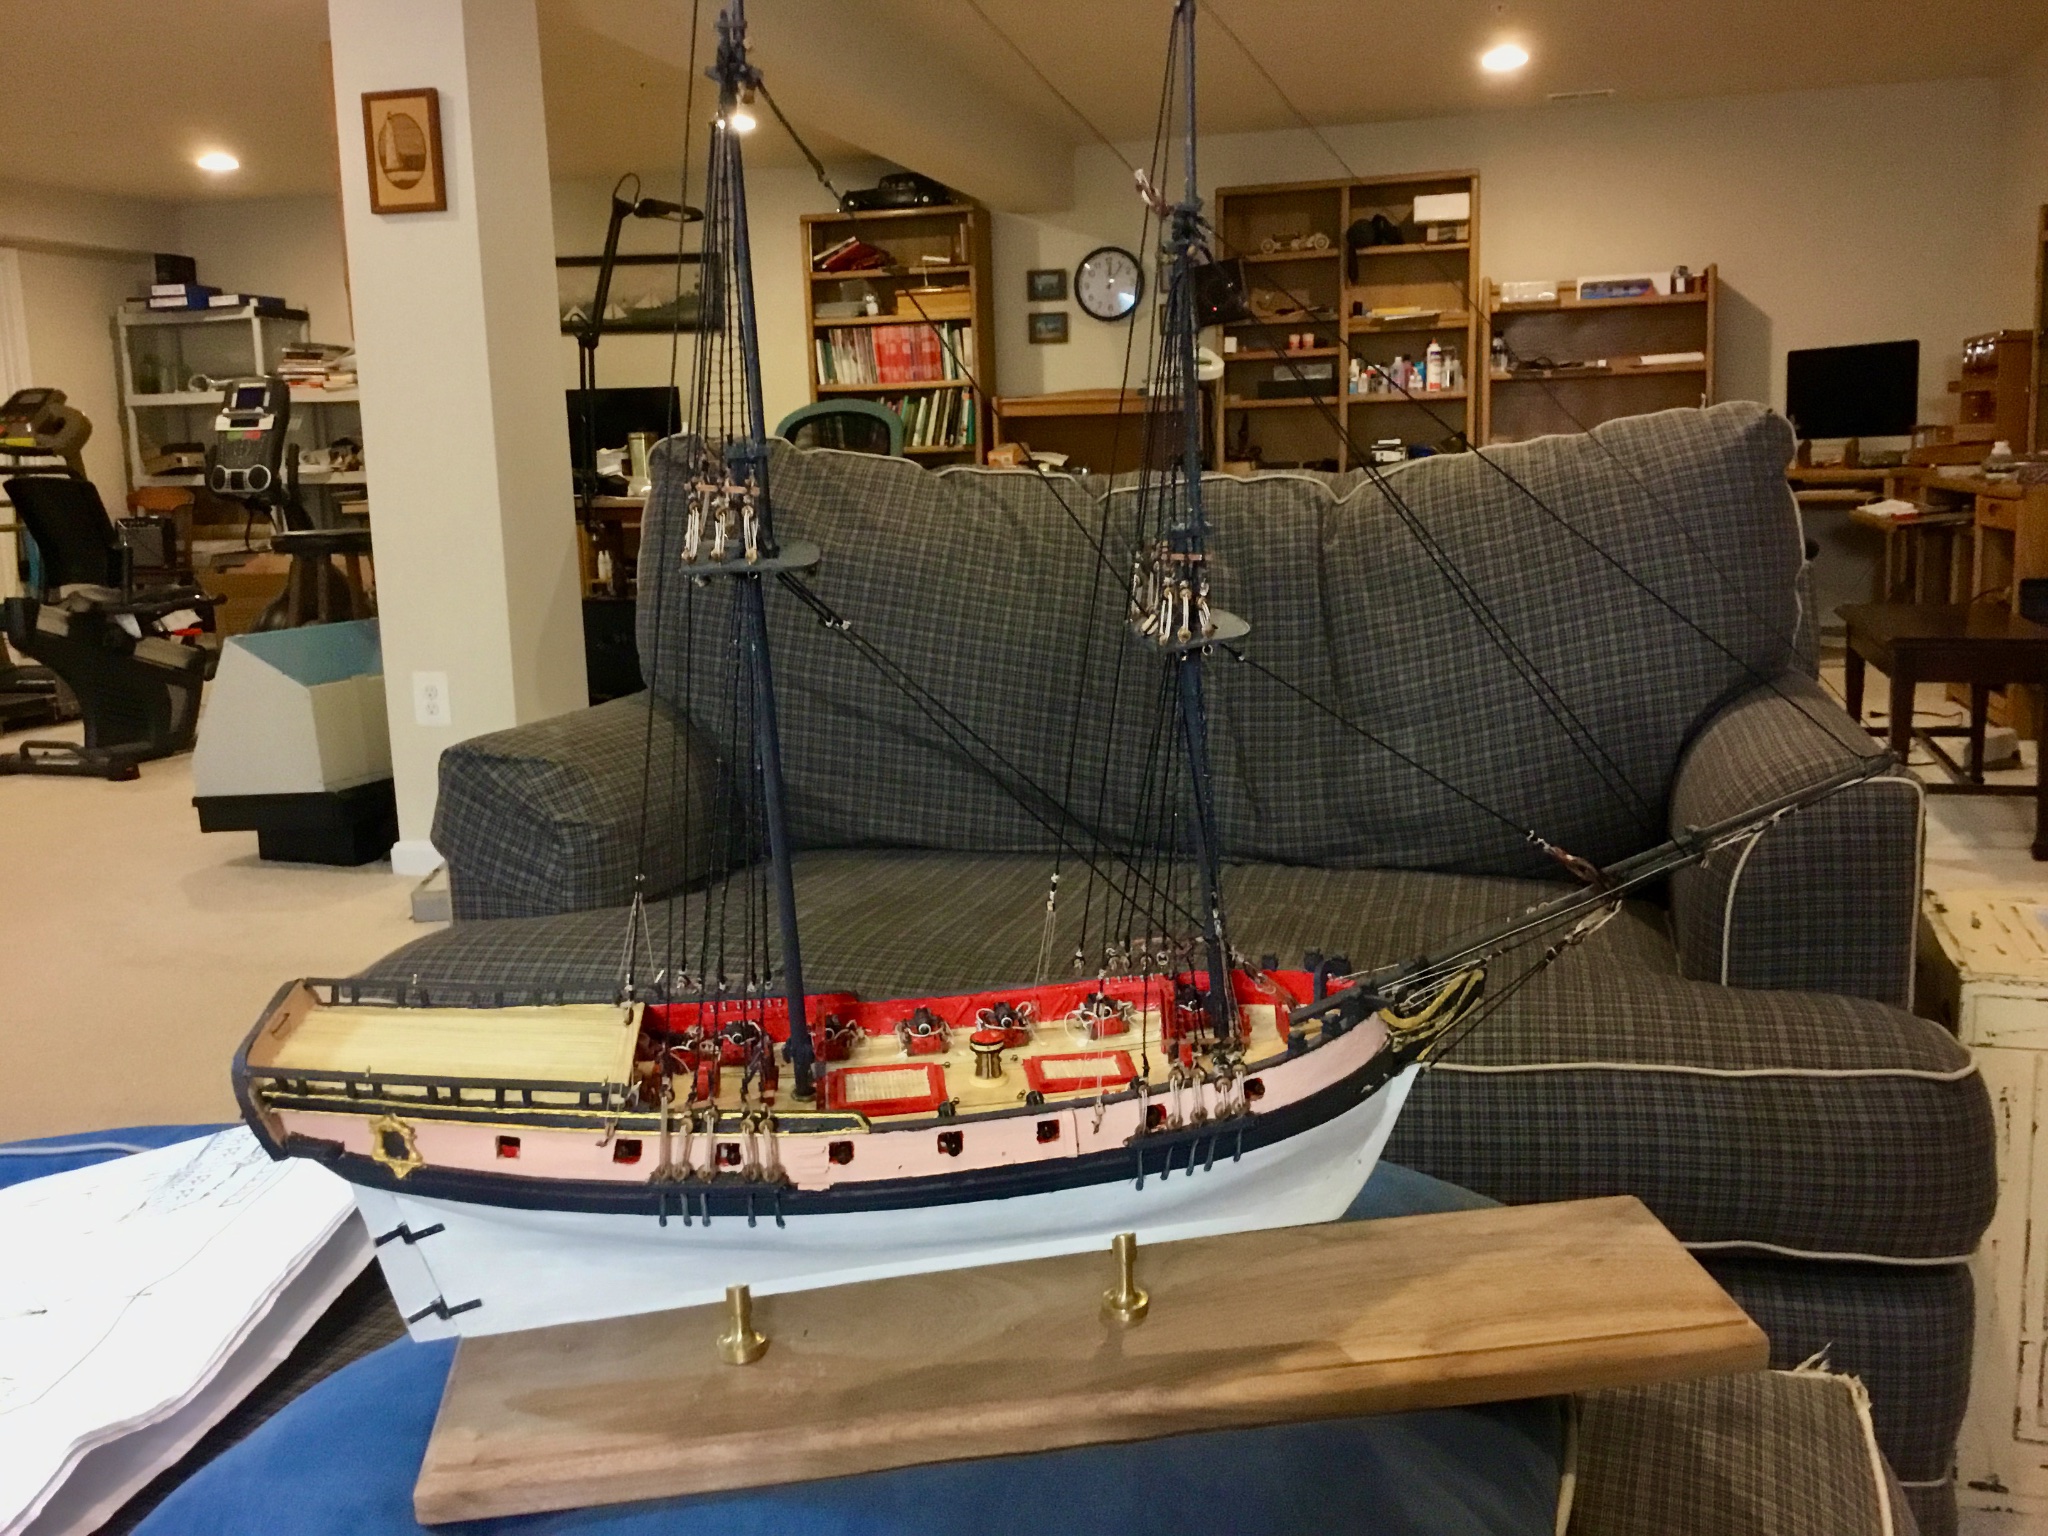
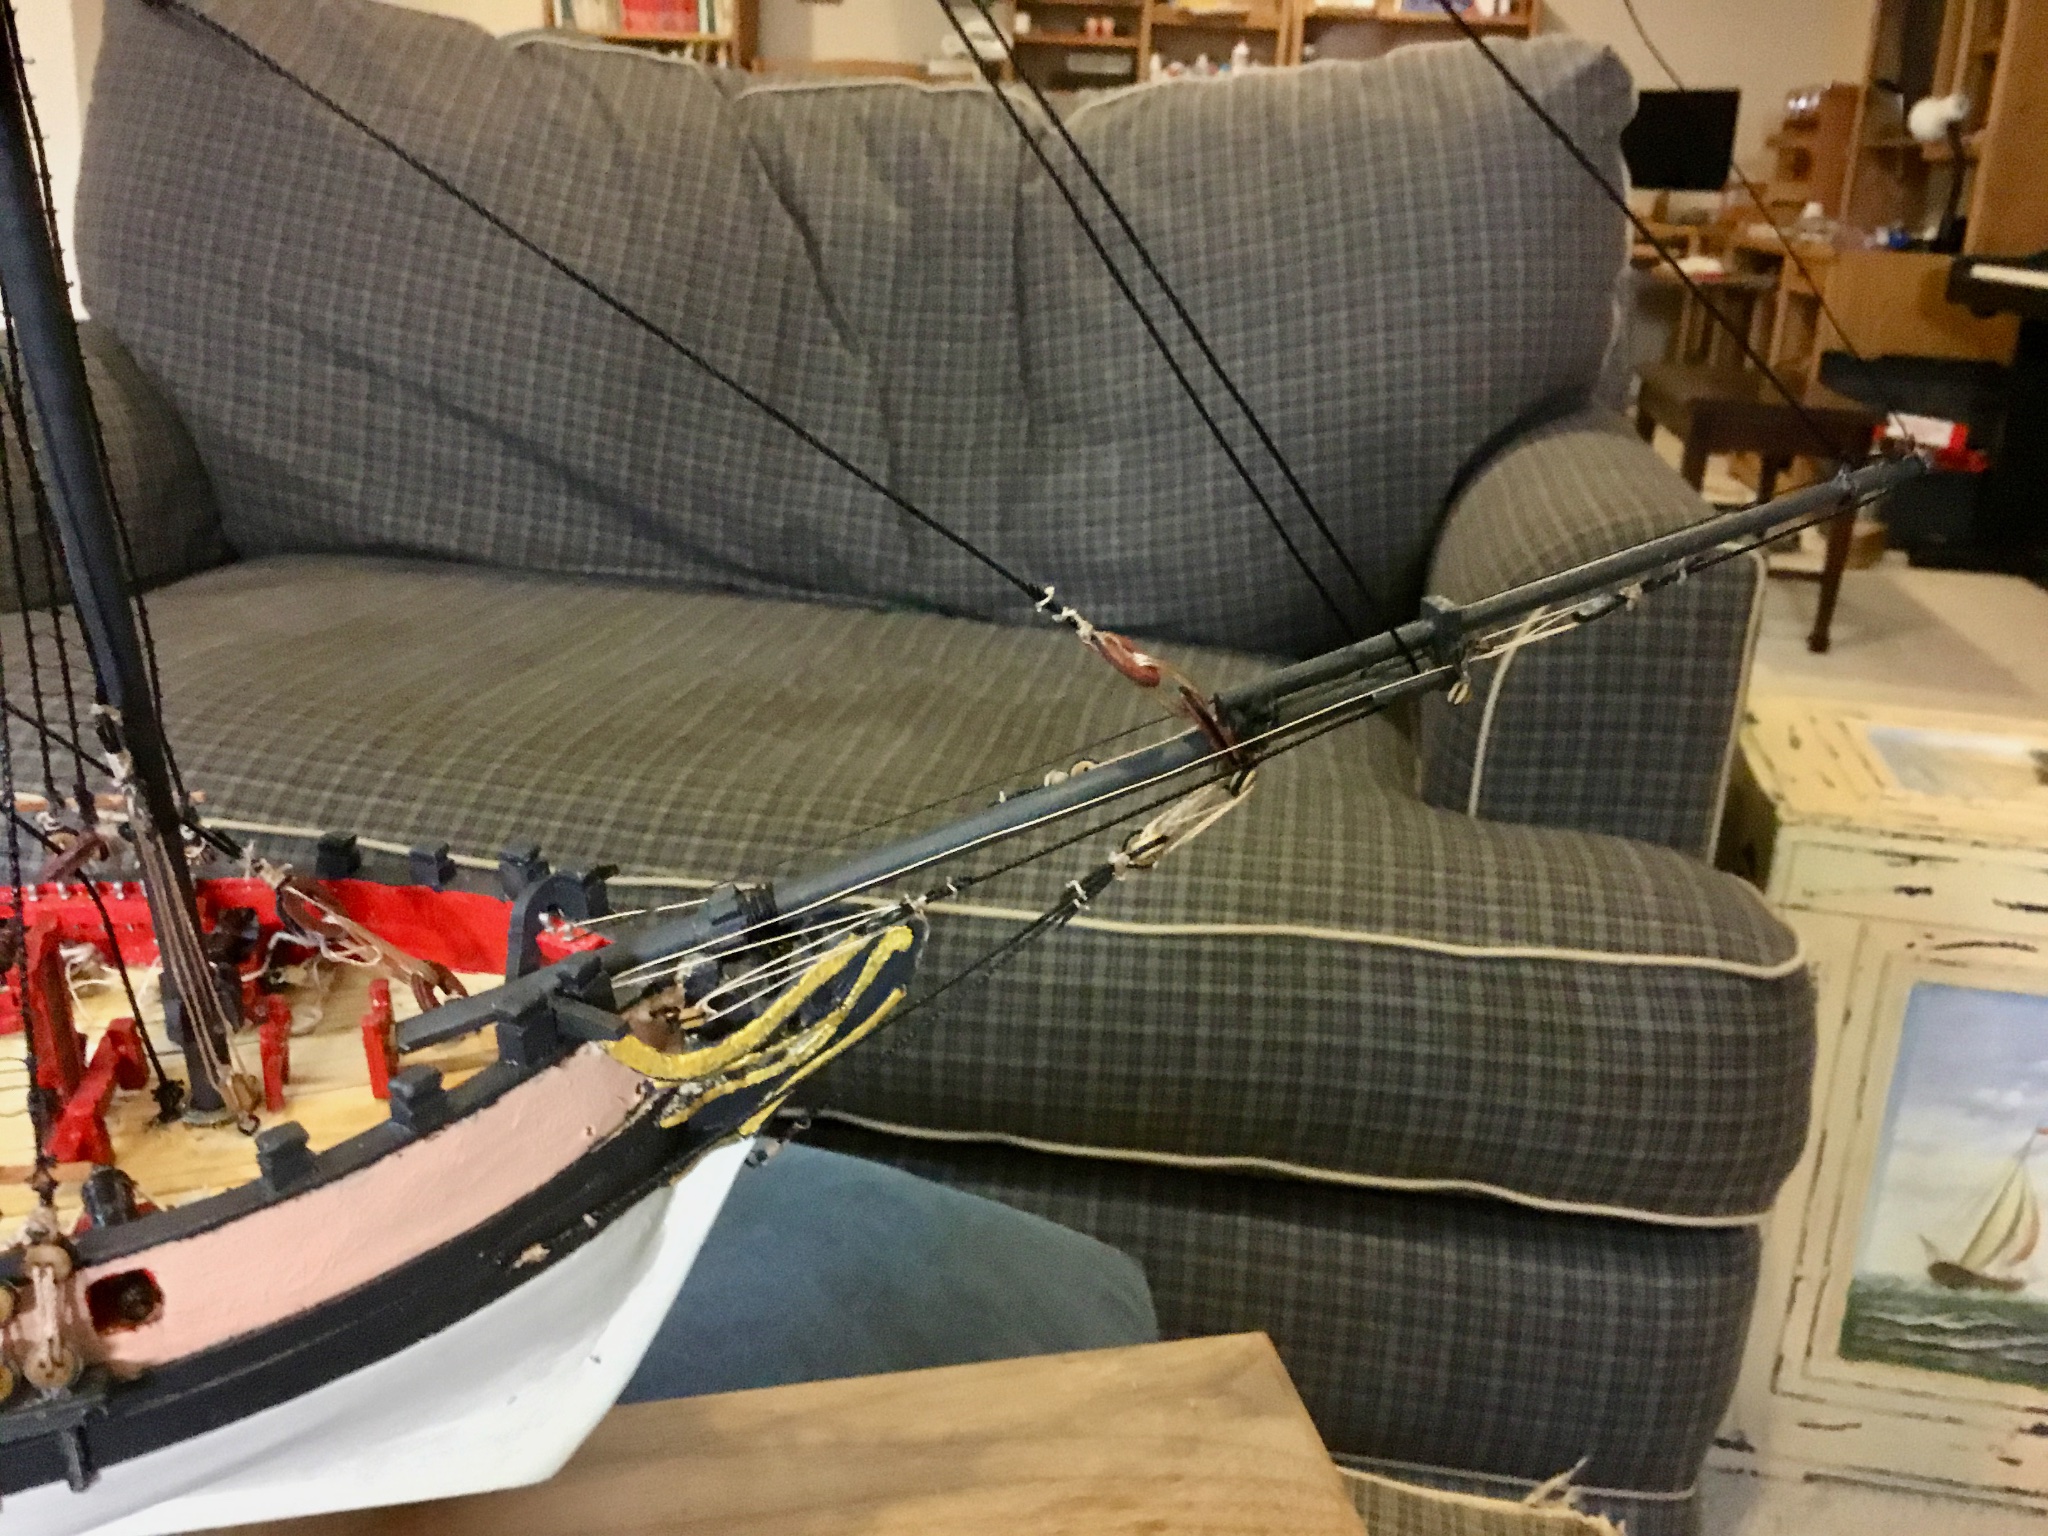
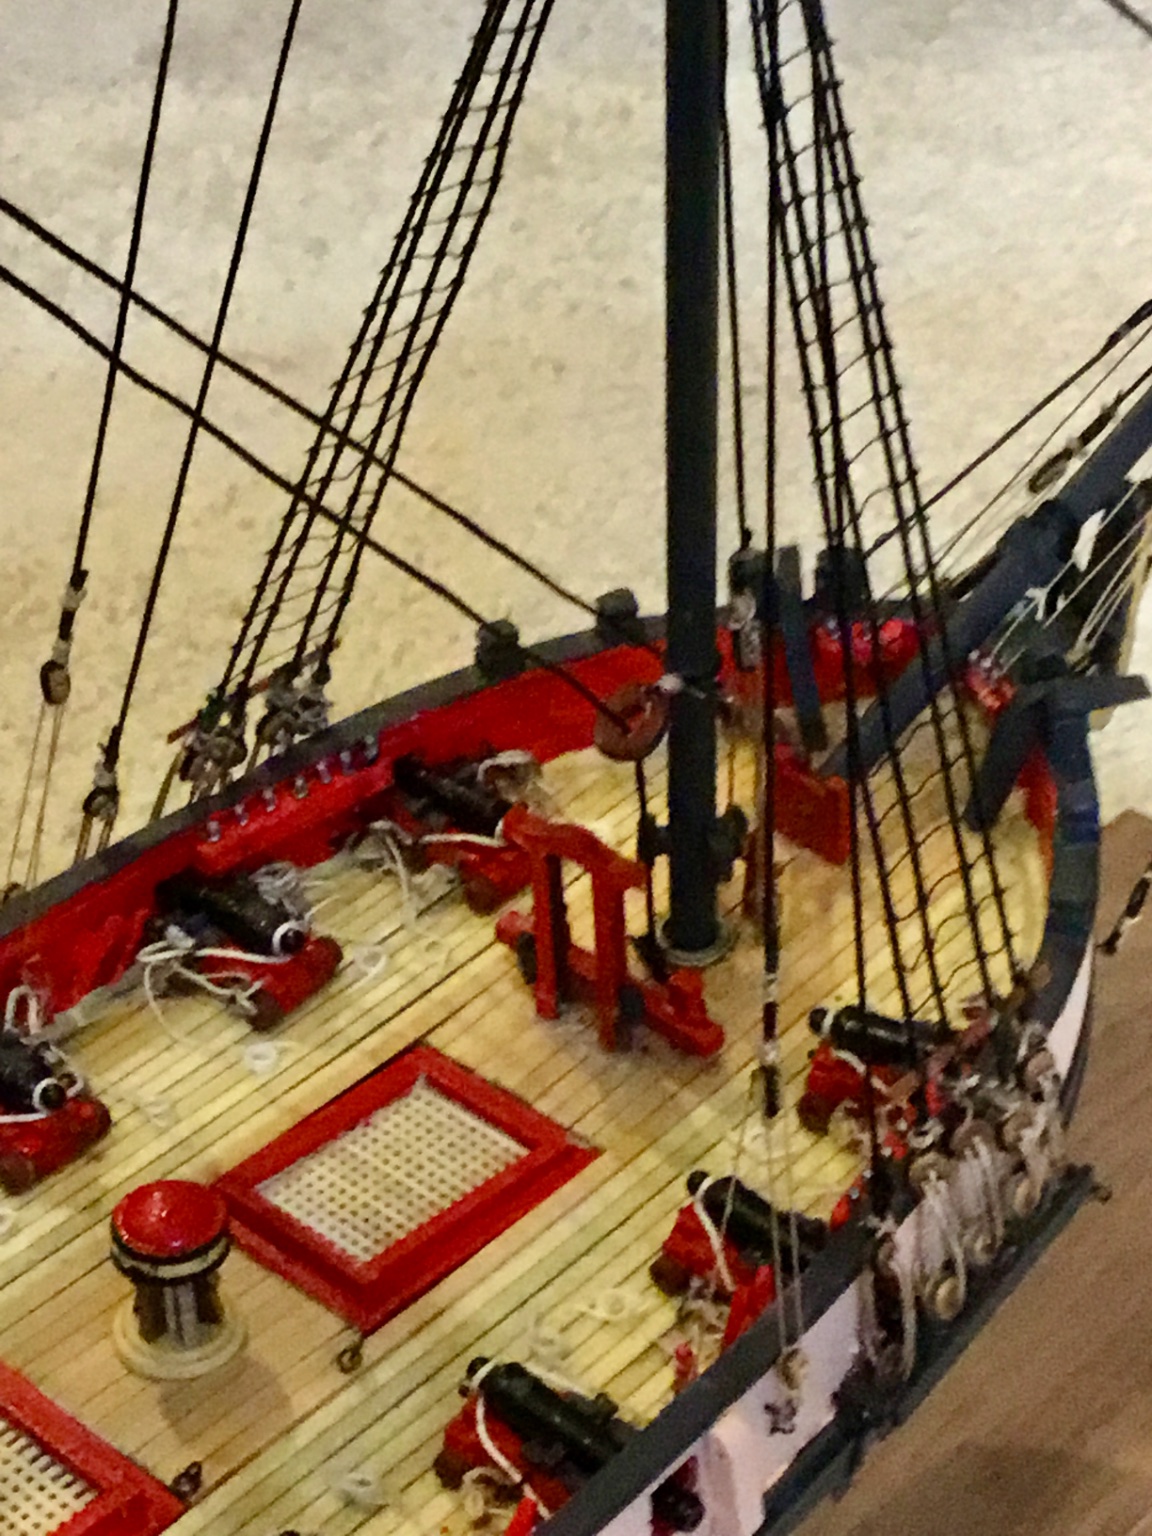
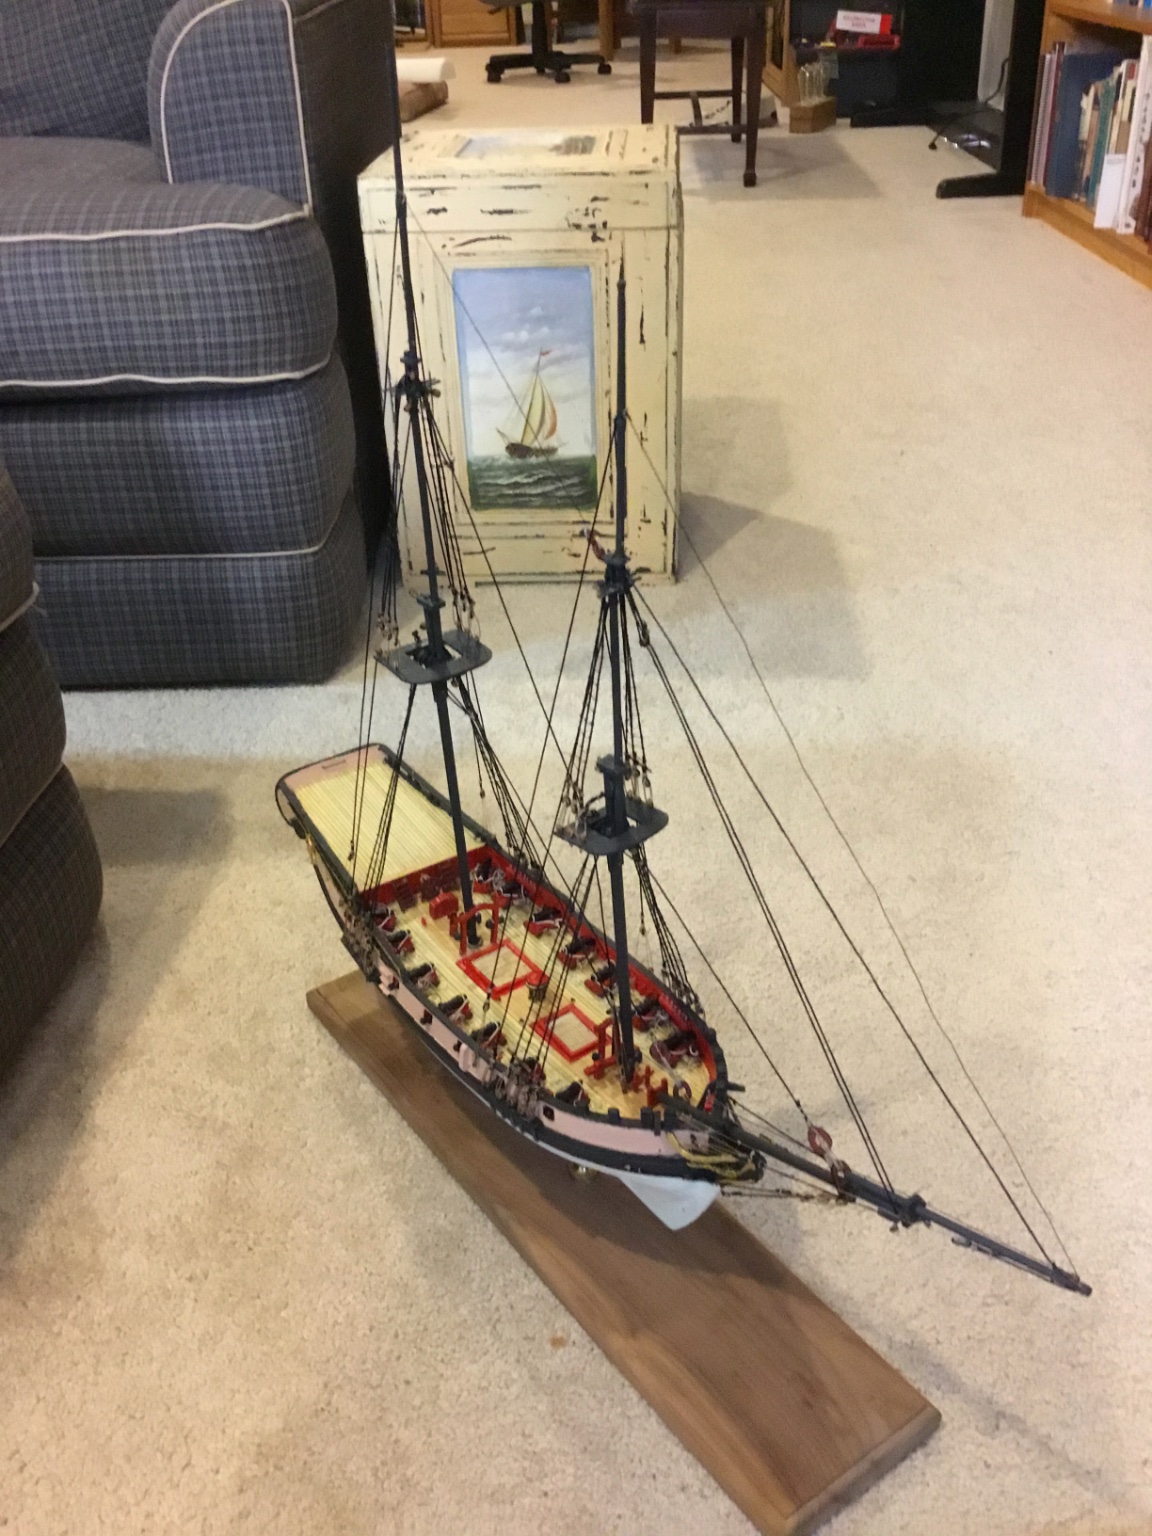
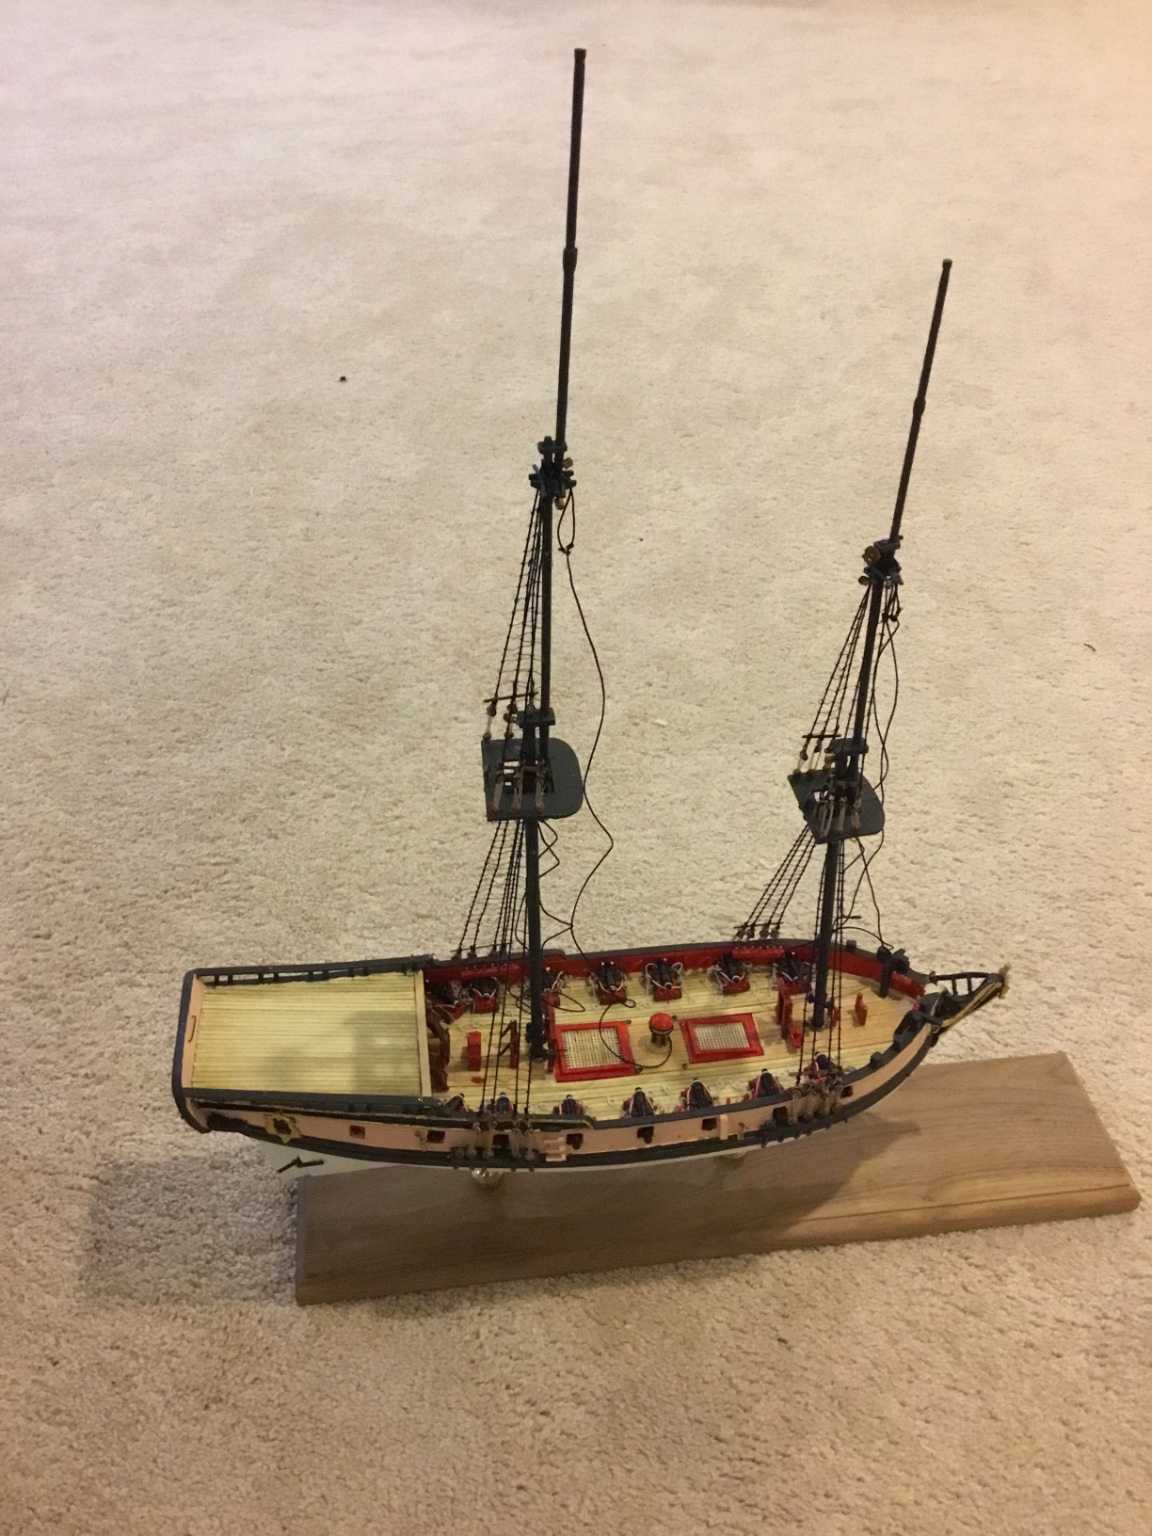
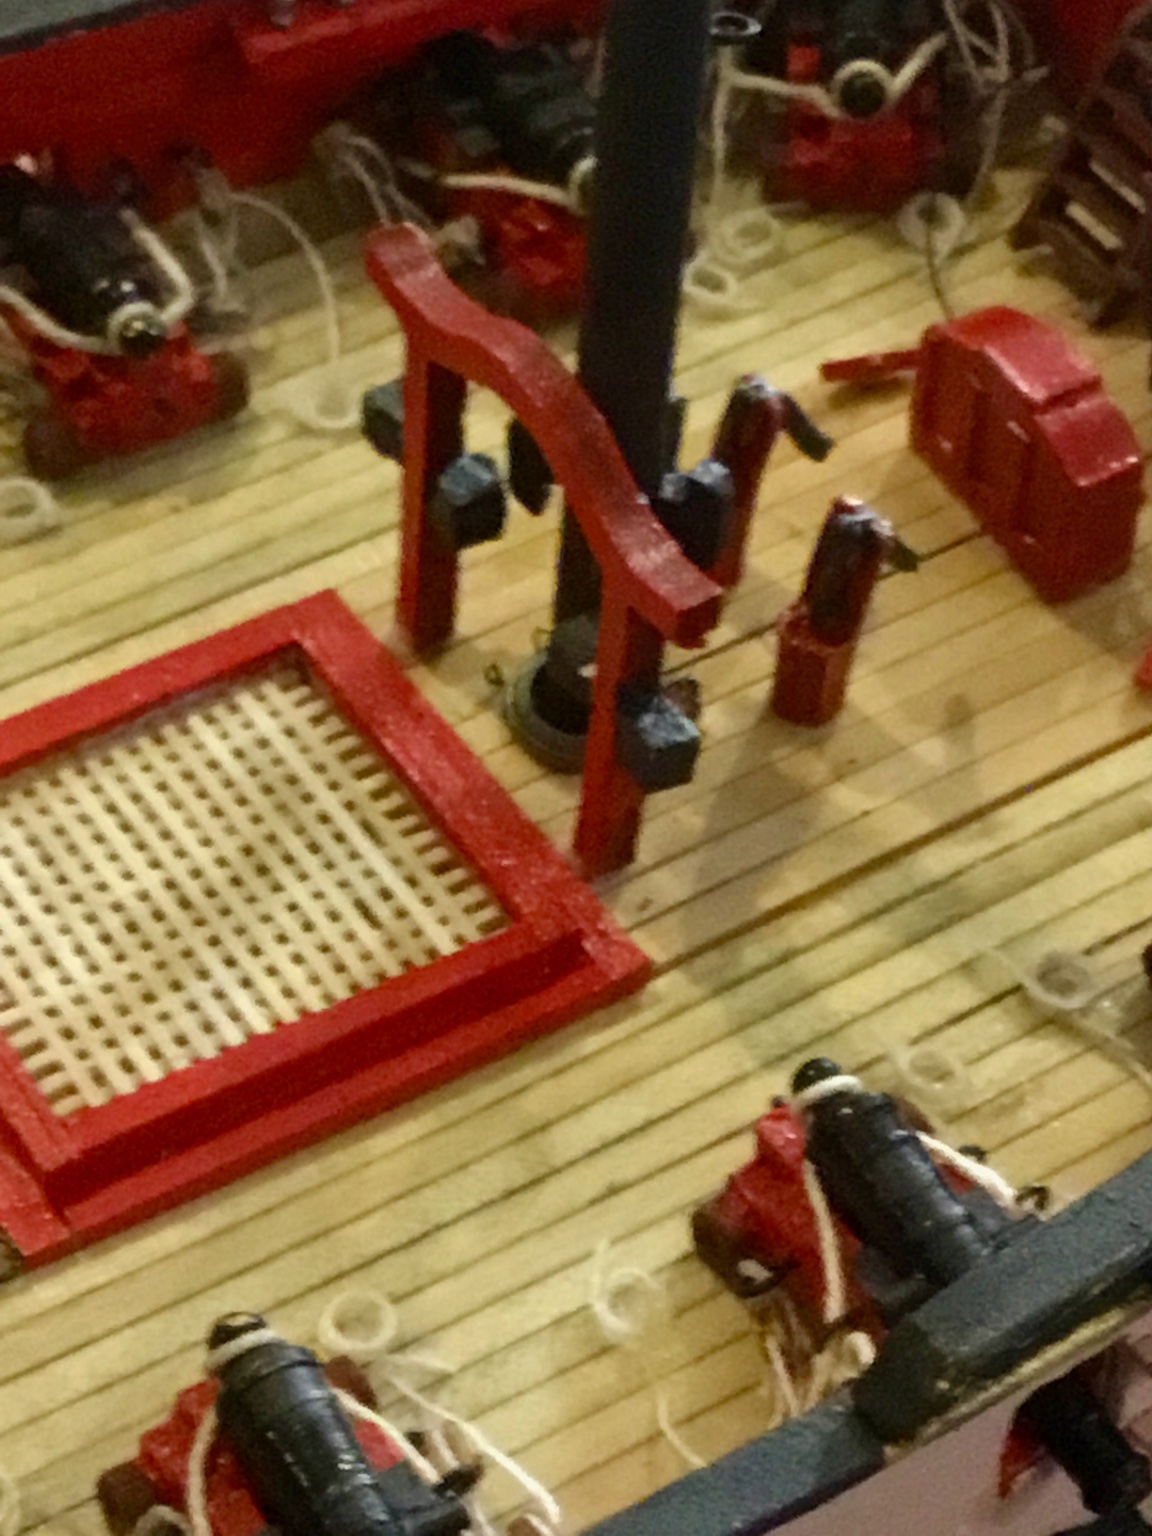
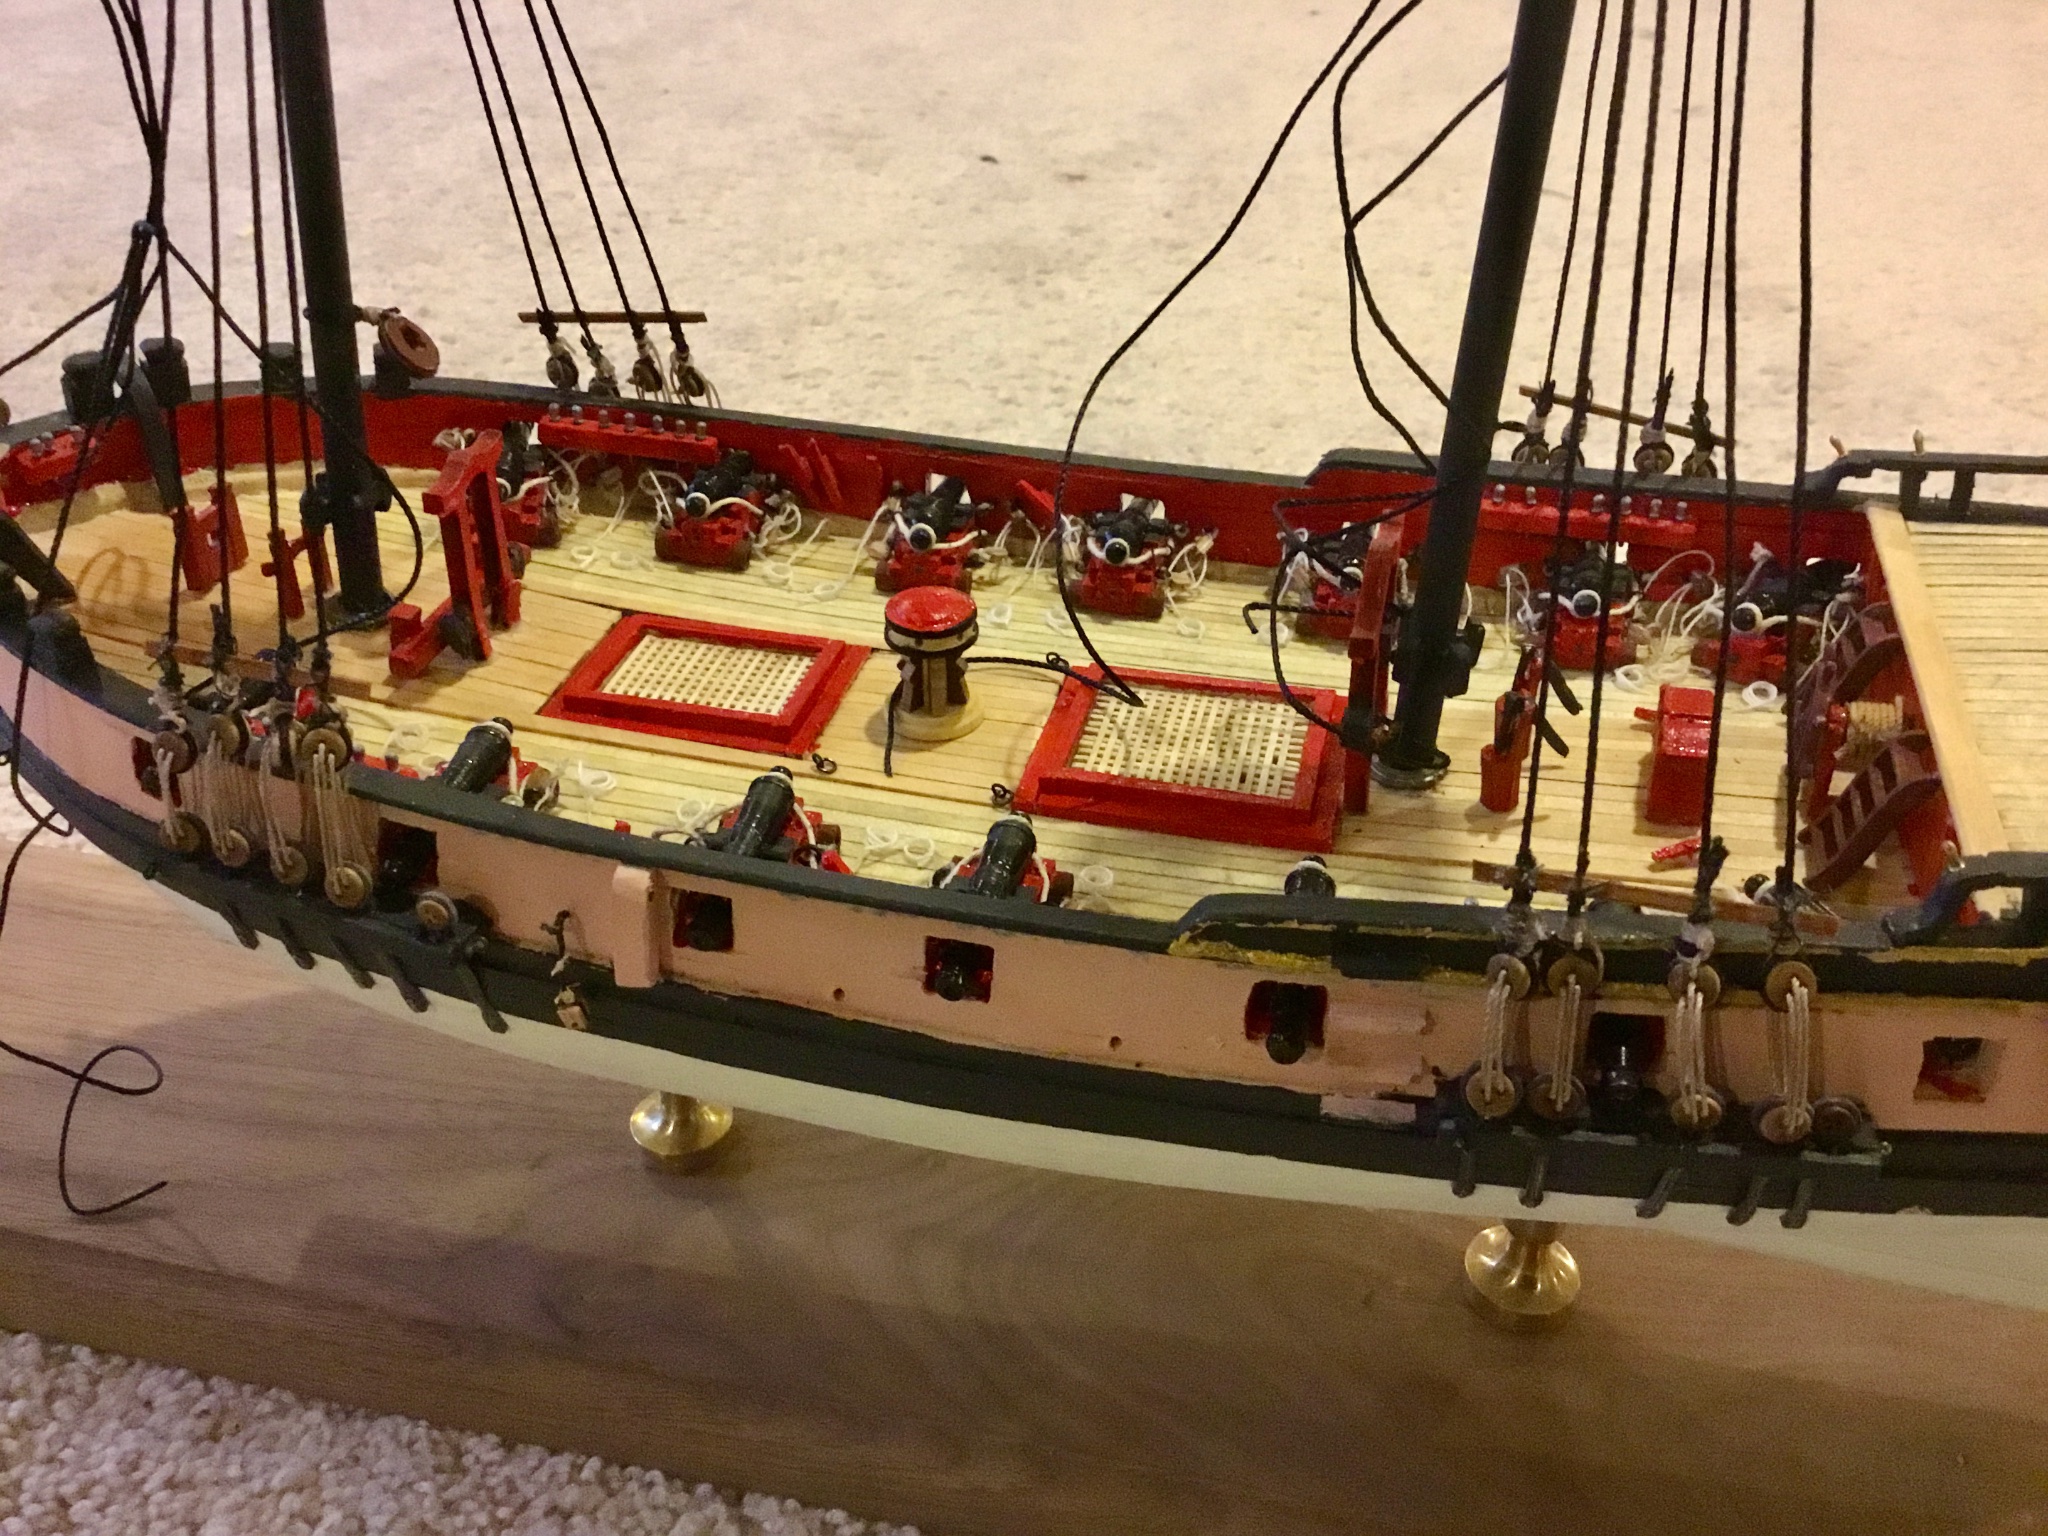
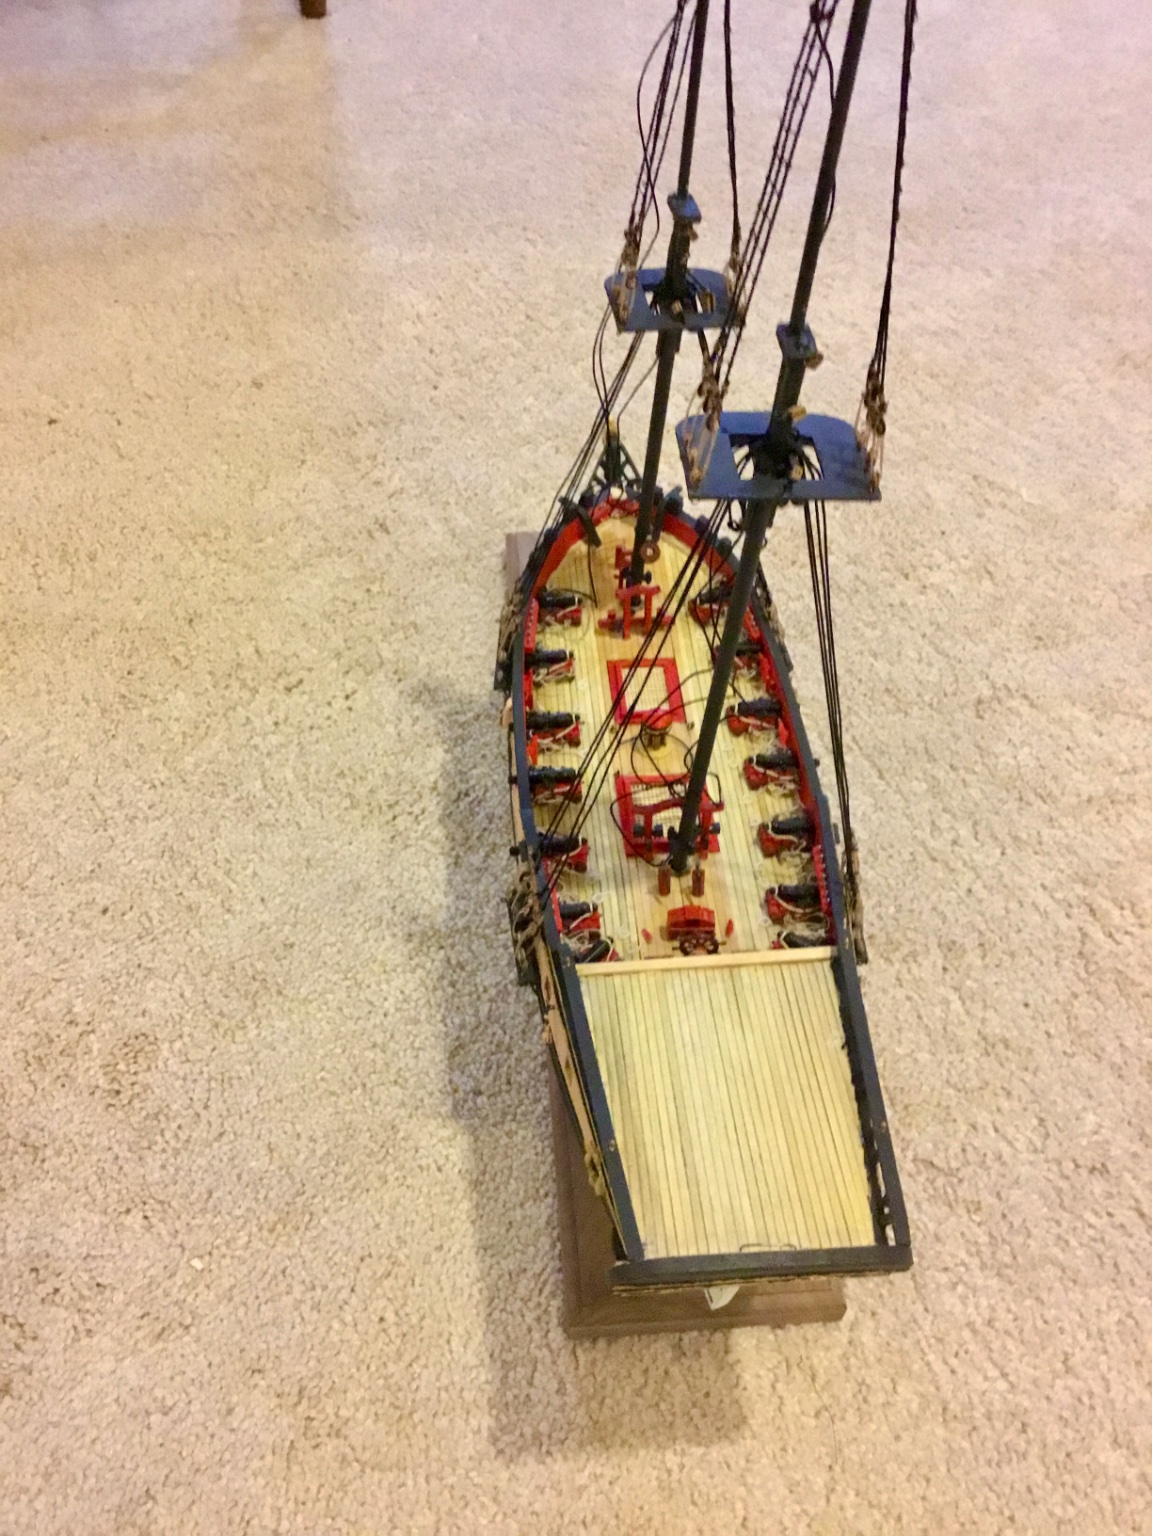
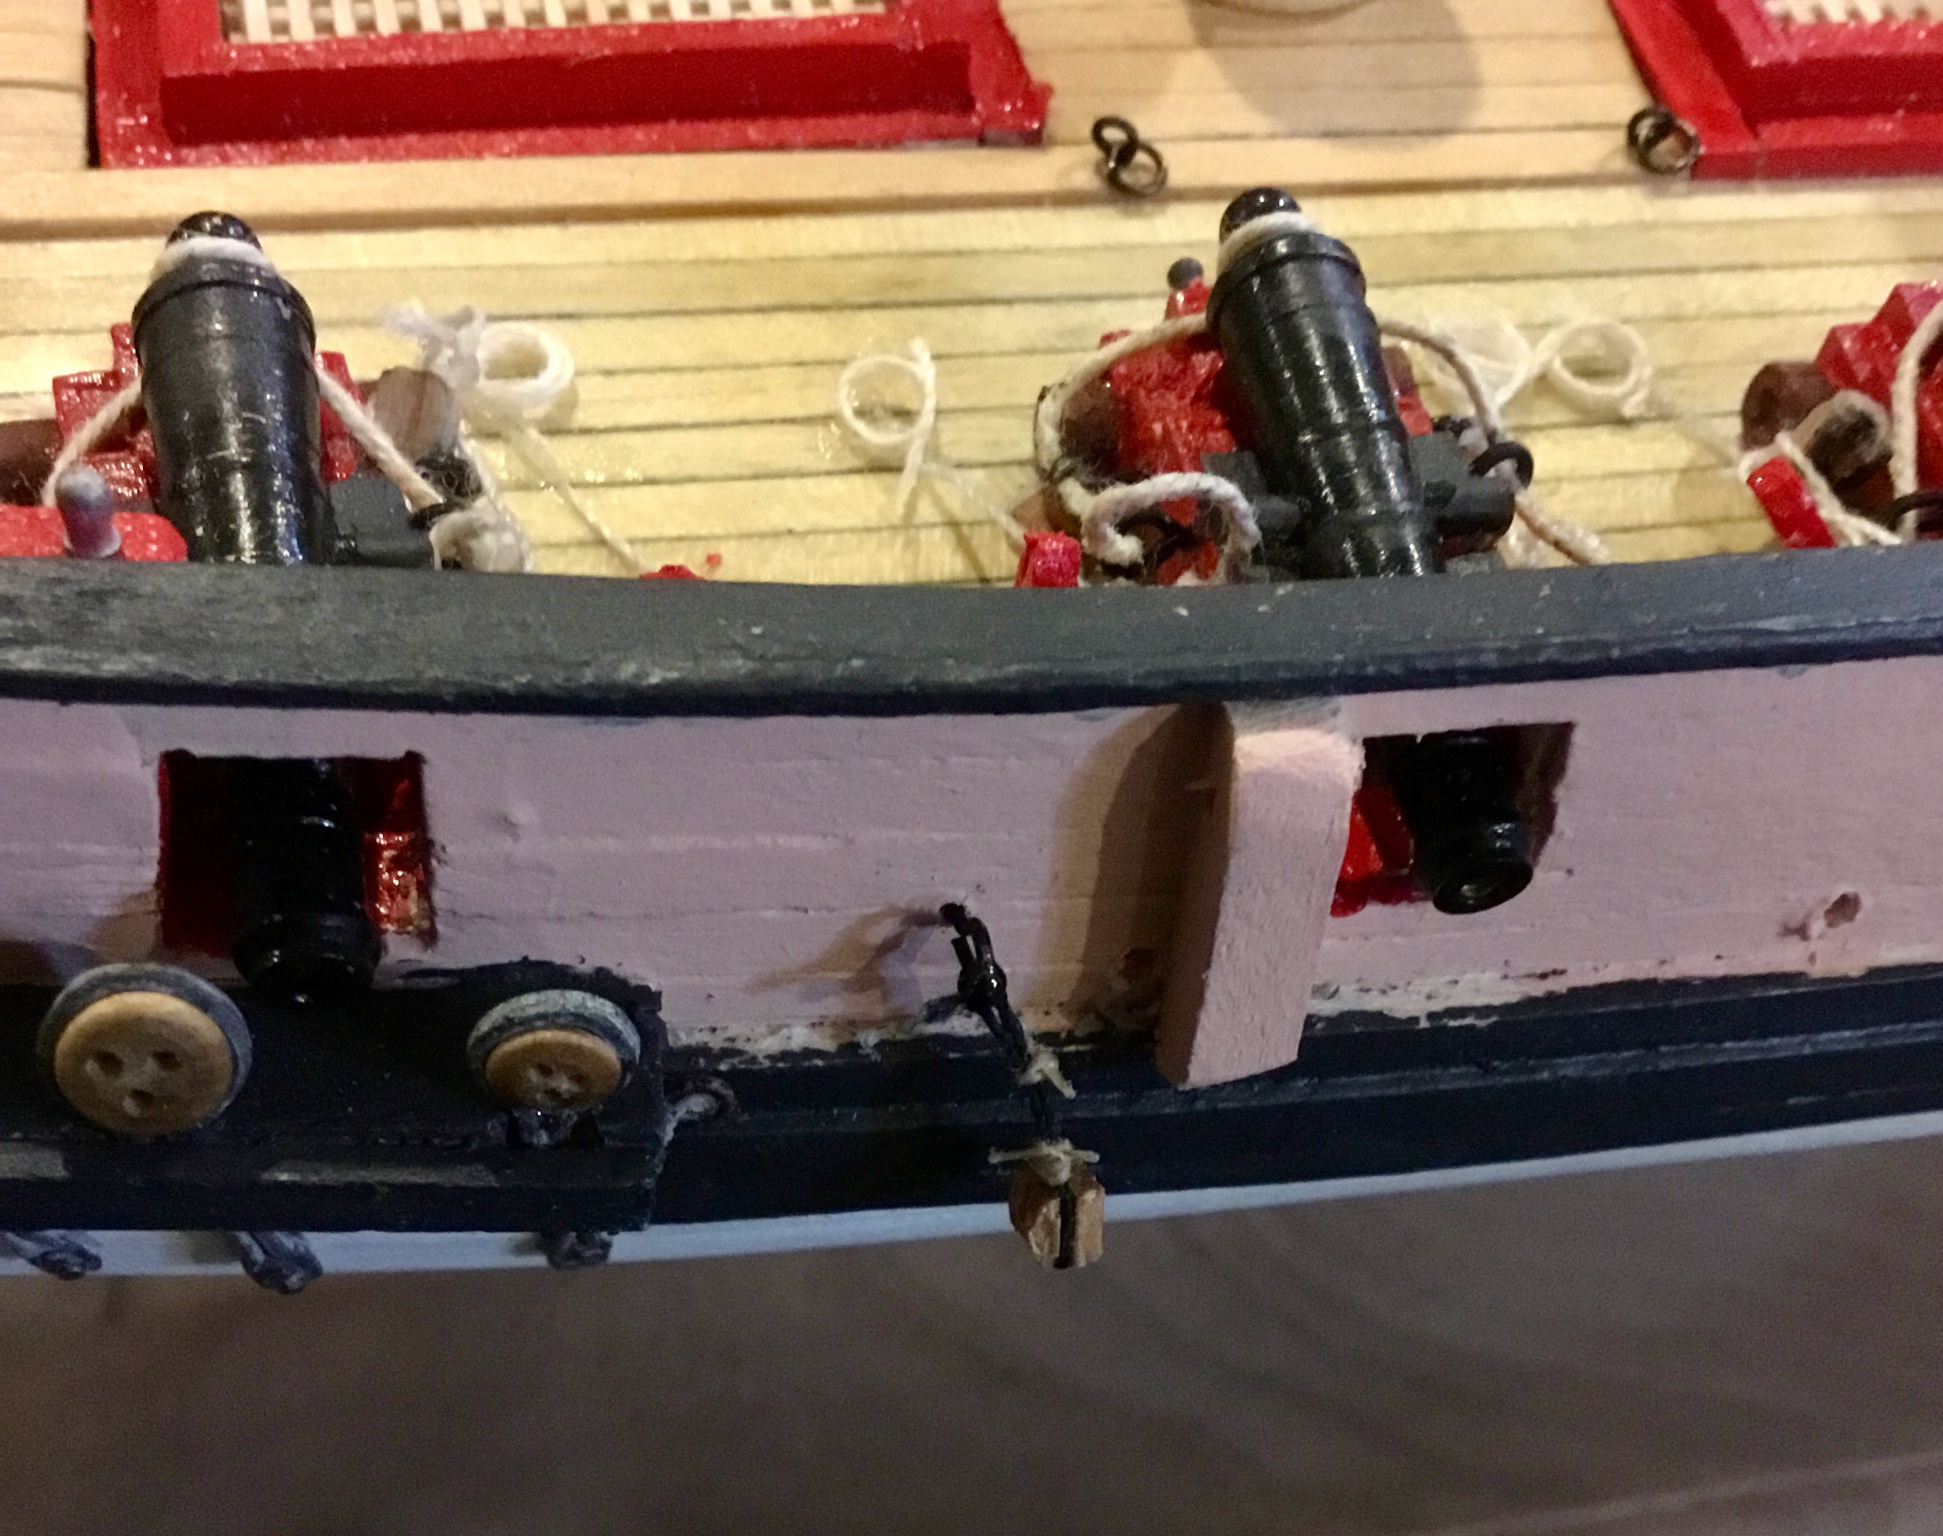
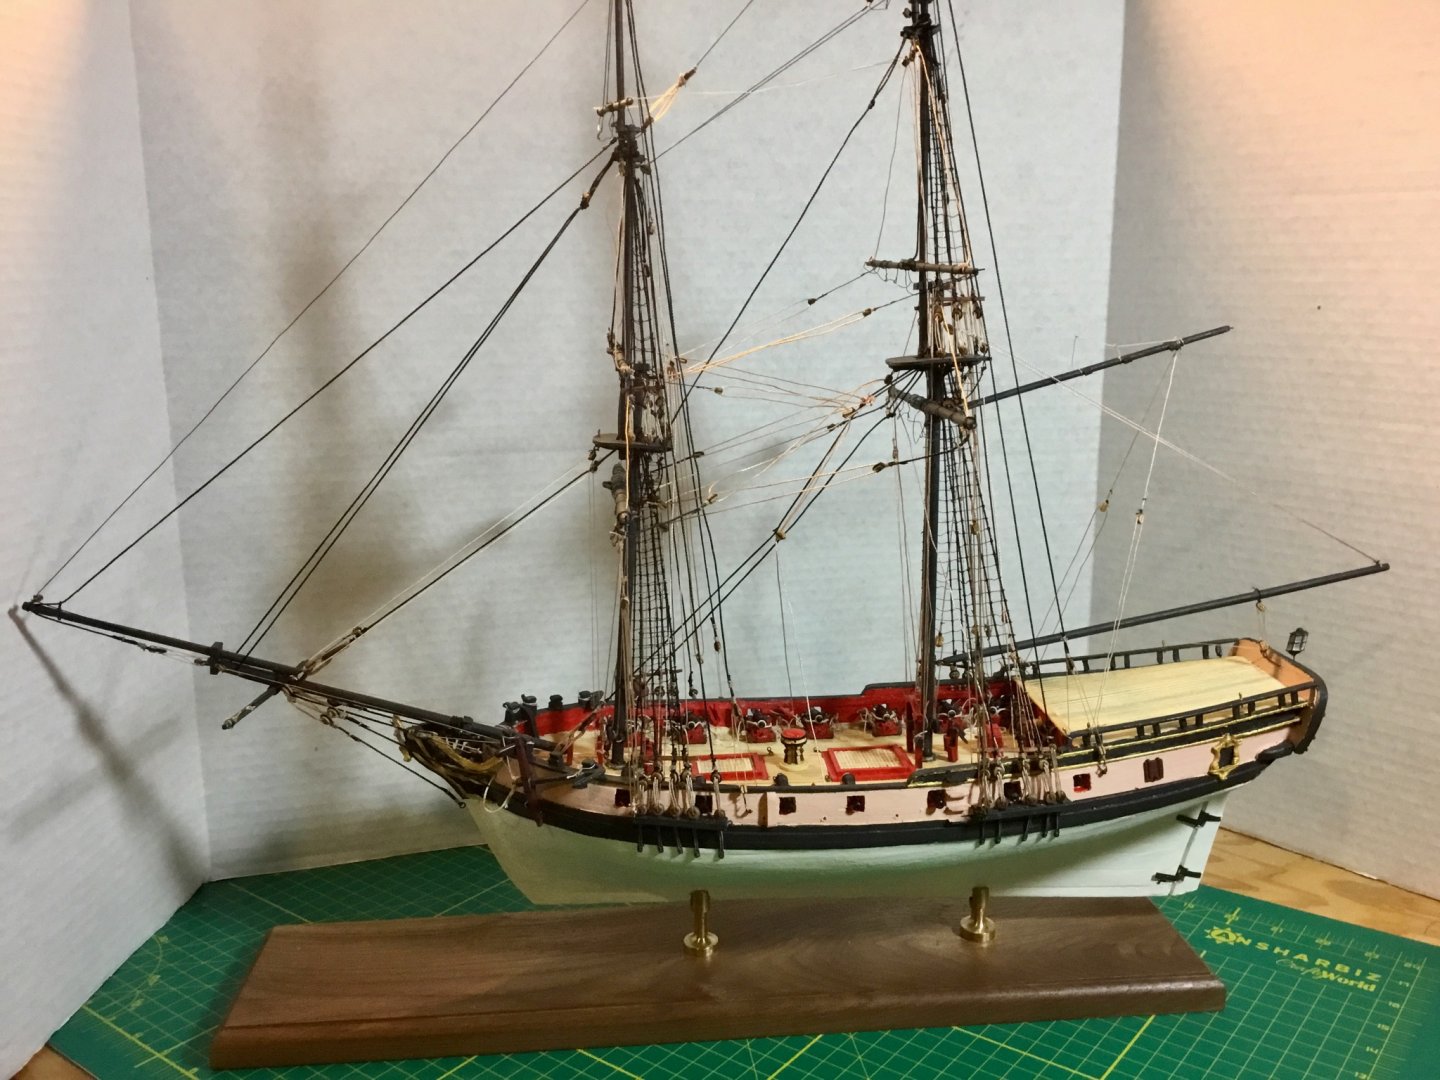
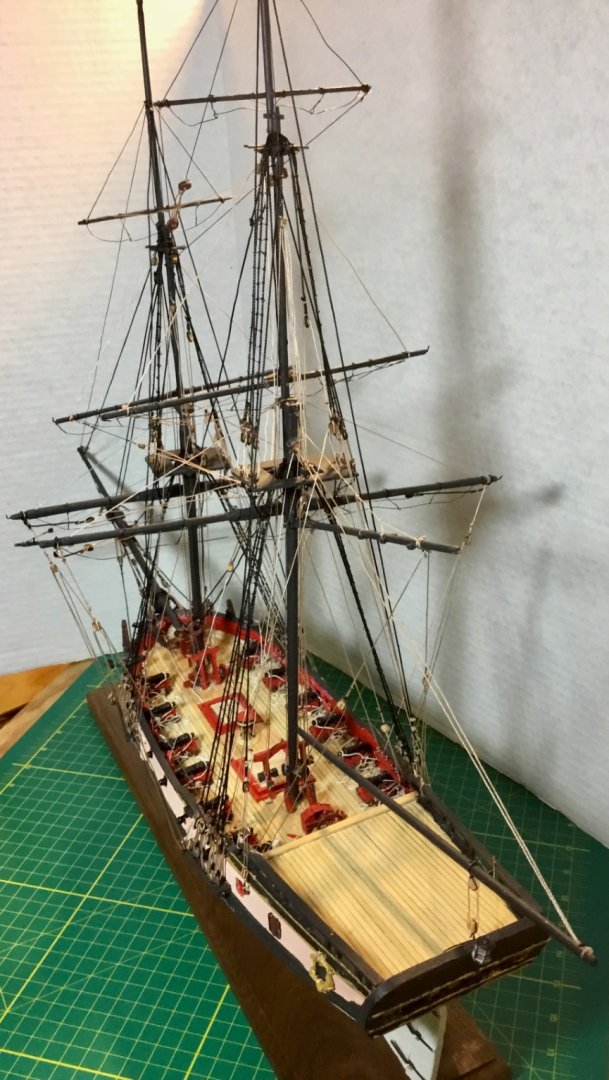
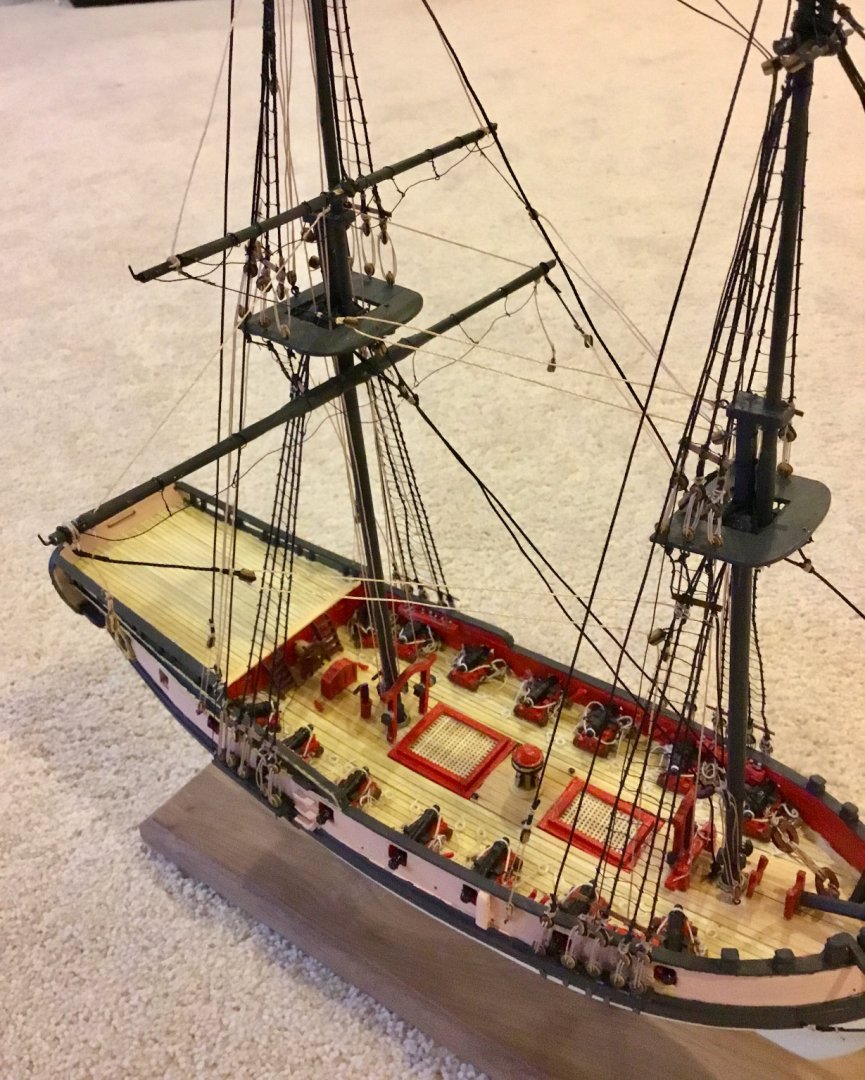
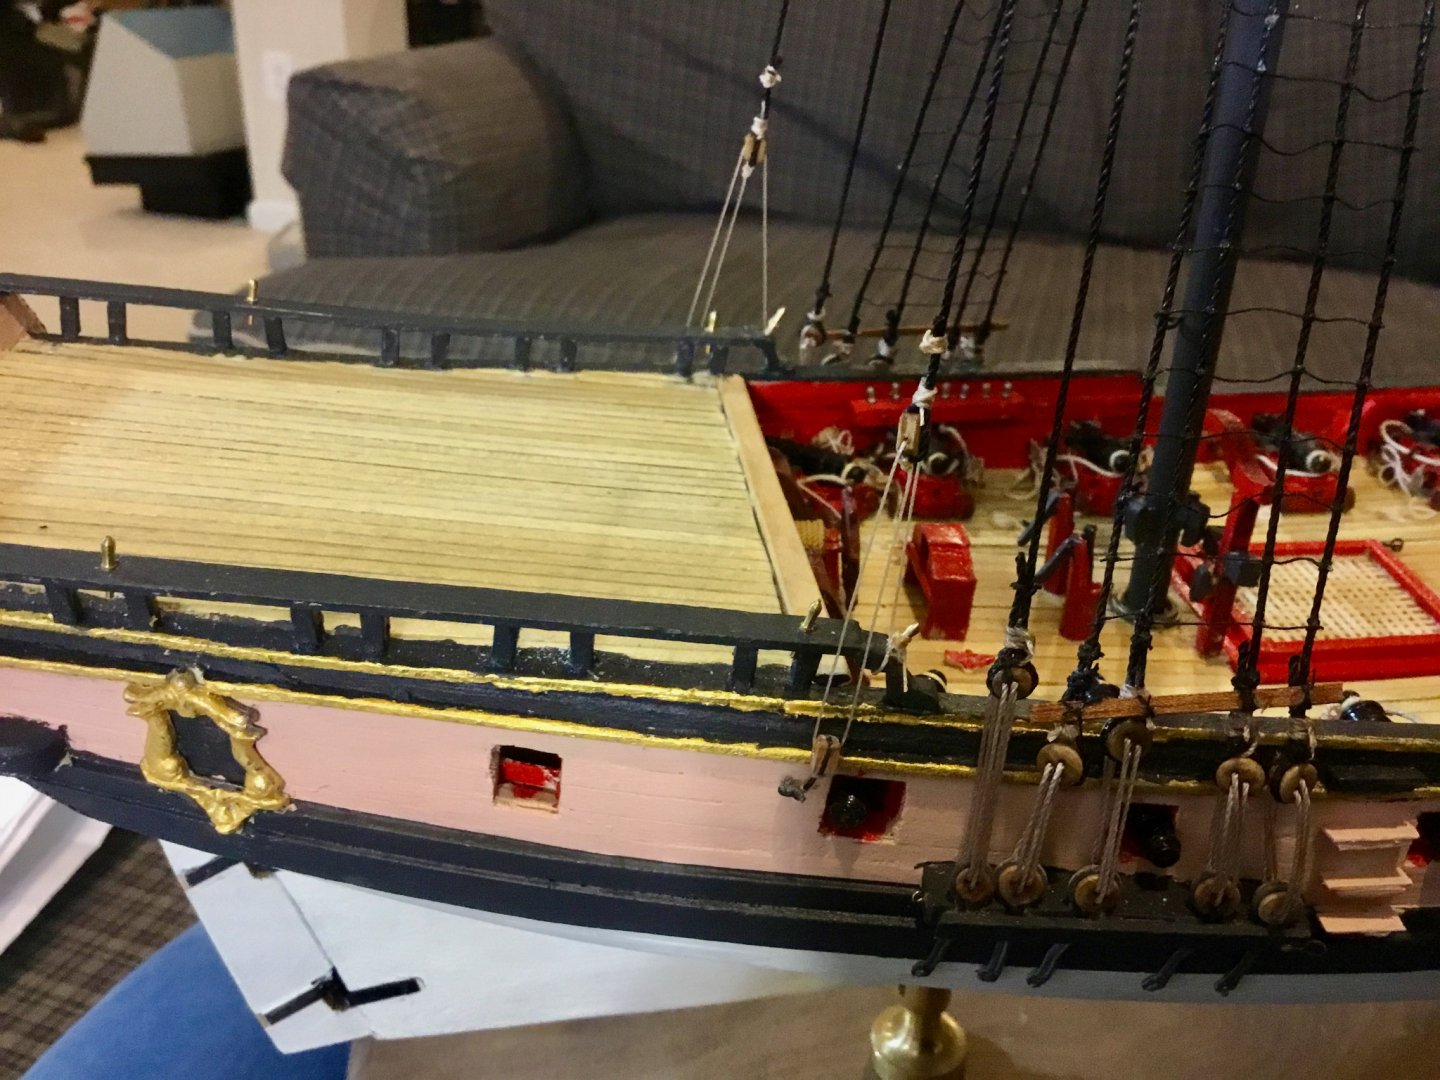
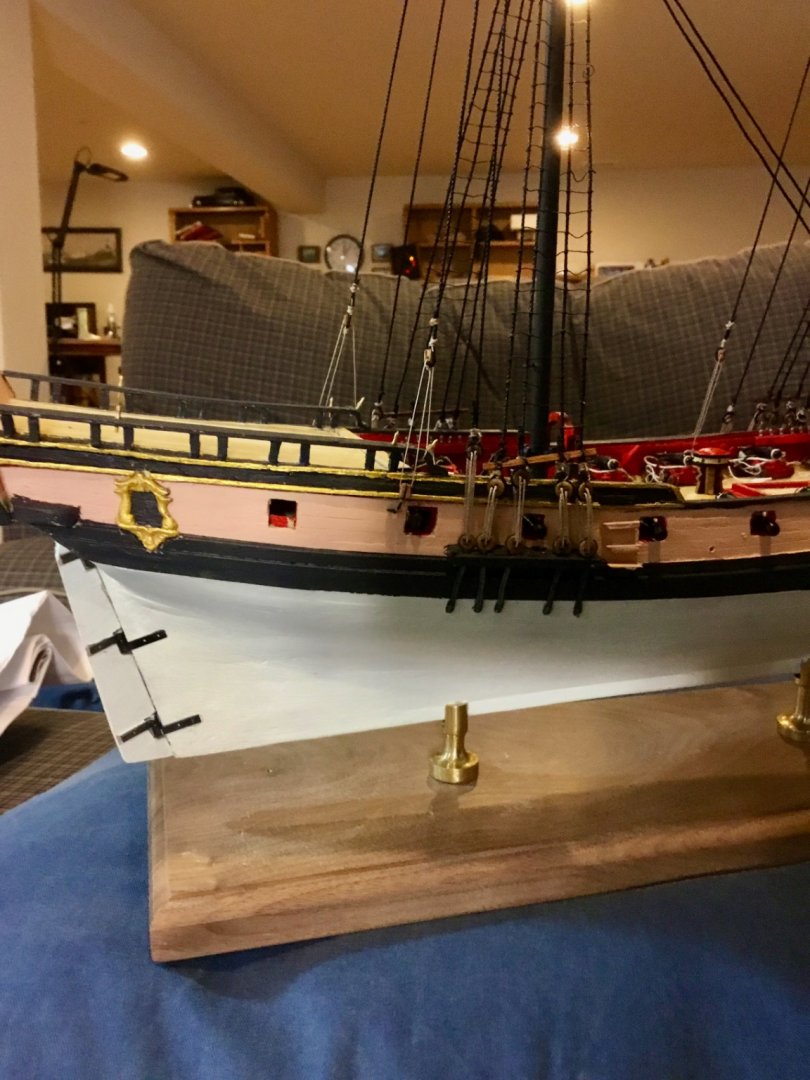
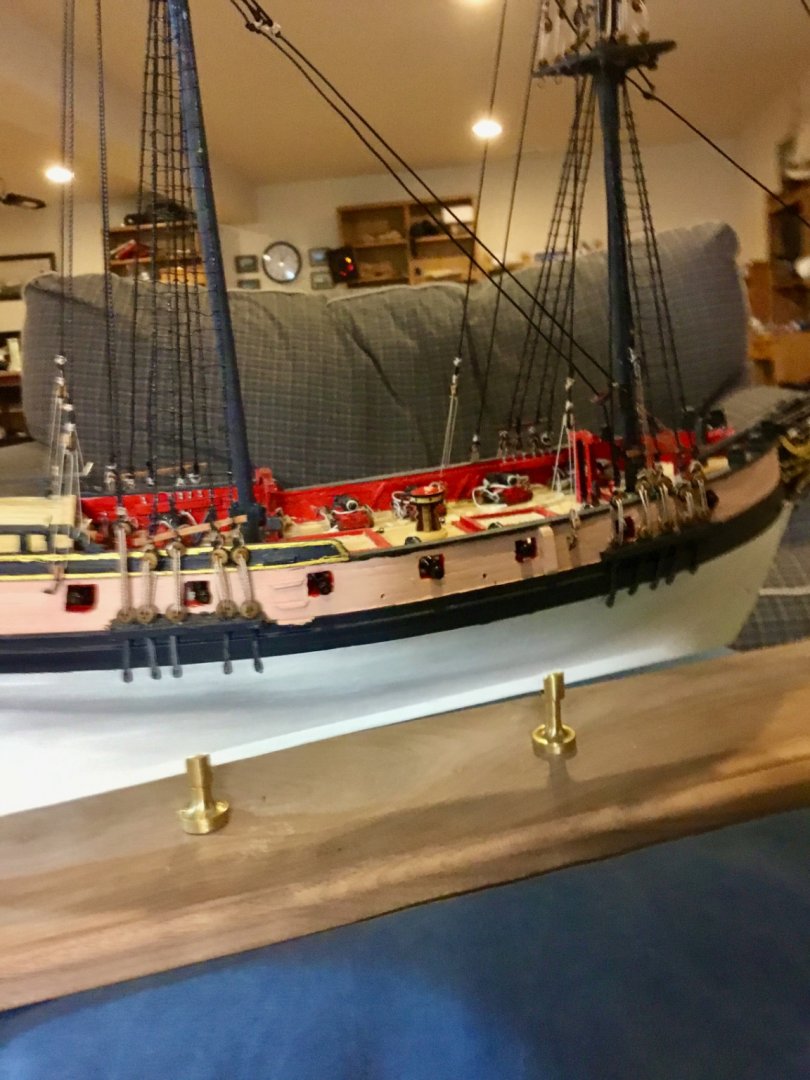
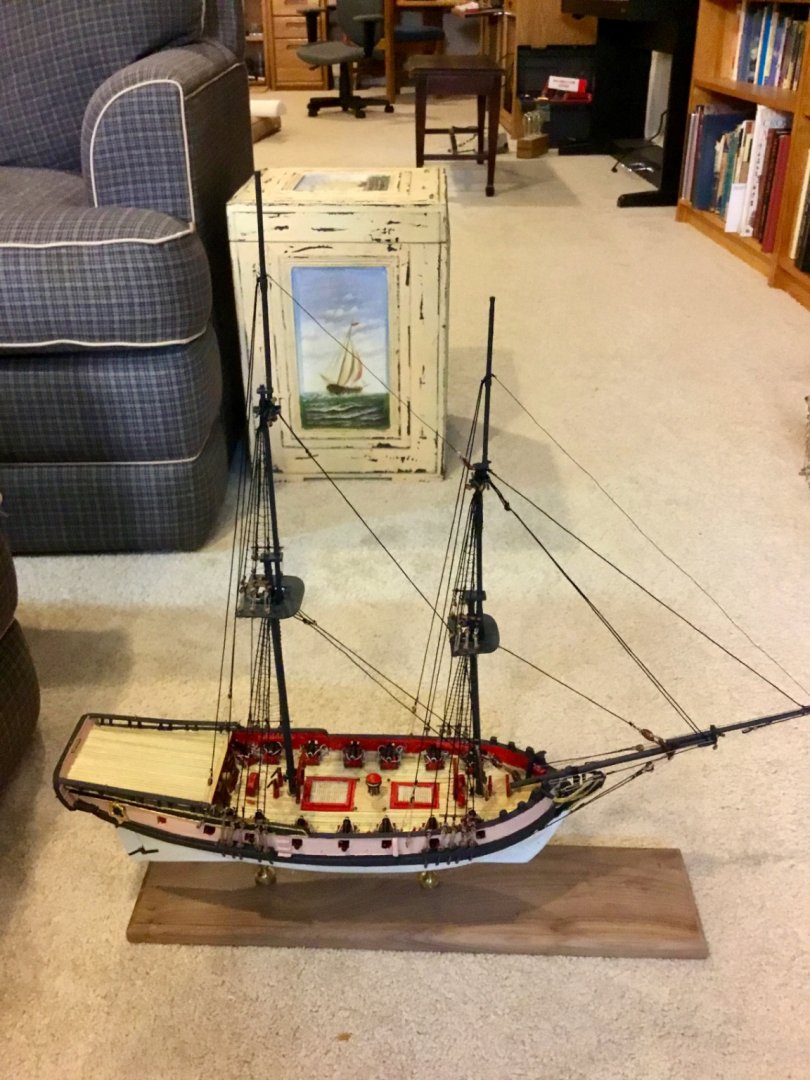
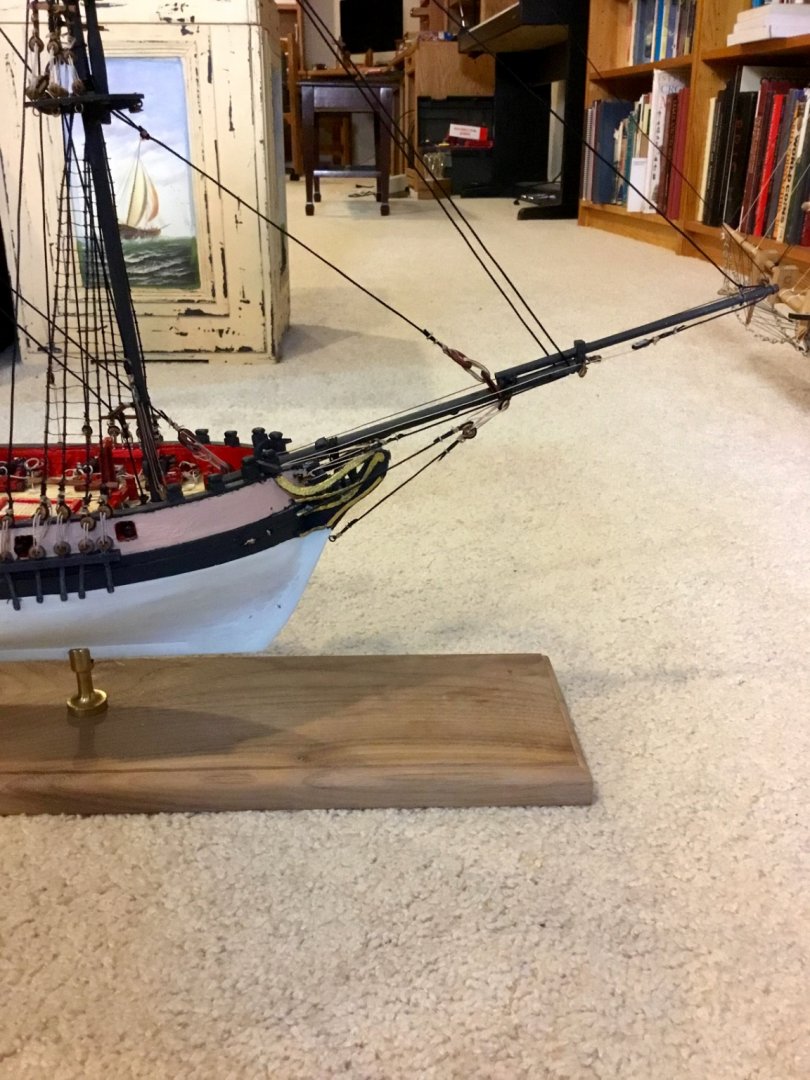
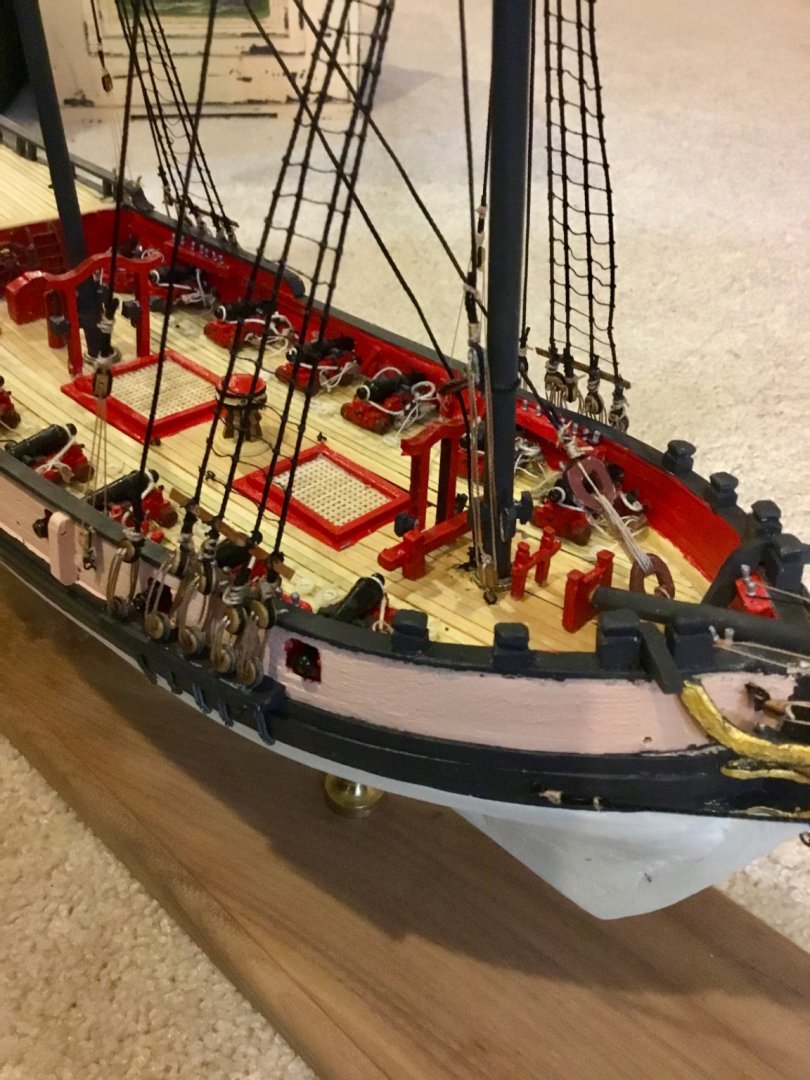
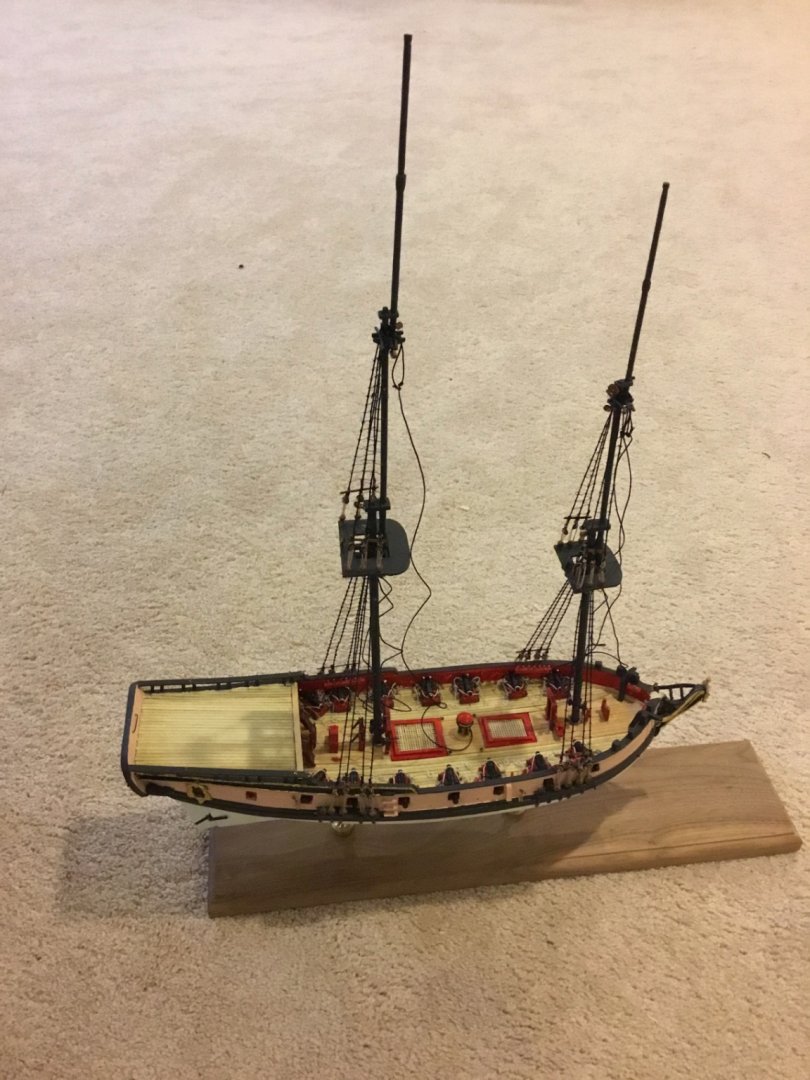
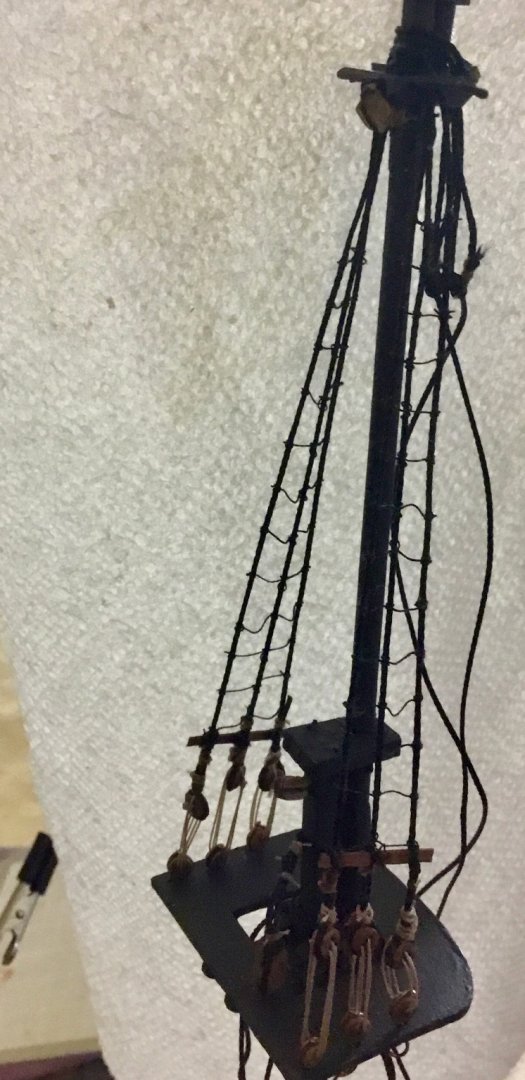
Completed rigging of gaff sail, fore mast, and bowsprit. Ship is nearly complete, some details left such as anchors, cabin window covers, etc. Should be able to call it complete in another week or so. All in all it's been an interesting build, learned some new things. I can appreciate some of the newer kits (which I haven't started yet) as this one left a lot to be desired from a beginners (third build) point of view. Rigging was a good deal of guess work as the instructions didn't go into detail and I had to try and interpret things from the plans that were definitely vague. But I did my best (such as it is) and I hope to do better on the next one. I can definitely see why someone substitutes for kit parts to upgrade the result and needs to use reference materials not included in the instructions to fill in the blanks. Here's the almost finished result.


- 24 replies
-
- 2
-
-
- Fair American
- Model Shipways
- (and 1 more)
-
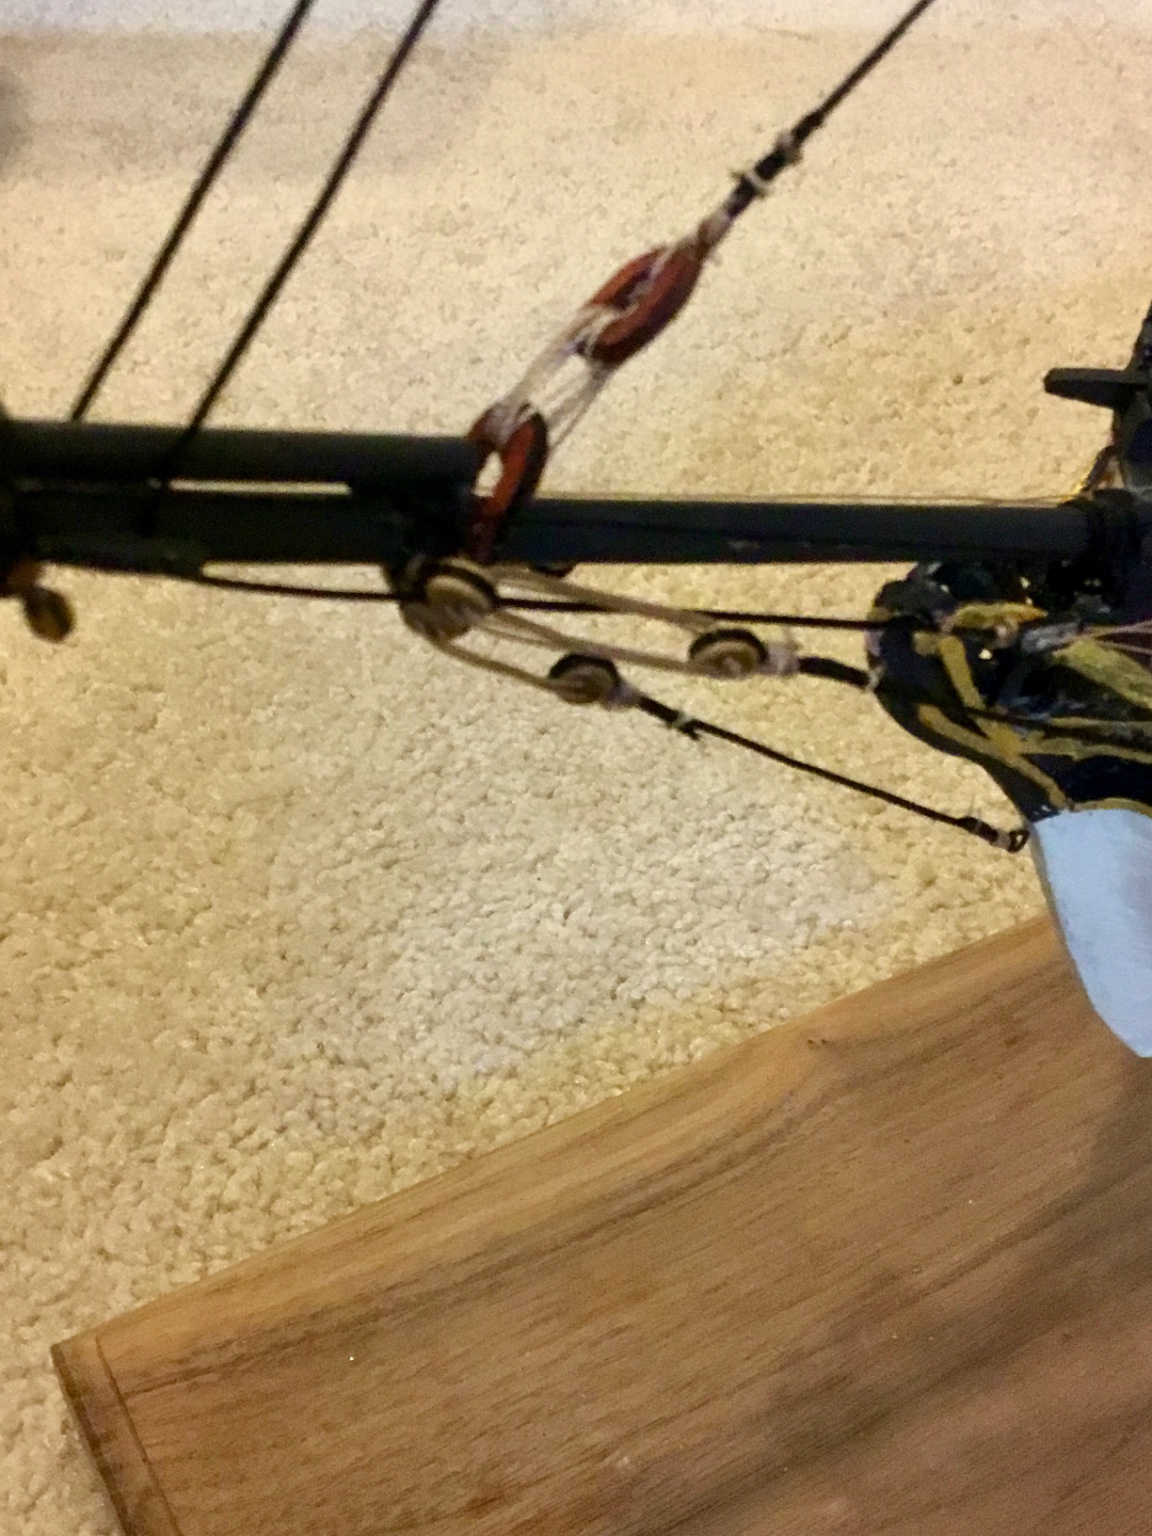
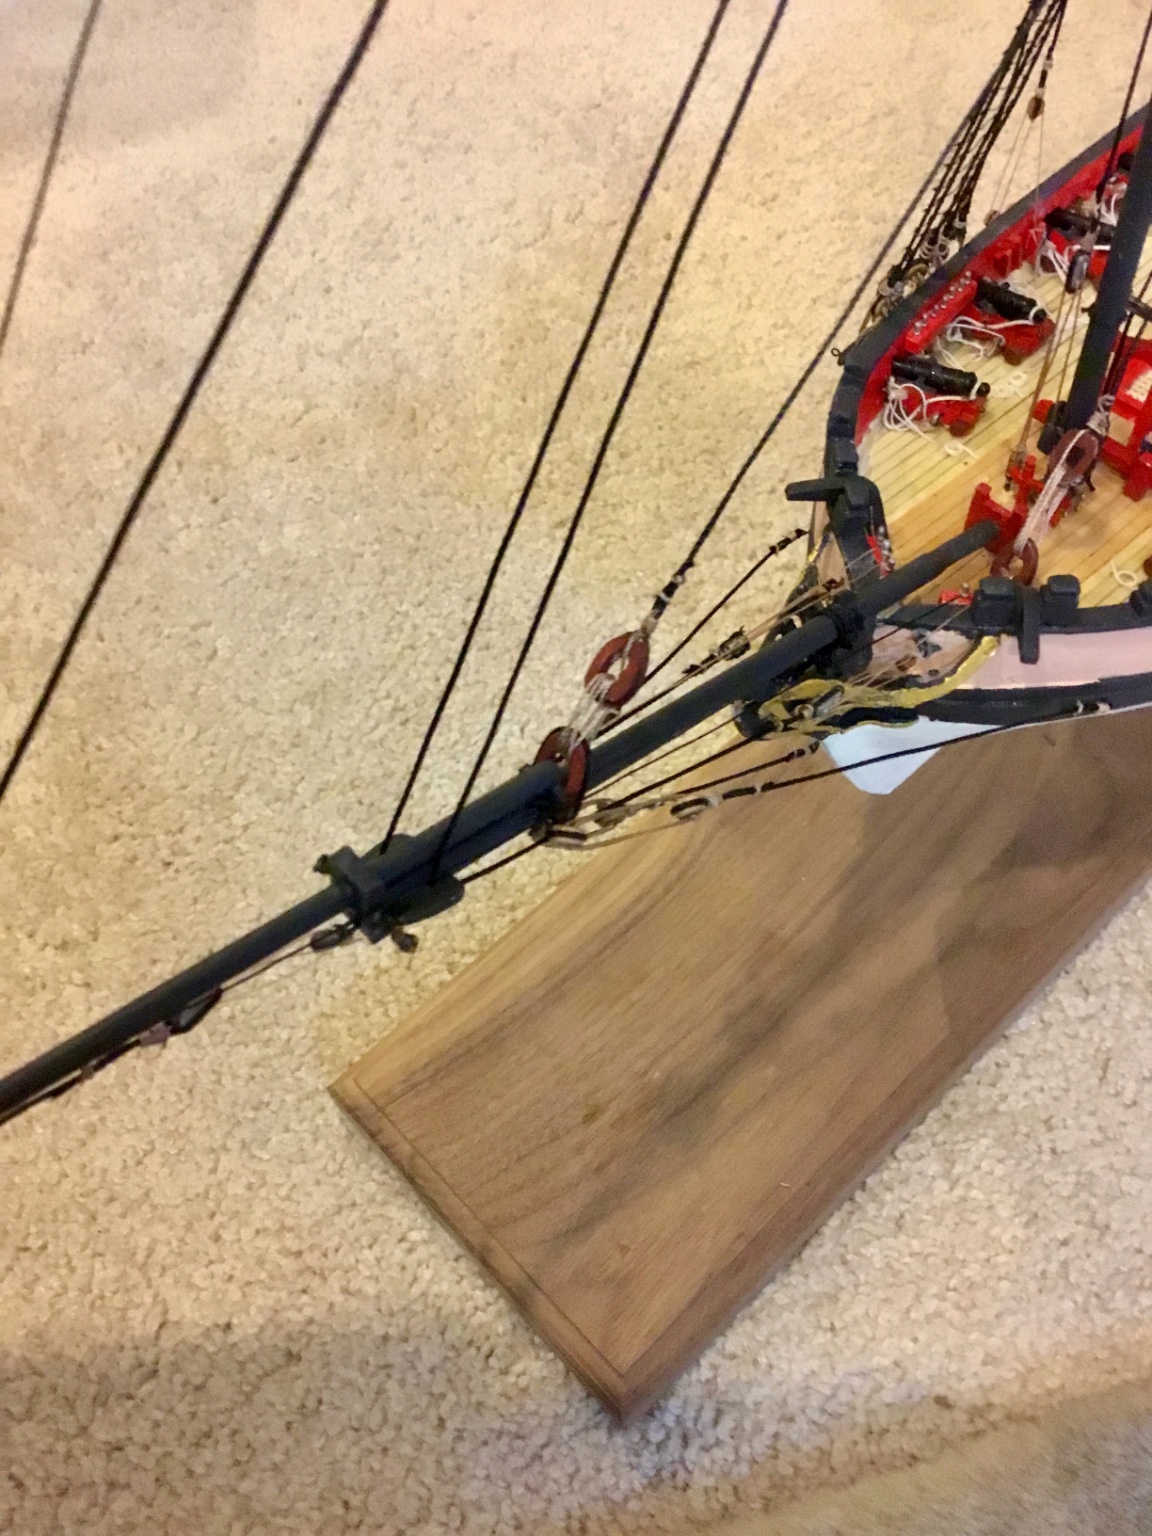
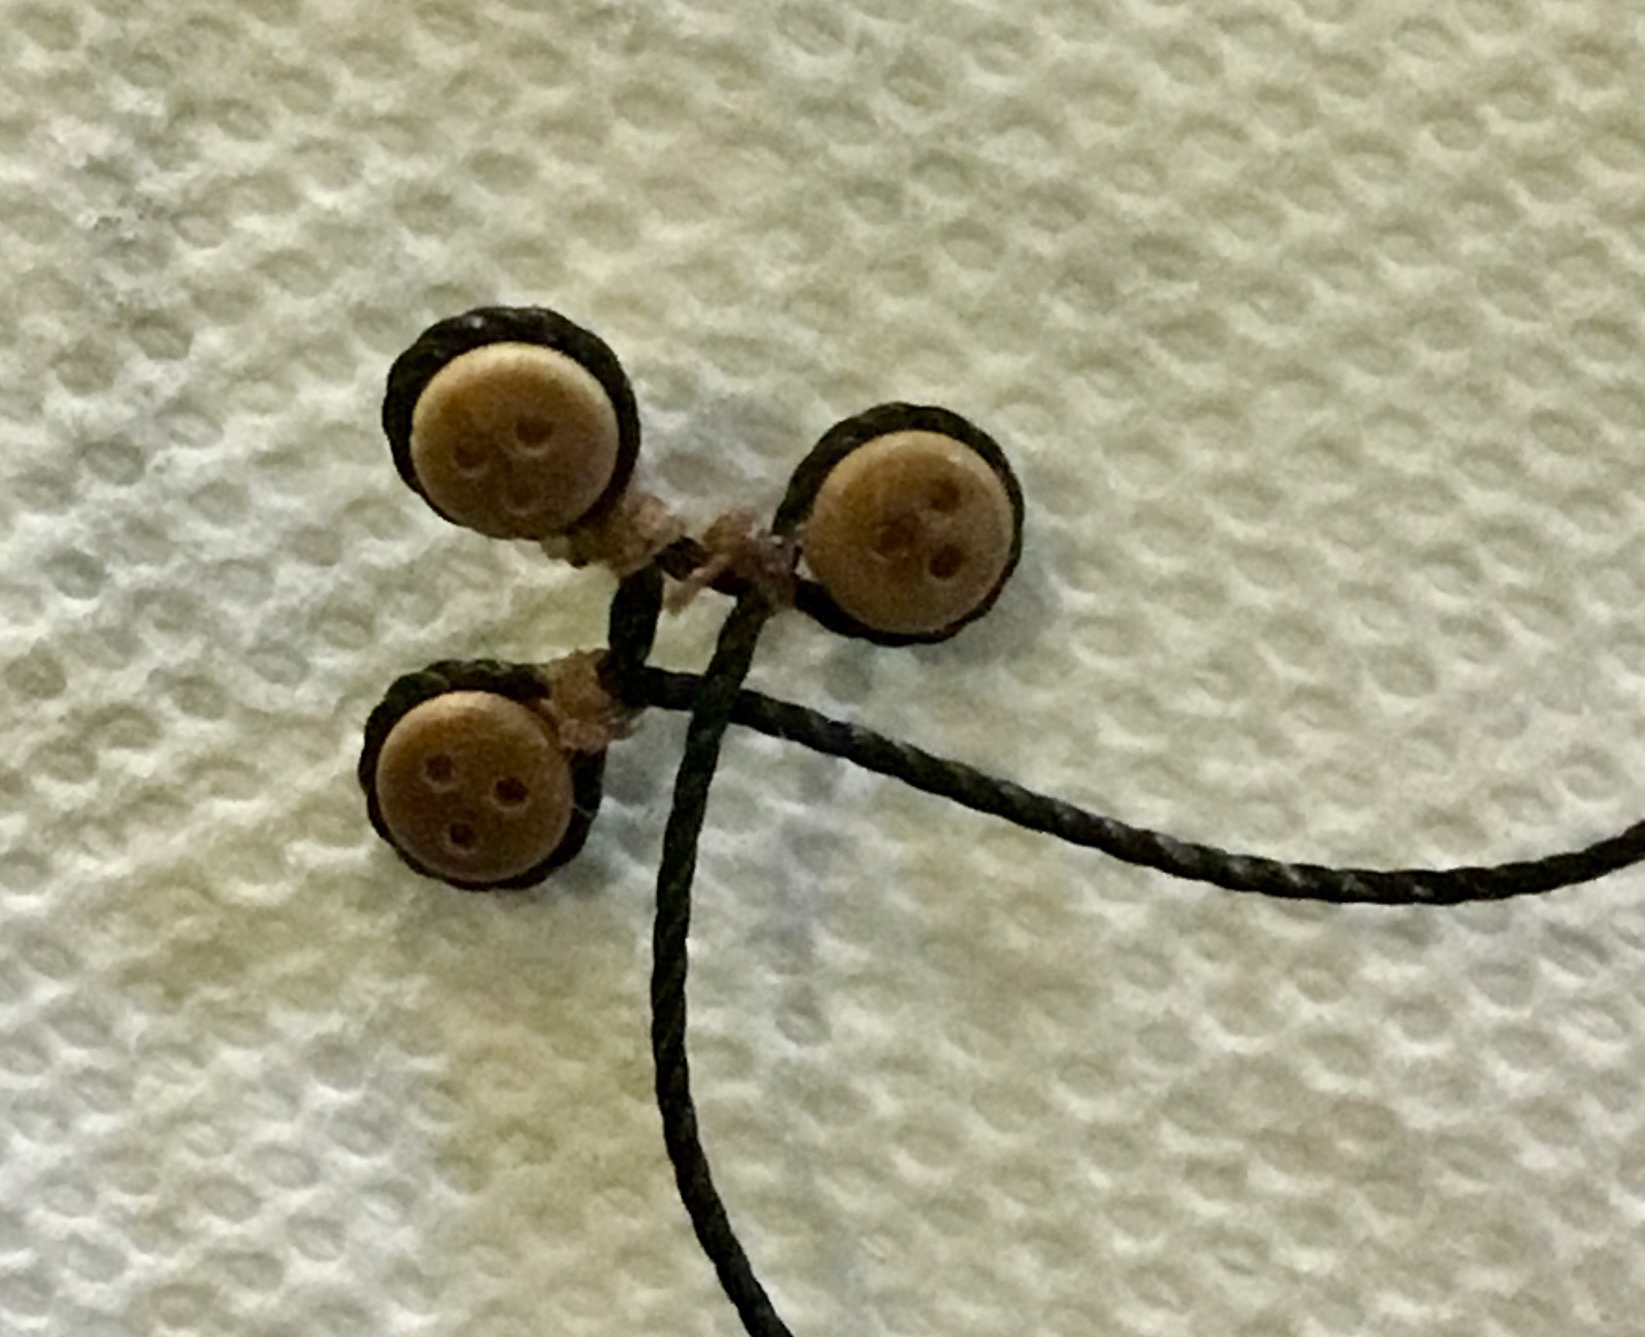
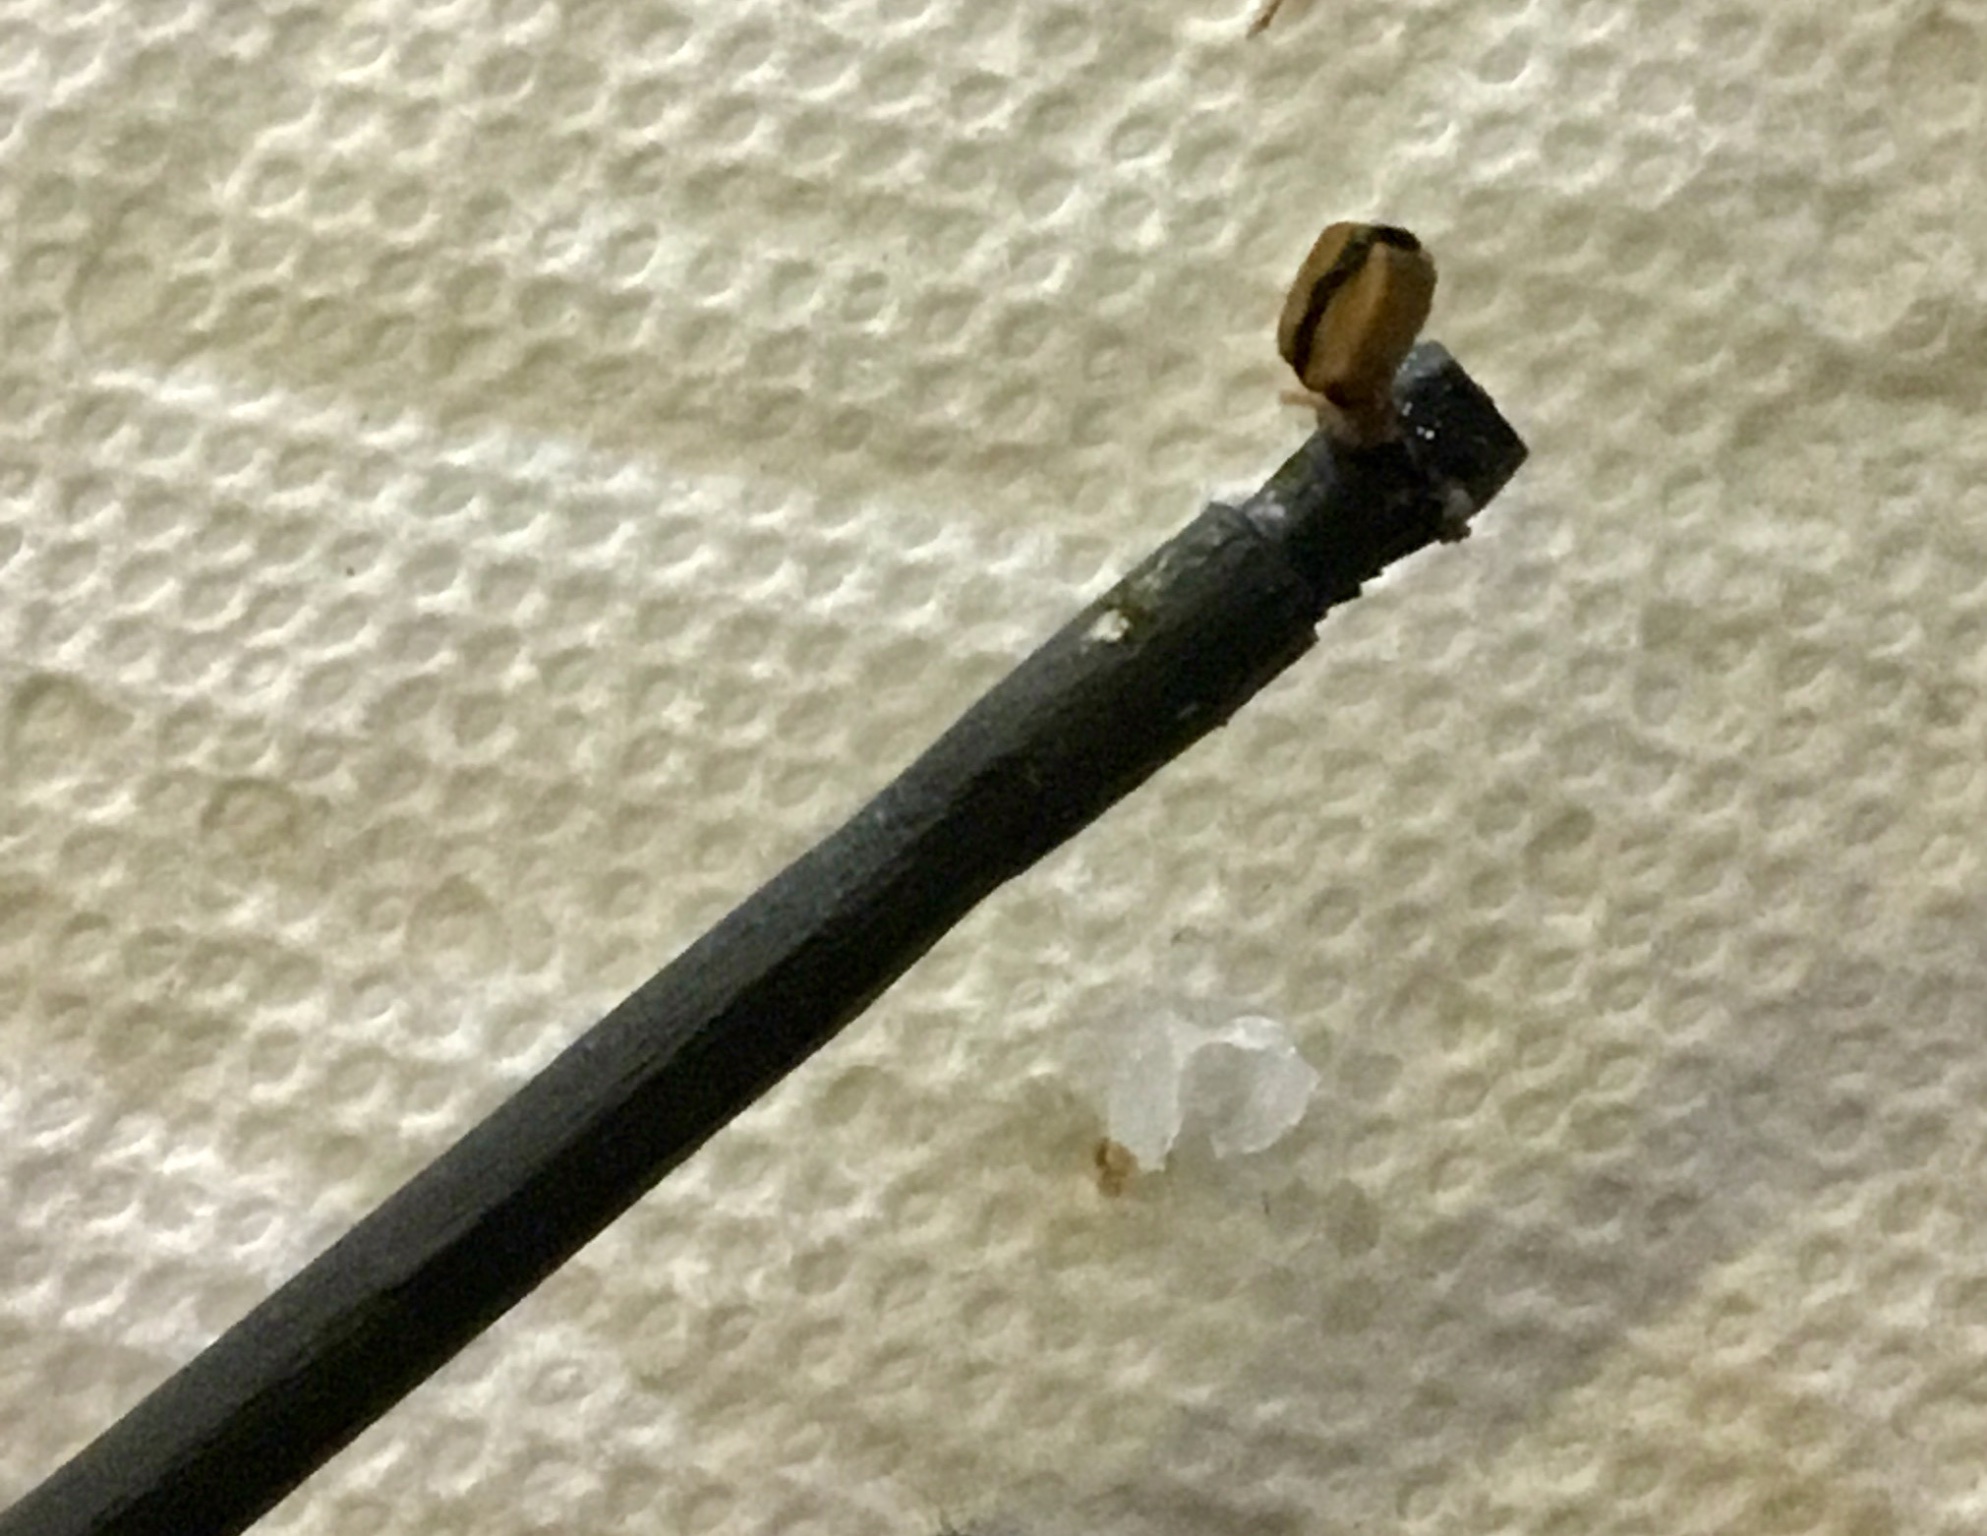
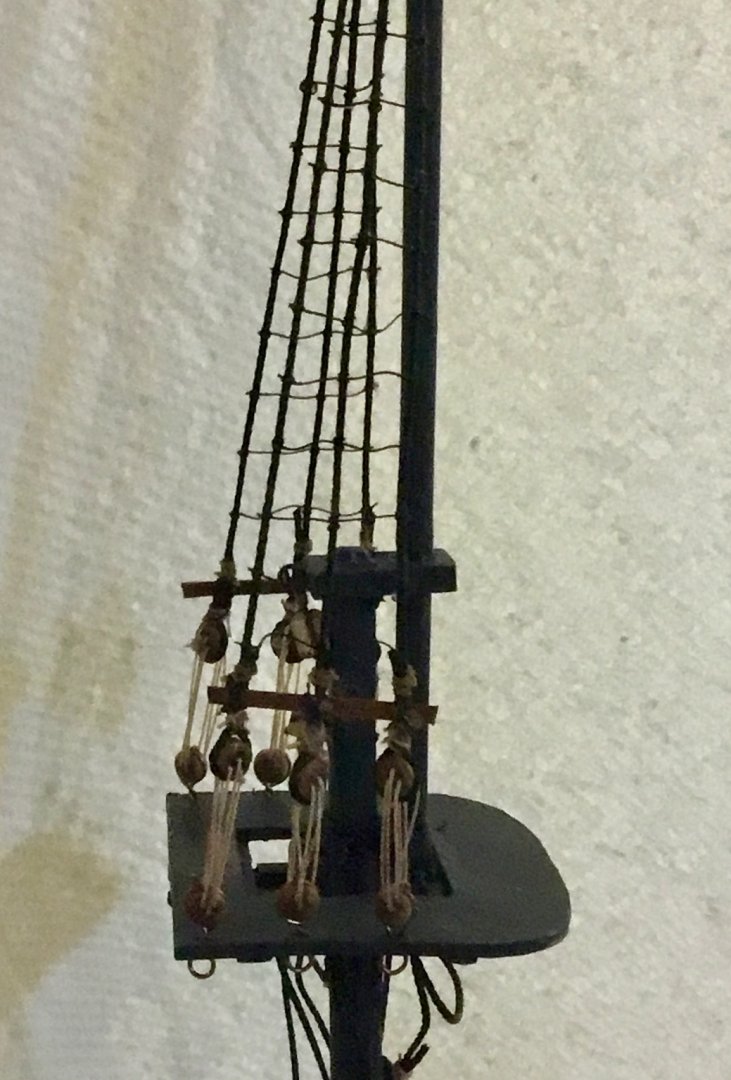
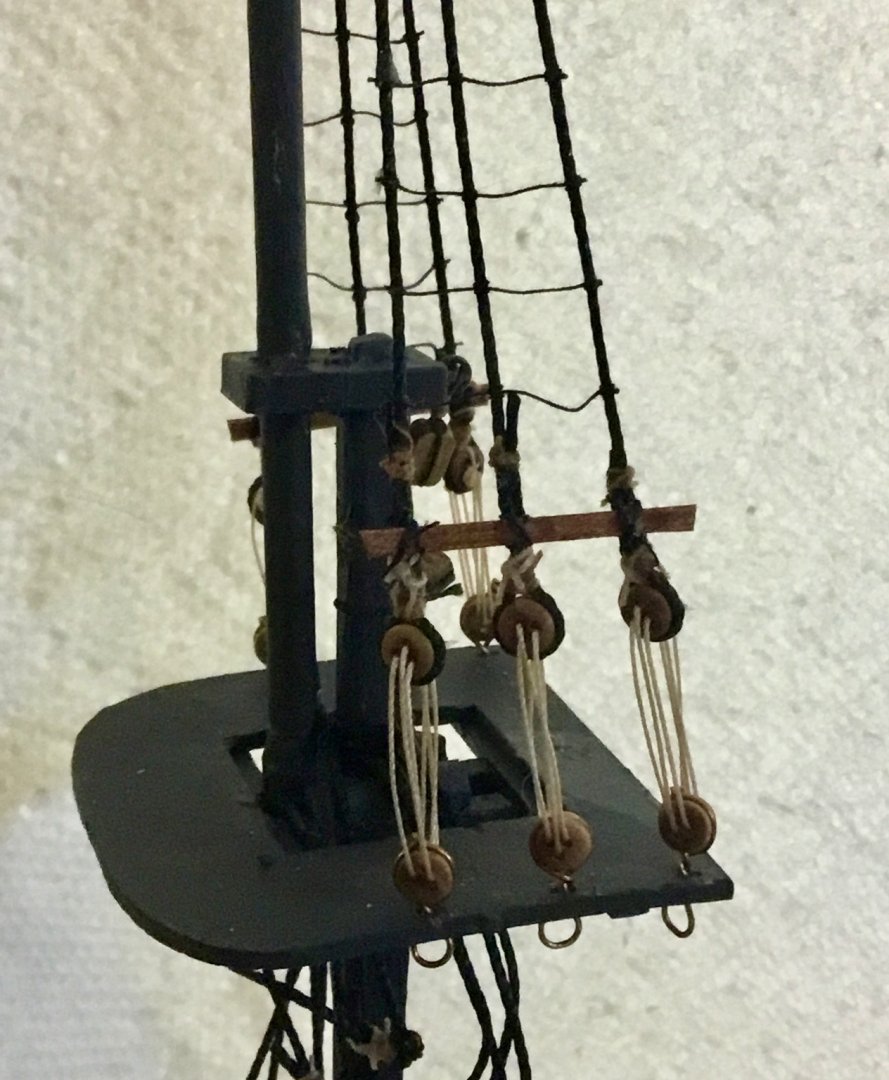
Wooden single block hole count
Dsmith20639 replied to Dsmith20639's topic in Masting, rigging and sails
Catapower, thank you , your explanation confirms my opinion. Just looking for clarification from people with more experience, so I am not making mistakes when I build a ship with better quality materials. I have some of Syren's blocks, only wanted to be sure I was using them correctly. -
Wooden single block hole count
Dsmith20639 replied to Dsmith20639's topic in Masting, rigging and sails
I know how real blocks are made and work and I realize that the holes are there to just simulate the sheave. So am I right that you only use the one hole for the line (the one closest to the point where the block is connected) and that the lay of the line thru the block which then covers the other hole in effect makes the other hole redundant (since you can no longer see it) and it is there only for convenience when orienting the block when you are mounting it on a yard or line? -
Wooden single block hole count
Dsmith20639 replied to Dsmith20639's topic in Masting, rigging and sails
So only one hole is used and the other is redundant. -
Wooden single block hole count
Dsmith20639 replied to Dsmith20639's topic in Masting, rigging and sails
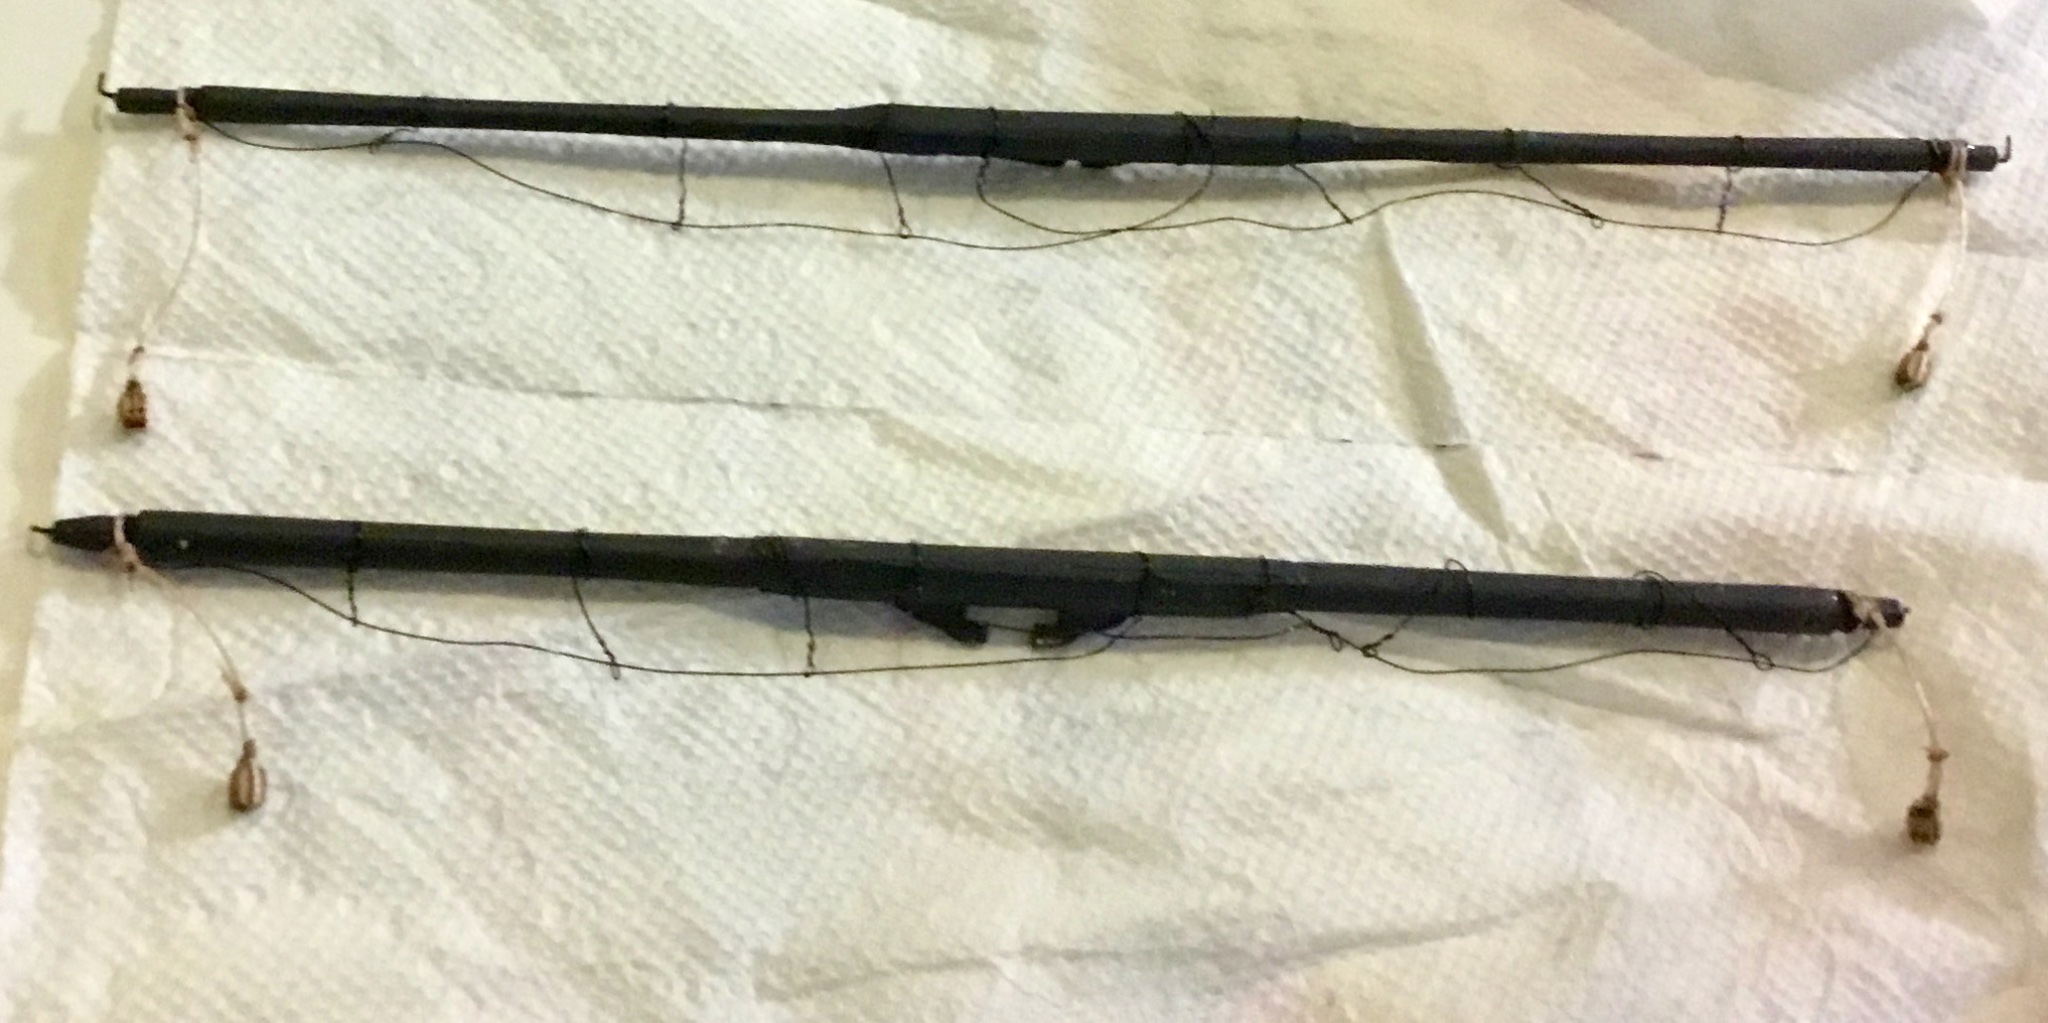
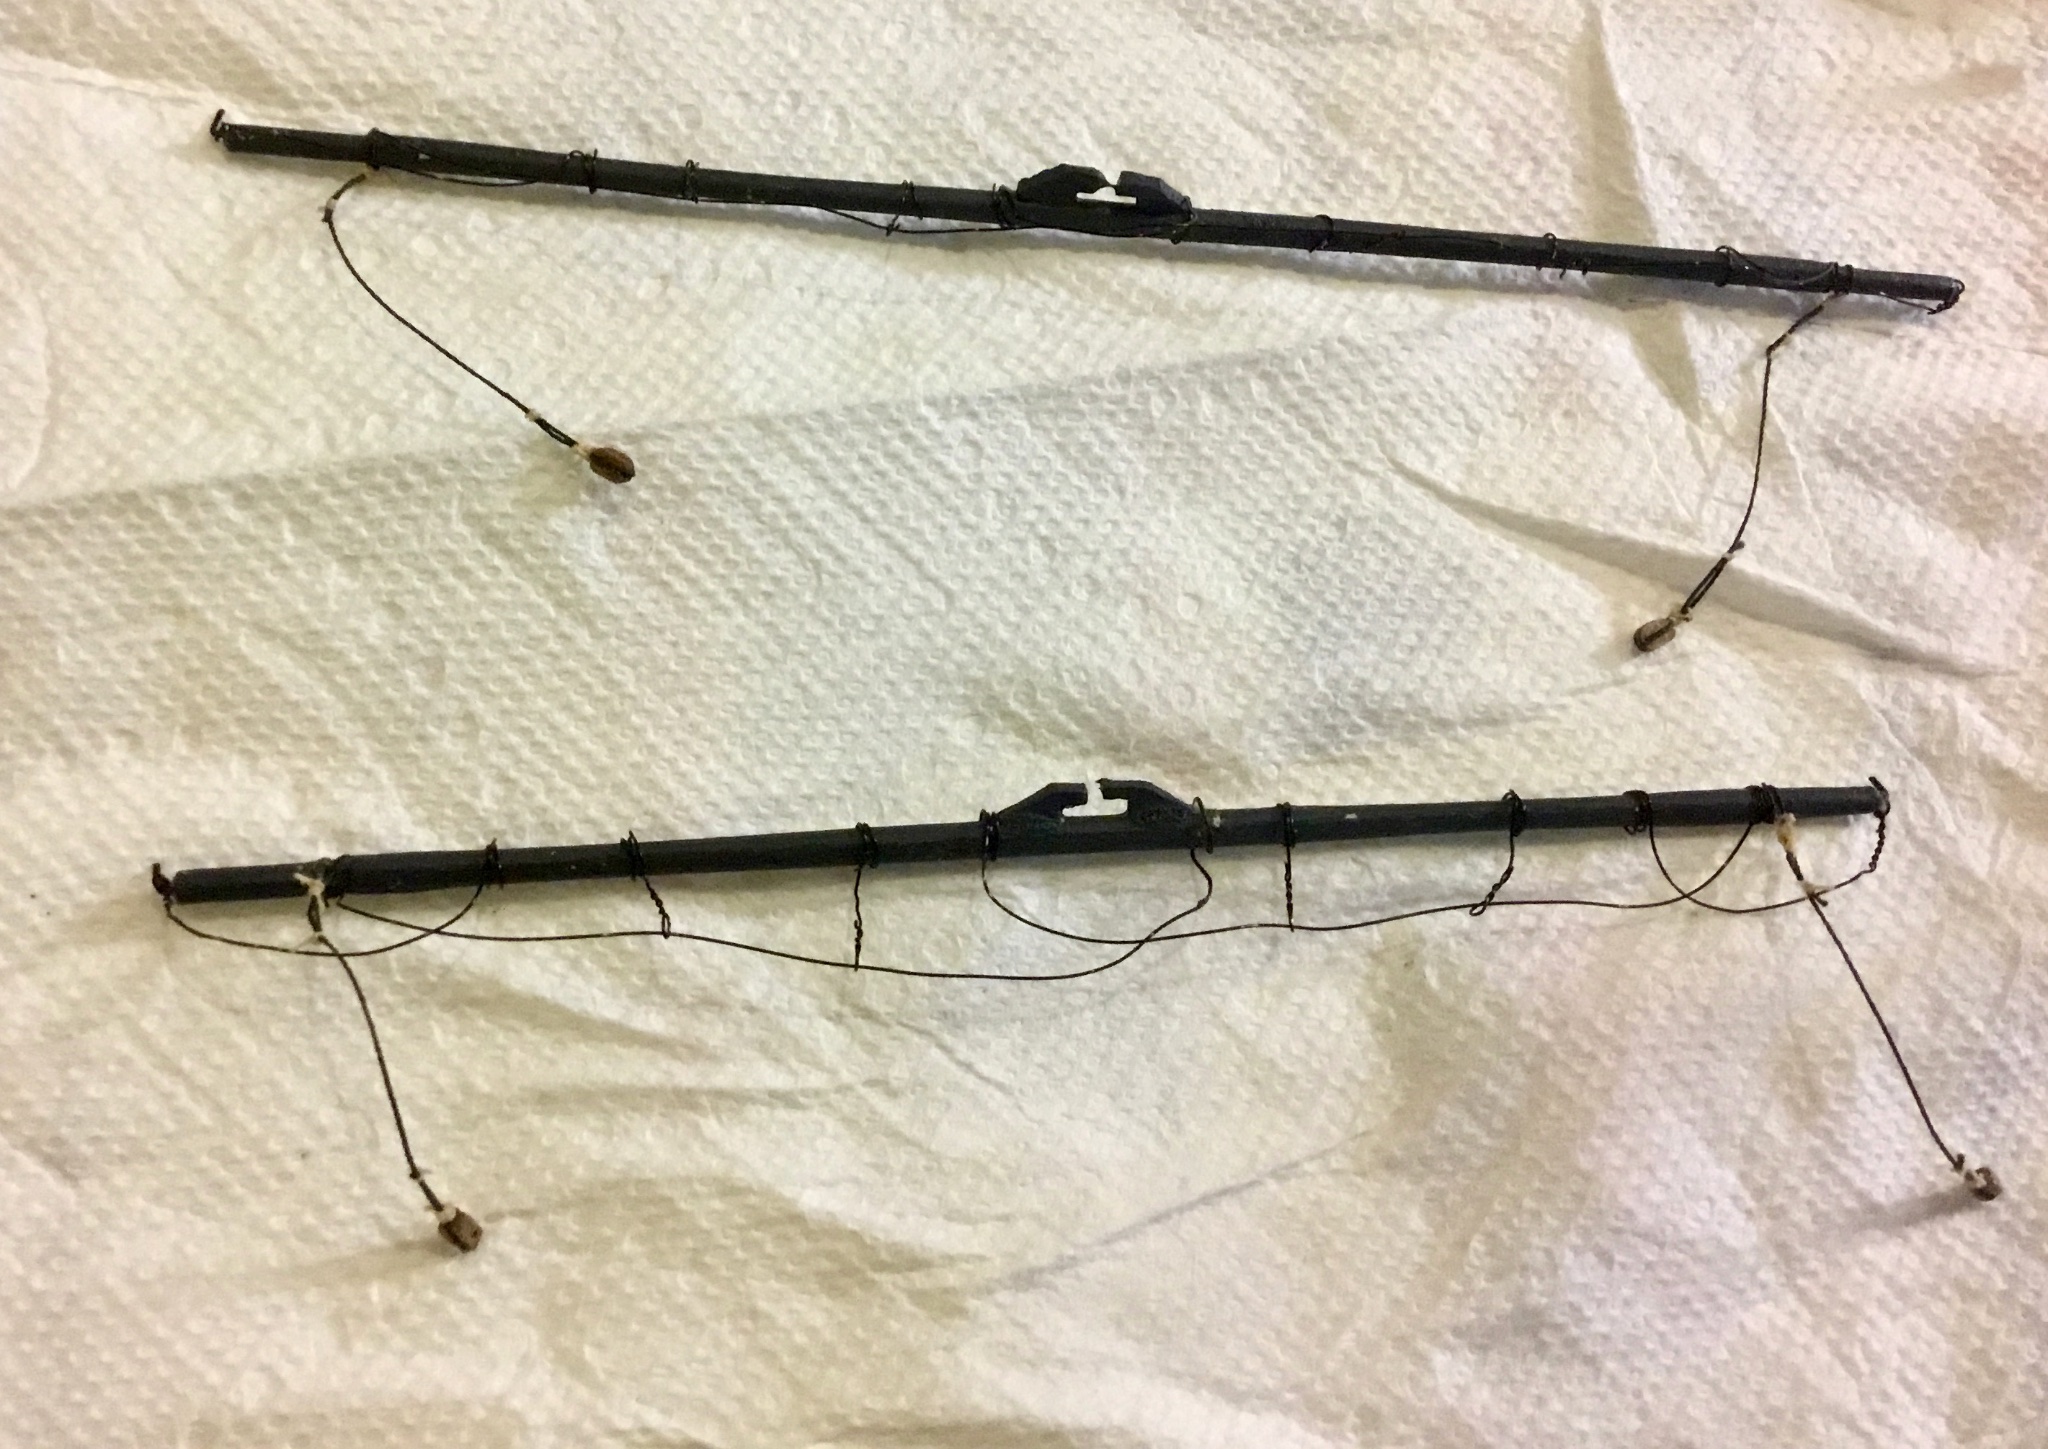
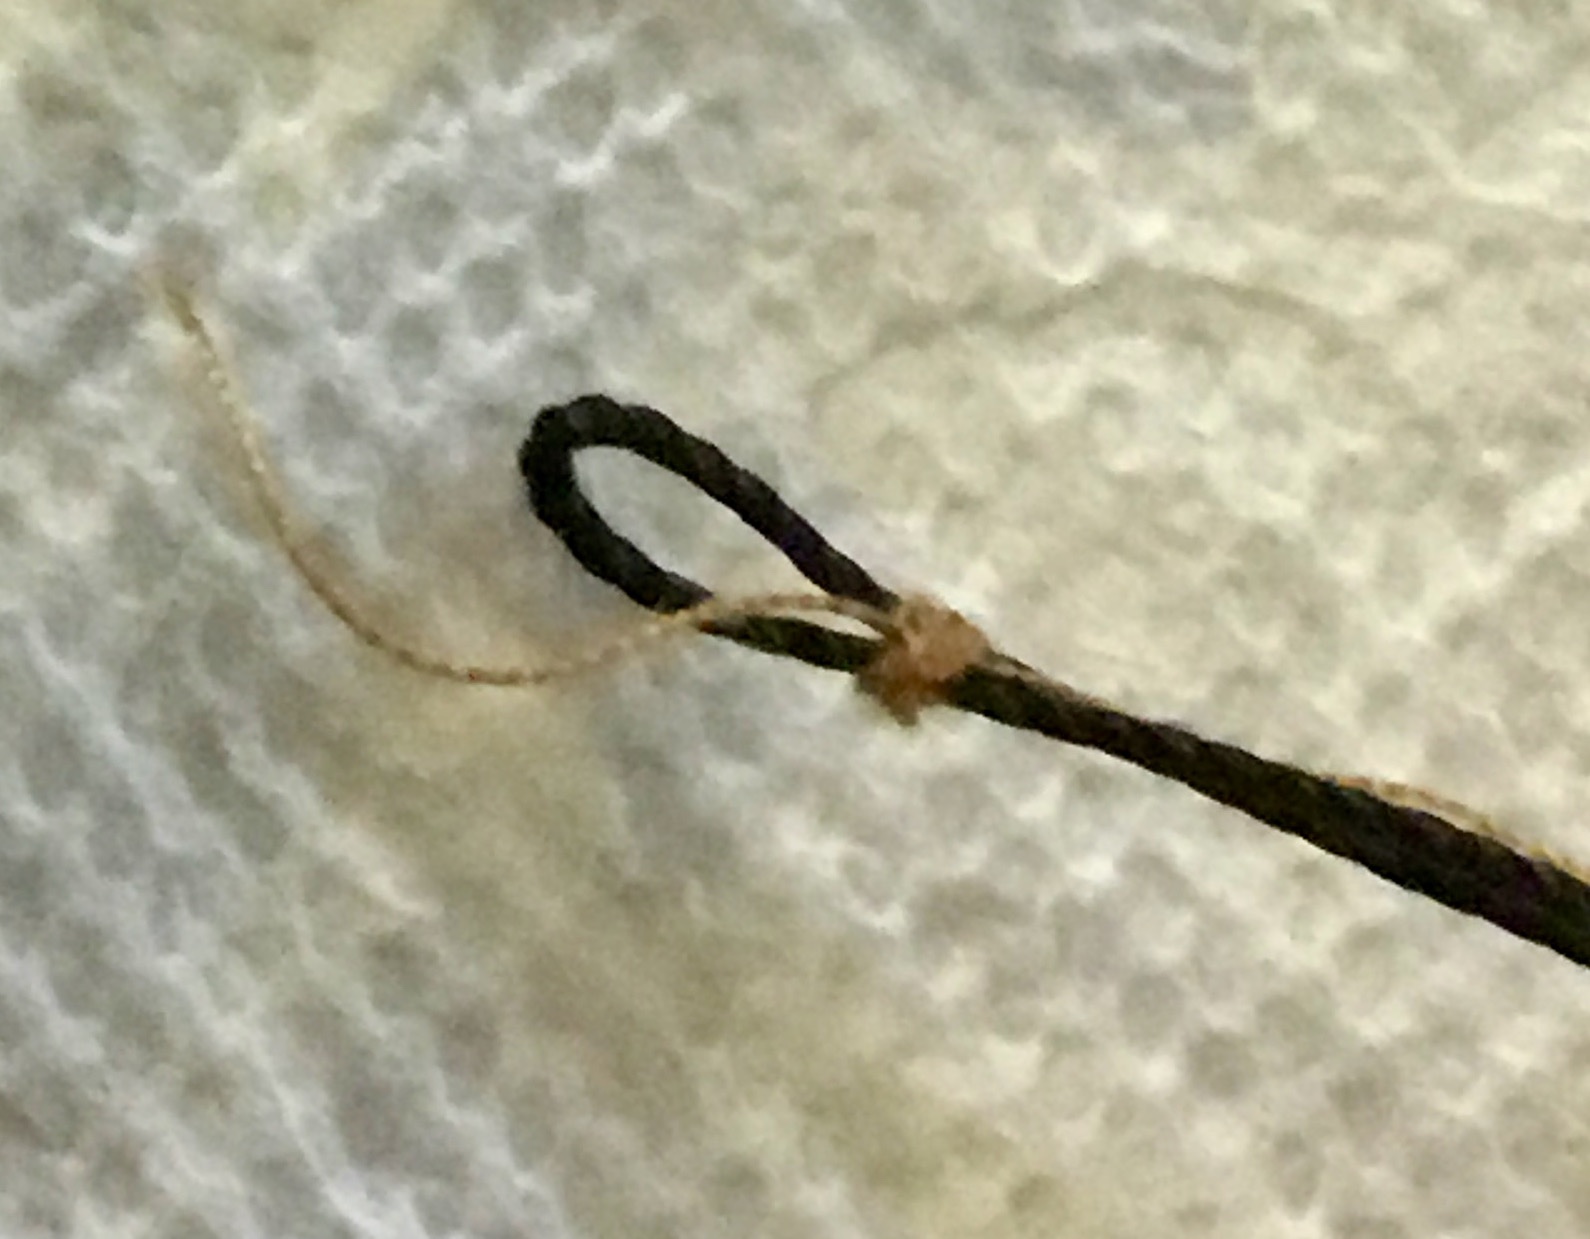
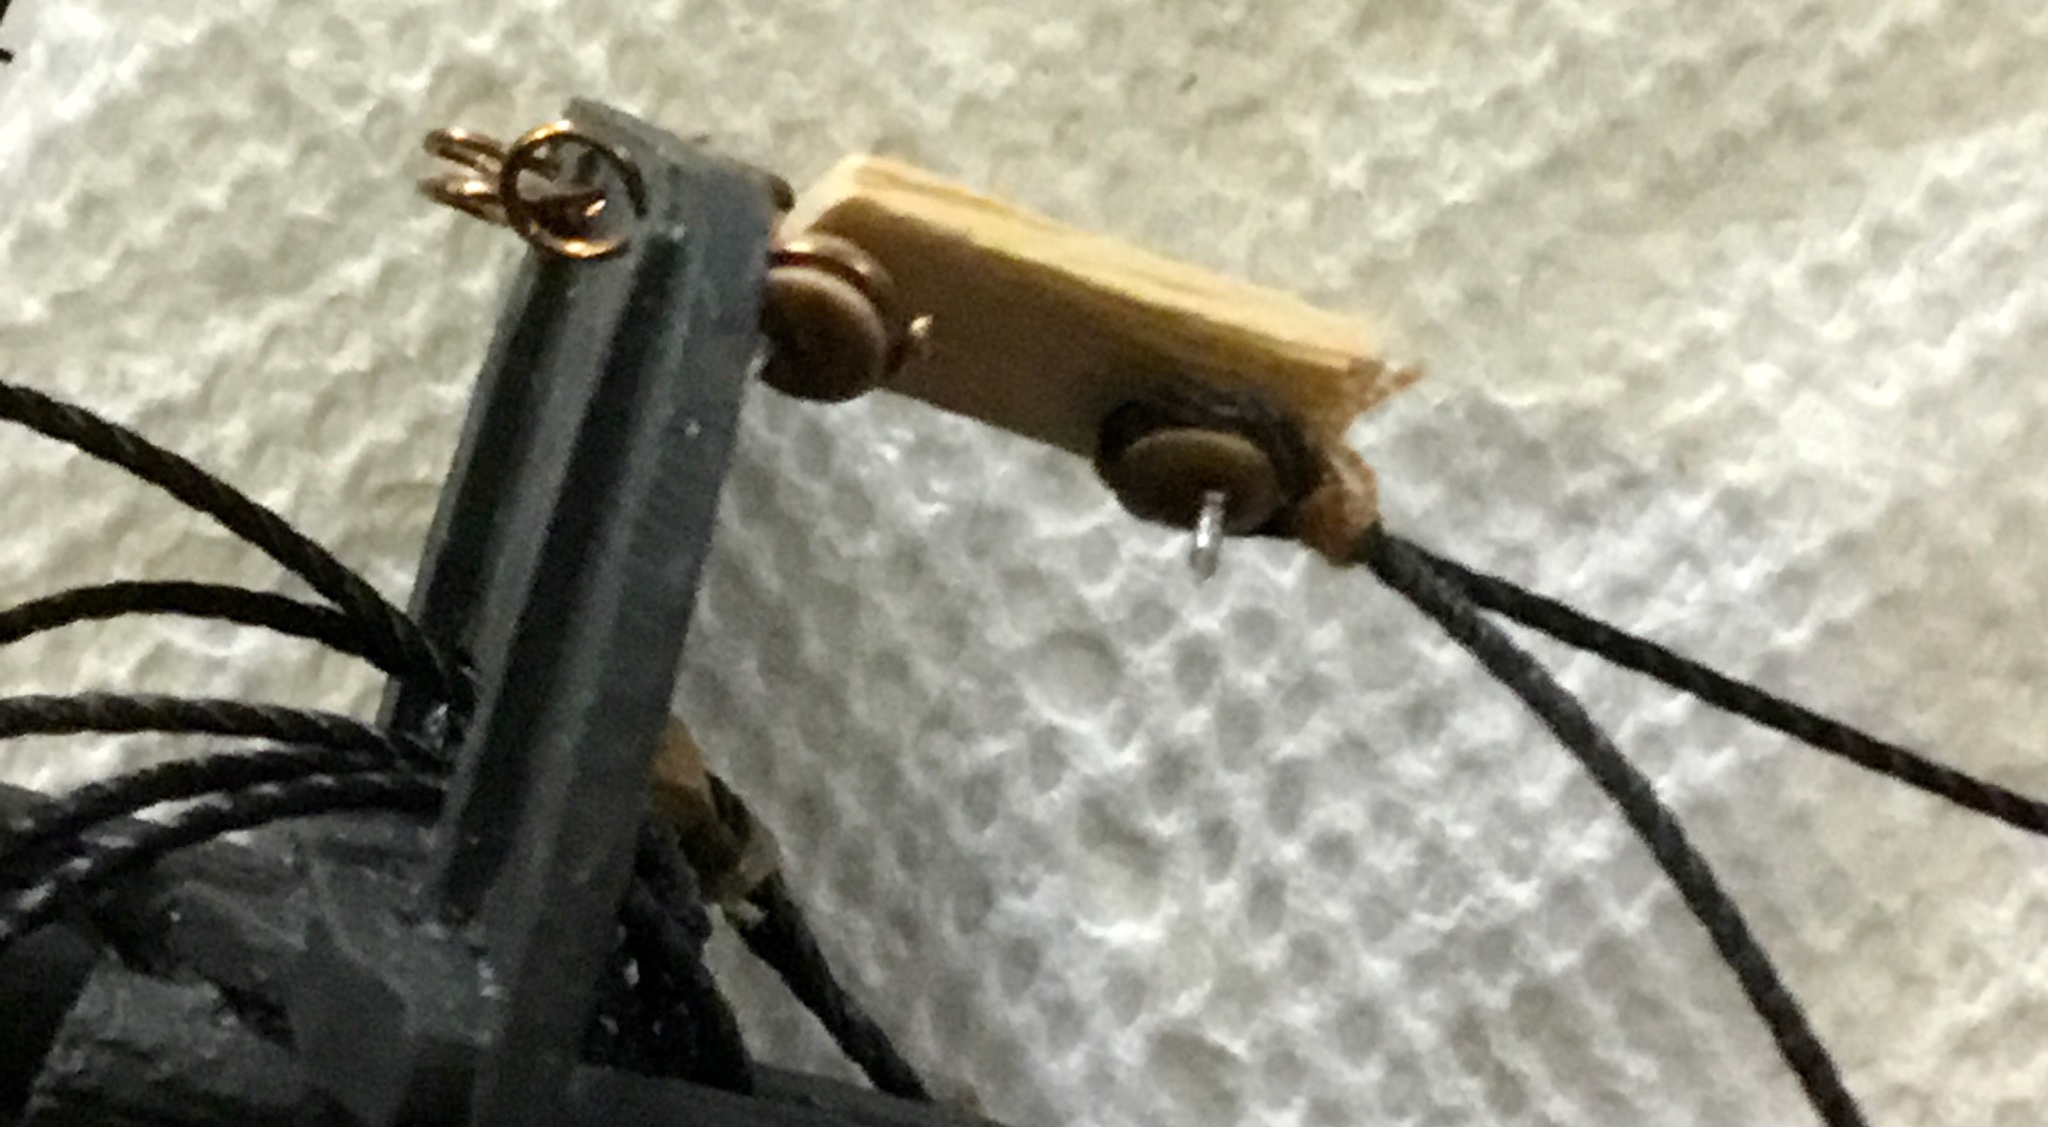
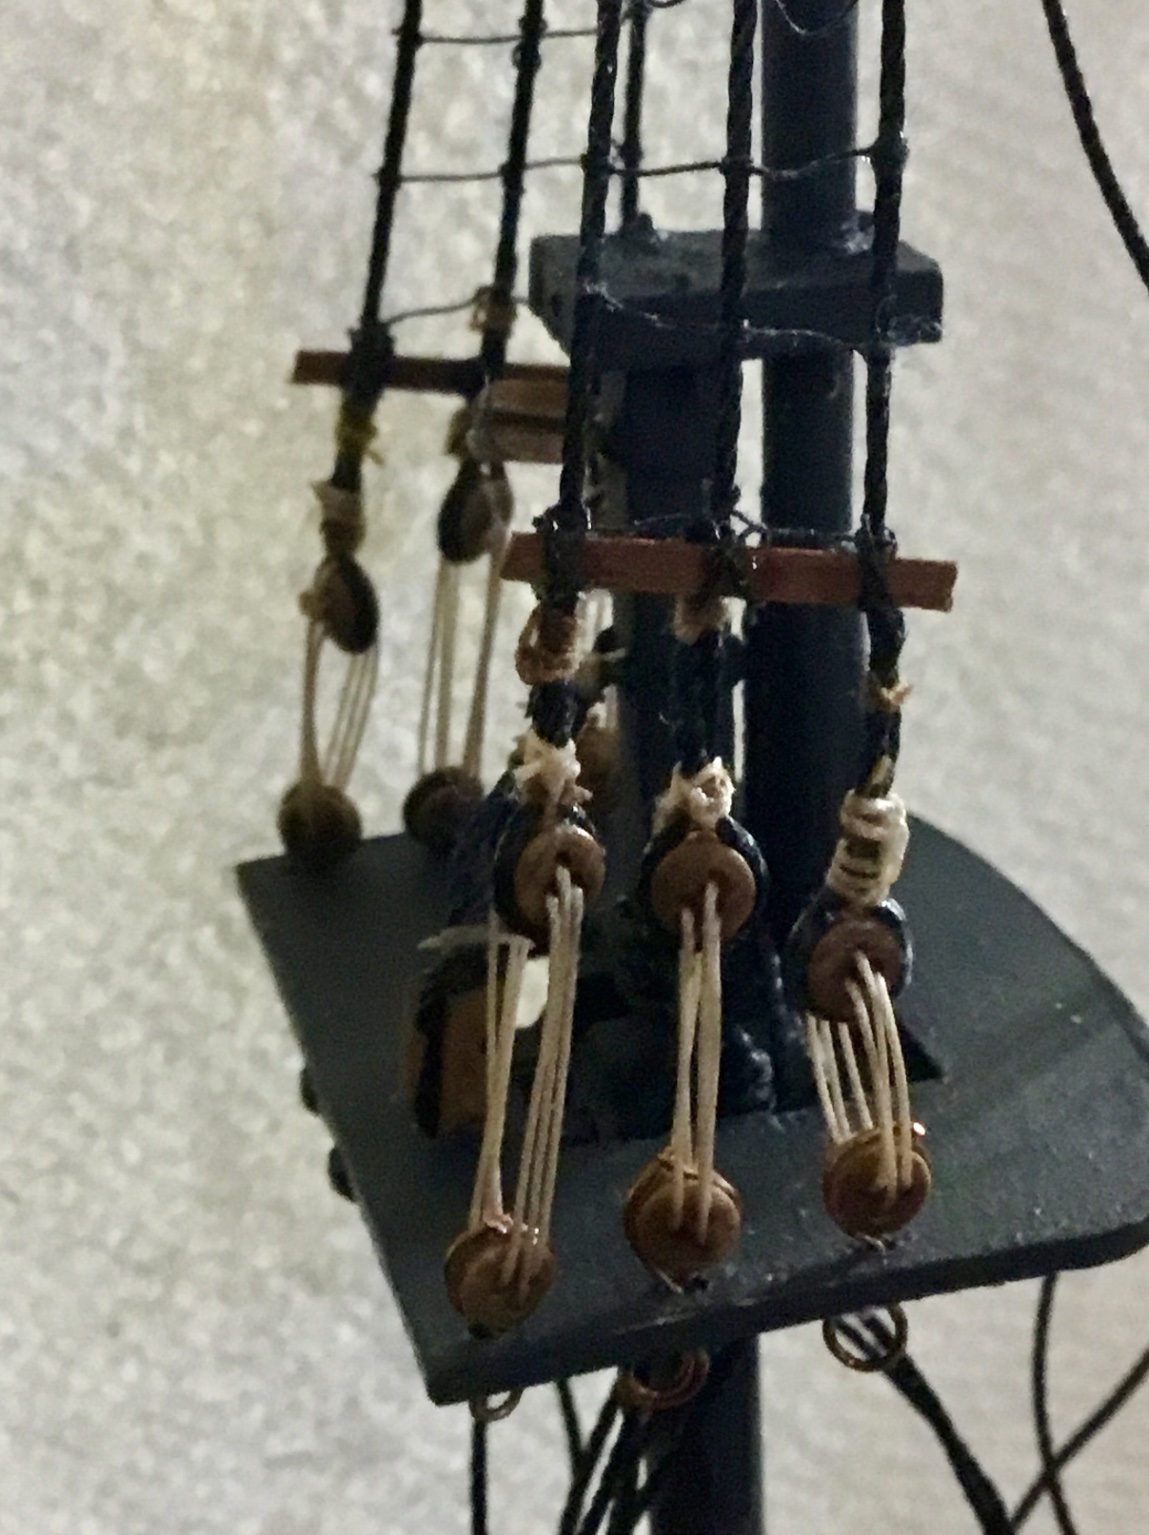
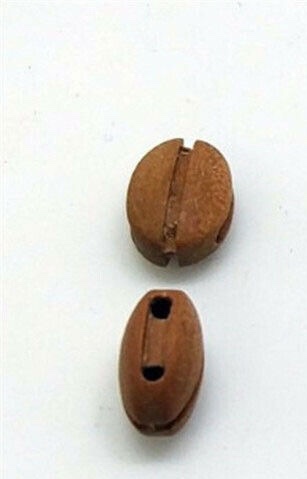
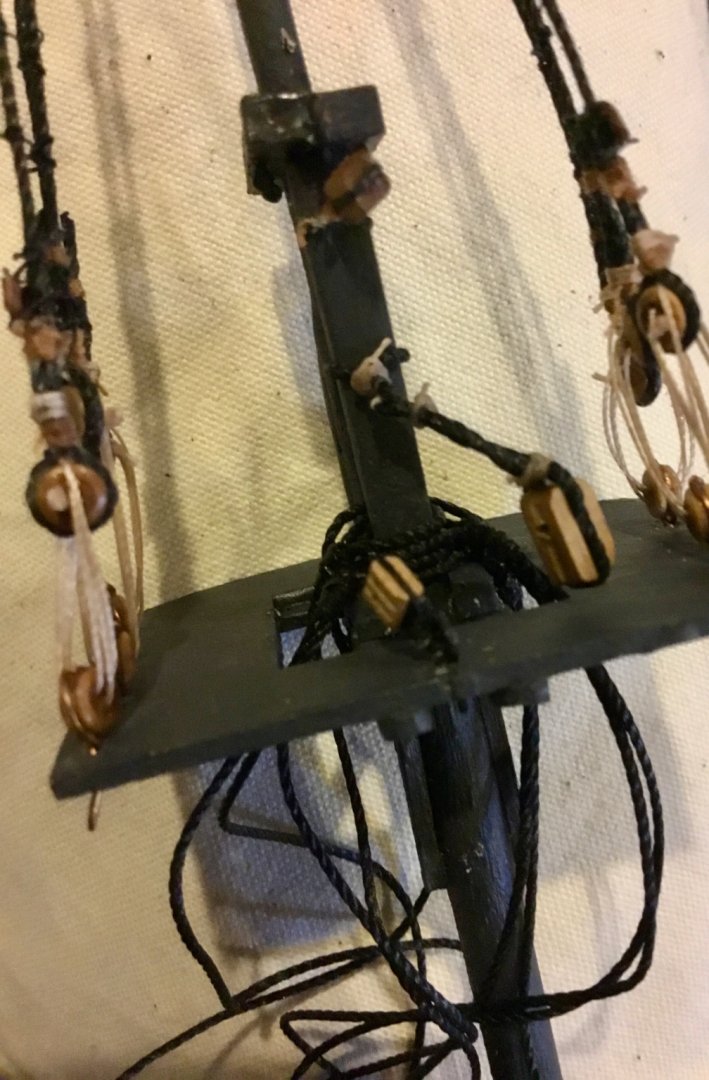
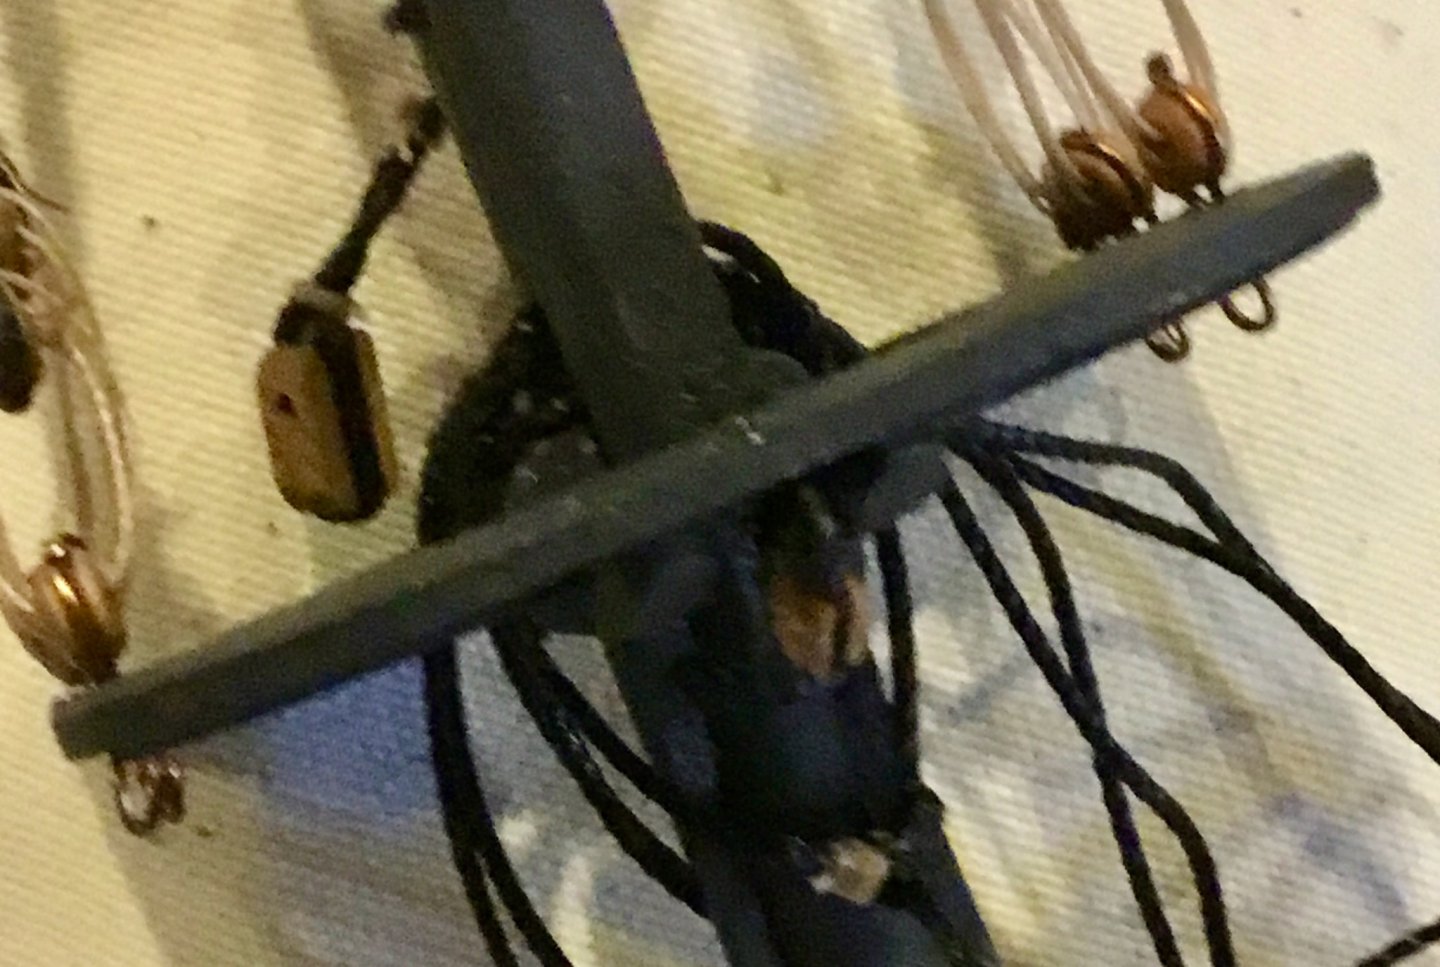
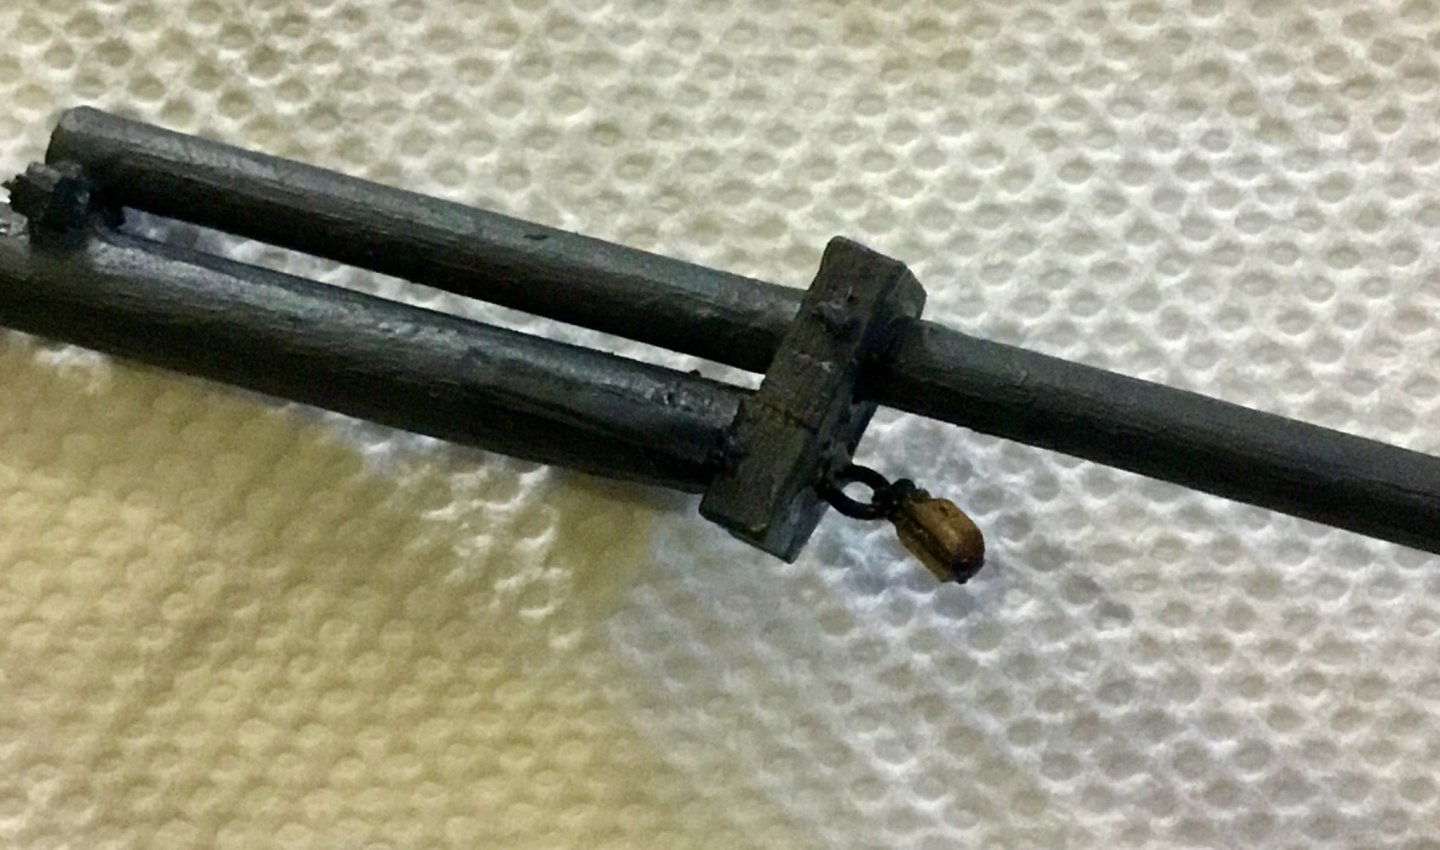
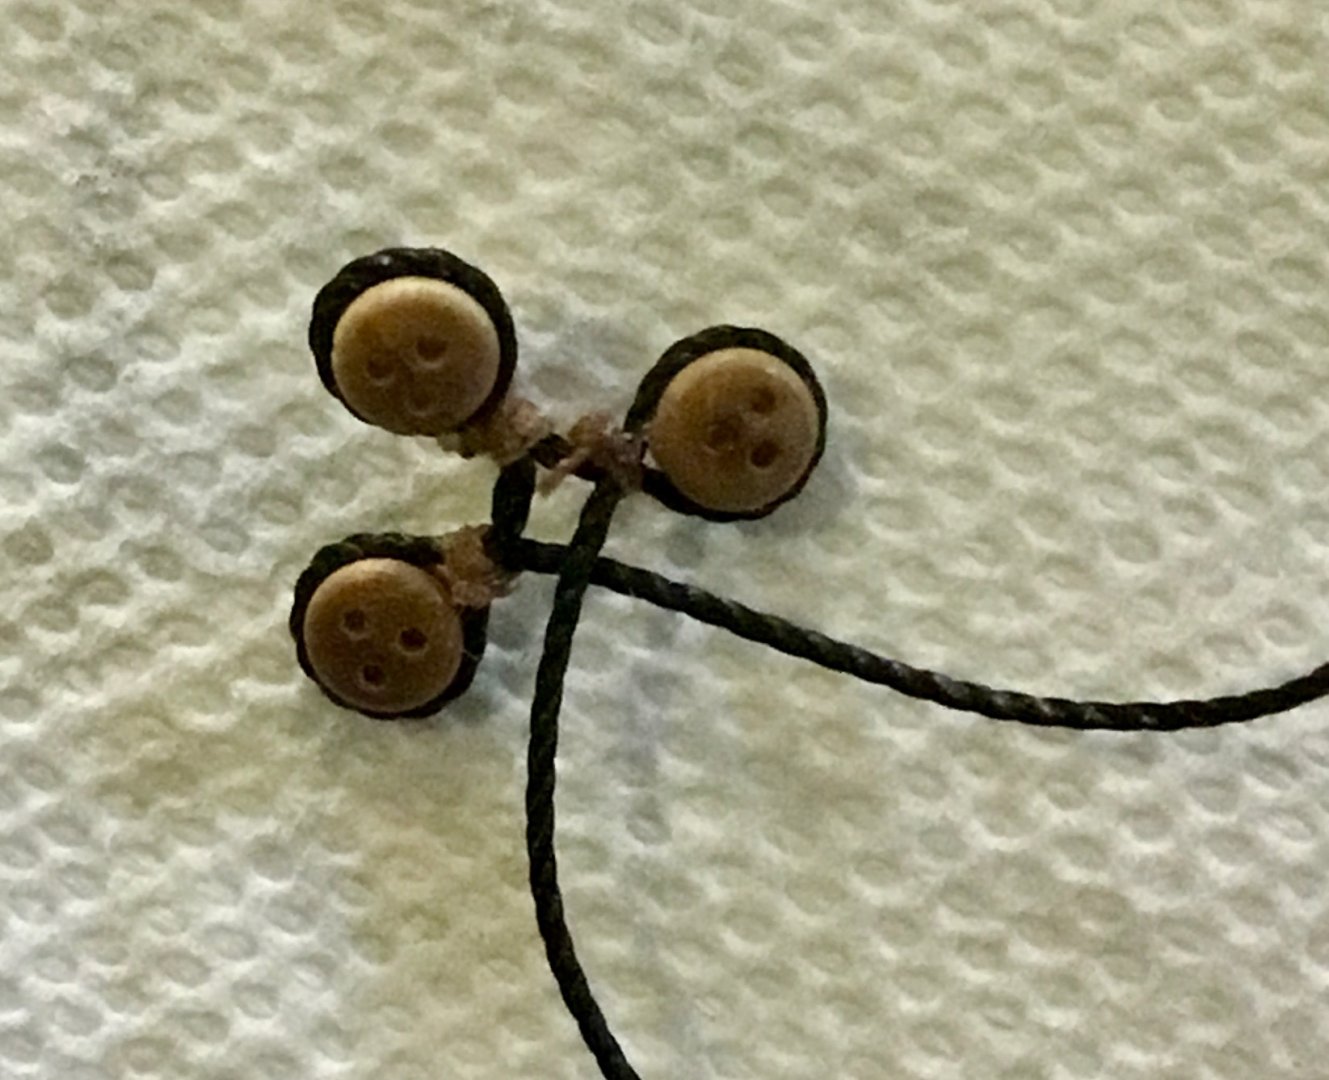
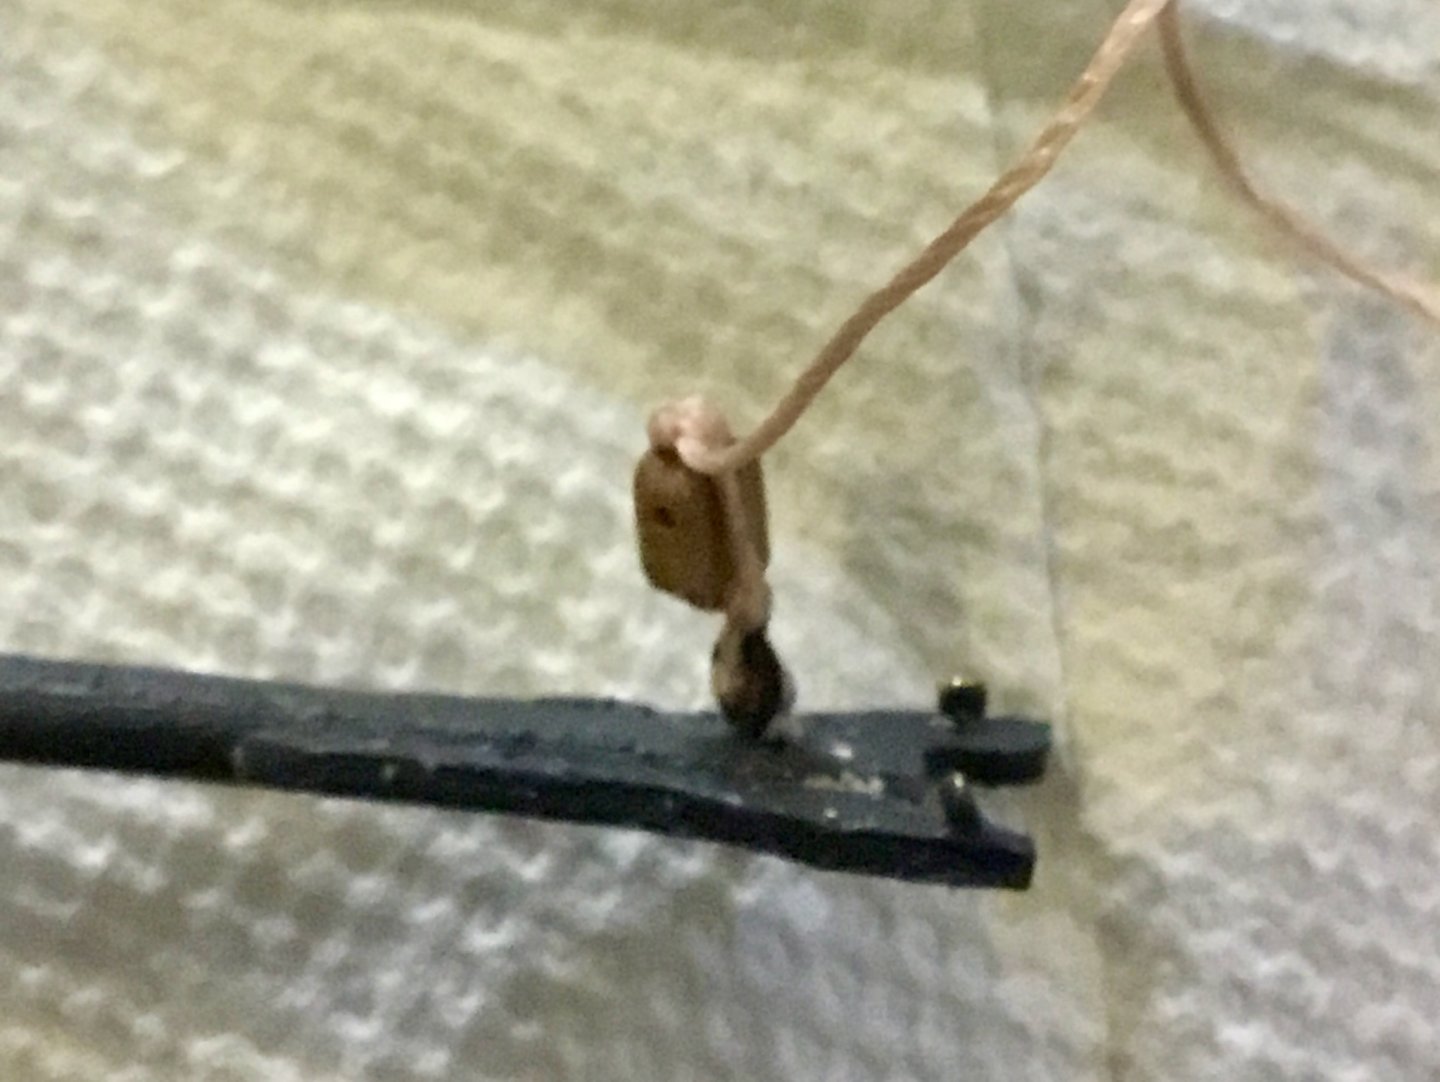
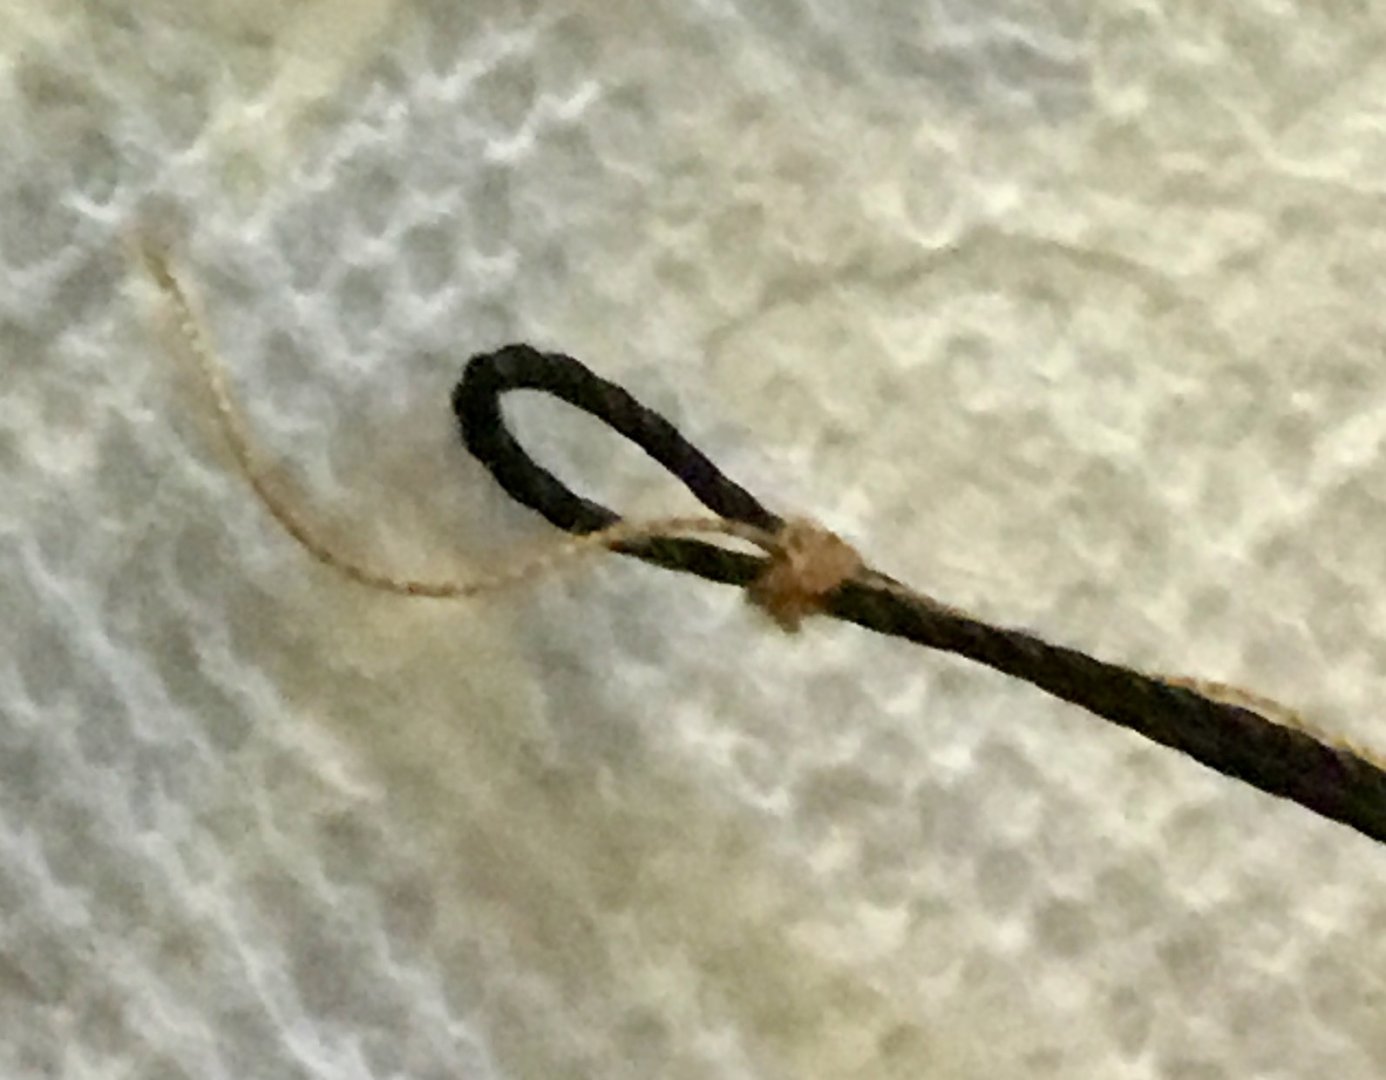
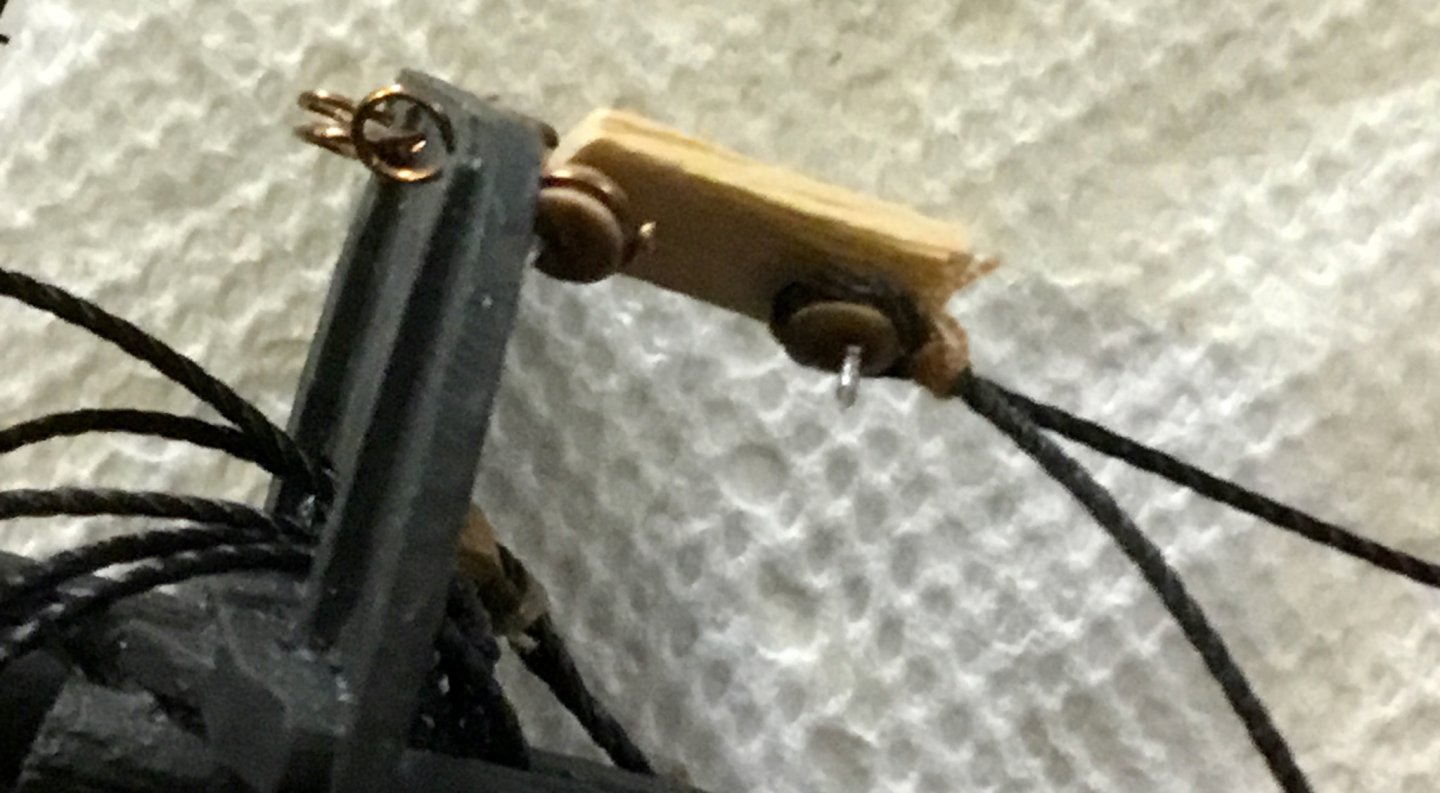
Sorry, that makes me more confused. Compare the two pictures below, the first is what I typically find in most kits I've built, the second is what I can buy separately from those provided in the kit. The first is inferior but only has one hole so it is obvious how to use it. The second looks more realistic but the fact that it has two holes instead on one is what's causing my confusion. Do I use just one of the holes and ignore the other or should I be using both holes with the same line? Why have two holes? Should the one line pass thru both holes? Is the second hole for a second line? Or is the fact that there are two holes merely a convenience to simplify mounting, as the ones with one hole typically have the hole closer to one end than the other. For the first type what determines which side of the mounting the single hole should be toward? Does it matter? Am I over complicating?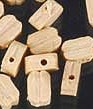
-
I've noticed that most of the cheap wooden blocks included in kits that I've built, that single blocks usual contain only one hole, but the more expensive blocks that you can buy separately usual contain two holes with a connected grove between the two holes. Whats the difference? And what's the purpose of the second hole? If I have a single line that goes thru the block should it pass thru both holes?
-
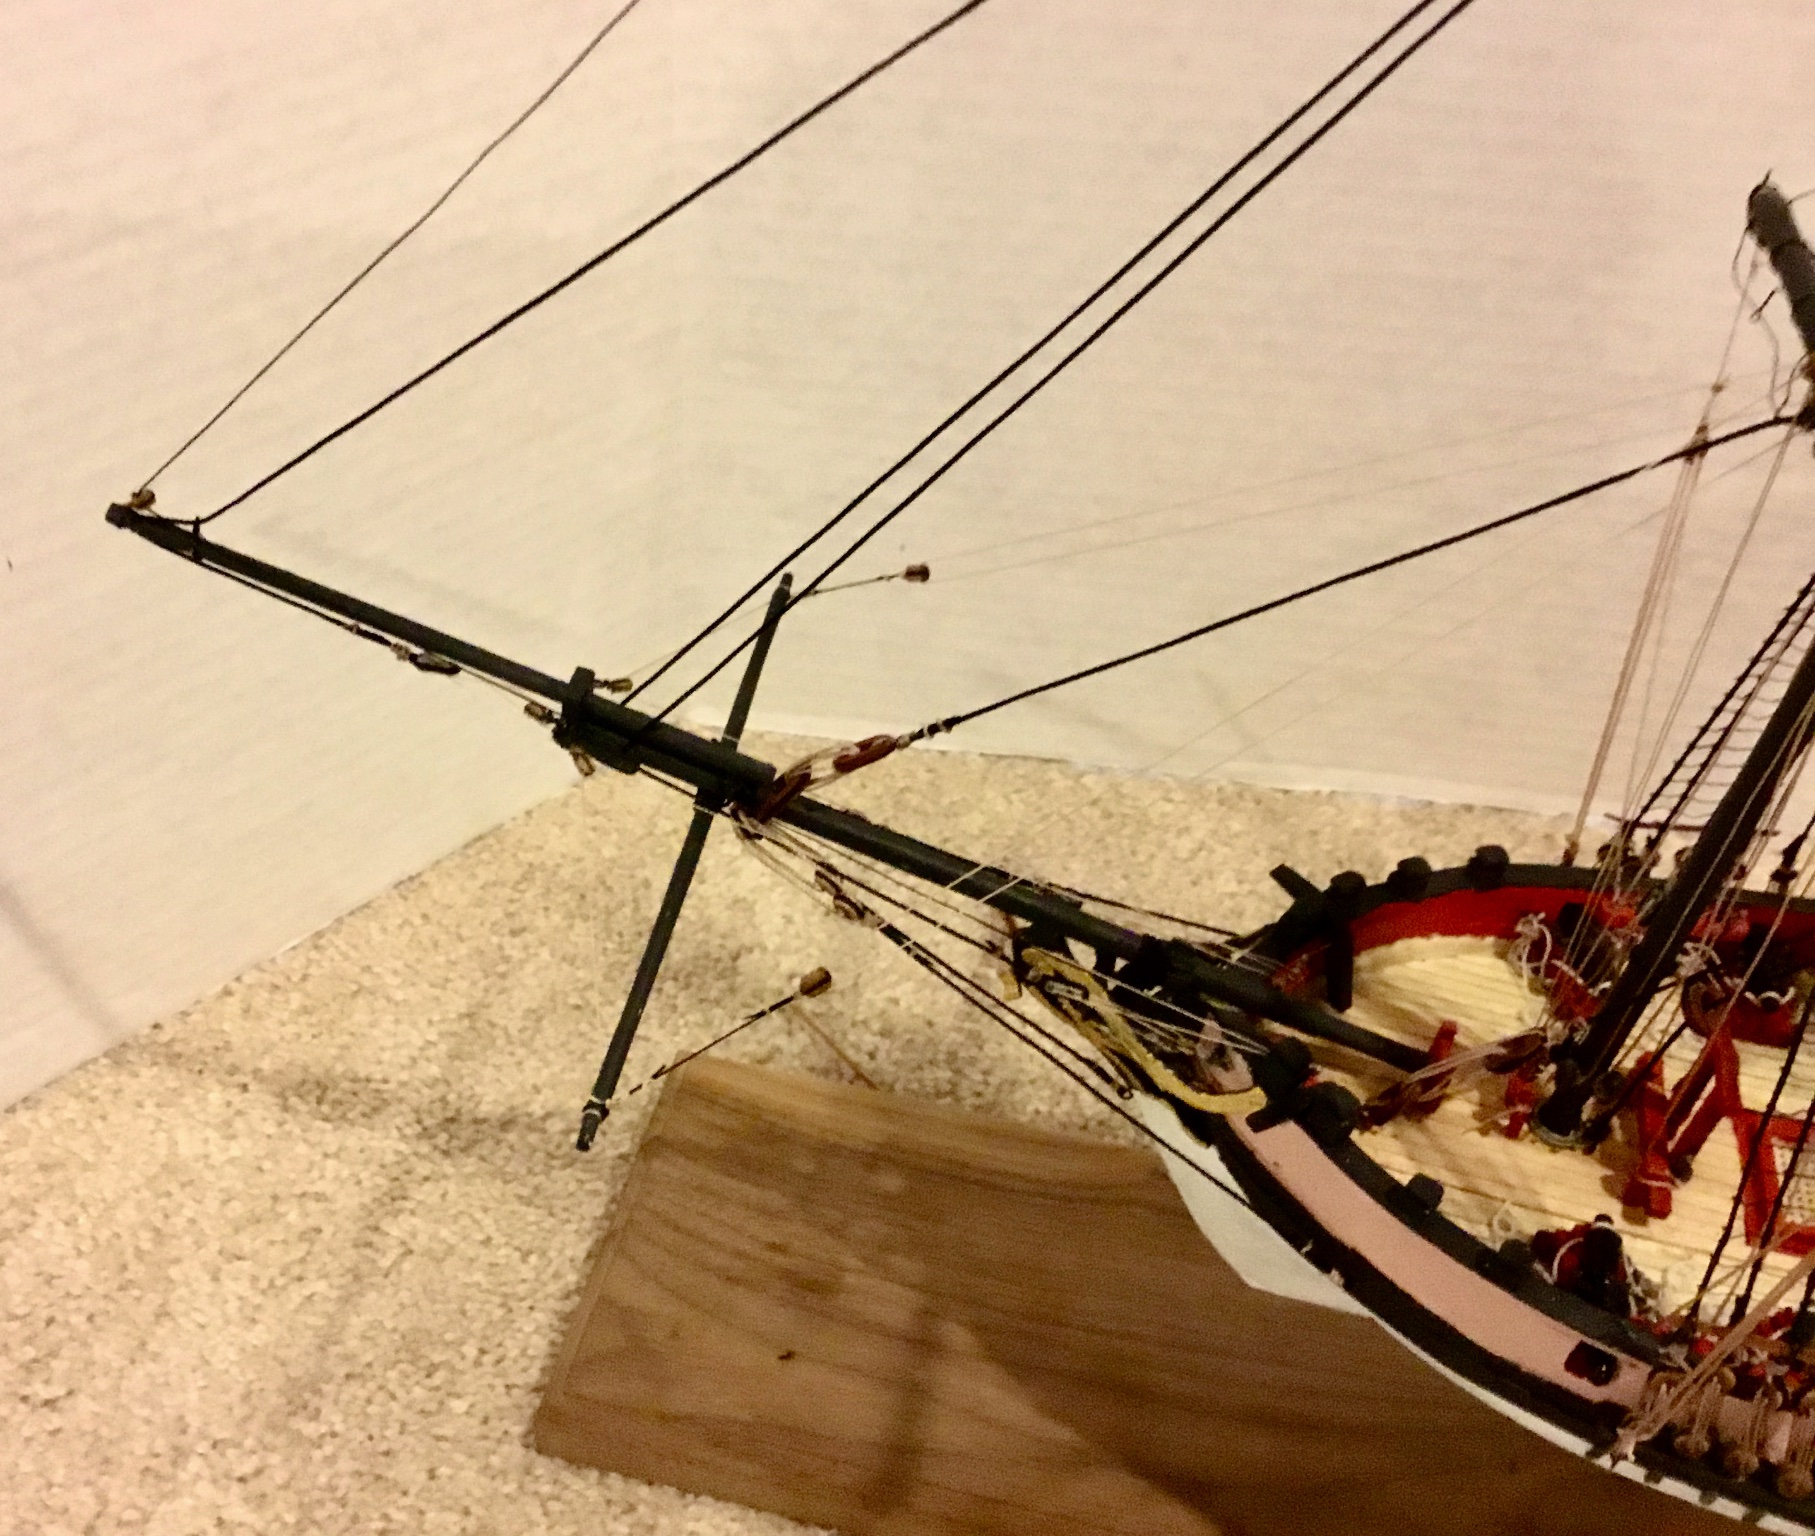
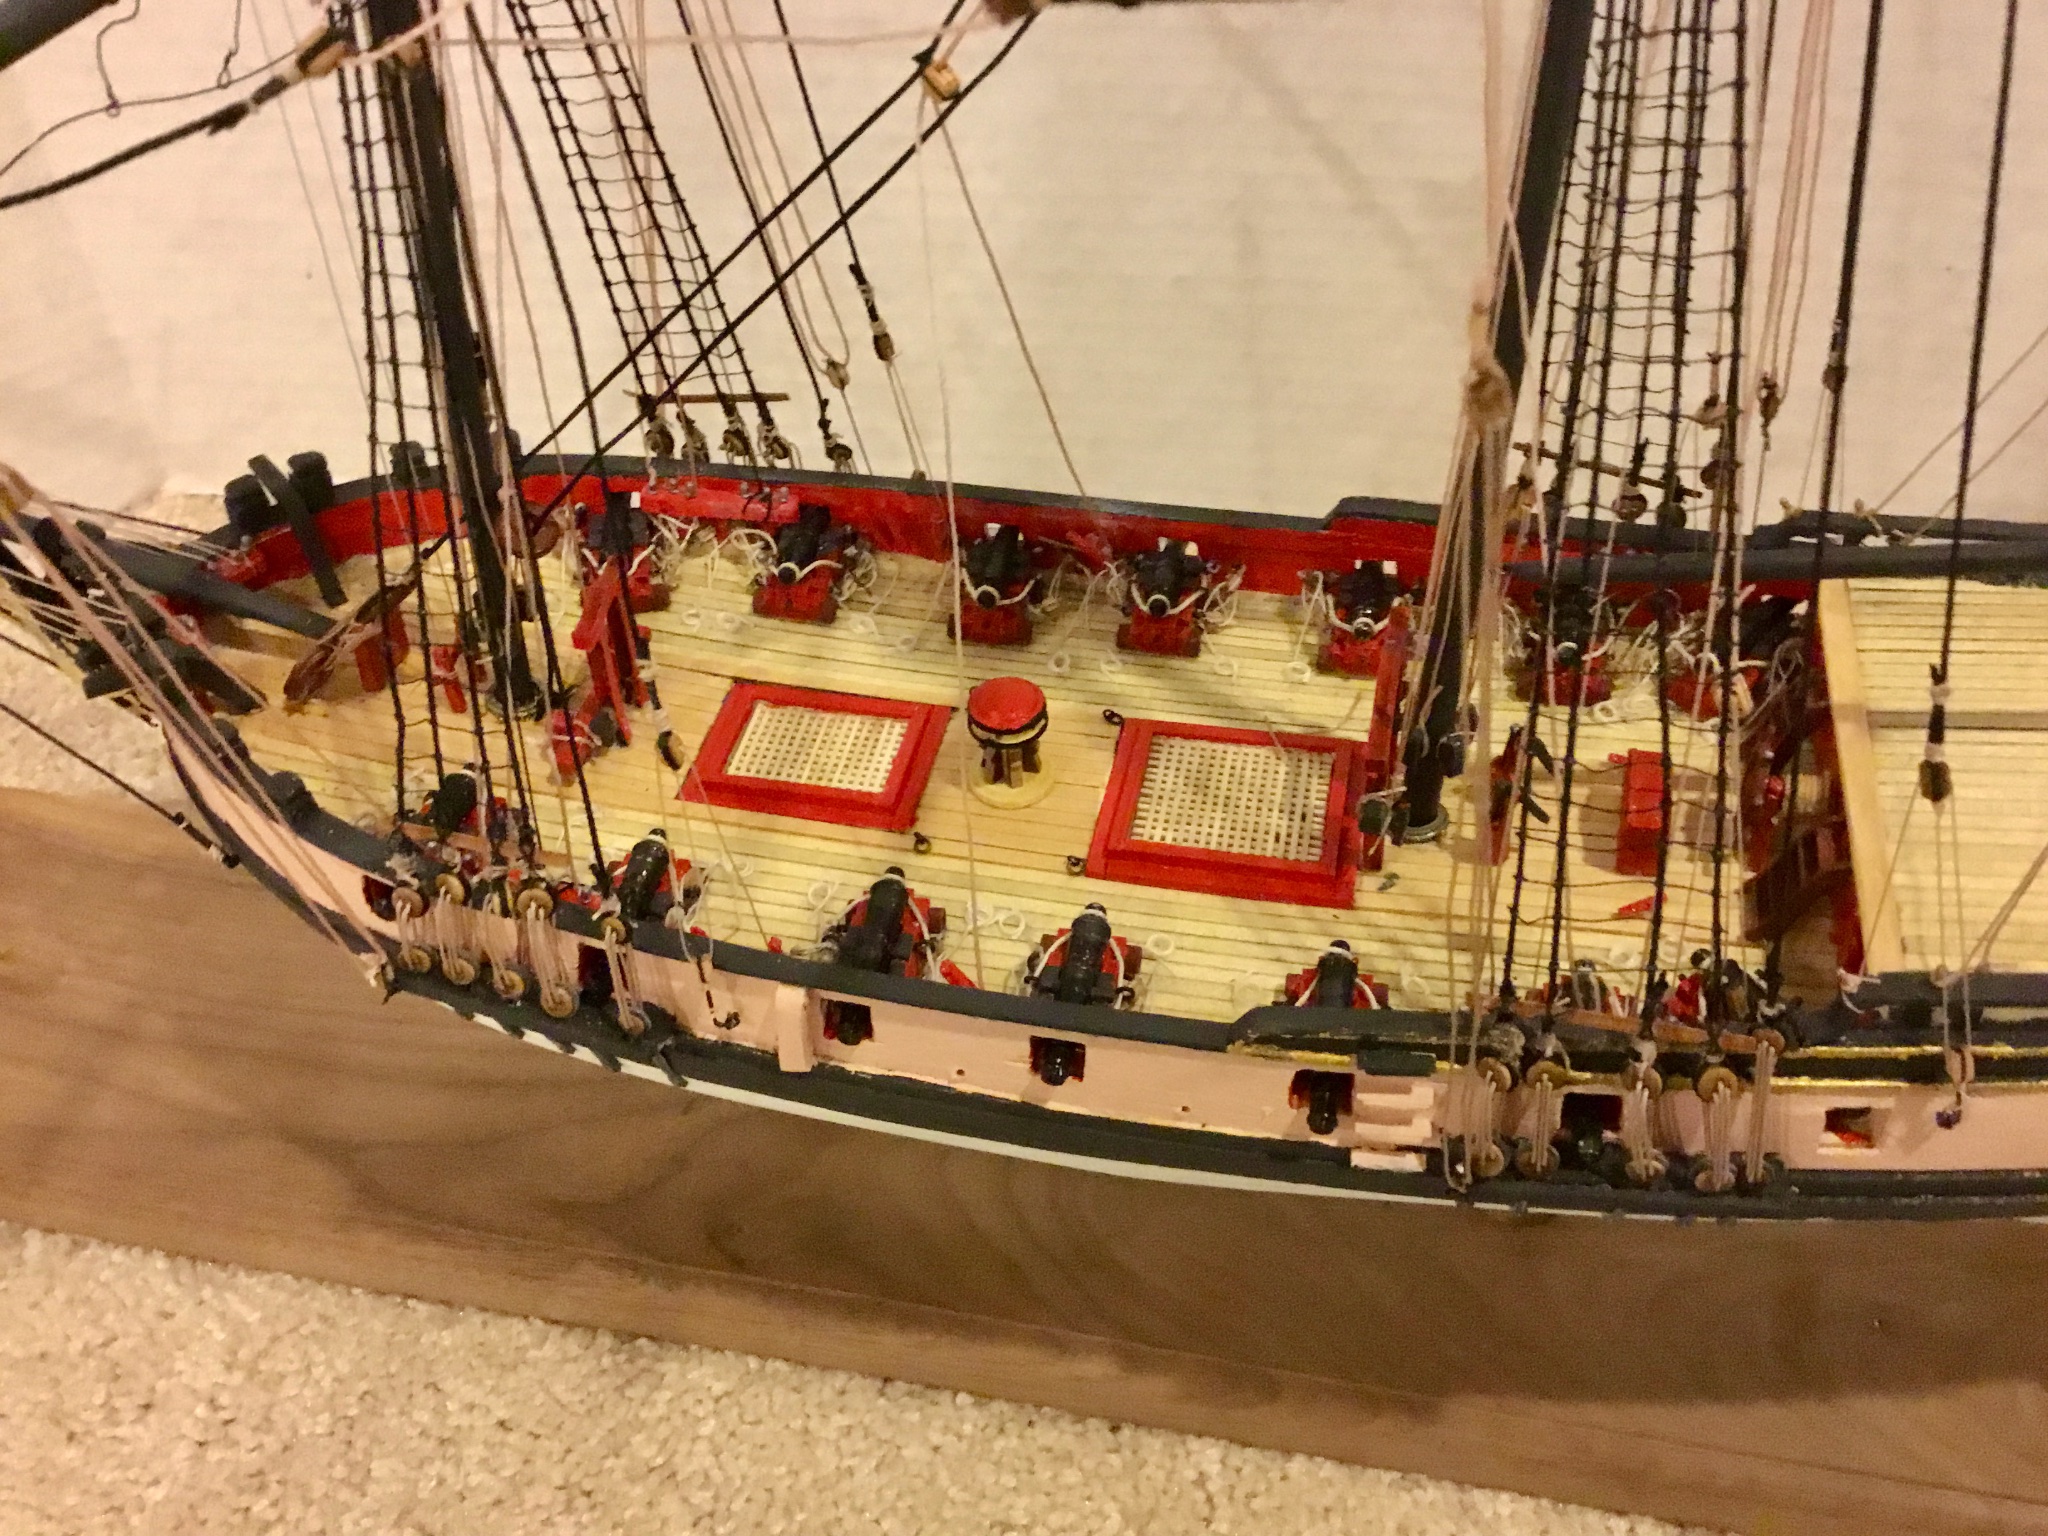
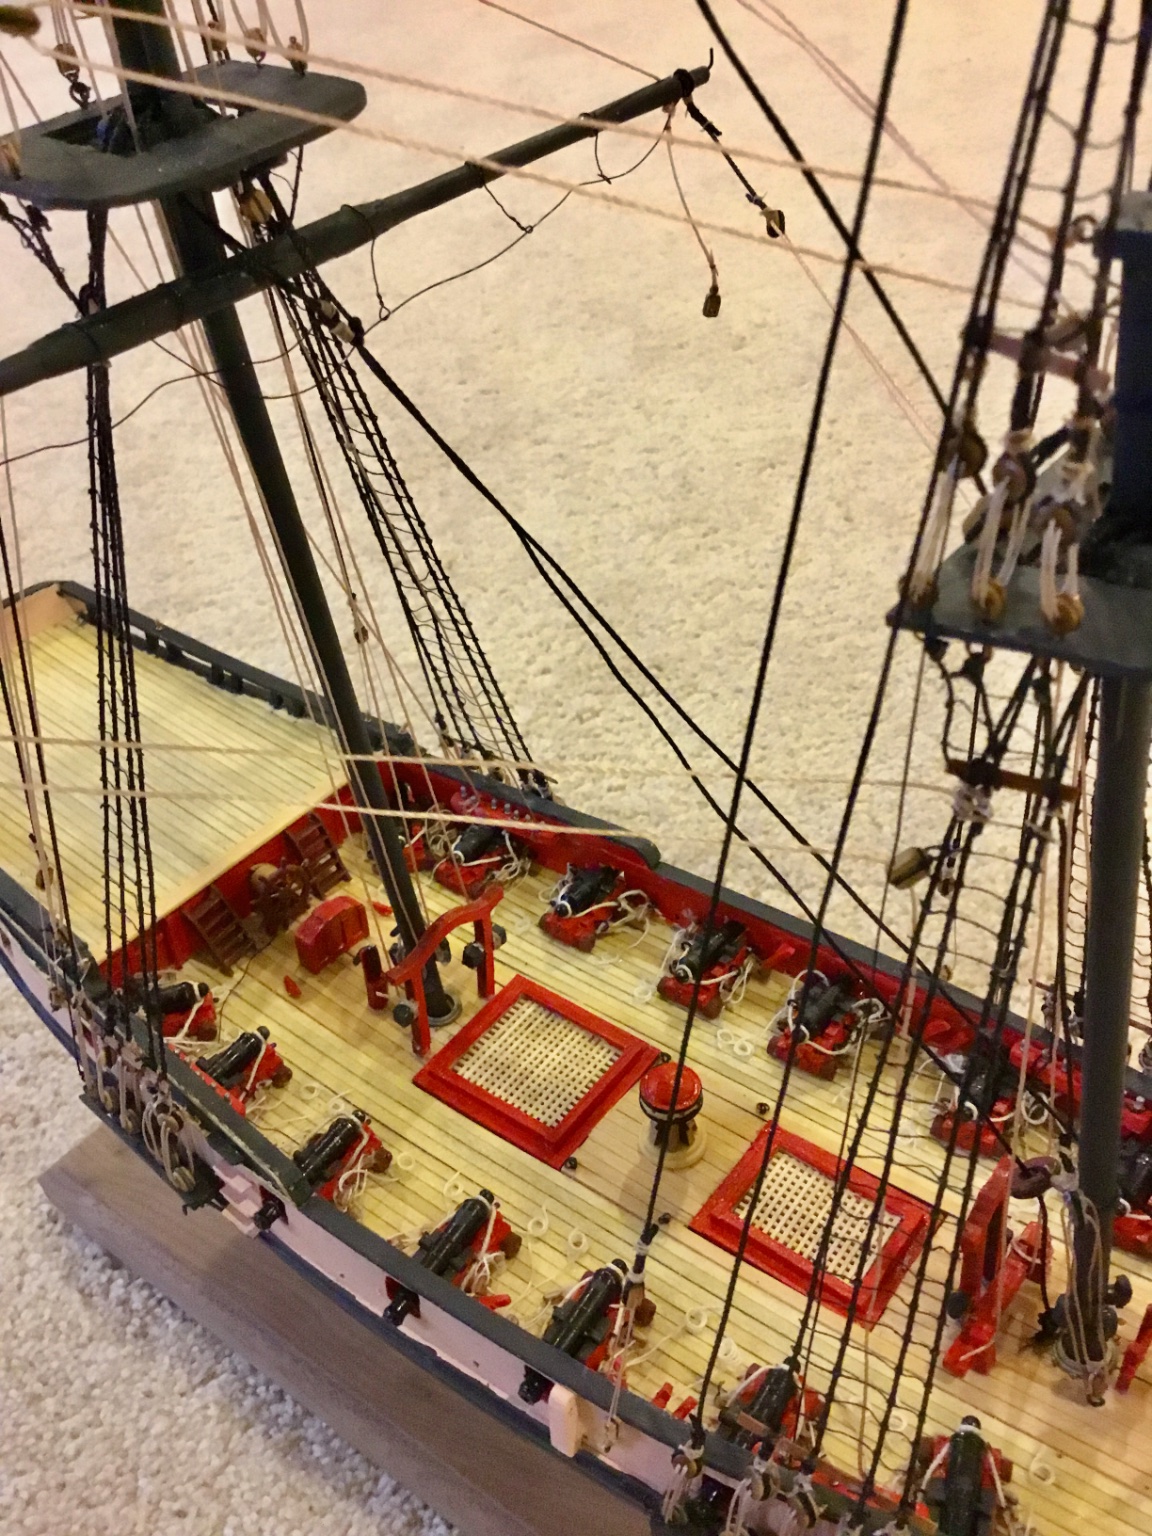
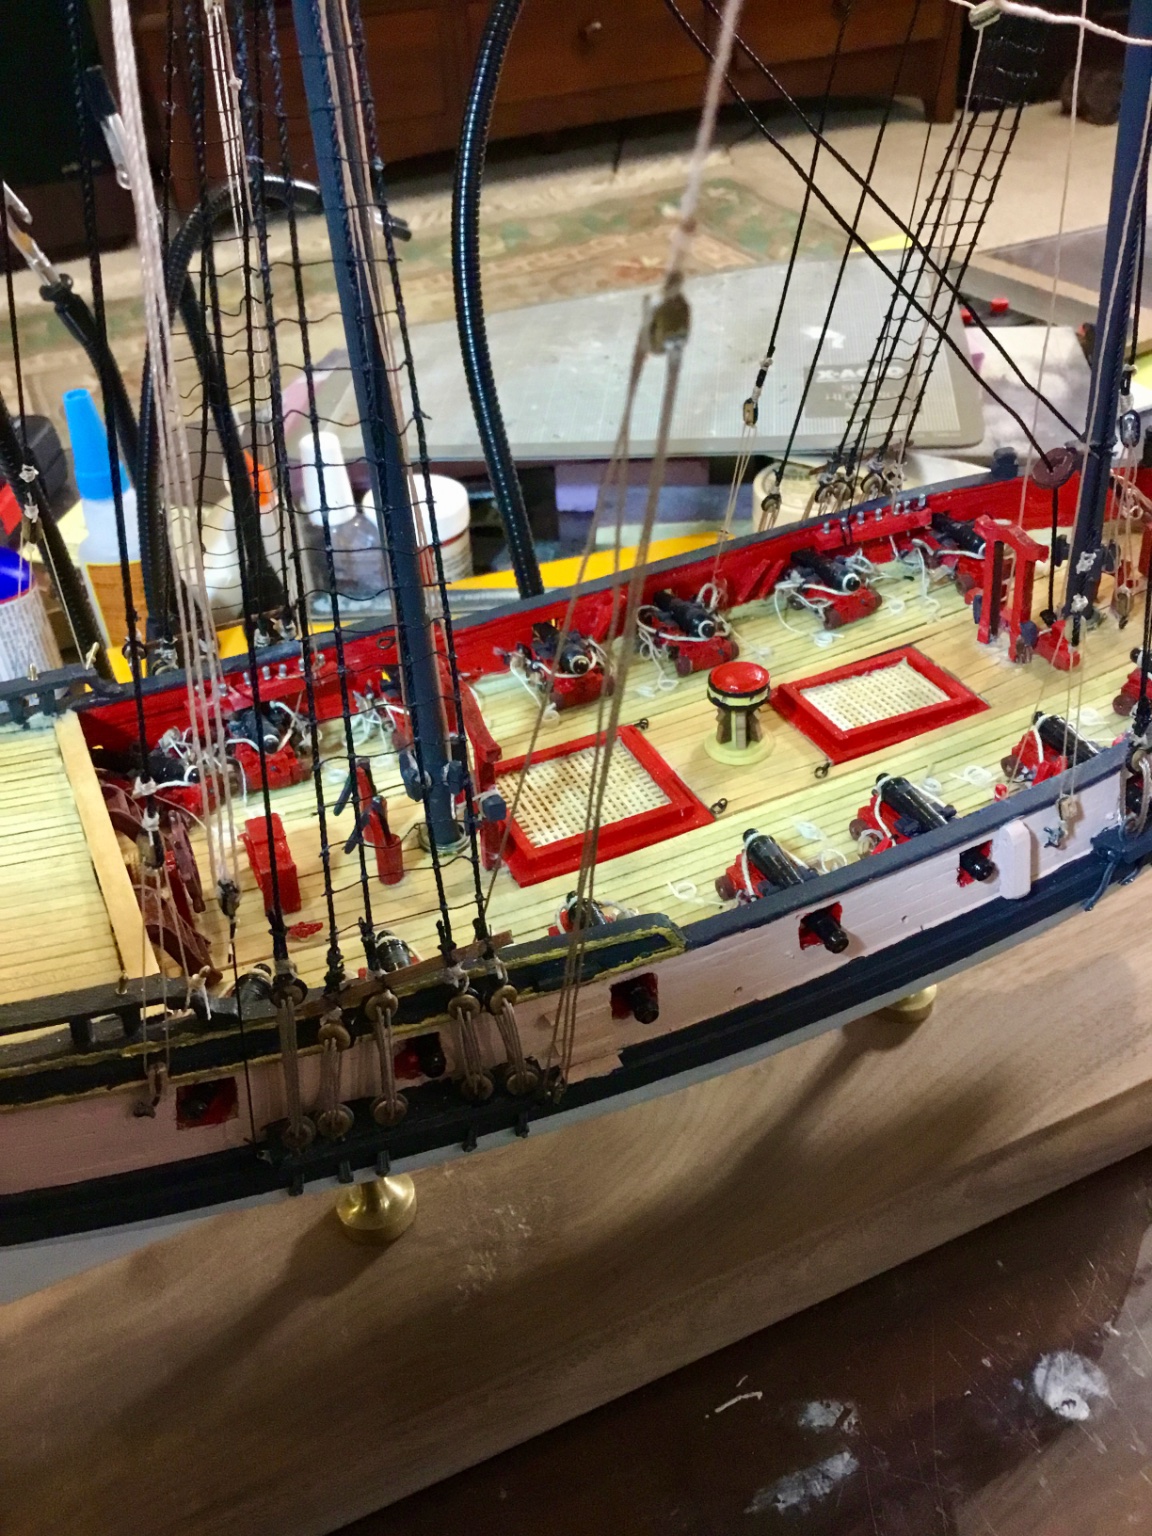
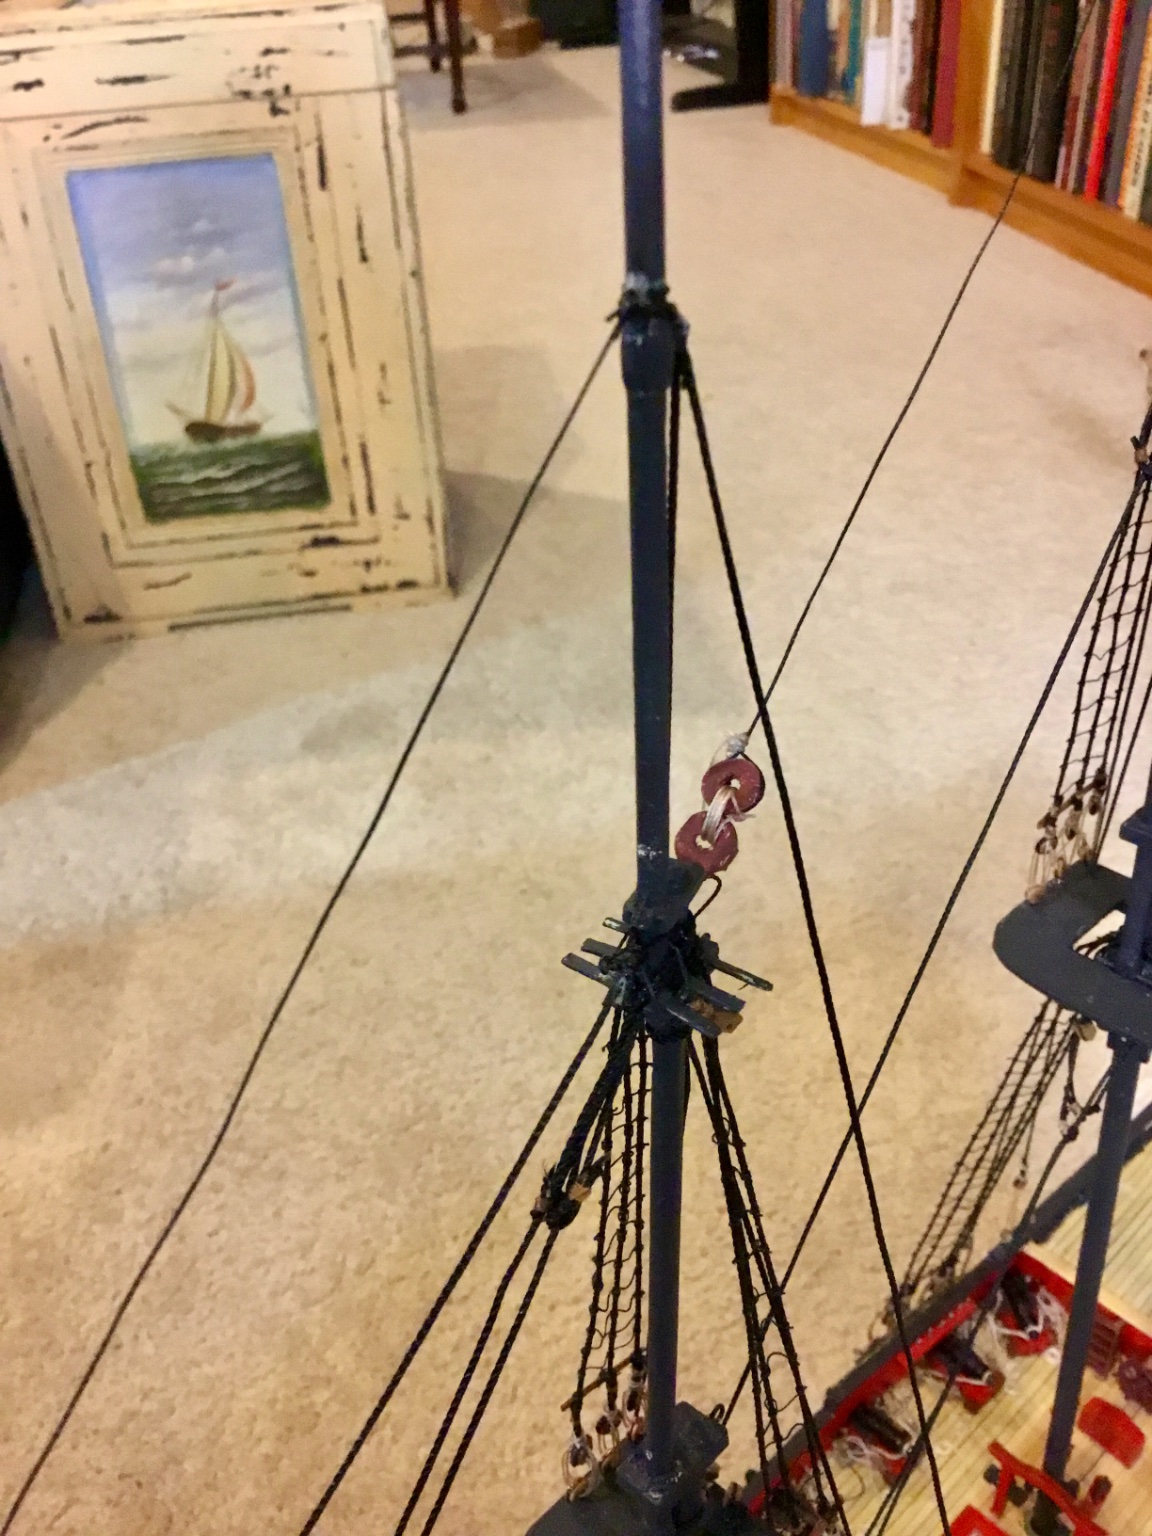
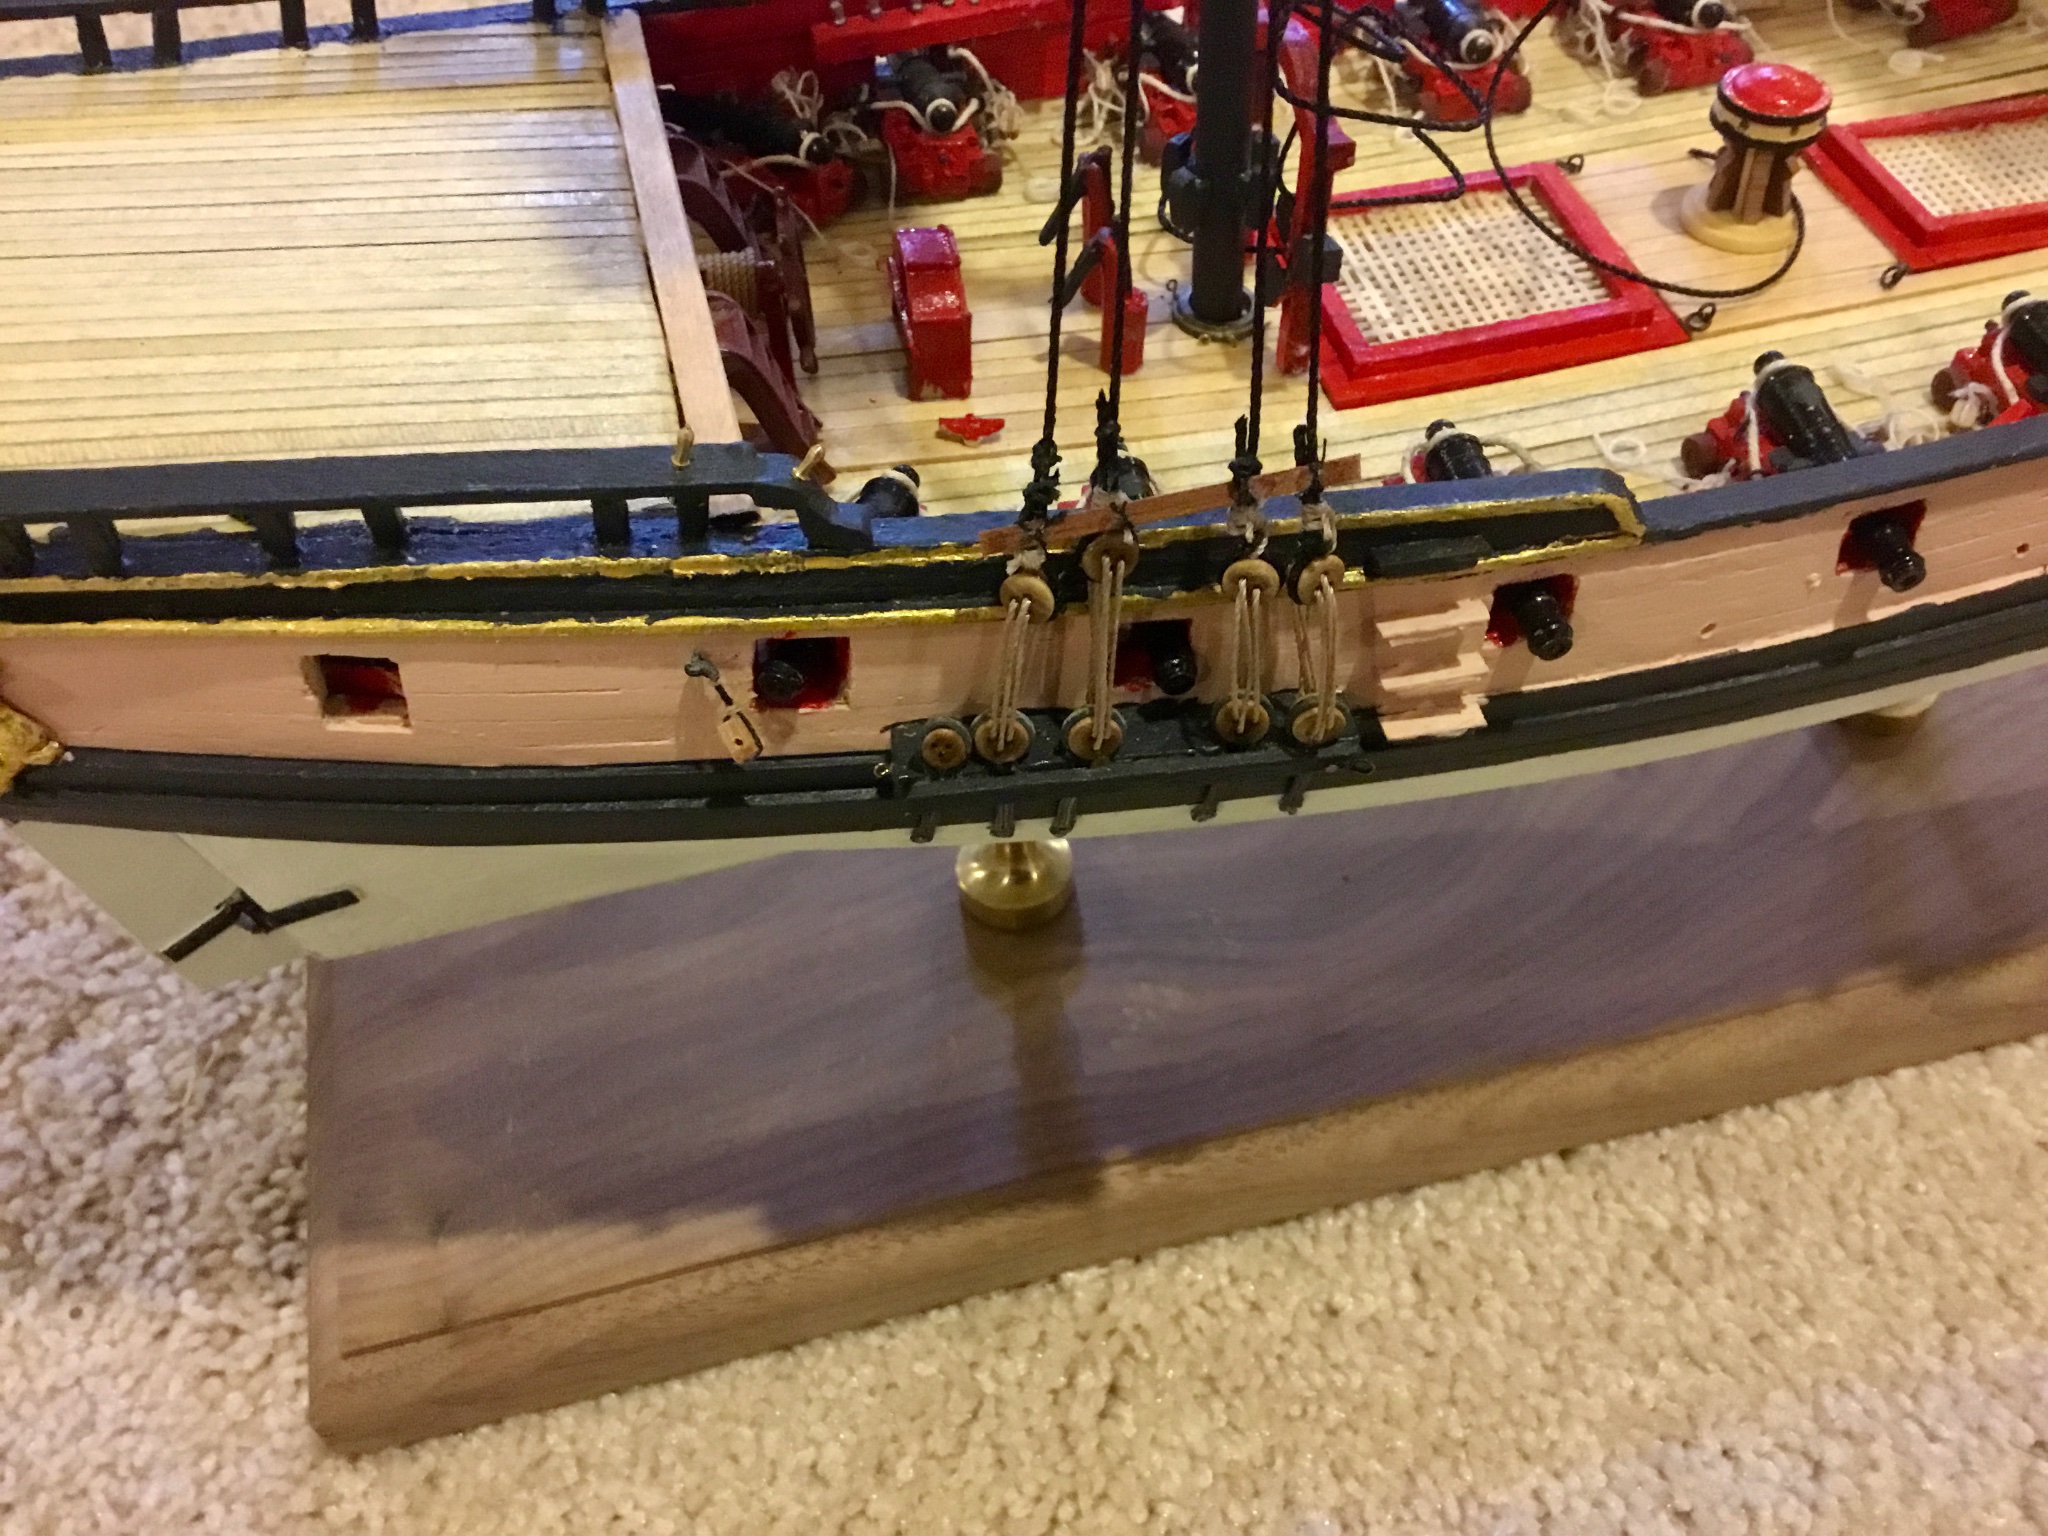
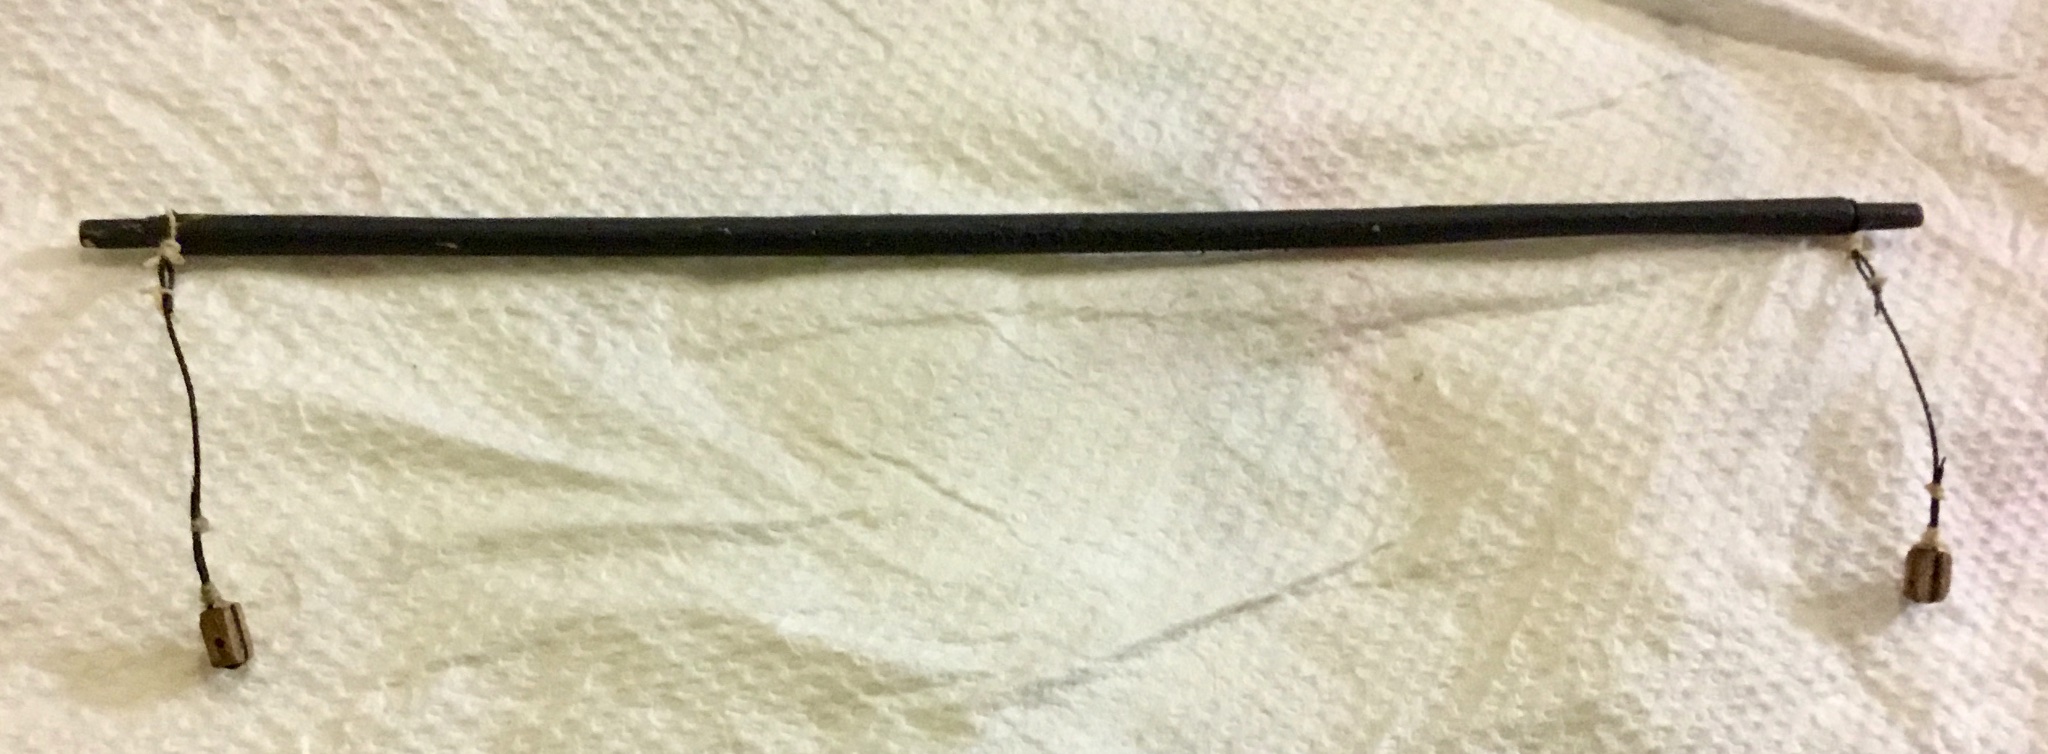
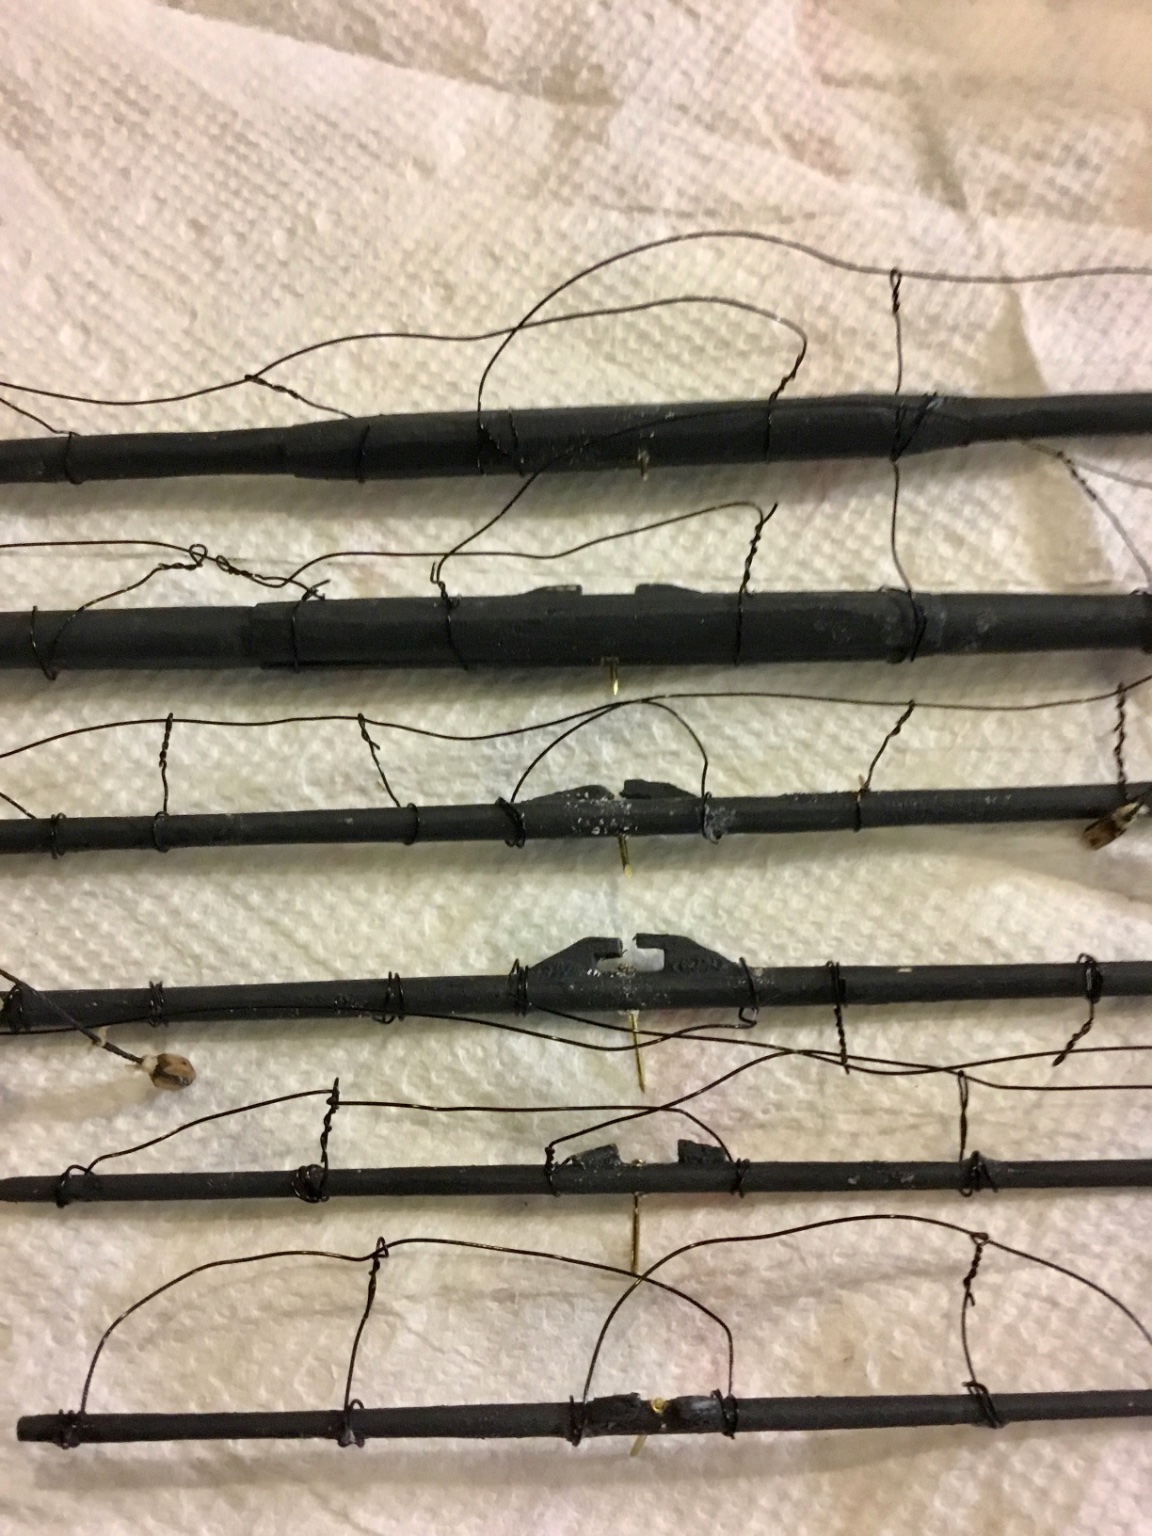
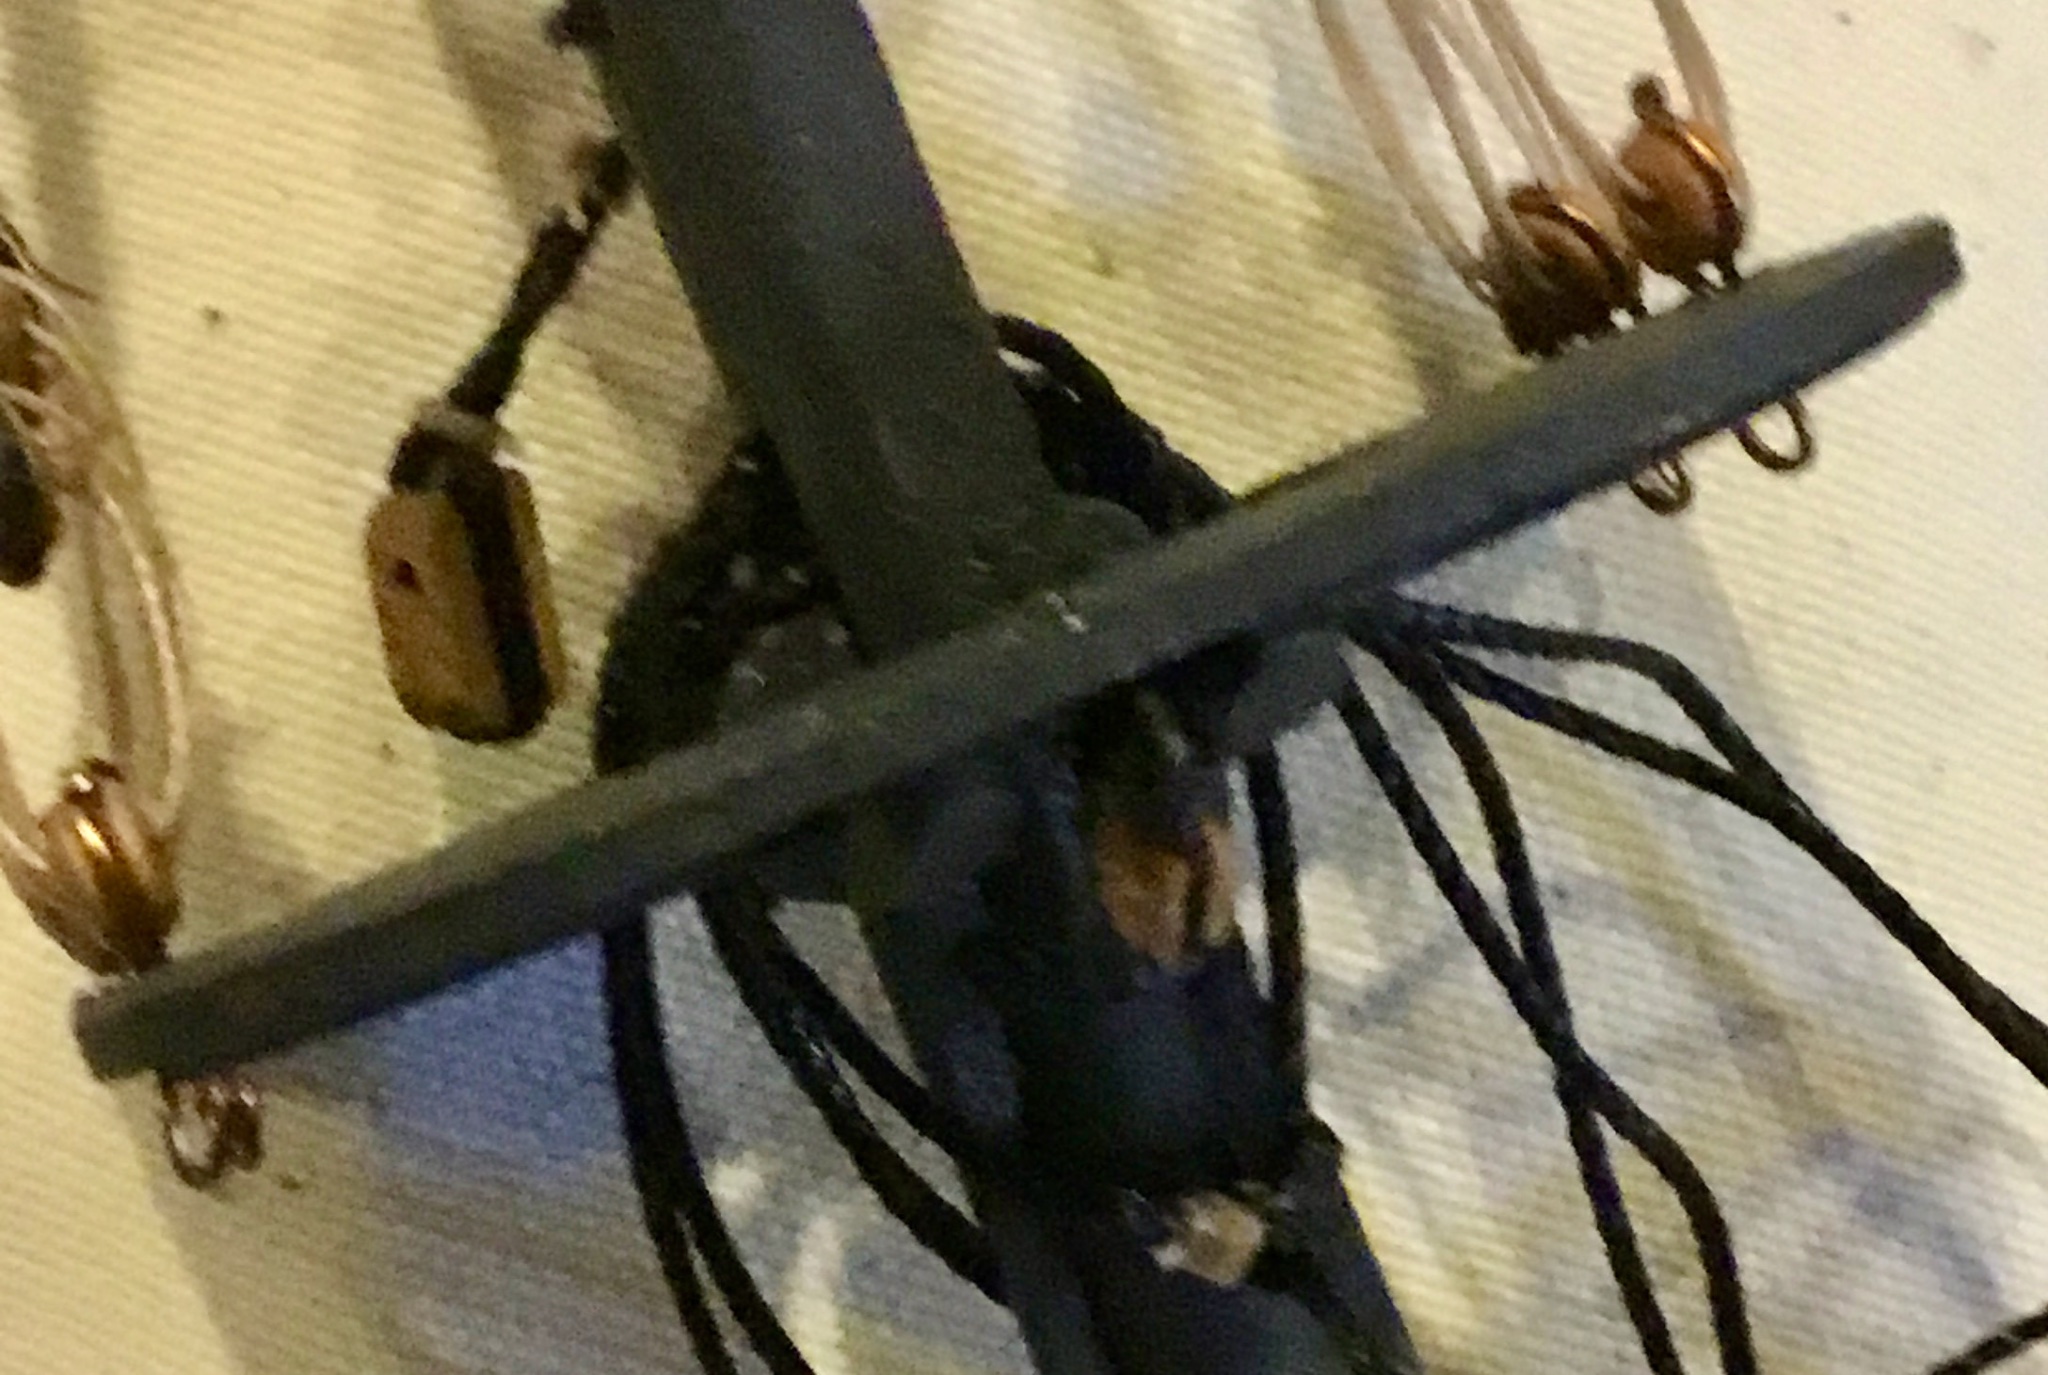
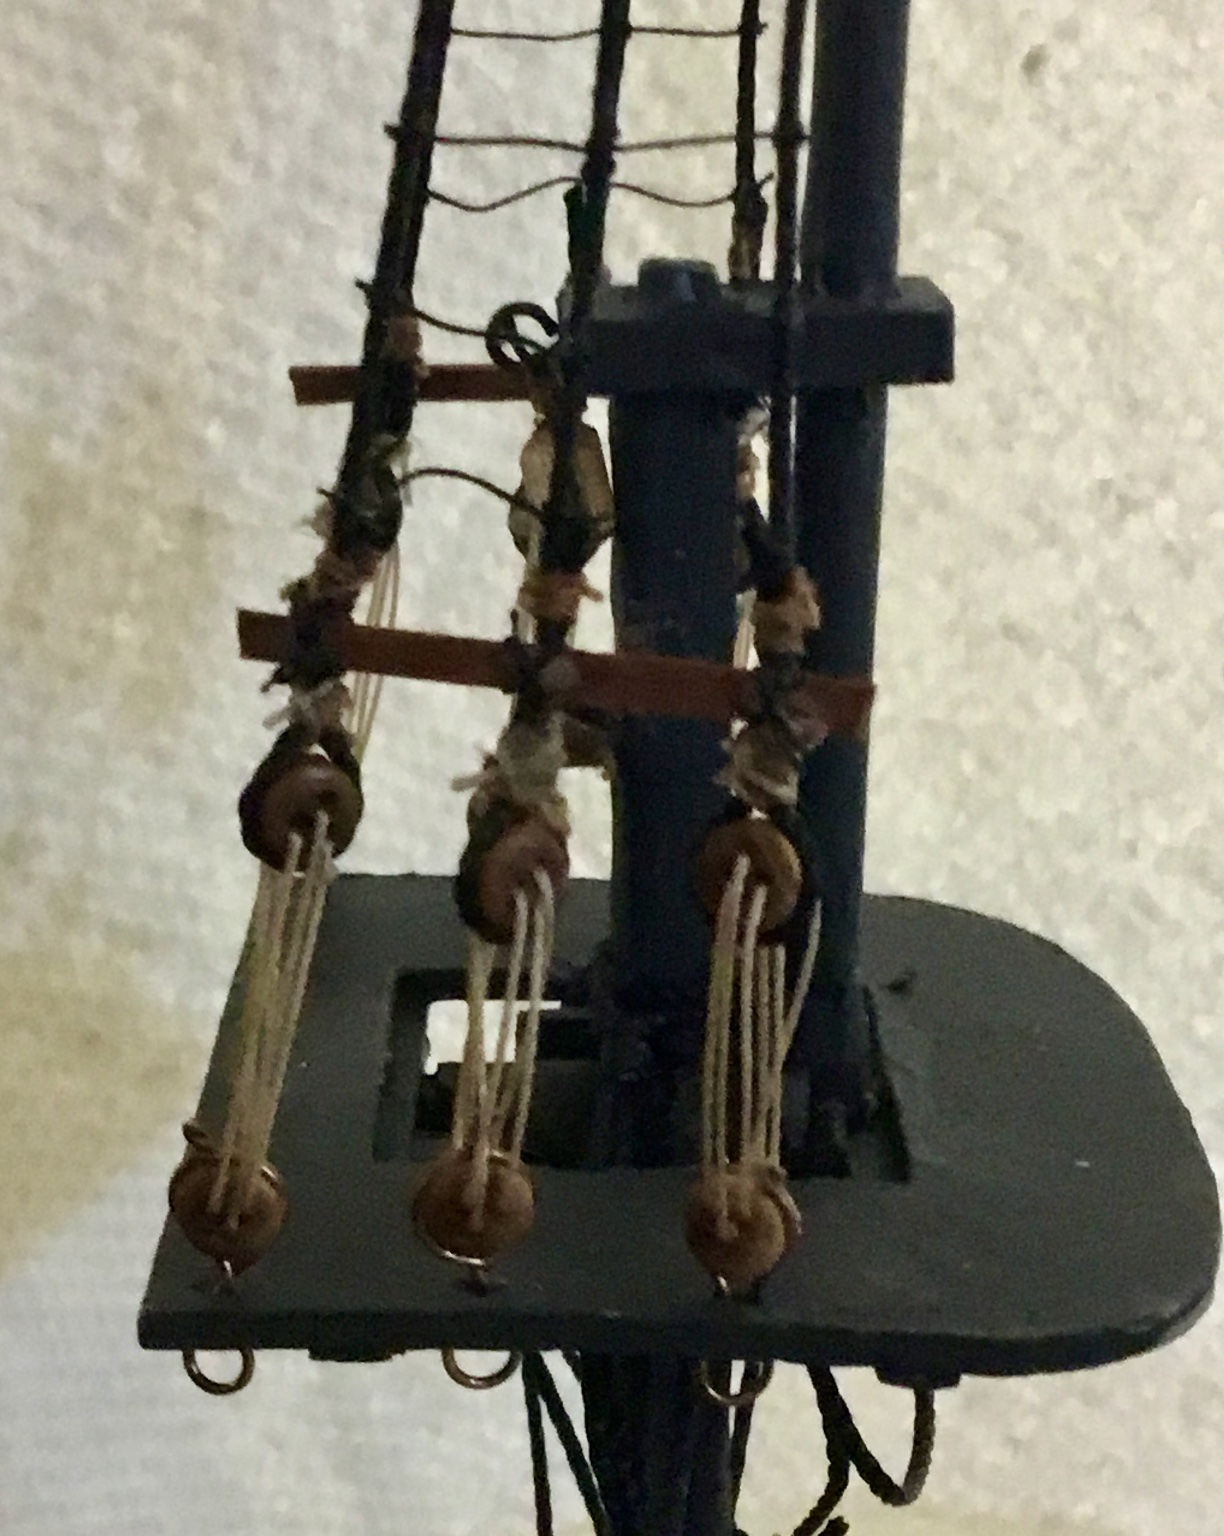
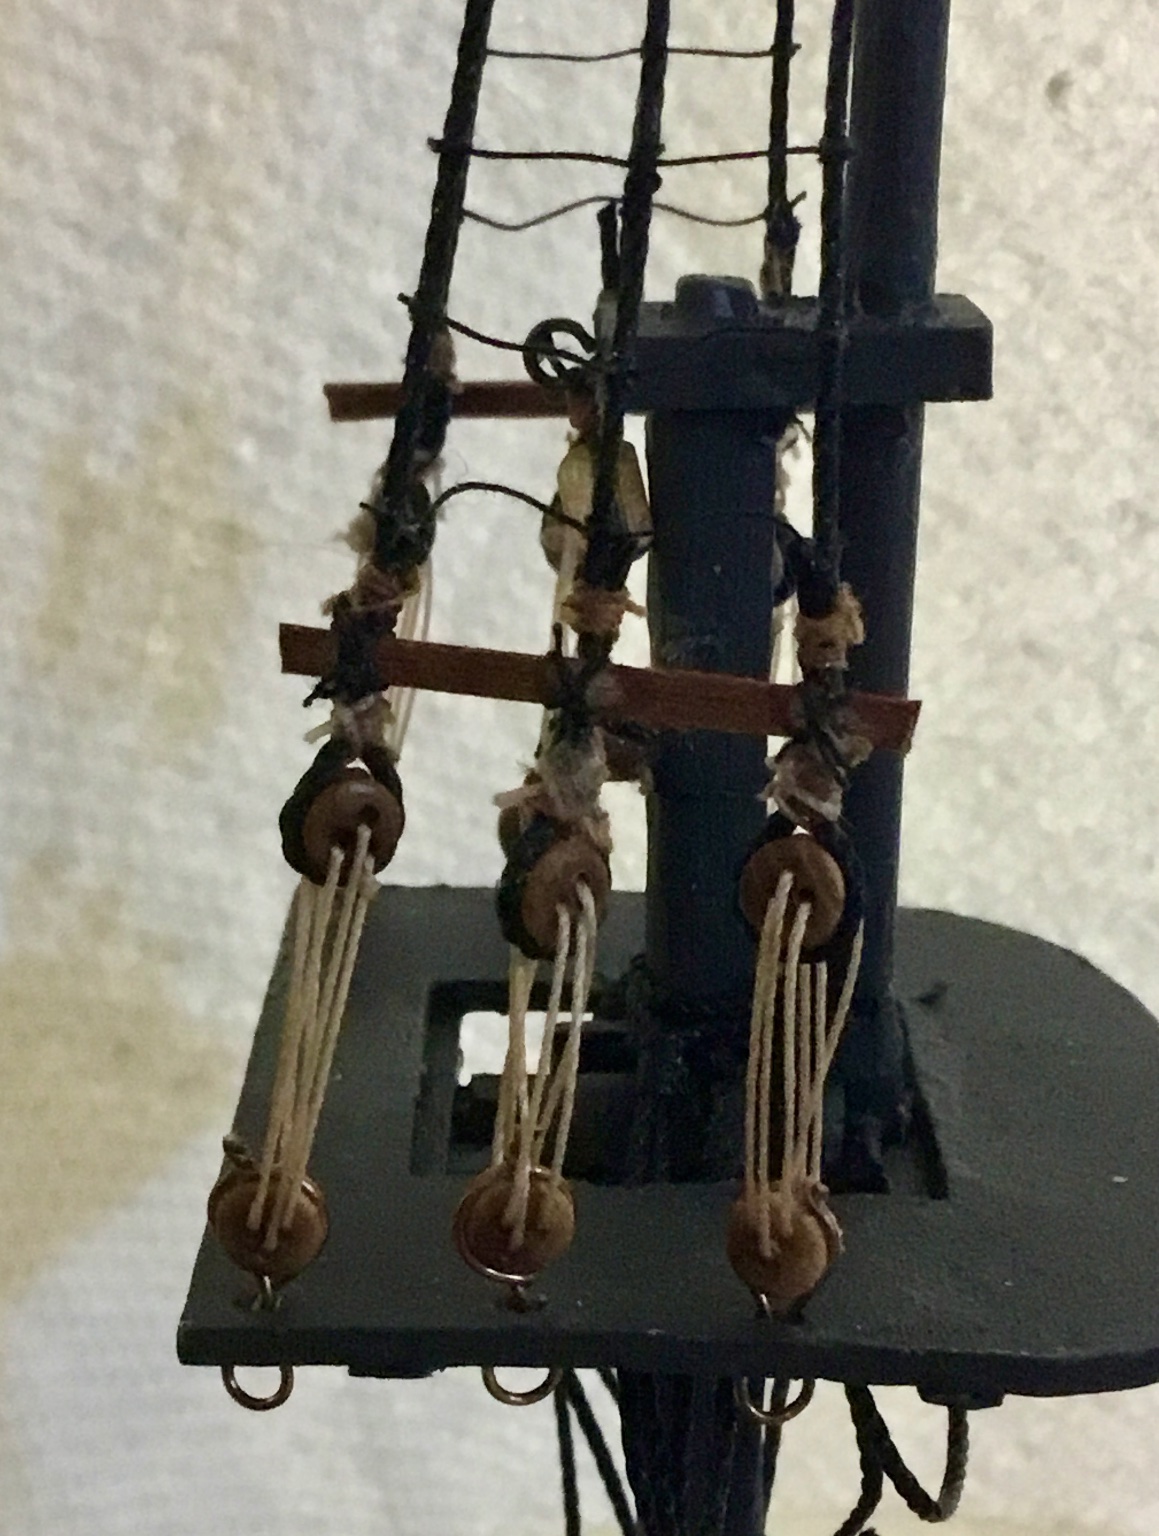
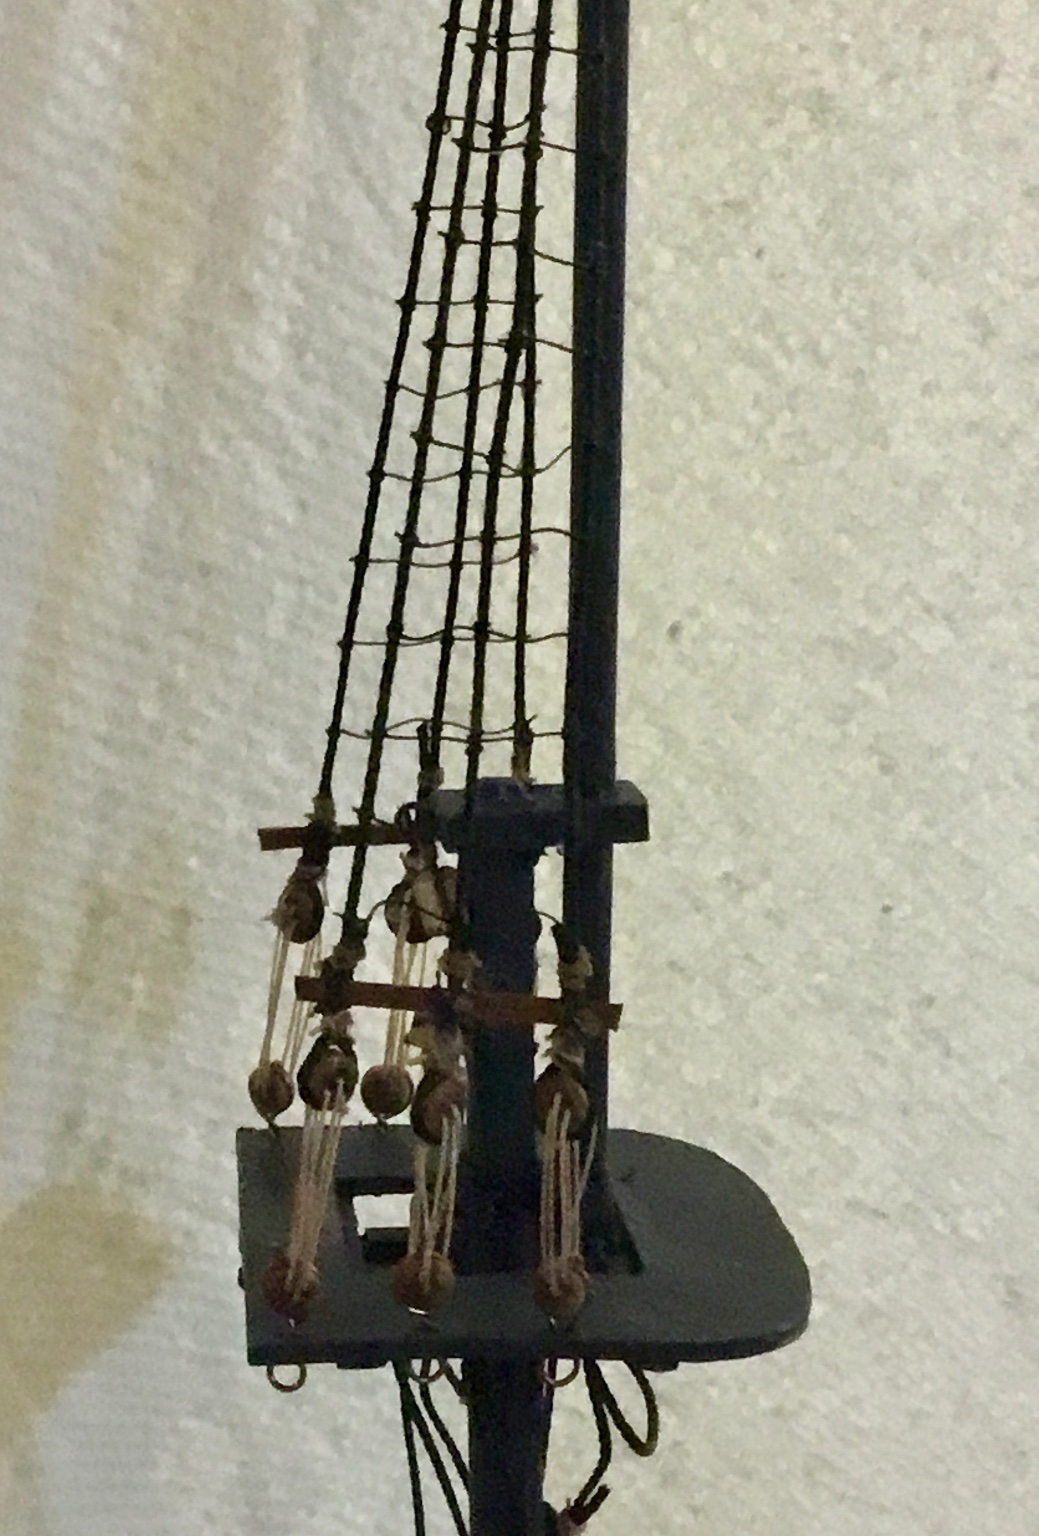
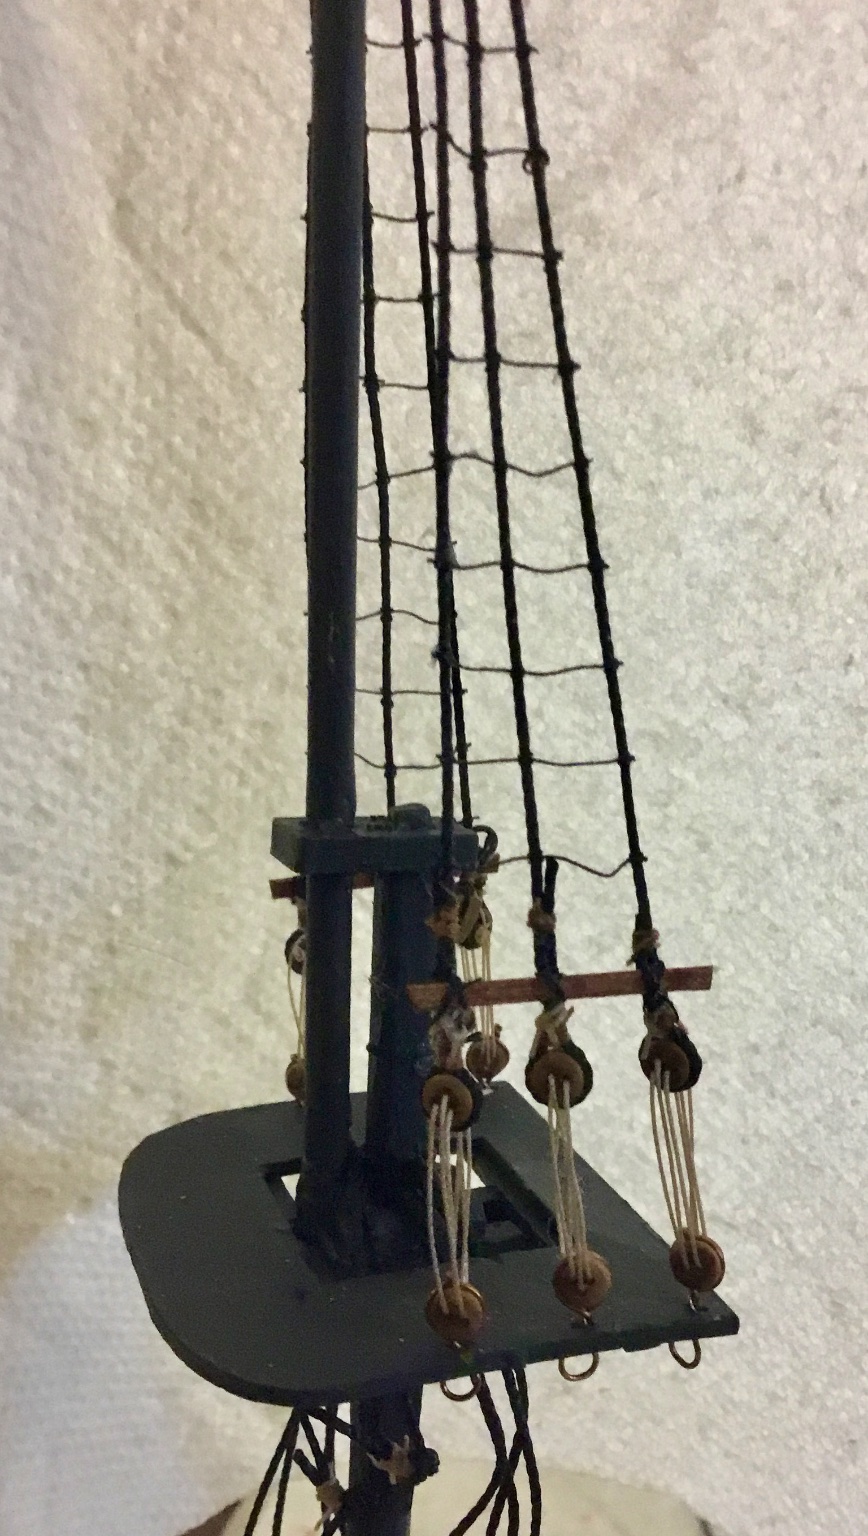
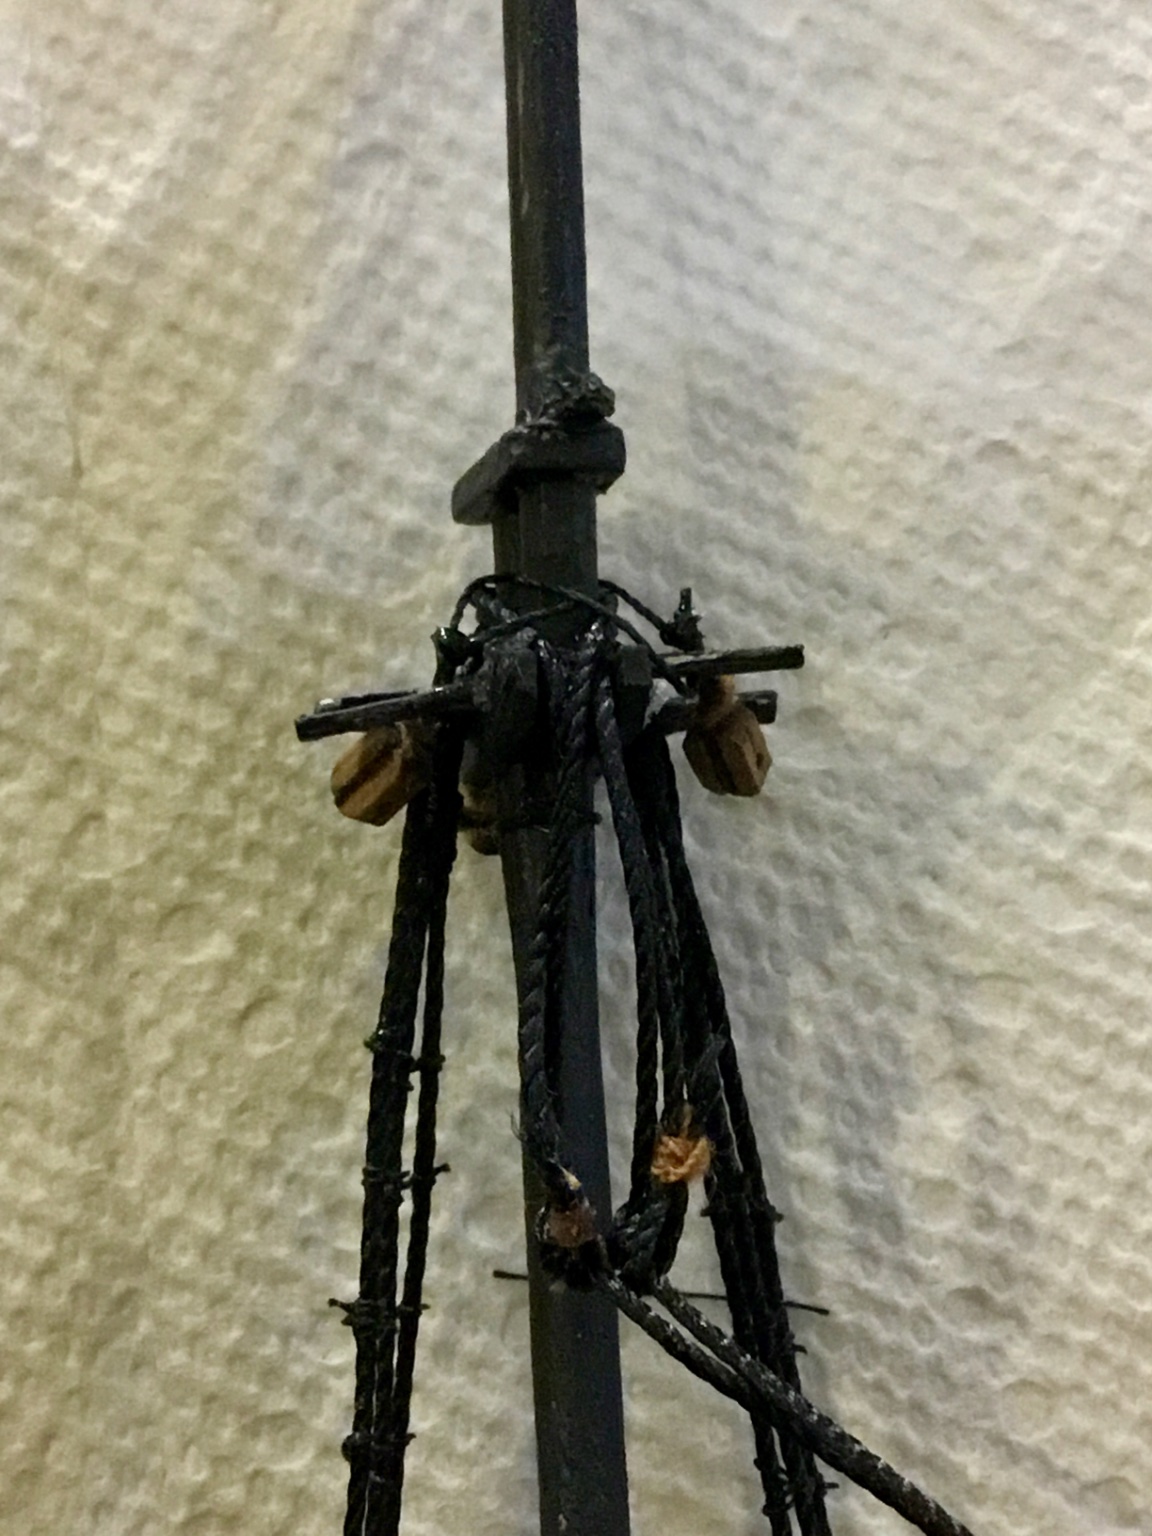
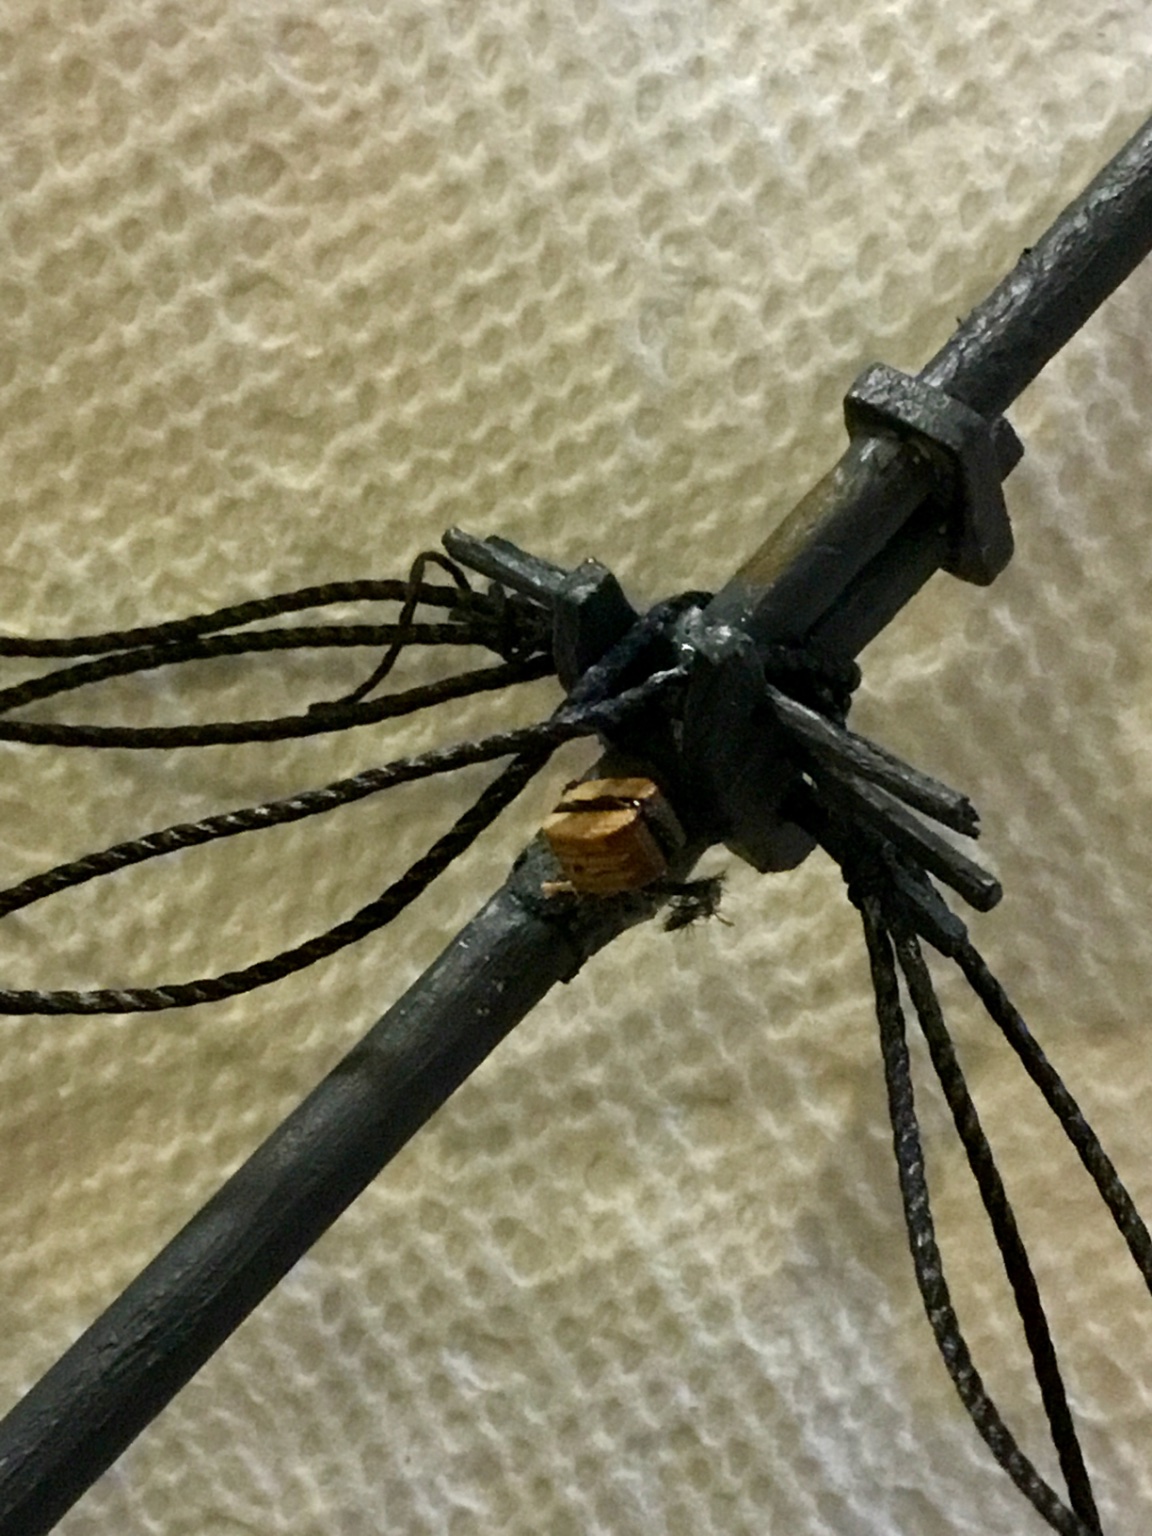
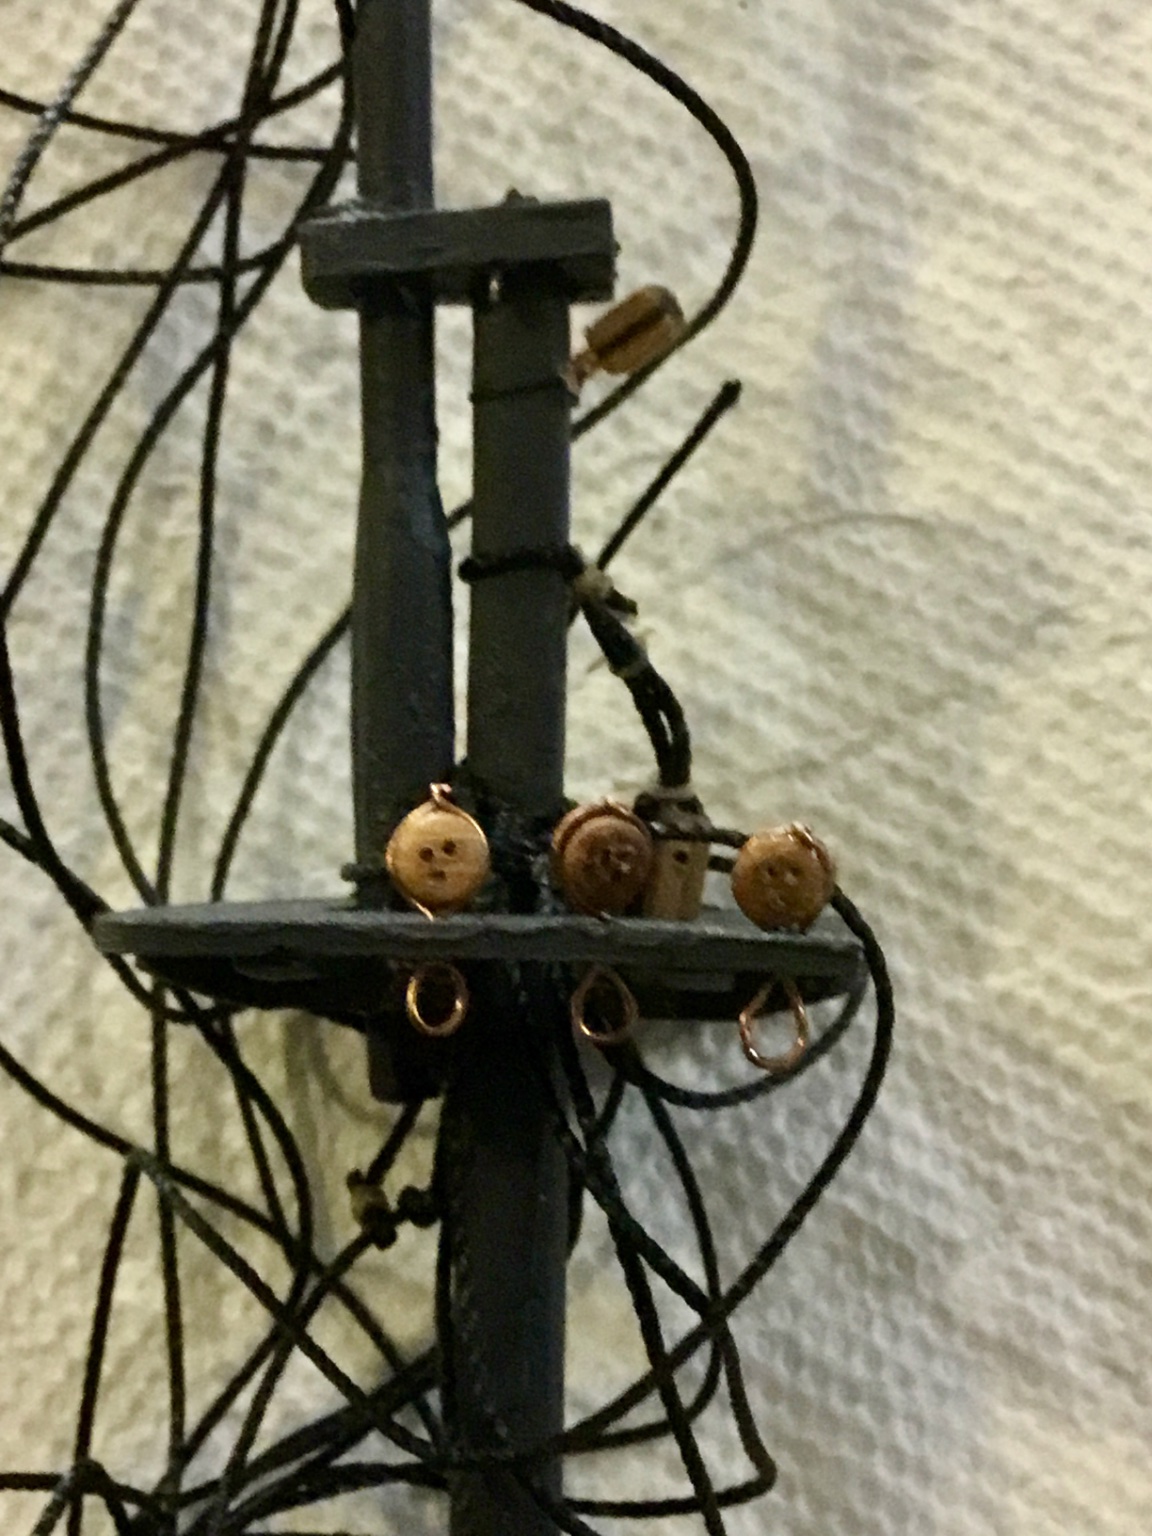
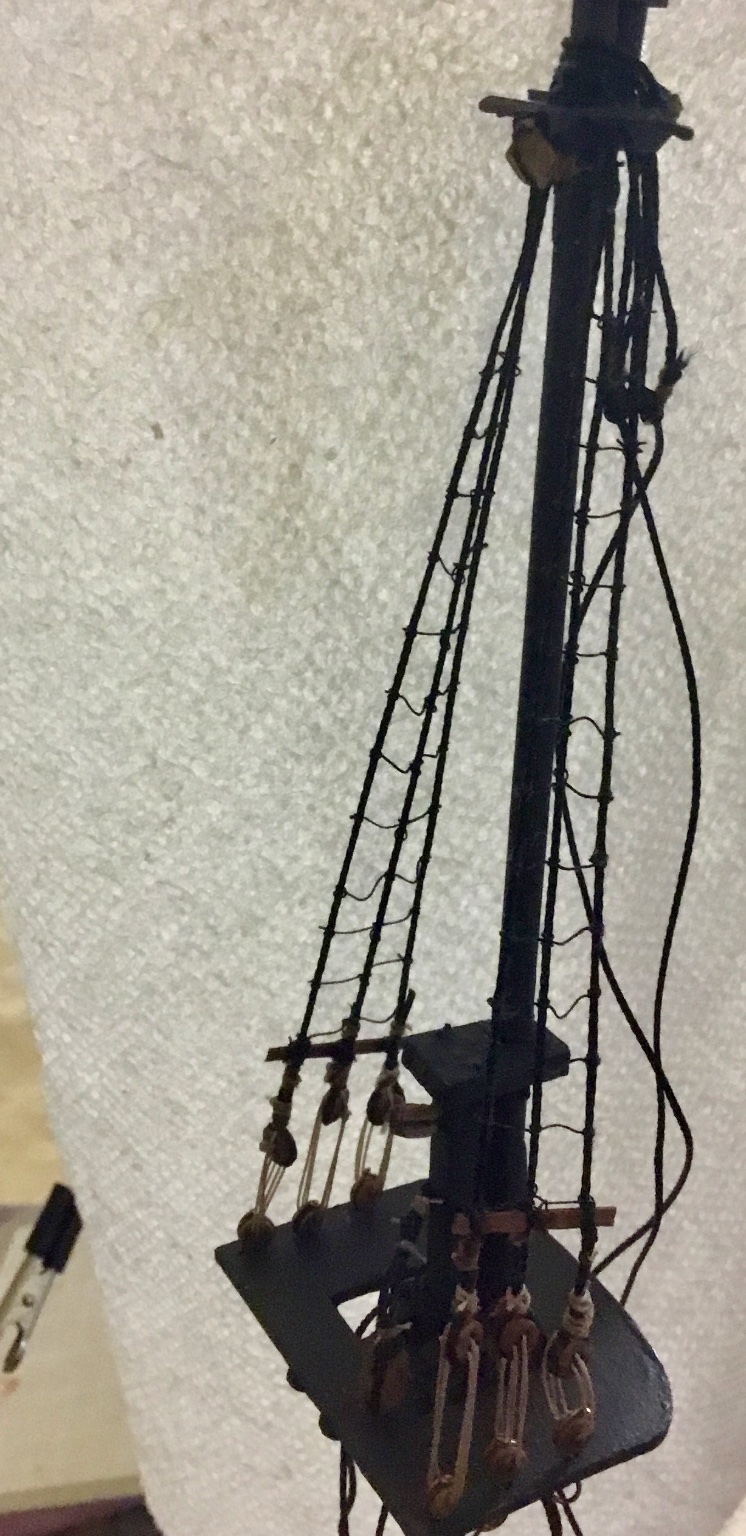
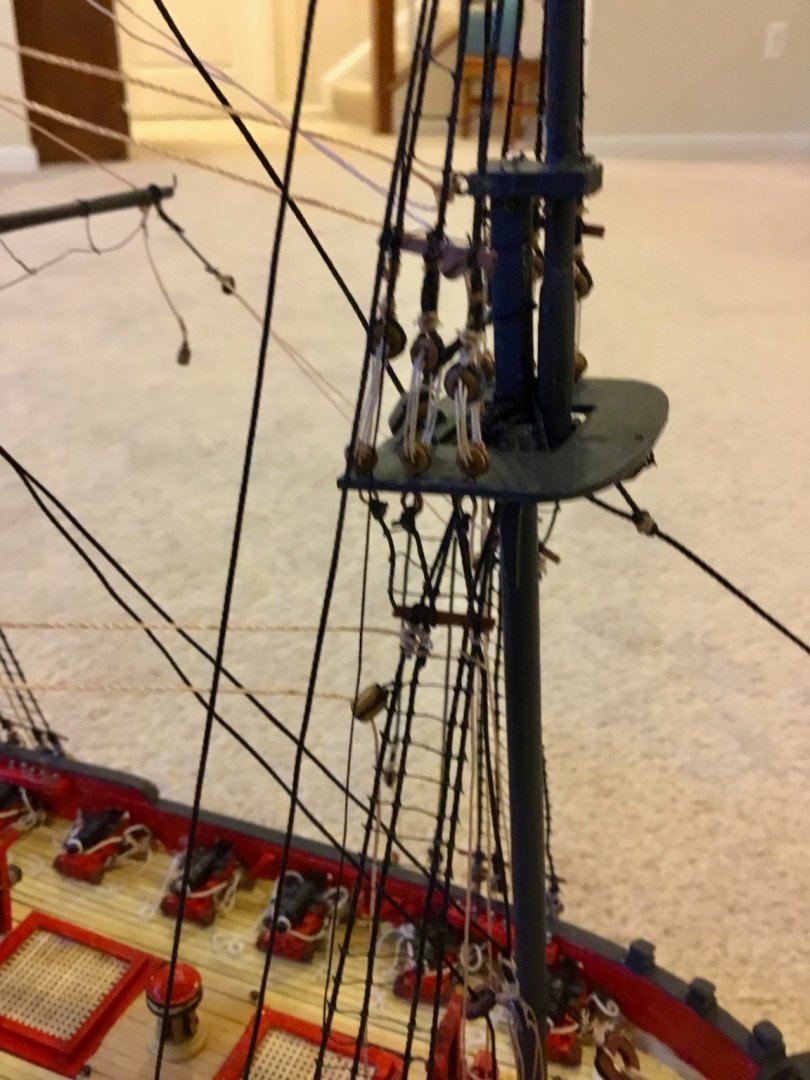
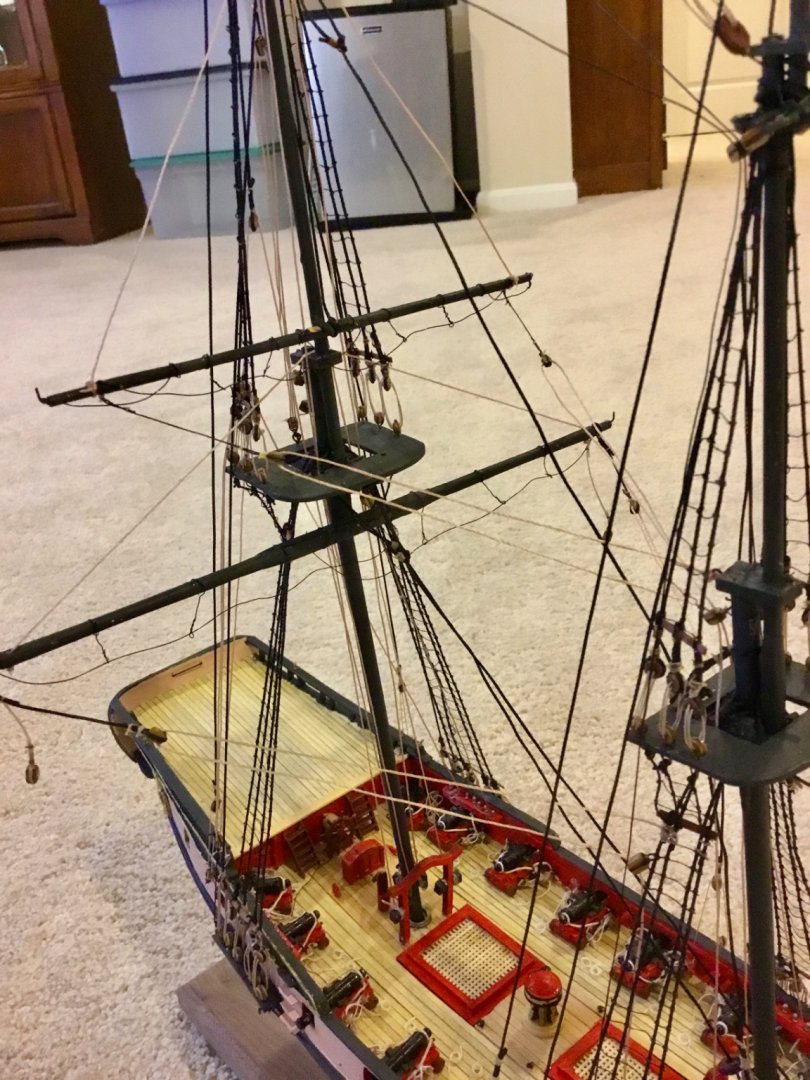
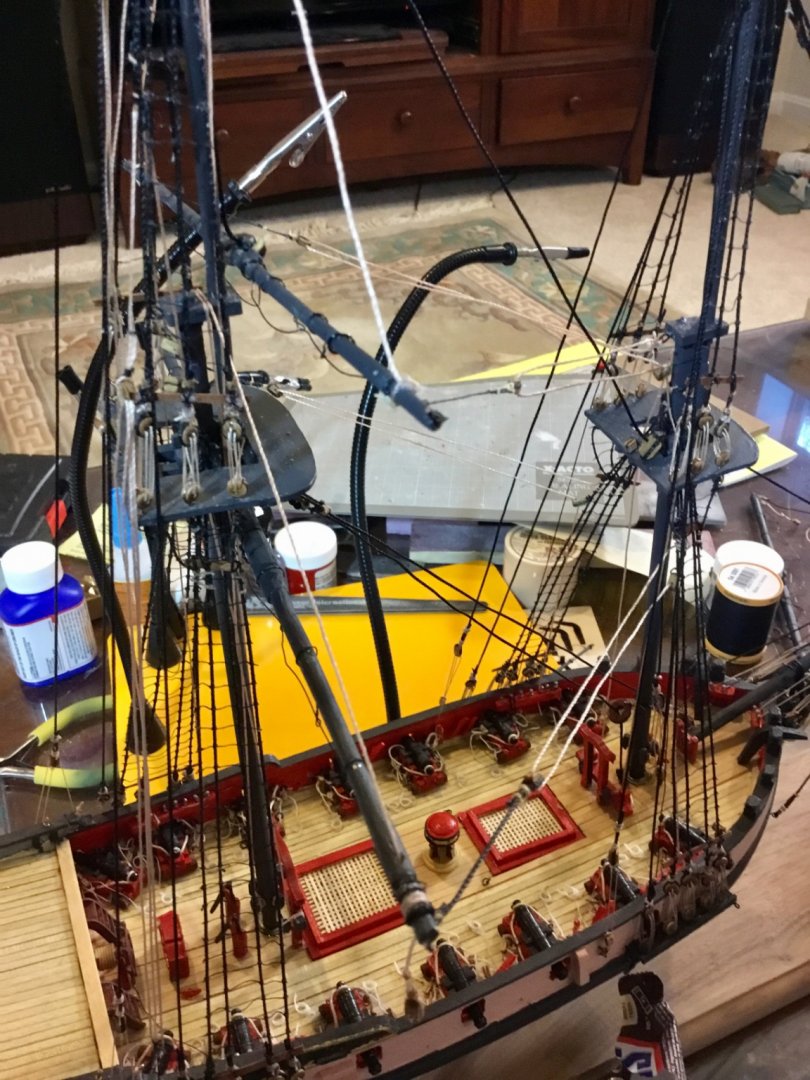
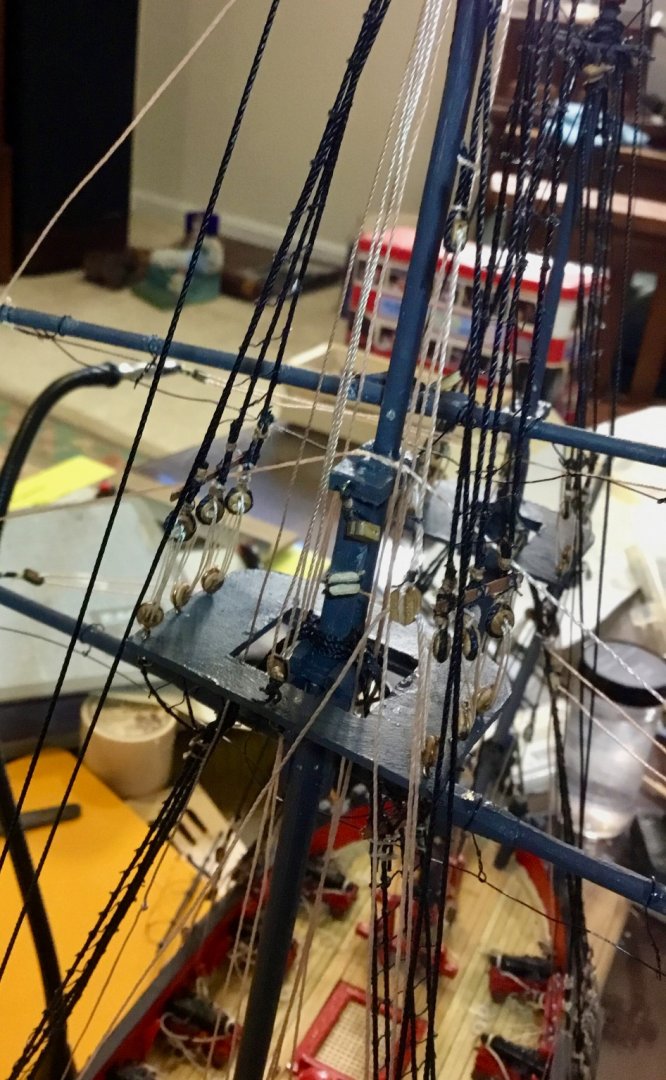
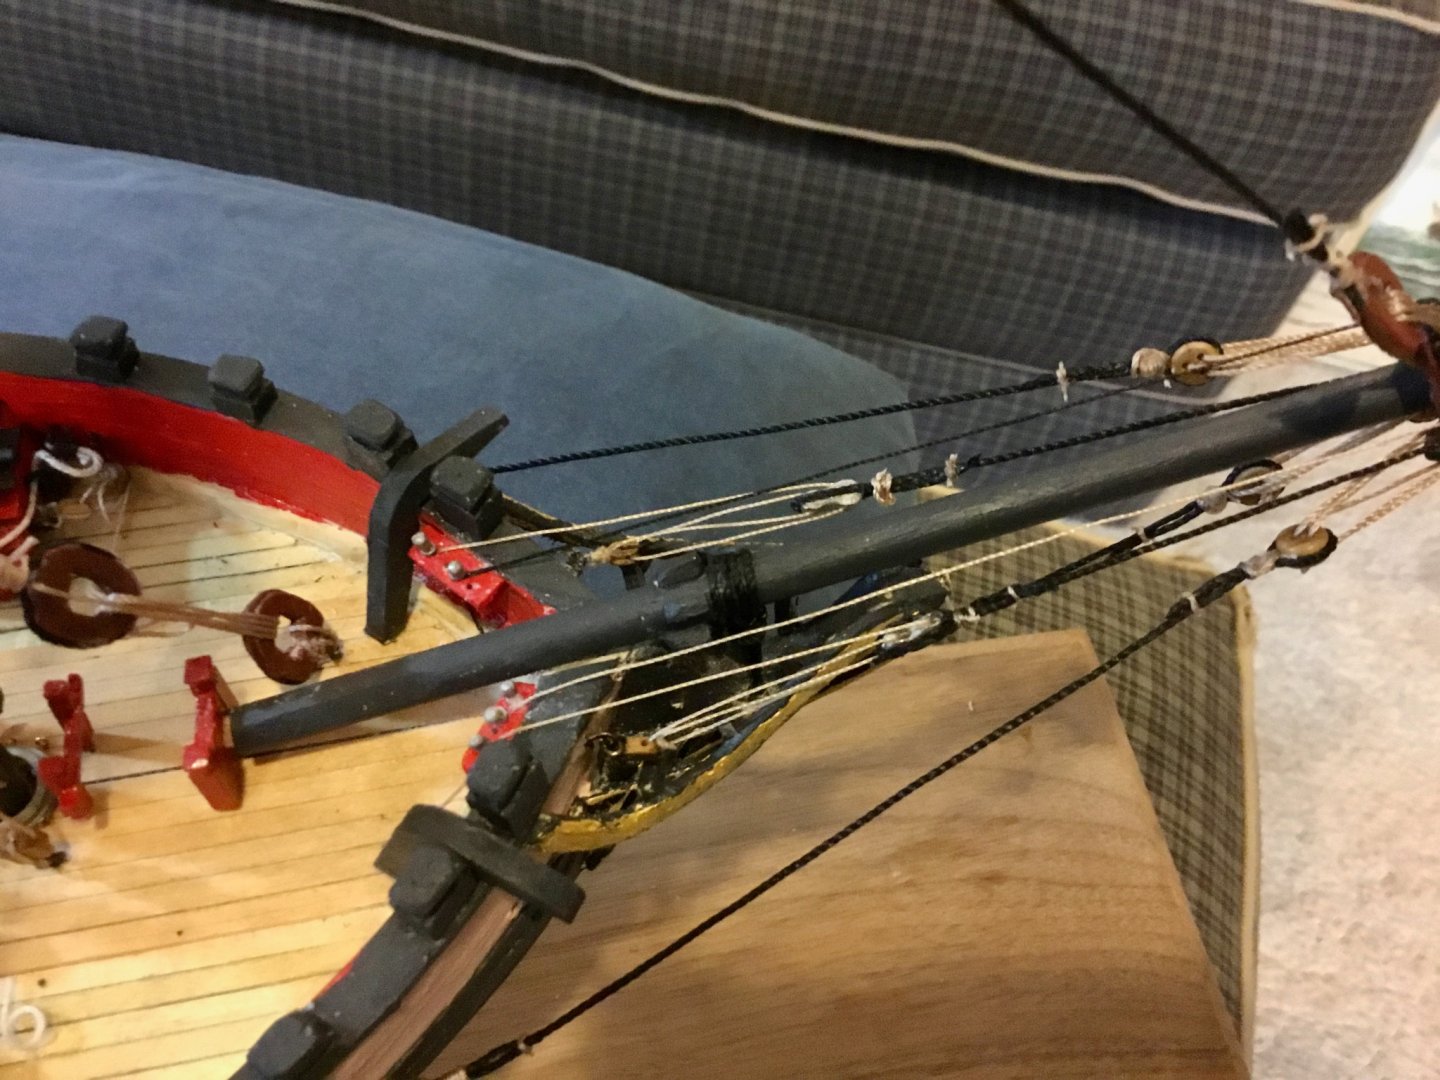
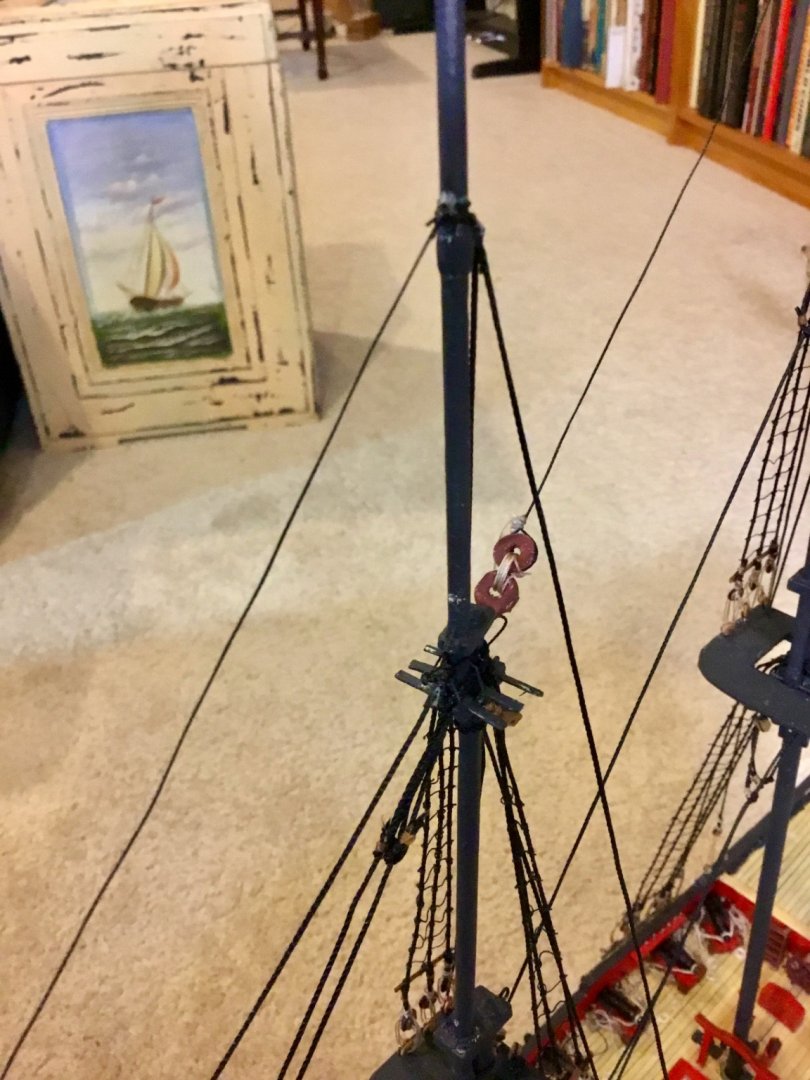
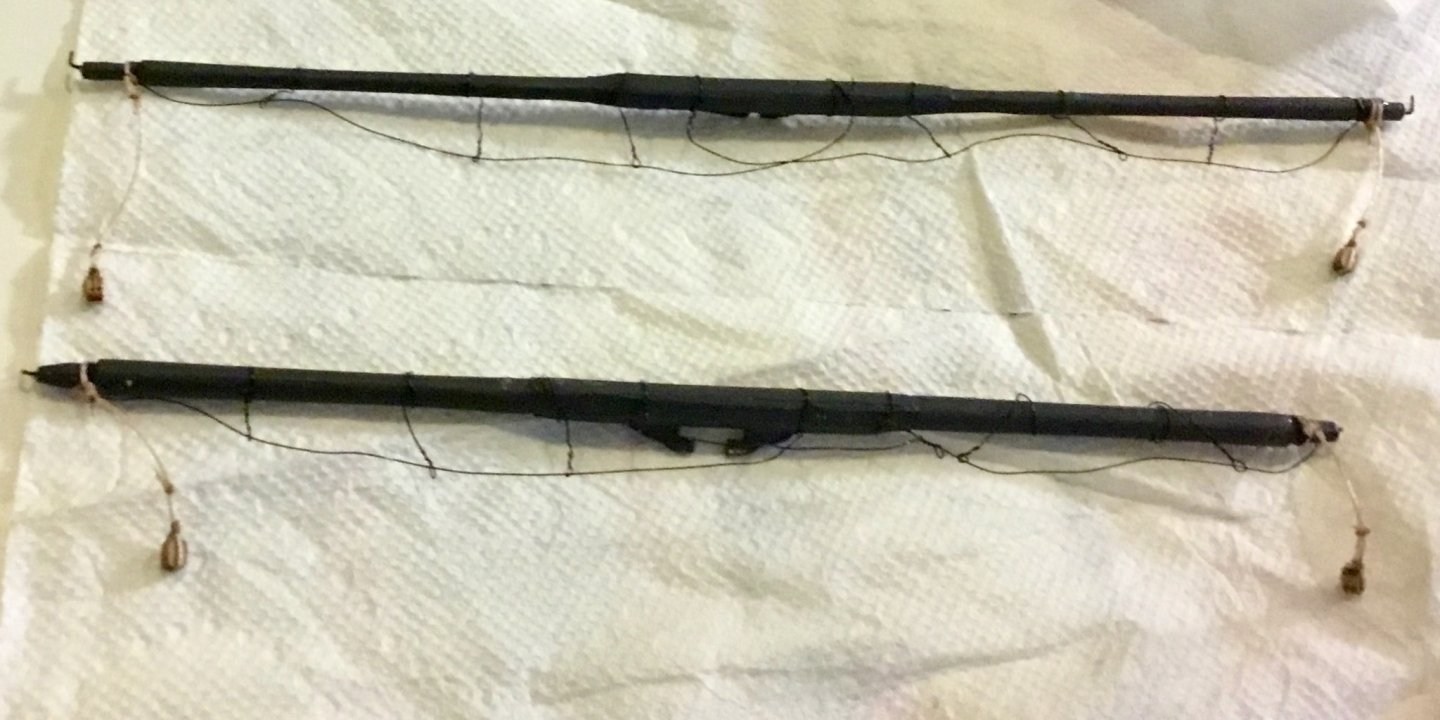
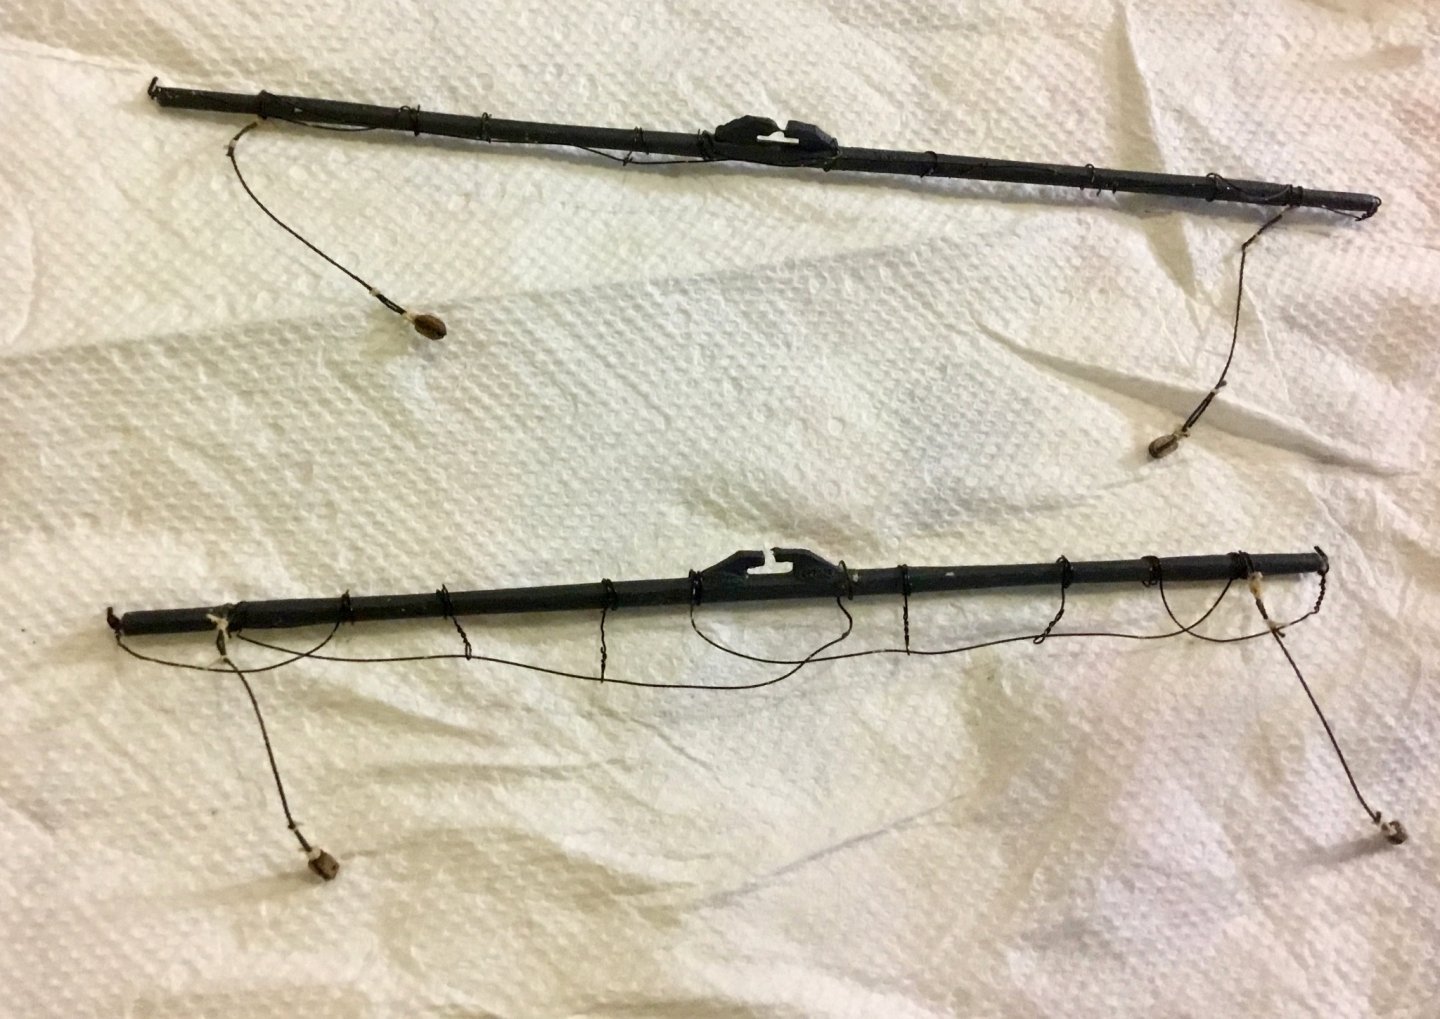
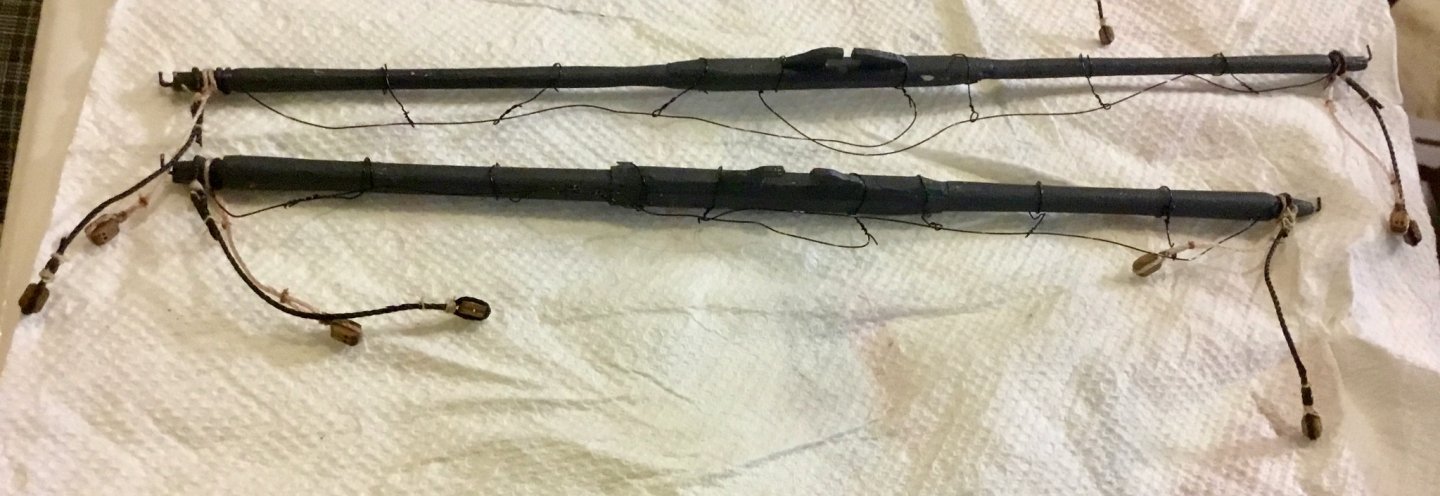
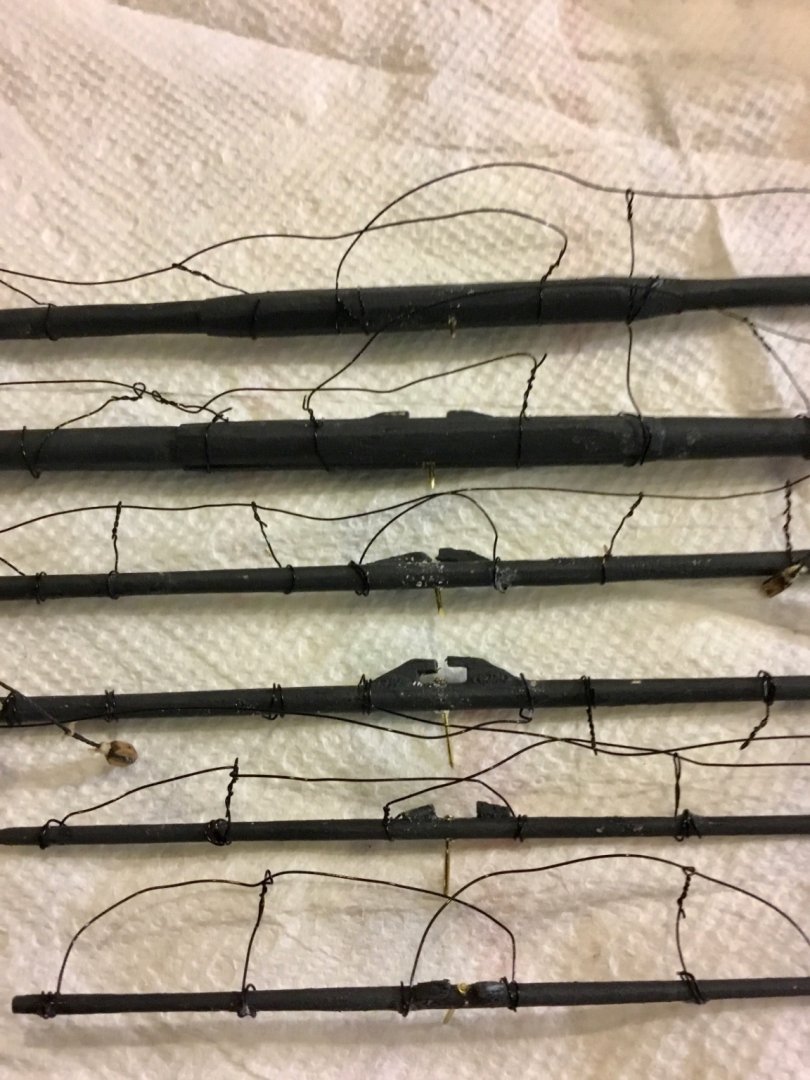
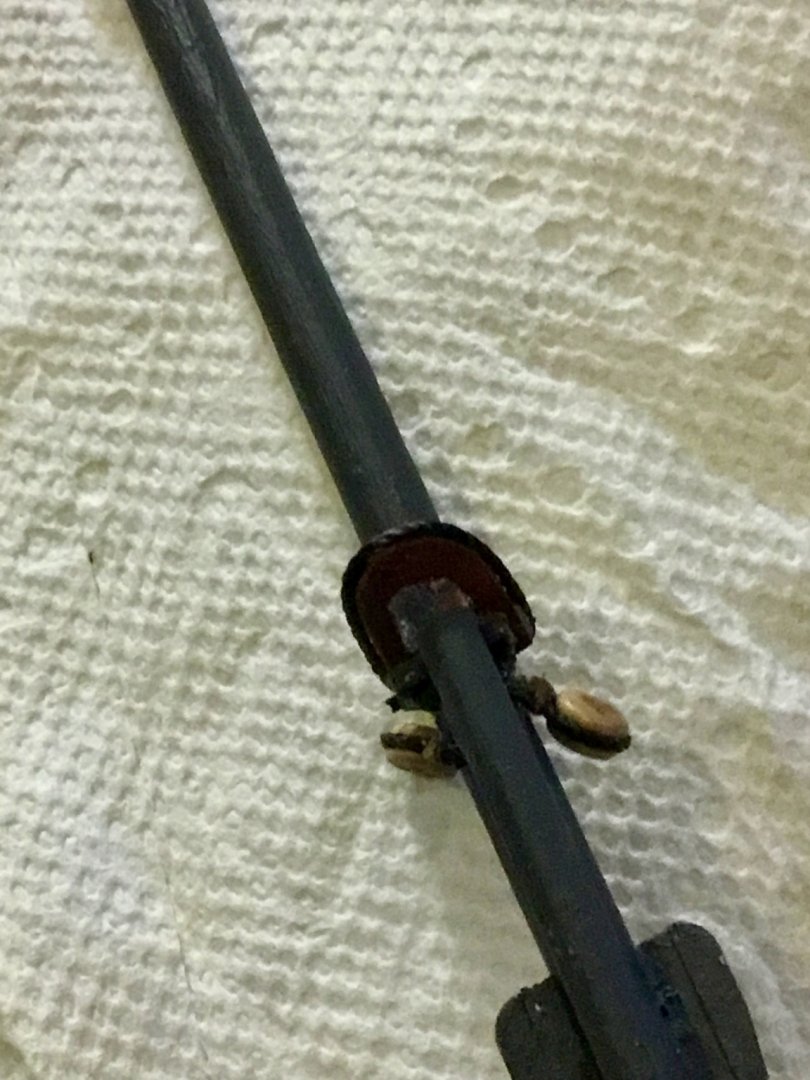
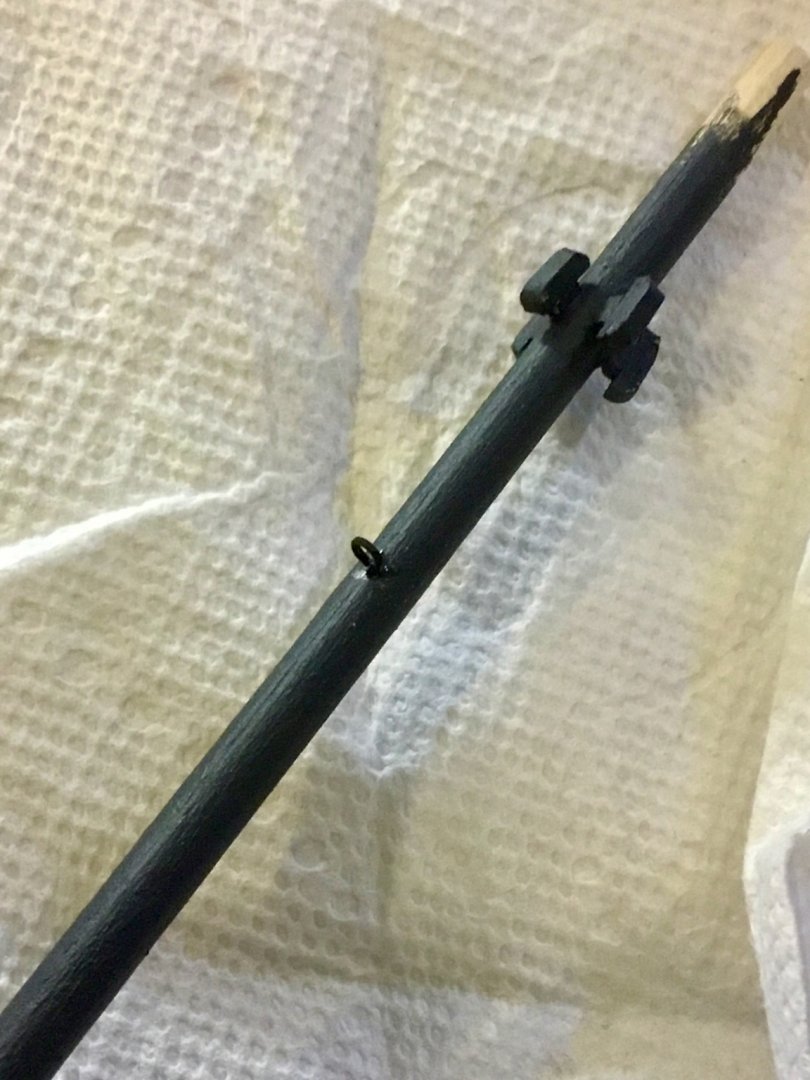
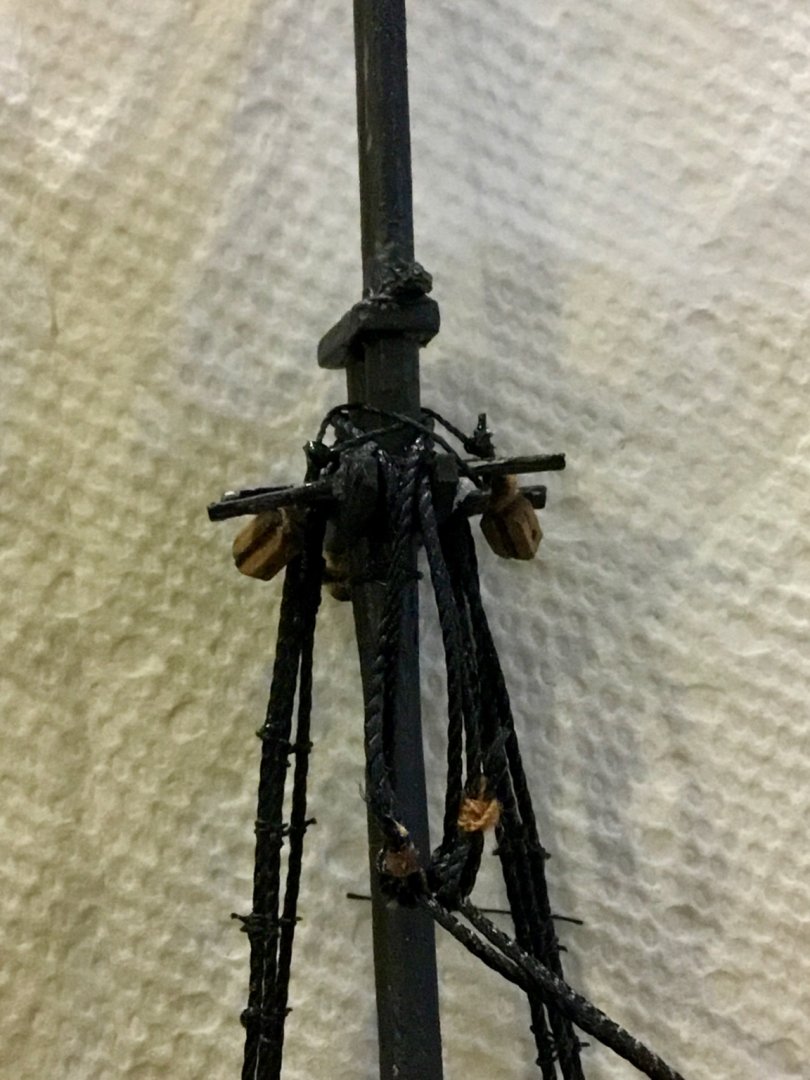
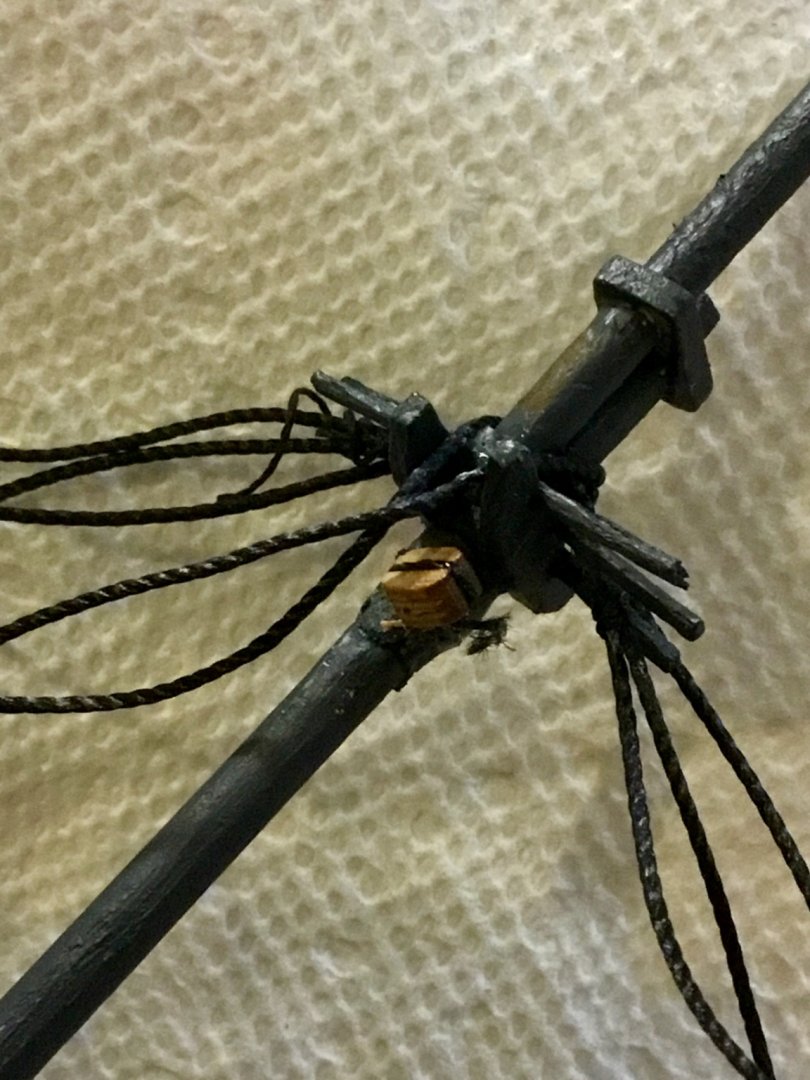
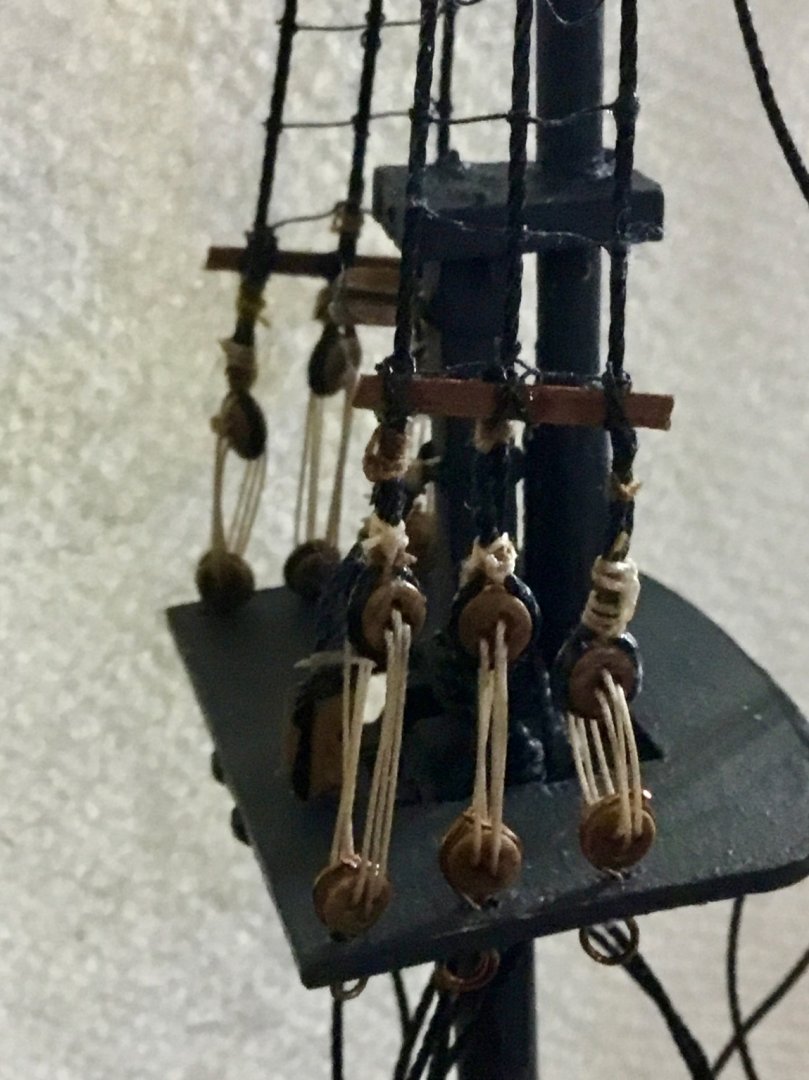
Completed rigging steps up thru 70 (Main Mast) now start rigging of Gaff. Didn't like how the futtock shrouds came out, but that's life. Will practice on prototypes before any future attempts that include them. Difficult to make photos now with all the lines going every which way and only my iPad to make photos.


-
Sounds like a good idea, I'll try using shellac. I had not thought about the weight of the line inducing a catenary curve to the span of the line.
-
Thanks for the advice, I've been running the line thru the pin hole from the top, thru the bottom seems more correct now that I think about it, though much more difficult to accomplish. What about lines that don't terminate at a belaying pin?
-
When I am rigging my models and I add a new line and make it taut I sometimes make a line that was previously added loose, which I cannot retighten without replacing it as it has already been glued. Sometimes I even end up slightly bending a mast out of line particularly near the top. Is there a proper method (i.e. order) in installing the lines or method of maintaining connections without gluing until all or most of the lines have been installed. My outcome generally looks OK, especially to the uninitiated viewer but is not as near perfect as I would like it to be.
-
Petrejus, E.W. Modelling the brig-of-war "IRENE"
-
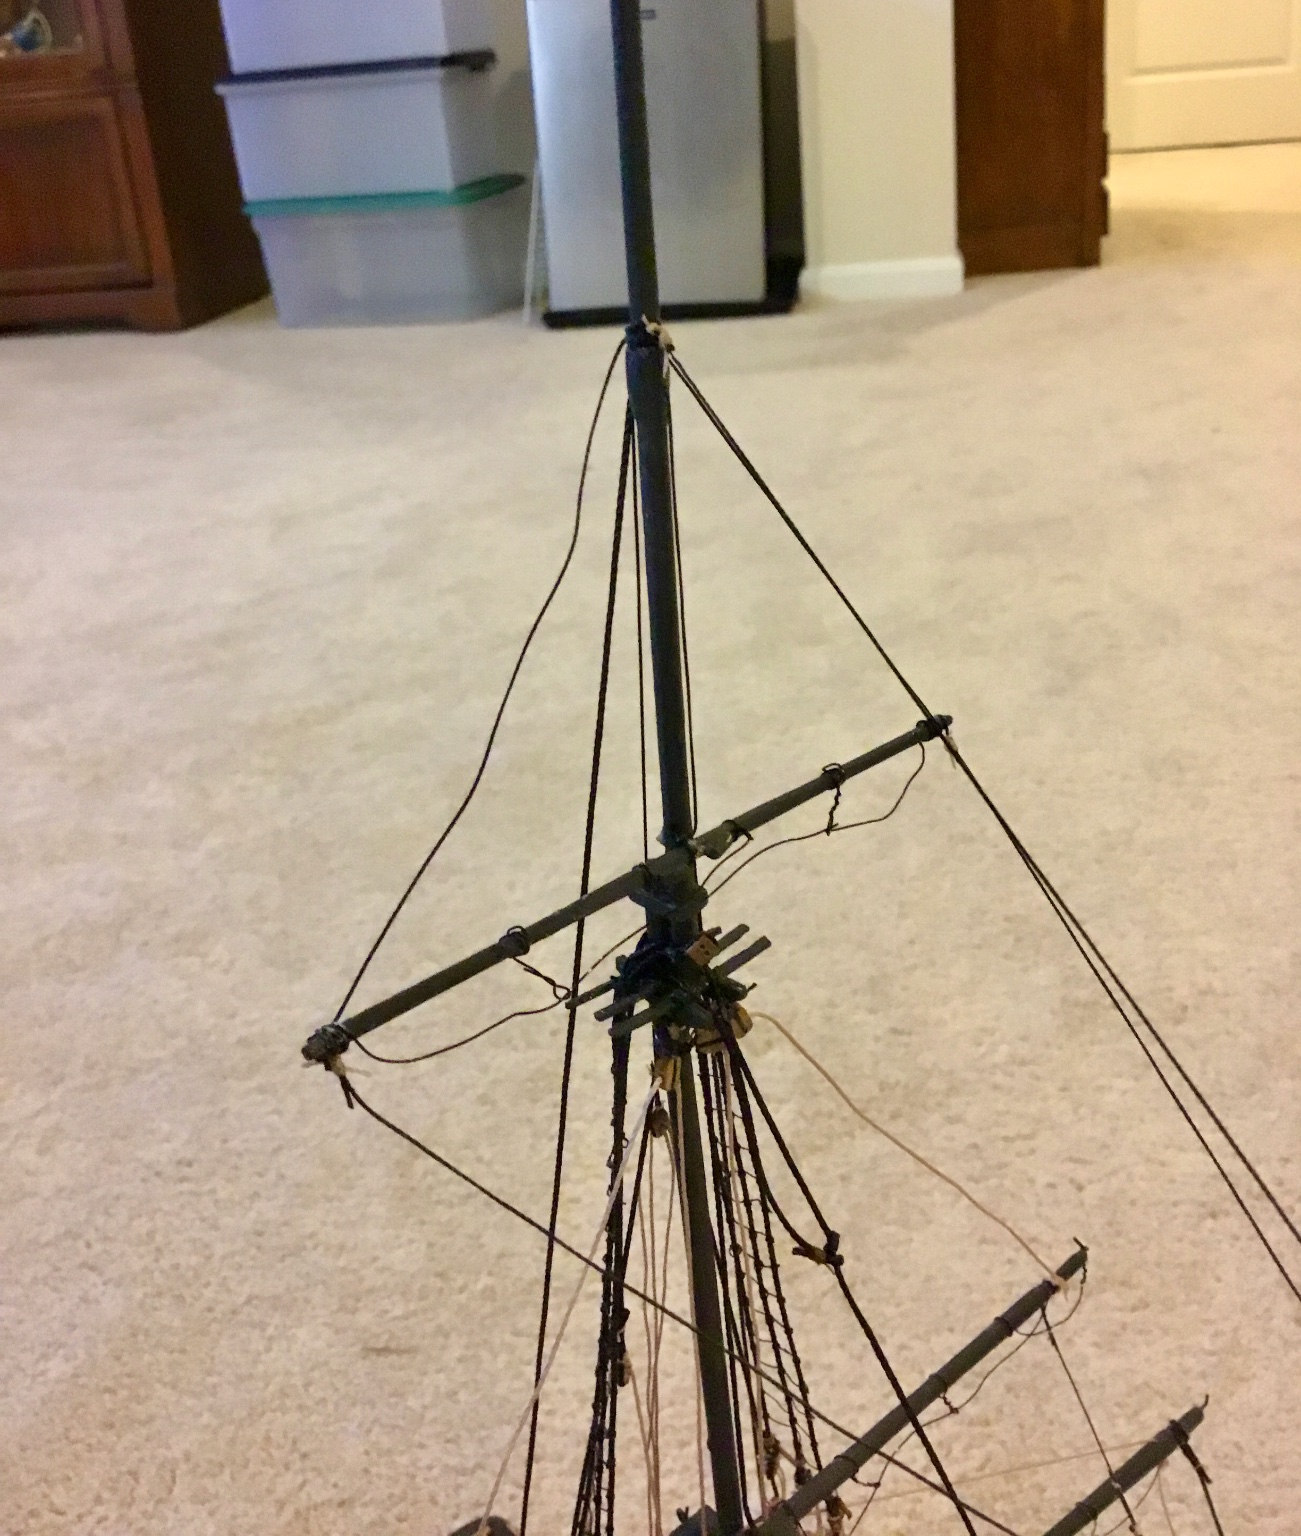
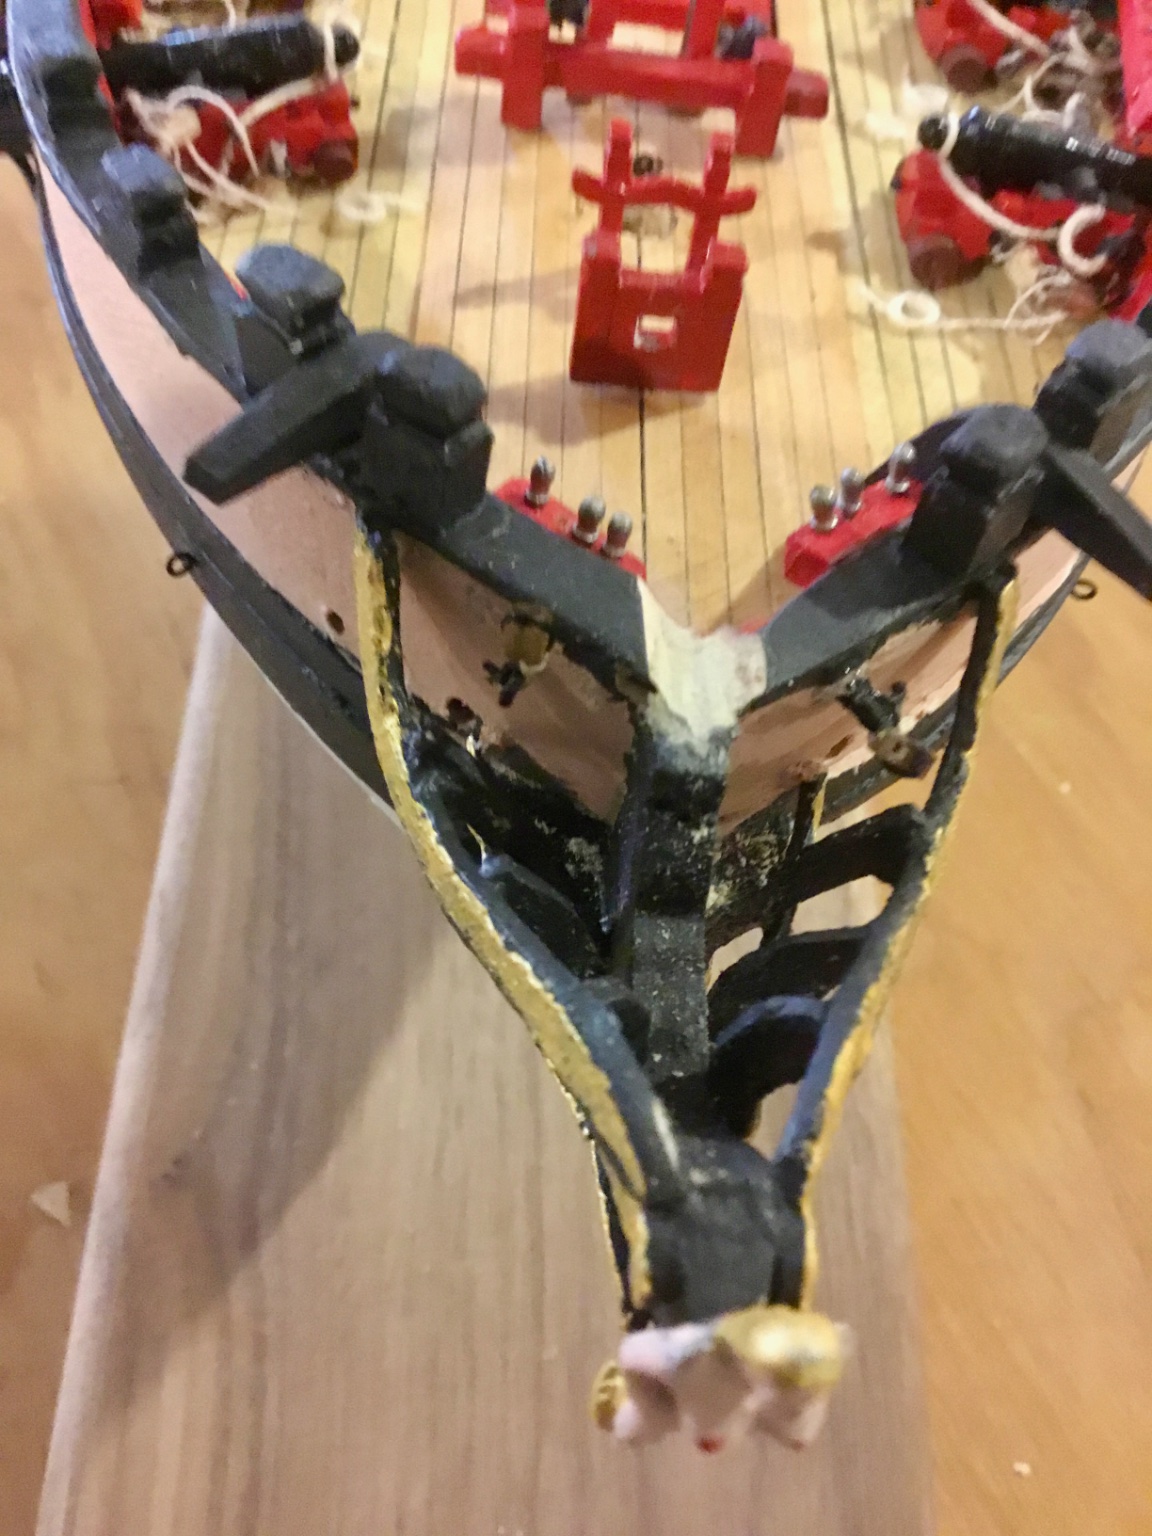
Completed rigging steps up thru number 58 on todo list. Installed fore and main topmast backstays; for and main topgallant backstays; bowsprit and gammoning; fore stay, fore topmast stays; fore topgallant stay; jib stay; bowsprit shrouds; bob stay; main stay; main preventer stay; main topmast stay; and main topgallant stay. Started futtock shrouds. I have never done these before so I hope they turn out OK.


- 24 replies
-
- 1
-
-
- Fair American
- Model Shipways
- (and 1 more)
-
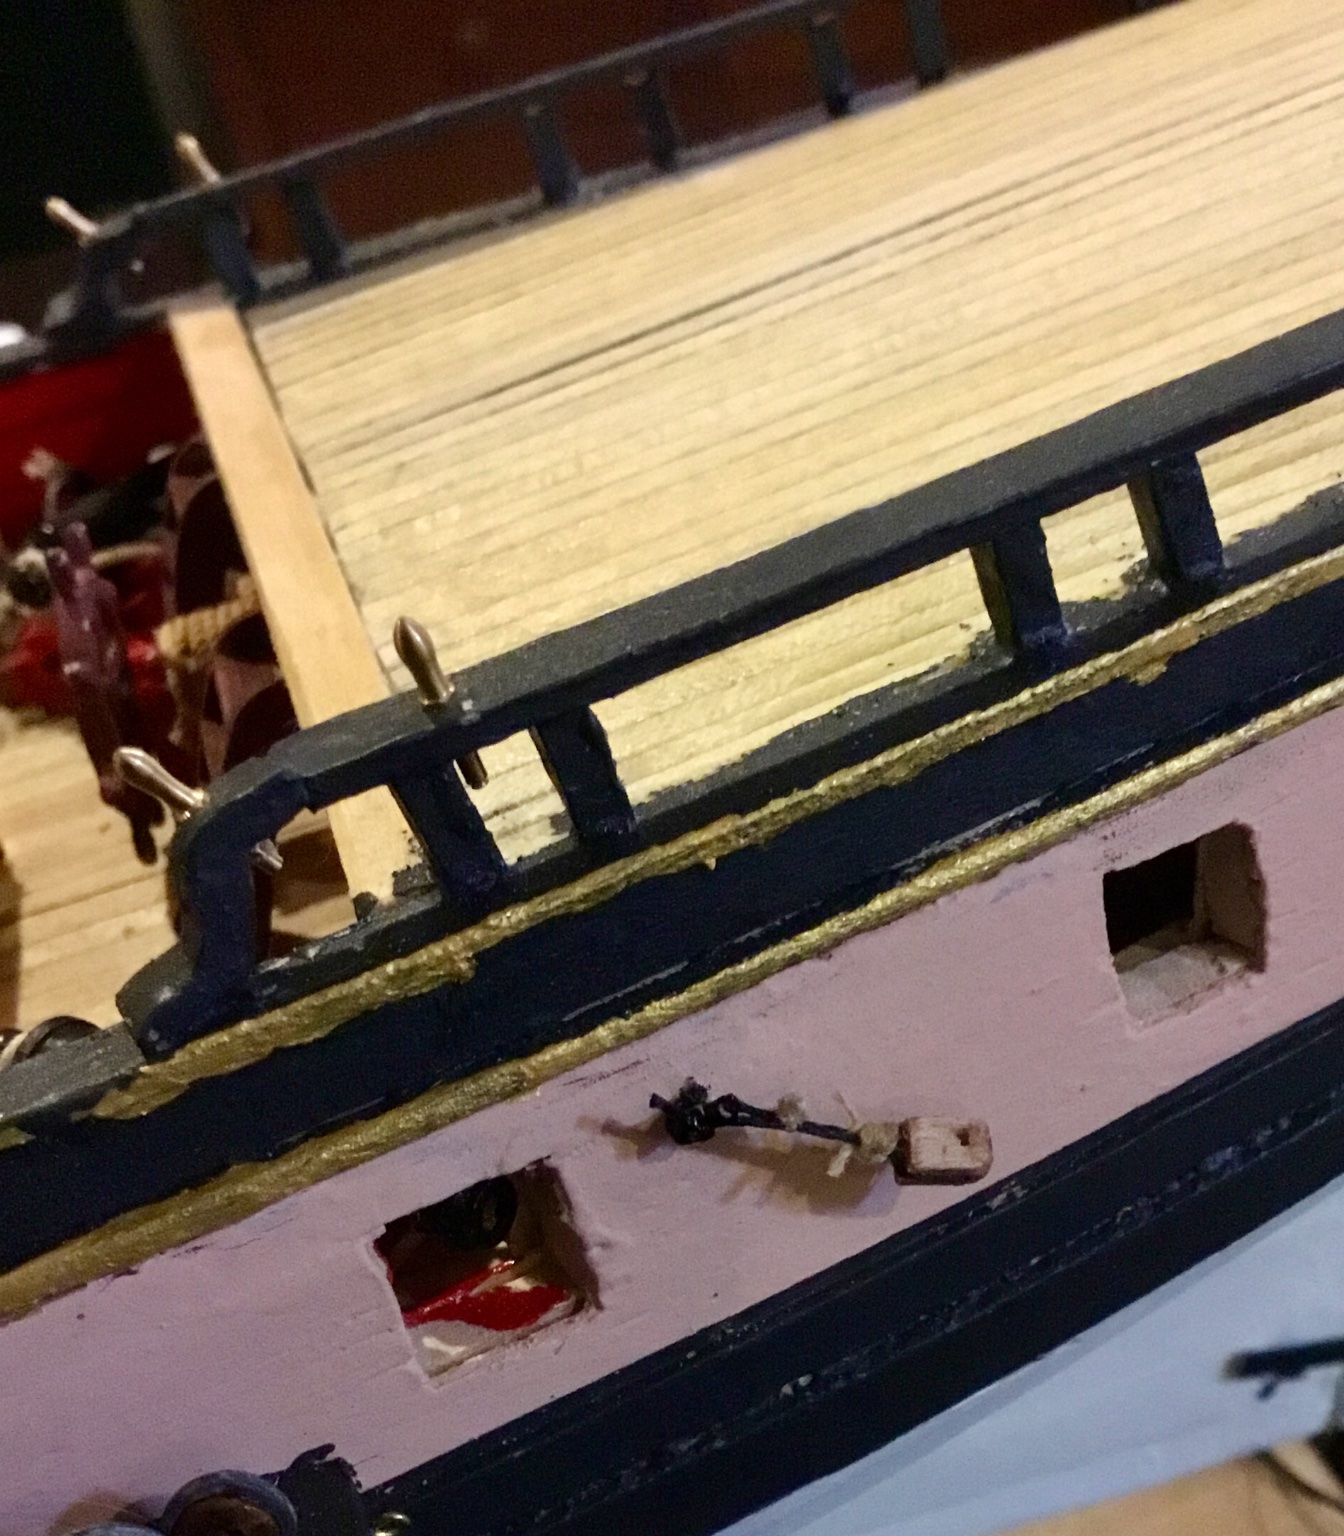
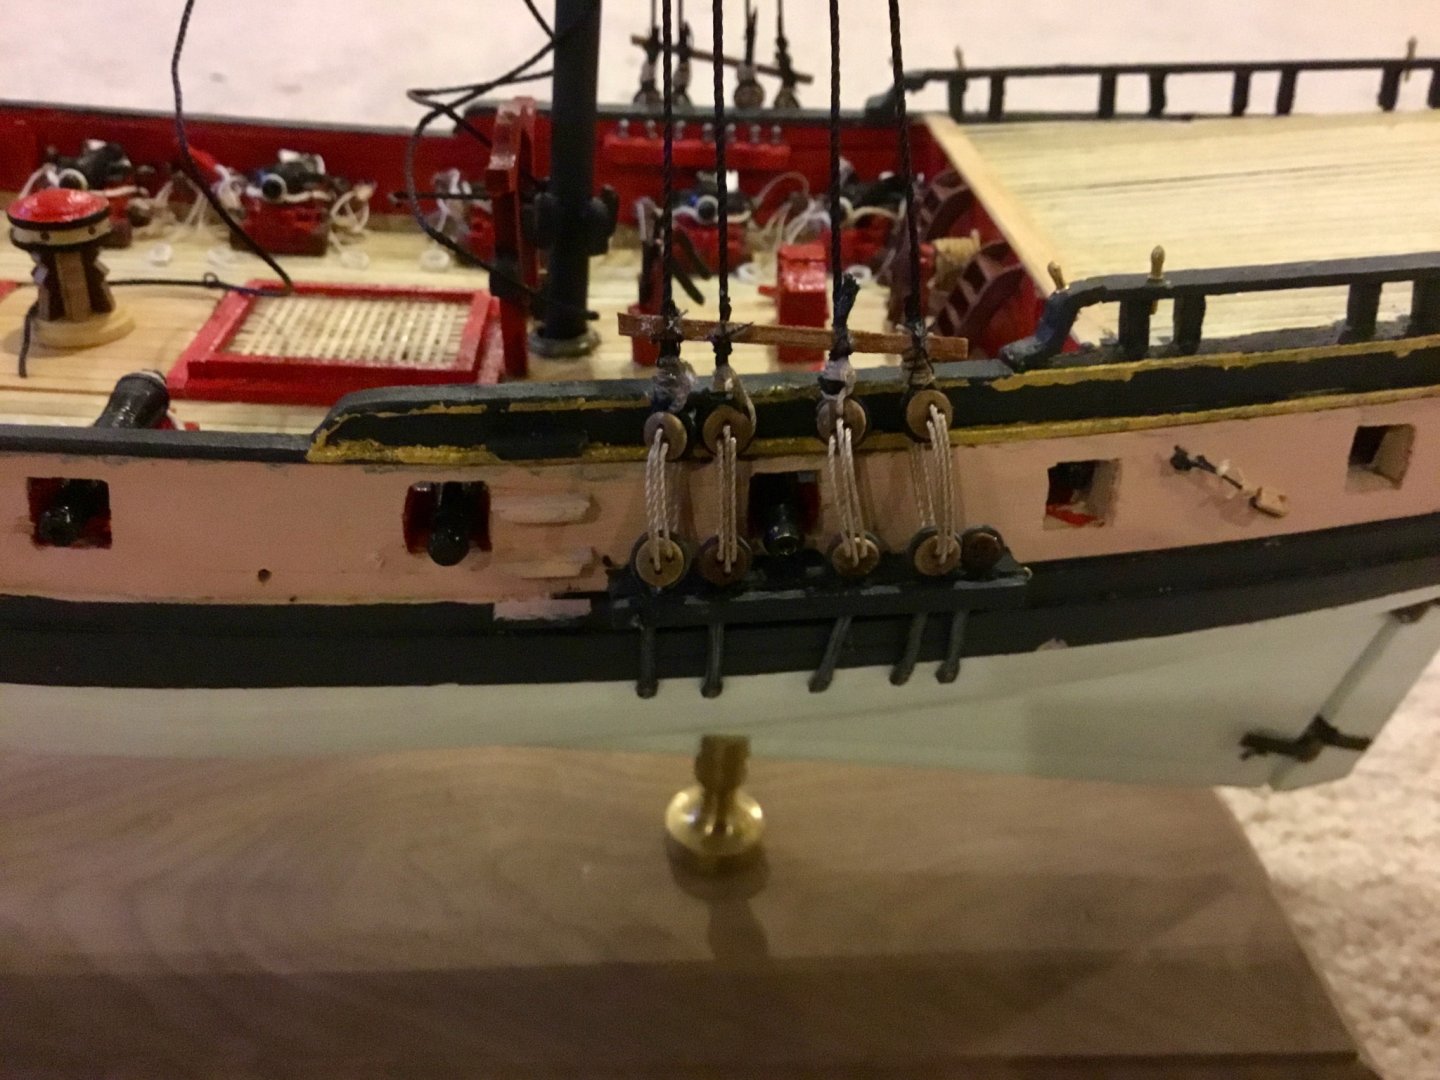
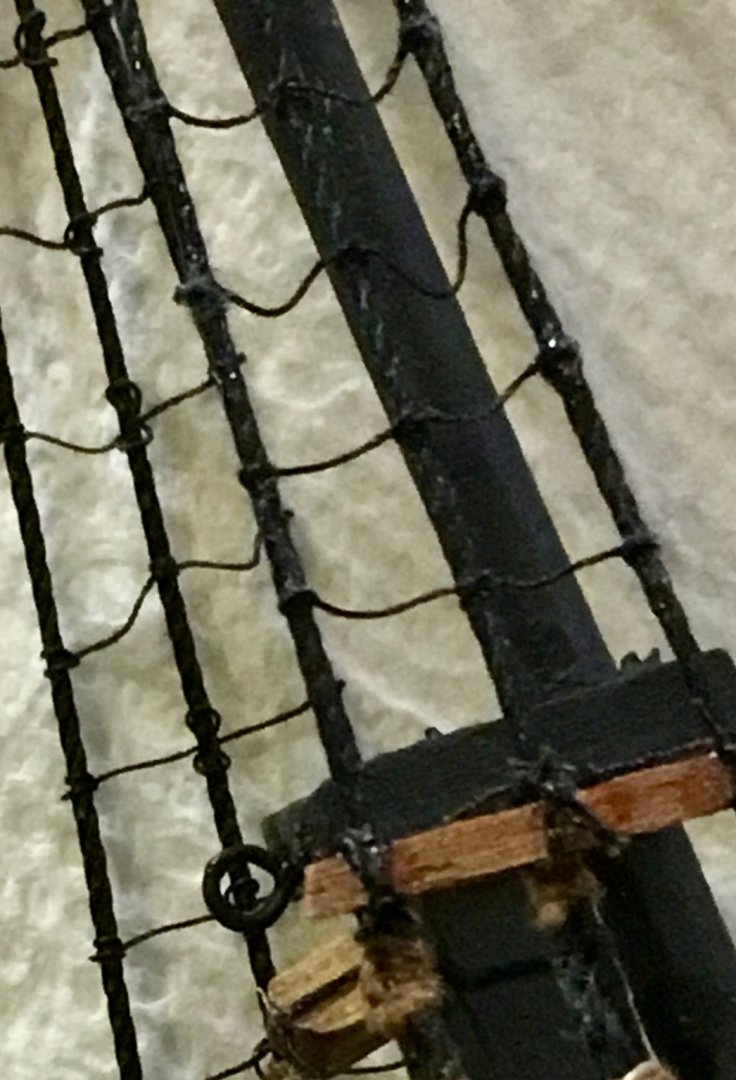
Completed installation of ratlines in lower shrouds. Now on to the more interesting aspects of the ships rigging.
-
You're welcome. I enjoy doing the rigging, with the possible exception of the ratlines. This kit required a lot of scratch built parts, more than I would have expected.
- 24 replies
-
- 1
-
-
- Fair American
- Model Shipways
- (and 1 more)
-
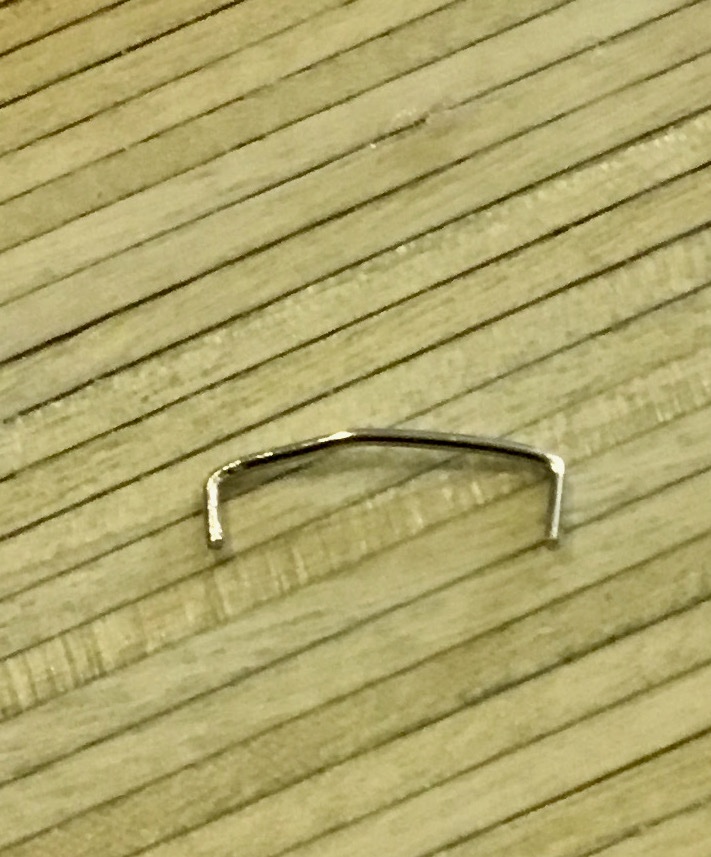
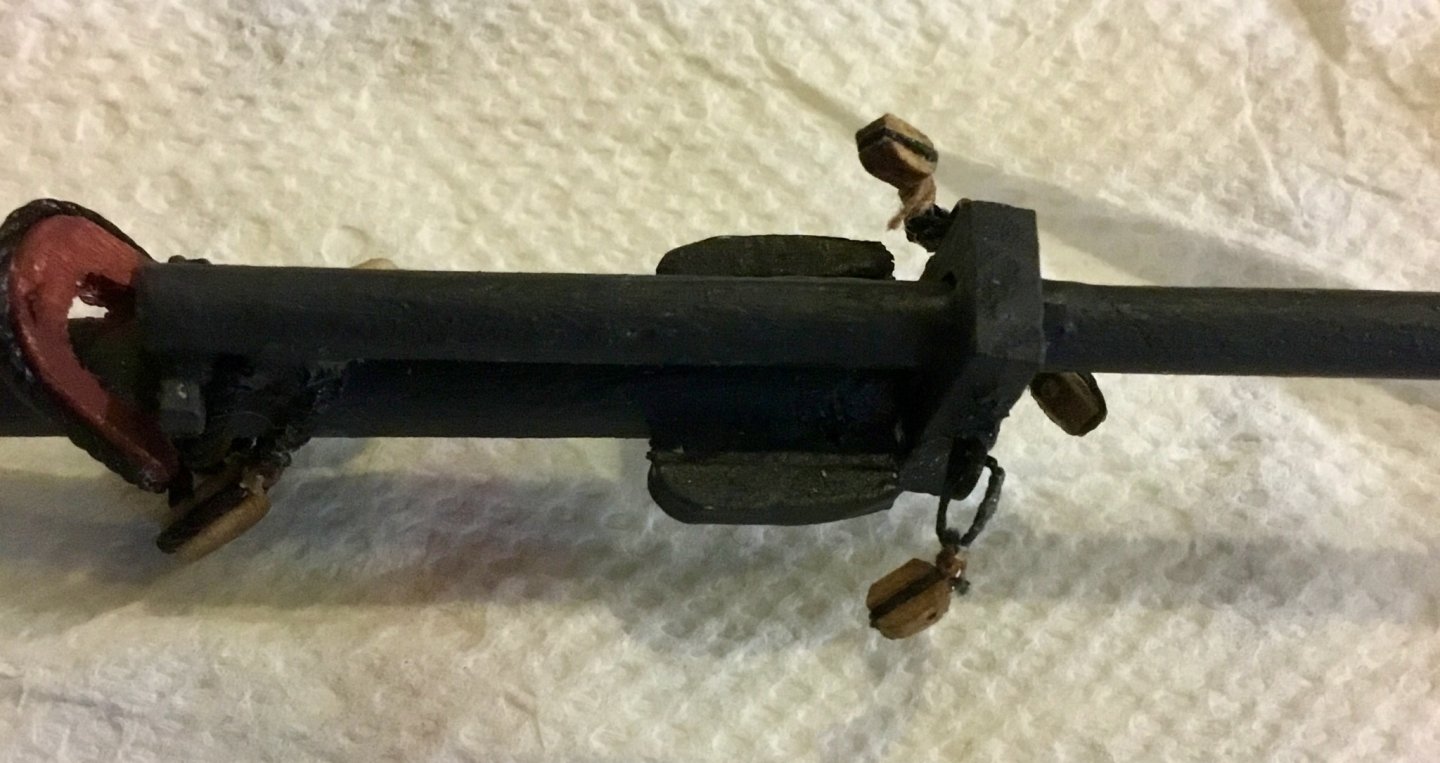
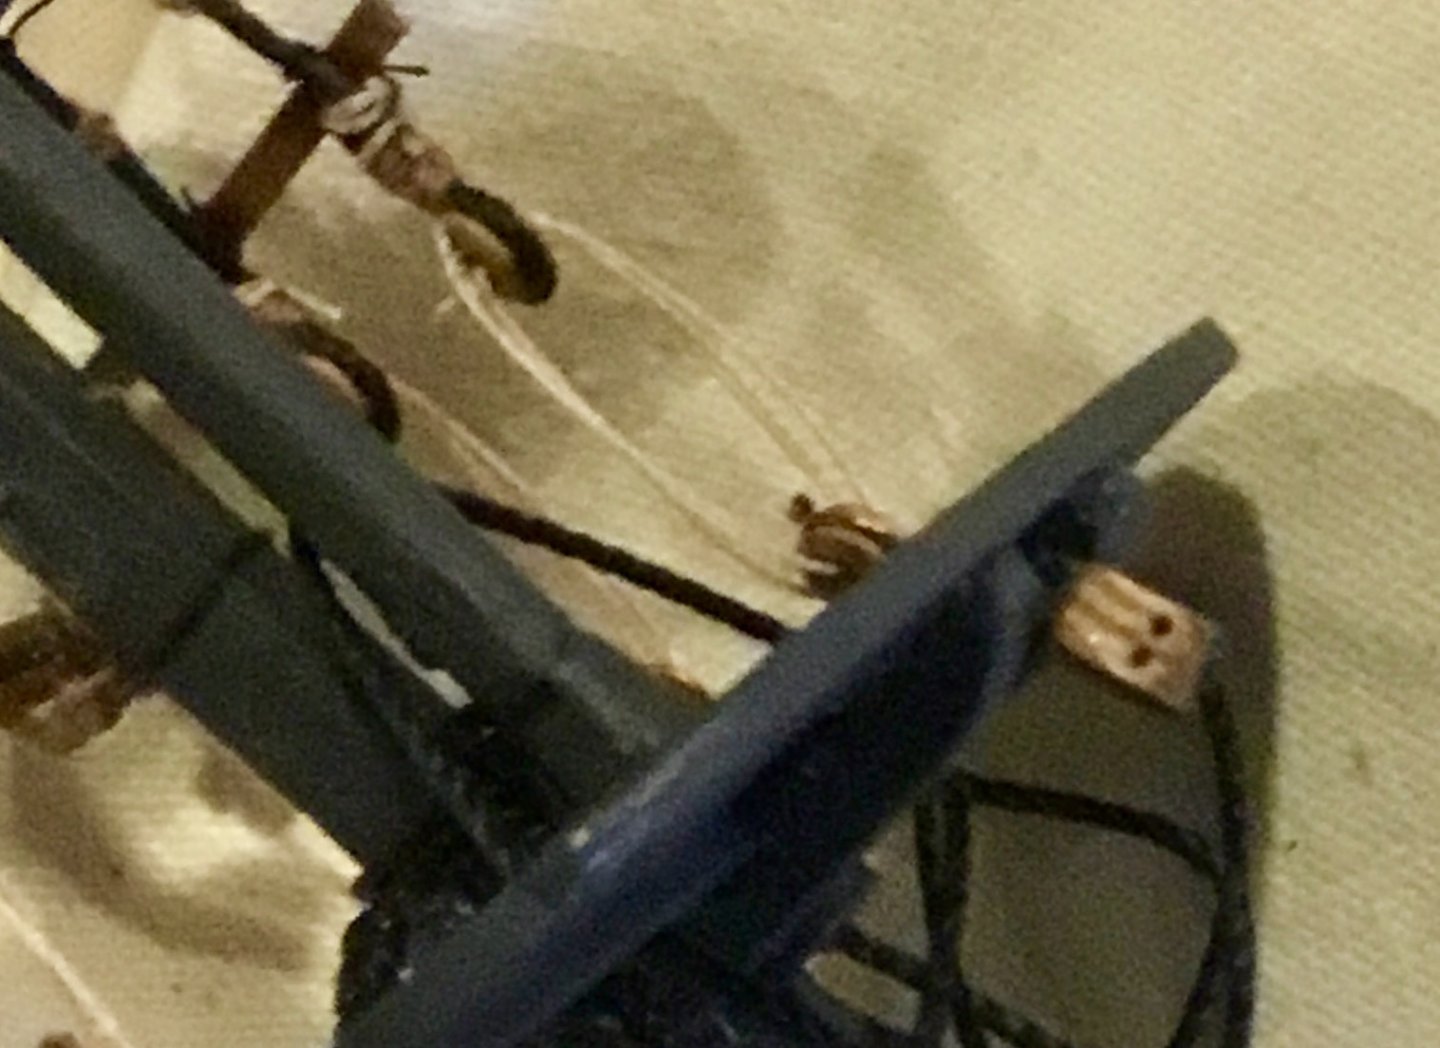
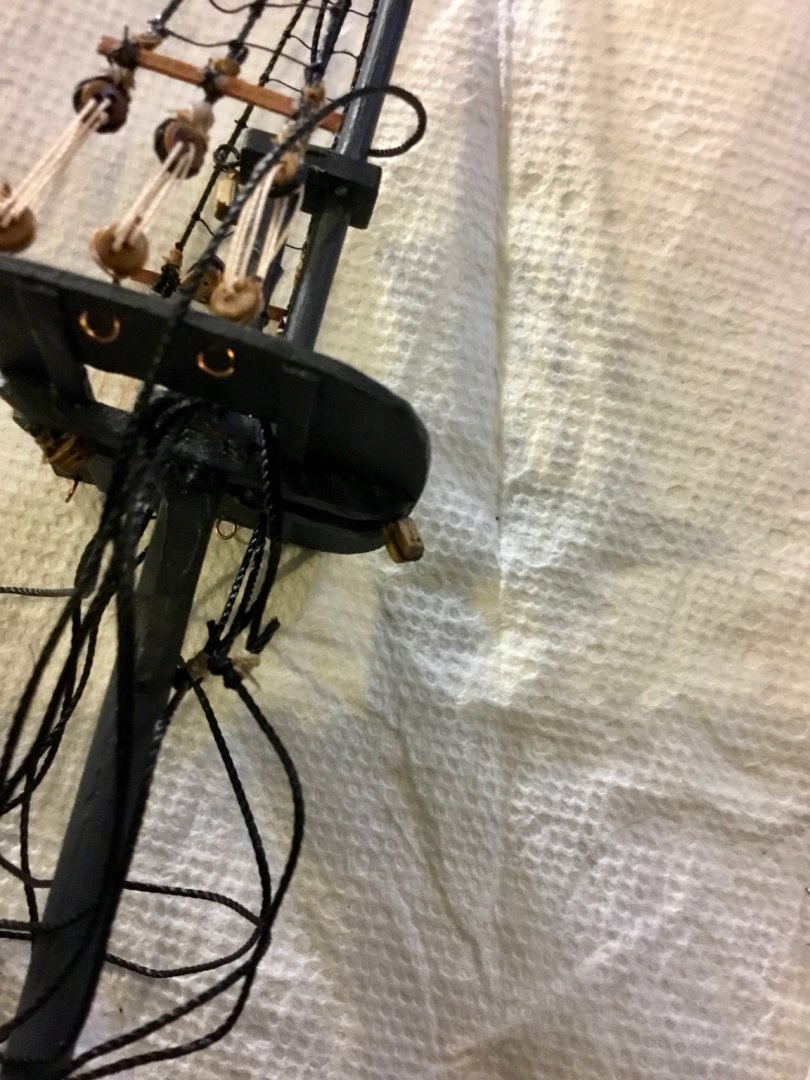
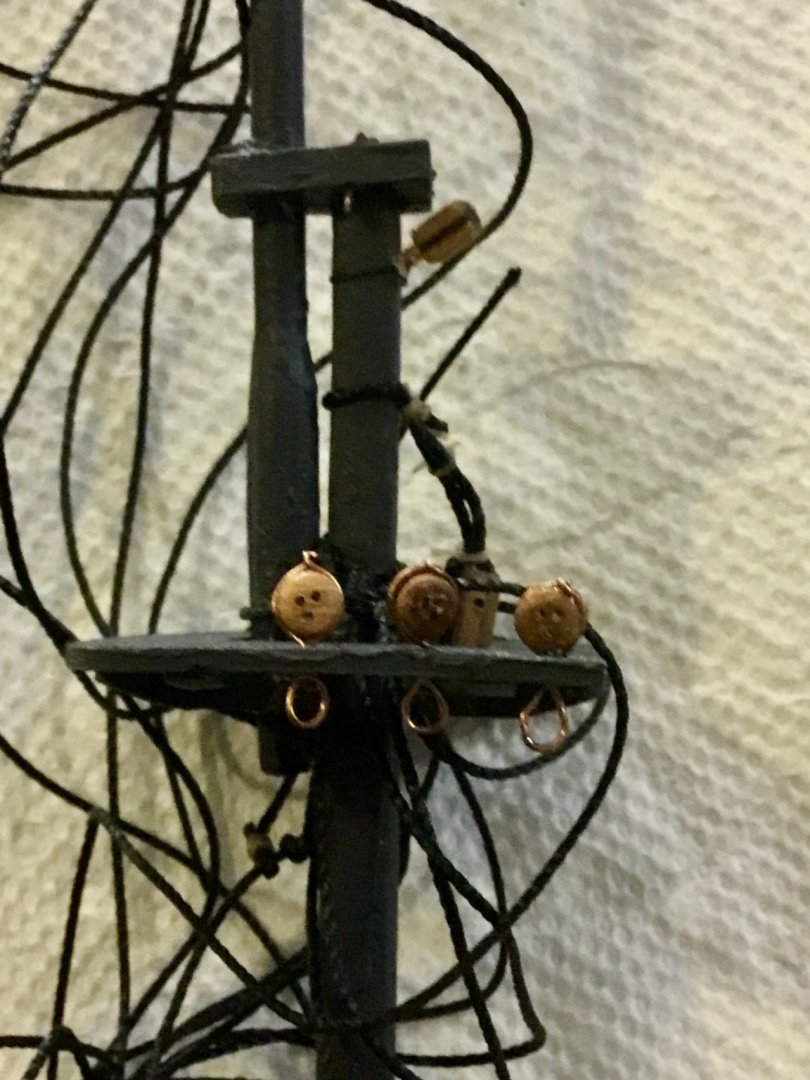
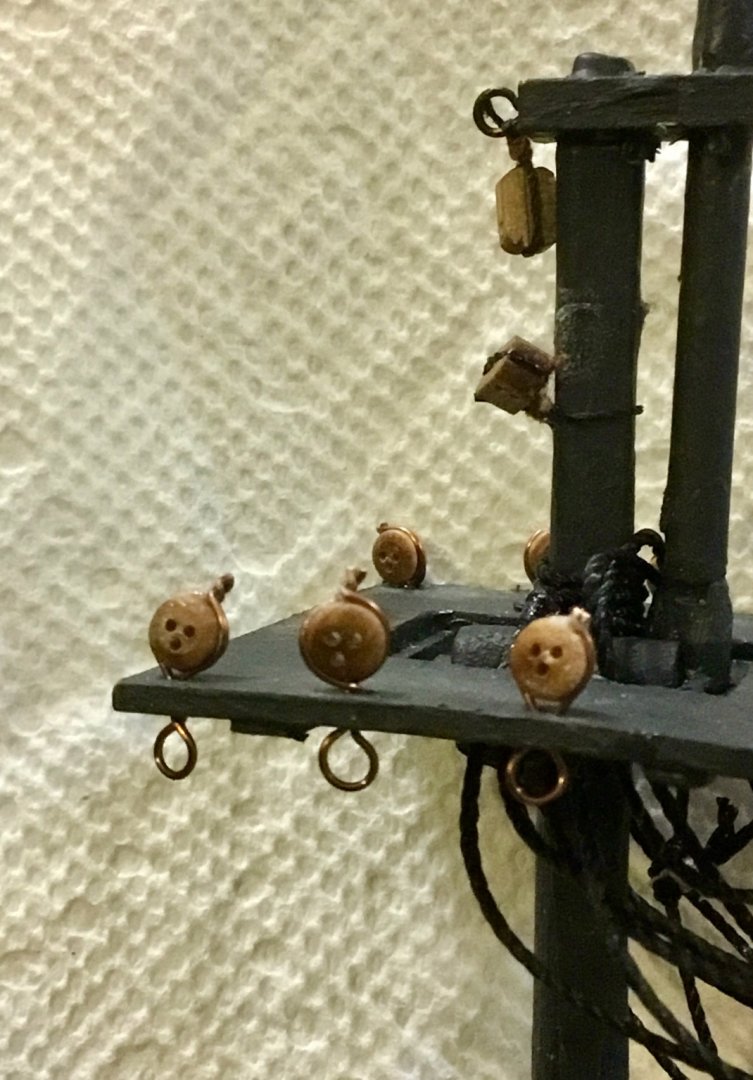
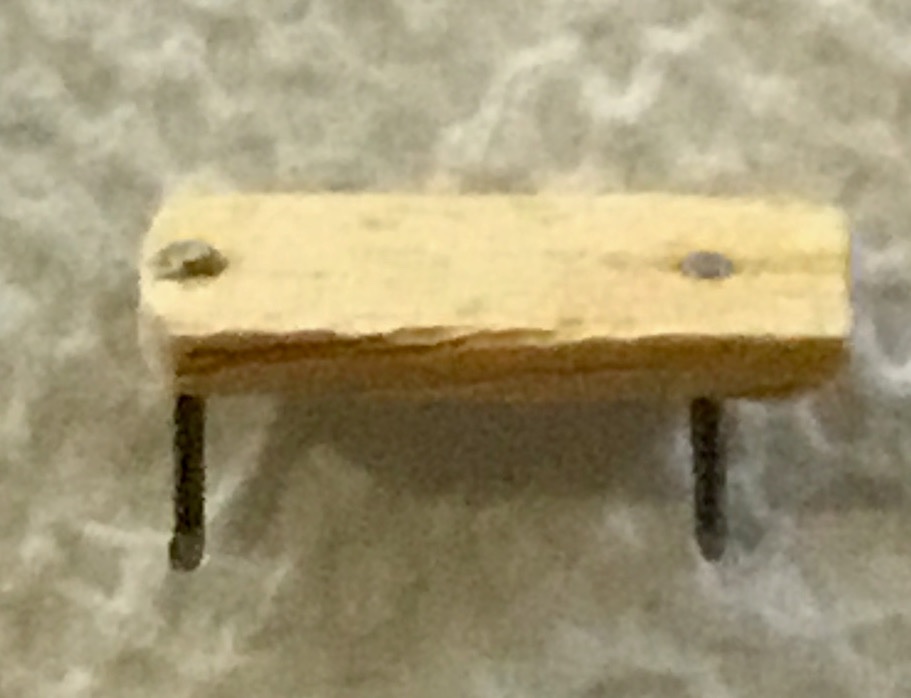
Completed items in rigging plan up thru step 44, mounting masts and installing lower shrouds including first part of step 45. Shrouds deadeyes alignment came out OK except for a couple cases, probably due to in consisted tensioning of the shroud lines when adjusting the shroud length and terminating upper shroud with deadeye. I wonder if its possible to tie off the upper deadeye without finalizing it by gluing and then still seize the shrouds and if to far off loosen the seizing readjust the top deadeye and repeat until suitable and then finalize the seizing and gluing of the upper shroud. Will have to experiment and practice with a test setup before my next ship. The spacer tool made from the paper clip worked out the best, the other two tools in the photos I couldn't get to work Anyway now onto the ratlines in the lower shrouds.


- 24 replies
-
- 2
-
-
- Fair American
- Model Shipways
- (and 1 more)
-
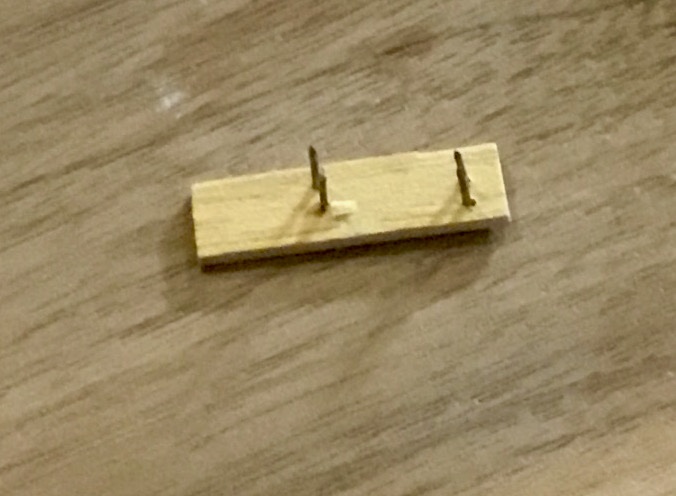
Completed rigging steps up thru step 39.4, began mounting of main mast. Able to create a workable deadeye spacer using a paper clip, previous attempts always failed when the upper deadeye would slip off when I tried to create a spacer using twisted wire or miniature nails in a wooden spacer, will enclose photos of results (such as they are) when I've finished installing the main mast.


- 24 replies
-
- 2
-
-
- Fair American
- Model Shipways
- (and 1 more)
-
Completed all items on rigging list up thru step 32.1. Still having a difficult time with deadeyes, tried using various mechanical methods to adjust separation between deadeyes with no luck, ended up just eye-balling it. Will try again when I mount masts with lower shrouds, the deadeyes there are larger so maybe I'll have better luck.


- 24 replies
-
- 2
-
-
- Fair American
- Model Shipways
- (and 1 more)
-
Completed items 19.1 and 21 on rigging list. Completed items 20 and 22 (shrouds, deadeyes, ratlines and sheer poles) for Fore Mast, continuing work for items 20 and 22 on Main Mast. Didn't do a very good job aligning deadeyes, but I reviewed some methods used by others in their build logs and hope to do better on the topmast shrouds for the Main Mast.

- 24 replies
-
- 2
-
-
- Fair American
- Model Shipways
- (and 1 more)