HOLIDAY DONATION DRIVE - SUPPORT MSW - DO YOUR PART TO KEEP THIS GREAT FORUM GOING! (Only 24 donations so far out of 49,000 members - C'mon guys!)
×


Dsmith20639
-
Posts
254 -
Joined
-
Last visited
Content Type
Profiles
Forums
Gallery
Events
Everything posted by Dsmith20639
-
I use tick strips to get the measurements at each bulkhead for each belt. I do not use a fan to compute the individual plank locations and then mark the bulkhead edge with a thin pencil as I find it to be inaccurate because my hands are not steady when placing the marks. I prefer to use proportional dividers incrementally reducing the plank count as I progress, as I feel it adjusts for slight errors which otherwise would propagate when planking each belt. I agree, I find using a thread with white glue to be easier to use when defining and fine tuning the belt locations. My problem is in correctly defining the curve of the previous plank when spiling is indicated. Otherwise straight edged planks generally work with some degree of edge bending. However this does not always seem to be the case, and I am trying to be more precise when that situation arises.
-
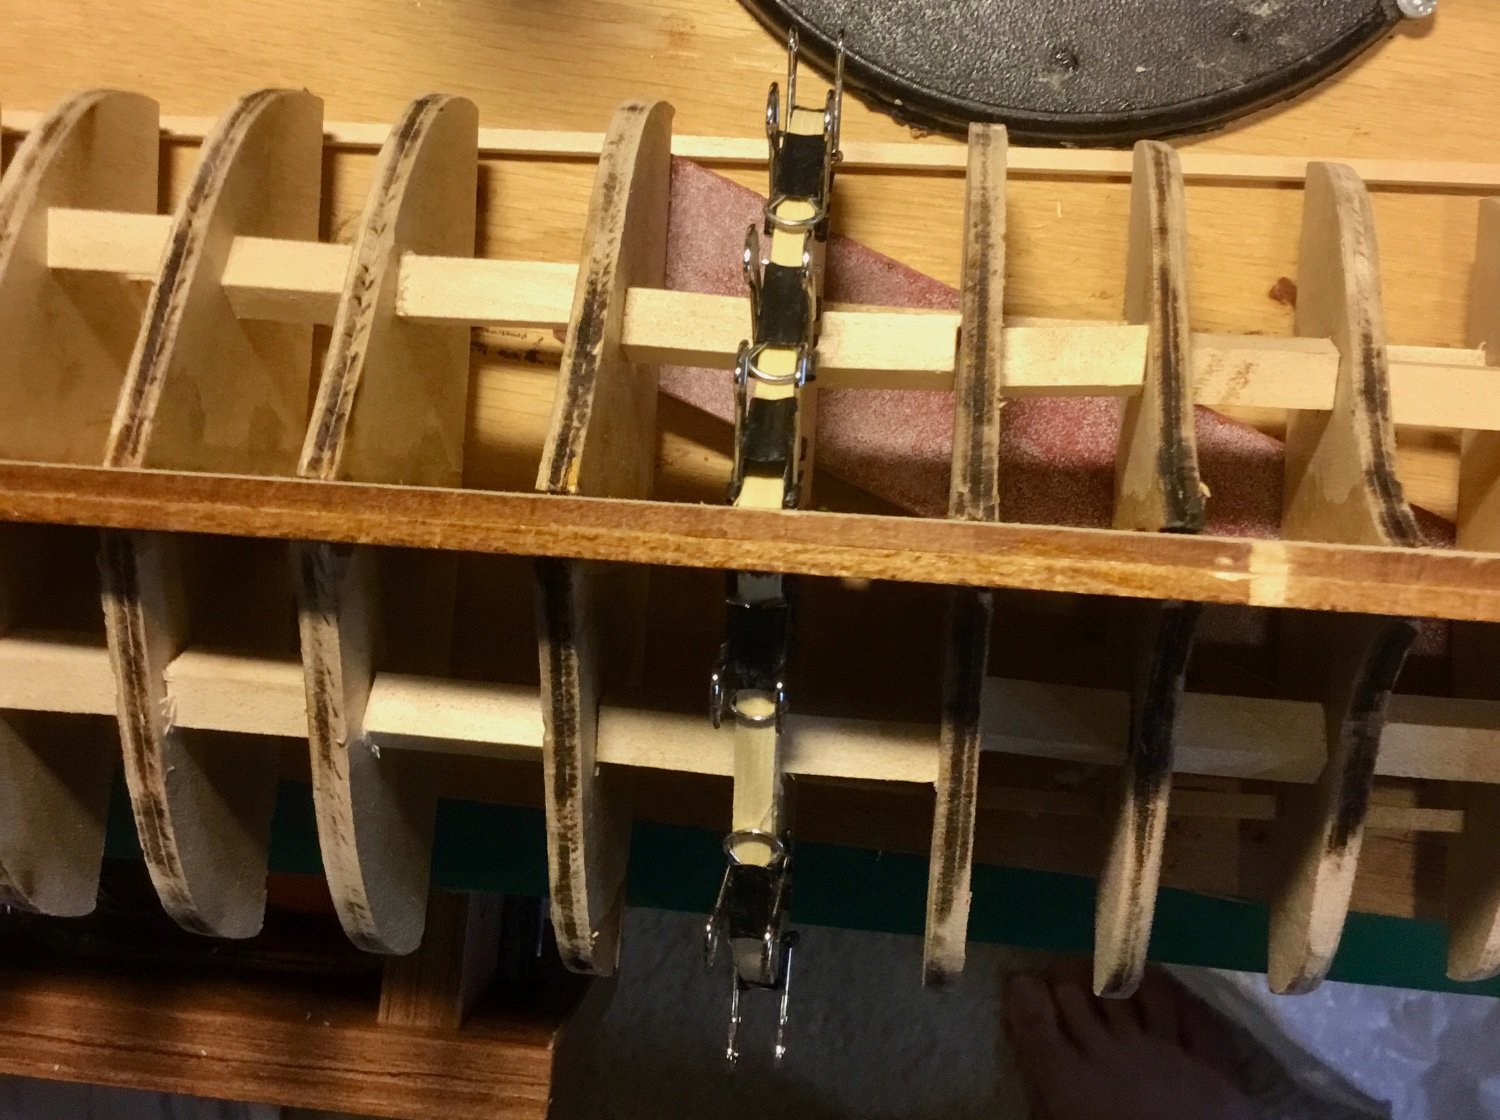
I am attempting my first try at spiling planks. I’ve tried to use a compass to transfer the shape of the previous plank or batten to a card but am getting inconsistent results due to trying to hold the metal compass point against the previous plank because the compass point is not a sharply define point; iin addition the compass lead is too hard to easily mark a line. I even tried to mark smaller points at each bulkhead instead of a continuous line. I am considering changing the lead in the compass to a softer lead and maybe sharpening the metal point of the compass. I’ve also thought of not using a compass at all but just using a pair of dividers and pricking a small hole in the card at every bulkhead and then connecting the pin holes with my plastic ships curve to recreate the curve of the previous plank or batten. Any thoughts on how to best to proceed?
-
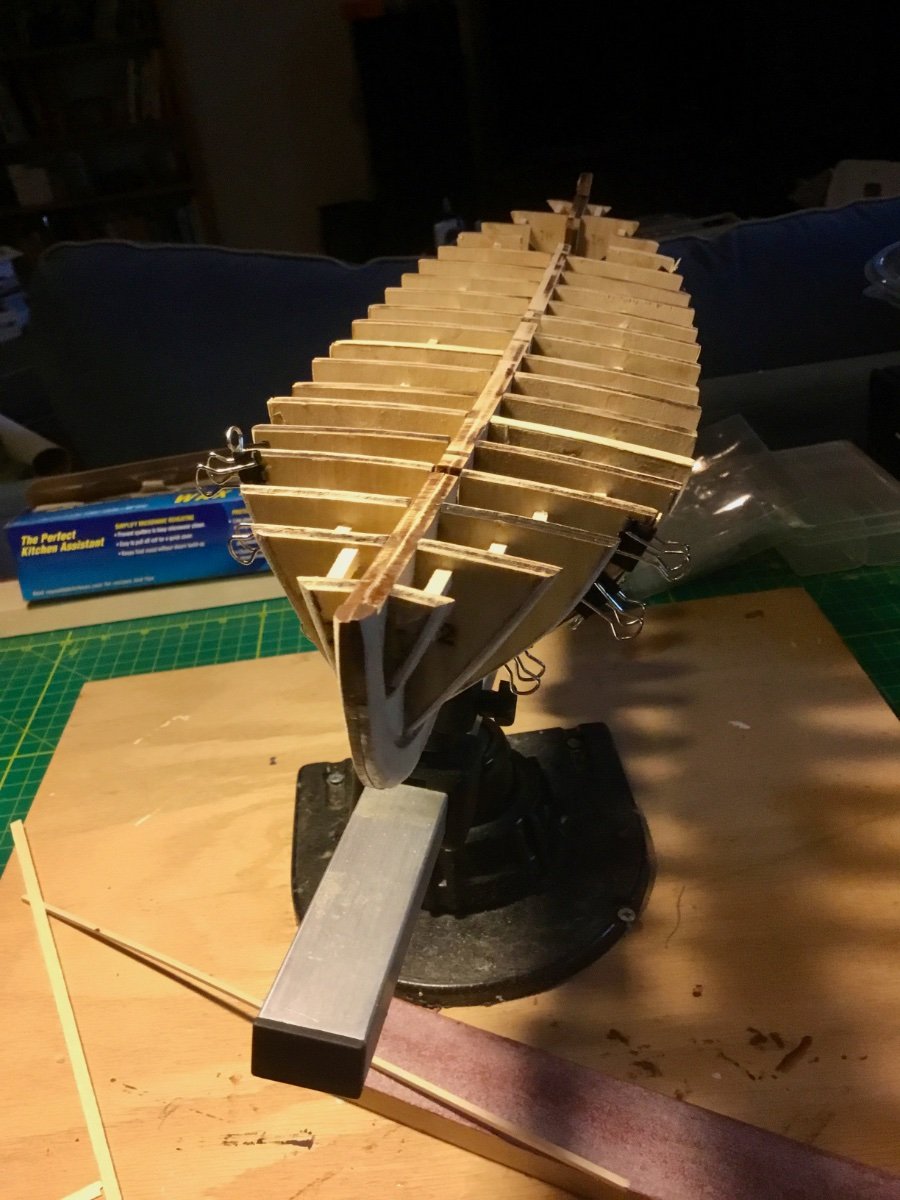
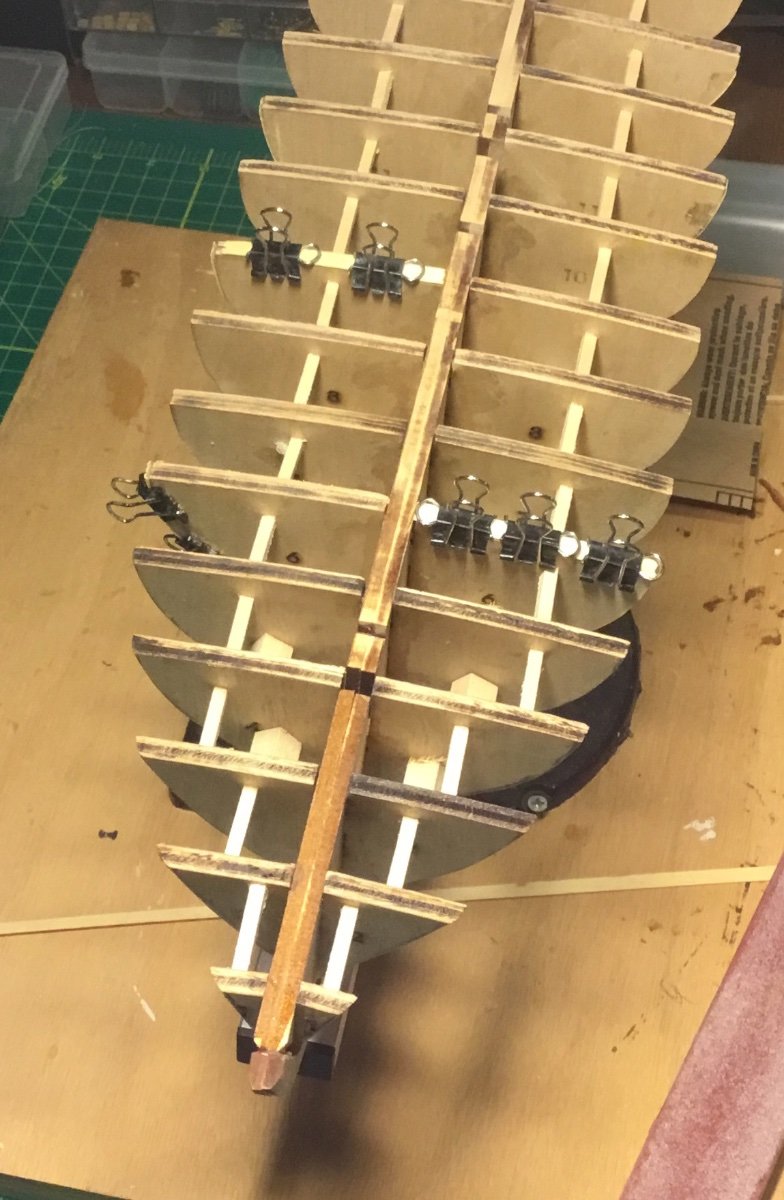
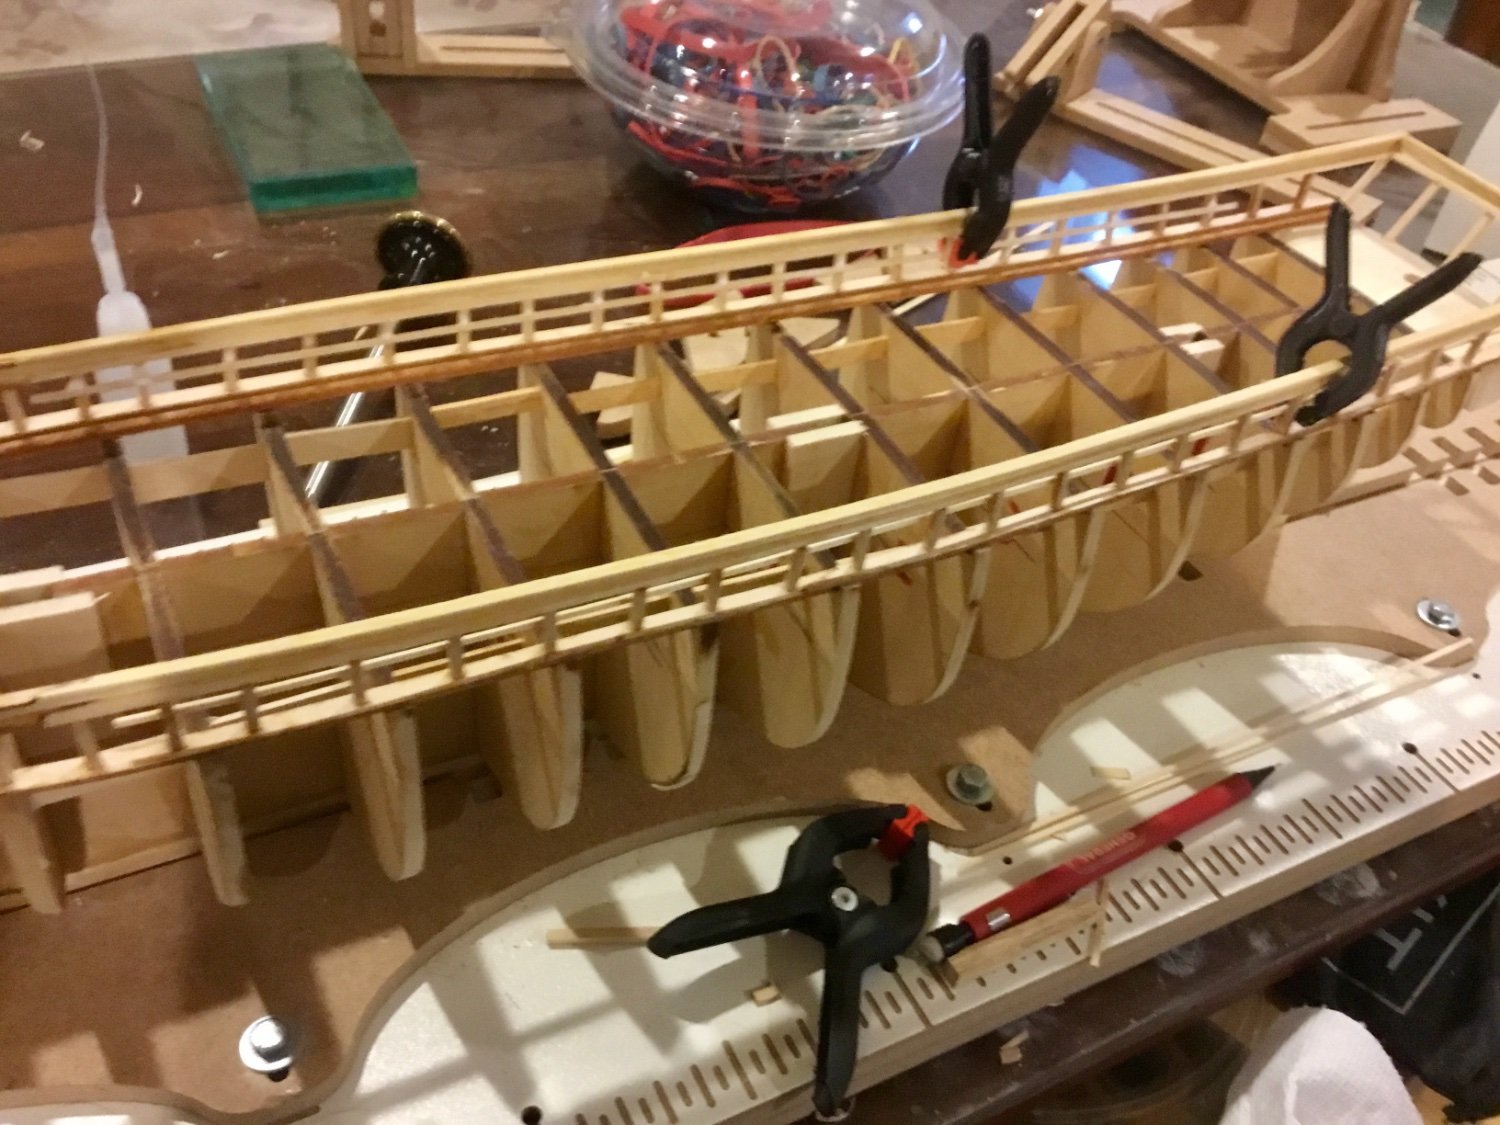
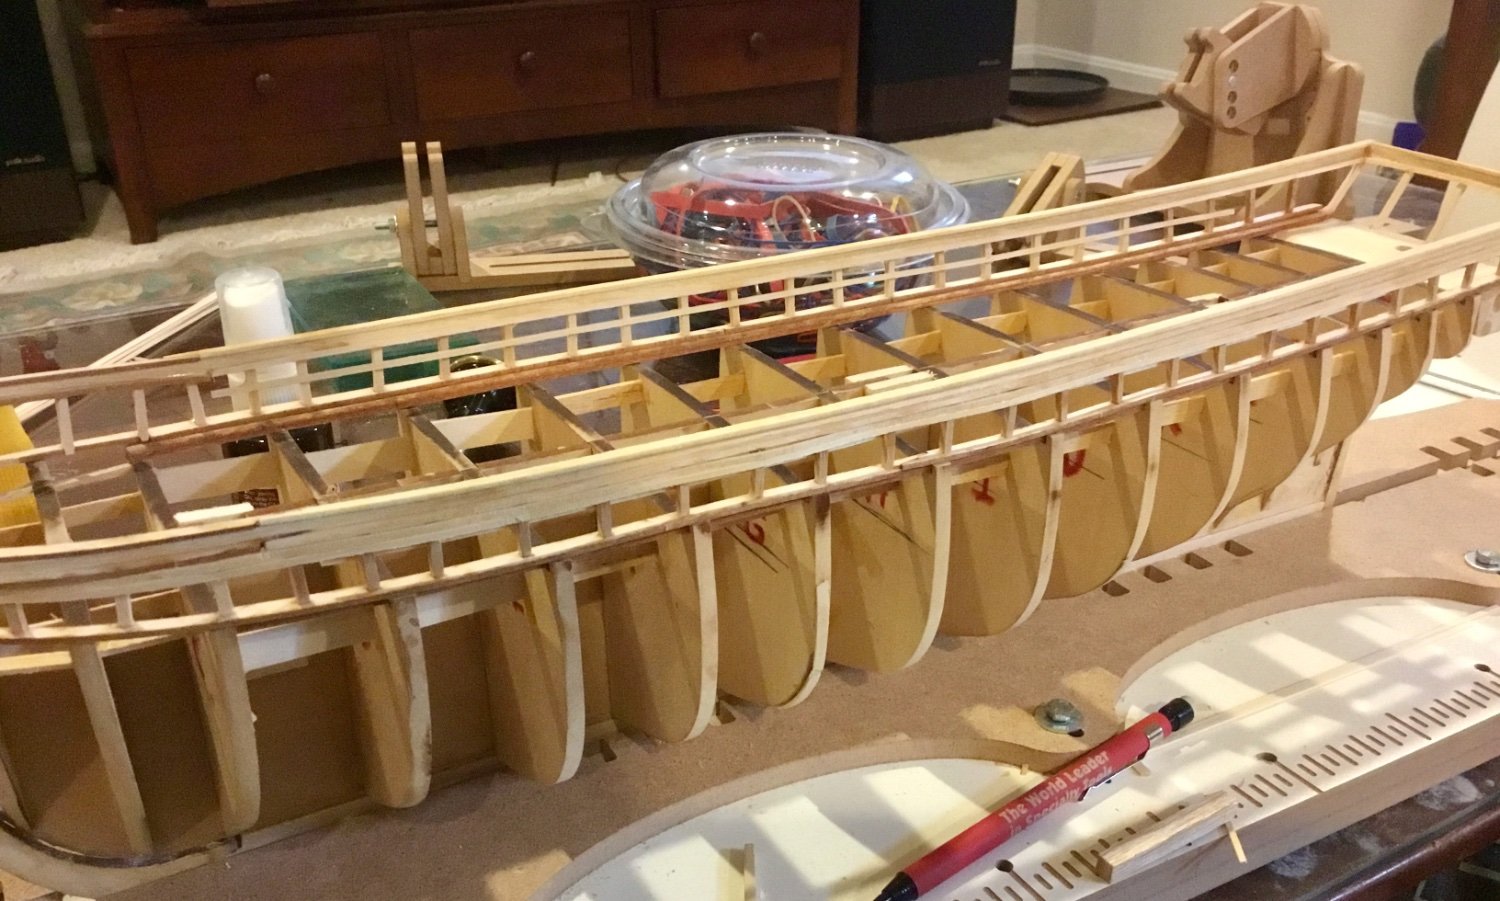
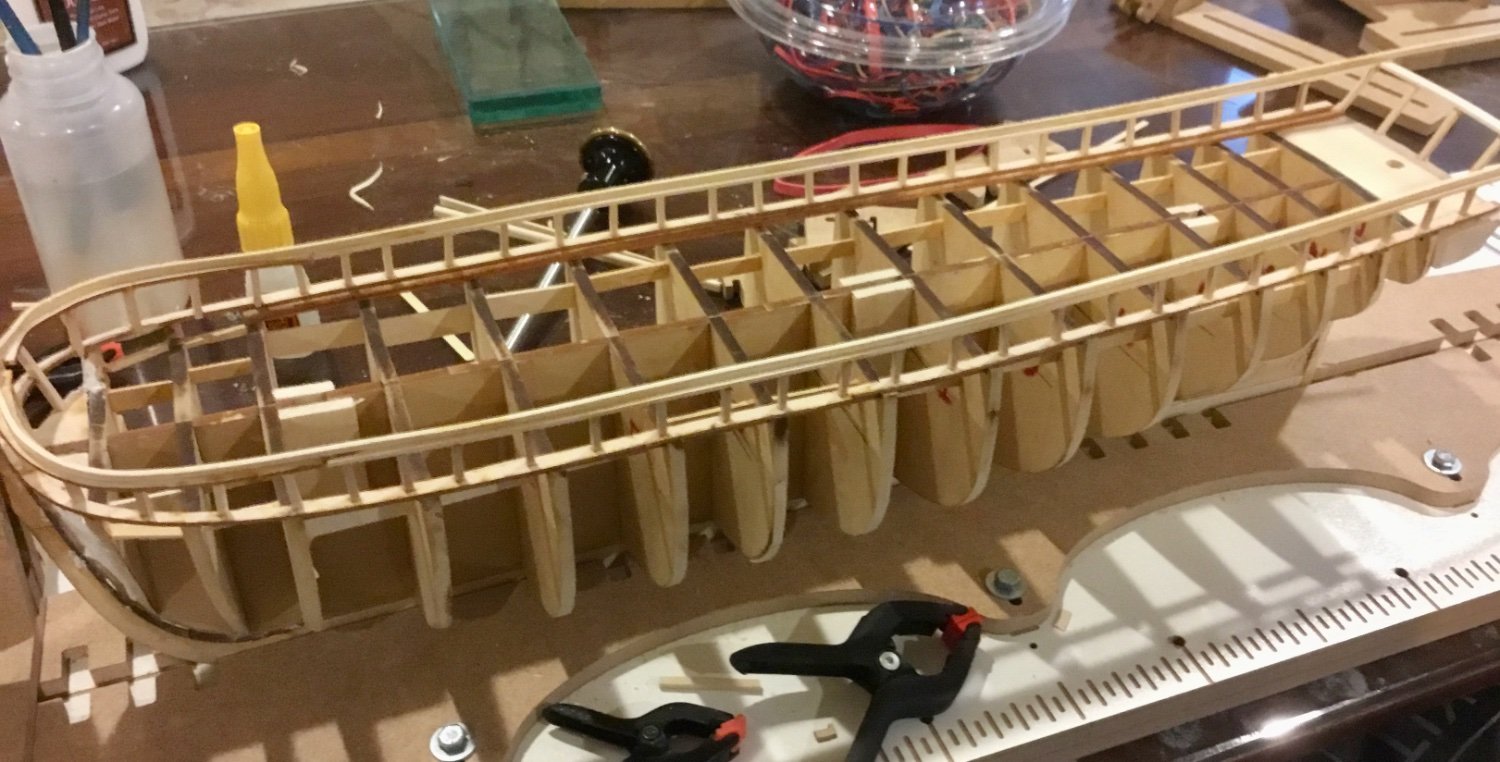
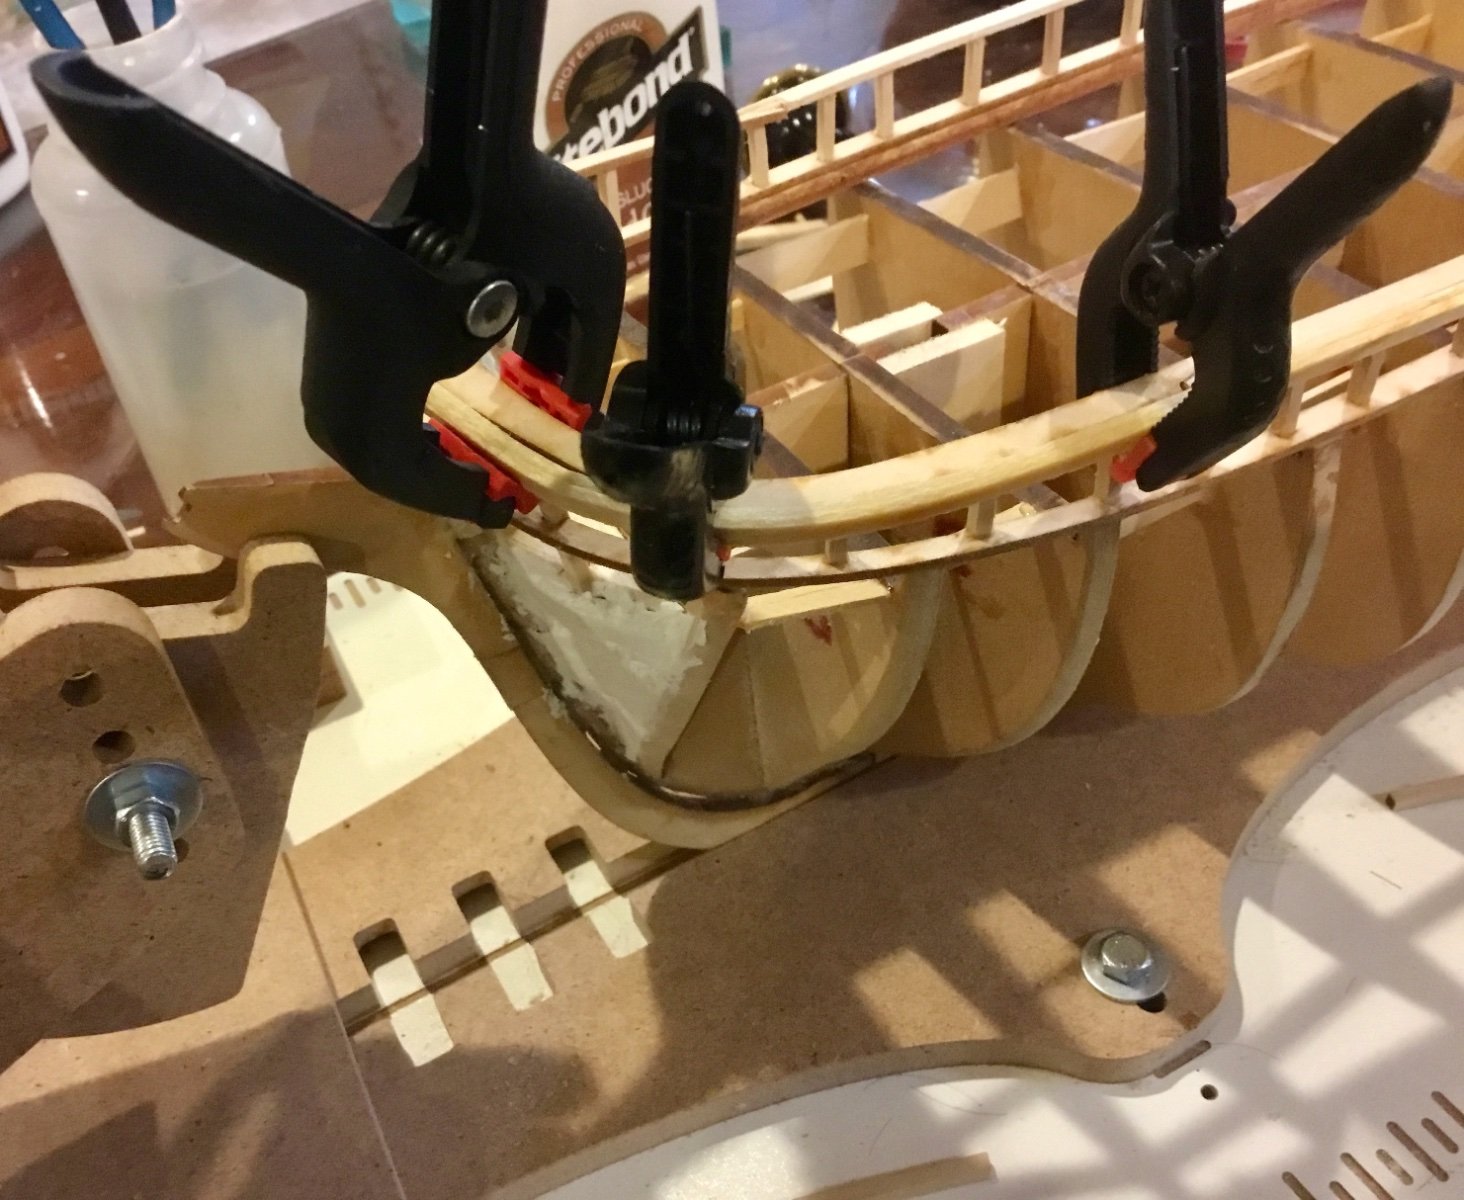
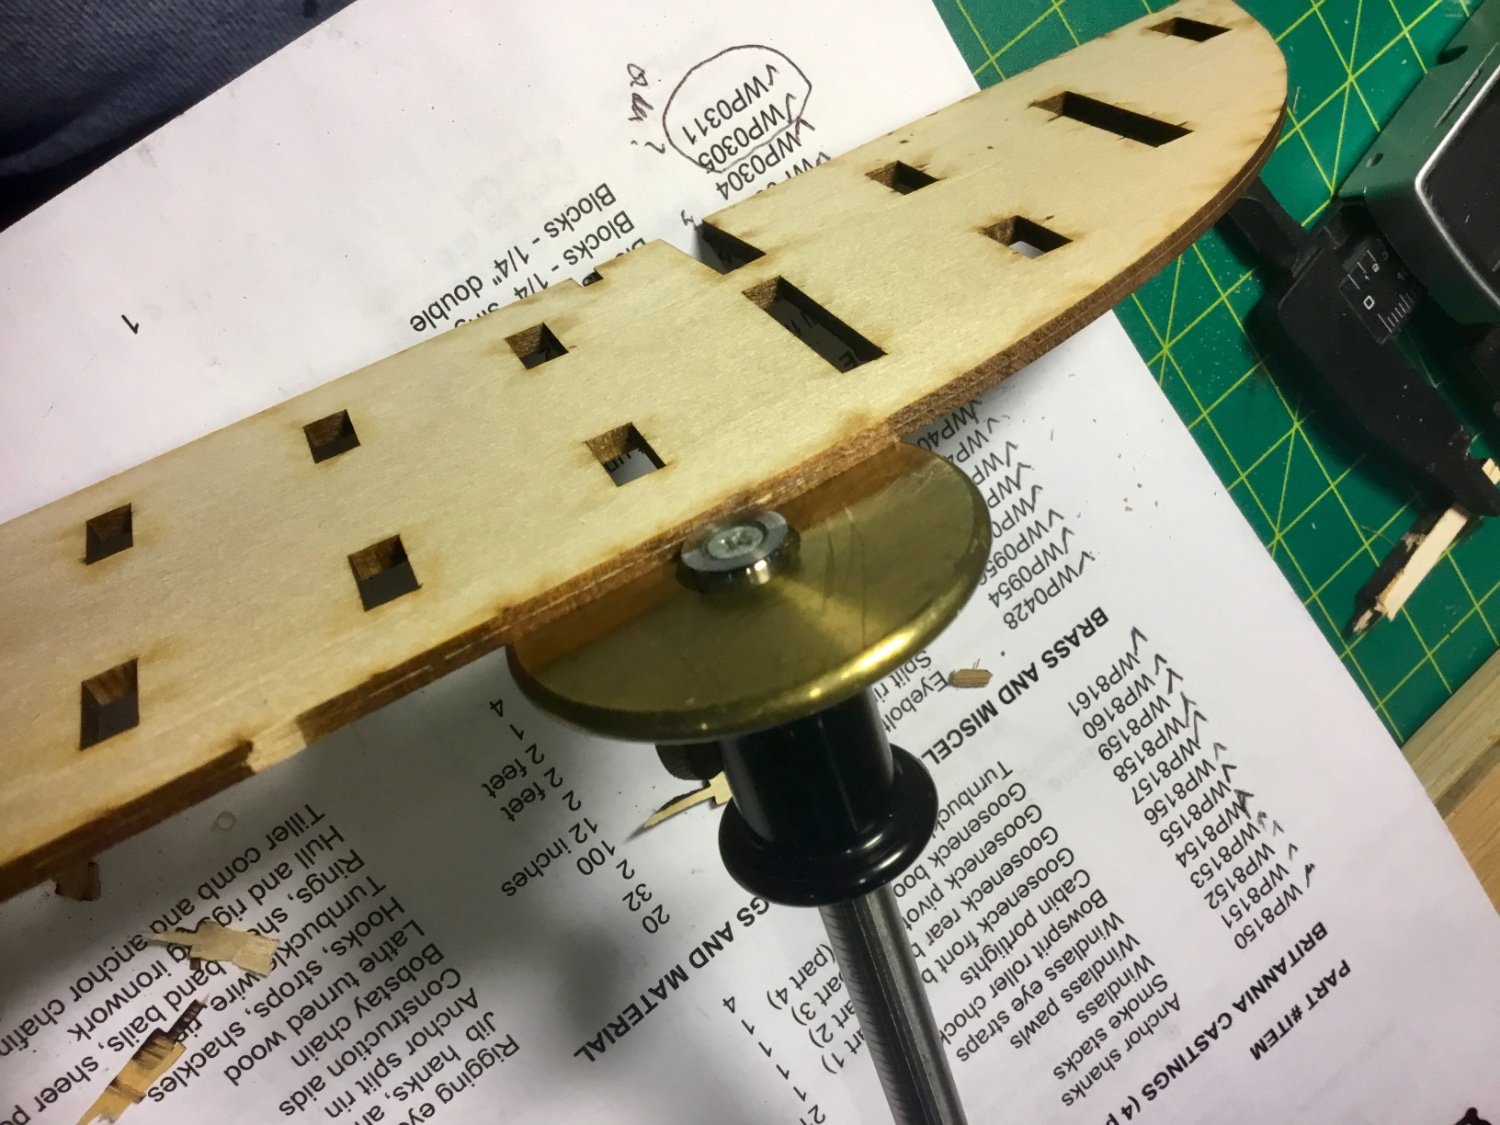
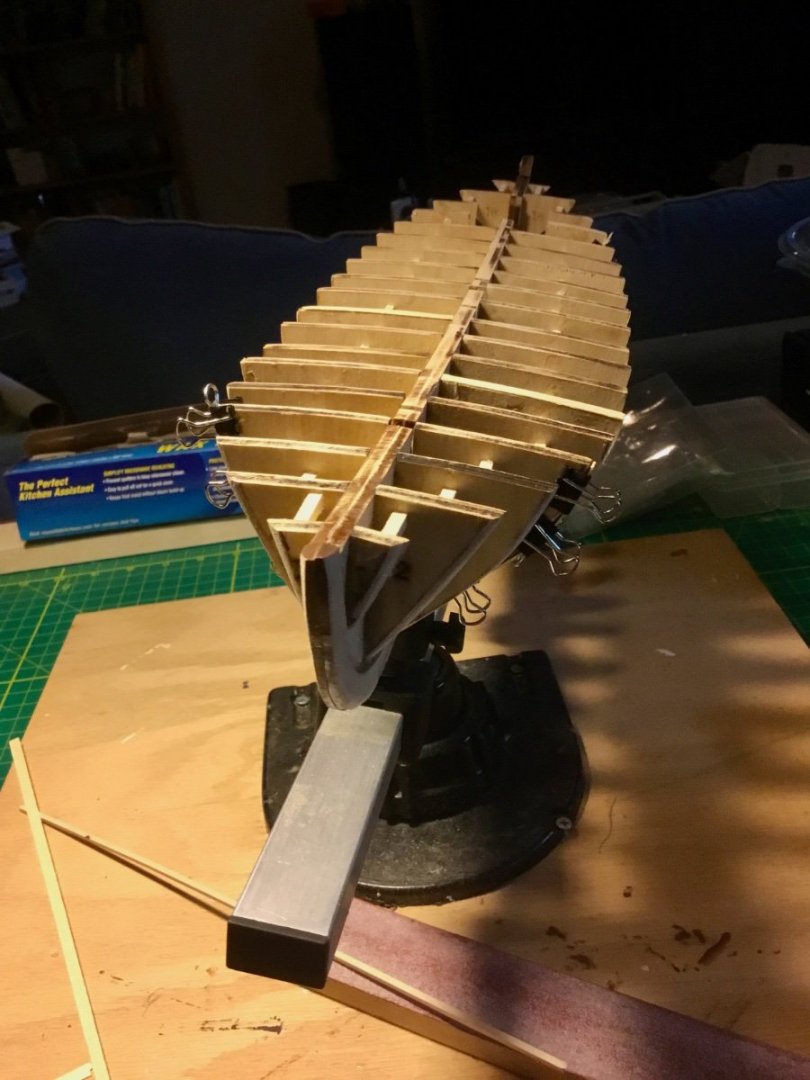
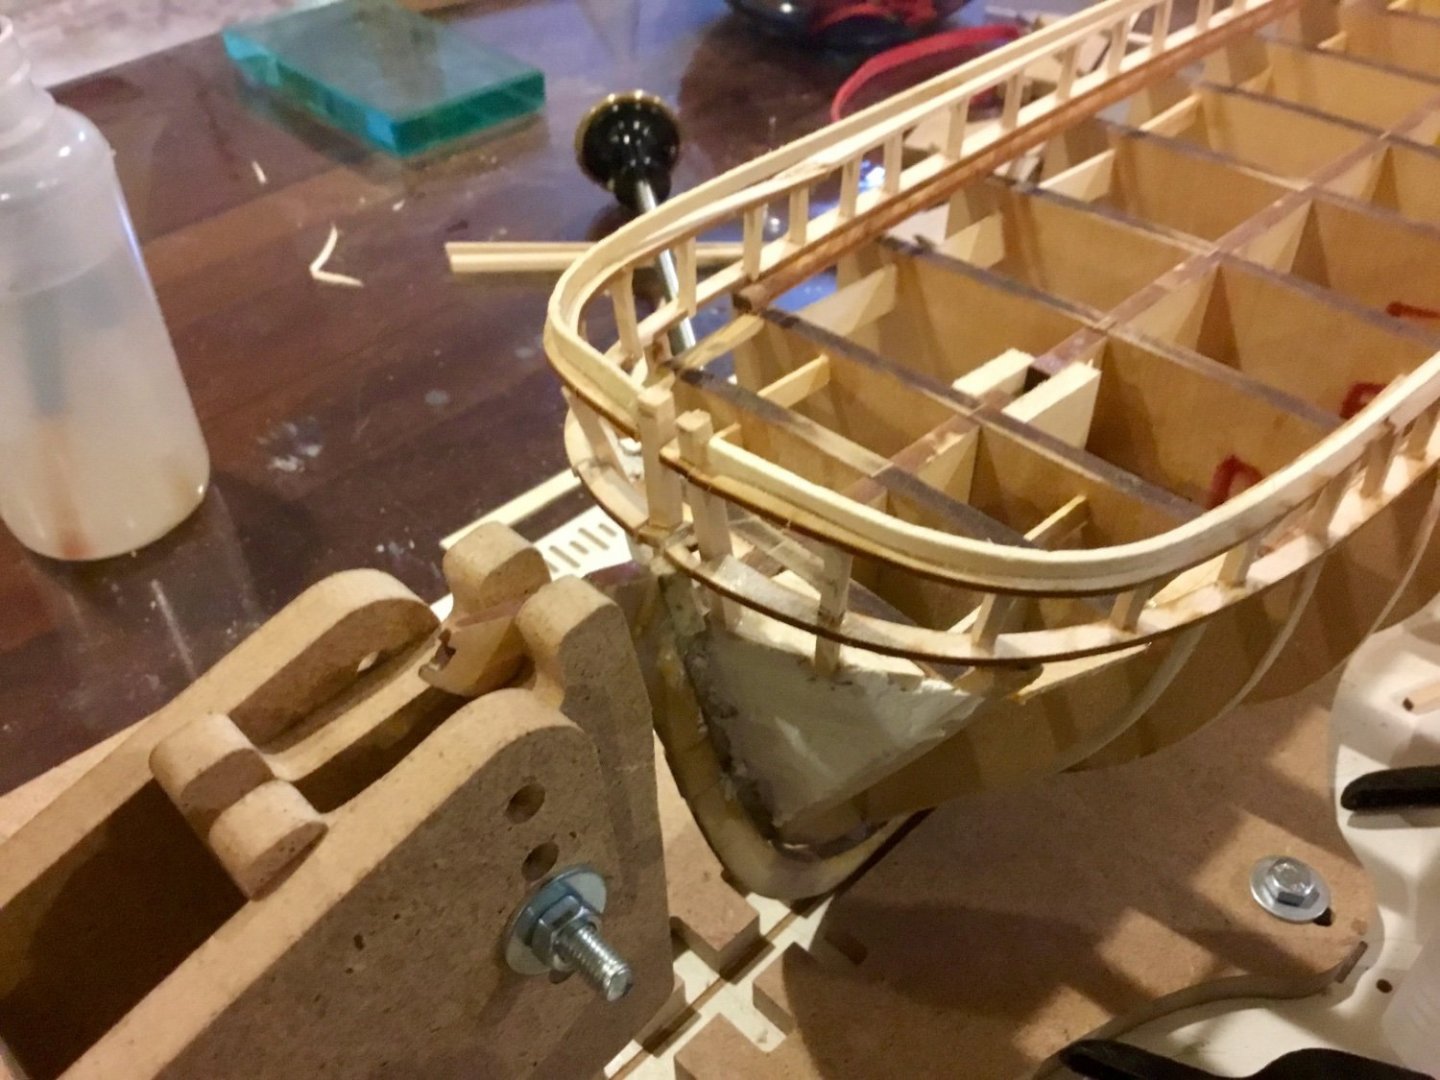
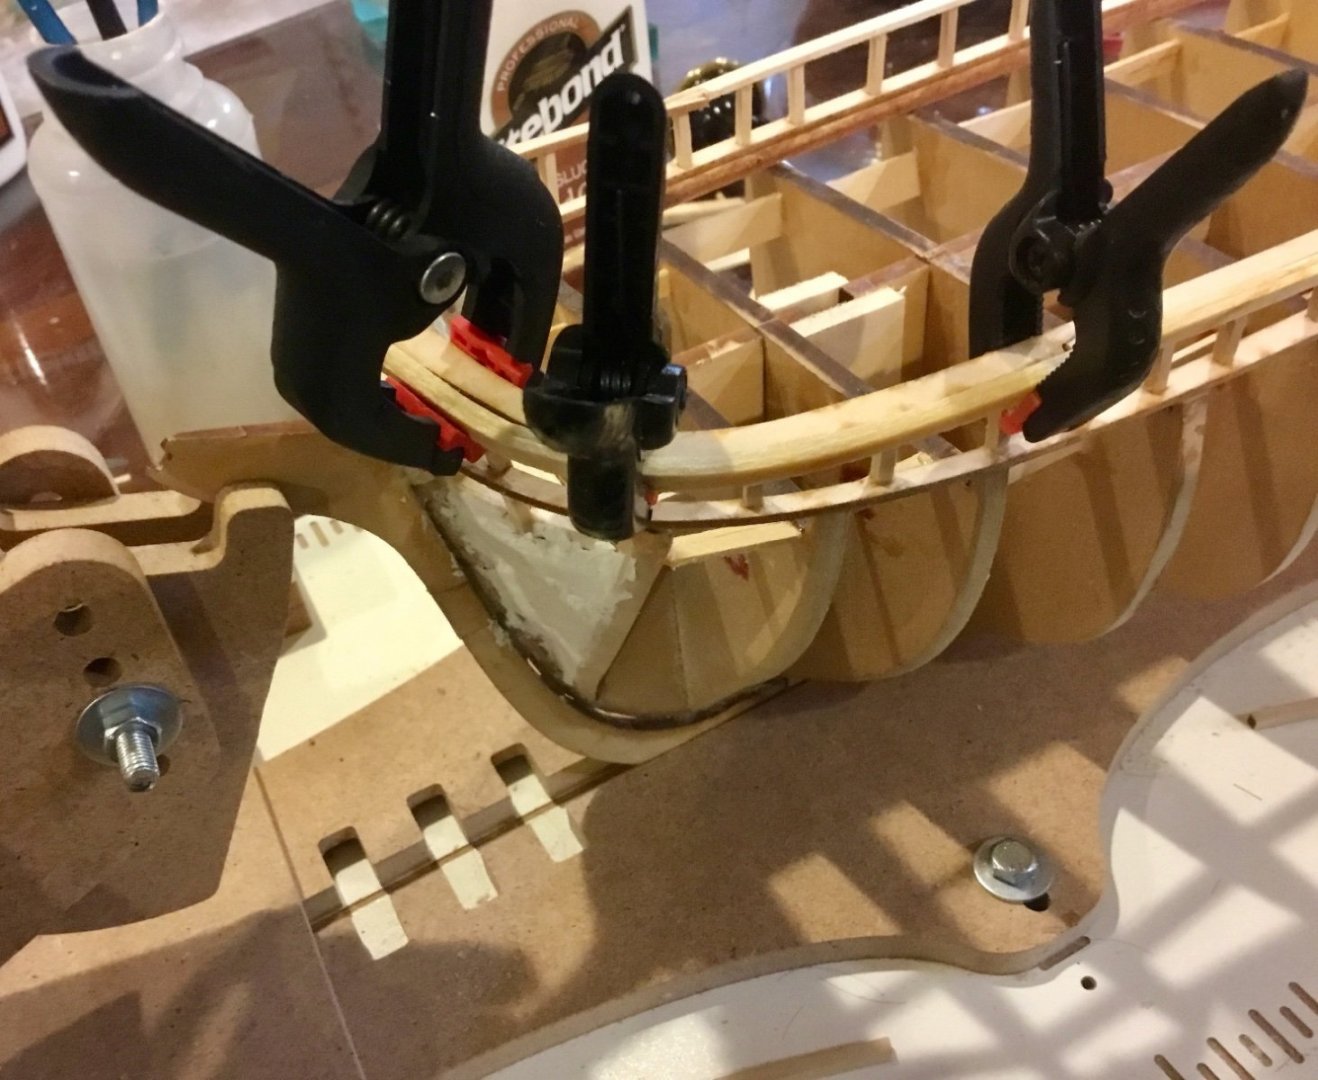
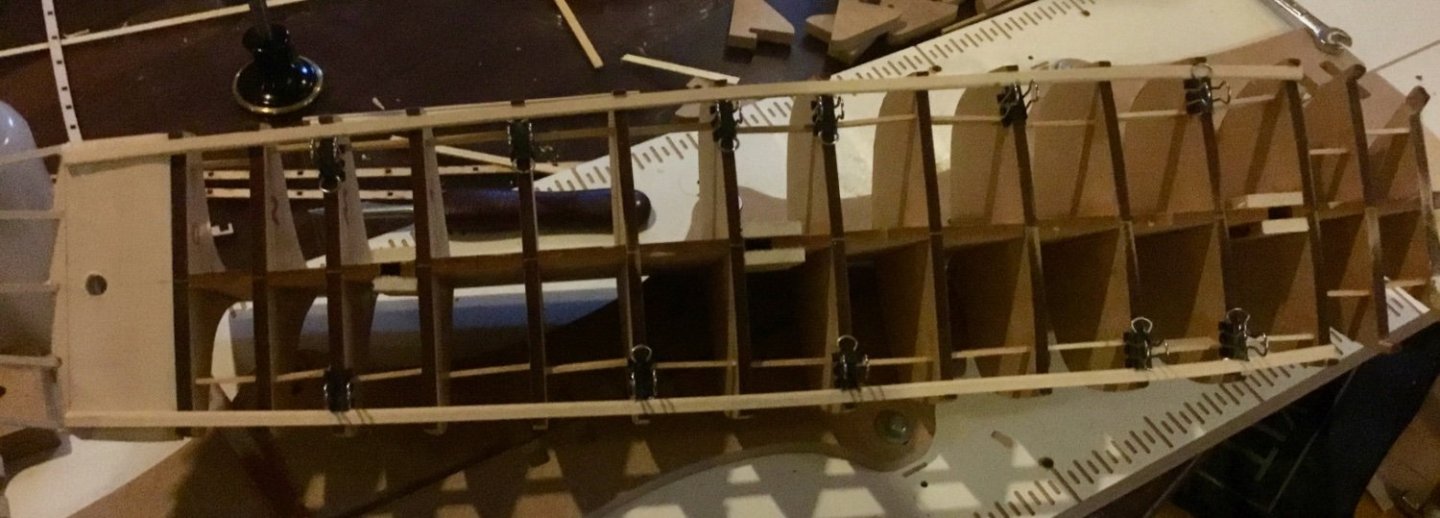
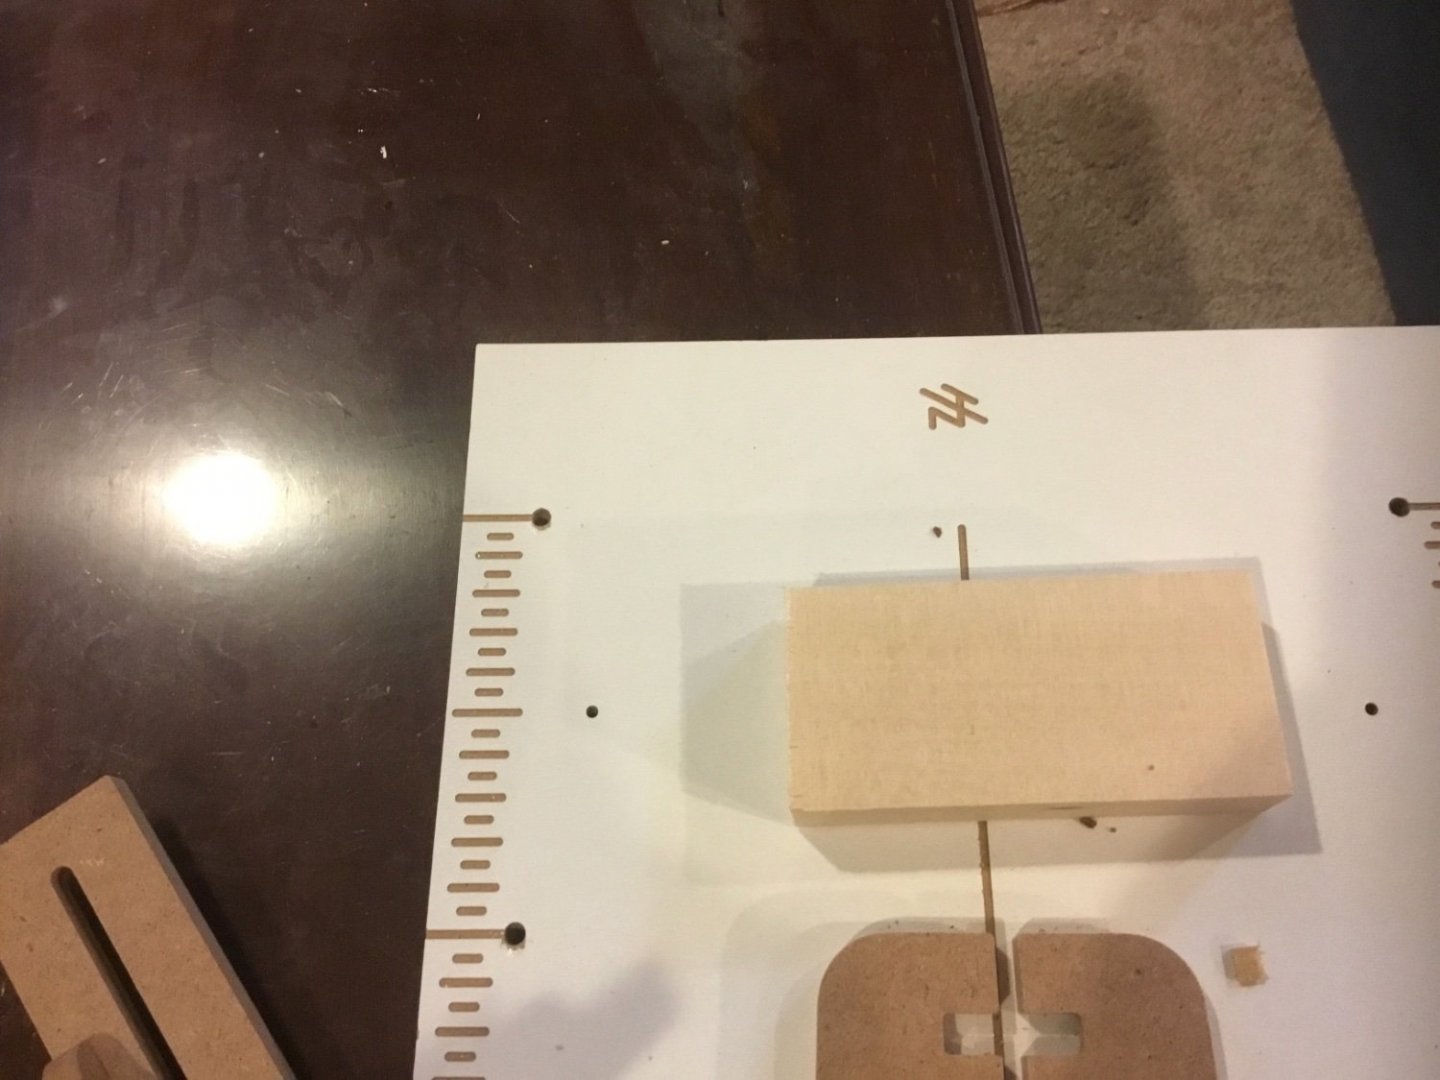
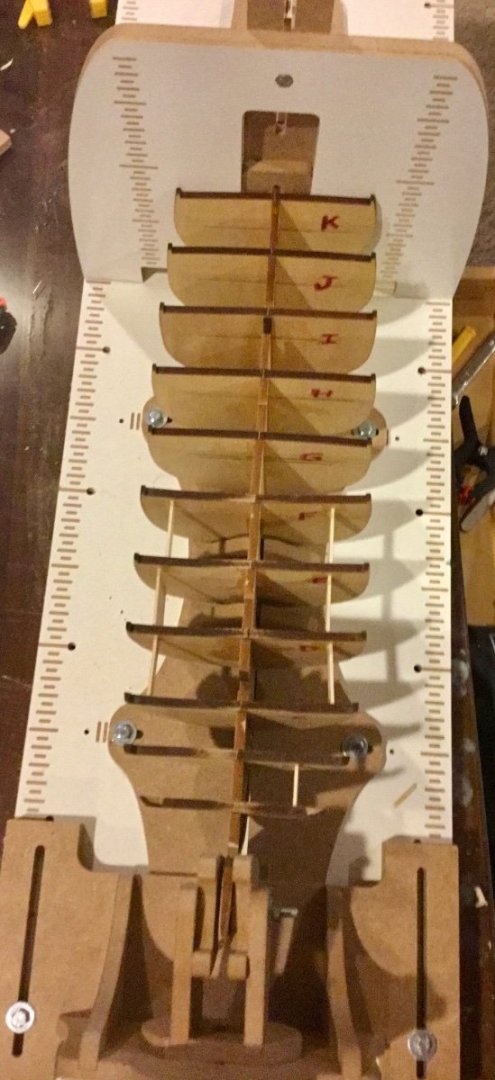
Completed steps 8 and 9 of the framing. Step 8 formed the mortise for the mast and step 9 installed the locator holes for the windlass bitts and the cabin heater stack. Then I started stage 2 of the build by lining off the planking belts with thread. Sheet 2 of the instructions says to lay out 3 belts A, B & C with belts A & B at bulkhead 10 consisting of 6 strakes each of 5" full size planks and belt C 3 strakes of 5" a broad strake 7" and a garboard 8". That gave a total span of 90" full size. My bulkhead 10 measured 96mm. This gave me equal width belts of 32mm width at bulkhead 10. I made 2 marks on that bulkhead at 32mm and 64mm from the top of the bulkhead. The width of the A & B belt strakes were given as 3.5" each at the stem and the stern, which gave a distance of approximately 22mm and 44 mm on the model. I made 2 marks at the stem and stern at these distances for the tops of the nearest bulkheads 1 and 19. I temporary glued a thread in what looked to me as a pleasing curve connecting these marks to form the 2 lines which separate the 3 belts. I have decided to start at the keel and work my way up when installing the planks. I used the templates provided in the kit for the garboard strake as a starting point. I traced these to thin card stock and cut out the pieces that make up the garboard and then began gluing these in place. Once the garboards are in place, I plan on using the planking layout from plan sheet 2 and the base established by the garboard strake for spiling the remaining planks in each belt.

- 37 replies
-
- 4
-

-
- Glad Tidings
- Model Shipways
- (and 1 more)
-
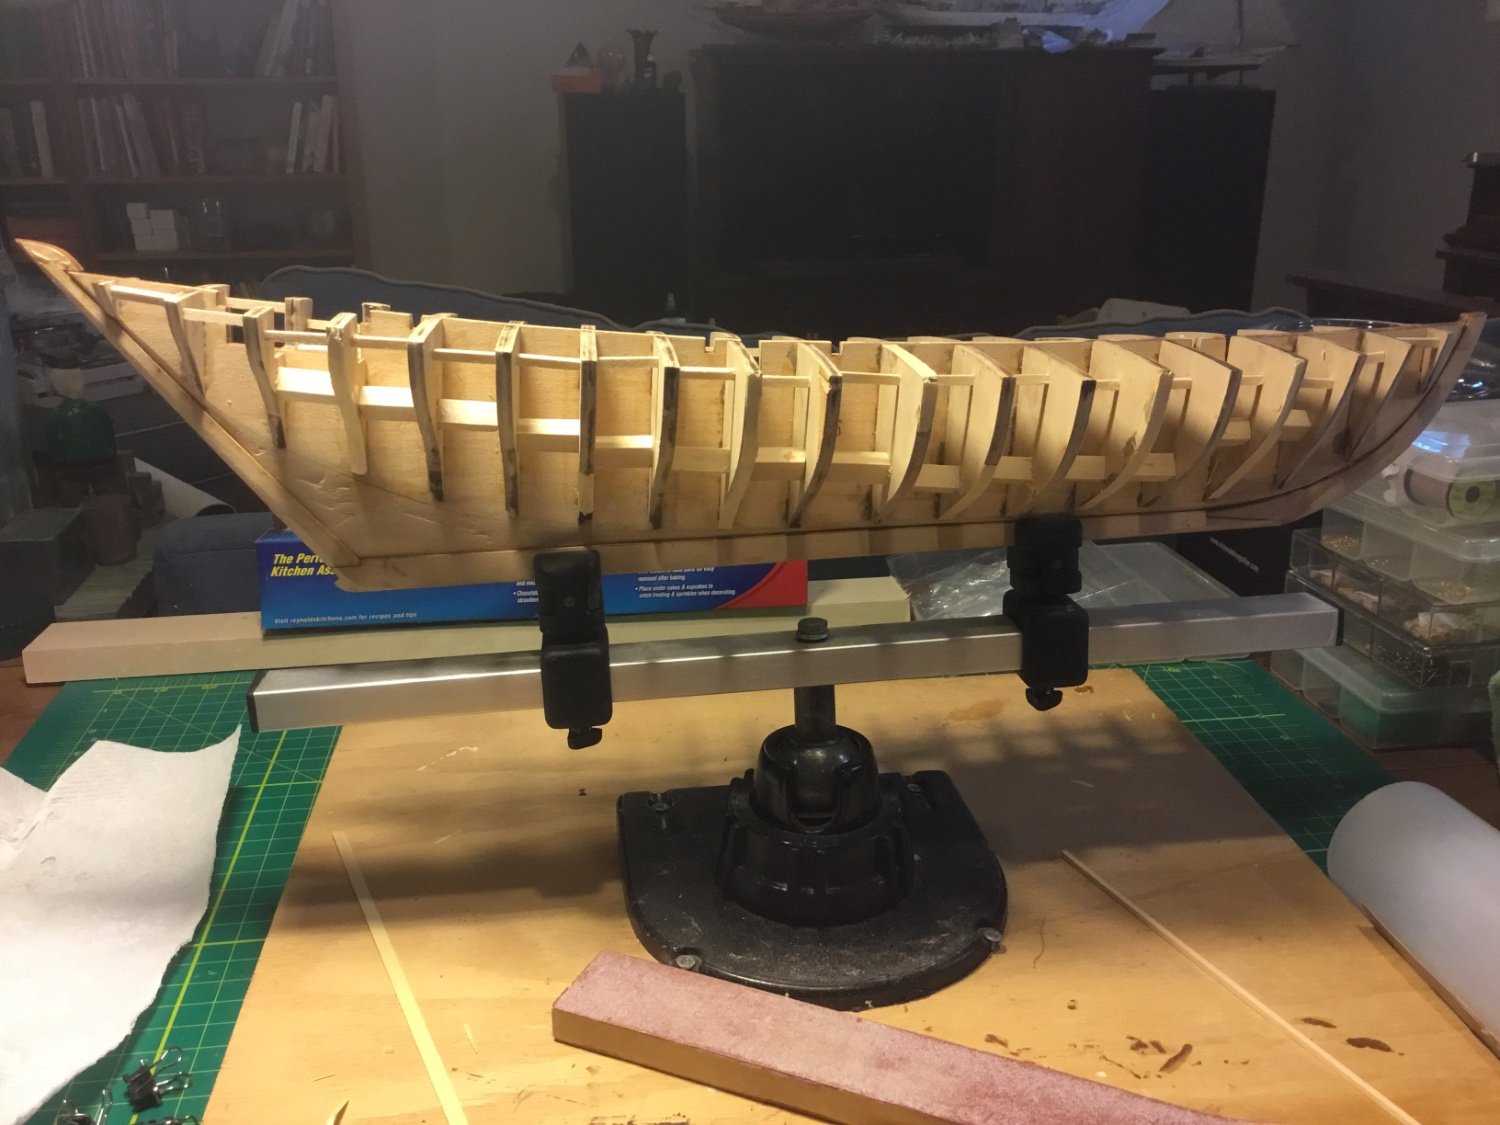
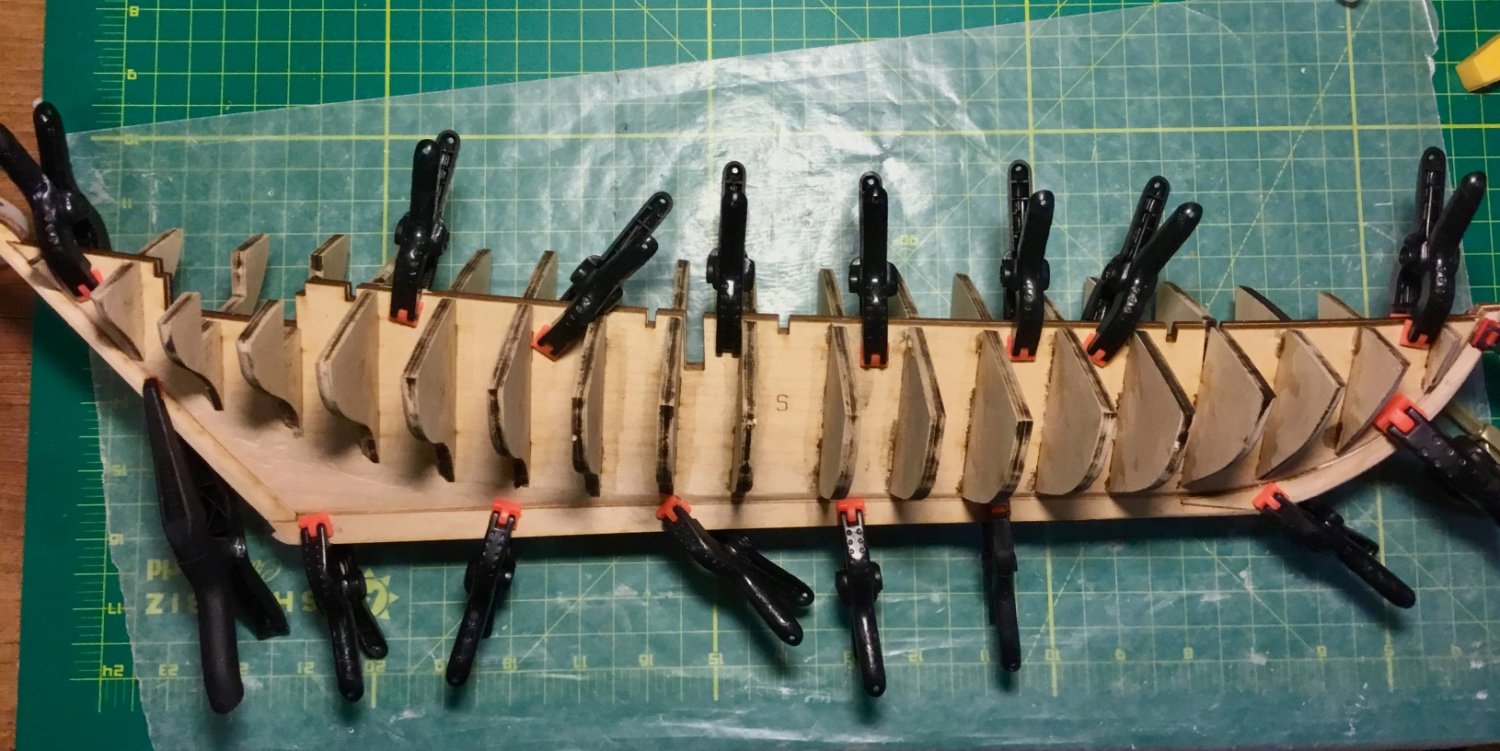
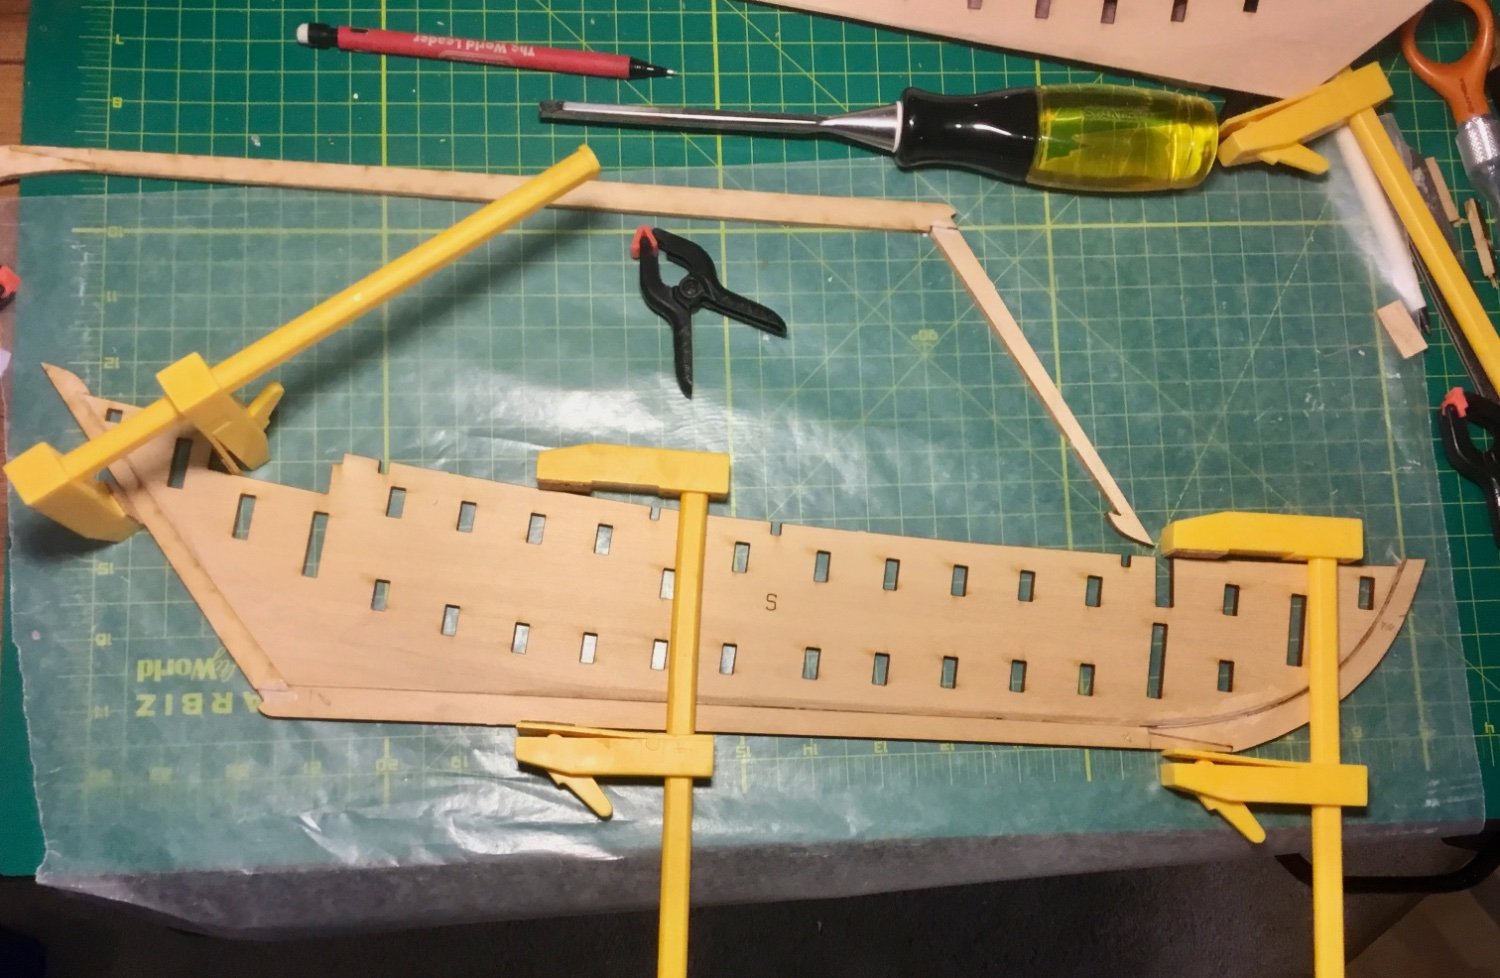
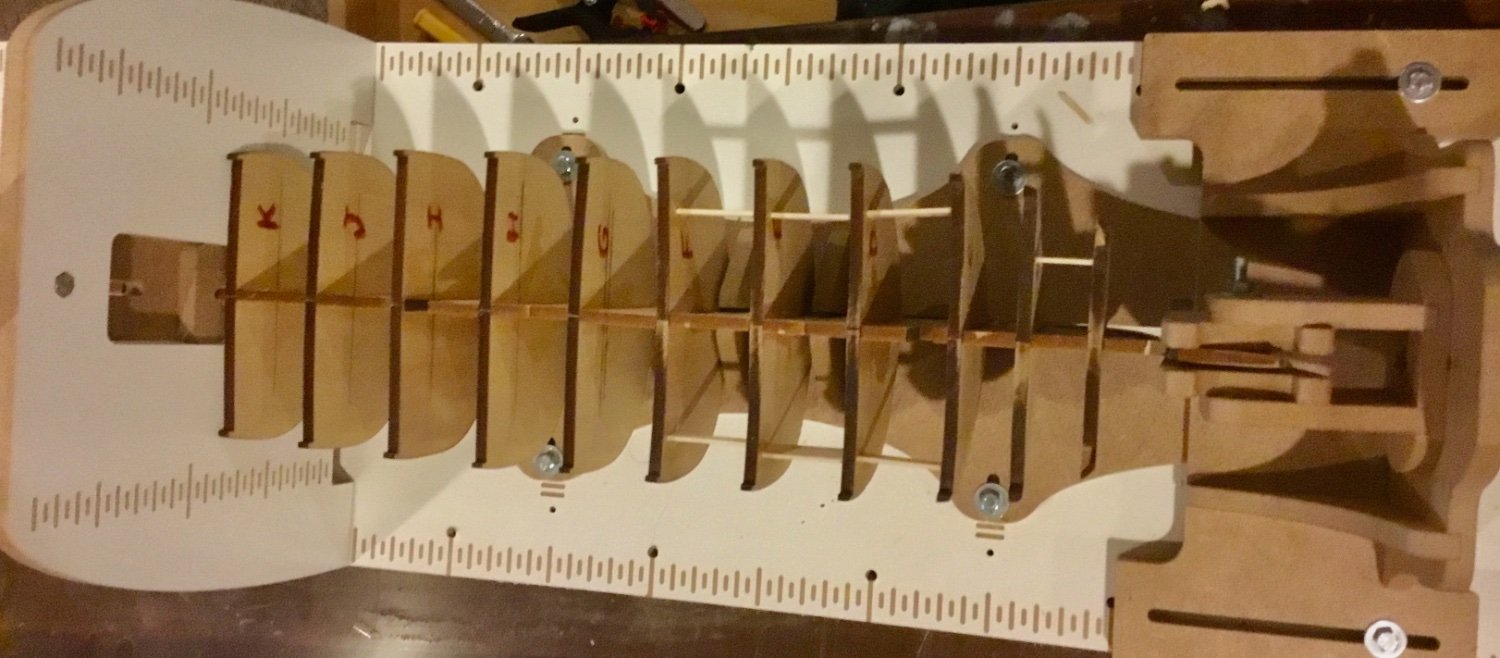
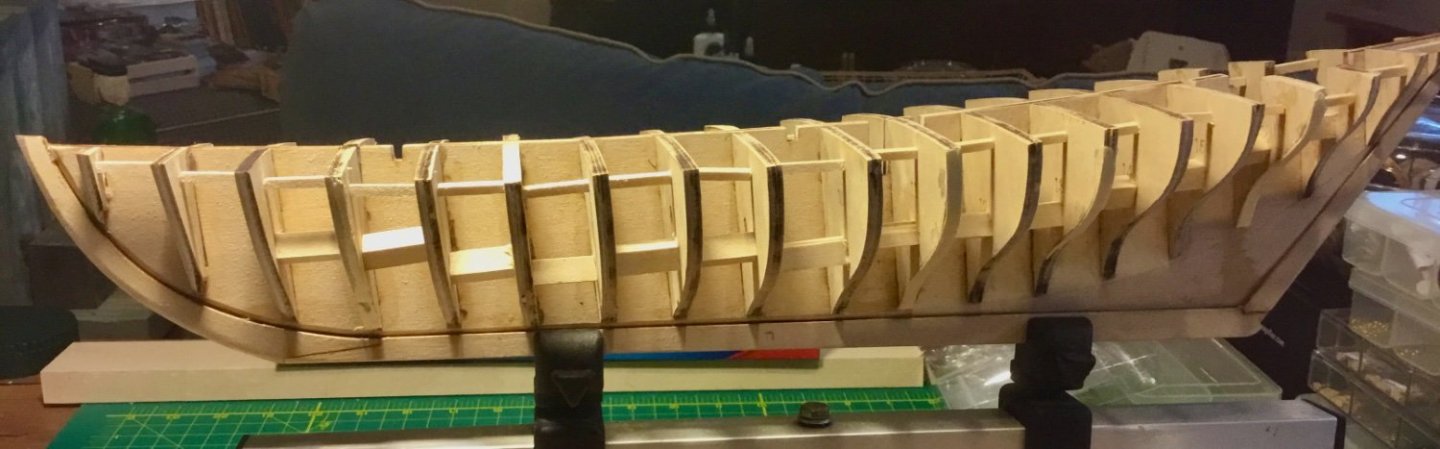
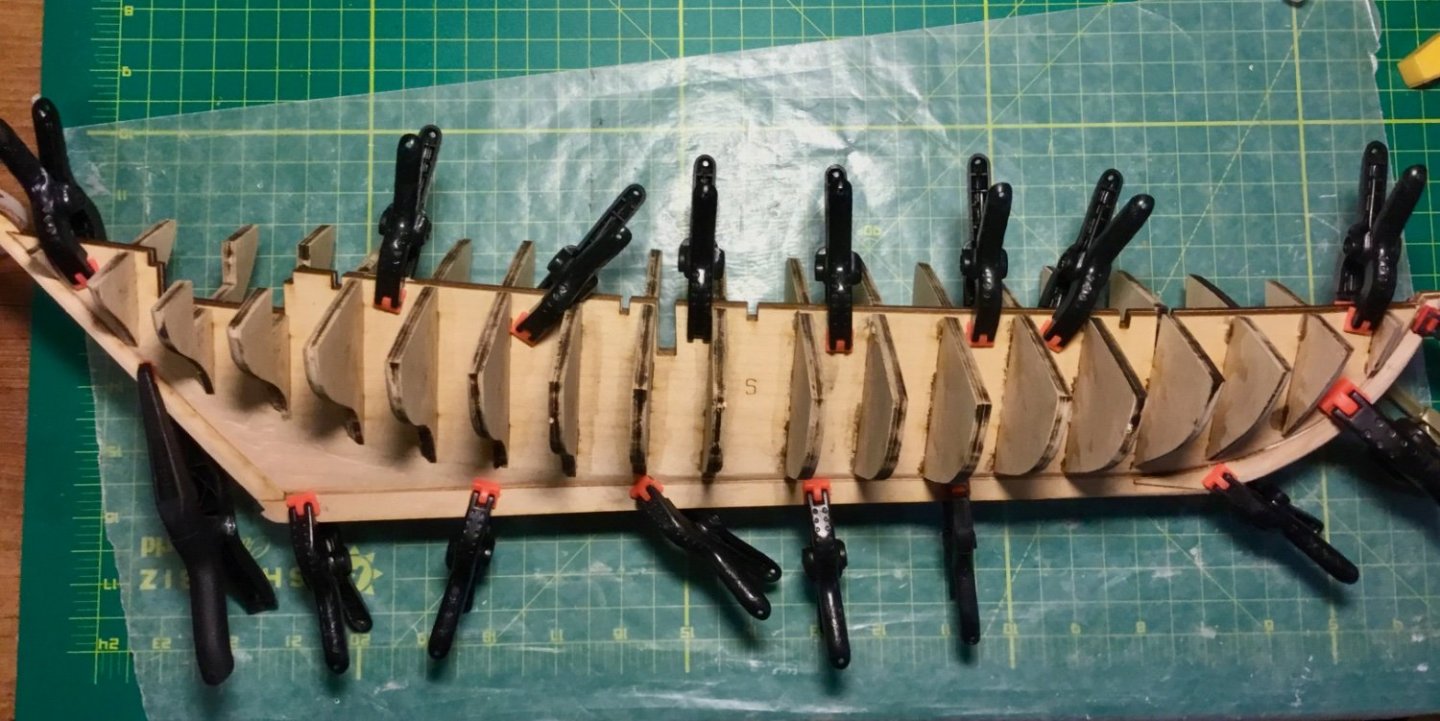
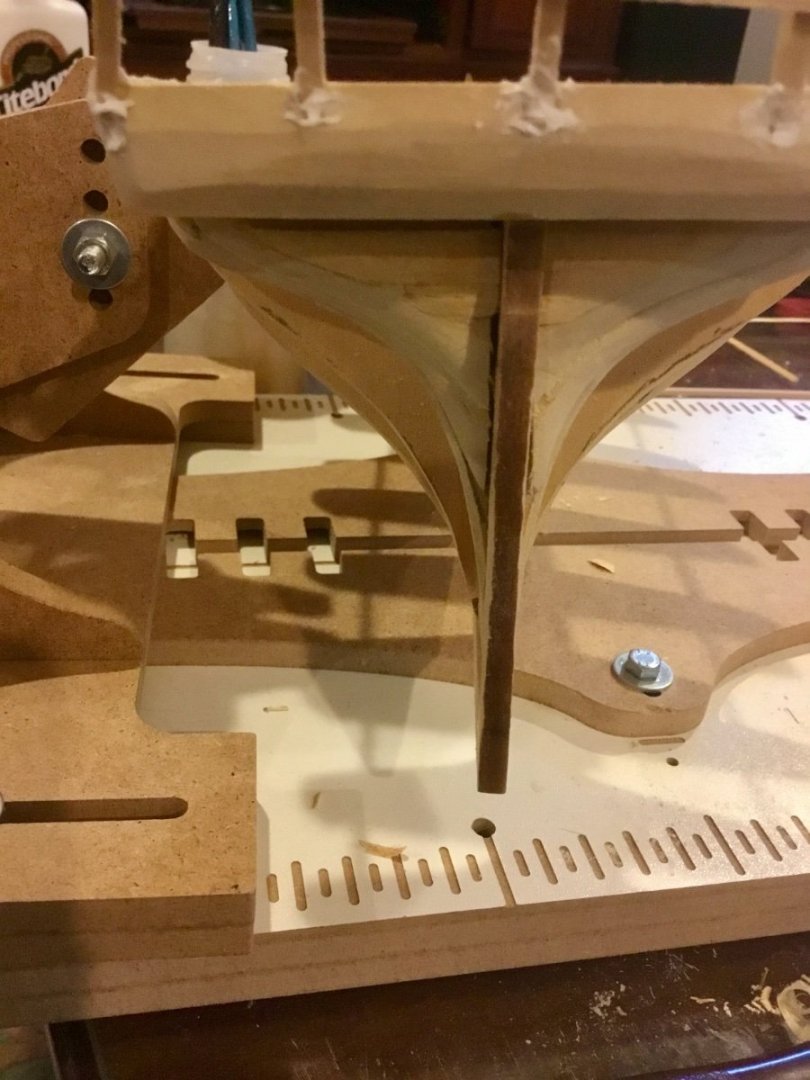
Completed step 7 of the instructions. I cut and fit the carlings between bulkheads, locating their positions by taking off measurements from the plans using dividers. I allowed them to dry overnight and then installed the laser cut traverse deck beams after cutting each to fit. The hull and the top of the bulkheads have both been faired to my satisfaction.


- 37 replies
-
- 4
-
-
- Glad Tidings
- Model Shipways
- (and 1 more)
-
Thanks for the encouragement. I plan on painting the ship and coppering the bottom so hopefully the paint will subdue the flaws that occur during construction.
-
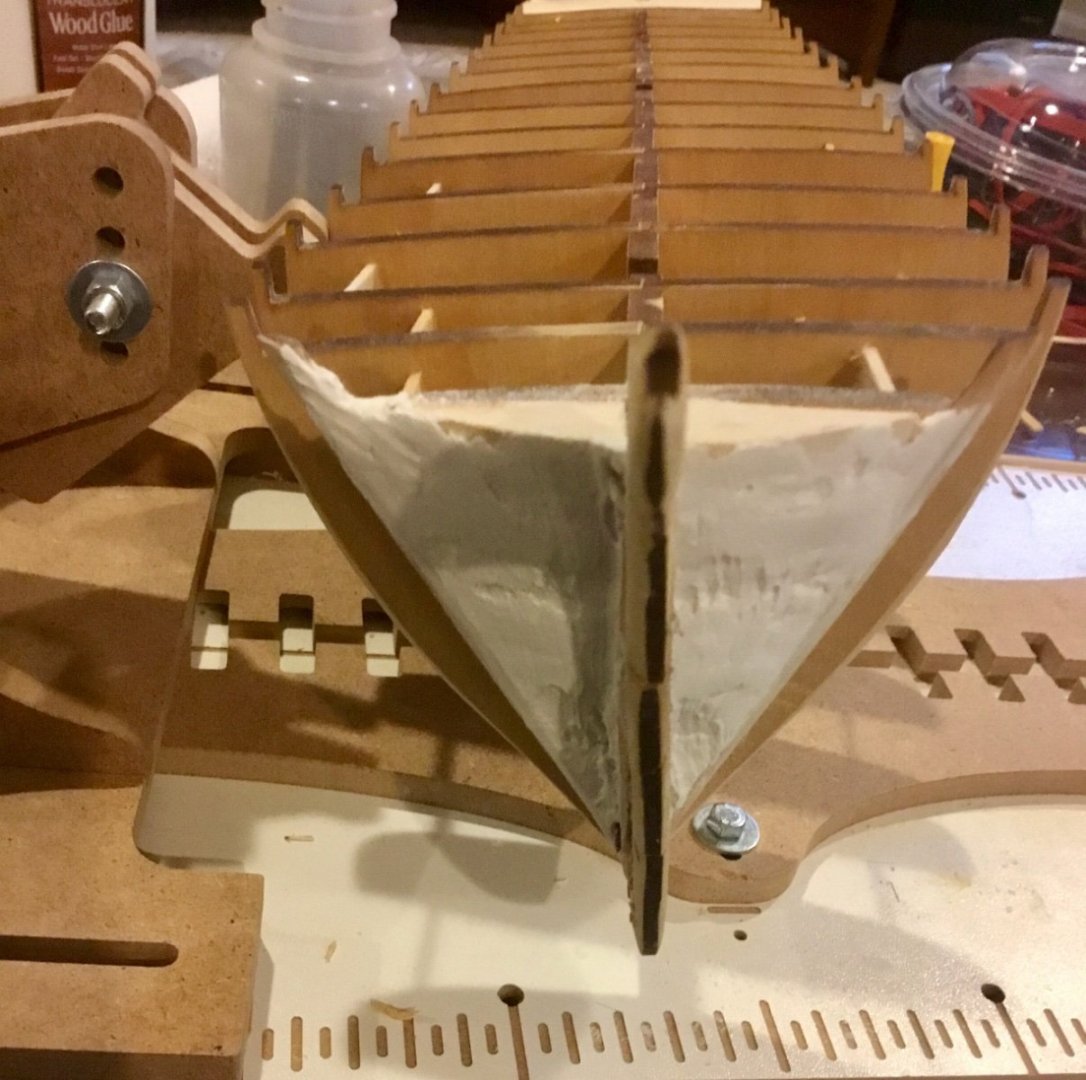
I have been slowly working on fairing the hull and the top of the bulkheads. Have been daily sanding, applying 1/64" x 3/16" shims at low points, resanding, checking fairness with a batten, etc. Think I'm almost there.


- 37 replies
-
- 3
-
-
- Glad Tidings
- Model Shipways
- (and 1 more)
-
installed the topgallant rail. Began planking the bulwarks. The small size of the planking strips and the inconsistencies in the stanchion positions is making this part of the planking process a little frustrating.Looking forward to getting to the hull proper.


-
Search for Hobbyzone, professional building slip in forums. I don't remember were I got it from, but it was on sale at the time at a site I found online.
-
My metal ruler was wrong.
Dsmith20639 replied to modeller_masa's topic in Modeling tools and Workshop Equipment
I generally use dividers to take or transfer measurements, particularly from plans. I use a digital caliper that reads in fractions of an inch to measure thickness and width of planks. I rarely, if ever, use a ruler for measuring when constructing a model. Also its becoming more difficult for me to read the smallest divisions on a ruler due to my age (77) and gradually failing eyesight. -
Installed main rail. Bent log rail at stem by soaking rail pieces and using my plank bending iron to approximate shape and then secured to main rail over night until completely dry and conforming to shape. Then I glued the log rail in place.

-
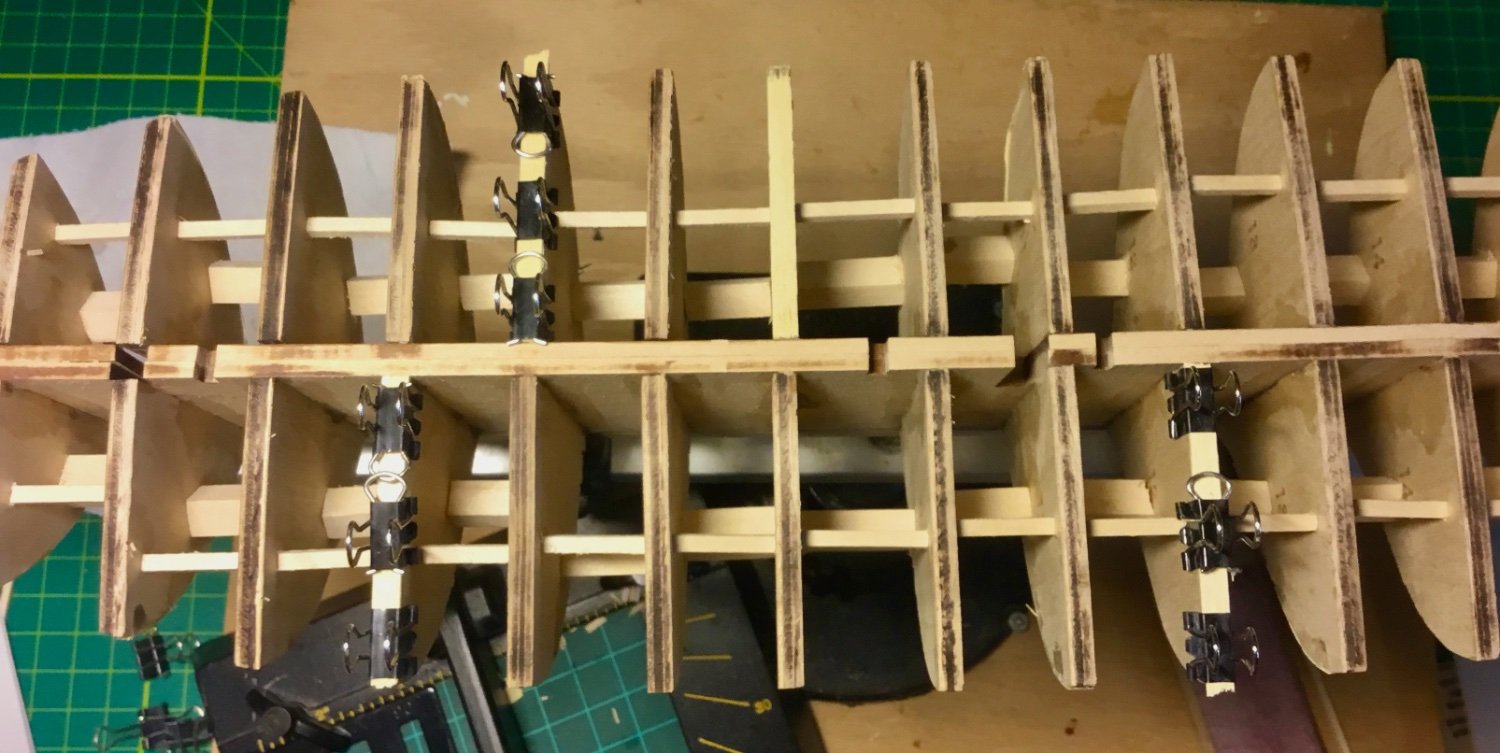
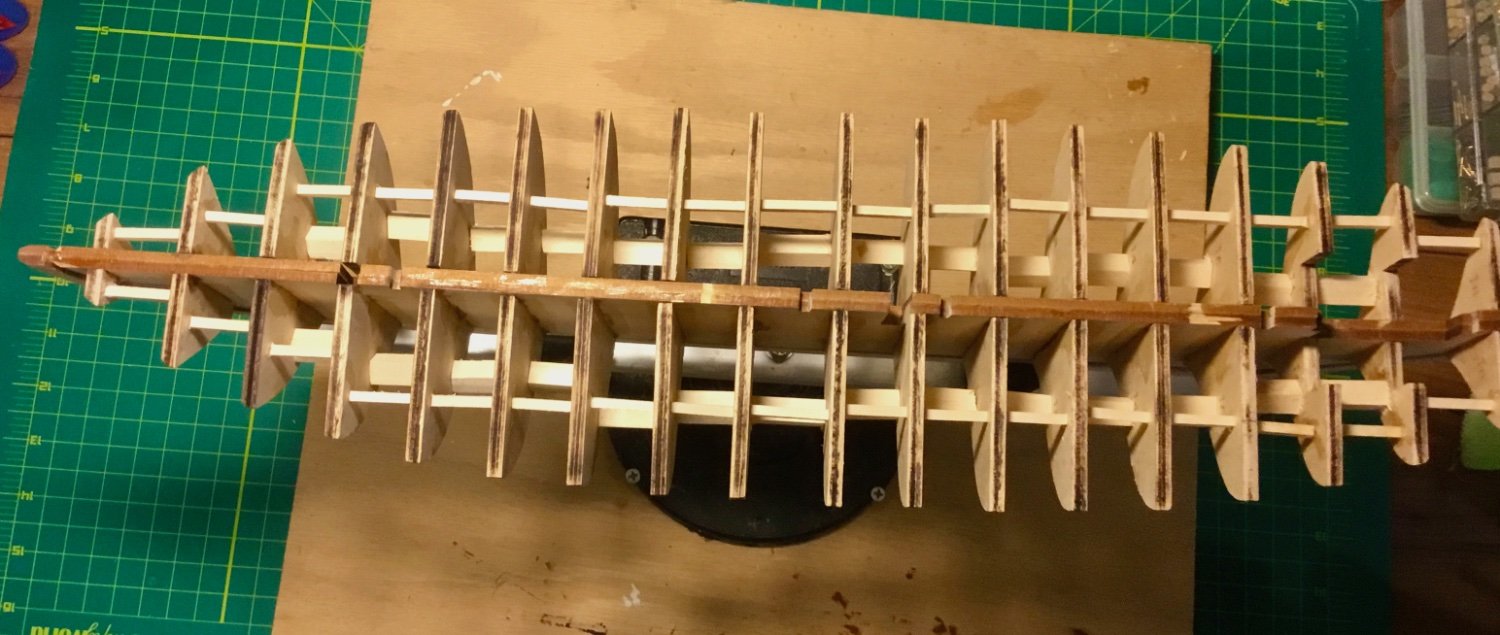
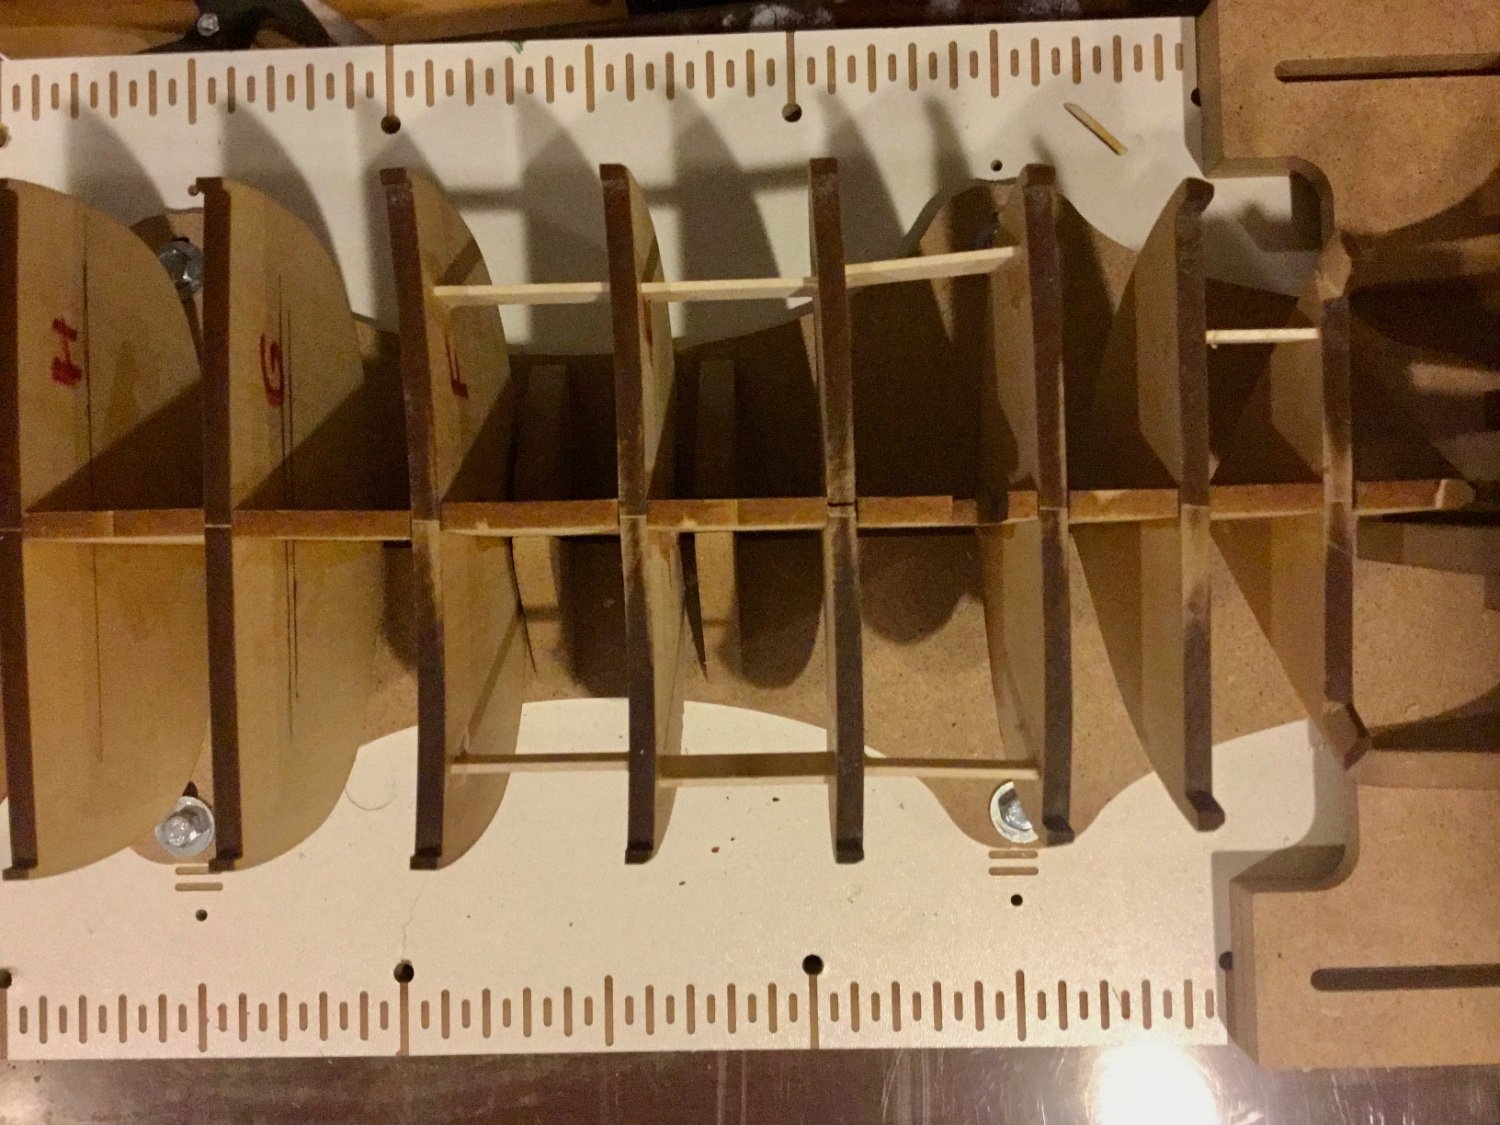
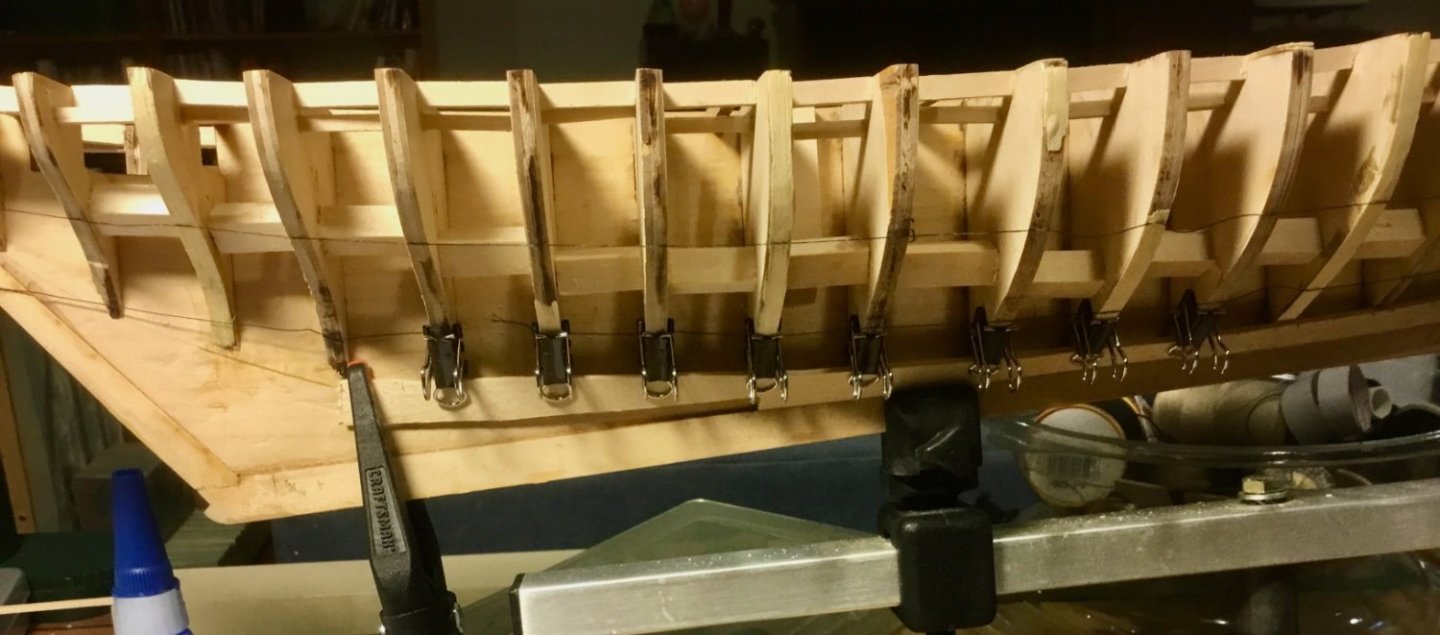
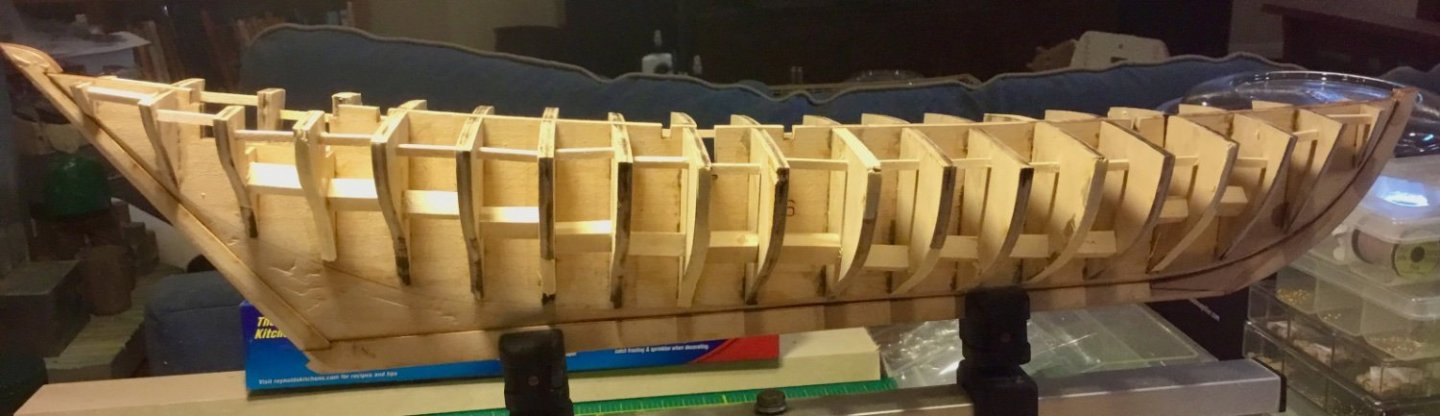
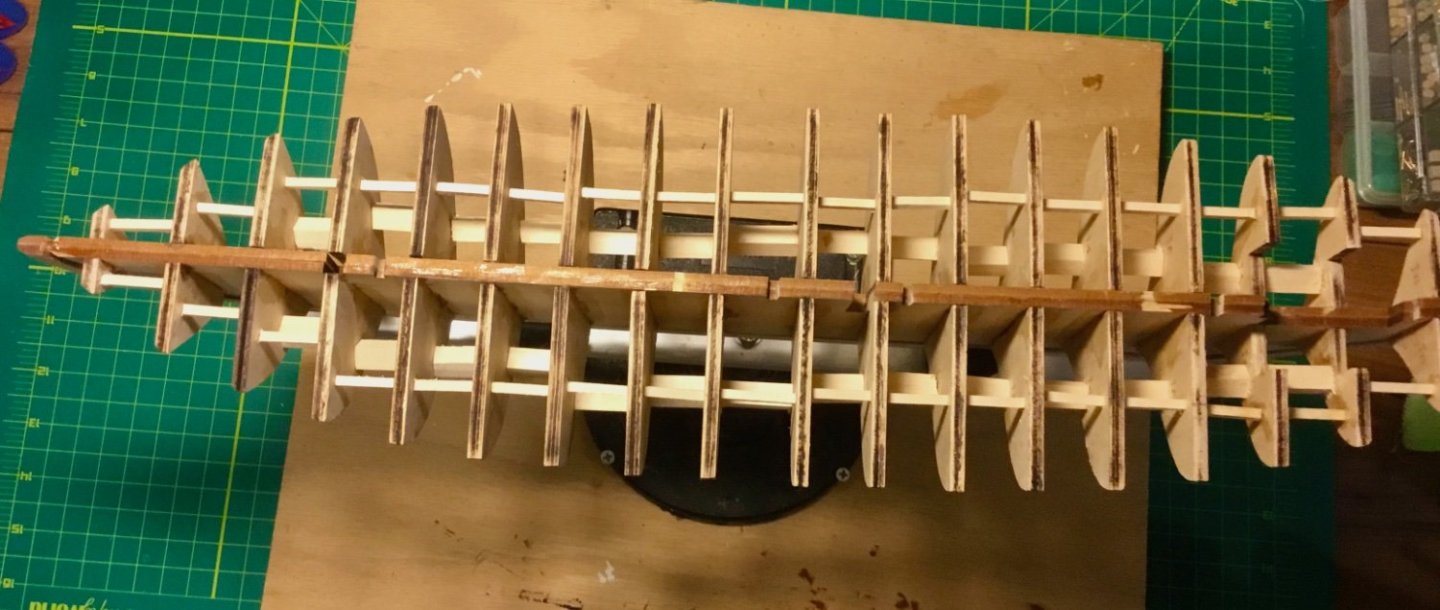
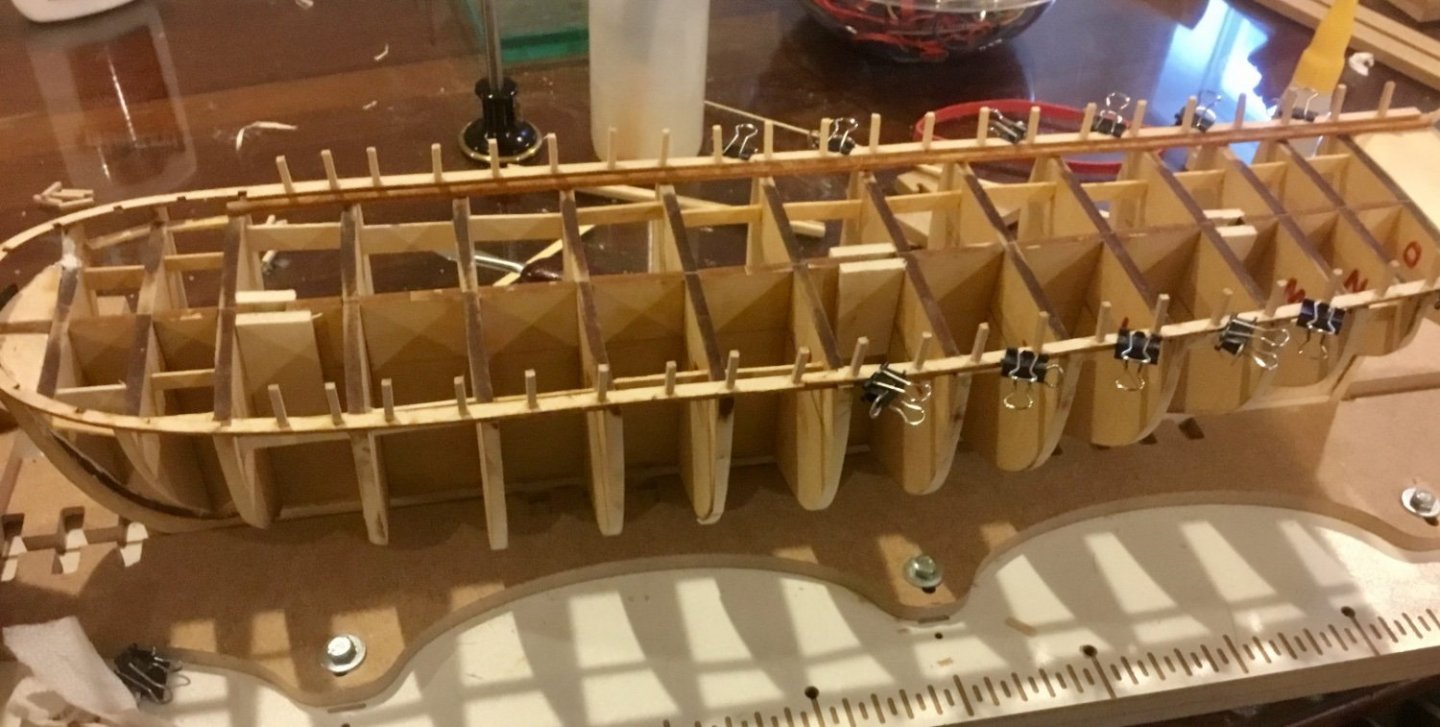
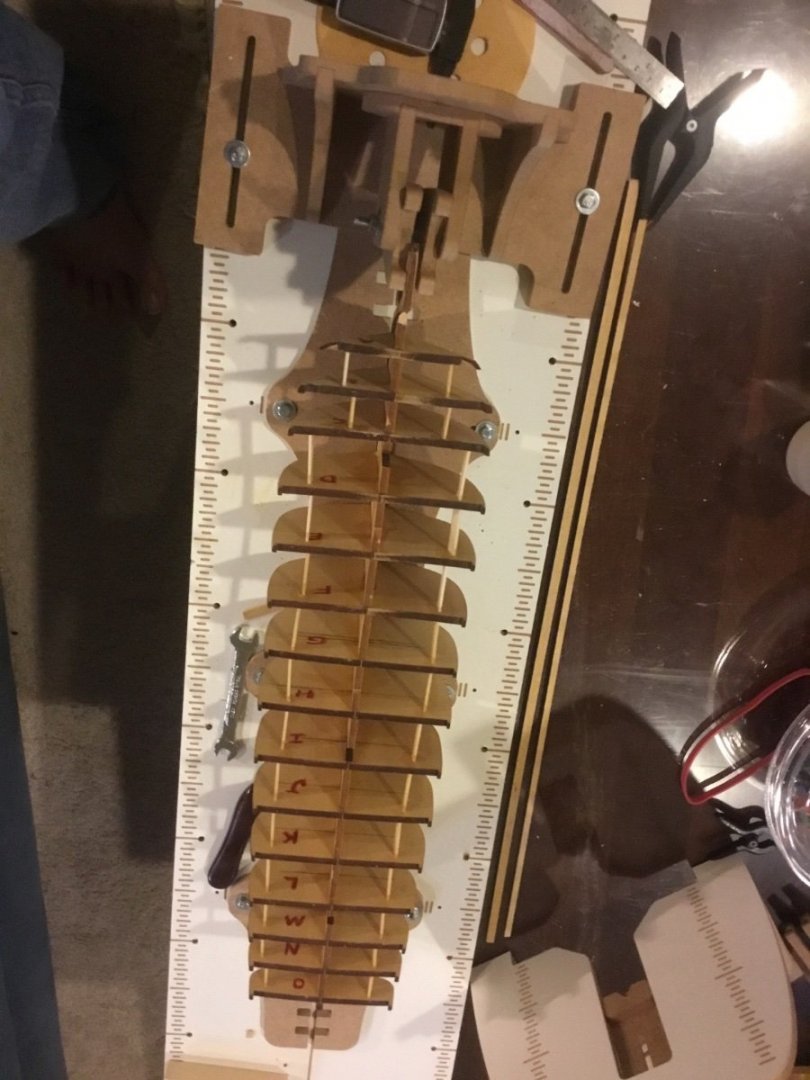
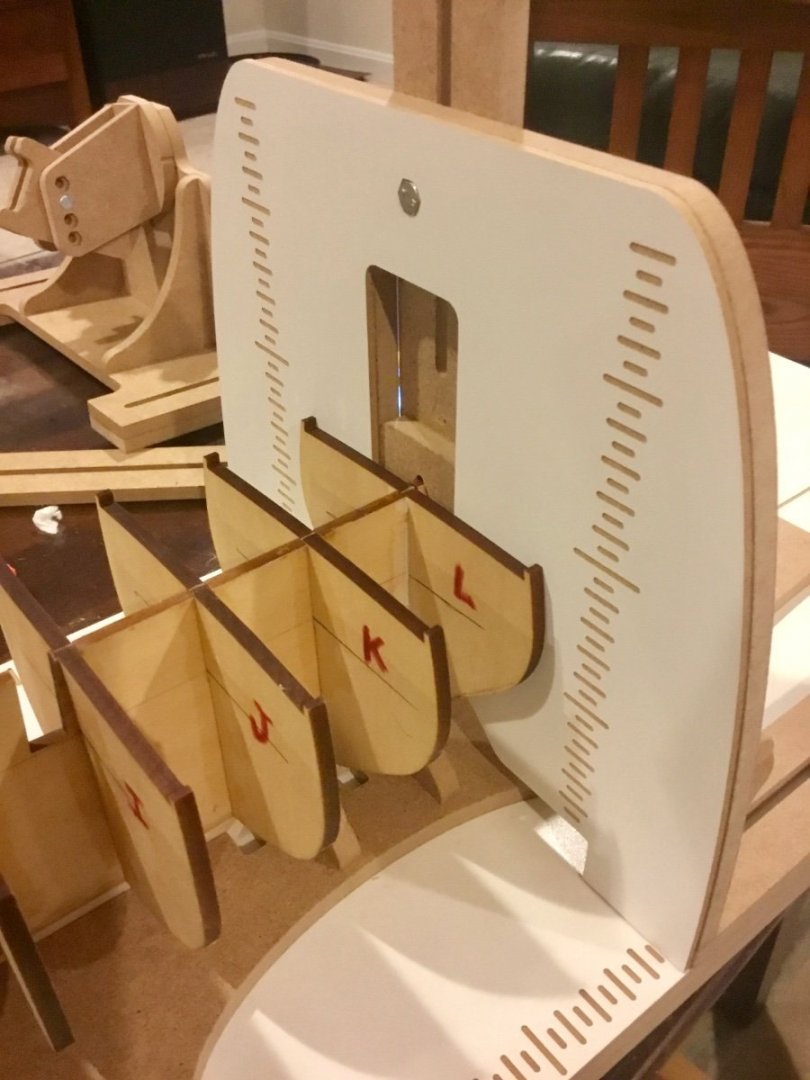
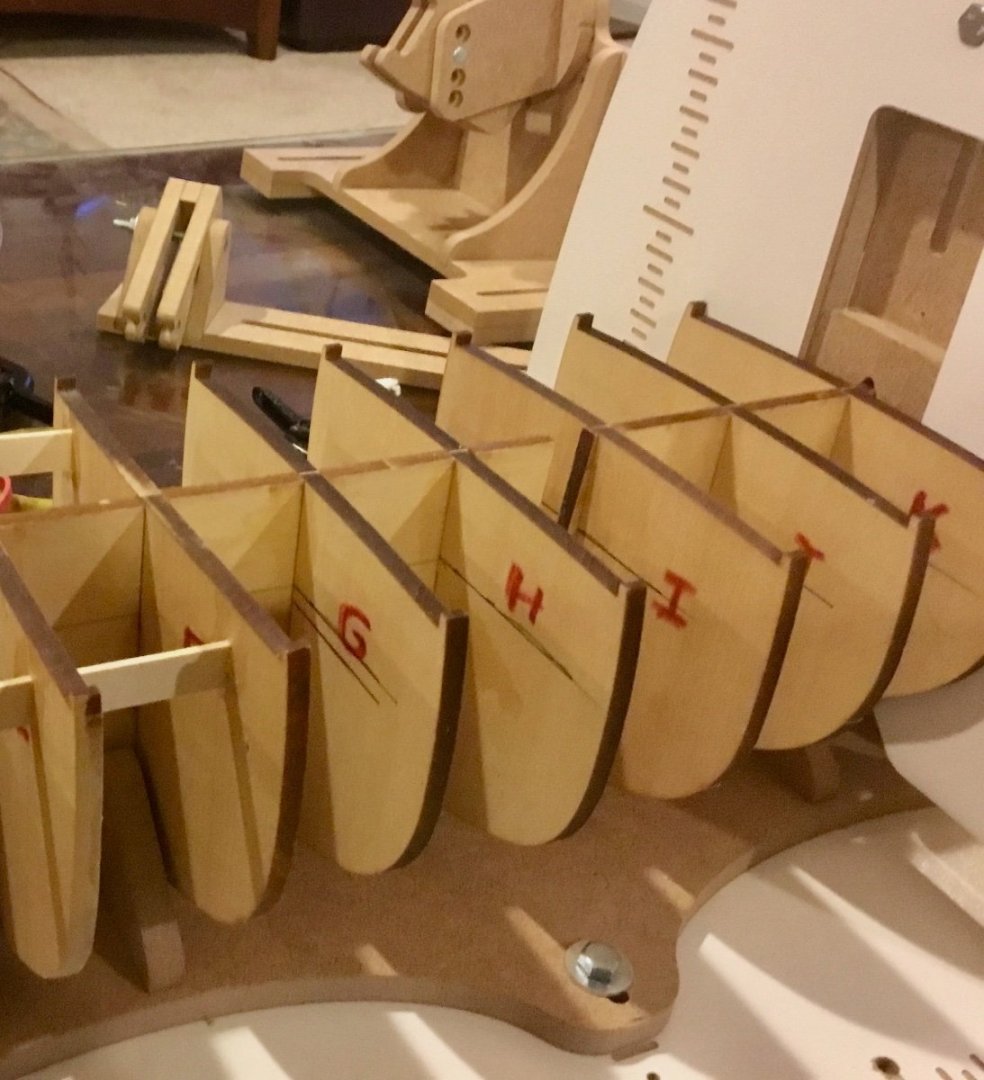
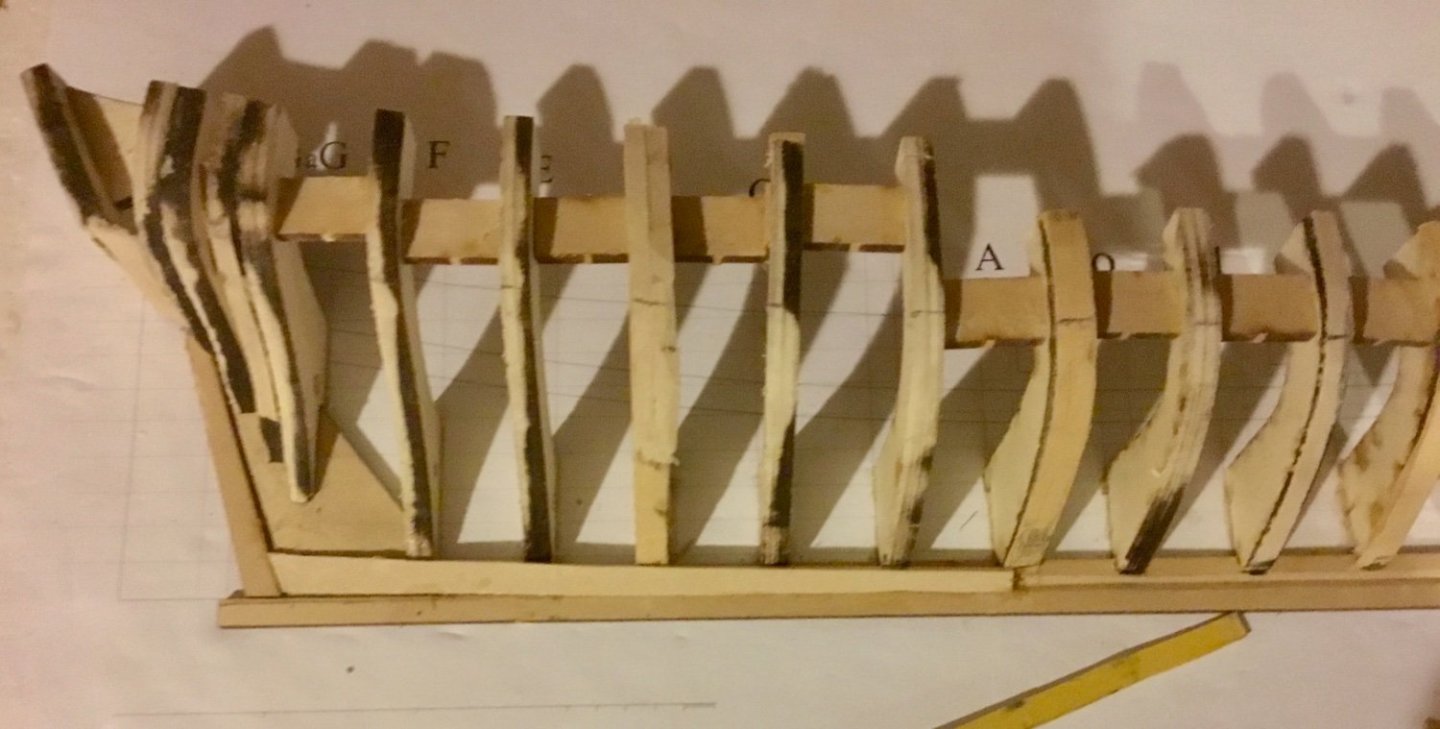
Finished adding bulkheads to individual hull halves. Glued hull halves together and added bracing struts between bulkheads.

- 37 replies
-
- 3
-
-
- Glad Tidings
- Model Shipways
- (and 1 more)
-
Continuing work on Glad Tidings. Gradually adding bulkheads to each hull half. I'm going slowly, only adding one or two bulkheads a day allowing plenty of time for the glue to properly setup.

- 37 replies
-
- 3
-
-
- Glad Tidings
- Model Shipways
- (and 1 more)
-
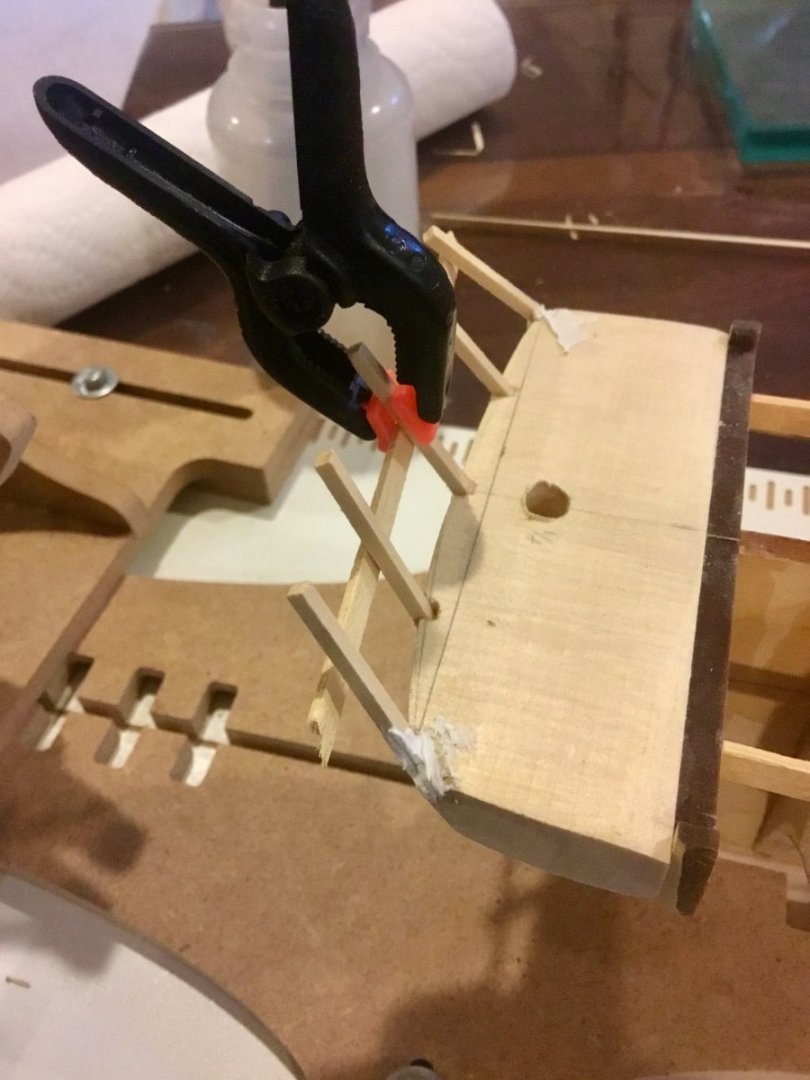
Continuing work on Charles W. Morgan. Faired the hull. Added the counter block, the stem and stern filler blocks, the waterway, planksheer, and most of the bulwark stanchions. Fortunately I had previously downloaded the build log from TEXXN5's web site before it disappeared. It has been a great help so far.

-
I think the effort put in to develop this kit is commendable. But in my opinion flawed. The title is half hulled PLANKING project. Emphasis should be placed on PLANKING. My previous comments might be considered for some future revision. Eliminate the use of a foam backing board, build it on a solid board with half size bulkheads ala the Glad Tidings pinky schooner and eliminate the need for transferring locations from an underlying paper plan such as the locations of the frame tops and wales to create an easier and stronger foundation for the purpose of learning how to plank a ship. I have spent more time coping with the weakness of the underlying framework than actually learning how to properly plank a ship. Even a rough solid wood half hull that needs sanding, etc. to smooth and true the shape of the hull would be better.
-
I agree with your last note but I think your machinists square must be a lot thinner or smaller than mine. Maybe a laser suggested markings on the frames to indicate potential locations of spacers or the wales would be helpful.
-
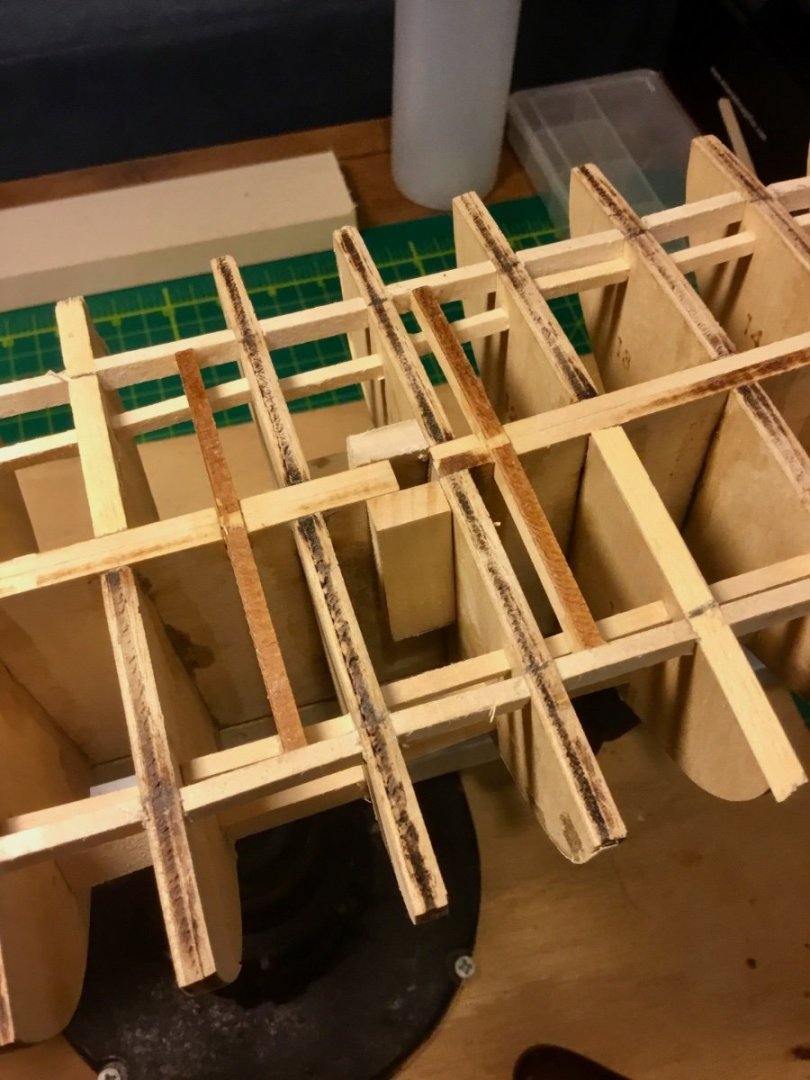
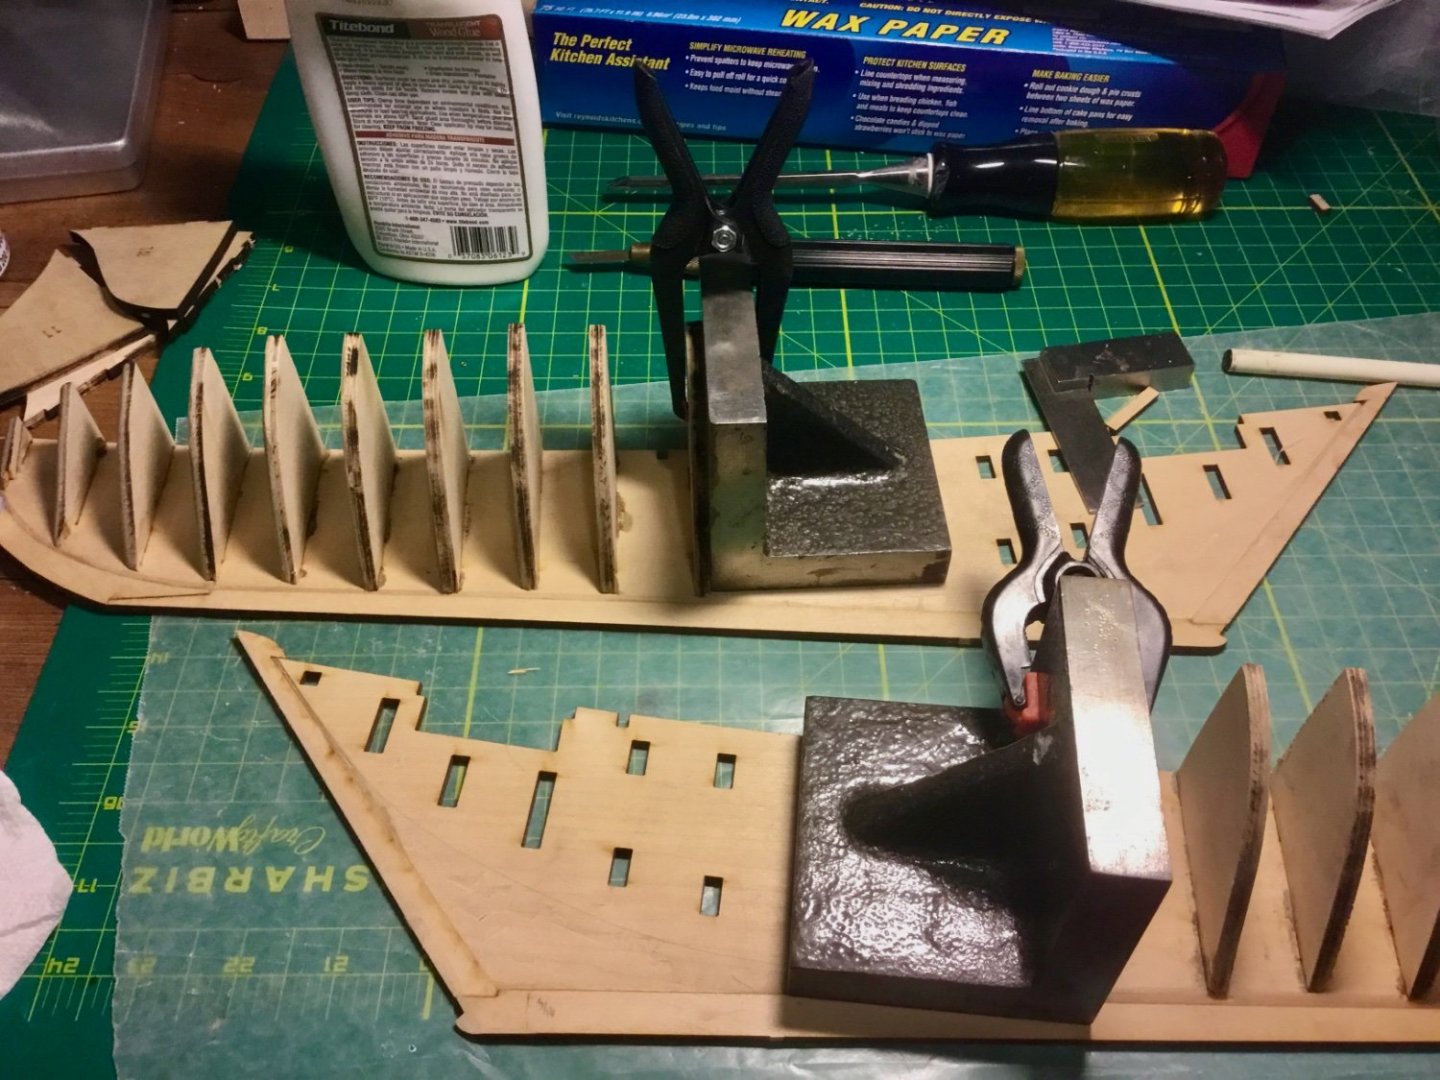
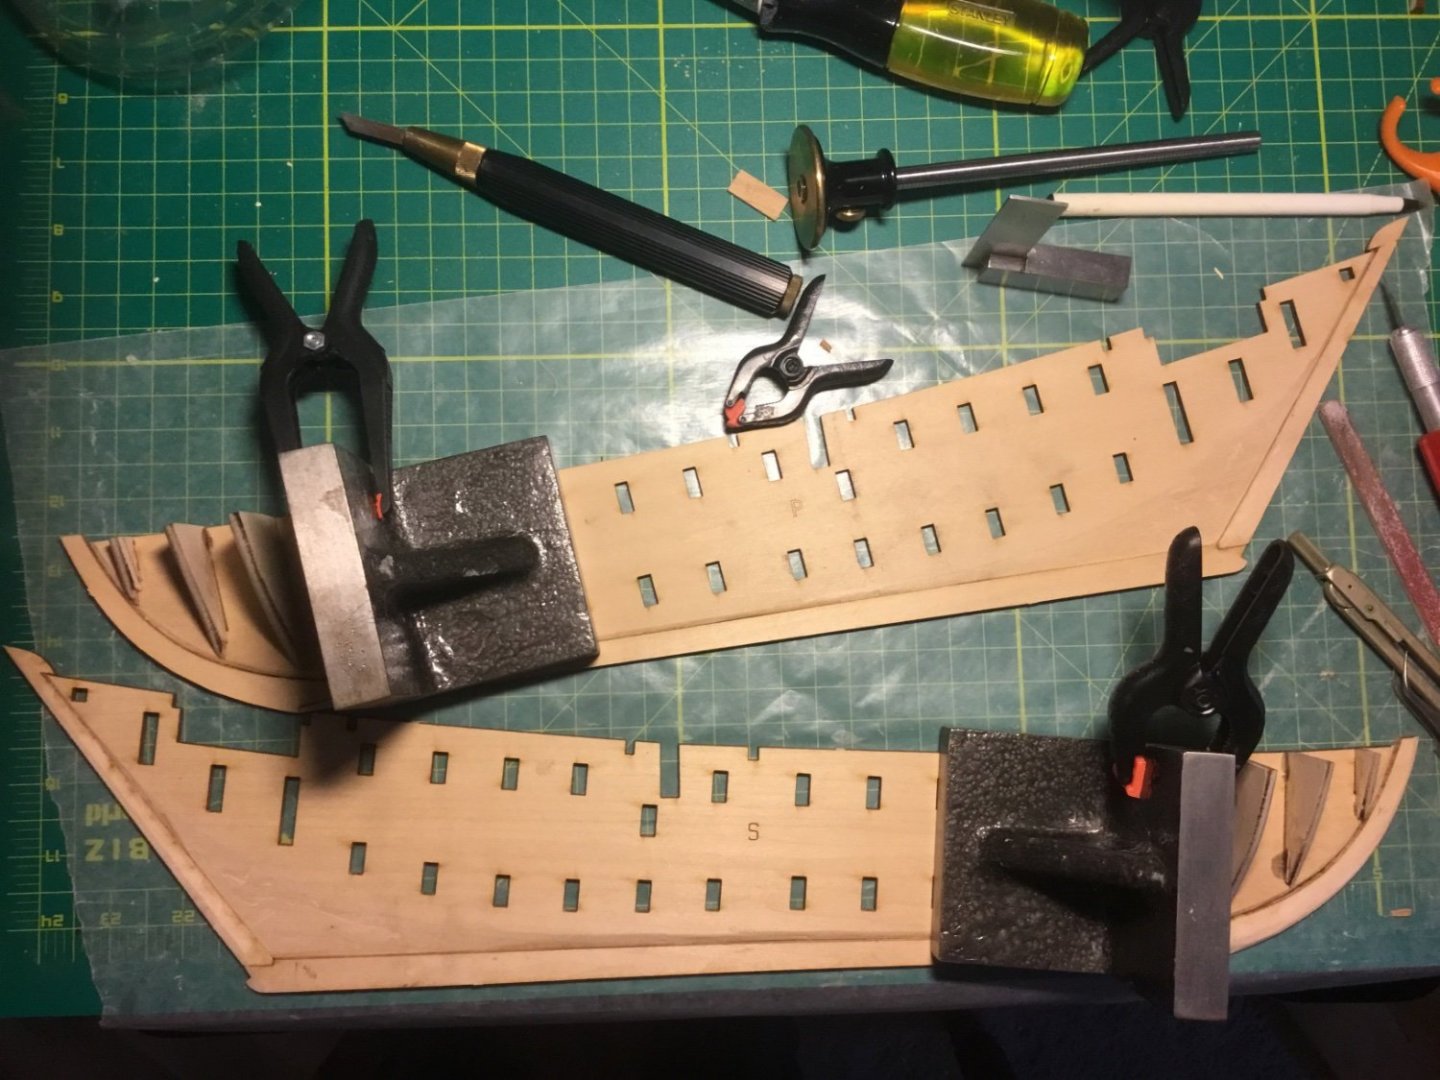
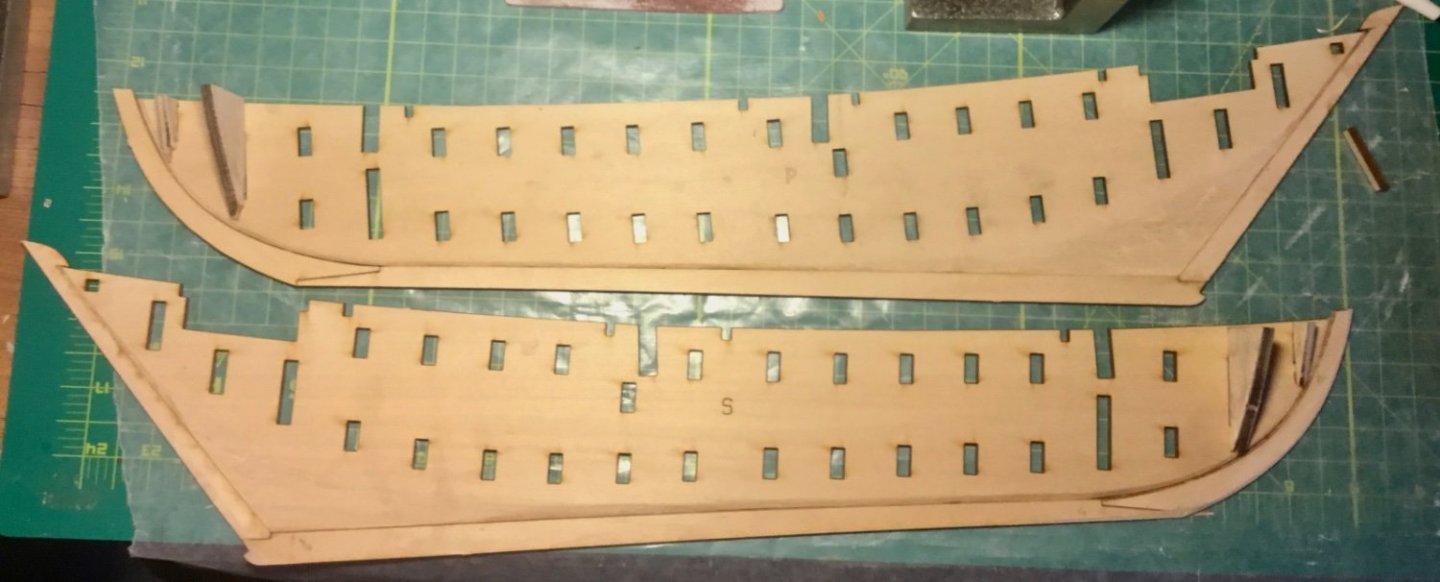
Started my latest primary build. The Pinky Schooner, Glad Tidings, after extensively reviewing several other build logs on this site. This is just the beginning, so far I have only removed the half center keels and cut the rabbets on each keel half. I used my woodworking marking knife to mark a 1/16" reference line around the edges of the center keels and a sharp 1/4" wood chisel to form the rabbets using the laser marked bearding lines on the port and starboard halves.


- 37 replies
-
- 2
-
-
- Glad Tidings
- Model Shipways
- (and 1 more)
-
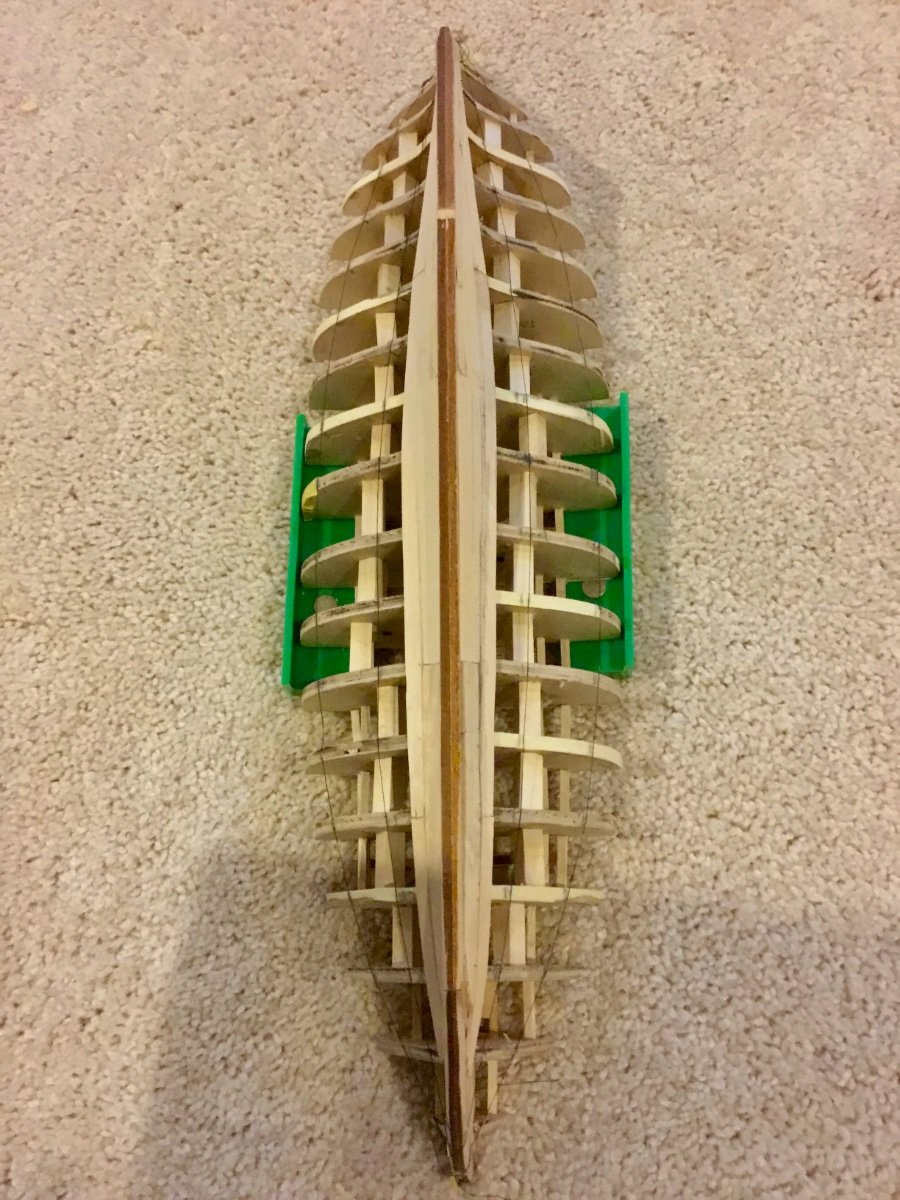
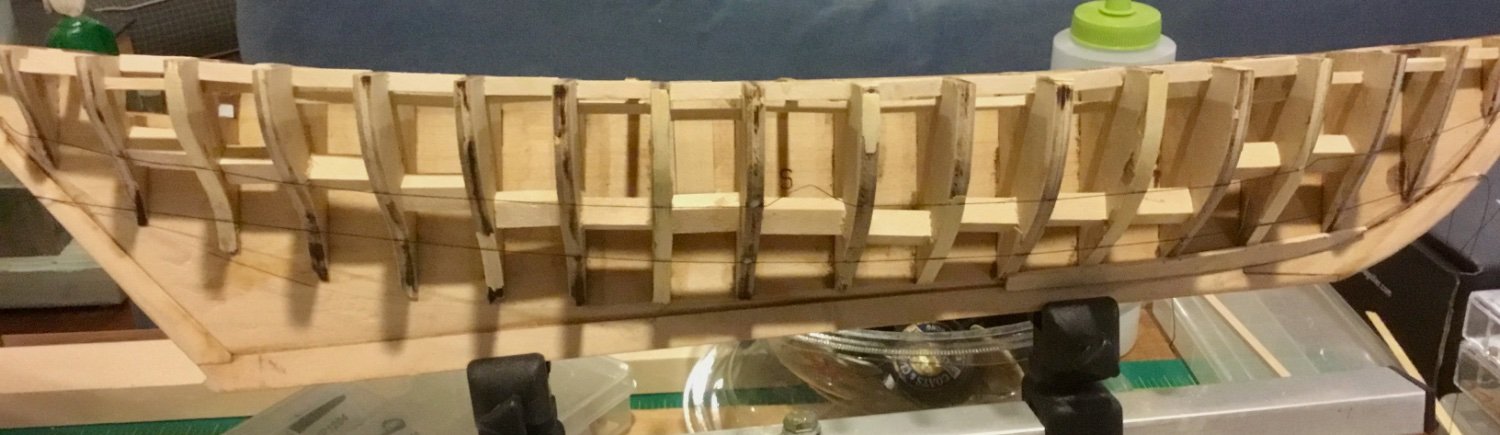
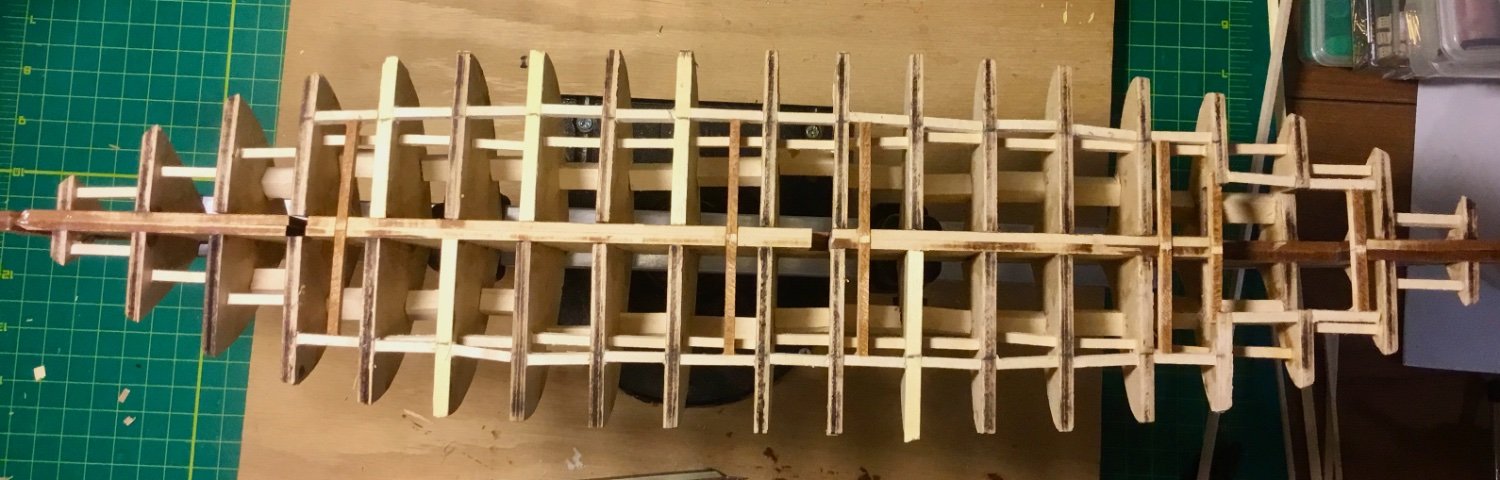
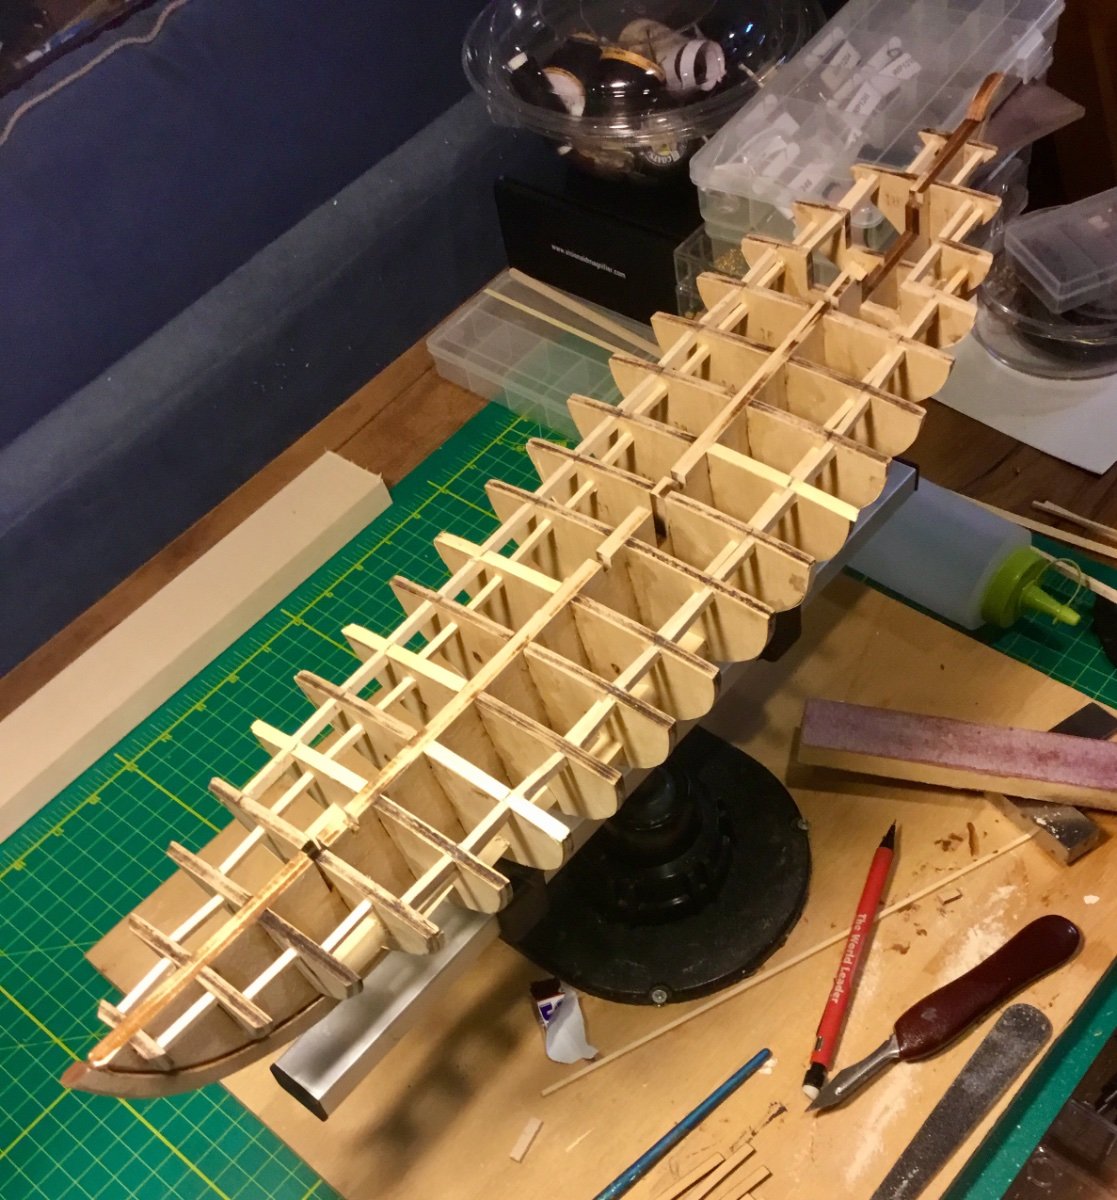
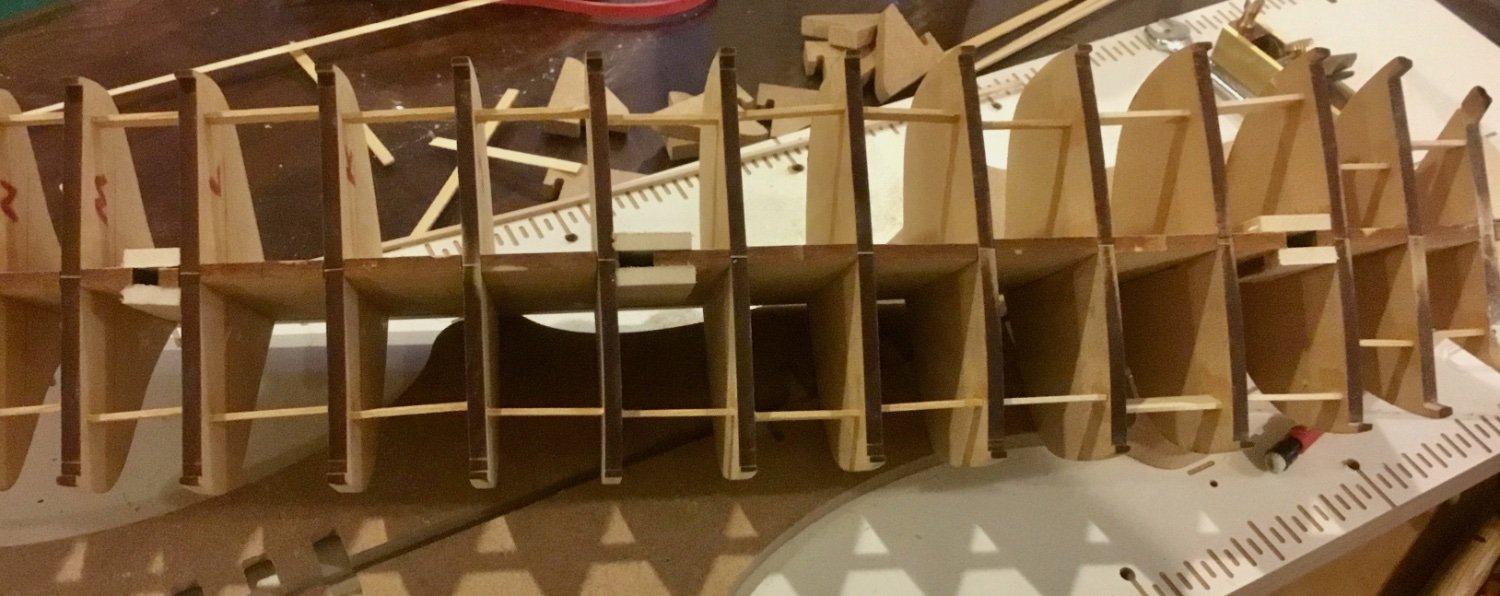
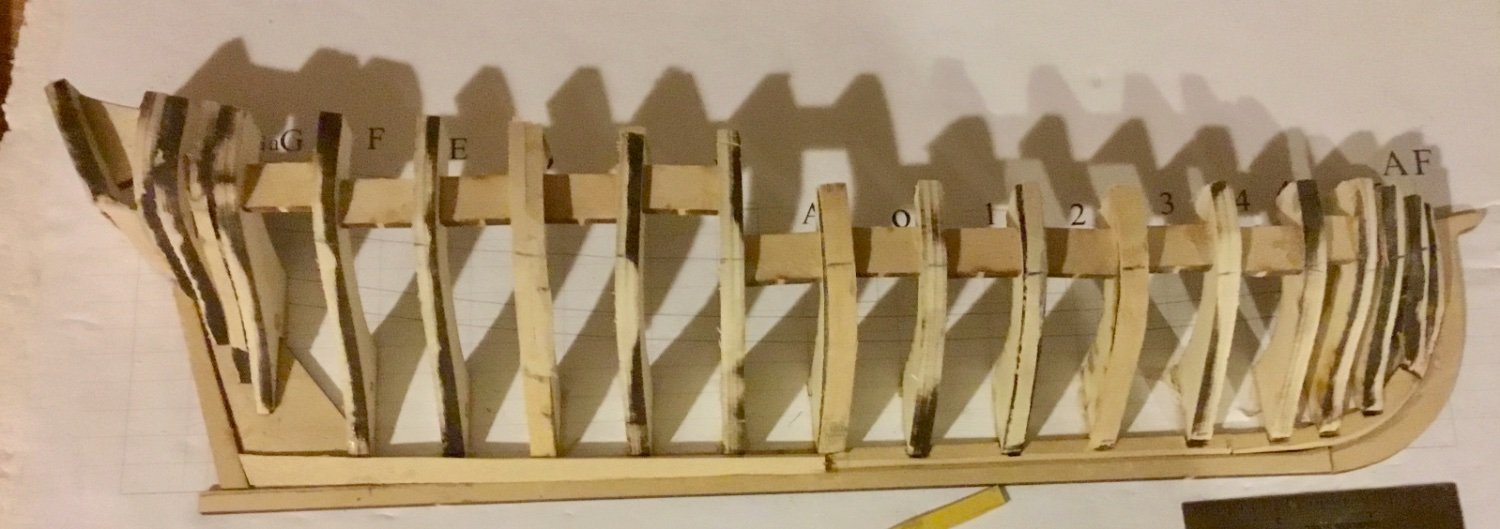
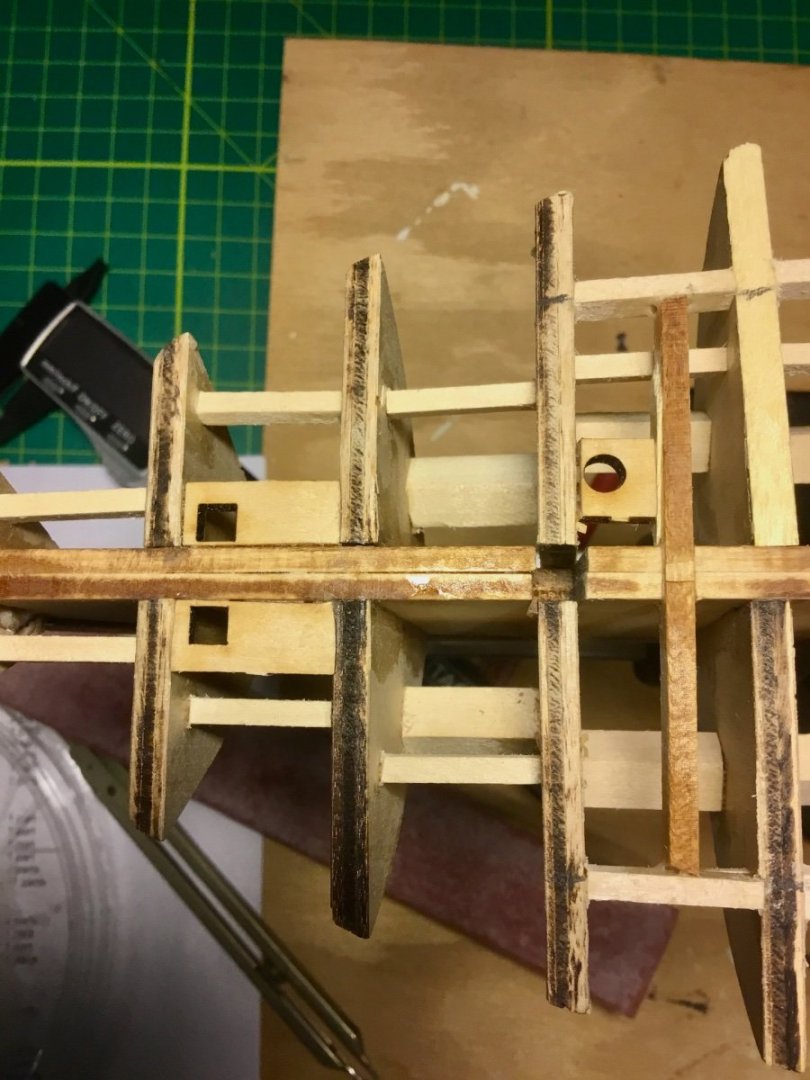
I bought my kit of the Charles W. Morgan many years ago and quickly realized that it was way beyond my capabilities. I purchased it at the Mystic Seaport store at full price at the time of $225.00 (now $400.00) to give you an idea of how long ago that was. Now with several successful? builds under my belt I decided to gradually start the Morgan up again. I had previously gotten to the stage of cutting the rabbet and mounting some of the bulkheads and at some stage noticed that I had added one of the bulkheads in the wrong order. I successfully removed the bulkheads in error but on moving to my current residence a couple of years ago the semi constructed framework was damaged and the keel lost in the transit. I used the laser cut panel I still had that the keel was part of as spare wood as a template and wood to fabricate a new keel. I am in the process of using my build board (which I didn't have at the time I first started) to rebuild the hull framework. Also one of the bulkheads was slightly warped over the years. These are photos of the current stage of the build process.


-
Continuing frustrations with this kit after a long hiatus while working on my Bluenose II. Picked up where I left off and further refined the fairing of the hull and installed the counter. Attempted to mark off the location of the Wales but my machinist's square was constantly unable to transfer the wale locations on the frames because the spacers between the frames were always in the way. I just gave up and tried my best to estimate the lower wale location. If I were to do it over I would mark the wale locations when initially installing the frames and before placing the spacers. Went on to the planking and following the directions managed to install the aft portion of the garboard strake.

-
Does this continue?
-
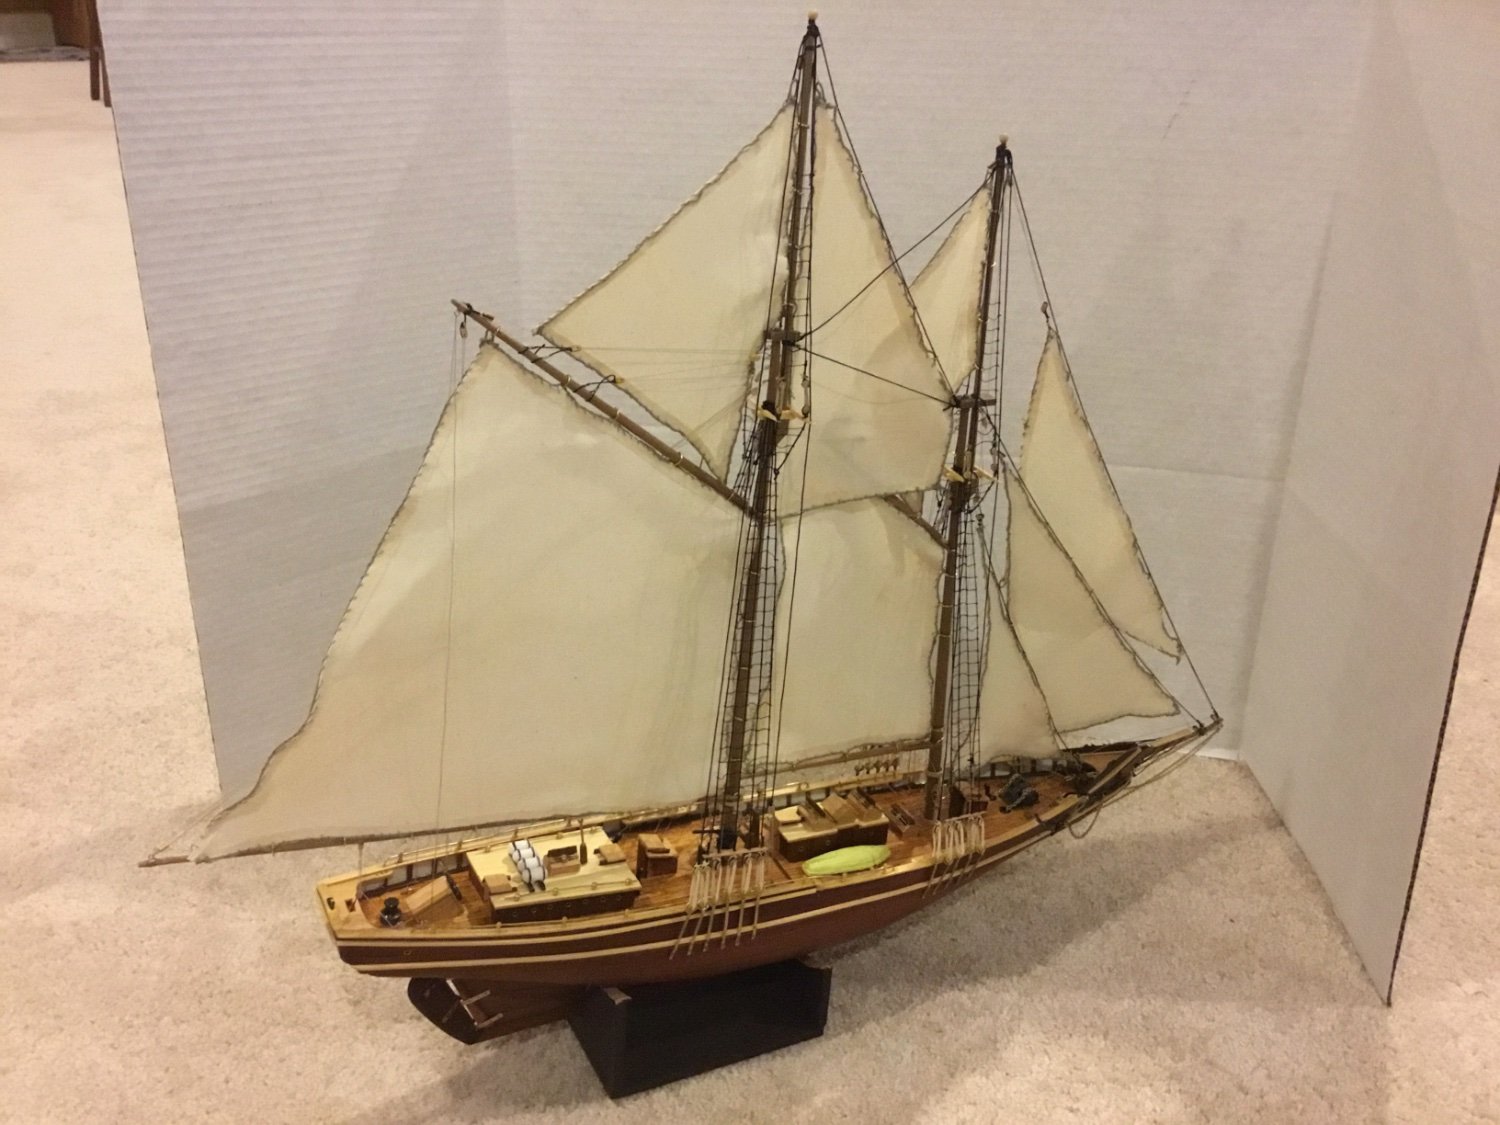
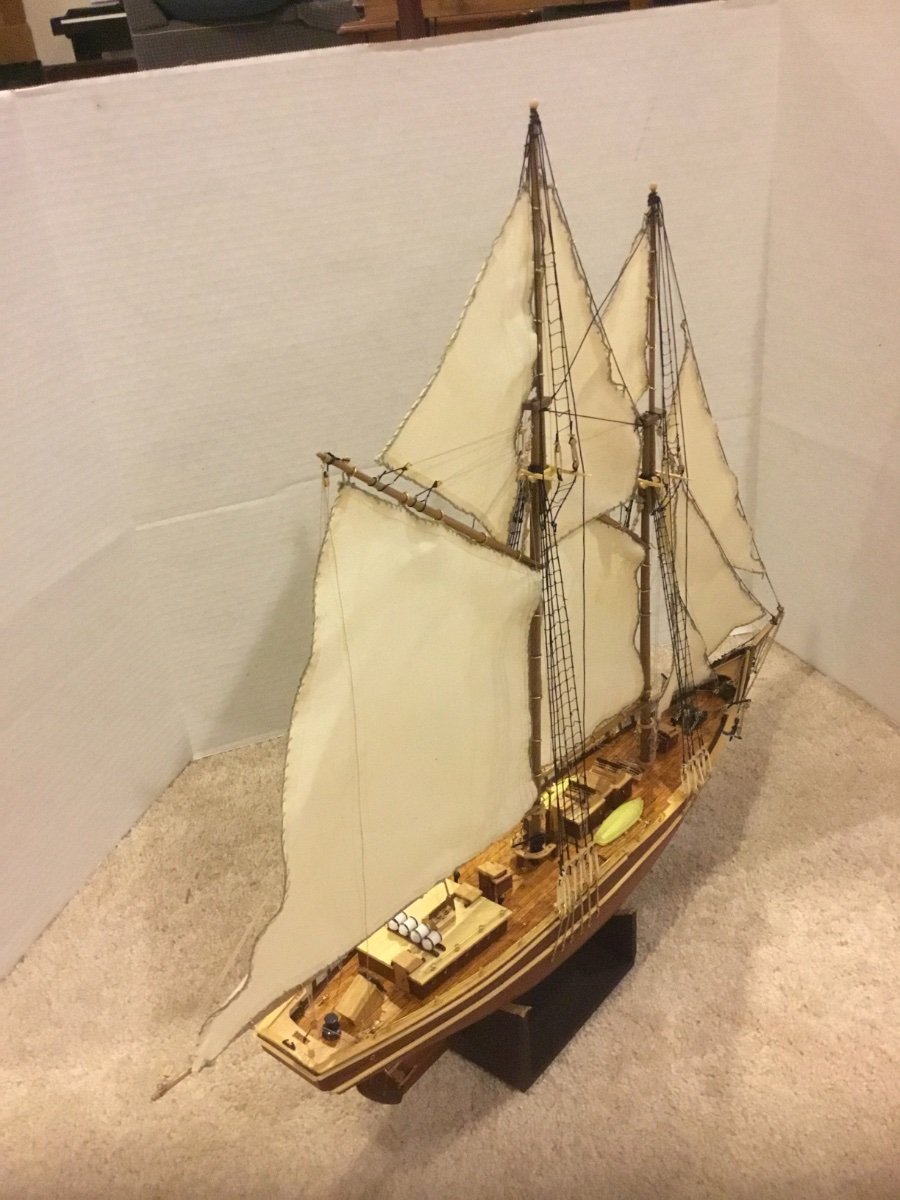
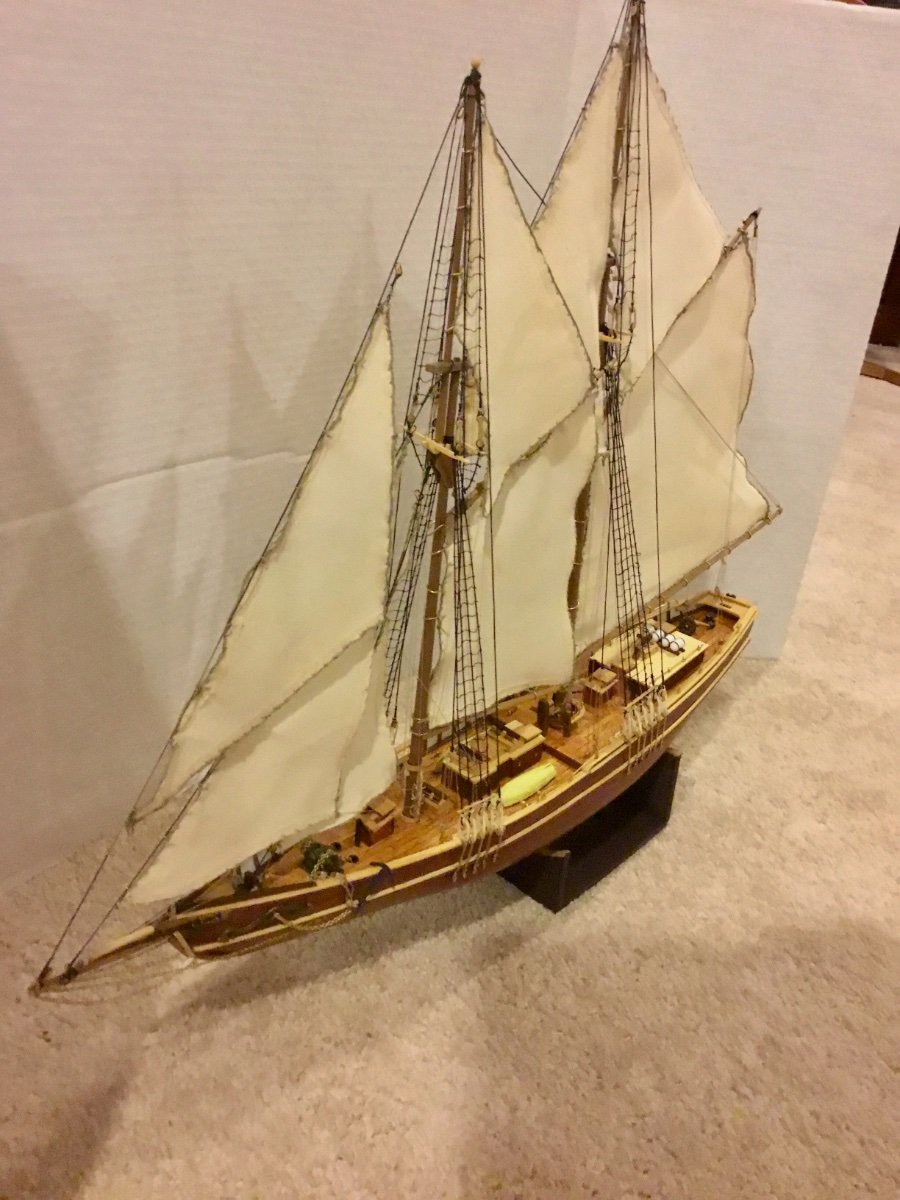
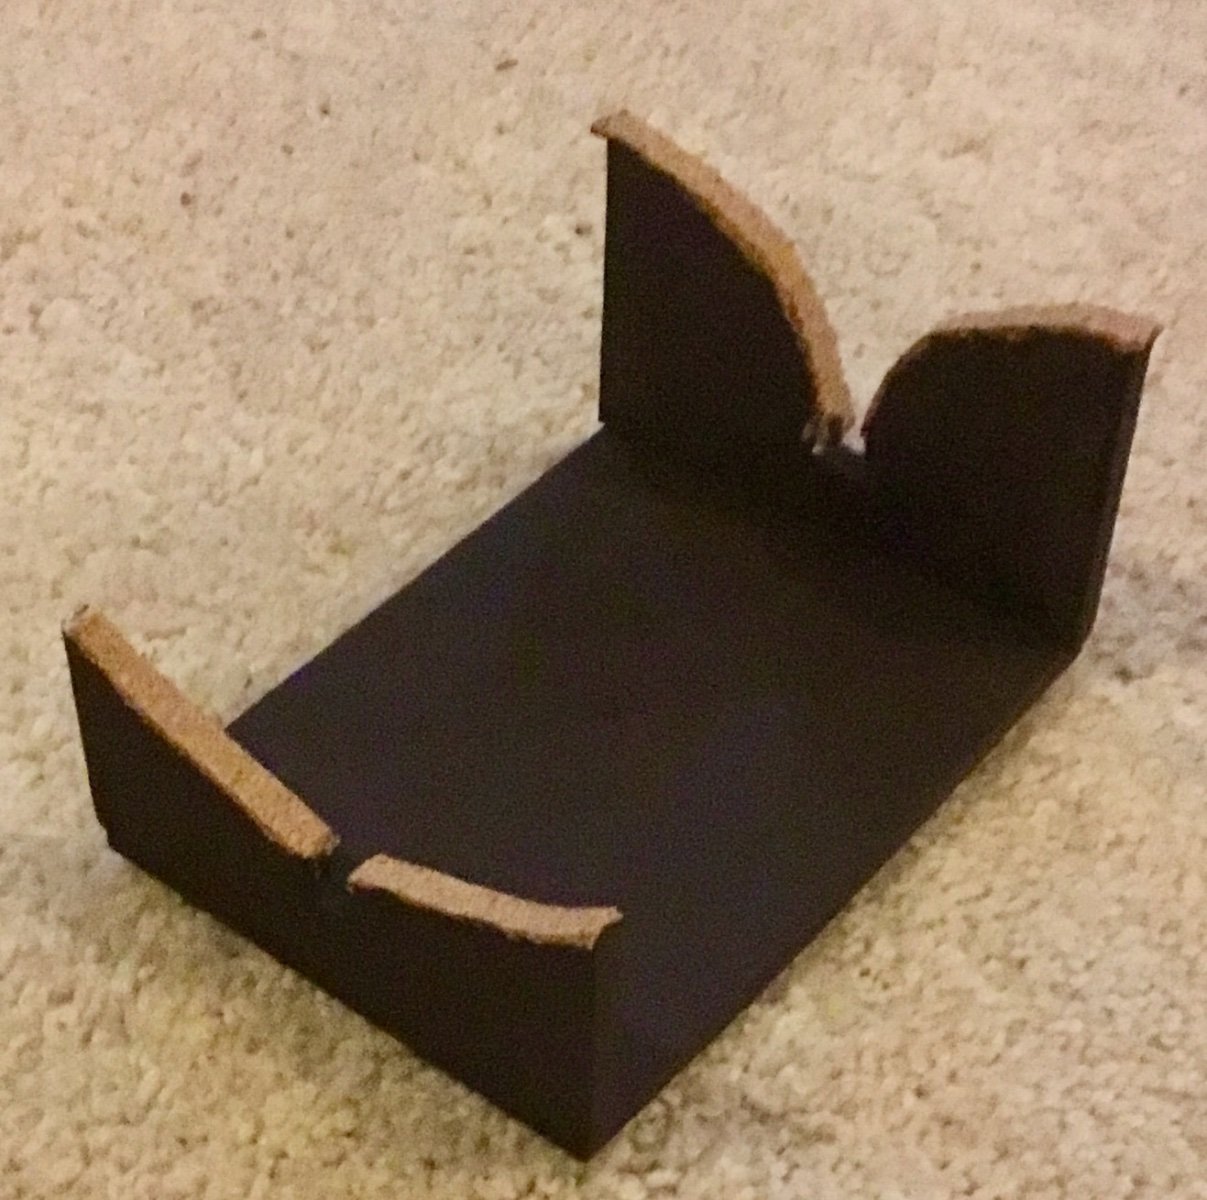
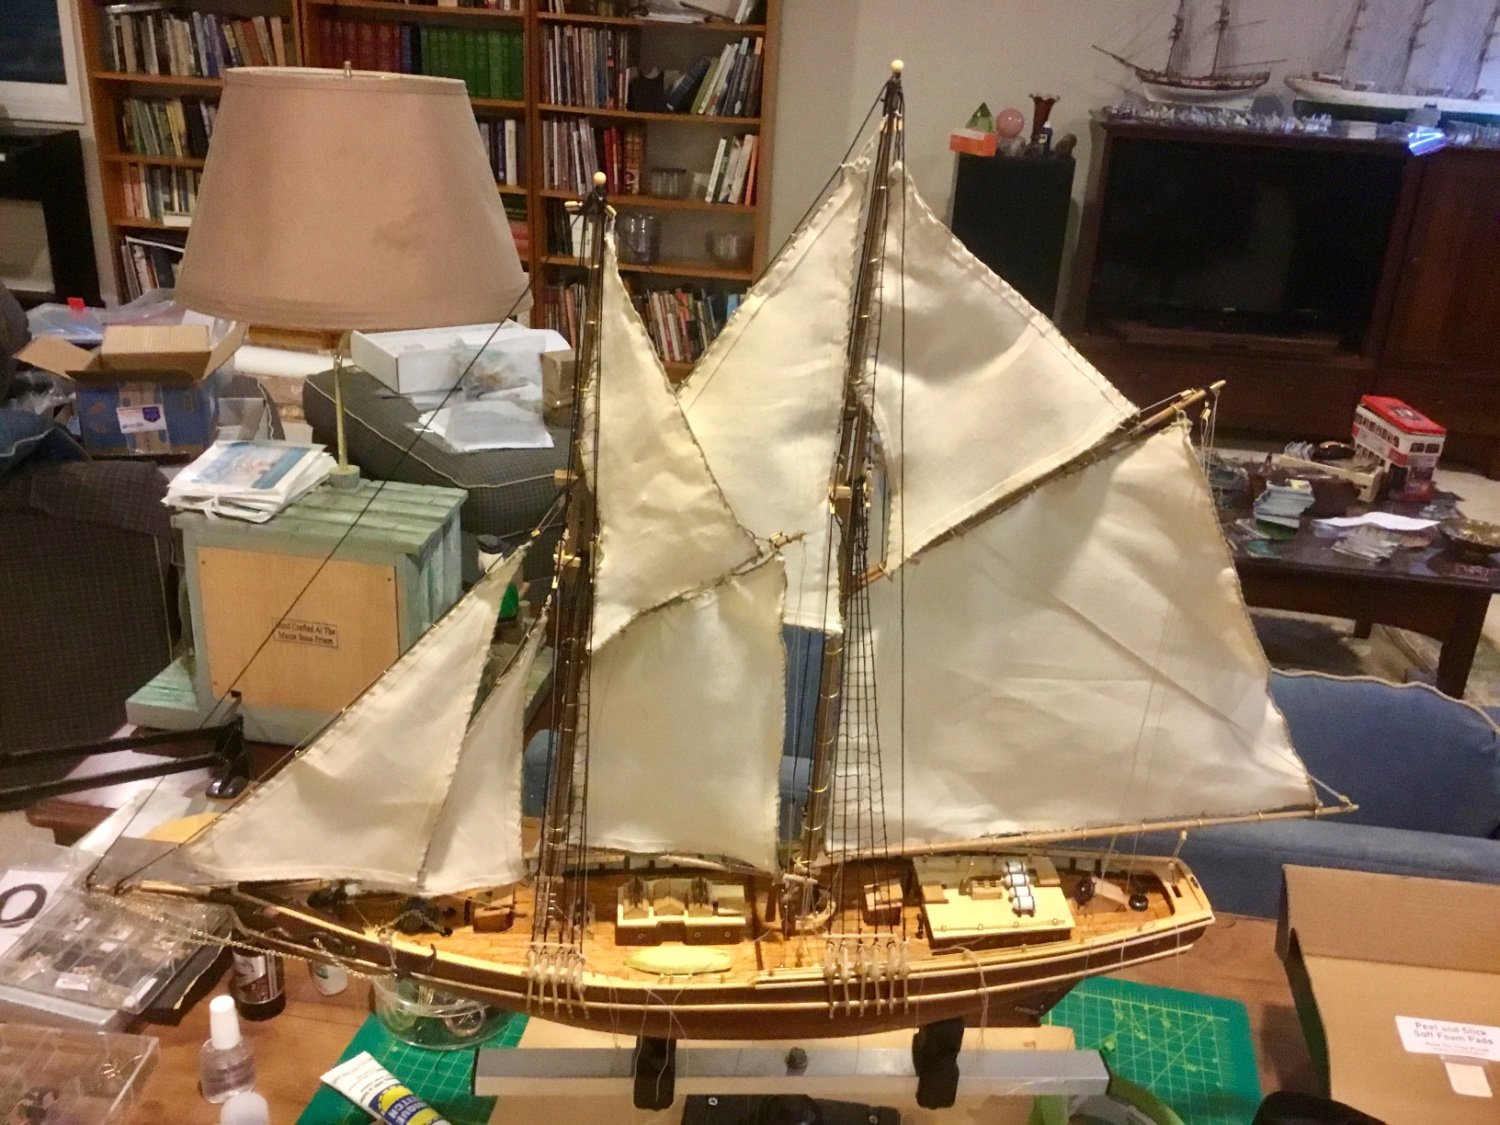
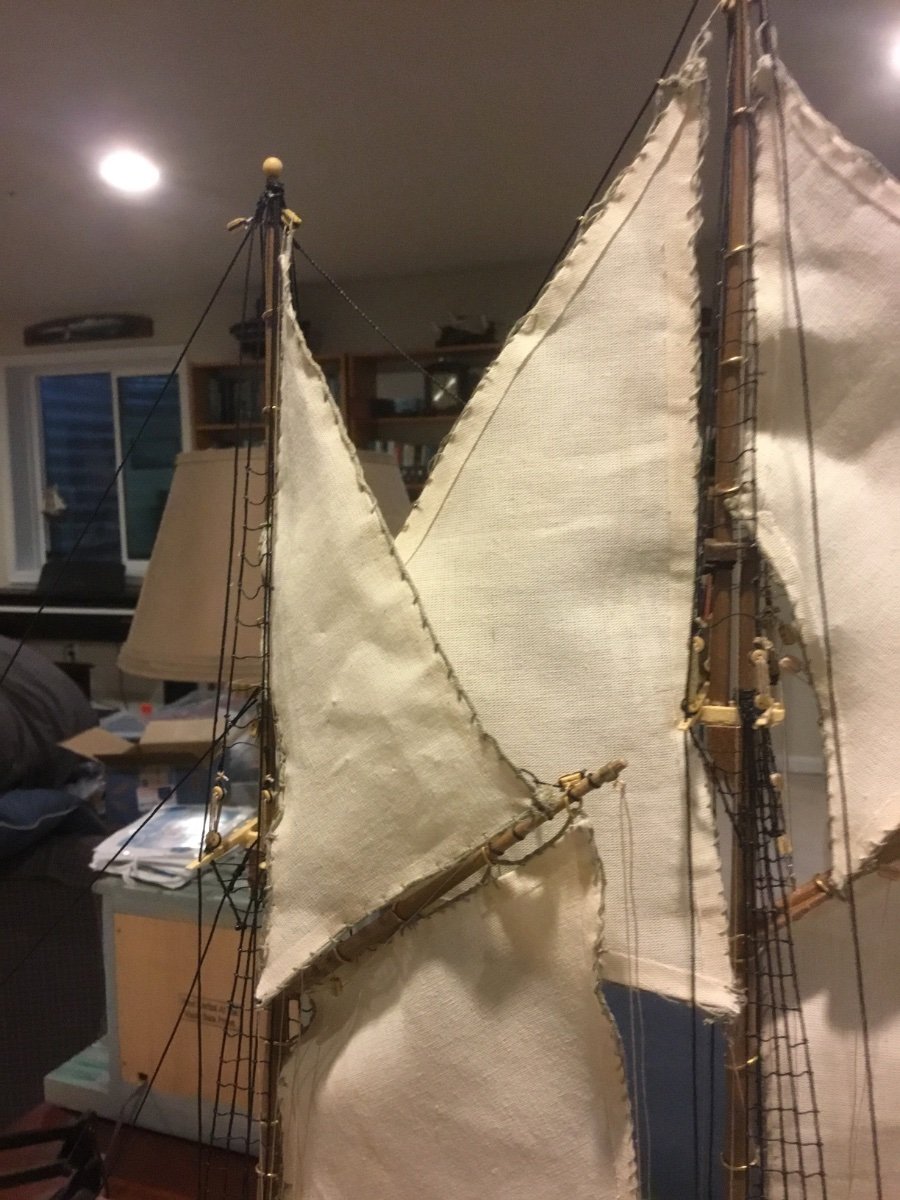
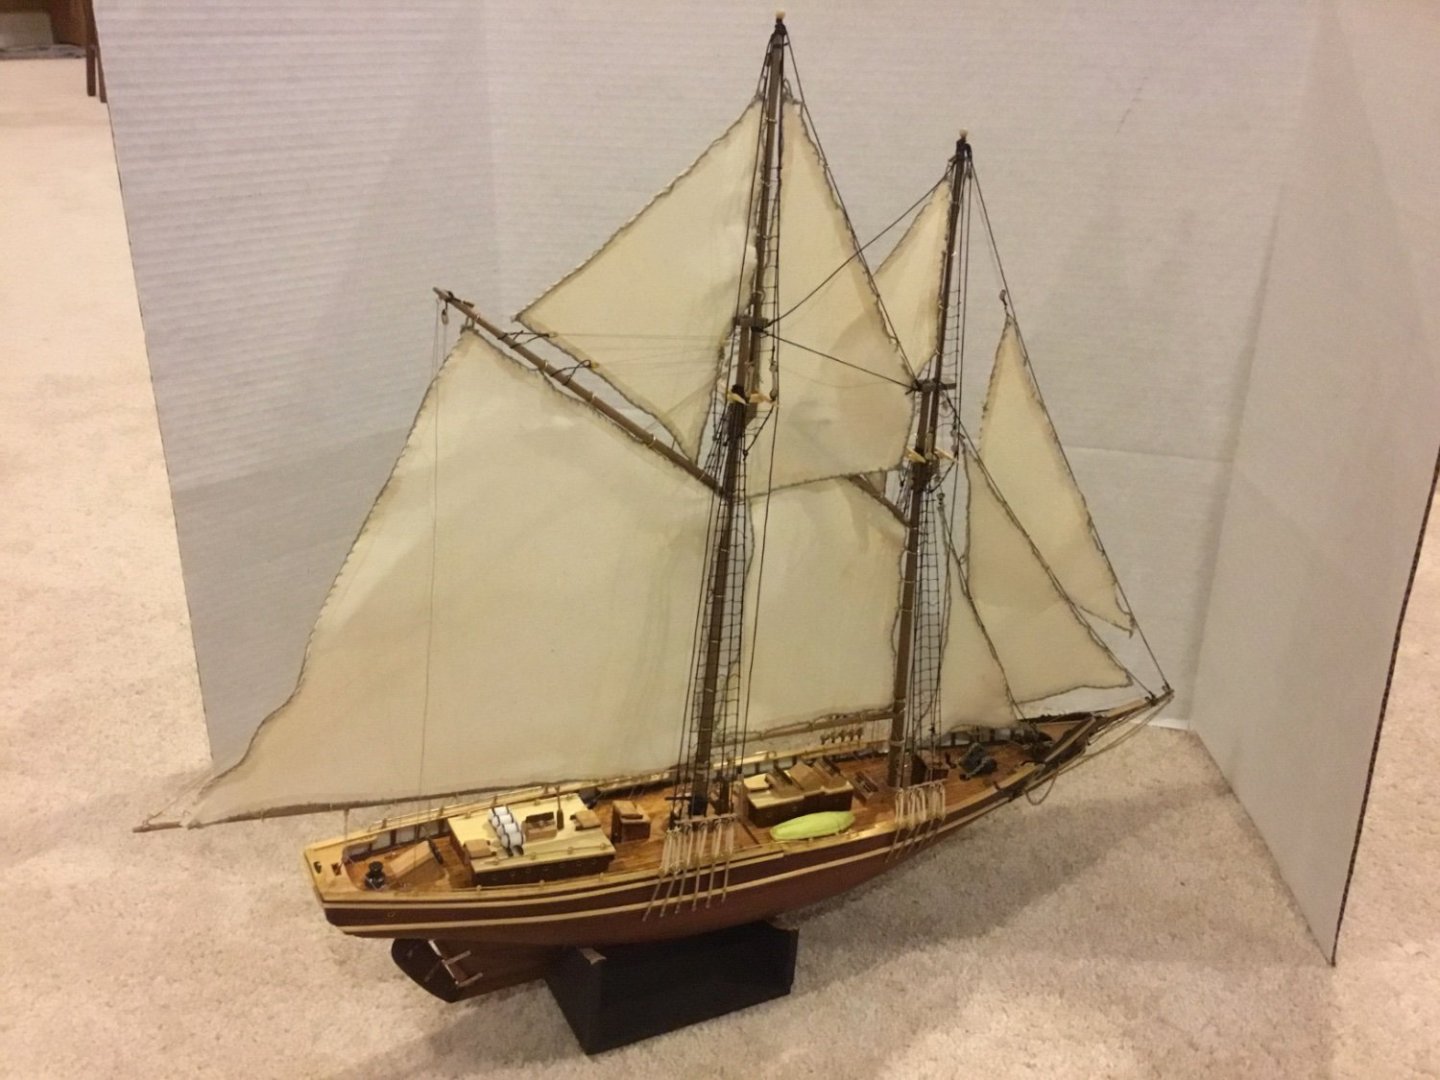
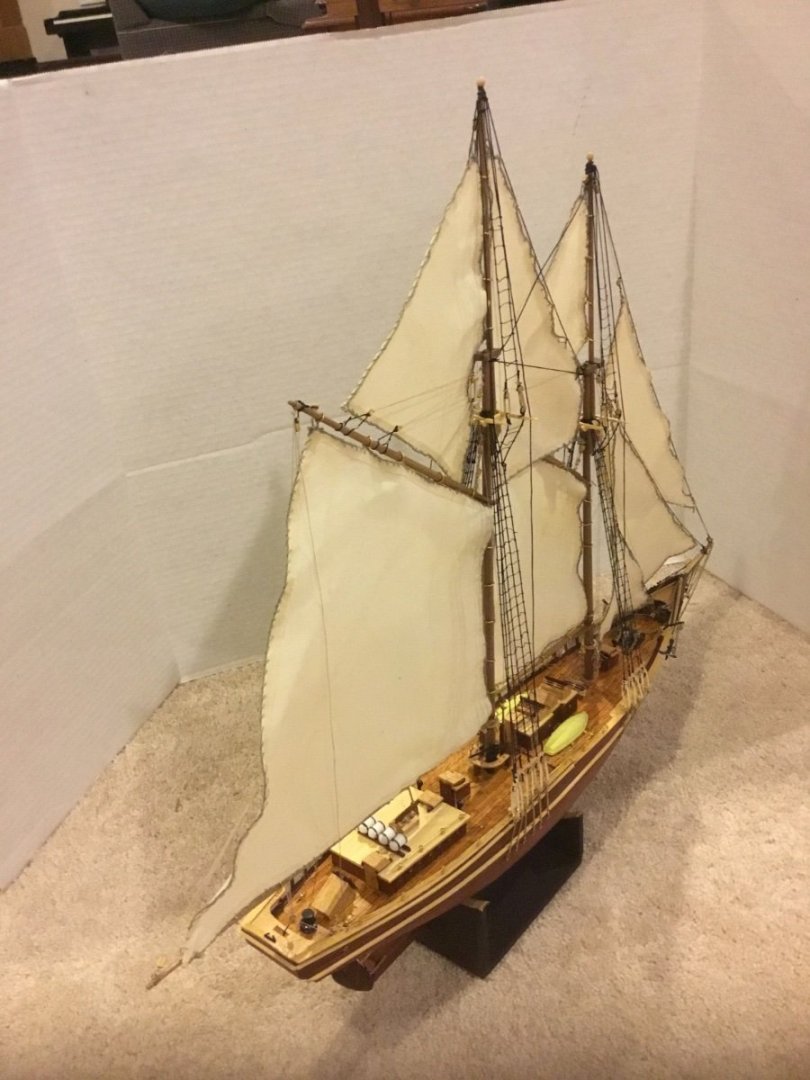
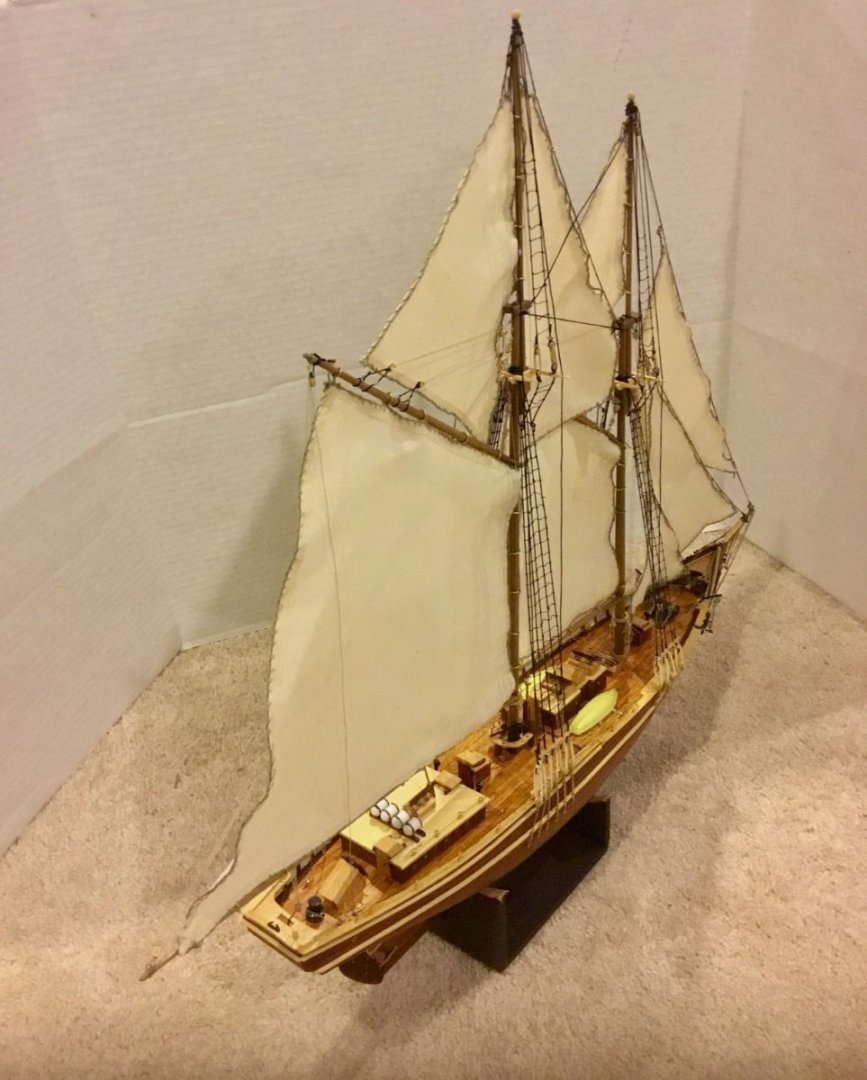
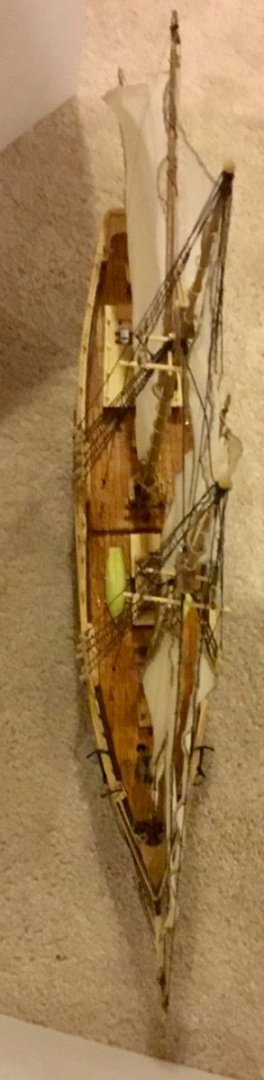
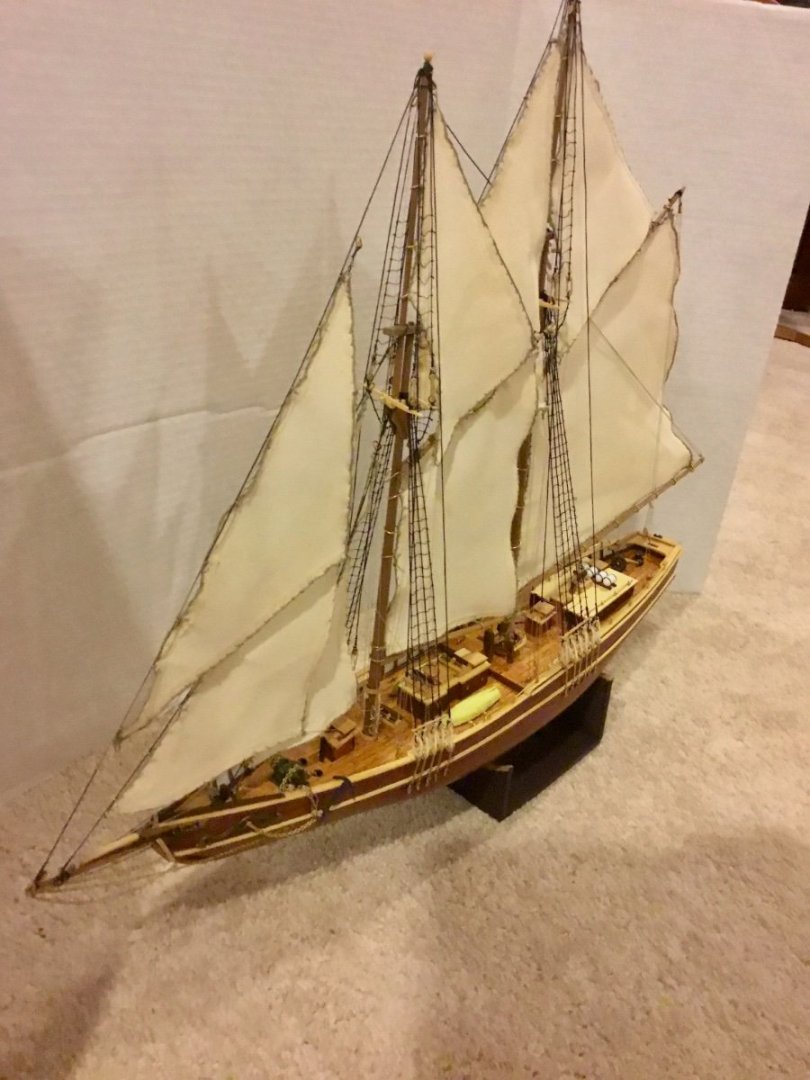
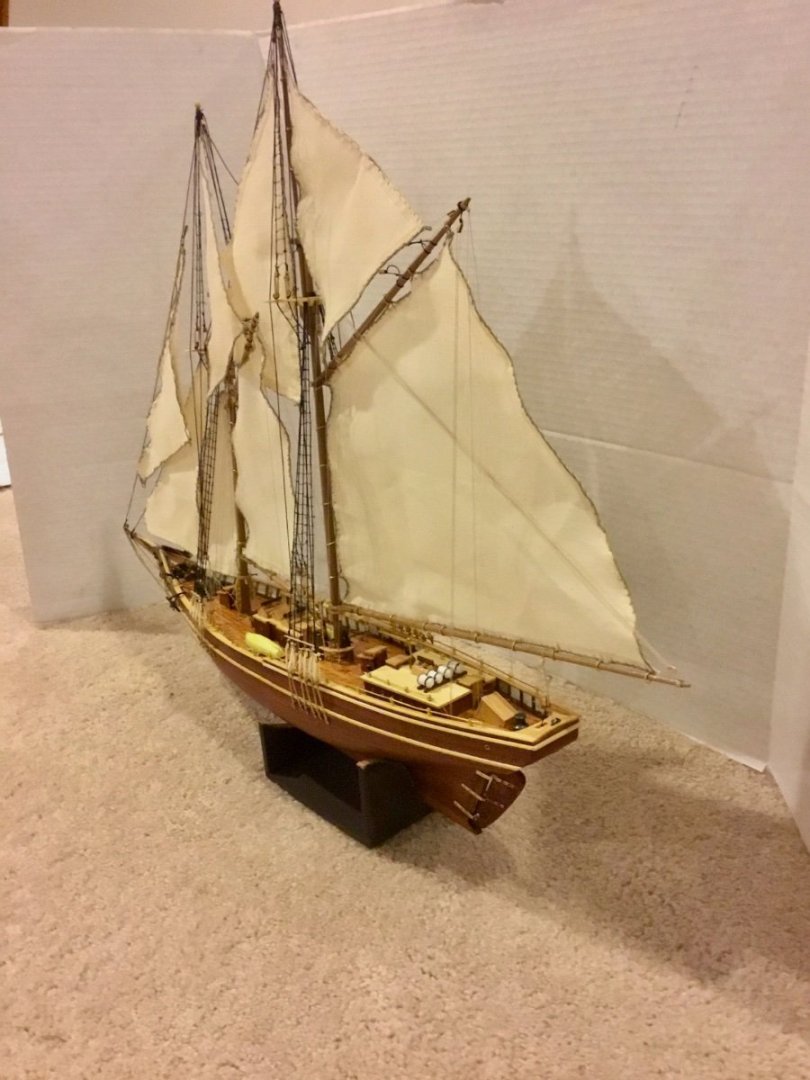
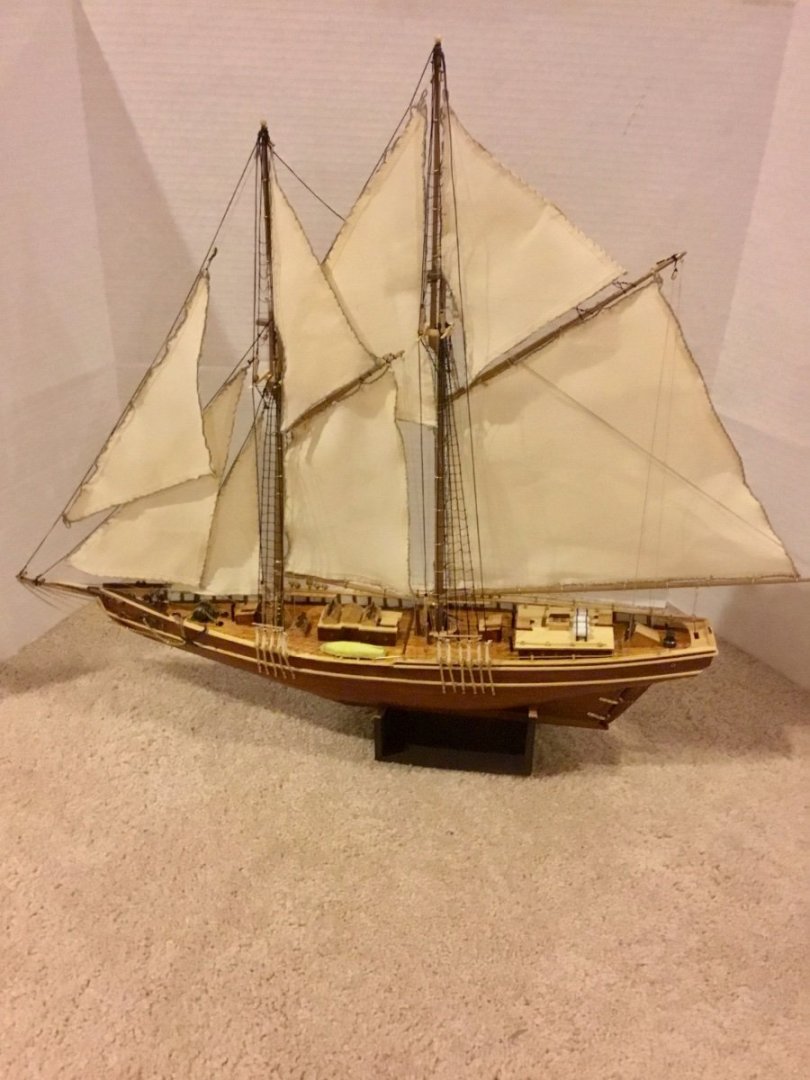
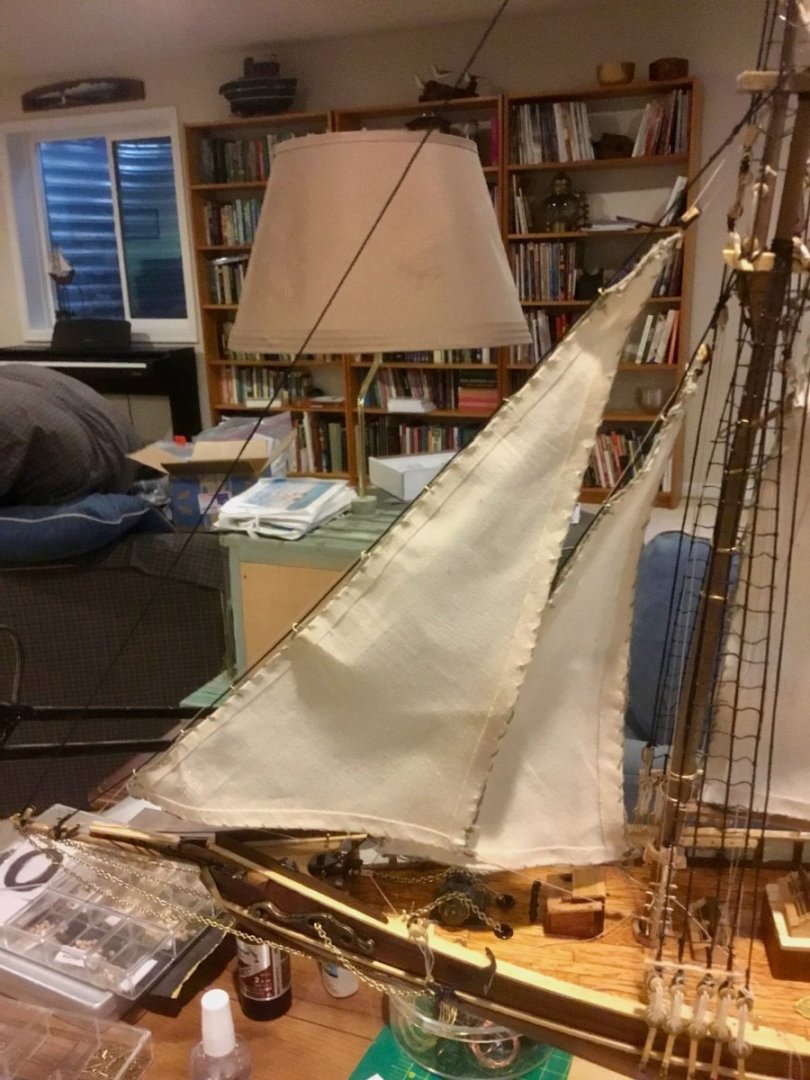
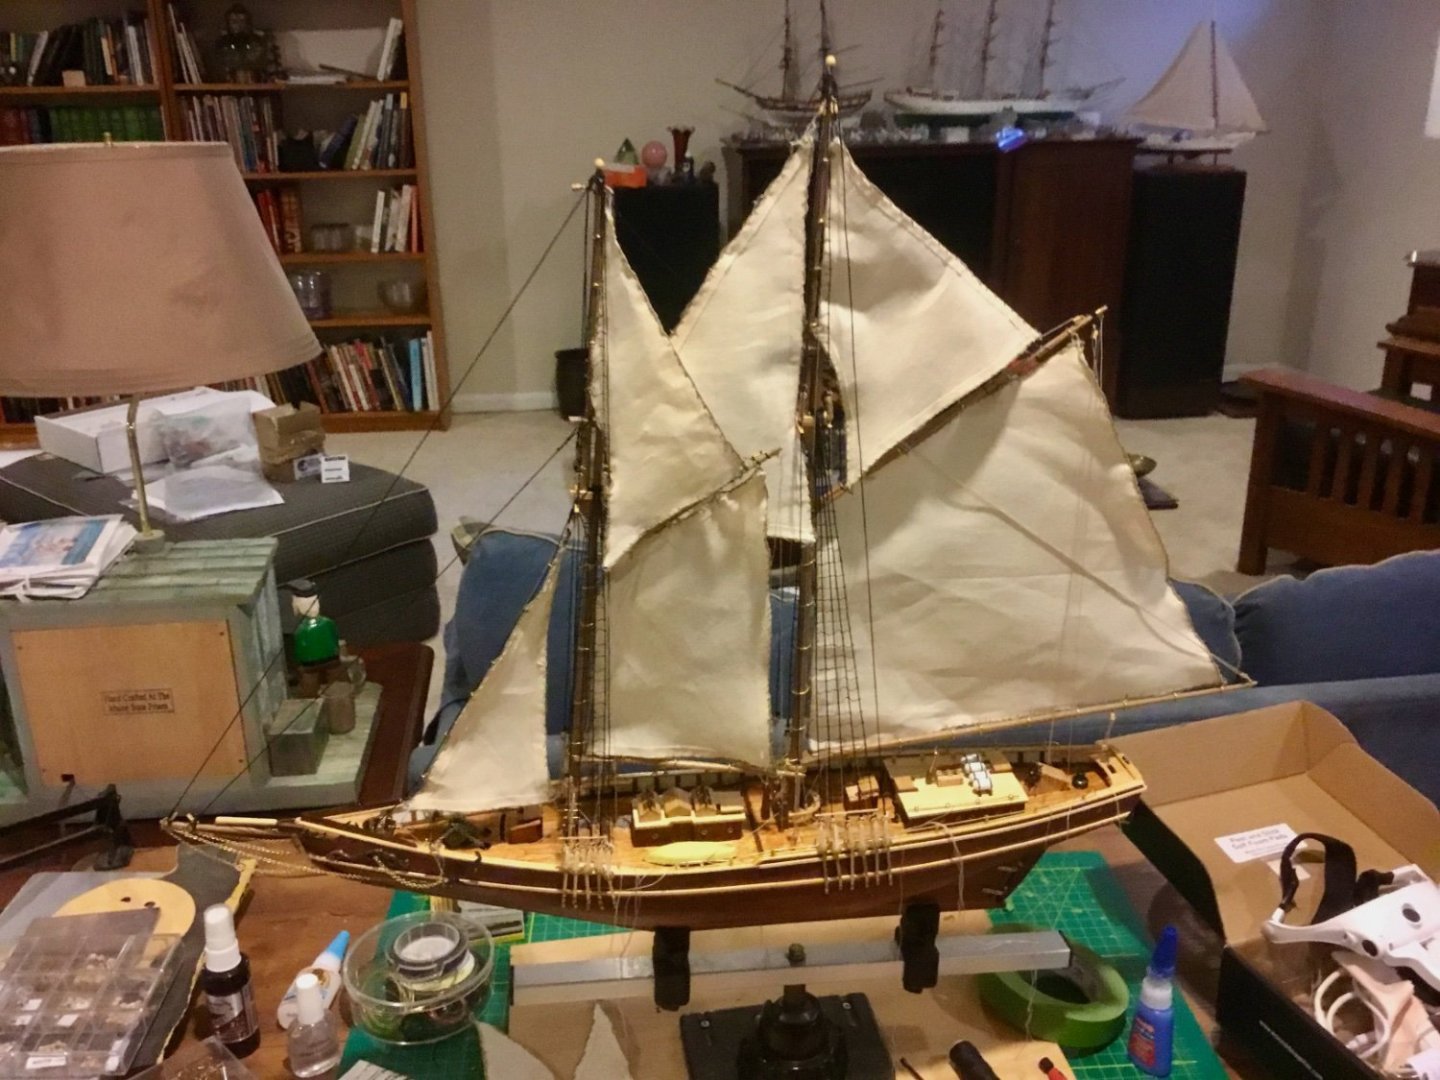
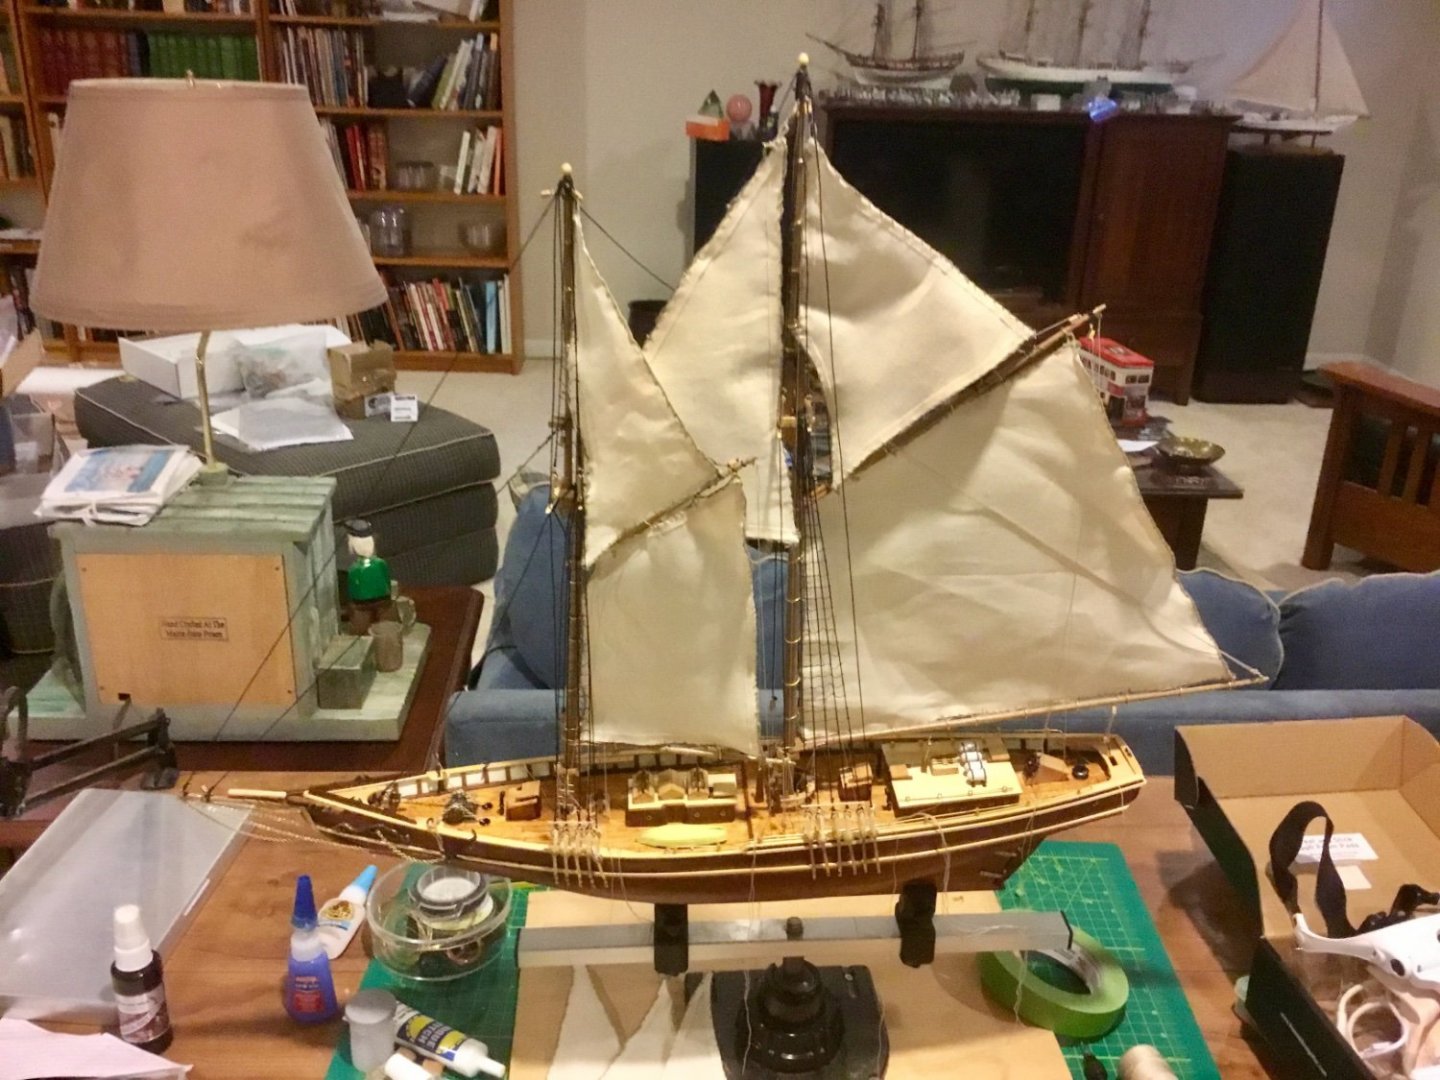
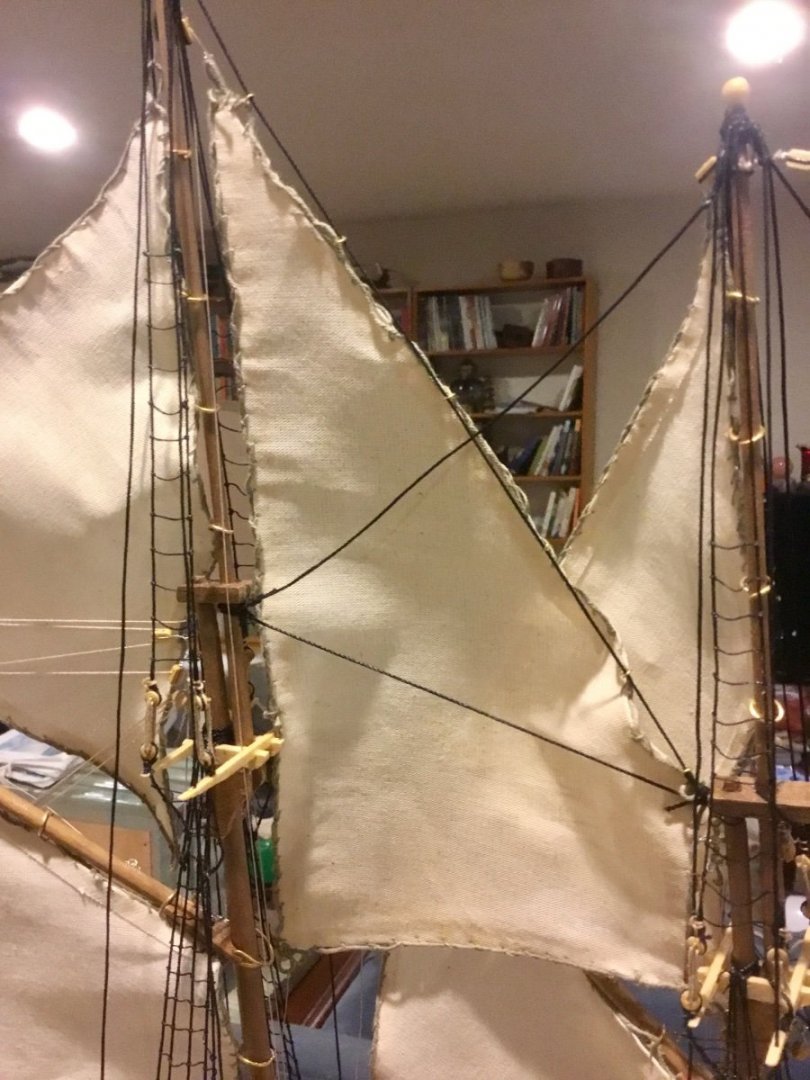
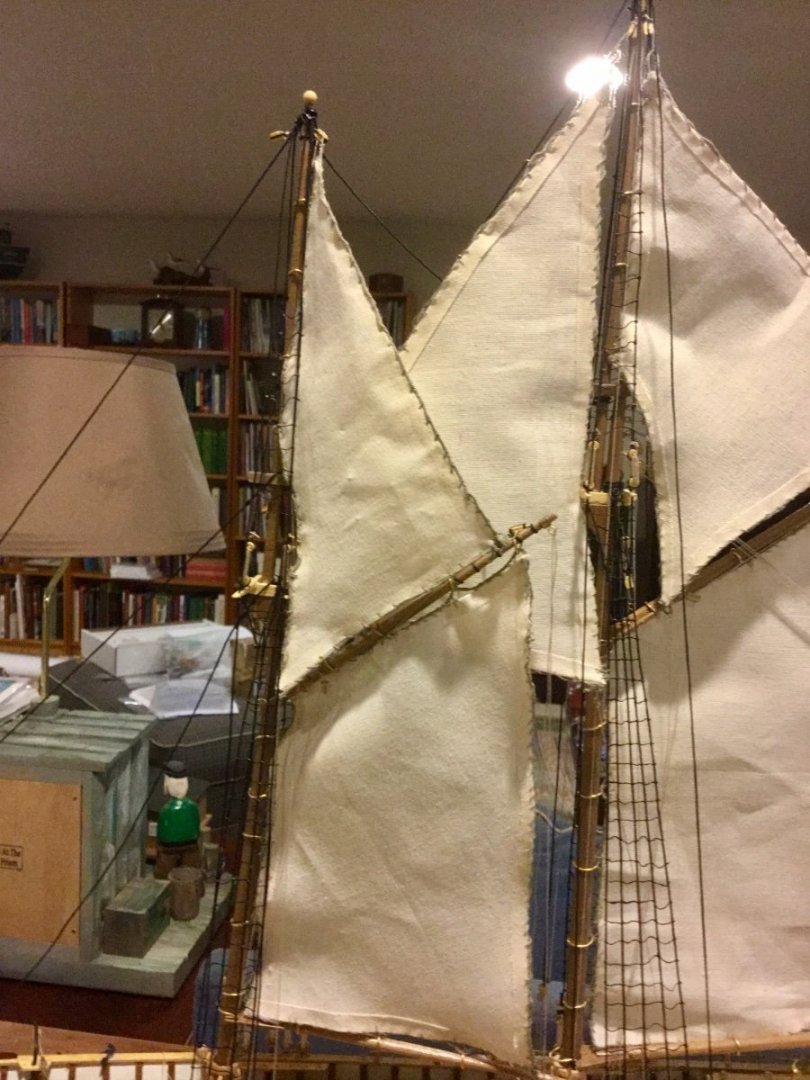
Well she's done. Mounted last sail and corresponding lines. Made a stand to mount her on. I think I could have done a little better with the sails, kept the seams all facing one side of the ship and done a tighter sticking on the bolt-rope. Doesn't look exactly like the Bluenose II because I didn't paint the hull, but I have a model of the Bluenose already and I ended up wanting something a little different.


- 34 replies
-
- 2
-
-
- Artesania Latina
- Finished
- (and 1 more)
-
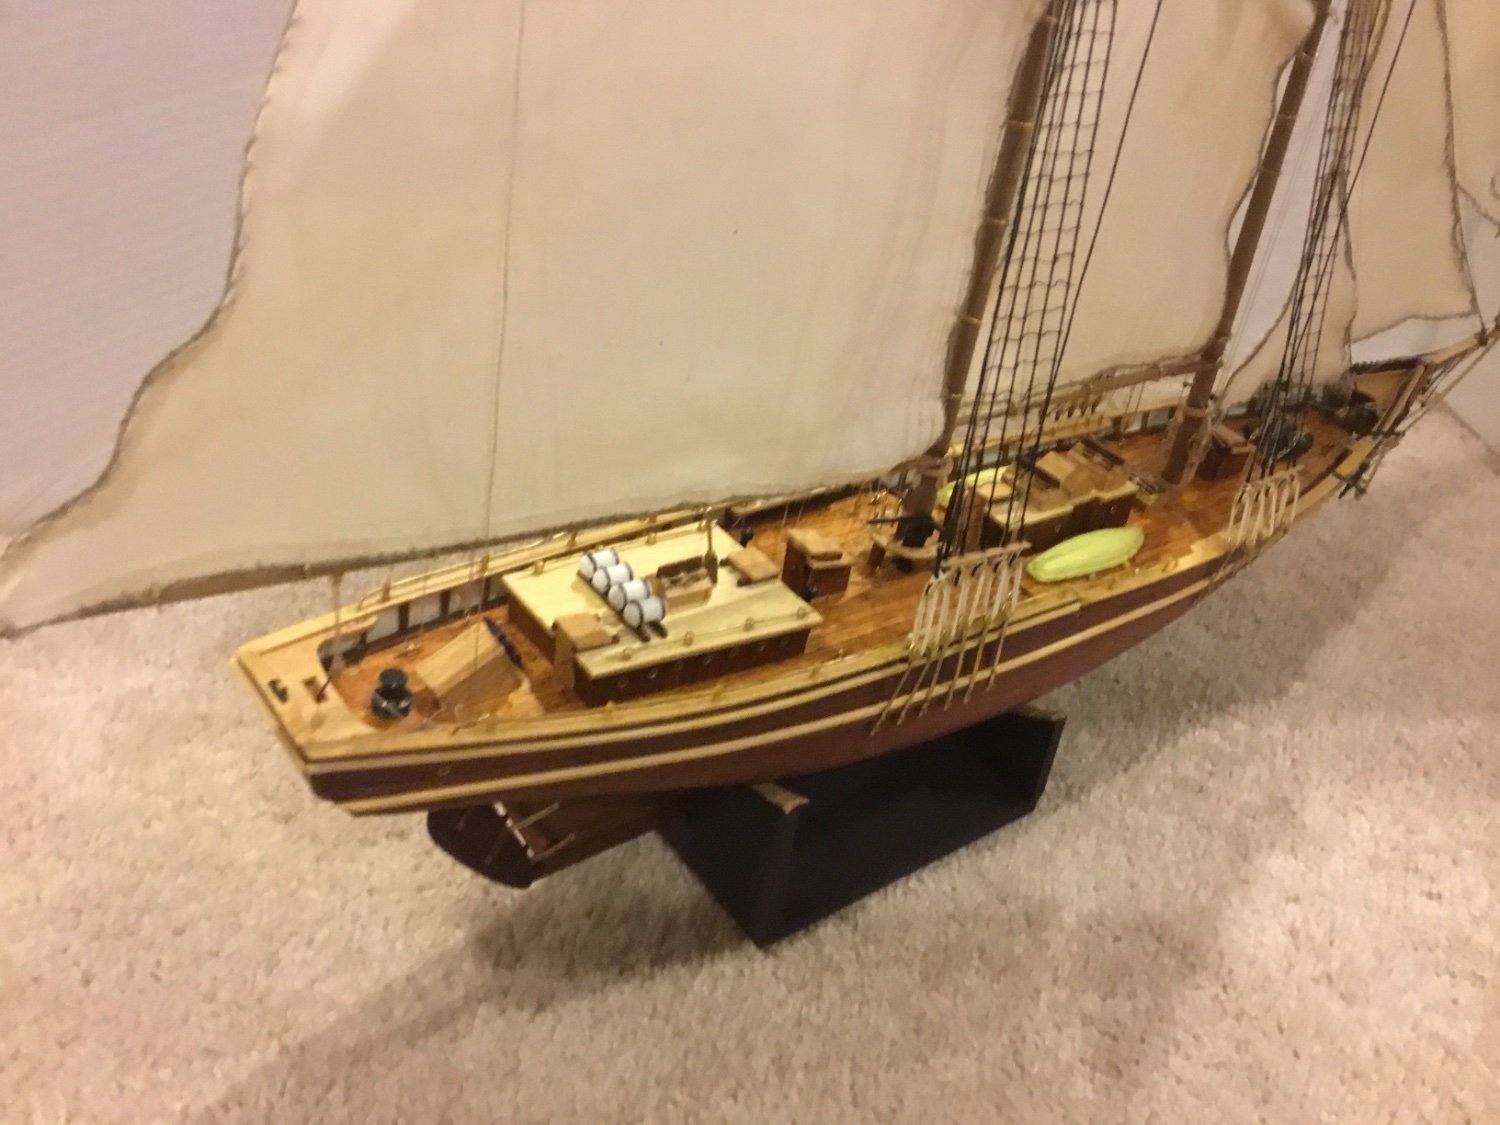
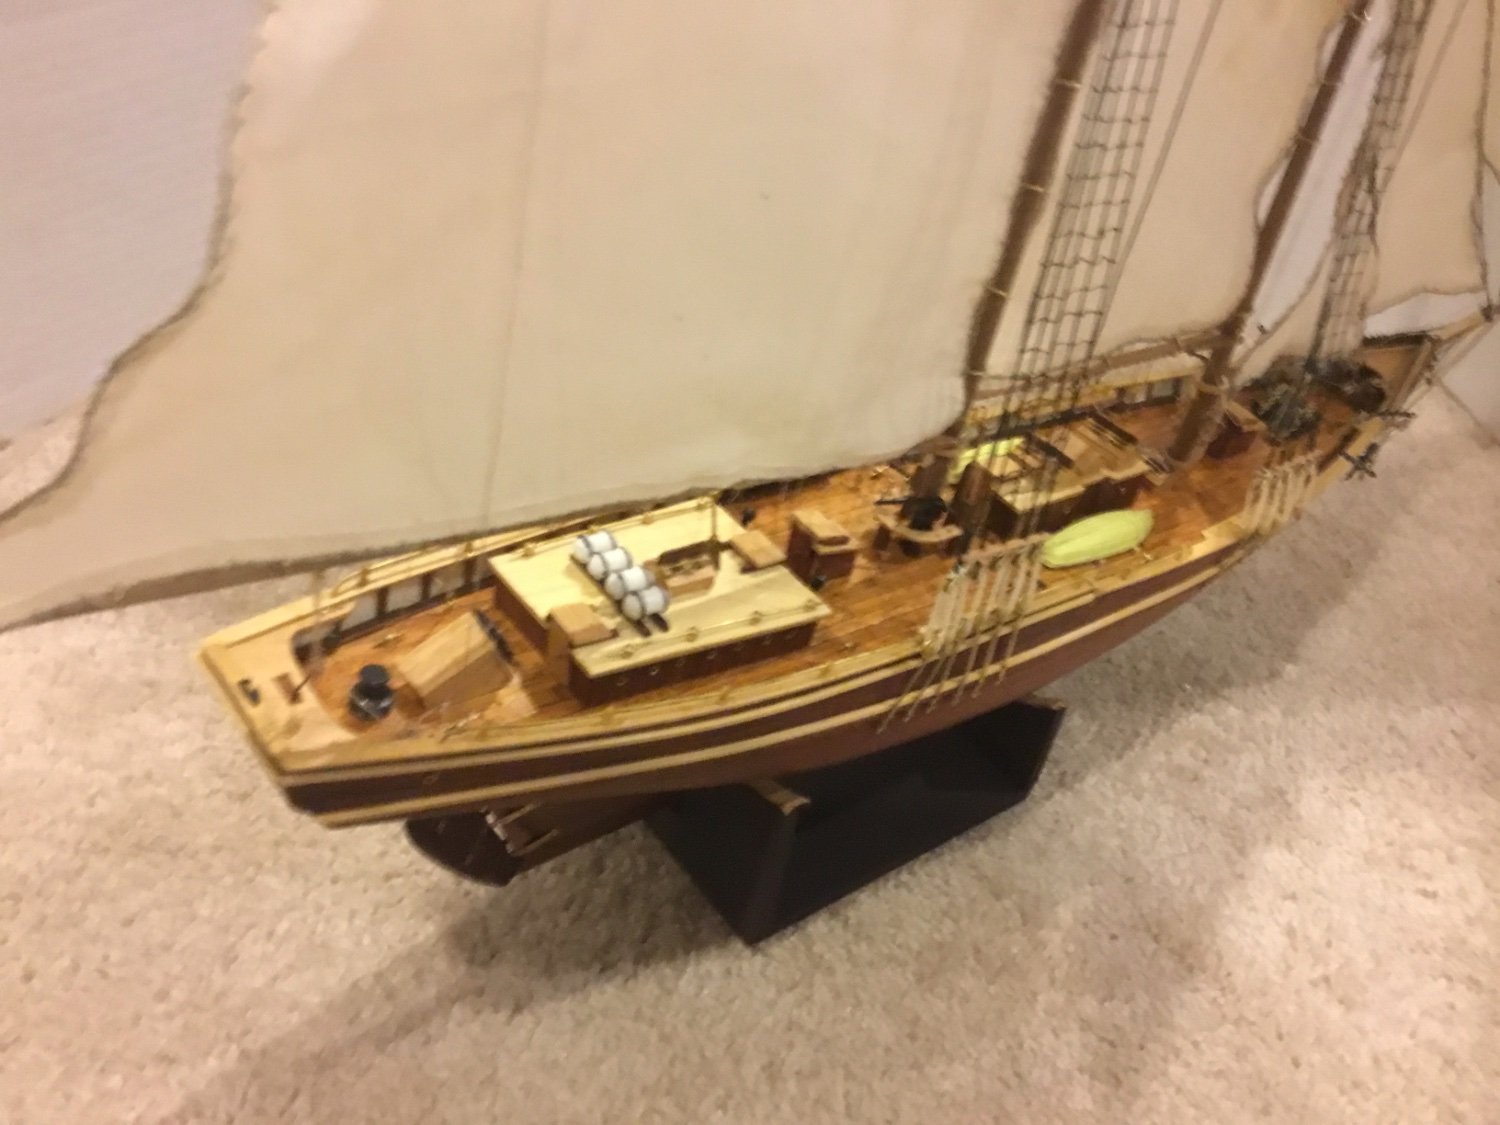
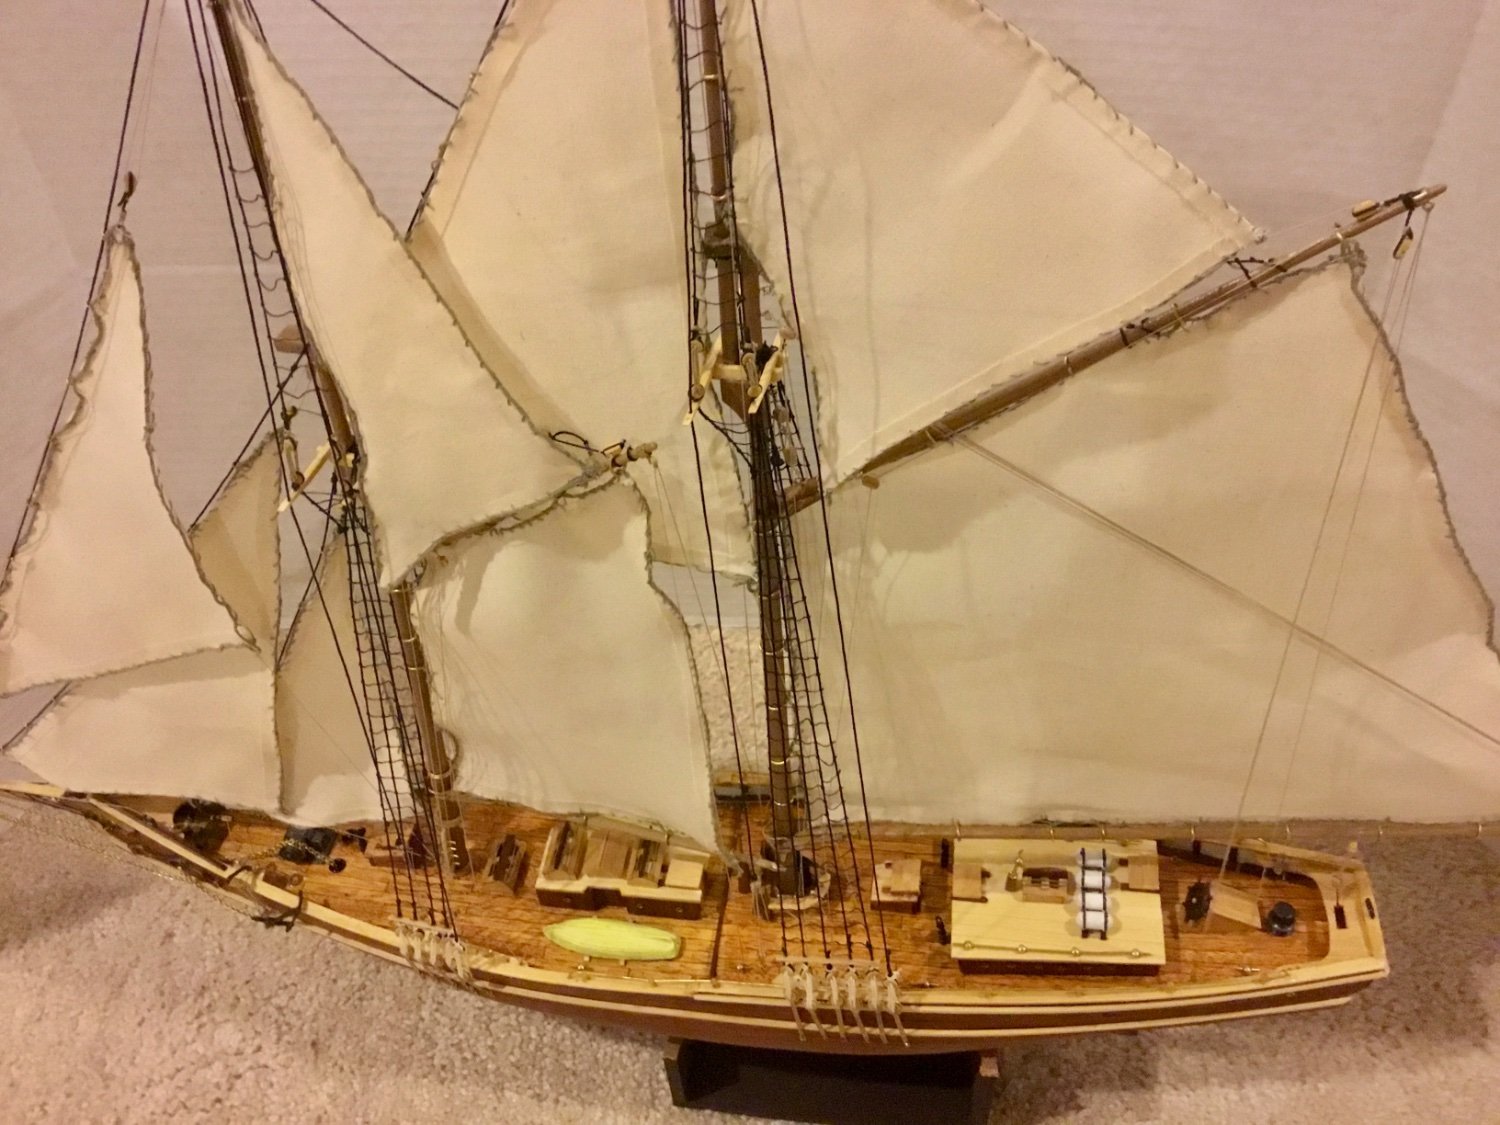
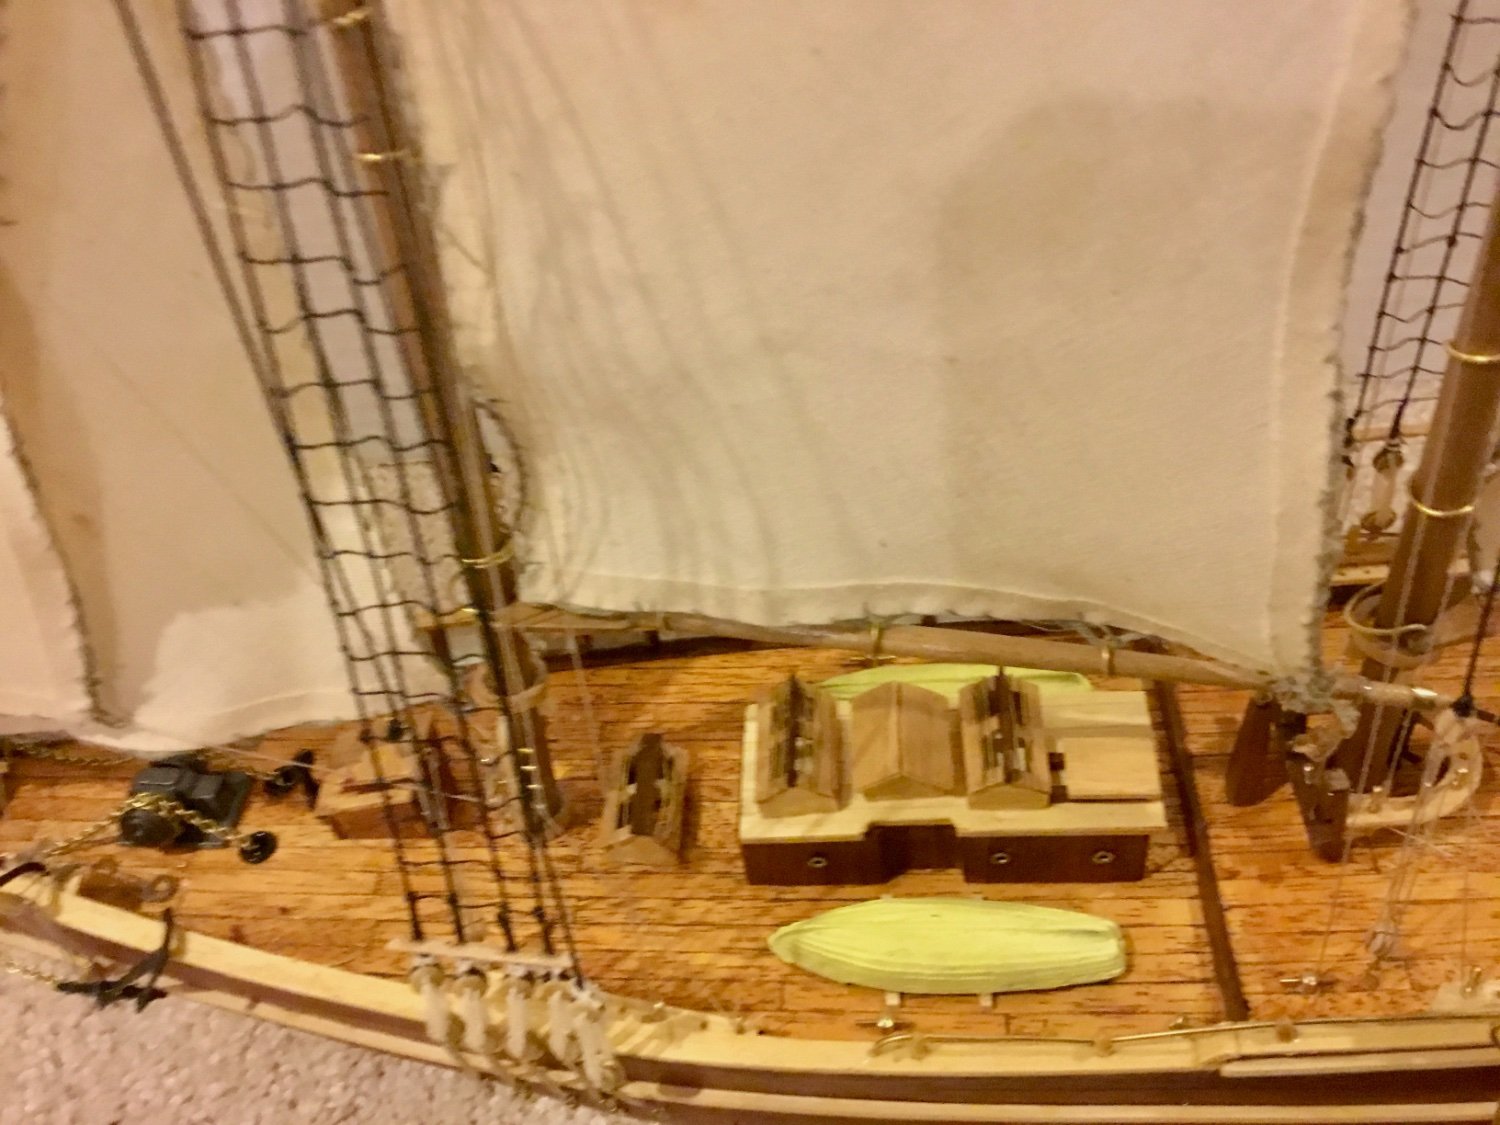
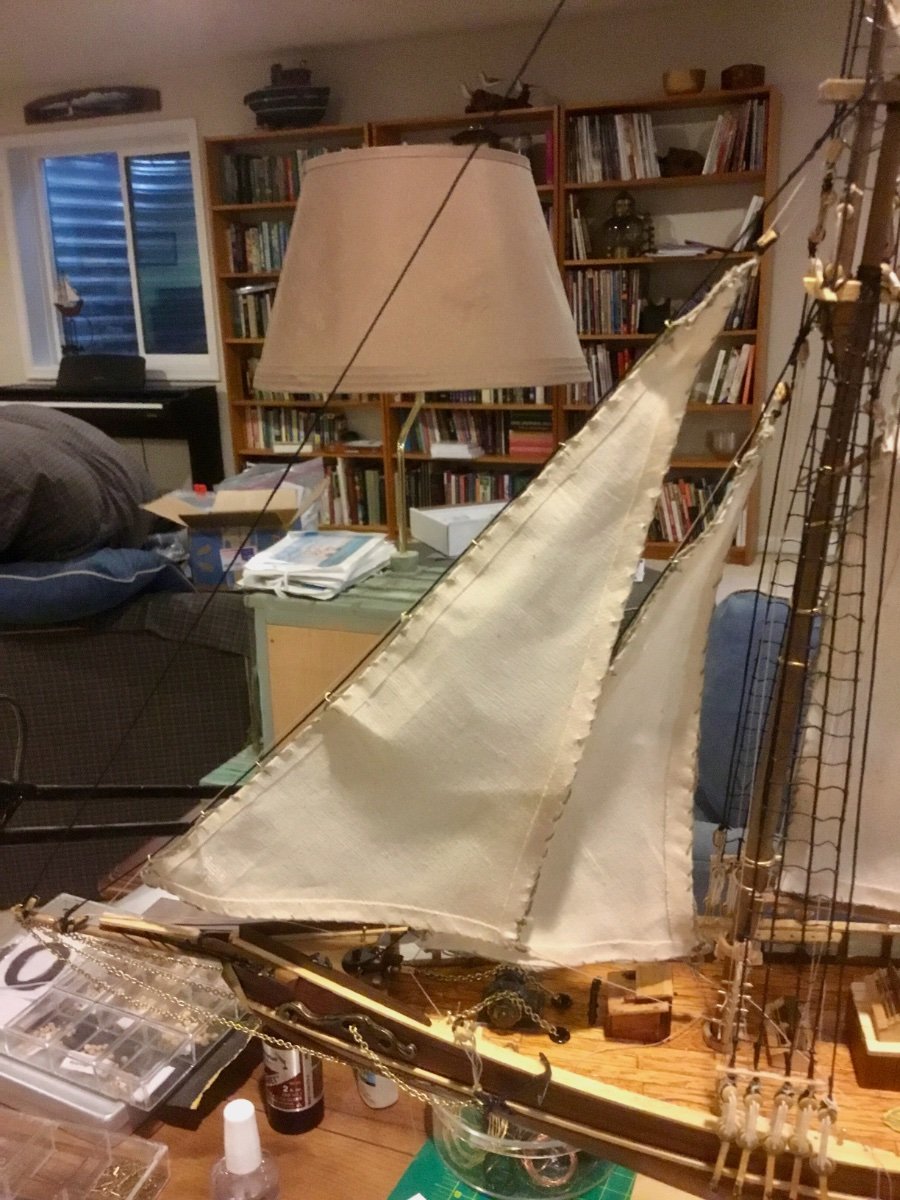
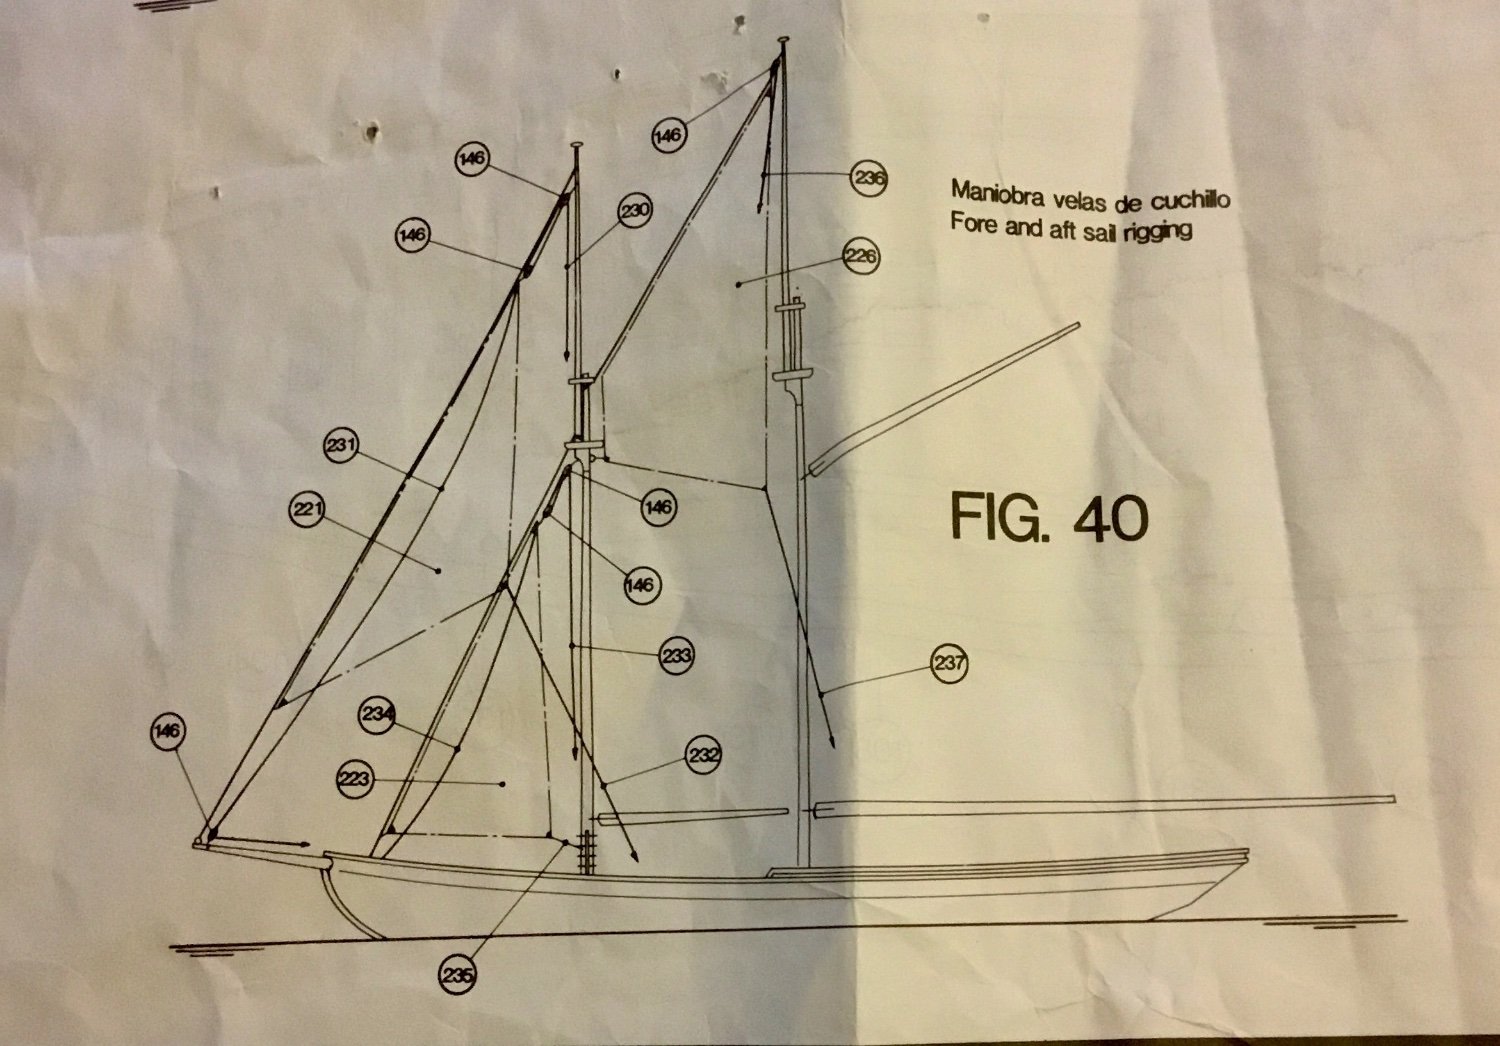
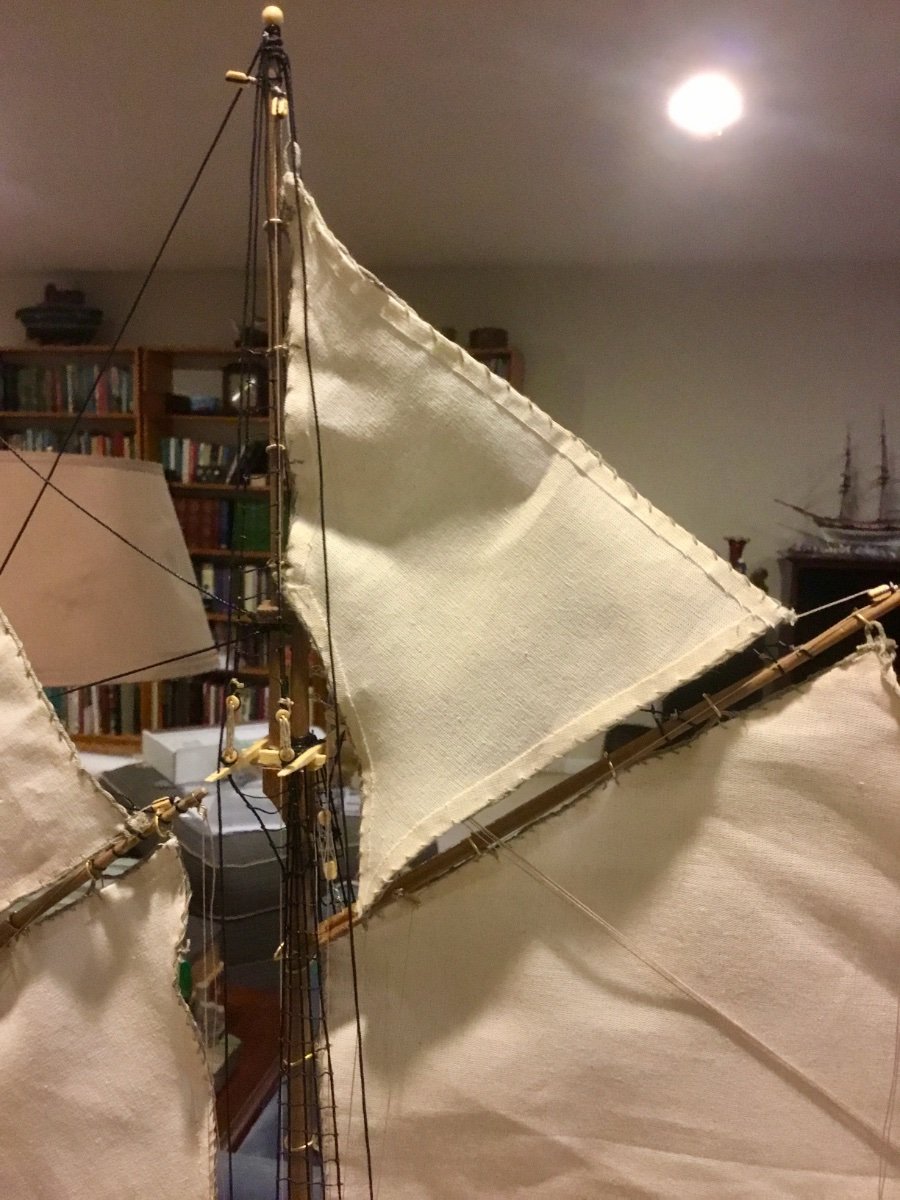
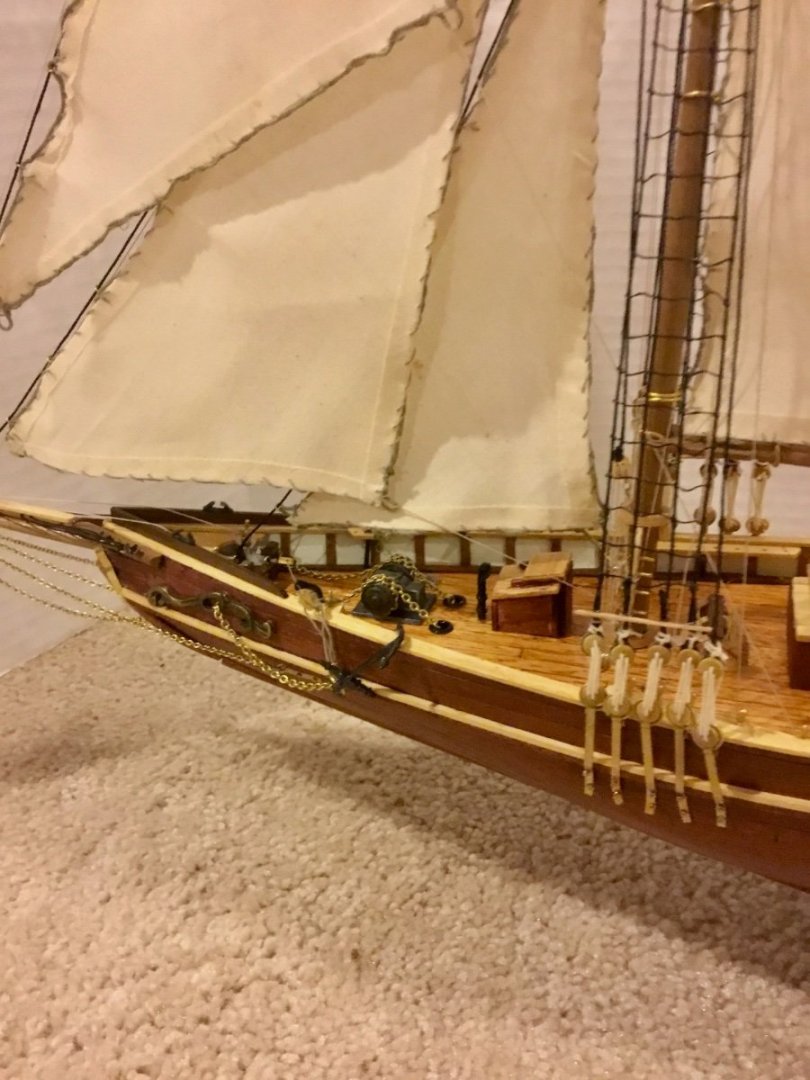
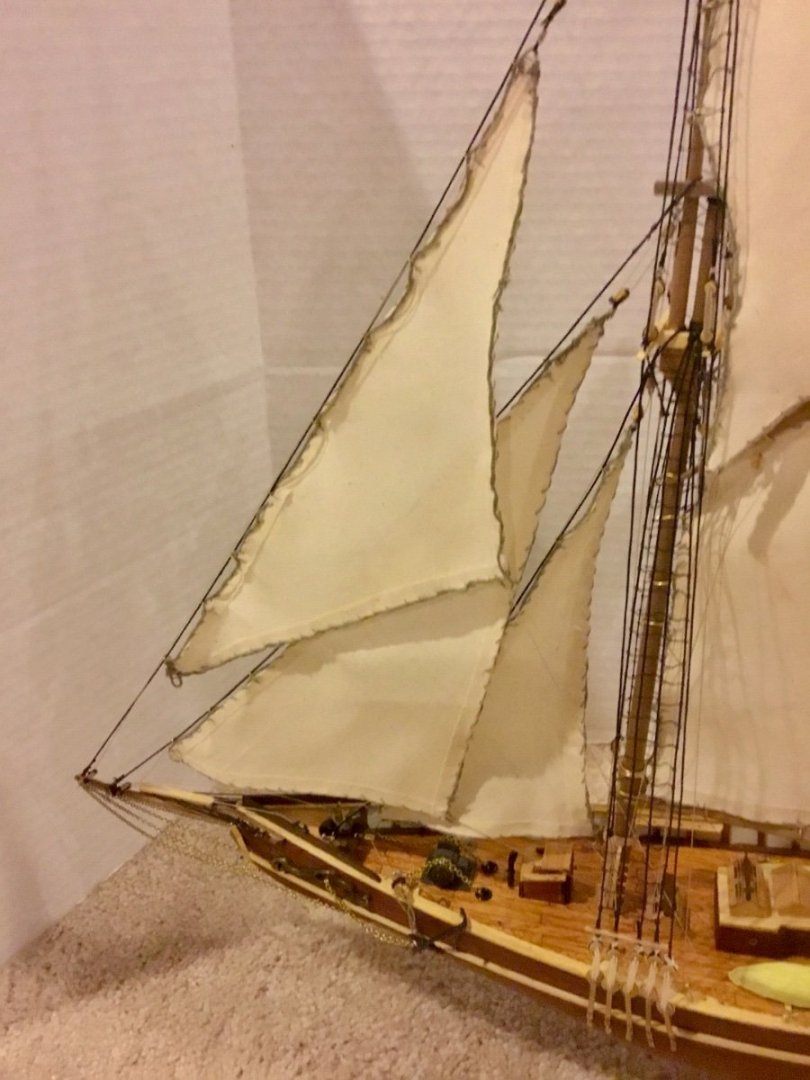
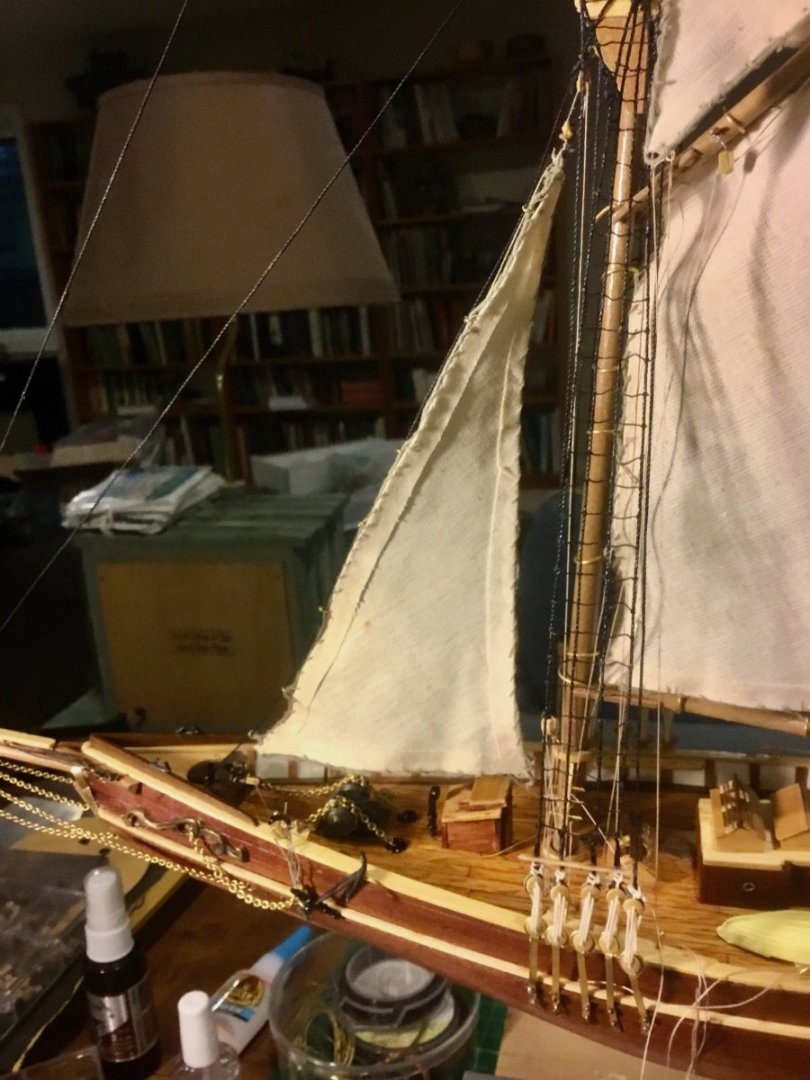
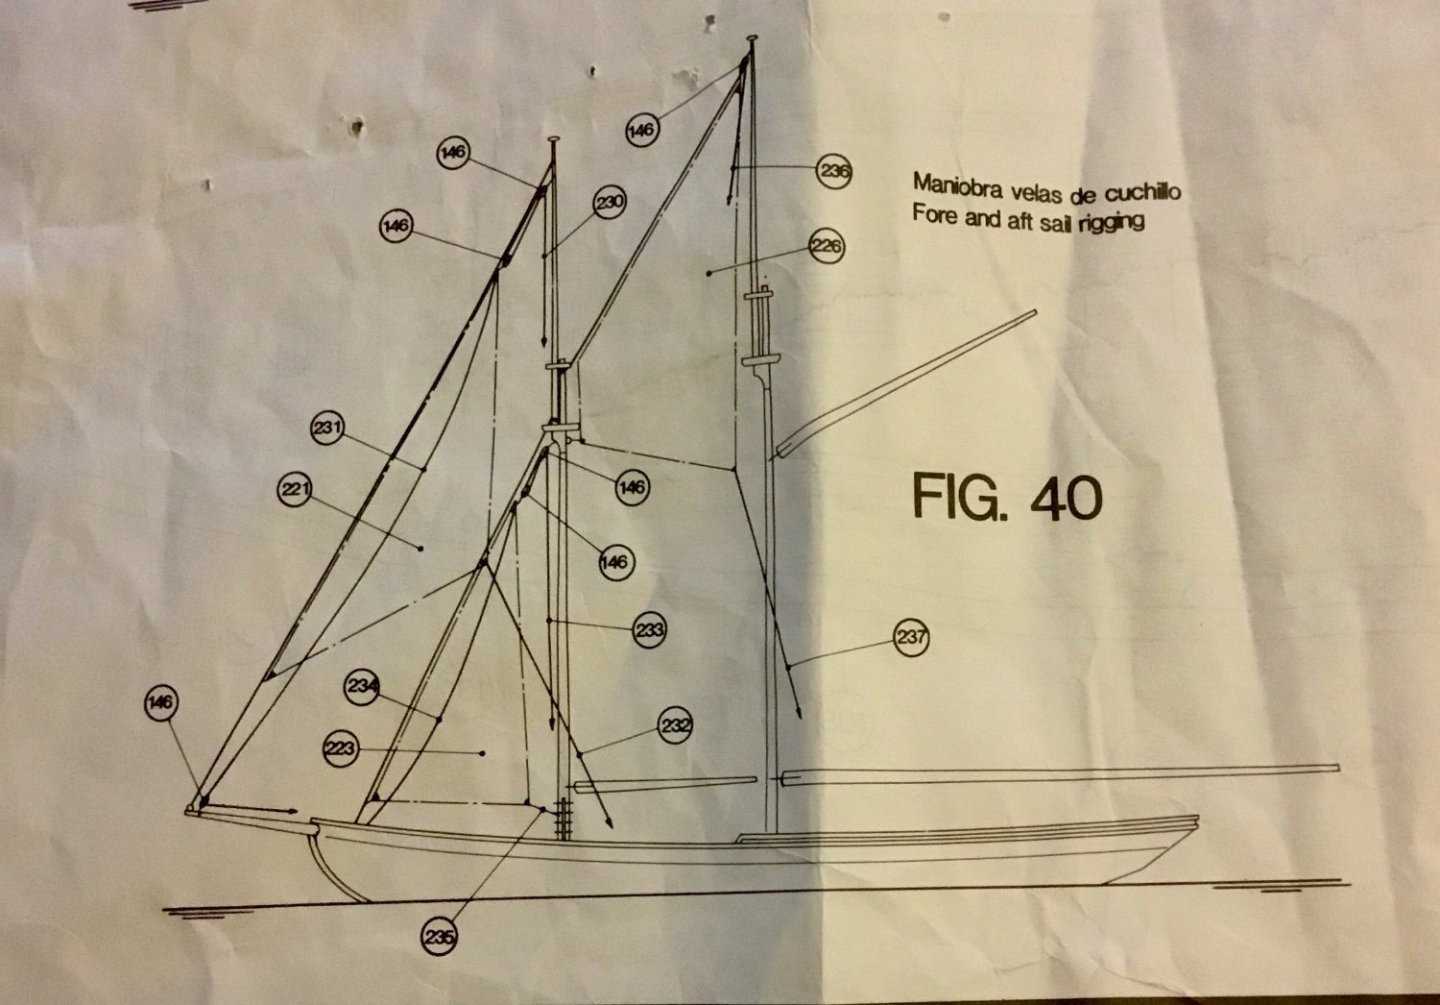
Mounted Jib Sail and its corresponding halyard, downhaul and sheet.

-
Mounted Jumbo Sail with jumbo sail halyard, downhaul and sheet.
-
Fitted Main gaff Top Sail along with main gaff top-sail halyard, main gaff top-sail tack line and mainsail halyard. Also mounted the Fisherman's Stay Sail along with Fisherman's stay sail halyard and Fisherman's stay sail sheet.


- 34 replies
-
- 1
-
-
- Artesania Latina
- Finished
- (and 1 more)