HOLIDAY DONATION DRIVE - SUPPORT MSW - DO YOUR PART TO KEEP THIS GREAT FORUM GOING! (Only 24 donations so far out of 49,000 members - C'mon guys!)
×


Dsmith20639
-
Posts
254 -
Joined
-
Last visited
Content Type
Profiles
Forums
Gallery
Events
Everything posted by Dsmith20639
-
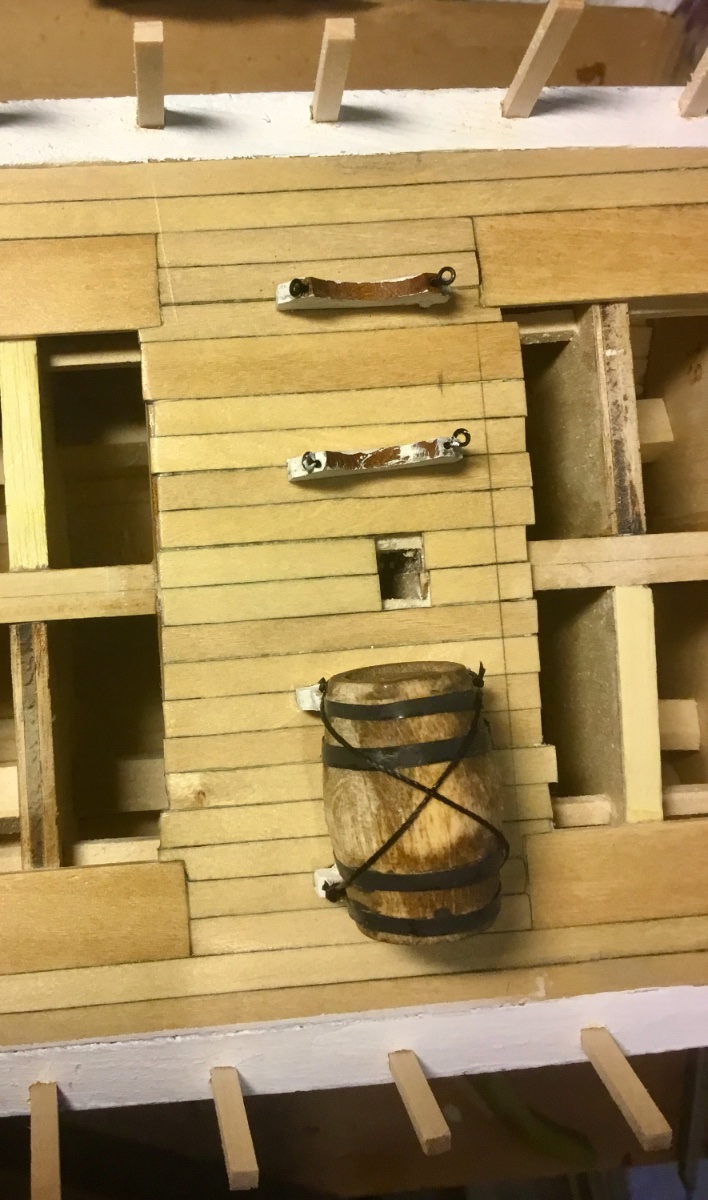
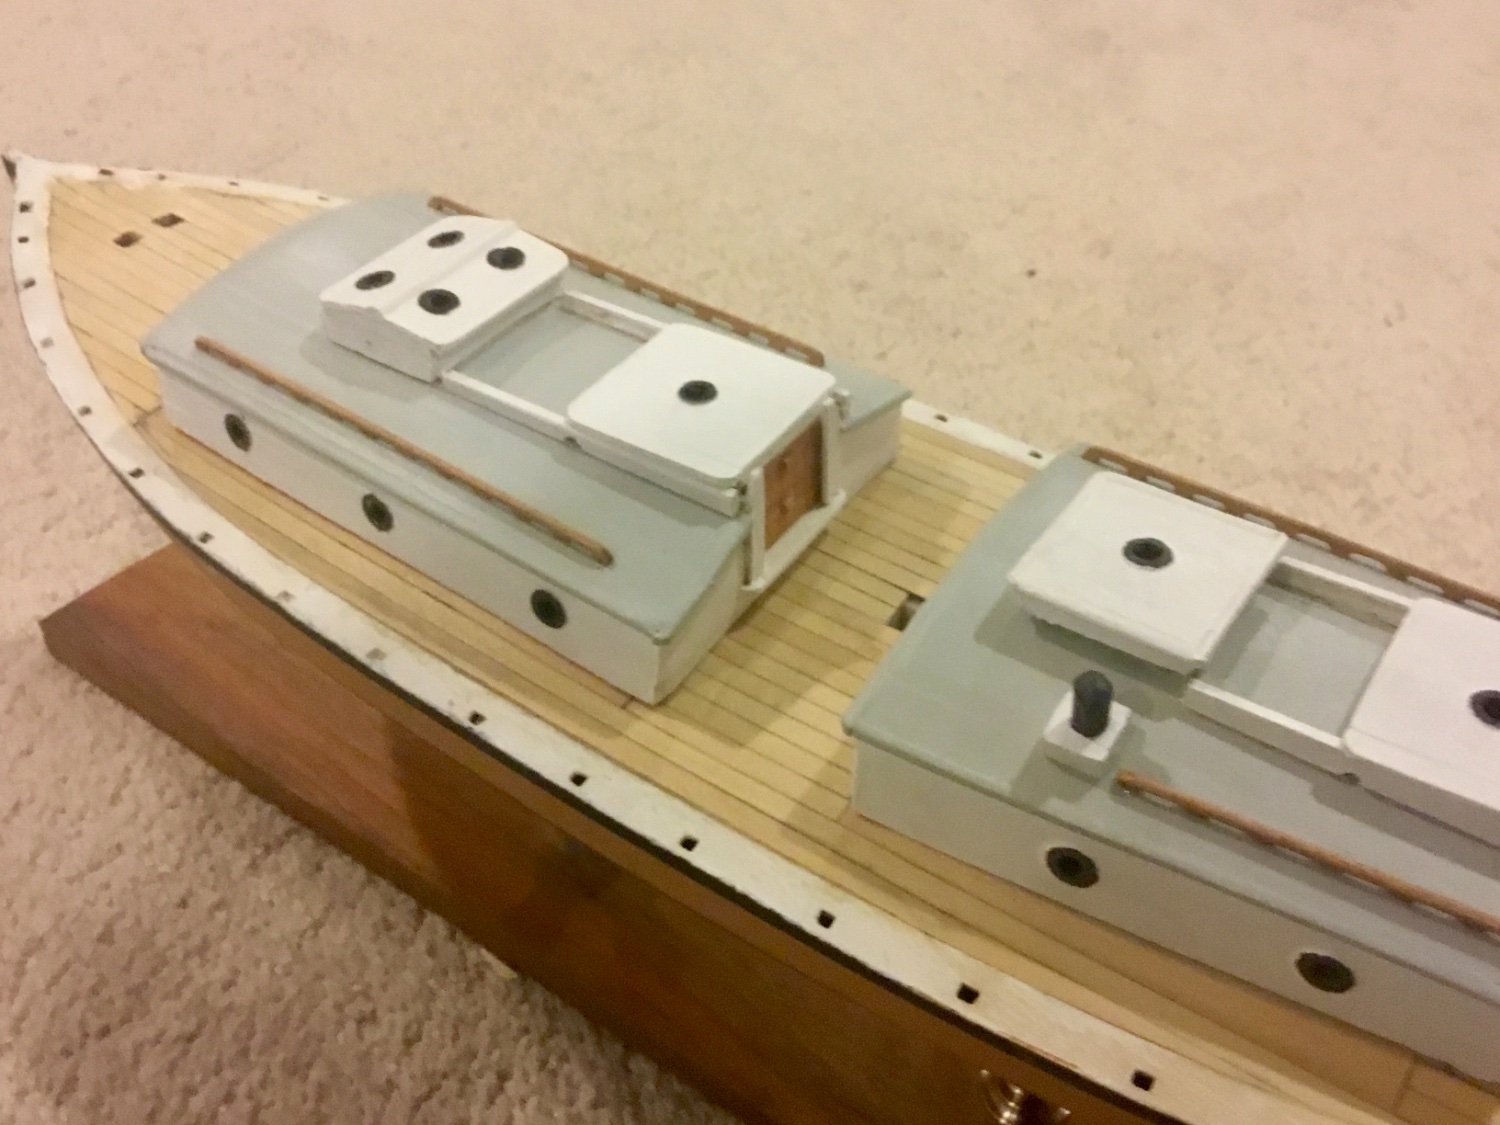
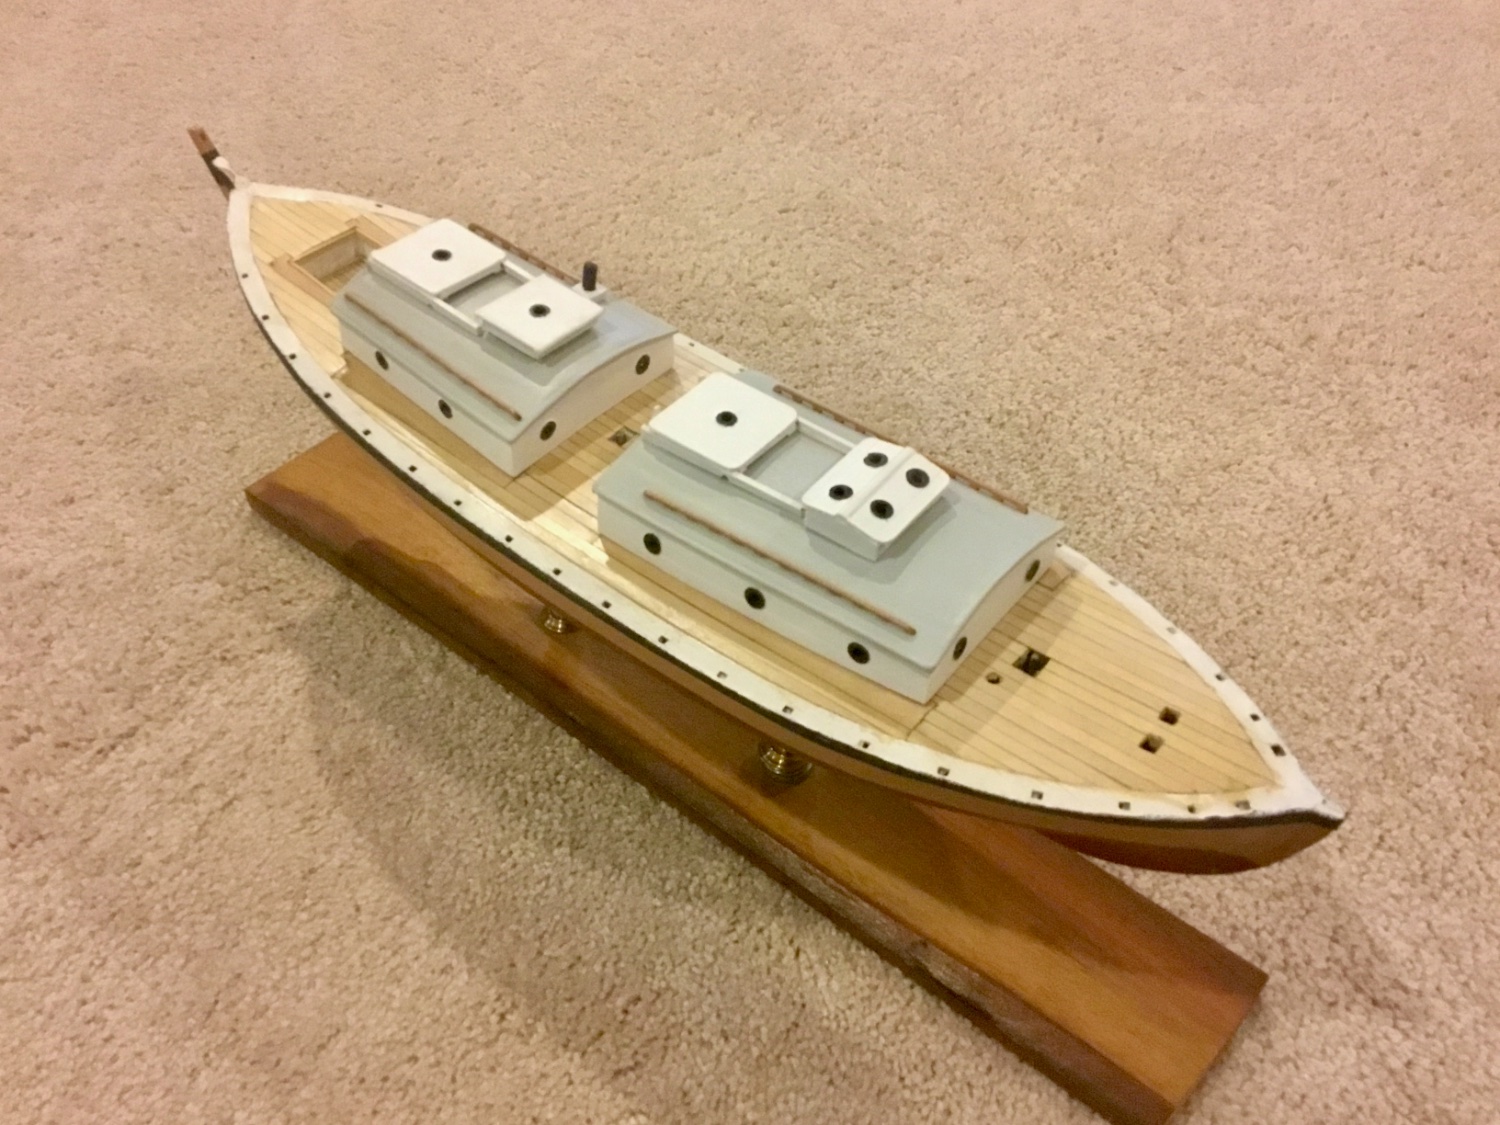
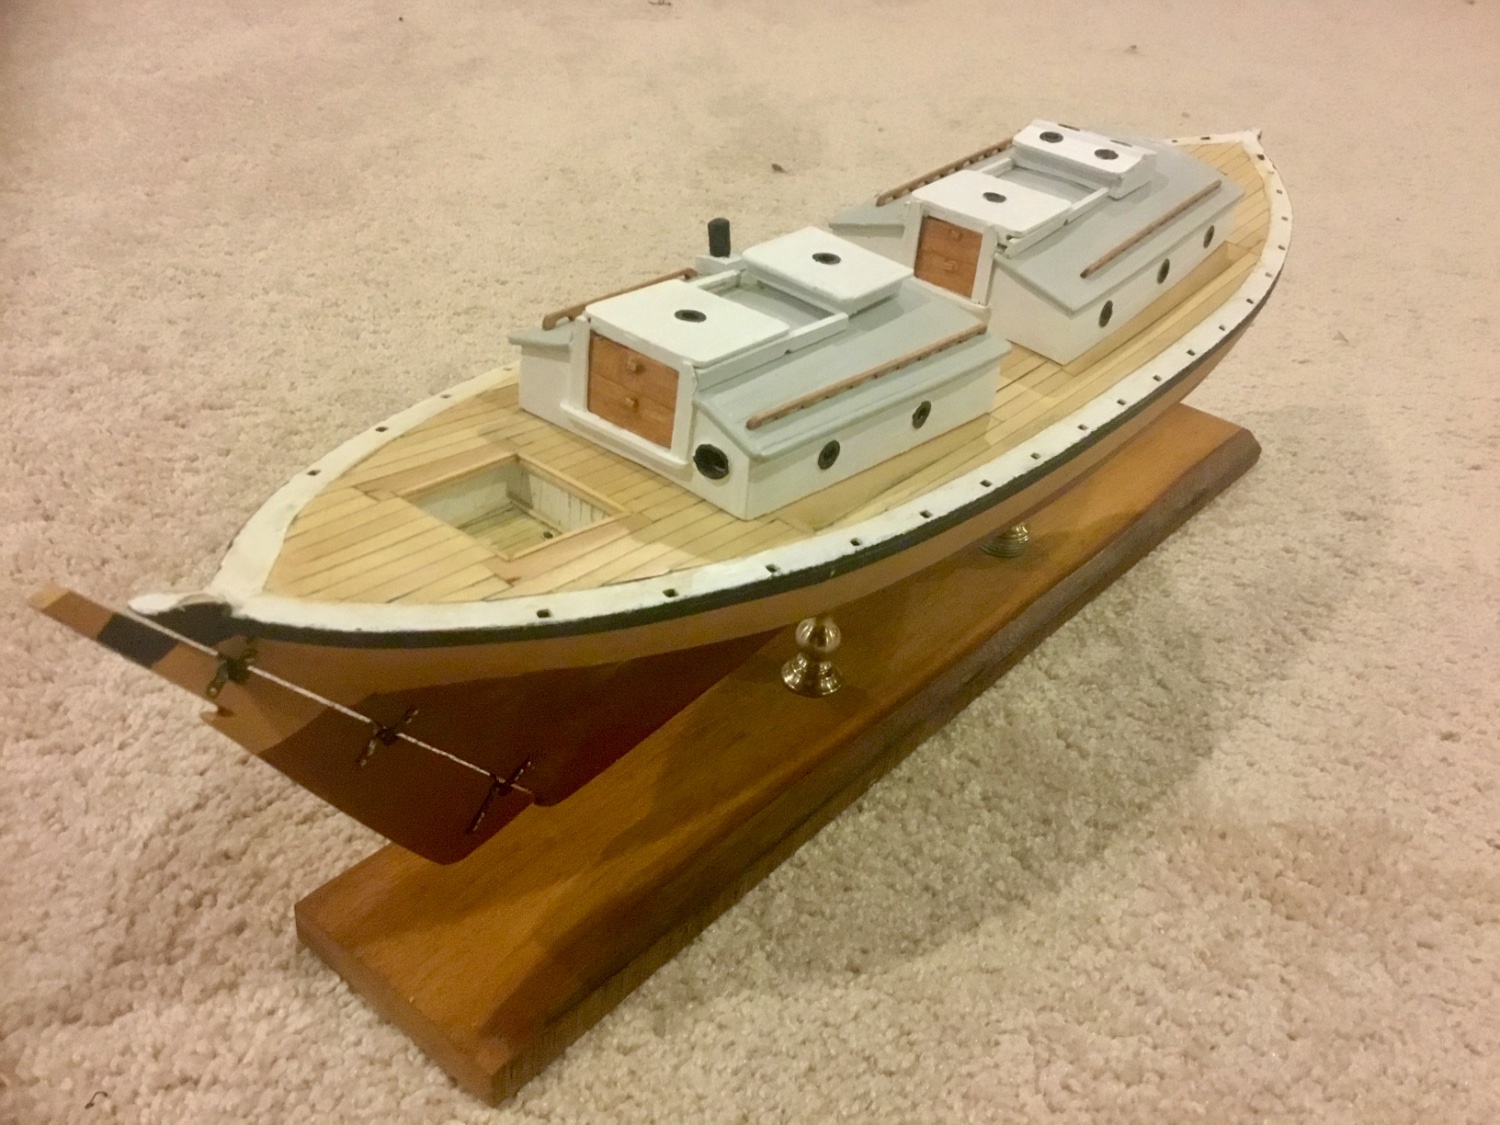
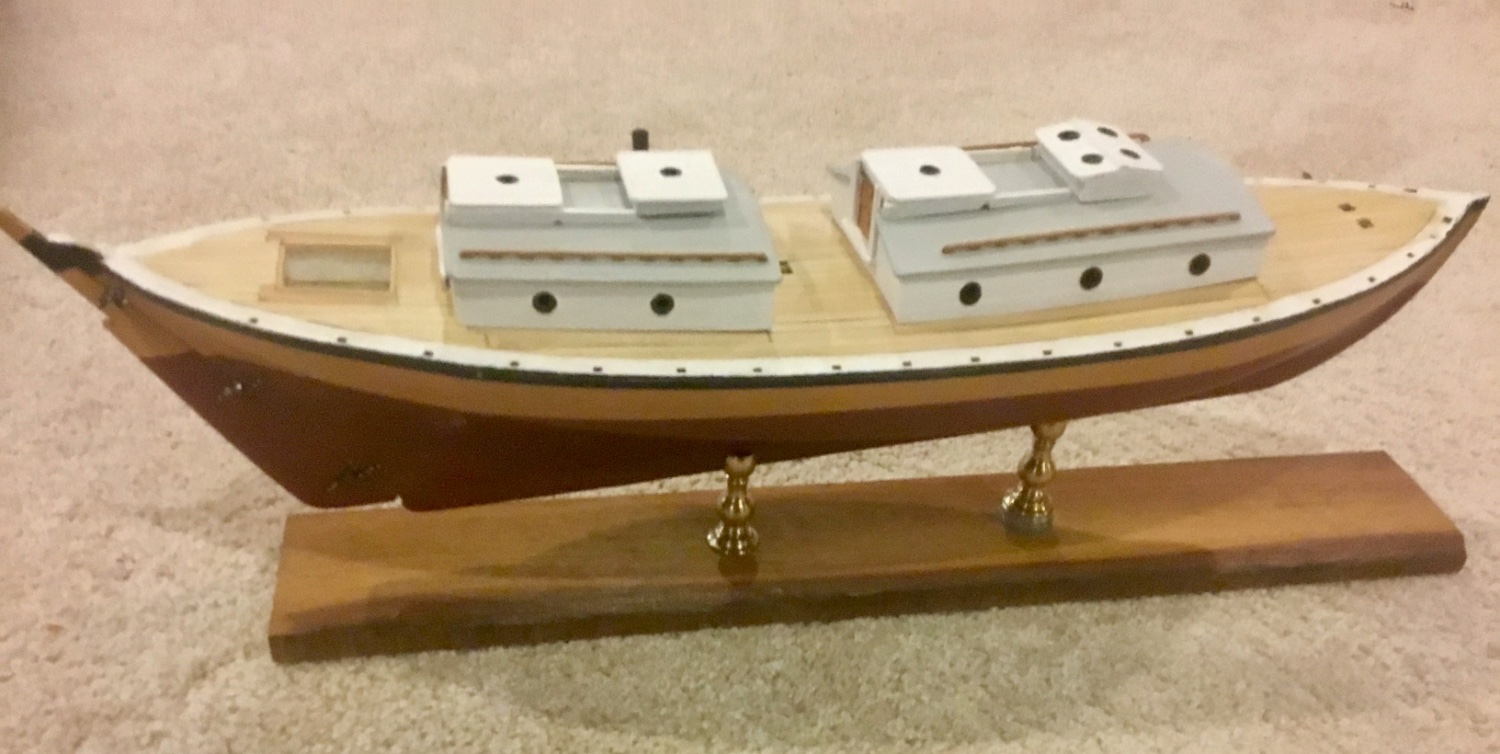
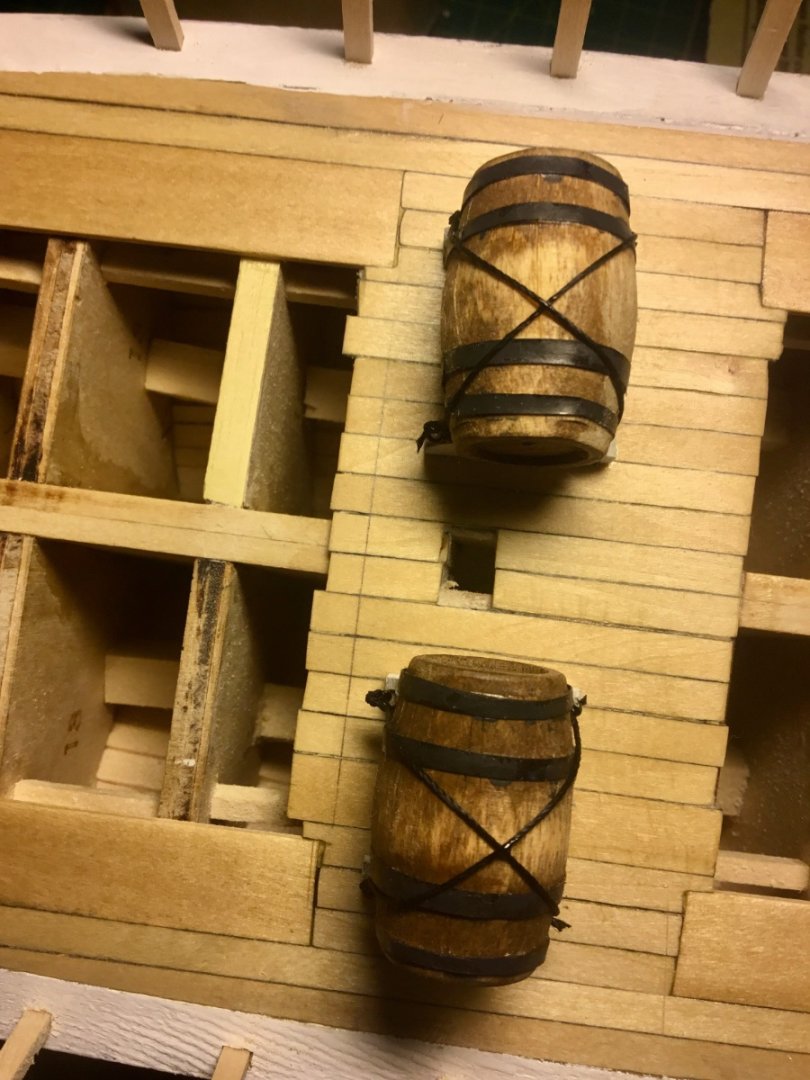
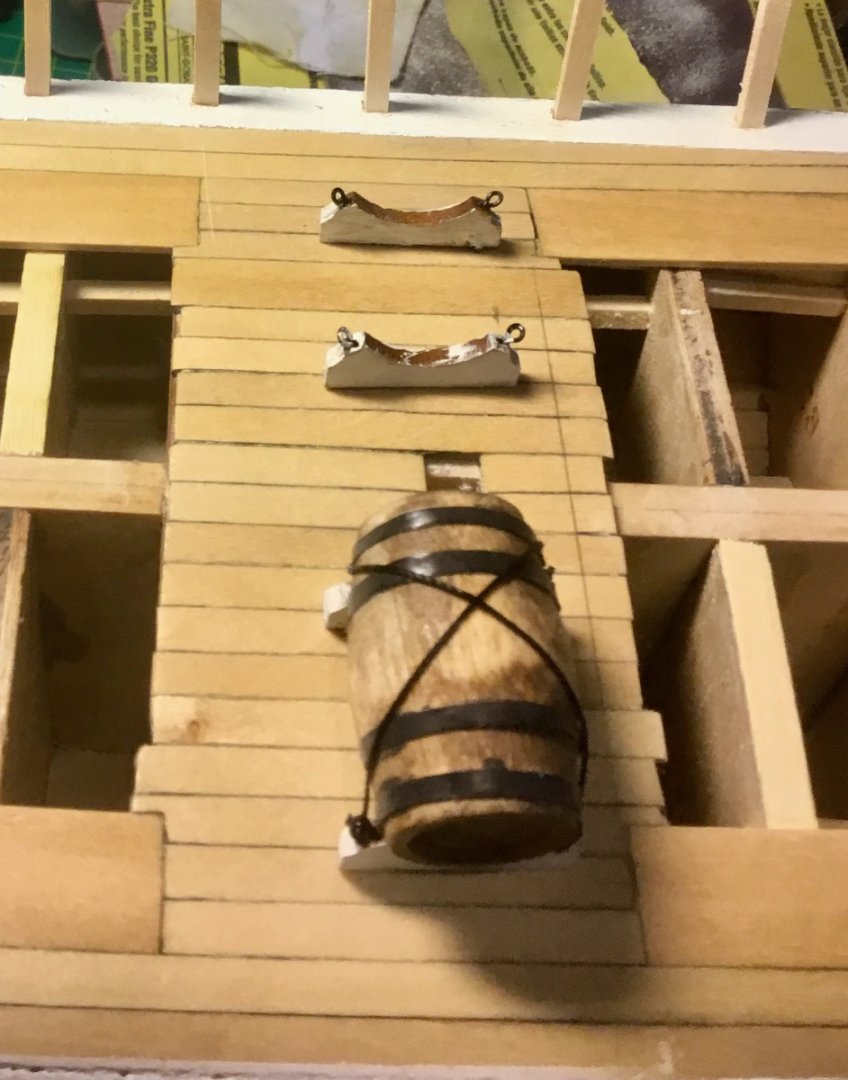
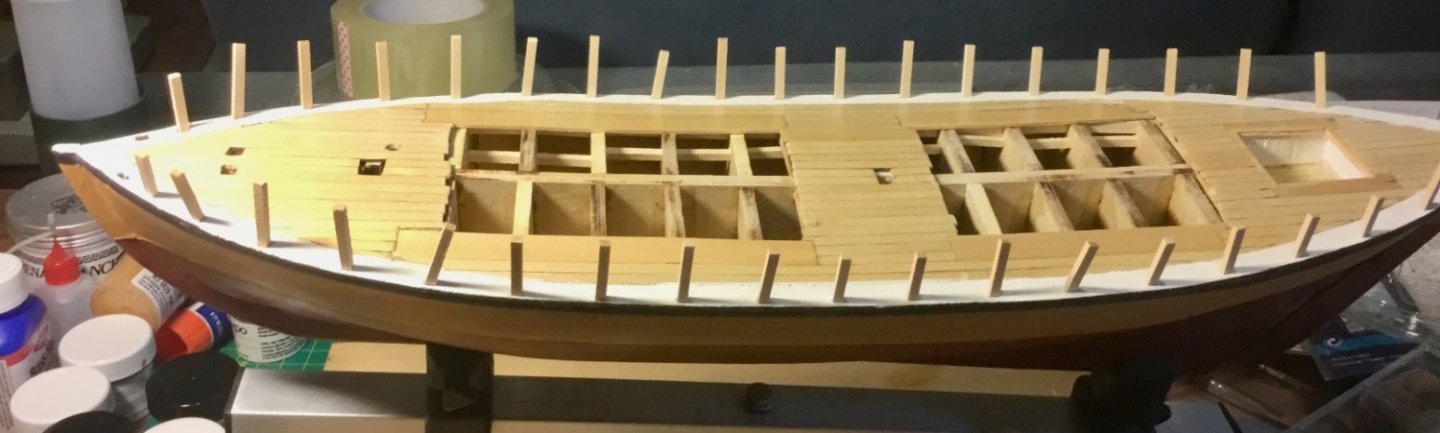
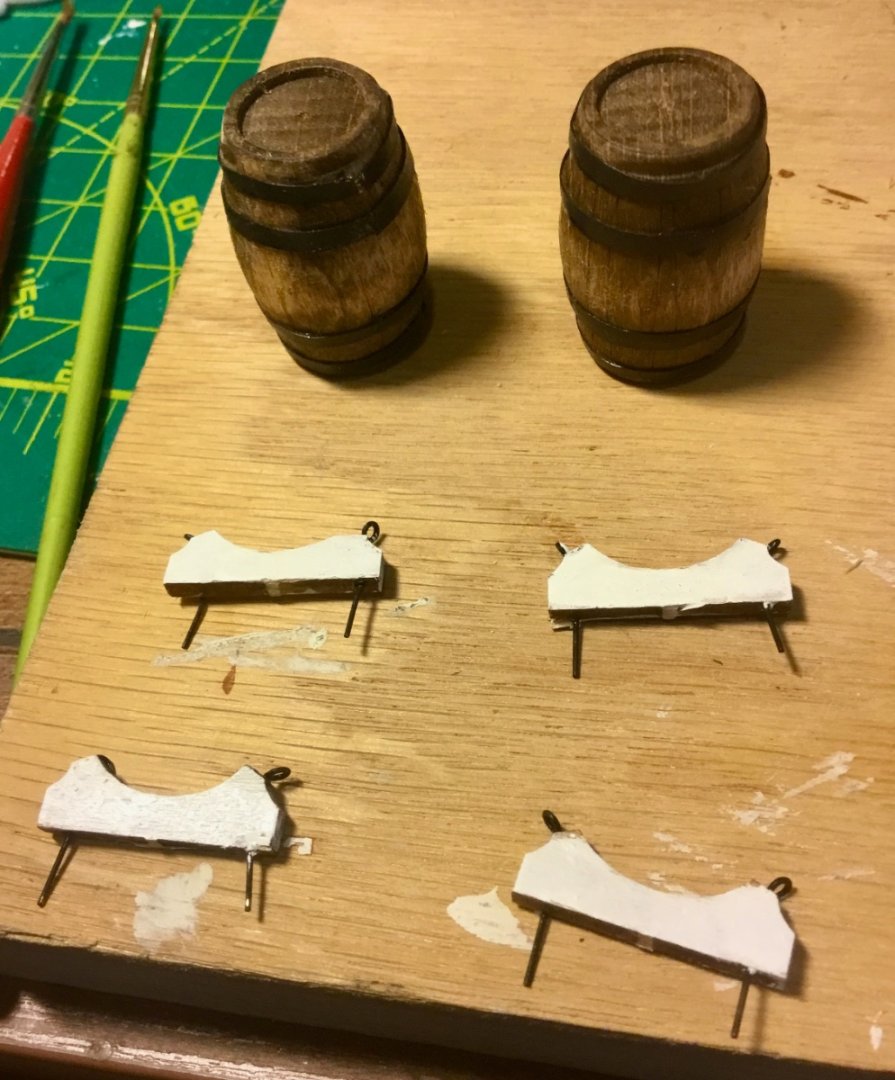
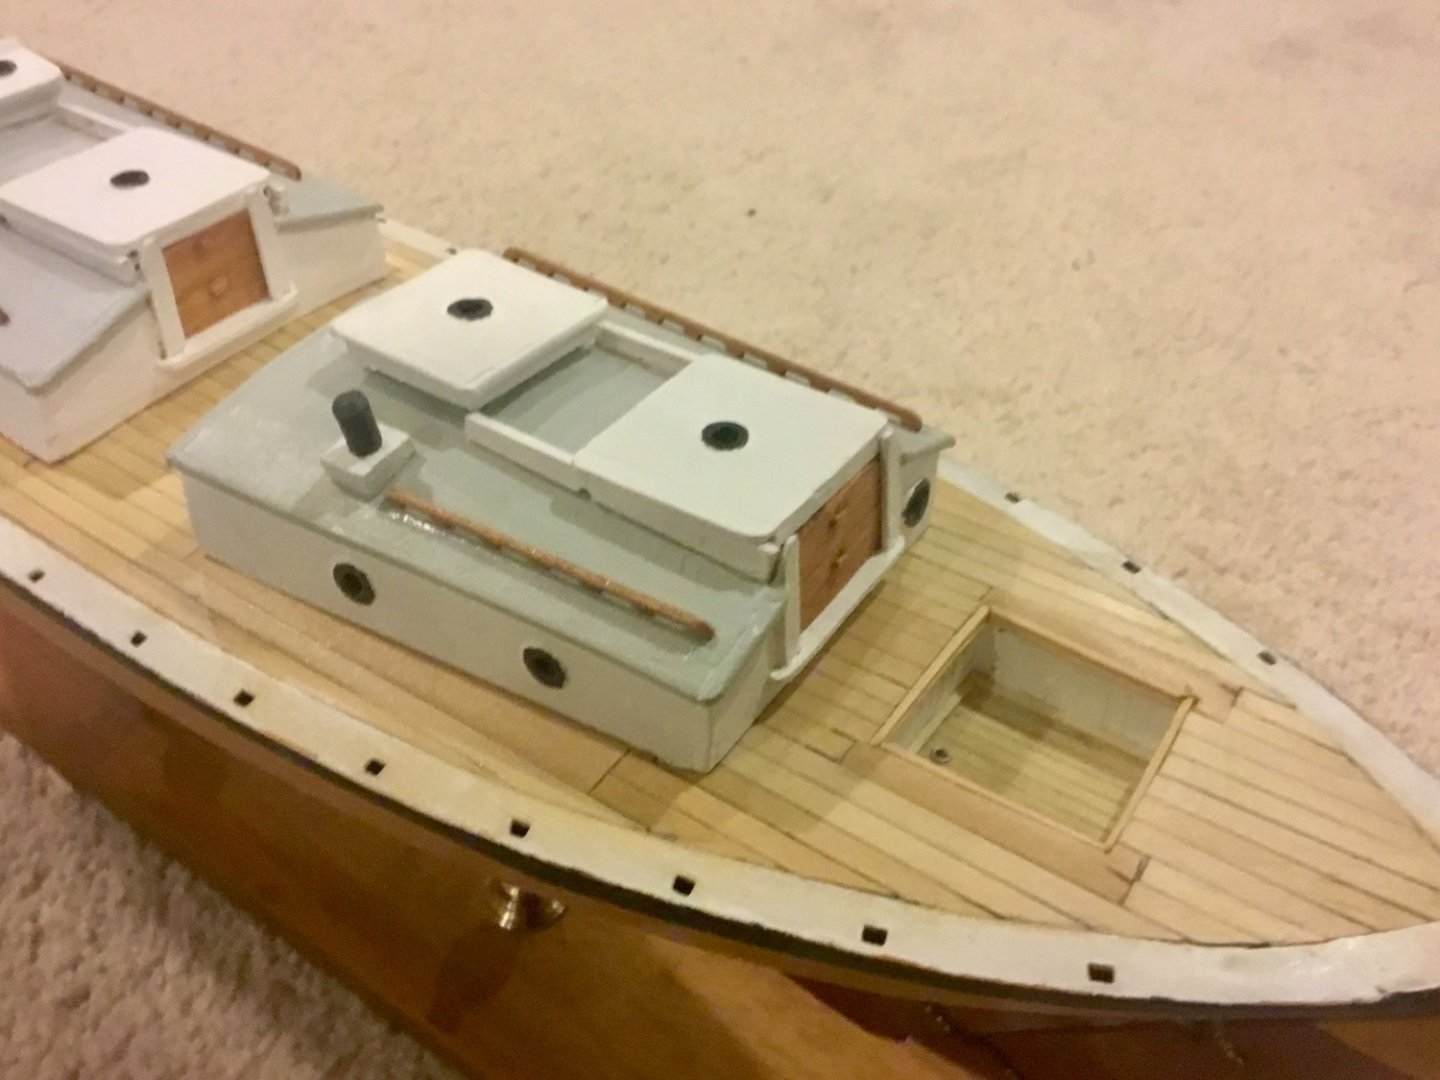
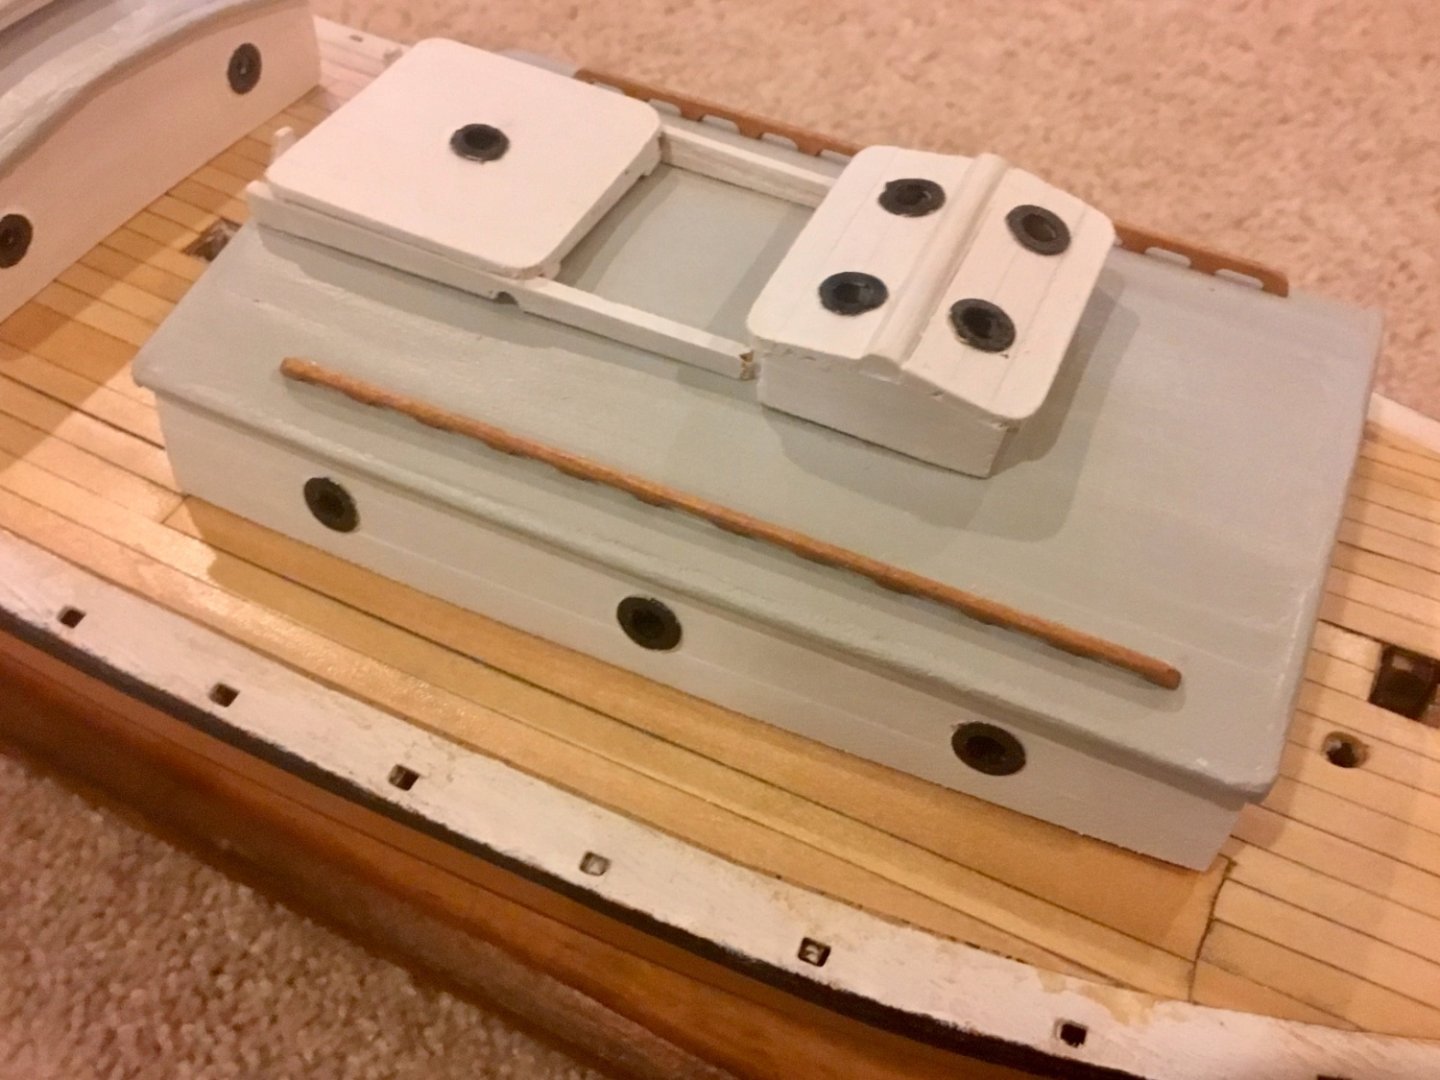
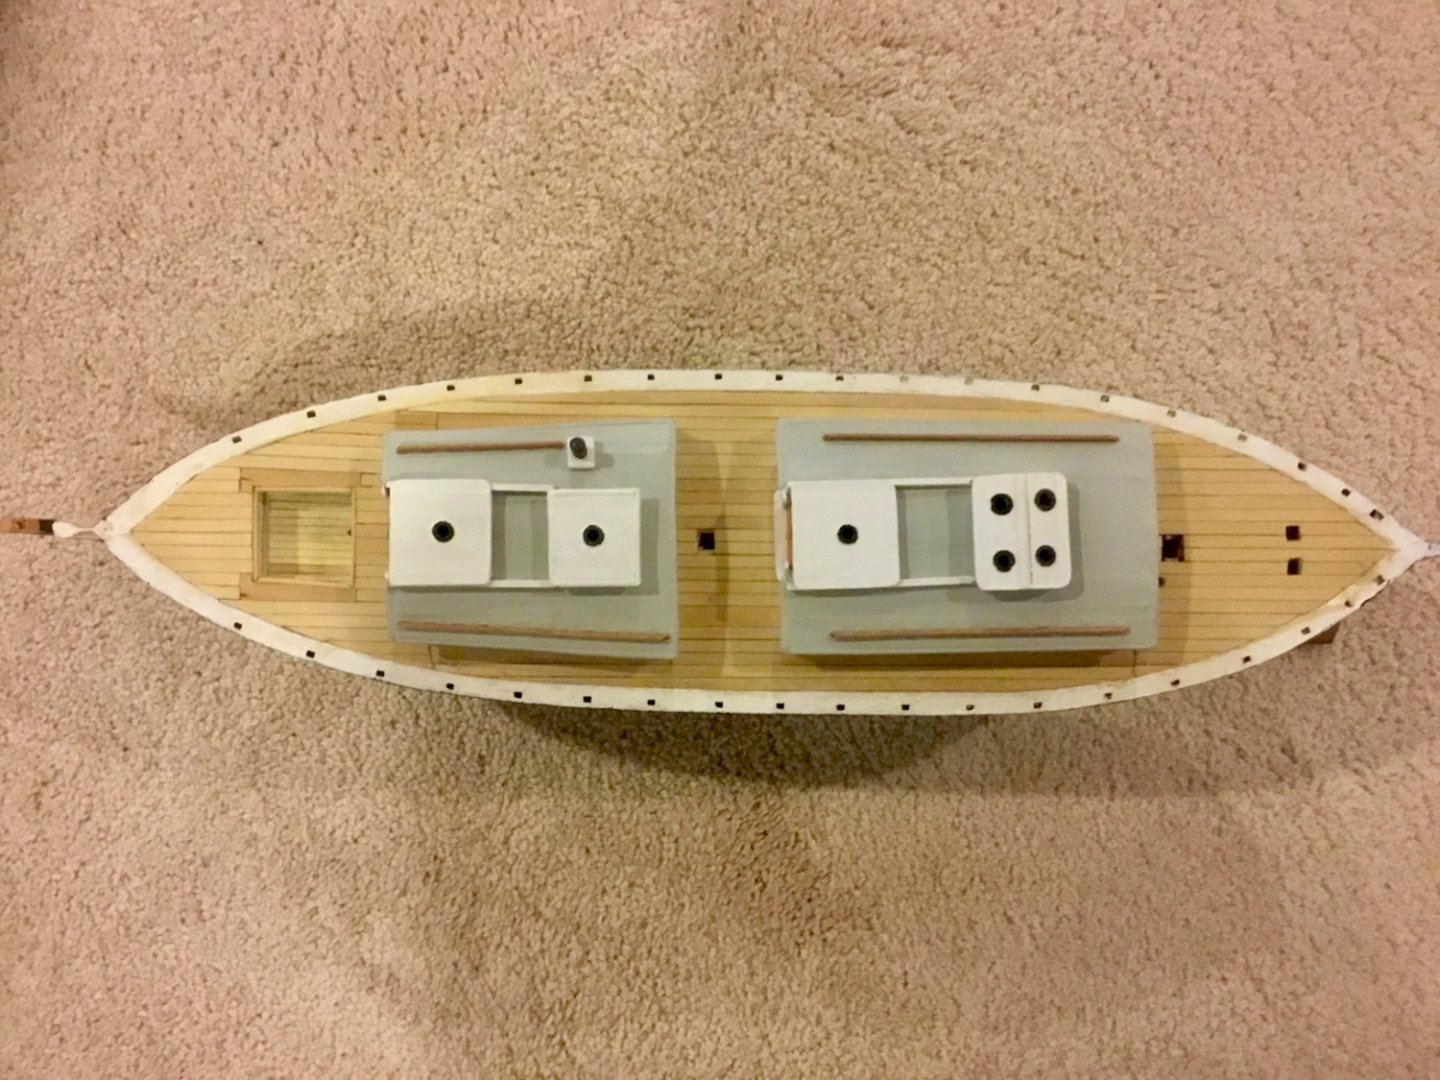
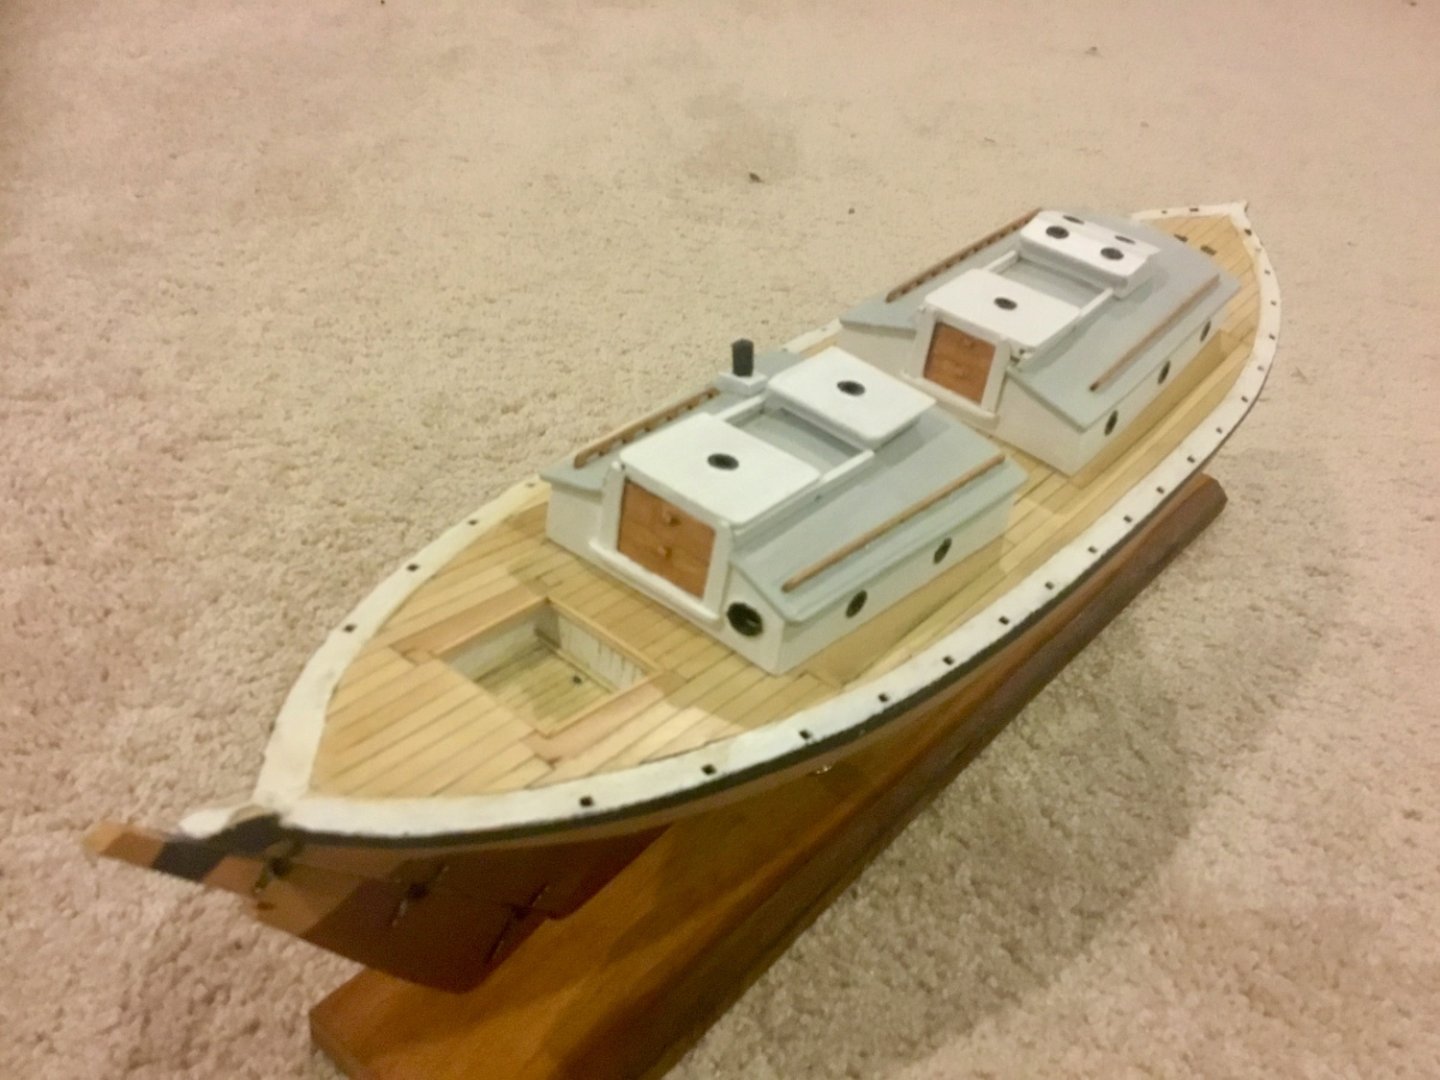
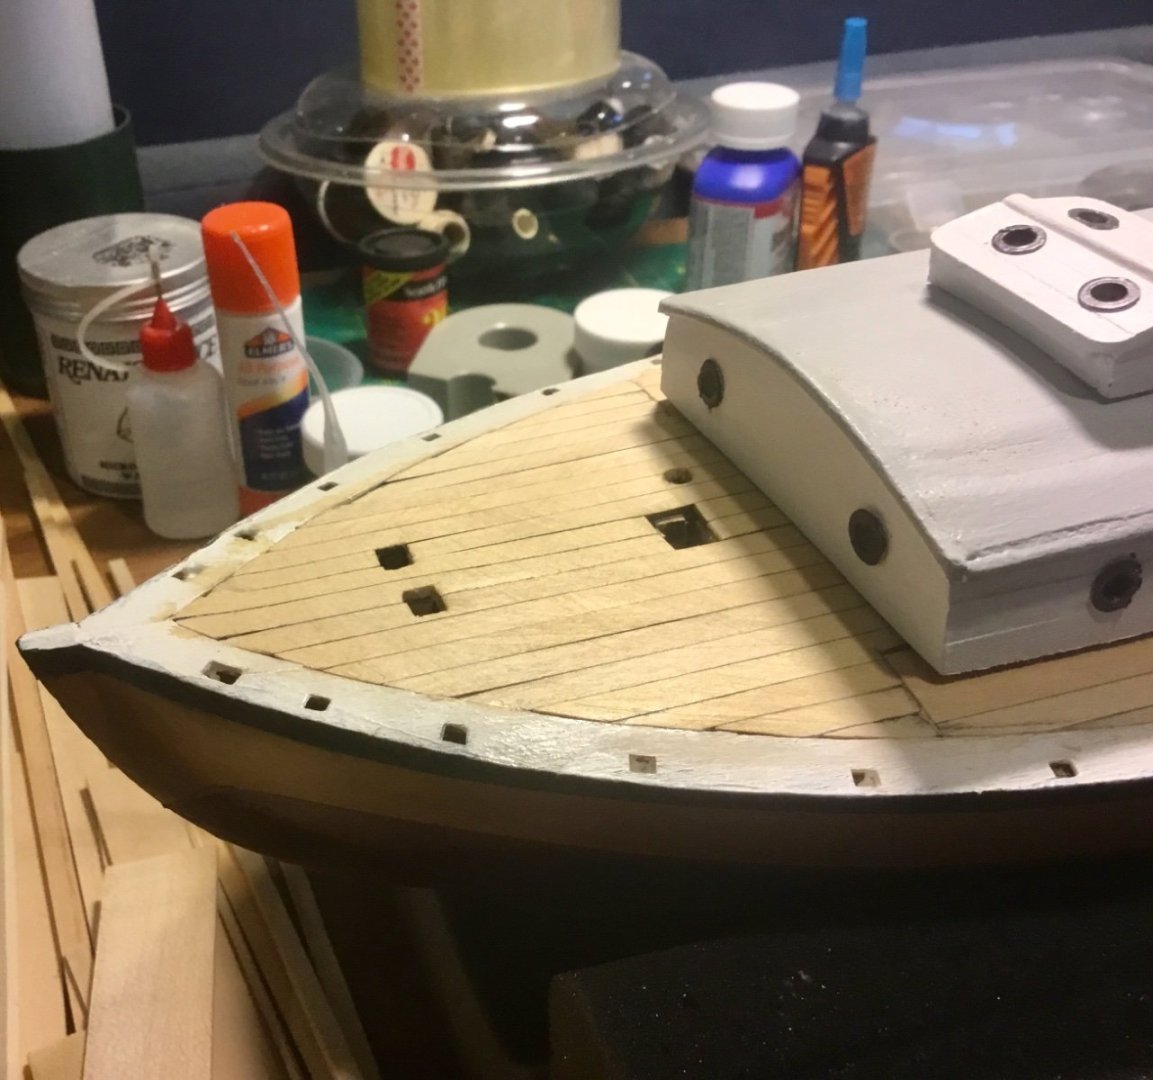
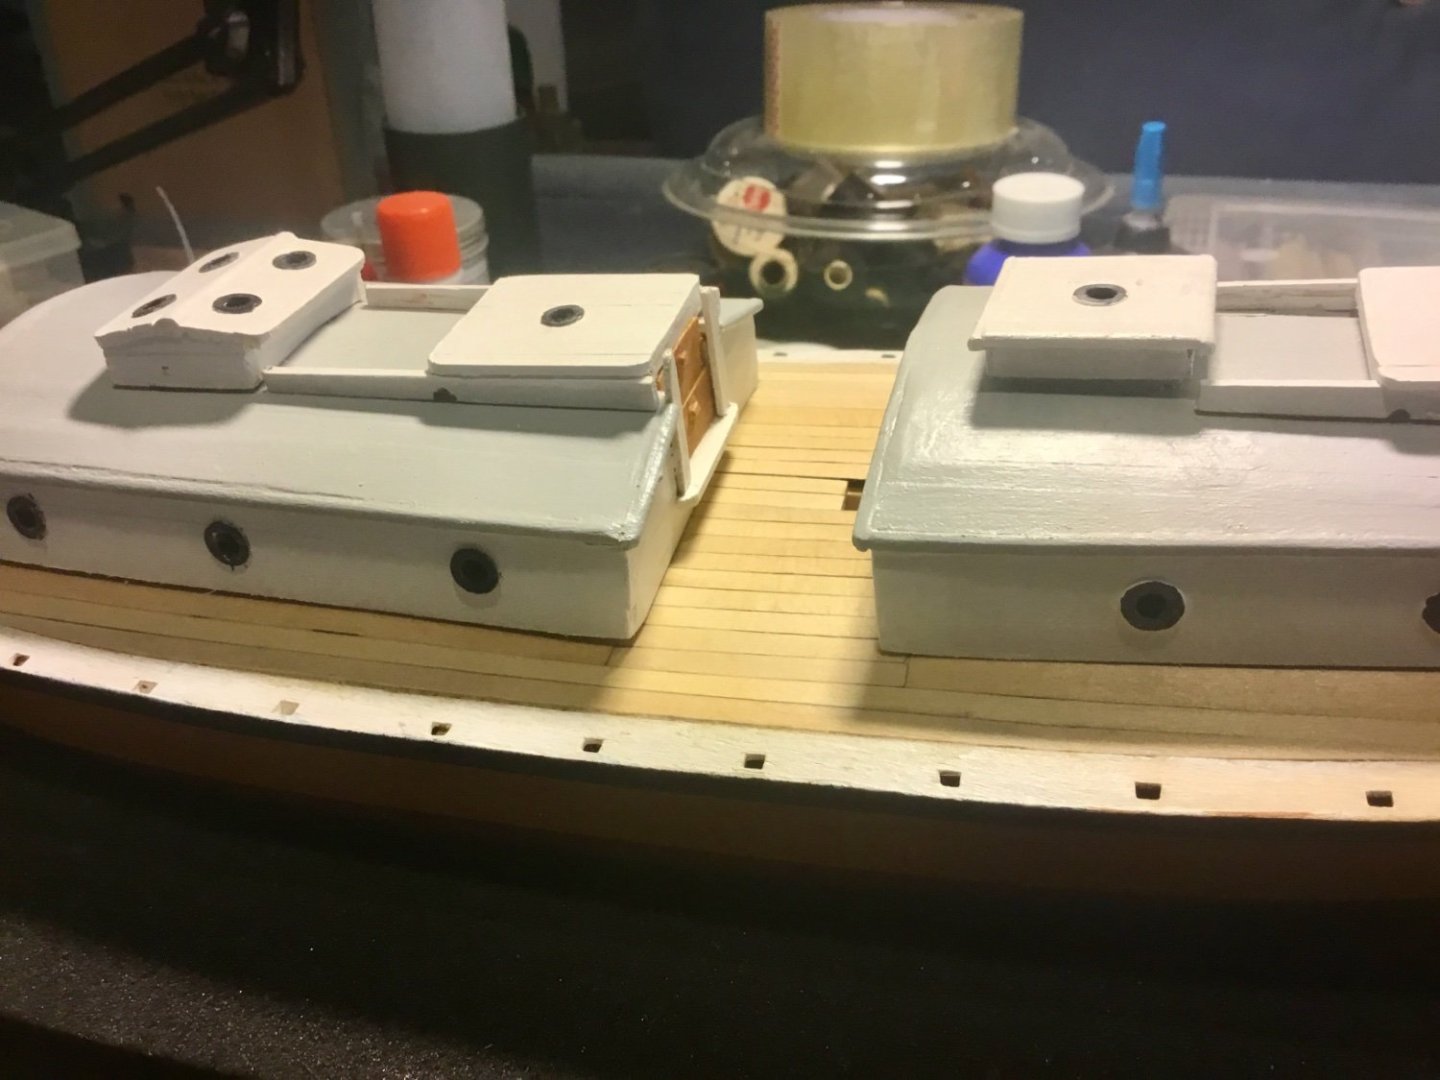
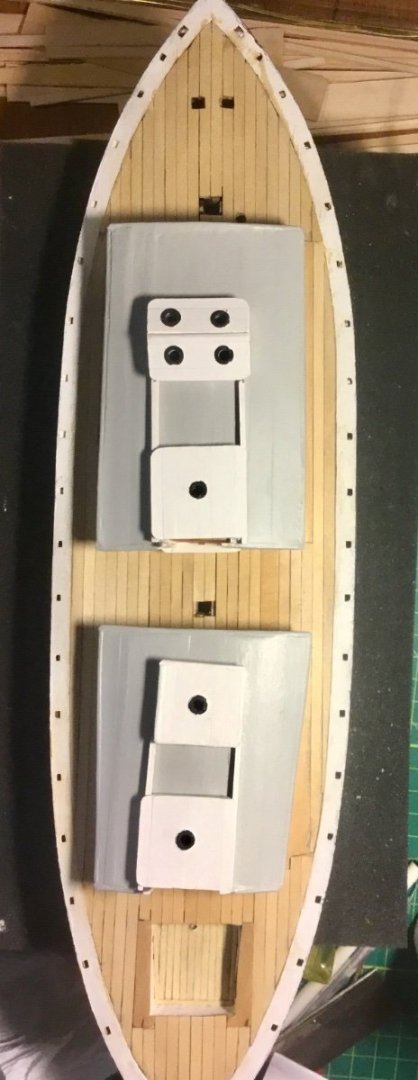
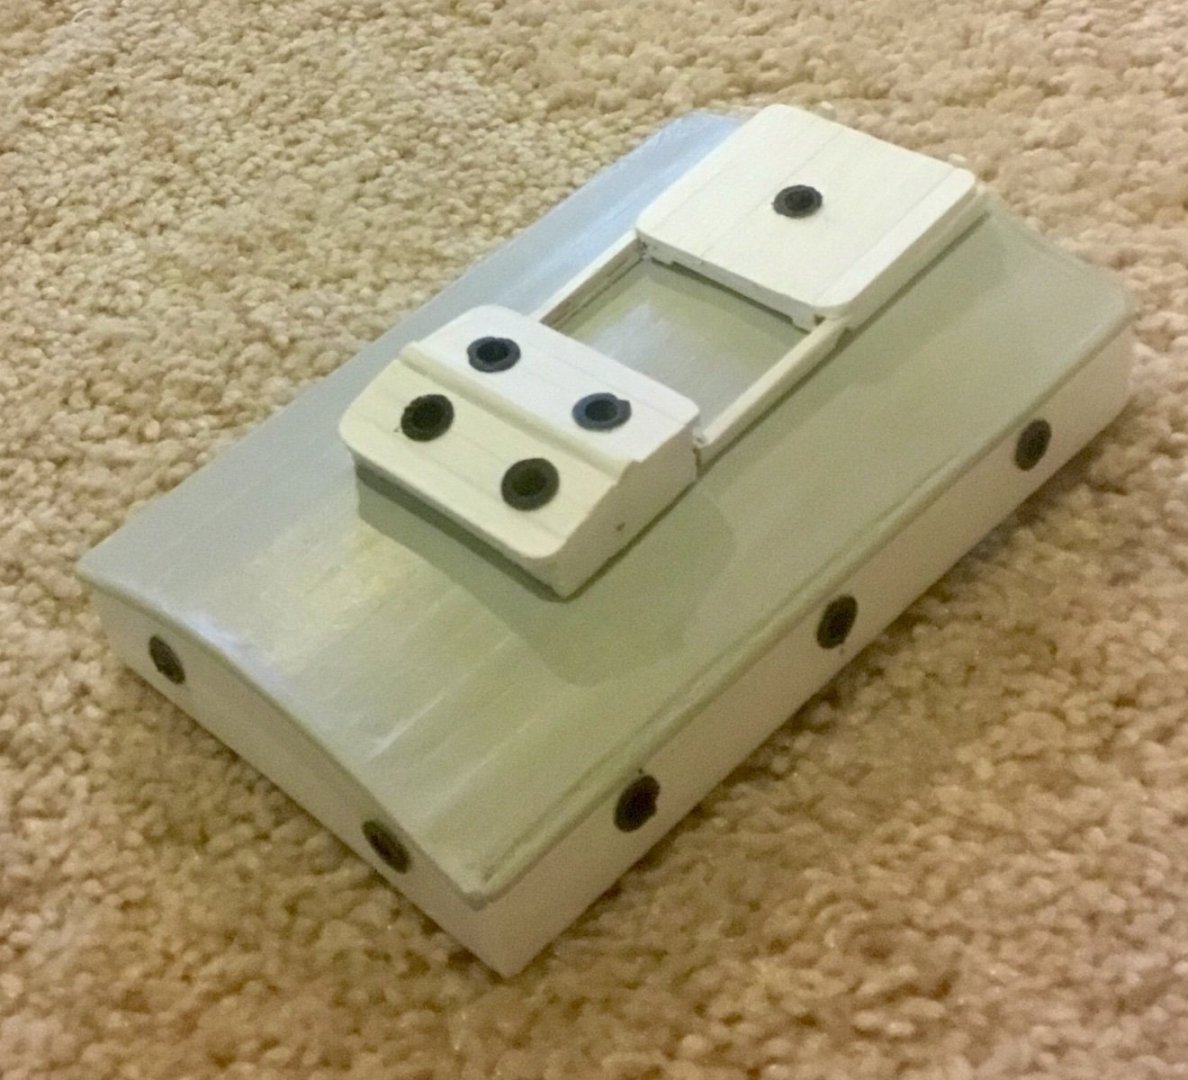
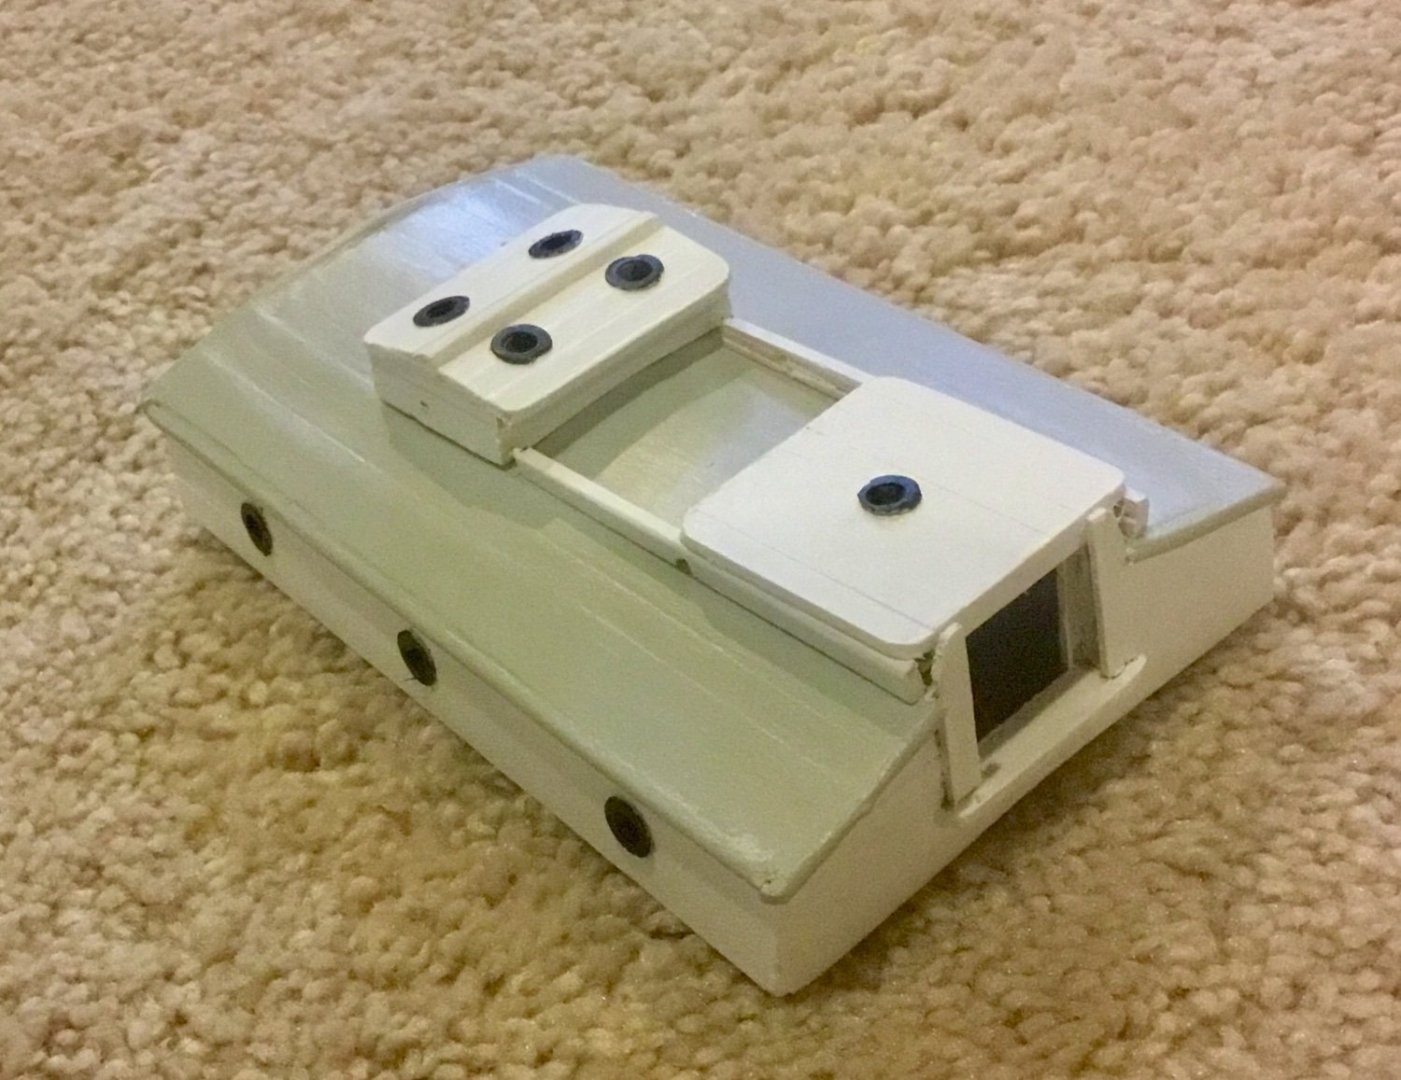
Finished the deck, completed cabins and temporarily placed in position for photos. Repainted the planksheer as some of the previous paint was removed when sanding the deck. Still need to create hinges for skylight. Temporarily installed the stanchions in the planksheer in preparation for installing the bulwarks (which the manual implies is the most difficult part of the build). I reviewed Olha's videos on how she did the bulwarks but decided in the end to go with the method in the manual. Chickened out I guess. Finished and mounted the water barrels on the deck along with the aft cabin.


- 37 replies
-
- 6
-

-
- Glad Tidings
- Model Shipways
- (and 1 more)
-
Replaced the fashion pieces with a simpler construction as seen in the previous post. Forgot to take picture. Anyway continuing with planking the deck.
-
Model ship building slip
Dsmith20639 replied to CapnJack43's topic in Modeling tools and Workshop Equipment
Interesting. Do you have plans available? -
Thanks, looks simpler than what I came up with, or even the construction manual's depiction.
-
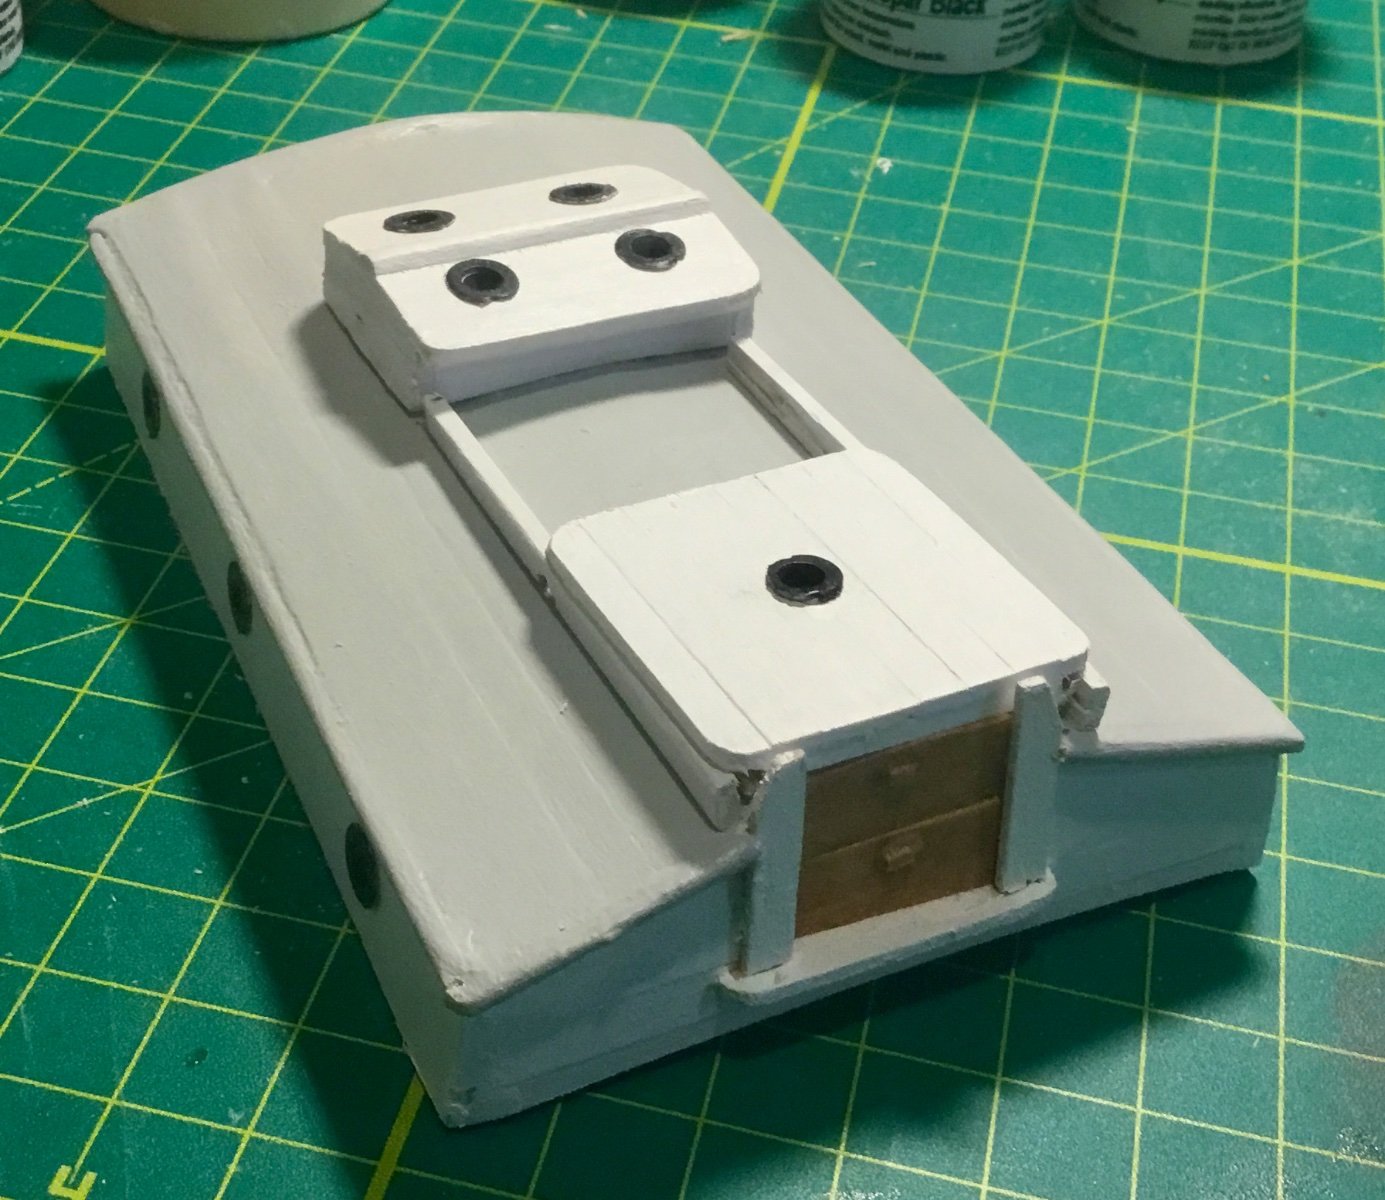
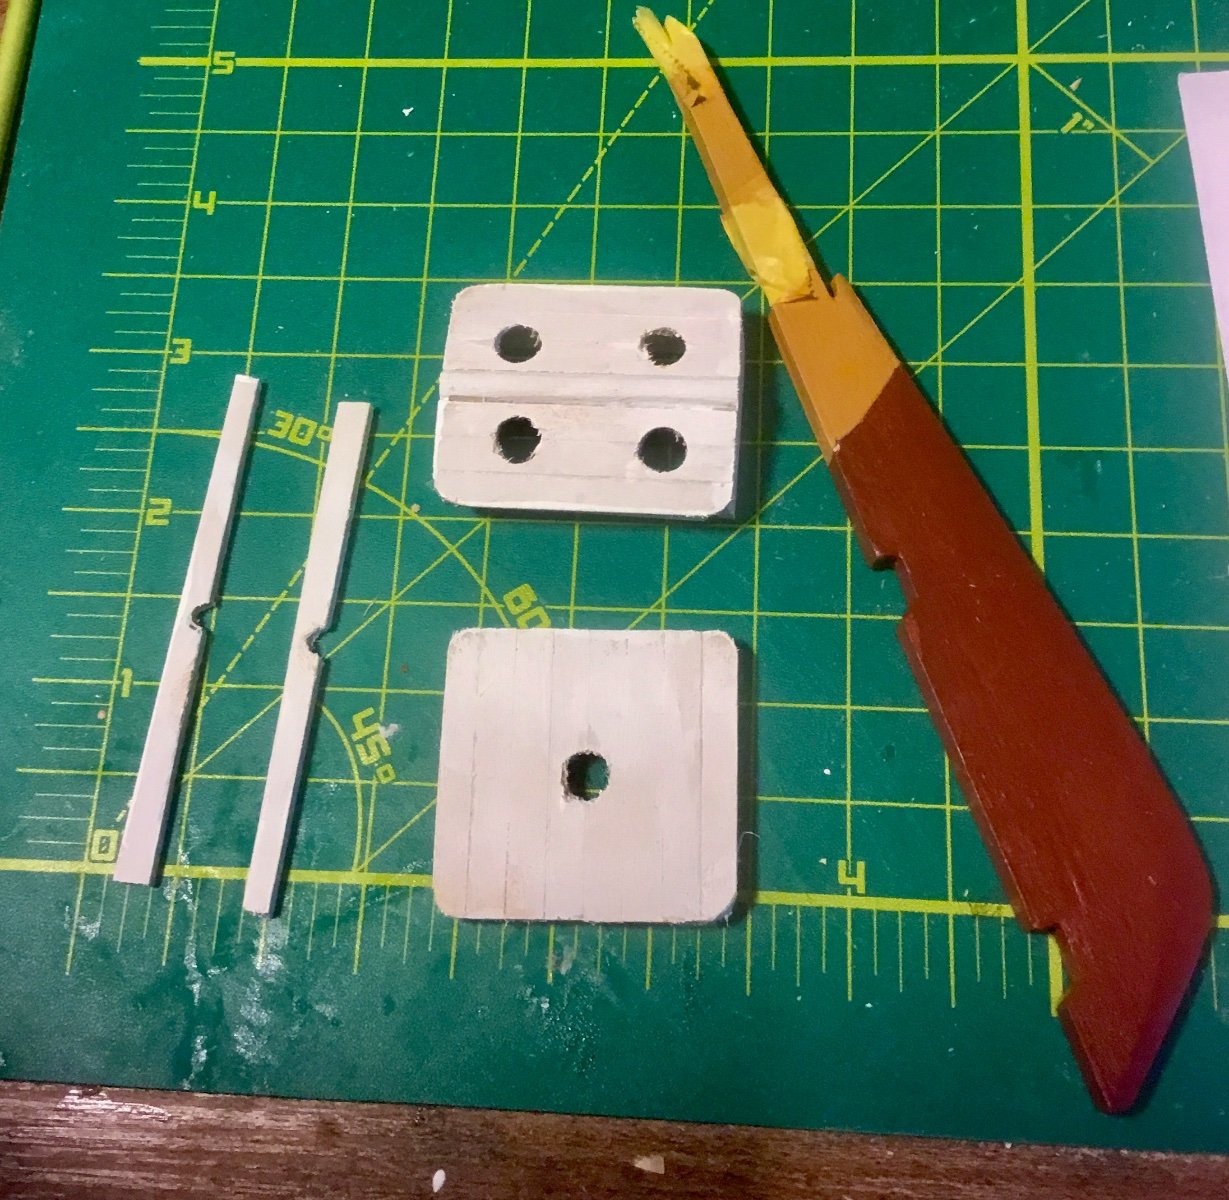
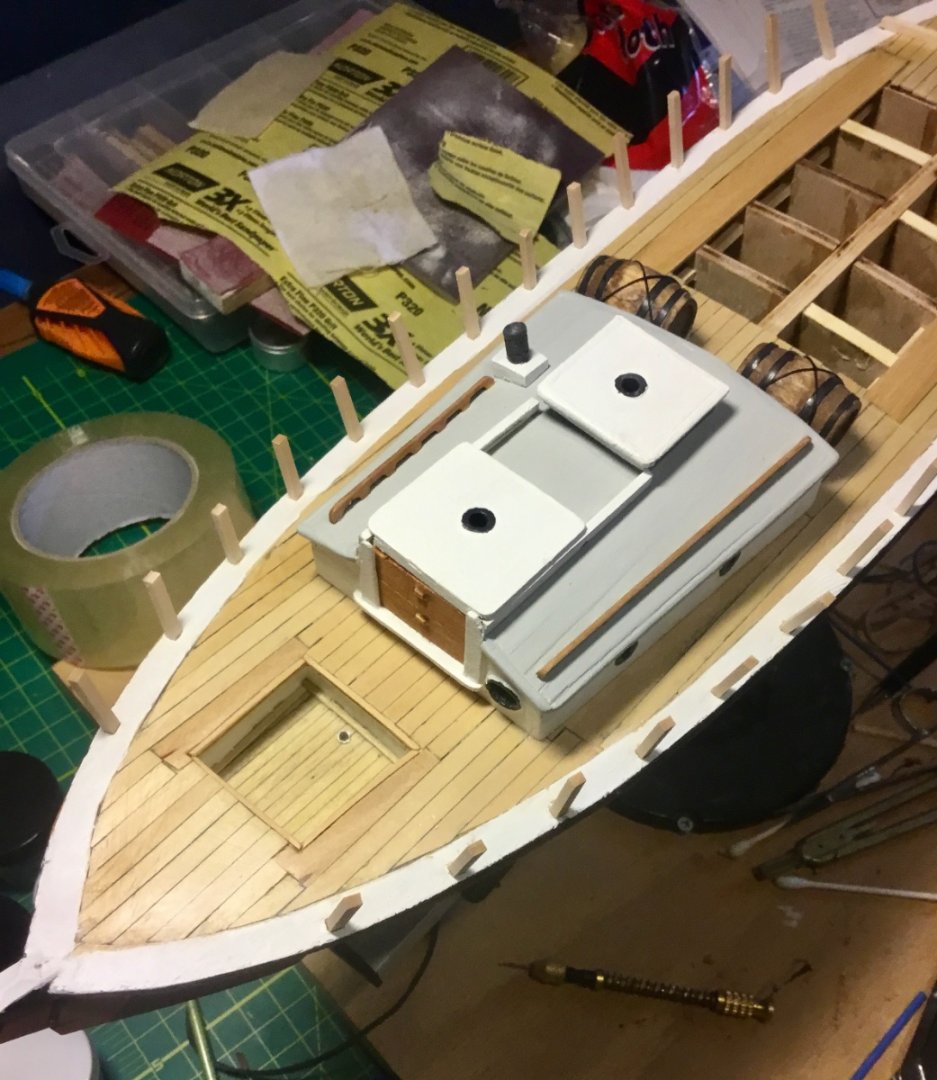
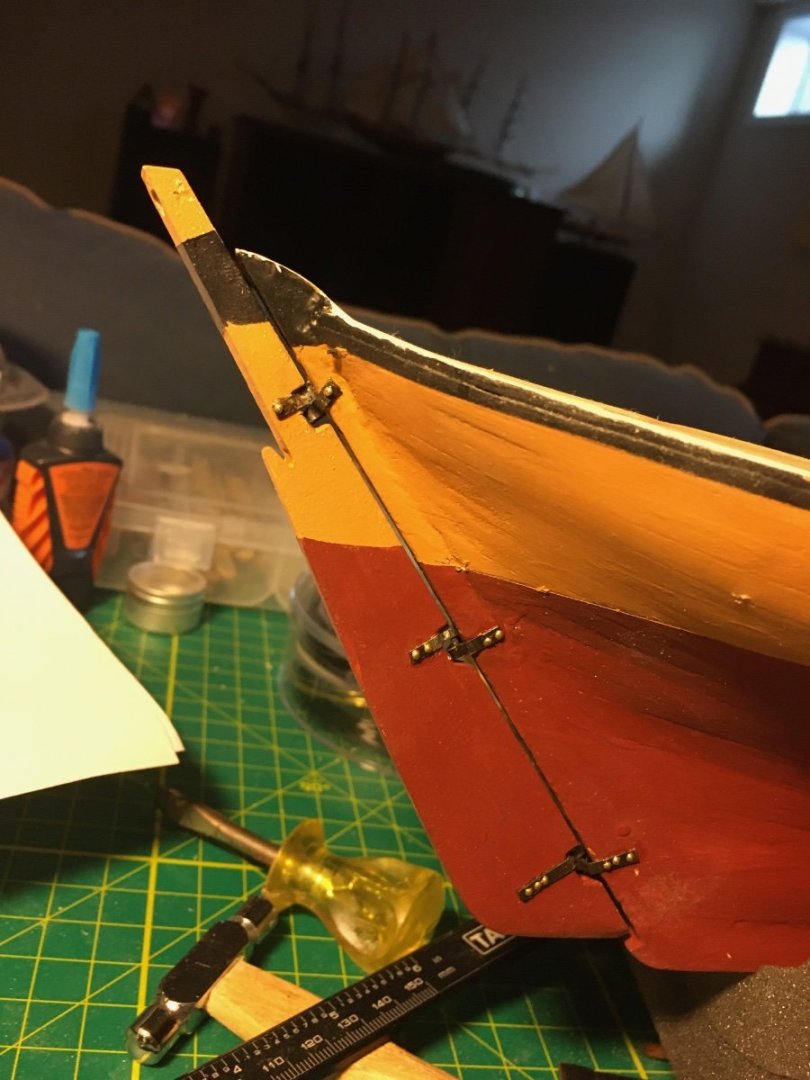
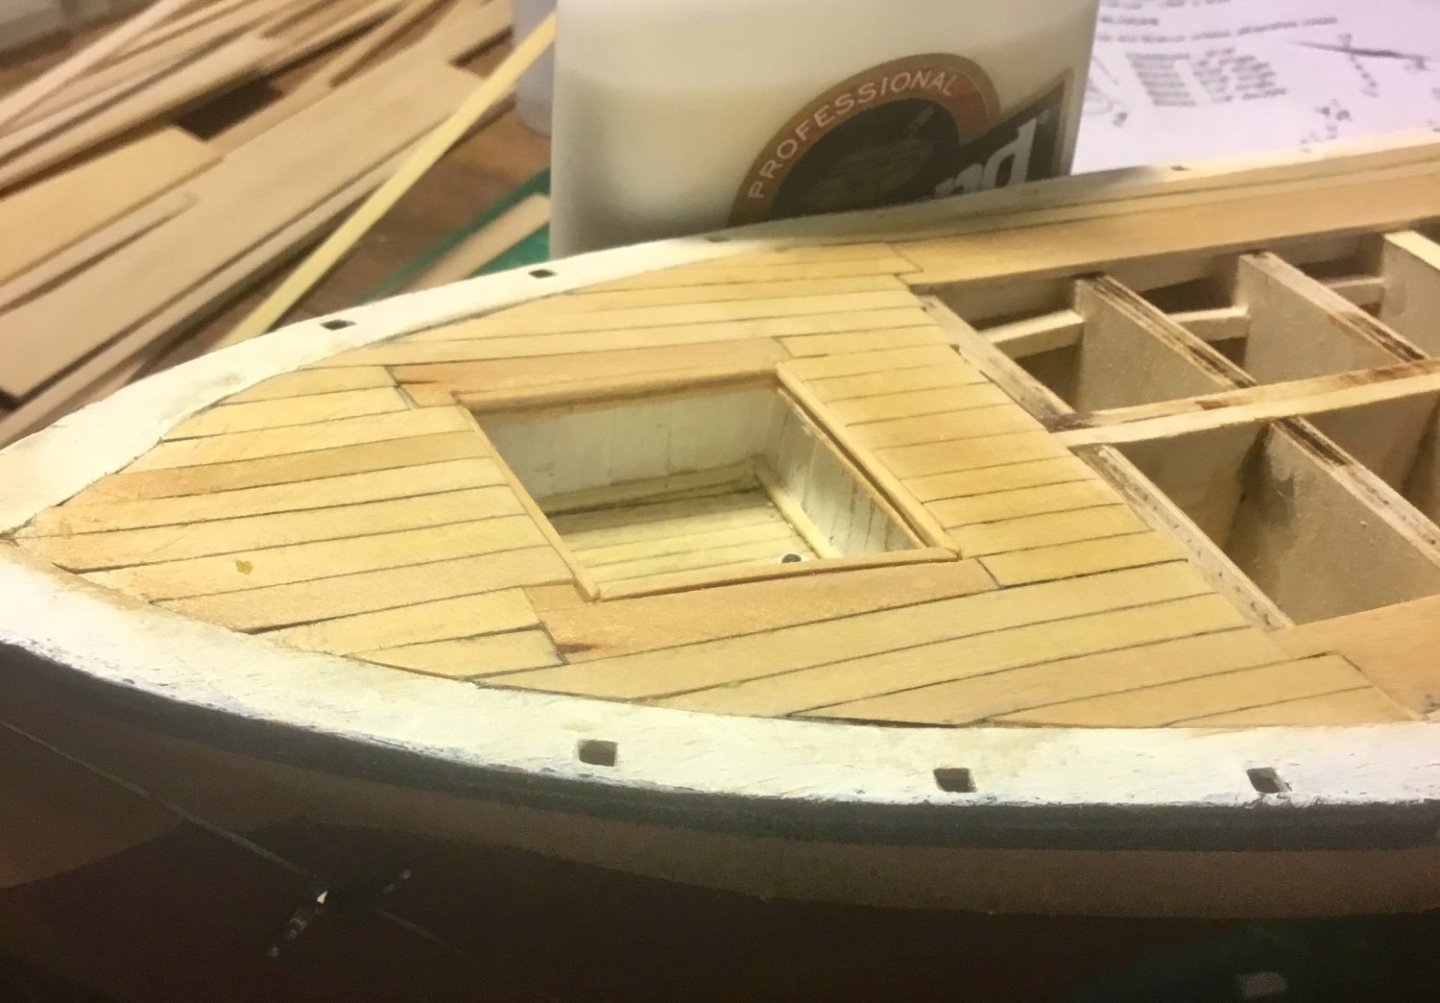
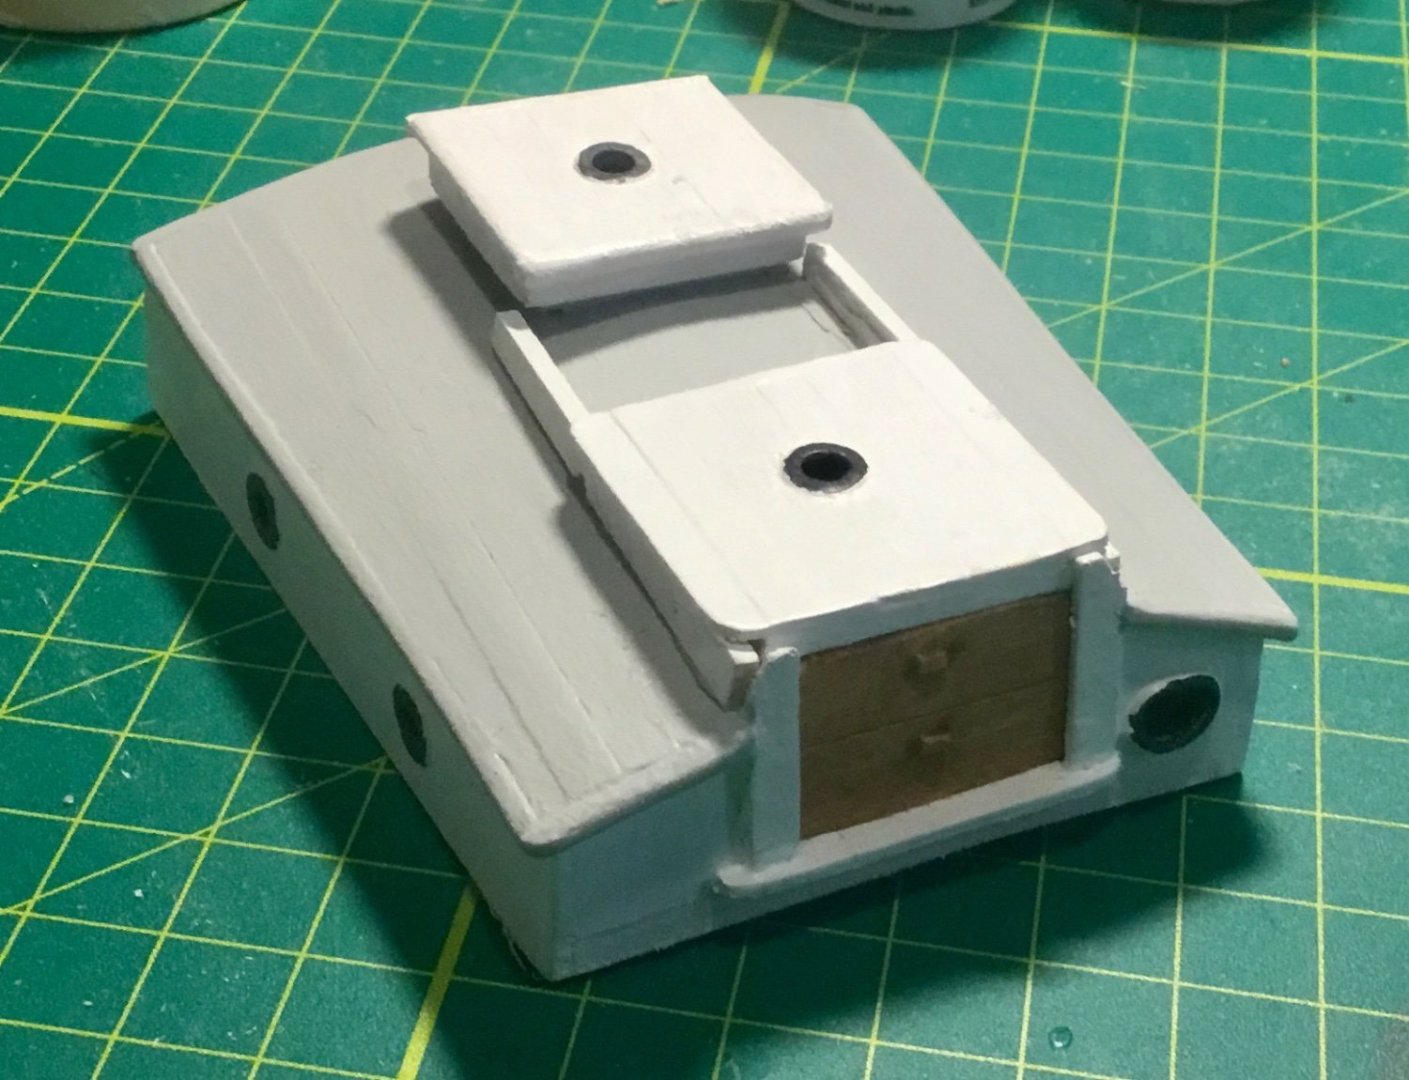
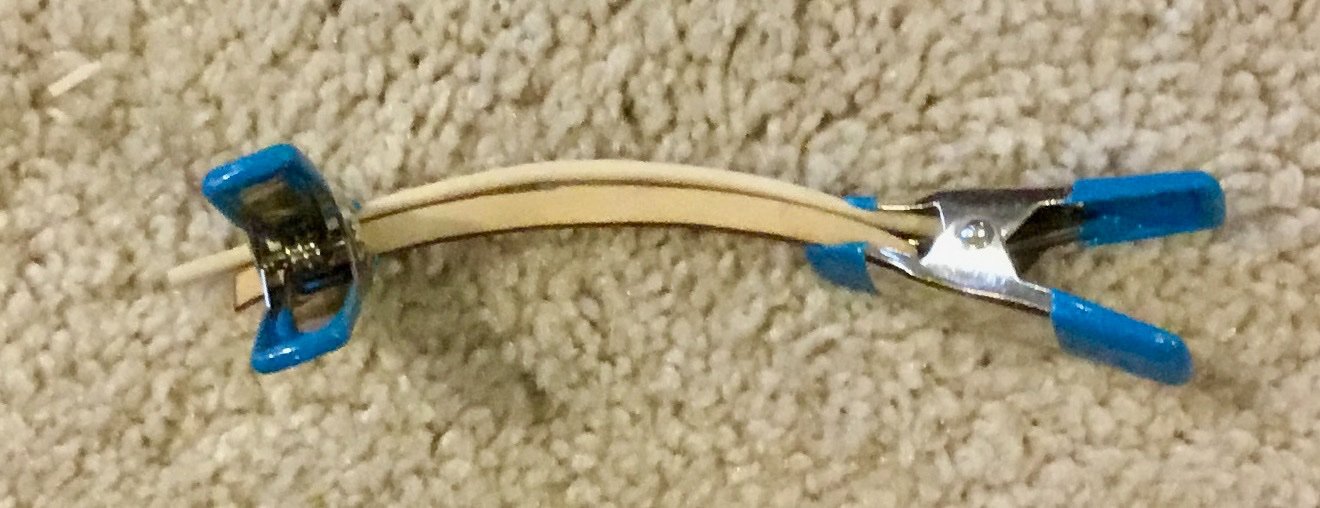
I mounted the rudder but still need to further blacken the pintles and gudgeons and the heads of the pins used for mounting. Continued work on the cabins. Fabricated and stained the lift panels for the companion ways. Formed the bottoms of the cabins so they would align with the deck by placing a sheet of sandpaper on the deck surface where each cabin was located and gradually rubbing each cabin back and forth until the bottoms conformed to the shape of the deck. Don't remember where I saw how to do that, but it was probably somewhere here on the forum. Planked the deck using pencil lead for the caulking and applied a 1st coat of Wipe-On-Poly. Added the cockpit moulding but will wait a while before adding the cockpit cleats. Cabins are not mounted yet, just placed on the deck for the pictures.

- 37 replies
-
- 4
-
-
- Glad Tidings
- Model Shipways
- (and 1 more)
-
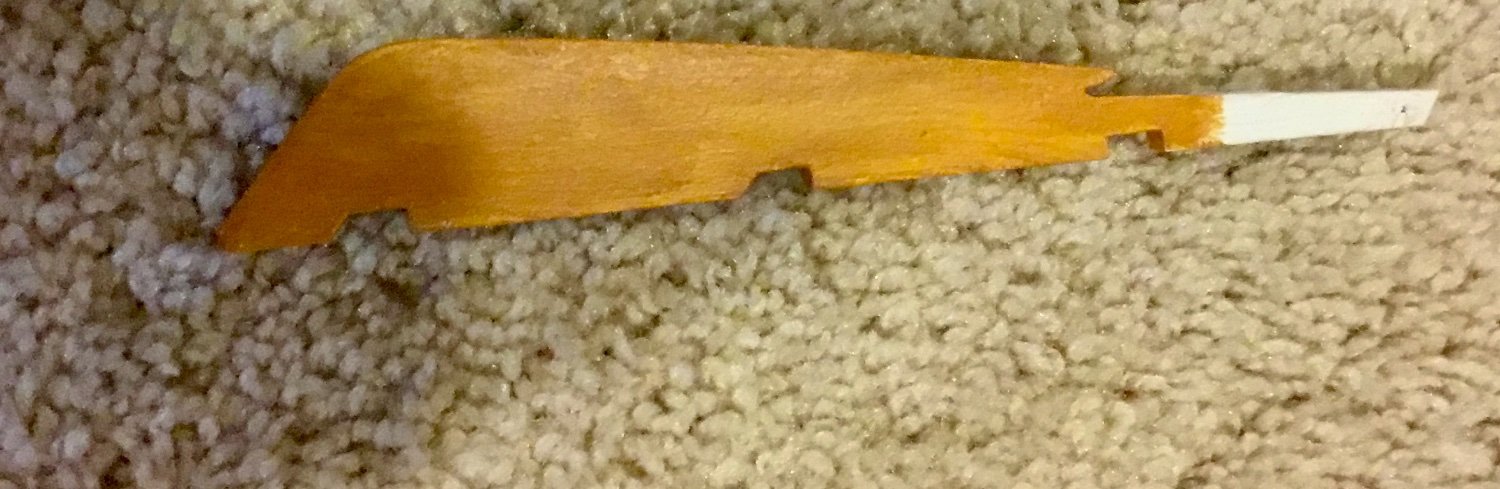
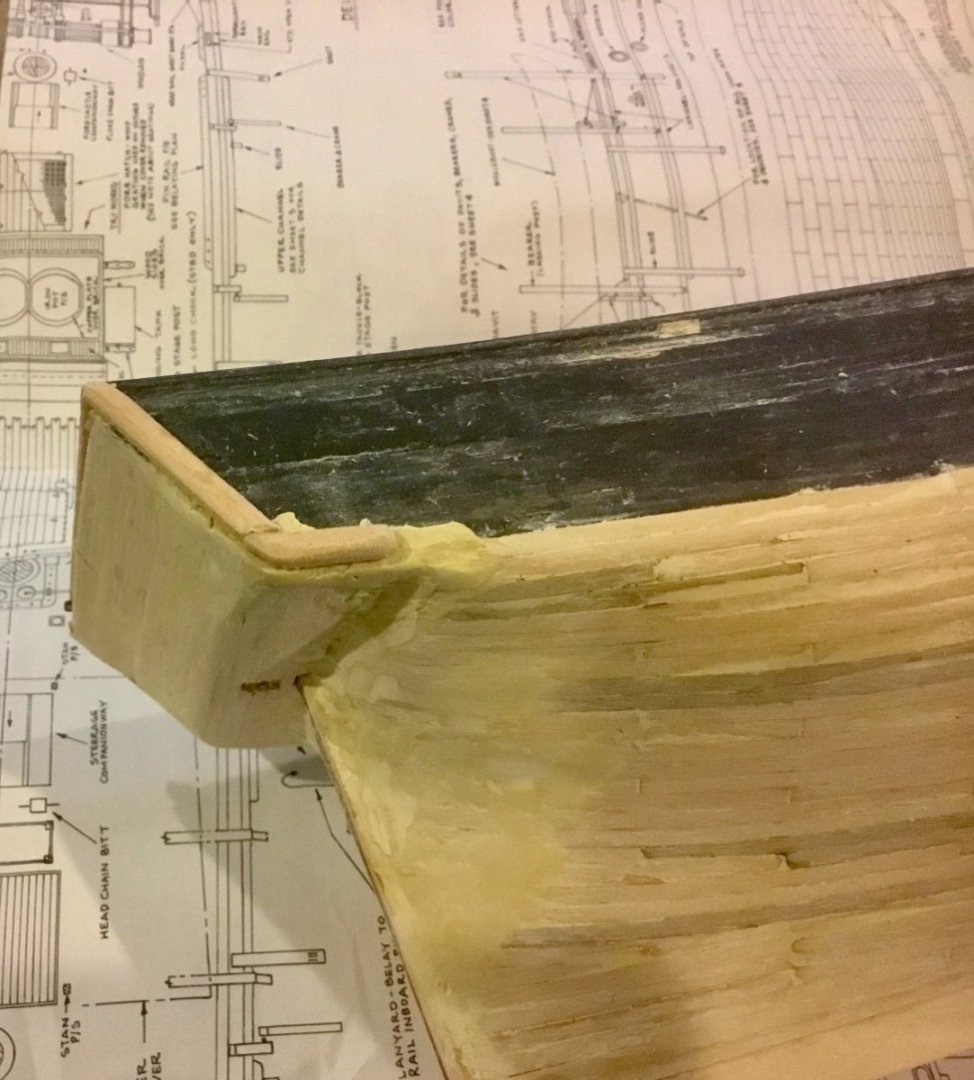
This is what I came up with for the stern fashion piece. I know it's not right. But every photo of the real ship and/or model I was able to find I could still not picture it because of the black on black coloring in the photos. Since only a handful of people will see the completed model and the part itself will be black on a black hull it will have to do for now. If anyone can provide me with a better representation of what the part should look like I can try to replace it before the ship is completed. Too bad the kit couldn't include a plastic or cast metal fitting for the part as I found it impossible visualize. I was on the real ship years ago when I bought the kit itself at Mystic Seaport.
-
Completed major work on forward cabin and sanded bottom to conform to deck curvature. Mounted pintles to rudder. Began planking of cockpit.


- 37 replies
-
- 5
-
-
- Glad Tidings
- Model Shipways
- (and 1 more)
-
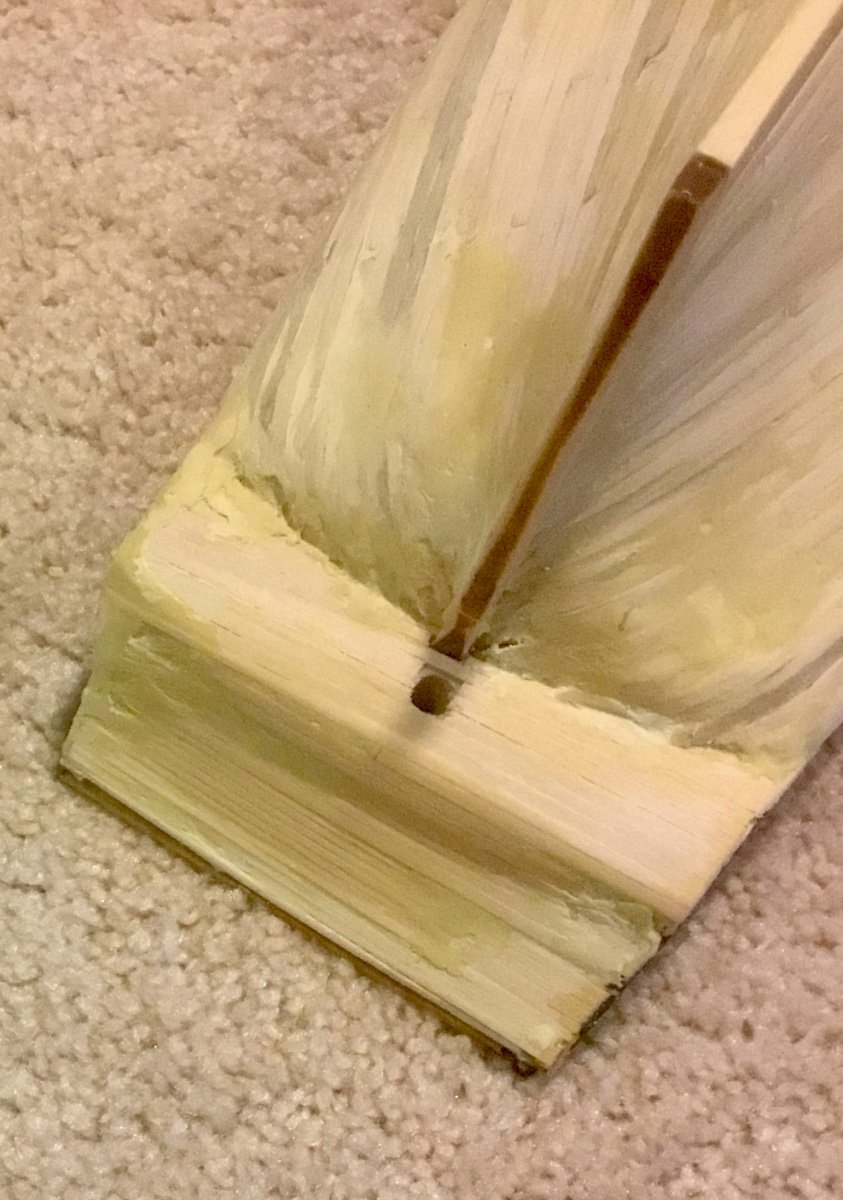
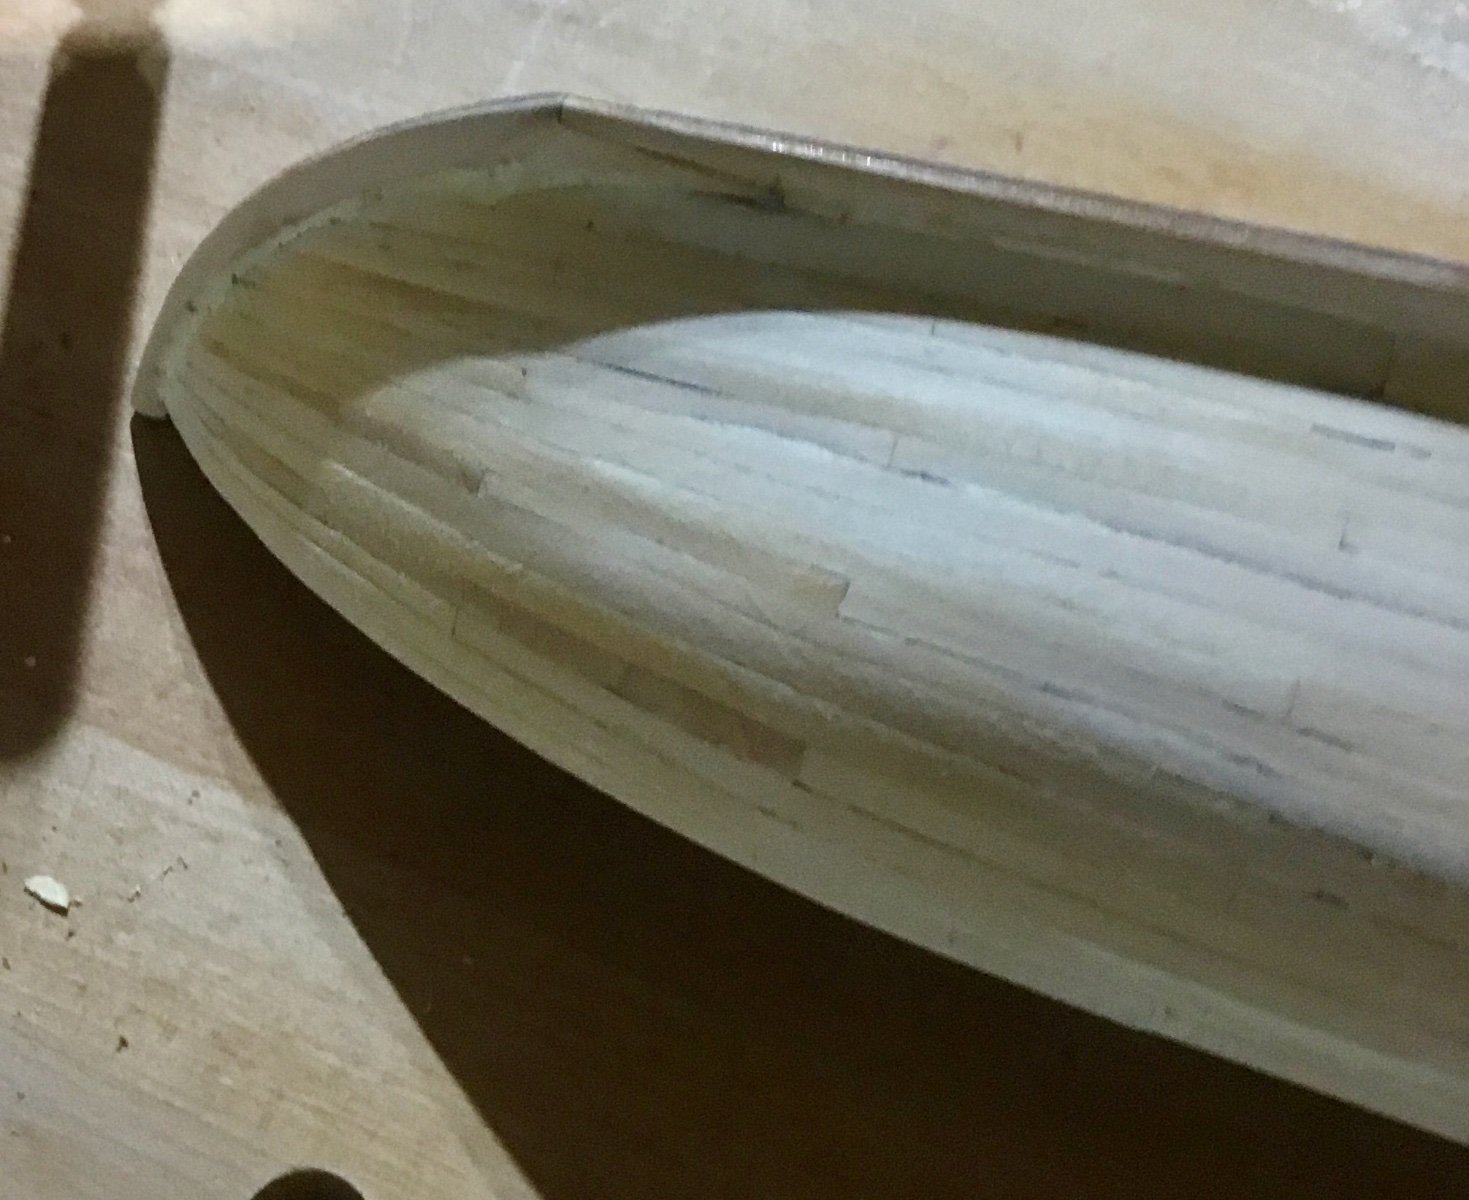
Completed hull planking. Filled and sanded. Still have some minor cleanup to do at bow and stern. Next up is to make the fashion pieces for the stern.


-
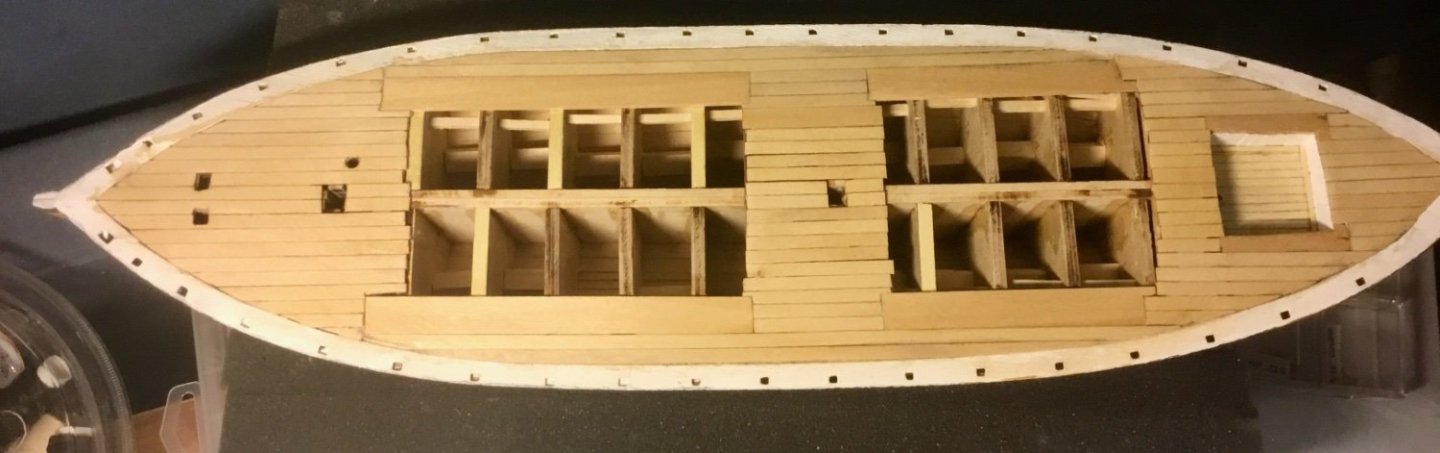
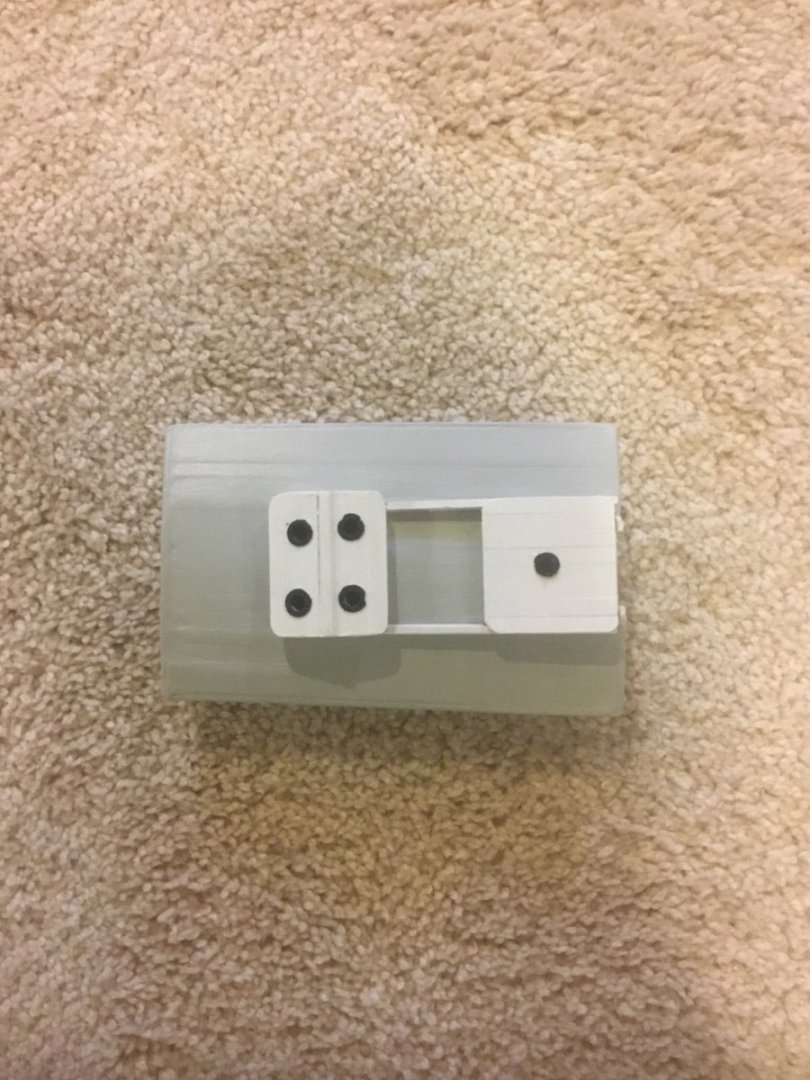
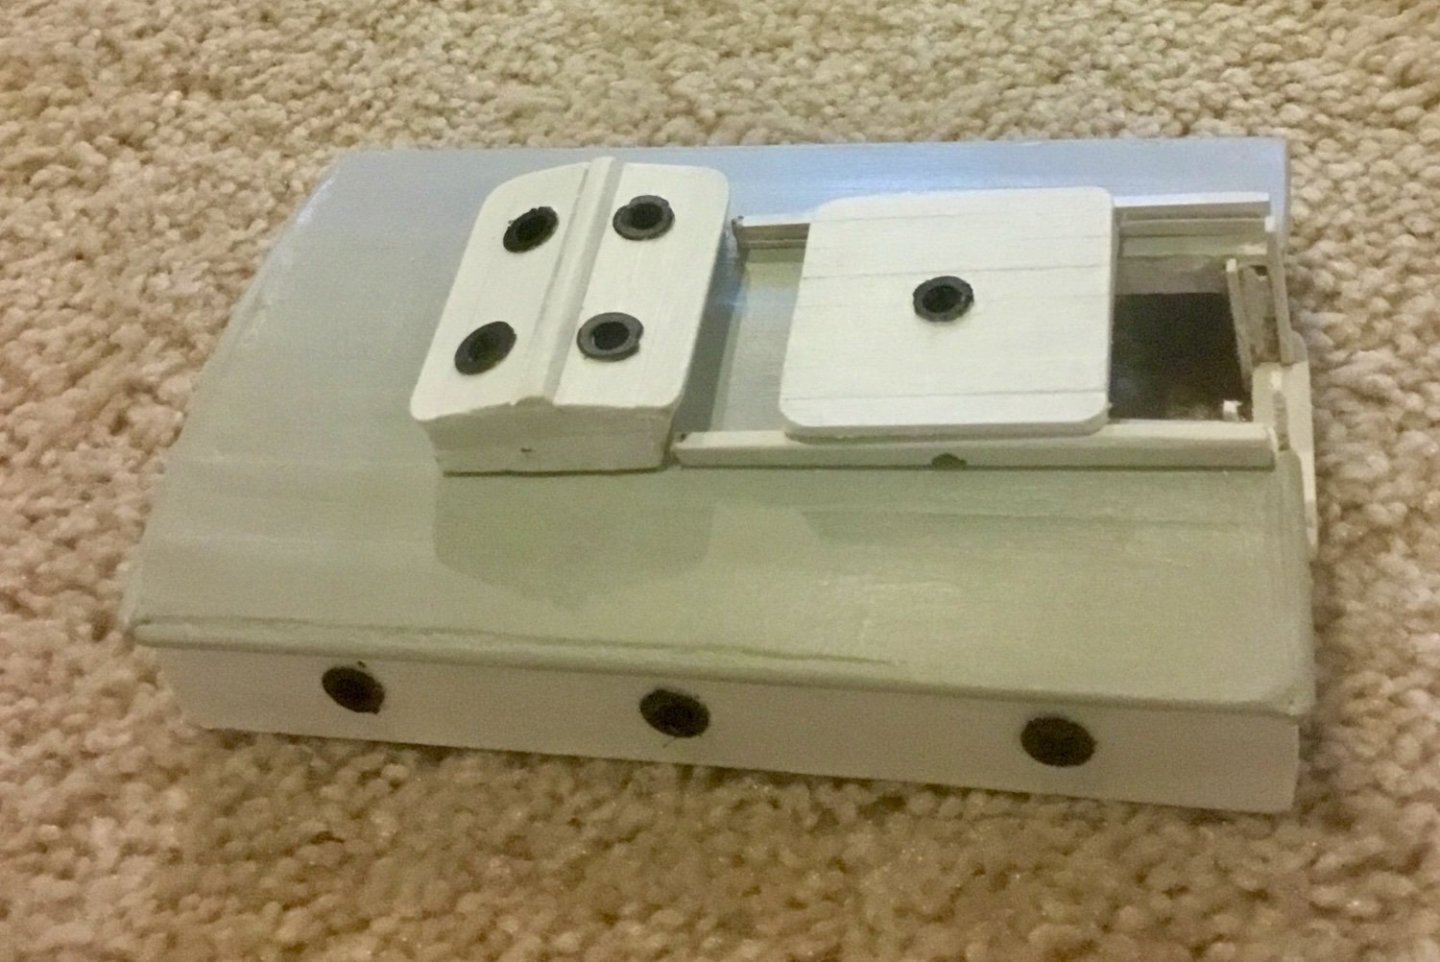
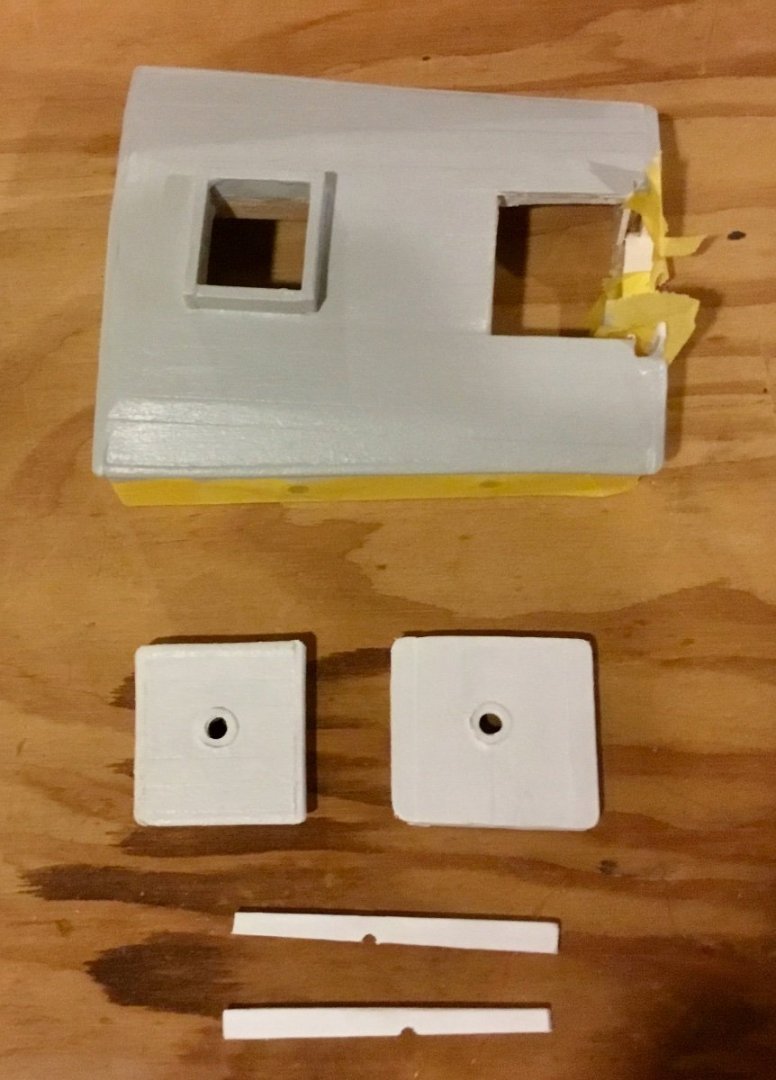
Continuing work on rudder and forward cabin. Drilled holes for port lights. Constructed parts for operational sliding hatch. Built skylight, but did not make it with working hinges as I thought I could not do a good enough job and nobody is actual going to operate them when finished. I want to partially complete both cabins before doing the deck planking so I can temporarily install them when fitting the deck planks in place. Applied primer coat to forward cabin parts.


- 37 replies
-
- 7
-
-
- Glad Tidings
- Model Shipways
- (and 1 more)
-
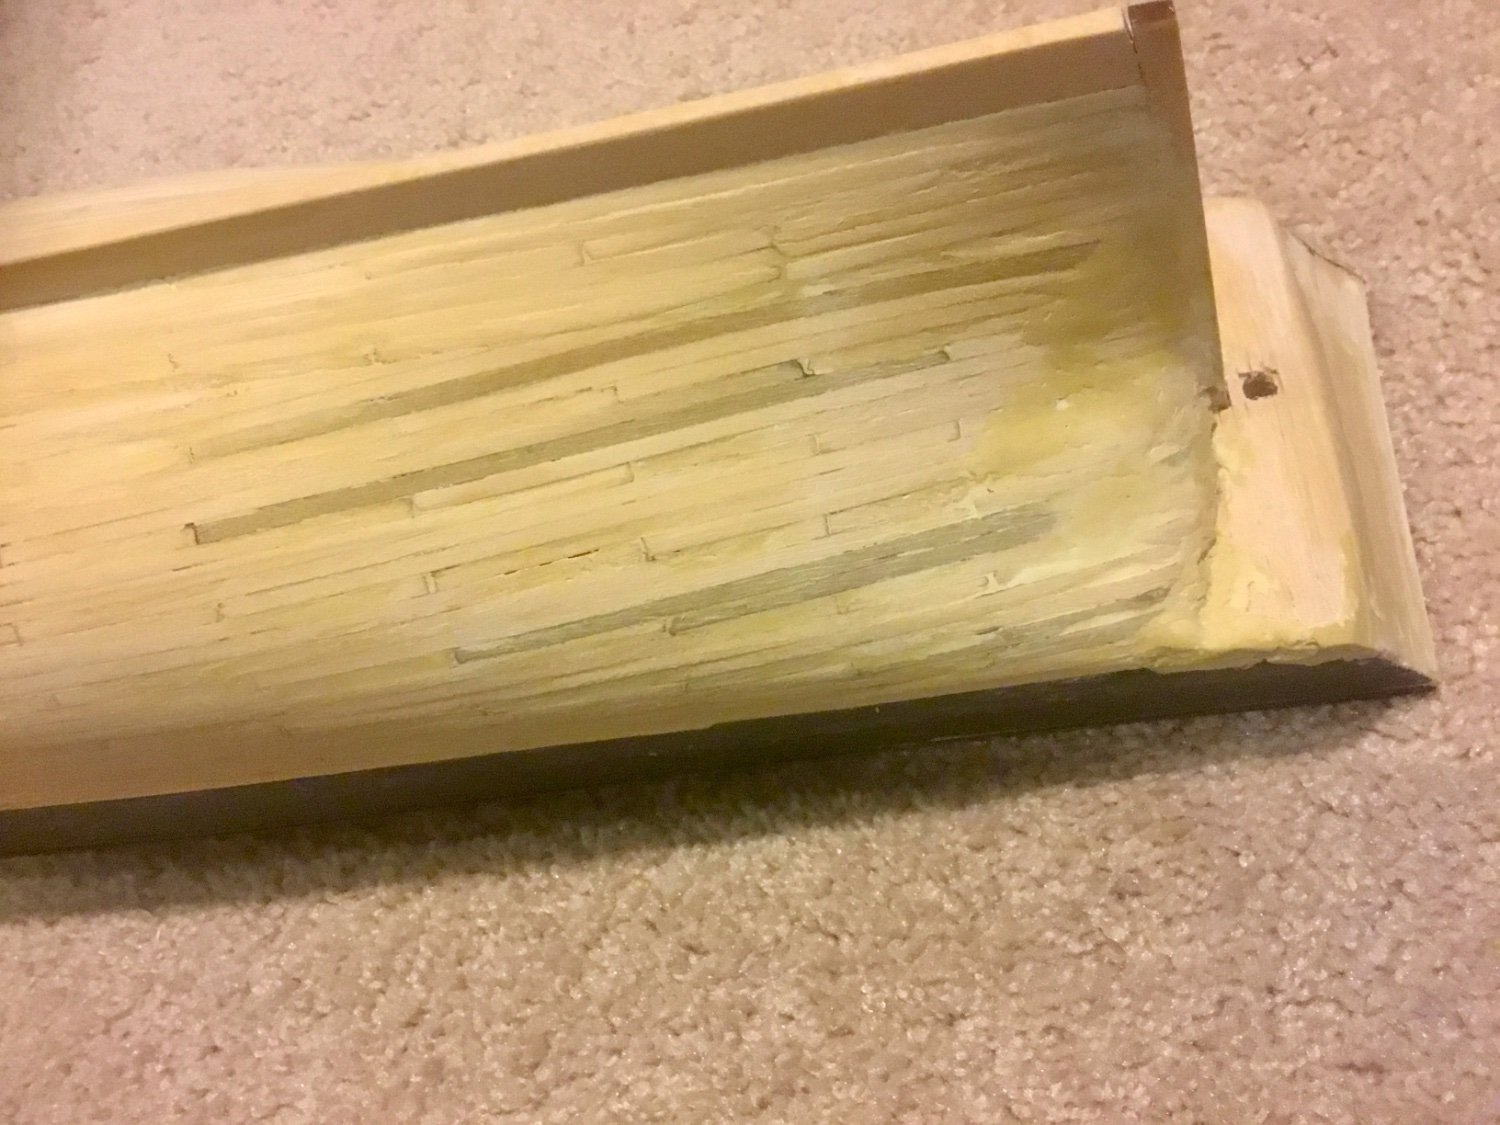
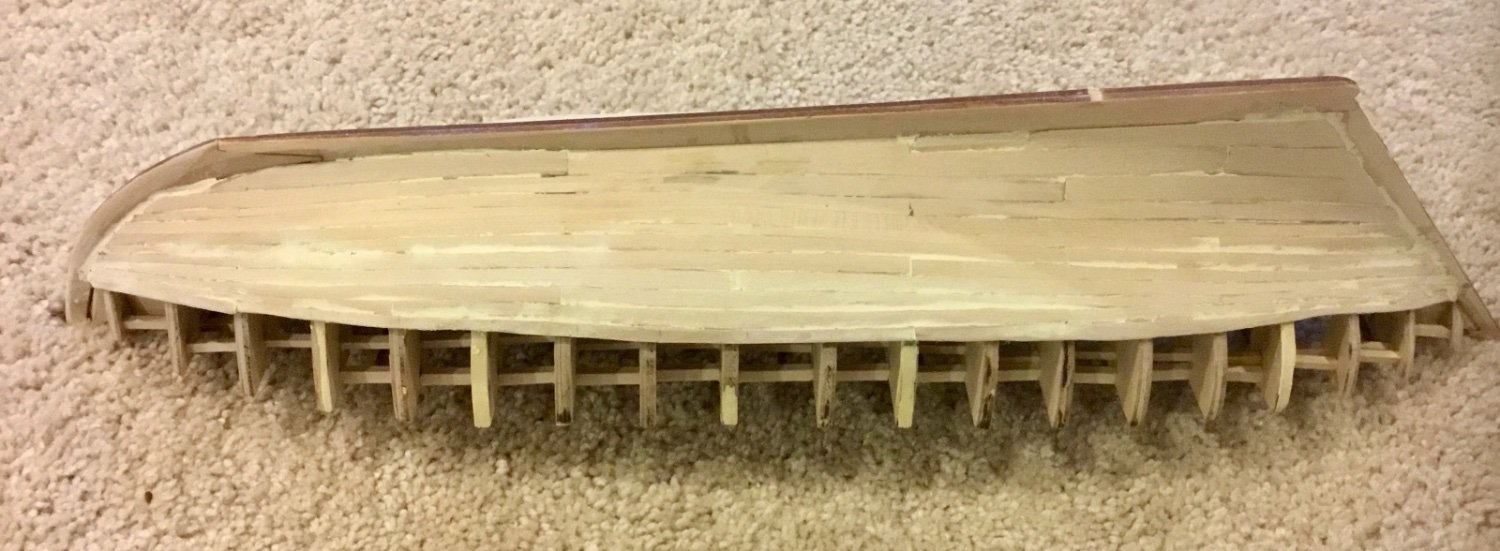
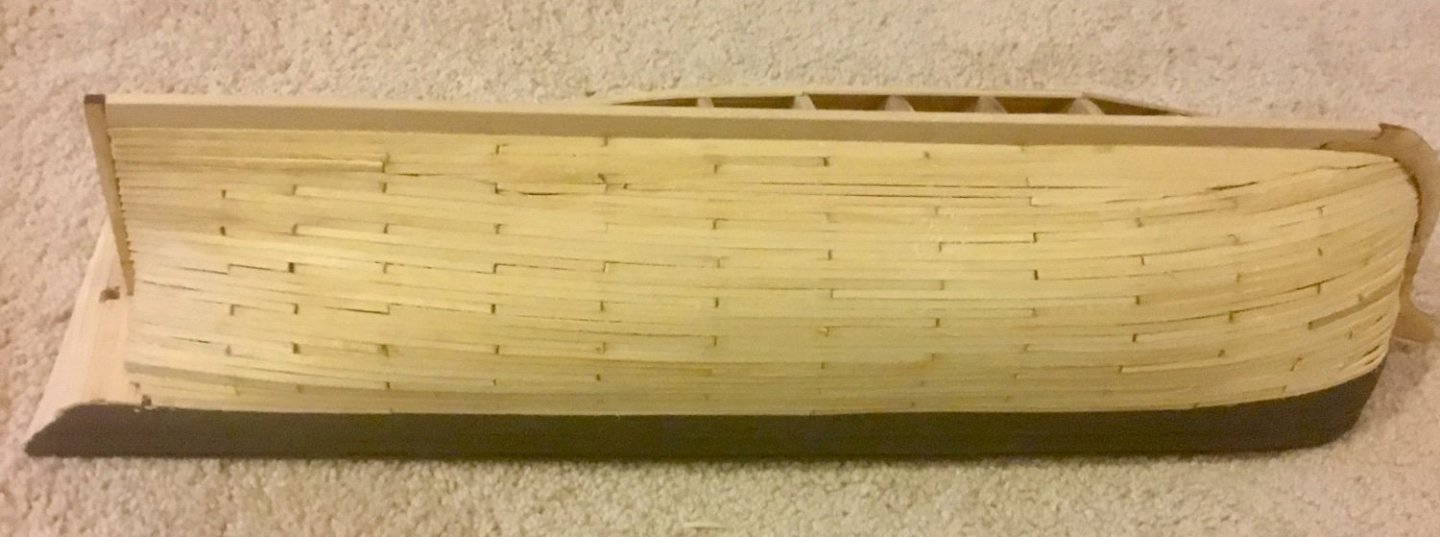
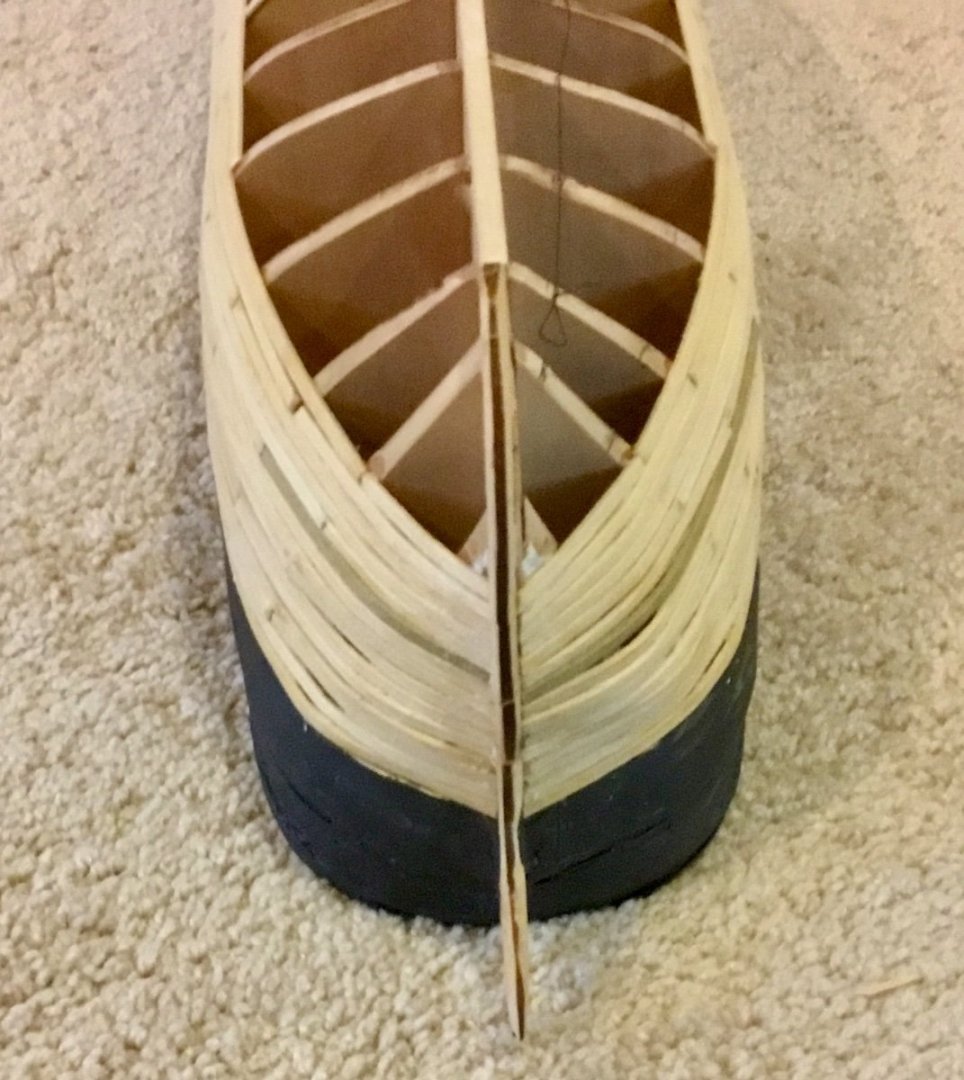
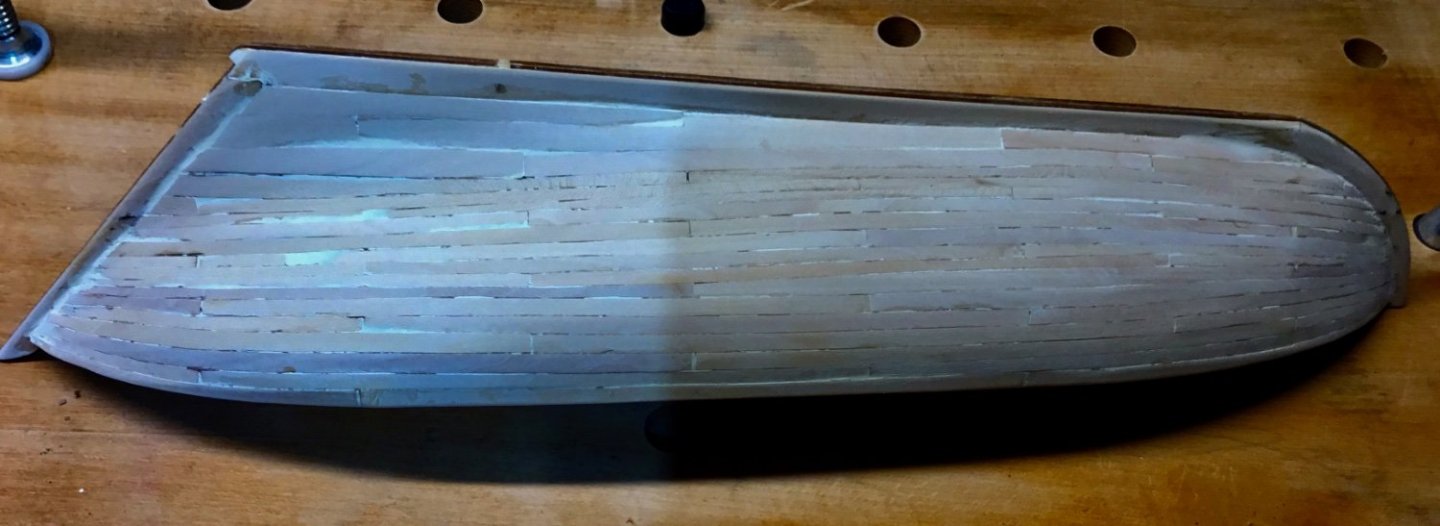
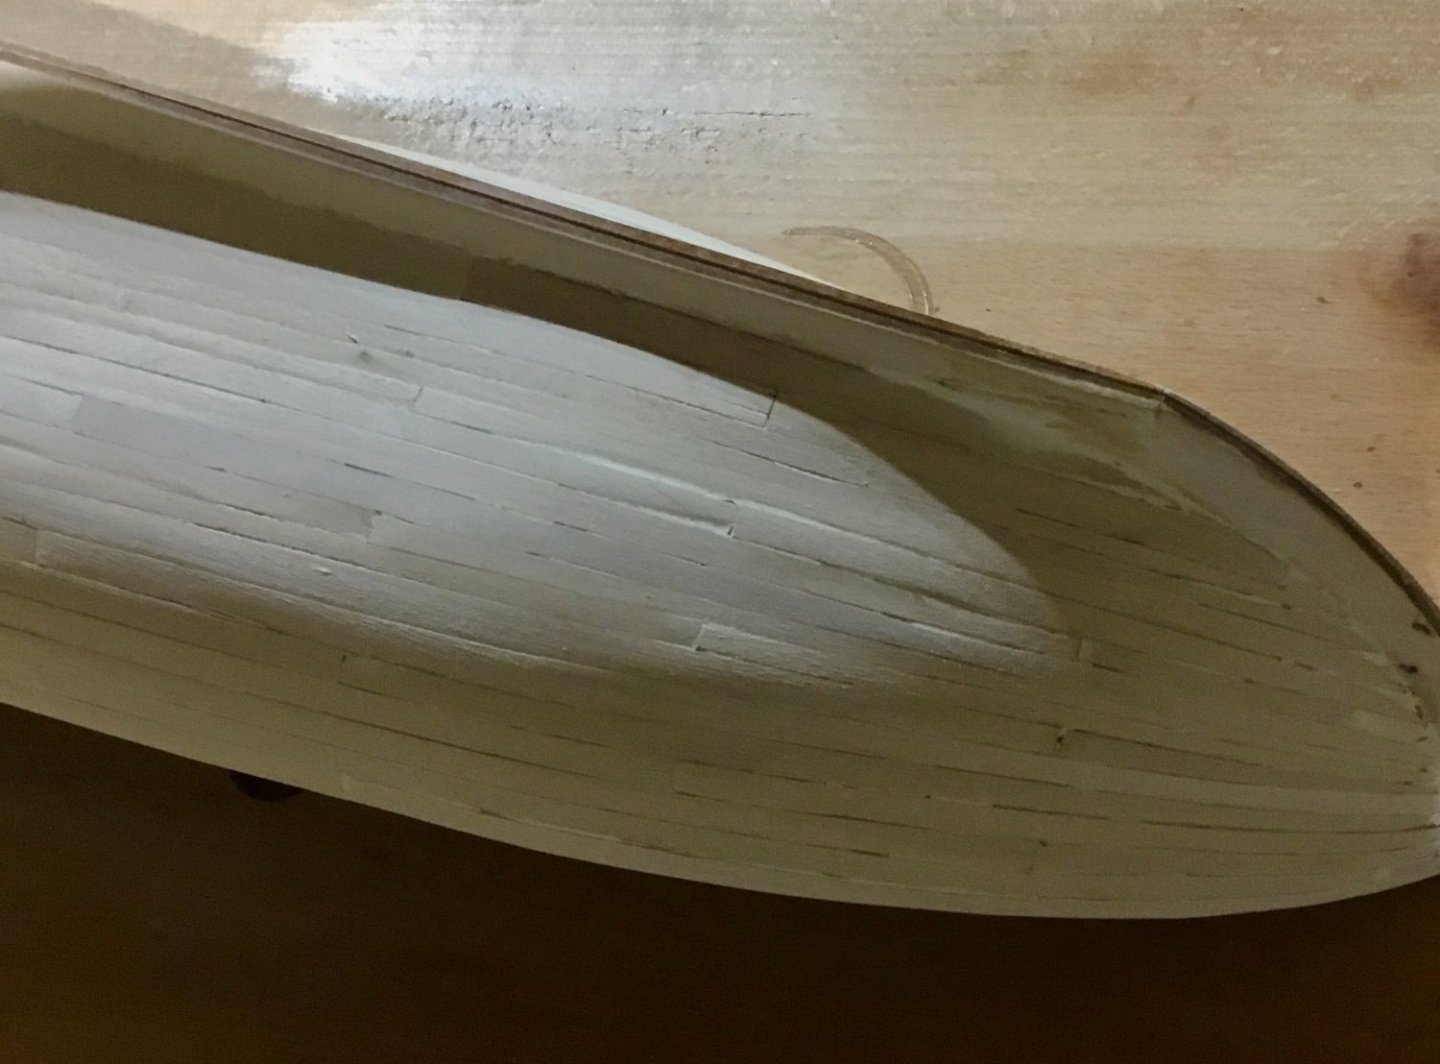
Completed planking of one side of hull (port). Need to finish planking of the other side, then sand and fill to follow. Looks like I need to do a better job getting my planking butts closer. Should probably cut them initially too long, test fit, and then sand to get a more exact fit before installing. Filler will make the gaps less visible, especially after being painted black and the lower portion covered by the bottom coppering.
-
What reeving direction causes what type of twist? Can anybody explain this in more detail. The comments sound reasonable but without further clarification I am at a lose on when to do what without doing some experimentation on my own. I was under the assumption that there was only one correct way to reeve a lanyard's deadeyes.
-
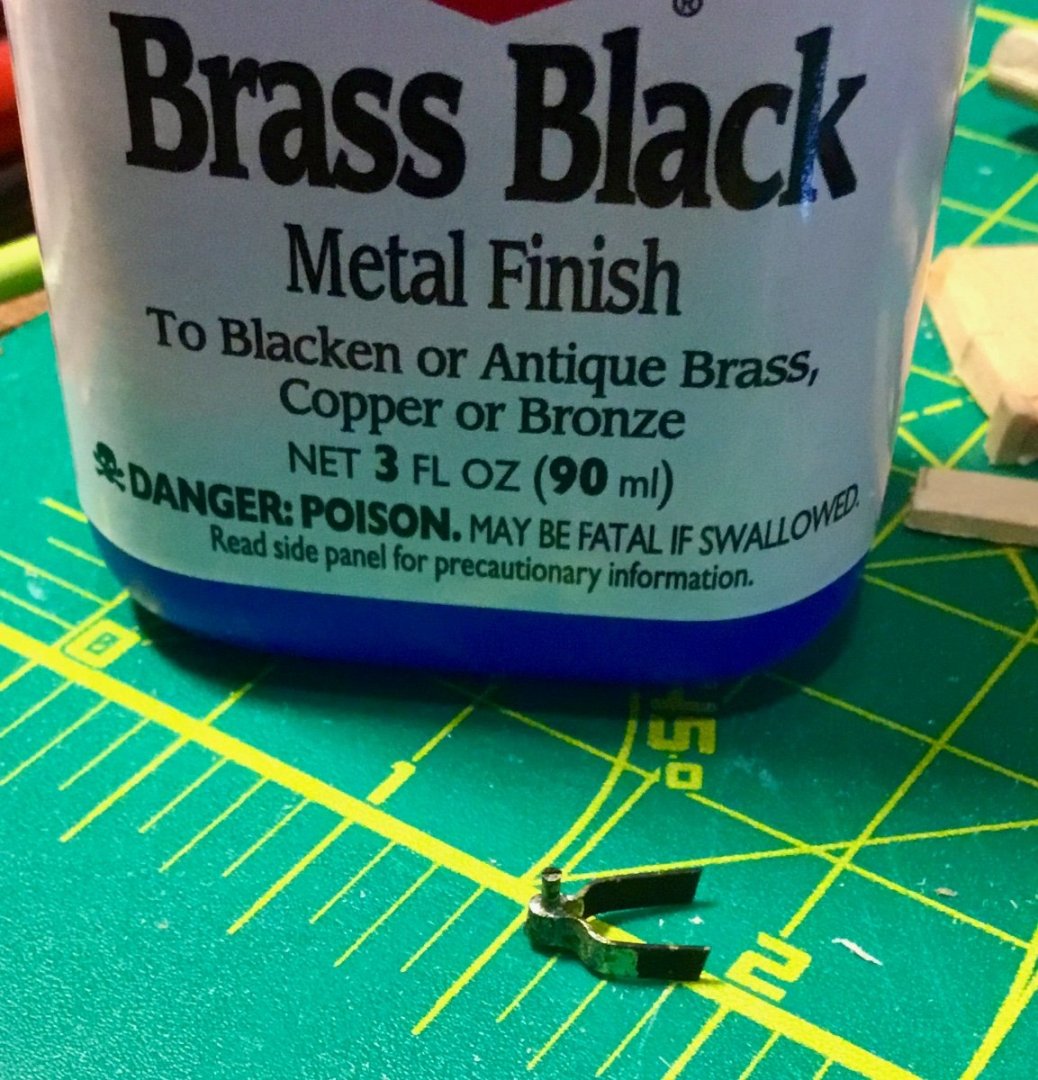
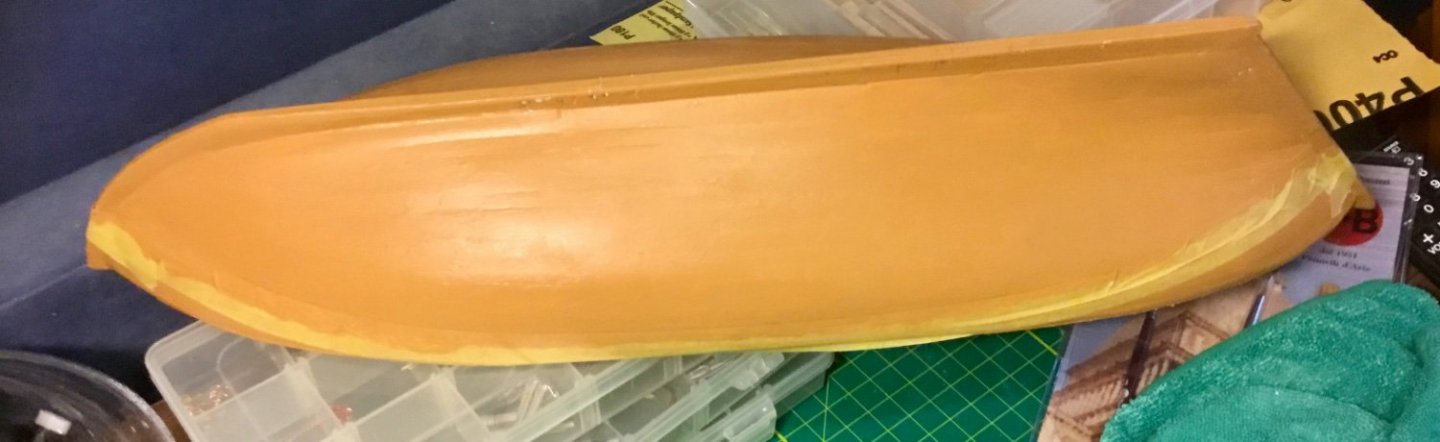
Hull painting complete. Began work on forward cabin. Started to paint rudder. Used blacking solution on rudder components but it failed to work on the soldered parts of the pintles. Will have to touch up with black paint.


- 37 replies
-
- 6
-
-
- Glad Tidings
- Model Shipways
- (and 1 more)
-
Continuing planking, about halfway there.

-
Your rope bundles appear out of scale (bigger) with the Iines they are attached to. Did you use a different size rope?
-
Completed planks of belt 'A'. Rough at stem and stern ends so will require a bit of filler.


-
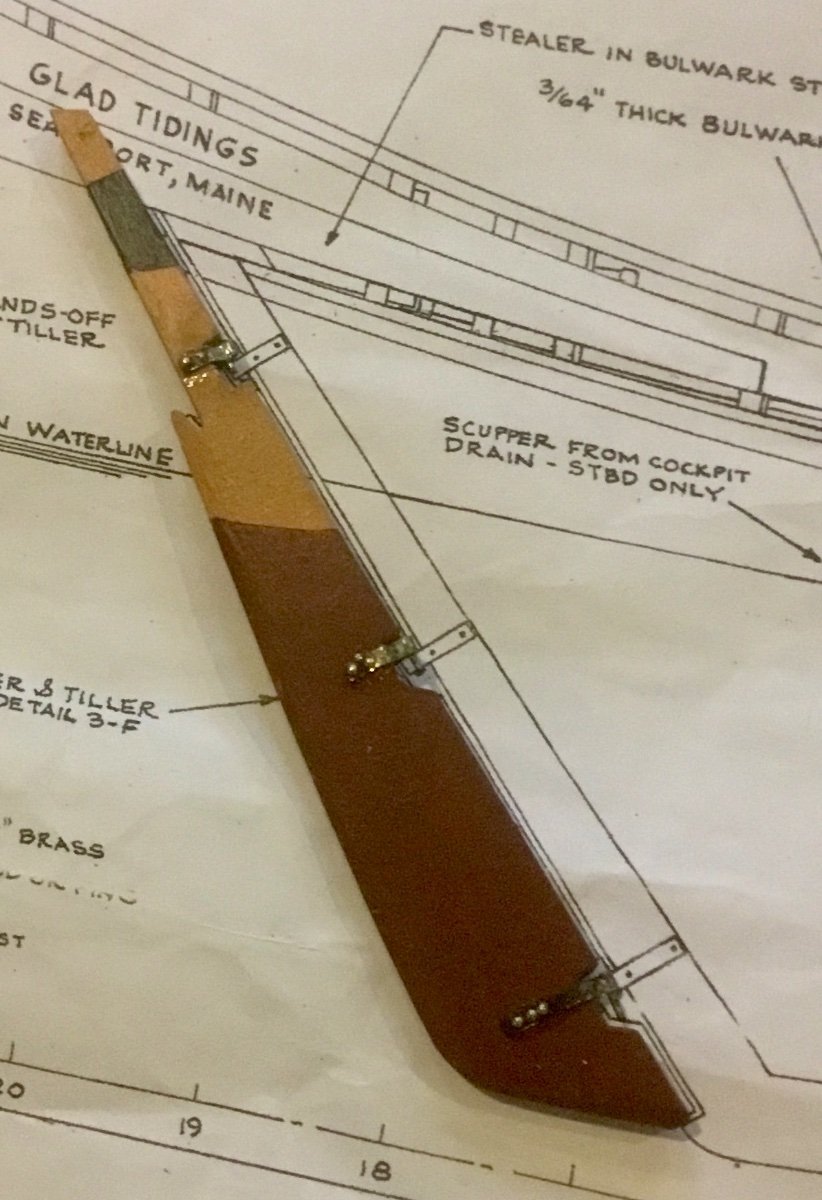
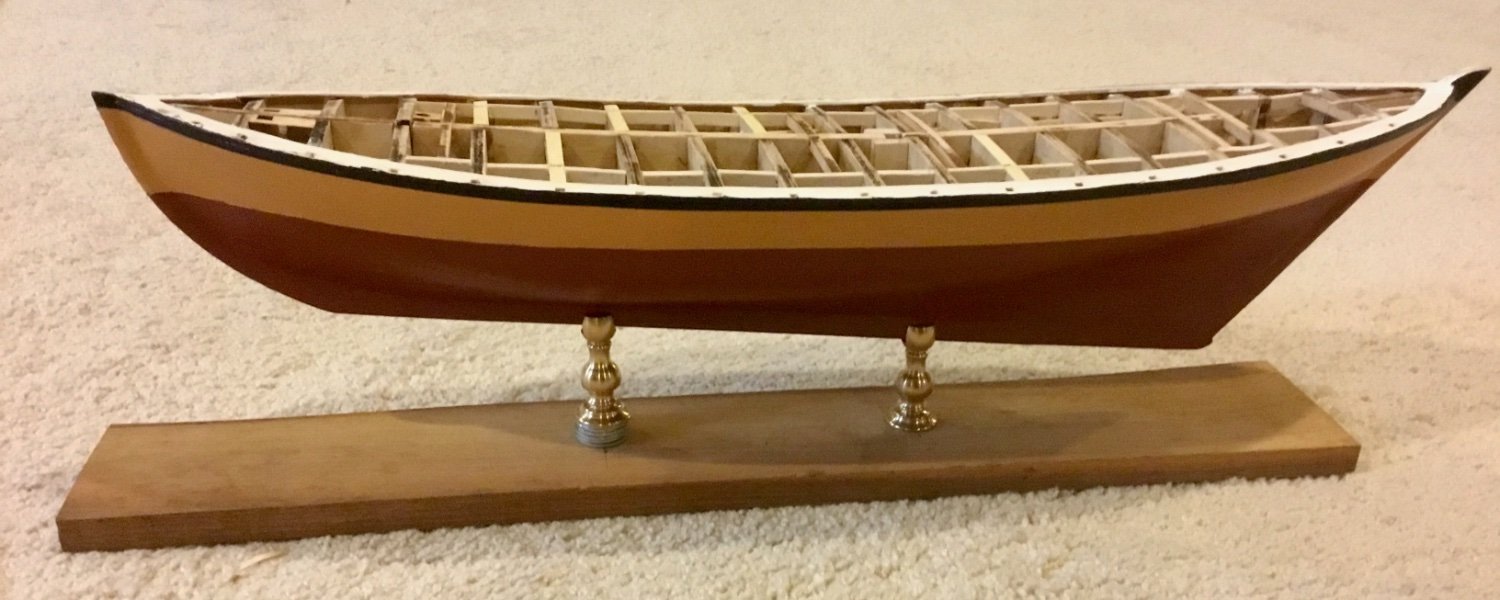
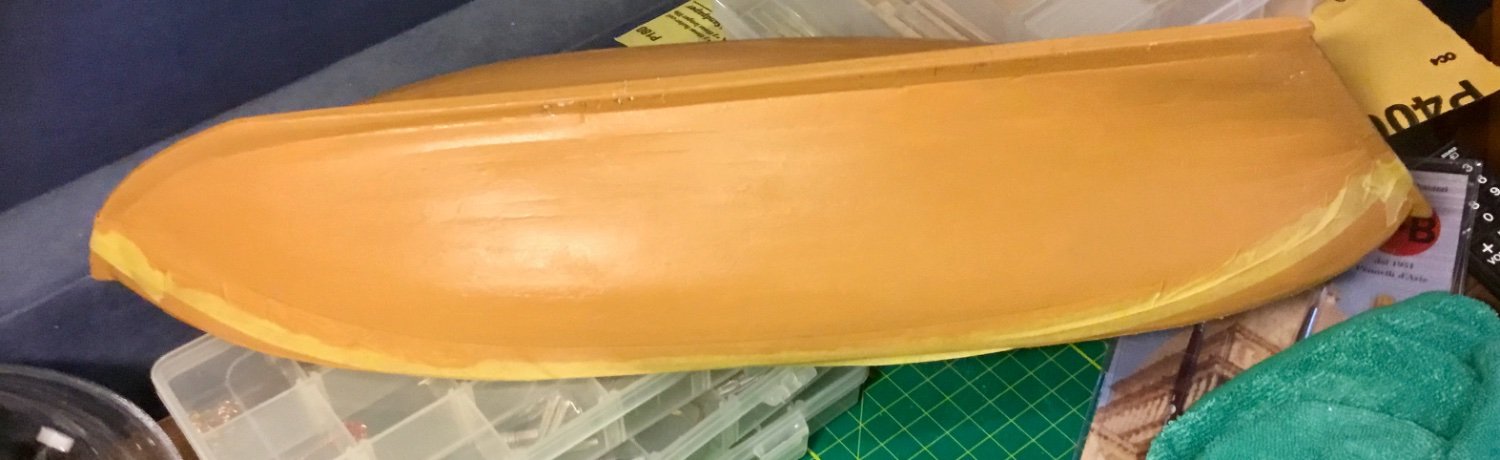
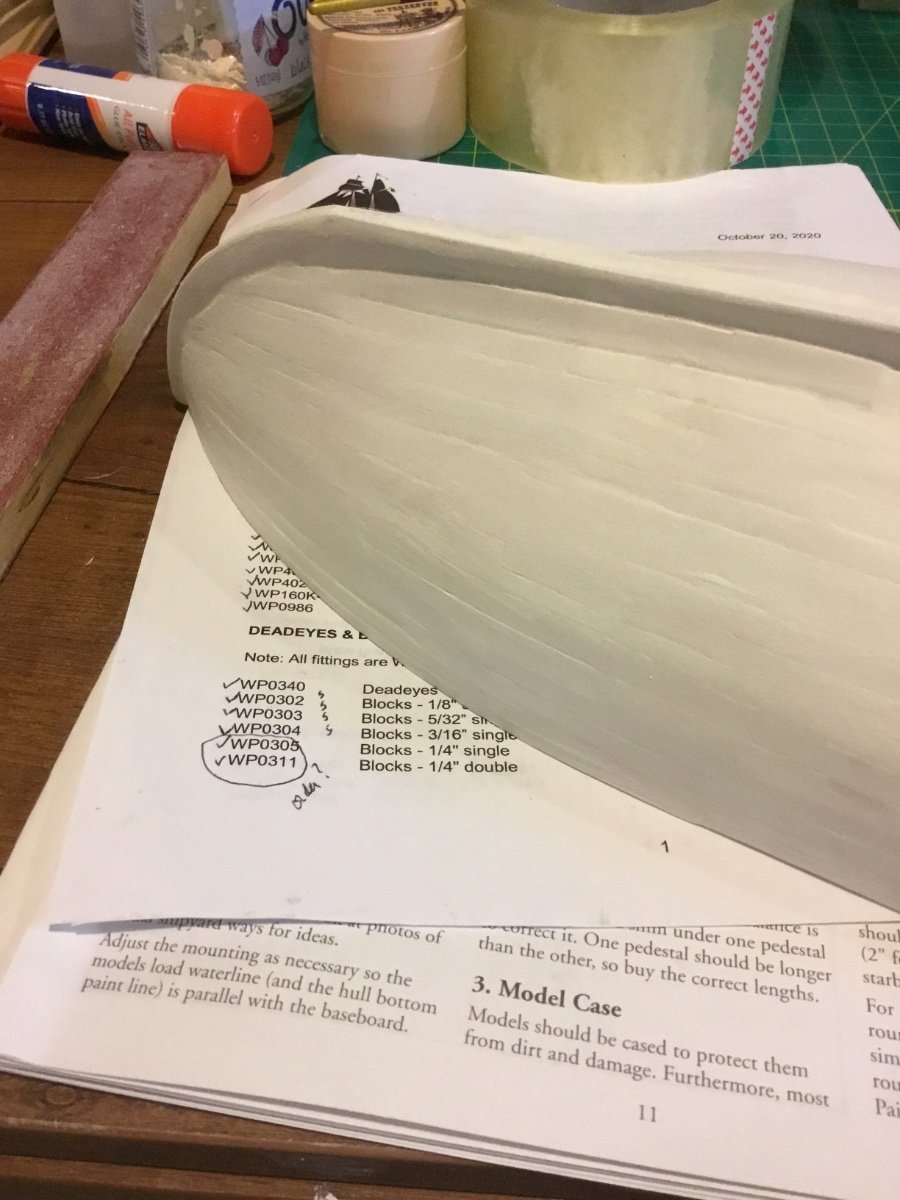
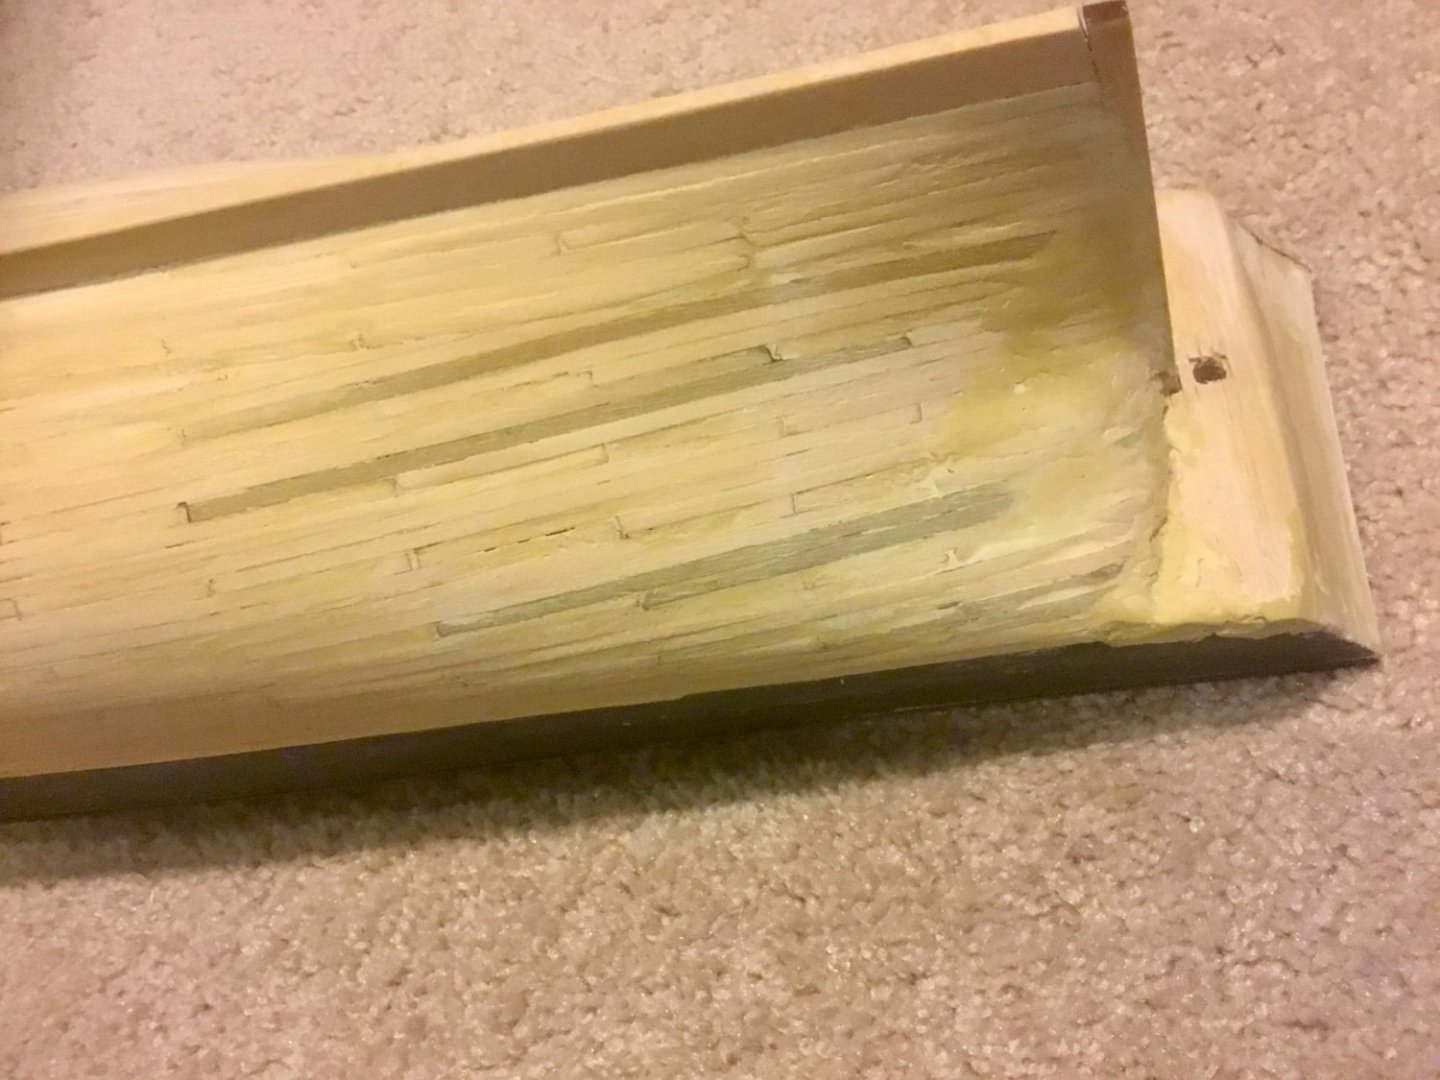
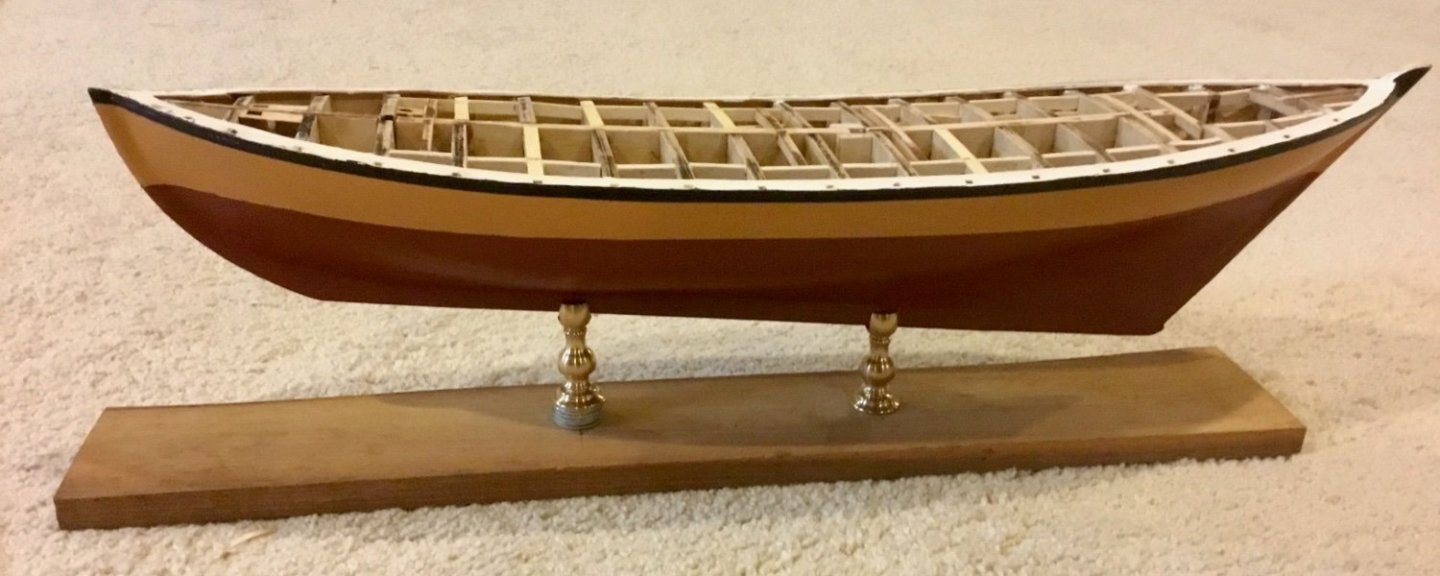
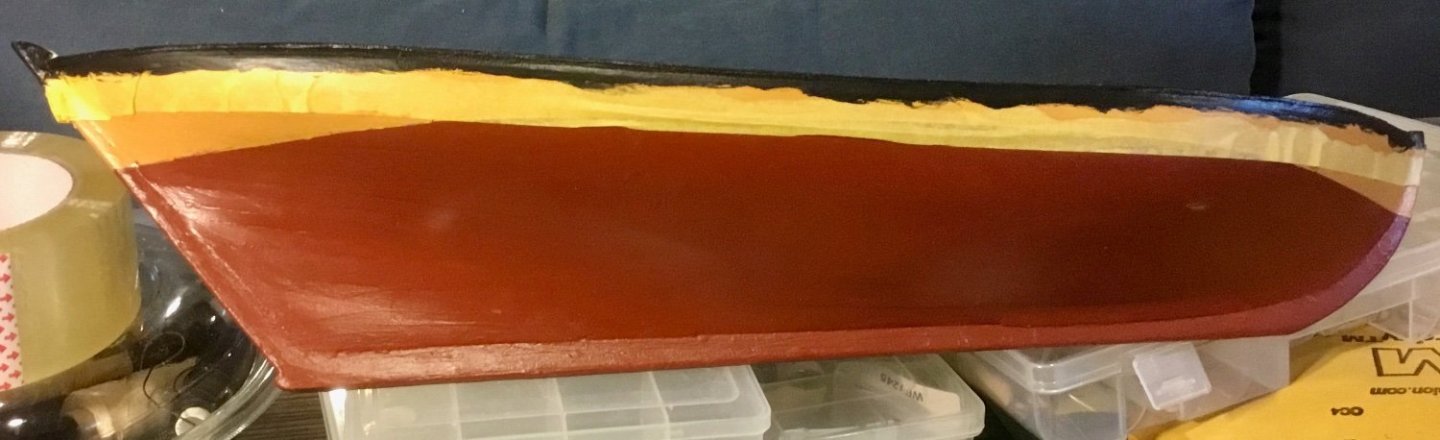
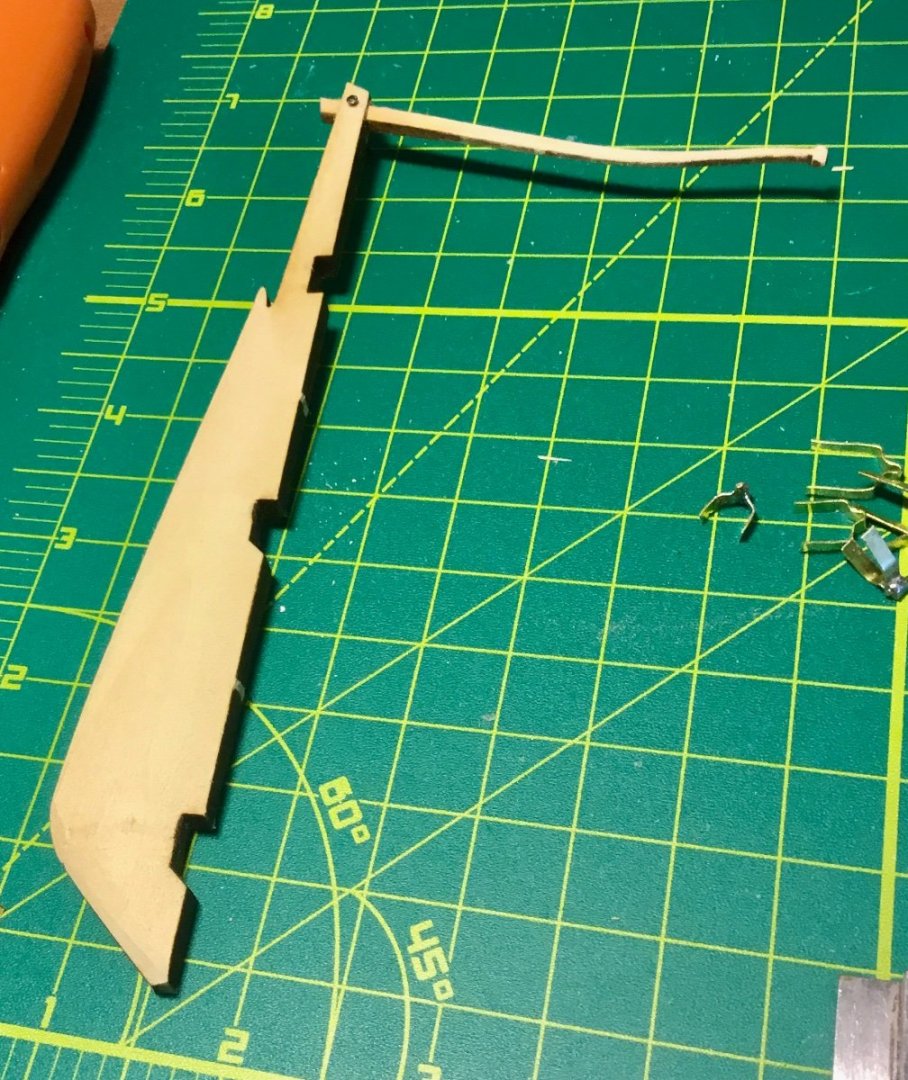
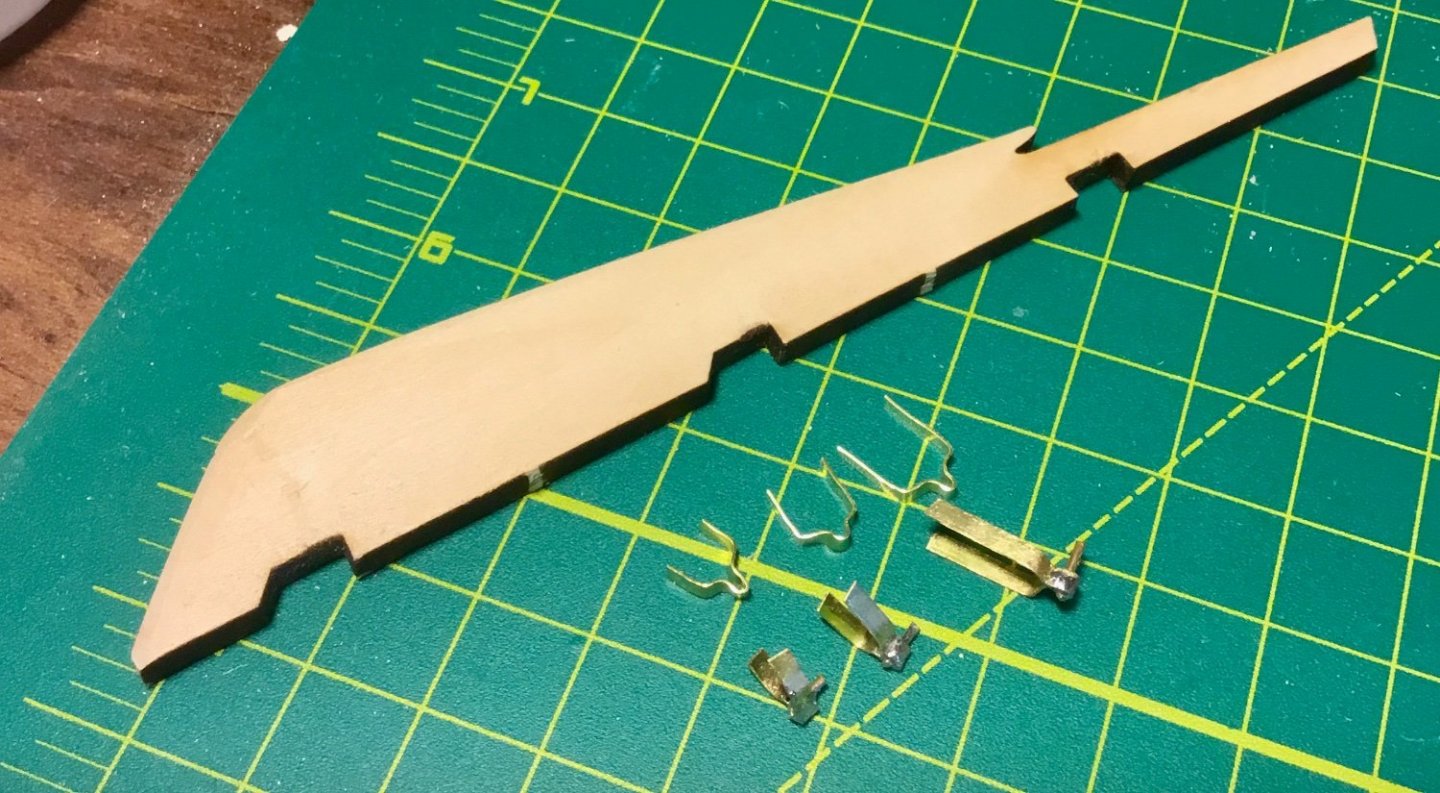
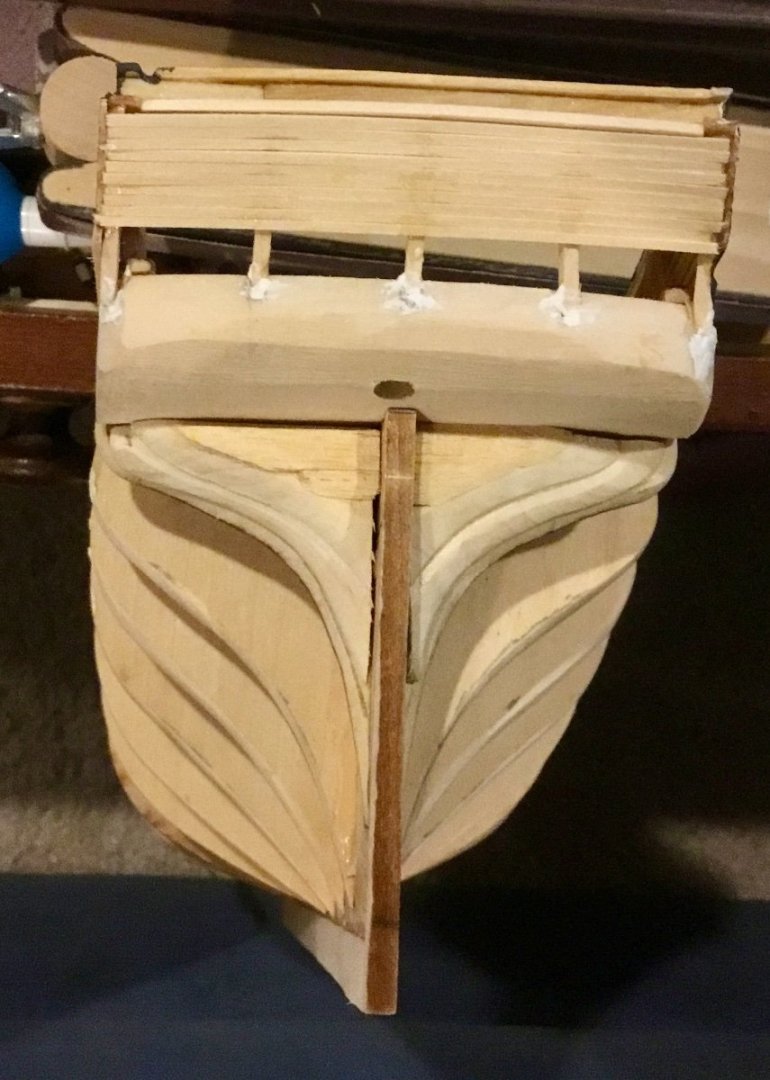
Completed painting of hull with yellow ochre base coat. Temporary mounted to base to draw water line. Tapered rudder and created pintles and gudgeons. Soldered pins in pintles using solder paste and a butane grill lighter. Still need to drill holes for mounting. Cut slot in top of rudder and fitted tiller to rudder with pin after rounding off forward portion of tiller. Next up is to finish painting the hull.
- 37 replies
-
- 4
-
-
- Glad Tidings
- Model Shipways
- (and 1 more)
-
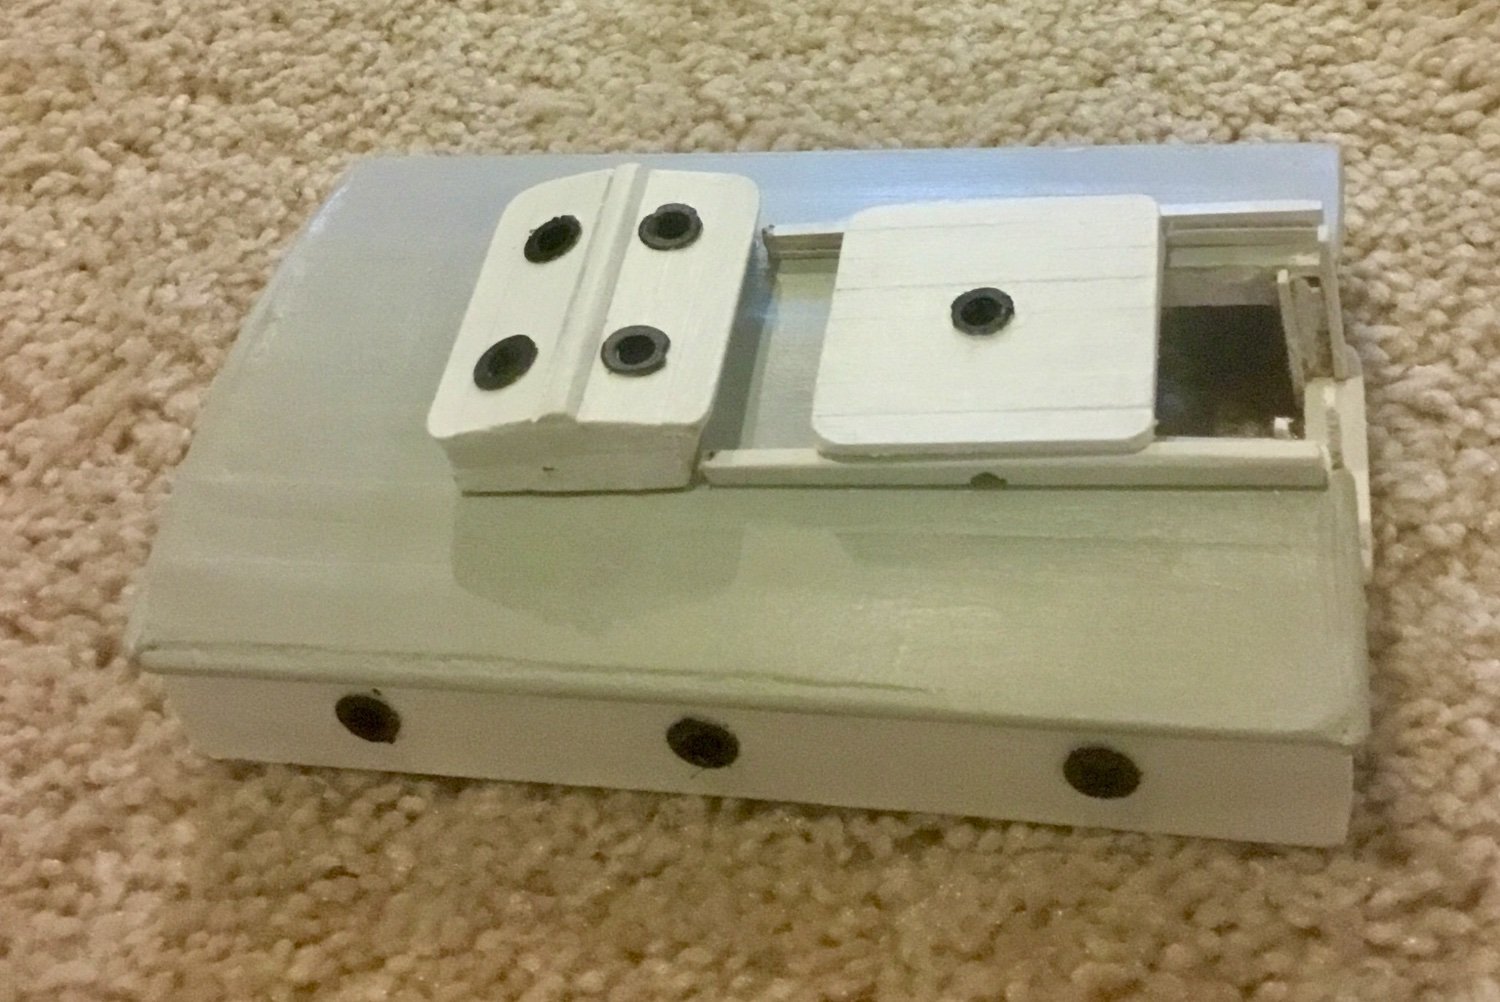
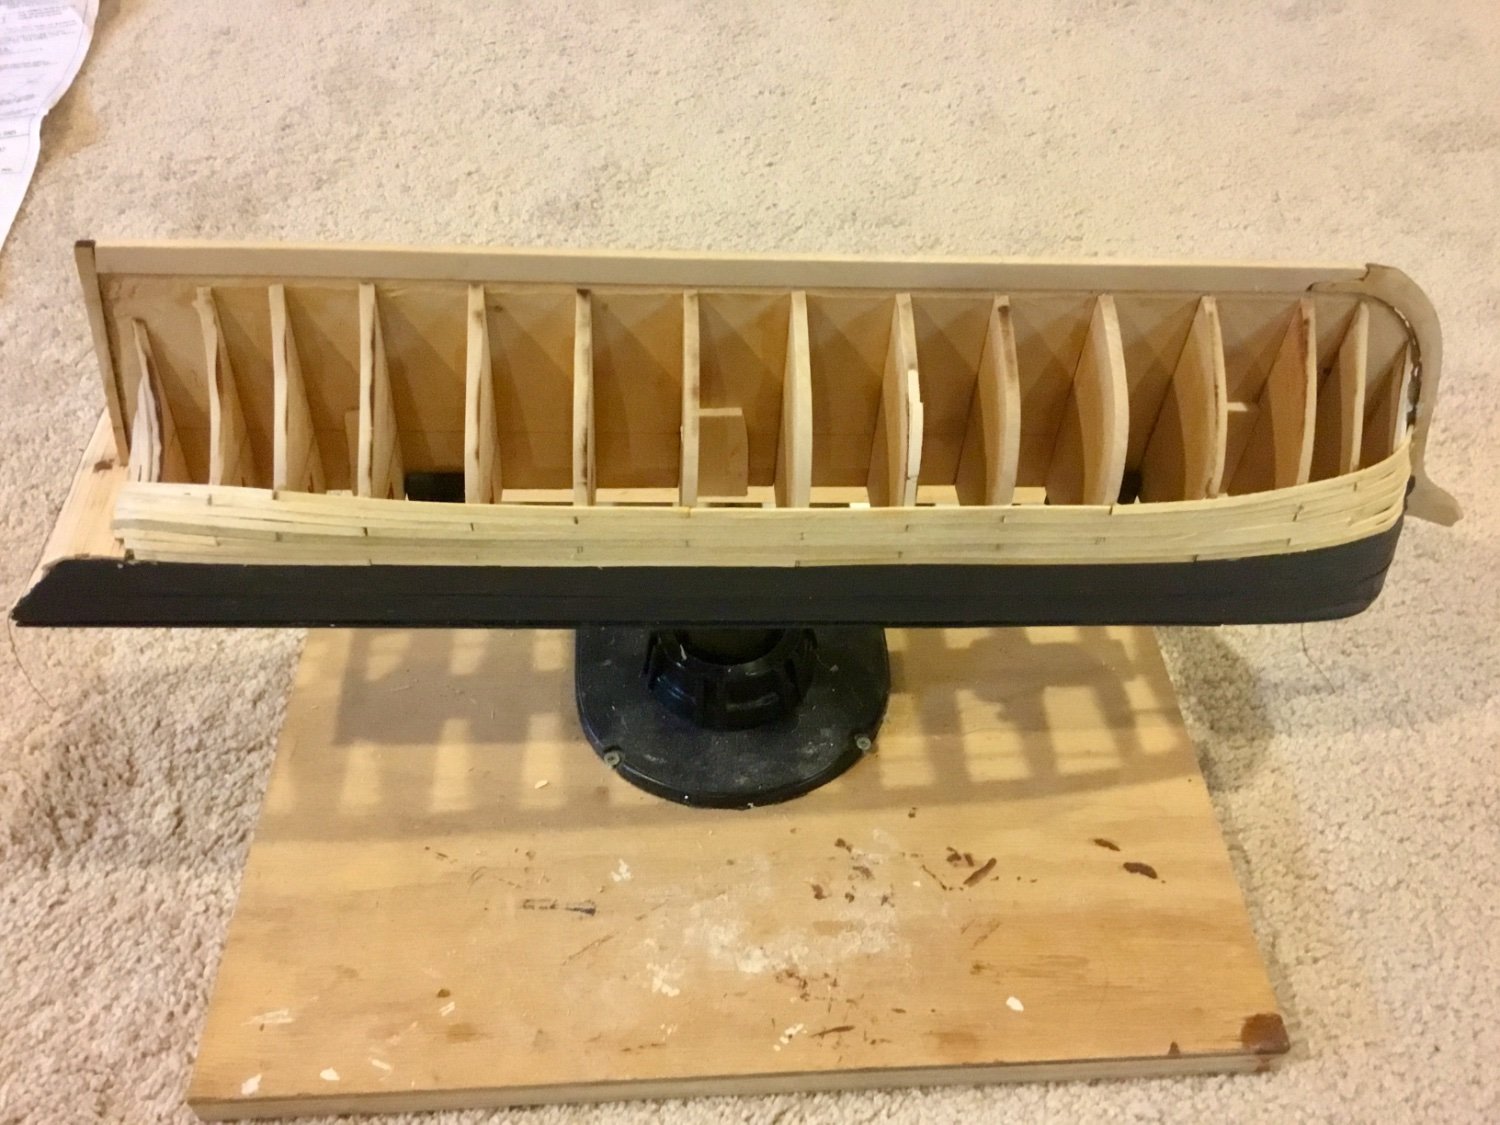
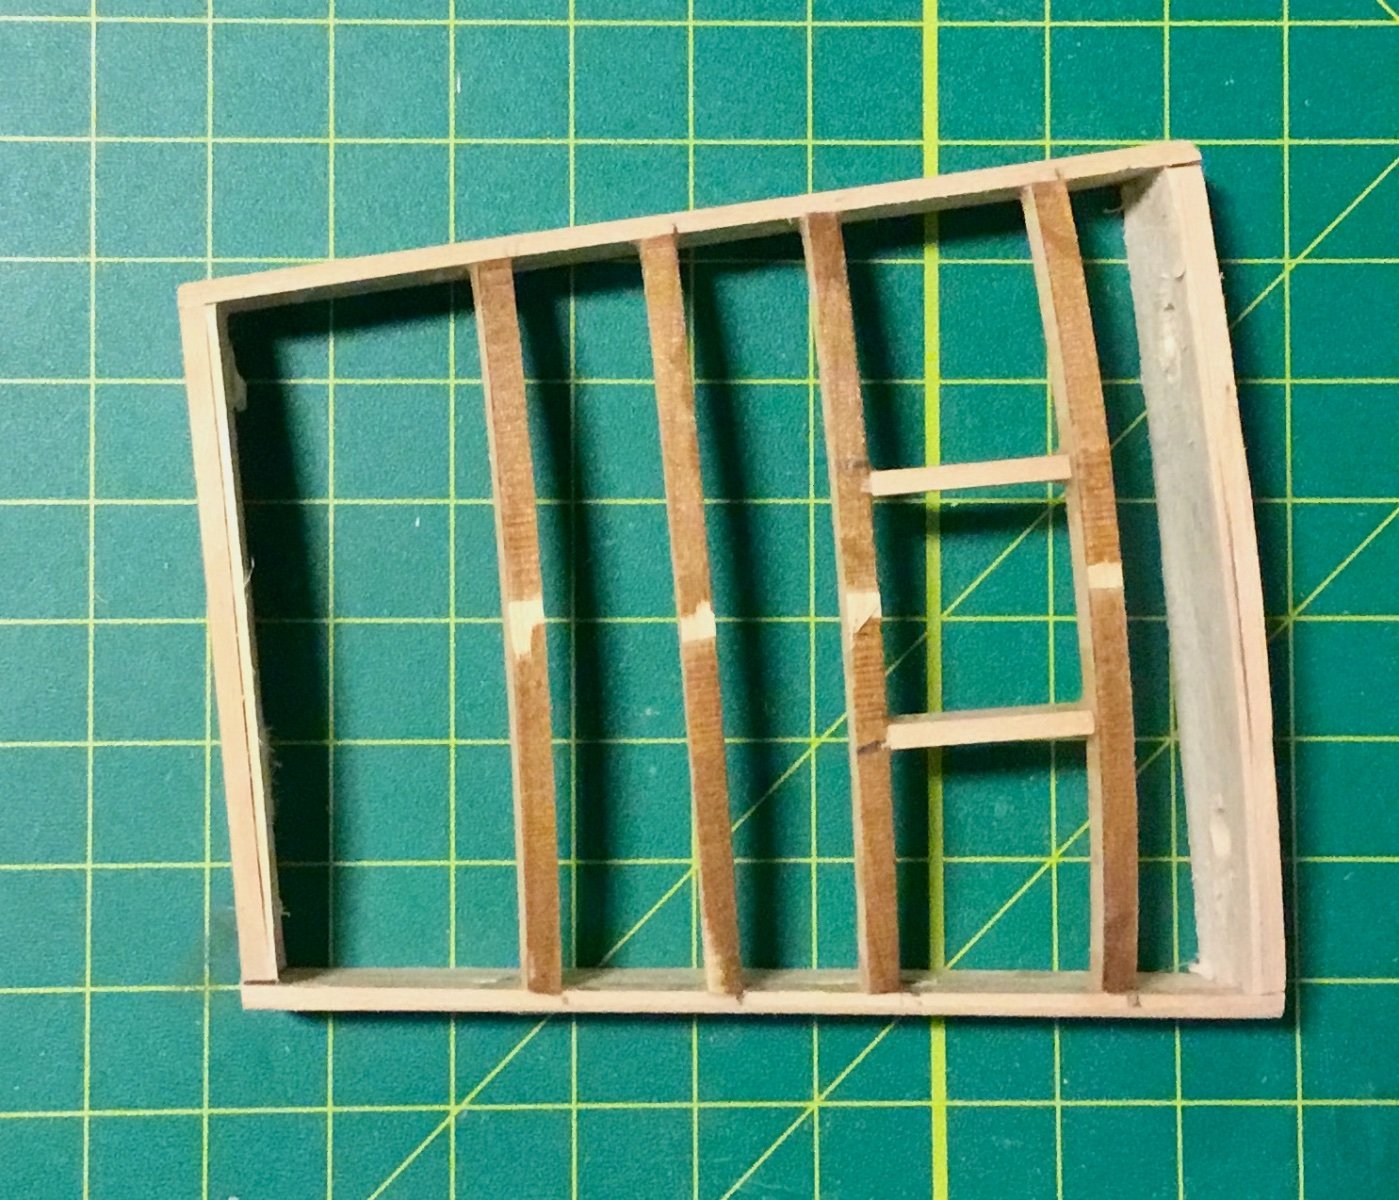
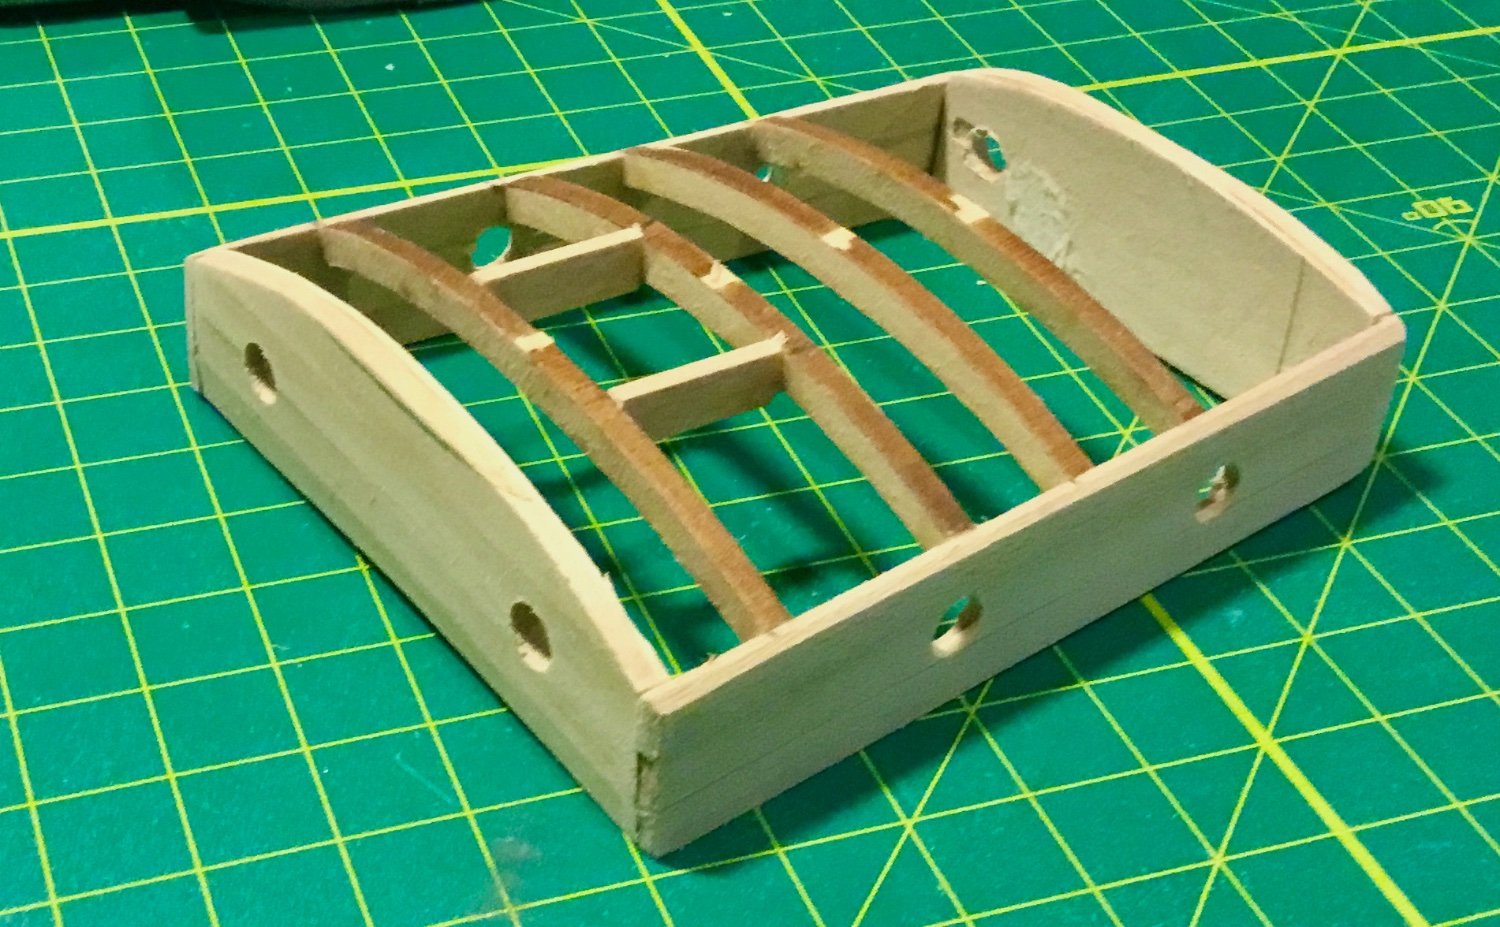
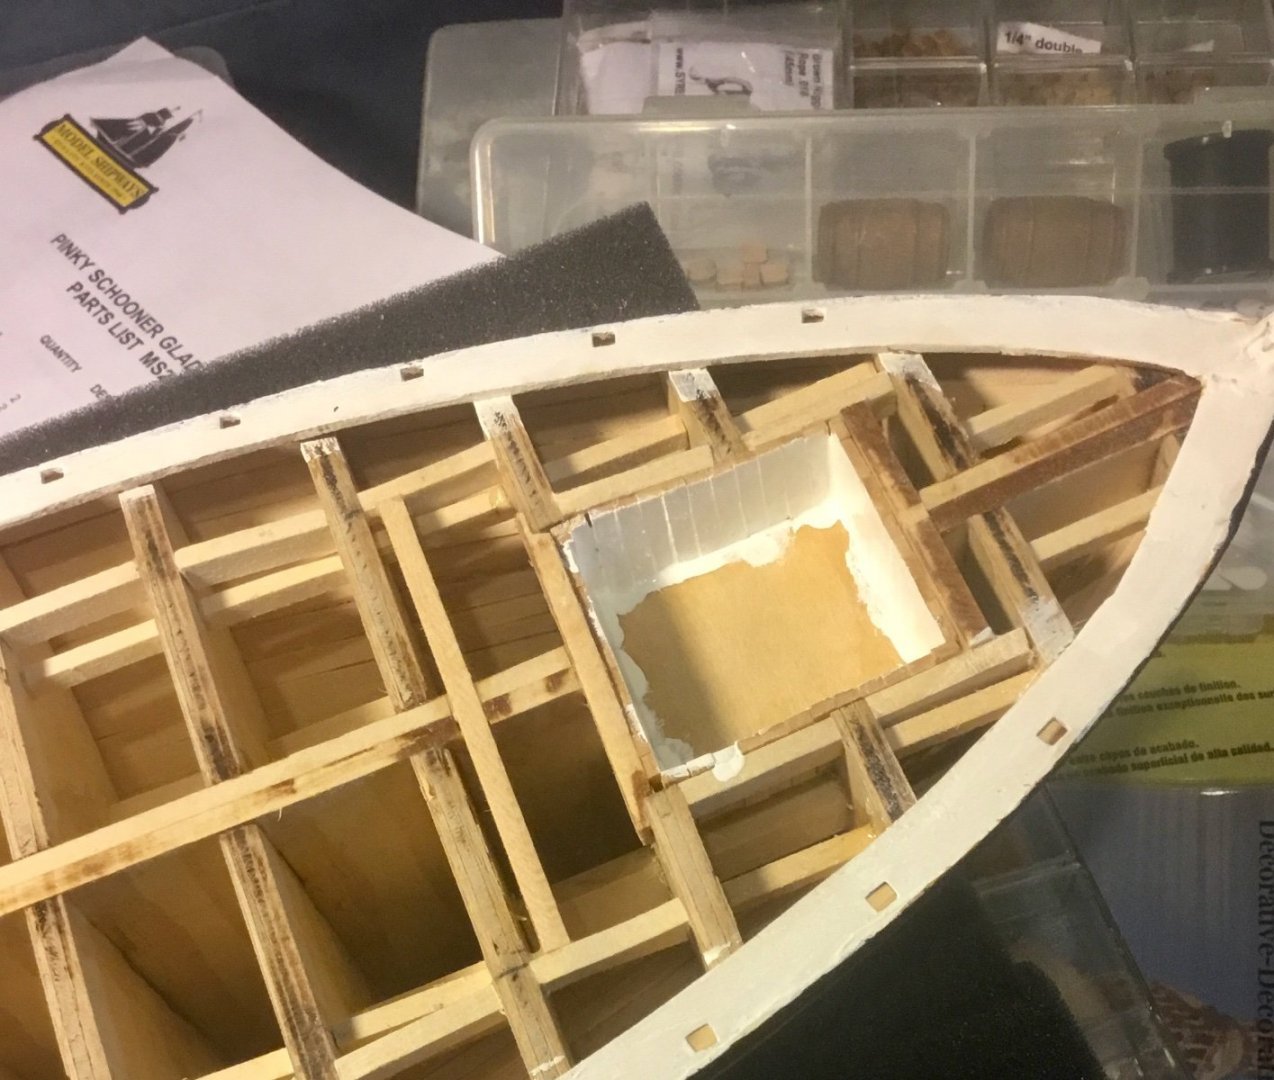
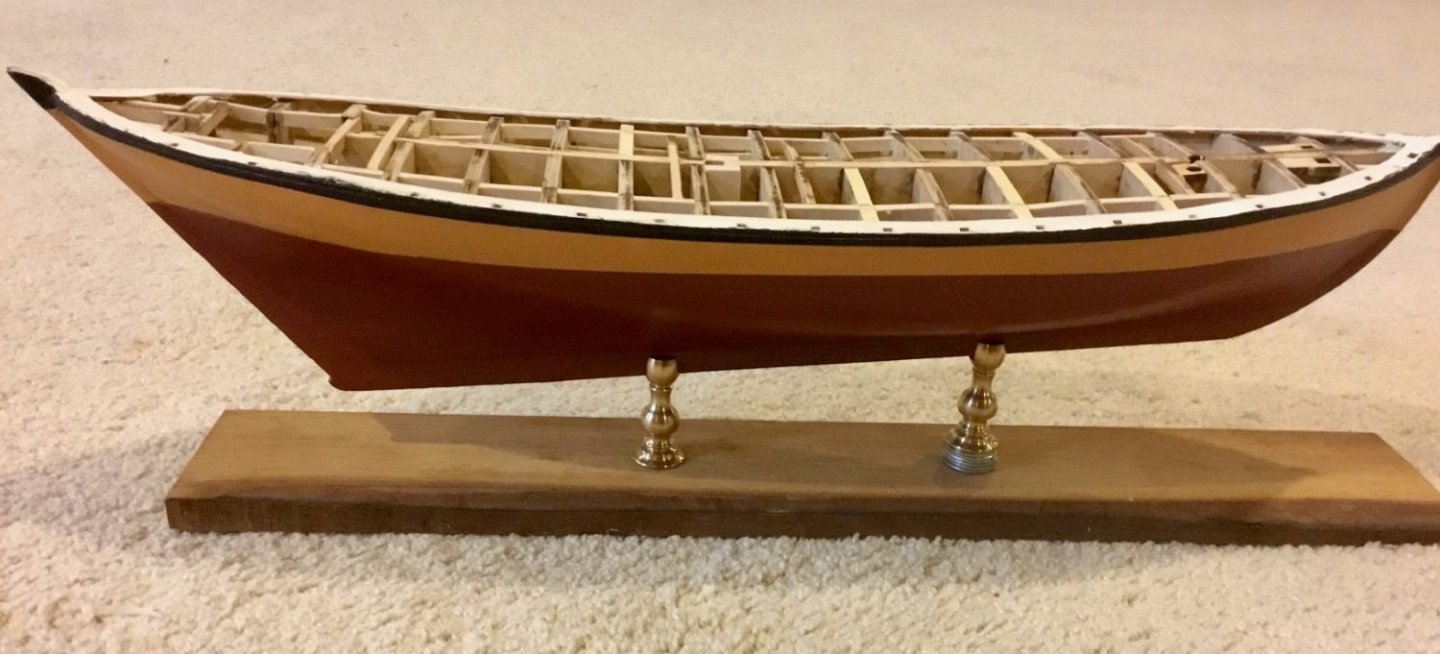
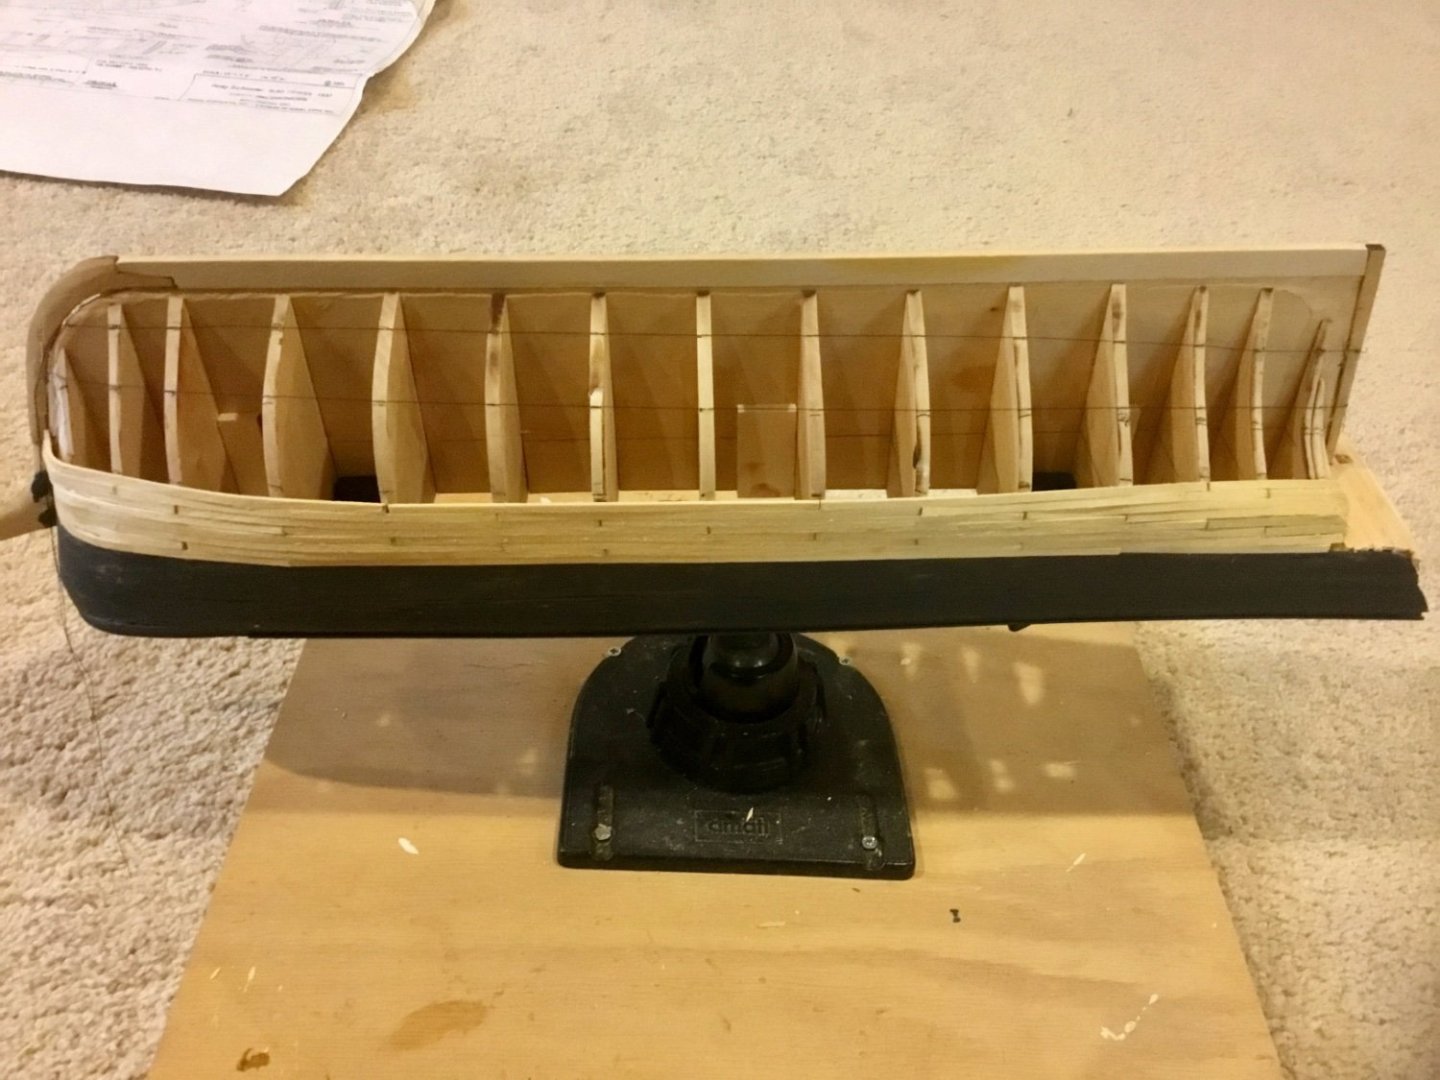
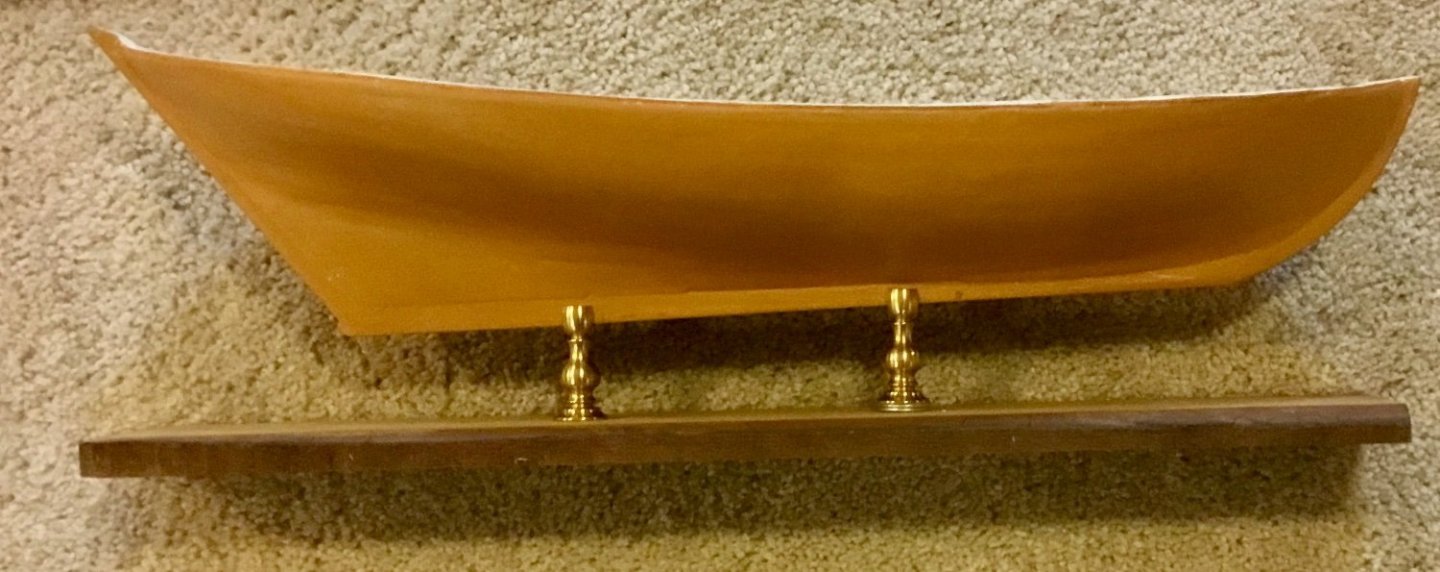
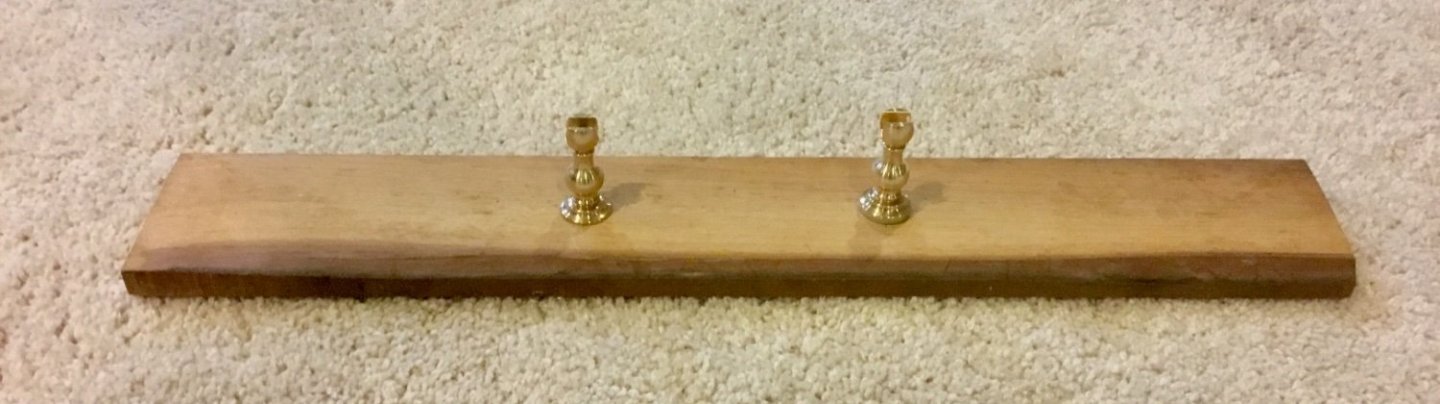
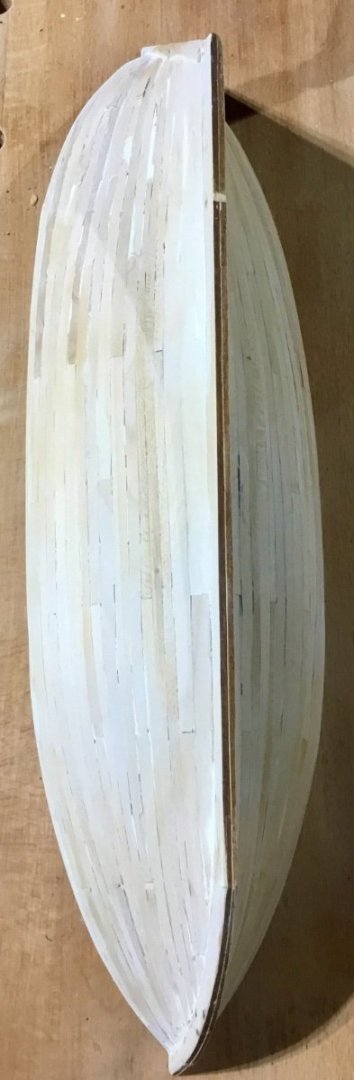
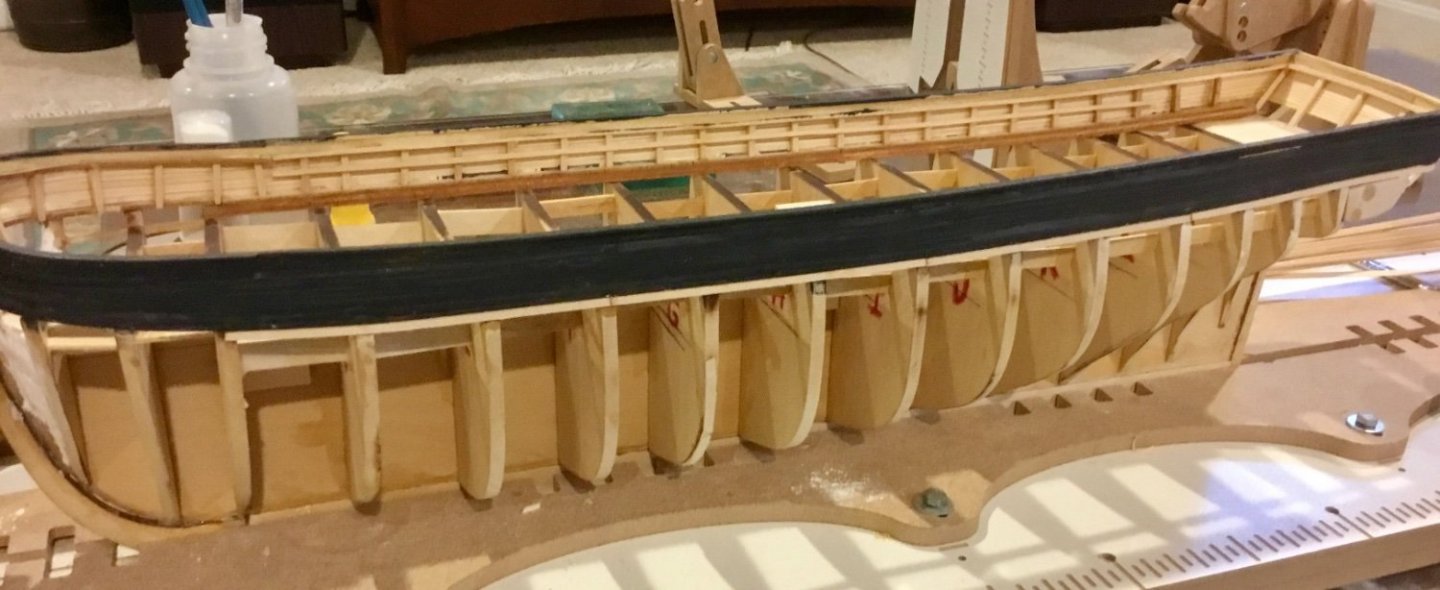
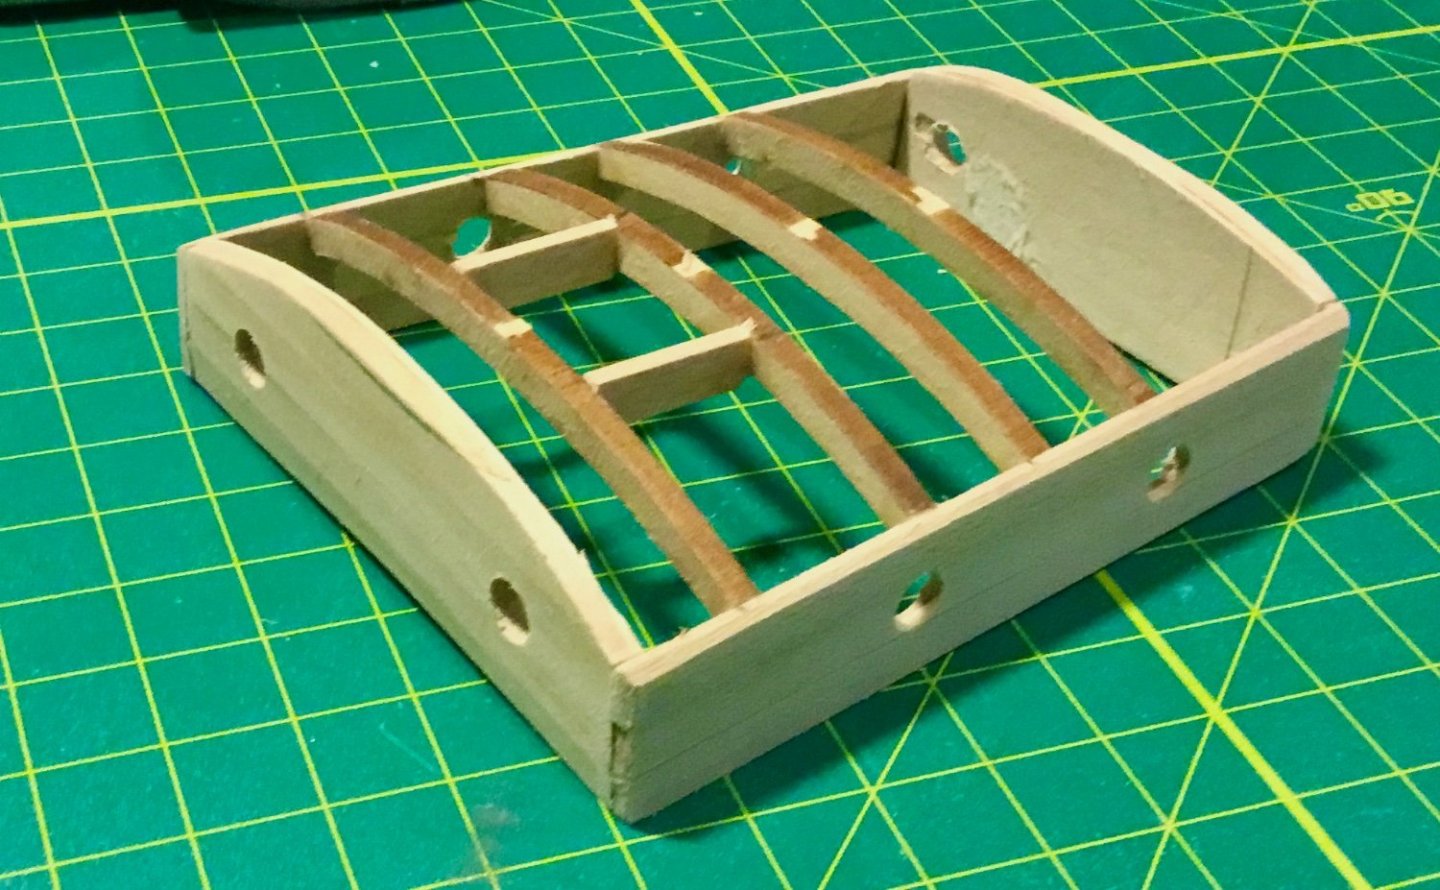
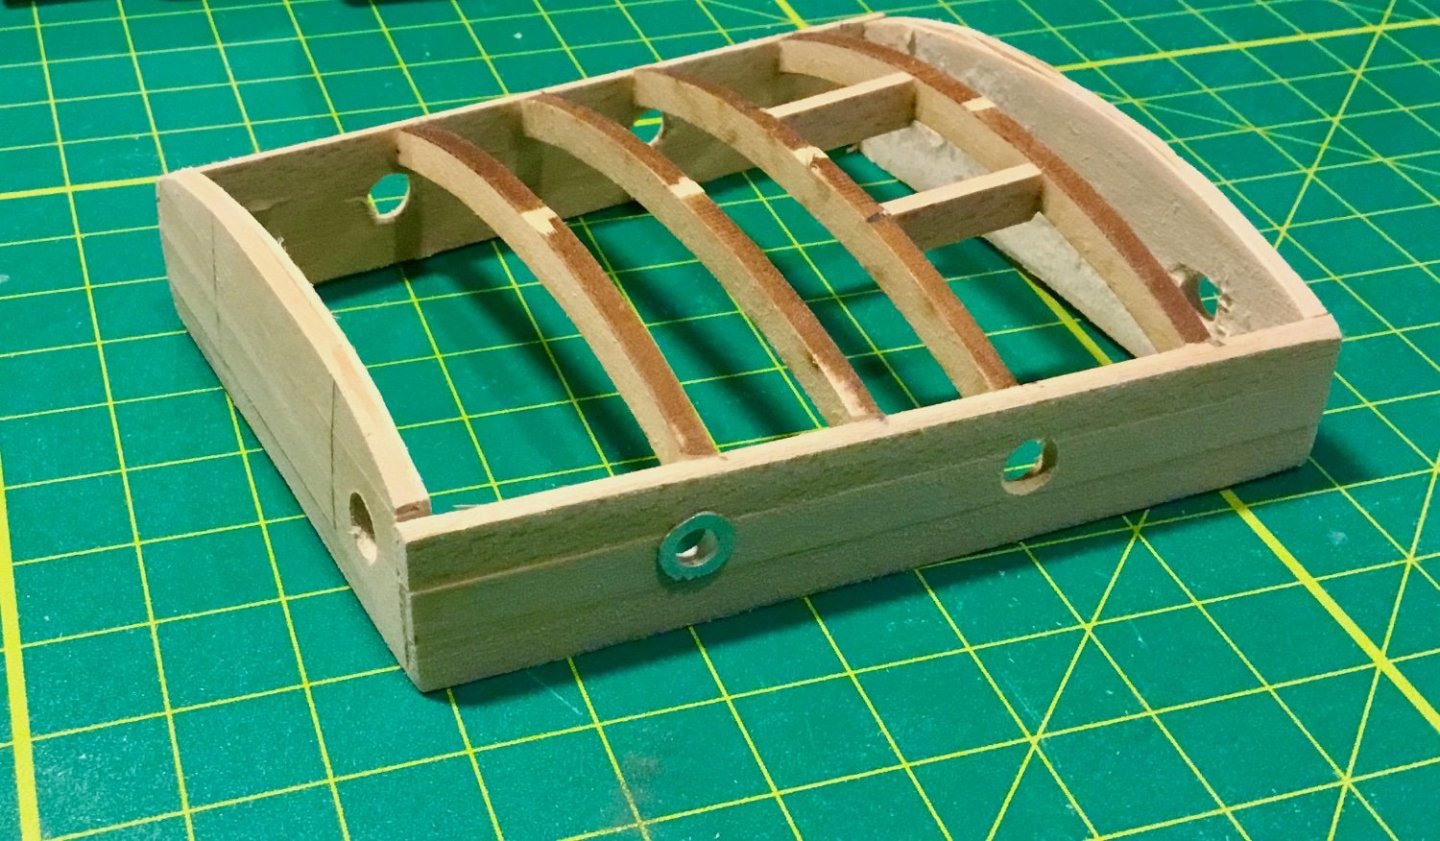
I applied a coat of white primer to the hull which emphasized the fact that I needed to do more sanding to get a smoother finish. After several more interations of sanding I think I have it well enough and have brushed on two coats of primer getting ready for painting. I glued in reinforcements blocks for the chain plates as mentioned in the plans. I then installed and primed the plankshear. The material was thin and each side broke from being flexed when being fit, but was easily repaired. In anticipation of painting the hull and getting the water line level when mounted, I worked on the mounting board for the model, I centered the supports on the board spaced between the 8th and 13th bulkheads and measured the height of the water line at those points on the plans which showed a difference of 1/8 inch higher at bulkhead 8. I drilled and mounted the stanchions adding 1/8 inch of metal washers below the forward stanchion to raise it the appropriated distance. I will take further measurements to confirm all this before permanently mounting the model.


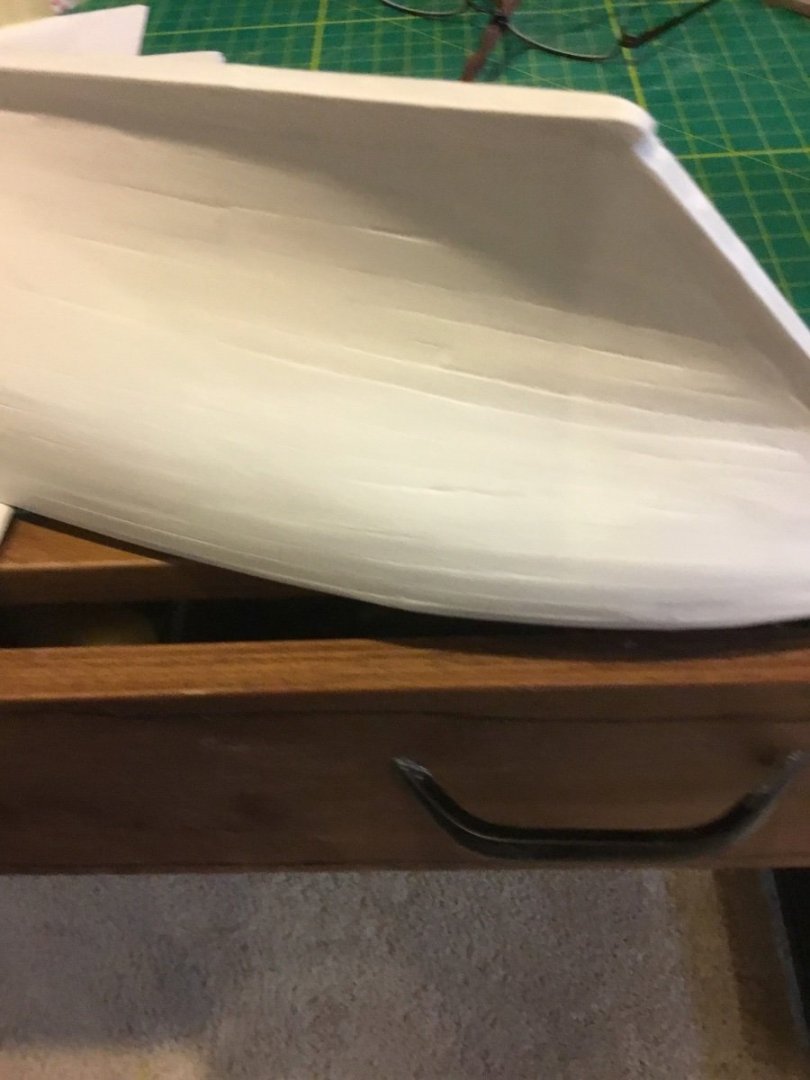
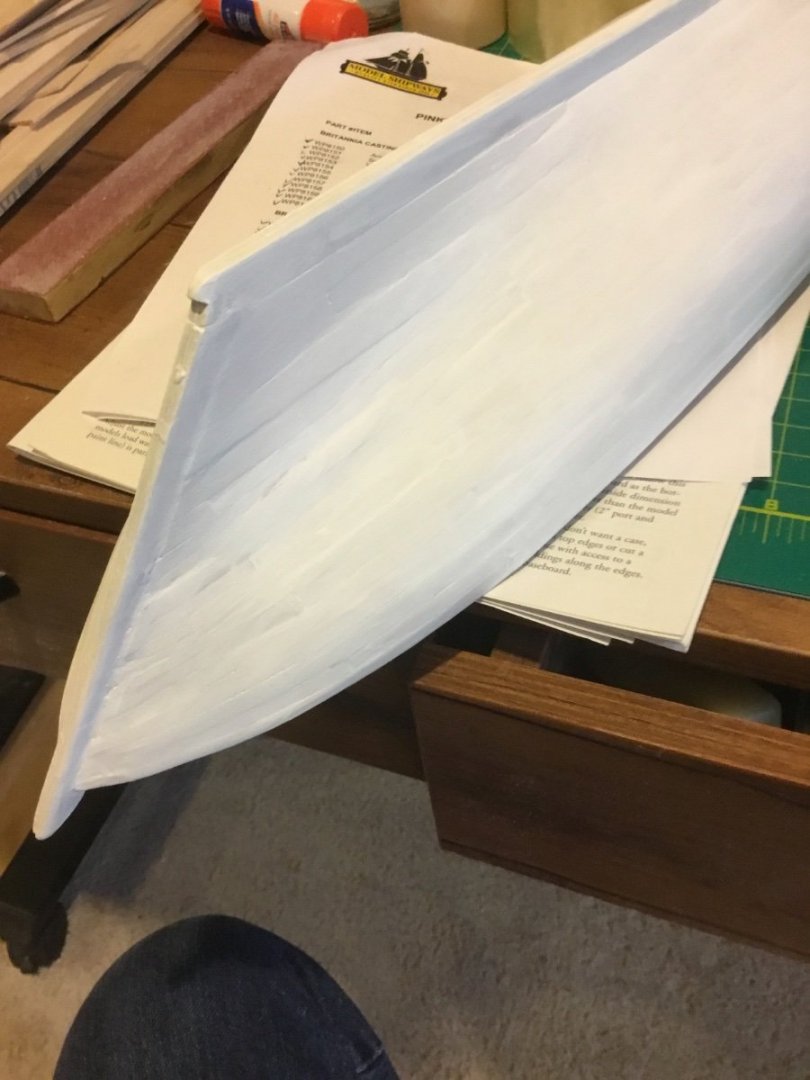
- 37 replies
-
- 5
-
-
- Glad Tidings
- Model Shipways
- (and 1 more)
-
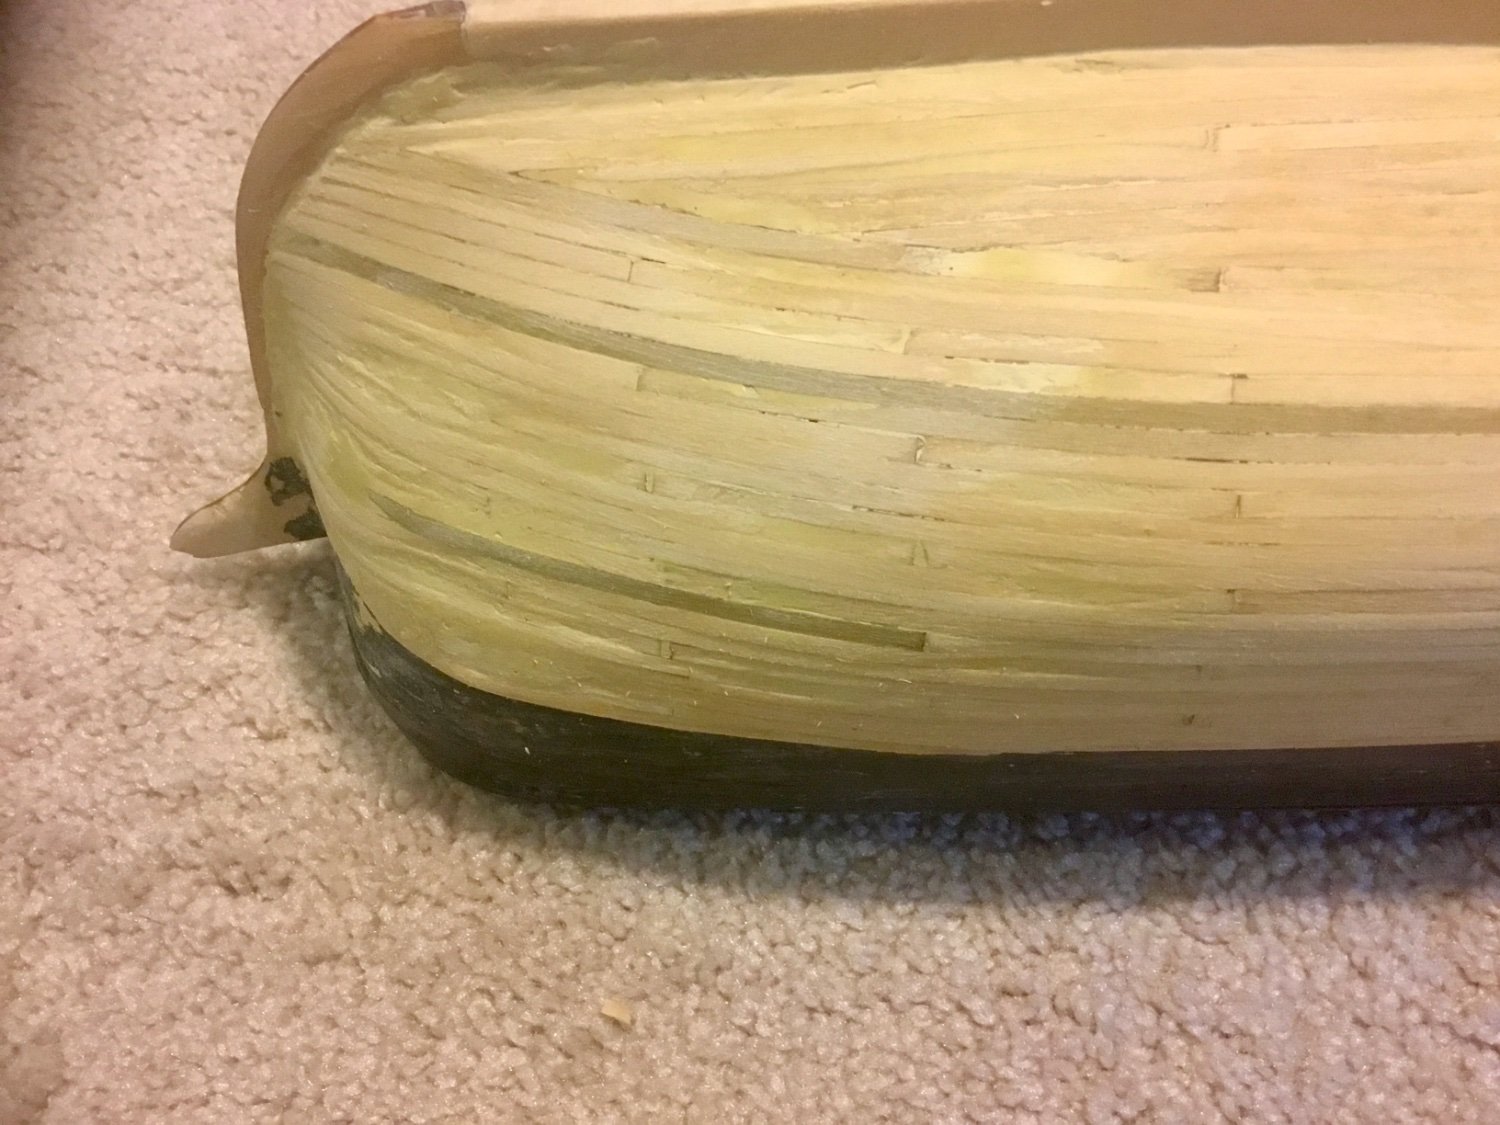
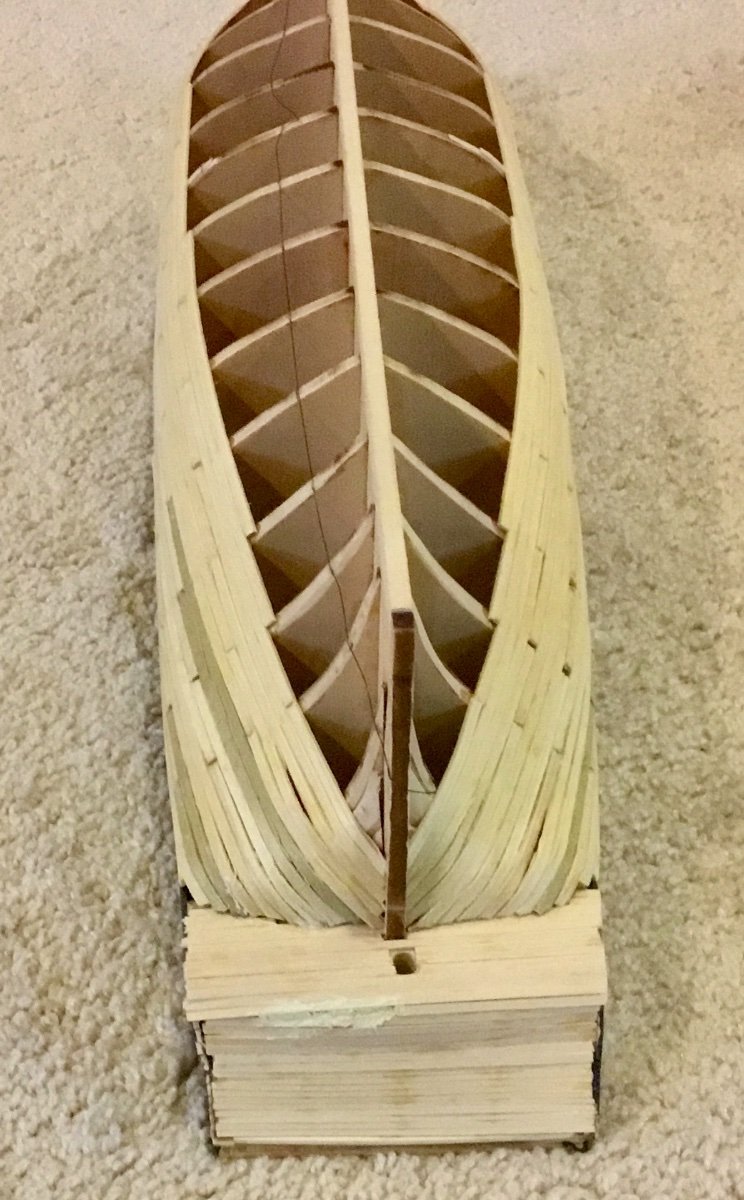
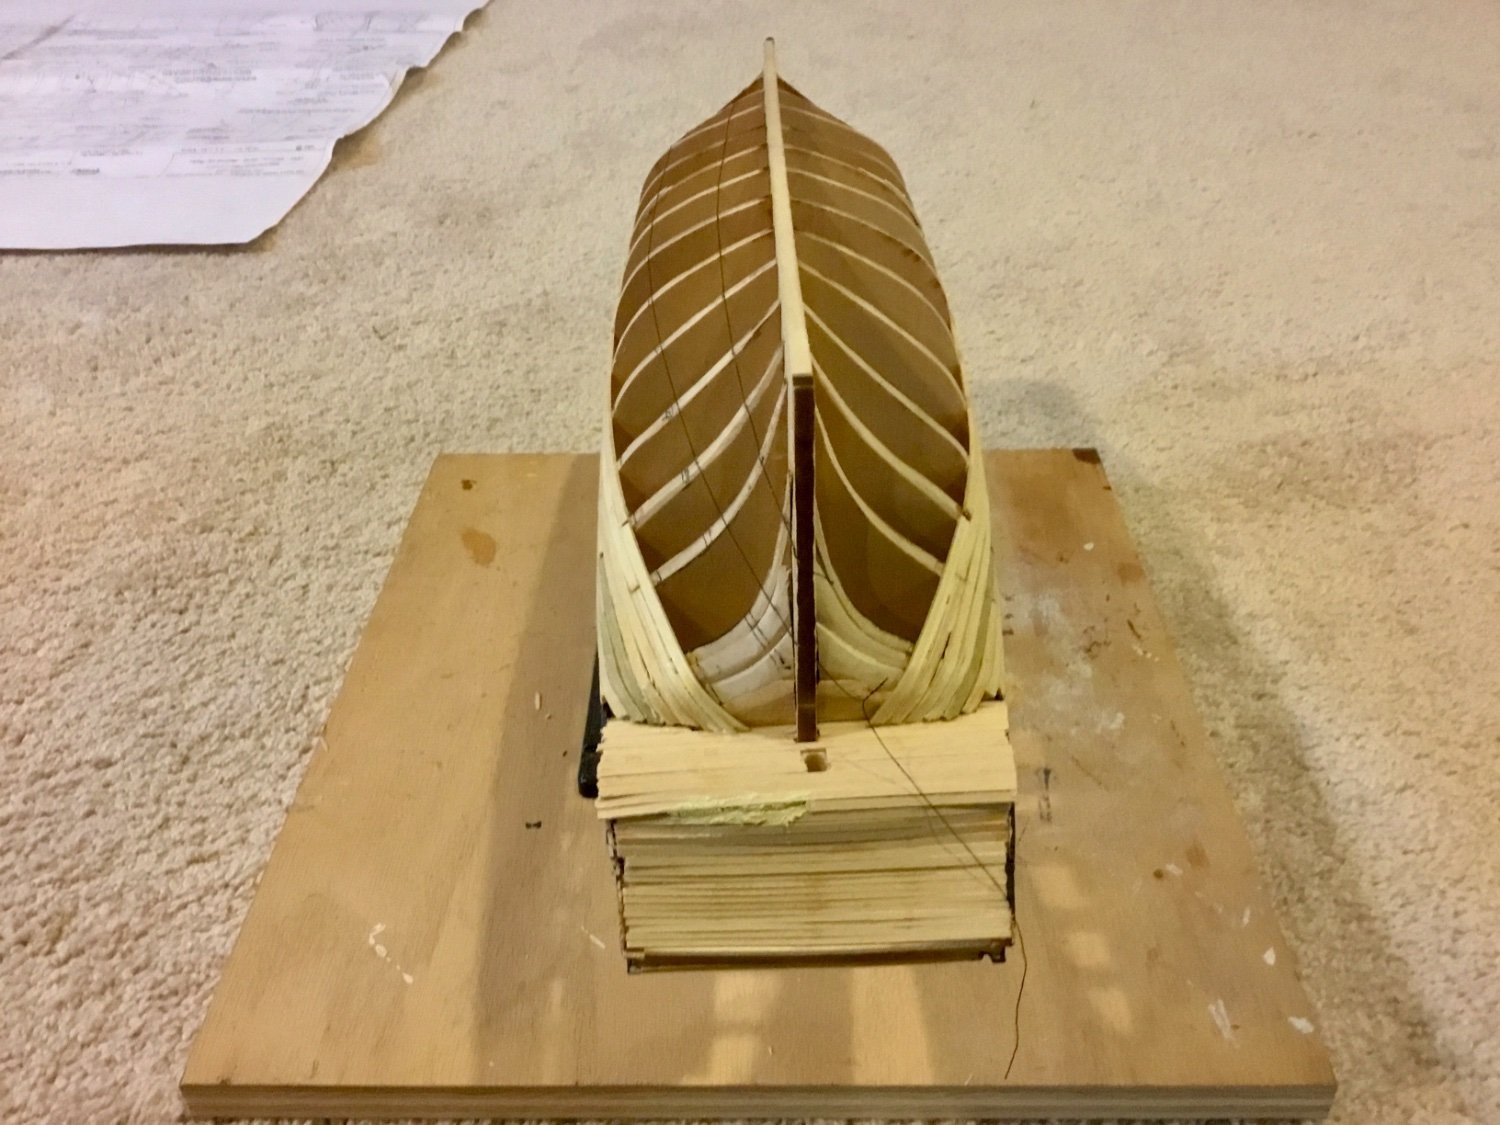
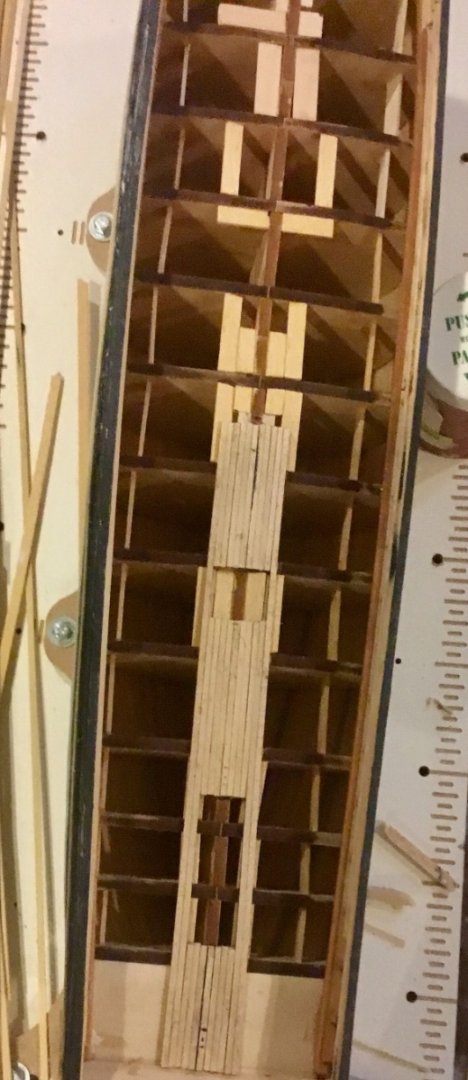
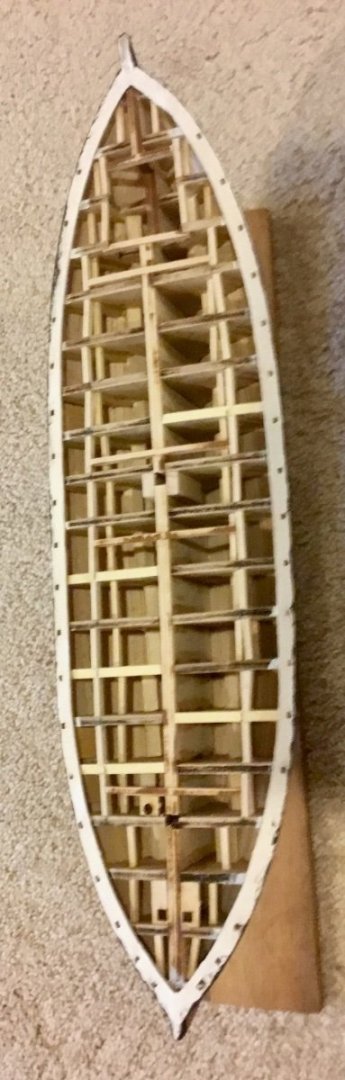
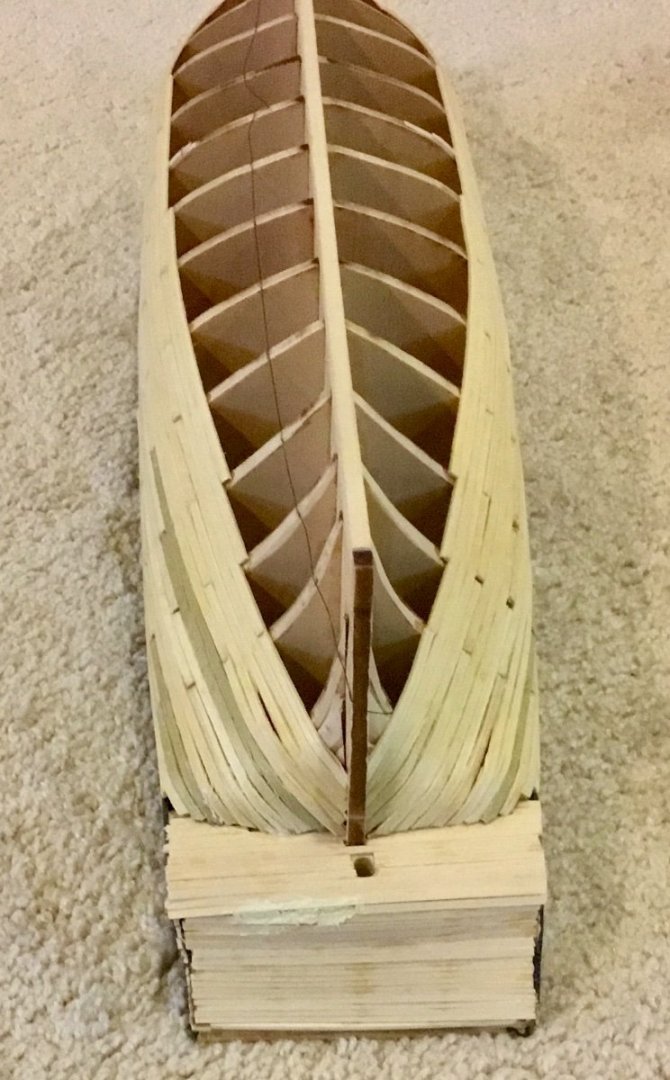
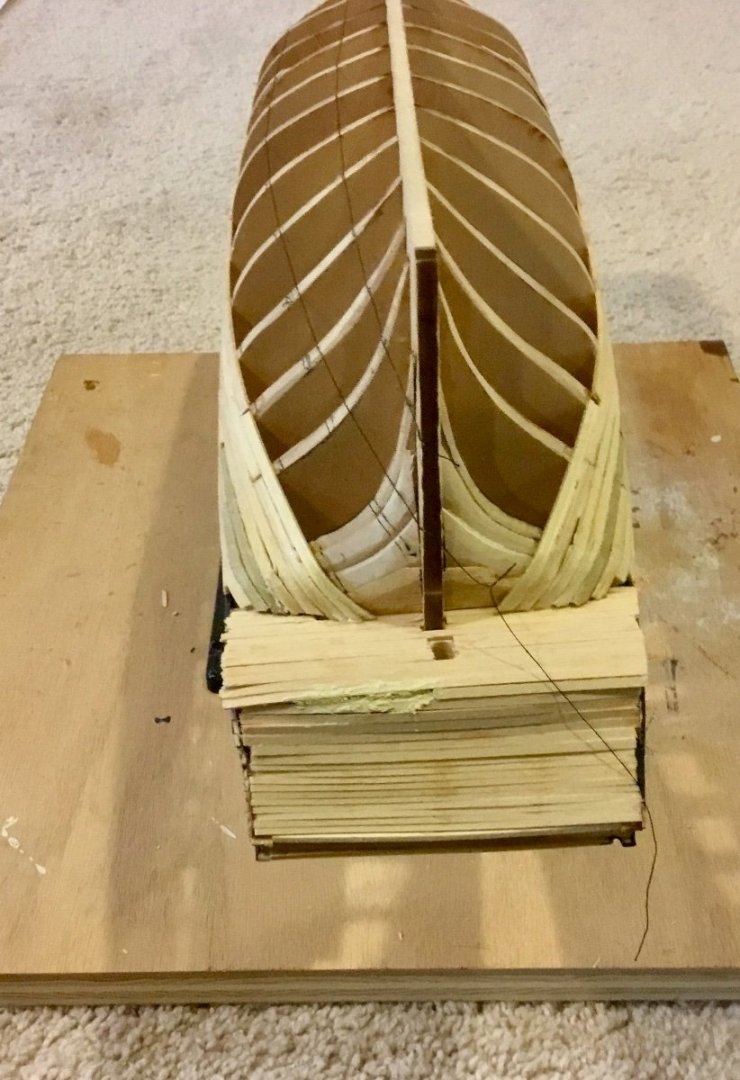
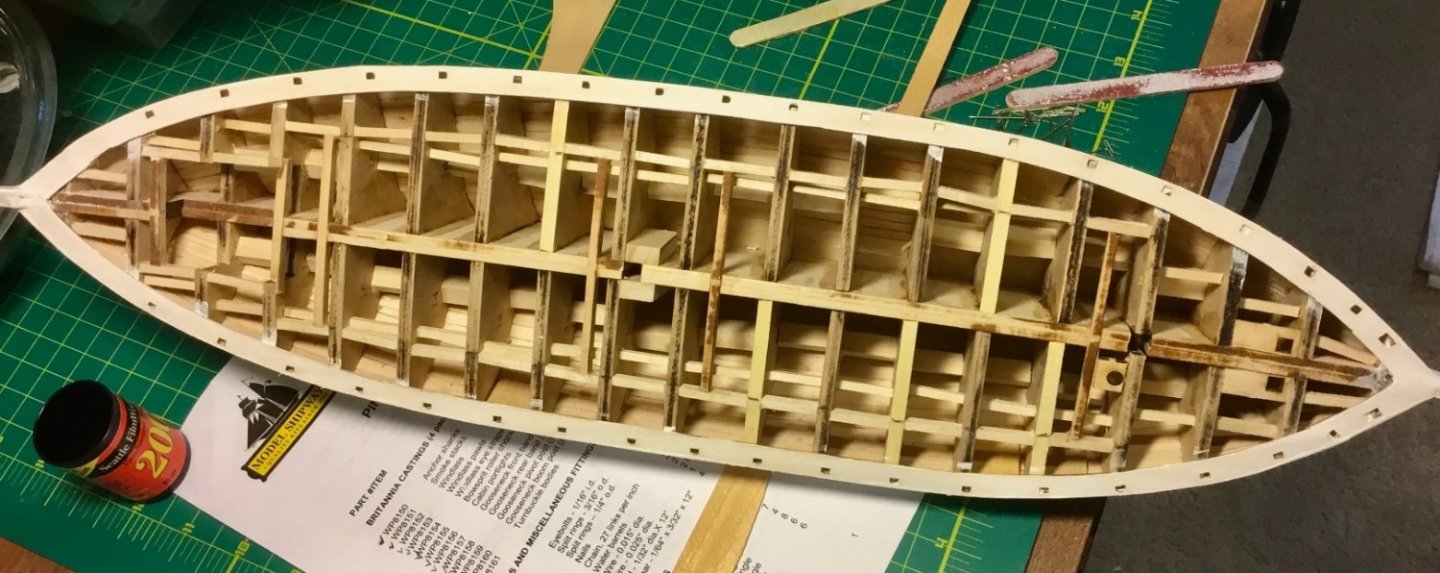
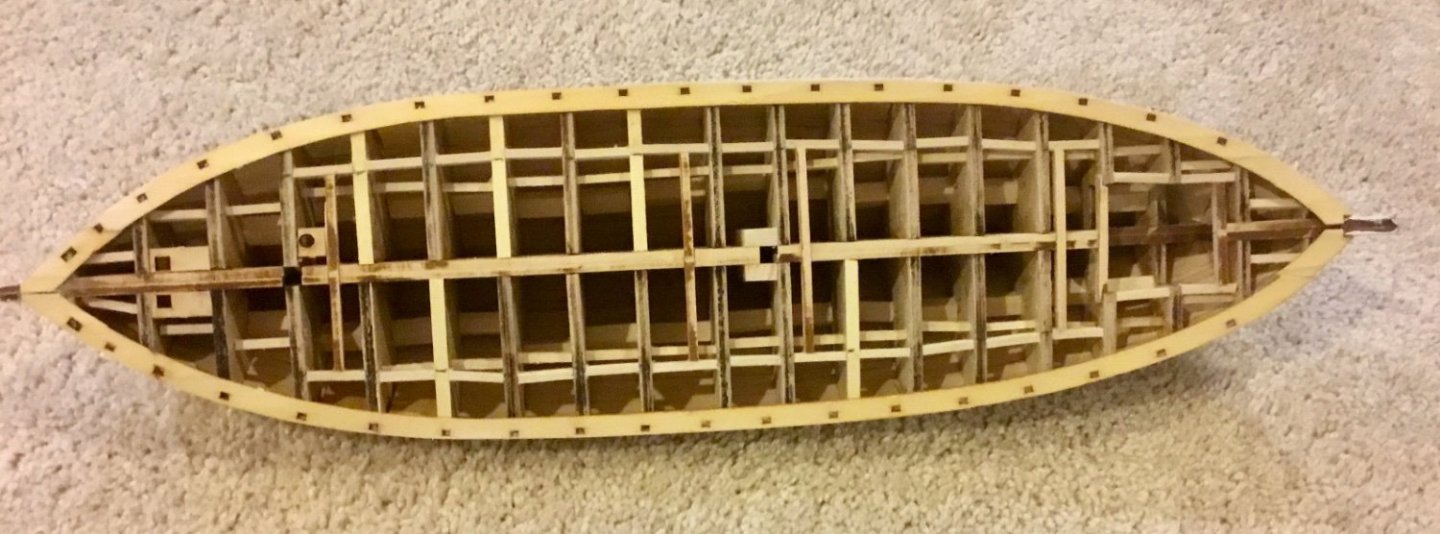
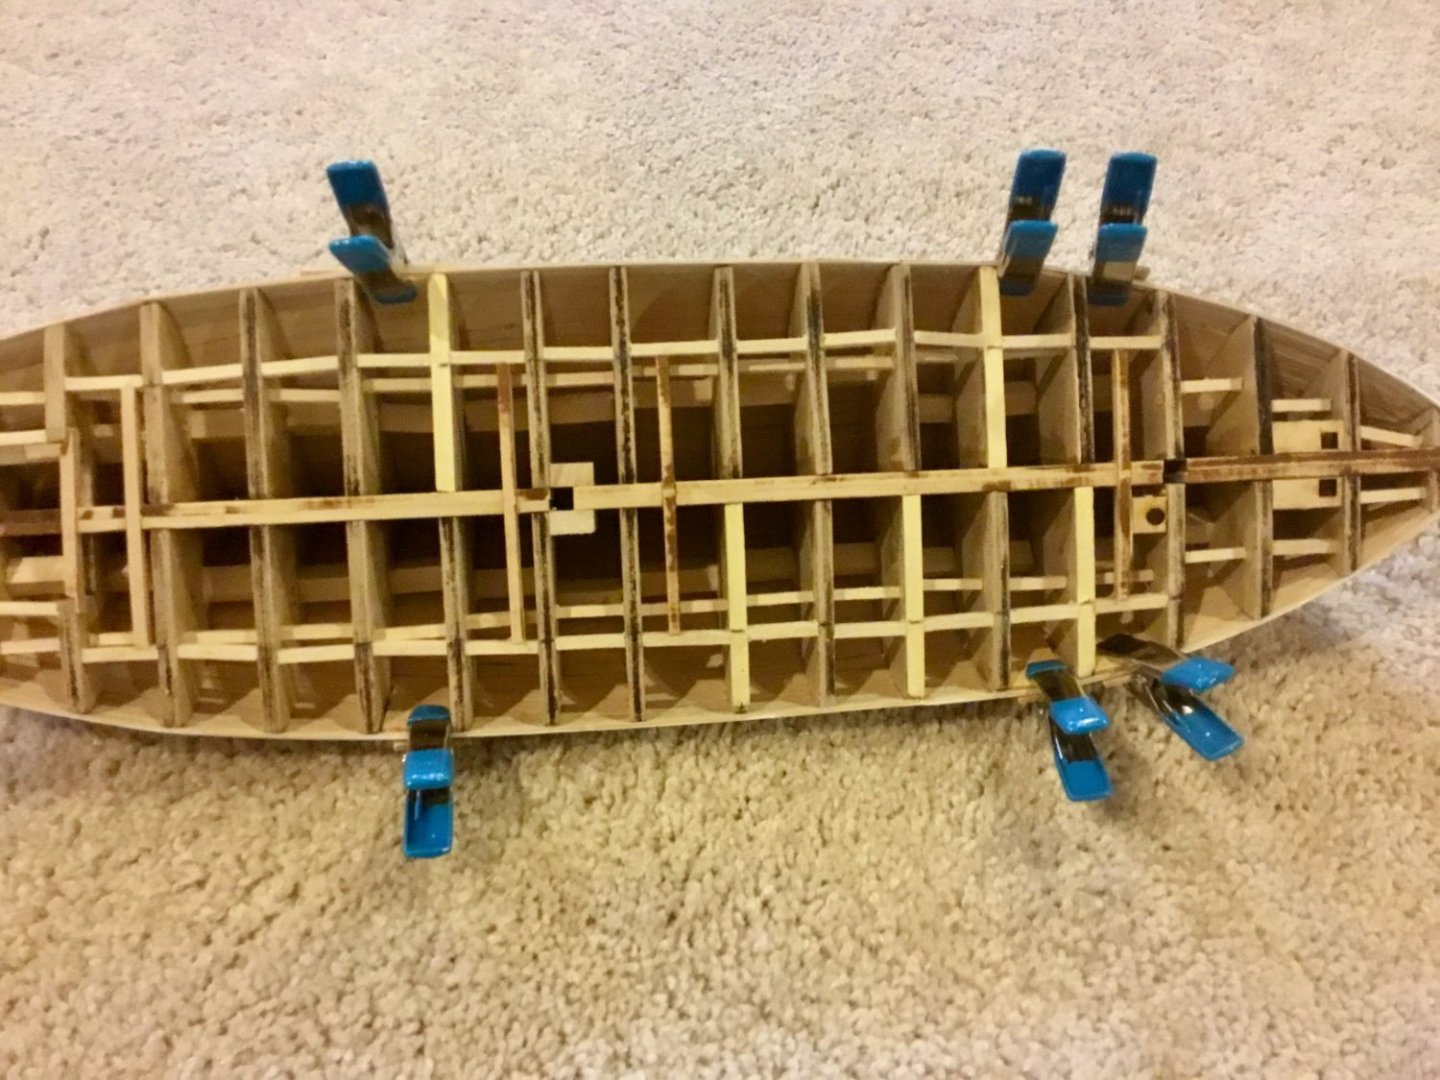
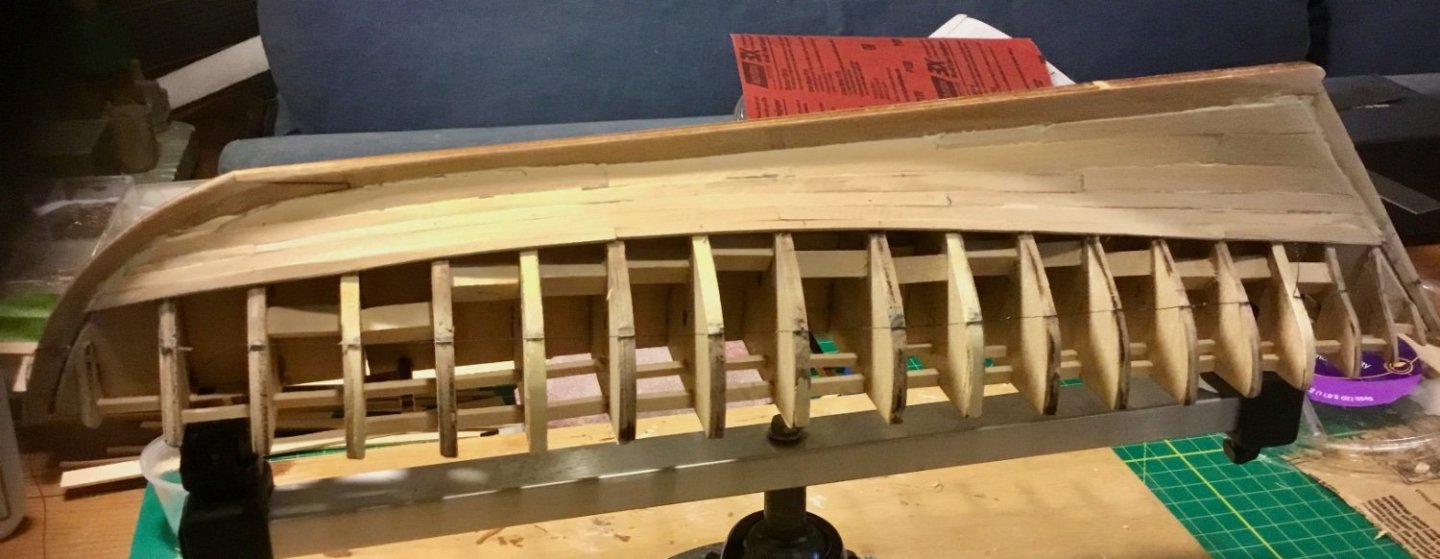
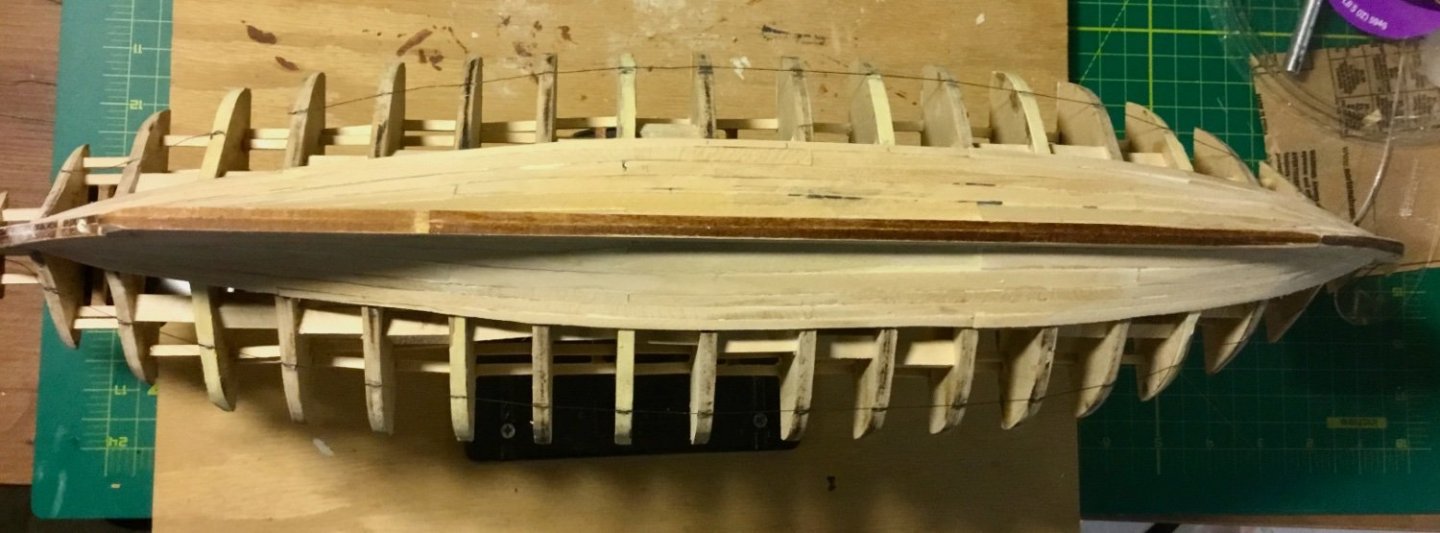
I installed the first 4 strakes in belt 'A'. Each plank spanning 5 bulkheads as shown in the plans. I am edge gluing each plank to the previous strake with PVA glue and to each bulkhead with CA. This lets me fit each plank in place without clamps by holding the plank in place until the CA takes hold, which is about 15-30 seconds. I'm not getting consistent curvature when bending the planks at the bow so I will need to do some filling there when finished planking. I didn't line off the port side as I'm assuming the sides are sufficiently symmetrical so that the widths and shapes of the corresponding planks on the other side are close enough to being the same. I'll take measurements as I go along to confirm this and make adjustments when needed. Here's hoping I'm not far off. This is not my primary build so the planking will be going slow as time allows.

-
I plan on painting it, brushed , in the colors recommended by Model Shipways and the kit plans. Black, White, Yellow Ochre, Copper Red.
- 37 replies
-
- 2
-
-
- Glad Tidings
- Model Shipways
- (and 1 more)
-
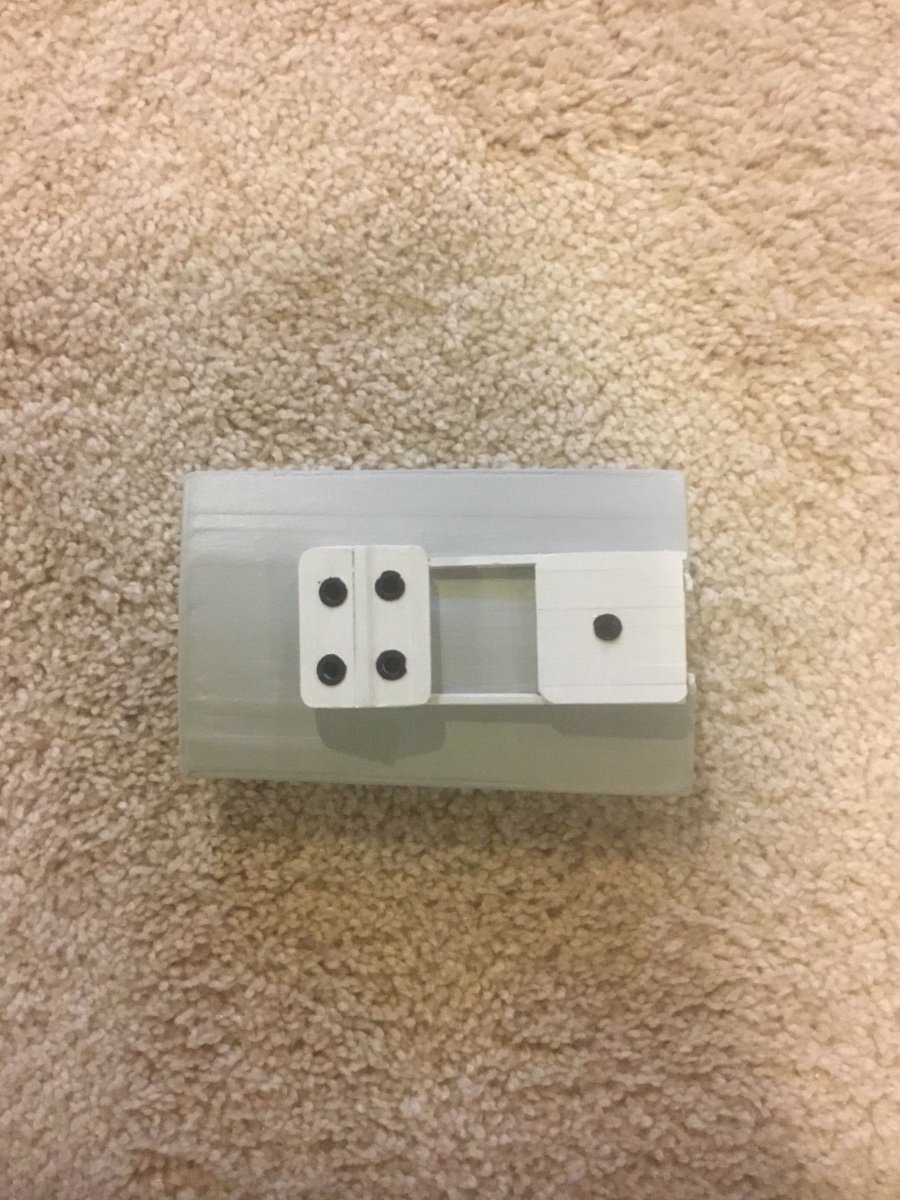
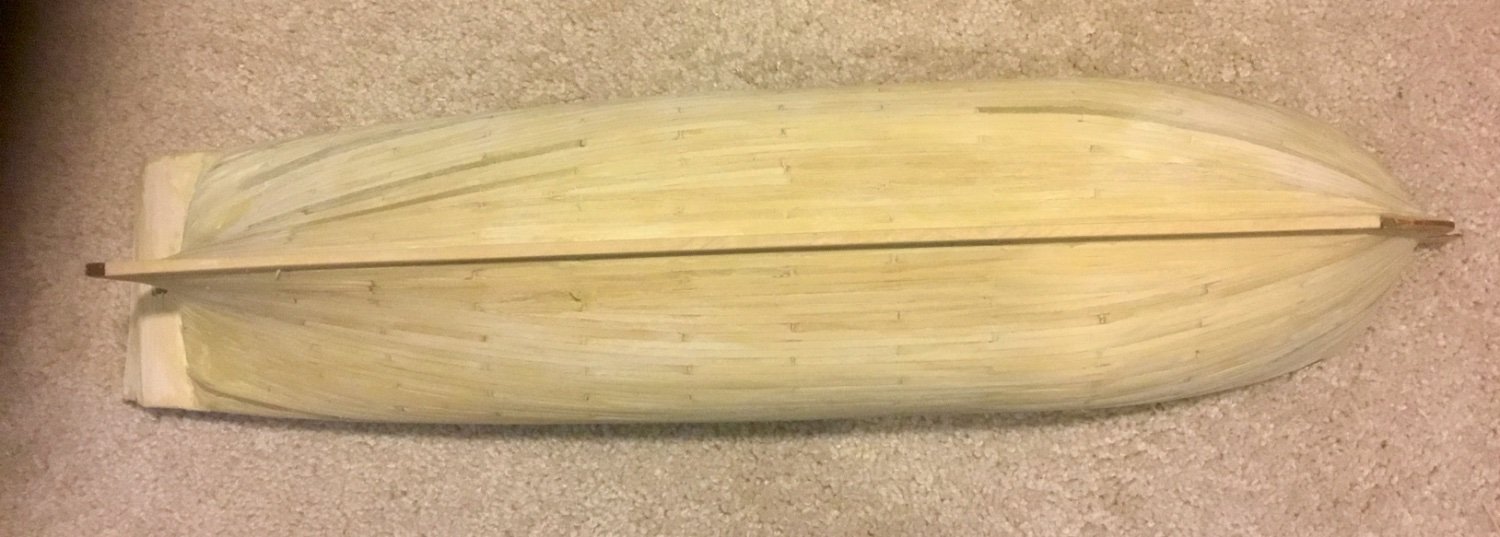
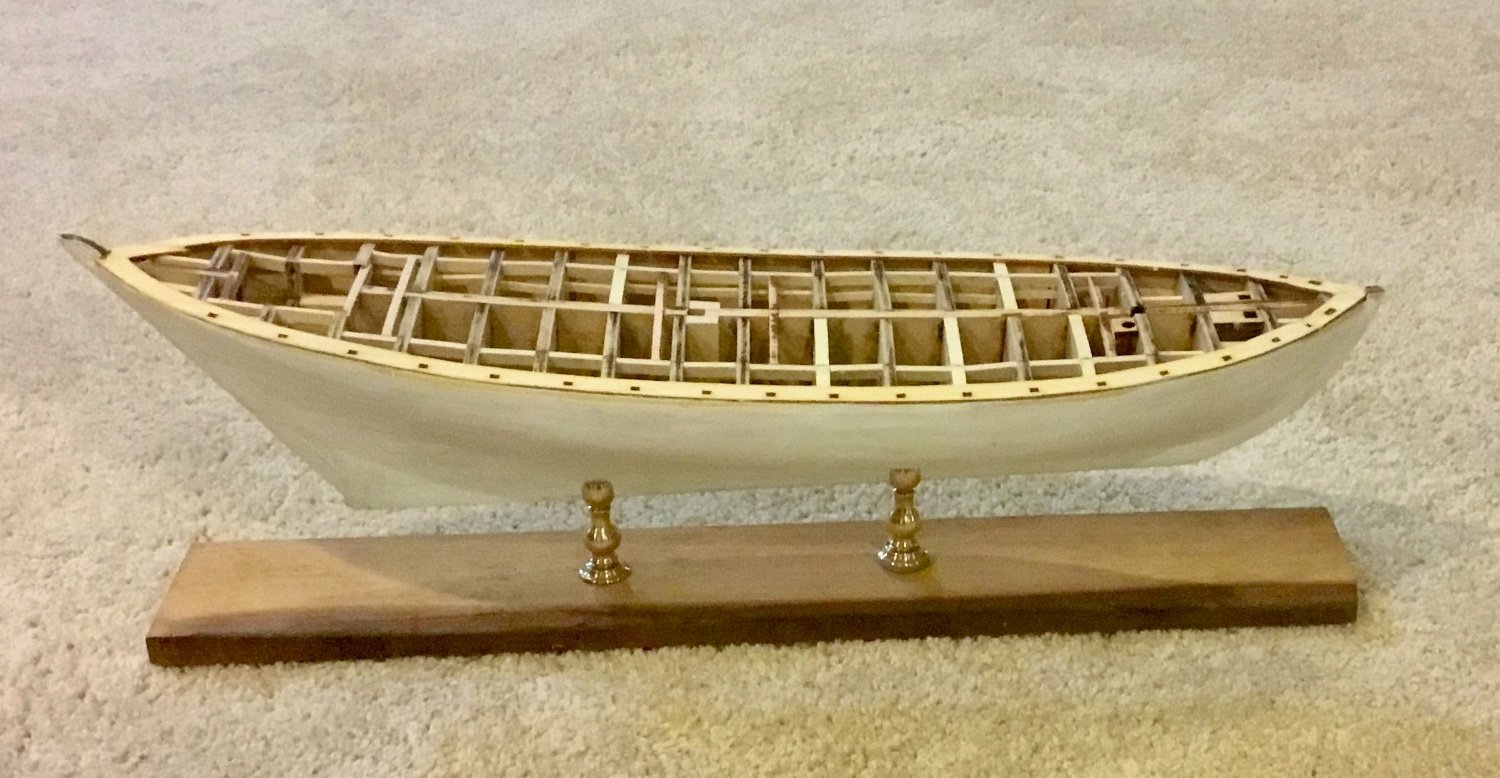
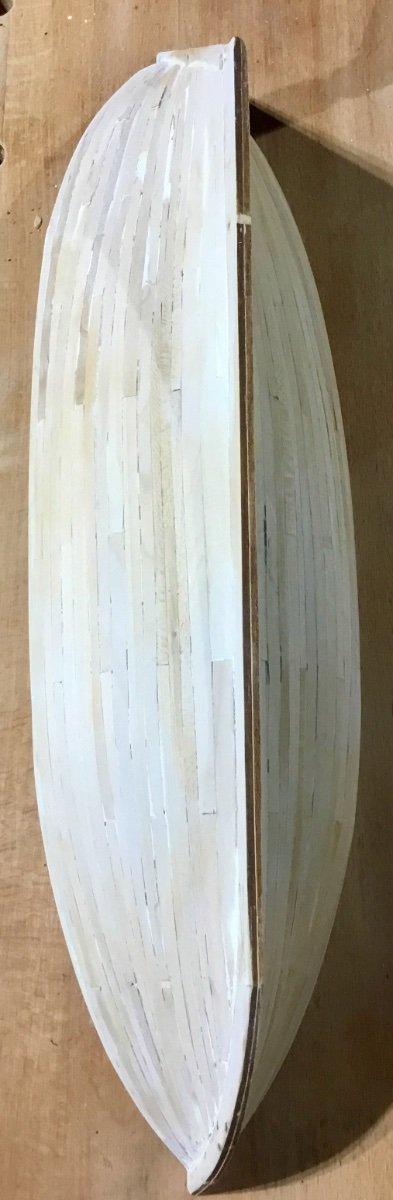
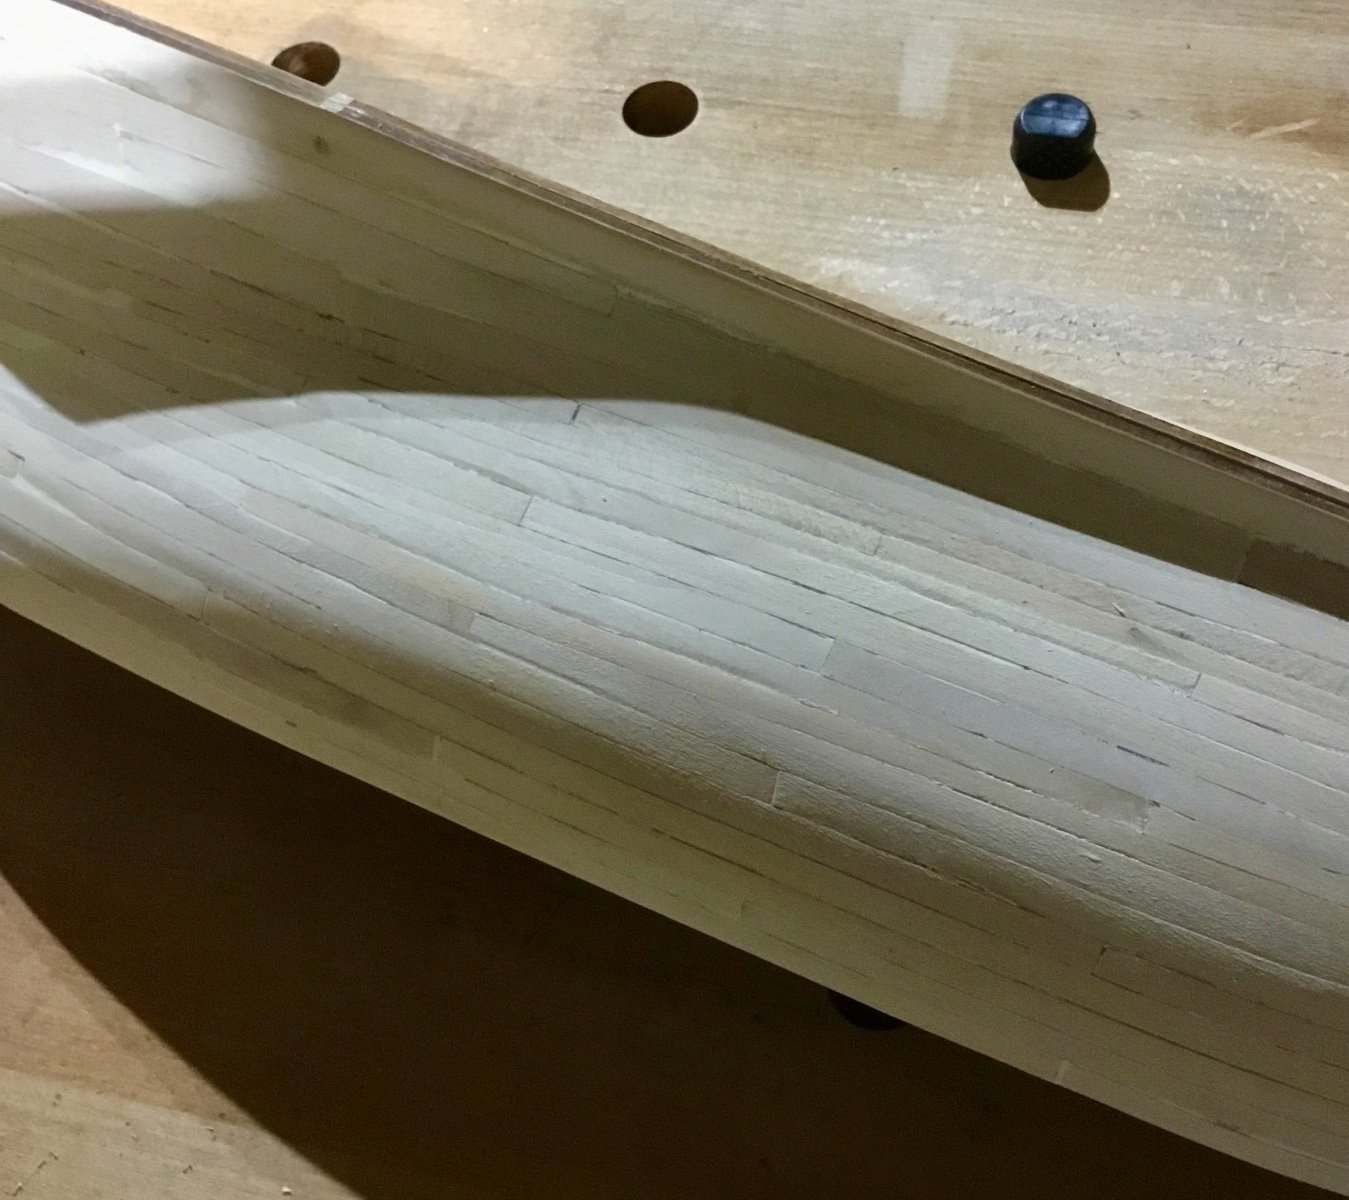
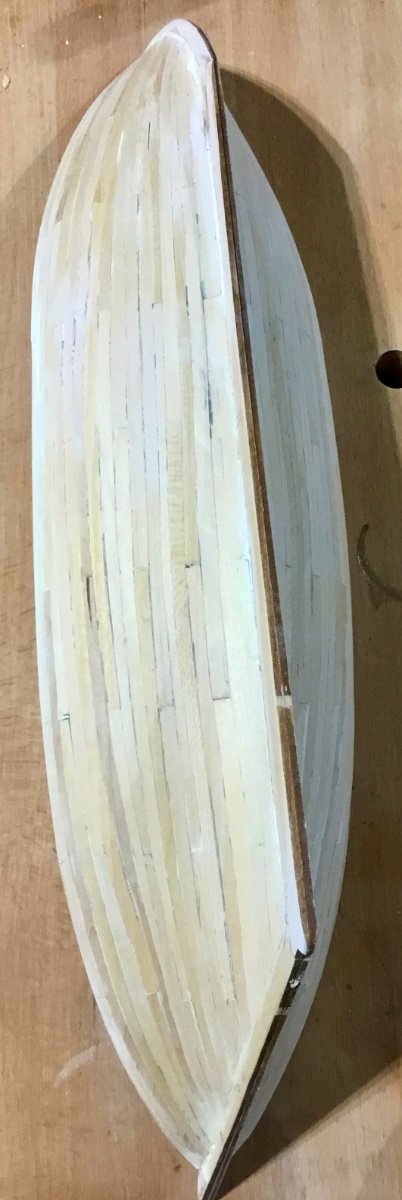
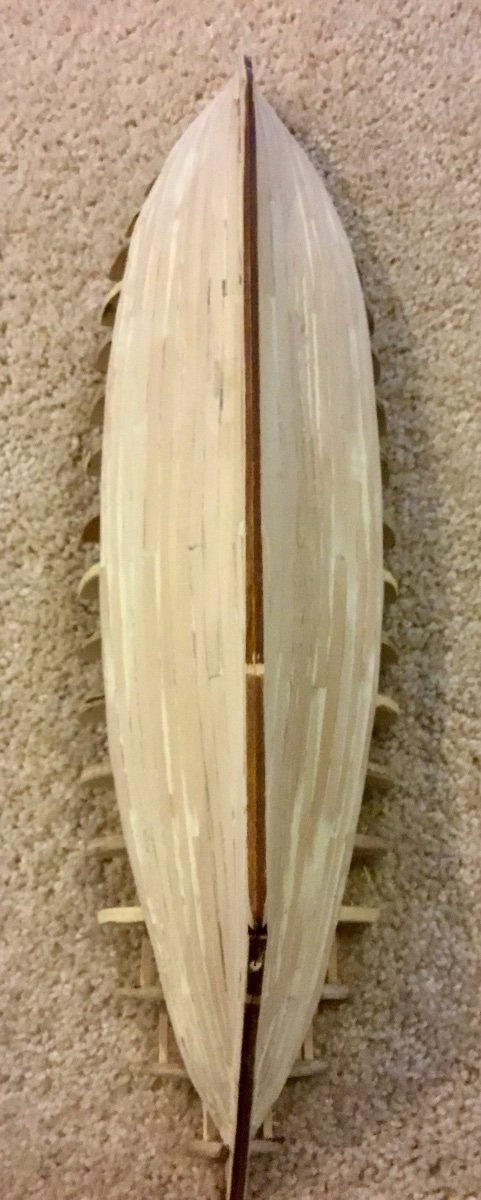
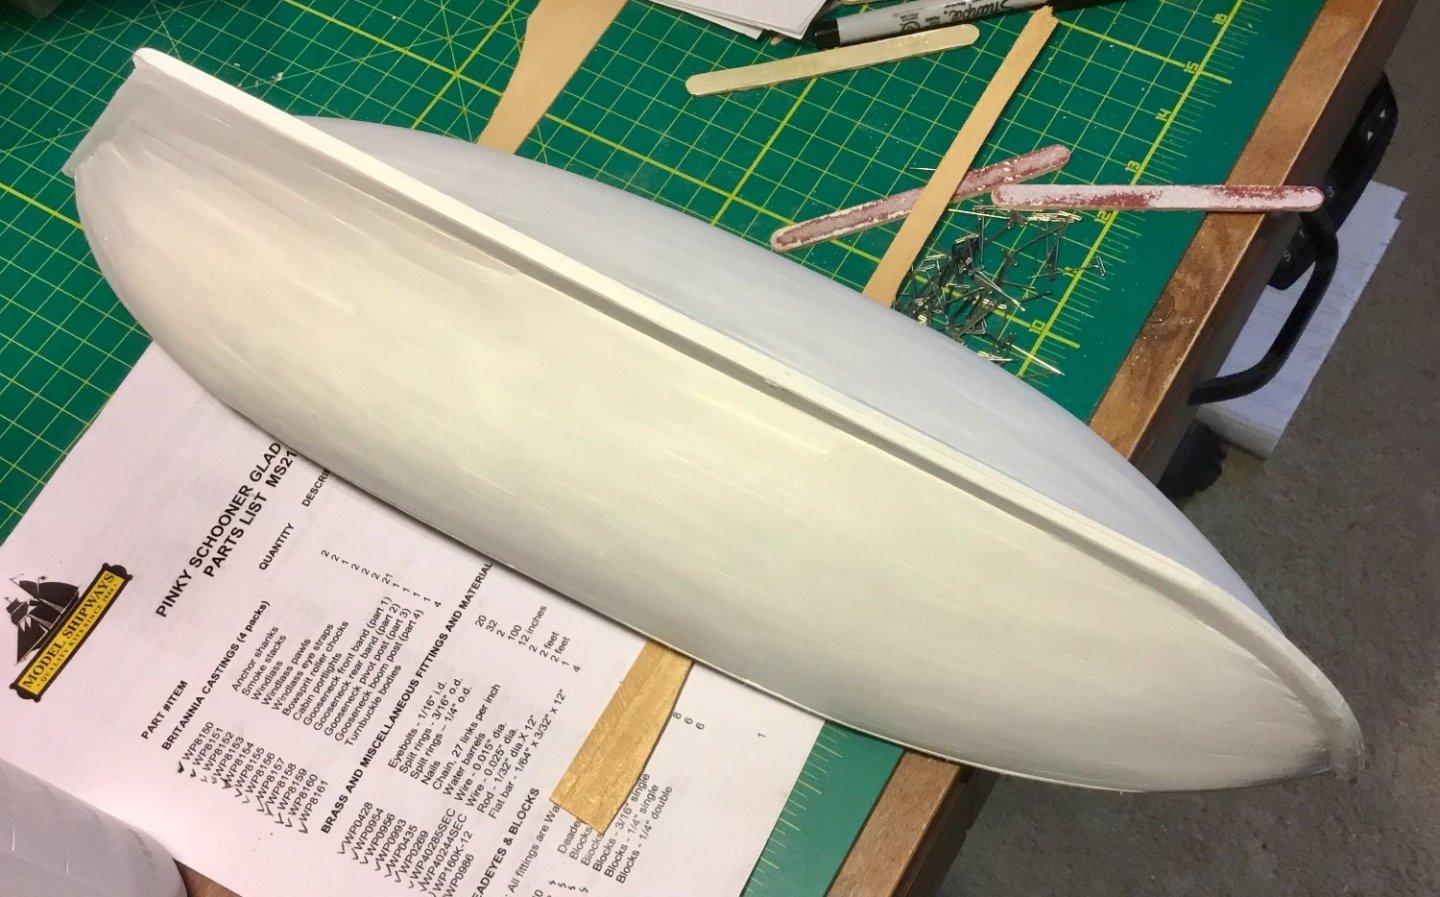
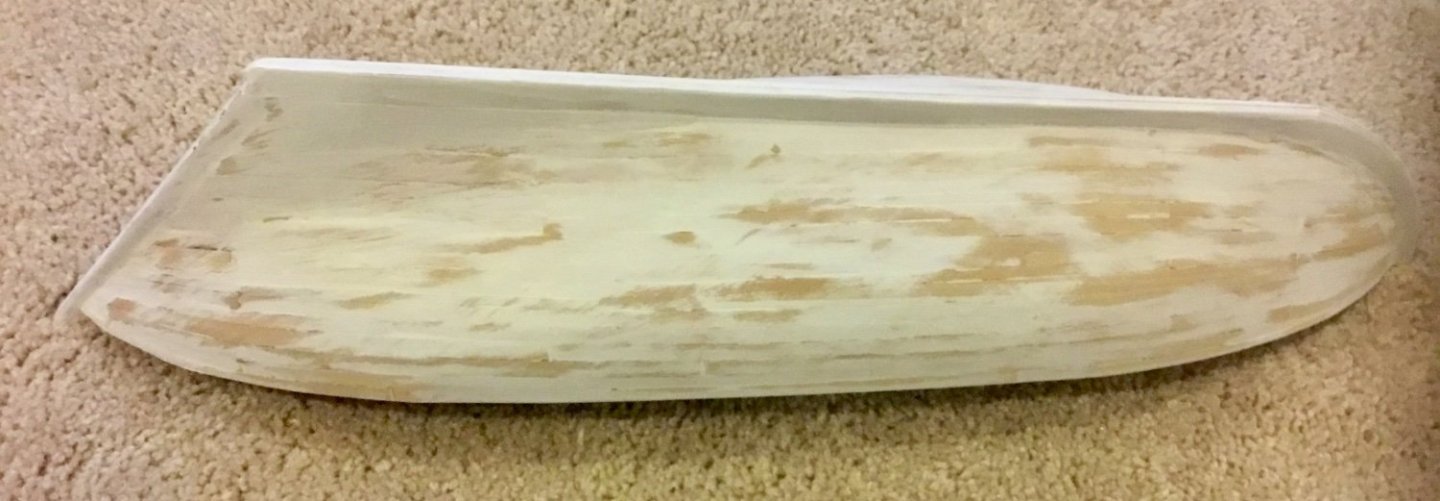
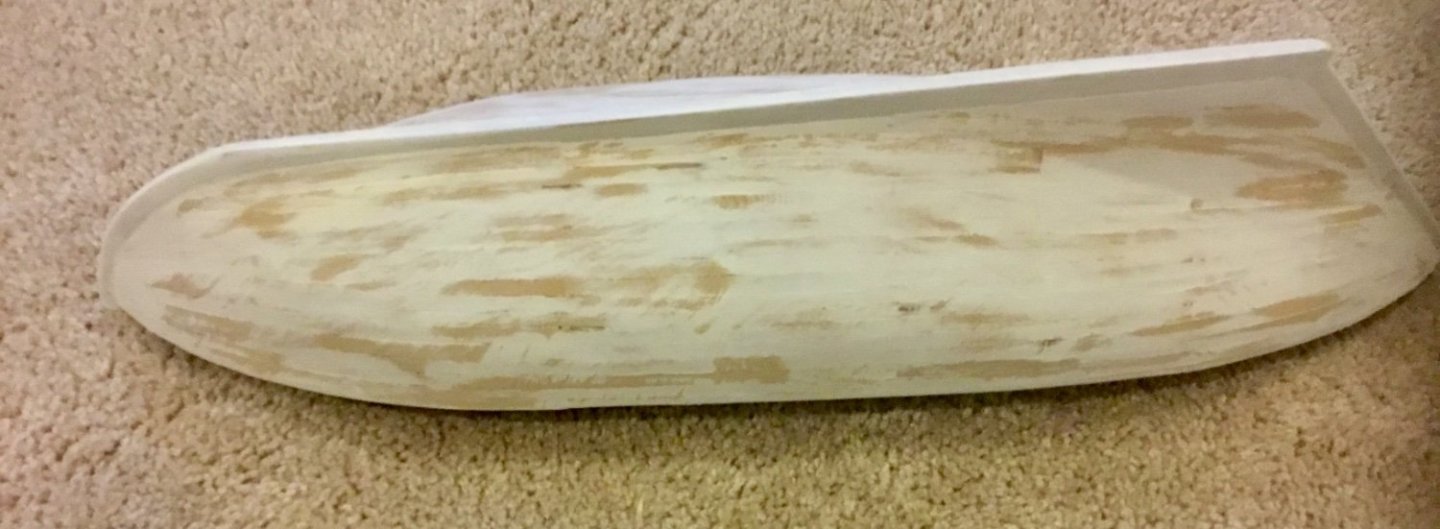
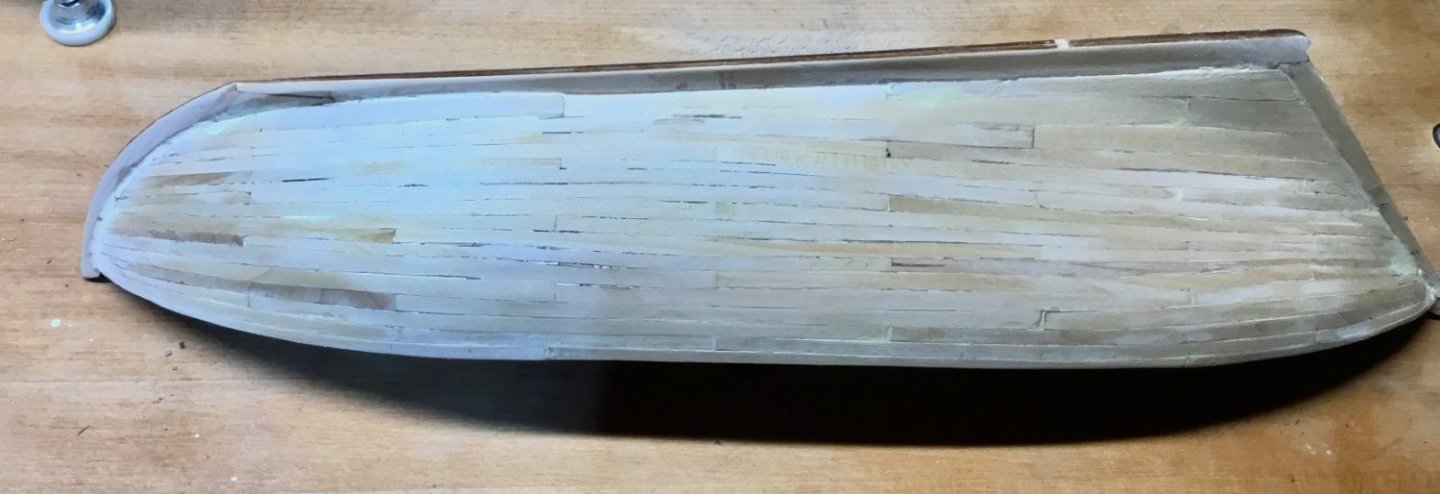
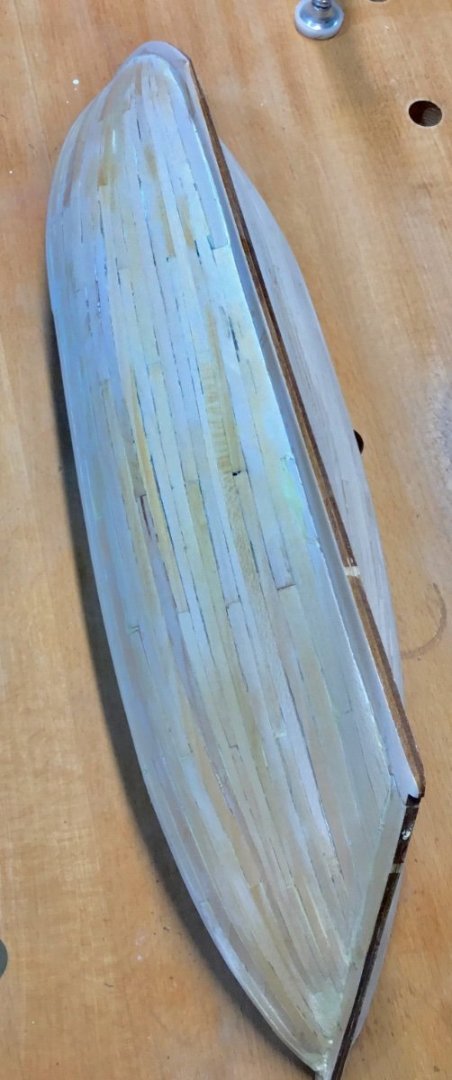
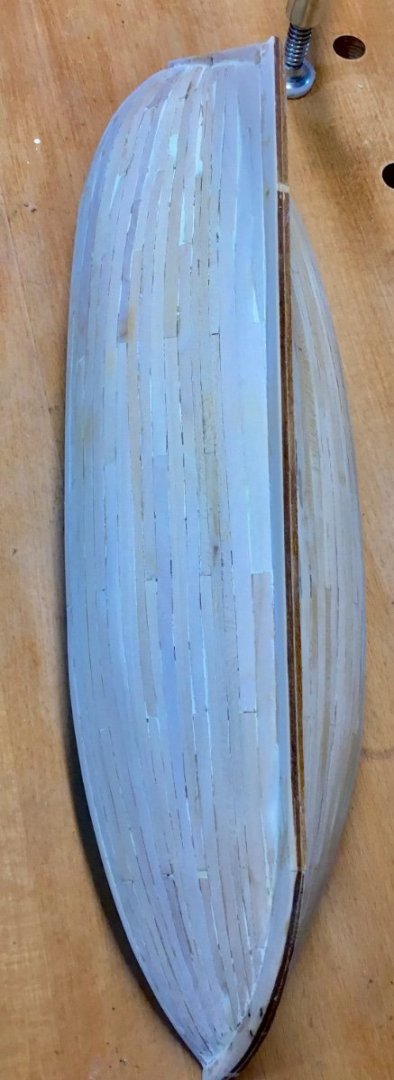
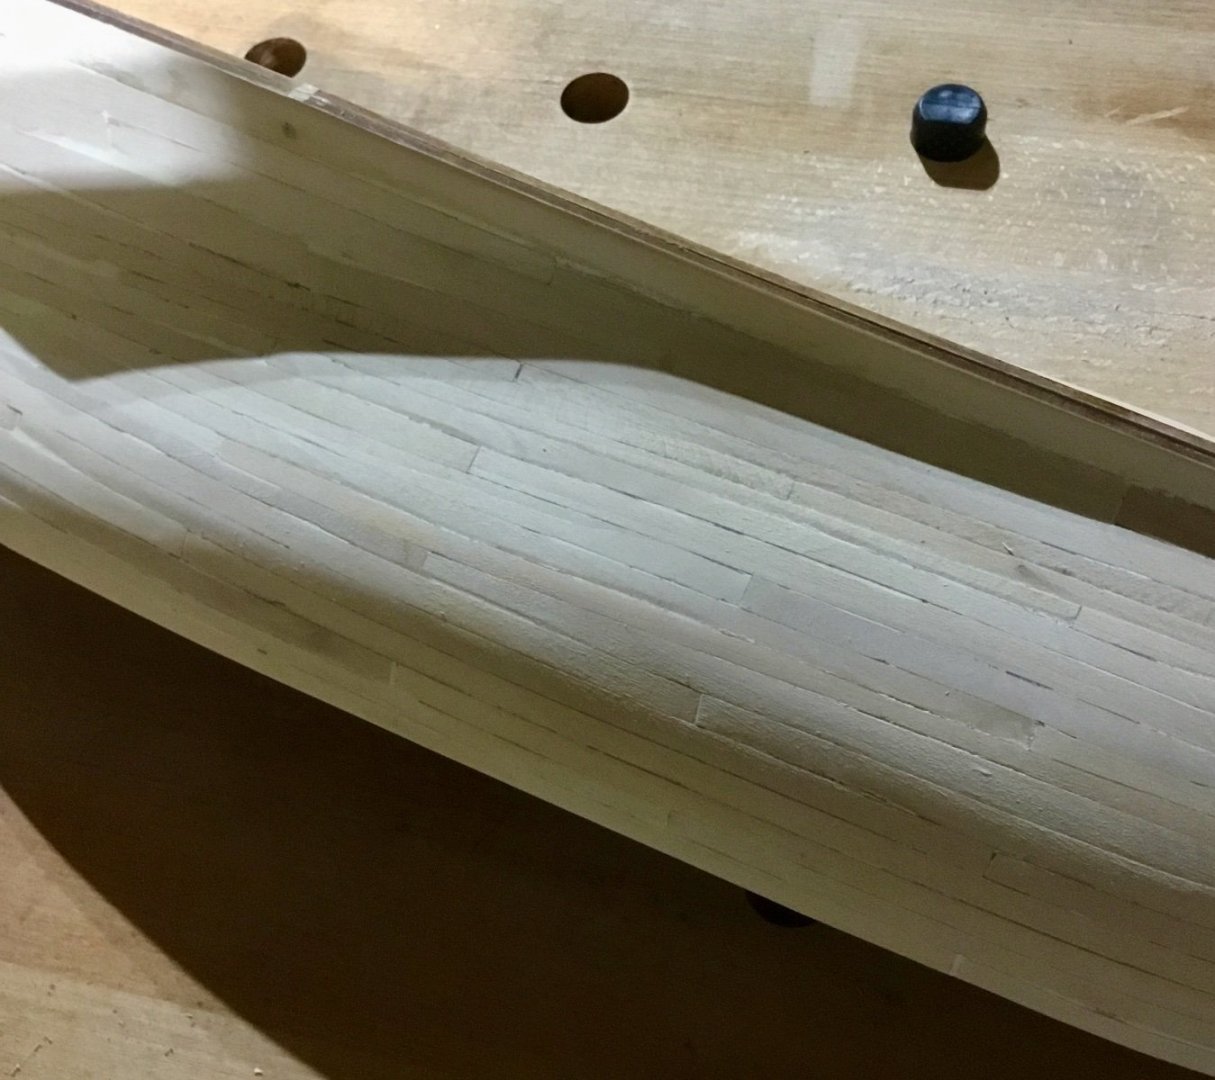
Completed final "A" belt of hull planking and filled and sanded where needed down to 600 grit. Satisfied with the result. Not perfect, but it's going to be painted anyway. I have noticed that some of the prior builds on the forum for this kit did not seem to follow the instructions for the size of the planking, but used wider and longer planks. I'm sure they are more experienced than I am and realized that if the hull was going to be painted there was no need to go to that level of detail. I did, however, gain a lot of experience in spiling during the process. It would have been great if the kit had come with pre laser cut out planks as shown on the plans. I also did some further assembly of the aft cabin. The hatch mechanism is operational. I think for the front cabin I will paint the basic structure first and then paint and install the port lights afterward which should give a better looking result as my hands were a little shaky trying to paint the port light frames after installation.


- 37 replies
-
- 8
-
-
- Glad Tidings
- Model Shipways
- (and 1 more)
-
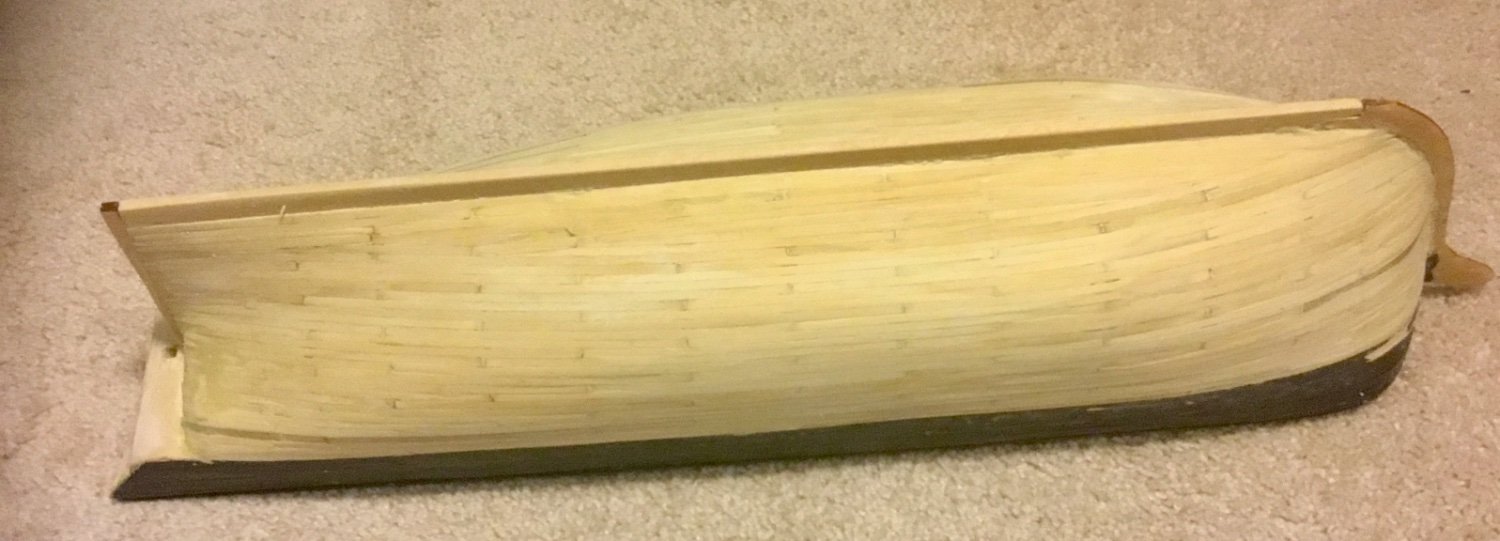
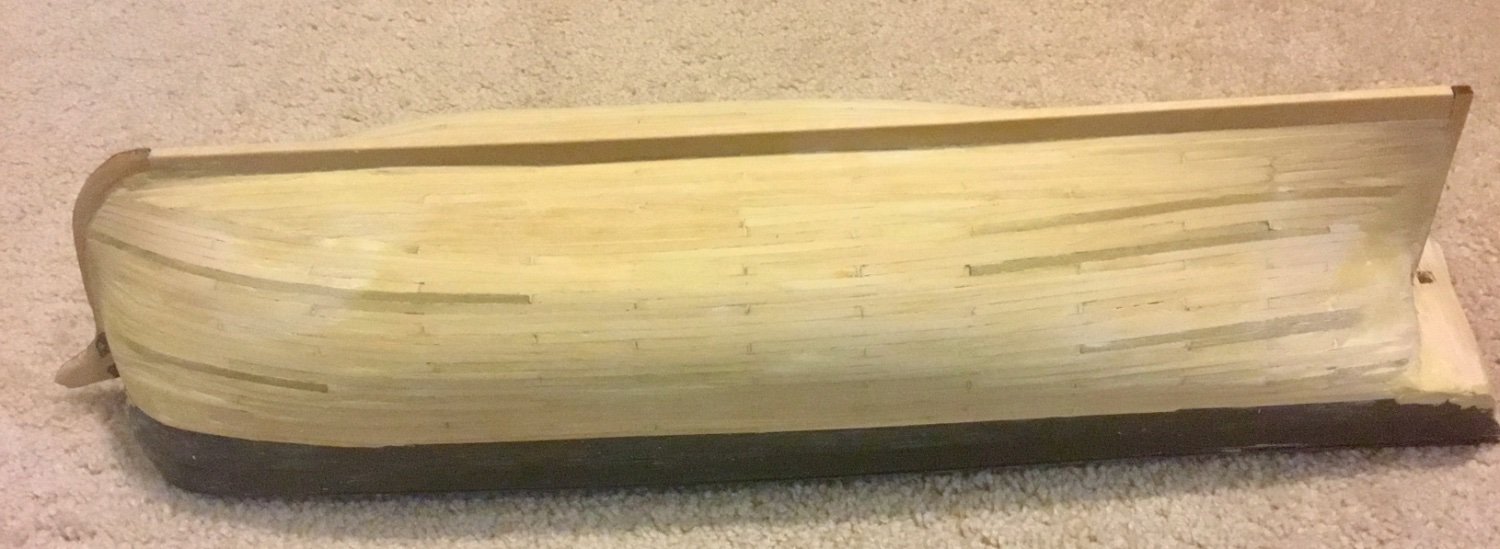
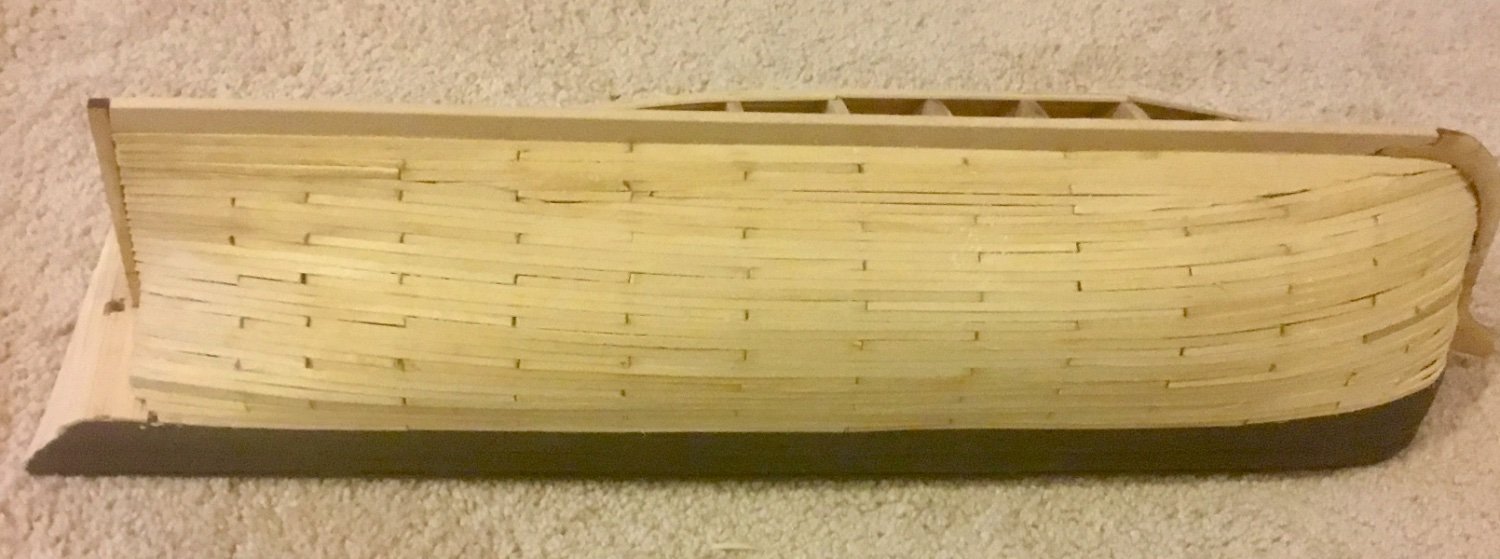
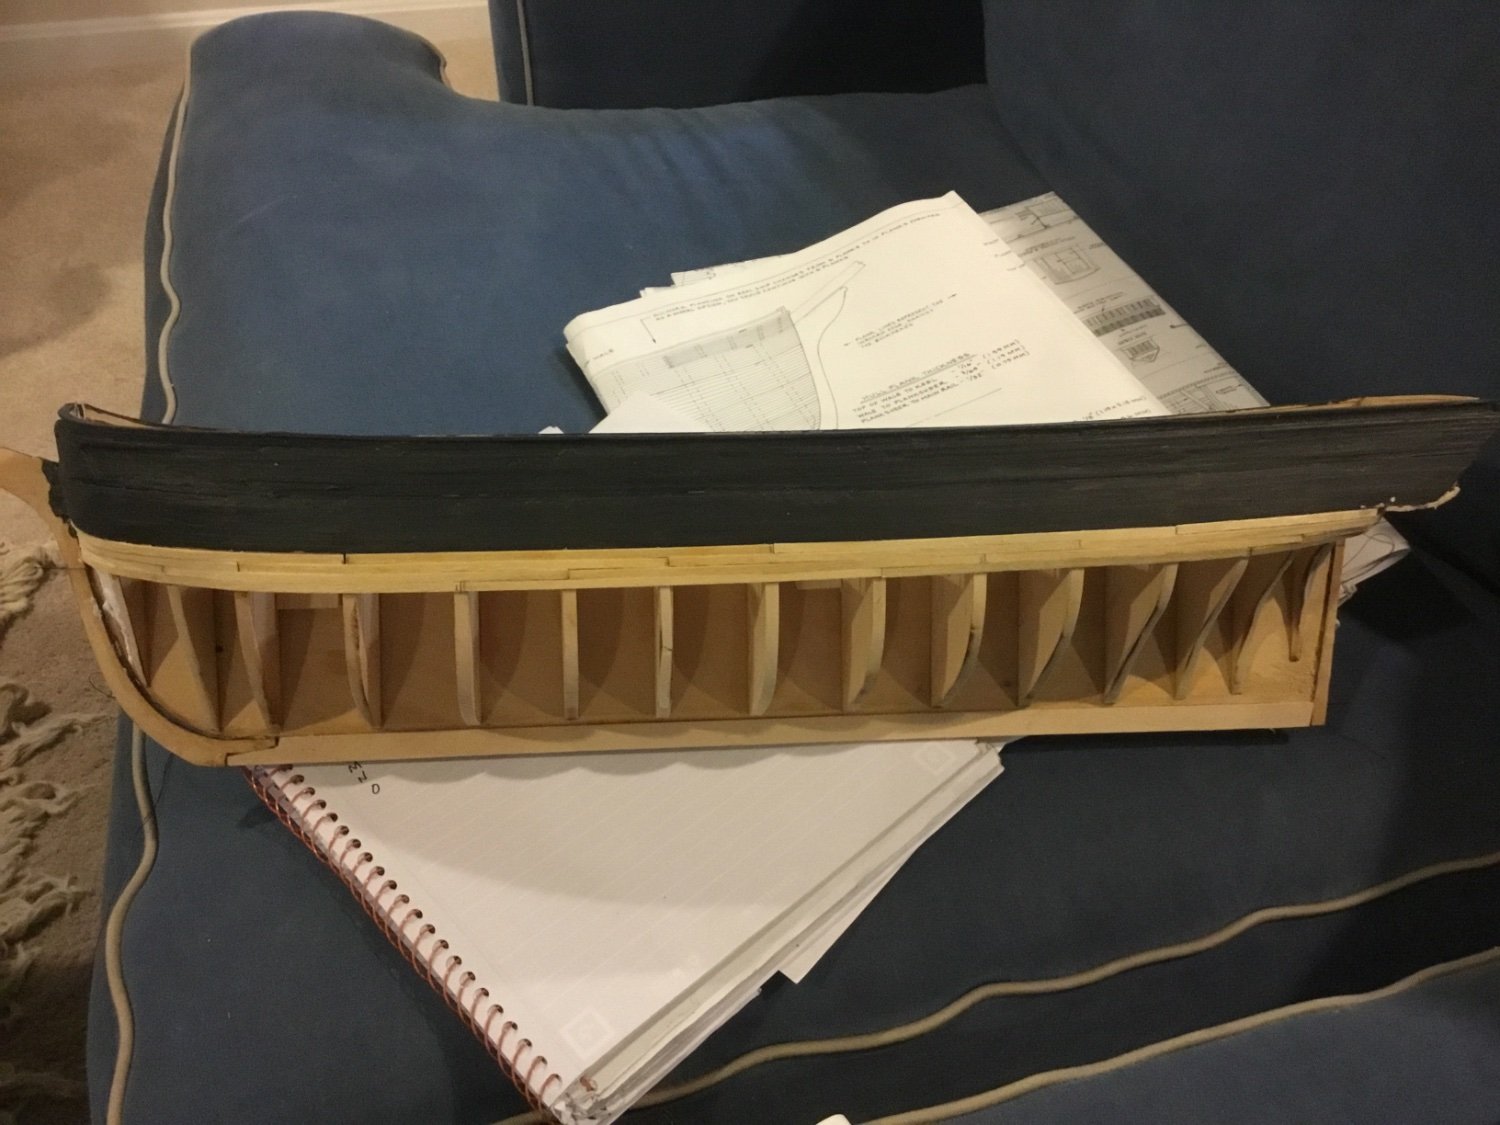
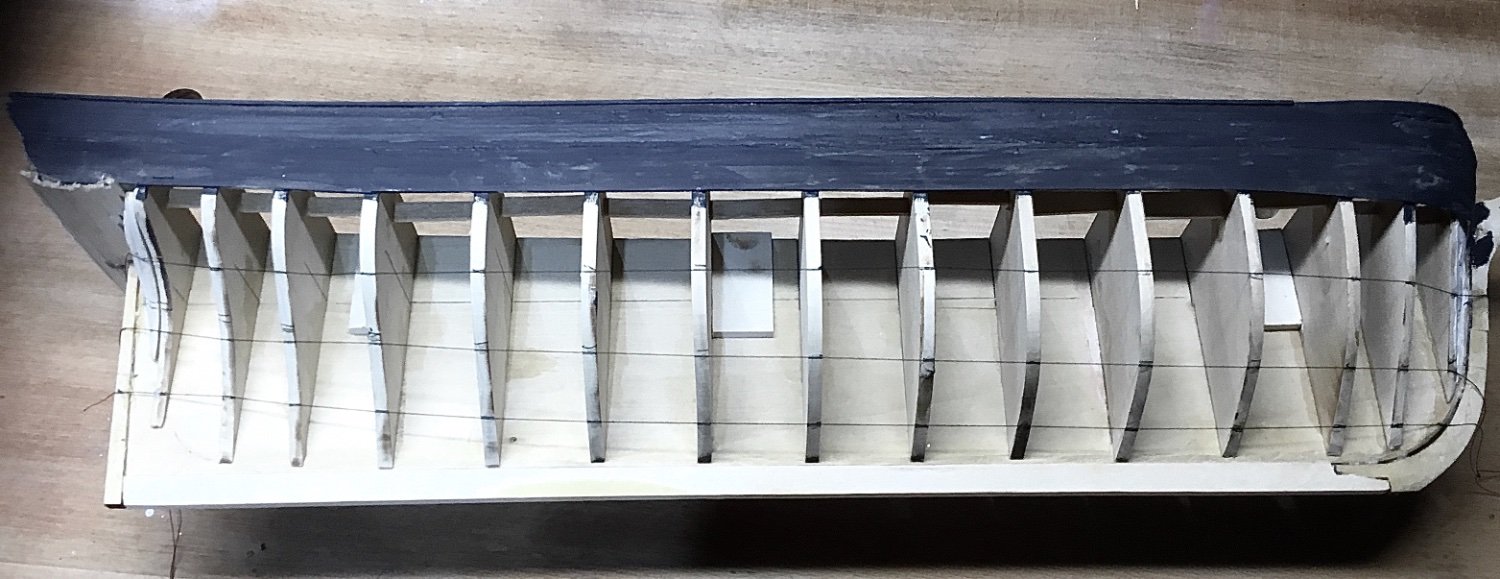
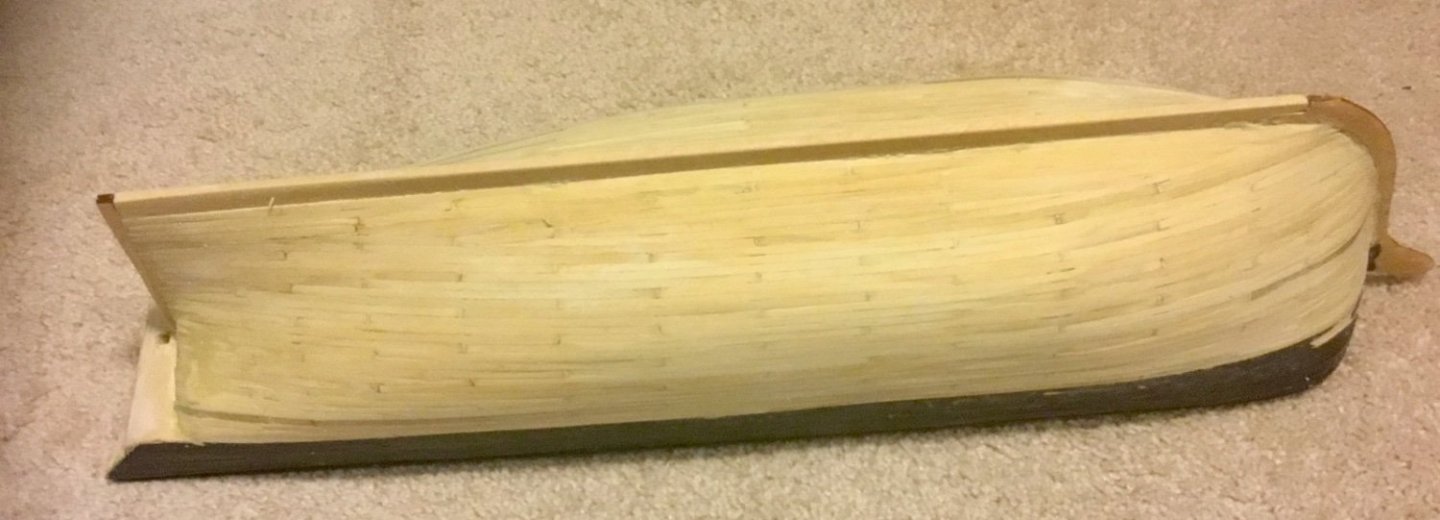
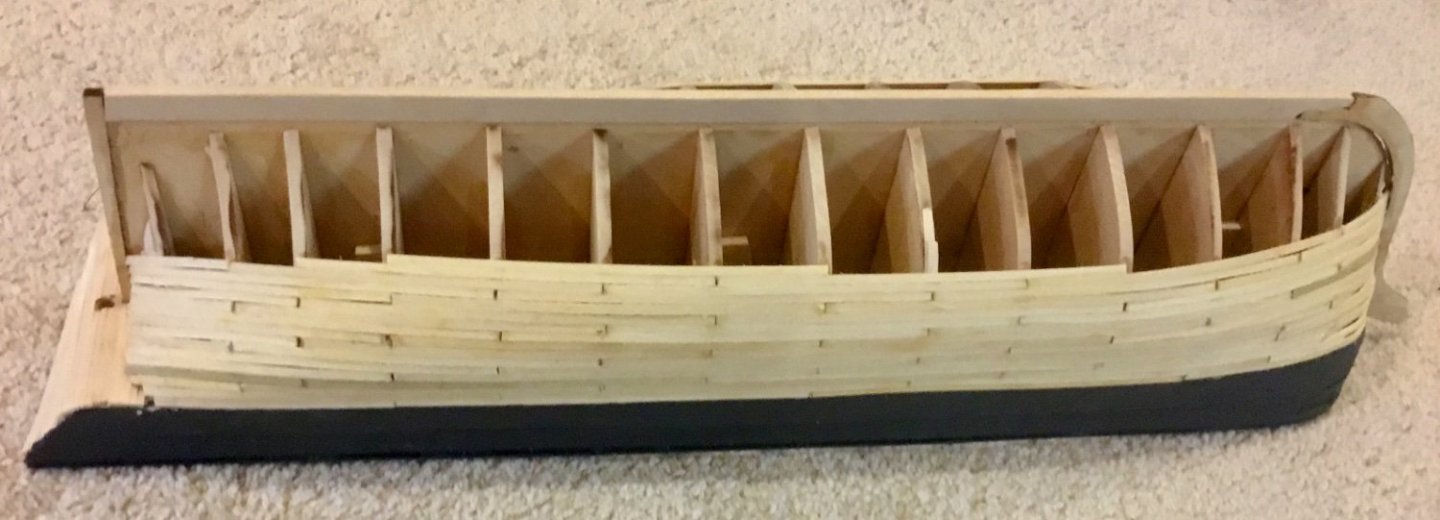
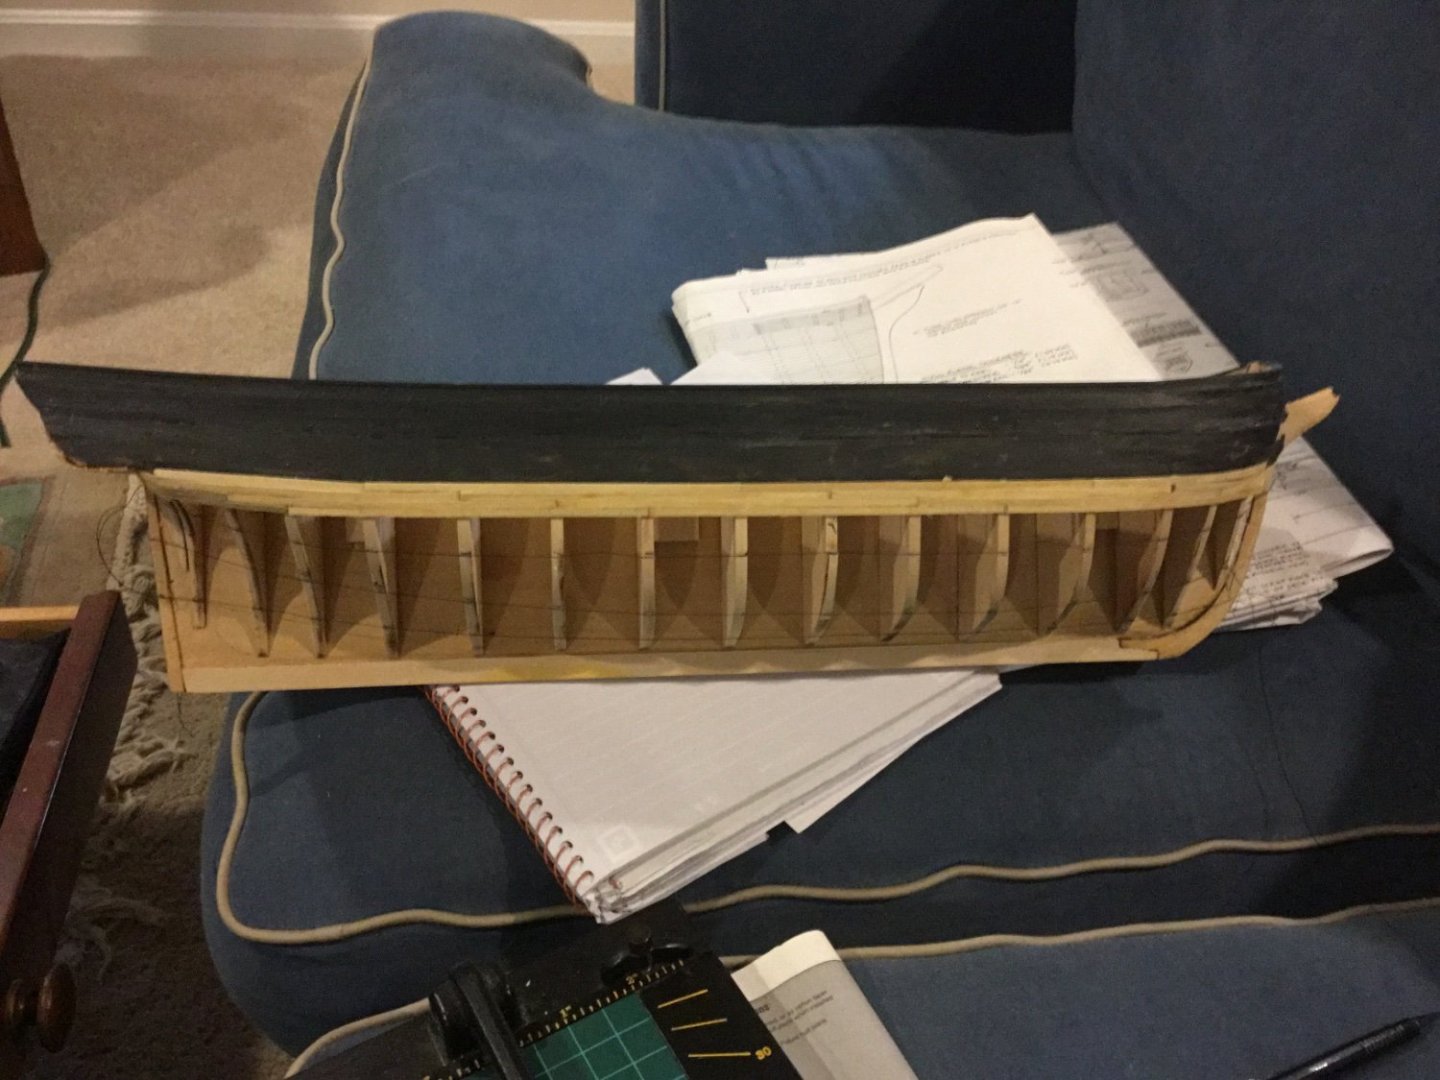
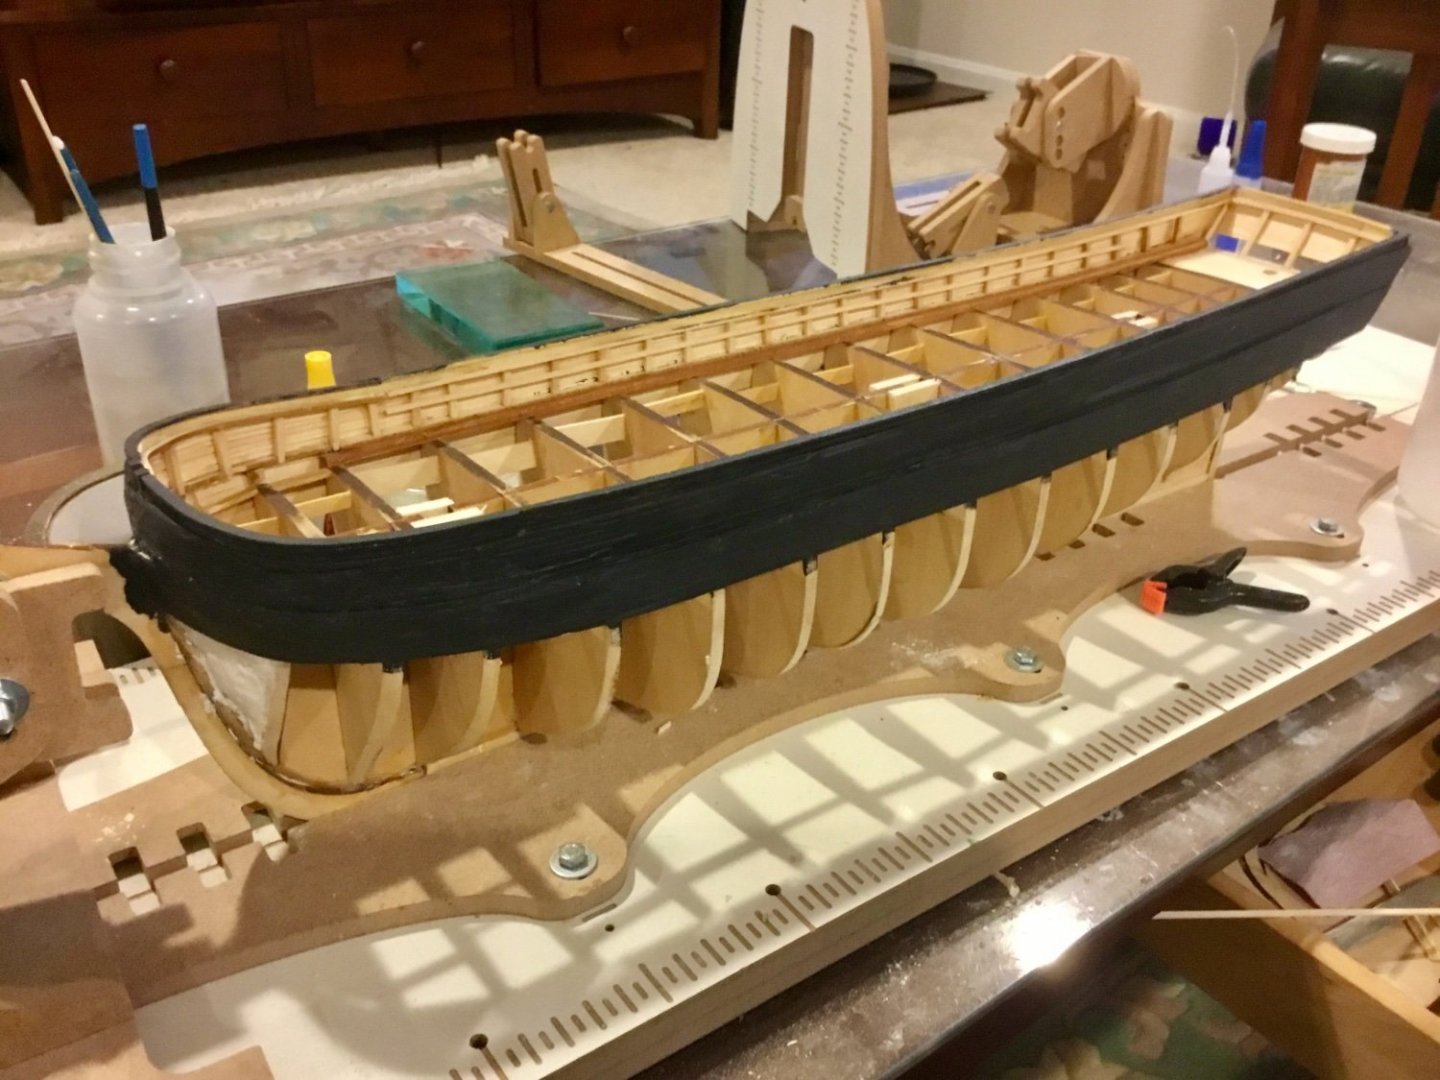
Planking finished down to the level of the wales, sanded and given a coat of black paint. Lined off hull into four belts to begin the remainder of the hull planking.

-
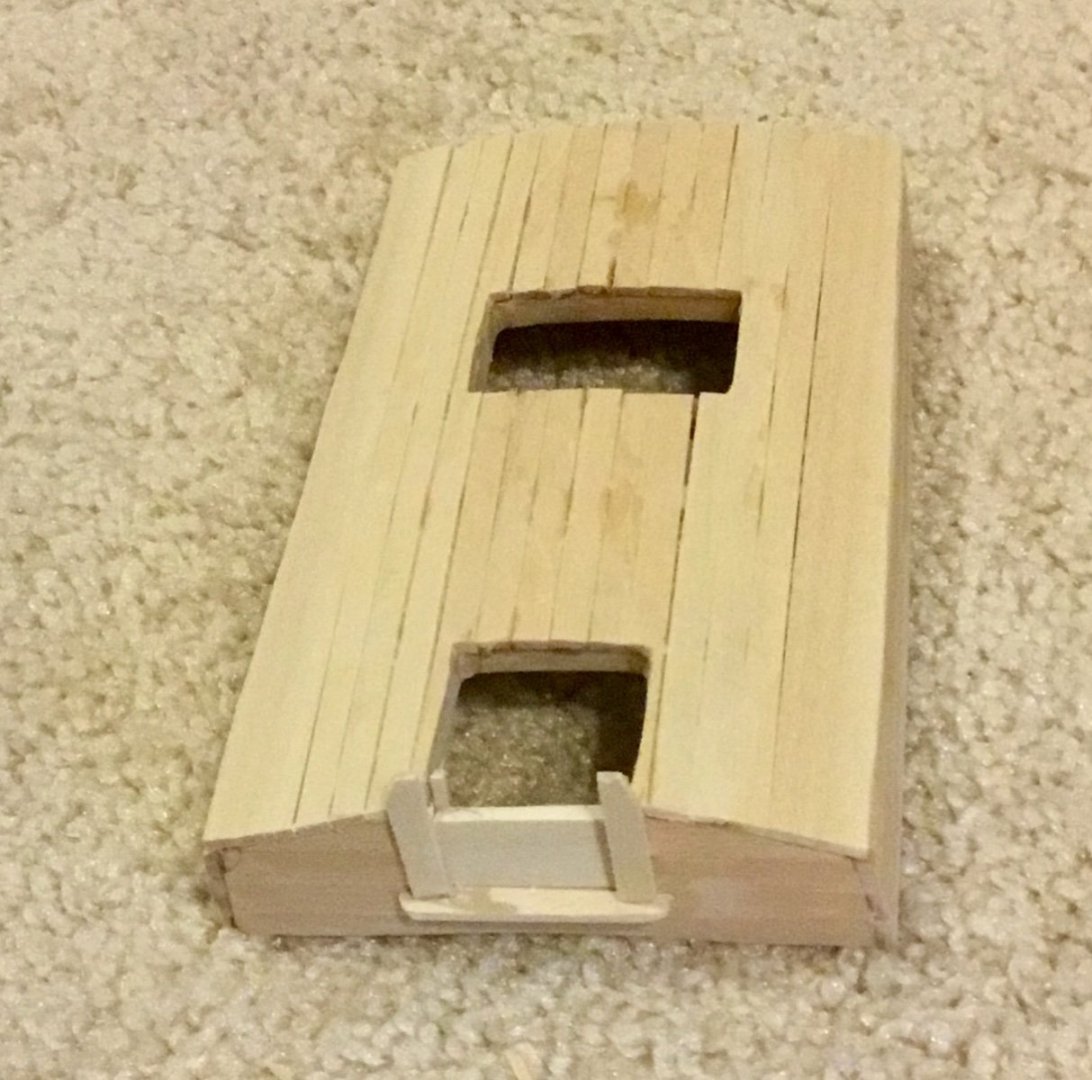
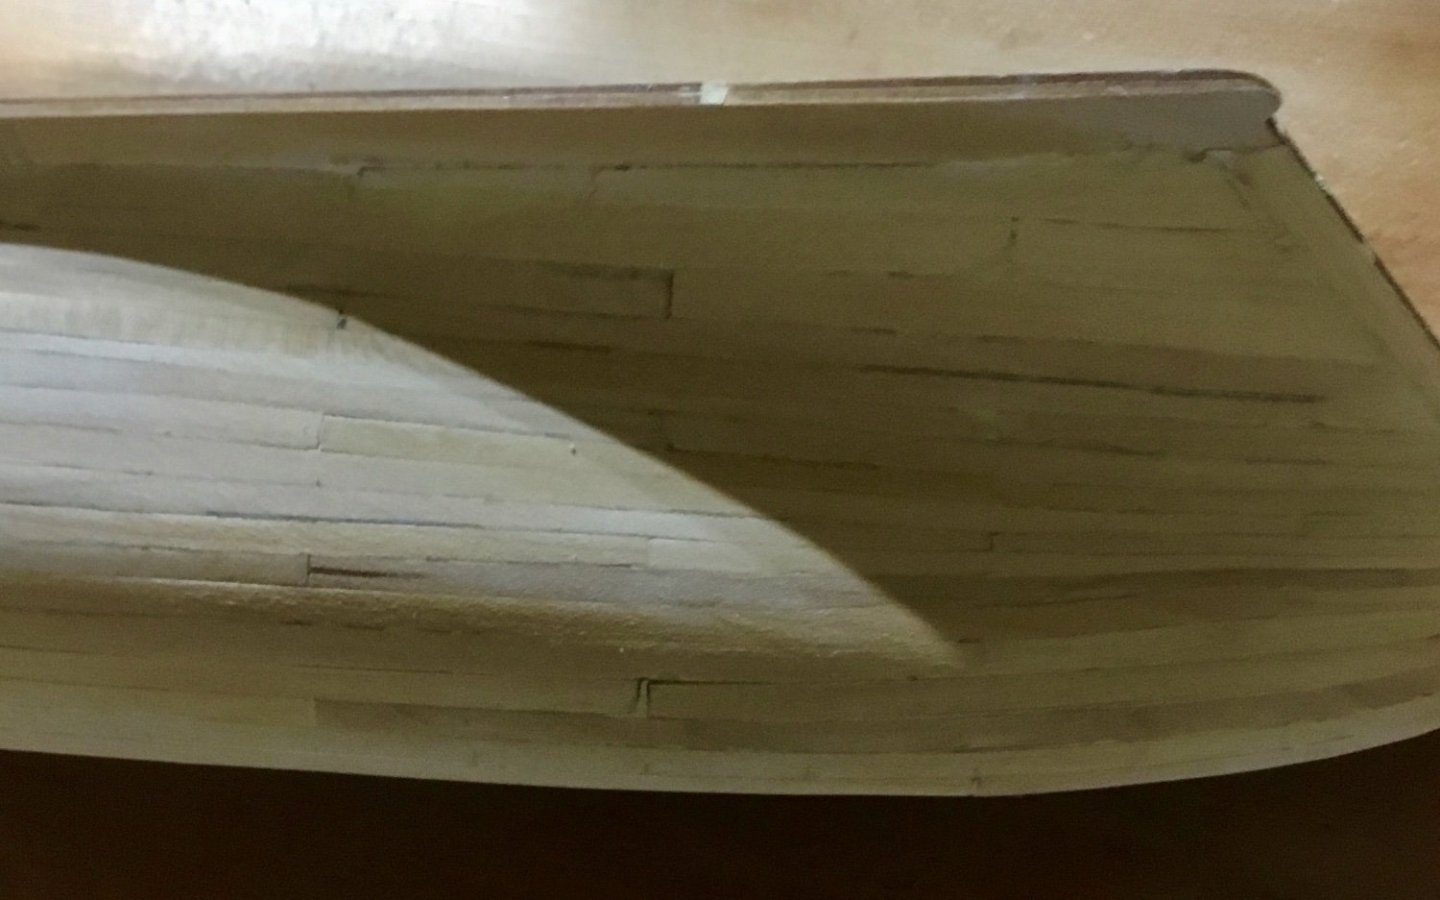
Completed the middle "B" belt of planking. Spiling is going OK with only a few minor gaps between planks. Not satisfied with how my strakes end at stem and stern. I think I have a few strakes that ended too thin at the ends. But with some filling and after painting will probably look fine. While waiting on individual planks to dry I continued work on the aft cabin. Used a small 1mm screwdriver as a chisel to create the guide slots for the operable hatch cover, installed the port lights, and began painting of the cabin. Now onto the last "A" belt of planking.


- 37 replies
-
- 5
-
-
- Glad Tidings
- Model Shipways
- (and 1 more)
-
Completed planking and filling of the bulwarks and part of the transom. Painted the bulwarks. Still need to fill some areas that I reopened while sanding, etc. Began planking the sides above the wale. Using suggested plank lengths that cover four bulkheads at a time.
-
Painting the hull
Dsmith20639 replied to Steve47's topic in Building, Framing, Planking and plating a ships hull and deck
you might try applying a matte wood sealer prior to painting -
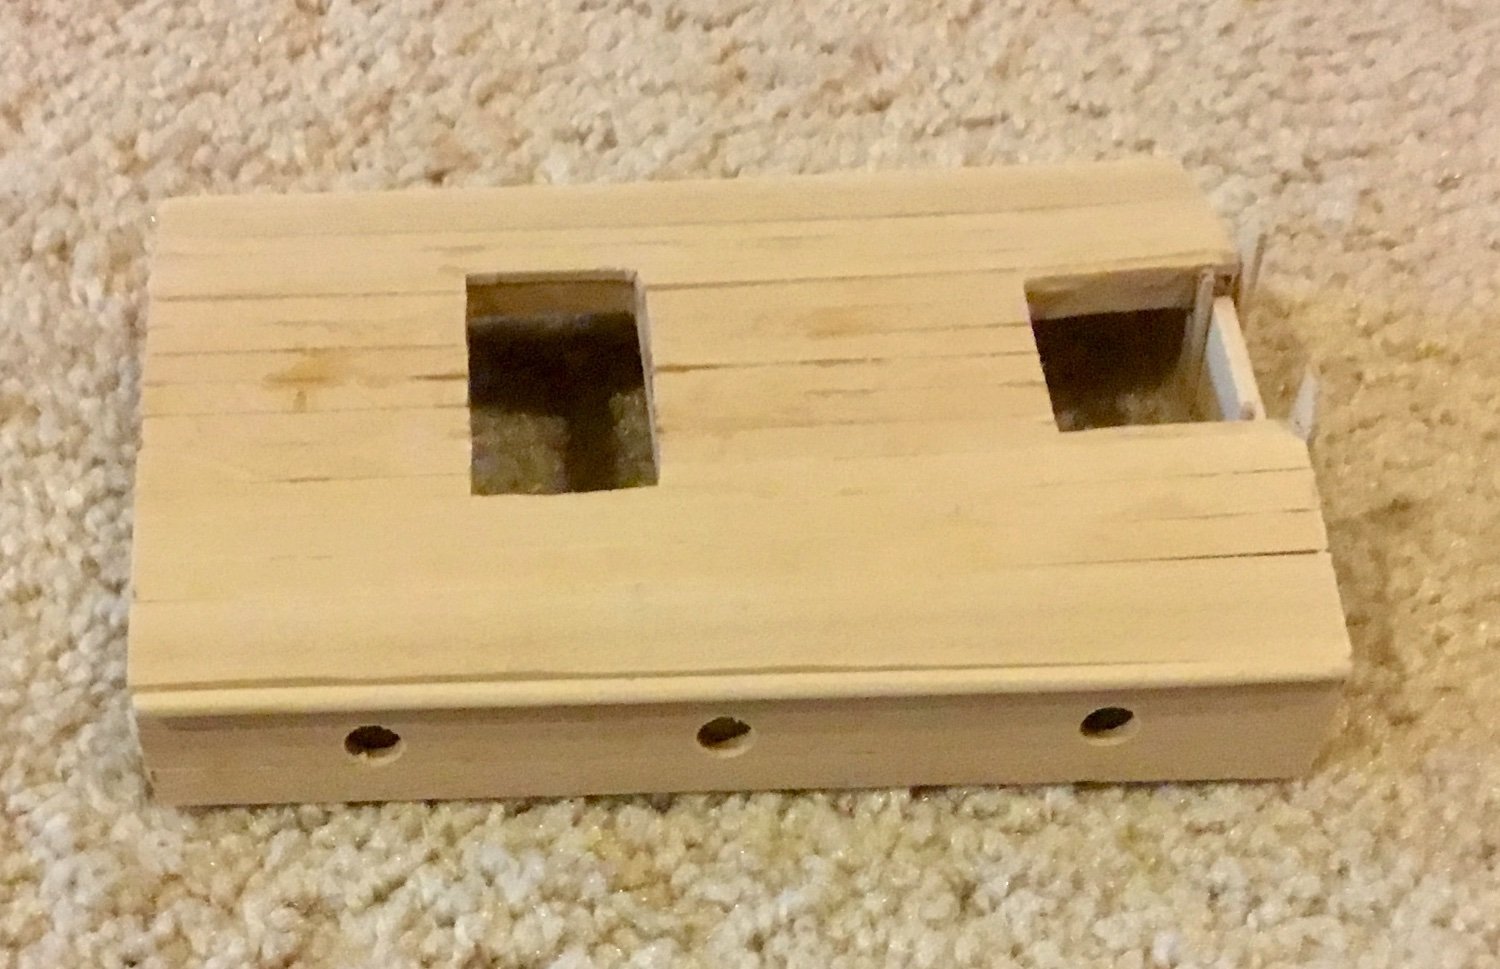
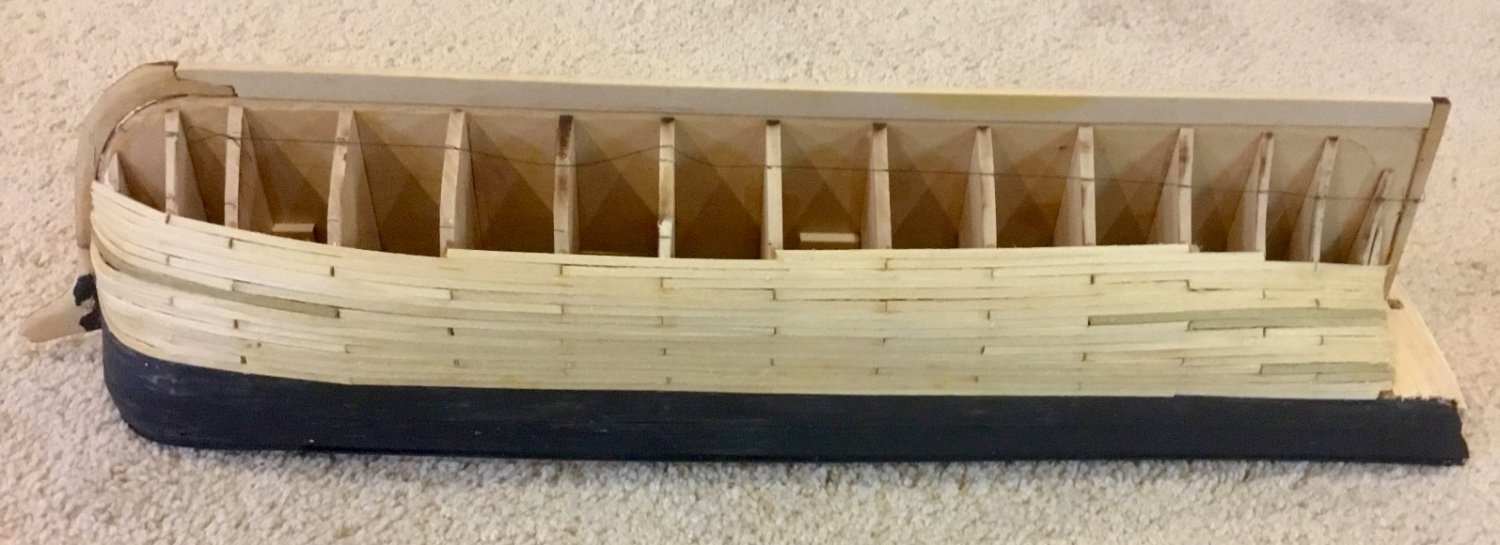
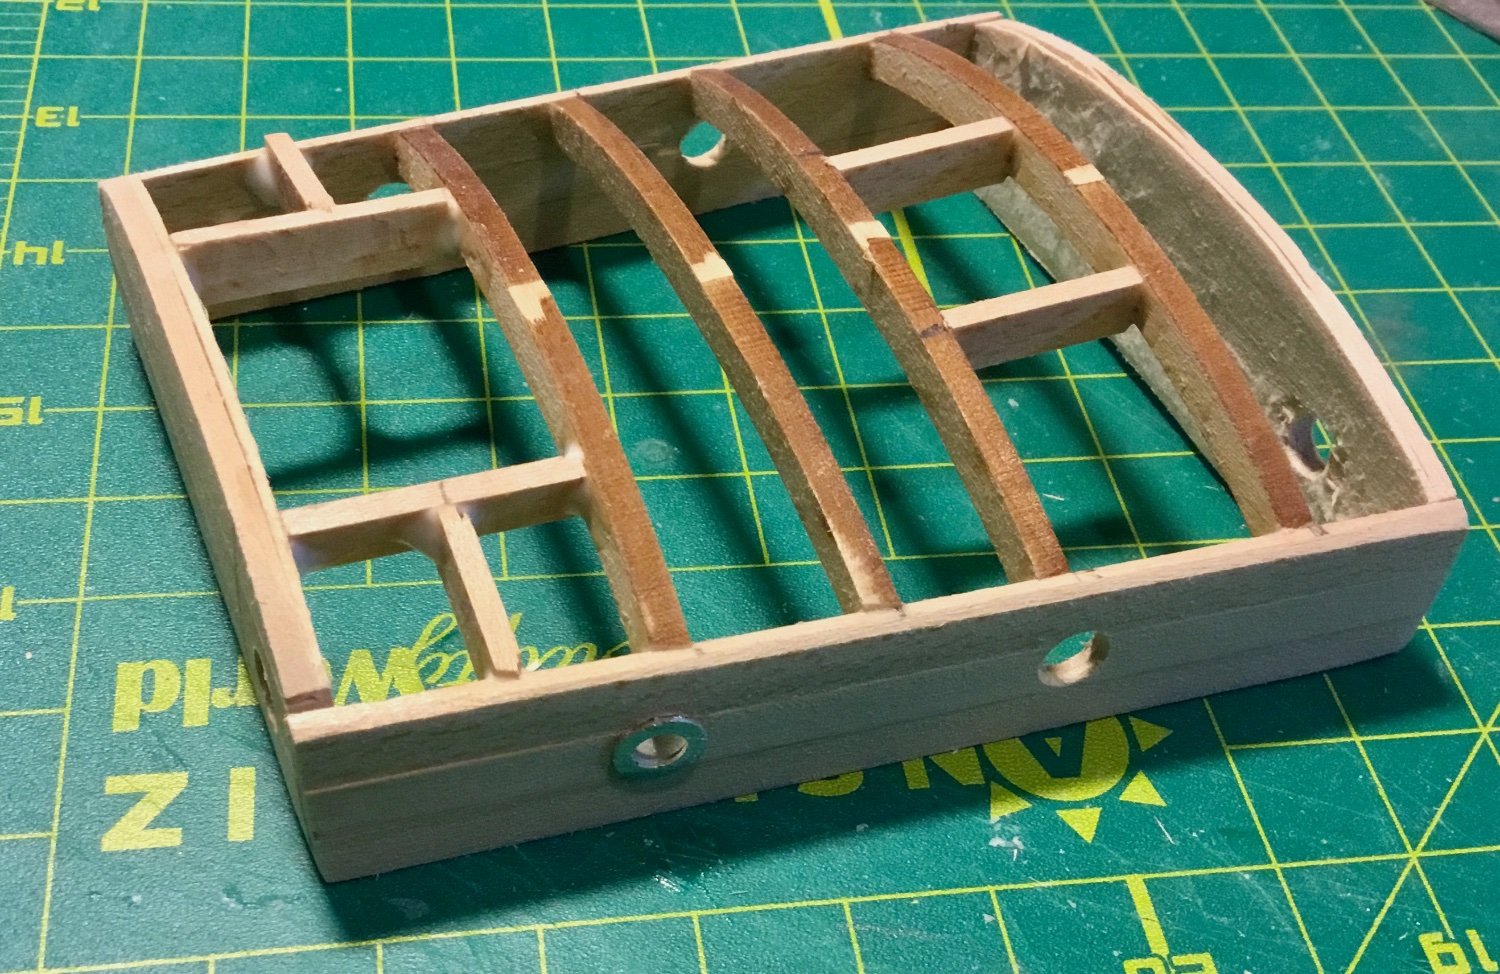
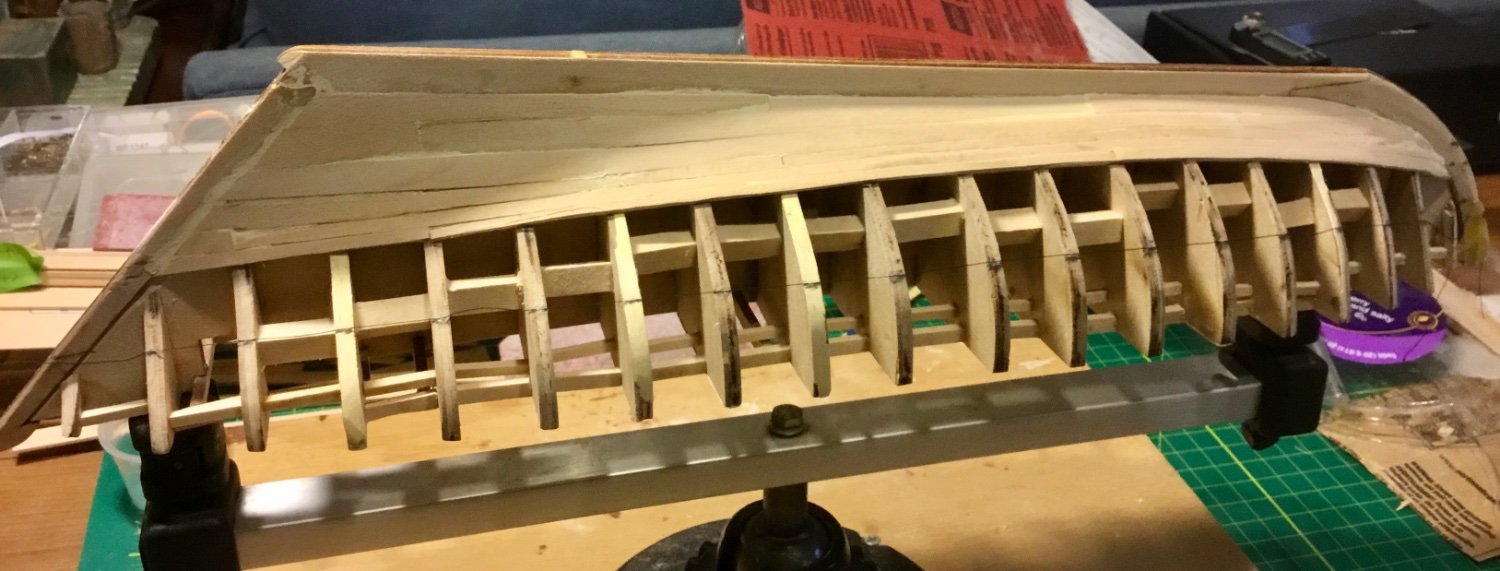
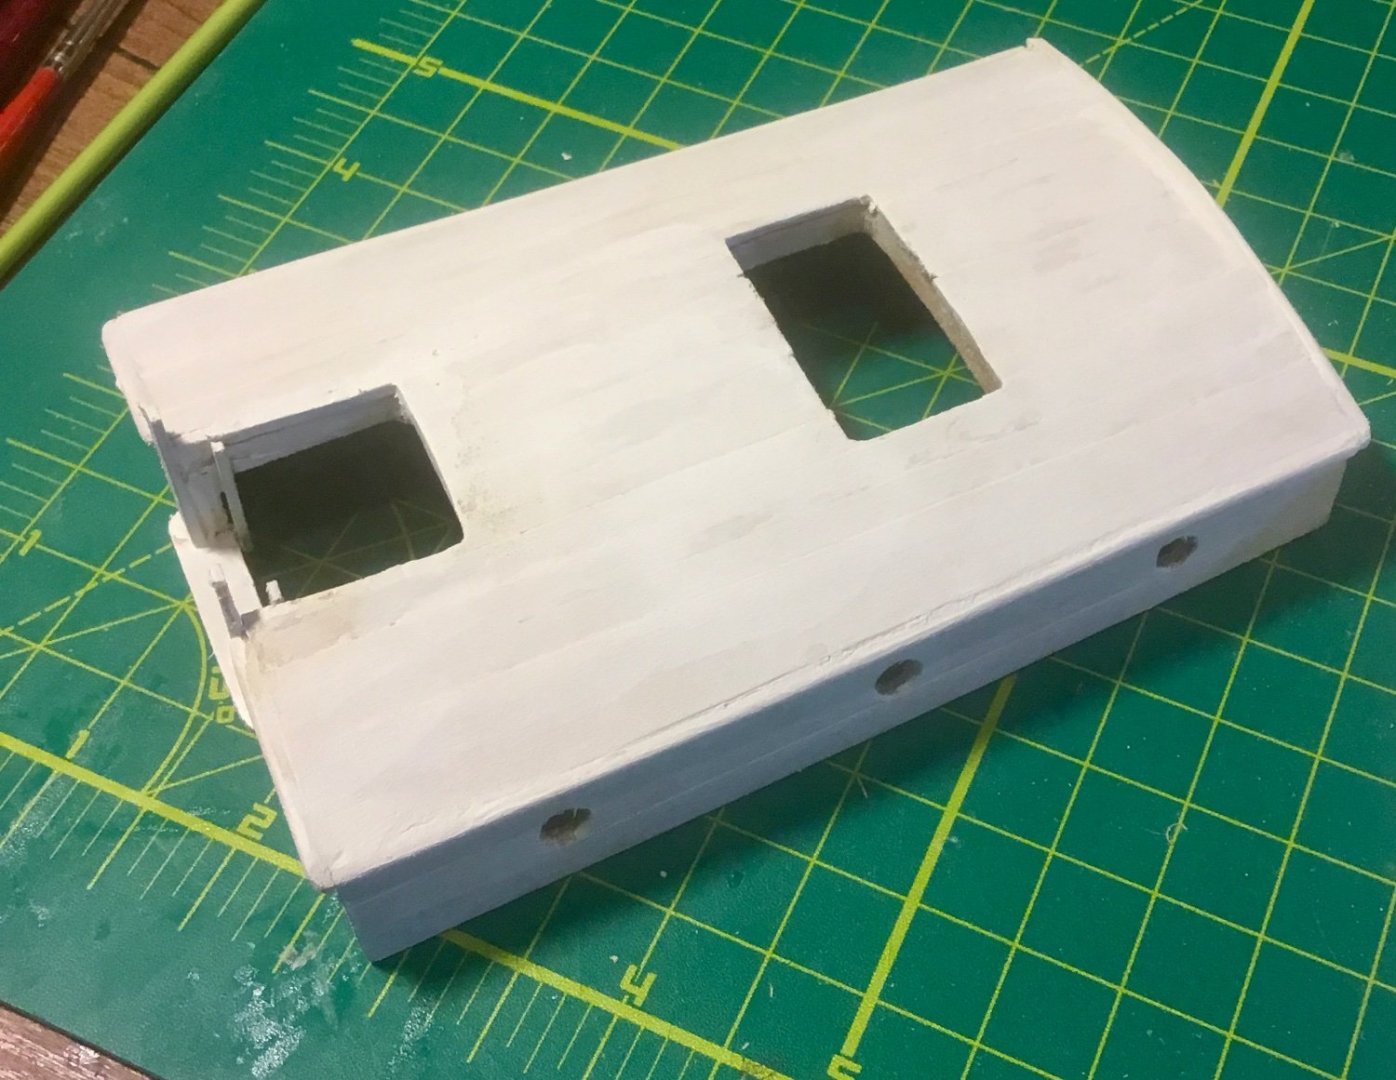
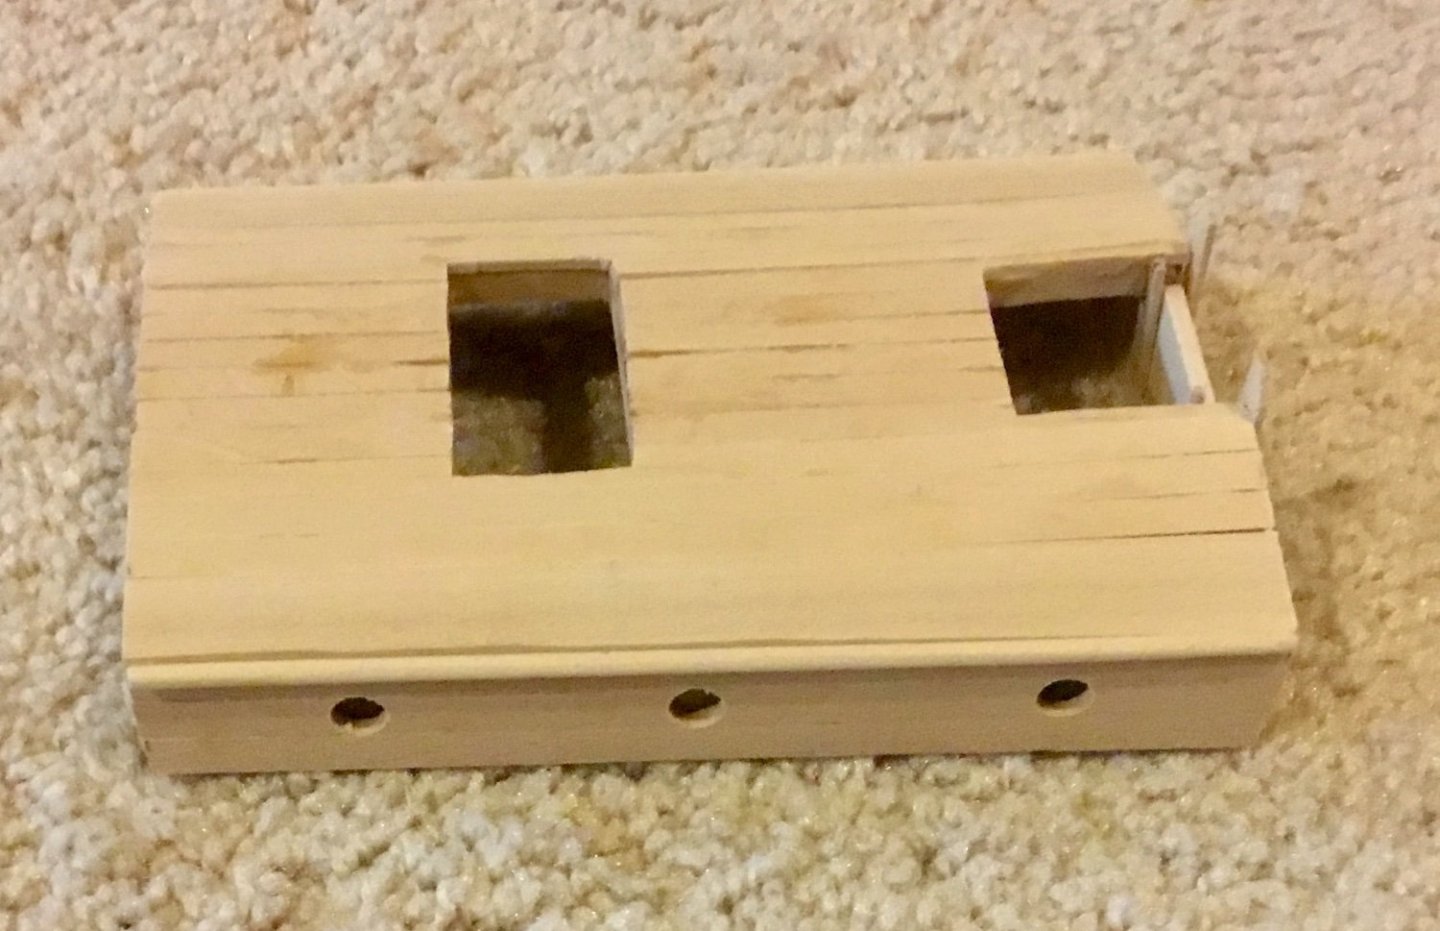
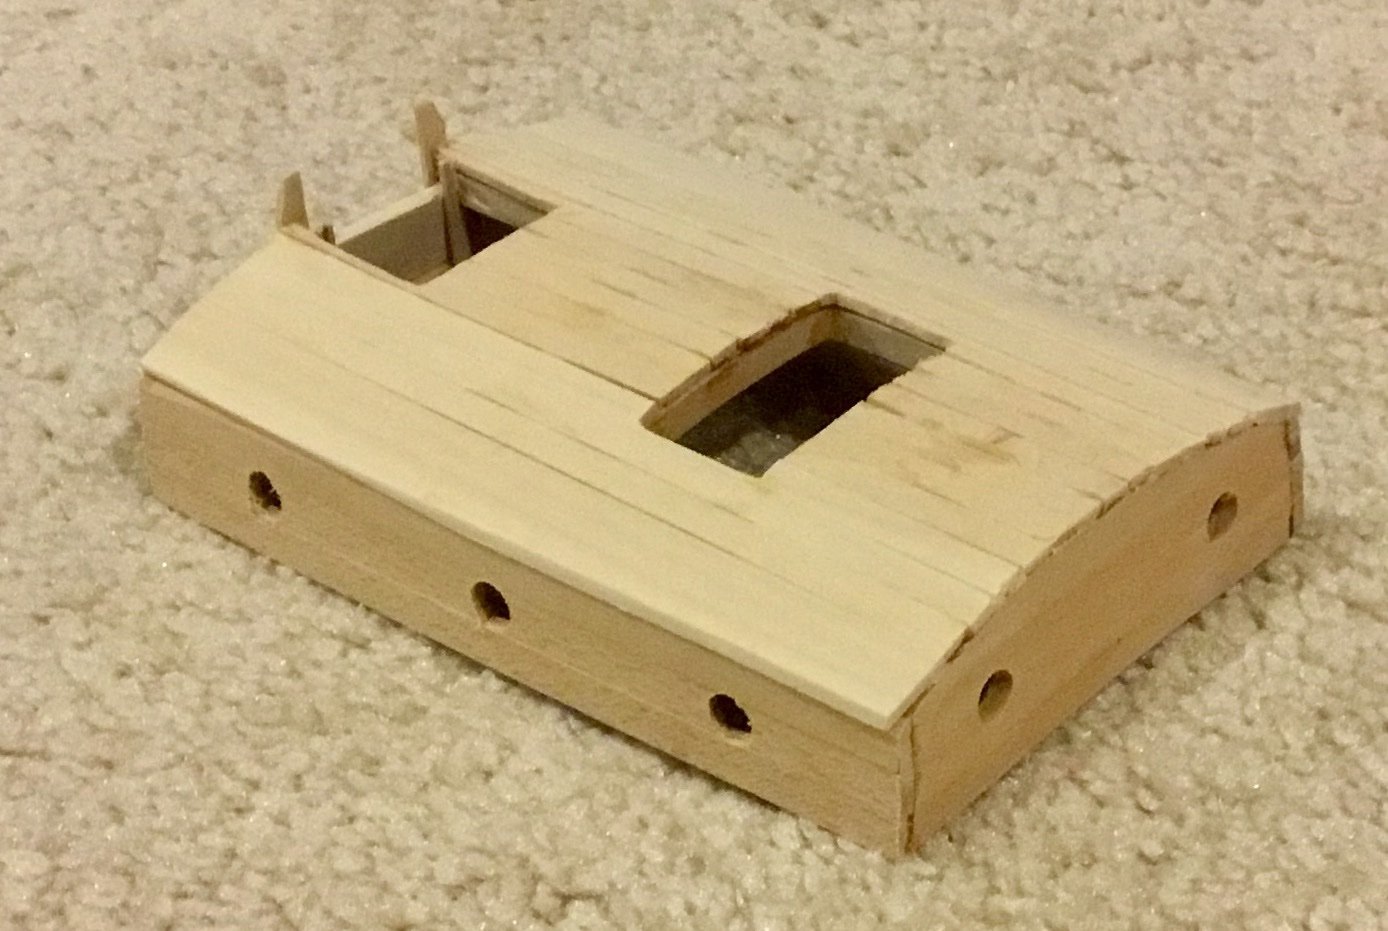
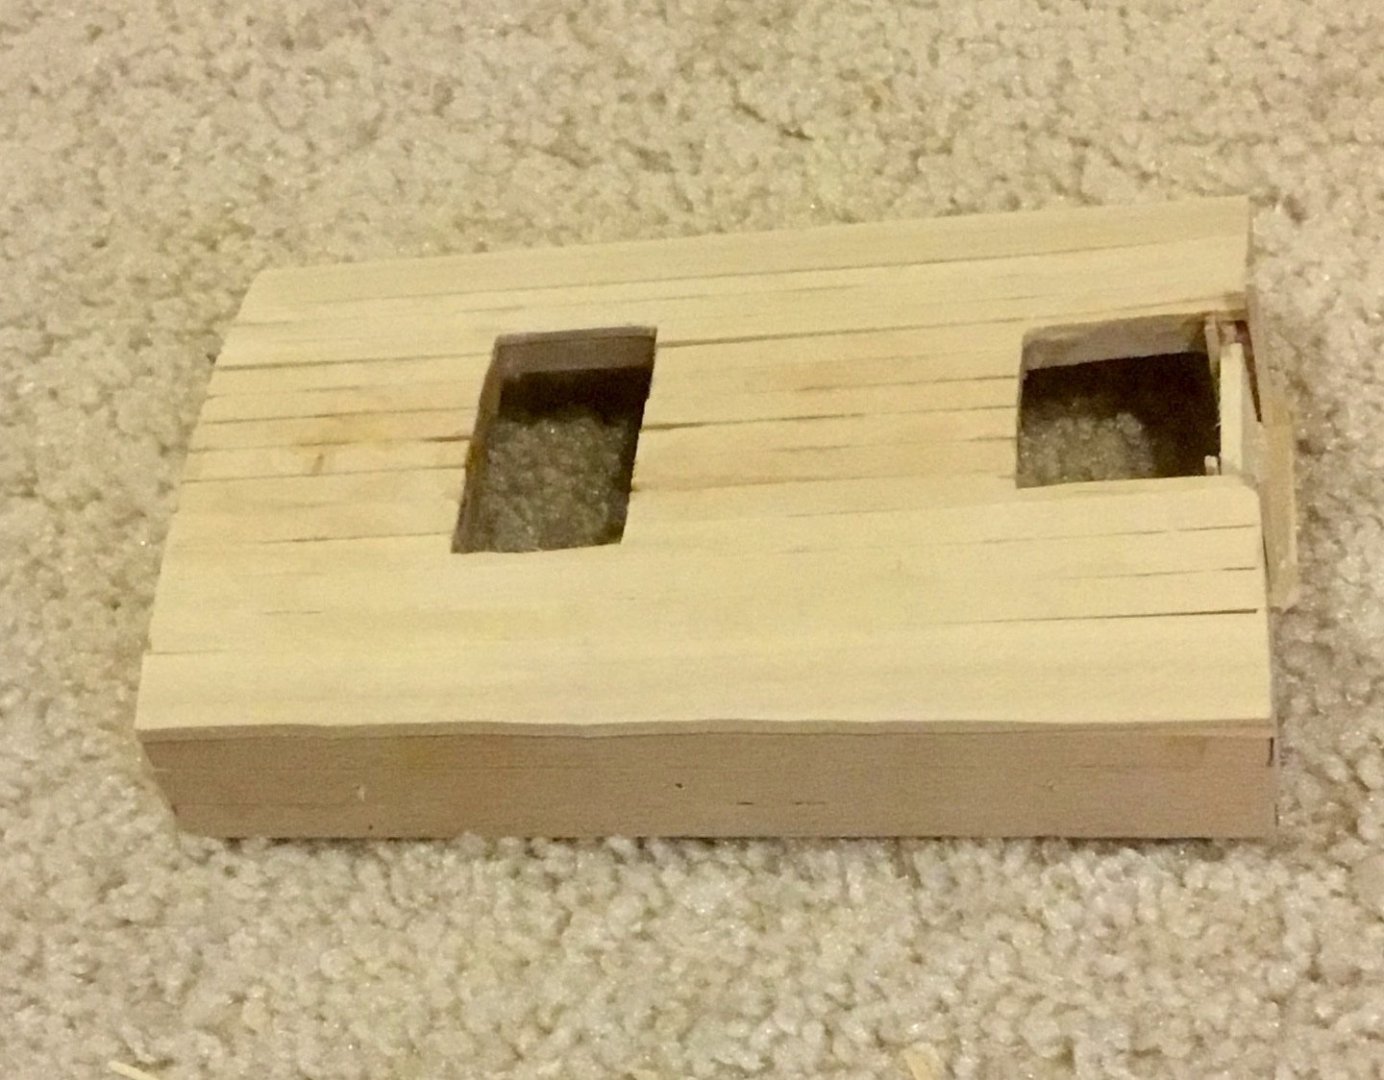
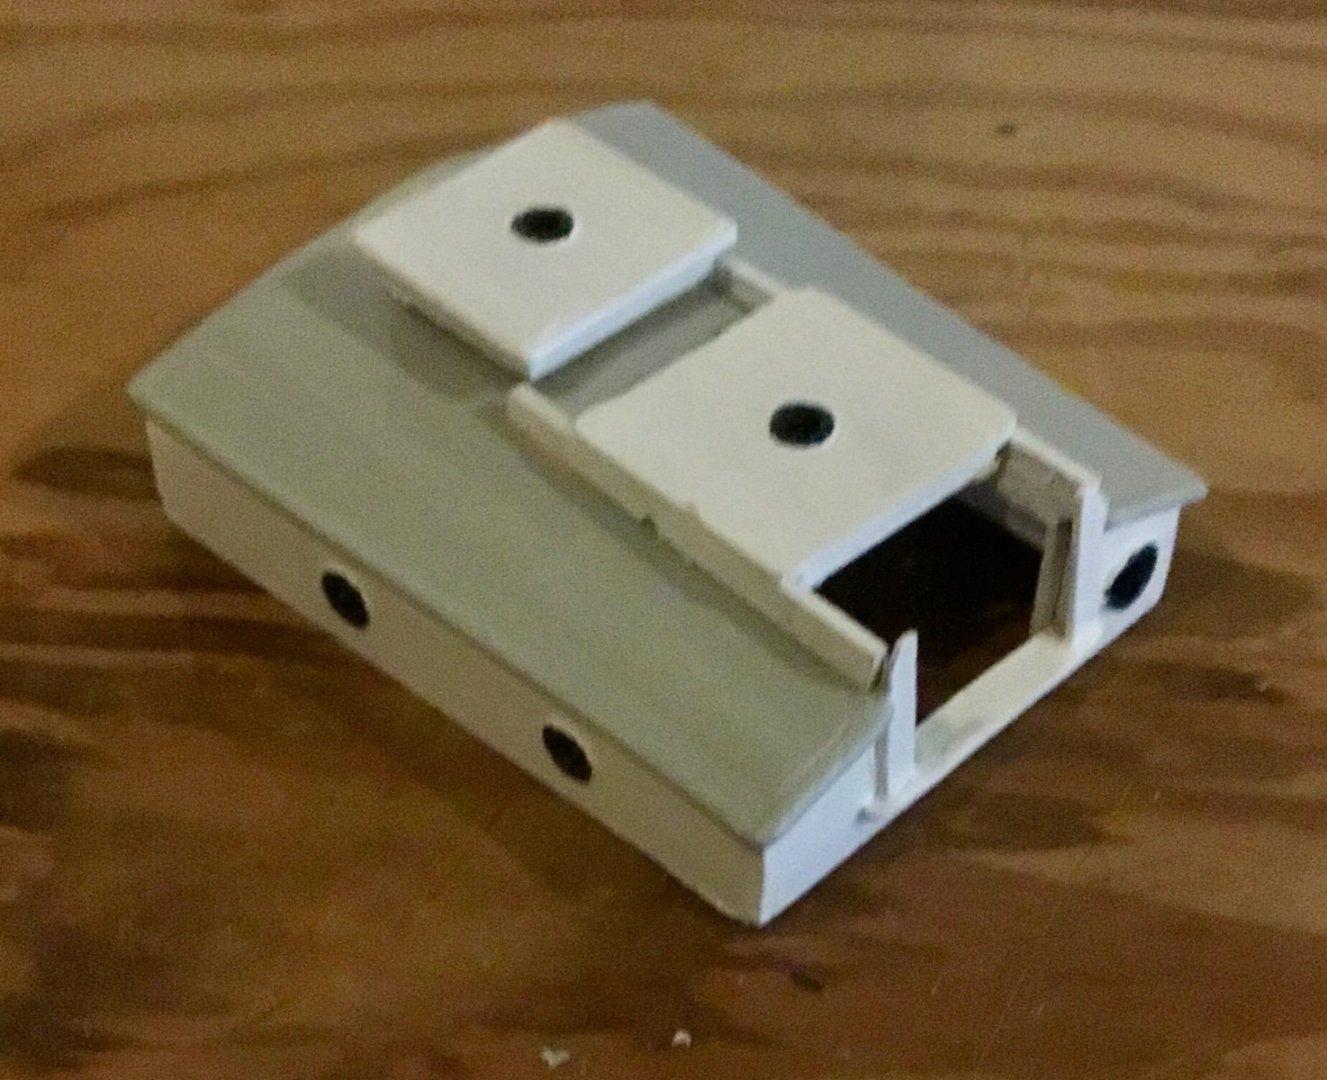
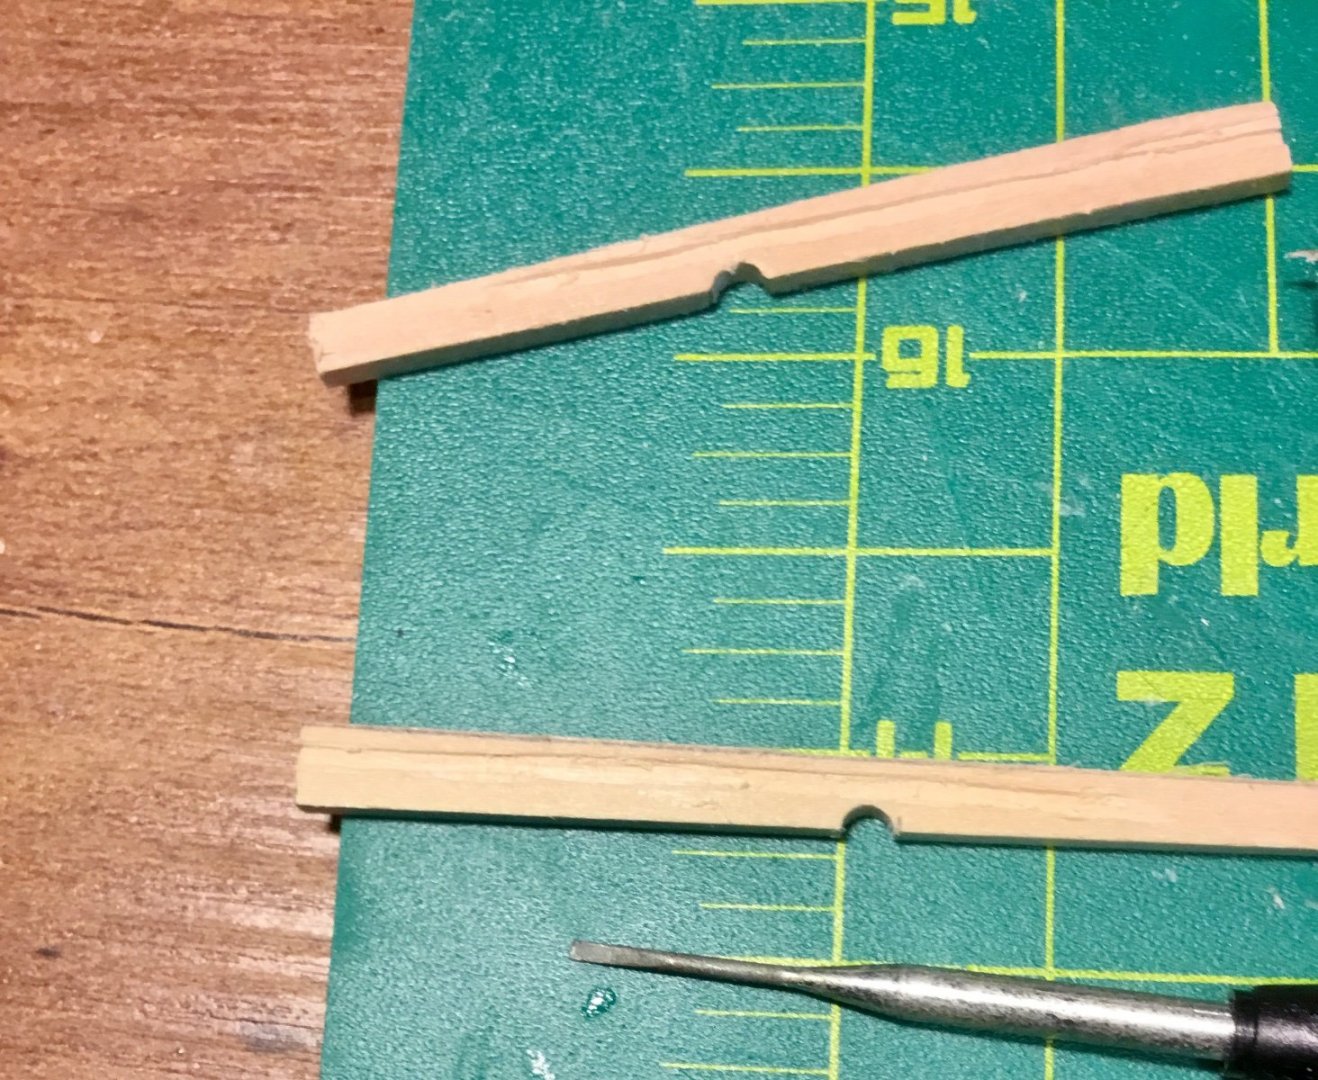
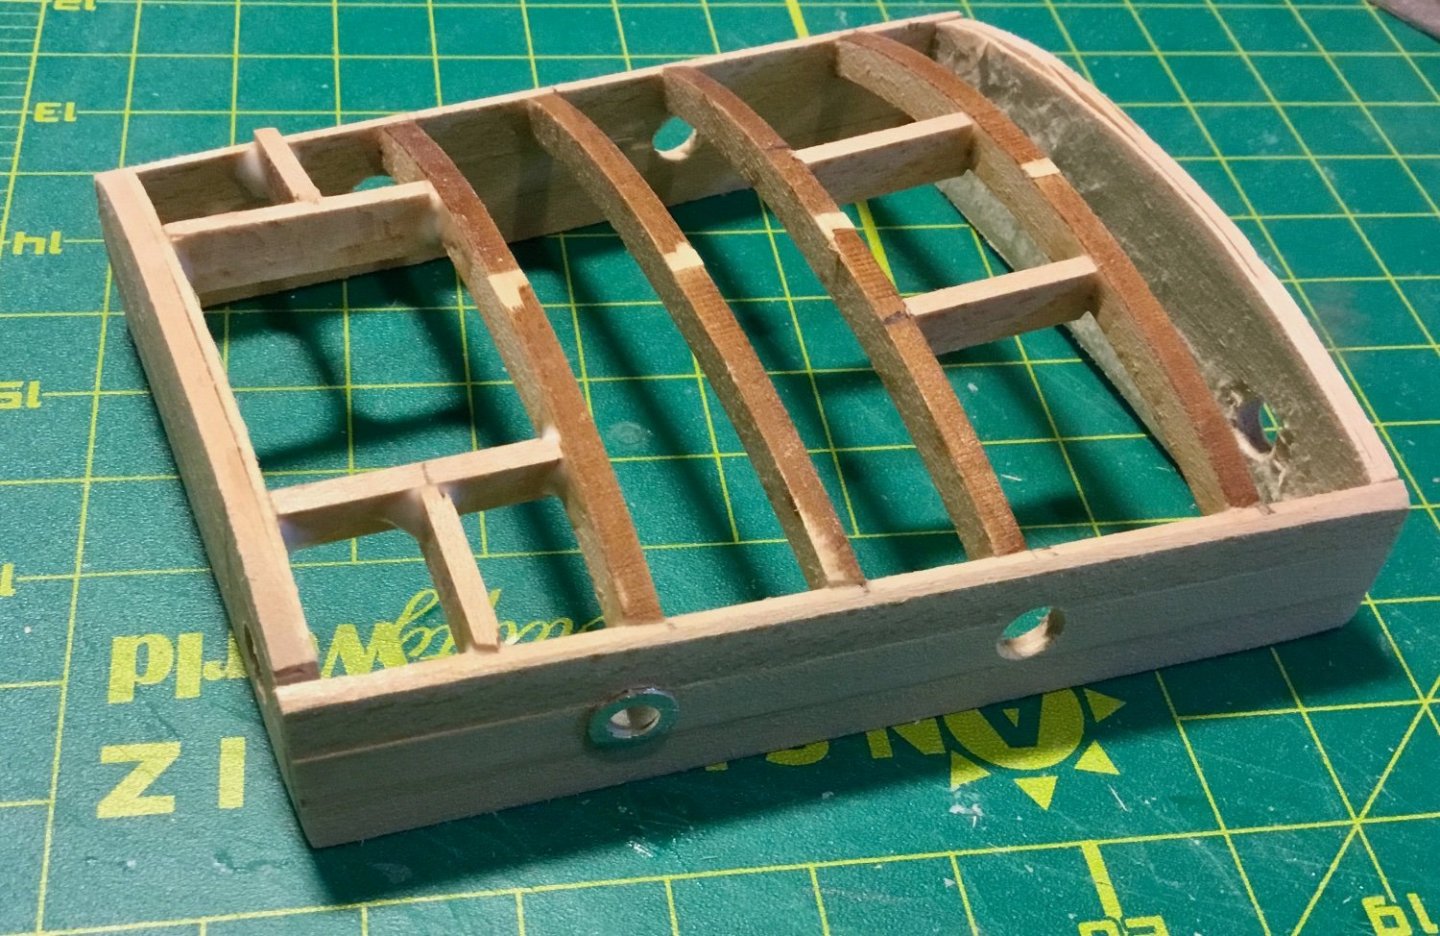
Slow going. I was out sick for a few days which didn't help. Completed the lower "C" belt spilling each plank. Filled minor voids and did an initial sanding of the result. I think the top two belts will be easier. While waiting for the glue to dry between adding strakes I began work on the aft cabin. I used the plans and some sheet wood to make patterns of the cabins front and back and then laid planks on the results. That allowed me to get the slanting cabin side at the correct angle. I used the laser cut cabin top beams as a guide for the curve at the top of the ends and the holes left over from the laser cut deck beams to draw the curve at the bottom of the cabin ends. I carefully sanded the bottom of the ends checking the fit with the deck camber as I went along. I installed most of the cabin top beams. Finally I drilled the holes for the port hole castings after measuring and marking their locations from the plan.


- 37 replies
-
- 5
-
-
- Glad Tidings
- Model Shipways
- (and 1 more)