HOLIDAY DONATION DRIVE - SUPPORT MSW - DO YOUR PART TO KEEP THIS GREAT FORUM GOING! (Only 20 donations so far - C'mon guys!)
×

Rob S
-
Posts
339 -
Joined
-
Last visited
Content Type
Profiles
Forums
Gallery
Events
Everything posted by Rob S
-
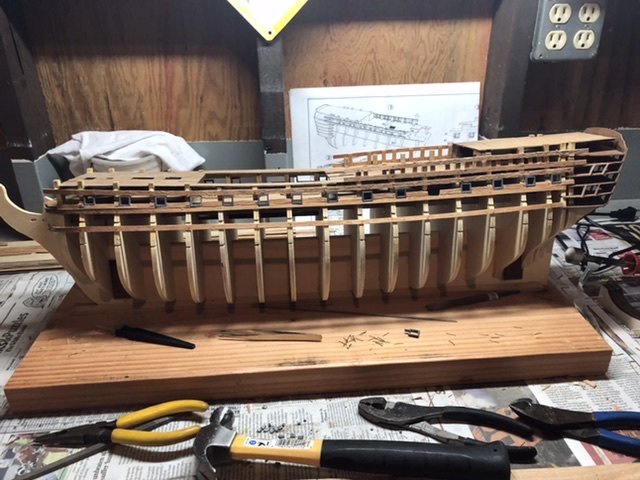
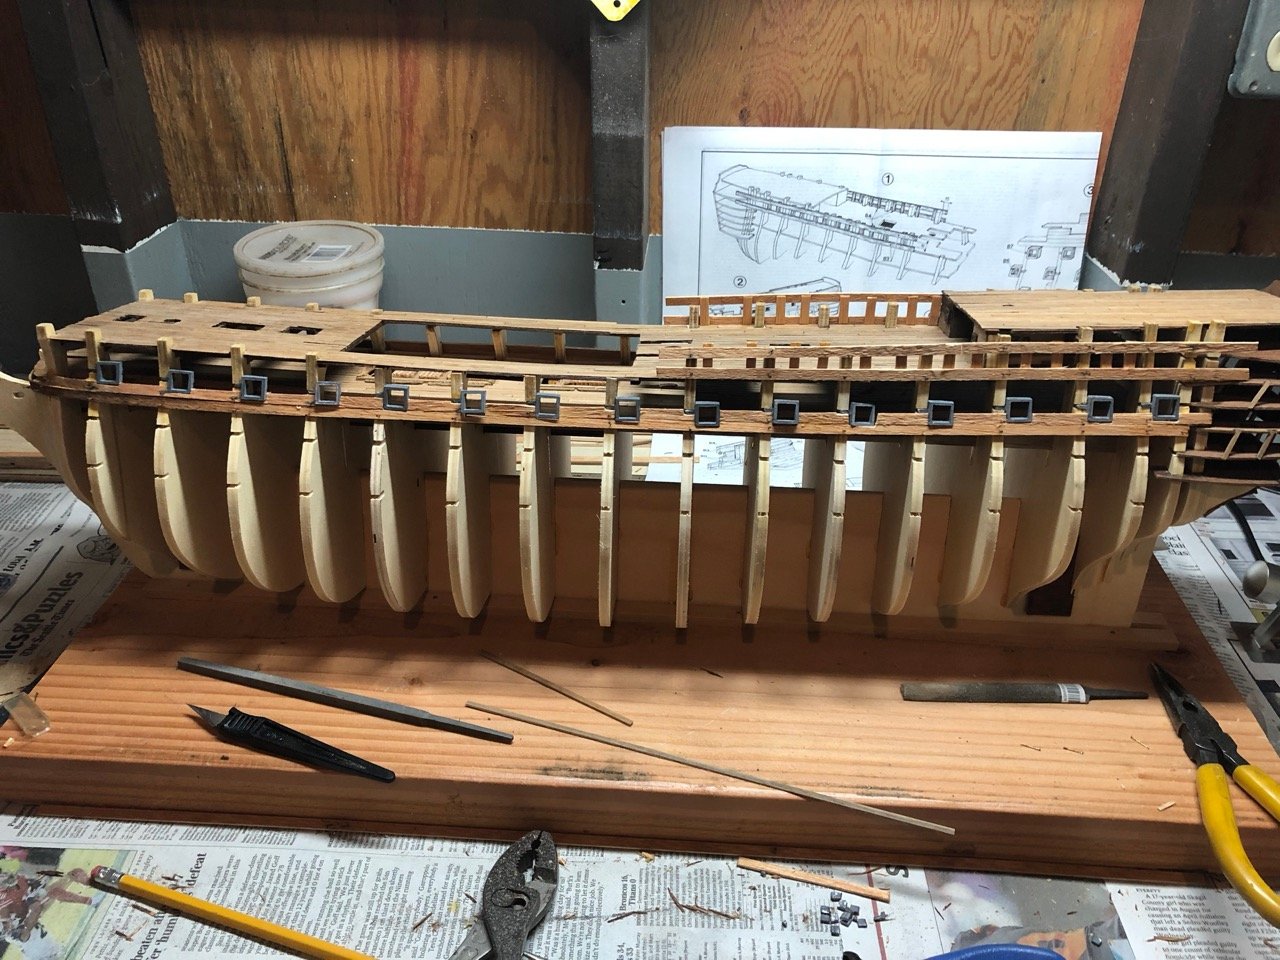
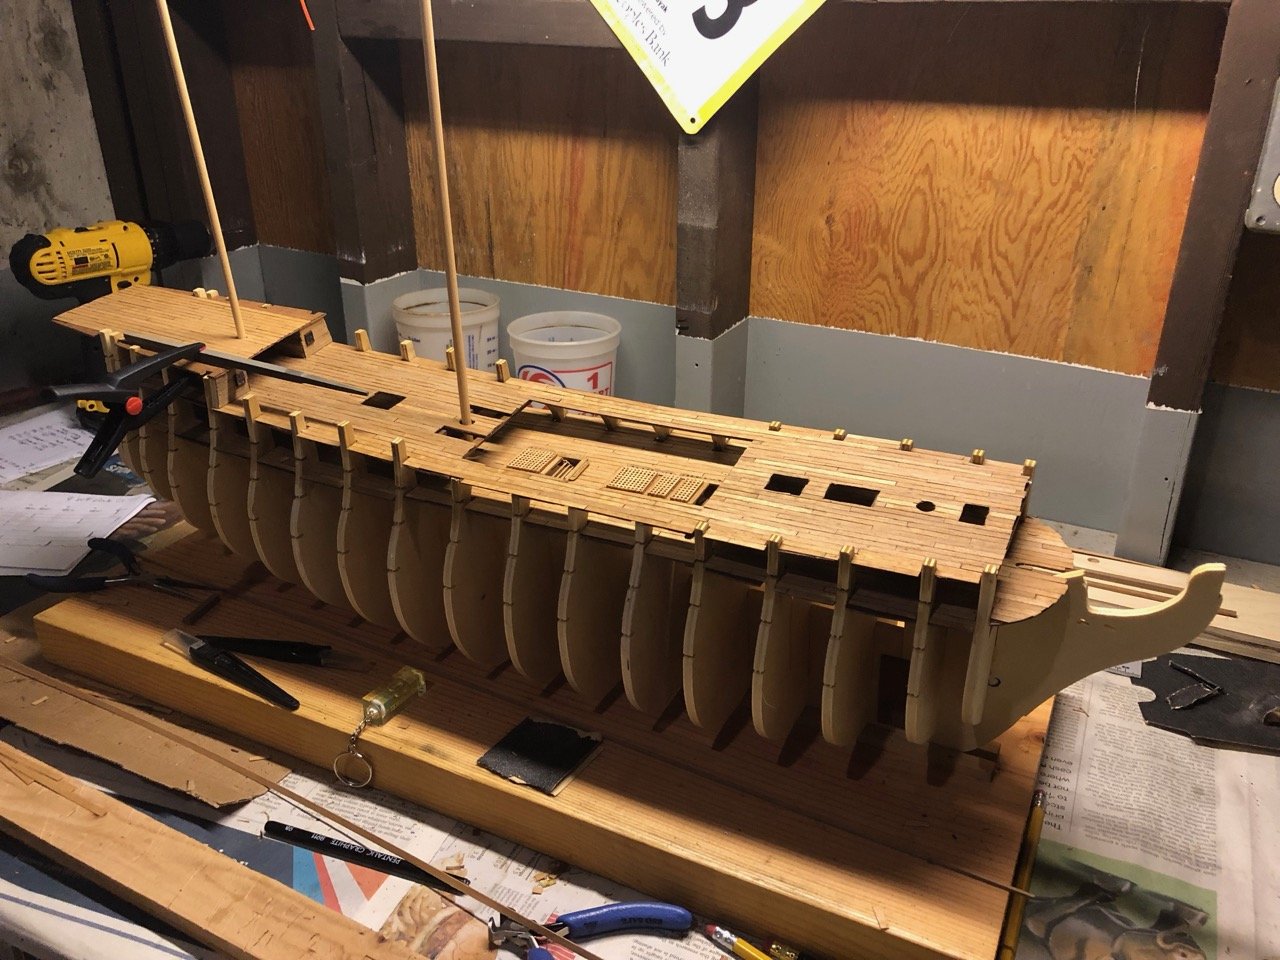
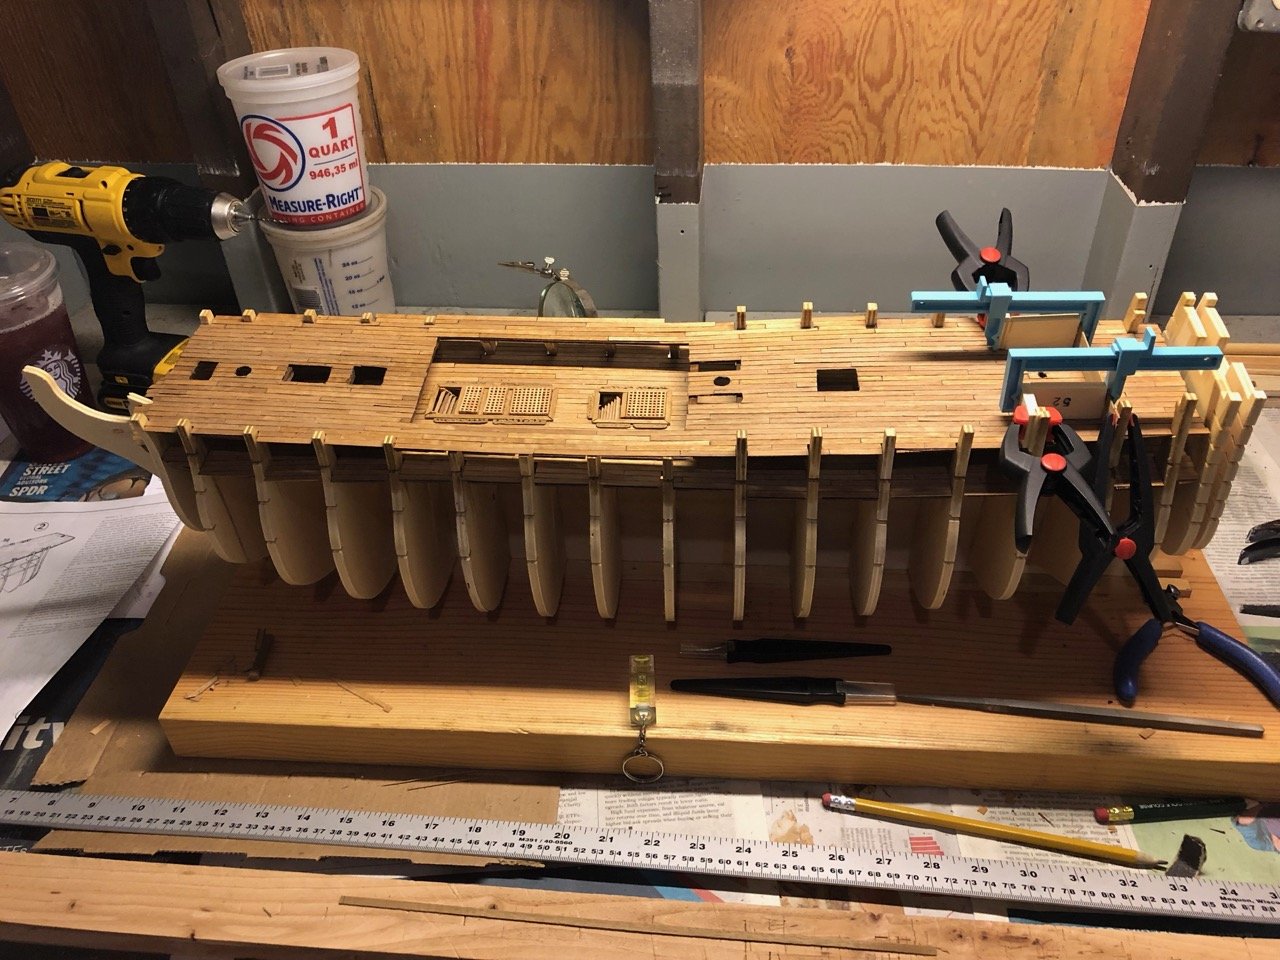
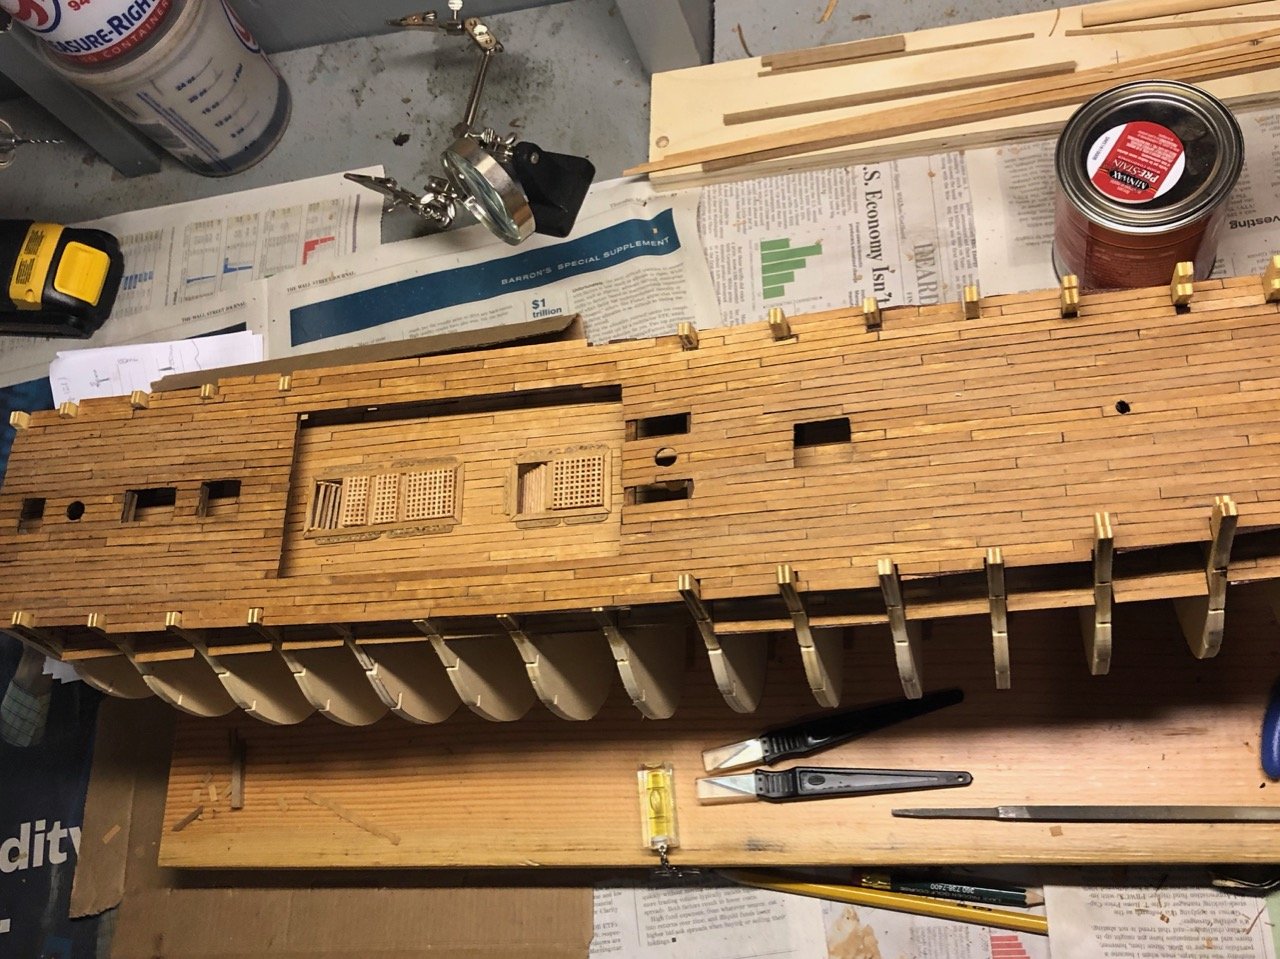
 The first set of ports are now fitted both port and starboard. I’ll frame the tops and then begin the same process for each gun deck. Happy New Year everyone!!
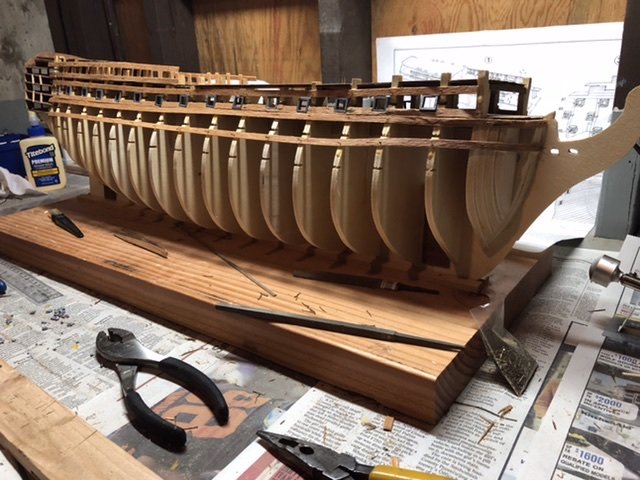
-
The first set of ports are now fitted both port and starboard. I’ll frame the tops and then begin the same process for each gun deck.

-
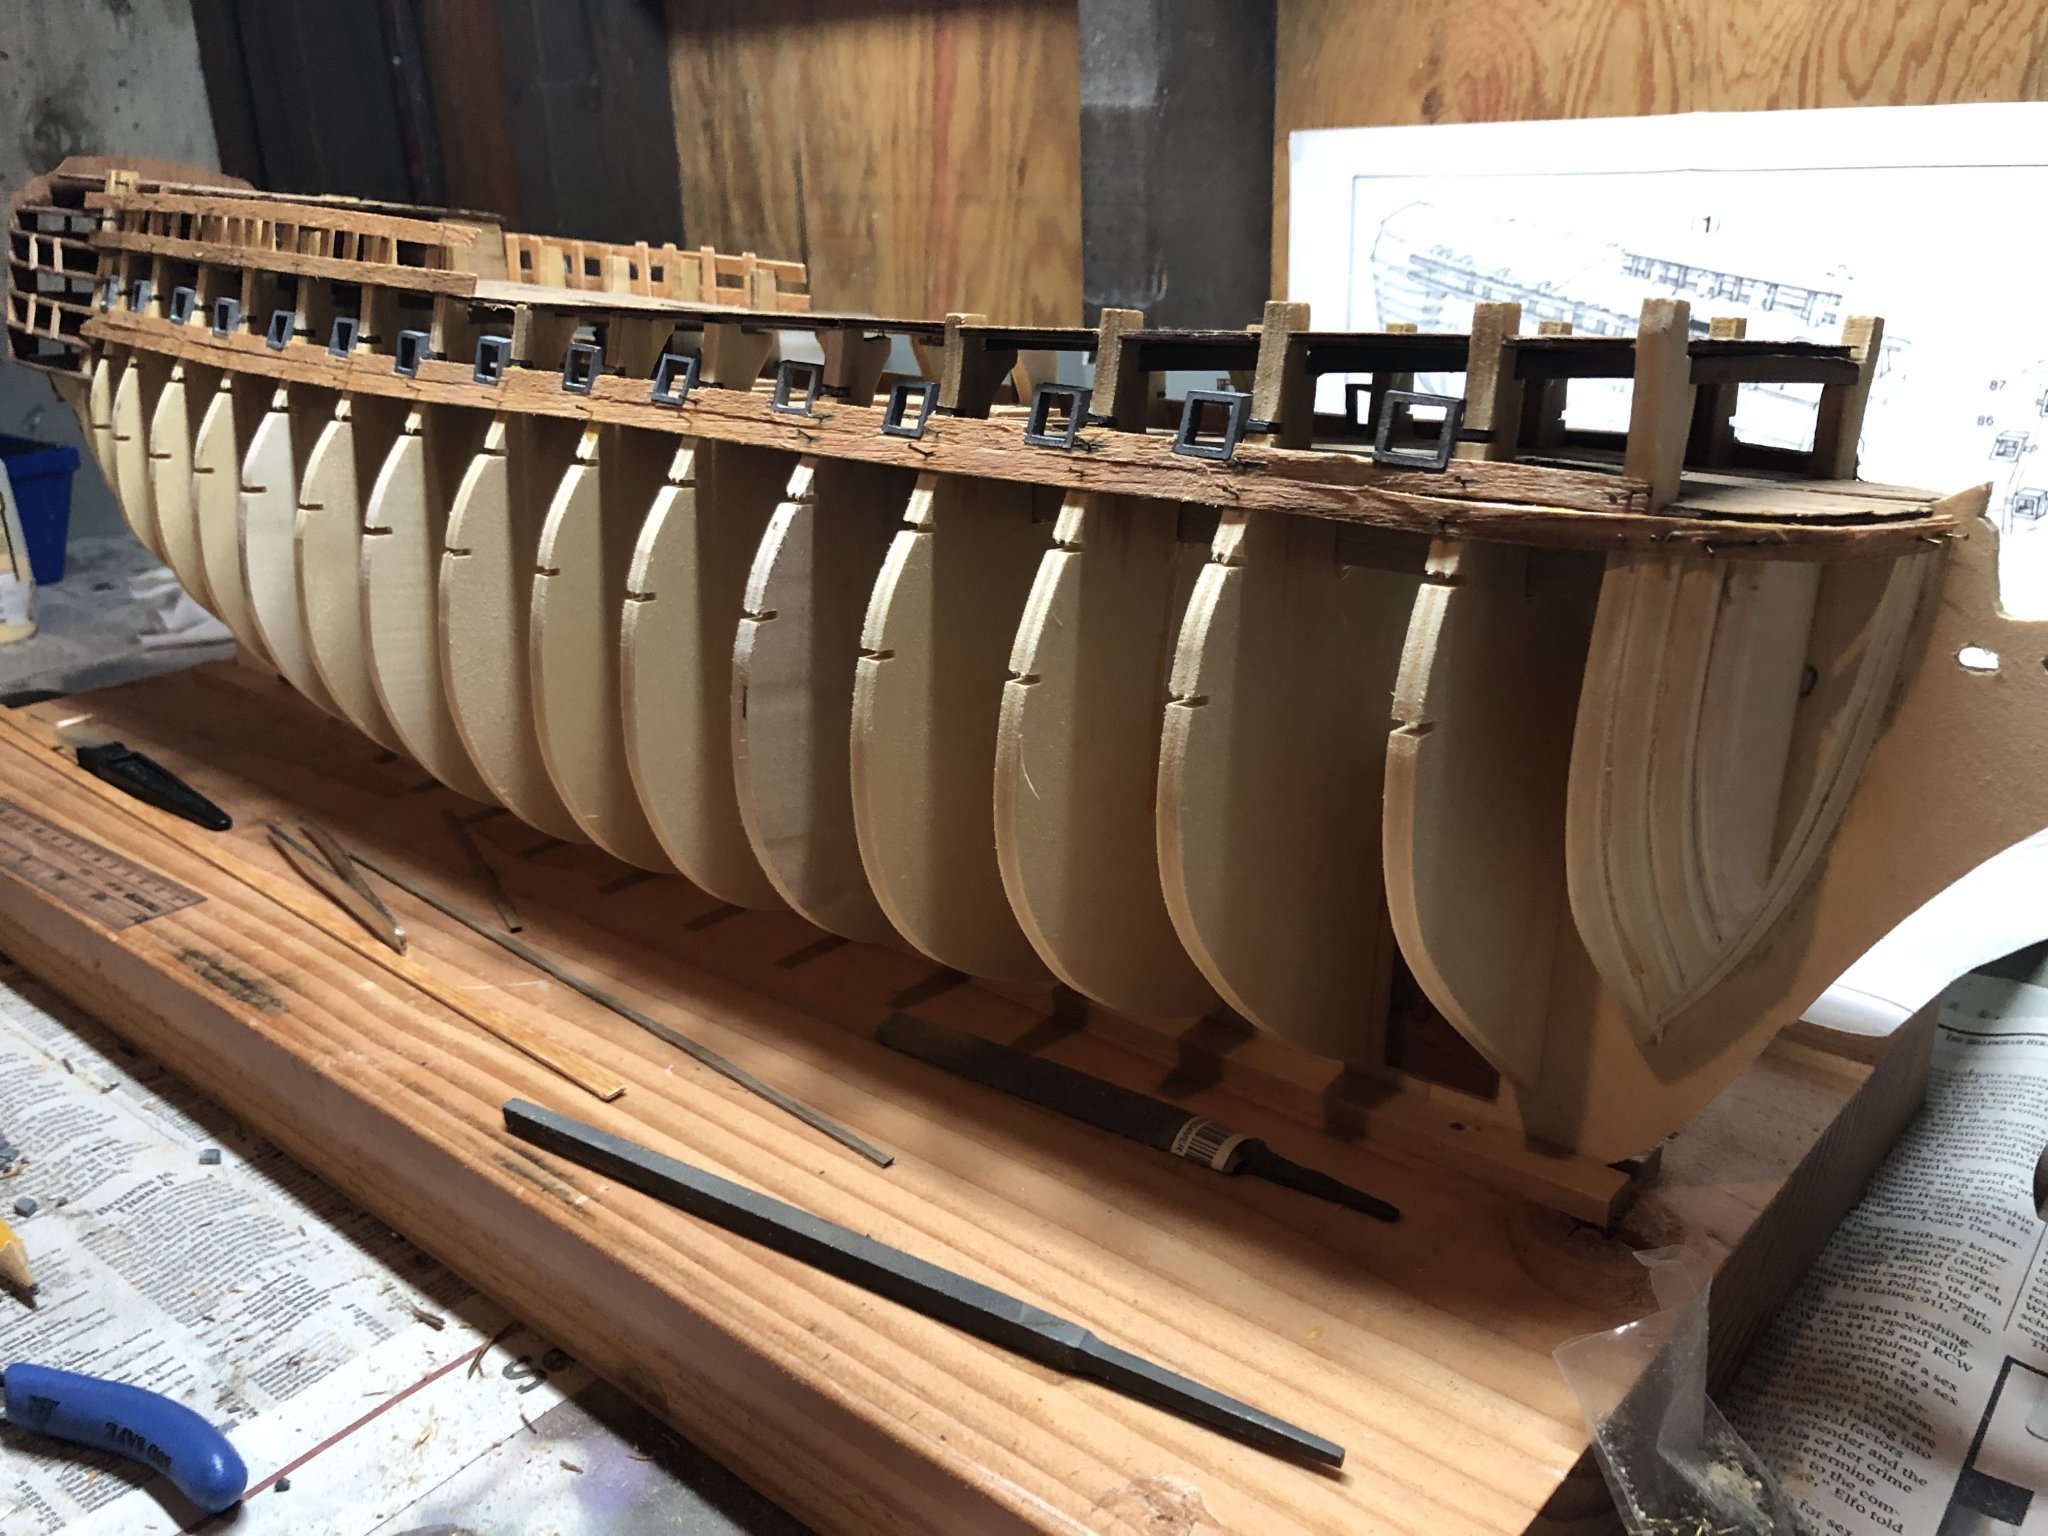
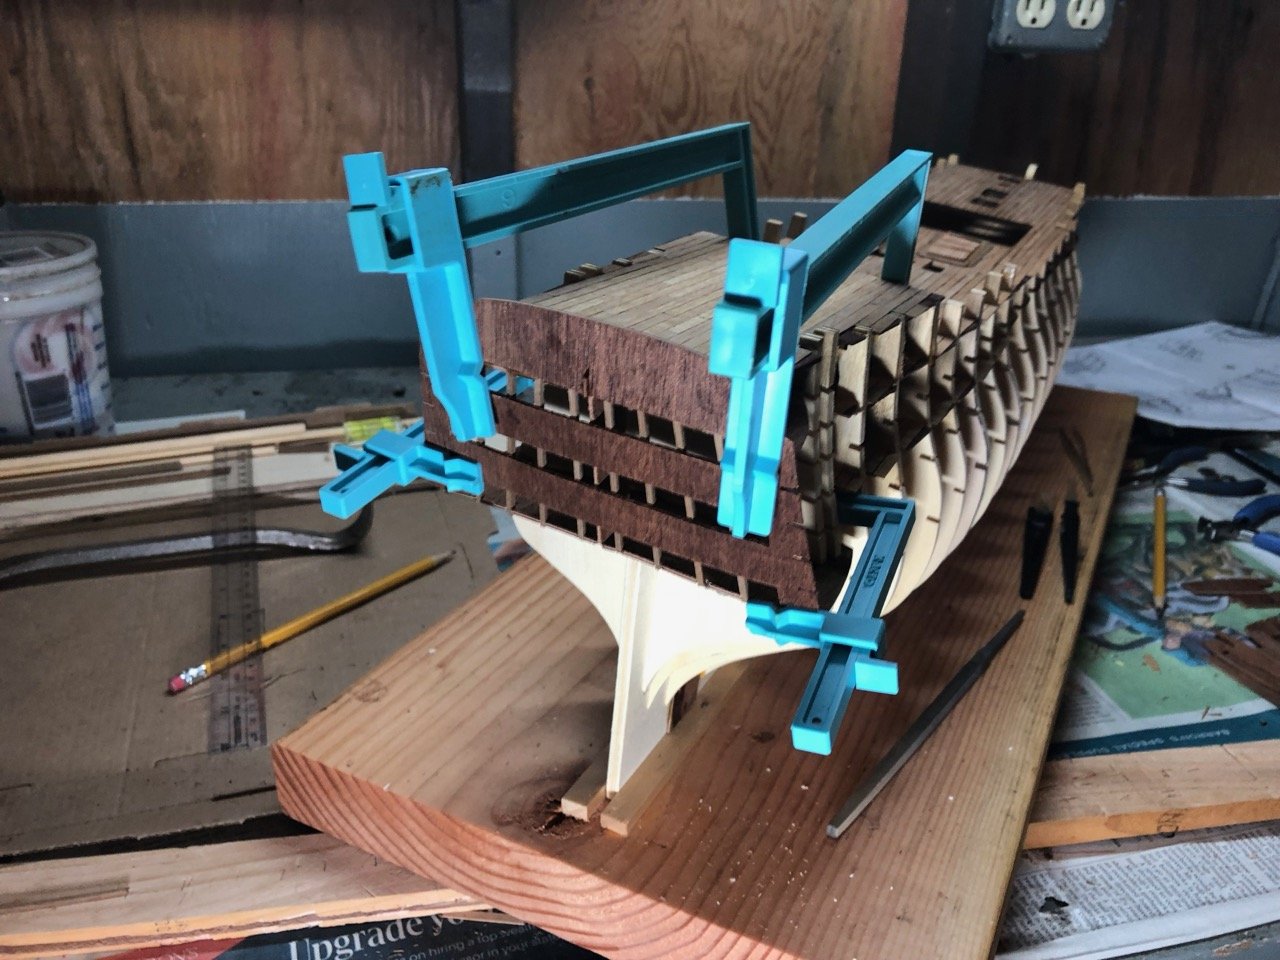
Thank you again Wallace; appreciate the kind words, advice and encouragement. Couldn't agree more on Y.T. Sound advice for any modeler in addition to the 'planking' advice section of this forum. The port side first set of gun ports are placed; some cleanup yet to do to ensure the outboard edges are flush with the planking. Then to the starboard side and repeat. Then more planking and gun ports.... I think this will take a while! late fall/winter time is a great modeling opportunity!
-
Hi Wallace - Thanks for that. Per the instructions, I did glue the main deck down. Guess I’ll need some really long tweezers! The planking is going on as I’m following Y.T.’s approach of adding the metal ports and then planking around them.
-
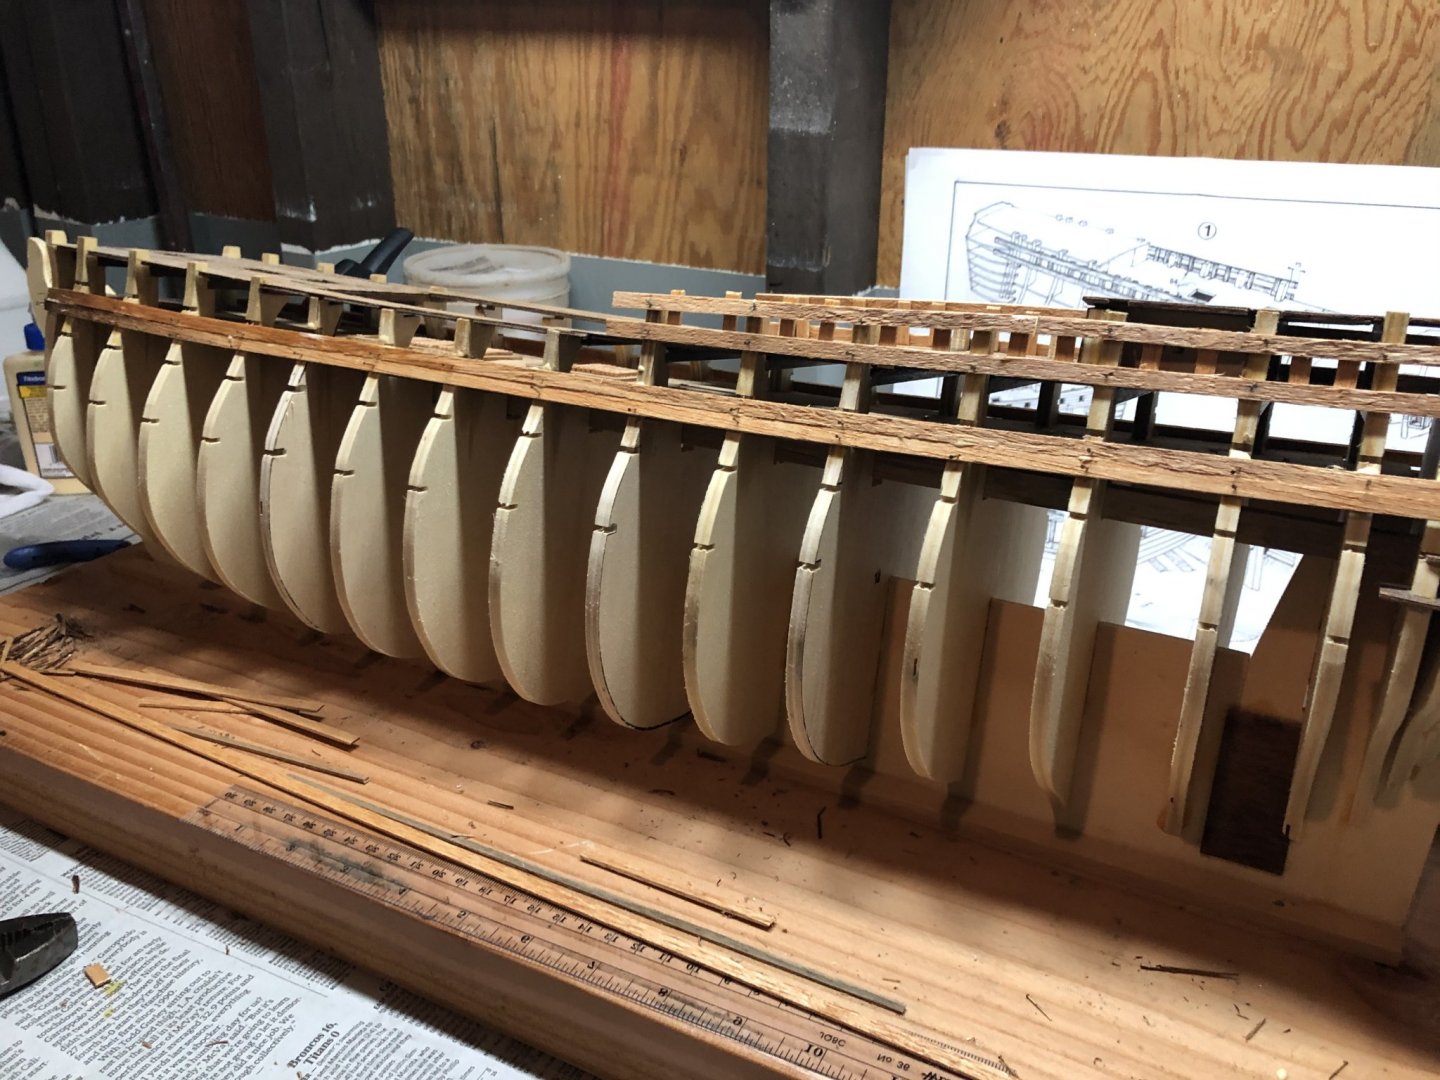
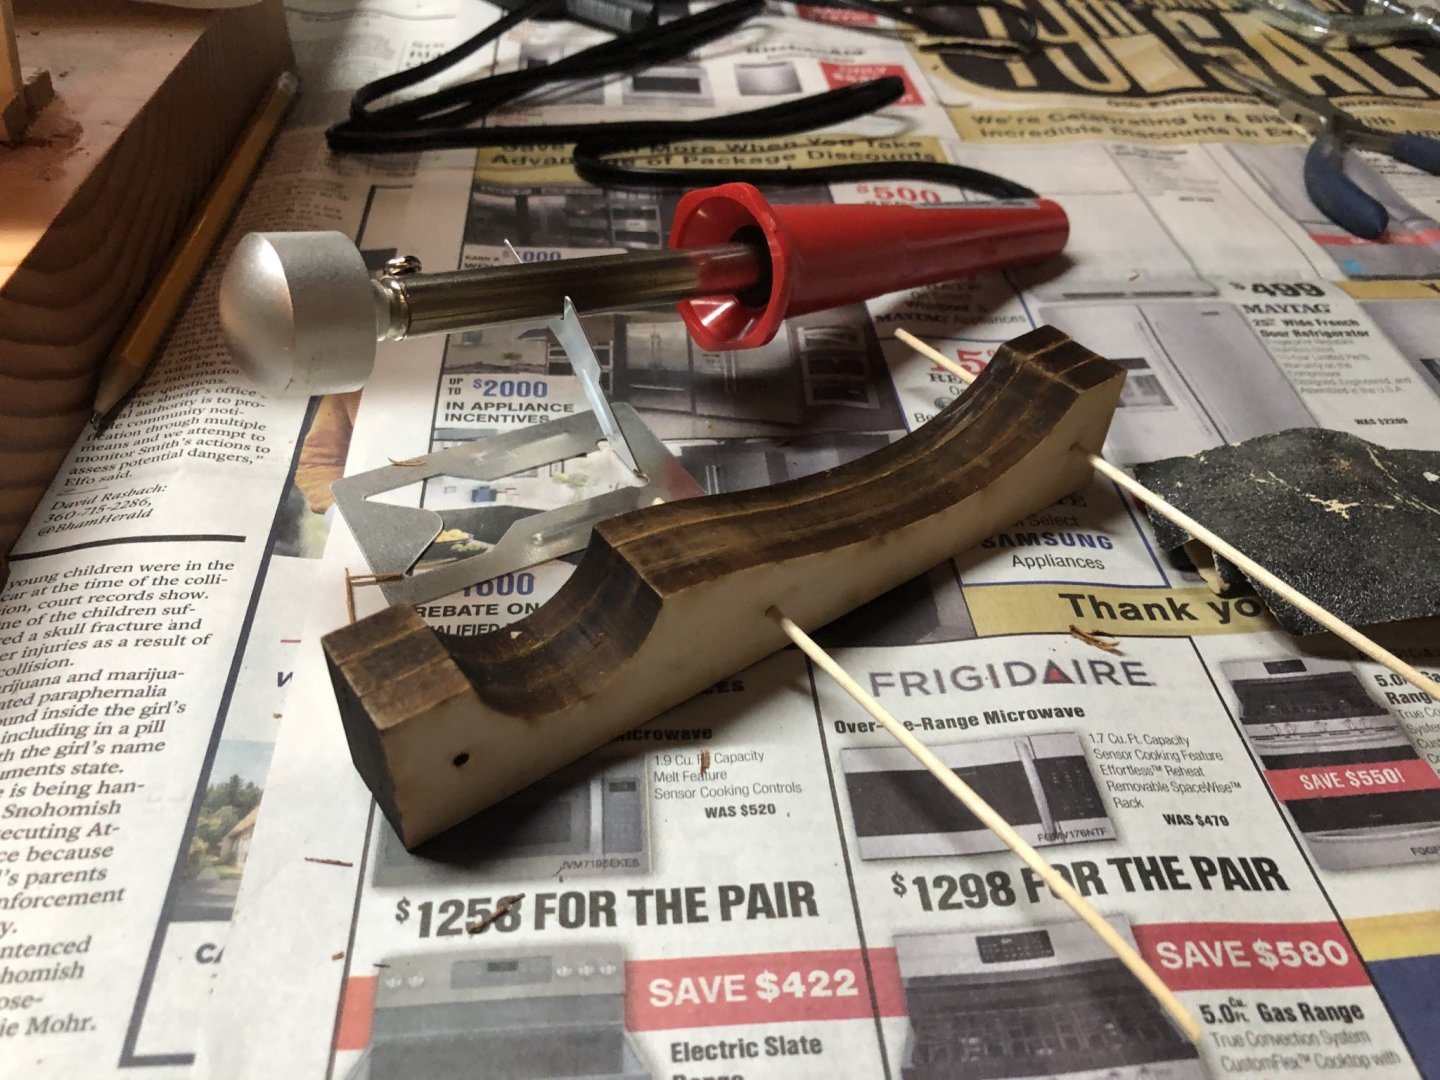
Thank you Wallace; I took your earlier advice and reviewed YT’s log. You correctly stated he is an excellent modeler based on the detail available in his log. I would heartily recommend it to any modeler - new or old. I also saw that YT is the Kopeikin I defended above. I started on the top as that is what the Mamoli instructions stated but have since reviewed YT’s log and have now followed his approach. I also noted that it appears that YT did not install the decks above the first one; interesting. Here is where I’m at with planking as of this morning. Before starting with the lower deck, I adjusted it’s position to better align with the bulkhead spacing which in turn will put the deck more in line with the gun ports. I’ve included a picture of my plank ‘shaper’ tool that is working pretty well so far. However, I’ve got a long way to go!

-
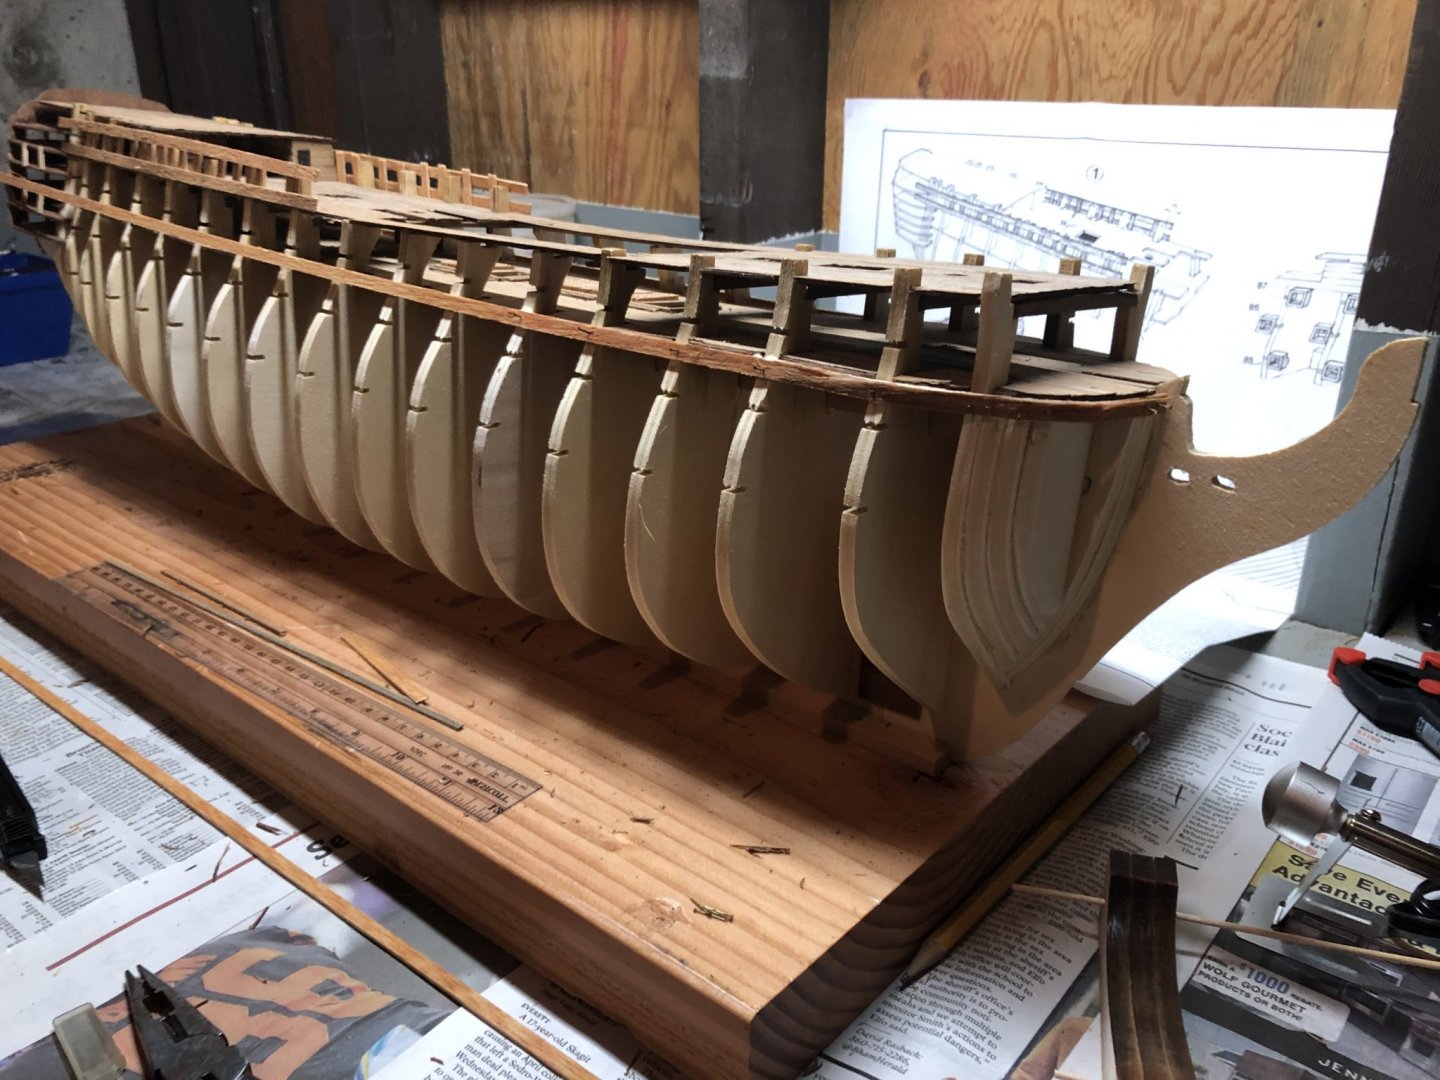
Here is where I am with the planking. I find it difficult to consistently meet the requirements of 8mm between the sections. I'm also just starting to bend the planks using an electric plank bender. Hopefully, with the help of those who have done this already - I'll figure it out. As I've looked at other member logs, I see that many appear to be working outside of the order provided by the Mamoli instructions. I've heard that the instructions are bad, but I'll need to dig into the member logs to identify those booby traps. In addition to Y.T. referenced by Henrik above, I found modeler Kopeikin, from the Mamoli/Victory logs has some Excellent work/examples out there.
-
As I was preparing to begin the planking, I noted the poop deck material split per the below picture. I inserted some wood glue between the sections using a Q-Tip, clamped it and it looks better now. Just wondering if these kits are subject to this sort of issue.
-
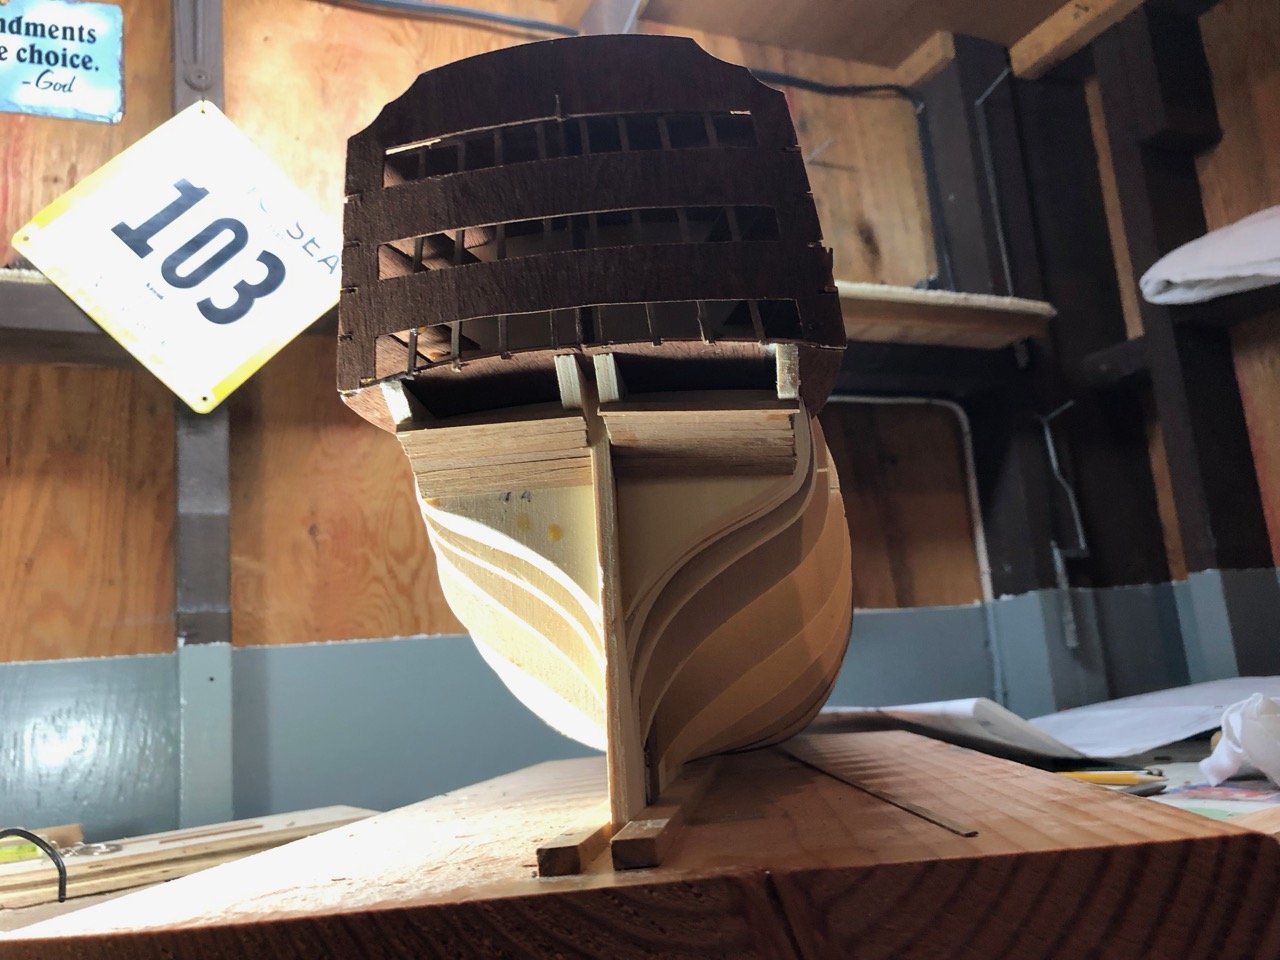
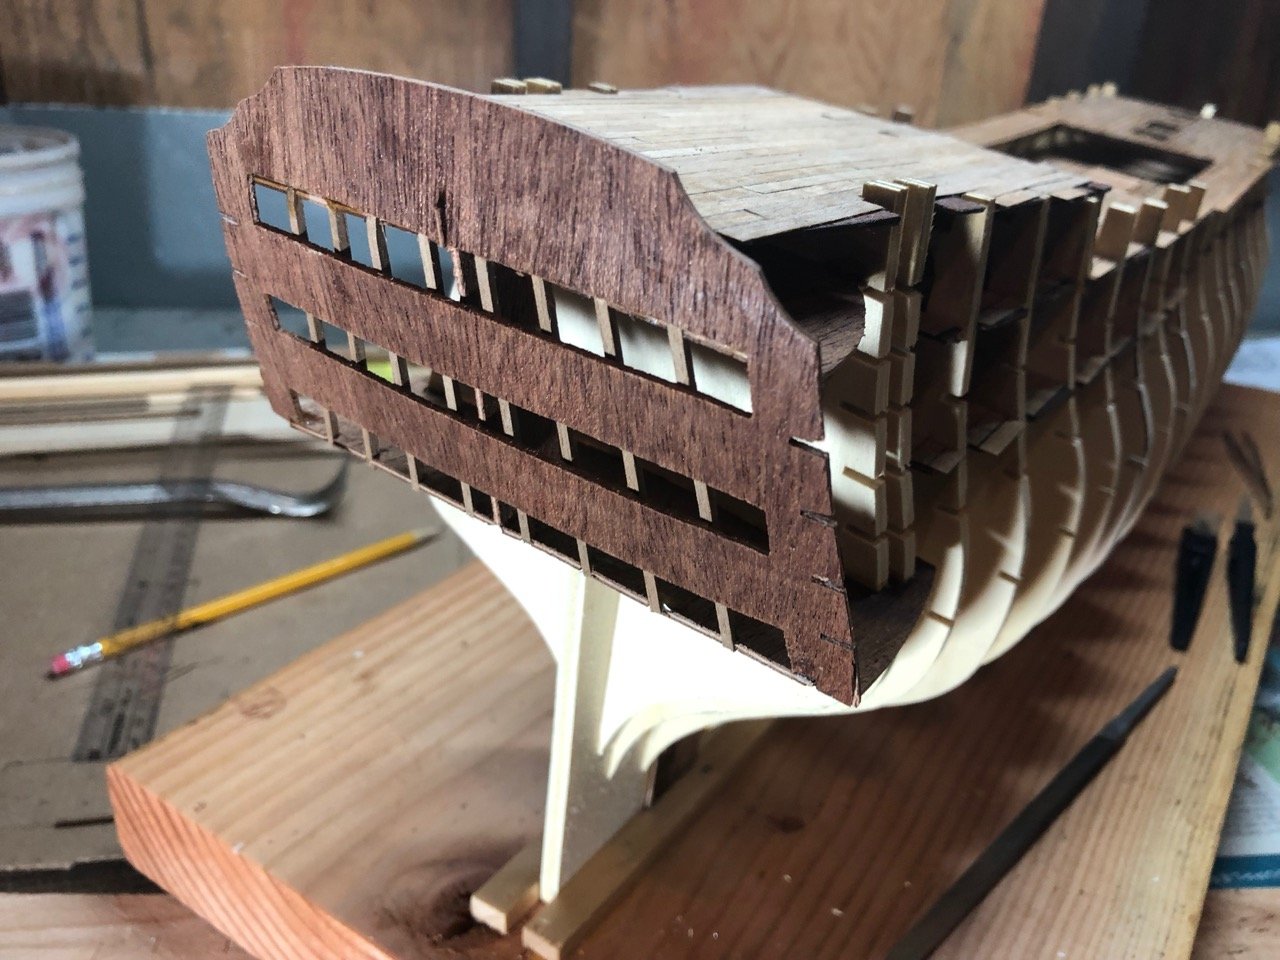
Thank you Henke; I've looked at YT's log but will go back and relook. It amazes me the amount of expertise, attention to detail and quality associated with these builds. My 'hat's off' is to those who have shown what these kits can be. Below is the current state of the stern. Since then I've started the planking called out on the third set of instructions and will show where I'm at in the following posts.
-
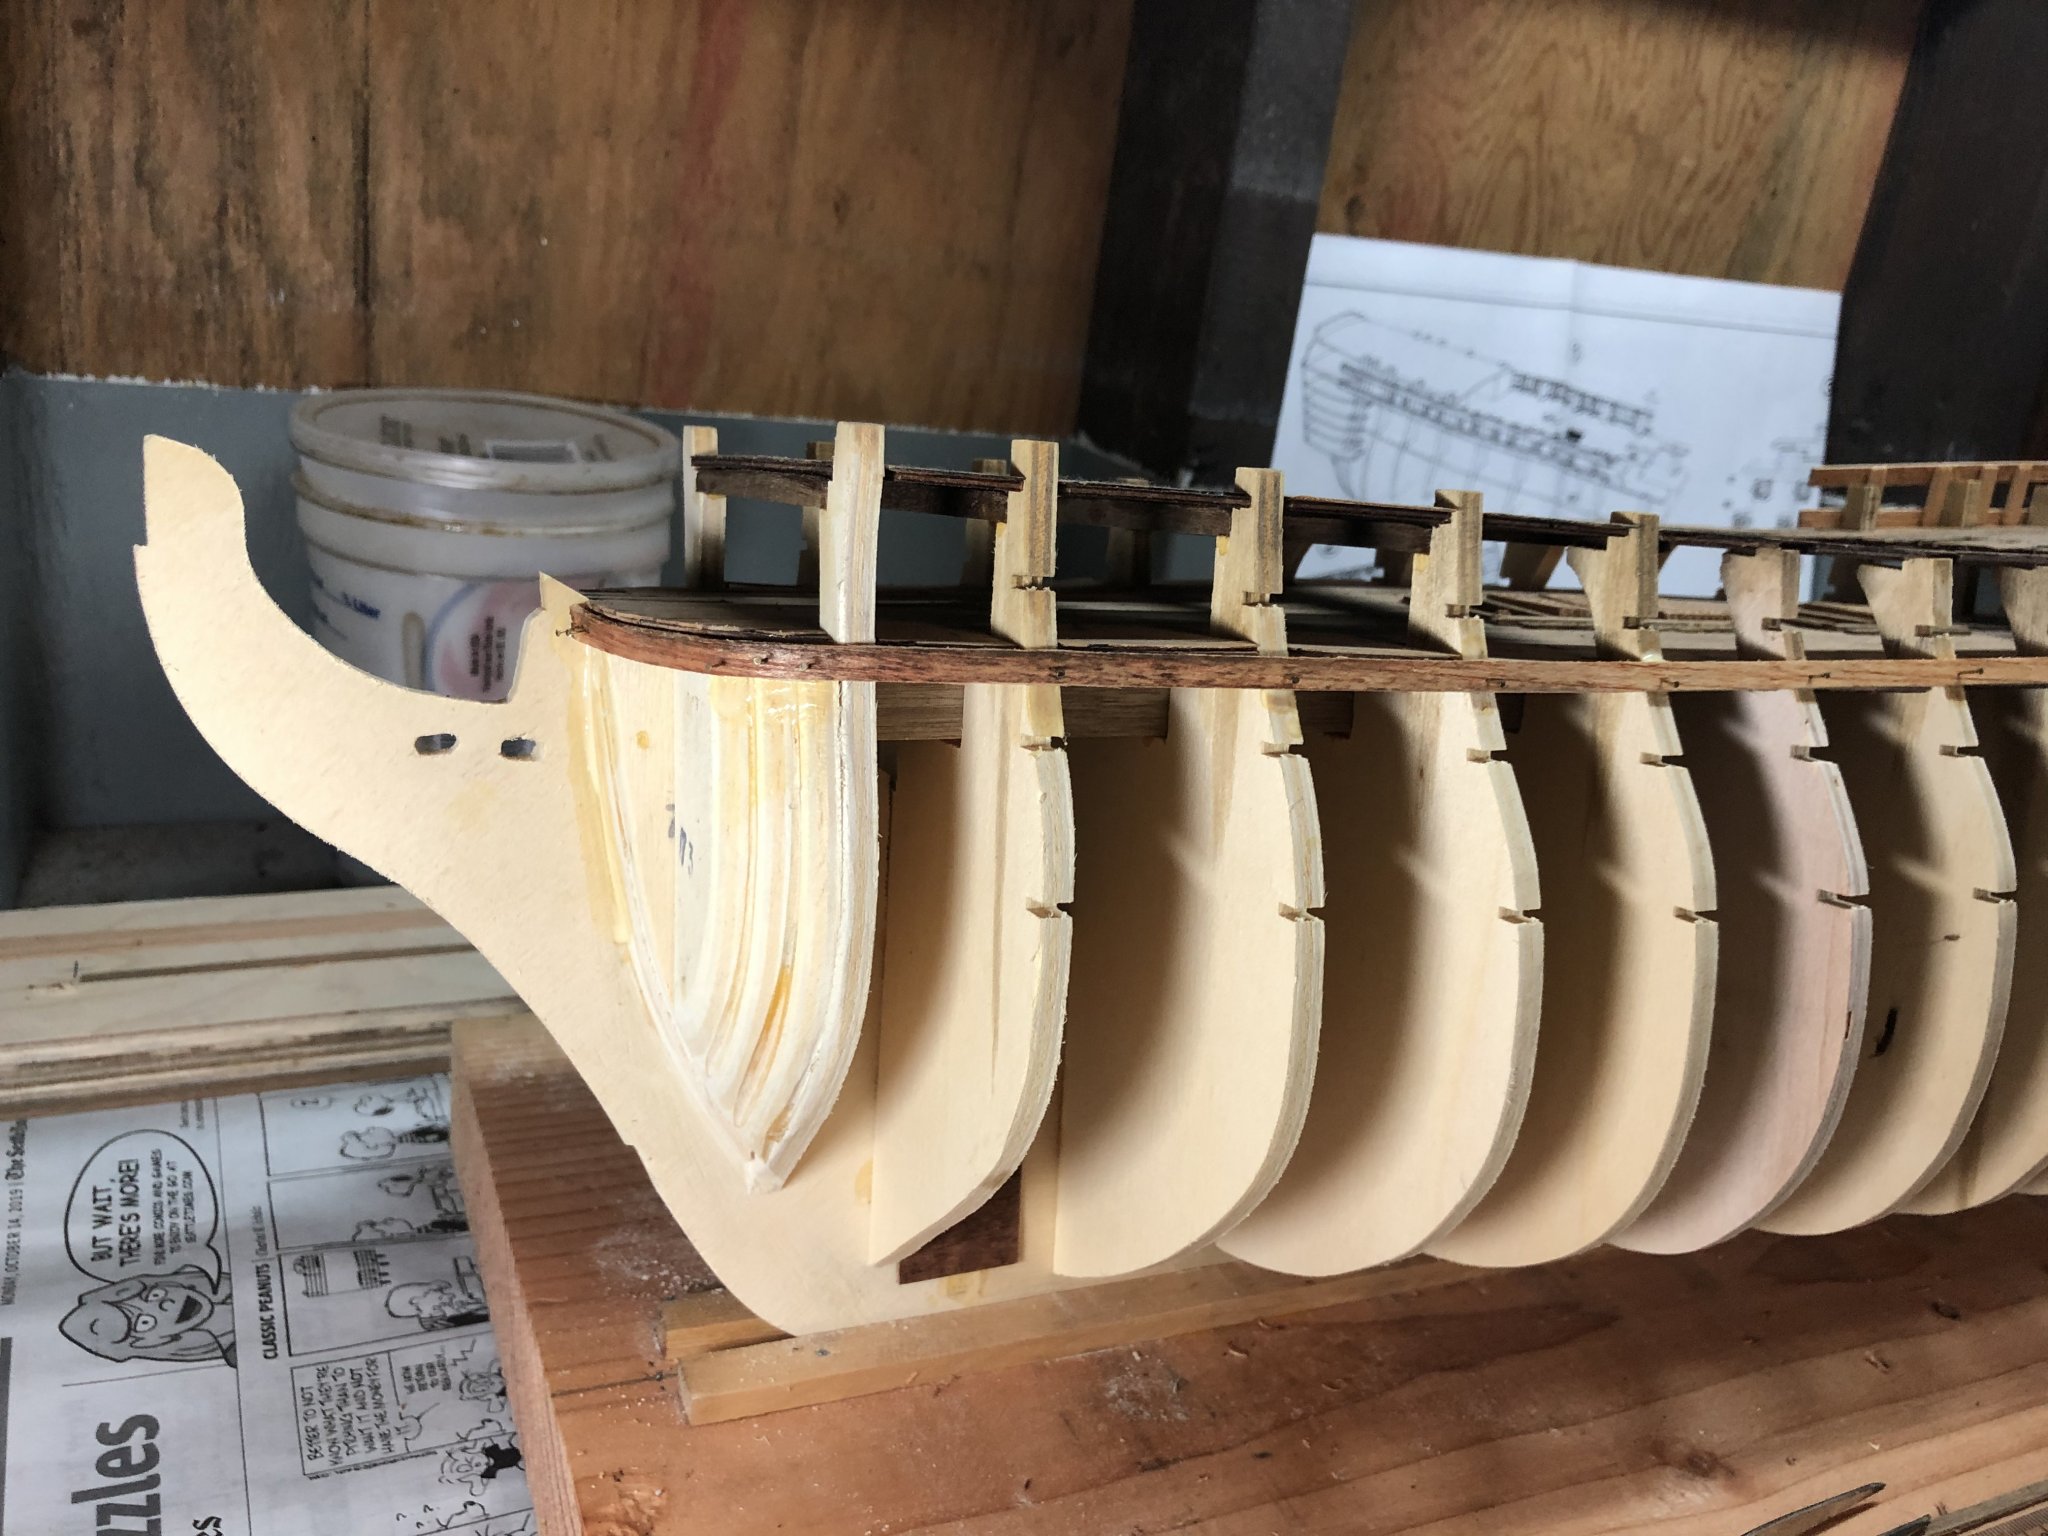
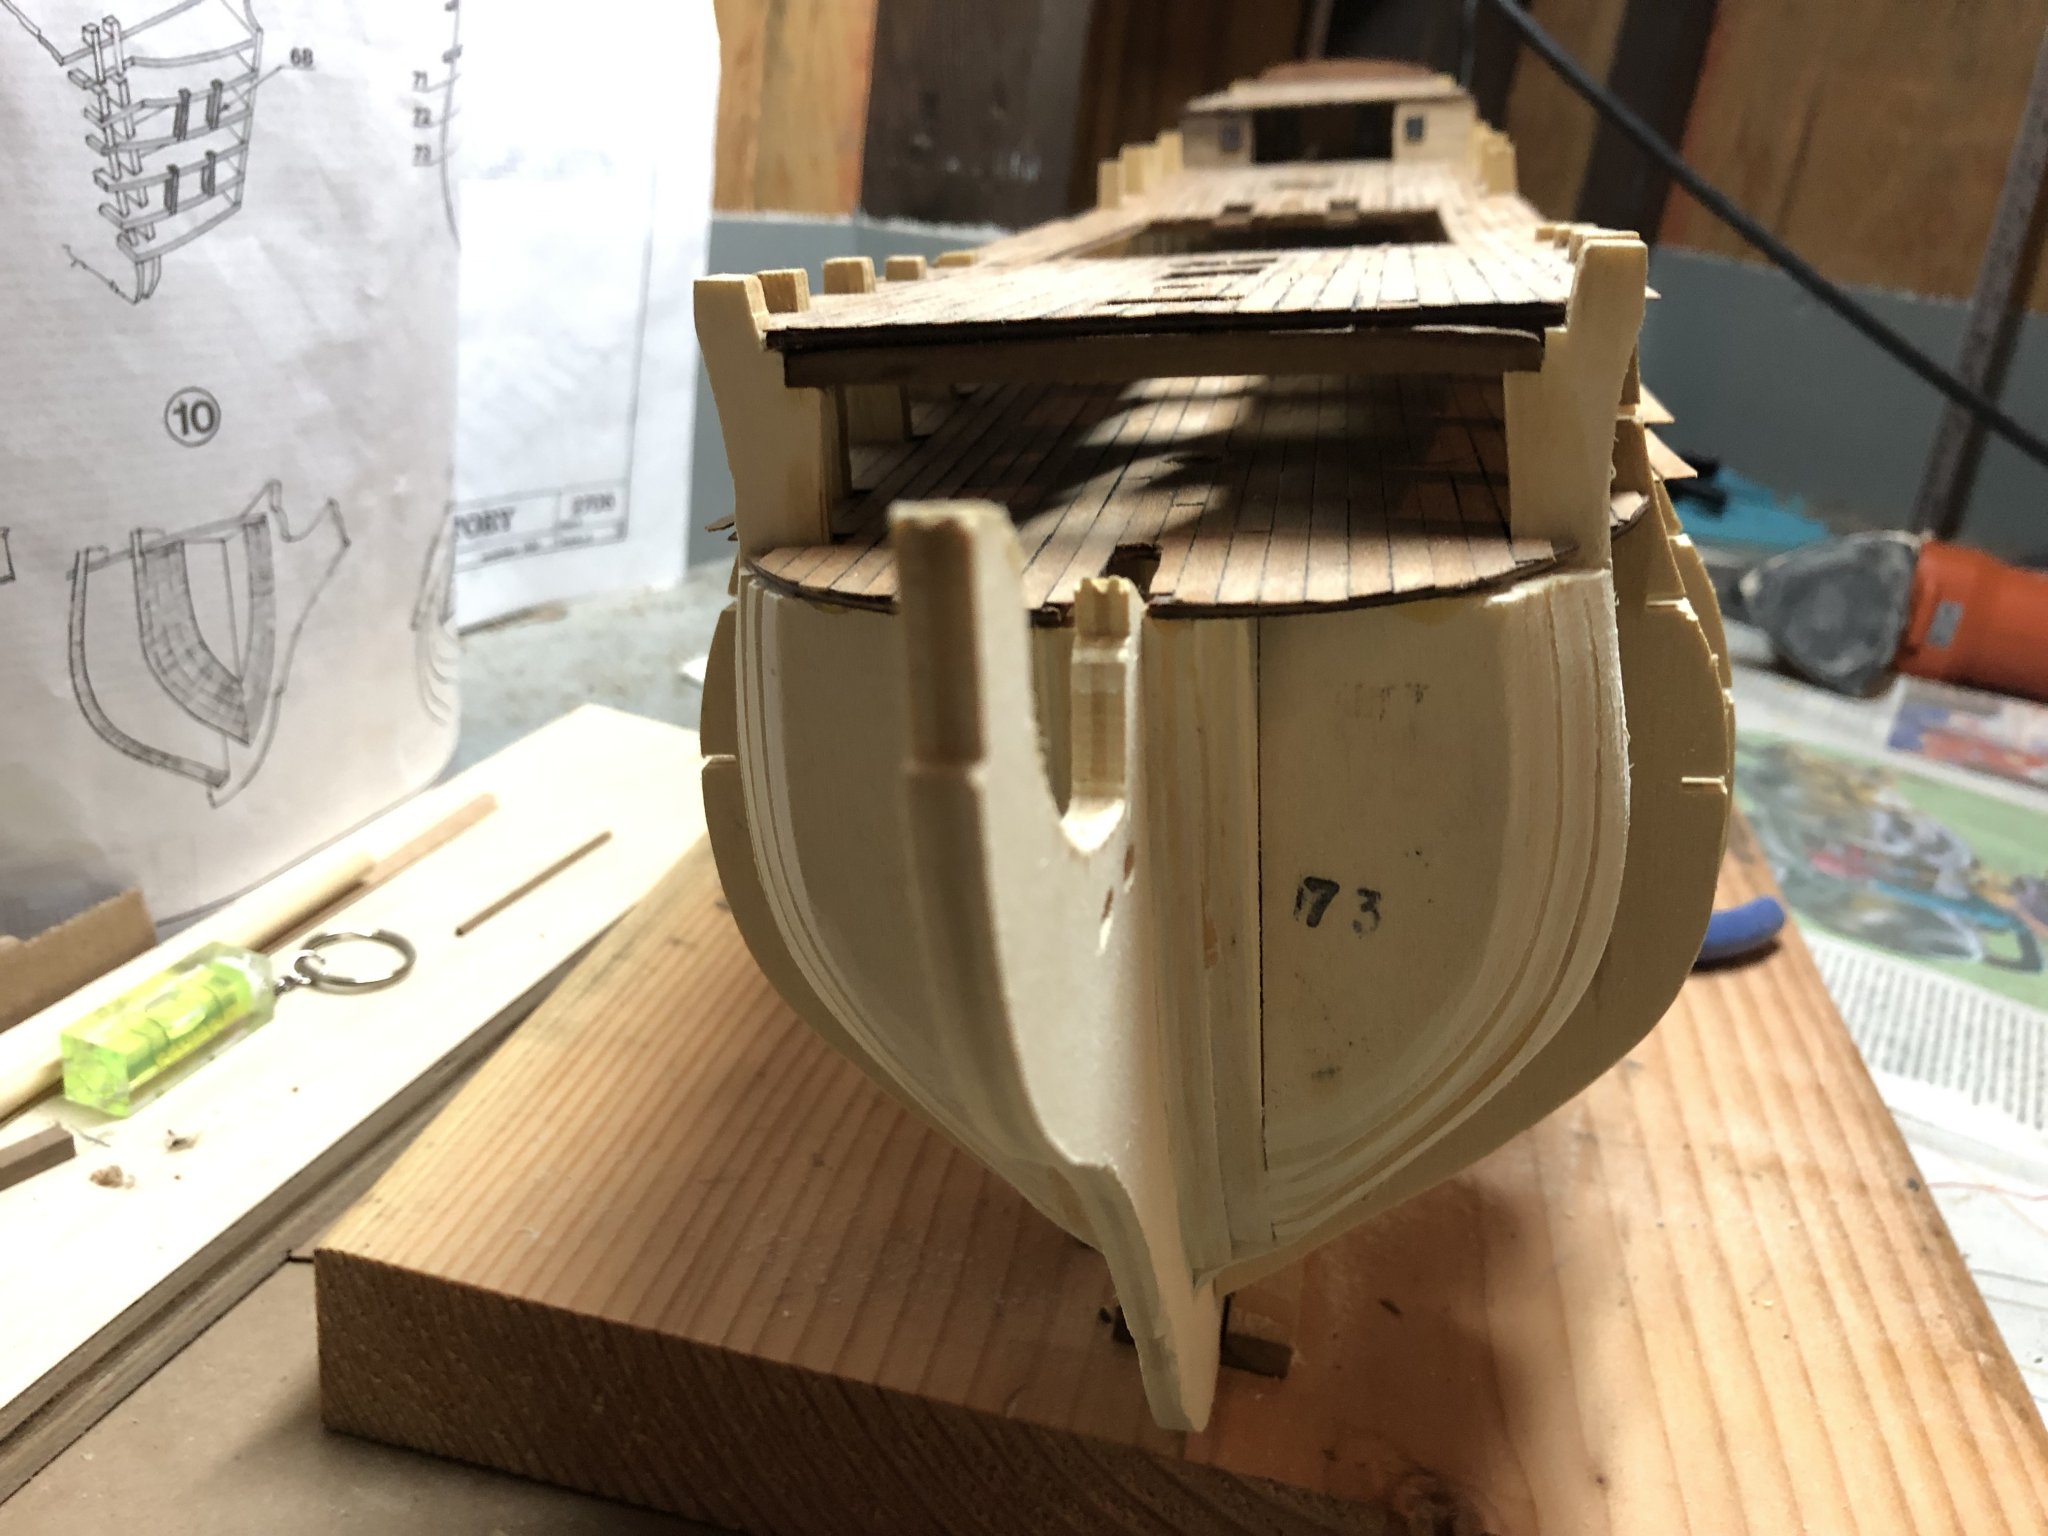
Thank you Mark; appreciate the kind words and understand. Now is the time to get it right rather than attempt to jury rig/fix something later. I'm working on the stern portions now and per the below, will need to do some 'roughing' of the starboard stern support to add in the curve so the planking will fit correctly.

-
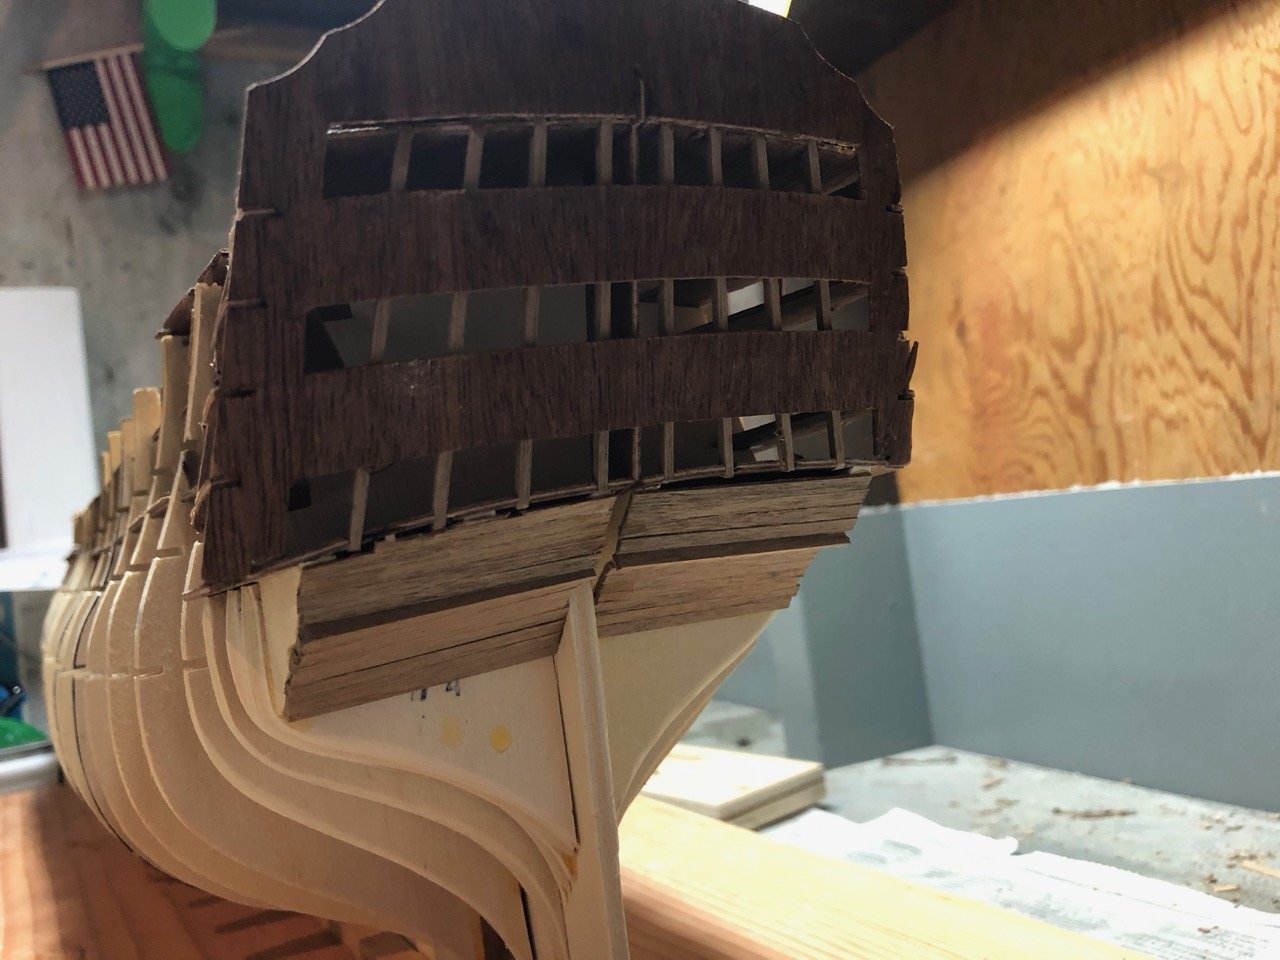
Working on shaping the stern sections to align with the plans before beginning to add the walnut laths beneath the bottom row of the stern windows.
-
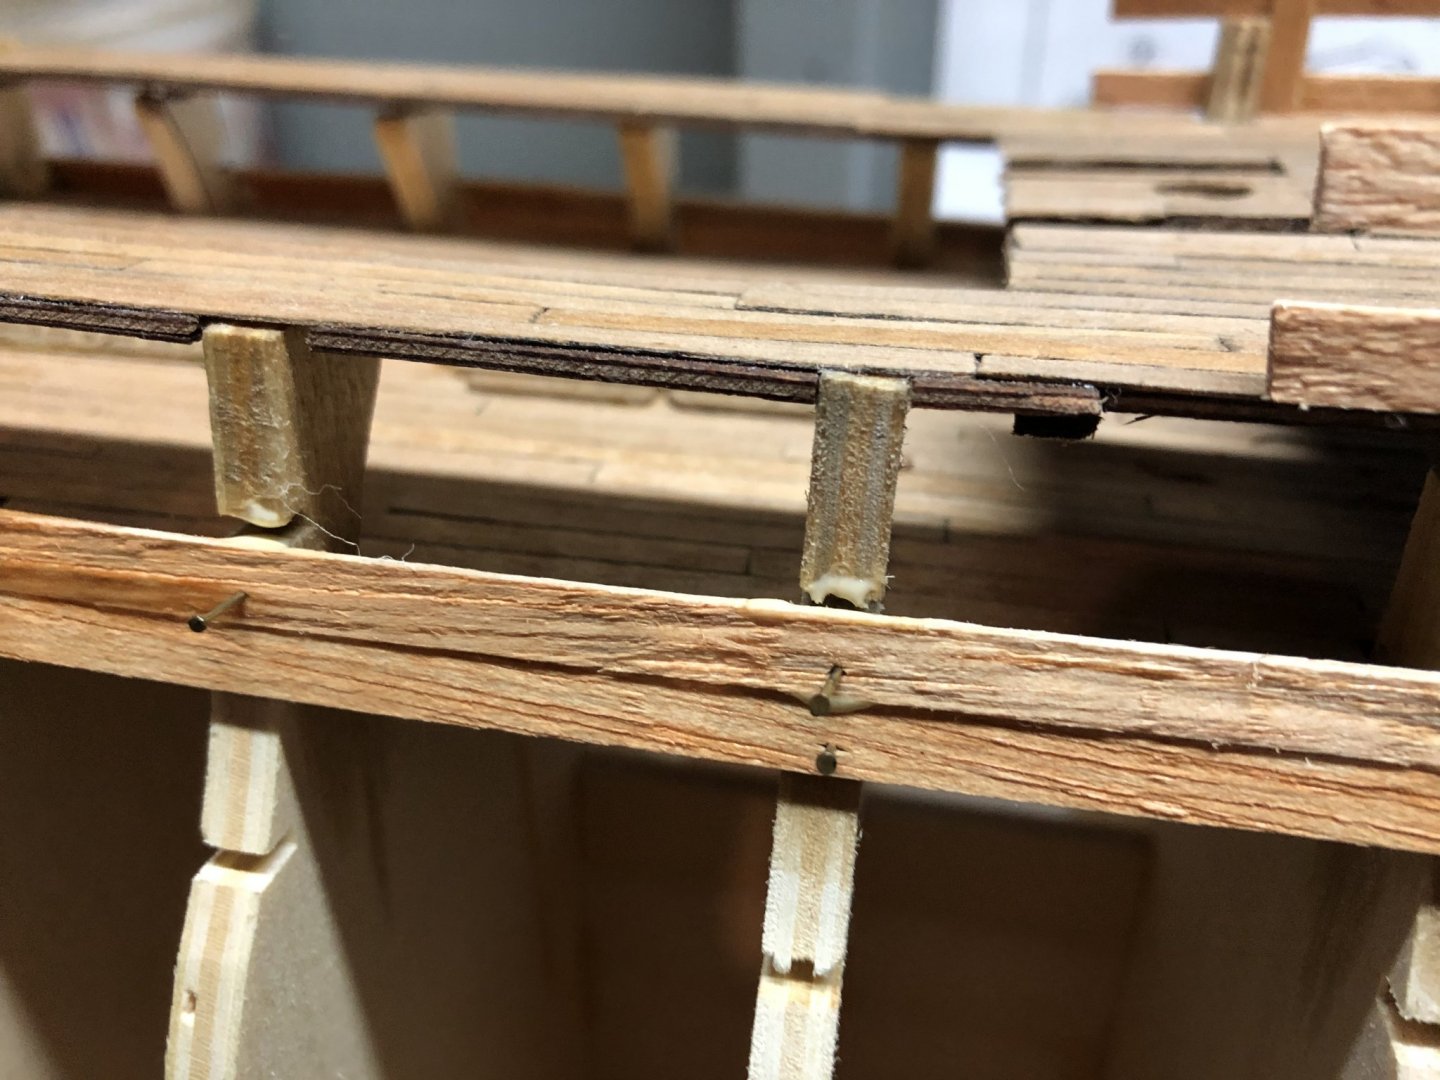
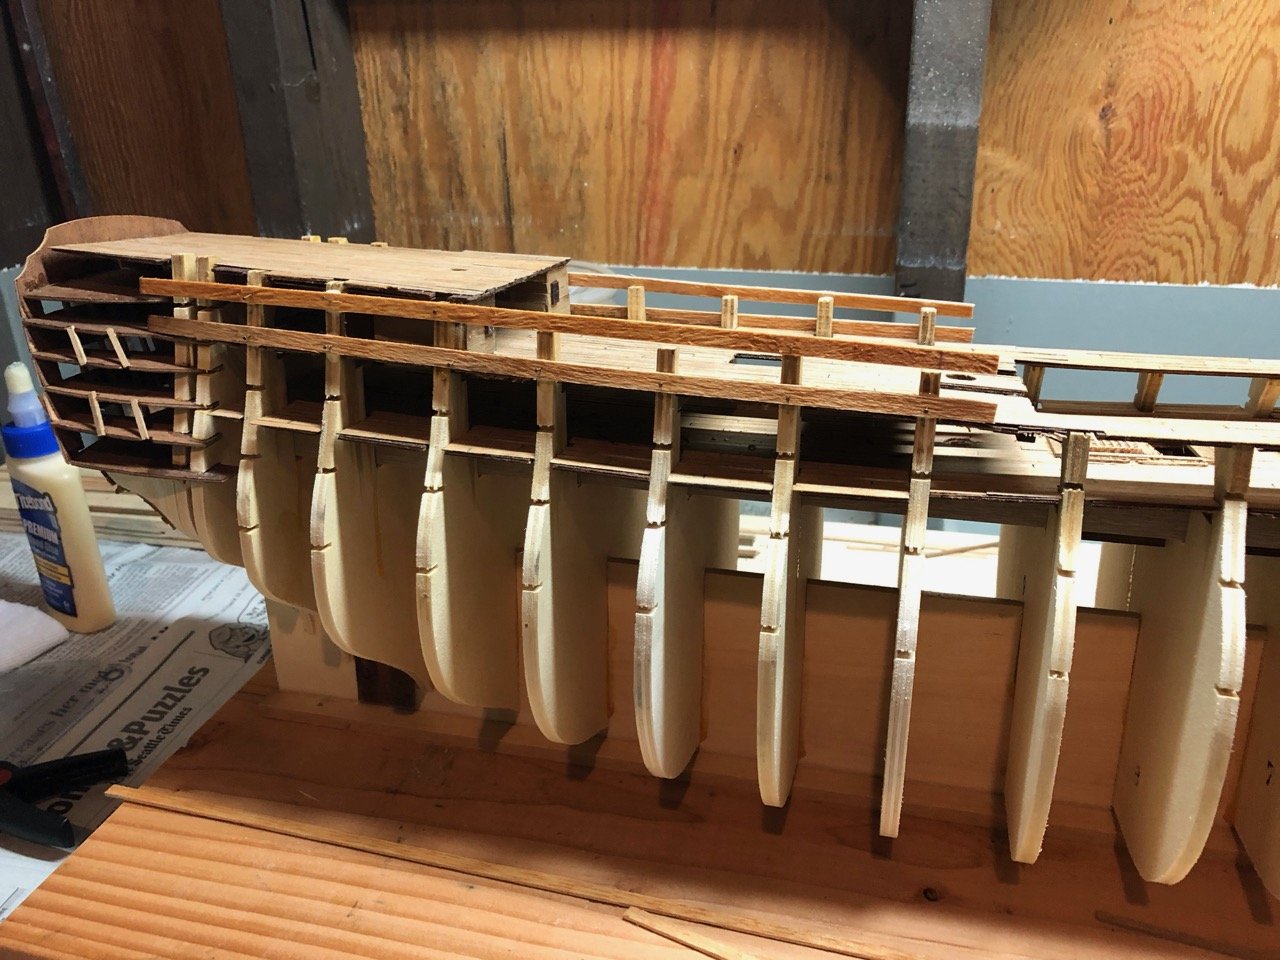
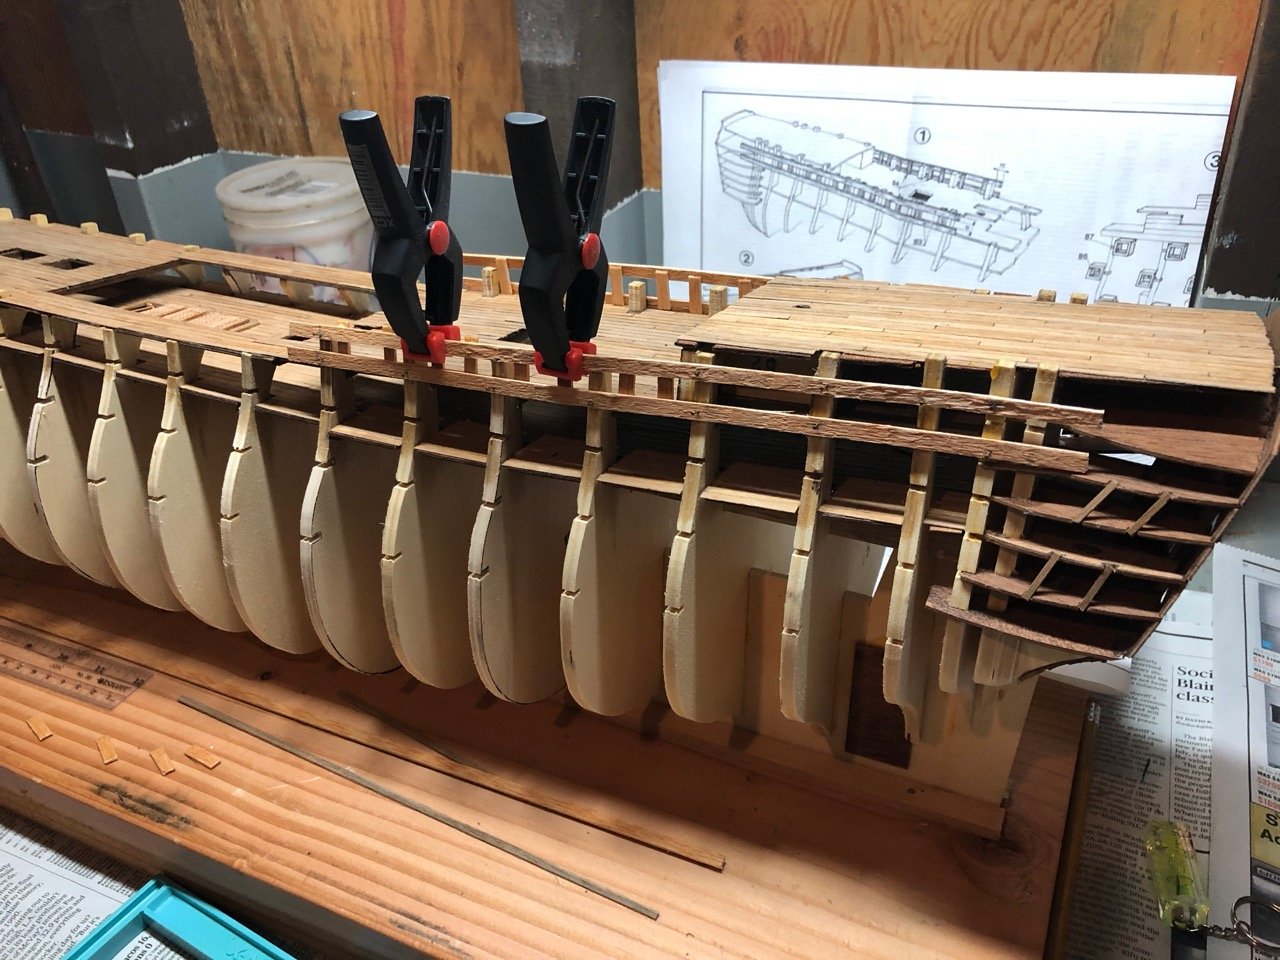
Work goes slower than I'd like, but bit by bit she's coming together. They say a journey of 1,000 miles starts with one step, so here we are. Pieces seem to be fitting together rather well. I did need to expand the stern piece side openings to better support pieces 64 - 67, but that was about all.
-
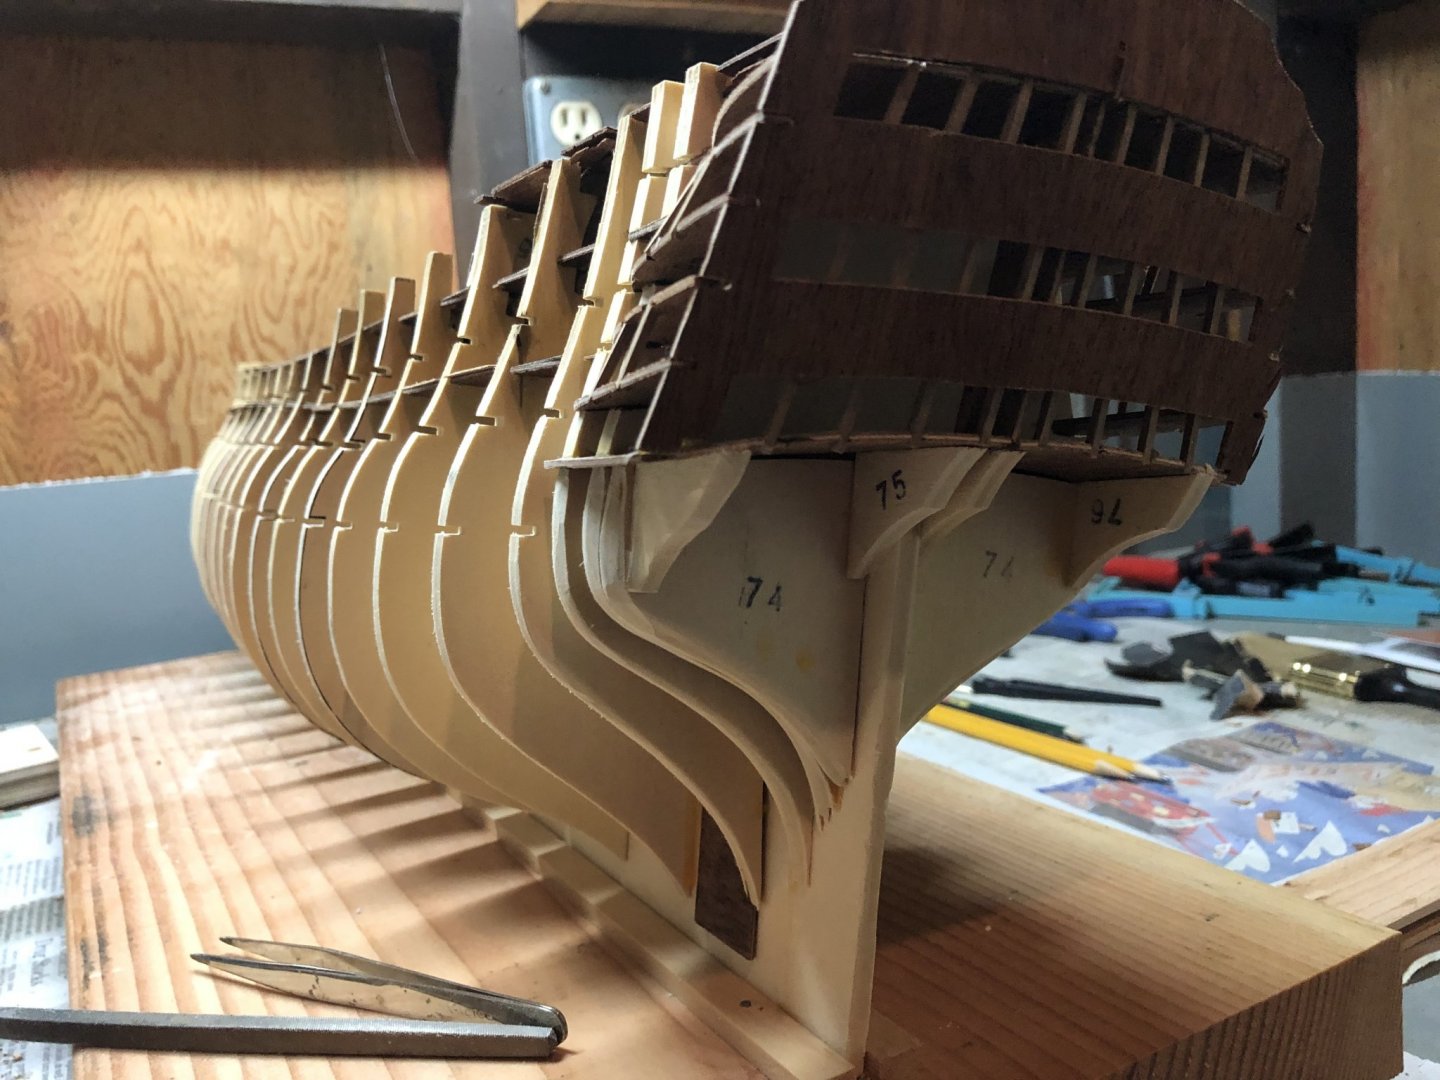
Thanks Mark; welcome aboard and appreciate your kind words. Yes, the key will be to read ahead and comb through all of the build logs of those who have gone before to avoid some of the pitfalls out there. Thanks also to Grandpa Phil for the definitions above. I've started the stern work as you can see. Slowly but surely!
-
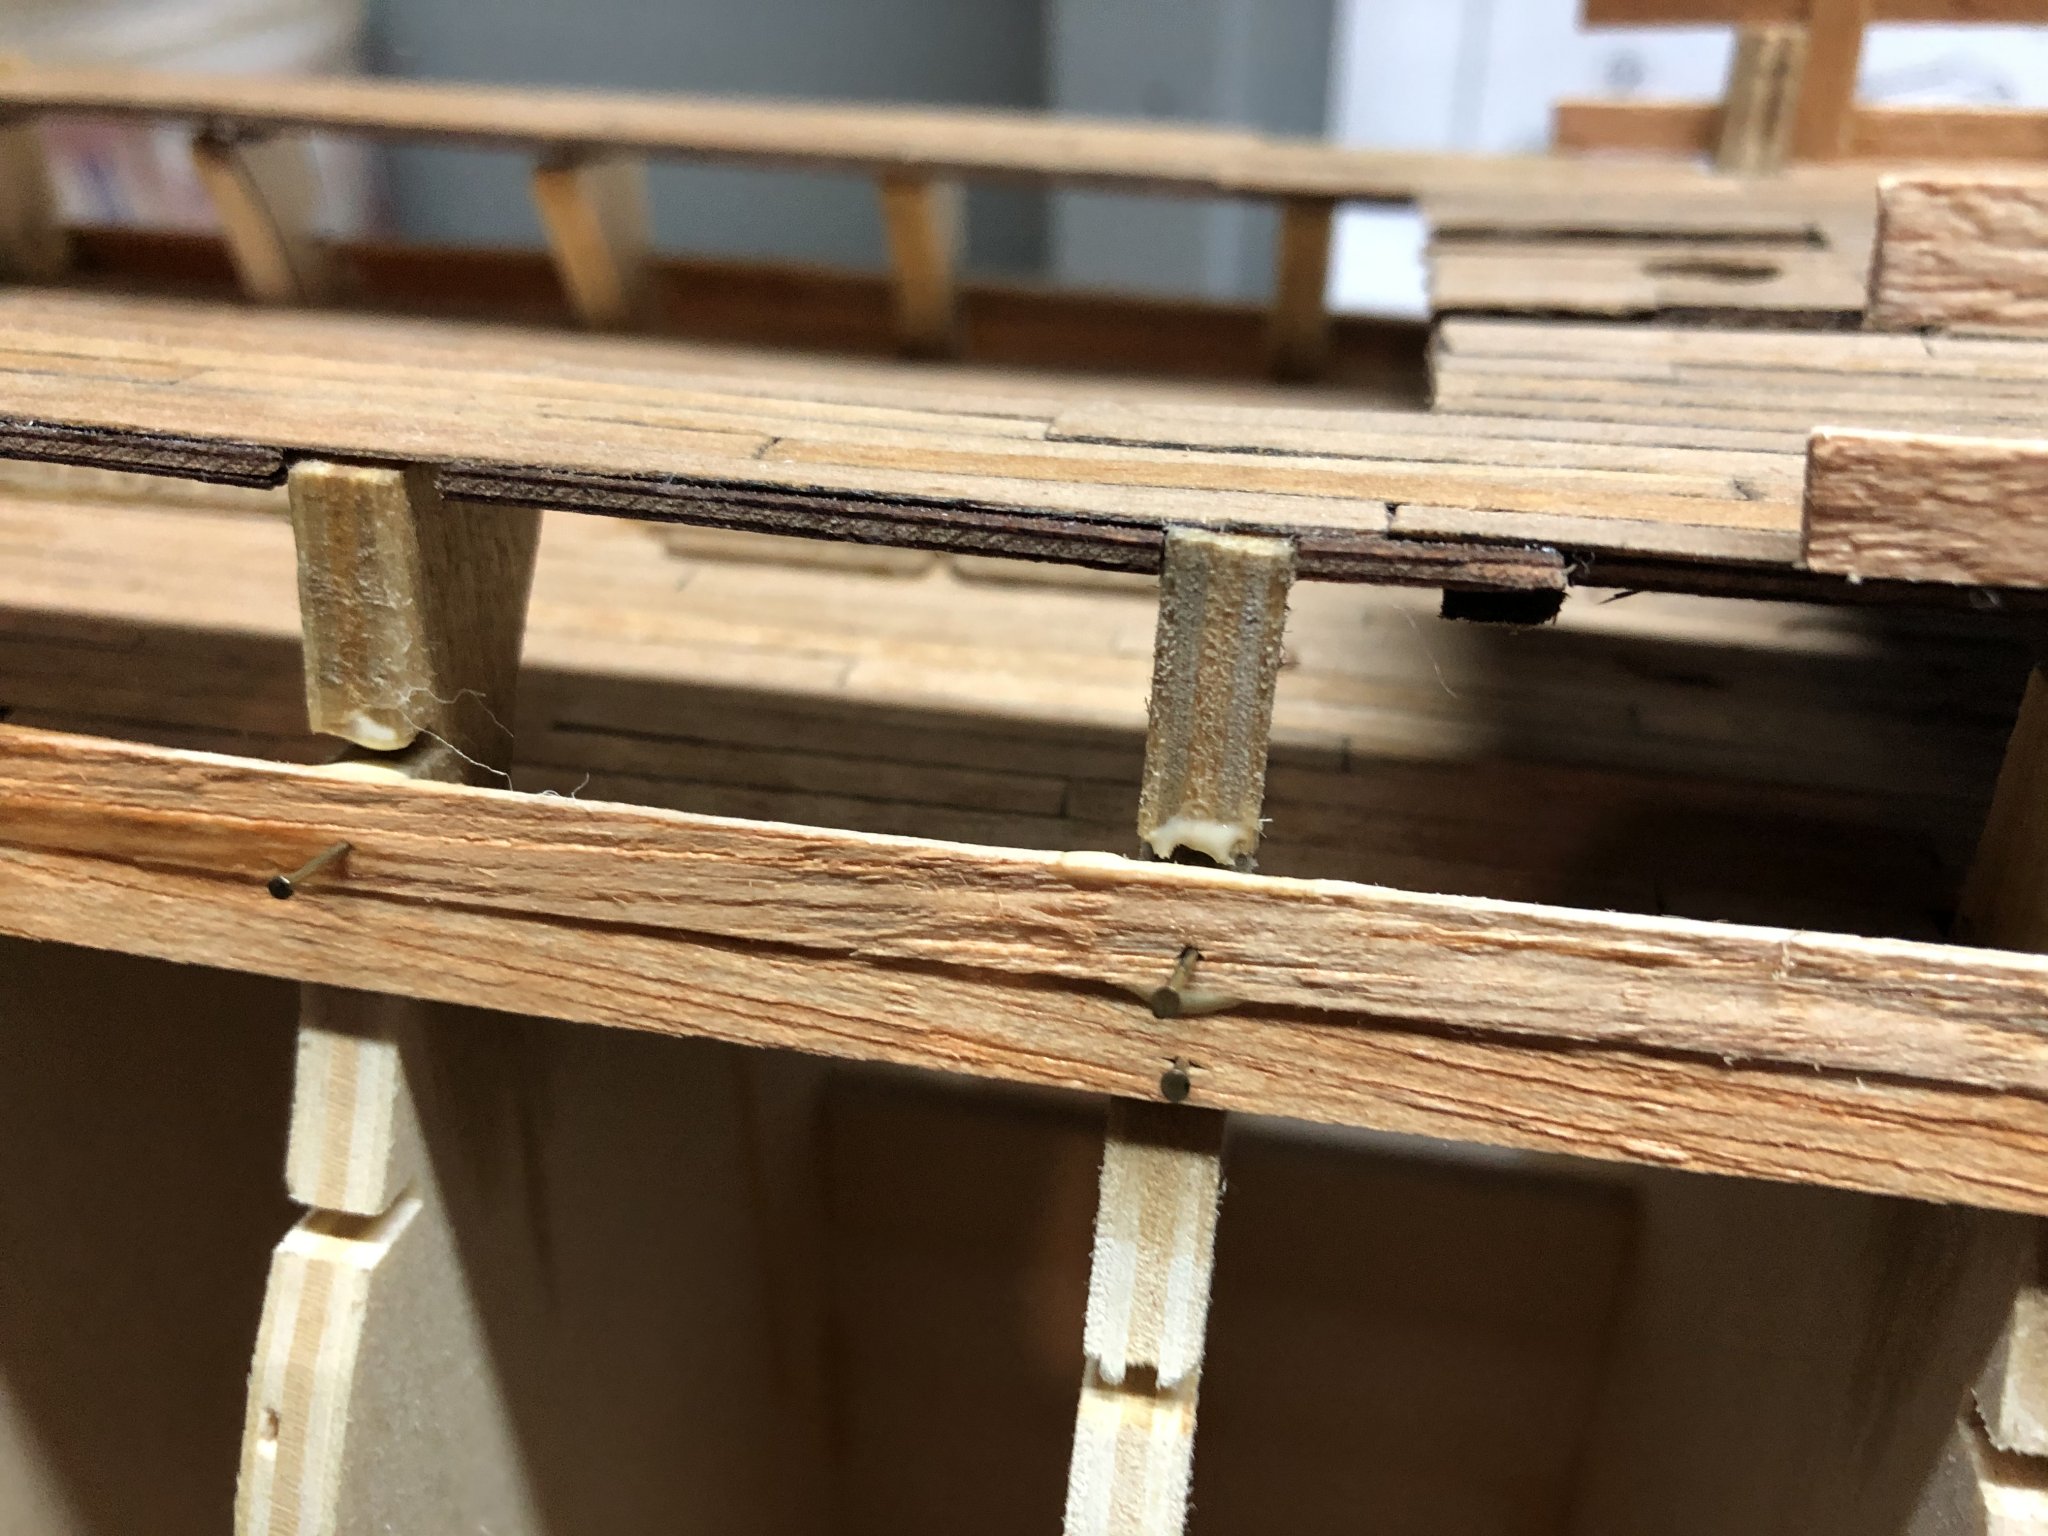
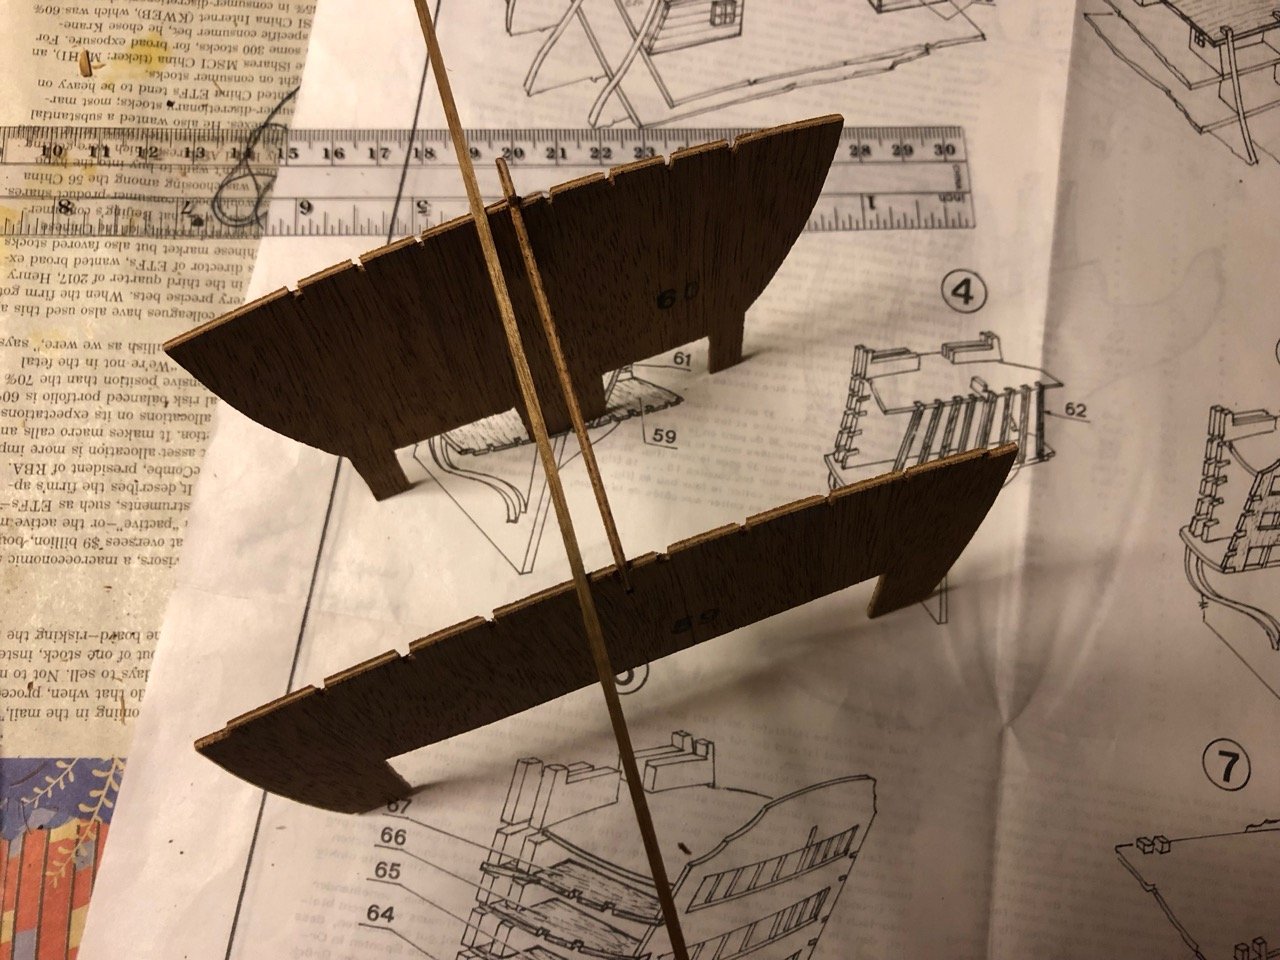
As I transition to the stern section assembly, I want to ensure I'm doing this correctly and with the right materials. Unlike plastic models where each/every piece is pre-fabricated and available, I'm learning wood models call out for a lot of 'part making' where the modeler does the work. I know, I know.. yes, I shouldn't have started with the Victory. Understood. That said, the Mamoli instructions show the main sections (59, 60 & 61) to attach including these strips (62) between the top and bottom sections. Of course the instructions/table is in Italian and calls out for step four (4) using 8 x part numbers 62. These parts, 62 are described in the accompanying table as: 'Listelli specchio di poppa', Quantity 8, material 'LN' (walnut lath) and Misure of '2x2'. The 2x2 is in mm. I've never figured out what is meant by 'Codice' which in this case is 6077. My understanding is I'll need to measure and cut these roughly 8 x 6cm long (2x2mm) sections from the long, approximately 74cm walnut lath that is 2x2mm. I'll also need additional 2x2mm walnut material for the stern sides. Finally, I ended up widening the grooves in each of the major sections (59 & 60) below to fit the 6cm by 2x2mm strips. The picture below shows in general how I understand it should be assembled (pre cut) with example of one strip shown. Please feel free to comment/advise on my understanding. Thanks in advance.
-
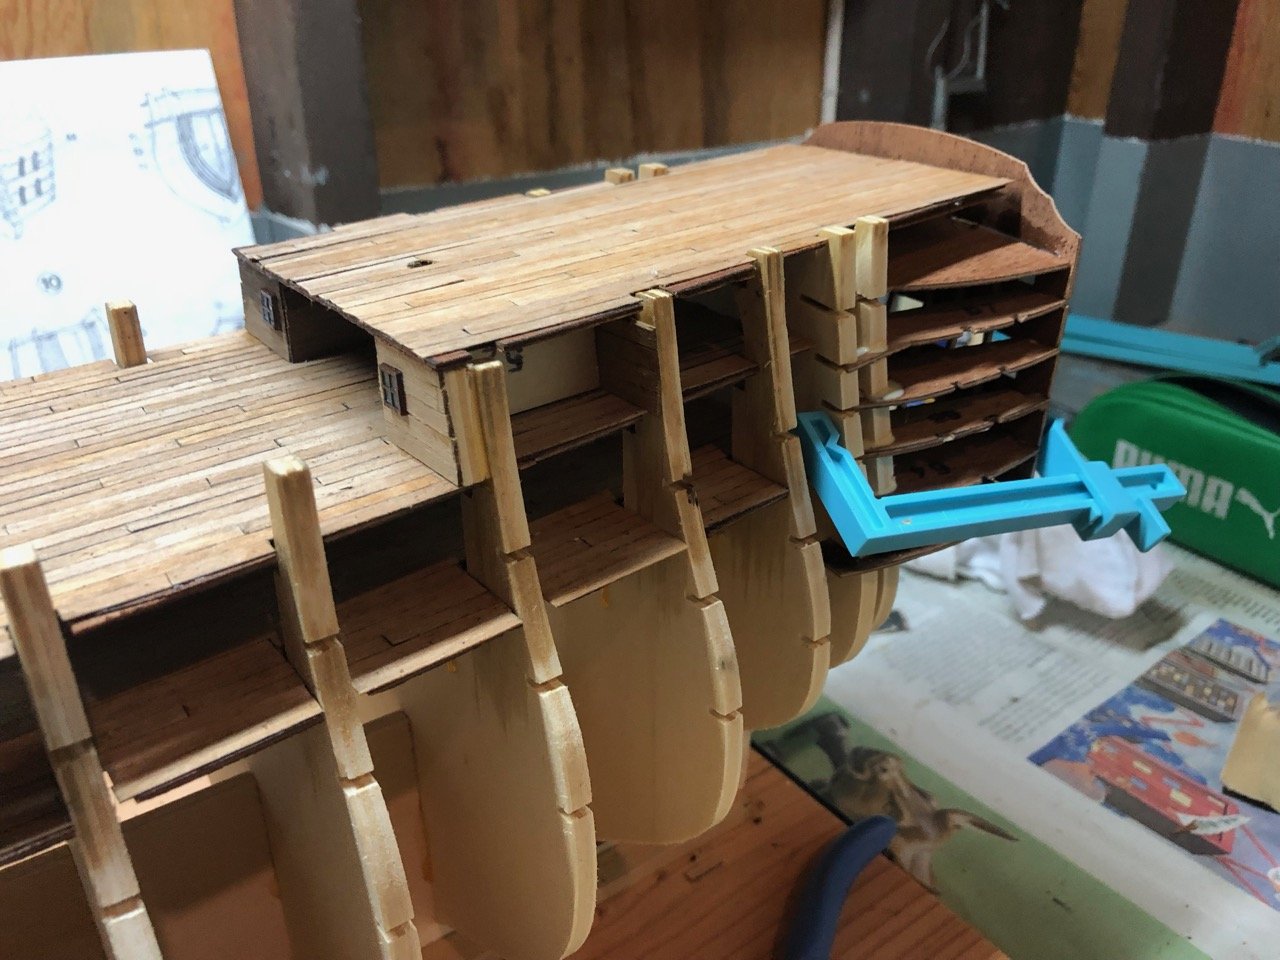
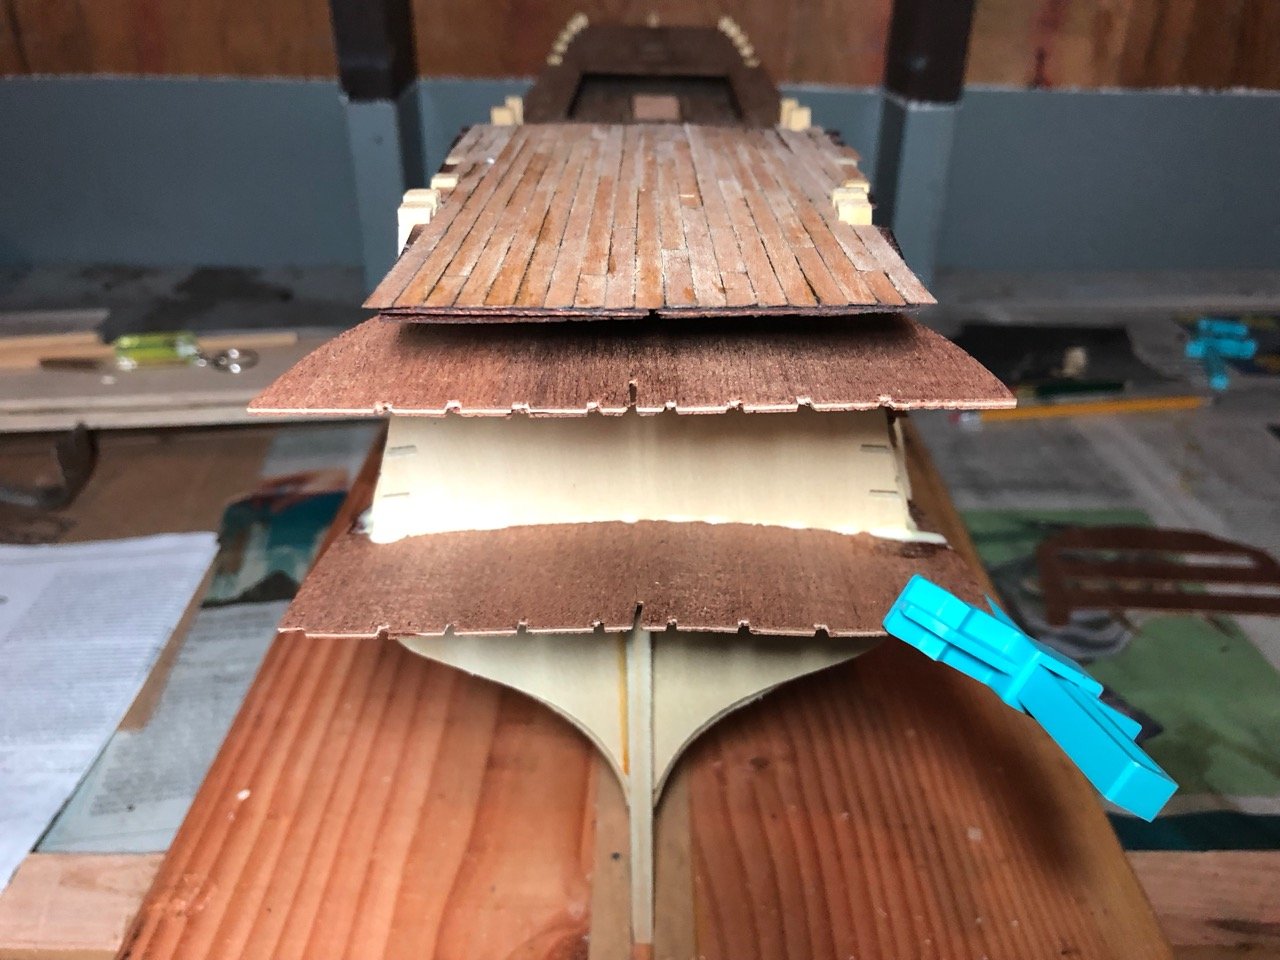
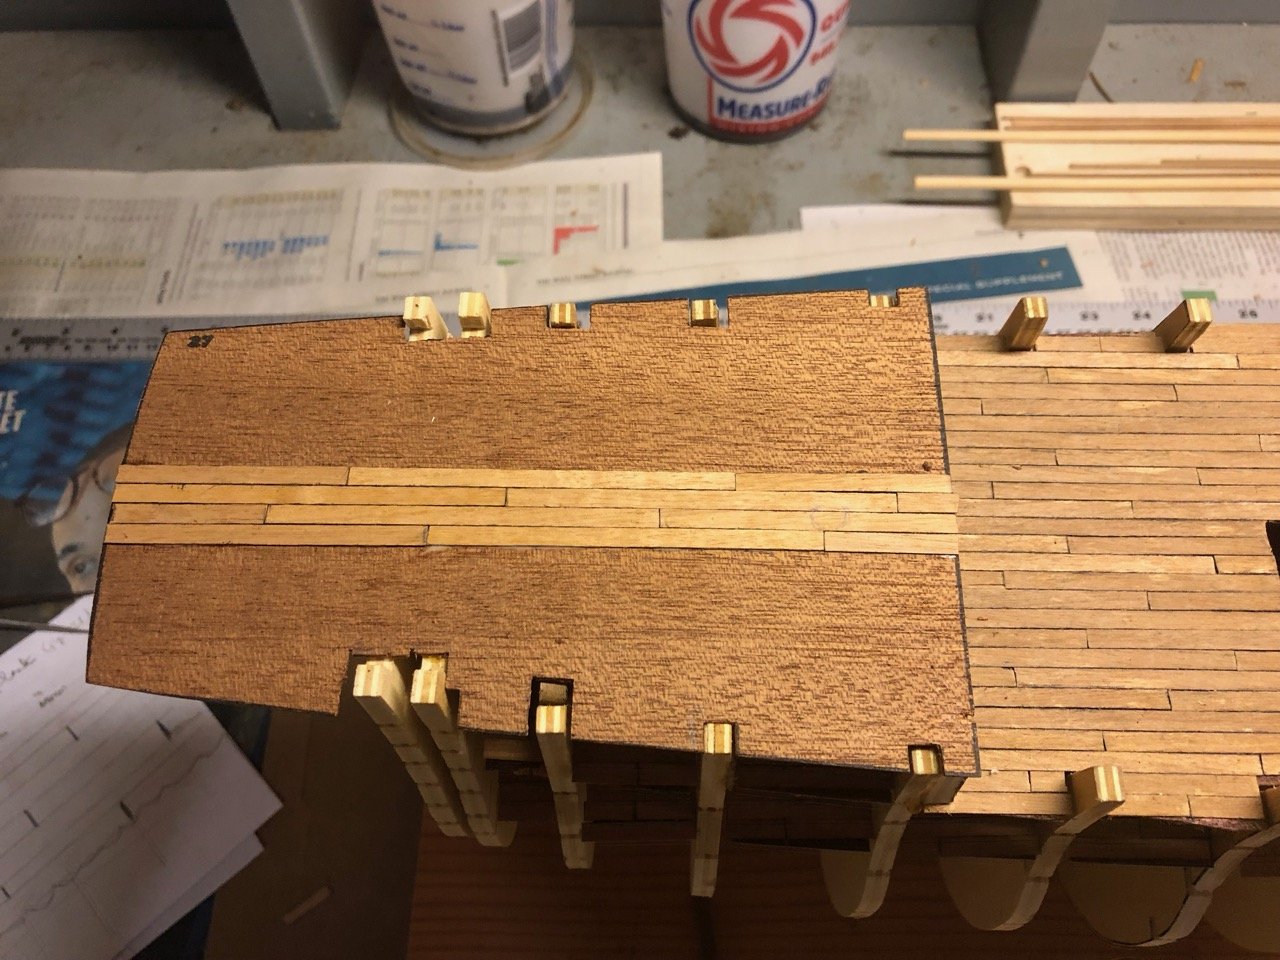
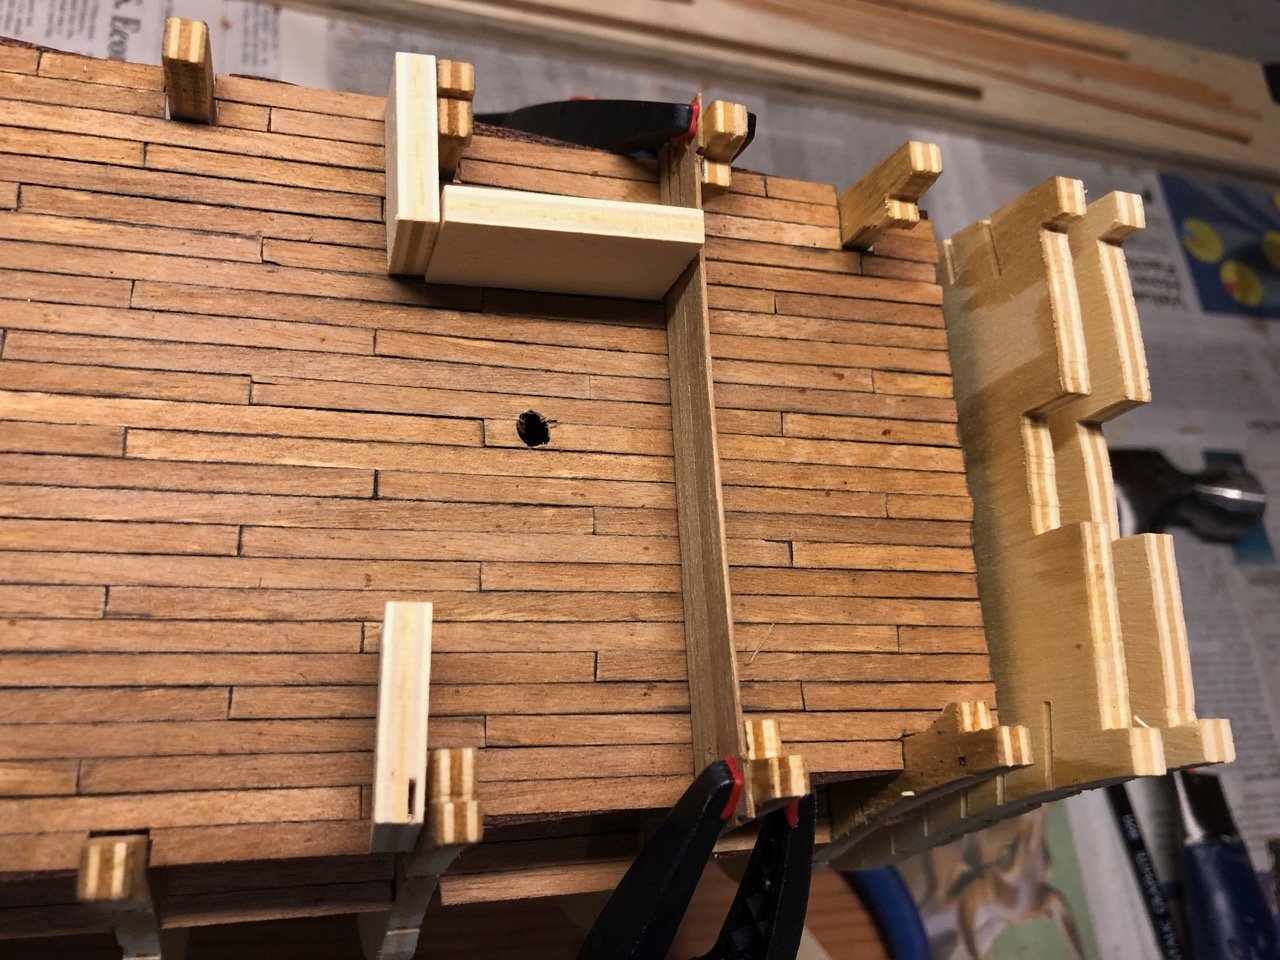
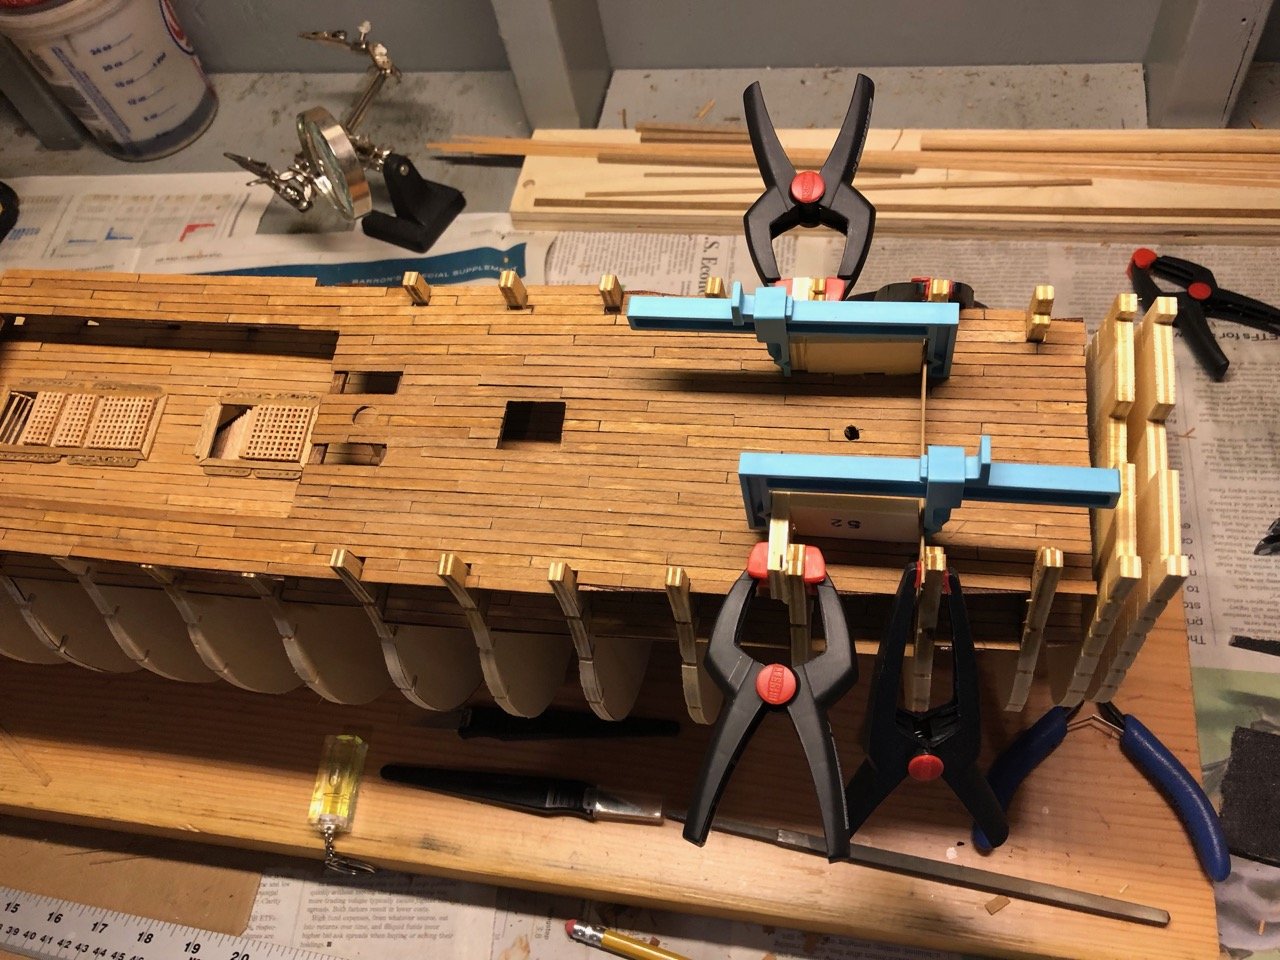
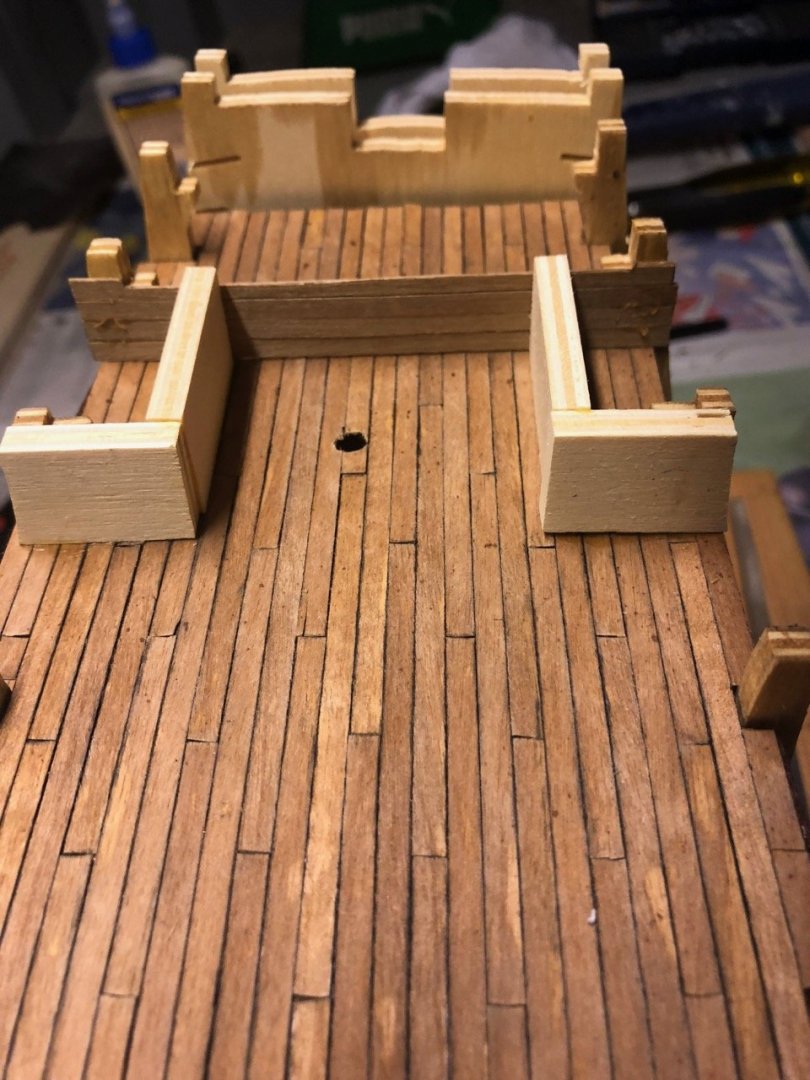
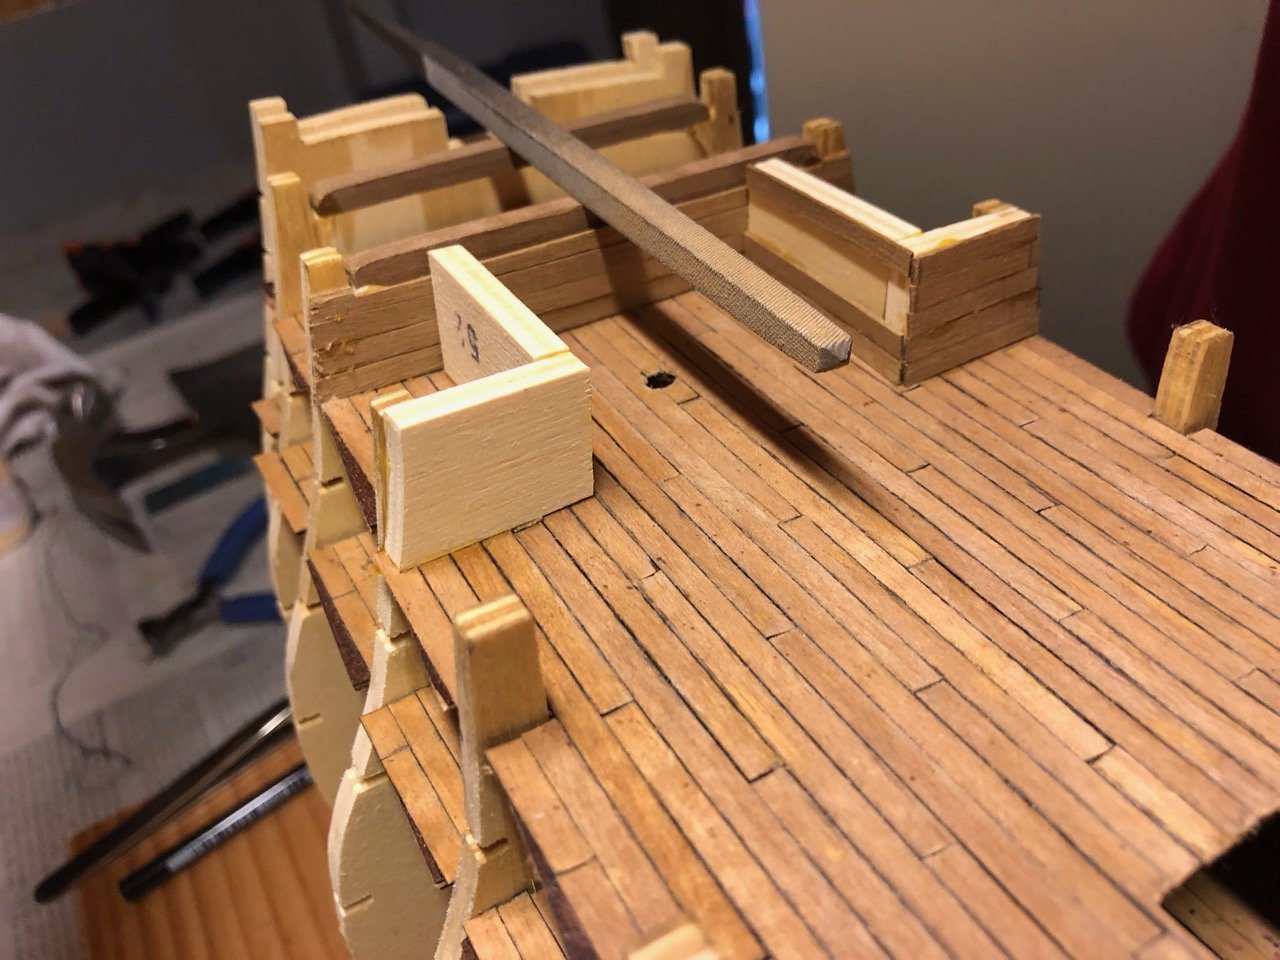
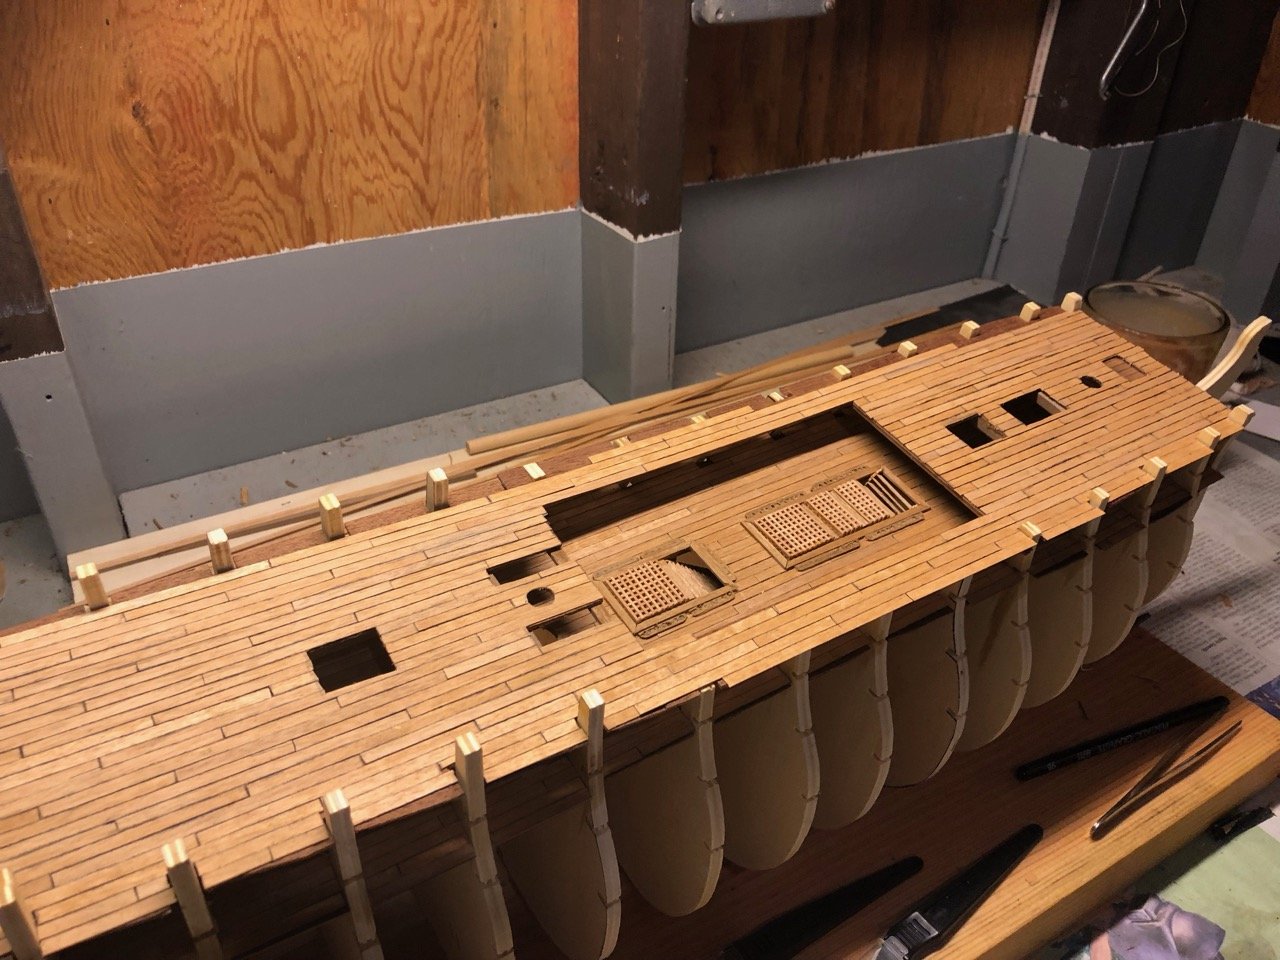
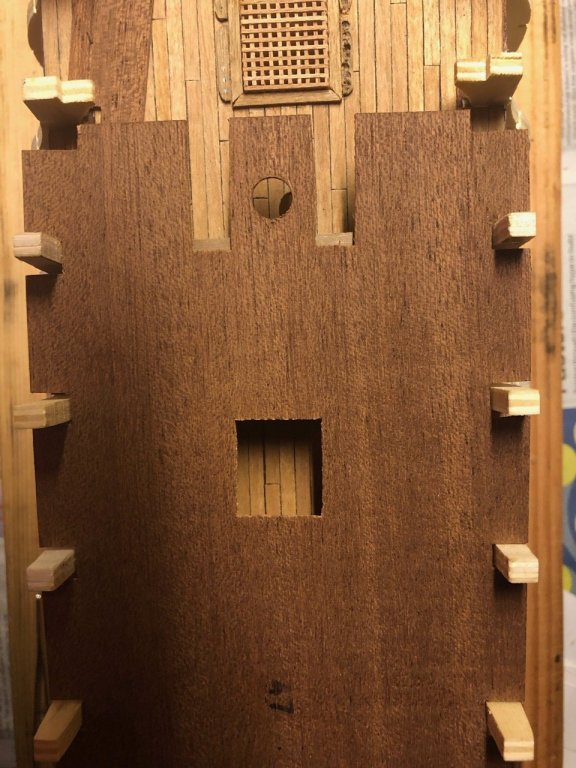
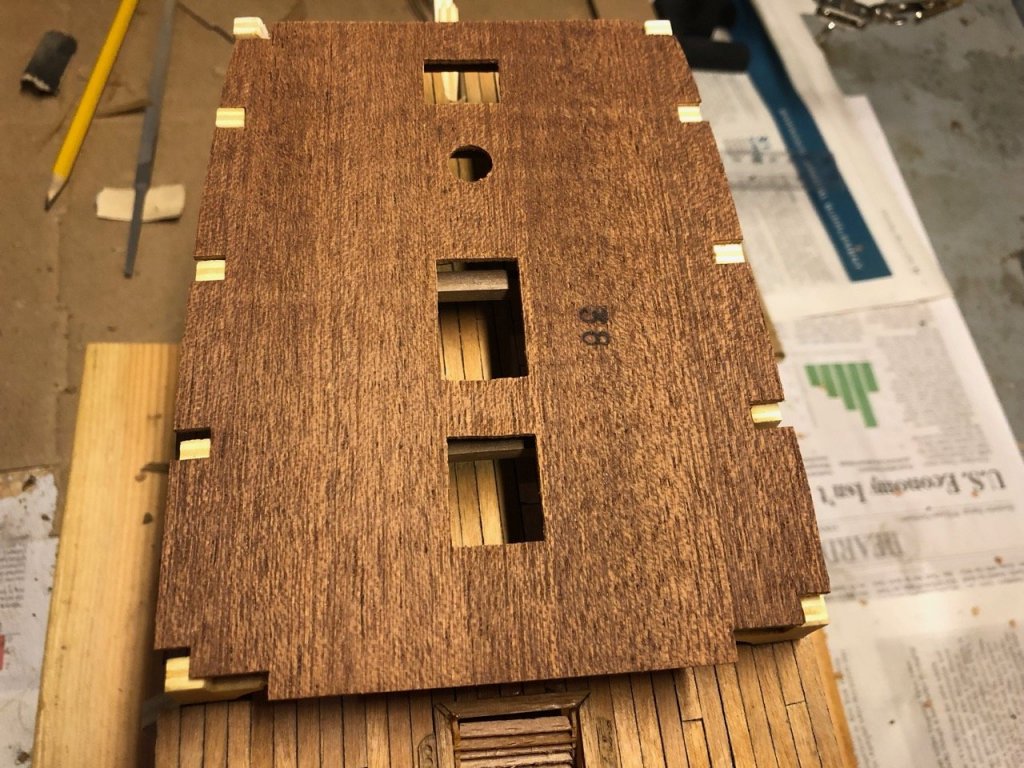
The Captain's quarters are now set with doors and windows painted brown, with the exception of the glass segments, and installed. I ended up using a thinner lath to complete covering the walls. Next up was the poop deck installation. The poop deck, as with all previous decks, had to be modified to fit. Of note the up front bulkhead sections did not protrude through the openings. so that may come back to bite me later. I aligned the deck with the Captains quarters to provide, per the instructions, some overlap over the walls. I also checked the mizzen mast opening to ensure the mizzen could be installed in a vertical position through the various decks. I had to adjust/modify the poop deck mizzen mast opening for the mast to be vertical when installed later. After the poop deck was installed, I planked it and will now treat and stain it like the two decks before it.


-
Next I've started with the Captain's quarters and have run into a couple of problems: (1) I only have one (1) piece of the called out (1 x 4mm) walnut laths/material to cover the walls and have run out of material. Options are to find a supplier for a foot of material or use a thinner piece of existing material and hope I'll not short something else. (2) I noticed that the number 16 bulkhead tops are actually below the added walls (see picture) and will not reach through the poop deck which could very well impact the poop deck bulwark construction.
-
The deck is now stained using a 50/50 mix of mineral spirits/danish oil (medium) after an application of Minwax prestain as I did on the first/upper deck.
-
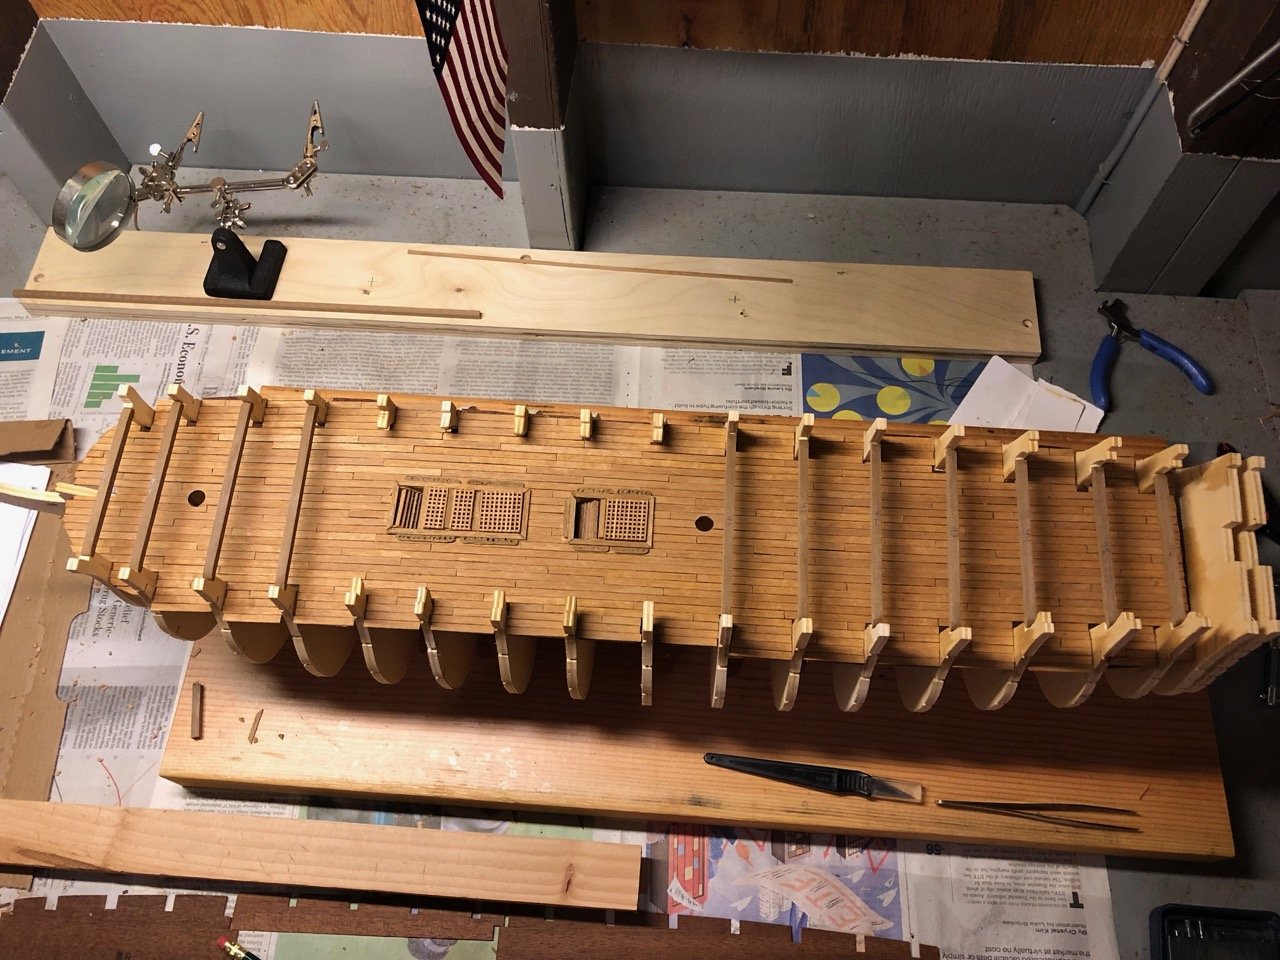
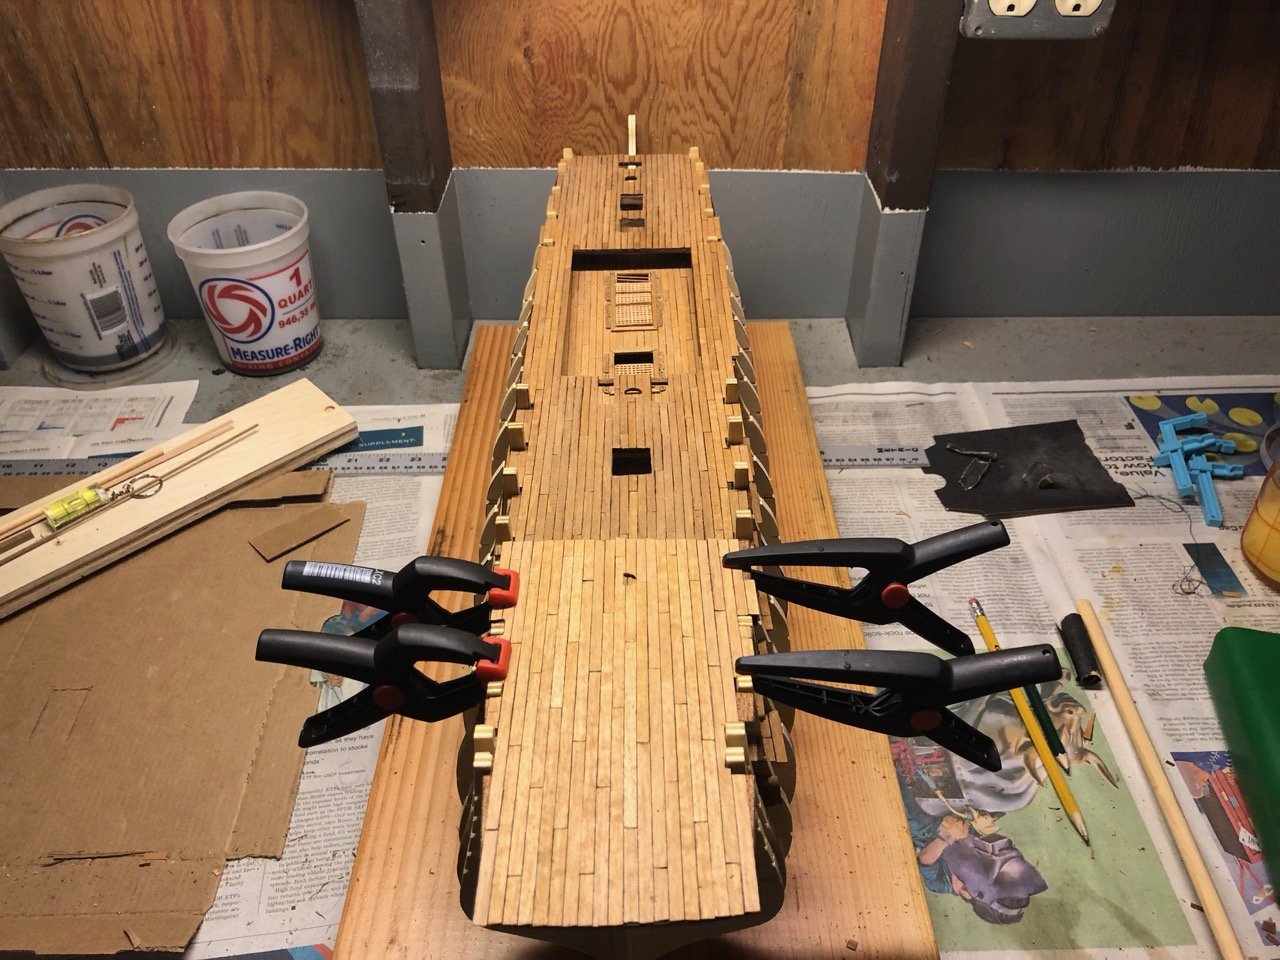
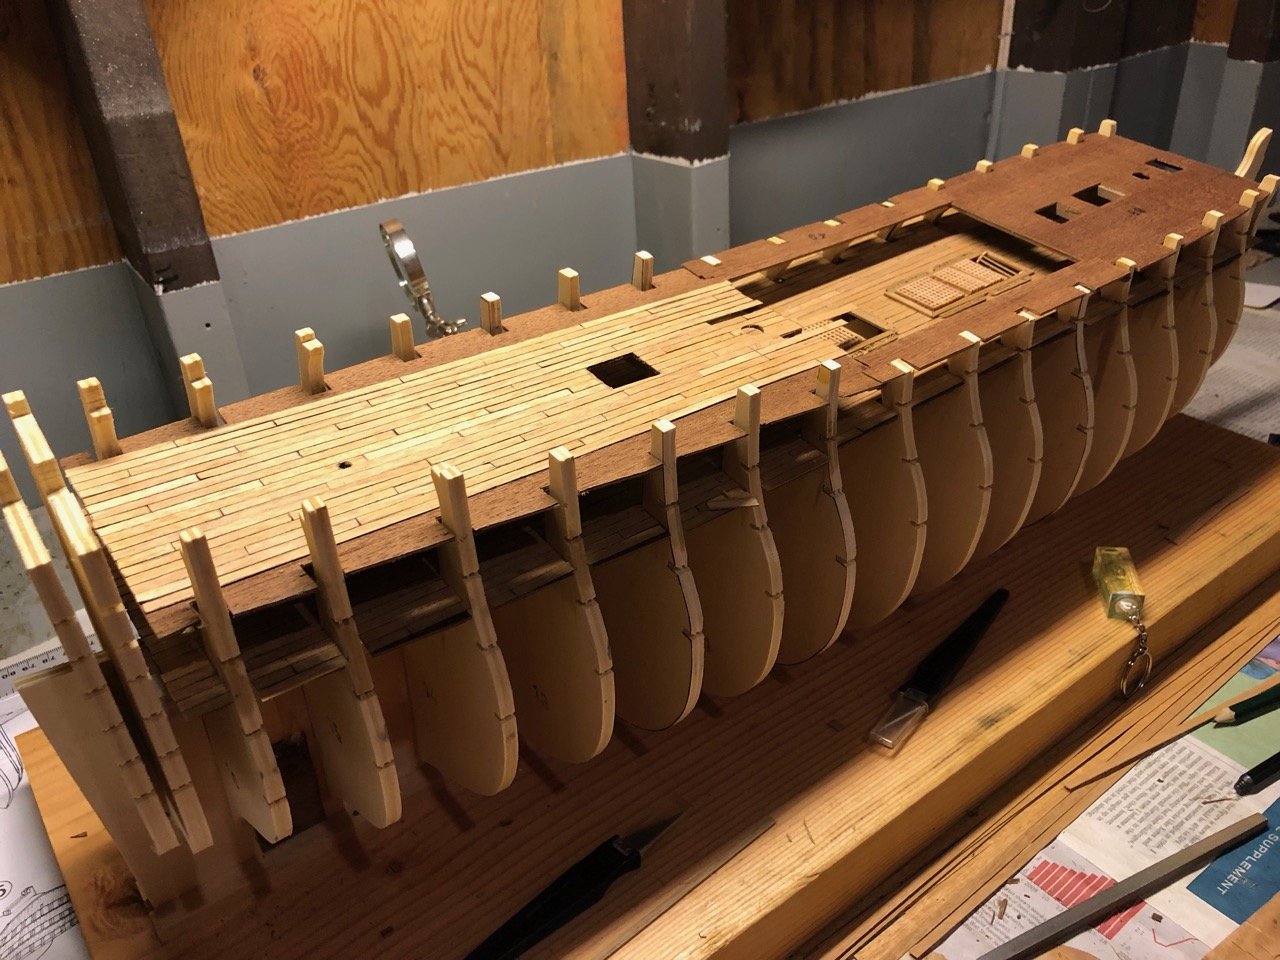
Quarter deck planking is now nearly finished. Maintaining the four butt planking pattern throughout was a bit dicey especially when crossing the gangboards toward the bow. I ended up including a smaller width plank in the bow portion (port side). I also noticed the planks are not 100% parallel between the upper and quarter decks. After finishing I'll then stain the deck before beginning to add the Captain's various spaces.

-
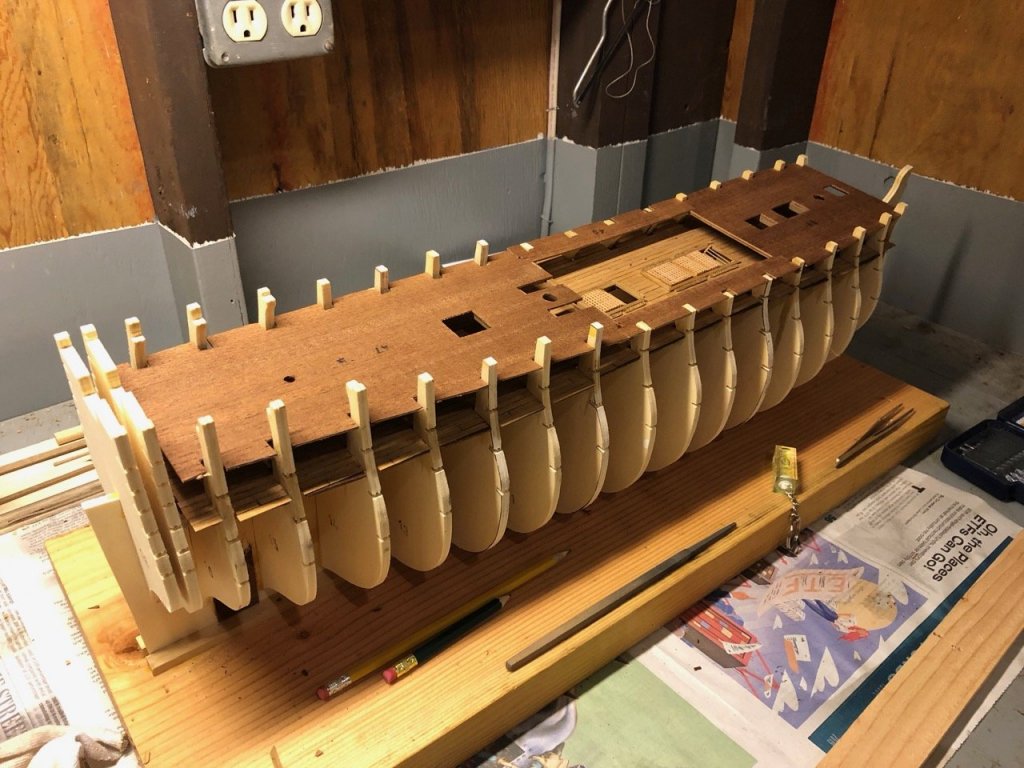
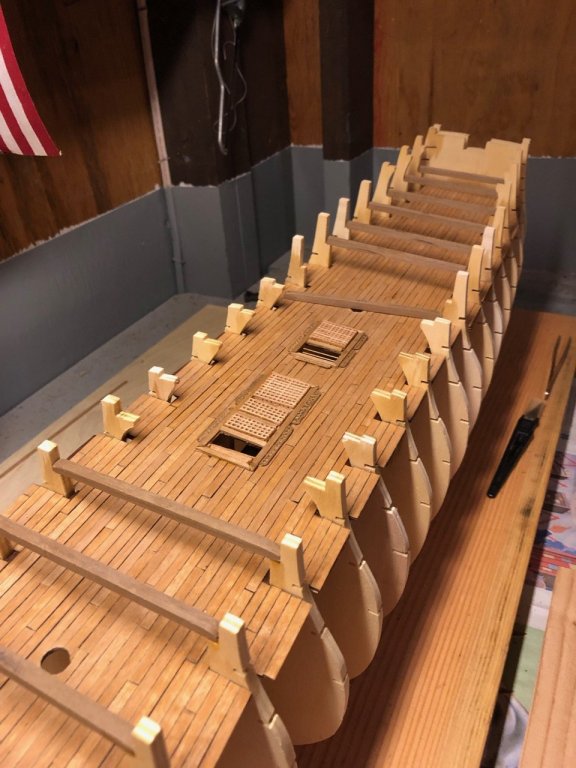
I'm sure it goes without saying that decisions/actions you take earlier in the assembly process can later impact future construction. In this case, I had to make significant modifications to the upper deck (just above the small middle/false deck piece) I made to make it fit. Those adjustments shifted the deck a bit. Later, when I placed the quarter deck pieces, the aft section main mast holes did not align. I ended up shifting the deck to the starboard side... the action did better align the deck sections..The main mast will now fit properly. However, we'll see what later impacts are later found as we continue the build. I am having a good time and I do appreciate everyone's comments/advice. The quarter deck sections are in and now I will be adding the deck planking. Will keep everyone posted.
-
The ladders were difficult to align properly. I used a couple of sections of string to hold them in place before gluing. Now the issue I have after modifying the second deck sections prior to installation is the main mast holes do not align. They are off from one another by 5 mm. Trying to figure out the best way forward. Options include creating another opening directly above the upper deck.... or possibly adding a slot to the upper deck for the main mast to fit into. Third option is to shift the upper deck to the starboard side. Neither optimal at this point.

-
Thanks everyone for your comments. Ladders (2) installed as well as the second deck support beams. All cut to length, ends rounded off via a file/sand paper and glued. I figured it best to fit all aspects of the second deck sections before gluing them one at a time. Note that the prow/forward section did not fit and had to be modified to allow it to fit properly. Good news here is the foremast holes aligned.


-
2 x ladders complete and one installed. Very tight fit. Some light sanding on the side, but still a bit too large. Planning to use a small string to position on the top step, place it on the small/false deck, pull the aft ladder up and glue in place.

-
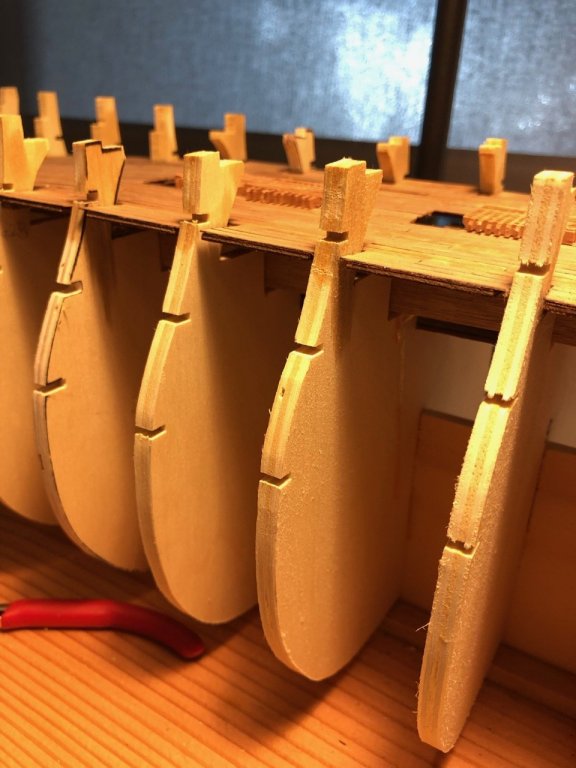
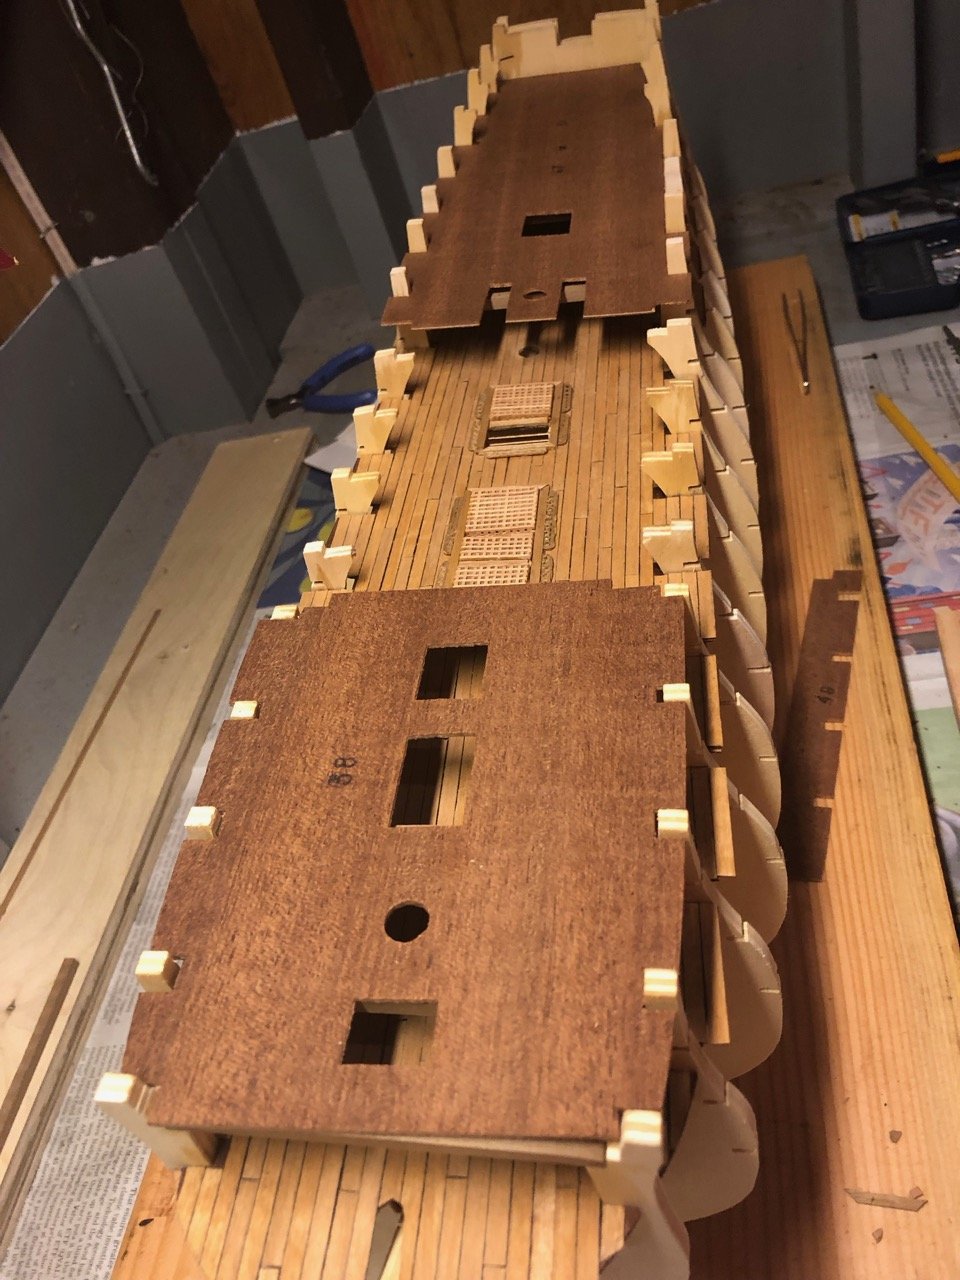
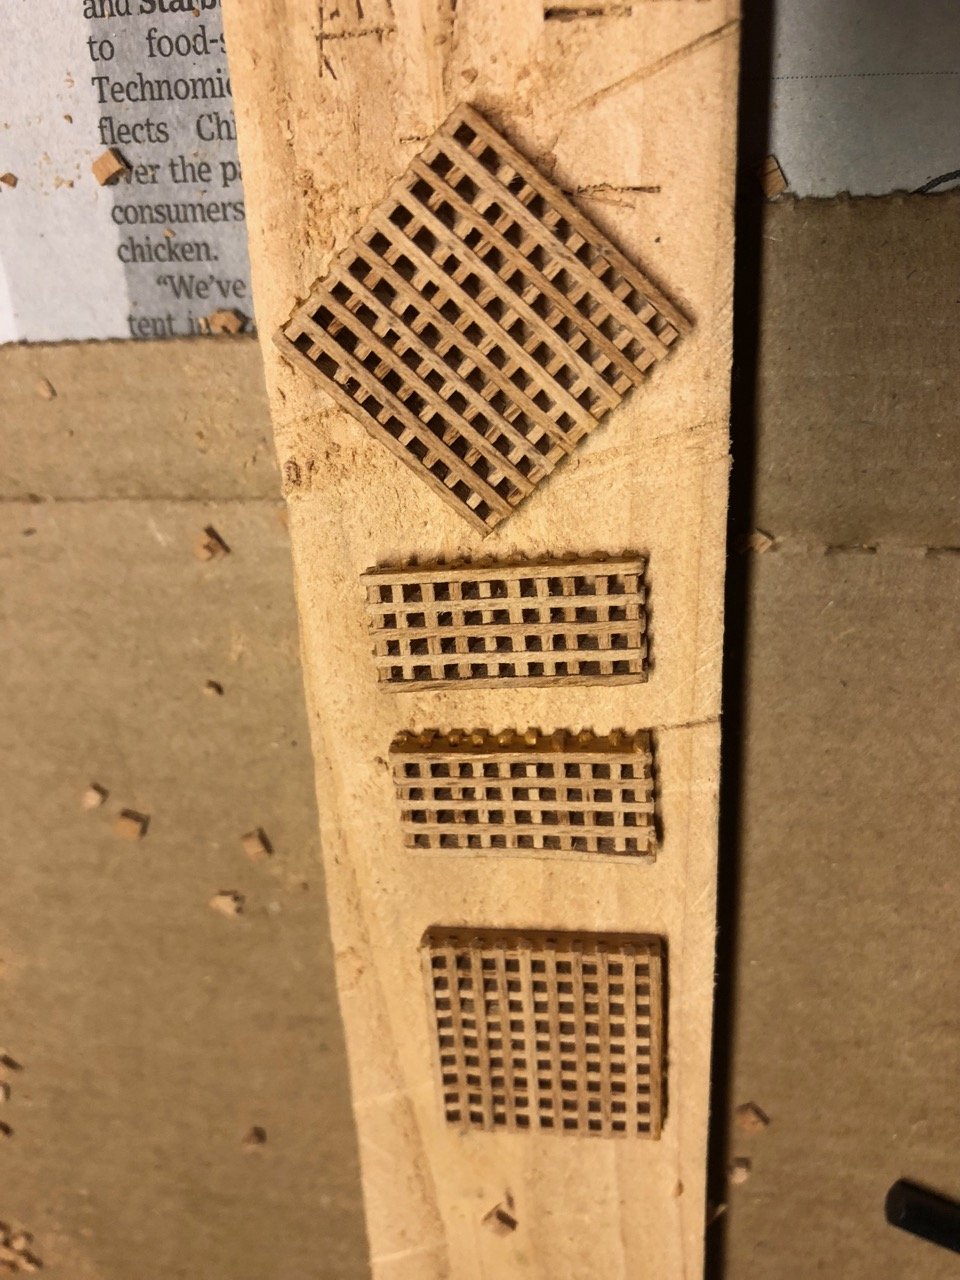
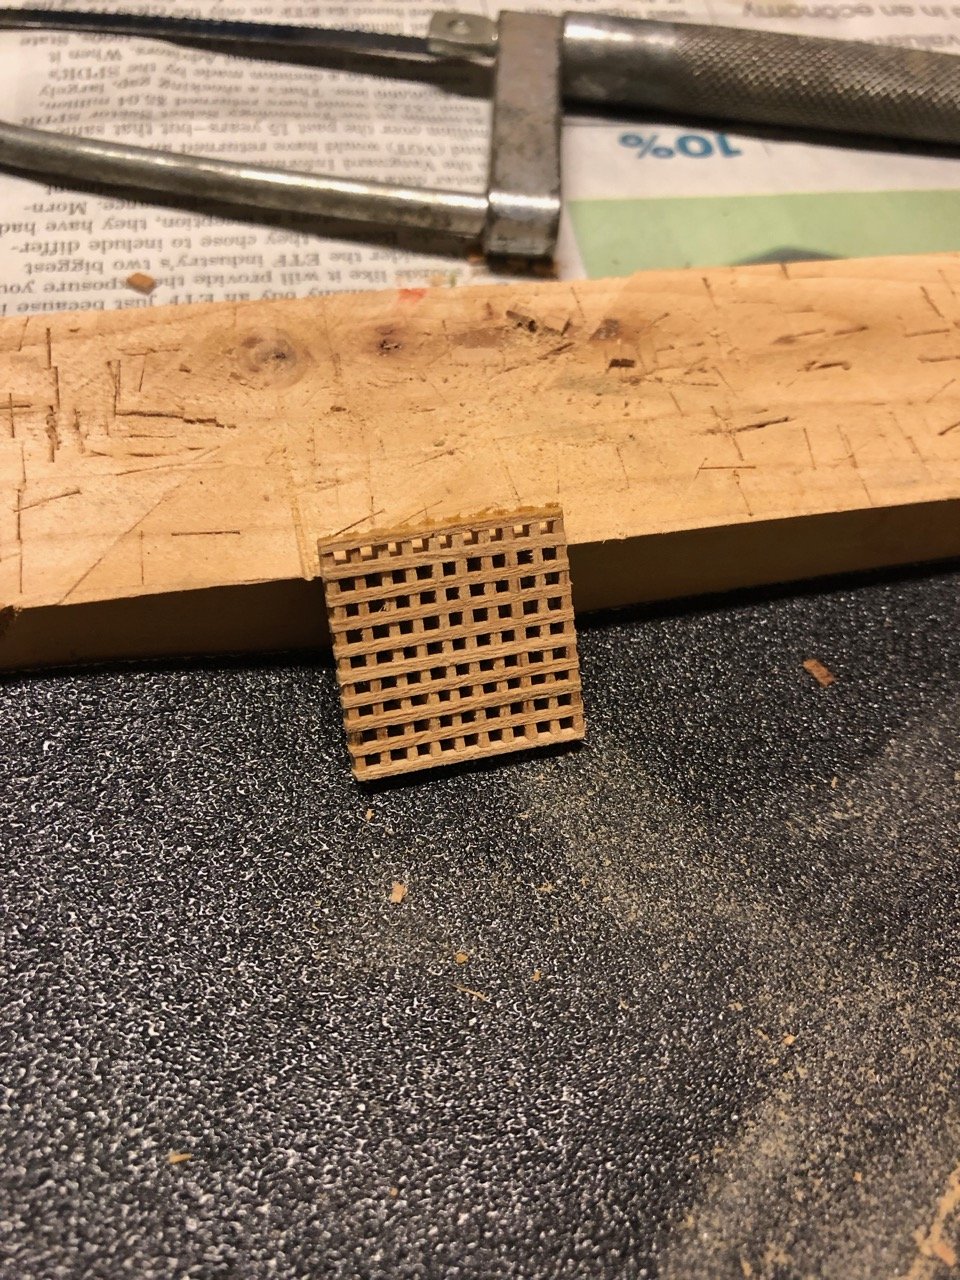
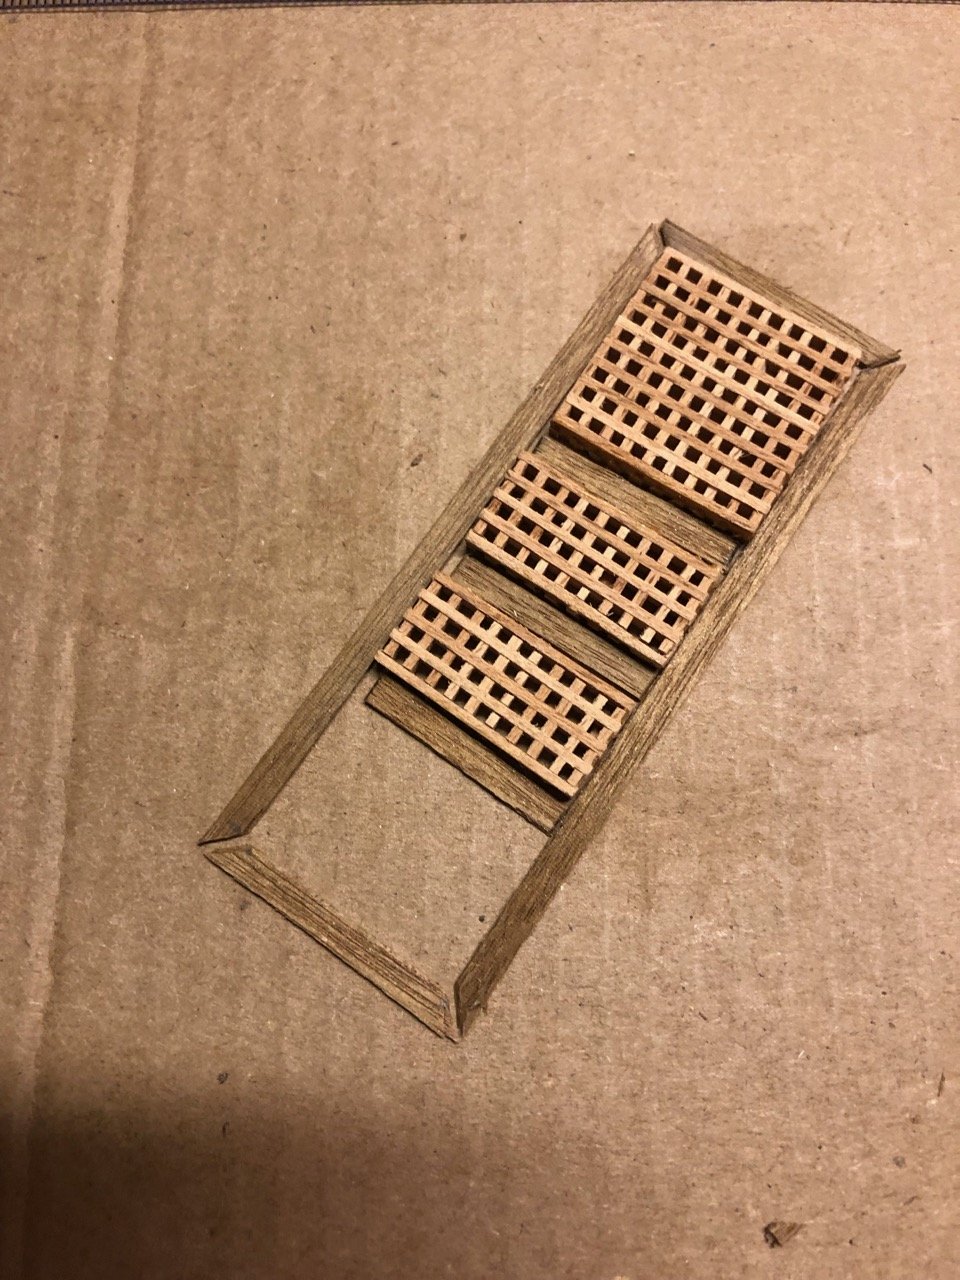
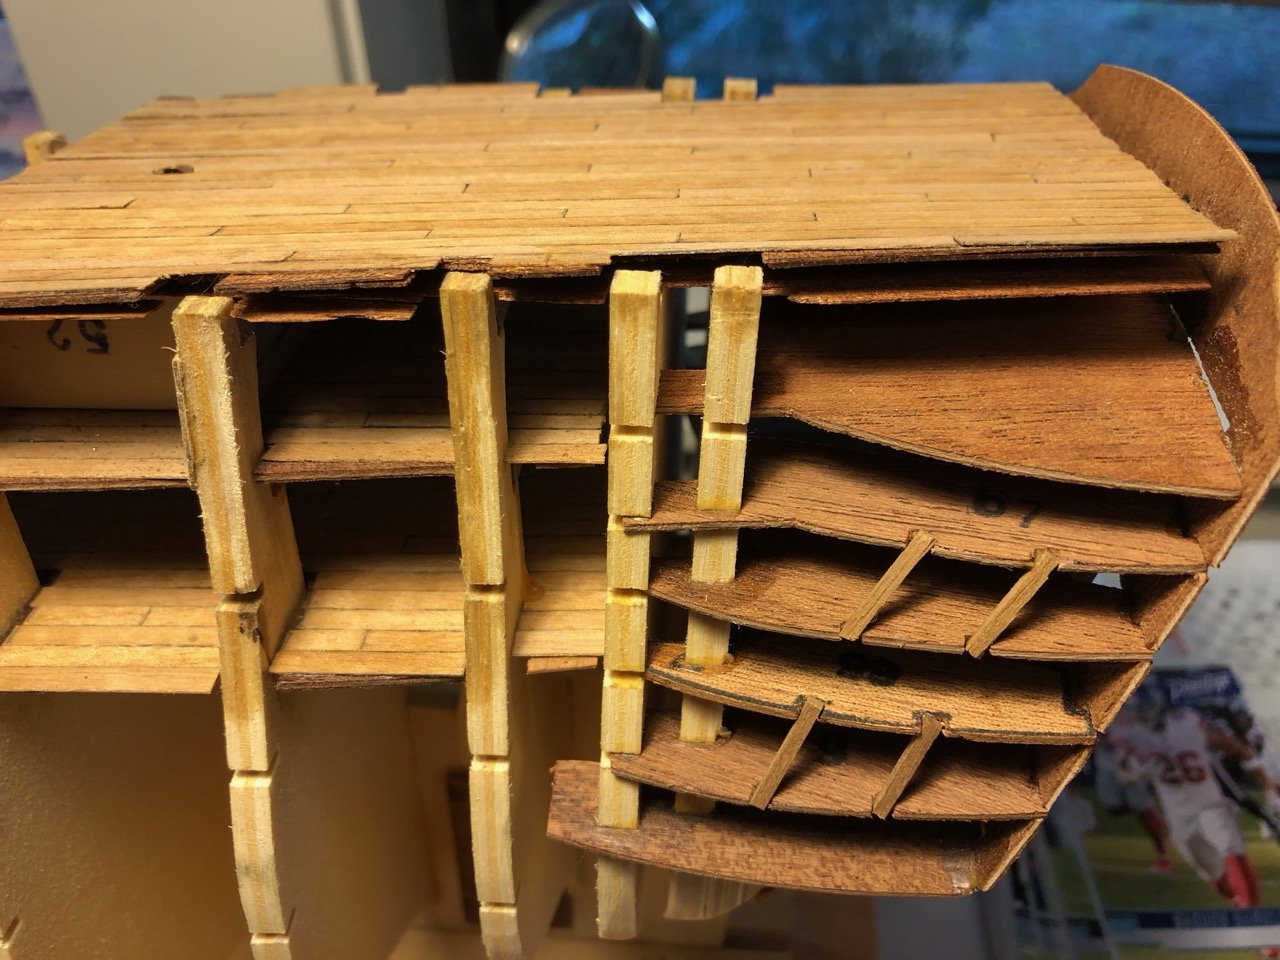
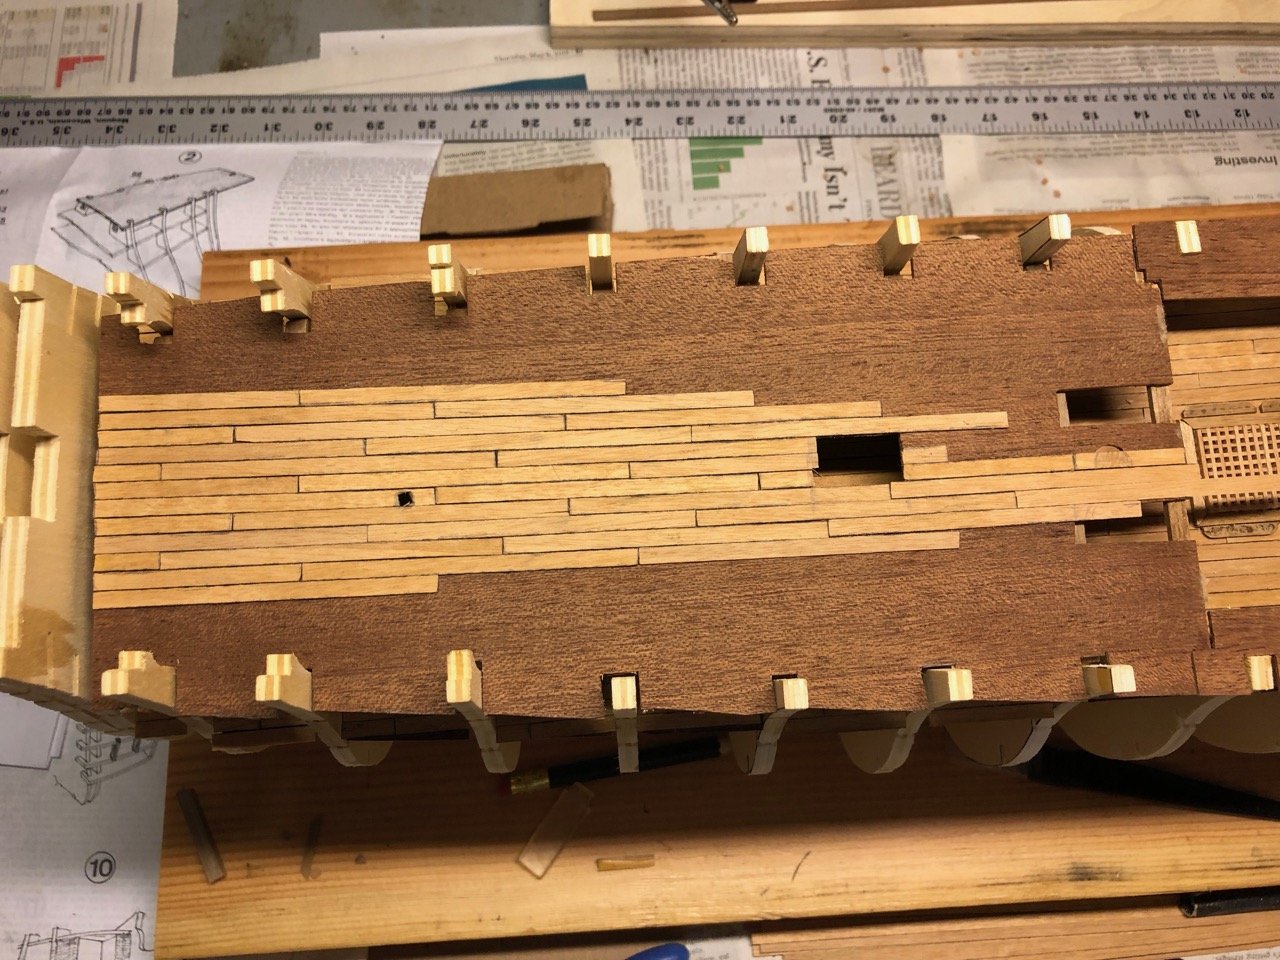
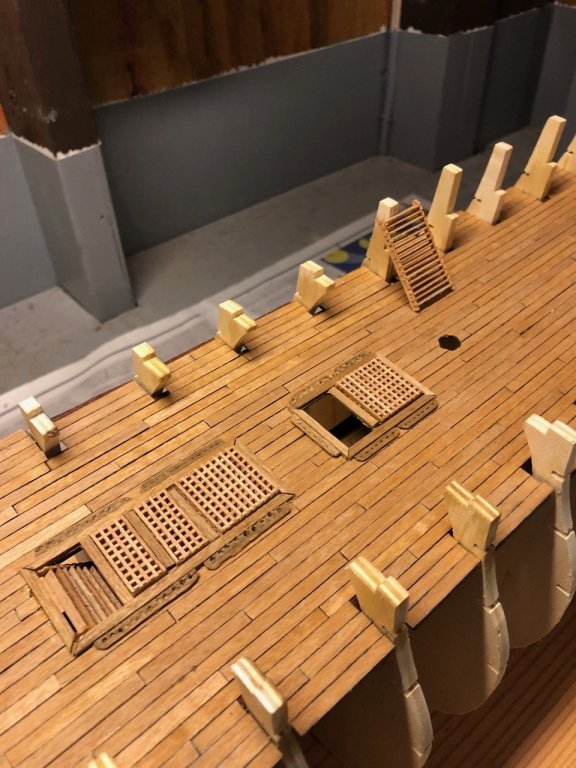
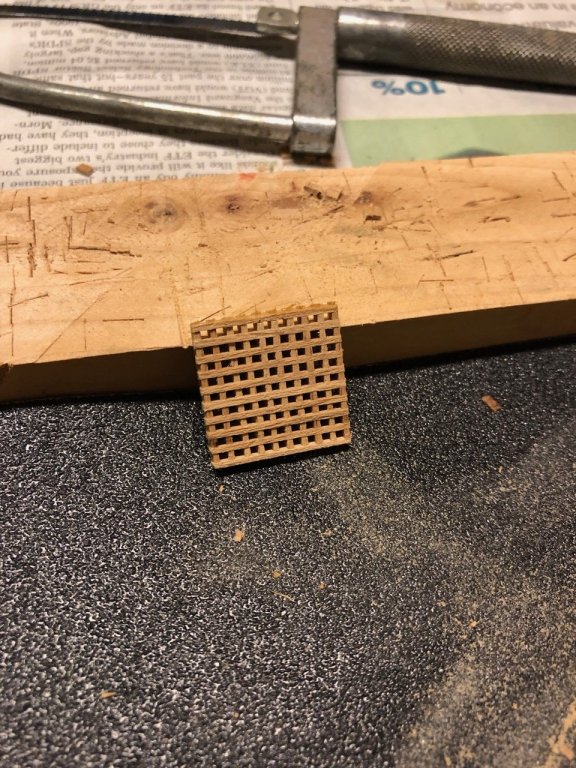
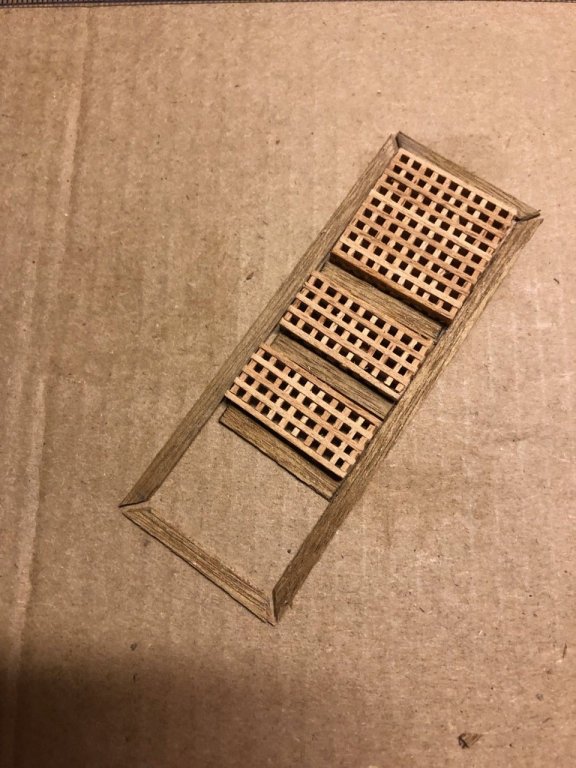
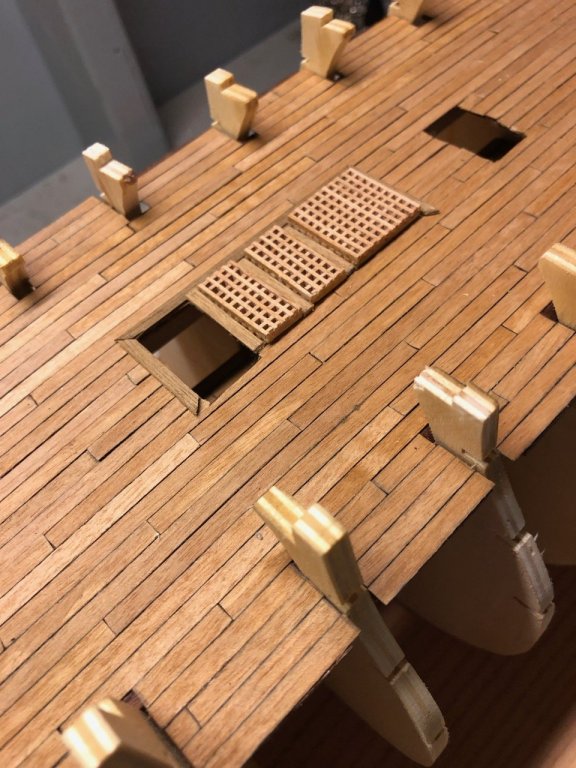
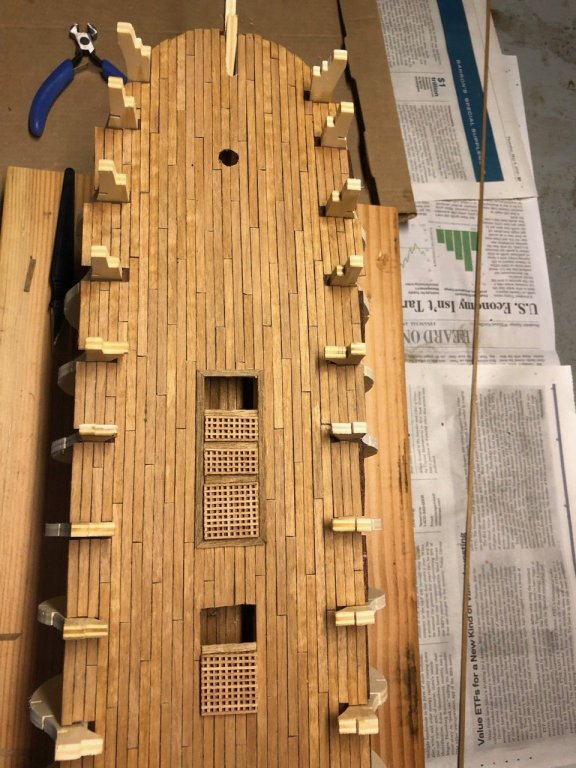
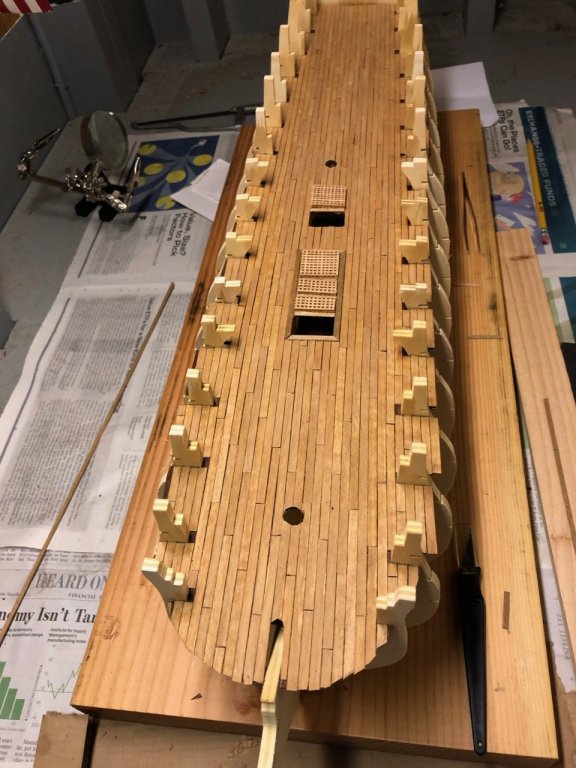
Wow! The devil is sure in the details; especially when building model ships! We all safely returned from vacation and I resumed building the grates that reside on what I believe to be the upper deck (C Nepean Longridge, 'The Anatomy of Nelson's Ships' - Inboard works diagram). I also ordered the vinavil called out in the instructions for dipping the grates in once completed. After melting the vinavil in warm water, dipping the completed grates and letting them dry - I still had a lot of work to do in cutting them to size, sanding and gluing the grate border. The Mamoli plans show 10 x 7 (large) and 7 x 5 (small) grates. However, I used Mr Longridge's diagrams to derive the length/width ratio and attemped to replicate the right dimensions. However in the end, I built 3 x large grates and cut one into two (2) sections for the smaller ones which were pretty close. I then measured the deck openings to accommodate the correct border piece length and cut to size. I had to re-do a few pieces, so hopefully there will be enough to complete all decks. Need to finish these and begin working on the ladders.

-
Regarding the grates on the middle/first deck. The Mamoli instructions indicate they are rectangles, actually about 10 x 7 squares.or about 24mm x 19mm with the longer side along the deck (stern to bow). However, the ladder opening is about 26 mm wide. Looks like the accompanying border pieces will expand across the opening. That said, I don't know how to interpret the instruction table that indicate there are five (5) grates of measurements '1, 5x1,5'. The instructions indicate five (5) grates but only show four (4) in the accompanying graphics. Anyone have any suggestions on this? In the meantime I'll look at the other logs. Thanks in advance.
-
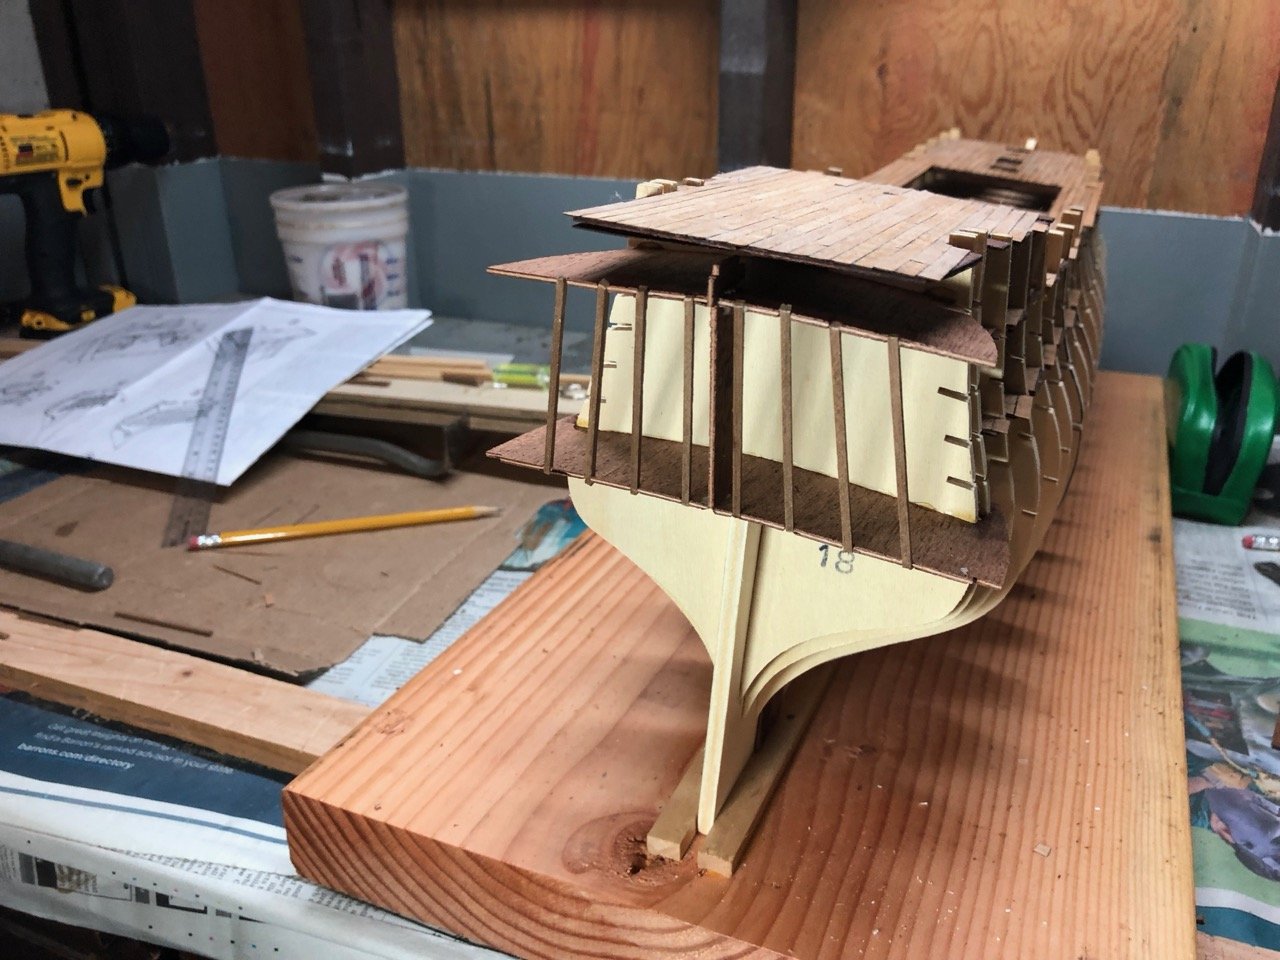
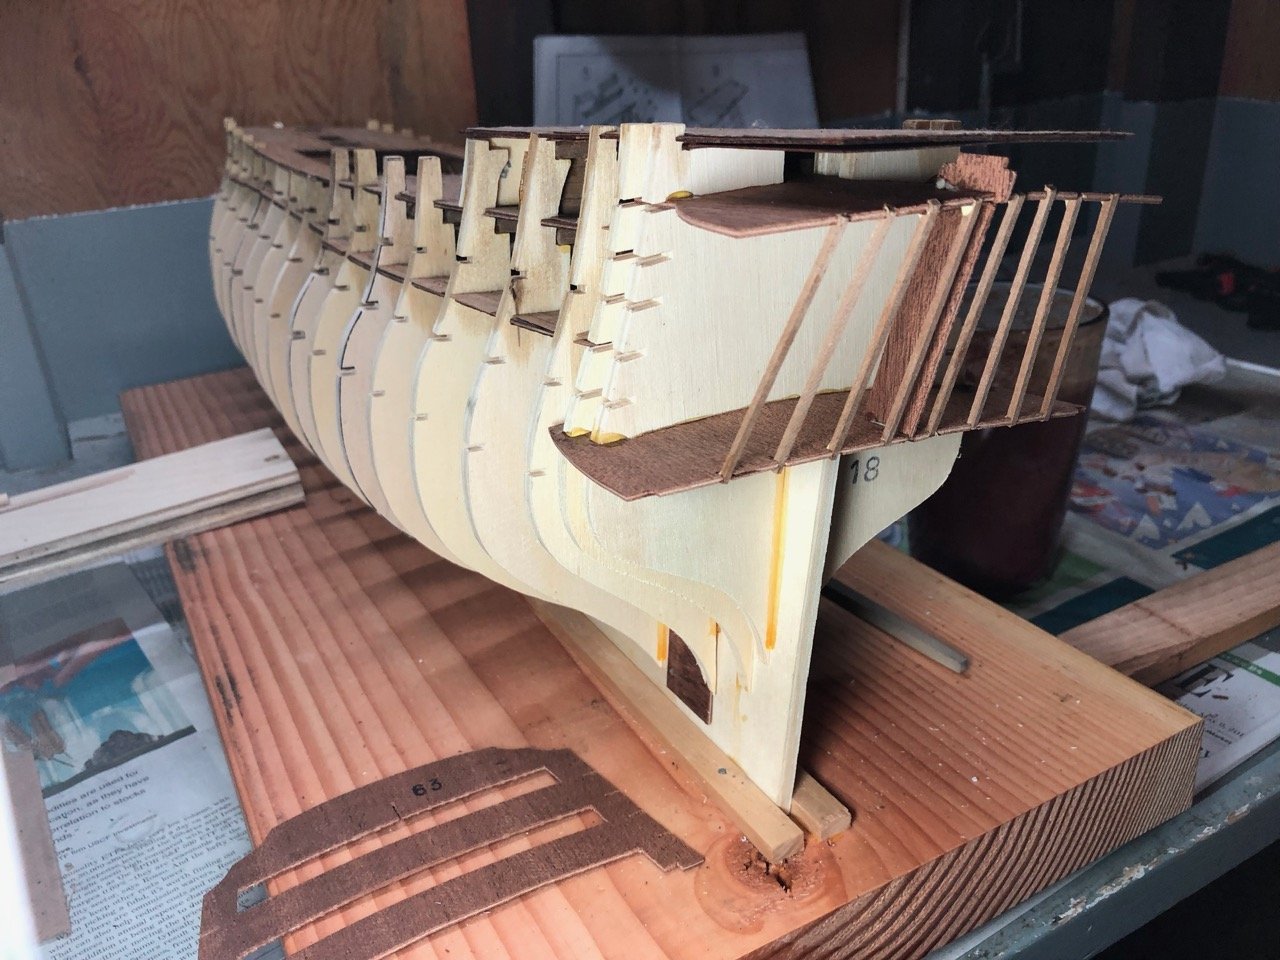
Perhaps obvious to everyone besides me, but just realizing this middle deck is riding high. Thinking the downside will be the cannons here will be at the top of the gun ports.. Will assess further over the next several days. I'll be off the site for a couple of weeks as I'm off on vacation starting tomorrow. However, I'll be taking 'The Ship Model Builder's Assistant' by Charles G. Davis for light reading while I'm gone. Hoping some of it will rub off!