Rob S
-
Posts
339 -
Joined
-
Last visited
Content Type
Profiles
Forums
Gallery
Events
Everything posted by Rob S
-
 Spider - Love the way your tiles turned out - very well done! The finished work impresses; now I’ve got a standard to shoot for!
 -
Good question. I ended up throwing out my original paint set, but had lugged them around for 20+ years. Hope you won’t be holding off that long!!
-
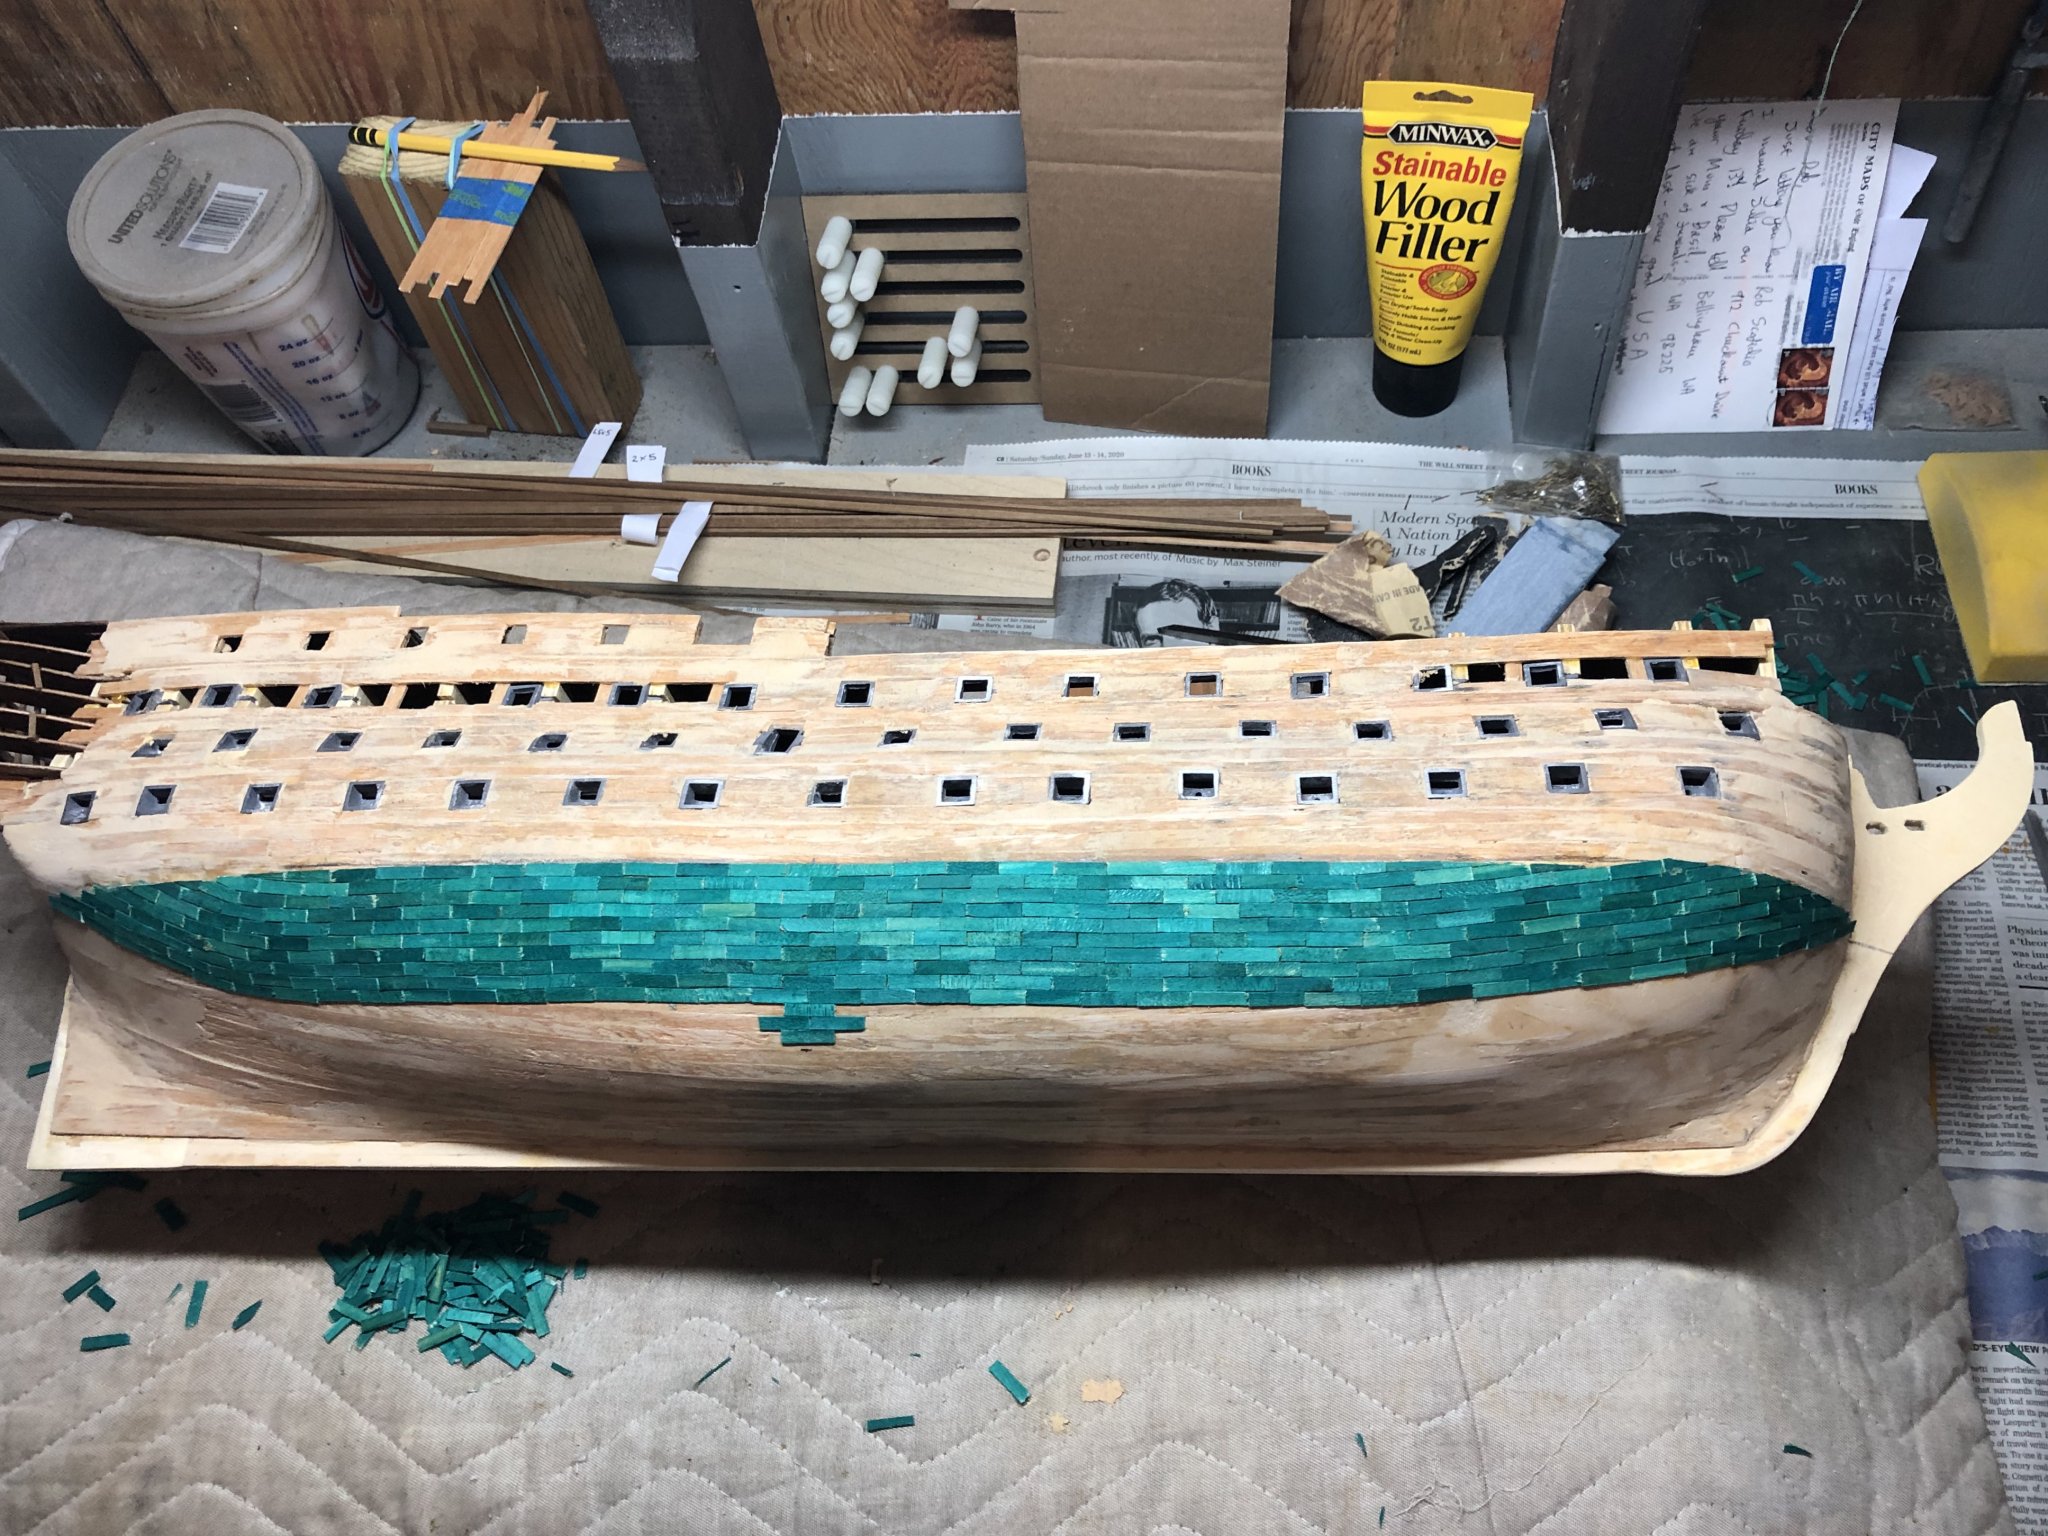
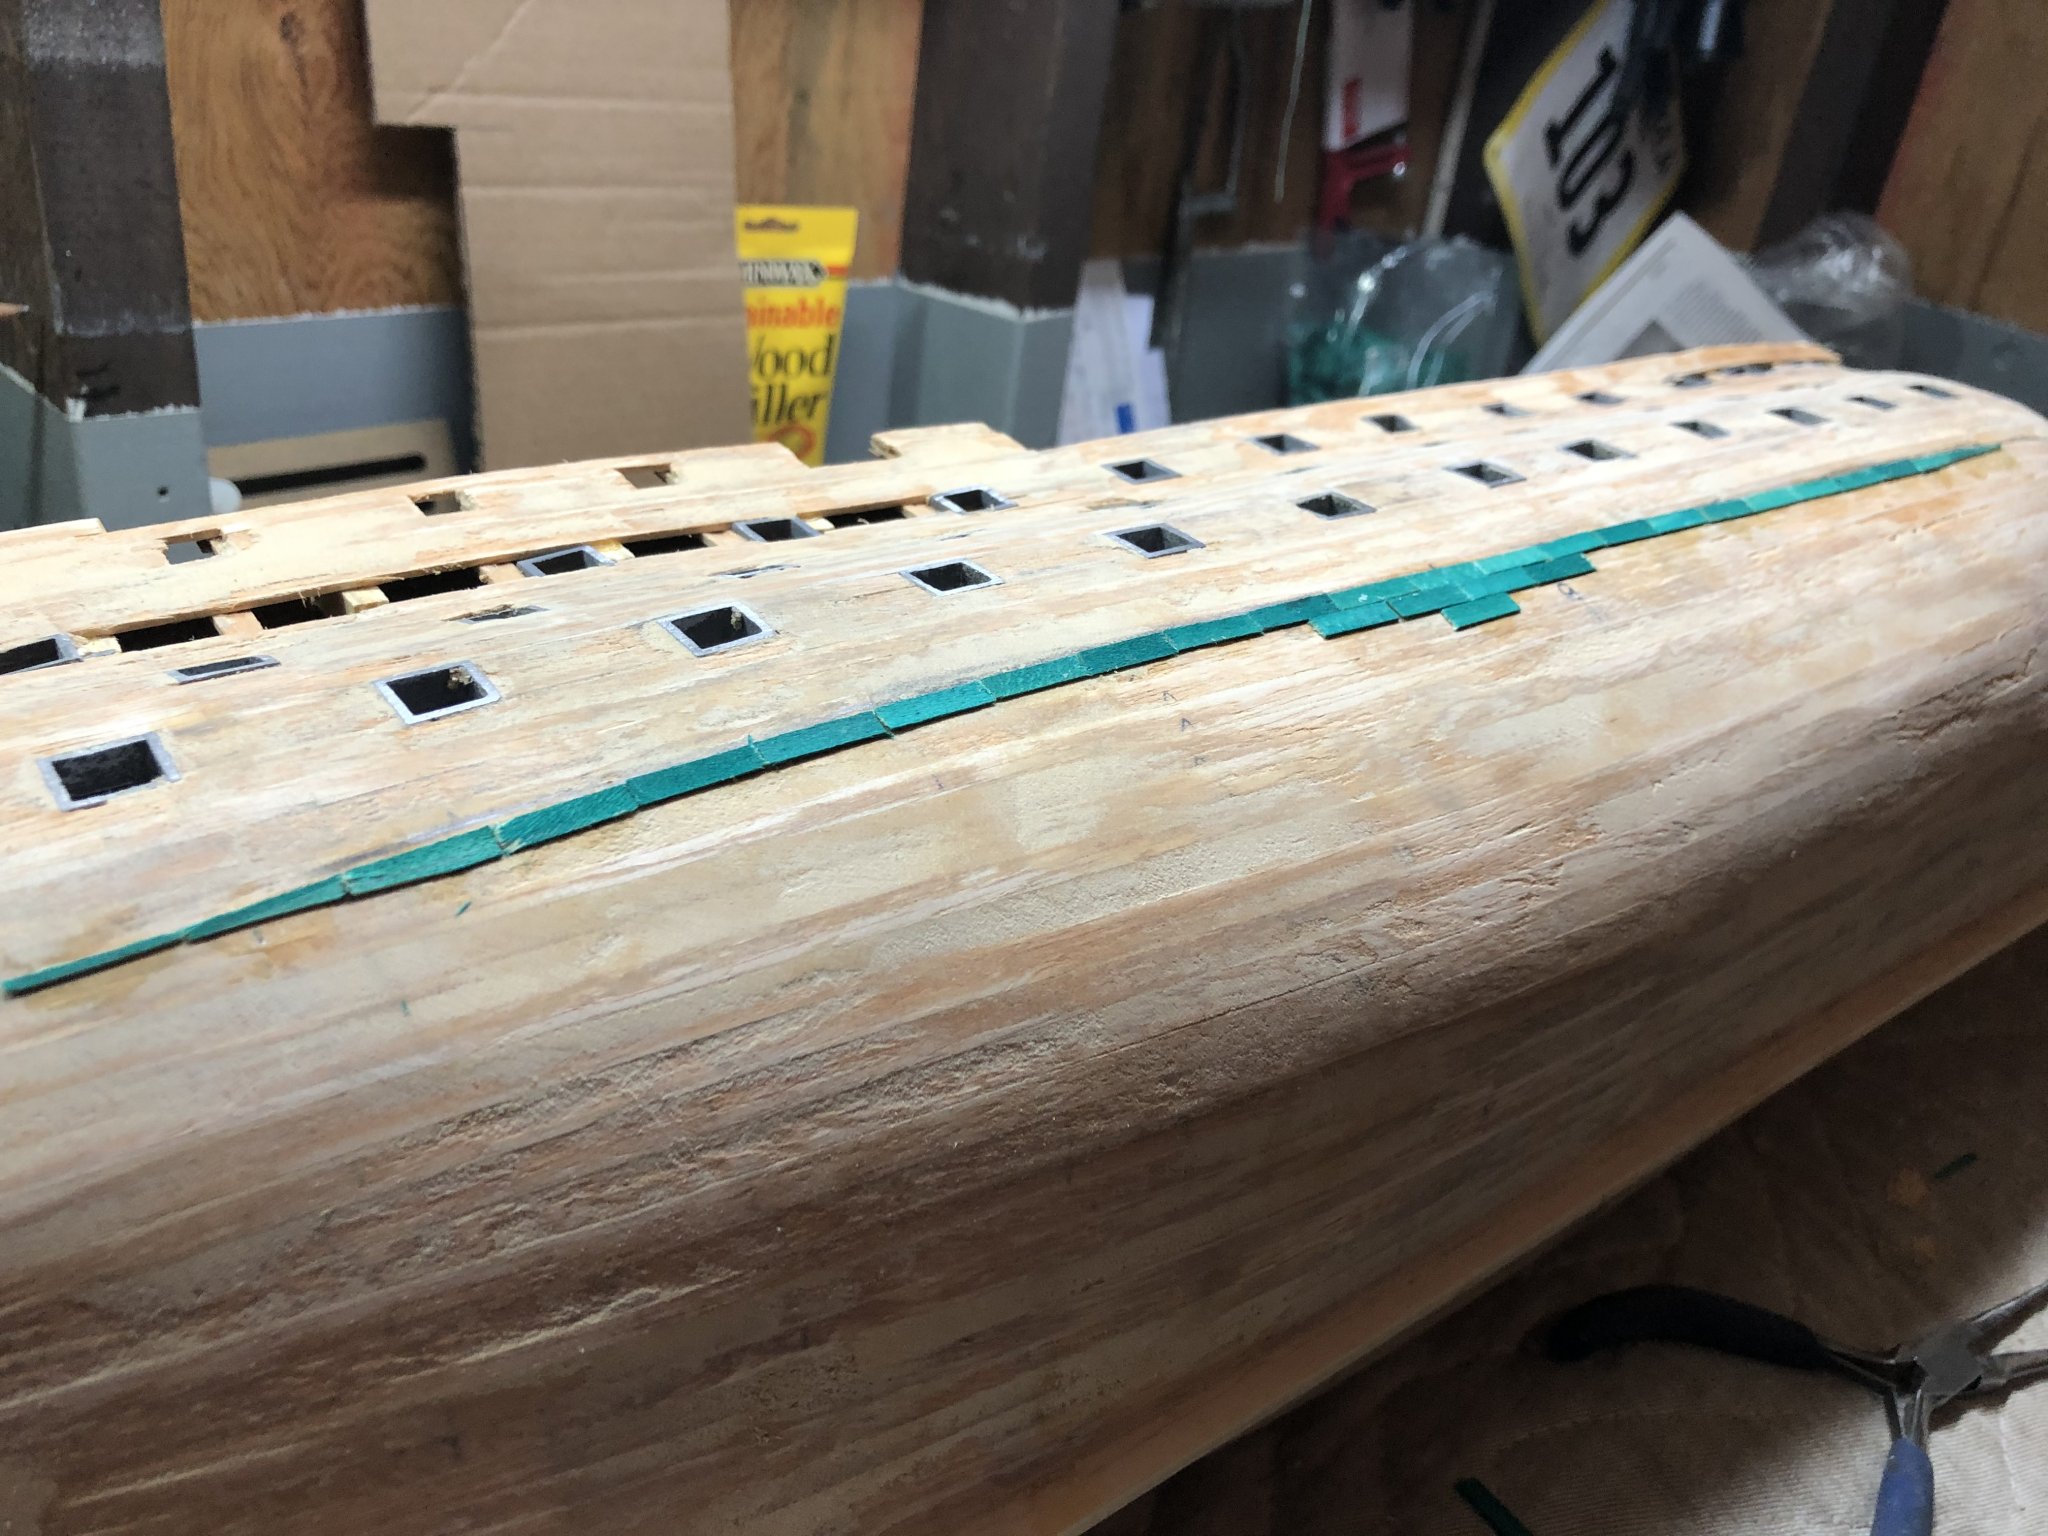
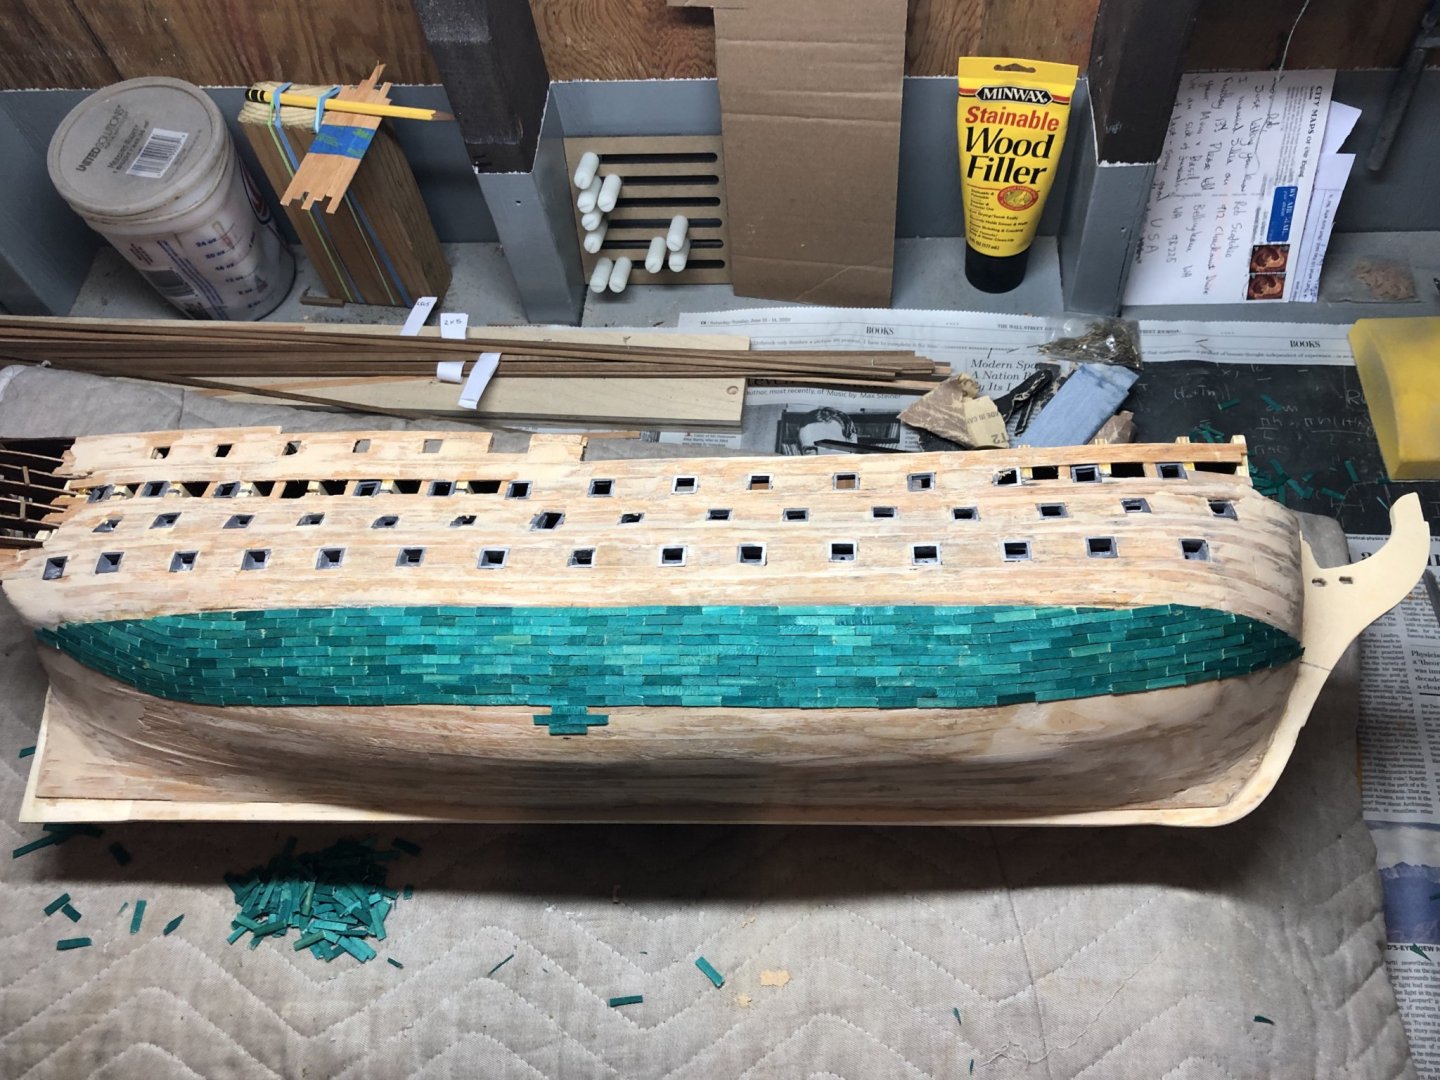
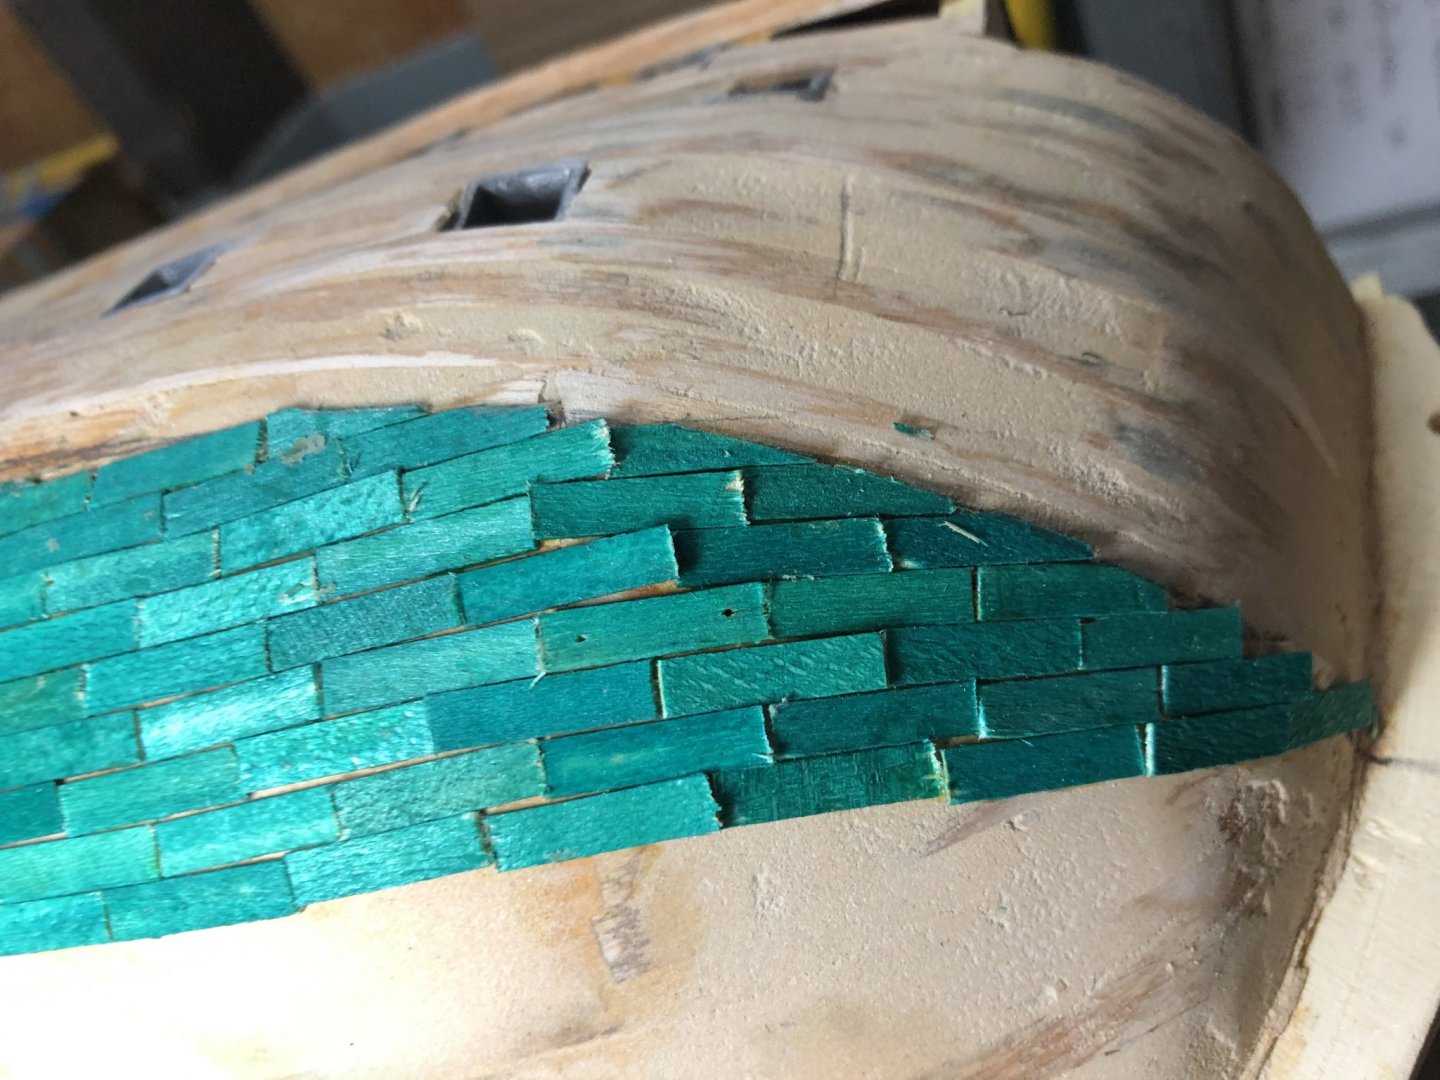
OK, now it is making sense! Thank you! Coppering is continuing. I’ve noticed some of the tiles on the bow section are sticking up and will need to be sanded. This is due to the curvature of the bow. I don’t think I’m supposed to bend them. Almost done with the first thirteen (13) rows on the starboard side. Then over to the port side and back to starboard to start the next section.
-
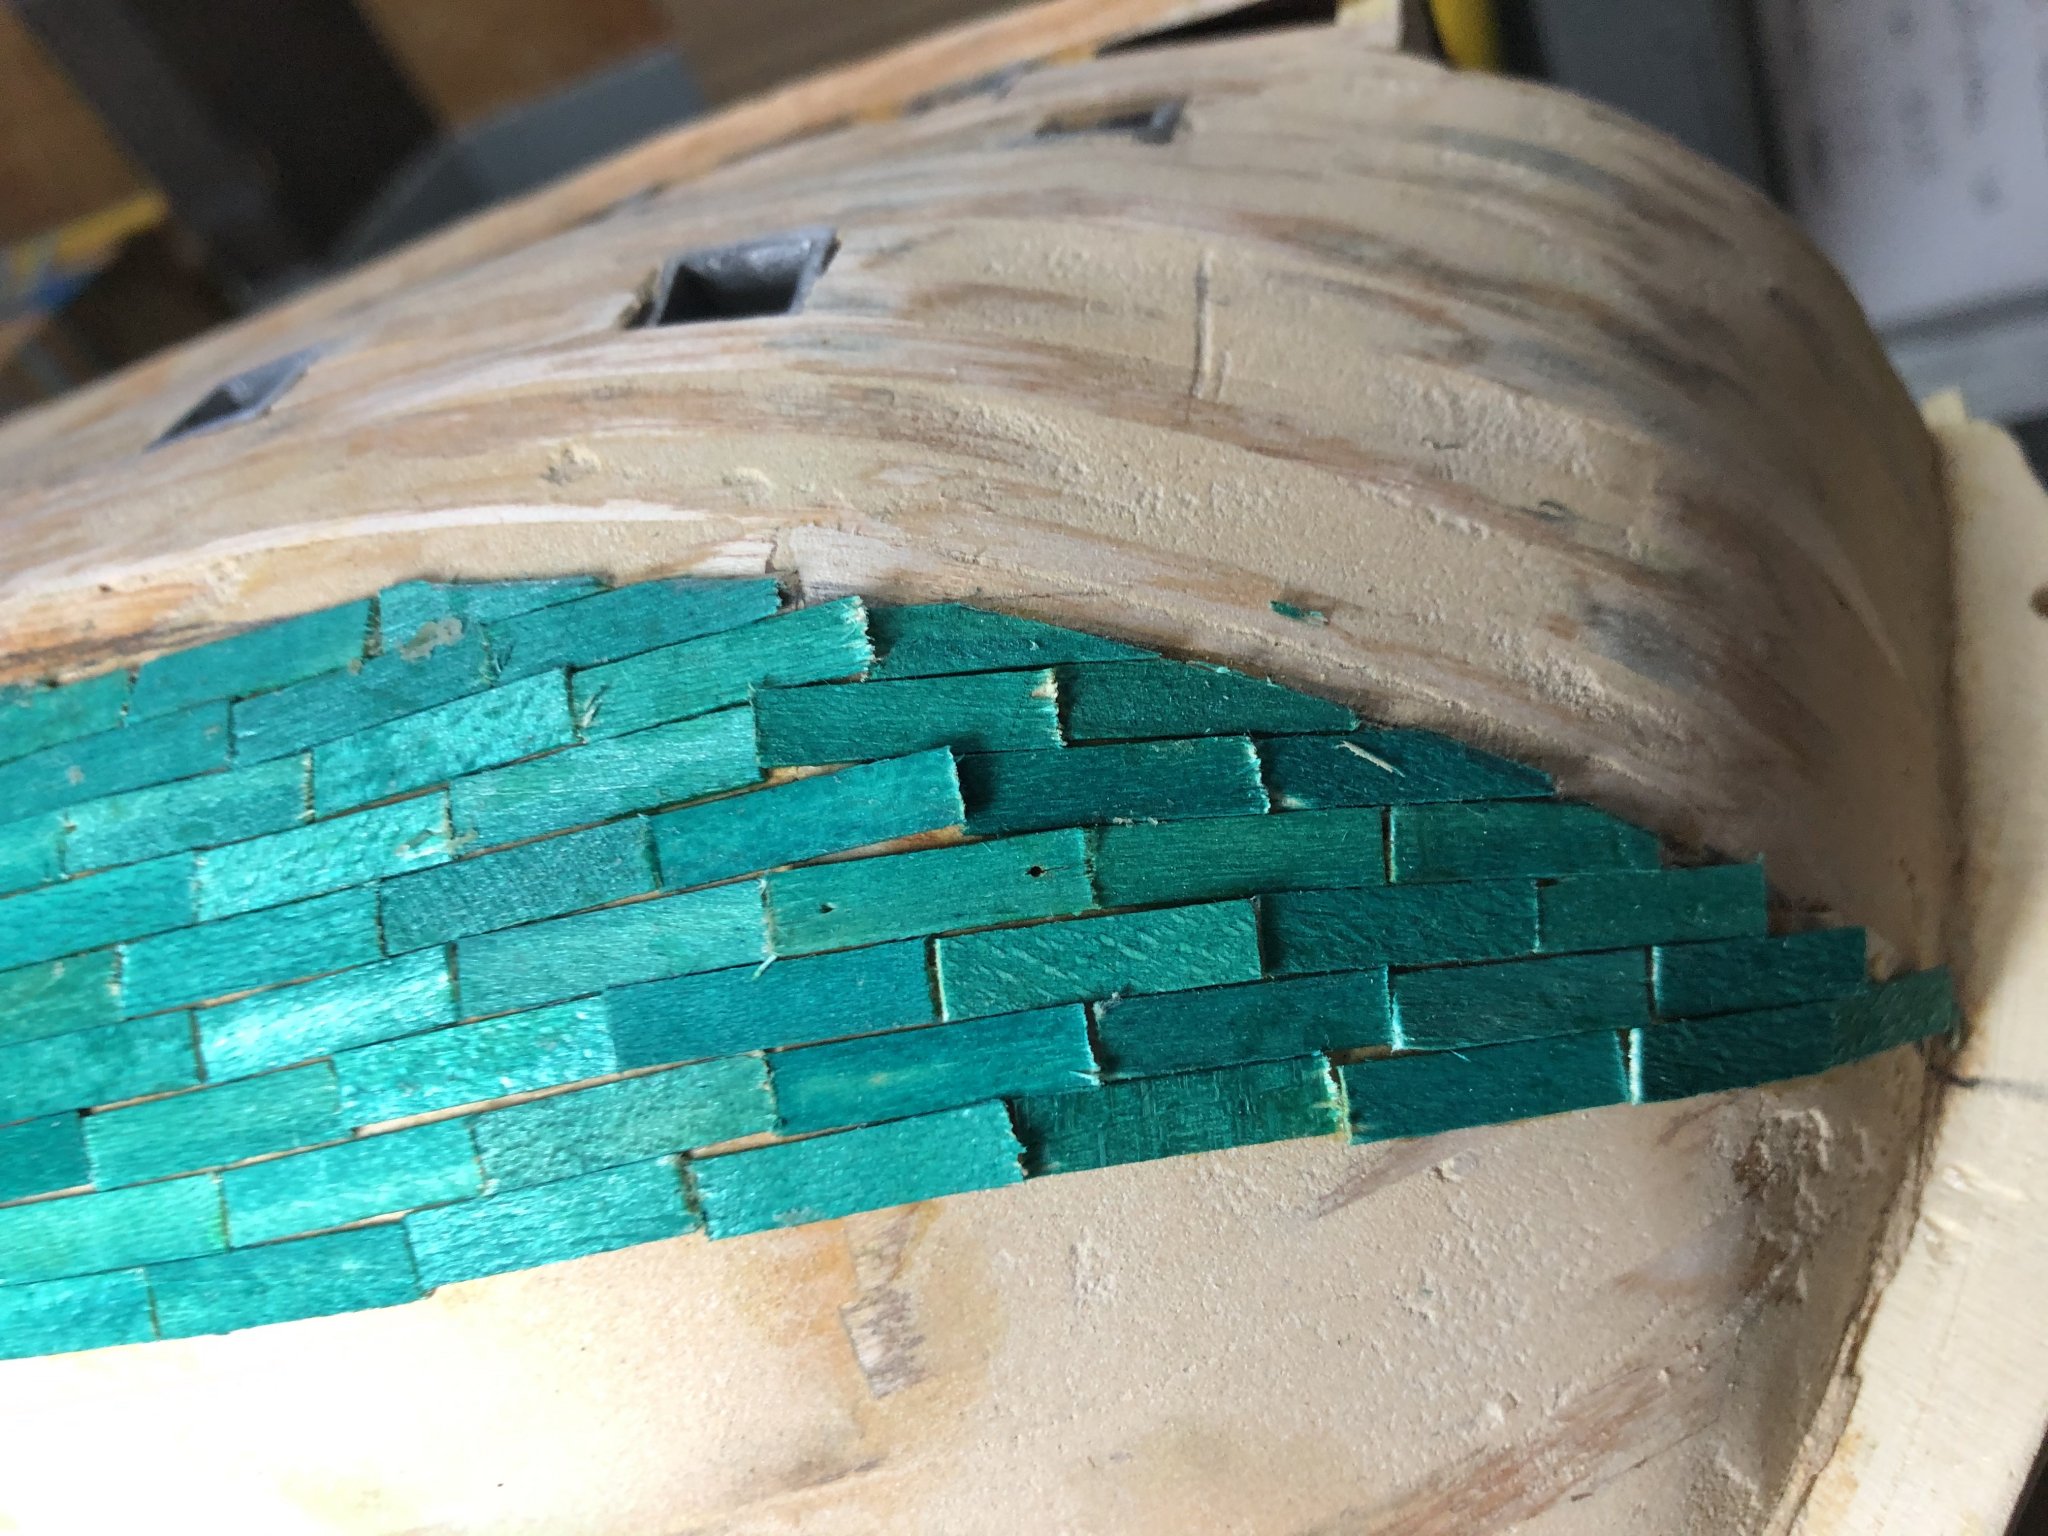
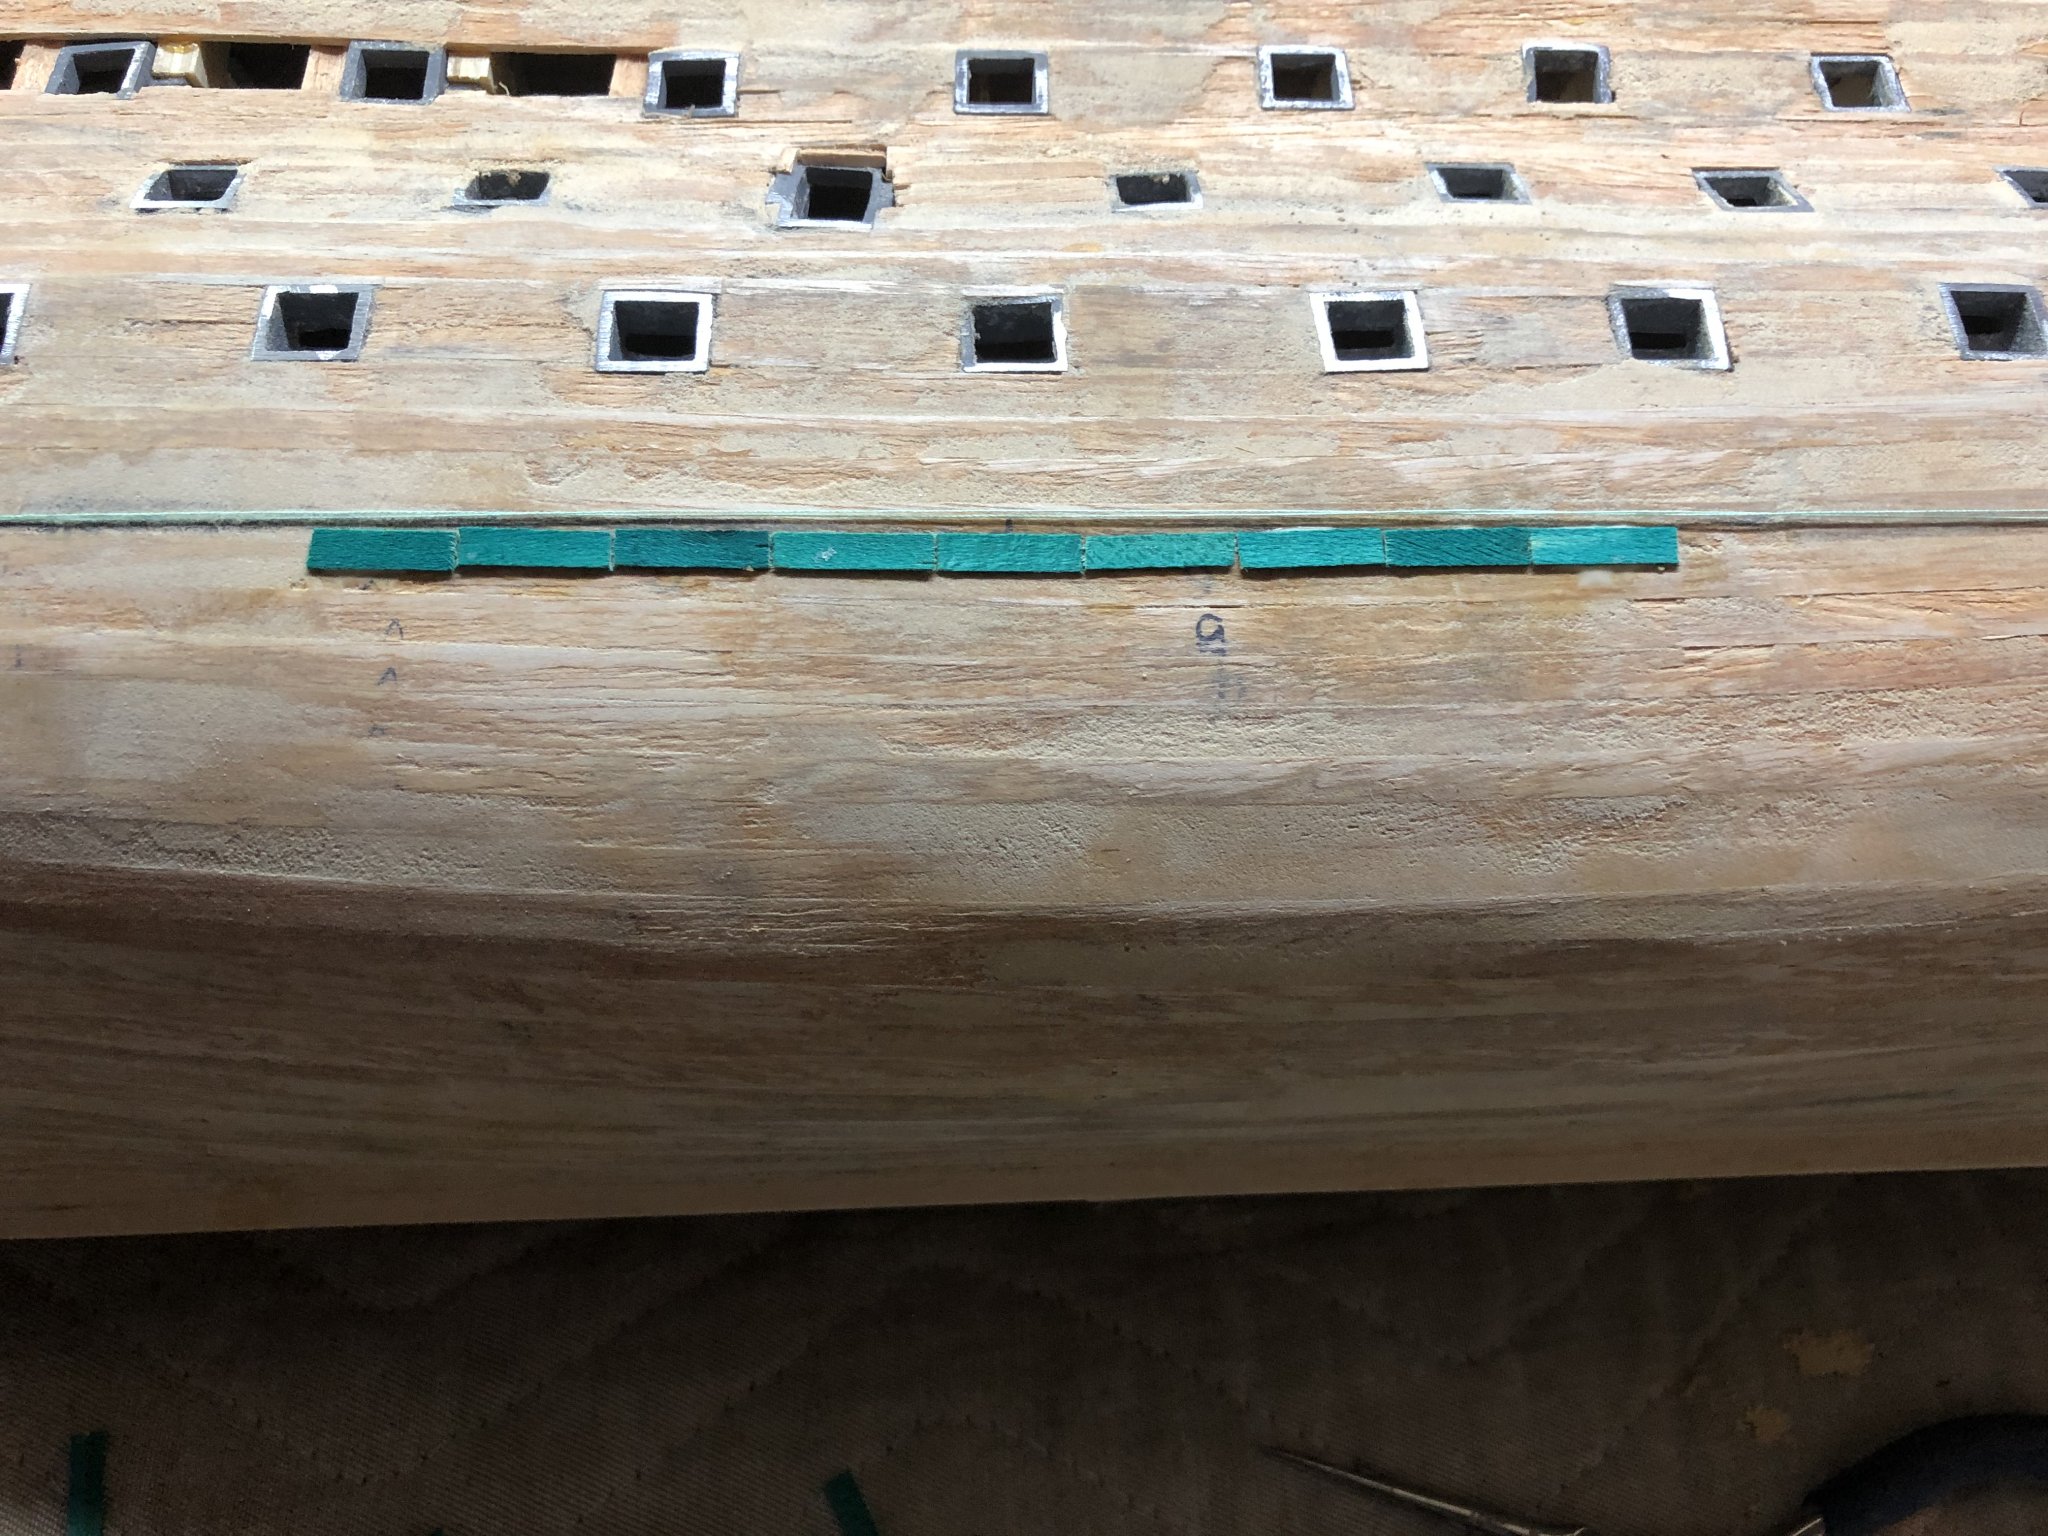
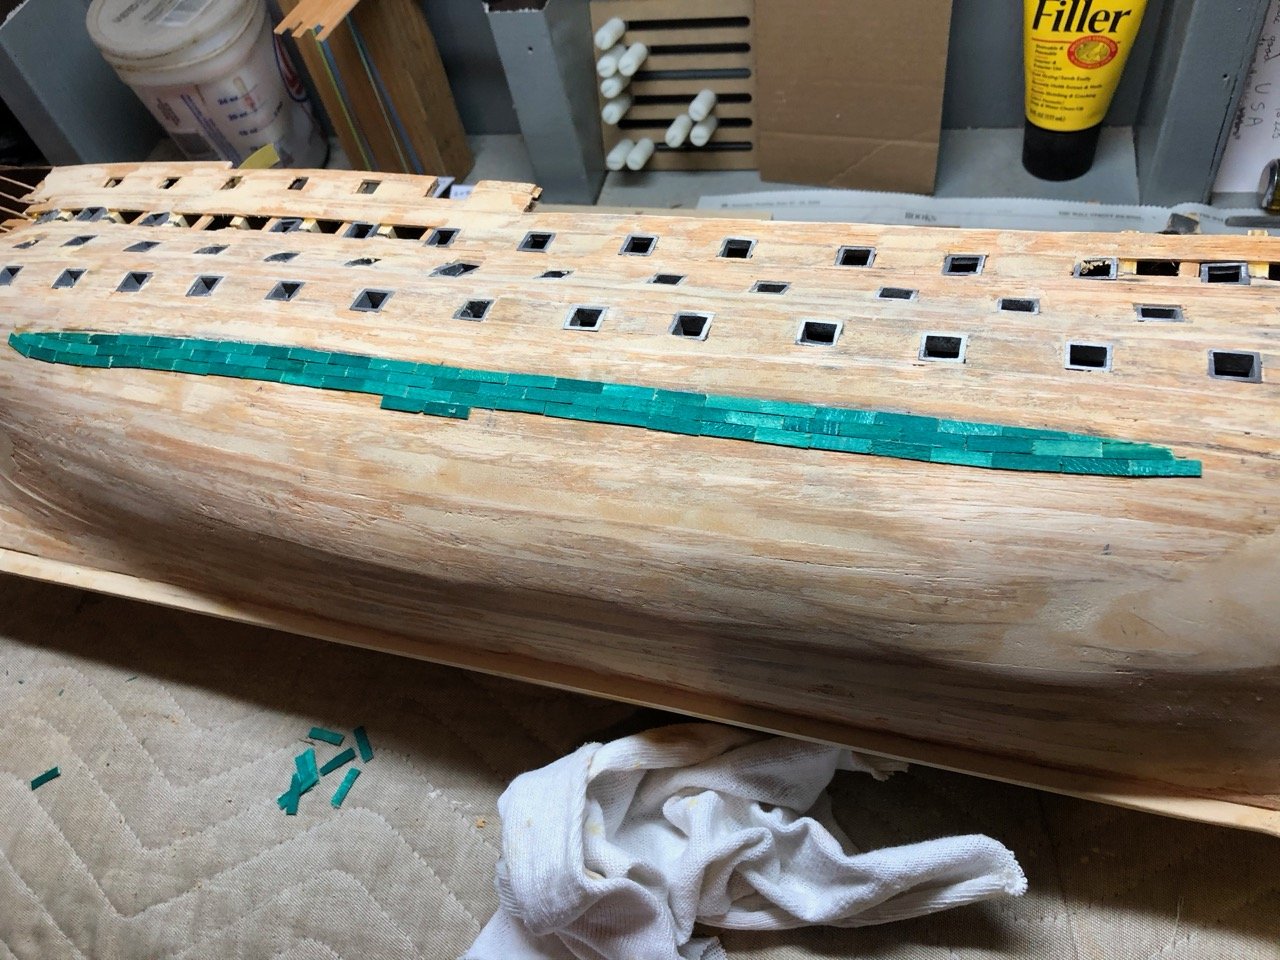
As I continue working the coppering effort on the starboard side, I'm making use of the Mamoli provided green 'tiles'. I've noted that several of them are of a different dimension (both longer and wider) than the standard tile. A bit frustrating when laying the tiles to later find out you've set one that puts the rest of the pattern off! I'm setting them aside as I come across them and will use them to fill in any open spaces.
-
Also noting that the green tiles provided in the kit are not all the same dimensions... some longer than others as well as wider. Not sure if Mamoli meant to do it this way to assist in the build or just poor quality control.
-
Spider - Rob S here. Thank you for the information you provided! I had previously reviewed your log and found your reference material most interesting. However, to this point I'm following the Mamoli instructions for the coppering and pattern detailed with their scale drawing that has the initial pattern down 13 rows, starting from mid-ships and working down, upon which the next pattern starts. I do like how your Vic is turning out; copper sheathing very nicely done, especially with the way you have washed out the green coloring. Appreciate the review, information and feedback. Keep up the good work! I'm enjoying the journey:)
-
Rob, I dont know if this is of any use to you mate, but here are the 2 pages from the book I have showing the details of the copper tiles, I have clearly marked where the break in the pattern lies, as well as the position of stealers etc. I found it very very helpful. Hopefully you can make use of it. As you can see from the photos on my build, I started with the 4 rows at the waterline at the bow, , then went to amidships and put 12 rows (held on with masking tape) in place, drew a mark on the planks, then same at the stern. joined the dots so to speak and glued on the first 4 rows. After that I just filled in above them up to the waterline. did both sides, then started down at the keel working up parallel to it until I got up to the first set., just got to cut and fit the shaped ones now. Regards spider Spider - Yes, thank you! I reviewed your log and found this material most interesting. However, to this point I'm following the Mamoli instructions for the coppering and pattern detailed with their scale drawing that has the initial pattern down 13 rows, starting from mid-ships and working down, upon which the next pattern starts. I do like how your Vic is turning out; copper sheathing very nicely done, especially with the way you have washed out the green coloring. Appreciate the review, information and feedback.
-
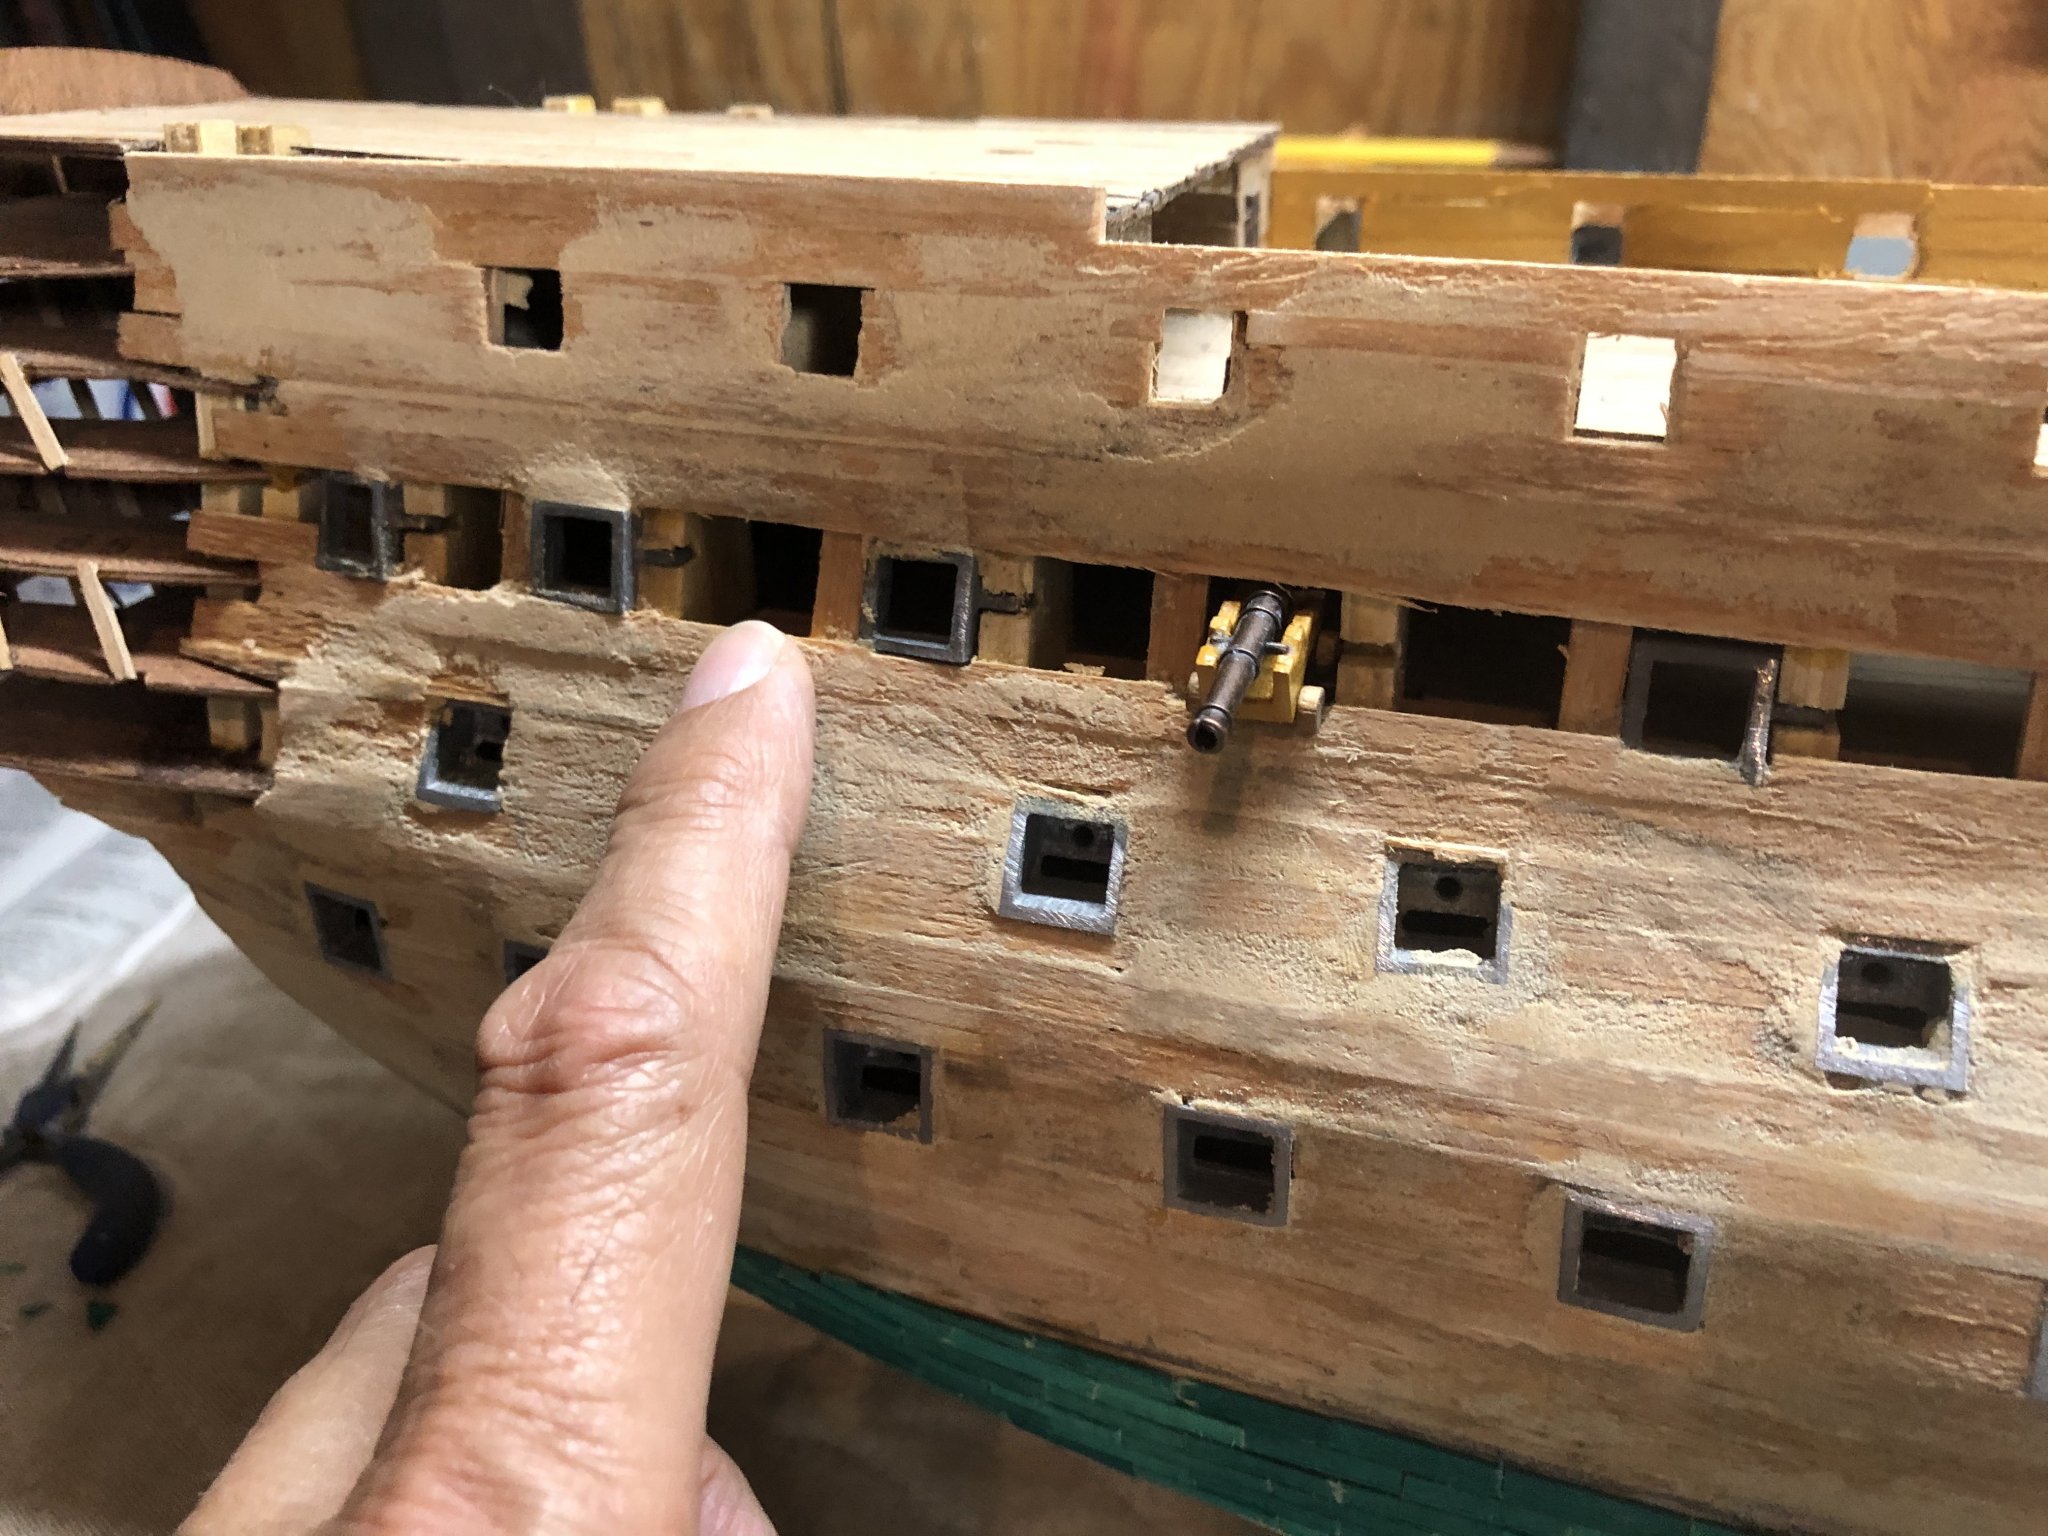
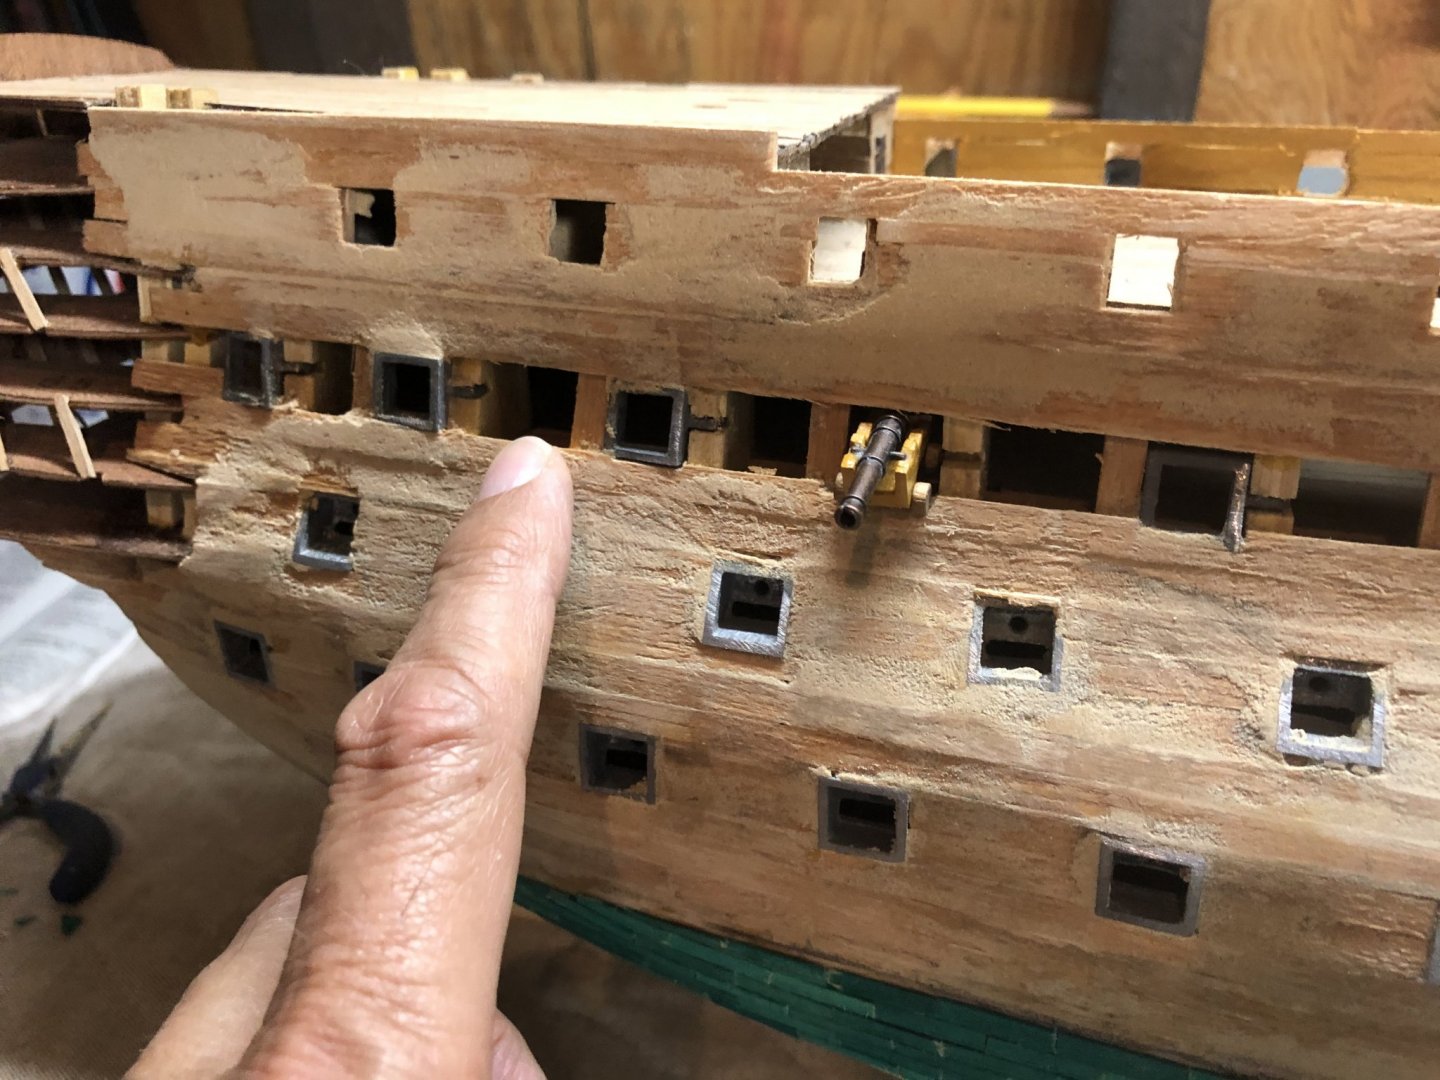
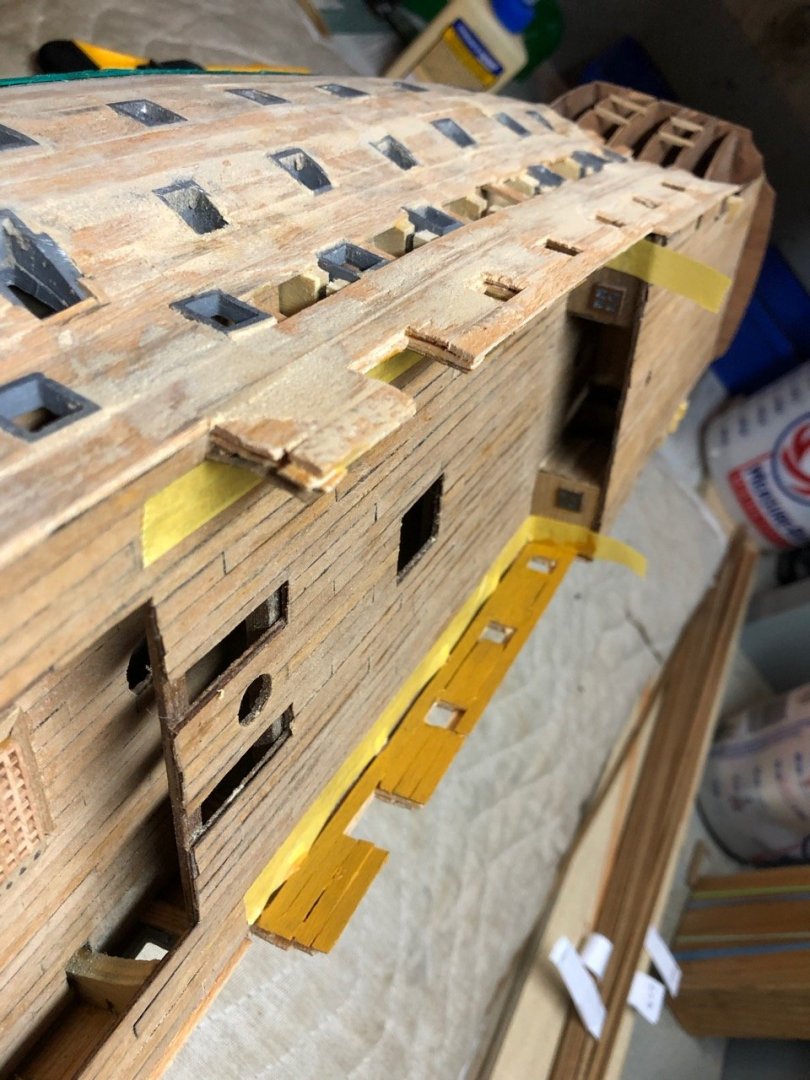
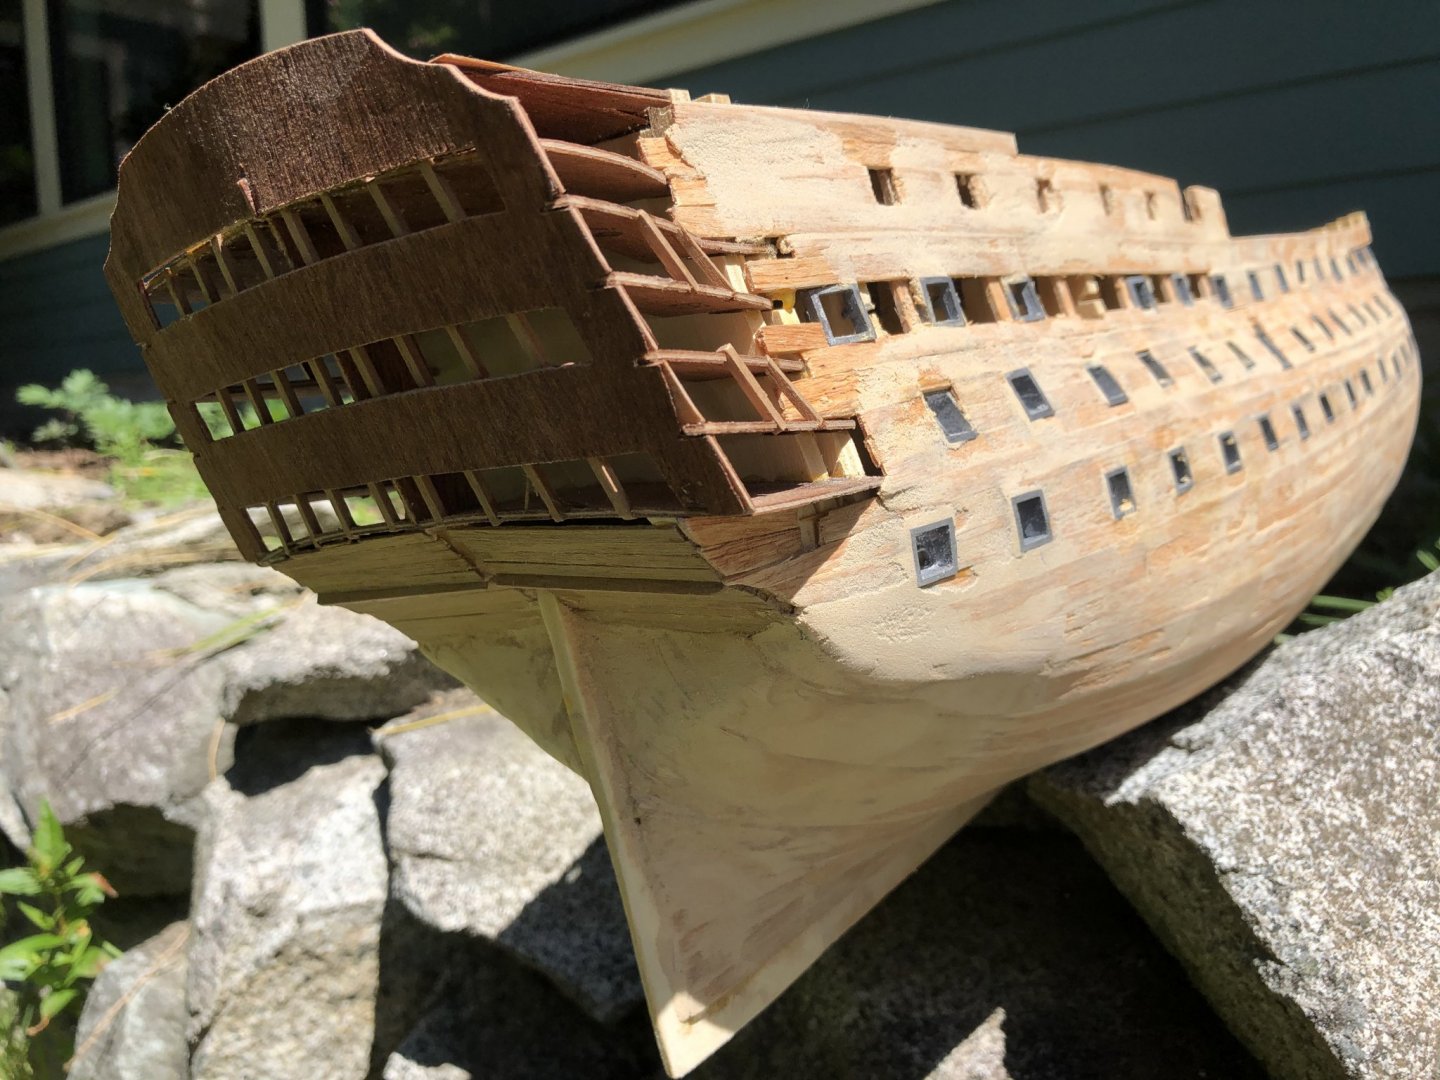
I’ve had several questions about inserting the cannons on the upper deck (below the quarter deck) given tight space limitations. I assembled a longer gun assembly and have identified a few spots (starboard case, my finger is pointing to and a gun is partially inserted) where I can insert an assembled gun and maneuver it to the correct port. There will be some additional work to adequately secure it, but given the location, etc. - it won’t have all the bells and whistled (e.g., ropes) but will be in place. Once all in, I’ll button up the upper ports and complete the second set of planking. Whew!

-
Looking nice! Very nicely done.
-
I’ve just stumbled upon this masterpiece; a very nice ship you have created. I’m now working the coppering with those cranky green strips and will be looking at your log for the secondary planking, among other things, once I get there. I like that you have shown step-by-step along the way with plenty of details. Very nicely done!
-
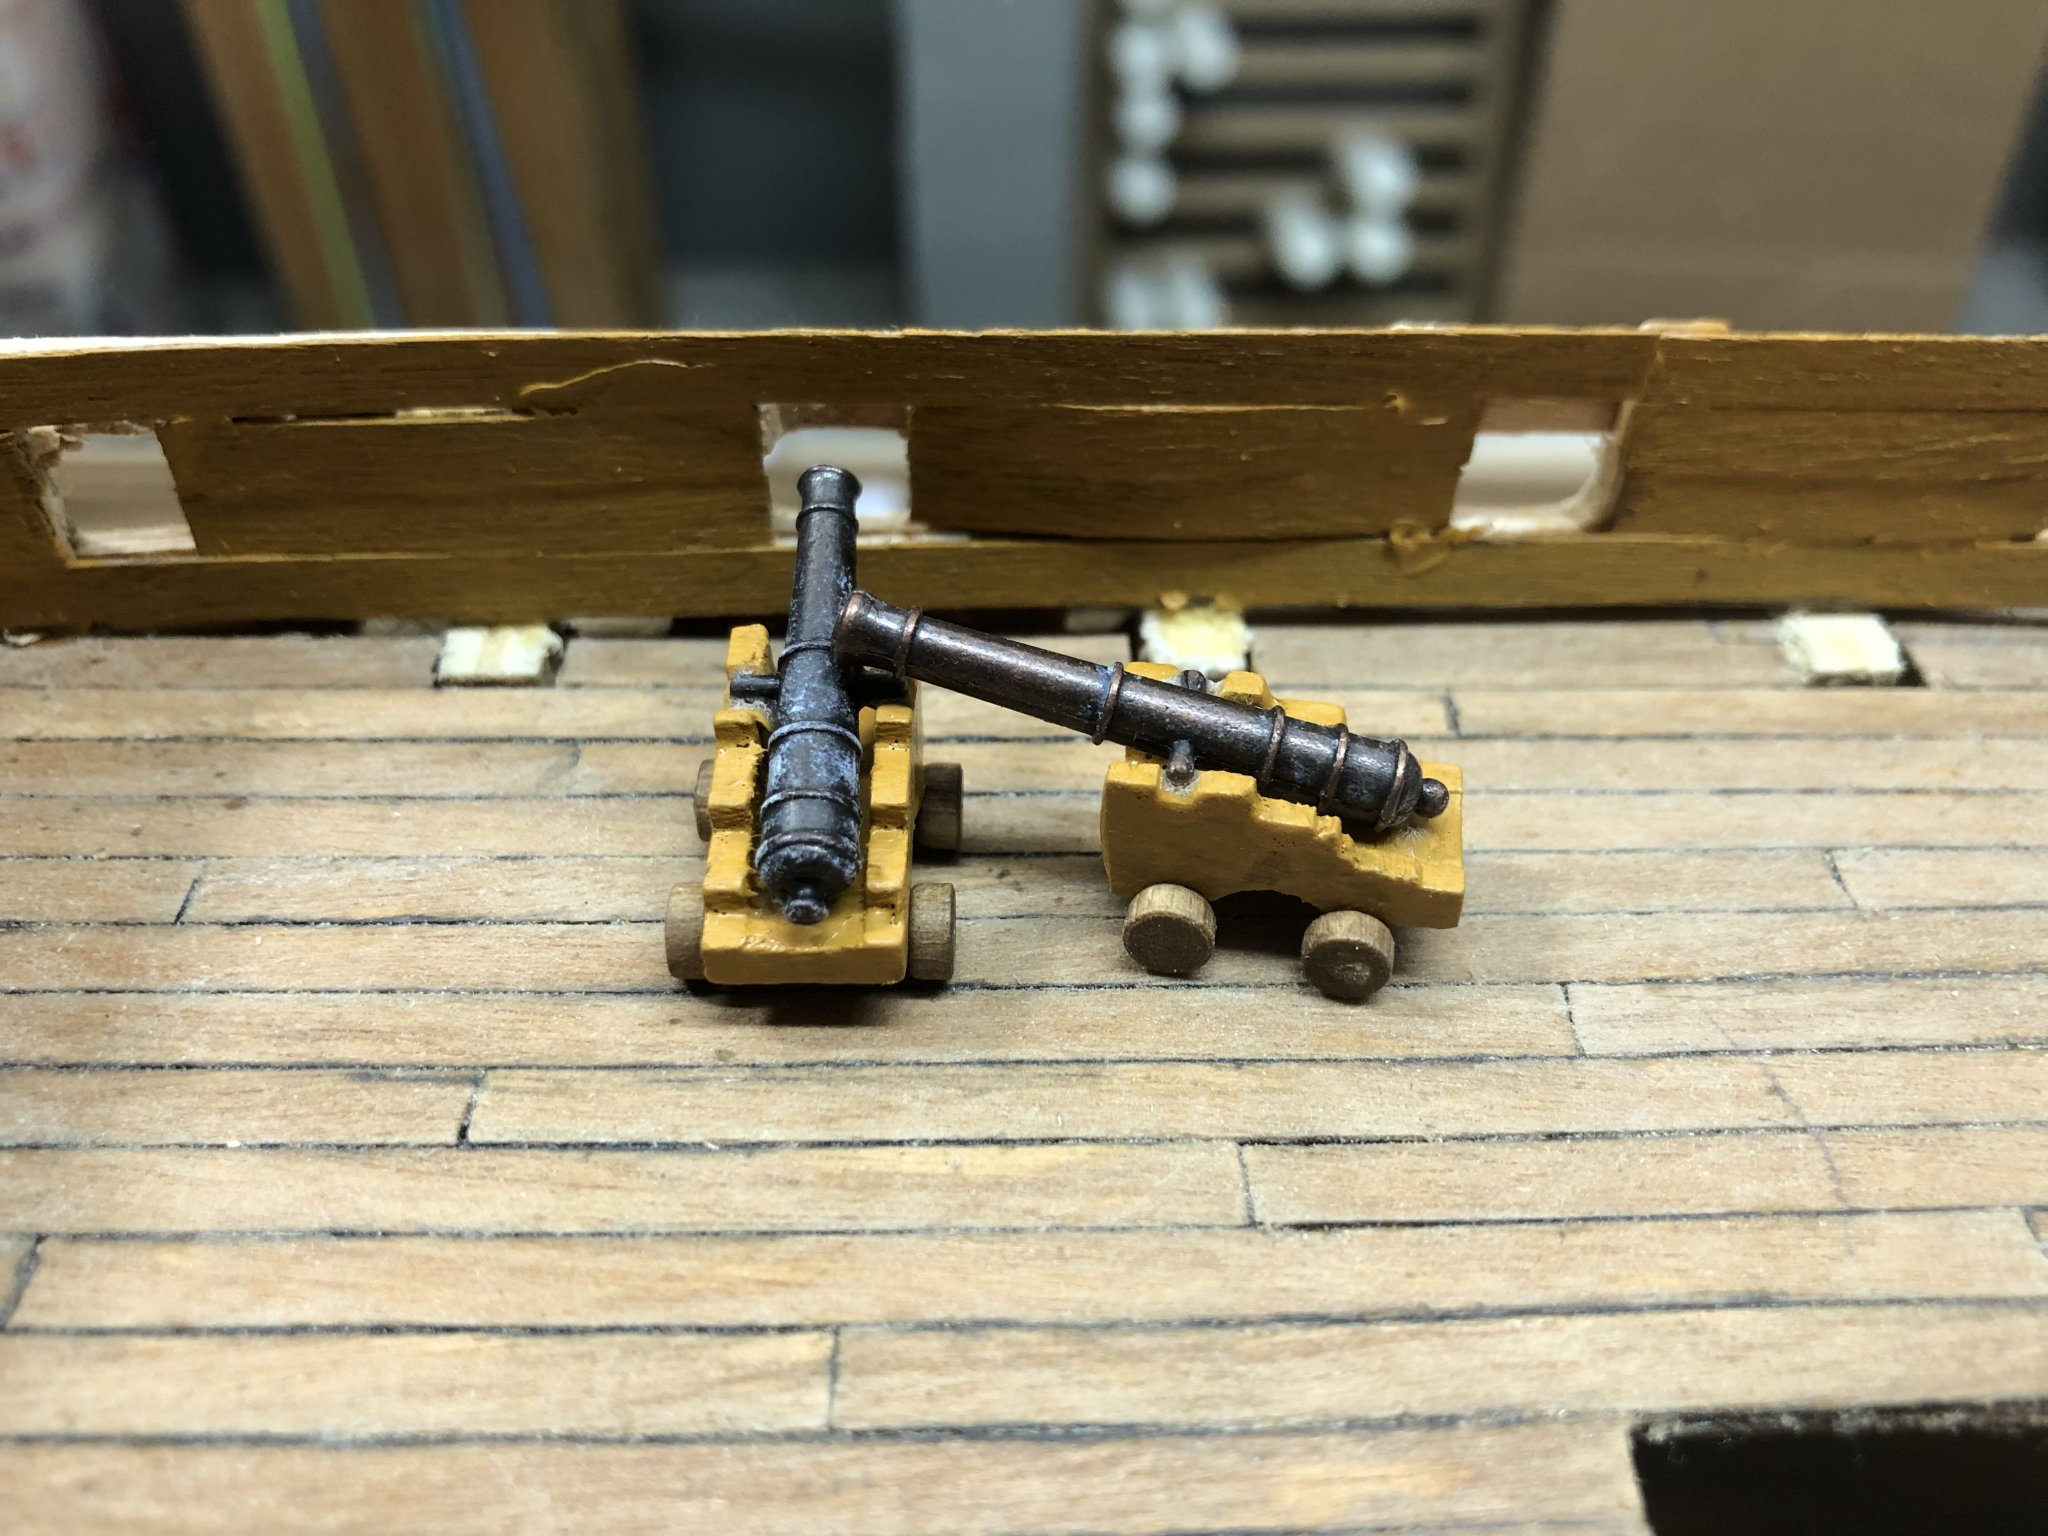
Tried out my new Yellow Ochre acrylic paint - this is what I have with two coats. Will build a few gun carriages for fit checks on the upper deck to ensure I can squeeze the cannons in. filled/sanded the hull further and continued the coppering exercise.
-
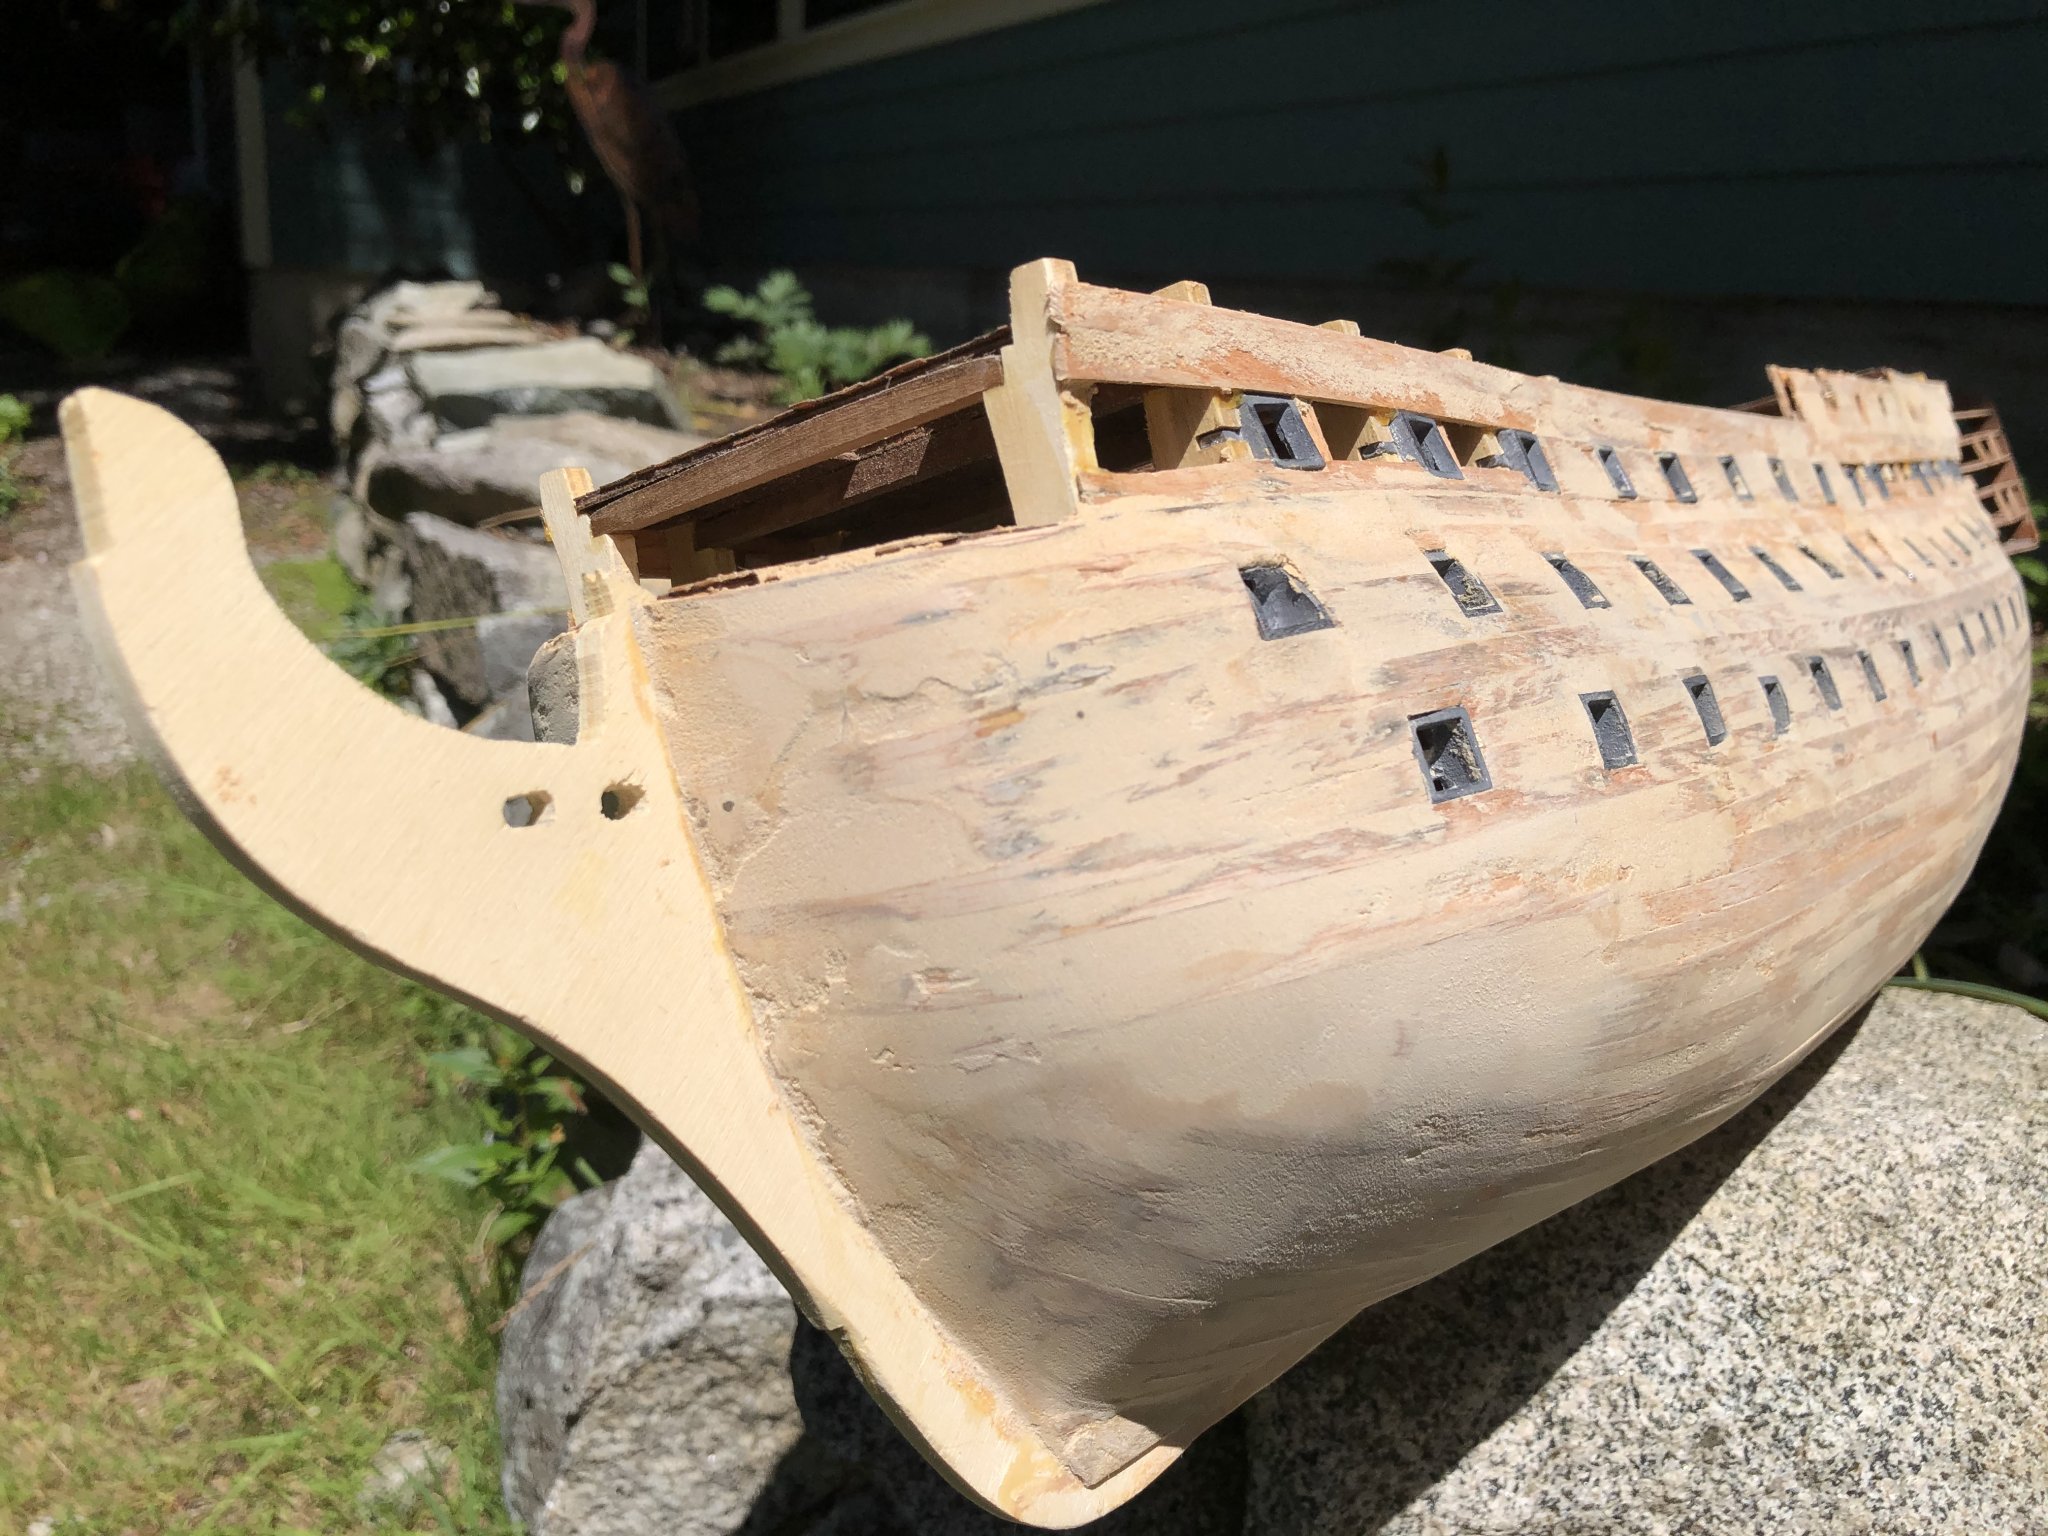
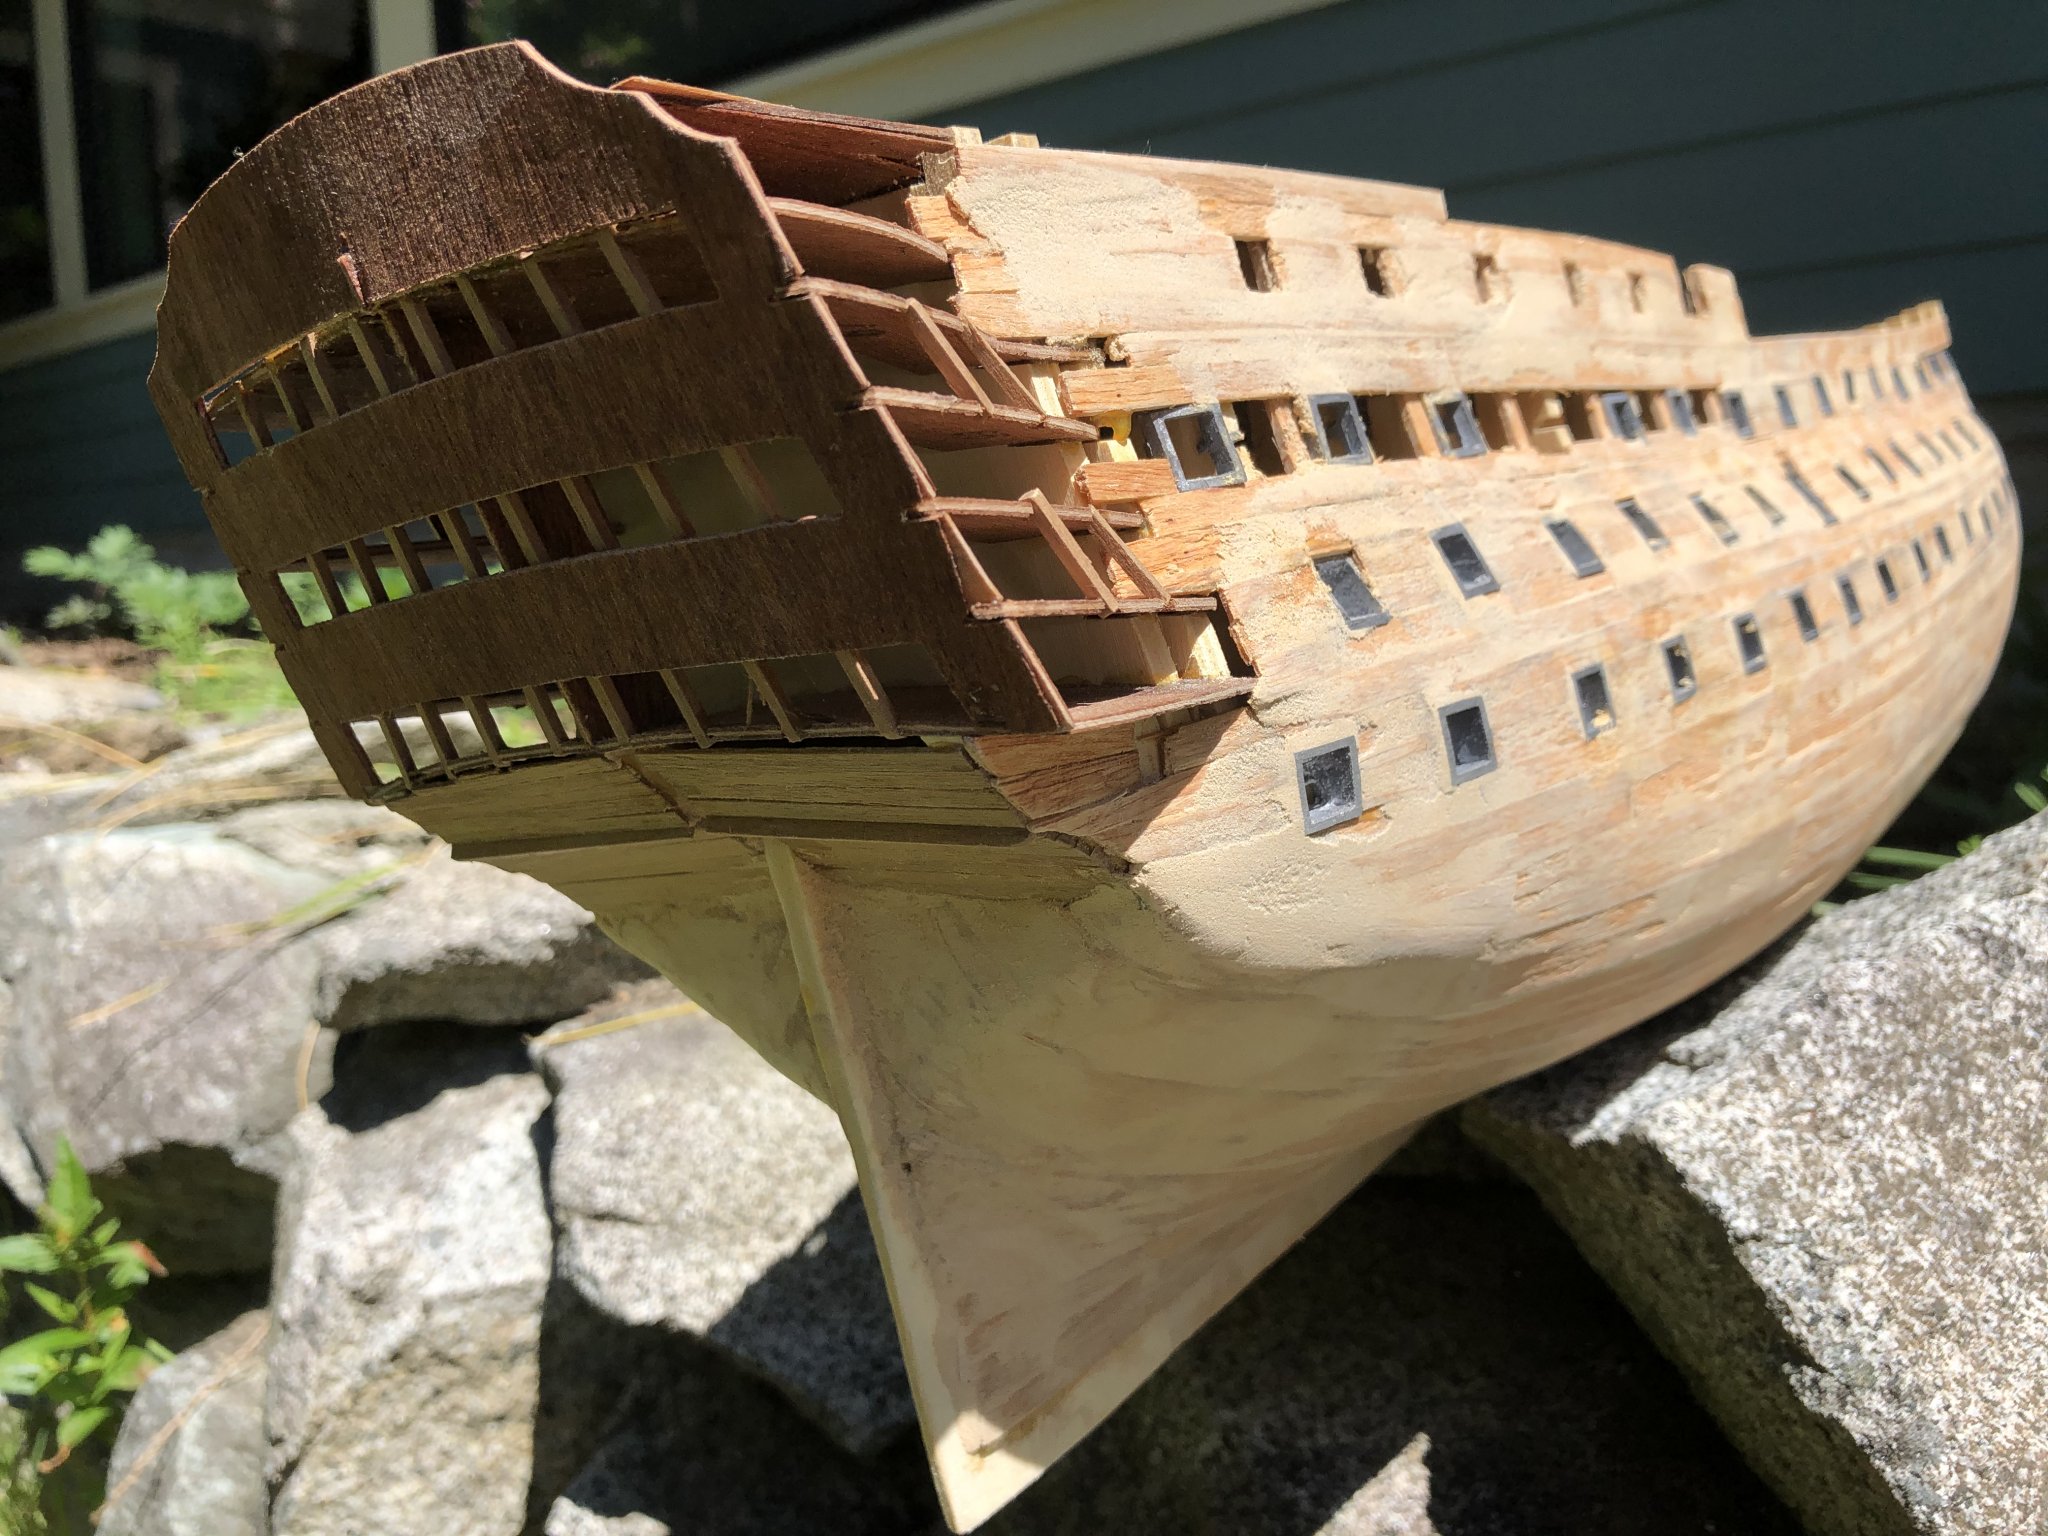
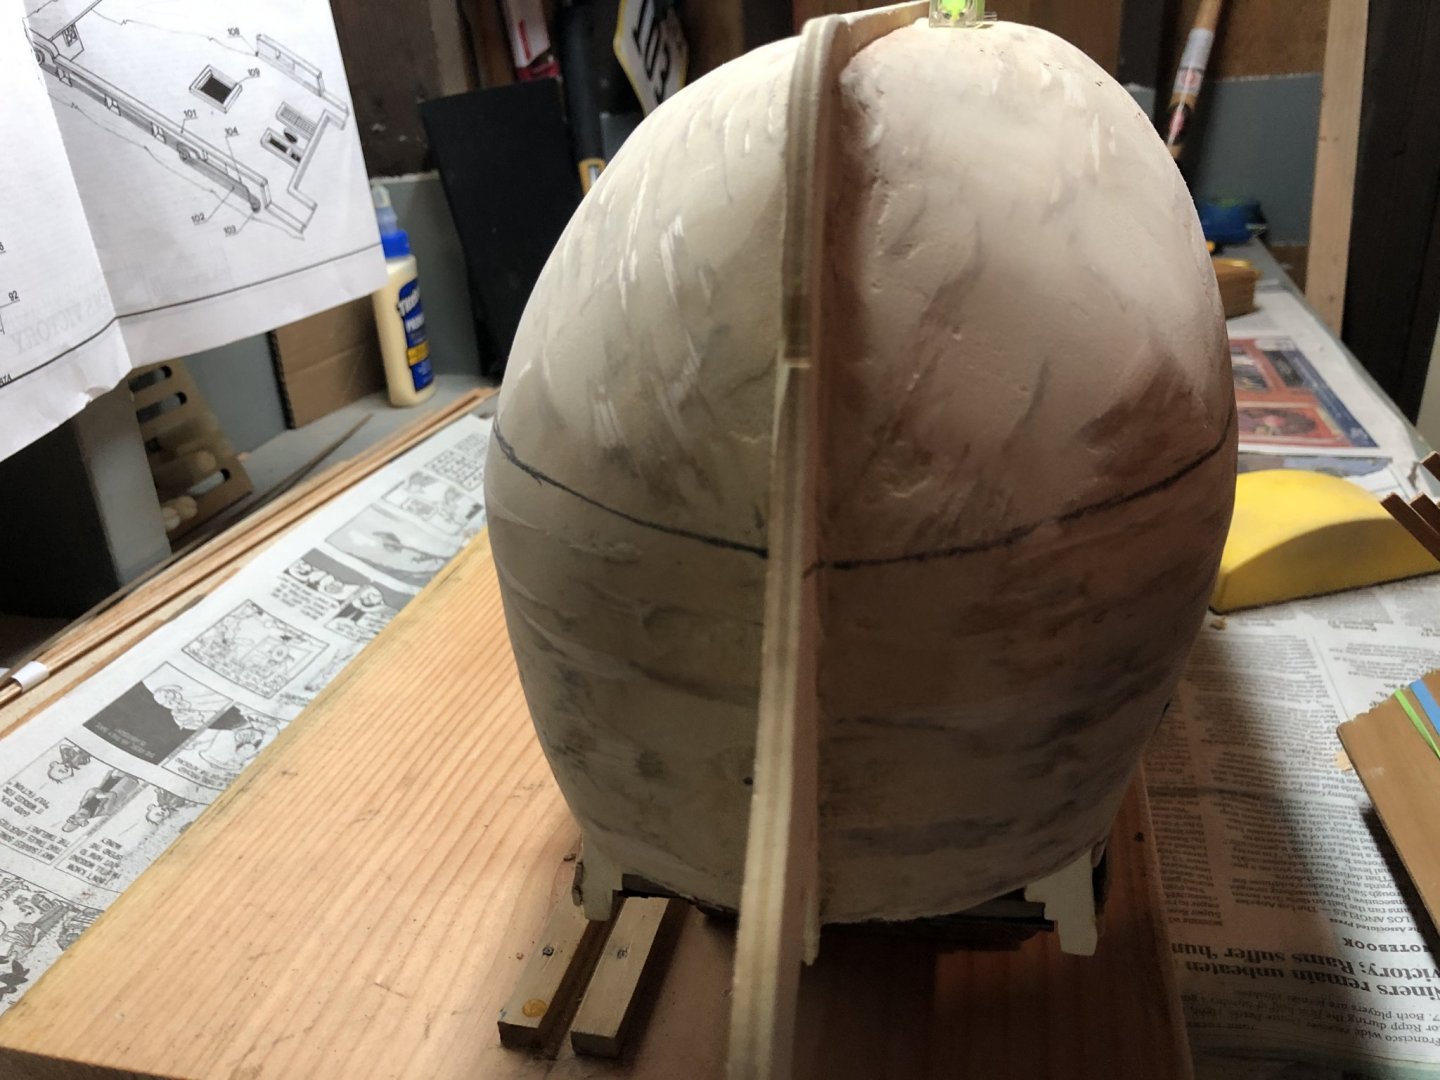
These pictures bring to light the hull imperfections that require some additional filling and sanding. I’m on it!
-
Have started the starboard side ‘coppering’ per the Mamoli instructions. I perused MSW for logs with coppering sections and it appears some believe you should start at the keel and others not. I started top, midship and tapered the ends. Mamoli includes a to scale Victory diagram that was helpful in interpreting the written instructions. I should be at this for a little while. In the meantime, I received some initial acrylic paint samples - Cobalt Blue, Bone Black, Cadmium Red and Yellow Ochre. I’ll do some initial painting to see how they look.


-
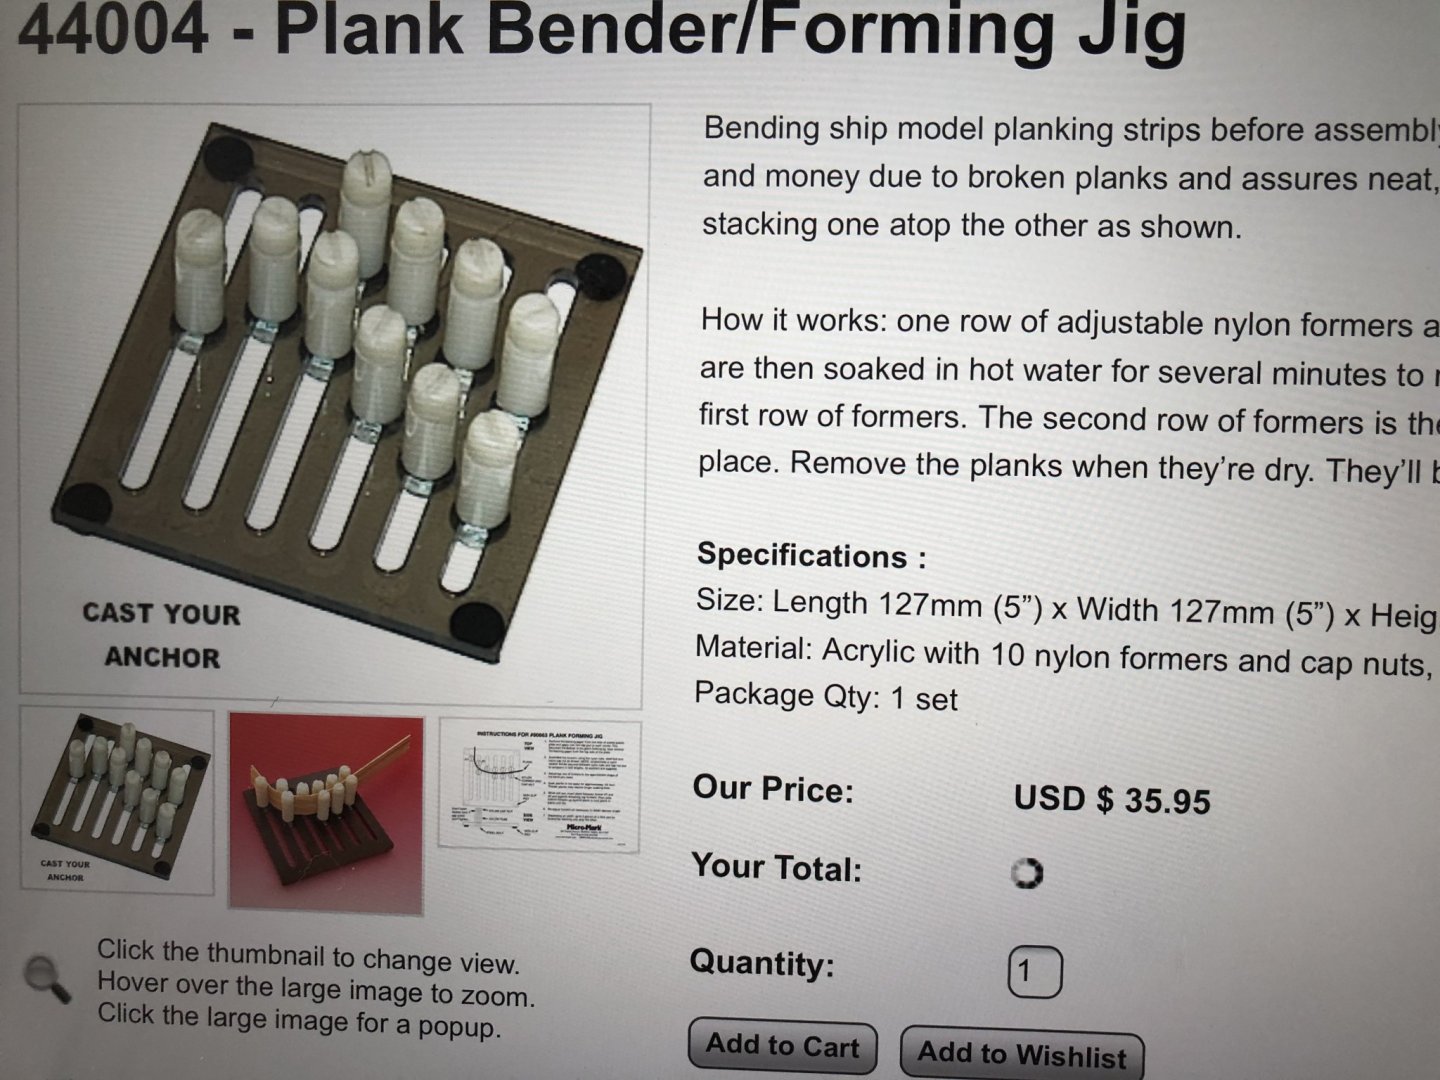
Plank Bender....
Rob S replied to dvlp47's topic in Building, Framing, Planking and plating a ships hull and deck
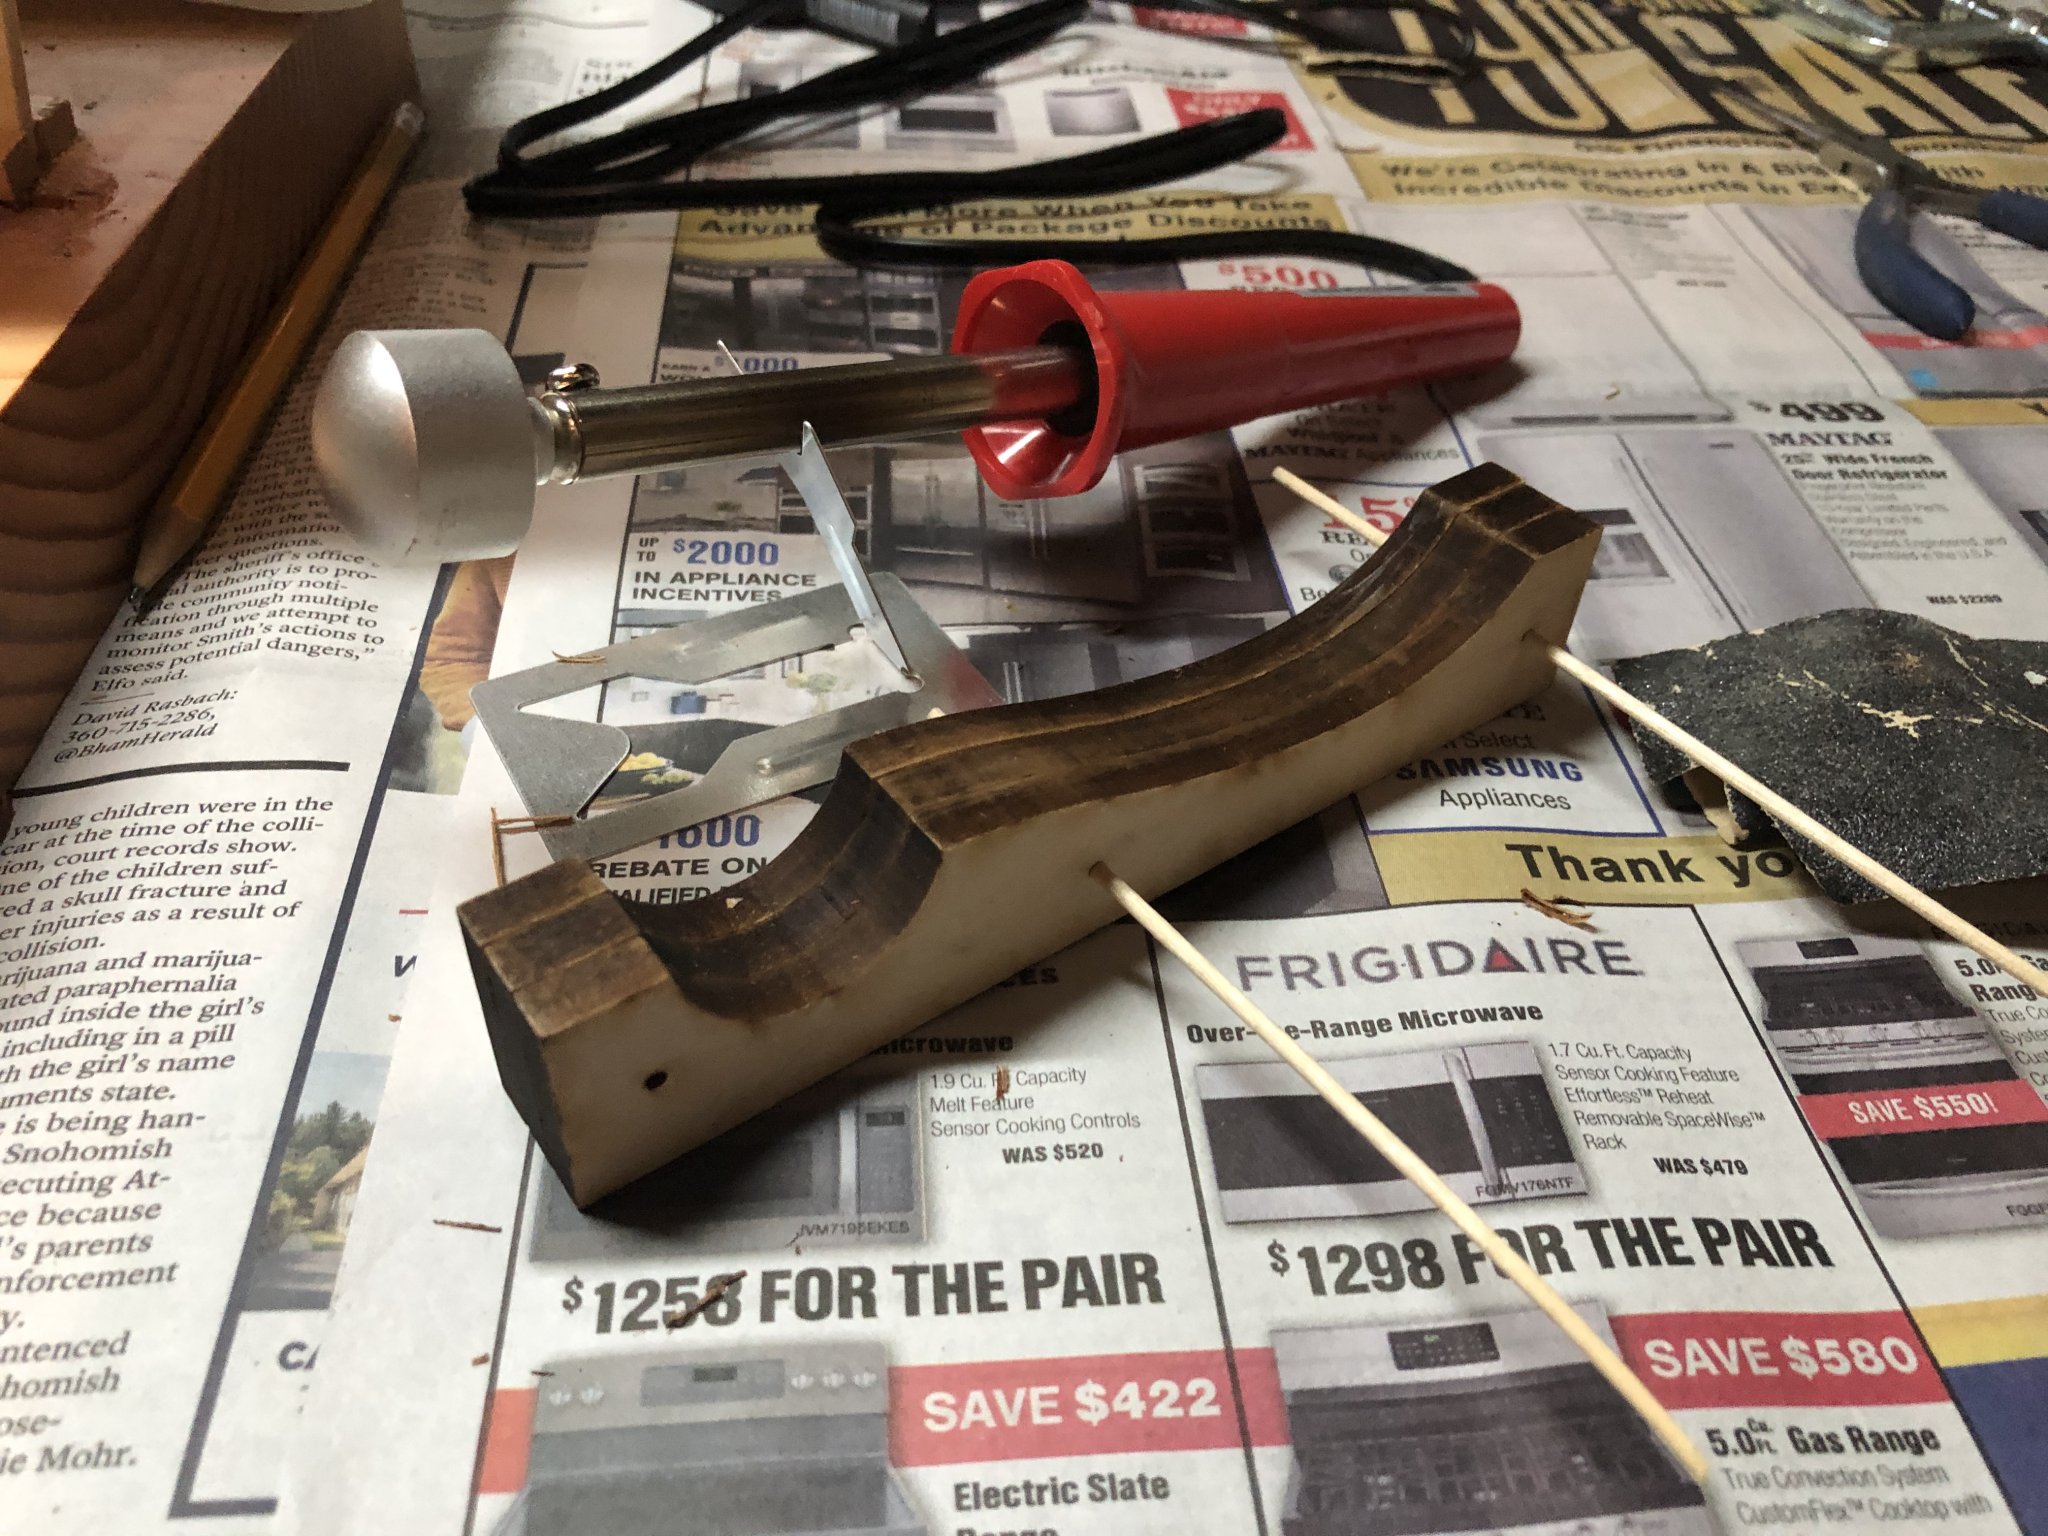
I’ve got two methods - one shown above as an electric, heated circular rod that is used to shape the moist planks. I have a second jig type device that can be used to hold planks in a certain position while they dry. I learned the hard way that fastening/gluing still moist planks on the bulkheads can be problematic as the wood wants to change shape as it drys.
-
Which wood filler to use
Rob S replied to dkuzminov's topic in Building, Framing, Planking and plating a ships hull and deck
I’ve been using Minwax stainable wood filler, brown color. It goes on easy, sands smooth and firmly holds nails, etc. -
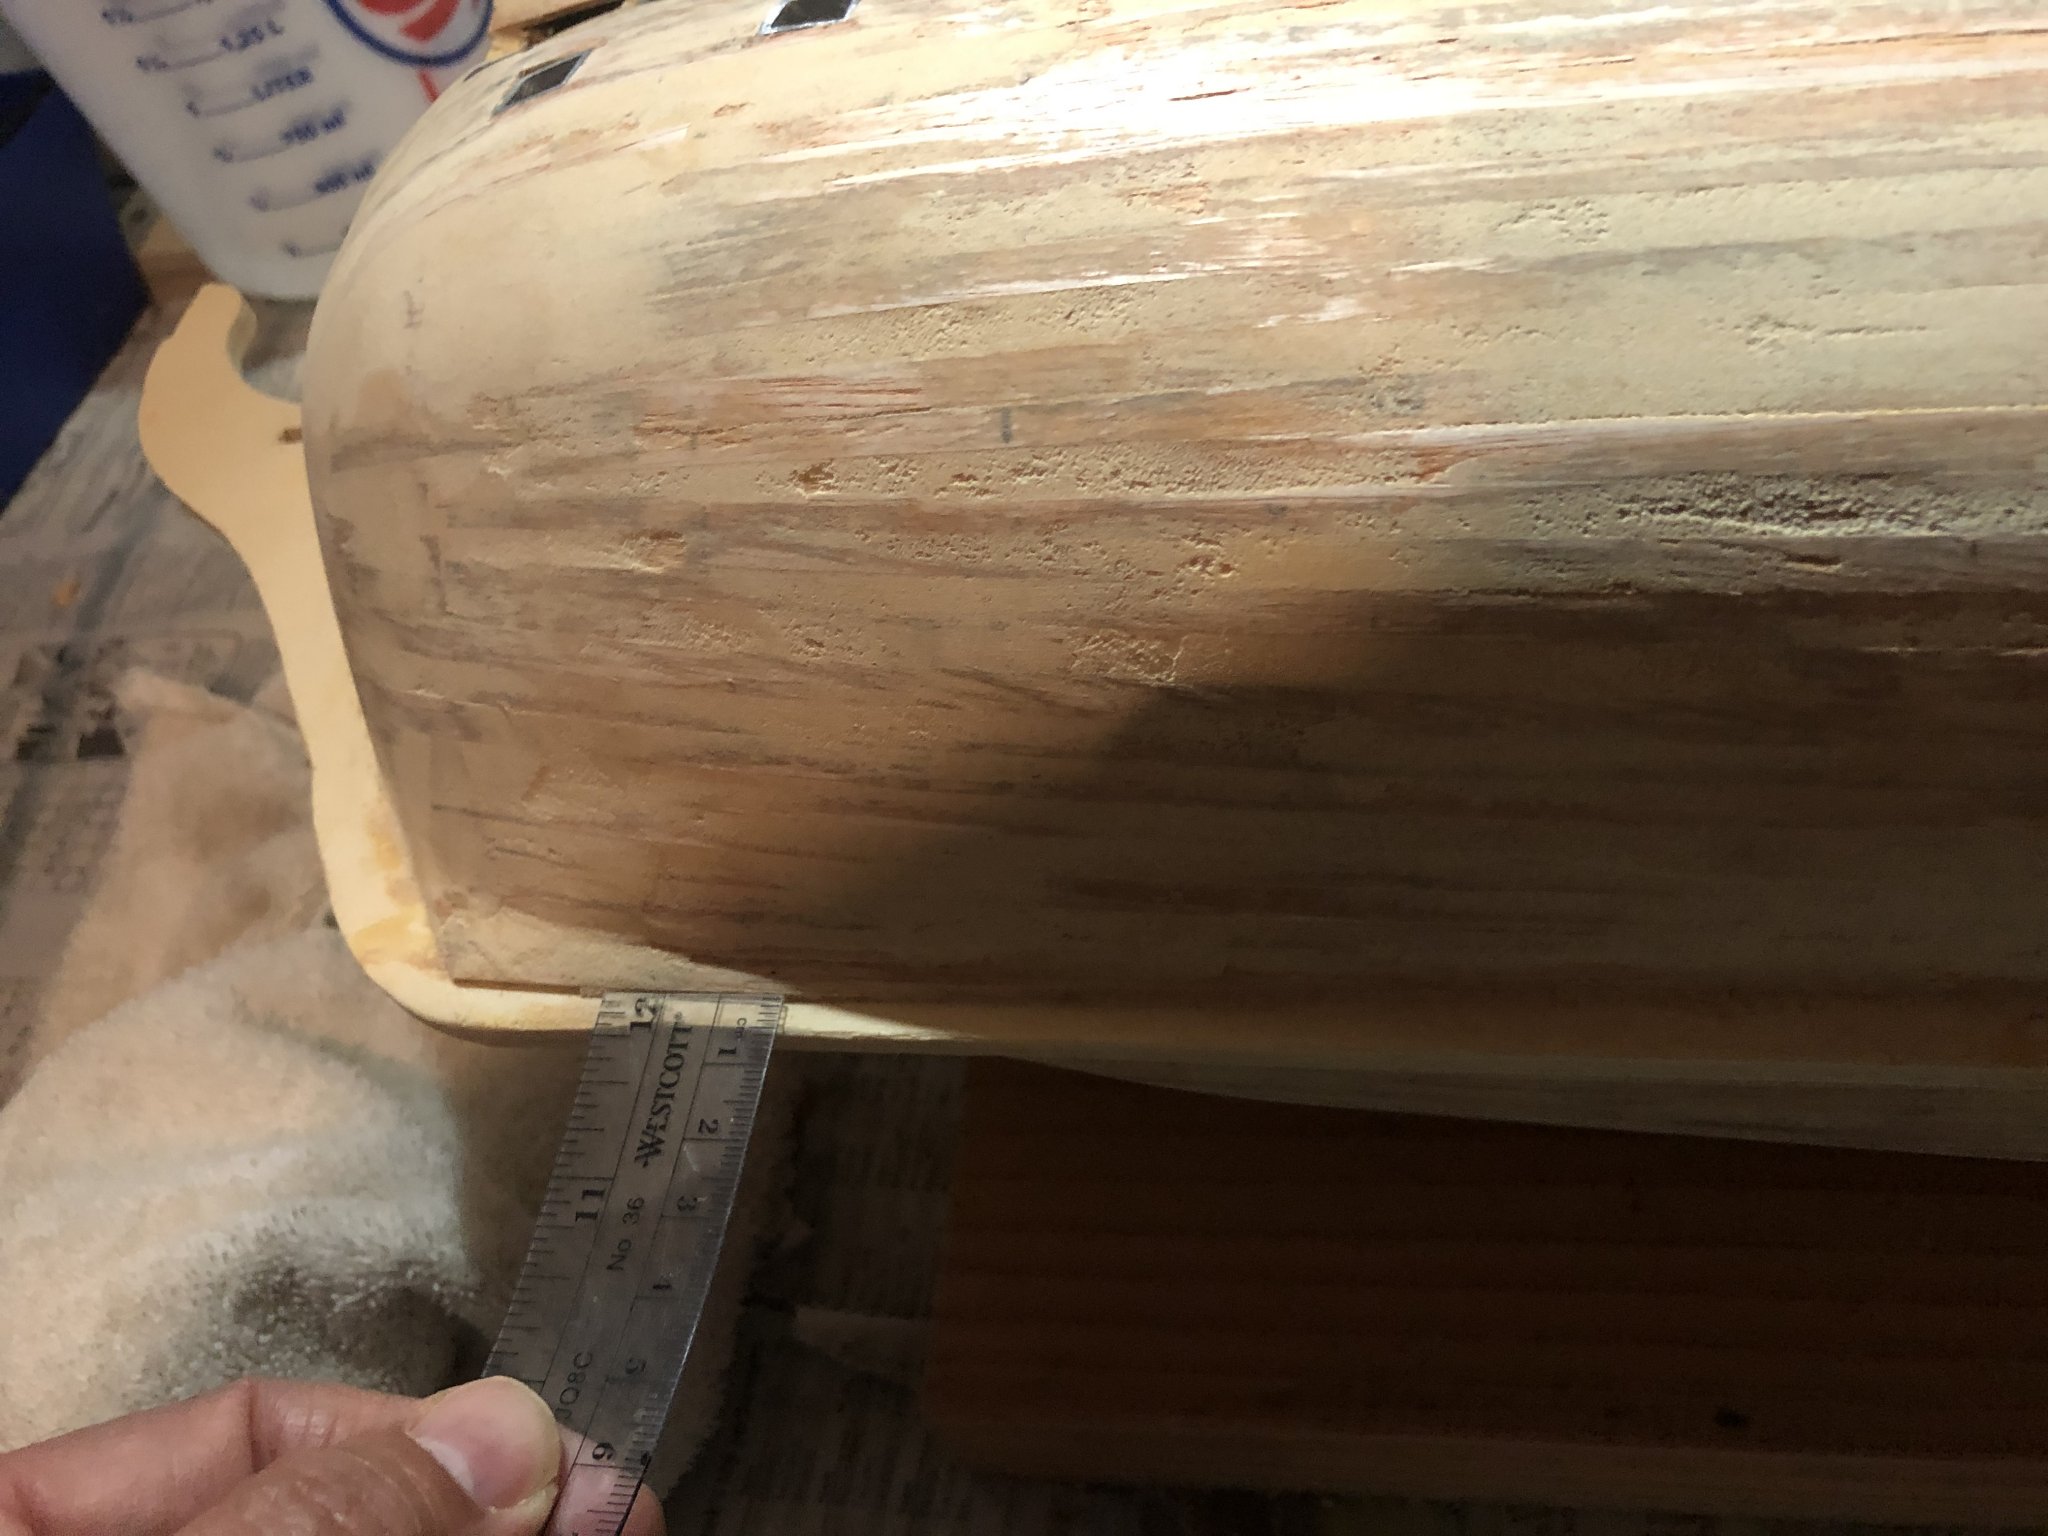
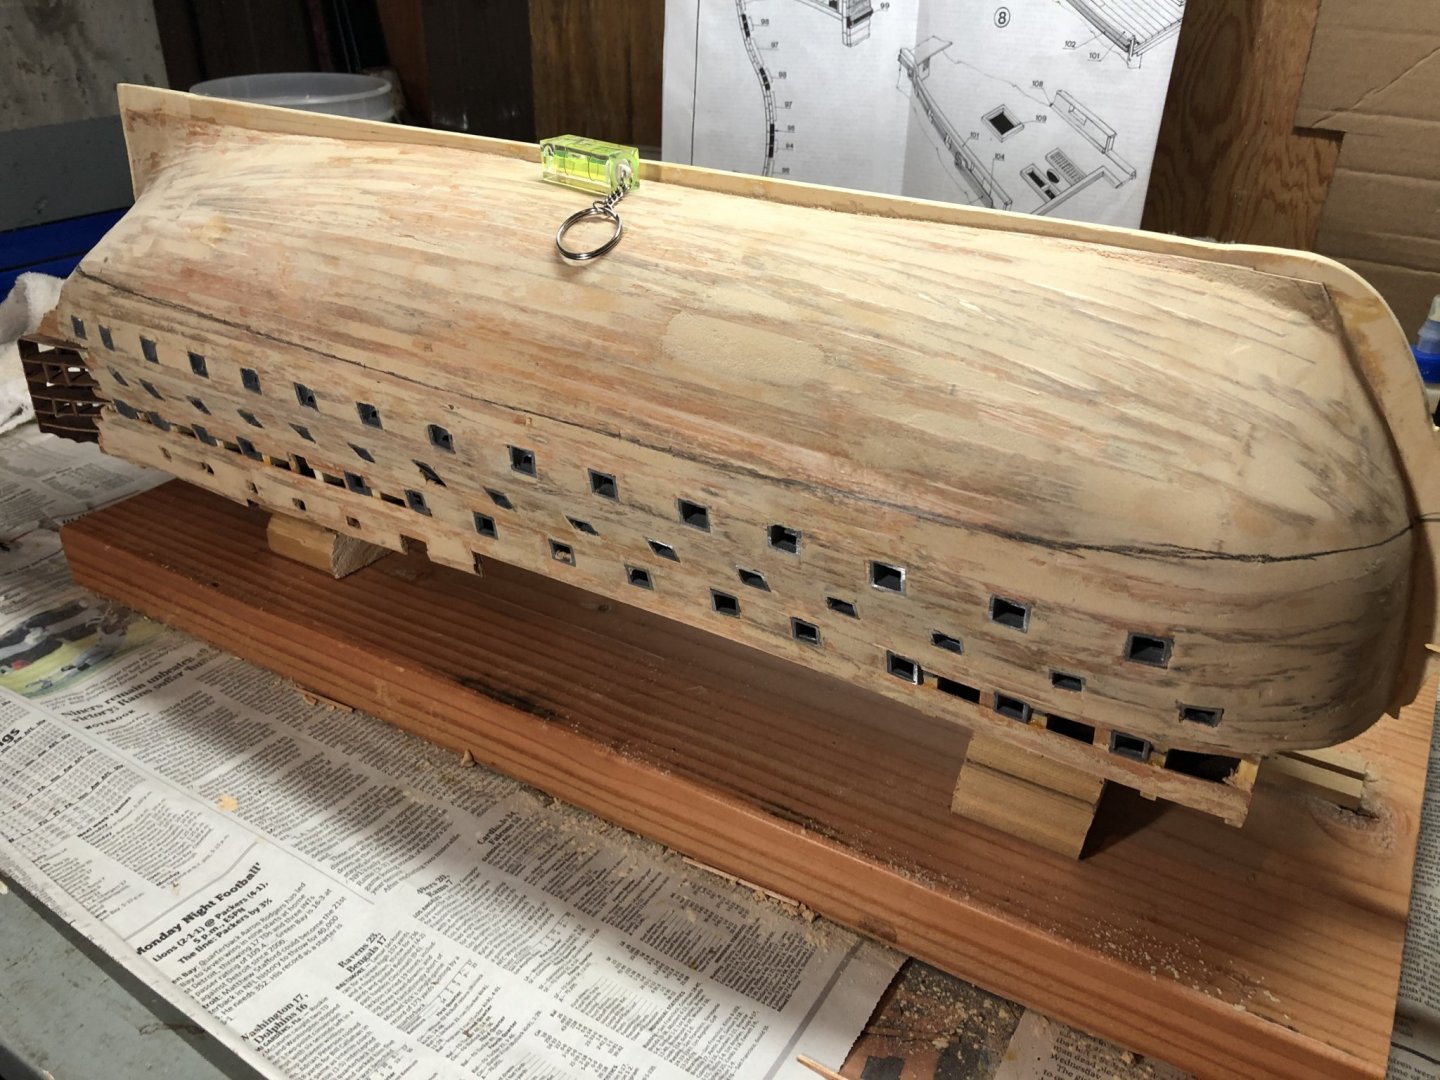
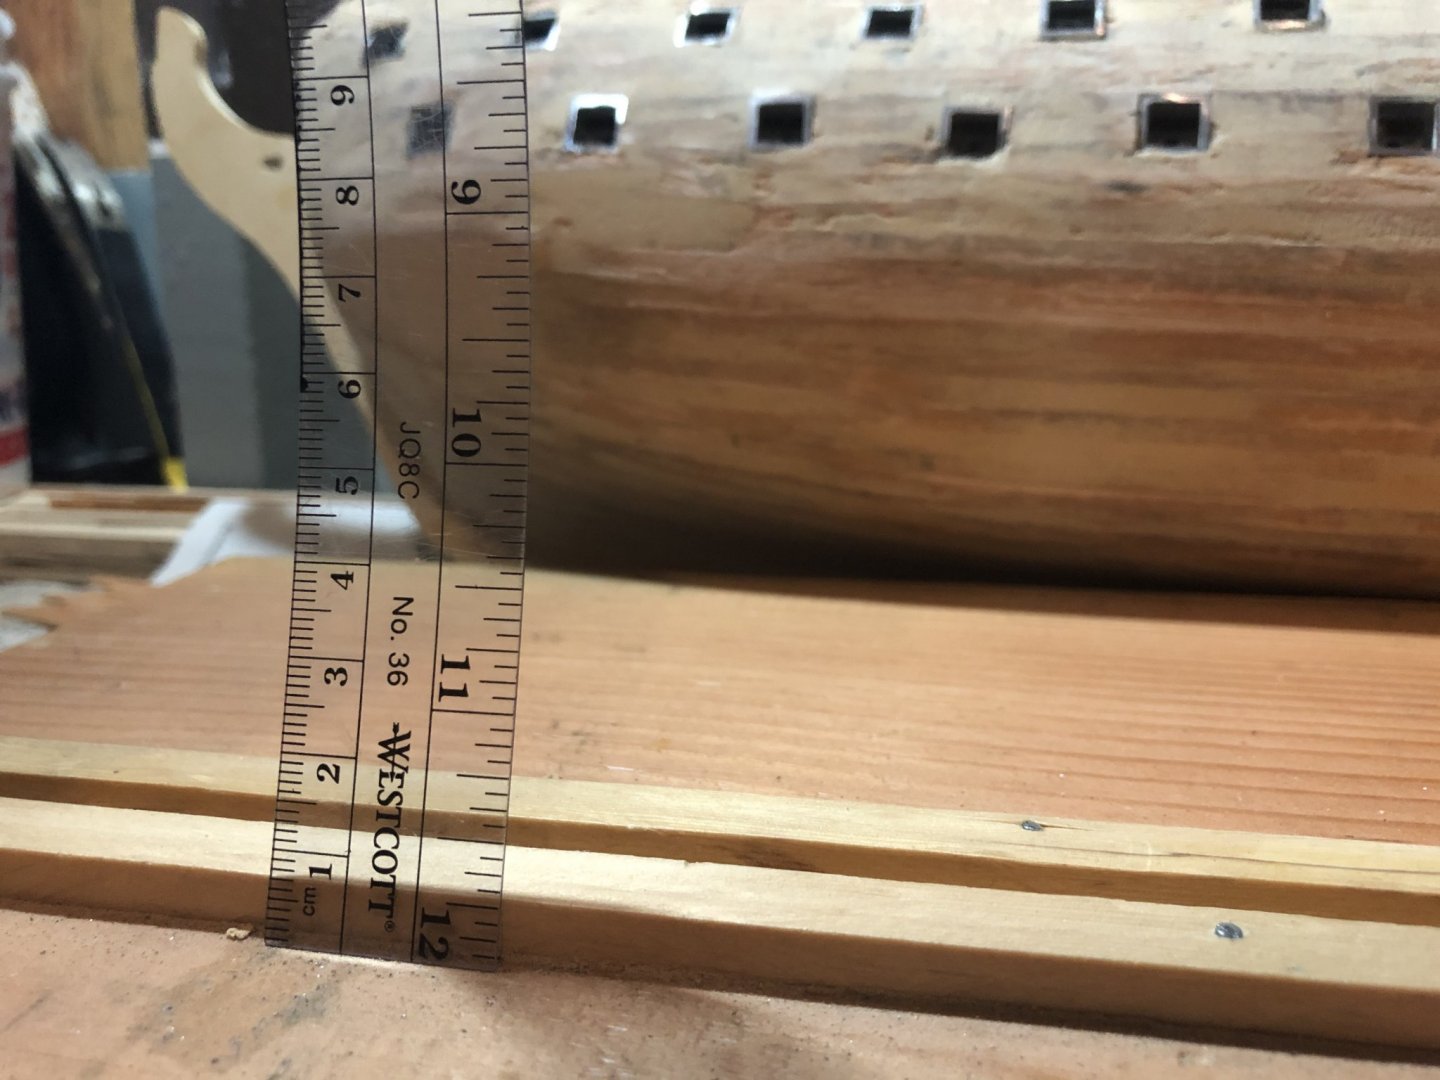
Doing a bit of ‘fit checking’ after having marked the water line. I verified the spacing below the lower ports vs. the to scale drawing from where the waterline marking was derived. Next, I want to ensure the lower wales/planking will fit correctly on top of the copper plates. It will be interesting shaping these wales as the aft and forward parts curve up. So far so good. Almost ready to start coppering.

-
Thanks Emmet - I try to keep my head down where I can. I don’t know what happened with Y.T., but hopefully he is doing well. Keep plugging my friend but don’t be in a hurry; take your time. You’ve got a lot of resources here to call from. Don’t hesitate to check them all out.
-
Just ordered this set Henrik; it should do nicely! Thanks everyone for your helpful and timely advice.
-
Hope you don’t plan on actually seeing if she can float... I get the feeling my Vic would immediately capsize if I ever tried it. I’m sure it will work it out as you can find all sorts of resources for determining the waterline for the copper... I imagine only the strictest/most meticulous modelers will pull out a ruler to measure...
-
Thanks GrandpaPhil. I’ve ordered some Yellow Ochre on EBay, but if it doesn’t work out, I appreciate the additional resource. Loving your Vic by the way!
-
Thanks kjs - I’ll need to do something likewise if I don’t find the extra HW. Bummer about Y.T.; he did fantastic work. I didn’t know anything about any pirated gear/items - but I know the forum is strict about this. I better do some homework there so that I don’t find myself on the wrong side of the law here. I will be looking at your log to see how the copper planking went. I can do monotony. OK, worked out my marking jig per the Mamoli instructions and am nearly done with marking the waterline. I’ll use a more permanent marker once I’m satisfied with the pencil lines. Still doing some fine tuning of the hull filling/sanding.

-
Hey Emmet - I dropped by to see how your Vic is coming along and see you have made a lot of progress in a relatively short time and are working through the challenge of planking. Looks like you’ve got a lot good advice coming your way. Also know that the second set of planking will hide mistakes made during your first layer as well as give you a solid, uniform surface to cover. 😎
-
Stopped by our local hobby shop for some paint shopping and although they had multiple paint suppliers and colors, I was unable to find the specific colors I was looking for. I ended up purchasing four (4) sample acrylic colors via Ebay, including yellow ochre. I’ve got a red, black and cobalt blue coming as well. It was interesting to learn from the shop proprietor that due to the Covid pandemic there was a spike in customer’s buying paint sets for models that the paint suppliers have been unable to recover from, hence the reason many paint suppliers are out of key colors. I’ve also taken time to review the stock of my materials and it’s interesting that I have counted ten (10) short guns for the quarter deck, 28 longer guns for the middle/lower deck and then 57 heavier guns for the lower sets of gun ports. Counting the two (2) carronades, that gives me 97 total guns which appears at first less than what the Victory carried at Trafalgar. I note there are 58 heavy gun ports vs. the 57 guns I have. Same with the middle deck where there are 30 gun ports vs. just 28 guns. I’ll need to do a closer inspection, but I may have a disparity with the hardware I have. ‘The devil’s in the details’ I’ve always heard and that’s especially true in modeling. I’m now preparing to mark the water line for distinguishing where the copper starts. The instructions show 7.5cm from the bottom of the keel to the waterline leaving another 8.5cm from the waterline to the top of the midships decking. I’m using a variety of methods to make sure I mark appropriately. I’ve verified the ship ‘dock’ channels are 5mm and not lifting the boat up, giving me a shorter measurement. I plan to mark several points, flip the ship over and using a device called out in the instructions, mark the line from bow to stern and start ‘coppering’. Once I have the paint, I’ll prep a couple of cannons for fit checks as previously described above.


-
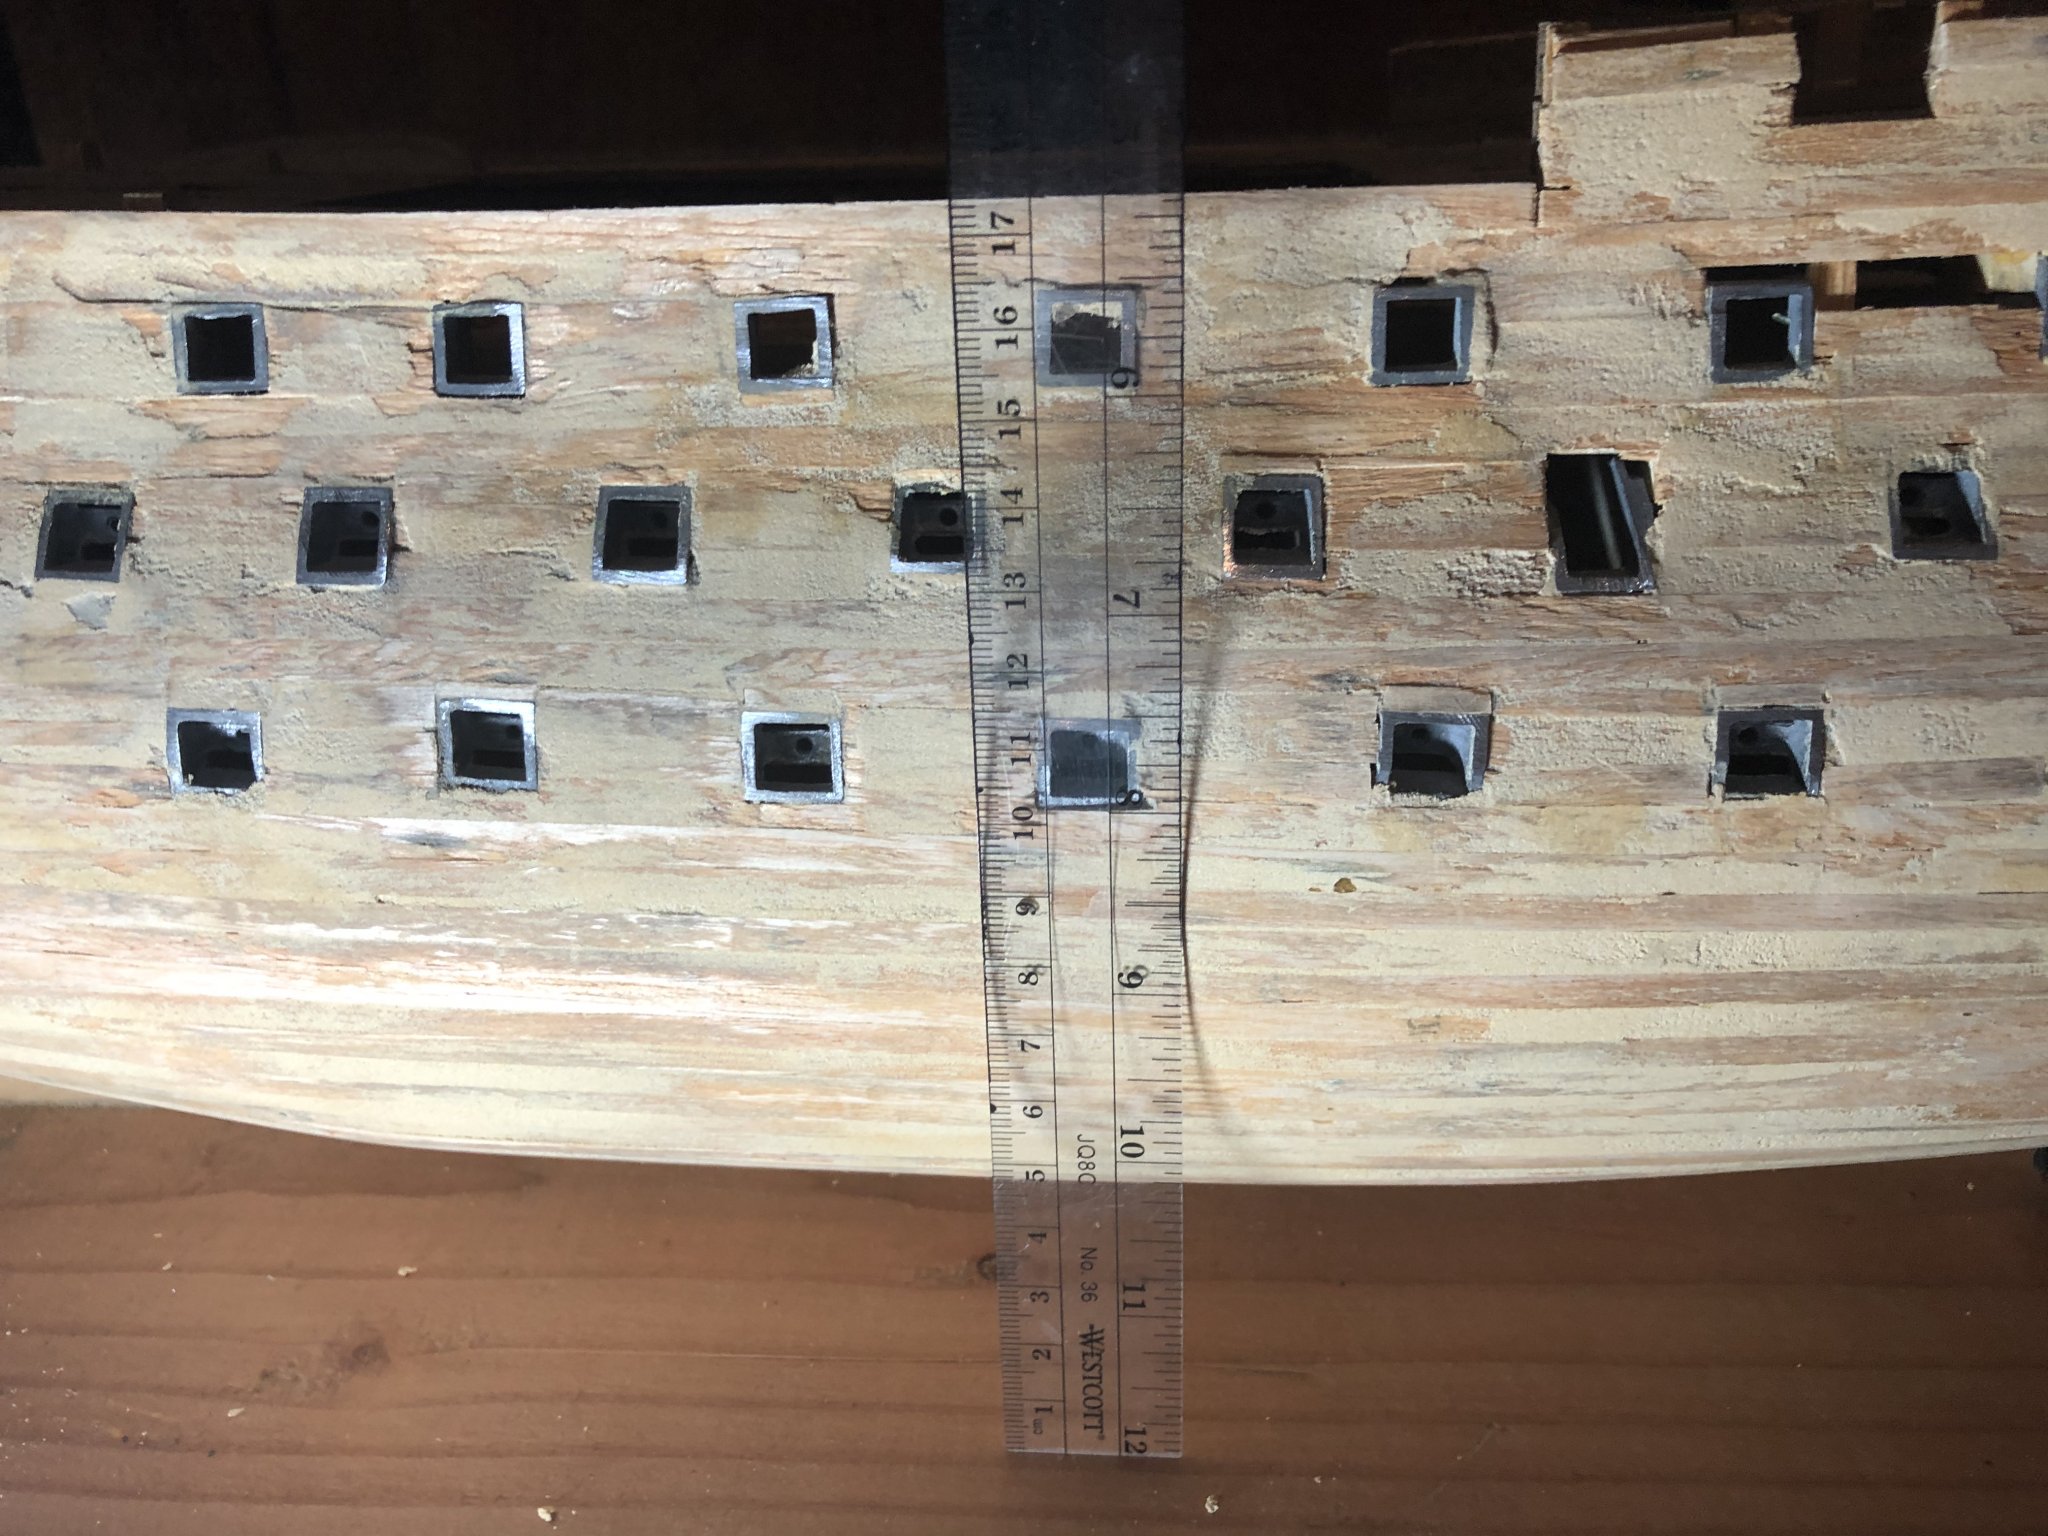
Sanding complete and lead gun ports filed down flush with the ship. Transitioning now to the second set of planking. However, I believe I’ll build a couple of gun carriages first to ensure they can be inserted to the right gun port on the quarter deck. Also working to obtain the correct set of paints for the ship. Thanks to all who helped me with ideas for obtaining the necessary colors.

-
Thank you!