MORE HANDBOOKS ARE ON THEIR WAY! We will let you know when they get here.
×

Rob S
-
Posts
339 -
Joined
-
Last visited
Content Type
Profiles
Forums
Gallery
Events
Everything posted by Rob S
-
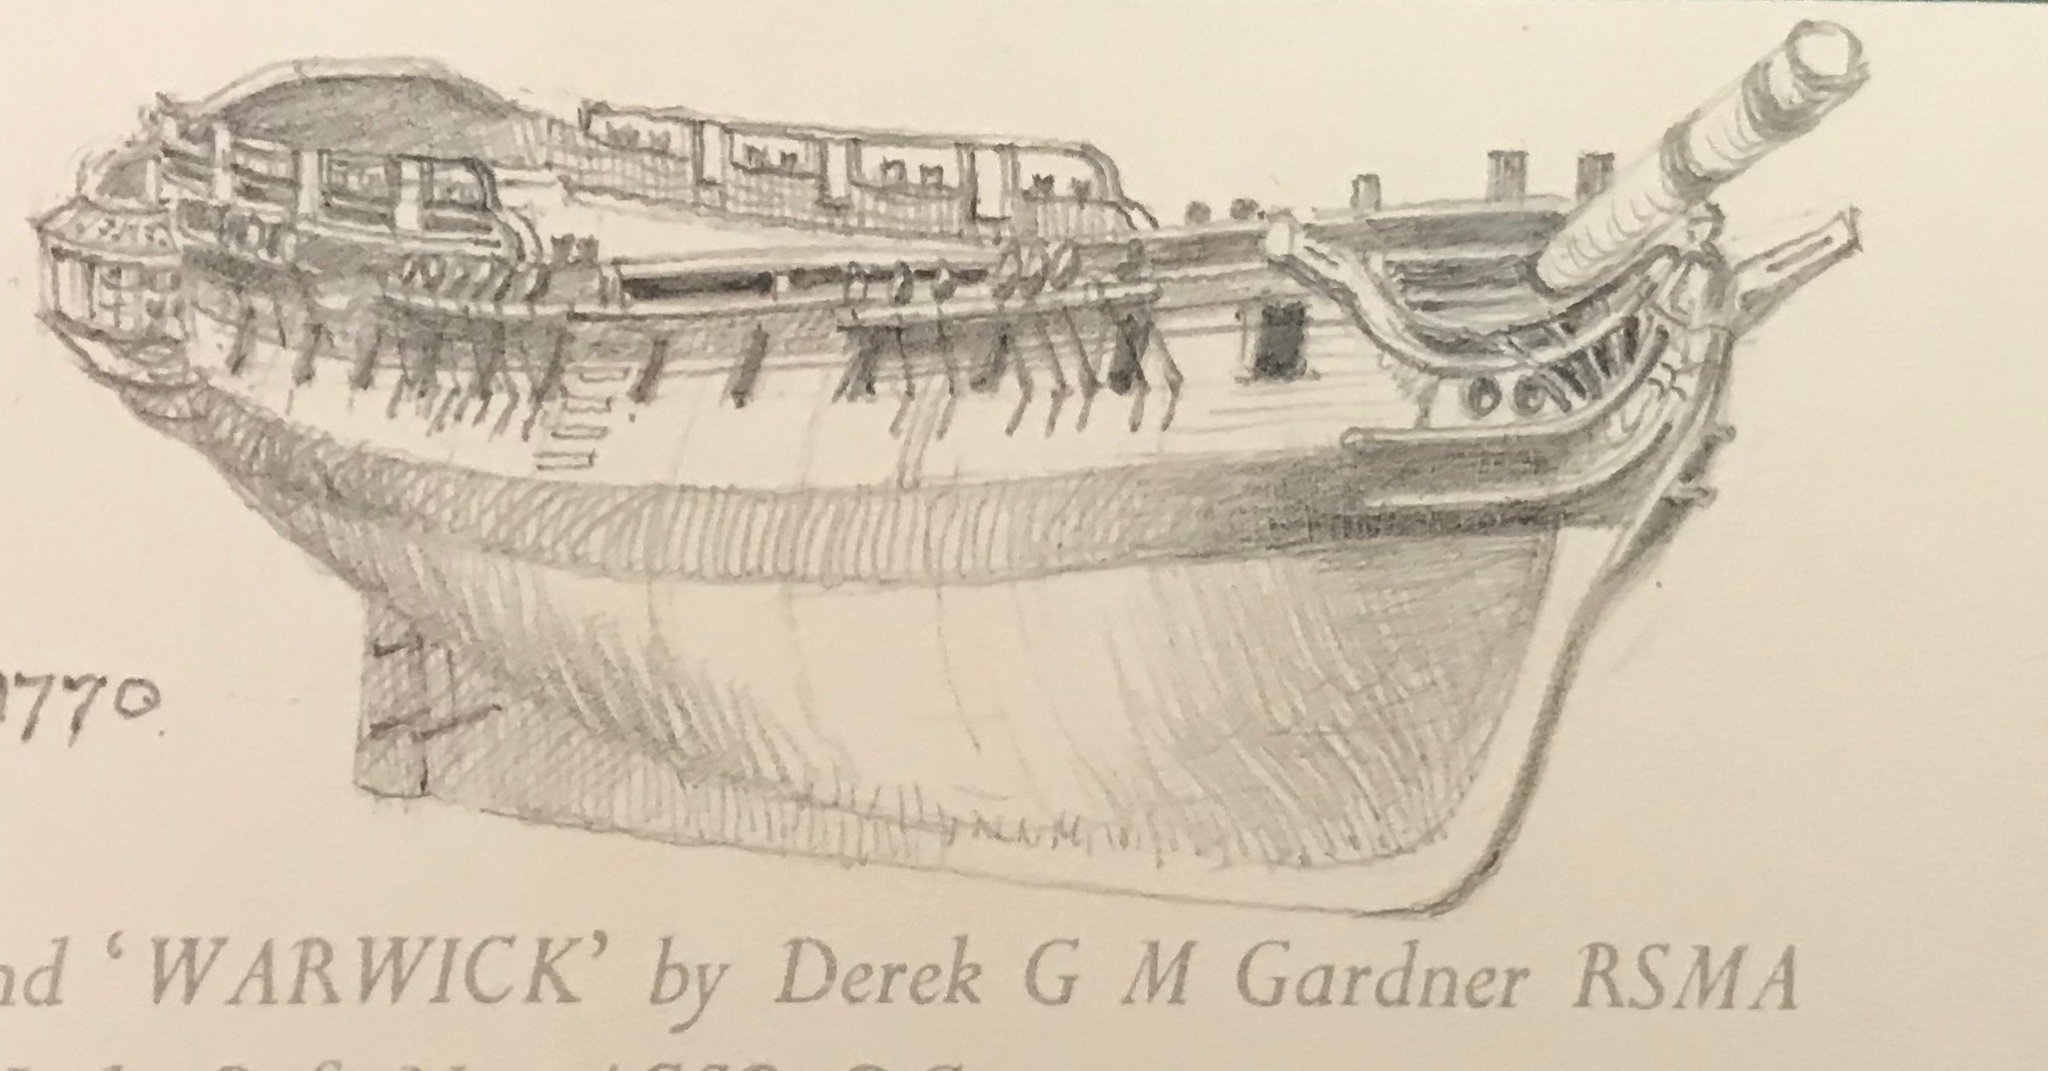
 I've got a long way to go, but looking ahead some, I'm thinking I want to stop the model once I get to the below example point. I think this gives me a lot more options to display the model given it will take up significantly less room than once complete with all the masts, rigging, sails etc. Just something I'm considering right now. We'll see where we end up!
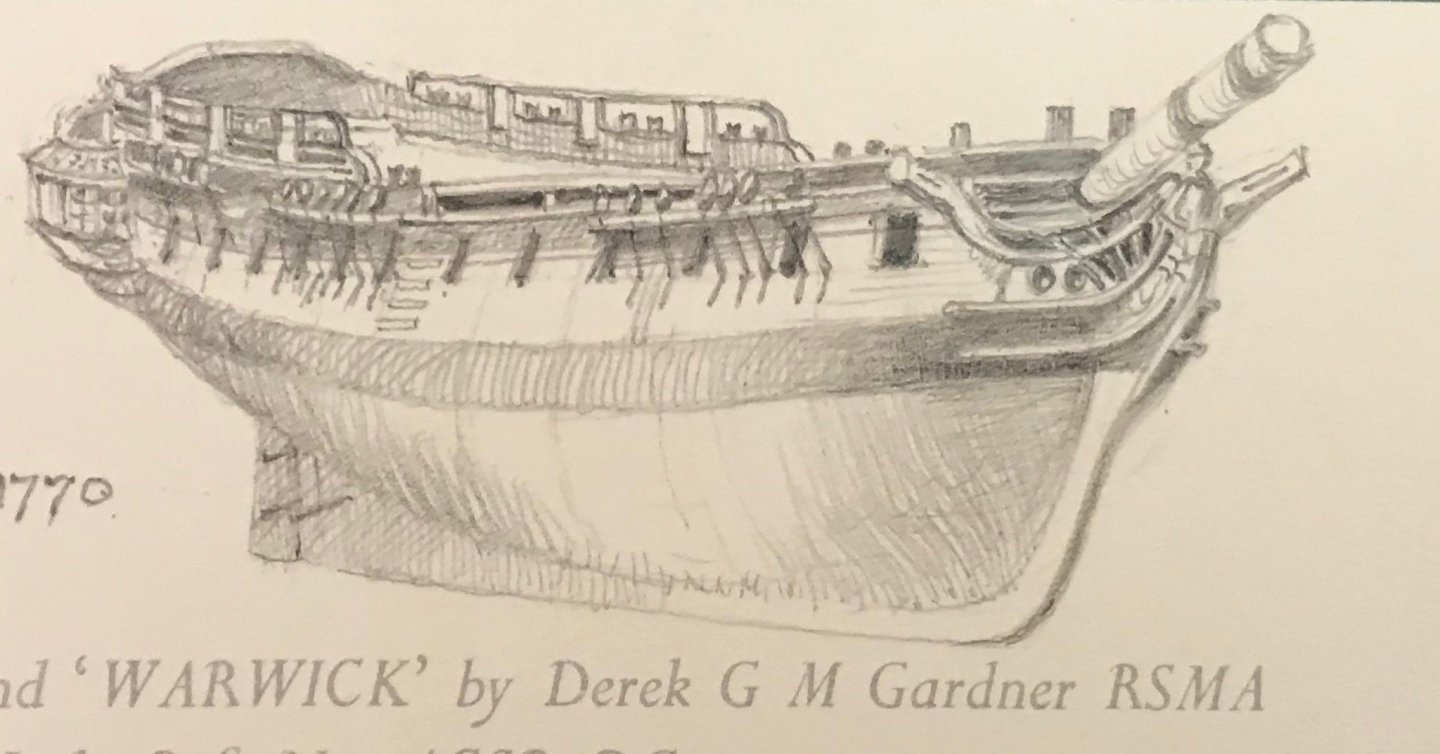
-
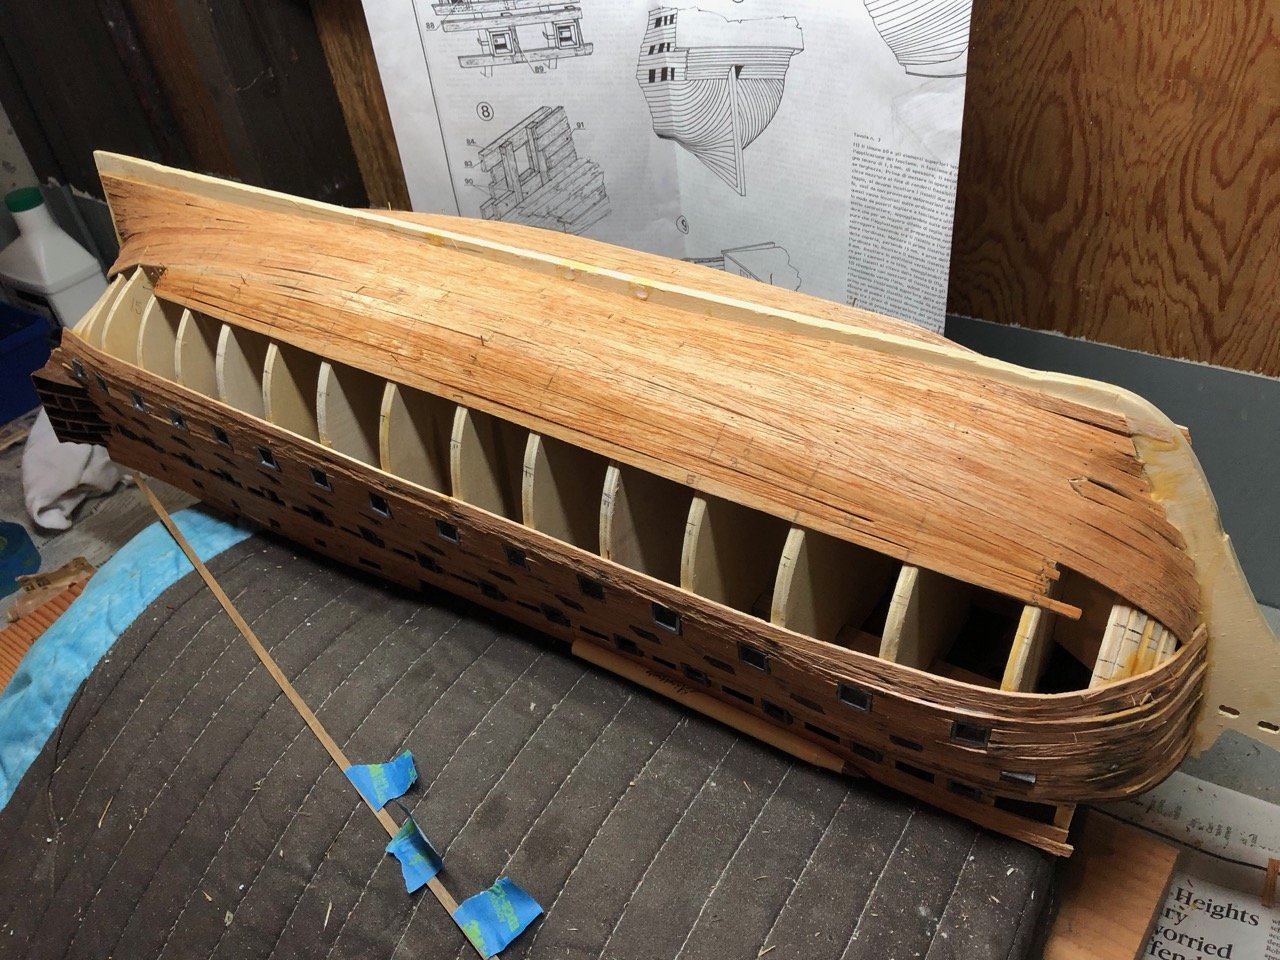
Thanks Emmet! Hope you made it home safely and glad you’ll have some helpful lessons for your endeavor both good and bad. Planking continues on the starboard side. It would be good to have a more repeatable tapering method. You can see where the planks don’t completely seal near the stern. Looks like I’ll have just enough planks to finish.

-
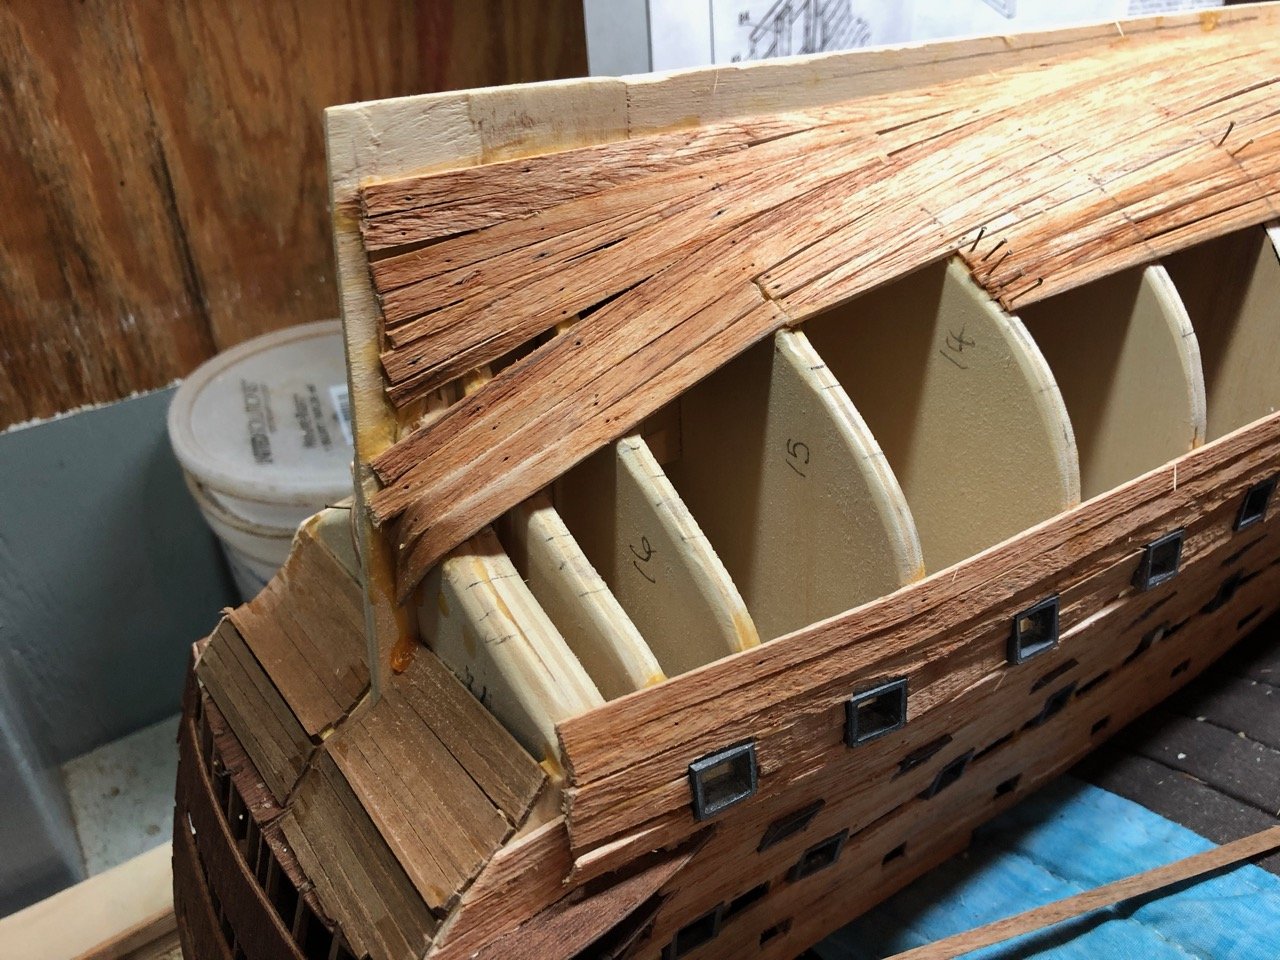
Here is what I'm attempting to do with the starboard side of the stern areas.... The yellow section would be where the drop strake would be added. Need to think about it a bit more. BTW, I'm sure many of you have noticed, I'm screwing up some of the terminology (e.g., strakes vs. stealers vs...). Sorry for that.
.jpg.b1e9898dadafb5355c9e7723849cc216.jpg)
-
Hi Ian. I'm no expert, but relied upon C Nepean Longridge's 'The Anatomy of Nelson's Ships' for assistance. He had an example of 4 step butt planking that I used in my Victory. However, I believe the planking used varied in different parts of the ship... Anyway, I'm sure you have many options. Whatever works for you! I have several examples of my approach in the first several pages of my build log. Good luck to you!
-
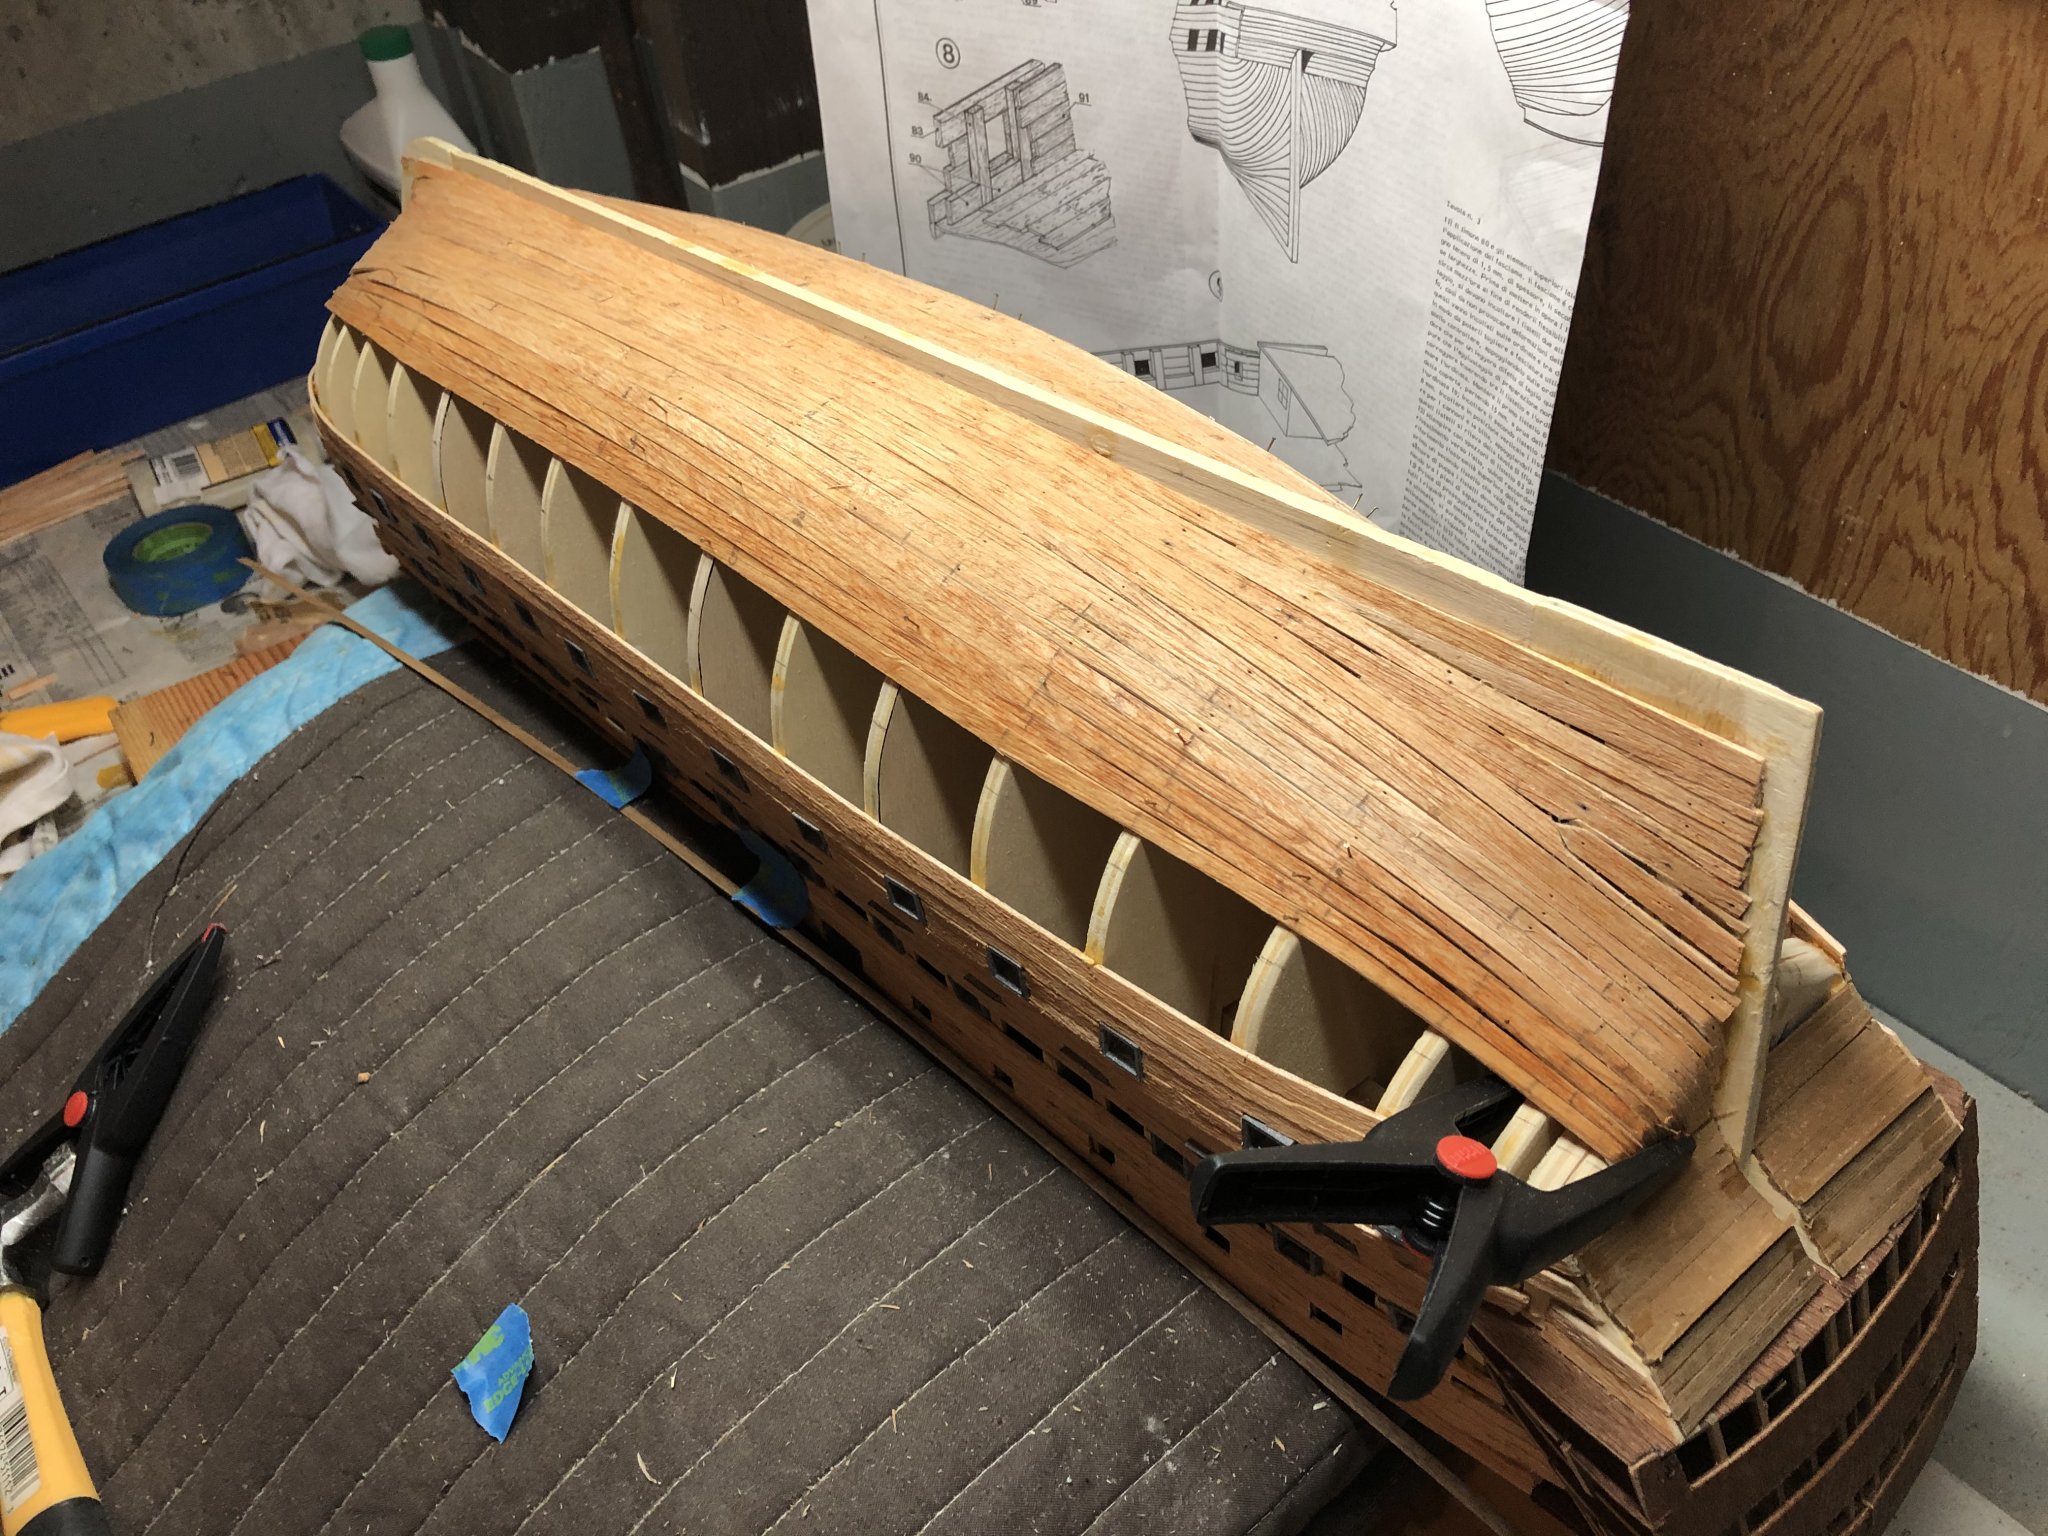
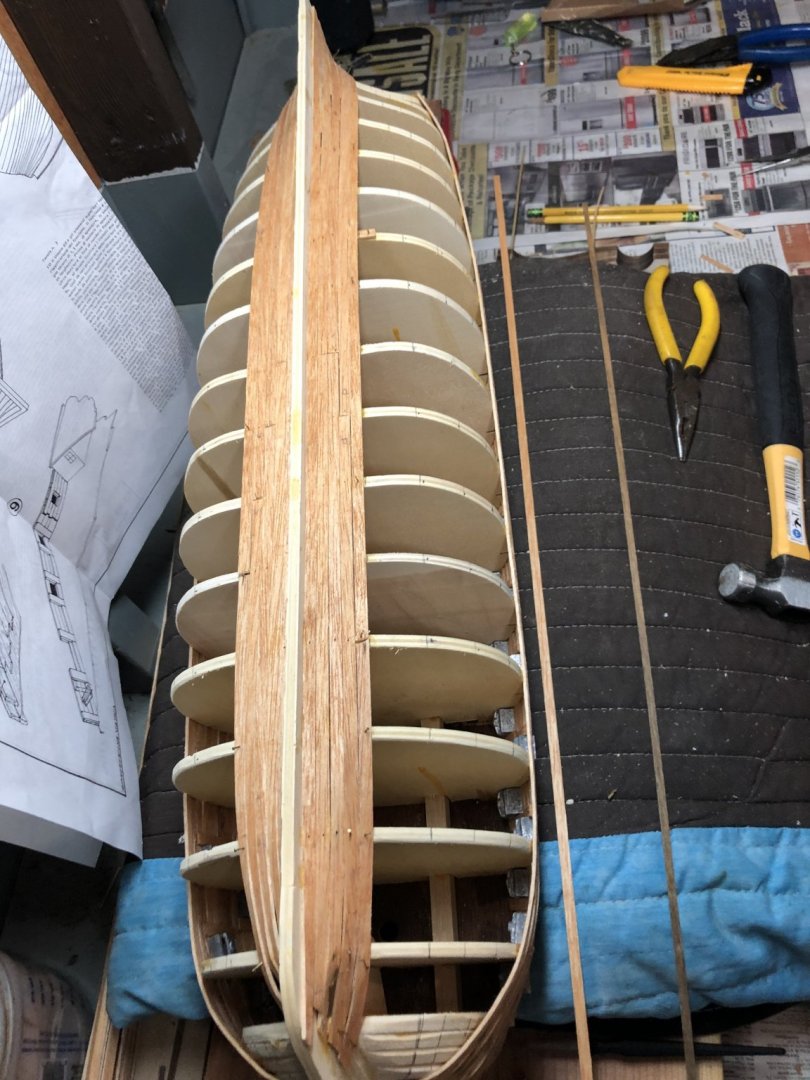
Continuing to plank. Slow going. I love that this forum has a wealth of those who have gone before down the planking rabbit hole, so there are lots of examples to see. As a first time planker, my methods are what you might call a hybrid approach (I'm being kind). I'm relying on the forum available 'Planking for beginners...' tutorial and particularly working to limit plank widths to no less than half the standard plank width or 2.5mm in this case. Tapering would have driven less than 2.5mm widths if I had continued further. The result is what you see below. I'm tapering using an exacto blade and my mediocre to marginal ability to hold a line. The planks are then sanded overall with mixed results. There is some unsightly spacing between a few planks at junctions where the plank width changes. I plan to finish the bow and stern sections with standard planks supplemented by stealers as necessary. We'll see how it goes. Starboard side: when I re-measured the 5 plank band sections across all of the bulkheads the result will allow me to just taper the planks down to the 2.5mm width with no need to do what was done below on the starboard side.
-
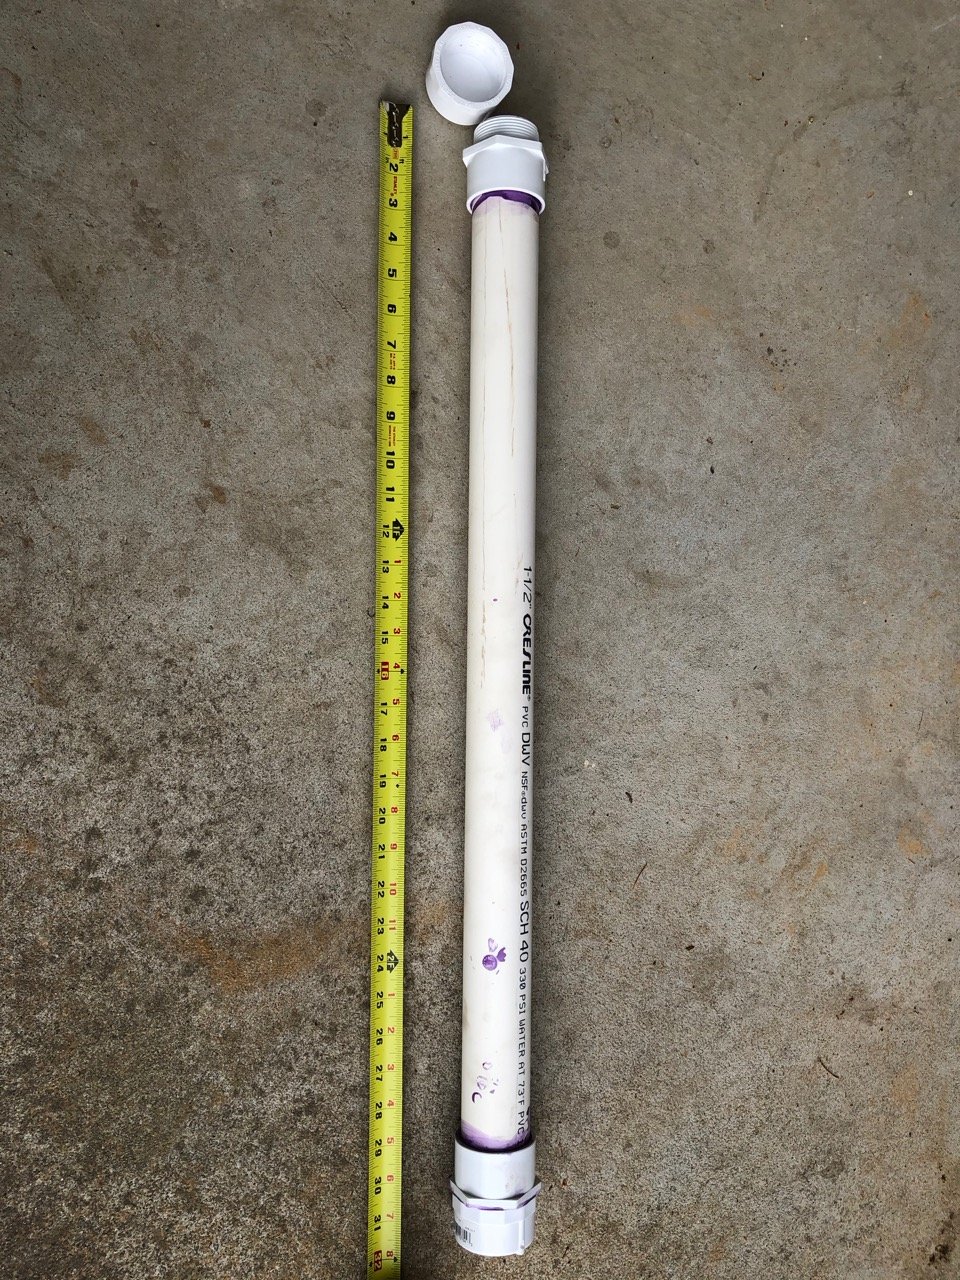
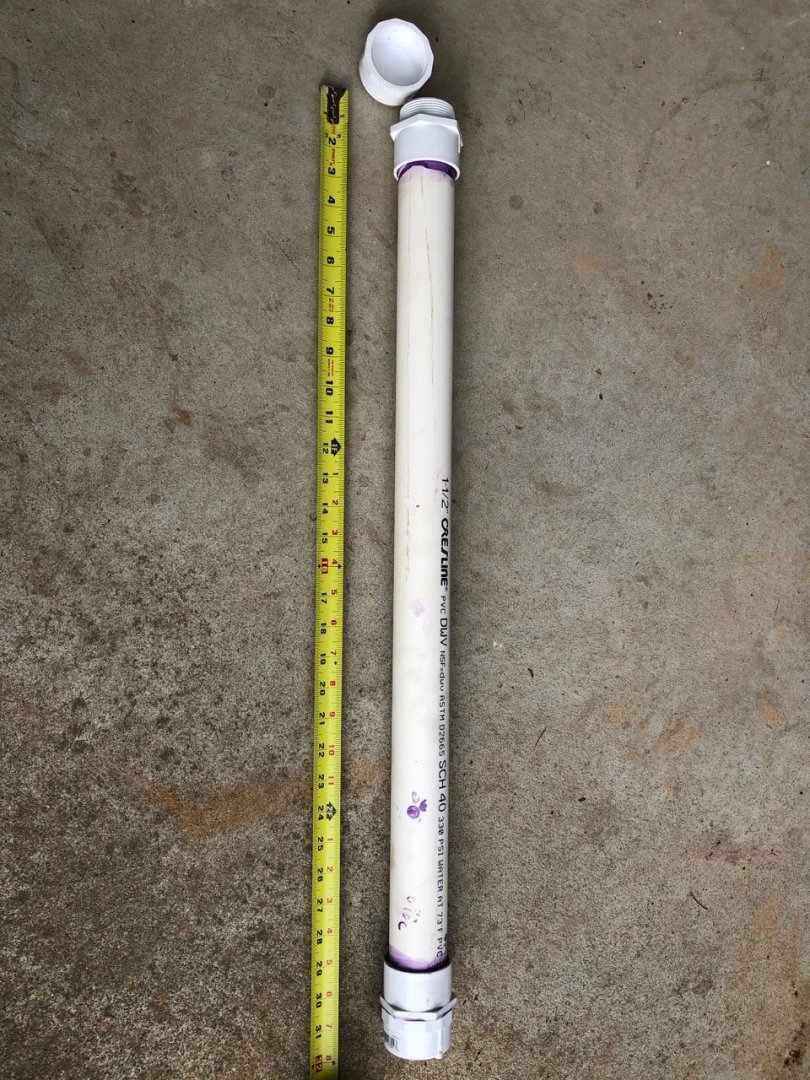
Finally got around to building my 'plank soaker' based on forum member comments/ideas. The mamoli supplied planks are about 29 inches. I picked up 28 inches of 1.5 inch PVC piping, glued on two 1 inch long ends with thread sets and glued on one end. The resulting soaker is just over 30 inches and can hold the entire plank(s) set as required. You can easily work both ends of the planks if required. Good news is the planks bob up when you open the end after soaking for 10-15 minutes in warm water and are easy to retrieve.
-
Henrik - If you don’t have it, this book by Deane might provide some additional insight on the Agamemnon during your build process.

-
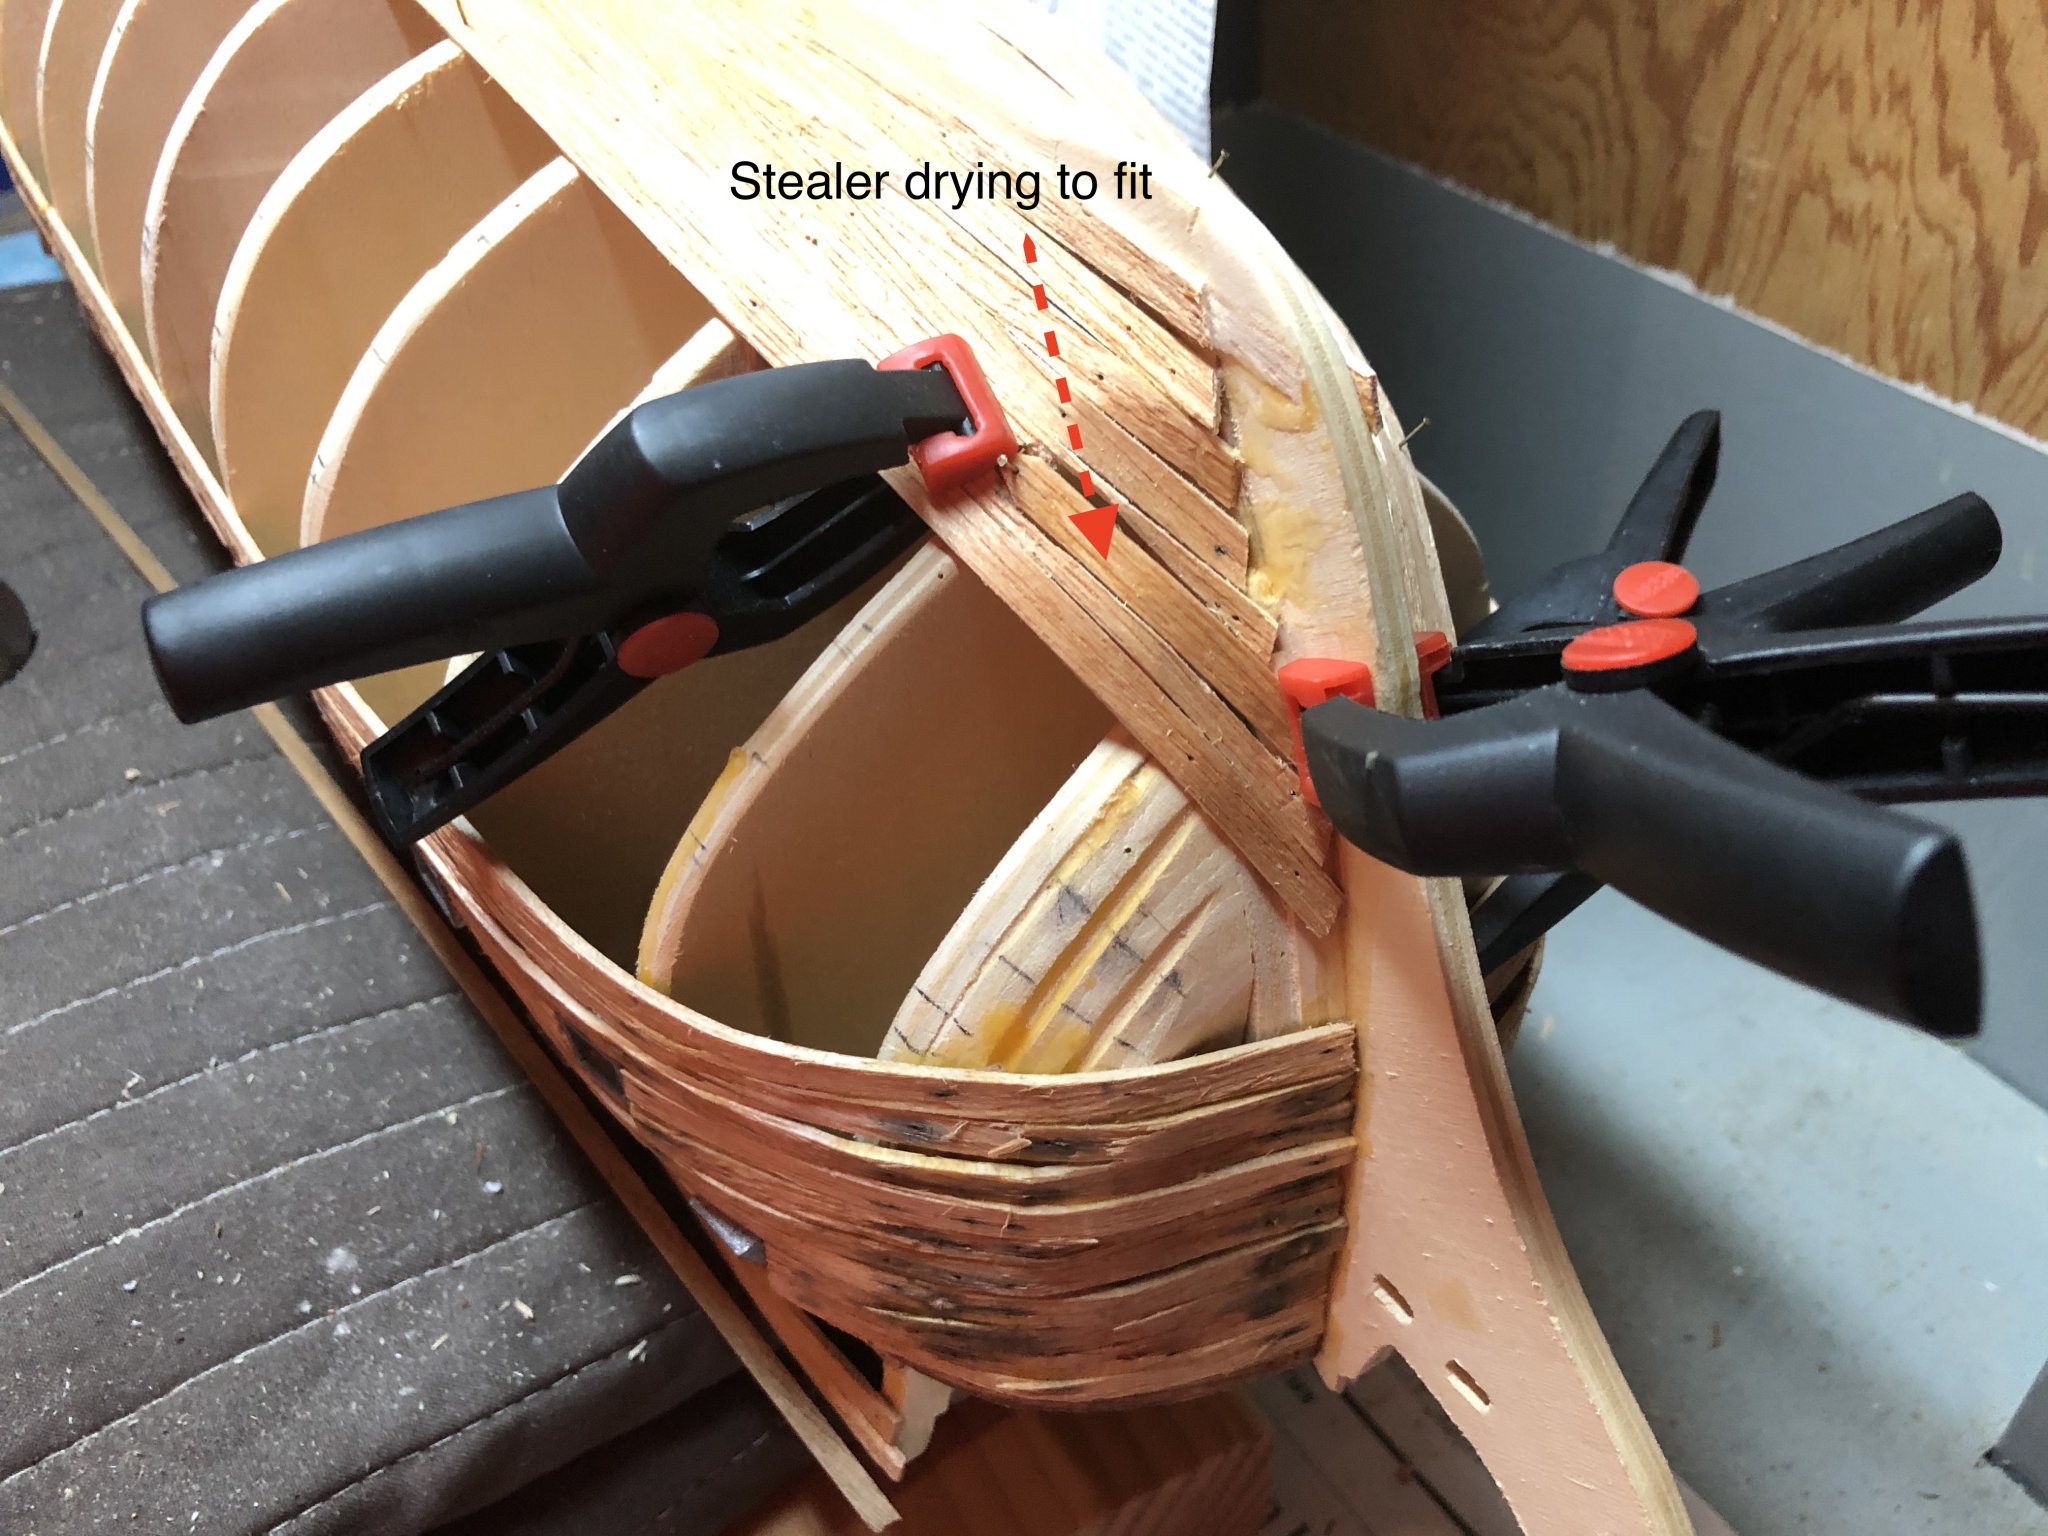
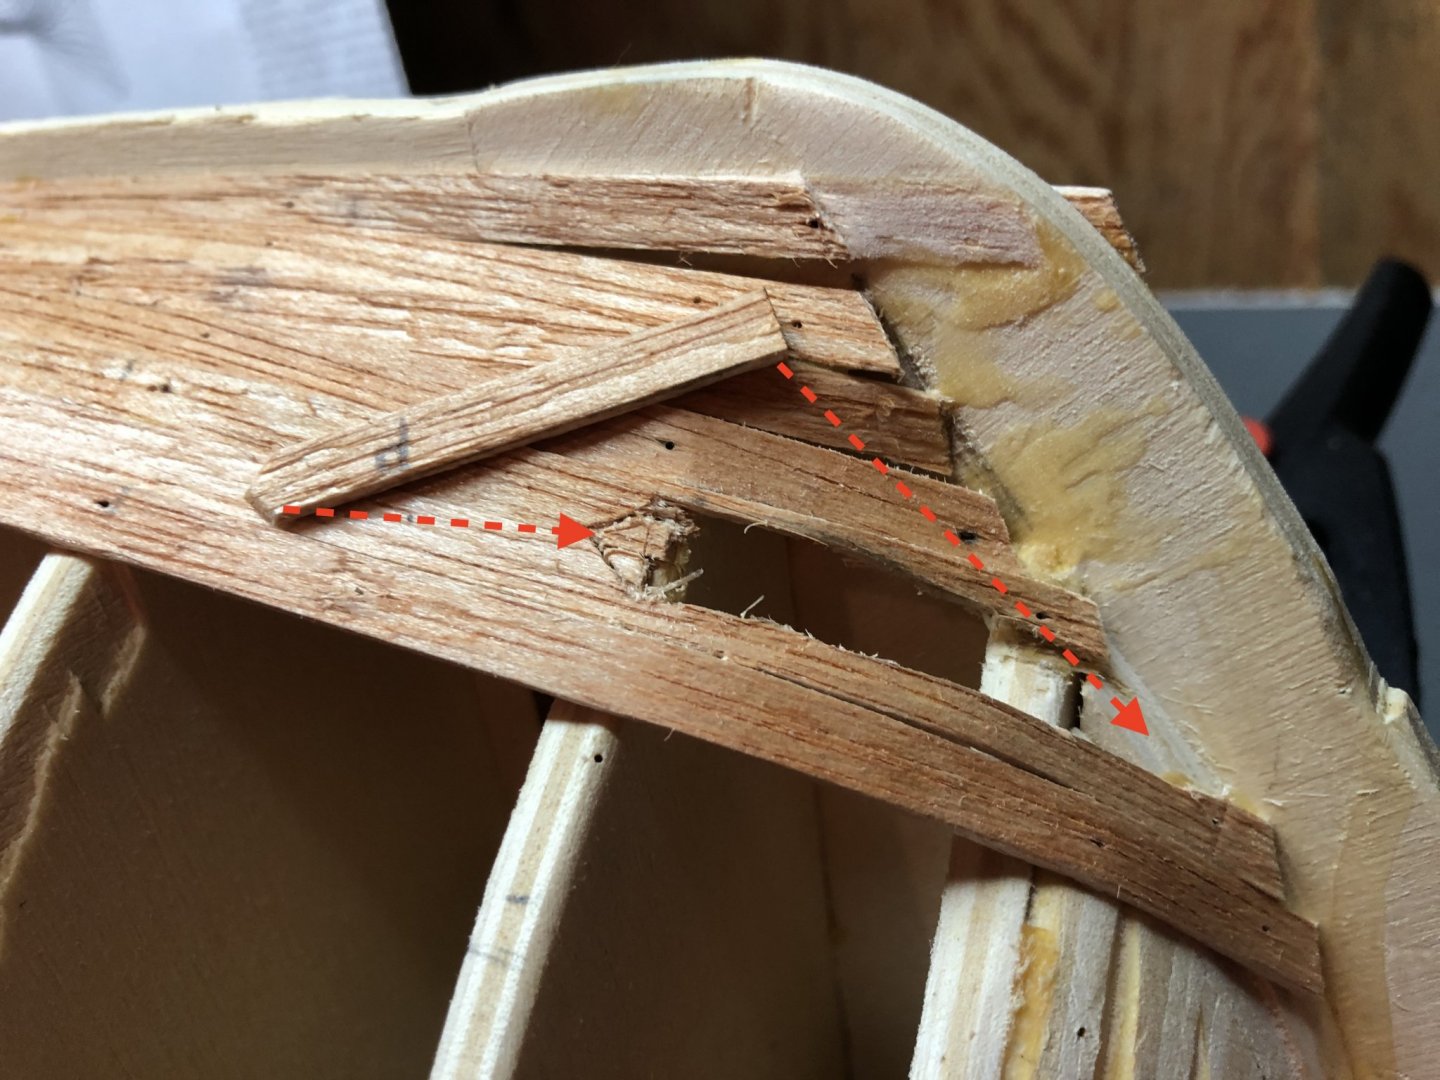
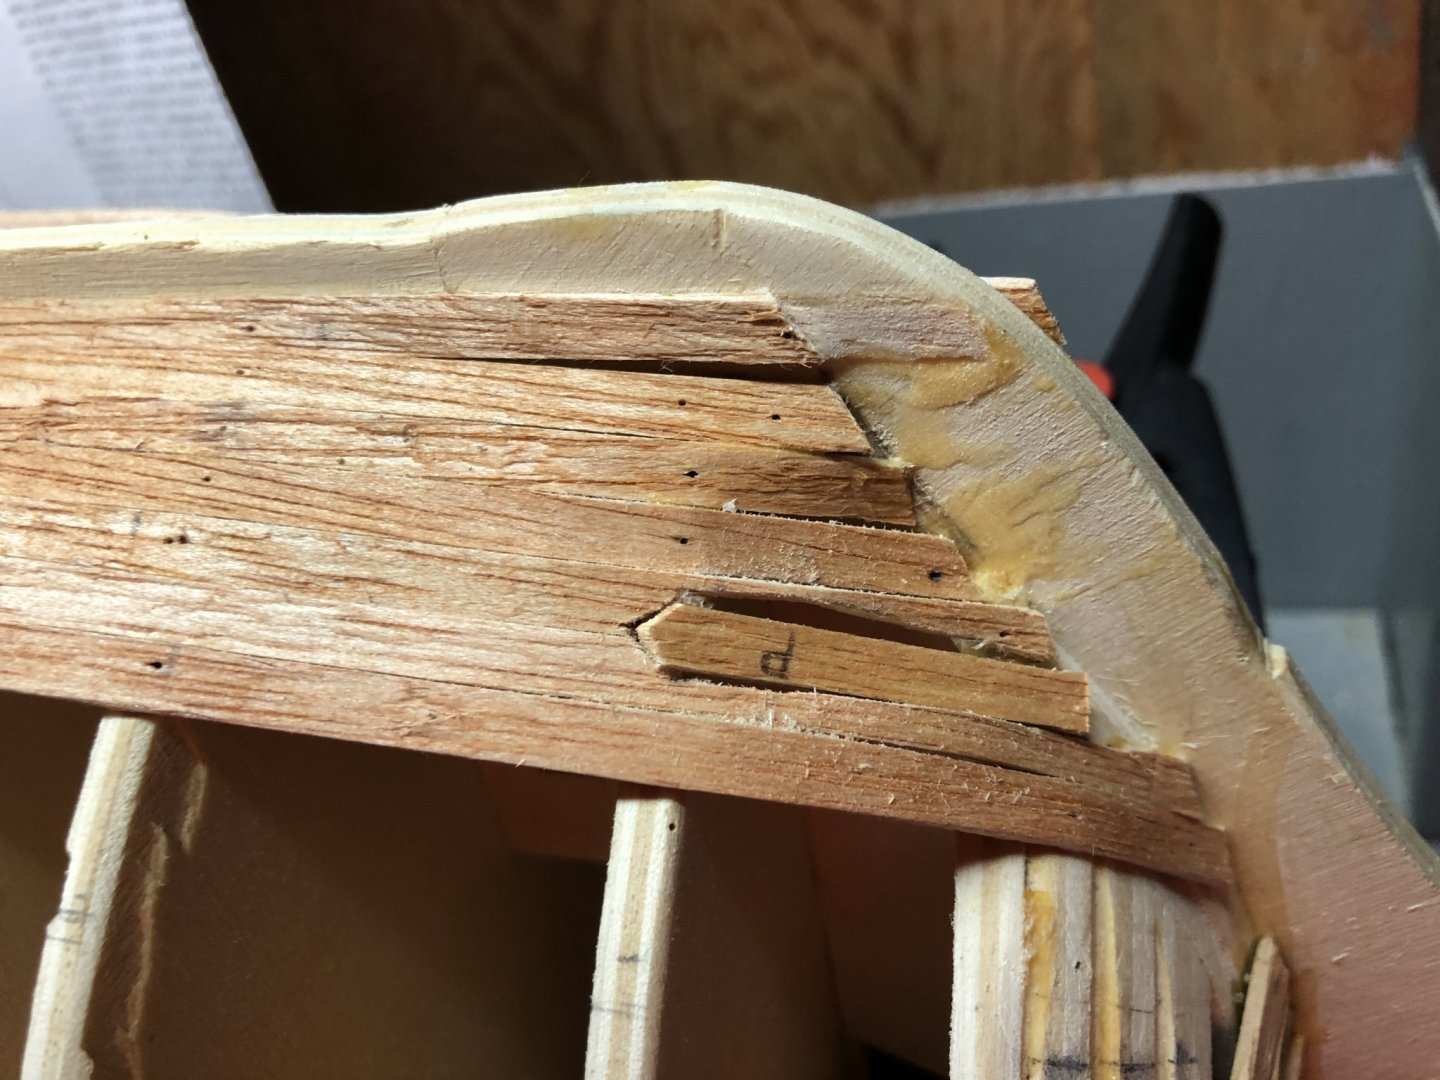
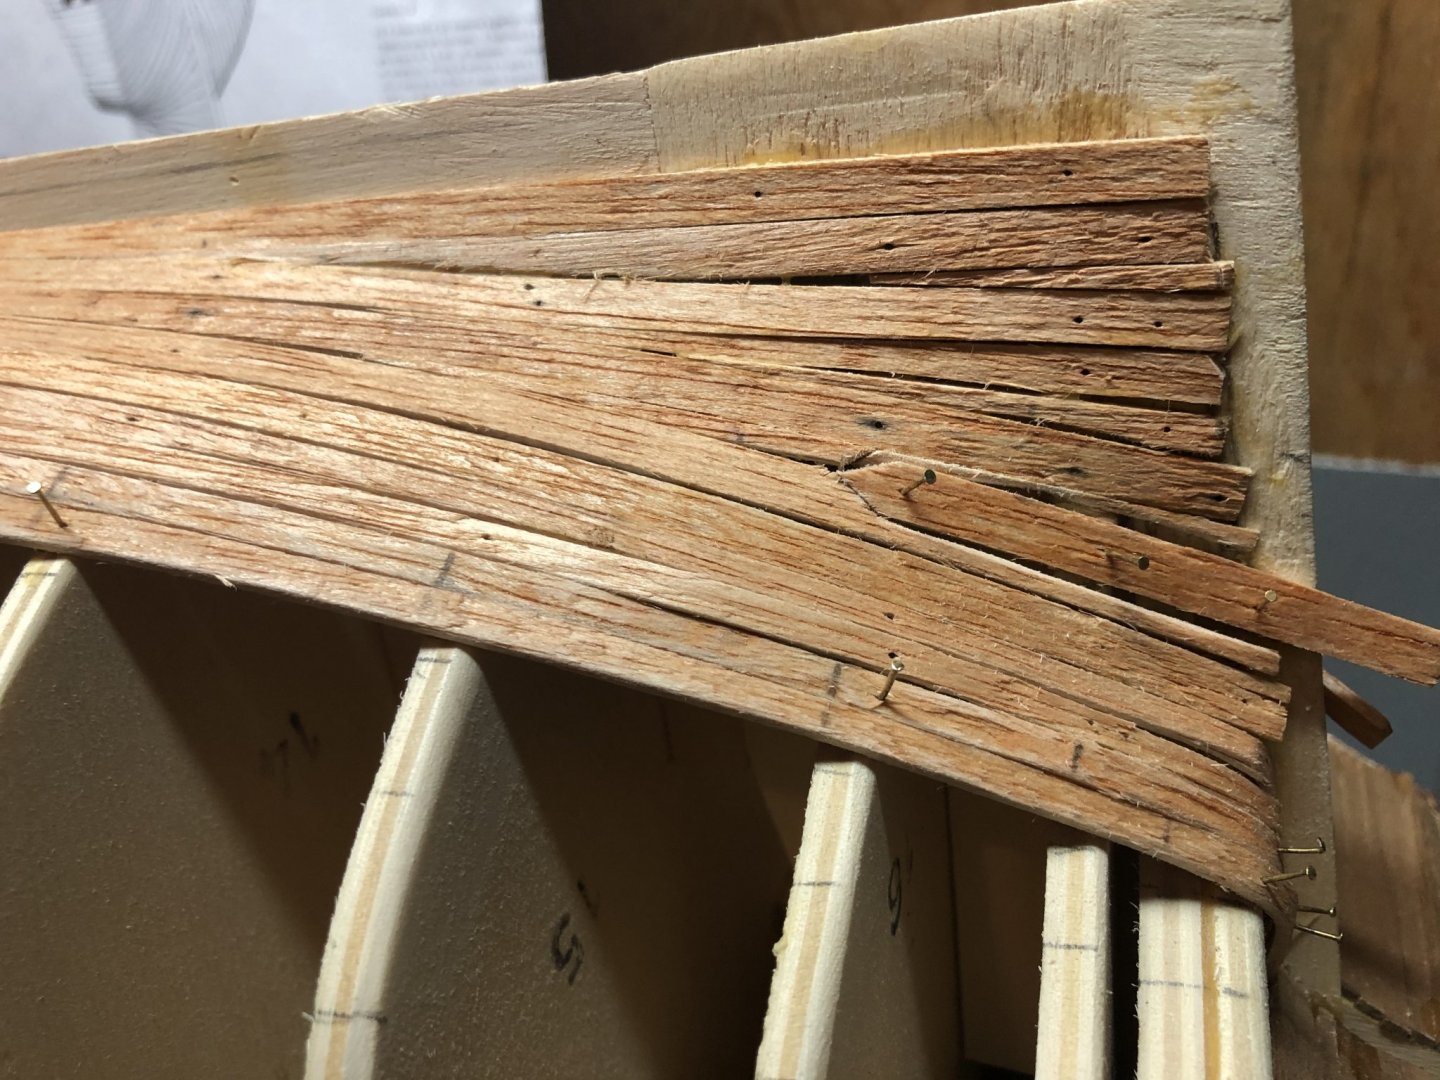
Thank you Emmet; drive safe. Appreciate the comments. Yes, jigs are helpful. I’m doing the tapering by hand with mixed results. Spent today affixing some formed planks on the bottom and then repairing a portion of the port bow planked section clearly in need of work. I identified the ‘before’ section (first picture) and then what was cut out vs. what was to go in. Once cut to fit, I moistened the drop plank, bent it to fit with the electric plank bender and showed where it is in place, drying before the final installation with glue. Will continue the main planking activity tomorrow. One note, I saw how many of the modelers on the forum were using the clamps on the bowsprit support assembly to hold a formed plank against the very forward portion of the bow. Nice technique. I was previously trying to nail them in place with those little nails... that was always a problem. This is much better.


-
Hey Emmet - How goes the journey? Answers following: I haven't looked far enough to see what the second planking really entails on the Mamoli kit. But that said, since the entire hull has the first planking, attaching a second planking will be much easier due to the amount of surface material available to adhere to. My previous application method was to soak, bend the planks with an electric, heated plank bender, glue and attach - but the planks were still damp. They would consequently shrink a bit. To make for better application, I bend and temporarily attach the planks while they are damp. They then dry and shrink, but retain the bends. I then permanently attach after the planks are dry. That makes for a better alignment of subsequent planks. I still will be filling/sanding the first set of planks to make for a smoother surface for any future planks. You and me both for the bow!! Yes, Bertu had a nice application method. I love Y.T.'s planking; he is a master. There are many examples on the forum - both good and bad.
-
Very nicely done Emmet; congrats on claiming that elusive ‘Finished’ Tag. I look forward to your next ship. Safe journeys!
-
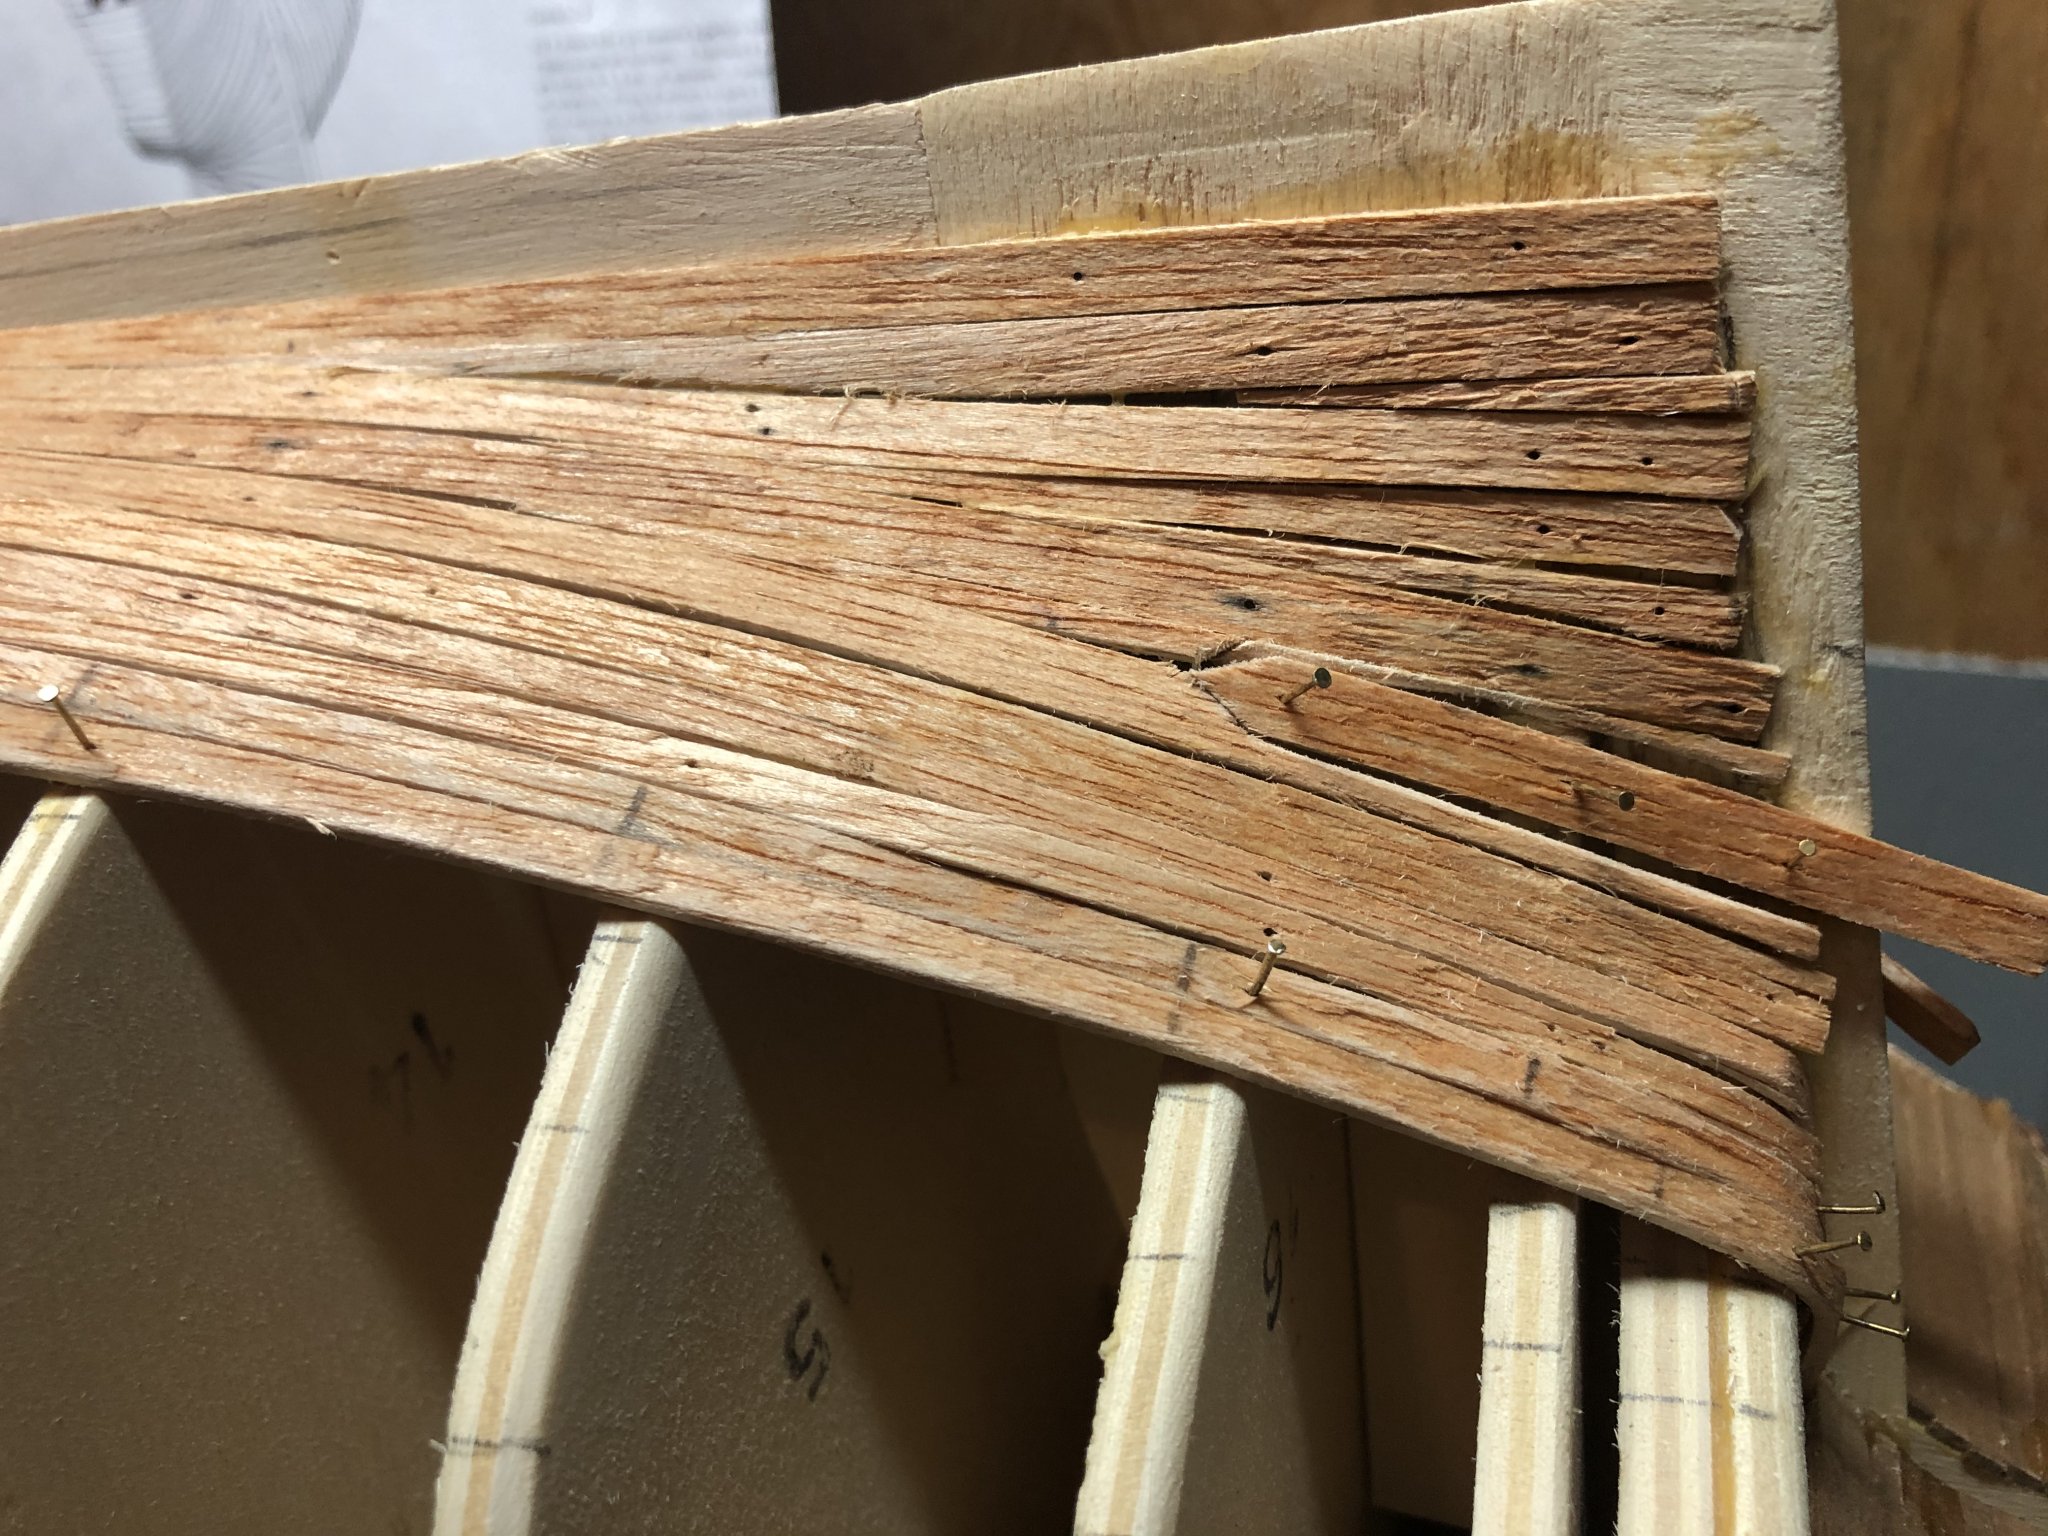
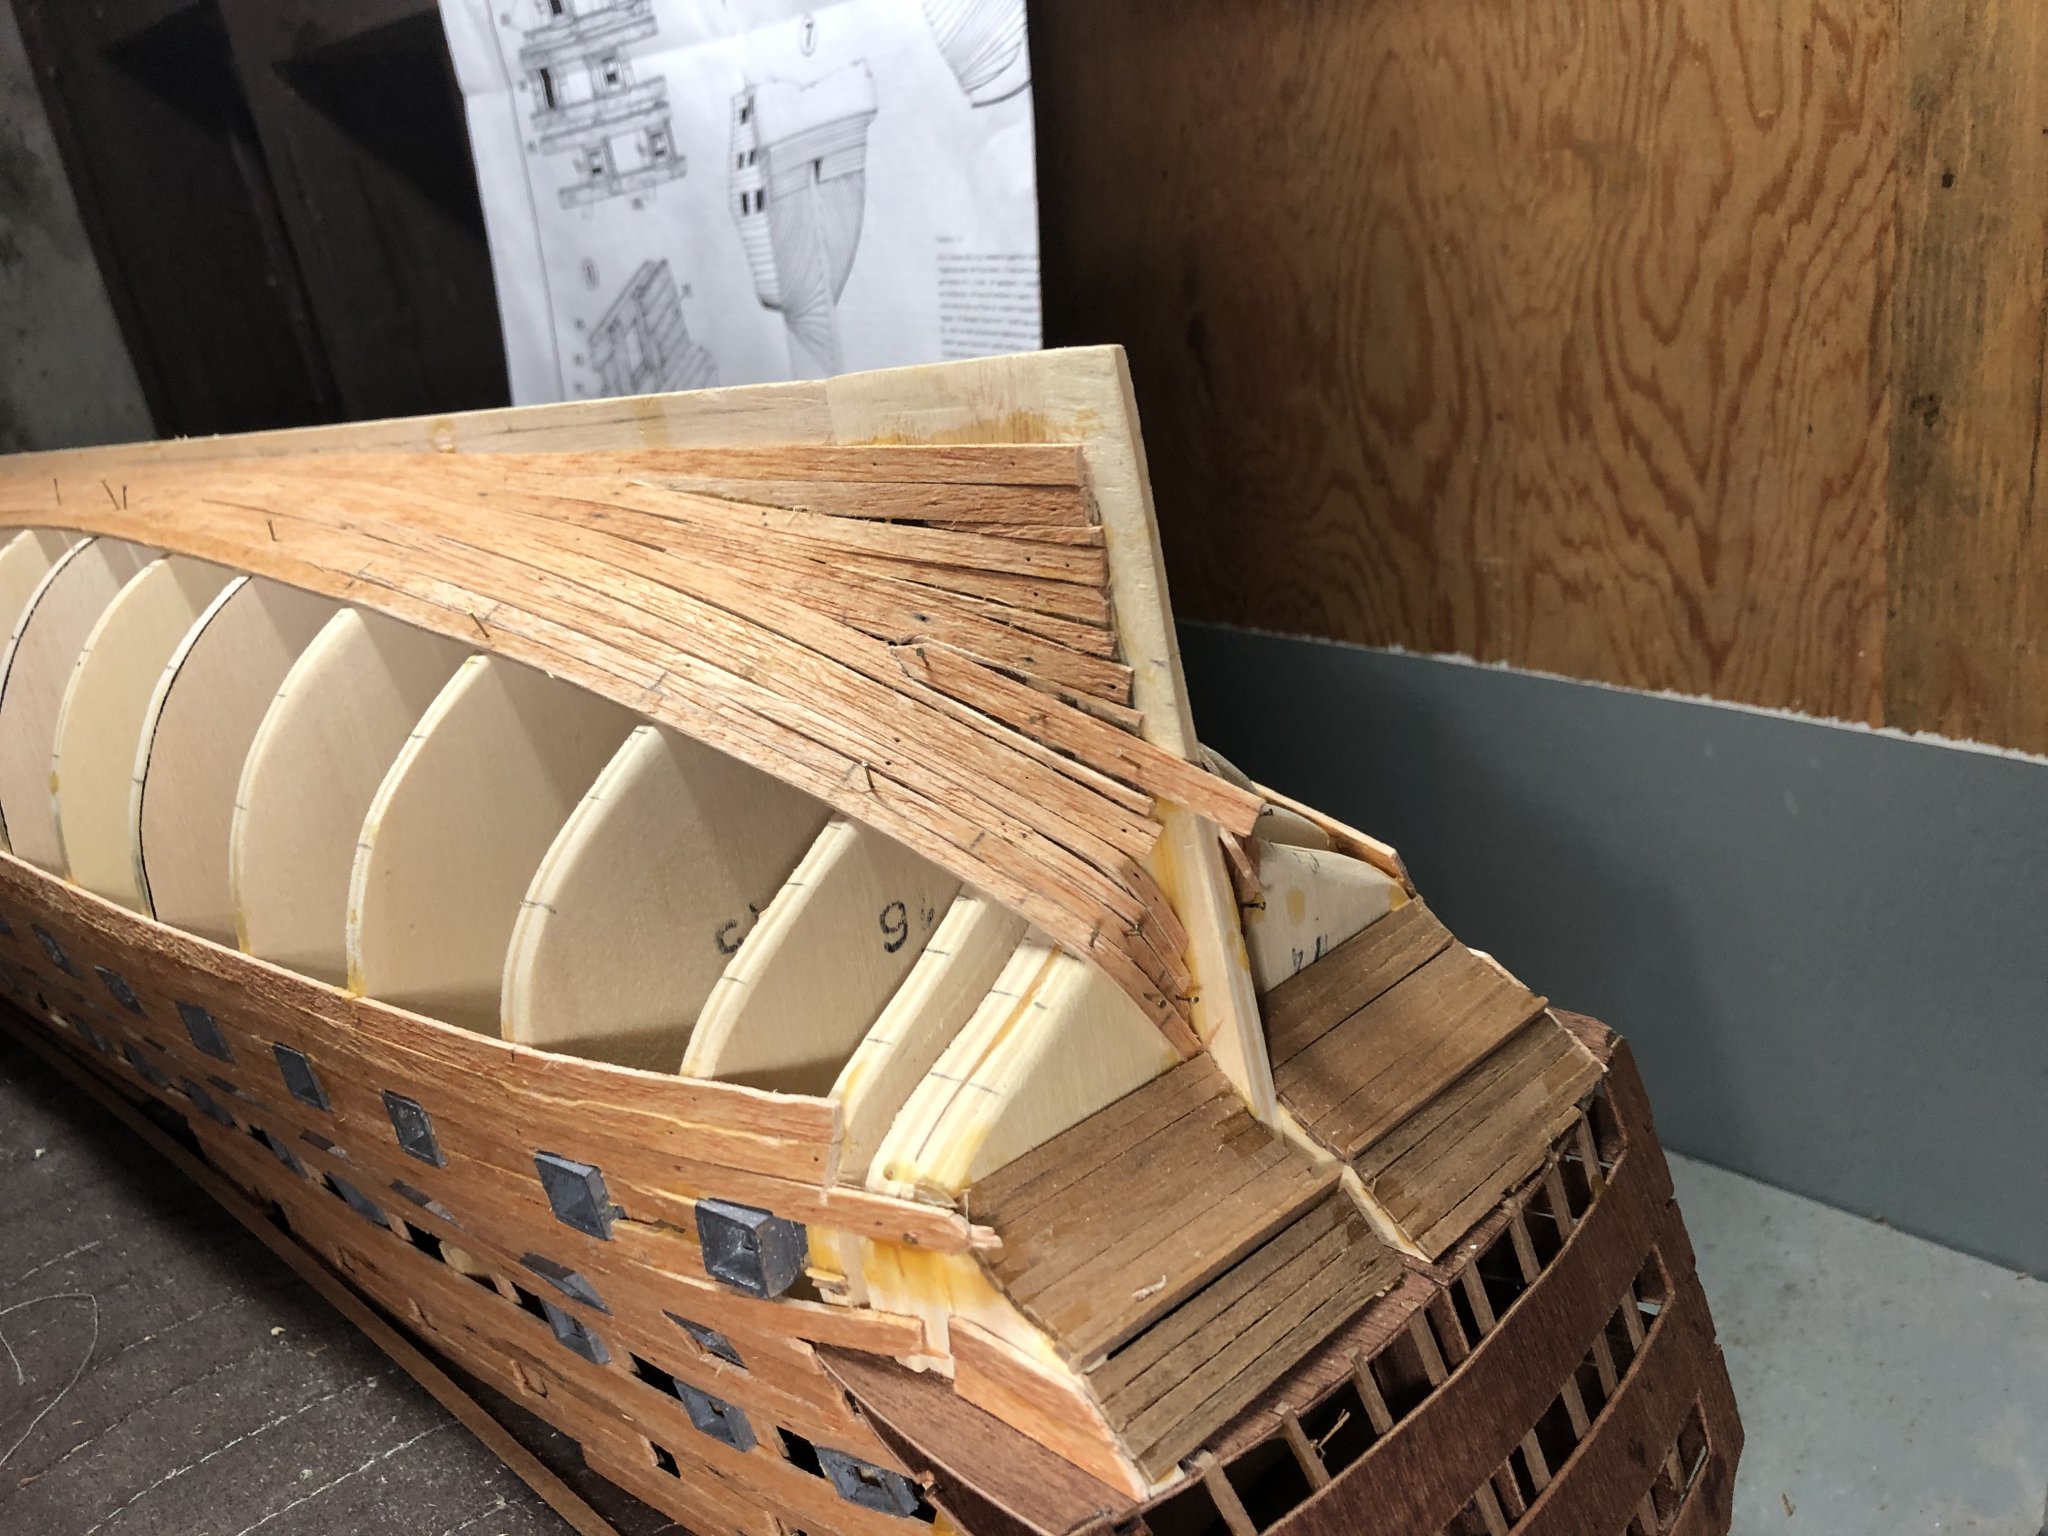
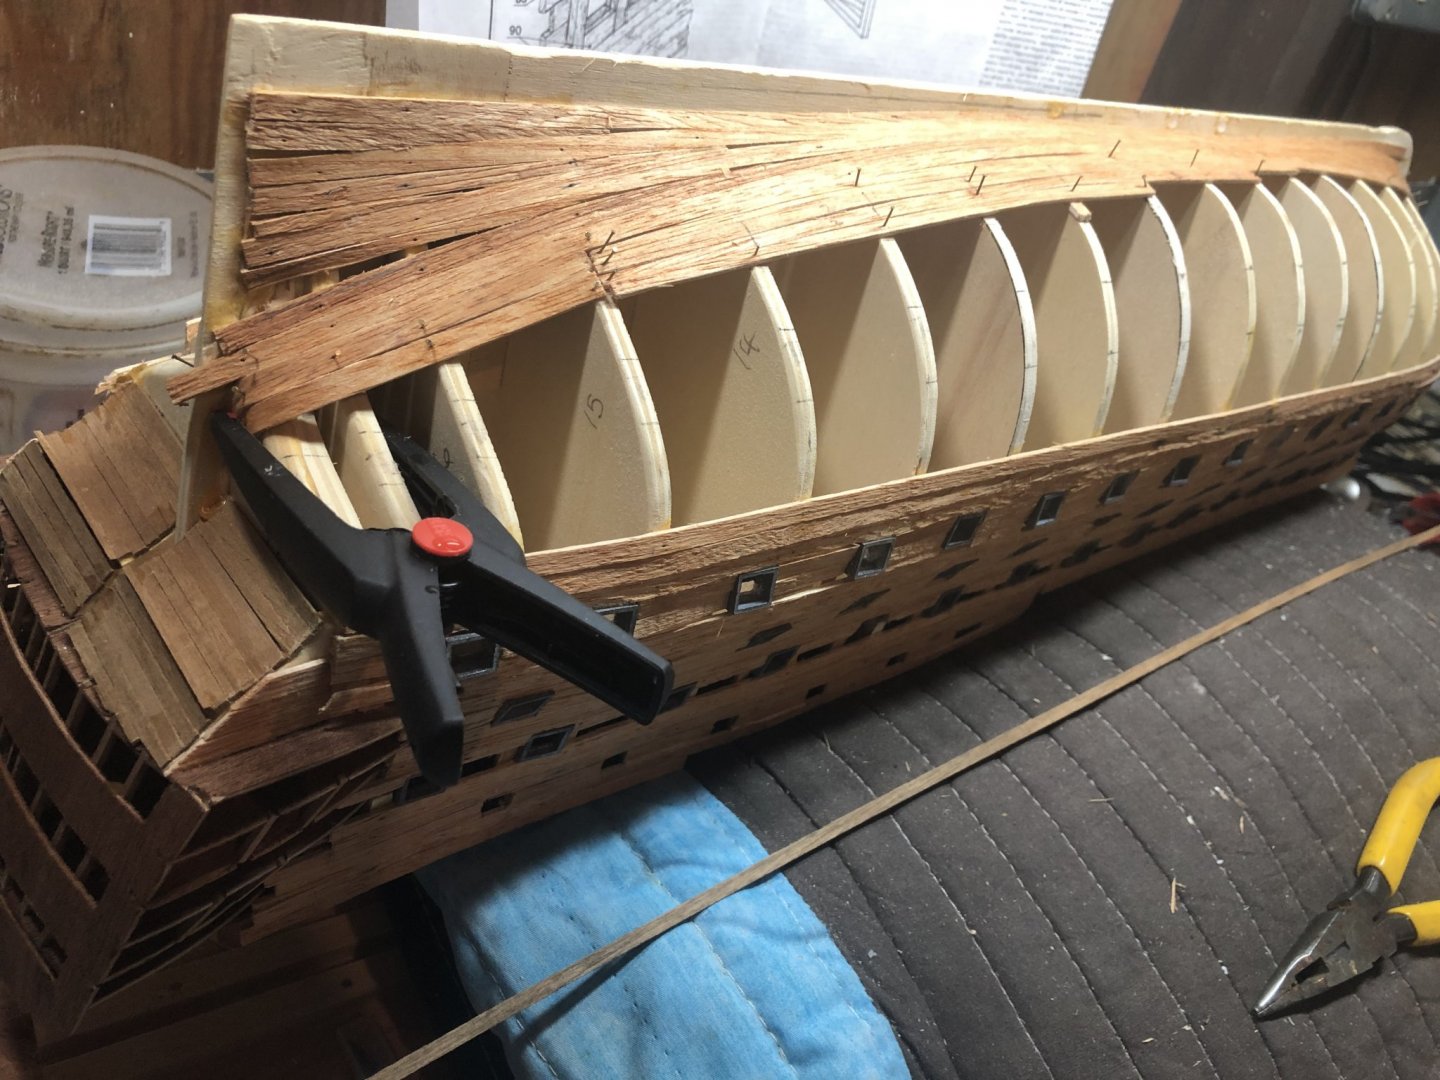
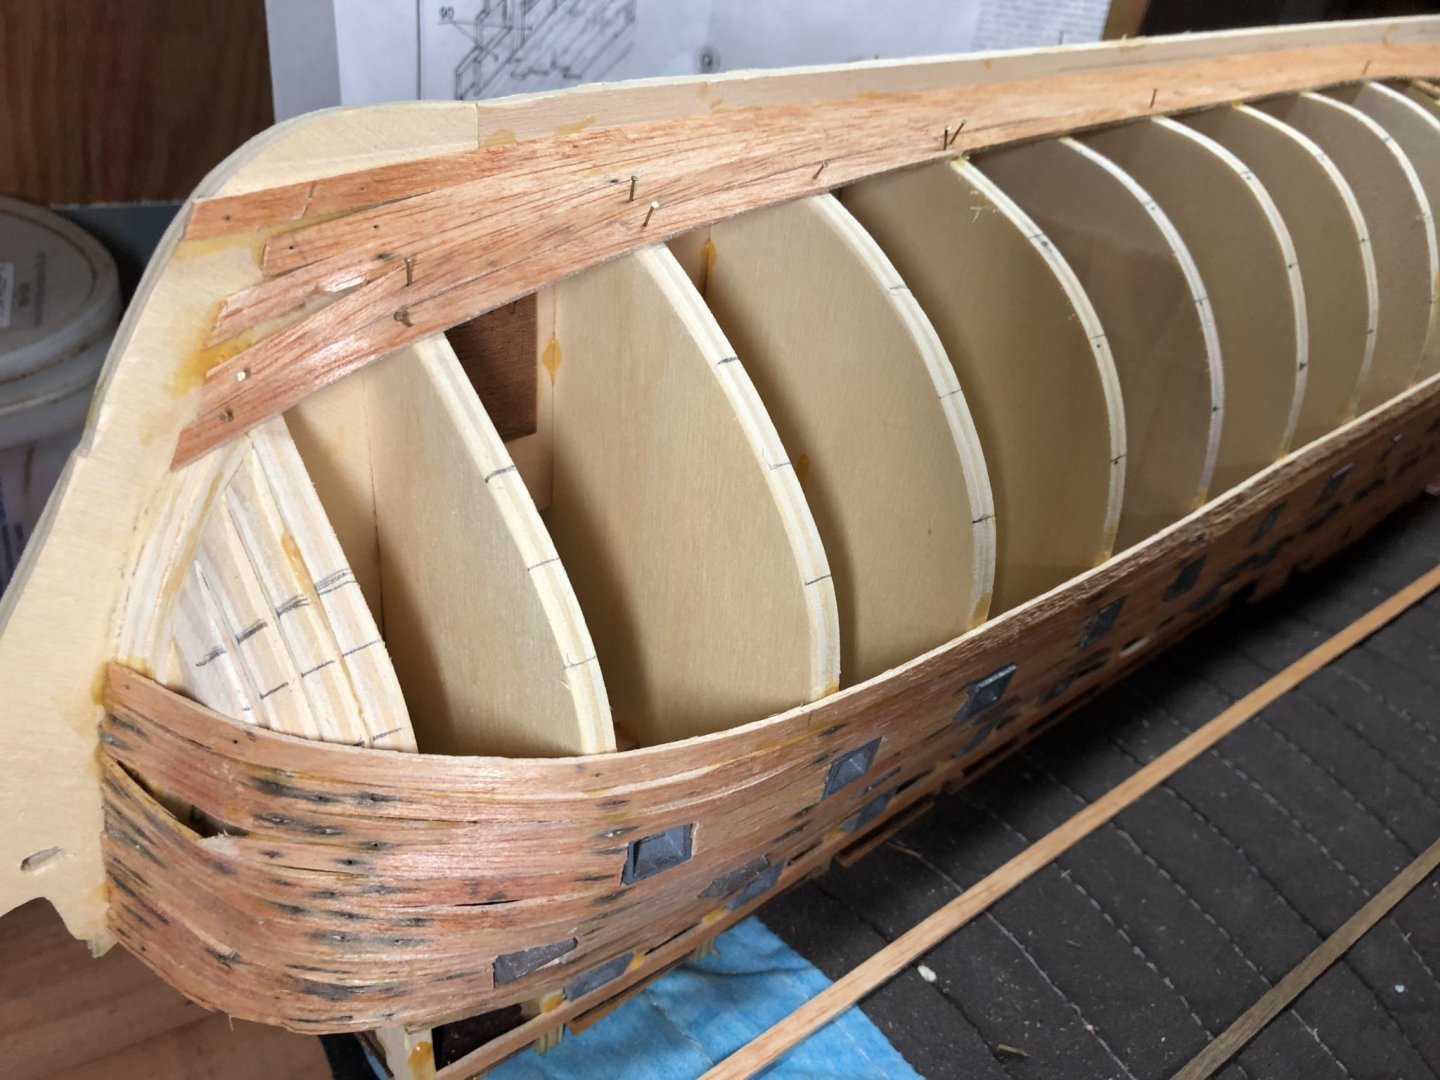
Continuing the planking exercise. You can see a minor repair under the stern by the addition of a ‘Full Stealer’ as called out in the Planking tutorial document for beginning plankers. The outer two planking bands on each side are tacked on as they dry and will be affixed tomorrow. The stern planking application looks better to me as I work my way downward, toward the top of the boat. You can see the bow planking needs a lot of work to correct the mistakes and does not look like it should per the planking tutorial. The reason must be due to the early application of lower planks. Good news (as I’ve read in the forum) is post planking sanding and the addition of the copper tiles later should help ‘correct’/hide some of these mistakes!


-
Graham - The work here is spectacular; thank you for showing some real attention to detail! I think you would be an outstanding brain surgeon given how precise you work with the minute parts and assemblies! I’m looking forward to following your journey.
-
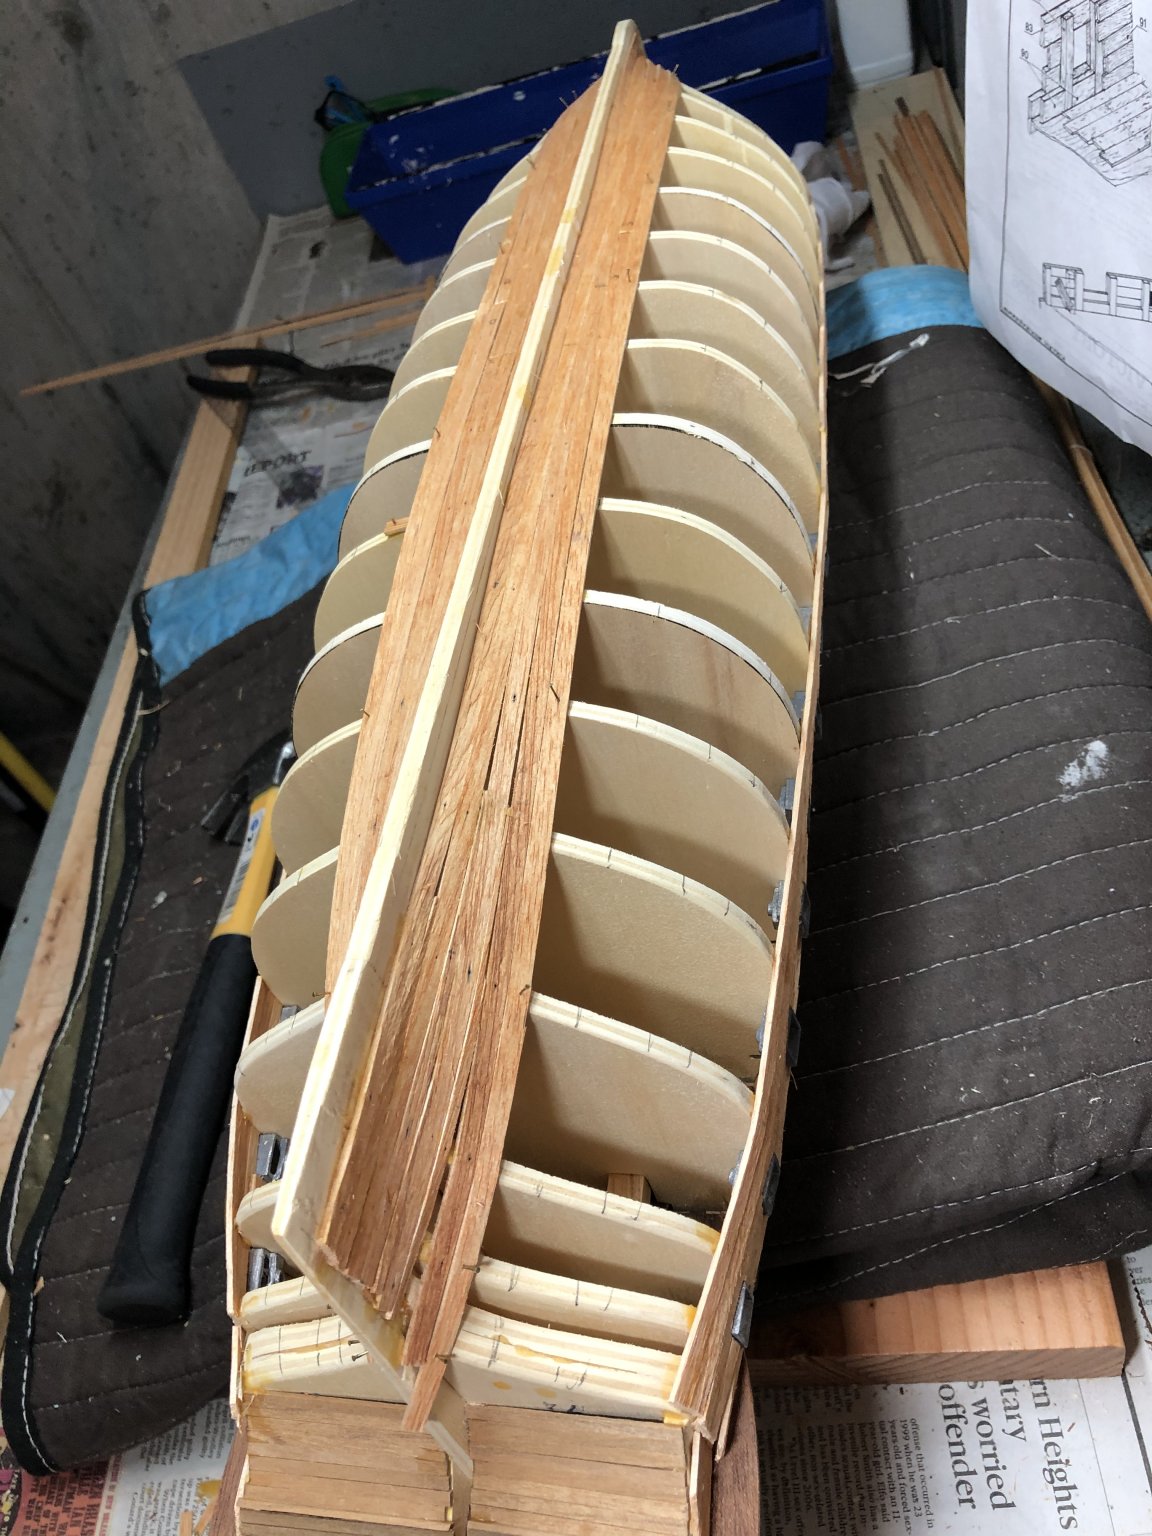
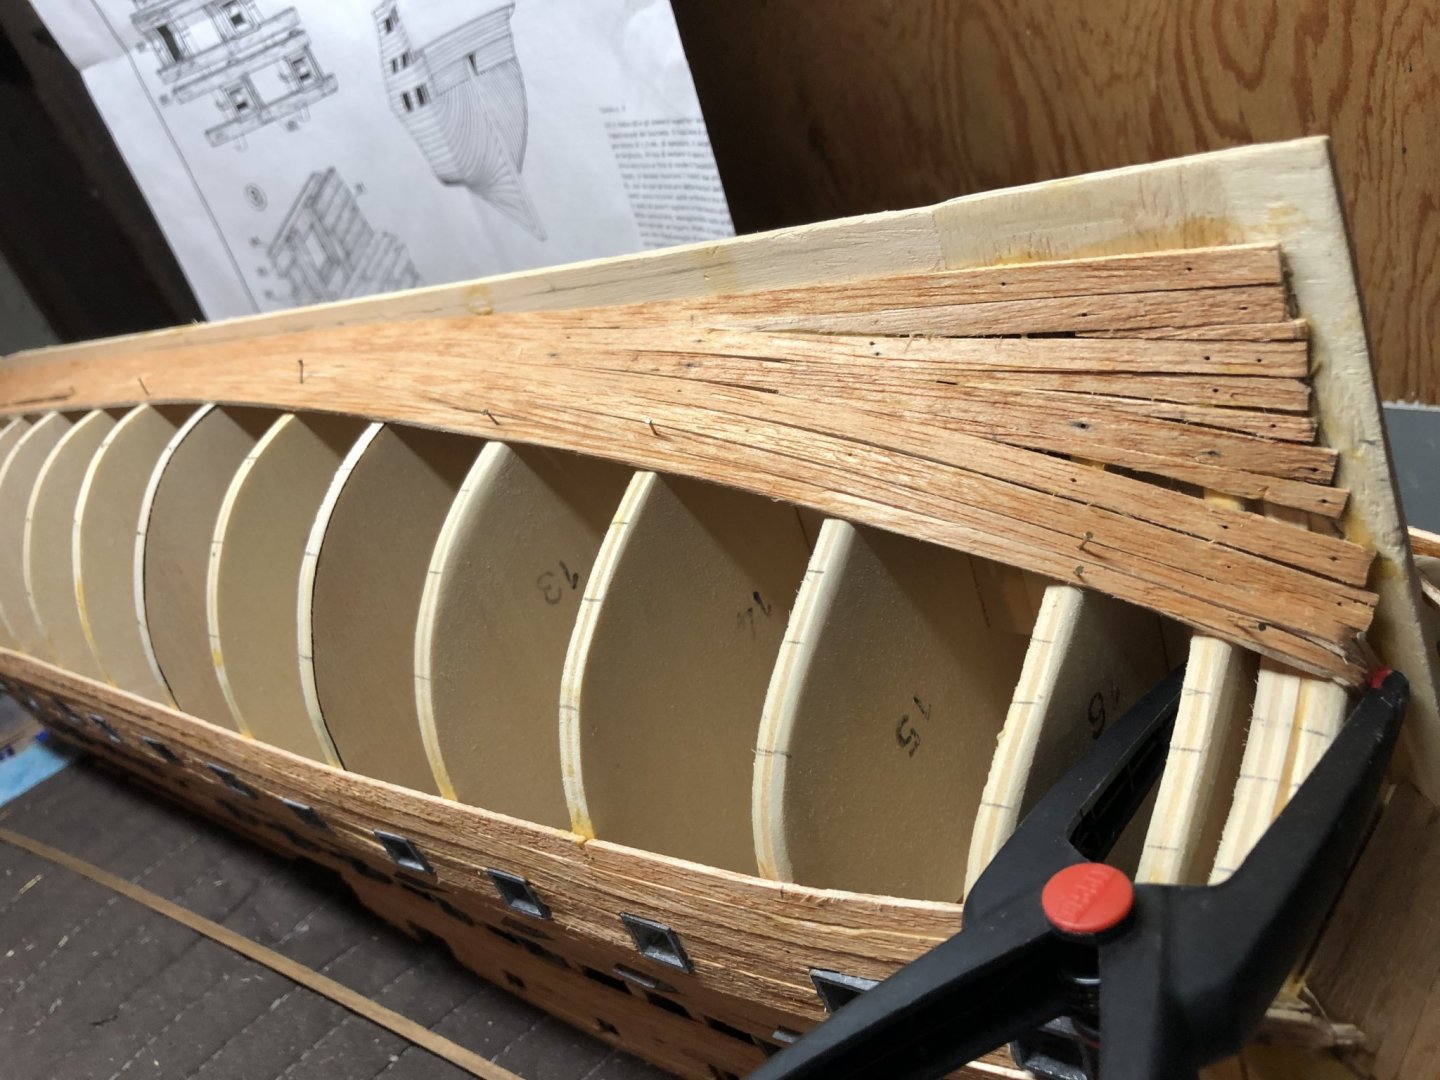
Continuing with planking. Working port side in band 1. Time consuming. The band measurement is different than the starboard side. Using the guidance of not laying a plank that the width is less than 2.5mm, I measured that point starting at bulkhead 15 and continuing to the end of the stern. I planned for 4 x 2.5mm planks to end at bulkhead 15 and then continue with 2 x 5mm planks from that point on - you can see the result. These planks are tacked in place for fitting and will be permanently applied after the planks are dried - sometime tomorrow. Then I’ll measure/fit the forward planks. Then back over to the starboard side to finish up band 1.
-
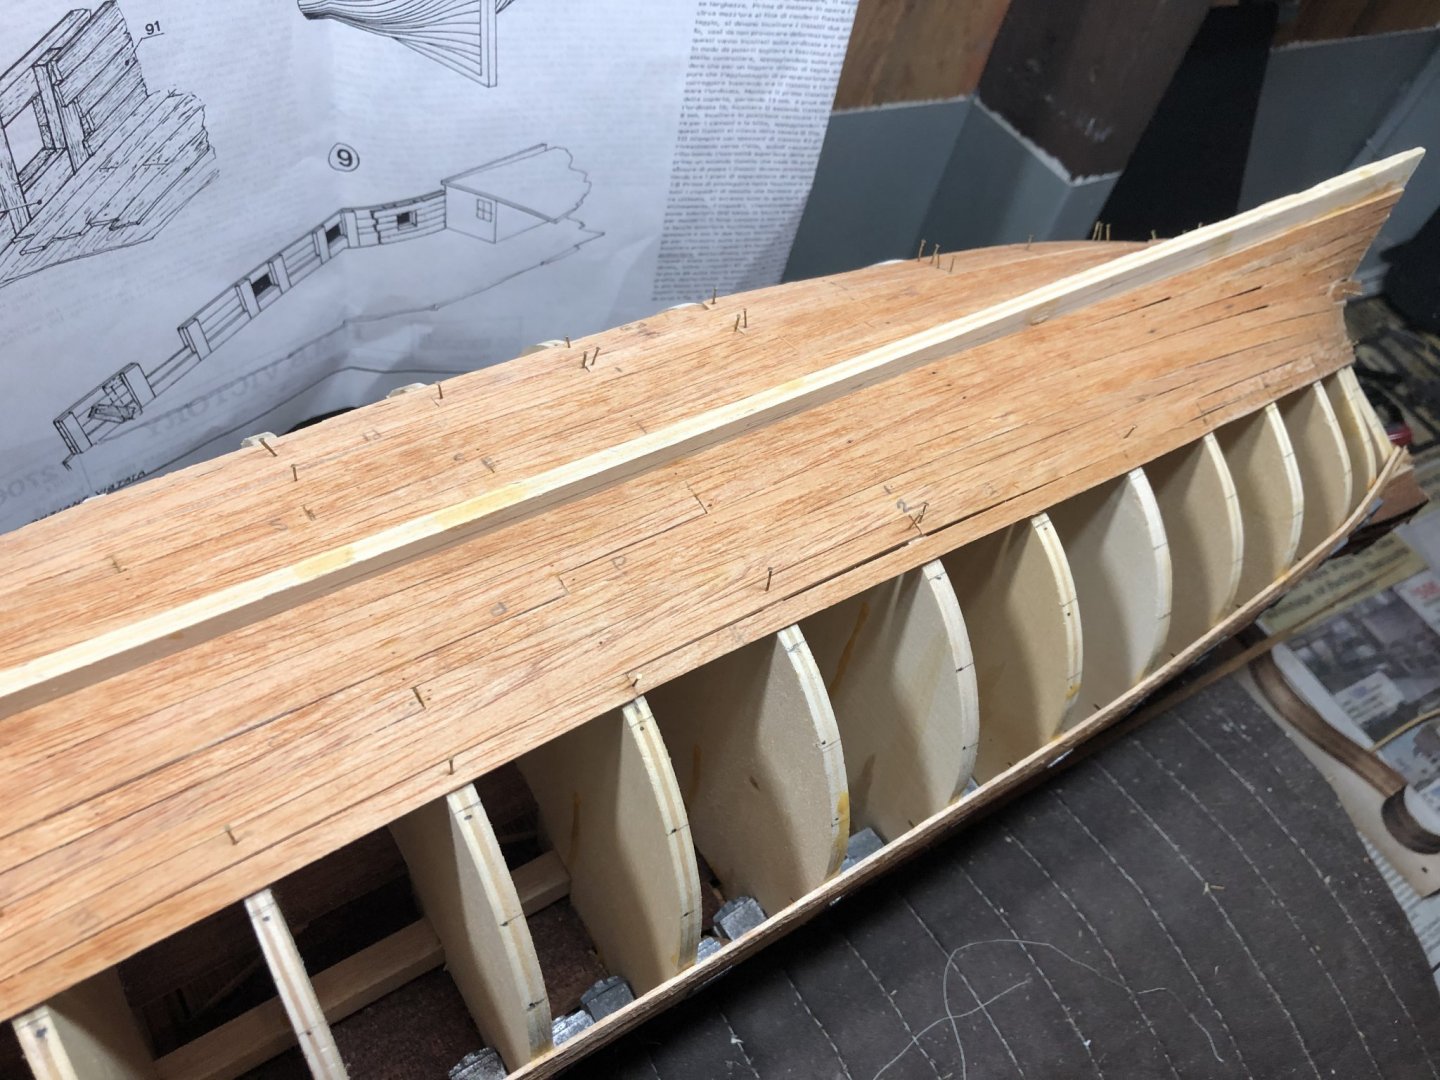
Thank you Emmet! Doing what I can. Have now tapered and put in place 2 x planks for drying on the starboard side. The two upper planks were tapered from 5mm to 4mm and finally to 3mm at the last set of bulkheads. The Port has different measurements for that first planking band so I will be looking at that side next.
-
Hi Mark. I'm stared building the Mamoli Victory (1/98) last May and am now in the planking stage using the kit provided 5mm x 1mm walnut laths. I bought the kit sometime in the early nineties and tried to keep it in the right humidity type conditions. The walnut is rough and seems brittle, but so far, so good. I've been soaking my walnut for 10-15 in warm water and find it fairly pliable. I'm also using a heated, electric plank bender by Model Shipways (MS7205) for the more serious bending that helps a lot. You seem to be a seasoned modeler, so I apologize if I'm telling you something you already know/have tried.
-
These images are very helpful Robert; thanks for sharing!! Now that is some attention to detail and I'm sure the results make it worth it. As Wallace stated, take one's time. I typically want to rush through it, but the results will not be as good.
-
Model box cover - better late than never! You can see this kit has been around the block a few times!
.jpg.bdb24f0c4d87043953b00121d0935056.jpg)
-
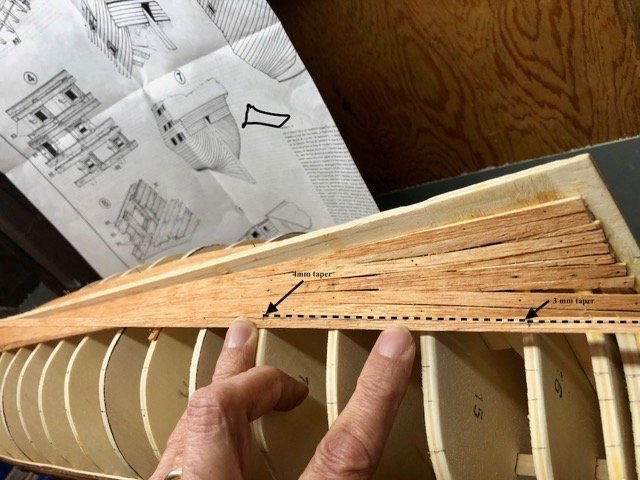
Thank you Robert! Well, starting to get to the 'devil's in the details' bit. Completed my table of measurements for the 4 bands per side and have identified the plank width per bulkhead (see picture). I also spent some additional time in the 'Planking for beginners...' doc on this forum. They reminded me that no plank should be tapered below half the width or in my case, 2.5mm. They also have a lot of the 'How to implement...' the planking solution. Not trivial for the beginner. The table in the picture highlights in red where the planks are not wide enough. In that case, I'll need to add in the filler bits (I forgot the technical name), per the planking tutorial document. You can see for the first band, that the bow sections don't require tapering while the stern portion around the indicated bulkheads are tapered from 5mm to 4mm and finally to 3mm. The picture shows which bulkhead band requires both 4mm and then 3mm tapers. After reaching 3mm, the plank is good. Also, the untapered edge goes toward the keel. I need to taper the other 4 planks in this same manner and will be looking at this forum for best way - likely sanding for now as I don't have a planer.
.jpg.5e1c4ae6a9a0cabaff7ee09bda6eb380.jpg)
-
Outstanding work Grandpa Phil; she is a fine ship! Happy Easter to you and yours!
-
I still need to sand some of the forward/aft bulkhead corners for better plank/bulkhead attachment. You can also see where I have some repair to do for some of the bow planks. Done right, this will allow the next set of planks to fit better and faster.
-
Learning new planking techniques every day from the fine body of knowledge on this forum. Couldn’t get there without it! Lessons learned include now: (1) Use warm water to soak planks. This may be a ‘no brainer’ to most, but I’ve been using cold water to this point with a plank bender. The warmer water is making the planks more flexible. (2) I soak, bend the damp plank to fit and then without glue, nail the plank in place. I allow it to dry. Then will glue it in place. Previously I bent the plank and glued it while still moist. As fellow modelers have pointed out, the plank changes size when drying, causing gaps. This will help because the plank will be dry when used to fit the next one. (3) I’ve identified the final four (4) planking bands (see pictures) and will measure the length of each bulkhead length in the given band for each bulkhead. I then know how much to taper the plank width for each bulkhead in each band. These bands should be aligned on both port and starboard sides so that the planks align when looking at the ship from front and back. The top/bottom bands are each 25mm at midships and the inner two are about 23mm. Will need to see how this works out. I now see why this will take a long time.


-
Dan - This is a very nicely detailed and fascinating log - a must for all plankers - both novice (me) and experienced. Looking forward to following this work closely. Thank you!
-
Thanks Emmet - I followed your planking exercise for La Niña and found it fascinating. I’m going to look at it again.
-
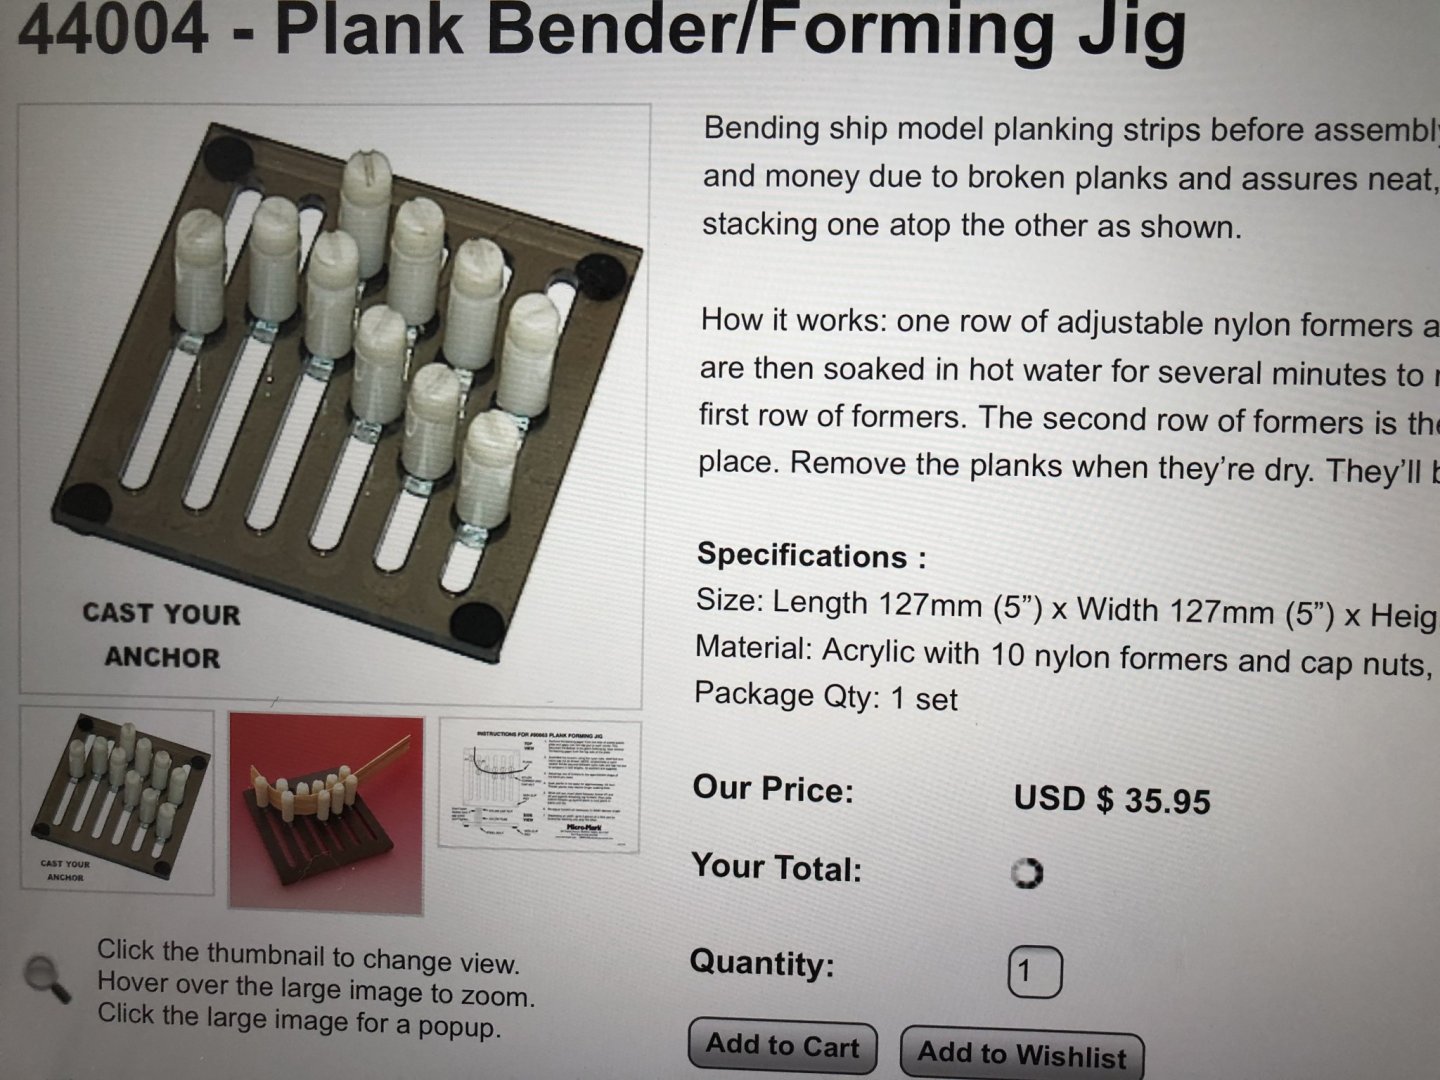
Thank you Robert - Your explanation above is very helpful. I’ve spent some time going over the ‘plankingprojectbeginners.pdf’ which I’ve found beneficial but is by no means trivial. I think I need a carpenter’s certificate to fully understand it. I’ve also looked at a few YouTube videos.. also helpful. But the ‘devil is in the details’ and understandably not every detail is covered. It would be ideal to attend a planking workshop to see how it goes. I’ve looked at Y.T.’s planking which looks fantastic and has helped me with laying out the planking bands. To confirm your explanation above, it seems the plank bending at the stern area is the lateral bending vs at the bow where it is more ‘flatwise’. I imagine lateral bending to be where a plank is put on a table and is transferred into a ‘U’ shape - while still flat on the table. An extreme condition to illustrate the point. The flatwise bending is illustrated in the jig picture above. Do I have that correct? Of course, no bending is required midships as the planks lie nicely there. Your explanation for attaching tapered planks was perfect for me; now I understand. I’ve created the table for each planking band to show the taper dimension for each bulkhead. The challenge now will be how to actually taper the small planks at each of the bulkheads. 5mm doesn’t give you a lot of room for error. Any suggestions or tutorials you think may be helpful? Thanks again!
-
Thank you everyone for the excellent tips. I’m taking a little time to ensure I understand what I’m doing before I start actually doing it. In the mean time I’ve just purchased the below jig for holding damp planks until they dry. It will take a little time to get here which should give me the time required for a bit more research.