MORE HANDBOOKS ARE ON THEIR WAY! We will let you know when they get here.
×

Rob S
-
Posts
339 -
Joined
-
Last visited
Content Type
Profiles
Forums
Gallery
Events
Everything posted by Rob S
-
 Thank you Henrik; appreciate your help. I’ll take a look. A little extra paint on hand at the end of the day can‘t be too bad!
 -
Thanks GrandpaPhil; I’ll be sure to take a look!
-
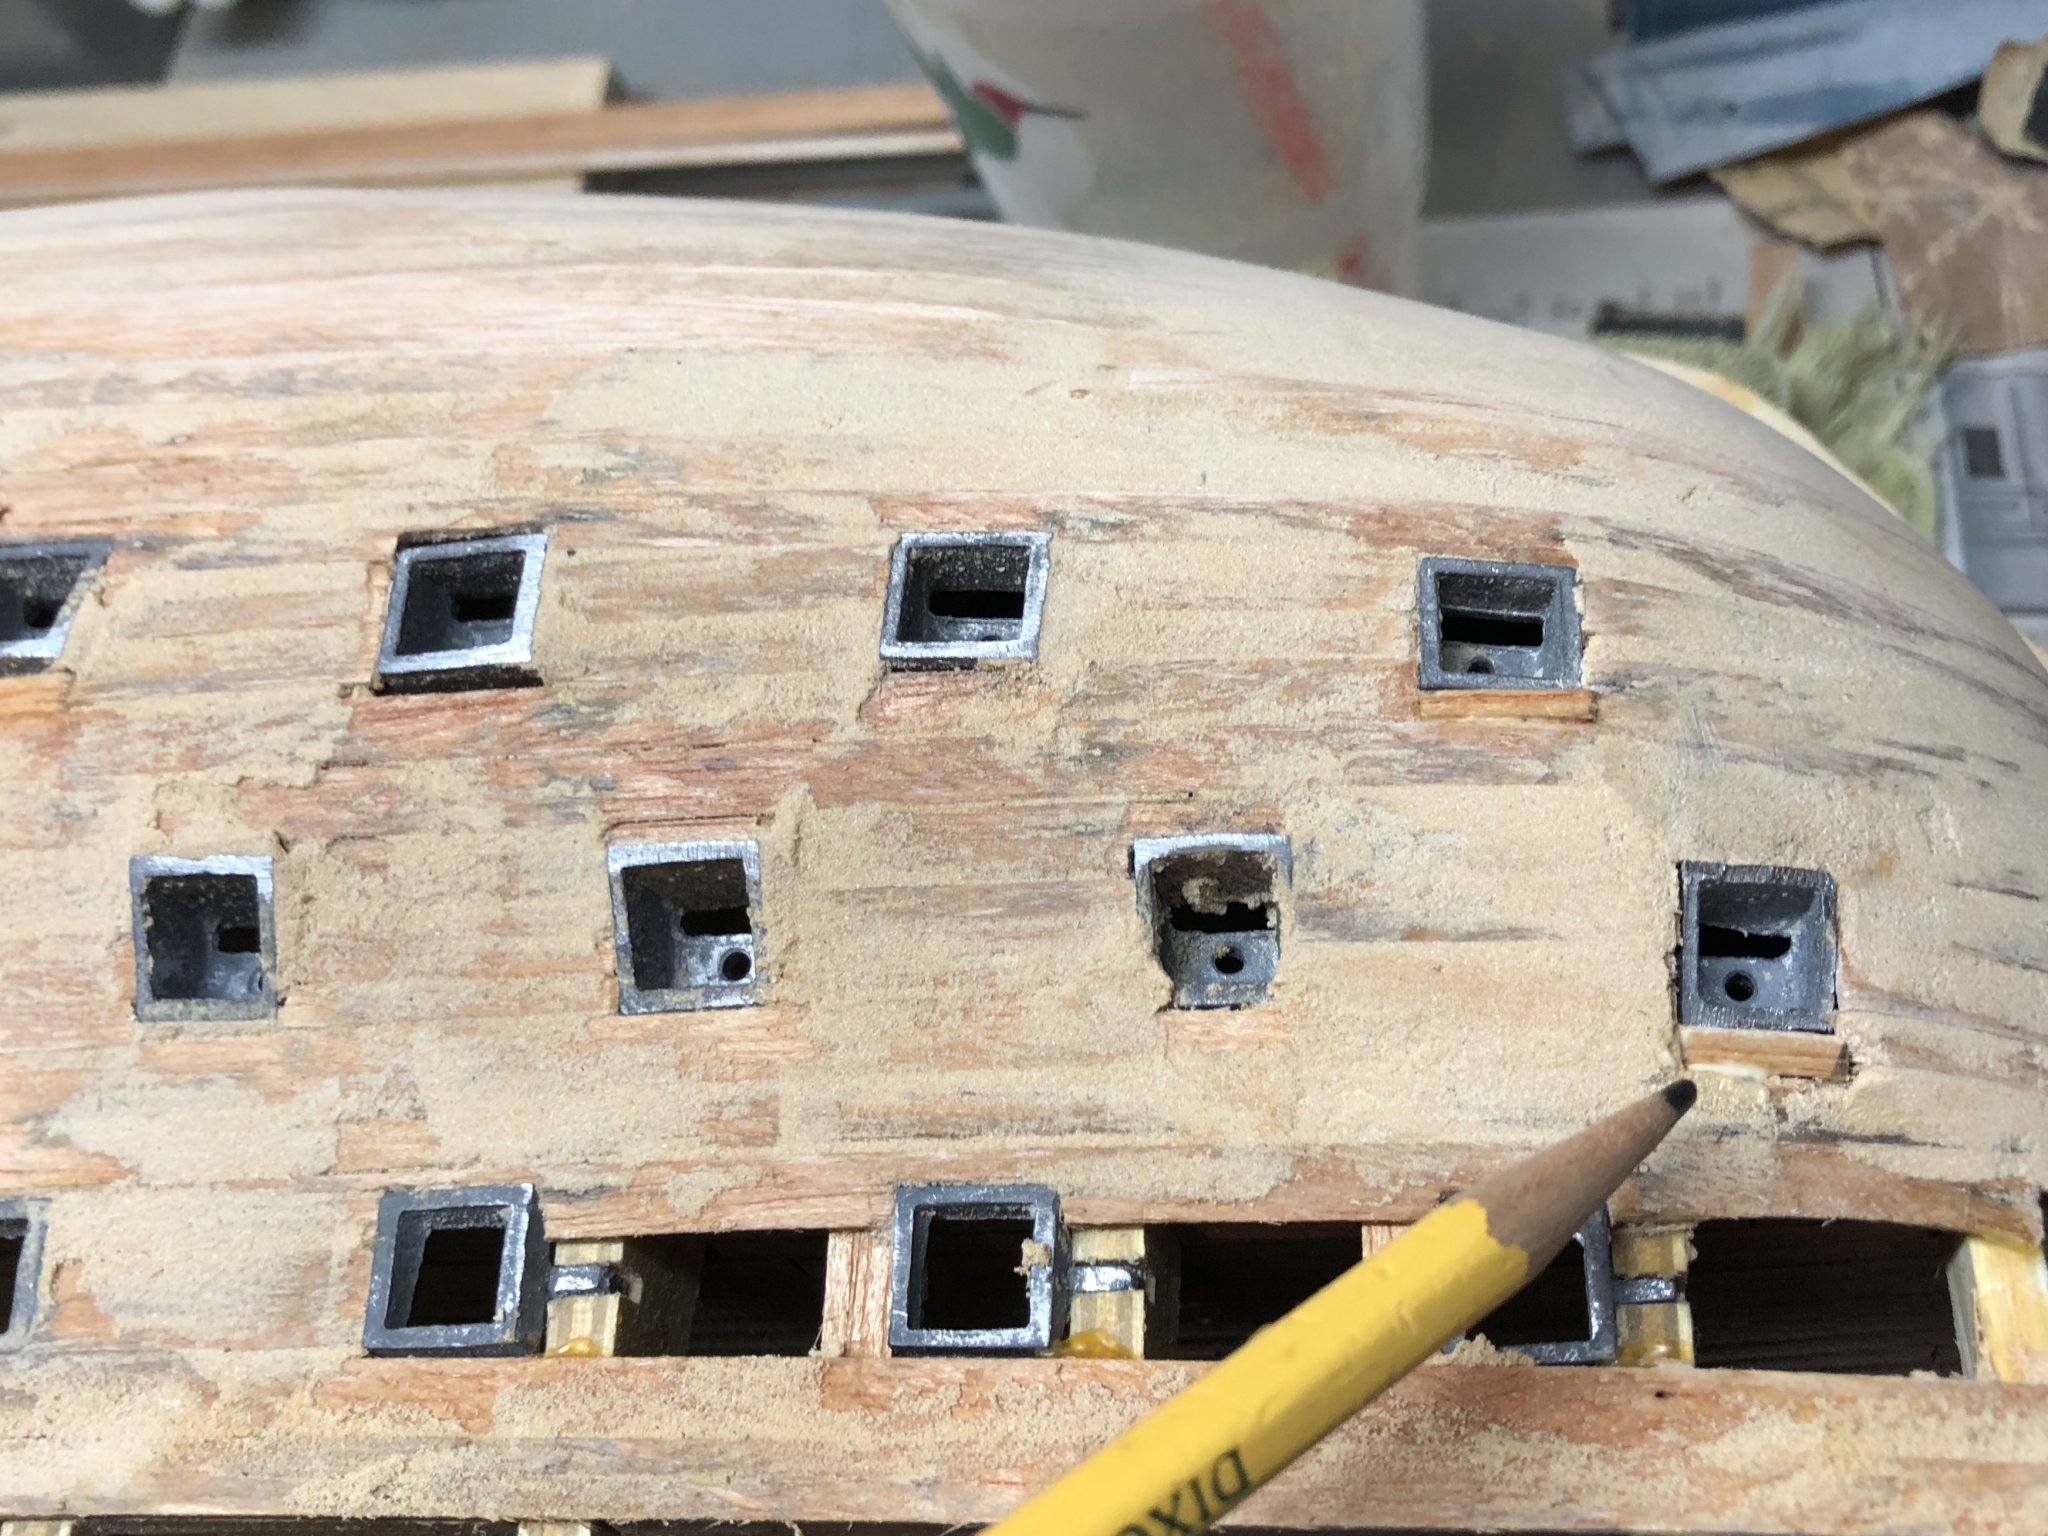
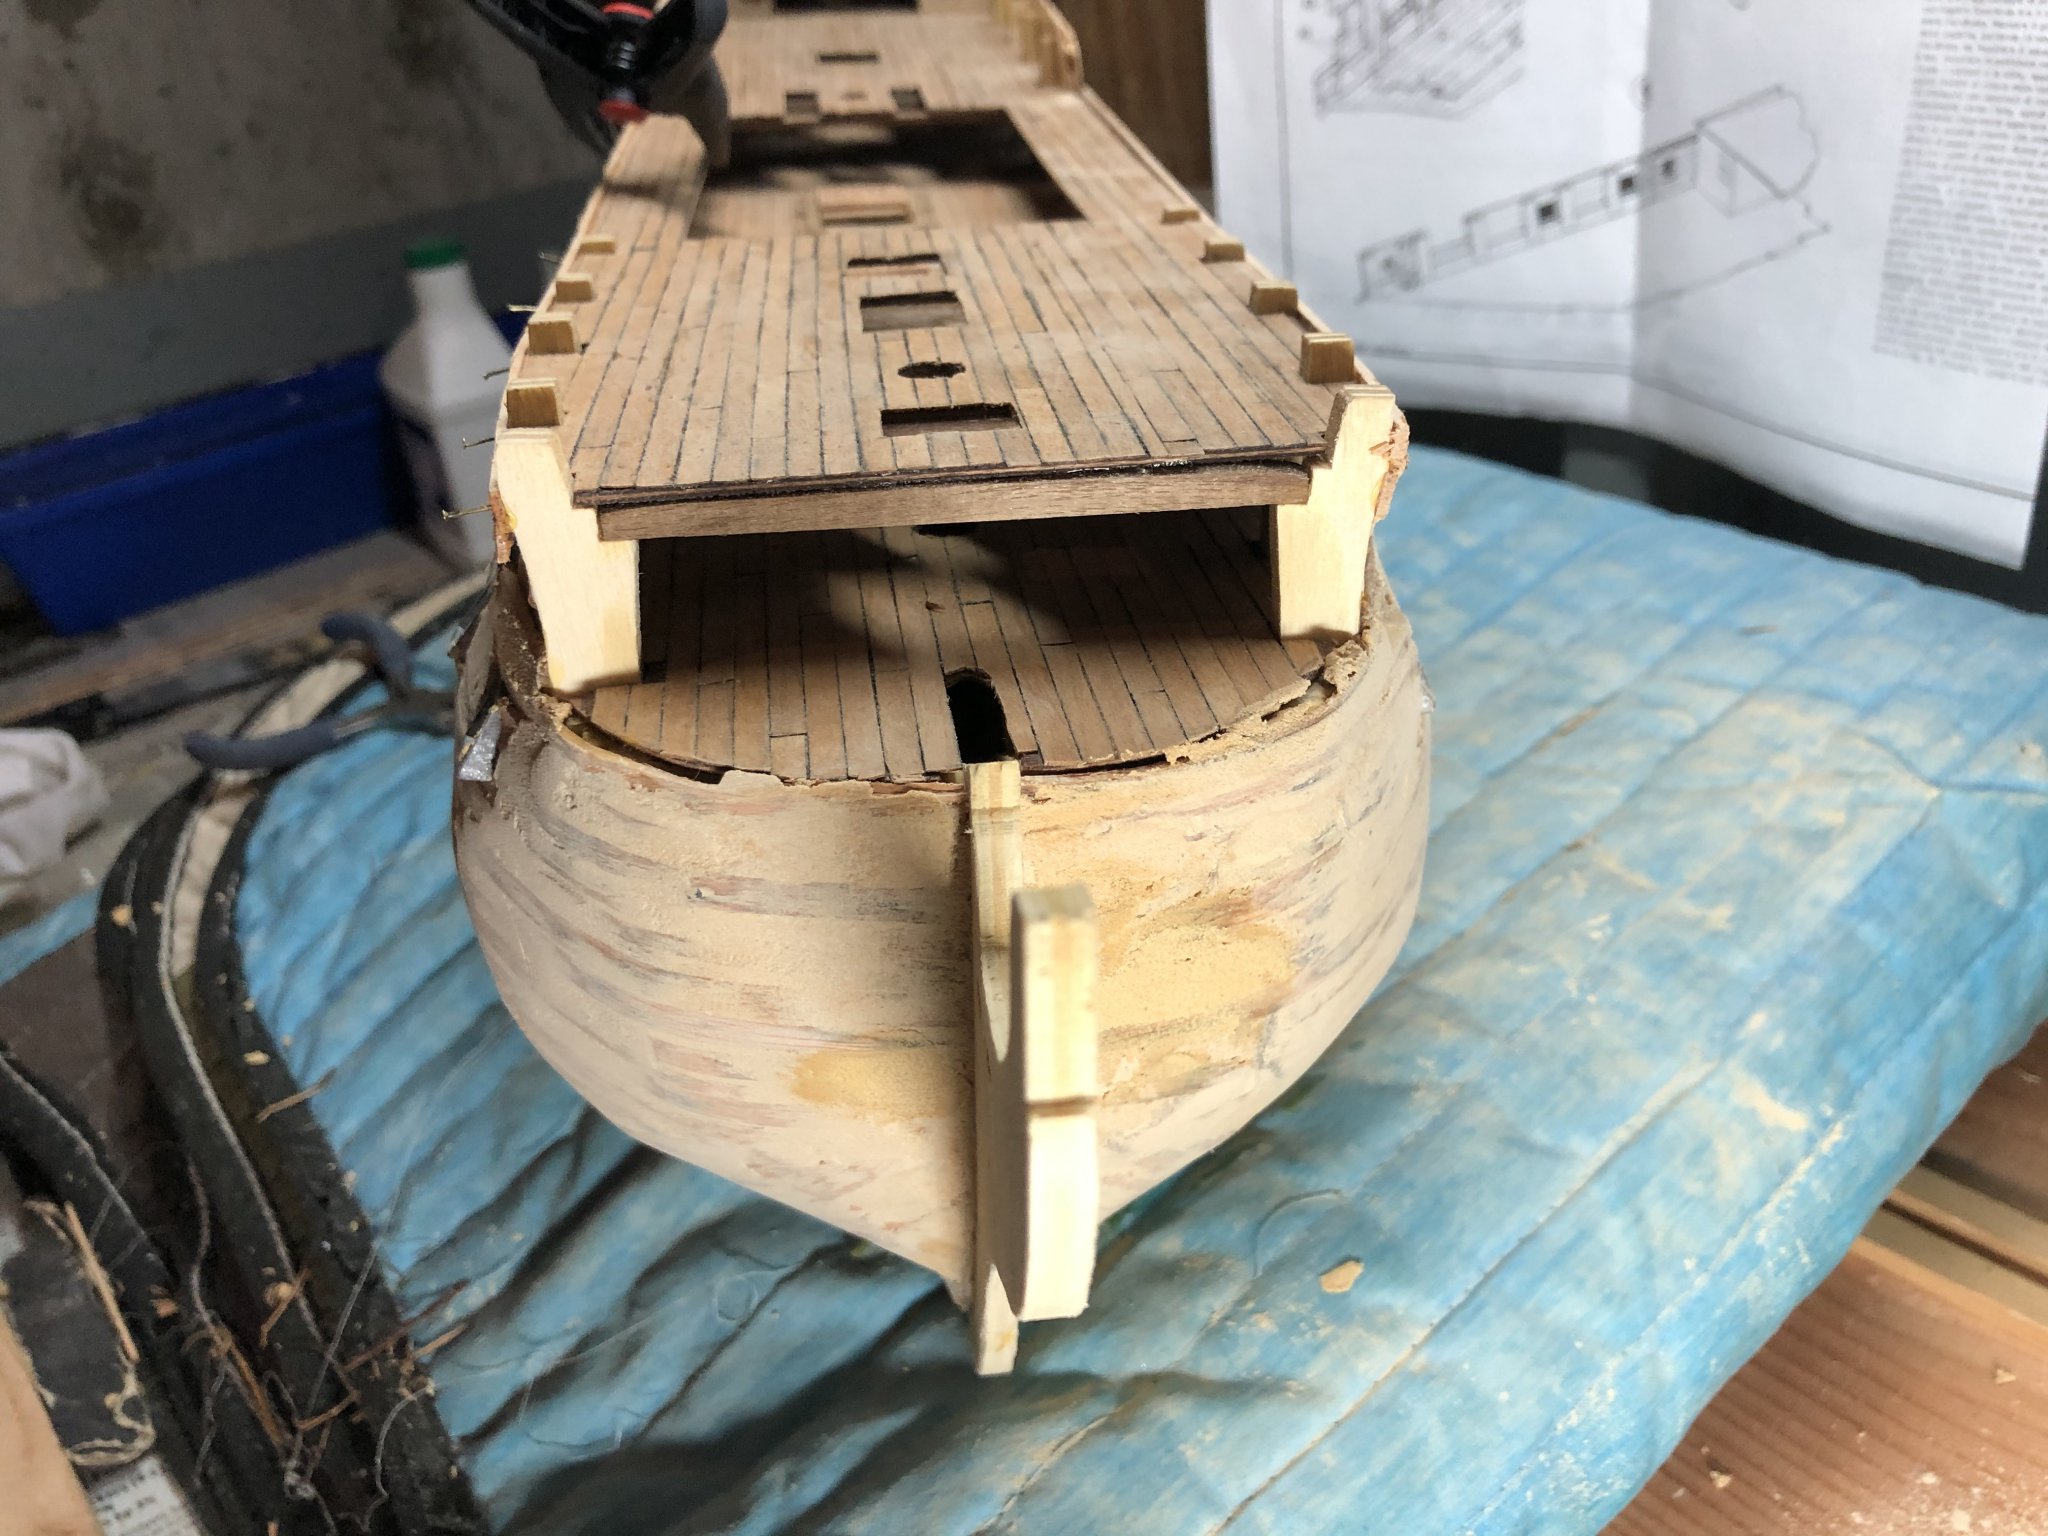
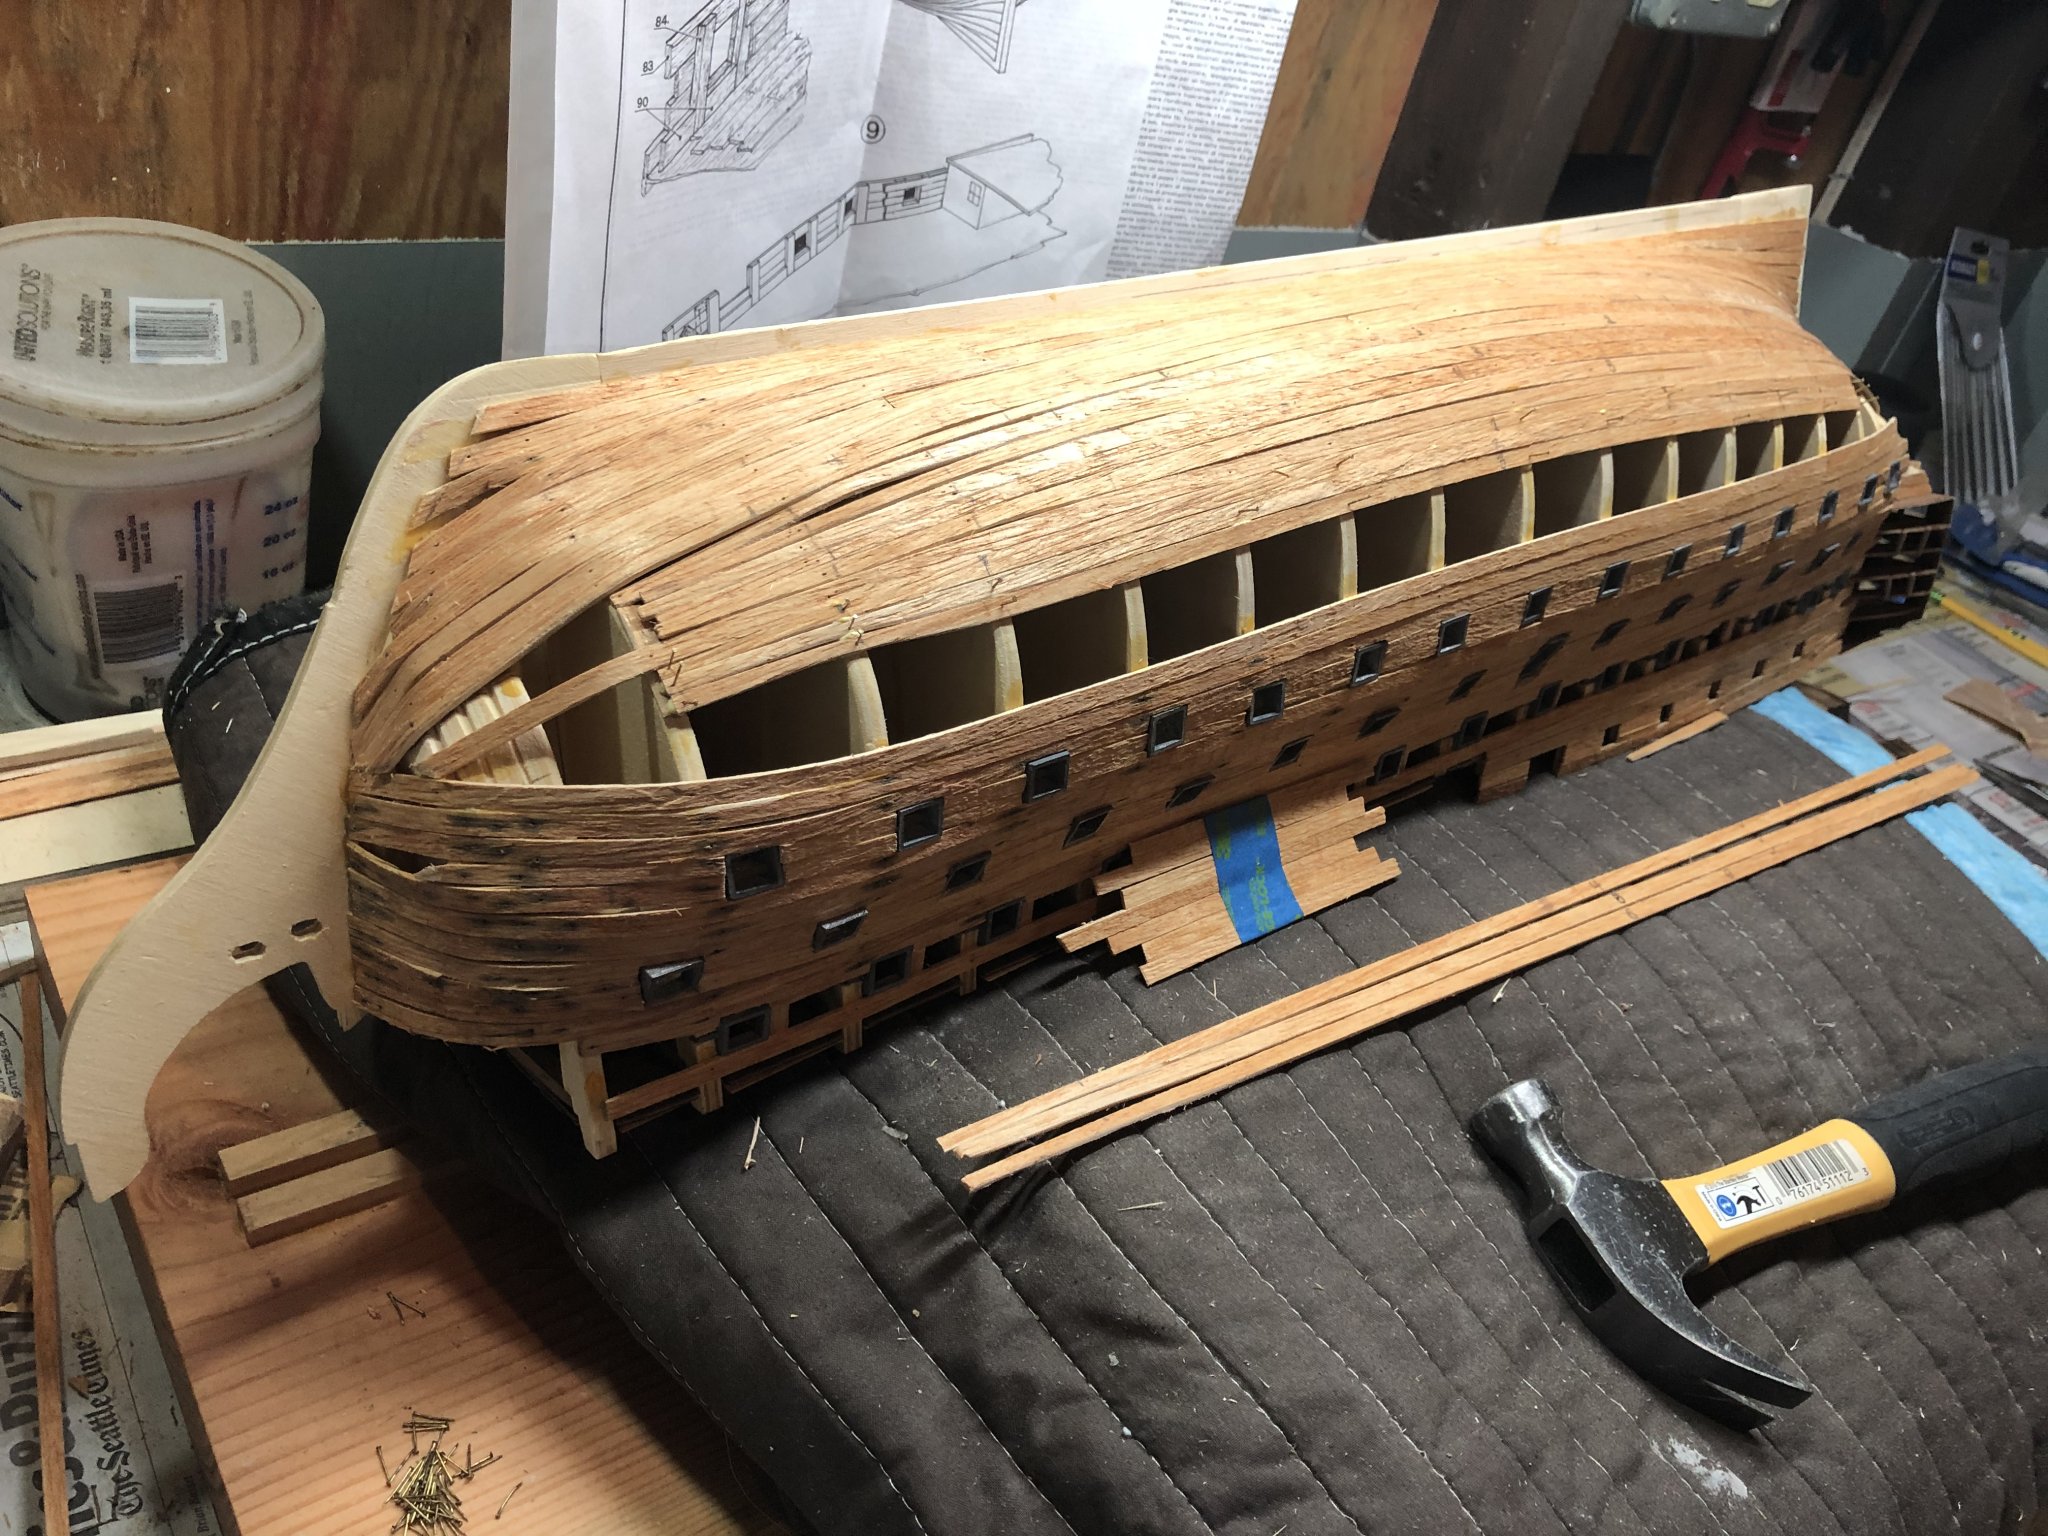
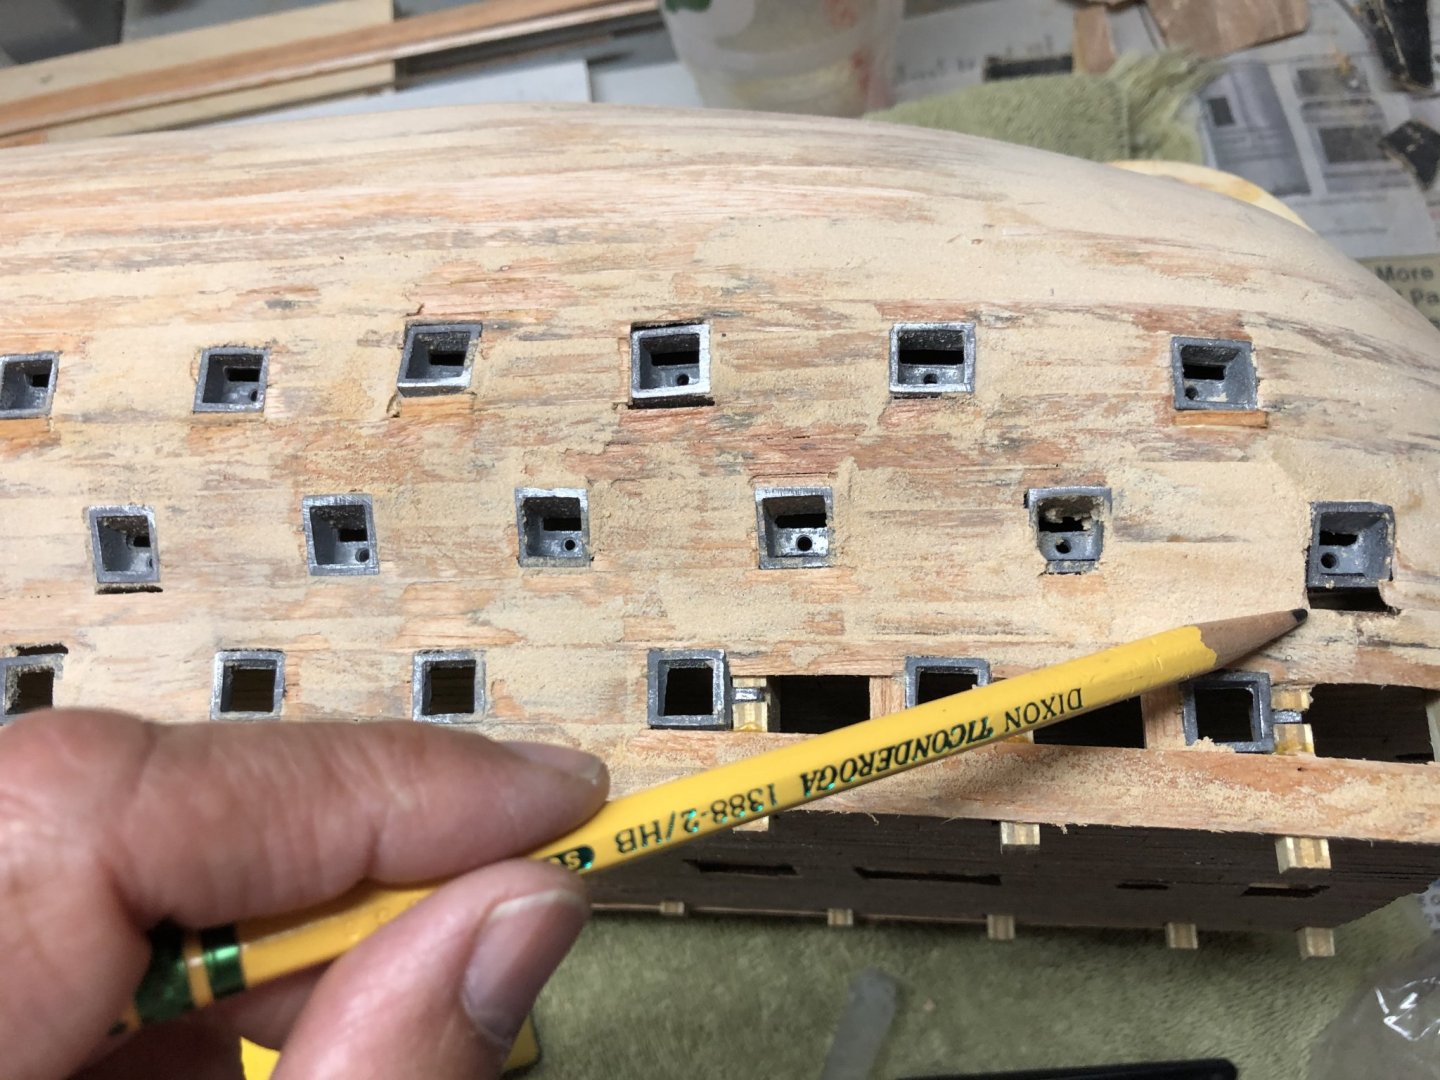
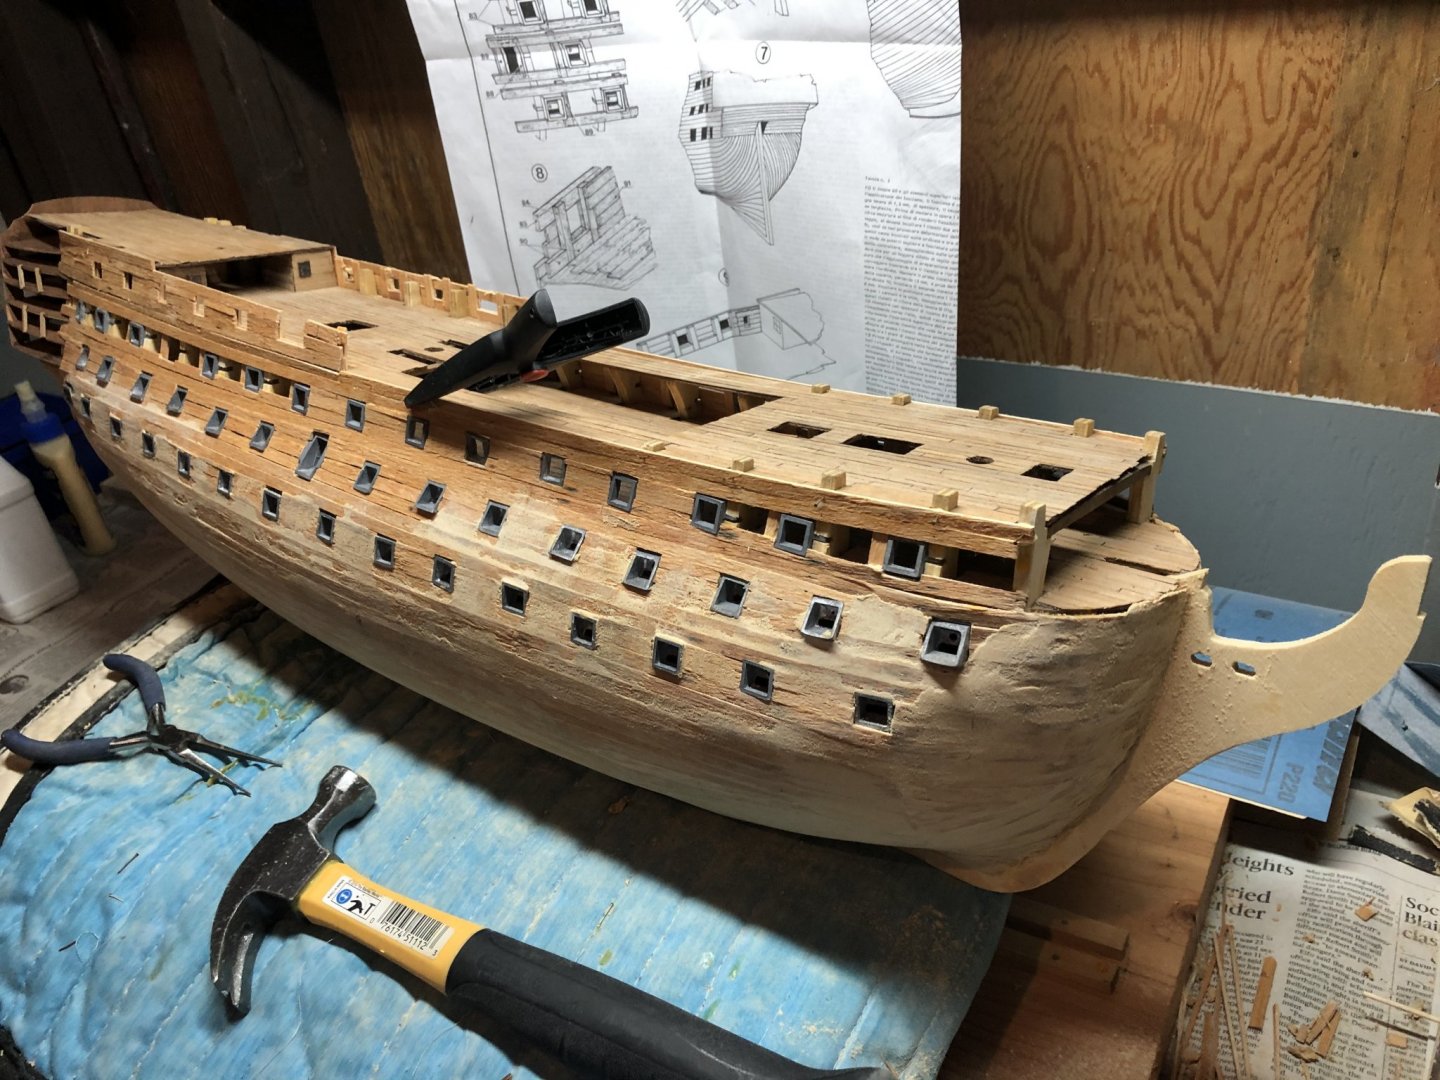
Still ‘touching’ up the planking post sanding. Still adding filler with some further sanding to do. There are also some large gaps between the top of the lead gun ports and the upper row of planking. I’ve inserted some small wood filler pieces and will sand/fill them down. Then, time to file down gun ports that protrude past the ship siding/surface. The gun port edges should be flush with the ship siding. Have completed the quarter deck inner planking for the insides. Re-reading the instruction set for anything I may have missed. I’m currently researching paint sources as it’s time to start some painting. I’ve seen where several paint supply sources state their Victory paint set is out of stock. Not sure if I should simply wait or not. I’m looking at other modelshipworld.com resources for potential suppliers and am open to anyone with other sources.. Thanks in advance. Also, nearly time to begin the second layer of planking.

-
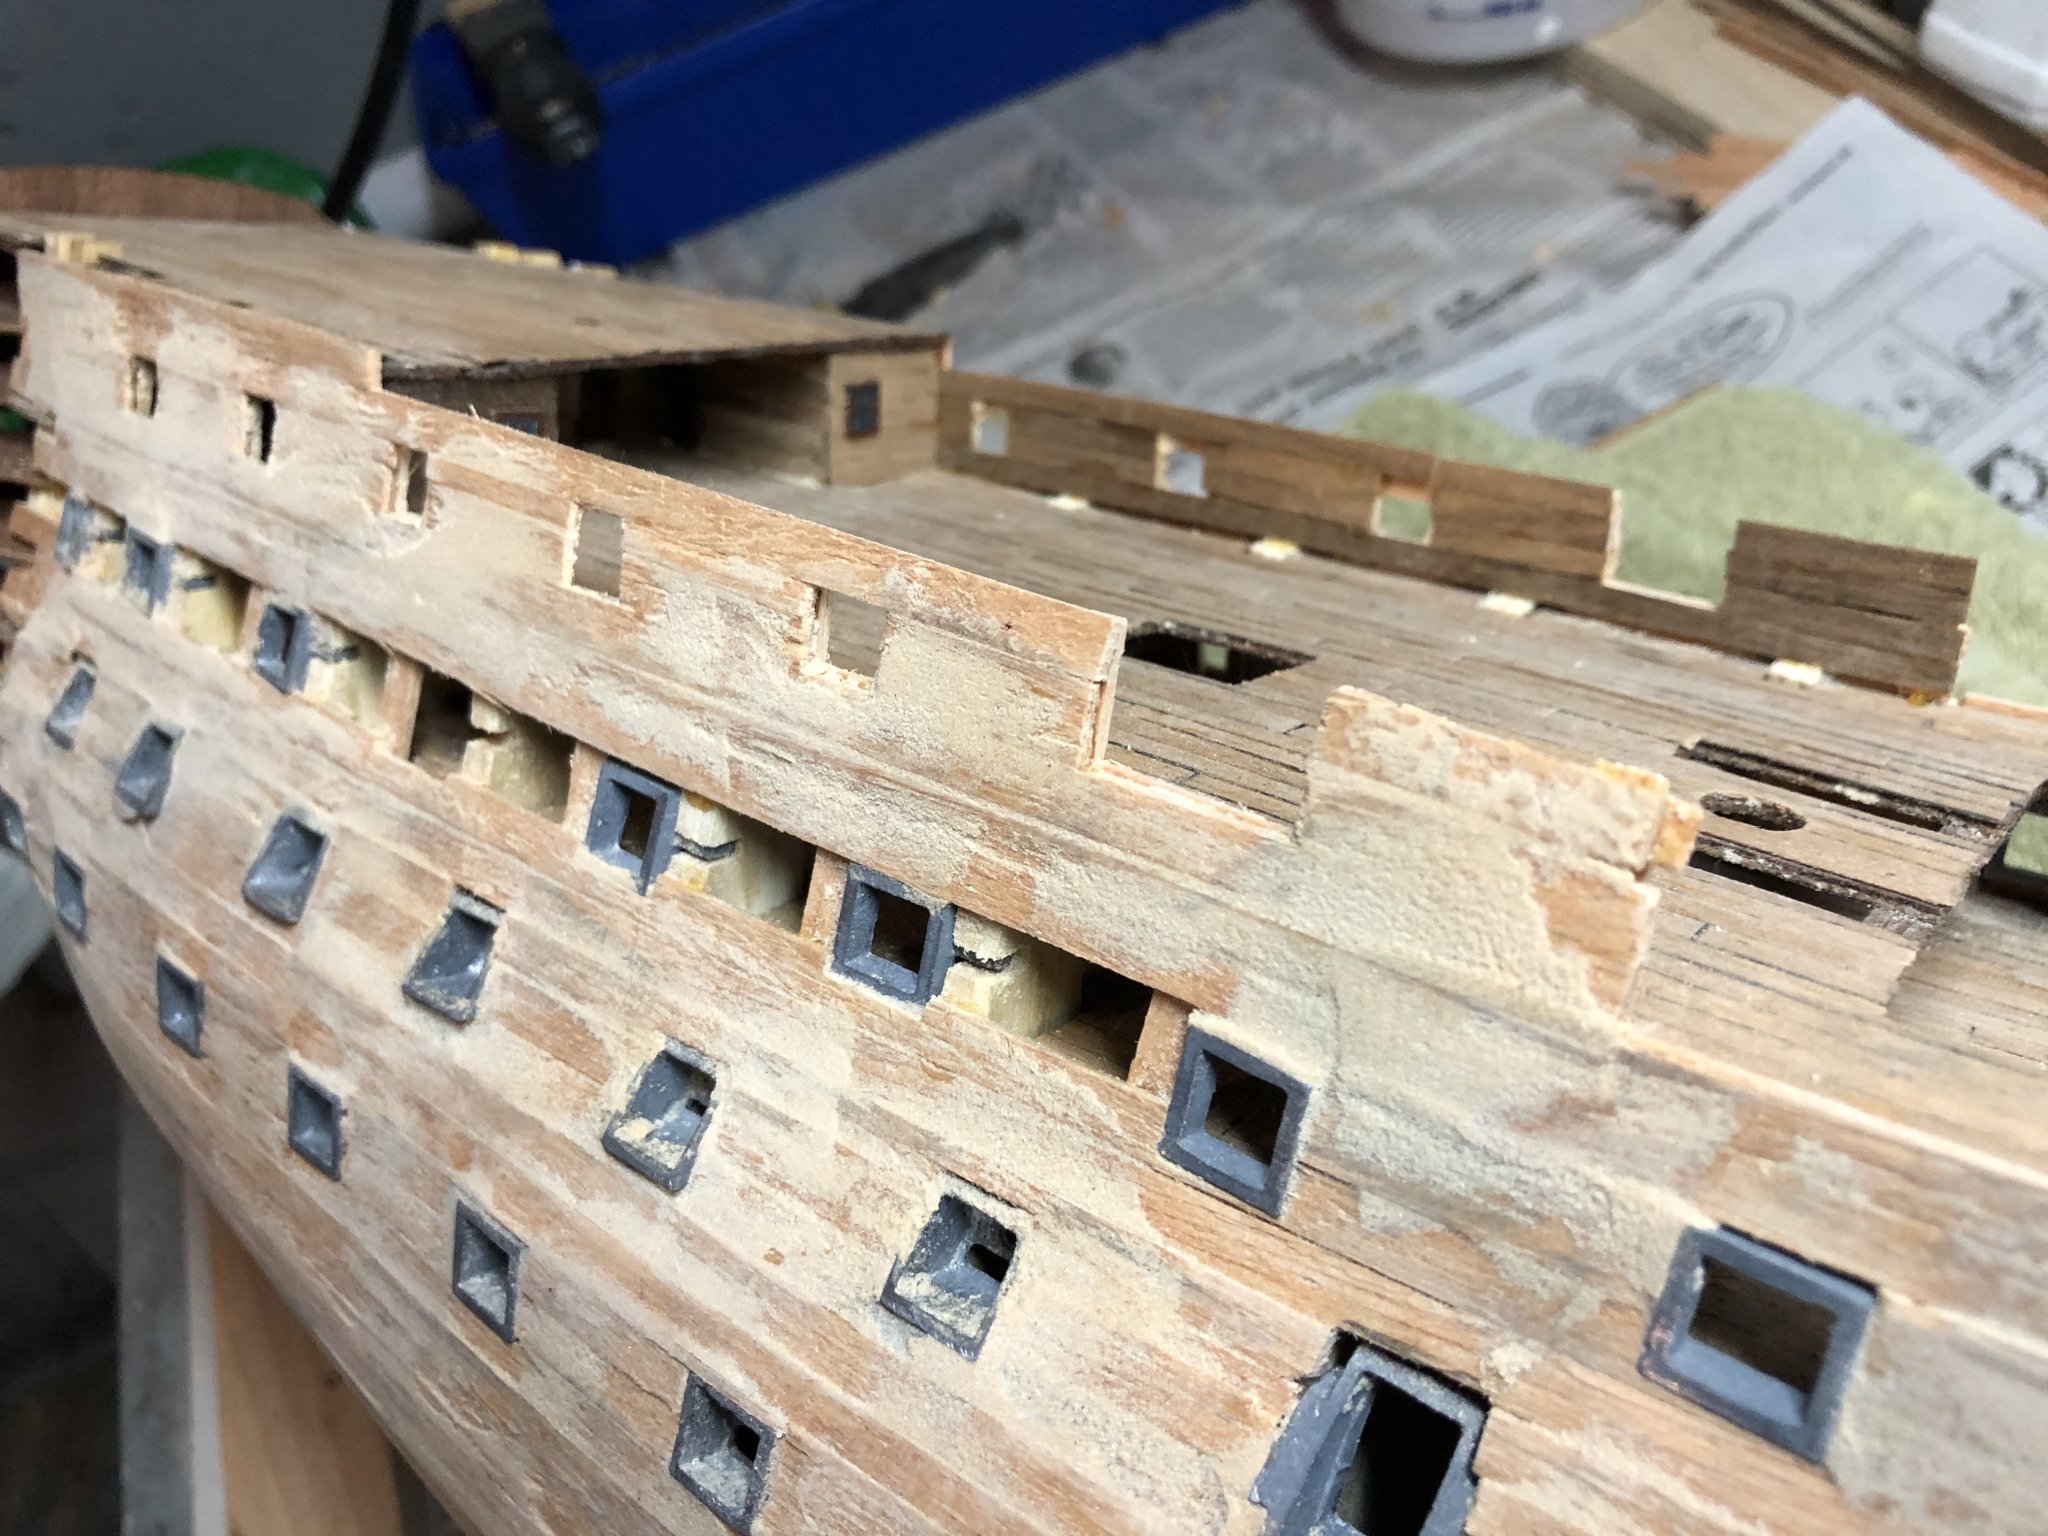
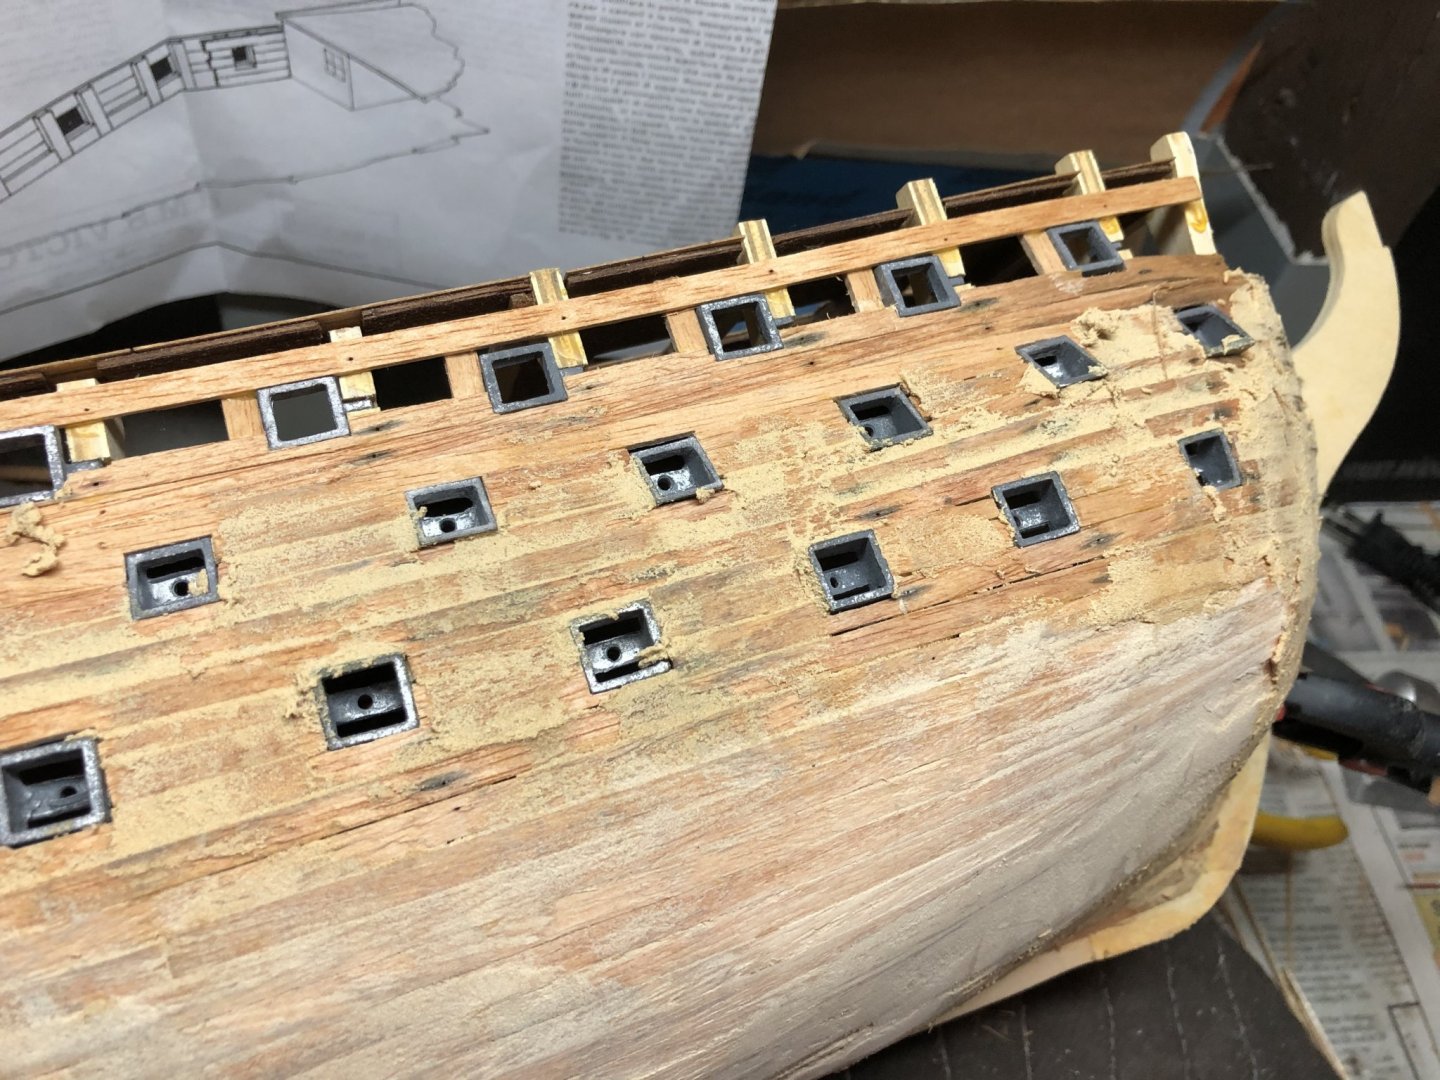
Have completed the starboard side. I spent some time re-reading the directions and see that I need to paint these planks ochre. In this case I’ll paint the planks once they are applied, assuming I can find the correct color. I had all the model colors when I first purchased the kit in the early nineties, but they have long since degraded/dried up. I’ll need to find the paint again. Have started on the port side planking. You can see there remains some sanding touch up yet to complete. The build up of filler around some of the metal ports is not always easy to remove. Lesson learned to be a little less liberal in adding the filler.

-
Very nice planking work; she is coming along nicely.
-
Thanks Emmet! I ended up only removing the inner portion of the bulkhead tops, noting they will be hidden by the walnut planking. More detail provided above. Your ship is shaping up nicely!
-
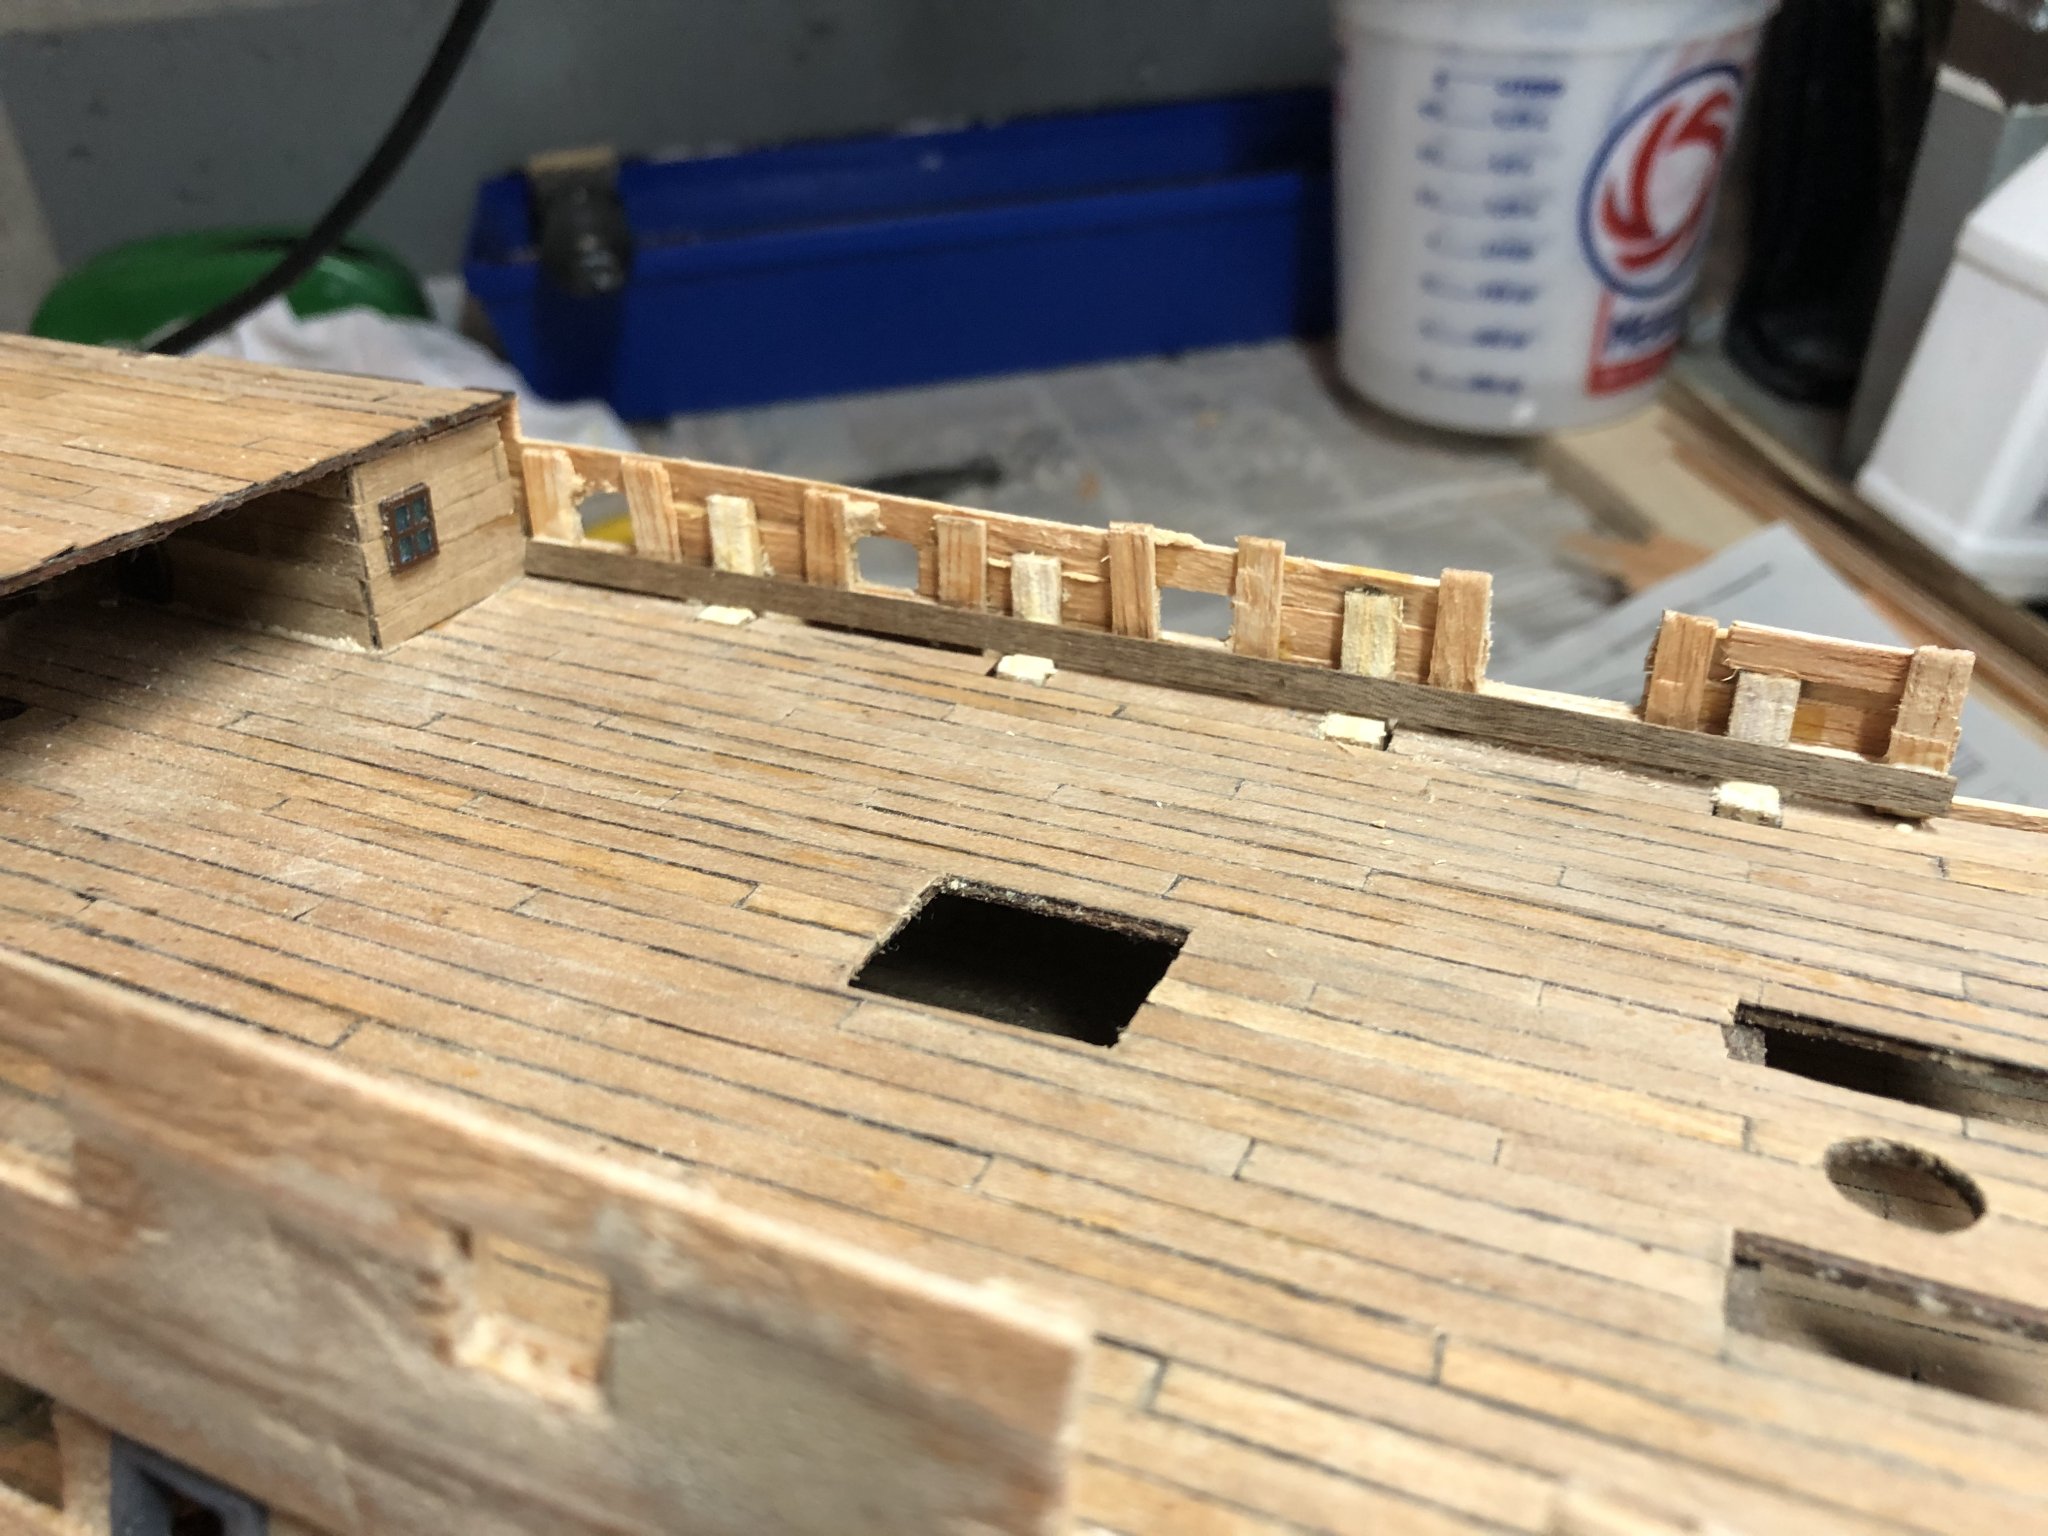
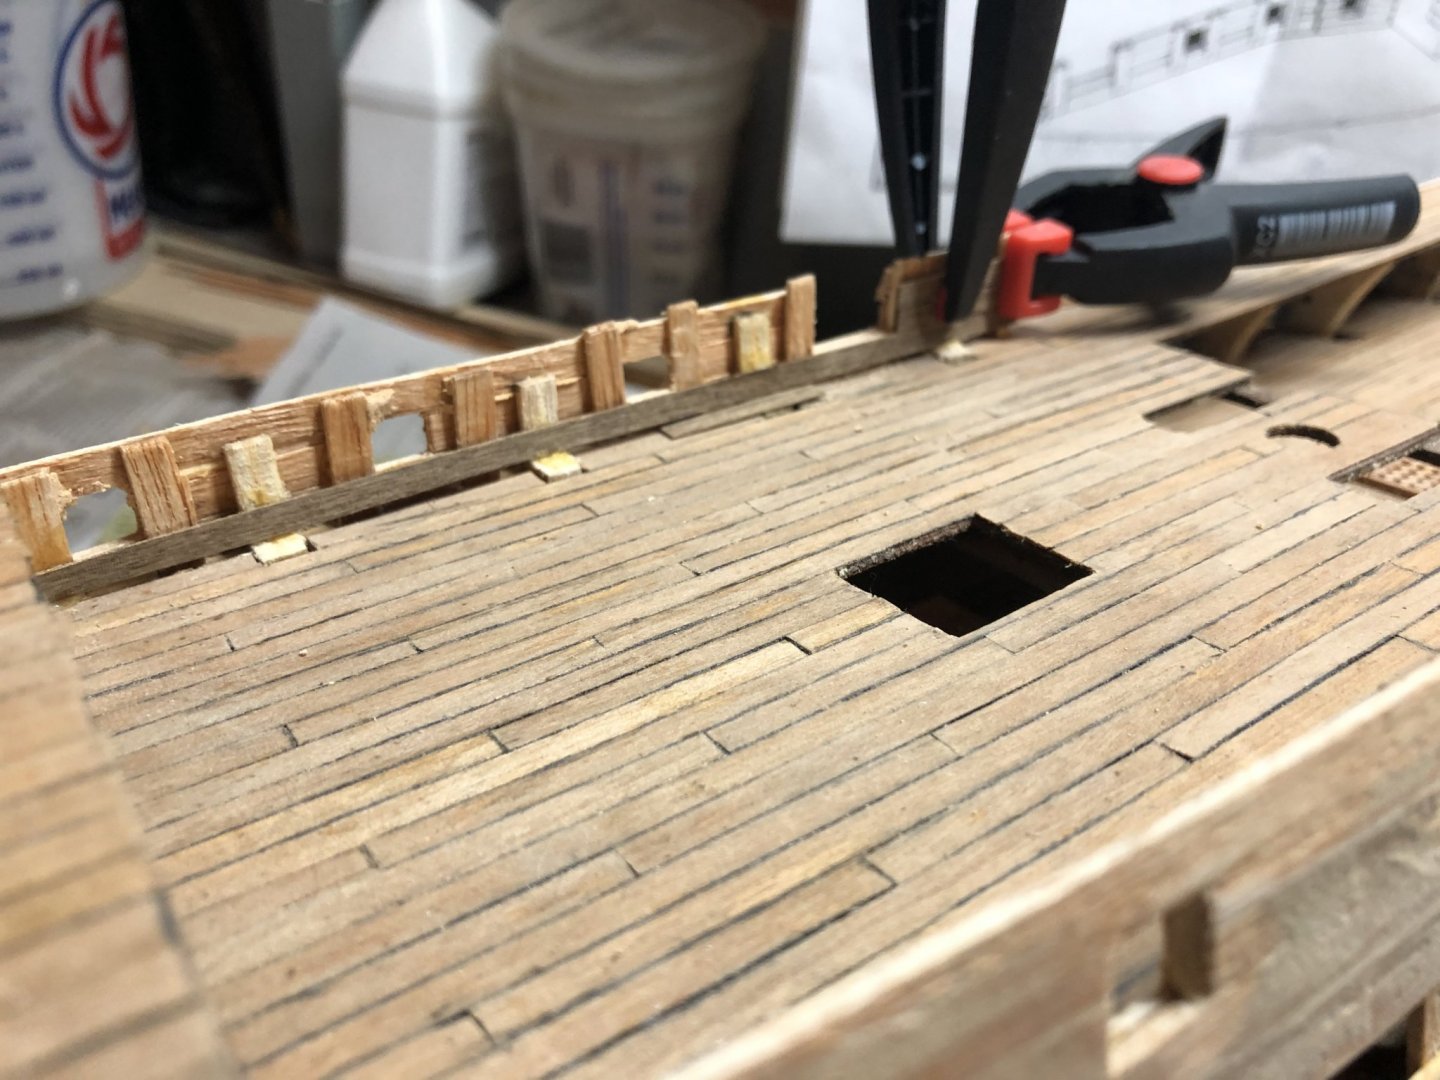
Working to add in the inner 0.5 x 4mm walnut planking. I ended up removing the inner portions of the bulkhead sections, sanding them flush with the other support pieces and then placing the walnut planking along the various bulkhead sections. Tough sanding in those tight spaces.
-
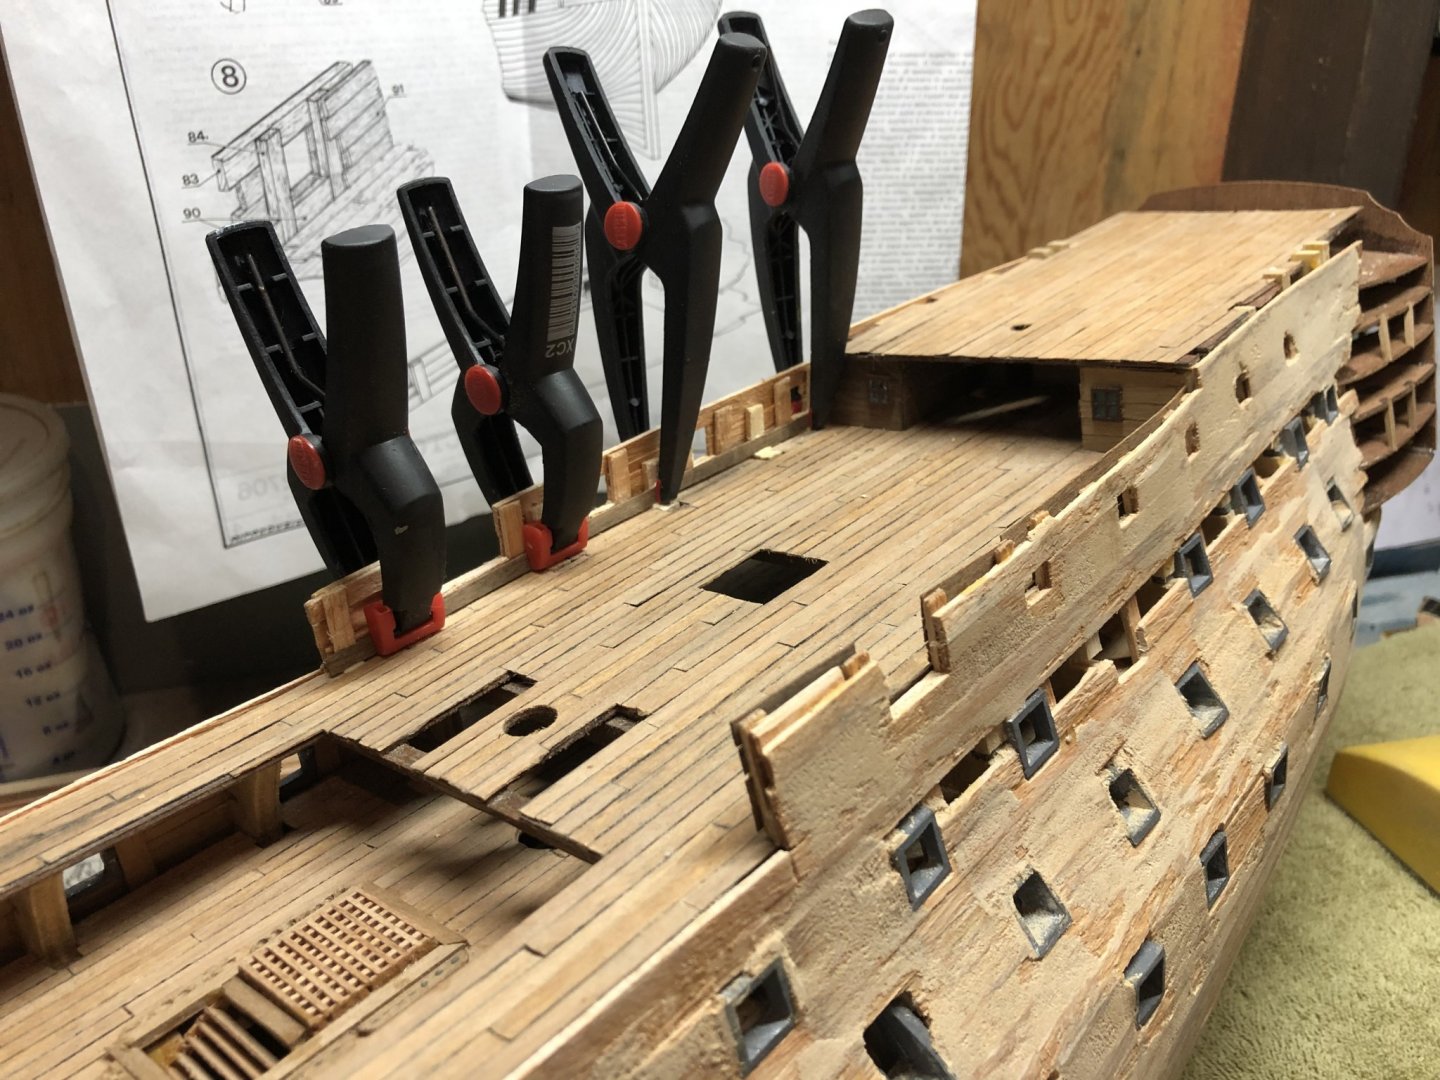
Hi Kjs - My plan for the aft quarterdeck guns will be to assemble them and then move them from midships to the respective port or starboard position. I’ve left the planks off between the gun ports to aid in this process. If the assembled guns do not fit - then, I’ll have some additional thinking to do. Once positioned, it will be difficult to fully outfit the guns with the associated ropes, etc. - but a problem for yet another day. Hope that helps and good luck with your build!
-
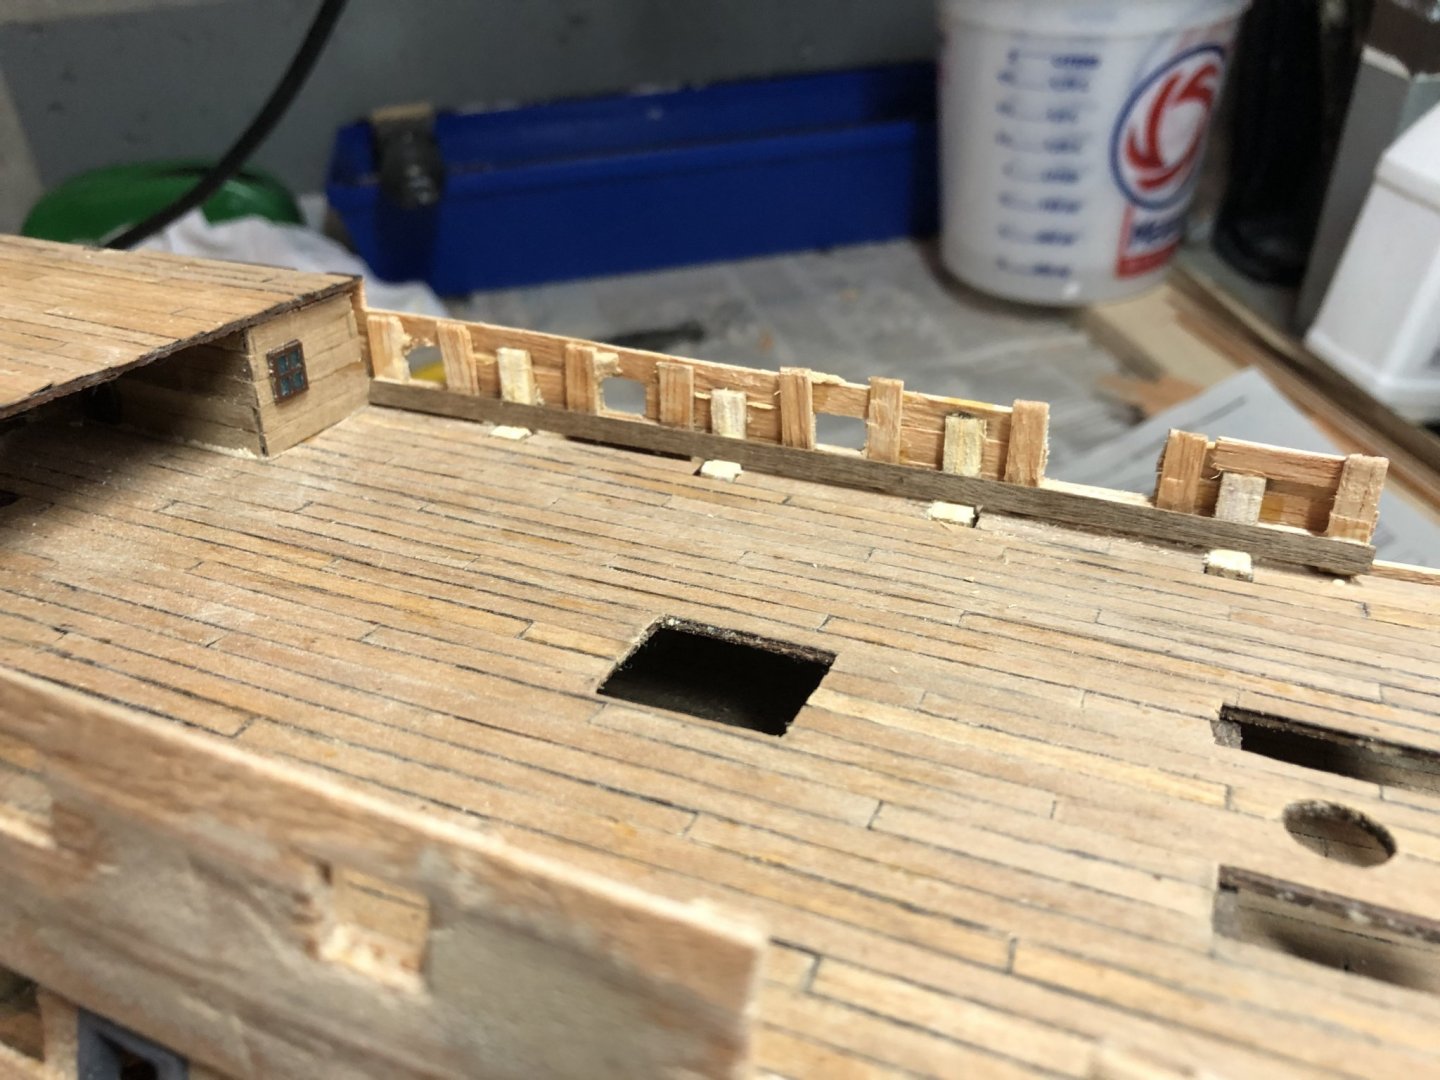
Hull sanding is largely finished. The next step is to gently remove the bulkhead tops on the quarter deck to allow for planking the inside walls. You can see where I’ll be removing the tops but note that some of the planks were glued to these structures. I’ll need to be careful when removing them to ensure I don’t damage the planking.

-
Thank you Henrik and Emmet. Message received and understood. Thanks again Henrik for your guidance on filling/sanding and you are correct as I've found there is more work on the bow and stern areas, with less mid ships. Emmet - I'm using a relatively small spatula for the areas between the gun ports. It is tricky to reach all of the areas. Henrik suggested using a cloth, in small amounts, to help spread the filler. I will do that in the harder to reach areas. I think the Mamoli metal gun port inserts make it more difficult to uniformly fill and sand. Kits without these ports may be easier to complete the process. Pros and cons with each kit.
-
Emmet - Good that you added the keel reinforcement pieces. Be careful that they don't reach too far down toward the bottom of the keel as it could interfere with your lower plank(s) when you start adding them. Something I ran into with my Mamoli Victory. Good news was Mamoli included the reinforcement pieces, bad news was I installed it a bit too low and had to later chisel a portion of it off.
-
Yves - Truly a museum piece if there ever was one; very well done and in such a relatively short time! The detail is amazing! Where will you display her?
-
Very nicely detailed work Emmet; she is coming along nicely!
-
Matthew - Thanks for including us on your fantastic journey. I look forward to the trip. Good luck, keep pressing and don’t be afraid to ask questions. There are a lot of resources at your fingertips for if and/or when you need them.
- 60 replies
-
- 1
-

-
- victory
- billing boats
- (and 1 more)
-
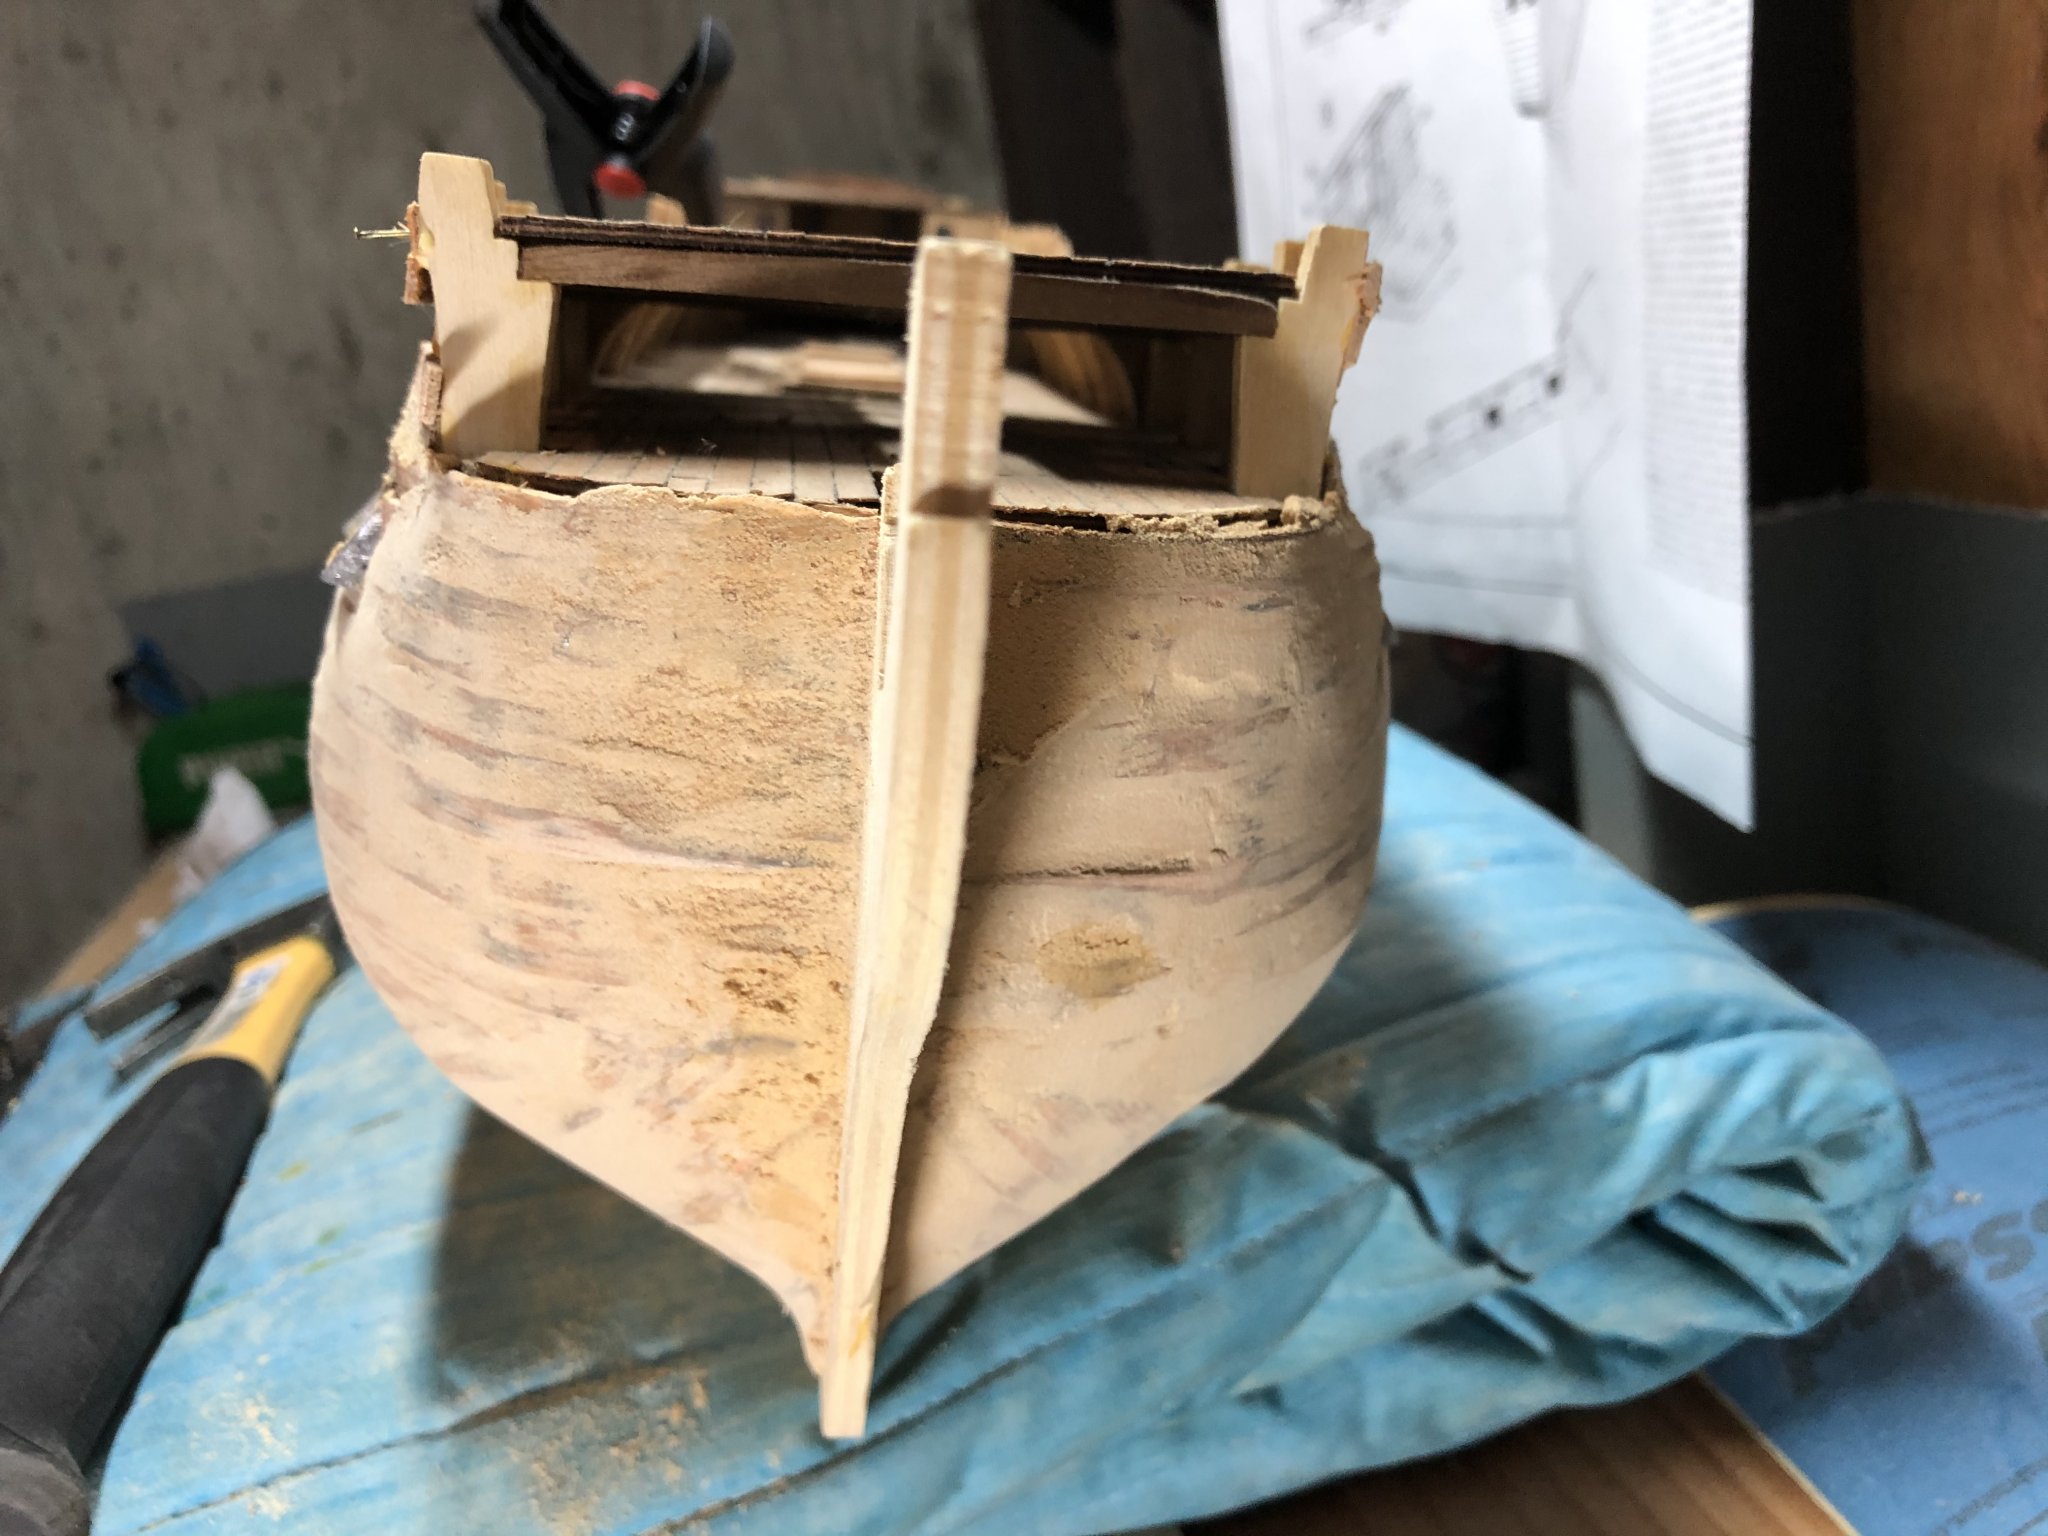
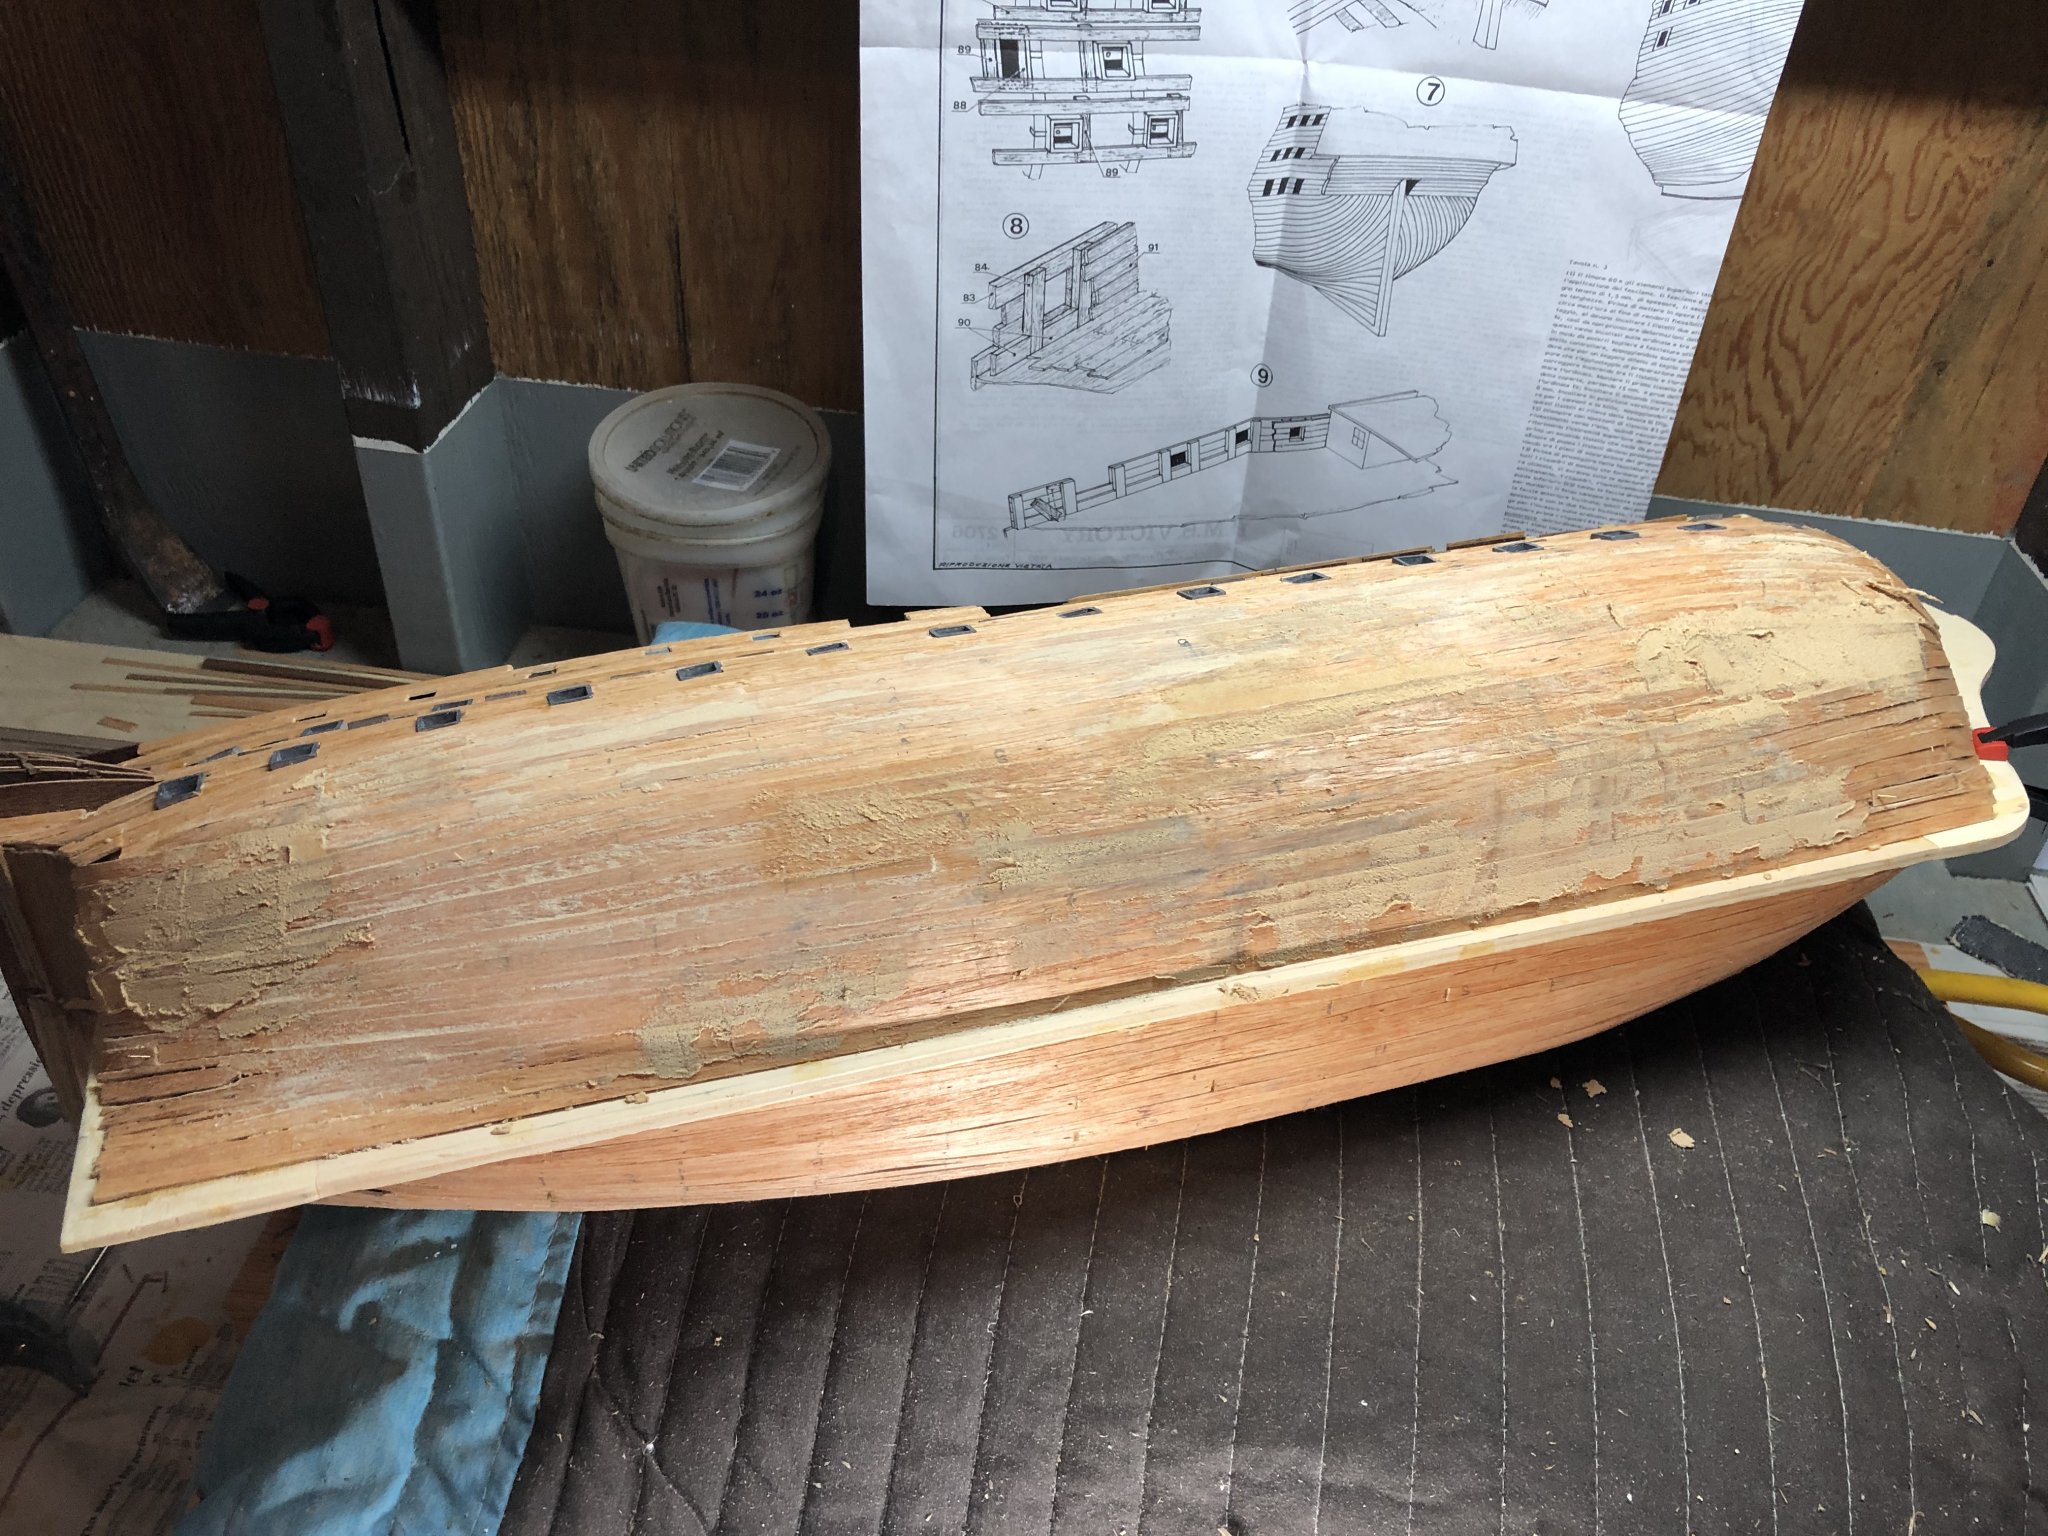
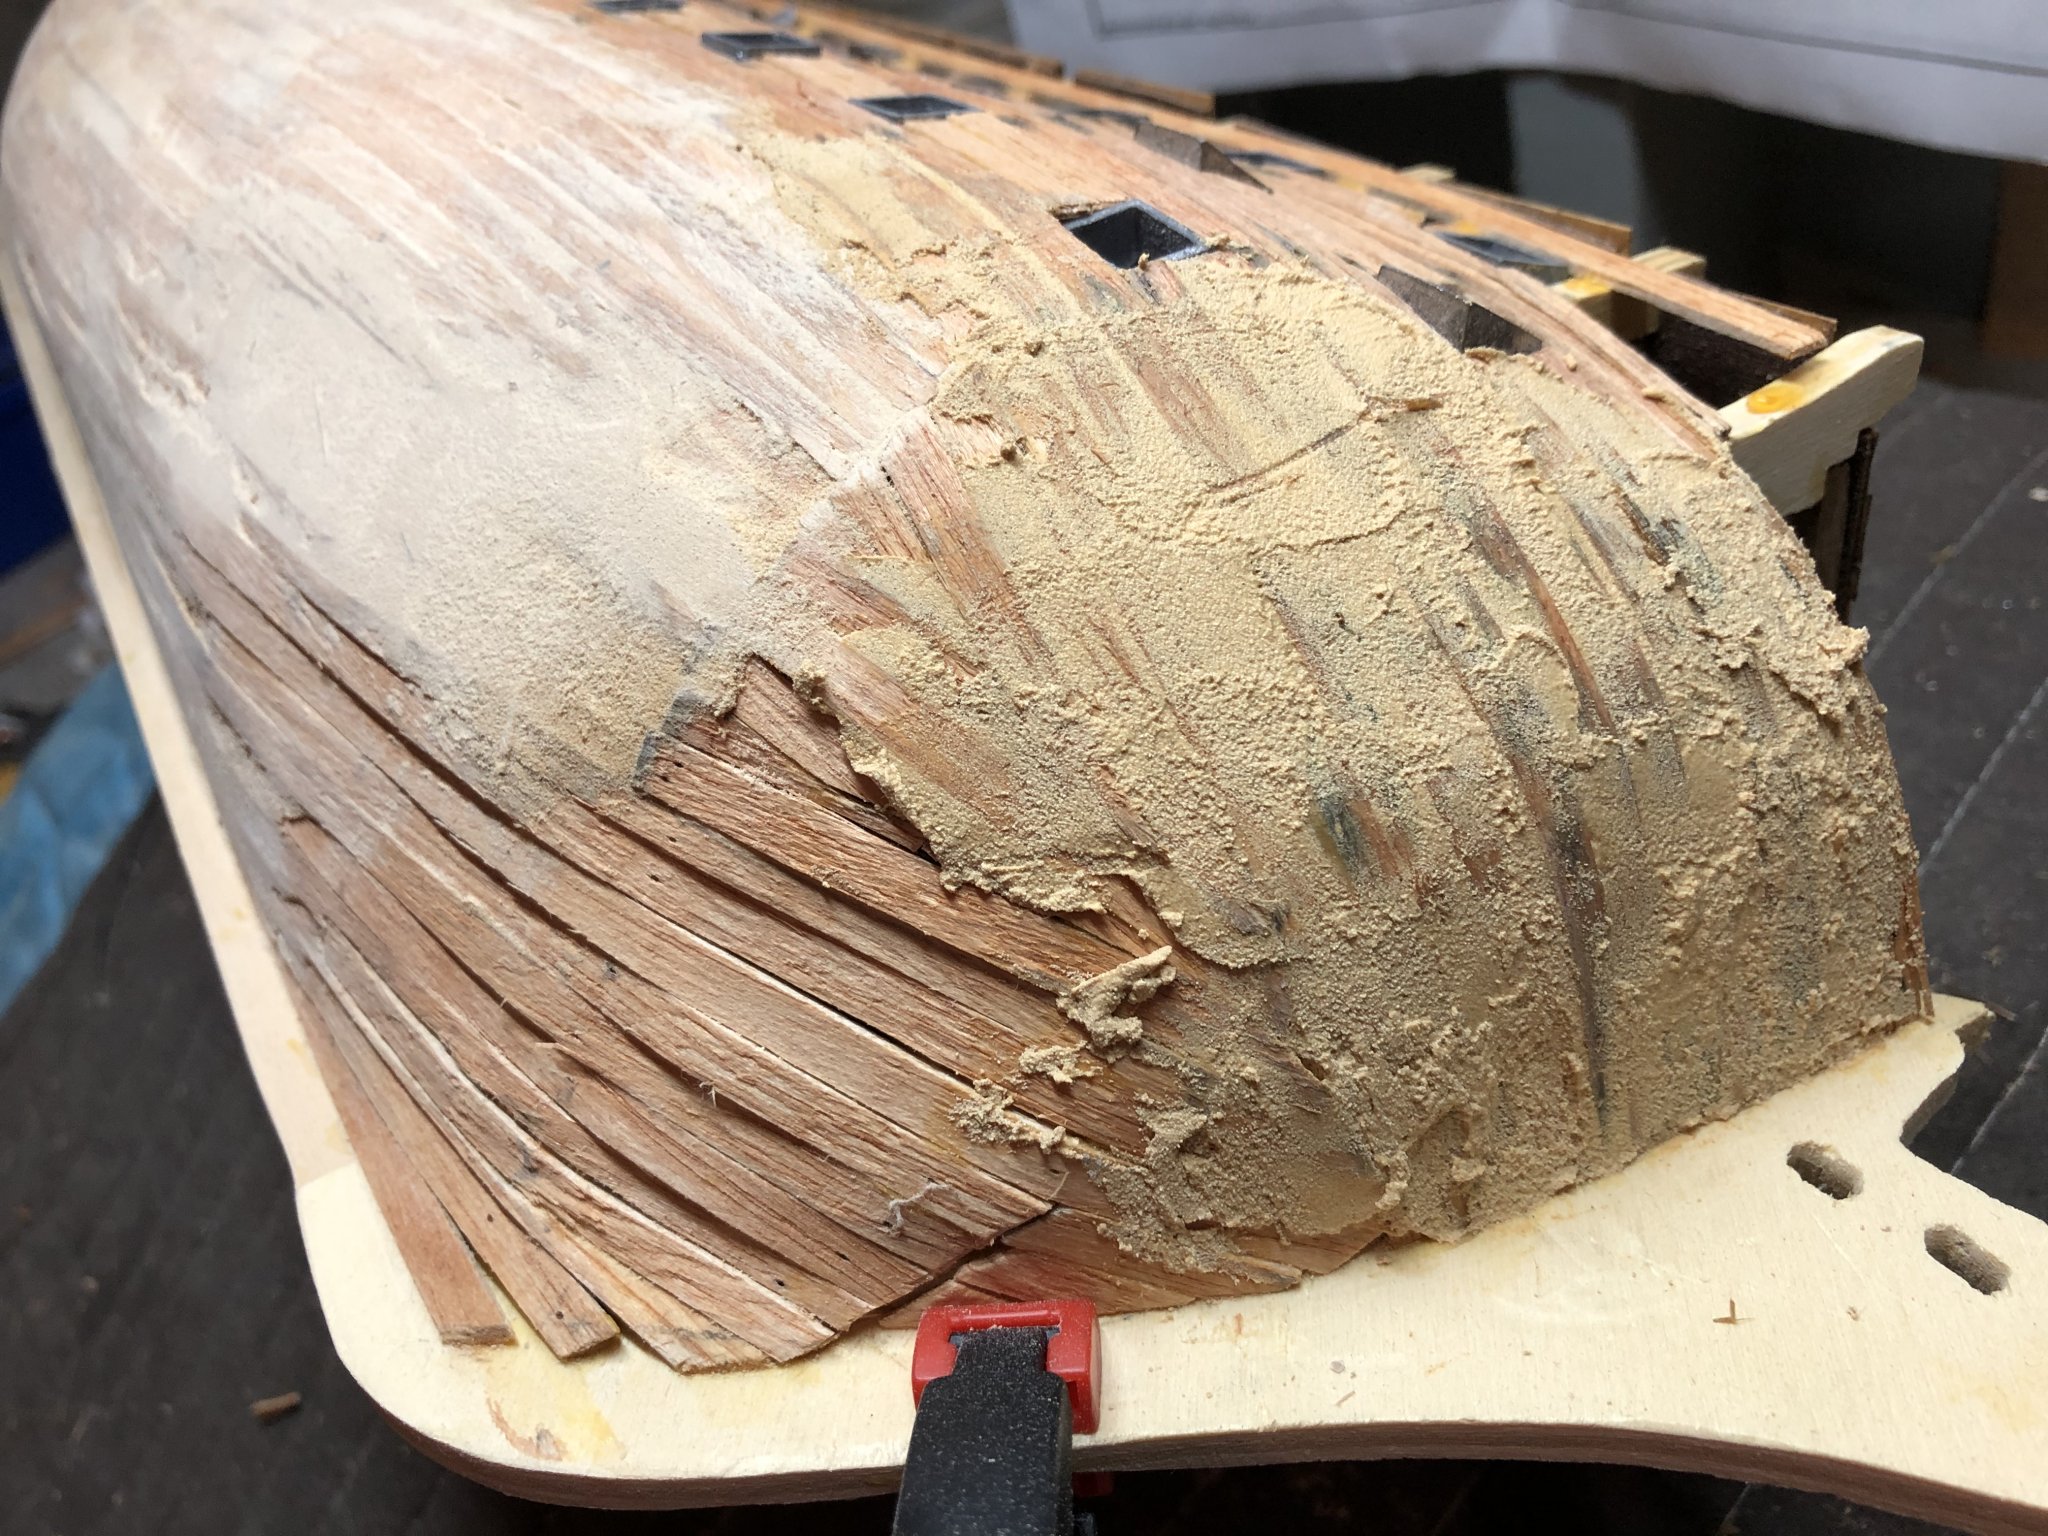
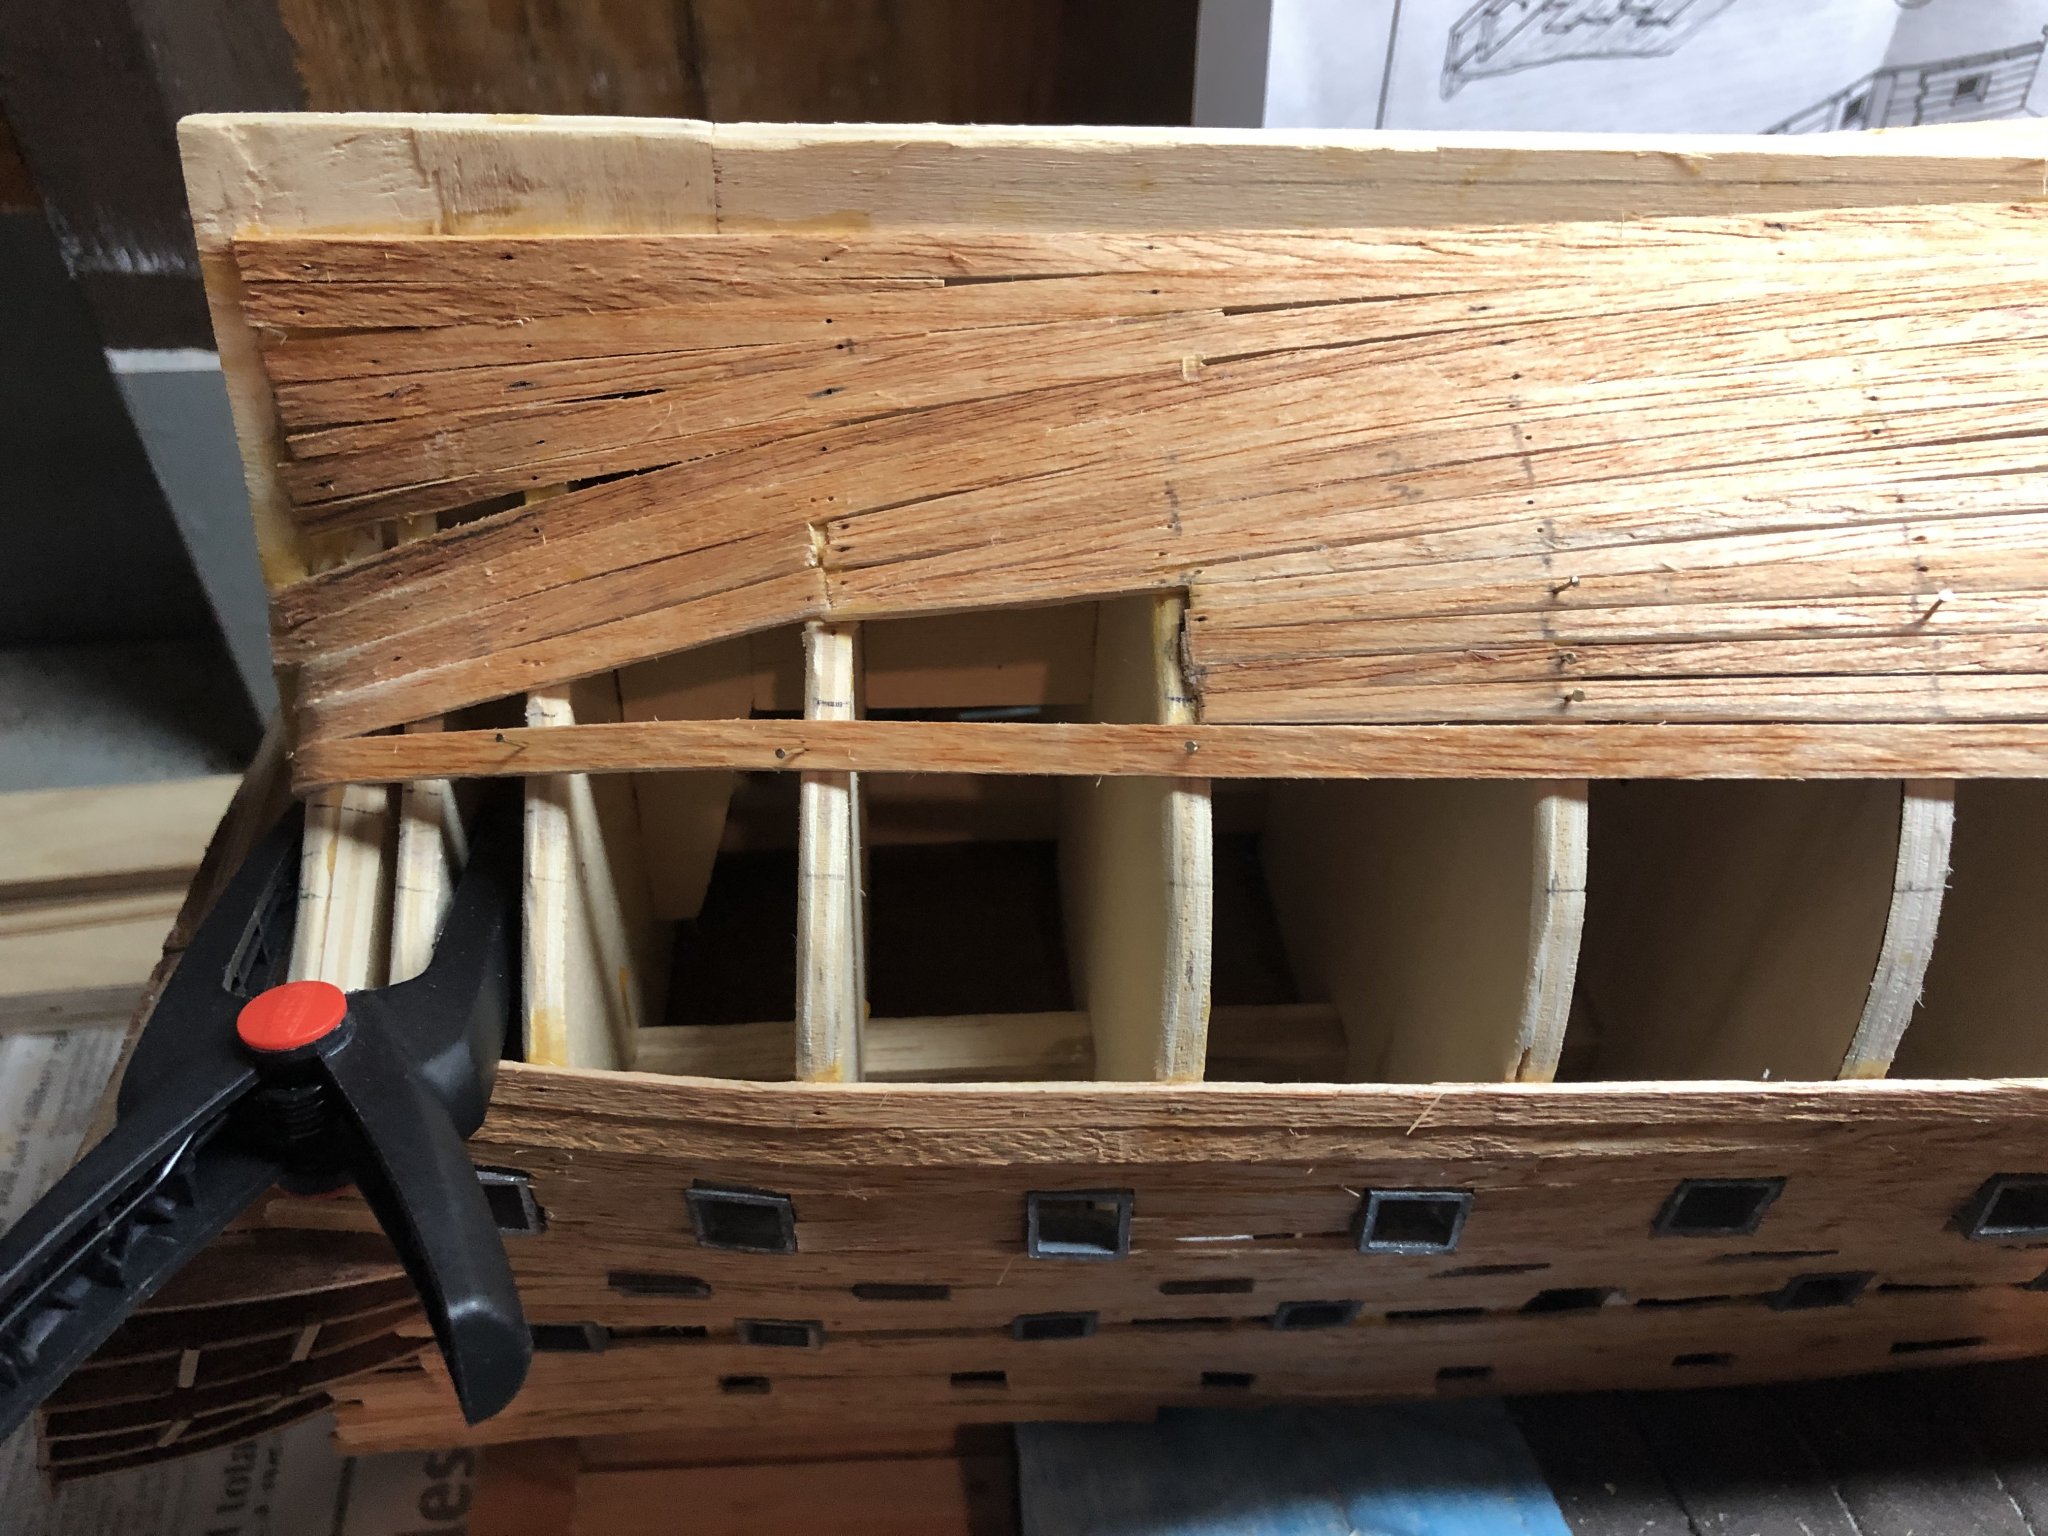
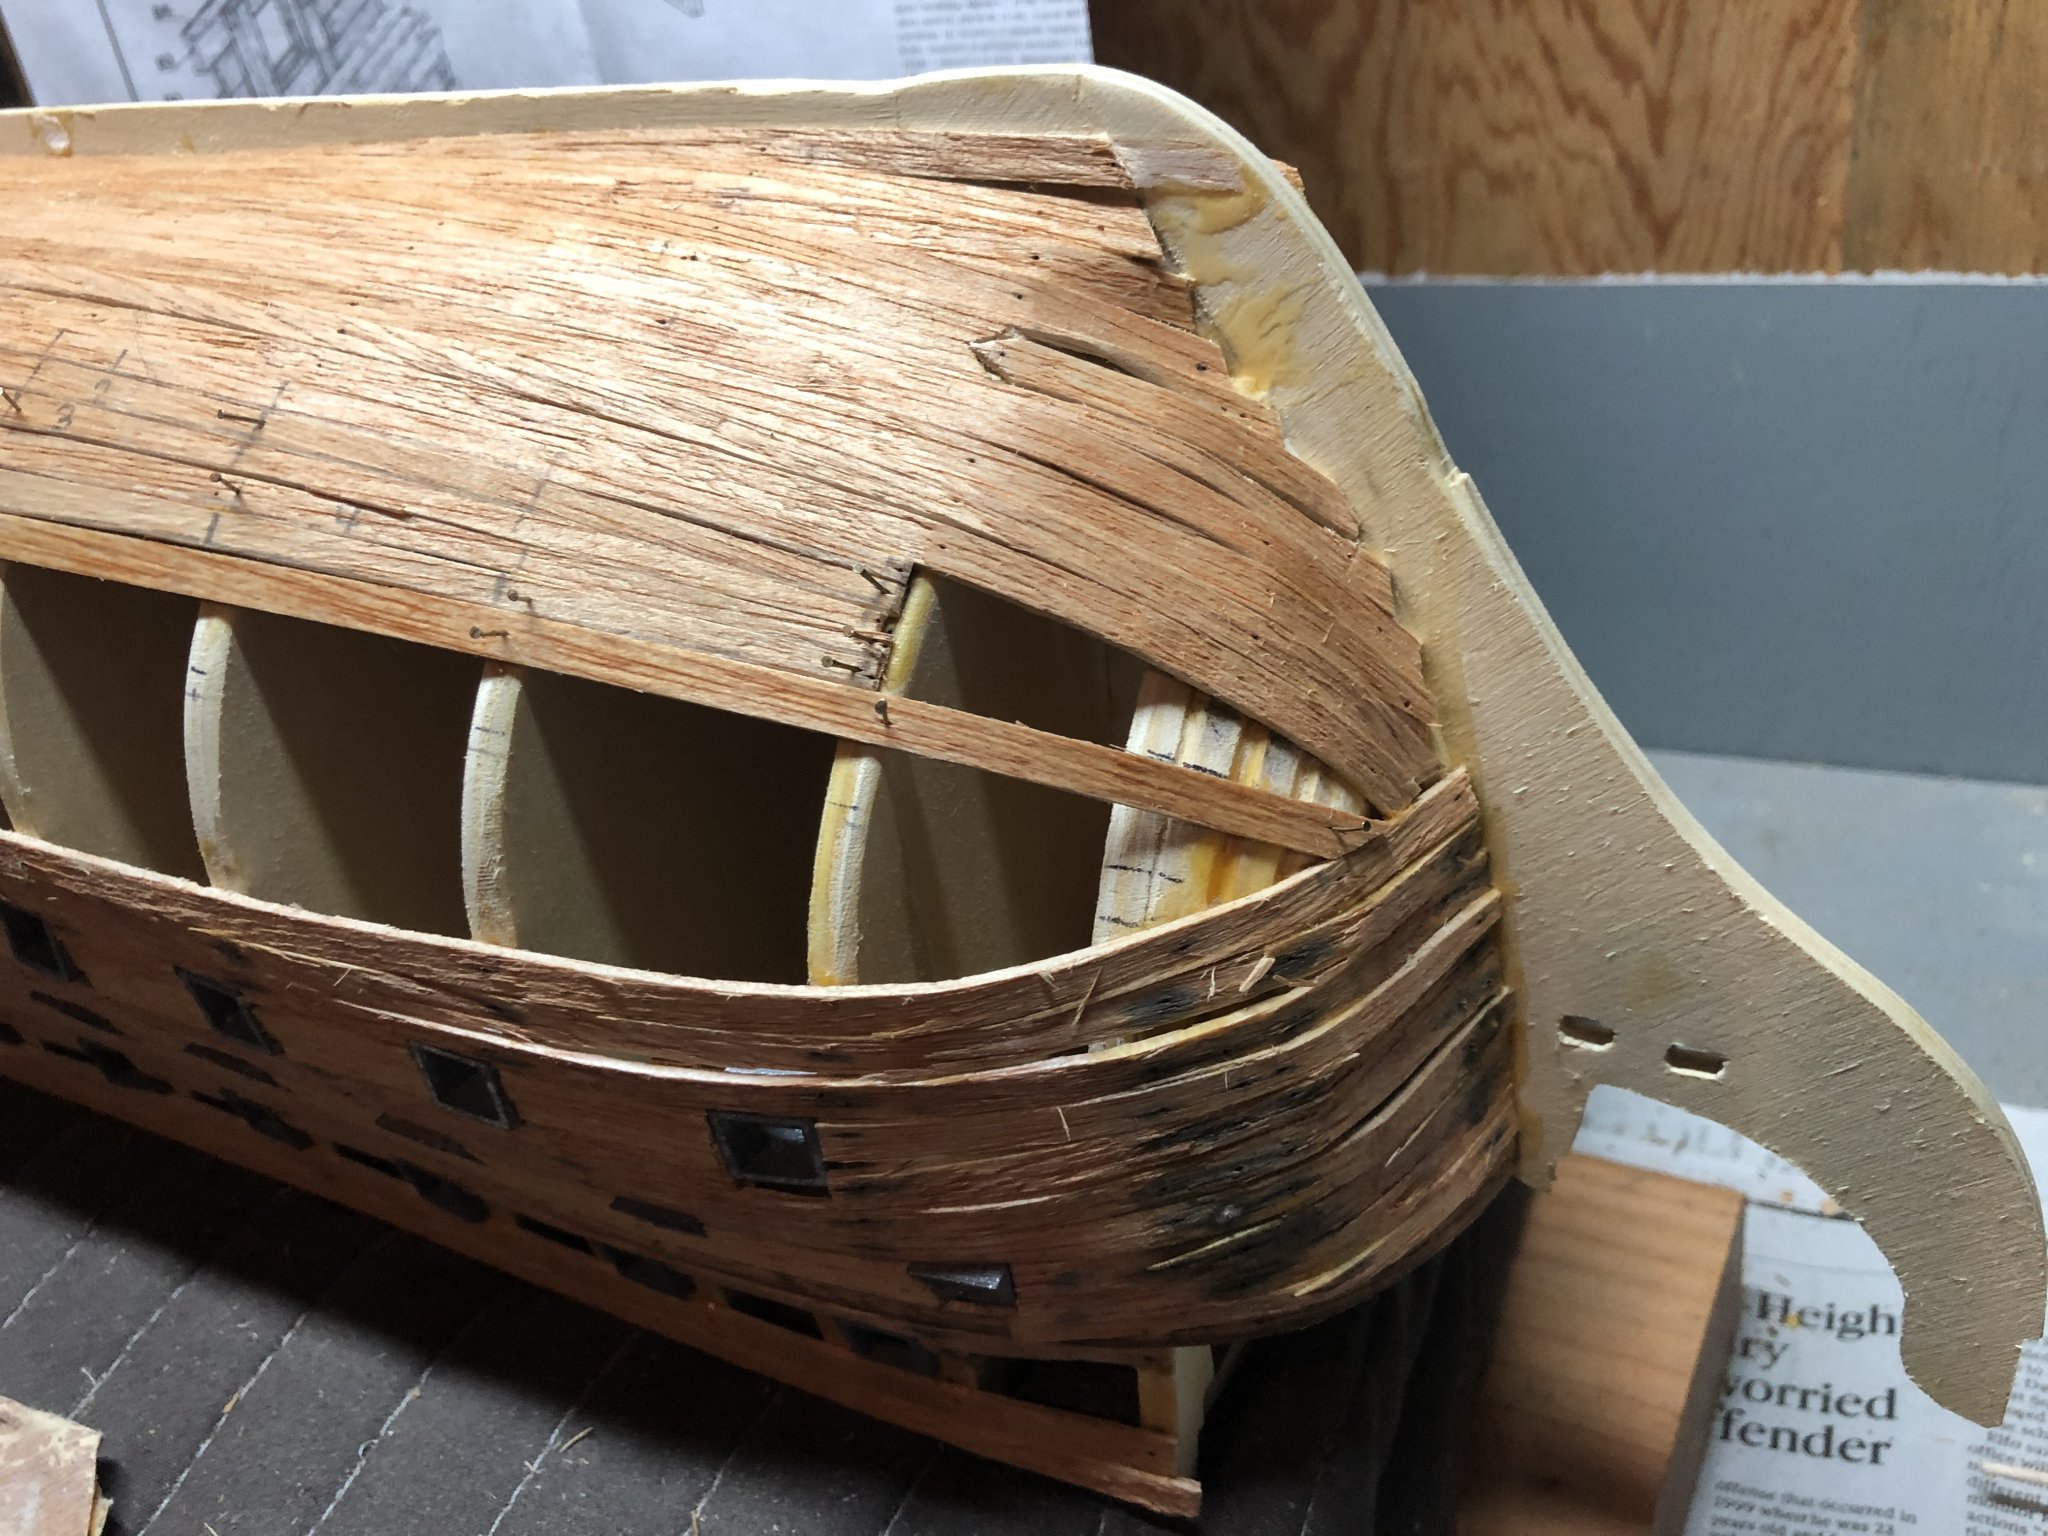
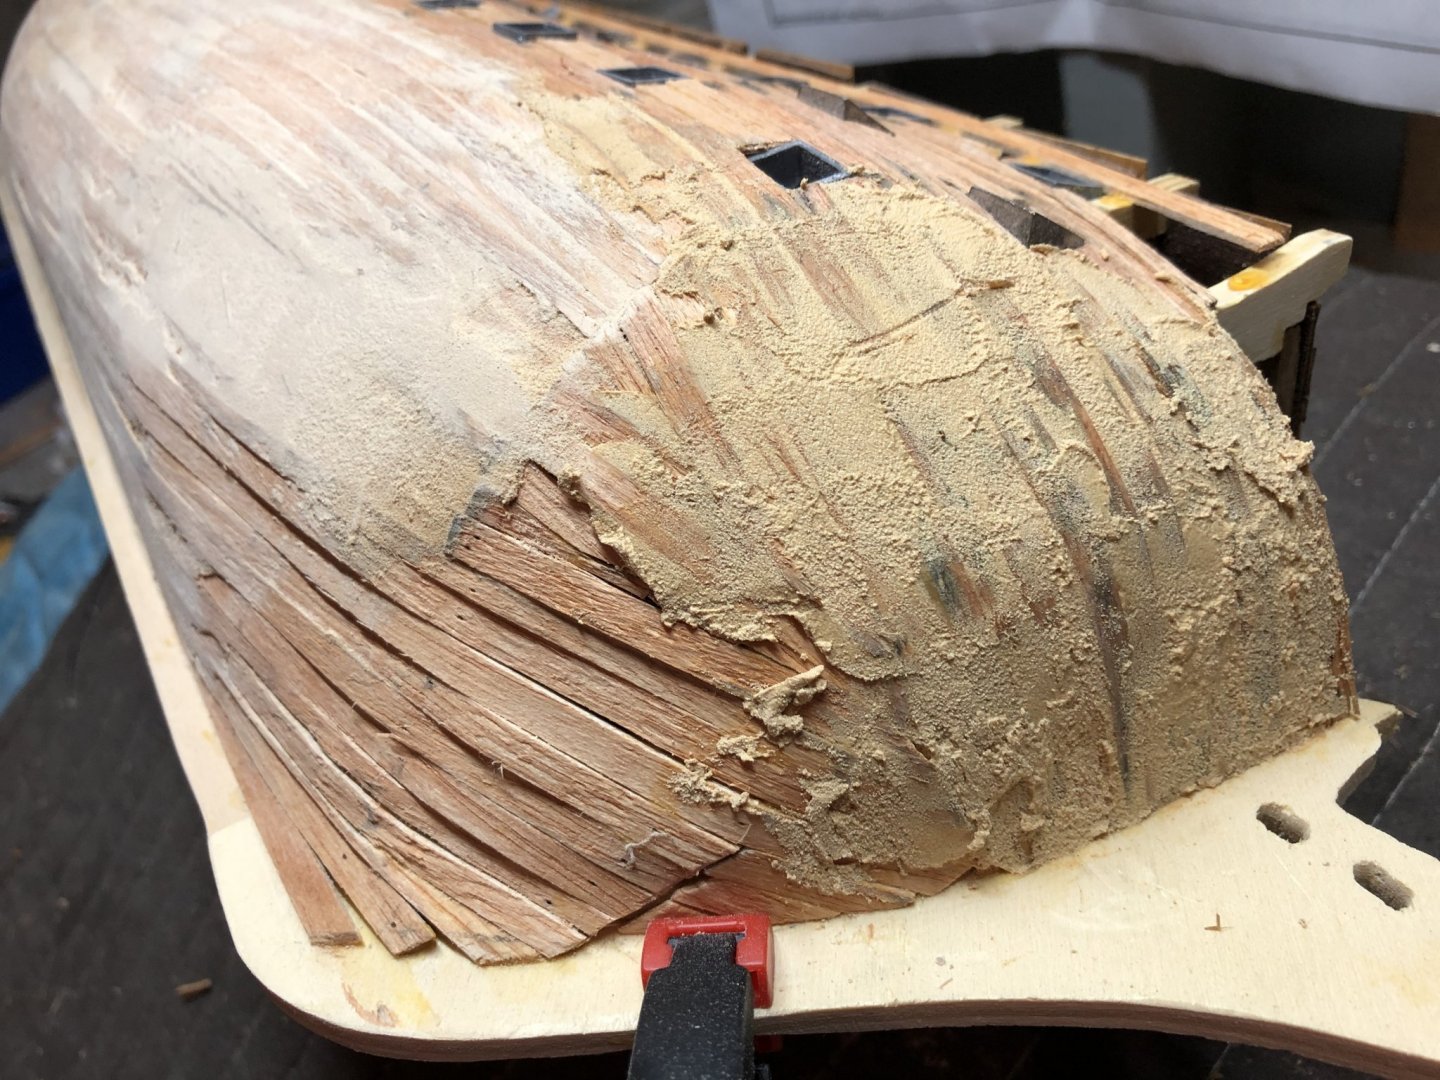
Continuing to fill, sand and then fill some more. The question becomes, ‘When am I done?’. I believe the answer to be when the resulting hull has a relatively smooth and continuous surface for the next set of planks. In my case it won’t be perfect, but I’ve seen several examples in this forum of those who have gotten very, very close to perfect. You can see the bow where there are areas that were filled in (first bow pic) sanded and then the resulting low spots filled in again (second bow pic). Hope this covers the bow. More work on the upper sides both port and starboard. I added an additional row of planking on the forward starboard side (top) as well as filled in some of the missing quarter deck planks between the gun ports because I saw that I can easily reach that area of the deck for gun placement, etc. The after and forward openings will remain at least for now for access to those areas of the deck.


-
Hey Emmet - the filler I am using is MinWax stainable wood filler. You can paint and insert nails on/in it. I’m also using 220 sandpaper for the initial sanding.
-
Have started the filling/sanding process. Thank you to Henrik and Mark for their sage advice in this process. Just getting started using a water based filler. You can see there are uneven spots (shadows) in need of filling/sanding. As observed, the filler hardens quickly so I am doing sections.

-
Hey Emmet - Be sure to check out Wallace’s Corel Victory... He has a lot of detail in there for you!

-
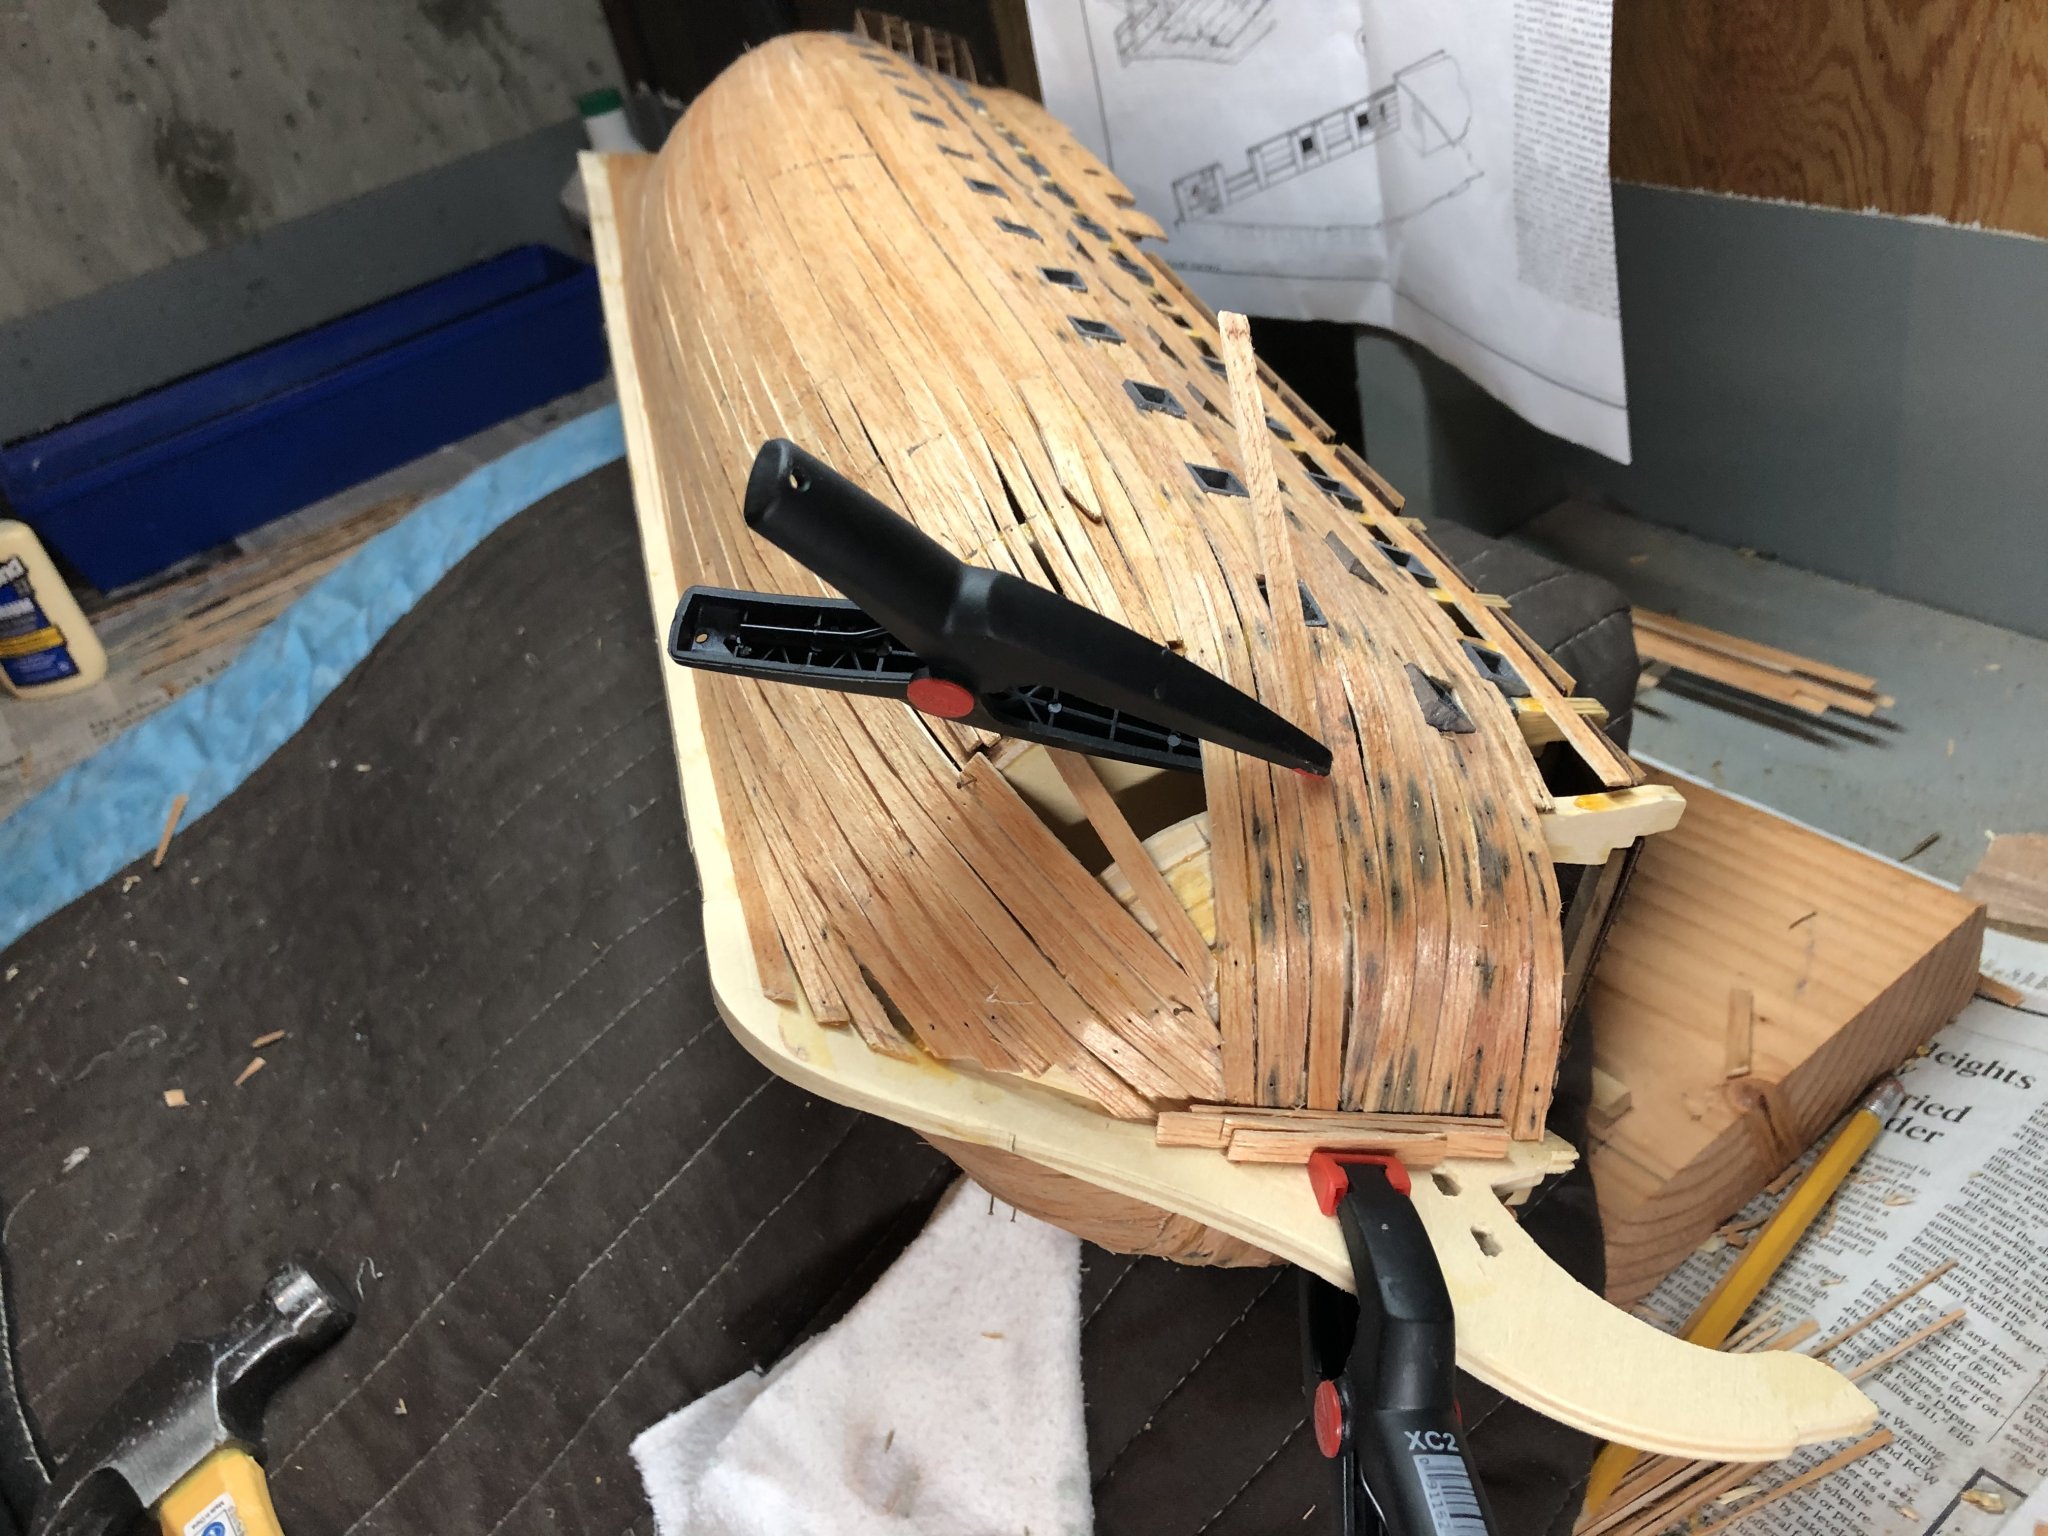
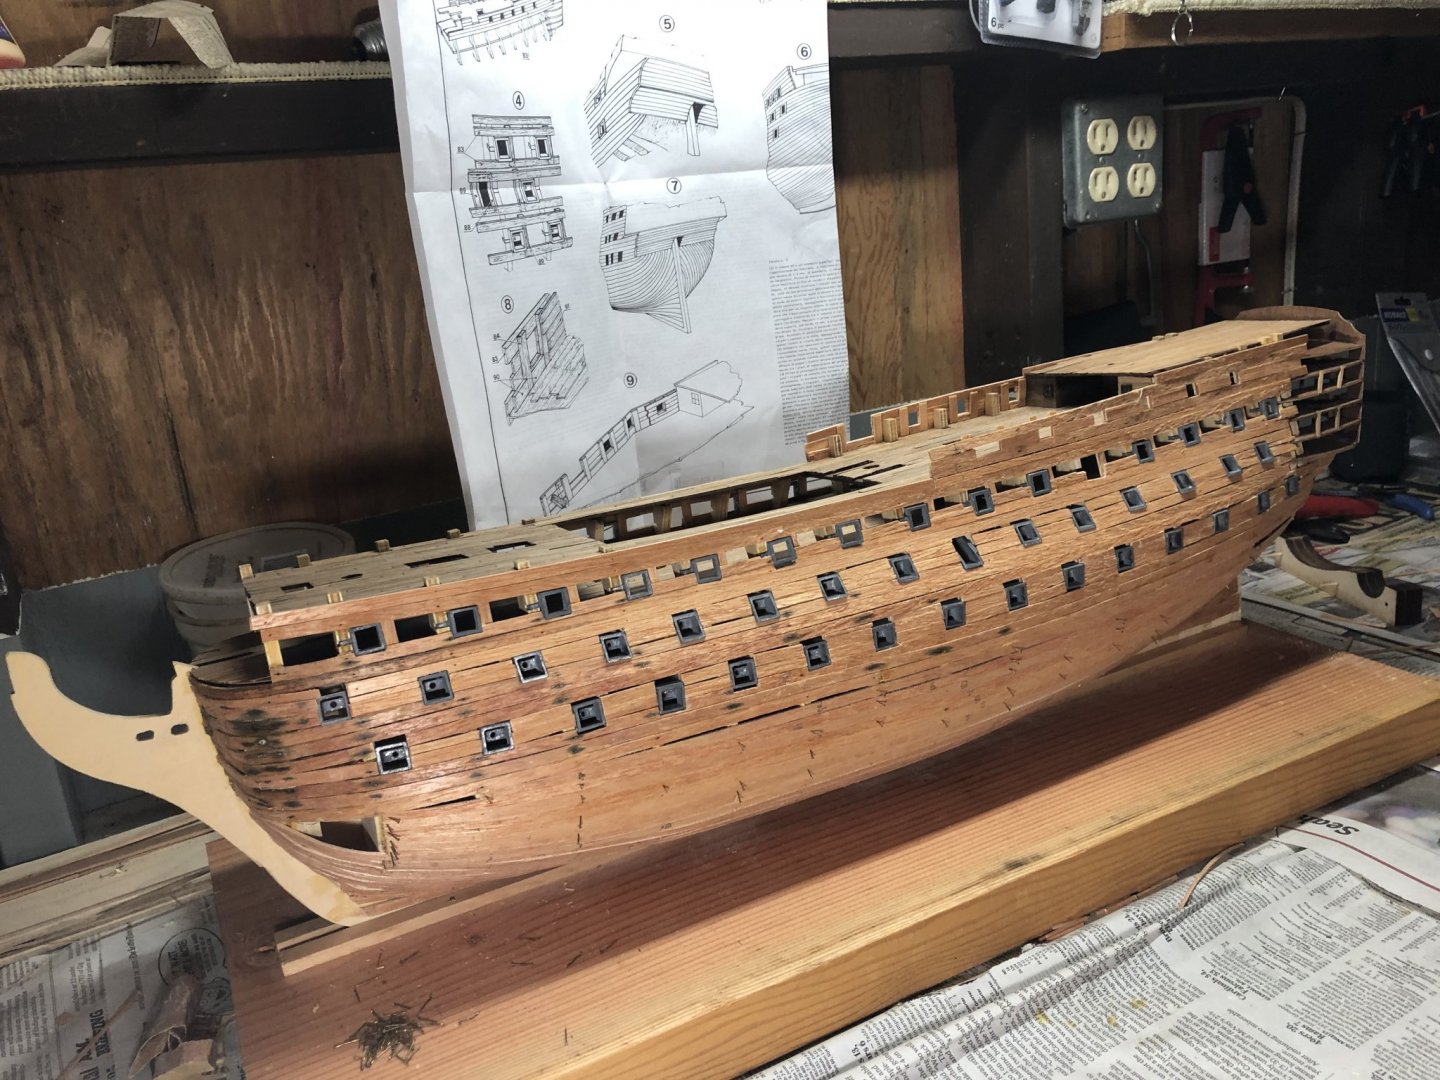
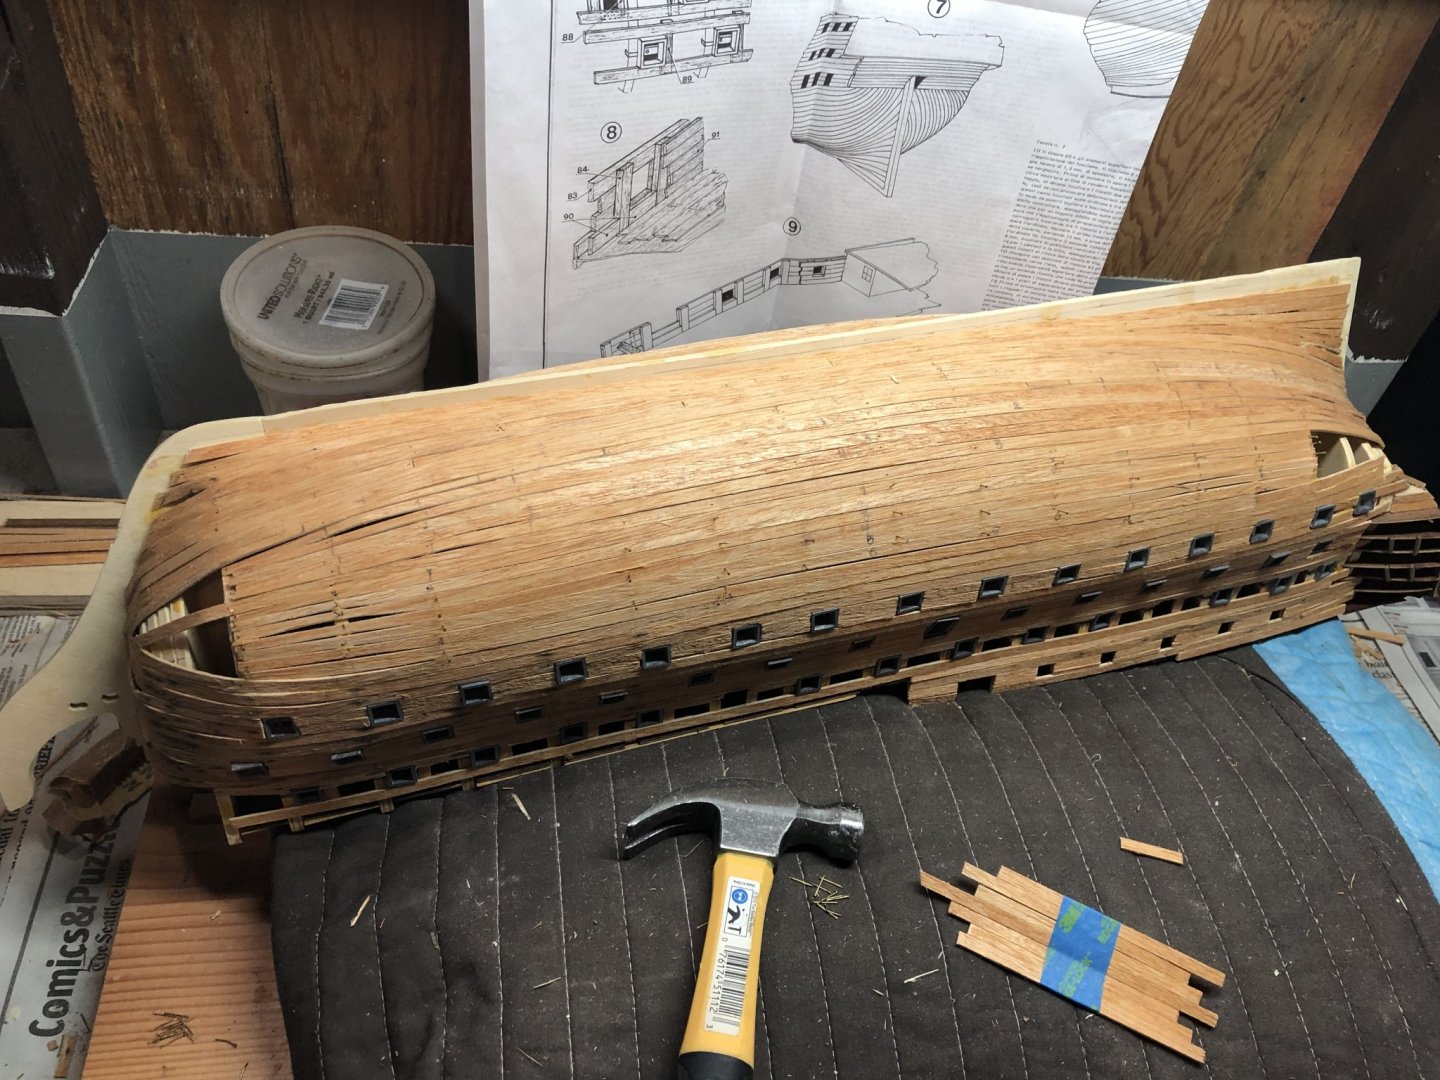
Planking continues. I’d like to think it is a ‘minor touchup’ but as you can see it is actually some reconstruction as I fix some previously damaged bow planks. One note, the dark stains in the wood are actually from where I inserted nails in damp wood resulting in some type of wood/nail interaction resulting in the stains. I’ll cover it up with paint. Still working to install some bow and stern planks and since the nails don’t always hold the plank in the right position and I can’t get a clamp into some spaces, the going can be slow. But that is OK! It’s not the destination, but rather the journey to be enjoyed!

-
Will see Emmet! I’m sure you will make good time. But for these beauties, making sure it is right (e.g., Y.T.) is more important than the speed we are going at.
-
Hey Emmet - I'm really looking forward to following along on this build. It will be a character builder, something you already have plenty of! Hope your trip home went well and you are ready to go.
-
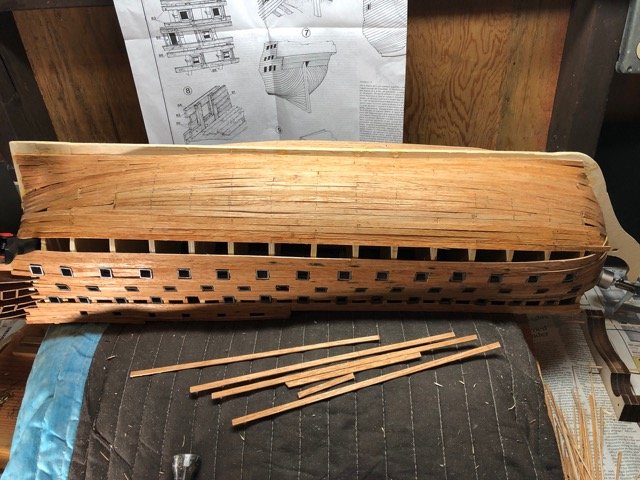
I was looking over this log and saw that I installed the first plank last Oct... I’m going on seven (7) mos of planking! Wow. I glued on the planks from yesterday that were formed. I only think I’m this far along because I’ve had a few extra hours on my hands! I’m amazed at some of the modelers in this forum who complete this work in what appears to be days. Very well done! You can see clear evidence below where my tapering was not quite up to par. I still have the bows and sterns to finish and hope to do so in the next several days. Then to finish the quarter deck railing per the instructions. I’ll need to look over the logs to get a sense of filling/sanding and then looking to put on the green ‘copper’ tiles. I don’t intend to put on real copper as some others have done. I’ll also be looking at the tile tutorials out there for assistance.

-
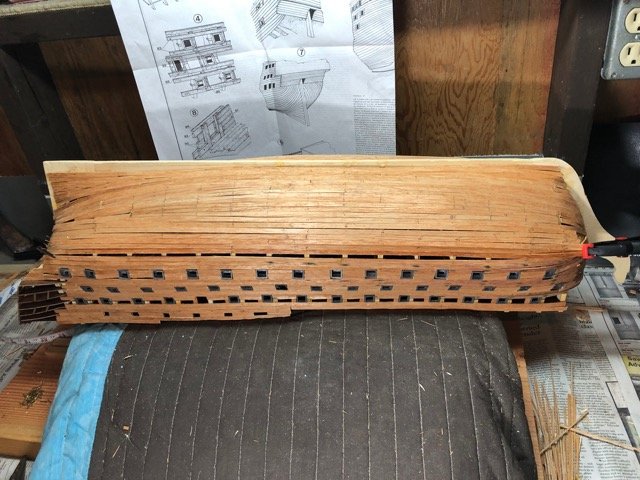
Port side nearly complete. Planks moistened, formed and now drying in place. Will remove, cut forward ends, sand and affix tomorrow, GLW. Then to complete the port bow before turning back to the starboard side.
-
Running a plank to see where/how best to cover the gaps using stealers. Same approach to be used on the starboard side.


-
Amazing attention to detail; a lot to be learned here. Thanks for sharing!