Rob S
-
Posts
339 -
Joined
-
Last visited
Content Type
Profiles
Forums
Gallery
Events
Everything posted by Rob S
-
 Very nice work Henrik; She is shaping up nicely!
 -
Yes, Happy Easter to all that are so inclined!! If not, may you have a safe and fulfilling day!
-
Thanks Robert; great tips! I'll pick up the PVC drain pipe for the longer planks. Up to now I've been attaching damp planks which now makes sense why I have some gaps (as Wallace also stated). I will work up a jig for holding damp planks in the right configuration for drying before installing. Can you expand a bit on 'flatware' - is that bending in the direction of the length of the plank vs. twisting? When tapering planks - can you confirm which edge (i.e., tapered or straight) goes on which side? It seems to me that gaps would be created by laying tapered against straight edges.. Thanks again!
-
Thanks Wallace - you mean 'over soak' the wood? In other words, can you leave it in too long? I've read that 10-15 minutes suffices. I'm typically doing a plank on port and starboard sides a day. That gives the wood some time to dry. BTW, that thermos flask has to be pretty large to hold most of the planks... Will see what I can find. Thanks again.
-
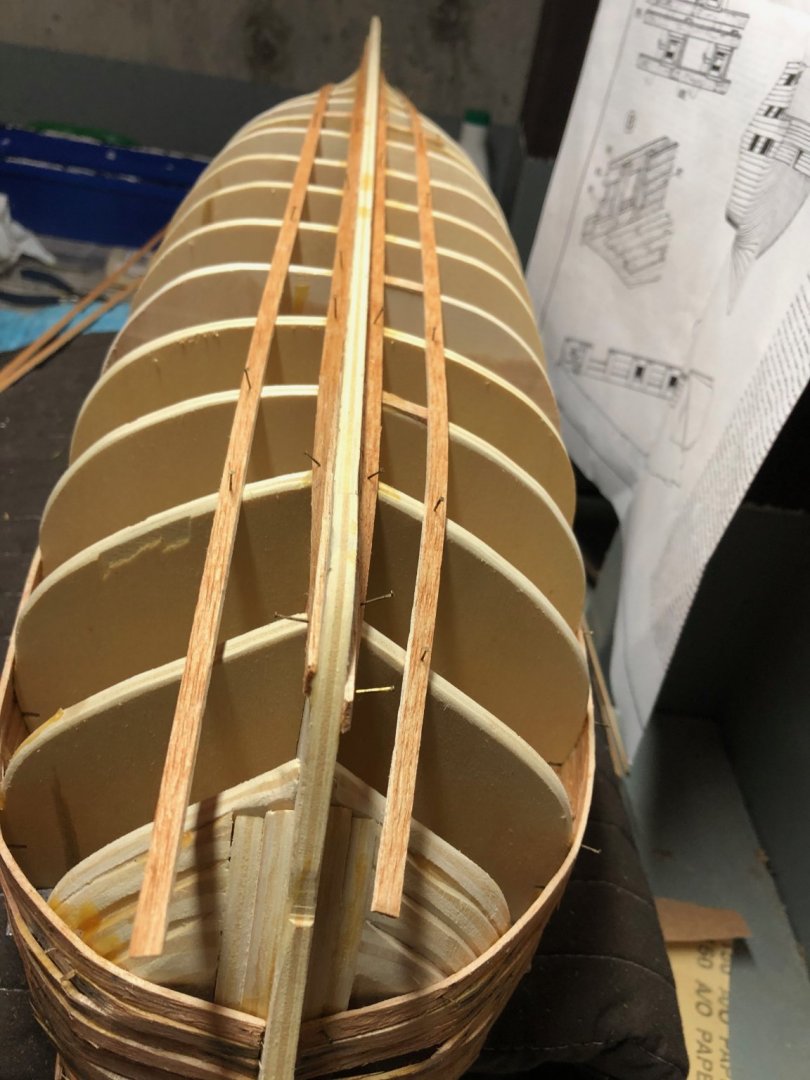
Planking progress near the keel. Taking it slow. I typically soak each plank for 10-15 minutes. The length of the planks make it difficult to wet the entire length. I am cutting some of the planks in two to ensure I can sufficiently moisten each.


-
Thank you Wallace; understood and sound advice. Your build log covers this nicely.
-
Emmet - This is a great forum to get feedback on what Victory model might be best. Be sure to check out the member kit survey results provided up front before the ship logs begin. Agree that each kit will have ups/downs, however the survey results may indicate some are better. Of course, Y.T. has certainly made Mamoli look good. Now, if only I had his skill set! The starboard and port garboard planks are now installed..... let the planking resume!

-
Fascinating and well illustrated log; I think I can learn from your planking exercise....and other build practices. Very well done. Looking forward to pulling up a chair, kicking back and enjoying the journey with you. Hope things get back to normal soon!
-
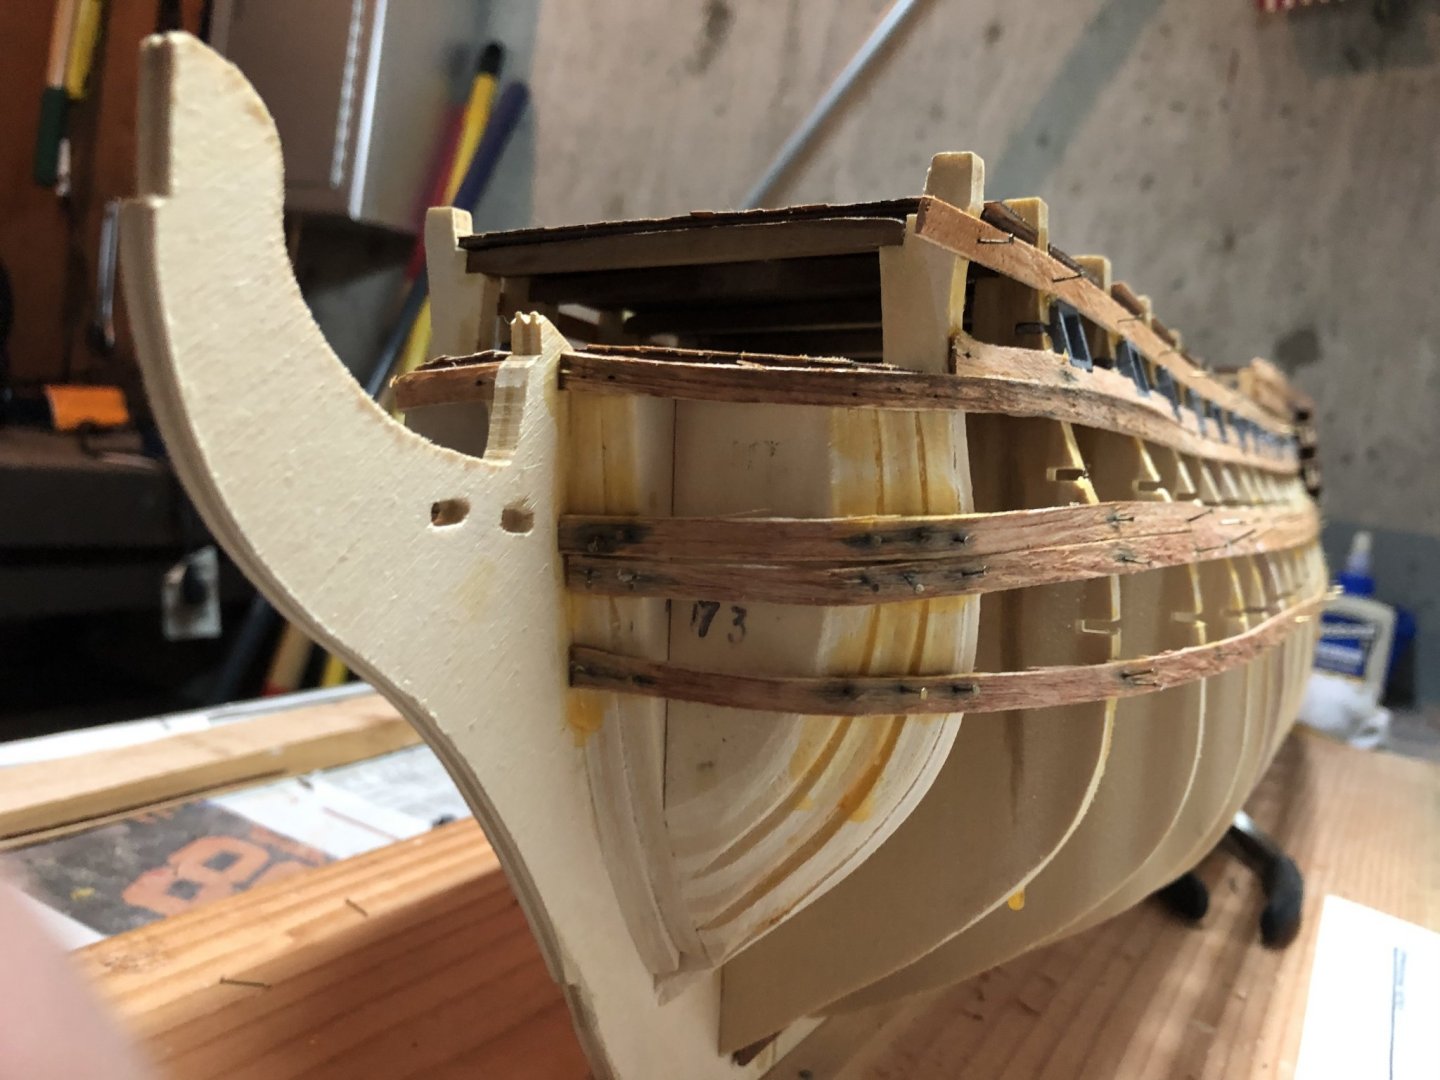
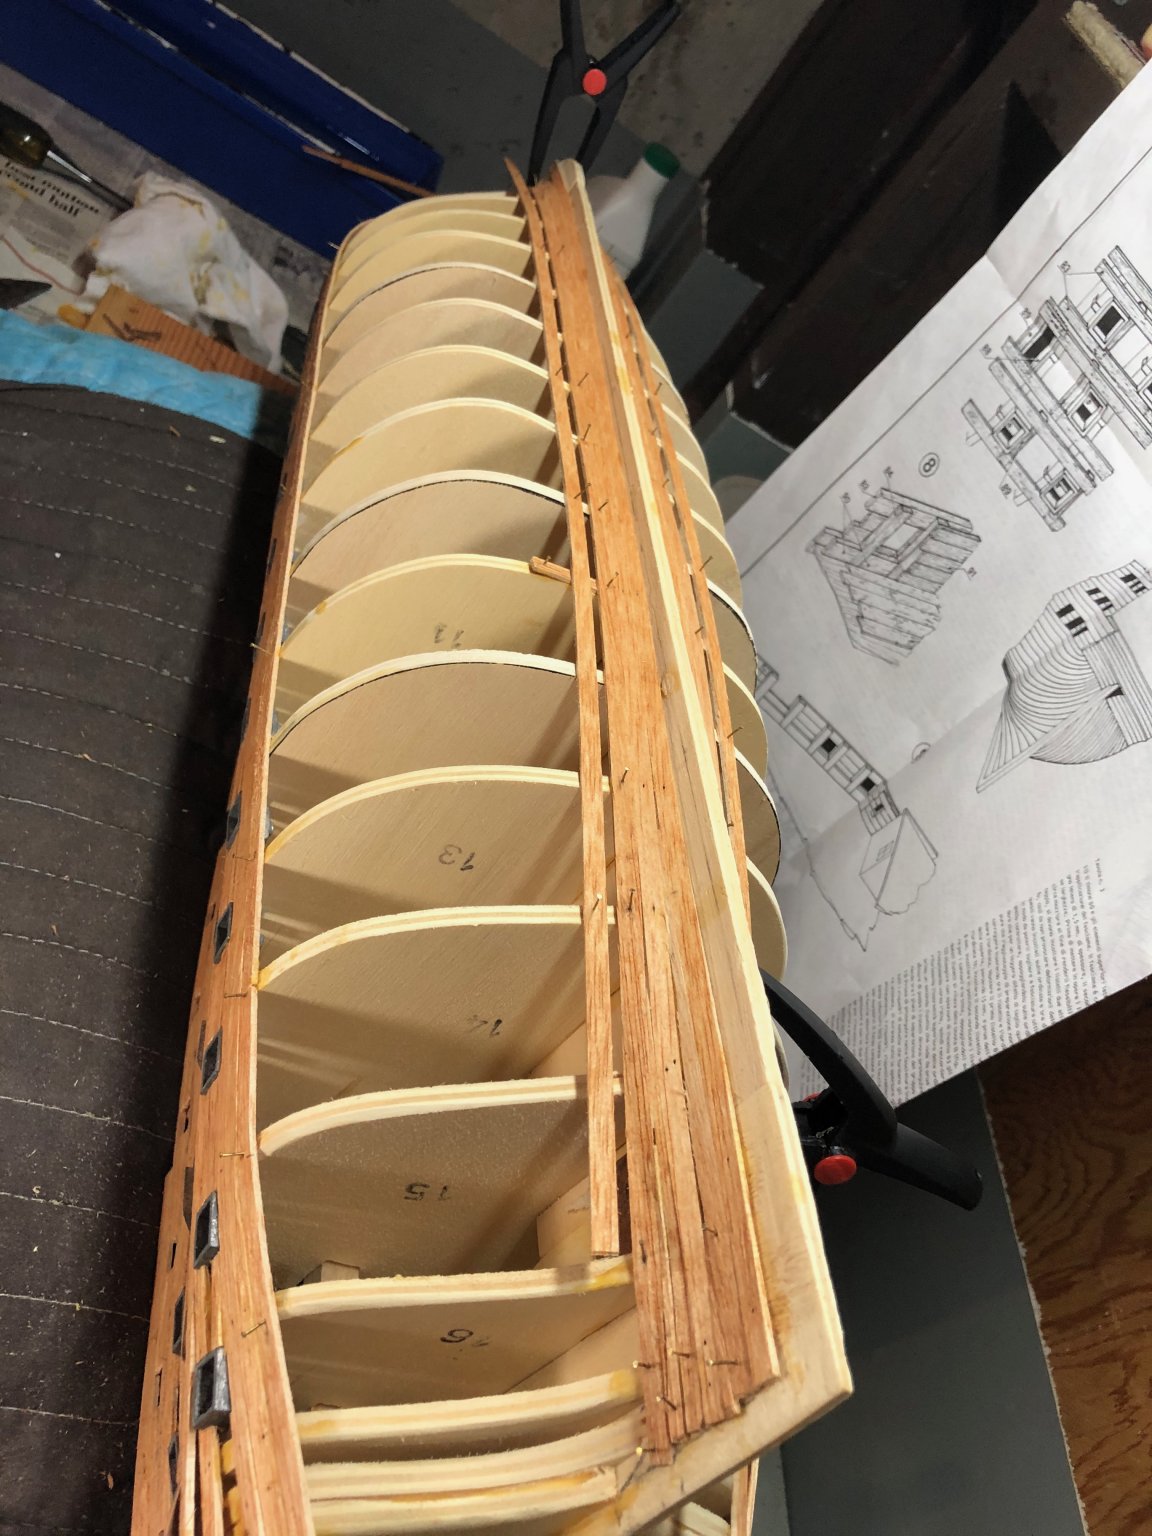
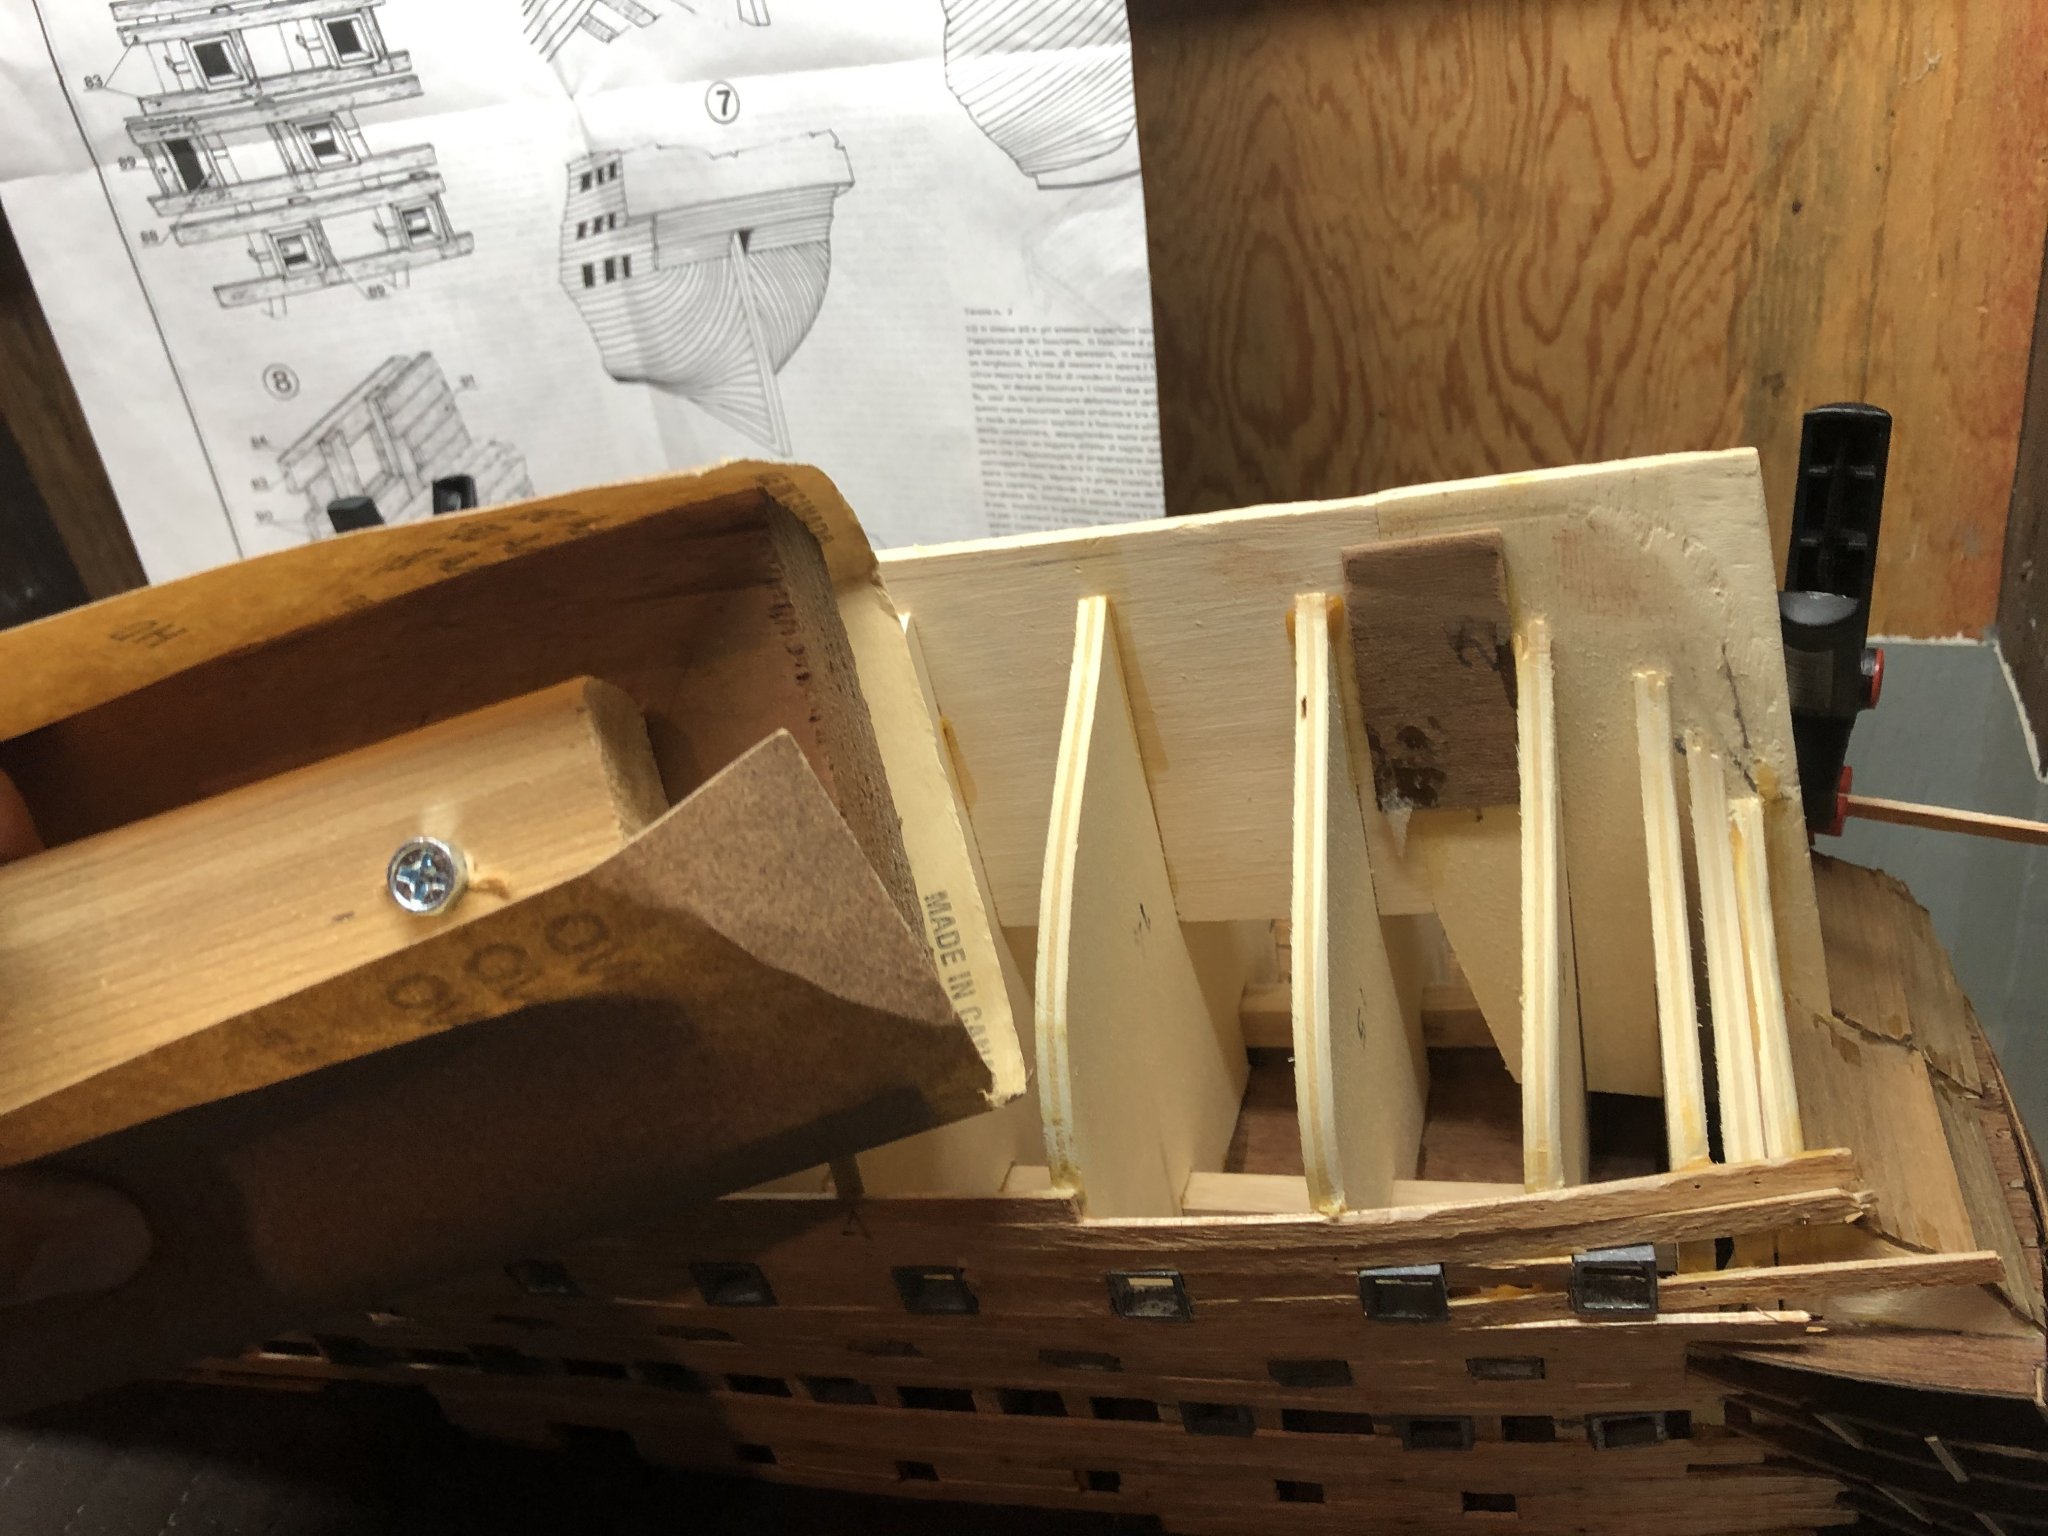
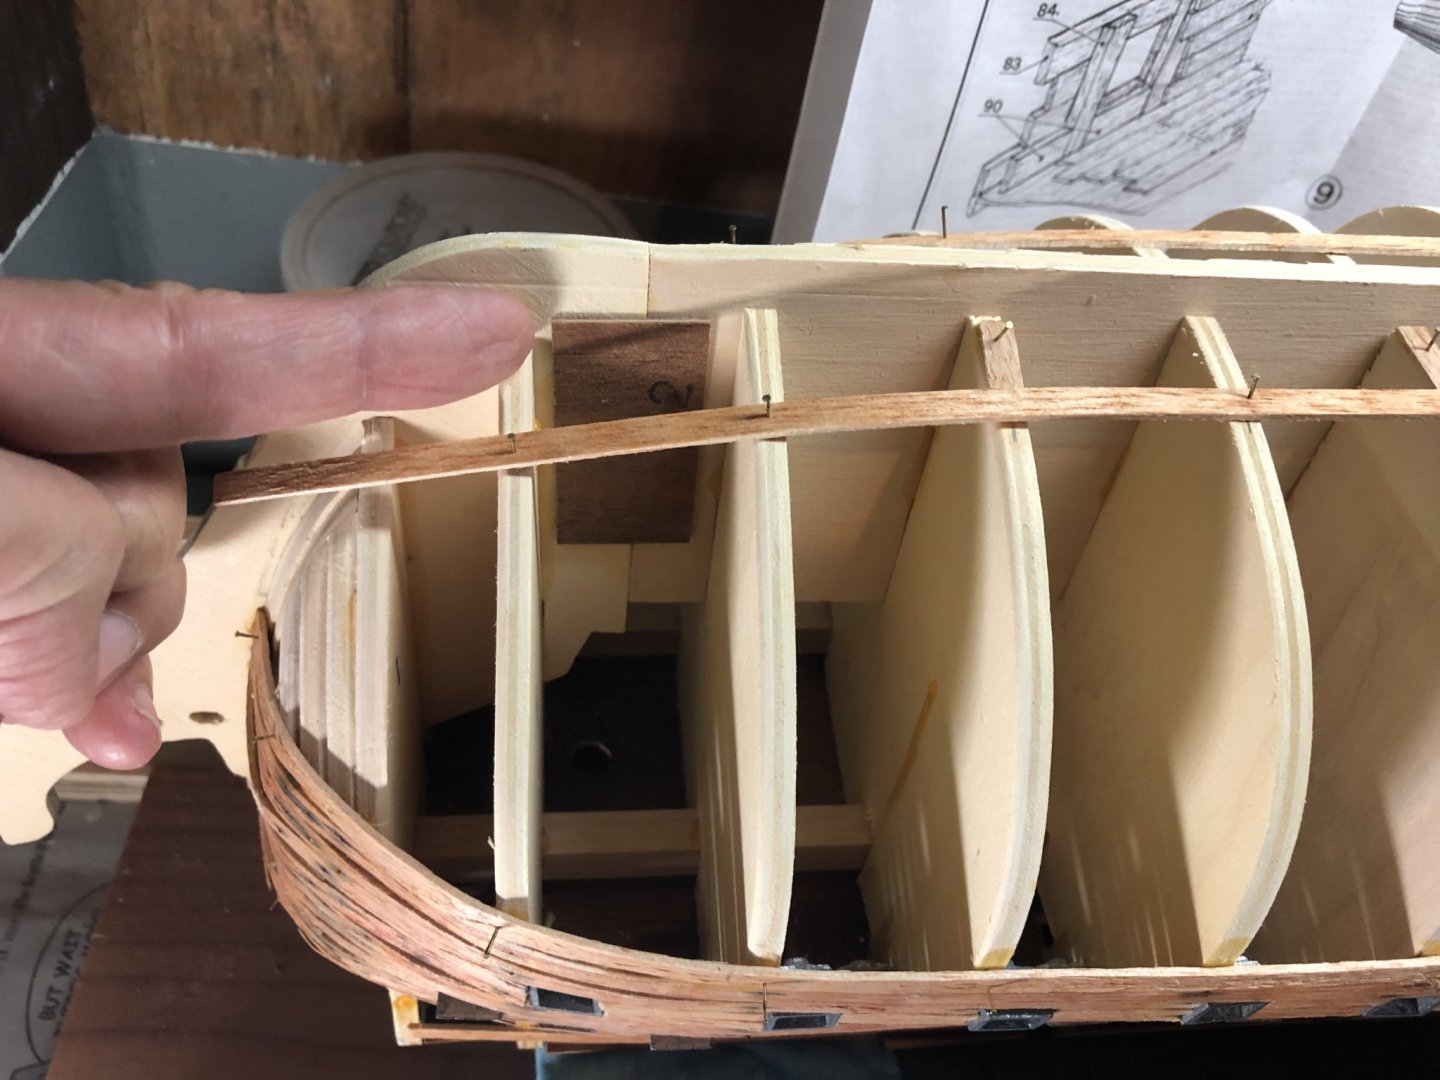
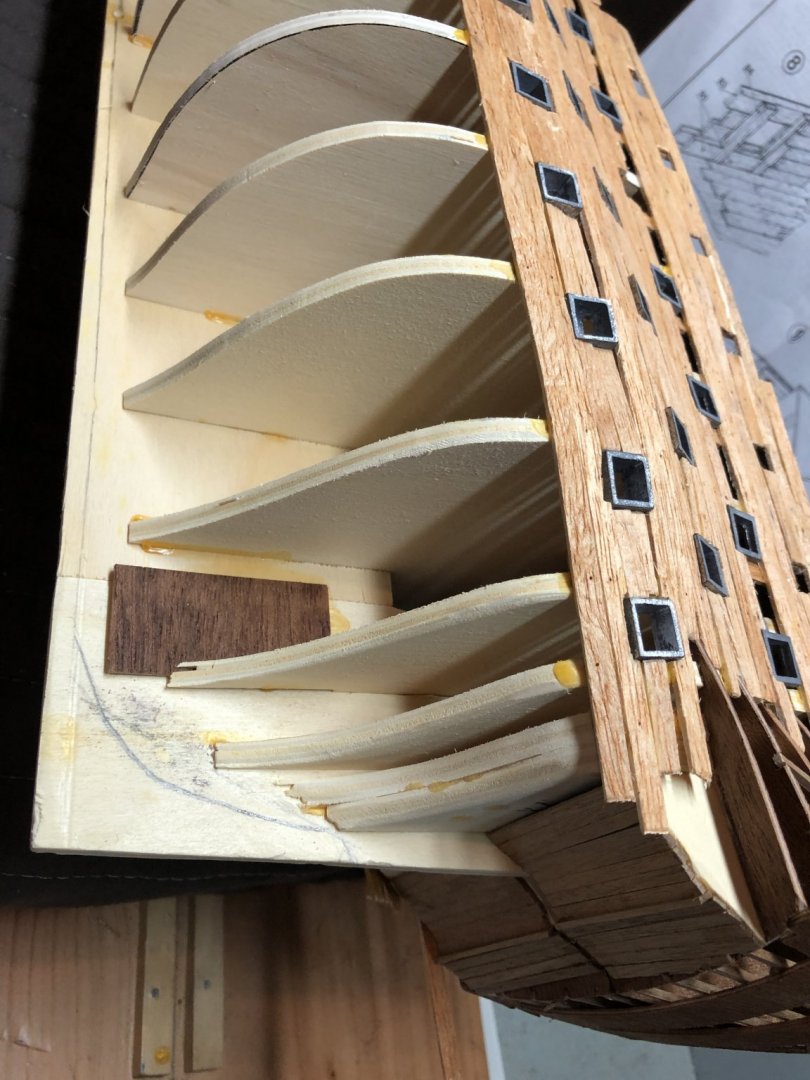
As I attempt to start laying the first of the garboard planks, I noticed a couple of things in need of resolution before beginning. The first issue would be well suited for some type of ‘Lessons Learned’ log for building this Mamoli kit. I’m going to attempt to keep this log as I go and publish it at the end so that other Mamoli/Victory kit builders can be forewarned. (1) Keel braces. The Mamoli Victory keel comes in three pieces - bow, middle and stern sections. Mamoli provides 4 x walnut pieces to glue over the bow-middle and stern-middle interfaces on both port and starboard sides - to shore up the keel. I made the mistake of installing/gluing these pieces too low on all sides so that they impinge on the planking/keel interface. See picture. Left alone, it would cause an unsightly bump in the planking. I’ve since cut them back, but it is a bit tricky given the current state of the build. (2) Bulkhead/plank interface. When putting the 25mm band plank in place near the keel, I noticed several bulkheads that were slightly higher (lower when installing the plank) resulting in a gap between some bulkheads and the band plank. The result could be a dip or soft spot in the planking over those bulkheads since the plank does not directly contact them. I since added a wedge of 5mm x 2mm material (same as the planks) on top of those bulkheads to allow the plank to lay flat upon it and eliminate the gaps. See picture. Hopefully I’ll get the garboard planks installed tomorrow!

-
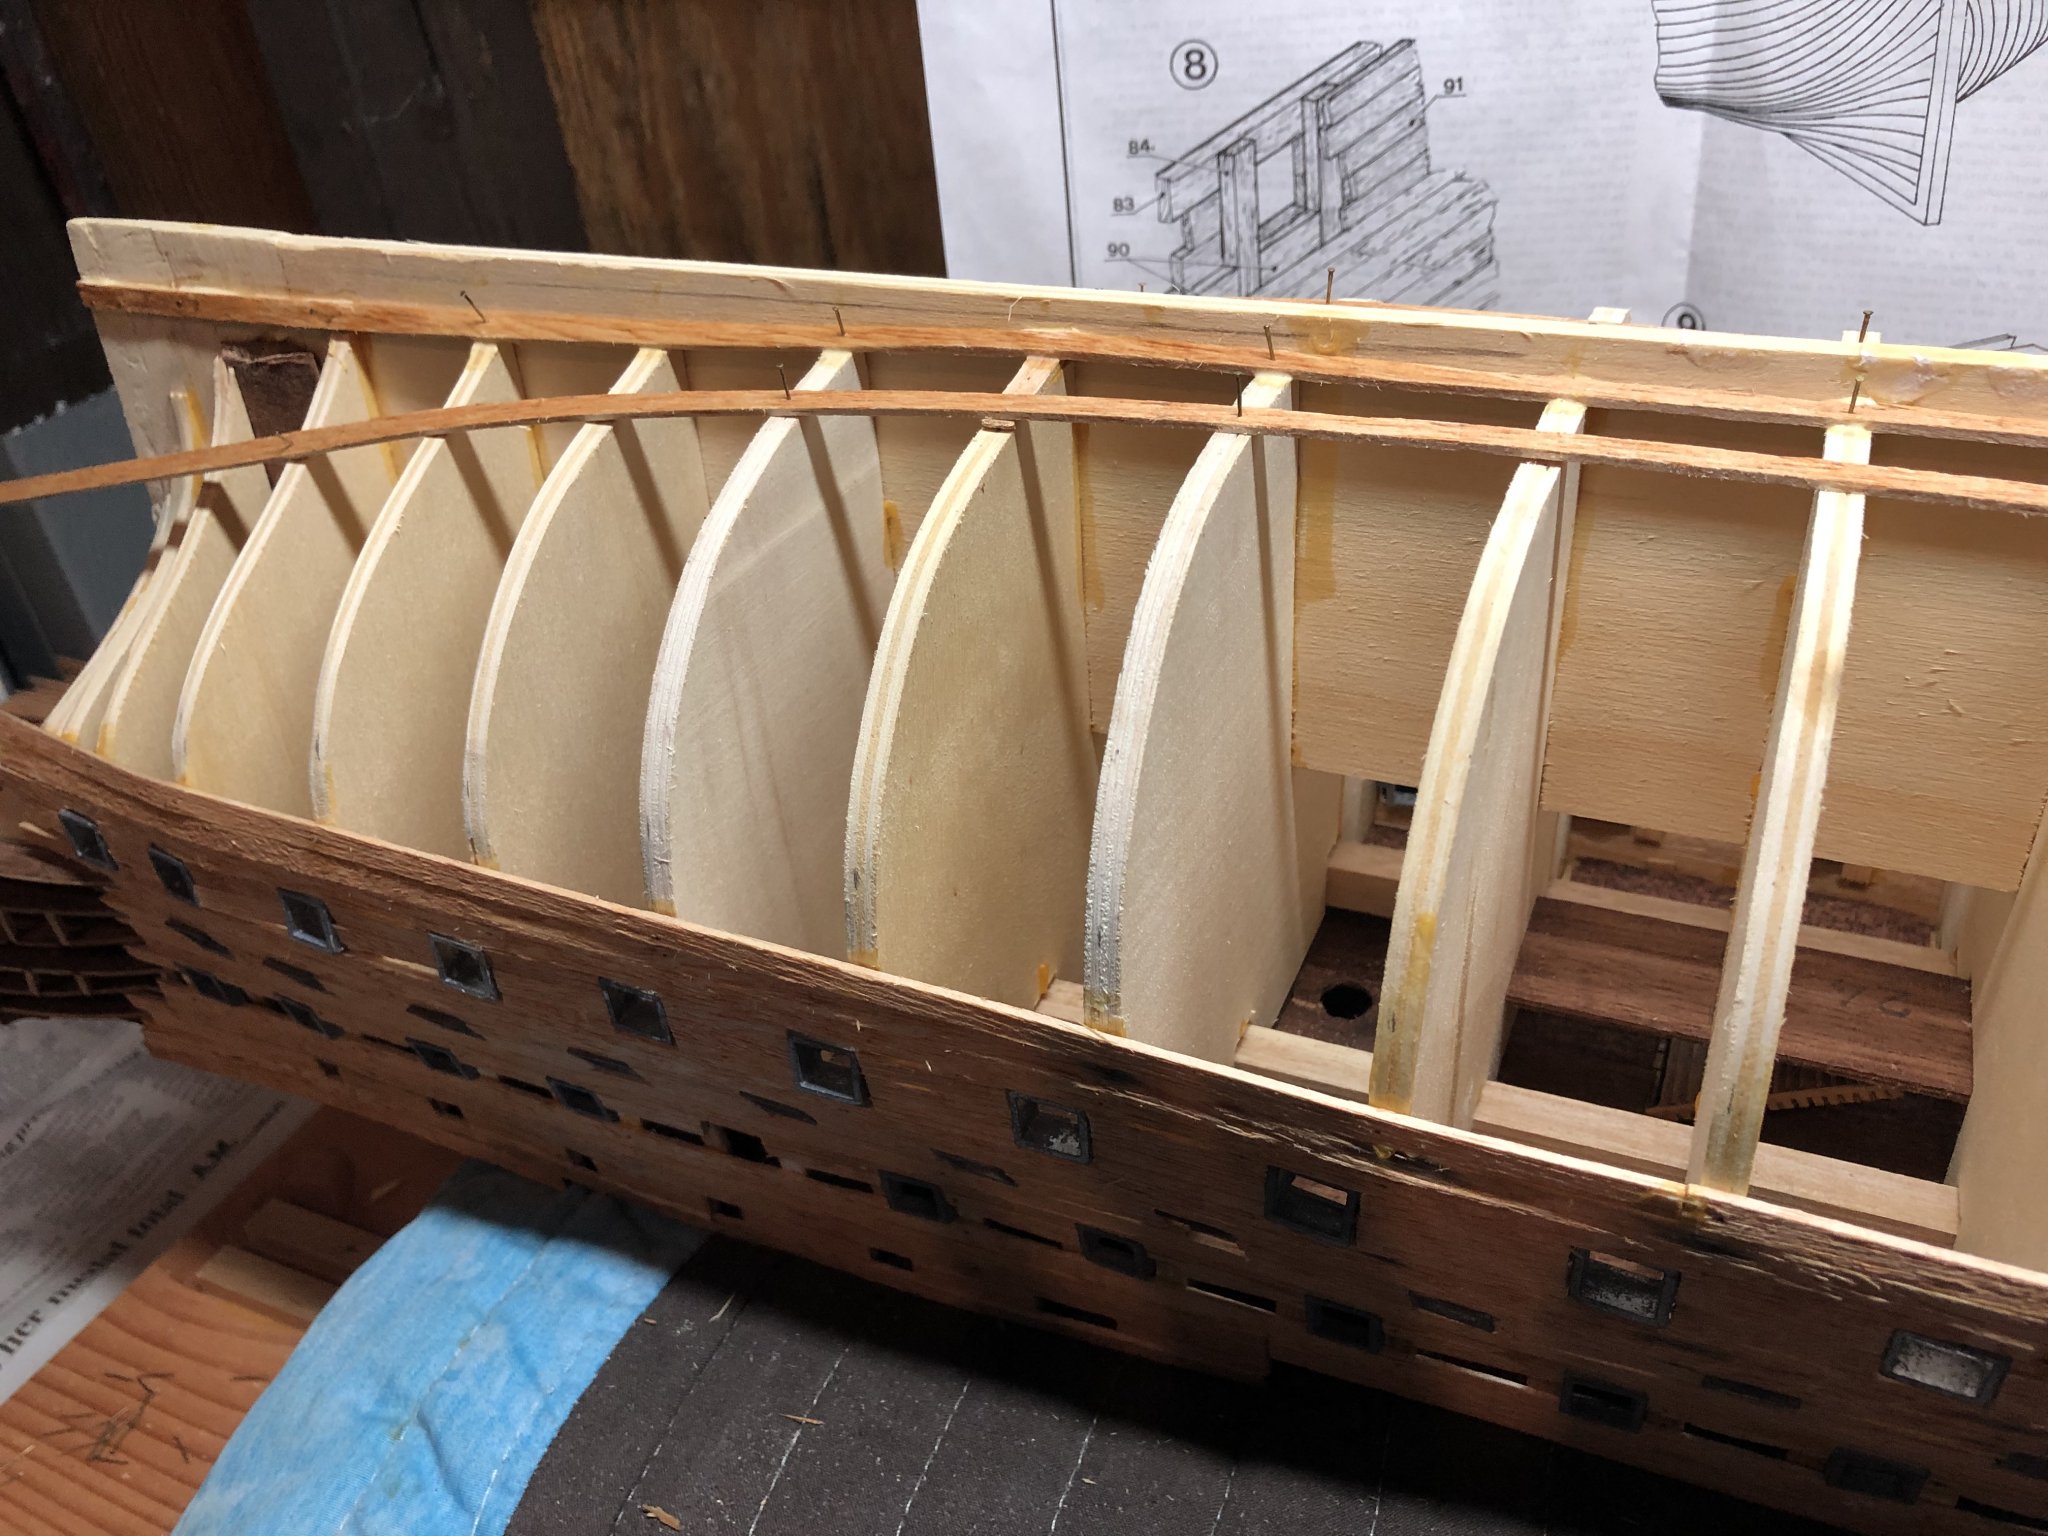
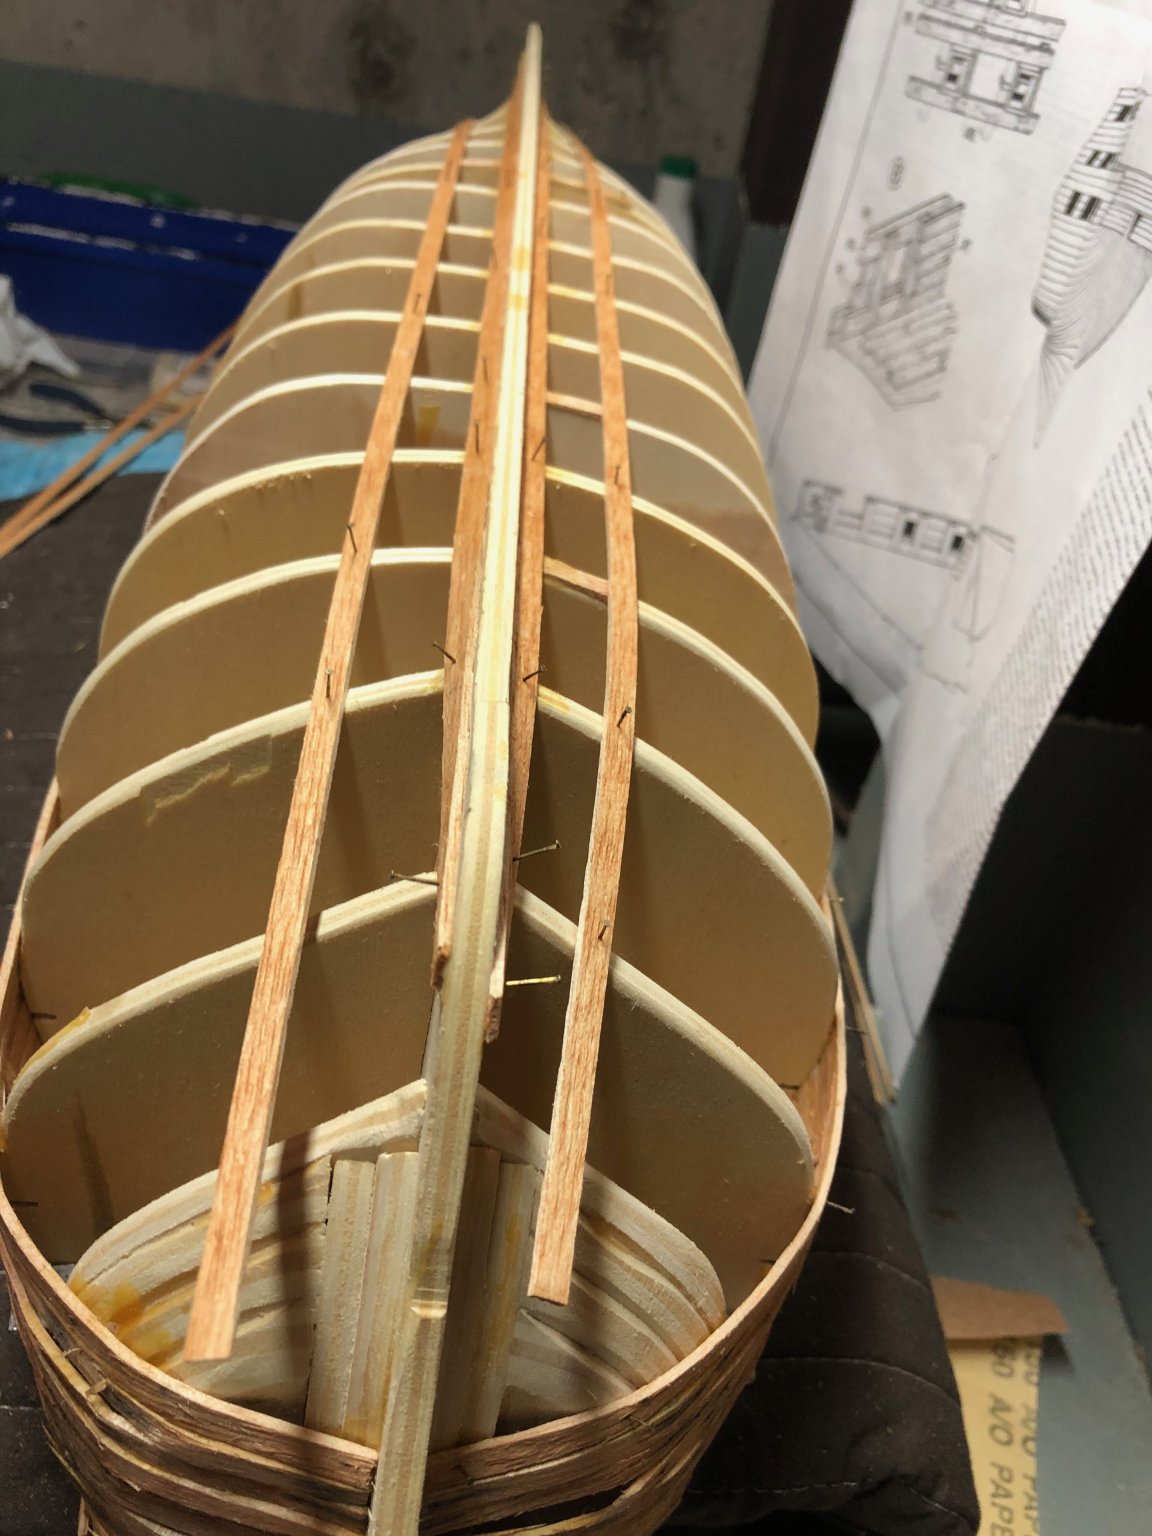
Thank you Emmet! I couldn’t agree more; there are many ways to do the same thing. I am continually amazed by the quality shown by so many modelers. I’m clearly not in their company, but doing my best. Please point me to your build log so I can follow along with your build. As of now, I’m working to prepare the ship for the rest of the planking exercise by sanding the various bulkhead edges near the stern and bow for a better plank/bulkhead bond. I created a simple sanding tool/block after watching a planking video on a YouTube and the technique used there. I’ve completed this sanding and now am planning to complete the planking in 25mm bands starting first near the keel with the garboard plank. The first two temporary planks are installed and I’ll be starting shortly.

-
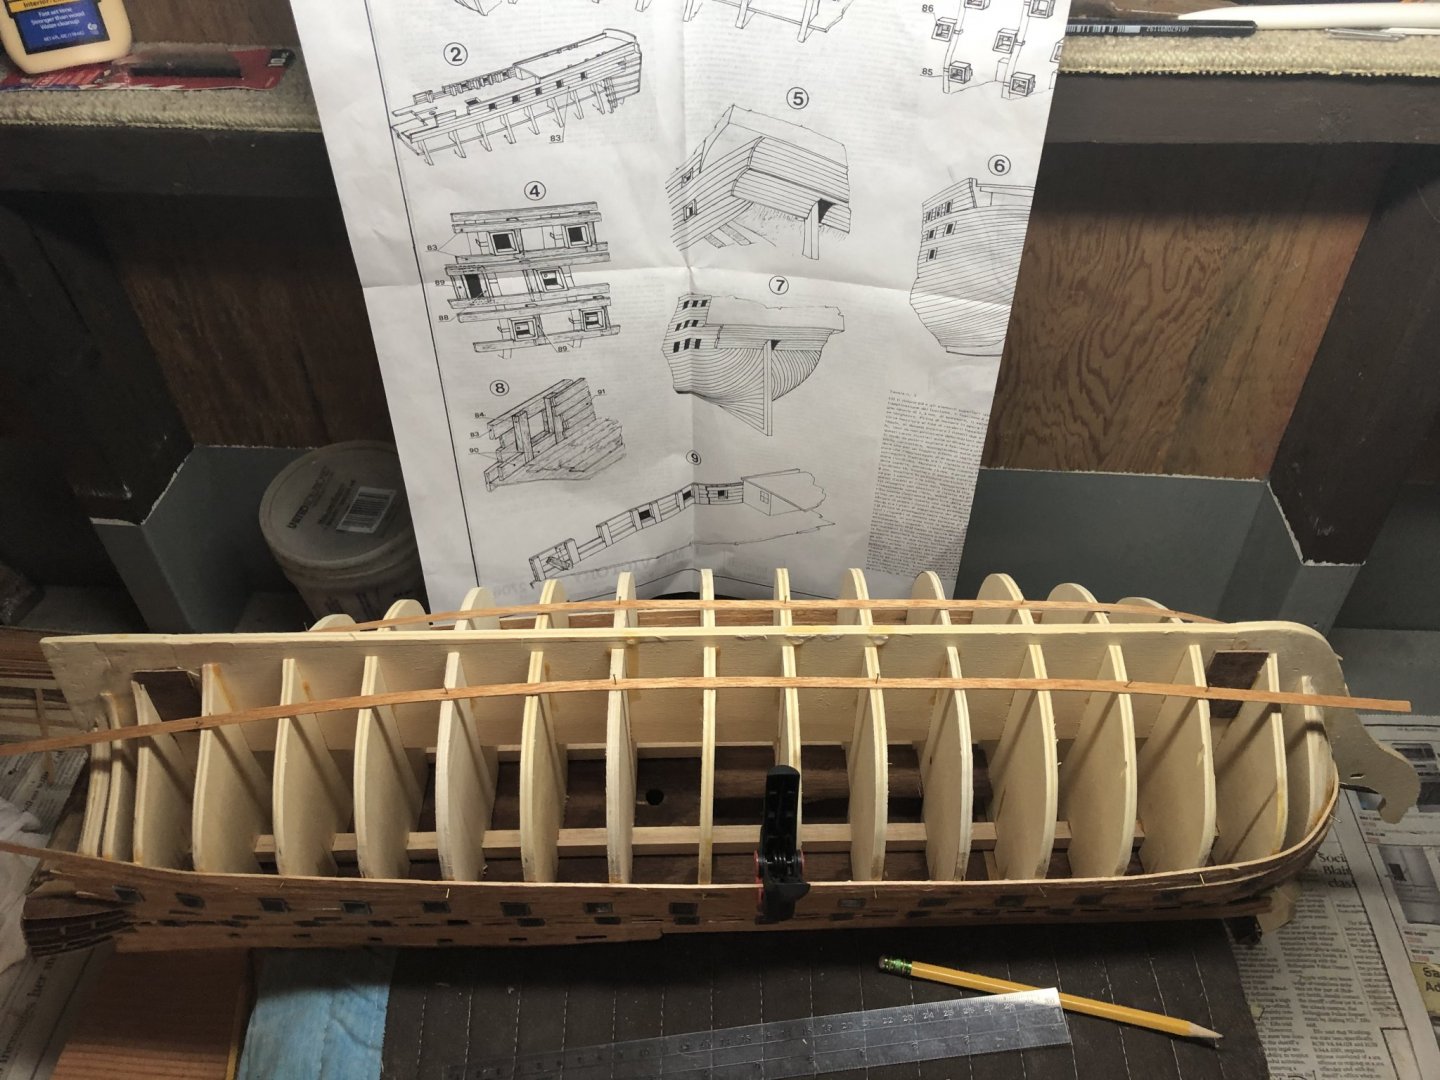
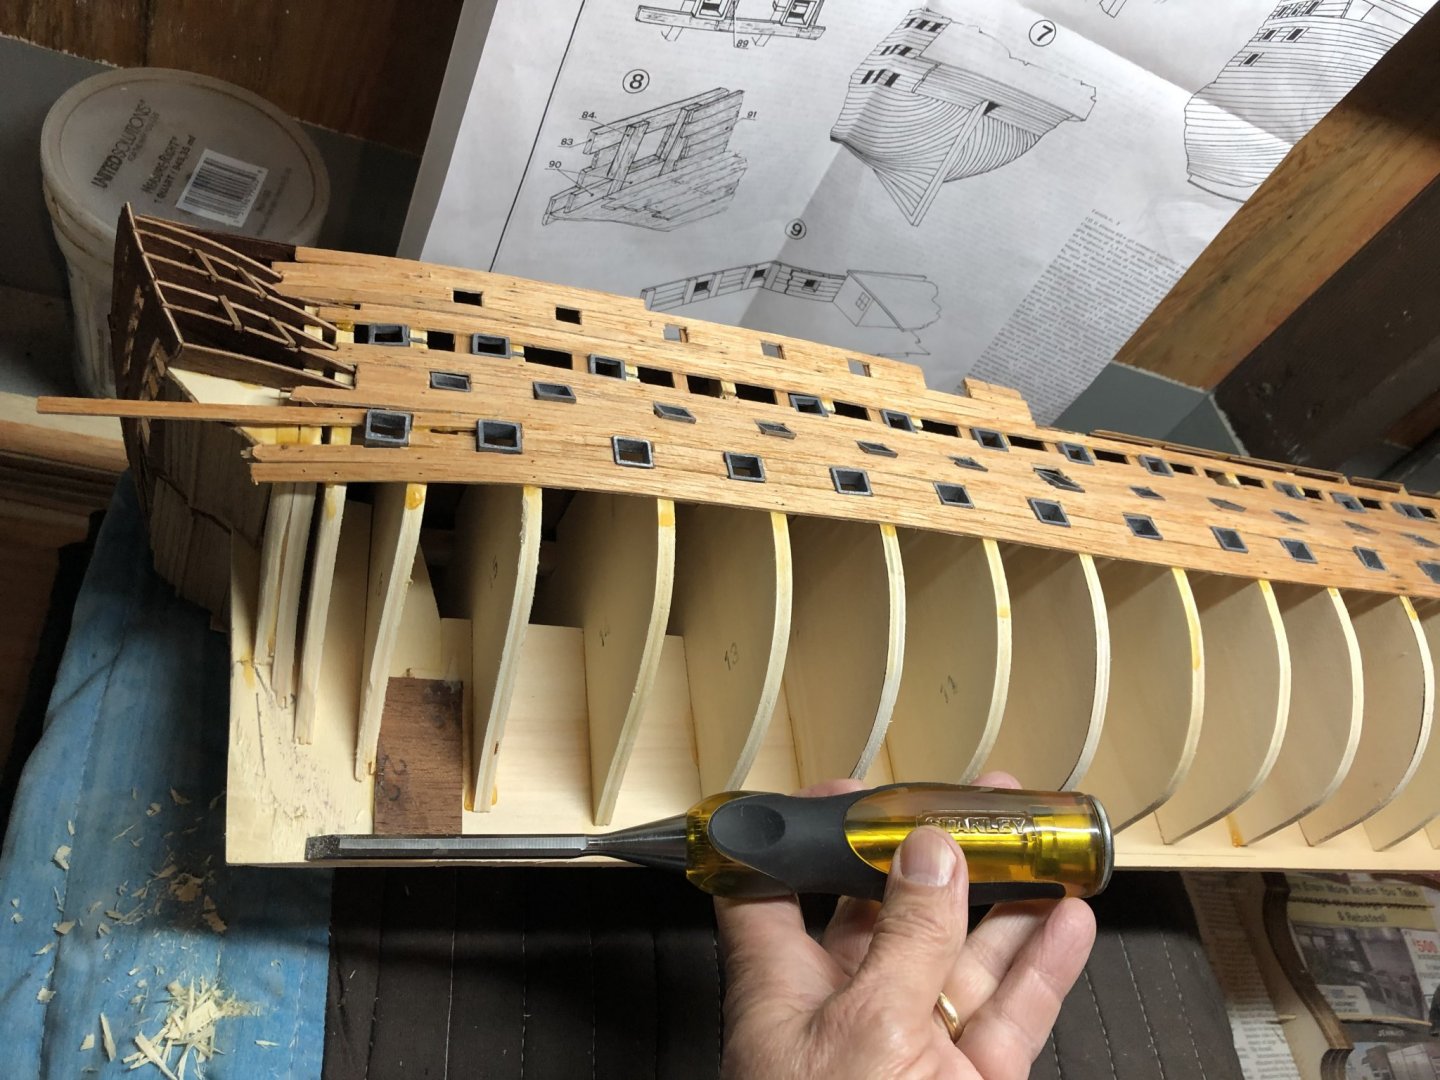
Thank you Emmet. This forum provides a multitude of ways for doing things and one must find what works best for them! I’m sure there isn’t a best way.. but it’s good to see methods of the many pioneers who have gone before. Good luck with your La Niña rigging; I’ll need to check it out. For now, I’m planning to use the planking technique called out in this forum’s planking material (See above) and I’ve started to remove the keel wood associated with the so-called keel Bearding line. This is one area that the Mamoli kit either didn’t call out to be done early on... or I simply missed it. I believe the planking source material stated this wasn’t an essential step, but if done correctly will allow the planks to lay on a better line. I’ll also need to sand down the supporting walnut (I think?) structure between the stern and middle keel sections. Just getting going and notice how I plan to secure the ship while I’m working this portion of the planking.
-
Thanks Emmet - now I understand! My tapering method has been in-precise at best. Each of the Mamoli Victory hull planks is 5mm wide. I first measure the gap width and length, then cut a 5mm plank to the approximate size and check the length. The length is adjusted by sanding or clipping, depending. The width is adjusted by laying a straight edge ruler along it and cutting with the exacto knife seen above. Sometimes the fit is good, other times not so. Looking closely at the planking technique material, it is by no means trivial. Perhaps I need to find a simpler planking job to hone my methods before starting with this one. We’ll see. Good luck with your model!
-
Couple of replies: (1) Ken - Yes, I only have one bag of green tiles. Not much room for error. I’m also thinking my planking may be light. Hope not, but will soon find out. (2) Emmet - Planking plan. Sort of. I’m following the Mamoli instructions and reviewing existing model (e.g., Y.T. Is one of many that are excellent plankers) logs for guidance. As I transition to the bottom portion of the hull, I’m using the modelshipworld.com repository that includes a section on planking of which I’m reviewing ‘Simple Hull Planking Techniques for beginners’ that seems very helpful. I will be going back to modify the keel to include a ‘bearding’ line. Not sure that I understand your ‘tapering’ question. Light sanding as necessary has served well. Hope that helps or be sure to include some additional details. Now that I’m nearly finished with the upper hull planking, with omissions previously described, time to create a tool to hold the model upside down for this next bit of planking.
-
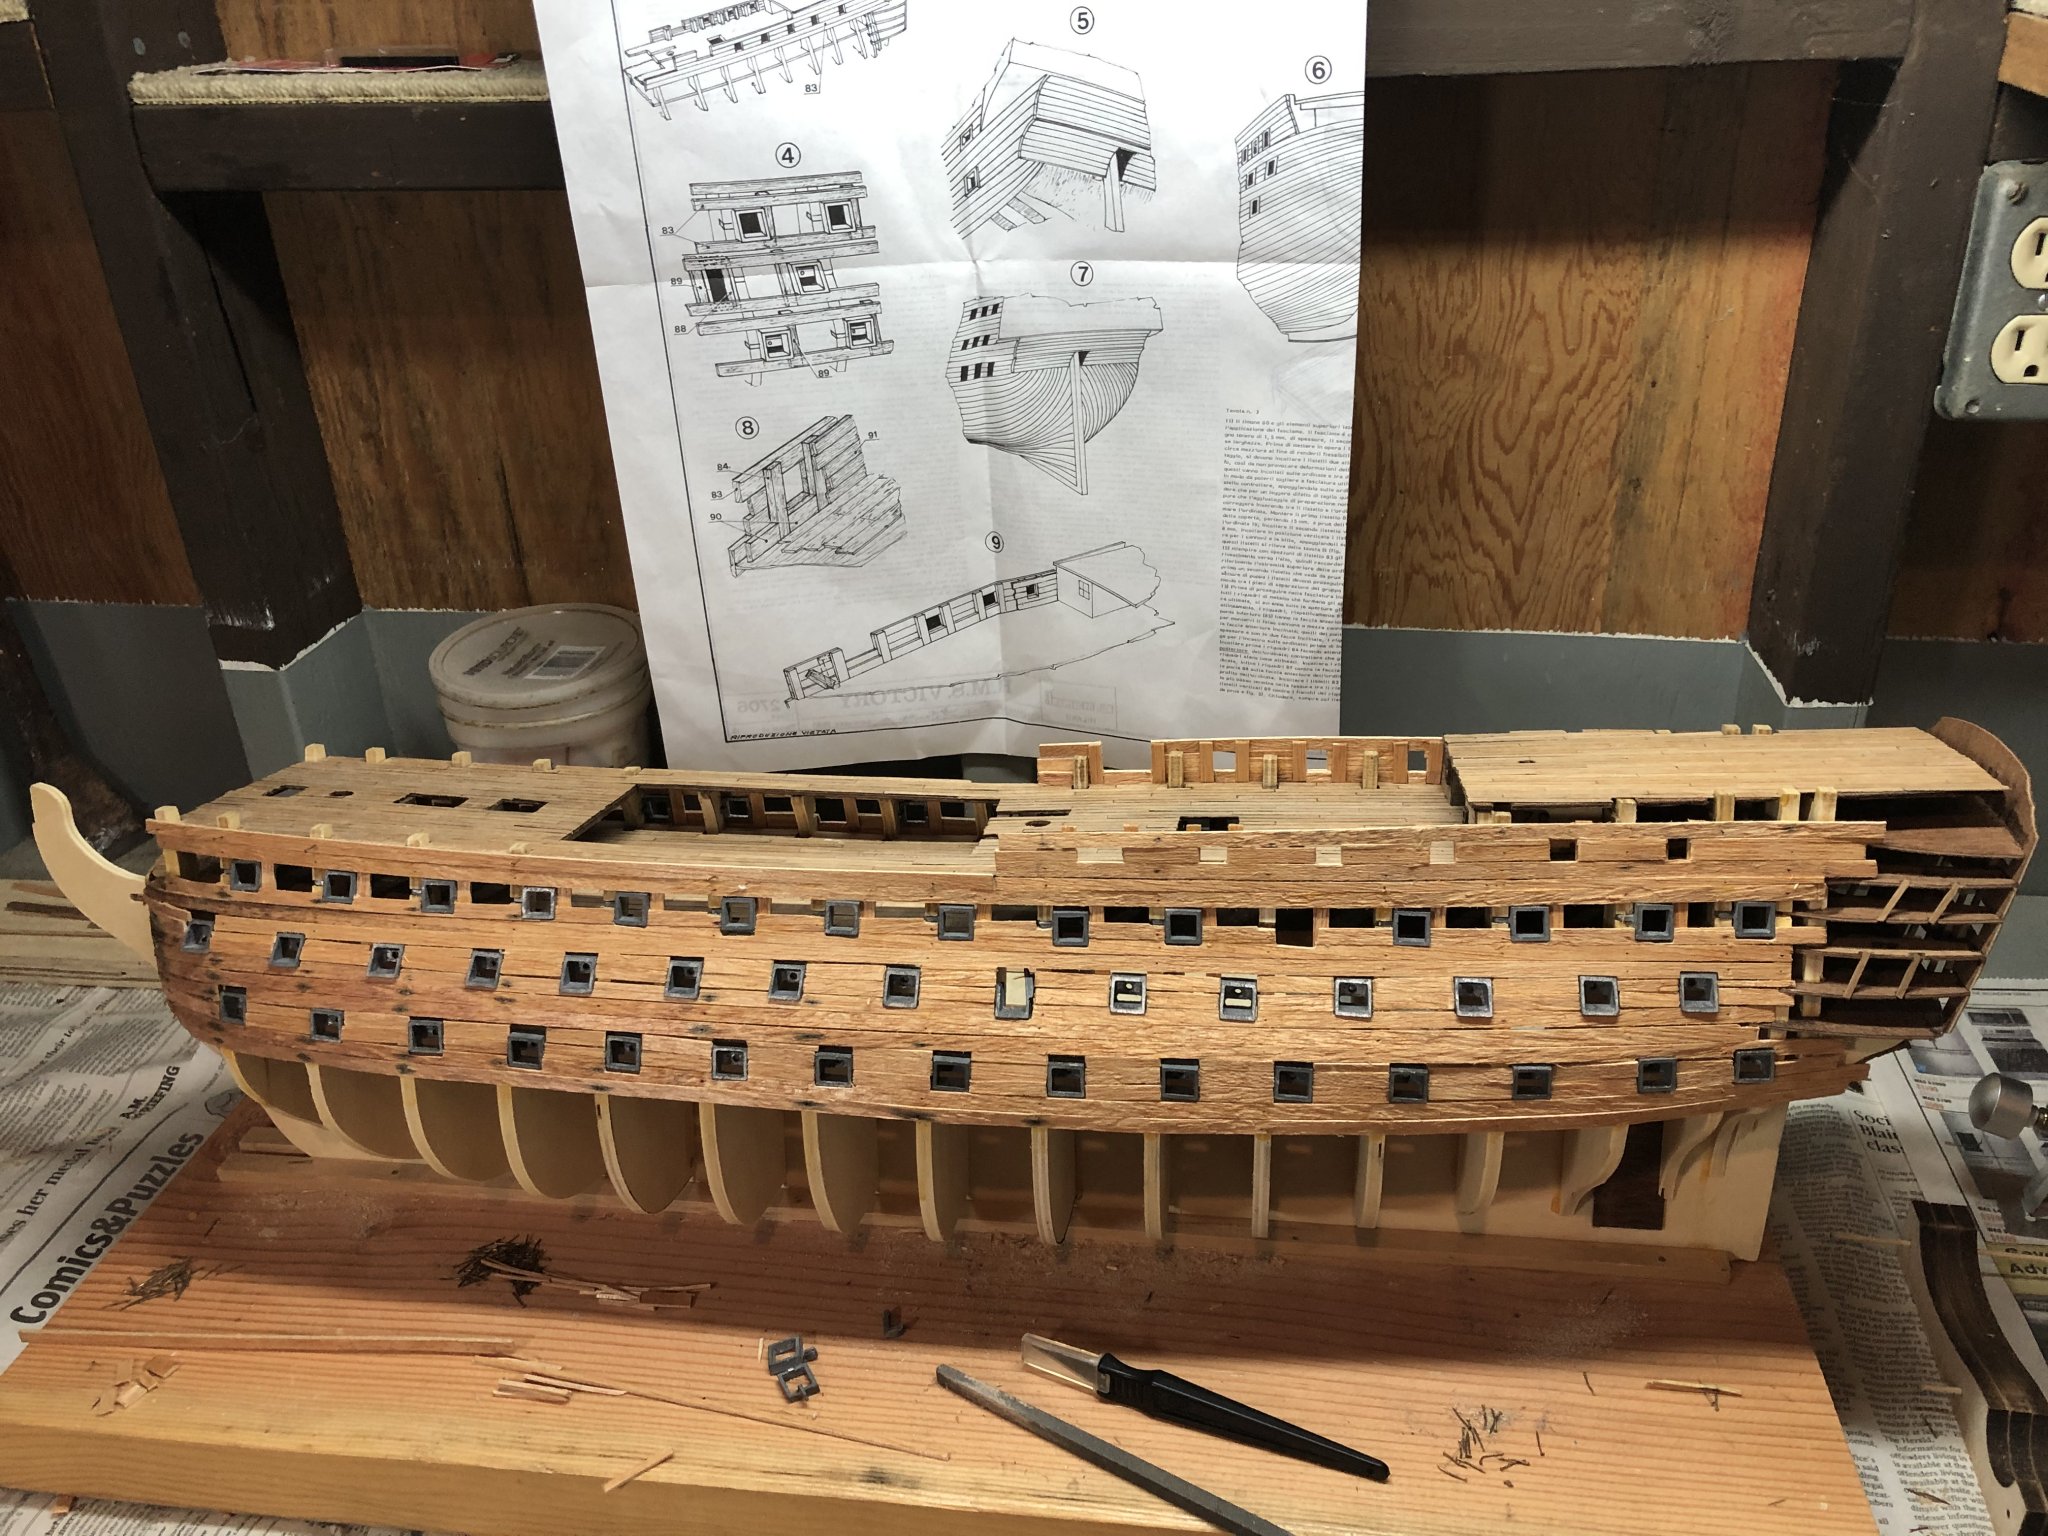
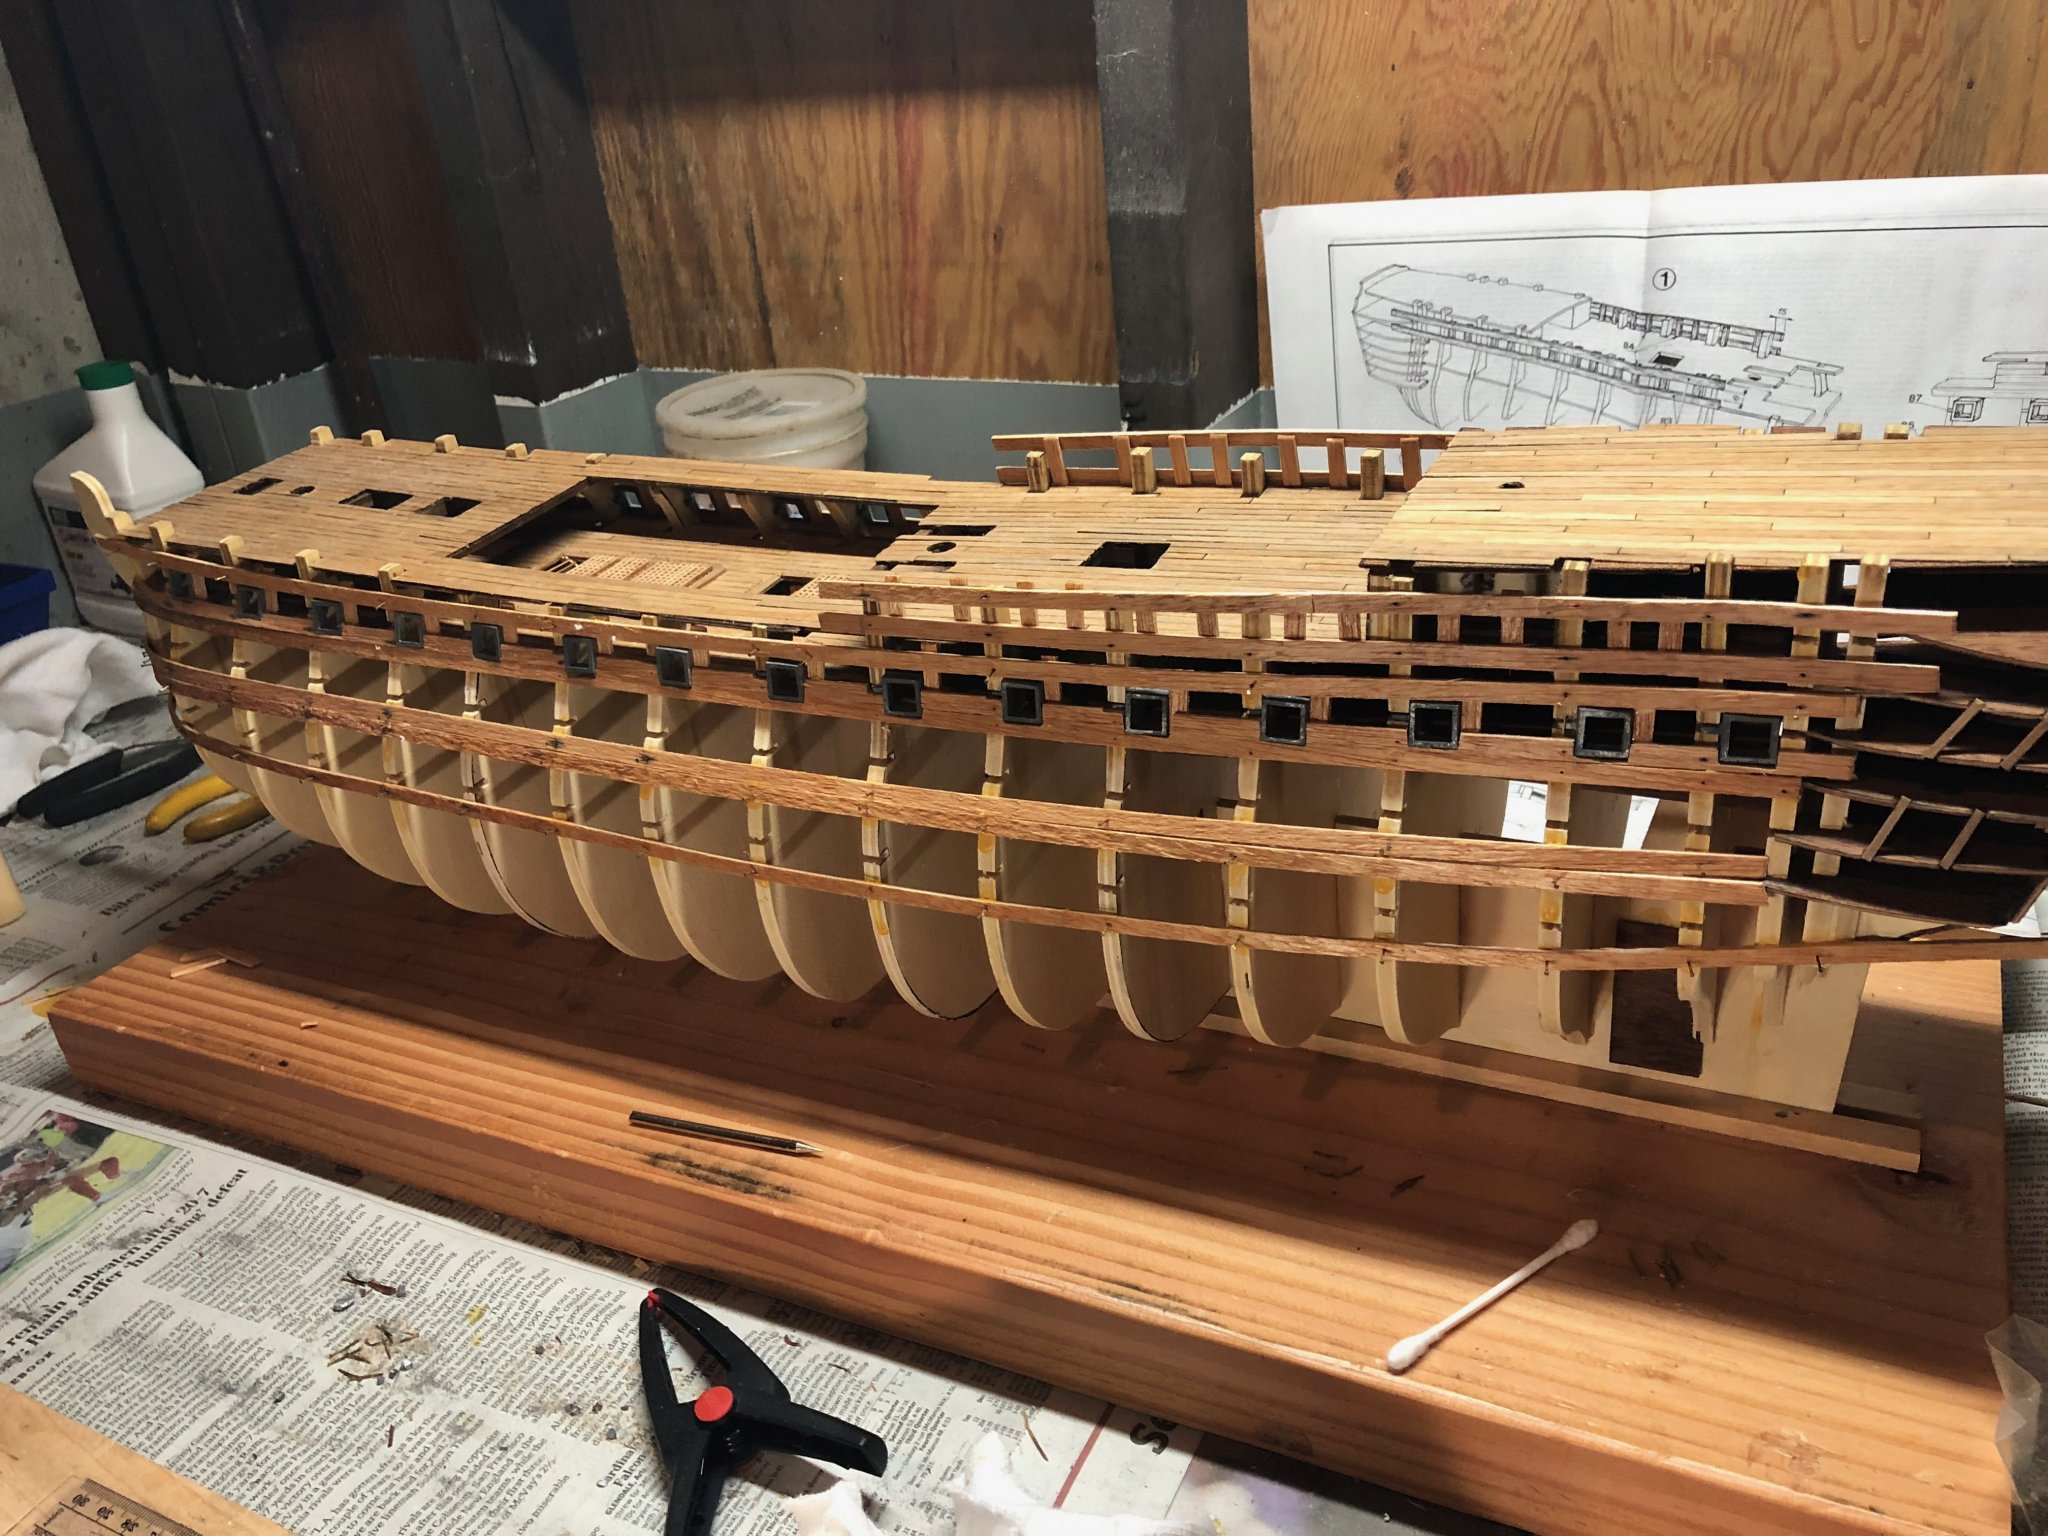
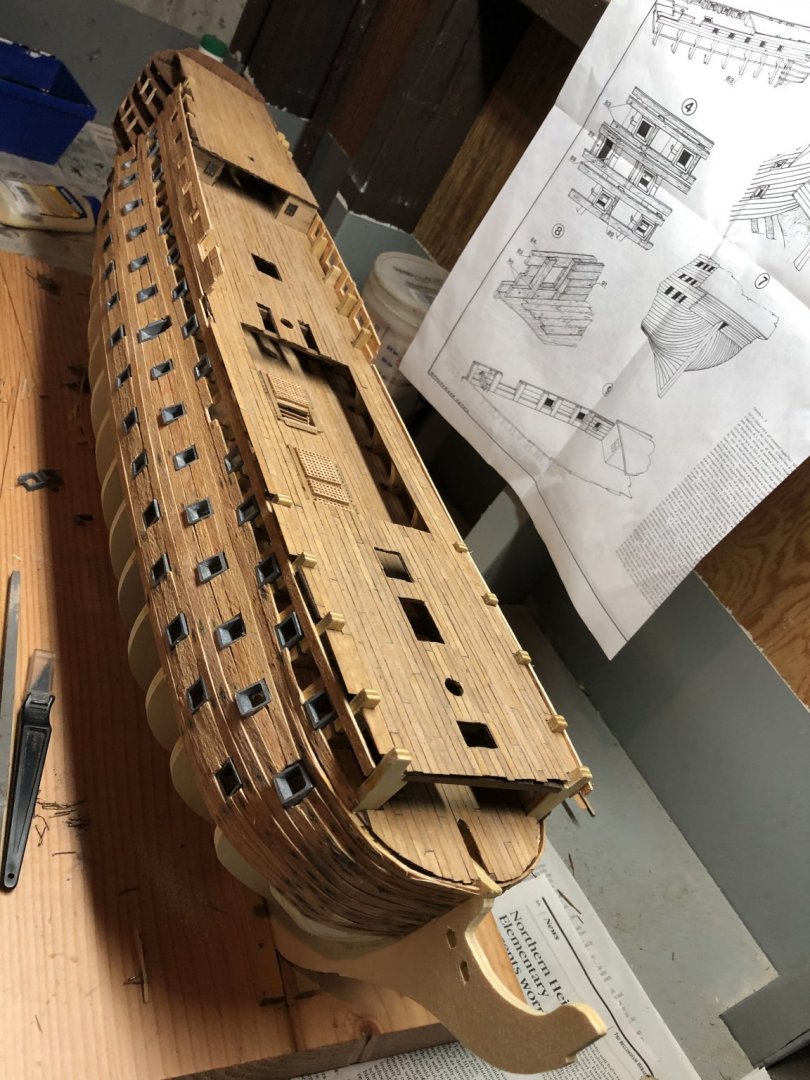
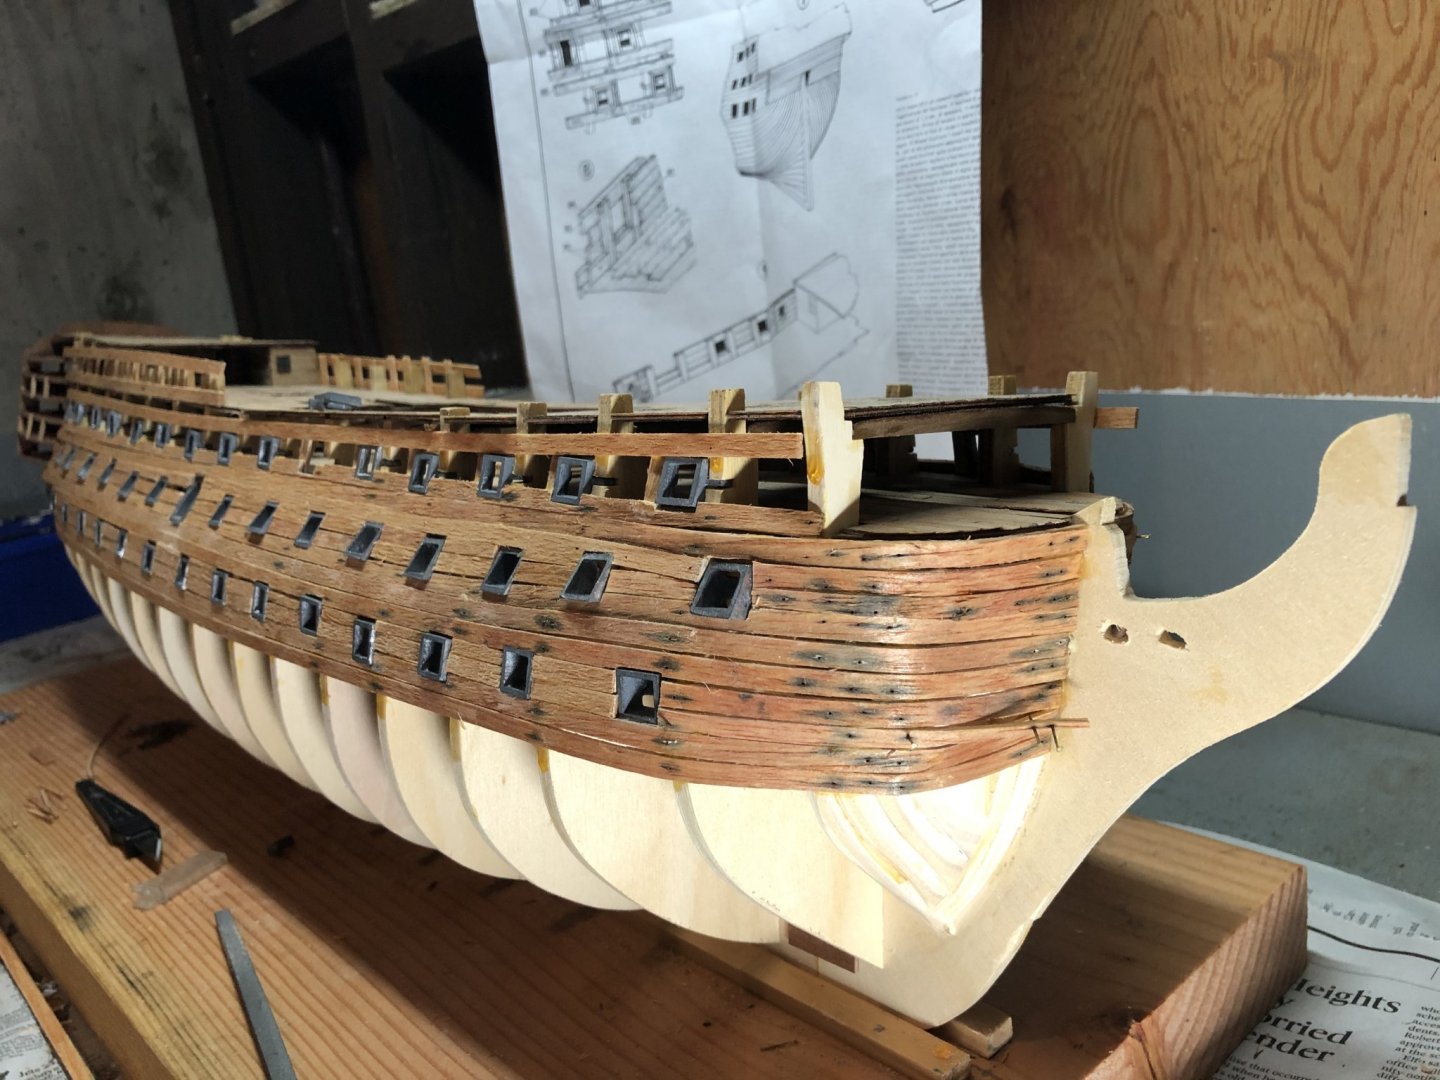
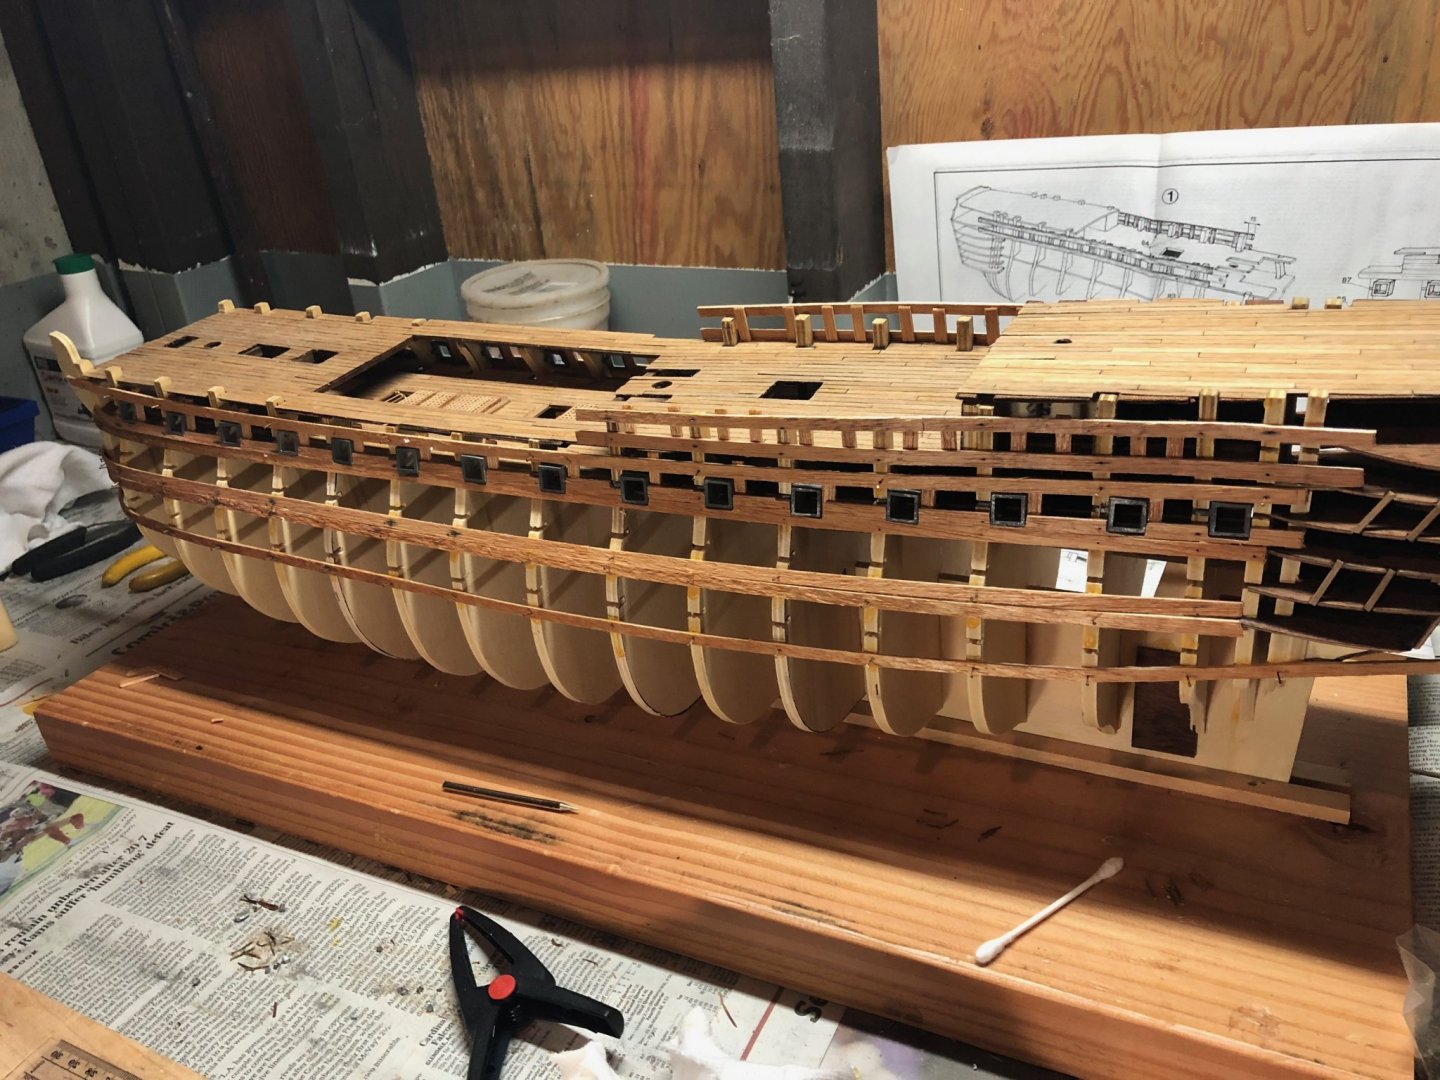
Just finishing the gun port planking on both port and starboard sides leaving the upper deck open for later gun insertion. Note the starboard bow planking piece that came loose after initial application. The piece has long dried out. I plan to cut the piece ,sand and then apply in the forward opening. Then on to the quarter deck gun port build before then going back to planking. Slow going but getting there.
-
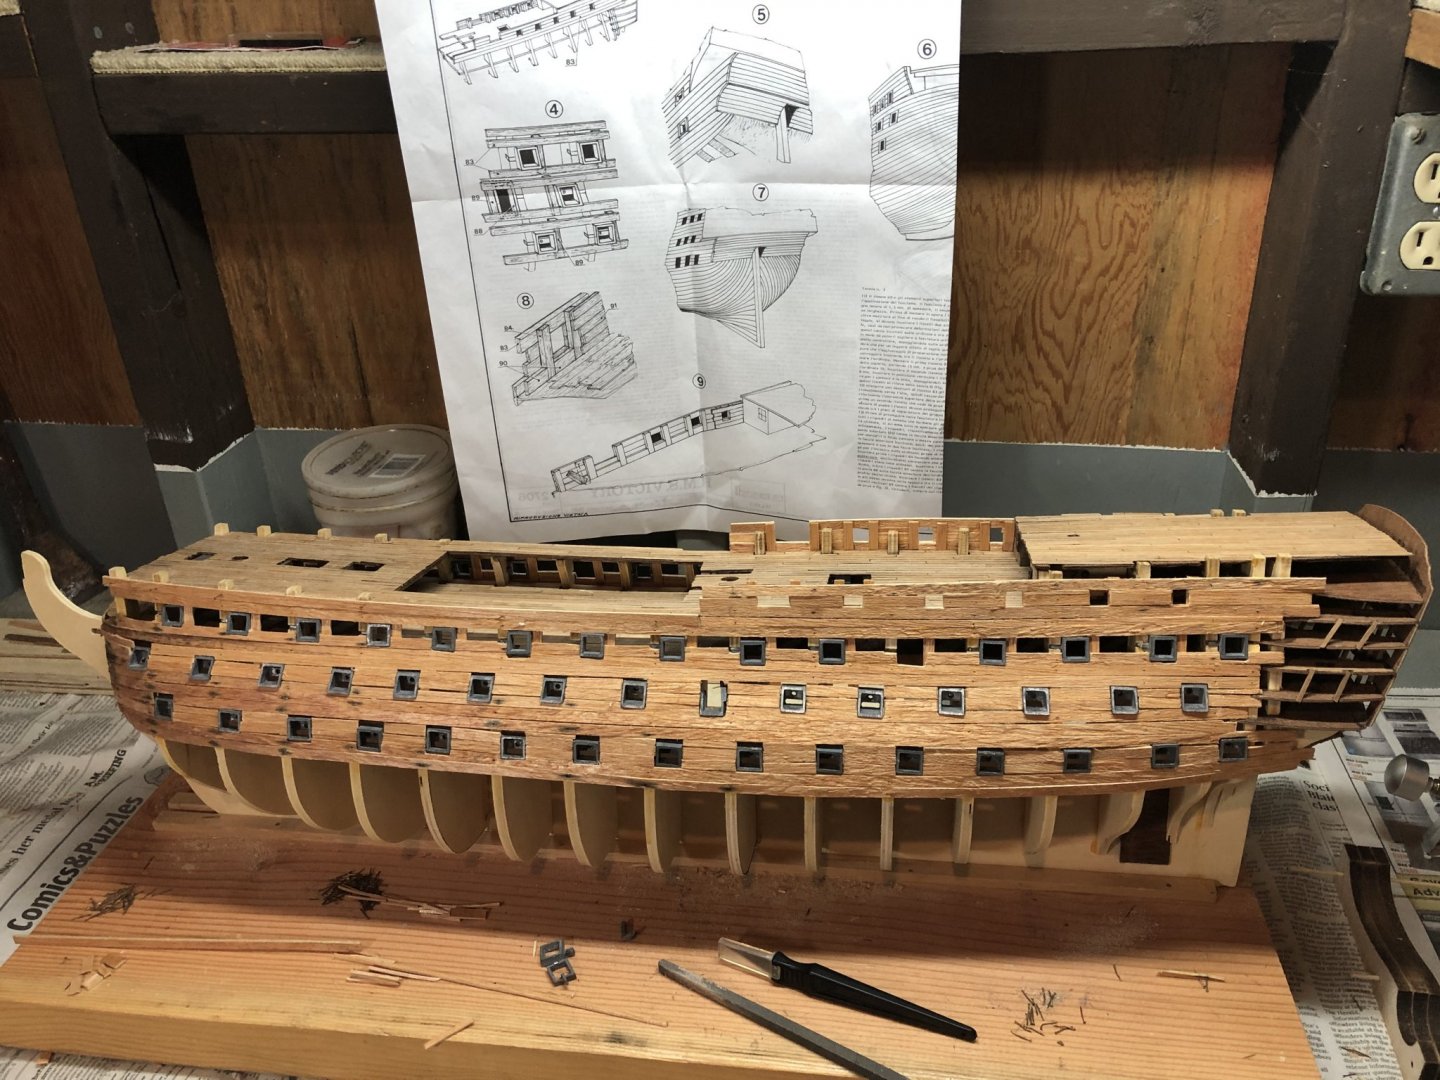
Slow but satisfying going.... My pictures seem to highlight the mistakes, but I also recognize wood is flexible with room to resolve errors. From what I’ve seen Y.T.’s work continues to set a high bar on this kit. Still working filling in the gun deck planking with work concentrating on the starboard side. Then the quarter deck ports and will be leaving the gun deck ports open for gun insertion (thanks for the reminder kjs) ... but will focus on the below water line planking first. Will likely take me through the summer... if I’m fortunate. Hope all are staying safe from the Coronavirus pandemic. Good news in that we may have more time in the ‘Shipyard’ (thanks Wallace!) with all the ongoing closures, etc.

-
Thanks kjs! Your wish is my command! Appreciate the advice and thank you. Wallace provided the same insight. My plan is to leave the quarter-deck open on each side so the cannons can be inserted. Then I can fill in the missing planks. For now I'll finish the lower two decks worth of planking, then work the top of the quarter deck for the five (5) gun ports on port/starboard before working on the mid-ship planking. This ship is becoming heavy!
-
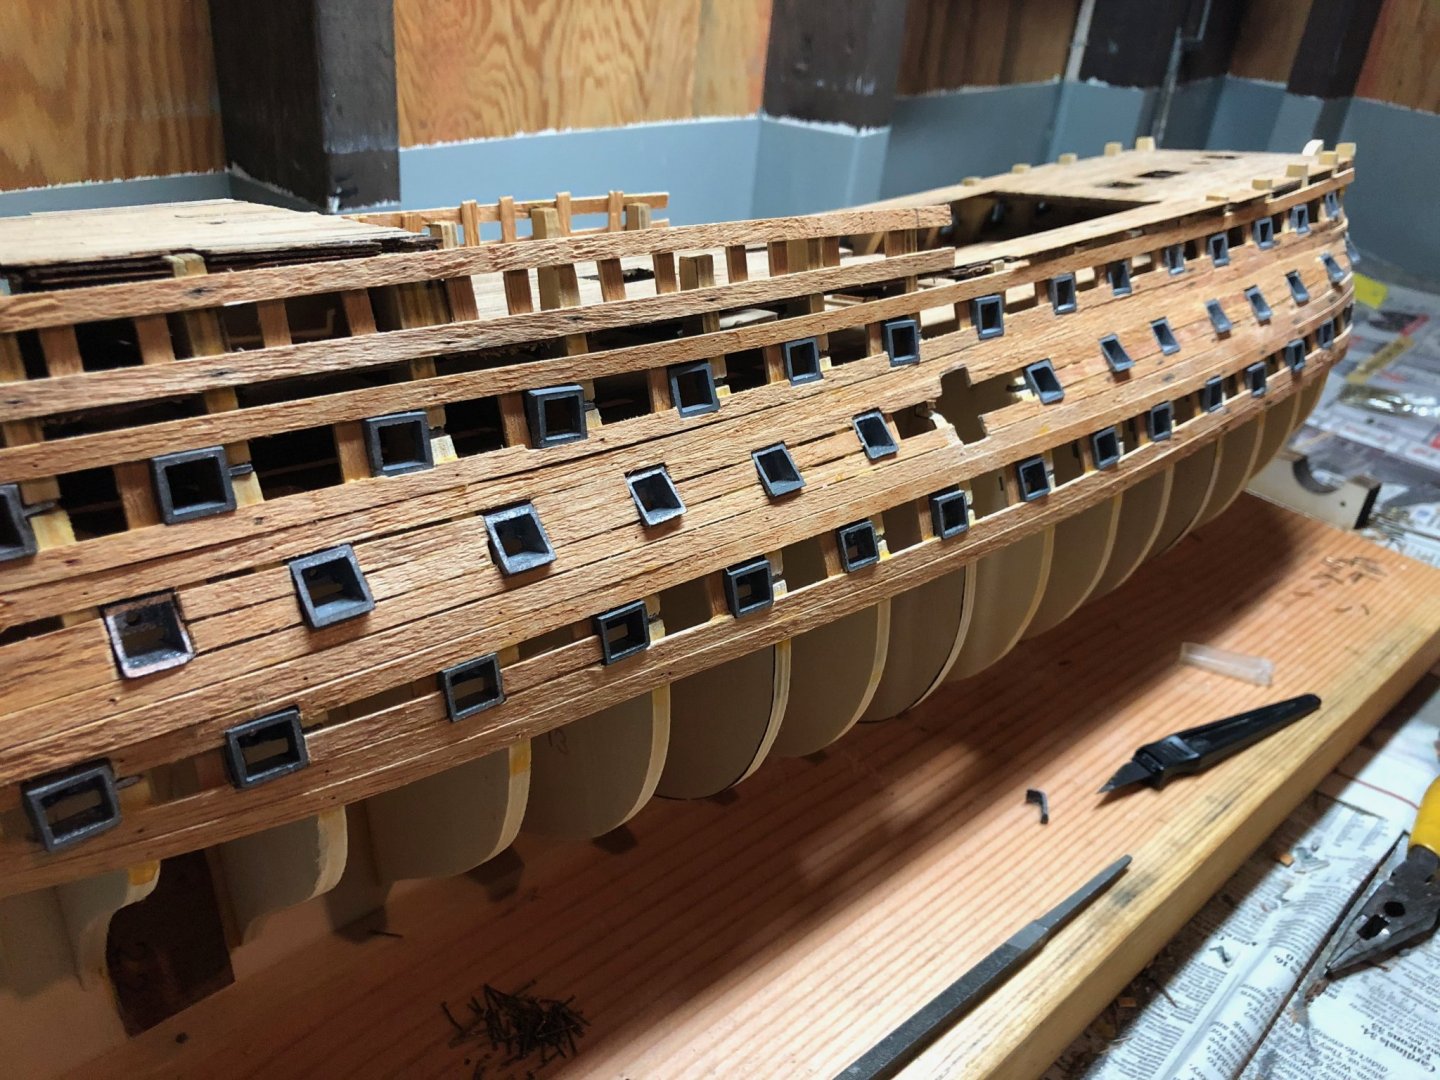
Starting to fill in the spaces between the lower and mid deck gun ports. Will leave the upper ports open for working in the quarter deck spaces later. Once complete here, will begin planking below mid ships where the real fun begins! I will be looking closely at Y.T.’s work as I go.

-
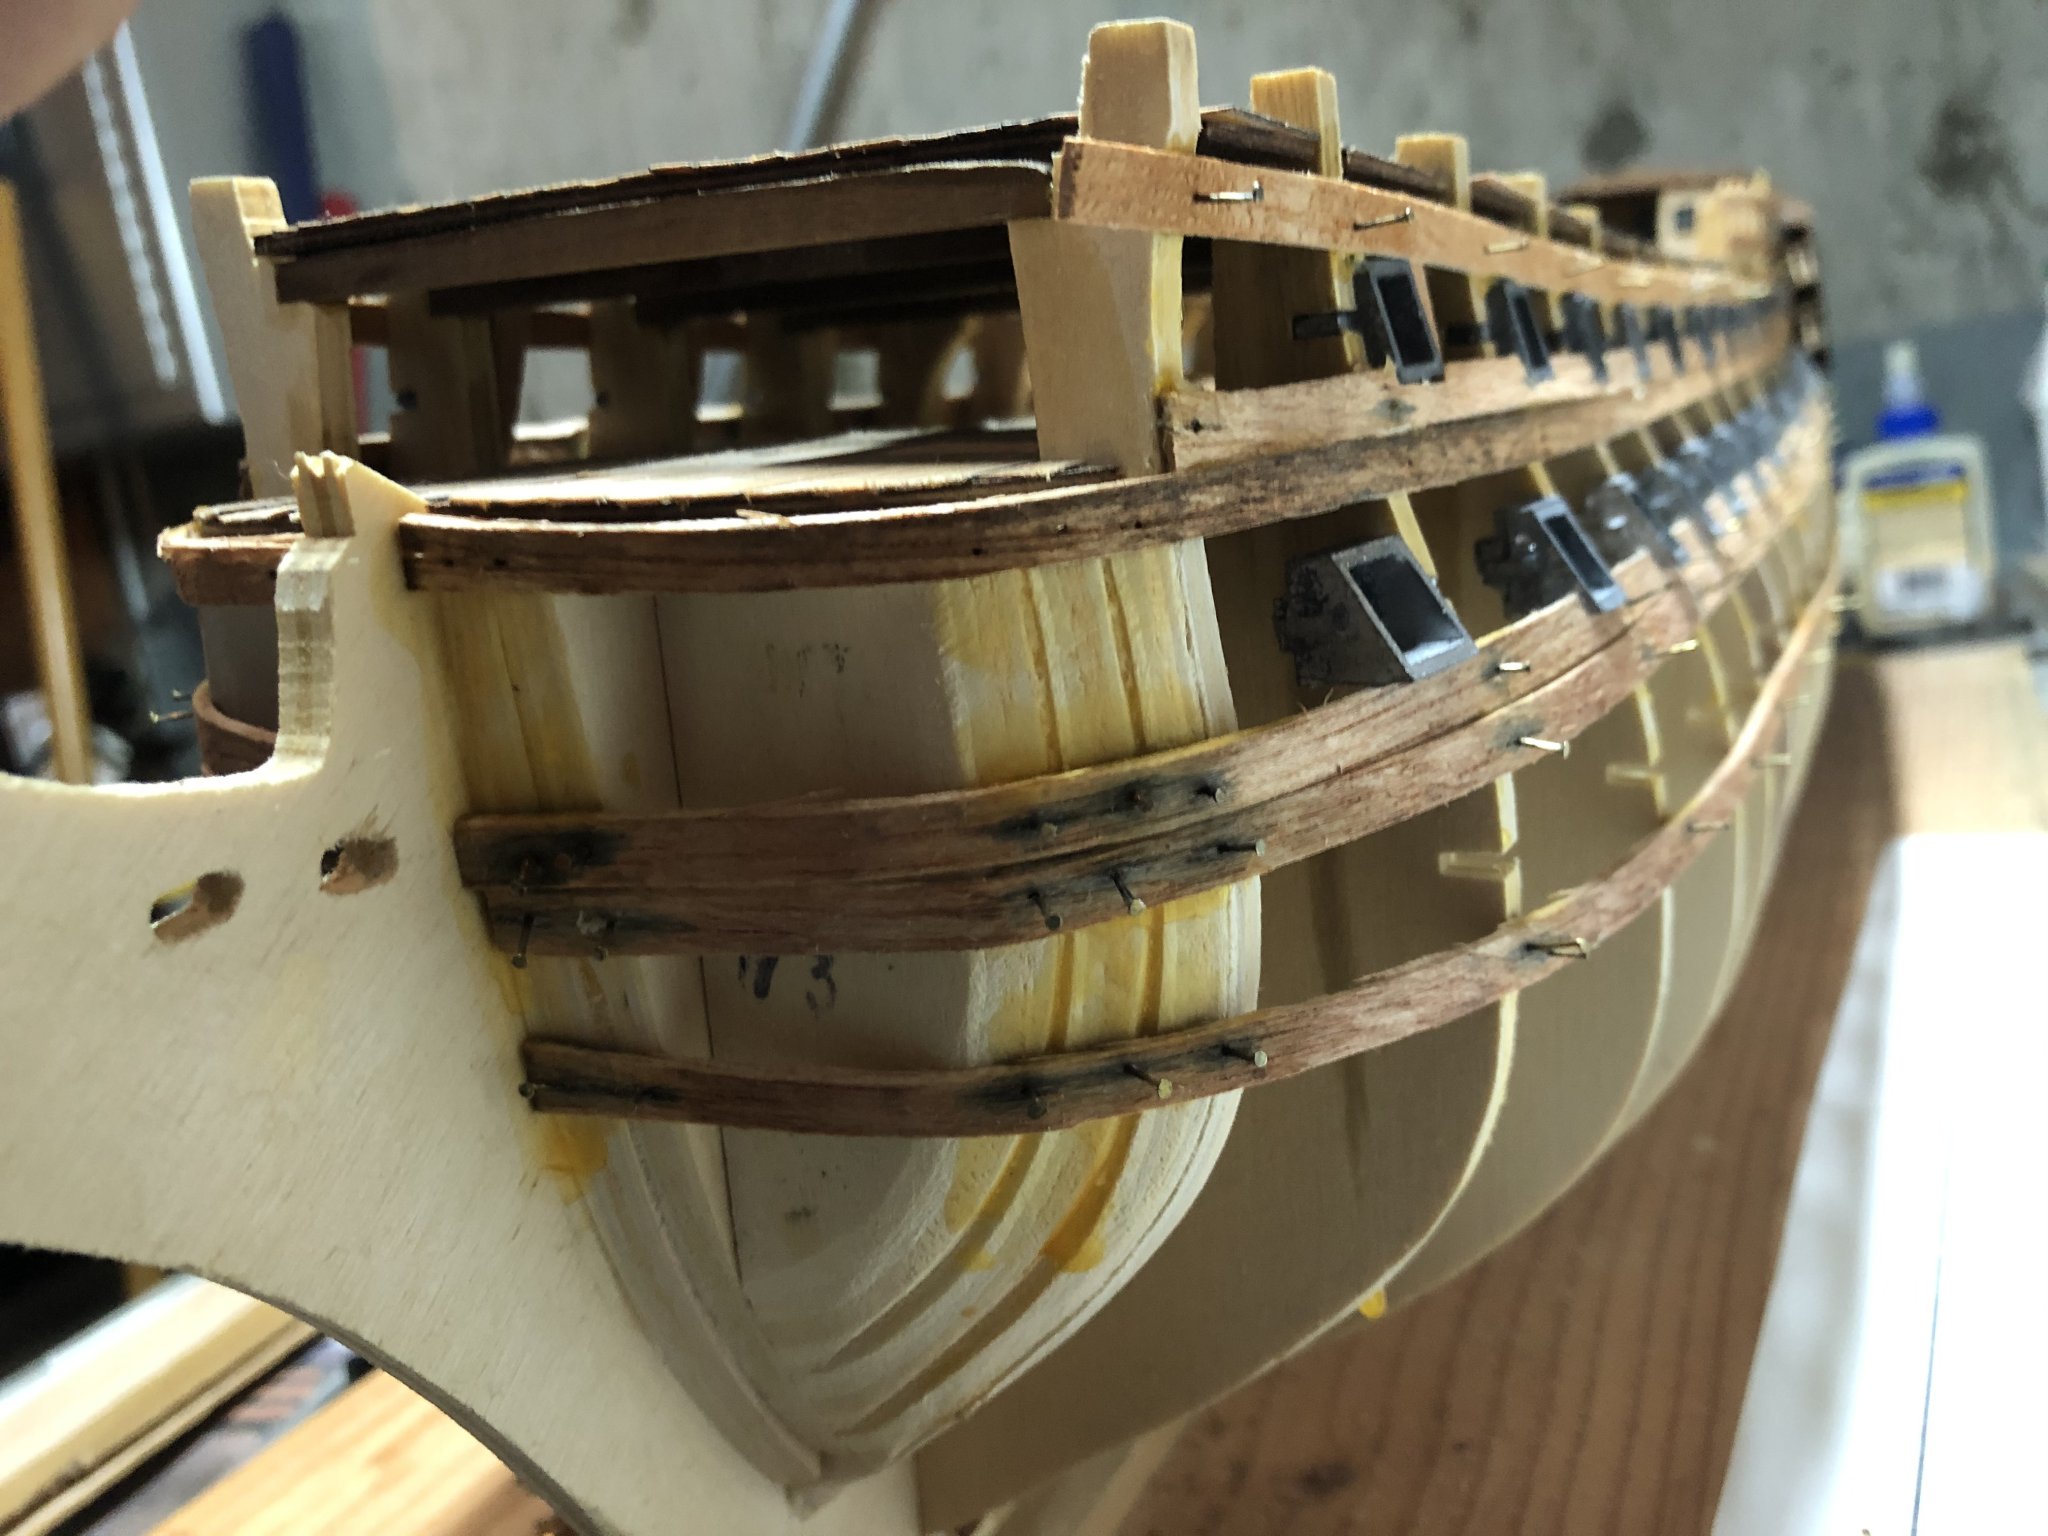
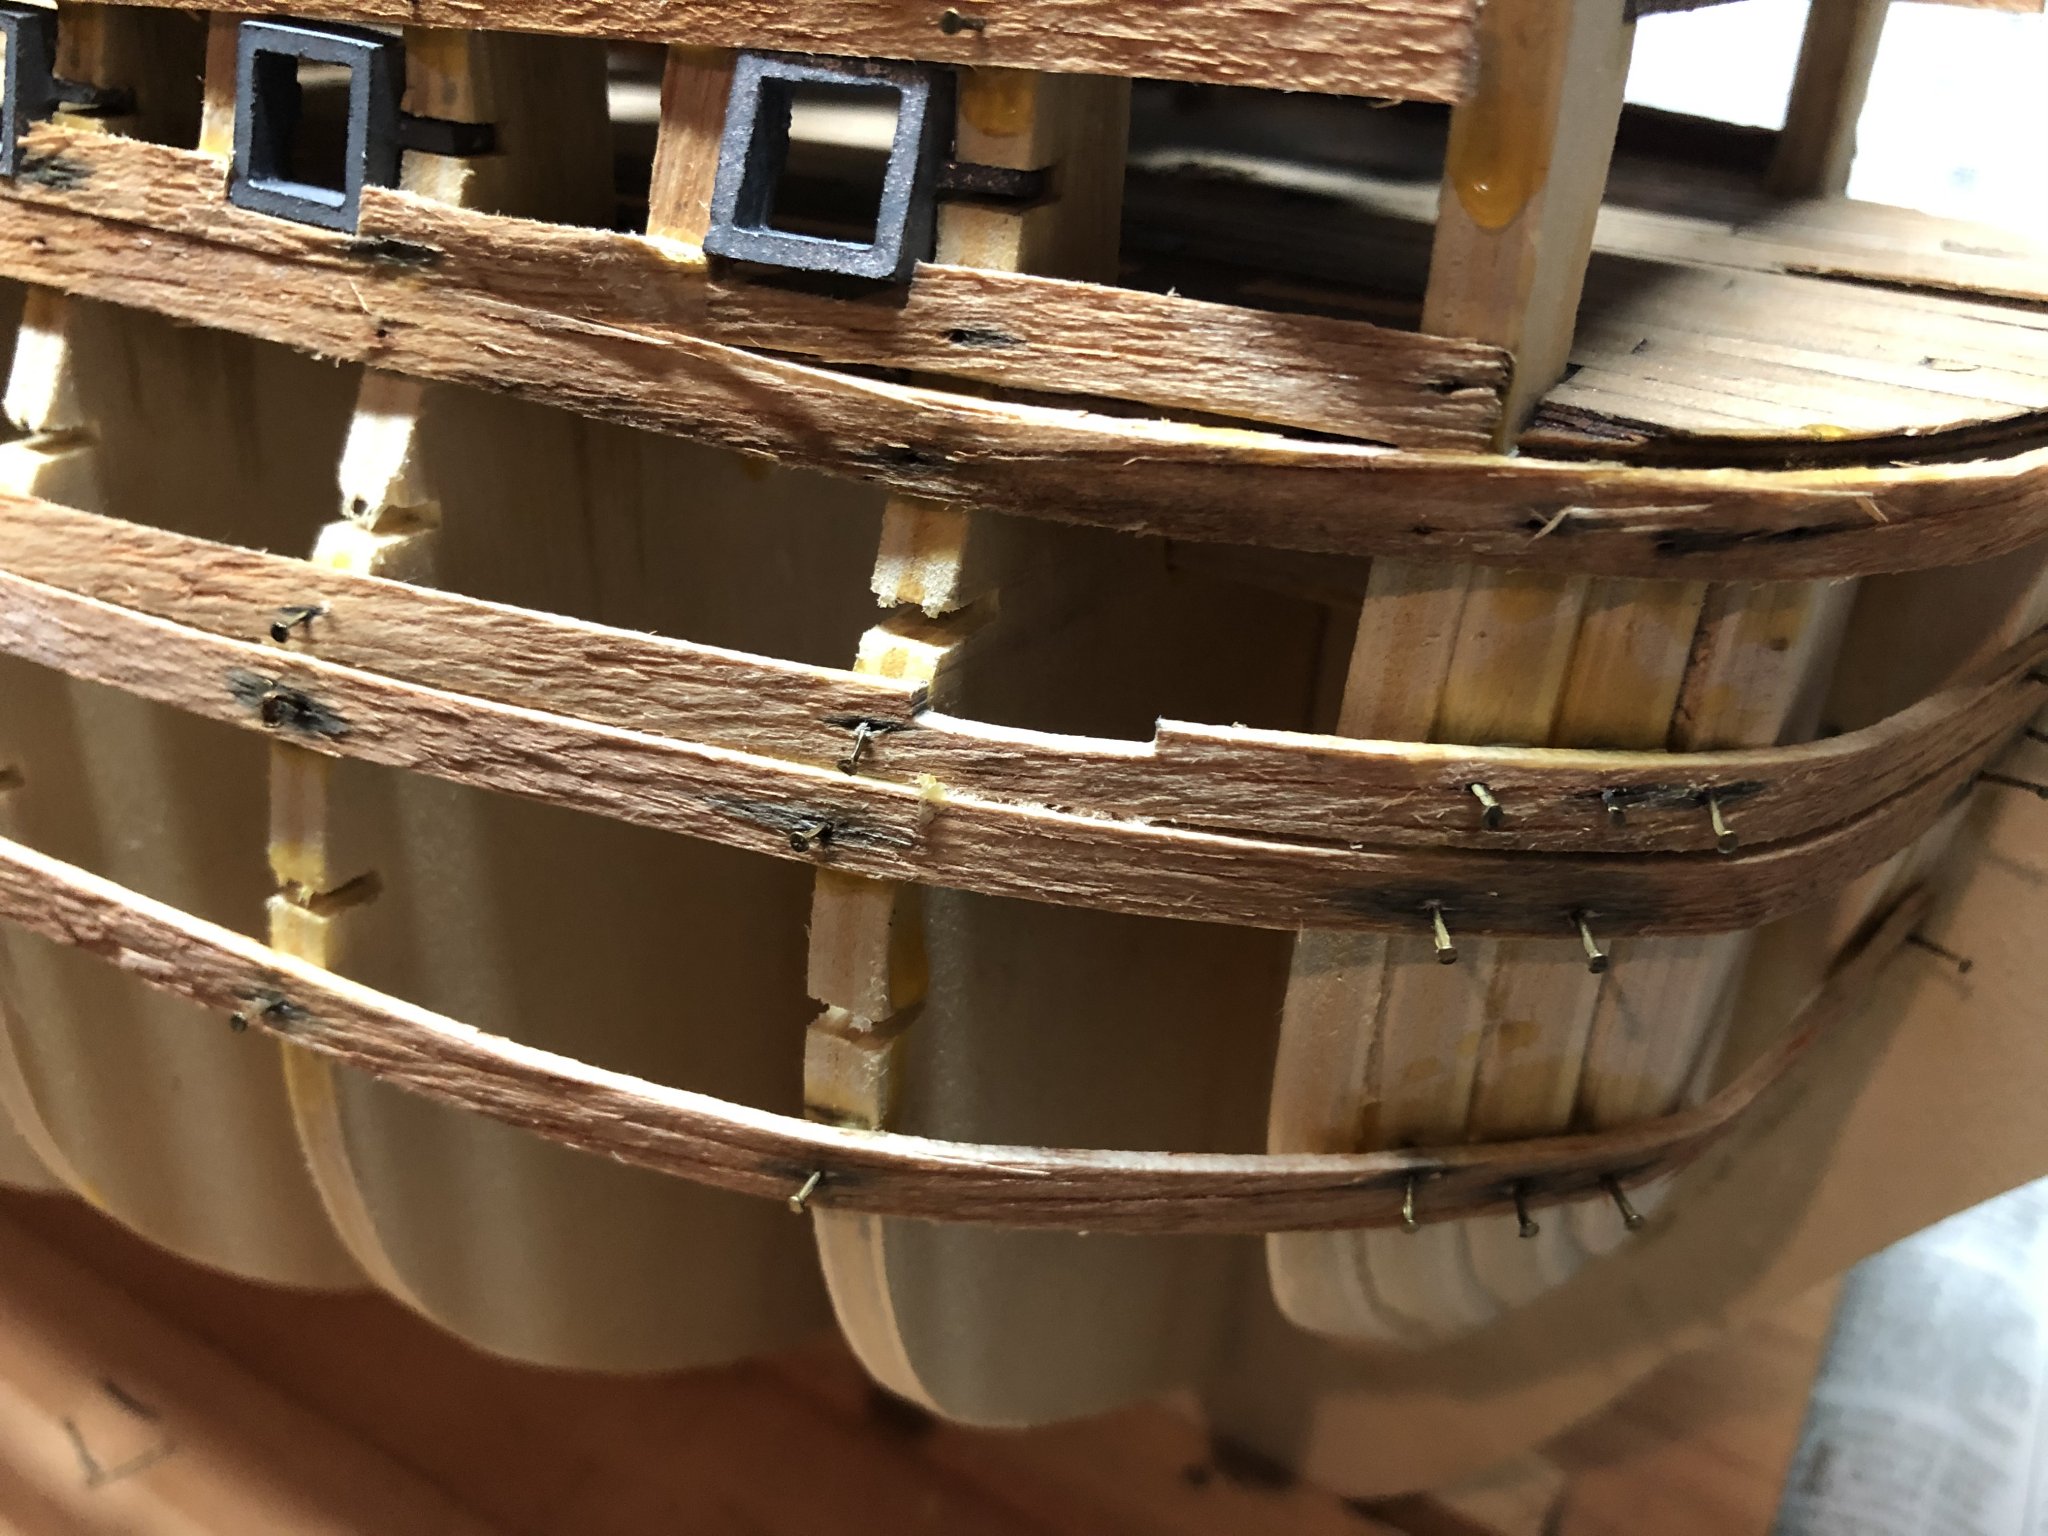
Planking continues on both port and starboard sides. I’m working to emulate YT’s approach with not nearly the same results! One note is the damp wood shaped to fit around the bow, turns darker where the small nails are inserted. I’m certain this will be alleviated by filling/painting as necessary. Once I get midway, I’ll start working the bottom section which will be the challenge. I’m spending some time reviewing the planking material in the forum - which is of great help.

-
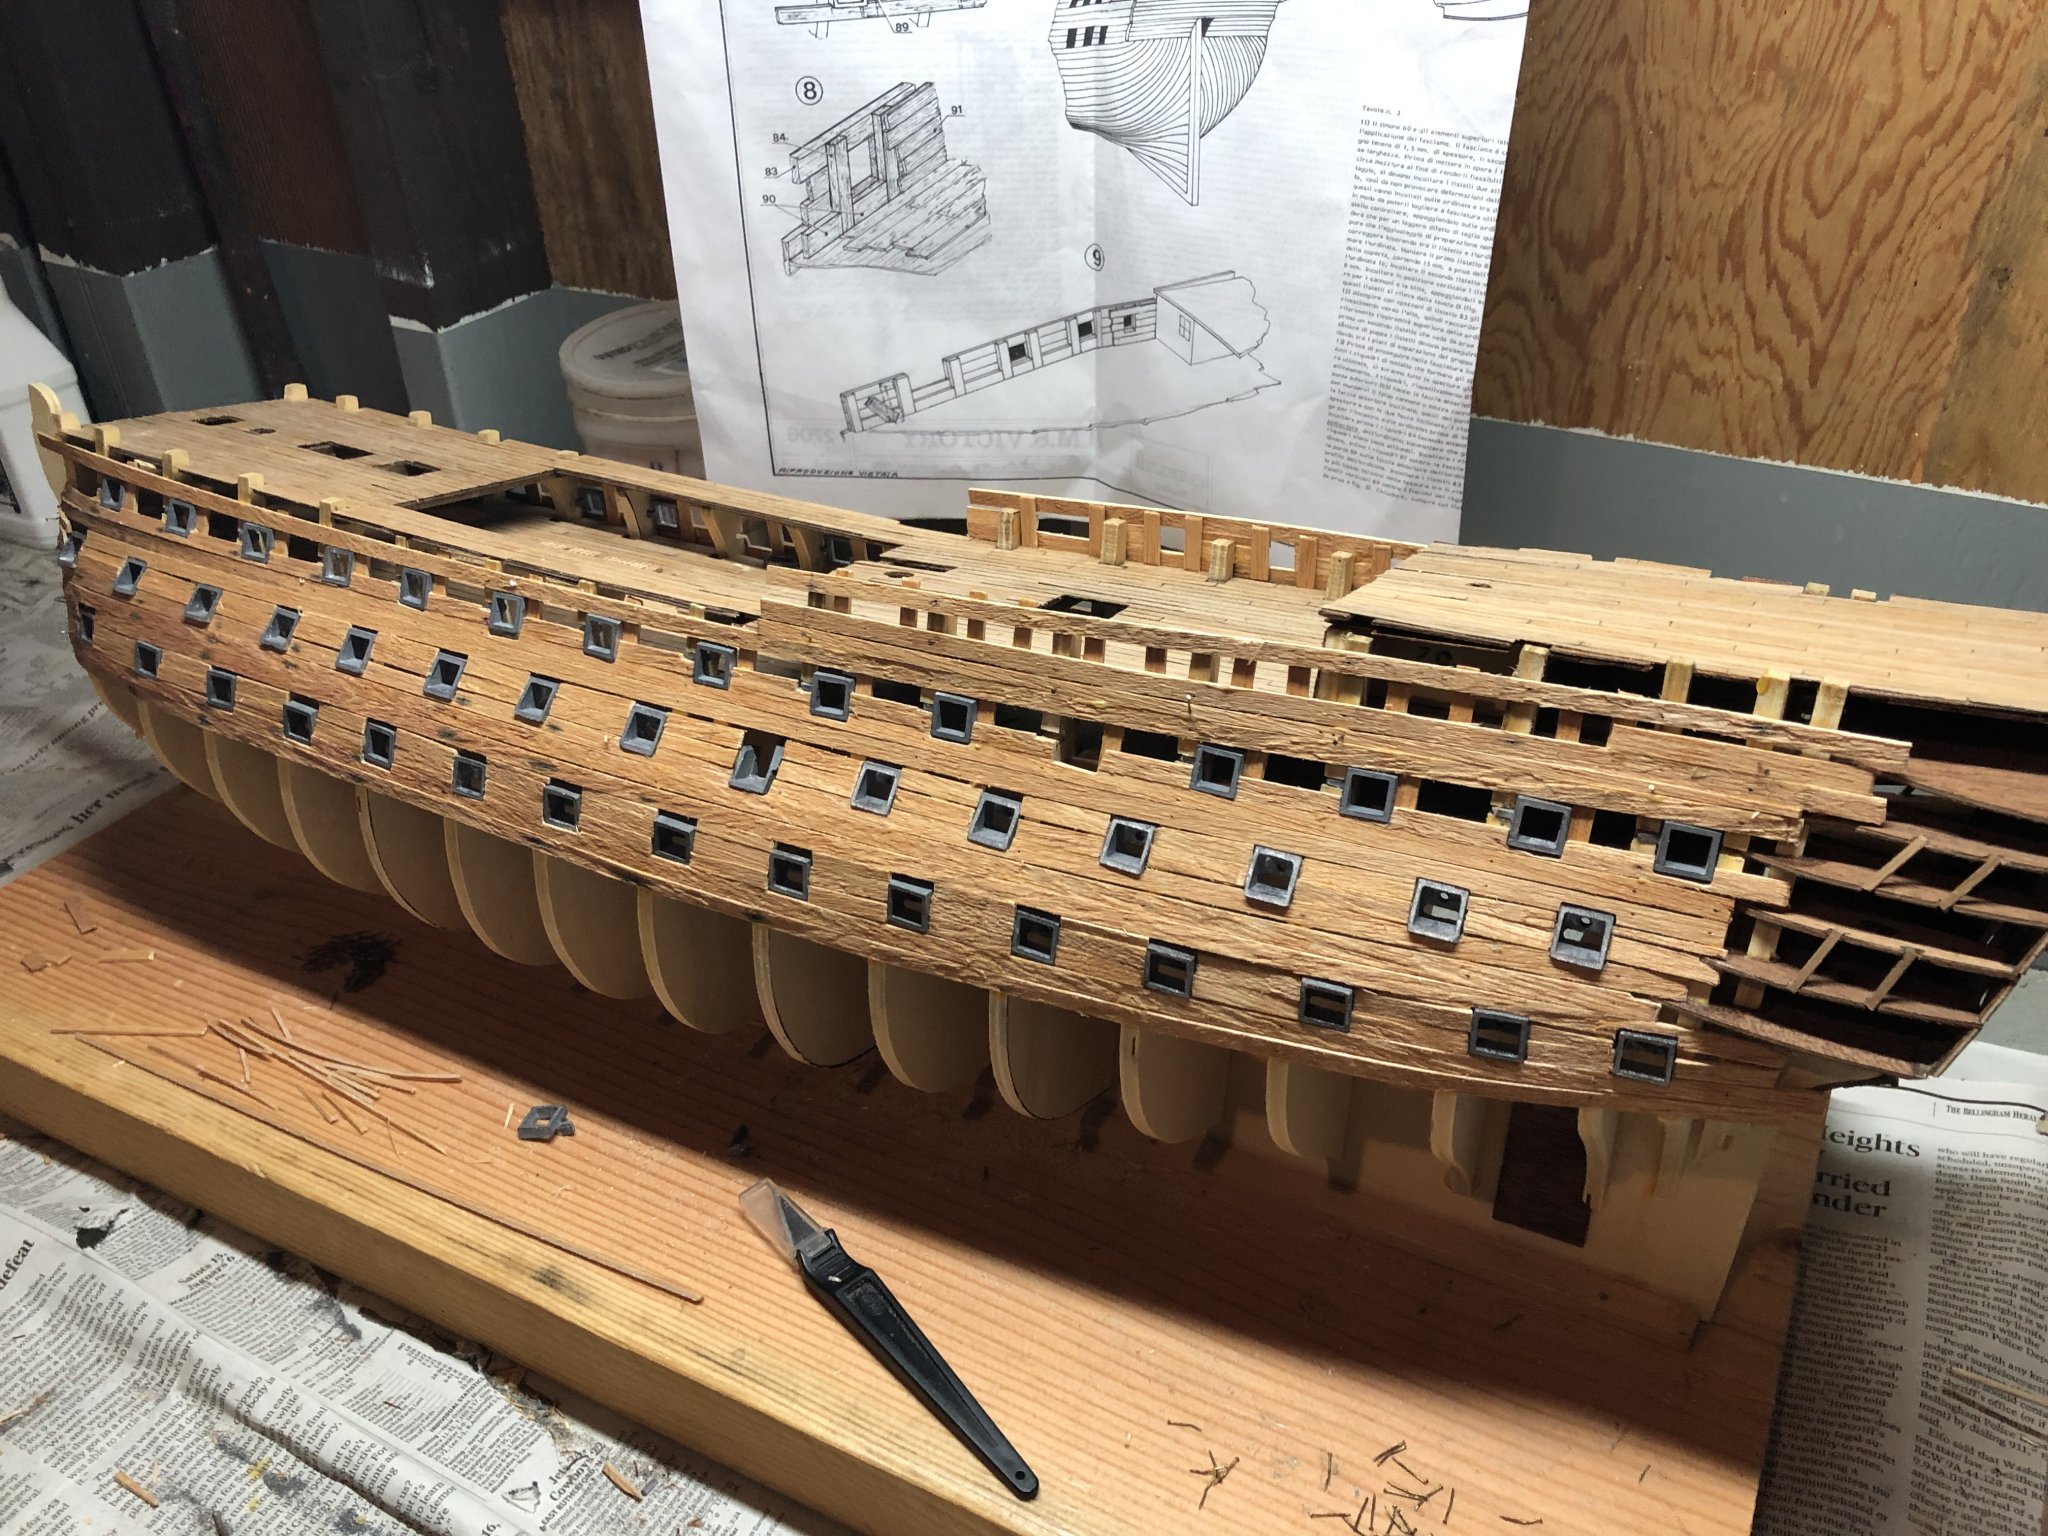
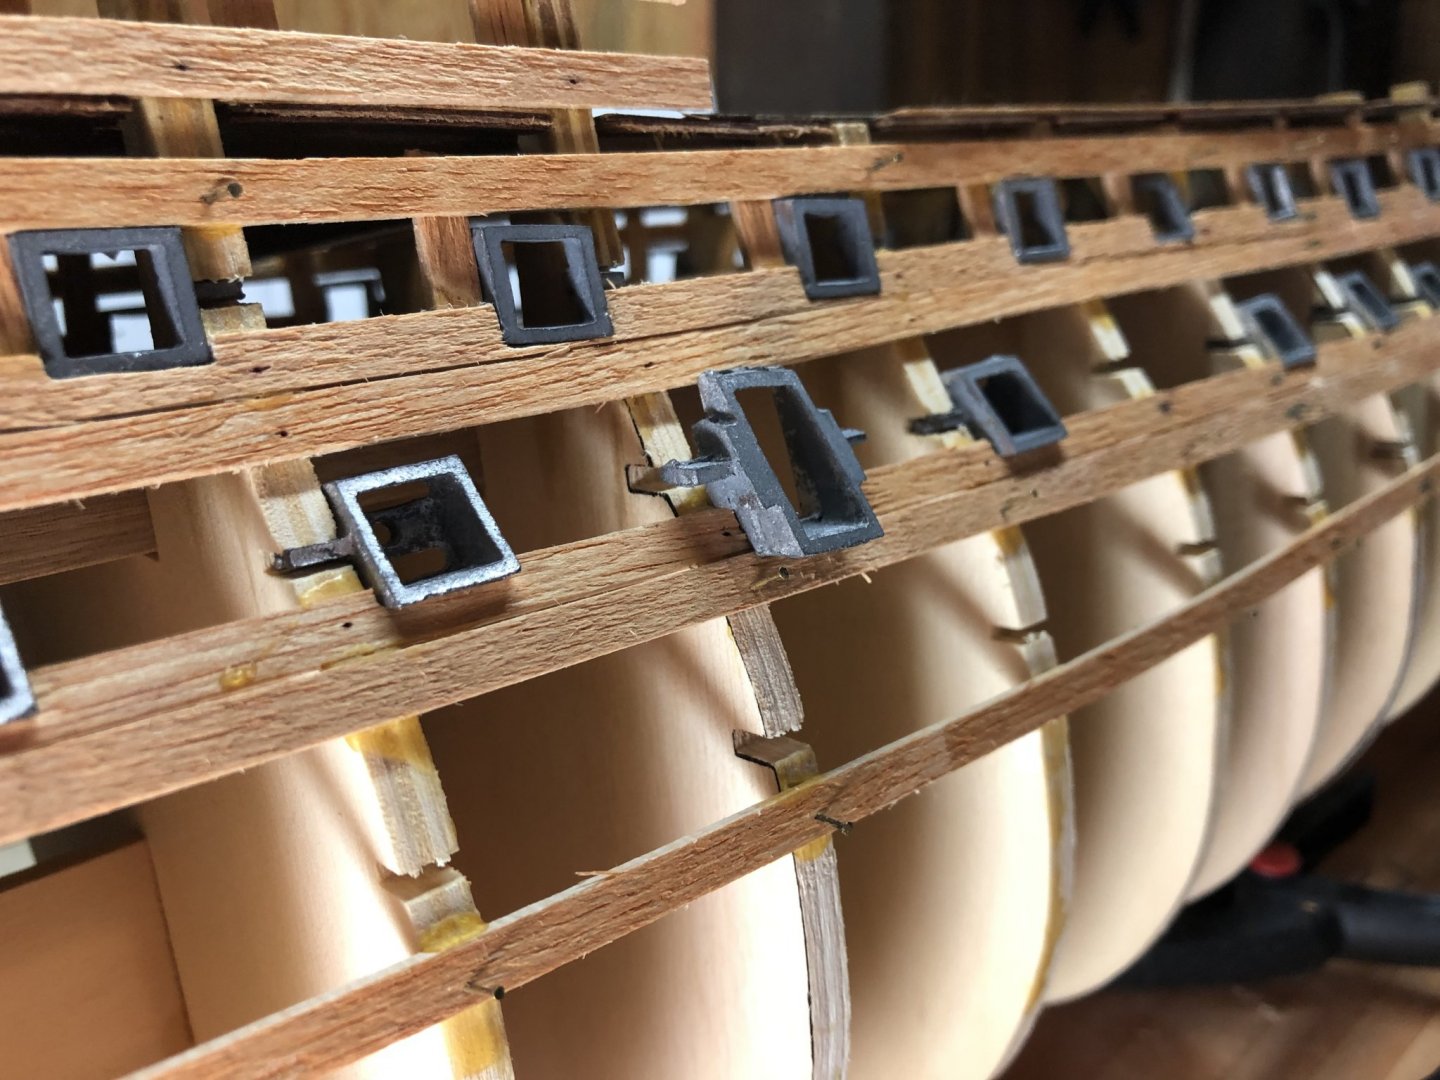
Have set the gun deck ports both port and starboard sides and adding supporting planks as necessary. Once these are set, I’ll be working to fill in the gaps above and then working planking below the waterline... I’ll be doing some research on the forum planking data base to make sure I minimize my mistakes....

-
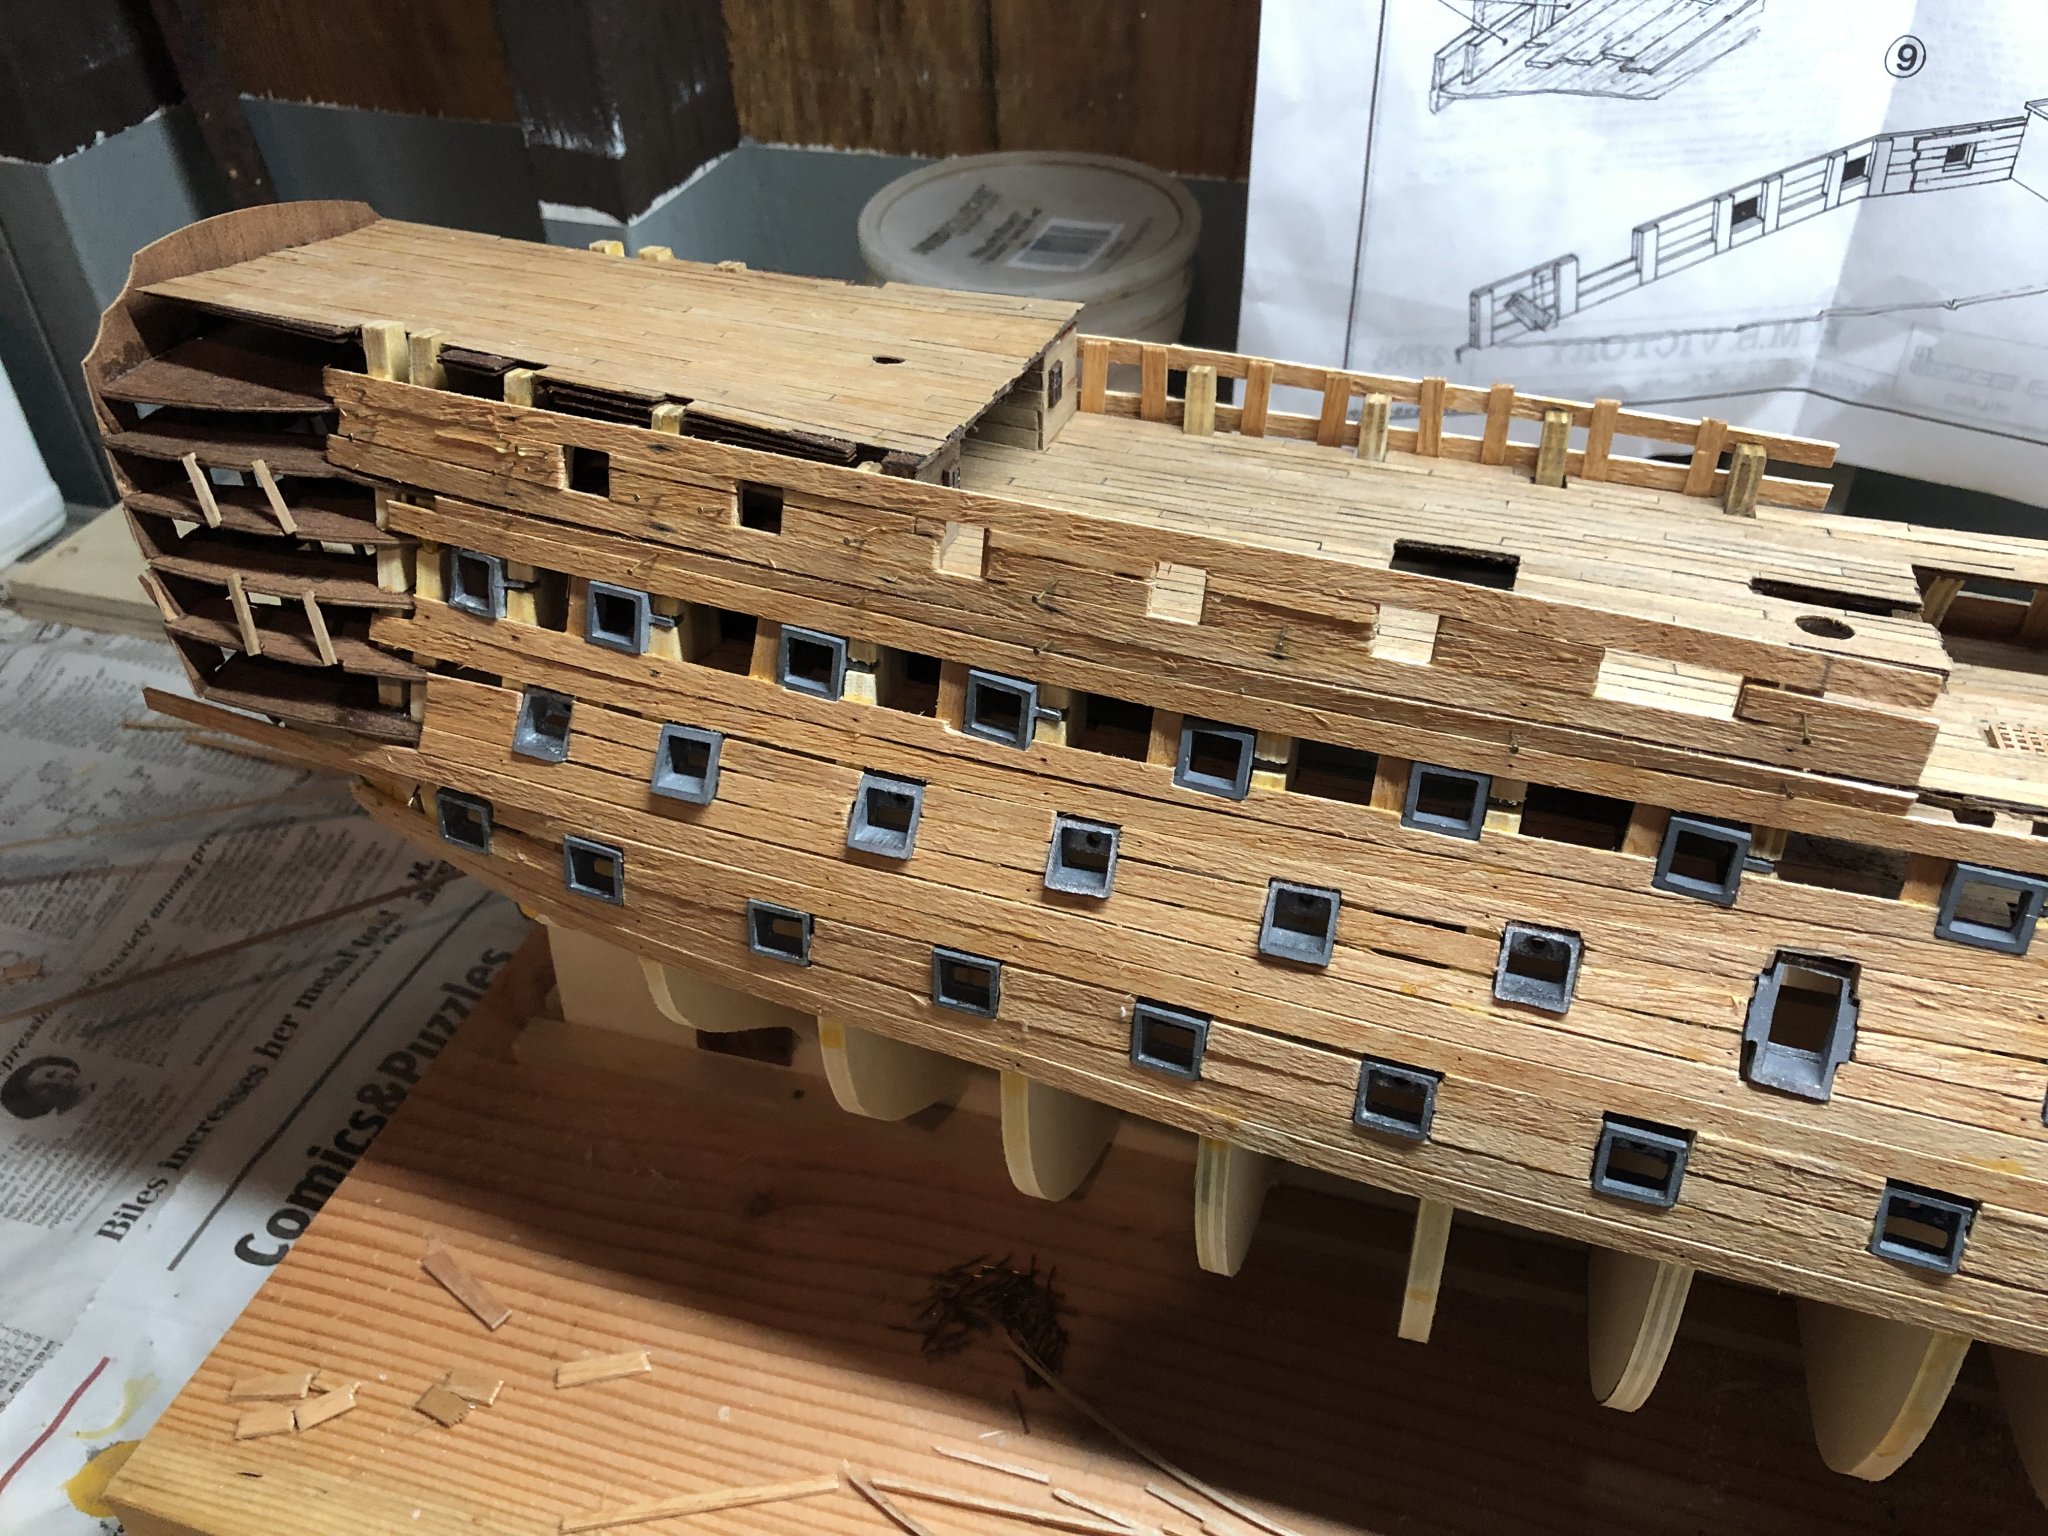
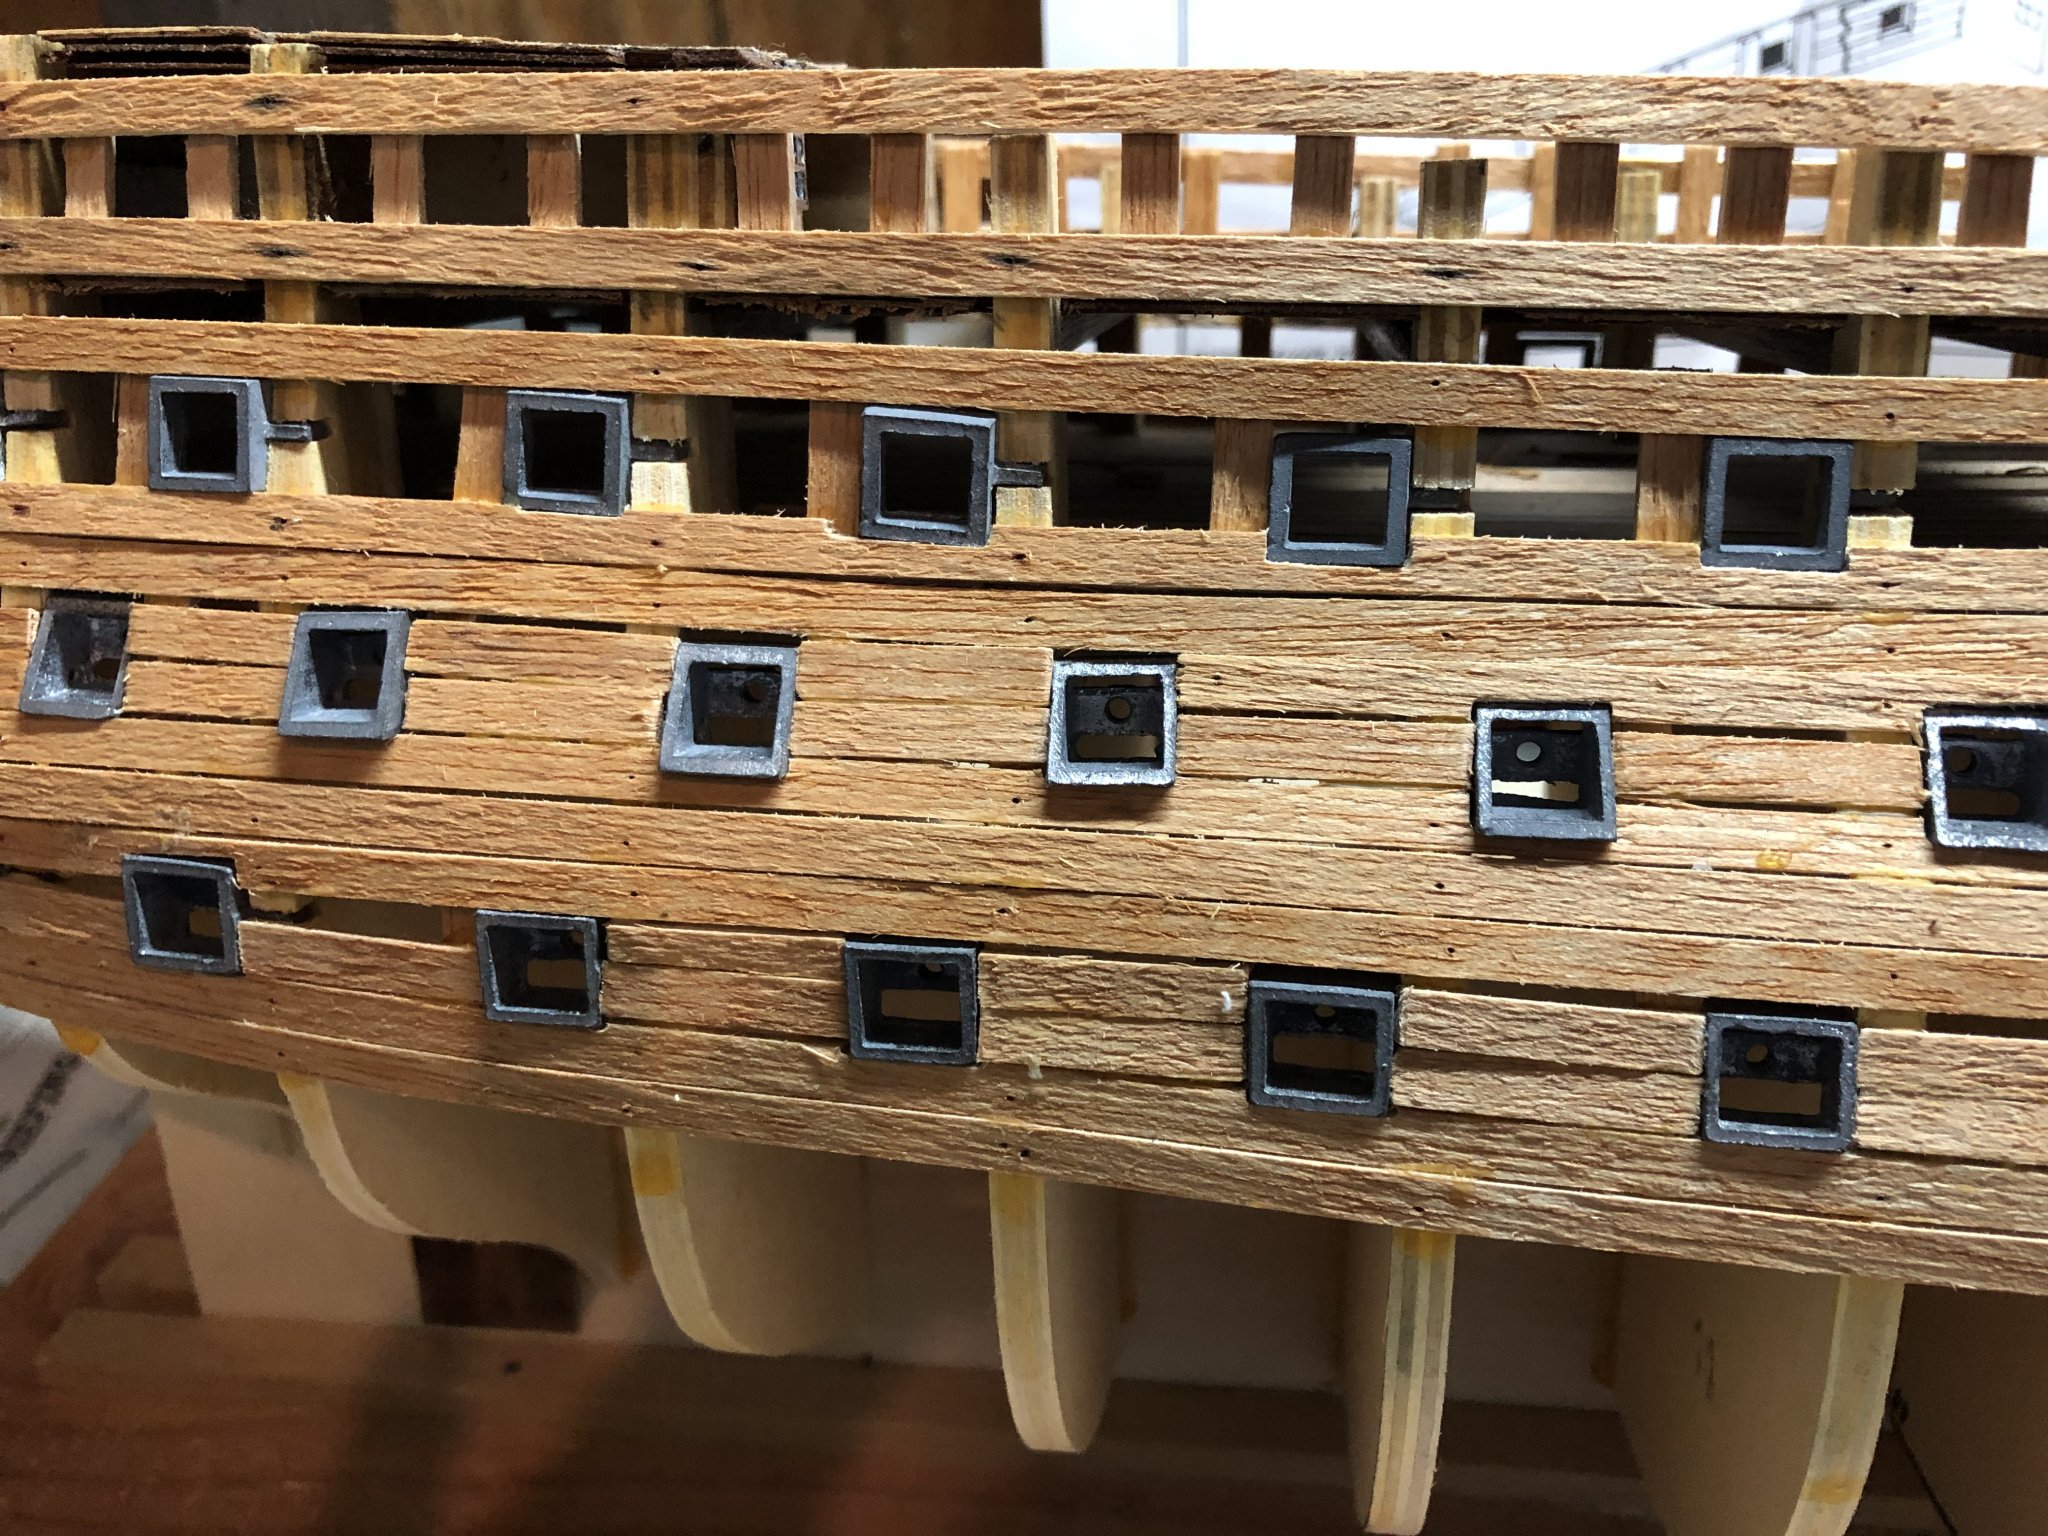
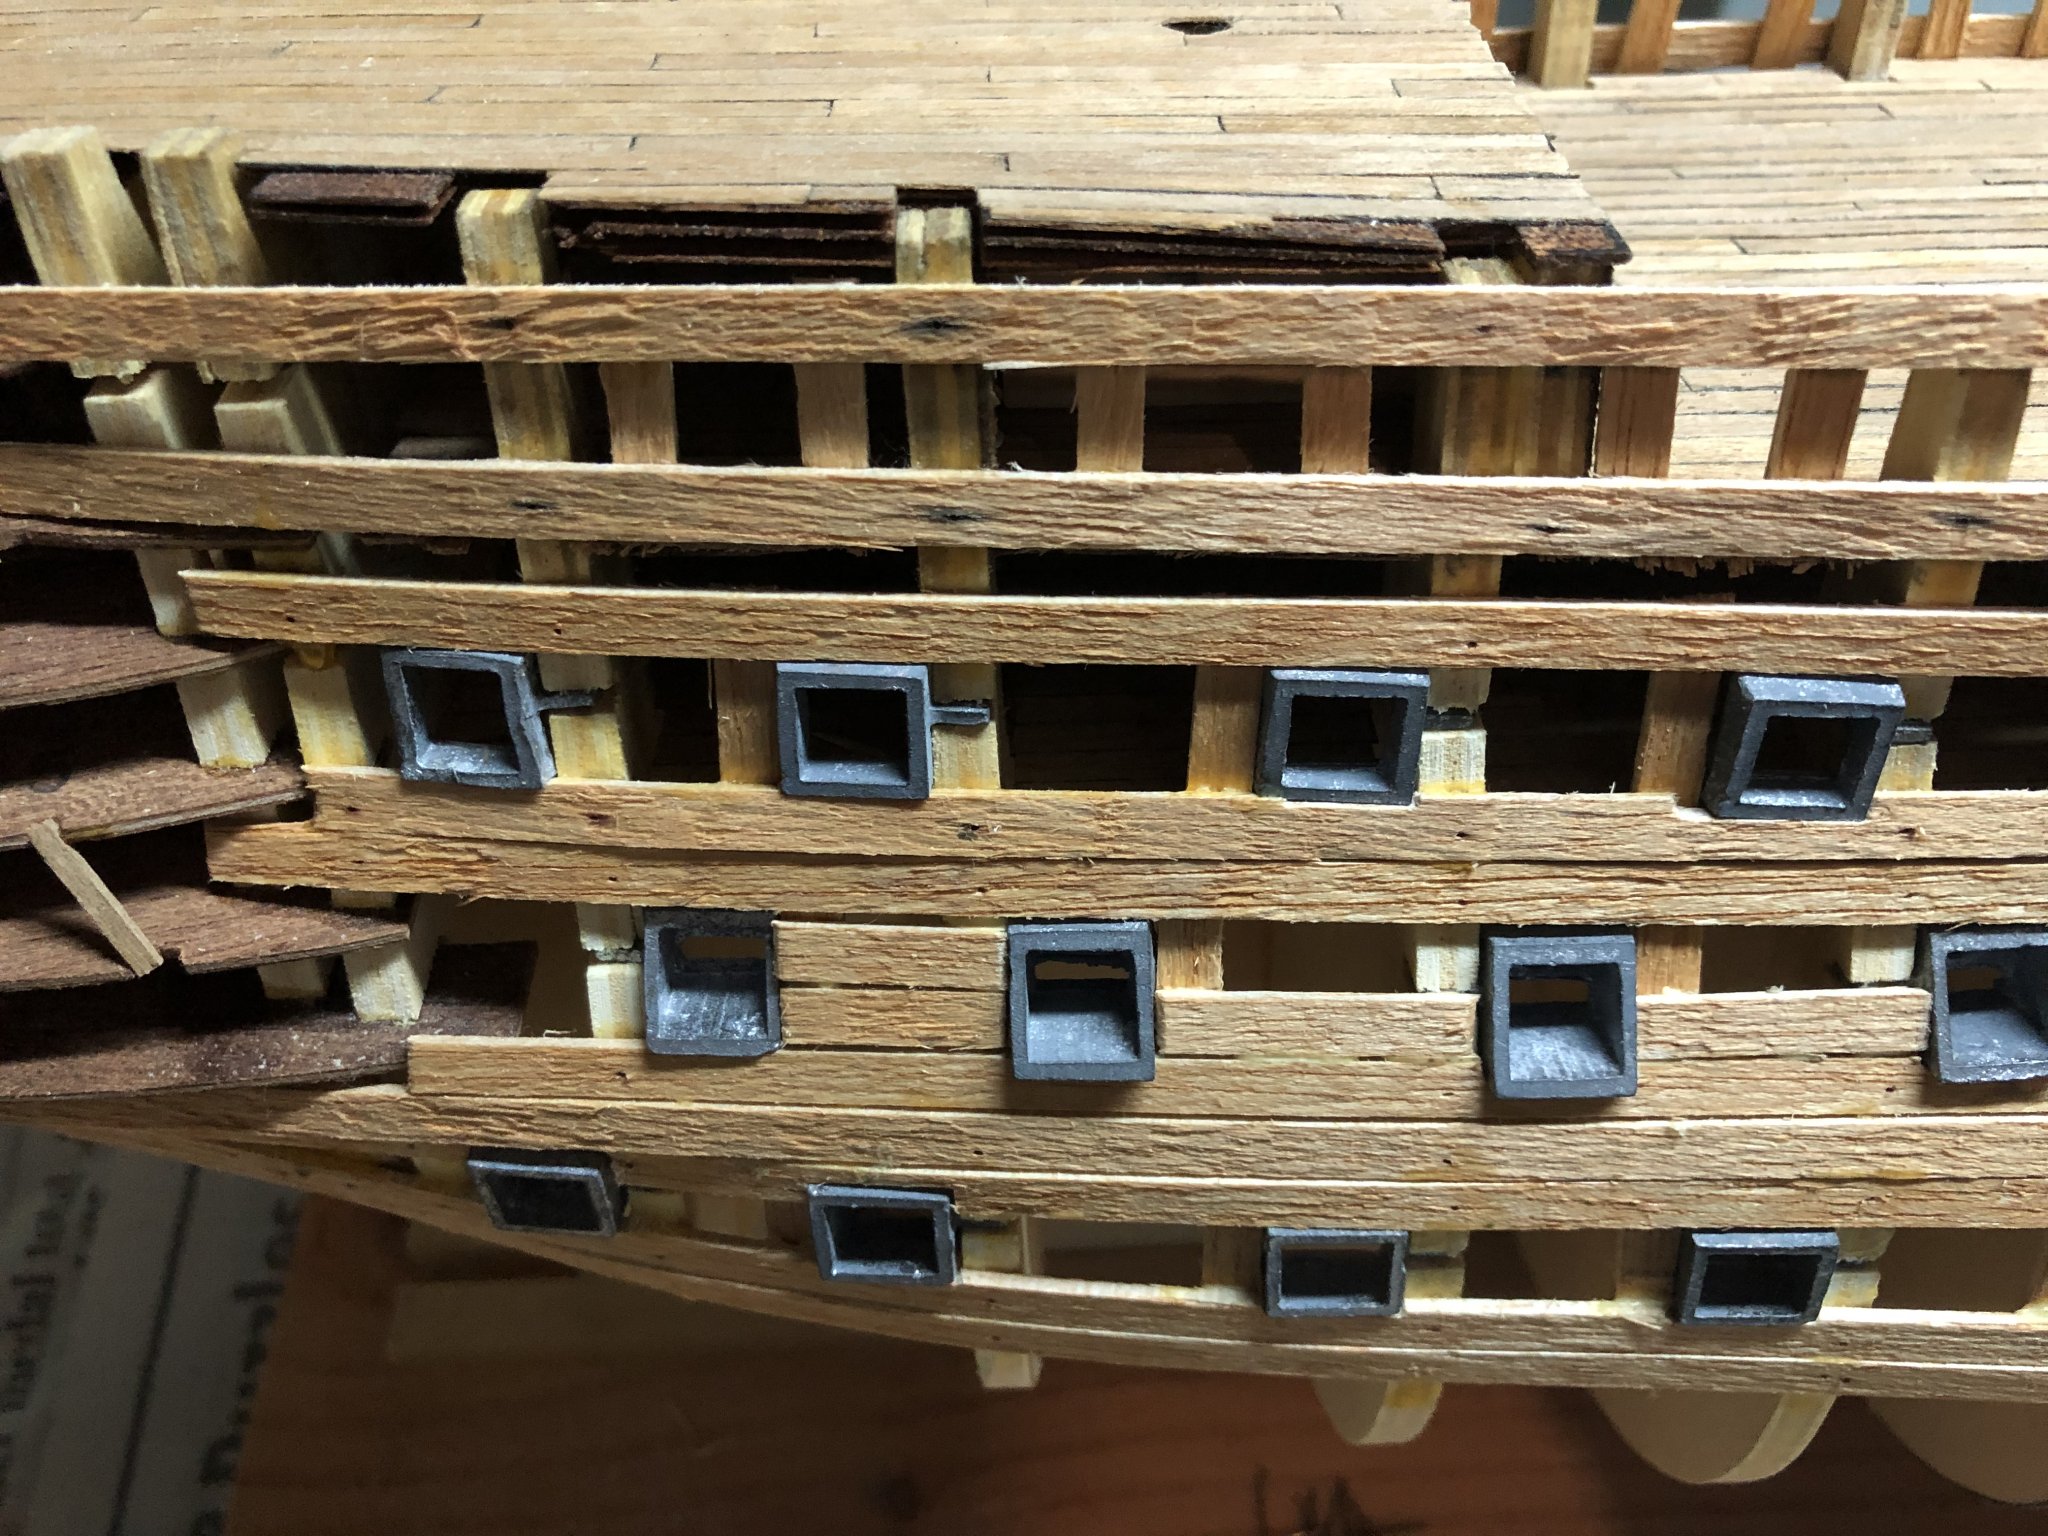
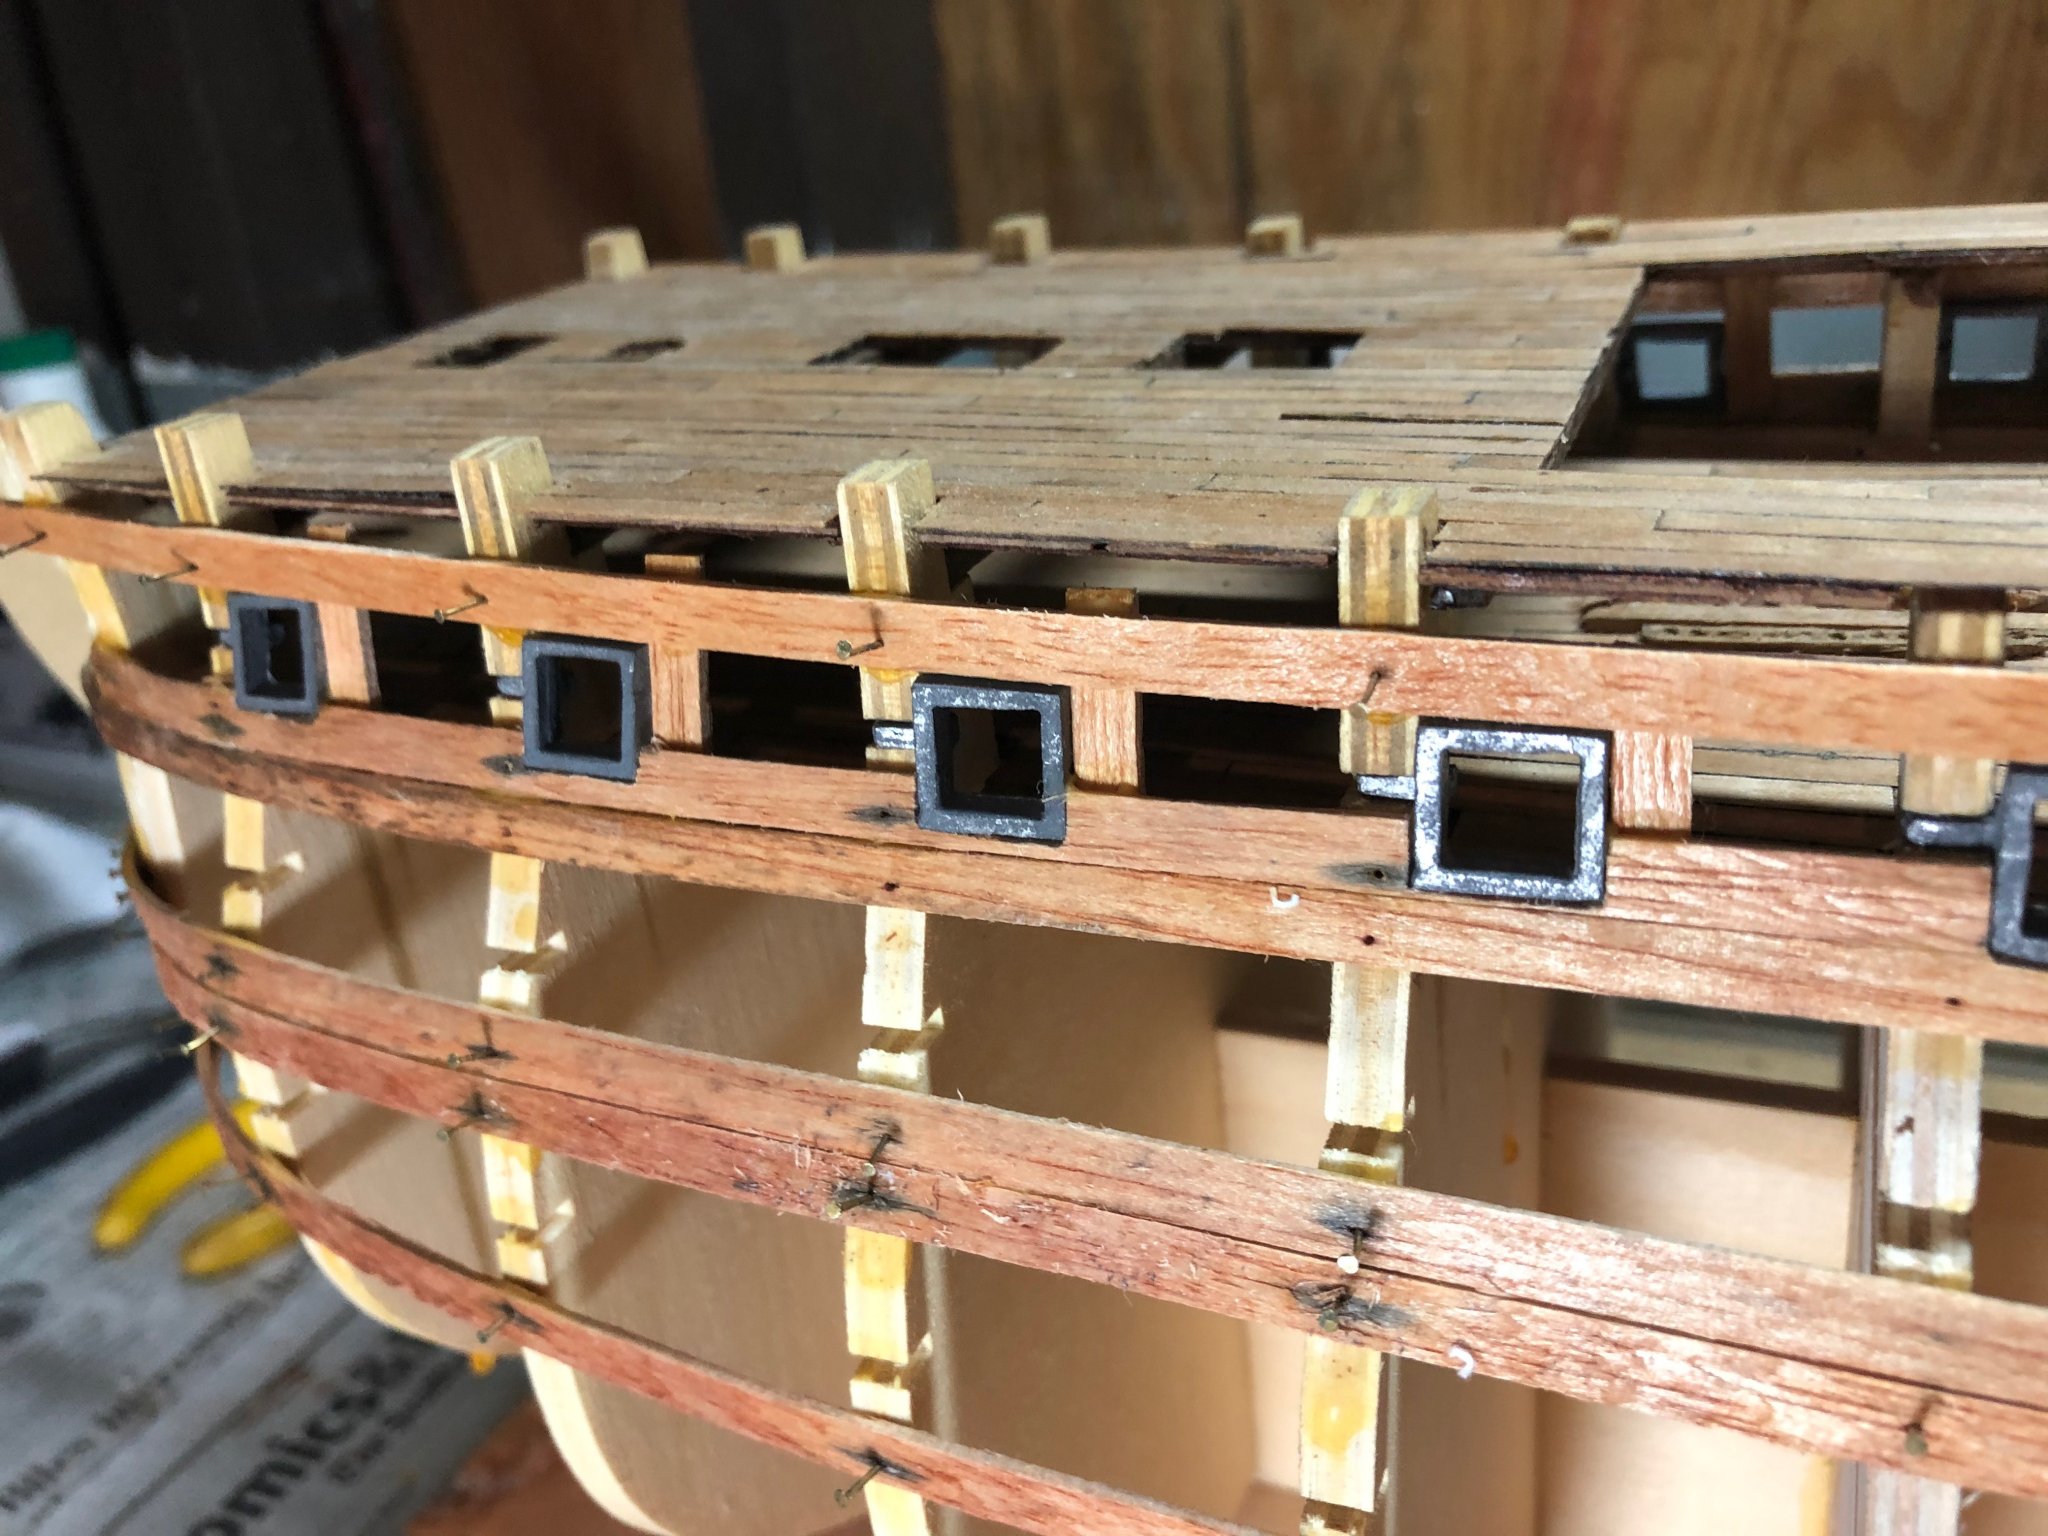
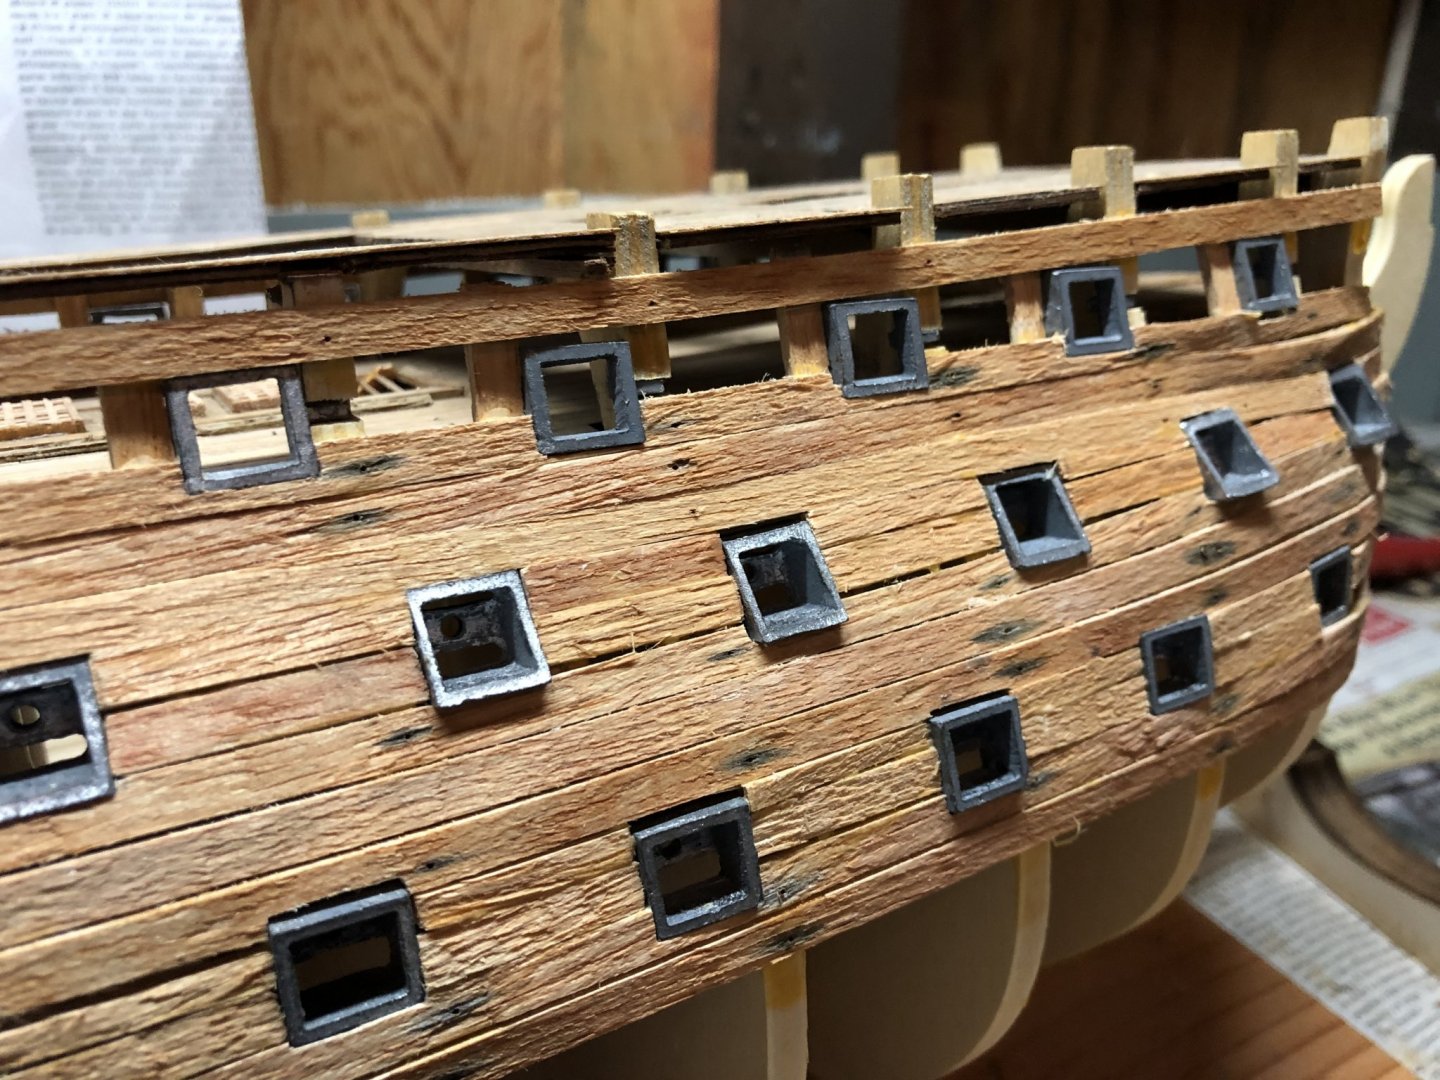
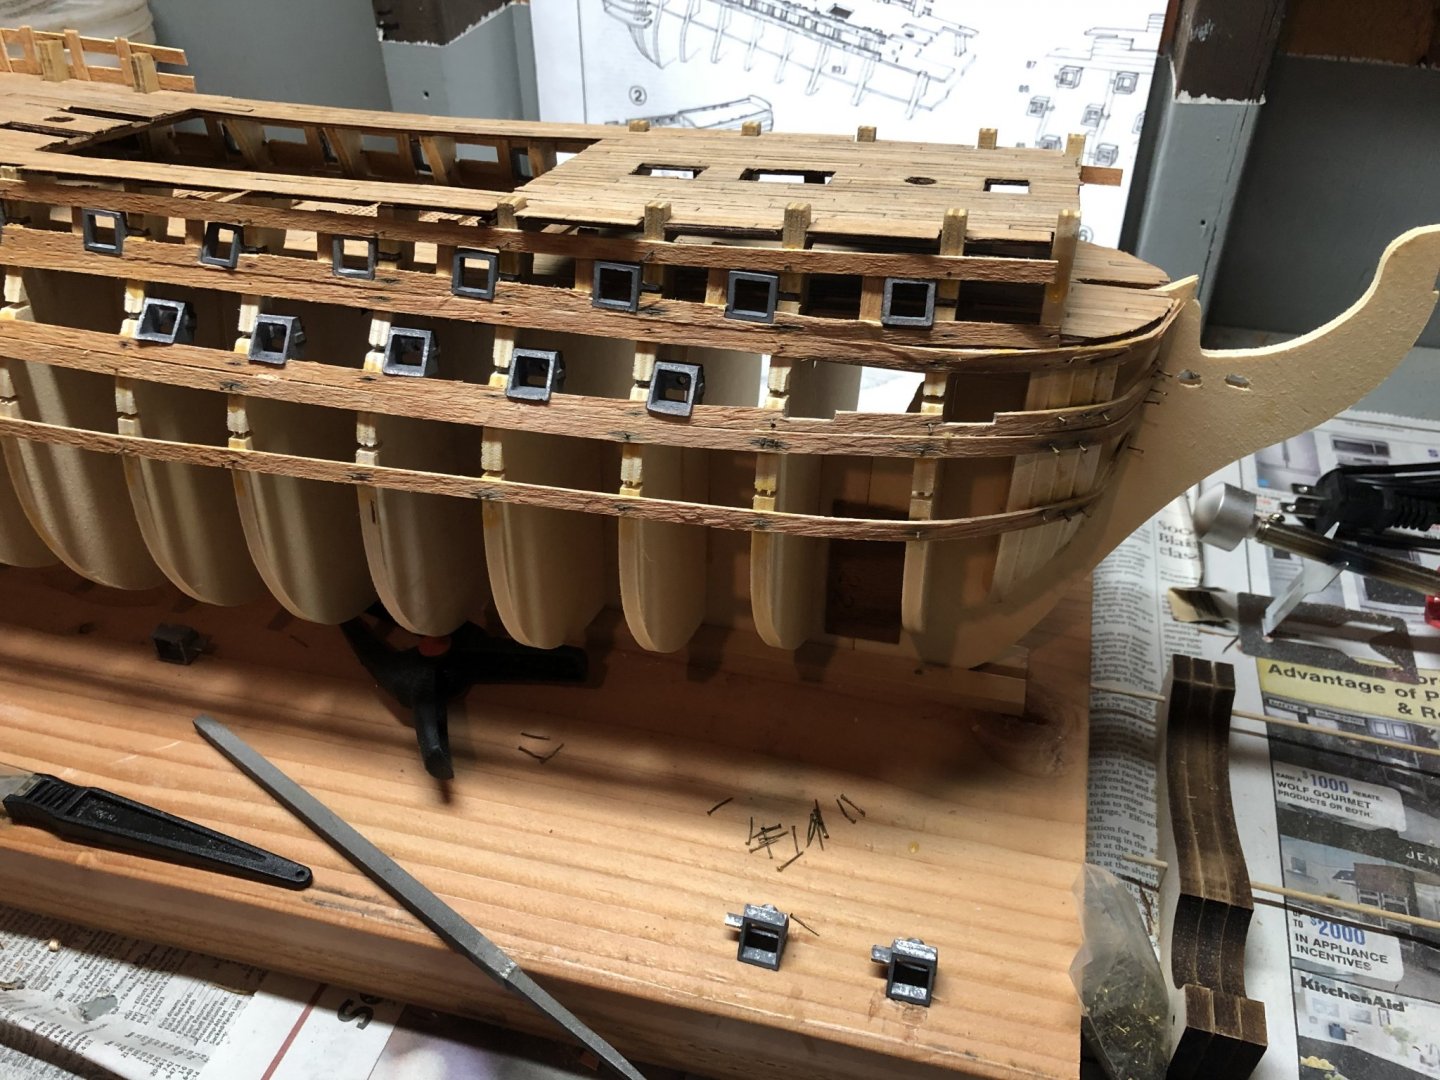
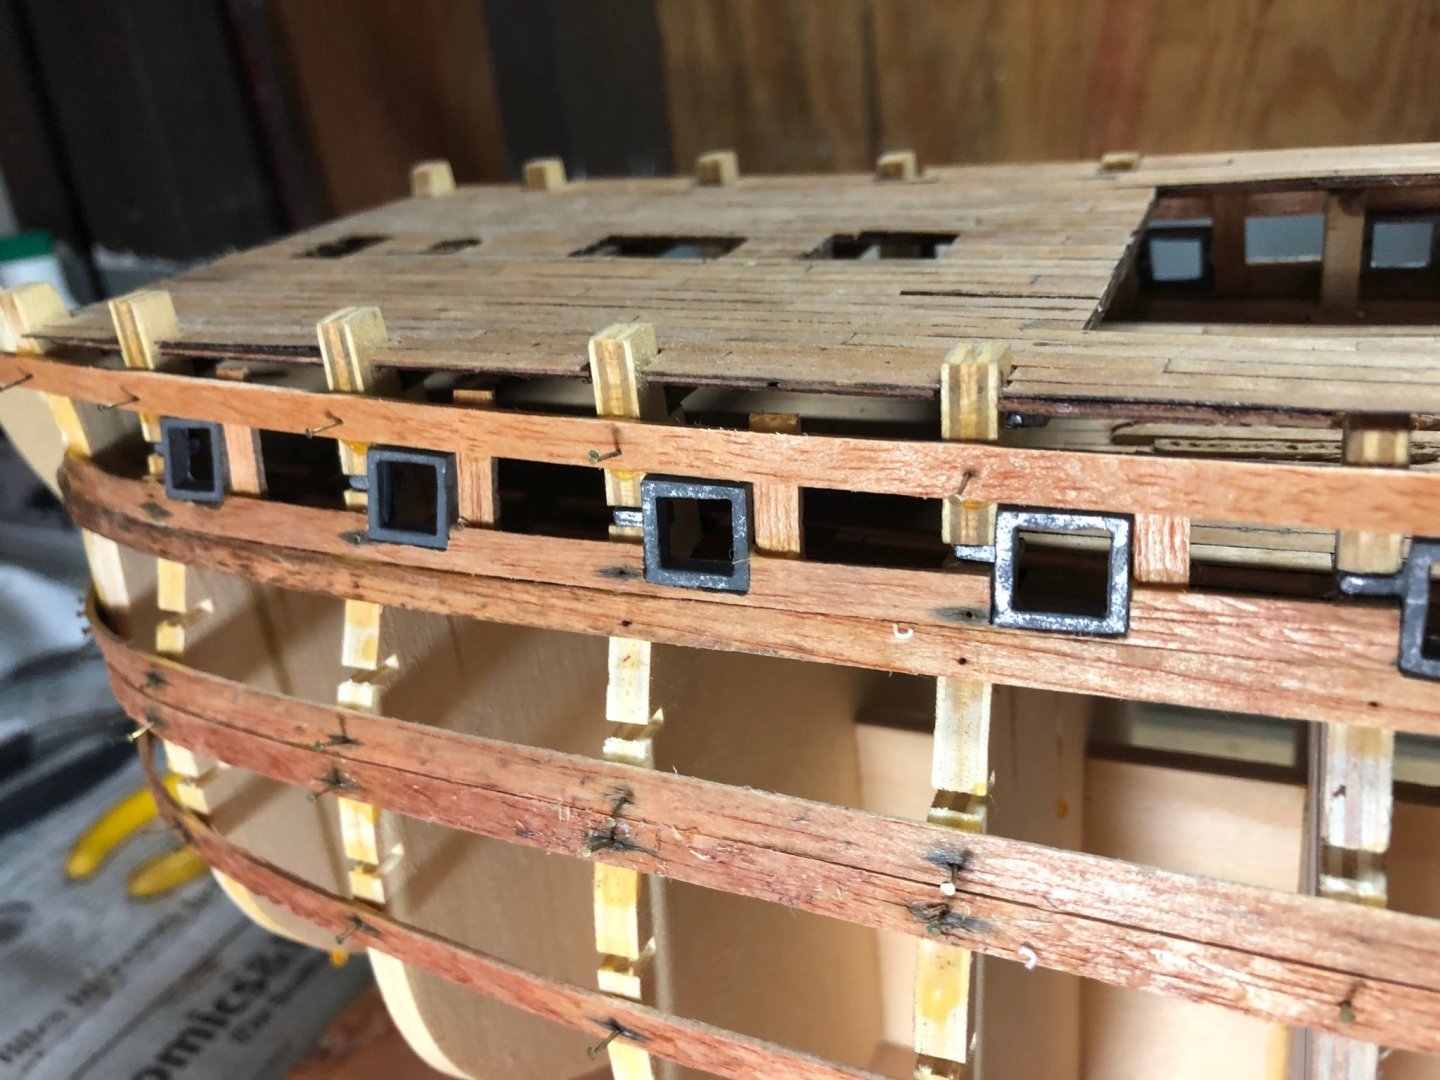
Both Starboard and Port Middle deck ports set. Each port needs to be set against the associated plank. Some planks will need to be adjusted via sanding and wood filler as can be seen. The Middle deck starboard gangway still needs to be set.


-
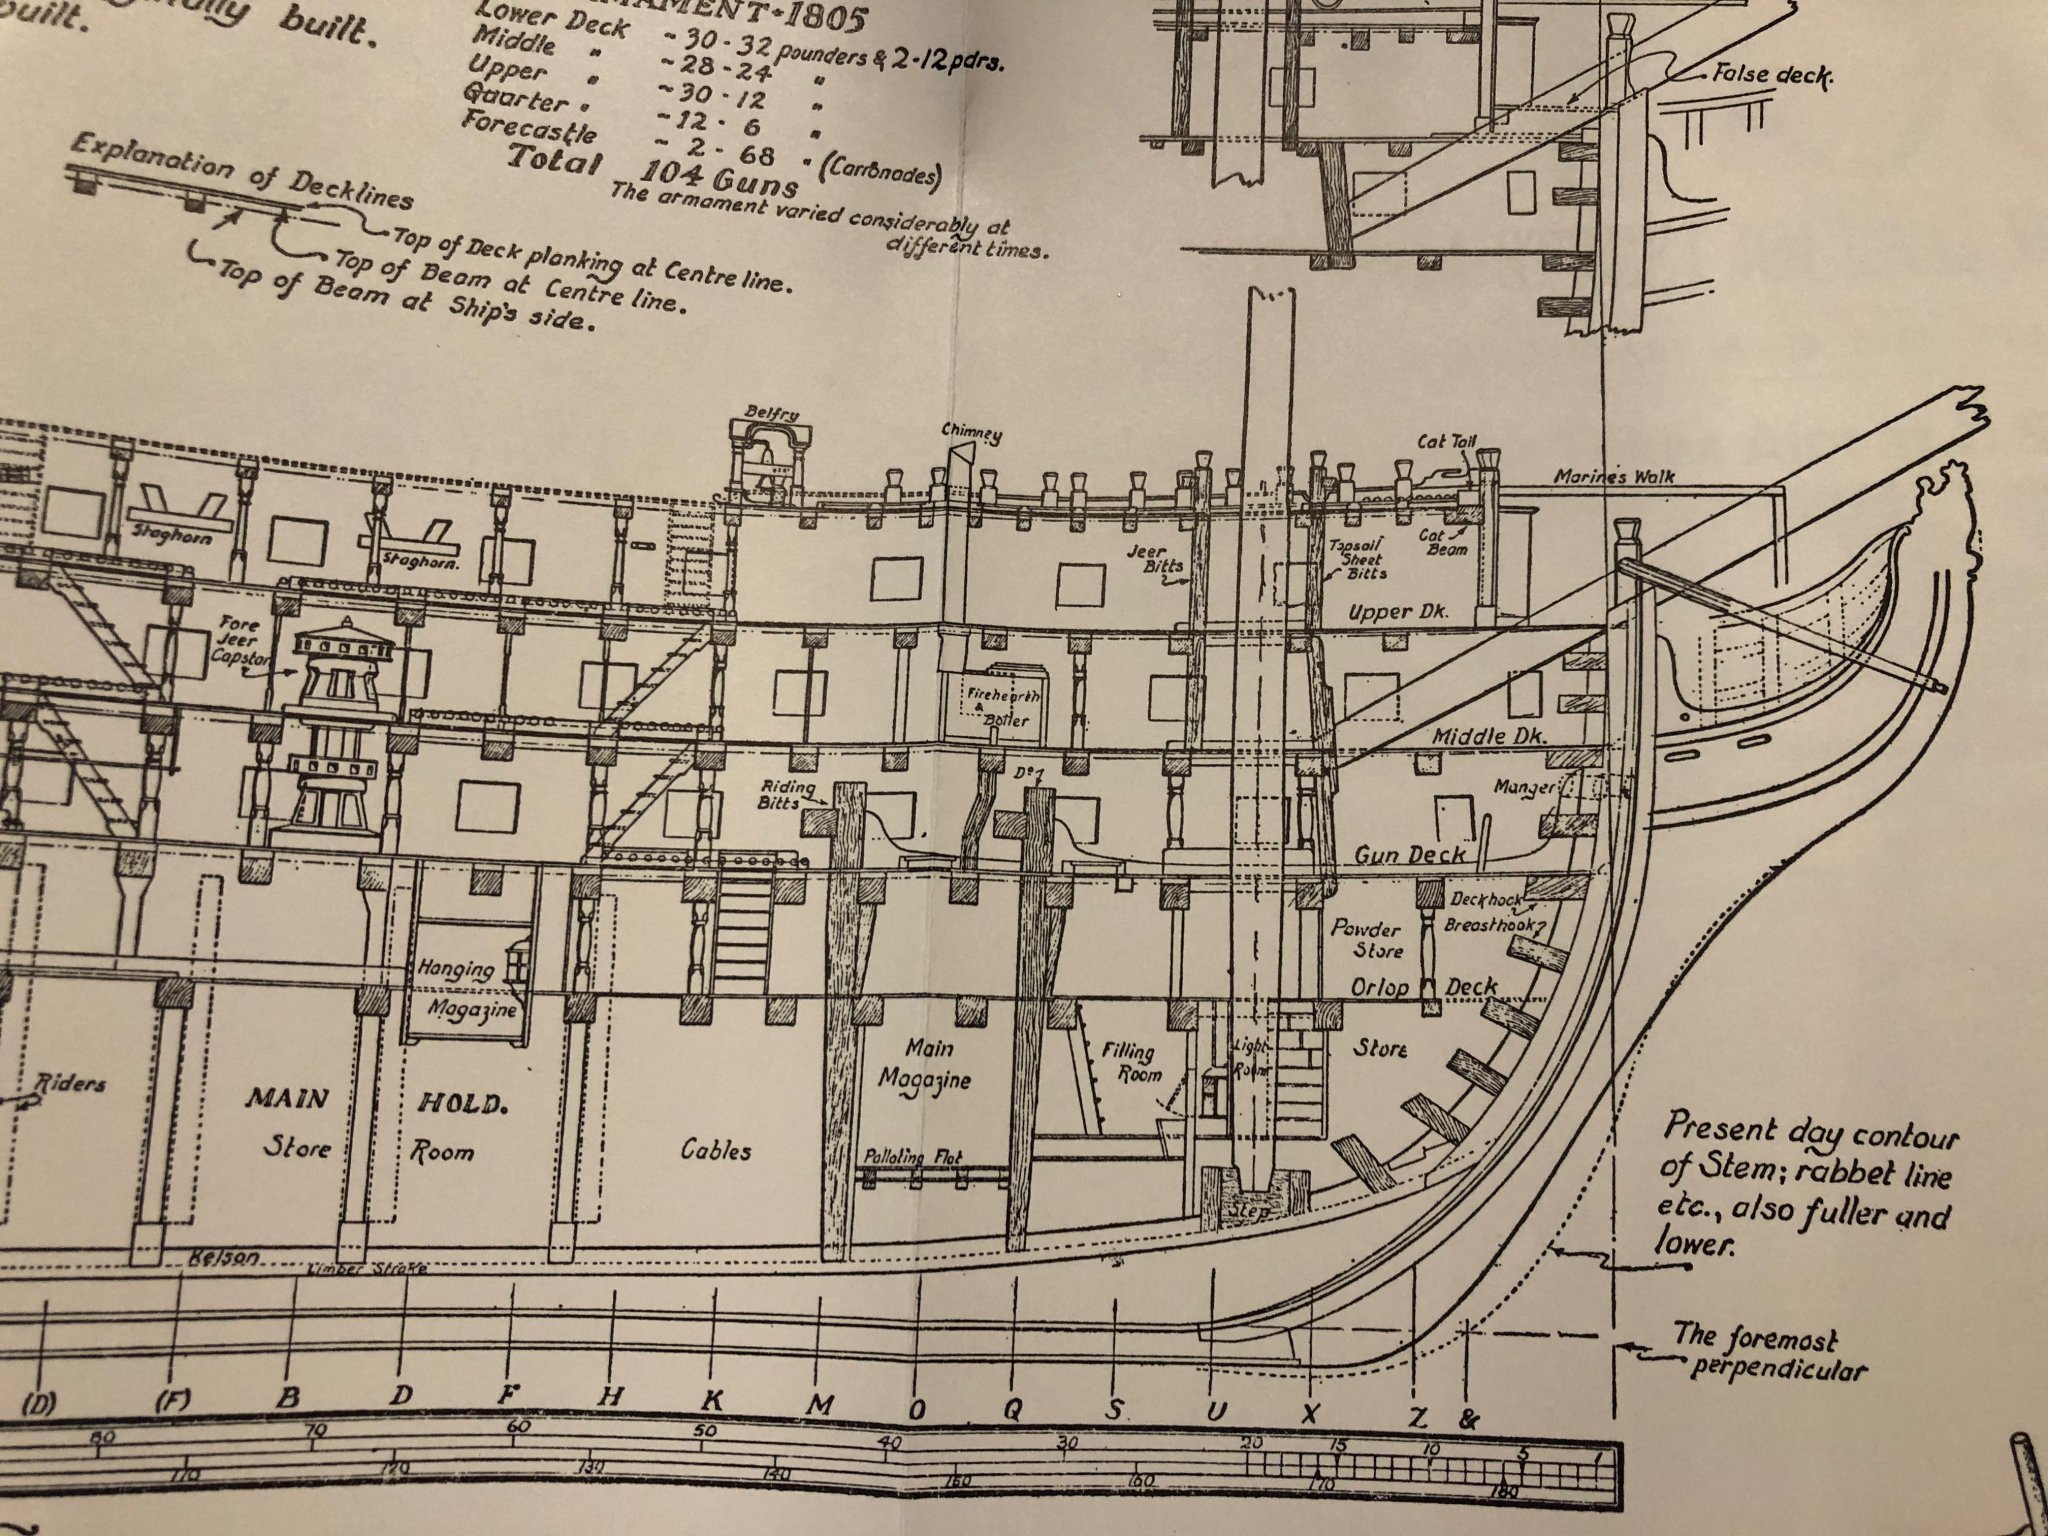
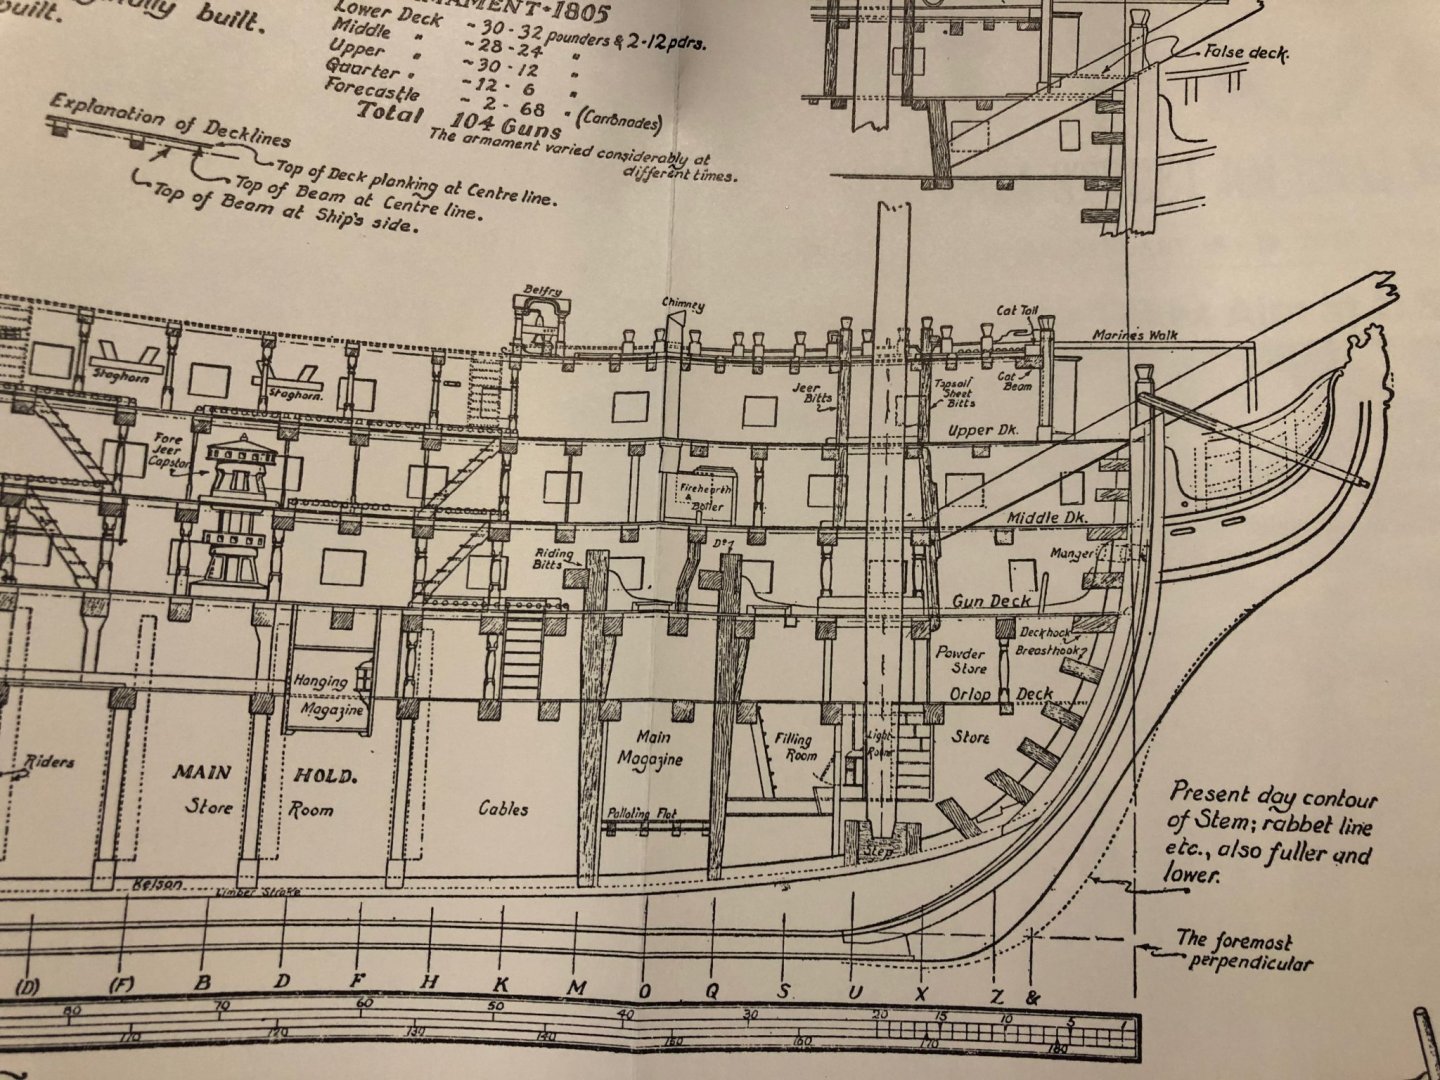
Communicating between our forum members can be a challenge as we (or at least 1) reference various model locations. I'm including a picture of the Victory deck nomenclature from Plan No. 1 contained in C Nepean Longridge's book 'The Anatomy of Nelson's ships' that I believe is mostly consistent with the nomenclature used in my previous and hopefully, future posts.
-
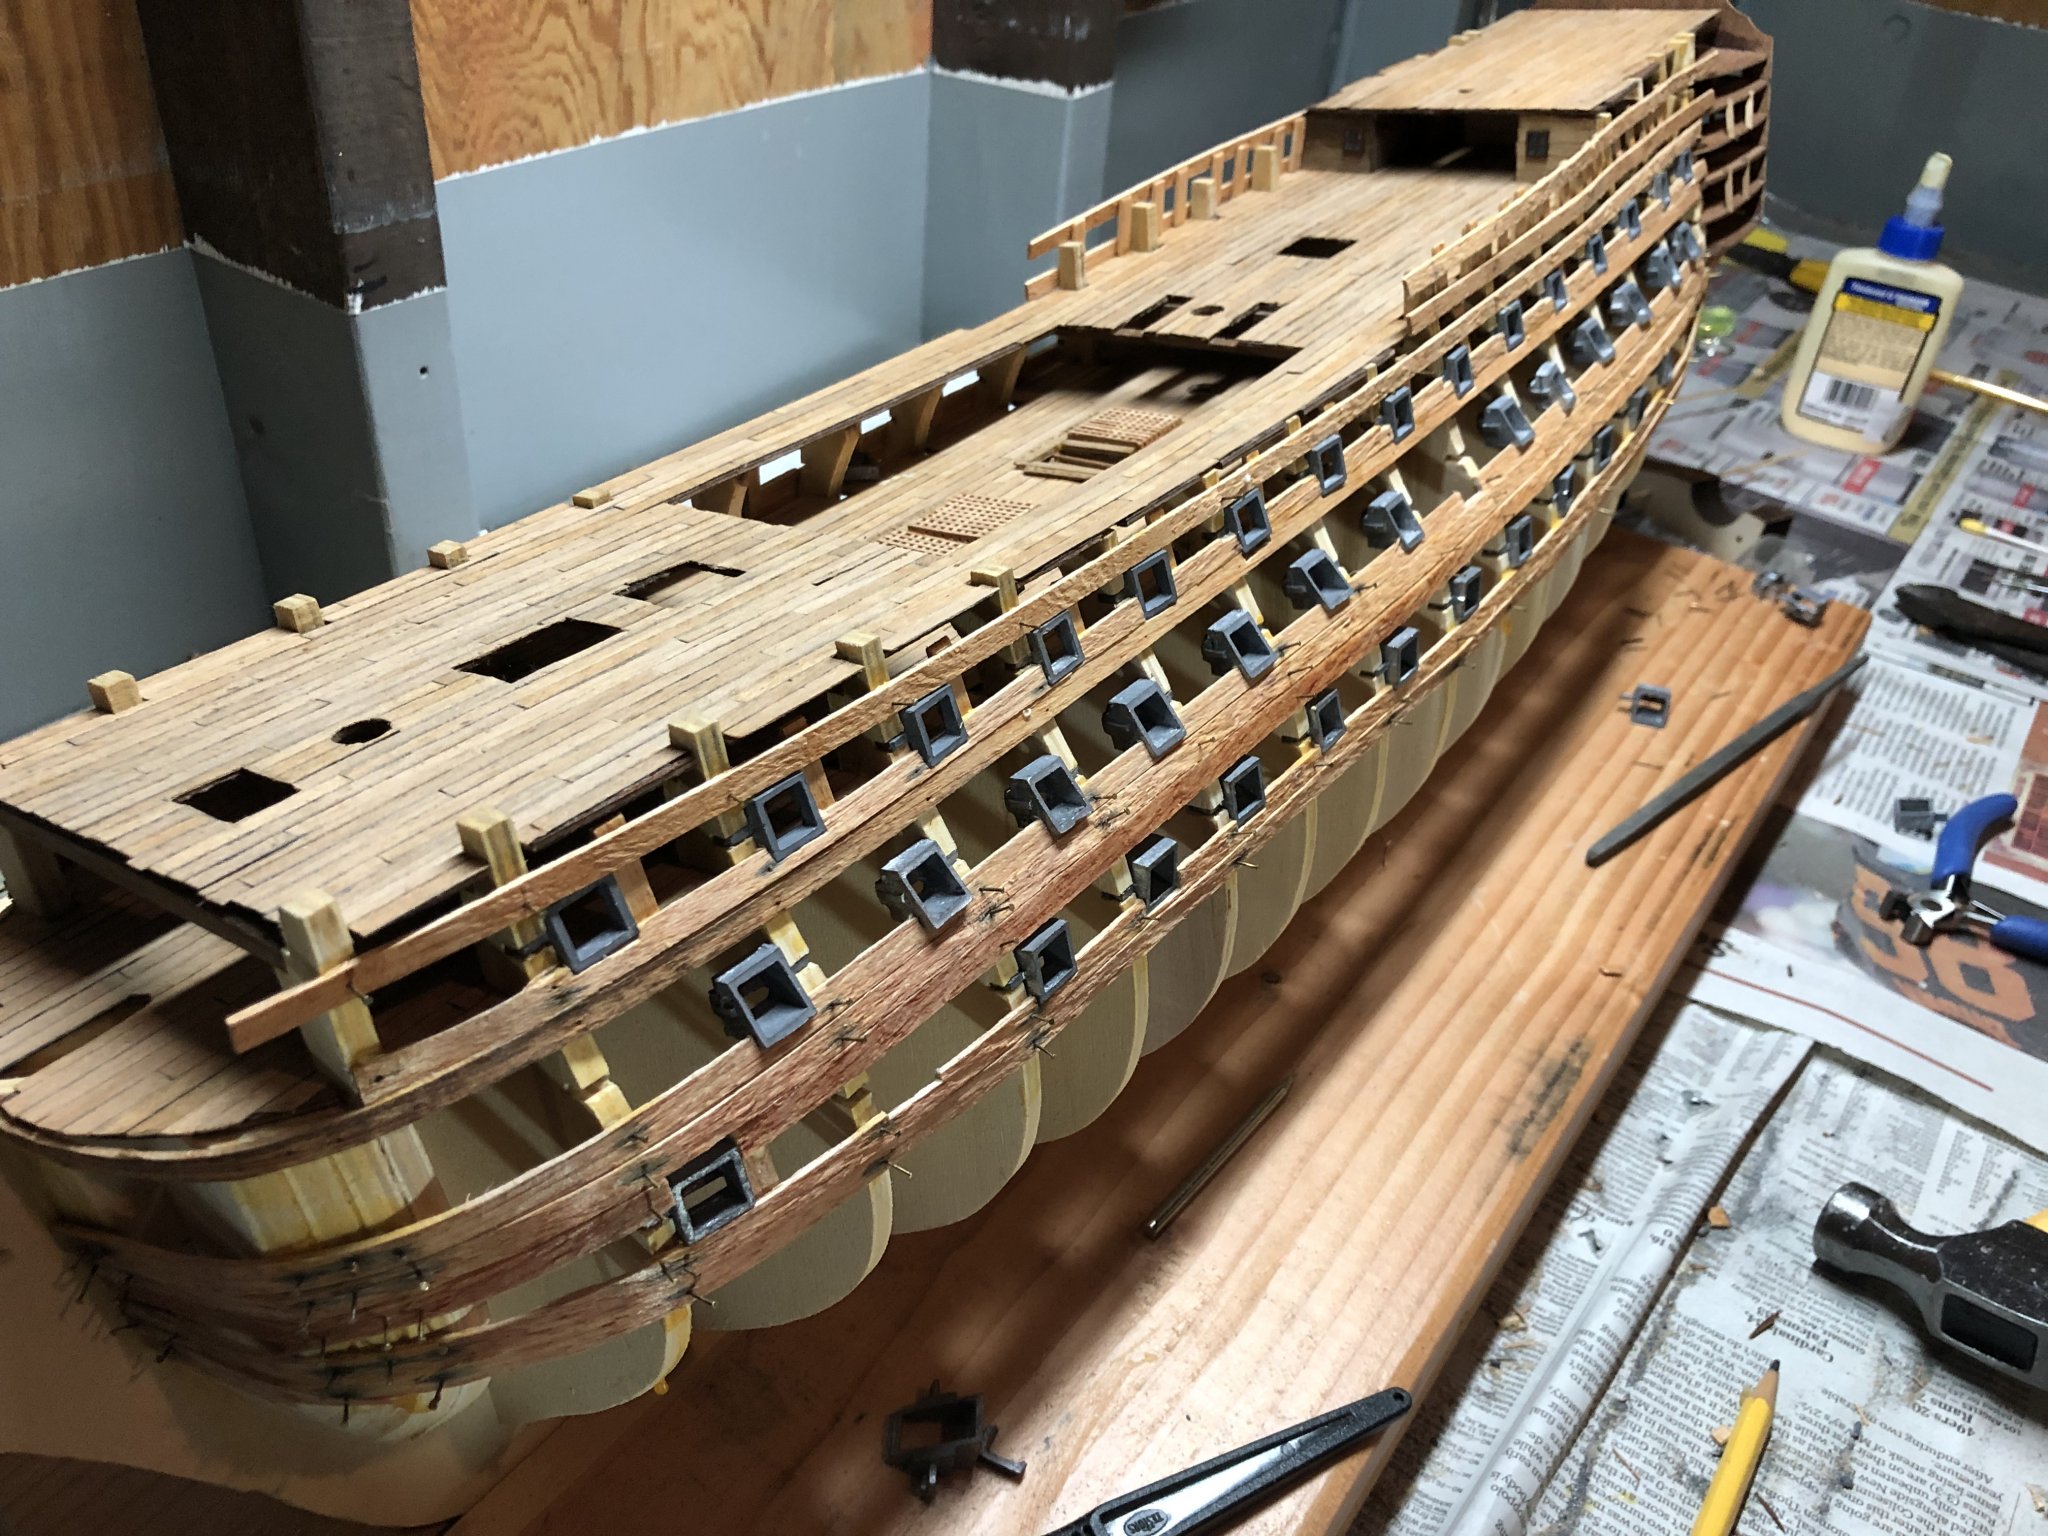
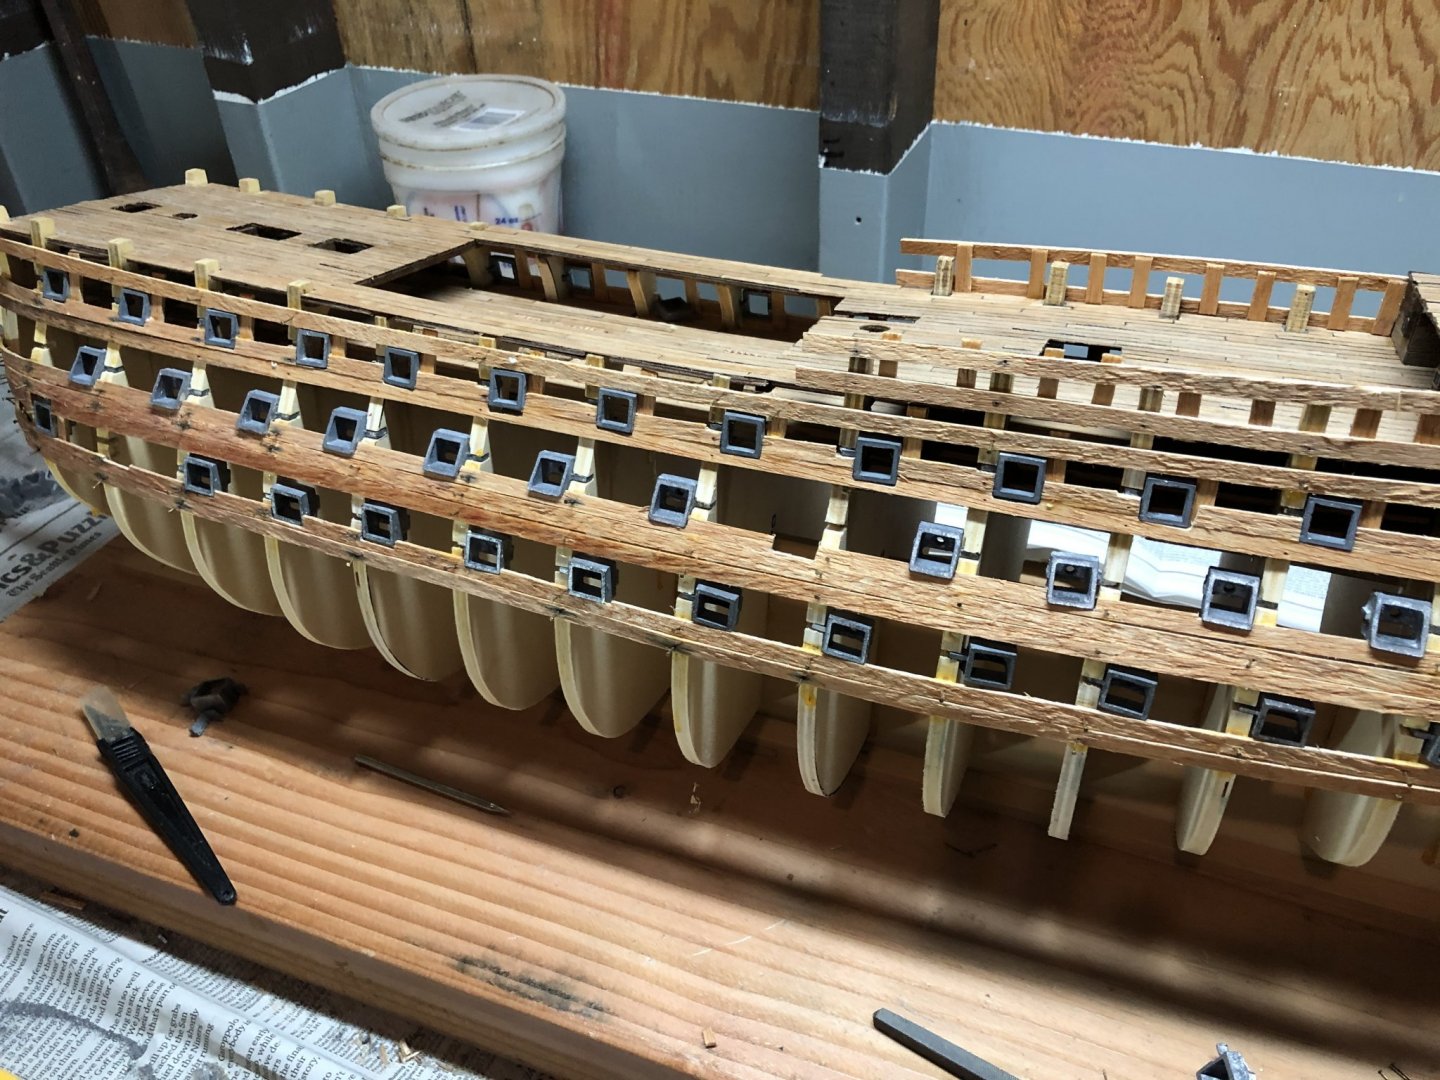
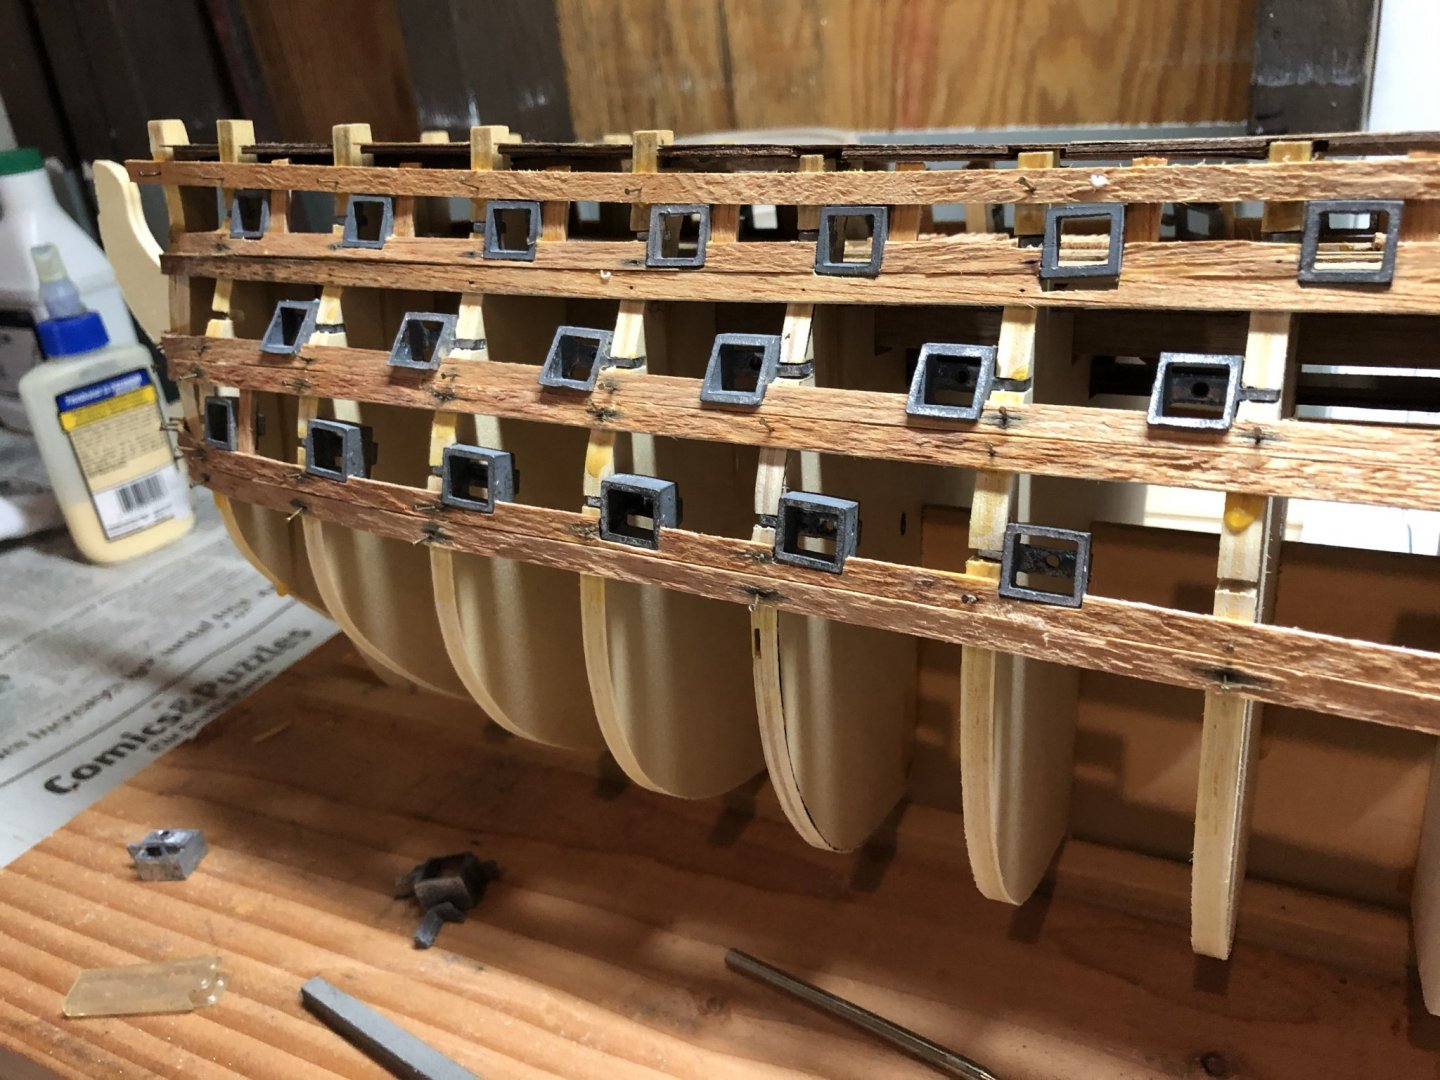
I've completely framed the upper deck gun ports on both port/starboard sides. Next is fitting and framing the Middle and Gun deck ports.
-
Hi Emmet! I'm responding to your question about the nails in my planks (Rob S: 1/90 HMS Victory by Mamoli). I soak my planks before shaping them to fit on a given section. Once they have been shaped and fitted, I add the wood glue to the plank underside where it will be touching the bulkhead sides, etc. Then, after applying the glue and when actually attaching each plank, I typically start at the bow and with my 'loose hand' (one not holding the plank in place) I push in a small nail as far as I can and then with a small hammer, tap it home. I do that for each plank/bulkhead connection as I move aft. Once the planks are in place for several days, the nails can be removed. The nails were included with the kit. Finally, be sure to check out Y.T.'s HMS Victory as he is a master at planking and shows the nails as well. Your build looks great and best in future work! Rob S.
-
Planning to set all the gun ports with the horizontal and vertical planks and then filling in the blanks.