HOLIDAY DONATION DRIVE - SUPPORT MSW - DO YOUR PART TO KEEP THIS GREAT FORUM GOING! (Only 51 donations so far out of 49,000 members - C'mon guys!)
×

Cleat
-
Posts
202 -
Joined
-
Last visited
Content Type
Profiles
Forums
Gallery
Events
Everything posted by Cleat
-
 When I trimmed the edge piece of the third deck I damaged some planks, I'm not sure how I can fix this.
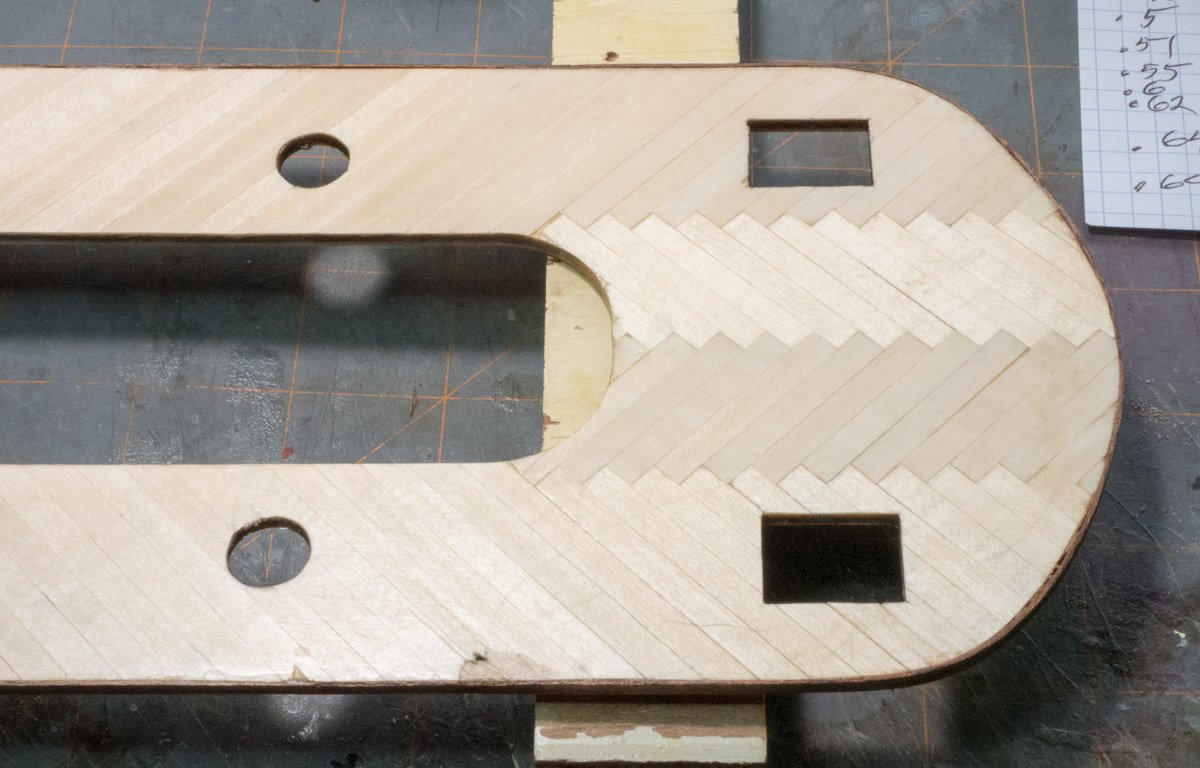
-
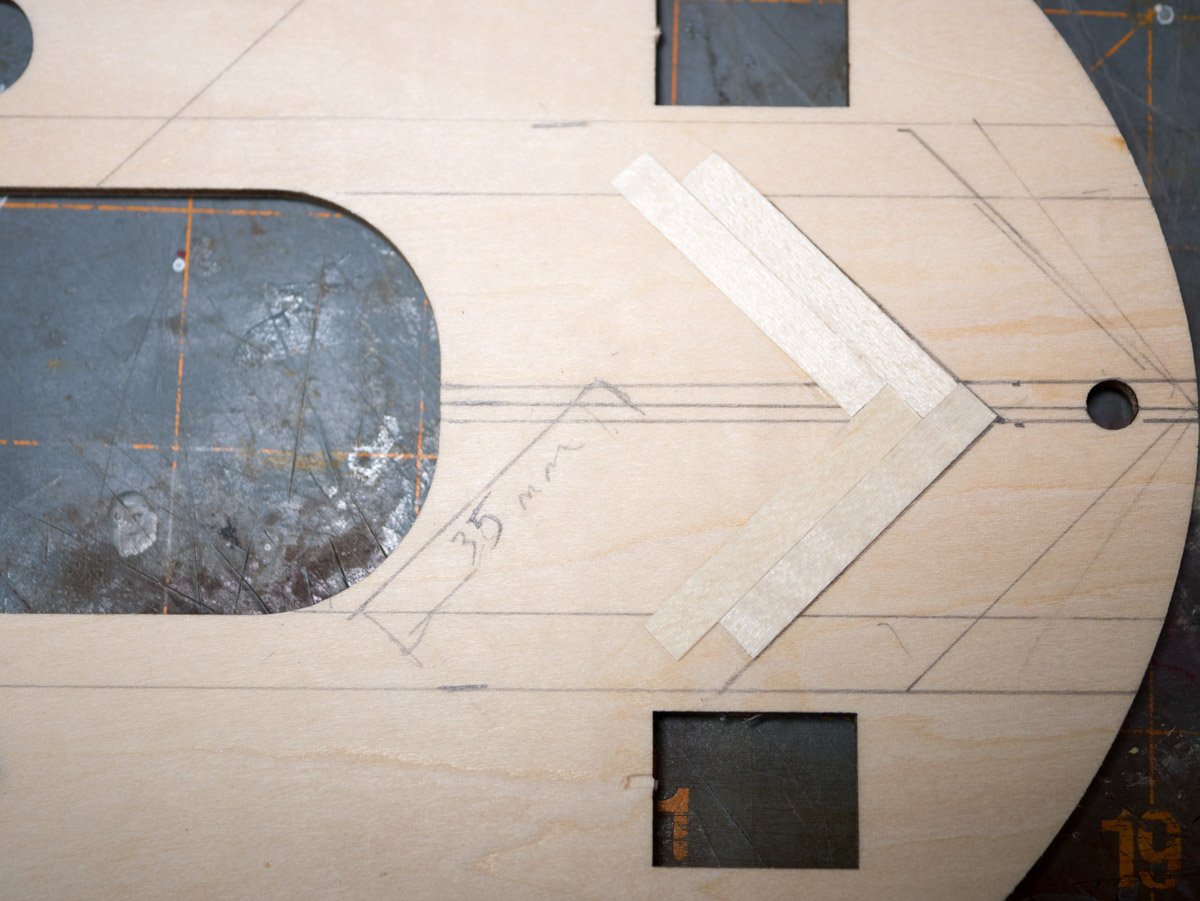
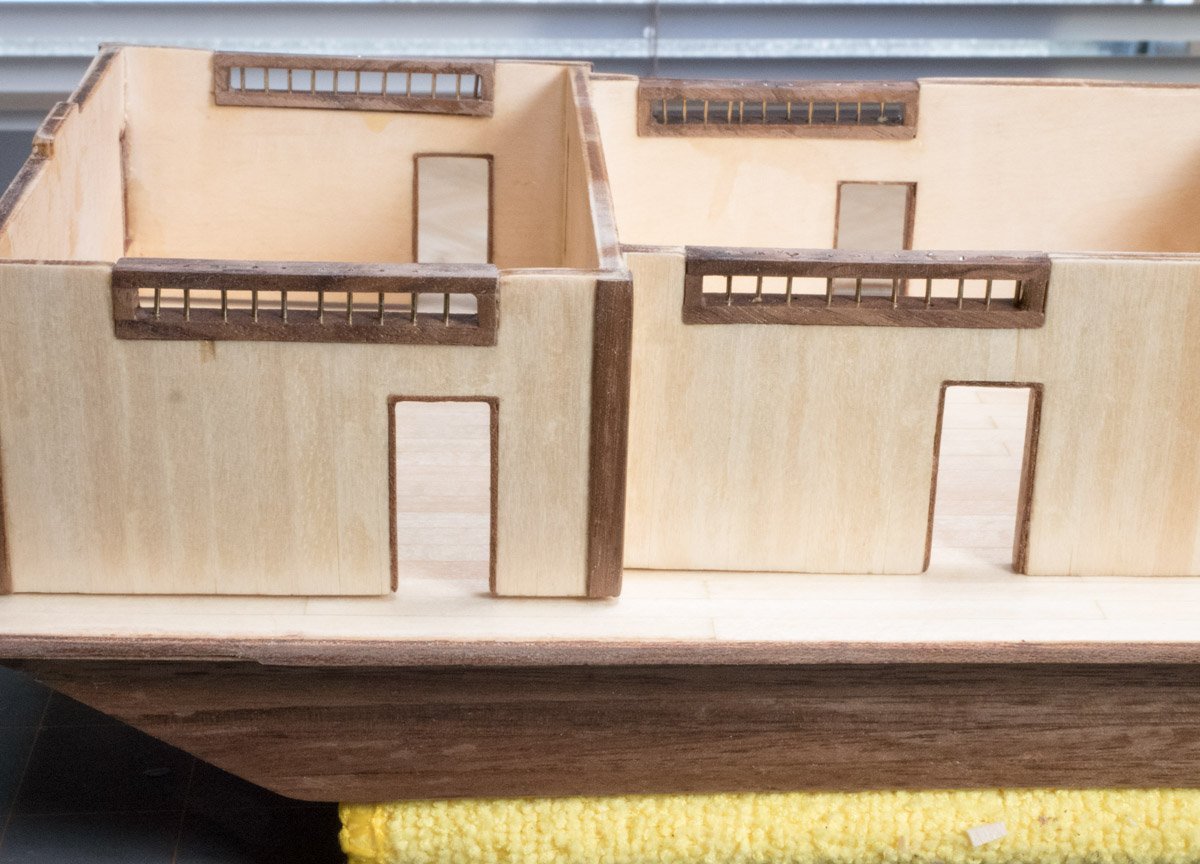
I planked the third deck. I had divided the deck into equal quadrants like I did for the main deck but looking at the cutout I decided to reduce the size of the middle quadrants, I went with 35 mm for the middle quadrants and 60 mm for the outside quadrants. I also planked the state room walls, floor, and ceiling. I had assembled the state room before I planked it, I should have planked the sides before assembly, it would have been easier to trim the edges. I had problems trimming the edges, several pieces broke or separated from the structure. I cut the deck posts for the bottom deck and while applying finish to each one I realized I should have finished the wood before I cut them. I’m finishing the other posts before I cut them and I’m looking at other pieces that I want to finish before cutting them to size. I’ve been applying finish to several things.
- 132 replies
-
- 2
-

-
- King of the Mississippi
- Artesania Latina
- (and 1 more)
-
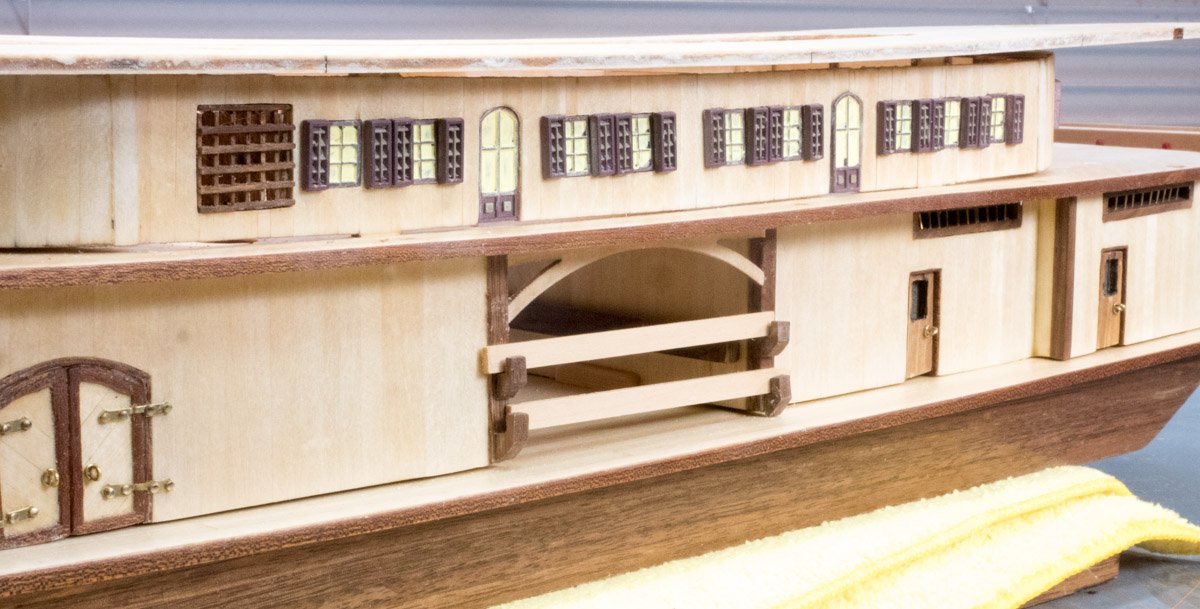
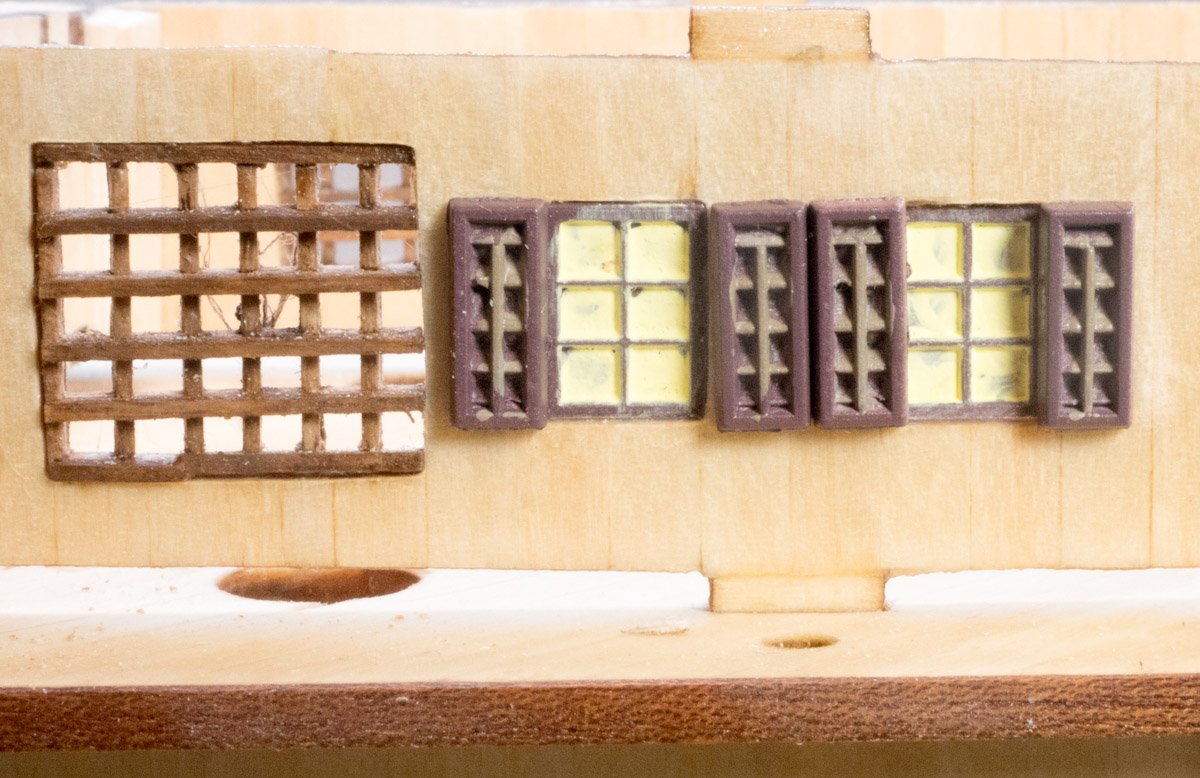
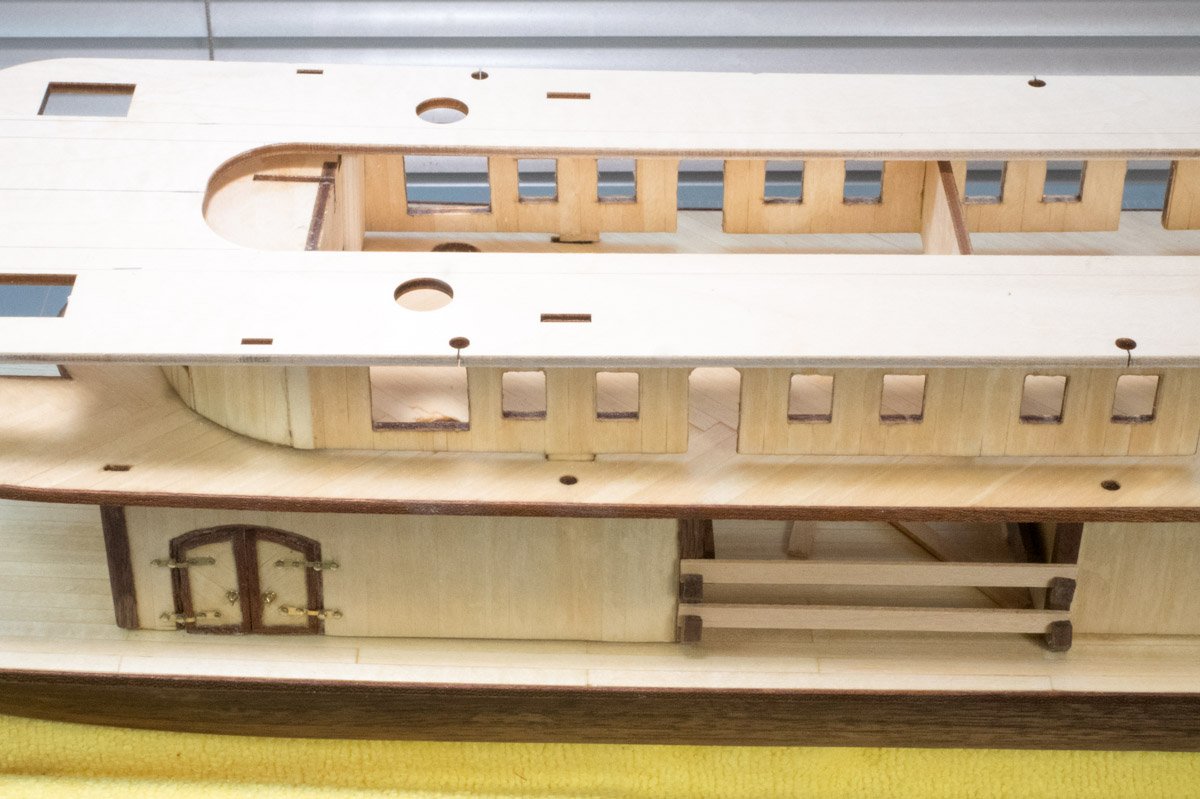
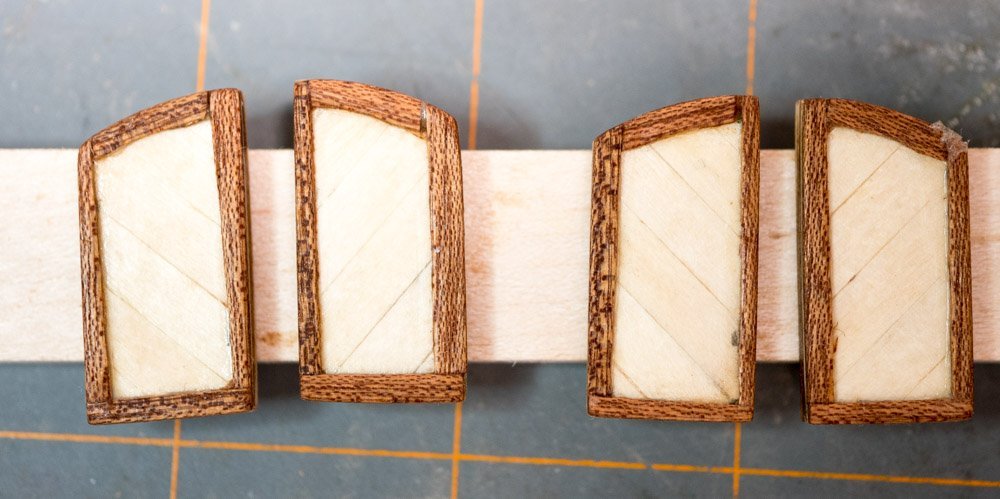
I completed the state room compartment (the second deck). I was not looking forward to painting the windows, doors, and shutters. It turned out OK when viewed from a distance but close up you can see my marginal skill with a brush. Test fitting the assembly to the deck (I started working on the third deck): For the grates I stained the plywood knowing it would absorb the stain unevenly, I wanted to see what the effect would look like - I could always paint them. It took a couple coats to get the effect I wanted. Once I glued the pieces together, I discovered how delicate the assembly is when I tried to trim them to size. The tiny glue joints can easily become disconnected or break. I used an airbrush to paint the windows/doors/shutters a brown base color. Brown is hard to mix. I watched a couple videos and it looked like you can get brown from a variety of color mixtures but that didn’t work for me. I was getting muddy gray with a tint of some color. It took me three attempts to get a paint mixture close to brown. The brown color is actually a muddy purple. For the shutters I wanted to mix a lighter brown and lightly paint the spine and highlight the edges of the shutters. I tried to mix a lighter brown but my brush paints mix differently than the airbrush paint. It also took three tries to get a complementary color that resembles light brown (but it is really a muddy gold). I would load my brush with paint, then swipe it on a paper towel to reduce the paint load and lightly brush the center of the shutters. It turned out but not as clean I hoped. For the windows and doors, I went with a light yellow. I tried to paint within the window panes but that wasn’t going to work for me. I ended up painting outside the lines of the window panes so I wiped the excess off so I could see framing and cross rails. (I wasn’t able to get all the yellow off).
- 132 replies
-
- 4
-
-
- King of the Mississippi
- Artesania Latina
- (and 1 more)
-
I didn't know they had a version with a motor to rotate the paddle wheel (my paddle wheel is so loose it hits structure when rotated). How is it powered? Have you tried putting the band on the interior pulley by working the band from the rear opening? I'm guessing you probably won't need to put the band on unless it breaks over time. The only thing I can see is to make the rear wall removable. Use some scrap from the laser cut panels to make a frame for the rear wall to attach to the frame.
-
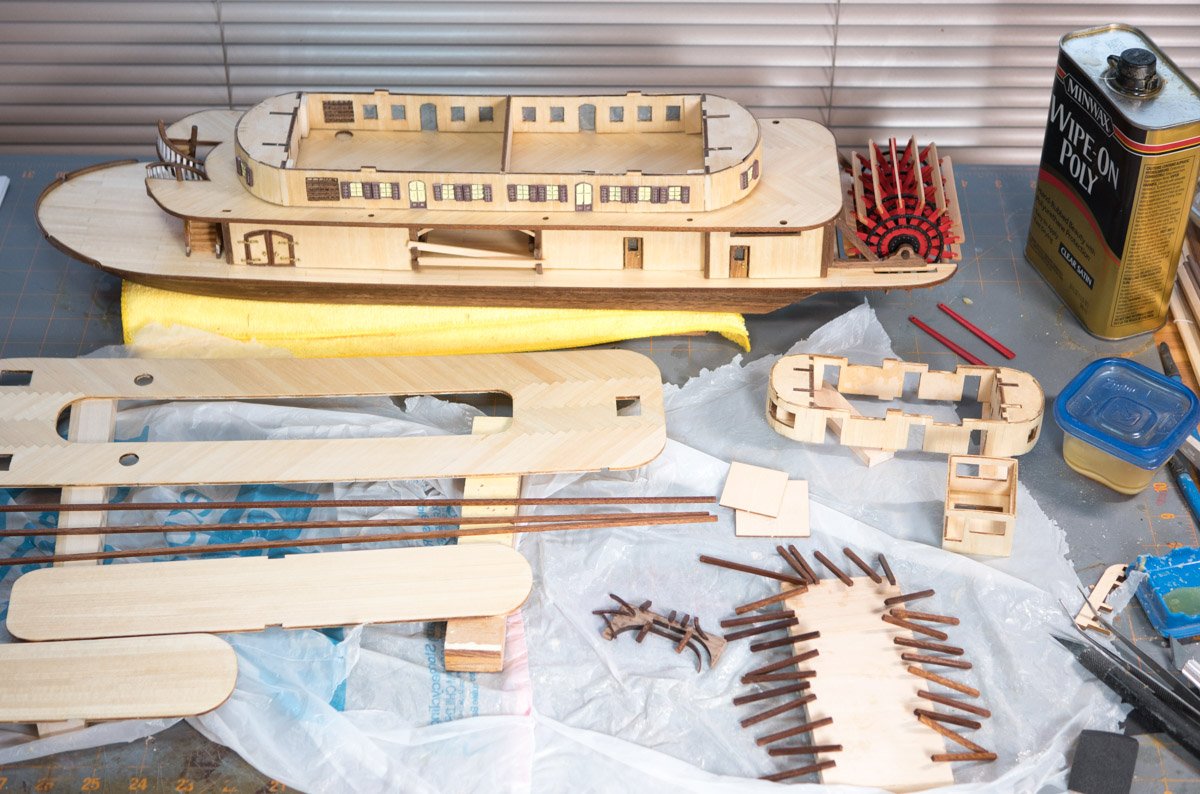
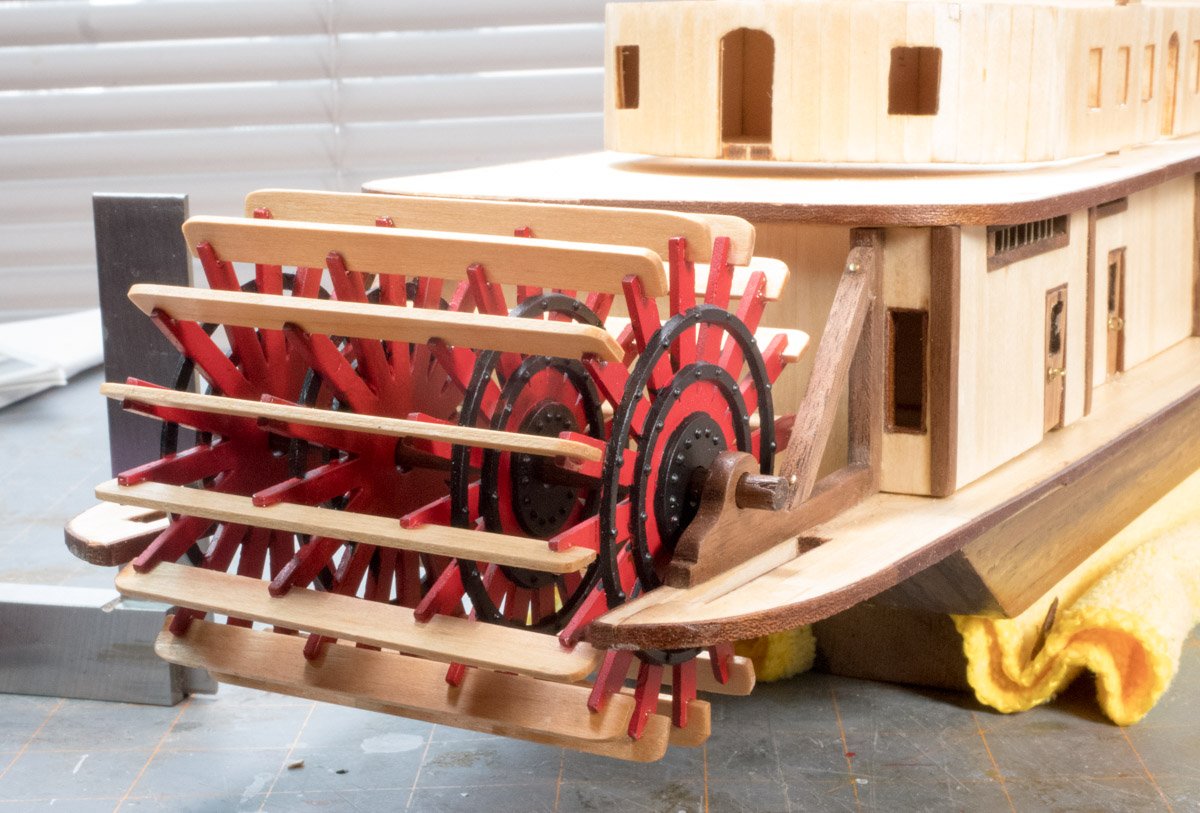
I built the paddle wheels. I painted the red base with an airbrush and hand painted the black accents (it has been a long time since I tried painting with a small brush). I ran a piece of sandpaper through the yokes for the wood to remove paint. I tried putting a dot of gray paint on the bolts but my painting skill wasn't good enough for that detail. I made a 23 mm guide from scrap to locate the four paddle wheel supports. It took awhile to align everything and just as I was going to start the assembly, I bummed it knocking supports out of alignment and it took even longer to get it back to where I had it. The shaft is a loose fit through the paddle wheels. I installed one board with a force fit, then I glued the second board using CA glue several spokes away from the first one to help lock the alignment of wheels. I put a few drops of CA glue on a small plastic bag (I learned CA glue doesn’t stick to those bags from my pen turning hobby). I used a flat toothpick to put a drop of glue in each yoke. This assembly has a big visual affect for the boat.
- 132 replies
-
- 6
-
-
- King of the Mississippi
- Artesania Latina
- (and 1 more)
-
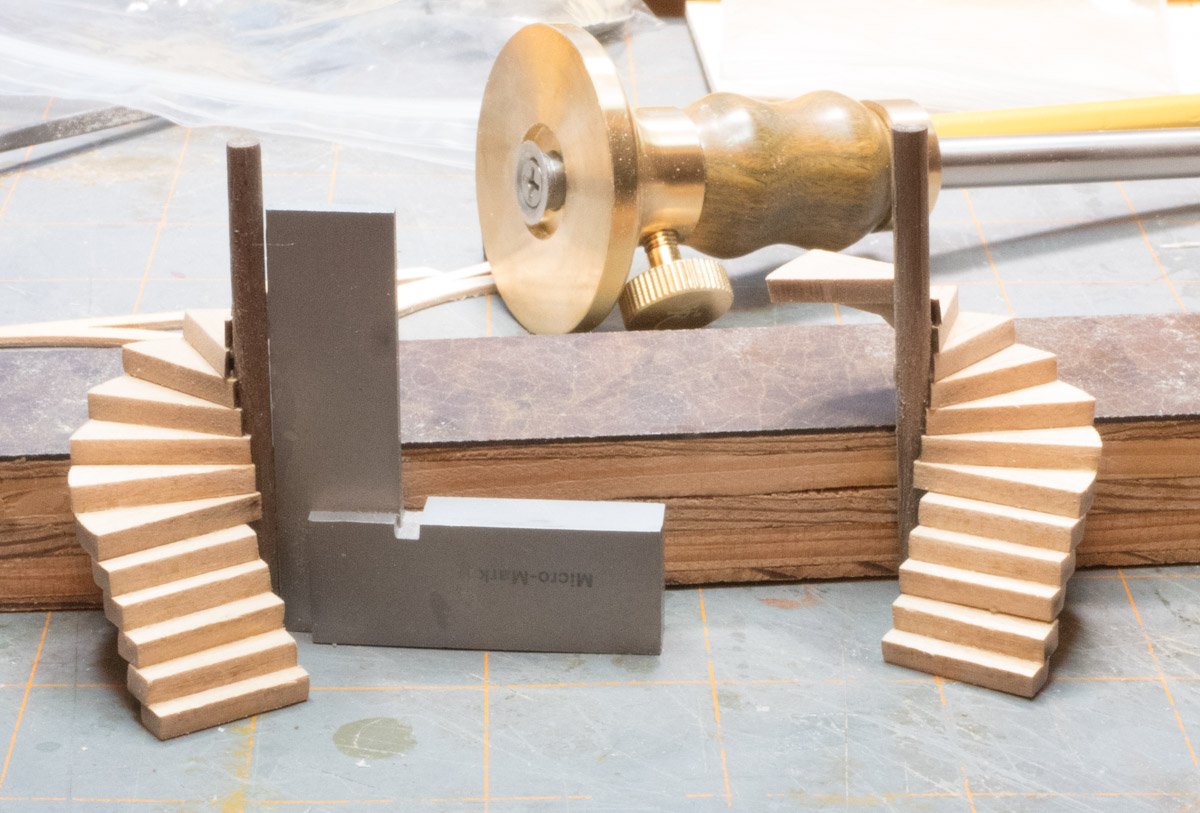
The stairs are a difficult assembly. I was happy that I was able to accomplish the task.
-
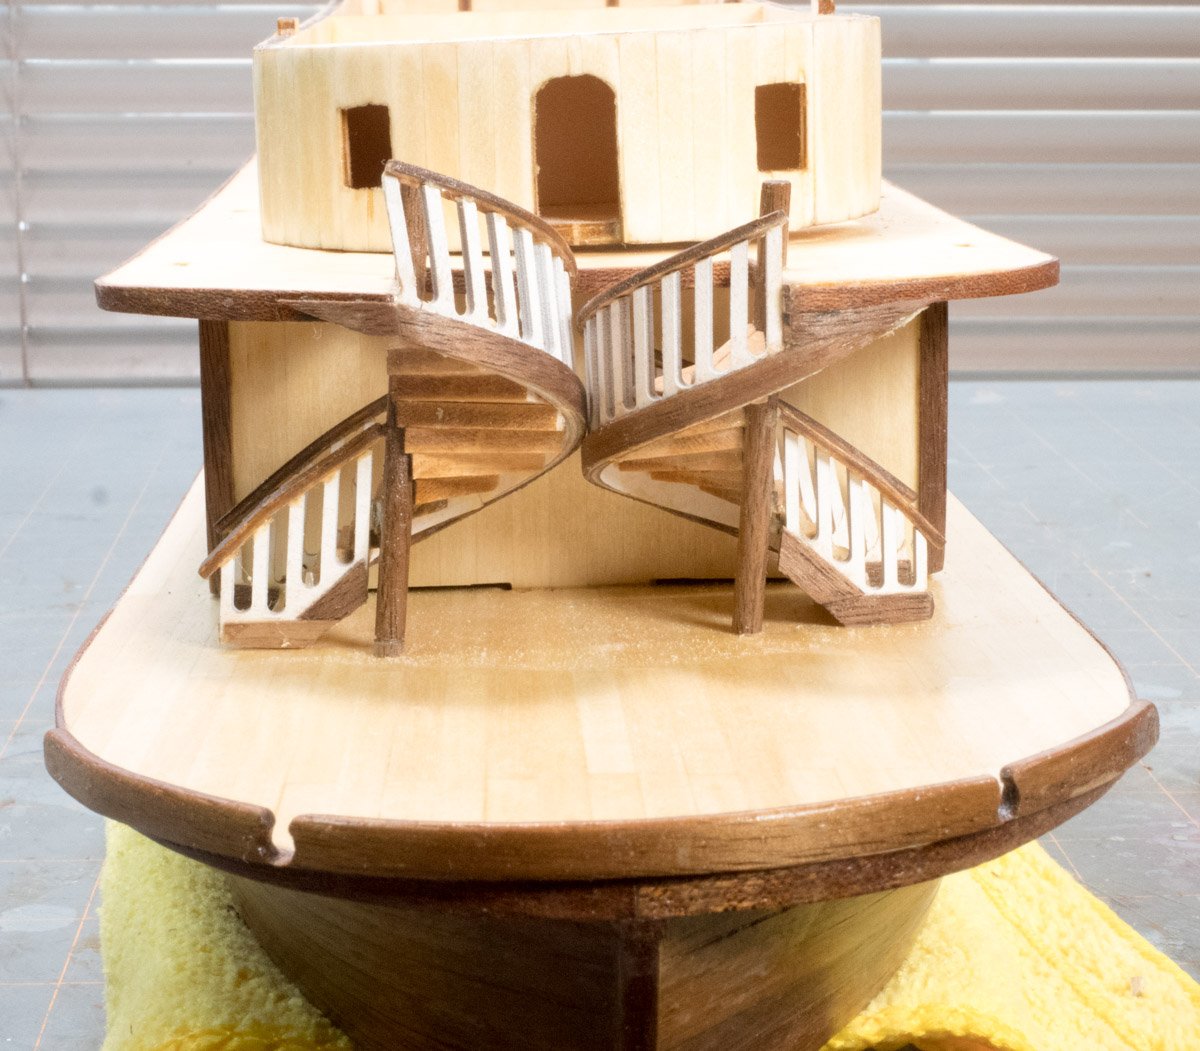
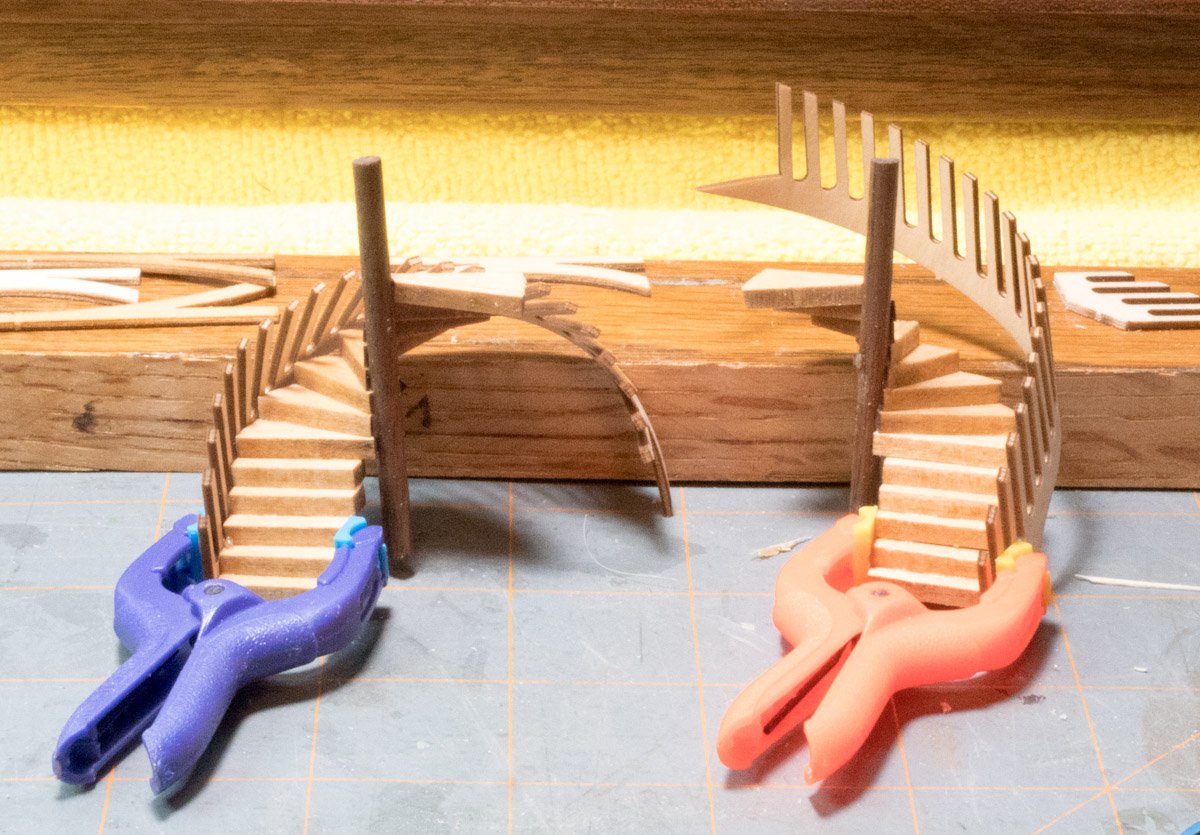
The Spiral Staircases When I bent the first railing posts I was only concerned about the diameter (a spice jar was the right diameter). But I discovered the height was way short. For the second railing I made an attempt to match the height between the decks, I came close but a little short. I decided to re-bend the first railing and it came out a little tall, the center post became crooked after the stairs broke and I reglued the parts (the picture in a previous post shows it was square at one point). Gluing the railing posts to the stack of stairs was tricky, it was hard to hold the assembly in position until the glue set a bit. I tried to glue both assemblies the same but aligning the pieces varied. I used my hands to clamp the piece to the stairs (for 3 songs) then it would hold in place while I added some clamps until the glue fully cured. To fix the height problem I would have to deconstruct the railing and that wasn’t going to happen. When I assembled the two staircases, I broke 2 posts and cracked 2 others - deconstruction would be a disaster. I decided to live with my mistakes and move on. On a positive note, I got practice and some knowledge for future kits. And I liked how my walnut embellishment turned out. This is how it turned out:
- 132 replies
-
- 3
-
-
- King of the Mississippi
- Artesania Latina
- (and 1 more)
-
Thanks for the tip. I haven't started Step 30 yet. I'm advancing several steps at the same time. I painted the paddle wheel metal parts and I'm finishing the planks. I air brushed the windows, doors, and shutter pieces with a base brown coat but I haven't decided how to paint the individual window panes, I don't want to paint them freehand and I haven't come up with a template idea yet. I made the second deck grates but haven't installed them yet (I need to do some filing to the grates and the opening to get a proper fit).
- 132 replies
-
- 2
-
-
- King of the Mississippi
- Artesania Latina
- (and 1 more)
-
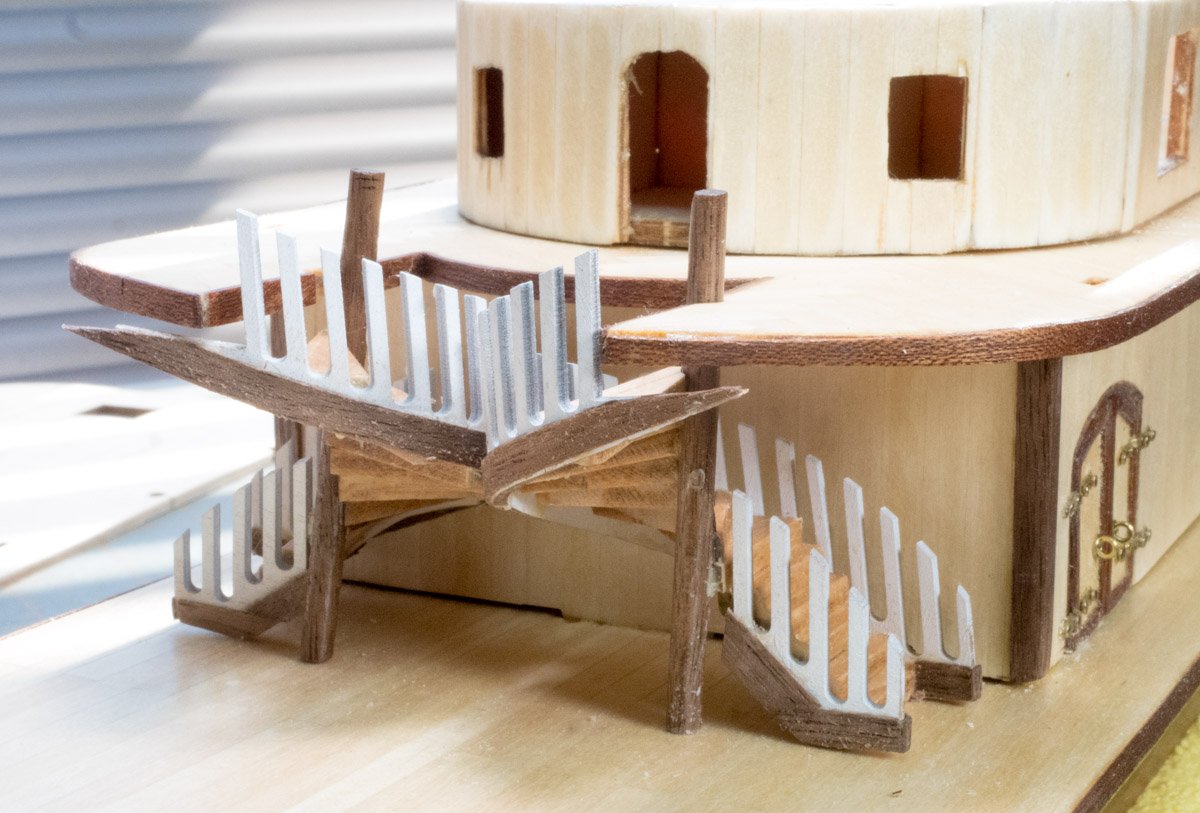
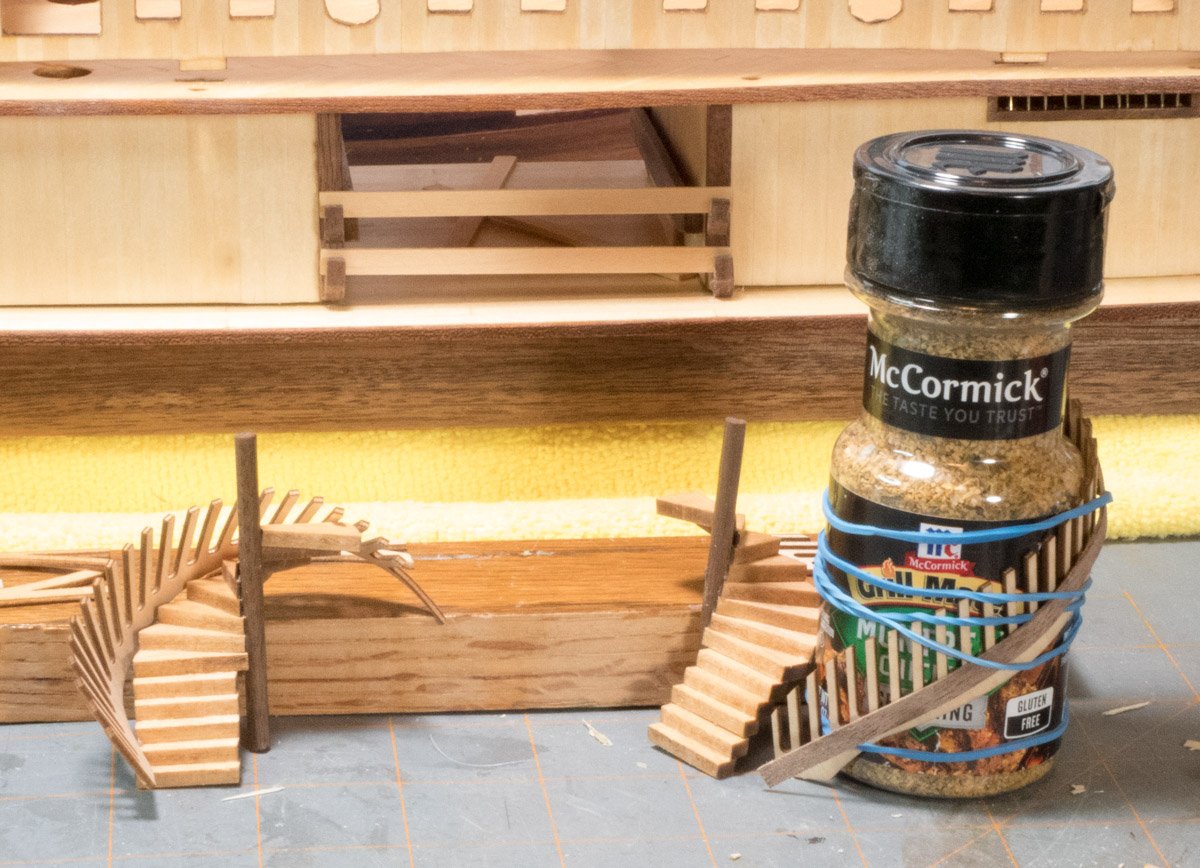
I’ve been working on the spiral staircases. I added walnut plank pieces to personalize the staircases. The picture shows a test fitting, they came up short. (The gap is smaller when I hold the bottom flush with the deck). When I bent the railing for the left side, I came up way short of the staircase height so I soaked the piece a second time, it straightened out and I bent it again to match the height of the steps. When I re-bent the railing, the top spear got out of its clamp and now it is straight which sticks out from under the deck. It looks like I’ll need to add a spacer at the top of each staircase. And I’ll probably cut the spear off the left staircase and reattach it at an angle to fit under the deck. It might take a little contem-beer-plating to figure out the fixes. I stained the hand rails and I’m nervous about attaching them to the staircase assemblies. I don’t know how well the hand rail will attach to the tops of the posts.
- 132 replies
-
- 3
-
-
- King of the Mississippi
- Artesania Latina
- (and 1 more)
-
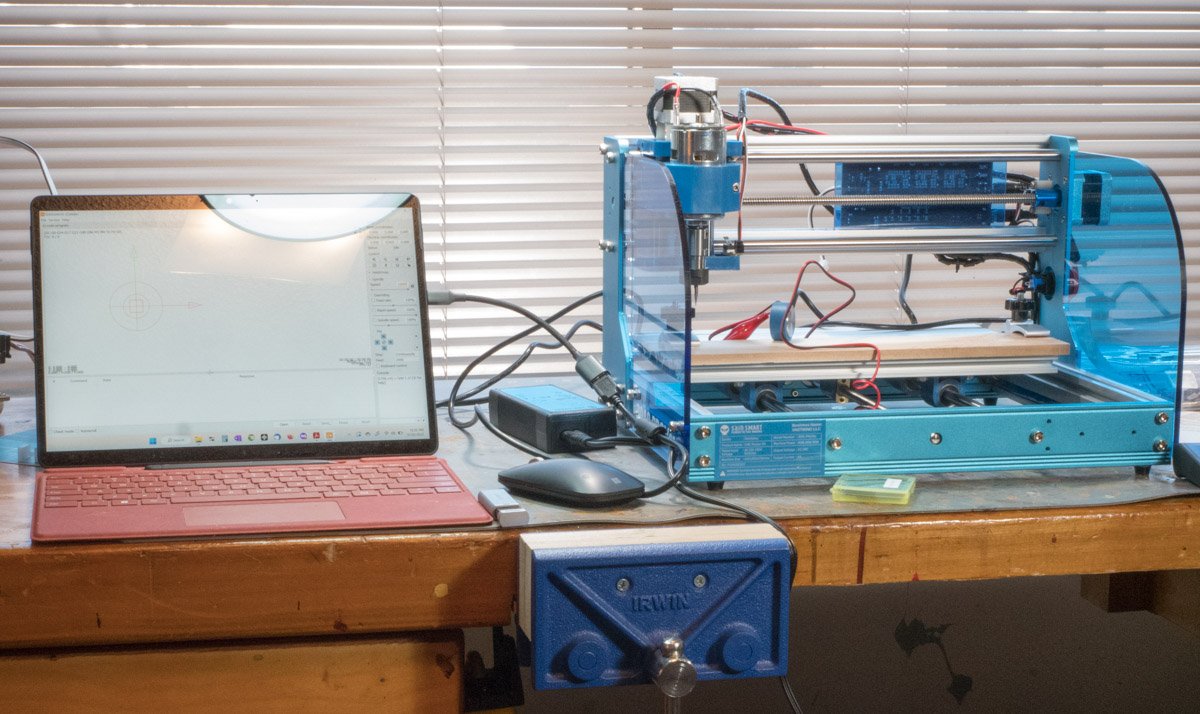
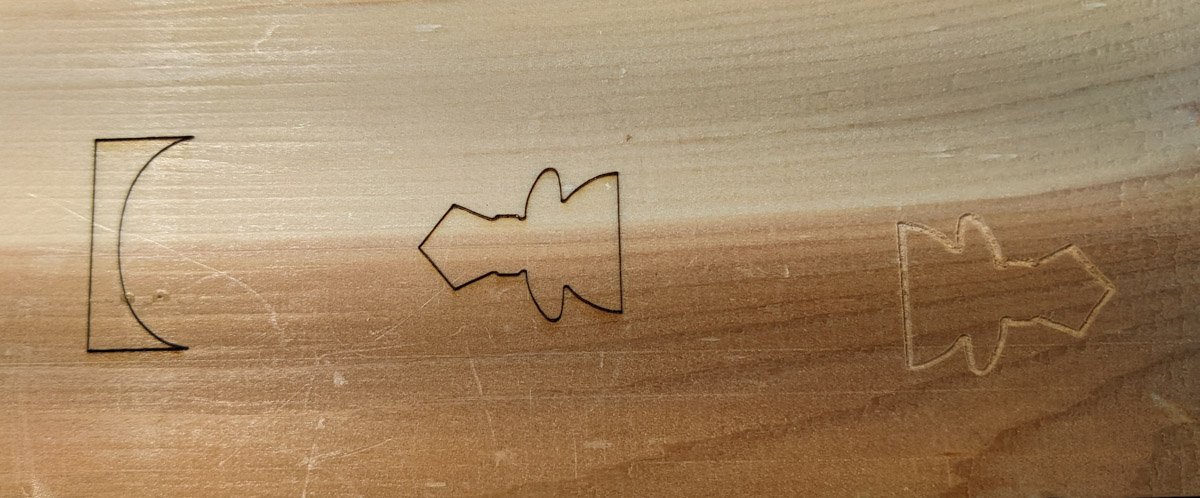
I’m learning the Sain Smart 3018-PROVer CNC machine, I intend to use it for engraving wood. For my riverboat project I’ll use the router configuration to make a sign with the name of the boat. I picked it because it can be ordered with a laser and a router. I wanted a small machine with lead screws and the Prover can be upgraded if my needs change. I’m also learning QCADCAM to create .DXF files (drawing) and .NC files (G-code). I made a simple icon drawing (in mm) and created both types of files. To test the laser configuration, I imported the .DXF file into Lightburn. Lightburn converts the drawing into G-code and controls the CNC machine to reproduce the drawing in wood. After some experimentation I was successful. You can create drawings in Lightburn or import drawing files (Lightburn is excellent for lasers). To test the router configuration, I used the G-code file (.NC) with control software to operate the CNC machine to etch the drawing in wood. And it worked - although it took me a week of frustration (from learning the software & making mistakes) to get the different software to work together. I tried several open-source machine control software; Candle (came with Prover), USG, and OpenBuilds Control. They all work but I think they prefer files with metric dimensions. I’m happy to see that everything works. But I now realize I will need to perform a bunch of tests and do some configuration tasks. I also have to look into dealing with wood smoke from the laser and vacuuming dust from the router (I hadn’t thought about that until I used it).
-
Thanks Bob, I've been referencing your build and it has been helpful.
-
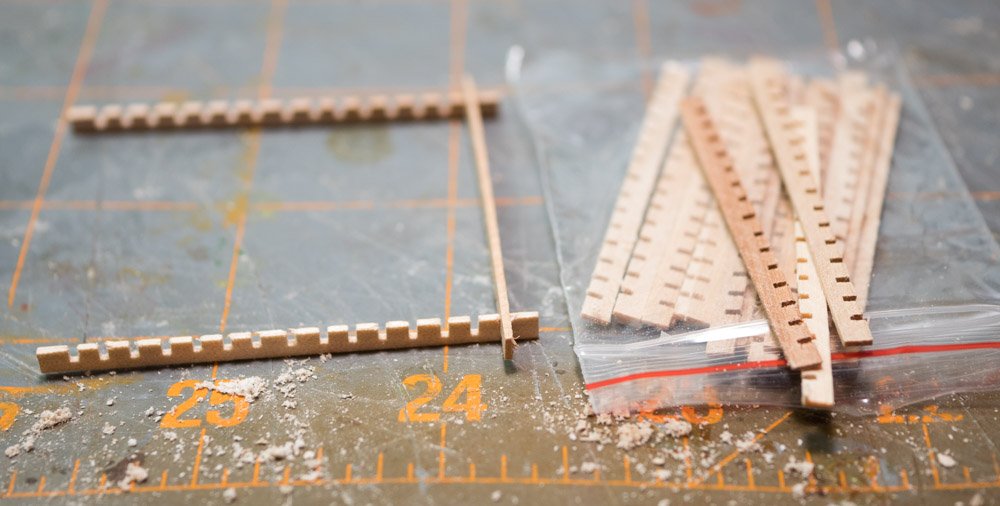
I've been filing the window openings in the second deck structure to fit the metal windows. I'm looking into making the gratings (step 26, item 77) on the second deck (the large openings). They look like they are assembled from straight pieces. I came across a bag of 20 interlocking pieces (instructions call out 20 pieces). Should I assemble the large grate structure, then cut the two grates from the structure? I expected the pieces to be sized for the openings. I don't see any other use for these pieces in the documents.
-
A spice container has the right diameter to bend the spiral staircase railing. I also bent a piece of mahogany I plan to use as an accent for the railing. Just before I was about to bend the second railing, I remembered to consider the direction of the bend which would be opposite the first piece. I discovered the first railing I bent didn’t turn out as expected, I got the diameter close but I didn’t consider the height the bend needed. The second piece turned out better. I might have to re-bend the first one (but I'm not sure if the wood can be re-bent). It looks like the railing is longer than the stairway and I'm not sure how it is supposed to work (what is the pointed end of the piece for).
- 132 replies
-
- 2
-
-
- King of the Mississippi
- Artesania Latina
- (and 1 more)
-
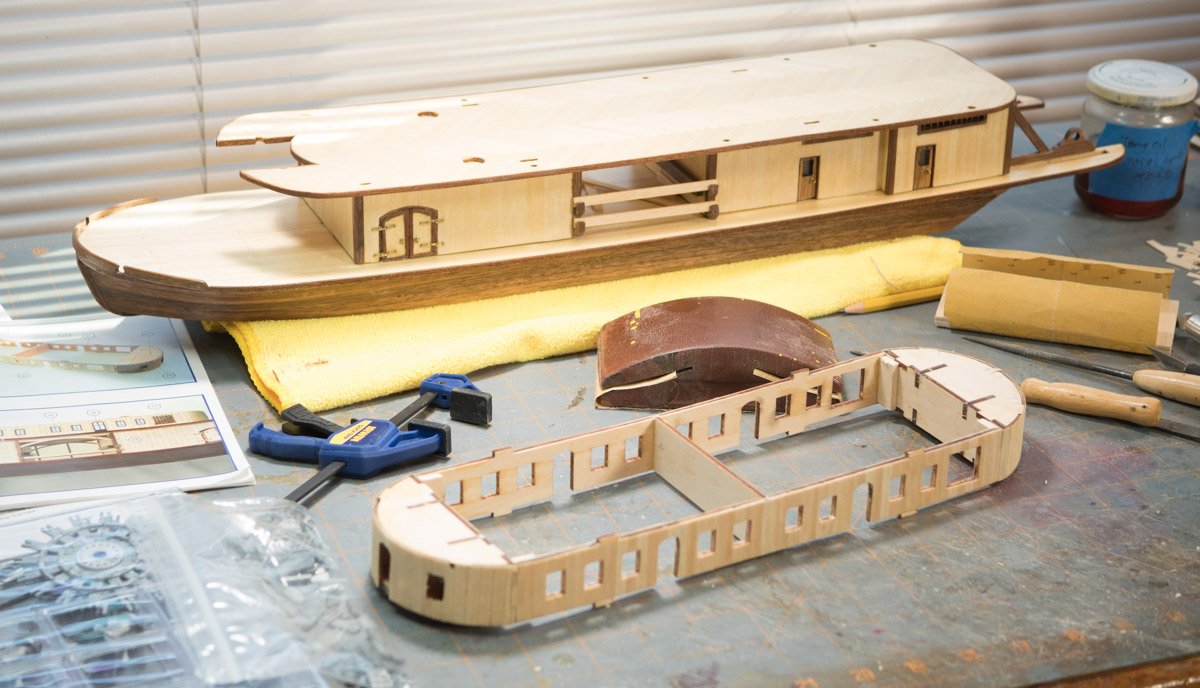
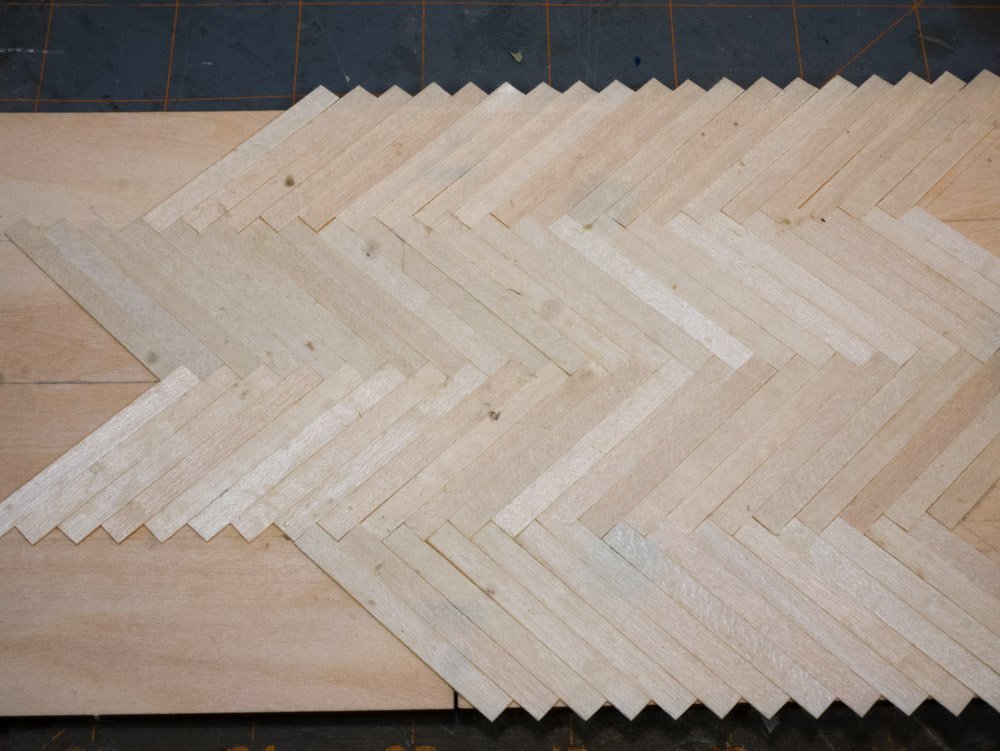
The seams connecting the curved end pieces were not good enough so I cut out the bad work to install a new plank, it worked out better but not totally clean. I started the spiral stairways. I set a marker to 2mm and scored the stairs to help align each step. I almost forgot to reverse the rotation for the second stairway. I noticed the pie shaped pieces are not symmetrical, the short side isn’t as long as the straight pieces so I used the longer side as shown. I used the pole to help register each pie shaped step. I don't know how close I got the the 90 degree turn. I put the third deck on the structure to determine how I might apply the herringbone plank pattern and I noticed that holes don’t line up between the two decks. I’m wondering if I should not have opened the holes on the second deck. I don’t know what the holes are for.

- 132 replies
-
- 3
-
-
- King of the Mississippi
- Artesania Latina
- (and 1 more)
-
I'm about to clean some of the metal parts for my King of the Mississippi riverboat. I have an ultrasonic cleaner and degreaser. I'm wondering if diluted degreaser is the right solution for the job. I'm also trying to decide if I should use automotive primer or a water based primer; I'll be applying acrylic paint with an airbrush (and details with an artist brush).
-
Hind-Sight Tip I didn’t soak the wood long enough for bending; I cracked one piece and broke the other when I formed and clamped them into shape. I fixed it: Next up is to apply primer to the gray metal parts. I’m trying to decide what shade of brown to make for the windows, doors, and shutters. I’ll be using acrylic paint with an airbrush). I’m also trying to figure out how to apply color the window panes and the indentations of the shutters.
- 132 replies
-
- 4
-
-
- King of the Mississippi
- Artesania Latina
- (and 1 more)
-
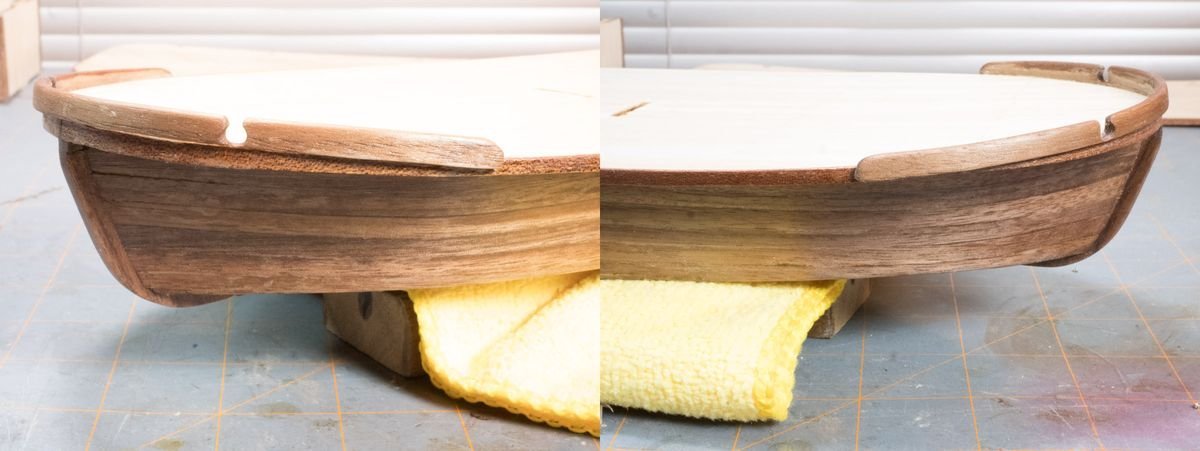
My King of the Mississippi project went on hiatus last spring; my workbench is shared with other hobbies as I transitioned to the garage season. Model ship building is one of my winter hobbies. I’m picking up where I left off (including making mistakes). I built the state room compartment and I didn’t pay attention to what I was doing. I installed one of the round end sections upside down. I managed to dissolve the glue with isopropyl alcohol without damaging anything. But re-glueing it wasn’t as clean as I wanted. I’ve started my process of sanding and leaving the saw dust in place, then I apply some finish and use wet/dry sandpaper to create a slurry to fill any gaps. After two or three applications things will be smooth.
- 132 replies
-
- 3
-
-
- King of the Mississippi
- Artesania Latina
- (and 1 more)
-
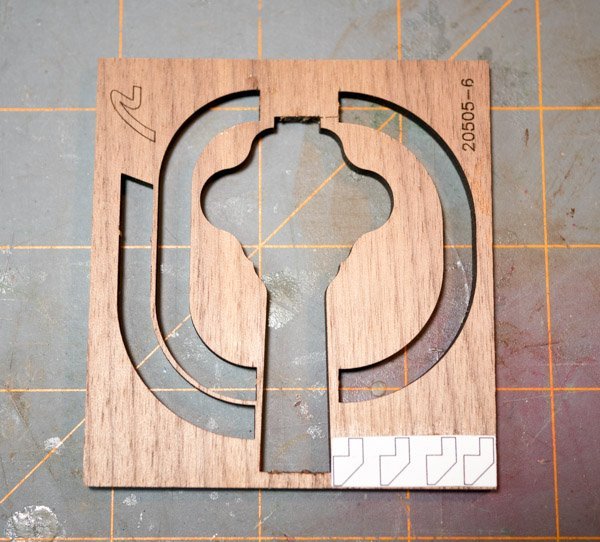
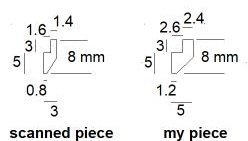
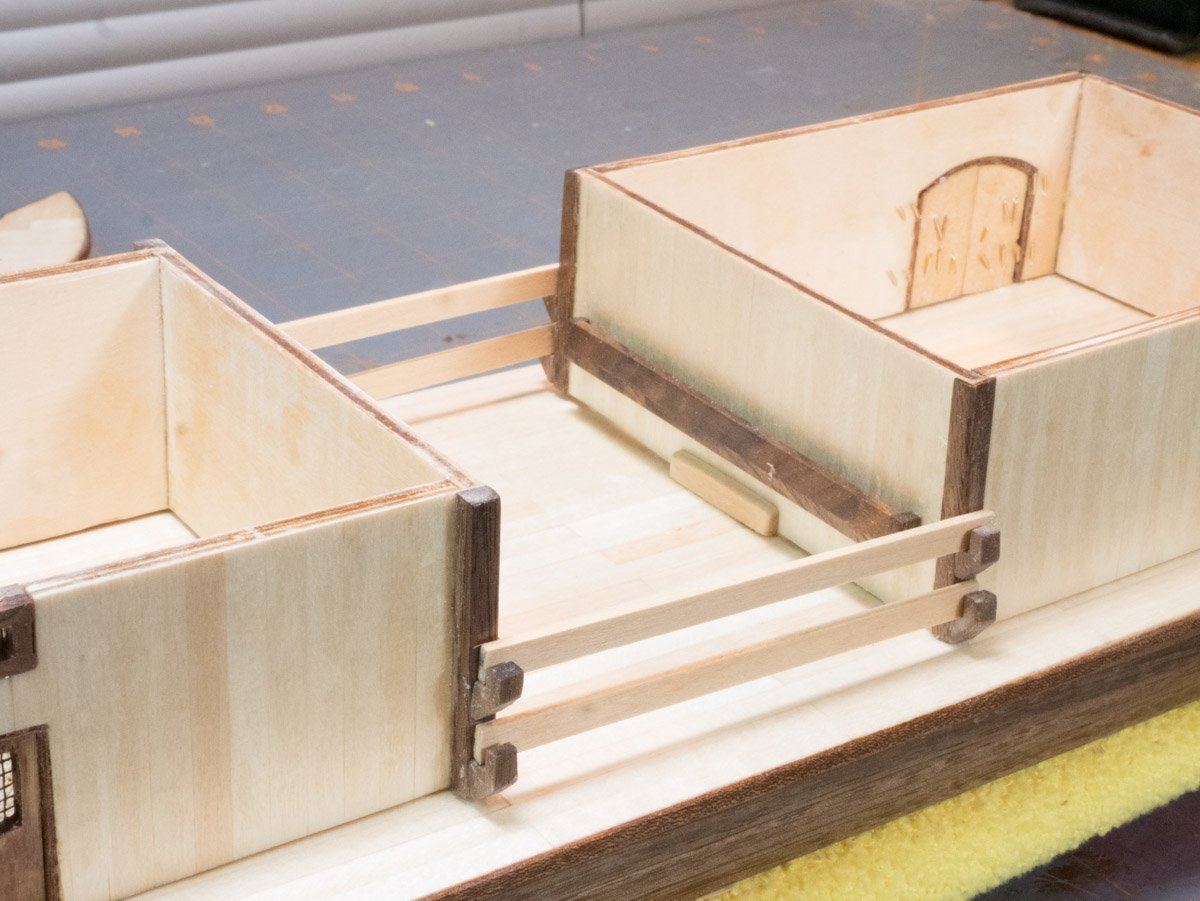
Item 59 – where are you? Item 59 is the bar supports for the open area and they are not included in the kit, you have to manufacture 8 of them. I scanned the picture of the piece, traced it in a drawing program and scaled it for an 8 mm height. The parts list identifies the part as a 5 x 8 mm piece but when I measured the tracing it was smaller; it was too delicate to make for my skills so I stretched the tracing to match the part list dimension. These are the dimensions I came up with (all dimensions are in mm): I printed out several copies of the part and glued a strip to walnut scrap from the paddle wheel brace parts. Three of the four pieces turned out so I made a bunch more using up the scrap. I cut the closing bars to the size identified in the parts list which is precisely the distance for the bar supports. To make the bars cross like the picture you need to cut a longer piece (90 mm). I also made a little piece to cover the hole from the tab for the forward structure. I attached the paddle wheel supports. I started to work on the floor of the second deck.
- 132 replies
-
- 5
-
-
- King of the Mississippi
- Artesania Latina
- (and 1 more)
-
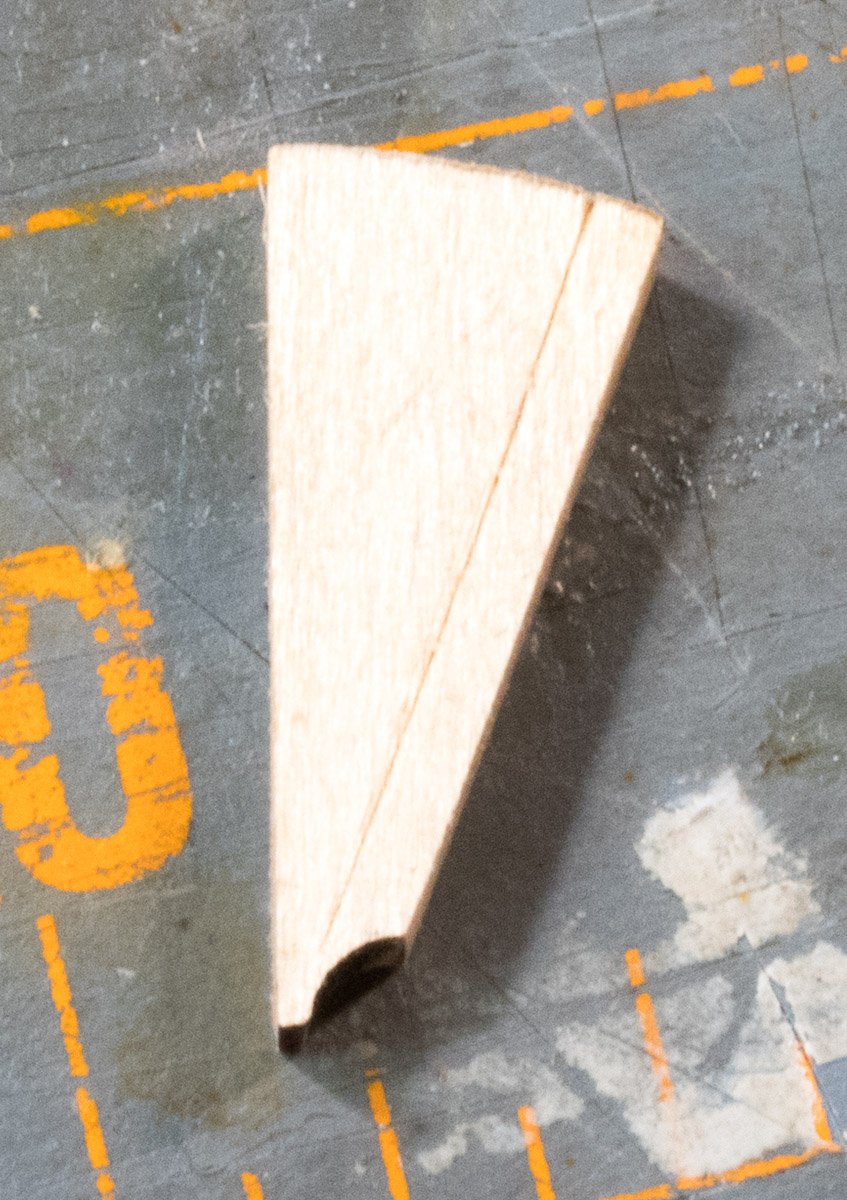
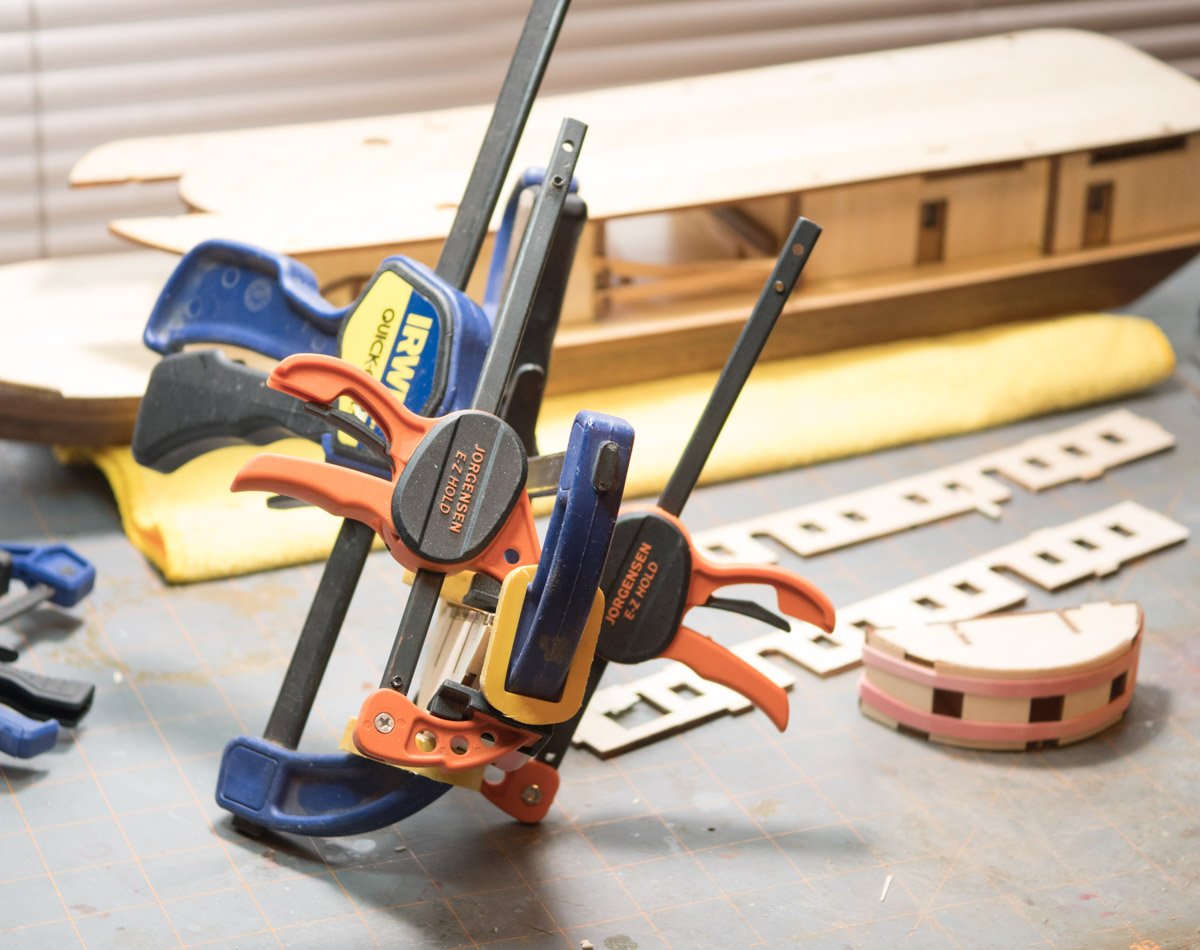
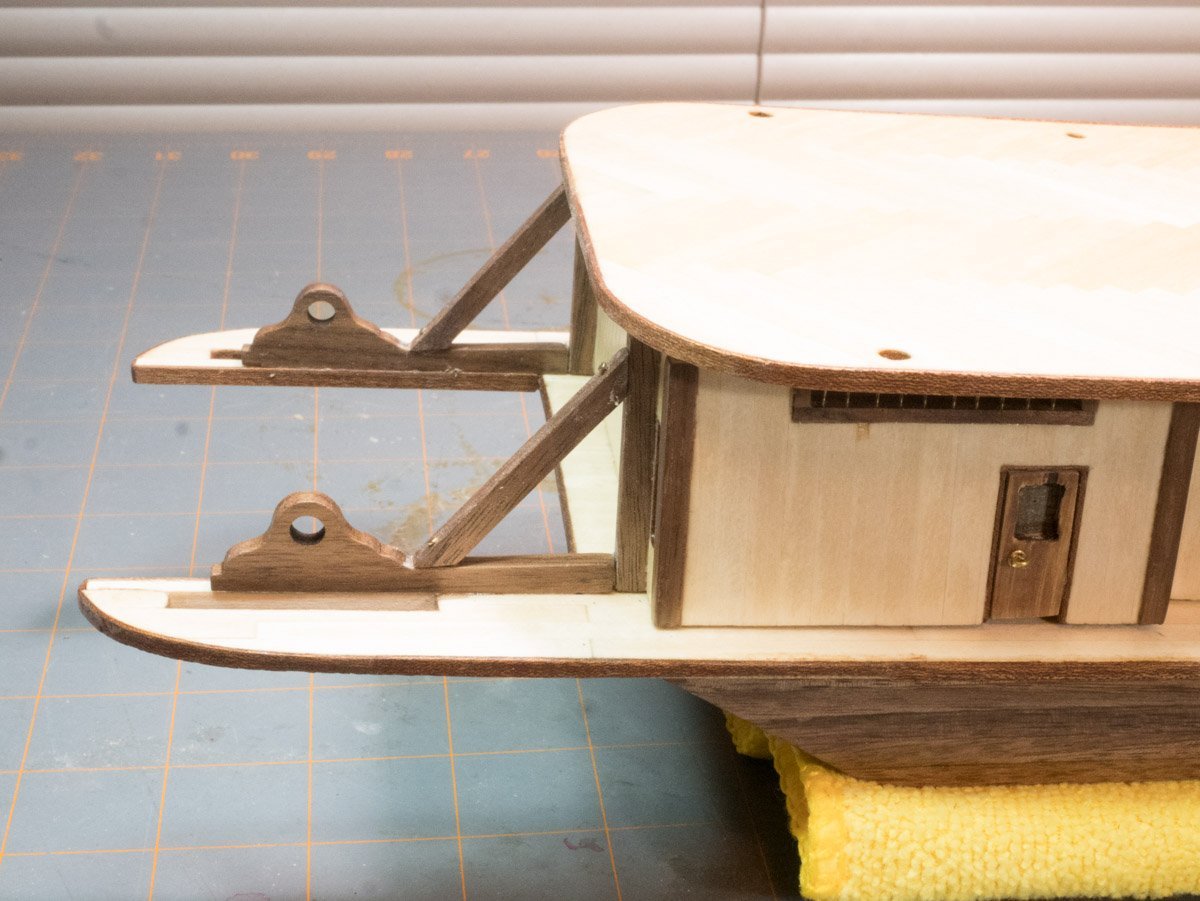
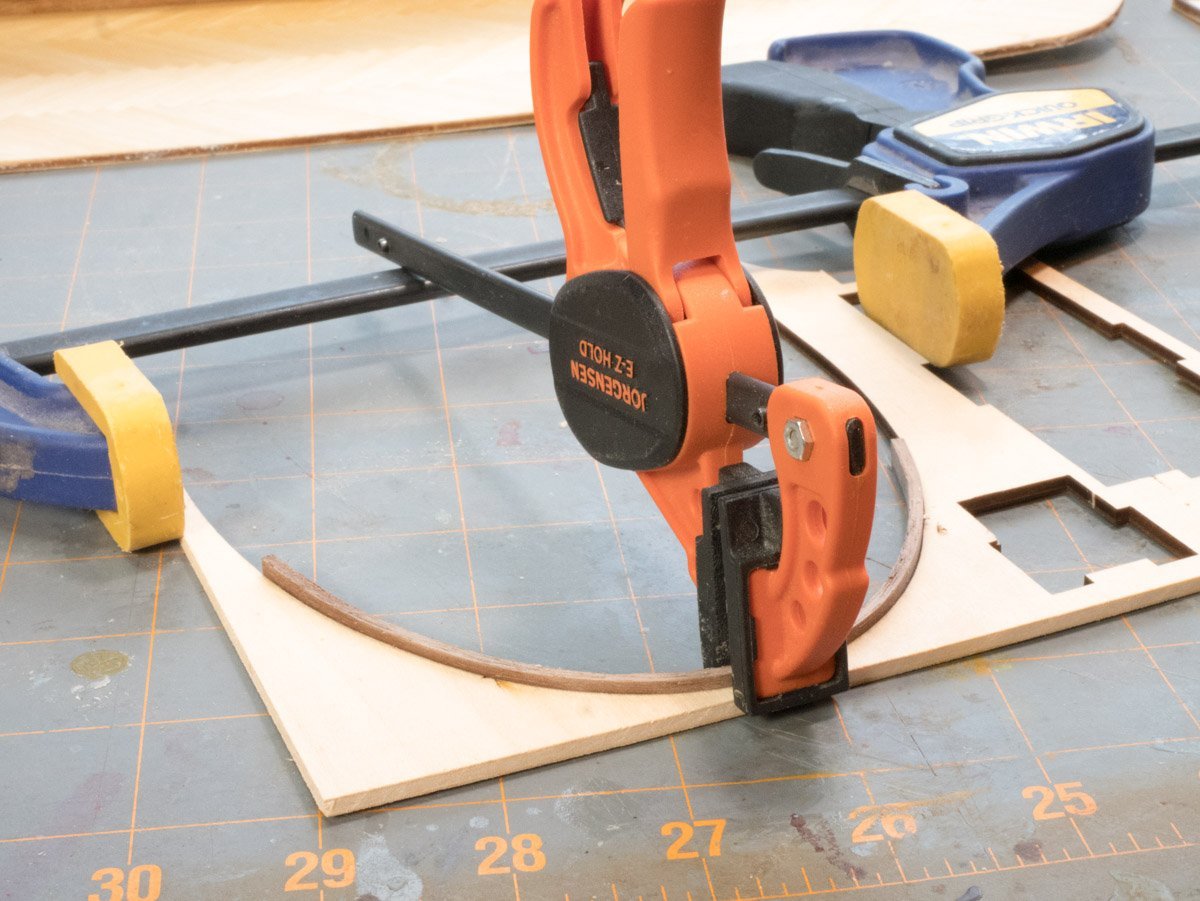
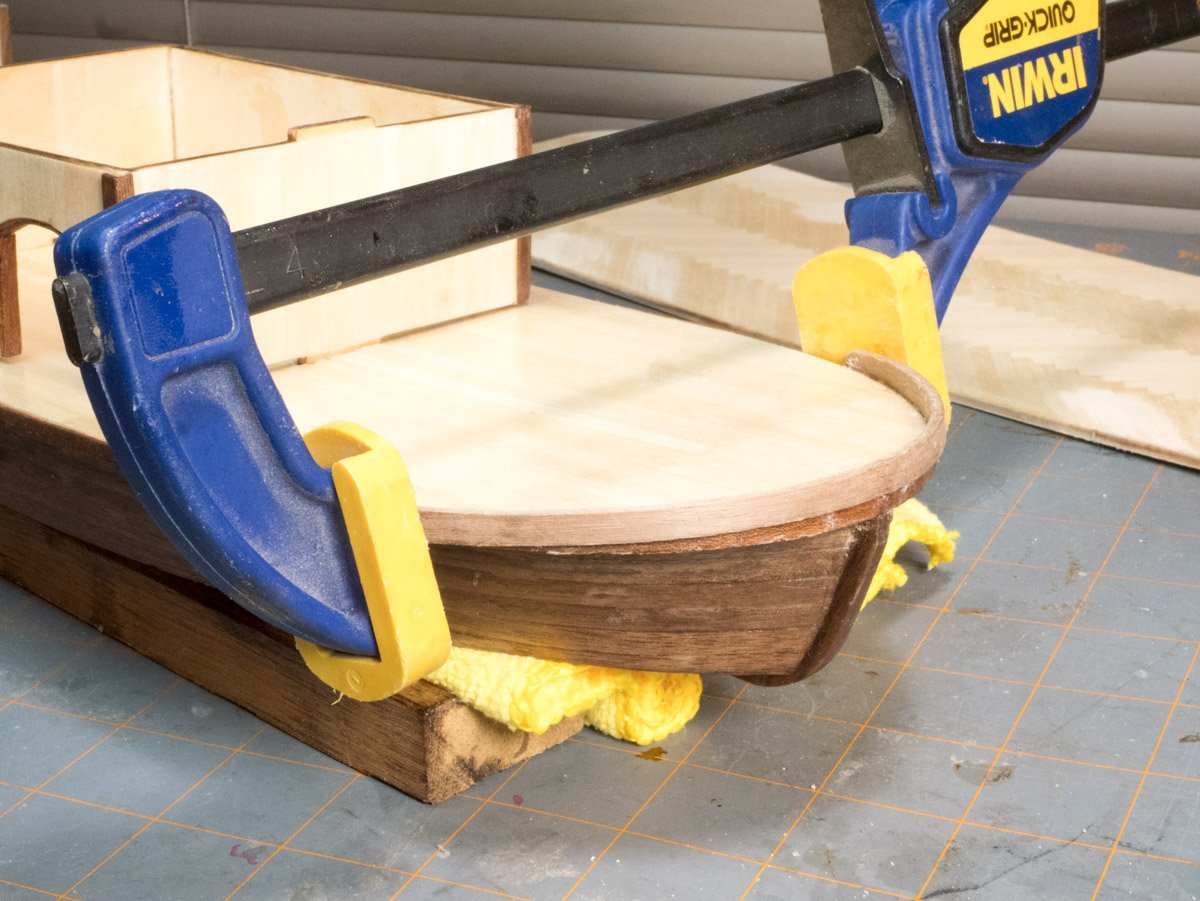
The bow strip was a challenge. I soaked the walnut piece for 30-45 minutes. My plan was to do two soakings, one to set the general arc, the other to set the final contour. I was wondering how I could clamp it in place. I managed to get the clamp to sort of trap the piece in position. I let the half circle dry overnight. I used the plywood scrap from where the deck was removed as a template for the second soak. I had a hard time gluing the piece to the front of the deck. Between trying to get the clamp to work on a non-flat surface and the wet glue causing the piece to move around. Once the glue got tacky I could set it in place and use the palms of my hands to clamp the piece in place (for about 3-4 songs). I drilled the holes with a 2 mm bit, then with a 2.5 mm bit. I realized I glued the piece in crooked. I debated about trying to unglue it, but I don’t have a lot of experience un-gluing stuff (mixed results) and I was concerned I’d loosen other pieces or break the piece. I chose to let it be.
- 132 replies
-
- 2
-
-
- King of the Mississippi
- Artesania Latina
- (and 1 more)
-
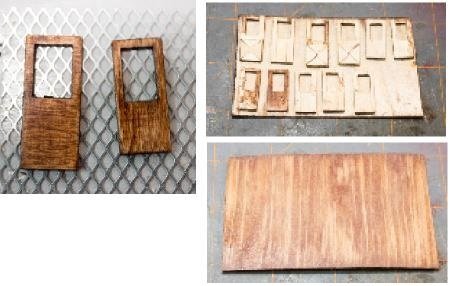
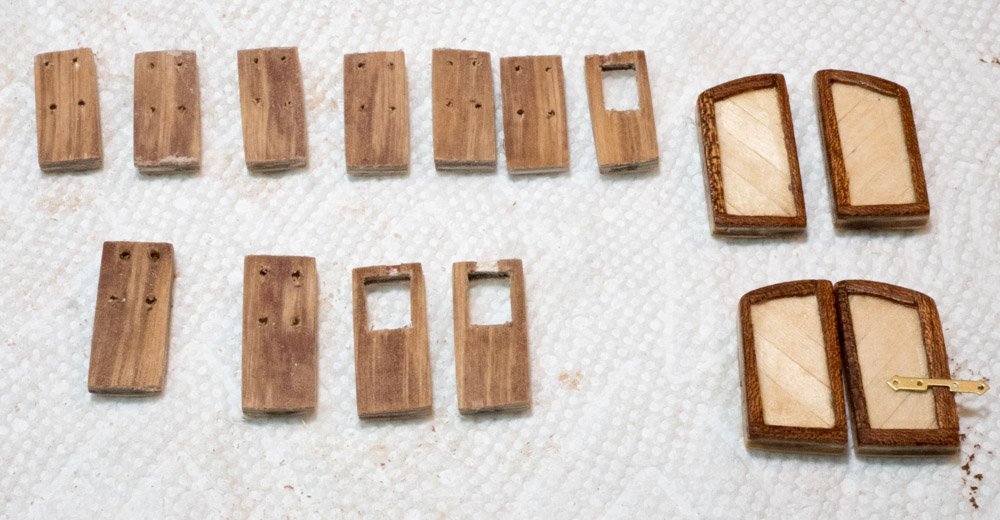
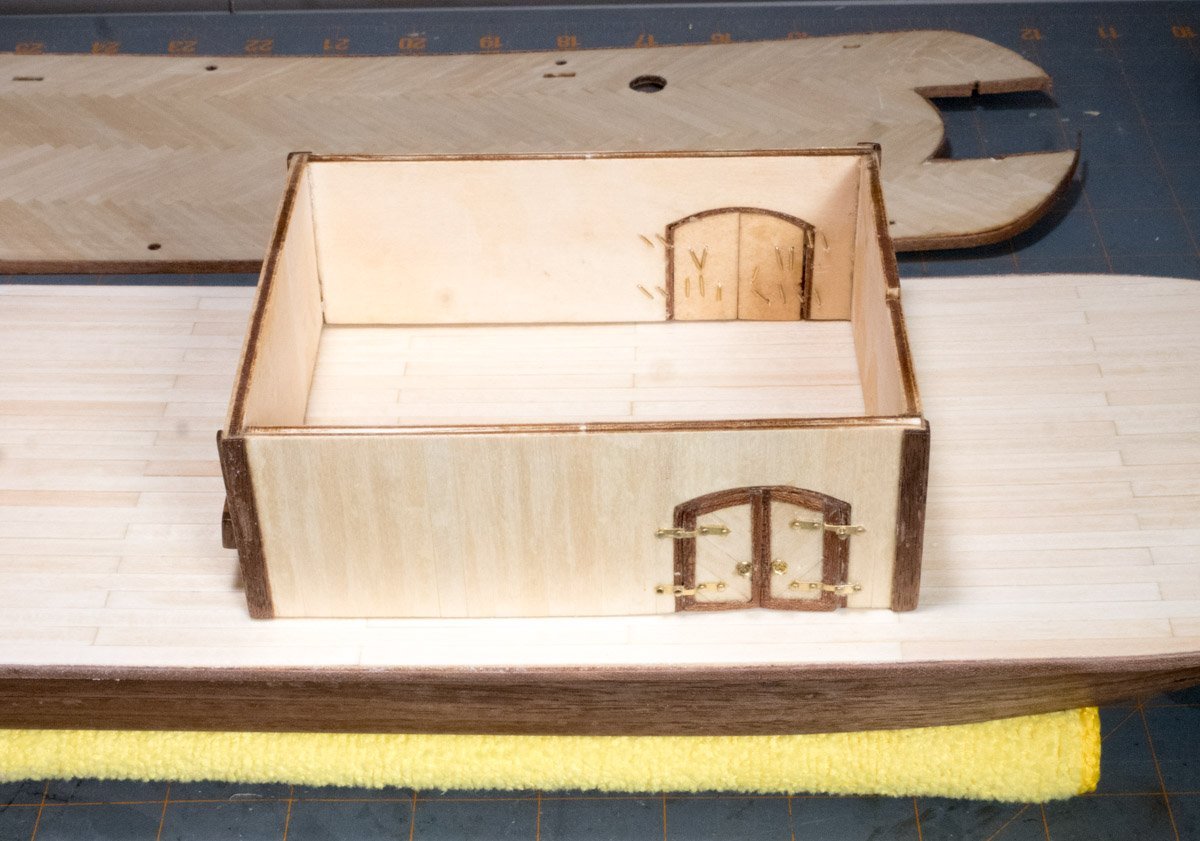
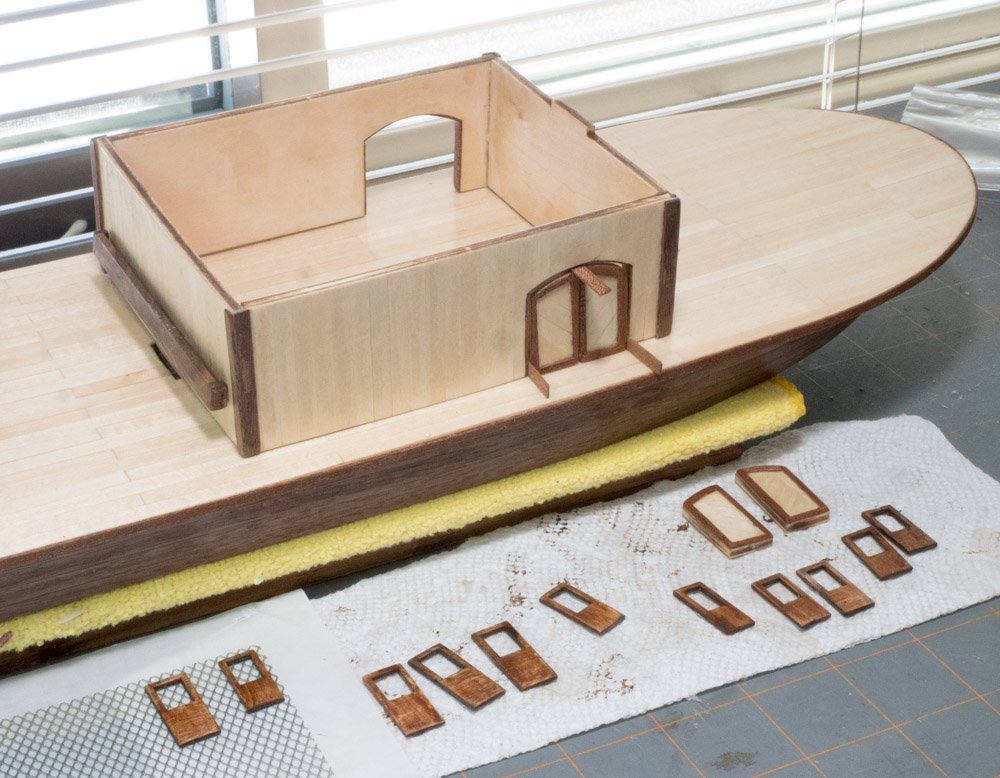
I worked on the doors. I discovered there are two sizes of the rectangular doors. I tried to stain the plywood doors but I didn’t like the results. I applied deck planking to the doors but I didn’t like how that was working out either. I picked up a 1/32 inch (0.8 mm) piece of birch plywood at Menards (they have a hobby wood section). I finished the birch with a sealer, nutmeg stain, and many thin coats of finish. I glued the doors to the back of the birch plywood. I drilled holes to define the corners of the windows (smaller holes work better). I got a couple divots when while processing the doors. I found a piece of nylon screen (from a window screen patch kit) and glued them to the back of the doors for the windows. I drilled holes for the eyebolts with a pin vice. I put a ring on the eyebolt with a dot of glue on the tip and pushed them in, I bent the pins over because the pins weren't a little loose. I glued a brace (kit scrap) on the back of each door and glued the assembly in the doorways. I planned on gluing the double doors in place. I couldn’t figure out how the brass hinge pieces worked until I looked at other logs to see how the hinge should work. They are folded over to make a hoop of the narrow section, each hinge is two pieces with a pin through the hoops. My skill with tiny components isn’t very good so I decided to make it less complicated and apply a single brass piece as a decorative hinge.
- 132 replies
-
- 4
-
-
- King of the Mississippi
- Artesania Latina
- (and 1 more)
-
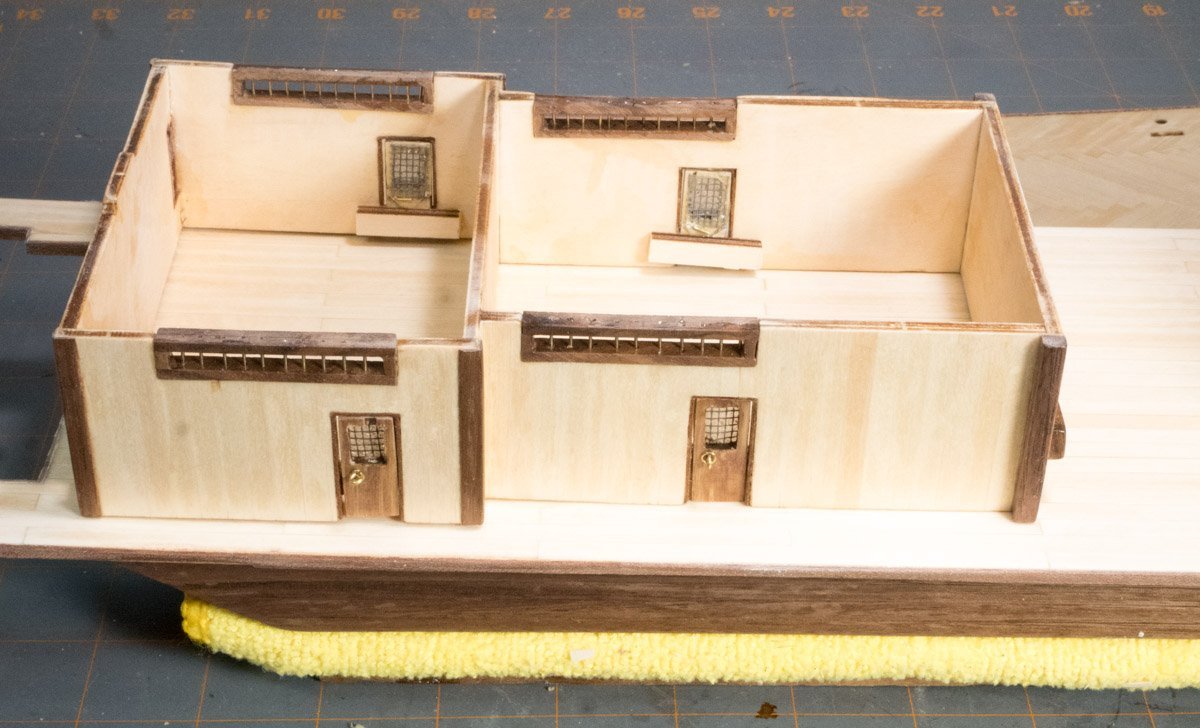
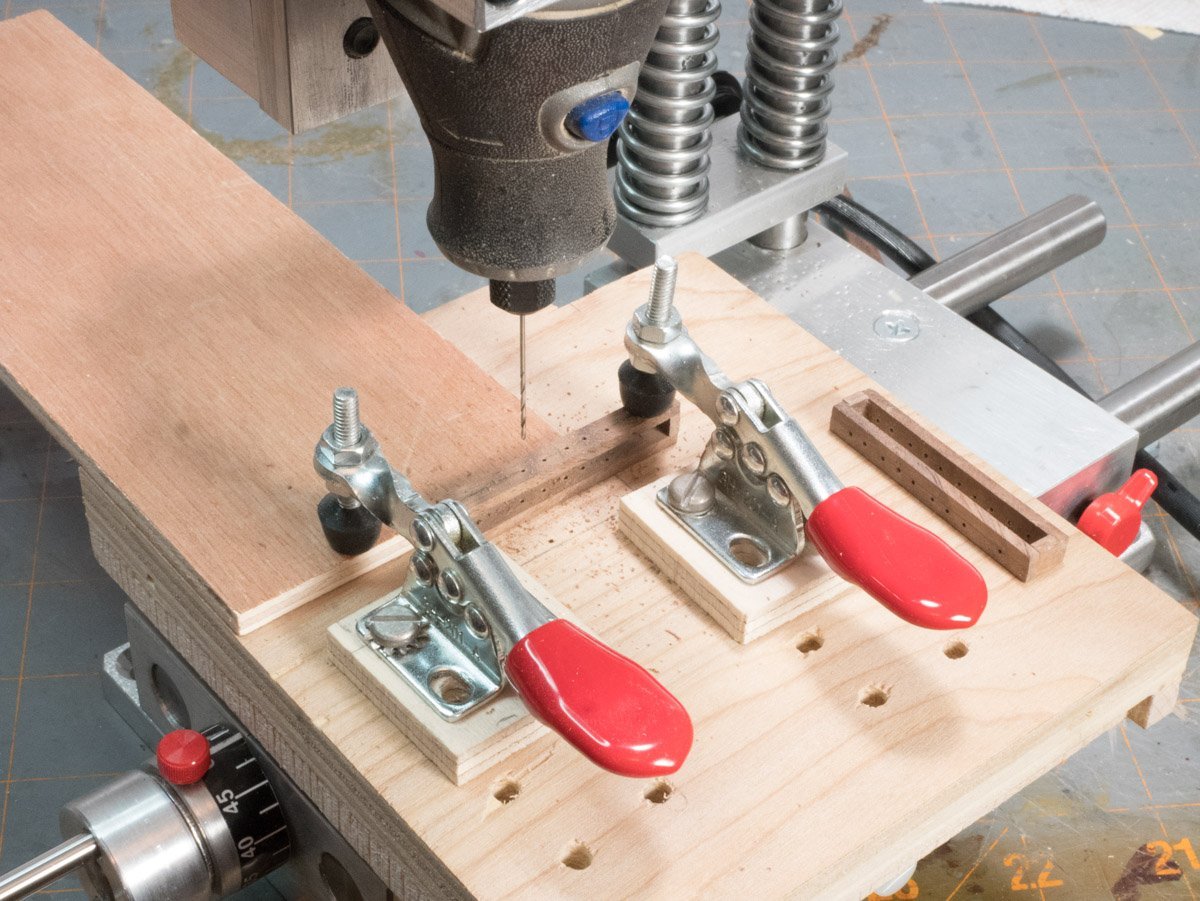
Building the ventilation windows was an interesting job. I finally got to use the x-axis part of my drill press. I bought the Vanda-Lay Acra Mill about a year ago and so far I’ve mostly used it as a fixed platform for my Dremel tool. I made a drill press table with clamps (not knowing how I’d actually use the x-axis part). My clamps worked – barely (I already have a new design in mind). Since I had to clamp the work piece, I could only use a portion of the x-axis travel so I had to reverse the piece to continue the drill spacing. I glued each ventilation window frame together to ensure my drilling aligned the top and bottom beams of the frame. I made a couple mistakes when I had to reverse the piece to complete the drilling, it took me a couple tries to figure out my process.
- 132 replies
-
- 5
-
-
- King of the Mississippi
- Artesania Latina
- (and 1 more)
-
I like your idea to skin the doors. I was looking at your build and noticed you did some raised panels which is giving me some ideas to try.
-
I’m working on the doors. I used a nutmeg stain on the traditional doors but the stain was absorbed unevenly (I should have used a pre stain). I’ve been playing around with the color and I’m not happy with my results so far. I don’t think I can get an even tone, I might have to paint the doors a sold color. I noticed the instructions show a pattern on the window, I wonder how they did that. I found an aluminum piece from a small hole patch kit that has a pattern that might work for me (I haven't decided whether to paint it or leave it shinny). I’m wondering if I should mount it on the back of the door (easy) or try to fit it in the opening (hard) and if should I use the clear plastic for the window. The double doors are undersized, I can add another set of door frame material for a nice fit. I
- 132 replies
-
- 2
-
-
- King of the Mississippi
- Artesania Latina
- (and 1 more)
-
After cutting a couple hundred planks for the first deck and structures I decided to get a Chop-It tool. I tried it out making planks for the second deck. The tool makes cutting planks much easier than the small miter I was using. I have four 31 mm rows so I made the calculation to determine that a 45 mm length would work. I test fitted several pieces to see how it would work out. It was fairly tight but it looked like 45 mm pieces would work. But when I glued the first pieces in each row, I realized I didn’t center the first pieces exactly on the deck. OOOPS I noticed some tiny gaps as I was gluing the planks and wondered how the error would add up. That’s when I noticed that my alignment was drifting to one side, one side wasn’t clearing the edge of the deck. I couldn’t figure out how to correct it without making the change obvious so I finished the planking of three rows. My rows drifted about 5 mm for the length of the deck. I cut some longer planks to finish the last row. Hindsight Tip I calculated the length of the planks precisely based on my measurements but I didn’t give myself much of a margin for error. I should have made my planks closer to 50 mm.
- 132 replies
-
- 4
-
-

-
- King of the Mississippi
- Artesania Latina
- (and 1 more)
-
Thanks Bob, Your technique worked out pretty well for me. My pieces don't have a consistent width and others not parallel (I'm still getting used to working with small pieces). For the curve, I used a needle file to make the inside arc with mixed results and used the overhang technique for the outside arc. Overall I'm happy to have a result and I learned a new technique. I also noticed that sapelli wood has different grain patterns on each side, most of the door frame pieces show the good side (something I'll pay more attention too when using it).
- 132 replies
-
- 3
-
-
- King of the Mississippi
- Artesania Latina
- (and 1 more)