HOLIDAY DONATION DRIVE - SUPPORT MSW - DO YOUR PART TO KEEP THIS GREAT FORUM GOING! (Only 51 donations so far out of 49,000 members - C'mon guys!)
×

Cleat
-
Posts
202 -
Joined
-
Last visited
Content Type
Profiles
Forums
Gallery
Events
Everything posted by Cleat
-
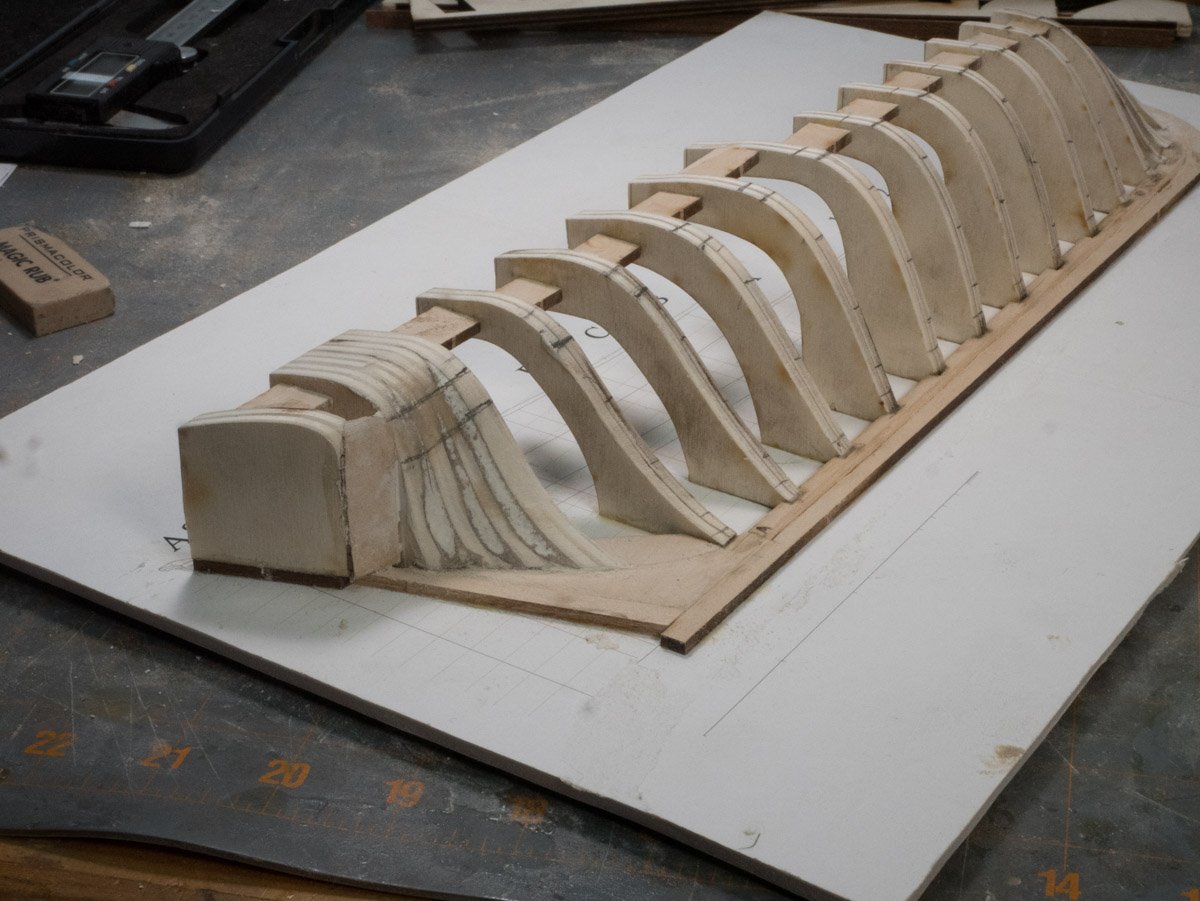
 That's as far as I have gotten so far. I'm trying to figure out where to install the stealer and how big it should be. I used a compass to mark the top 4 plank course and the middle 4 plank course to see the where they deviate.
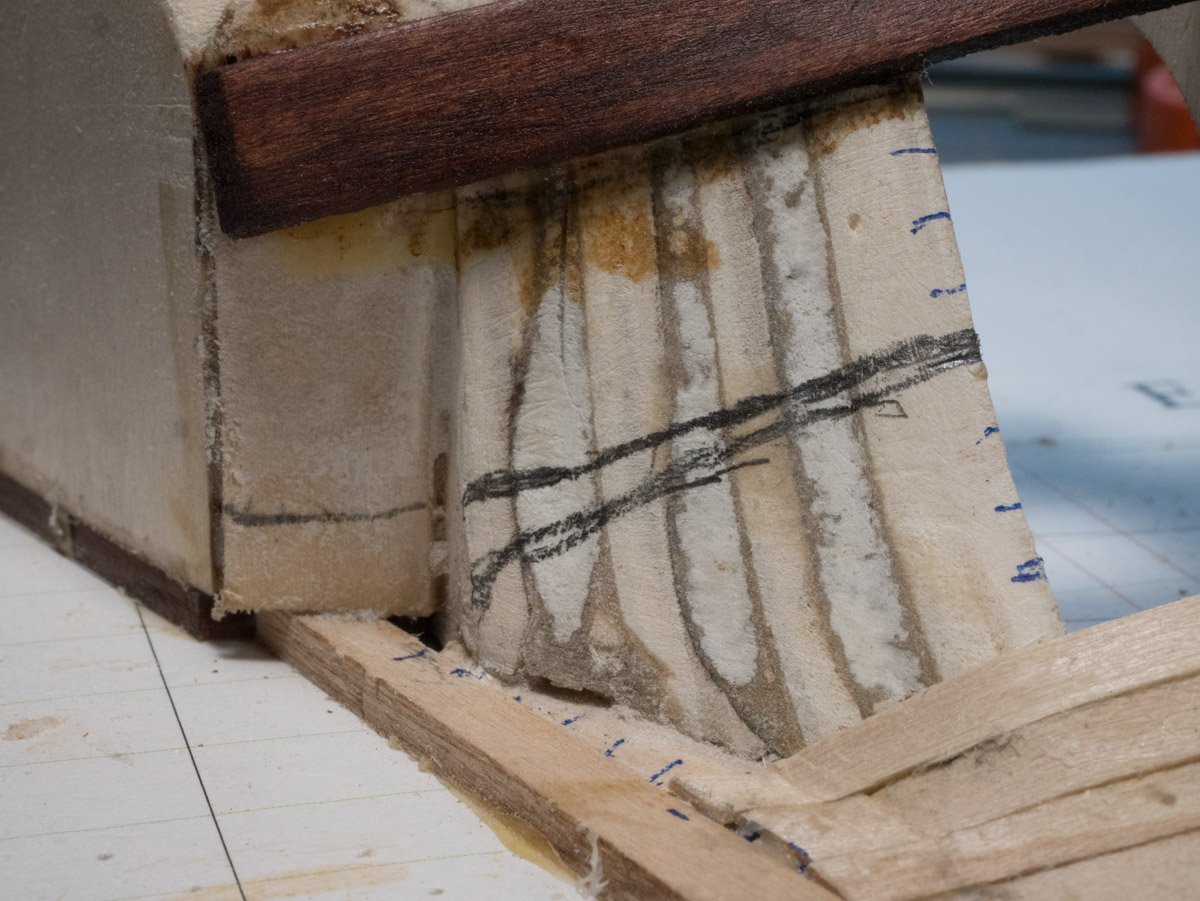
-
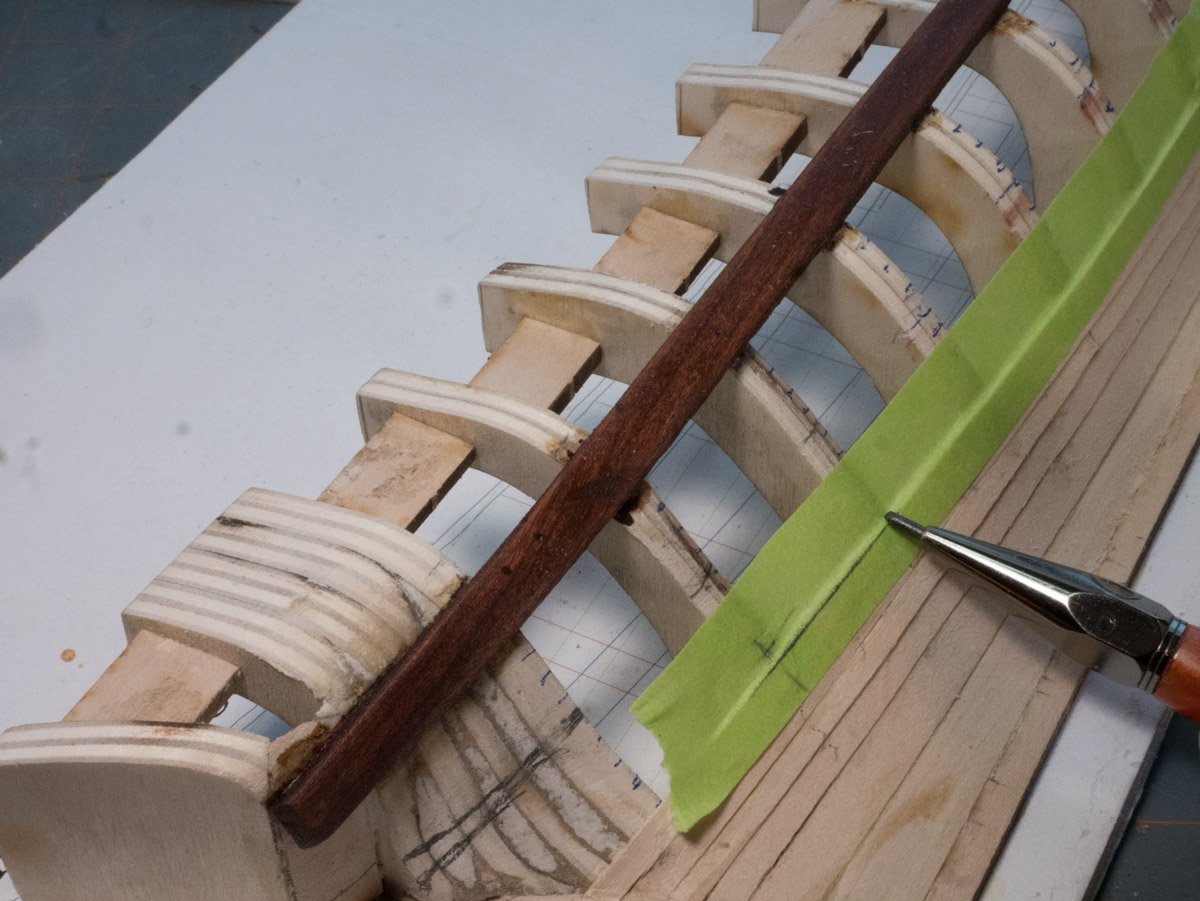
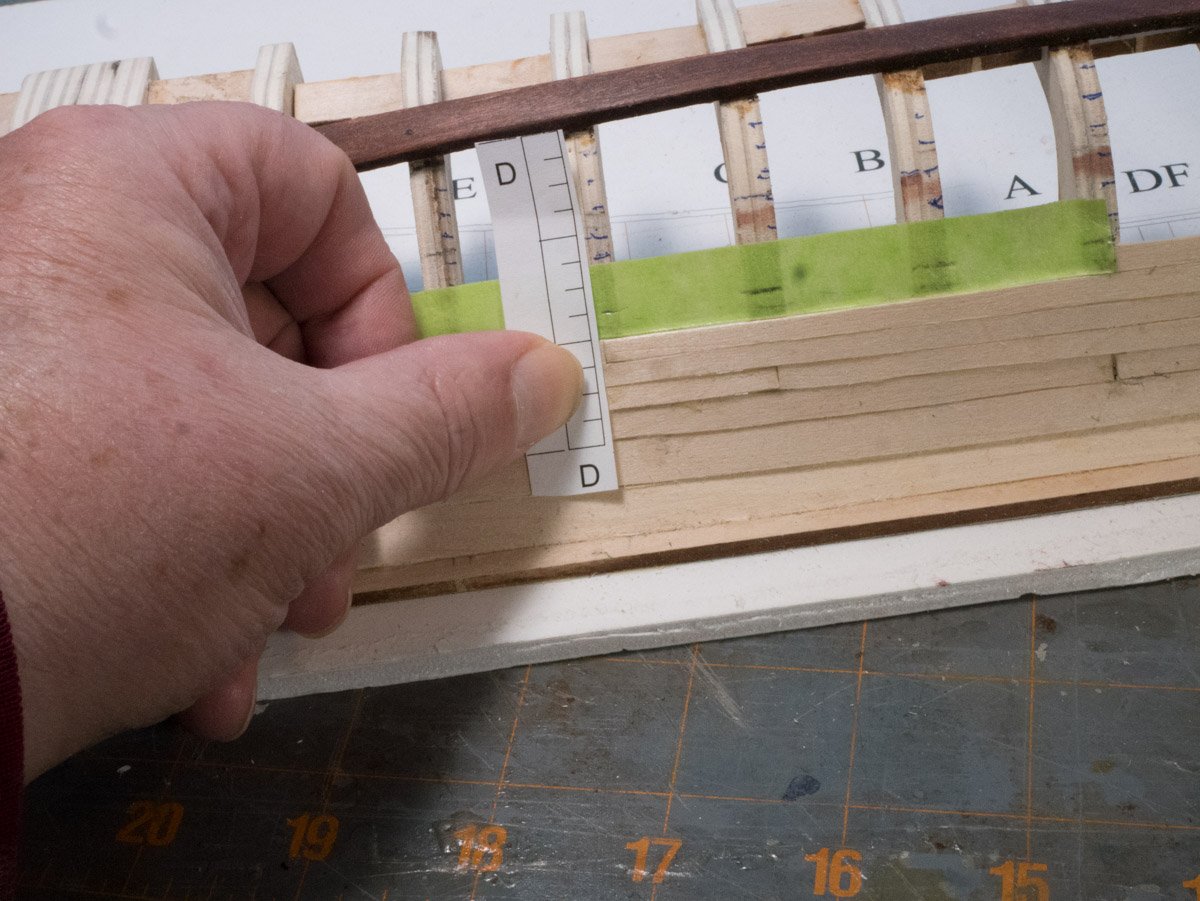
I measured the distance between the bottom of the wale board and the top of the strake plank for each frame. I used drawing software to create strips for each bulkhead with the 12 plank marks evenly distributed. I tried several techniques to create the planks with mixed results. I started to call my Exacto knife the Happy Wanderer, but I really knew it was my technique. What works for me is to apply painter’s tape on the course of planks, I use a pencil to mark the edge of the plank. I cut the tape to shape and apply it to the bulkheads. I use the marking strip for the bulkhead to mark the height the plank, repeat for each bulkhead.

-
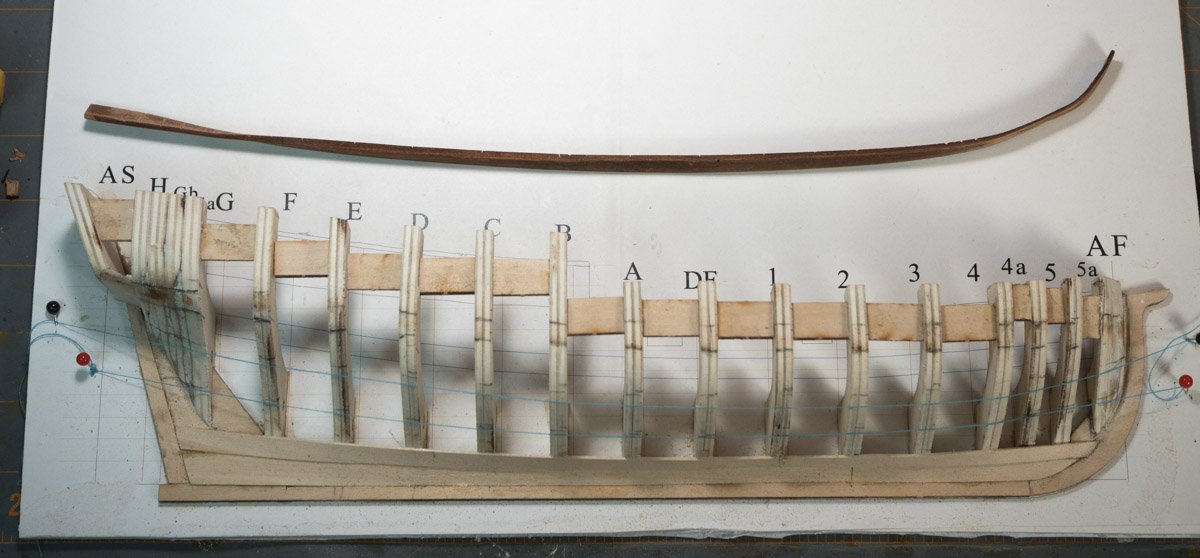
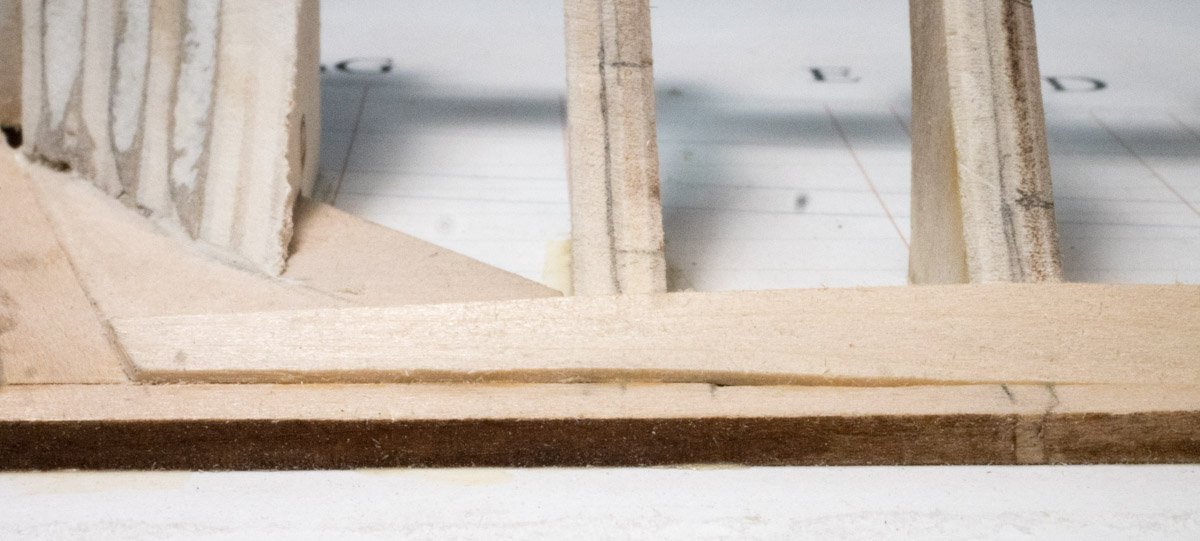
I had cut some pieces of scrap barnwood for the wale board, there were about 3mm thick. I wanted to stain the wale board to customize the kit with something special. And I wanted to bend and twist a long piece of wood (it is a tutorial). I soaked part of it in water for about 15 minutes, then used an iron to bend and crimp the piece for the bow. The first piece broke. I made some shallow cuts on the concave side and tapered the 3mm thickness to 2mm where the bend would be – it worked. I soaked the other end in water and use the iron to twist the piece for the stern – that worked too. I soaked the piece two more times to fine tune the fit by clamping the piece to the frame and letting it dry. I discovered a problem with my wale board, it has a flat spot in the bow curve. I took some measurements of the frame and compared it to the cutout, they were close. I considered building up the frame but I was concerned how that might affect the planking, in the end I glued it on. In hindsight I realized I could have put a piece of plank material behind the flat spot to help reduce the flat spot. I glued the wale board onto the frame because all of the planking would be referenced from it. I also stained it to give it some color.
-
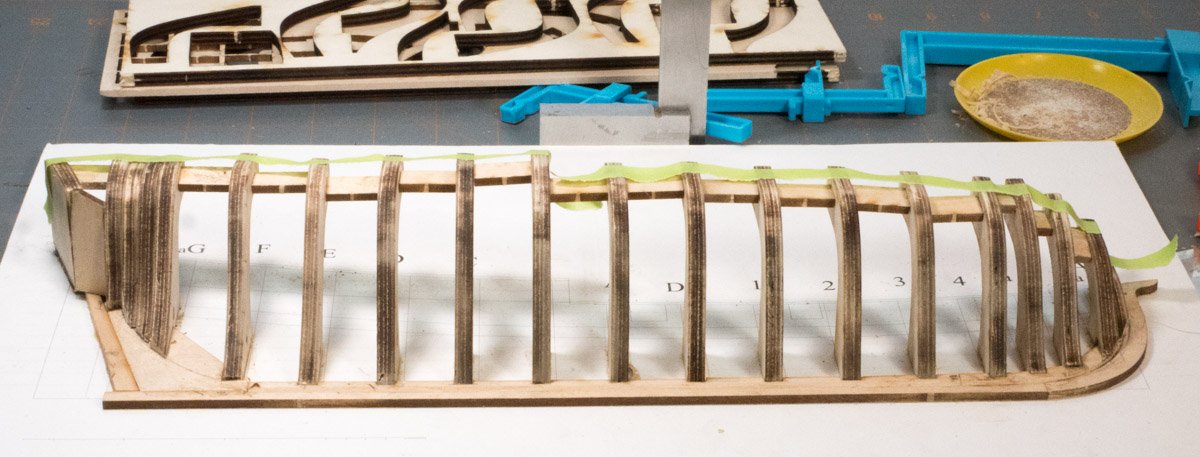
I’ve never sanded so lightly when I did the fairing of the frame, I didn’t want to go too far so I worked it in a couple sessions so I could evaluate what I had done before finalizing my shape. The last four bulkhead frames were connected for my kit (other builds showed fewer frames). I was trying to decide how far to sand that area. I wasn’t sure if I should sand them down to create a solid piece. I decided to go half way and fill the gaps with sawdust/glue, I didn’t have enough sawdust so I used Hobbylite Filler to complete the fill. I figured I wanted the largest contact patch when gluing the planks to the contour of the stern.
-
When I made the garboard I cut a notch to accommodate the end of the rabbet but I didn’t like the look with the notch. I made a new piece without the notch and glued it in place. In hindsight I wish I had cut a transition.
-
I deepened the keelson slots for the bulkhead frames 1/16” as instructed but I wasn’t sure how accurate my cuts were. I noticed one of the build documents used a marking wheel gauge and I wish I had one. After I installed the bulkhead frames there weren’t enough spacers so I cut up the Counter to make the two pieces I needed (plus it had the right angle to support the transom). I realized later I wasn’t supposed to use that piece. The project is taking shape.
-
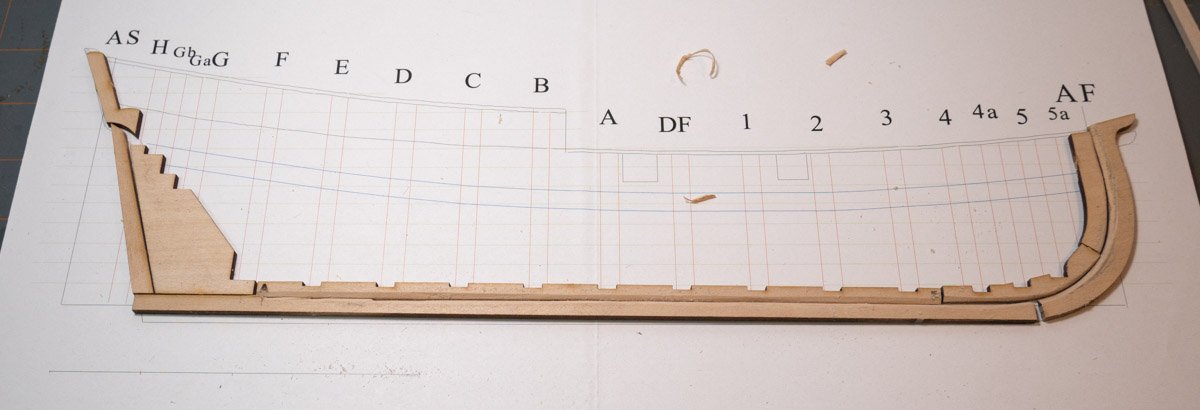
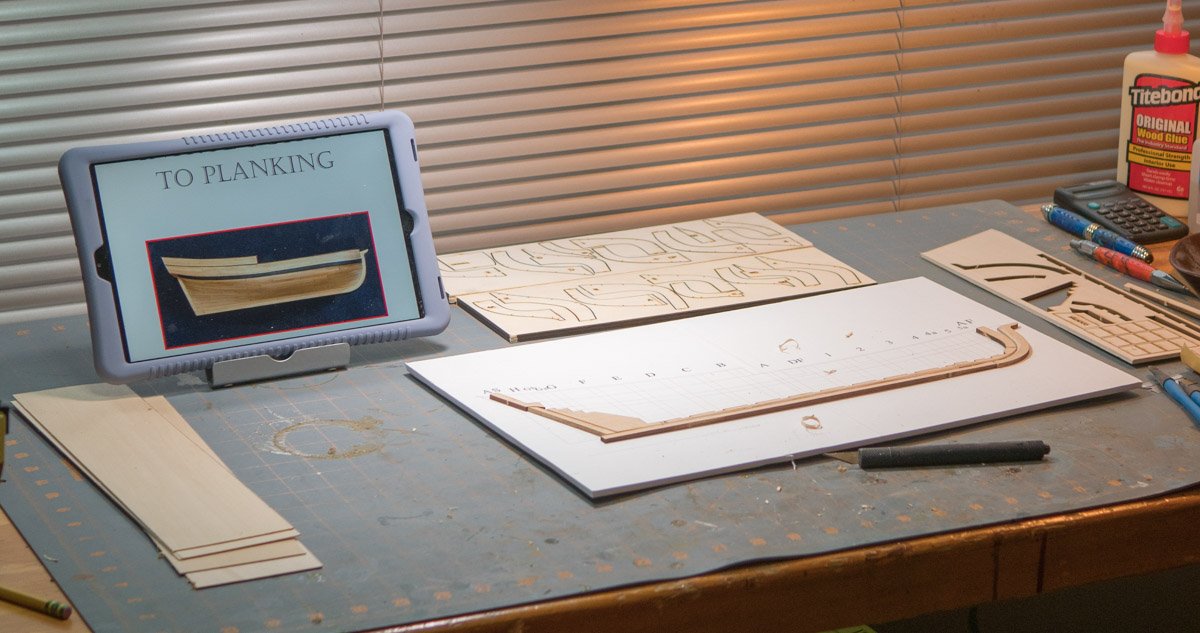
I place the pieces that make the spine of the kit on the print to check the fit. Once things fit I glued the pieces directly on the print. I placed a piece of the planking material on the edge of the keel to mark the width of the rabbet, I also did it on the keelson. I told myself to cut up to the line. I tried several methods to cut the rabbet with poor results, I ended up sanding the material along the straight bottom section, I carved the bow section. When I was done my marks were gone – I made the rabbet much wider than it should be. (I’m still getting used to working with such small material).
-
While building my first boat kit (Chris-Craft) I had a hard time doing the planking, I discovered that a straight plank did some unexpected things at the bow of the boat. I was frustrated and knew I’d have to figure out planking. I came across the Half Hull Planking kit when searching the forum for planking information. I previewed the instructions and realized I didn’t know the terminology. The instructions identify the names of the laser cut parts but there were a number of terms in the documentation that I didn’t know. I found an illustrated glossary of ship terms (it is helpful): https://www.oxfordhandbooks.com/view/10.1093/oxfordhb/9780199336005.001.0001/oxfordhb-9780199336005-e-48 I previewed builds by tlevine, dcicero, modeler masa, and LyleK1 and I’ve been referencing those builds during my build. The kit comes with laser cut pieces to build the frame structure and planking material you cut for each plank. The instructions are a PDF file; the instructions are well written and explain concepts to understand how wooden ships are built. The kit includes an 11x17” print that shows the location of the structural parts along with other significant lines. I mounted the print on a piece of art board but I quickly discovered that I wanted to cut the size down to accommodate the use of clamps during parts of the construction.
-
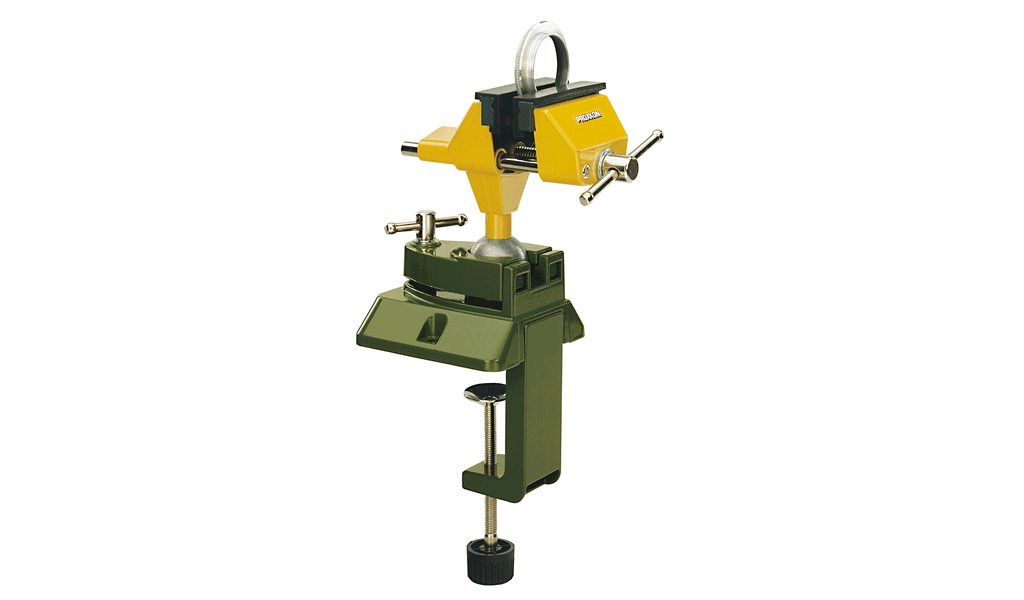
I have the Proxxon vise with the table clamp and I really like it, the ball clamp lets you adjust the position of the jaws. I removed the table clamp (it slides out from the base) and mounted it directly to my workbench (it has holes to mount it with screws).
-
Thanks for the pictures. I've started my Half Hull project and was wondering how the transom was orientated and I noticed it in one of your pictures.
- 13 replies
-
- 1
-

-
- half hull planking project
- NRG
- (and 1 more)
-
I'm about to start the Half Hull project kit. But the first thing I came across reading the instructions is that I don't know the terminology such as keelson, sternpost, etc. Is there a place I can find a list of ship terminology?
-
AIRBRUSH OPINIONS PLEASE...
Cleat replied to MadDogMcQ's topic in Painting, finishing and weathering products and techniques
I set the compressor to 30-40 psi and use a MACvalve at the airbrush to lower the pressure to what works the best. The MACvalve (the section with the round knob) is connected to air input of the airbrush and it makes it easier to adjust the air pressure. (I'm a woodworker and made a stand for the airbrush). I picture is small parts I painted chrome with the airbrush.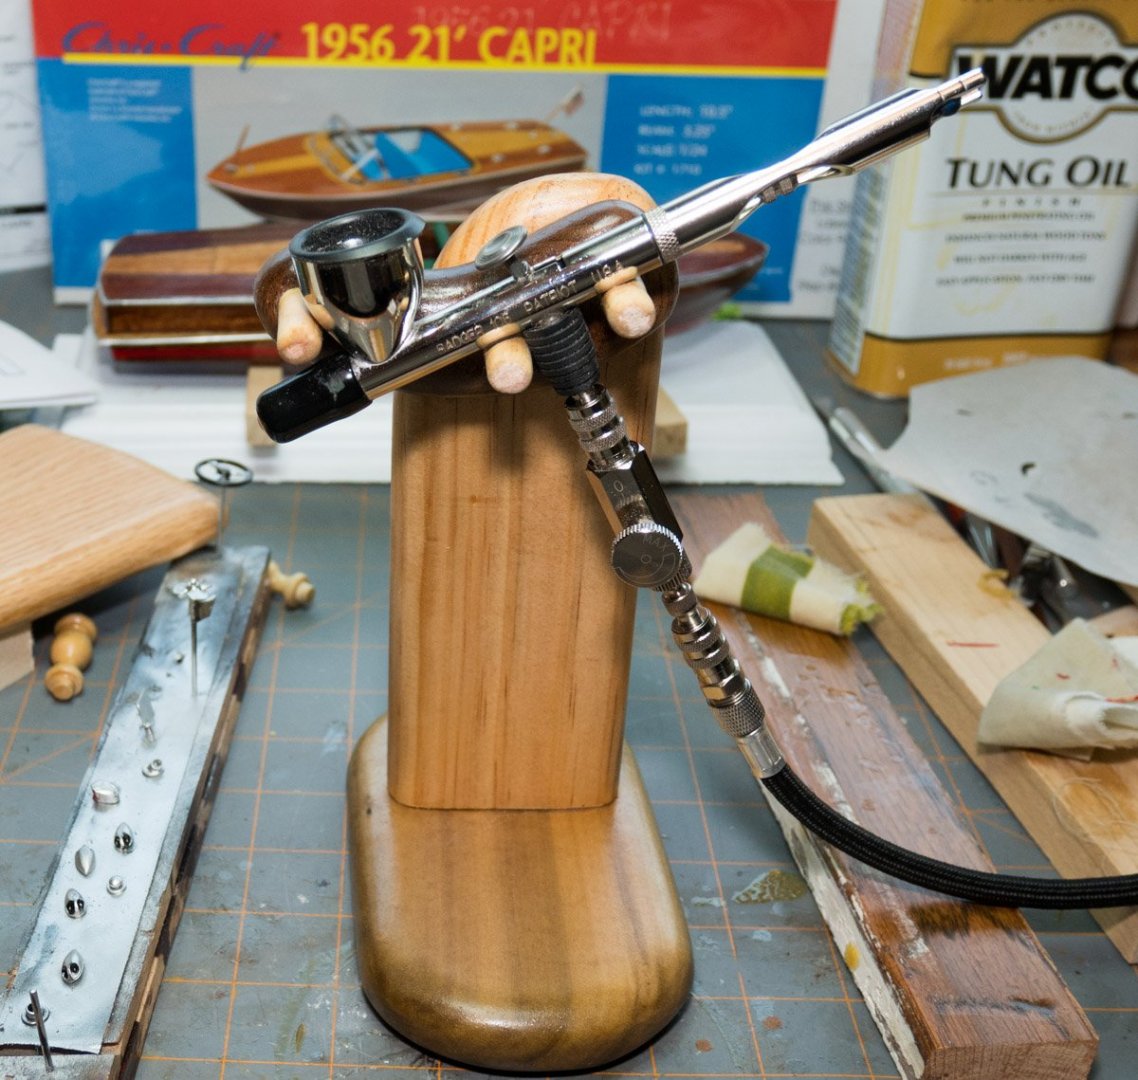
- 40 replies
-
- 5
-
-
- best airbrush
- compressor
- (and 1 more)
-
AIRBRUSH OPINIONS PLEASE...
Cleat replied to MadDogMcQ's topic in Painting, finishing and weathering products and techniques
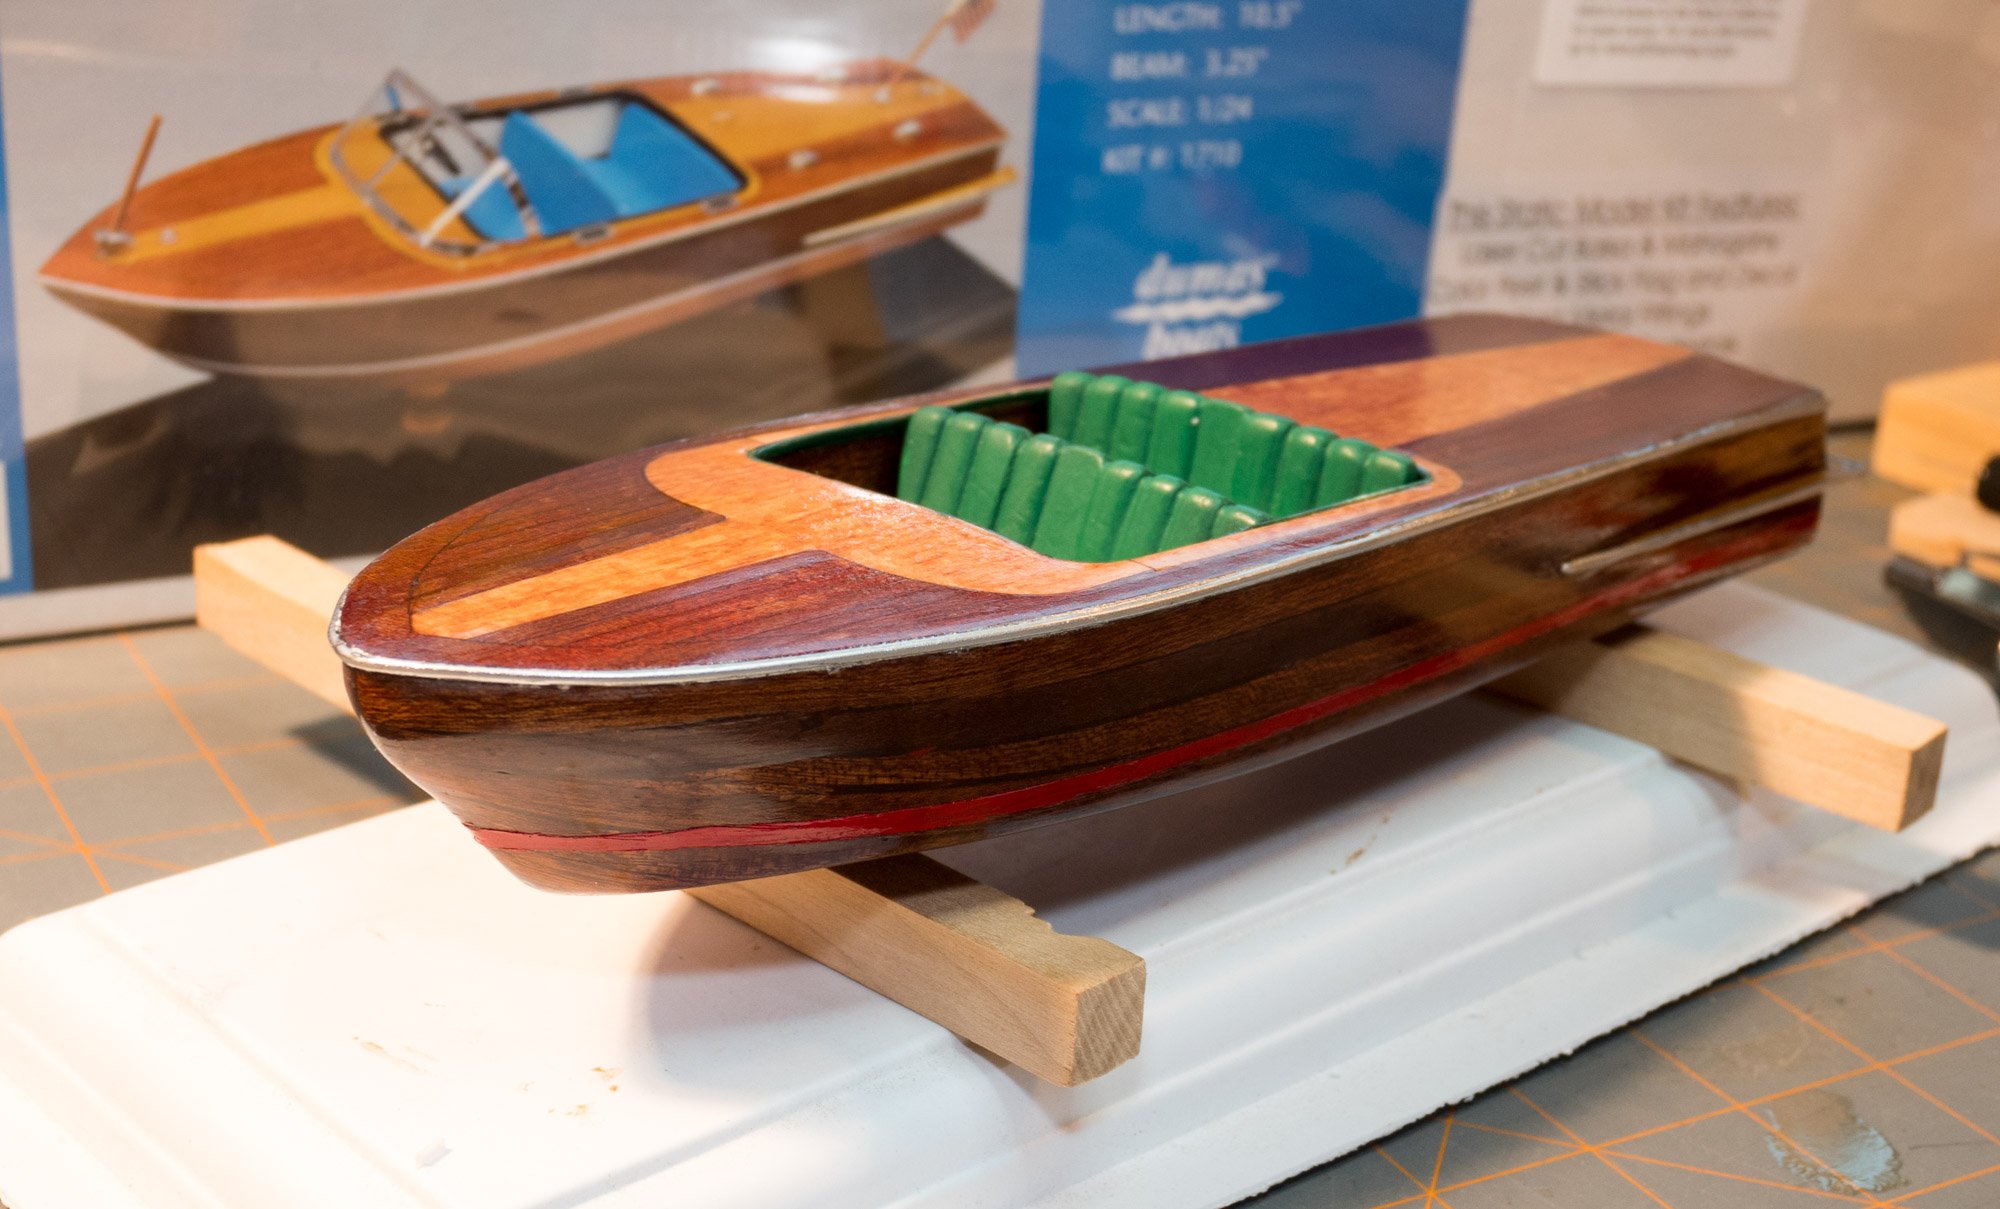
I have recently started learning the airbrush. I got a Badger Patriot 105 (inexpensive, quality starter airbrush – it has a large nozzle which is easier to handle), a California Air 1P1060S compressor (inexpensive and quiet), a six pack of Createx acrylic paint (different colors to mix for any color), and some auxiliary parts (cleaning tools, cleaning pot, MAC valve, color wheel.). I modified the air compressor; I added a manifold with a moisture trap and more accurate gauge for the airbrush operating pressure range (less than the compressor output). So far, I’ve mastered full on (which is useful for what I’m doing now), I need to practice control exercises to figure out the double action. I’m getting more comfortable cleaning the airbrush – it is the first thing I learned. I’ve been learning to thin and mix paint colors and figure out an ideal air pressure. I’m at the stage where I need practice; mix colors, paint practice lines & dots, clean – repeat. I bought a Mississippi river boat kit for my winter project and plan on using the airbrush for painting; I need to decide what colors I want for the river boat (and practice using the airbrush).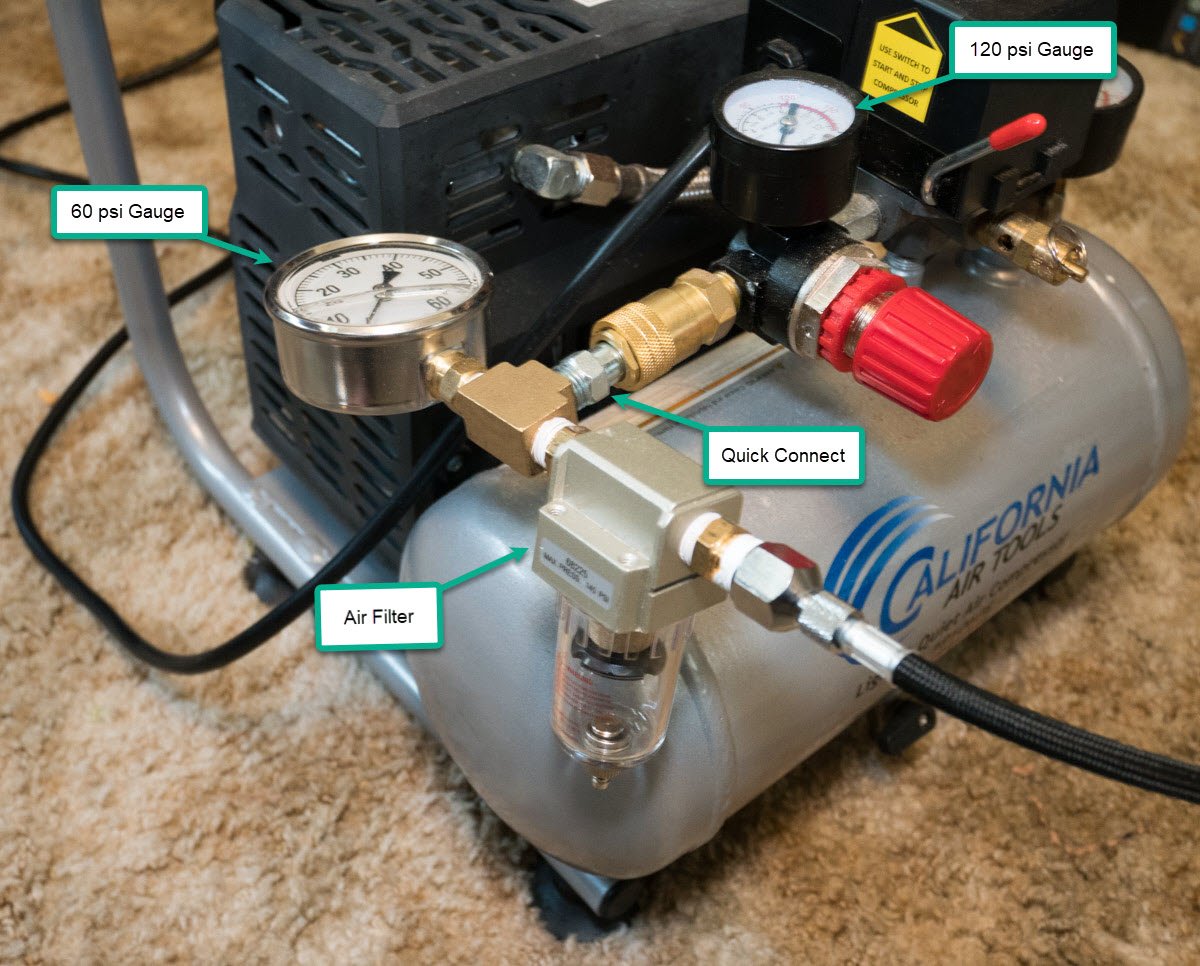
- 40 replies
-
- 5
-
-
- best airbrush
- compressor
- (and 1 more)
-
I recently started to learn the airbrush, I got a Badger Patriot 105 ($75), a California Air 1P1060 compressor ($100), plus $25 for a 6-pack of paint. I'm no expert but from my research this is a decent basic system. So far I've mastered full on (like a spray can); I'm doing some line exercises to learn finer control.
-
Thank you for the comments. I work towards perfection but fortunately I'm not a perfectionist. I recognize my skill level and eventually say it's good enough. I'm happy with the experience and I'll do it again.
- 36 replies
-
- 1
-
-
- chris-craft 1956 capri
- dumas
- (and 2 more)
-
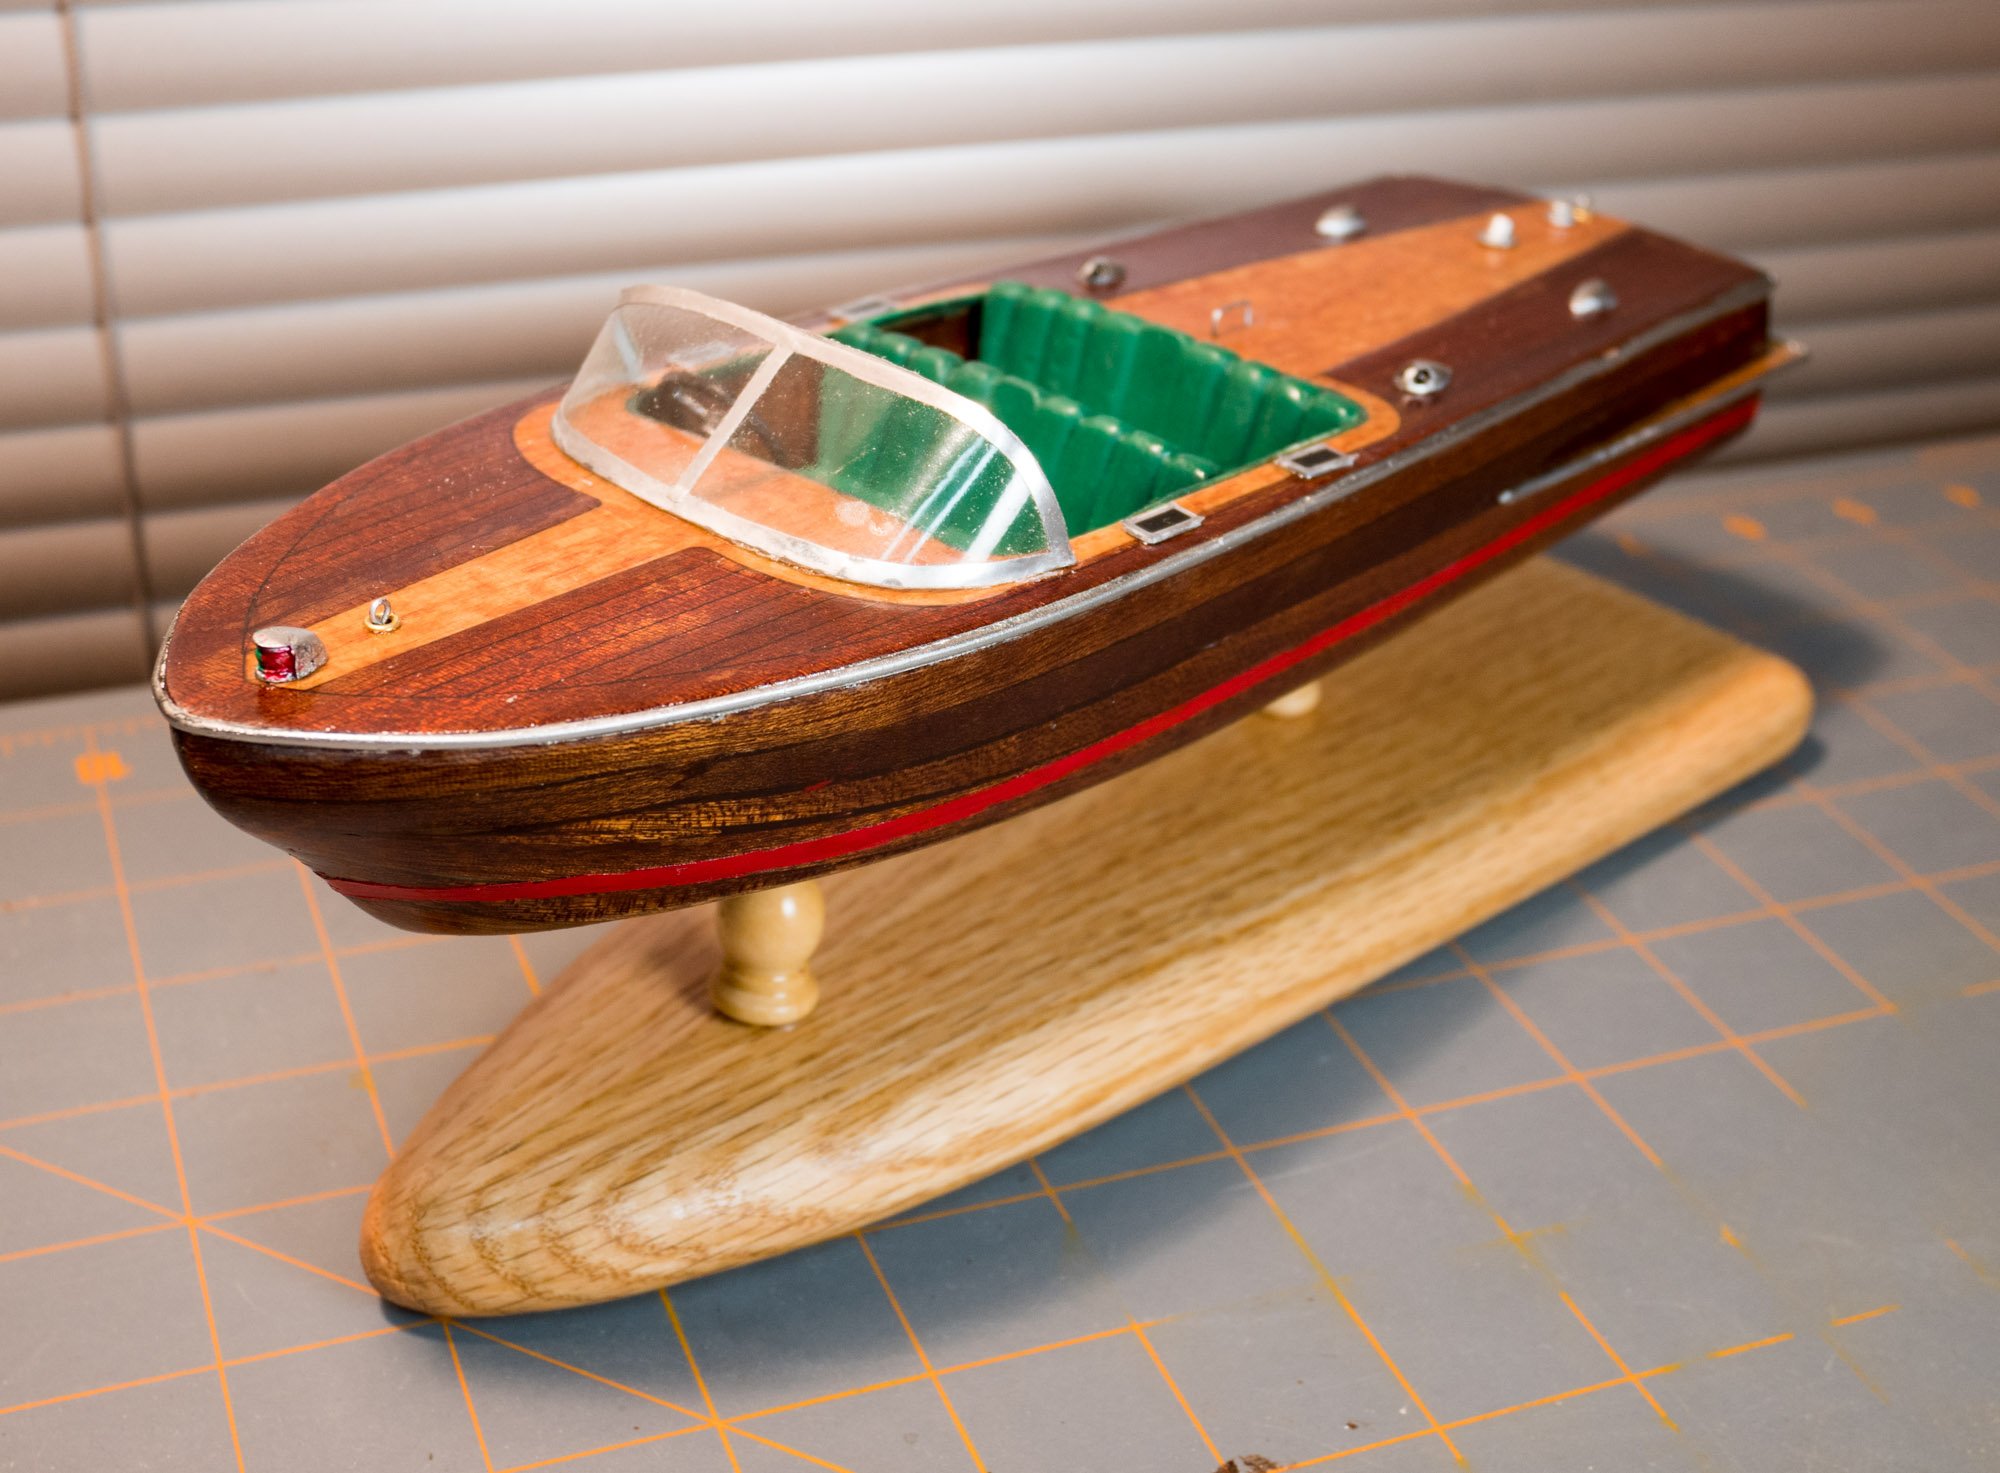
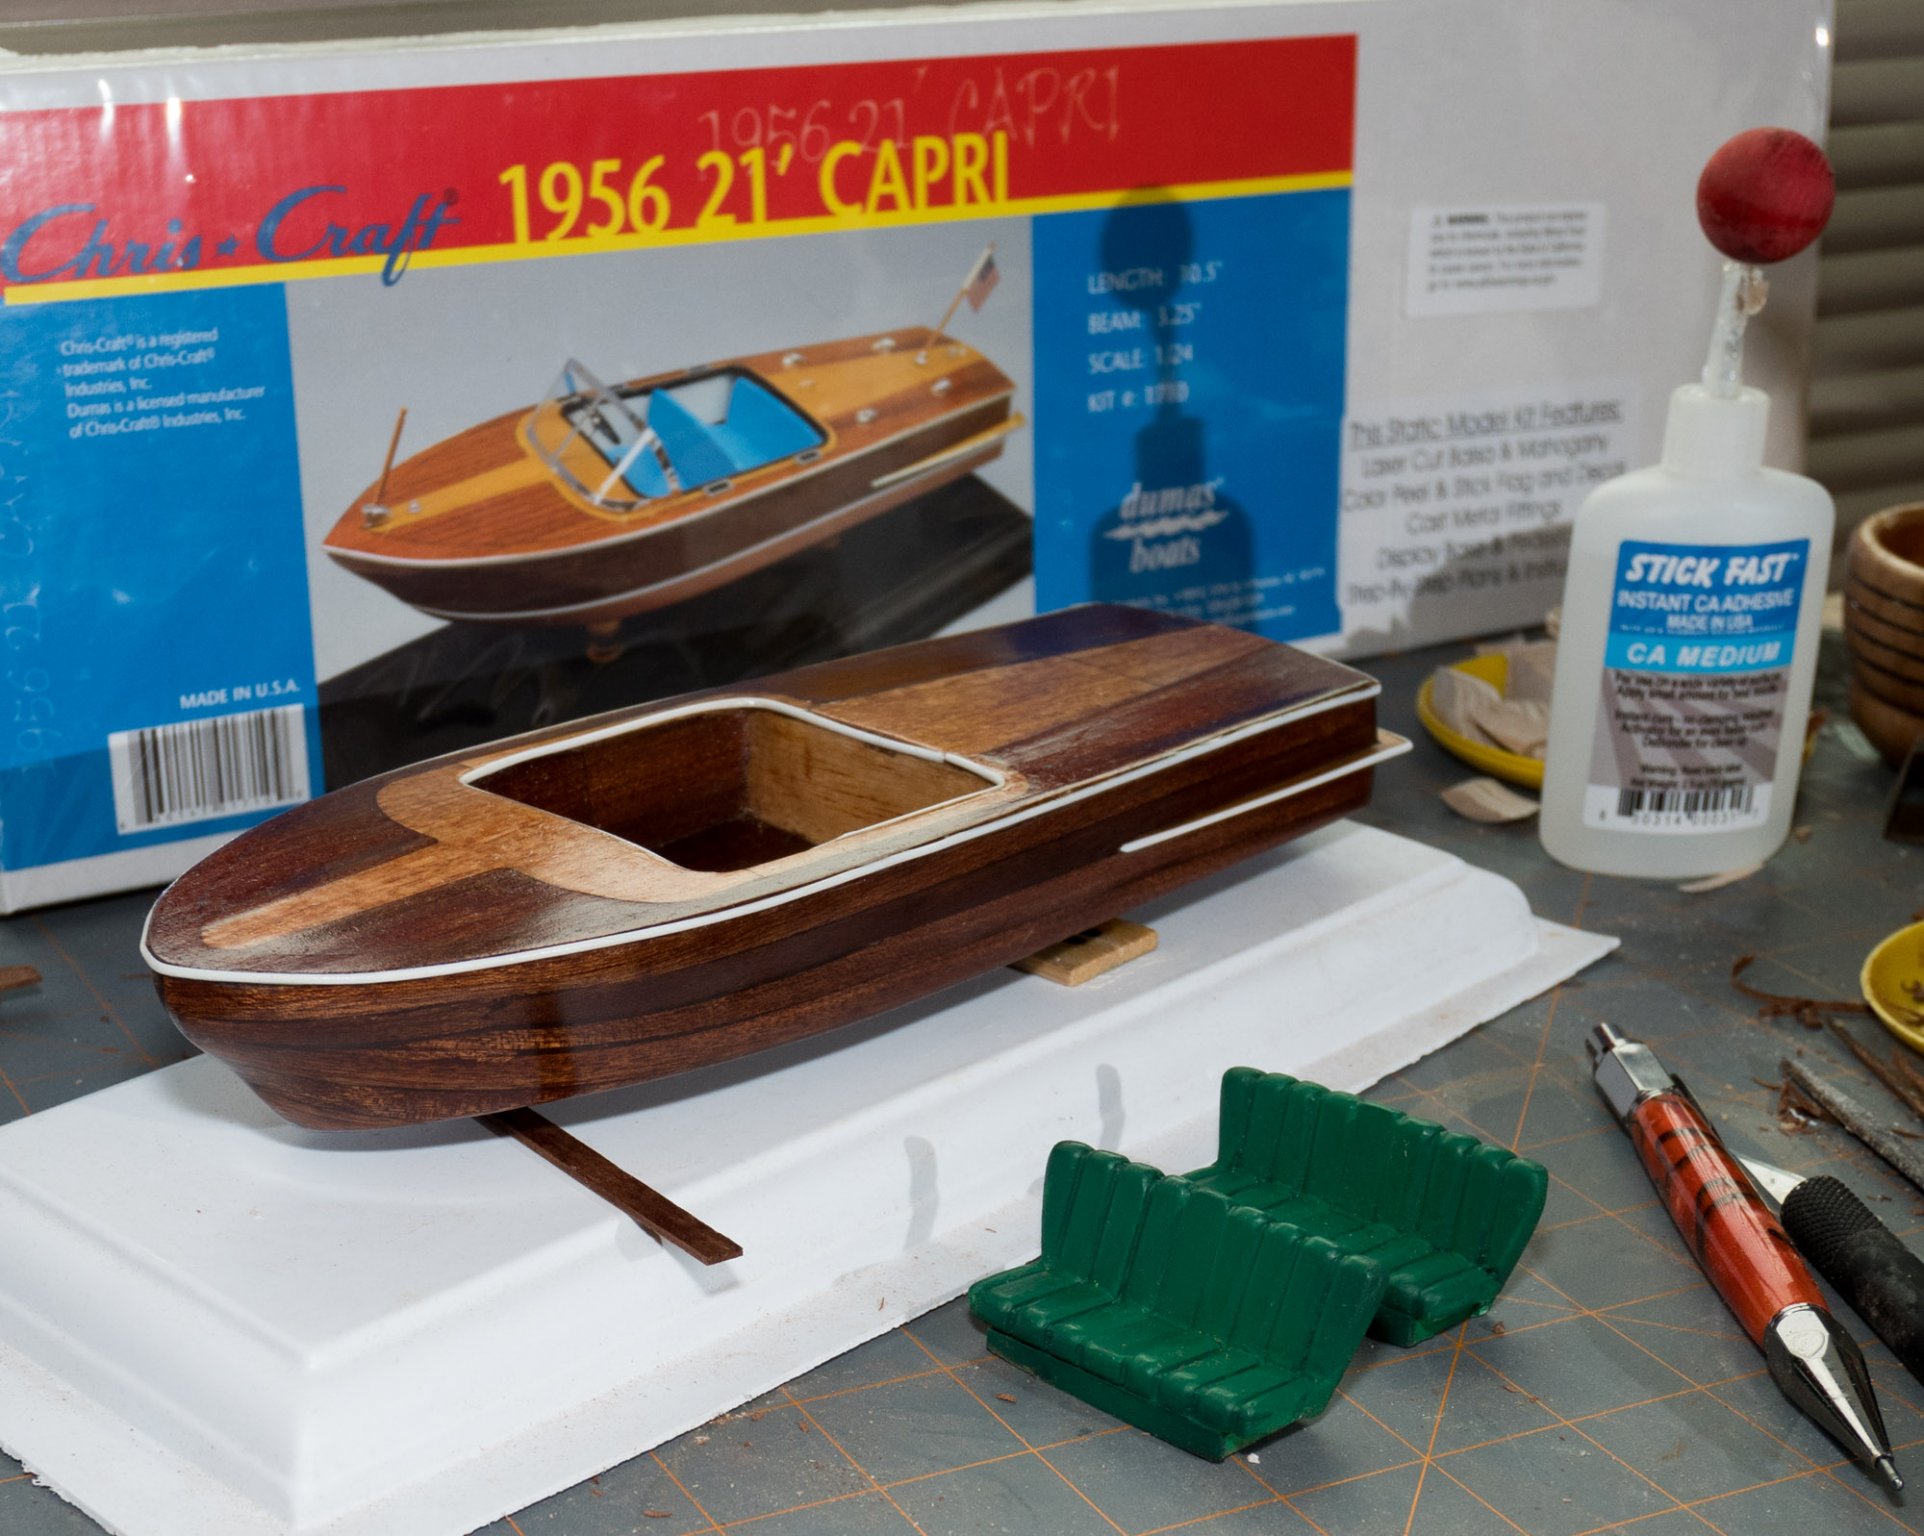
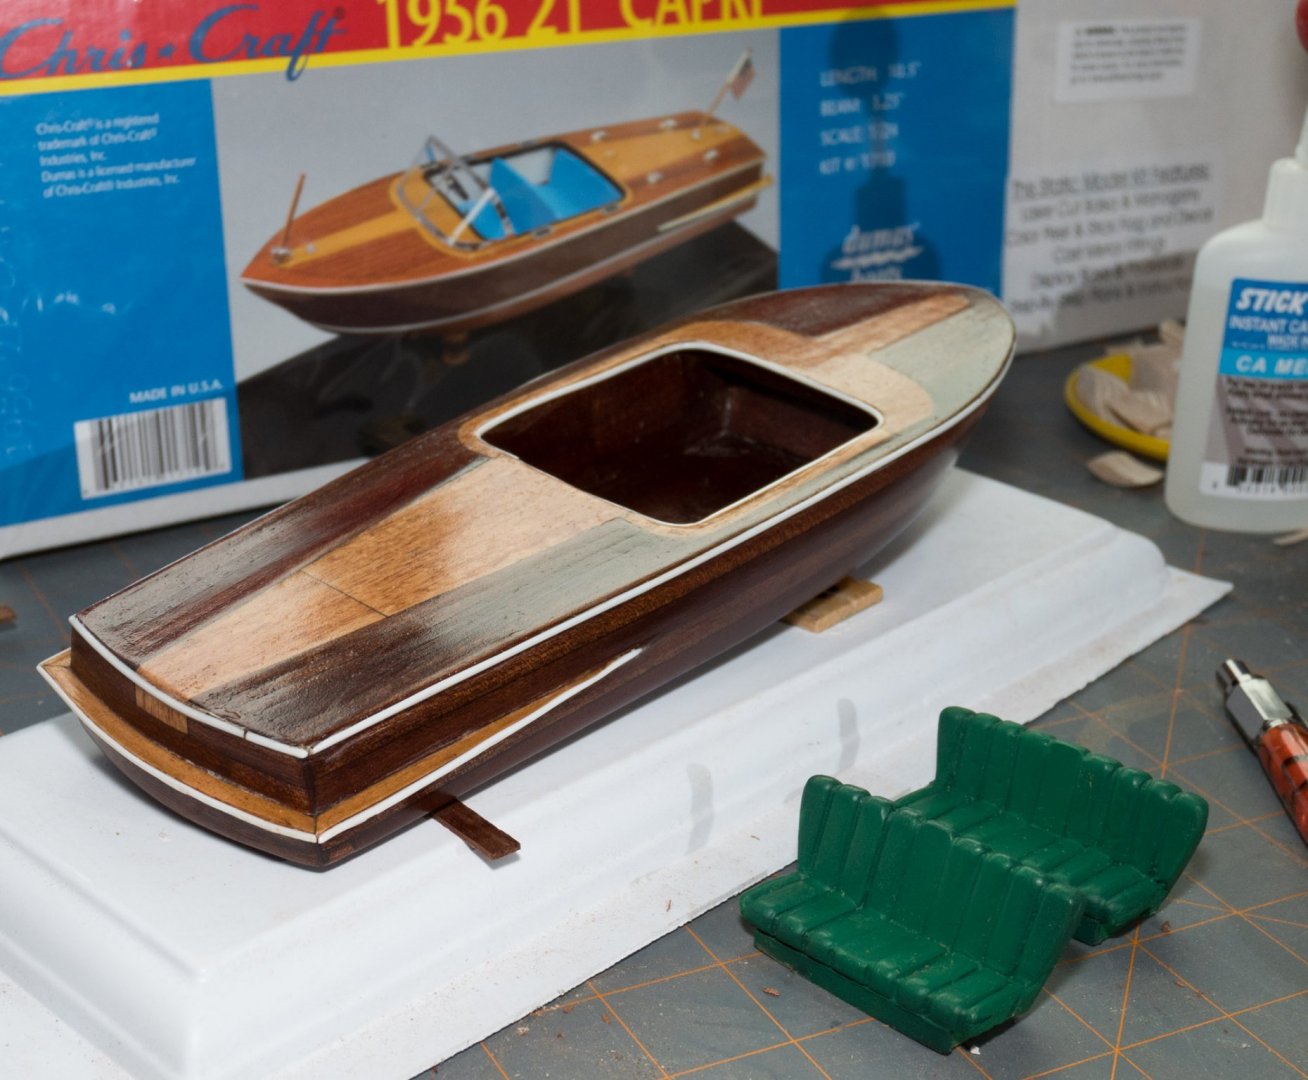
Working with the small parts was hard, I'm not accustomed to working with small parts and I haven't mastered using tweezers yet. The windshield was a bear to do and I'm not very happy with the way it turned out. The real boat has an odd bulbous feature on the bow which I tried to replicate but failed. I wanted the base to emulate a wake, I cut two pieces of oak at an angle and glued them together. I got frustrated several times during this build but I decided to see it through, I wanted to know if I could build it and to what level of quality I'm at (I need improvement). I misplaced the flag staffs, the bow light doesn't have a hole for a shaft, I found a piece of the material so I'll add a flag staff to the rear. My next kit will be the Planking kit I've seen in this forum. I am trying to decide what kind of kit I want to try after that.
- 36 replies
-
- 2
-
-
- chris-craft 1956 capri
- dumas
- (and 2 more)
-
I'm glad I came across this log. I was frustrated with planking during my first build. I found a reference to the kit and I'm considering it for my second build. I'll be referencing your build.
- 44 replies
-
- 1
-
-
- half hull planking project
- half hull
- (and 2 more)
-
I painted the water line red and the rub rail bumpers chrome. Masking the areas was trickier than I expected. I repainted the water line three times and it got kinda thick. I also painted the bright parts but I haven't mounted them yet. I used the mirror chrome that usedtosail recommended and that stuff looks pretty good. I haven't figured out how to deal with the chrome trim decal for the windshield. The decal is gray, I'm considering painting it chrome but I don't see how I can work with it I paint it. I might look into foil. I forgot the foot steps for the deck so I have to work those too.


- 36 replies
-
- 2
-
-
- chris-craft 1956 capri
- dumas
- (and 2 more)
-
After my first experience planking I decided my next kit will be chosen to work on planking. Do you have a recommendation for a kit to help me learn planking?
-
Tru Oil is used on gun stocks and knife handles. I used it on a couple of fish filet knife kits and I'm working on an Ulu knife. (In the picture you can see that I collected the saw dust on the instructions which I used to make a slurry to fill gaps).
- 36 replies
-
- 1
-
-
- chris-craft 1956 capri
- dumas
- (and 2 more)
-
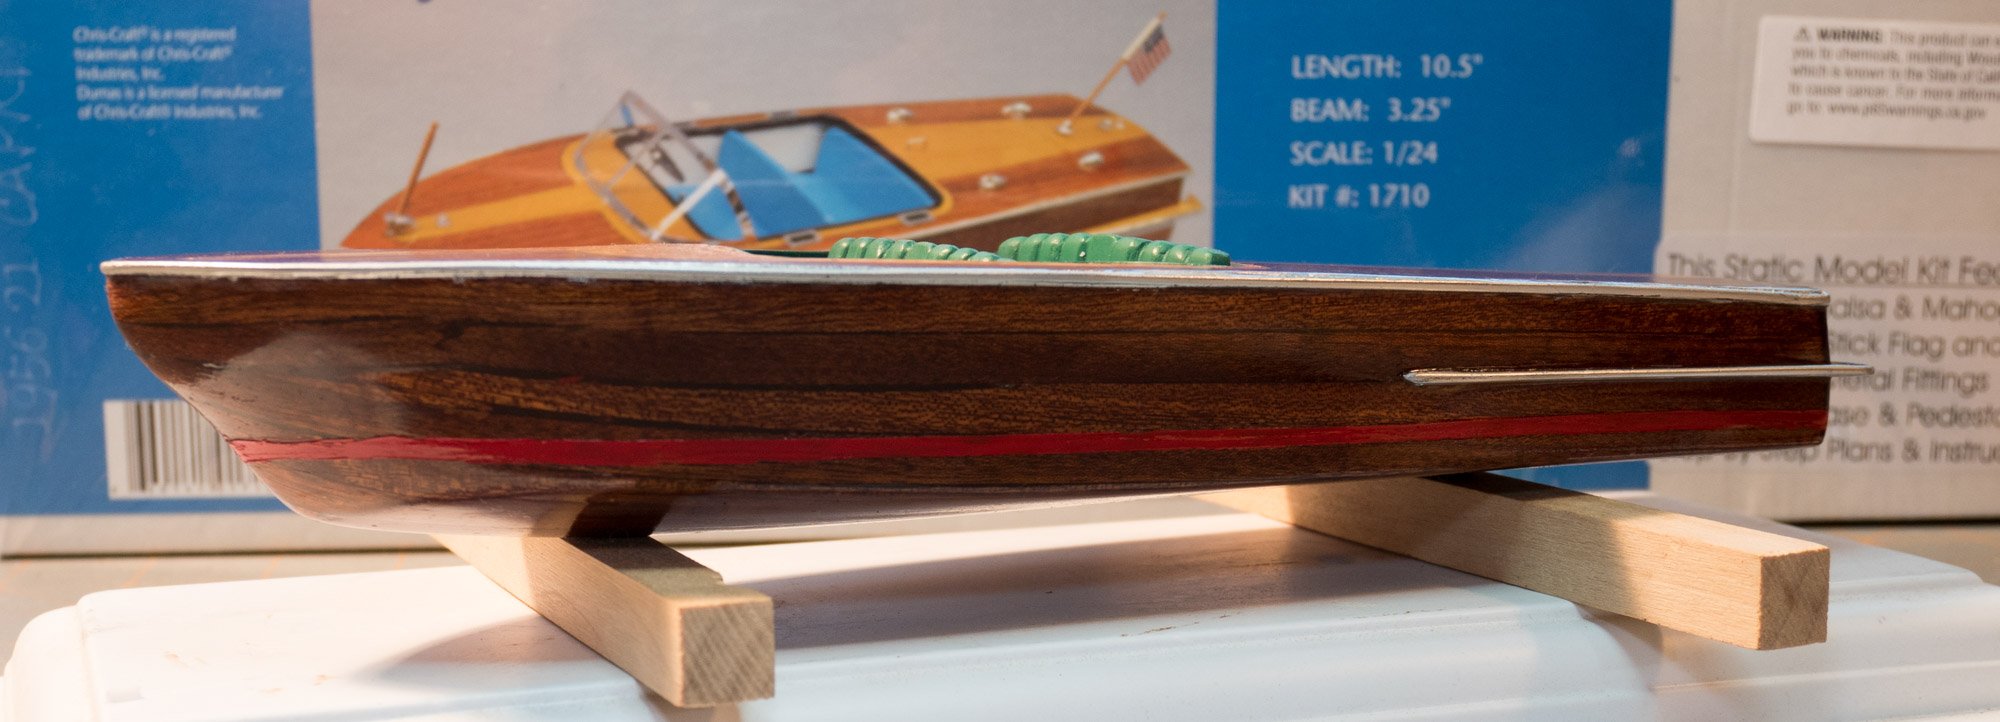
I installed the rub rails, bumpers, and coning; it was messy. Mistake # 7 I didn’t read the manual. The step describing the application of the half round styrene rod material should be done before finishing the wood. I didn’t do that. After making a CA glue mess on the finish and my fingers I sanded down to wood to apply the half round styrene rod material. I use CA glue to finish wood when turning pens; CA glue doesn’t stick to the pen part bags so I used a couple bags to help position the material before I hit it with accelerator to instantly cure the glue. Once I came up with a better process, I managed to glue the rub rail on the edge of the deck and the bumpers. The perfectionist in me wasn’t happy with parts of the job but the practical side said it was good enough. I’m not willing to try to fix my mistakes because I might make it worse (which is what I should do for the learning experience) but I don’t want to spend unlimited time on the task. The instructions say to install the cockpit coning on top of the deck. The real boat has it on the inside edge and I decided to give it a try. I used a hair dryer to see if the coning would take the inside turn, it worked. Next up is to paint the rub rail and bumper chrome and paint the cockpit coning the seat color. I’m trying to decide if I want to paint the bottom. All of the real boats have the bottoms painted (I assume for water protection reasons) and the color is mostly copper but some use the color of the interior. I’m also trying to determine what color to paint the water line. White is the most popular but the interior color is used sometimes; I'm considering red if I don’t paint the bottom.

- 36 replies
-
- 7
-
-
- chris-craft 1956 capri
- dumas
- (and 2 more)
-
The copper foil looks good. Where do you get it?