HOLIDAY DONATION DRIVE - SUPPORT MSW - DO YOUR PART TO KEEP THIS GREAT FORUM GOING! (Only 51 donations so far out of 49,000 members - C'mon guys!)
×

Cleat
-
Posts
202 -
Joined
-
Last visited
Content Type
Profiles
Forums
Gallery
Events
Everything posted by Cleat
-
 I got another deck done and I'm ready for the top deck. I will be filling the gaps and cleaning up the ends and extension of the interior walls. I will apply some walnut veneer to the plywood frame.
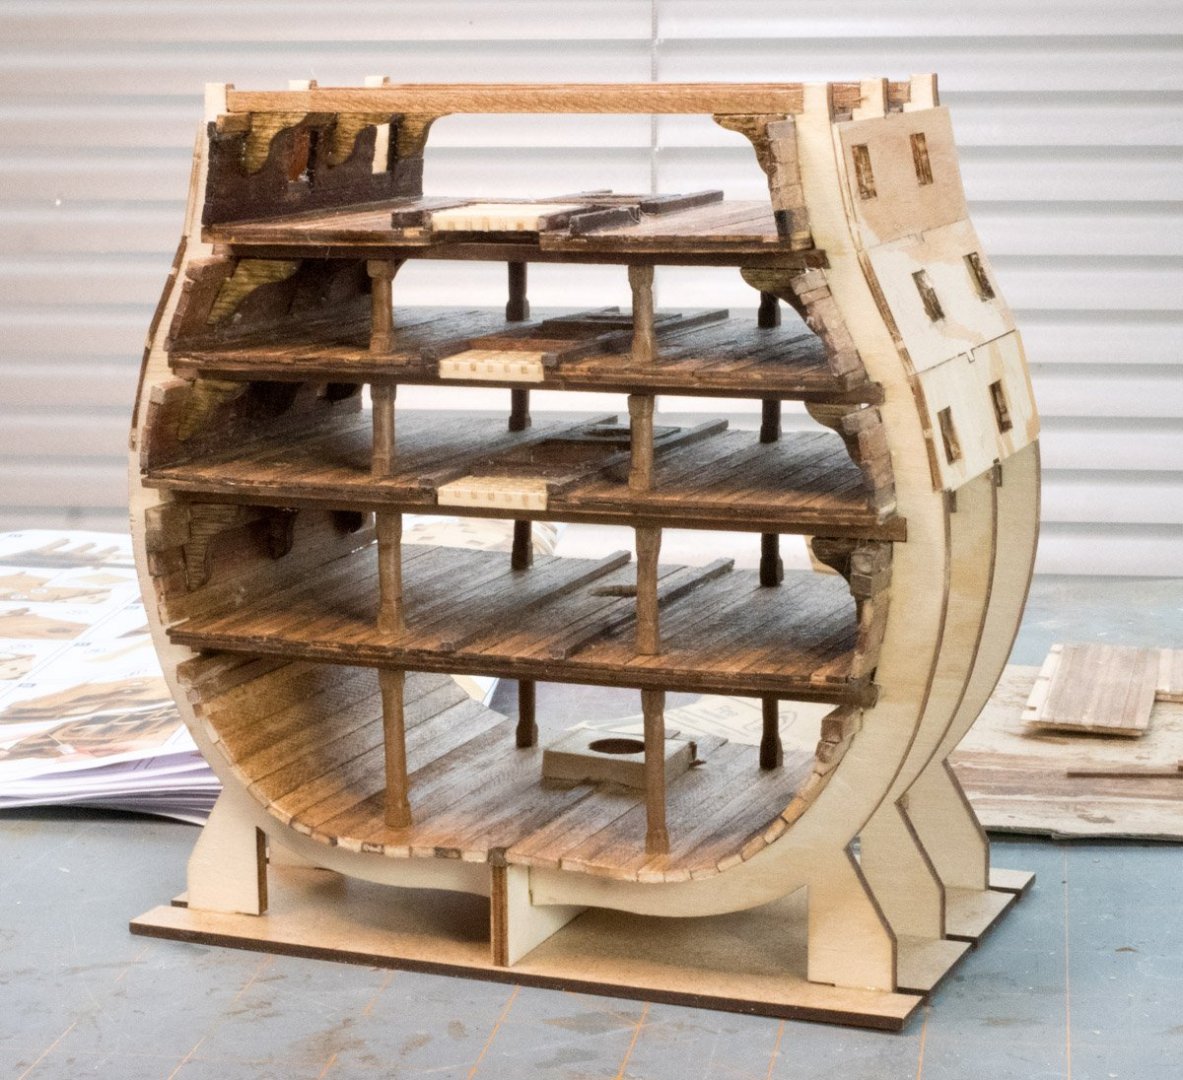
-
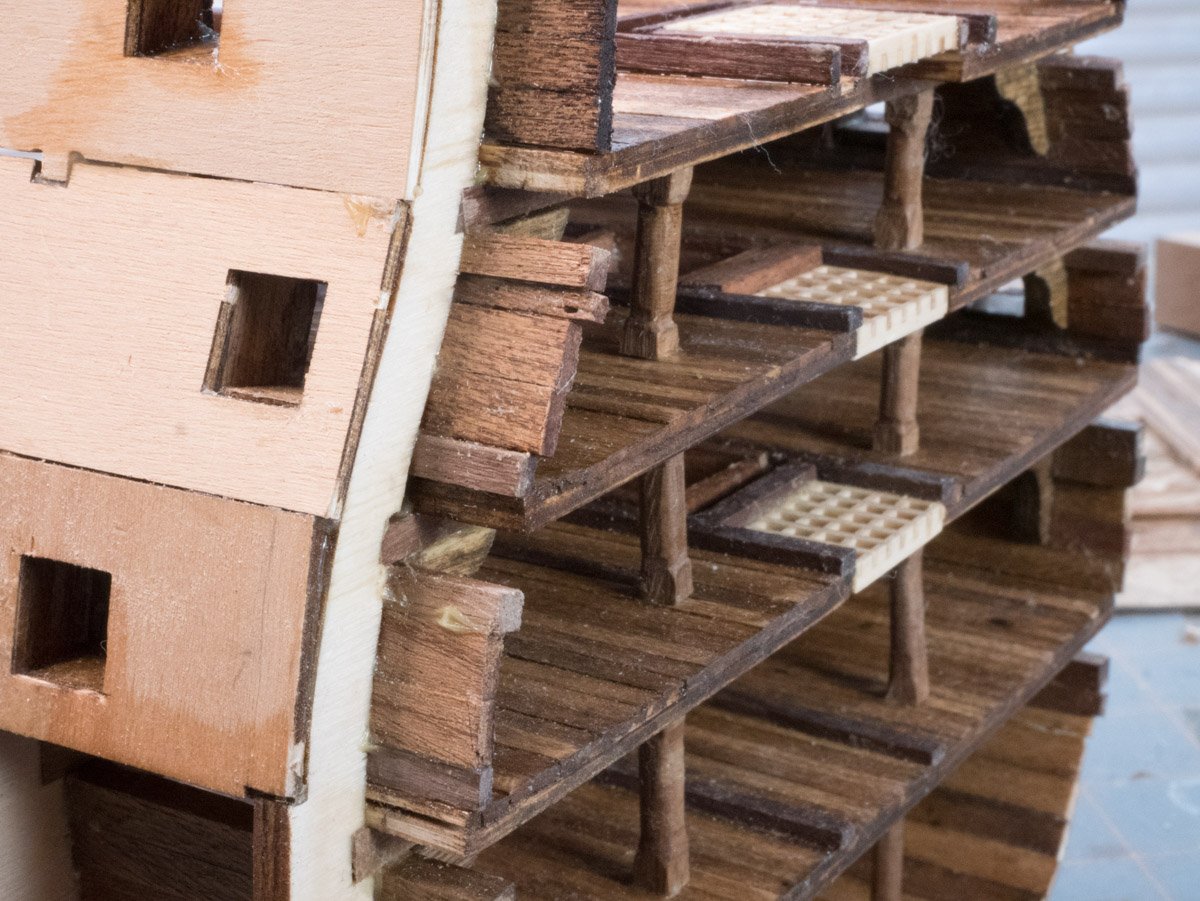
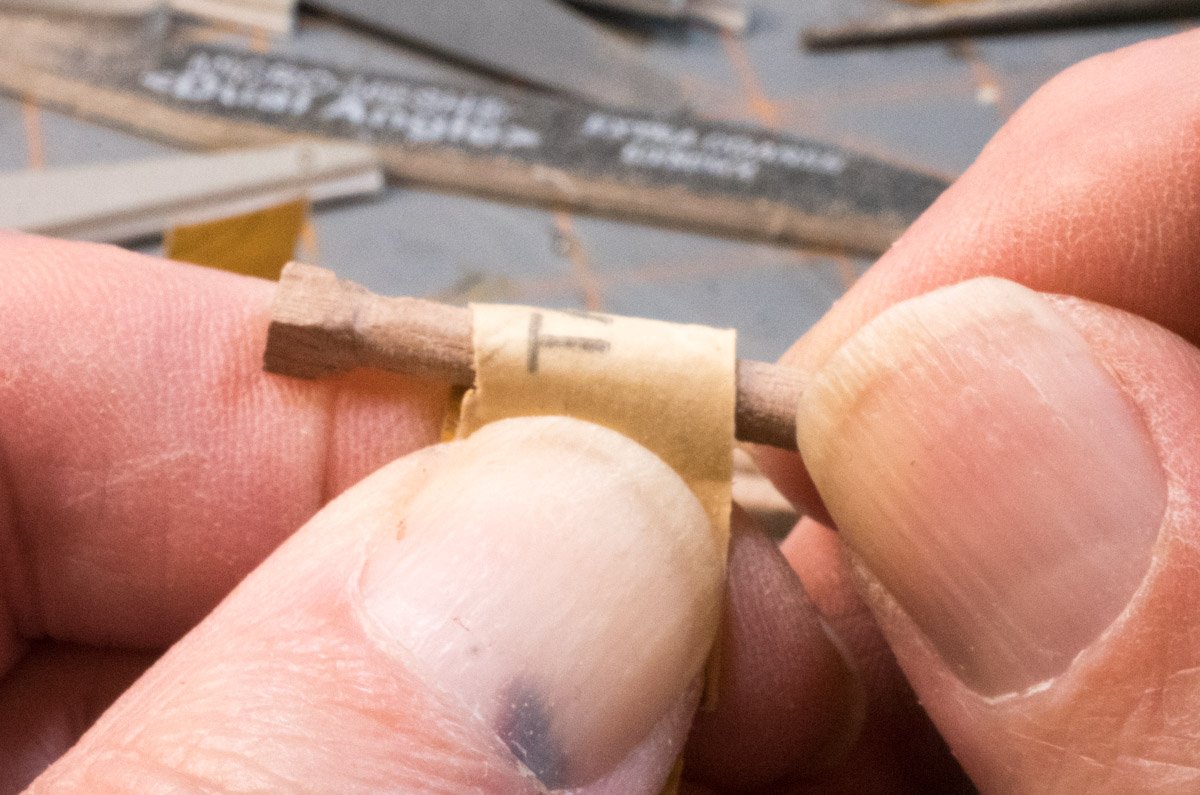
To make the columns I marked the ends with a pencil. I used a round file to create the transition from the square ends to the round middles. I used a flat file to knock off the edges. I used 150 grit sandpaper to round the columns.

-
I'm making progress. I added another deck. I noticed that I placed the columns inline with each deck with the first columns, the kit shows the columns next to the center features. I haven't decided if I want to move them of leave them as is and call it a personalization.

-
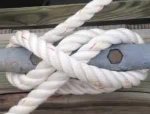
The rope work is great. I nothing but trouble with the rigging (I failed trying to make the big knots).
-
I assembled the first two decks. I had to revise the notch in the bracket frames (item 40) to make them fit. I started to think about how I might treat the ends of for the interior strips. There are some gaps to fill where the cross beams attach to the frame.
-
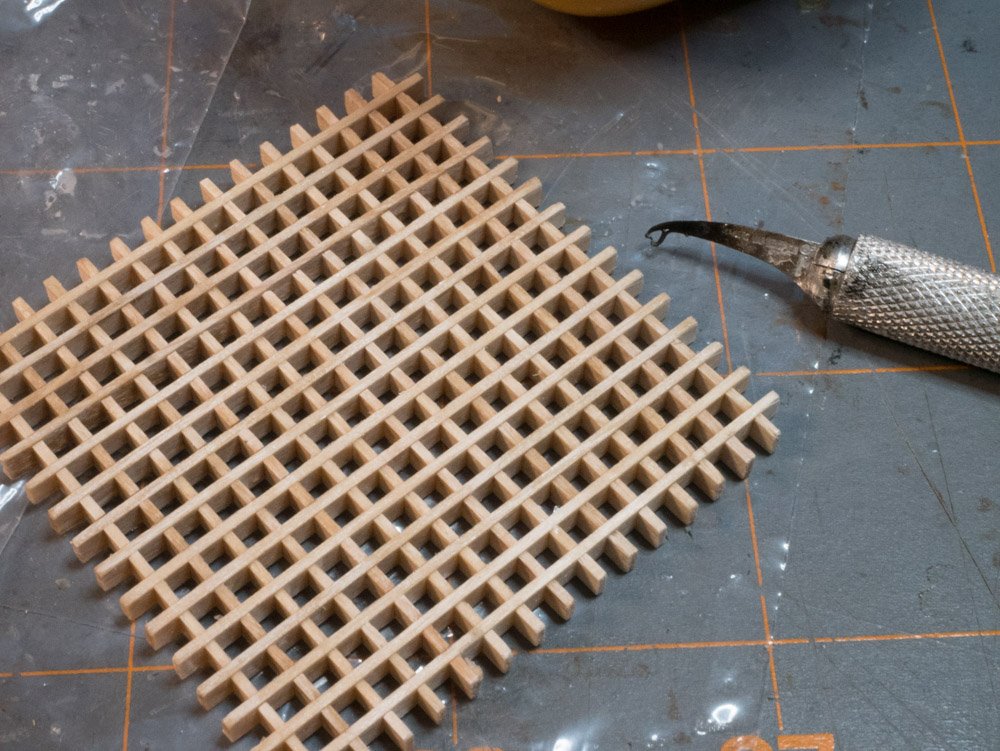
While my finger is healing, the first thing I could do was use a mouse. I scanned some of the laser cut plywood parts and created CAD drawings that I can use to cut walnut veneer for the pieces – such as the stand. Unfortunately, my hobby CNC machine is down and they don’t make the control board for it anymore; fortunately, Sainsmart has very good customer support and they found one at a distributor. I’ve been gaging my finger recovery by doing some model ship building tasks. I assembled the grating and glued the seams with a Glue Looper tip (fits Exacto handle). The Glue Looper has a small loop that you dip in thin CA glue and apply it to a seam; it uses capillary action to draw the glue from the tip into the seam. It works great. The tip is small enough to fit into each square of the grid.
-
It looks great. Did your passengers get a reduced rate while you finished the railings?
-
I also had some trouble with the laser cut curved railings too. I reconfigured the curved sections at the stern to make my laser cut pieces work. I like how your railings turned out.
-
Your build looks great (I hope mine turns out this nice). I've been thinking about painting the cannon base a dark red too, I'm glad to see how it looks. When you installed the side panels with the cannon openings, did you need to bend the panels to fit the frame? If so, what technique did you use?
- 21 replies
-
- 1
-

-
- Santisima Trinidad
- OcCre
- (and 2 more)
-
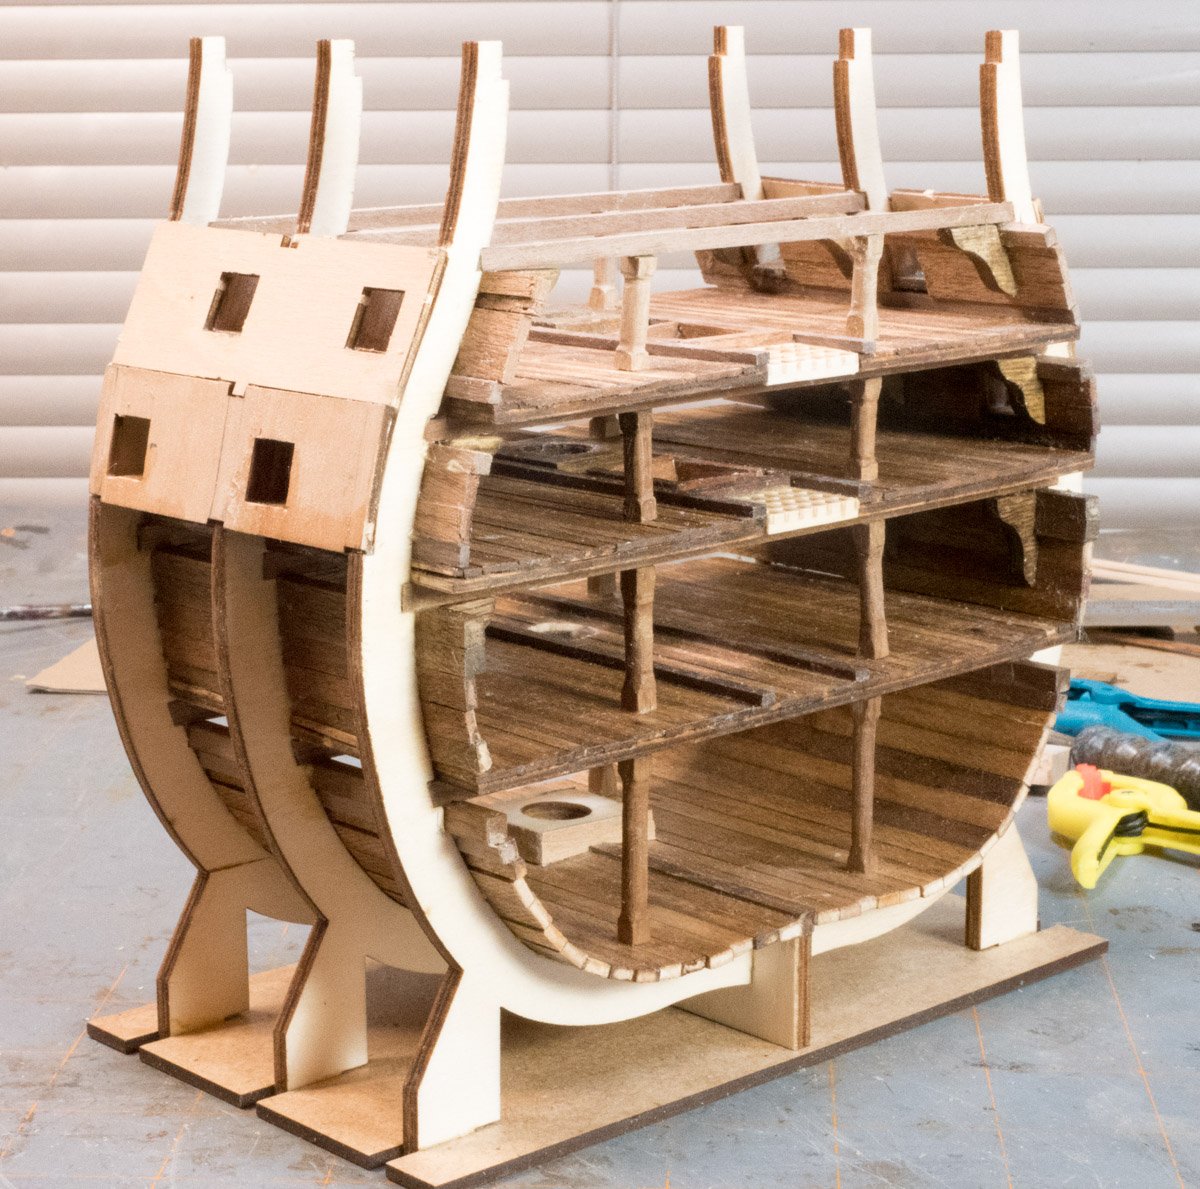
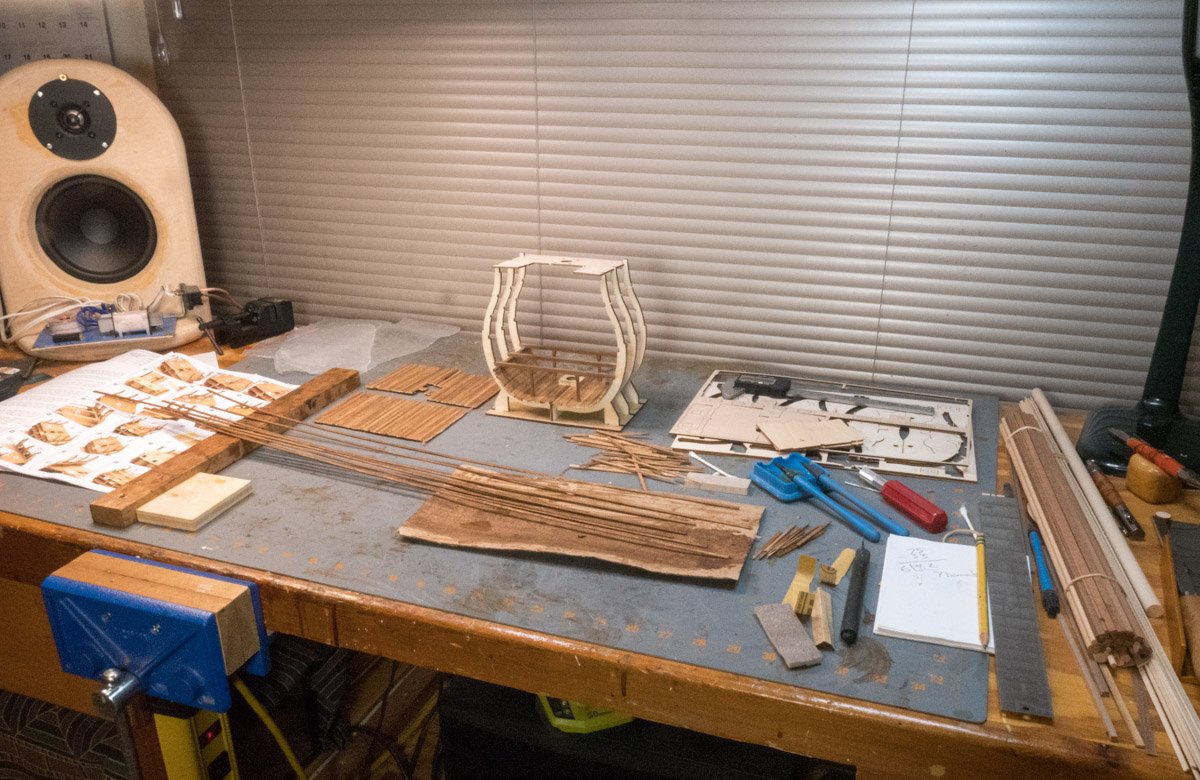
I scanned a frame piece before I started the kit. I traced the frame scan, scaled the drawing, and created structure components to emulate similar designs in other logs. I cut some walnut laminate with an inexpensive CNC machine to test my process and the see how the pieces fit. I applied stain and finish to some of the pieces to see how the walnut will look. I placed the pieces on the frame to check the how they will work (I didn’t fit the pieces). I created another file to cut another set of walnut laminate pieces plus a pair of the one-piece frame laminate; unfortunately, my CNC machine stopped working (part on order). I also dislocated a finger so I can’t use an Exacto knife for a while. I have a bunch of walnut laminate so I plan on cutting walnut laminate for more of the laser cut plywood pieces.

-
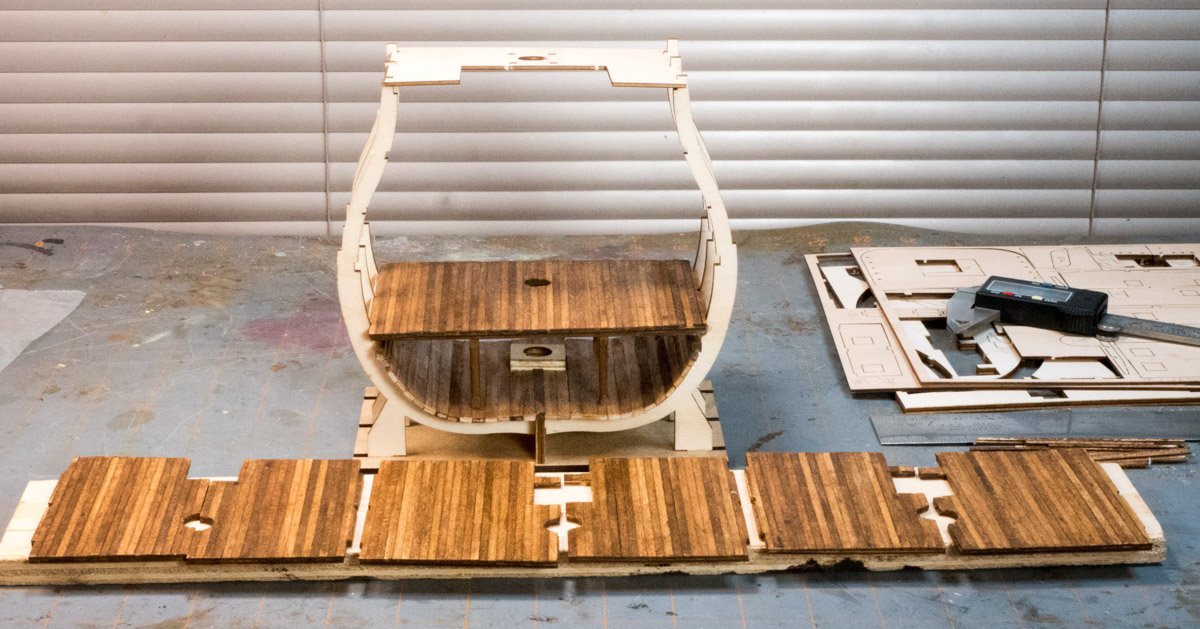
I liked how the planks on the base of the frame turned out so I did the same thing for the decks. I decided to do all the decks at one time to so all the decks would look the same. I checked the width of each stock piece I used because the there are several pieces that have a slightly larger width. I applied stain to the 1x3 stock, when dry I cut the pieces to length. The parts list specs 90mm but I cut them to 91mm. I applied a single coat of Wipe-On poly (clear satin), I don’t want to make it too shiny. I’m test fitting the bottom deck and it fit pretty well. I’ll attach it after I apply veneer to the mast base.
-
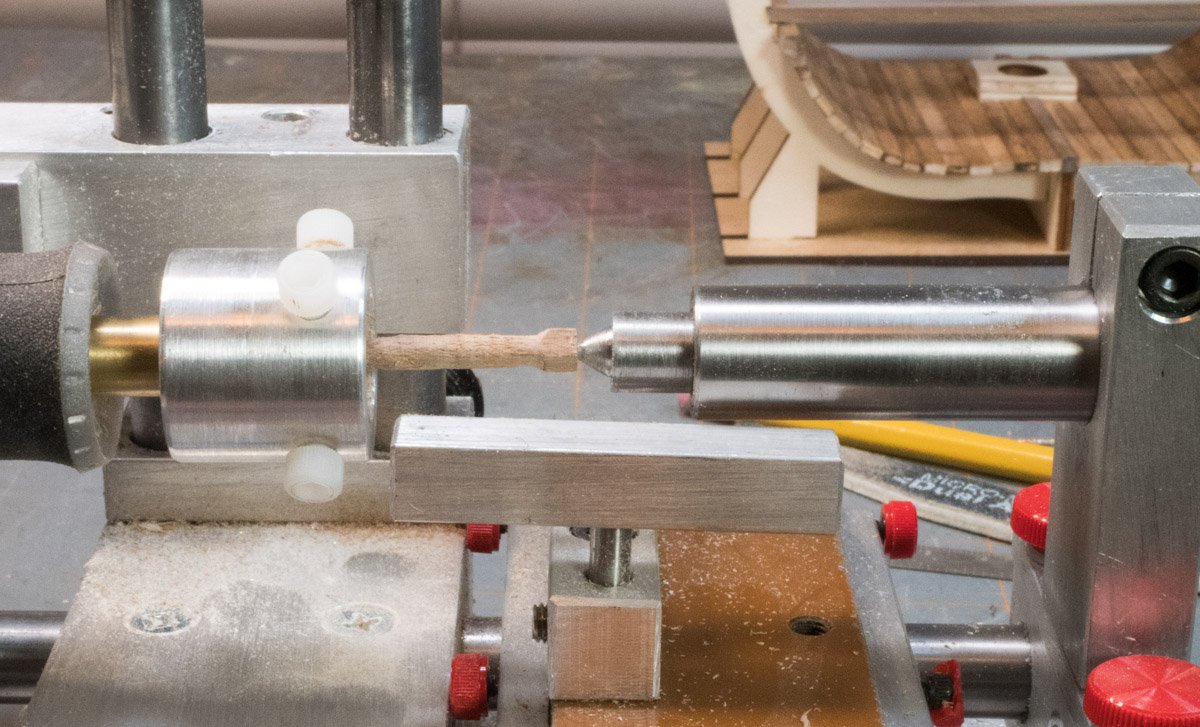
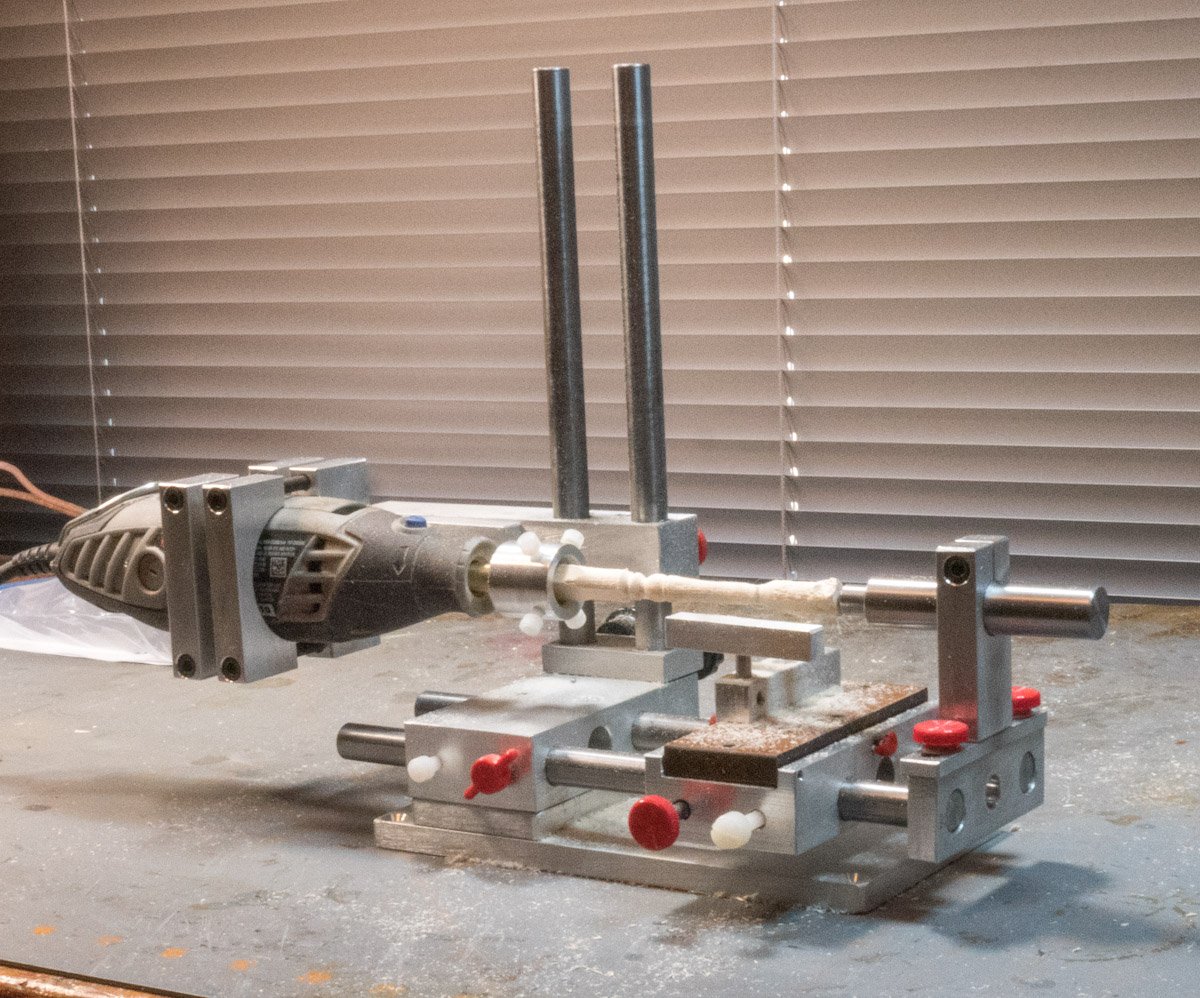
To make the deck columns I used a round file to make the transition from the square end to the round column. I tried using my micro lathe to turn the column but the stock is too small for the lathe (and centering the stock in the lathe was hard), I managed to knock the corners off but I could only process about half the column, I turned it around and knocked the corners off the other half to prepare it for sanding. I used 150 grit sandpaper to shape the column by rotating it in a sandpaper wrap.
-
I hadn't considered adding a crew, I don't know where to get miniatures like crew. I've been looking though your build and it looks great. You log is helpful and I'll be following.
-
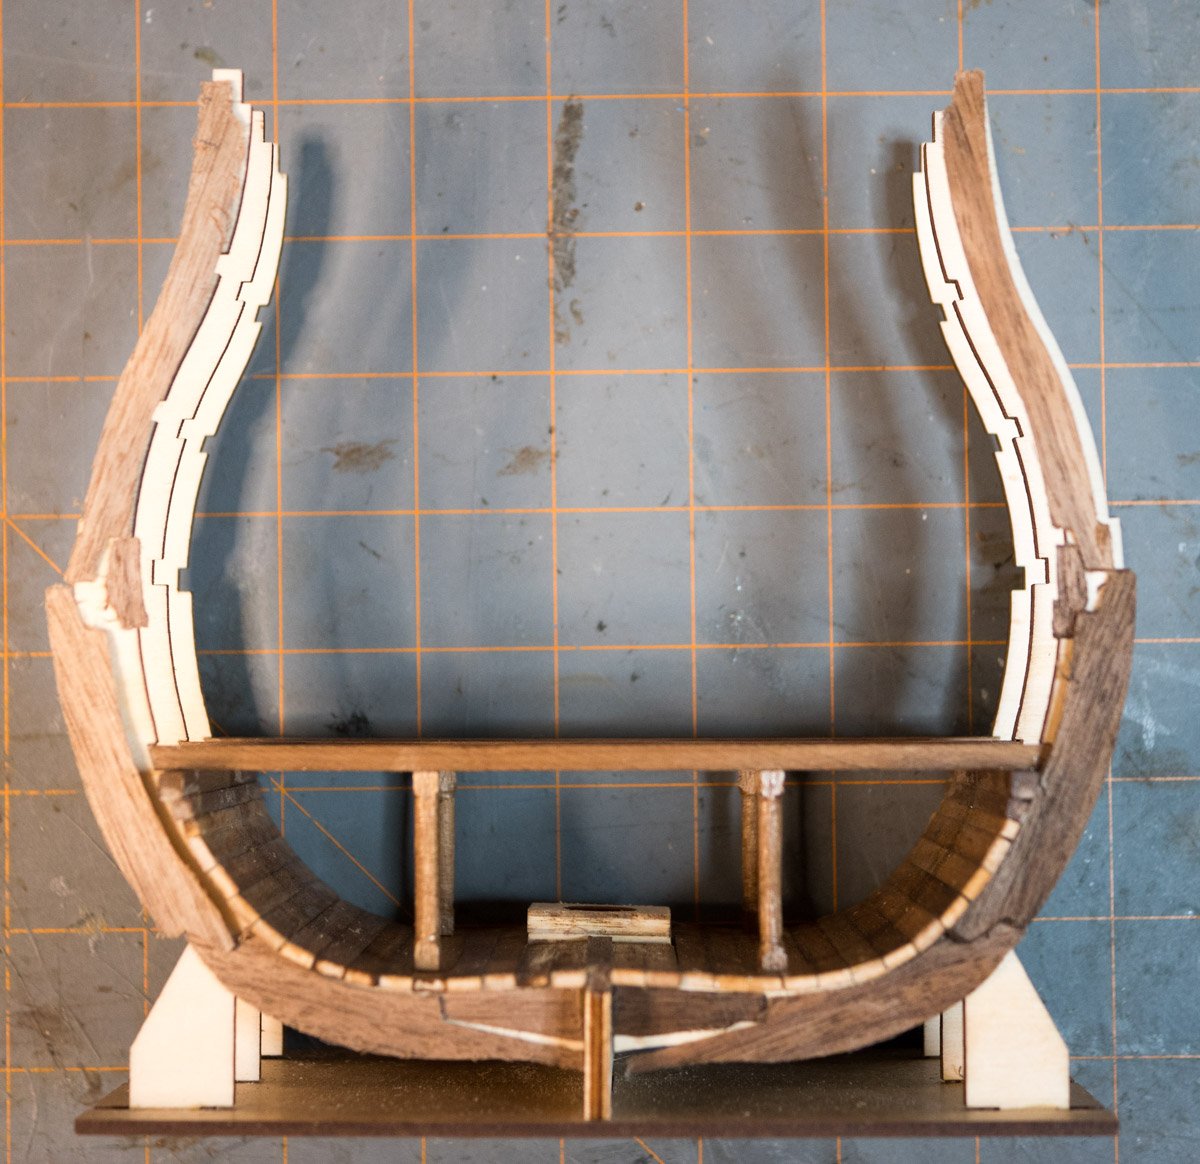
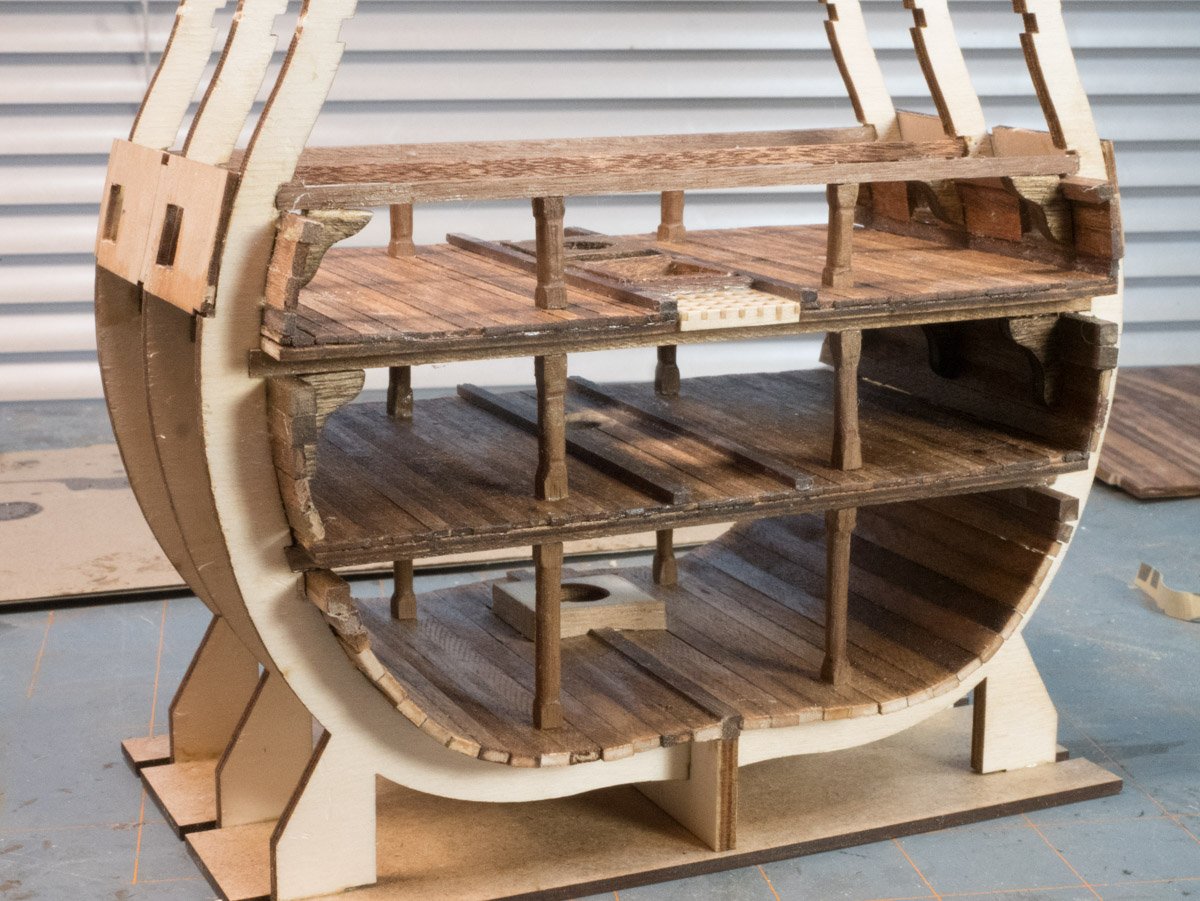
The build starts with a temporary base, the instruction points out not to glue the keel to the temporary base. Looking through the instructions, you eventually cut the hull from frame tabs glued to the temporary base. I applied stain to the 2x5 mm stock to get uneven coloring before I cut and glue the floor pieces to bottom of the hull. The last floor plank on each side needs to be trimmed to fit; I needed a 3mm wide piece so I set my plane to 3mm and planed the 2x5 mm planks to 2x3 mm (it is nice to have the right tool for the job). I’ve noticed in other logs that some create the look of a structure on first frame. I plan on emulating what md1400cs did in his build log. I have some walnut veneer and a hobby CNC machine so I scanned a frame piece to start the process to create the structure pieces. (it will be a side project to practice working with my CNC machine). I wonder if the structure detail will be seen when the hull is completed.

-
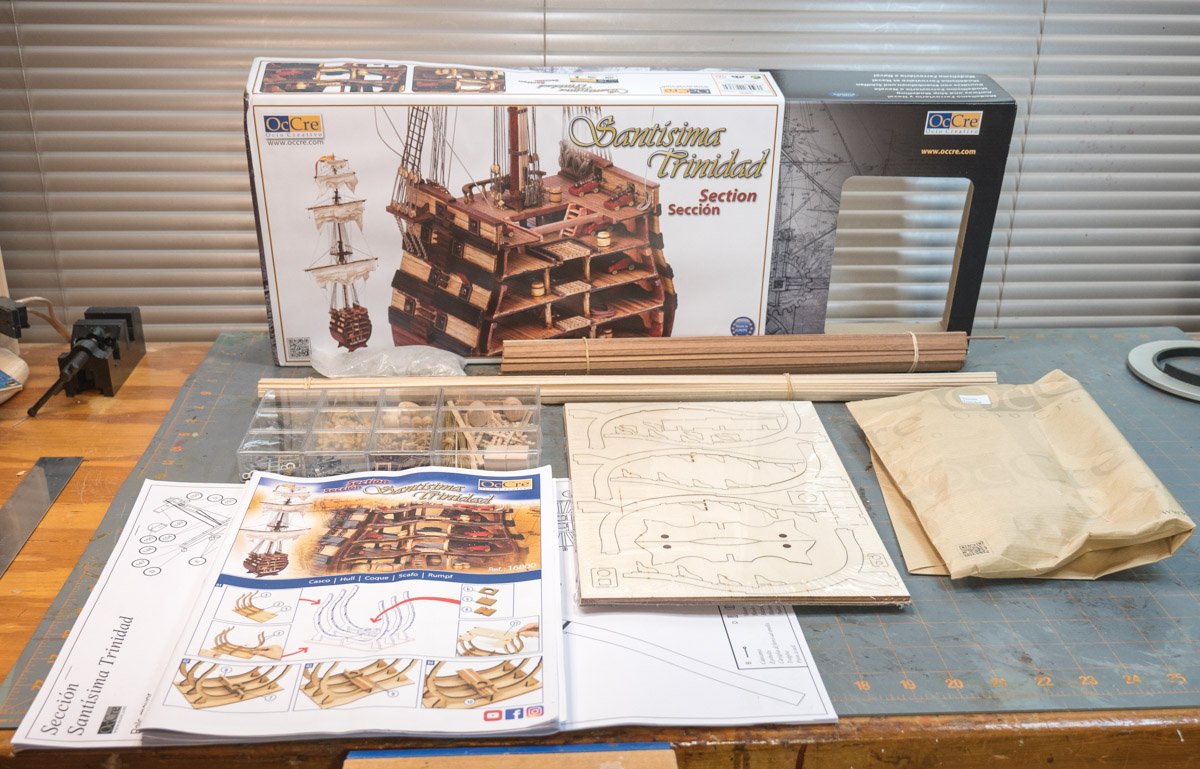
I decided to build the OcCre Santisima Trinidad Section kit for my fourth build. I think it is an interesting subject (I’ve wondered what was beneath decks). It will give me experience with miniatures and give me an introduction to sail rigging. I looked through other build logs to get familiar with the build and see how others personalize things. It looks like the kit has changed over the years. The kit includes a variety of wood in 400 mm and 600 mm lengths, laser cut parts, a container with metal parts and wood miniatures, a full-scale drawing of the mast and rigging, useful pictures, a parts list, and minimal instructions. The pictures show what to build with part list callouts for each step. The instructions provide basic information and some useful tips. I plan on making some pieces to go with the supplied miniatures.
-
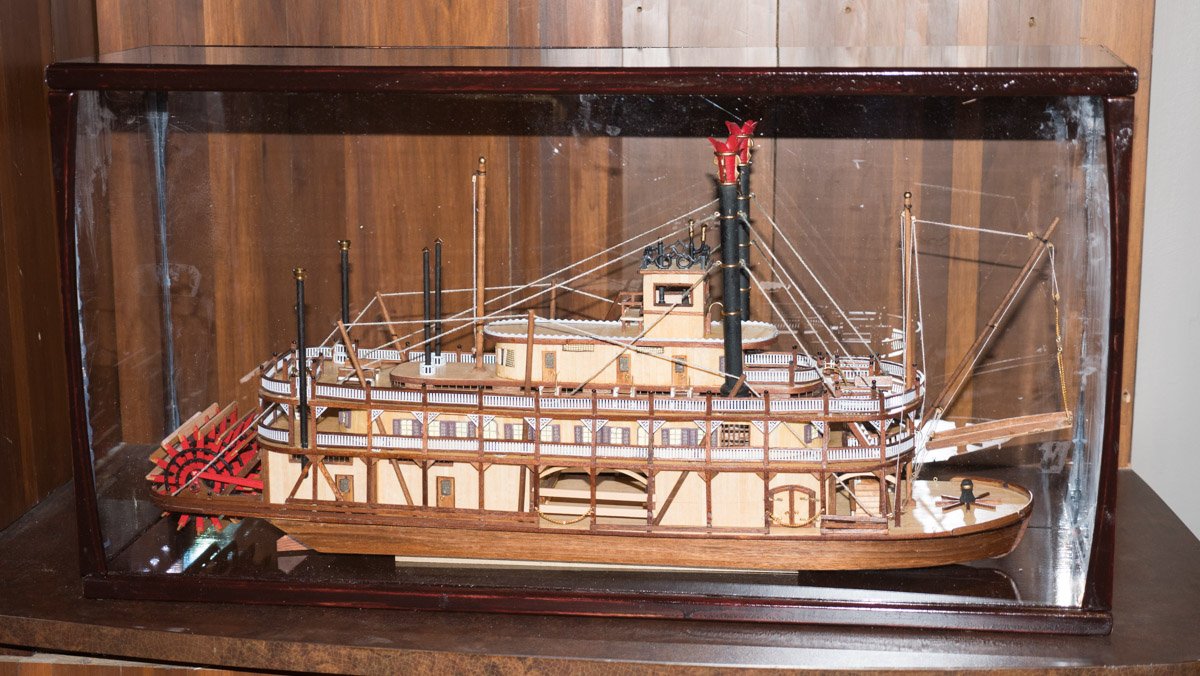
I used scrap wood to build a display case for my Mississippi Riverboat because I haven't built a case before and I wanted try a design. it will replace the dry-cleaning bag covering my model, plus I’ll gain the shelf space for my next ship build. I cut .75 inch plywood to 7 x 27 inch panels, one for the base and one for the top. I cut a 0.25 x0.25 inch dado in the four edges on one side of the base and top. I attached .25. ix.75 inch pine strips to the plywood making a.25 inch slot for the polycarbonate panels. I cut 0.093 inch polycarbonate for the clear panels. I cut (4) .25 x .75 x 13 inch and (4) .25 x .5 x 13 pieces to make stanchions to hide the seams of the clear panels; the two sizes create a post with equal sides. (I have a cnc router and cut the pieces with a quarter inch shallow curve on one side). To disguise the plywood and pine I painted the wood with a variety of stains. I have a lot of small, partially used cans of stain to use. After five coats of four different shades of stain I ended up with a mud color - I added red mahogany and it looks OK. I used the slots in the base to help align the clear polycarbonate panels for gluing. Unfortunately, I lost control of the panels (more than once) while I was gluing them with CA glue and smeared several places. The design works and it is better than a dry-cleaning bag.
- 132 replies
-
- 7
-

-
- King of the Mississippi
- Artesania Latina
- (and 1 more)
-
When I started here I read the Cautionary Tale thread and decided to not to get the kit I wanted to try, I'm glad I went with a smaller kit (CrisCraft speedboat). I found out that I wanted to learn more about planking so I built the half hull planking kit, it is an instructional kit just not a complete ship (I learned a lot, mounted it to a board, and use it to hold rages for applying finishes).
-
Are there better tools for drilling tiny holes?
Cleat replied to Dan Poirier's topic in Modeling tools and Workshop Equipment
I have a Vanda-Lay drill press for my Dremel.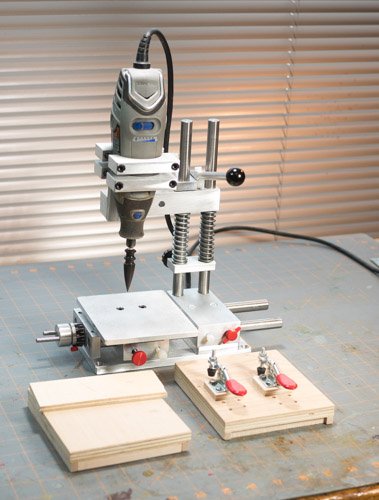
-
I have a Vanda Lay AcraMill with the drill press accessory. It has an X-axis adjustment that I used on my riverboat to drill a bunch of holes the same distance apart. I realized I no longer need the X-axis accessory; my hobby CNC machine can do the same thing. I bought the Micro Lathe accessory to repurpose the AcraMill and it works. I can switch it back to the drill press configuration with a few screws. It is a versatile tool. The Vanda Lay is designed to hold a smaller Dremel tool than what I have, I got stiffer springs for the drill press configuration to handle the weight of the Dremel 3000. I like the Vanda Lay because it can hold a Dremel tool which lets me use both hands with the material I’m working with. I made several drill press tables, I used the one with hold downs as a jig to assemble railings for my riverboat. The drill press configuration picture shows it with a burnishing bit which I use to burnish the edges of leather projects.

- 1 reply
-
- 6
-
-
I looked at the dust on my first boat kit (dust collector) and decided to look into cutting plexiglass, I'll have to get some and try cutting it. I'll be using a dry cleaning bag to cover my riverboat until my garage becomes warm enough to see how plexiglass works. I'm checking out build logs for the Bluenose kit (or something similar) and cross-section kits for my next project.
-
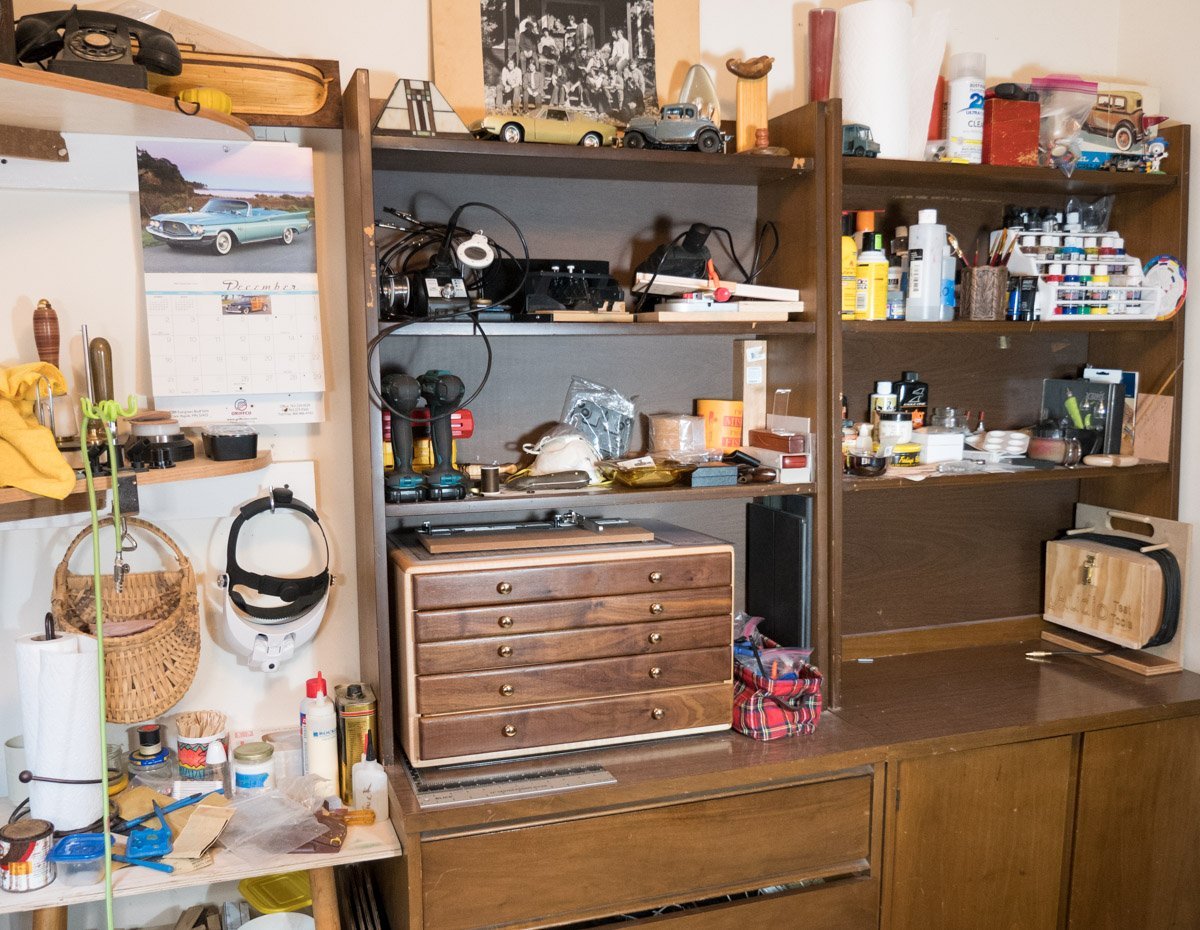
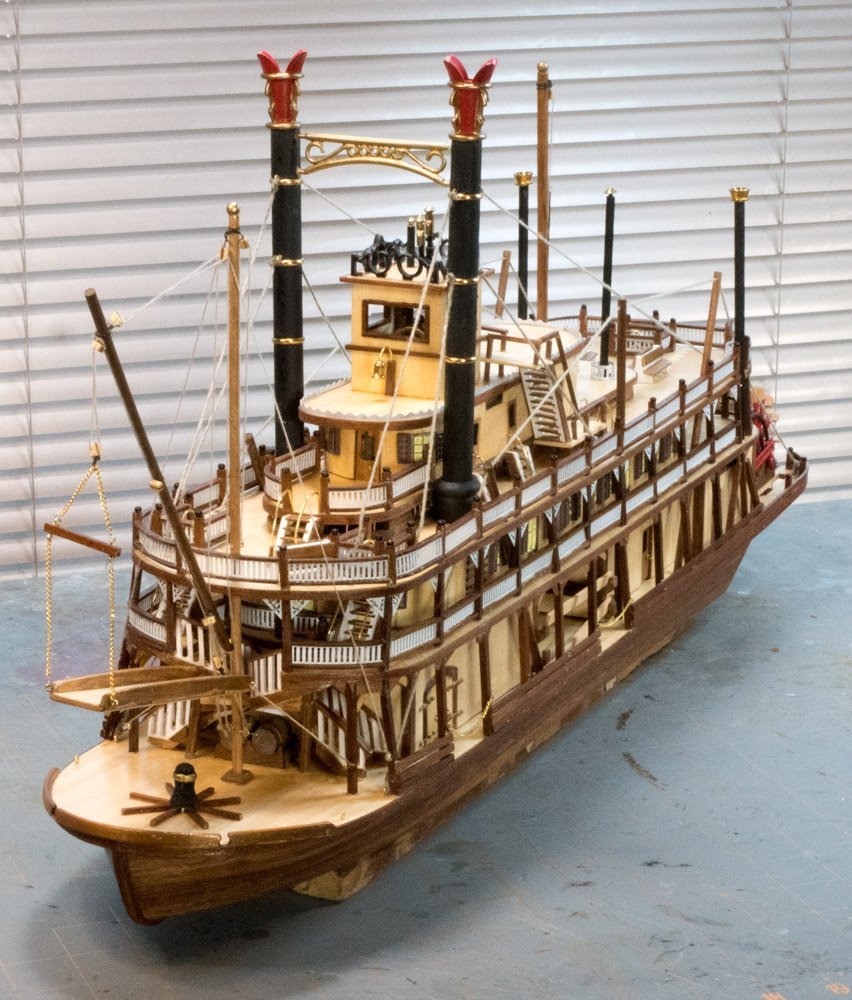
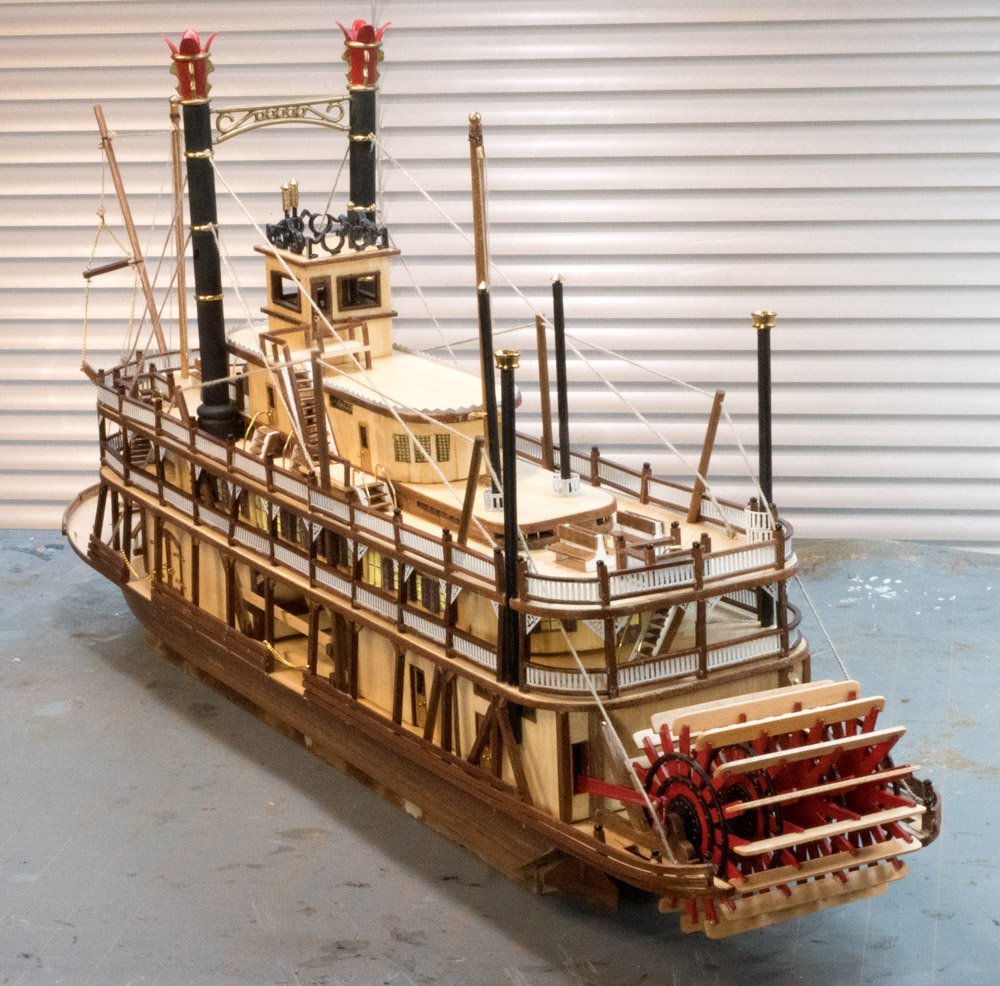
A couple favorite tools included Rockler’s silicone micro glue applicators and the Gluelooper CA glue applicator. I haven’t mastered tweezers yet but I got a lot of practice. I used Minwax Wipe-On Ploy on all of the wood, the number of coats depended on how much shine I wanted on the piece. I had built a small tools chest a few years ago (my best woodworking project). Here are a few more pictures:
- 132 replies
-
- 4
-
-

-
- King of the Mississippi
- Artesania Latina
- (and 1 more)
-
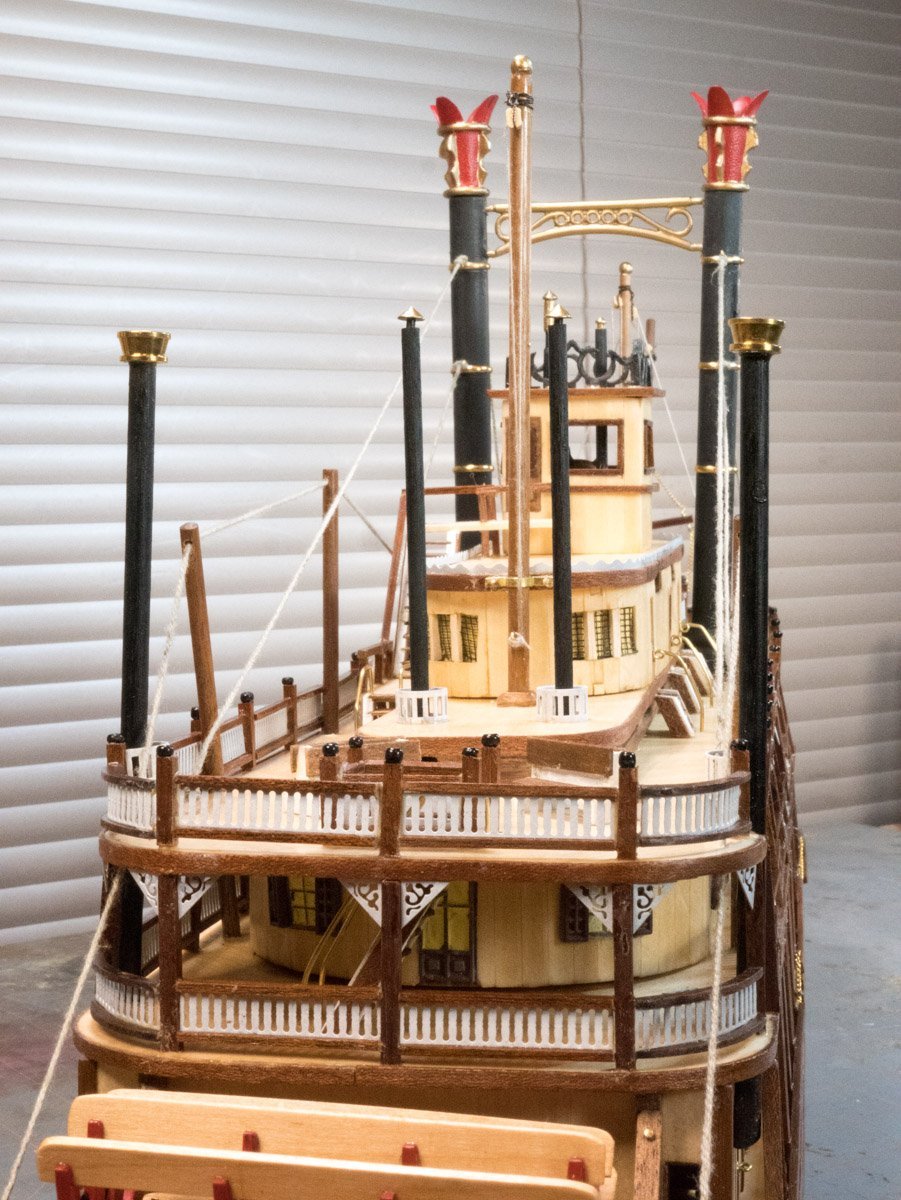
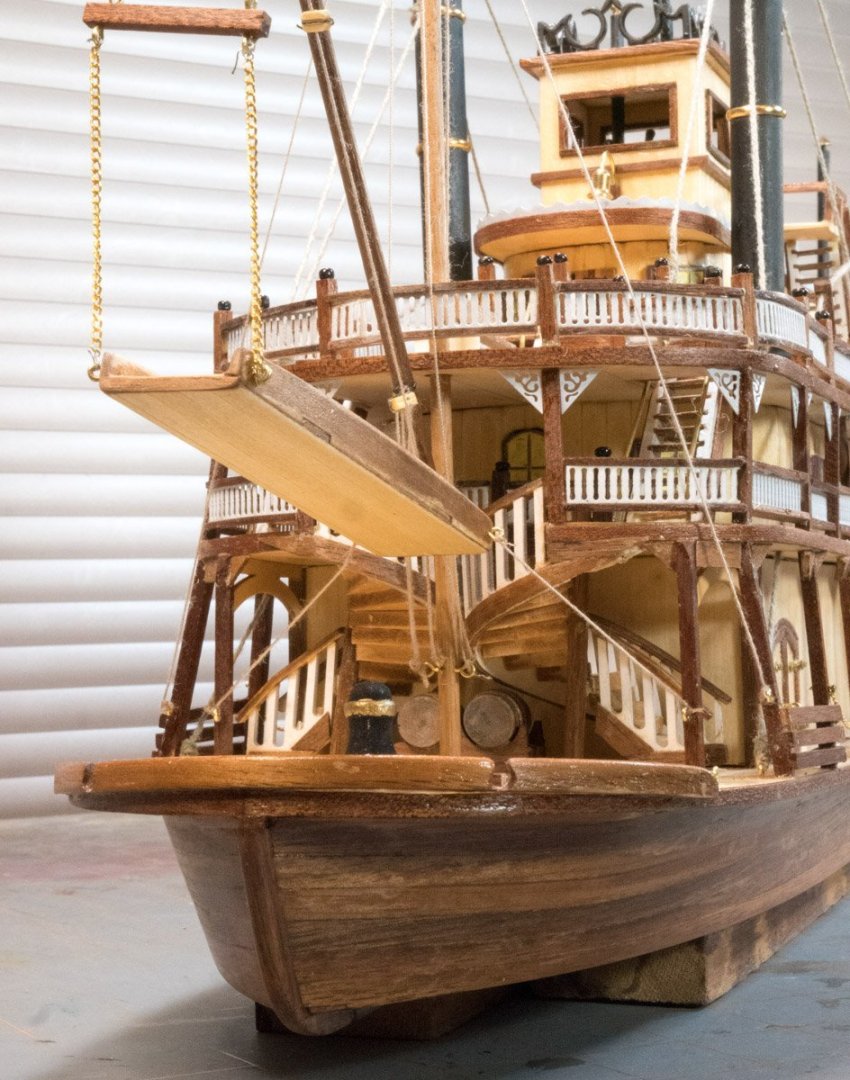
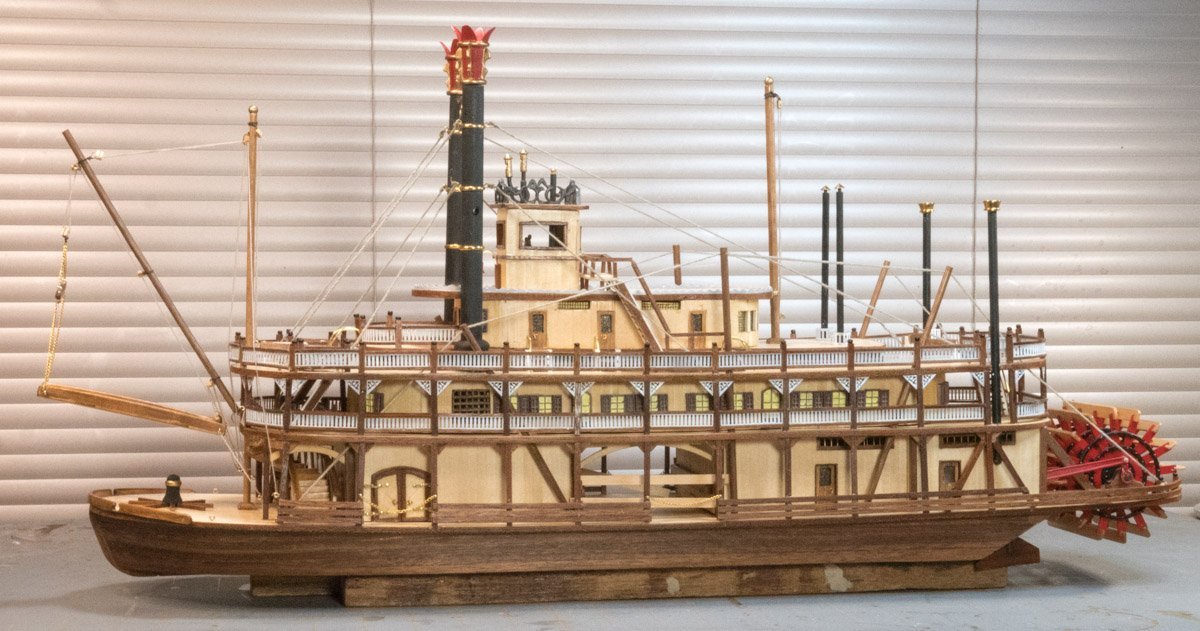
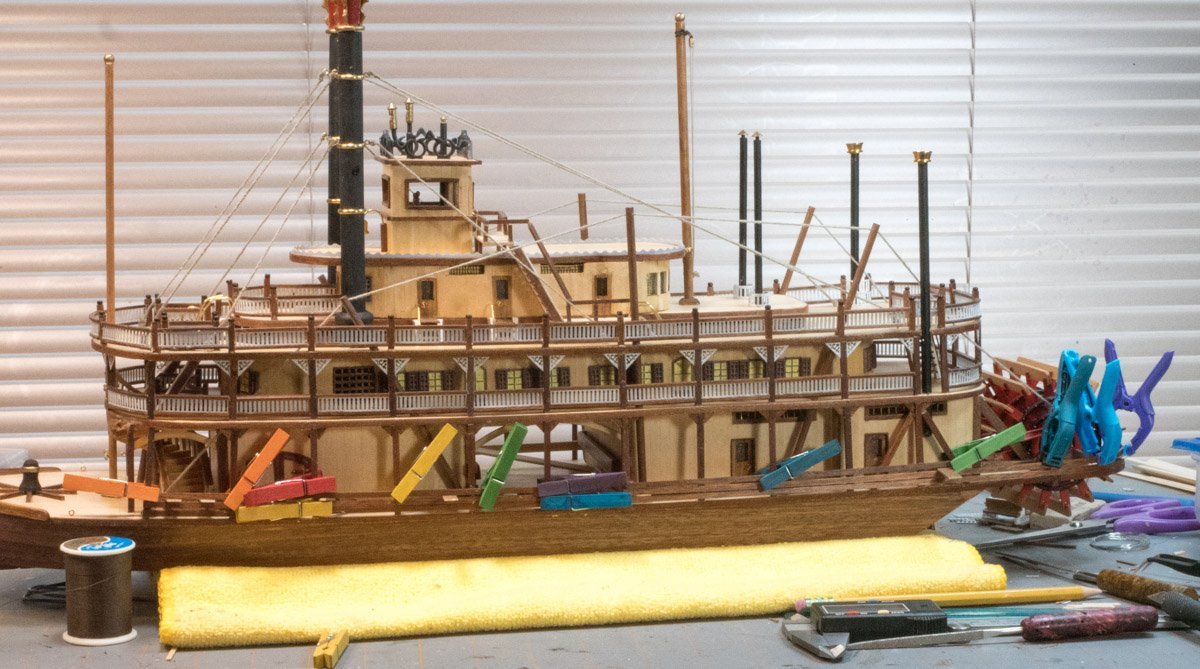
I am proud to finish my King of the Mississippi riverboat. A picture, a parts list, and minimal instruction required me to figure out how to do things I haven’t done before – problem solving is a good thing. I want to thank the others who made build logs and those who answered my questions in this log. I repeatedly referenced other build logs. I learned a lot and want to try another kit next fall. The build was a challenge for me, I enjoyed most of it but there was frustration (there was some a lot of swearing). When I built the spiral staircase, I knew I could overcome anything in the build. It felt good when I figured out how to complete a task (a few beers might have helped with the problem solving and feeling good). I’ll build a stand for it when my garage becomes available. Now I’m wondering how to deal with dust, the riverboat is moving into its dust collection era; I might look into a Plexiglass container but that isn’t a priority.
- 132 replies
-
- 5
-
-
-
- King of the Mississippi
- Artesania Latina
- (and 1 more)
-
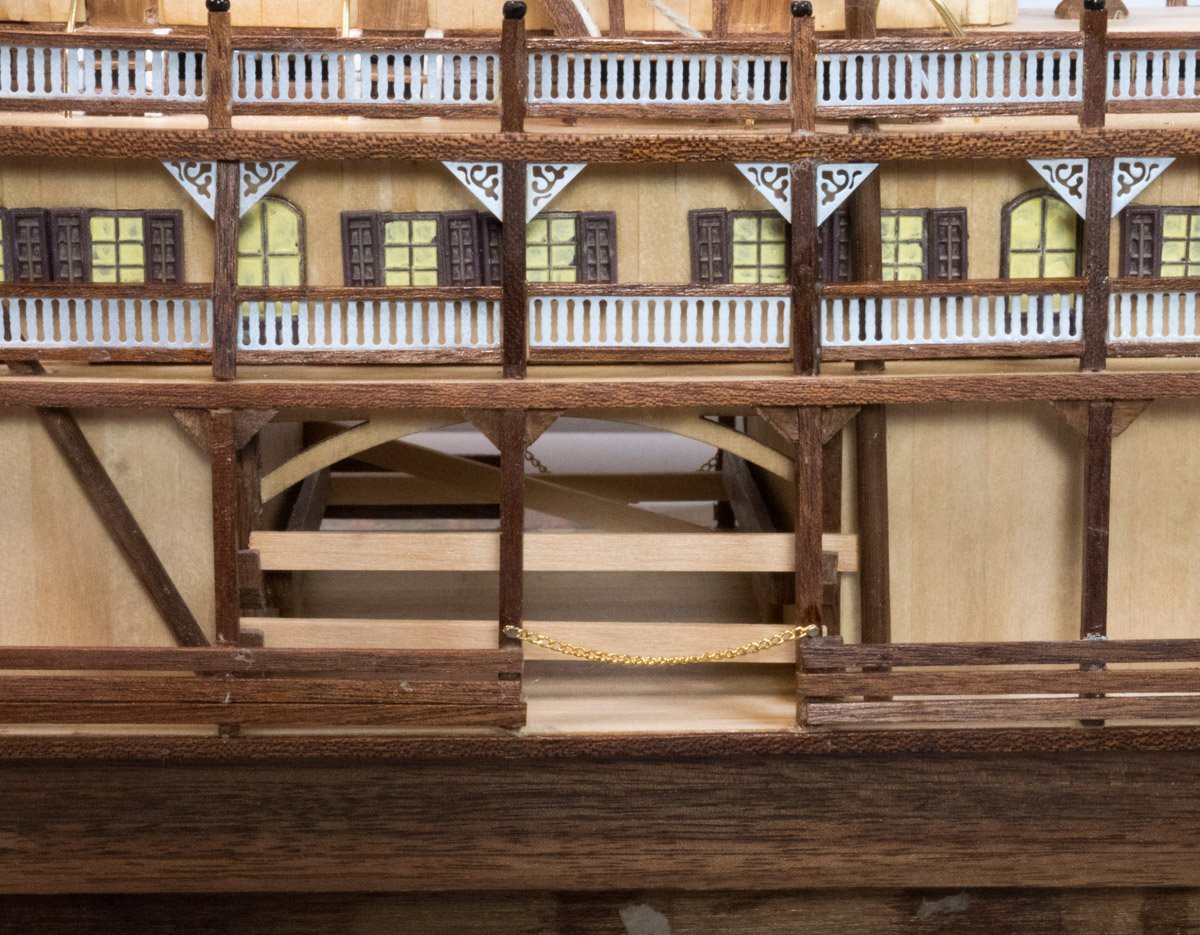
I was not looking forward to the gangway rigging. I don’t know how to tie rigging knots; I’ve seen some fancy knots in various pictures on the forum but they are beyond my skill. I looked into one and it resembled a fishing knot but it was too difficult to tie on a small scale so I went with simple knots and CA glue to accomplish this task. I tied a simple overhand knot and tried to lasso the groves in a block but that was too hard. I placed thread in the grove on one side and applied thin CA glue. When the glue set, I tied an overhand knot on the other side and applied thin CA glue. I extended the two threads and applied CA glue at the ends of the two threads to make it easier to tie a knot later. I looped the thread around a mast and wrapped it around the thread between the block and mast and applied CA glue to hold it in place. I tied a half hitch to complete installation. I found pictures in Bob Fraser's log (thread #68) to be very helpful (mast pictures). I found it difficult to work the rigging while the mast and gangway moved around. Parts of the routing didn’t make sense; I wasn’t sure where some lines ended. Working with 0.15 mm rigging and sewing thread required a level of precision I lack. The gangway ended up much higher than it should, I had adjusted the lines to get the gangway to the proper height but between sorting out the spaghetti of lines and taking up slack it had moved. I was focused on getting the knots tied and didn’t notice the change. After installing the rigging, I have a better idea how it works. I determined which lines control the gangway height and I think I have enough line to fix it. The gangway chains are unequal (I had adjusted them once already) so I have more to do.
- 132 replies
-
- 6
-
-
- King of the Mississippi
- Artesania Latina
- (and 1 more)
-
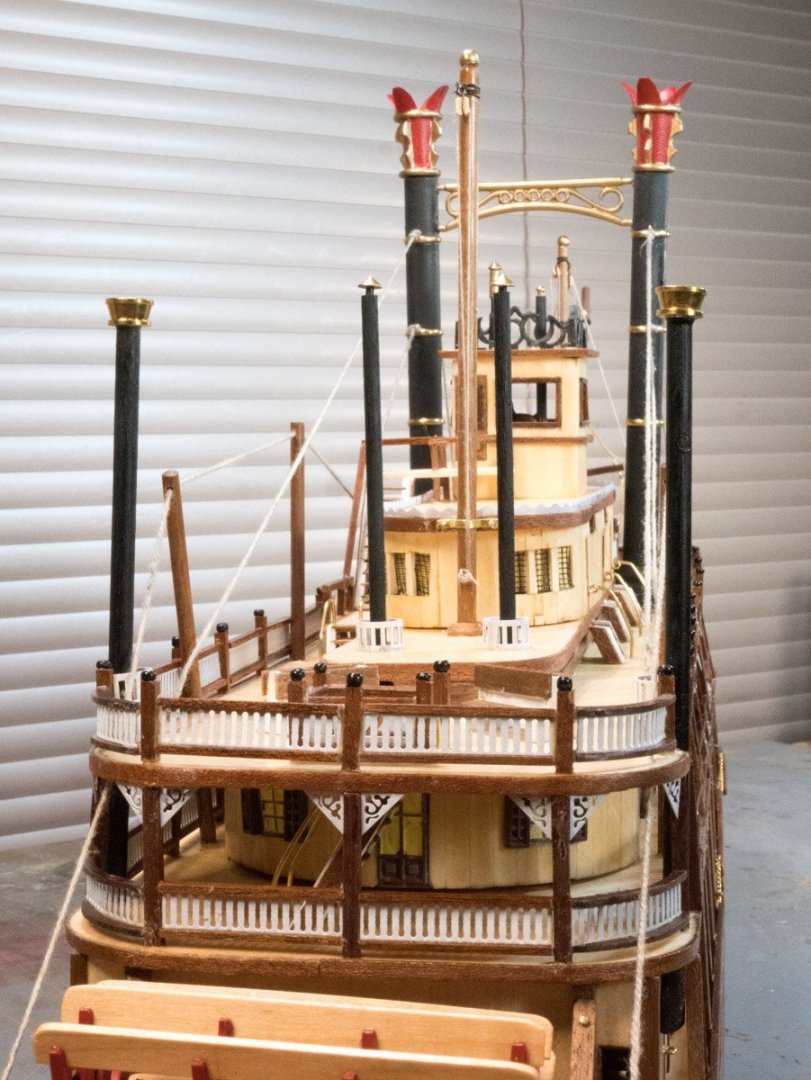
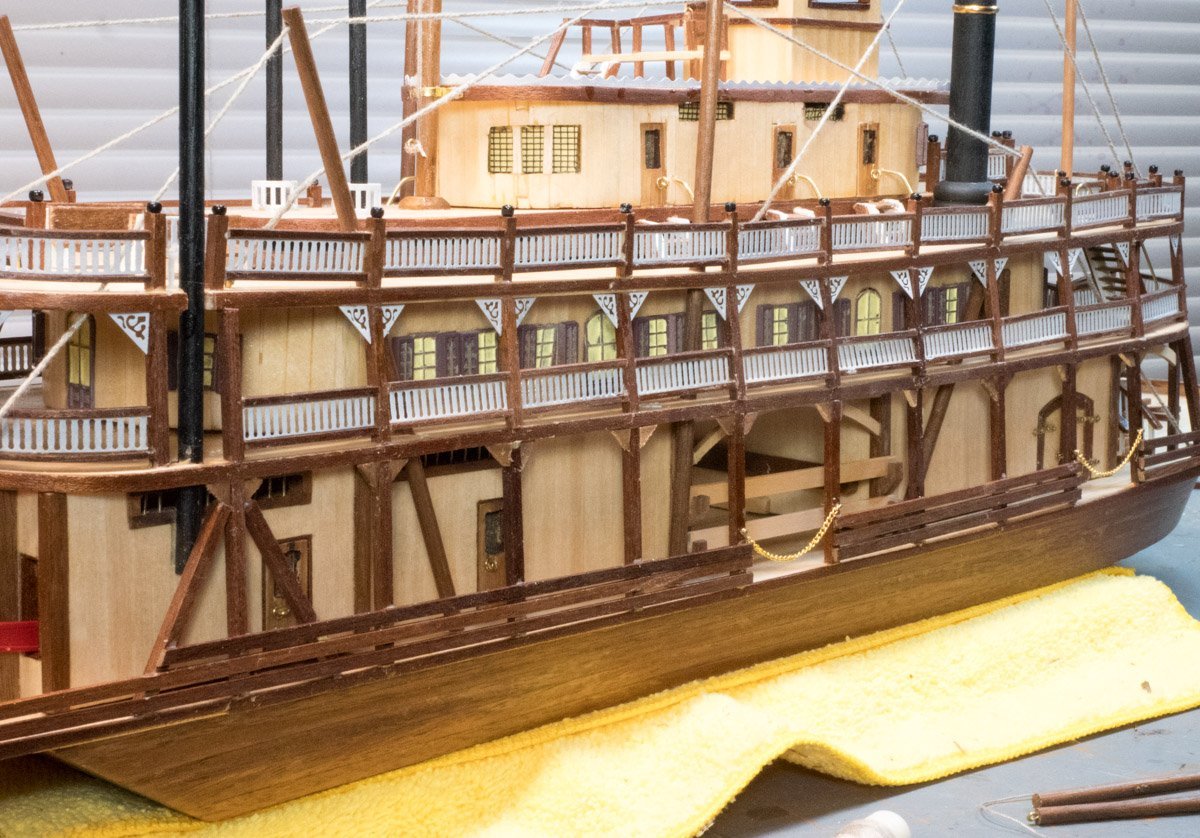
I installed the lower deck railings; the small clothes pins were the right size. I held off on these to leave access to rigging tie downs. I had applied finish to the long walnut stock and cut it to length so I didn’t want to soak the railings to bend them; I have a wood burner with a disk tip that I used to bend the wood with heat only. I made 10 mm railing posts on the paddle wheel deck. I installed the beads on top of the posts like the others I had made. I installed a short pin in the bottom of the posts, marked the deck, and drilled slightly oversized holes for the pins (to give me a bit of adjustment). Gluing the posts pinned to the deck made a solid attachment (I wish I had done that for the posts on the top deck). I'm making progress. I see I need to reapply one of the white triangle supports. I had to use a couple deck columns for the diagonal stern columns because I ran out of material of the proper length (I made too many deck columns), I should have installed the diagonals before cutting material for the upper decks.
- 132 replies
-
- 5
-
-
-
- King of the Mississippi
- Artesania Latina
- (and 1 more)
-
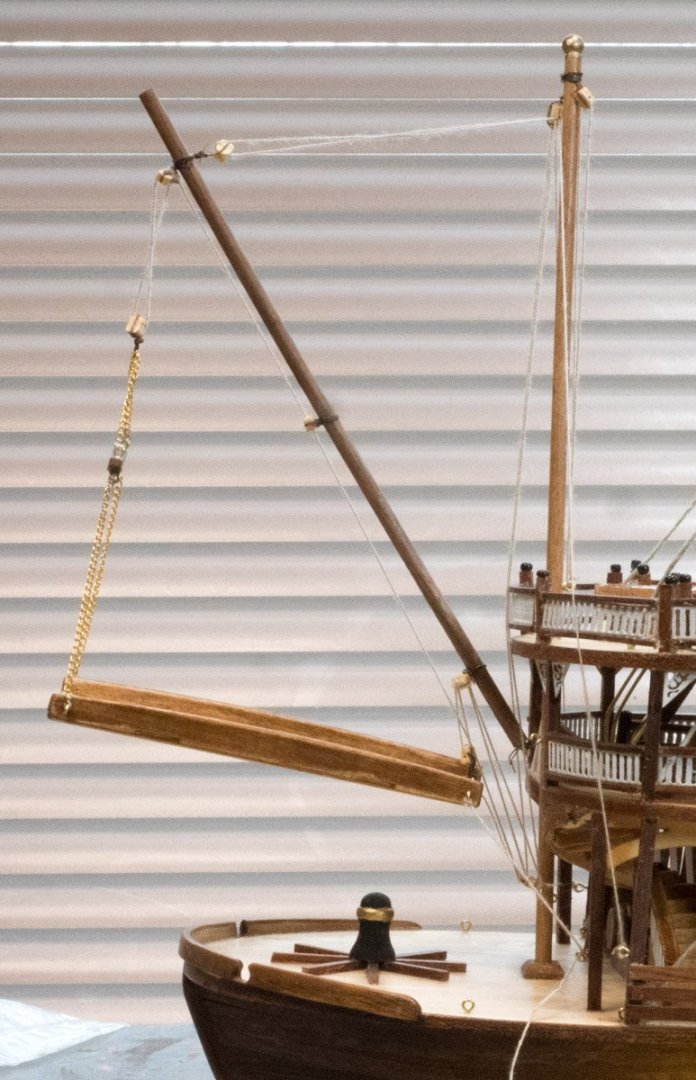
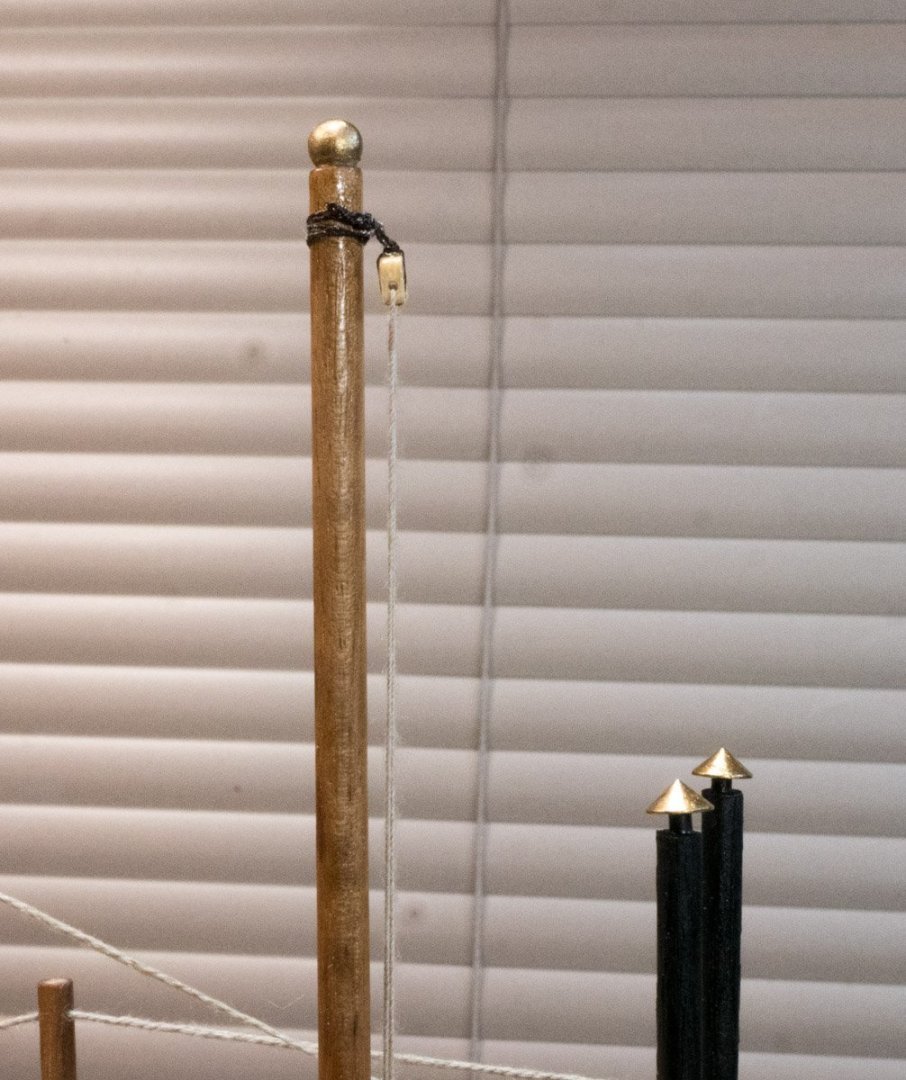
I used a drop of CA glue on the end of the line and cut it at an angle to make a point (as suggested). That technique worked fine to get the line through the block. I used dark brown sewing thread instead of the wire. I tie fishing knots to lures all the time but trying to tie sewing thread is hard. I also had a hard time tying the cotton thread for the smoke stack lines, a slip knot doesn't work on that material when trying to take up slack. I got practice working with the block on the pennant mast but the bow rigging will be a challenge.
- 132 replies
-
- 4
-
-
- King of the Mississippi
- Artesania Latina
- (and 1 more)