HOLIDAY DONATION DRIVE - SUPPORT MSW - DO YOUR PART TO KEEP THIS GREAT FORUM GOING! (Only 51 donations so far out of 49,000 members - C'mon guys!)
×

Cleat
-
Posts
202 -
Joined
-
Last visited
Content Type
Profiles
Forums
Gallery
Events
Everything posted by Cleat
-
Mini self contained airbrush
Cleat replied to Bill Hudson's topic in Modeling tools and Workshop Equipment
I started with a Badger airbrush and a small California Air compressor (both are quality inexpensive products). I'm not an artist, I don't make fine lines. I want to paint stuff with a color I can mix, I use my airbrush more like a small spray can of paint. There is a learning curve to figure out air pressure, paint thinning, and cleaning the airbrush. -
I have the Rikon 10" bandsaw and I like it. I haven't had any problems with it and I've had mine for many years. I consider it a general purpose tool for a hobbyist. (I have several Rikon products). The fence is pretty basic, it works but I'd prefer something better. I use a magnetic fence now. And it doesn't do very well for resawing (you need to go real slow). I have a Jet mini wood lathe and I like it, but I had to replace the clamping disk for the tail stock.
-
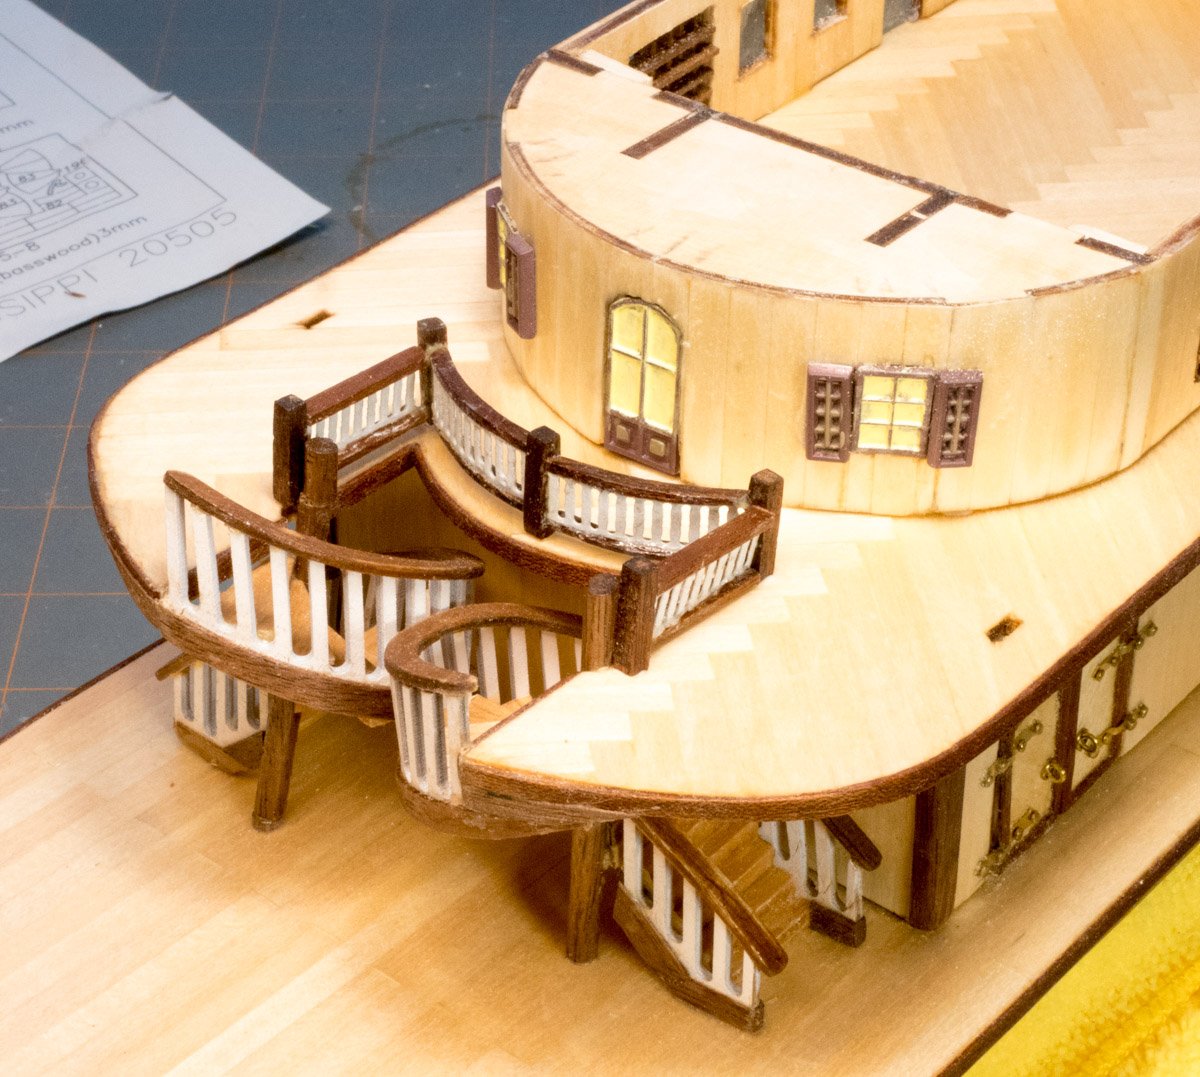
The ladders are tricky for me and I only made the short ones so far. I ran short of the step material so I need to find more. I like the dark wood trim detail around the stairway opening.
-
Your build is looking great. What kind of glue did you use for the white railing installation. I like the brass railing on the short stairs, it is a nice addition. It looks like you pinned the 1st deck railings; I've been debating if I want 2 or 3 horizontal railings (yours looks good).
-
Those speakers are an experiment. I have open baffle speakers (speakers on a board) in my garage and they sound good, they hang from the ceiling and need to be a couple feet from a wall to disperse the sound. But the desktop application sounds very bad. I'll try something out but I suspect I'll have to make boxes for better sound.
- 132 replies
-
- 2
-

-
- King of the Mississippi
- Artesania Latina
- (and 1 more)
-
Your build looks great. Your craftsmanship is impressive - it is a level I hope to achieve some day.
-
I built Estes rockets when I was a kid (decades ago) - fond memories.
-
Much of it is fun but there are frustrating parts where I don't know how to accomplish a task (forum logs are helpful for that) or my skills are lacking. There is satisfaction when I complete those frustrating tasks.
- 132 replies
-
- 1
-
-
- King of the Mississippi
- Artesania Latina
- (and 1 more)
-
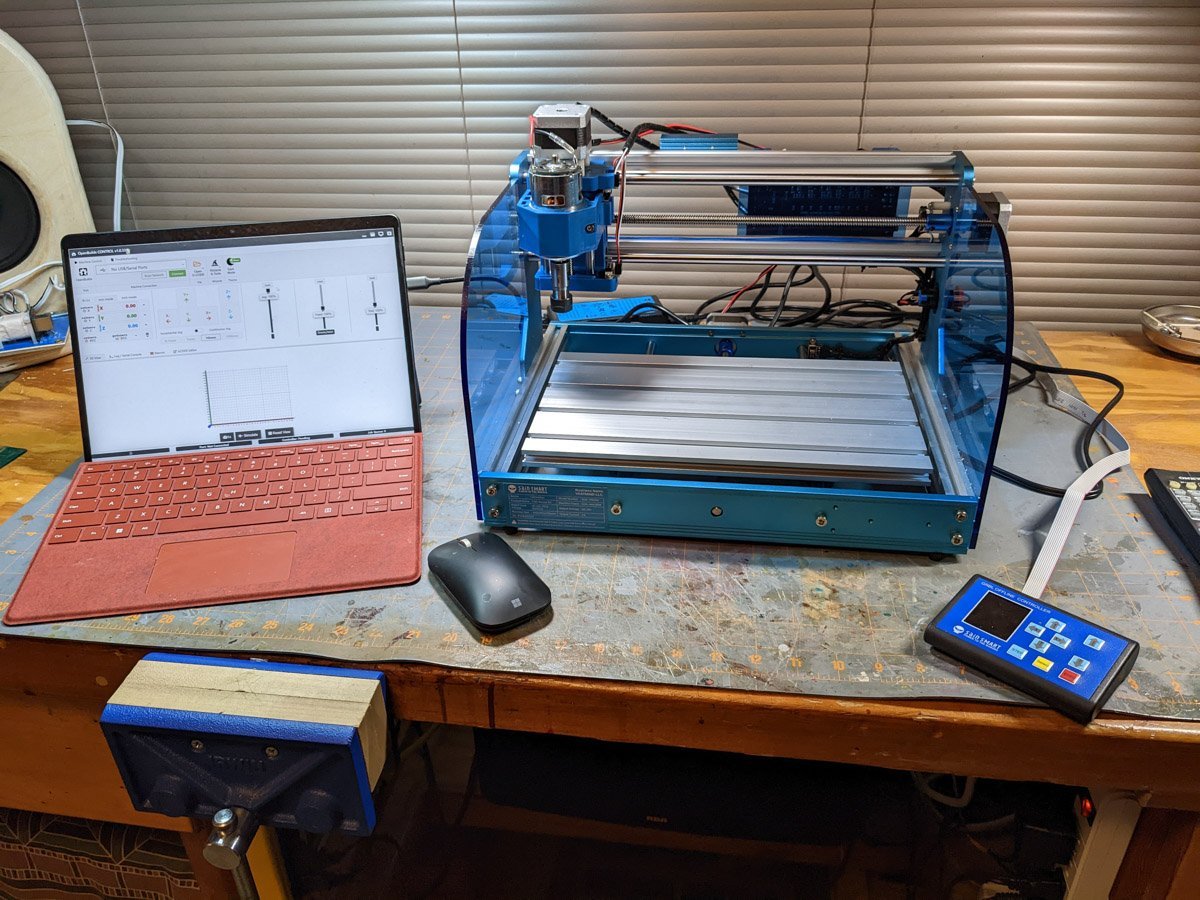
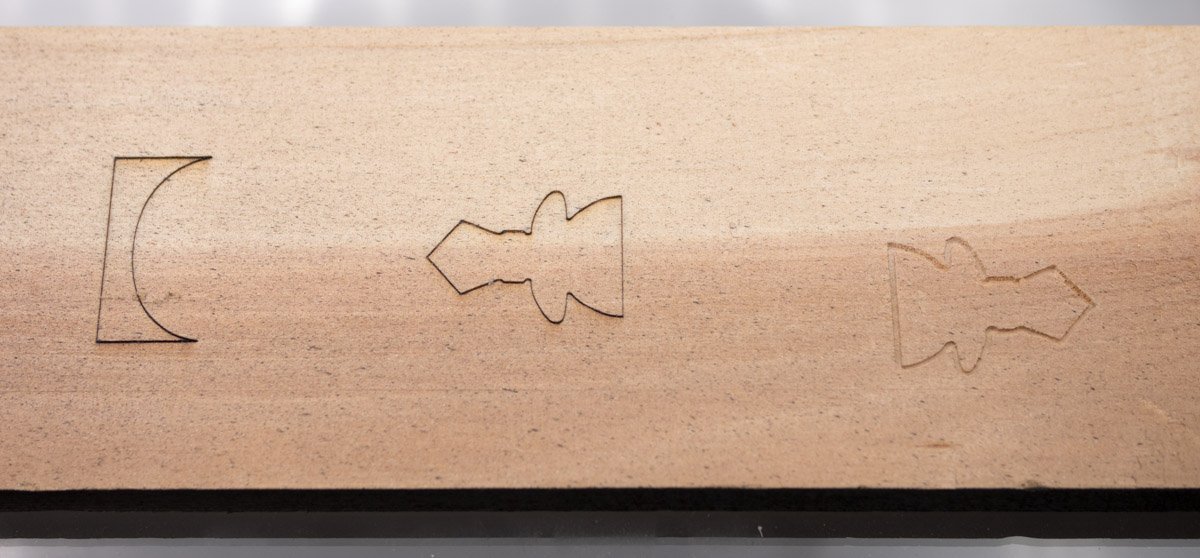
Thanks for the reference, it will be helpful. I have the Sainsmart 3018 Prover and I've bookmarked a few reference pages for my upcoming tasks. I bought Lightburn to control the laser (best software for that), and I've tried three, free controller software for the router (I haven't picked a favorite yet).
-
Last fall I bought a hobby CNC machine. It can be configured with a laser or a spindle (router). I got it working but I realized I need to do some tuning, a bunch of testing, and some additional setup chores. I chose to work on my riverboat instead. Now I need to complete some tasks including documenting my processes so I don’t have to relearn the tool every time I use it. I tested it using the same file with the laser and the router configurations: One of my test pieces will be a sign for the riverboat. Since I live in Minnesota (the source of the Mississippi river) I’m calling my riverboat the Headwater King.

- 132 replies
-
- 3
-
-
- King of the Mississippi
- Artesania Latina
- (and 1 more)
-
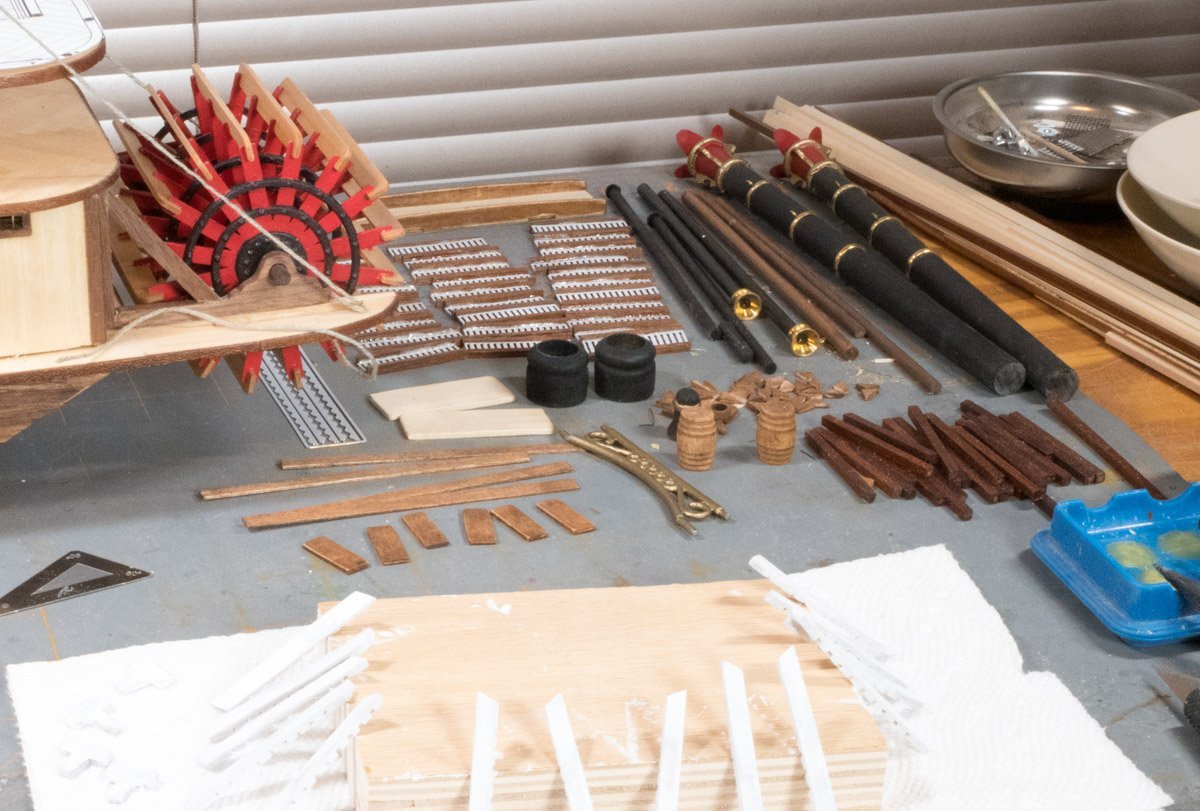
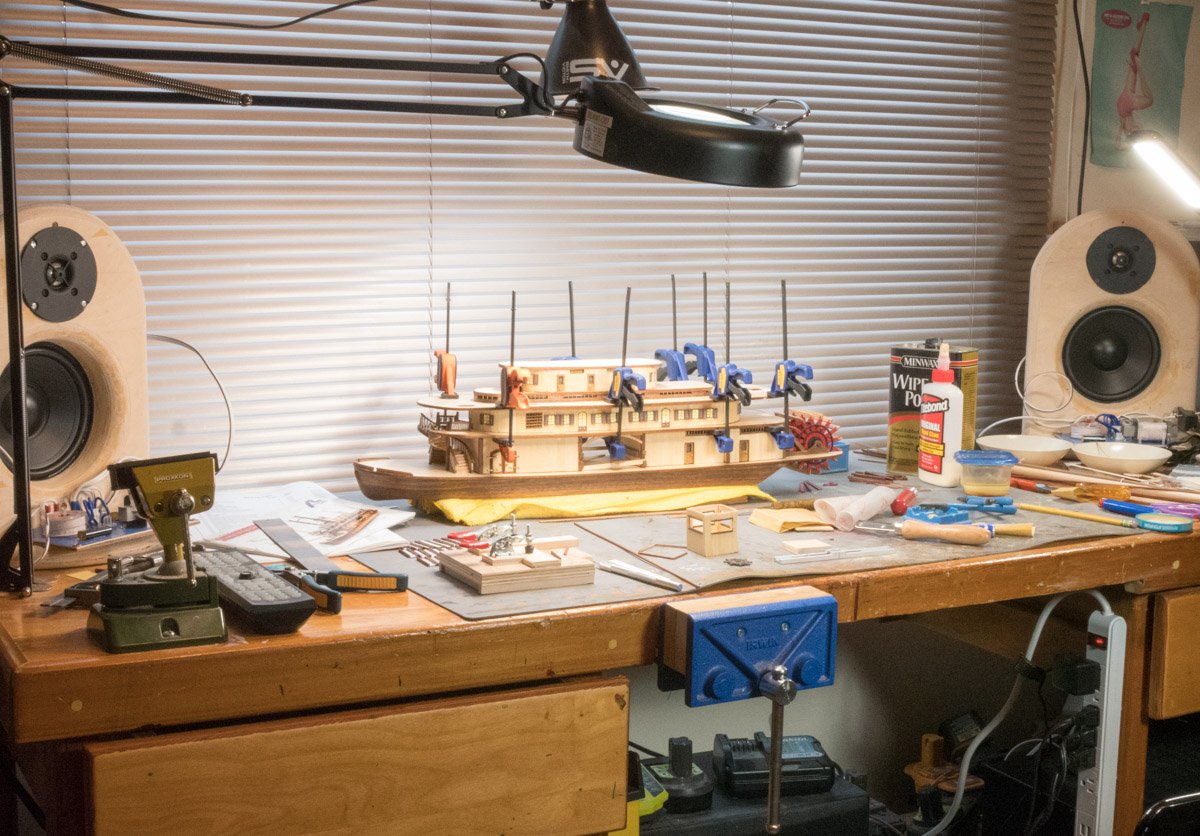
I’m taking a break on my riverboat. I share my workbench with other hobbies and I want to work on them and prepare for my summer projects in the garage. I’ve made good progress and don’t want to rush it. I’ll be working on it less frequently. I’ve also made some unforced errors. I accidentally knocked the wheel house off the top deck, the four black crests broke off and I can’t find one of them – three pieces were within a couple inches of each other but the last piece got legs. It seems a good time to clean the workbench and I still can’t find the missing piece (I’ll have to go through a pile of old computers next to my workbench to continue my search). I noticed I don’t have enough stock for the stairs. I’ve assembled some short ones and I’m not happy with my work, I want to redo them. I disassembled one of them and I’ll be able save the stringers. I also need to determine how much material I have for the railings on the bottom deck, other logs mention the kit has a limited amount of 1.5 x 3 sapelli wood. I wonder where I might look for hobby wood stock.
- 132 replies
-
- 1
-
-
- King of the Mississippi
- Artesania Latina
- (and 1 more)
-
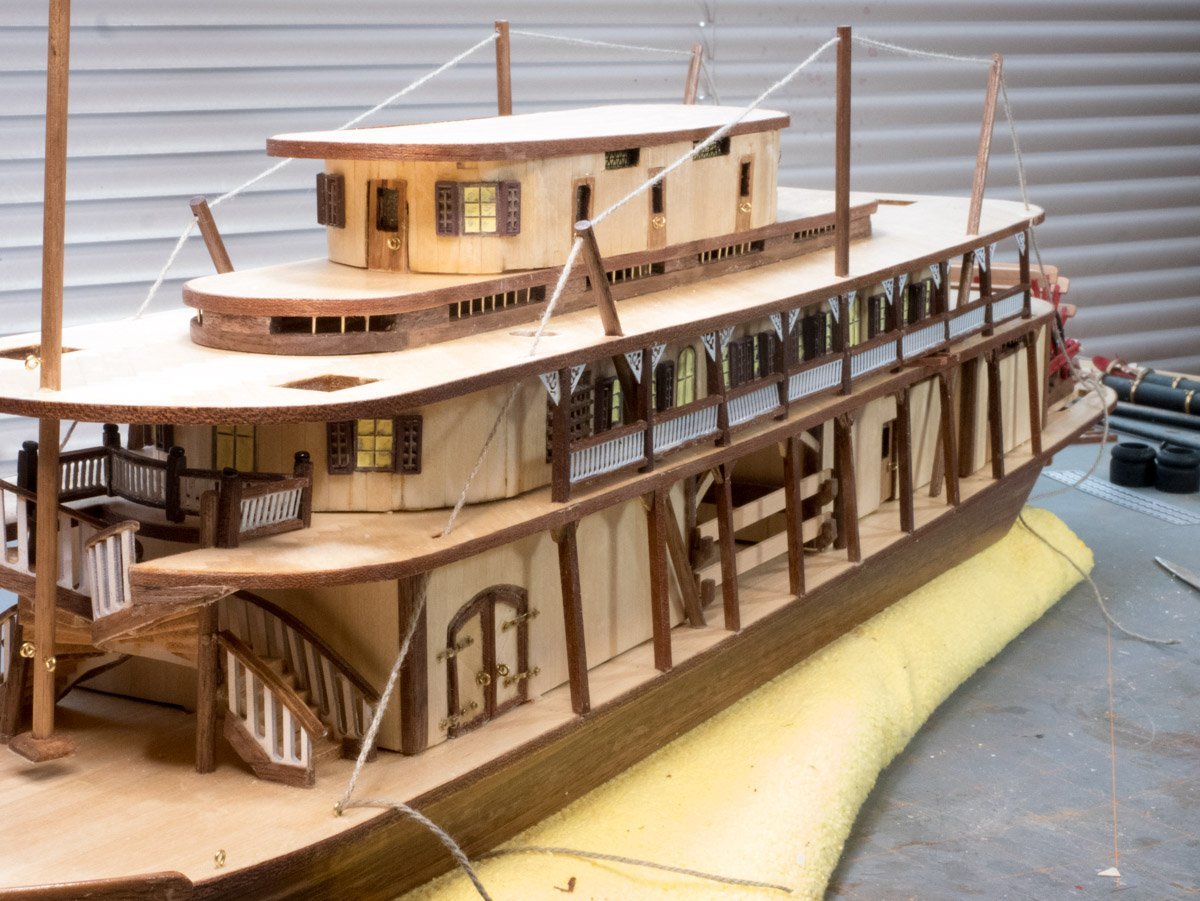
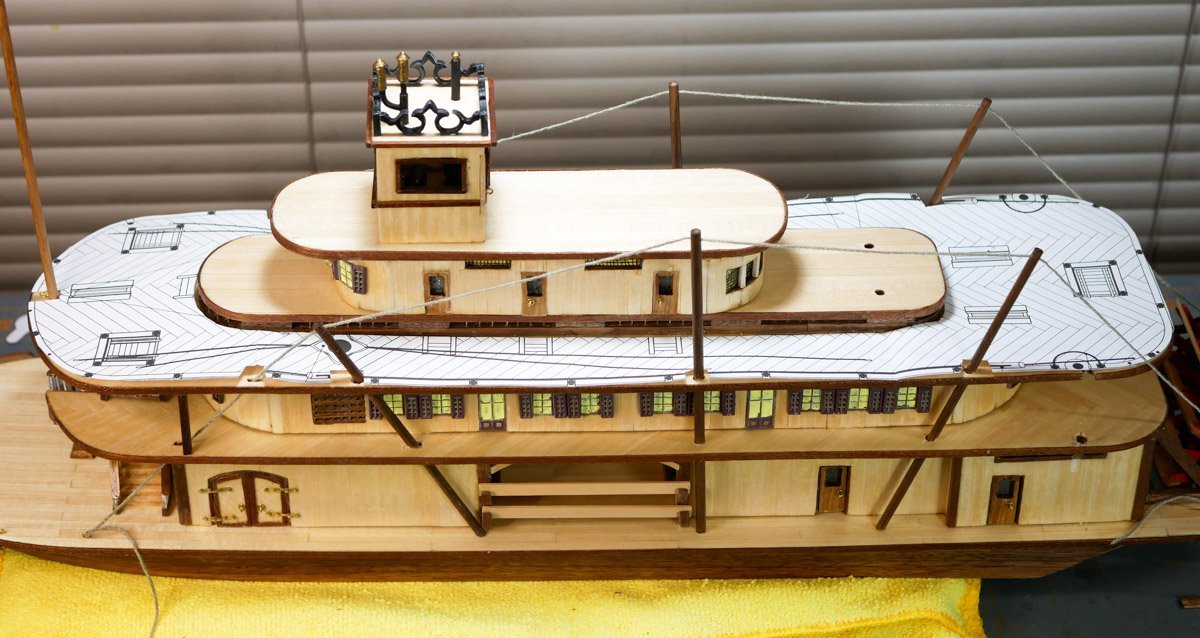
I installed some of the railings on the second deck and the columns on the bottom deck. I only did the side section on both sides of the boat so I can leave access to the stairways. I had a feeling that my railings might not be as precise as the drawing and I was right. I aligned the first column with the drawing at the front of the structure. As you can see, the last column I installed is off from the drawing (I’ll have to figure out a way to fudge the discrepancy). I used 2mm pieces to set the height of the railing assemblies. When I tried to glue the first railing string, I discovered how delicate my assemblies are. A few of them fell apart when I handled them too much. I choose to install the columns on the second deck straight up to make the process easier because I was figuring out an installation process. I angled the columns on the lower deck as shown in the drawing. For the other side I angled the columns on the second deck but the columns on the lower deck had to be straight up (there was no offset); this told me the decks aren’t centered.

- 132 replies
-
- 4
-
-
- King of the Mississippi
- Artesania Latina
- (and 1 more)
-
Congratulations on finishing your riverboat. I think it looks really good. Your modifications give it a unique look. I hope mine turns out as nice as yours. I can relate to your conclusions.
- 86 replies
-
- 2
-
-
- king of the mississippi
- artesania latina
- (and 2 more)
-
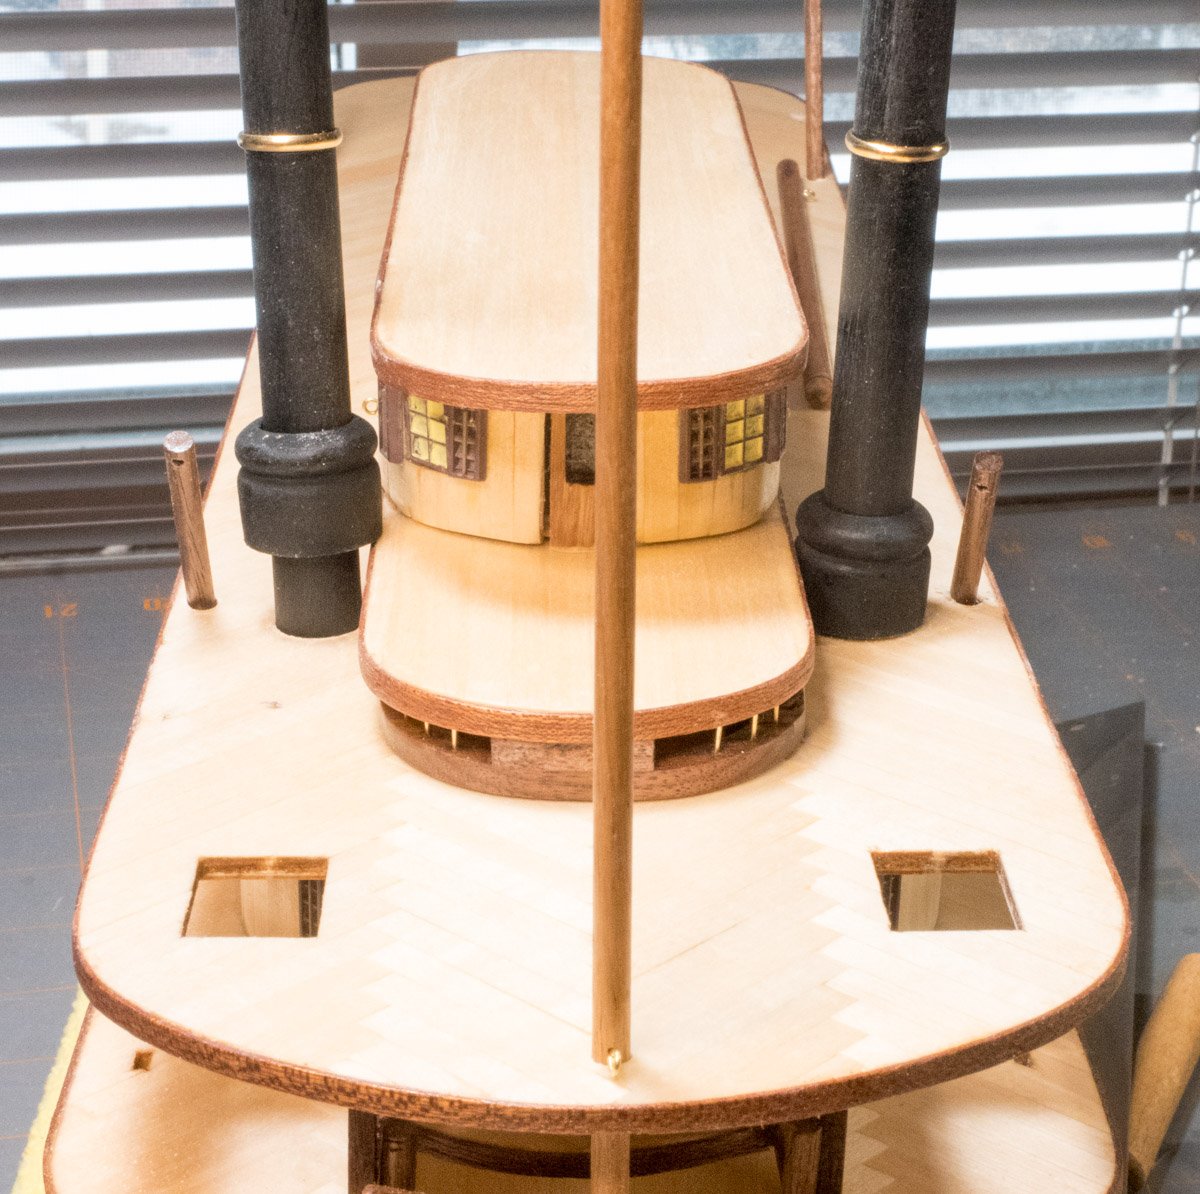
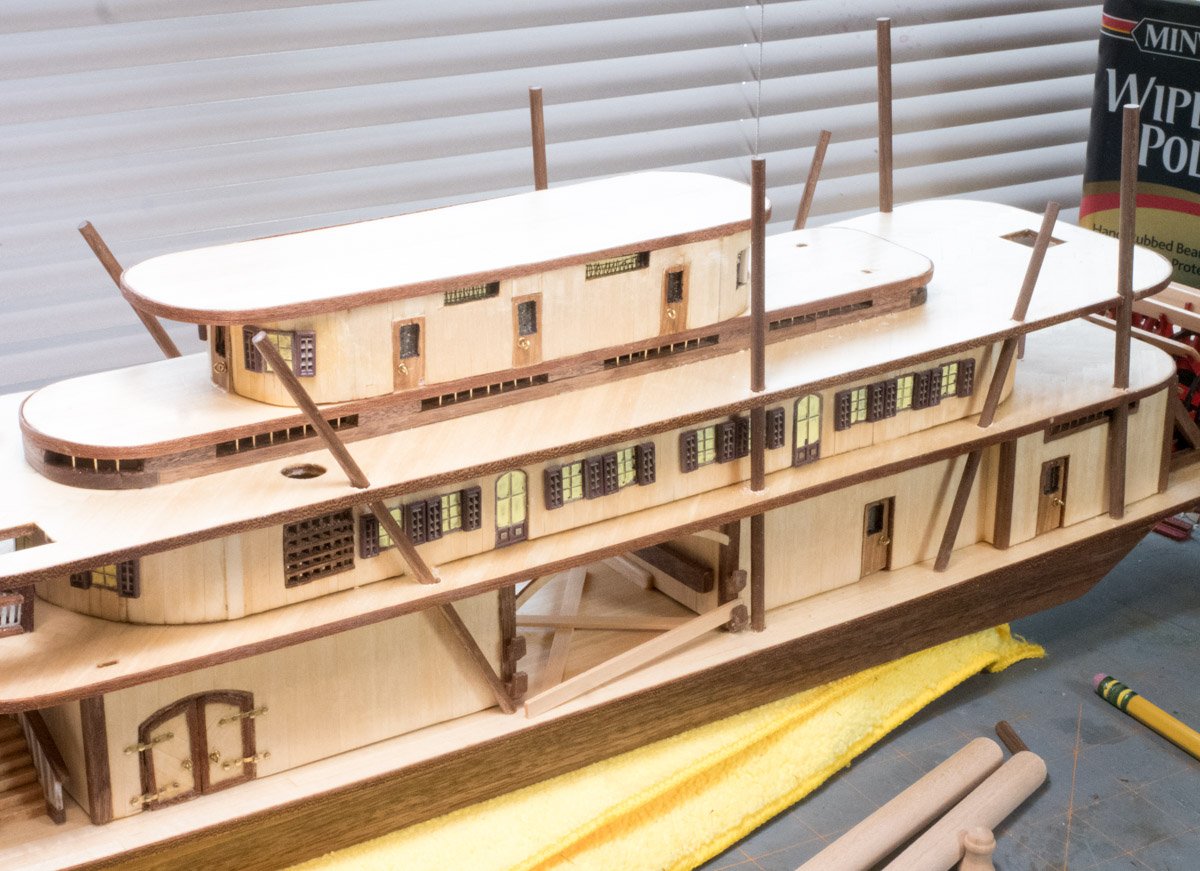
I’ve been processing various components with paint, stain, and finish. I made about half of the railings. I tried painting the stairway stringers with my airbrush to prevent paint from clogging the step recesses but the air pressure would cause the pieces to blow around so I ended up painting them with a brush, I’ll touch them up when I cut them to size. The kit doesn’t have all of the bench pieces so I made a few pieces from scrap. I installed the anti-hogging masts before installing the railings to prevent me from disturbing the railings when working with the masts. (I haven't installed the wheel house yet). I cut the third deck out of the full-scale drawing and placed it on the third deck so I can identify where the railing columns should go. I figure the second deck columns will be a good reference to align the first deck and third deck columns and posts. My plan is to install a second deck column, then install a railing and another column to work my way around the deck. I noticed the holes for the steam stacks at the rear don't align with the drawing. I won't know how accurate the railing columns align with the drawing until I install a few of them.
- 132 replies
-
- 5
-
-
- King of the Mississippi
- Artesania Latina
- (and 1 more)
-
I've started to do the things you recently built, it is really helpful to see things in detail (good pictures). I like your brass & rope railing (my brother made a similar railing for a lake view deck). I'm curious what you use to bend the brass?
- 86 replies
-
- 1
-
-
- king of the mississippi
- artesania latina
- (and 2 more)
-
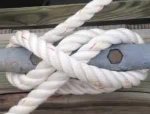
Sharp eye, the upper deck is 2 mm off. I see that the blocks are attached to the masts with wire. I'm wondering how to attach the wire to the masts, the blocks have holes but I haven't determined how it all goes together. What kind of knot should be used to tie the the guy-wire thread?
-
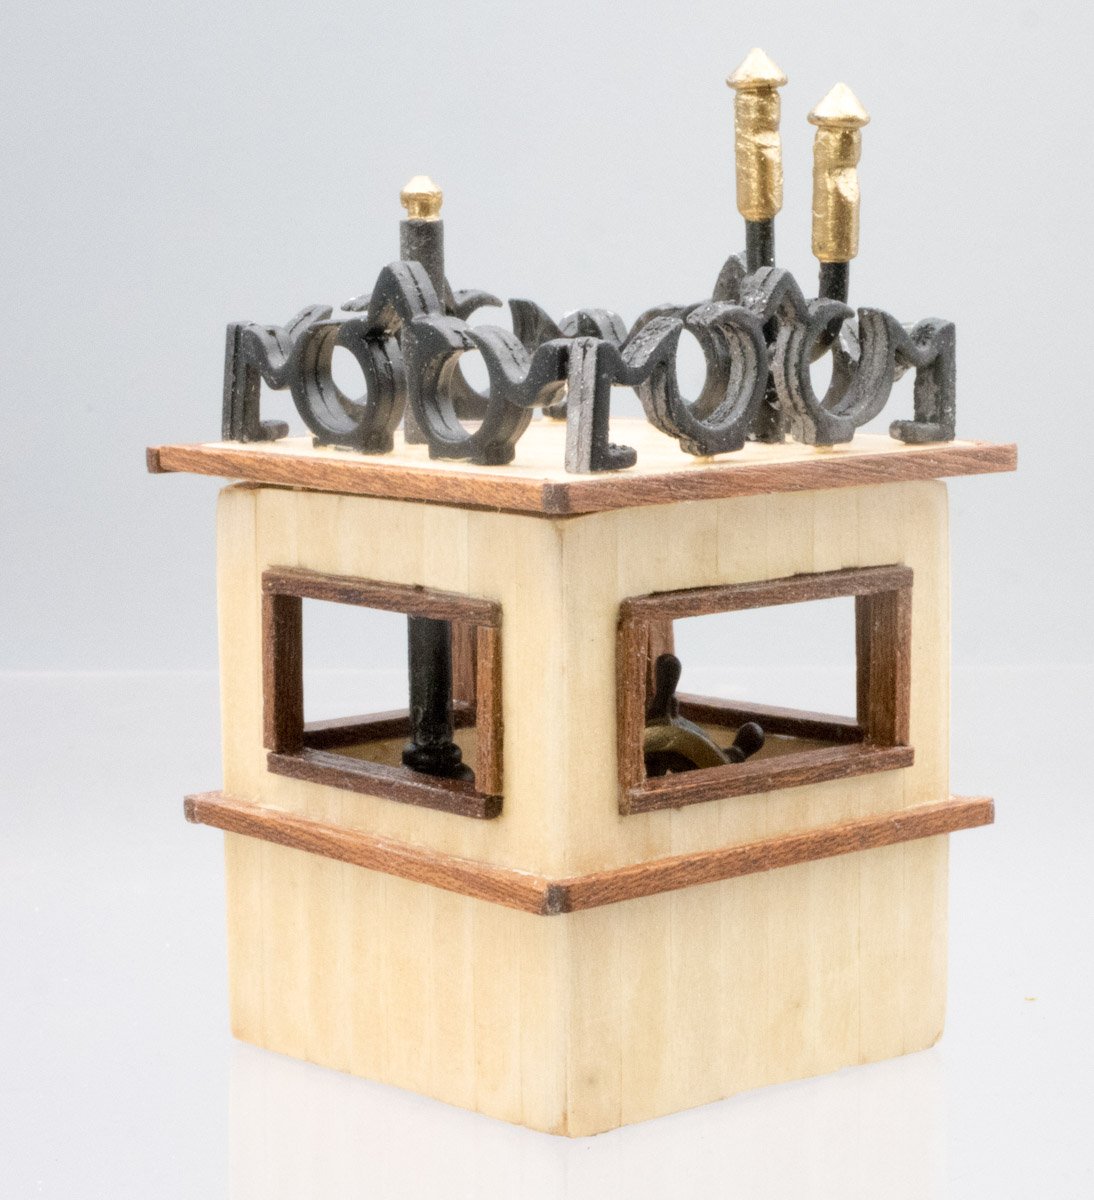
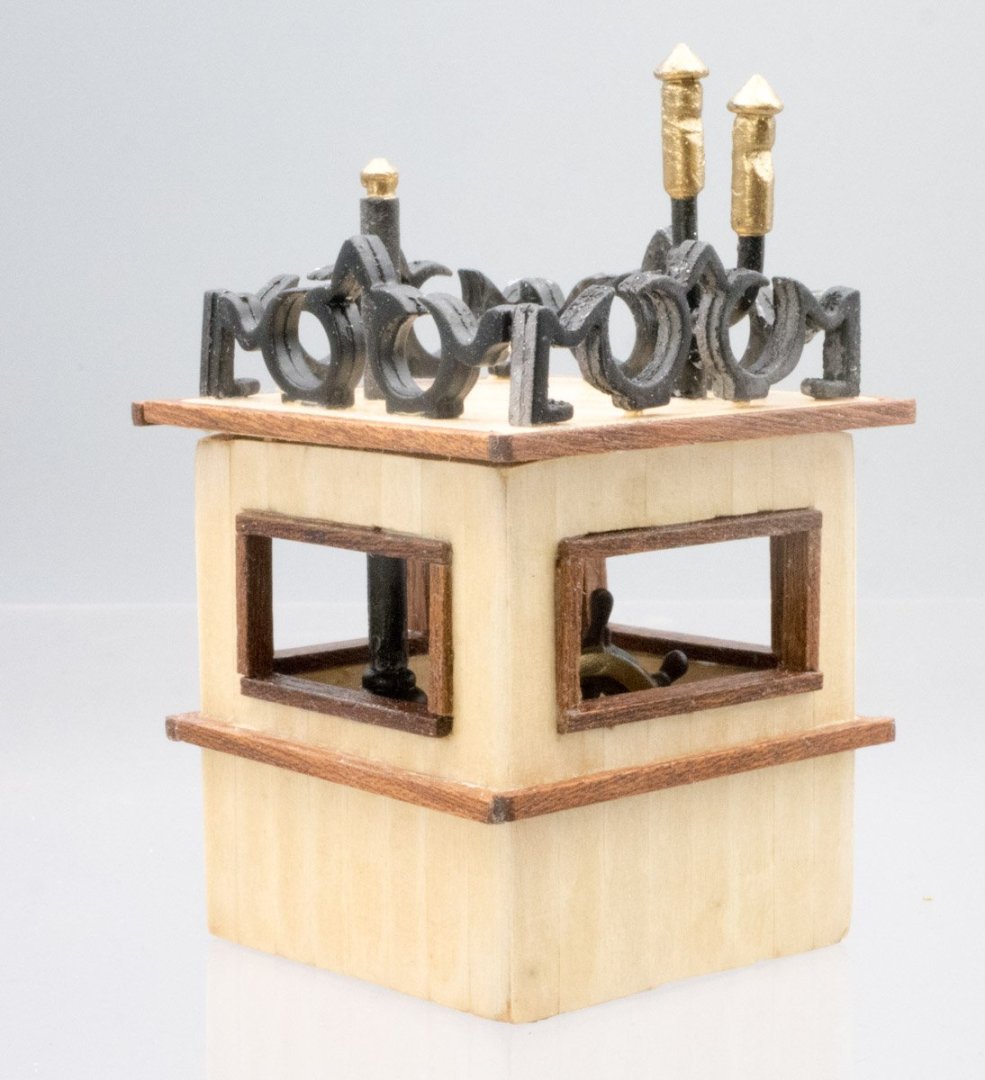
I put the wheel house together and I didn’t notice that I put the back panel on backwards until it was too late; I’ll be putting the stairs to the other side of the structure. I painted the helm brown and added a bronze accent. I had curved the top plywood but it didn’t take, somehow it flattened itself out (I’m guessing it happened when I put the planking on it then put a weight on in). I installed window frames but I’m debating if I want to try making the windows. (I have a photography box to take pictures of my pen turning hobby). I’ve been working on the various masts and smoke stacks. I drilled .9 mm holes in the mast turn-buckles but the holes seemed too small for the .8 mm thread so I drilled them out to 1.2 mm. I also installed the eyelets to the various masts. When I test fit the large smoke stacks I discovered I need to make some adjustments.

- 132 replies
-
- 5
-
-
- King of the Mississippi
- Artesania Latina
- (and 1 more)
-
Thanks for the help and pointing out the parts list continues on page 25. When I came across the General Tips in a different language I assumed the rest of the manual was instructions for different languages - my stupid mistake. And thanks for the explanation about the masts. I normally use digital calipers to check the thickness of the wood, I didn't notice the difference between the 4mm & 5mm stock until I was about to cut a second piece - then I checked the diameters.
- 132 replies
-
- 1
-
-
- King of the Mississippi
- Artesania Latina
- (and 1 more)
-
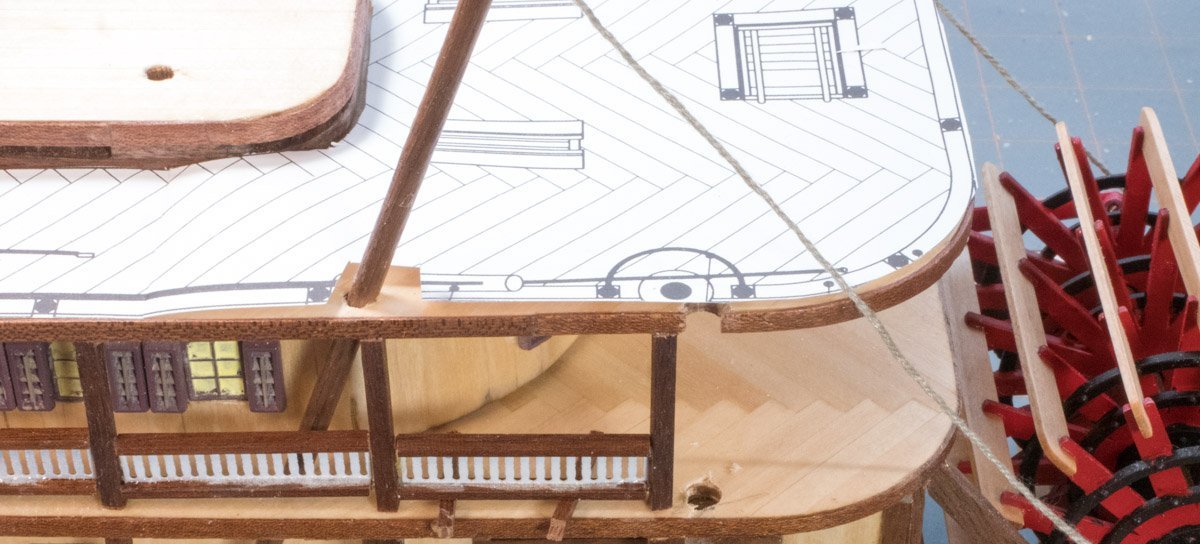
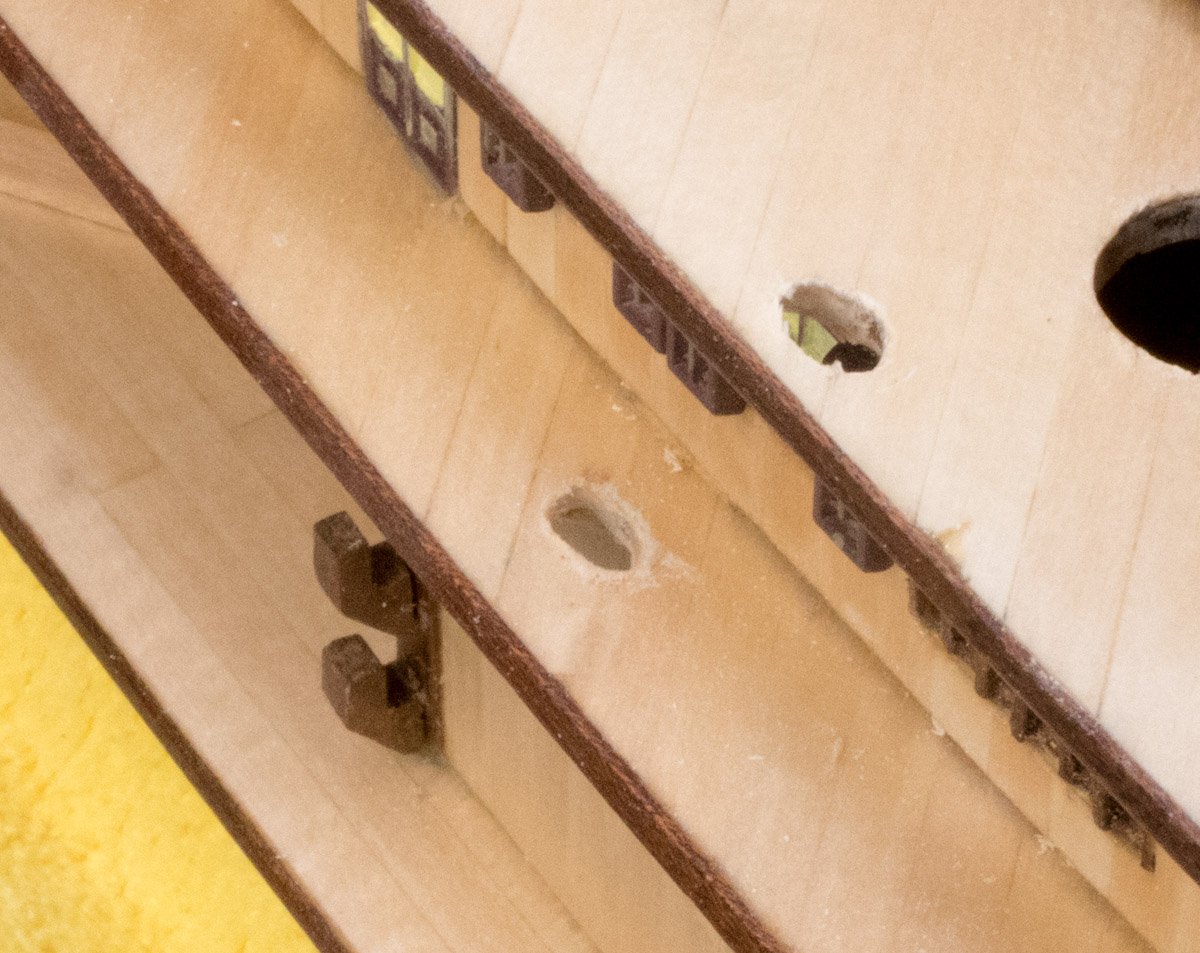
I reached the end of the Parts List I noticed the parts list stops at item 183, I rely on the parts list to identify component sizes and material, I’m disappointed that the parts list is incomplete. I look at the color pictures to determine how parts are orientated and the full-size drawing helps determine the size of components. But I’ve confused 4mm & 5mm round stock and I have to fix a piece I cut short. The full-scale drawing shows items on or near the top of some poles but I haven't determined how the rope contacts the poles, I’m trying to figure out if I need to drill holes or make guides for the rope (I don’t know the names of components – they aren’t in the parts list). Test fitting the poles: I used a 4mm drill bit to align the holes between the two decks, I used the drill bit to elongate the holes to achieve the required alignment and angle. The forward angled post was aligned with the lower bar support so I had to elongate the holes further to miss the support.
- 132 replies
-
- 2
-
-
- King of the Mississippi
- Artesania Latina
- (and 1 more)
-
I’m scoping out the installation of the railings. I found a good discussion in another thread: https://modelshipworld.com/topic/20603-king-of-the-mississippi-by-john-gummersall-finished-artesania-latina-scale-180/?do=findComment&comment=694399 I decided to cut out the third deck from the full-size drawing and place it on the deck to establish where to put the columns. I’m trying to decide on an assembly procedure. I’ll start with the second deck railings which will help set the locations for the main deck columns and the third deck posts. But I think I should install the various beams that go through the decks before I start the railings.

- 132 replies
-
- 3
-
-
- King of the Mississippi
- Artesania Latina
- (and 1 more)
-
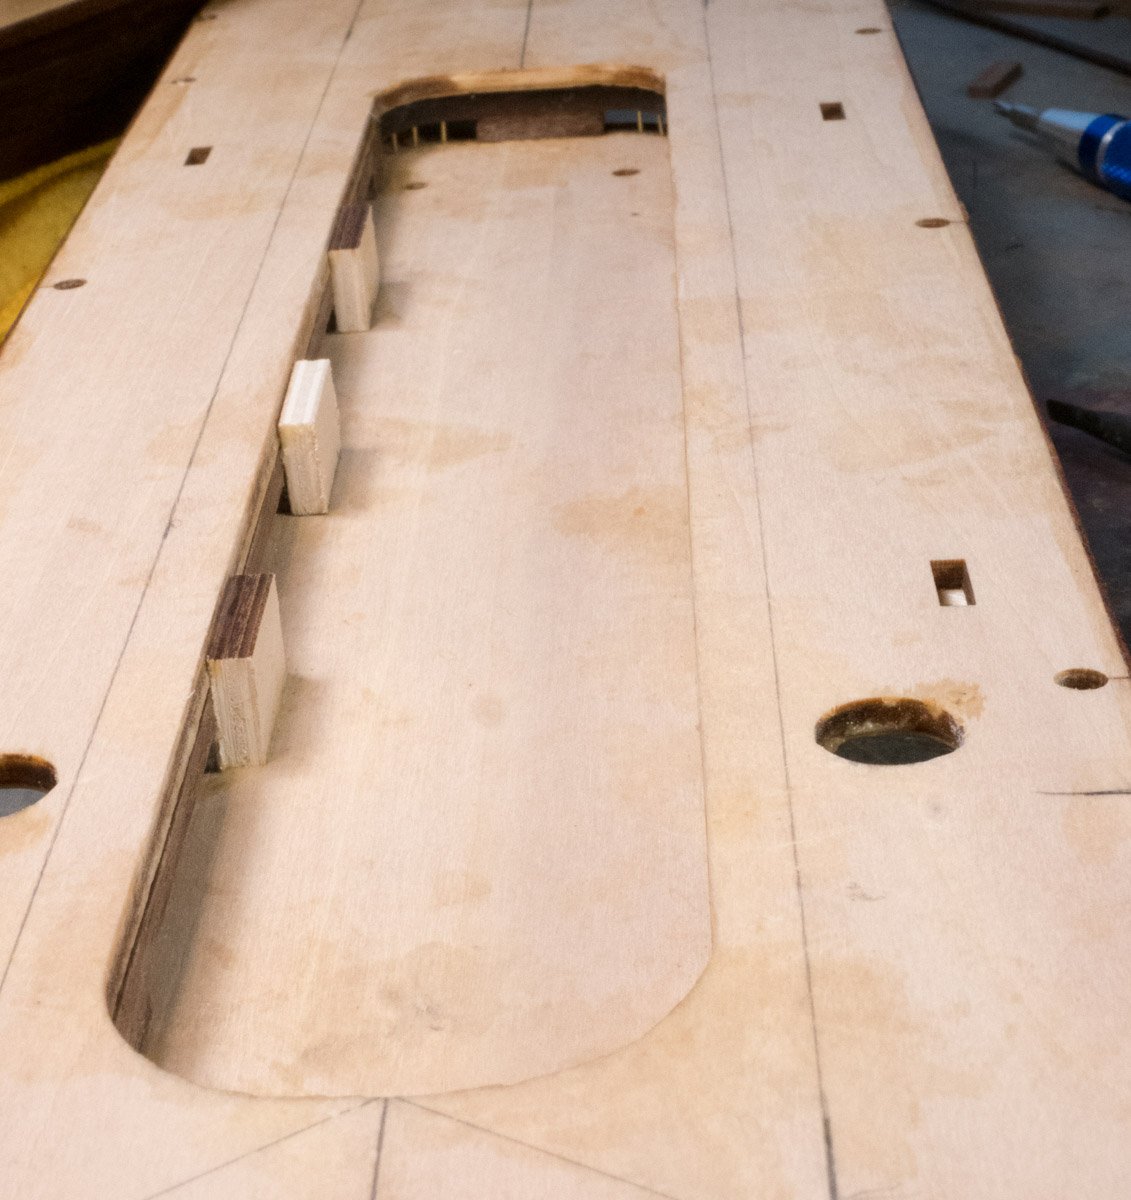
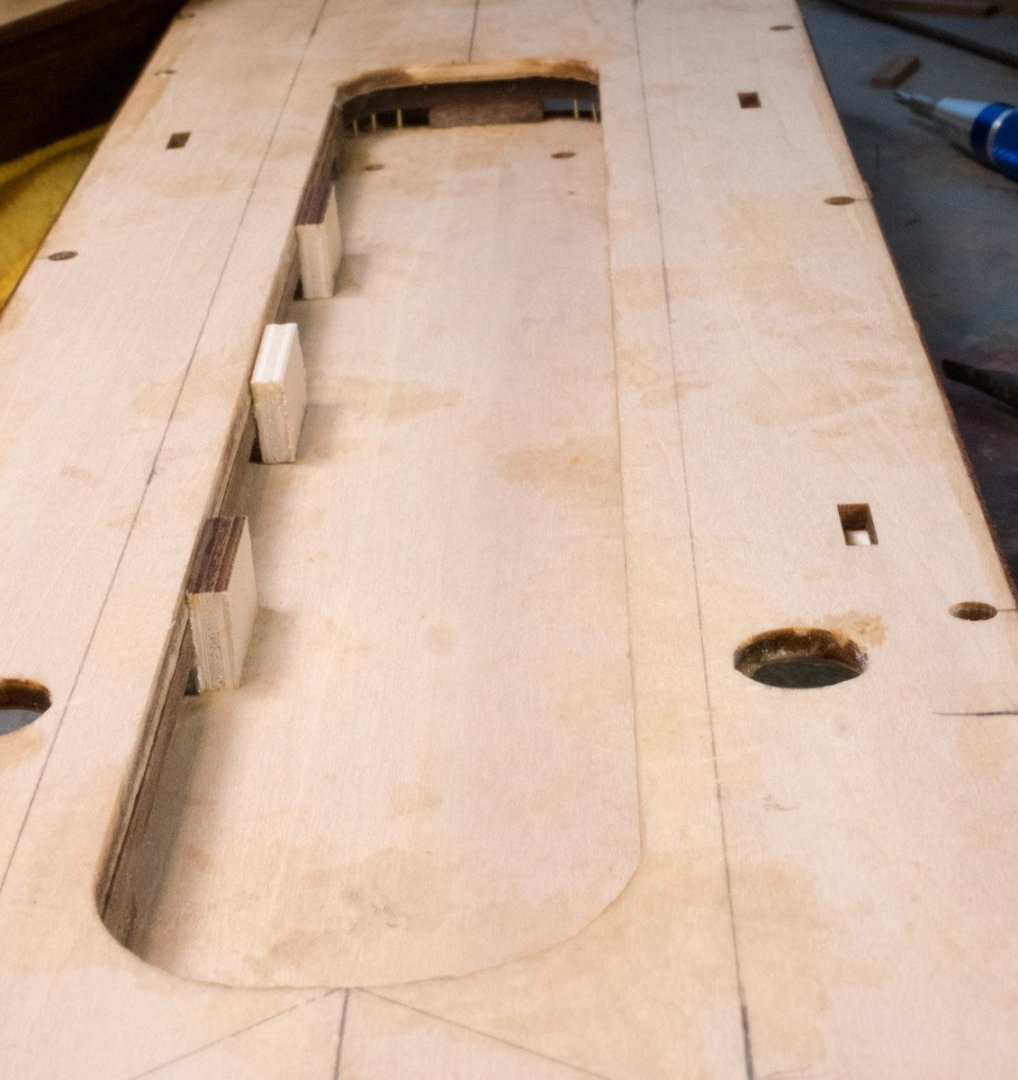
I noticed my grate assembly below the state room didn’t match the opening in the third deck. I choose not to use the walnut pieces (items 121 & 122), I used scrap from the laser cut skeleton to register one side of the assembly. Tip: save all your scrap. I glued the third deck assembly to the main structure. When I clamped it, it creaked a couple times – nothing broke so I let the glue cure.
- 132 replies
-
- 2
-
-
- King of the Mississippi
- Artesania Latina
- (and 1 more)
-
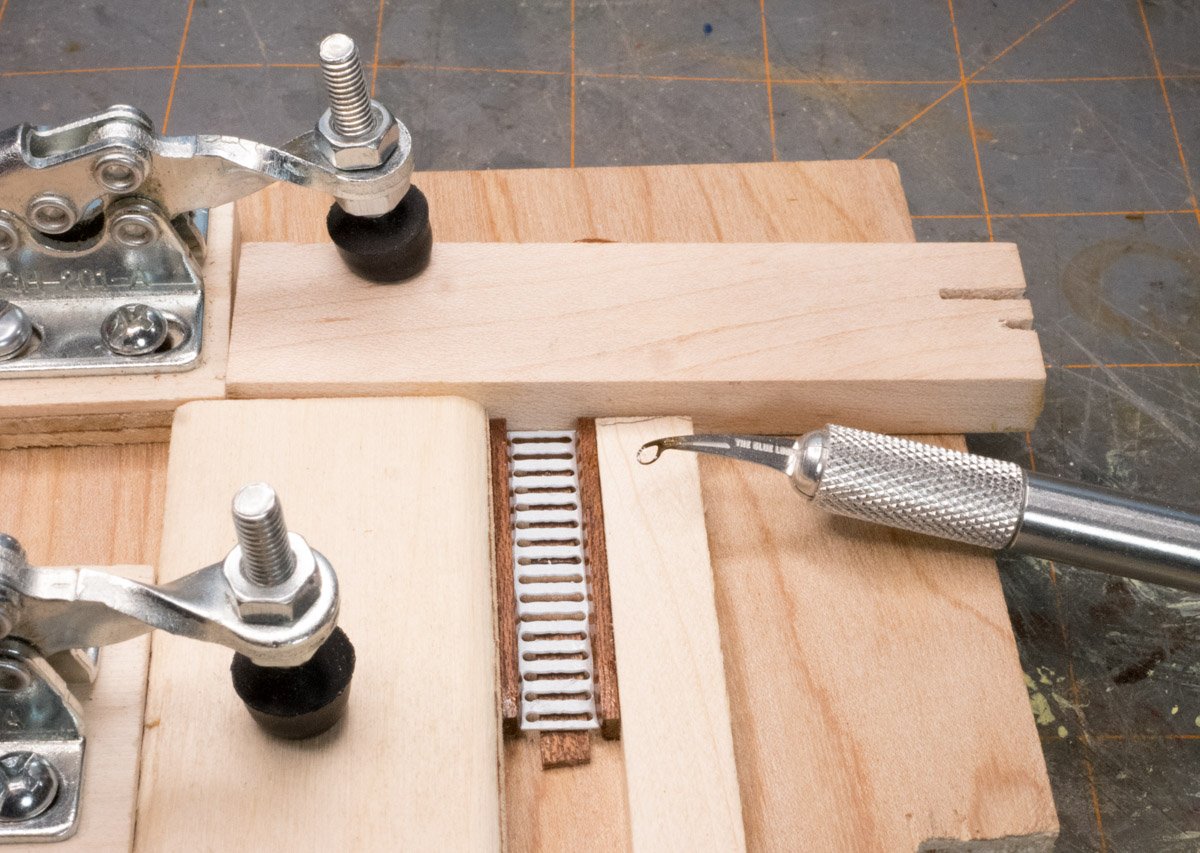
I made a jig and it works. The tricky part is putting the components in the jig. I glued a piece of Sapelli scrap from the kit to set the height of the metal component and sandwiched it with the wood components. The right side guide is loose, I hold it in place while I apply CA glue to the joint, then spray some CA glue activator on the assembly and let it set for a few minutes. I found toothpicks didn't work very well for me when I made the forward railings so I got some Glue Loopers which work really well. A set of 10 cost $13.75 at the manufacturer's site (http://www.creativedynamicllc.com/home.html) and they are reusable (use a lighter to remove any excess glue); they fit in any Exacto tool.
- 132 replies
-
- 5
-
-
- King of the Mississippi
- Artesania Latina
- (and 1 more)
-
The railings are hard. I decided to assemble the railings on the second deck at the circular stairs. I knew this task would be hard but I figured I should try it because there is a lot of railings to make. It was difficult to get the railing components to glue together. Every time I handled them a component would separate and I’d have to try and re-glue it. I used CA glue to attach the white metal sections to the supports and I used wood glue to attach the wood components. After several frustrating attempts, I managed to complete the assembly and glue it in place before I caused any more problems. It turned out messy and the metal parts weren't centered. I realized I needed to come up with a better way to glue the metal component to the wood components. My plan is to make a jig to hold the metal at the right height to attach it to the middle of the upper and lower railing wood. I made an attempt at this process only to glue my spacer to the railing – but I think I can make it work.
- 132 replies
-
- 6
-
-
- King of the Mississippi
- Artesania Latina
- (and 1 more)
-
The planking has been glued to the piece so I don't think soaking it will work (it was flat when I was applying finish to it). I'll try heat with some steam from an iron to flatten it.
-
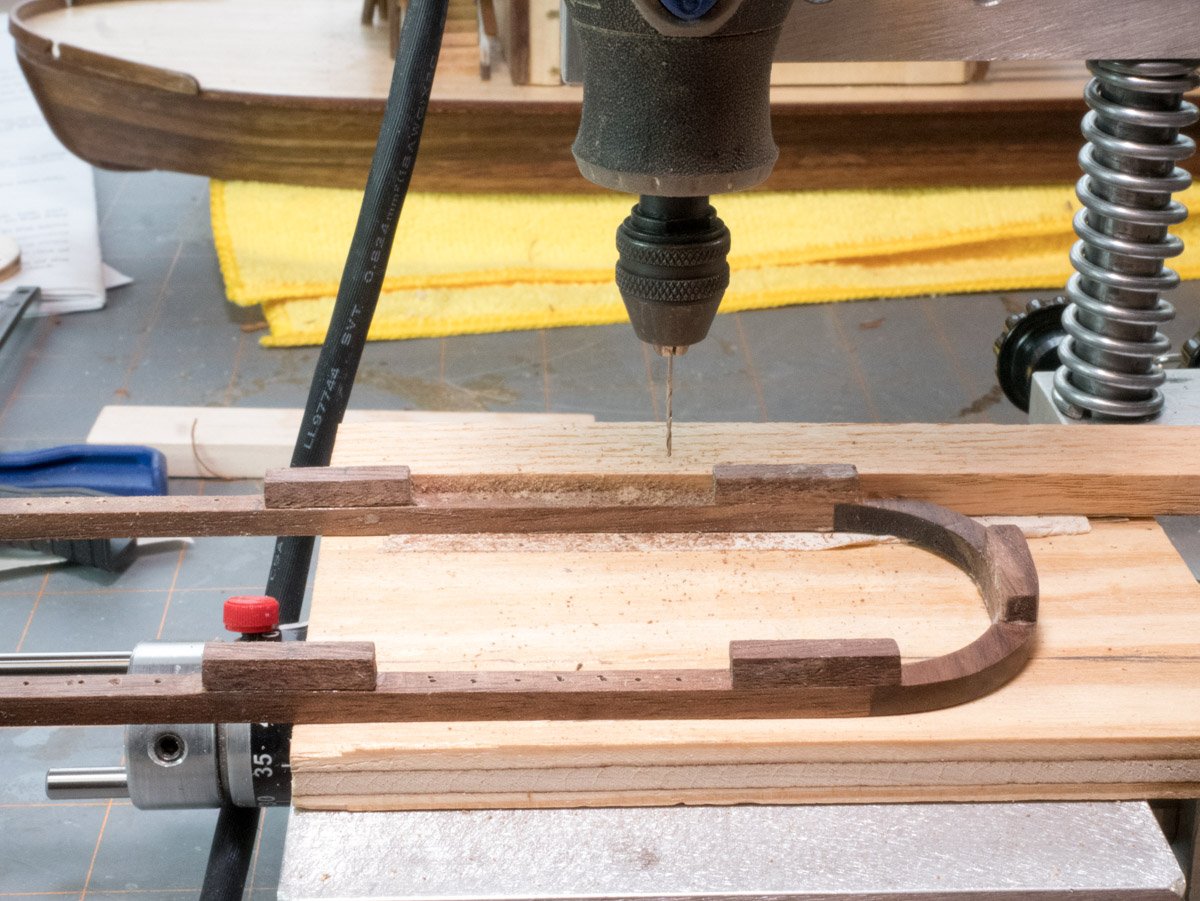
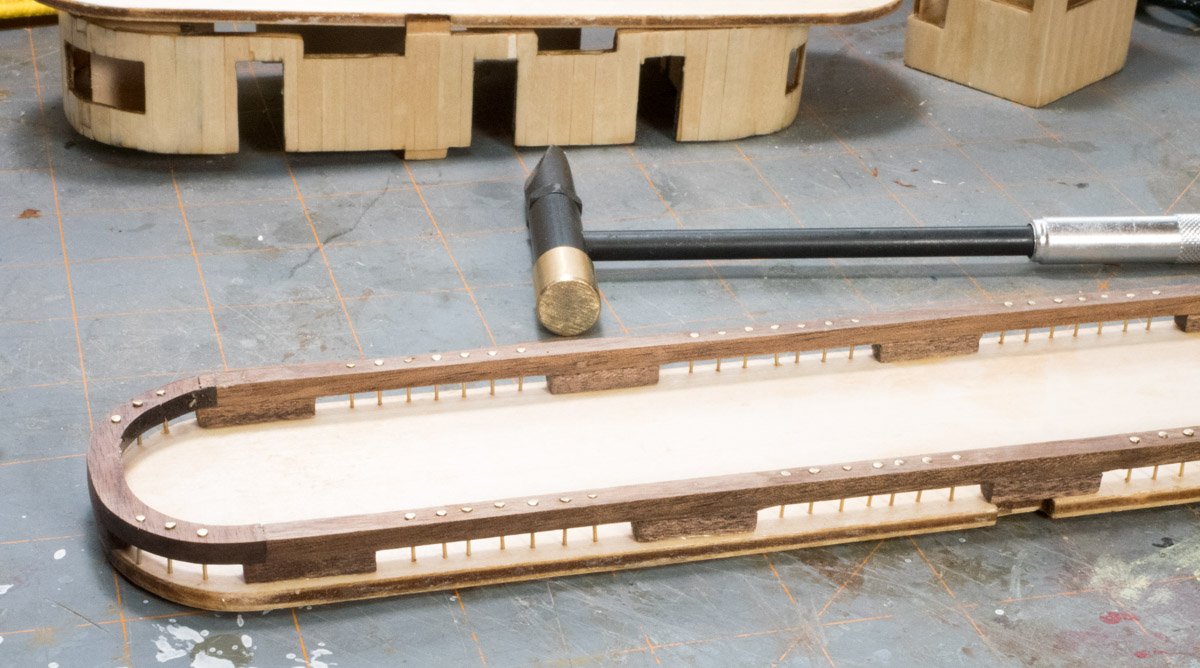
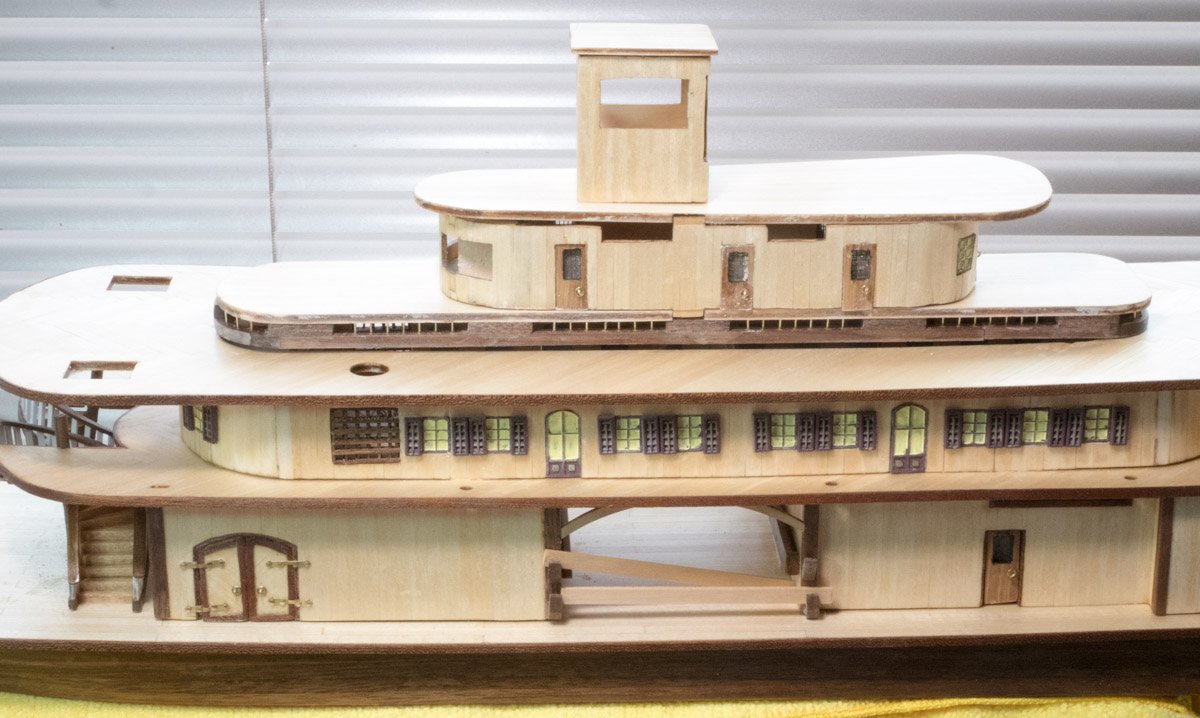
I assembled the grate standoff for the state room. I have a hobby drill press with X-axis capability for my Dremel tool. The X-axis feature has 40 mm of travel which worked for the 42 mm gaps between the stand offs. I used double-sided tape to fix a reference block on a piece of plywood. I used the reference board to position the standoff structure on part of the tape to hold it in place while drilling holes for the pins. I determined a number of turns for the X-axis travel adjustment between the drill points, the distribution mostly turned out consistent. I had made a slight counter sync for the head of the pins, most of them were flush. This is how it turned out: I've been working on all of the structures above the third deck. I test fit the structures and noticed the the wheel house platform is warped and I'm wondering how to flatten it. I need to find some material for the openings along the top of the state room. And I need to determine how to trim the front windows of the state room, the instructions aren't very clear (I've been checking other logs for tips).
- 132 replies
-
- 6
-
-
- King of the Mississippi
- Artesania Latina
- (and 1 more)