woodartist
-
Posts
292 -
Joined
-
Last visited
Content Type
Profiles
Forums
Gallery
Events
Everything posted by woodartist
-
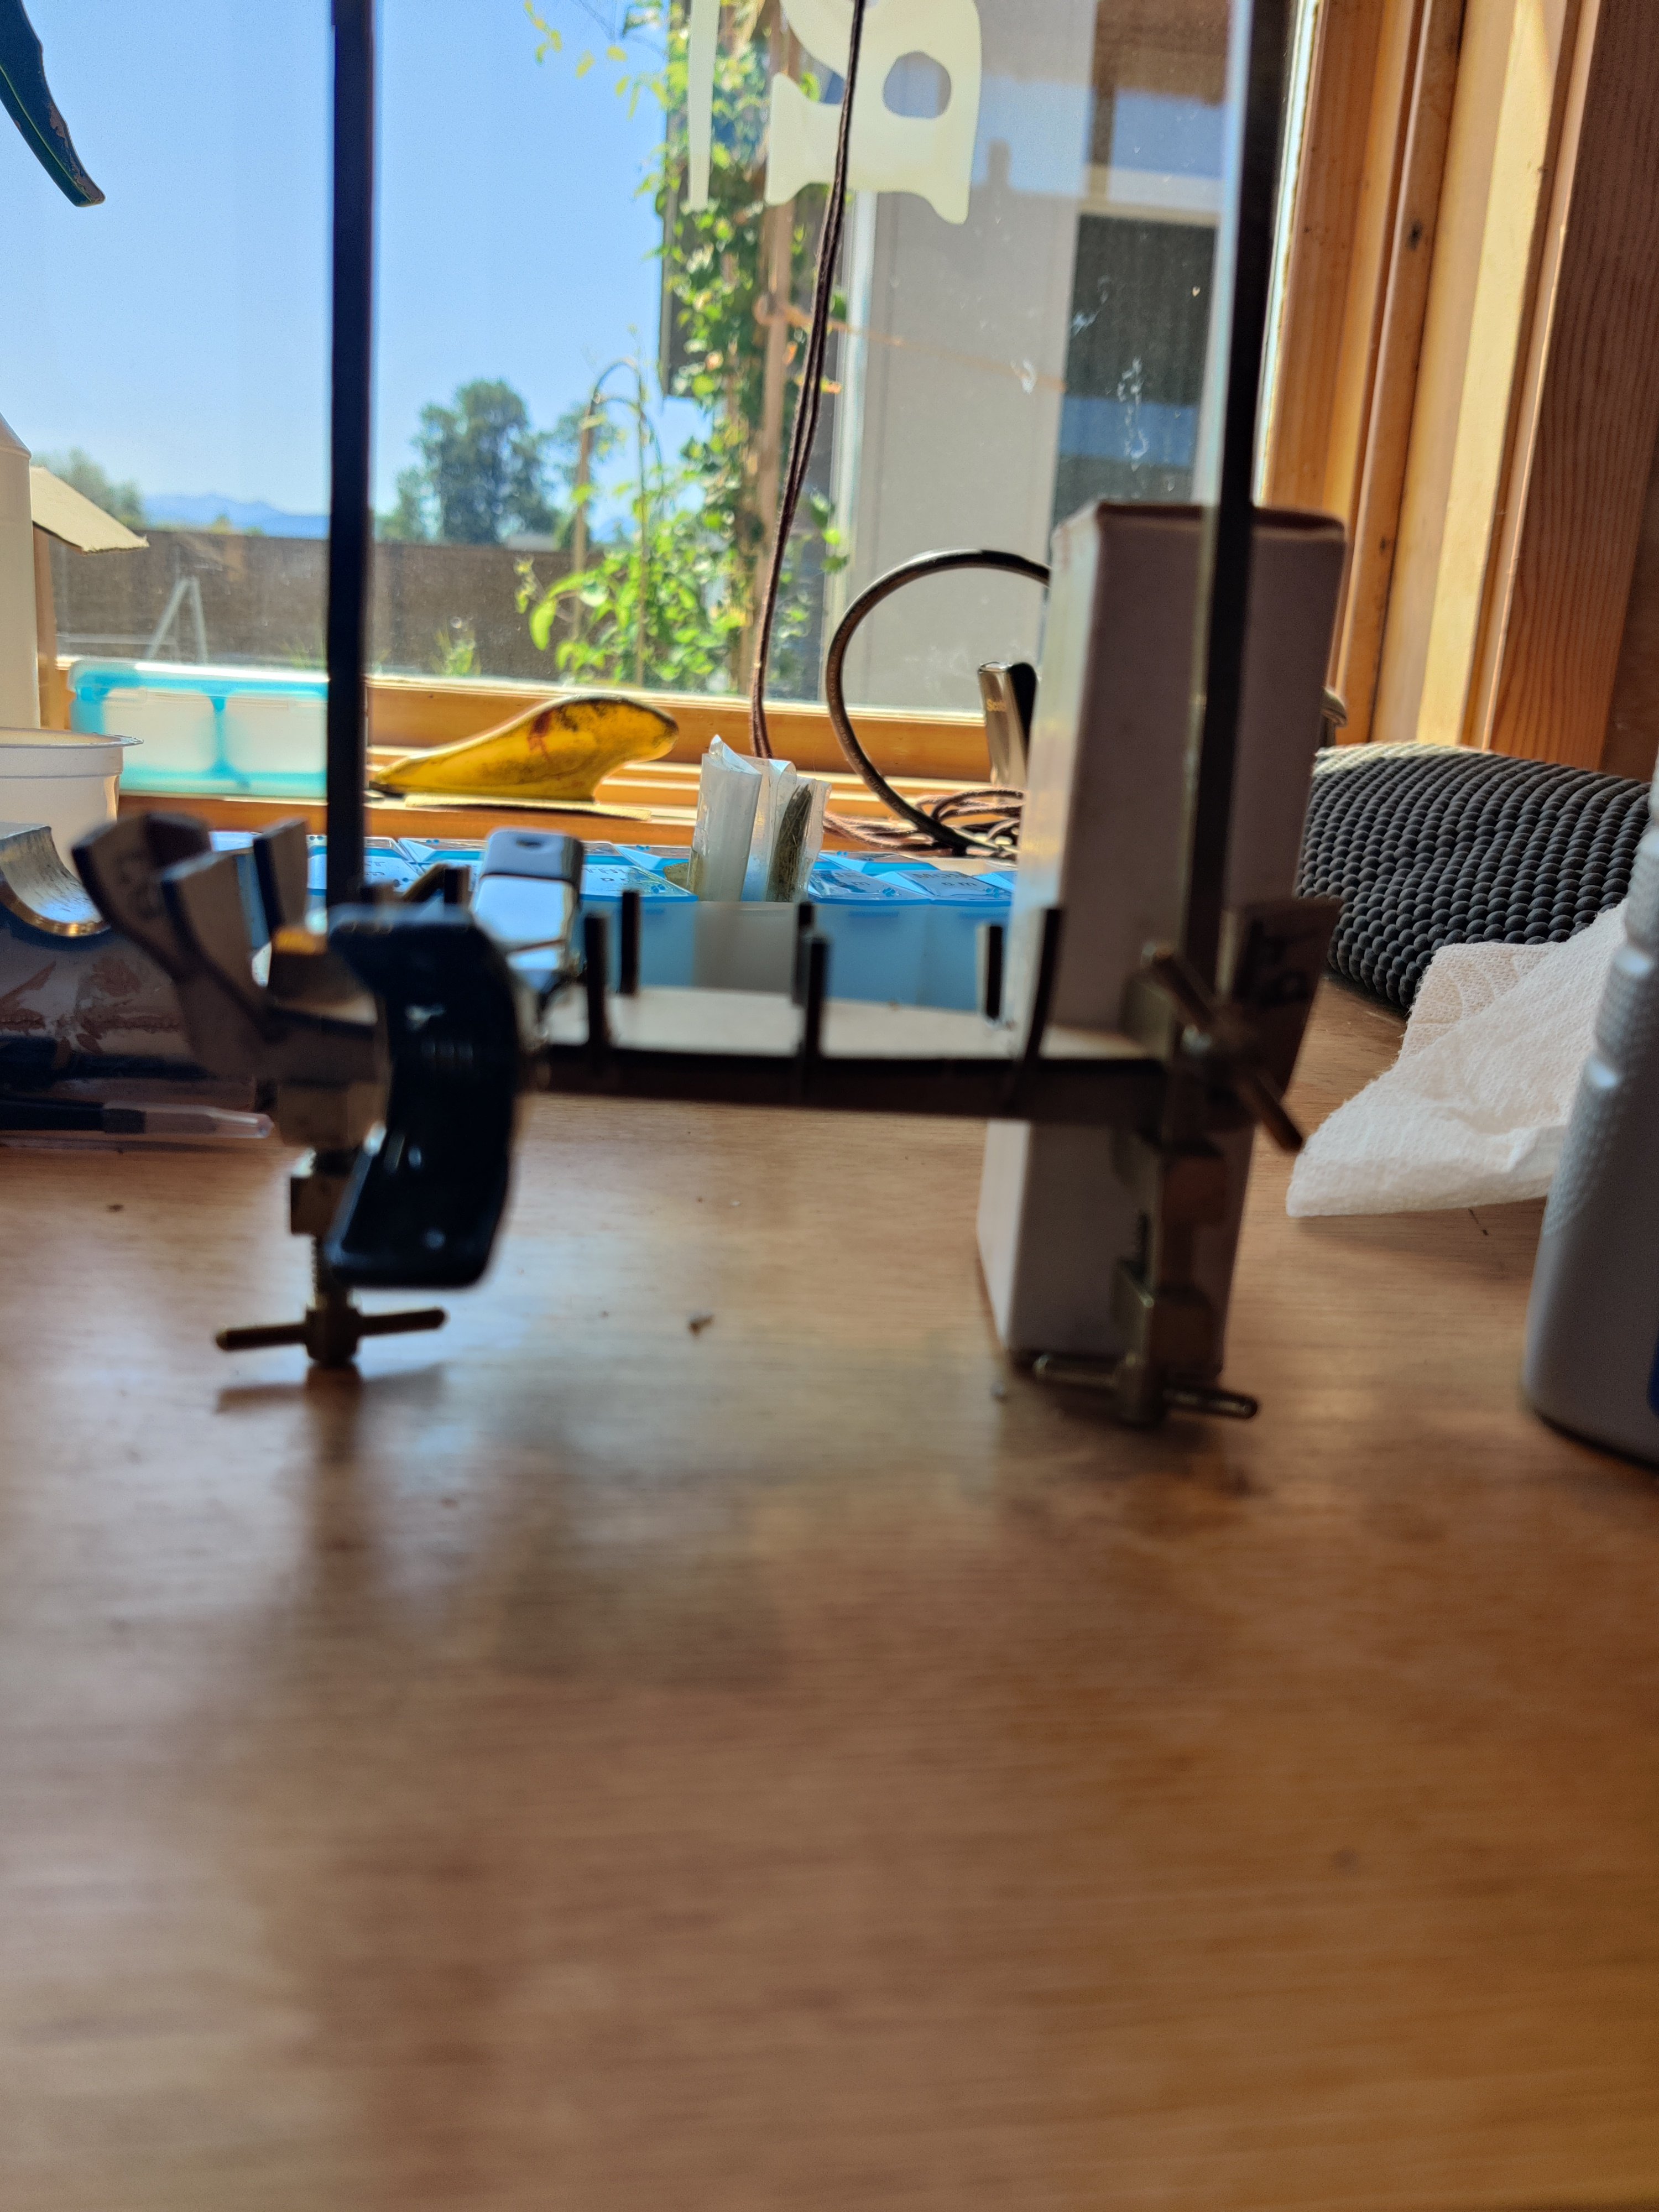
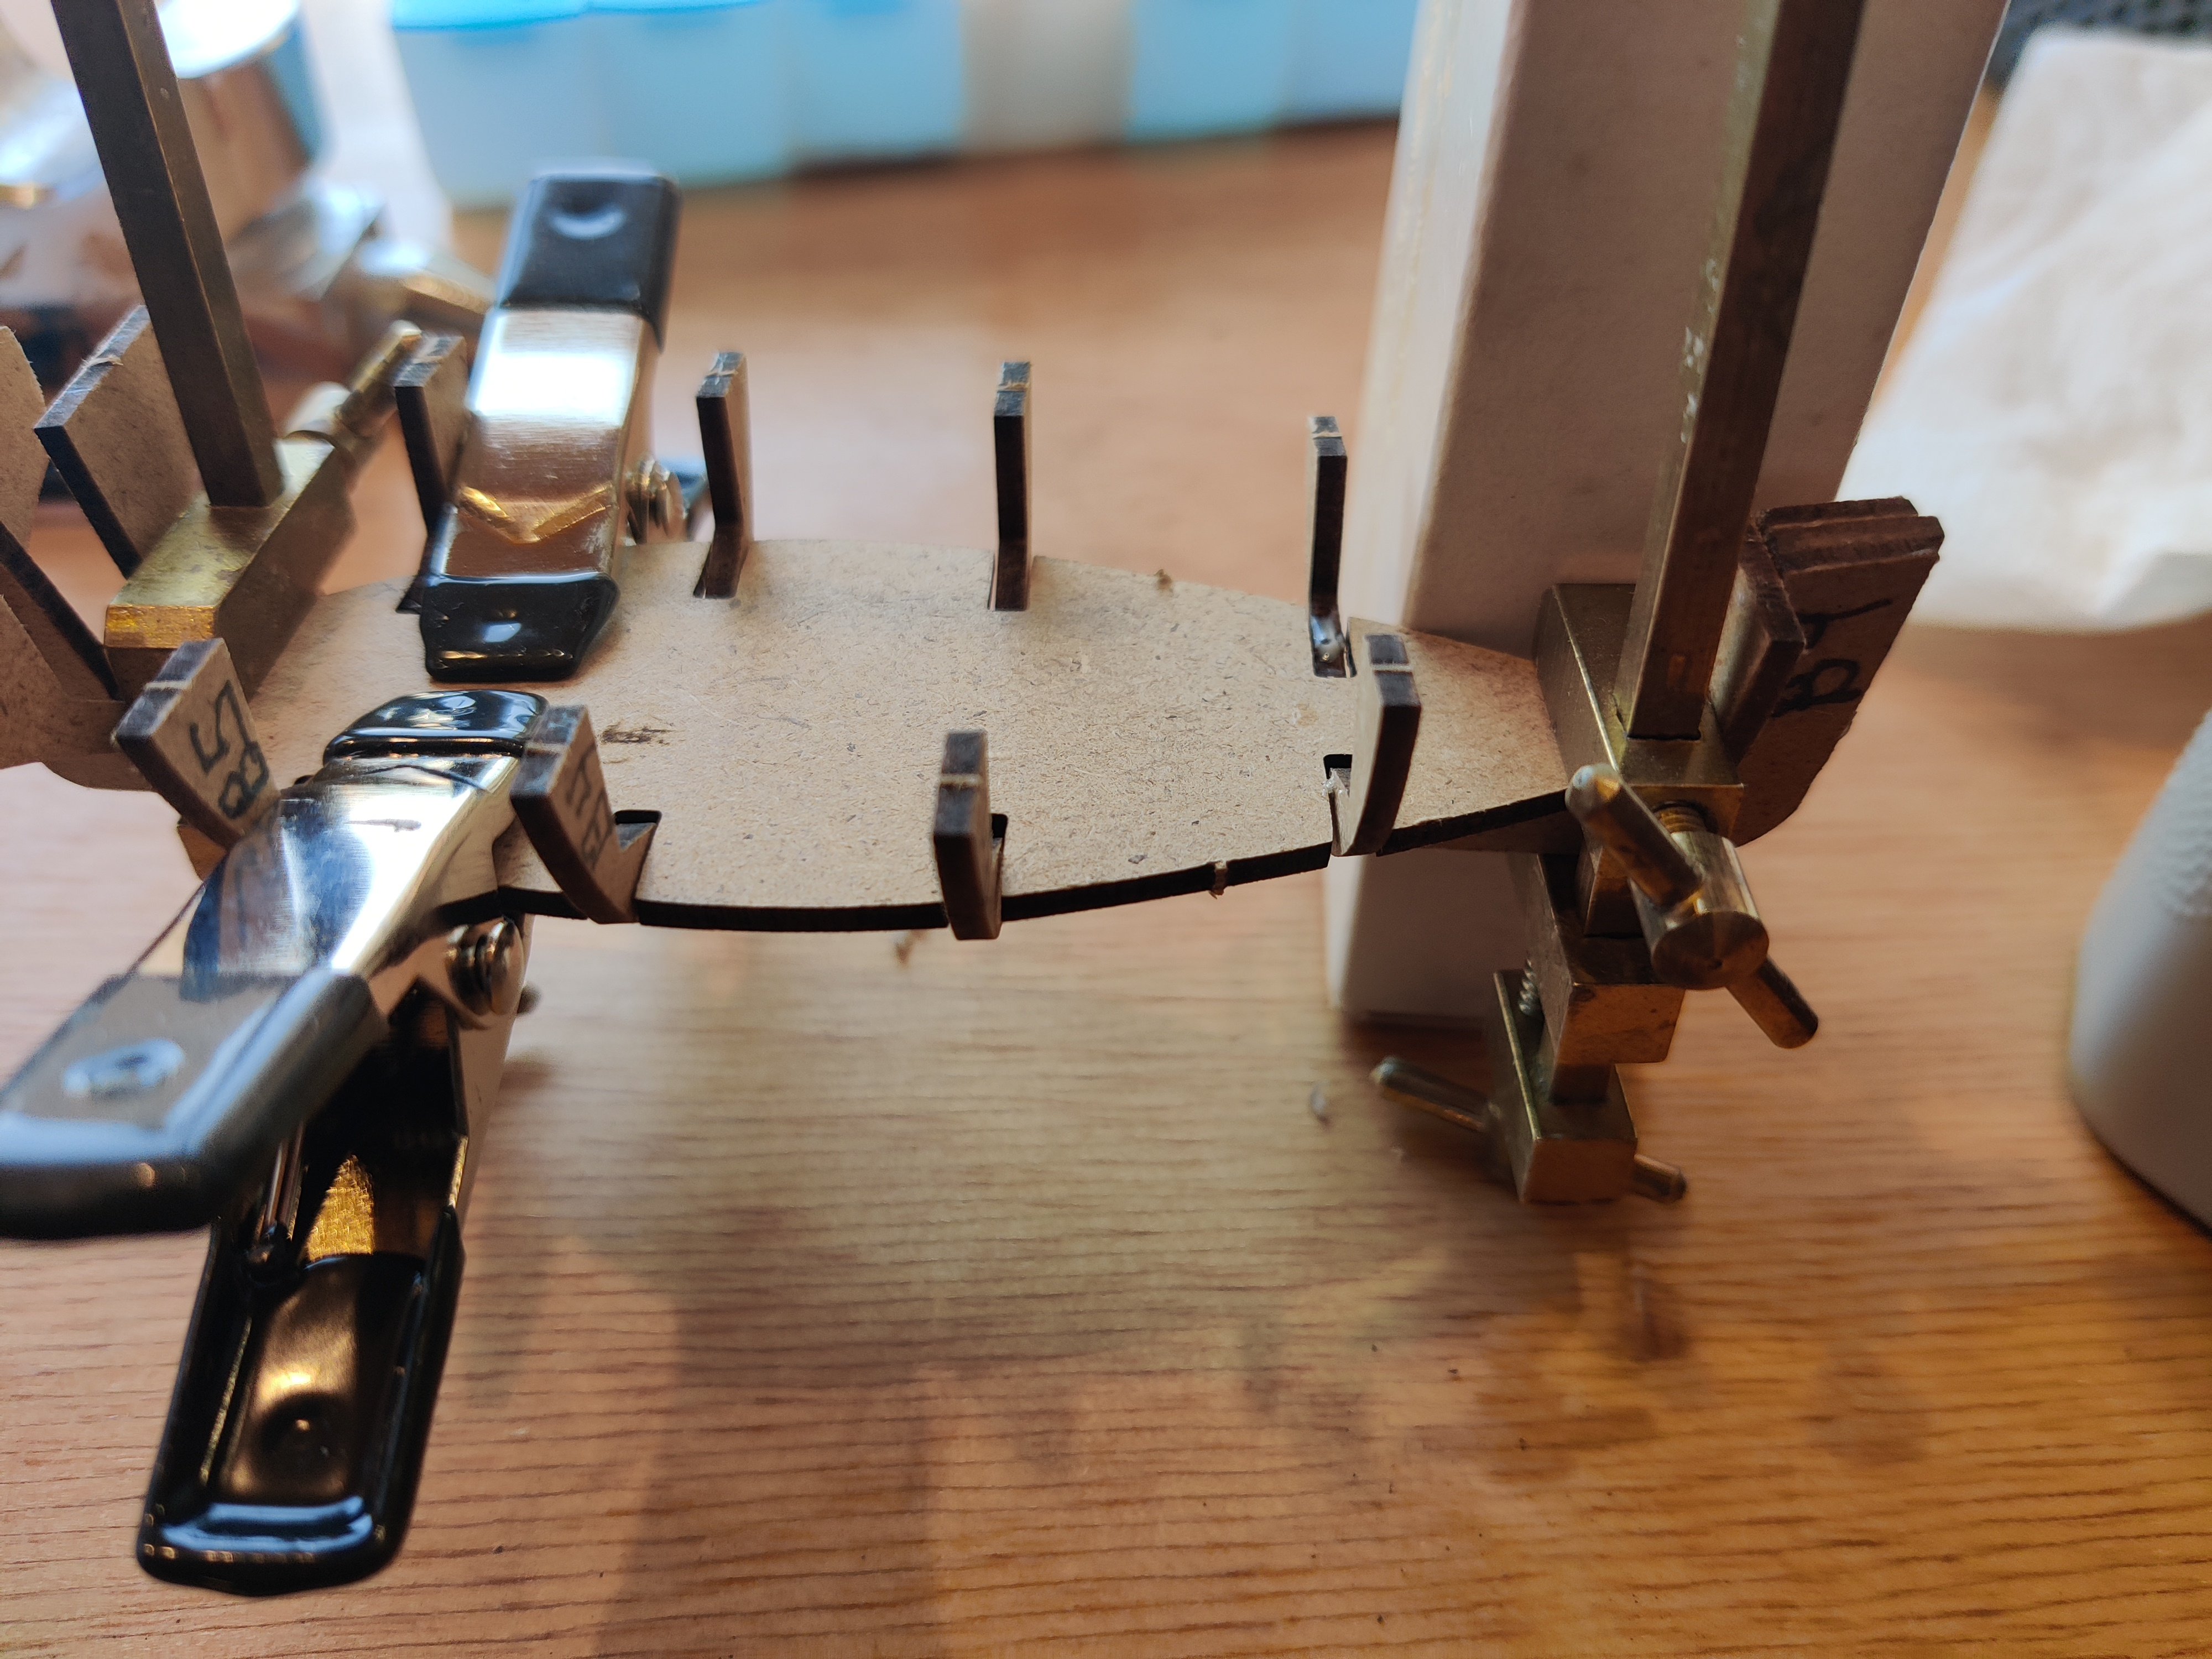
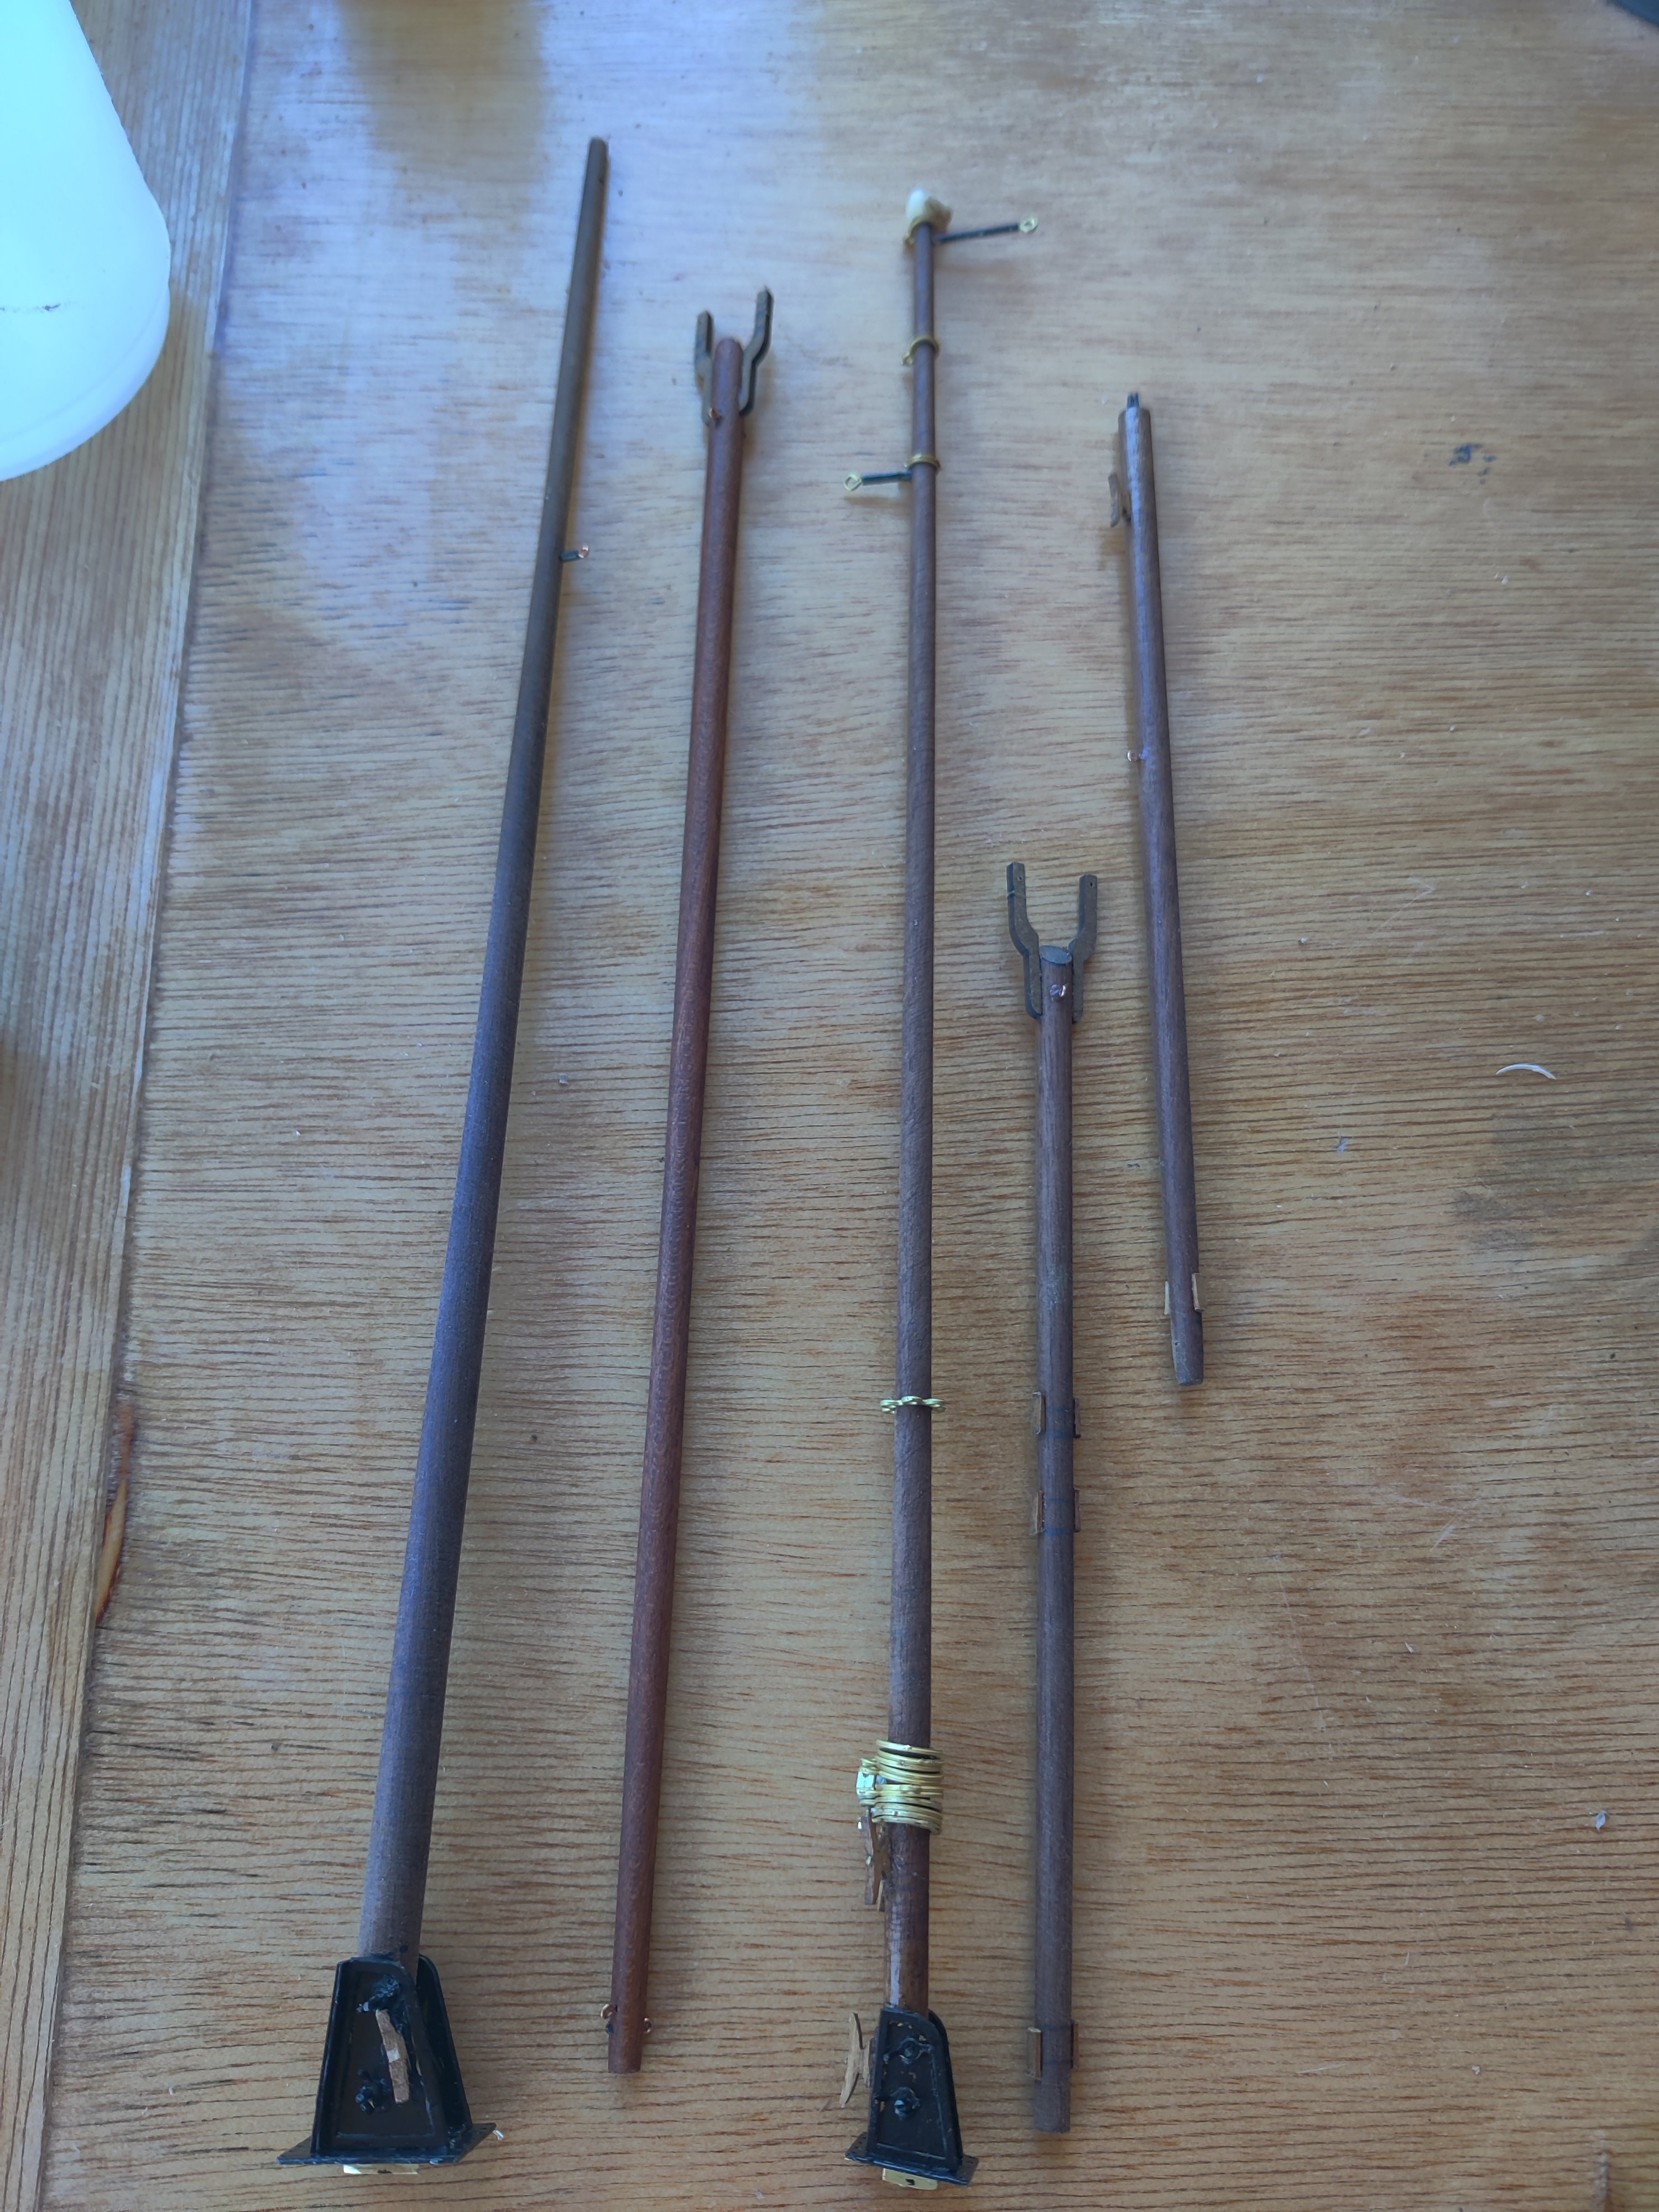
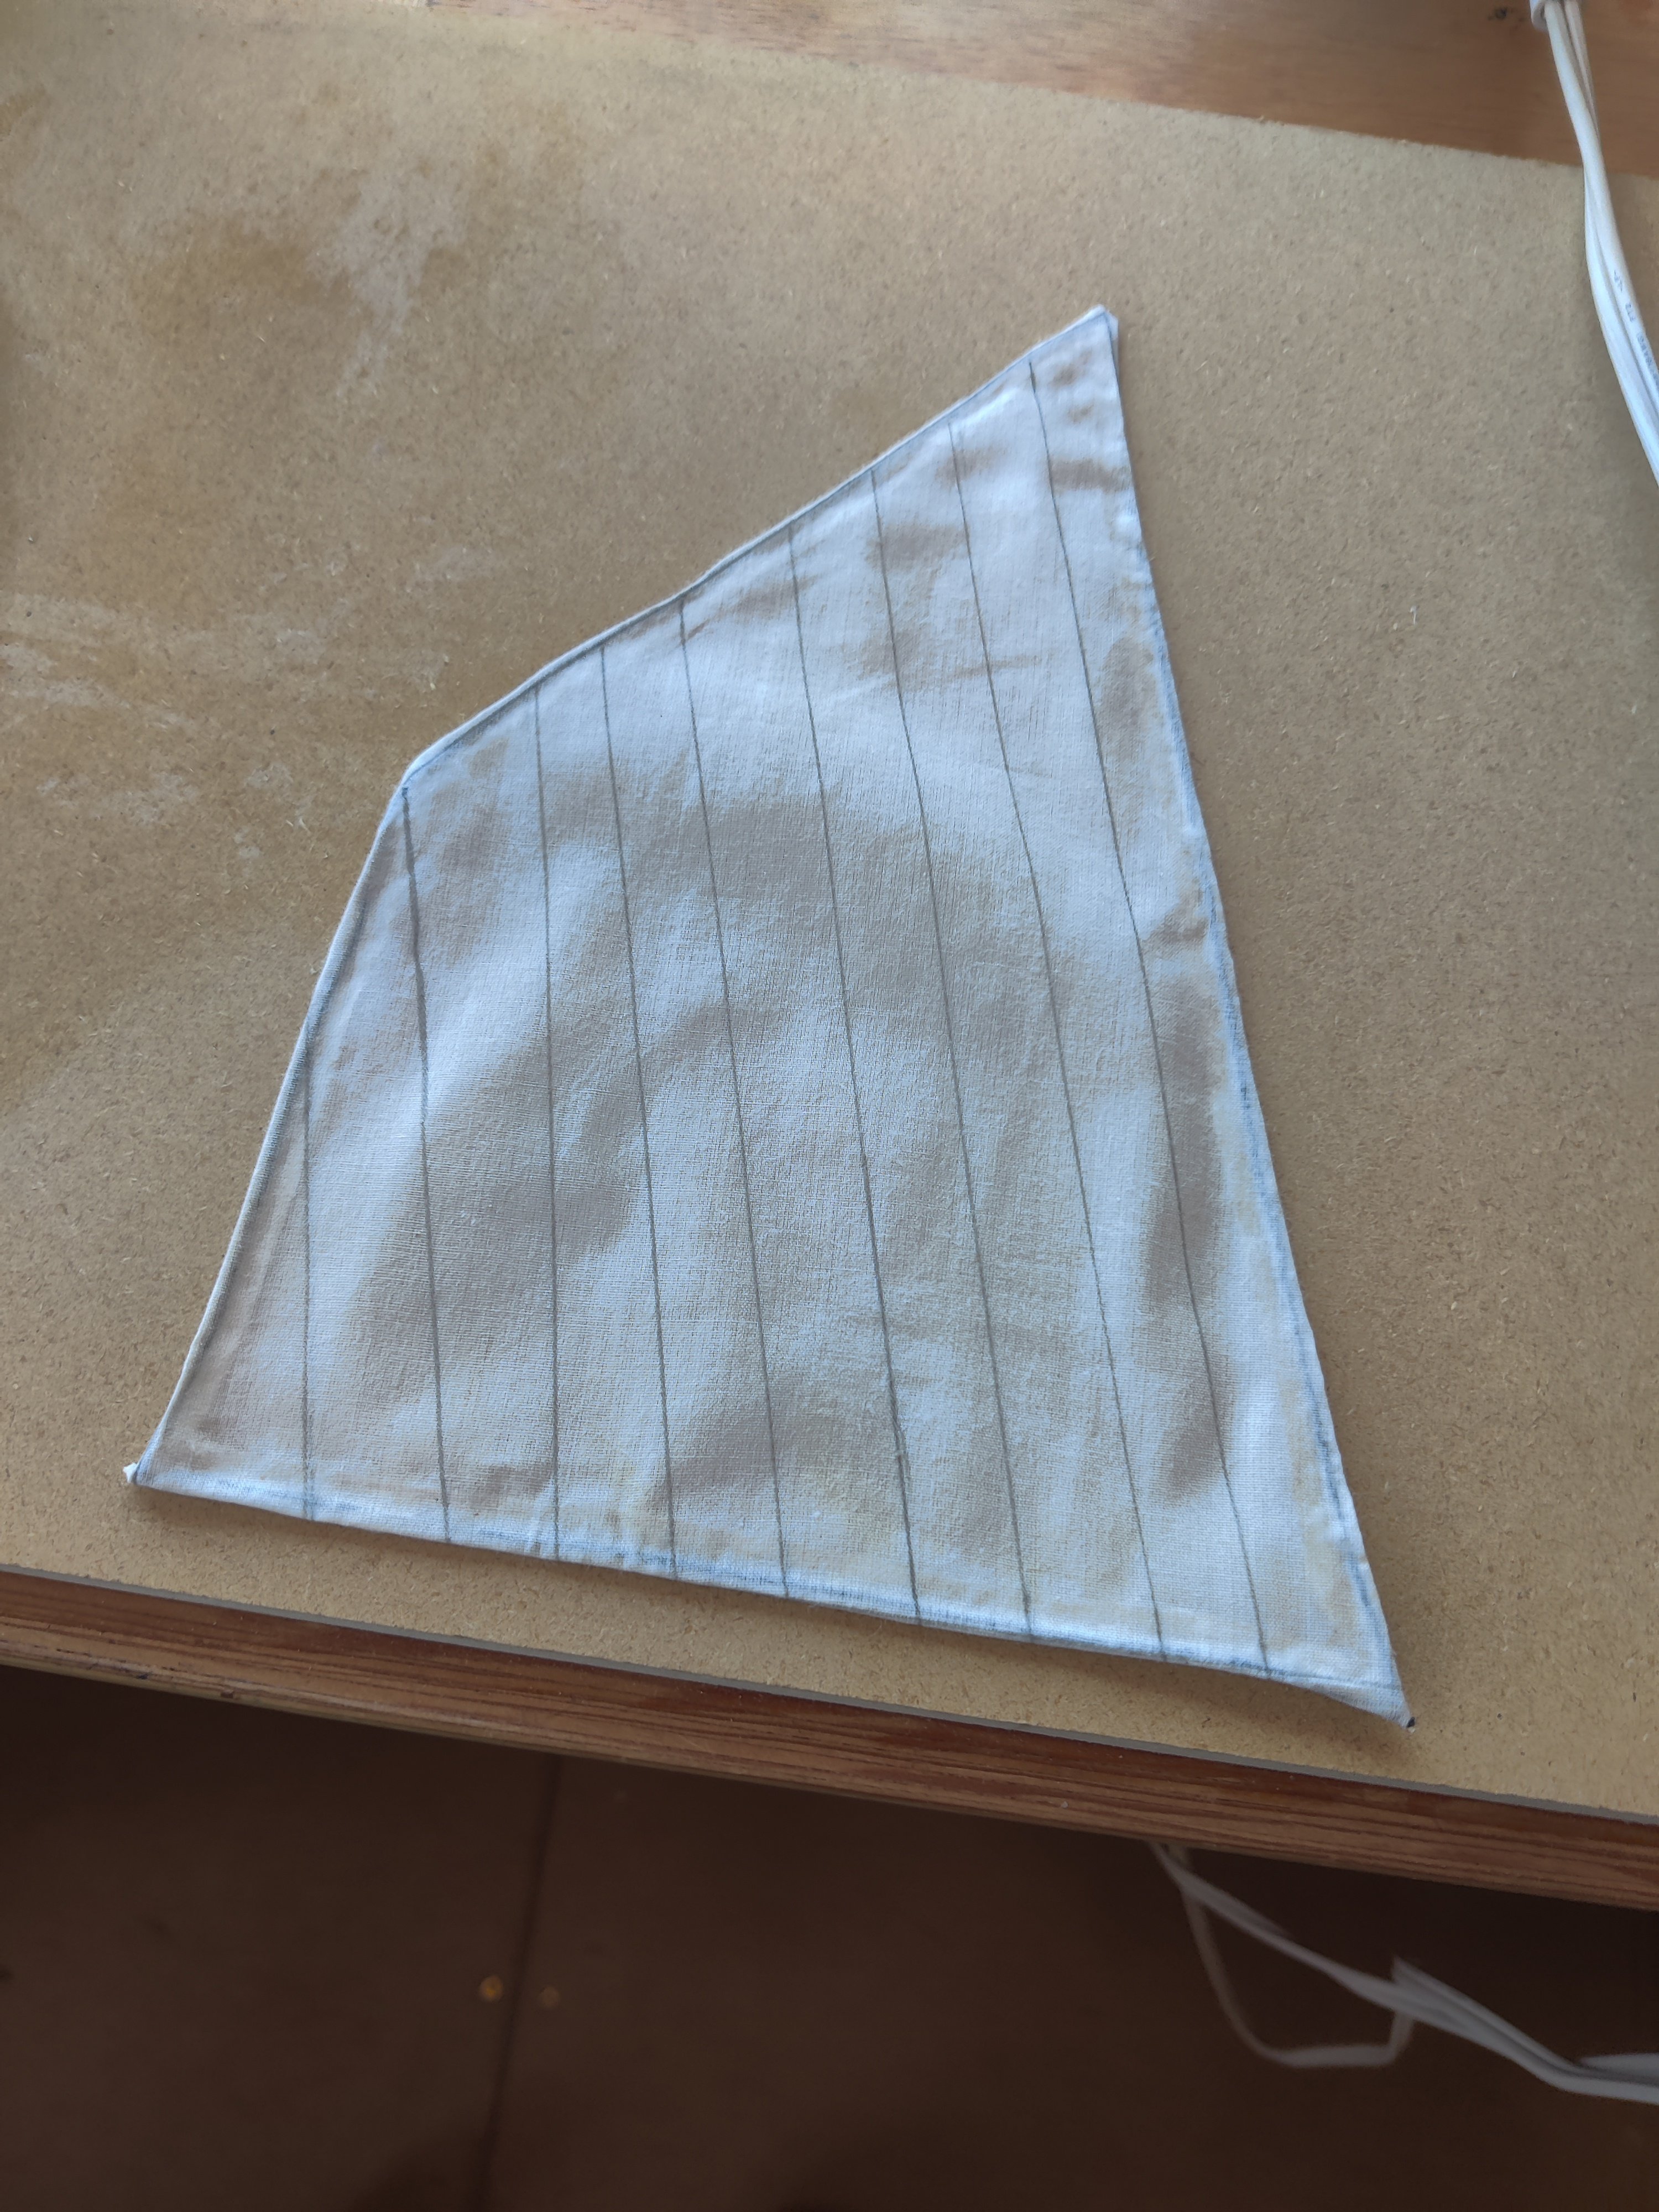
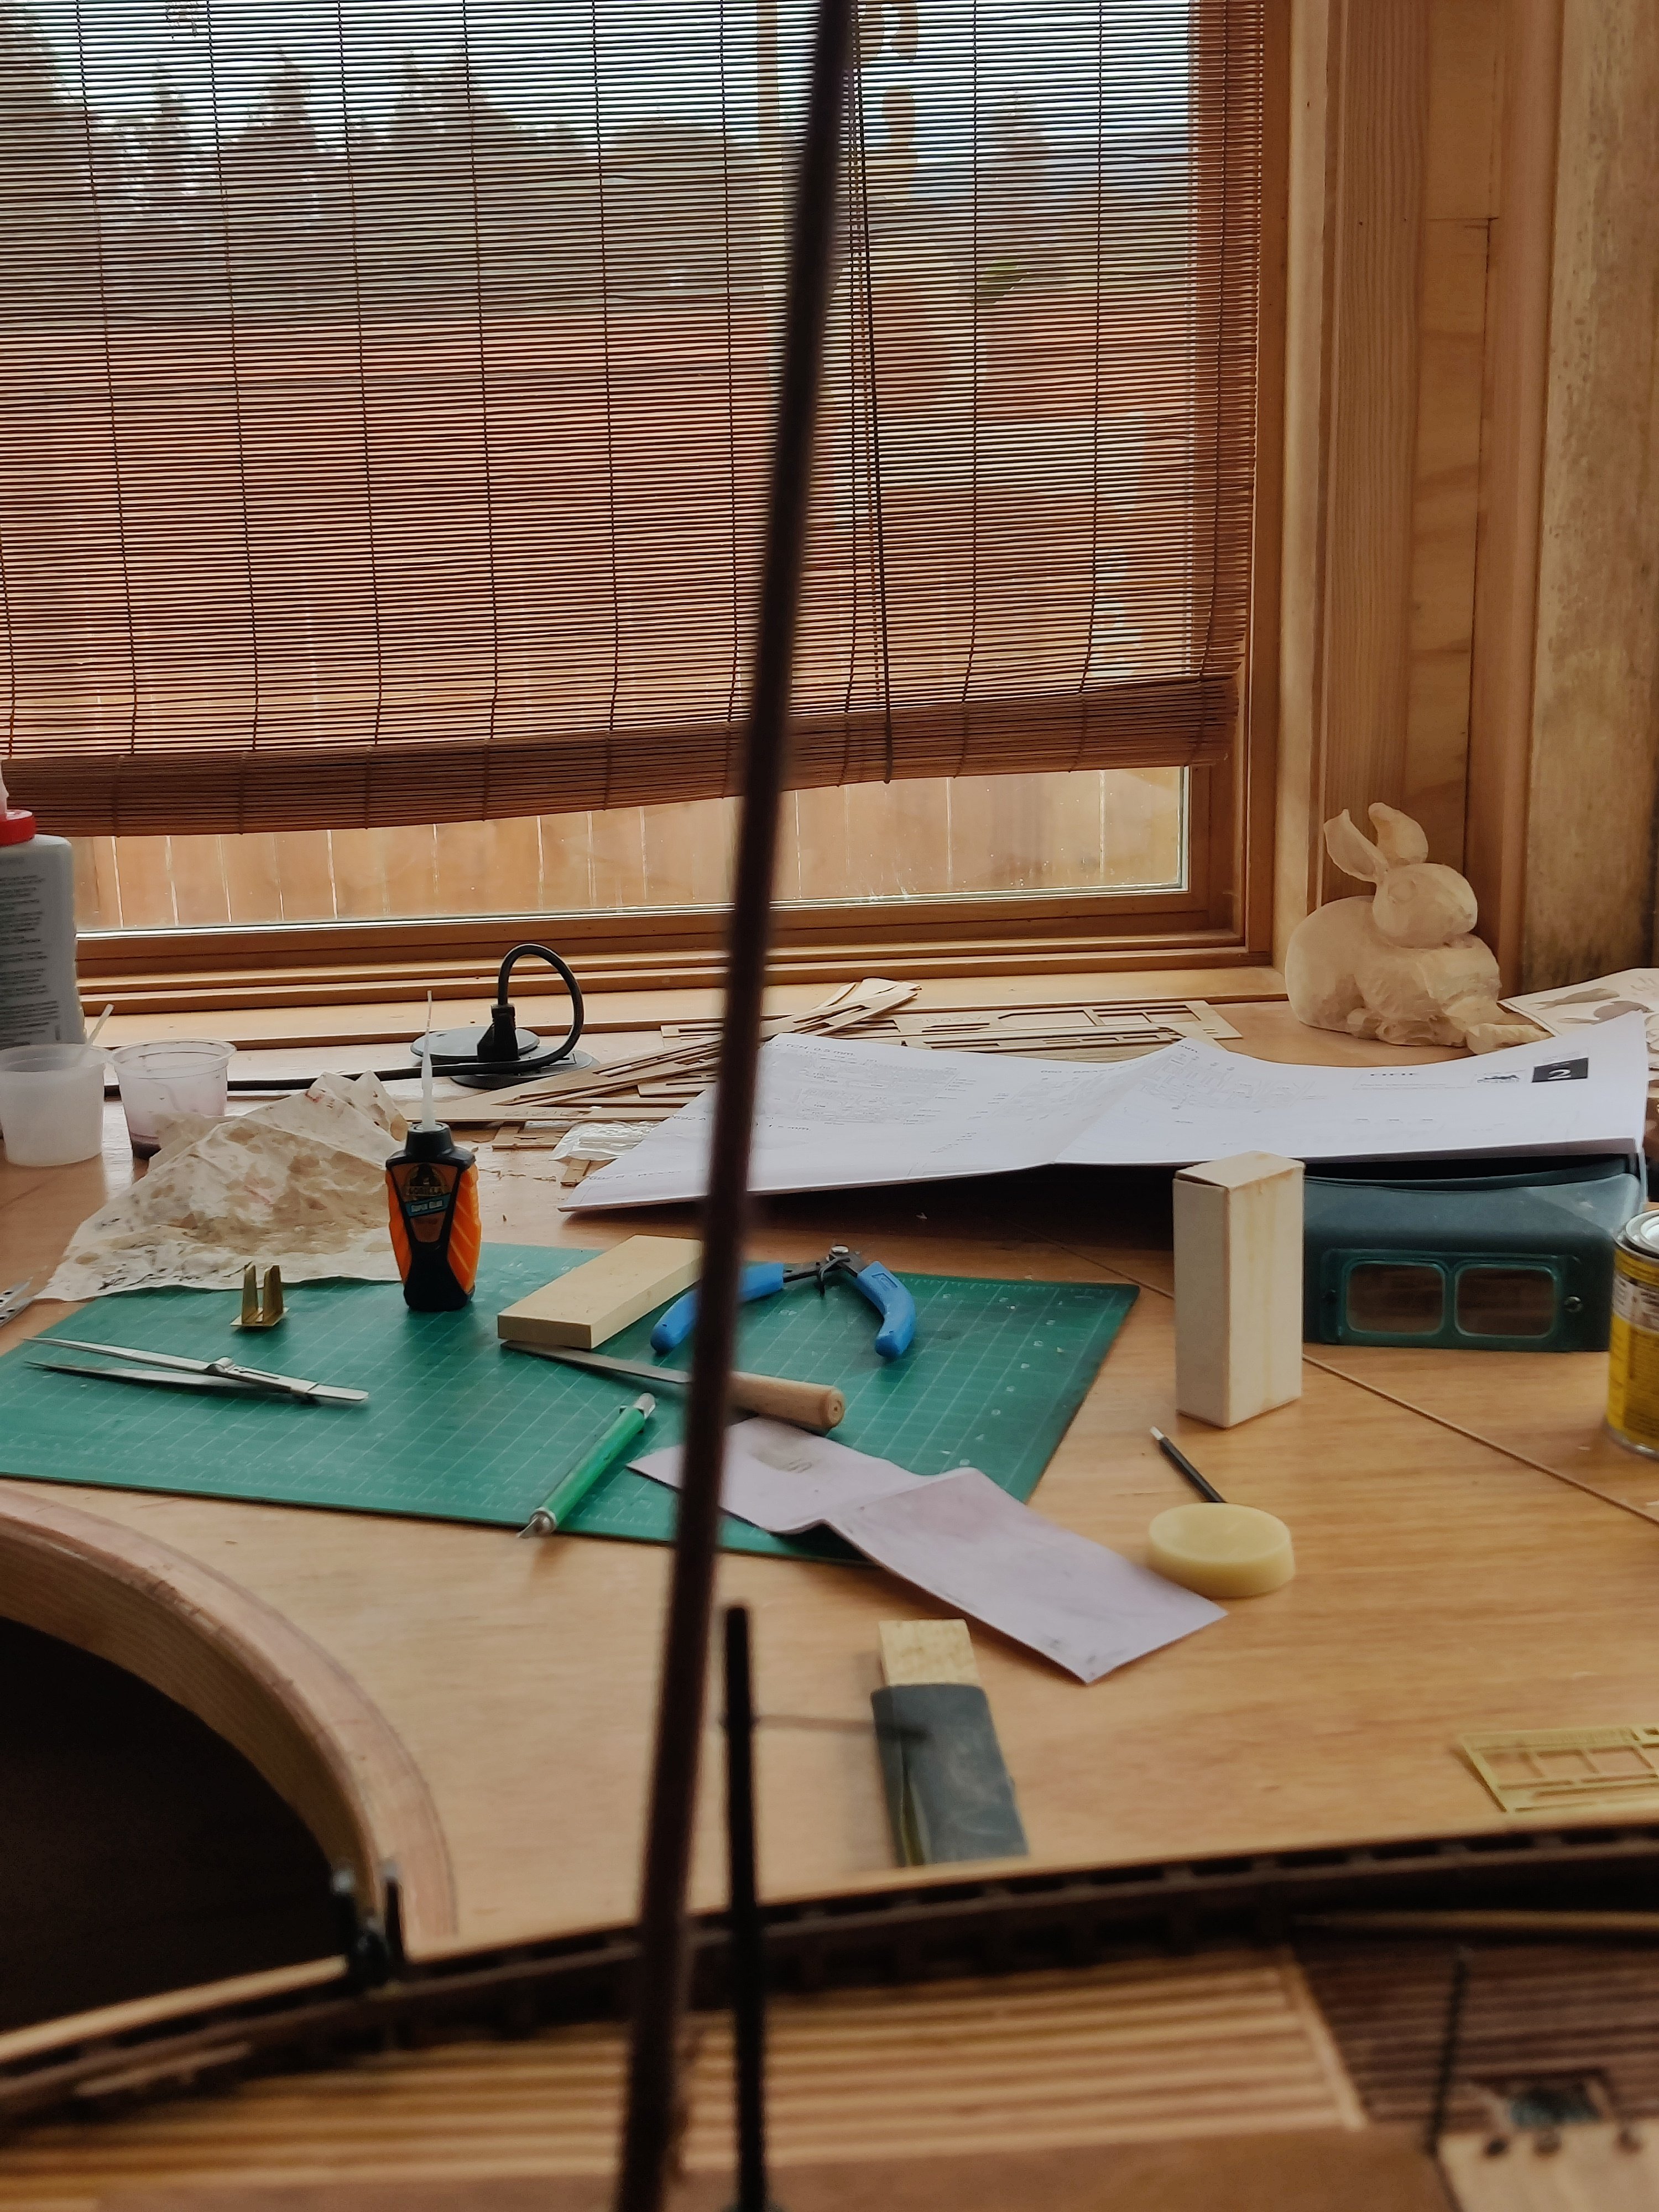
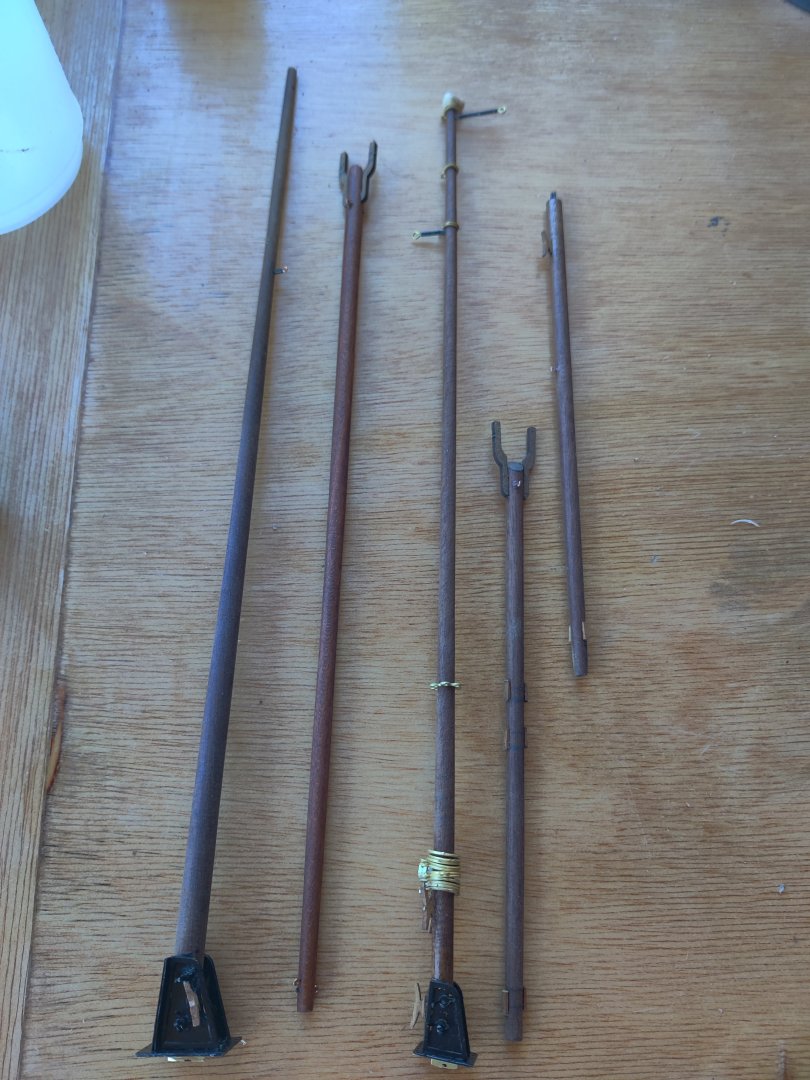
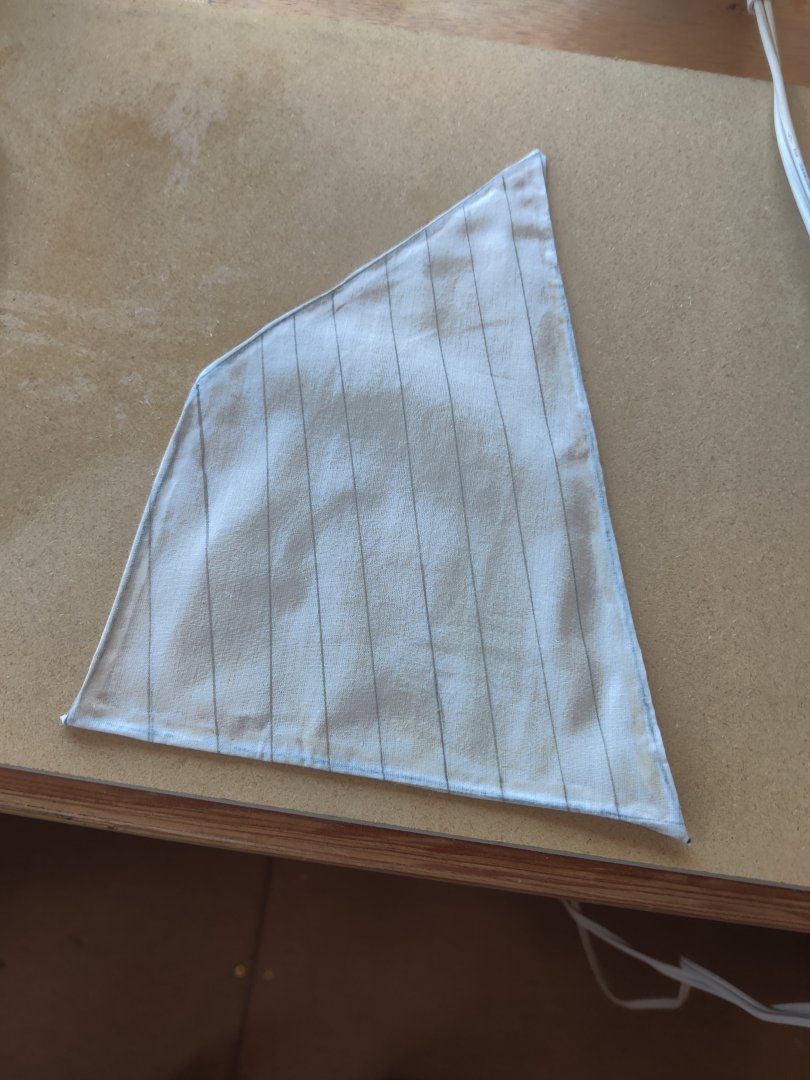
Well this build is getting closer to being finished. All the masts and booms are ready to rig. All the fixtures for the deck are completed and ready for permanent installation after the masts are finished rigging. I made my first sail. It is not perfect but I think it looks good. I only have use of one hand so doing any rigging is not realistic so I have gotten a friend to volunteer to do the rigging. I tried to make the process as simple as I could for him, I put in all the pin and cleats needed for the rigging and the masts have all bits and pieces shown on the plans for rigging. I still have the the small deck boat to complete but the frame structure is done. It was difficult to keep it straight because the bulkheads have only a small surface that connects with the keel but with several tries ans an assortment of clamping methods it is glued and straight and ready for faring and planking.

-
I recall that there were discussions underway, that someone was contemplating taking over production of Byrnes saws and sanders. Does anyie have an update? I have put off buying a Proxon table saw in hopes that this would happen.
-
I noted that as well. I also have learned so much on the last two builds that I will likely do a total restart on Conny rather than a continuation. It is so crtical to get things correct at the beginning or it is an endless struggle to make it right.
-
this looks really good, I like Mustafa's suggestion. It as the least amount of risk.
-
You have earned it!!
-
I have ordered the keel, bulkheads and chapter one parts in yellow cedar and will start the journey.
-
I am looking for an Article written by John Tilly "Rigging and Forming Sails". Does anyone know the link?
-
Jon, Yours was the first log I copied, Then i coped Rentner and MTBediz. They are all truly gems.
-
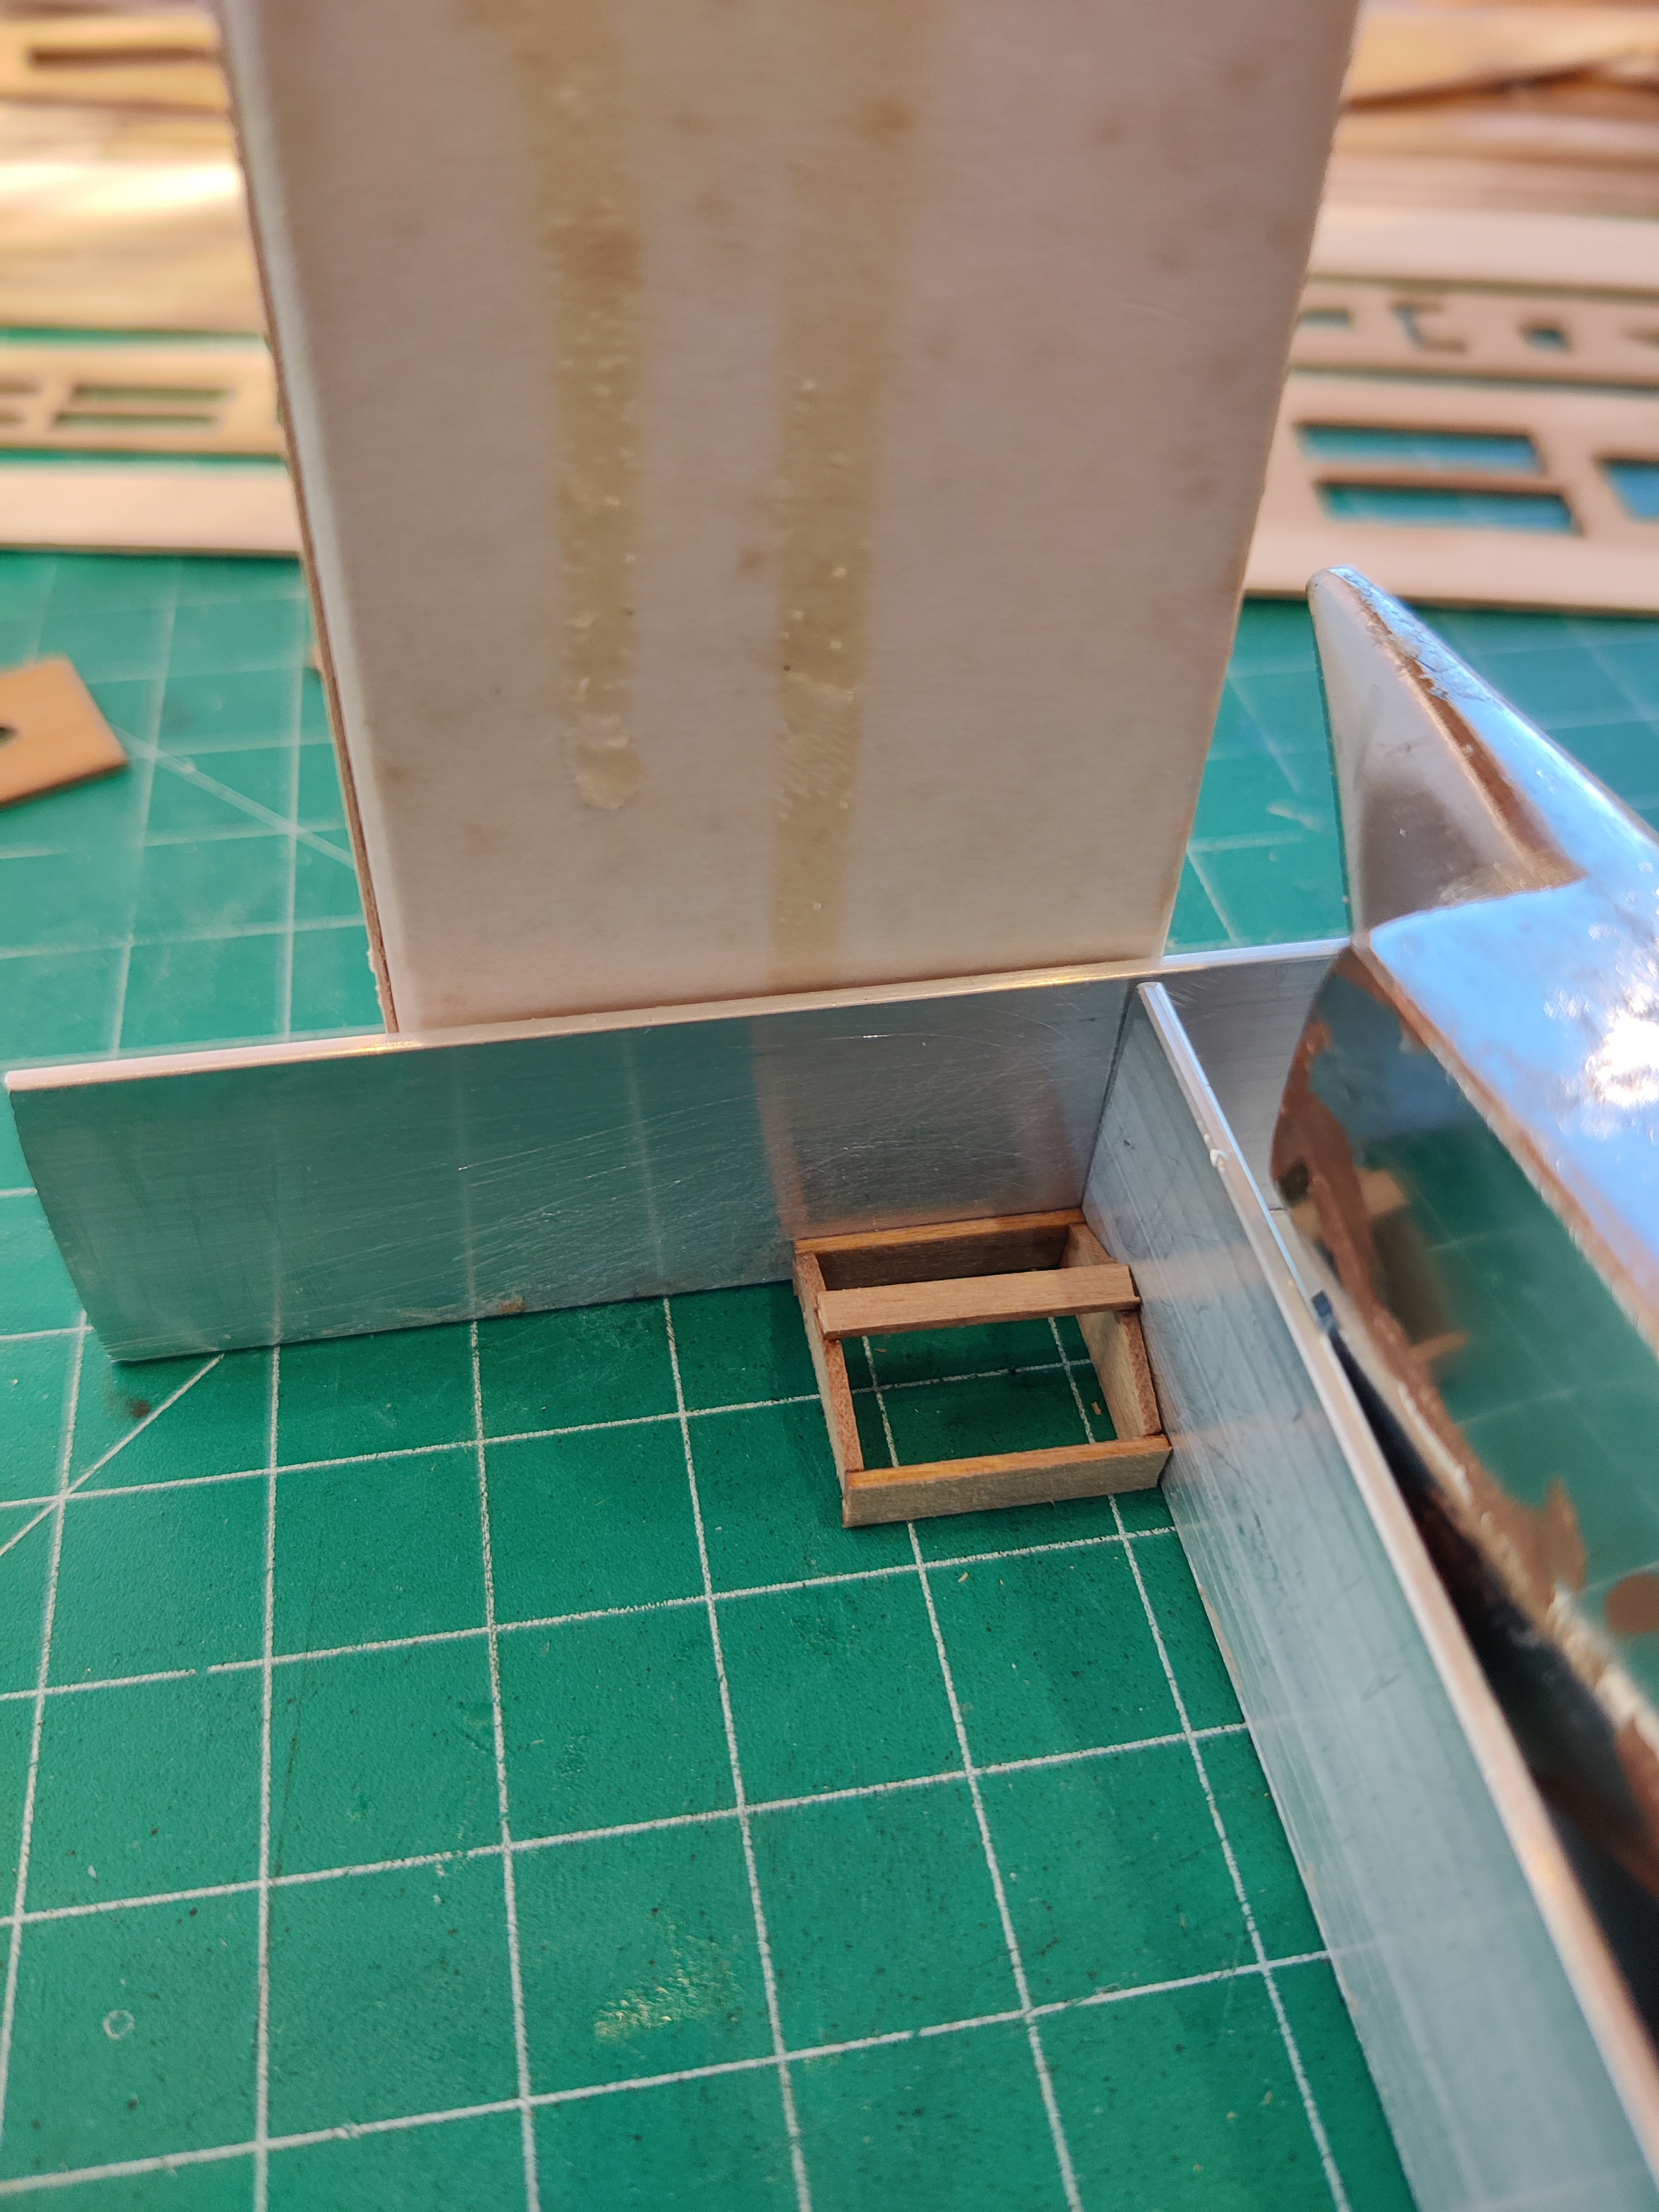
Using guides that are square and do not move sure simplify, gluing up really small, light weight pieces.


-
looks like it will work, great idea.
-
they look like the real thing.
-
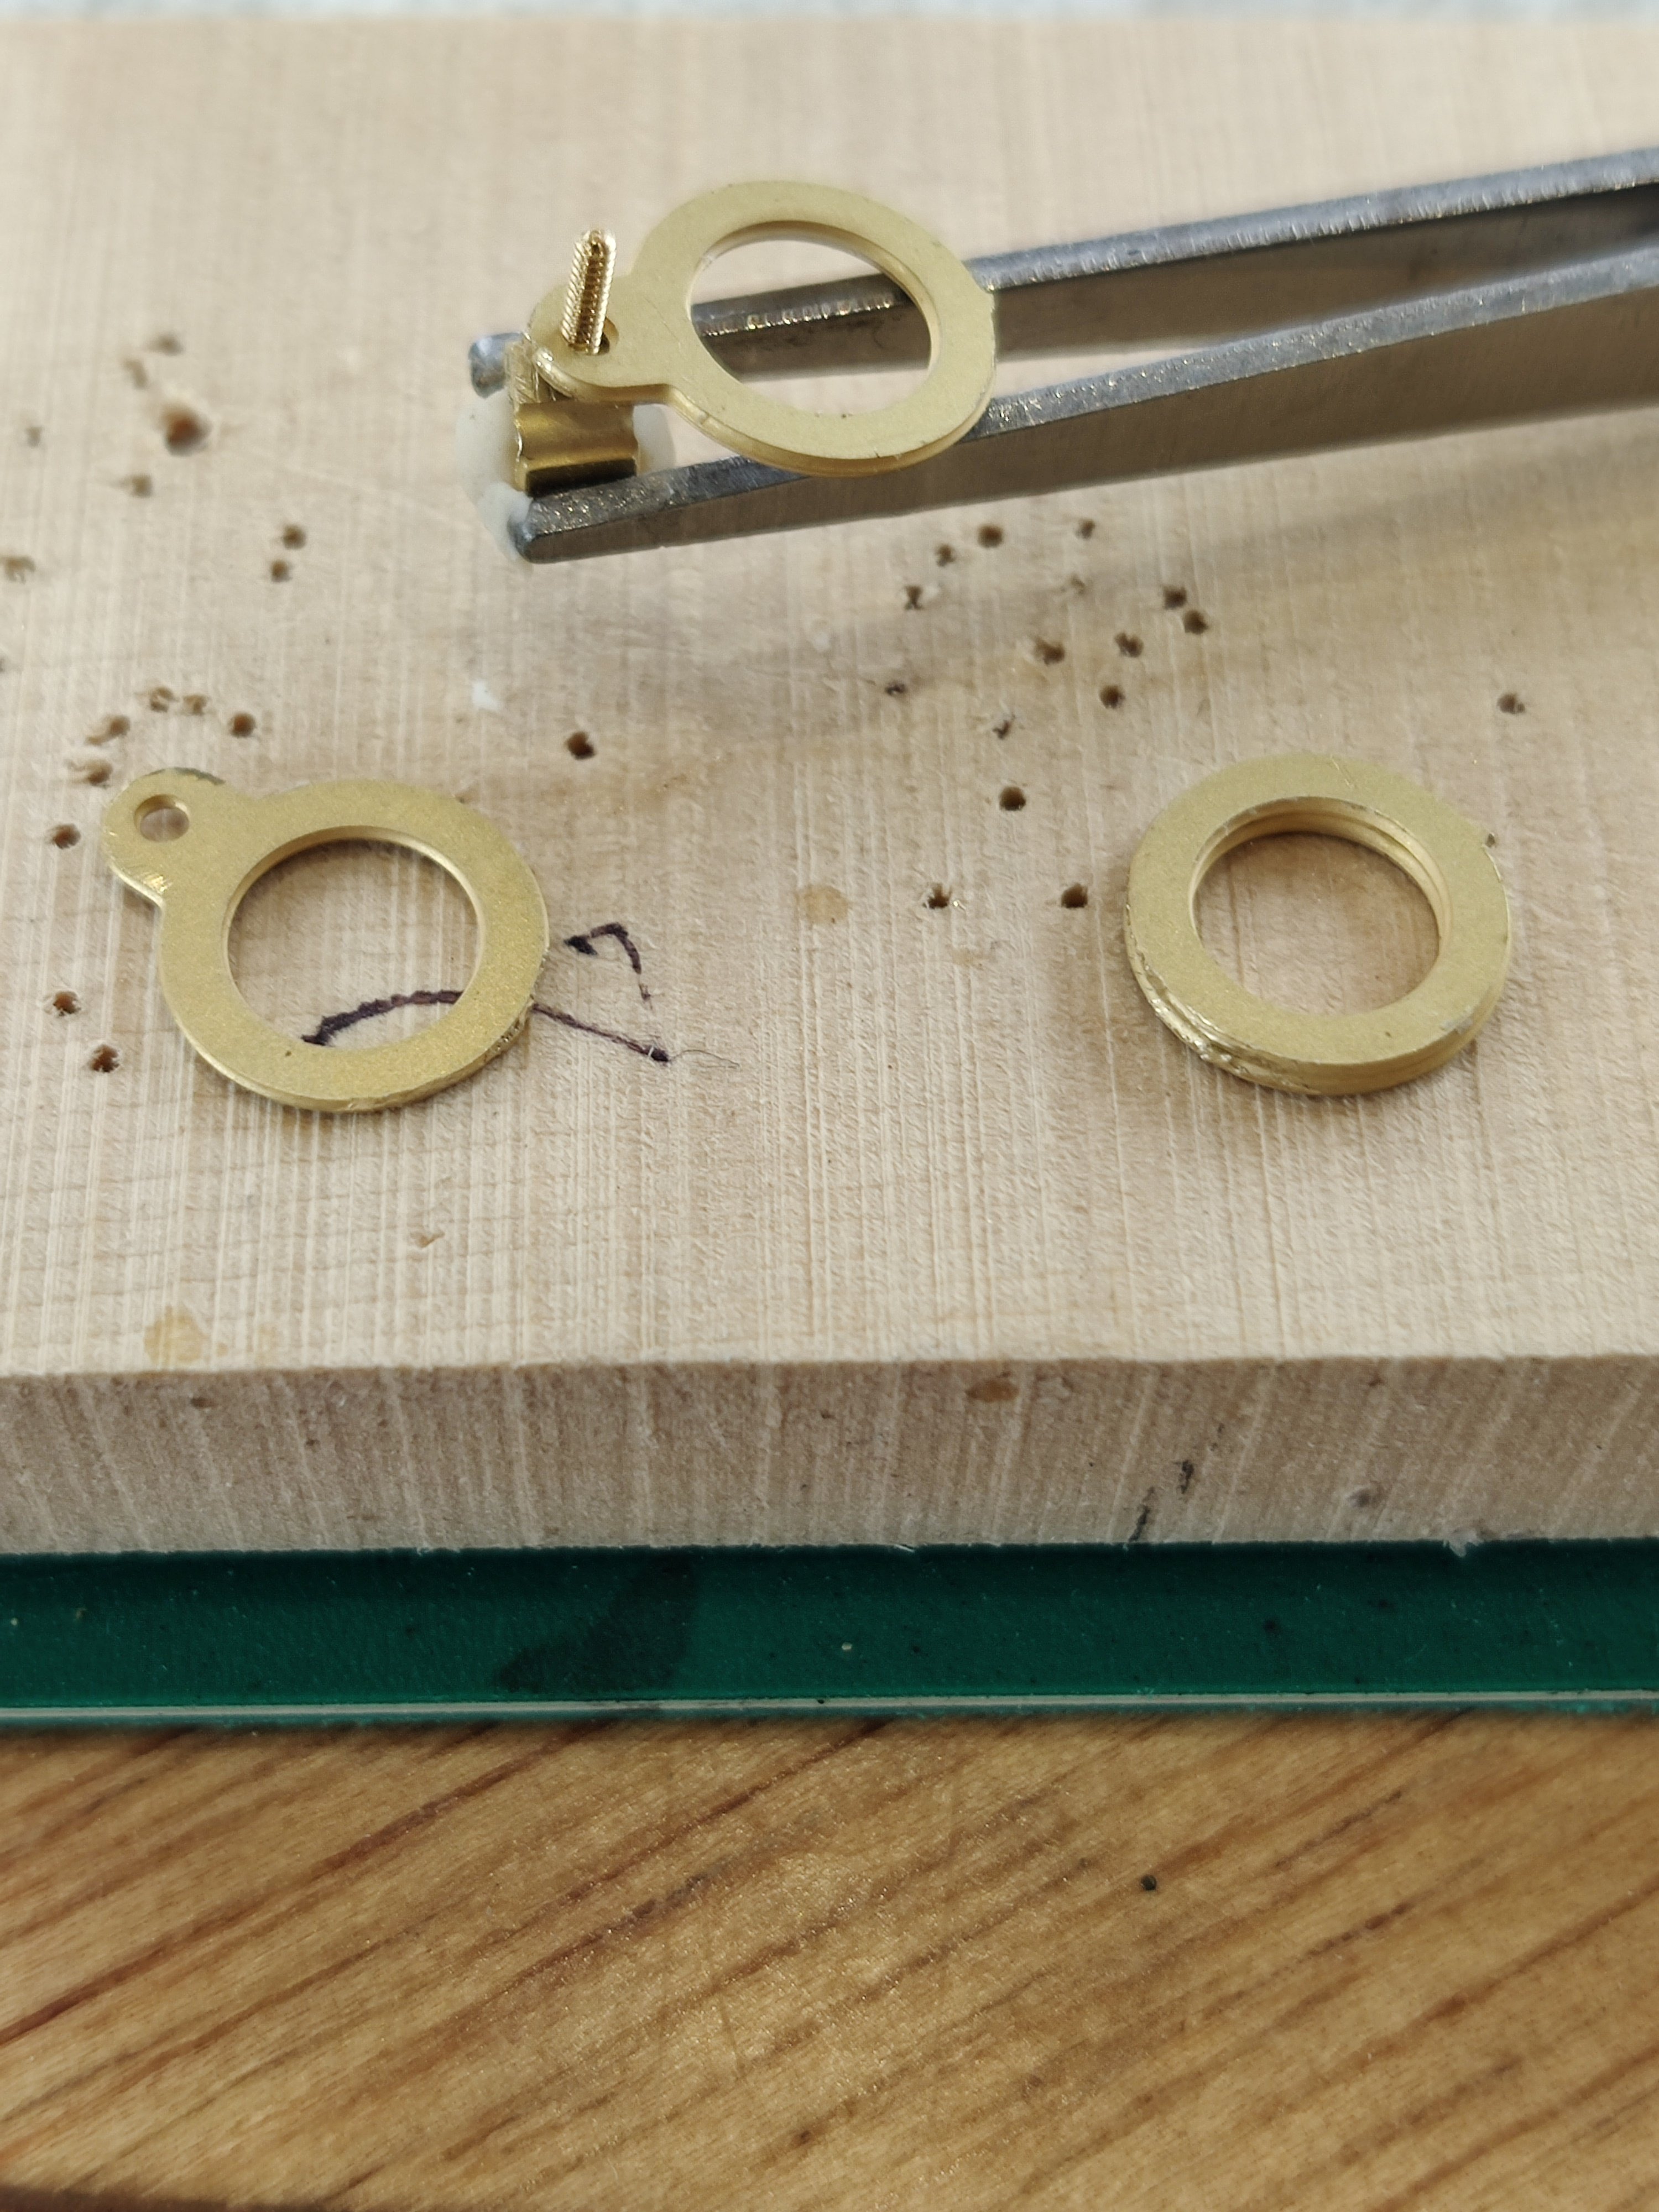
Work continues on prepping the masts for rigging. I struggled with finding a way to get all four ring brackets together and locked n place with bolt and nut in the bracket piece. I tried every camp/tweezer process I could think of to no avail. After several hours of failure I thought lets put them on the mast first and let the mast hold them in place, ah eureka, it was done in a flash.

-
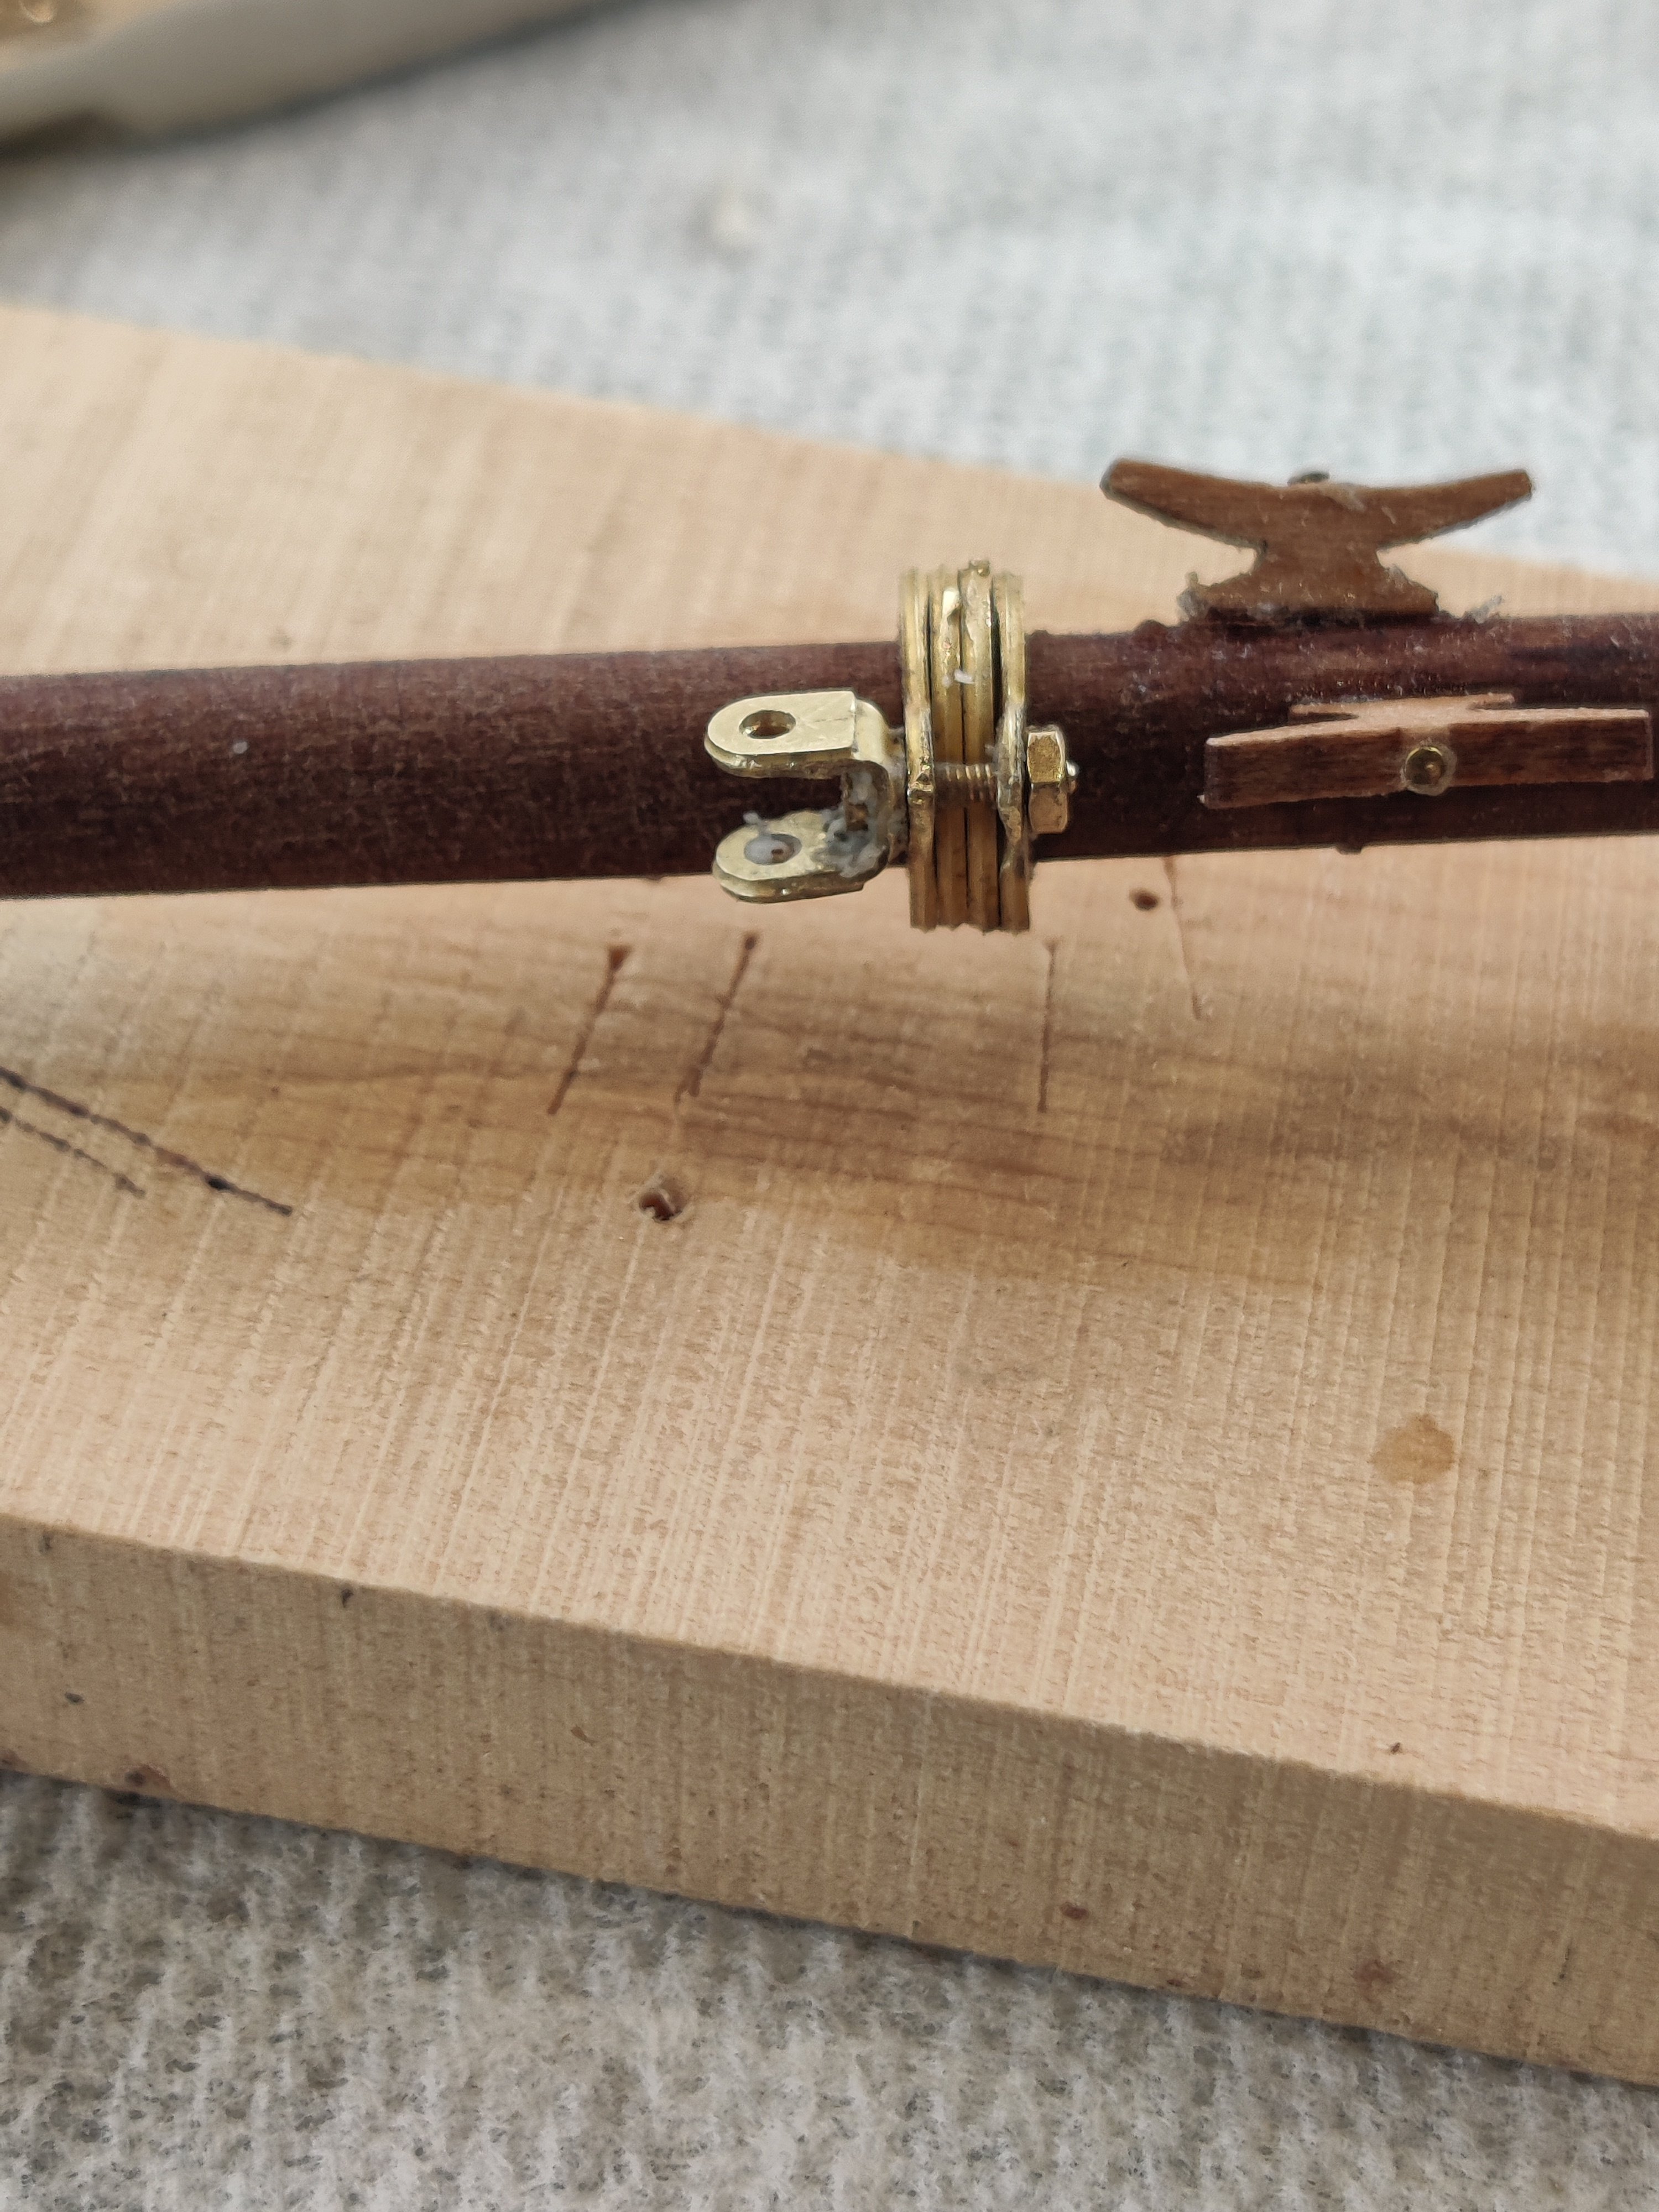
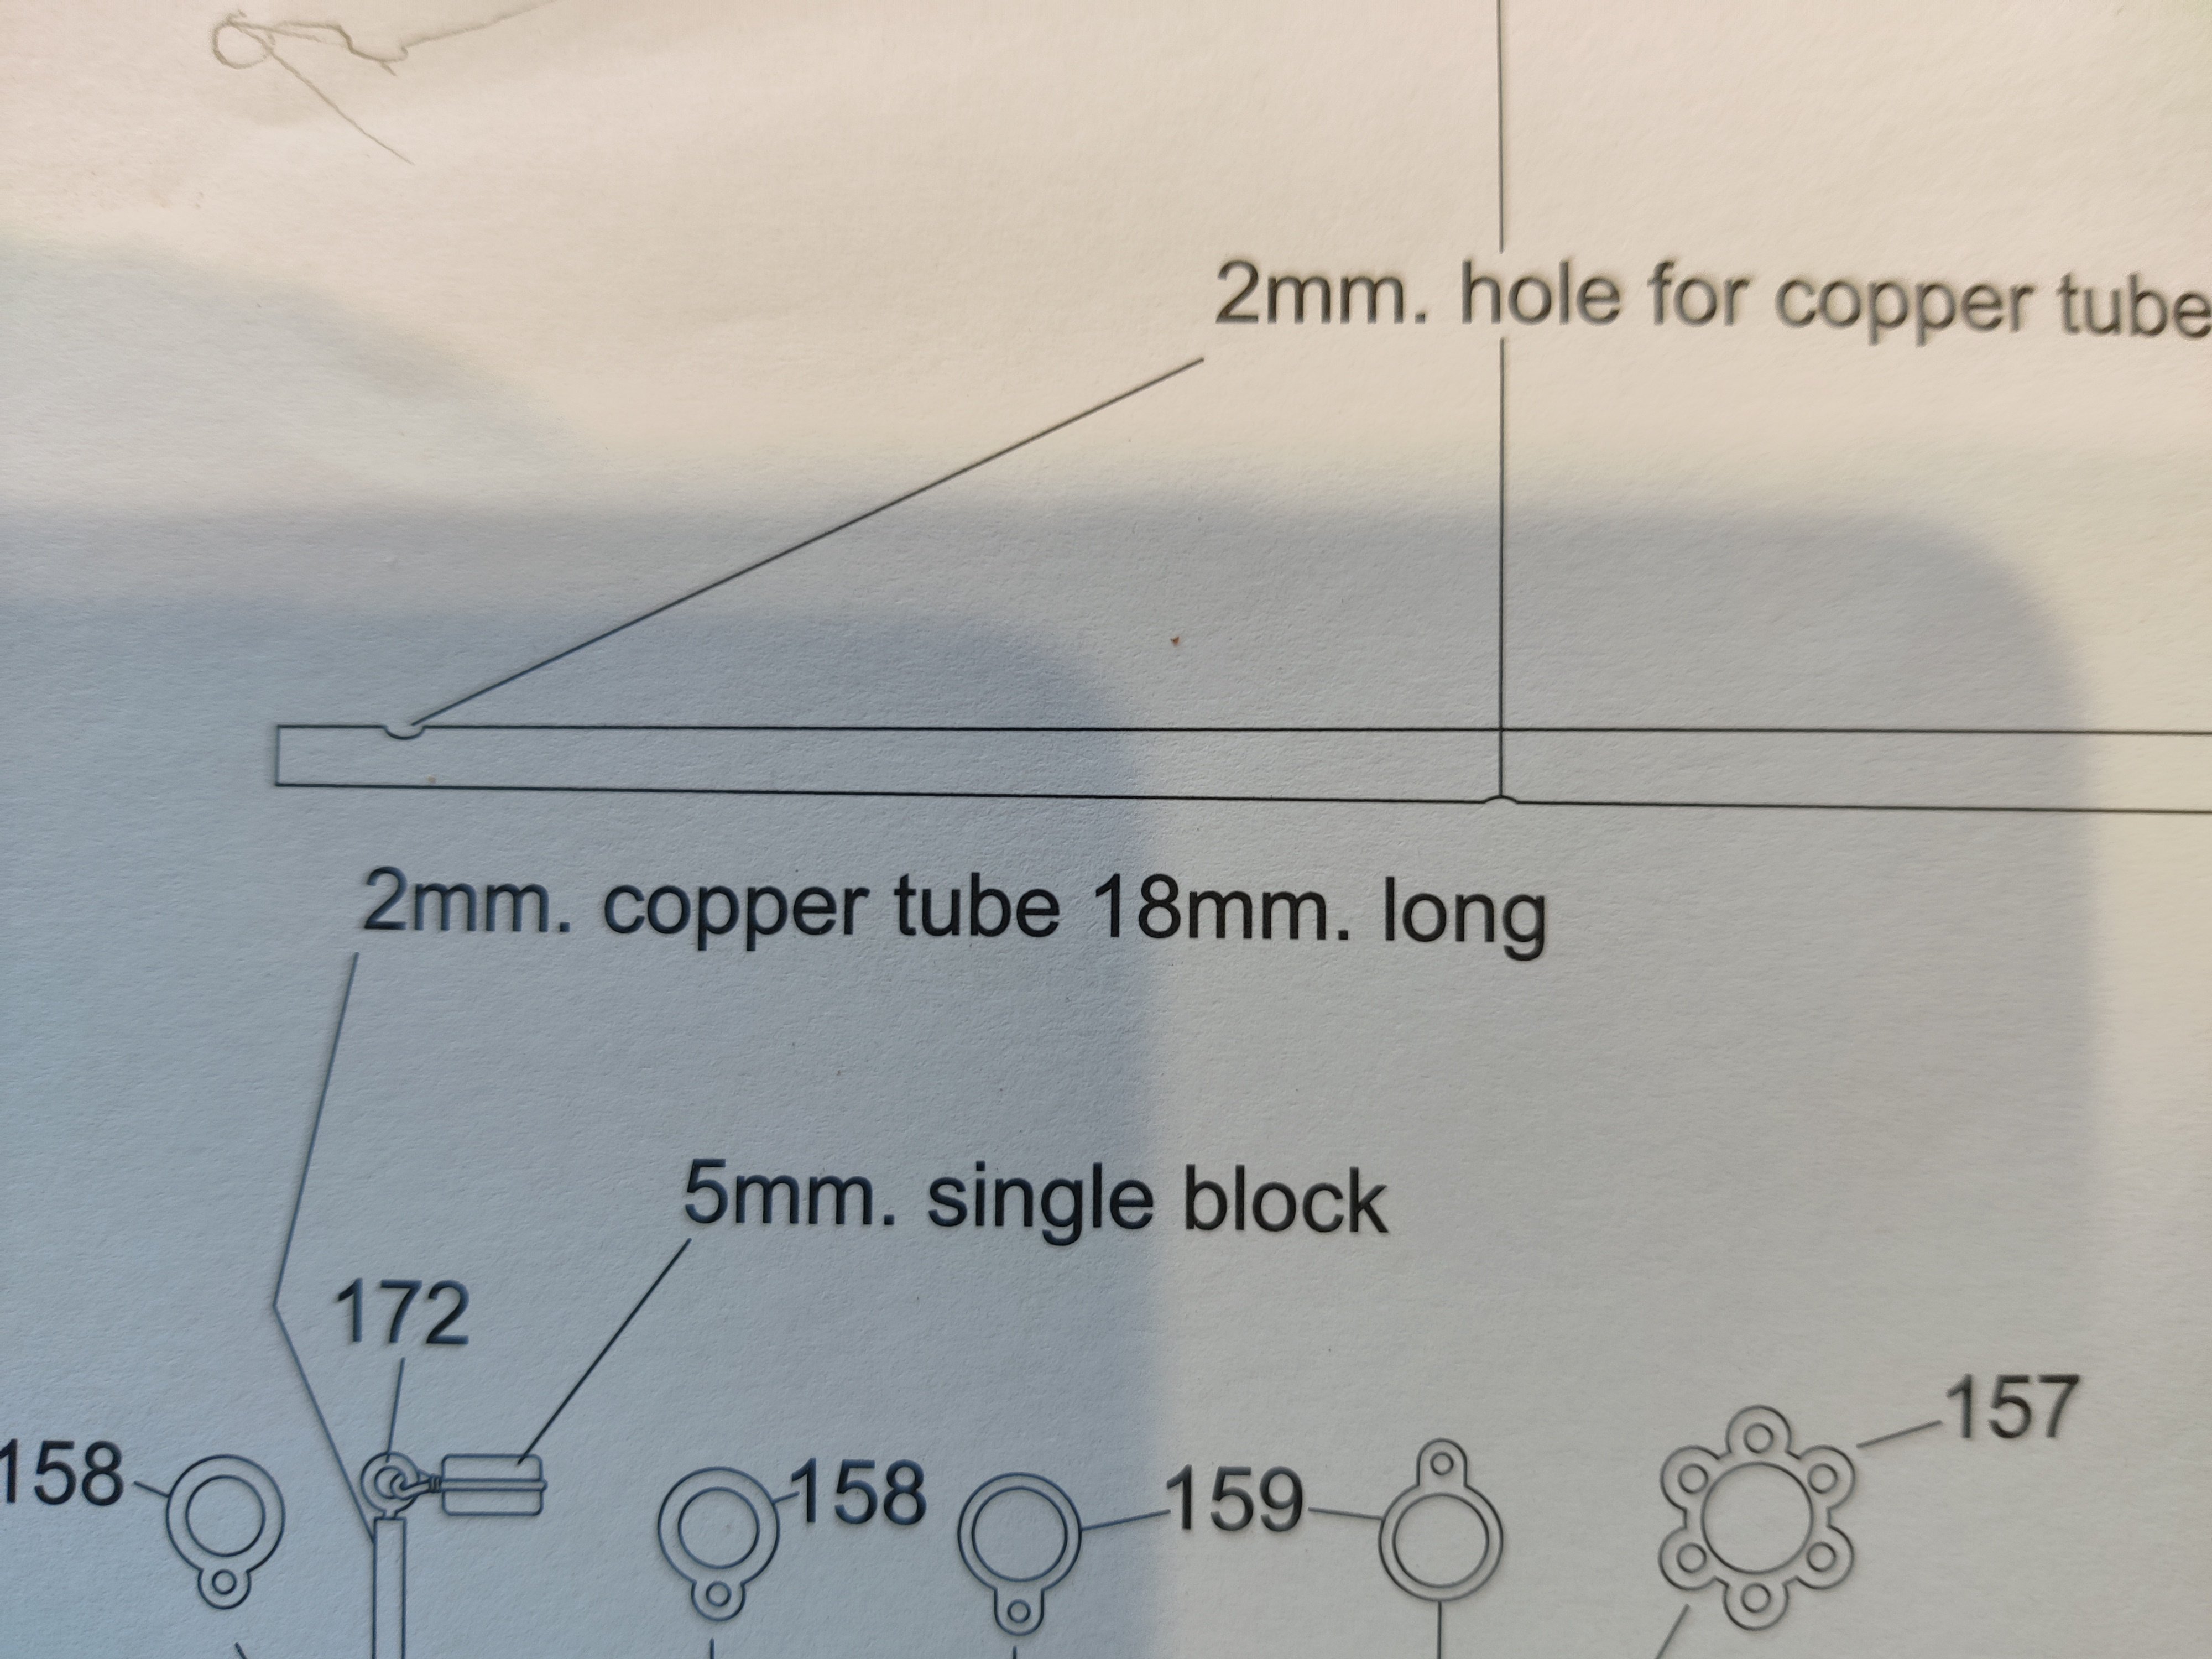
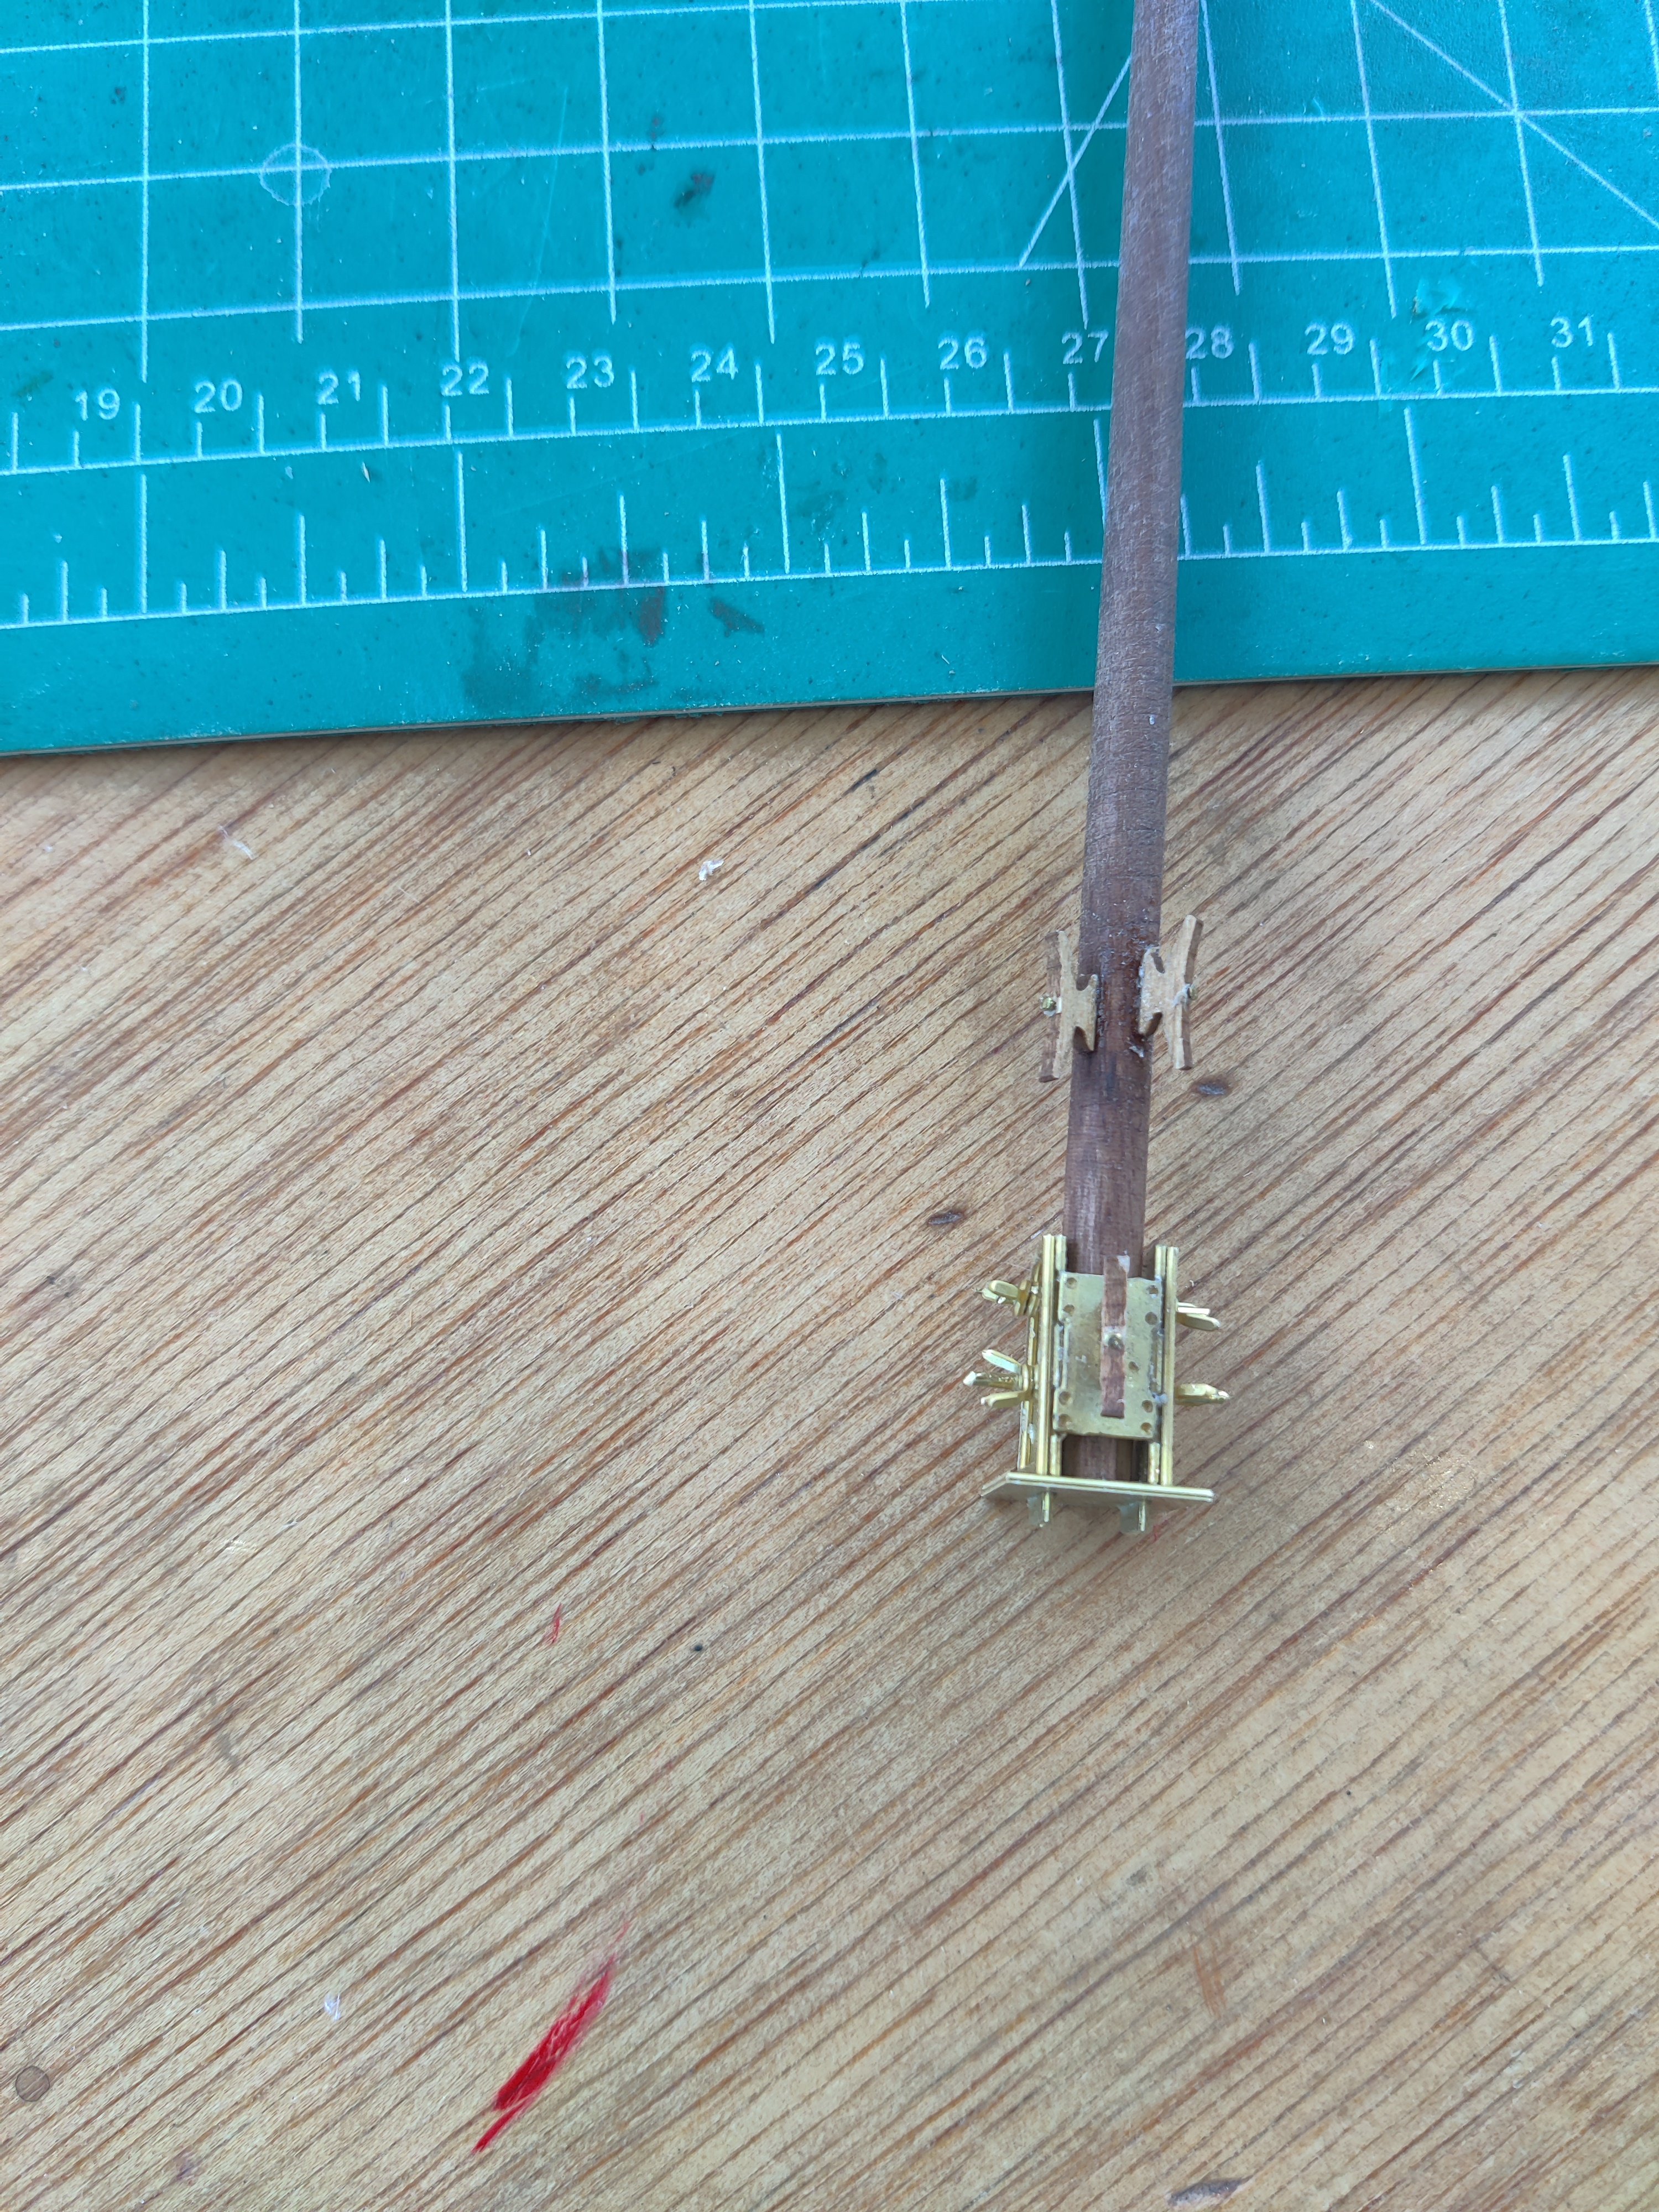
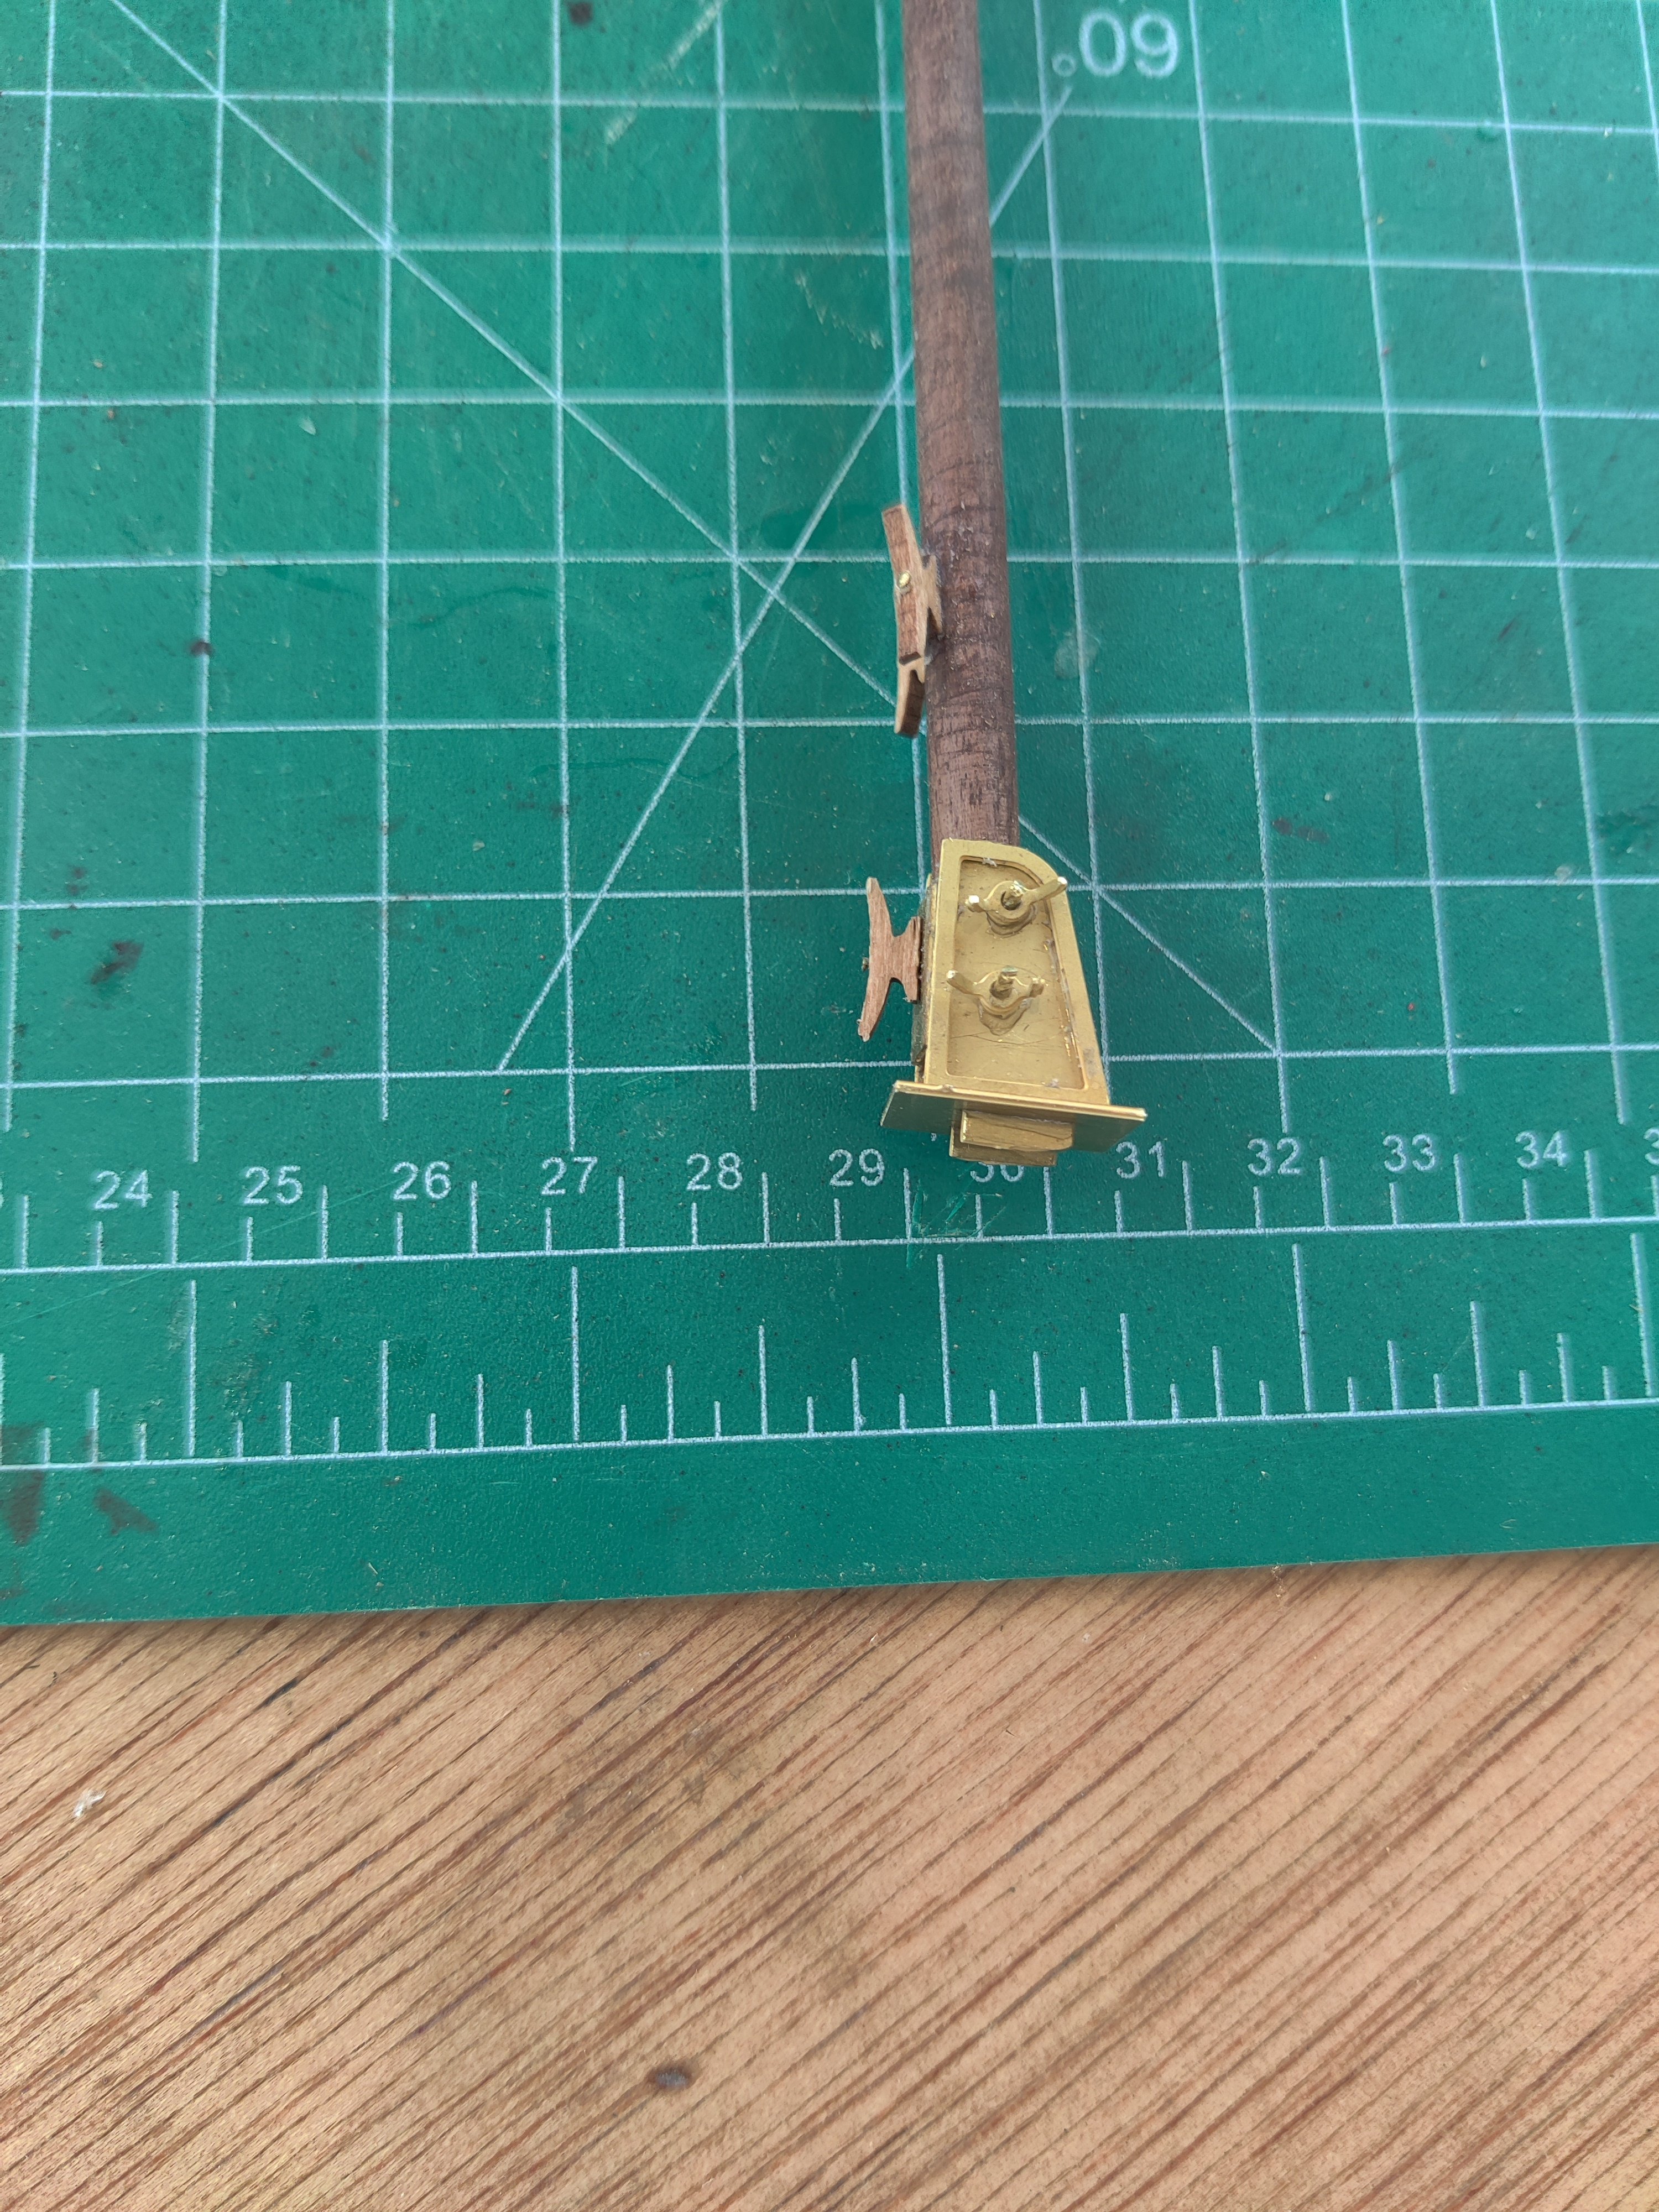
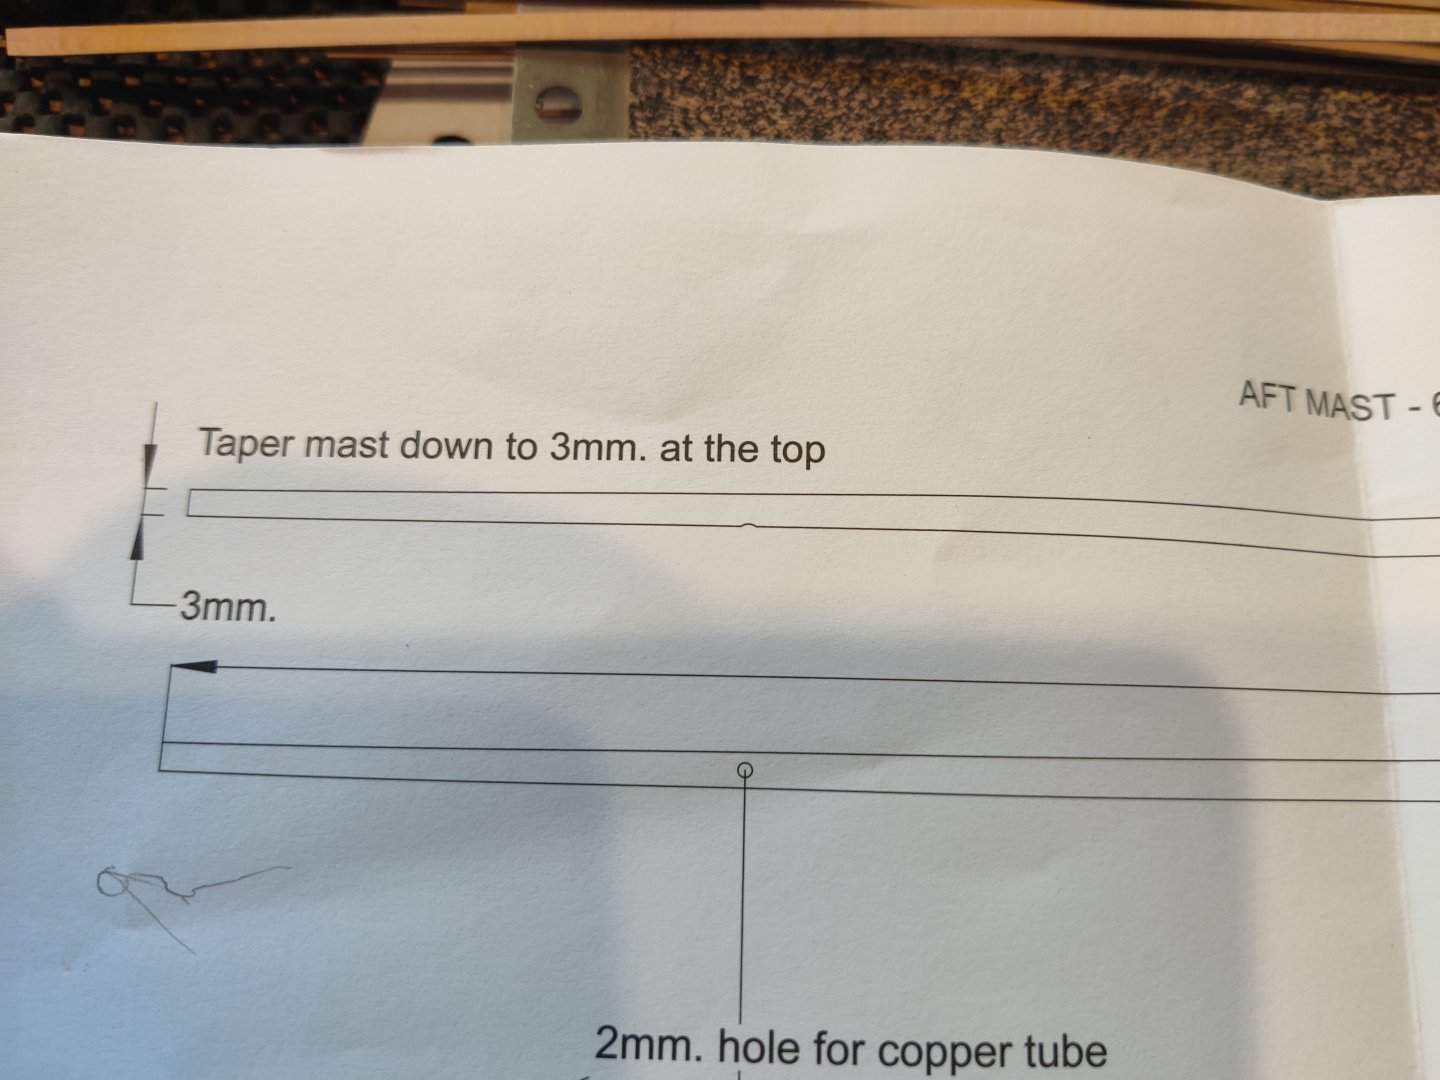
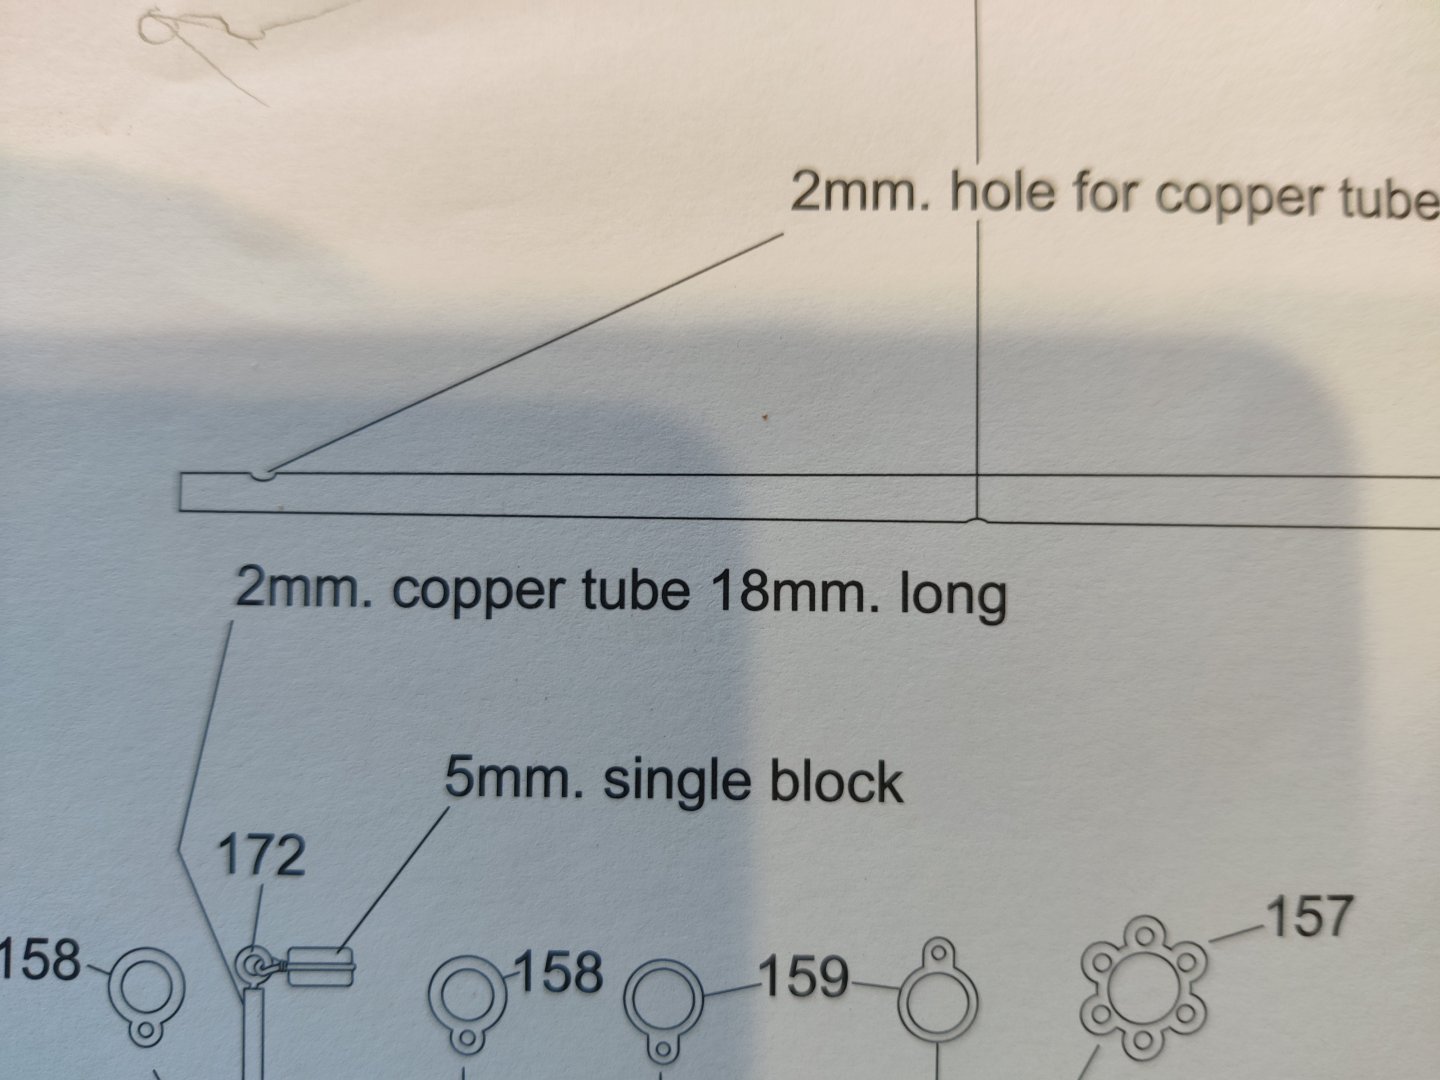
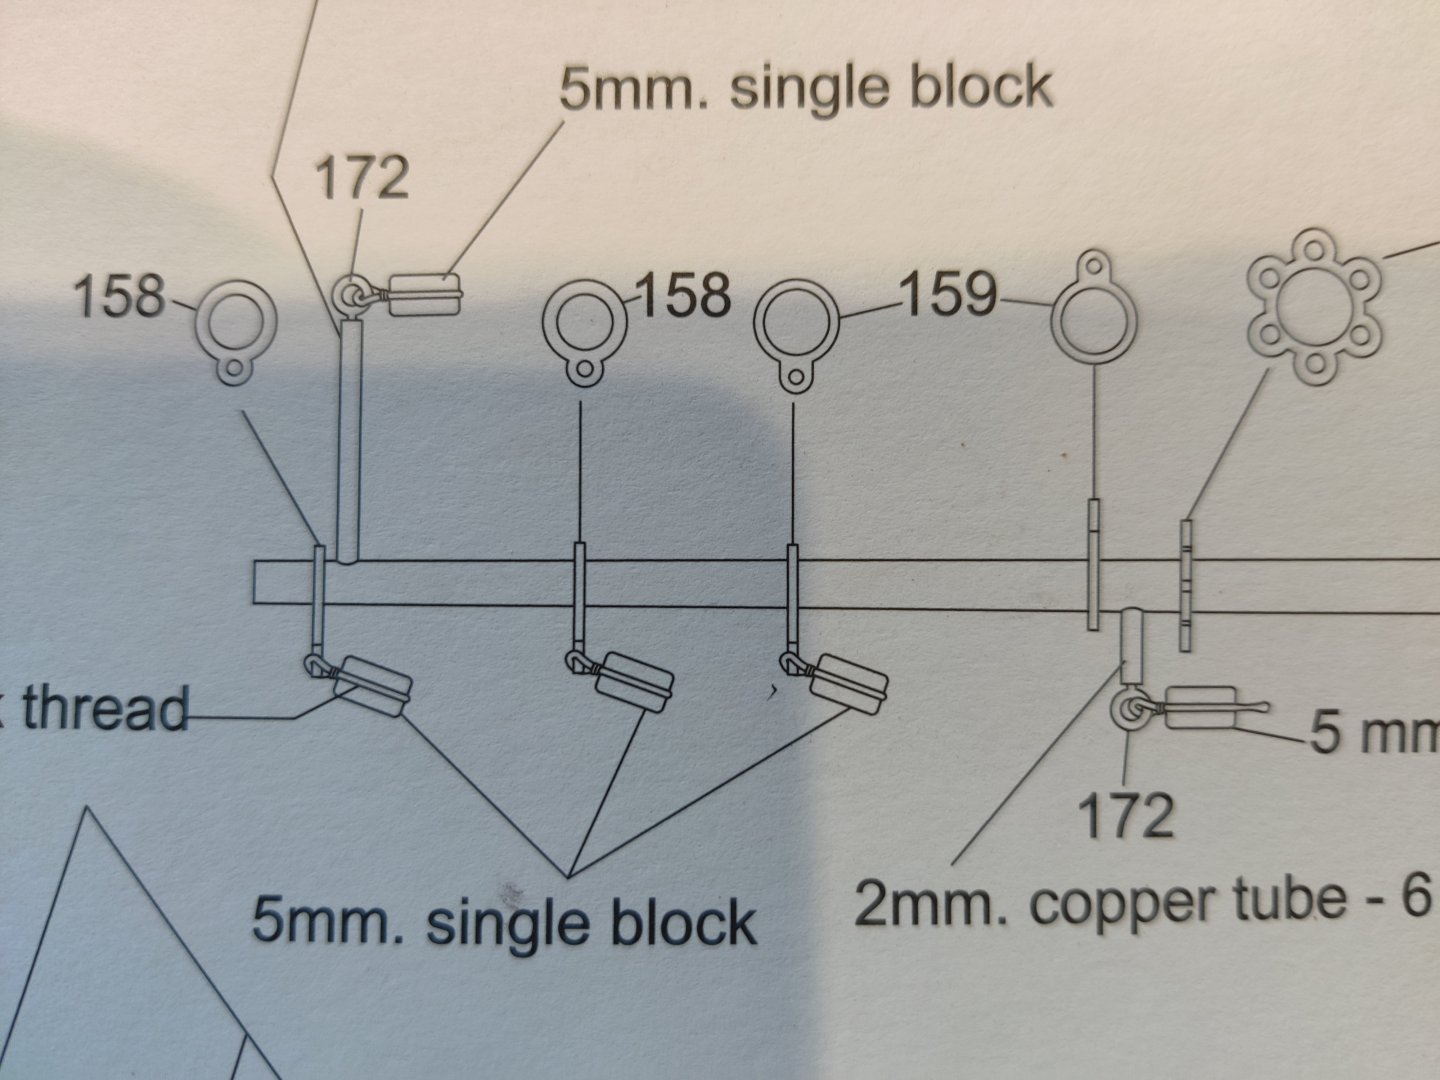
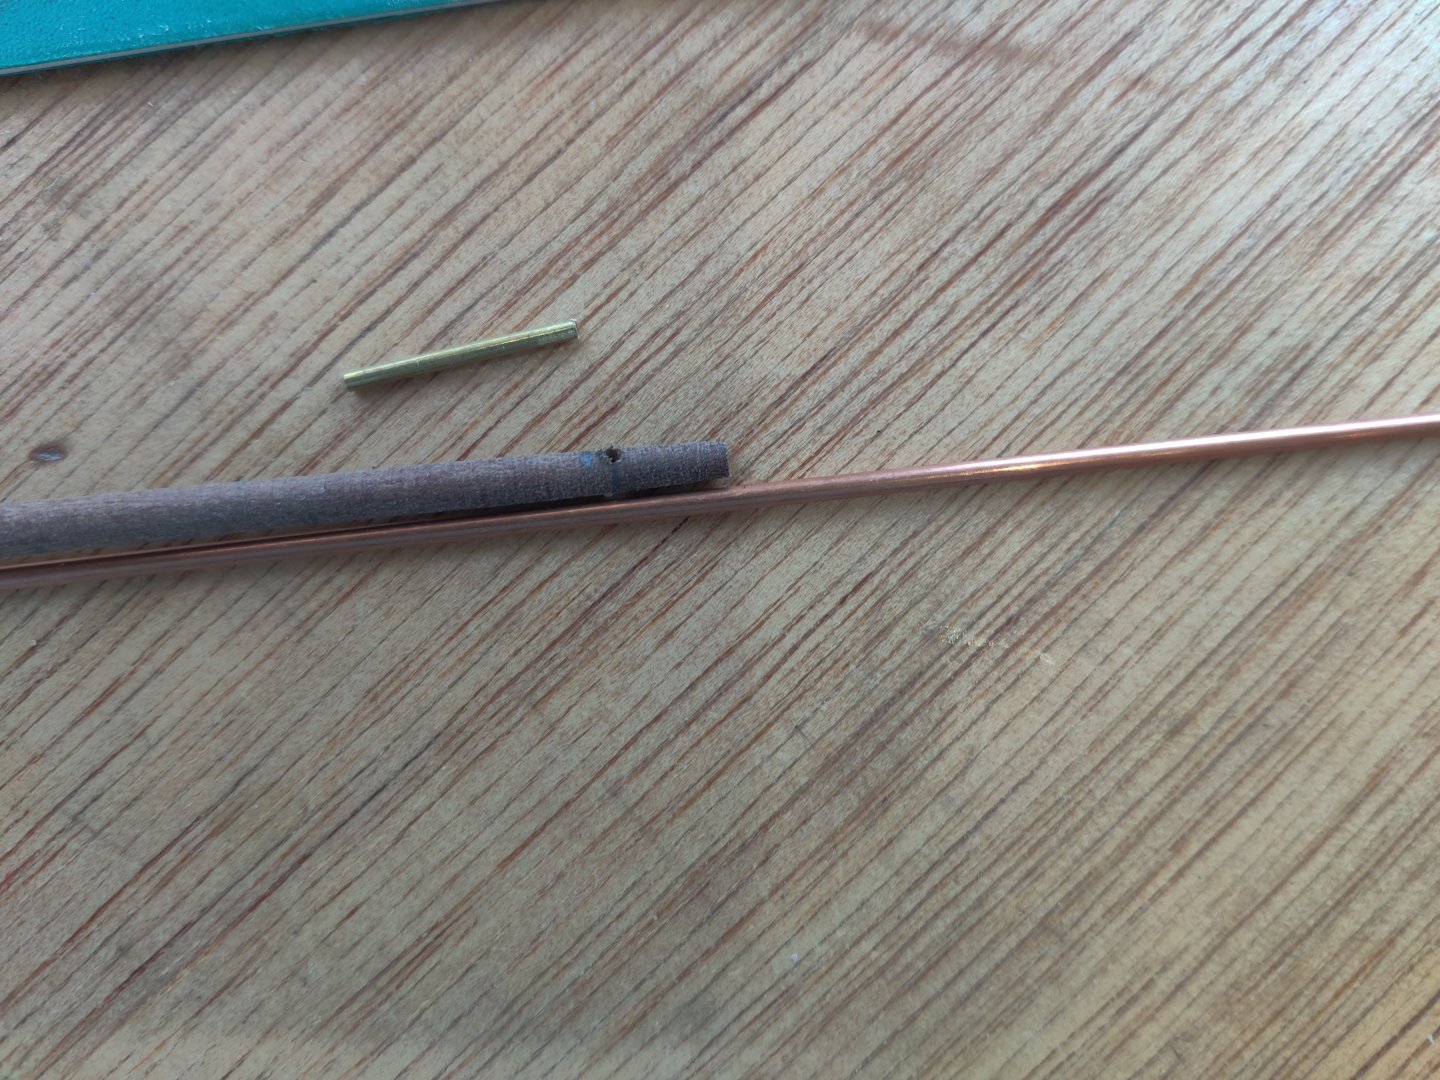
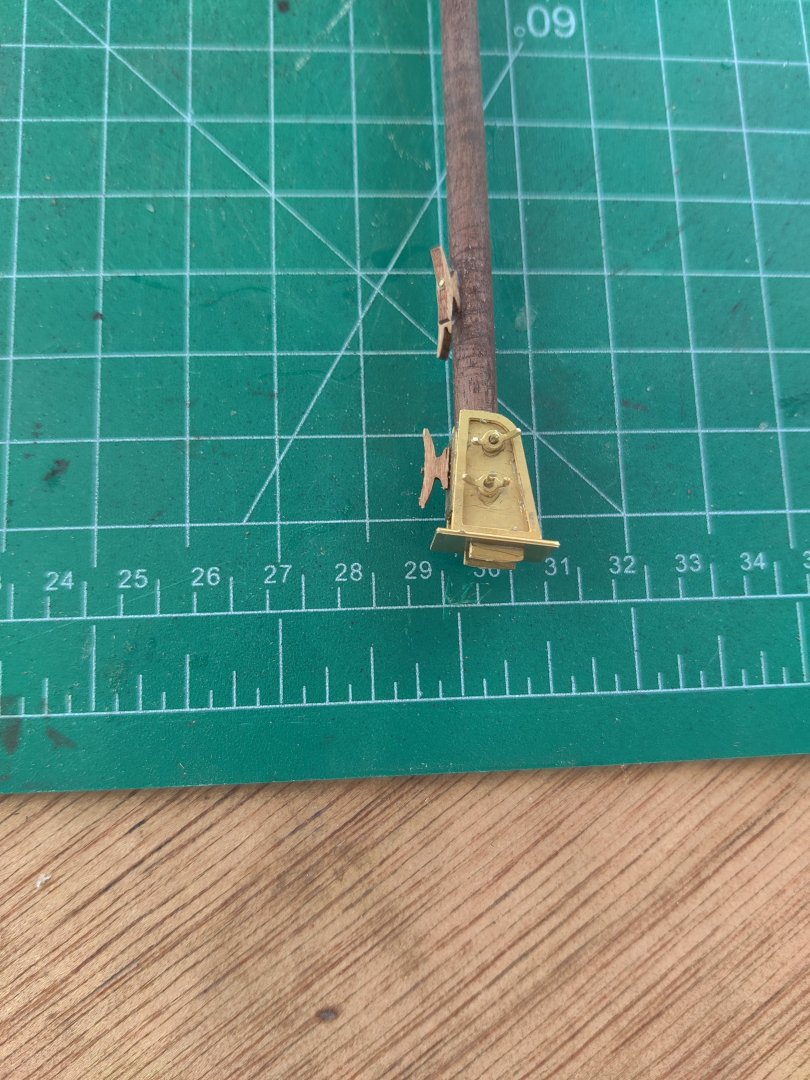
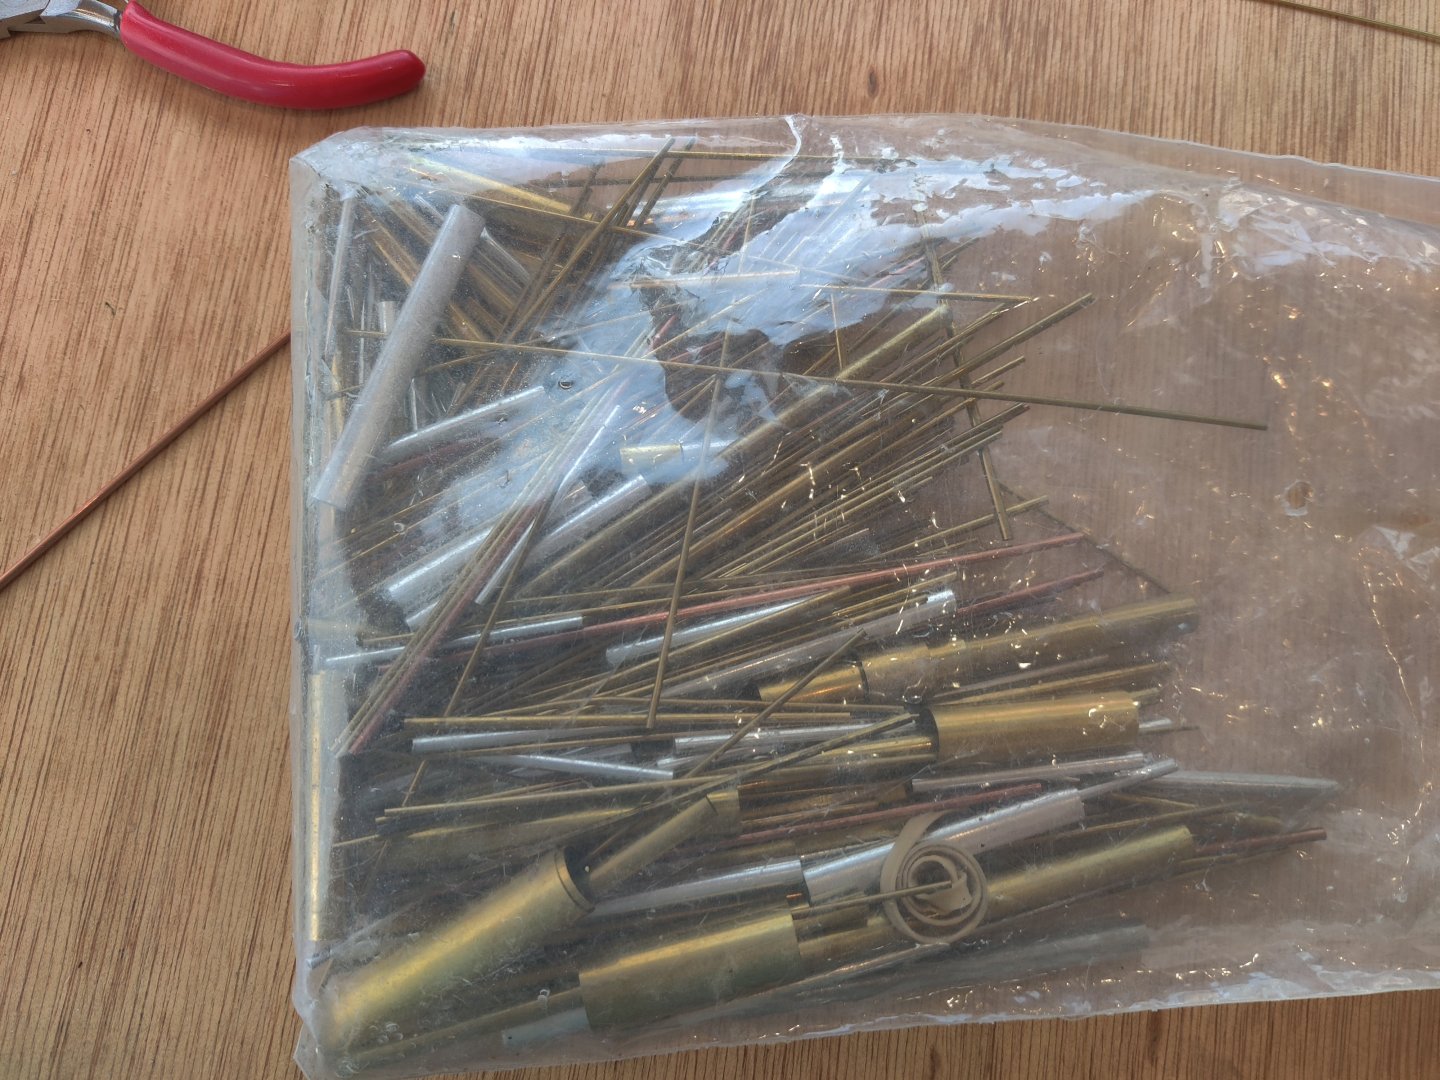
I have begun the work on the aft mast. The plans below indicate the mast is to be tapered to 3mm at the tip. I used the drill and sand paper to taper the mast and matched the taper on the plans. The plans then cal for a 2mm copper tube 18mm long be inserted near the tip where it is 3mm thick. The copper tube supplied does not measure 2mm but n fact is 2.65mm. If I drilled a hole large enough to accommodate the provided copper tube the mast section would be extremely weak. I could have sanded the copper tube to get it to 2mm but that is a lot of sanding. I looked in my supply bag for another piece of tubing that was 2mm. I did not have one exactly 2mm but I did have one 1.75mm so i used it. I inserted the mast in the provided base and secured it with brass wire bolts and attached the 3 cleats shown on the mast plans. I then temporarily placed it in the slots on the main deck. The base sits flat on the deck and the mast is properly fixed in the mast base and there is a observable angle the mast, upon checking the photos in the manual it appears that there is a less than a 90 degree angle to the aft mast. So I will start the process again for the forward mast.

-
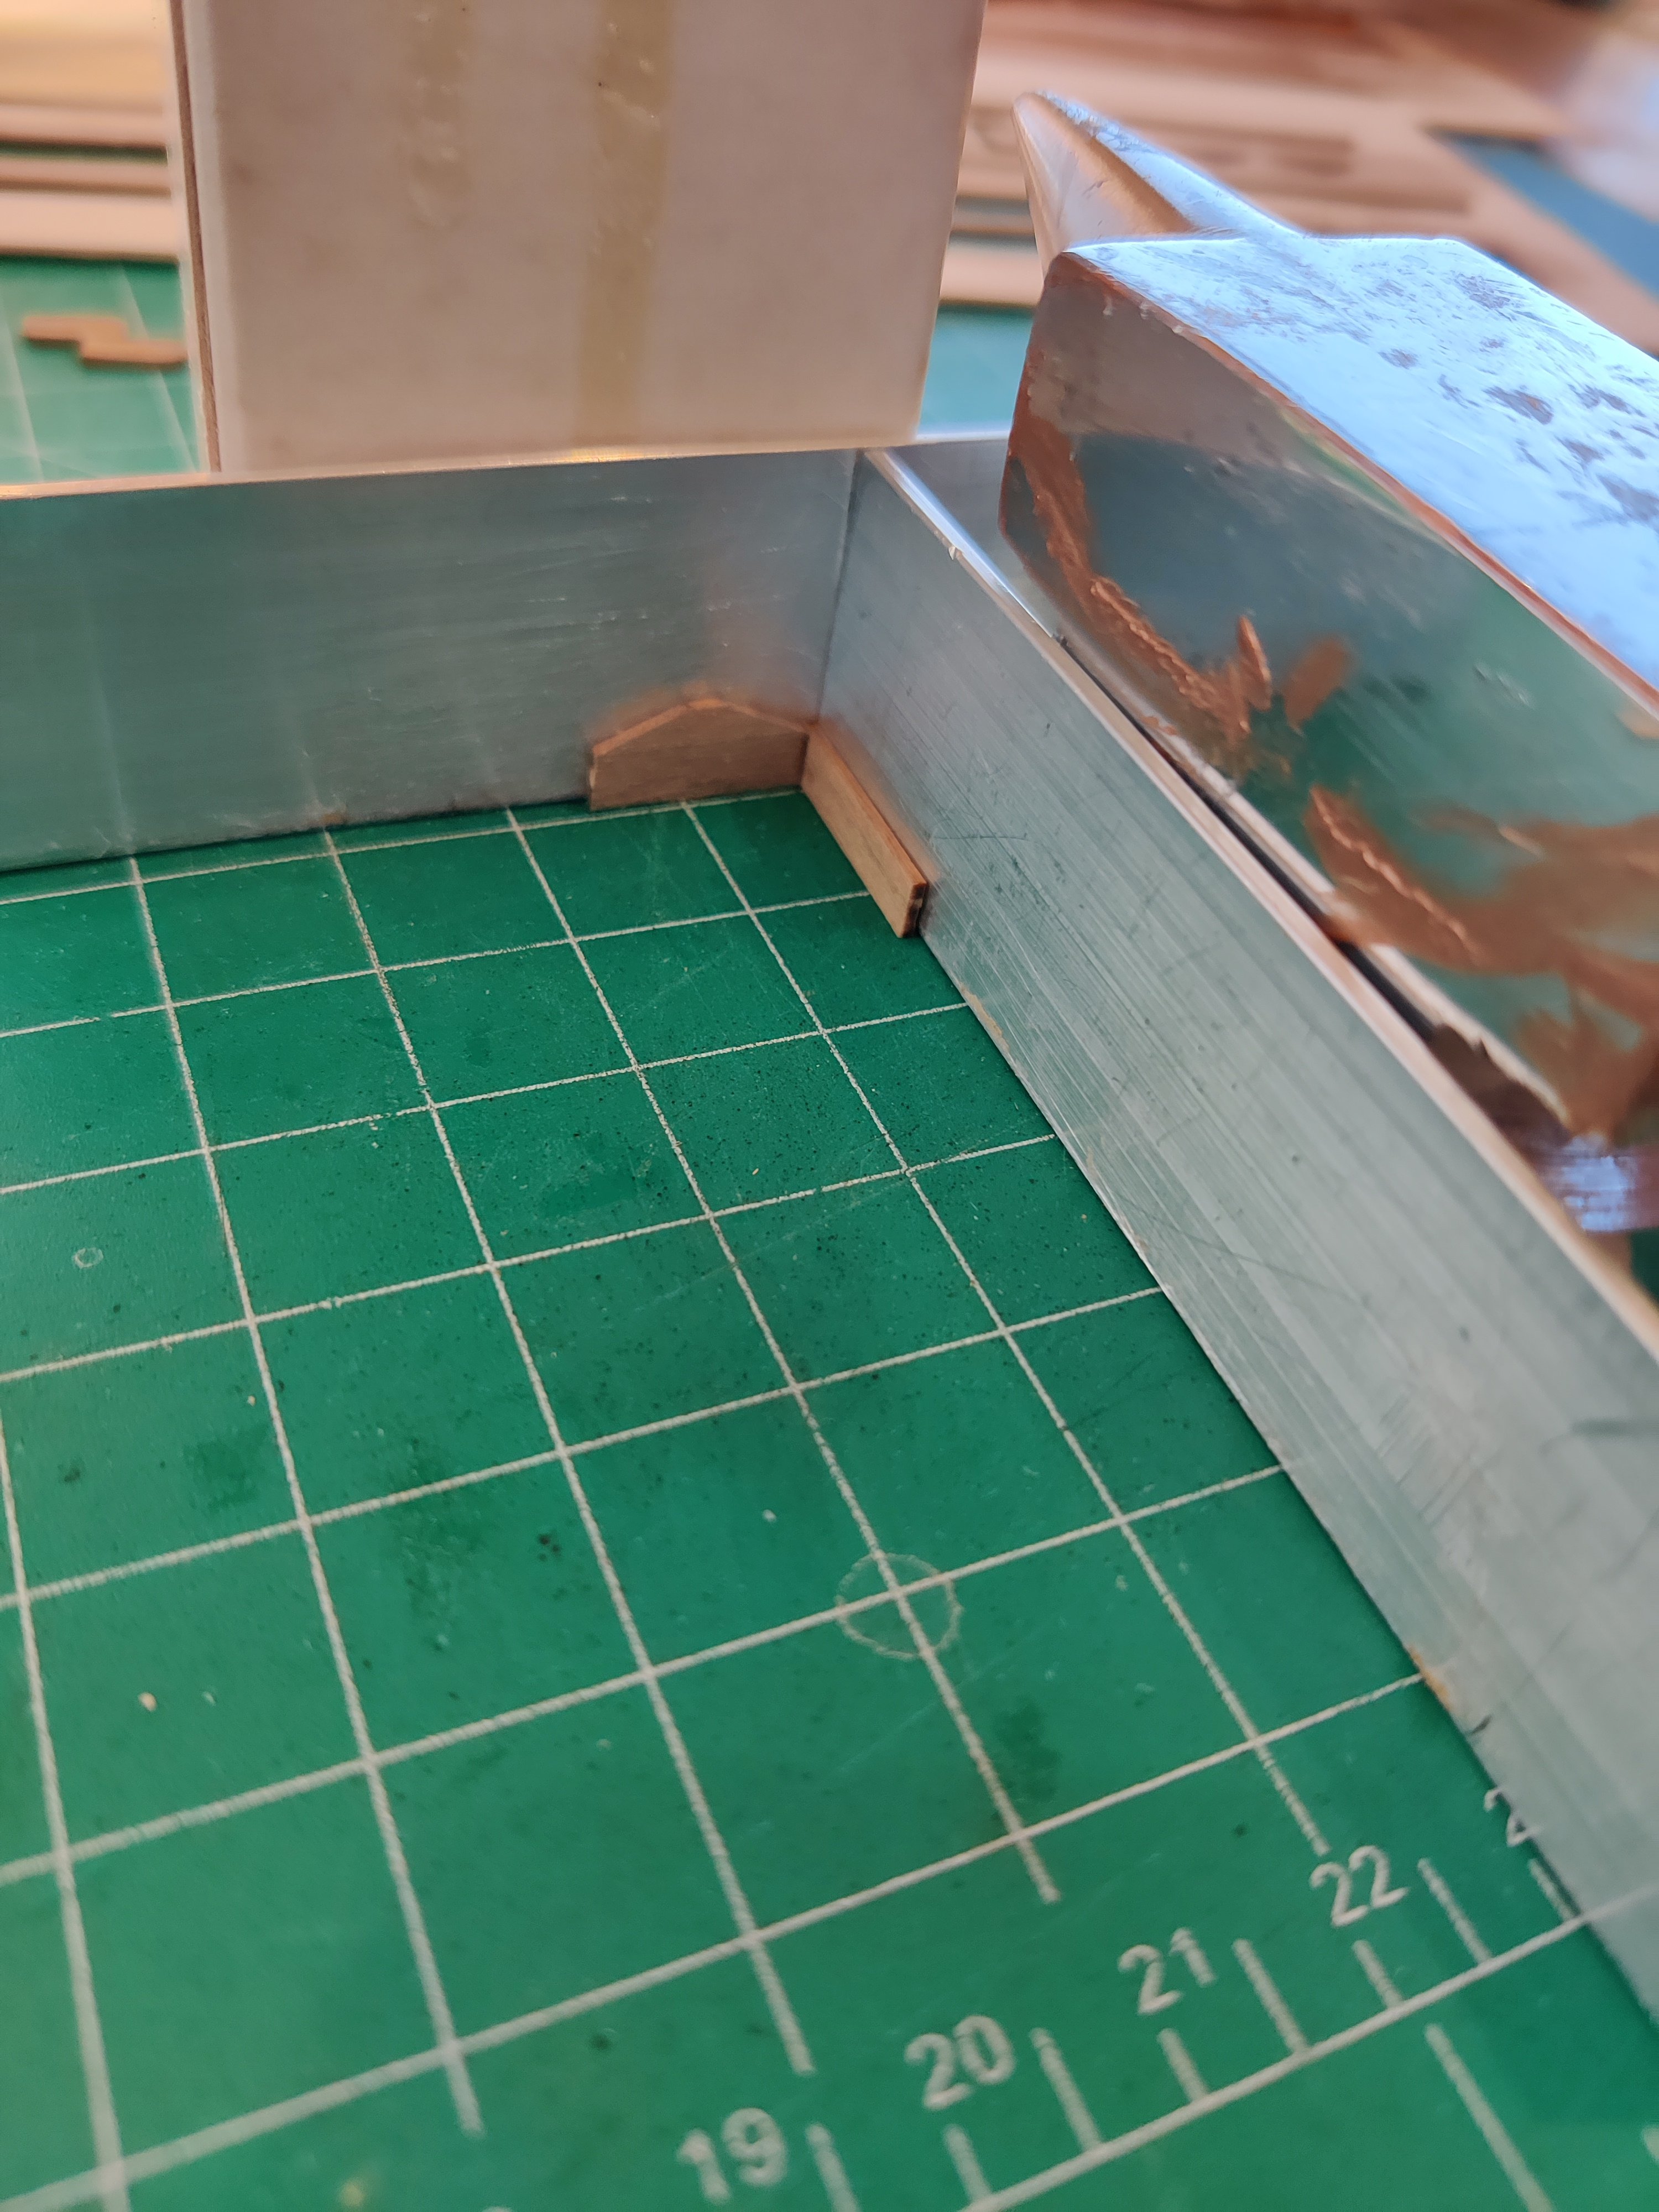
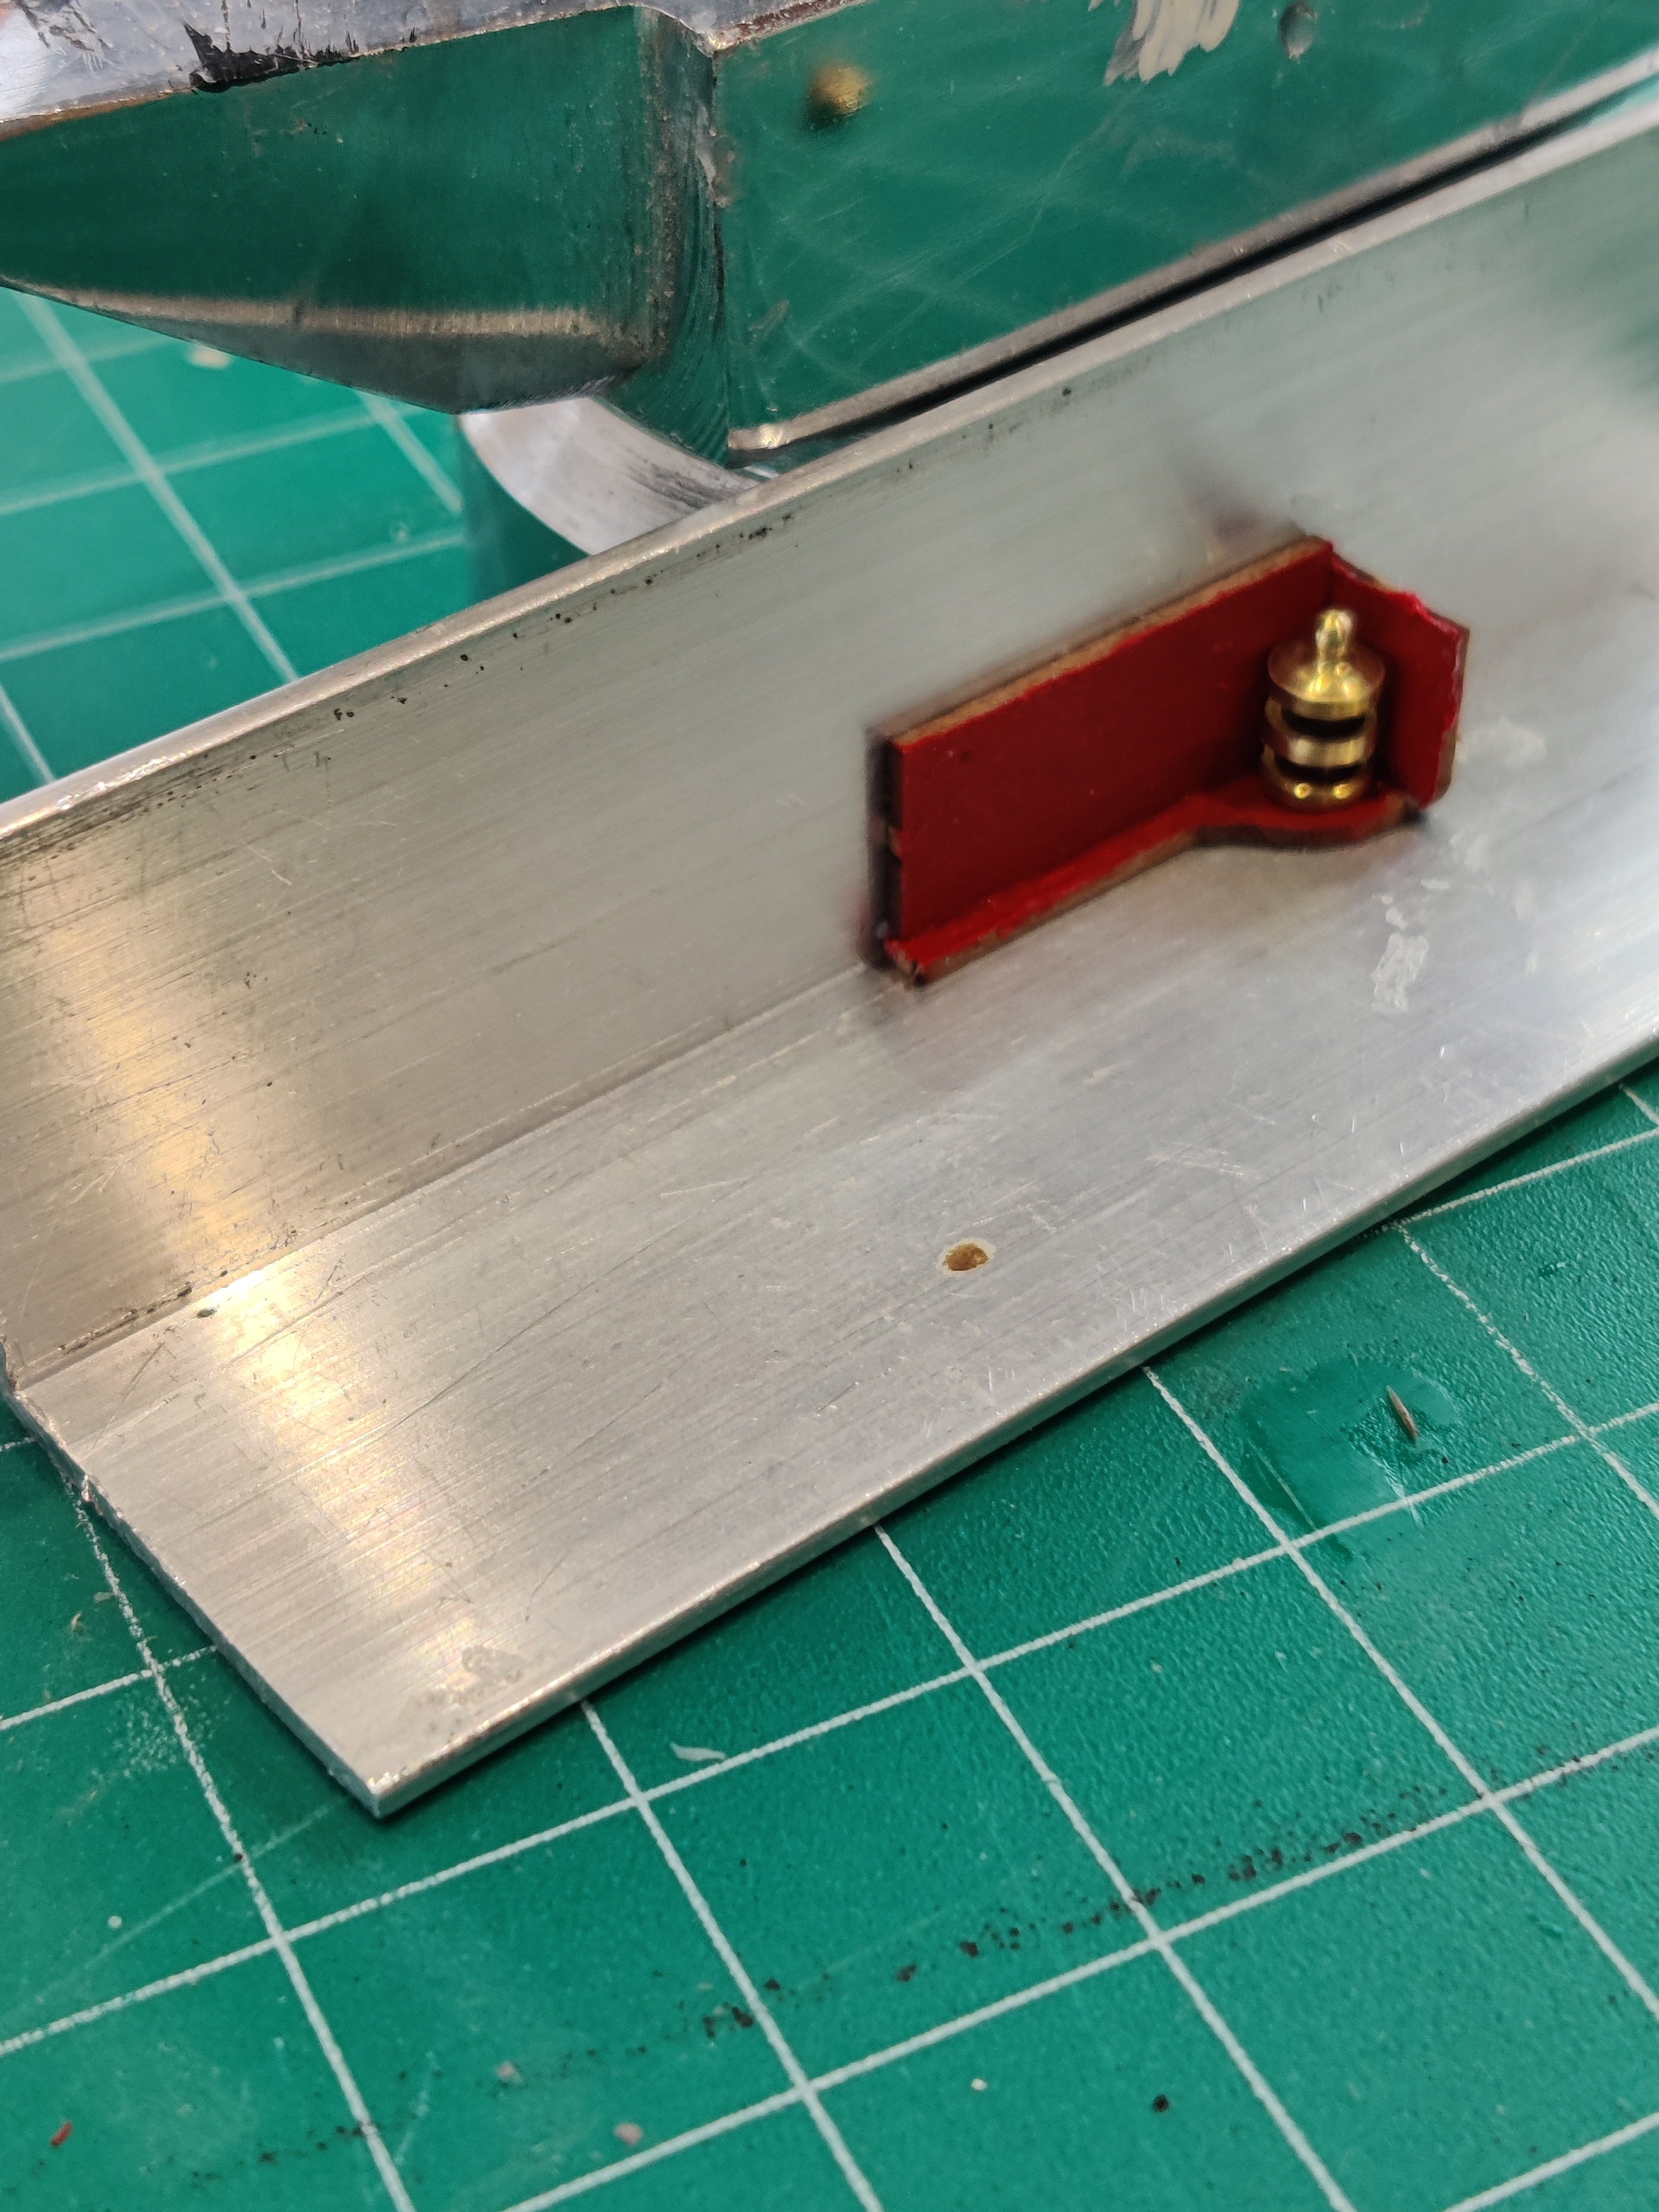
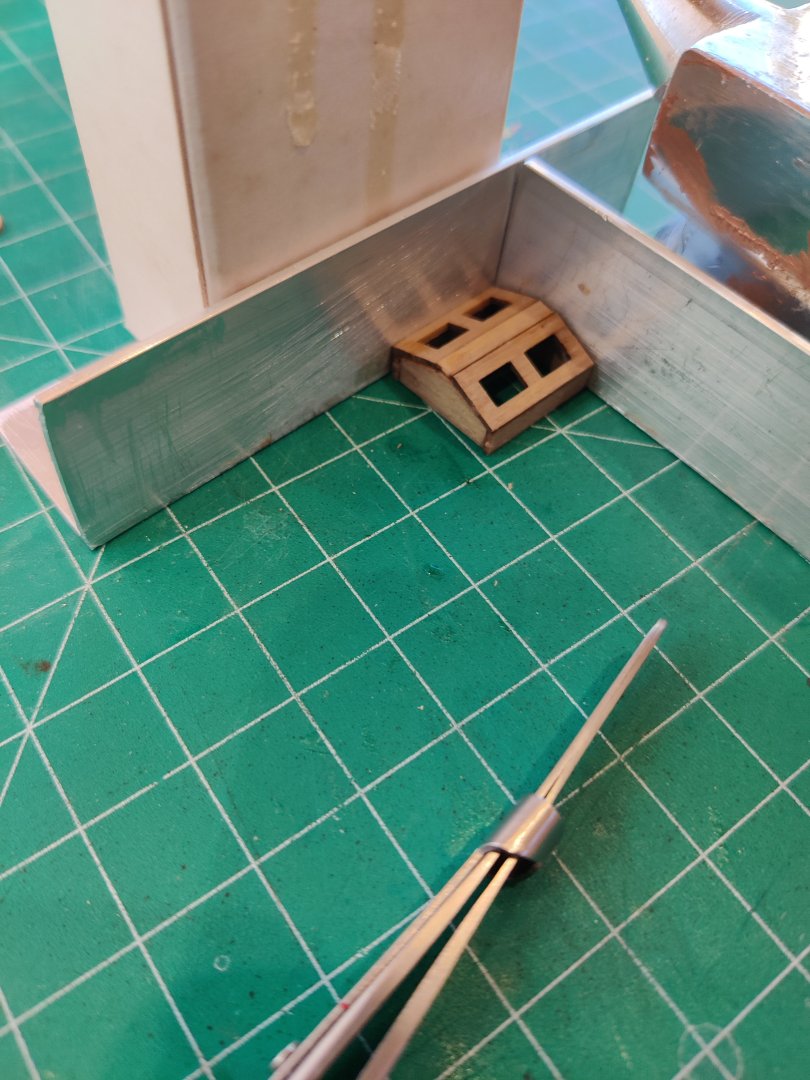
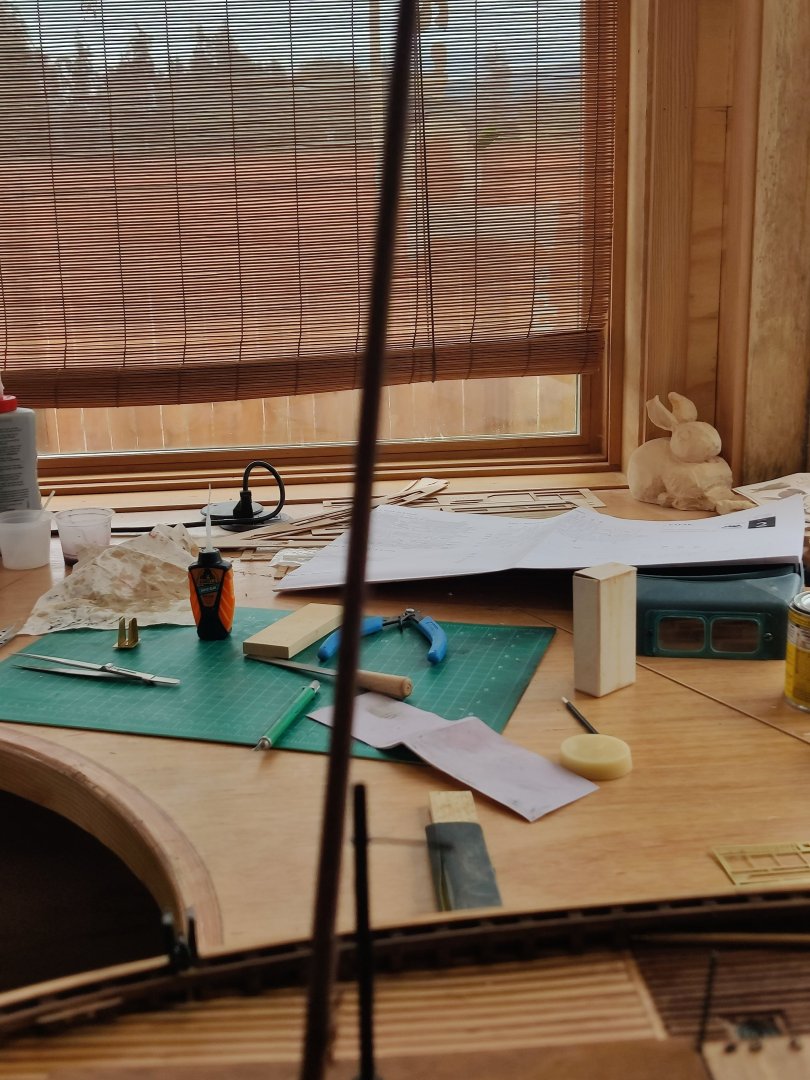
continuing to work on completing the pilothouse. For newbies, when pieces of wood are really small it helps to have a square frame to hold the in place when gluing. I use the 90 degree angle pieces of aluminum that I normally use to square up the bulwarks.


-
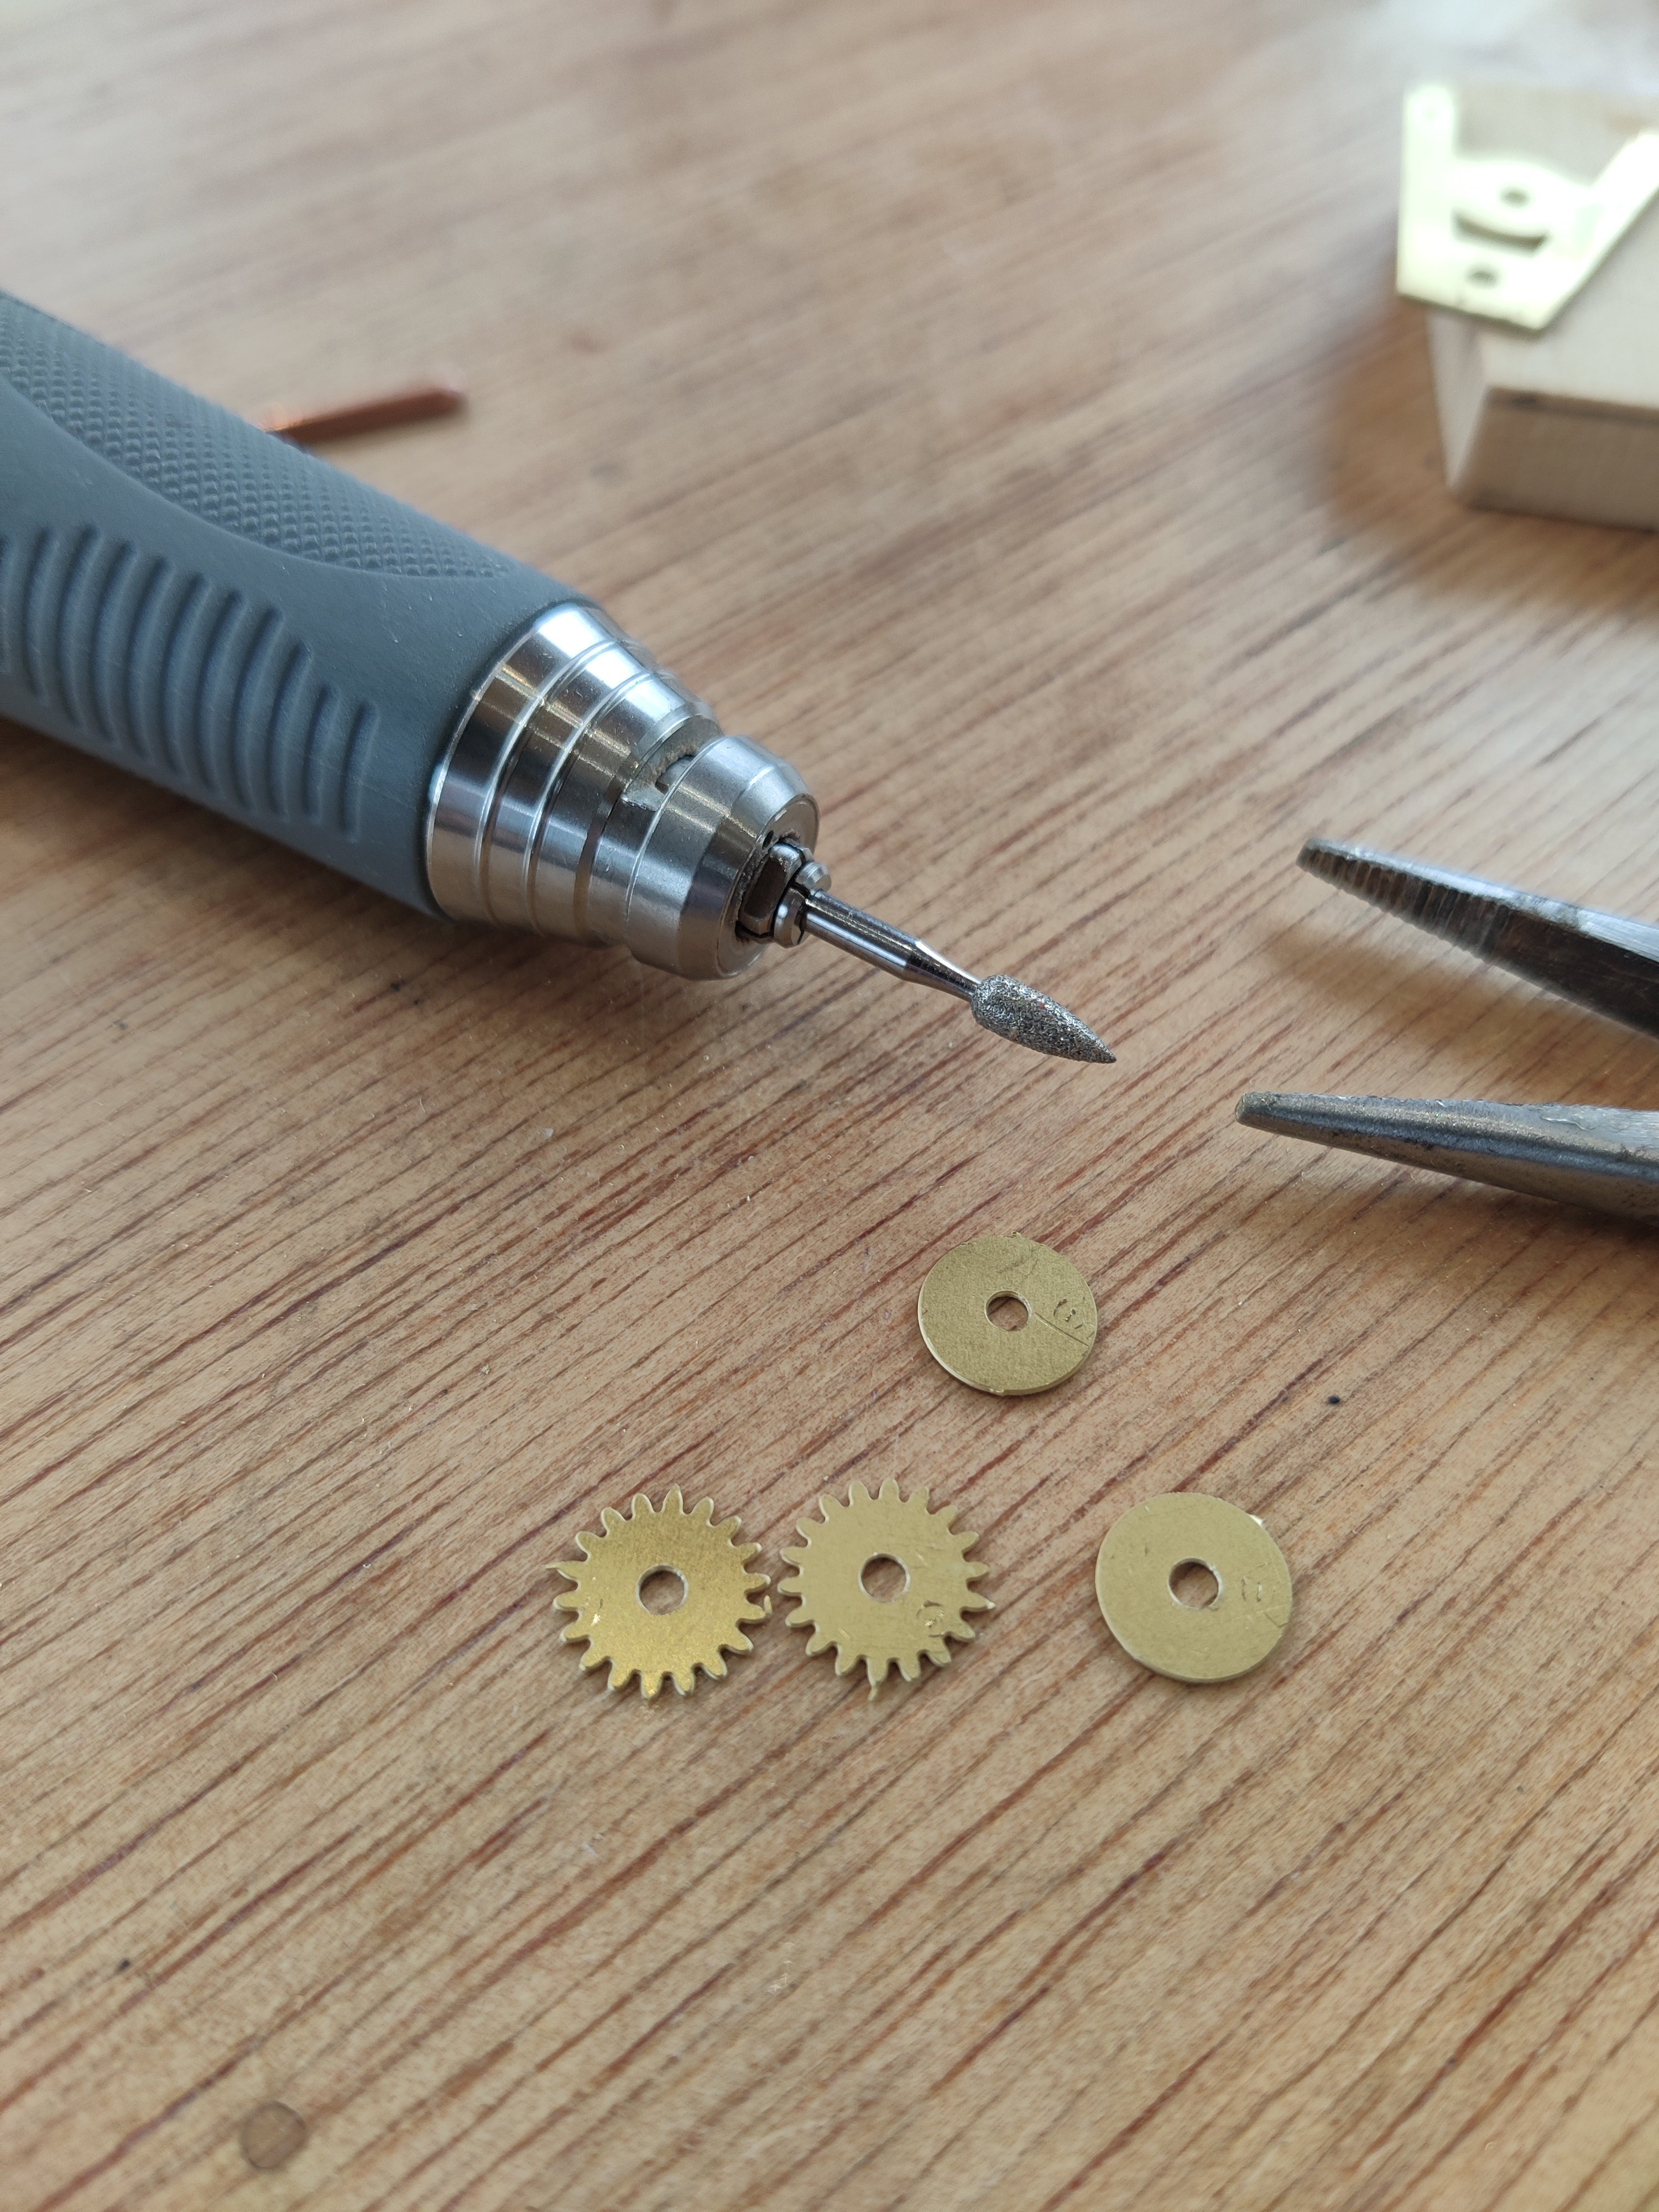
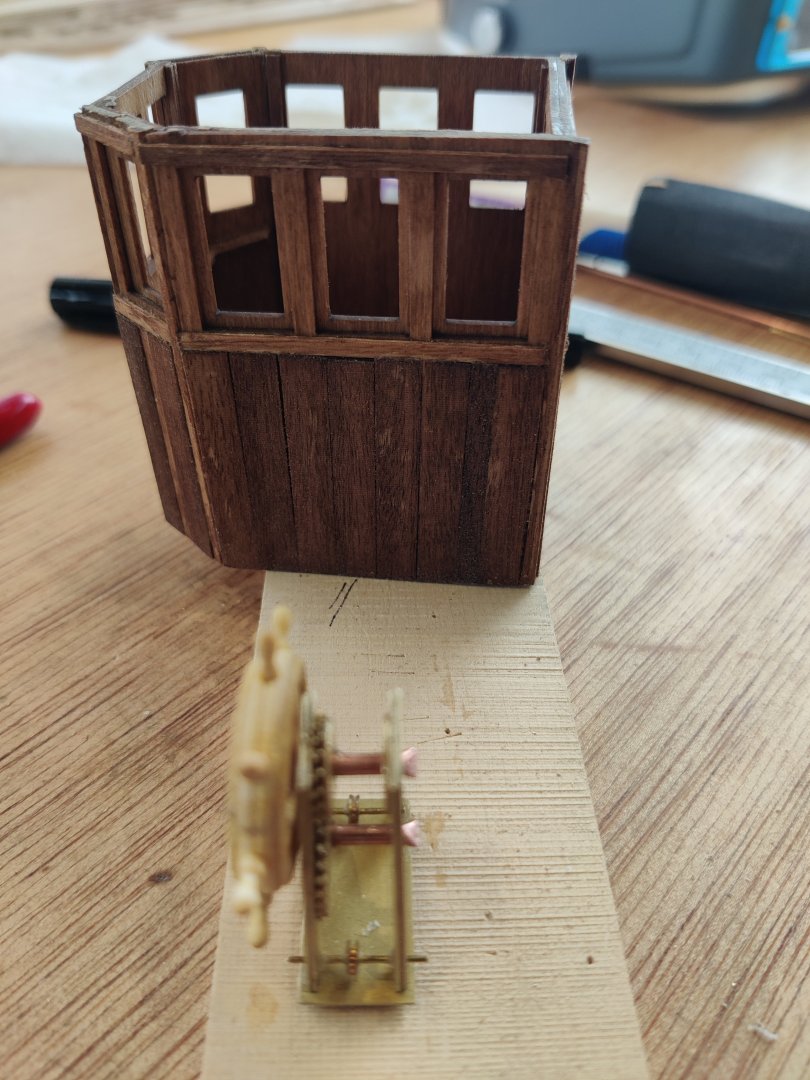
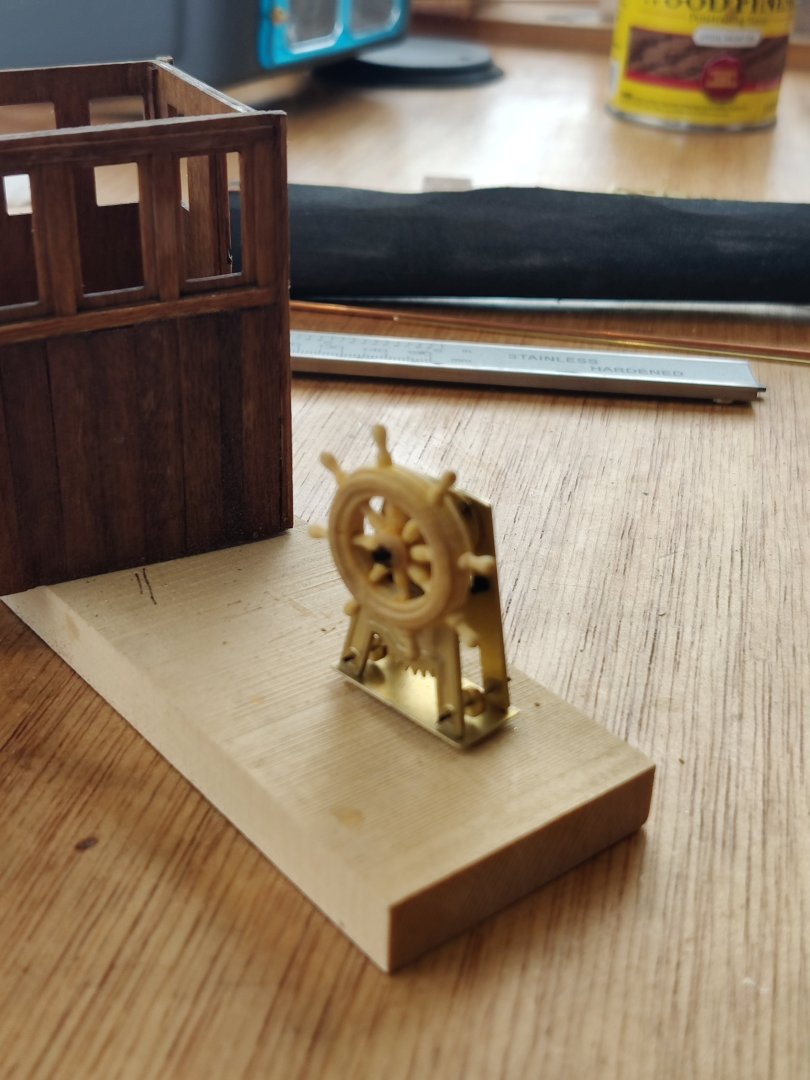
Putting the wheelhouse together. The gears all need to be reamed out for the copper tube to fit. The same holds true for the brass wire openings. I tried to assemble the pieces in the sequence shown in the manual but it did not work for me. I first assembled the two pieces for each side. Sanded the feet on the bottom and glued them in to the base. Thereafter i inserted the copper tube into the wheel after reaming it it fit. Then placed the top gears in and then the copper tube for the large bottom gears, then the two top spacers. the bottom gear will not fit if you install the spacers before the bottom gears. After it was completed painted the copper tubes black and the pins black. I then installed it in the wheelhouse. It looks really good in there.


-
This is a great catch, When I get back to Connie I will try it.
-
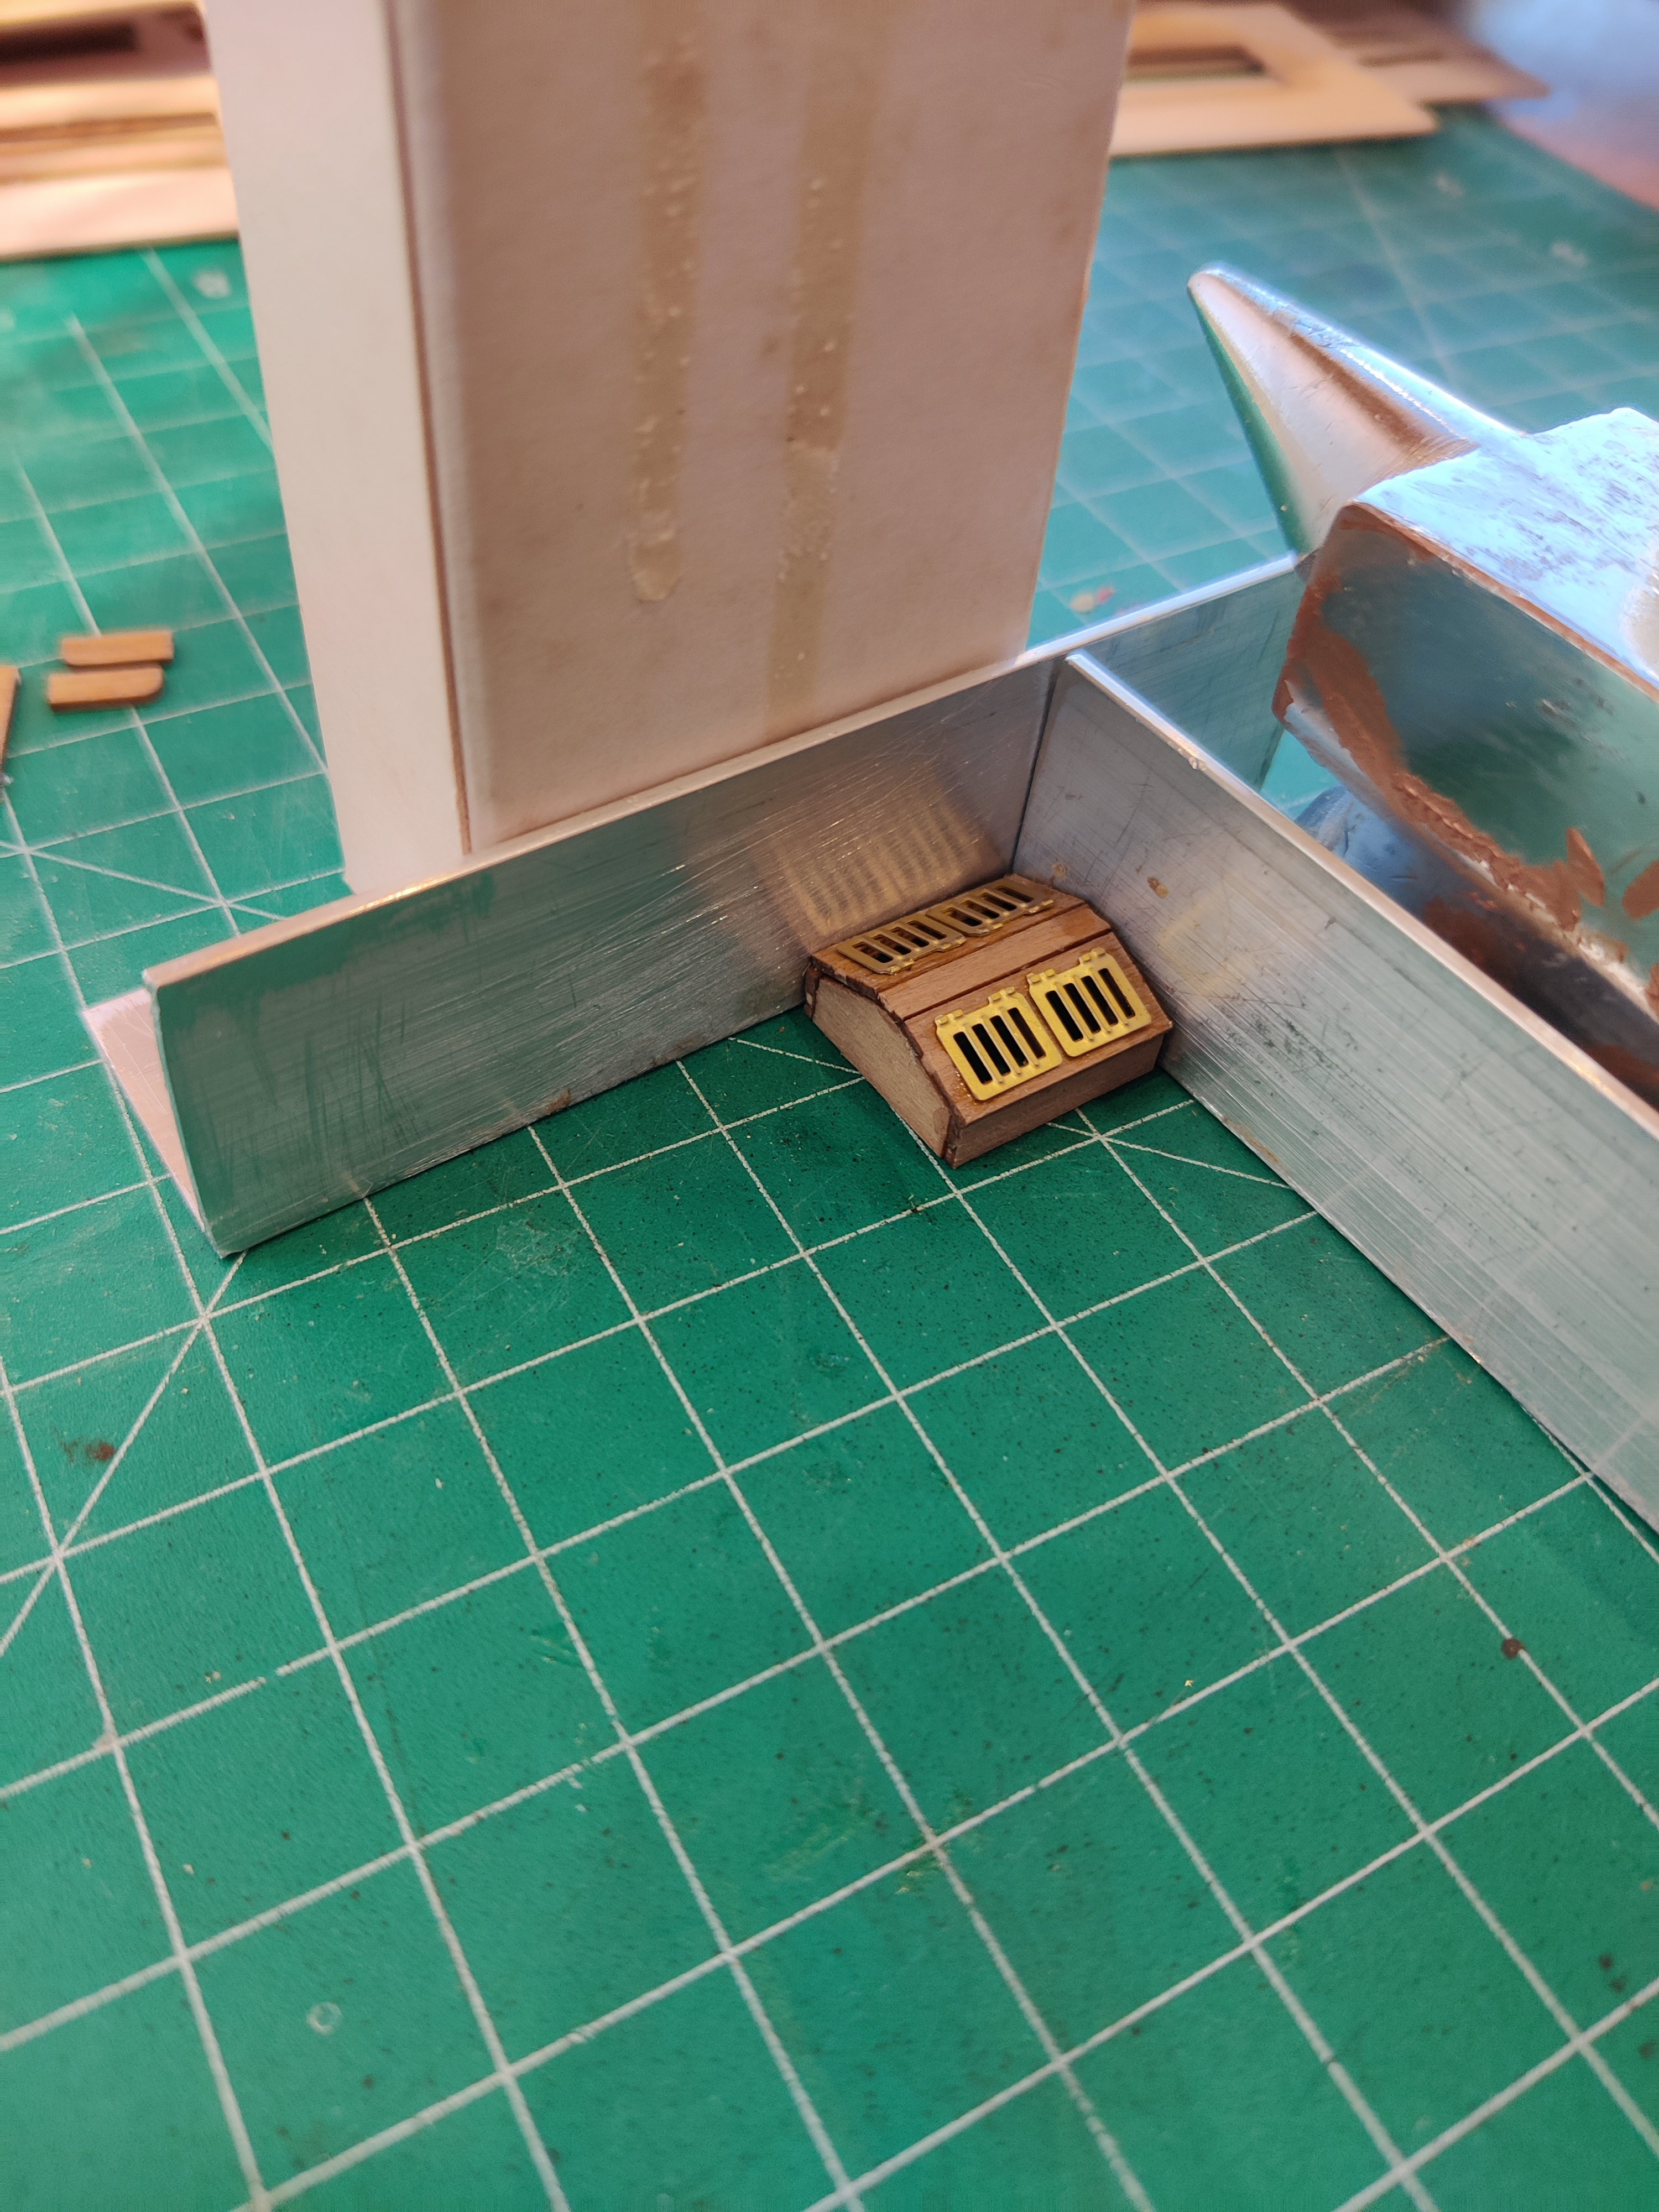
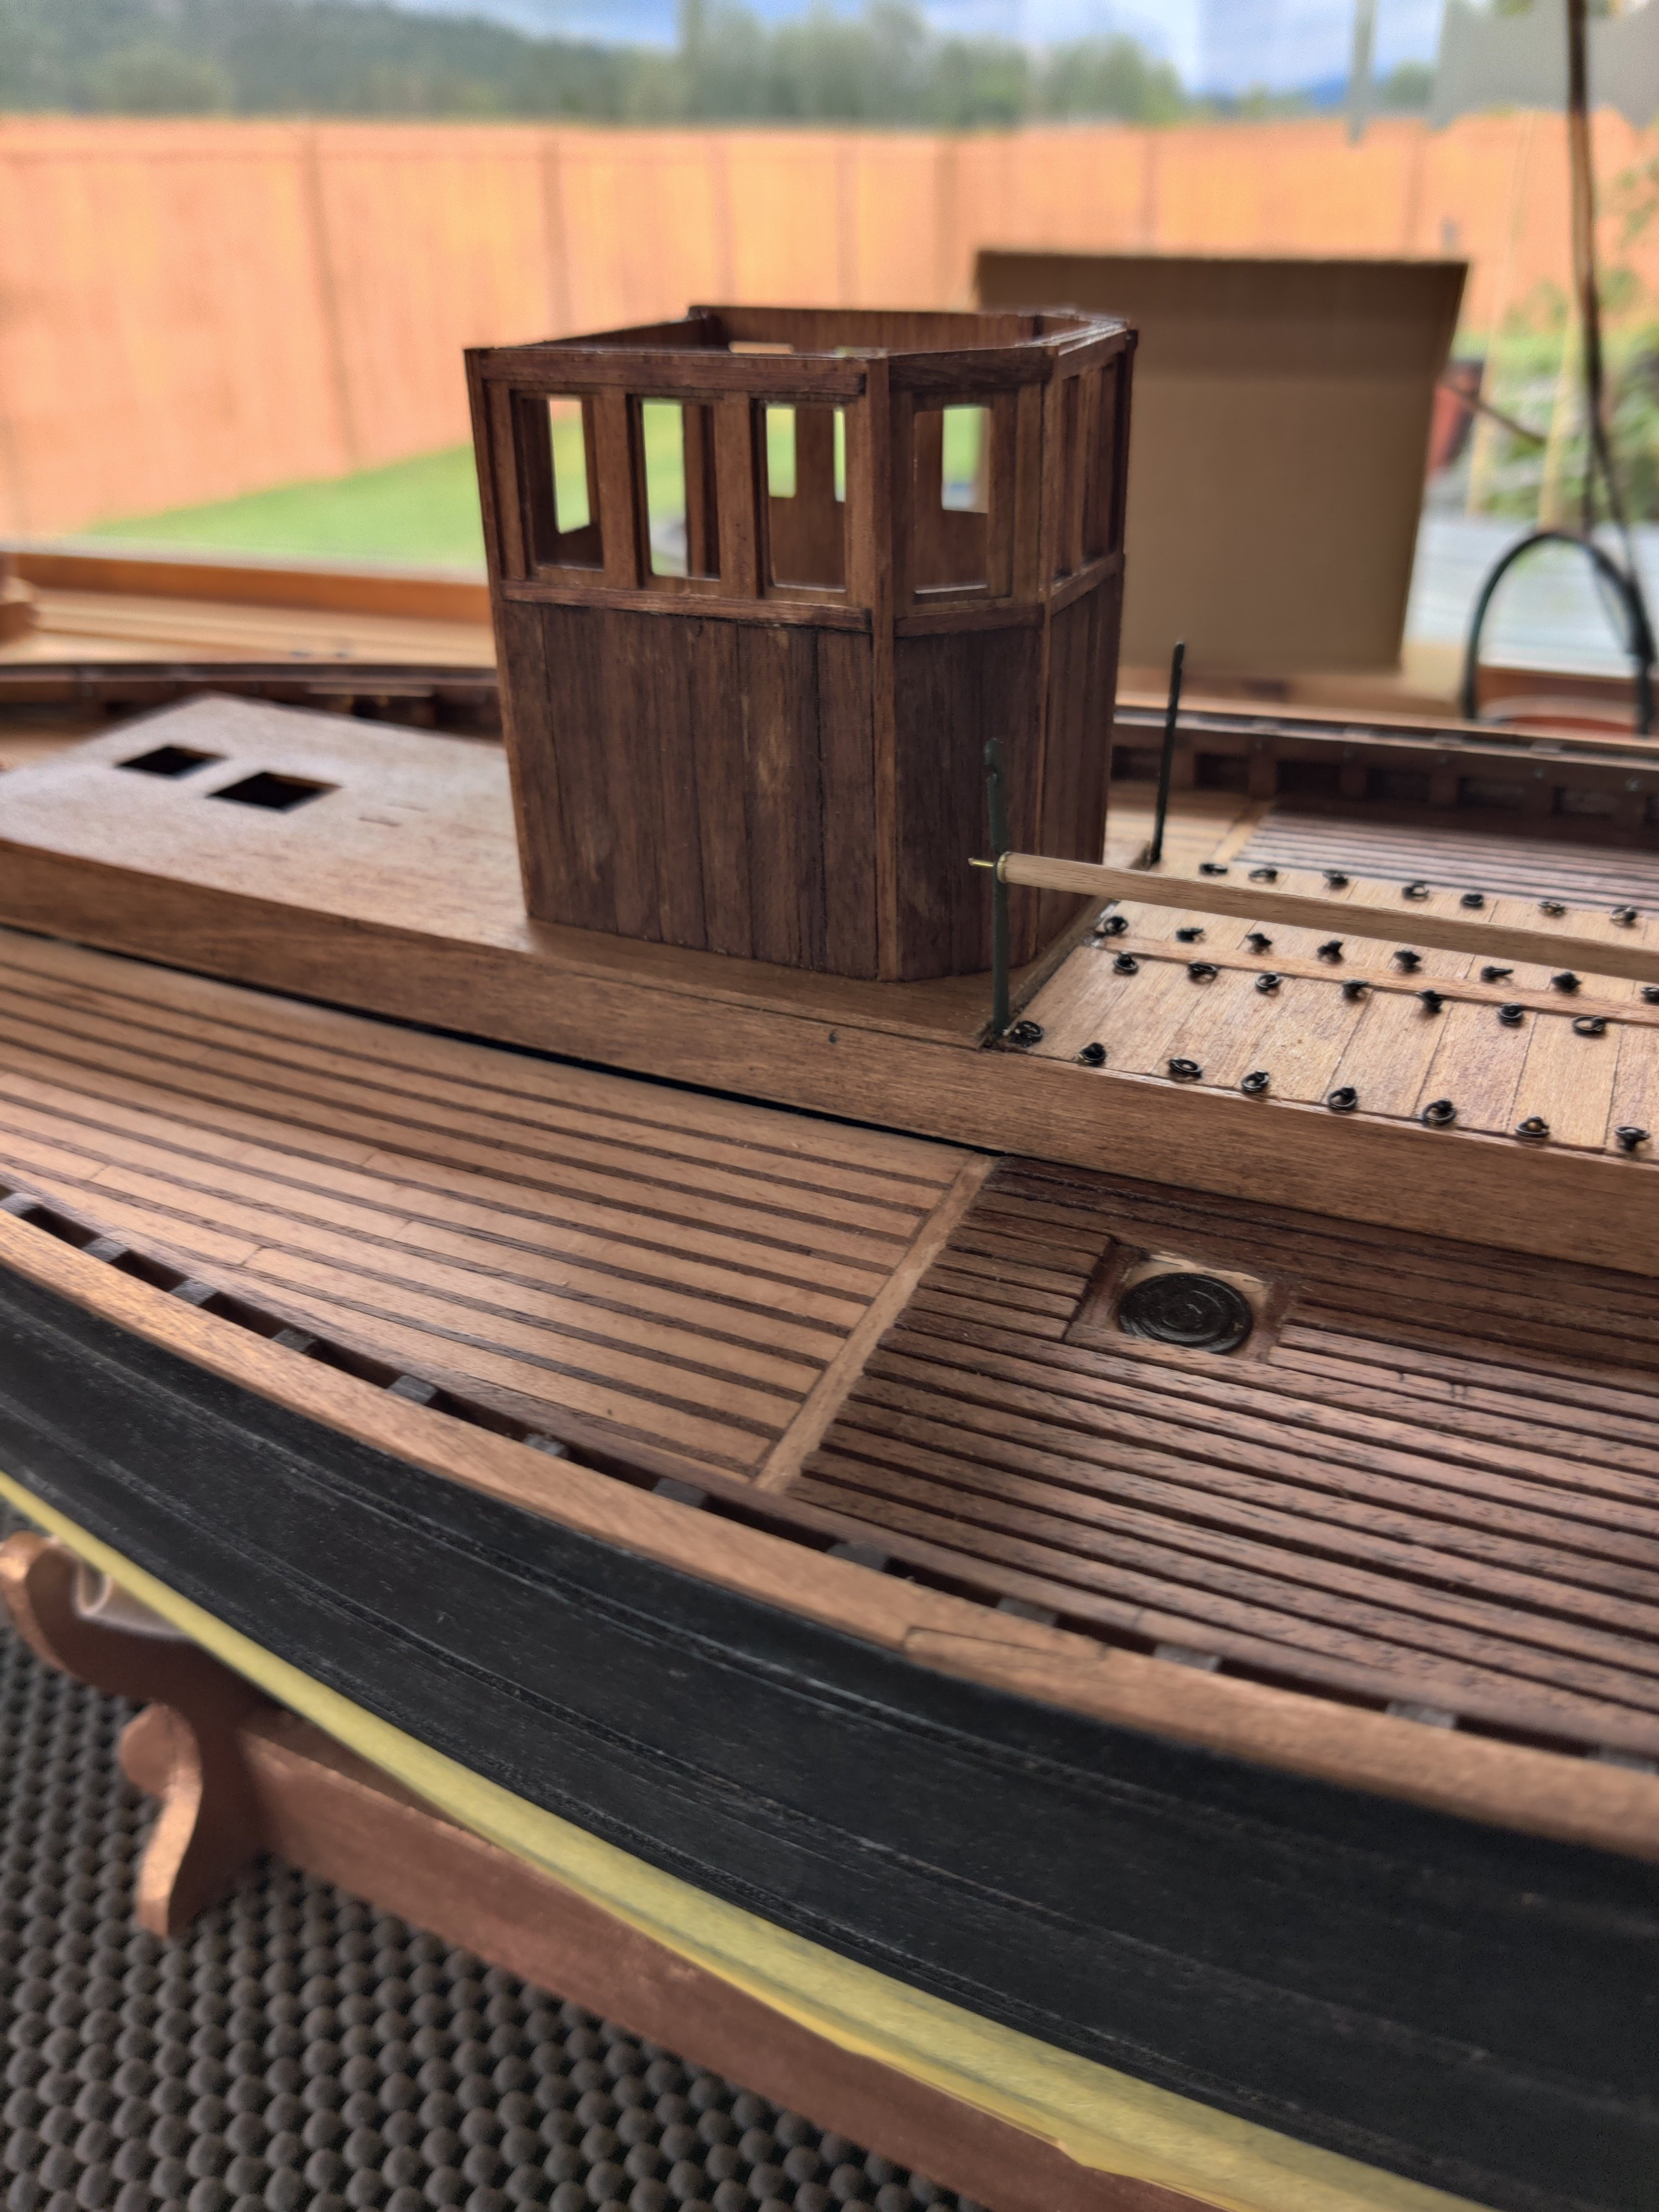
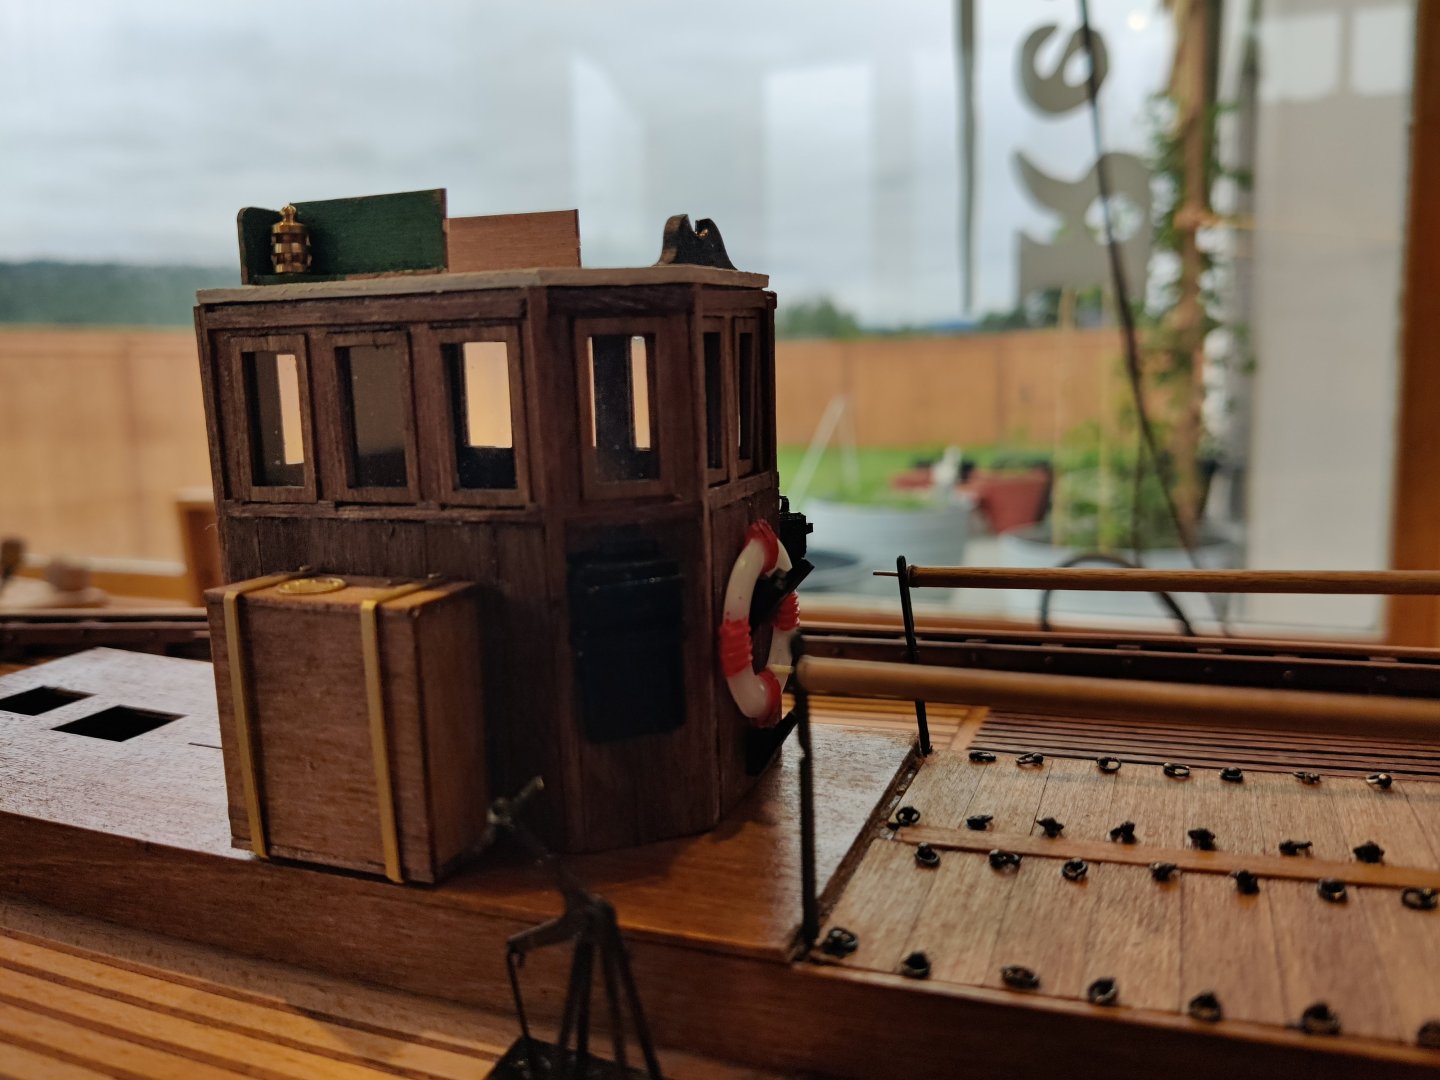
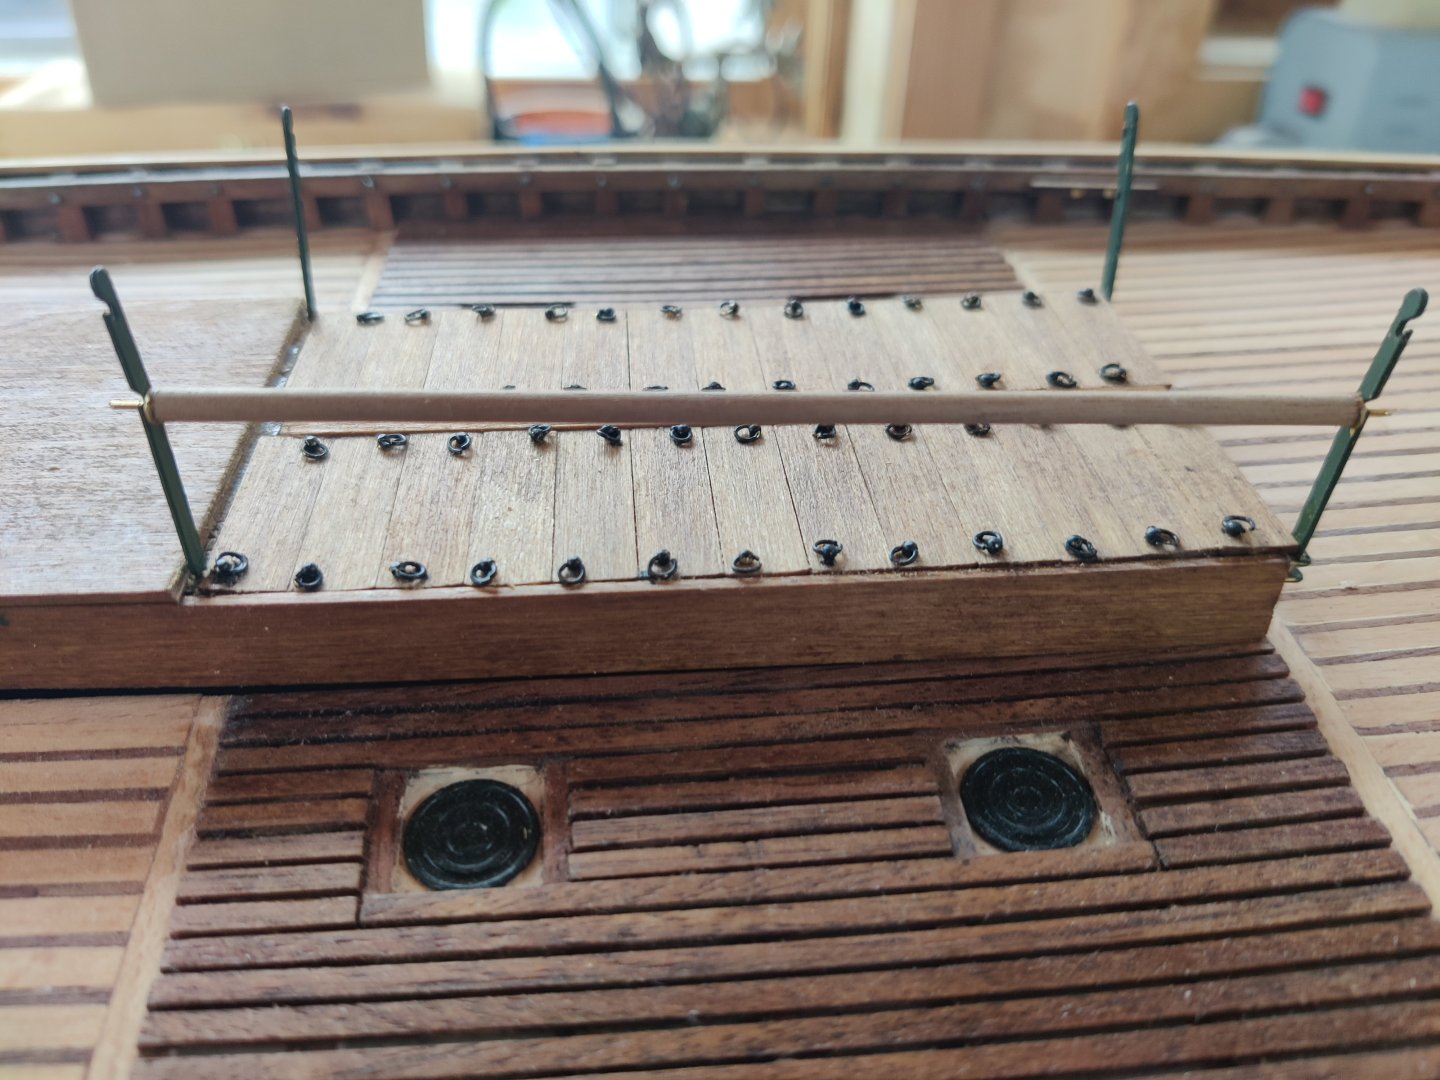
Der Alte Rentner no wonder you did not know what they were, to me, they looked like pole holders, to a seaman like yourself they would be stanchions. I suspect they are there to prevent the fisherman from falling into the water wells that hold the herring. I have not permanently placed the framework that goes around the water wells and supports the wheelhouse but I have mocked this u to show the stanchions and their purpose. The wheelhouse still needs, the window frames, windows, roof and door, but they have to stay off until complete the interior of the wheelhouse. Progress is slow but sure. The wheelhouse was tricky. The angles on it require that you sand the connecting edges to a 45 degree angle.

-
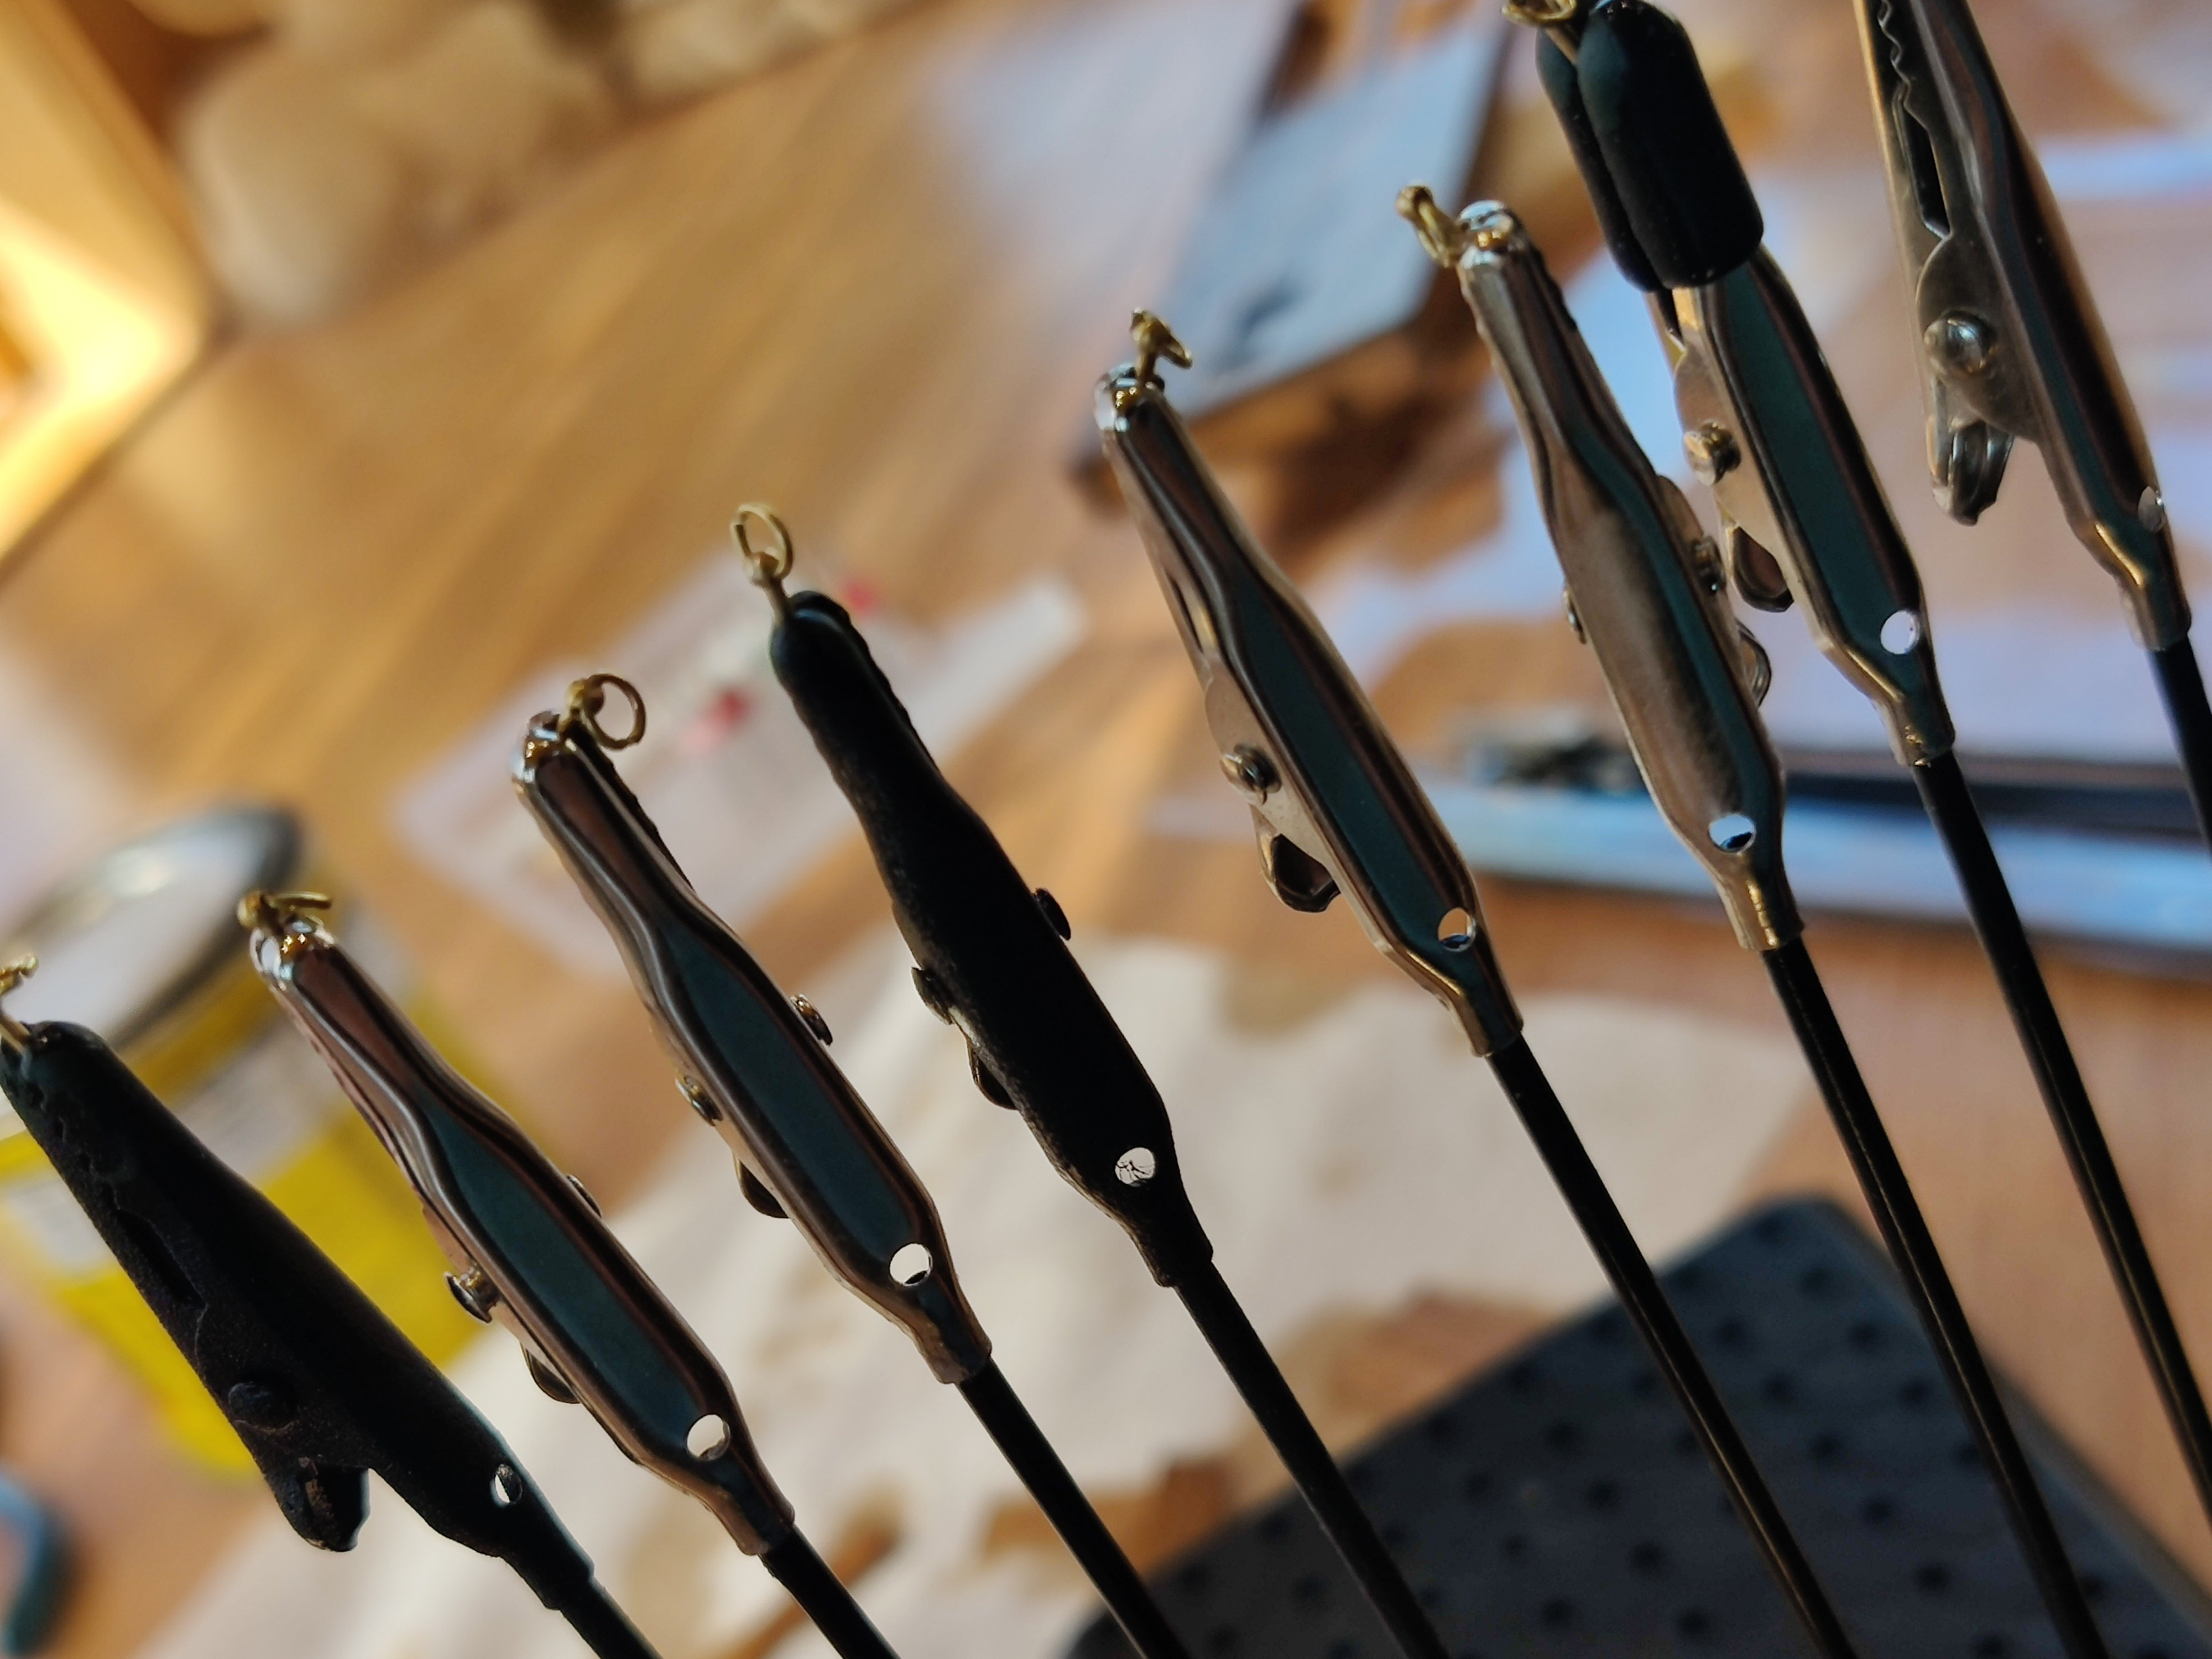
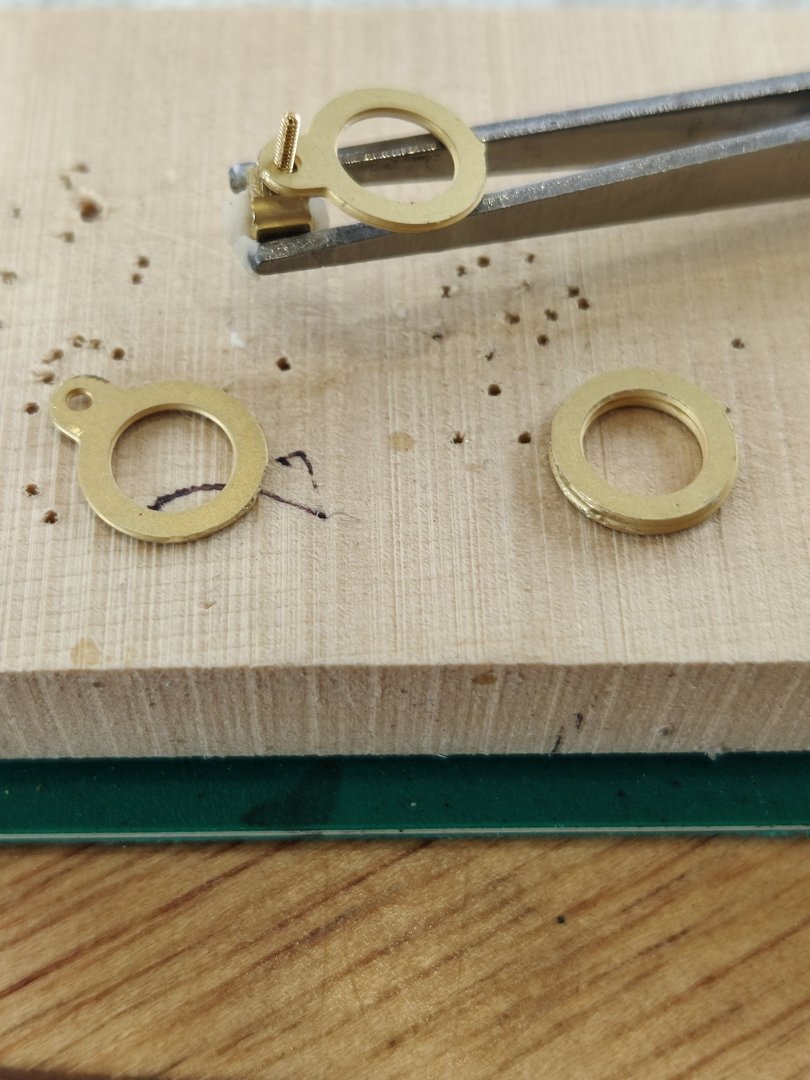
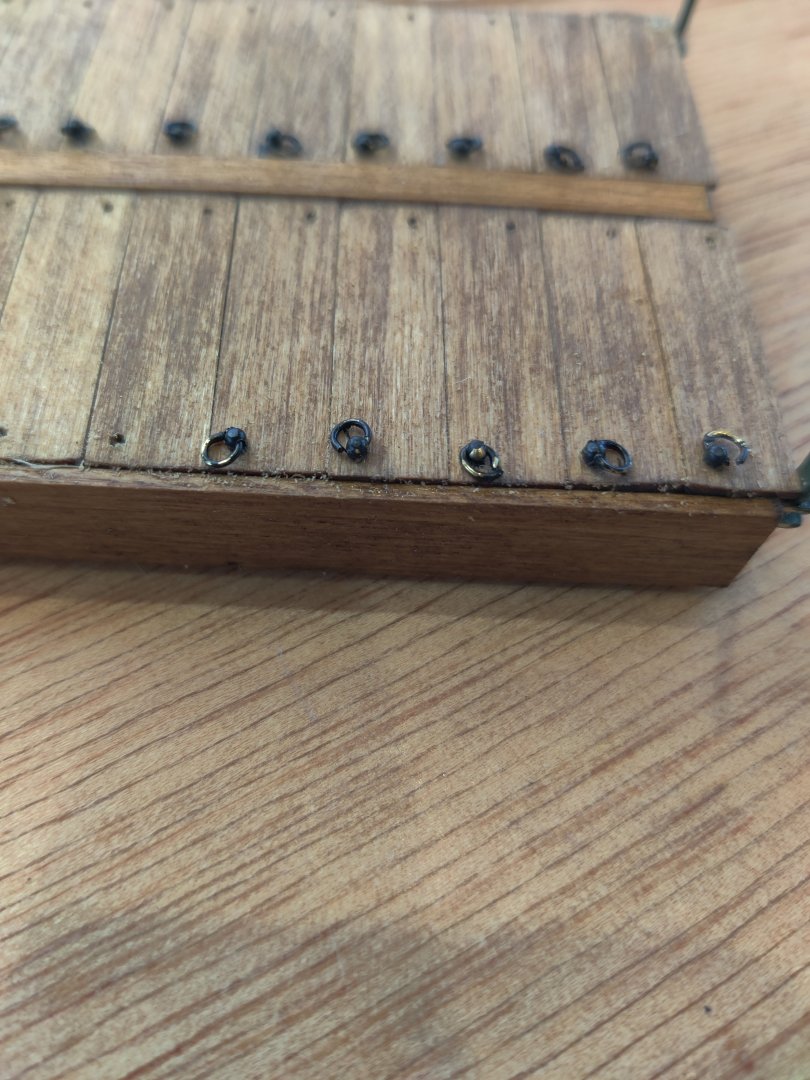
Well it took me 4 days to complete the pins and rings, a a fifth of Belvenie Scotch. When completed there were only 5 extras so be very careful not to loose any. Four of the pins had no hole and could not be used. Once done I painted them black. Once they were dry I inserted them in the drilled holes. in the process some of the paint came off, so I touched them up again. I should have delayed putting in the pole holders until all the pins were in, the pole holders make it difficult to put pins in near them.

-
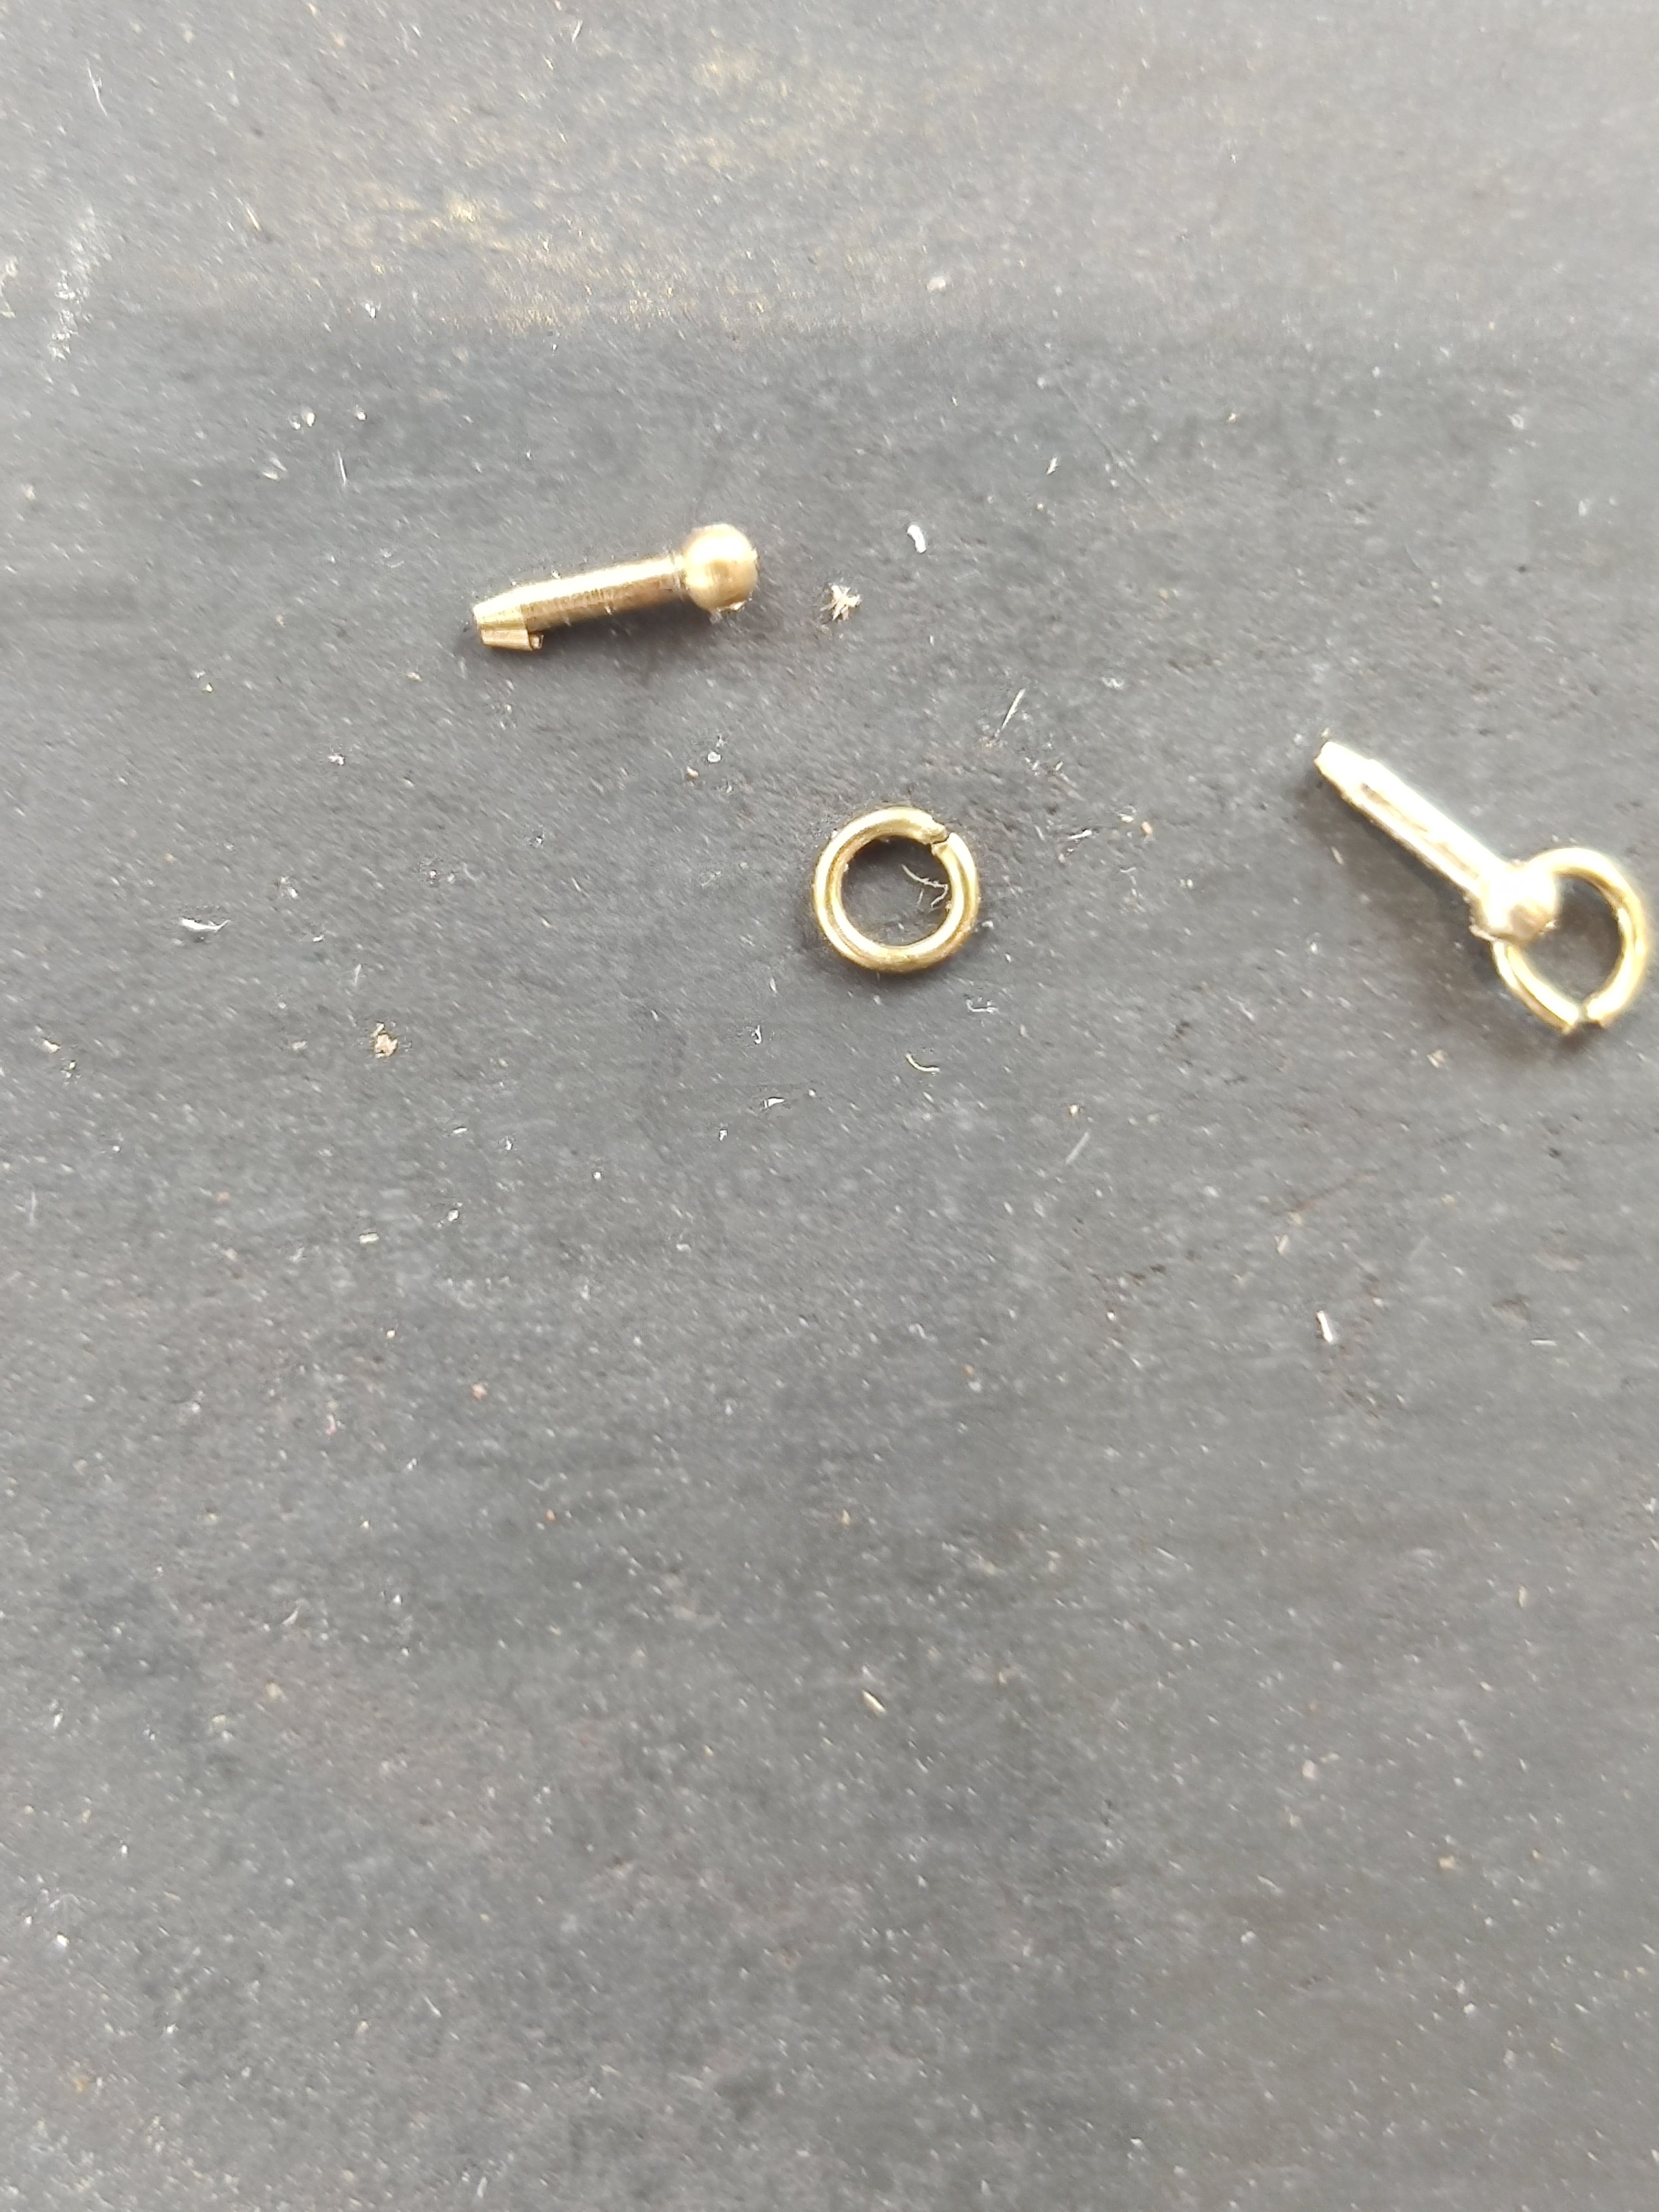
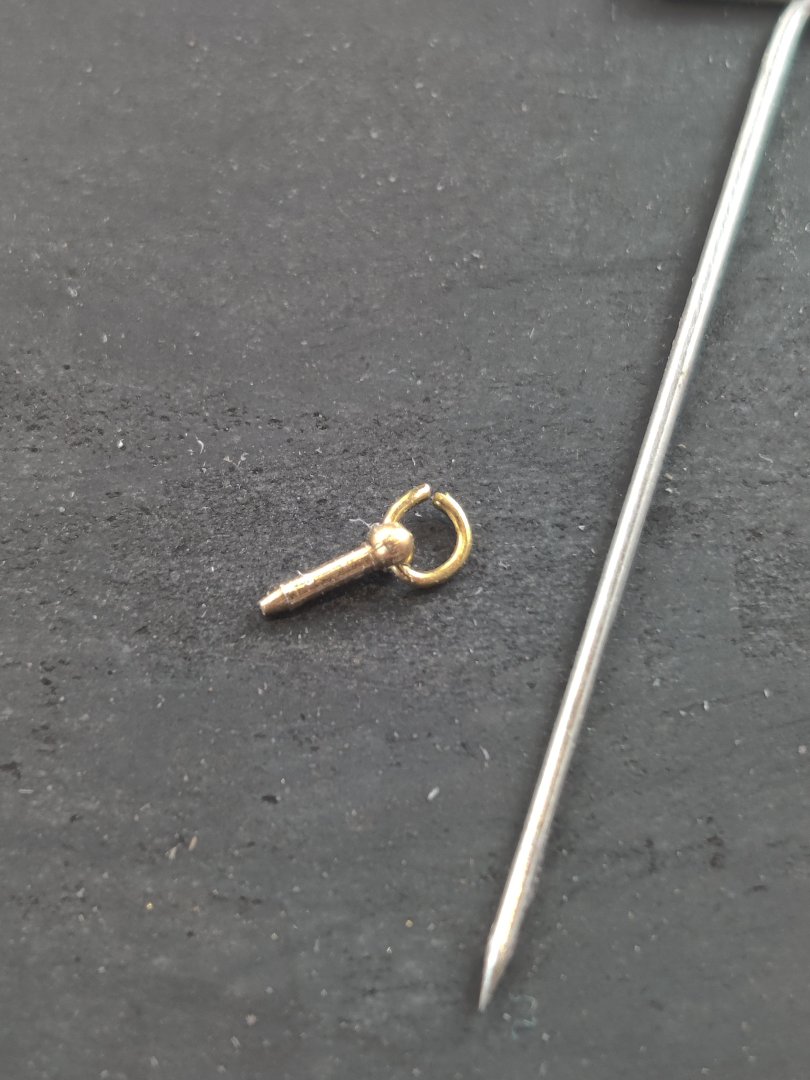
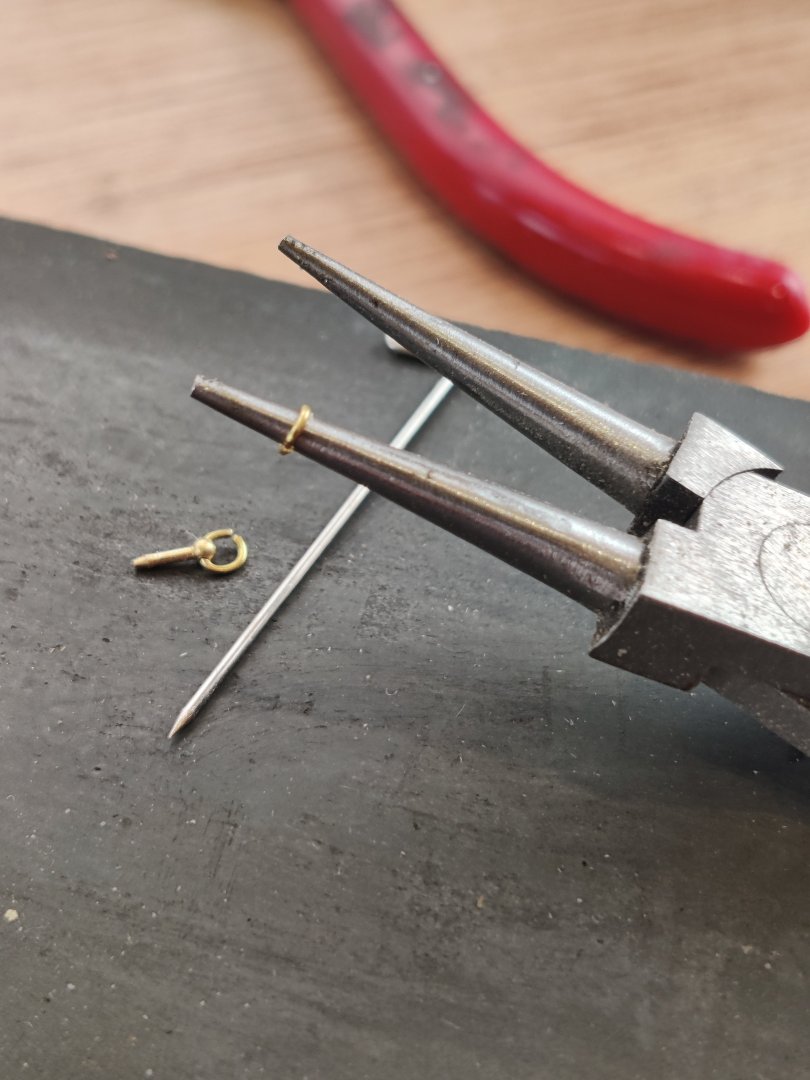
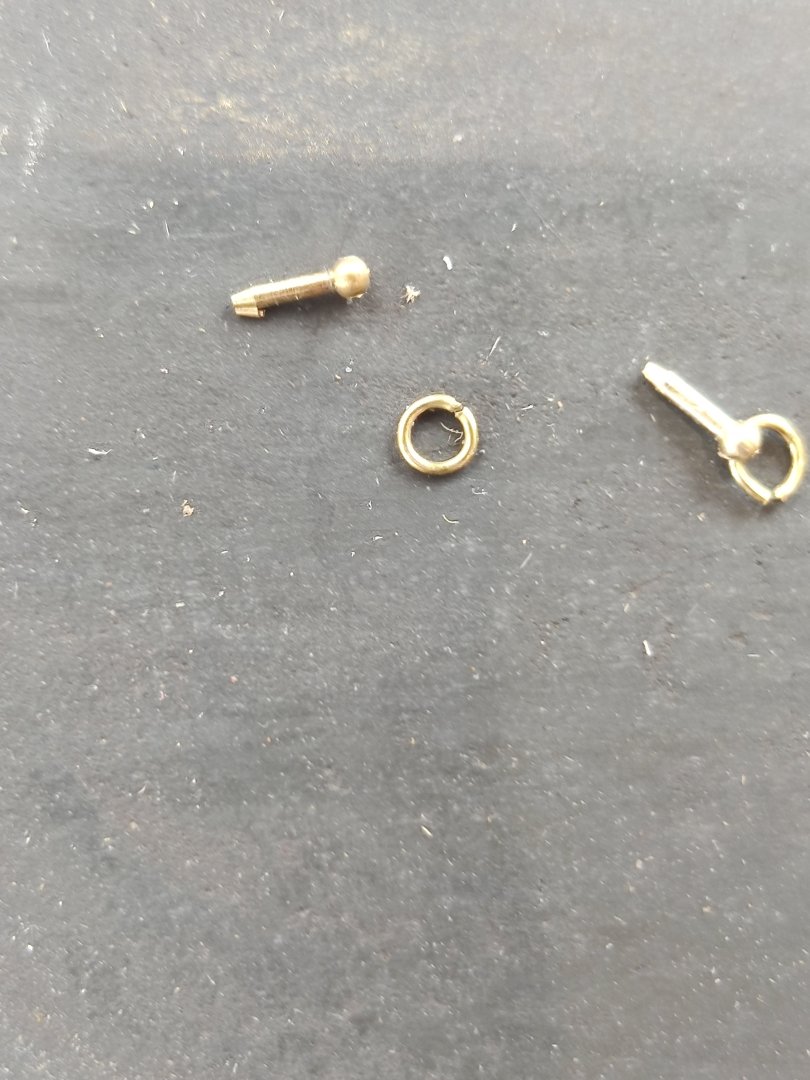
update on fitting the ring into the pin. the sequence of tasks is really important in order to complete the 52 completed rings in pin process. These pieces are small and light. If you try and hold them with tweezers I had some fly away, and it took awhile to find them. It is better to use pliers. spread the ring on the round pliers first, then grasp the pin in the pliers and turn it so you can see the hole in the pin. Some pins have no hole, some have a hole on one side but it does not go al the way thru. Take the drill with the bit in place and drill the hole while holding it in the pliers. After the hole is drilled immediately pick up the spread wing with the other pliers and insert one end in the pin. Then turn the ring in the pin with the pliers and then squeeze the two ends of the ring back together. Every time you set the pin down and have to grasp it again it takes a lot of time to get it adjusted right to work with. If you hold the pin in place with the pliers thru the entire process it will be much easier to accomplish. I tried to drill the hole in the pin with a manual hand drill and was not successful. Power is the only war to get it done for me.

-
I wholeheartedly concur, Joe Volpe, at Modelers sawmill provides high quality wood, that is precise and does it timely.
-
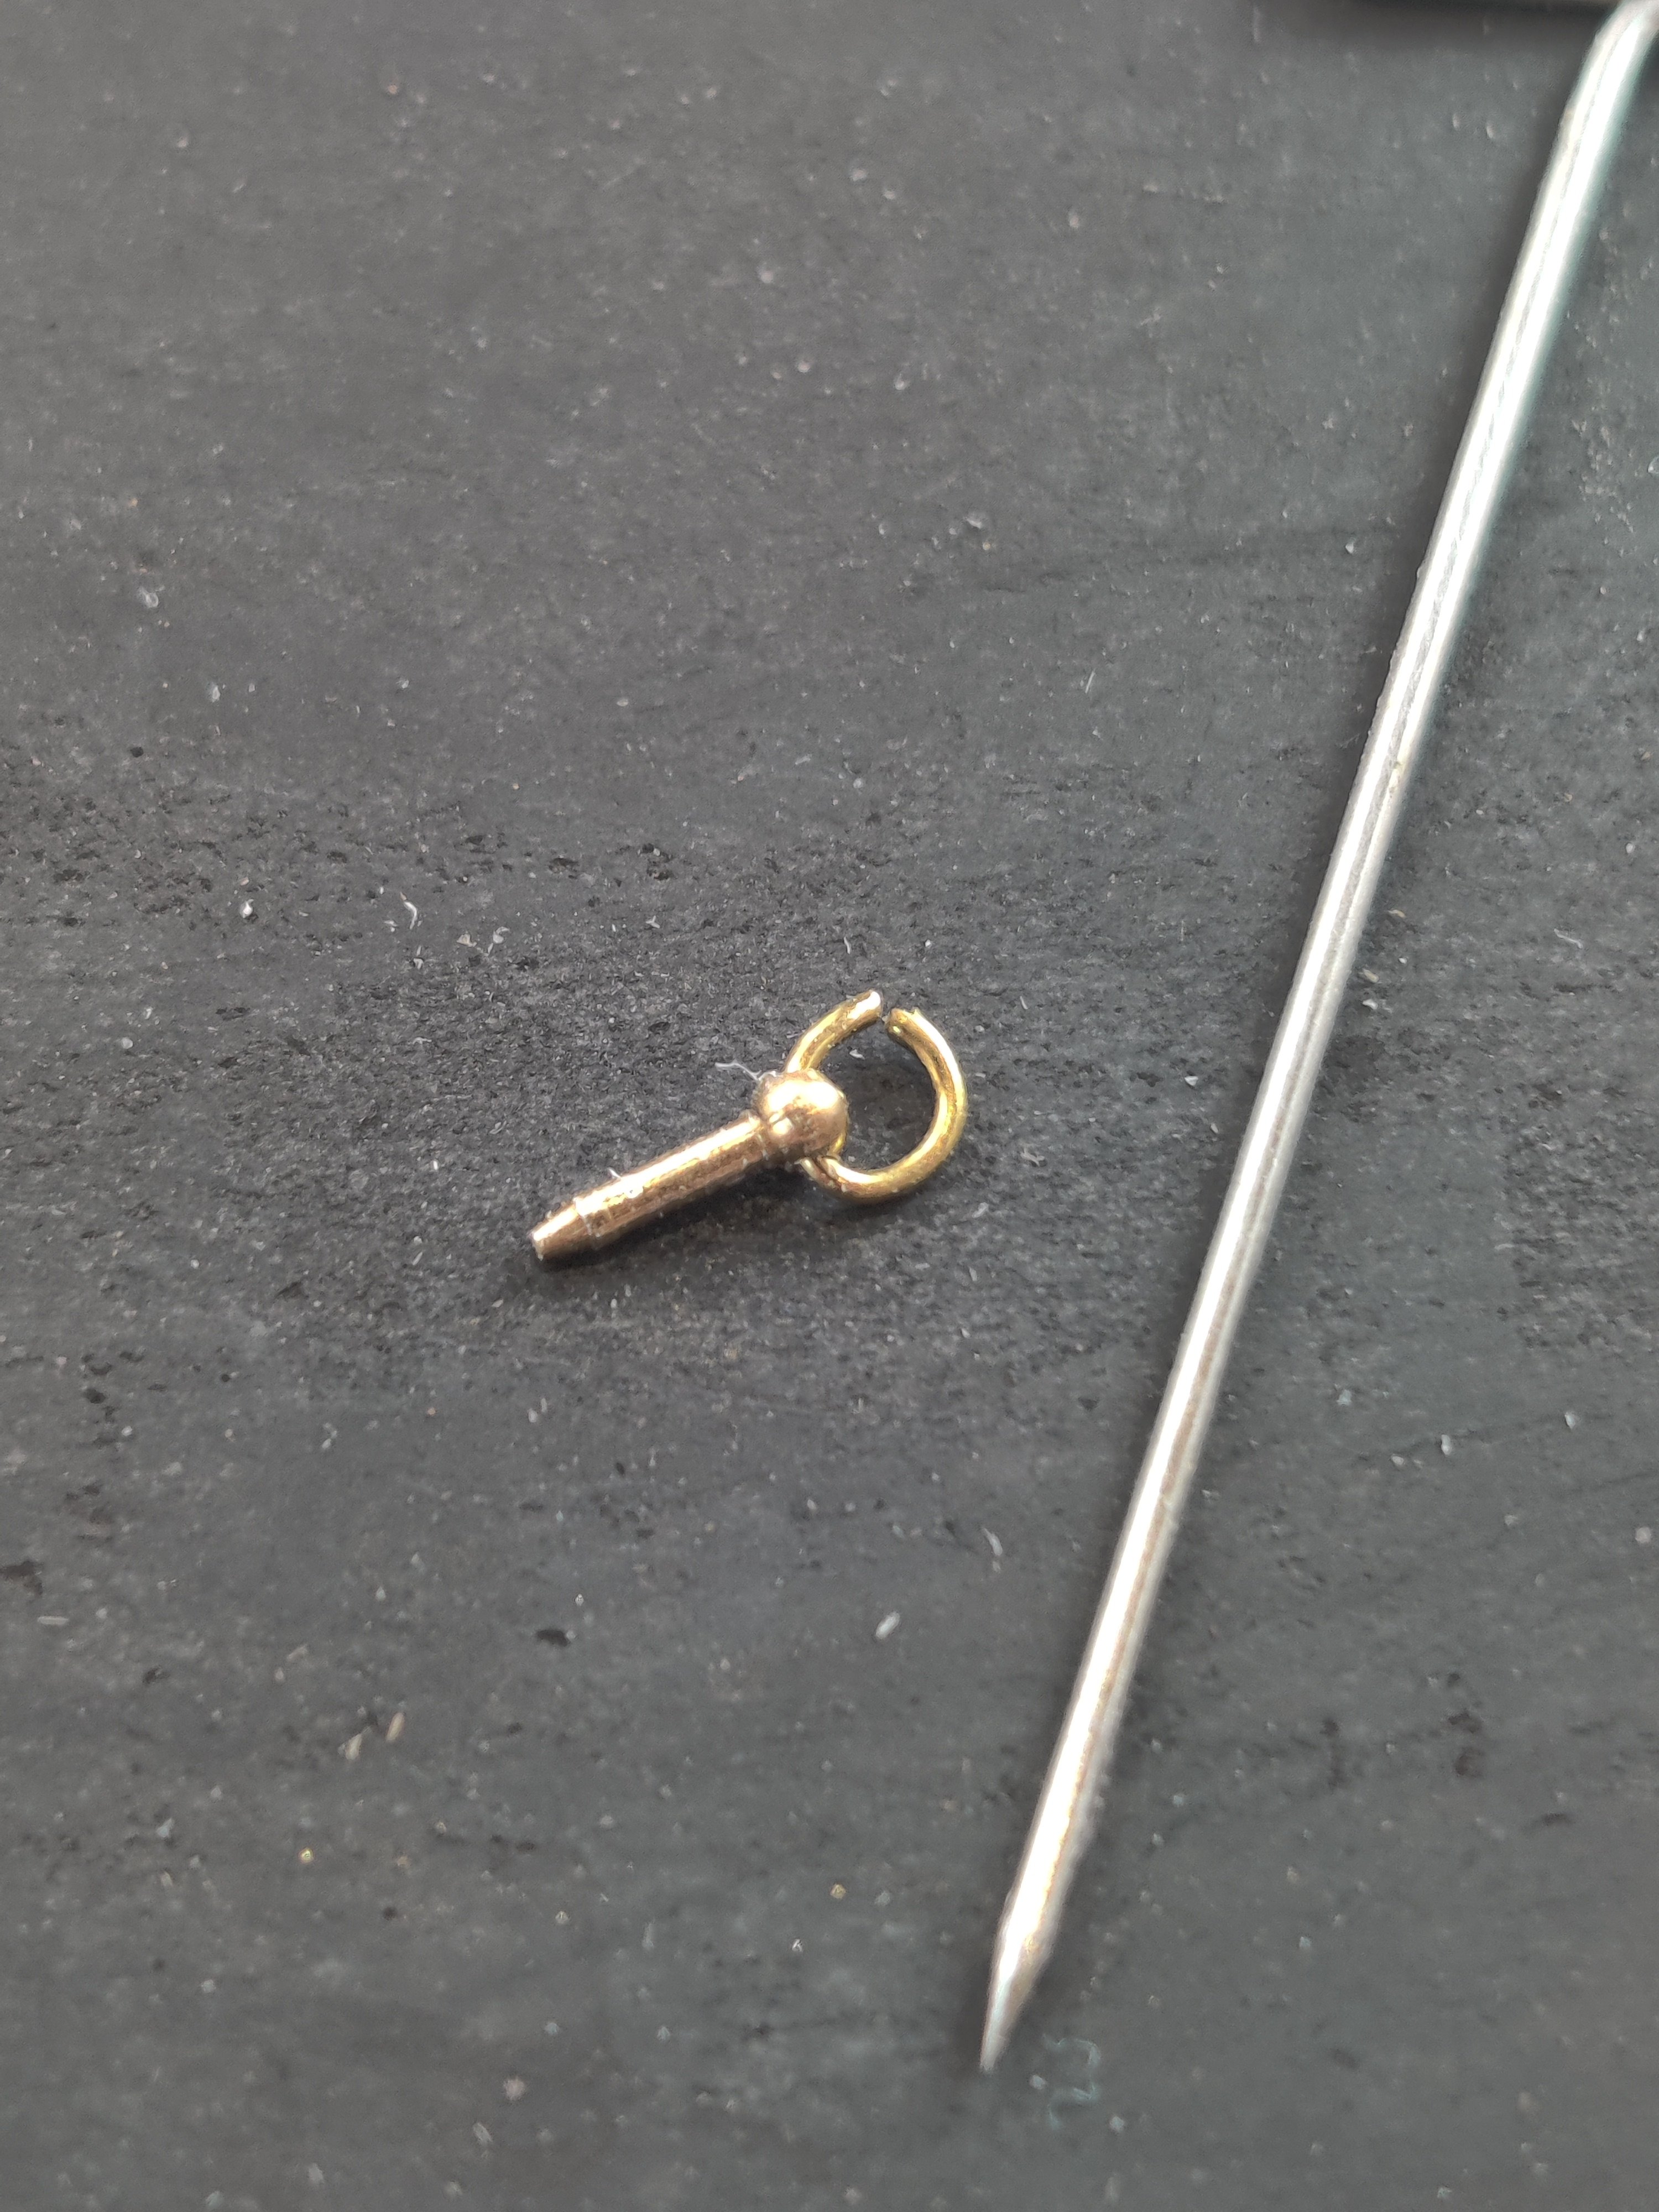
Well progress is proceeding, slowly!! The task was to put a ring in the eye bolt for the lids over the fish well. It took me 4 hours and three lost pieces to get one completed. The pieces are really small!! I finally used a round pliers set to put the ring on, then force it down the post far enough to open the ring enough to thread thru the eye bolt. The hole in the eye bolt needs to be reemed smooth before the ring will fit. Then hold the eye bolt with one set of pliers. put your optivisor on so you can see the hole, then hold the ring with another pliers and thread it into the eye bolt, Then squeeze the ring closed with the pliers. With 52 of these to do, it will be awhile before I do anything else. It will be a costly scotch bill to get this step done.
-
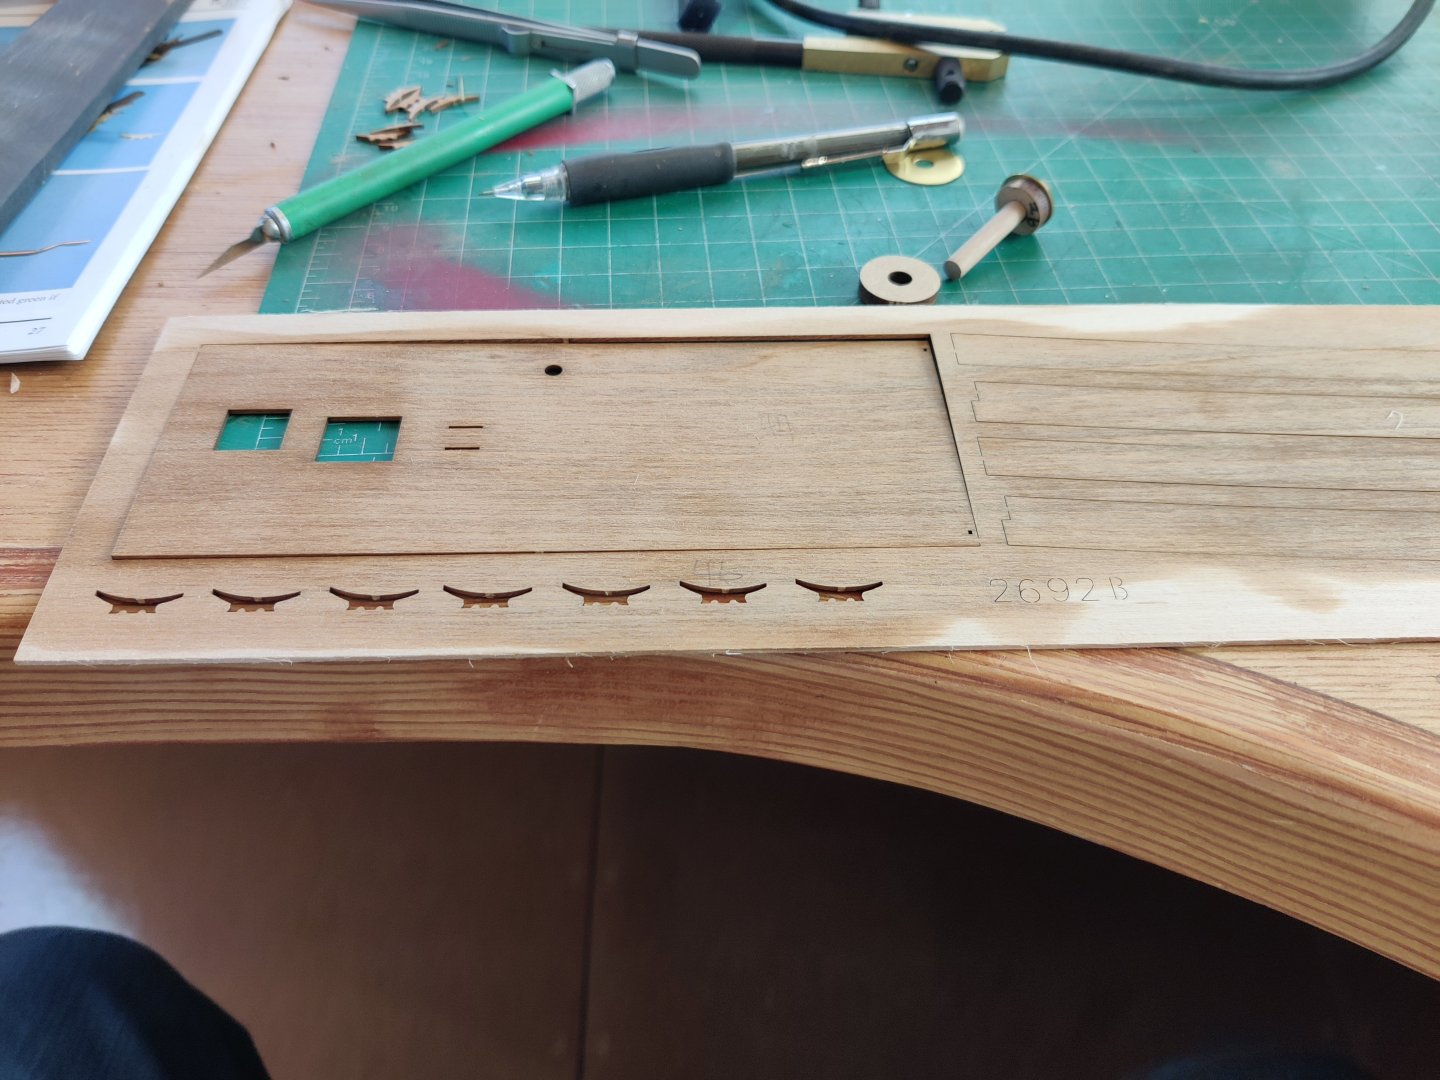
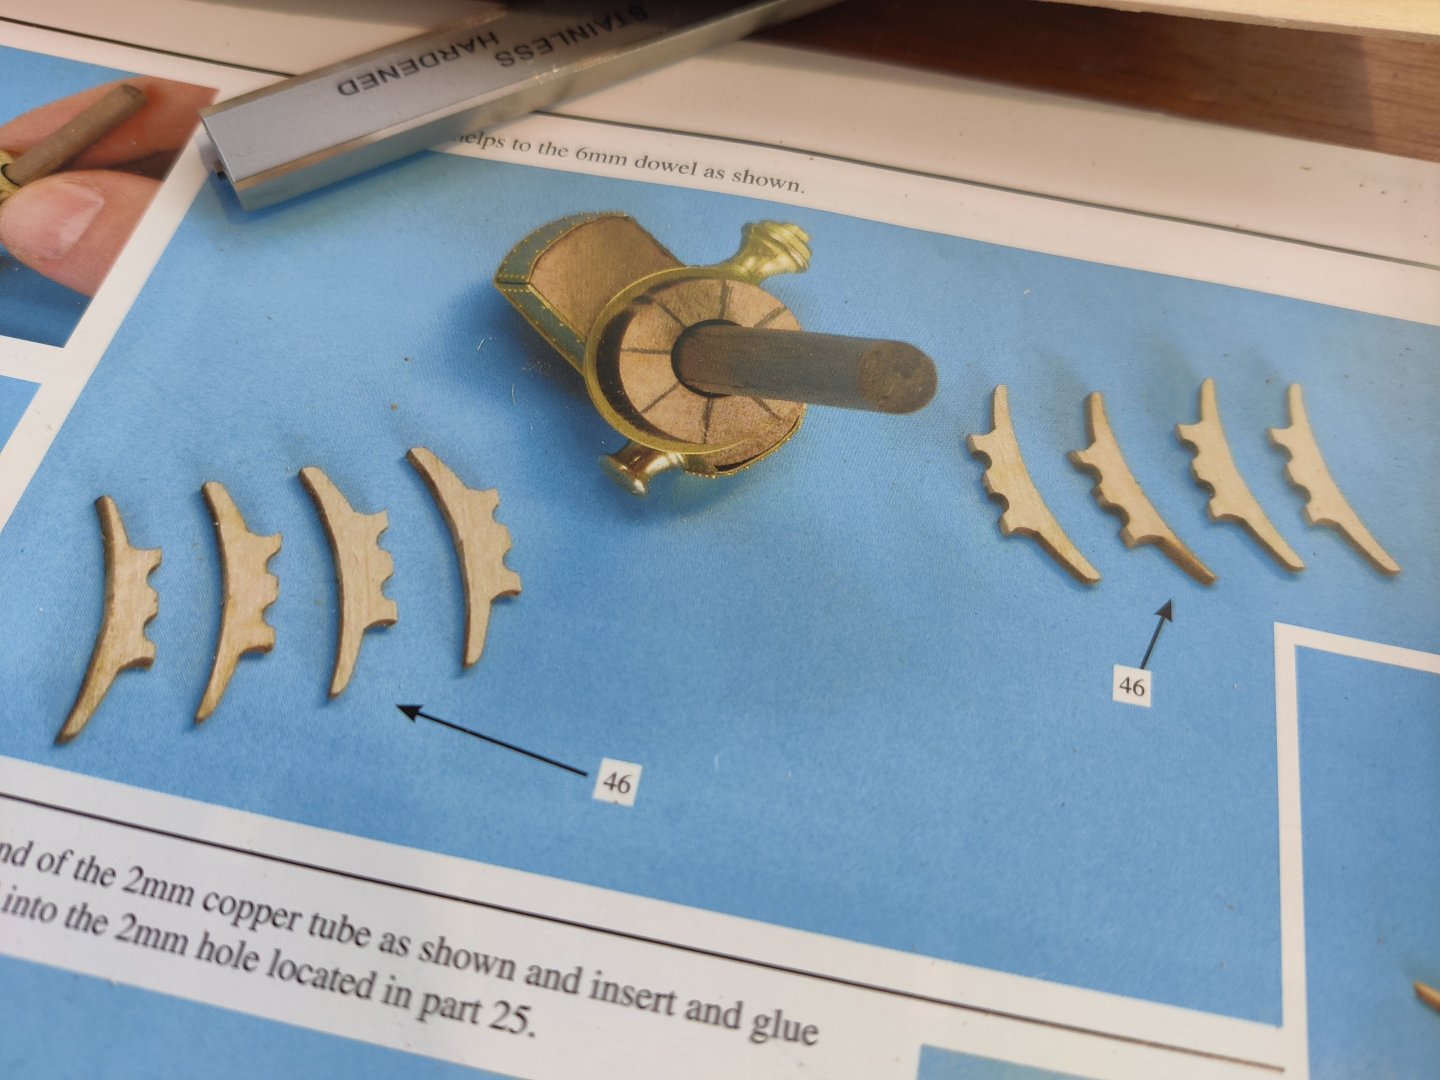
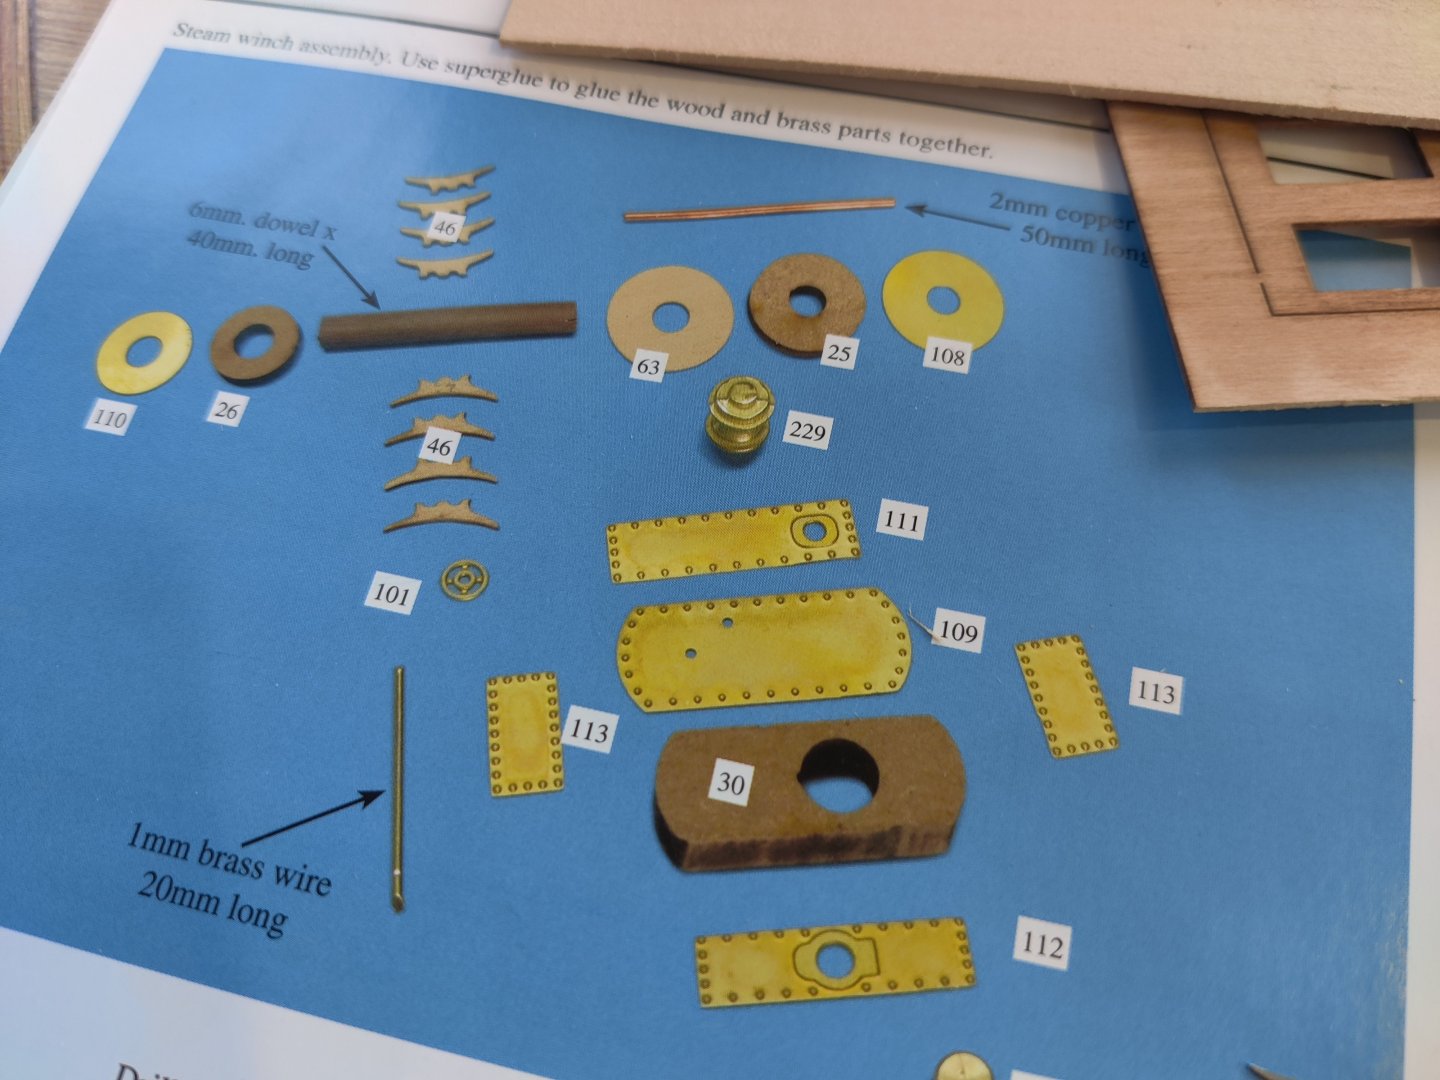
The photos below demonstrate an issue with the Fifie kit pieces. The plans call for 8 arms for the steam winch. However the kit only supplies 7 so the builder has to make the 8th one. Not a particularly hard task but a PIA and a mistake the kit builders should have caught.

-
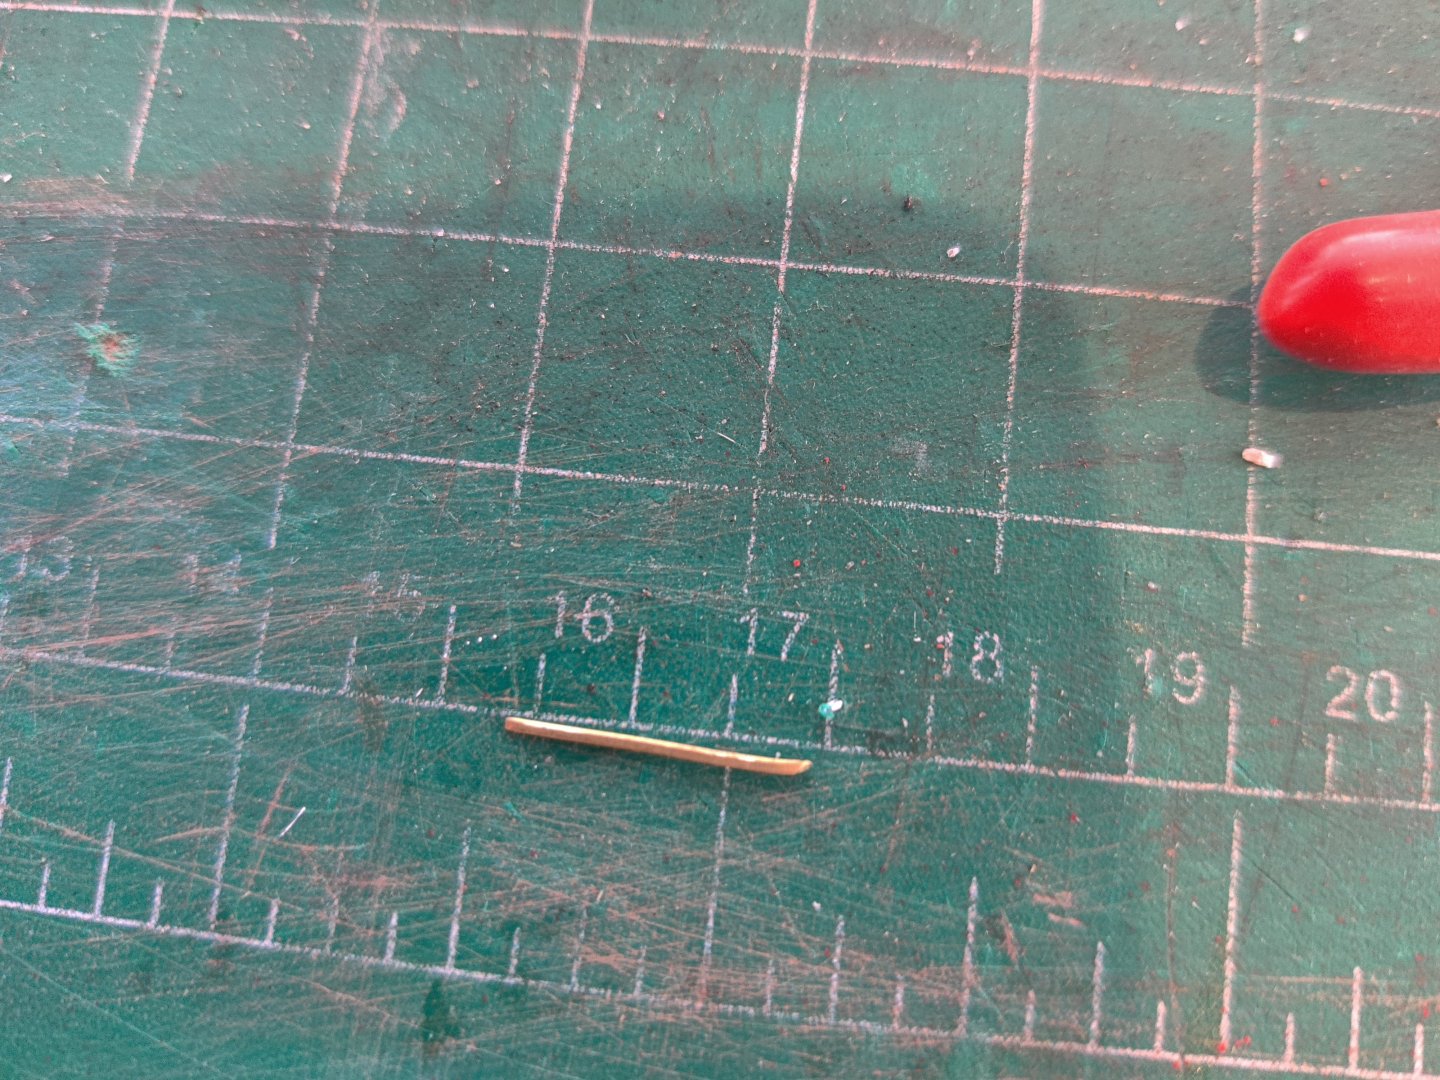
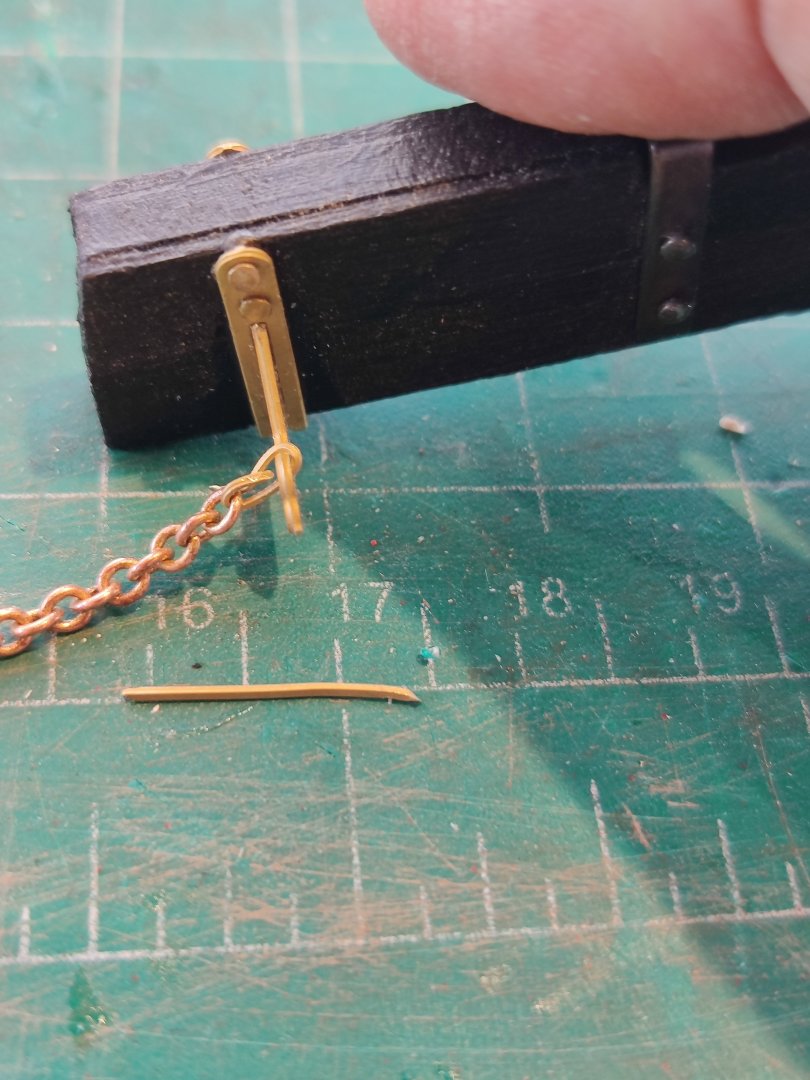
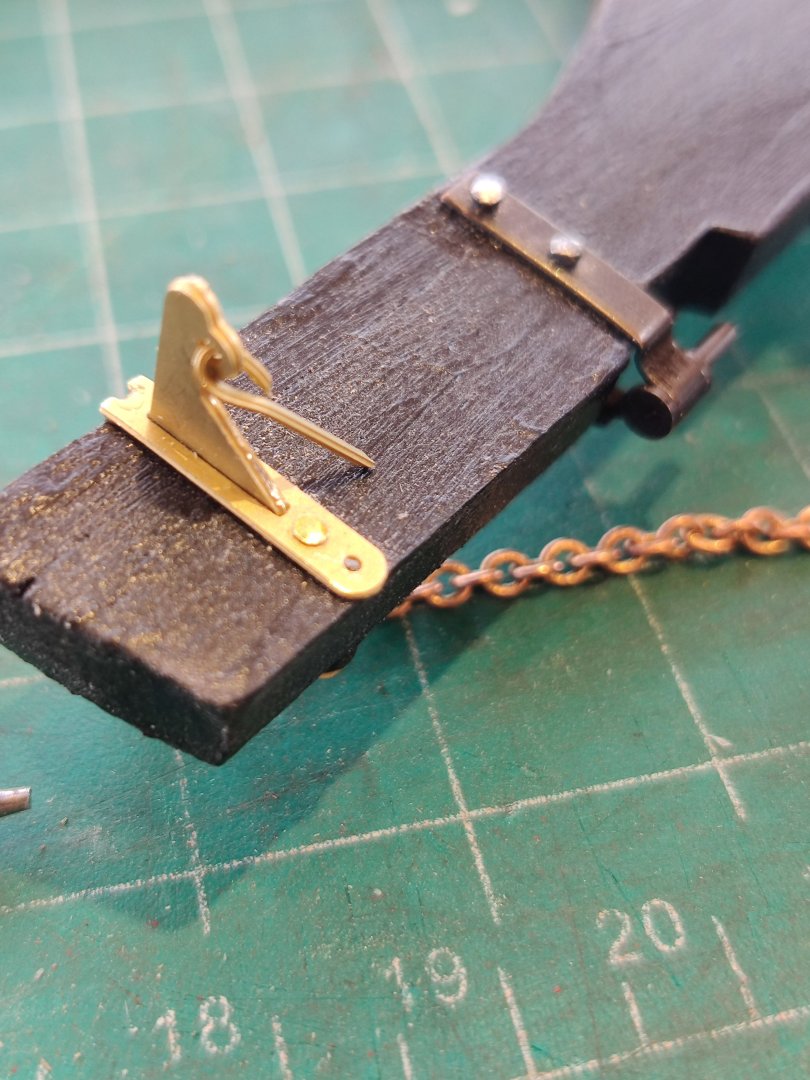
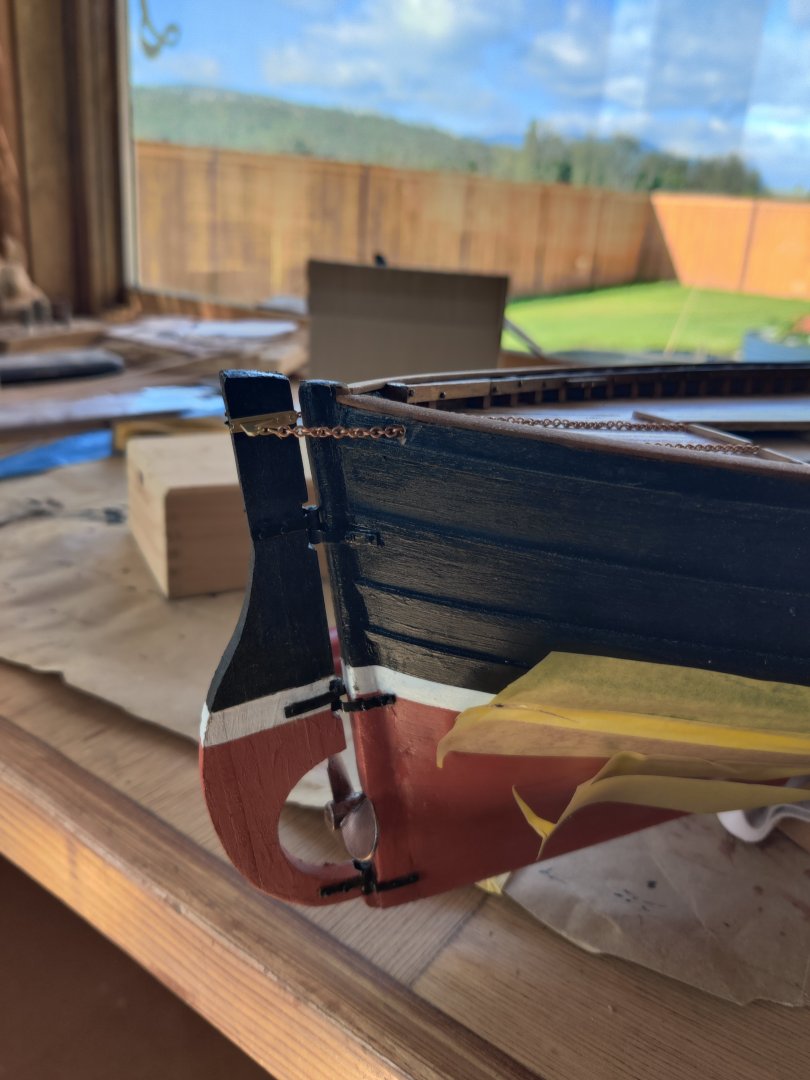
With the decking all complete, the next project was to build the rudder and attach it. The chain for the rudder needs to be attached to the brass bar inserted in the slot at the top end of the rudder. There is no s hook or other part provided to attach the chain. I cut off the thinnest straight divider from the brass part sheets and used it to attach the chain. *note that the brass pins provided are too long and need to be shortened to about 1/2 their length, since the pins are coming in from both sides. I found that it works best to drill holes for the pins before insertion. It saves the paint and keeps the pins from bending.When attaching the rudder to the keel I experienced numerous newbie obstacles. To be sure others did not encounter the same issues, I edited my prior entries to alert others so that they did not encounter the same issues. The primary problem was that I encroached onto the keel section about 1/8"-3/16" when planking so that there was not enough depth left on the keel to accommodate the full length of the rudder hinges. I should have added a plank or two to the rudder to get the length needed but it looked odd at the bottom because it moved the rudder to far away from the prop. Instead I attached the tip of the two top hinges onto the hull. It was a mistake. So I will now remove those two top hinges and taper the planks added and leave the bottom hinge in its current position. It will be a lot of work but I am not happy with it as it sits. I should have dry fit the rudder with hinges before I did the planking and marked their location on the keel. Lesson learned the hard way.