LyleK1
-
Posts
541 -
Joined
-
Last visited
Content Type
Profiles
Forums
Gallery
Events
Everything posted by LyleK1
-
 Thanks Joe! Actually, I discovered today that the original drawings in the "Anatomy" book don't show crowsfeet on the Bounty! Oh well! I've already done the foremast crowsfeet and will continue on but I'll be checking more closely going forward. I plan to have the sails in a dry set position which will allow most of the rigging to be visible. You always know what you did and can always point things out to the novice eyes looking at it! Sometimes that good enough. Appreciate the comments! Finished the main stays today. I'll post more pictures after my brief trip to LA tomorrow. BTW, I stopped by your Bounty build log and am absolutely floored... Beautiful work. You must have the patience of Job to work at that scale!
 -
Thank you! Appreciate the comment and support.
-
Thanks for all the helpful comments. I’ve got it sorted out… for now!
-
Thanks Dave... The scale is a curse too! Can't hide many mistakes! But definitely easier on the eyes!
-
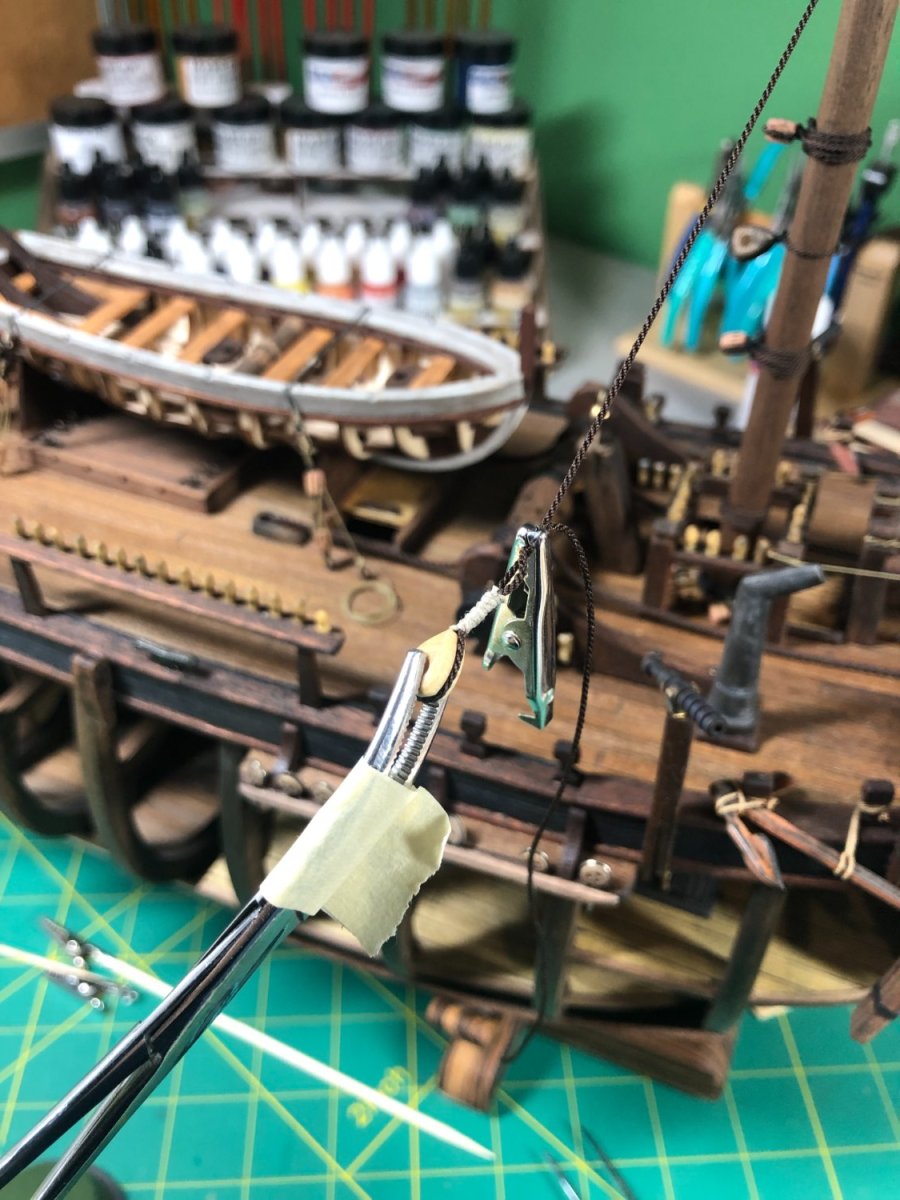
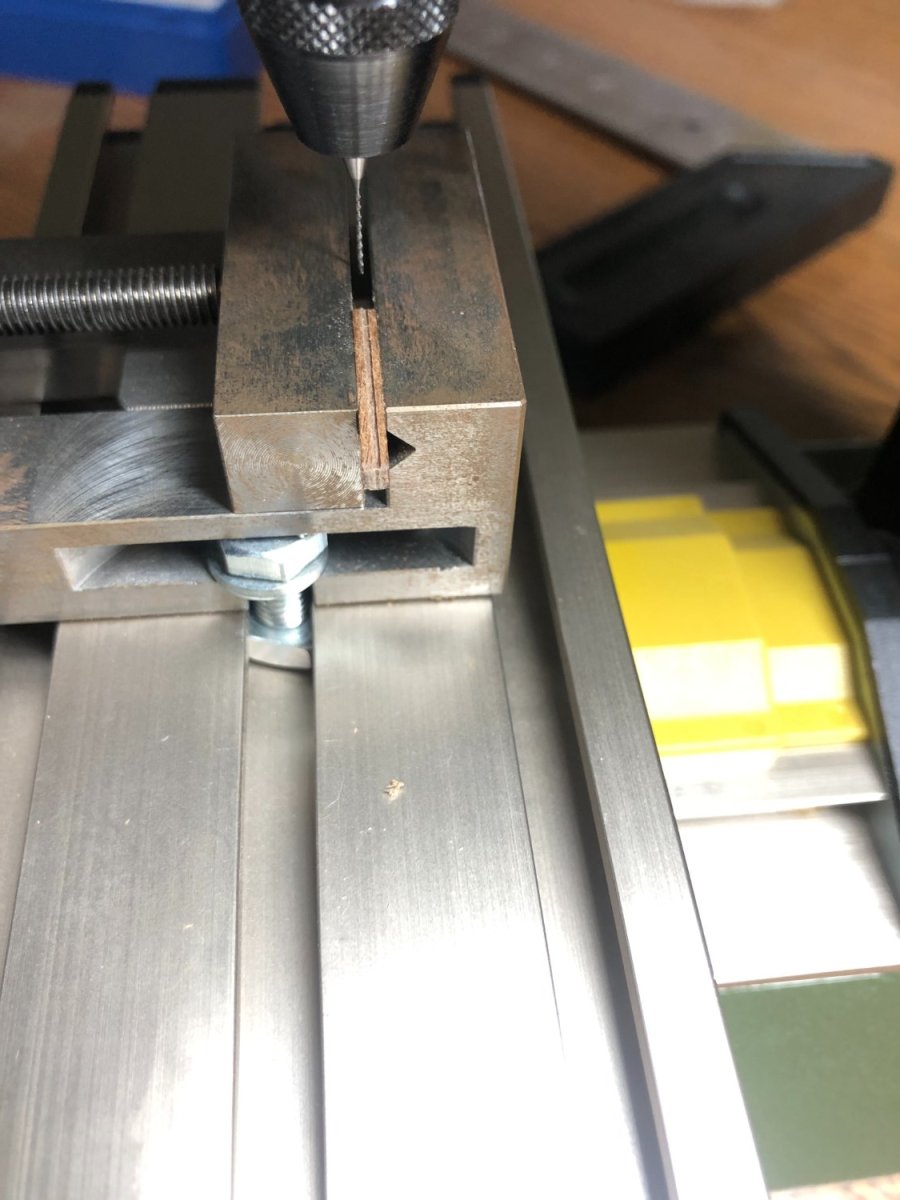
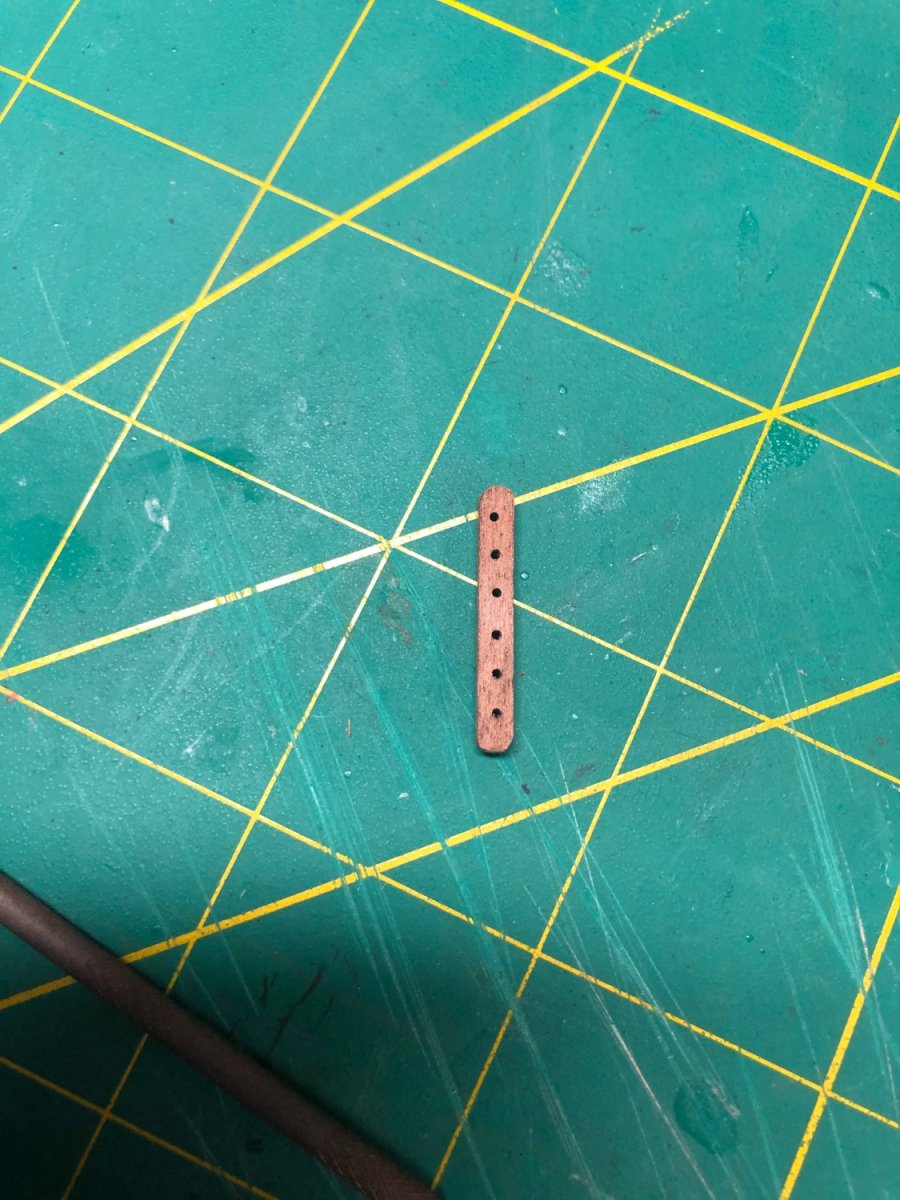
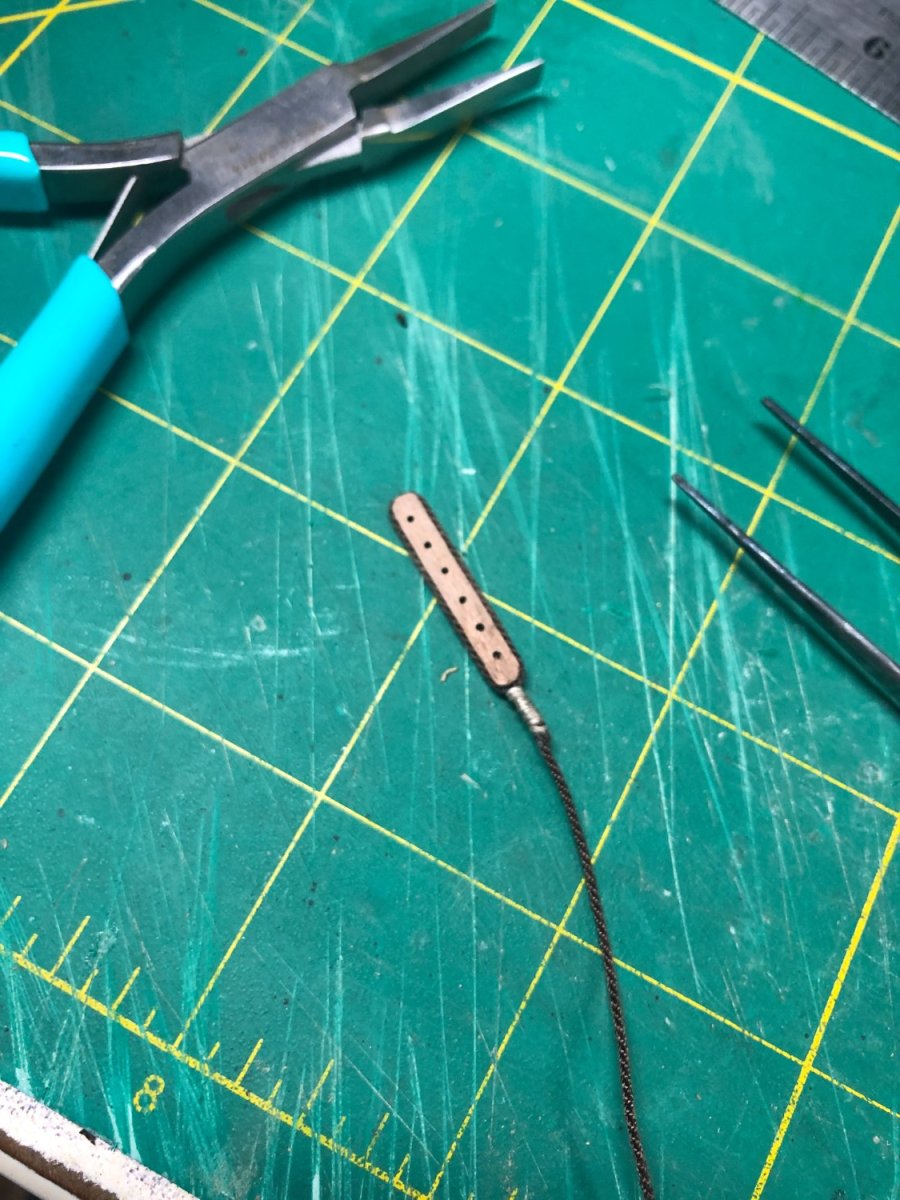
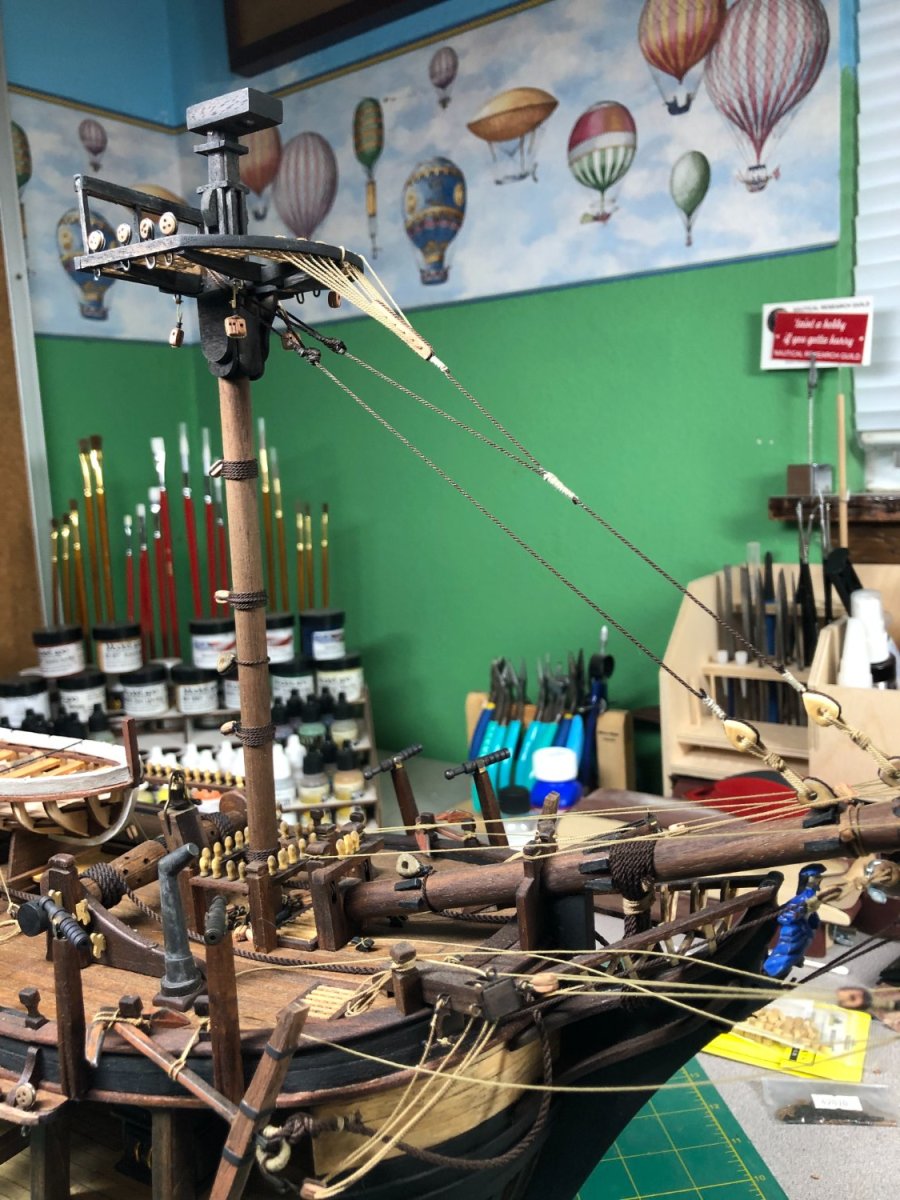
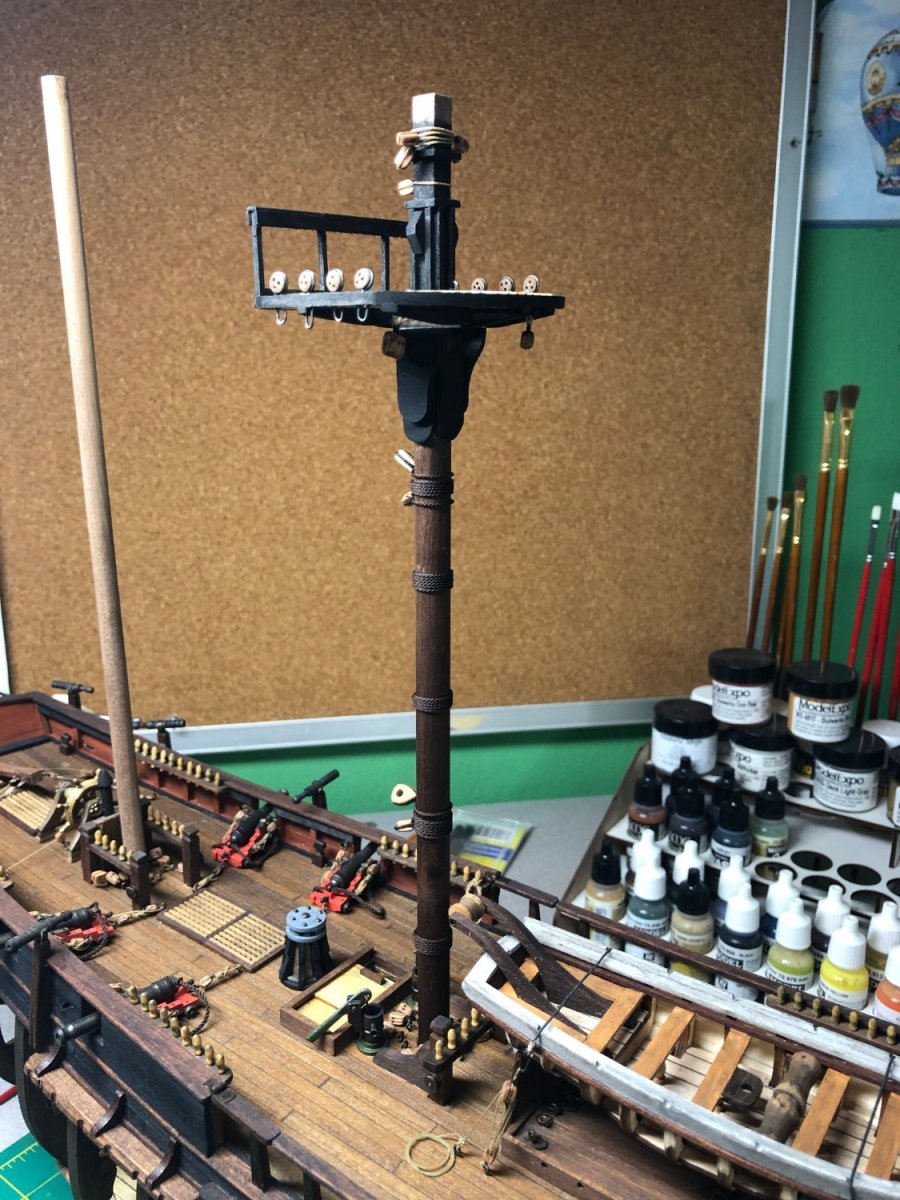
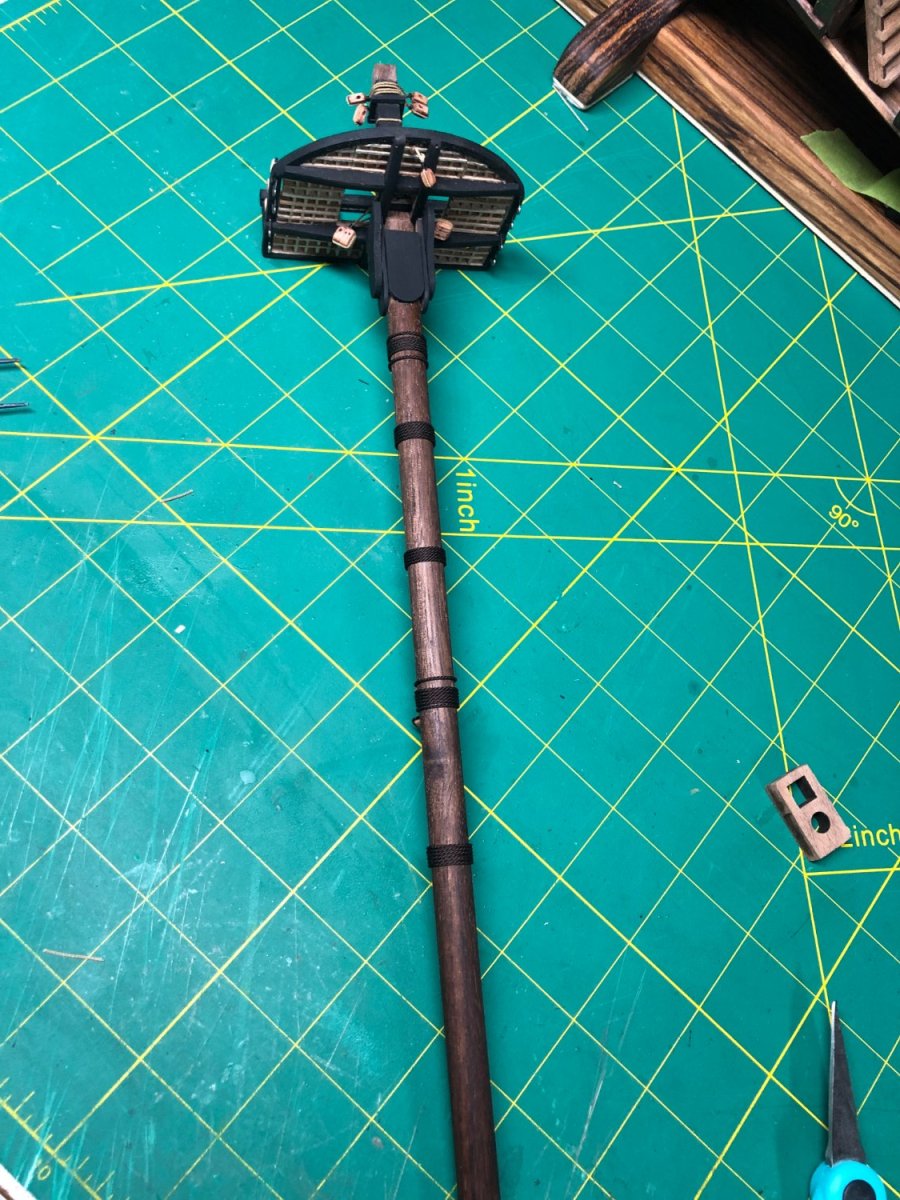
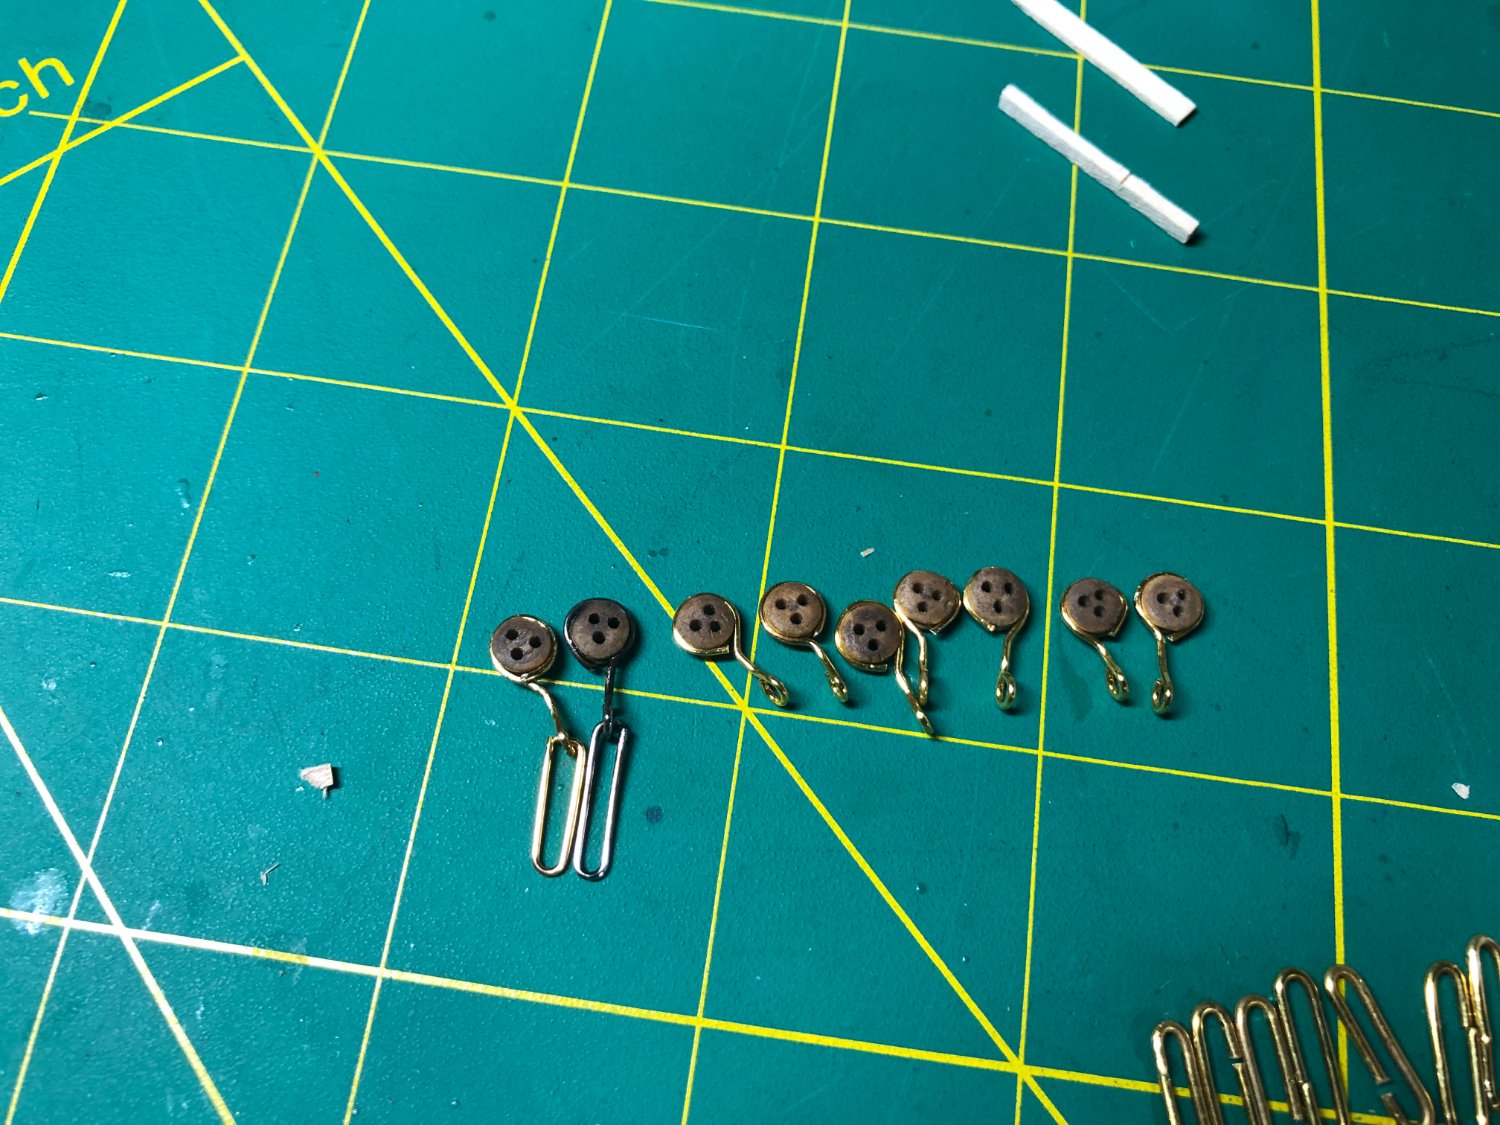
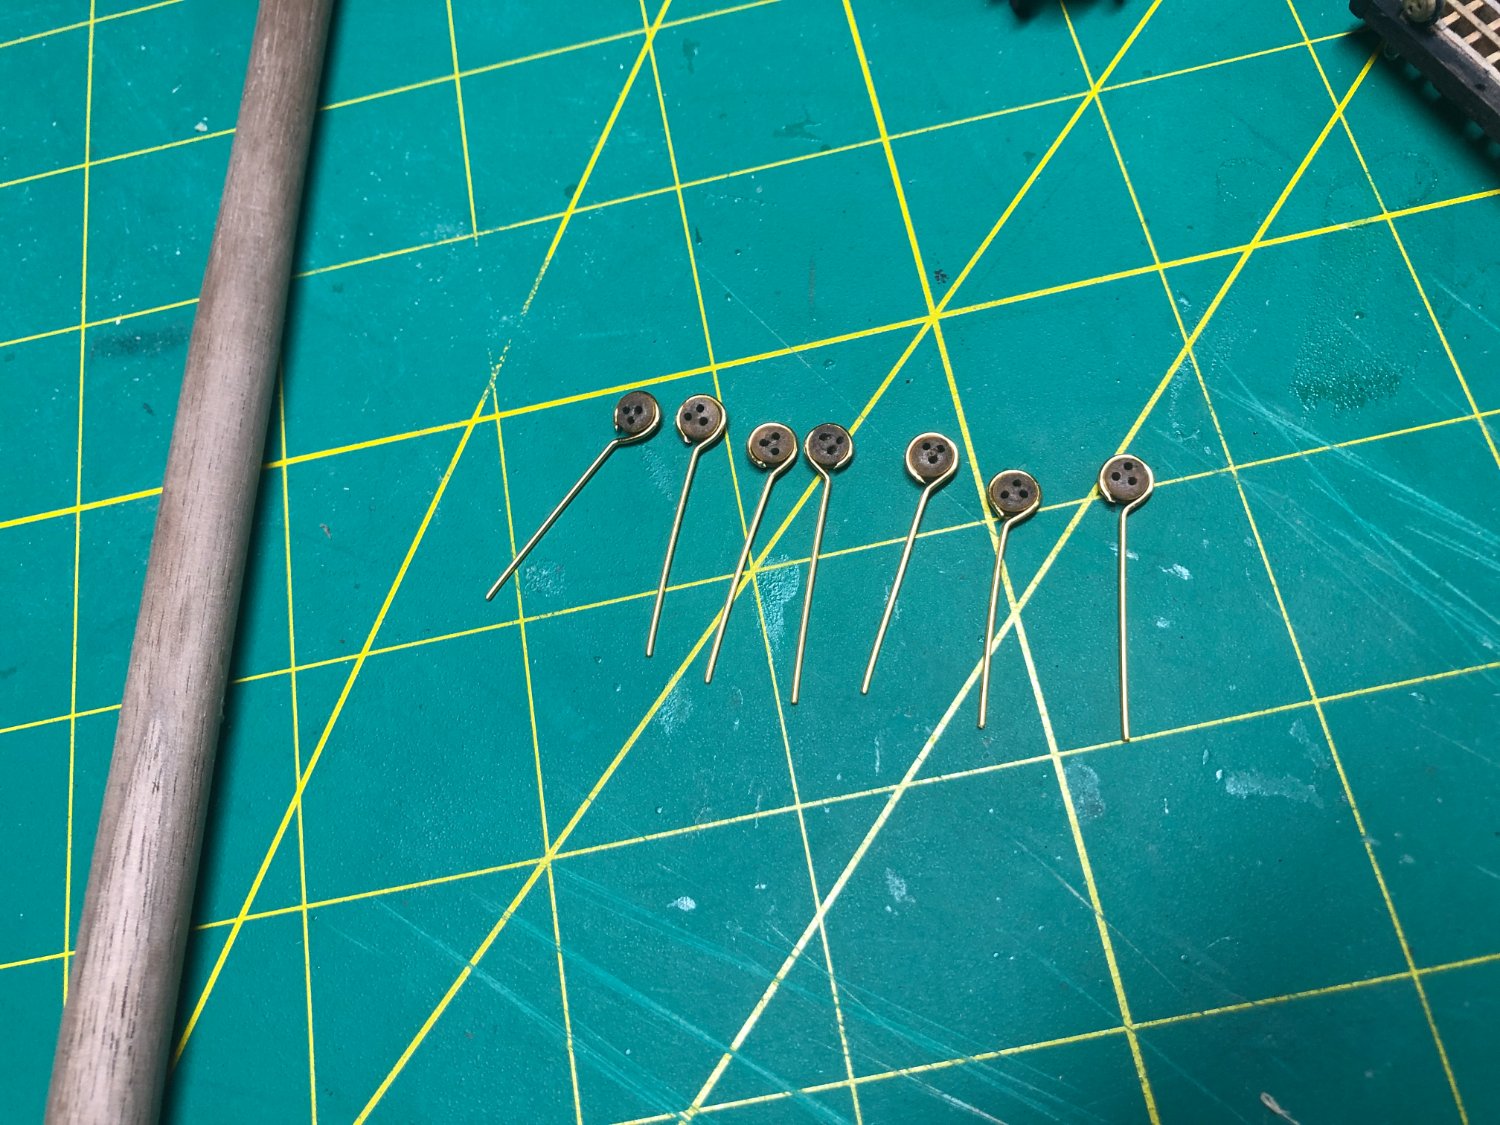
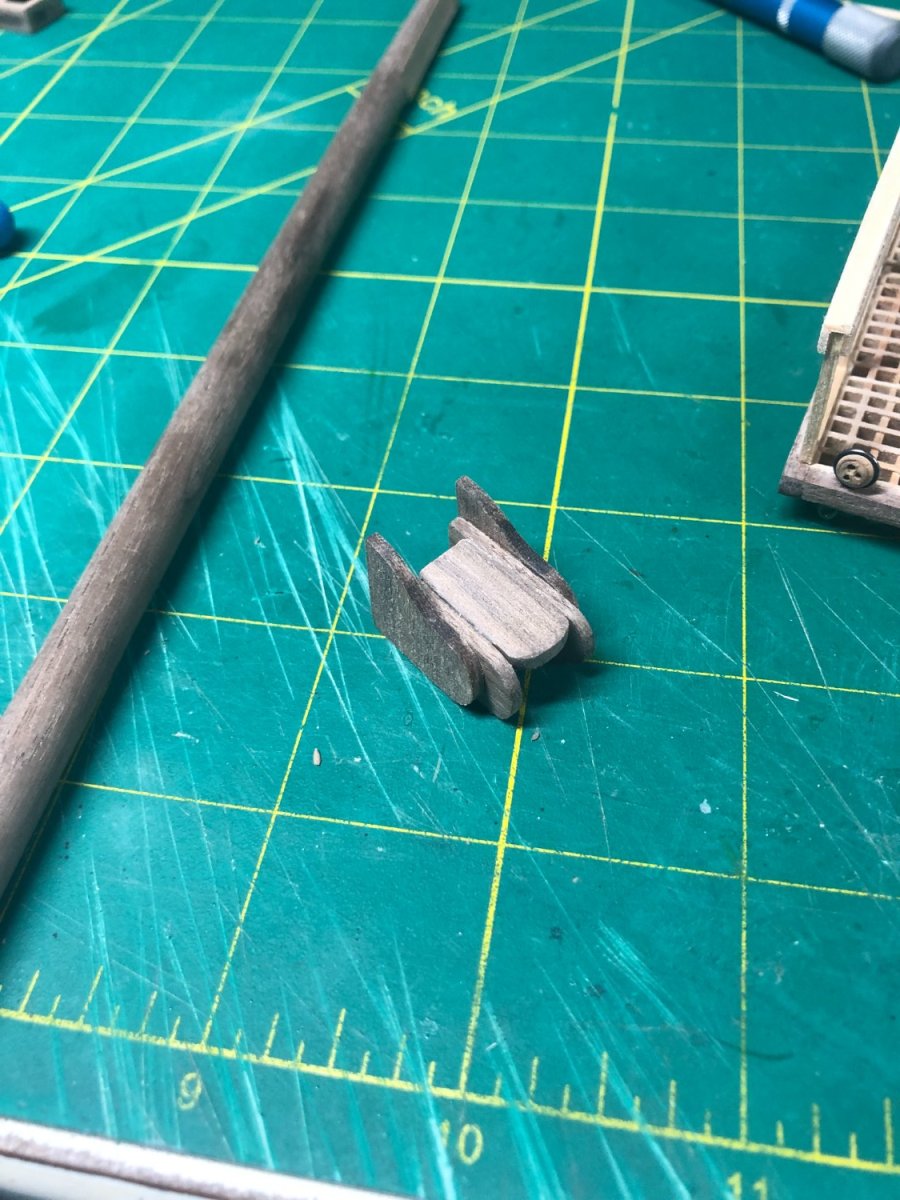
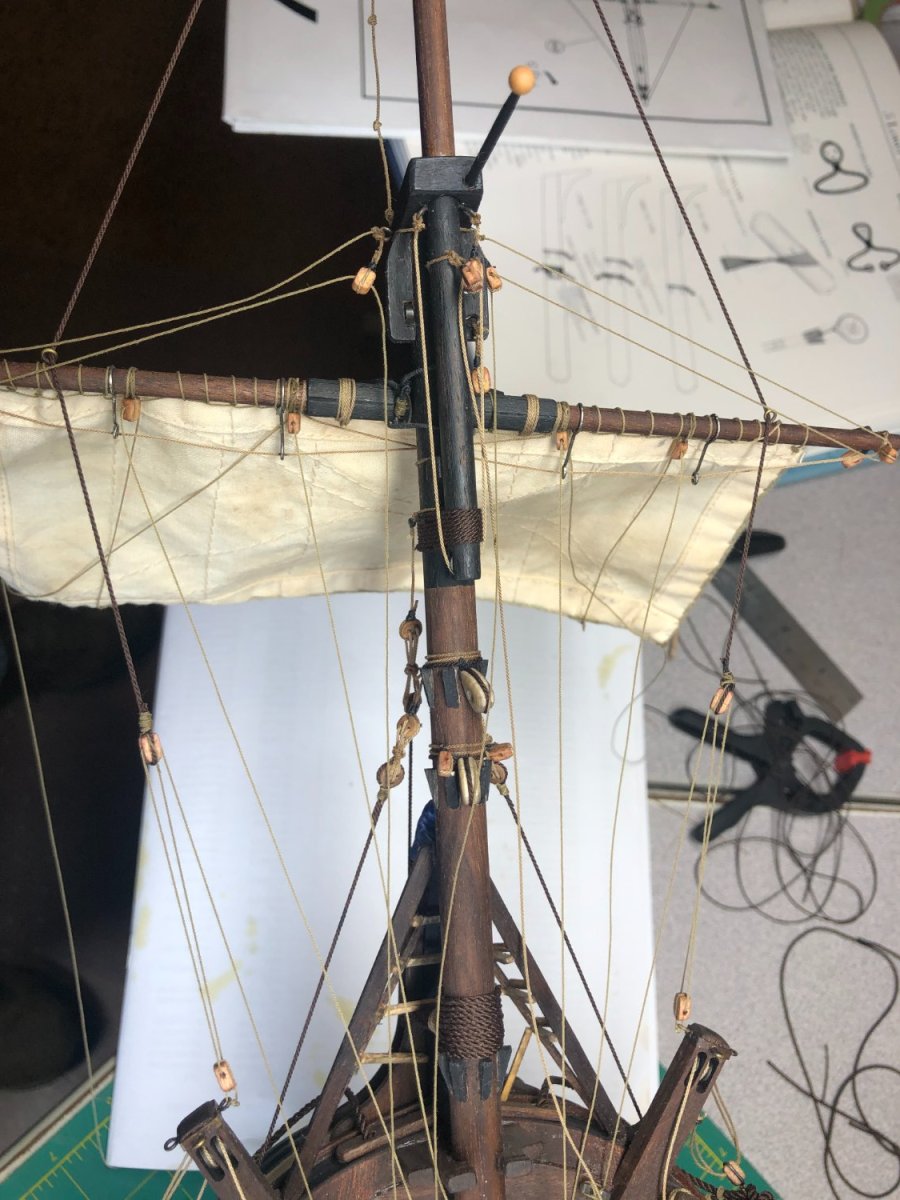
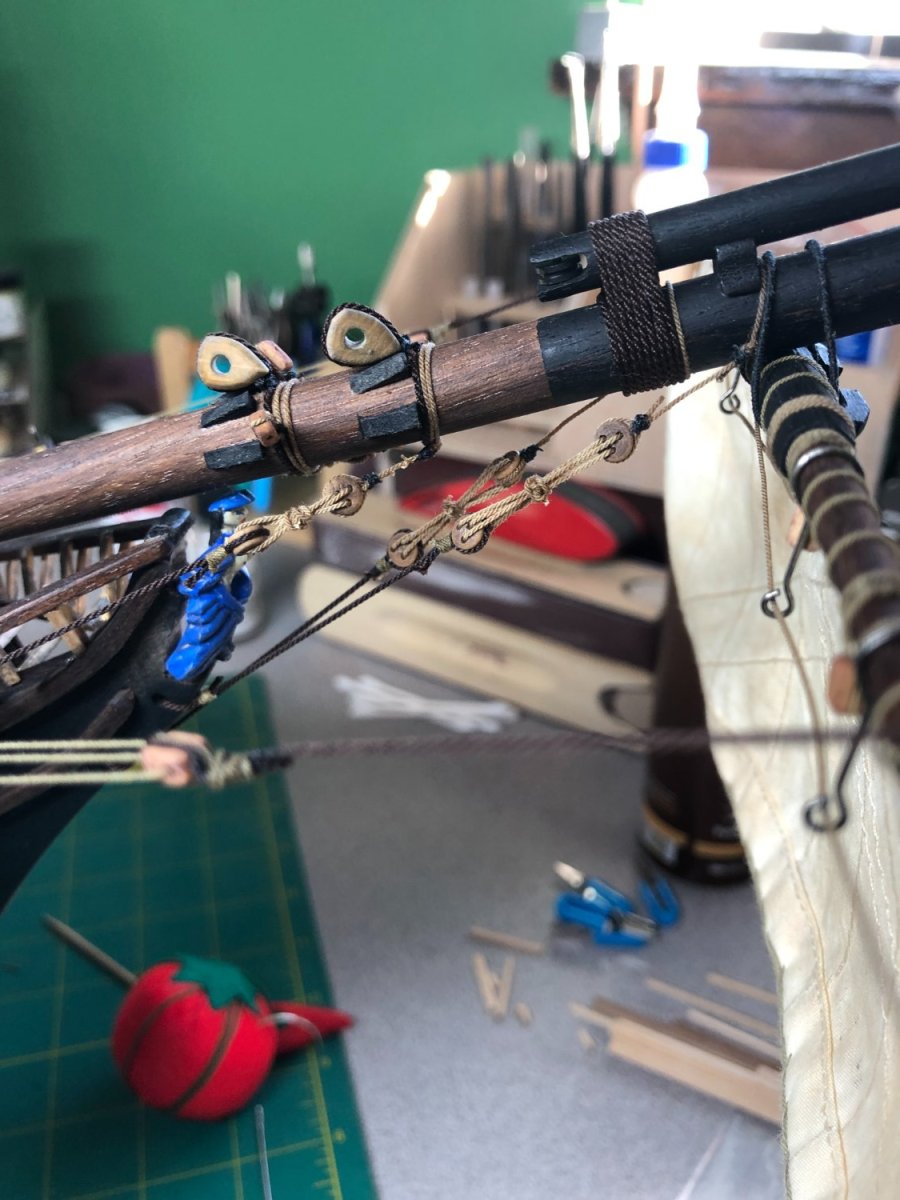
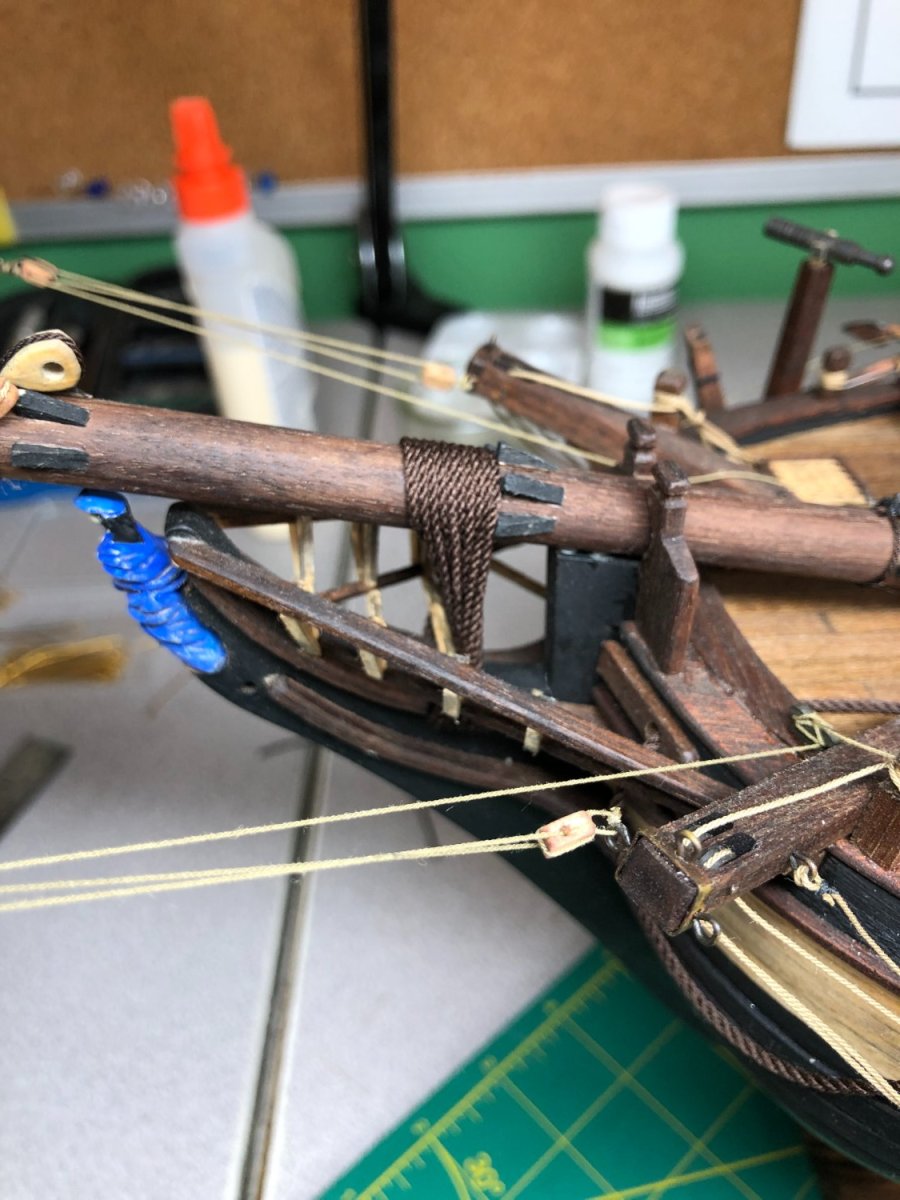
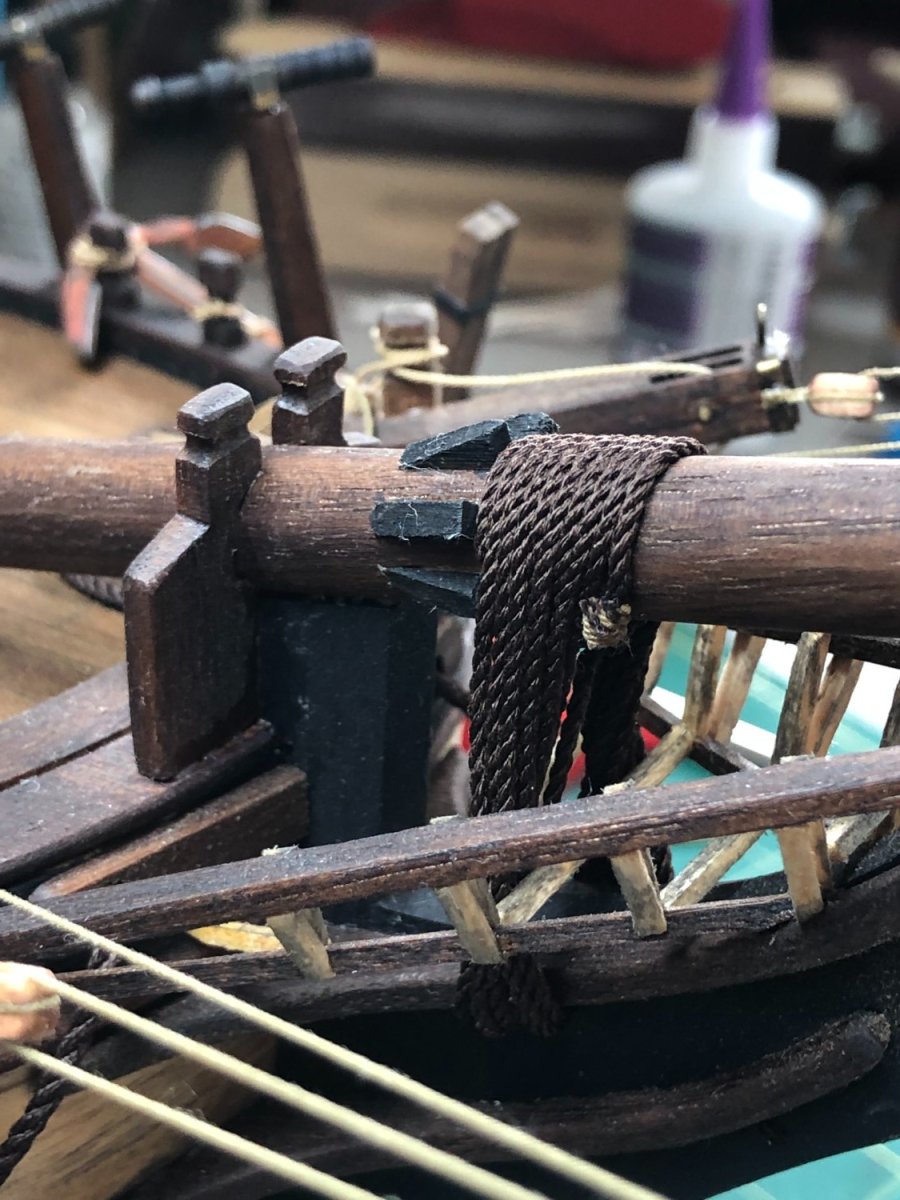
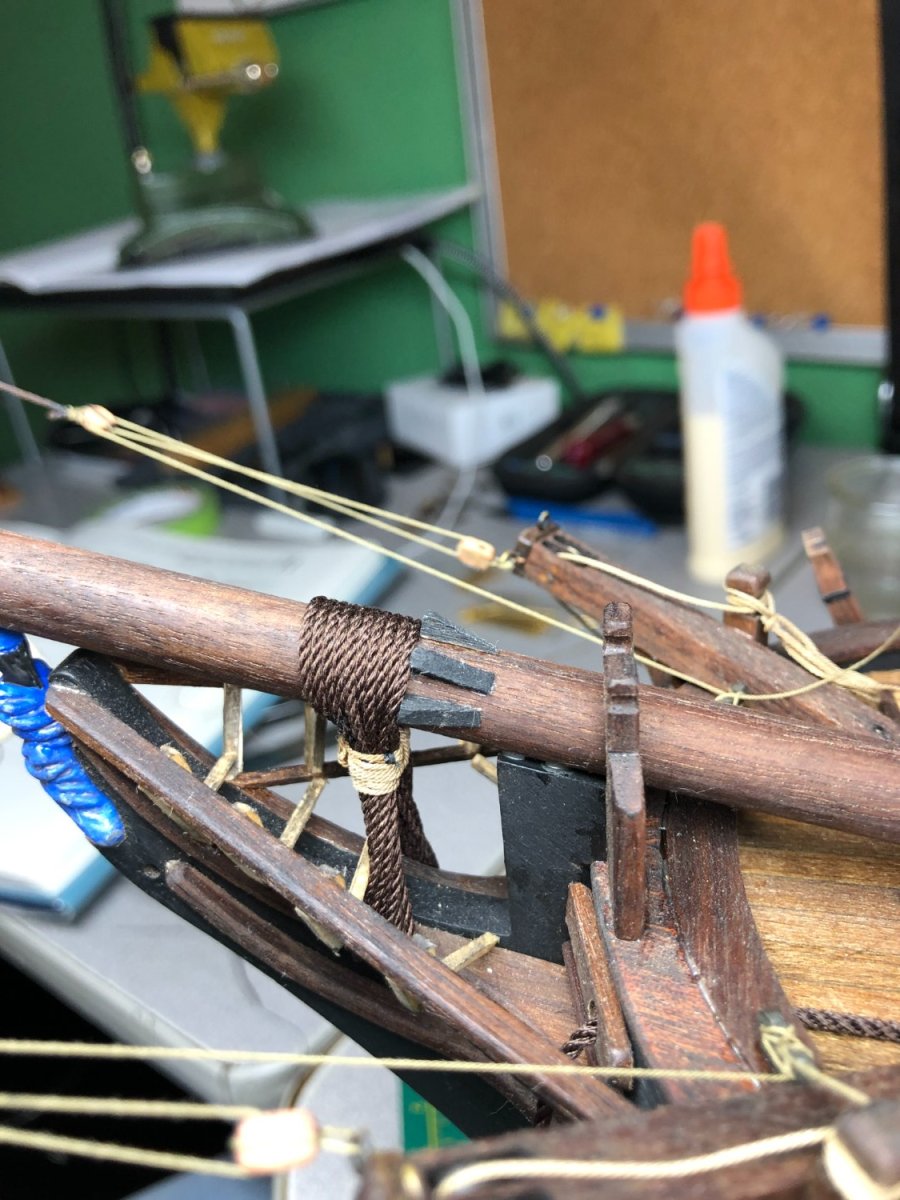
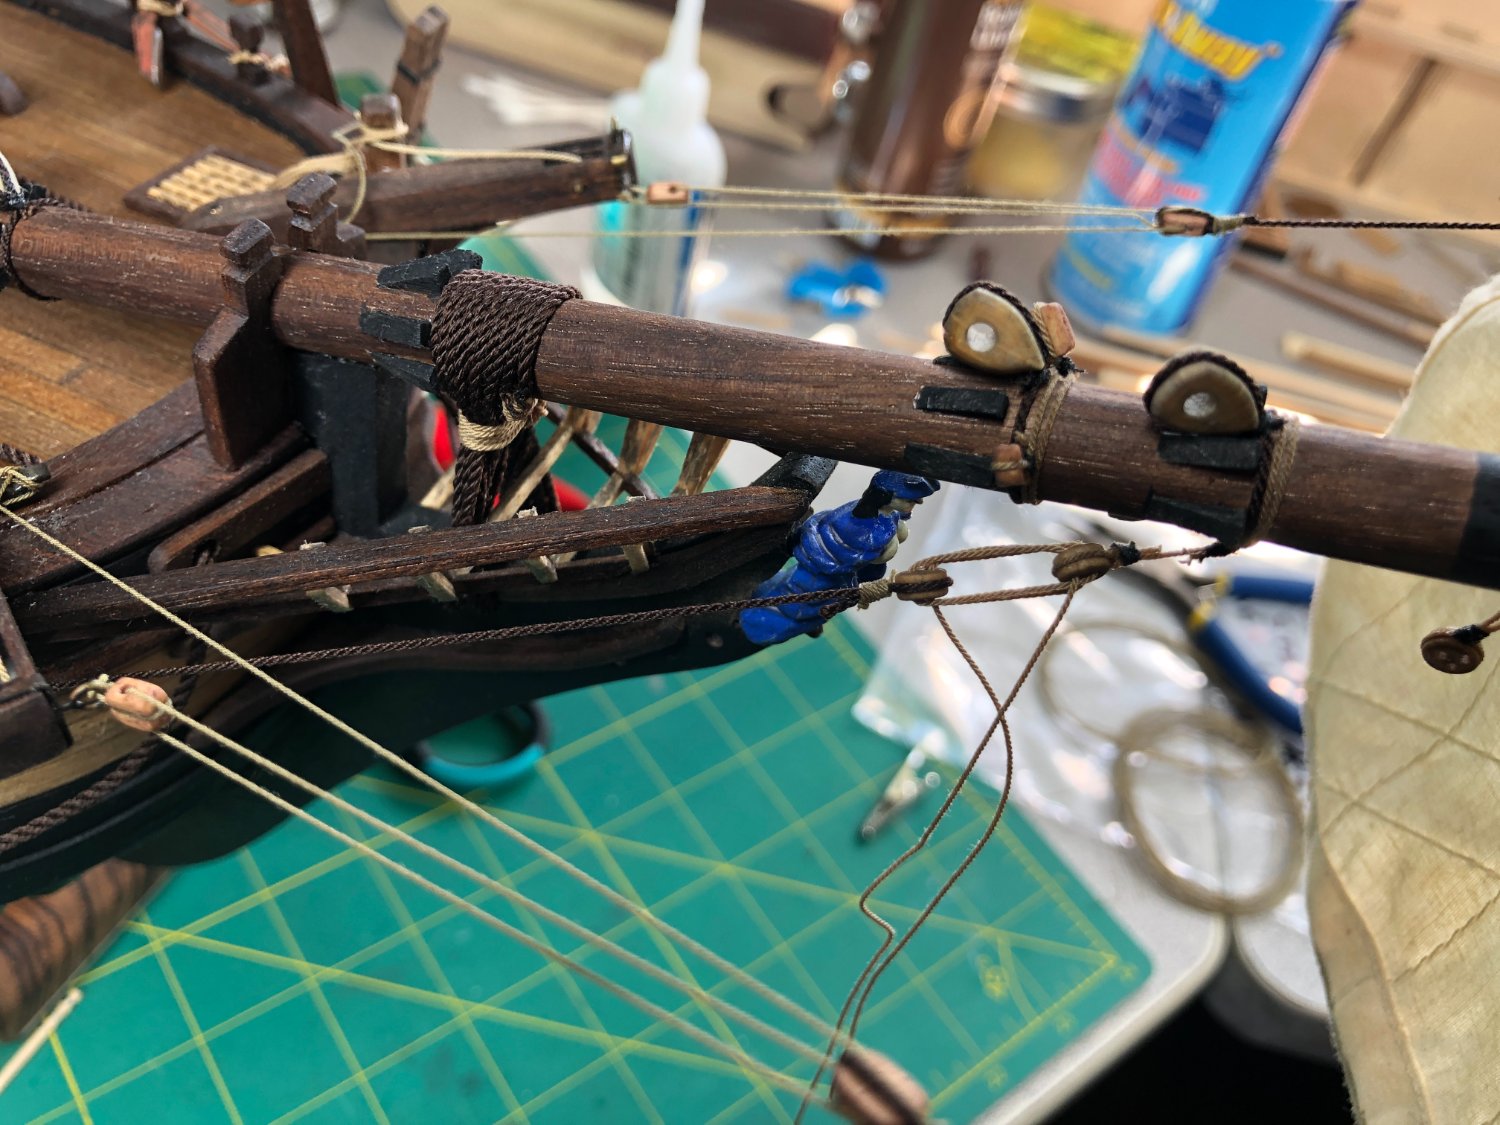
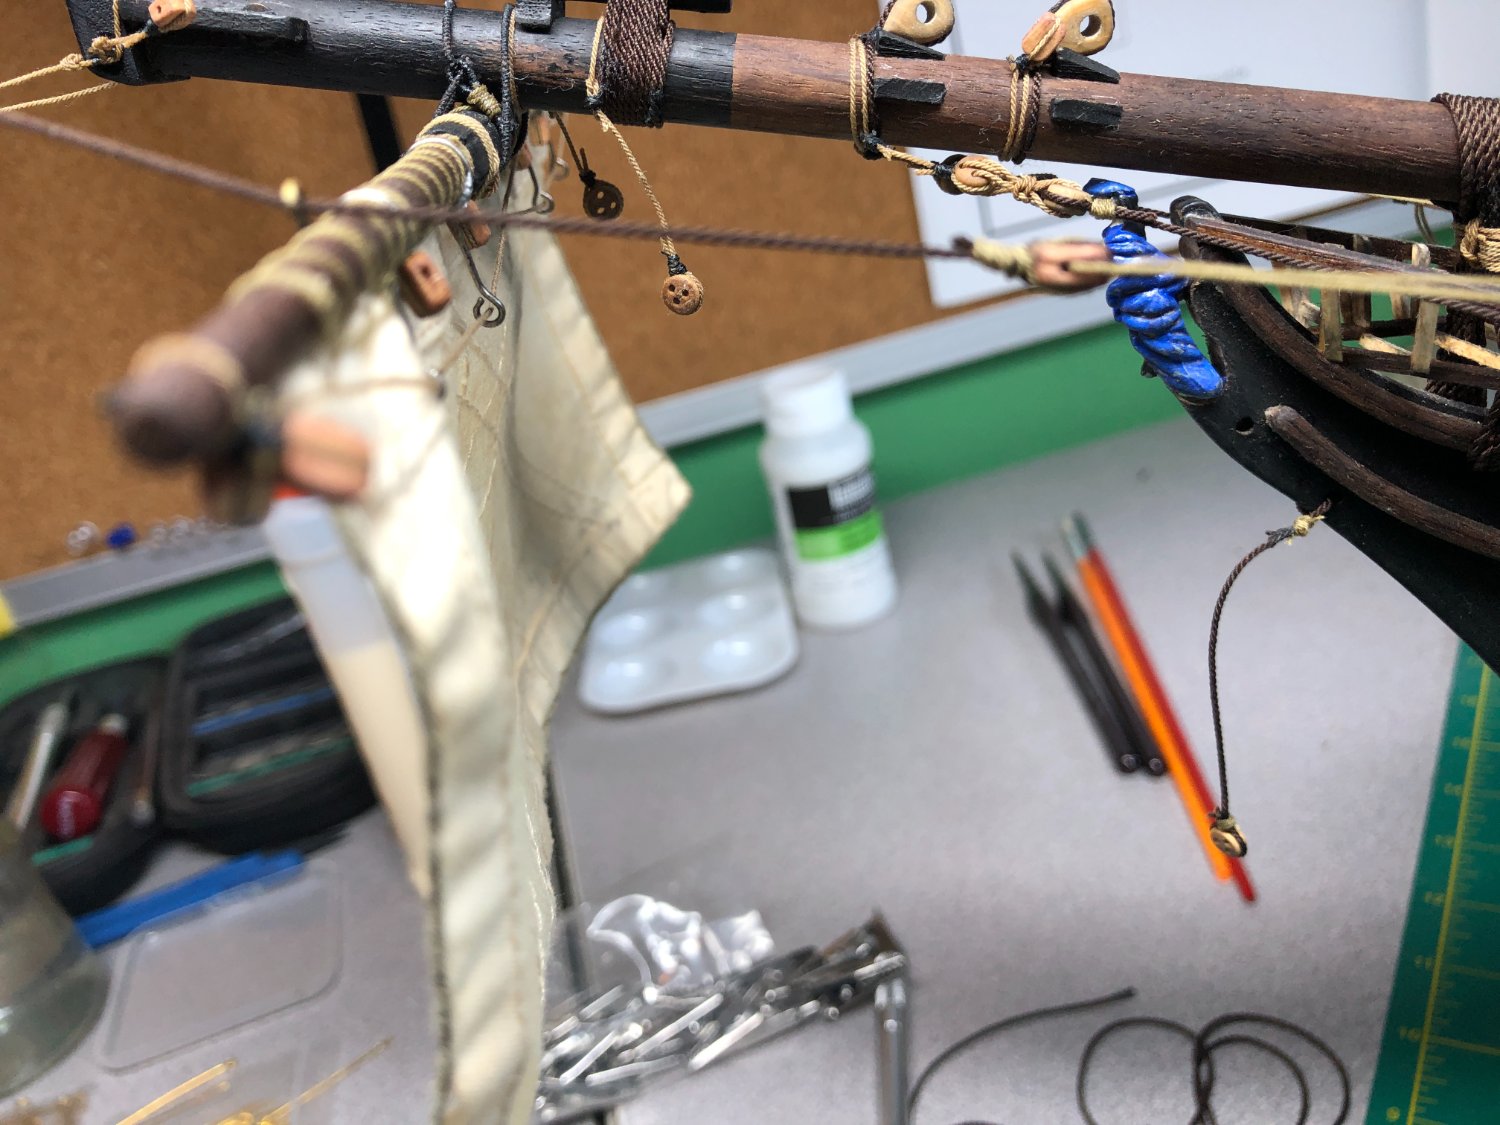
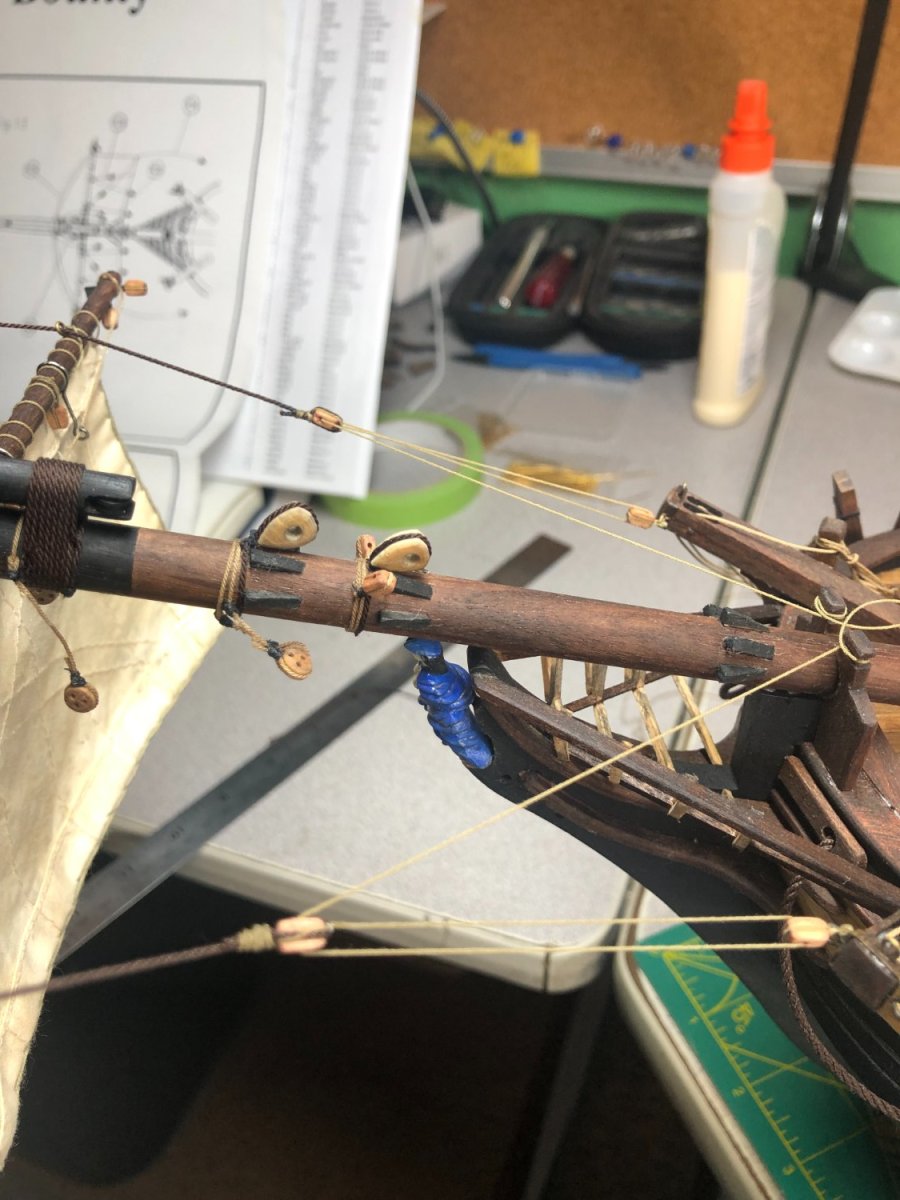
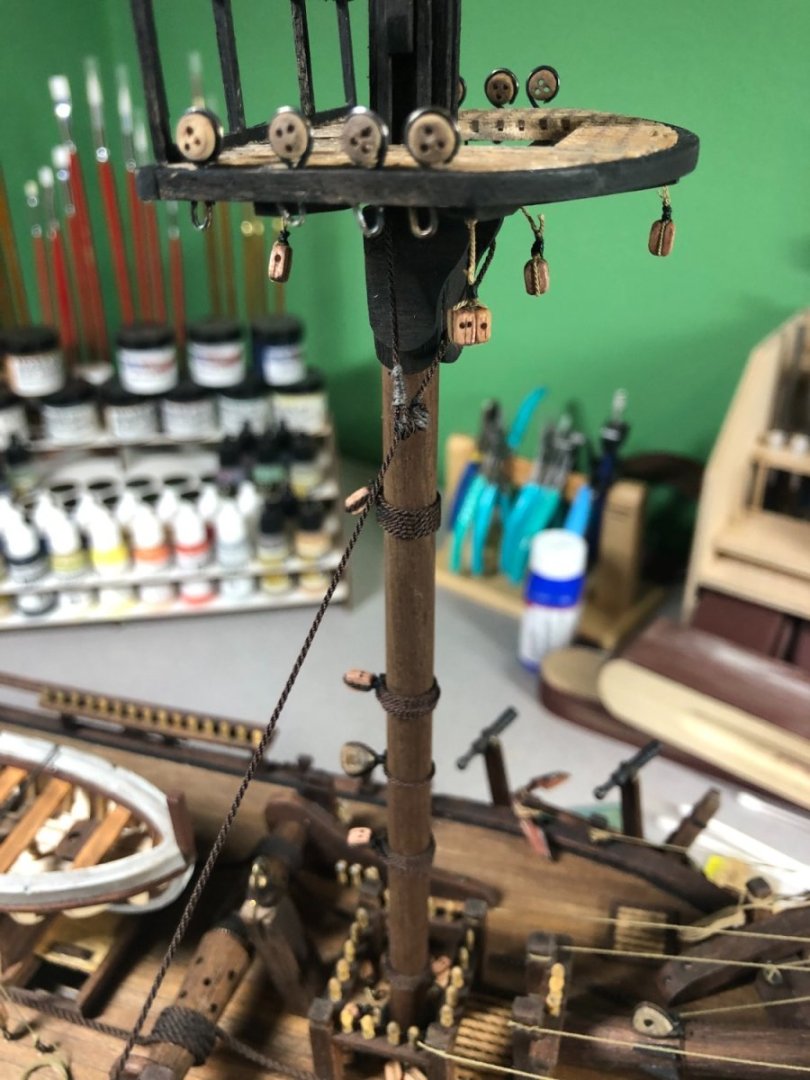
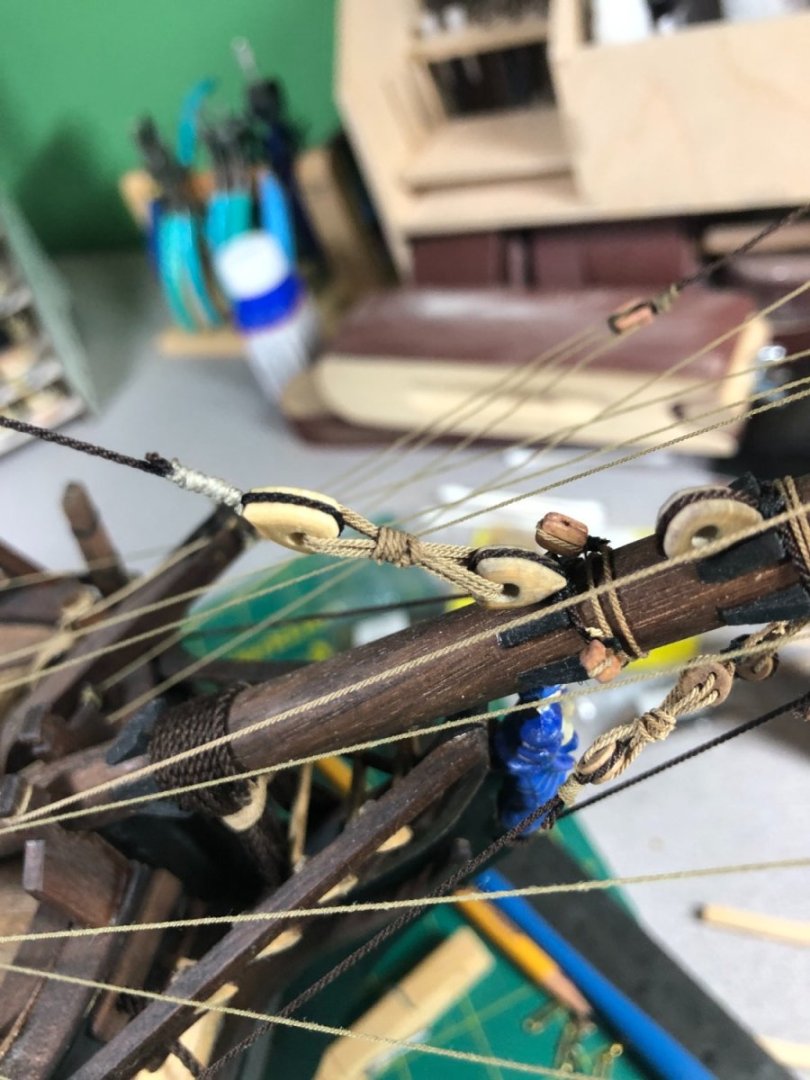
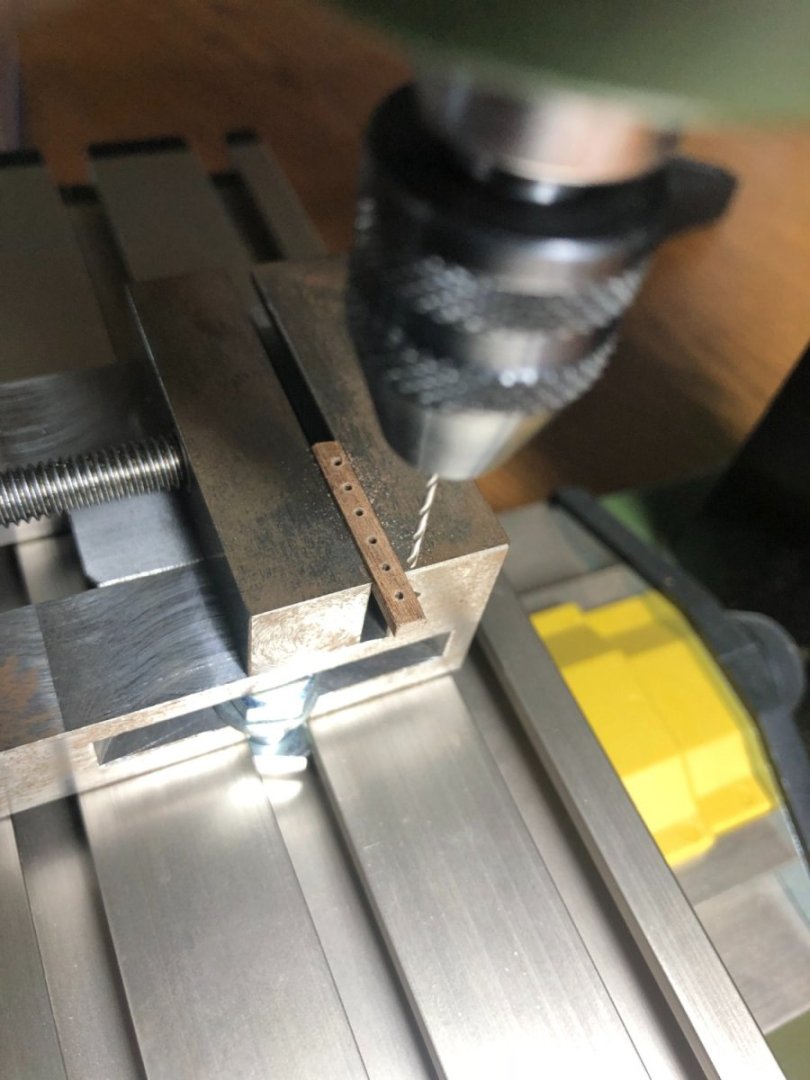
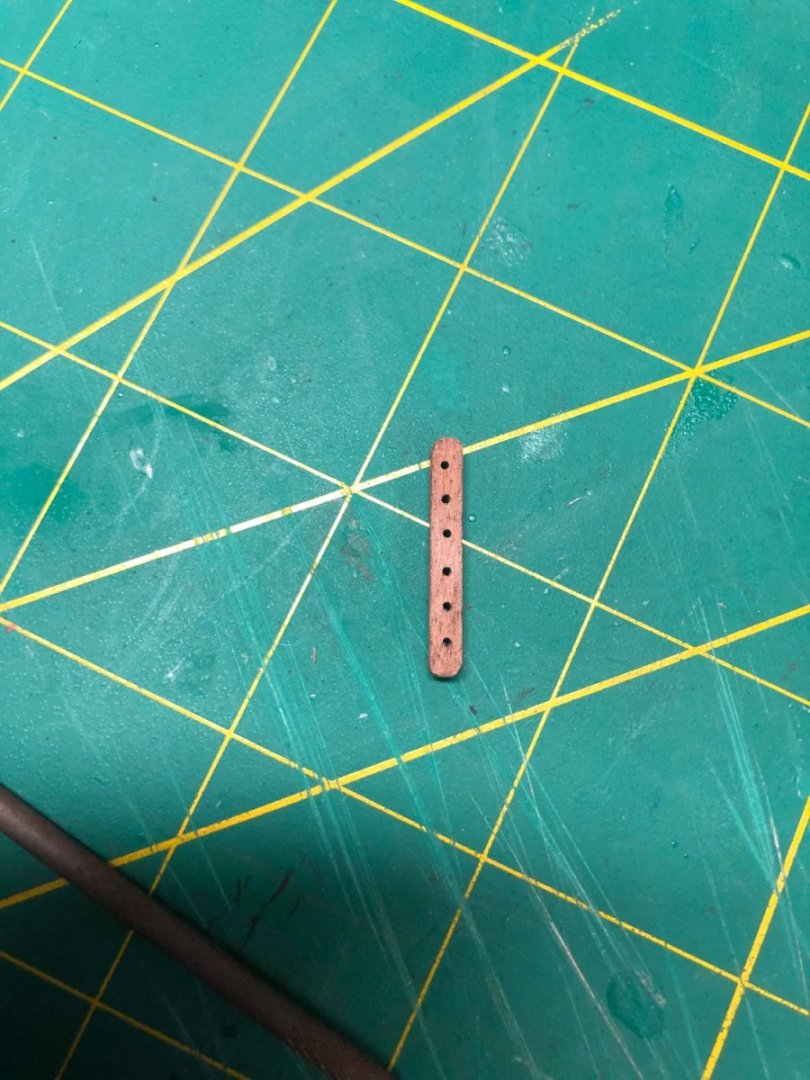
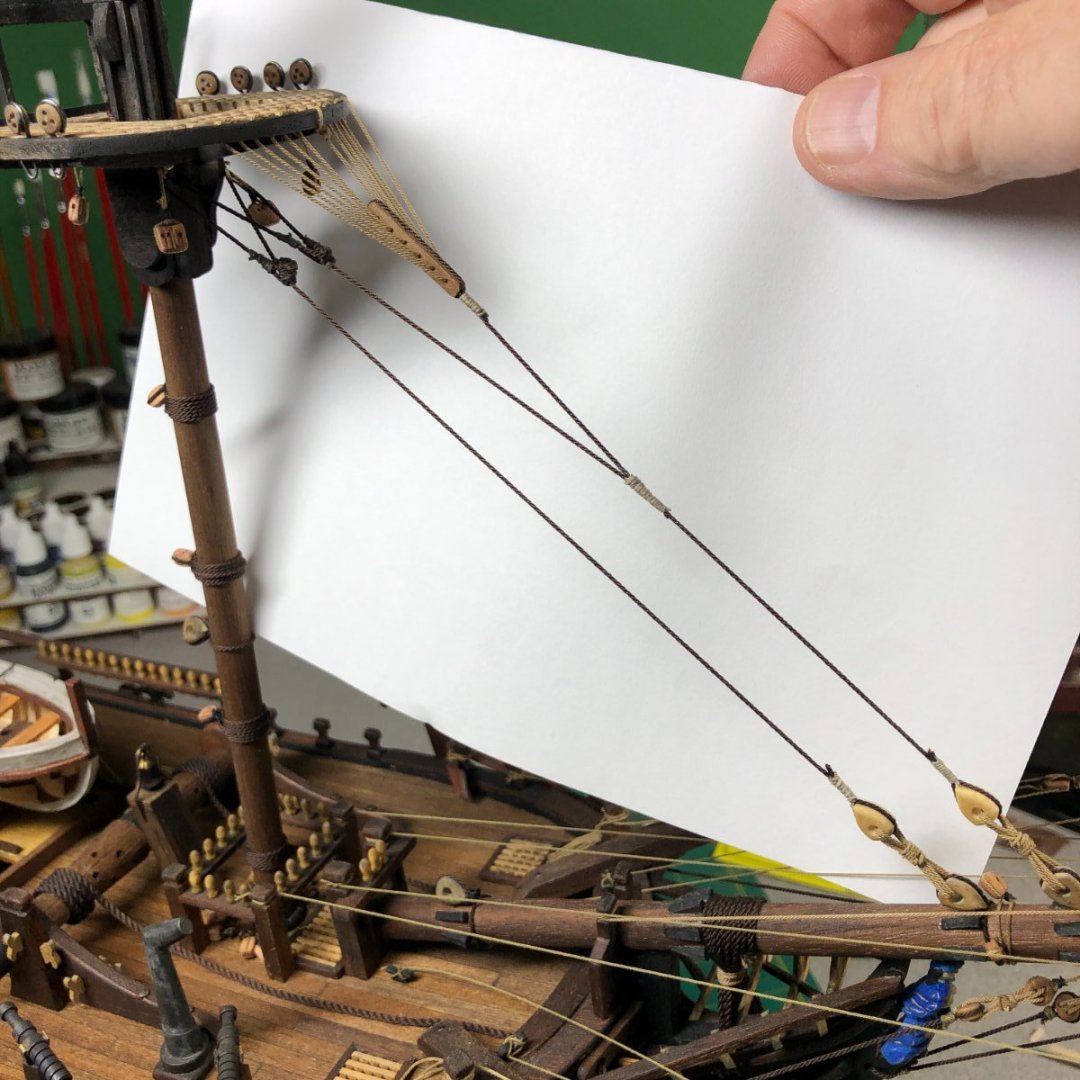
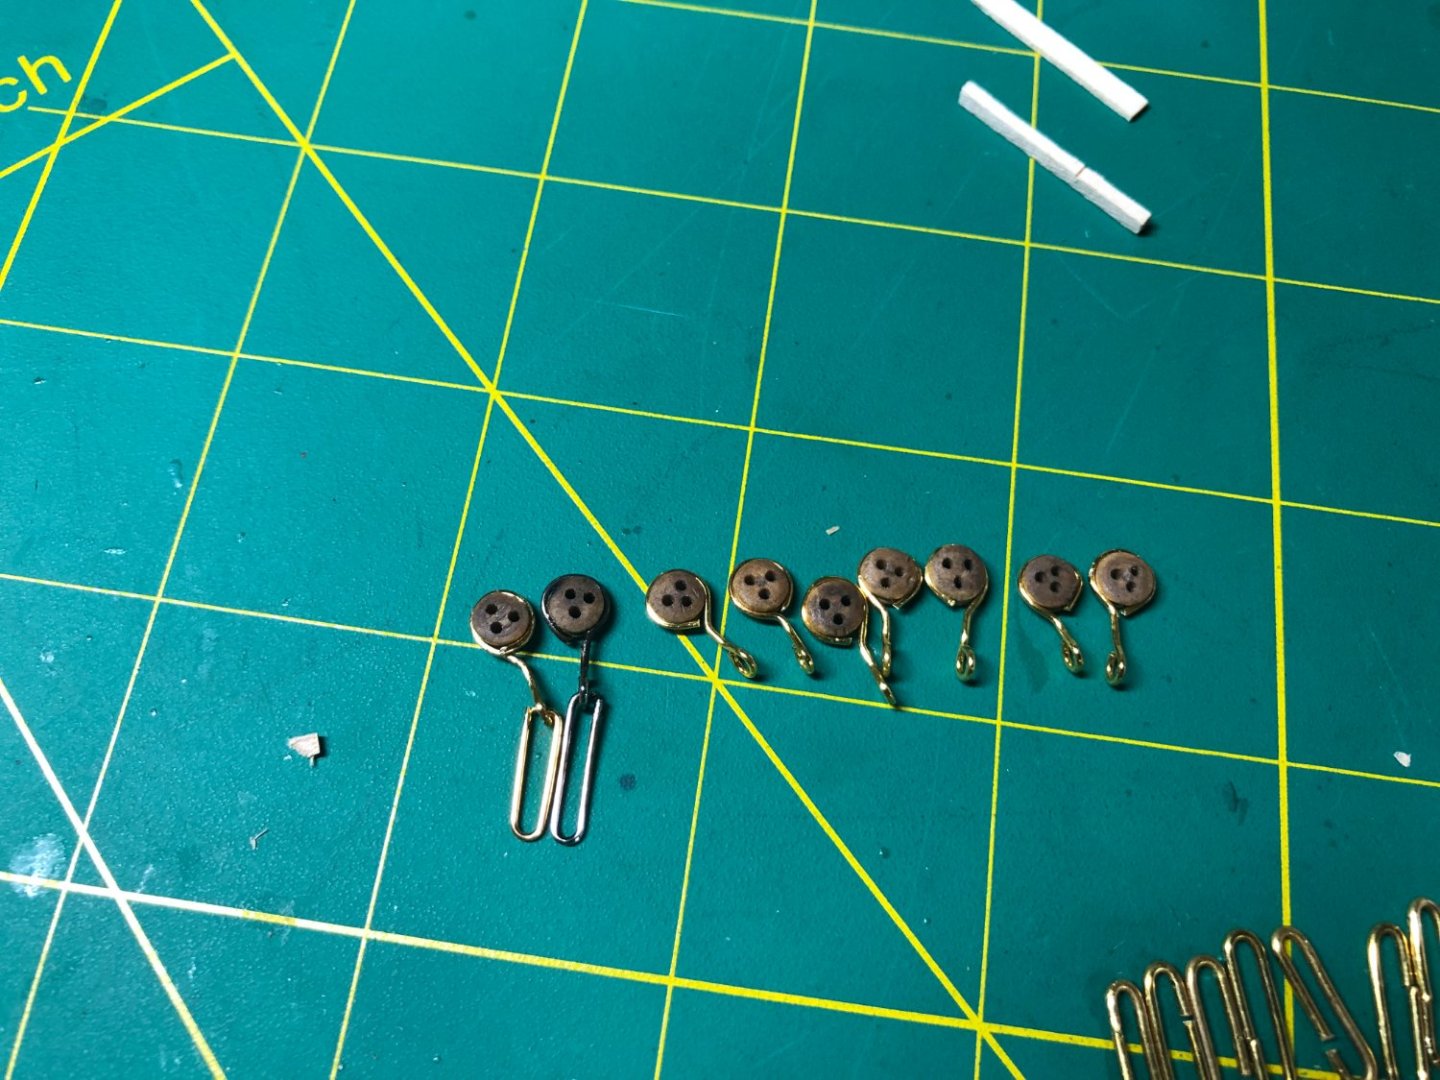
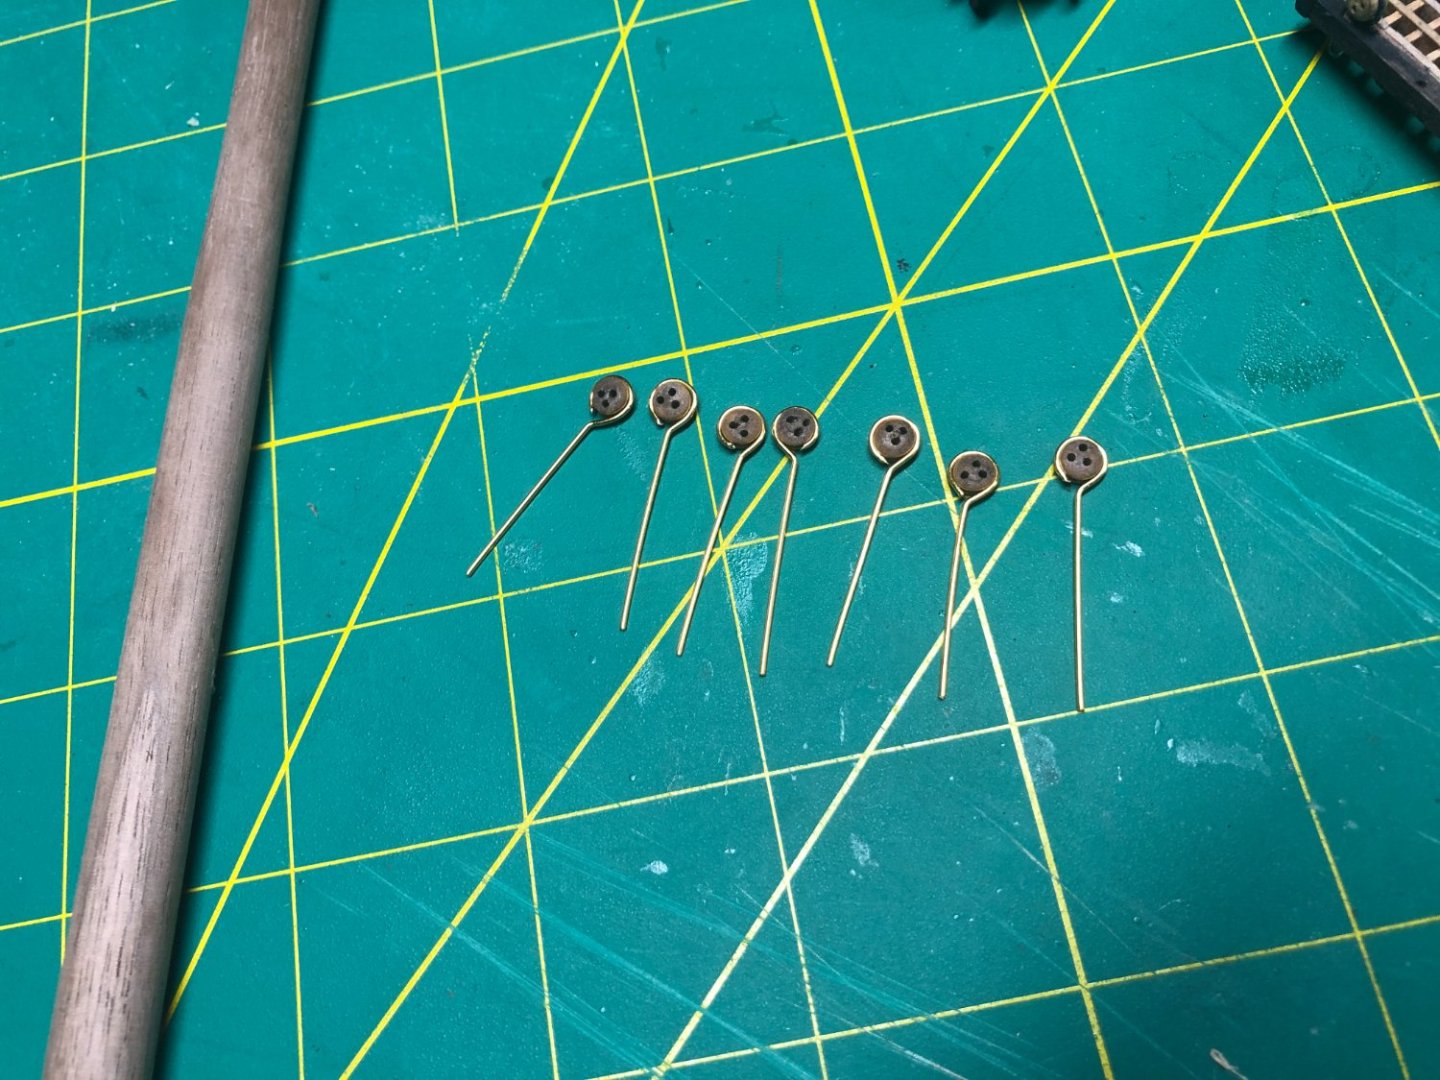
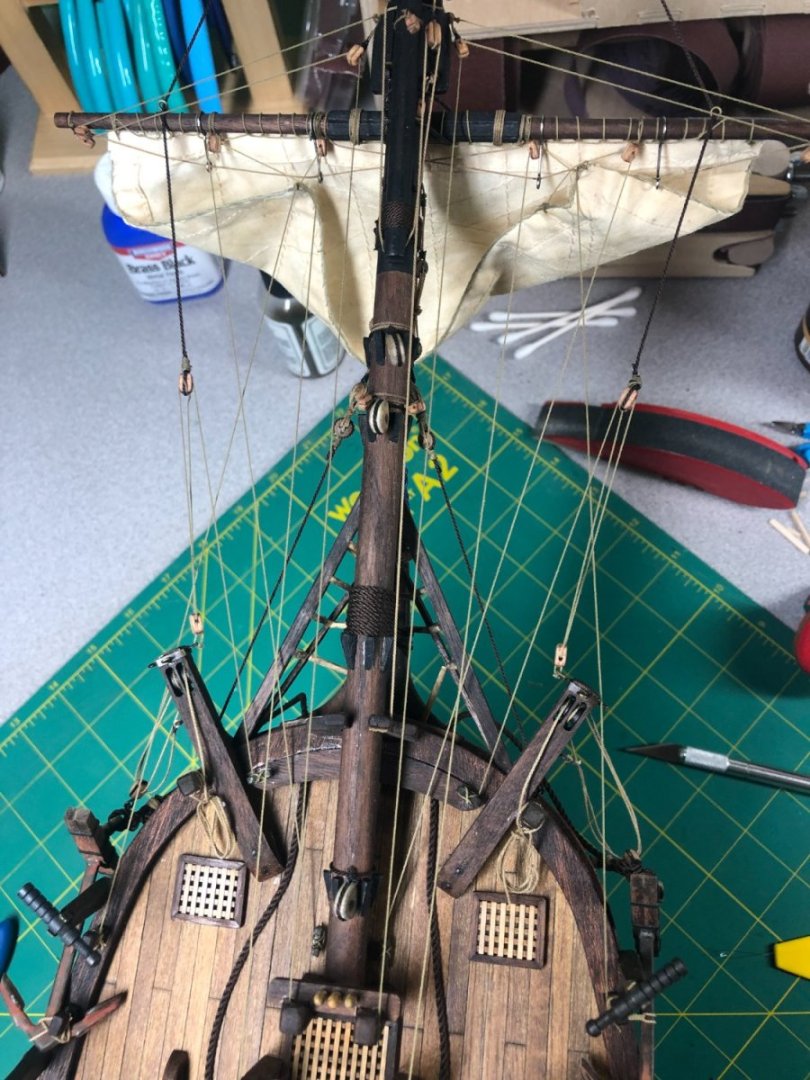
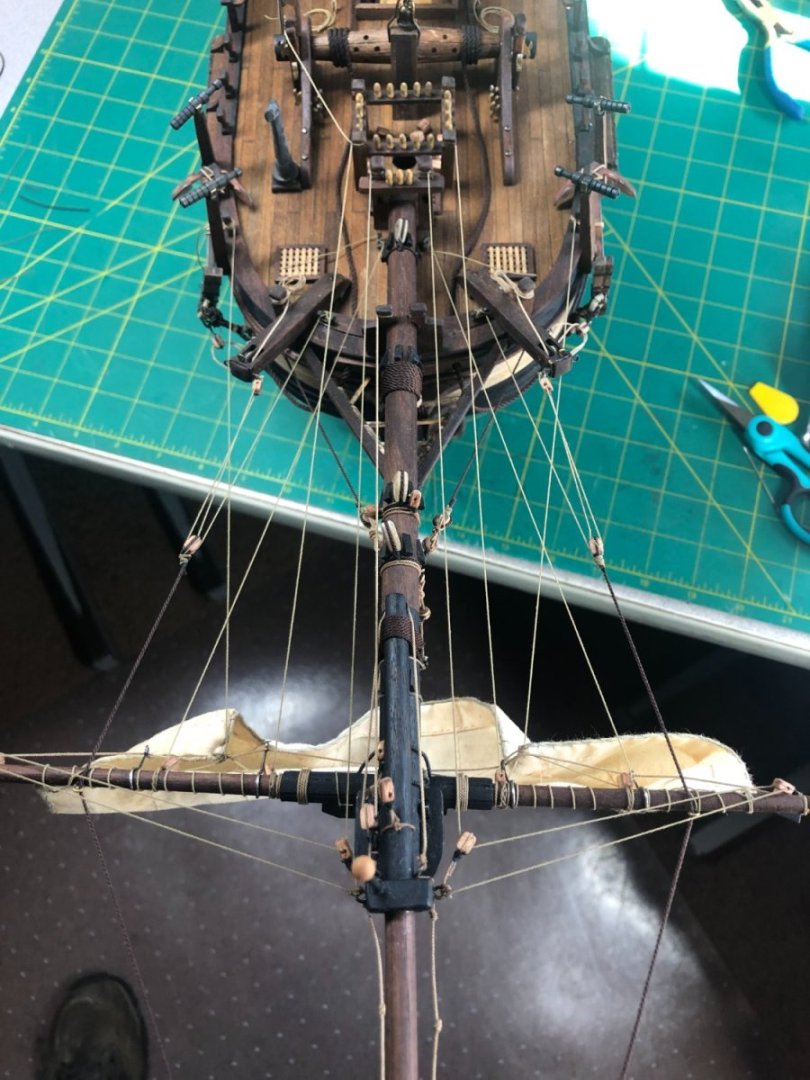
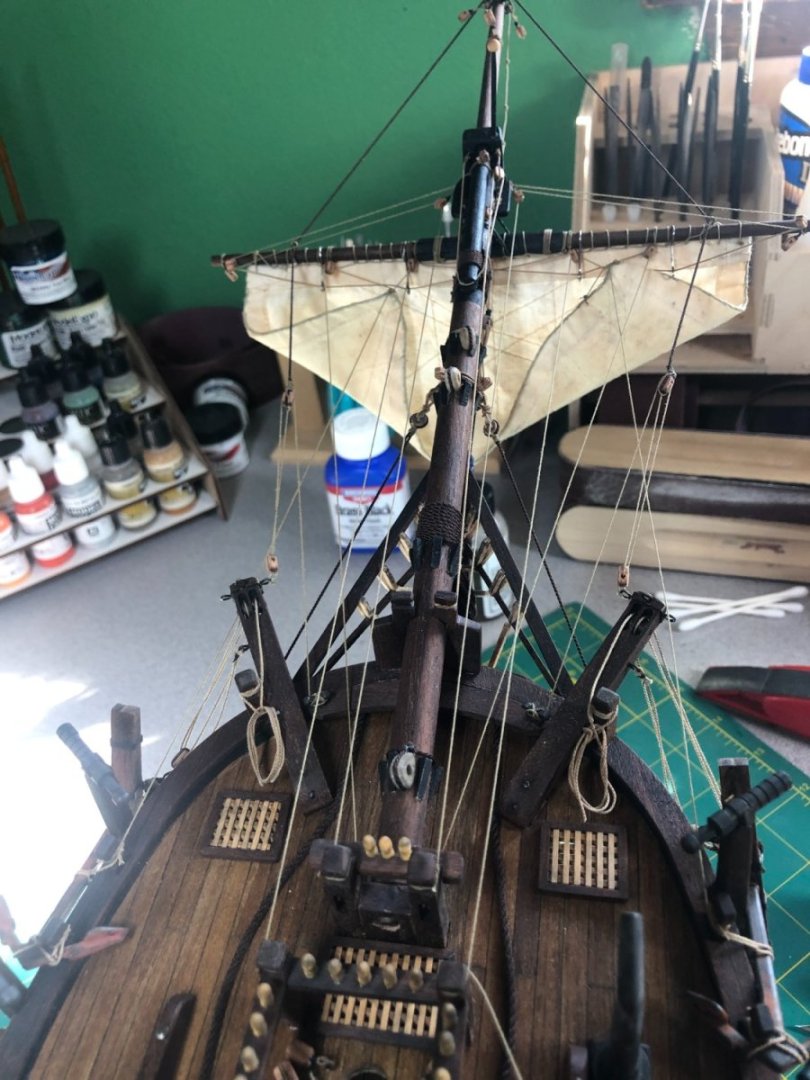
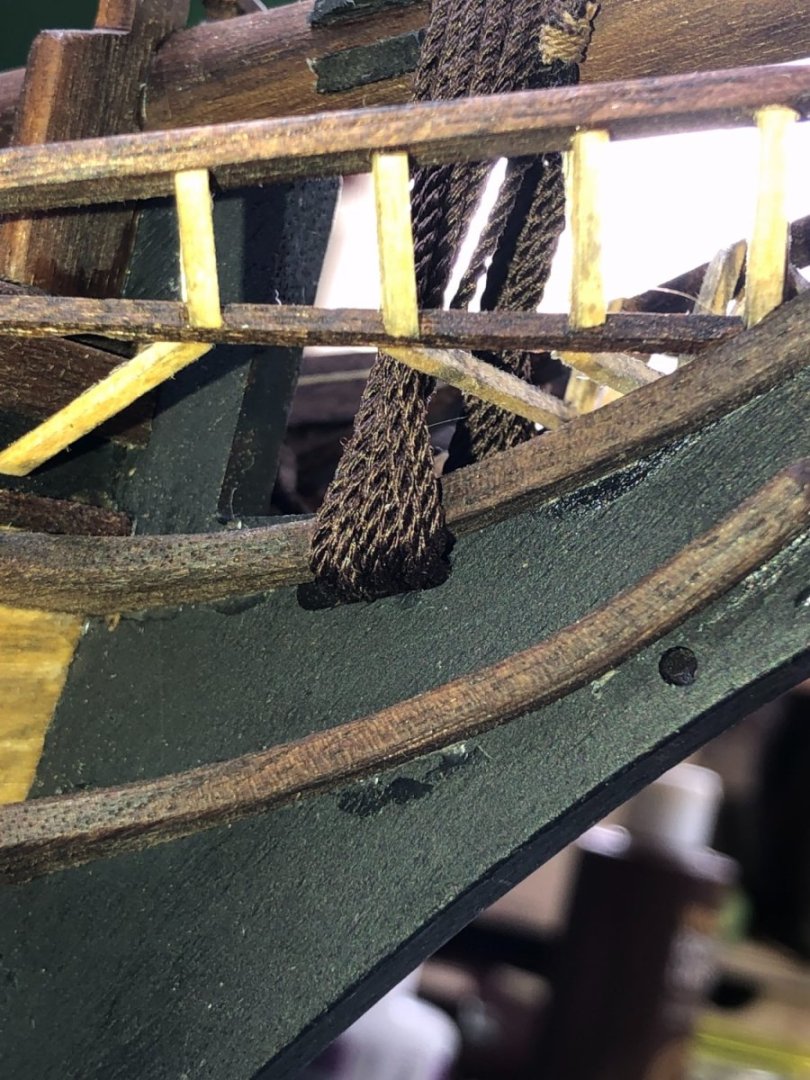
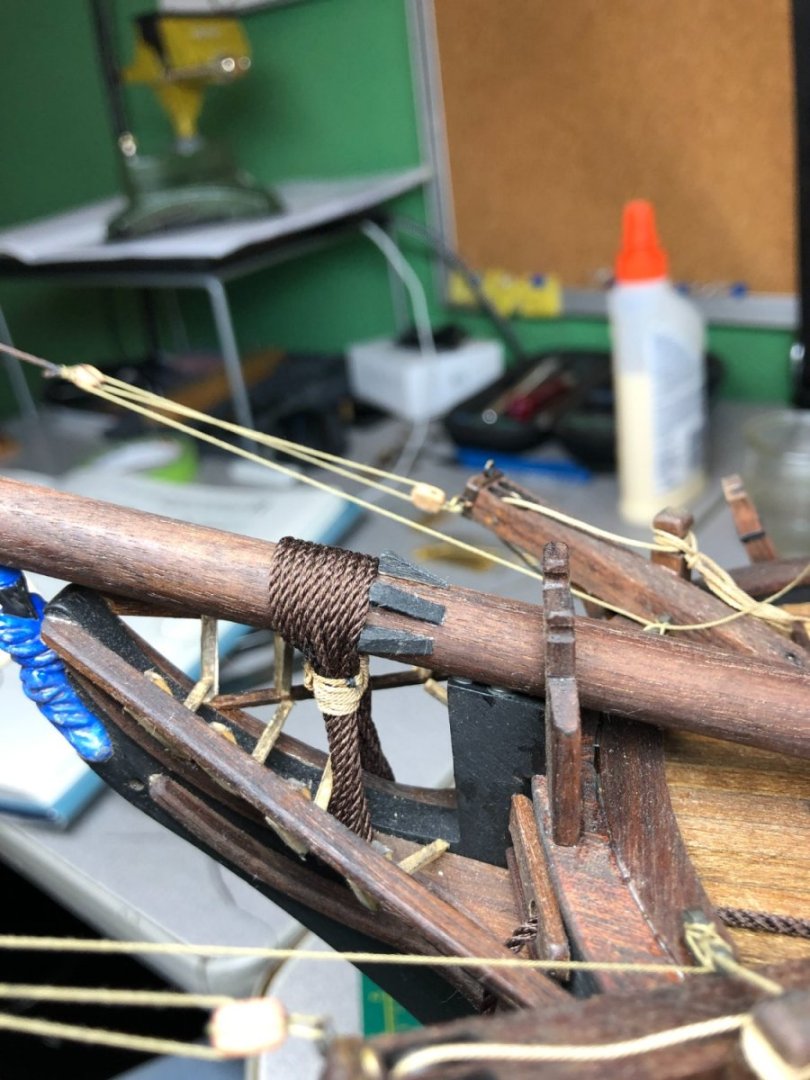
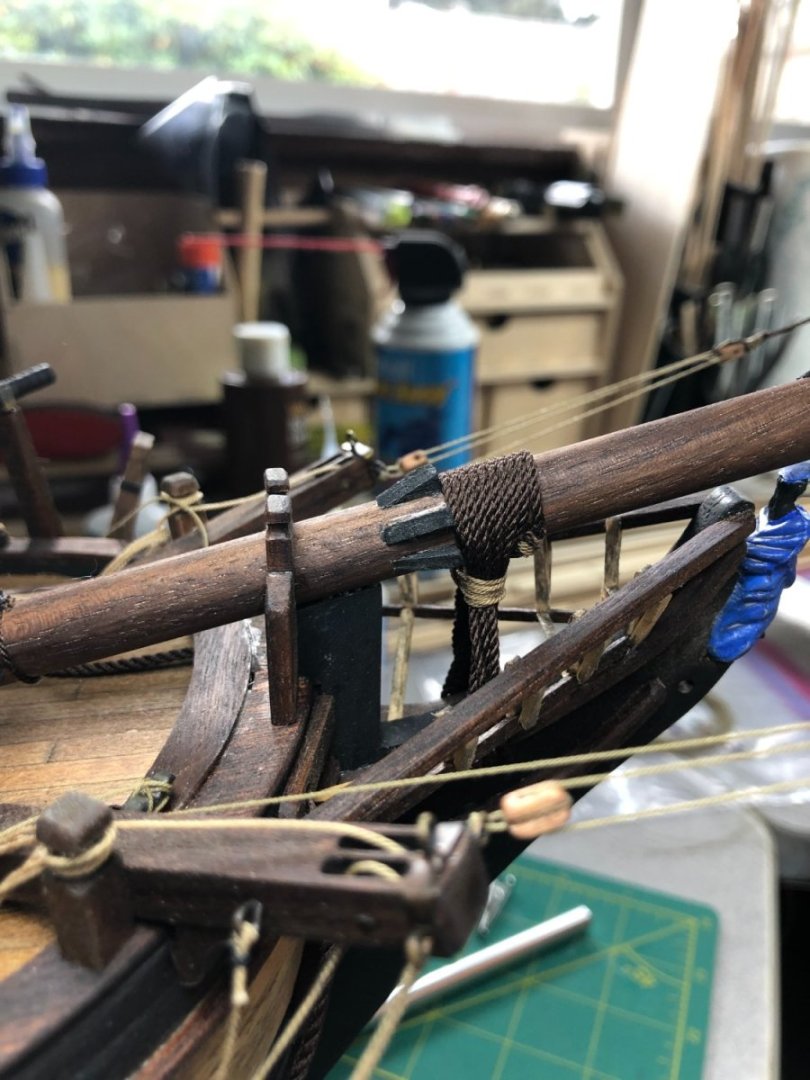
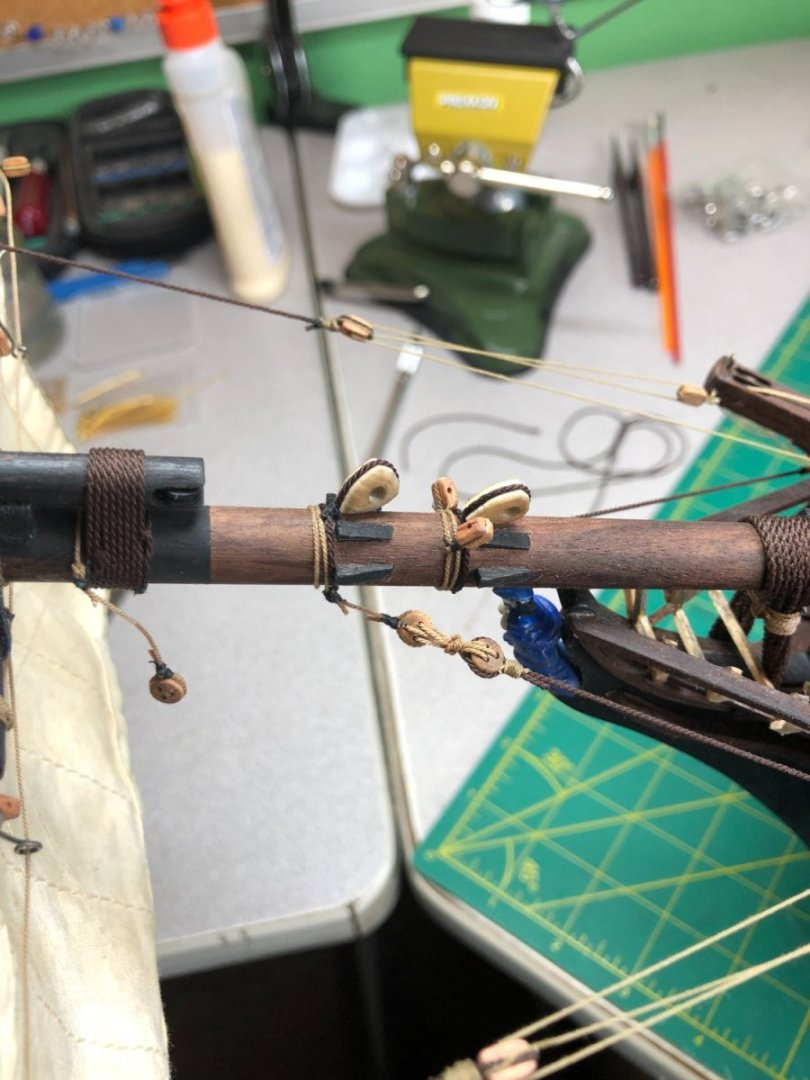
Lower mizzen mast completed: There are a couple more blocks to be added at the masthead... The plans have an optical mistake, showing the placement of the blocks different in the side view. All sorted out with the help of several but in particular, Tim Moore (again!). Onward! Next up, the fore stay and preventer. Also, the crowsfoot (crowsfeet?) for the foremast. Both stays are looped around the mast. I installed a "mouse" by tying a couple of knots and then covering the knot with seizing. A loop was installed on the end and the stay threaded through the loop and tightened against the "mouse". Then a heart block was added at the bowsprit end after making it the appropriate length. To keep the heart block in place while tied it, I used a very small spot of CA glue on the block and wrapped my line onto it and seized it: Then lashed it to the bowsprit heart block: The preventer was done exactly the same way. The crowsfoot looked daunting but really was fairly straightforward. I started by making the Euphroe block. Using my mill, I cut a groove all the way around the block for the line to sit in and then drilled the holes: Some light sanding done: And a line is stropped to it: The euphroe block is seized to the preventer and then following the pattern in Petersson's excellent rigging book, I ran the line and tightened up: On to the main mast stays!


-
Thanks Tim... it's as I thought. When it comes to putting the blocks on, if not done now, it can become a nightmare, as I'm sure you know! Glad to have that resolved! Didn't want to wait until summer! The offer is most definitely on the table, would enjoy meeting you. When you get settled, let me know and we can talk further. It's fairly certain that we will pass through Nanaimo next summer, probably twice. Hope your battleship is going well.
-
Thx is Tim! I’ve looked over your pictures (thankful for them!) and the rigging diagrams and as mentioned above came that conclusion. I’ve got plenty to do and will wait to hear back!
-
Thanks Tom!
-
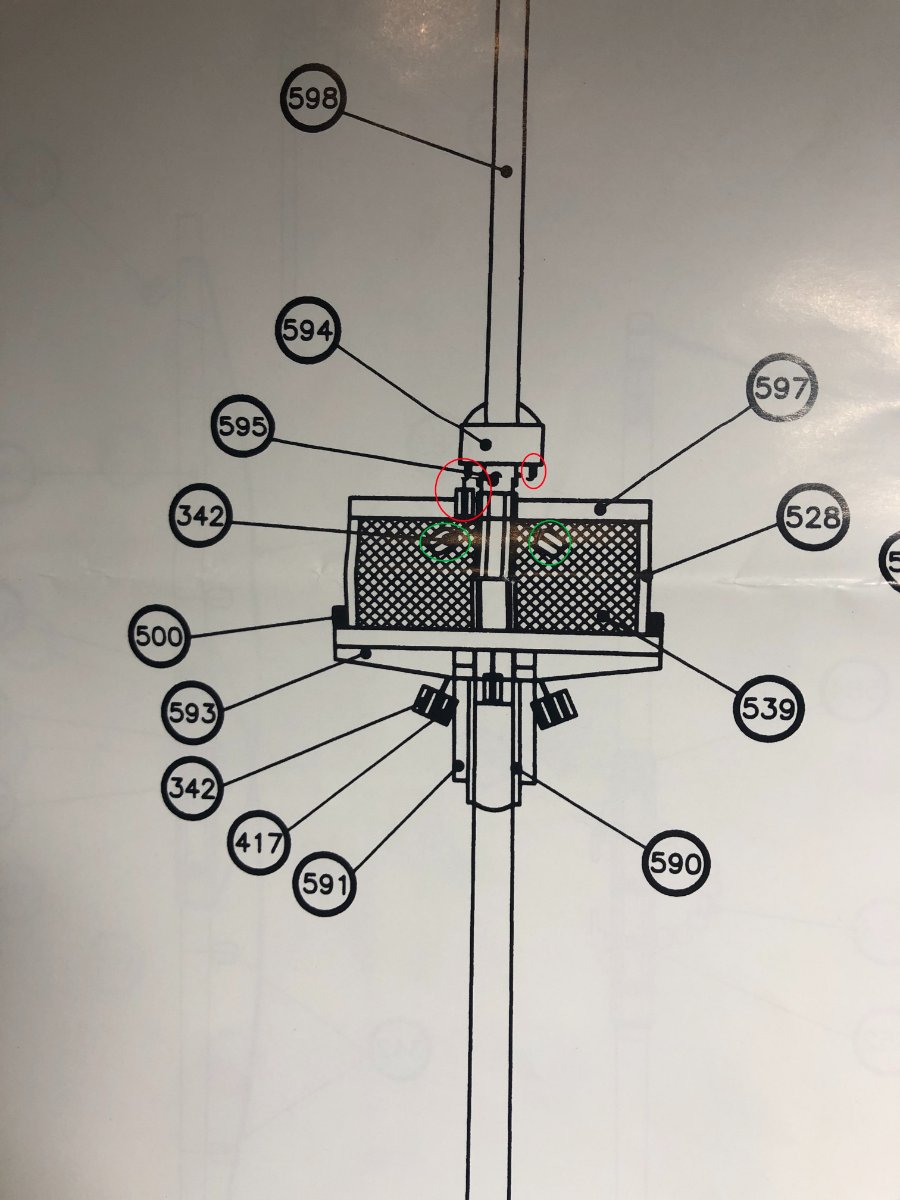
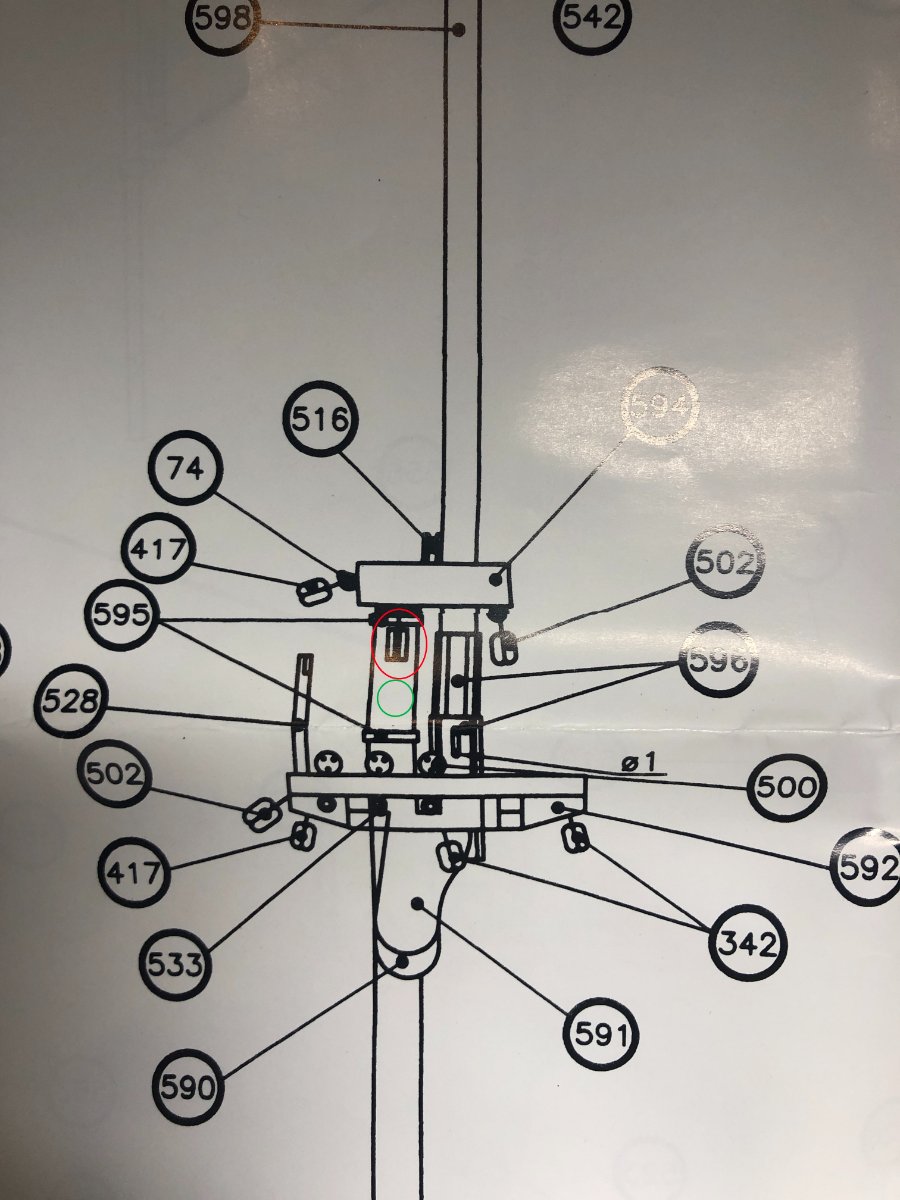
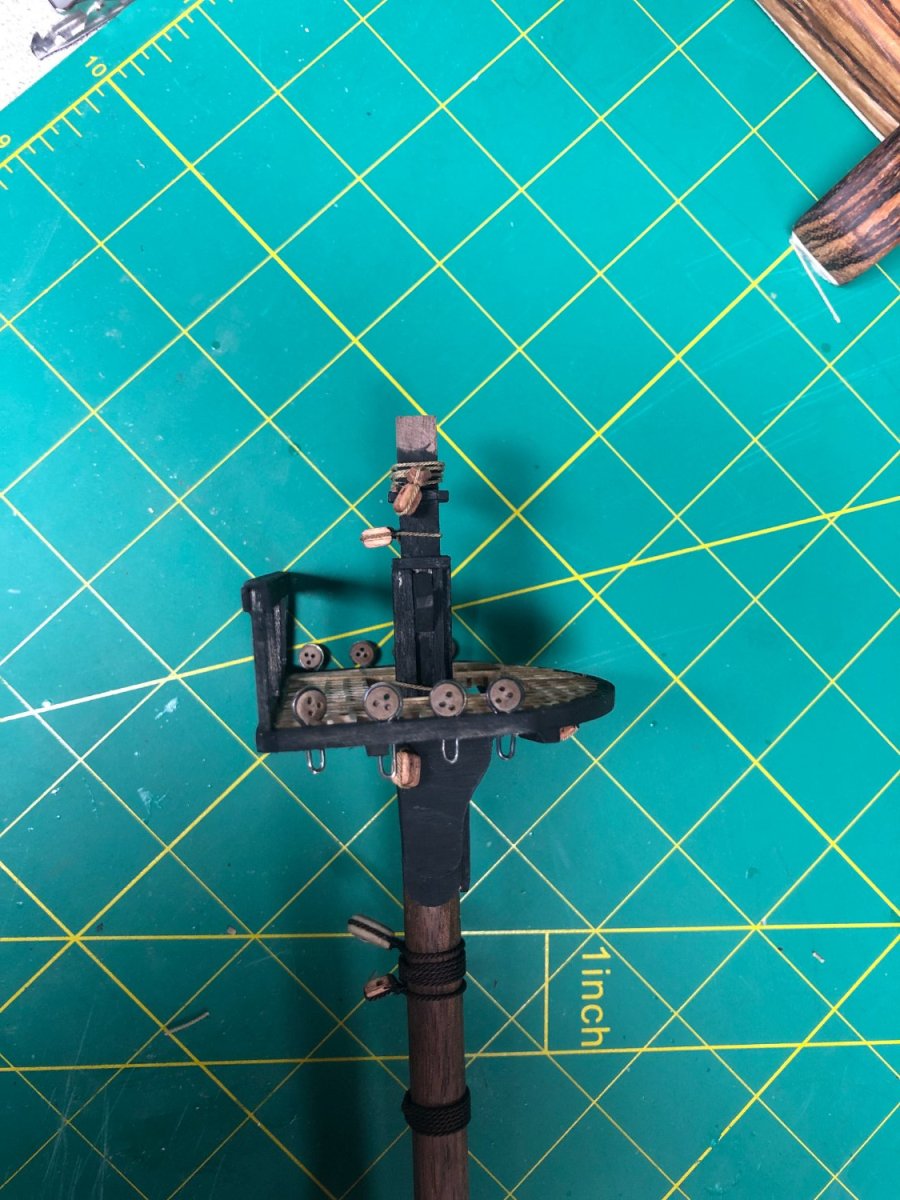
Well, I feel kinda dumb! I have two of the books mentioned above by Gregory. Lee's book, as detailed as it is, it is very hard to follow (for me, anyway) but still a good source normally. I didn't find what I was looking for in it. However, I do have Petersson's book too... Unfortunately, it's a Kindle edition and I forgot that I had it until it was mentioned by Gregory. I'm gonna have to find a hard copy because it is definitely a better source for locations of lines and some of the equipment used (blocks, etc.). Just a quick look and I was able to answer the above questions: The red circles on the pictures above should show one block set up on both sides. The green circles appear to be the same blocks but incorrectly shown and doubled up on the starboard side. Build logs for the AL Bounty are abundant but not many made it to this stage. I use Tim Moore's version for refence quite a bit but his pictures were inconclusive and I hadn't reached out to him yet. I should look at other build logs of the Bounty for reference. Thanks for kicking in my memory and the suggestions!
-
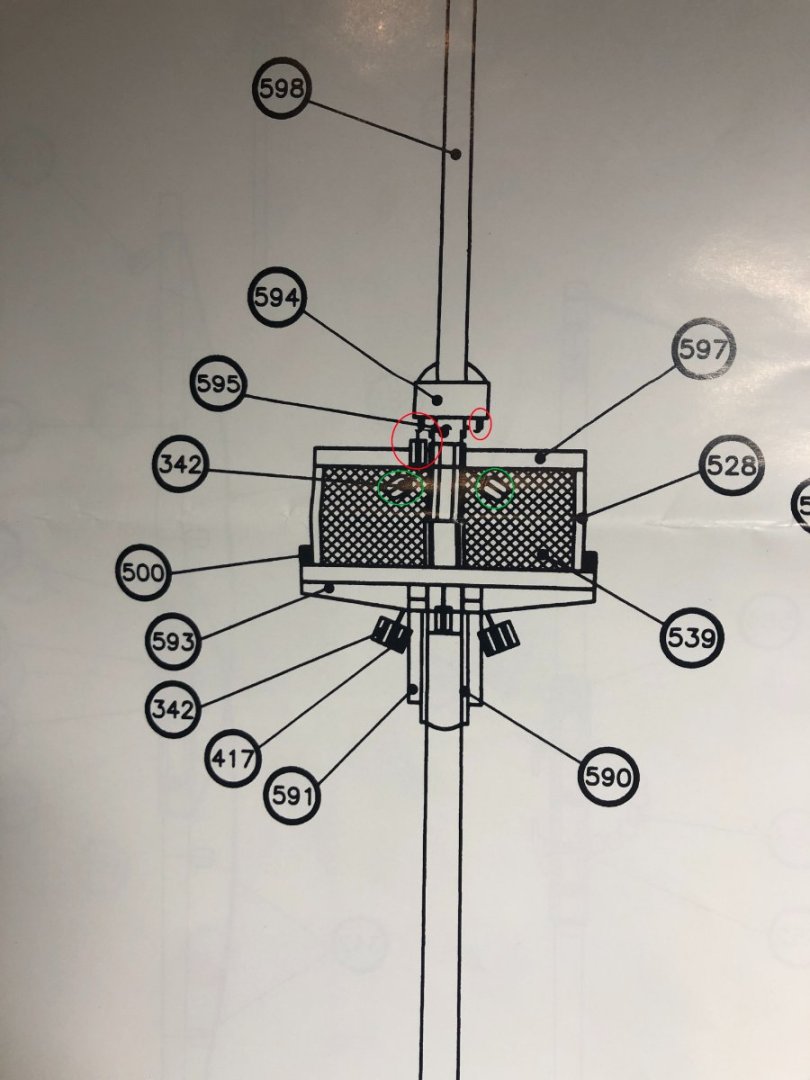
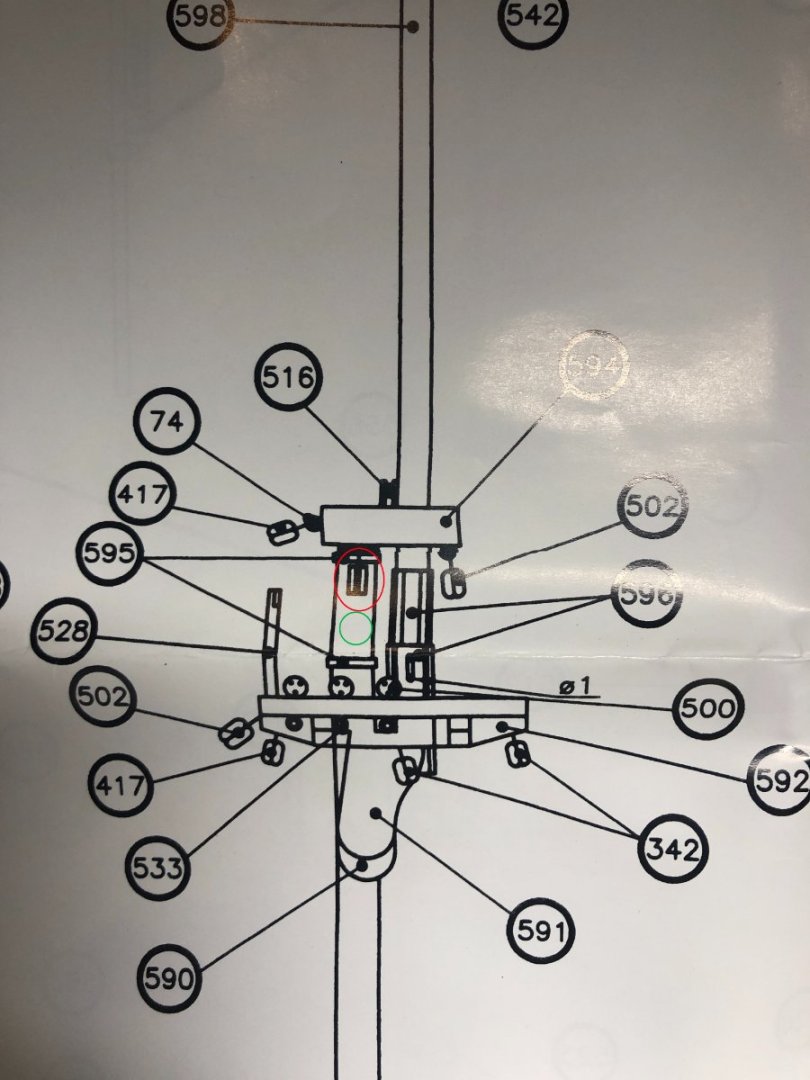
The plans for the AL Bounty leave a lot to be desired! I am trying to figure out how many blocks are actually located on the mizzen mast at the platform. The plans are not conclusive and are a bit confusing in that it appears on one that there are blocks but on the other (side view) they don't show. Here are the examples: In the picture above, the green circles show two blocks appearing to be tied to the mast and the red circle shows one block tied to starboard side of the mast head block but nothing on the other side except some type of protrusion. This is the same area but a side view: The red circle shows the starboard side block but no block at the green circle. So, are there two blocks tied to the mast or not? And, is there supposed to be a block on the port side of the mast head block or not? I've looked at pictures of other builds and spent hours going over the rigging diagrams (also, very poor) trying to sort this out but have had little luck. Artesania Latina needs to do better with their diagrams and plans... so much time lost scratching my head because of poor plans. Any thoughts?
-
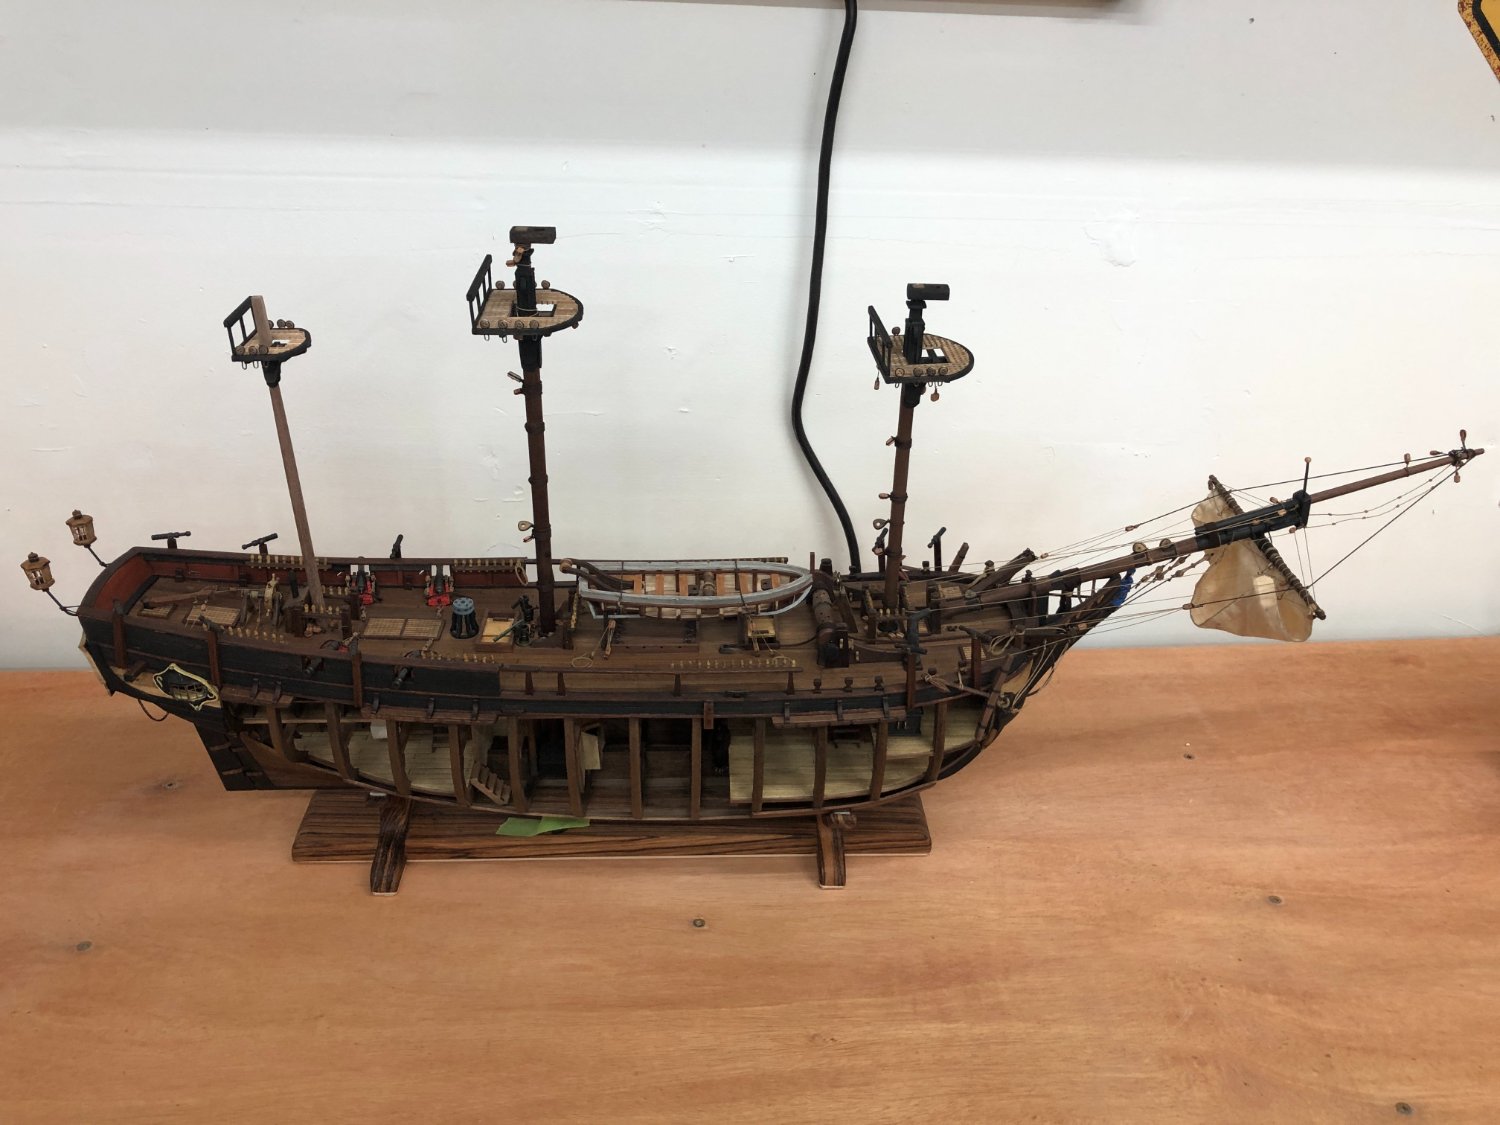
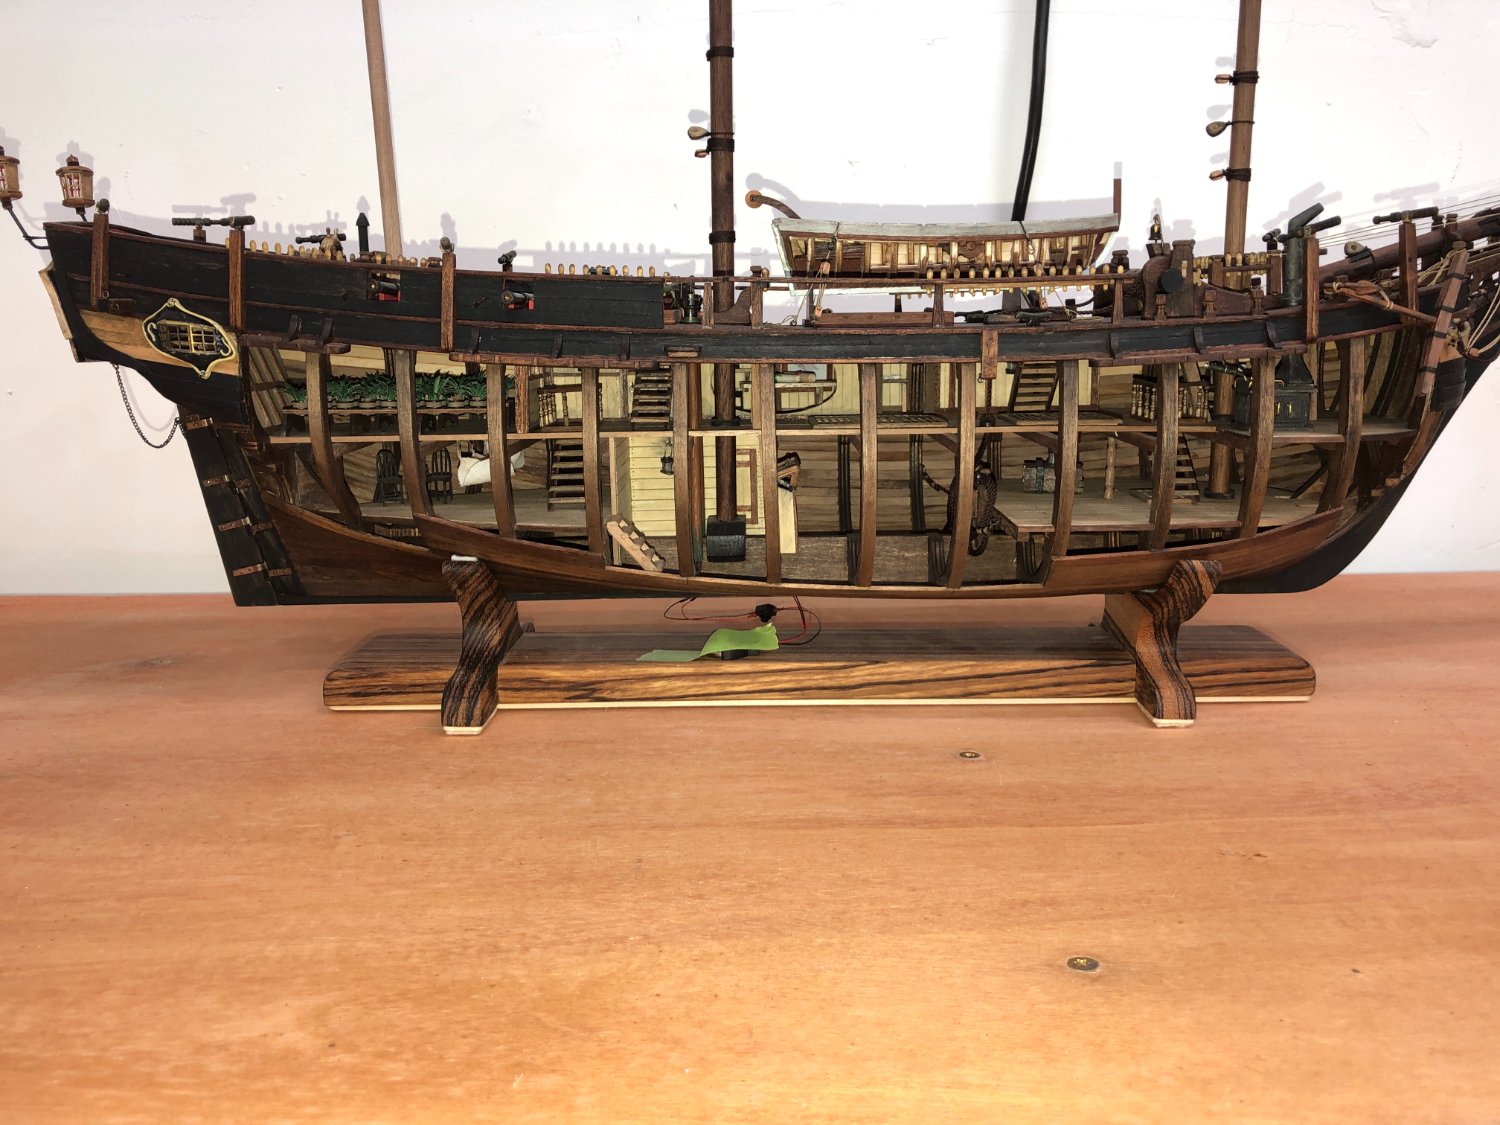
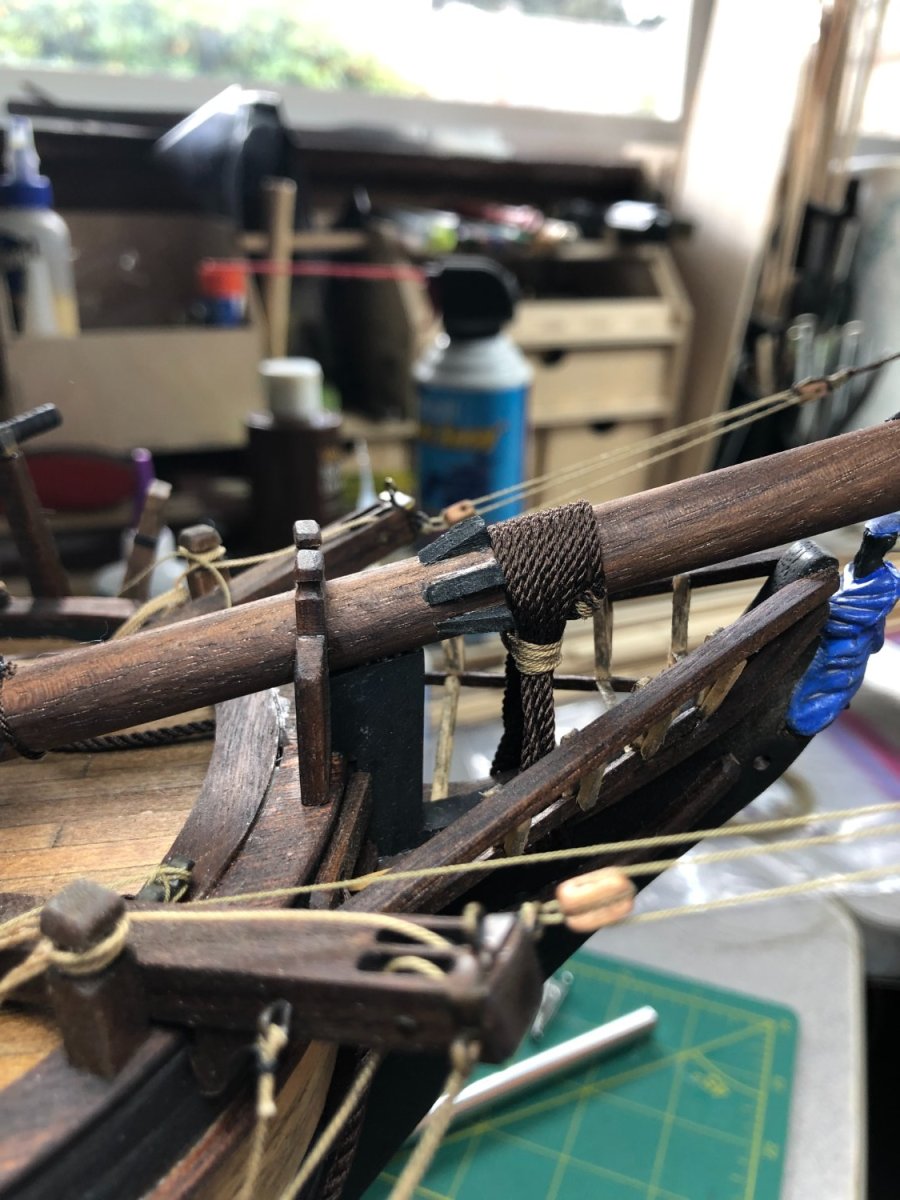
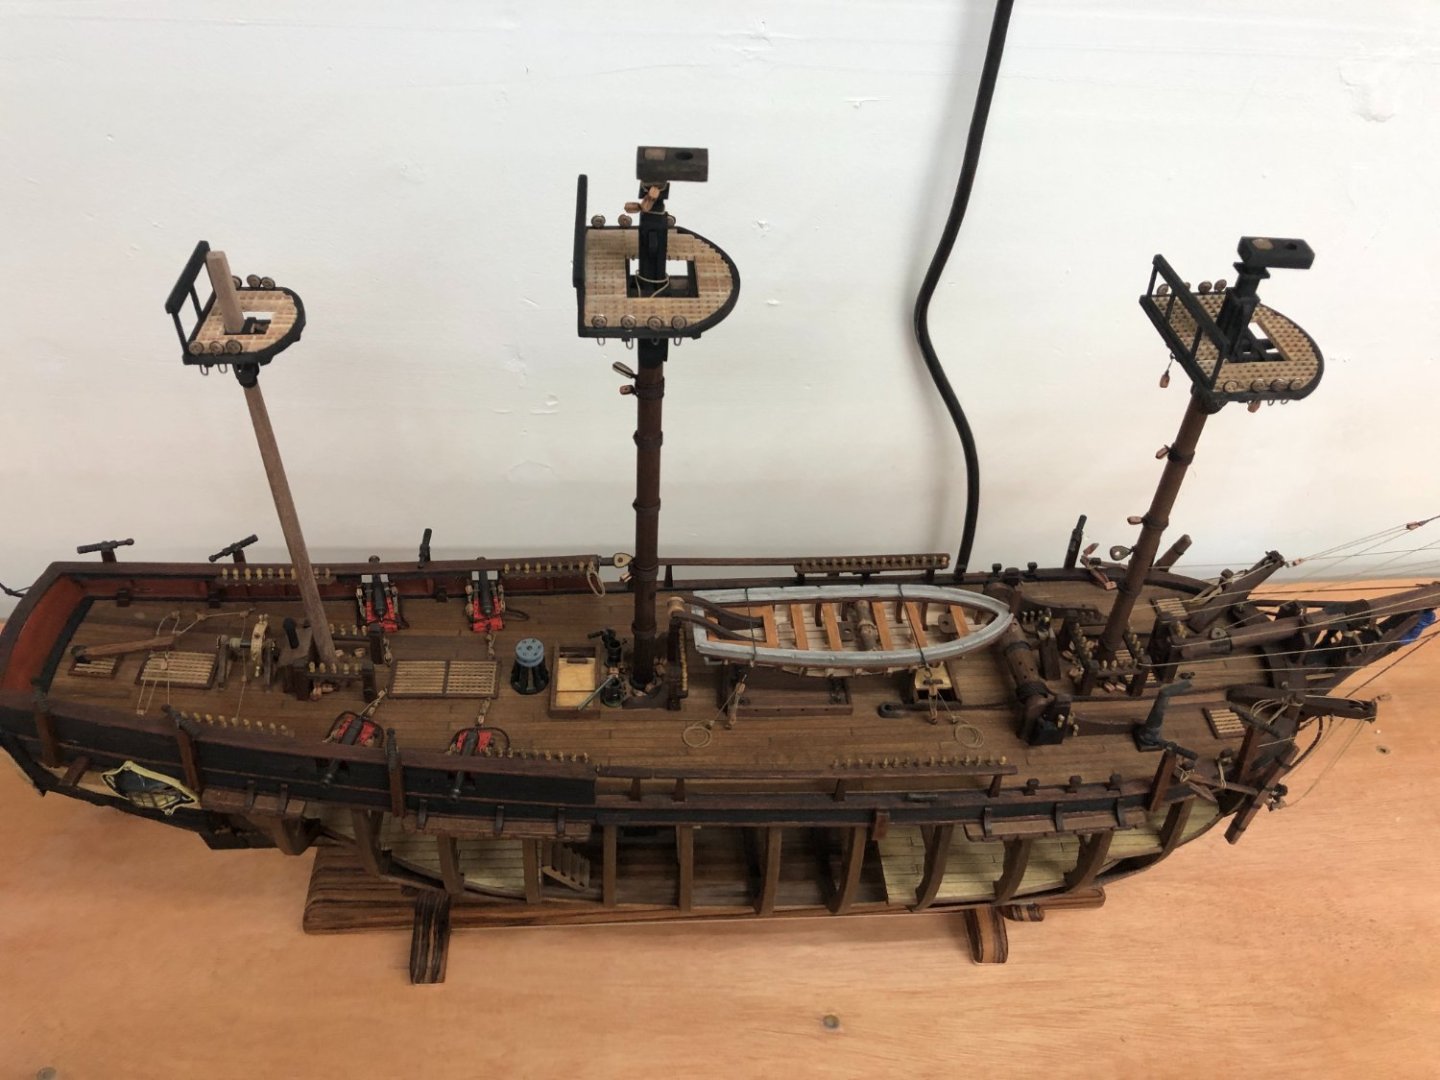
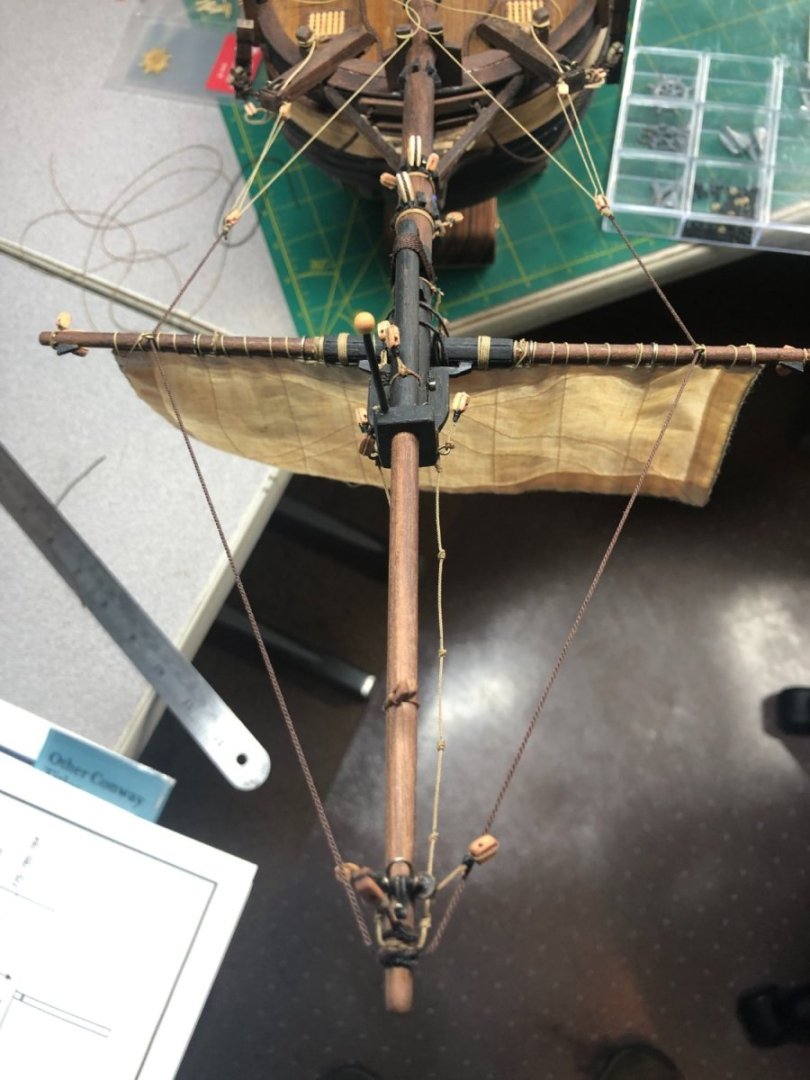
I've been asked to add some updated pictures of my progress. So, I added a separate post with a couple of pictures. If anyone is interested in a particular area, let me know and I can focus a couple shots on that area!

-
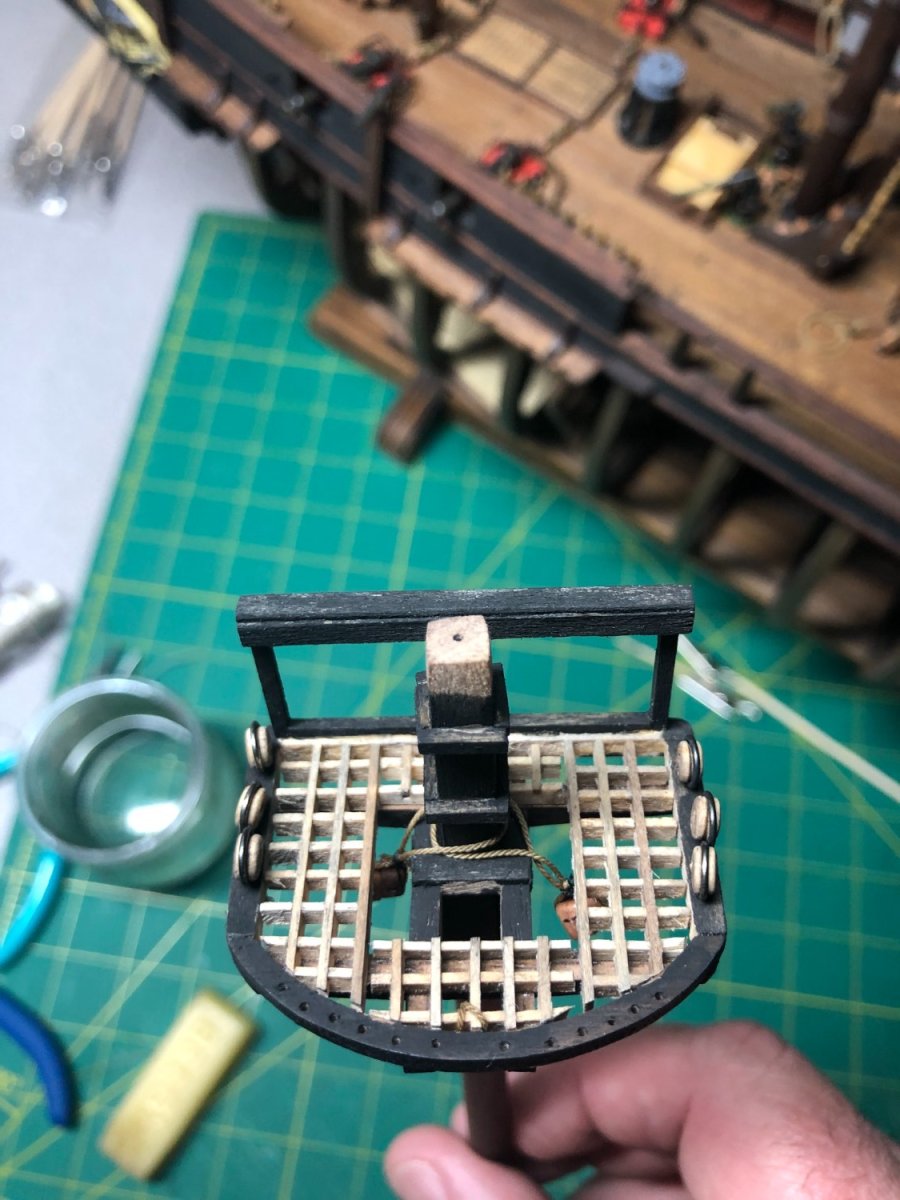
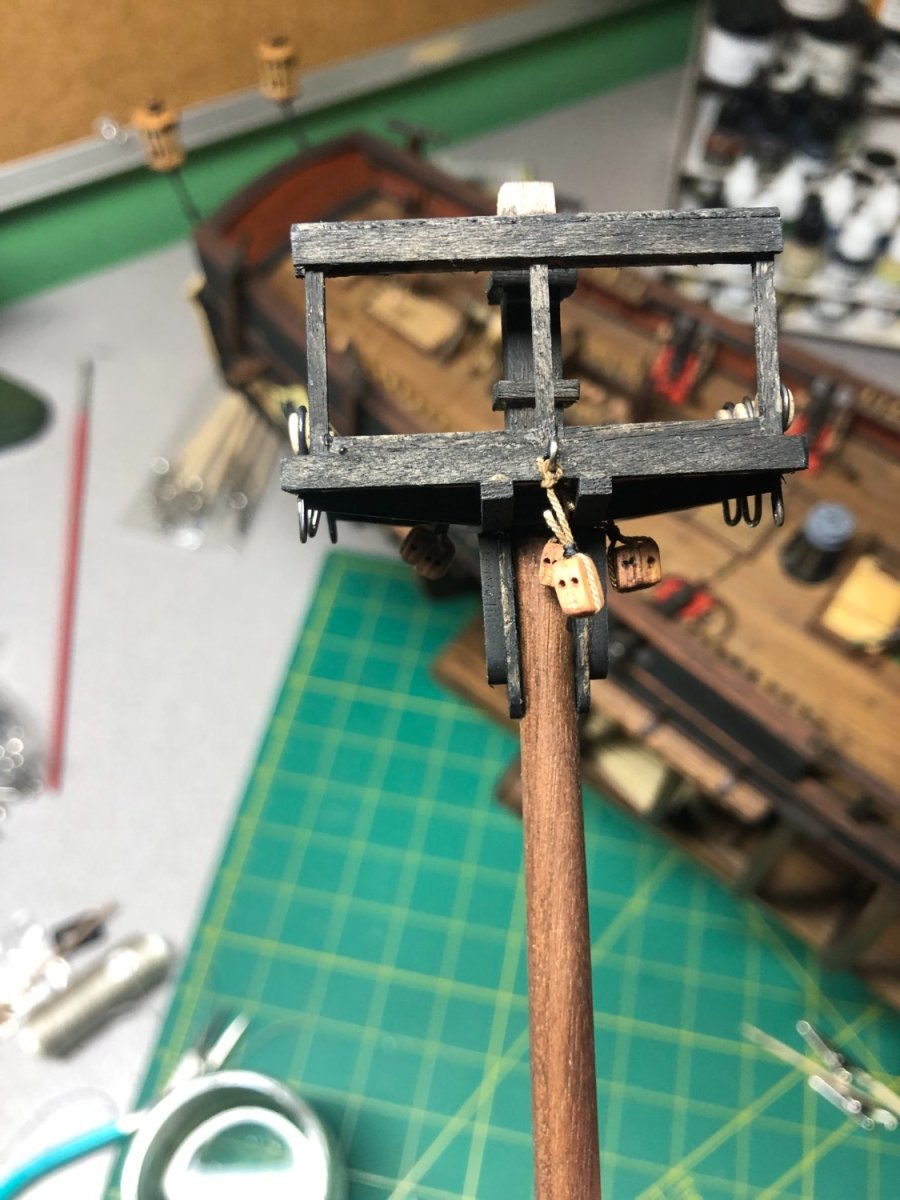
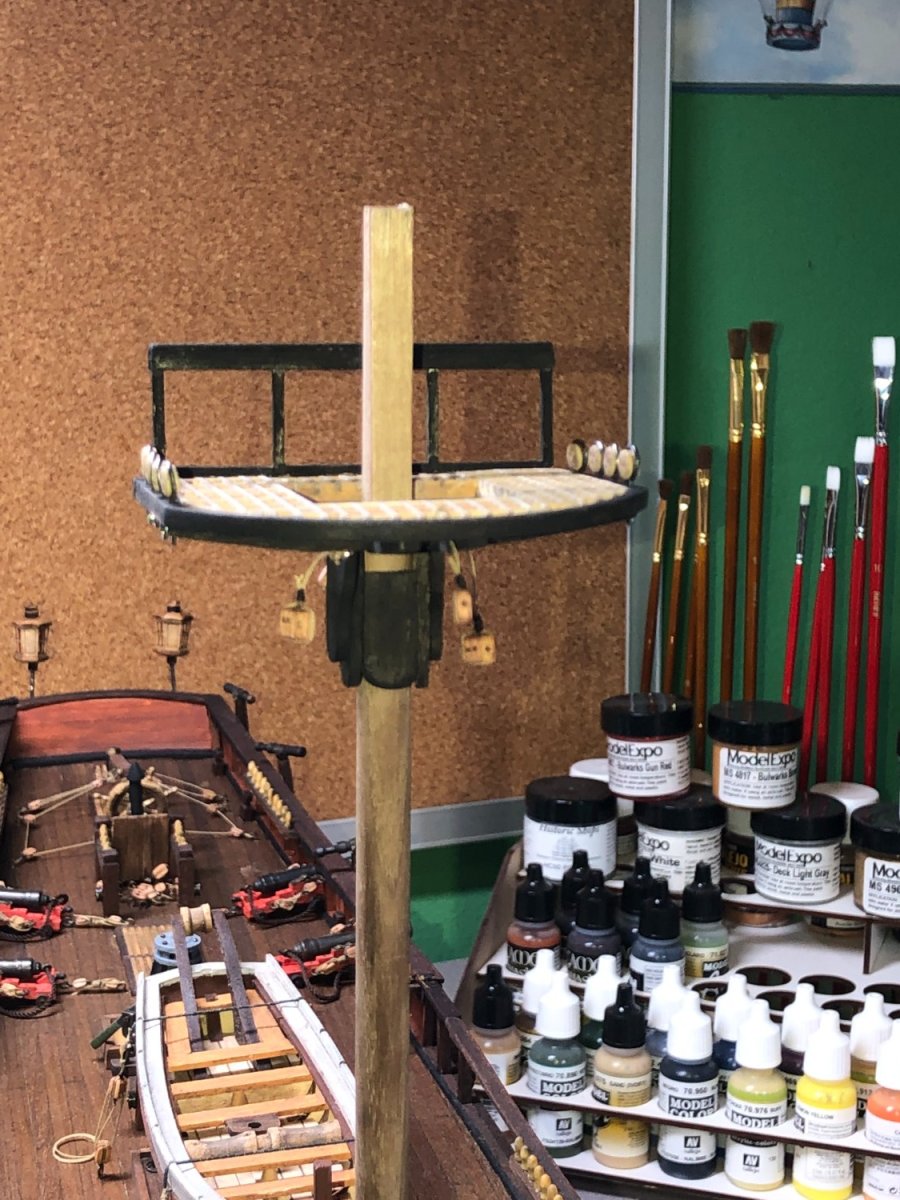
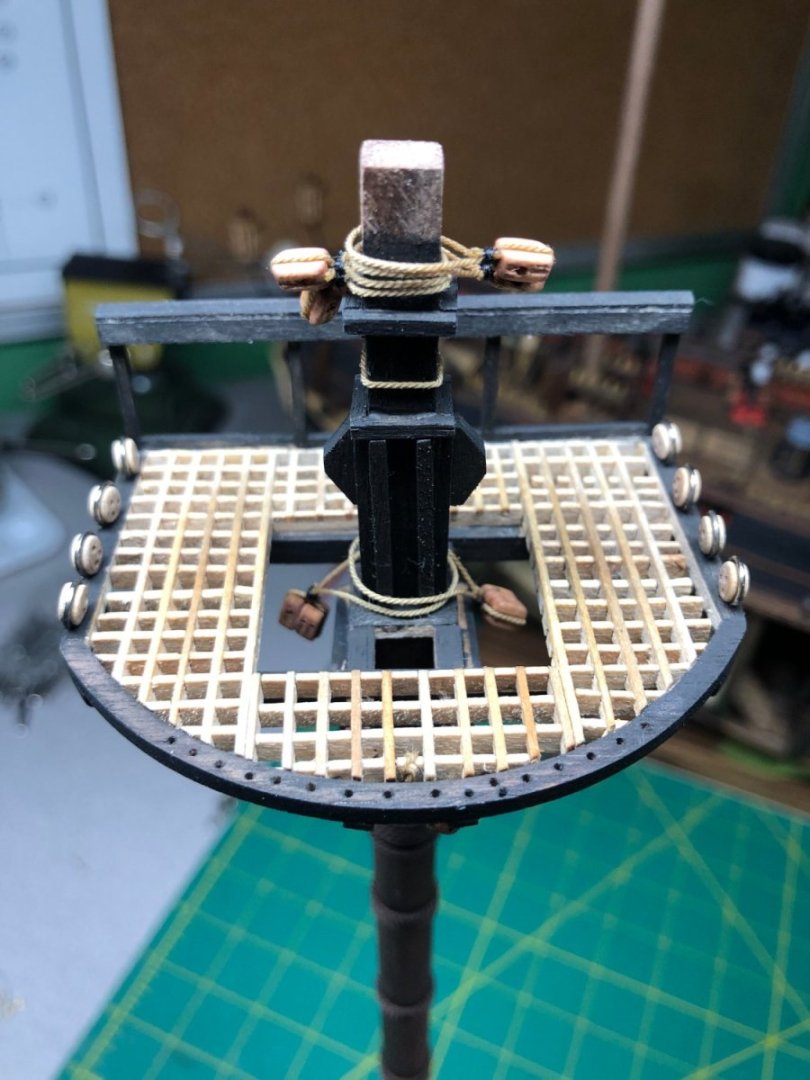
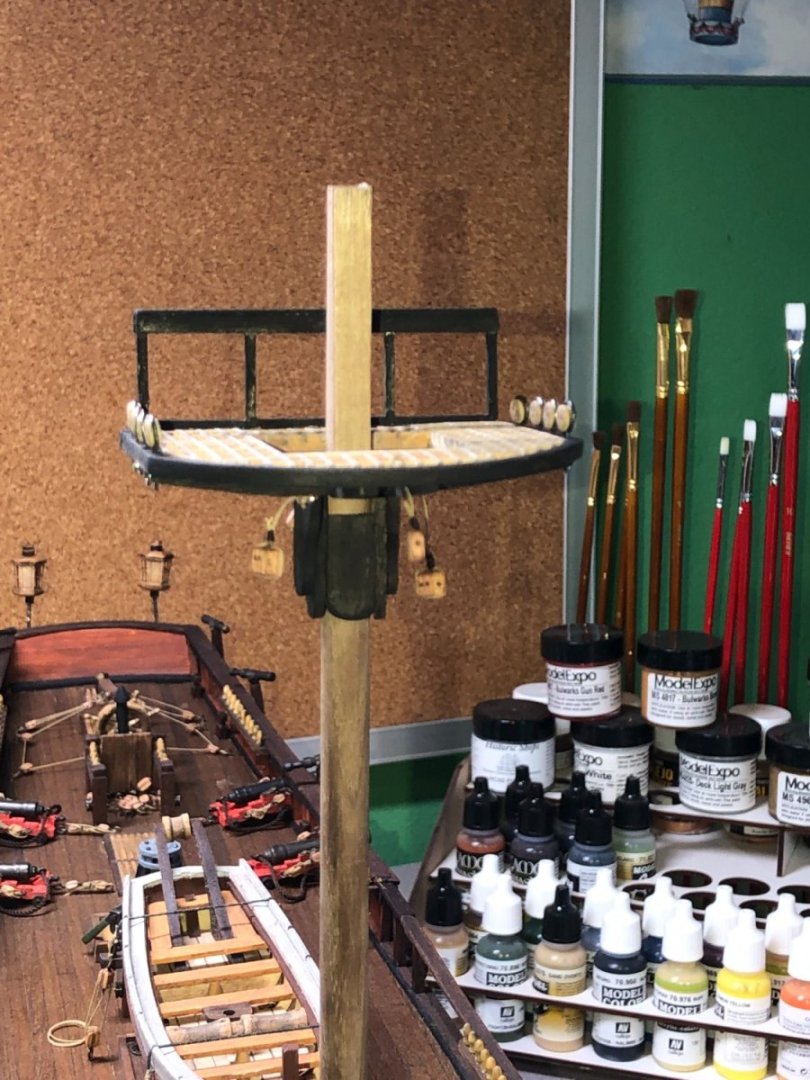
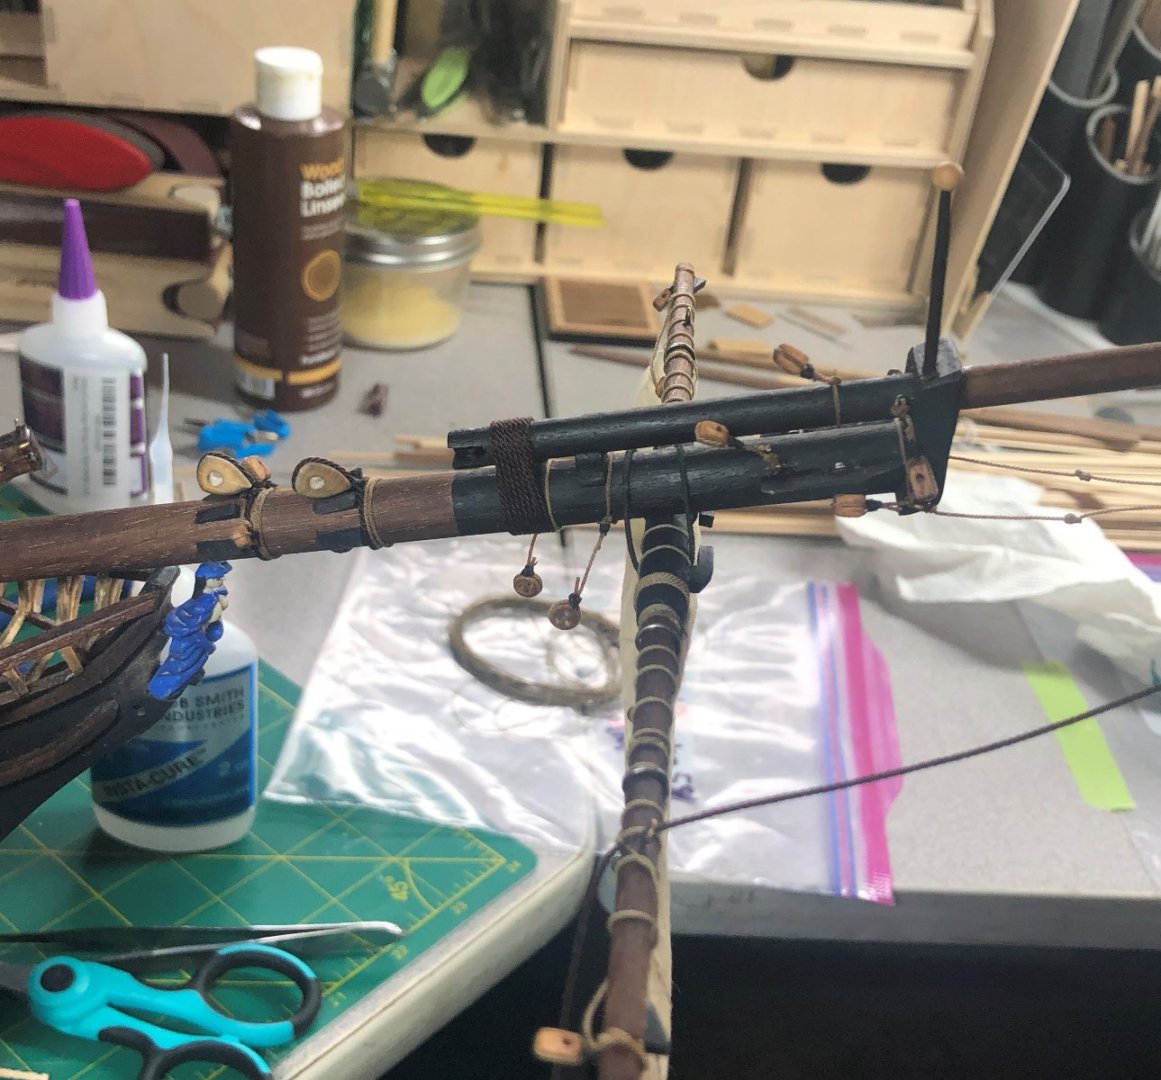
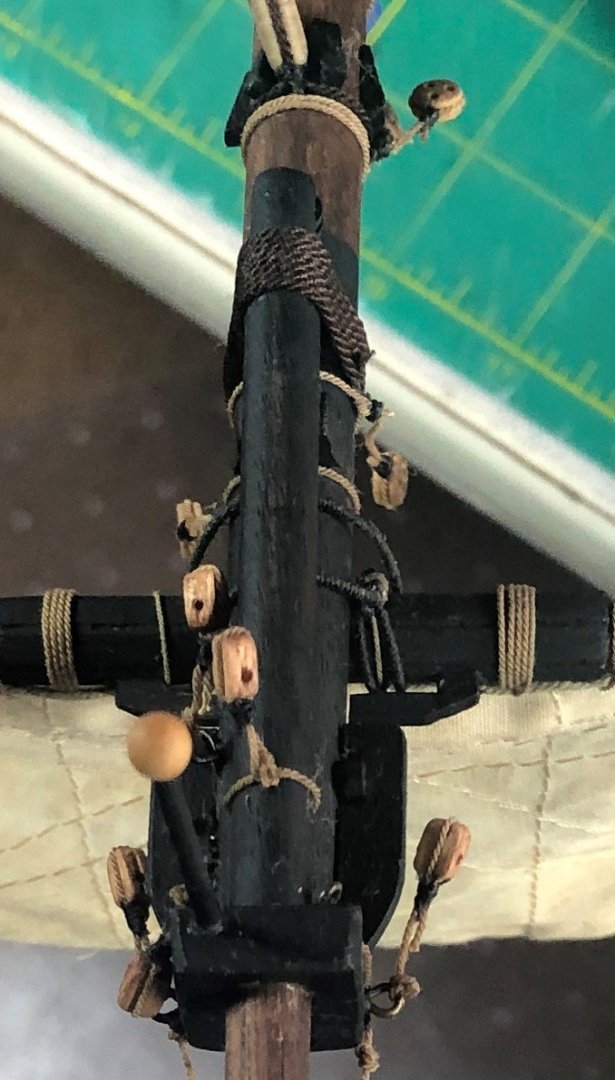
The mizzen mast again is nearly identical, on a smaller scale than the previous masts. Just some quick points... Squared off the mast head with my mini mill: Assembly of the masthead was similar too: And finally the support for the Spanker Gaff Support: Blocks to be added tomorrow and work on mounting the deadeyes has begun: The mizzen mast will be mounted tomorrow and the rigging for the lower masts will get under with with the Fore Stay and Preventer Stay.


-
The lower main mast is basically identical to the foremast... a bit taller but otherwise the same. I don't need to go over the procedures used since they too, were identical. Finished product below: Next up is the mizzen mast... and then the rigging really gets going!


-
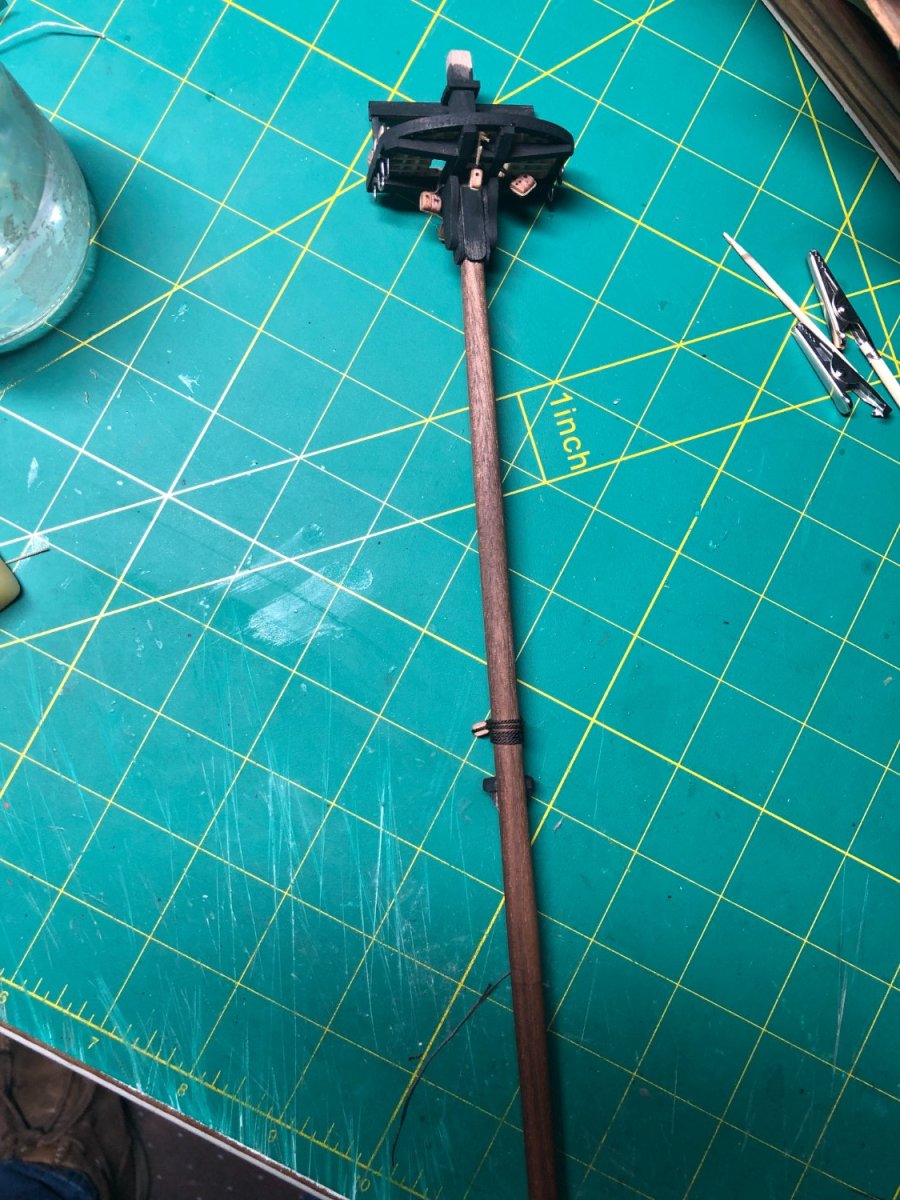
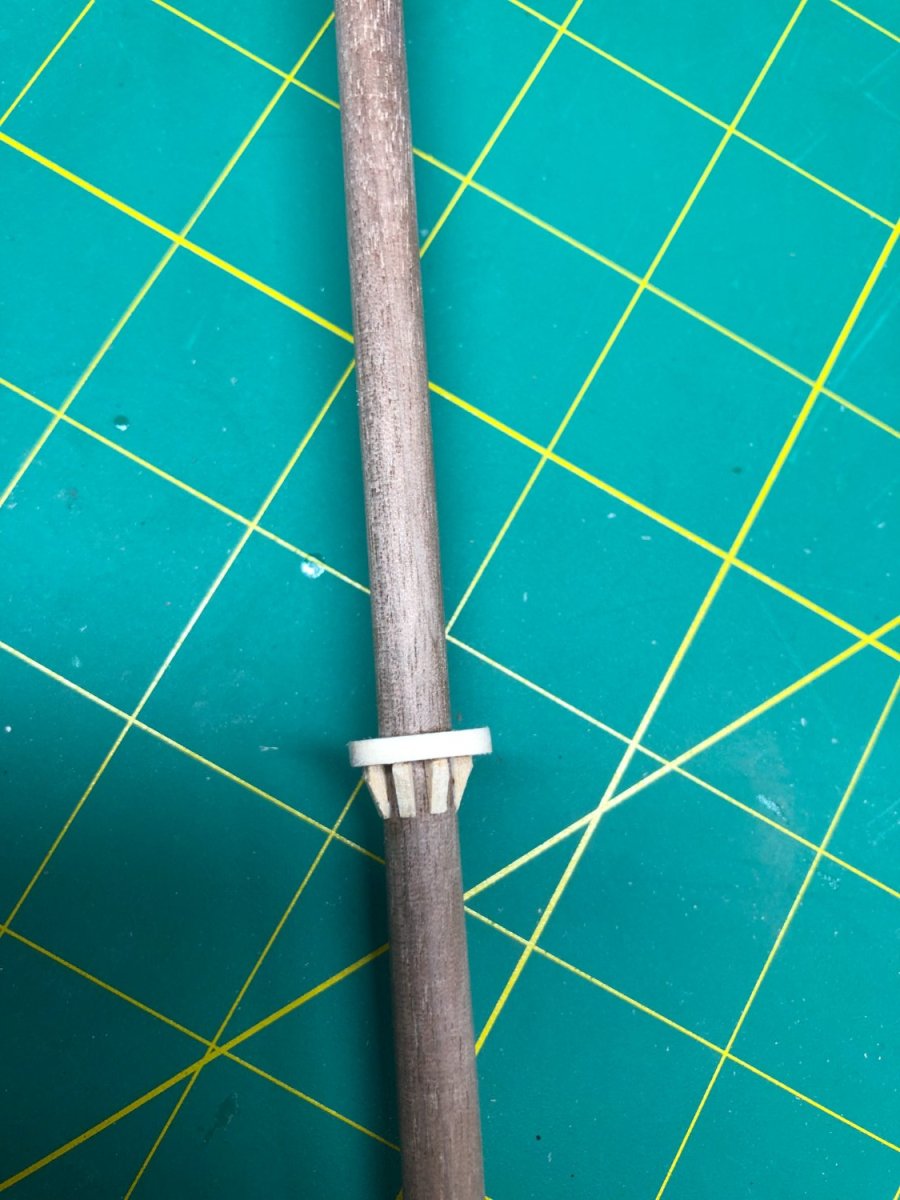
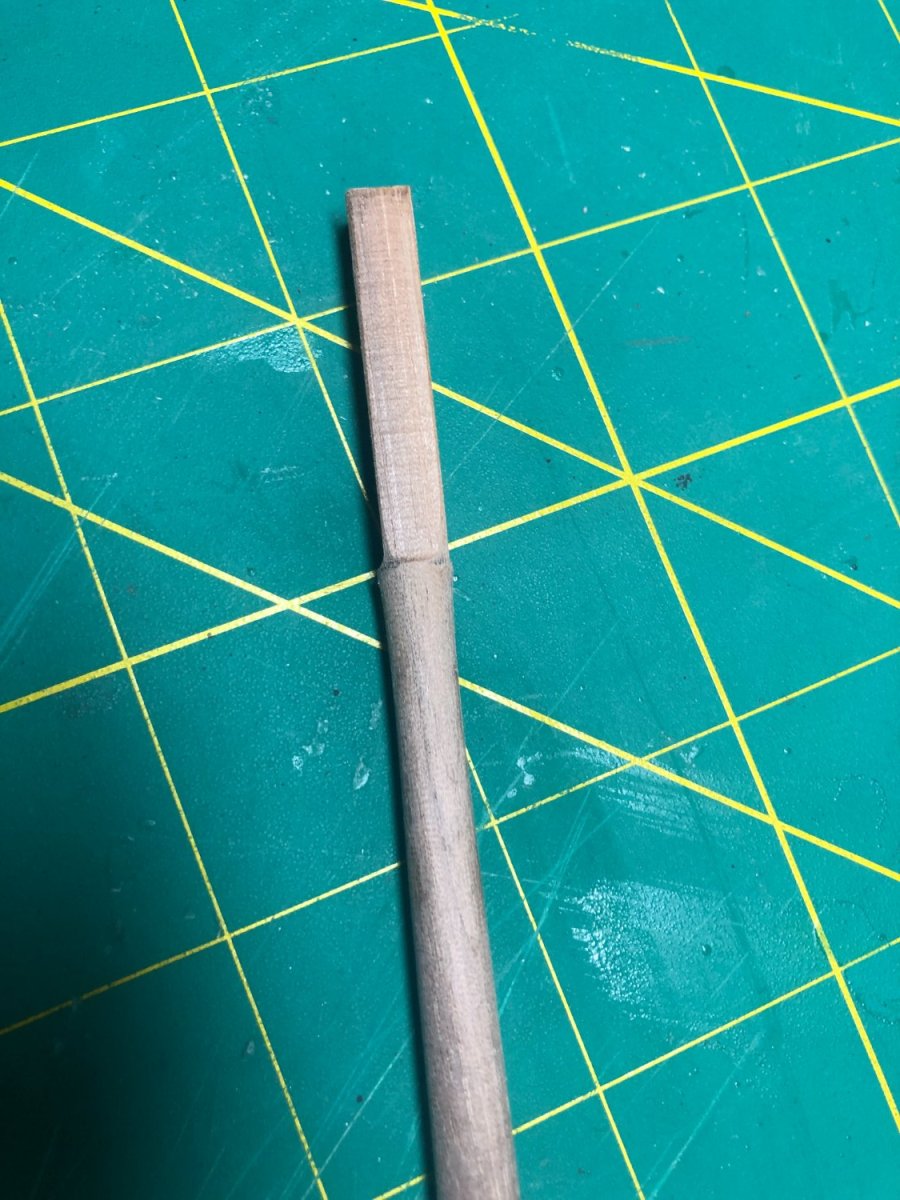
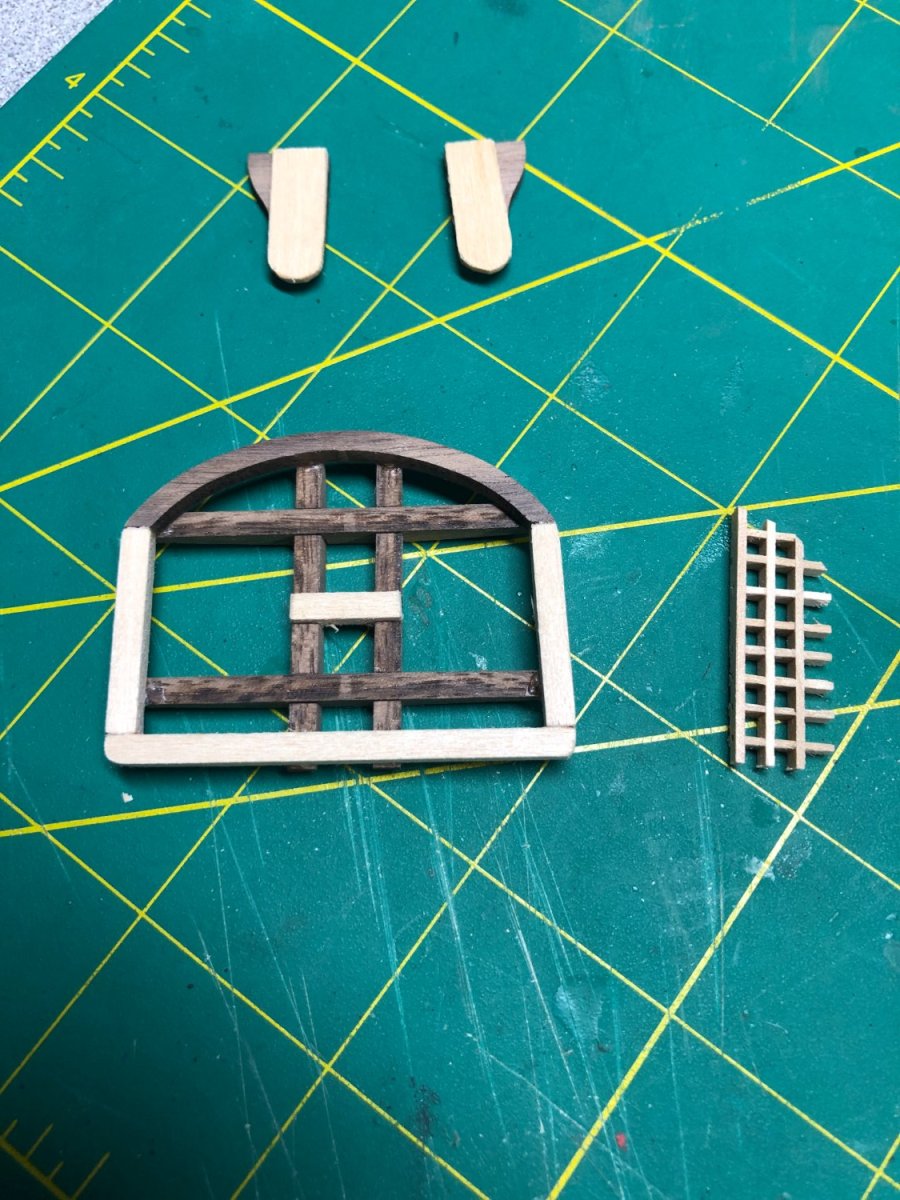
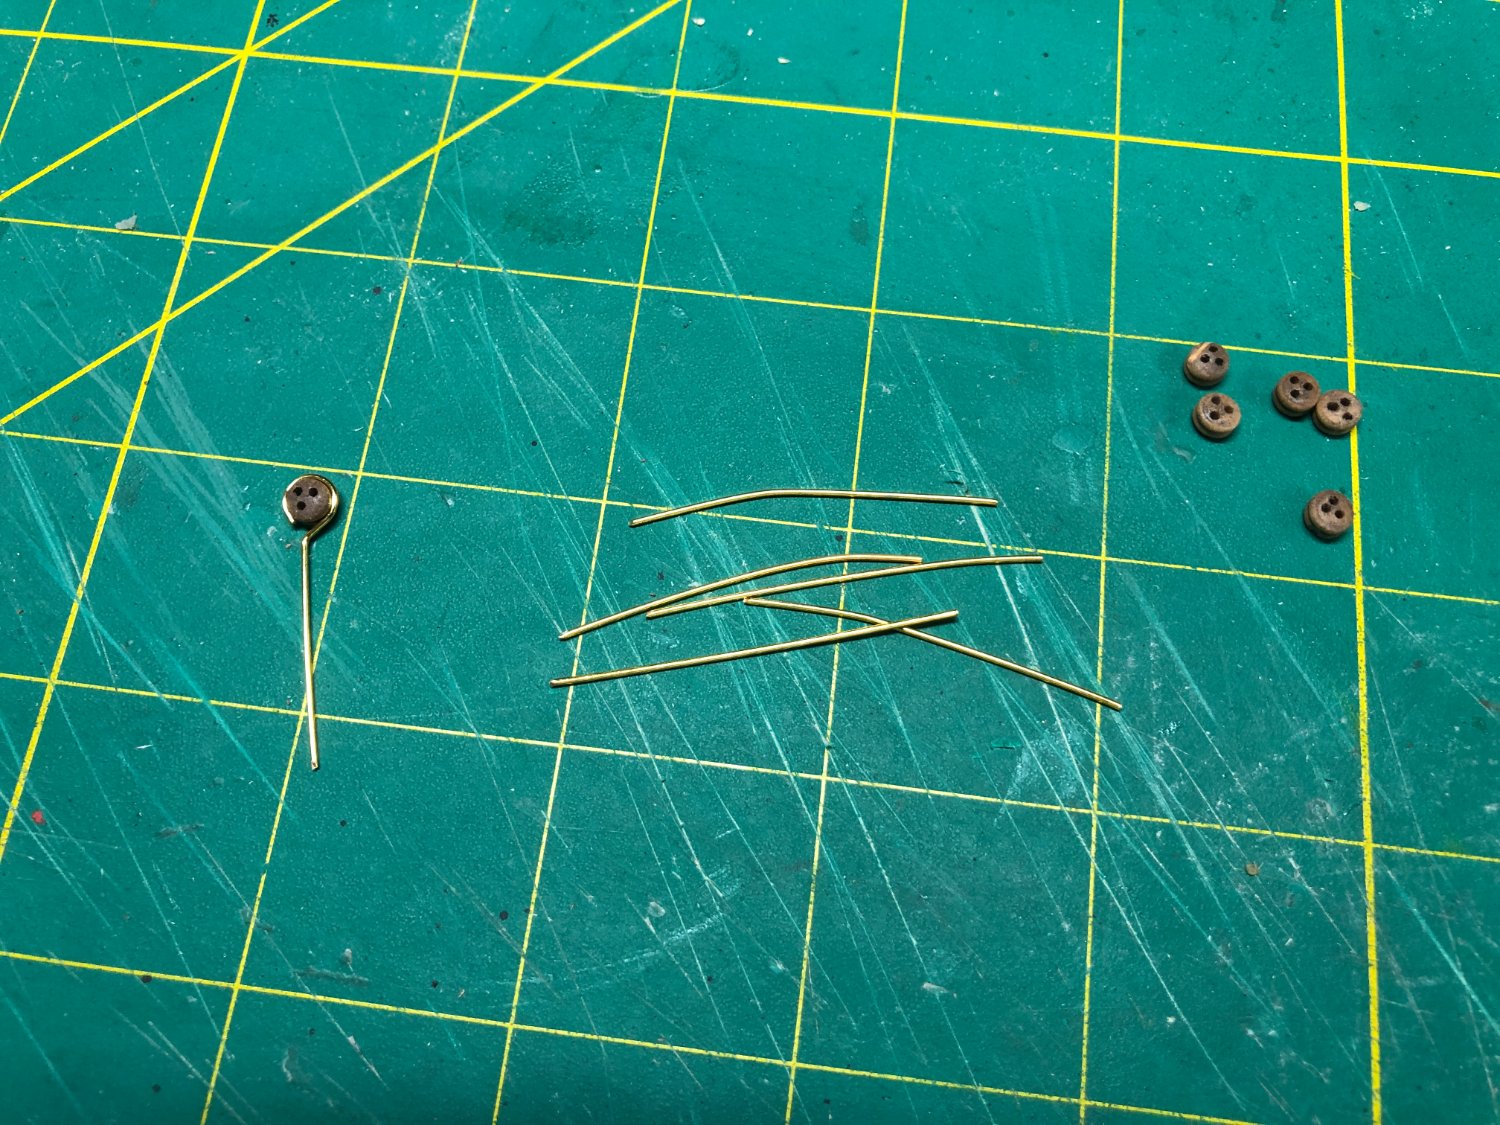
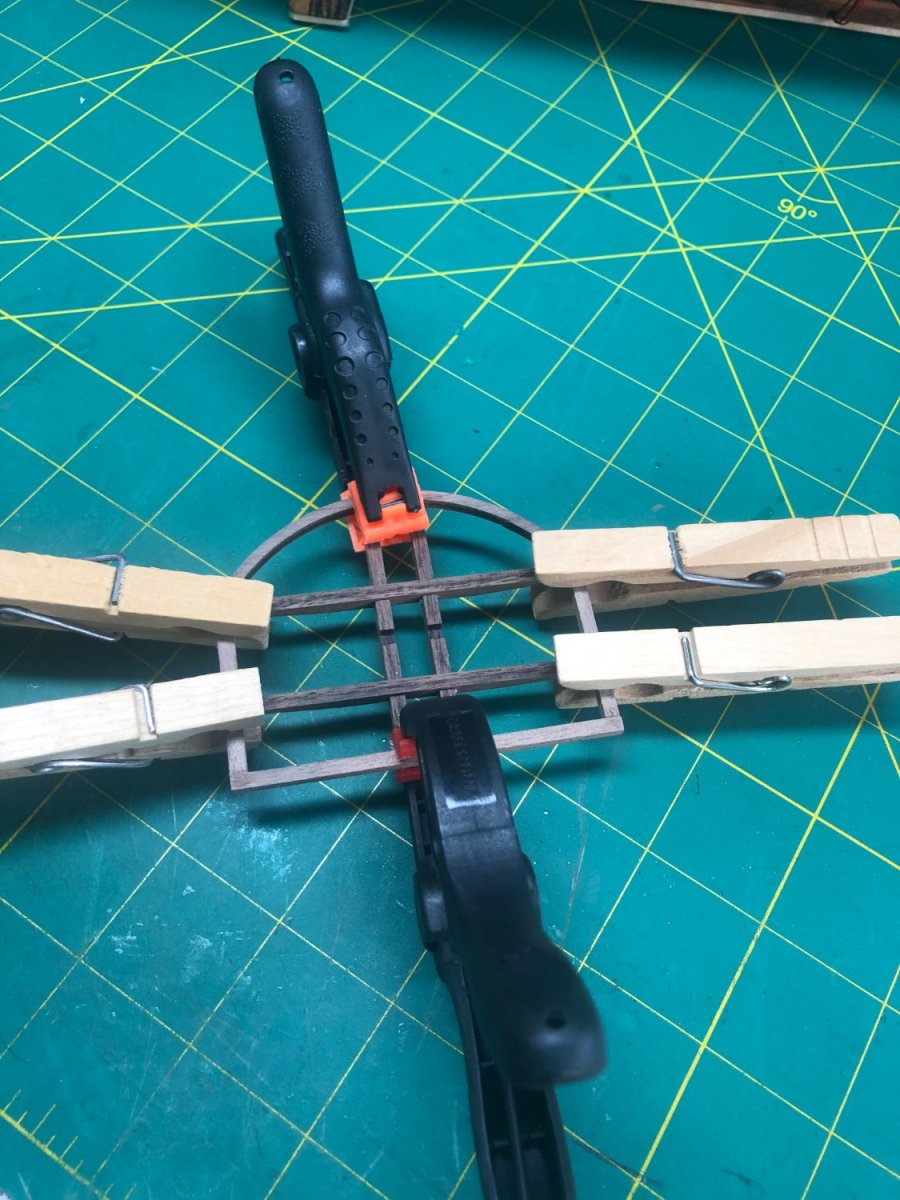
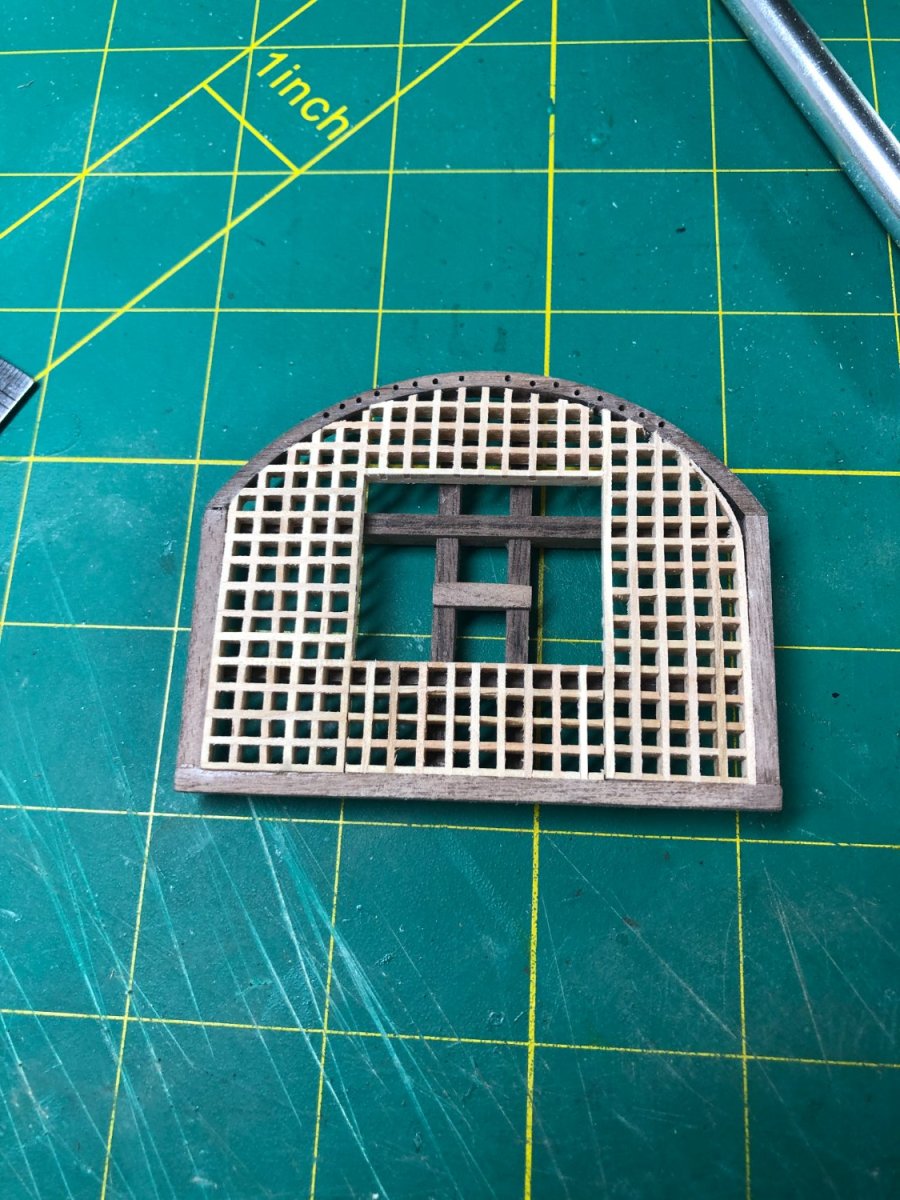
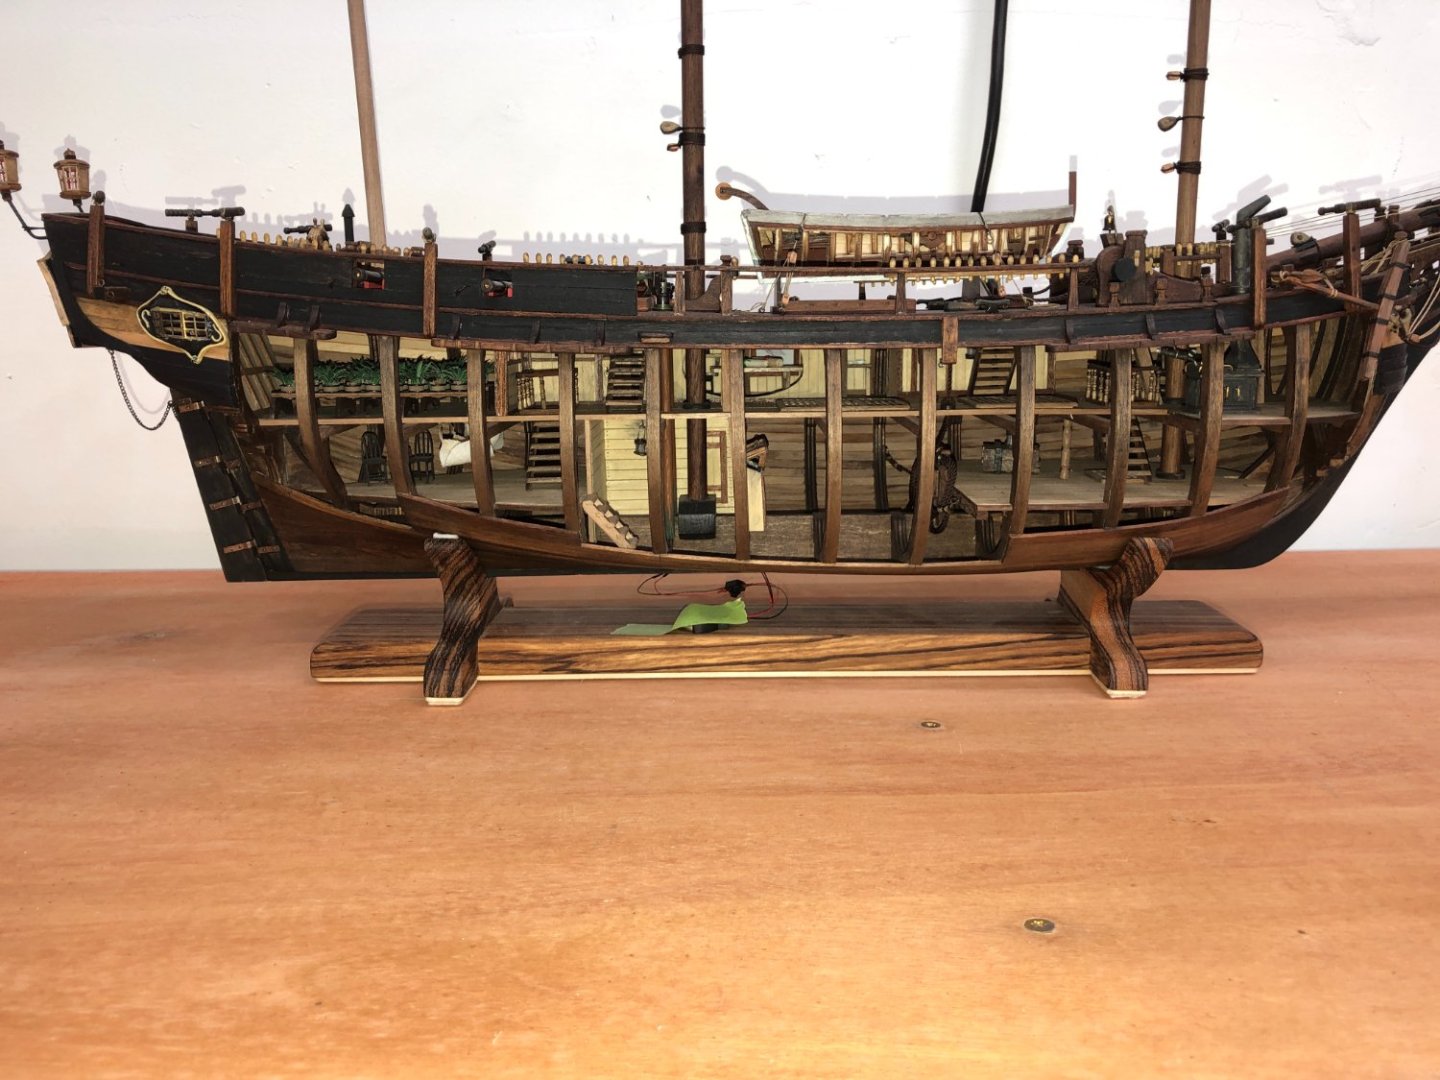
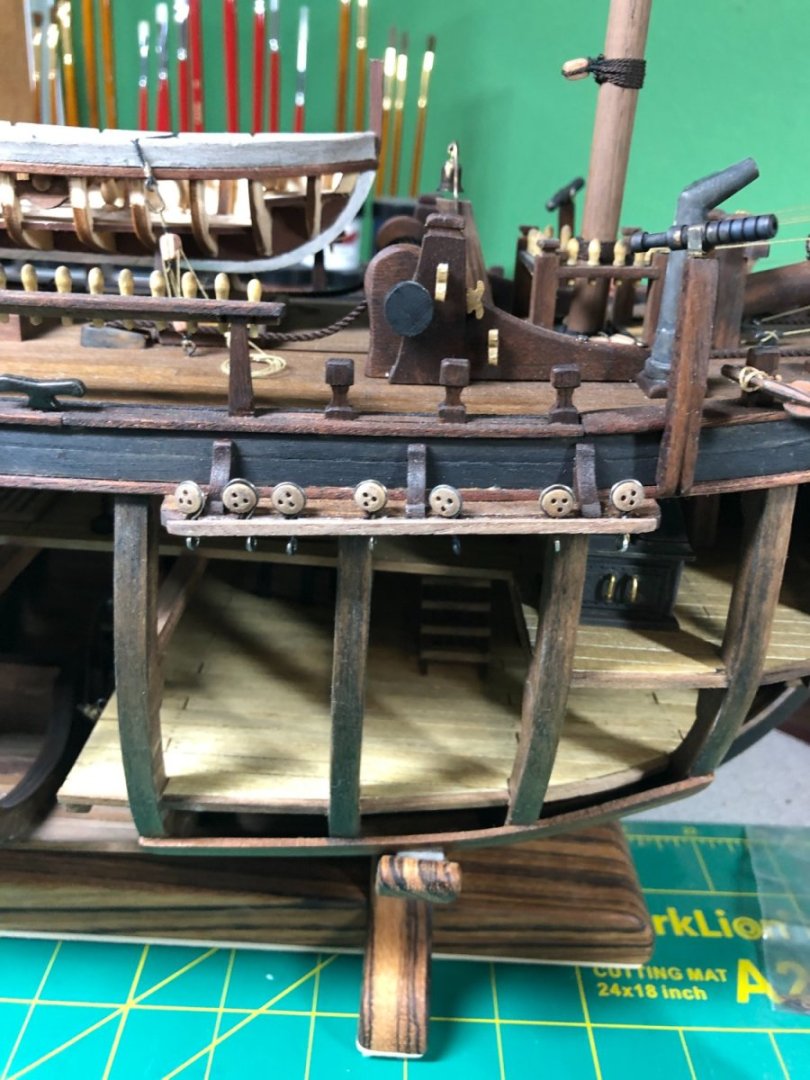
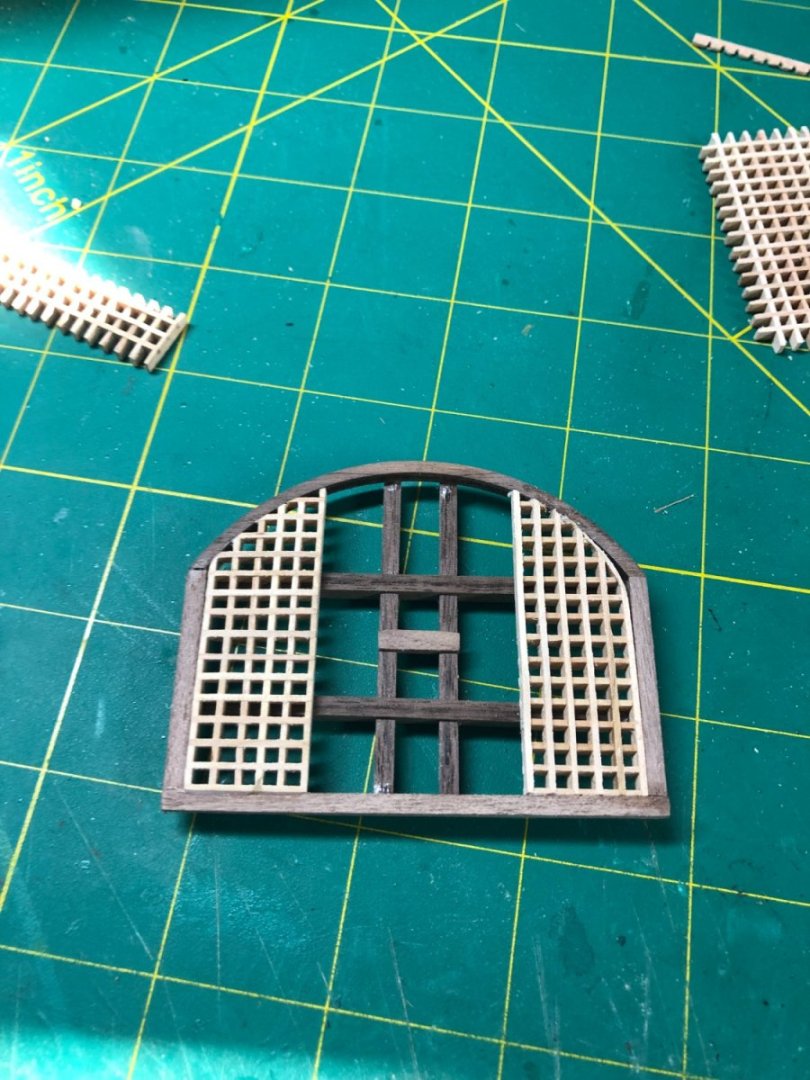
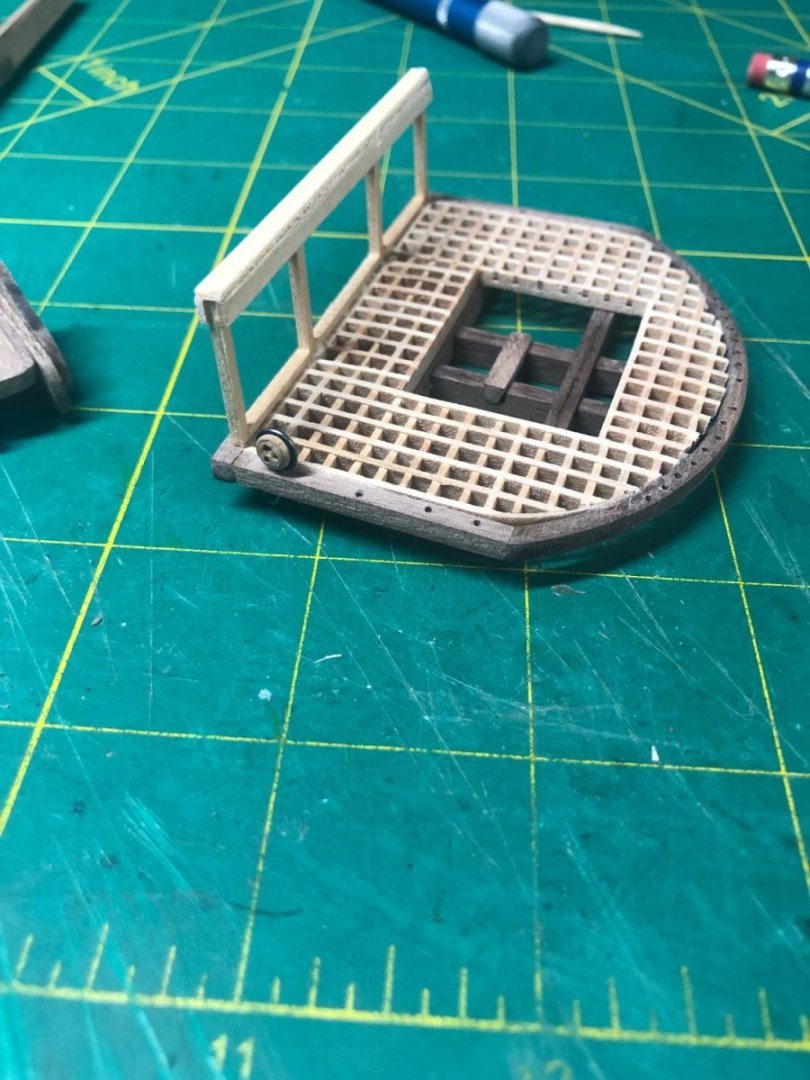
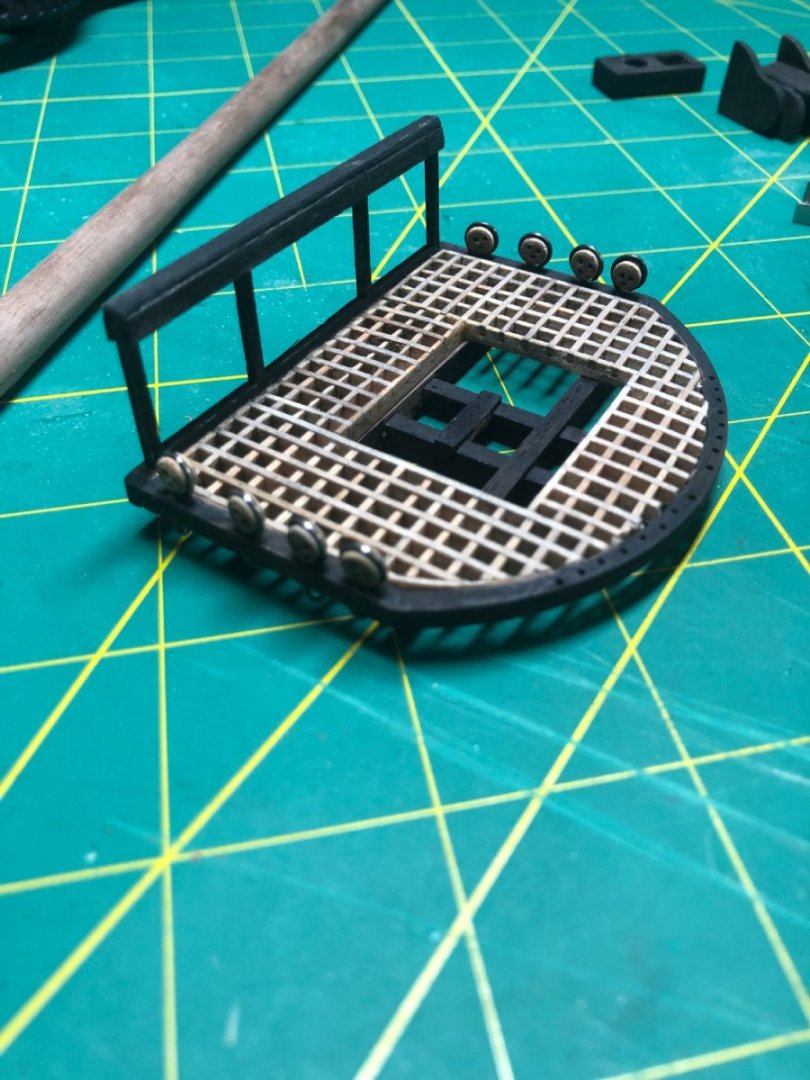
Back at it! Still some projects around home but the Bounty is getting her just priority right now! With the bowsprit completed, I've moved on to the foremast. I started by working on the deadeyes and chain links and the deadeyes for the foremast top: The foremast was sanded to the proper diameter and work started on the foremast top: Grating added and holes drilled for the rigging: I altered the railing from what the kit show but I think it looks better: The cheeks are assembled and ready to be added after some paint: Deadeyes added and painting completed, ready for installation: Glued into place: The mast is not glued into place yet. I'll be doing the rigging preparations next before gluing it into place. Shroud lines, and upper mast bracing will be added (before final placement).


-
I wasn't aware that you are boating too! What do you own? Where do you keep her?
-
Hi Dave... No she stays in the water year around.
-
Just a quick note... I have been heavily involved in a remodel of my garage... turning it into a small woodworking shop! I'm almost done and will be back on the Bounty in the next week or so.
-
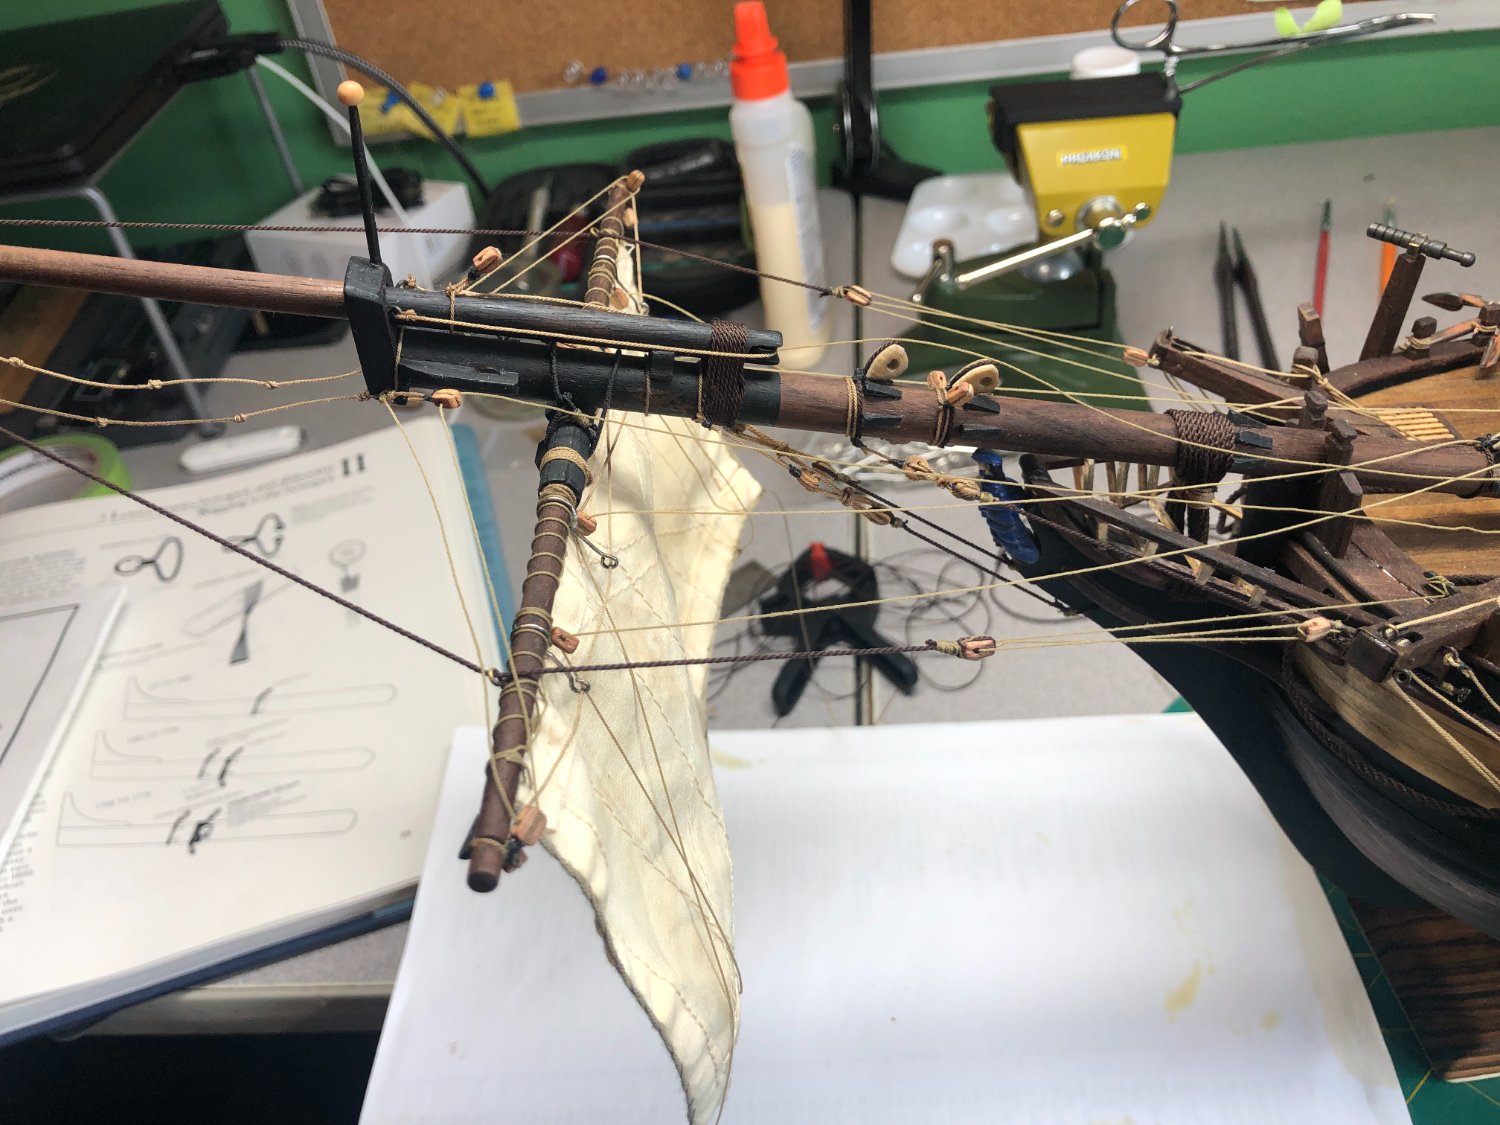
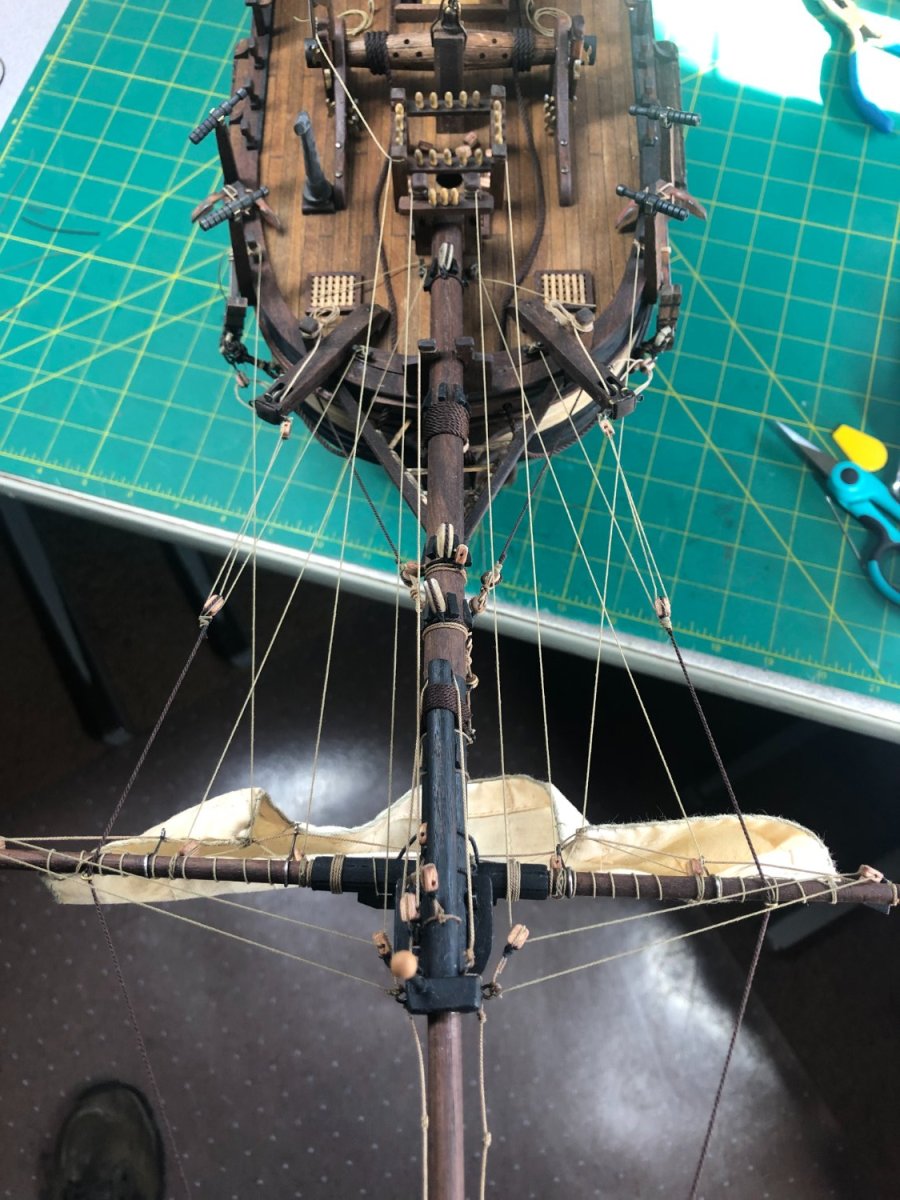
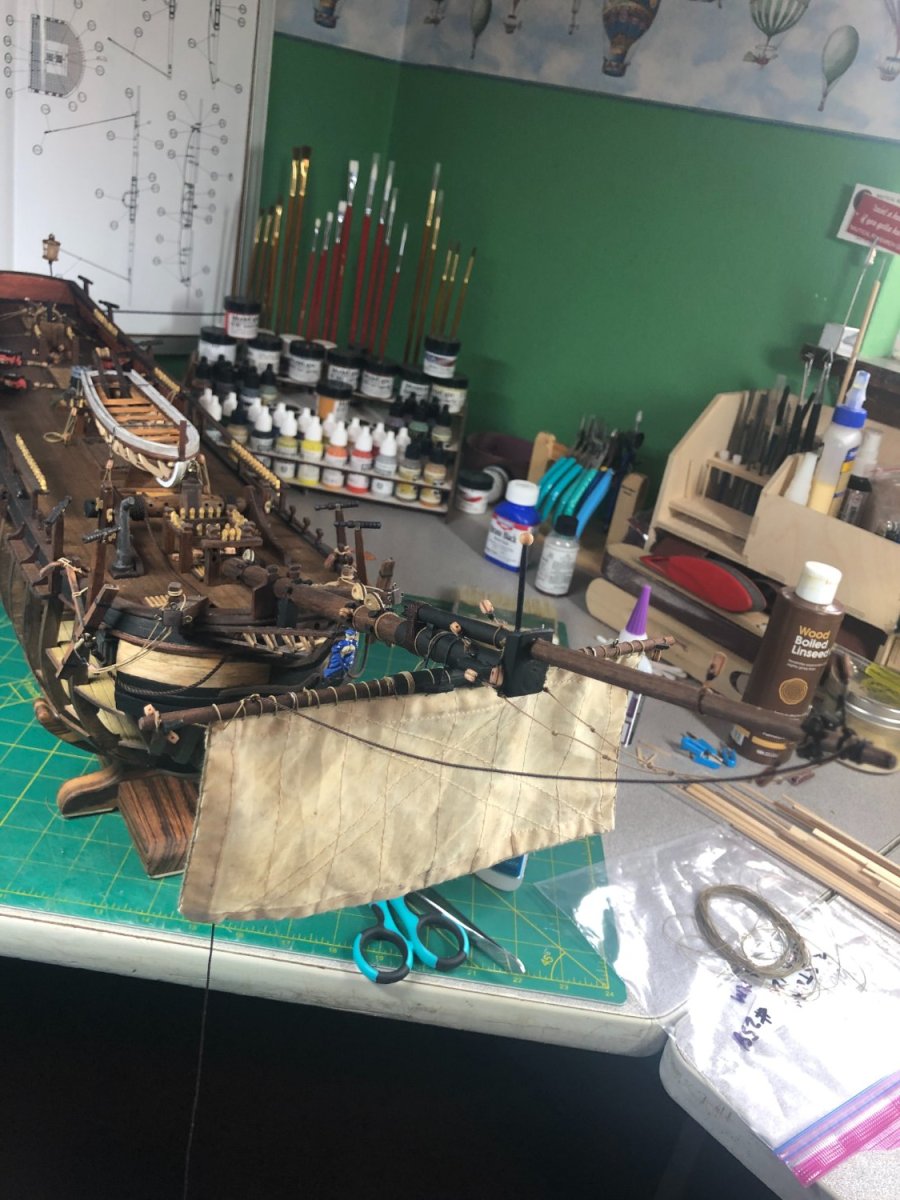
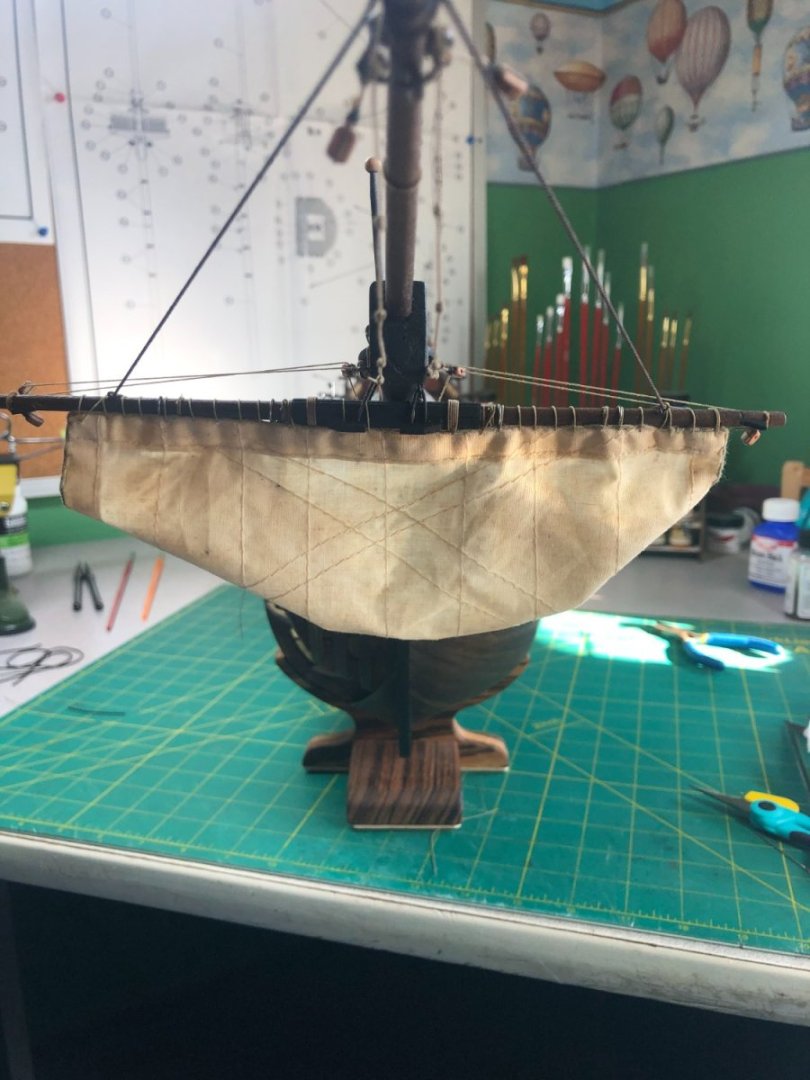
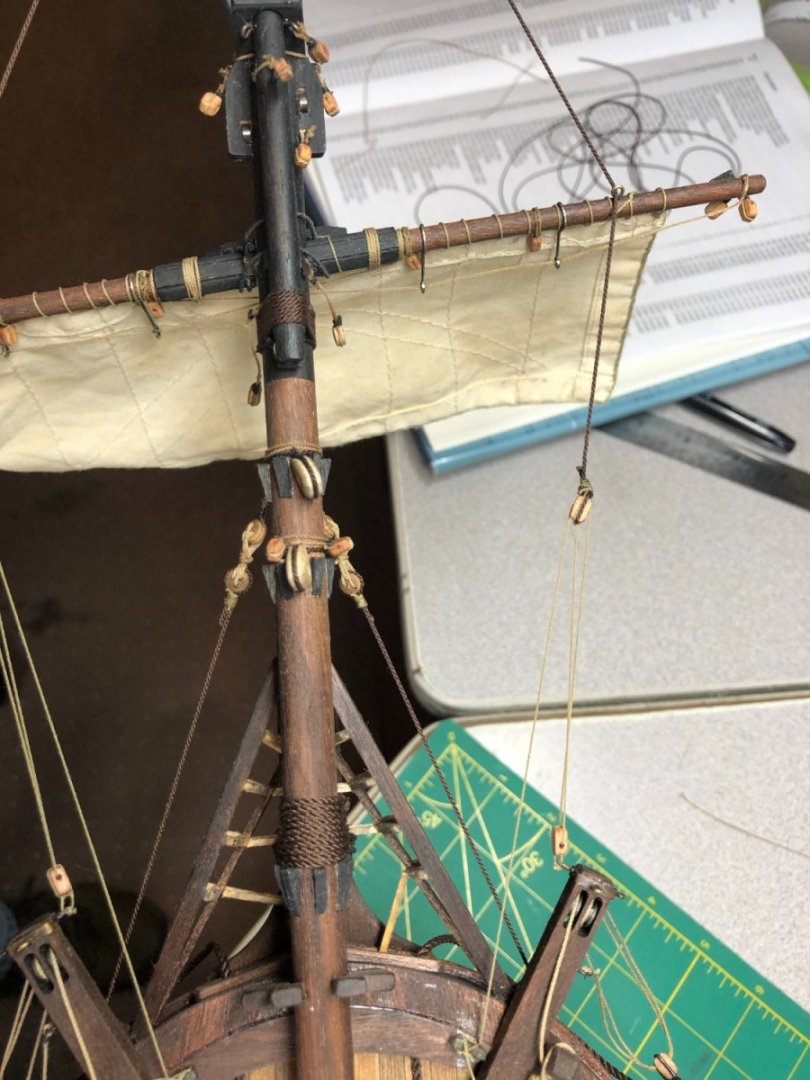
Bowsprit and sprit sail are done! May do some minor modifications on the sail but overall, I'm done with the running lines for both the sail and the yard: In the midst of placing the lines! Front view of the sail: All lines secured: Foremast work coming up!


-
Lots of pictures today... I spent 5-6 hours working on the rigging of the bowsprit... still not done but close. Started the day with gammoning the bow sprit to the stem. I continue to use the rope I made with my Rope Rocket. The gammoning was done with twist by starting forward on the bowsprit and aft on the stem hole: Once I got 10 wraps, I tucked the end through the loop knot and tied it off. Not necessarily correct but given that it is invisible, I took the easier route! The final line pulls the twist tight: Next up were the 4 bobstays. 2 go to the stem and 2 go to the upper bow area near the cathead timbers. Pretty straightforward work with my biggest concern was trying to keep lines the same length, etc. These are the 2 that end near the catheads: These are the 2 ending at the stem:


-
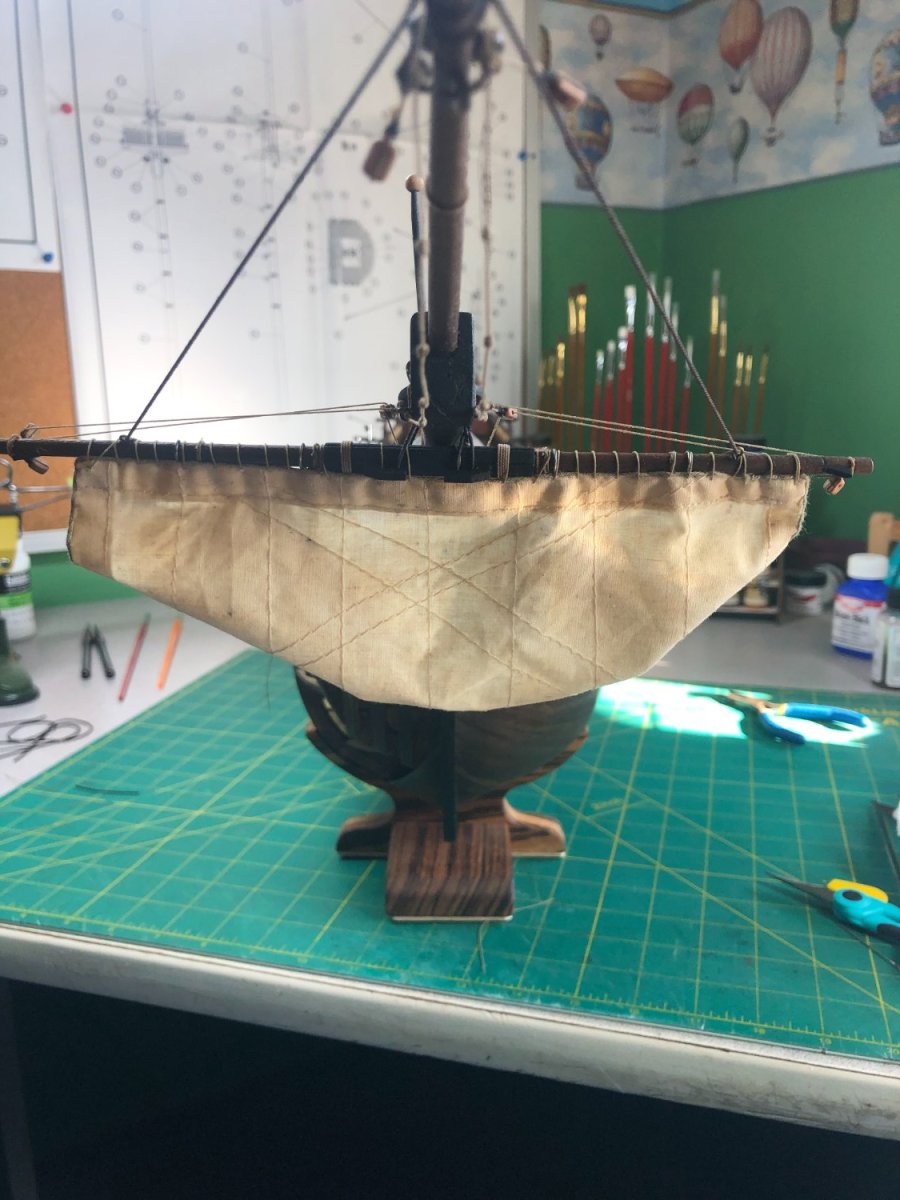
As I previously posted, I haven't aged/weathered the next sail yet but will provide details of my process when I do the next set. I have a ton of projects that are in progress and haven't done a lot but wanted to post an update. Our summer weather is about done which means more time in the workshop! The sprit sail is now mounted on the yard: I used a line stitch to keep the sail from riding up the yard and as is visible, it hangs nicely from the bottom of the yard! I then attached the yard to the bowsprit: The line has been served and is attached to the yard with a loop and then wrapped around the bowsprit: Finally, I attached the sprit guys and ran the pulley system with just the final tie off point left to do: The lines are not tied in their proper places as I have to add the cleats. I plan to run the standing rigging for the underside of the bowsprit next along with the sprit sail running lines.


-
I did something similar... I forgot about my last post! I haven't done any other sails yet but promise to post details when I get the next sail going!
-
Mine are due on Monday! I got all 11 books requested!
-
List of books that I’d like to add to my small library sent to Gerry! Hope to get 10-12 books!
-
That is a lot of books! Thanks for passing this along, Chuck.
-
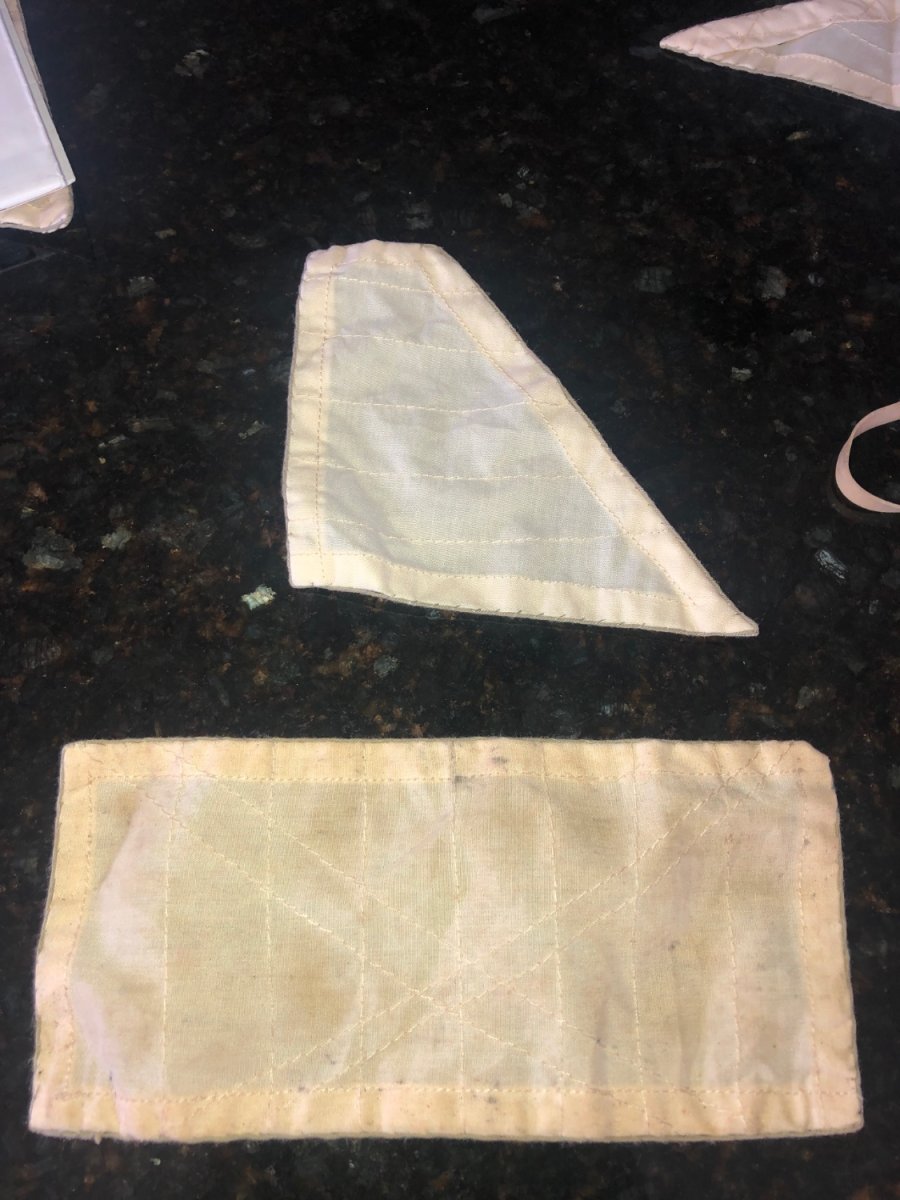
Your point is well taken and I certainly don’t mind it at all. Weathering has made the build much more difficult and time consuming but I do love the look… the new ship look is great but a used vessel look is more realistic to me. As to the sails, I agree that it can be too much and have done a ton of research to find a balance… I am planning to do each sail individually and will either dry set it (as mentioned) or if it appears to be too much, it will be furled. I should mention that the picture I took of the sail was still in a damp state, once it dried, it is a bit lighter… see the attached picture. I appreciate your opinion! Thanks!