LyleK1
-
Posts
541 -
Joined
-
Last visited
Content Type
Profiles
Forums
Gallery
Events
Everything posted by LyleK1
-
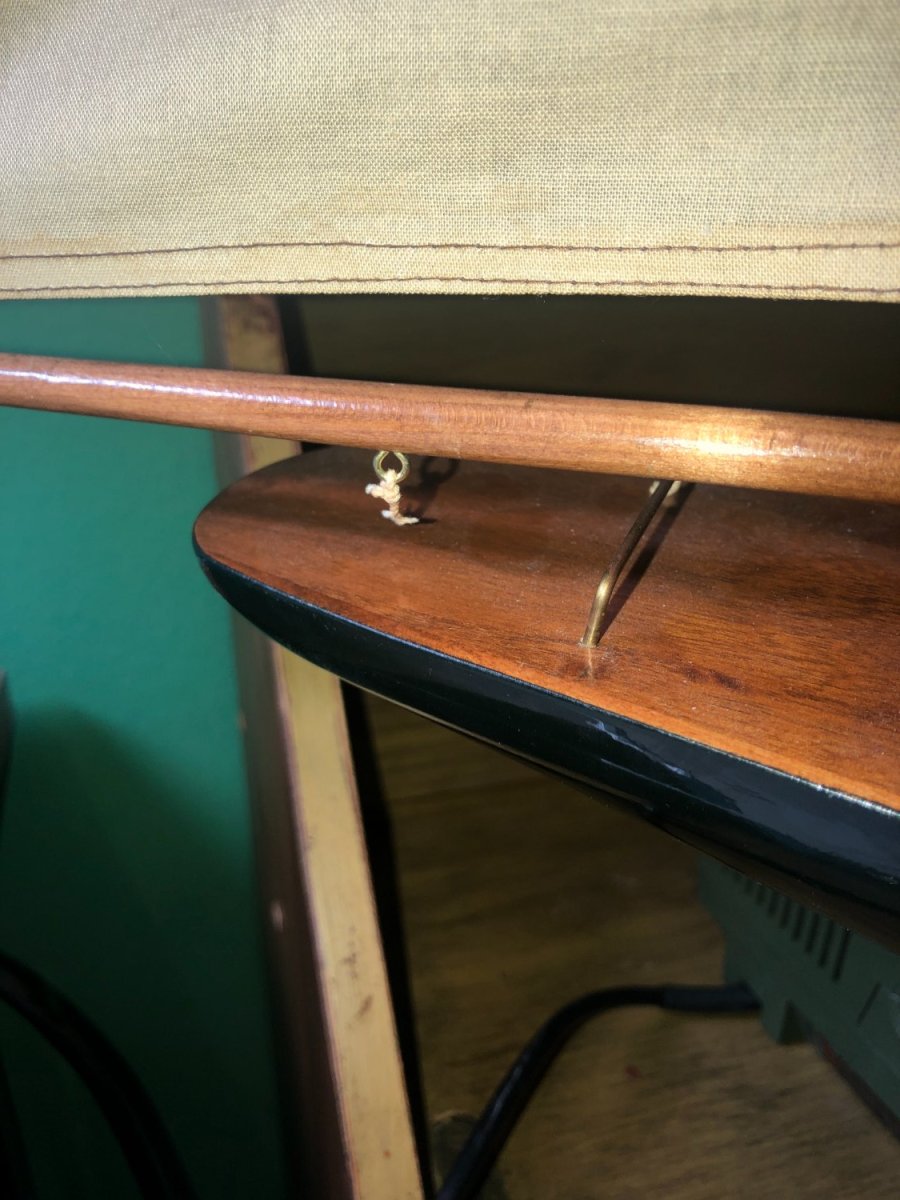
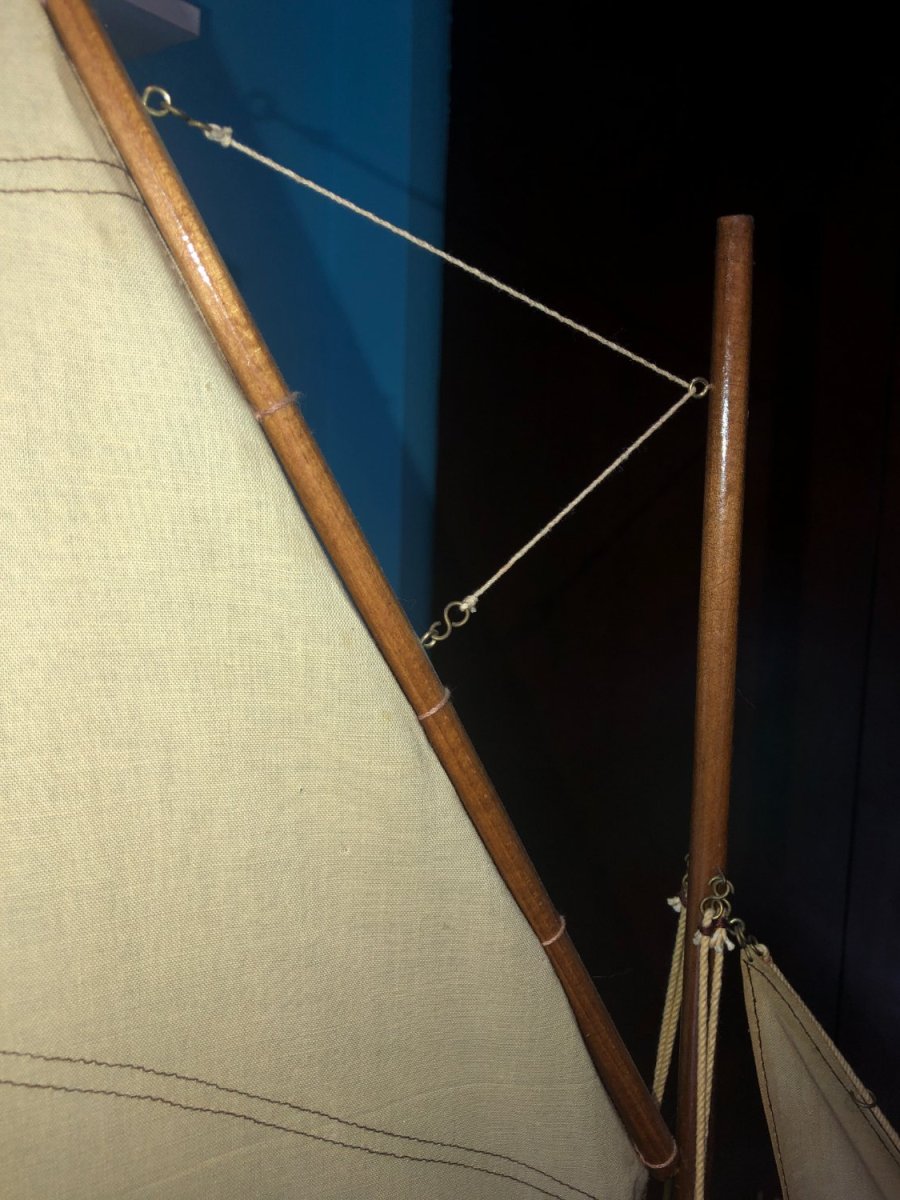
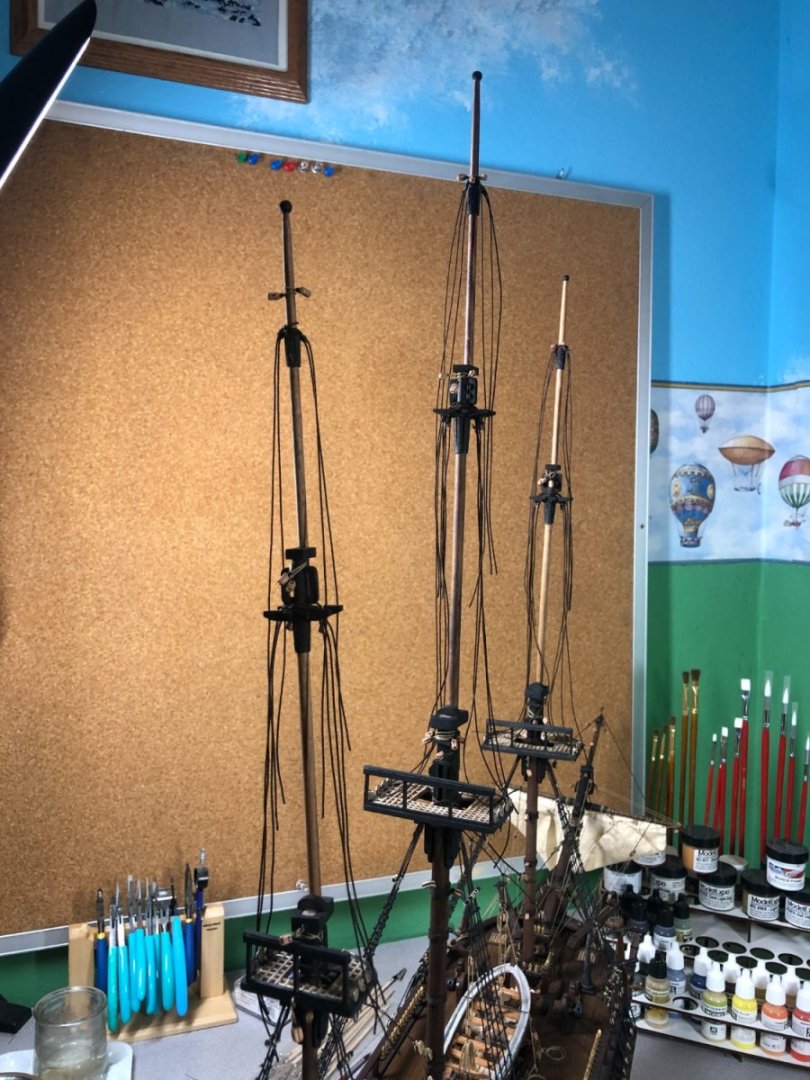
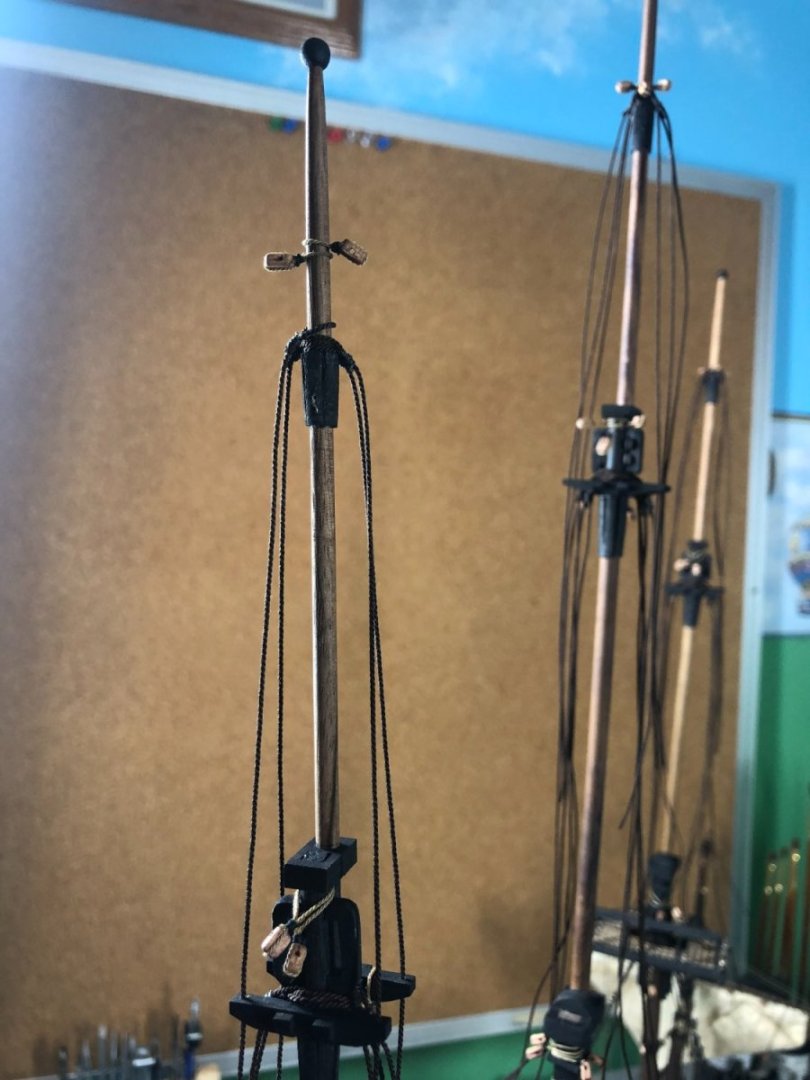
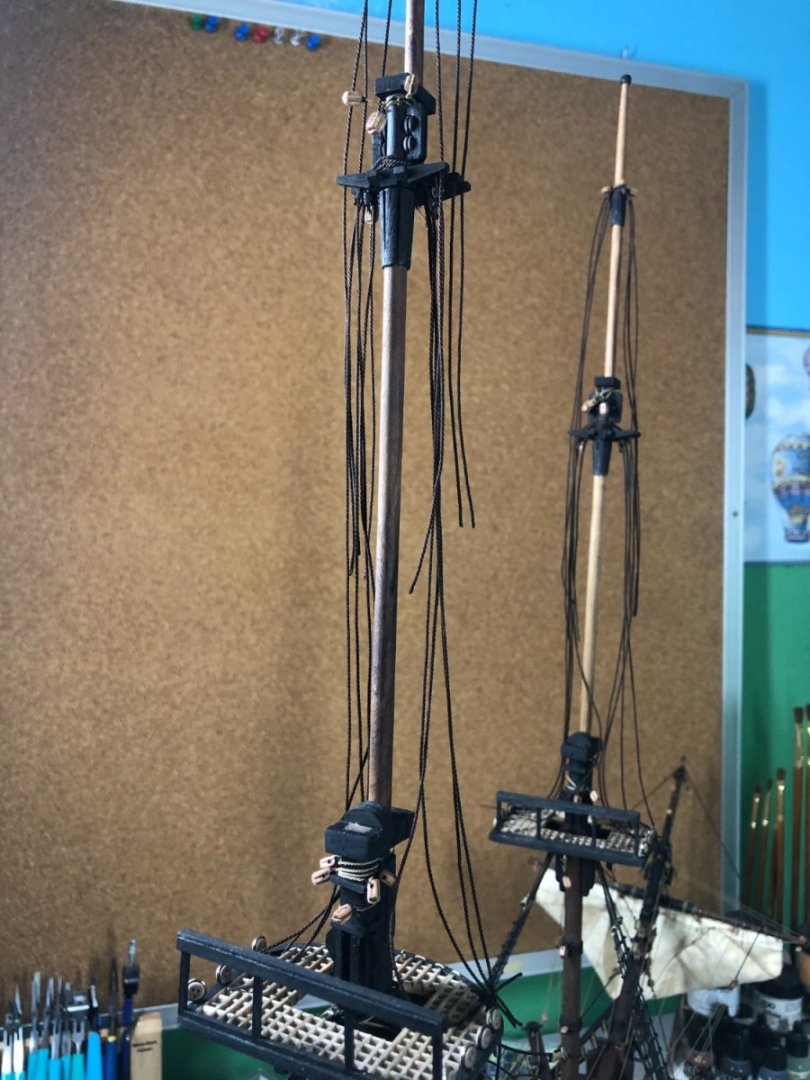
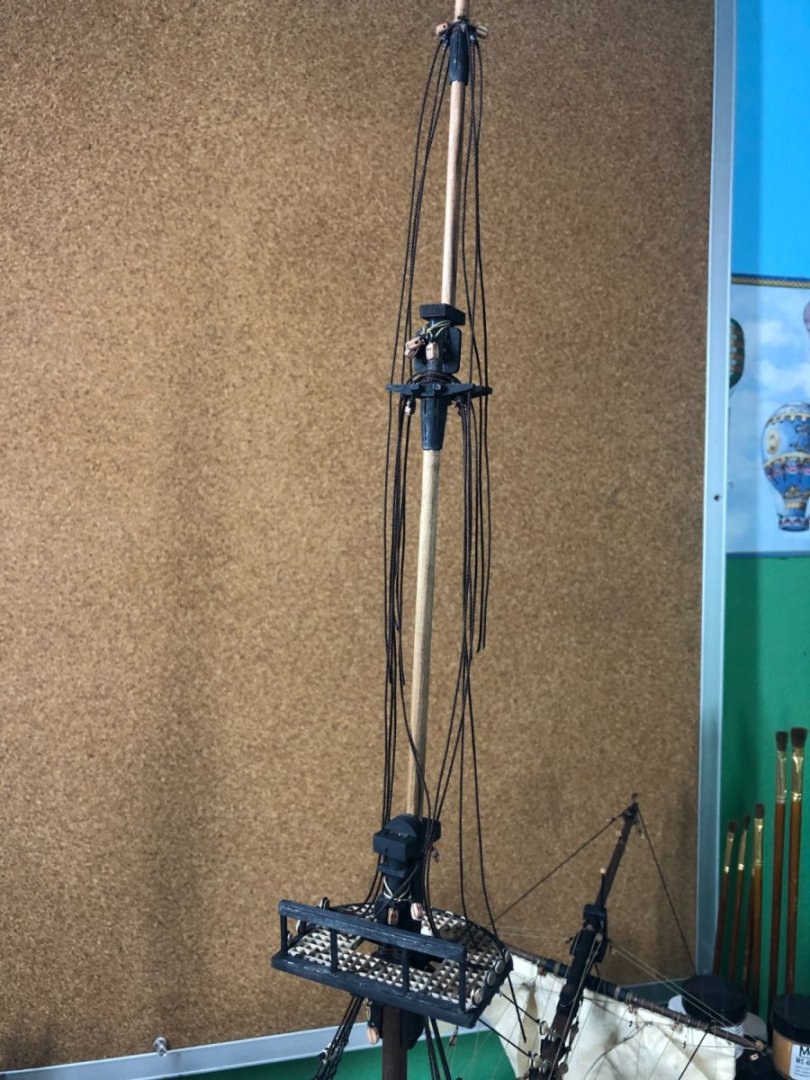
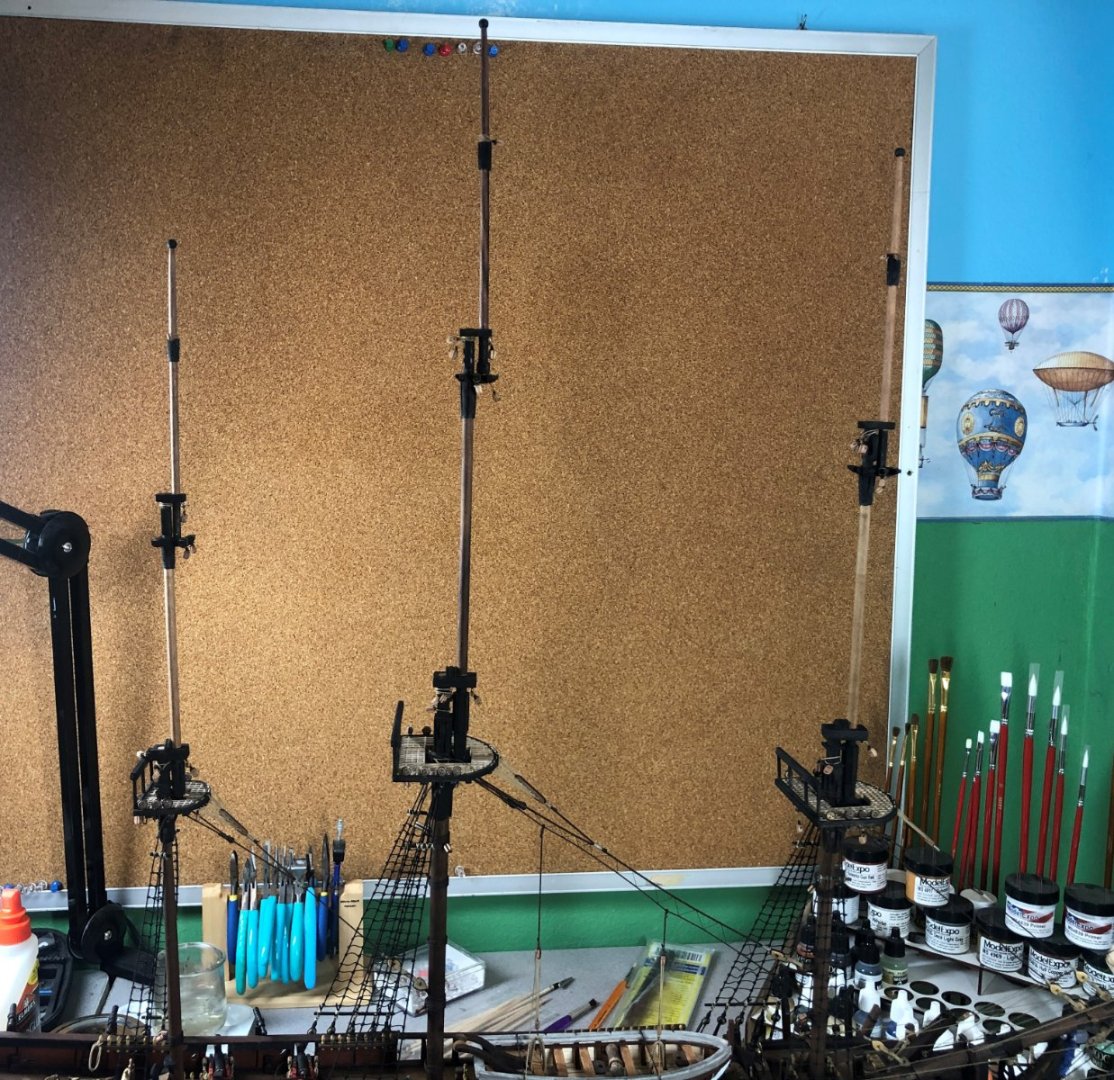
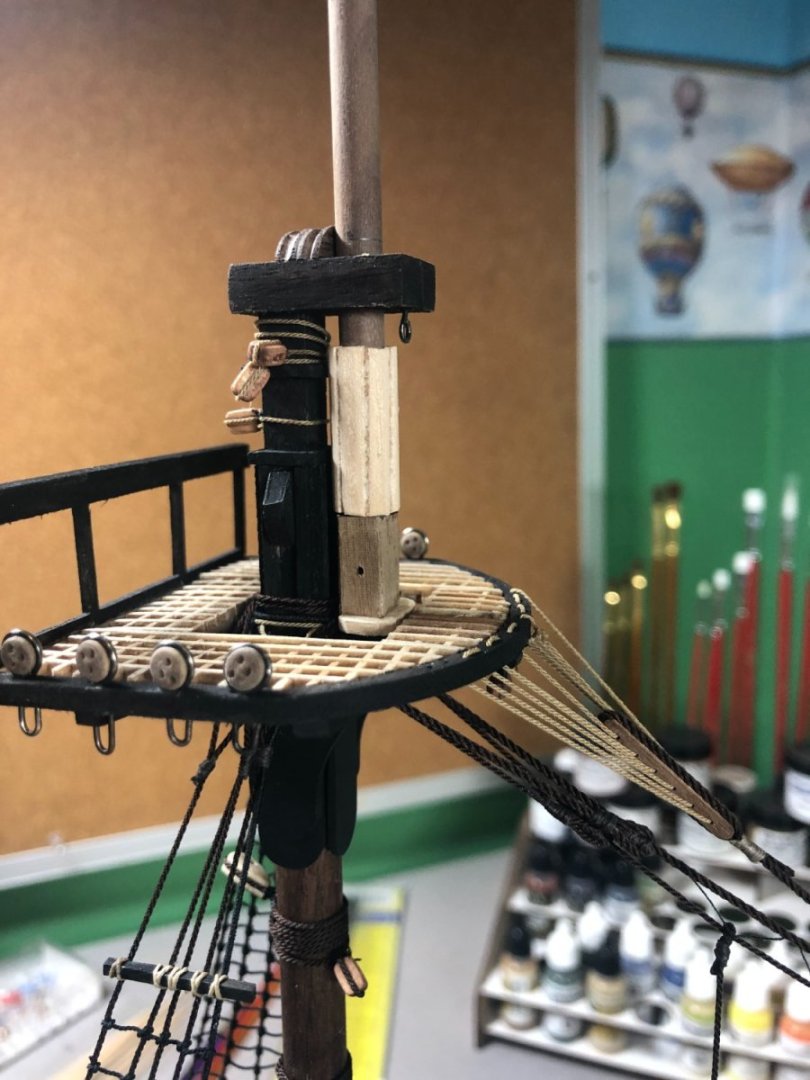
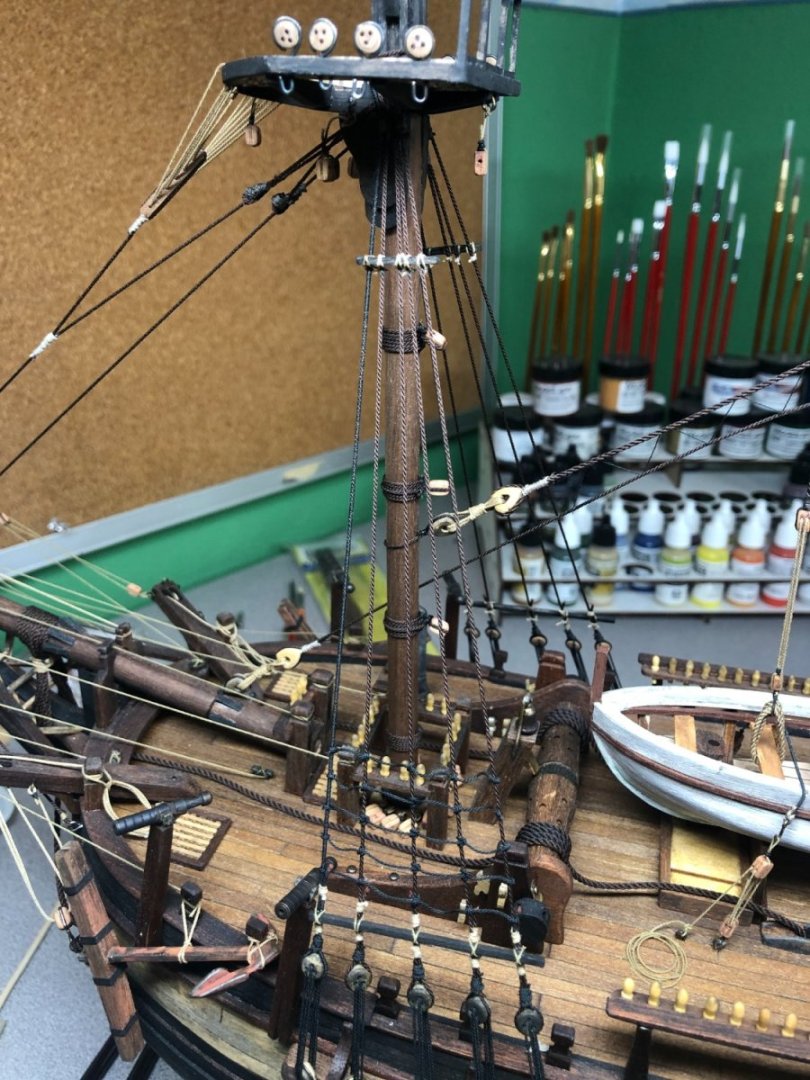
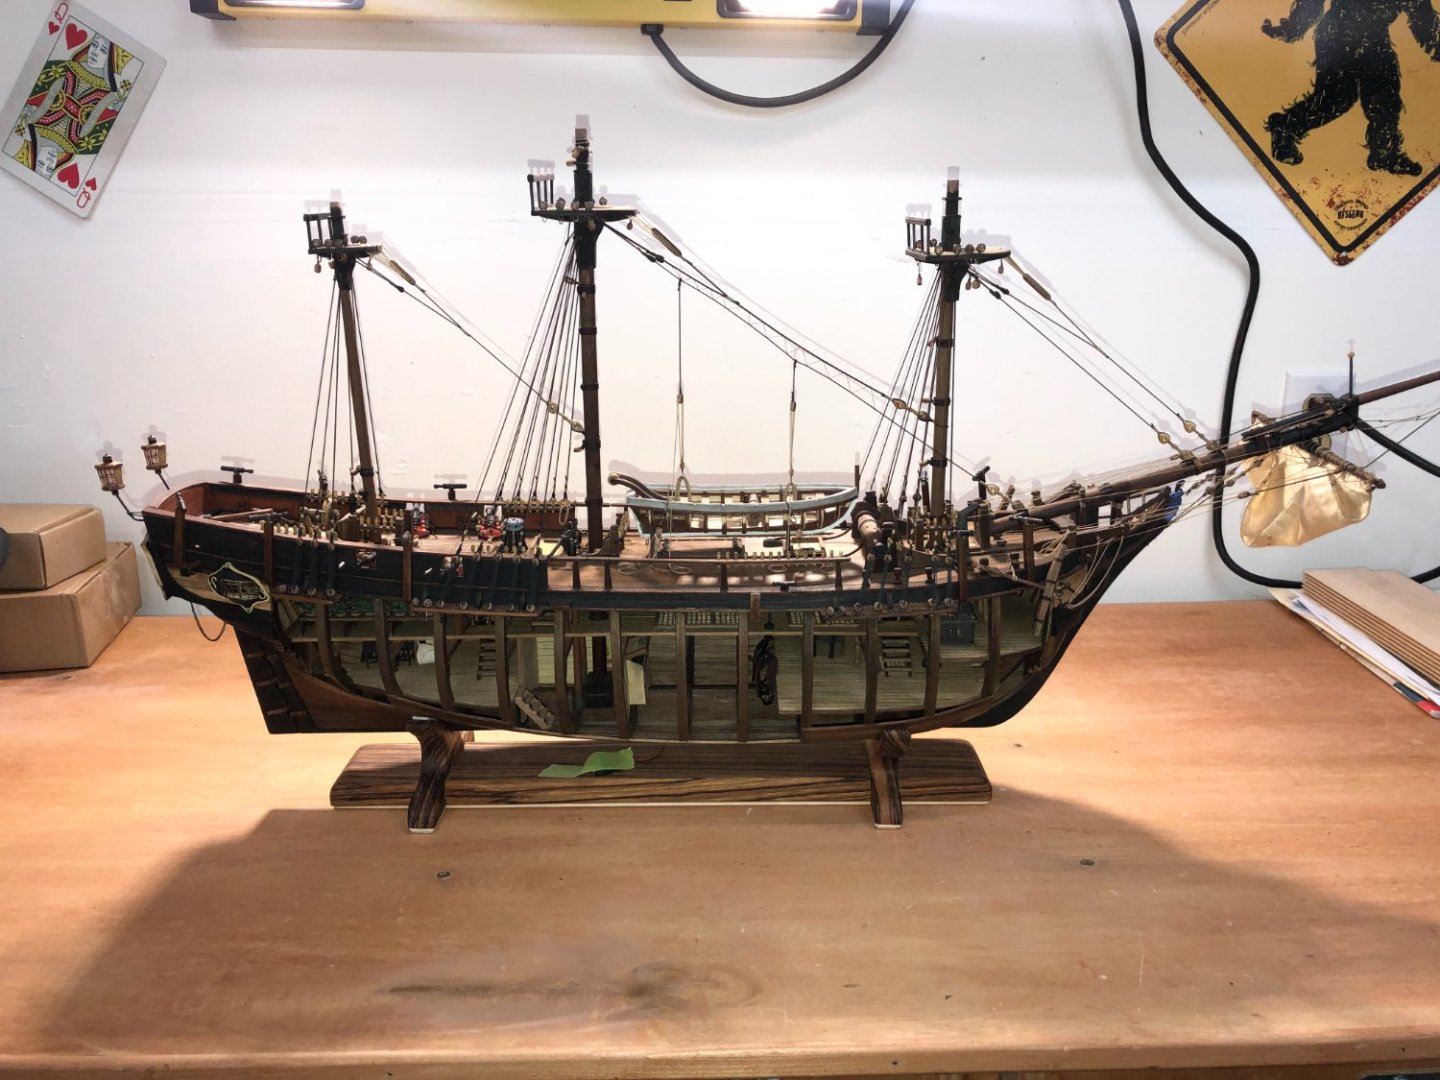
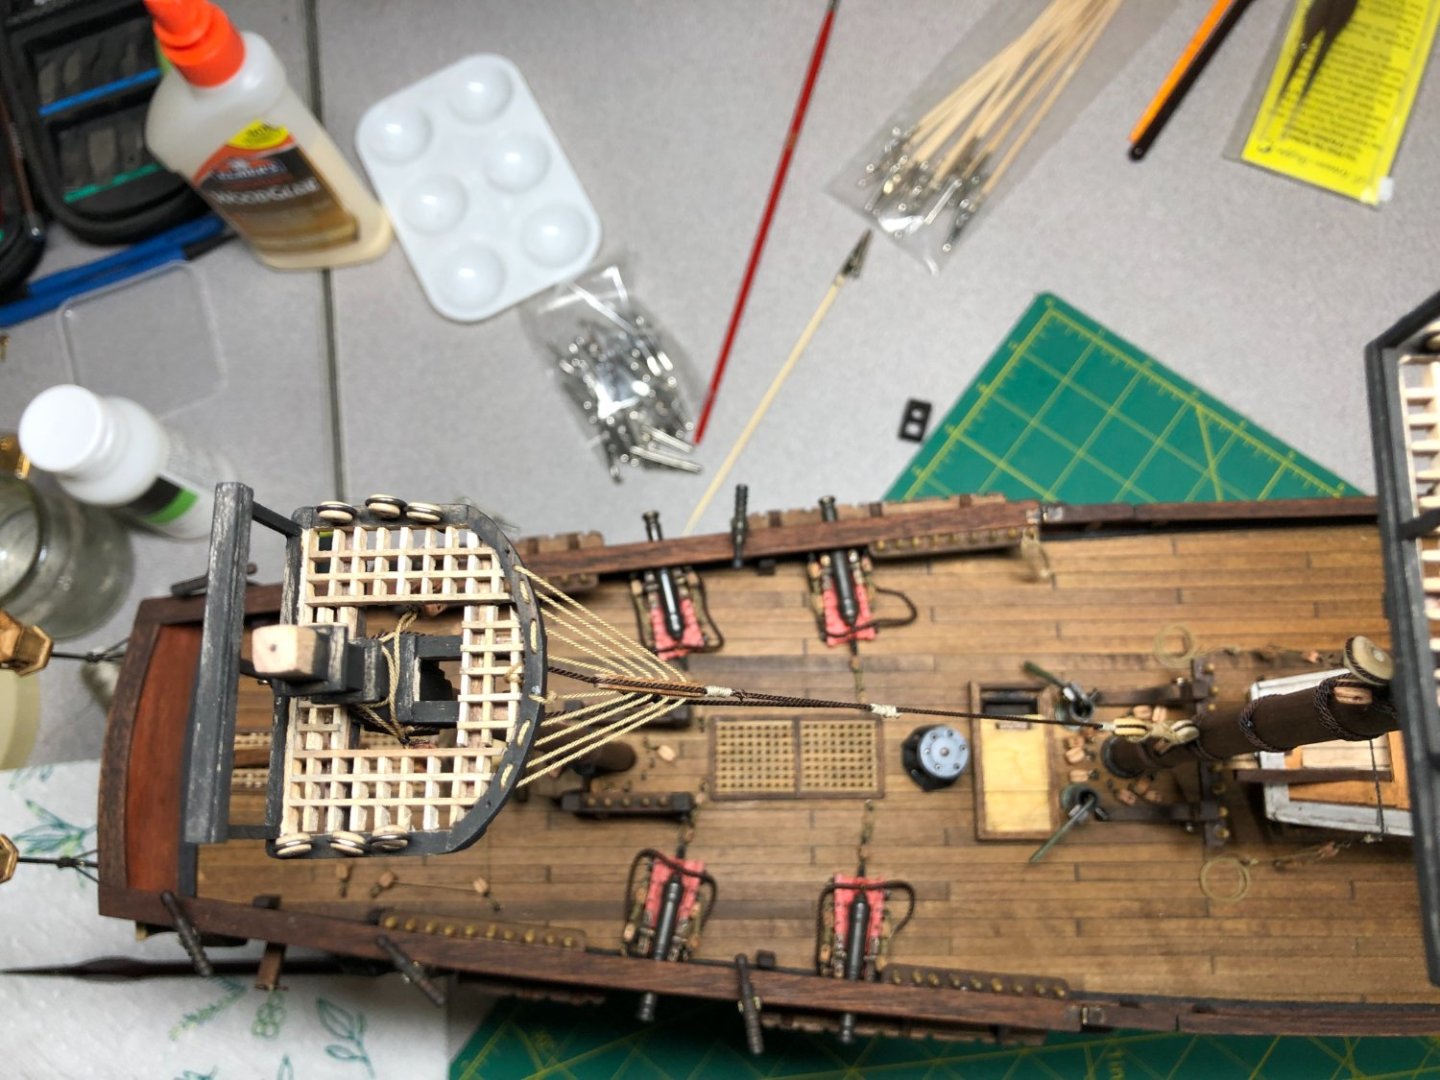
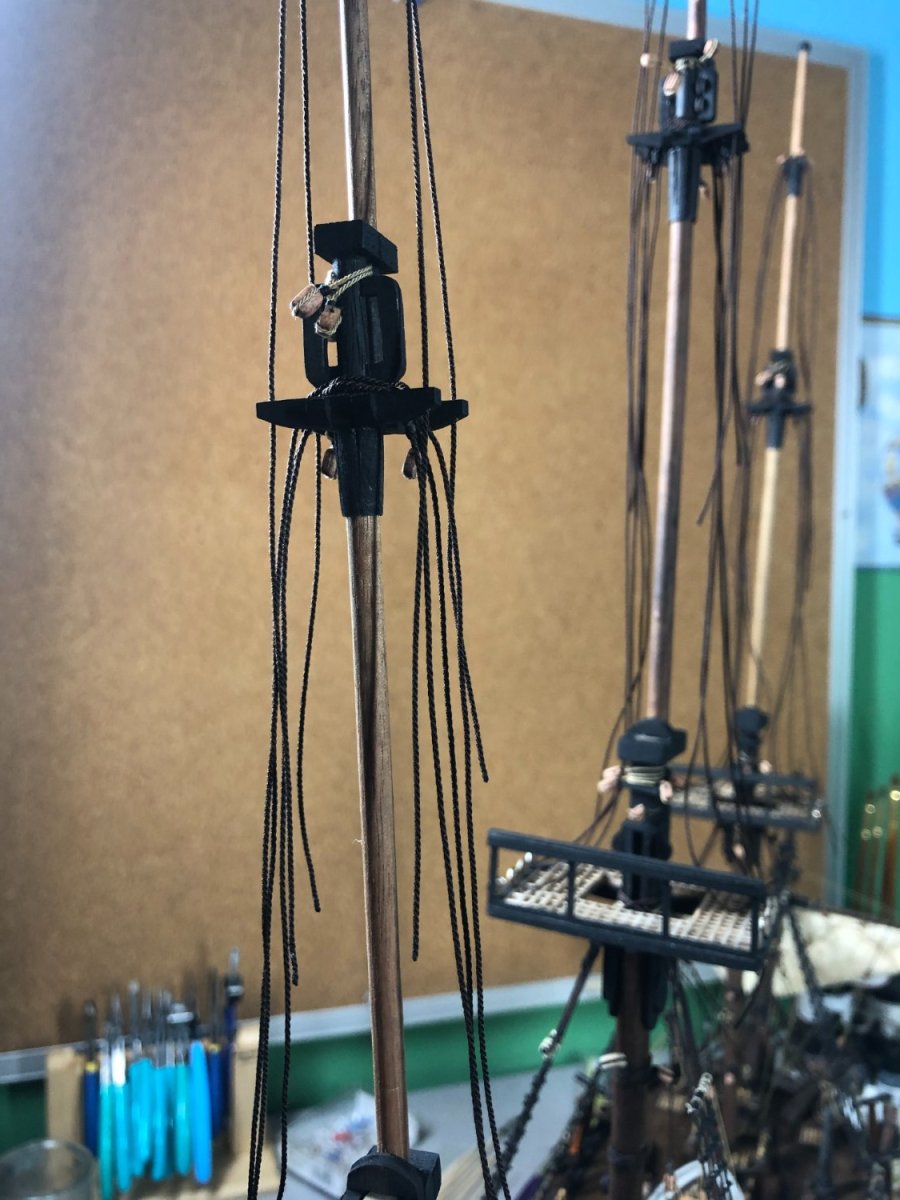
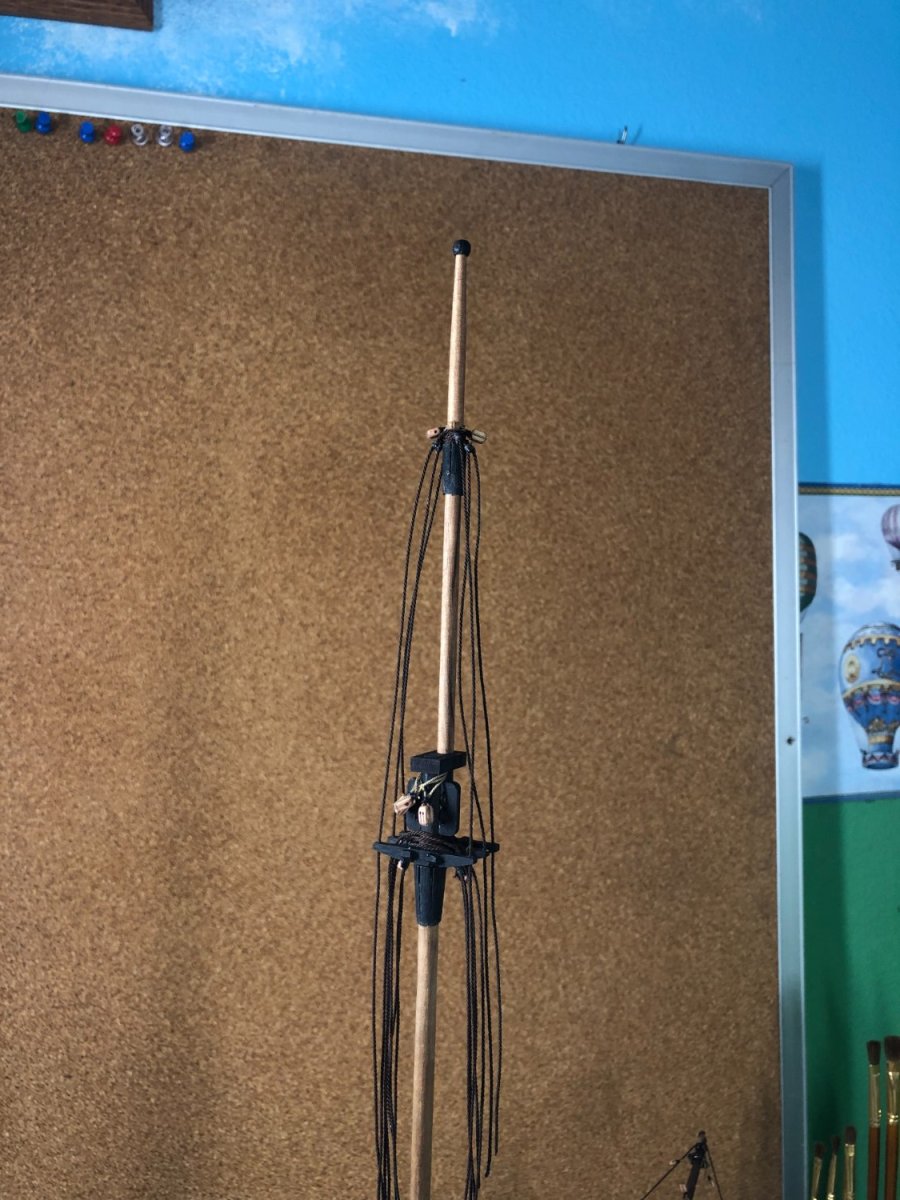
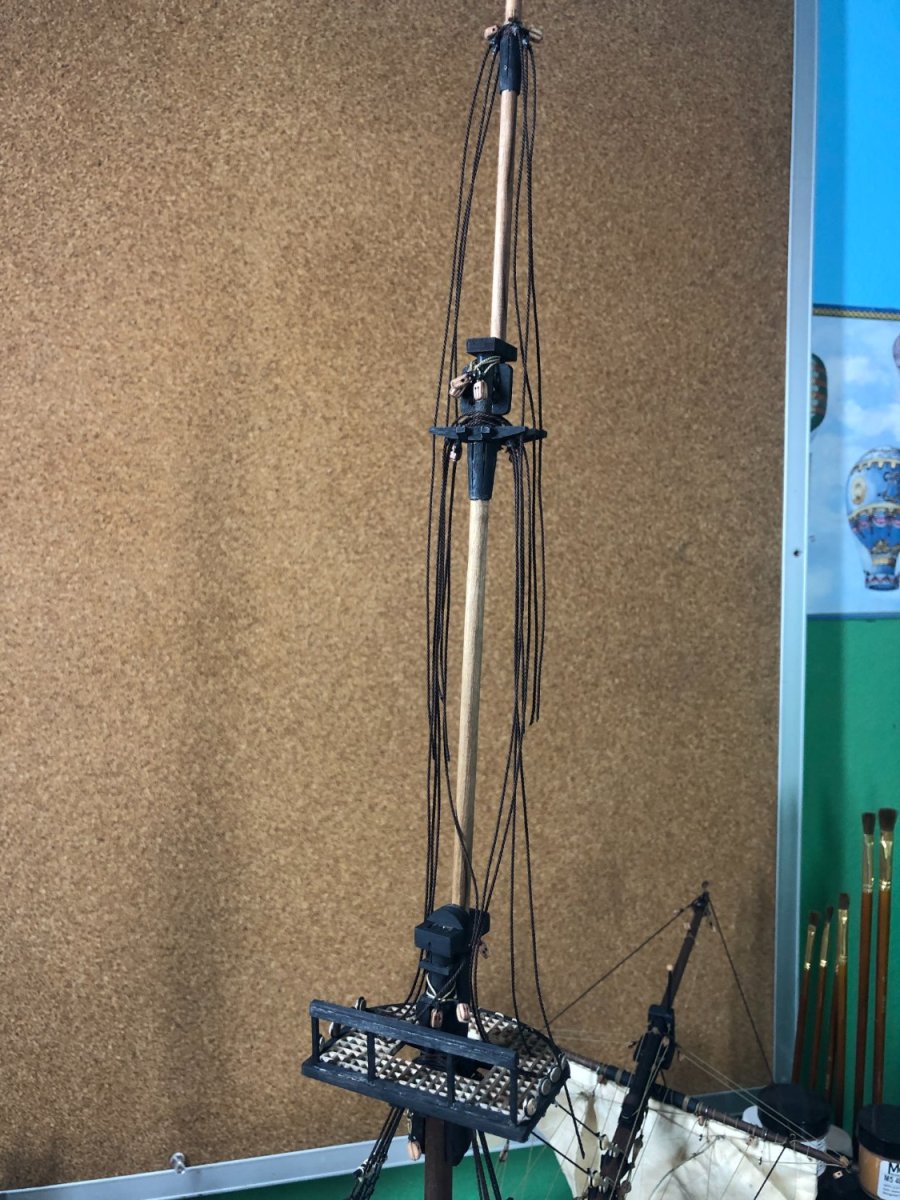
 Masts done... the only wood work left are the yards! A number of pictures to help future builders... The blocks are all in place too. As I noted in my previous post, I glued the main mast into place before adding the standing rigging lines. That made adding them a bit tricky but I managed: All the shrouds are ready to be completed but I still need to add the stays, etc. See the spaghetti below! I made a major (to me) blunder when I accidently bumped one of the stern lanterns knocking it loose and severing the wire to the lamp. Unfortunately, I don't see a way to fix the wire, the lamp is repairable. I was pretty upset as I've been really careful for two years and all it took was a little bump from my sleeve to do the damage. Nothing I can do.... but move on. Standing rigging lines will be added. Then the masts will be glued into place and the shrouds attached... Oh boy! More knots!! An update will follow.
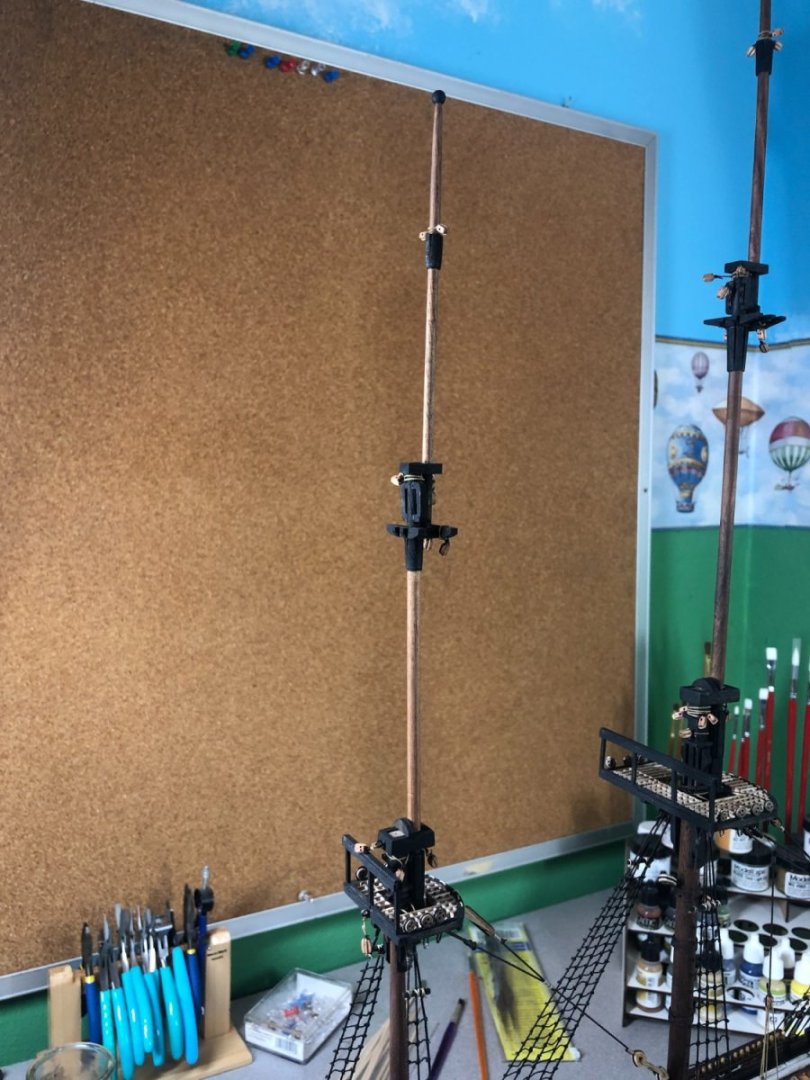


-
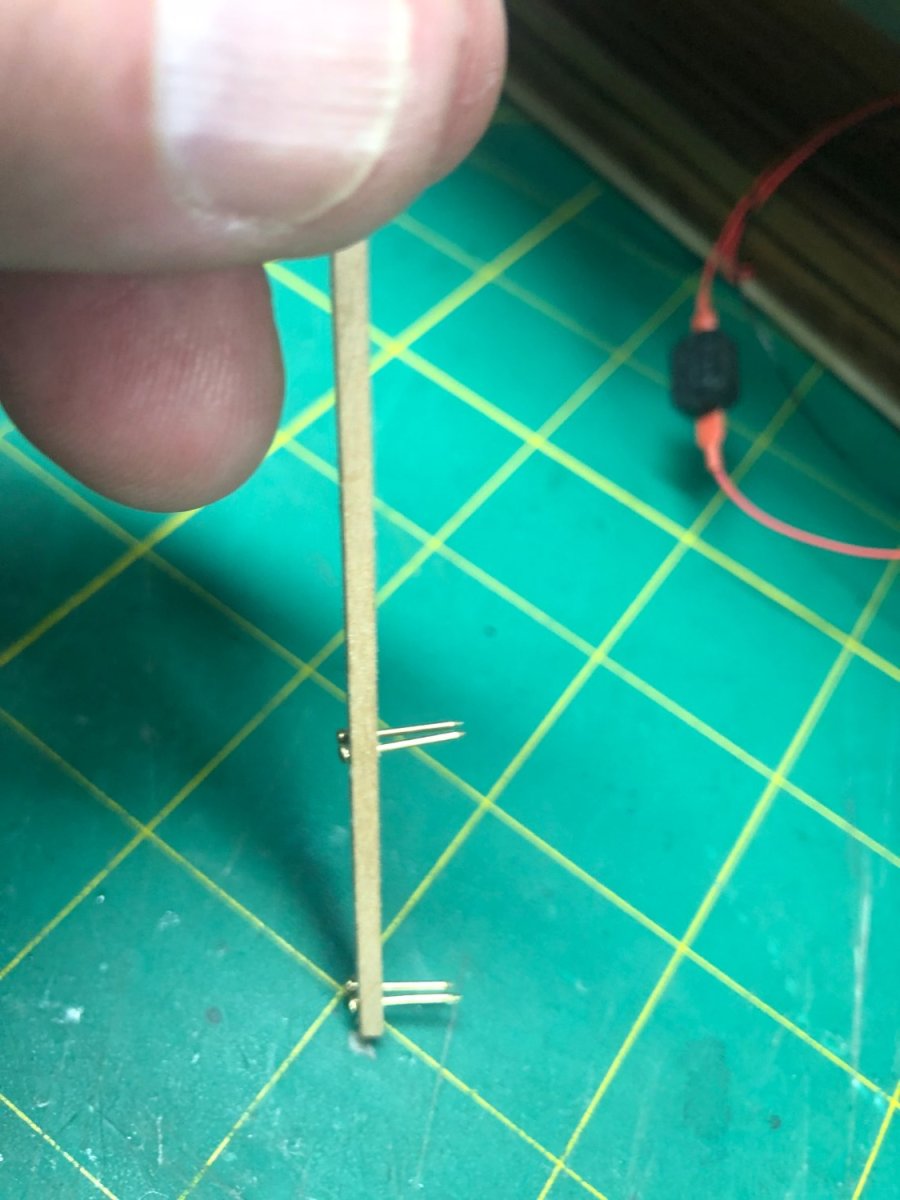
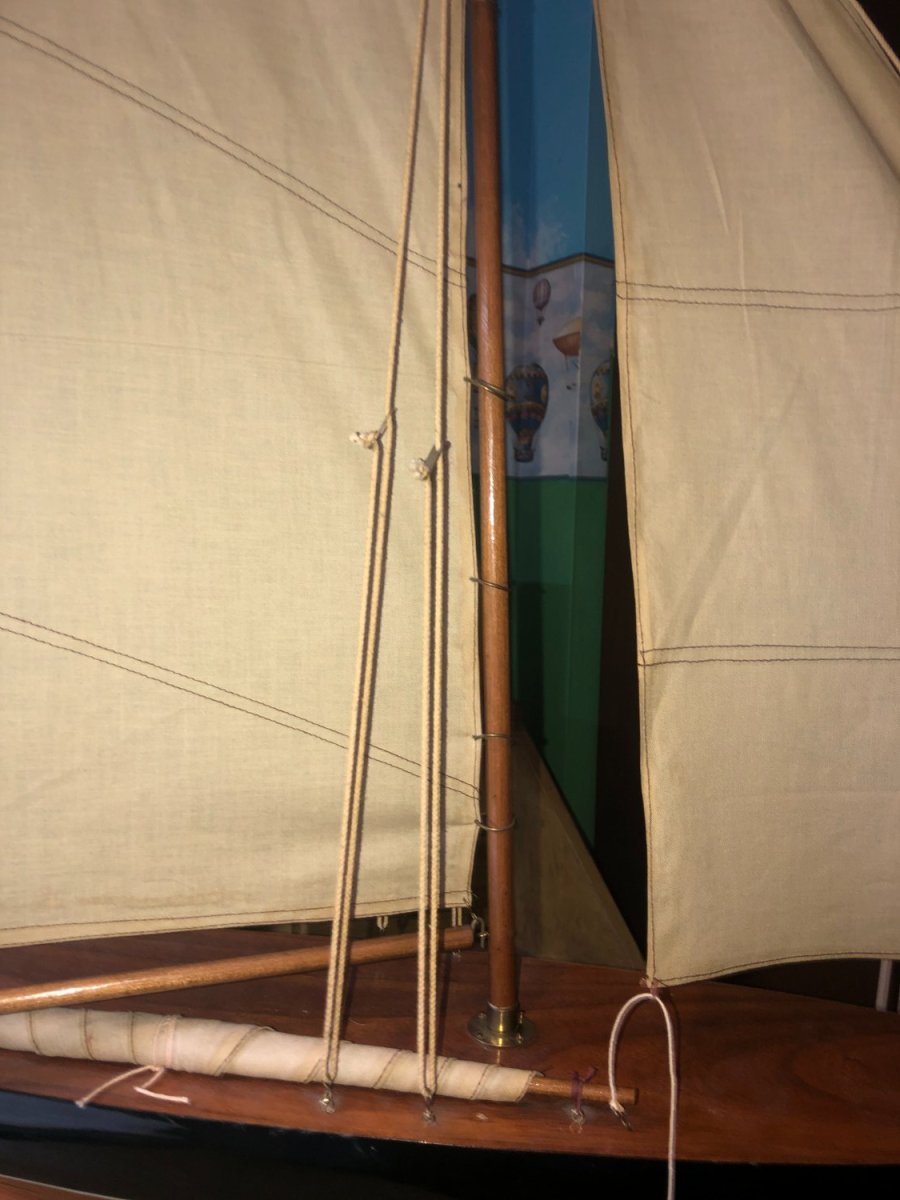
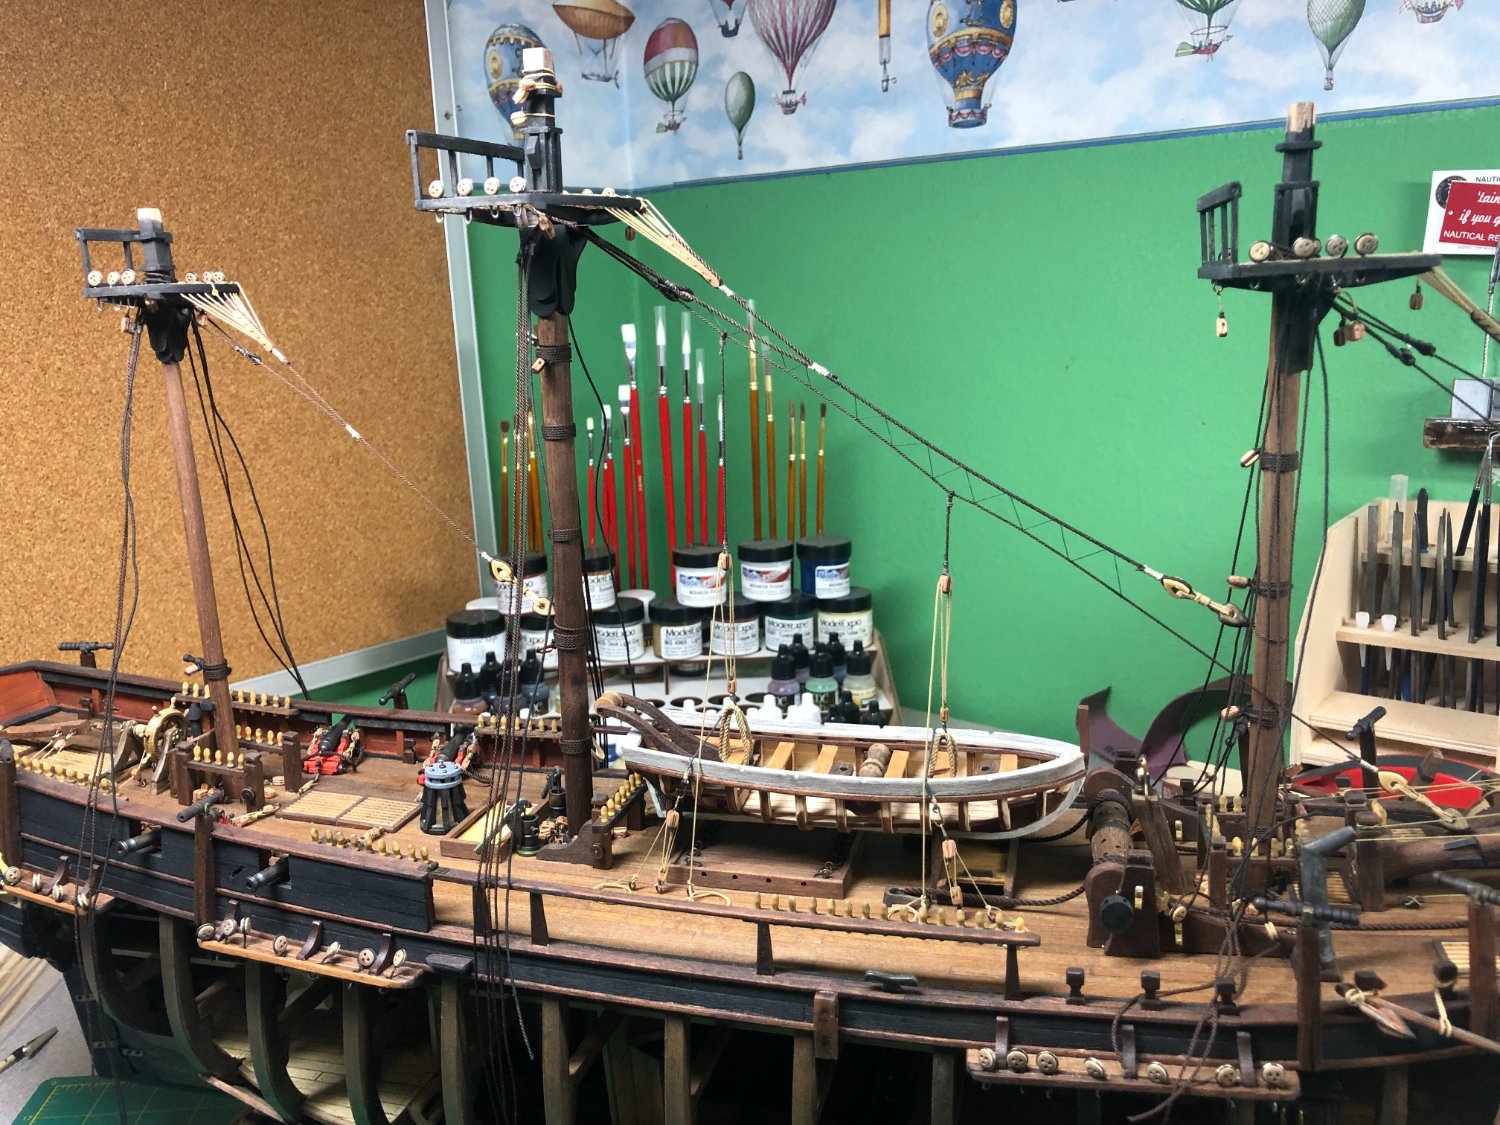
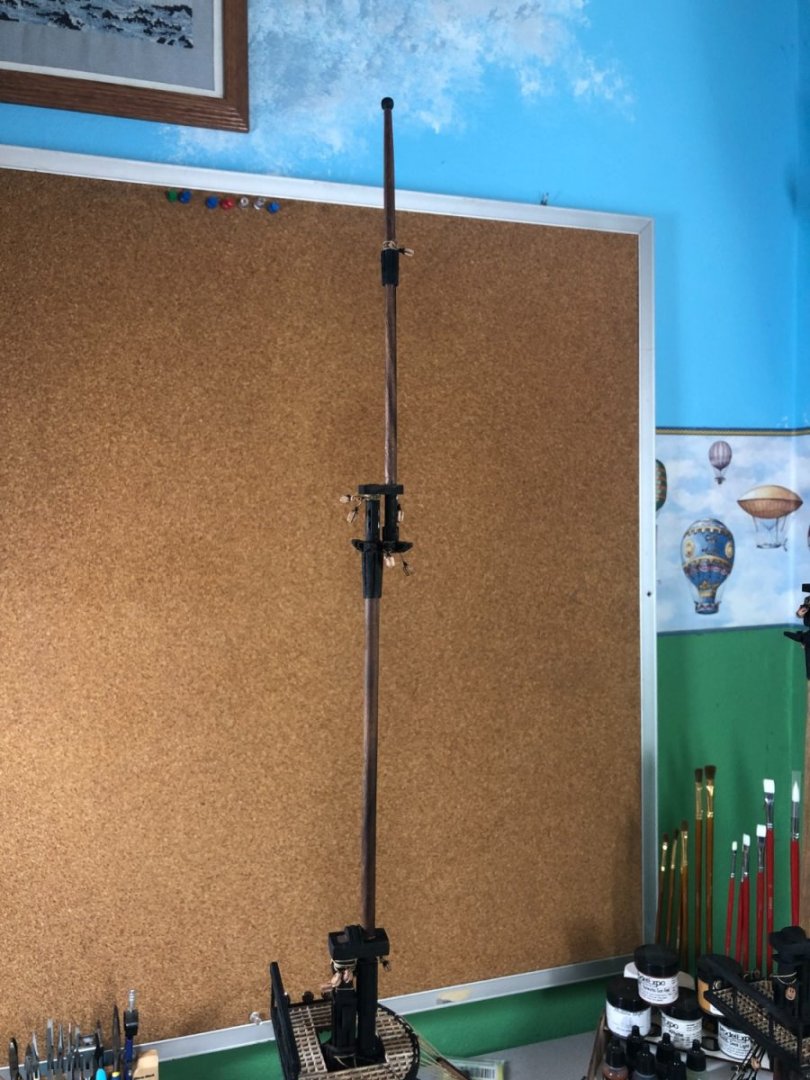
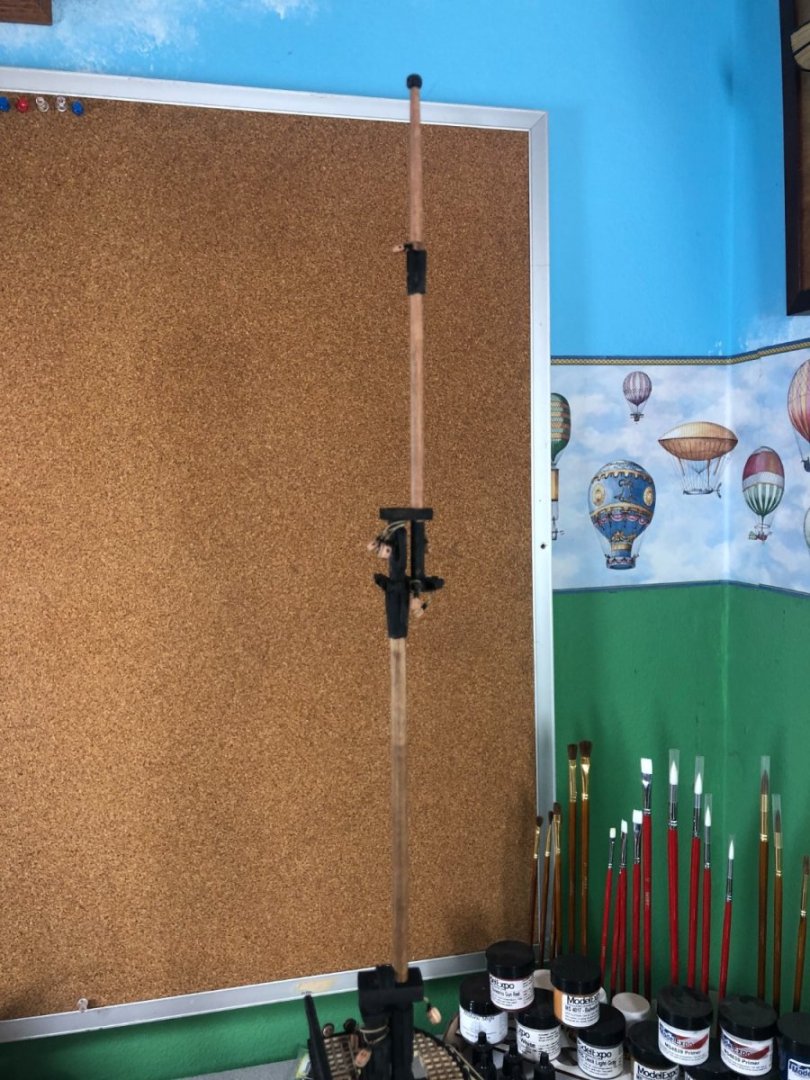
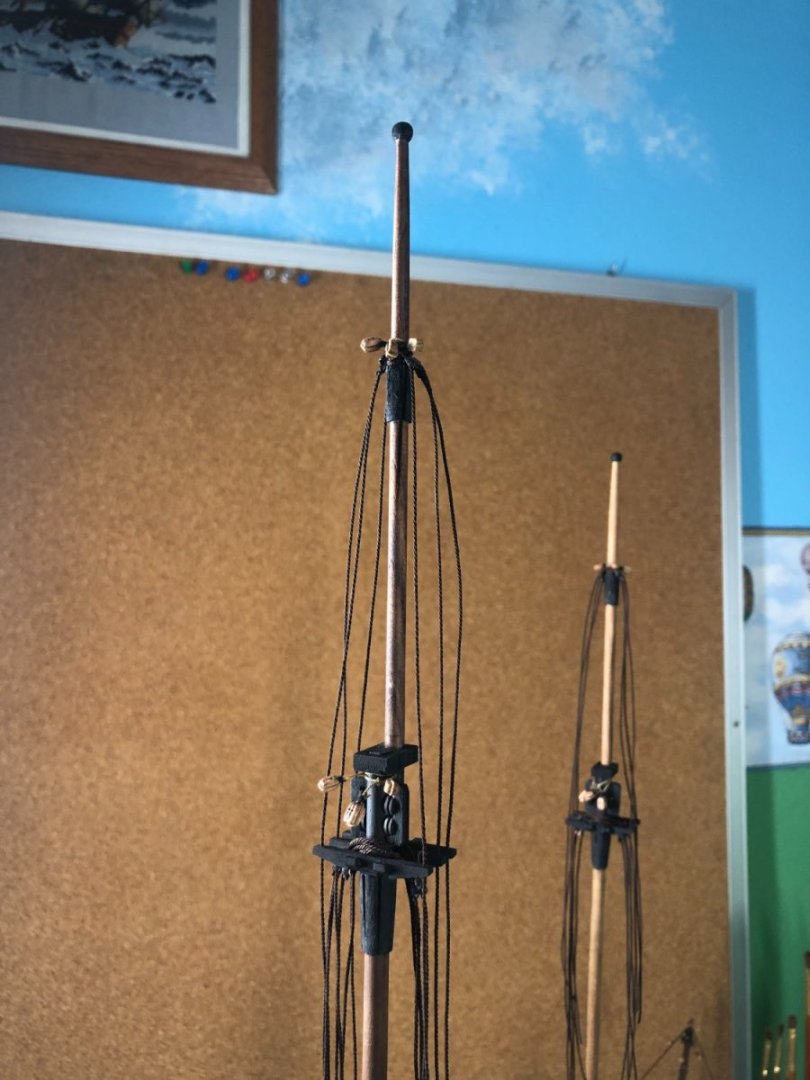
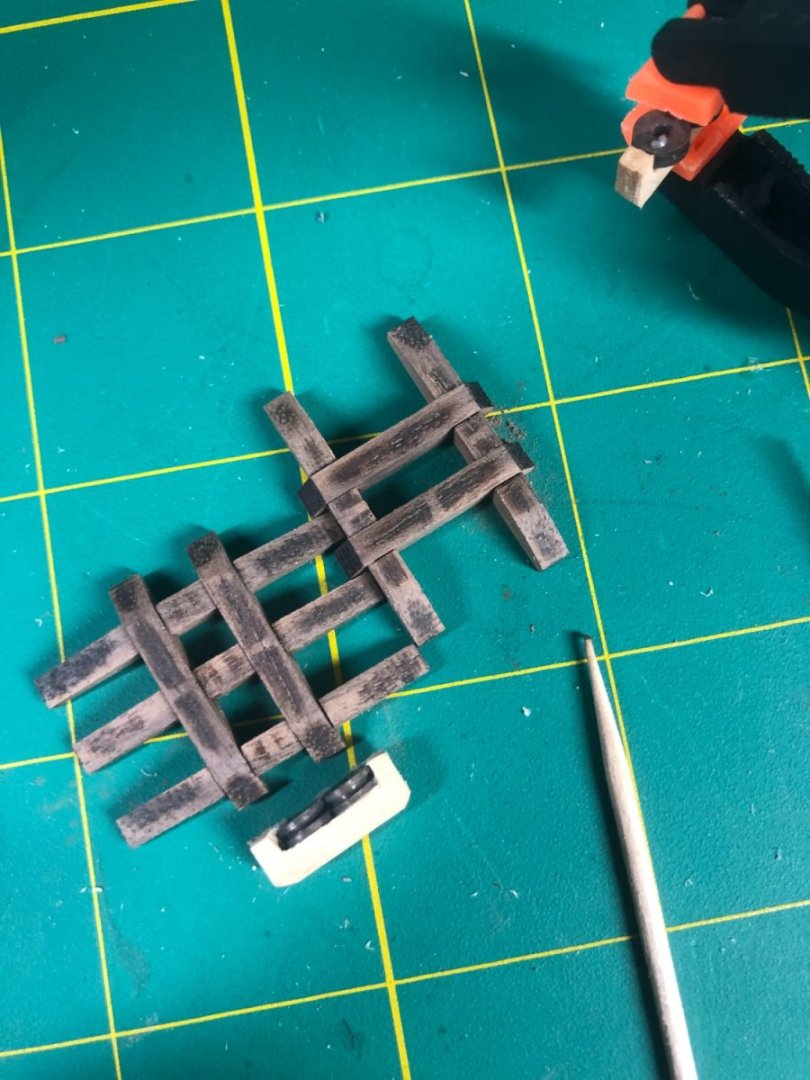
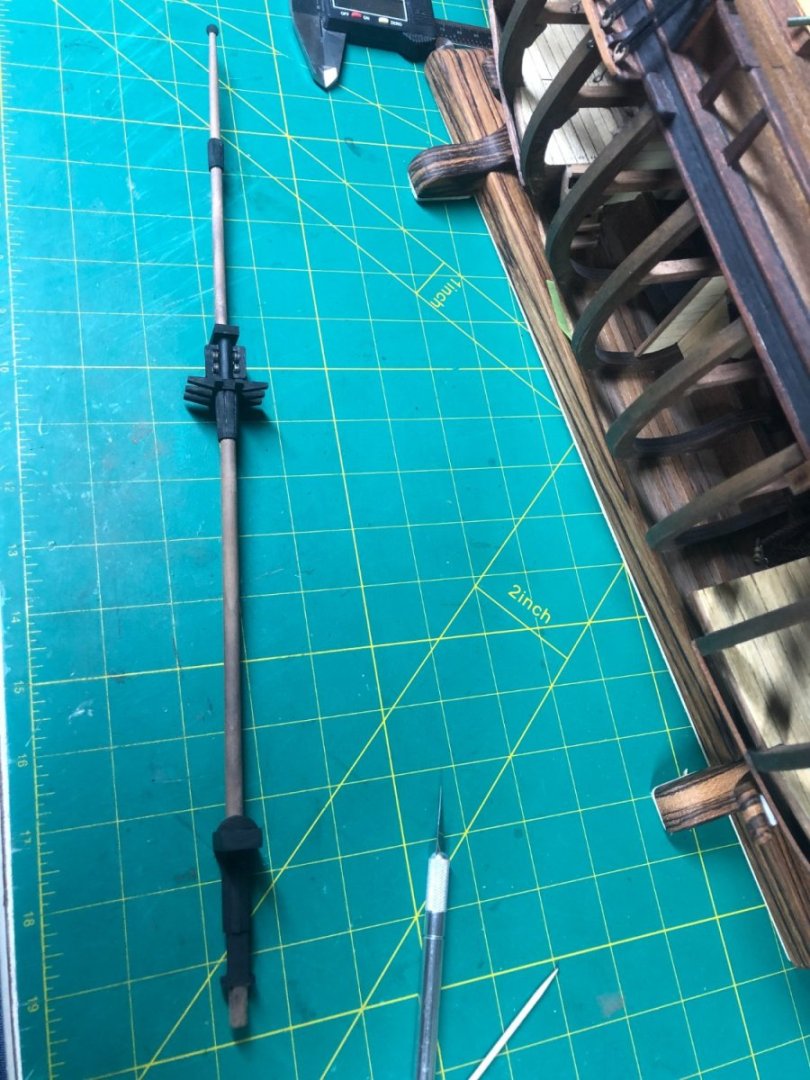
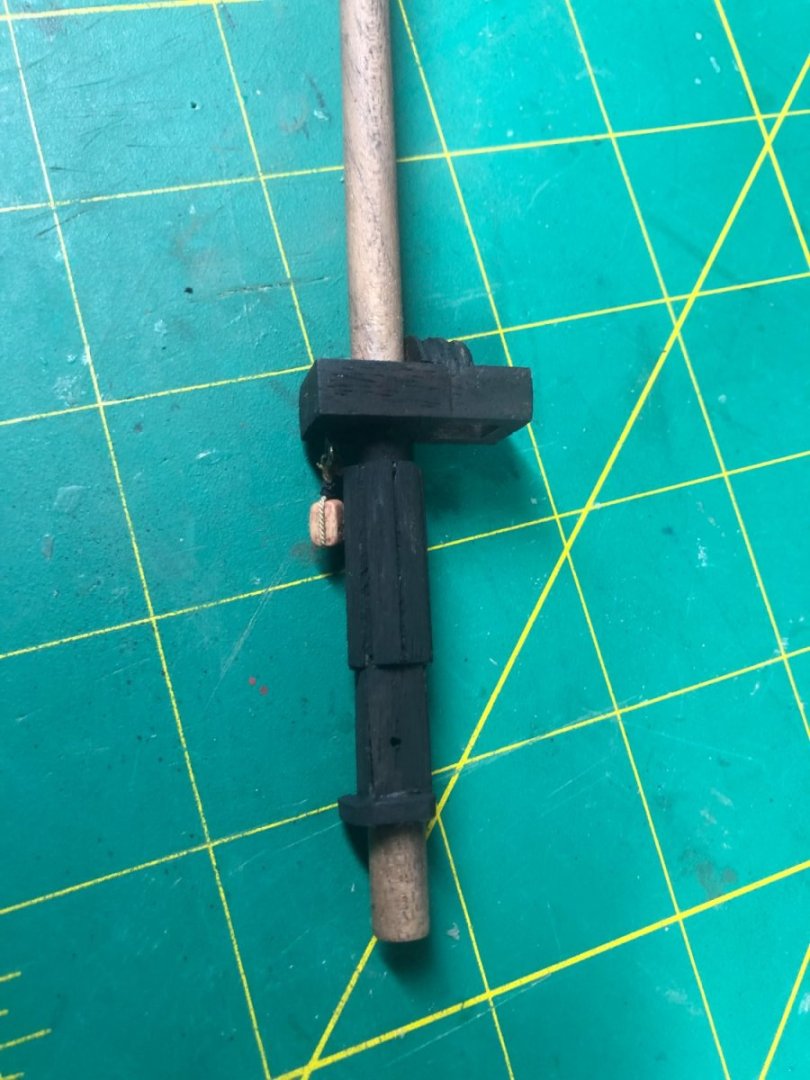
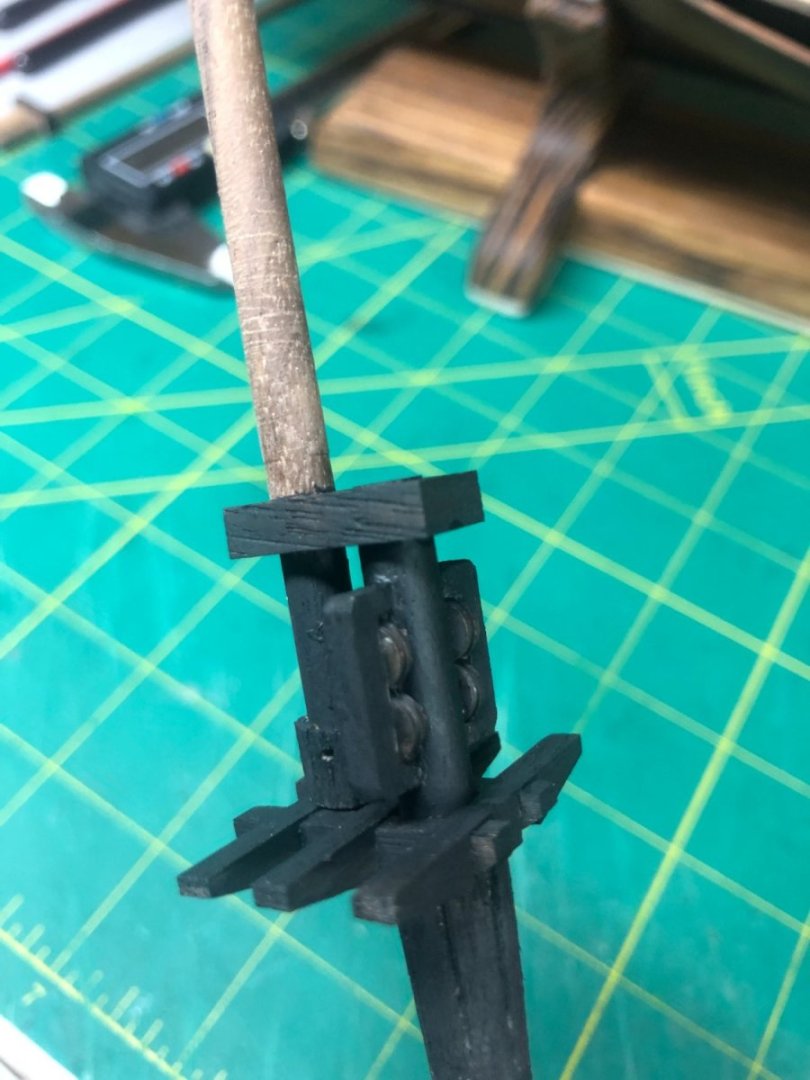
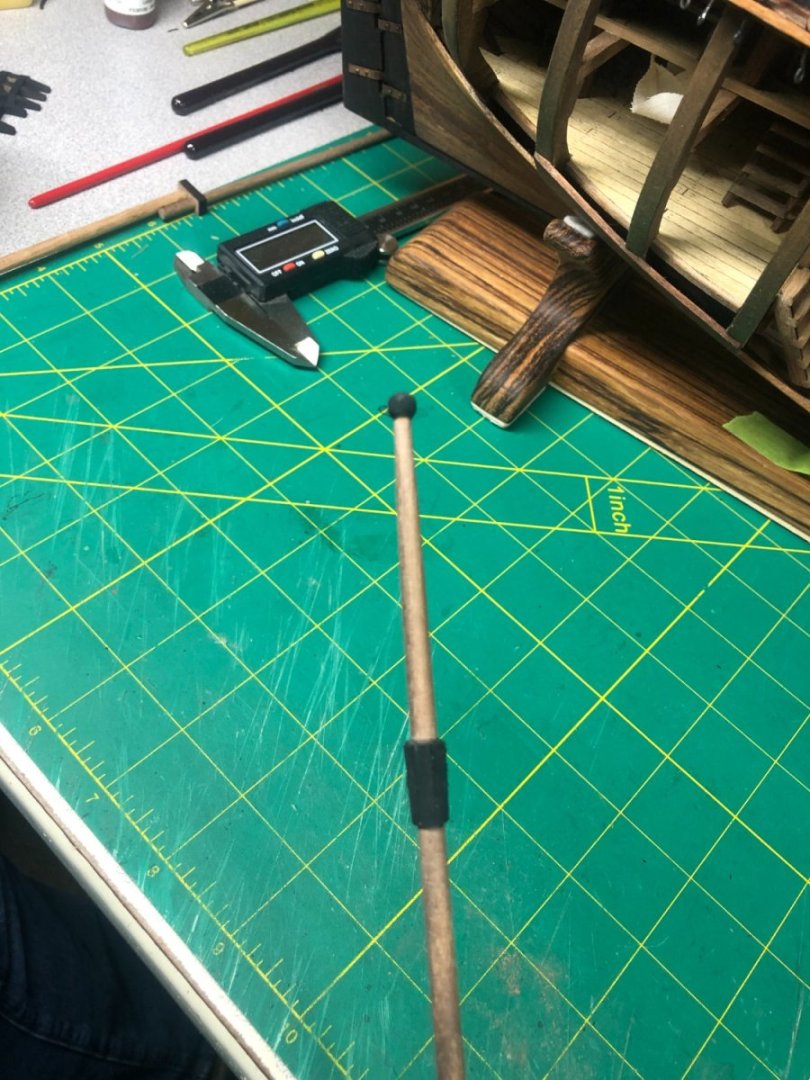
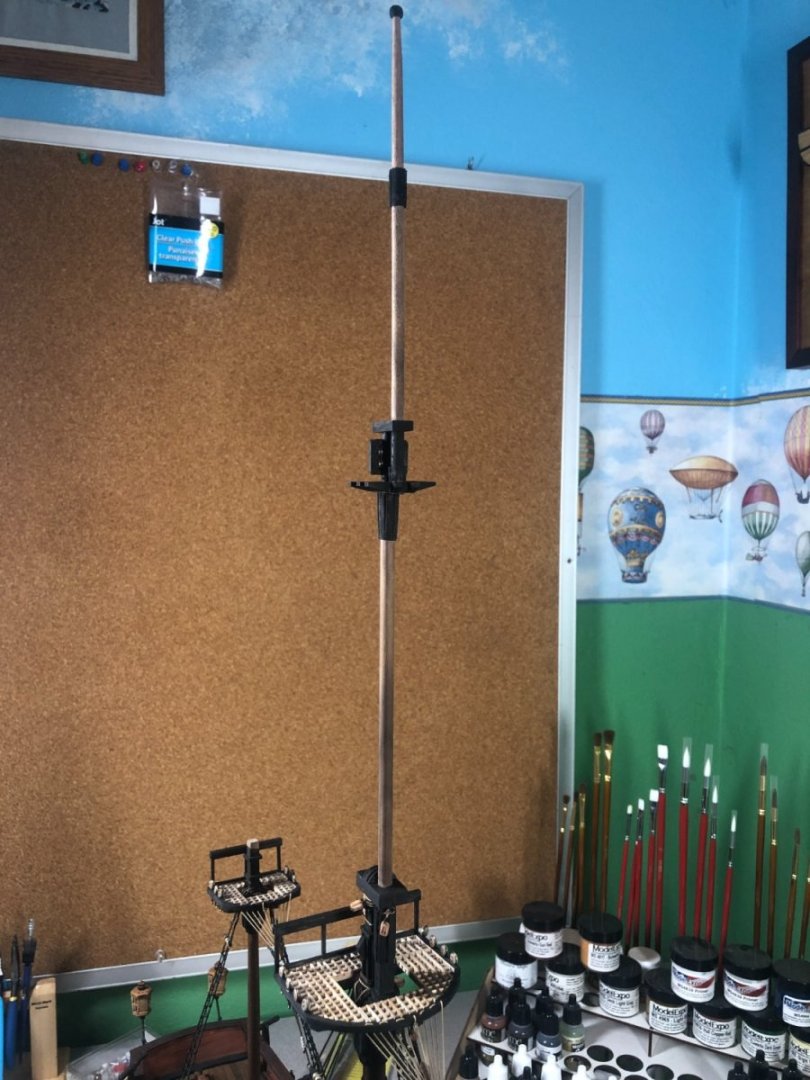
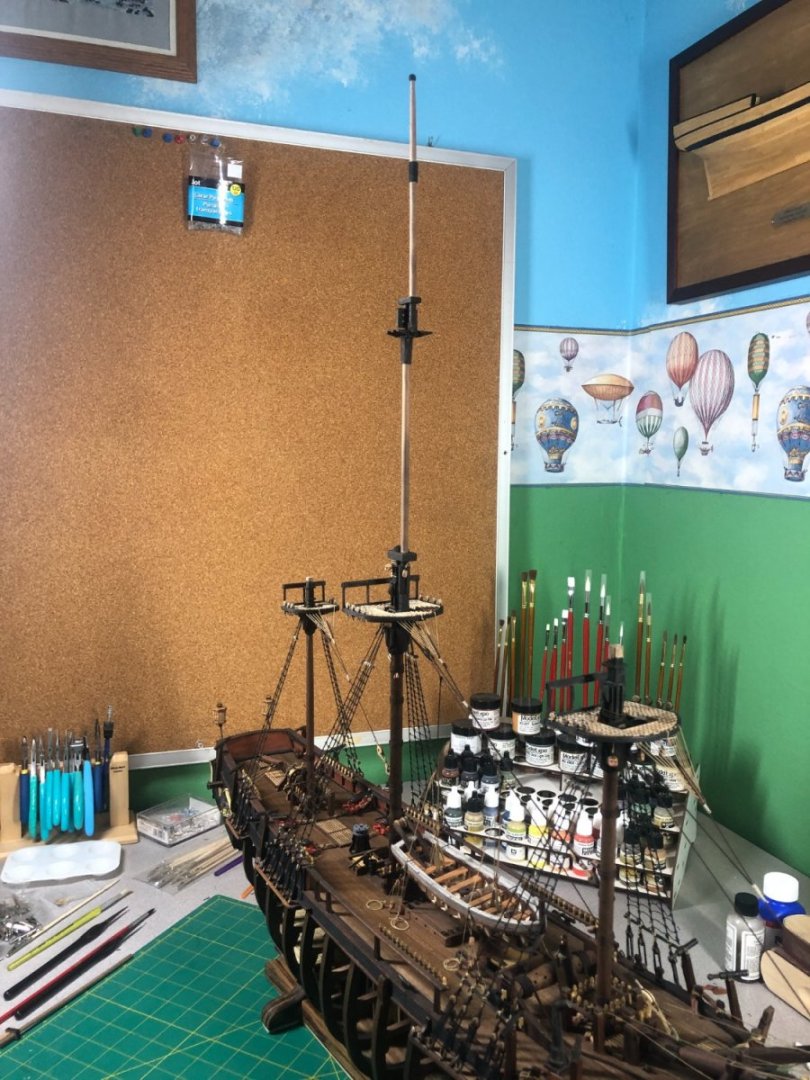
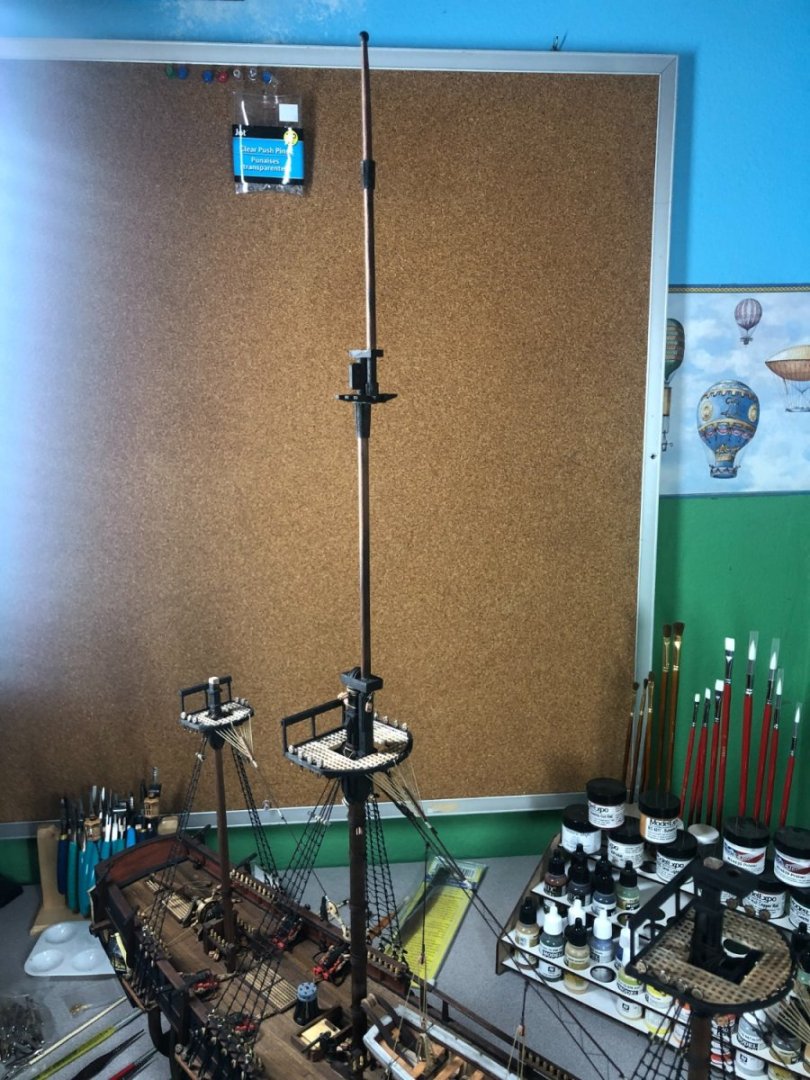
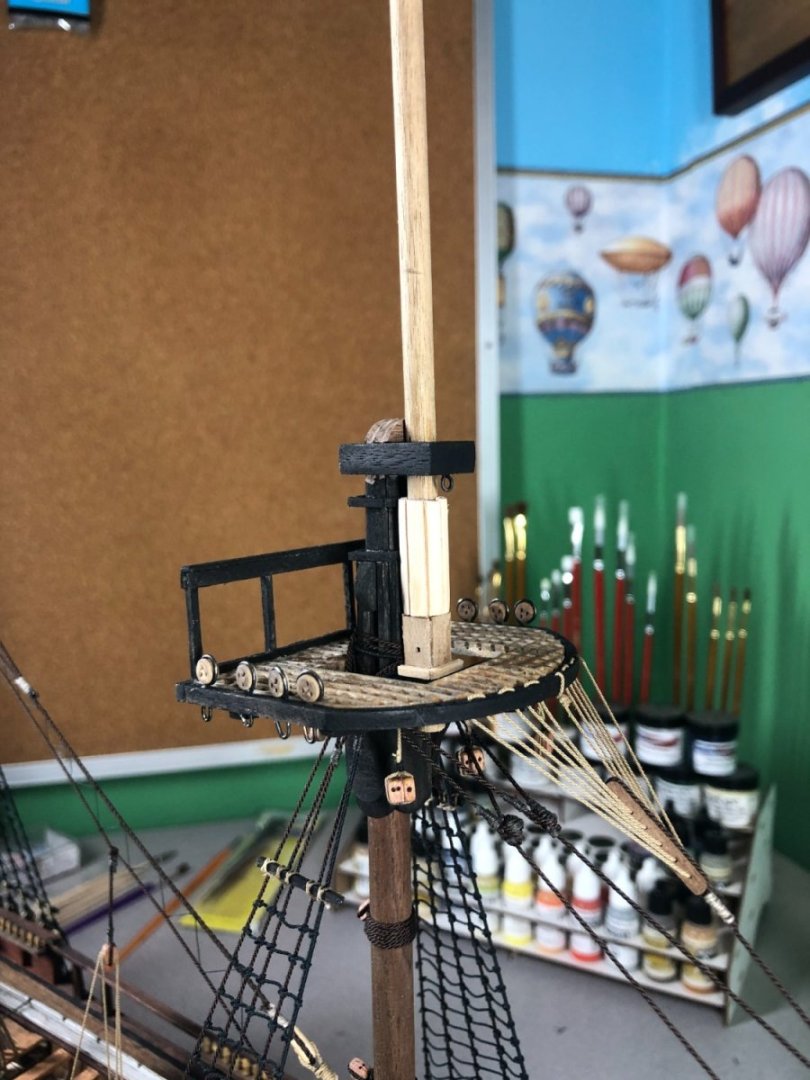
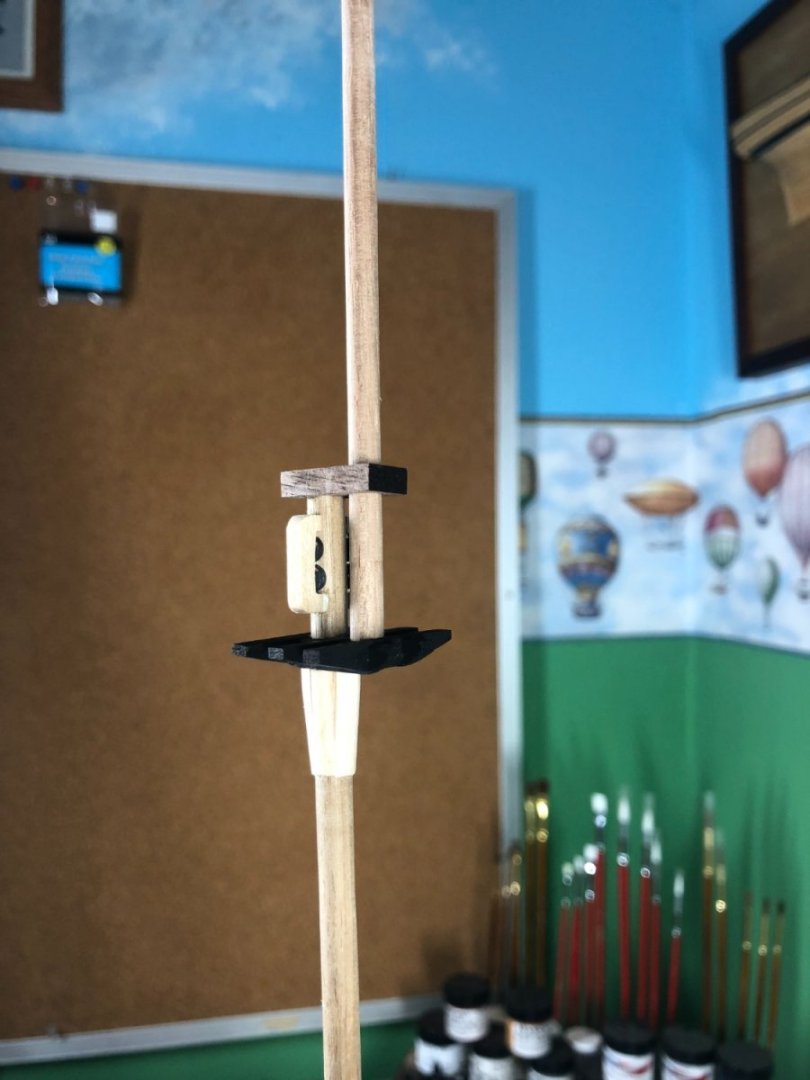
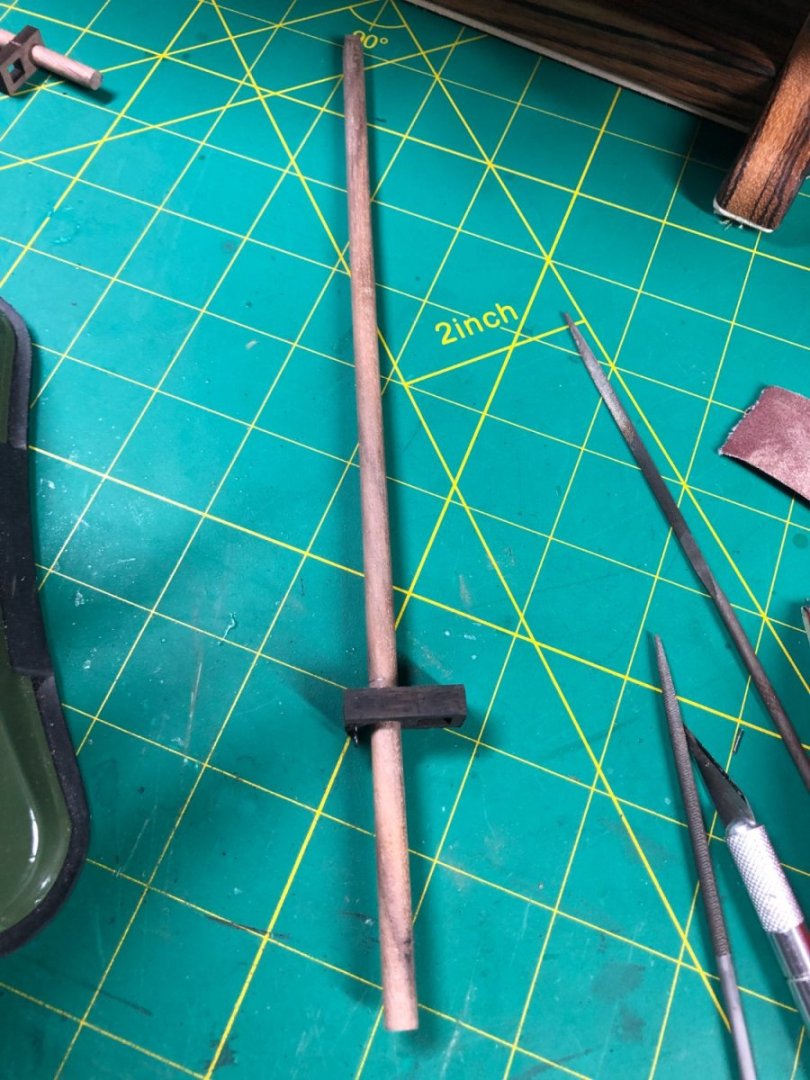
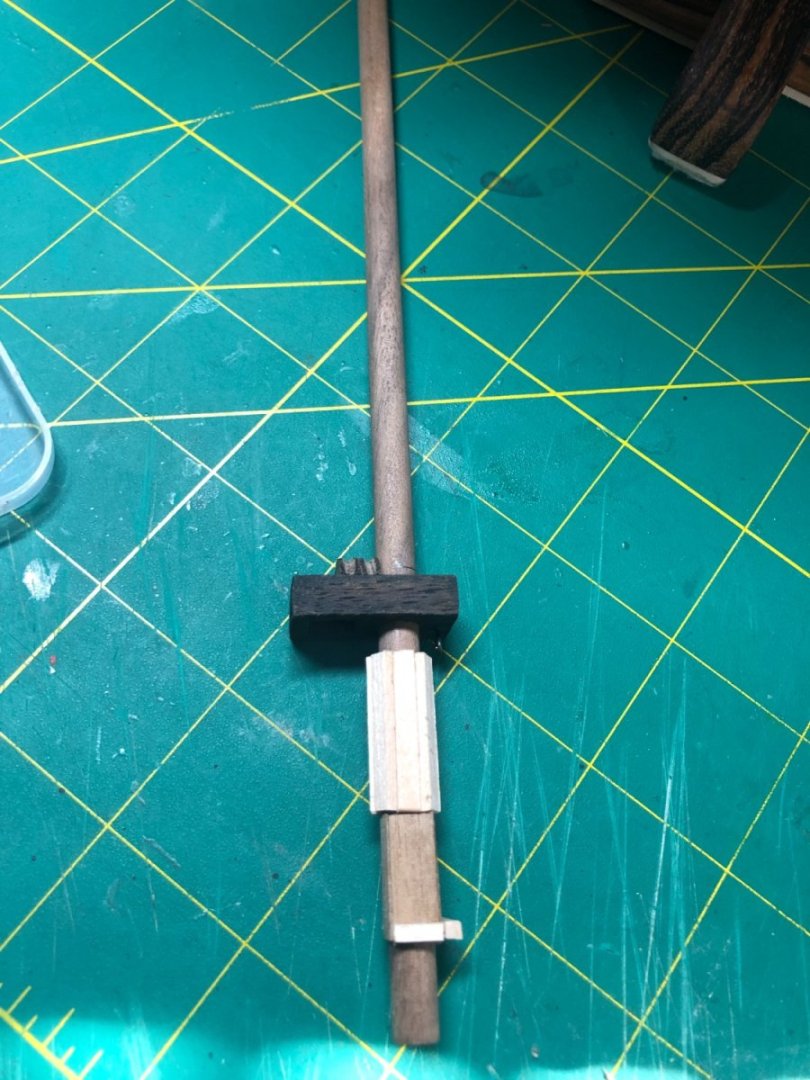
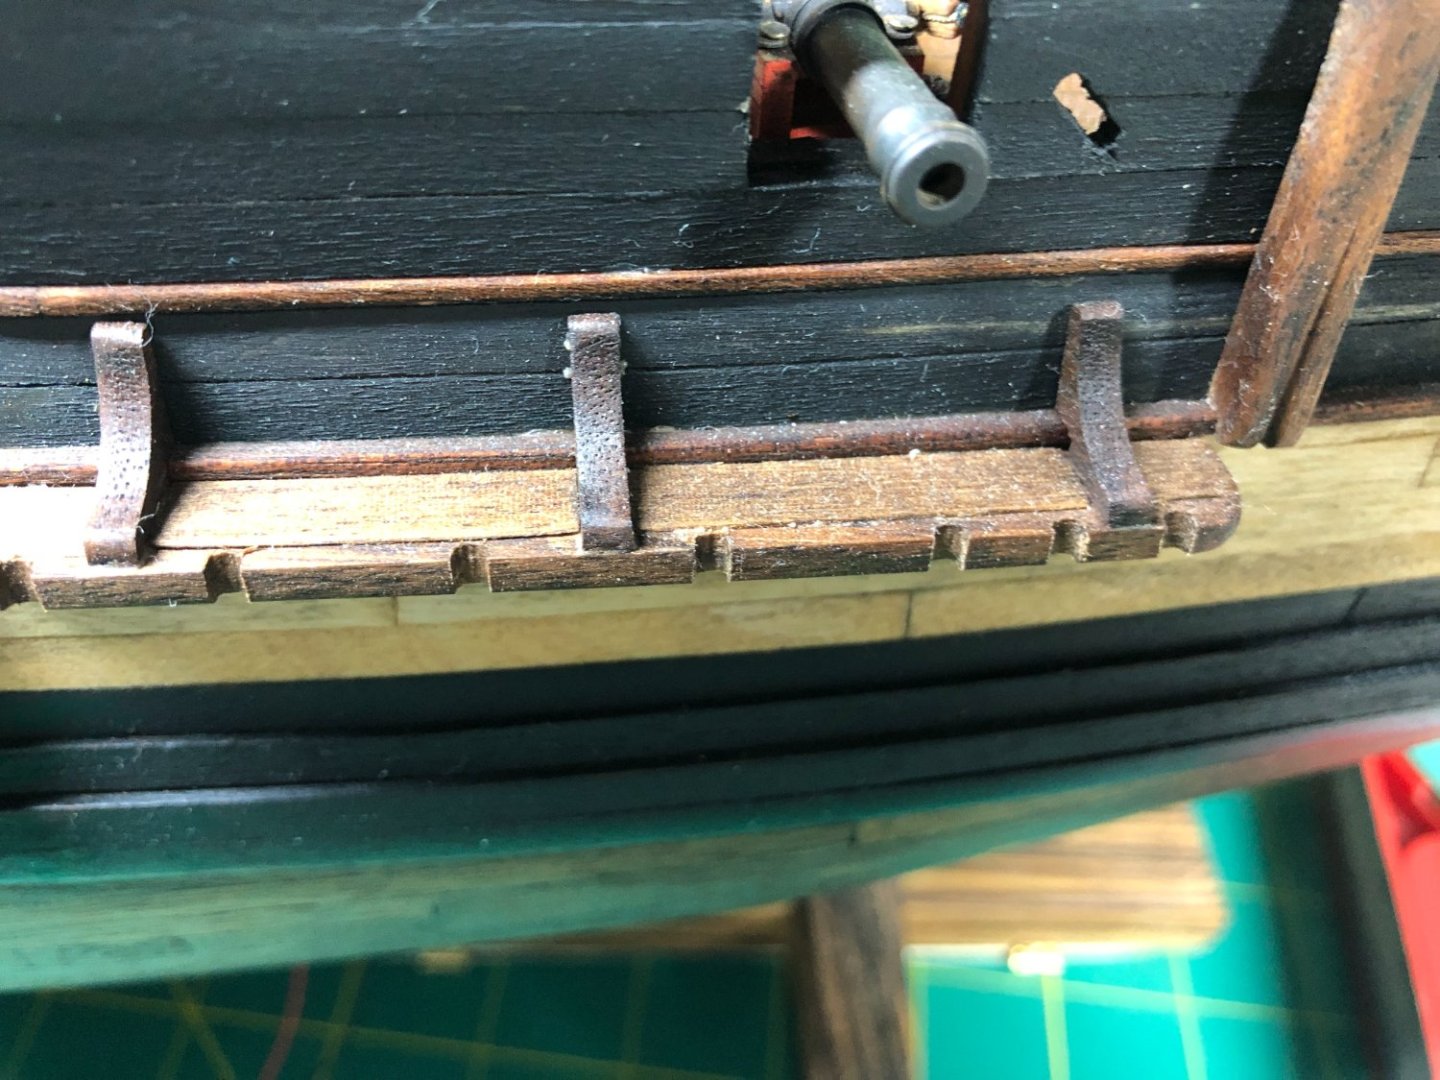
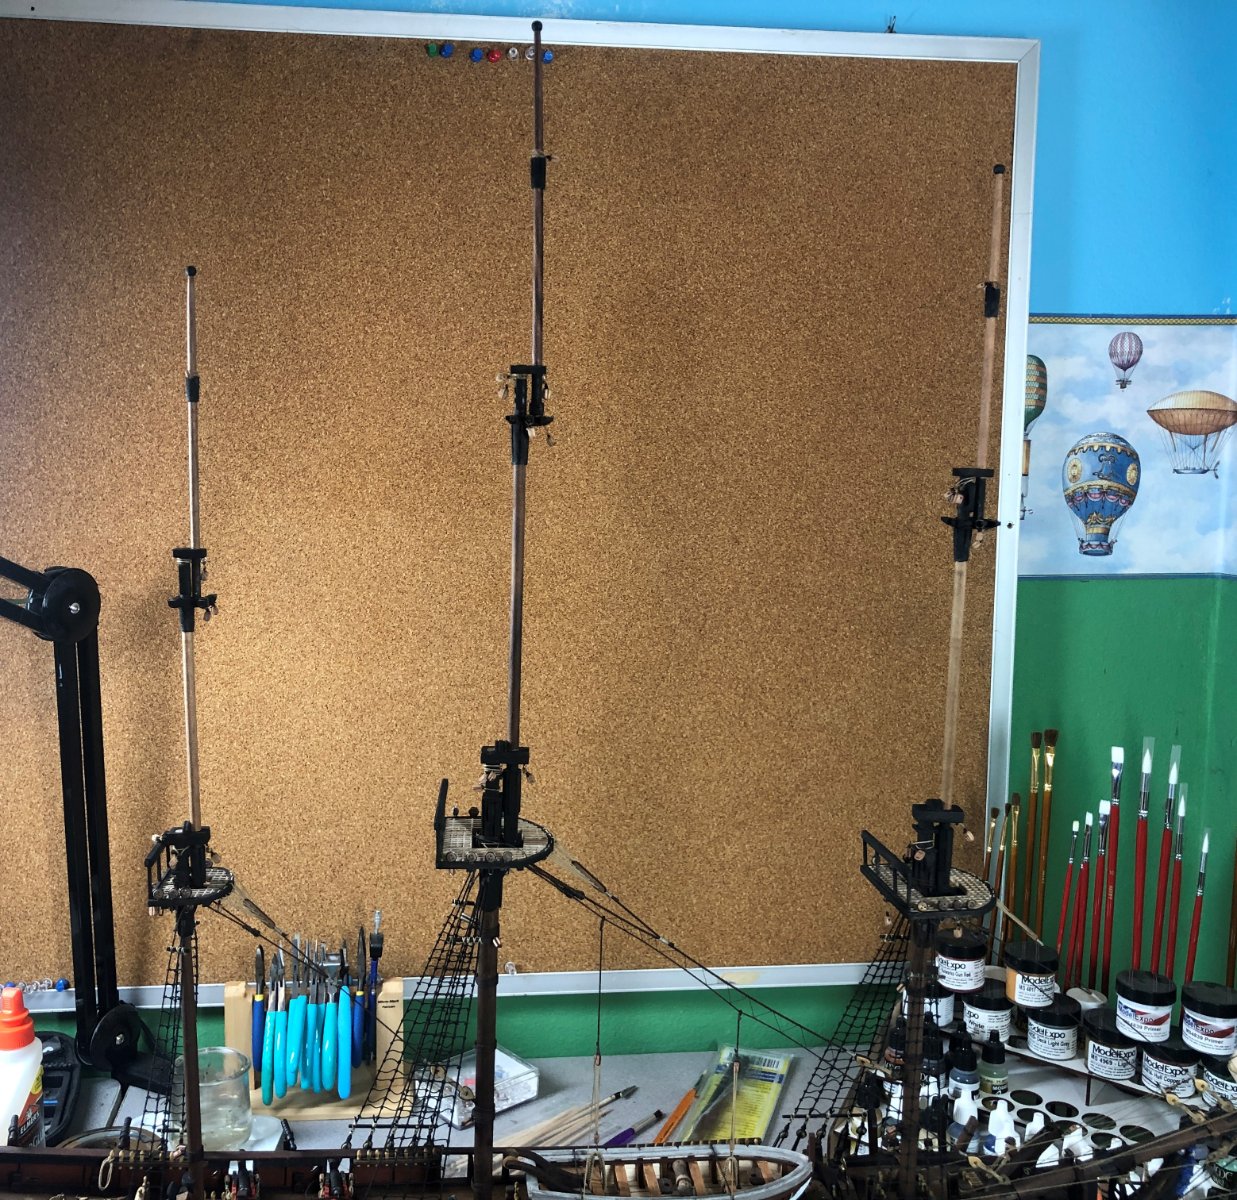
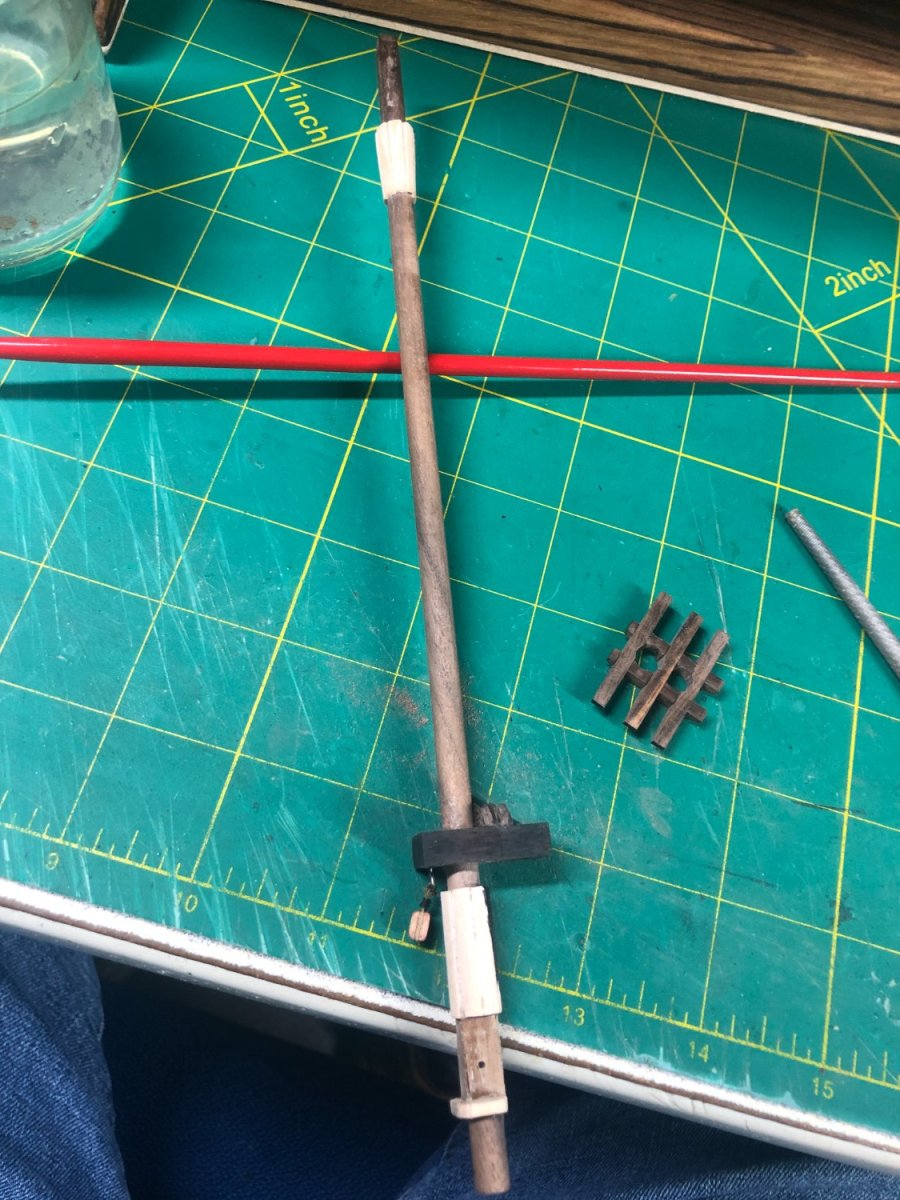
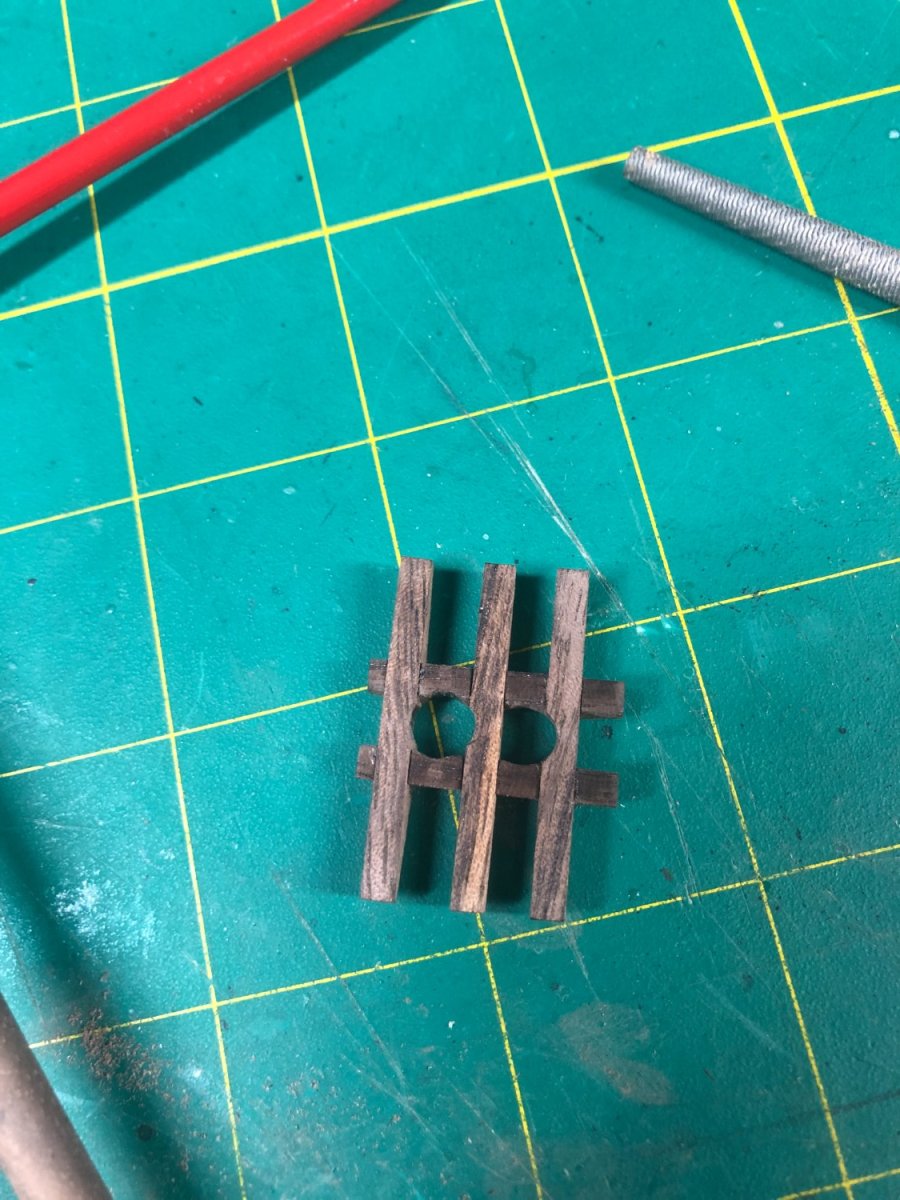
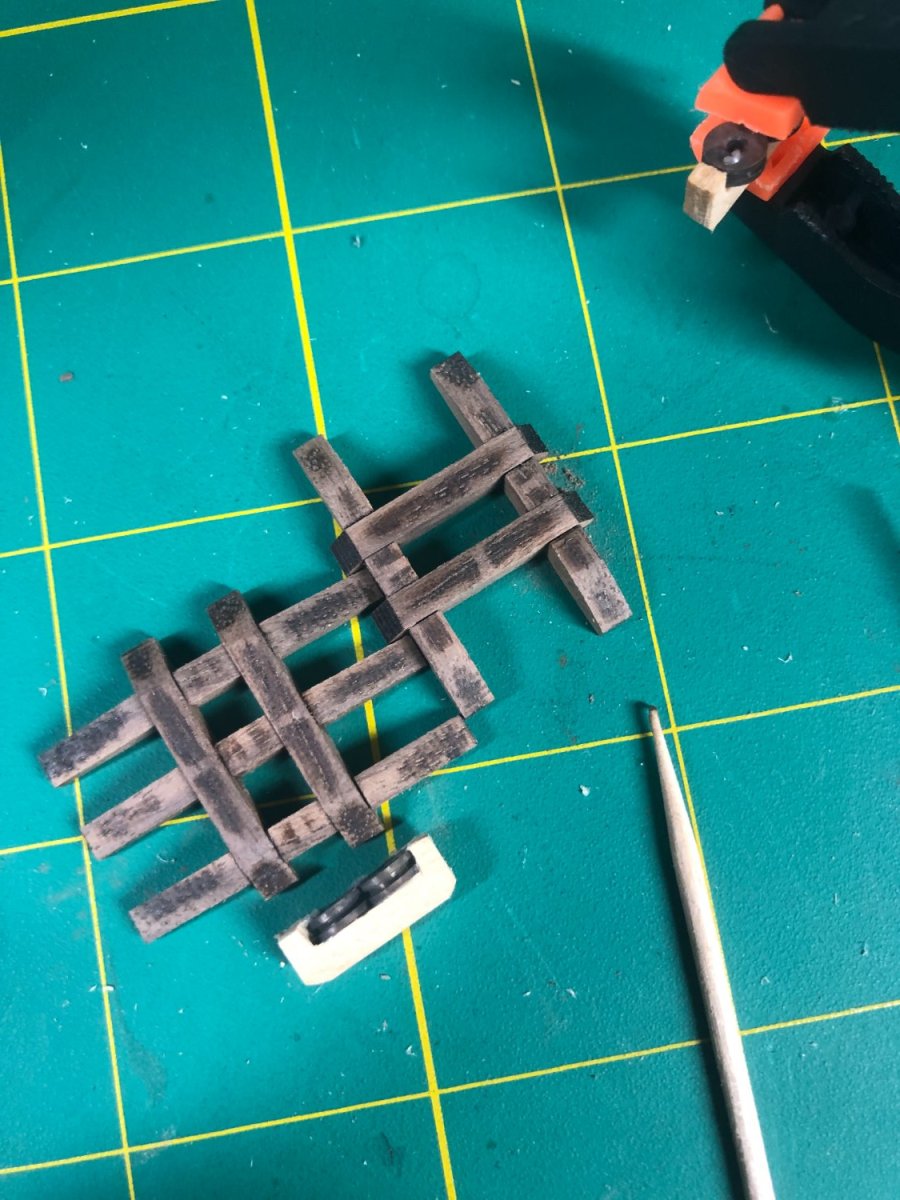
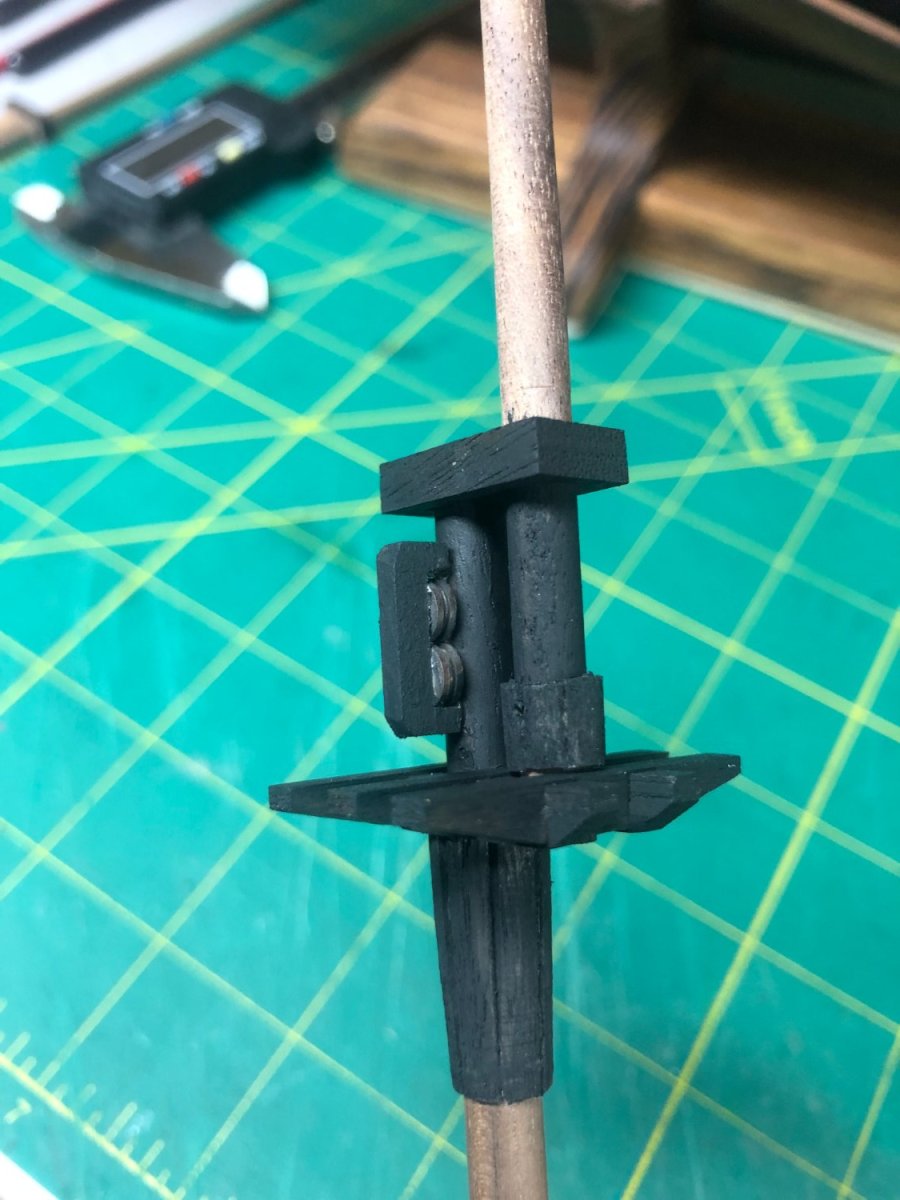
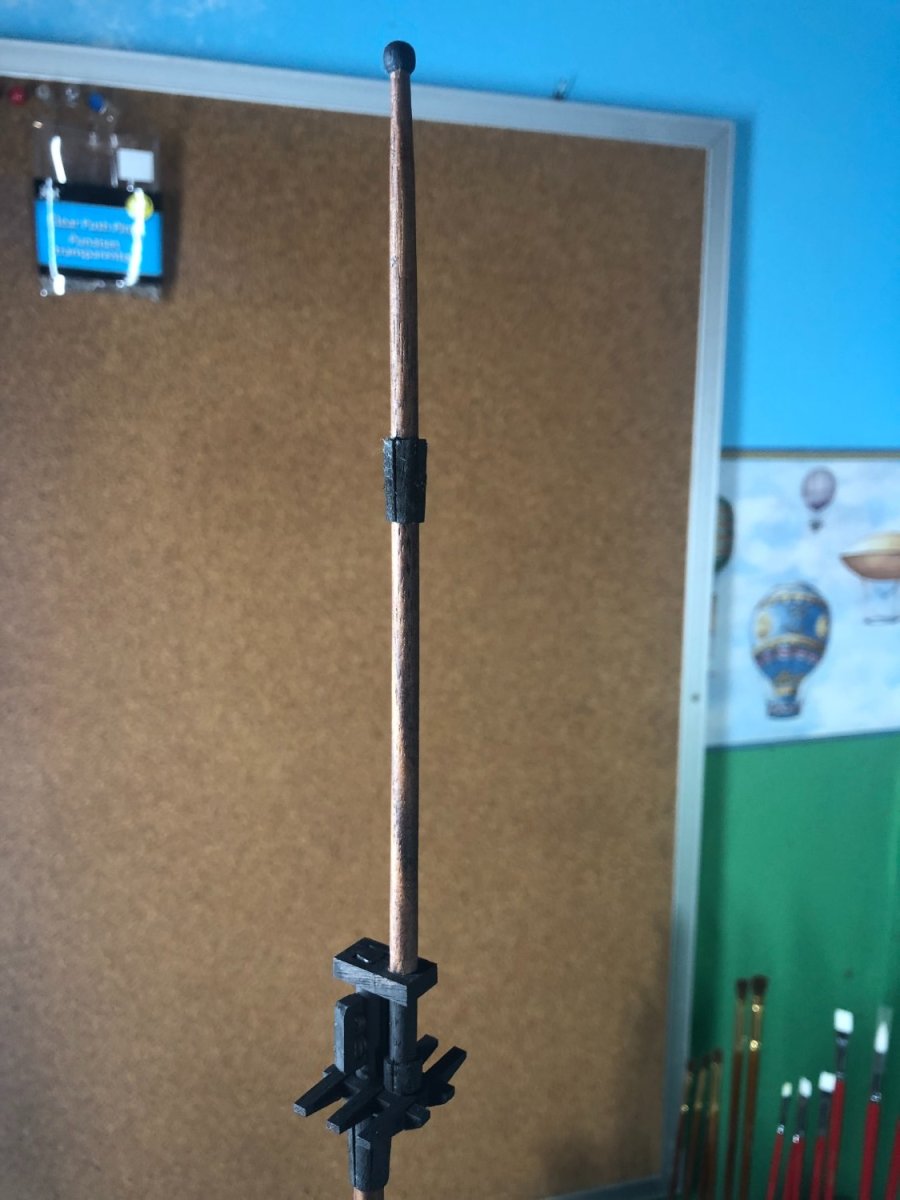
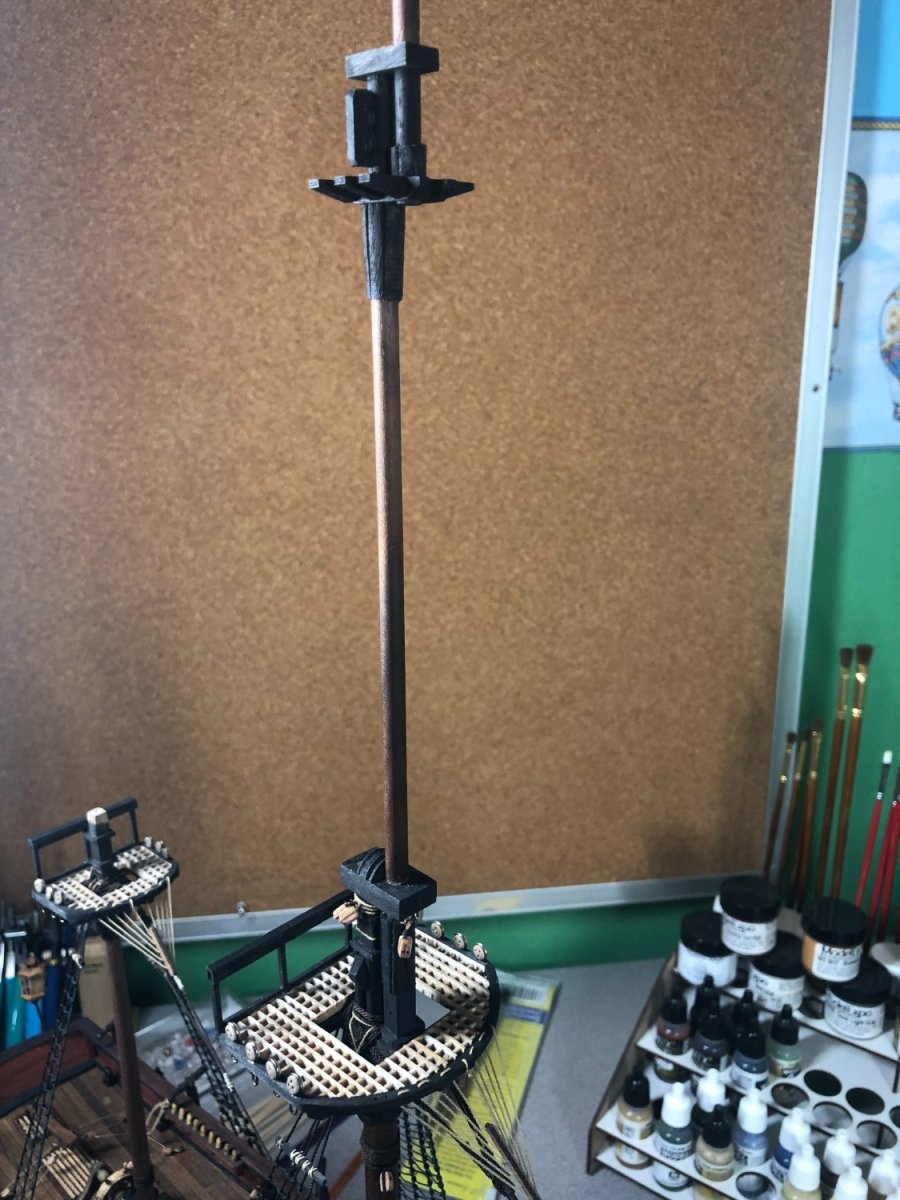
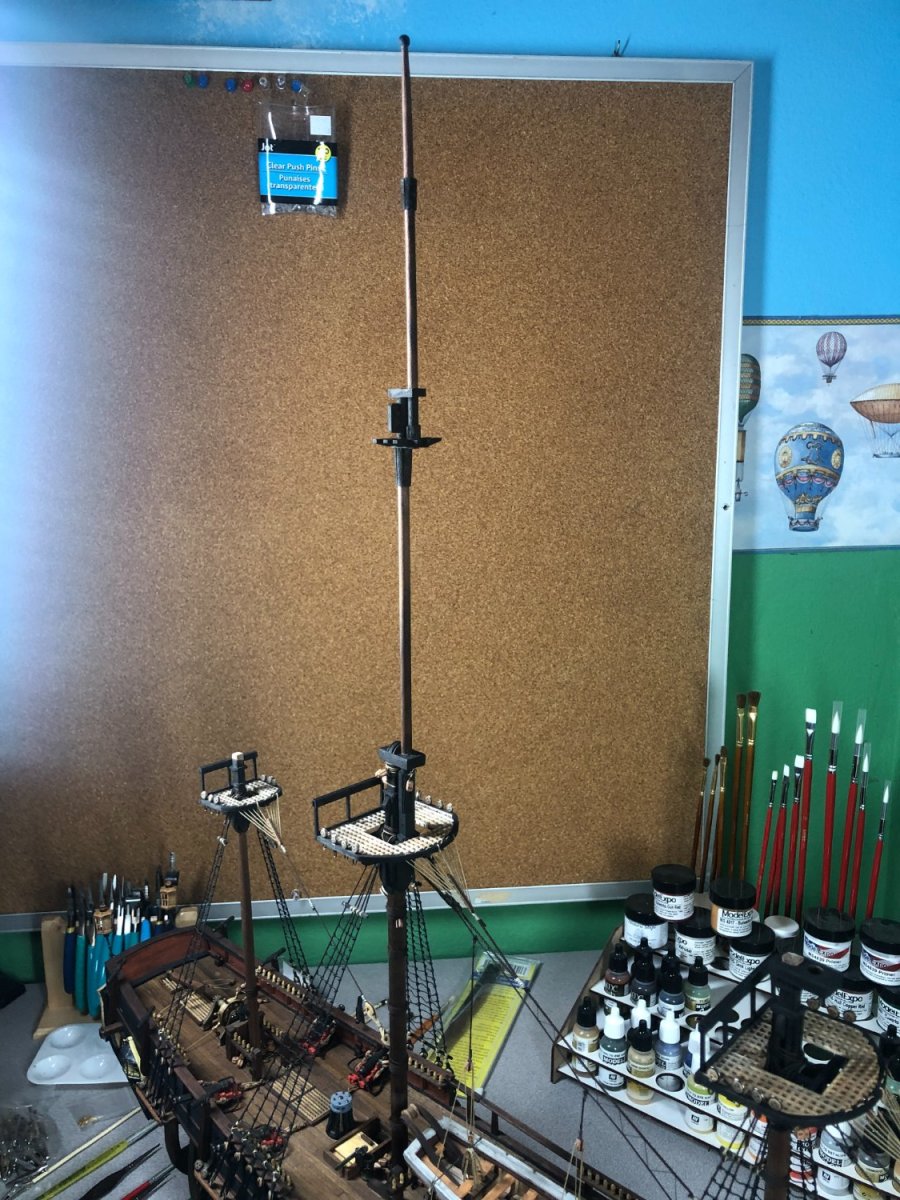
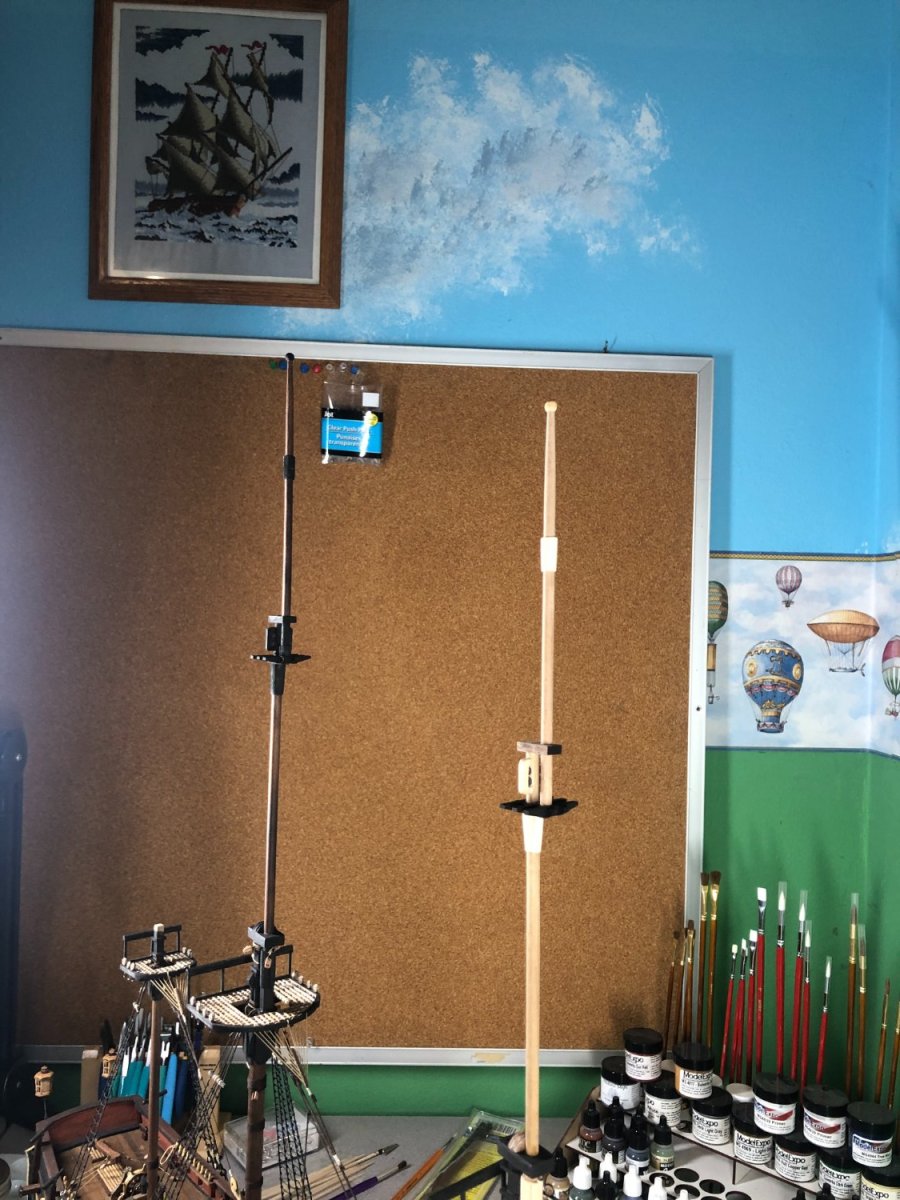
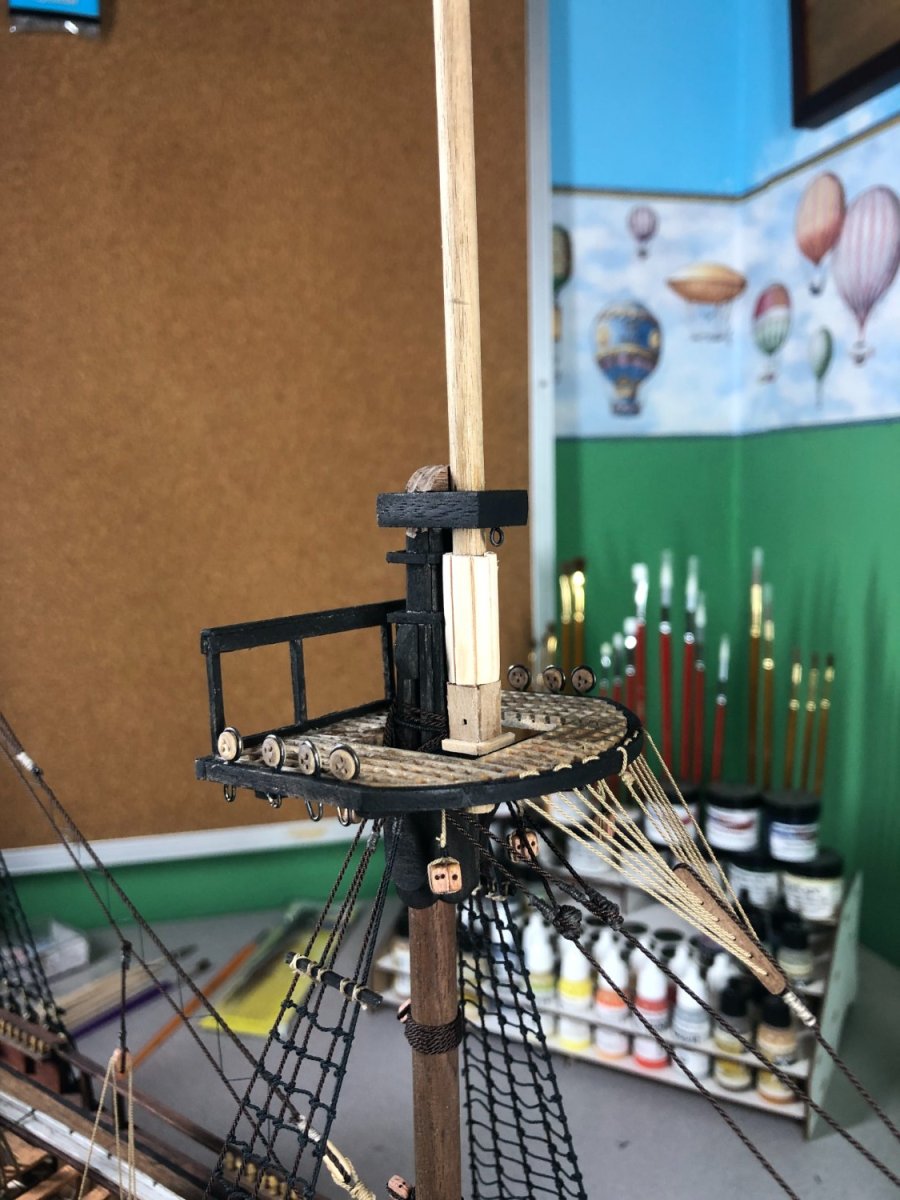
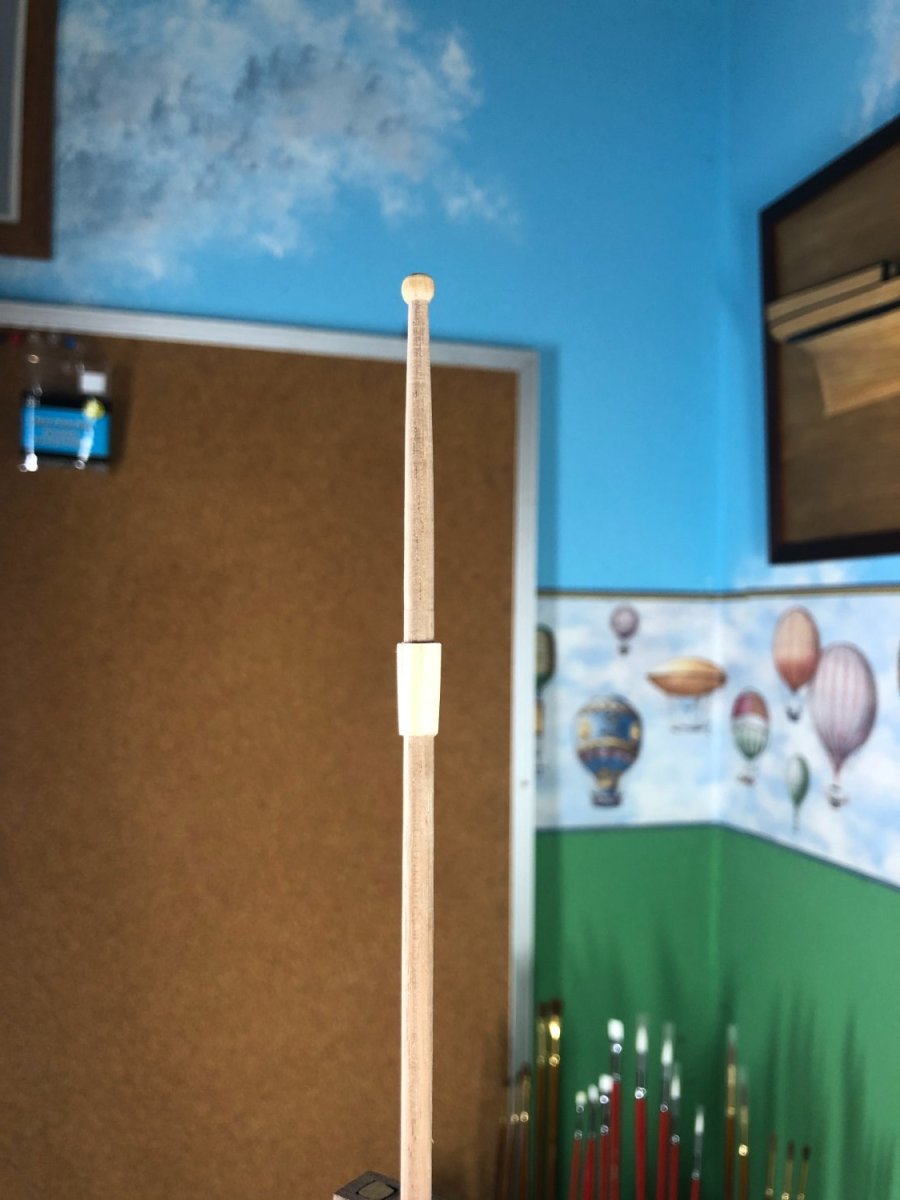
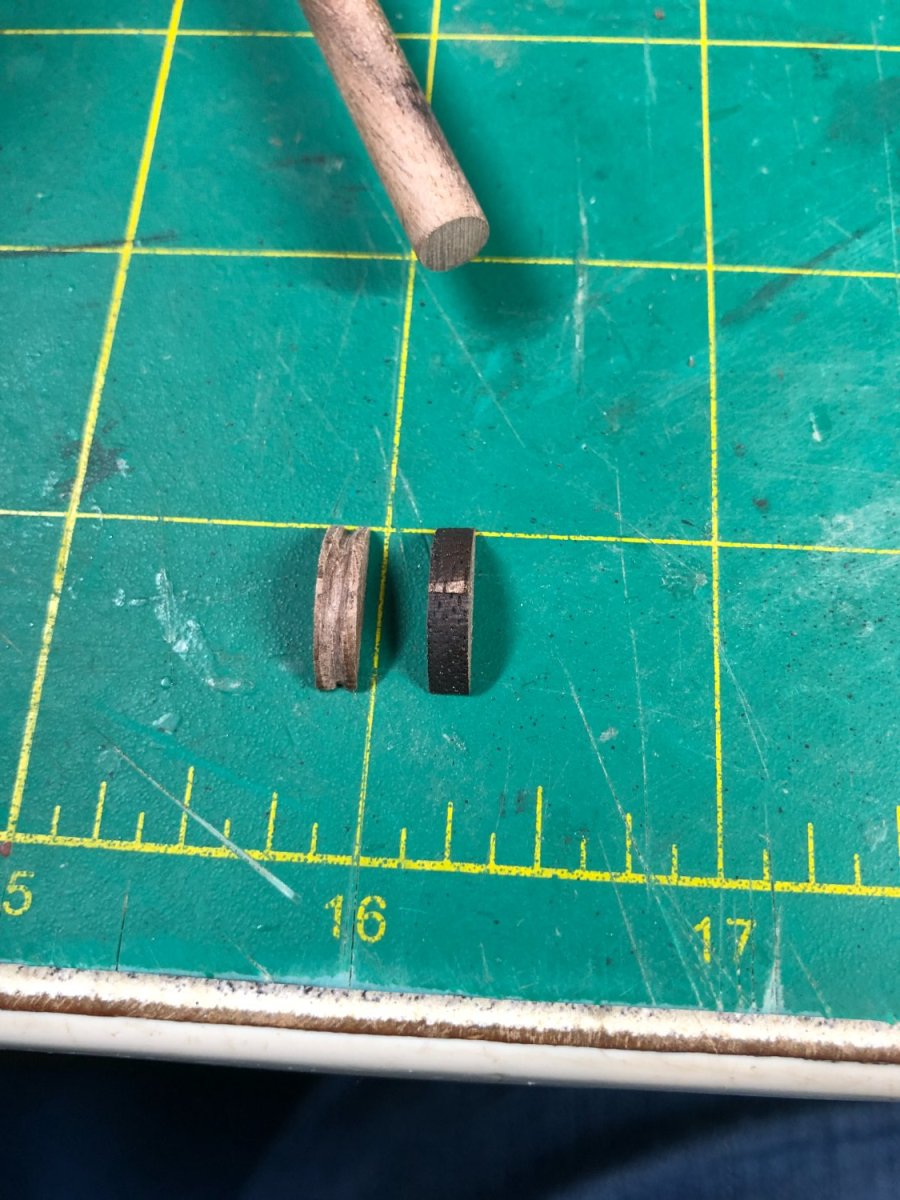
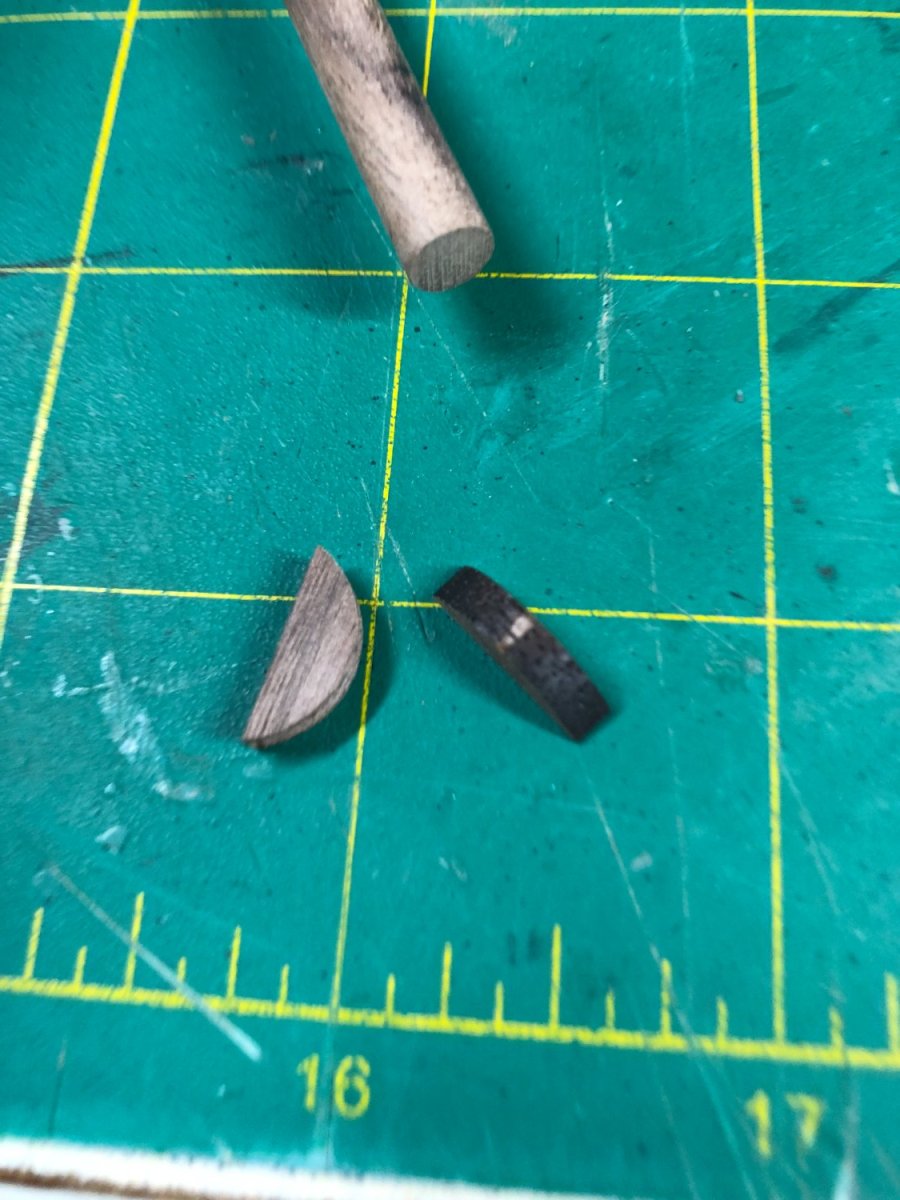
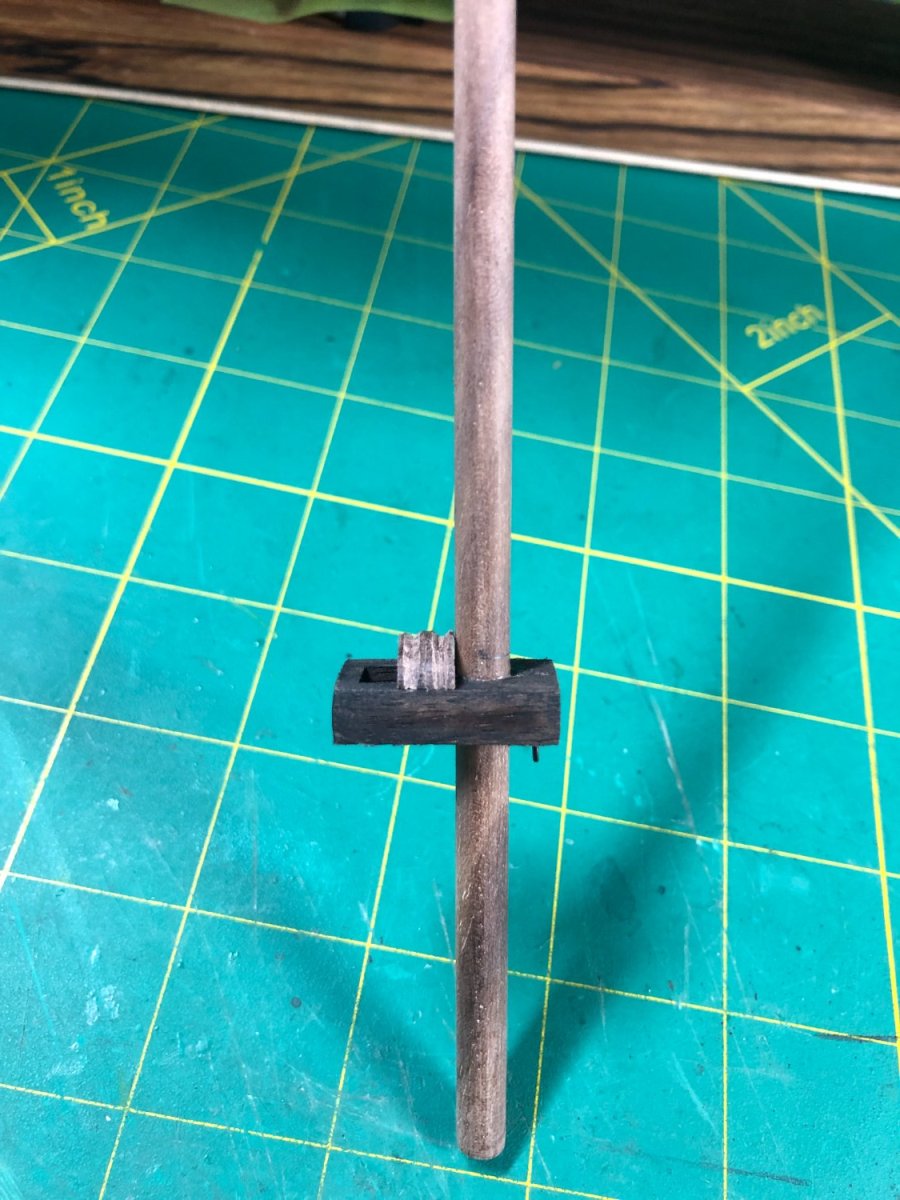
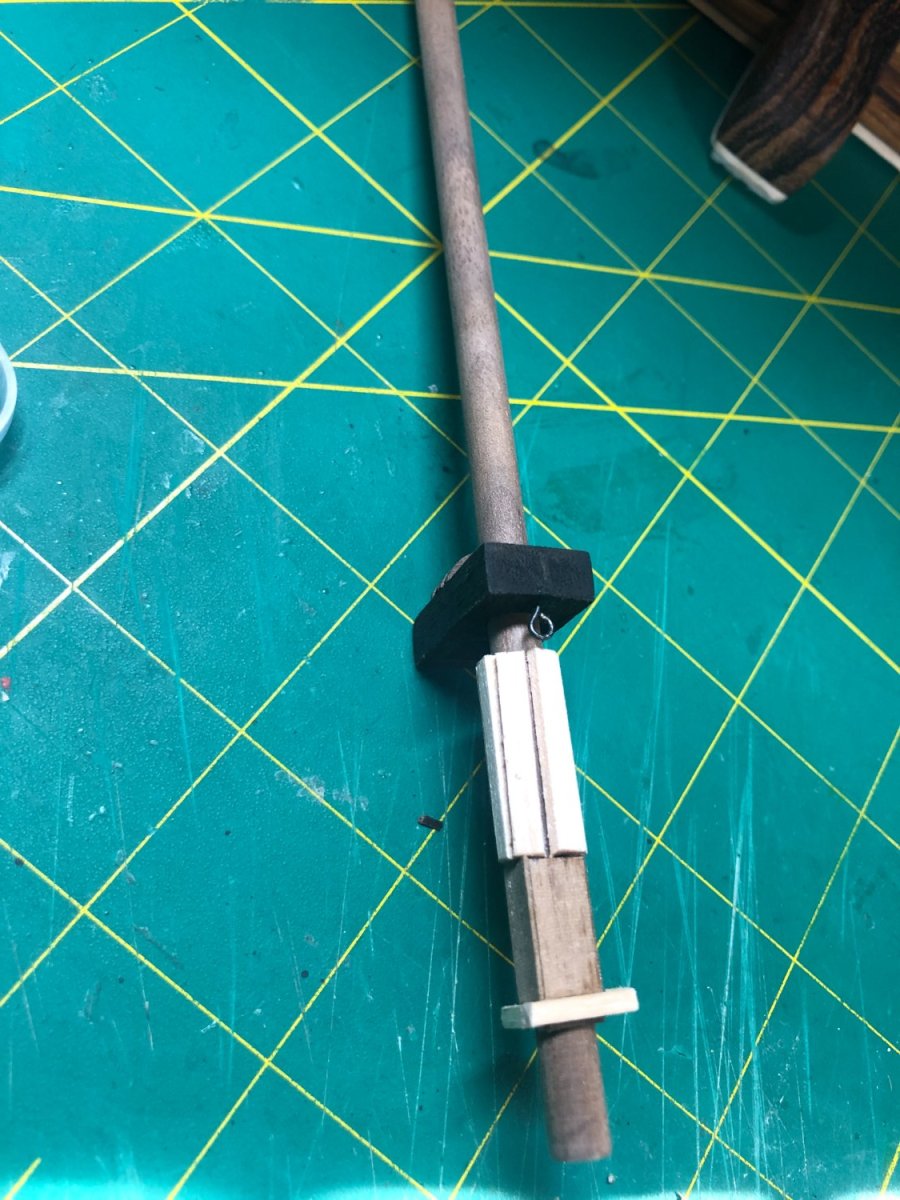
Lots of pictures today... Making up for the lack of instructions and pictures in the kit! The plans are fairly good and with the help of other build logs, I've managed to get the foremast and main mast completed, short of some paint and mounting the blocks. So, let's get to some pictures... First up was the main mast as I found out that I was short on walnut round stock for the foremast by 2cm. I ordered some and it arrived quickly. The mast head was reamed out and fitted onto the mast: I should point out that the fore and main masts are similar in construction with the main difference being the total length. The mast caps were shaped with a rattail file and glued into place on the mast head: The mast stiffeners were glued into place and then sanded to shape: A hole was drilled as per the plans and the mast placed for reference: Next, I added more mast stiffeners and sanded to shape: Assembled the platforms and bees for all three masts: Glued the bees into place along with paint and weathering: I got a little ahead of myself by mounting the mast and gluing into place by not adding the blocks and not treating the mast with boiled linseed oil... Oops! It'll just mean a little extra work with the blocks, in particular, as I'll need to do the work standing up! I guess I was a little excited to get it in place! Getting the masts straight from side to side and fore and aft was a bit difficult but ultimately, turned out close to perfect: Note that I show the foremast in place but it hasn't been glued yet as I need to add the blocks, paint and oil! I'll finish these up over the next day or two and get the mizzen mast in place before moving on to the standing rigging for the upper masts. See you all soon!


-
Thanks Joe! i appreciate the comment and you stopping in!
-
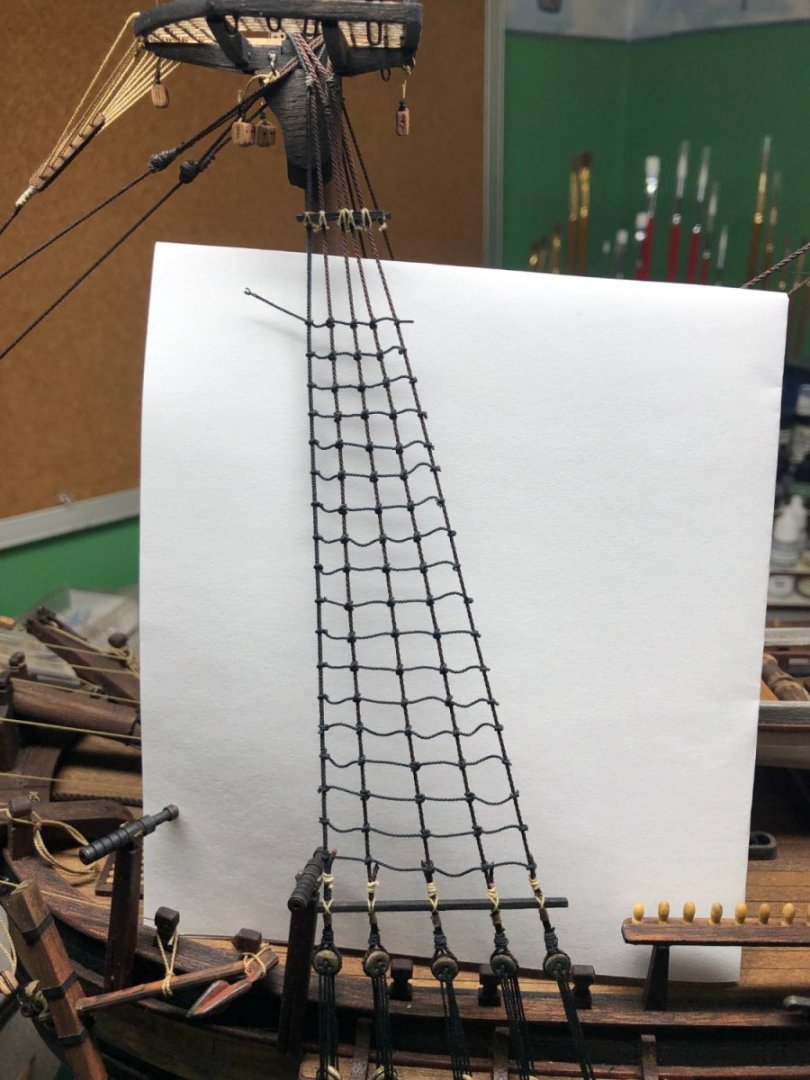
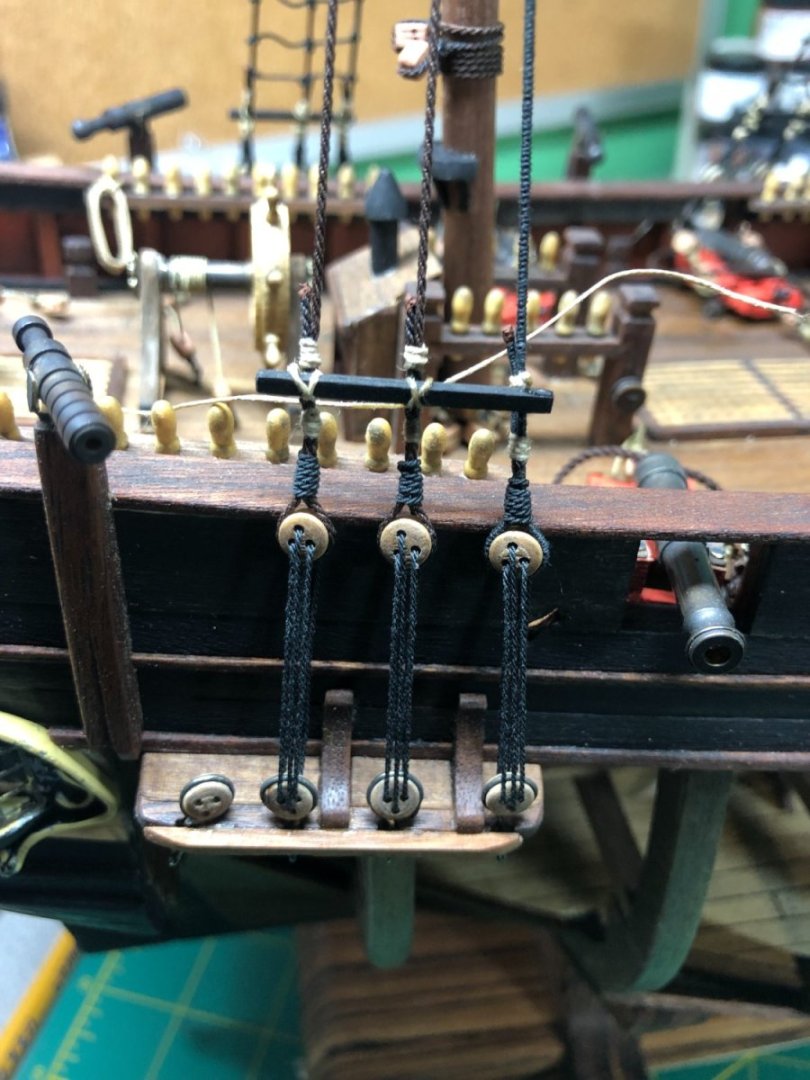
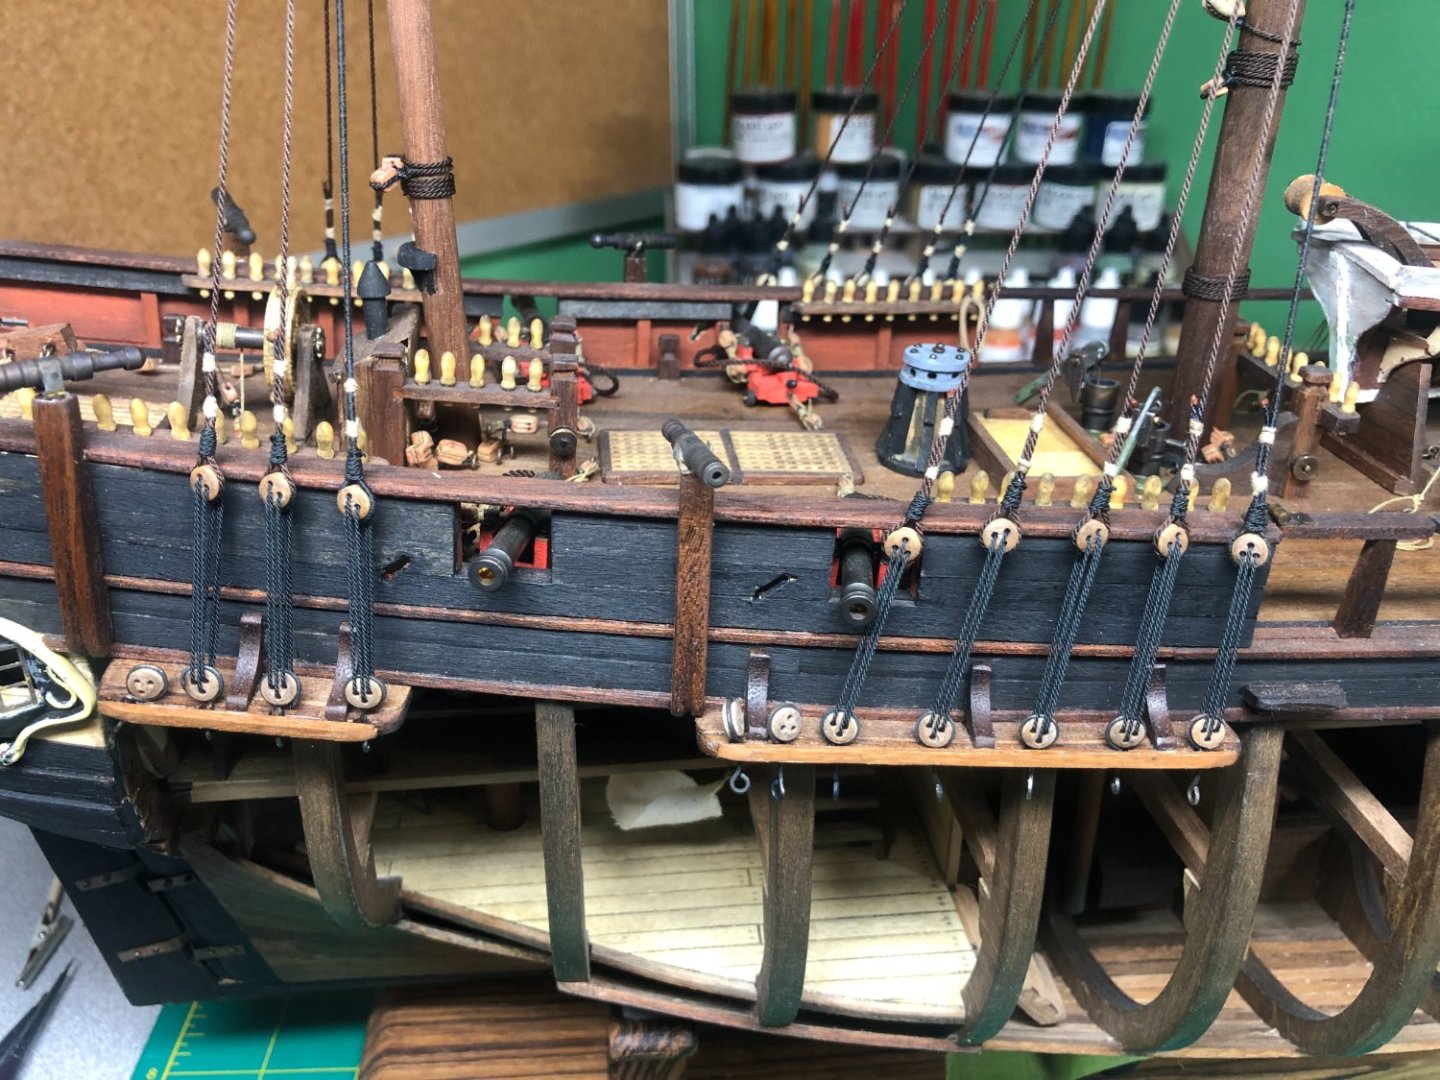
Tying the lower wooden ratlines and the futtock staves: Final look: Ratlines on the port side are done... starboard side up next!


-
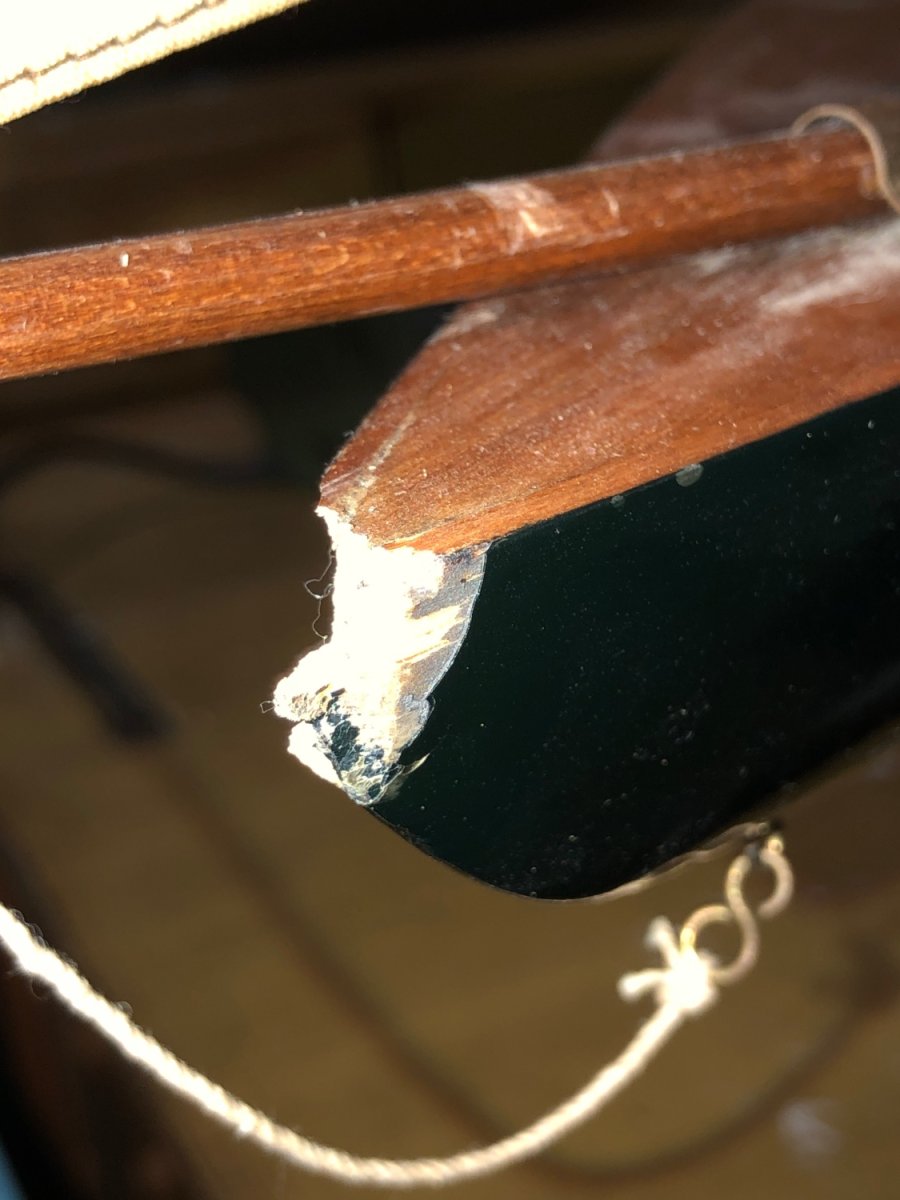
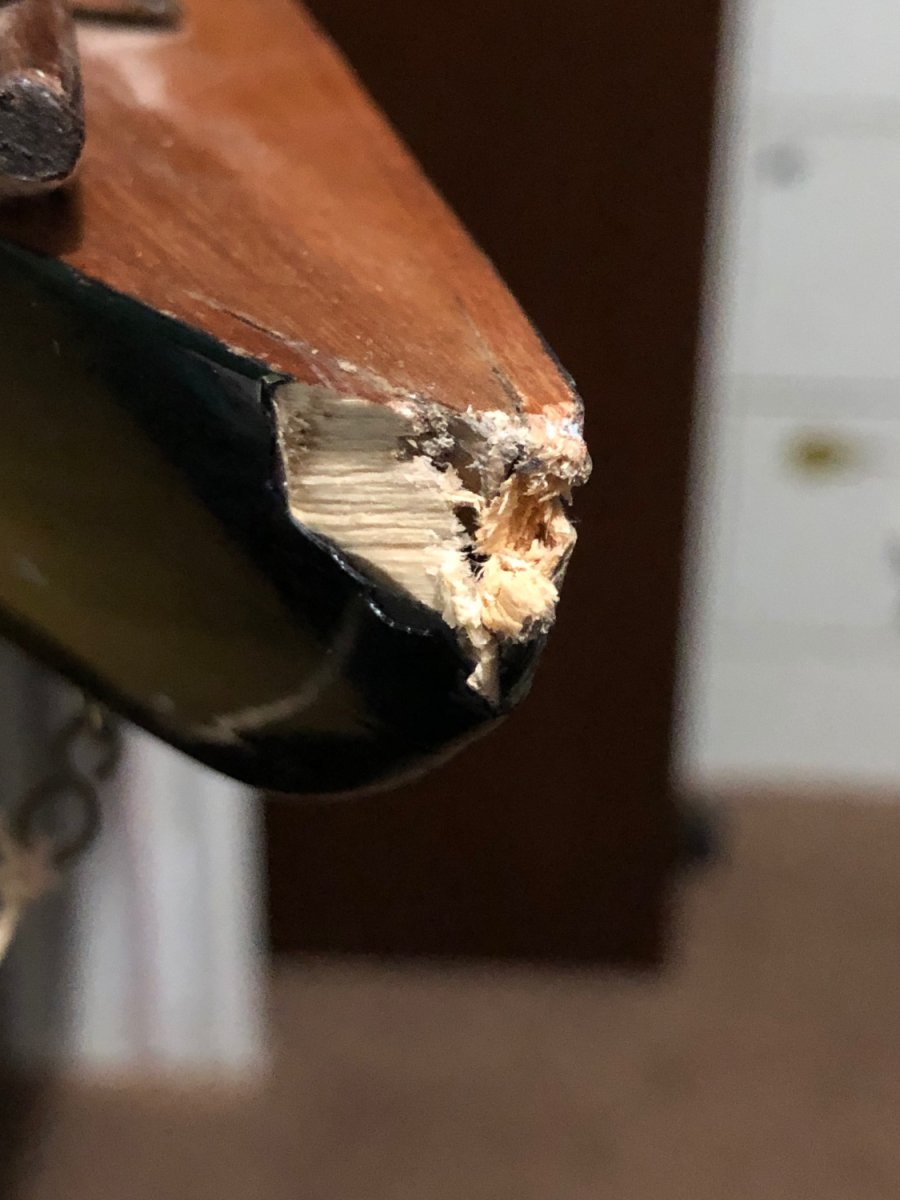
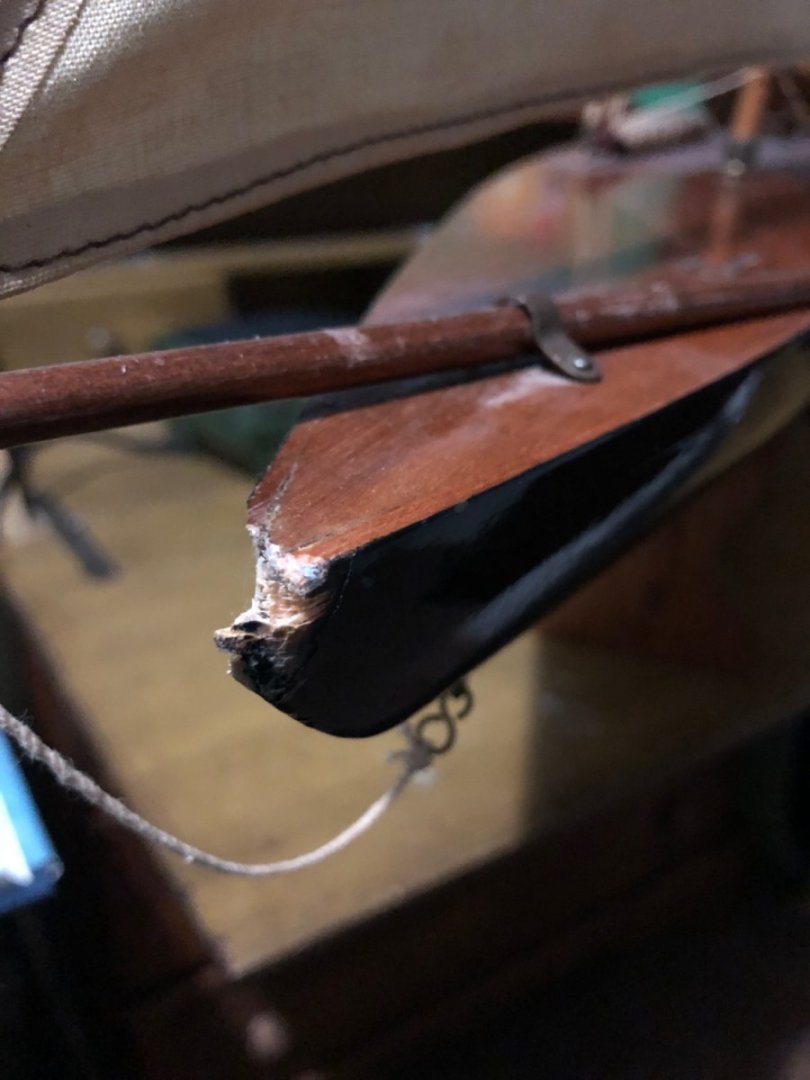
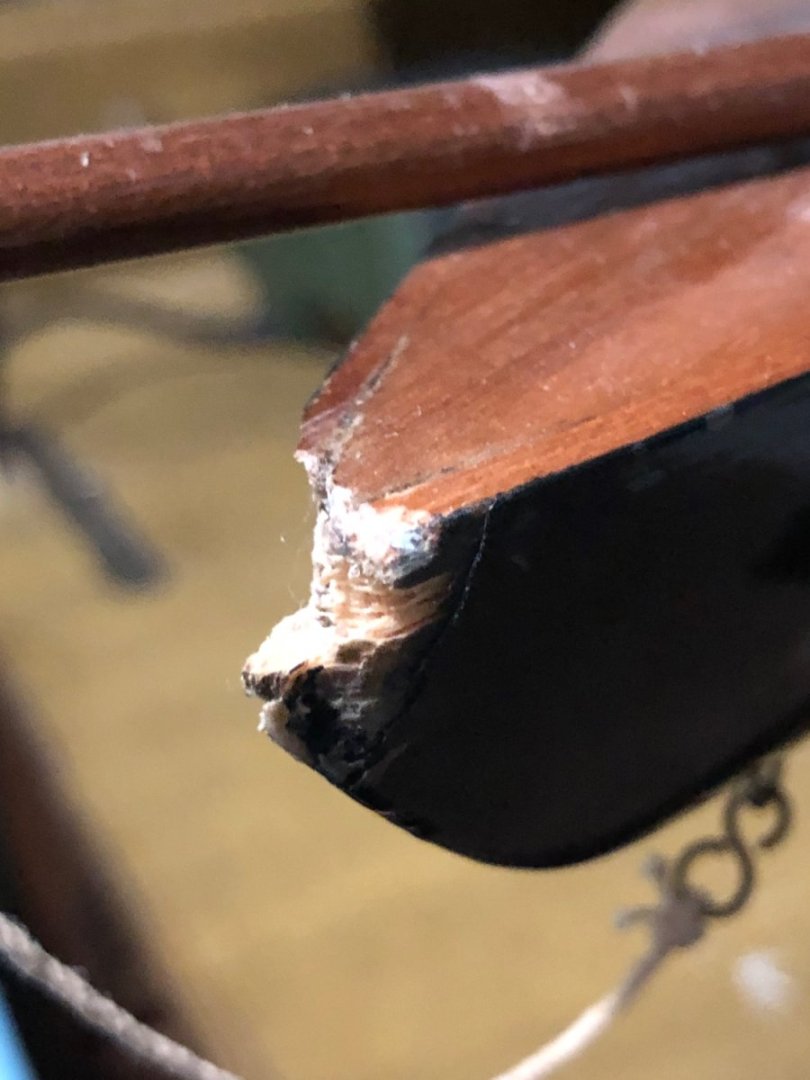
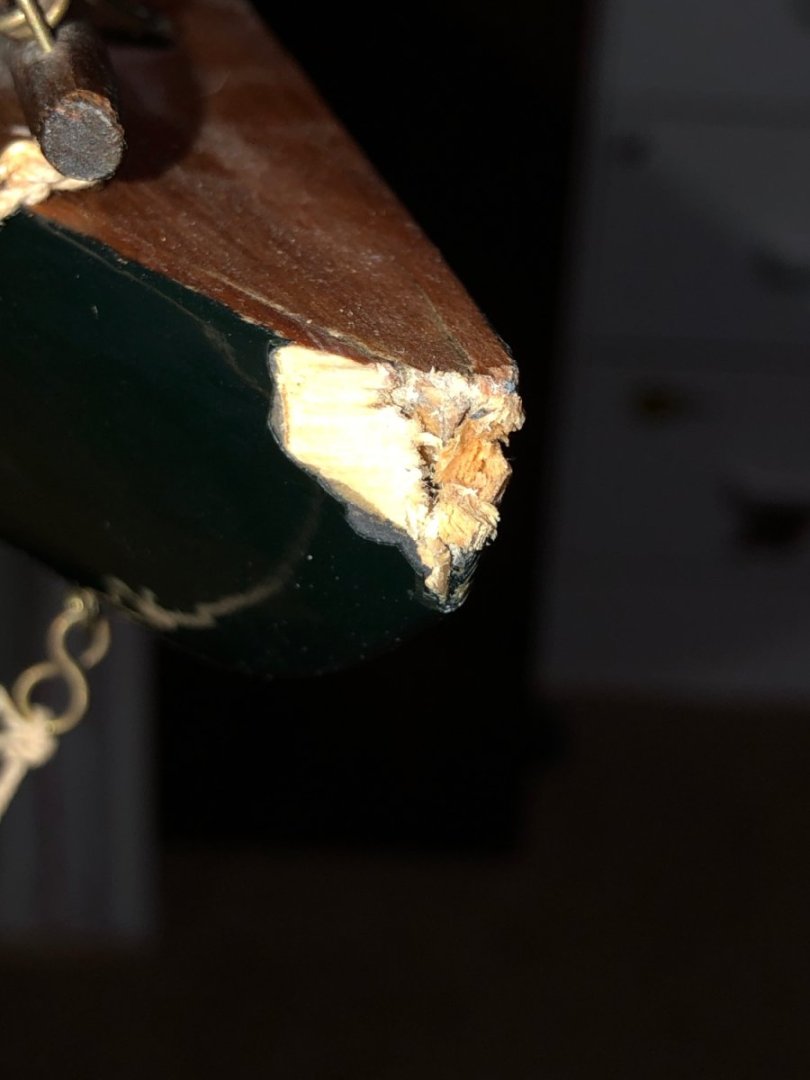
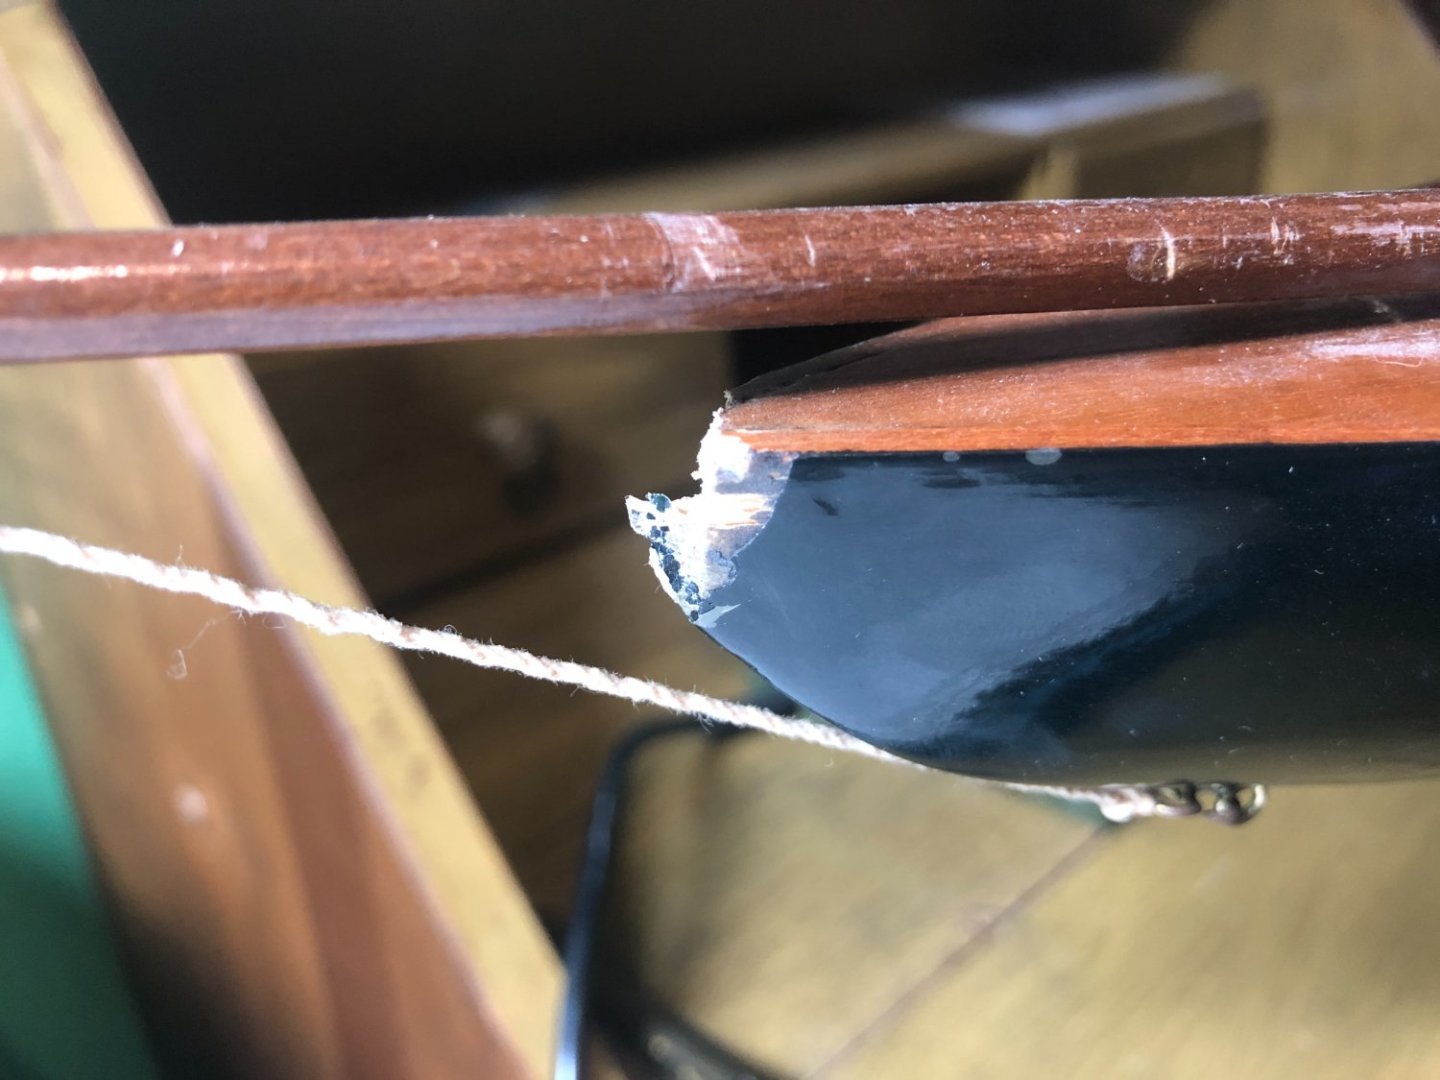
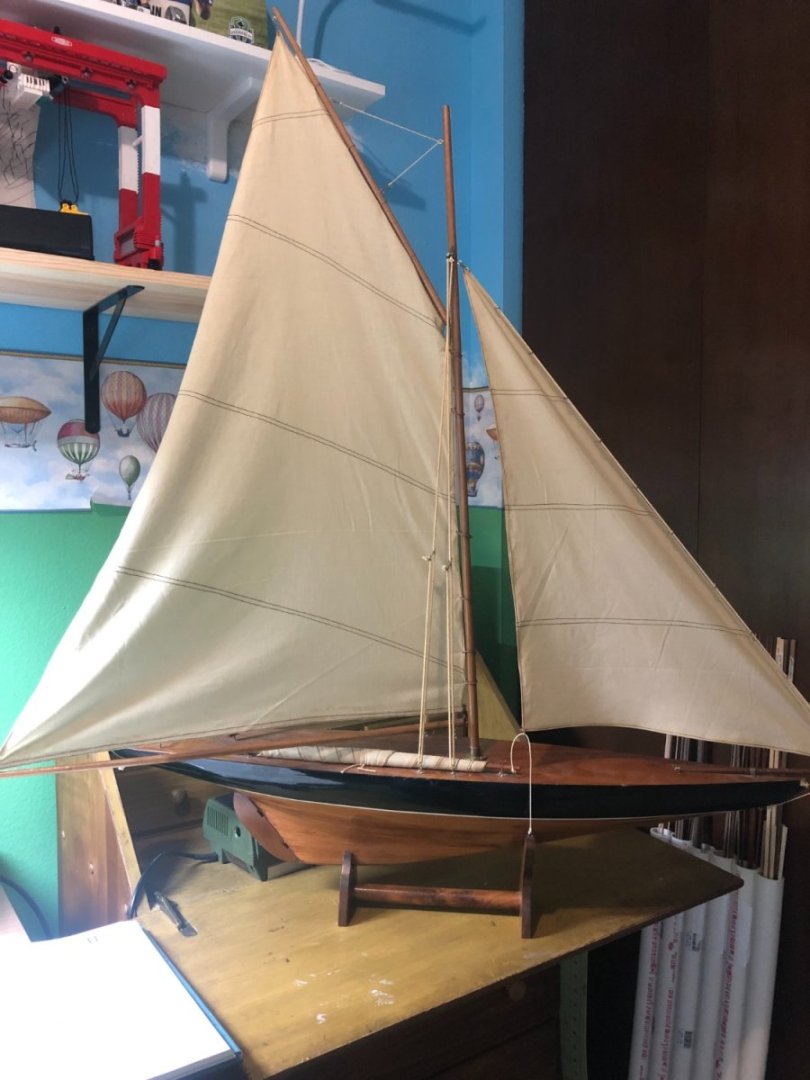
A difficult repair! Matching the coating (some type of plastic) was nearly impossible. Especially, trying to get it as glossy as the rest of the hull. Turned out ok... I made several other repairs to the bowsprit, mast and replaced some of the missing or damaged rigging. Re-glued some of the loose hardware and cleaned her up! Looks good... going back to the clubhouse on Tuesday. Thanks again for the help and comments.
.thumb.JPG.ac7983e09e0c4353715e669fea517a5c.JPG)
-
As stated the march of progress goes on... I have a couple of e-books related to the subject of model ship building. In every case, I have ended up buying the book! I find the book easier to have next to me when I'm using it as a reference. But I do wish you well.
-
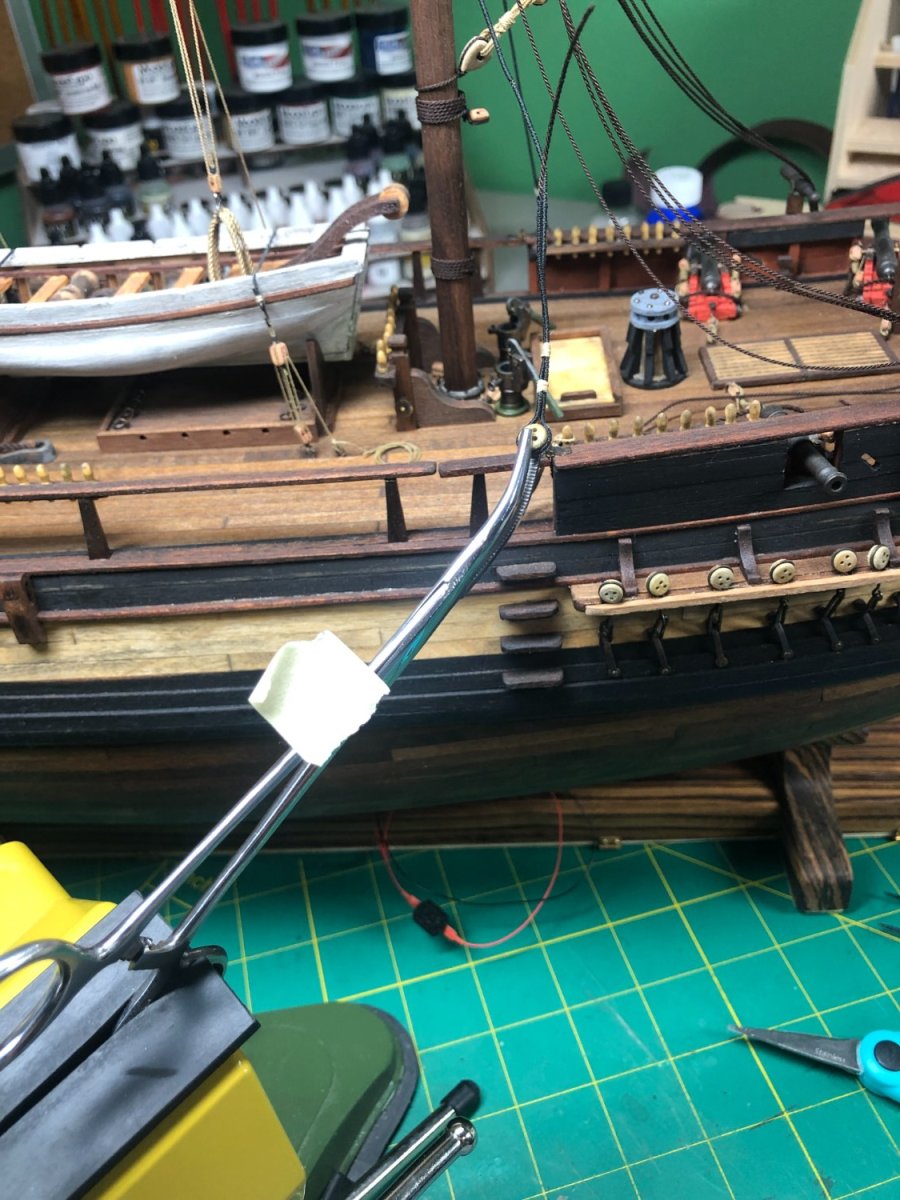
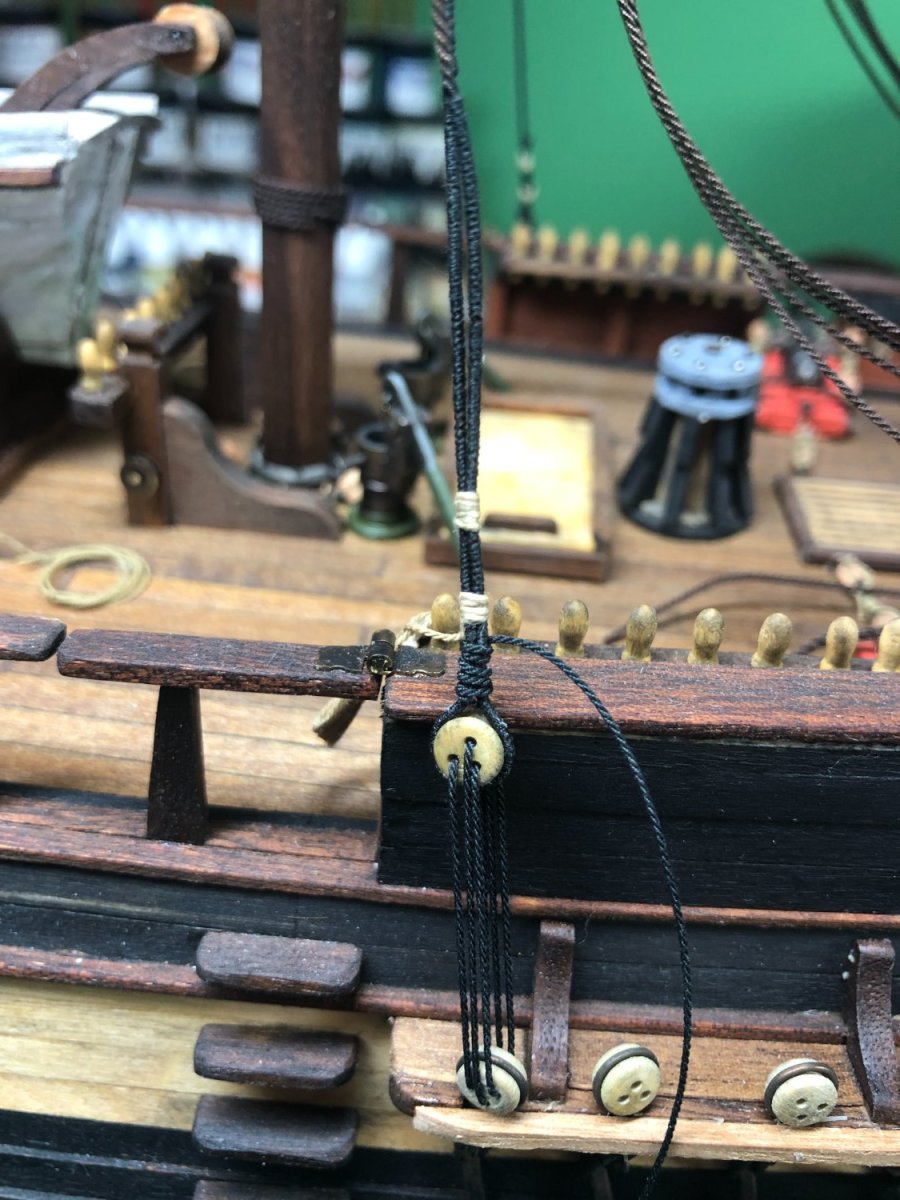
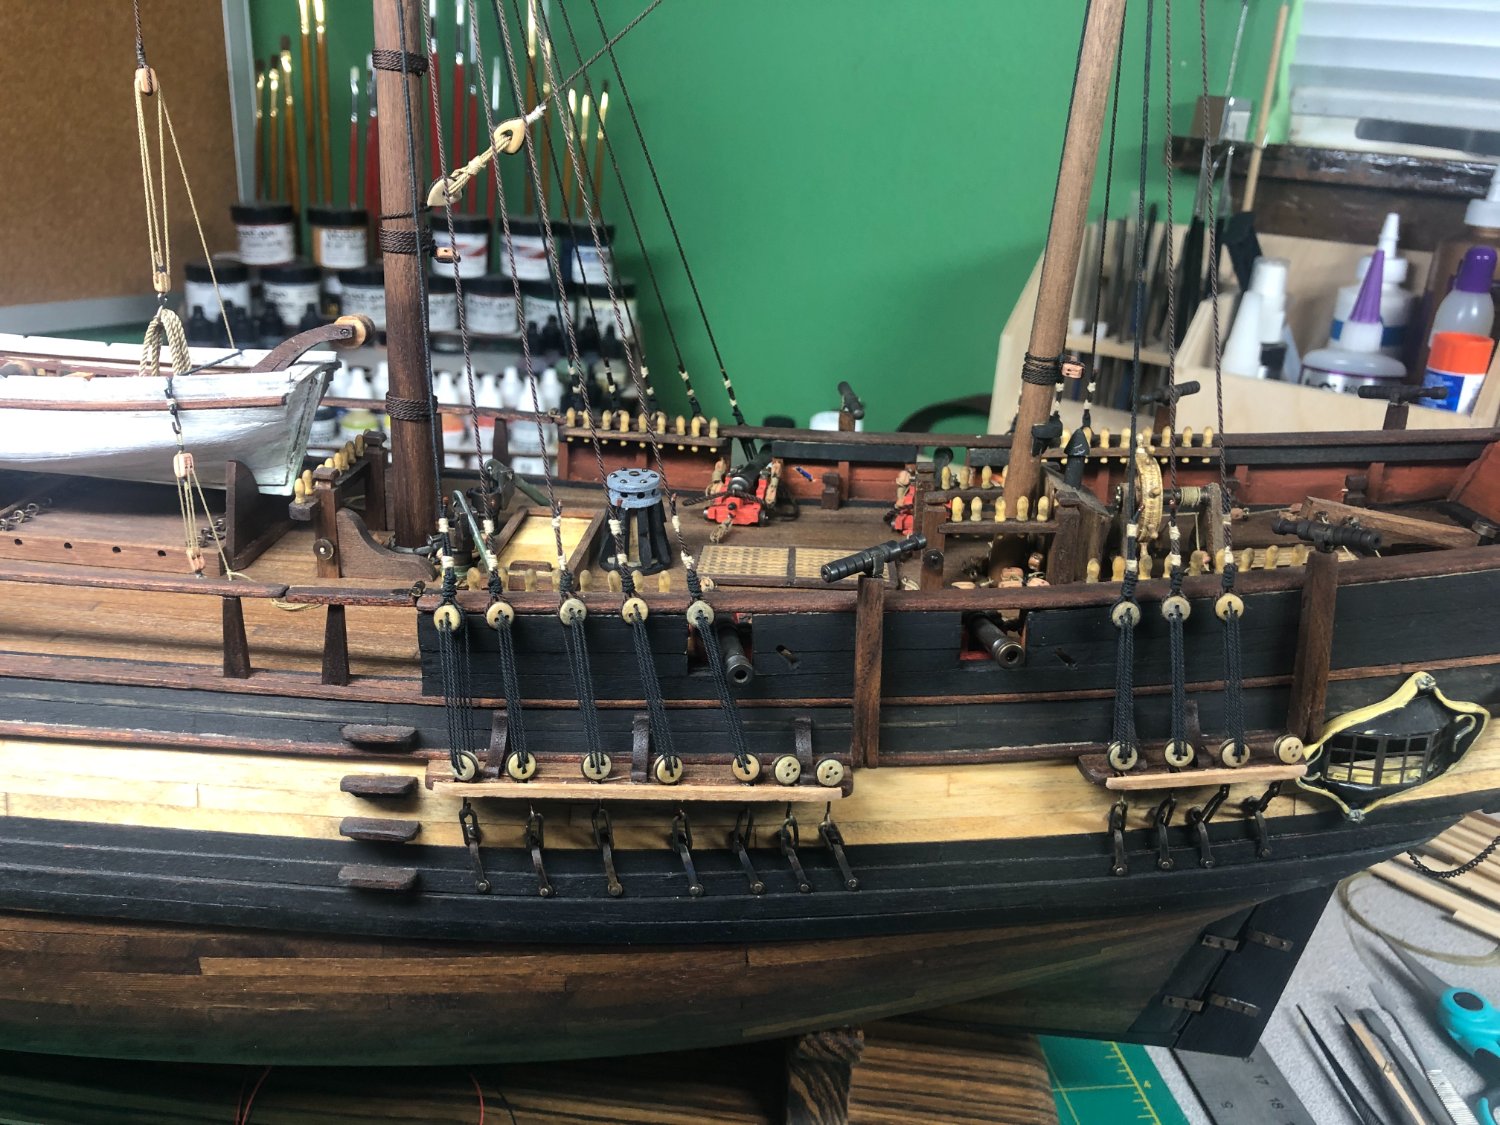
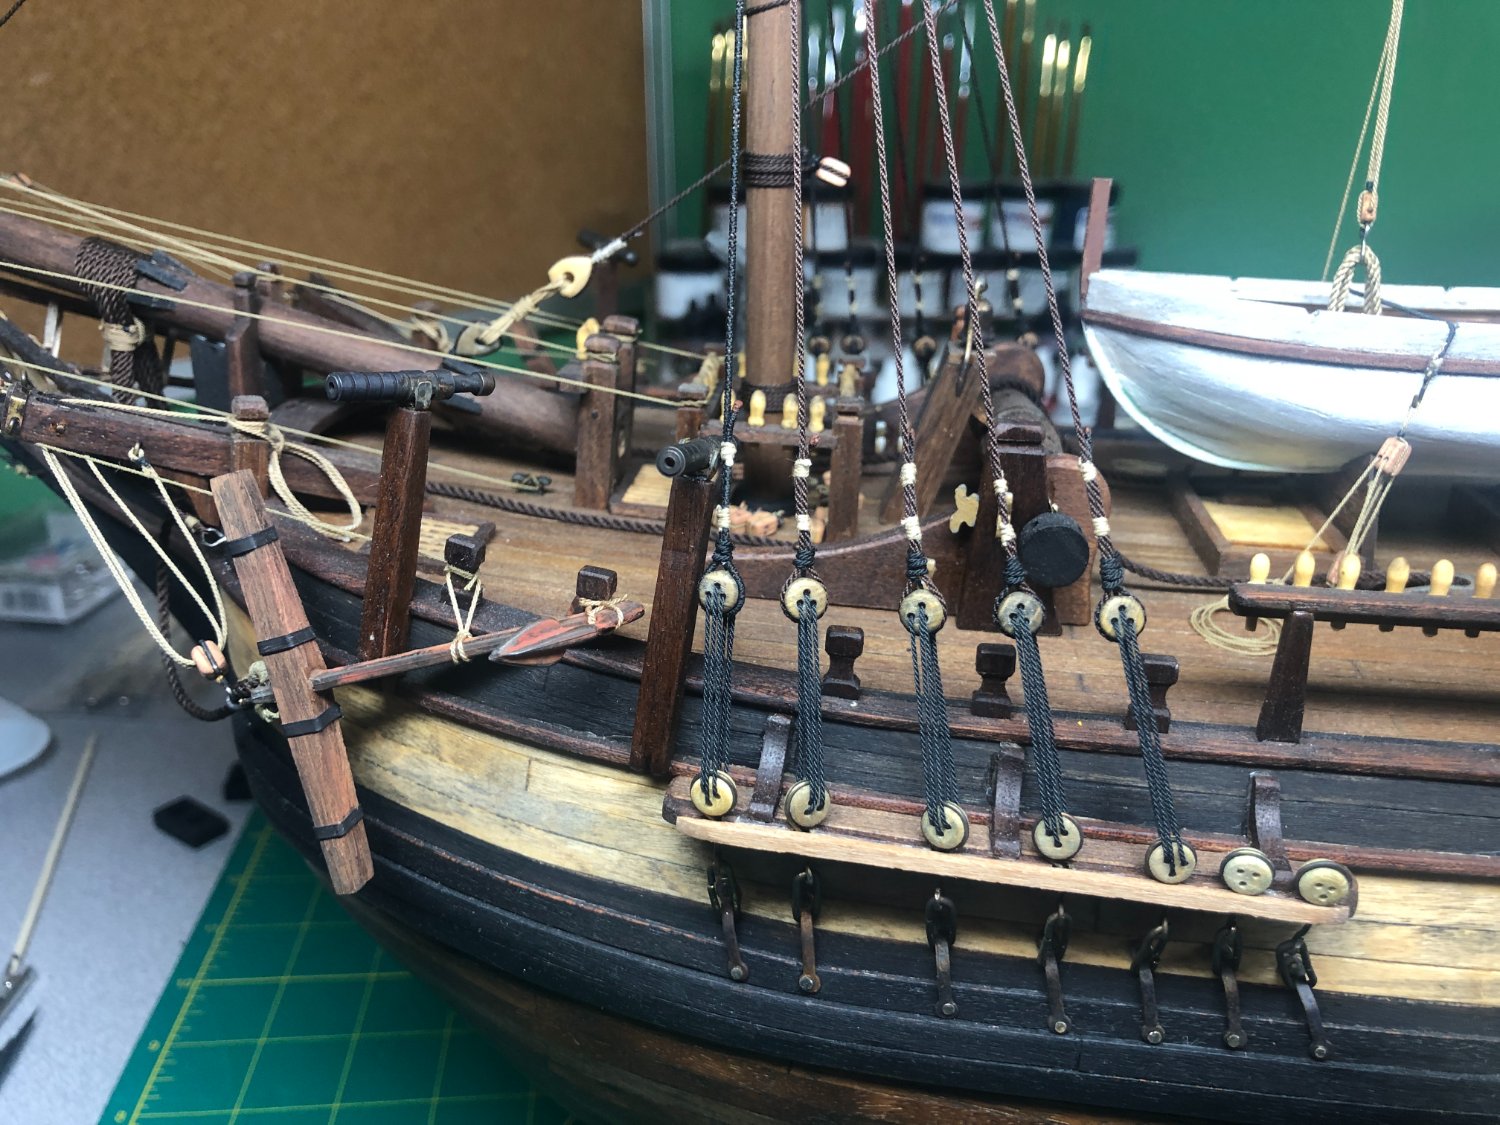
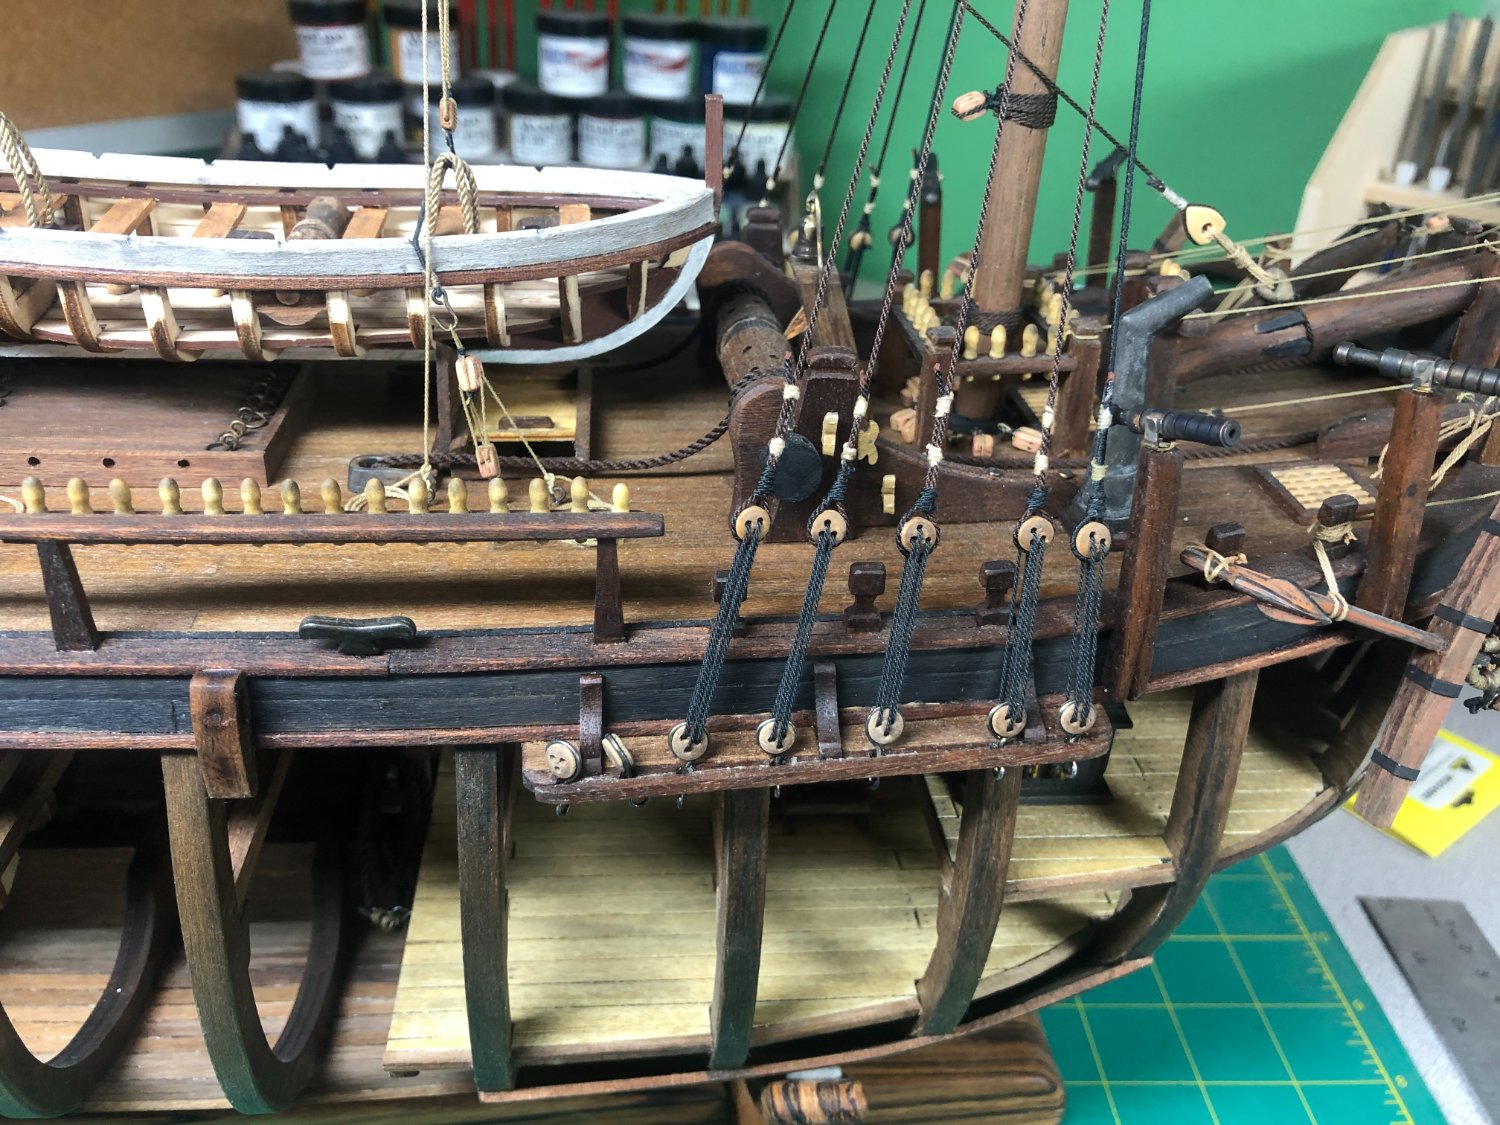
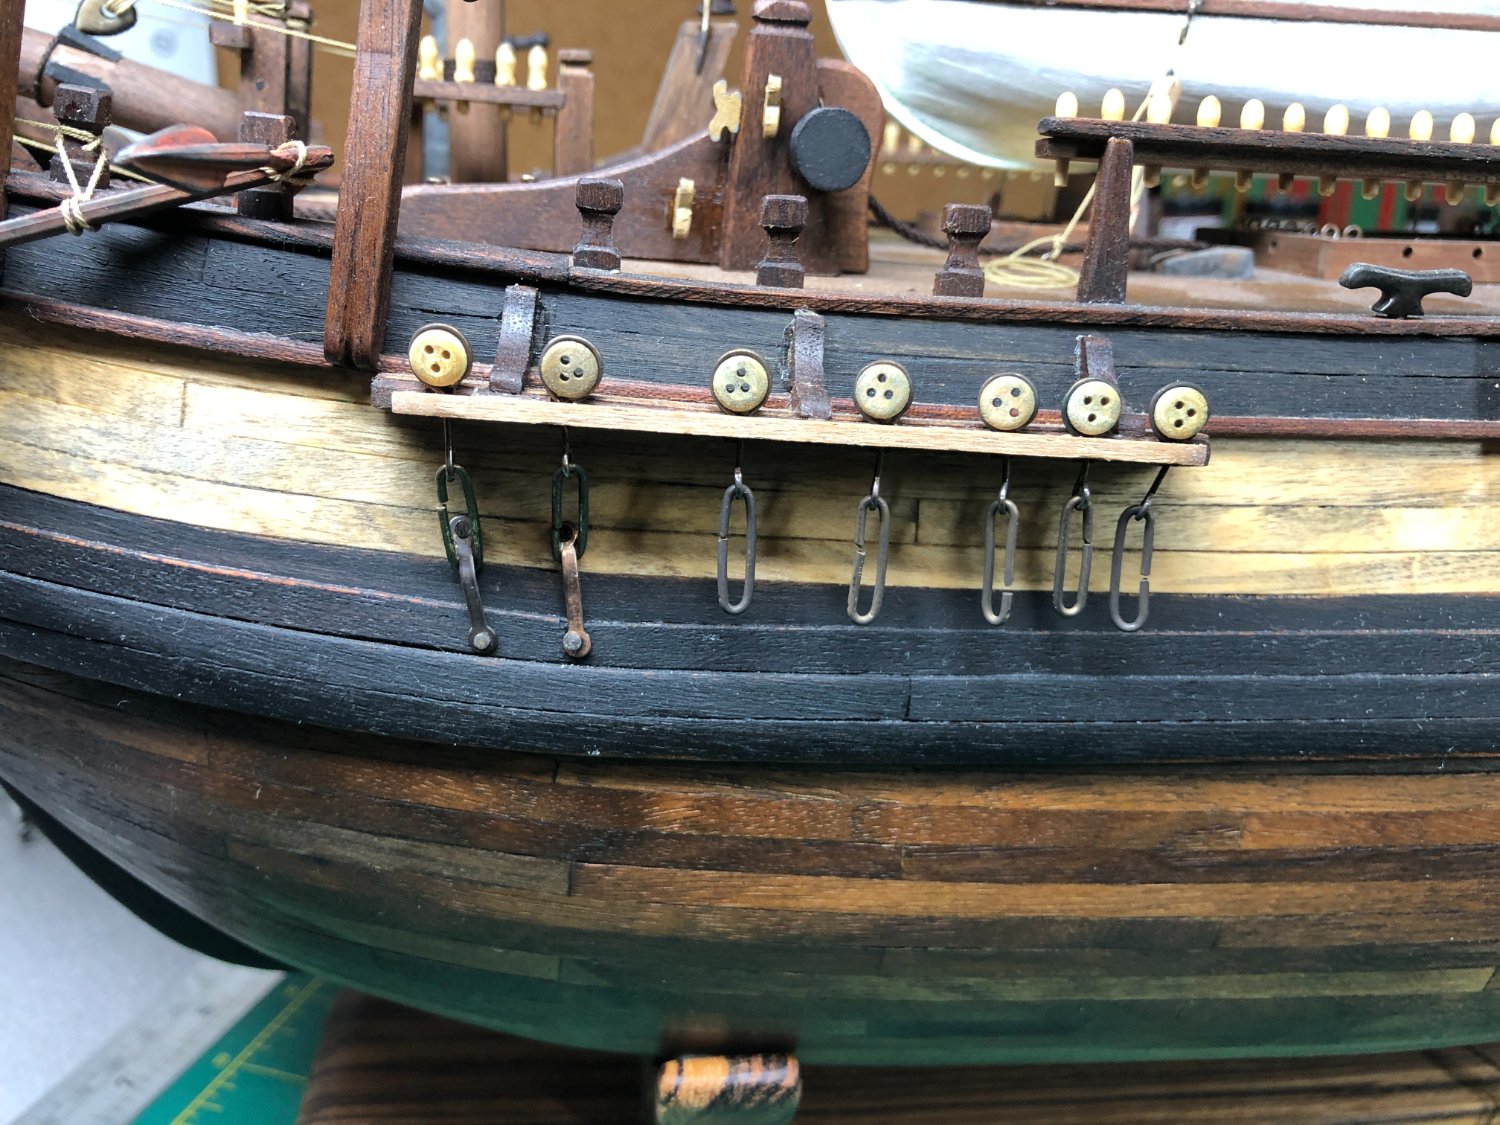
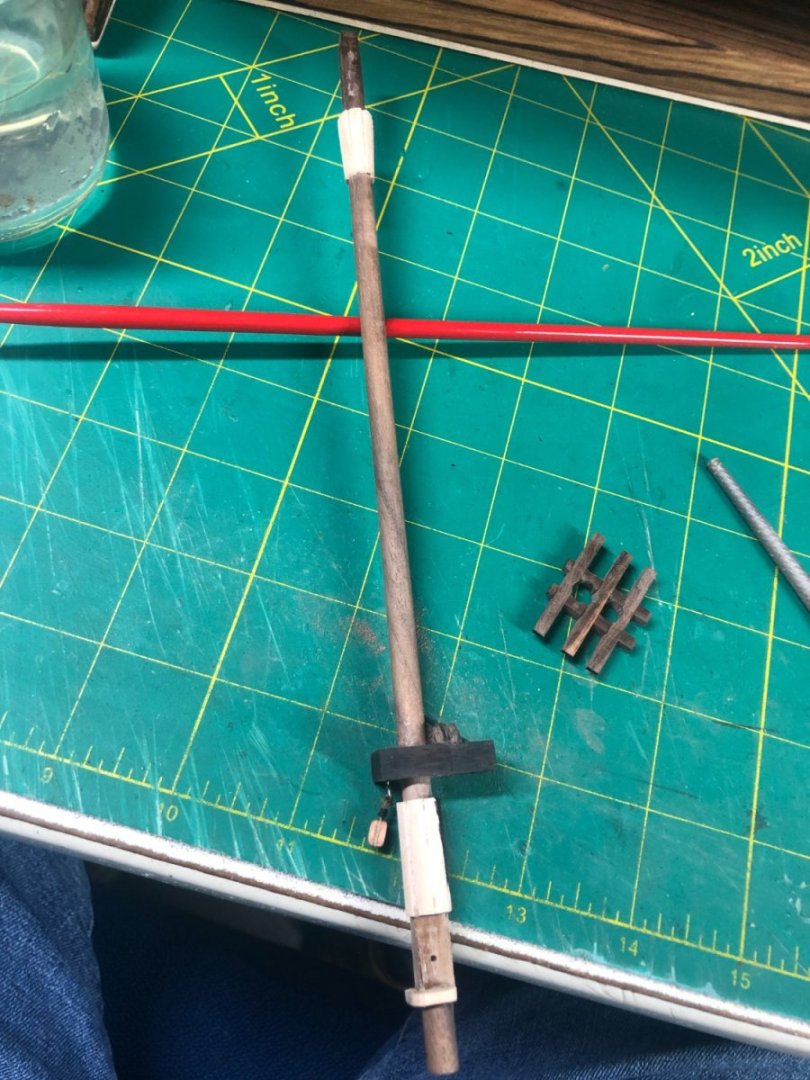
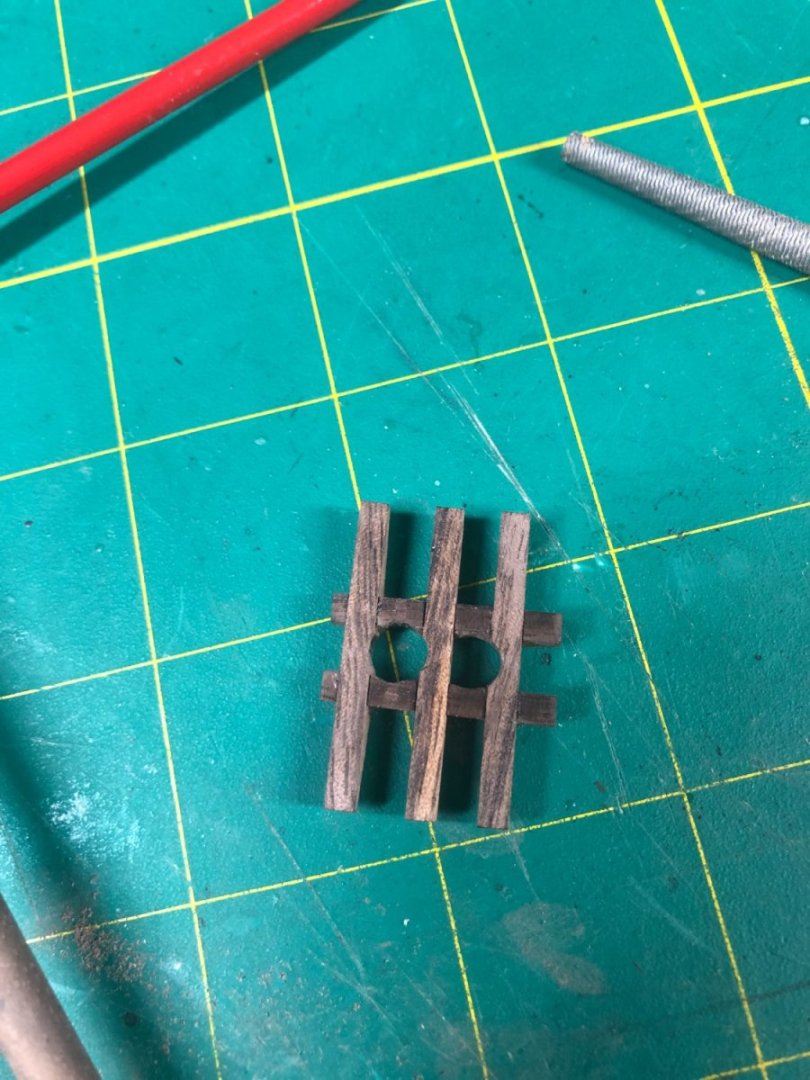
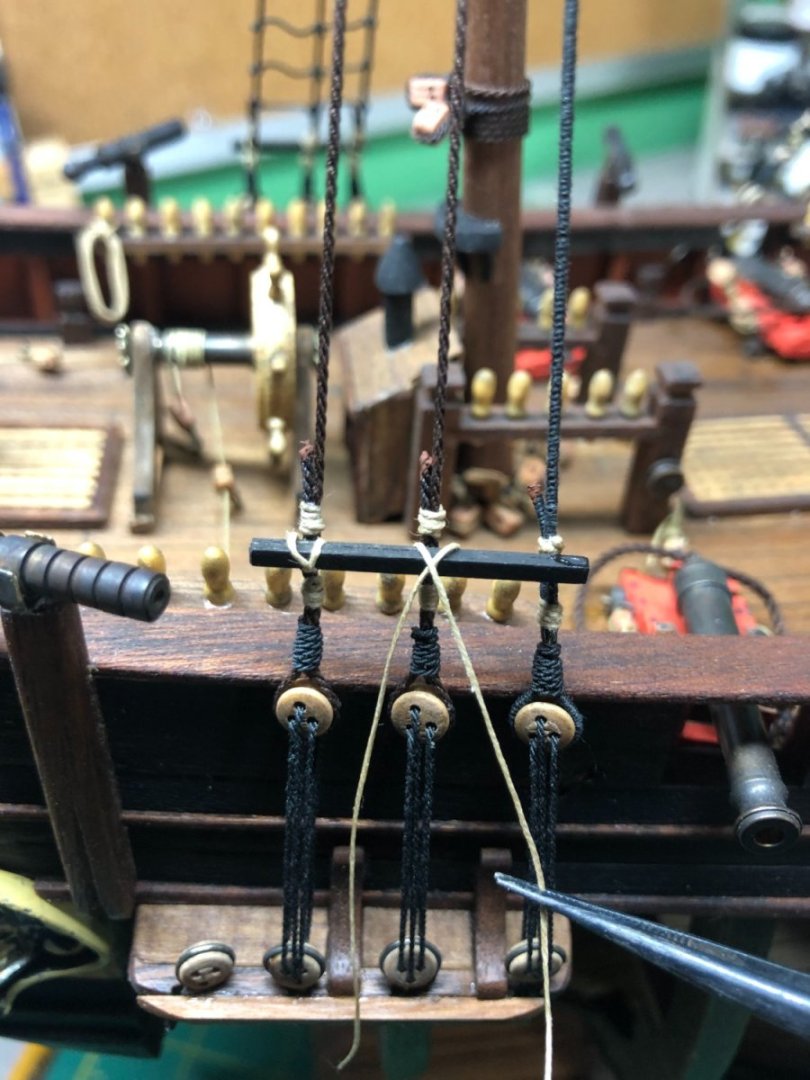
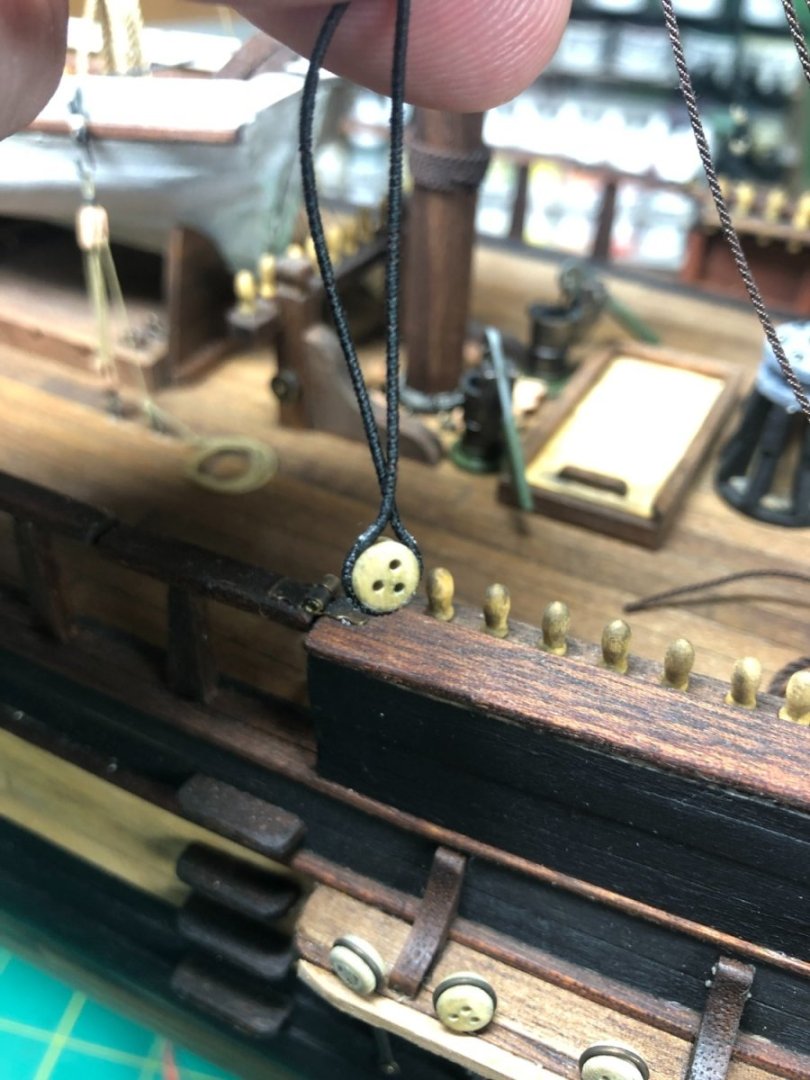
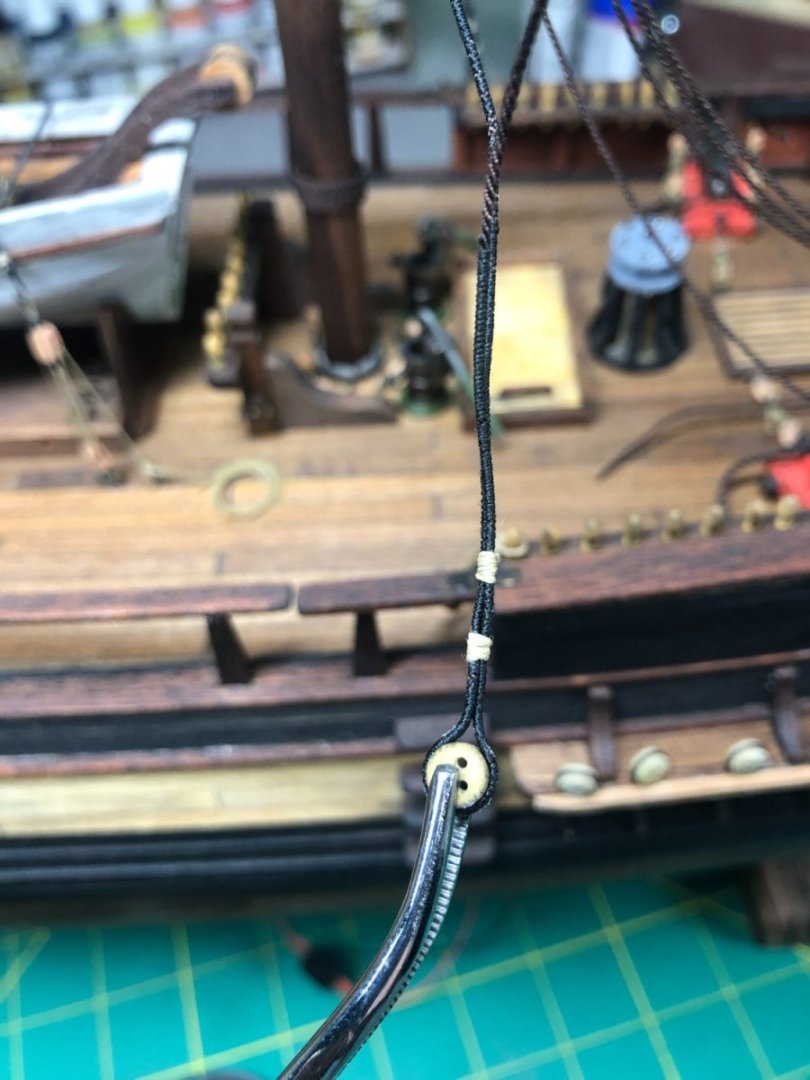
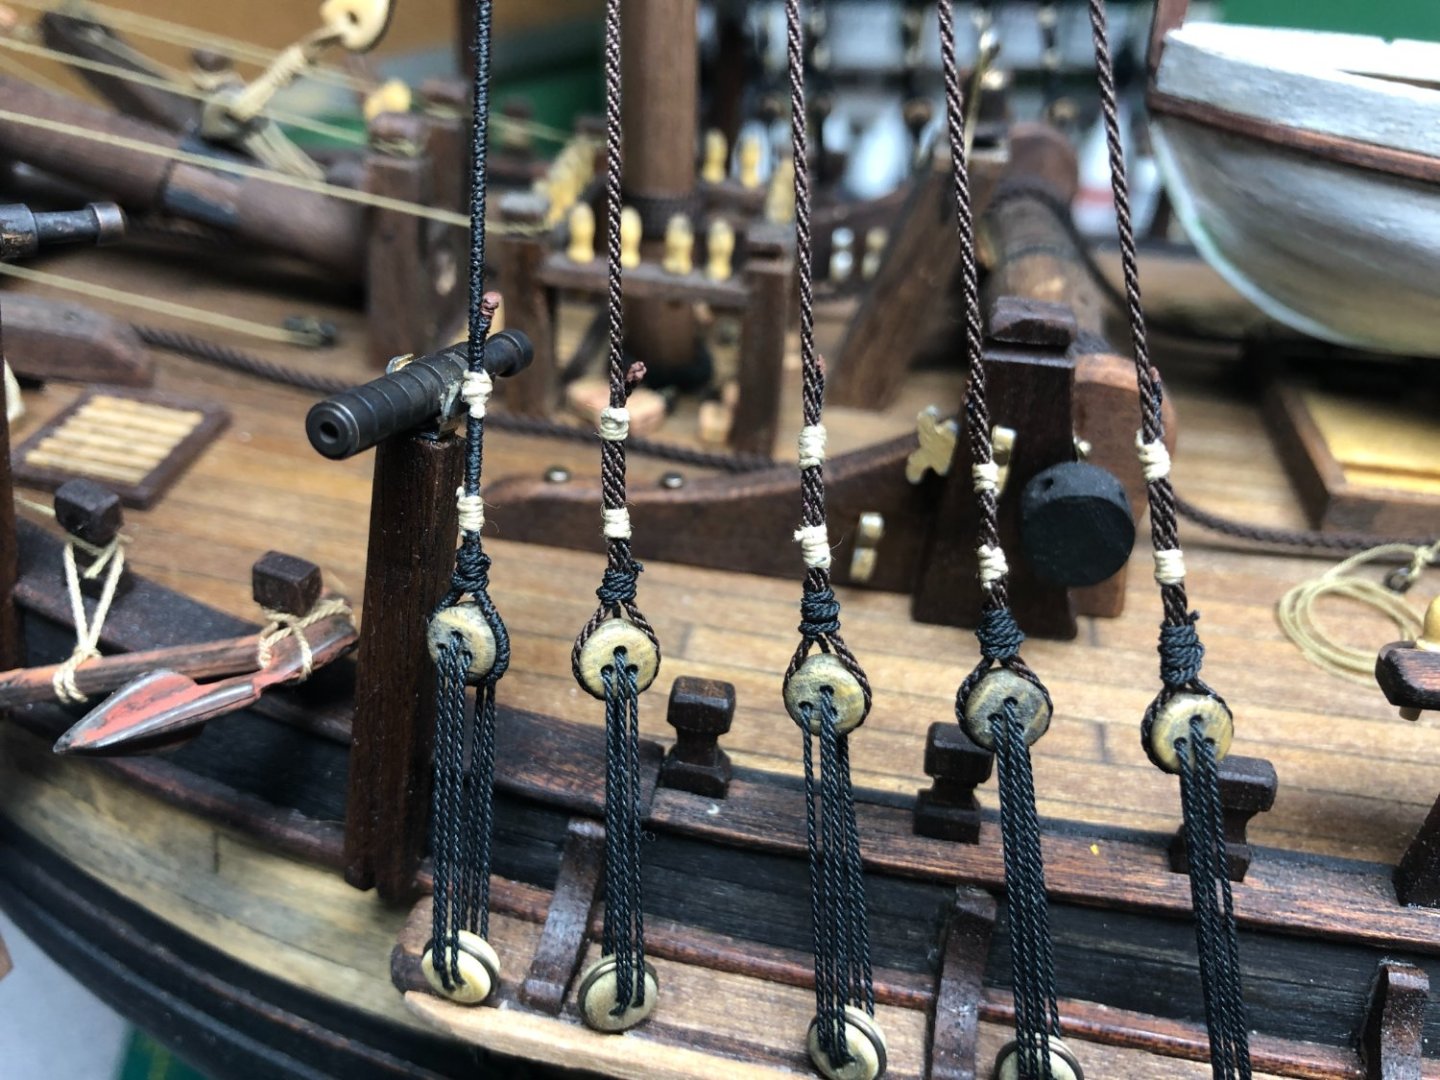
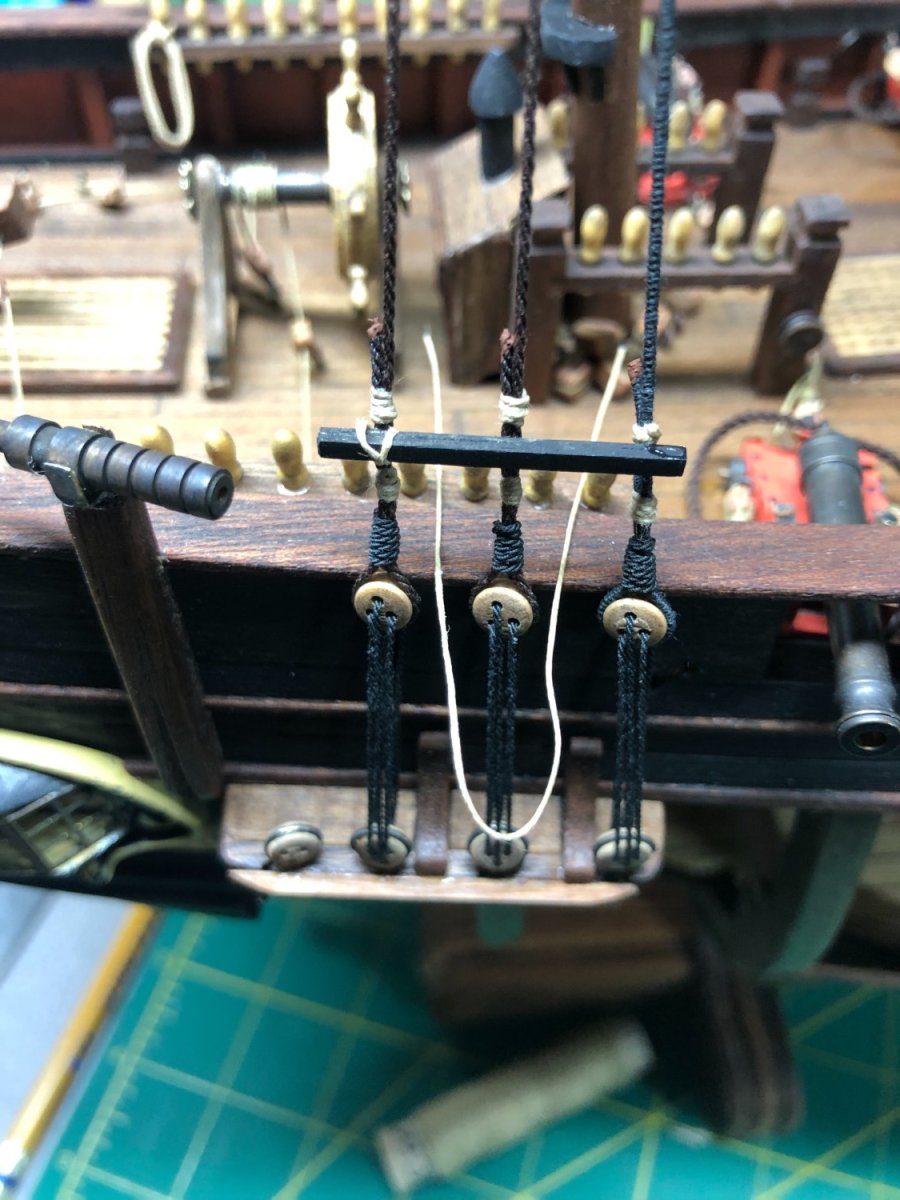
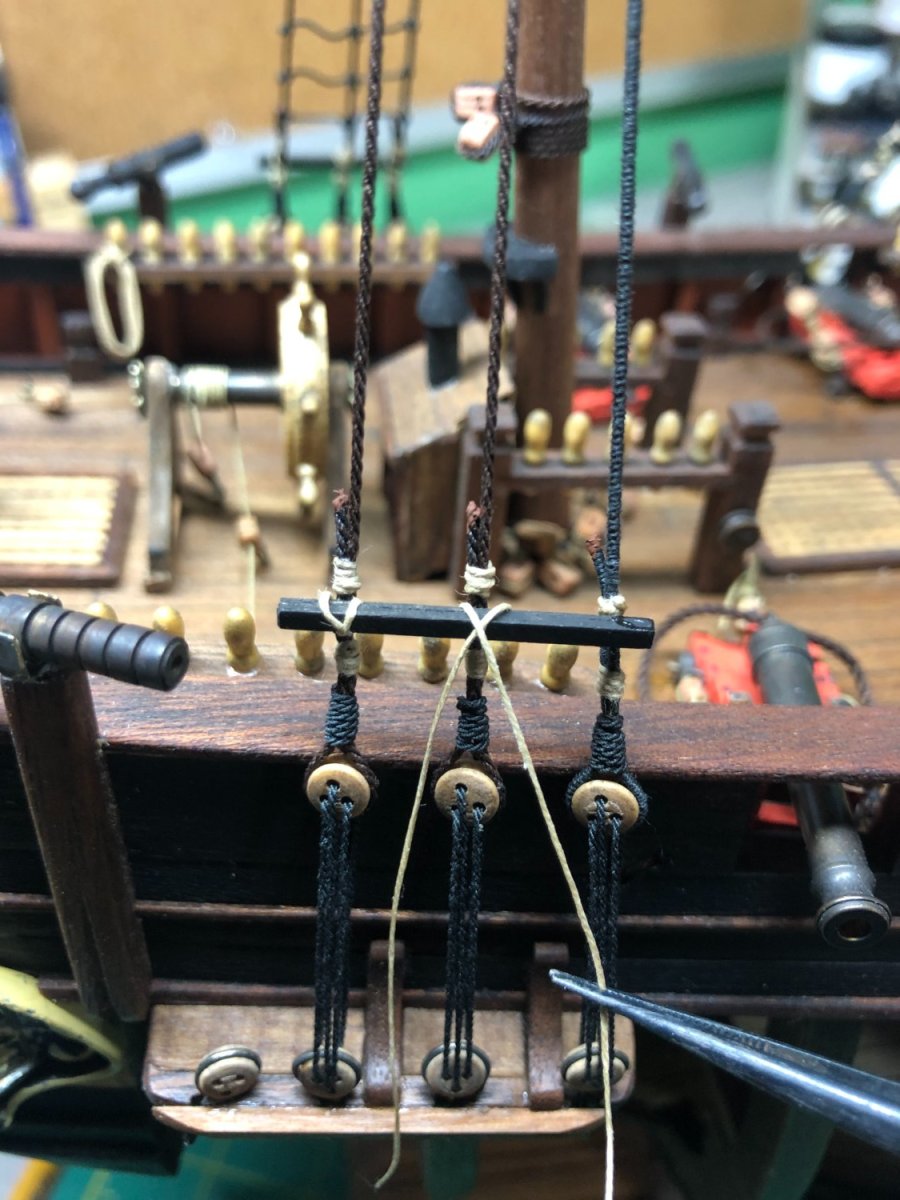
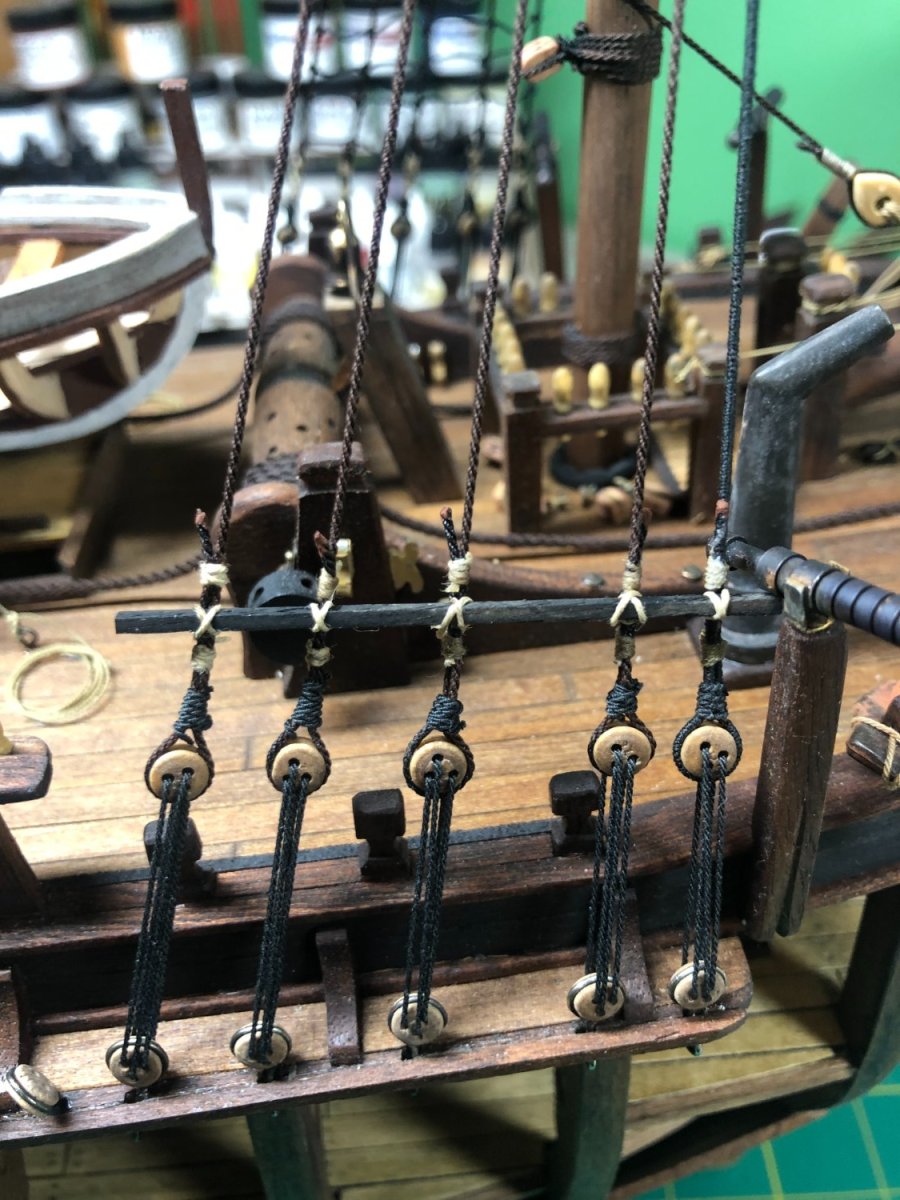
The lower mast shrouds are done. I tried to stay historically accurate with a few minor tweaks. The process I used is outlined below. In the previous post, I mentioned that the seizing was too bright for my taste... I changed the color to a more "hemp" color but I'm getting ahead of myself. I made a small tool to try to keep the deadeyes even as they were being mounted: Pretty self-explanatory and it served two purpose... keeping the spacing even and keep the deadeyes turned properly. Once I had the deadeye in position, I use a drop of very thin CA glue on the bottom of the deadeye to hold the shroud in position while moving on to the next steps: Using a pair of forceps and a moveable vice, I tied the two seizing's to secure the deadeye to the shroud. I used (as mentioned above) a thread that was more of a hemp color, waxed it and tied it: Doing my research, I decided that the lanyards needed to be a dark brown or black due the rope being coated in a pitch/tar substance to protect the lanyard from the elements. Using the appropriate pattern, the lanyard is threaded through the upper and lower deadeyes: Finally, the lanyard is tightened evenly and looped around the shroud (this is where I went off track, historically, a little) several times and tied off with a simple knot and a dot of CA to hold the knot. Historically, the lanyard would be seized to the shroud. I found this to be very difficult and visually unnecessary. The shroud completed except for snipping off the lanyard and shroud: 13 shrouds on each side. It should be noted that I alternated from one side to the other to keep the masts straight and square to the deck. On the lower masts, it's probably not necessary as the masts are quite stout but a good practice because it will make a difference on the upper masts. Also, I painted the ends of the cut shrouds with a brown paint to simulate the leather cap usually used to protect the shrouds from the elements: The camera is quite good at showing things from much closer than the eye can see... so you get to see the good, bad and the ugly! In the pictures below, I took from a more reasonable distance and the work looks good, overall! To finish this step, I need to install the wooden ratlines at the bottom of each set of the shrouds, futtock staves at the top and then the ratlines... a measly 625 knots! But who's counting!!?


-
John and Roger, I like your ideas and will work toward that as a solution... We update the post when I have made some progress. Thanks!
-
No idea on the age but someone may know… I agree on the repair problems but really don’t know of any other options.
-
John, The shape of the bow shouldn’t be too tough to replicate just by following the lines of the hull and deck. There wasn’t anything special on the bow except the bowsprit which is damaged but intact. I’m adding more pictures… no, I’m not sure if it’s plastic or ??? The pictures show it pretty well…


-
Sergal HMS Bounty.
LyleK1 replied to mark j's topic in Building, Framing, Planking and plating a ships hull and deck
Hi Mark, I, too, am building the Bounty but mine is made by Artesania Latina. If I can offer any assistance on your build, please feel free to ask or visit my build log (see the link below in my signature area). As many have mentioned, for a first time build, this is a tough one... you can become easily discouraged! So, don't hesitate to ask for help! Good luck! -
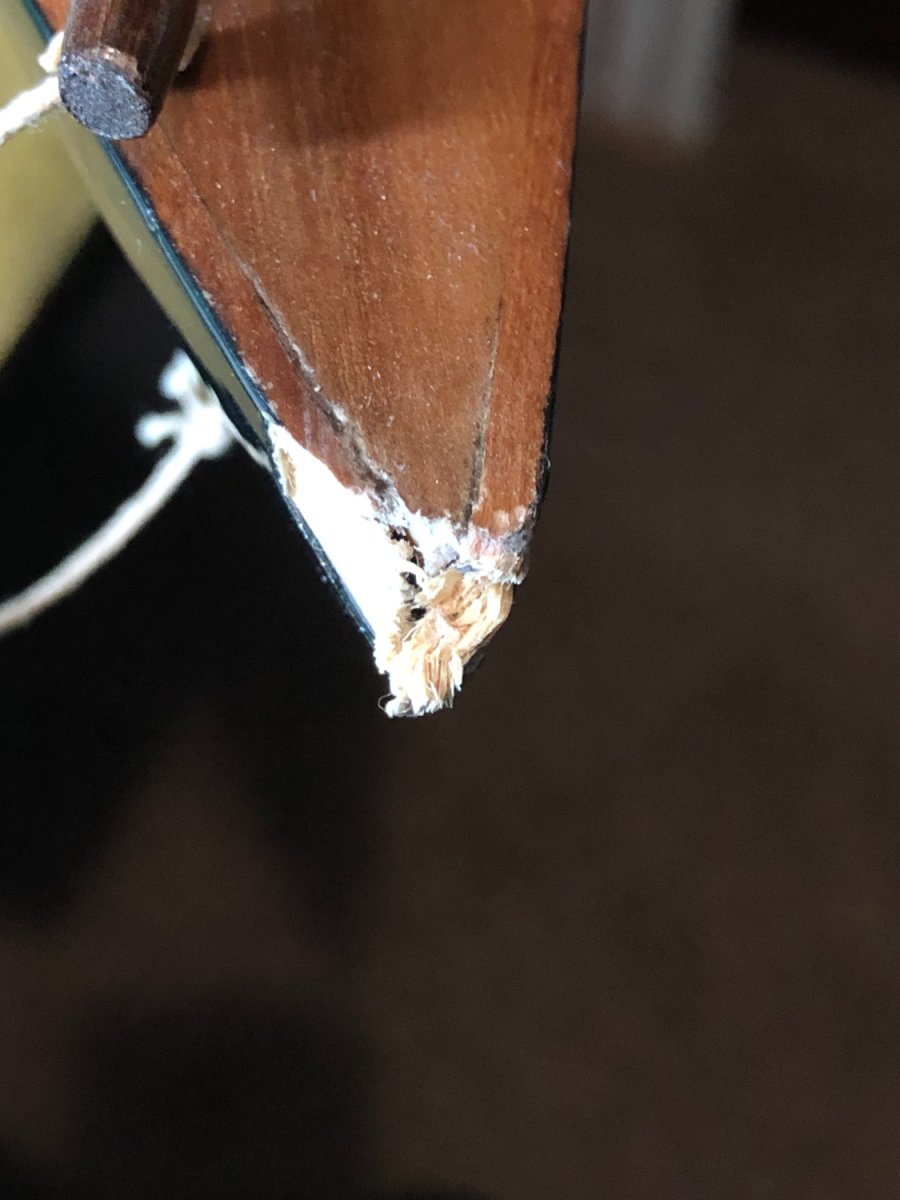
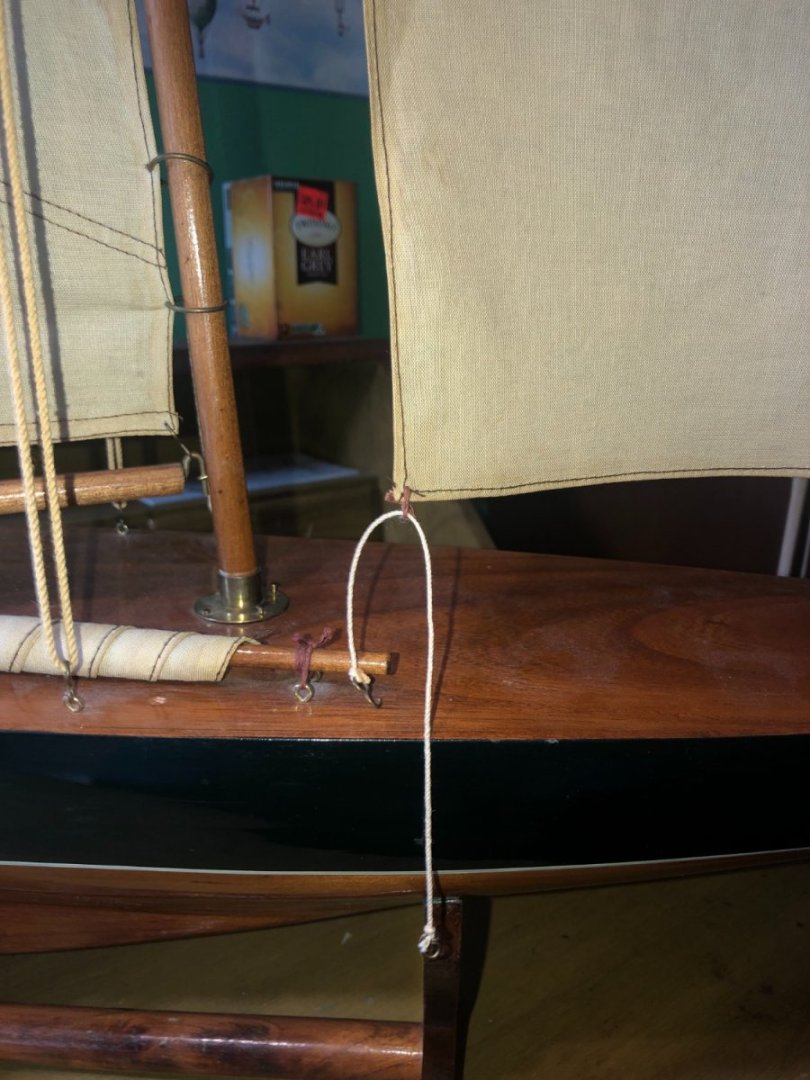
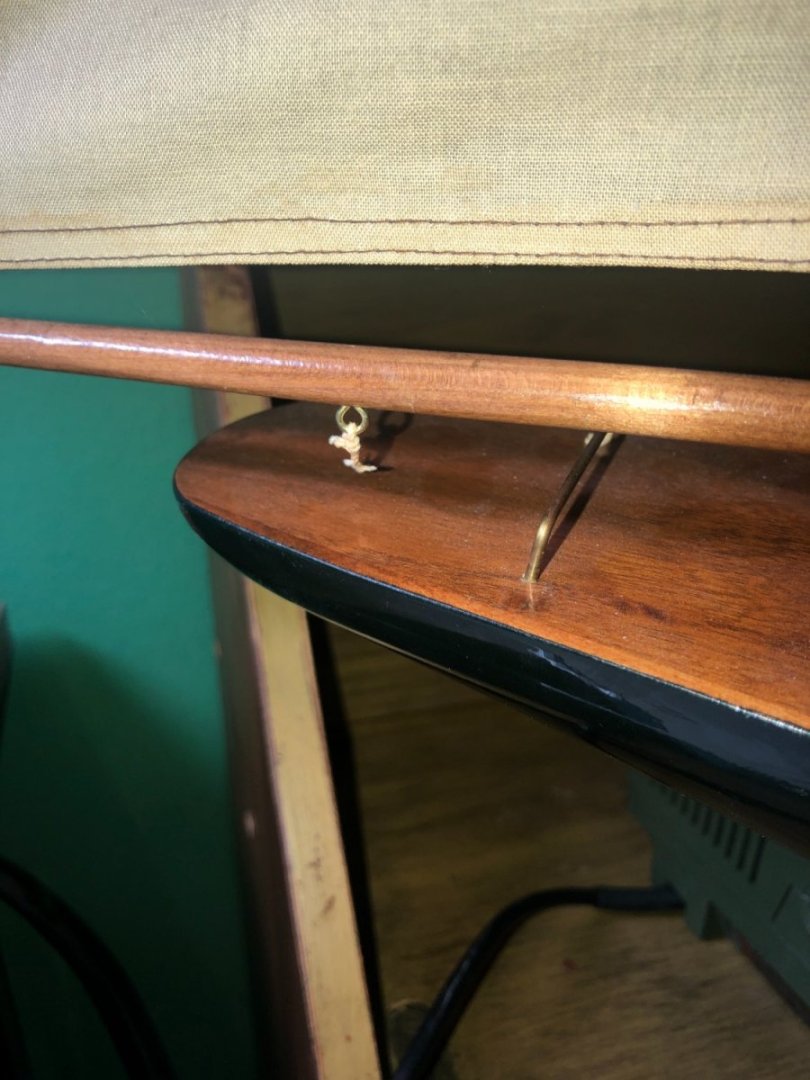
I was recently asked by my yacht club if I could repair a model sailing boat that has been in the clubhouse for many years. Most of the work needed is cosmetic and cleaning... However, the bow has been badly damaged from being dropped (I'm guessing) and I'm not 100% sure how to go about fixing it. I can clean it up and re shape it with wood putty or some thing similar but the plastic black coating is not something that can be fixed easily, if at all. Short of doing the repair and painting it gloss black, I have no other ideas. Any suggestions, ideas? Pictures below if the model and the bow: Anybody that knows what this particular model is and can steer toward a picture(s) that show the original bow shape would be helpful too! Thanks!


-
::Rant:: I thought when I retired (over a year ago) that I would have tons of time to work on the models I chose to build. Boy, was I wrong! I have to fight for every minute! I'm far busier than when I worked fulltime! ::Rant over:: I finally got all the lower shrouds laid out and installed: The foremost shrouds on all three masts are served as noted in many of the books I'm using for reference. I started installing the upper deadeyes and finished one (which I'll need to re-do. The position is too high!) and installed the lanyard to get an idea of positioning and such: As I noted above, the positioning is too high and I'll be re-doing this one. However, I would like some feedback on the overall assembly. A couple things that I'd like critiqued: 1. Color of the threads used, except for the lanyard. It will be black. The one in the photo was for testing only. I think the seizing is too bright of a color. 2. Position of the seizing's and the size of them (too big or too small). 3. (Not shown) Once the shroud is cut, what color should the canvas/leather cap be? It will be painted or maybe left off? 4. Anything that I should have done differently or added/subtracted to the overall assembly? Looking forward to your critiques before moving on with all the lower shrouds.

-
Chain plates completed: I'm doing some research on the shrouds. The Eighteenth Century Rigs and Rigging book and Lee's book both state that the foremost shroud on the masts are wormed and served. The remaining shrouds are only served where they go around the mast. Additionally, there is a pattern to how the are rigged. I won't be worming the lines but I will serve them. So, my next update will be after I serve up some lines!


-
Looking real good! Option 3 is my vote!
-
Tim, As usual, your work is impeccable. Looking forward to seeing the finished battleship. The Sierra West website is very interesting and reminds me of my fathers work on his railroad diorama's that he assembled throughout my childhood! I'd be curious to know how these kits are assembled. I just finished my second year on the Bounty and am working on the masting and rigging. Happy holidays to you and your family! The weather here is dreadful as well... but improving!
-
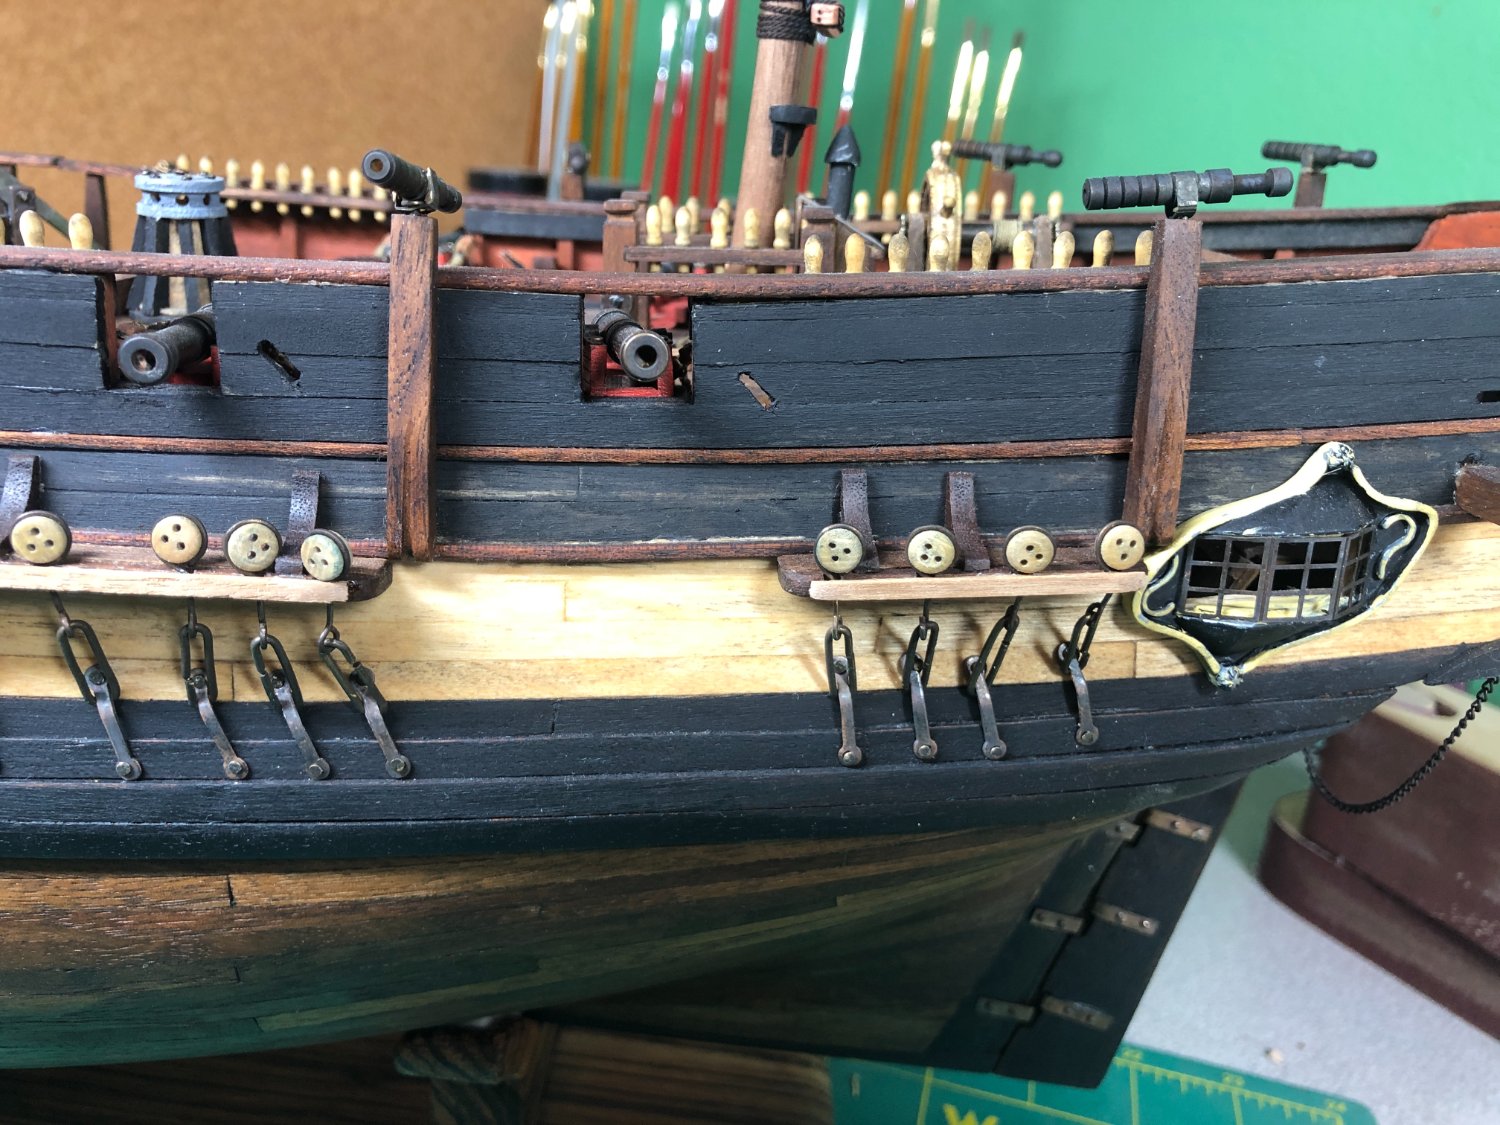
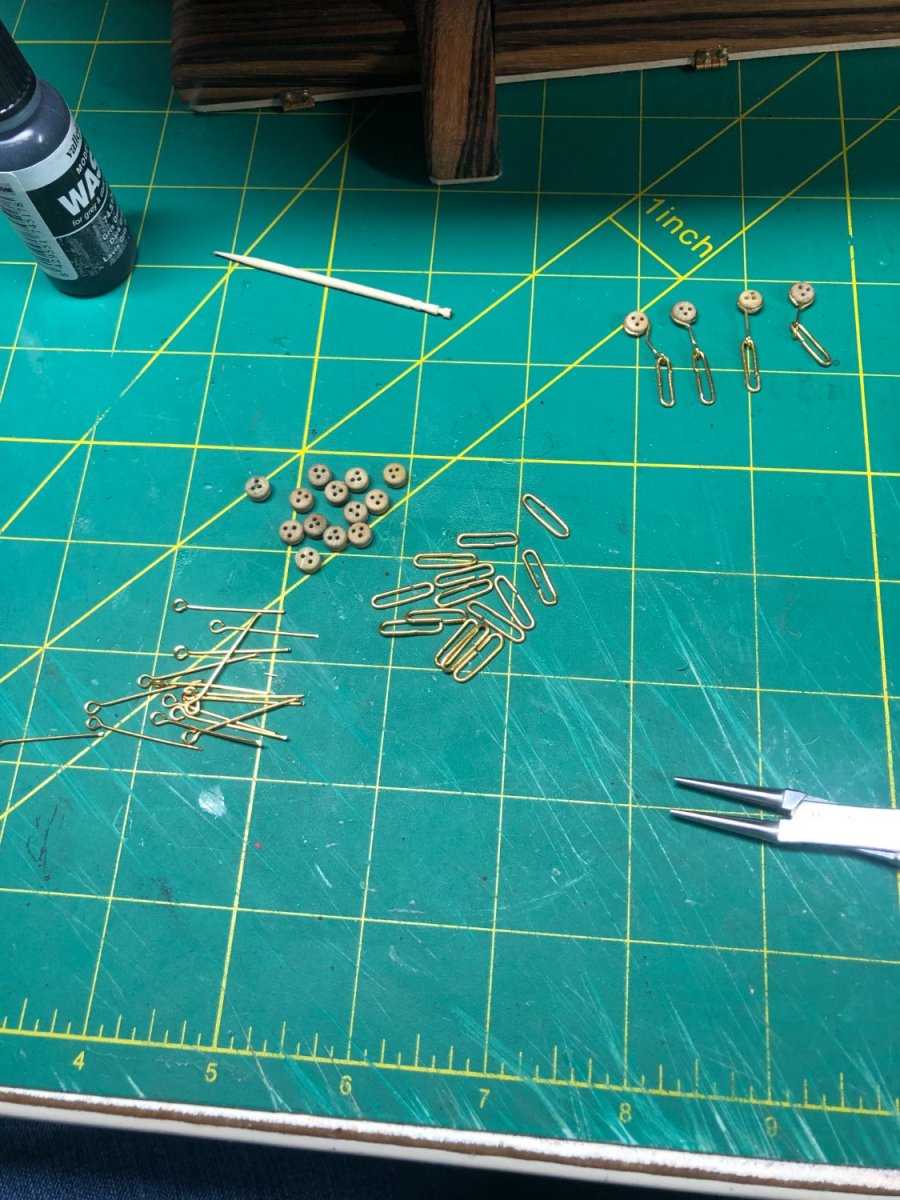
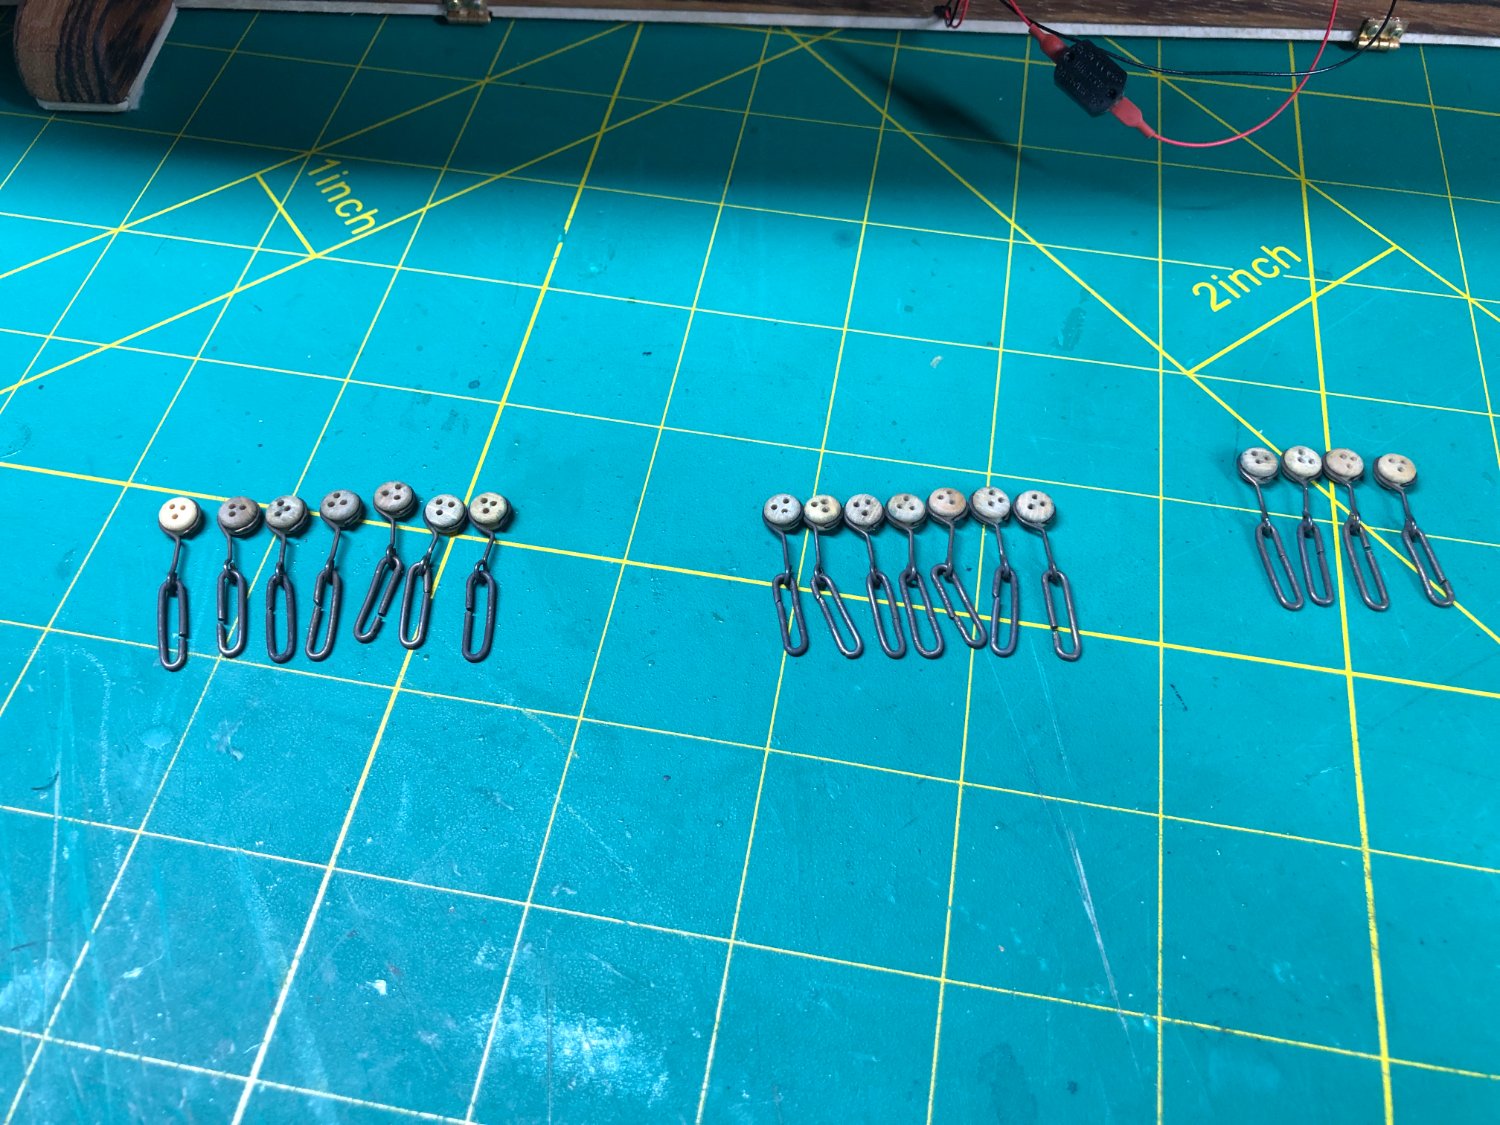
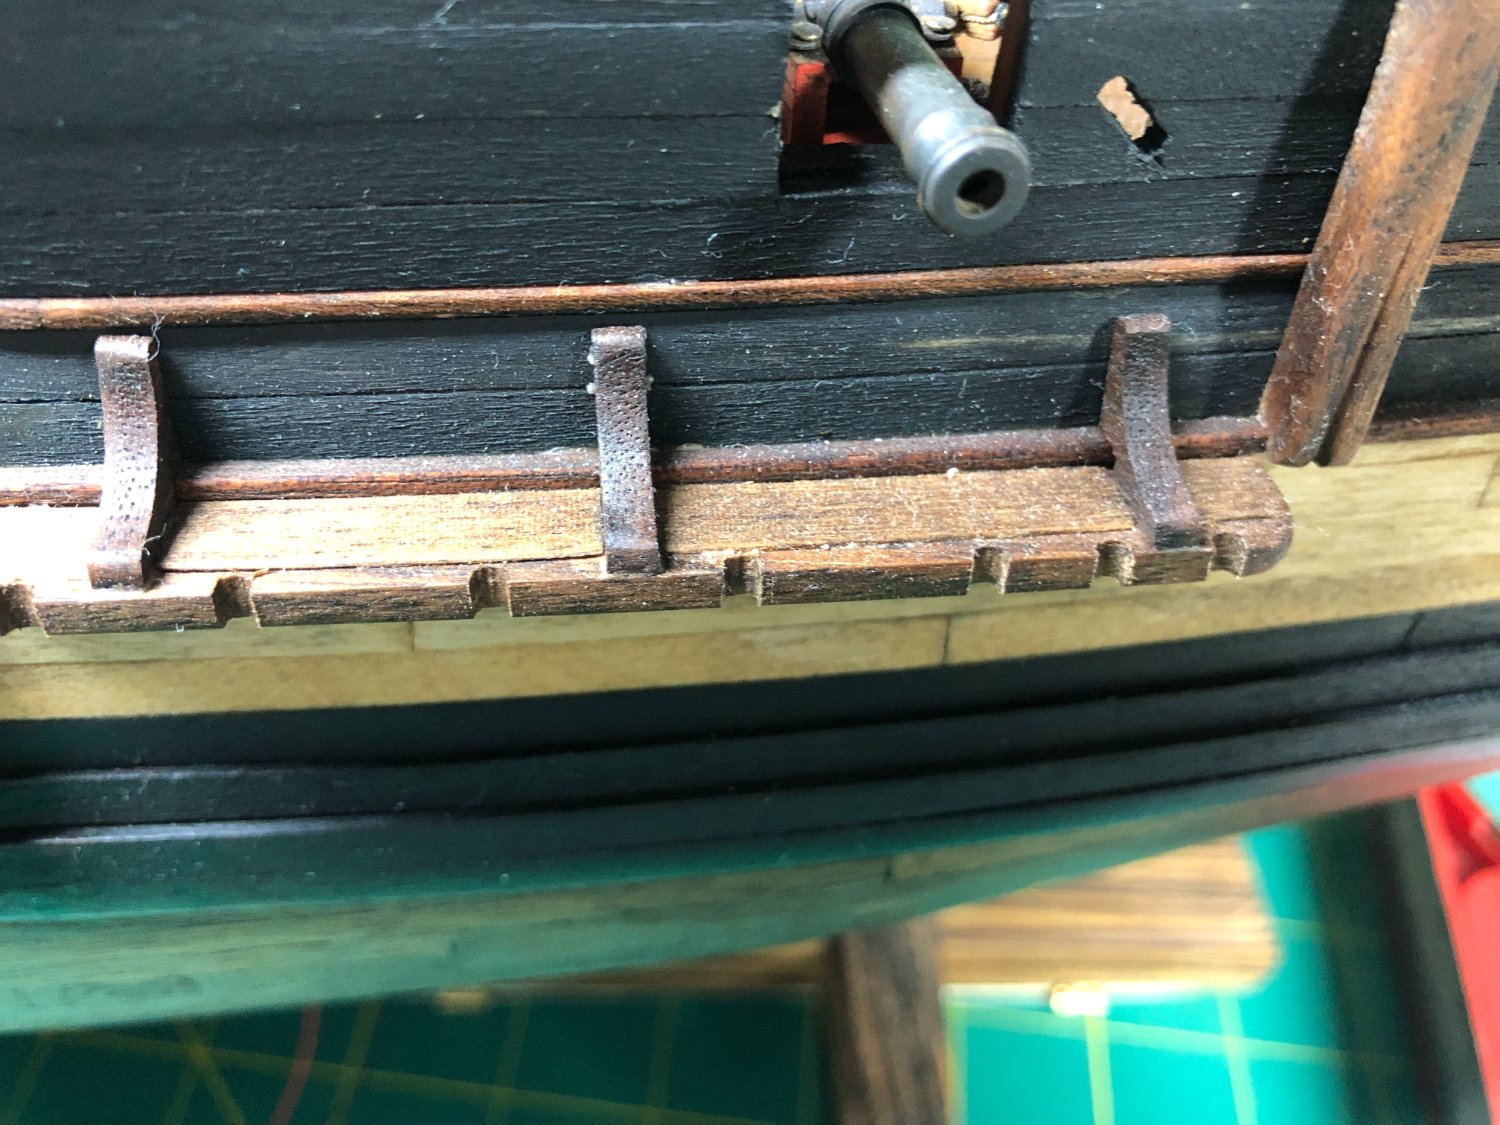
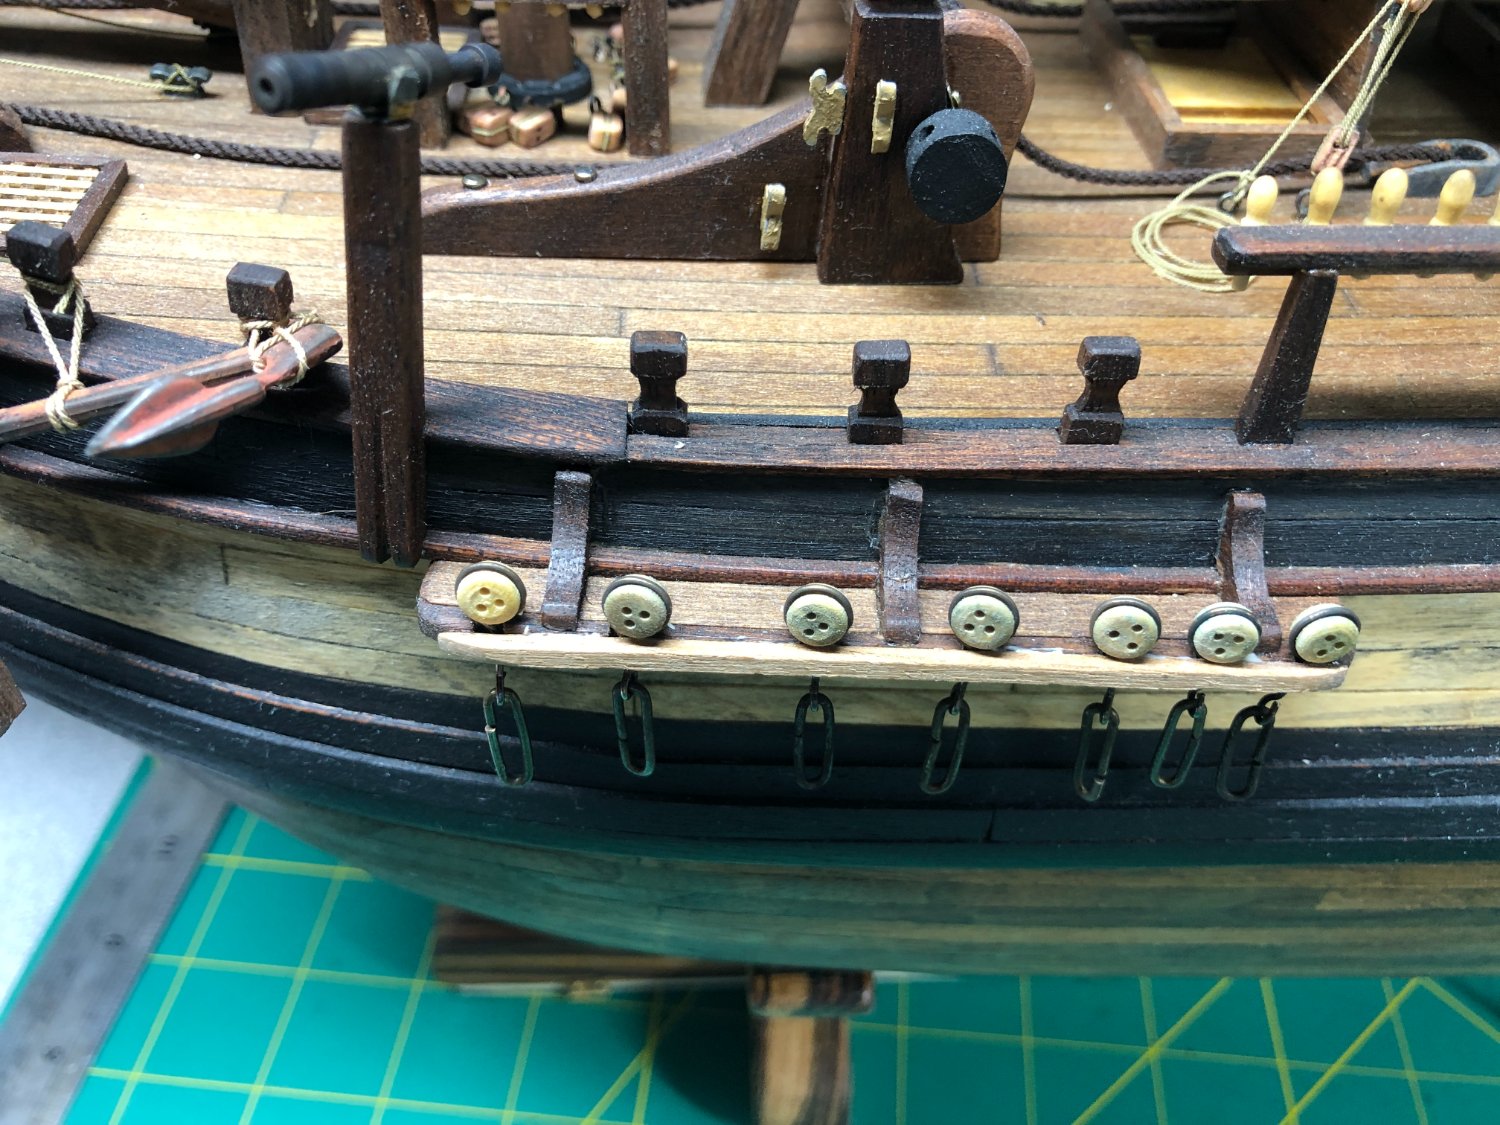
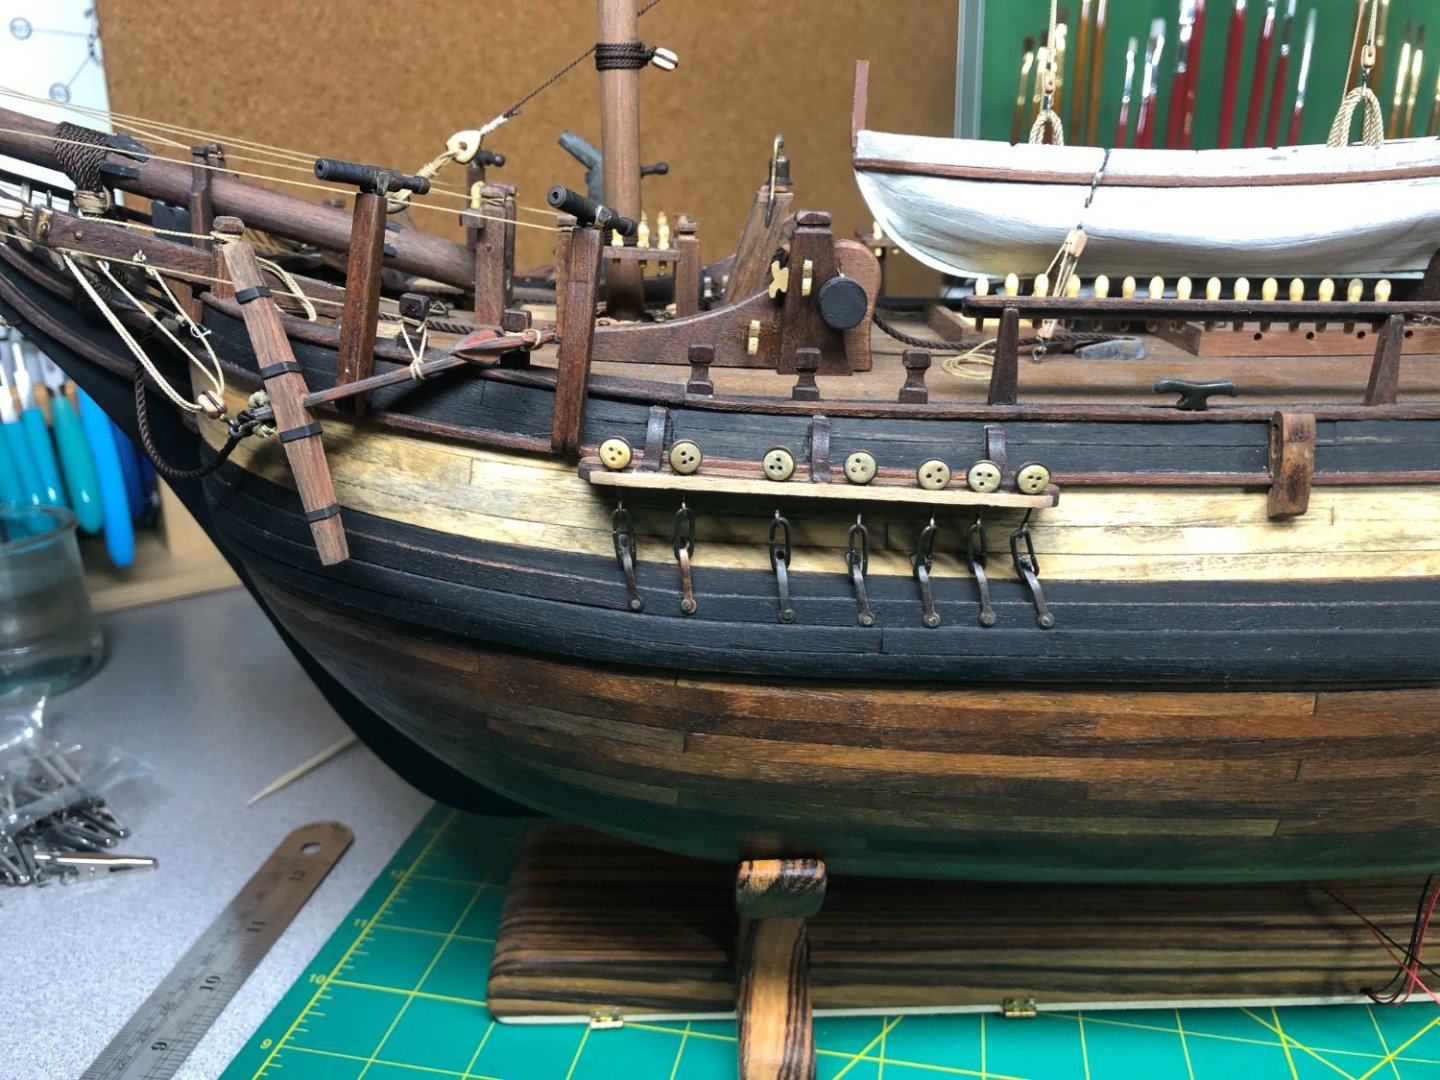
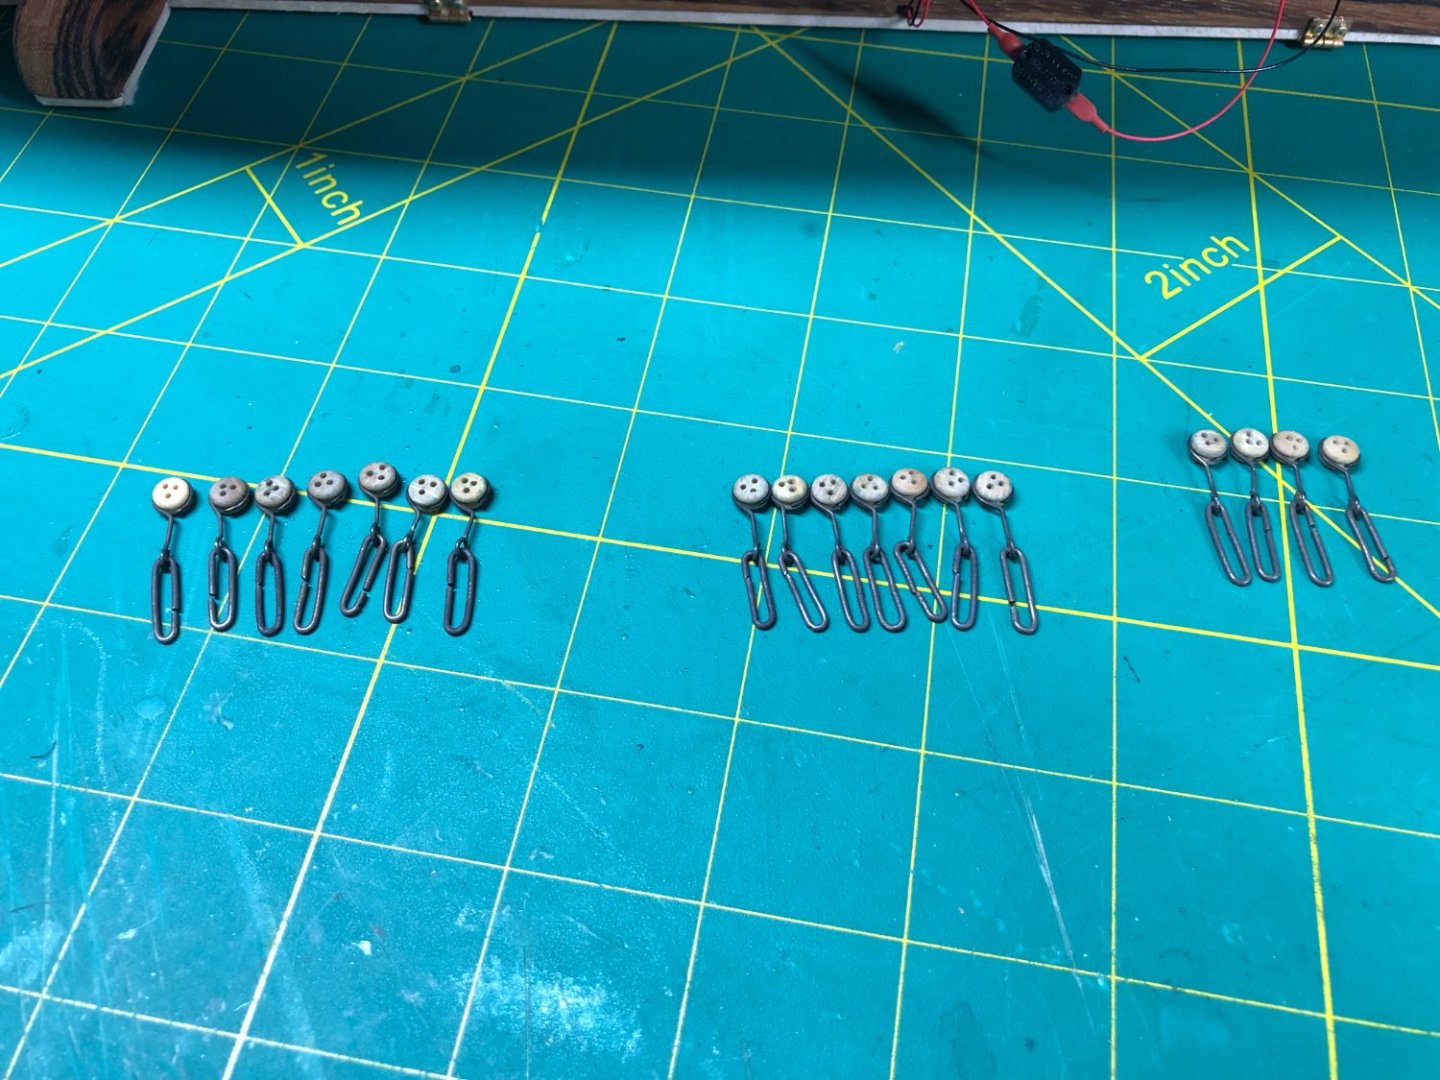
Two years have passed since I started the Bounty! I have approximately 970 hours into the build! I have started on the deadeyes and chain plates. On the open side of the ship, there will not be any chain plates and will only have the deadeye and attaching hardware. The other side is slightly different than the kit and most of the other models I've seen as I tried to replicate the "Anatomy drawings" to a degree. Hopefully, still keeping it period correct! I started by assembling the deadeyes: Once assembled, I blacken them for the weathered effect: I still need to darken the deadeyes but that will be done as a finishing touch much later on. The deadeye assemblies were added and the channel cover glued into place: Boiled linseed oil will be added to the covers once the glue is dry but in the interim, the first two chainplates are completed. Not an easy task and it took me a couple of hours to come up with a system that seems to work...so far! Hopefully, the remaining 16 will go a bit quicker! I've started serving some line for the first few shrouds and will begin to add those next. More to come soon.


-
Thanks Allan. Appreciate it.
-
Band Saw Recommendations
LyleK1 replied to ChrisLBren's topic in Modeling tools and Workshop Equipment
I have a Ricon 10-3061. It will cut up to 5-1/2 inches. I use it to mill wood for many things including for our hobby. It's small enough for a basement/garage but versatile enough to do a lot. Good luck in your search! -
I'm also a fan of shellac but to add to the conversation... I really like using boiled linseed oil too. It easy to apply, fairly fast drying and a satin finish. Plus, I've put acrylics over and under it!
-
There are a couple of ways to get notifications… if you start a topic, you should get notified of responses automatically. In other posts there is a button at the top right side of the post that states “follow”. The button gives options of the type of notification you can receive. Adding photos is easy too. Whfn adding a post there is an area at the bottom to drag and drop your photos! Good luck and welcome!
-
Planking improvement
LyleK1 replied to Picard's topic in Building, Framing, Planking and plating a ships hull and deck
I might also suggest the half hull project from NRG's store. It's inexpensive and is a great teaching tool specifically geared toward planking. Having said all of that, as others have expressed, it's a learning experience and I've found you get better with time and experience. I think the work you've shown is decent! Keep after it! -
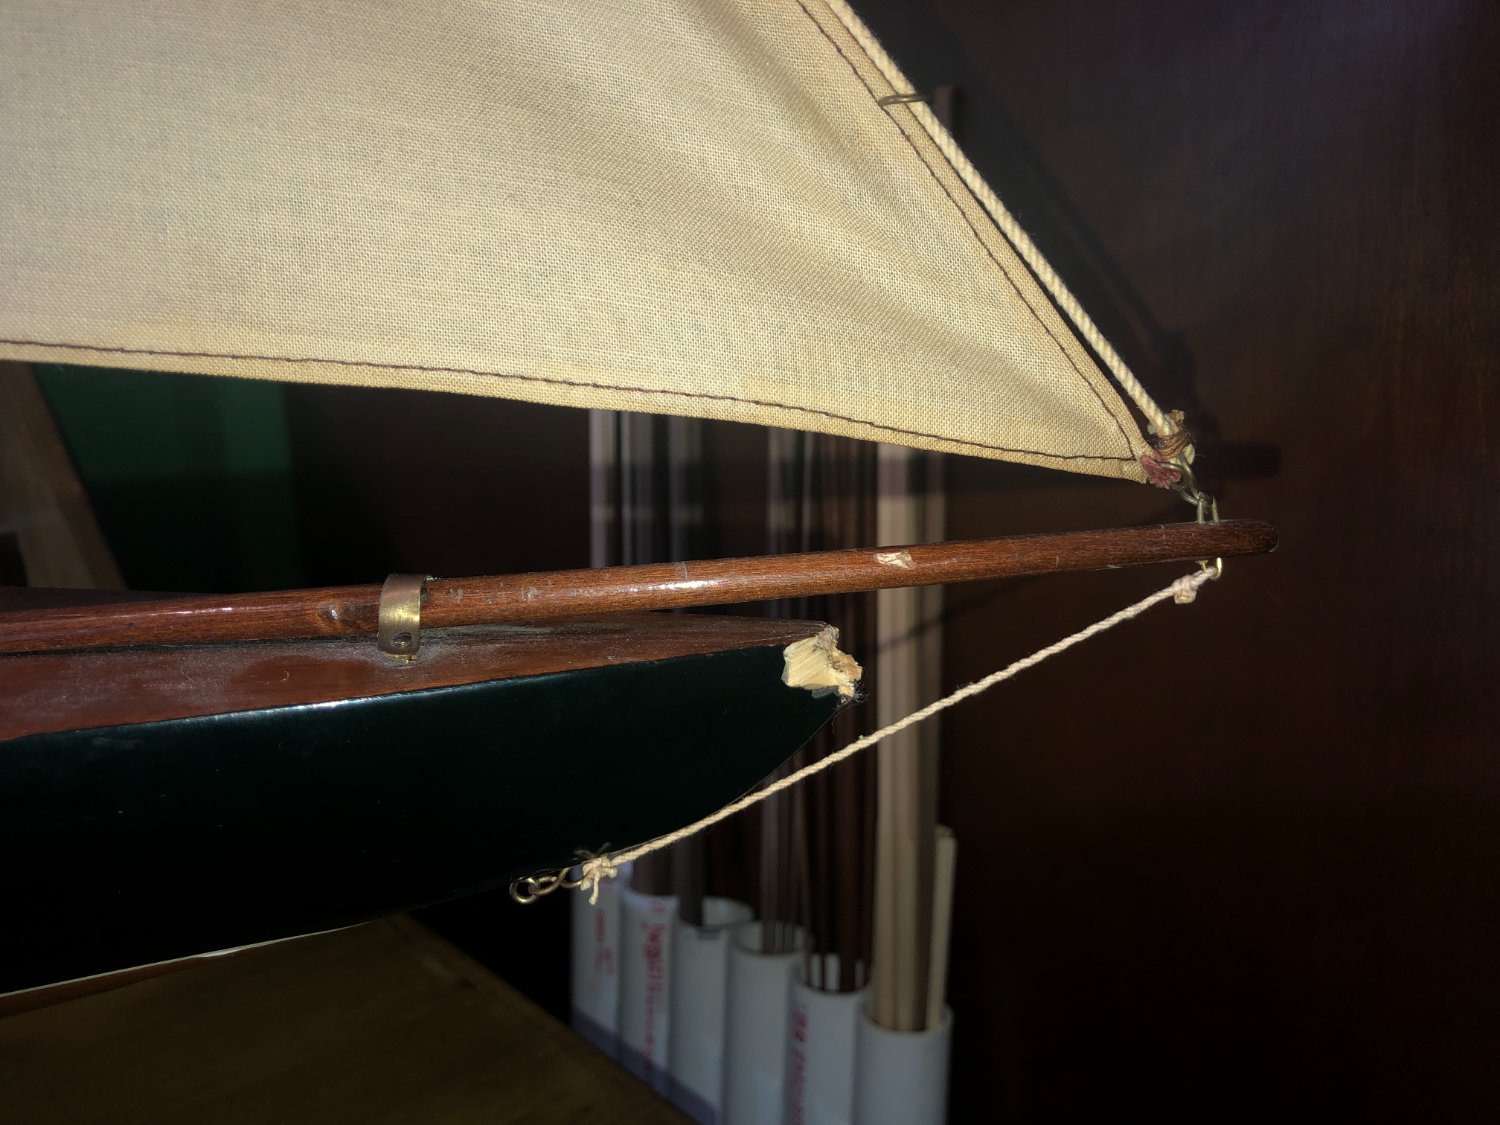
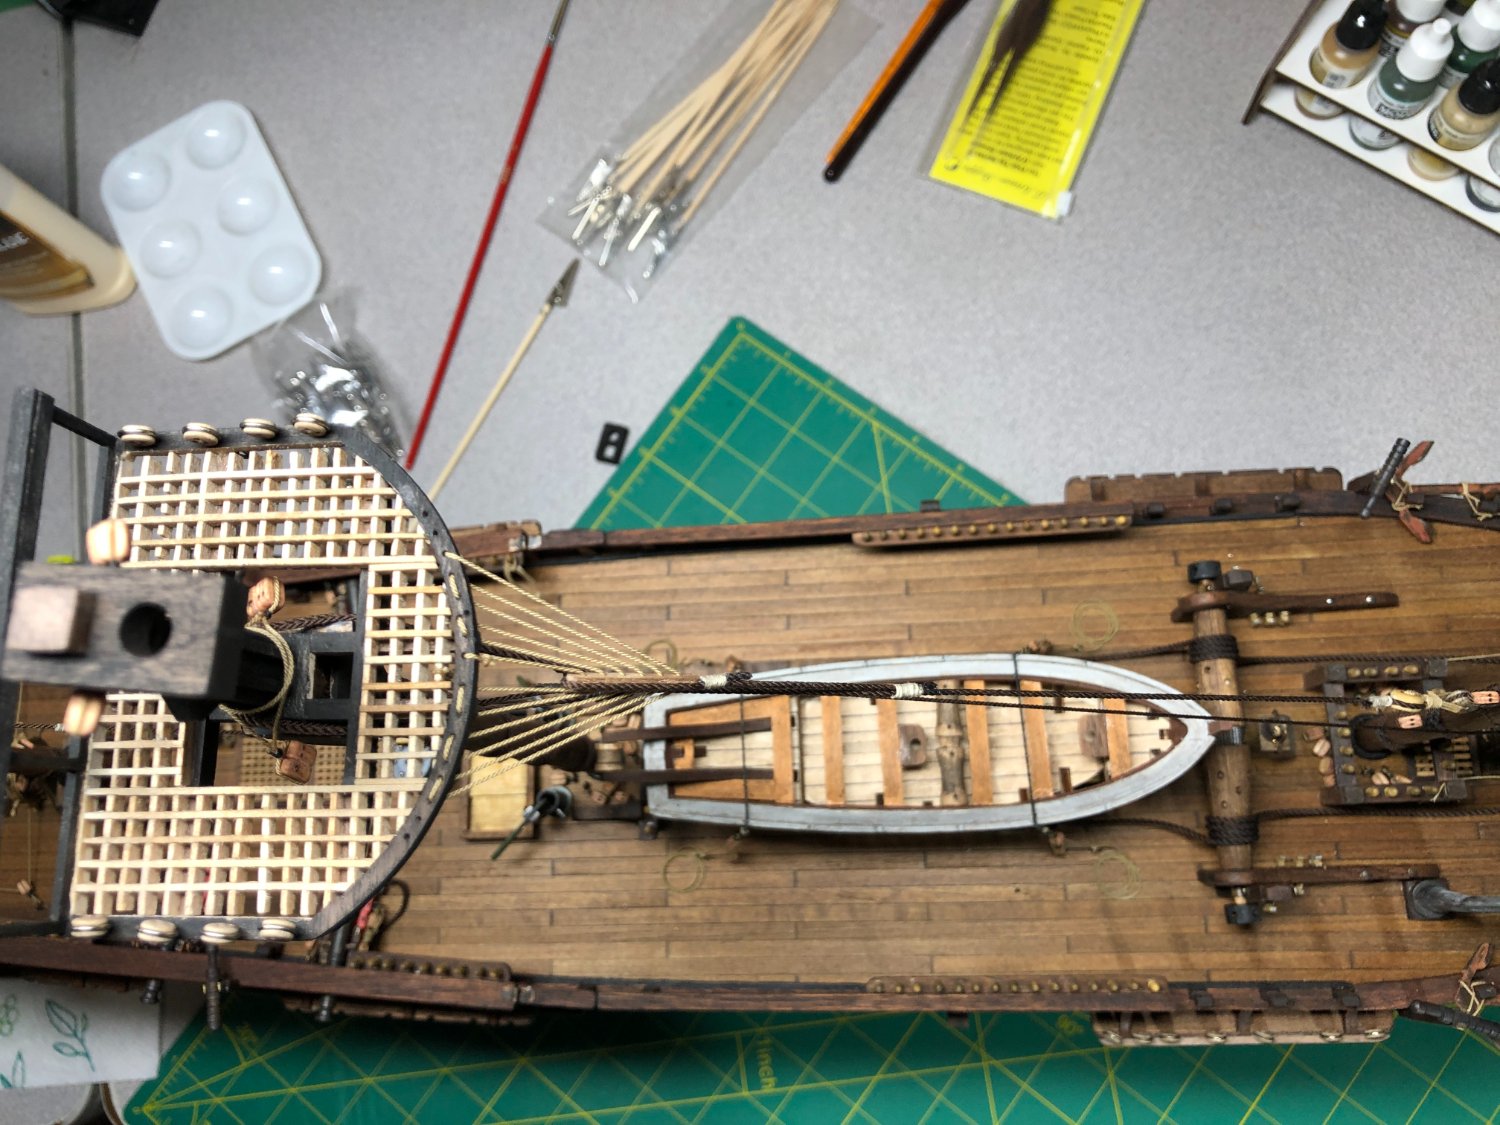
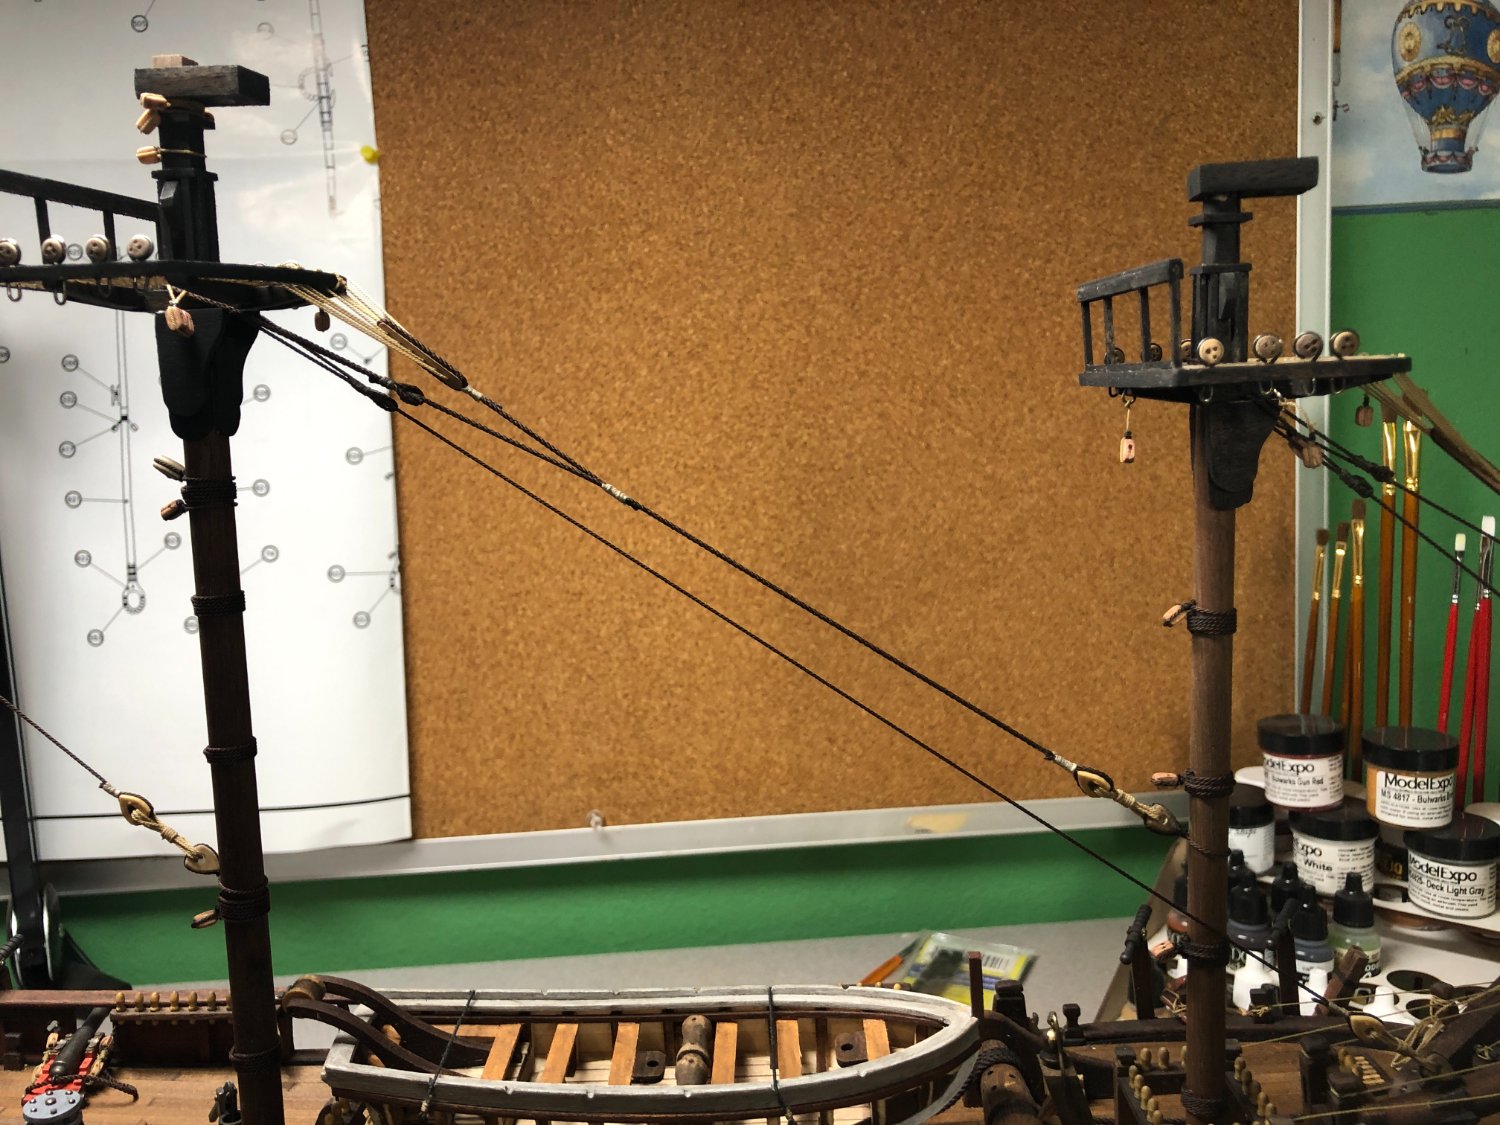
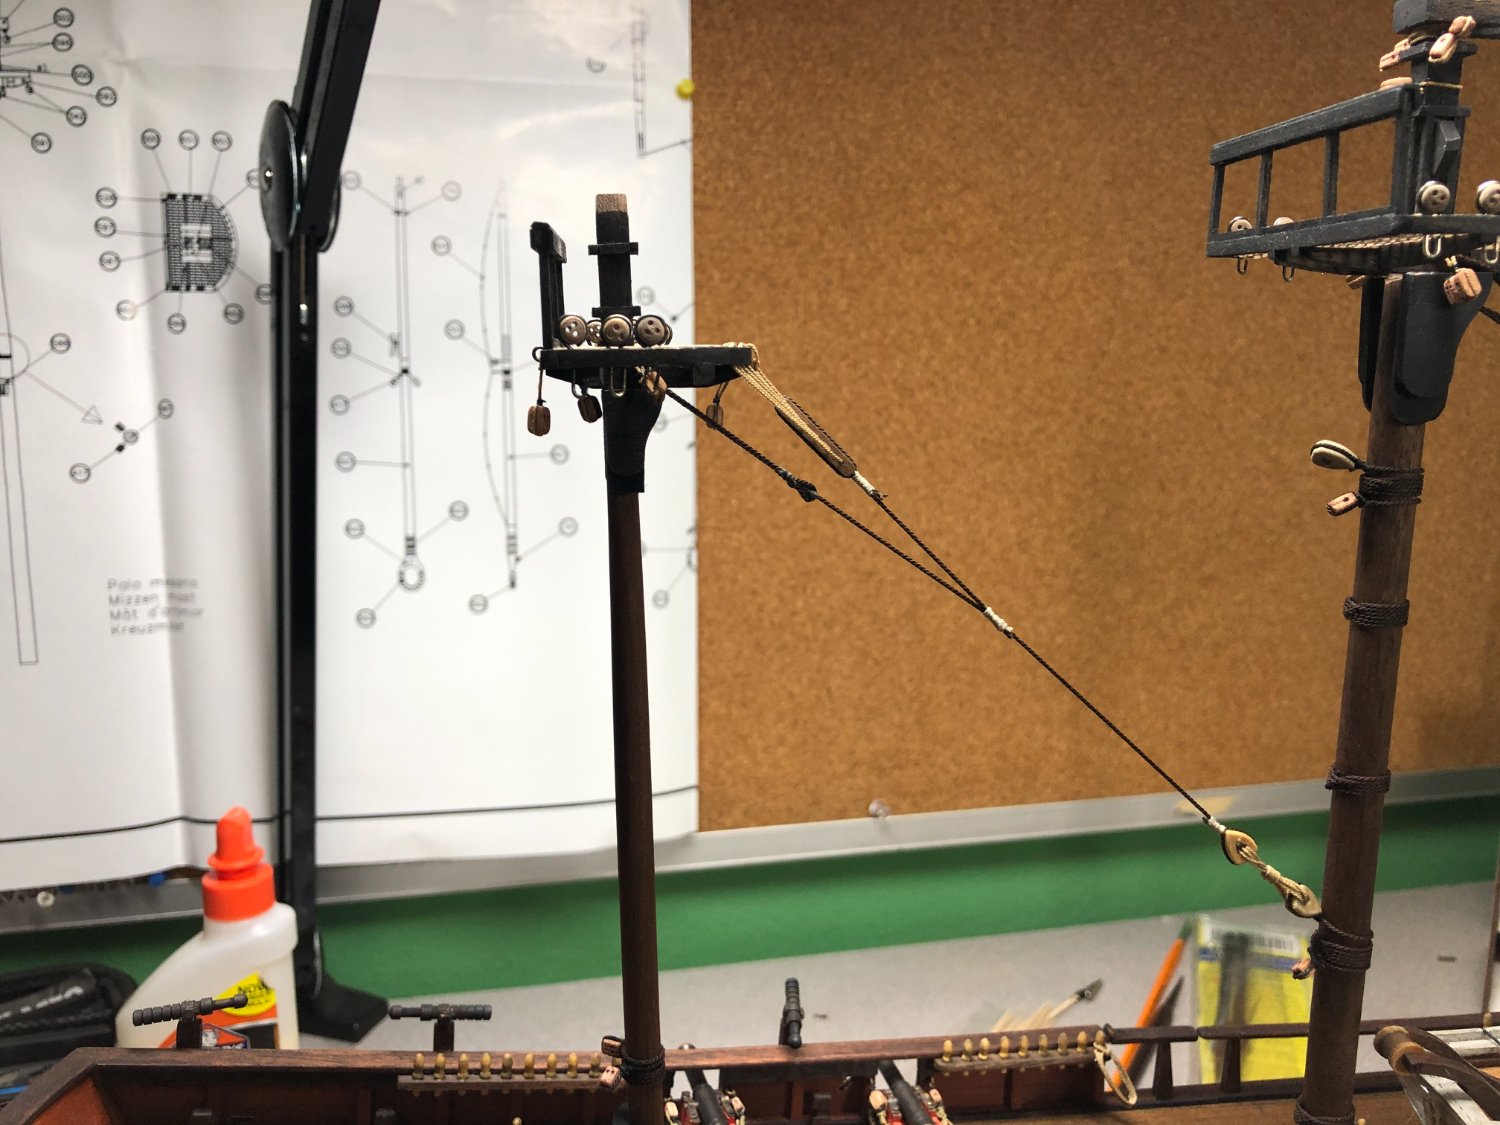
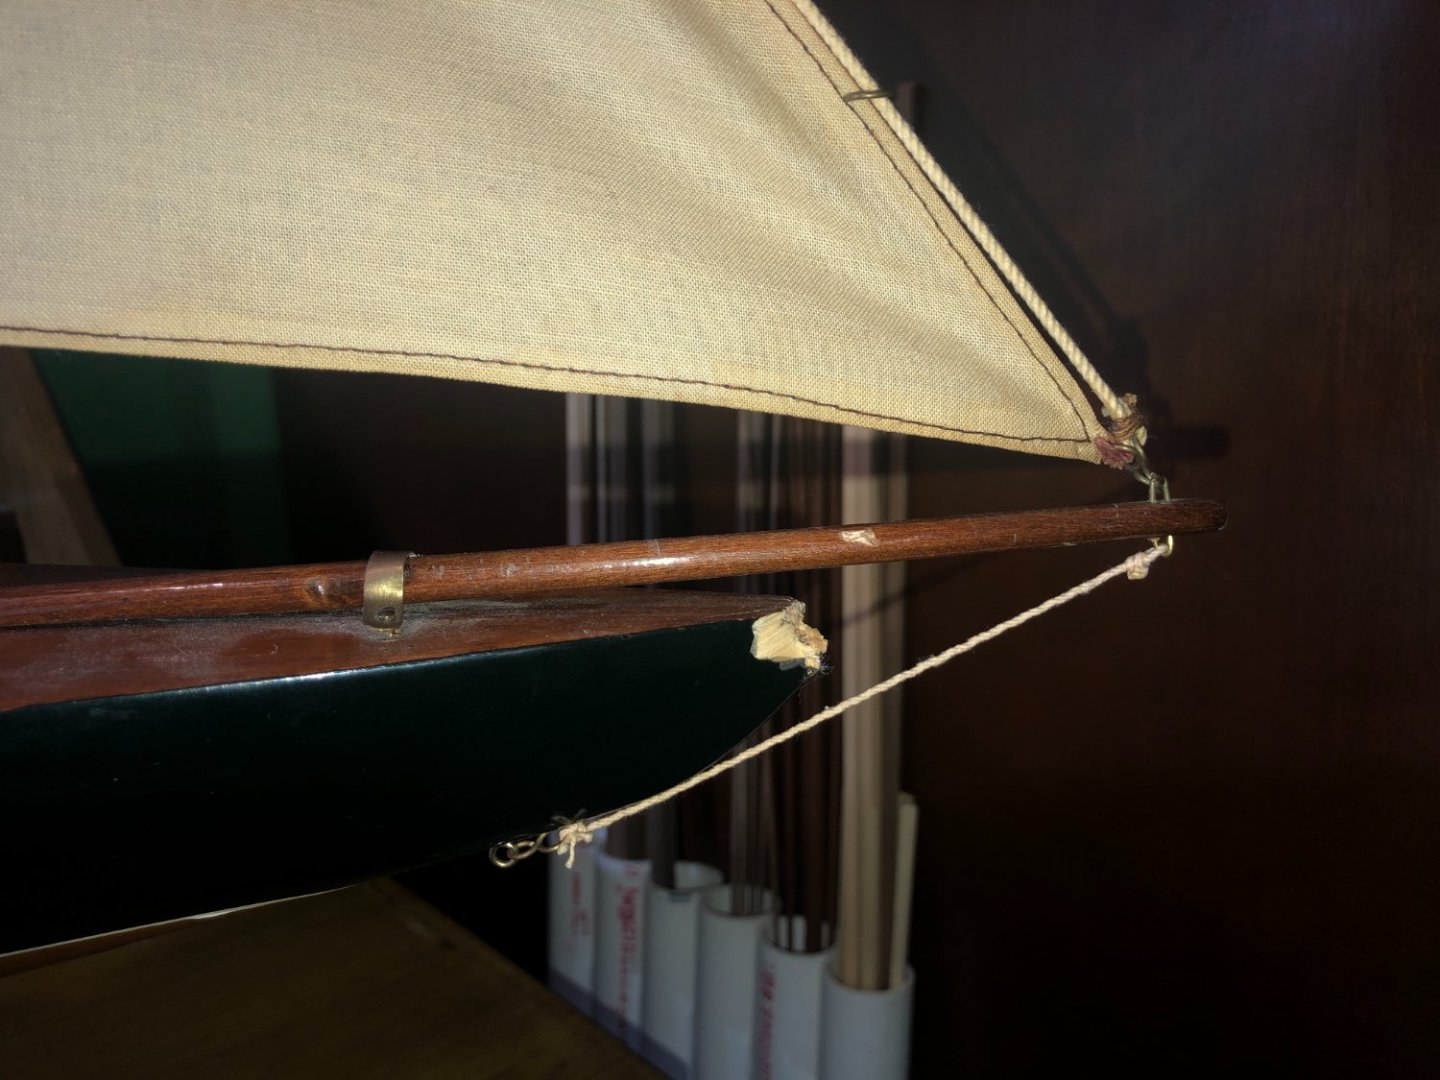
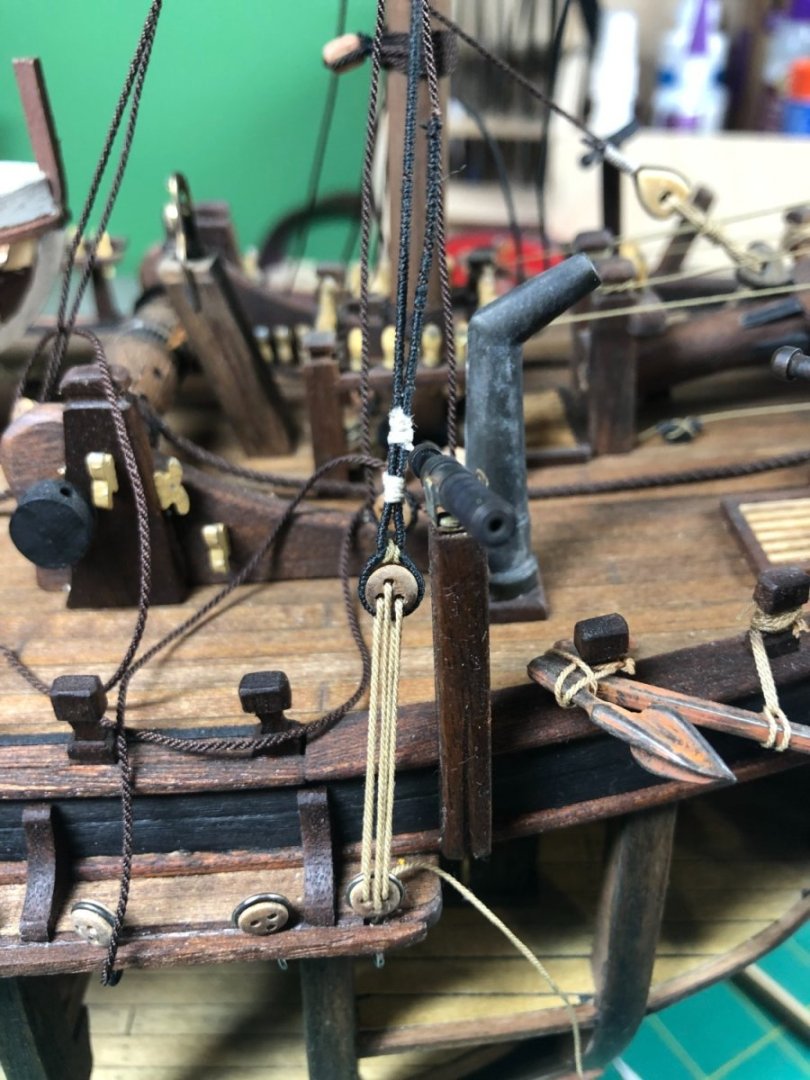
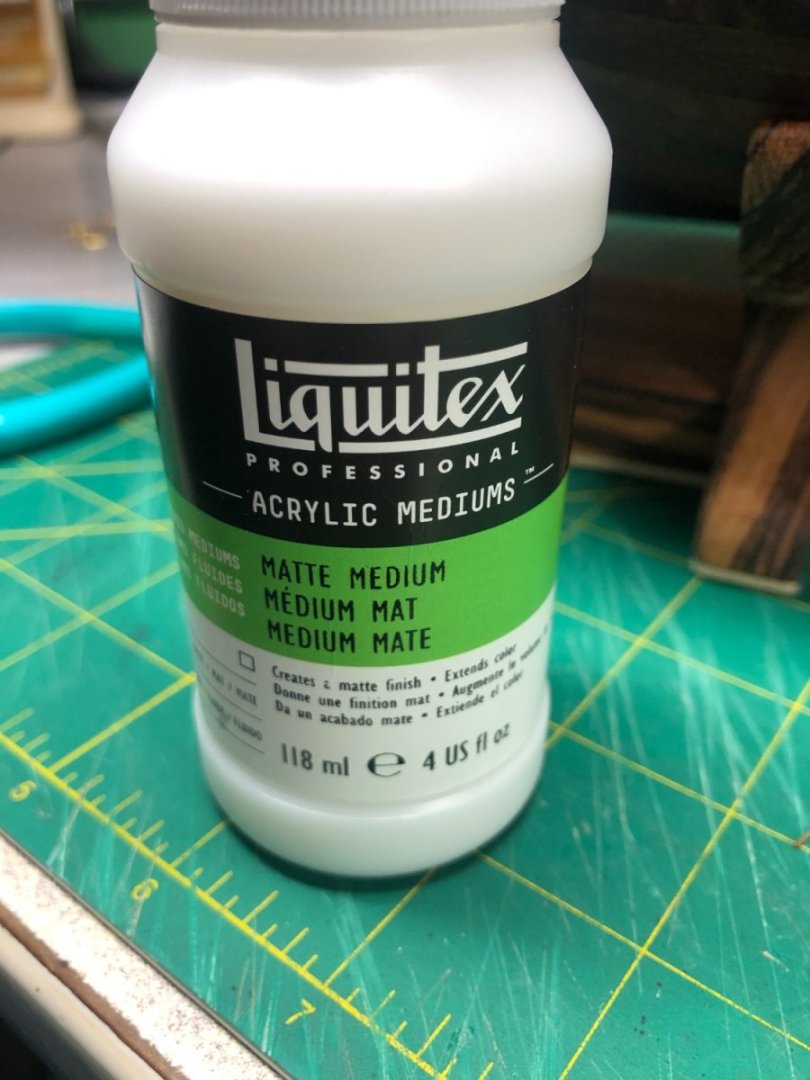
The main stays and the mizzen stays are completed: A while back in my log, I mentioned experimenting with different methods of ensuring knots stay tied... I have been using a Liquitex product (see picture). It goes on white but dries clear and I have not noticed any signs of it once dried. Here is the product: I have to add a couple of blocks on the main stay for lifting the boats and then it's off to installing more deadeyes and the shrouds.


-
Wrong! The crowsfeet are on the drawings in the Anatomy book. They are not on the other drawings I have... I stand corrected!


.JPG.7661ecc4cc3c4a07783474555c9e62fc.JPG)