LyleK1
-
Posts
541 -
Joined
-
Last visited
Content Type
Profiles
Forums
Gallery
Events
Everything posted by LyleK1
-
 I certainly wasn't trying to make anyone envious! I'm always learning, just like you! Thanks for the kind comment, though.
 -
Good luck with the build. Although I am not building the Caldercraft version of the Bounty, I am building the another version. Feel free to stop by for a look! I'll be watching along as you go.
-
Rope making attempts - Feedback requested
LyleK1 replied to Moonbug's topic in Masting, rigging and sails
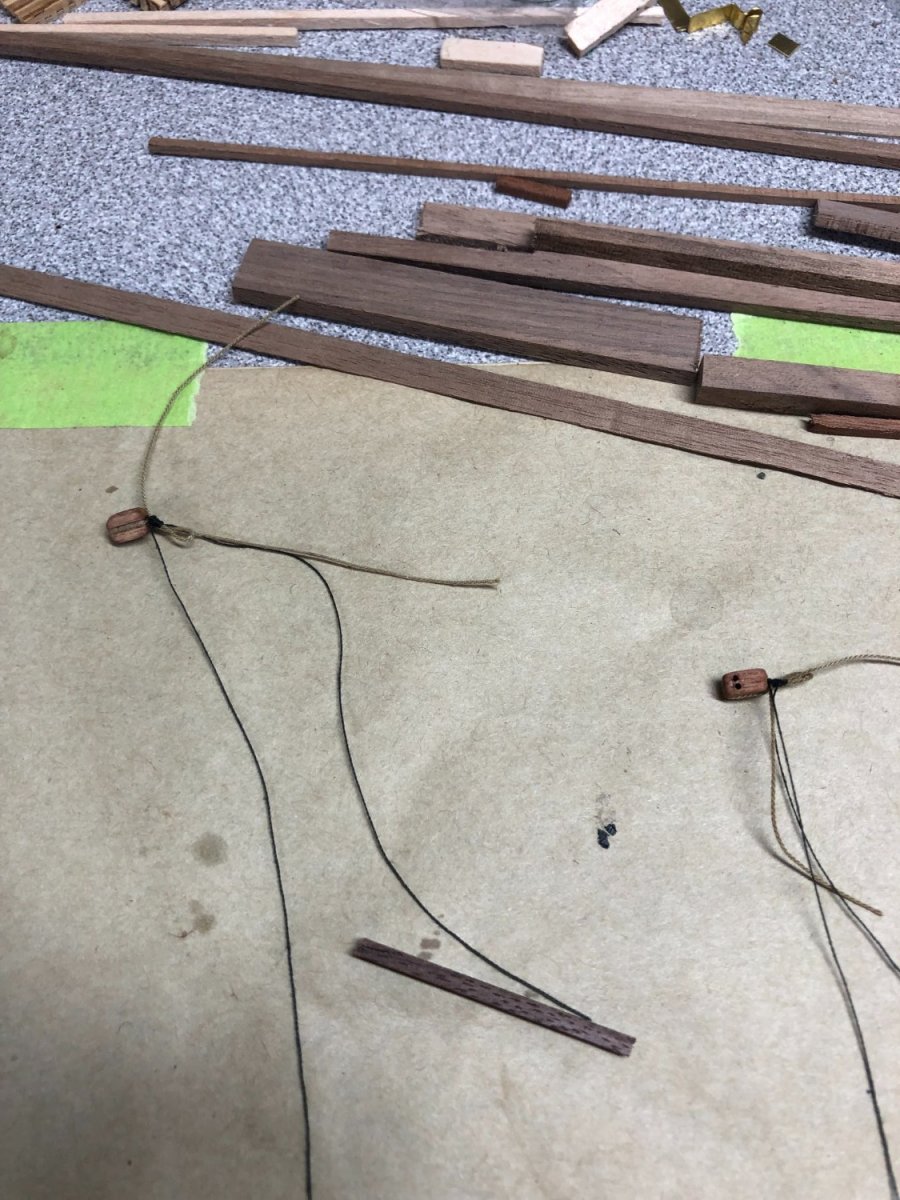
Looks great! Nice job. I'm about to do about 1000' of 4 different sizes of rope for my Bounty build! That'll take some time! -
One channel done: Thoughts?

-
Following up:
-
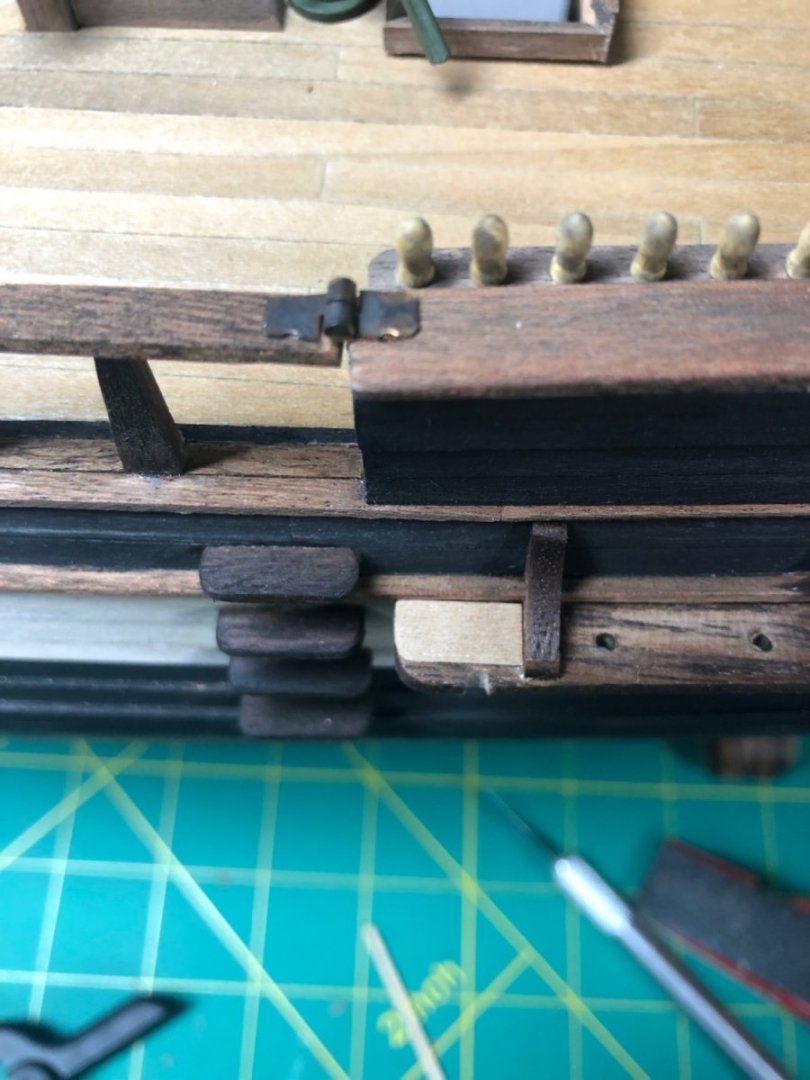
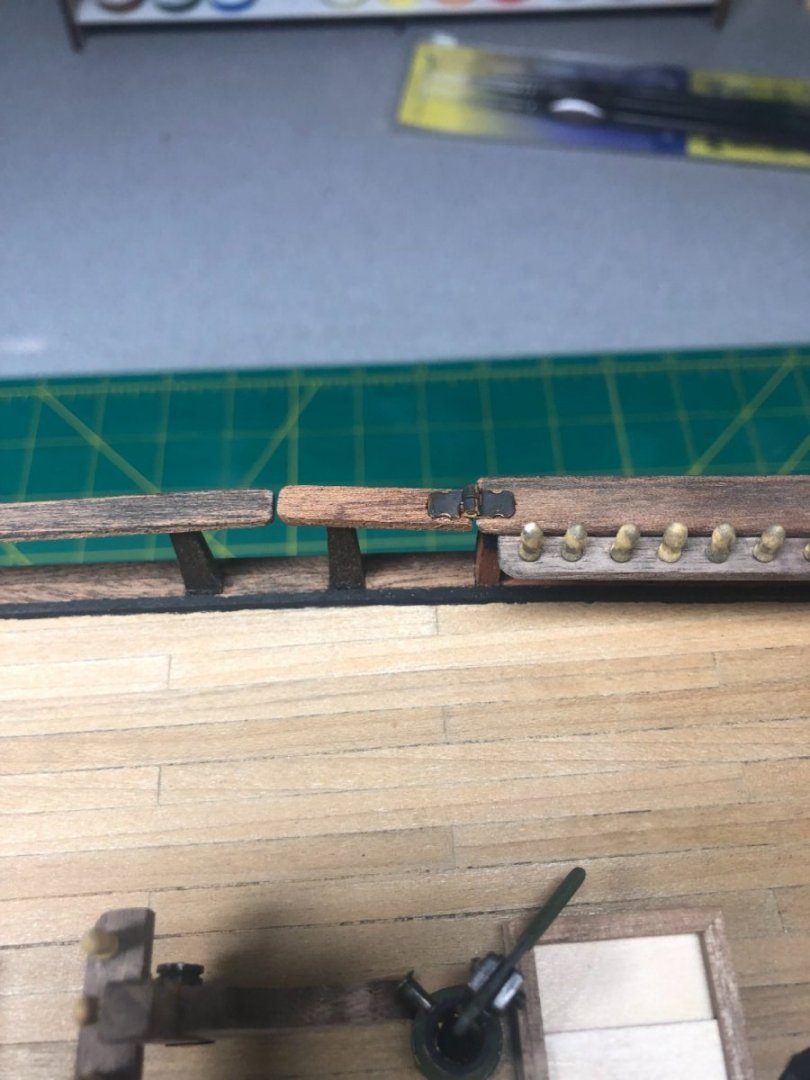
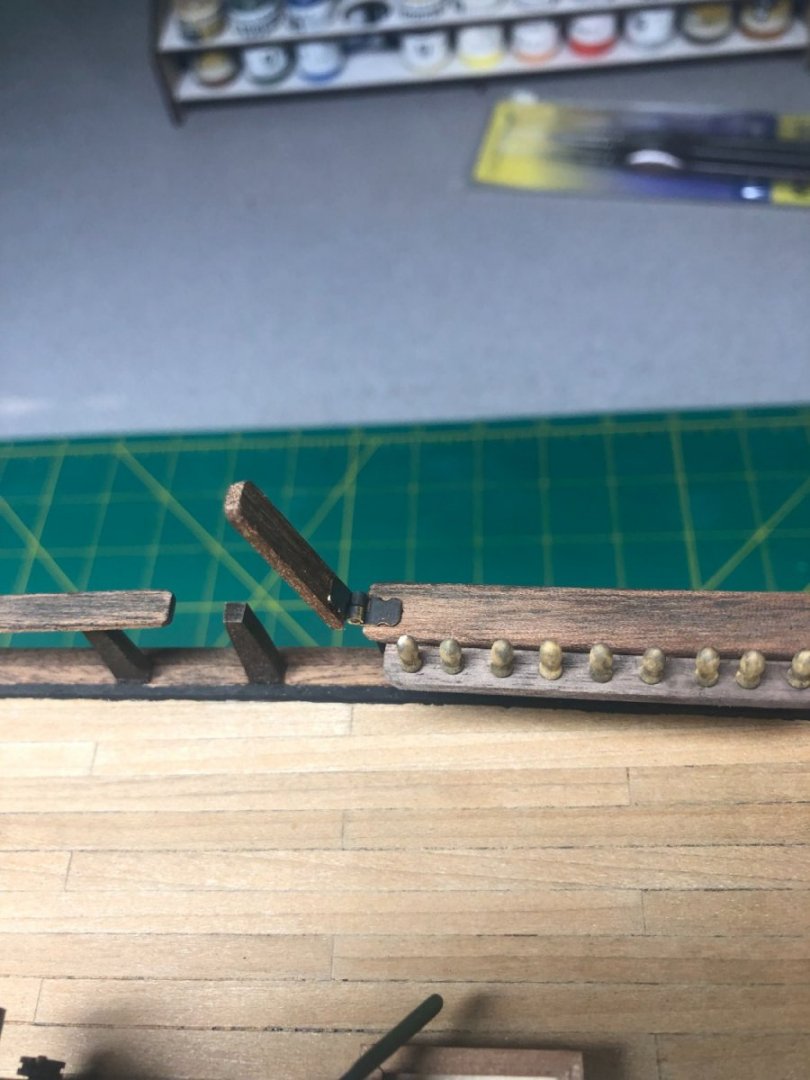
I kinda sorta made them… I have some really small hinges from another project. I cut them down and used them.
-
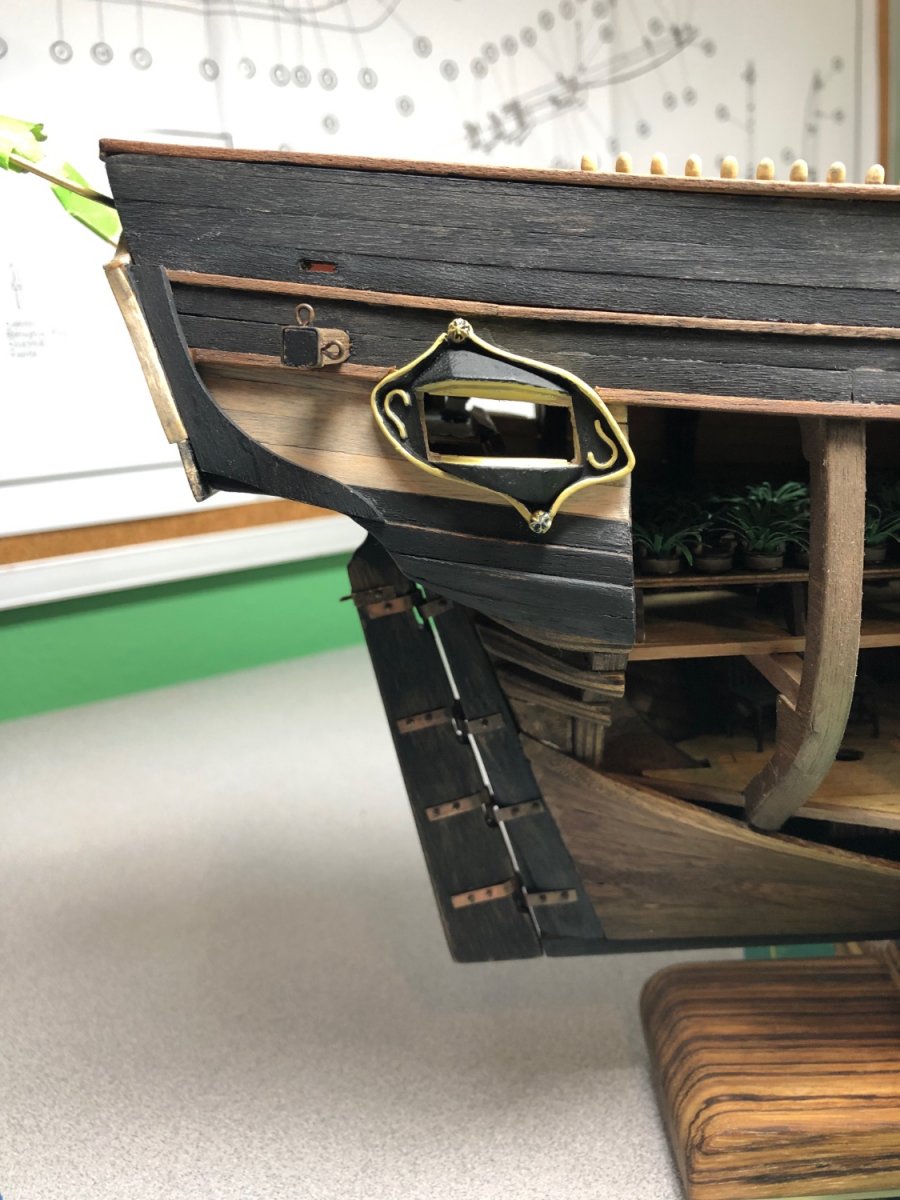
Agreed… disappointing but not surprising. Of course, my own lack of knowledge on period changes and the accepted norms (like the gratings you pointed out earlier) is not helping but I enjoy learning… not necessarily fixing though!! Here is the direction I’m going in: Still working on the slot but it’s close. The veneer will be fine once glued down and stained. Lots of extra work but I think it will work. Thoughts?
-
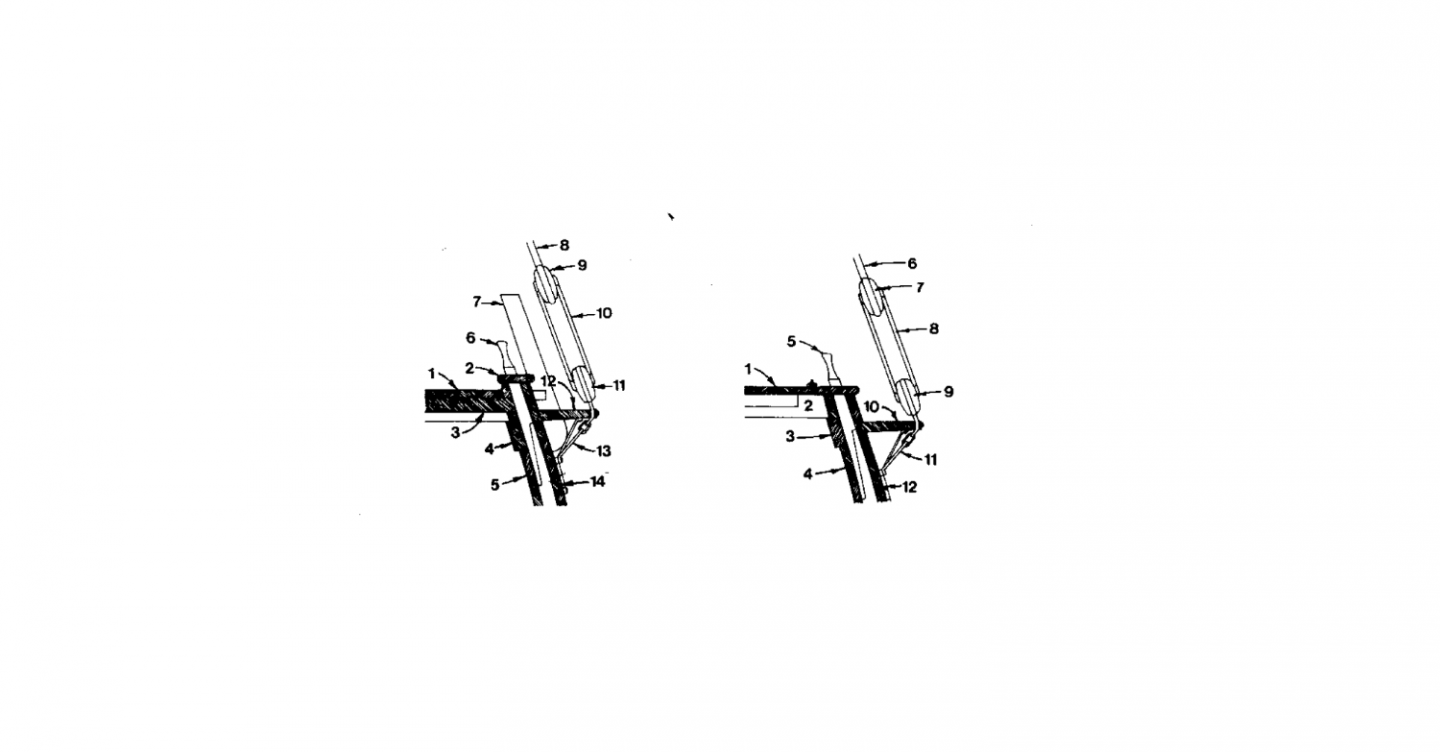
After reading your post and a message from another Bounty builder (Tim M.), I decided to rip through some of the plans, the Anatomy book and the kit plans. I also researched your stated dates and found it to be accurate enough (actually, I found the change to have occurred in 1771 but that's splitting hairs!) It is widely thought that Bethia's keel was laid in 1783, well after the above stated date. Obviously, I followed the kits plans without researching this particular part as I was not aware of this change. In the Anatomy book there are several drawings of the channels. Although there is no breakdown of the channel itself, there is clearly some differences: The "slots" appear to be very close to the outer edge of the channel and as you can see, there is no mention of a trim piece or whatever it may be called. I have to think there were slots and a covering piece. I am going to look over the chains and deadeye linkage to see what needs to be done for a proper fit. I really hate to redo these pieces but I might find a way to modify them while still attached to the model. The holes a bit too far back to file into slots... what I am considering is cutting the slots into the outer edge of the existing channels and cover it when the deadeye work is done. That leaves me with the holes...! I may consider a cover of some sort, I have some veneer that I might be able to fashion into a cover that will be virtually unnoticeable or I may just redo the pieces. They were a pain in the butt... I'll post my solution once I figure it out. Thanks for the info.
-
Agreed... I read somewhere that Bligh had her updated to a more colorful scheme when they were in Tahiti. What that means...? I have no clue! Since my version is depicted with Breadfruit plants, one must assume that the Bounty has been or is, in Tahiti. ... still don't know what I'm gonna do!
-
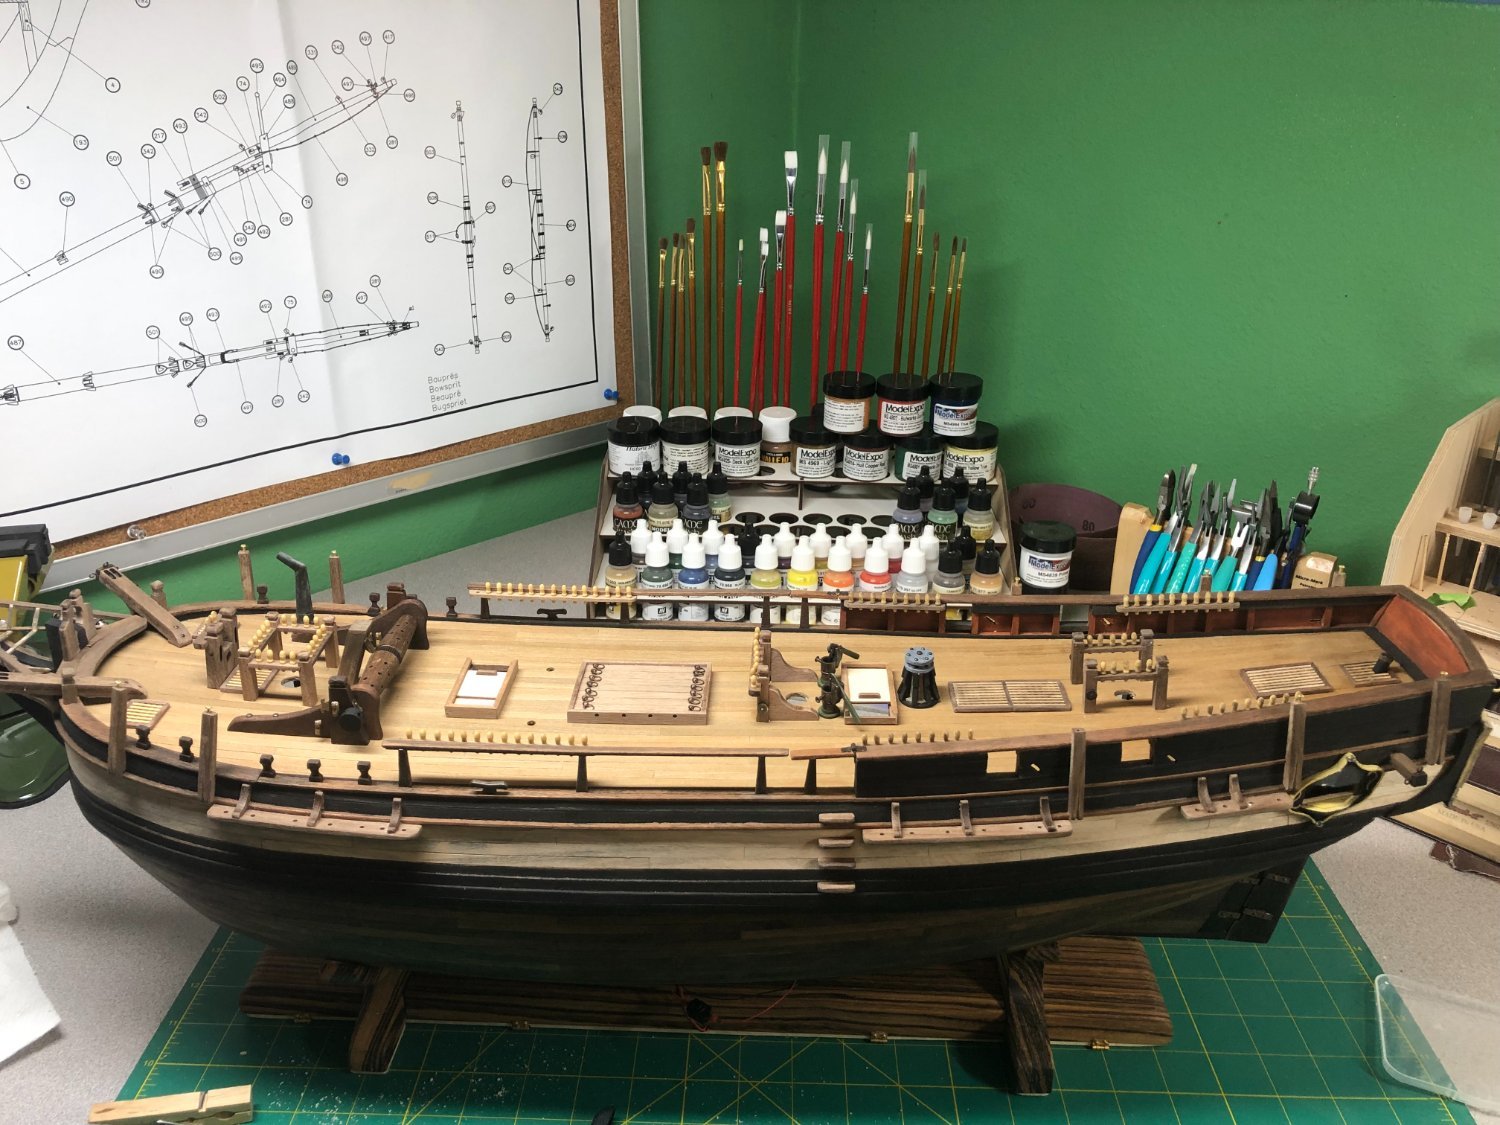
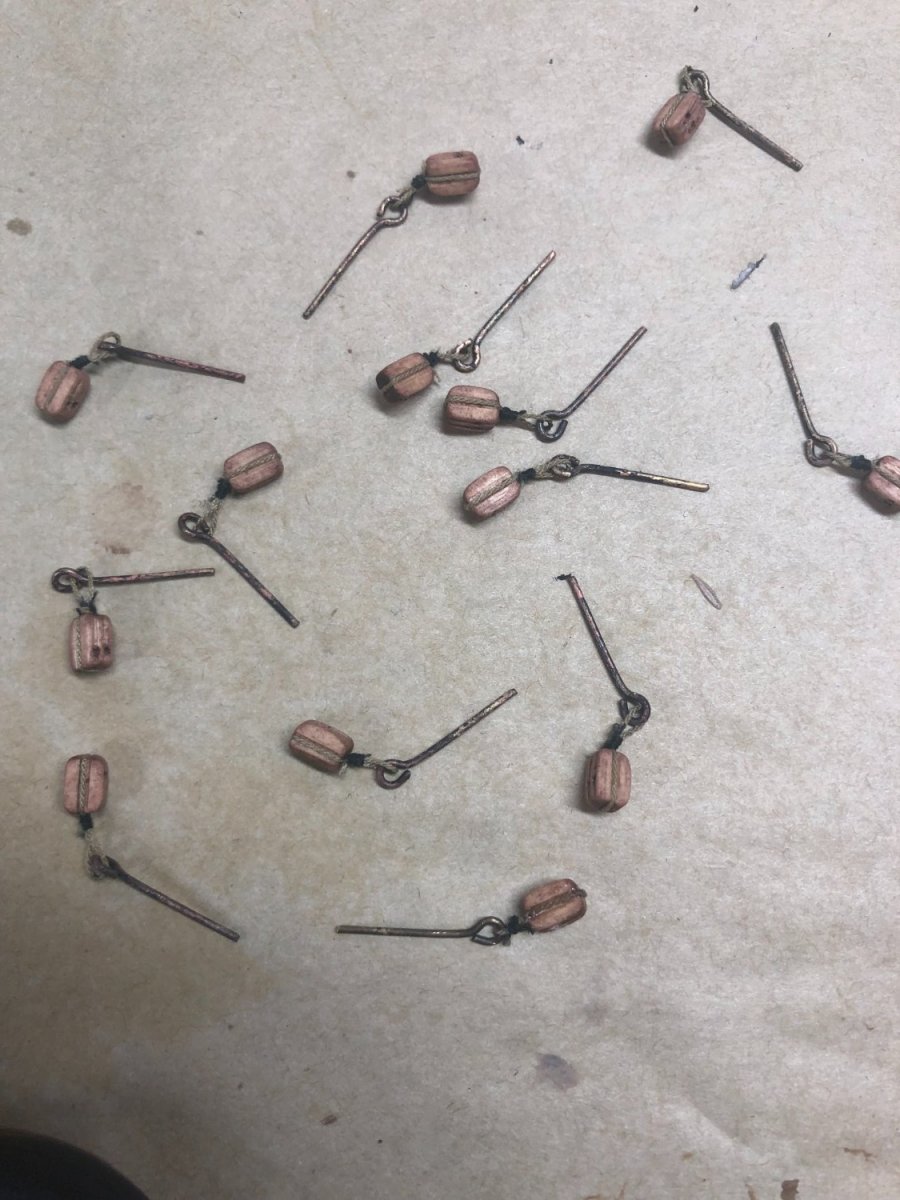
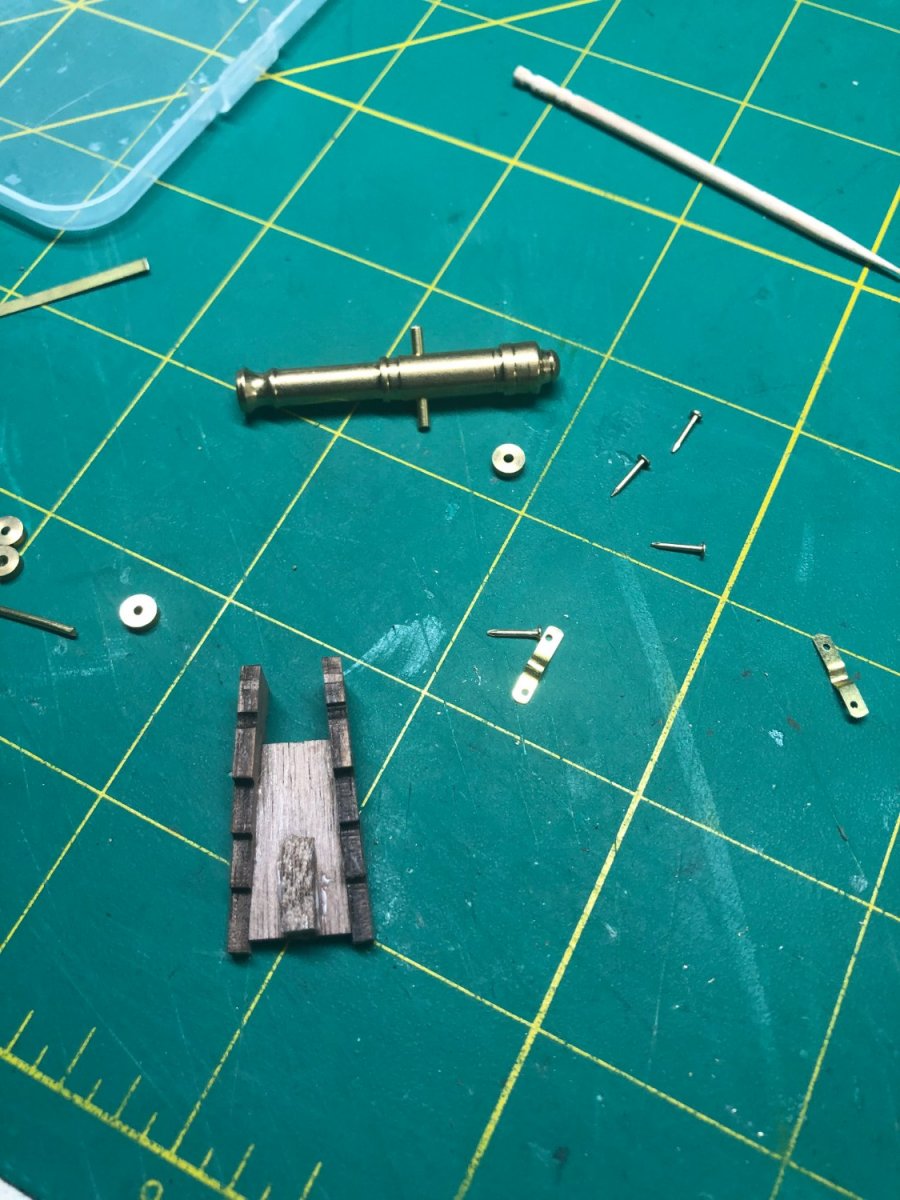
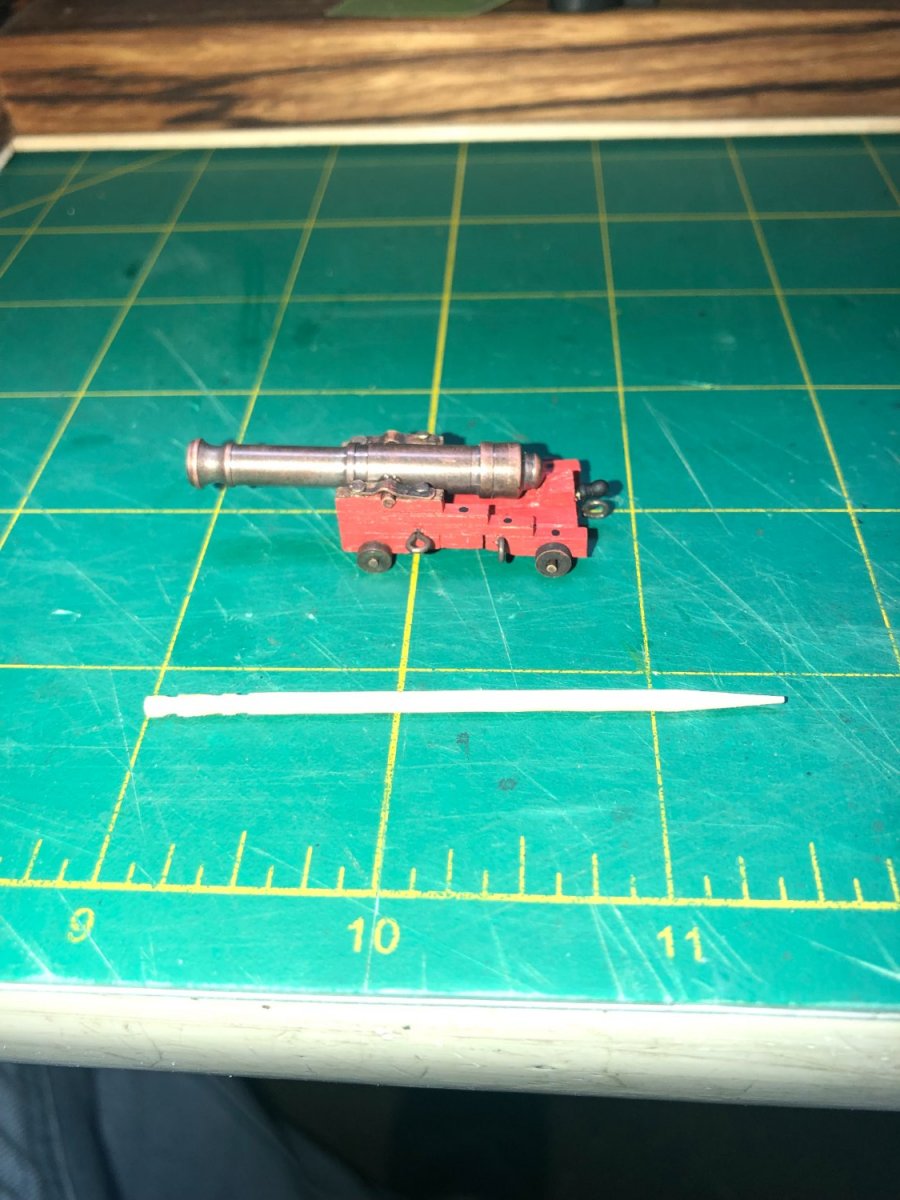
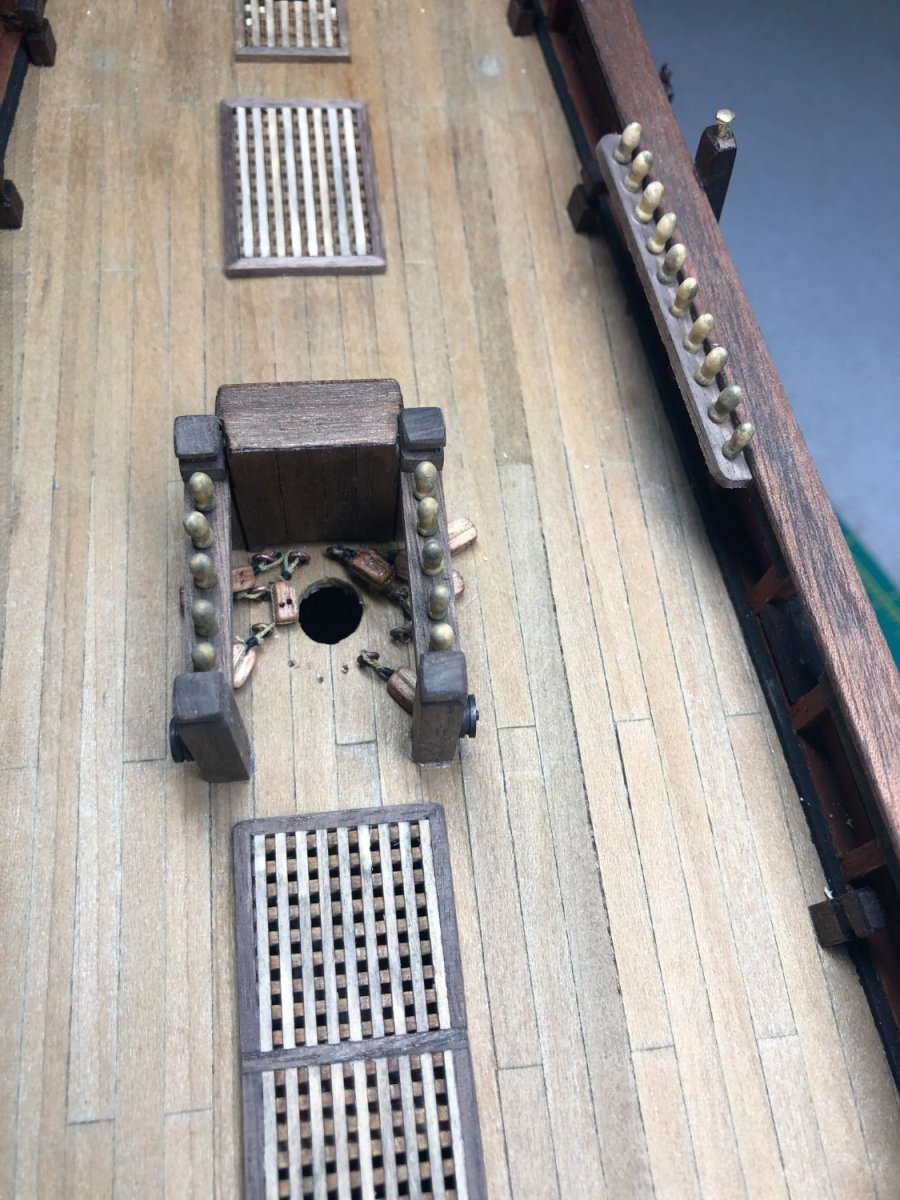
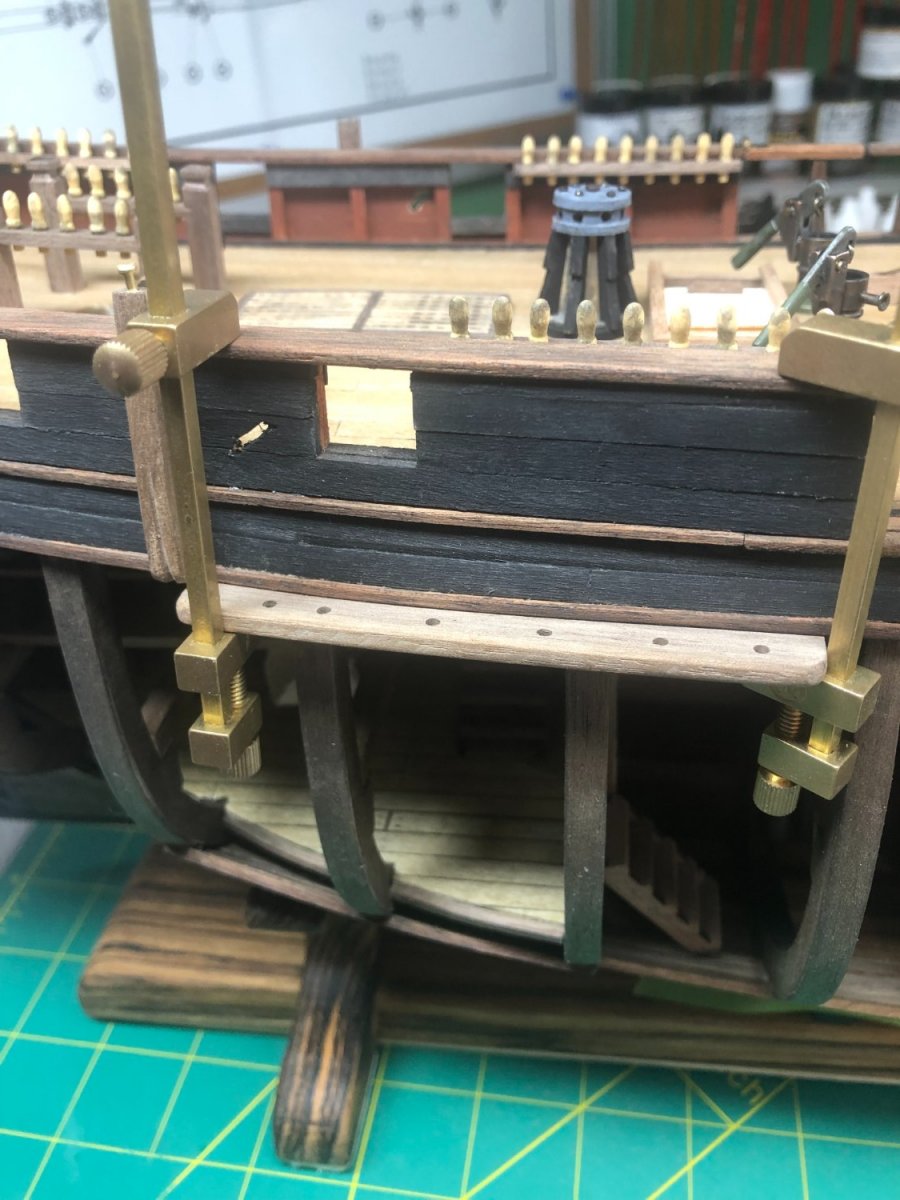
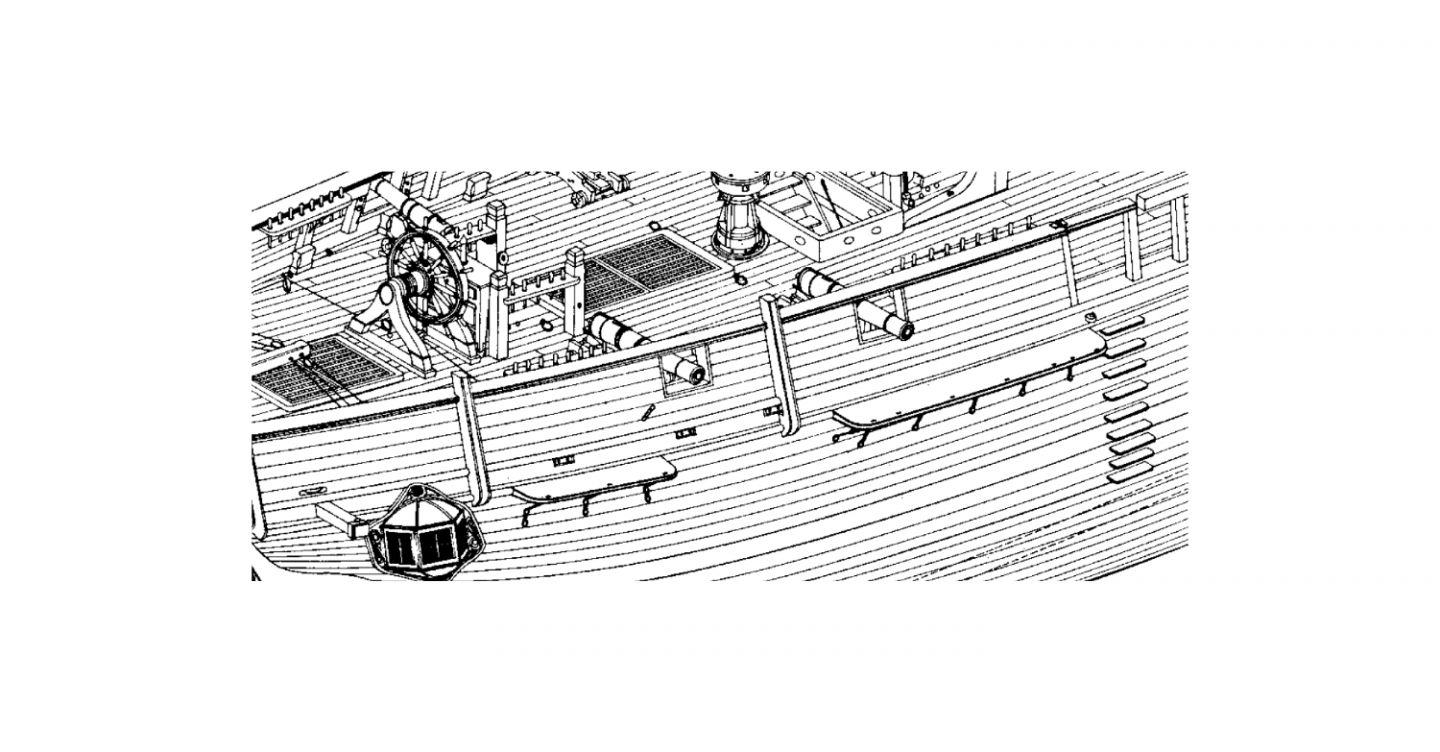
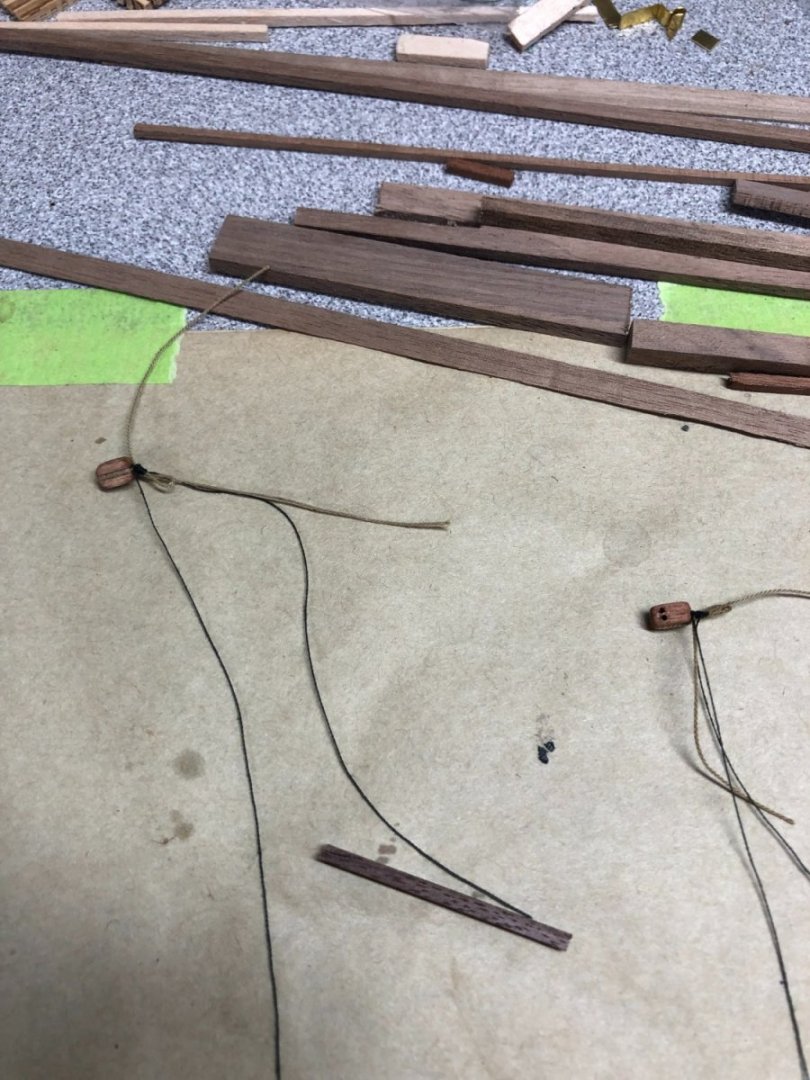
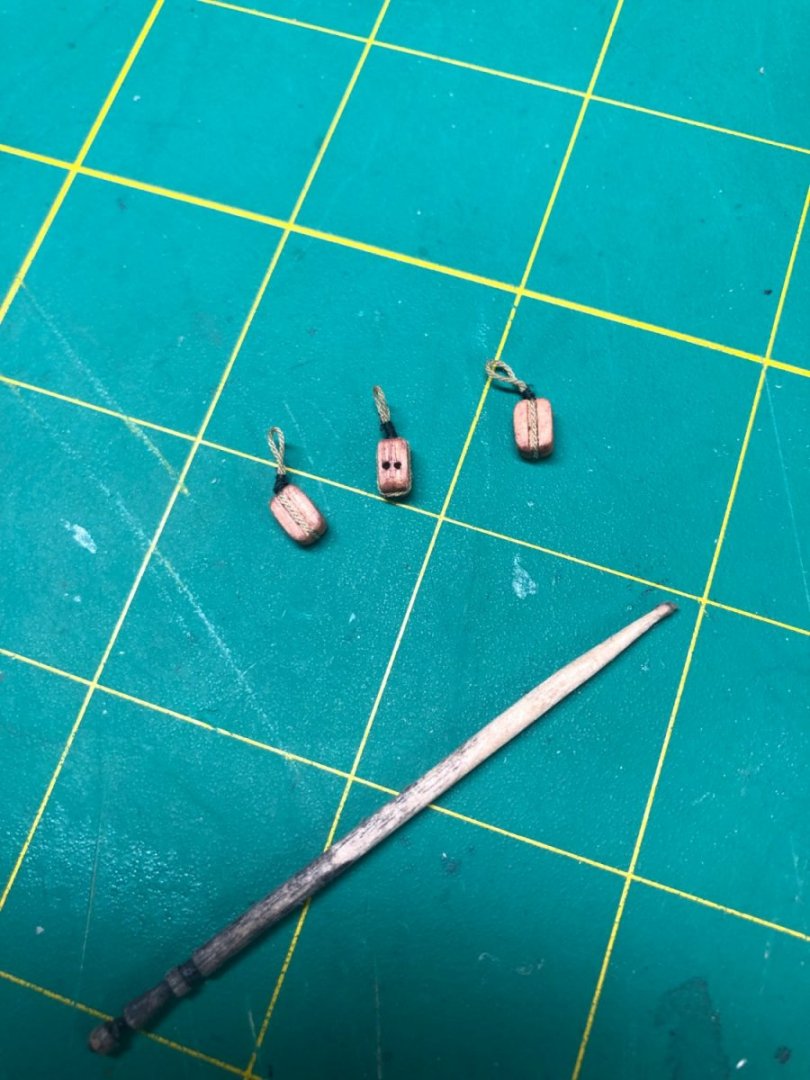
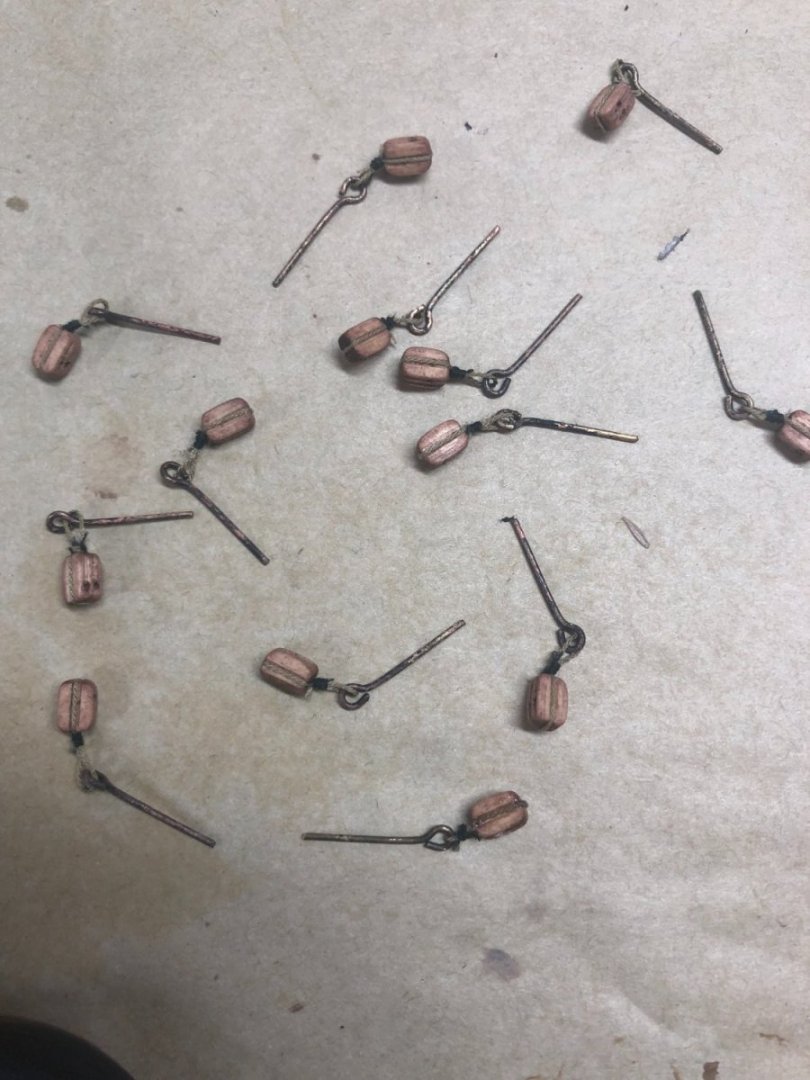
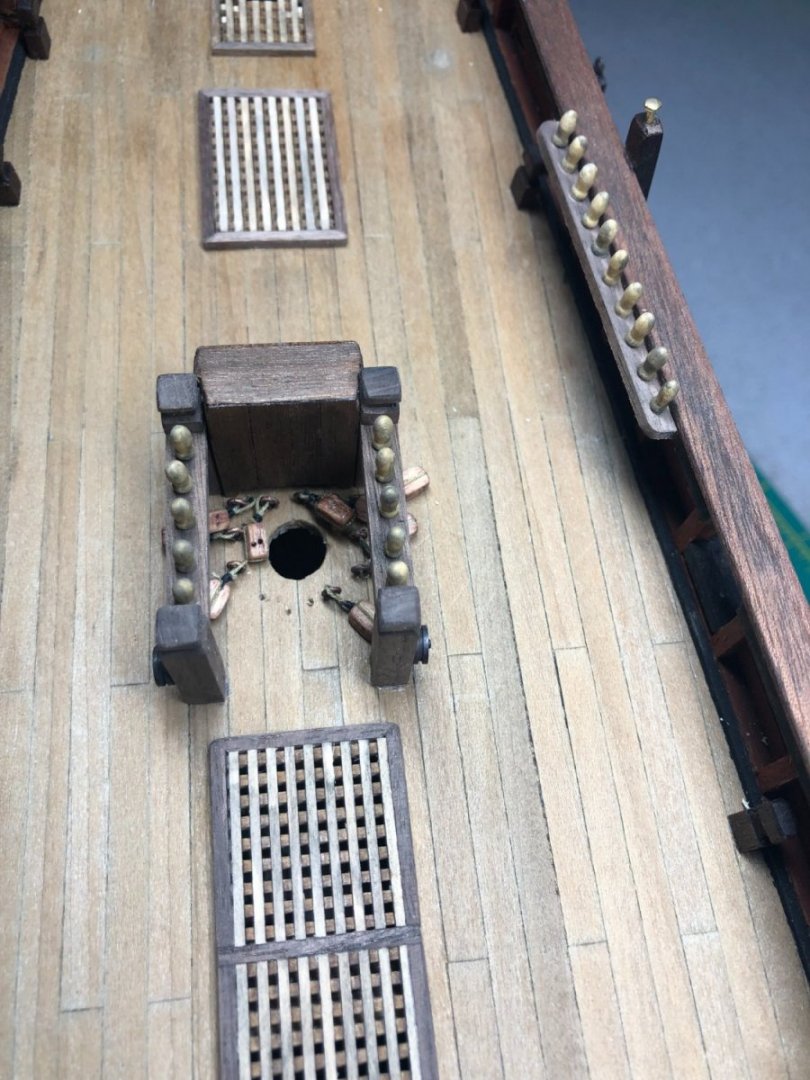
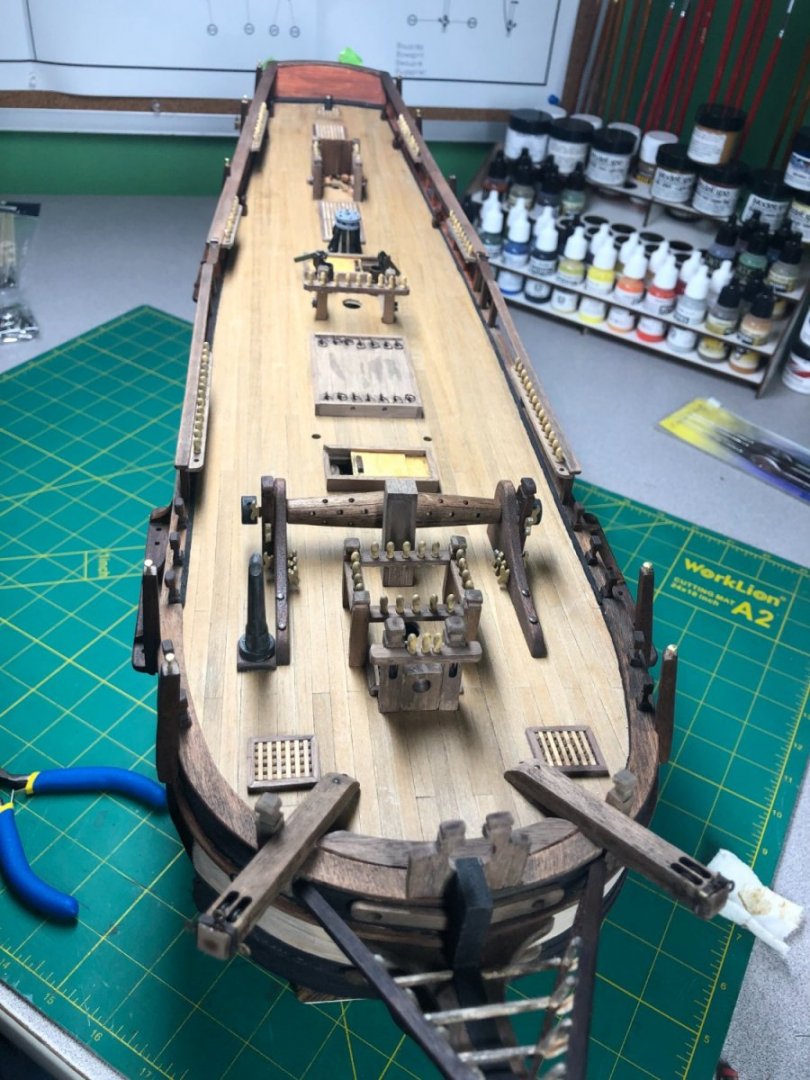
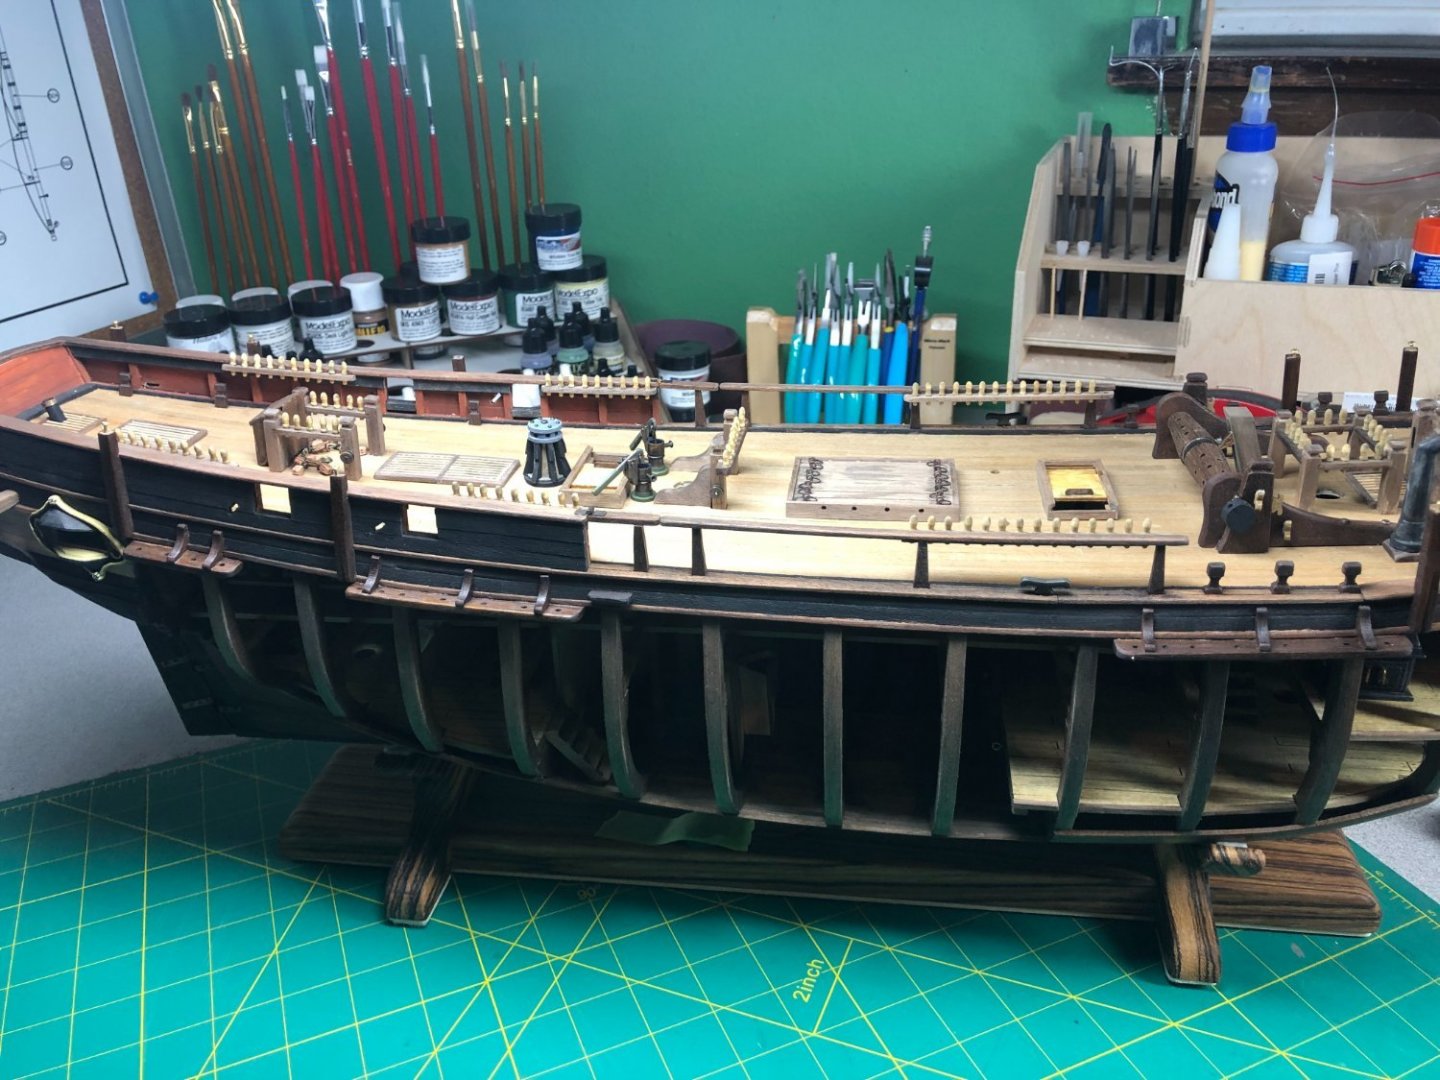
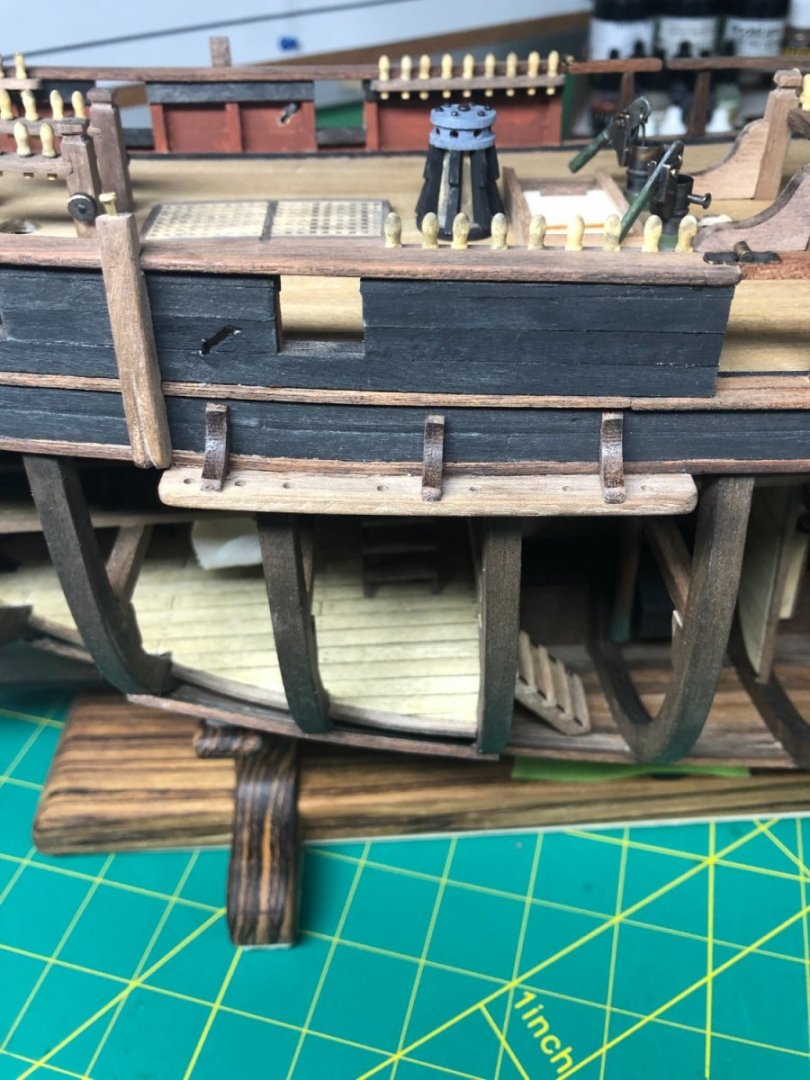
Another long week of work on the Bounty! The shroud mount rails were a lot tougher than I anticipated and there was some cussing and getting up and walking away a few times! The problem is the area to mount them is minimal and really no good way to clamp in place to allow for drying. I tried these and they worked on the open side of the hull: But on the other side, I finally figured out that the best way to accomplish a good fit was to glue on the braces, allow them to dry overnight and then install them: Worked well on both sides... just took me a while to figure that out! Made up the steps for boarding the ship. The plans called for 8 of them... But looking at the installation, about half would have been below the waterline! I installed 4 steps, down to the wales: Next, I built the Binnacle and installed it: A simple build, nothing to add. The plans call for several double blocks to be mounted to the deck around each mast. Using the rope I made, I attached a piece to each block and lashed a loop for the hook to attach: Its been a while since I've done rigging work but I got rolling after tying a few. The hooks were cut down and this first batch were installed around the mizzen mast: I am not looking forward to threading those when the time comes! I built the first cannon/carriage using my usual methods for aging the brass: The flash on the camera makes it look brighter than it really is. After all of that I did some painting and aging to catch up with all the installations over the last few weeks. Here is an overview of the Bounty after this weeks work: More cannons to assemble and the launch and jolly boats are on the horizon too.


-
I’m still contemplating that on my build… any suggestions?
-
It's a painting.... Real good but limited in info based on the painting.
-
Sand to fit.... for the mount included in the kit. Brass mounts usually are mounted with a bolt through the keel. I f you don't have access, its problematic! Or you could fashion your own mount! Lots of choices.
- 362 replies
-
- 2
-

-
- Amati
- Lady Nelson
- (and 2 more)
-
What is the scale in the book? I can't say that I've ever seen one mentioned.
-
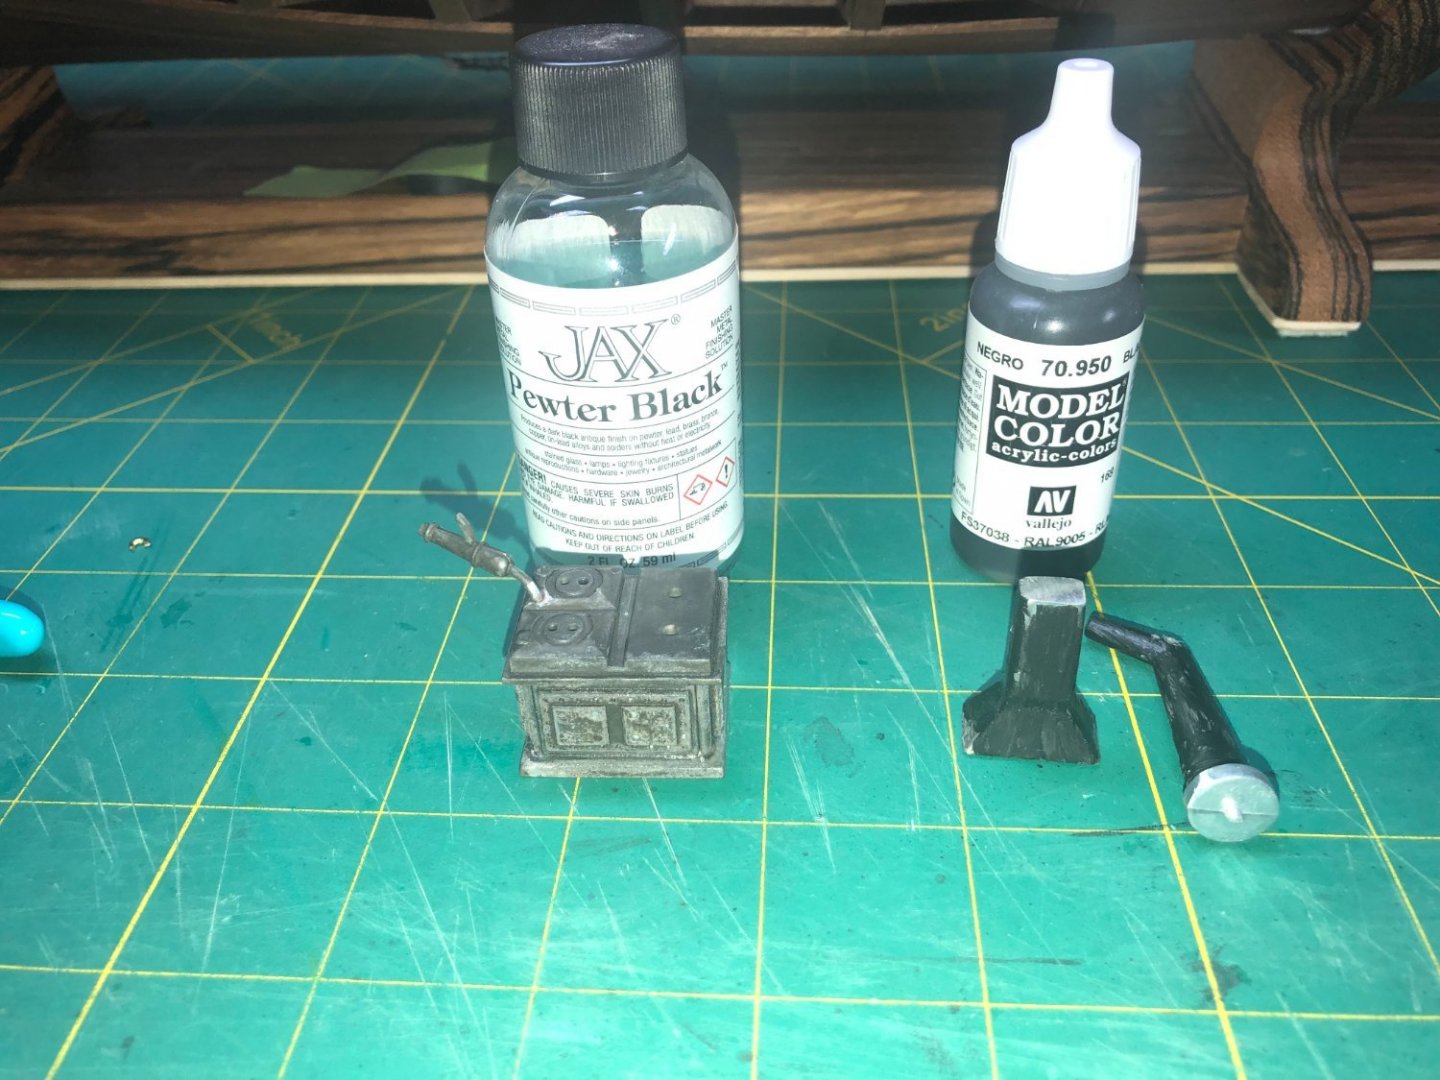
I use Jax Pewter Black. Good stuff!
-
I use Vallejo paints. Buying a small starter kit is not too much money and gives you many options. There are other good paint options with similar choices. I find paint bronze or metal pieces to be problematic because the paint is easily scrapped off when working with or around it... I've not tried etching primer and that may prevent that from happening. Also, depending on what you're looking to achieve, I found that blackening can get the colors you're looking for too.
-
Just my two cents... I usually use a blend of colors to achieve the look I want. It depends on what the piece was actually made from but also on personal preference. I have enough different colors that I can blend to get virtually any shade of brown that I want.
-
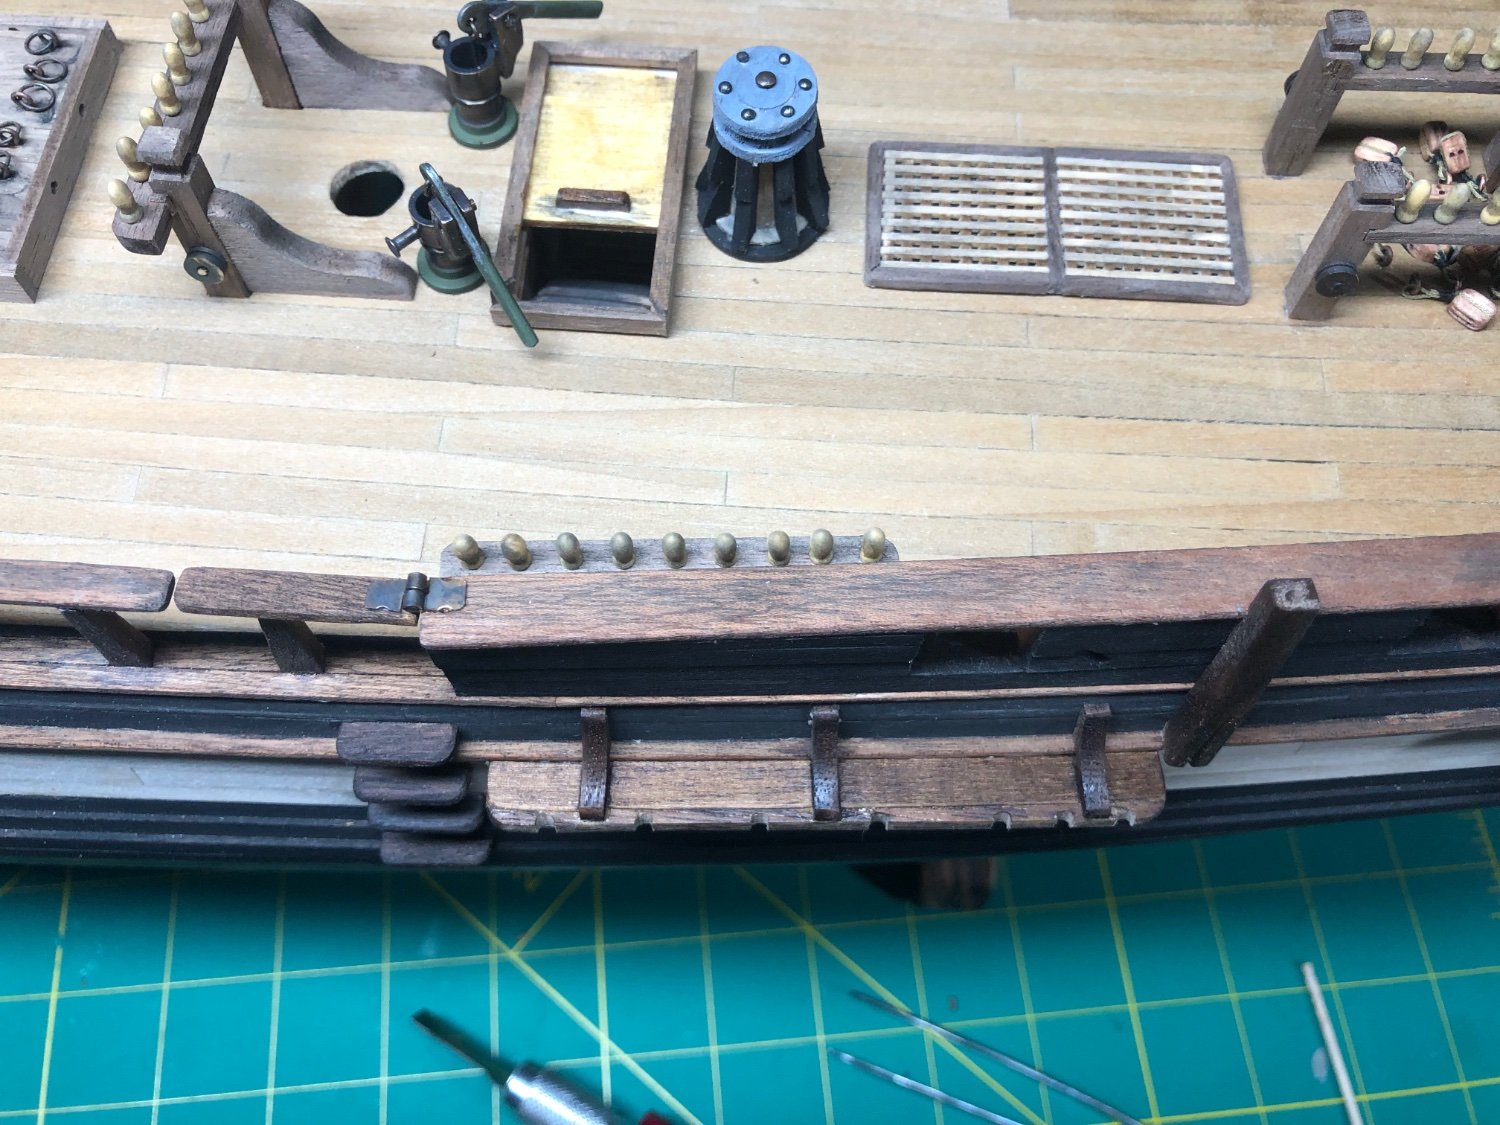
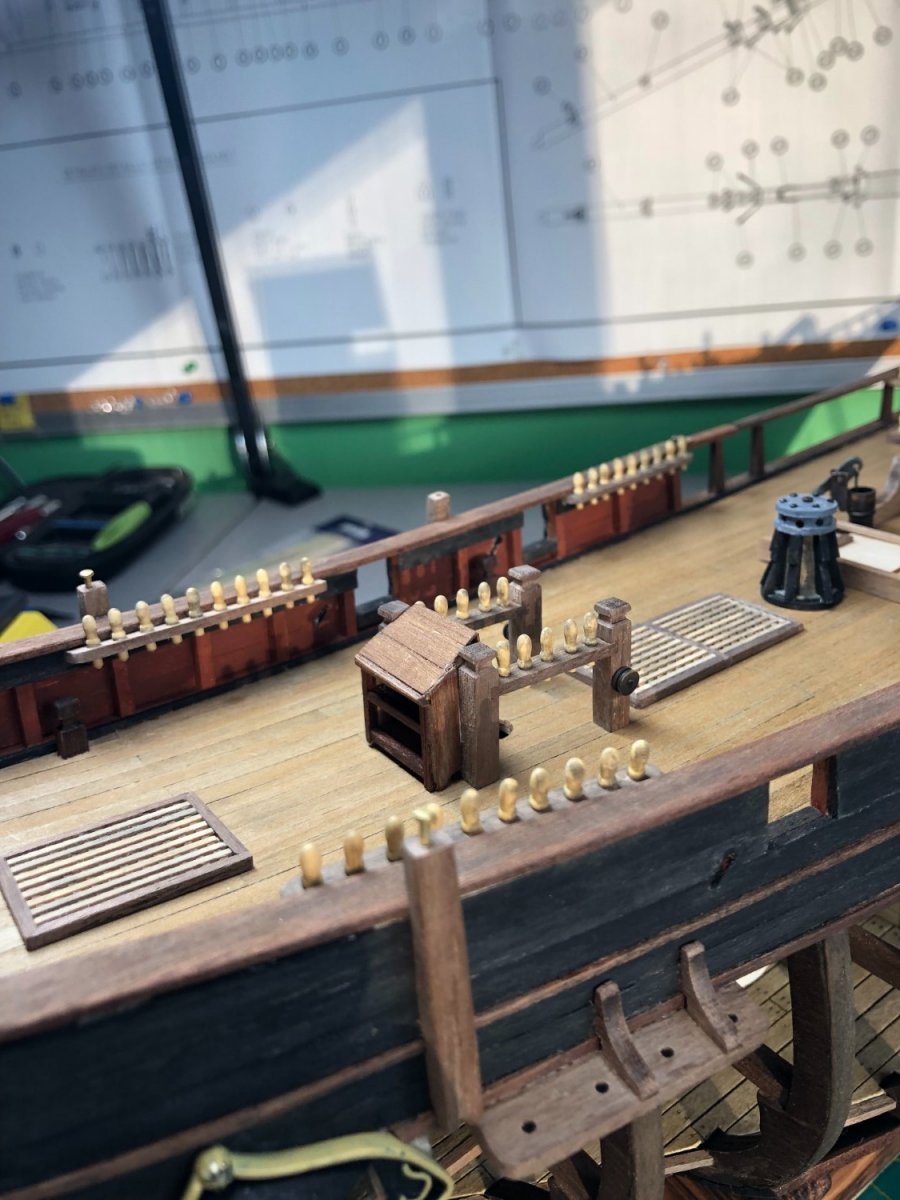
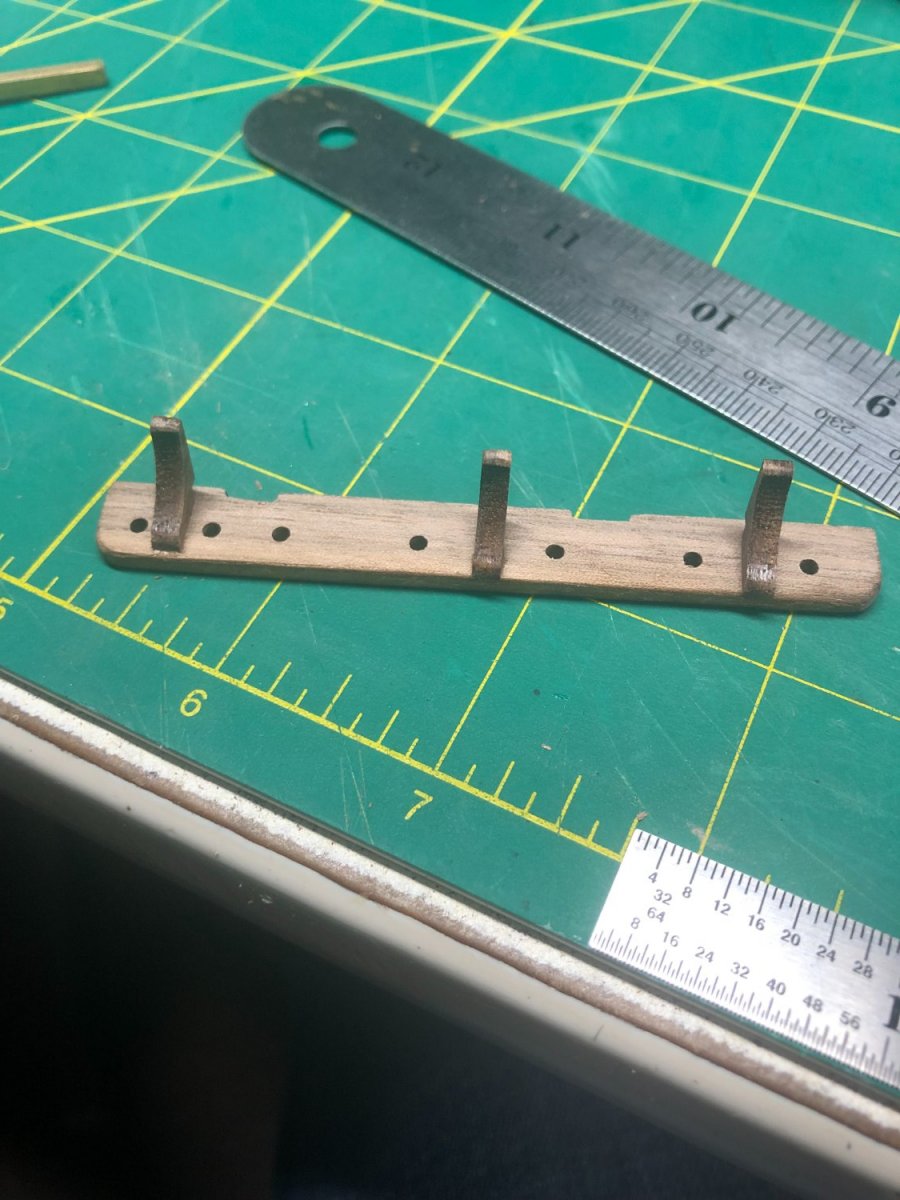
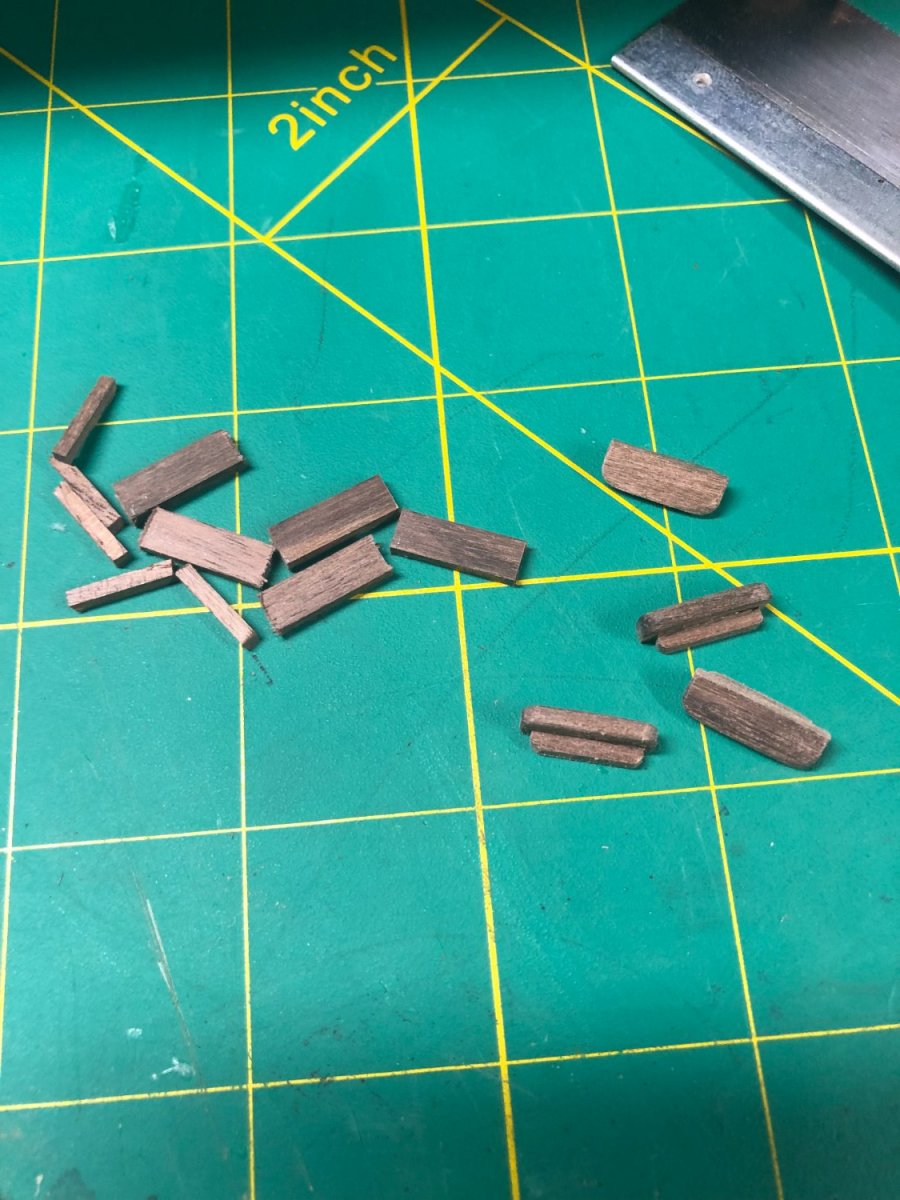
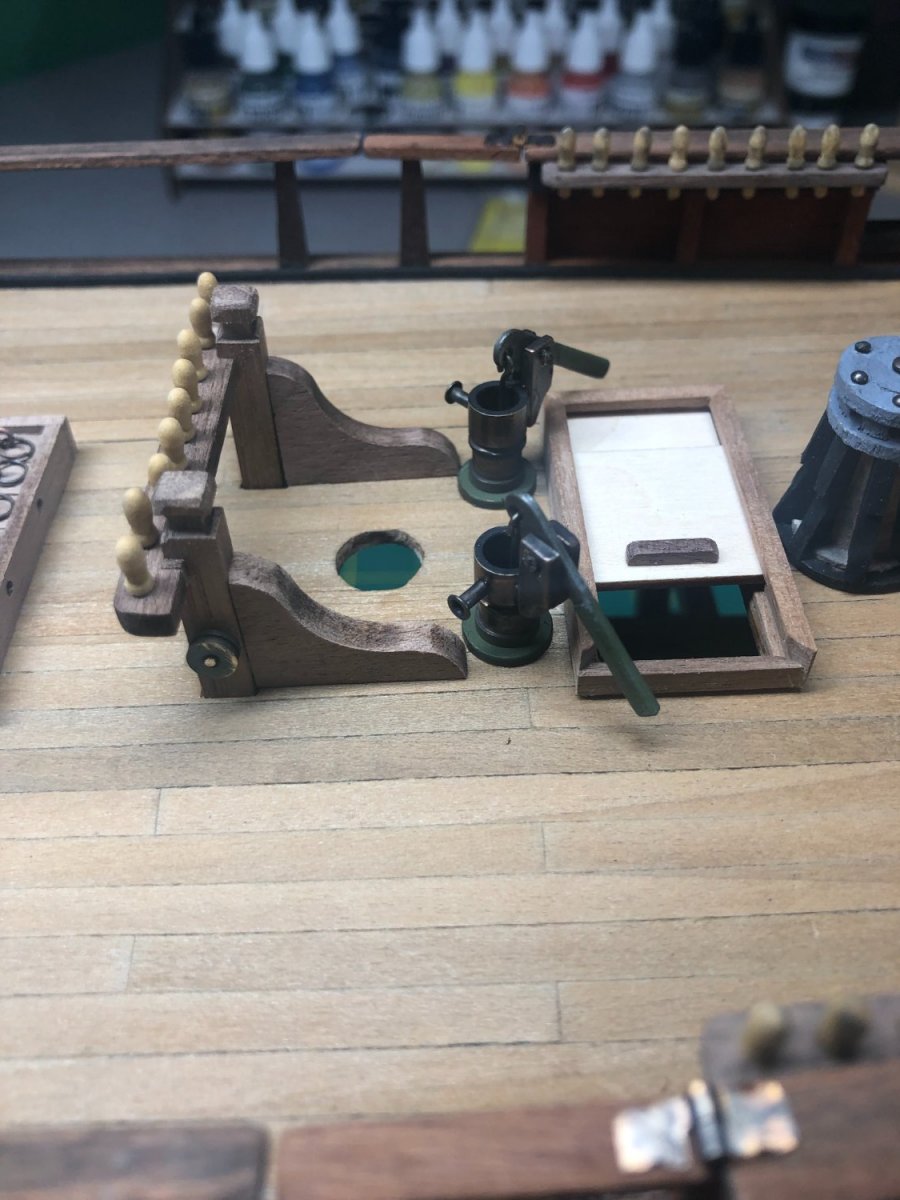
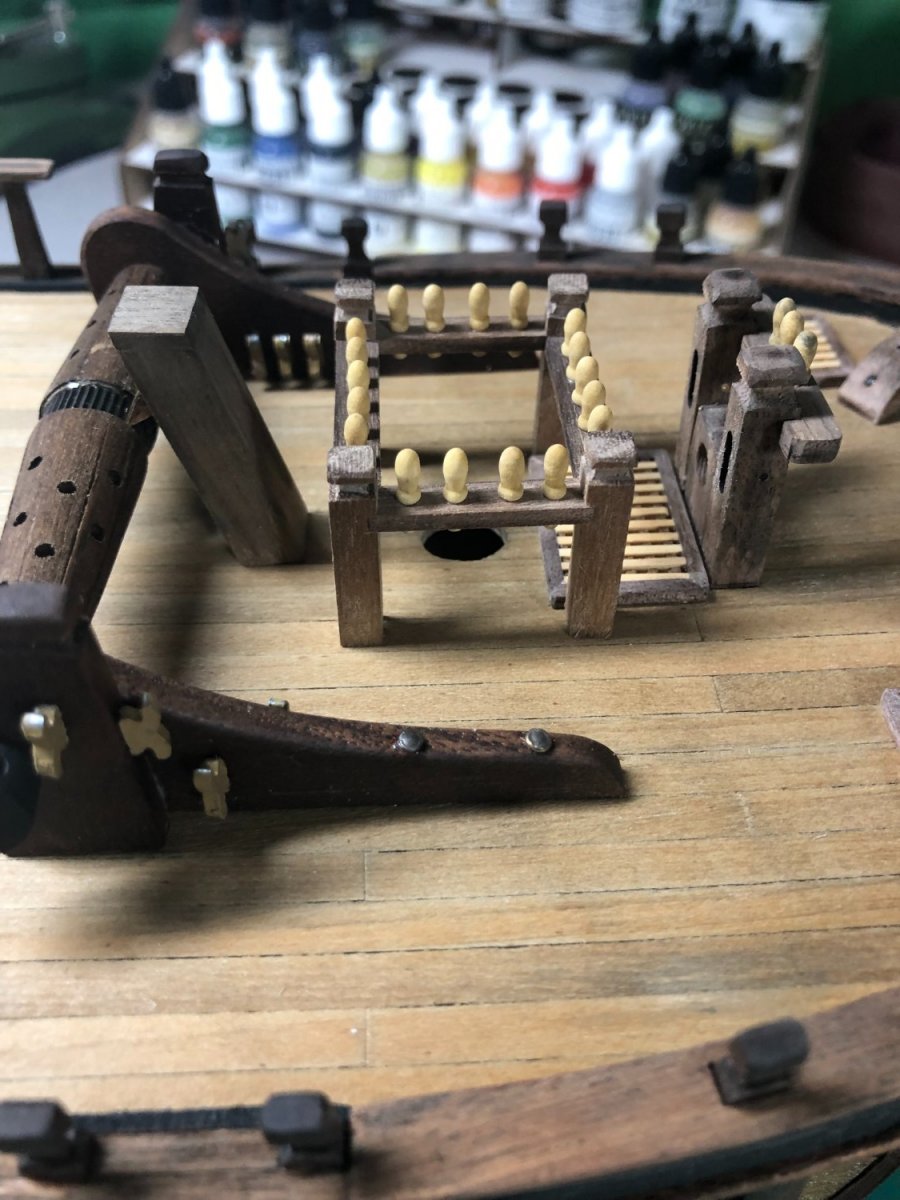
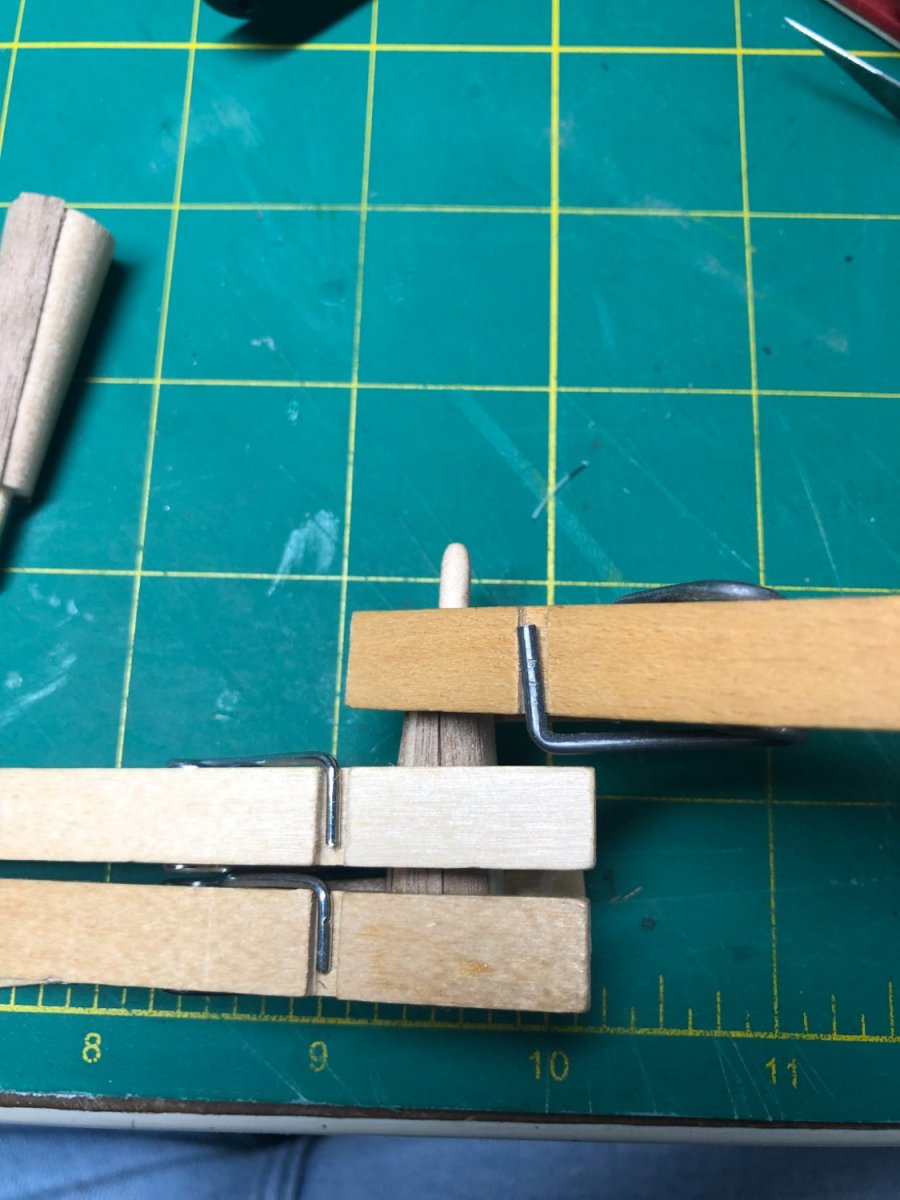
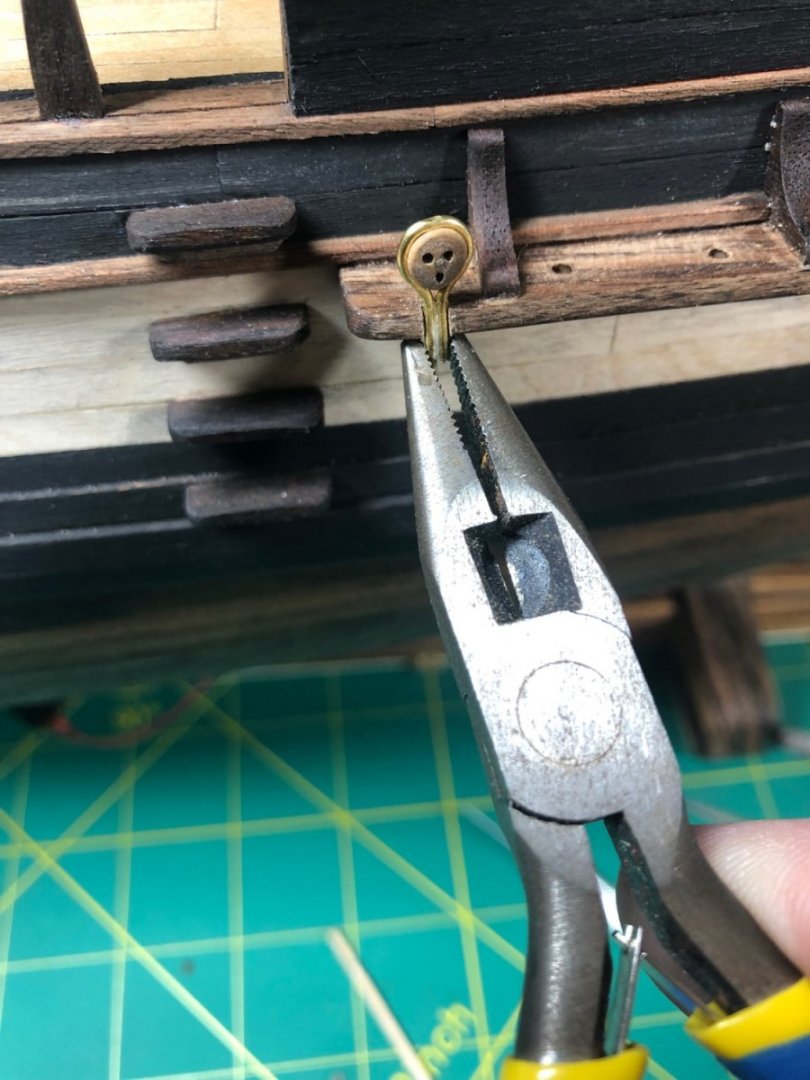
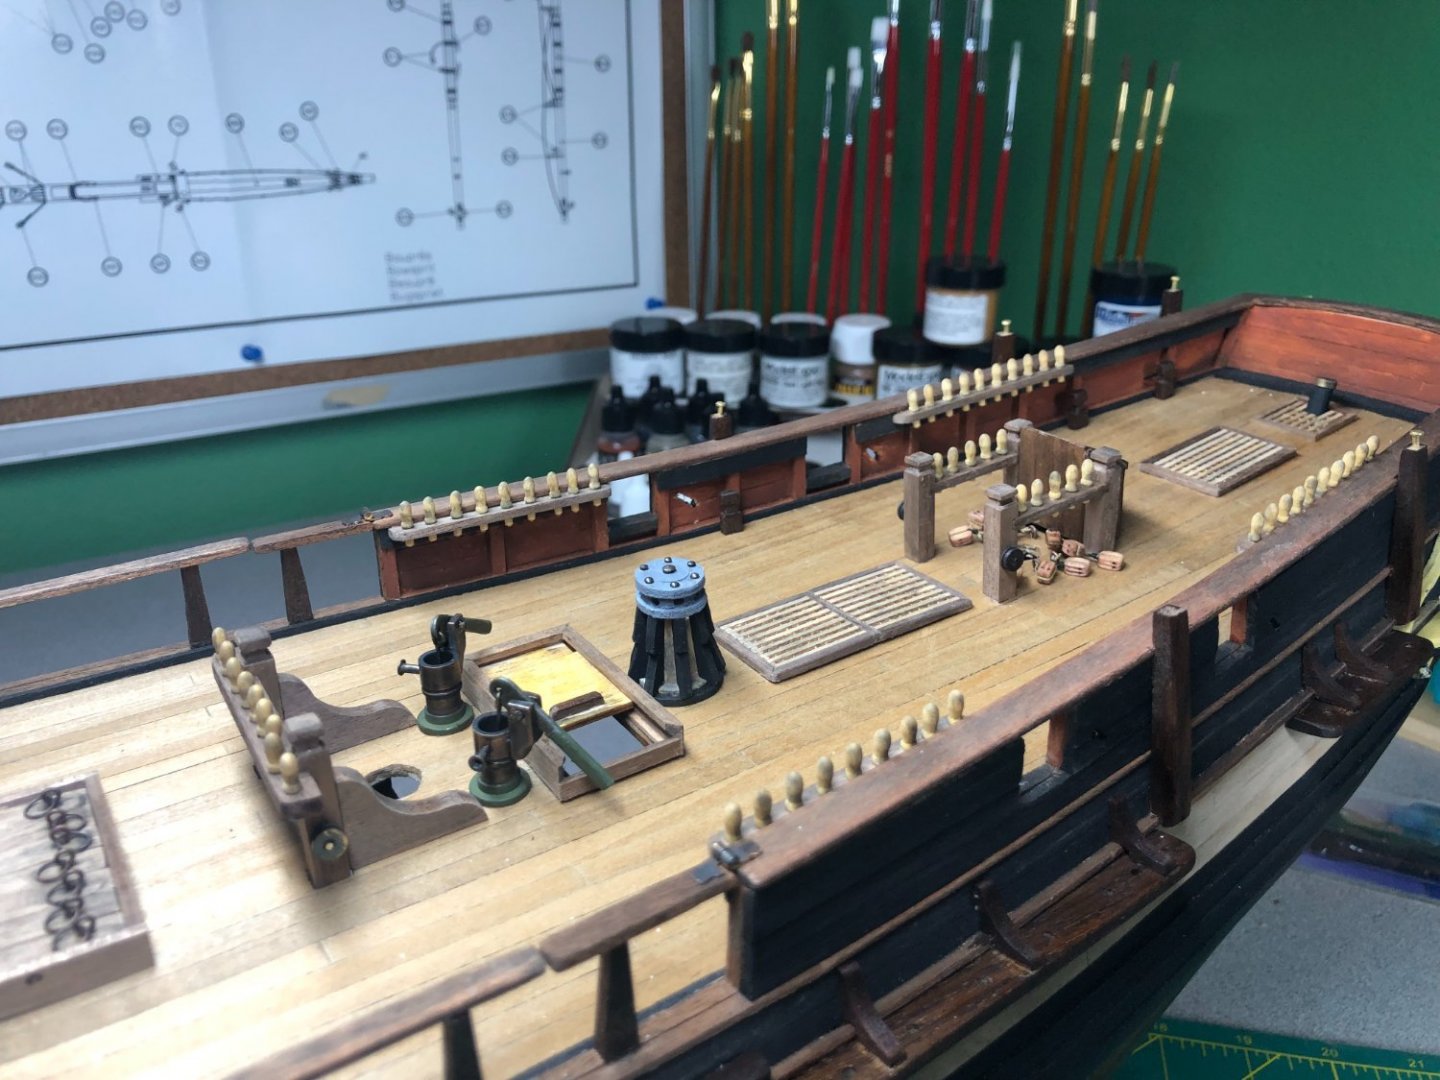
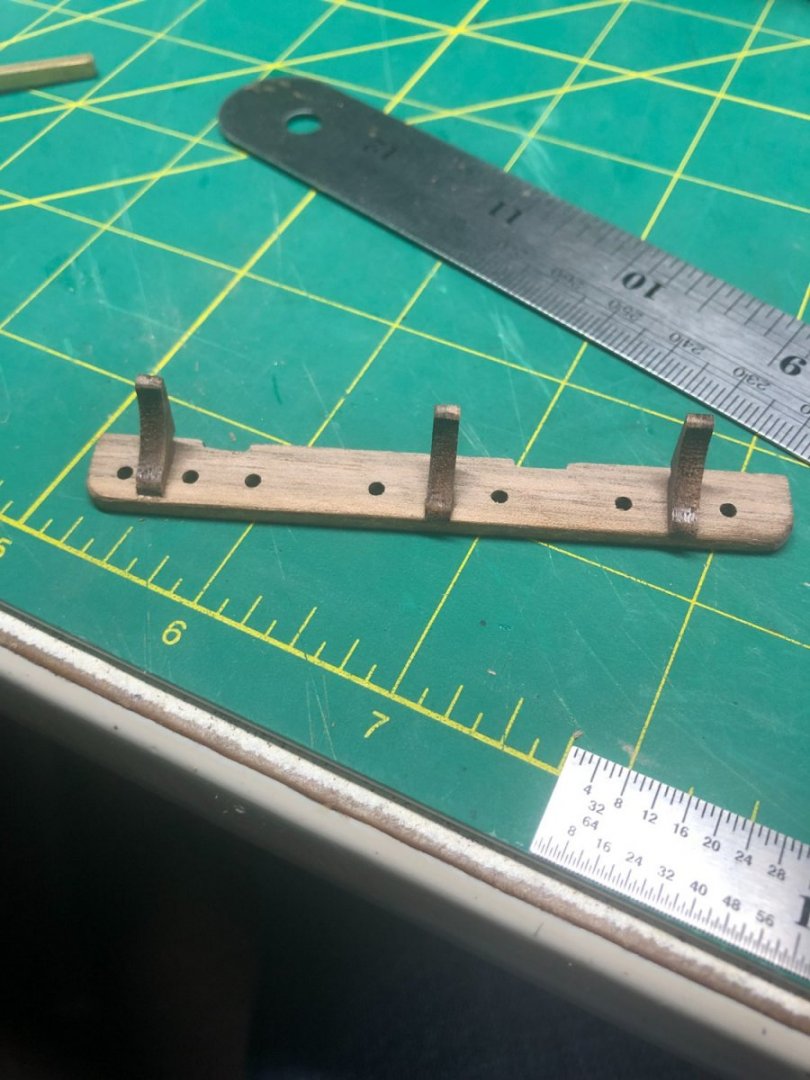
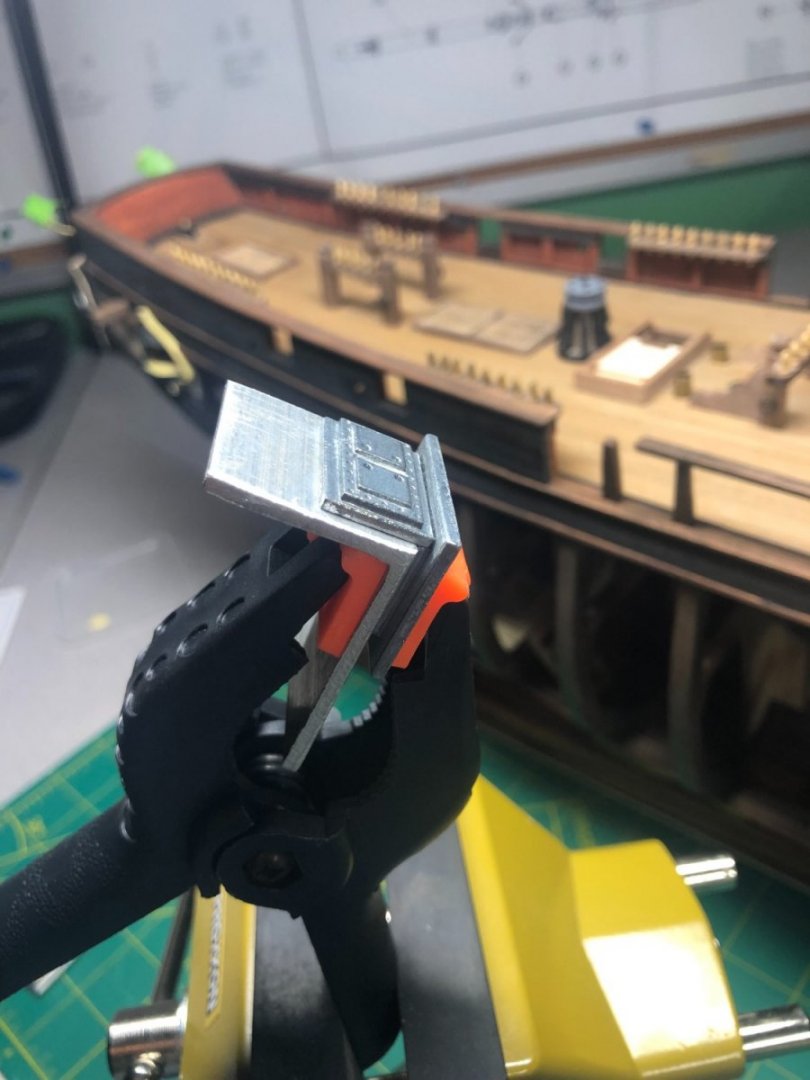
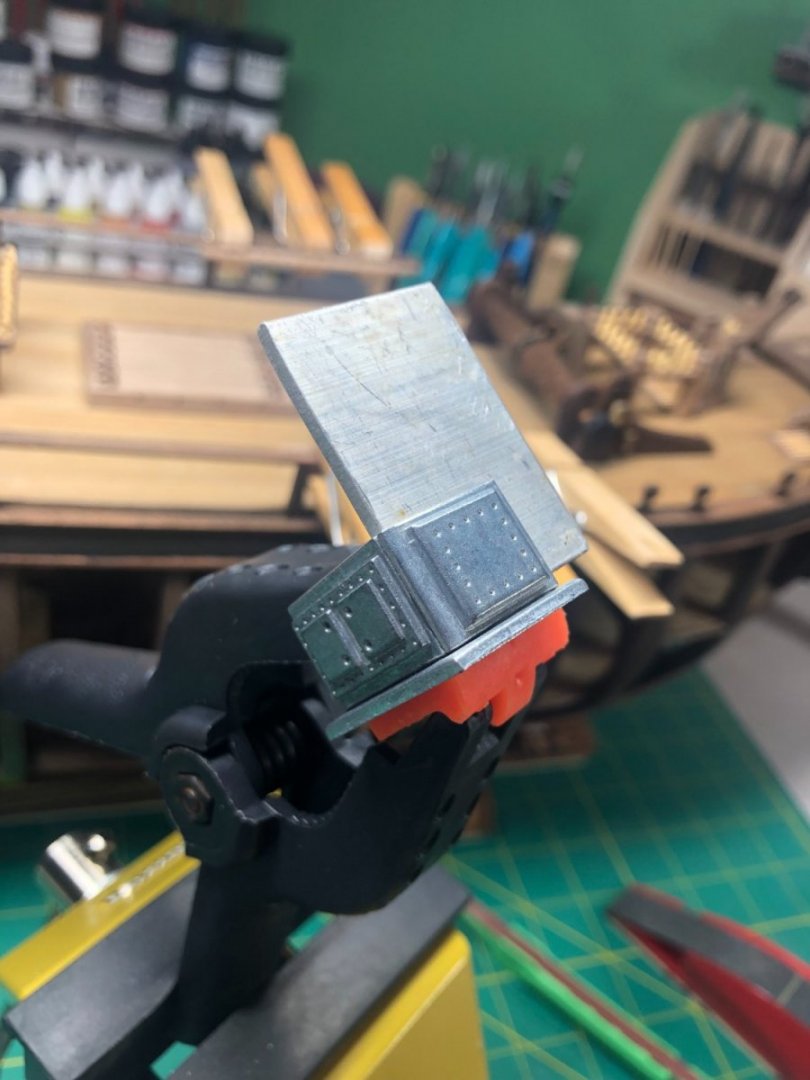
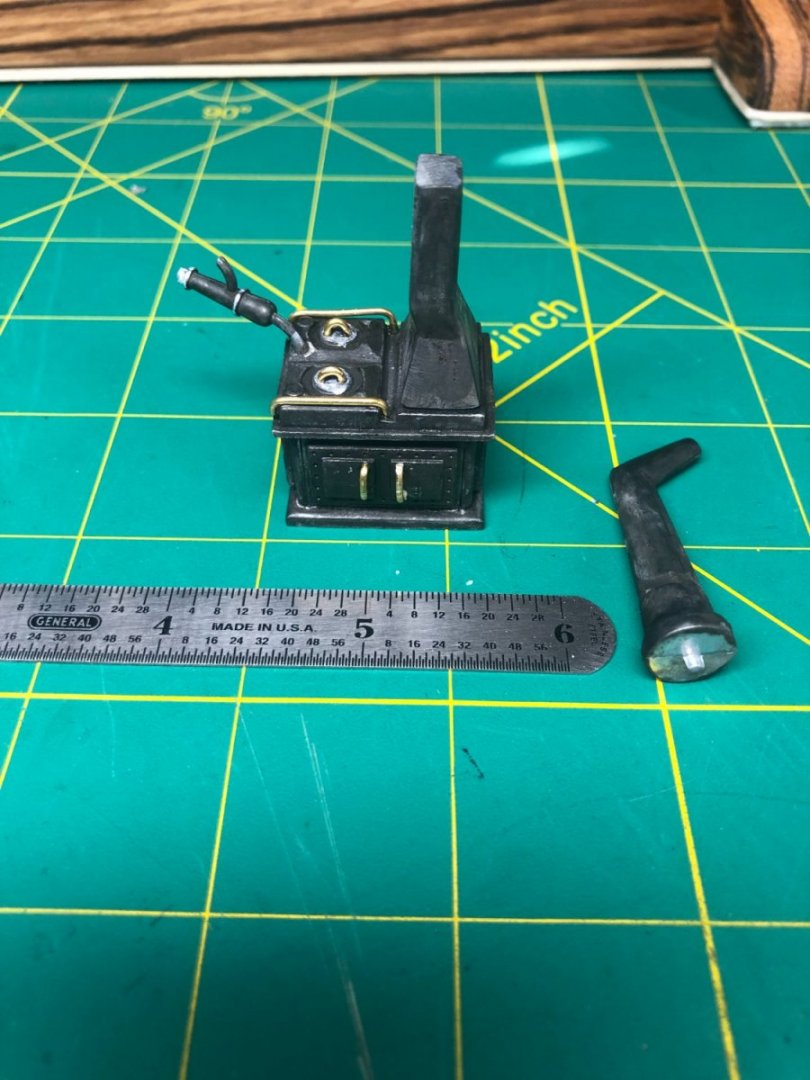
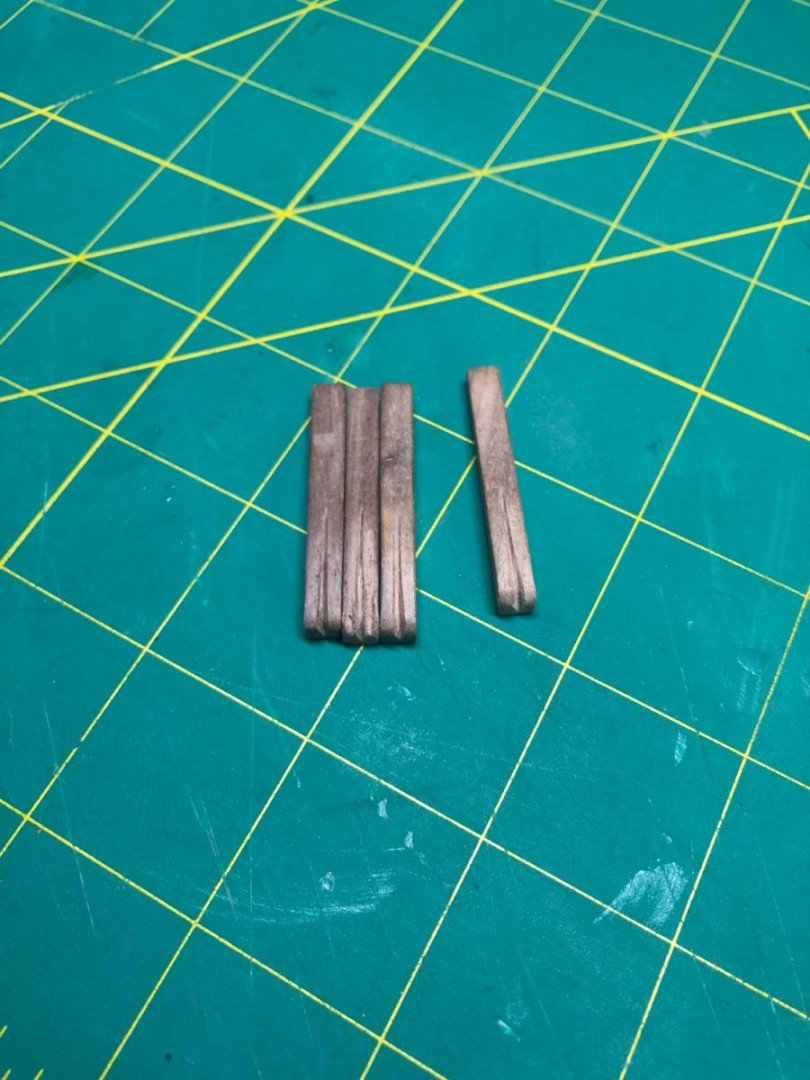
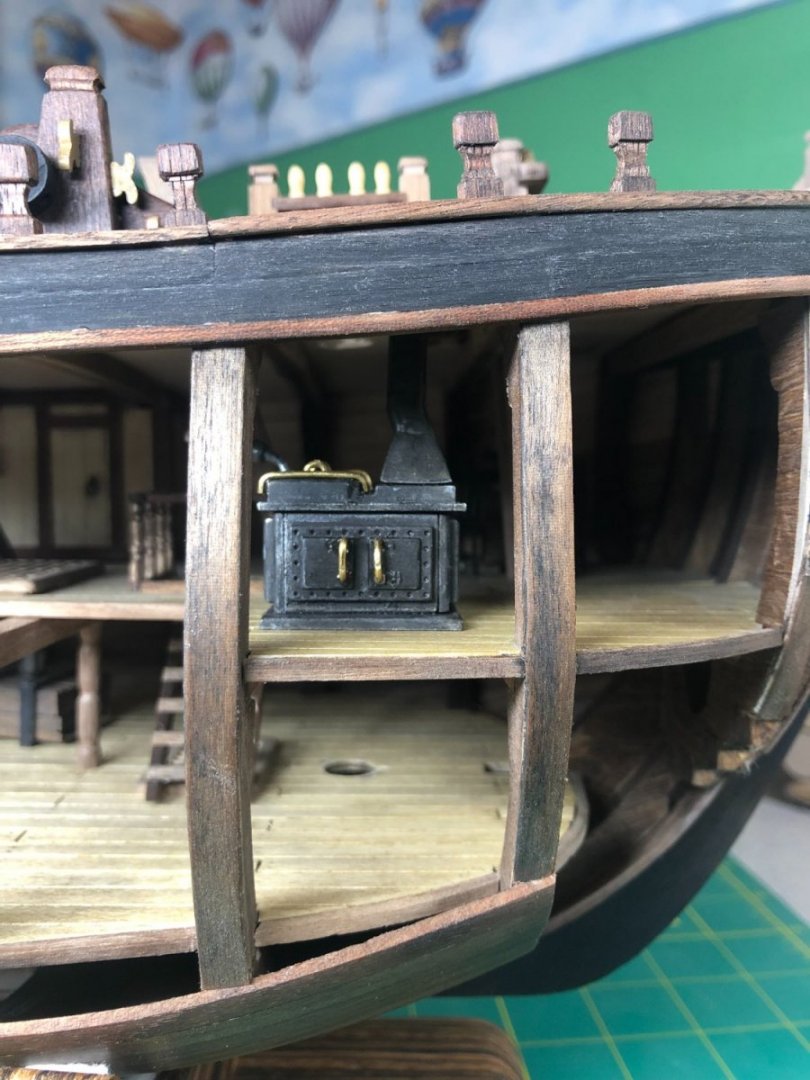
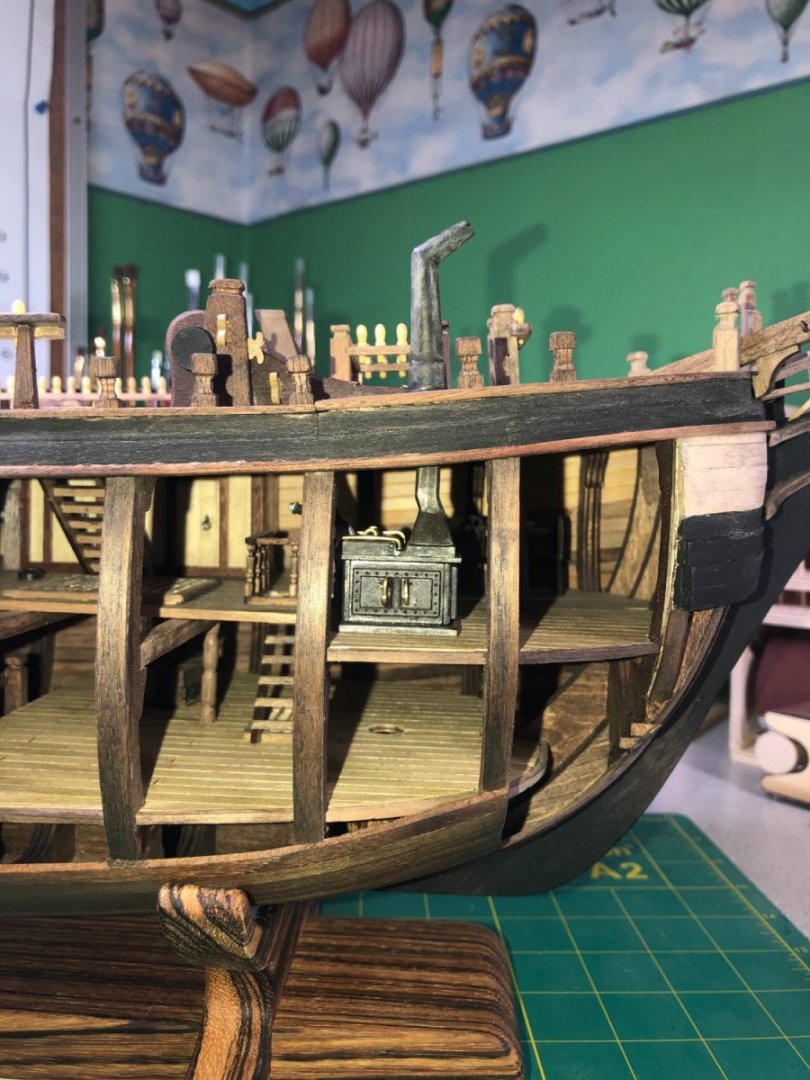
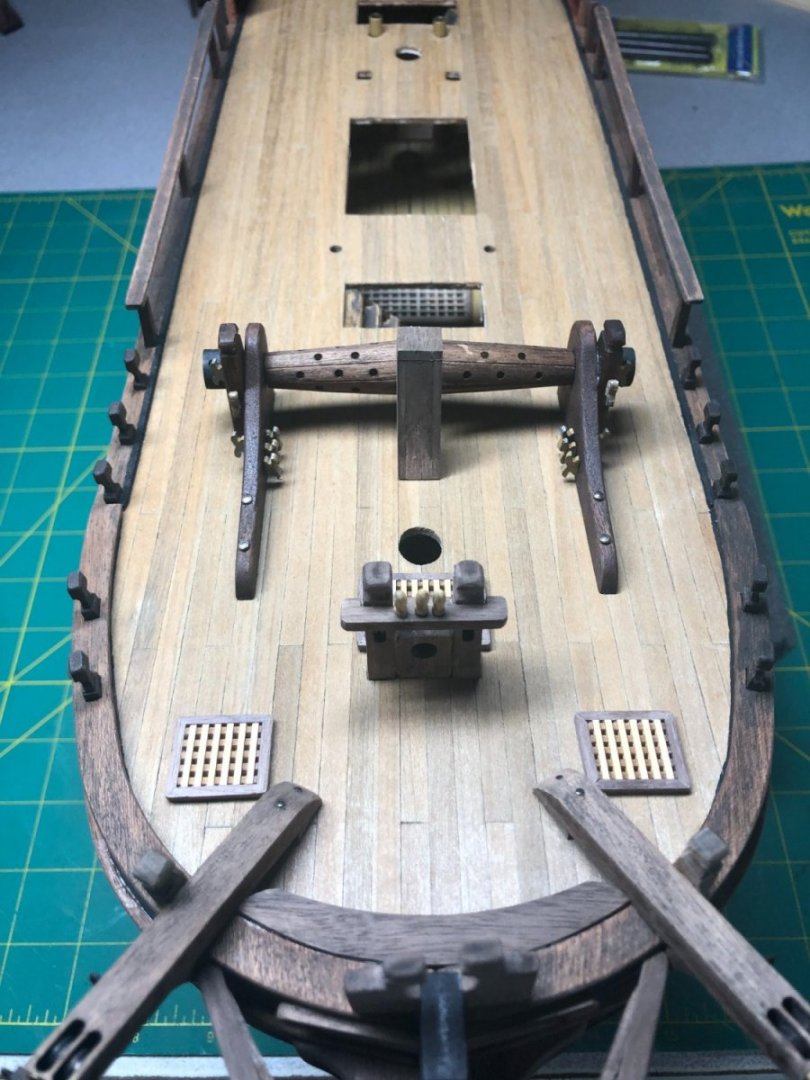
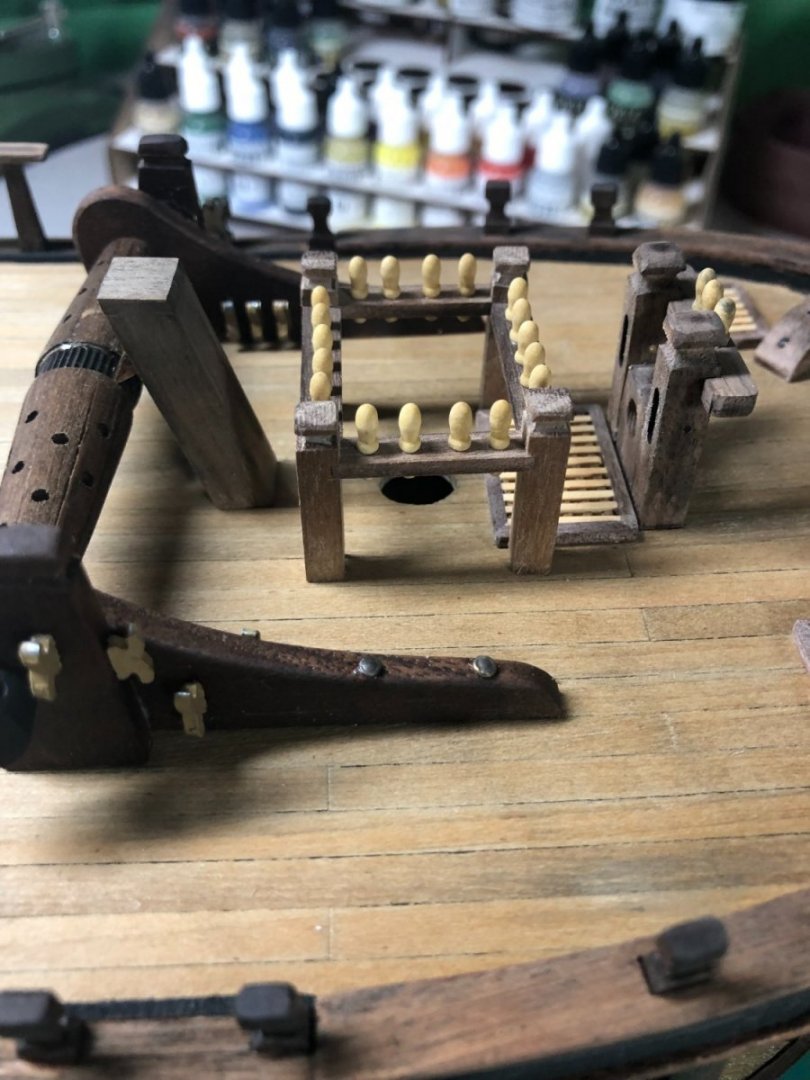
Last of the pin rails being placed: The cook stove was a relatively easy build but definitely has some quirks. The pieces being metal, all had to have some of the casting seams sanded off: Using a piece of angle iron (aluminum, actually!), I assembled the pieces: Obviously, it needs paint. I tried black paint on the smoke stack pieces and was not impressed, brush marks and easily removed paint... Tried my blackening solution as a possible solution and was mildly surprised: It took 3 coats but eventually I got the color and texture I was looking to achieve. I used my Dremel to remove the paint on the stacks and blackened them too: Installed on the Bounty: The half-pounder gun mounts were next up. These were just 5x5mm pieces that needed to be shaped and decorated with some carving: Locating, notching and gluing into place took a little time but was not difficult. There are a total of 10 mounts. Before gluing, I drilled the hole in the tops of them to prepare for the guns to be mounted later on. The gates were simple but the hinges were not! After multiple attempts of making a halfway decent looking hinge, without success, I remembered that I have some tiny hinges for another project. I took them to the disc sander and sanded them down to size, blackened them and glued into place: Worked perfectly and looks good too! Finally, the upper portion of the pumps were painted and the mechanism for the handle installed. The pumps were glued to the deck: The shroud mount rails, cannons and a few remaining deck features are next. Additionally, I need to spend some time catching up on the weathering/aging of the latest components completed.

-
Do you have this kit? Do you have the picture book? Do you have the plans (big posters)?
-
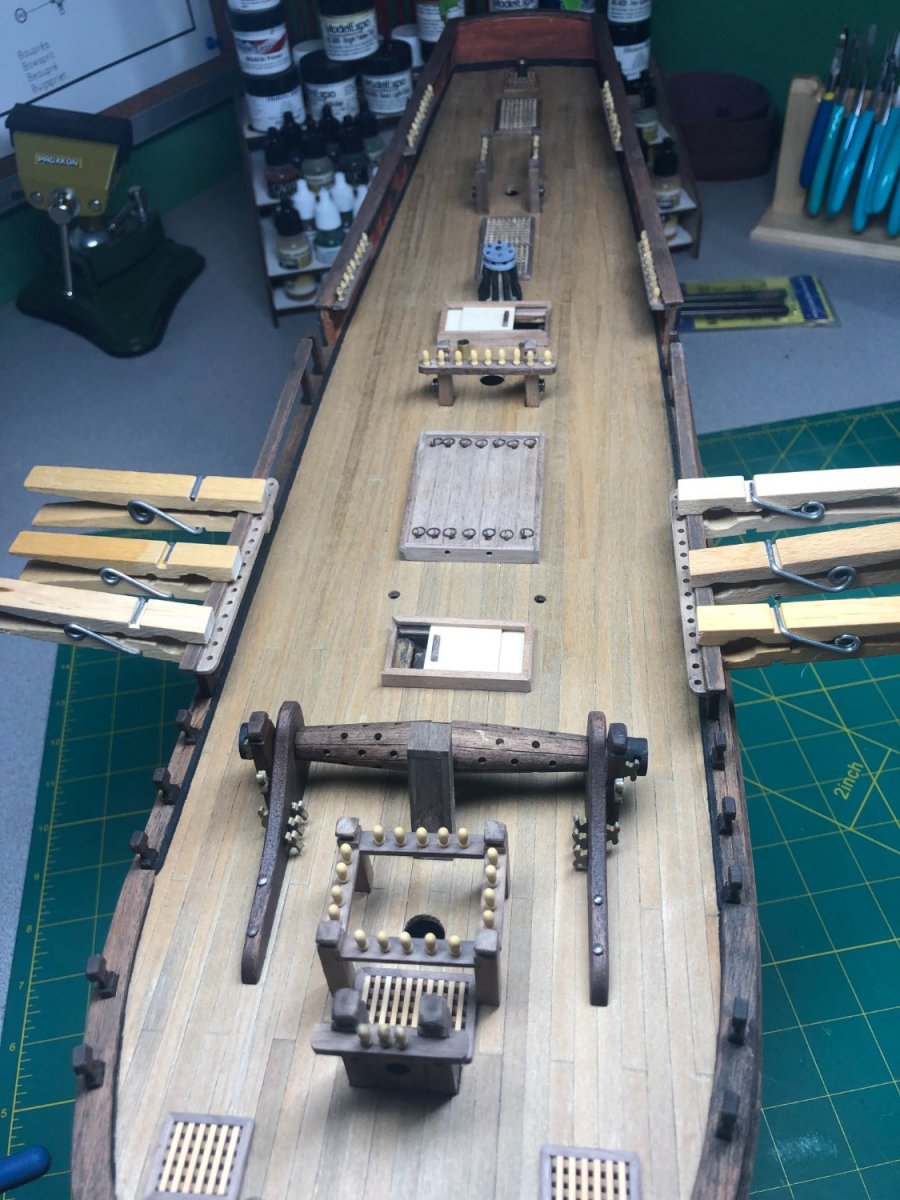
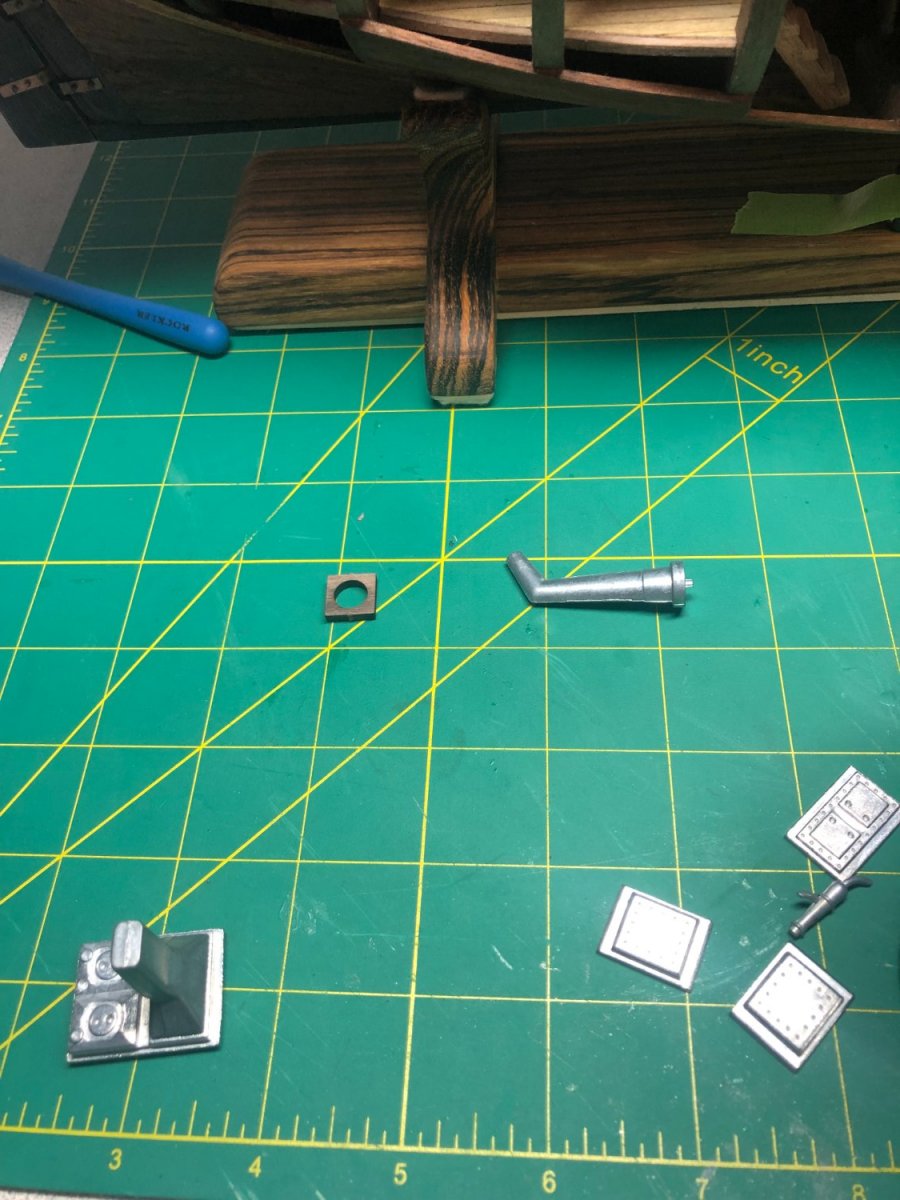
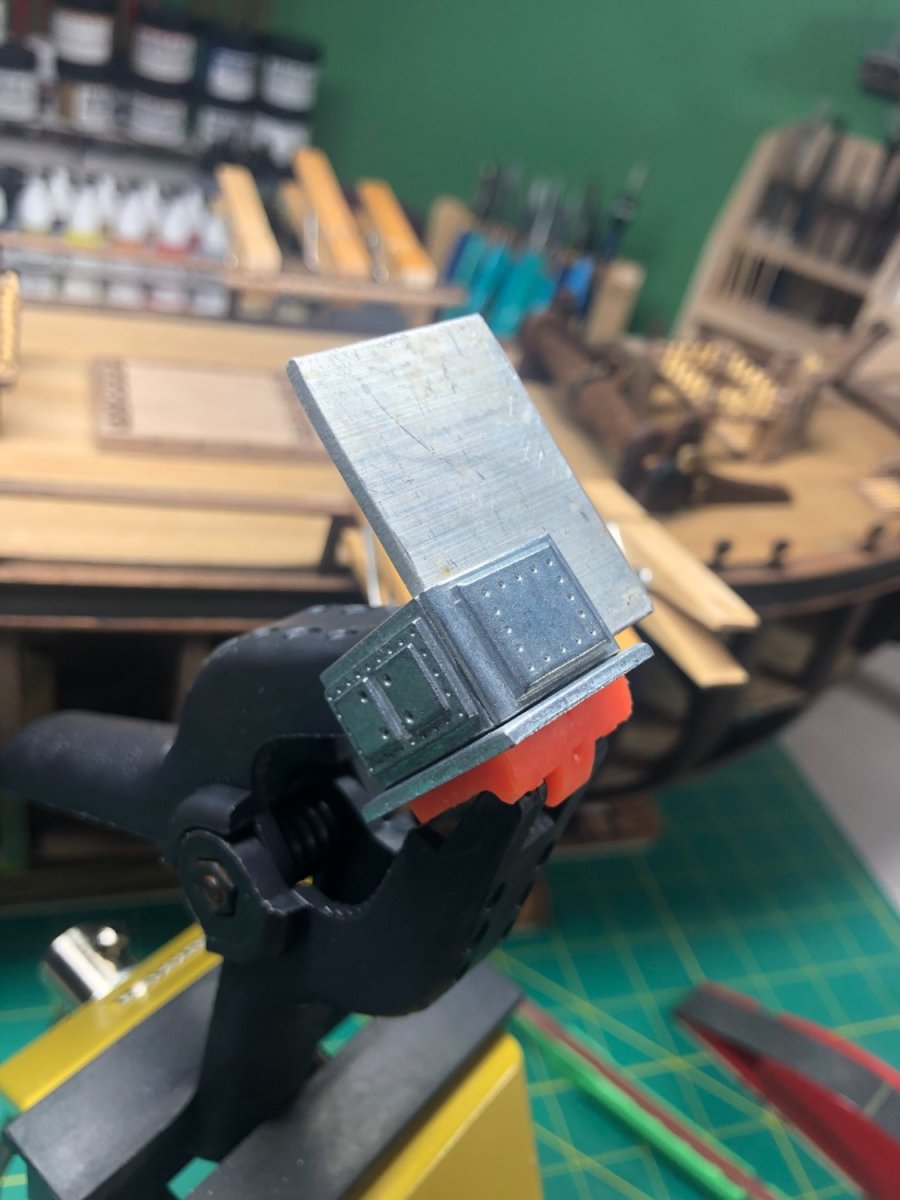
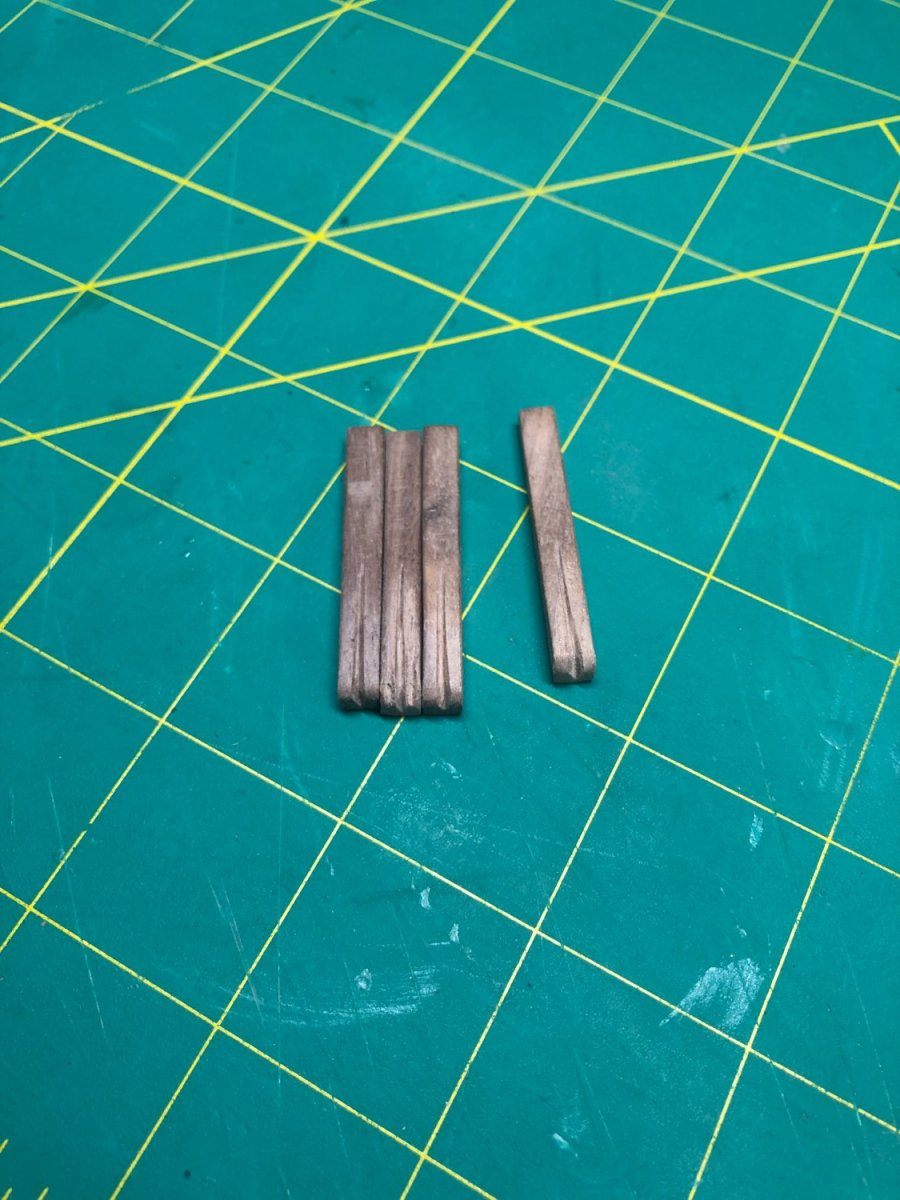
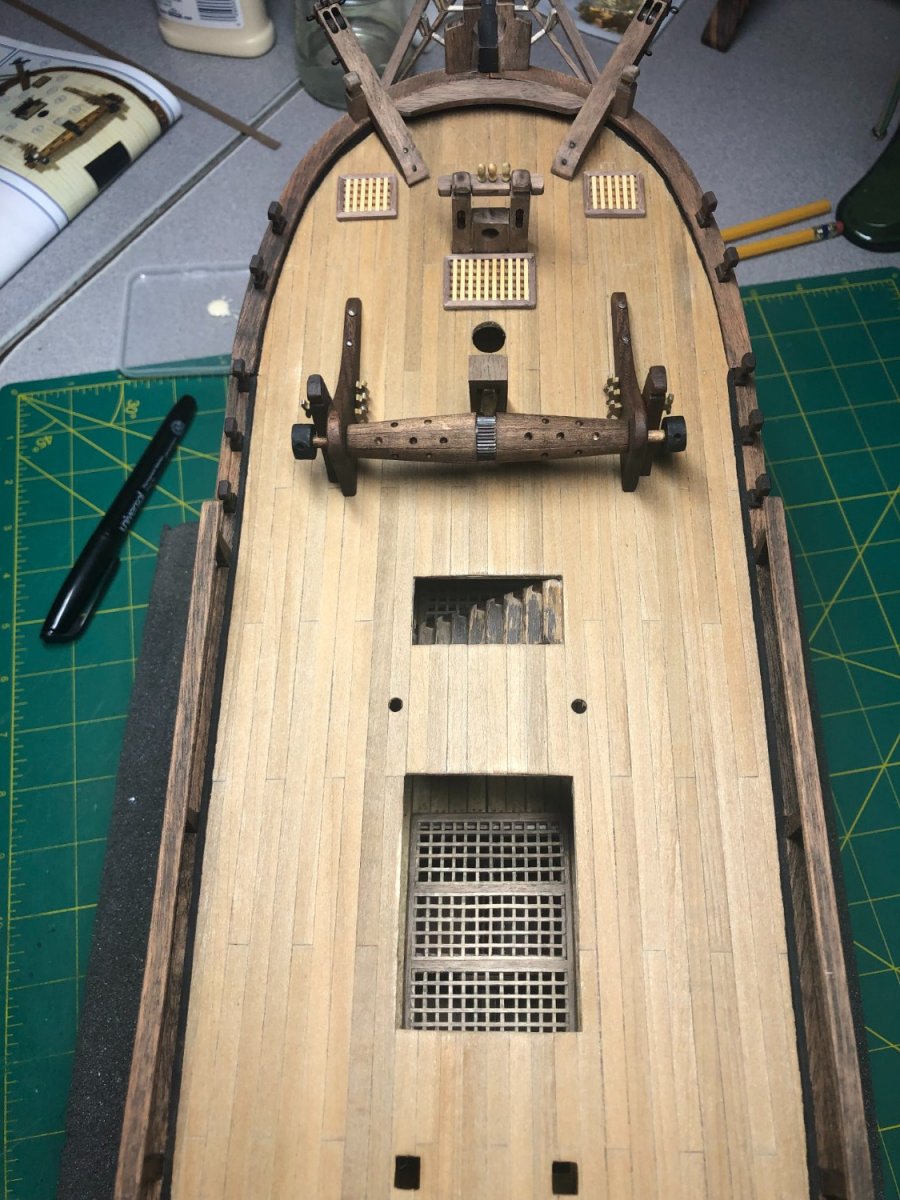
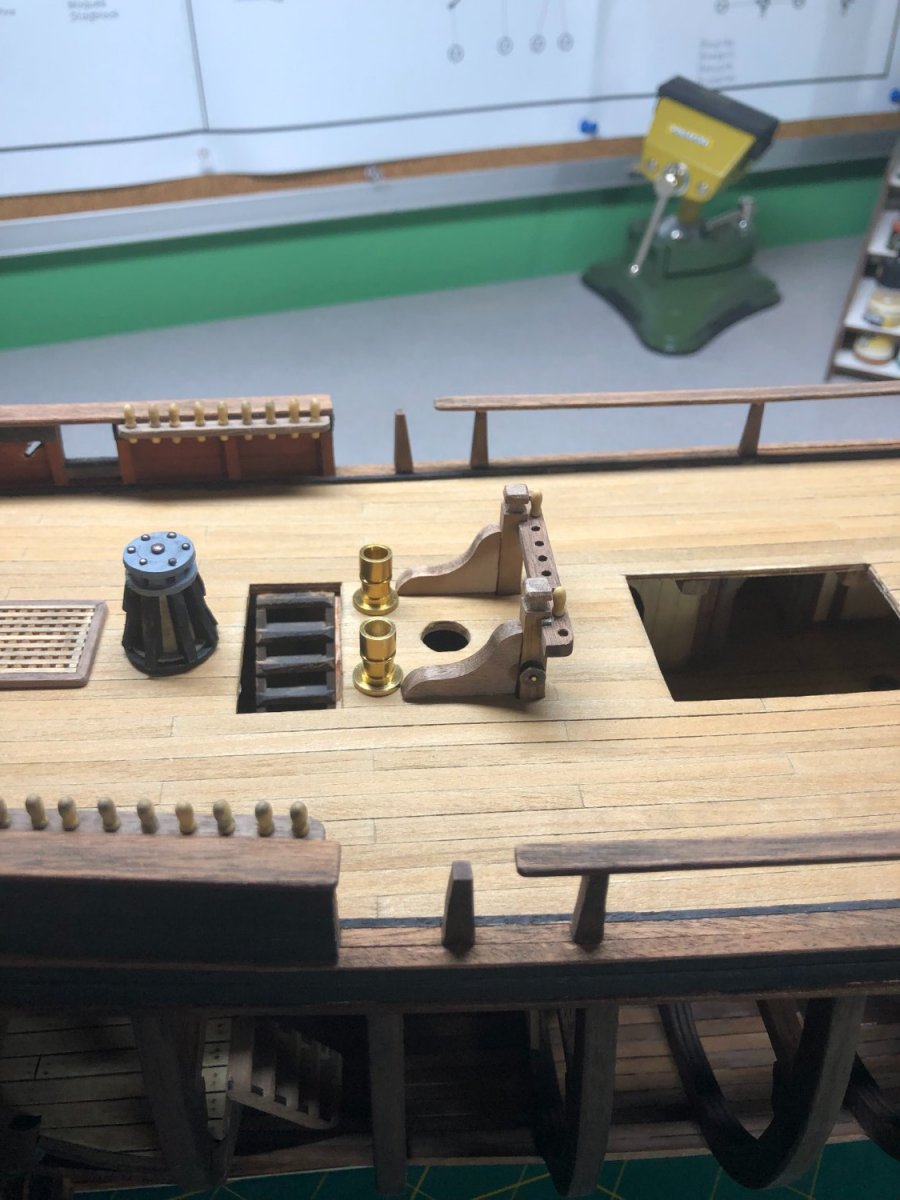
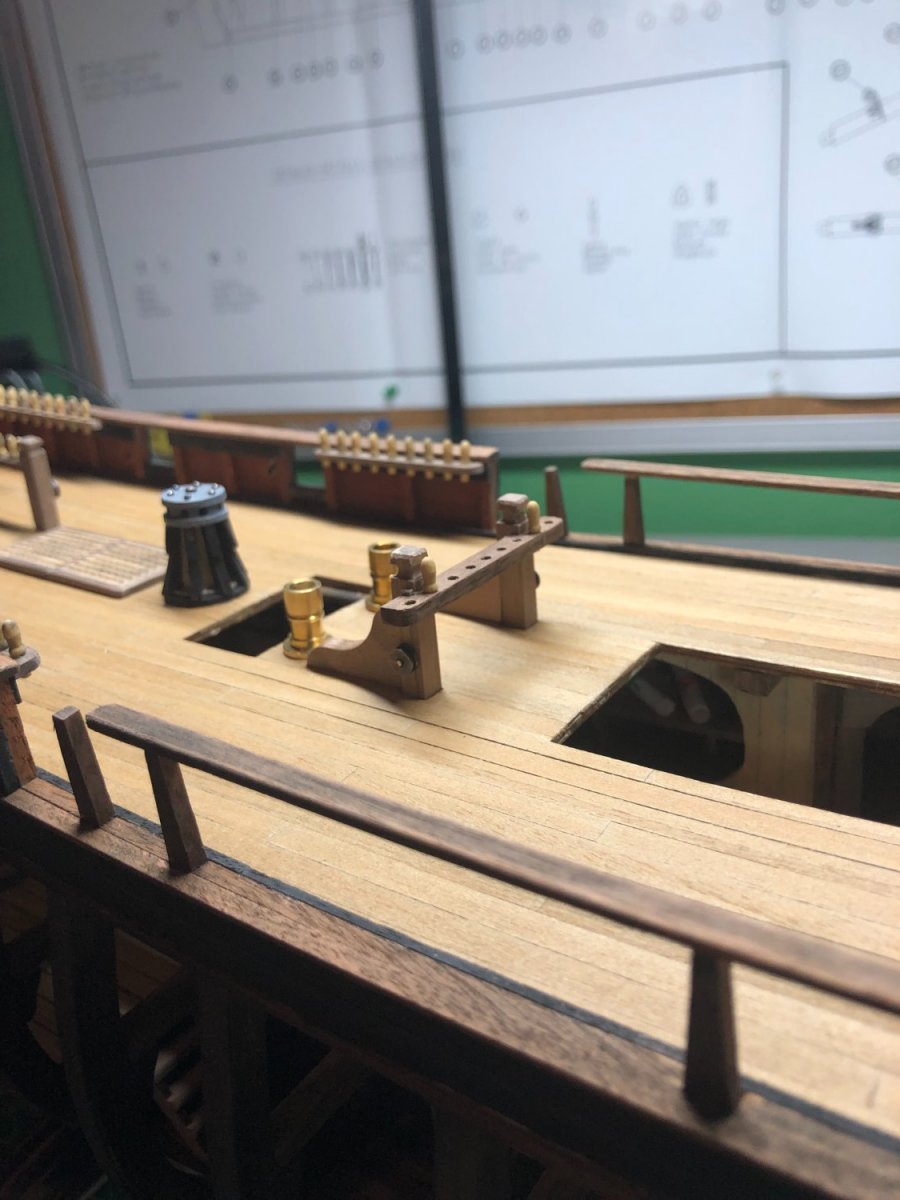
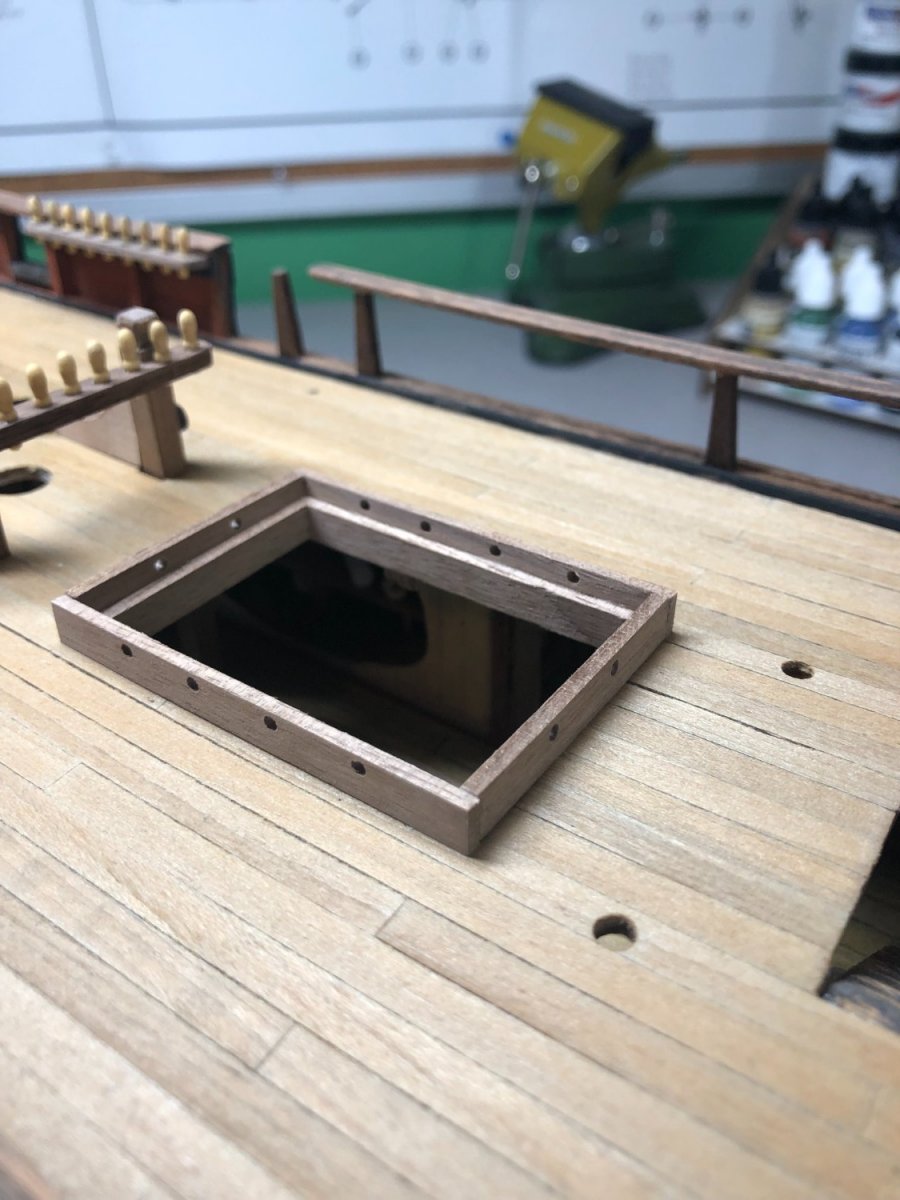
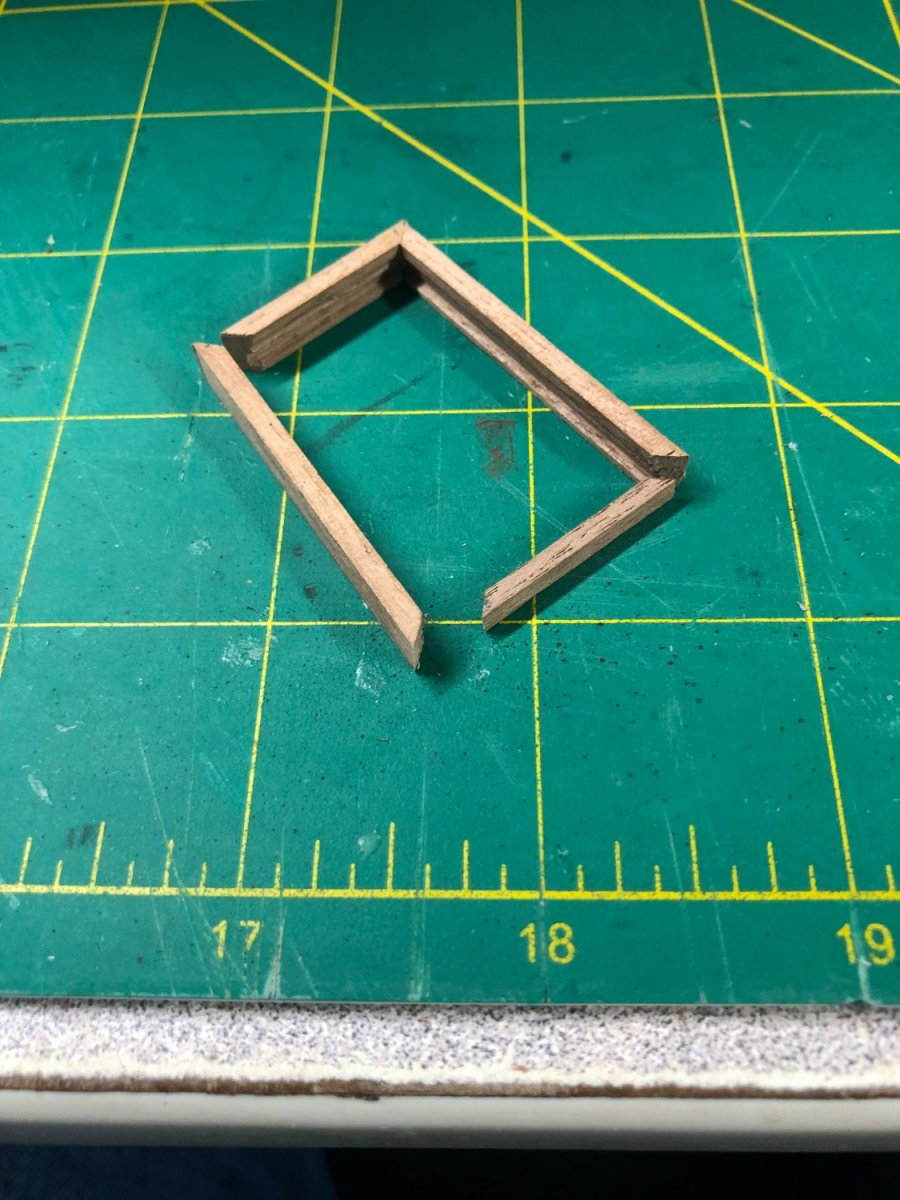
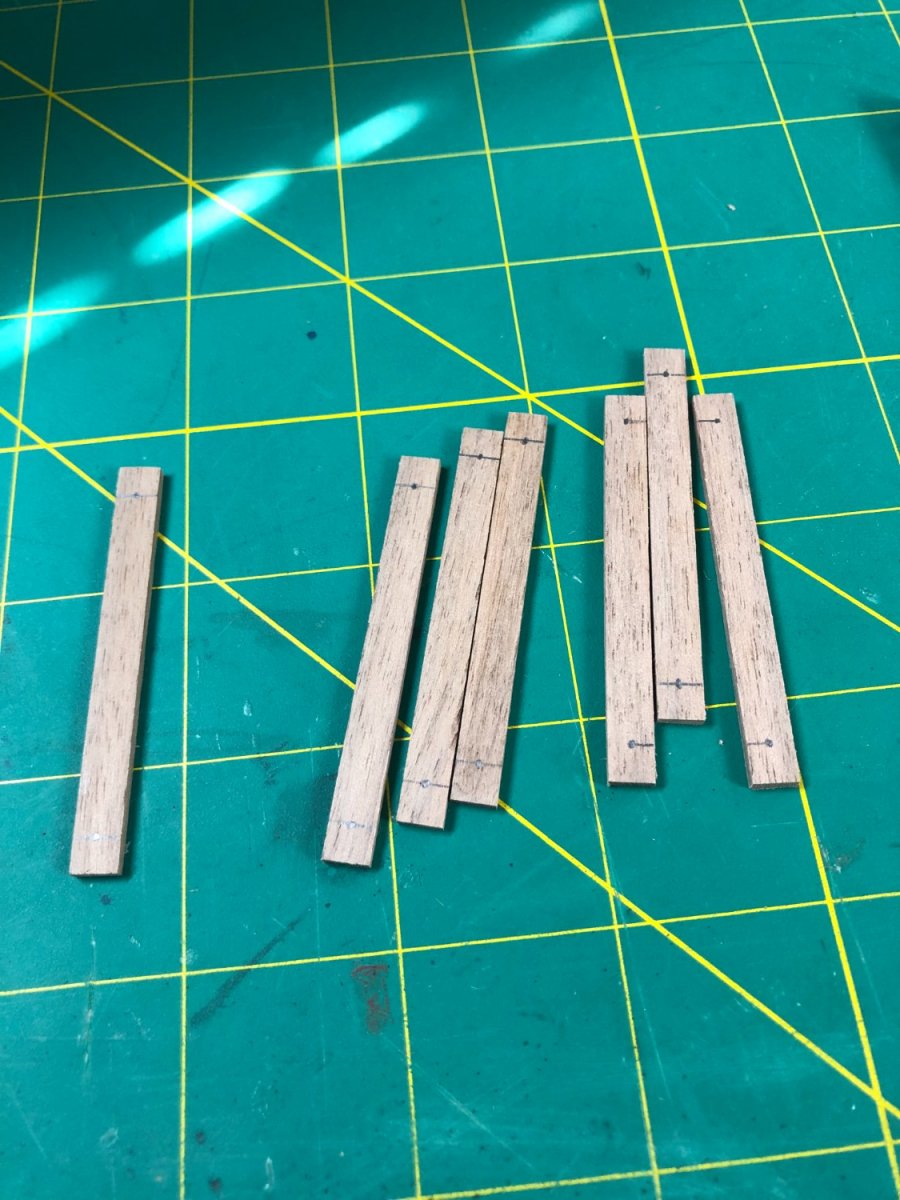
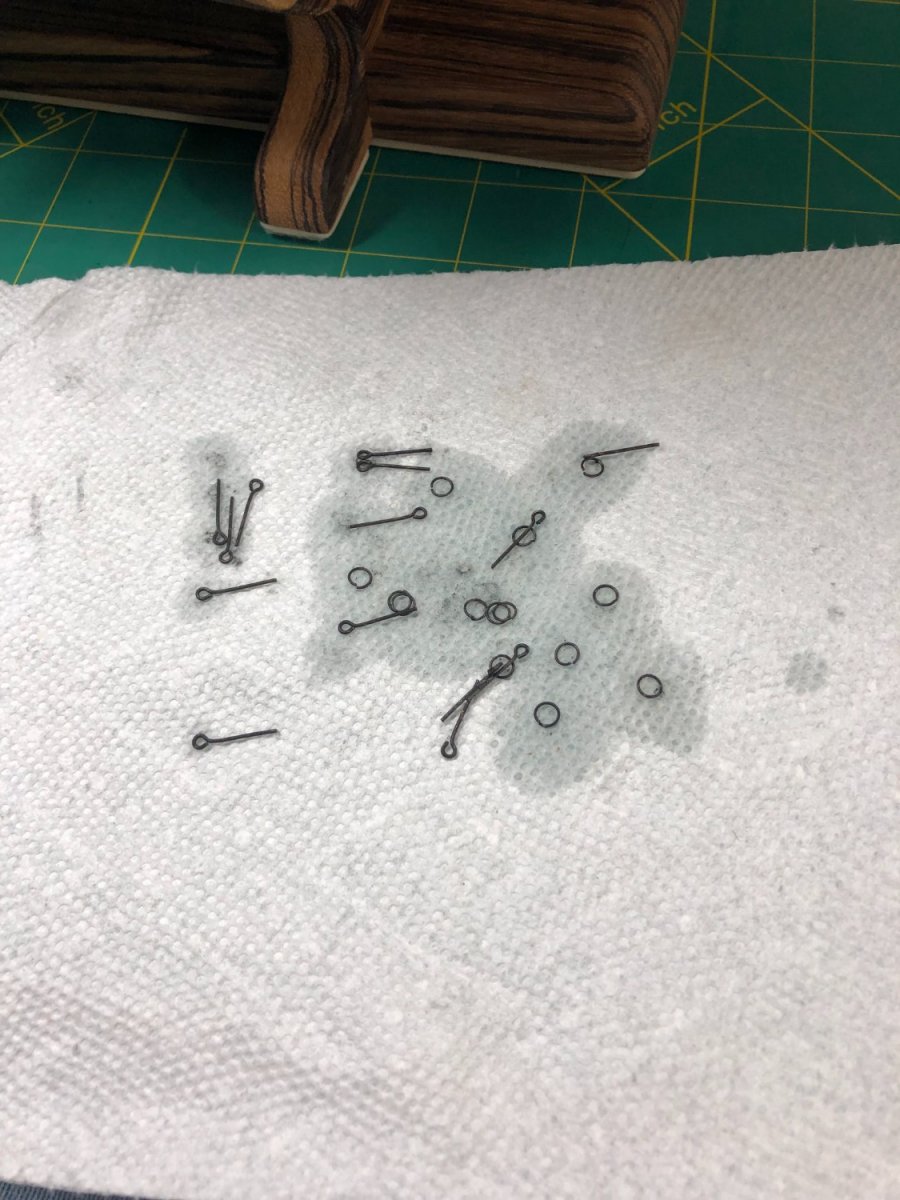
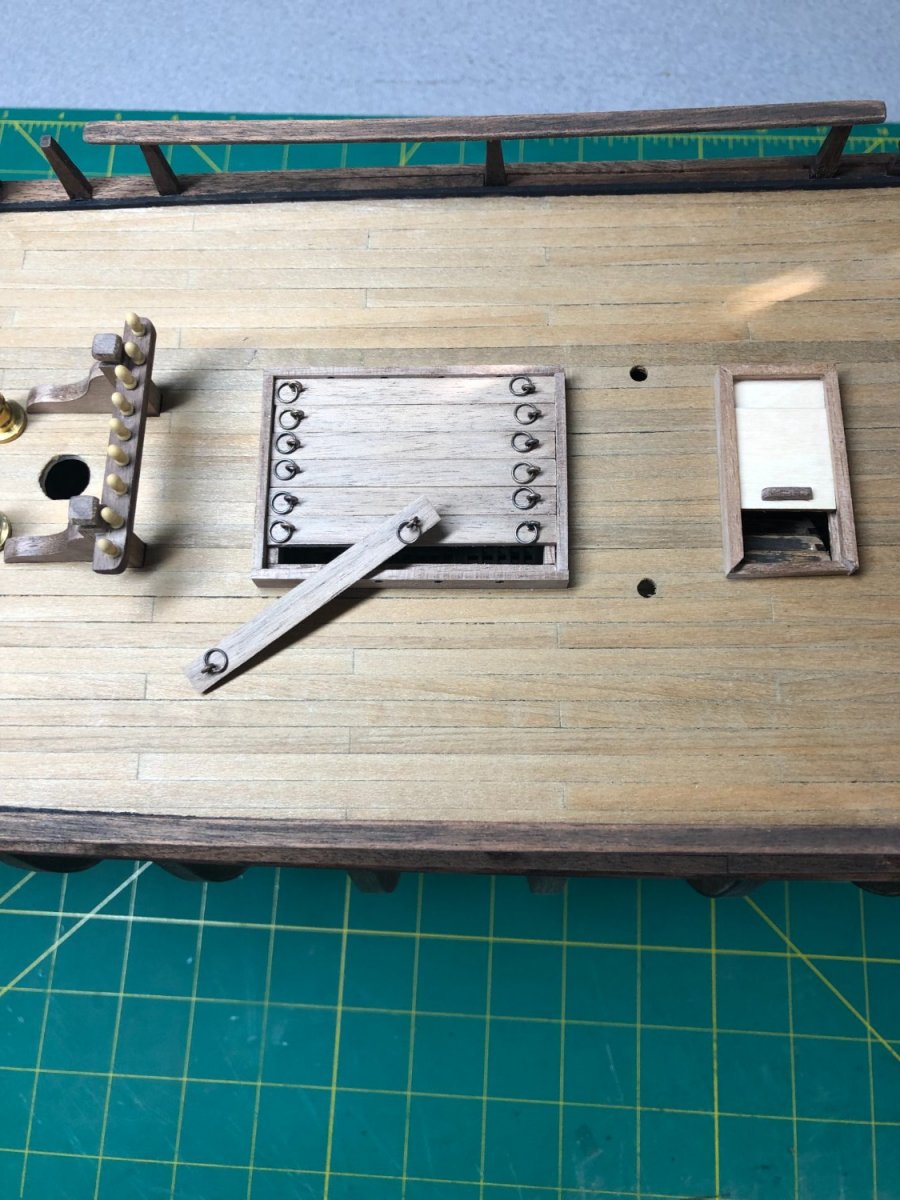
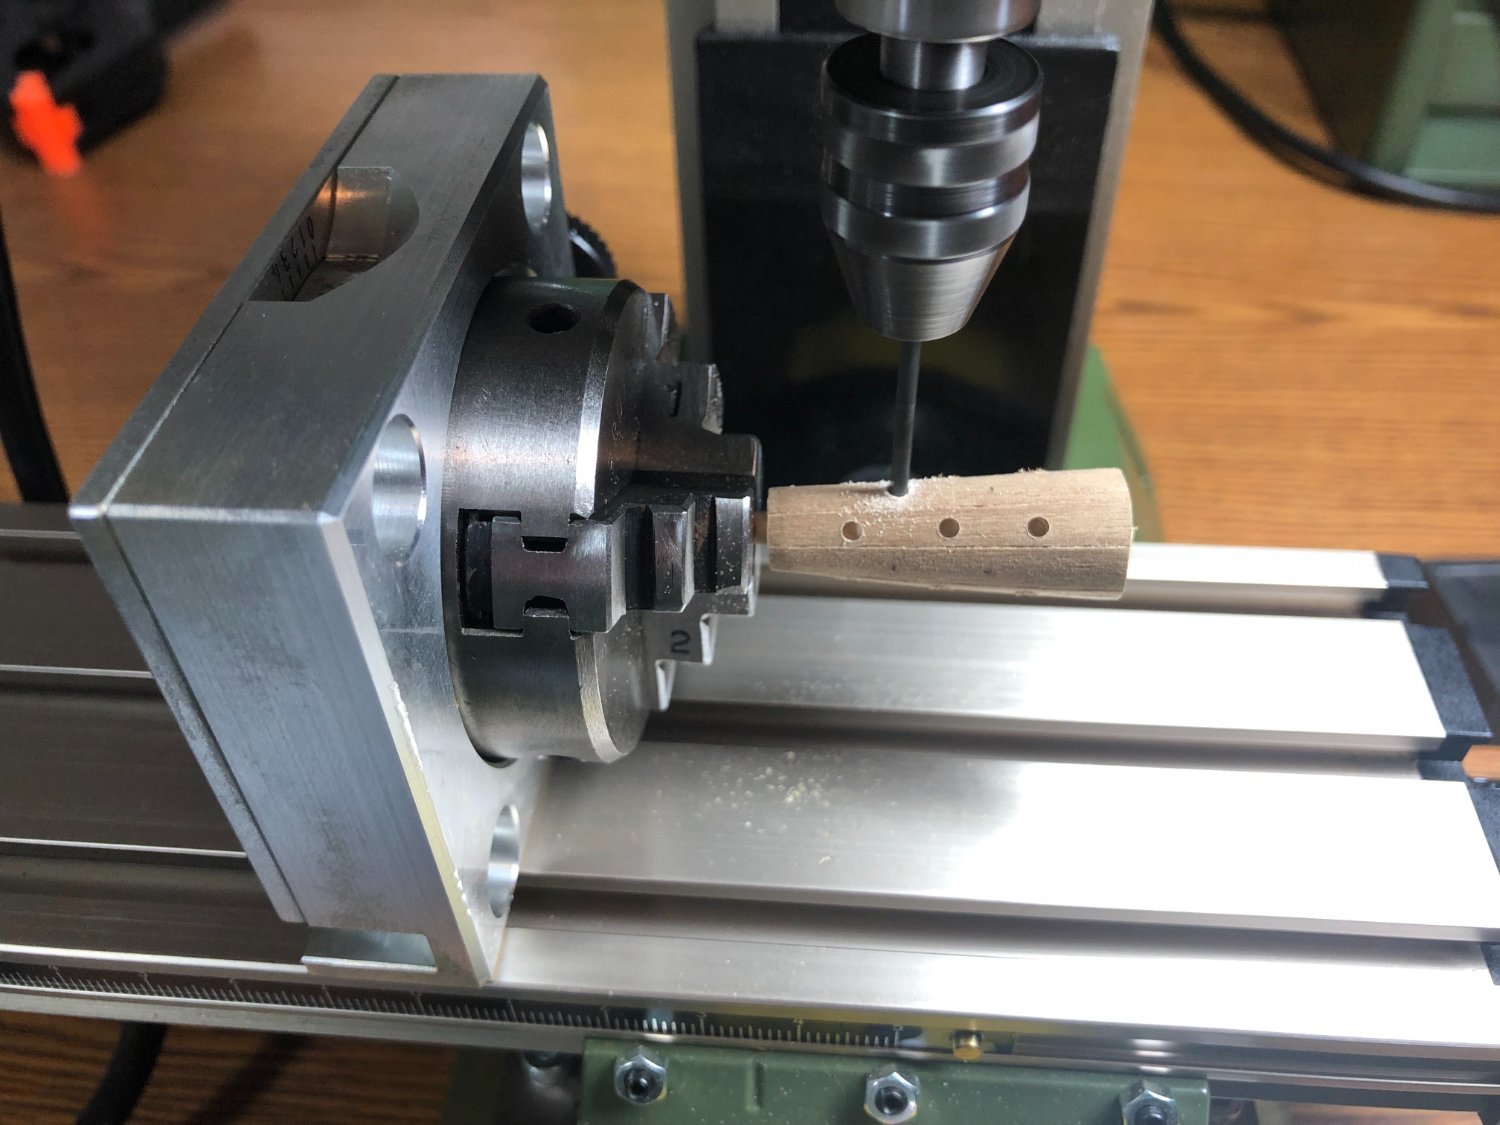
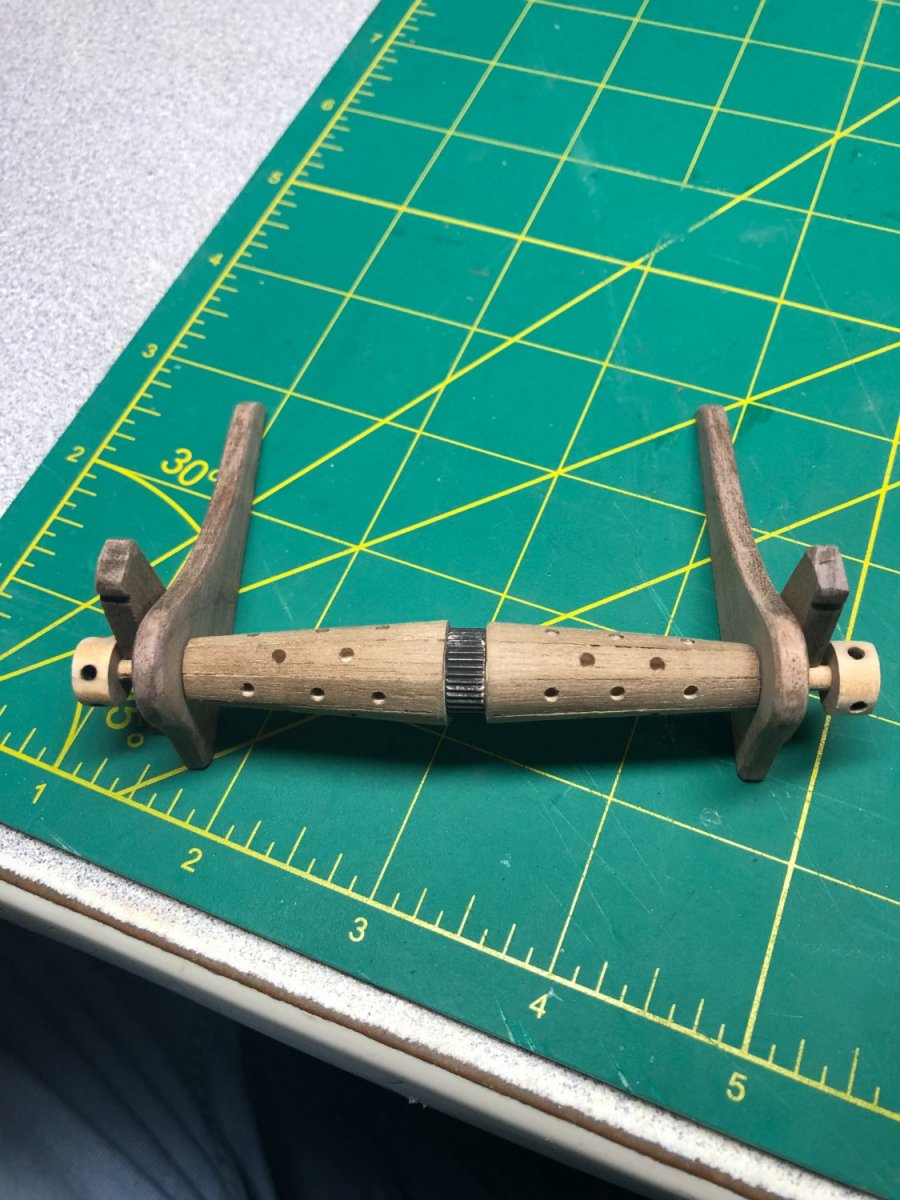
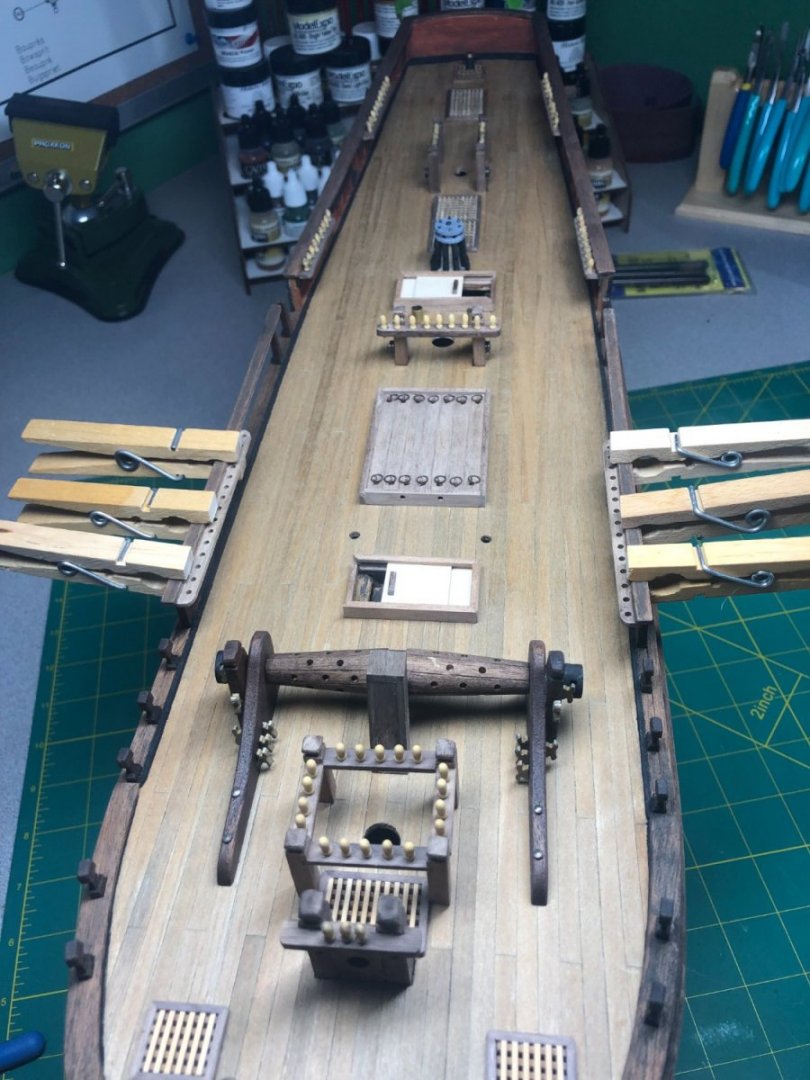
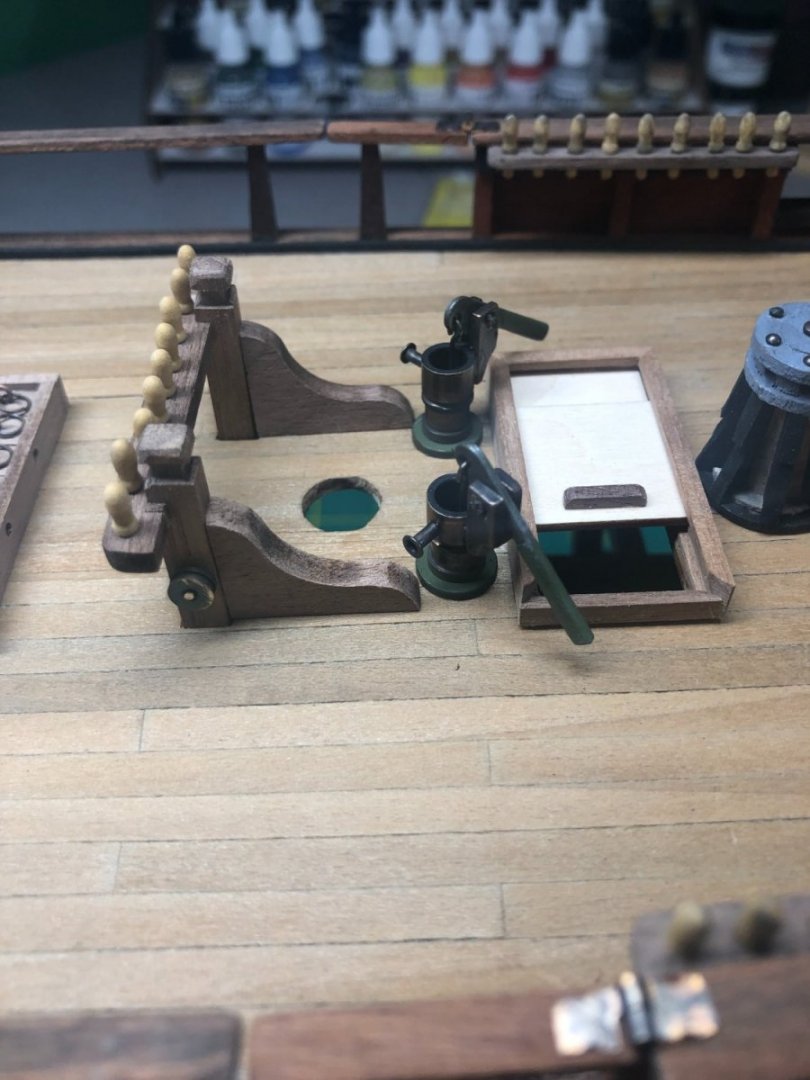
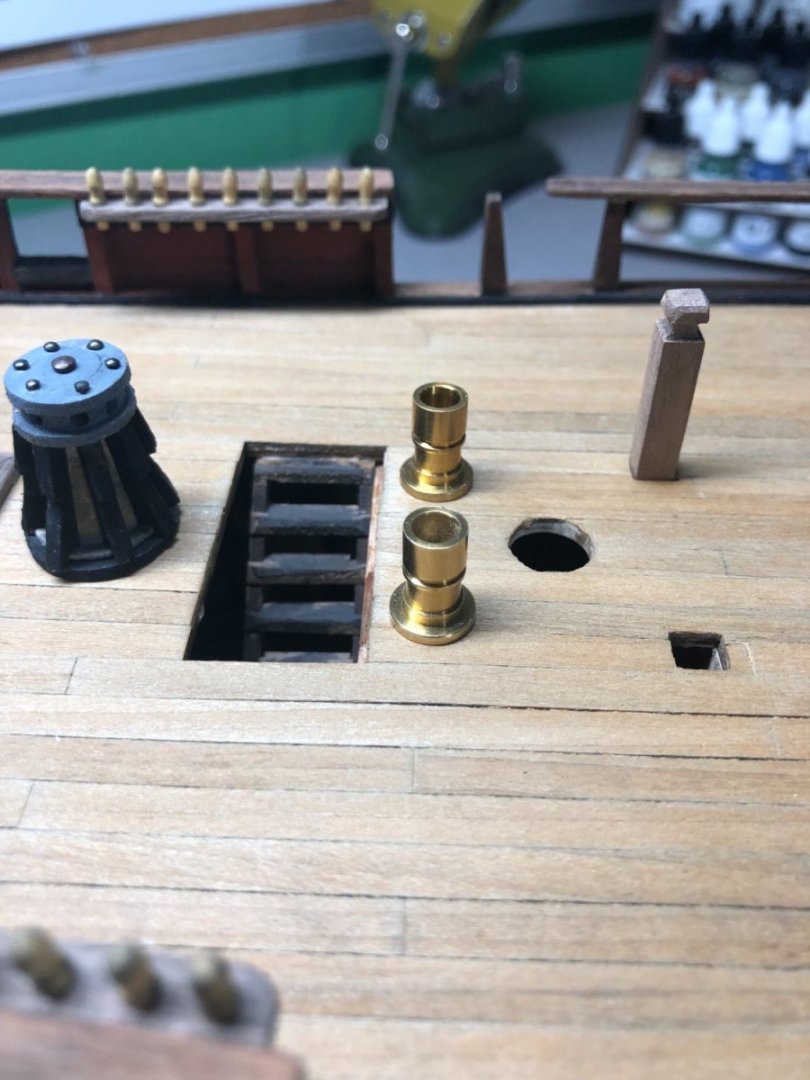
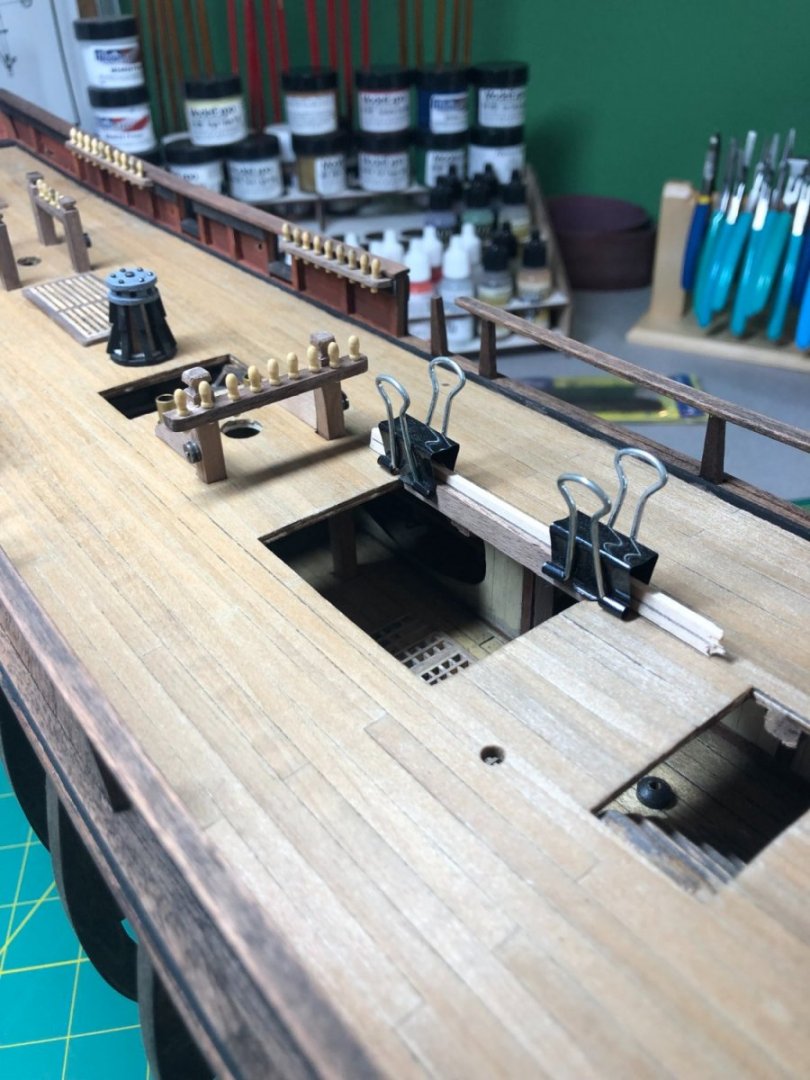
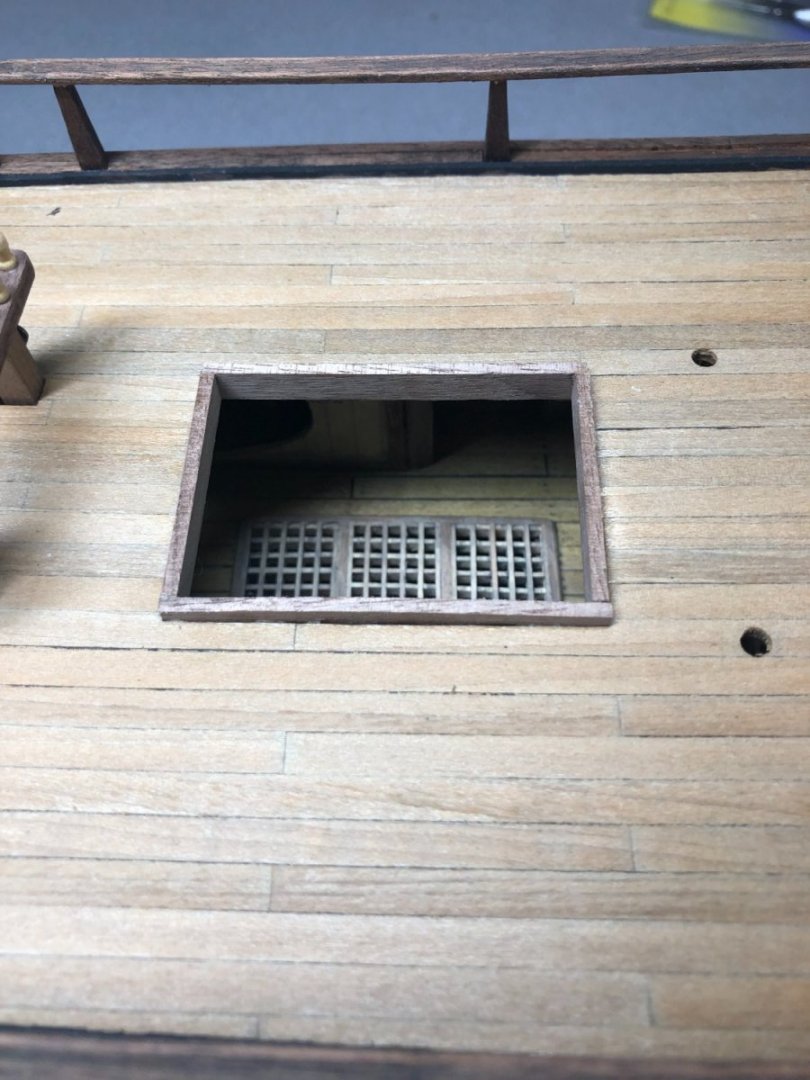
First, a look at the anchor windlass in place: Next up was the foremast pin stanchion. A straightforward assembly done much the way the other stanchions are/were done previously in the build log. Placement was simple too: The main mast pin rack stanchion was next. Although, it is similar to the others, this one did pose some potential problems. The bilge pump assemblies are very close to the stanchion and one of the companionways. Additionally, the brass pieces for the pumps did not fit over the brass tubes. I had to drill them out to 6mm ID for a good fit. Once drilled out I placed them over the tubes and checked the fit of the stanchion pieces: The uprights go through the deck into notches on the deck below. However, these did not line up as well as I though they should and I filed the main deck openings a bit to ensure proper fitting: The main cargo hatch covers were next. Cutting and fitting the pieces was timing consuming but a proper fit was important, for looks, if nothing else: I used a jig to ensure a 90 degree fit with the proper amount above the deck for the remaining pieces to mate to: The outer frames completed: The two companionway hatches were assembled with some difficulty! The pieces provided in the kit did not allow for a good fit and required some milling to fix the problem. Also, keeping the assembly square was a bit of struggle due to the small size of the pieces. In the end, it finally came together: Lastly, were cover pieces for the cargo hatch. Again, a good fit was desired for appearances! I cut all the pieces, sanded, marked and drilled the holes for the hardware: I cleaned up the pencil marks and blackened the hardware using the same method used throughout the build: And the final assembly: Weathering, aging and some staining to come on these assemblies. More deck work coming up!


-
Well said!
-
I dunno if I agree with the colors in the book. I have never found an accurate, trustworthy source for what the actual colors were on her. As to the wales, even though it is different, is it worth the extra work to you? Only you can answer that question!? Here is my version of the same area: I use the same book… artistic freedom is an important part of any build that does not have a solid source of accurate information, IMHO.

-
Looks good… Thst half hull project will you in the future but overall you’re doing fine!
- 362 replies
-
- 1
-
-
- Amati
- Lady Nelson
- (and 2 more)
-
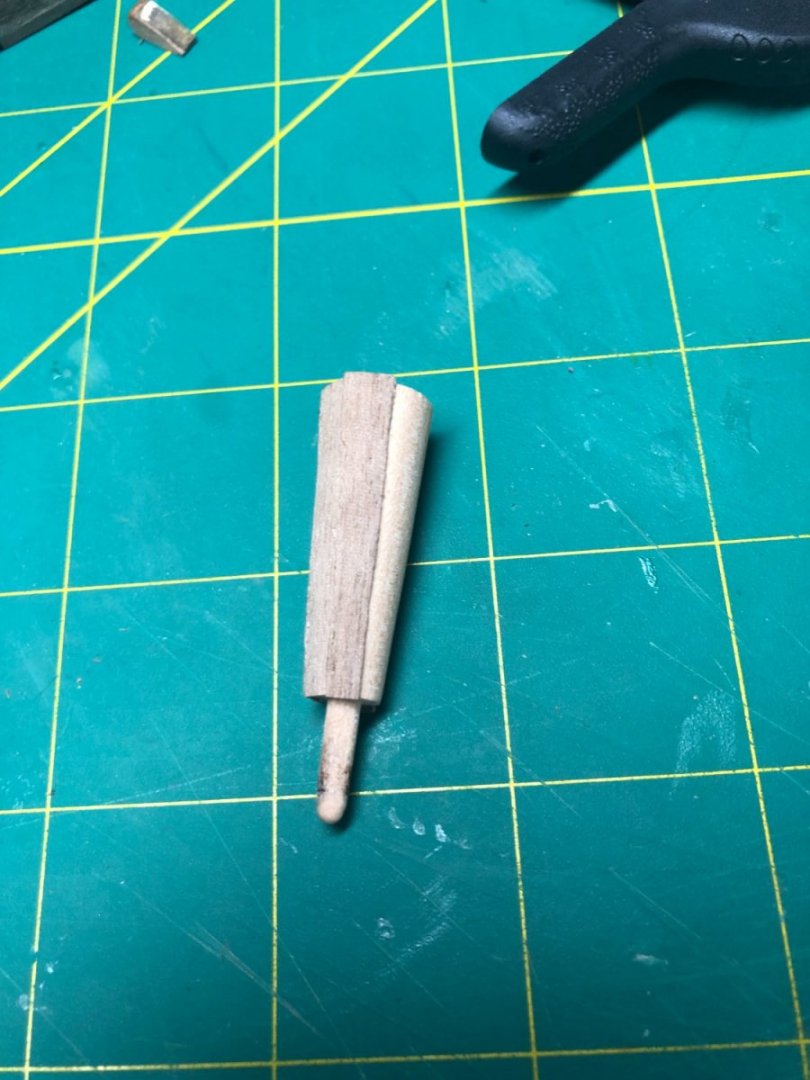
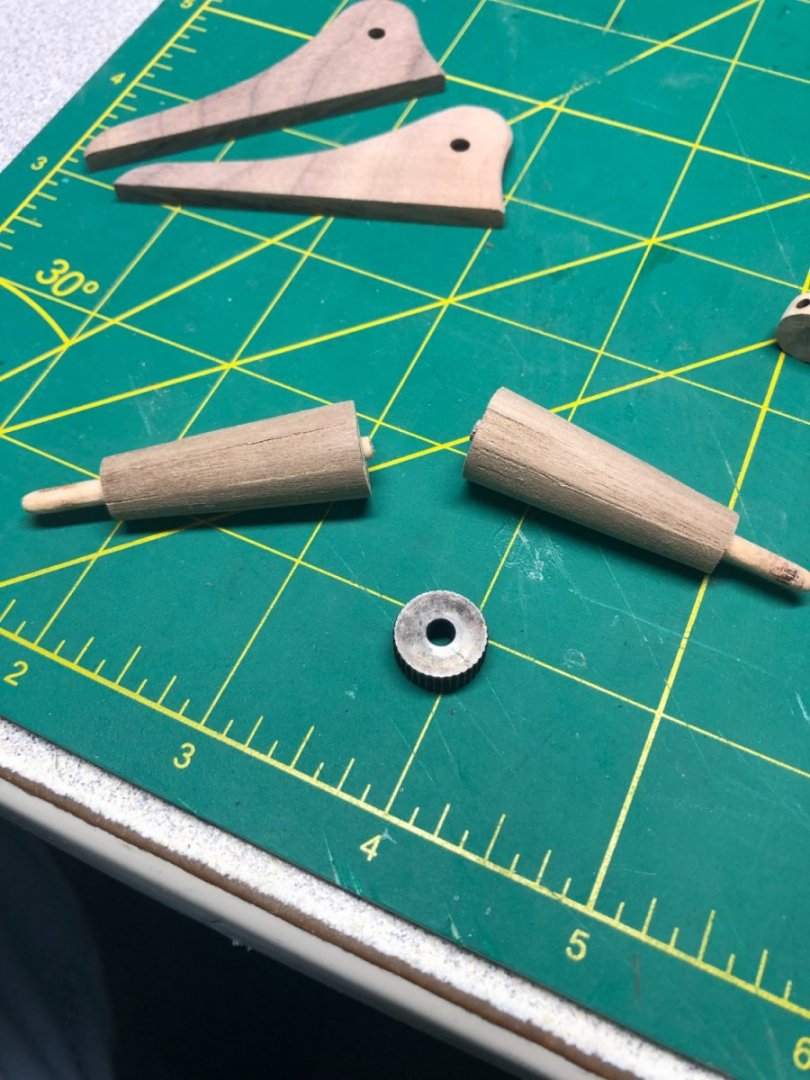
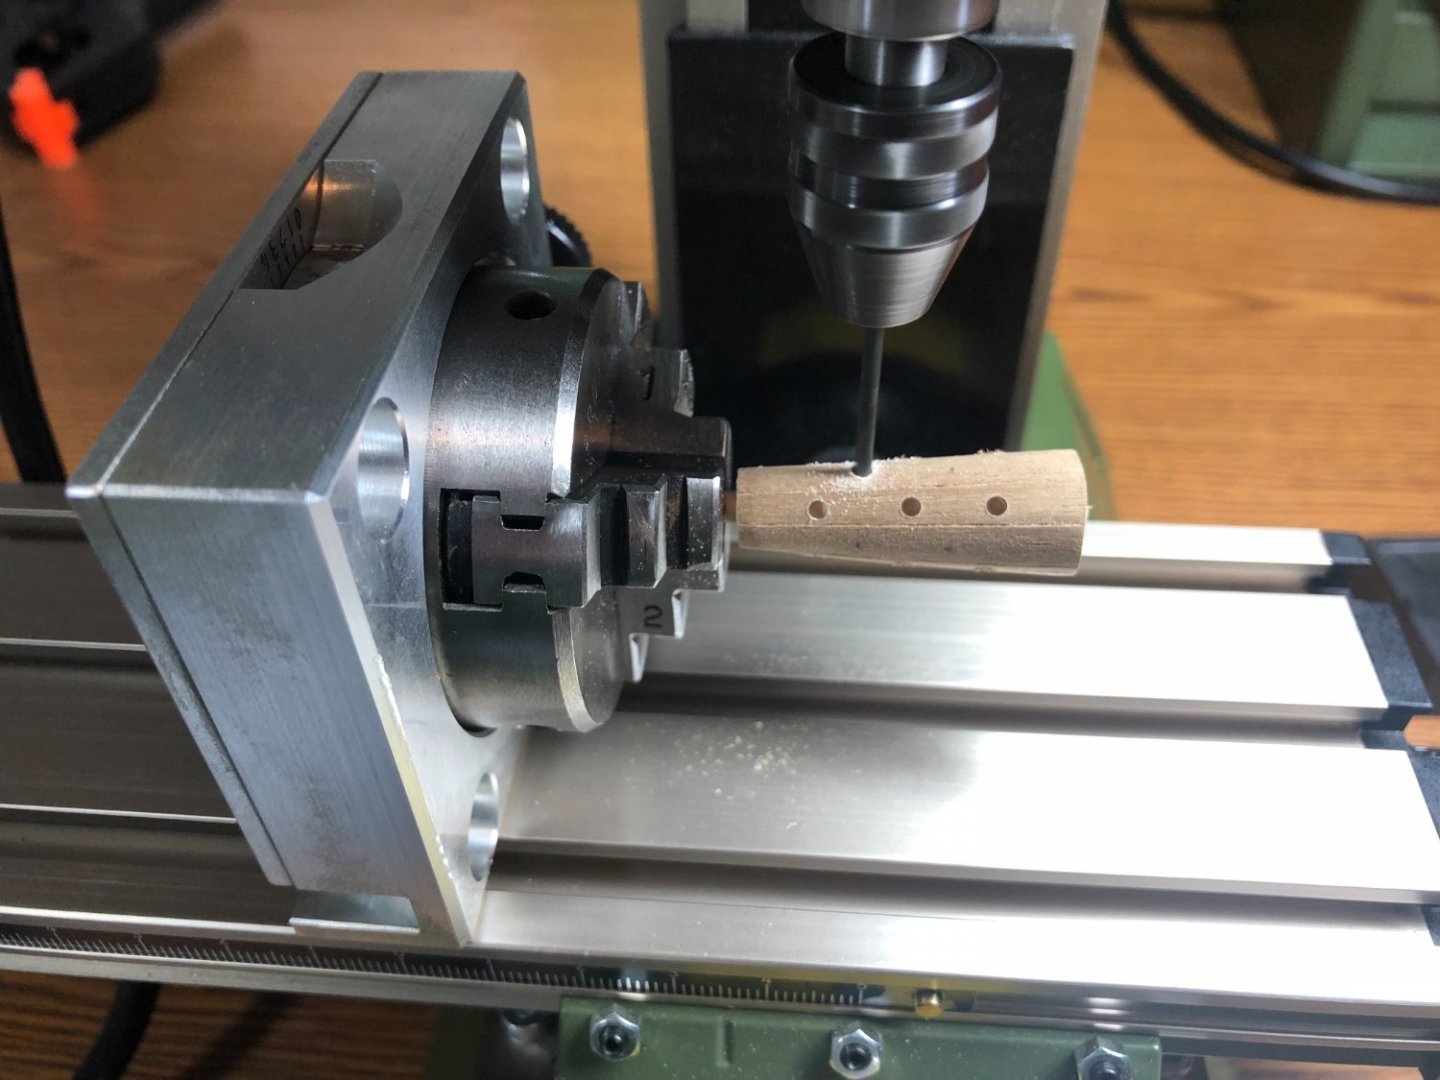
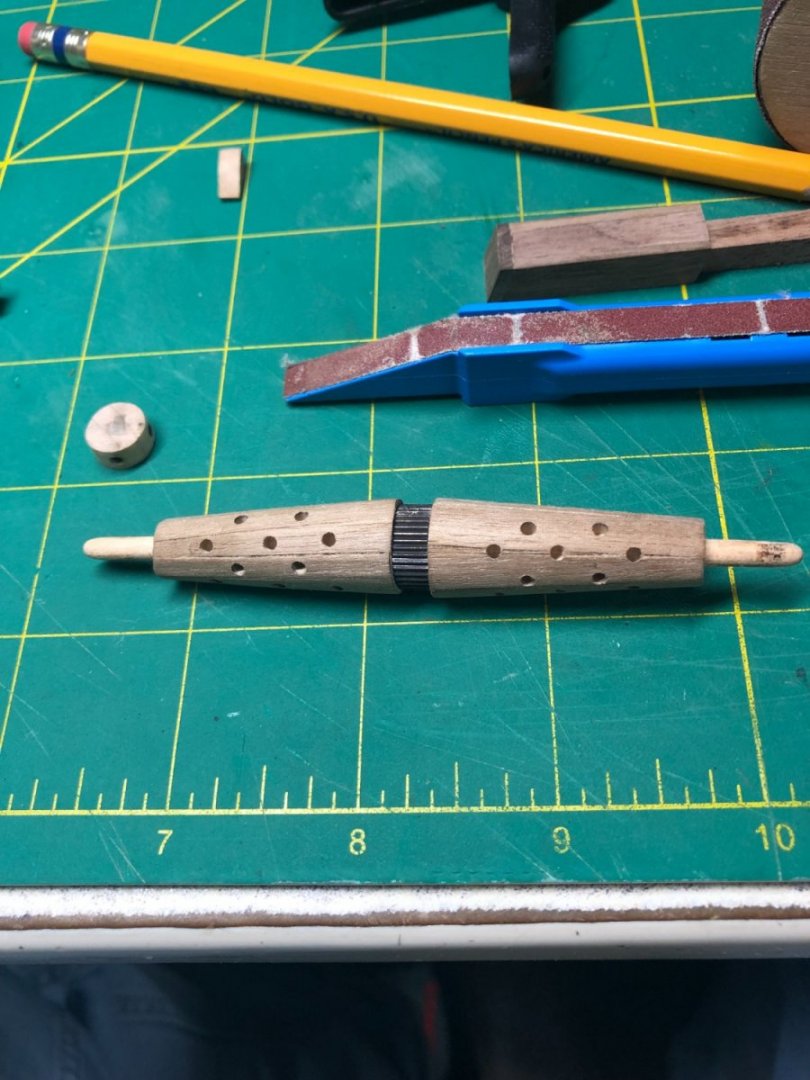
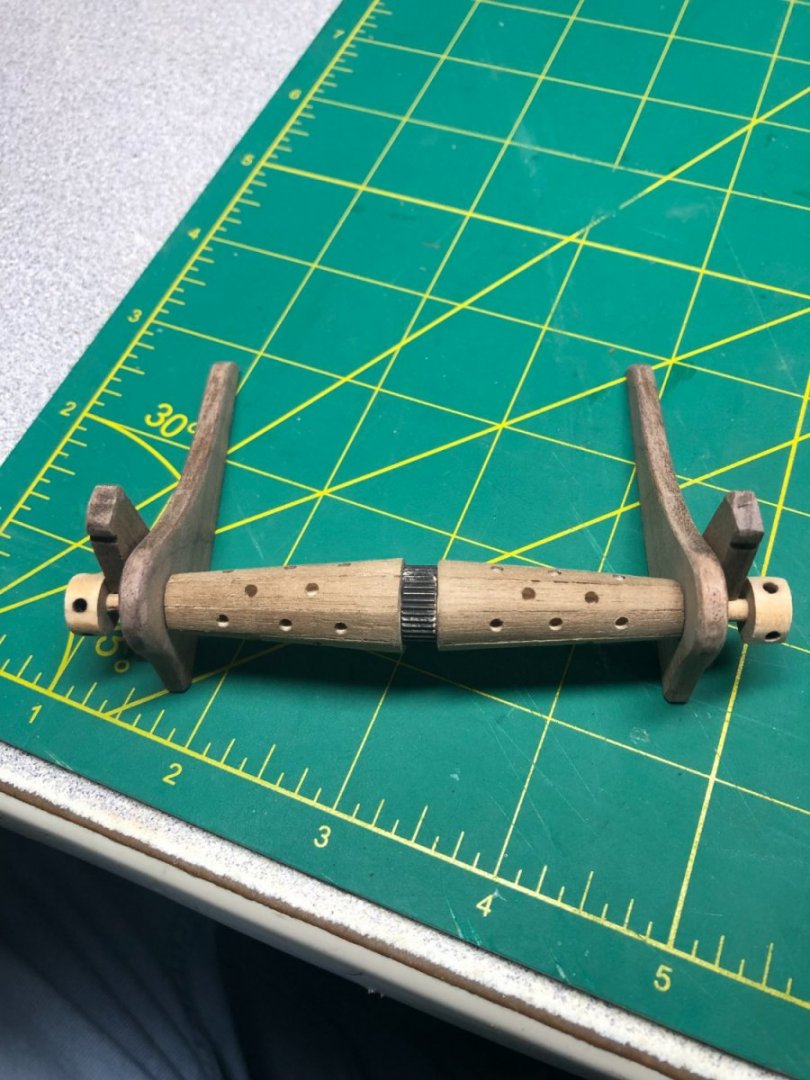
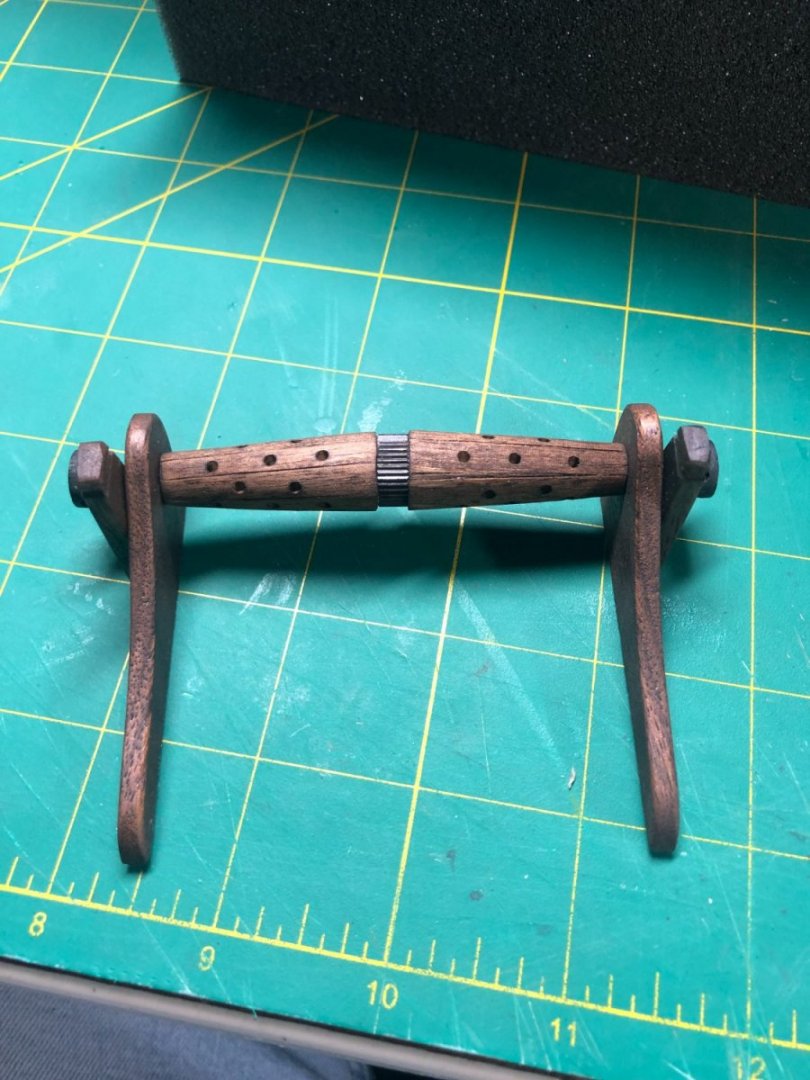
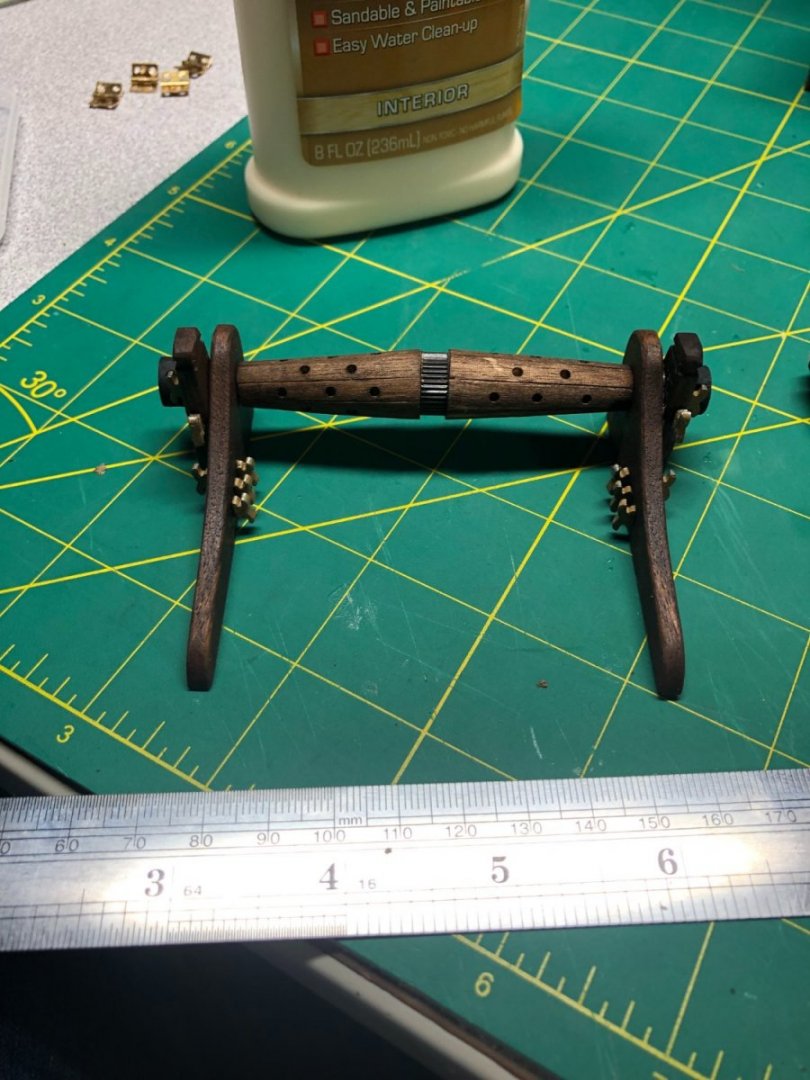
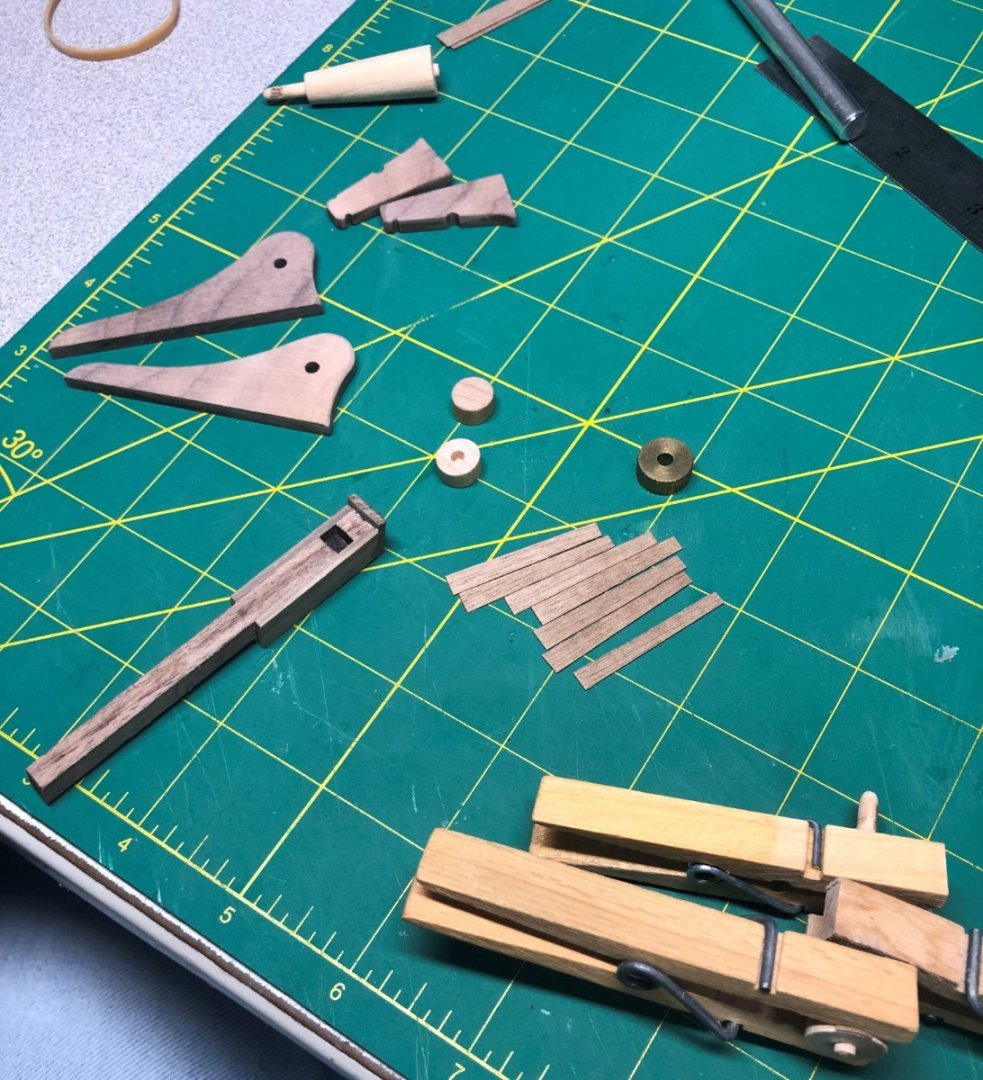
The anchor windlass was a fun project! Lots of pieces to assemble and some mill work too. First, I cut all the necessary pieces, some prefabbed and some hand fashioned: The paw stanchion and paw were a simple matter of cutting pieces to glue to the existing laser cut piece. The only difficult part was ensuring that the pieces met the deck properly when installed... glued with sanding left to go: The windlass needed to be covered with walnut veneer. I measured the circumference at both ends and determined the shape of the pieces to be cut. Once all were cut, I glued them in place one at a time using PVA glue and clothes pins to secure it to the surface until dry before moving on to the next piece: With just a minor adjustment on the final piece, it came out good: Some light sanding and then off to the mill for making the hole pattern: I blackened the gear and assembled the pieces: Dry assembly of the windlass: For this assembly, I decided to use a Dutch oil stain: And finally, I added the cleats... not a fan of the metal ones included in the kit but decided to use them anyway. Painted and glued into place using CA glue. The assembly is complete and ready for installation: I'll get a picture of it mounted in the next post... On to more deck fixtures and work! Thanks for stopping in!