LyleK1
-
Posts
541 -
Joined
-
Last visited
Content Type
Profiles
Forums
Gallery
Events
Everything posted by LyleK1
-
 My wife just asked me the same thing! No... I have all the yards and booms built but they need to be painted/stained and all the blocks, etc still need to be added. All that has to be done before I can get back on the sails and running rigging. Additionally, there is the touch-up work and all the staging of the interior. I'm leaving on the 2nd of July and not returning until late August and then again in late September until November! As I'm sure you know, you just can't rush this work... it is very time consuming. Hoping to finish in December!
 -
Foremast is mostly done... still a few lines that need to be buttoned up but that will come a little later. It never ceases to amaze me at how many lines are needed to operate the masts, yards and sails... these sailors were/are a marvel! Starting on the main mast yards and I think I'll go ahead and build up the mizzen mast yards and booms before moving on to the next set of sails and rigging. Only a couple of weeks before we leave for the summer and early fall. We'll see how much I can get done before the 4th of July!
-
Interesting idea… I may consider that when I get to the staging part of the details. Thanks Tom.
-
Thanks Tim! Your build continues to be a source of reference and inspiration. As you know, the AL plans leave much to be desired. You’ve helped fill in the gray areas and I do appreciation your pictures and you’re help! Looks like I’m on track to get her done after our summer and fall trips.
-
Welcome Herby! If I might suggest, put your build log link in your signature. I'd love to see the build!
-
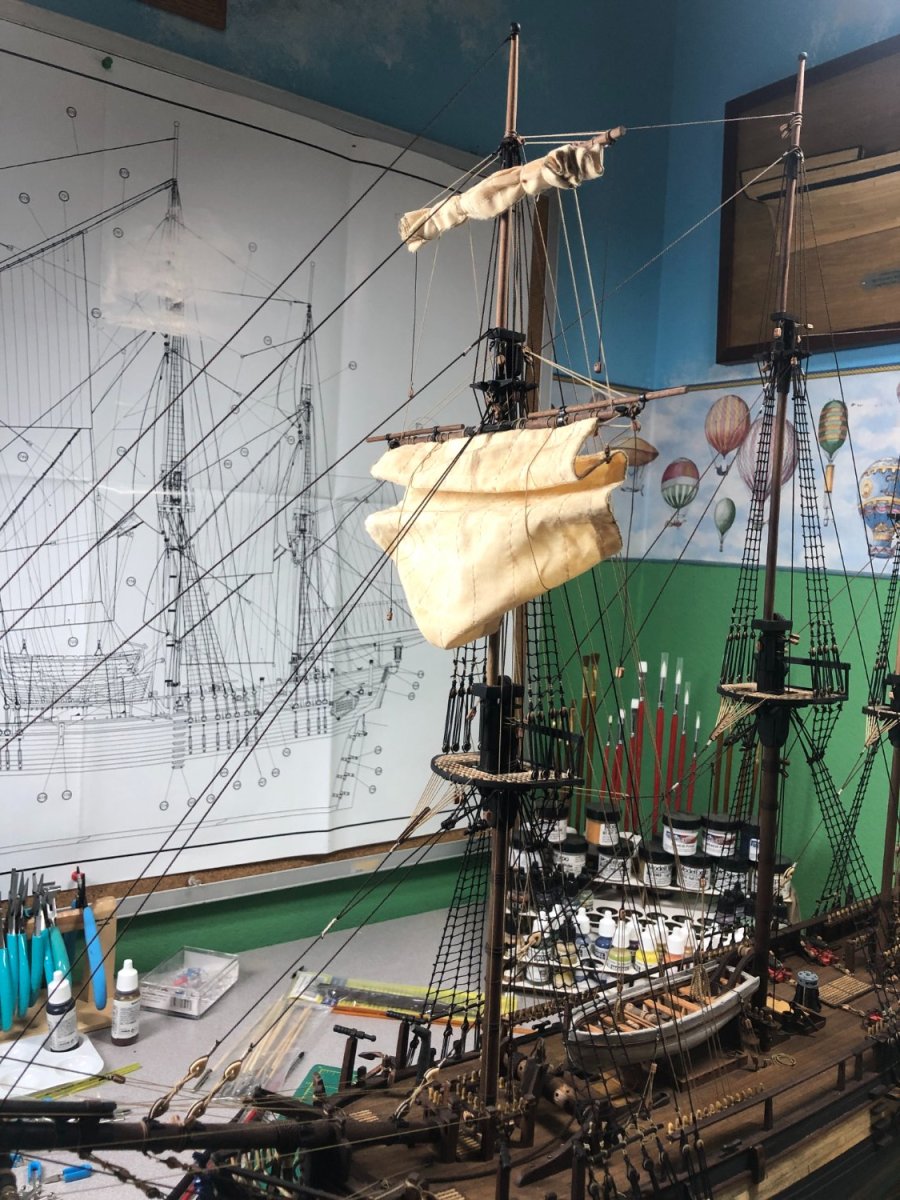
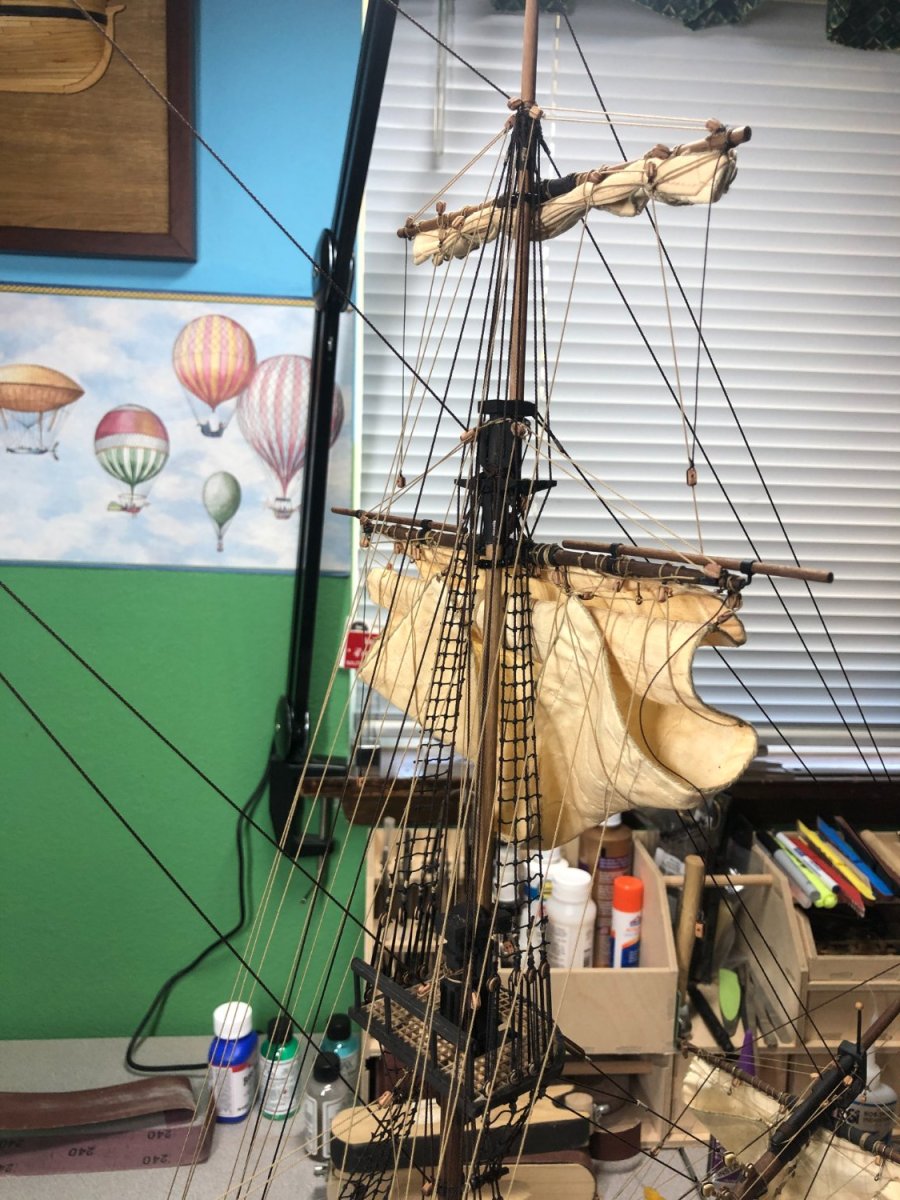
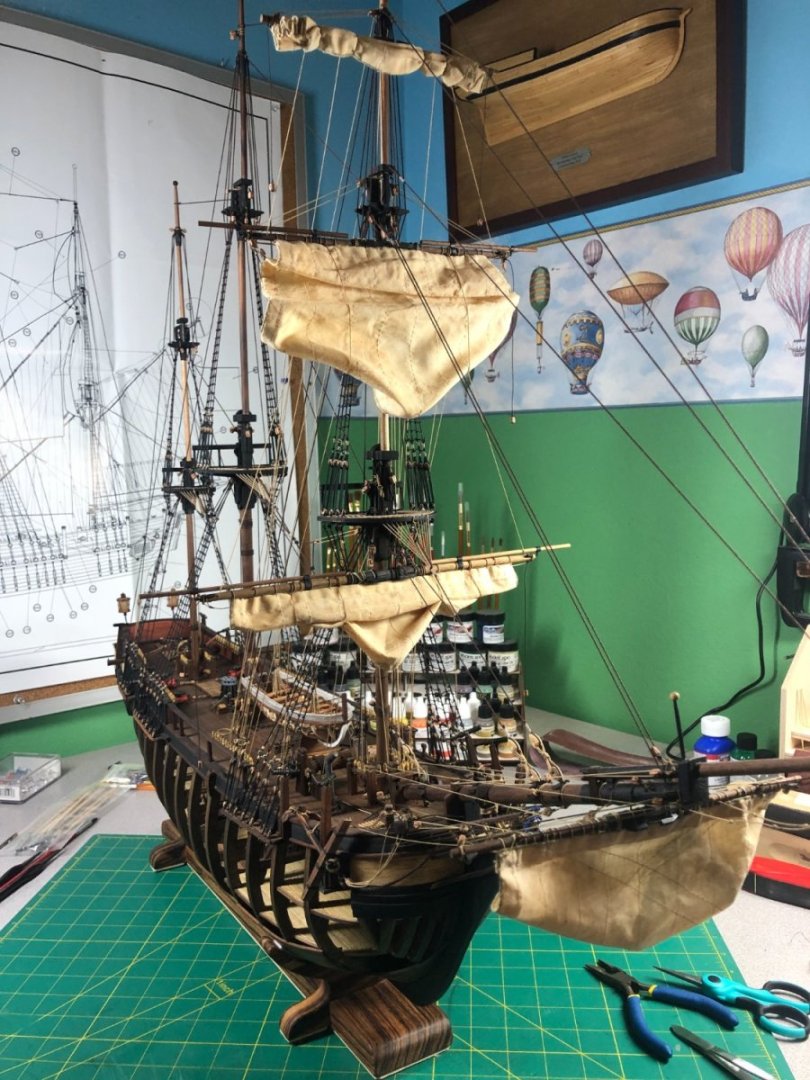
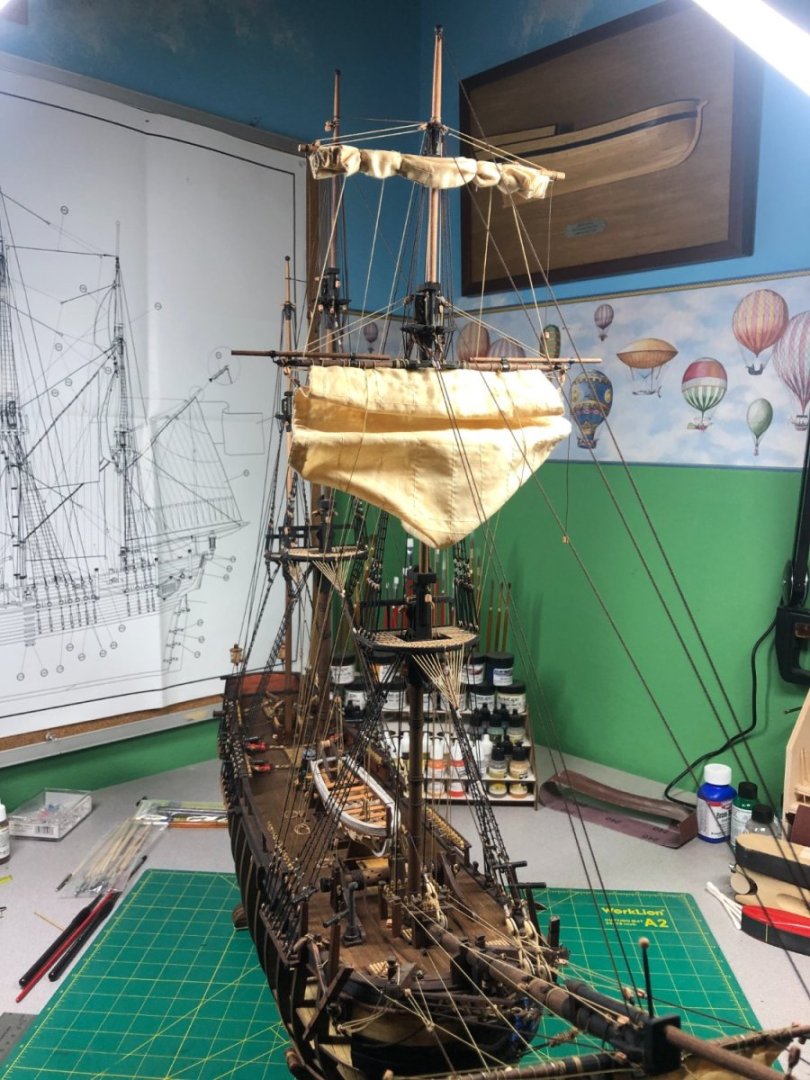
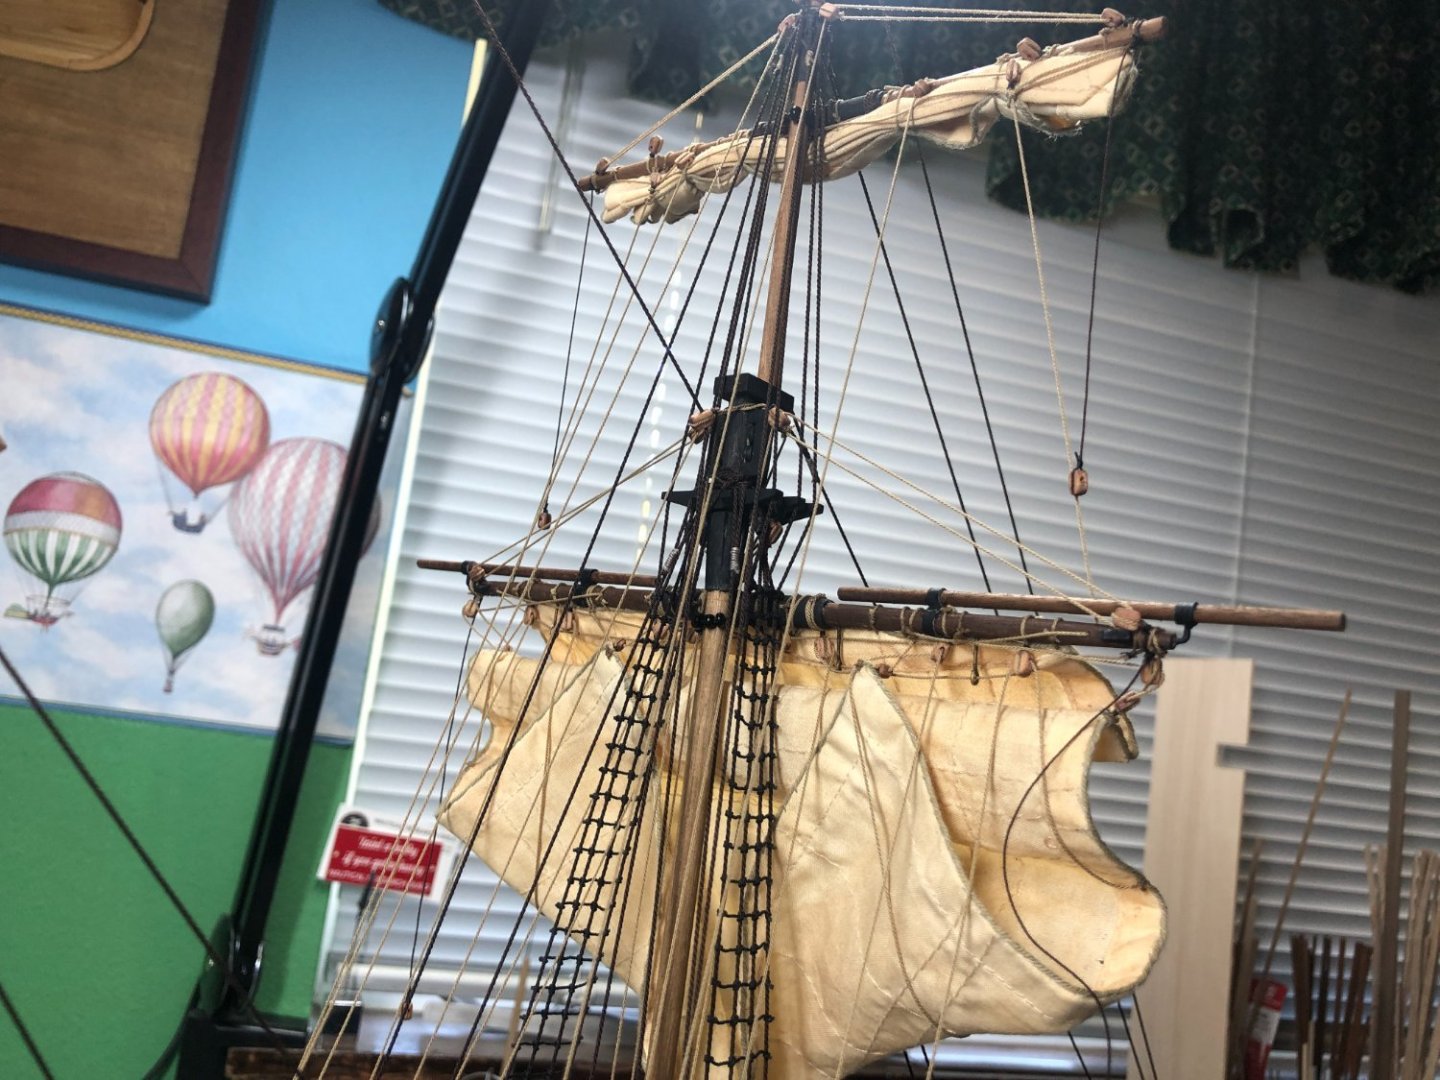
Two down and many to go! Please leave a comment on the way I've set the sails... I'm looking for that furled and dry-set state. Although the sails are well made, they are bulky and I think will be better displayed with a mix. Additionally, I get the added bonus of leaving the ship easier to view since the sails will be one way or the other. So far, I think it looks good. Thoughts?


-
Thank you! Appreciate the comments.
-
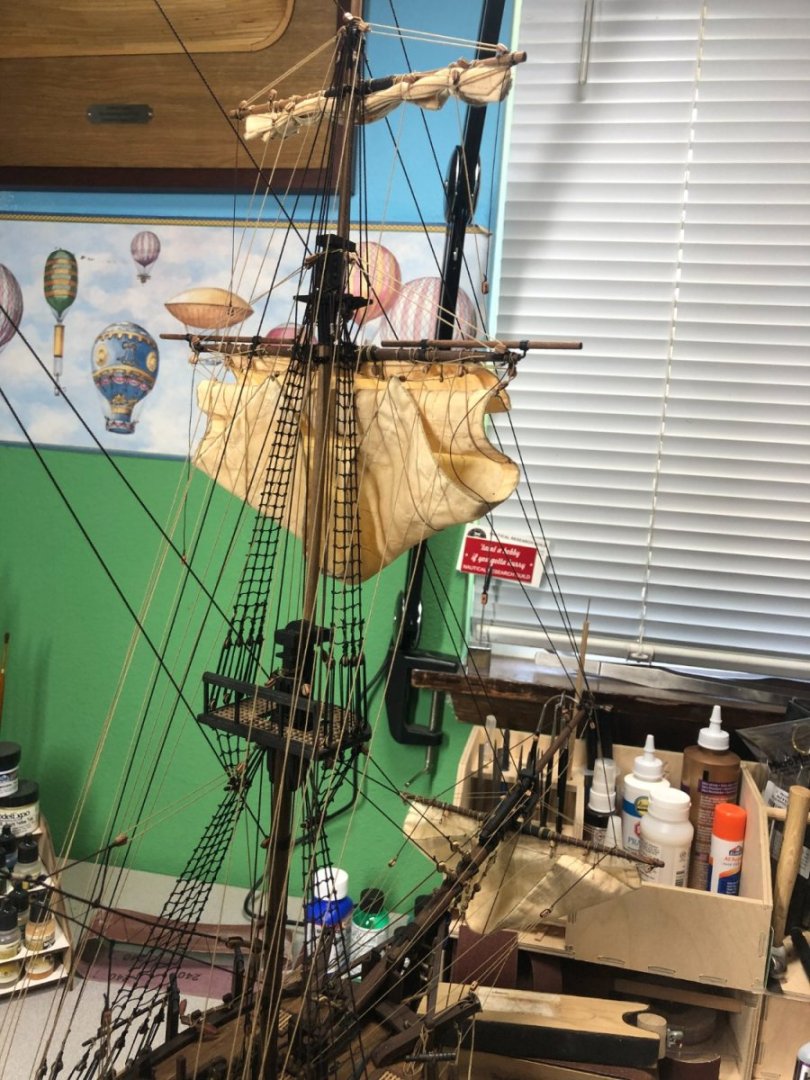
Still some time before our next trips get started! So back at it! The fore top gallant yard and sail were hung today. I attached the halyard to the yard and then bent (?) the sail to the yard. After tightening and knotting, I ran the halyard line to the deck for attaching later. I also attached blocks on the lower corners of the sails for rigging. I'll set the sail after getting the yard rigged. On we go!

-
Good luck, Ross. I think you'll like the results. Unfortunately, the pictures don't do the results justice. They turned out really nice!
-
No! Your not making tea!!
-
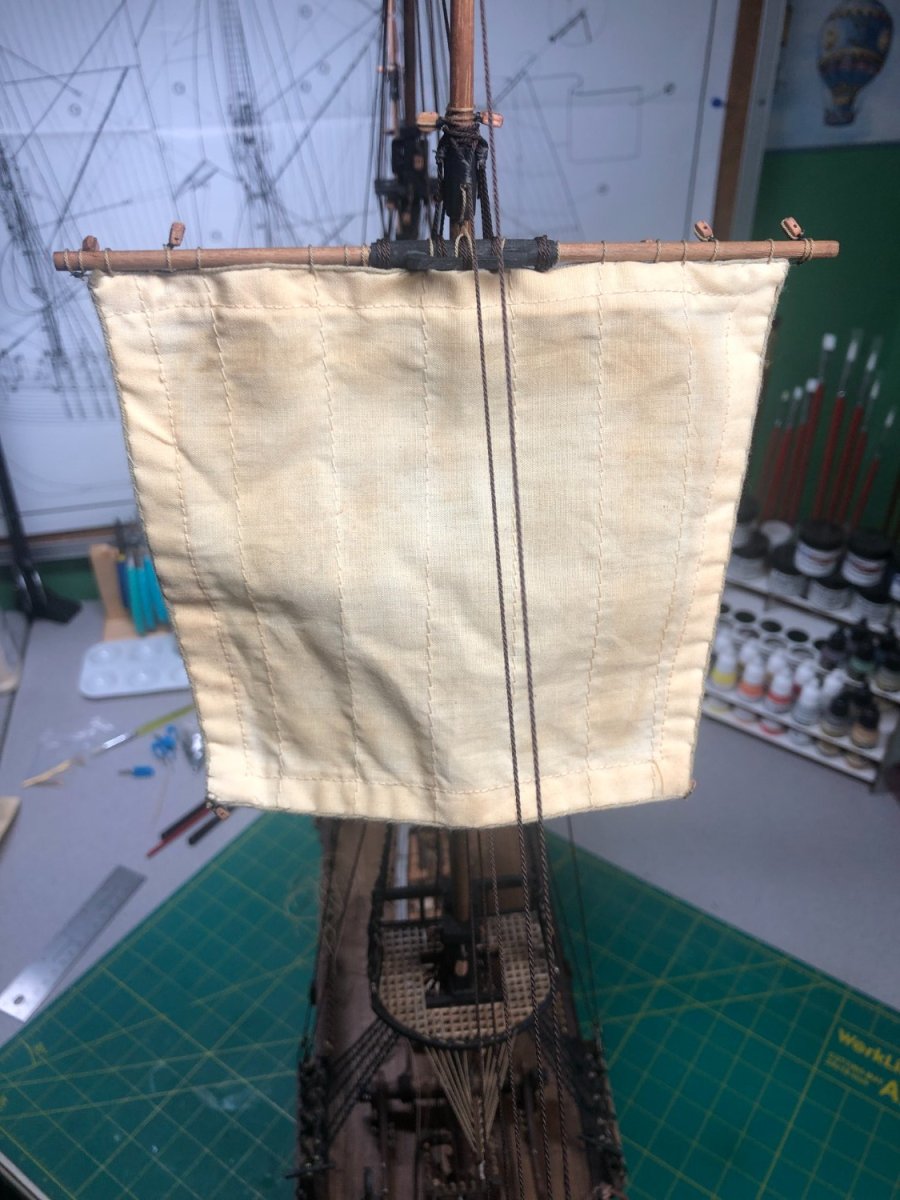
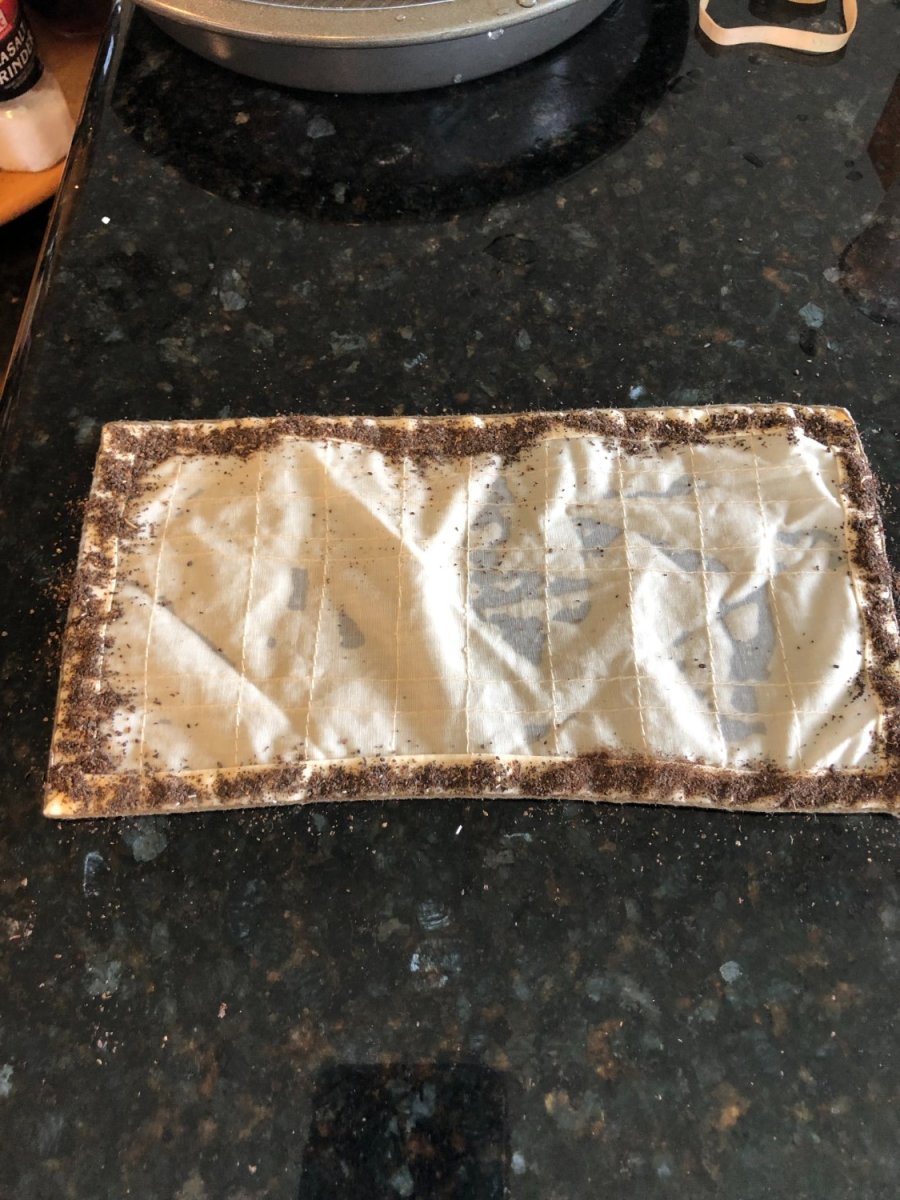
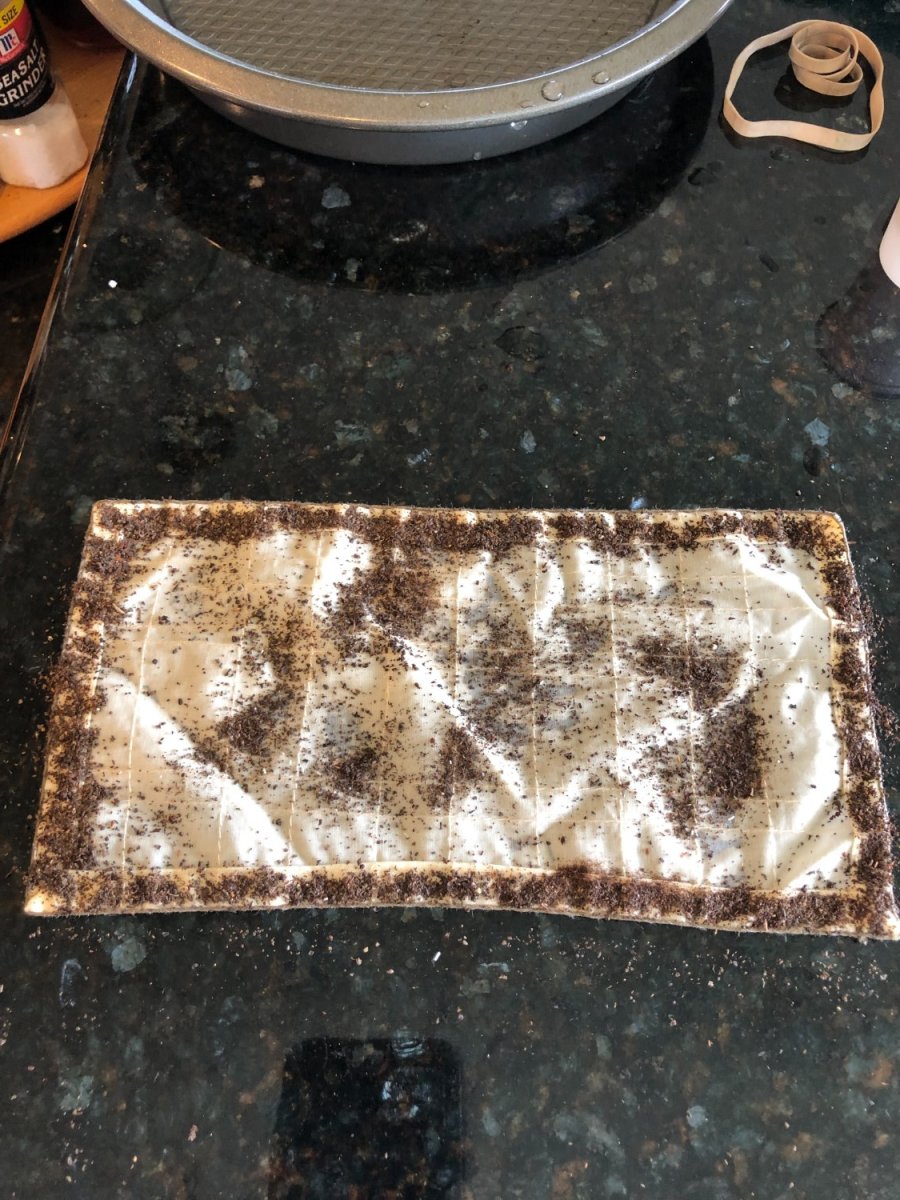
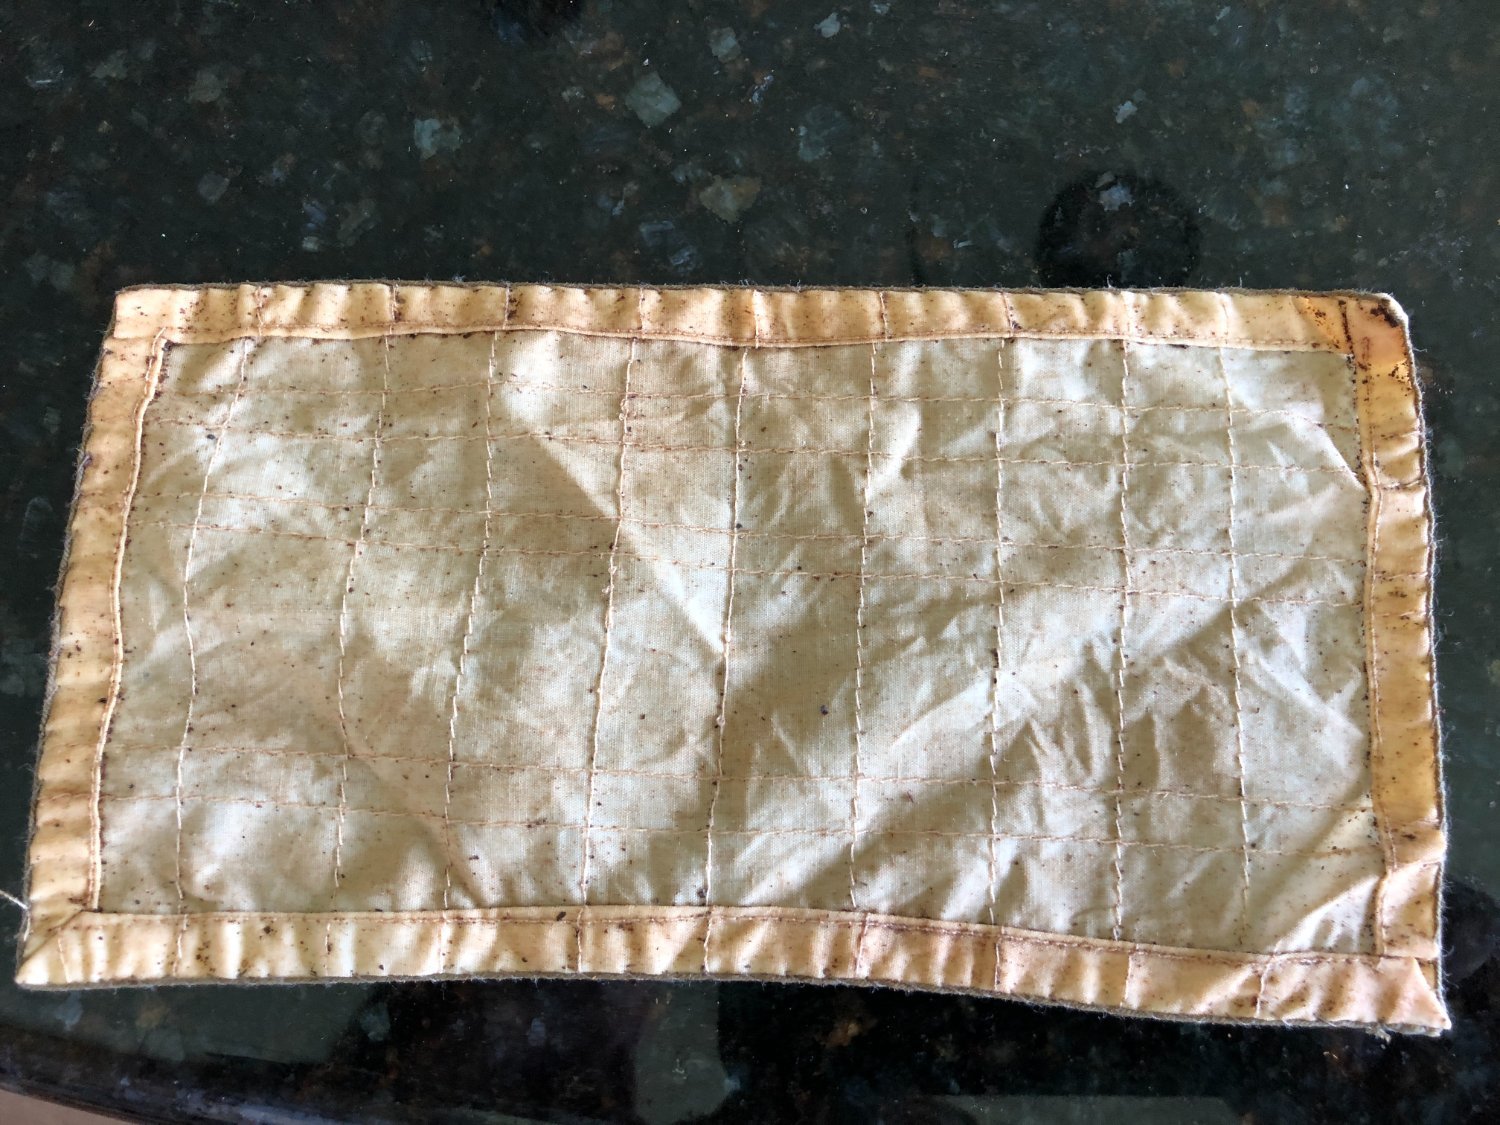
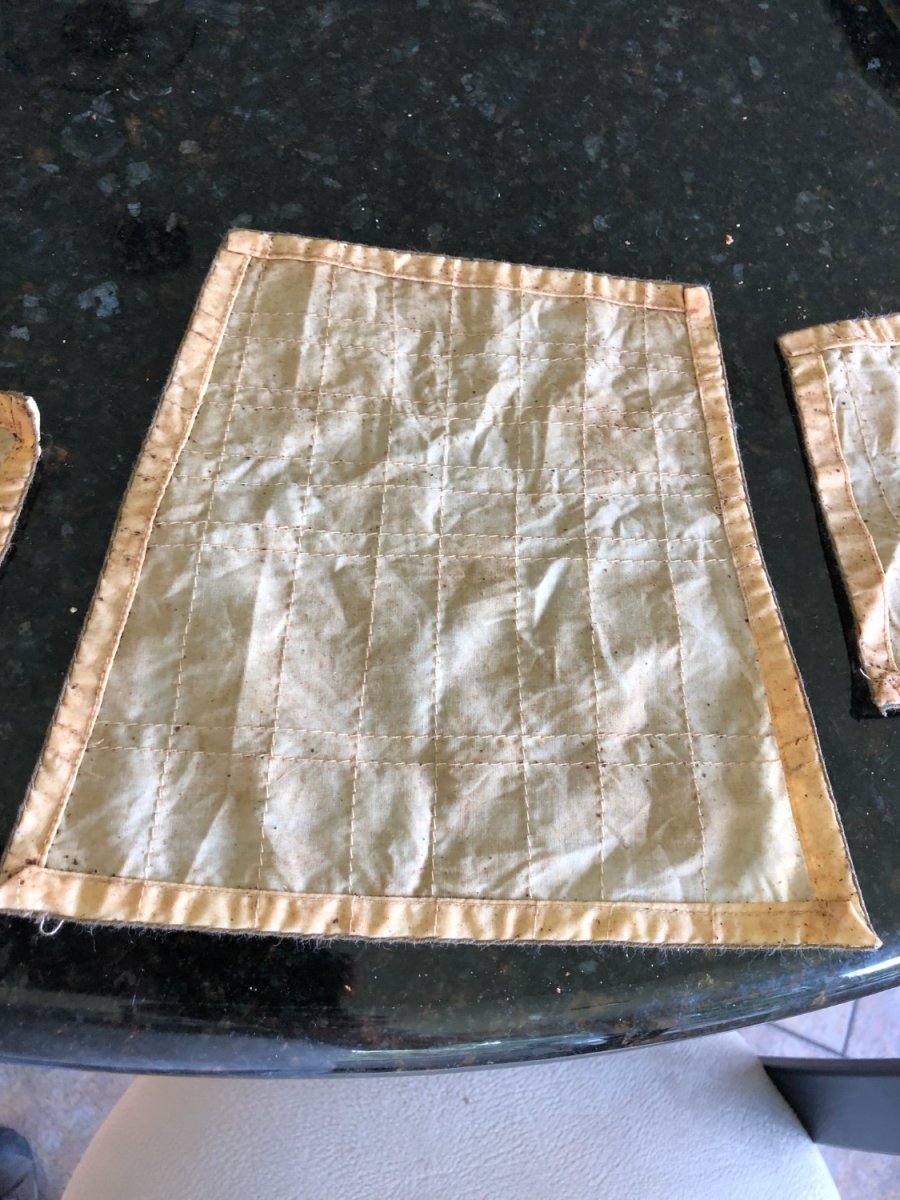
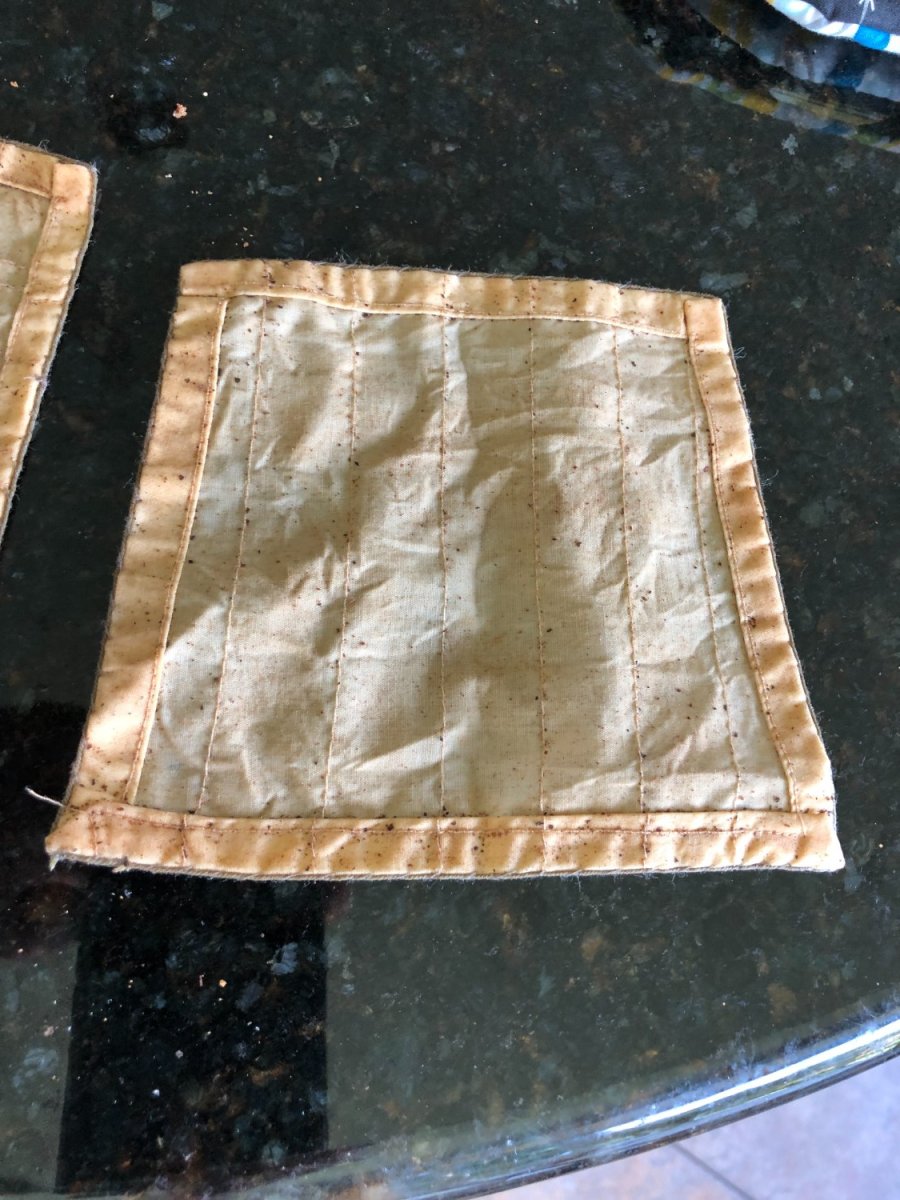
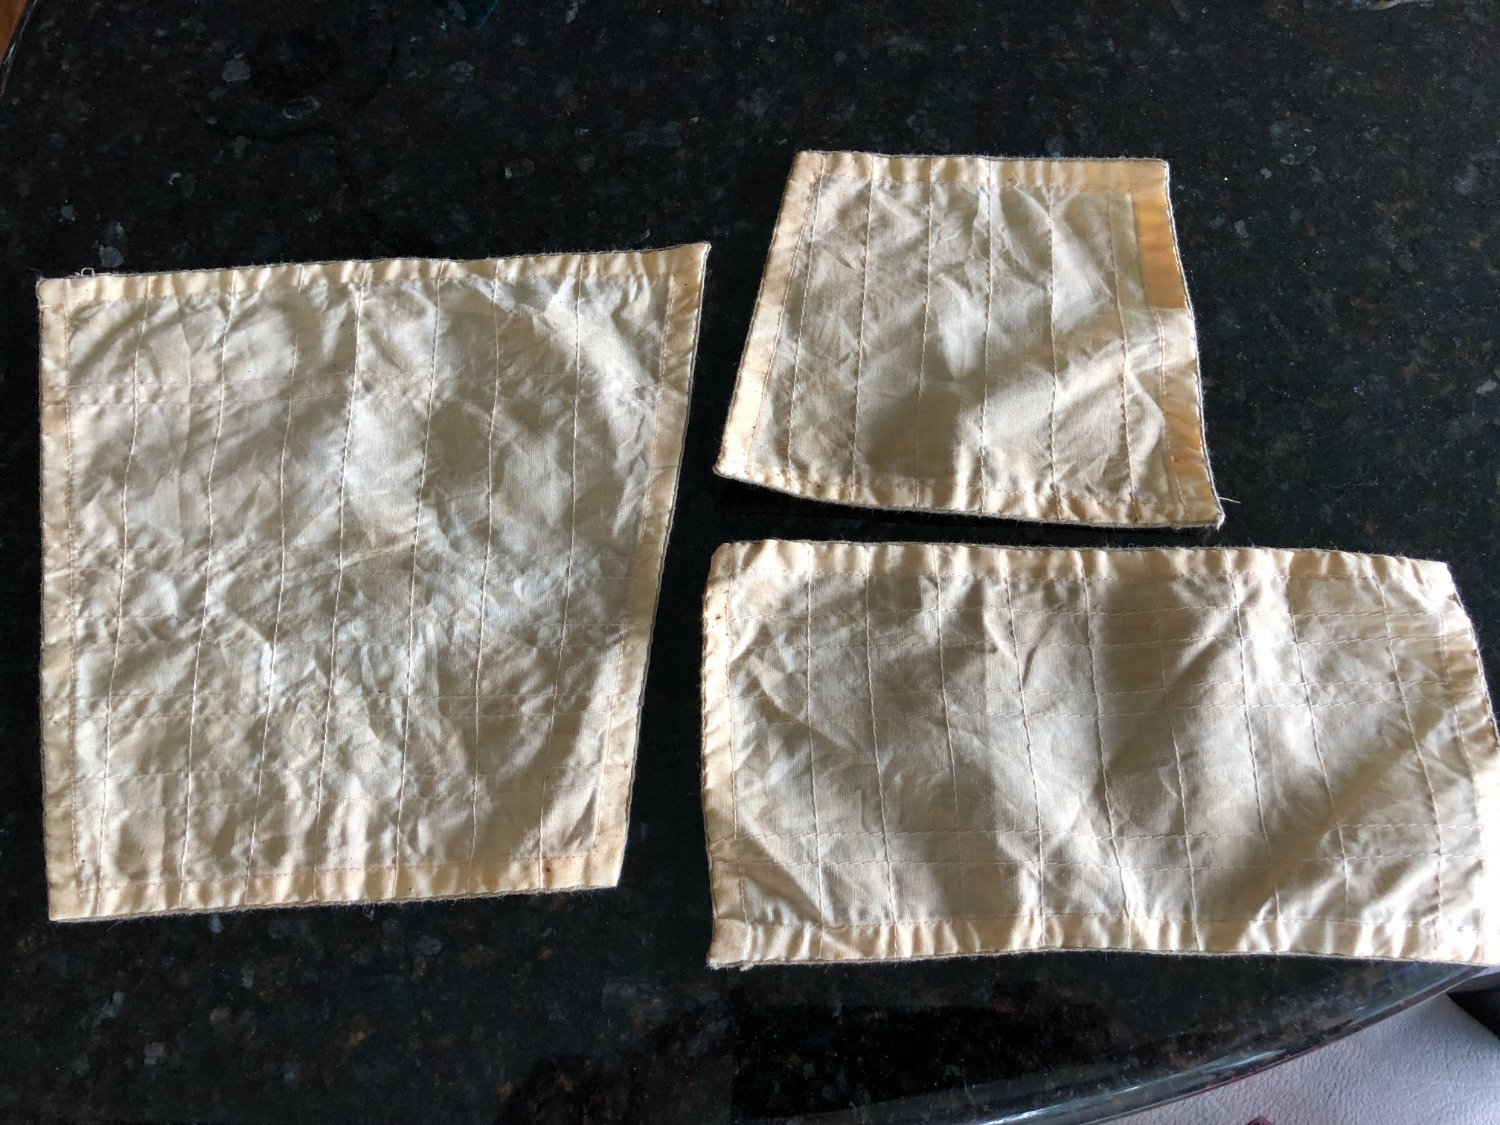
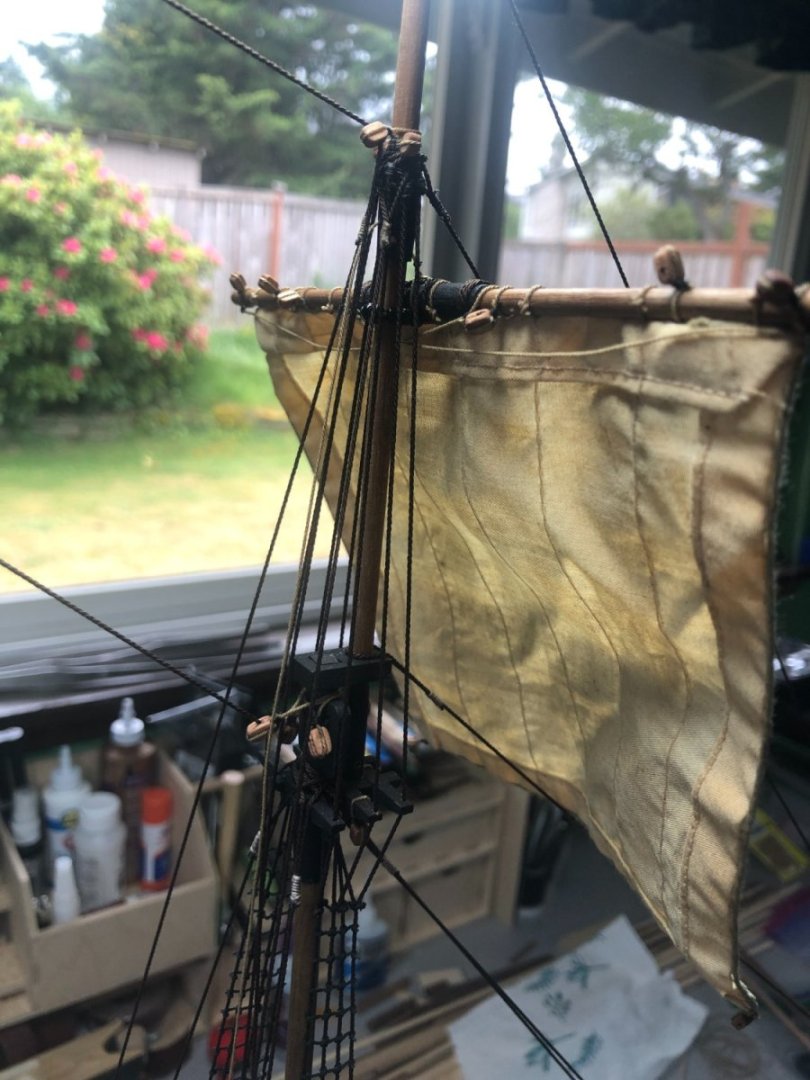
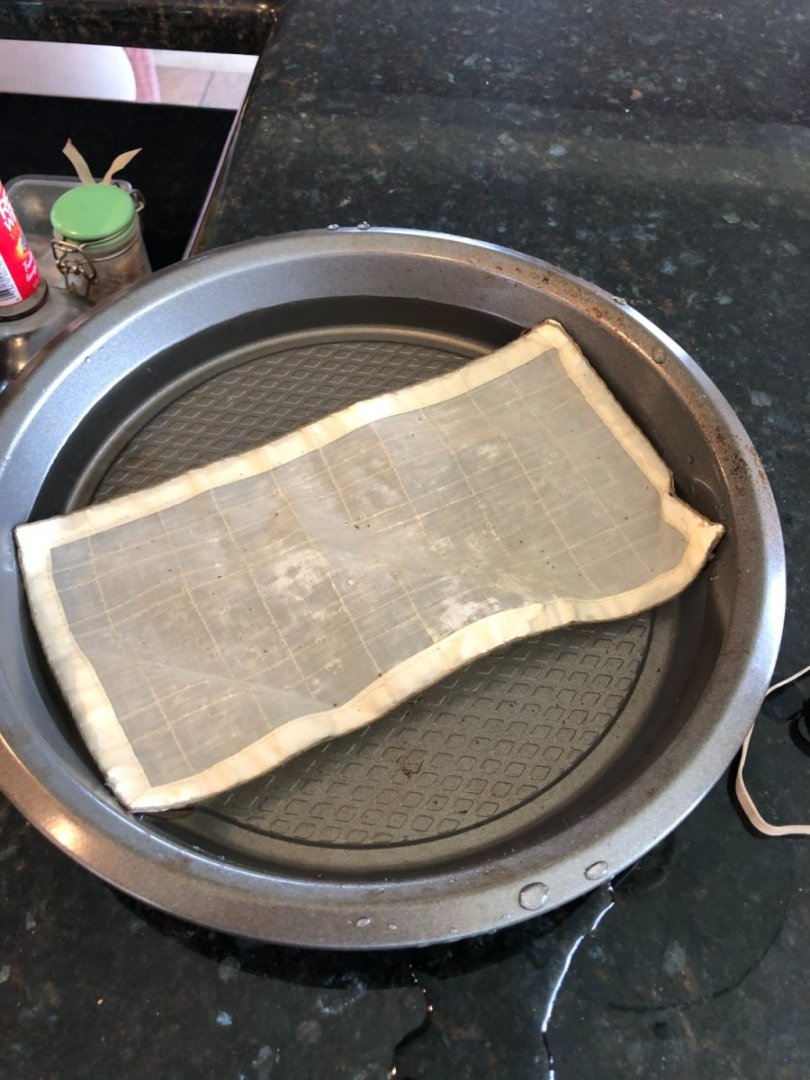
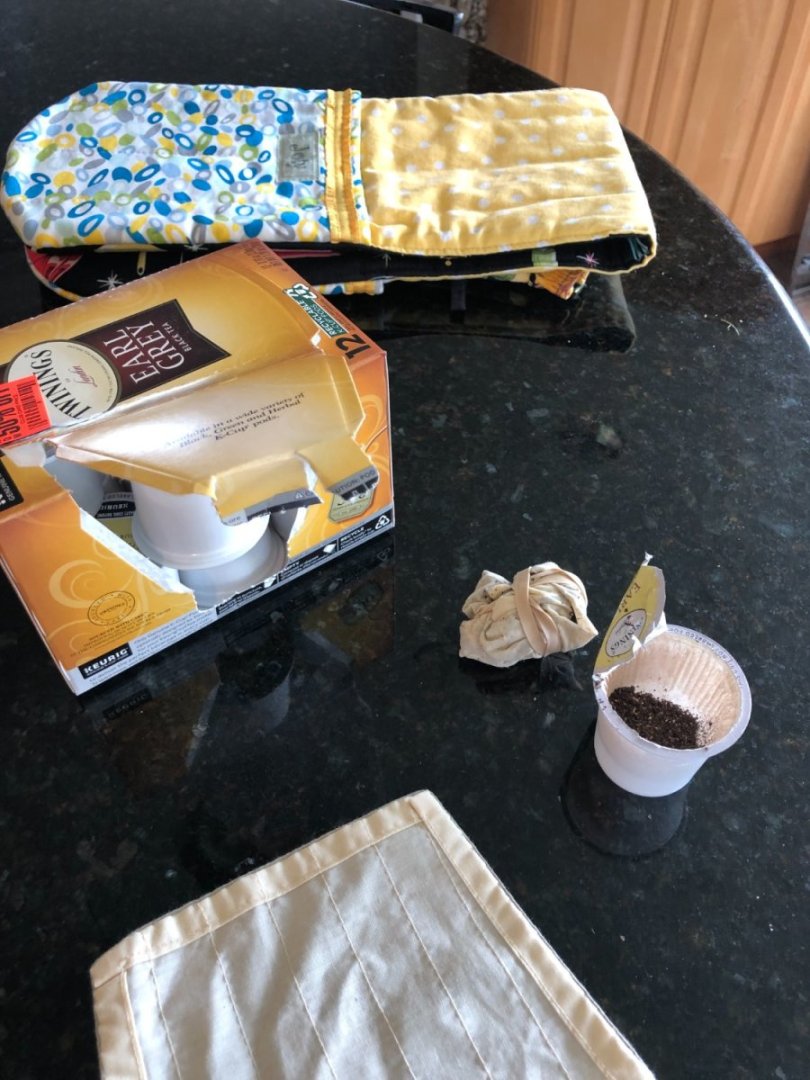
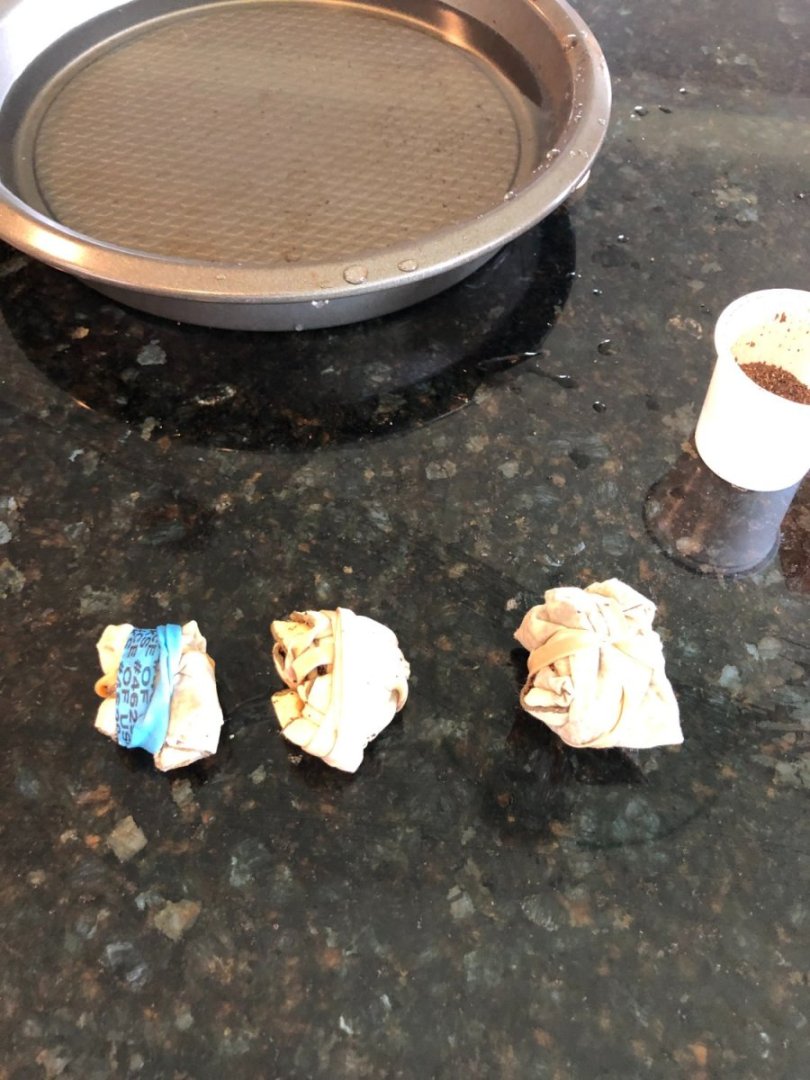
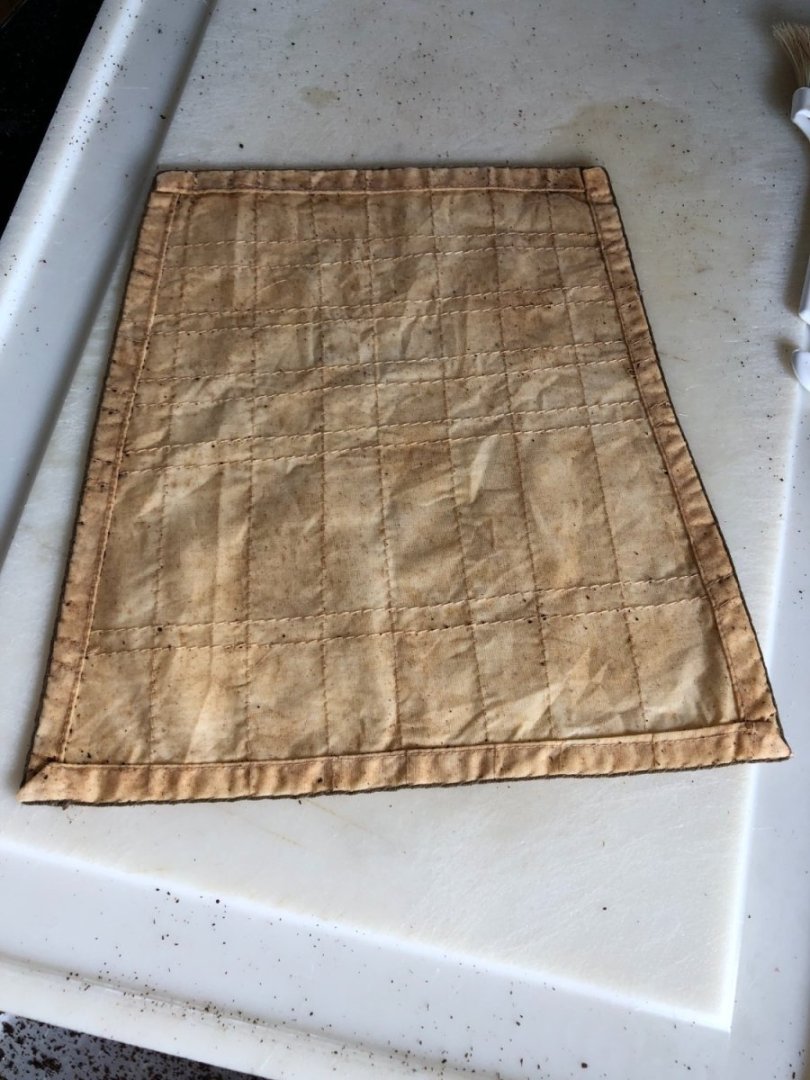
Sorry about the long delay... spring and summer activities are in full swing! Didn't work on the Bounty this month at all except today! As promised a few months back, here is the procedure I use for weathering/aging my sails: Gather up your sails, a bowl of water and tea bags or in my case, tea cups (you'll see!). Also a few rubber bands are needed. 1. Wet the sail... make sure it is completely soaked and then the excess squeezed out. You can see the "cups" I used but tea bags work just fine too. 2. Sprinkle the tea particles very heavily around the edges of the sail. Be liberal with the tea on the edges. Add more tea particles to the center portion, randomly making heavier spots. 3. Press the tea particles into the sail with your fingers/hand. They won't all stay in place but enough will. Fold over the sail and ball it up real tight. Wrap a rubber band or two around the sail to keep it balled up. 4. Dip them into the water very quickly and remove. Let the sails set for at least 1-1.5 hours. The longer left, the darker the color. So, be careful not to go too far! 5. Remove the rubber bands and unfold the sail. Using a stiff brush, removing as much of the tea particles as possible. 6. Using a hair dryer (or you can just let them dry naturally), dry the sails and remove the remaining tea particles. The sails will lighten up a bit as they dry. The following pictures are wet sails: And here are the same sails dried and ready to be worked: The sails are weathered, splotchy and dingy around the edges... perfect for an aged model. Hope this answers some of the questions I received about ageing the sails!


-
Finished already!!? She looks beautiful! Well done, Bob!
- 56 replies
-
- 4
-

-

-
- Sea of Galilee Boat
- SE Miller
- (and 1 more)
-
It took a little finessing to get mine off the strong back but ultimately, it did come off without any damage! Hope yours does too.
- 56 replies
-
- 4
-
-
-
- Sea of Galilee Boat
- SE Miller
- (and 1 more)
-
I have the Rikon 10-3061. It's the same model but has 1/2 HP. I use it for many things and highly recommend it. It's easy to operate, easy to change blades and cut accurately.
-
Looking good! Now the fun begins. Take your time with the next few planks... it progressively gets tougher to bend and twist them. The better the joint, the less sanding later! There are spots on my build that were mighty thin! Have fun!
- 56 replies
-
- 5
-
-
-
- Sea of Galilee Boat
- SE Miller
- (and 1 more)
-
What a cool idea! Nicely done!
-
Fore mast yards done! Work is ongoing on the remaining yards for the main mast. Spring has sprung in my neck of the woods which means I've got a lot going on. Progress will be slow but I'll update the log as work gets completed.
-
Good luck! It was a fun build. You can access my log to the same build below, if you're interested. I'll be pulling up a chair to watch!
- 56 replies
-
- 5
-
-
- Sea of Galilee Boat
- SE Miller
- (and 1 more)
-
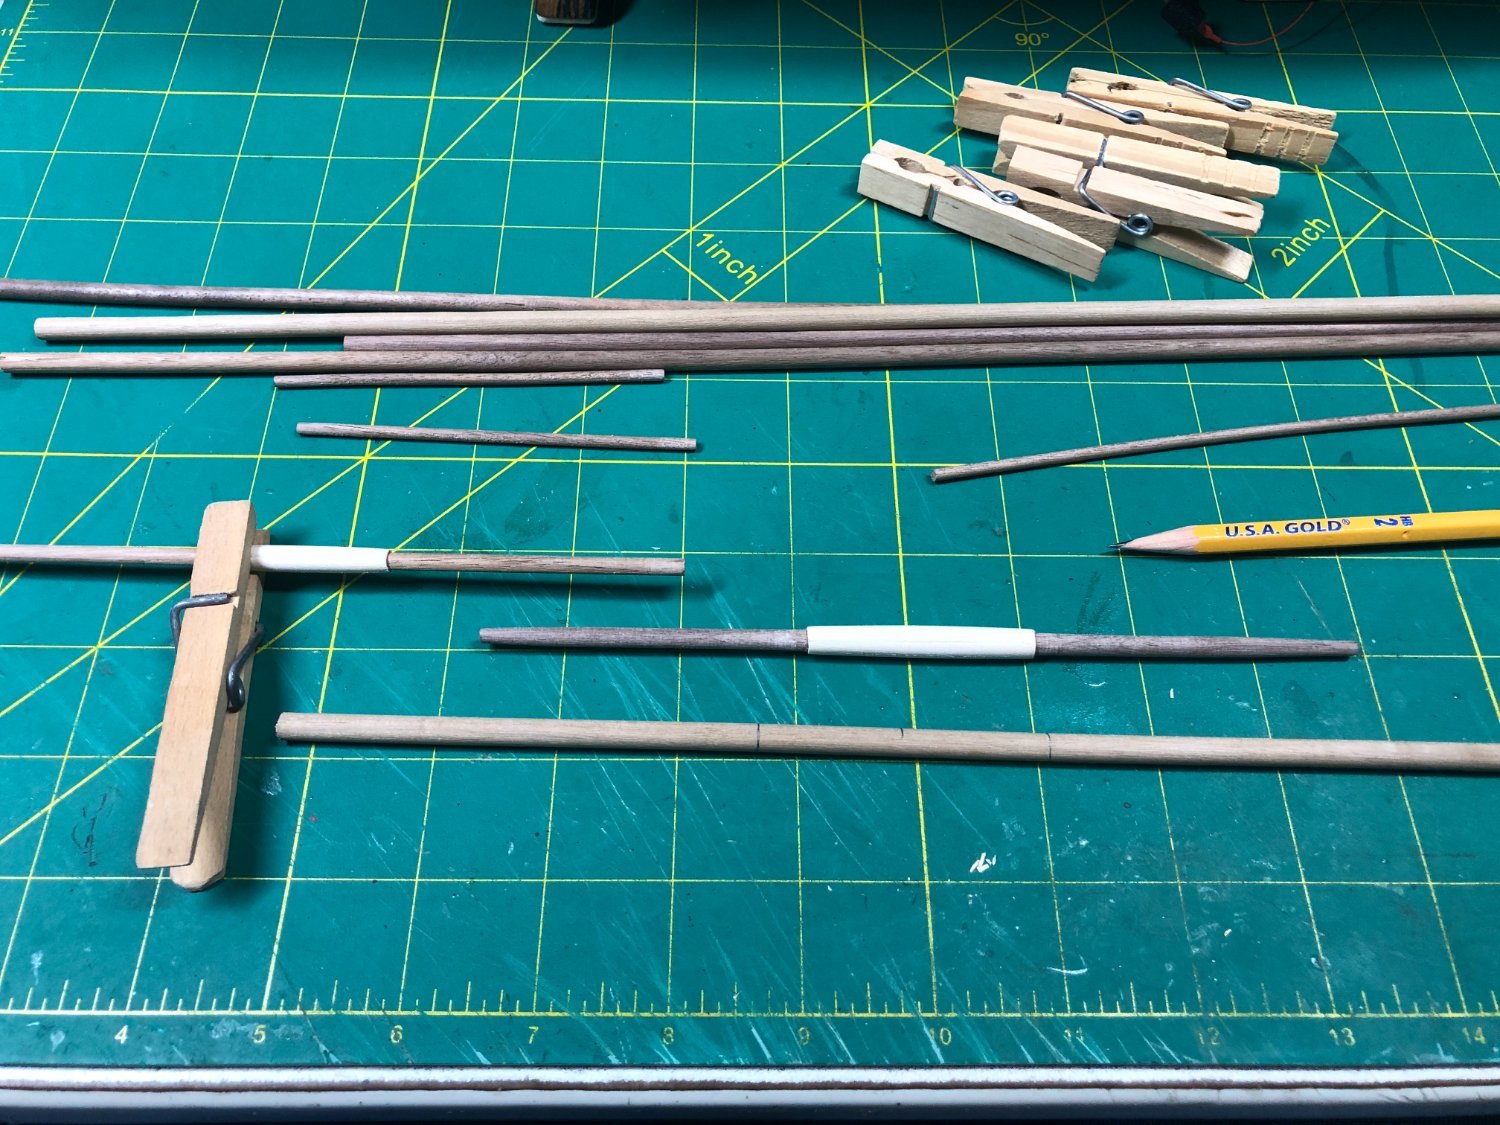
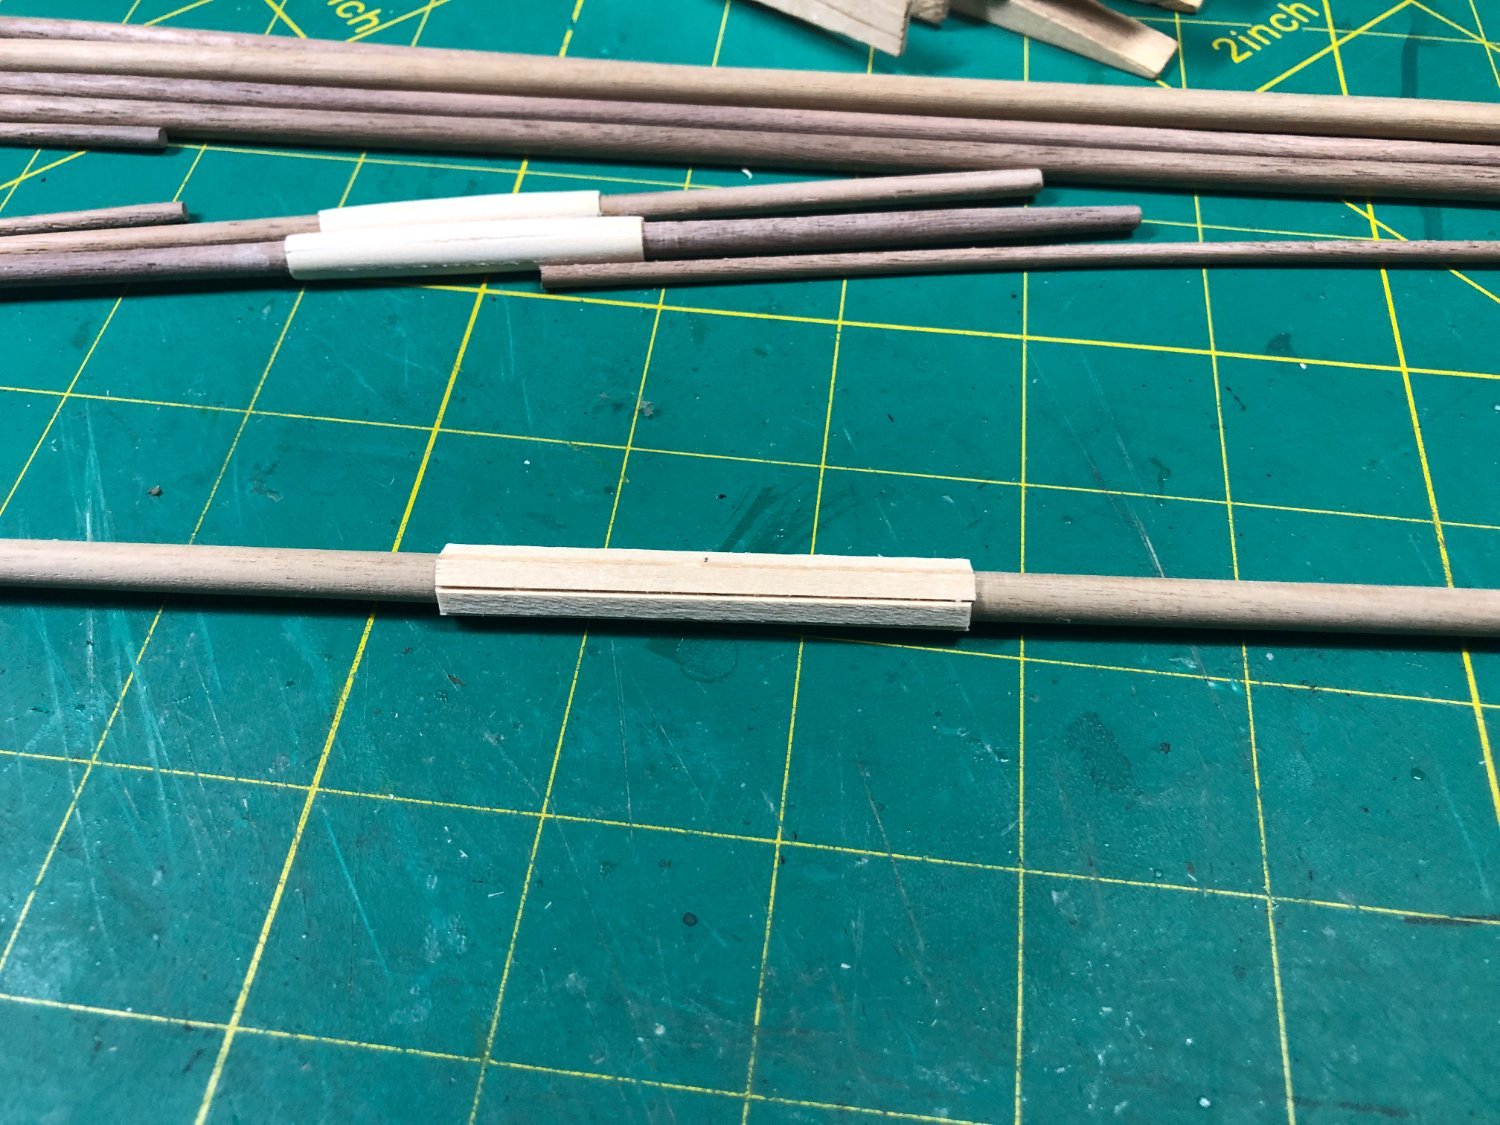
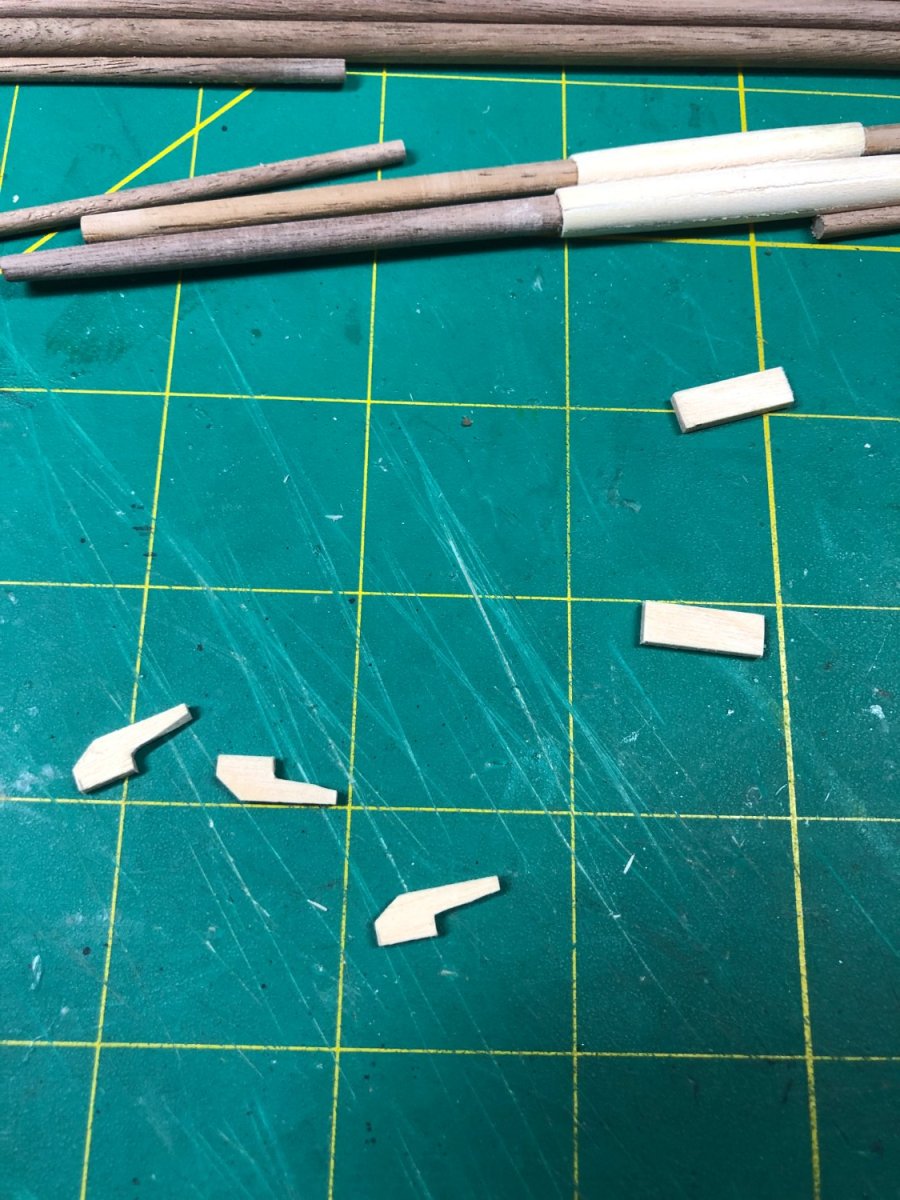
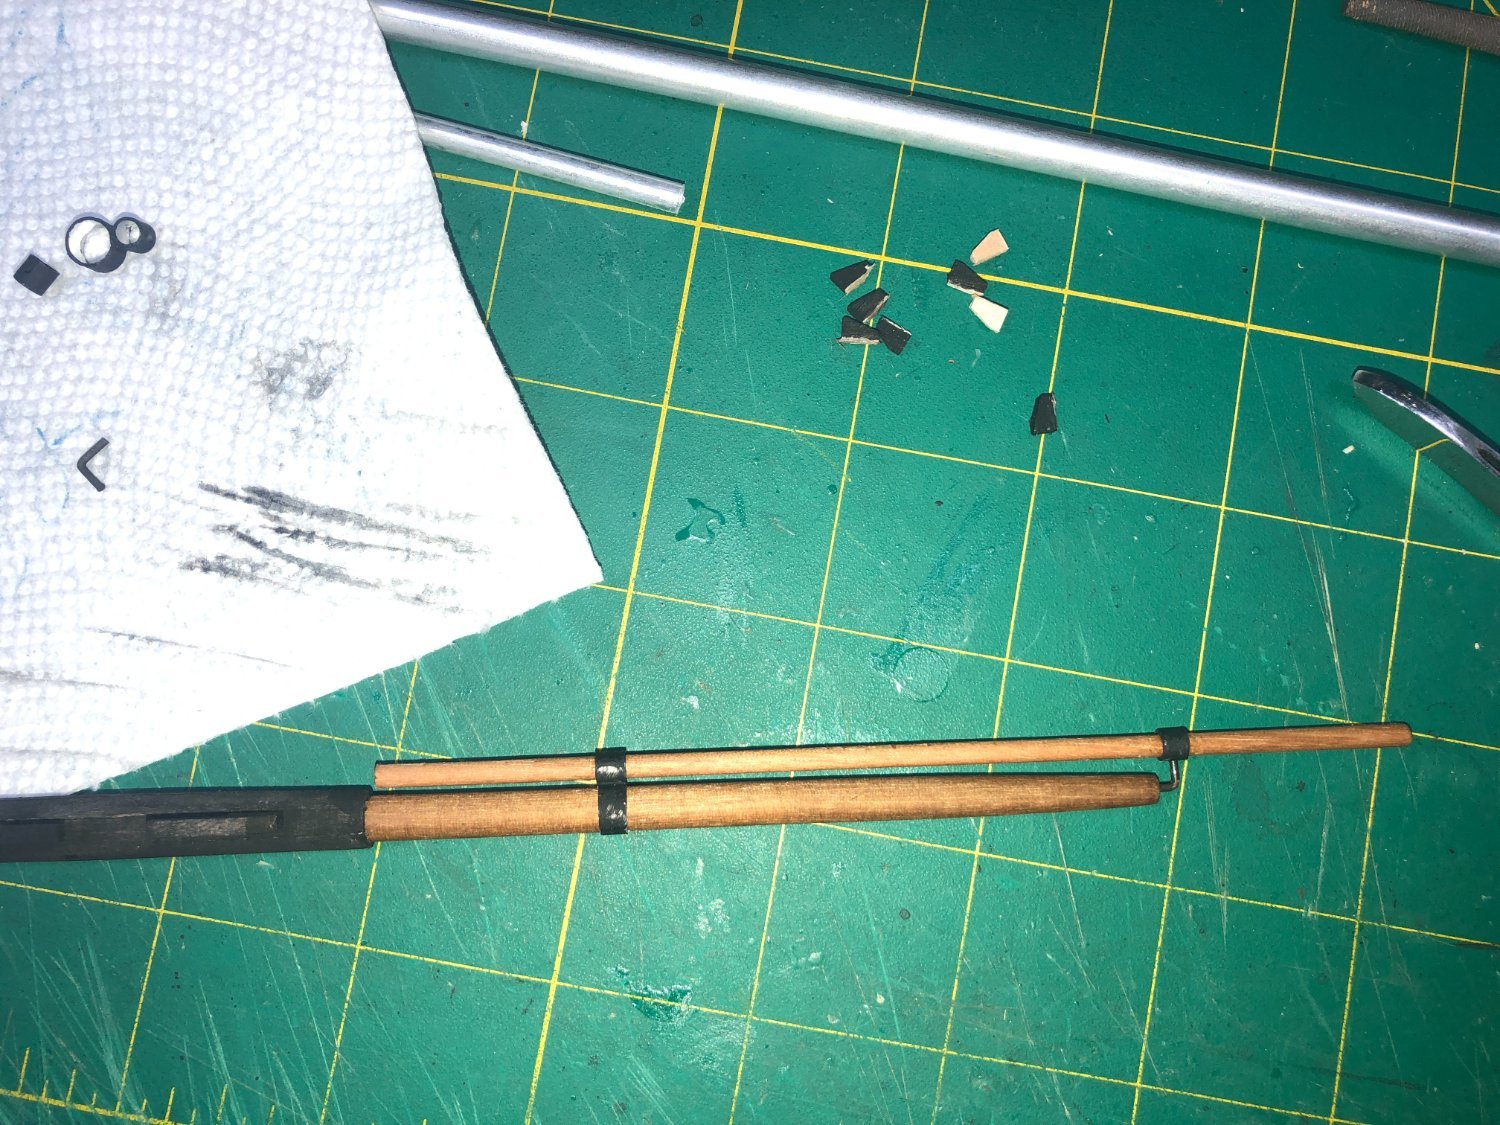
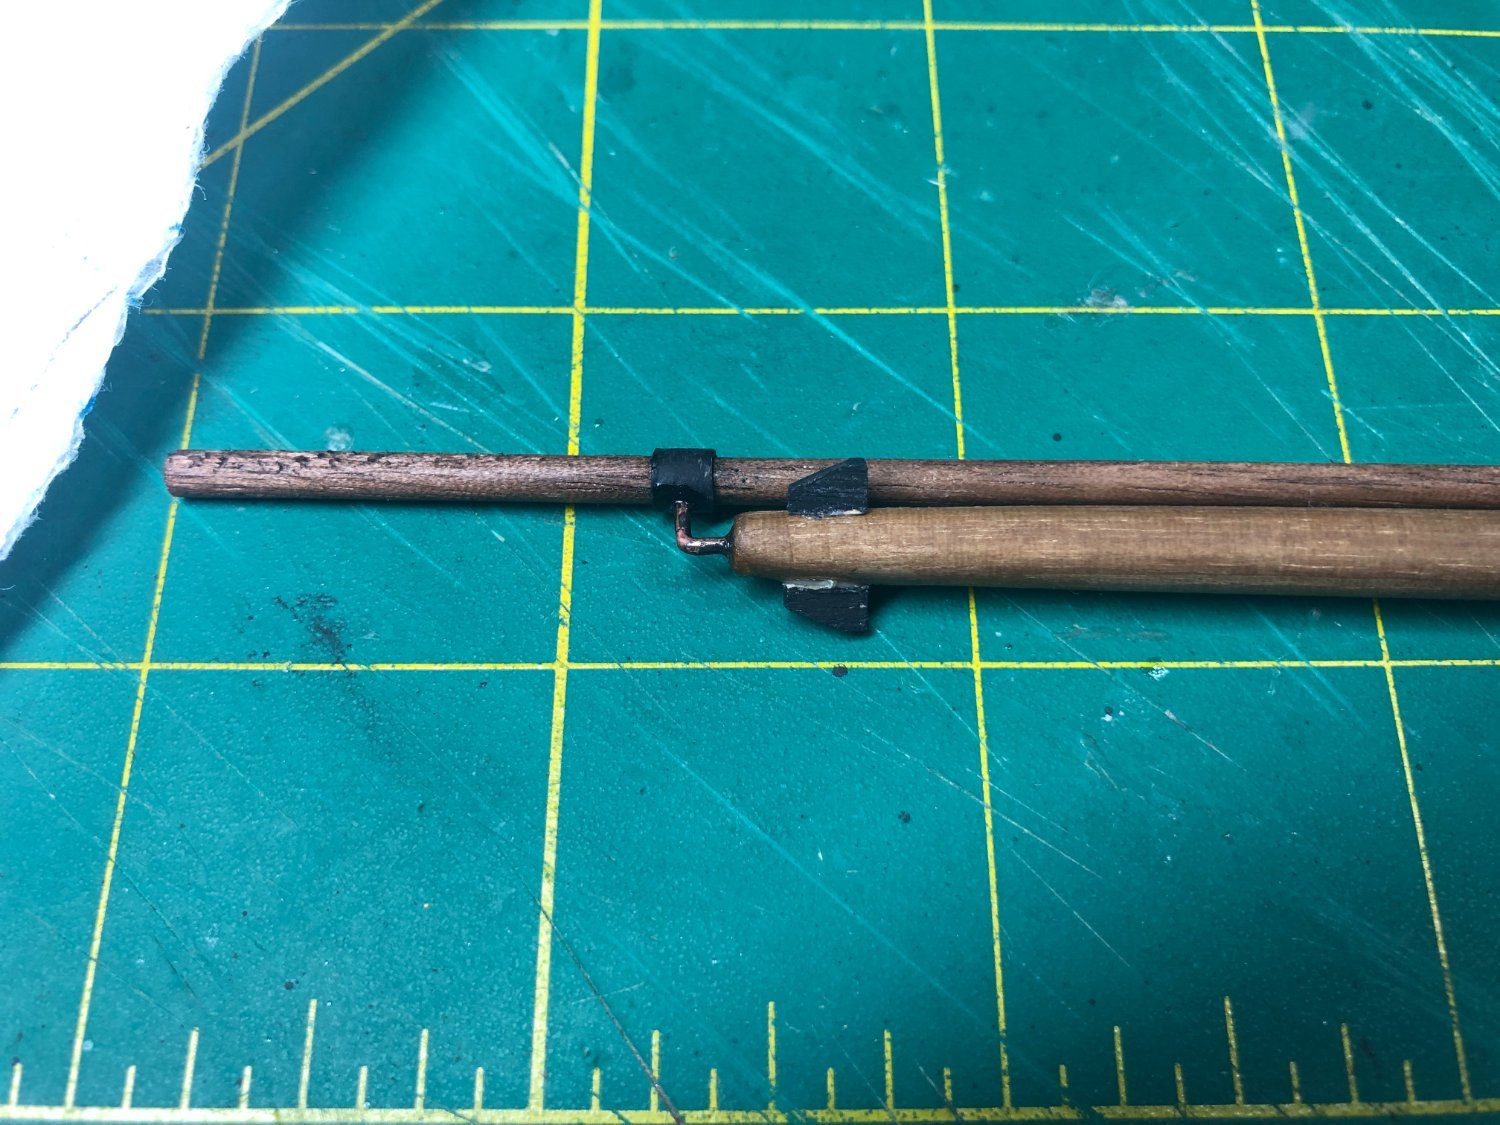
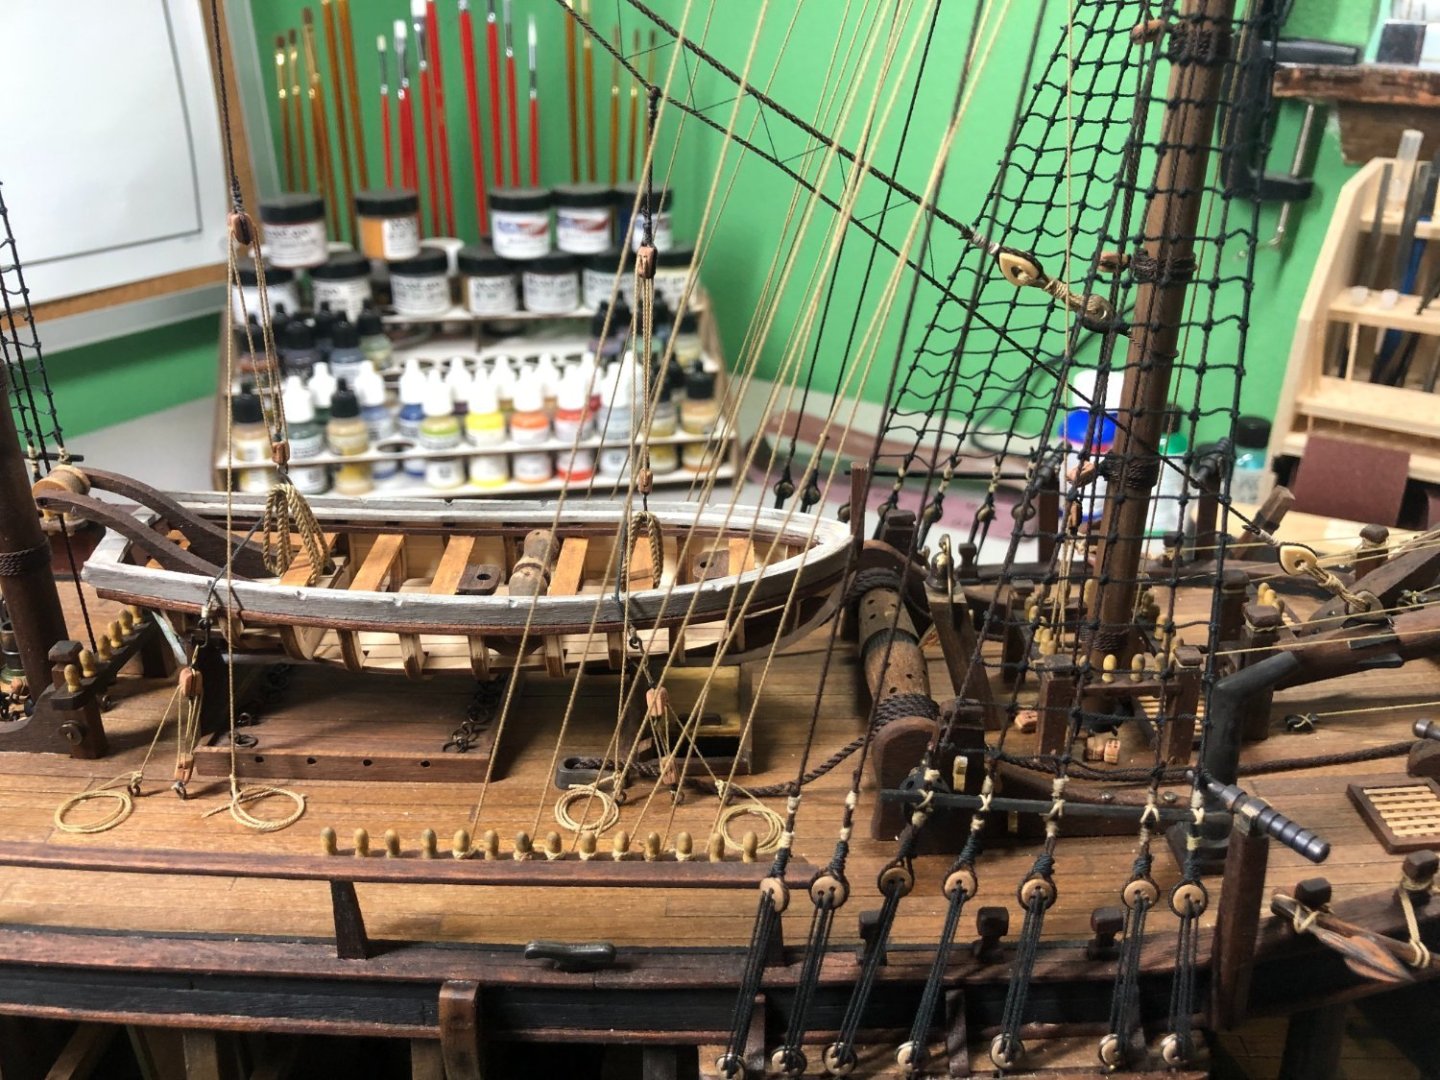
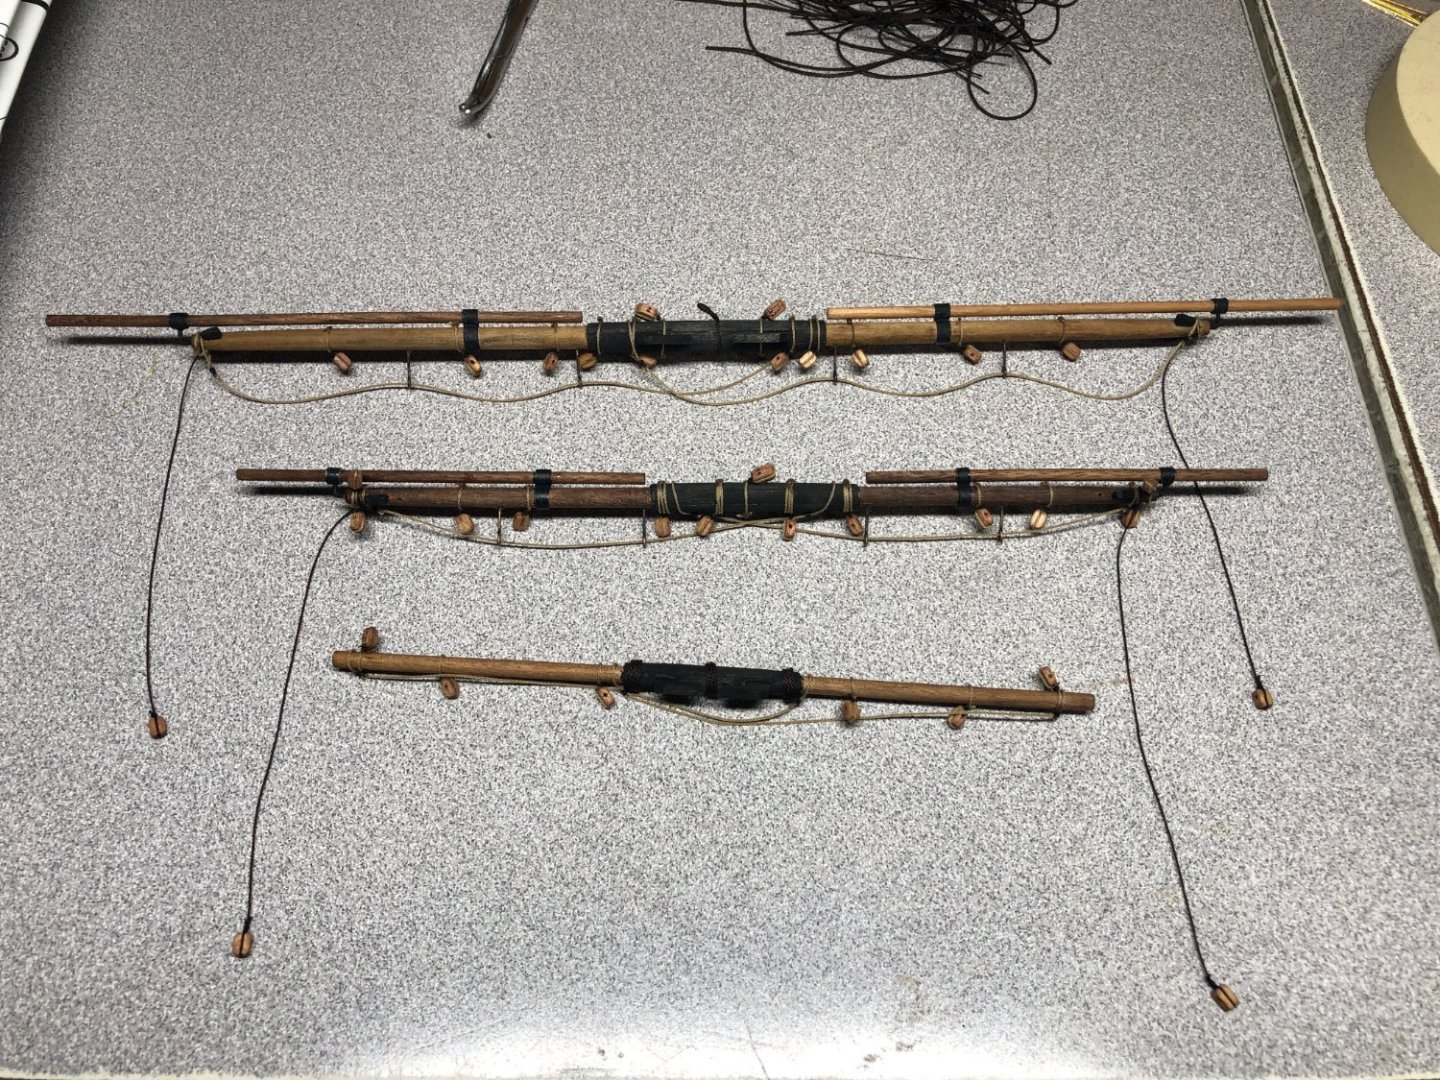
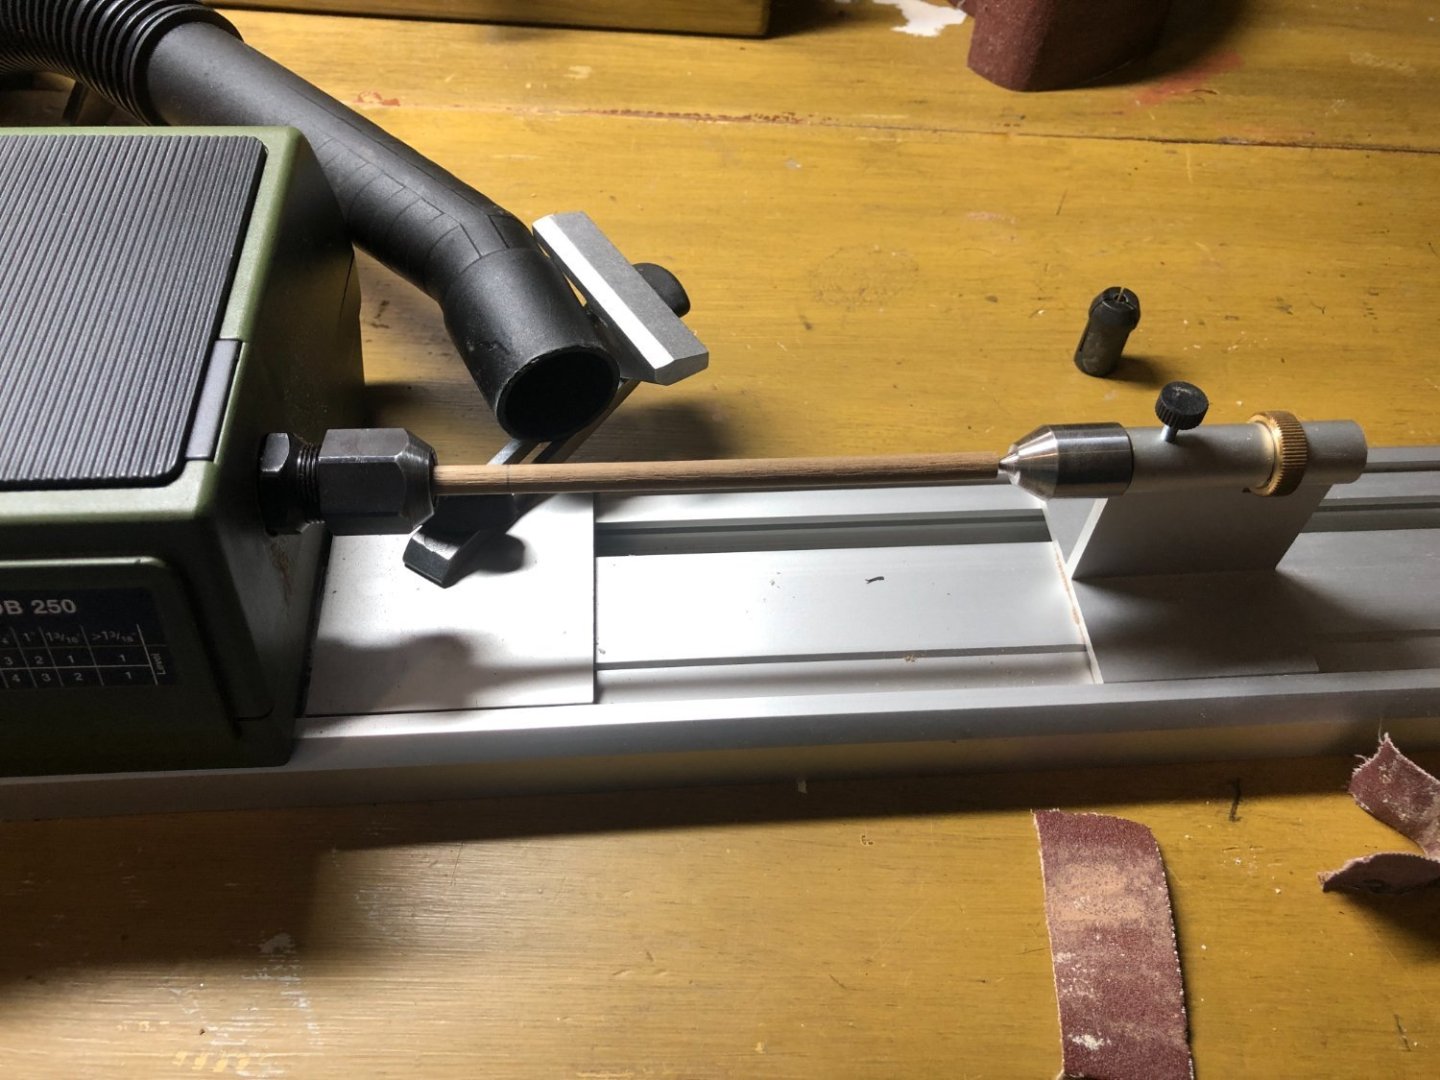
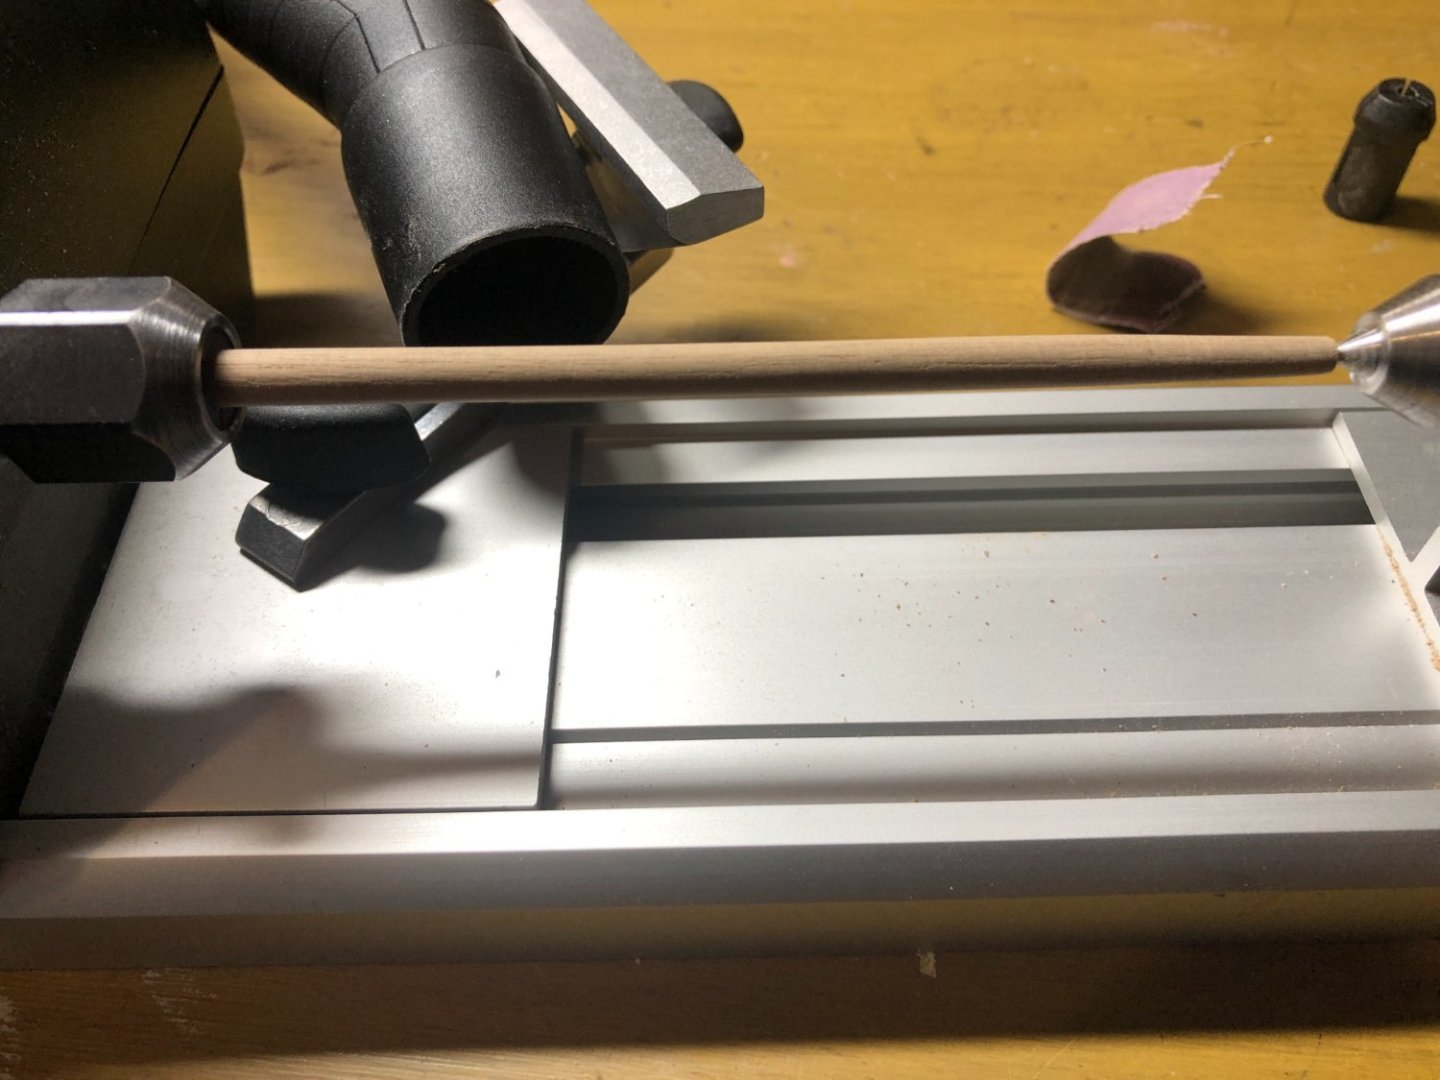
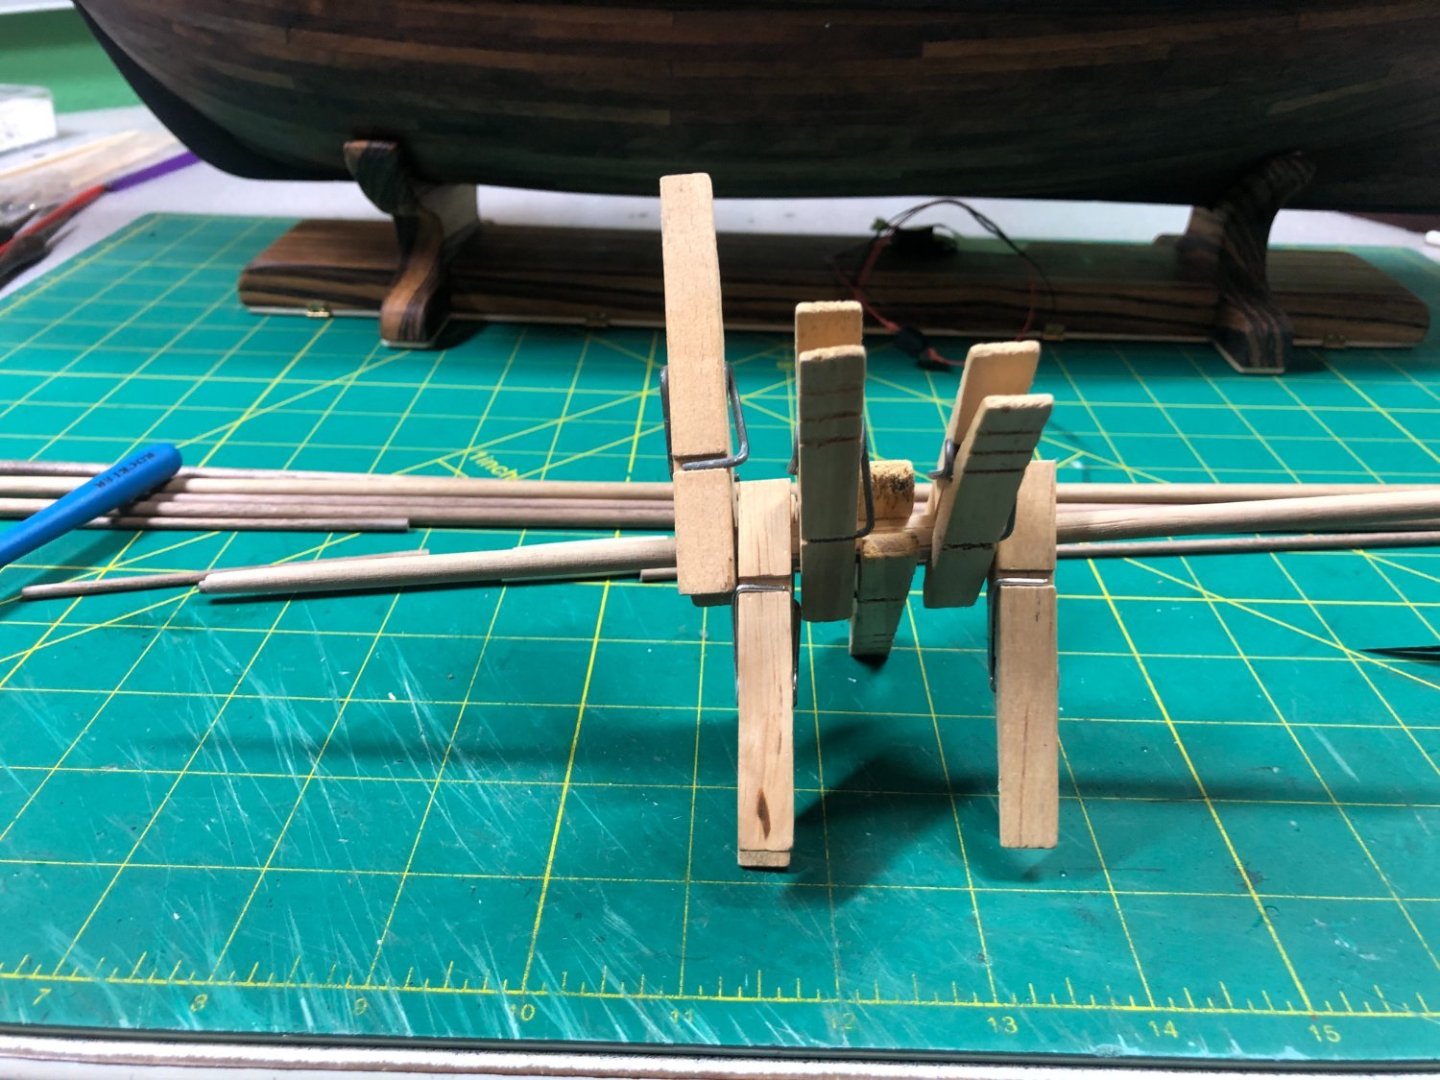
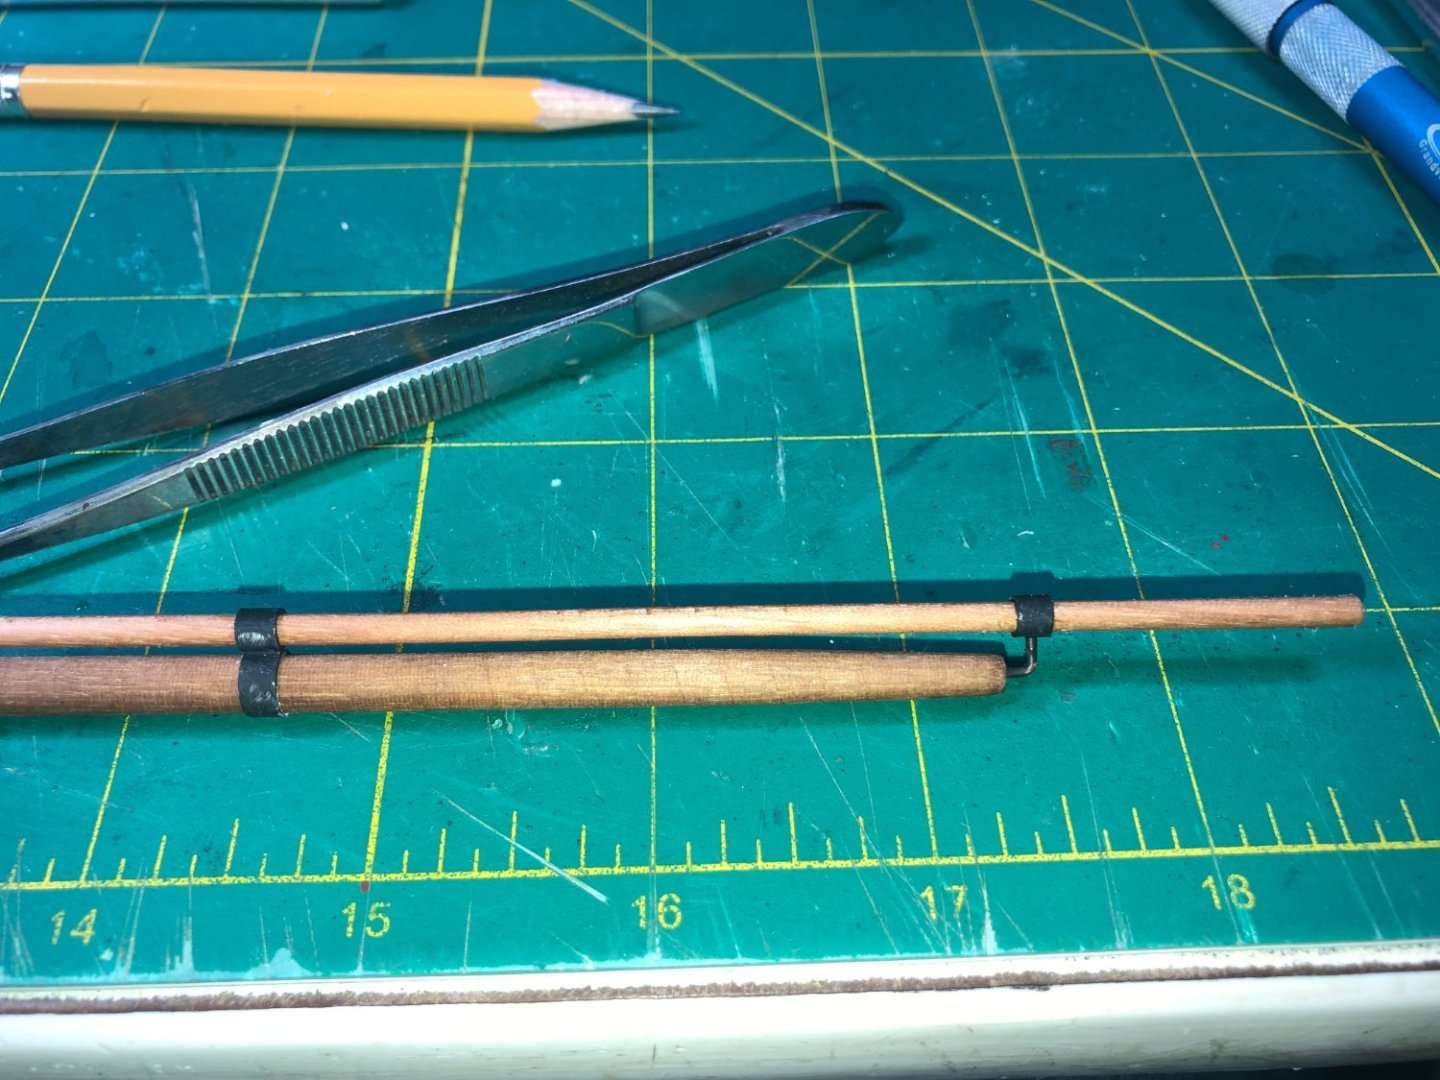
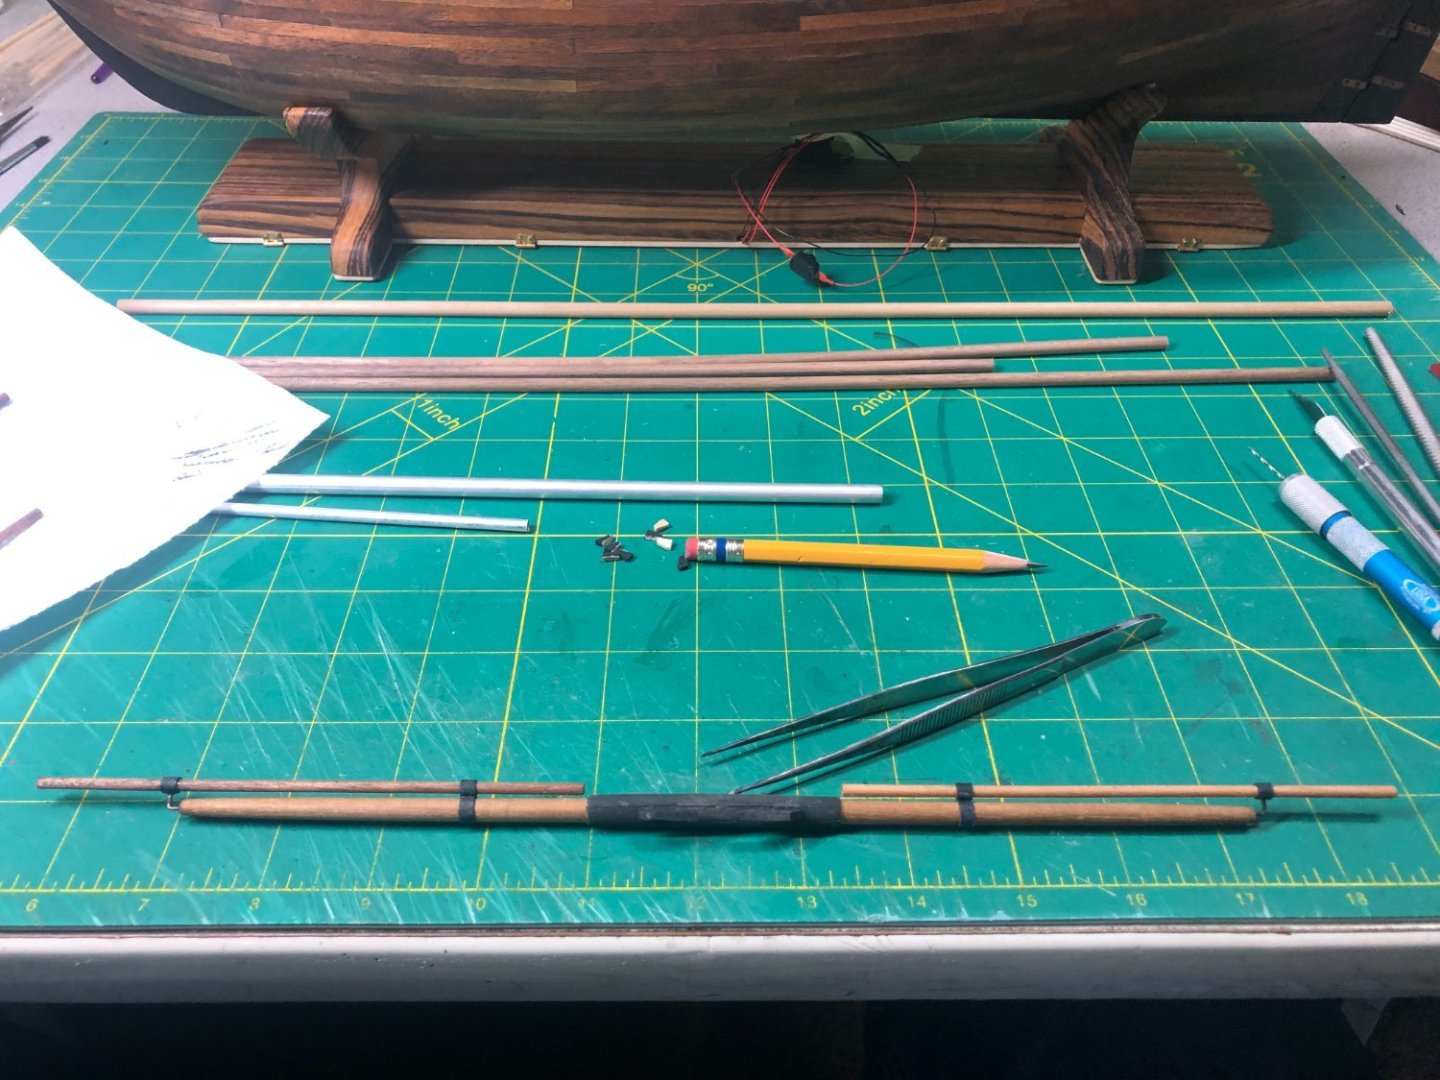
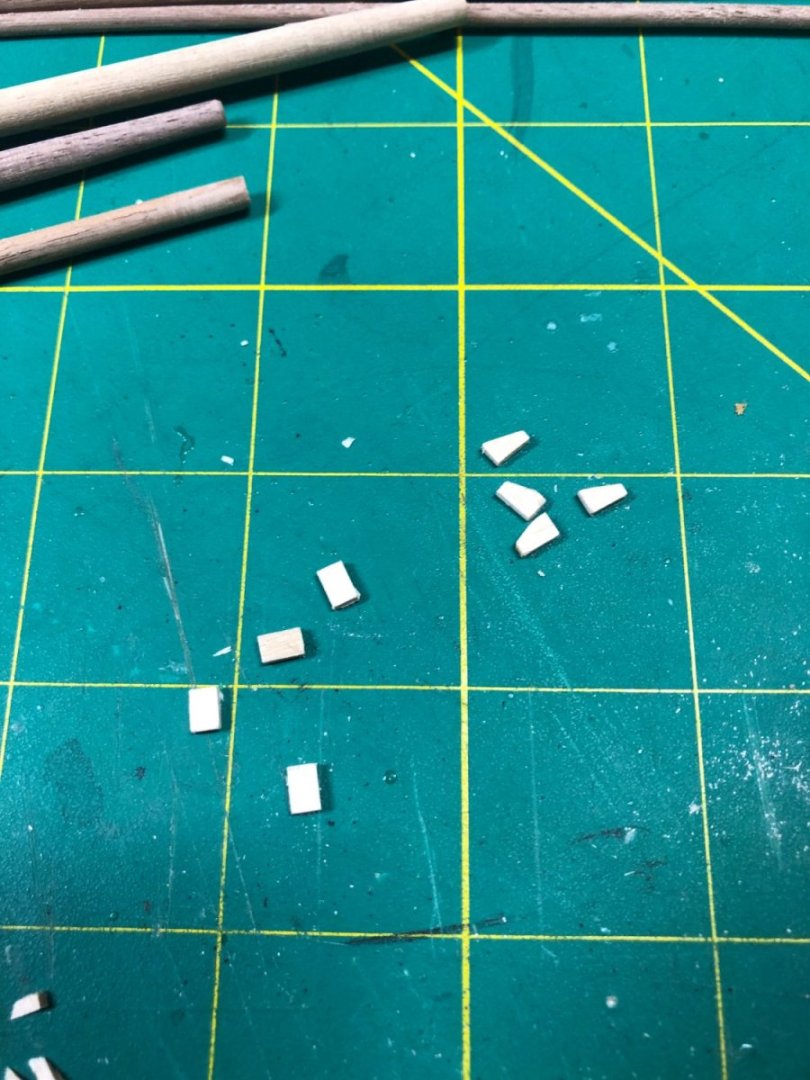
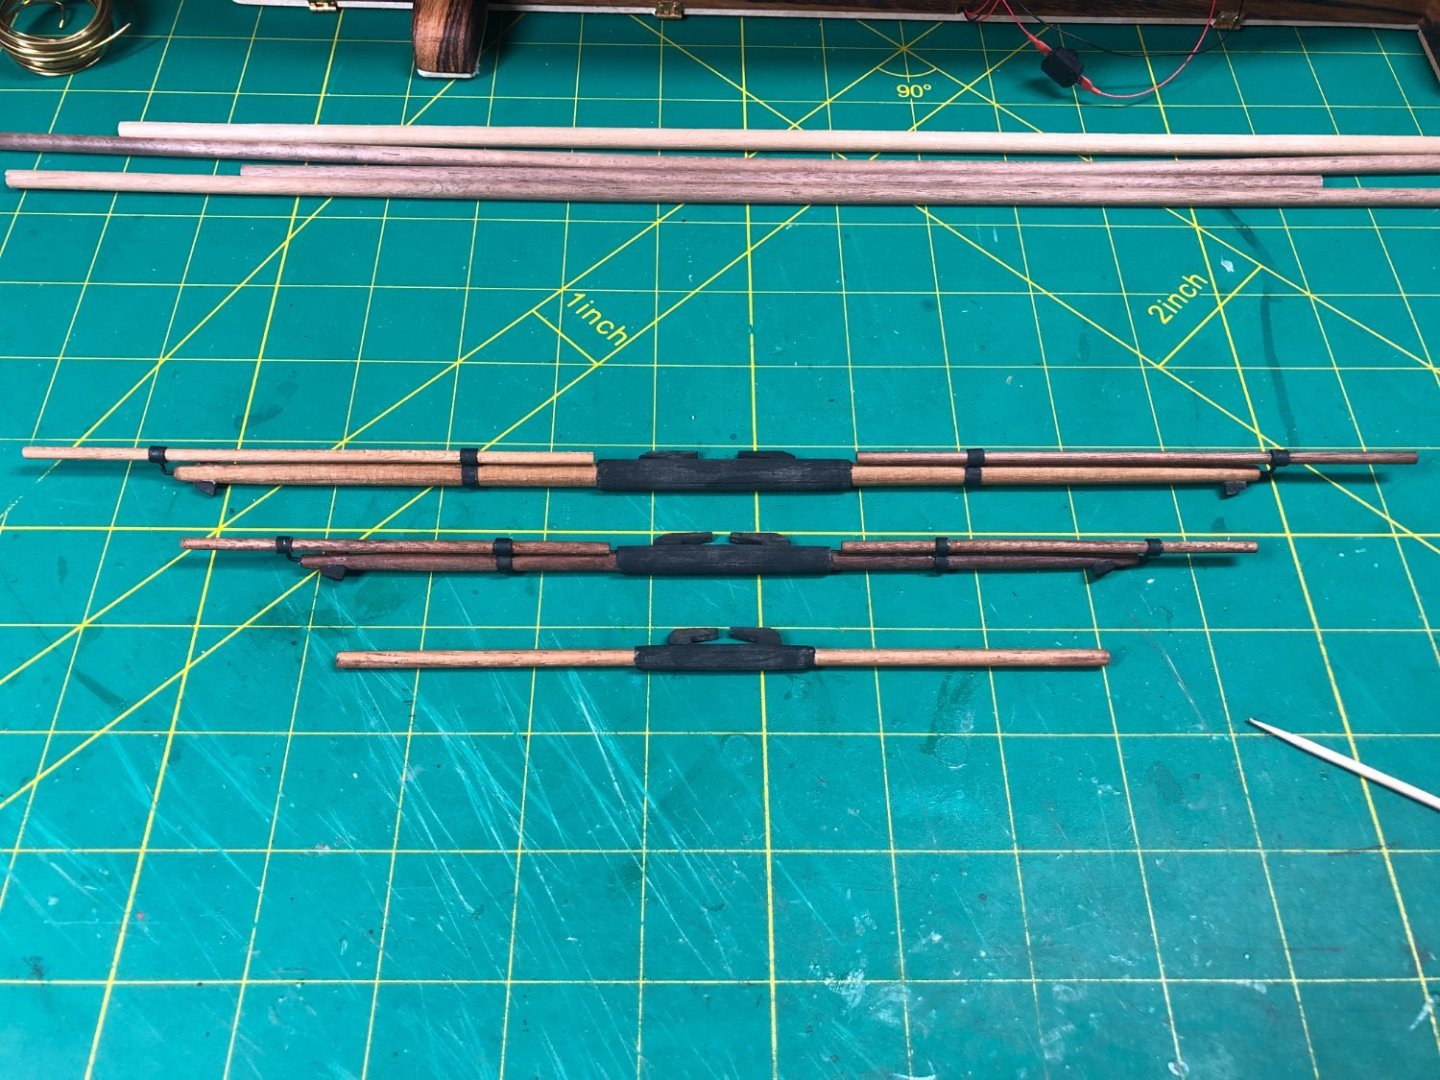
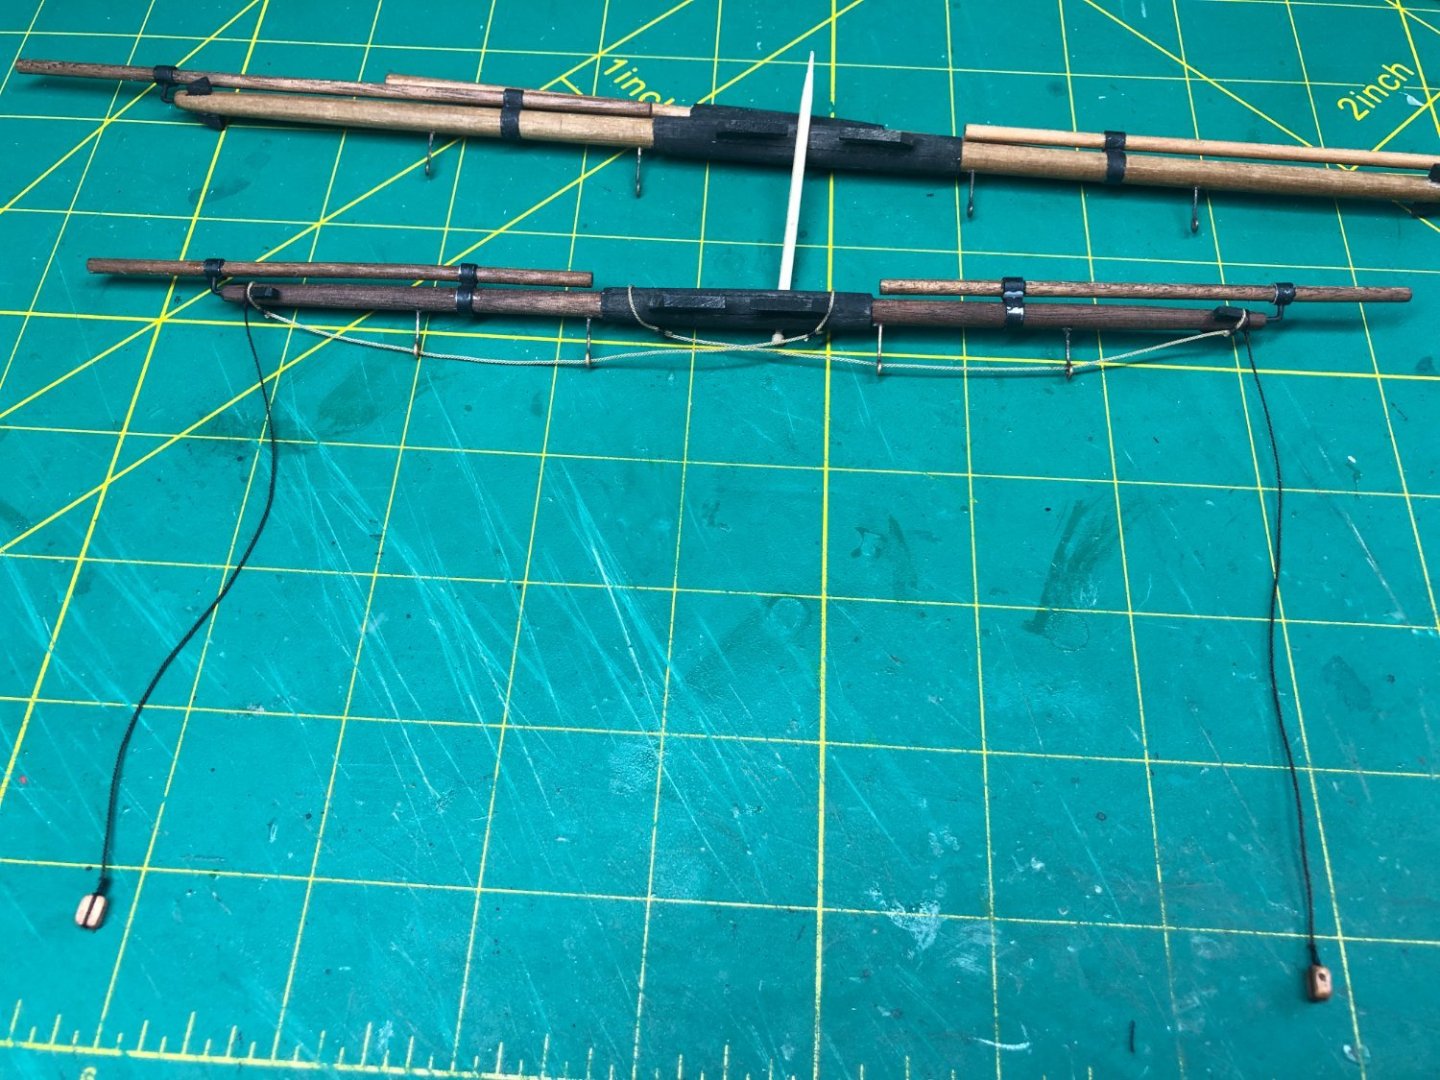
Off I go on the yards and associated hardware. To start, I used my mini lathe to taper the yards to the sizes shown on the plans: Once they are tapered, the reinforcements were added. I used clothes pins to hold the pieces while the glue dried: And then sanded: The cleats were cut and sanded: And installed per the plans: The booms were a bit of conundrum. The kit provided brass wire and flat strips to make the the mounting hardware... what a joke! I attempted to make a set and they turned out looking like... well, lets just say, they did not look good! While doing some research, I was going through Tim Moore's log on his Bounty (I use it a lot!) and "borrowed" his method! I purchased some small aluminum tubing with I.D.'s similar to the O.D.'s of the yards and booms. Using a miter and handsaw, I cut pieces to size and used CA glue to join them as needed. Additionally, I used the brass wire for the end mount by drilling a small hole in the tube and the yard: It took some time to figure out a system but in the end, I got a good result. Unfortunately, painting the aluminum is not working out as the paint just wipes off! I'll be touching the pieces up as needed. For future yards, I purchased Jax Aluminum Blackener to solve this problem. I'll have it in time for the next set. Then the end cleats were made and installed: Yards assembled for the fore mast: Footropes and the beginnings of the blocks and tackle in progress: I'll post a few more pictures once the yards are done for the fore mast. The process is identical for the main mast and I'll not bore you by showing the process all over again! Once I get started on the mizzen mast, I'll post more details.


-
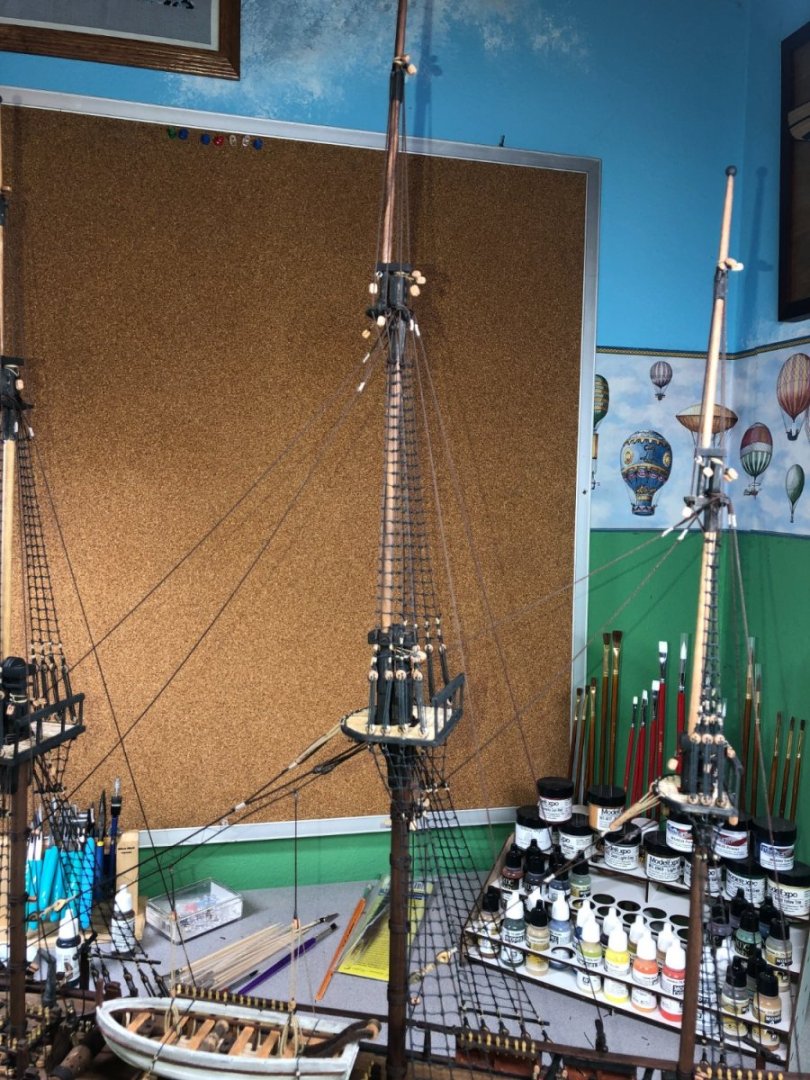
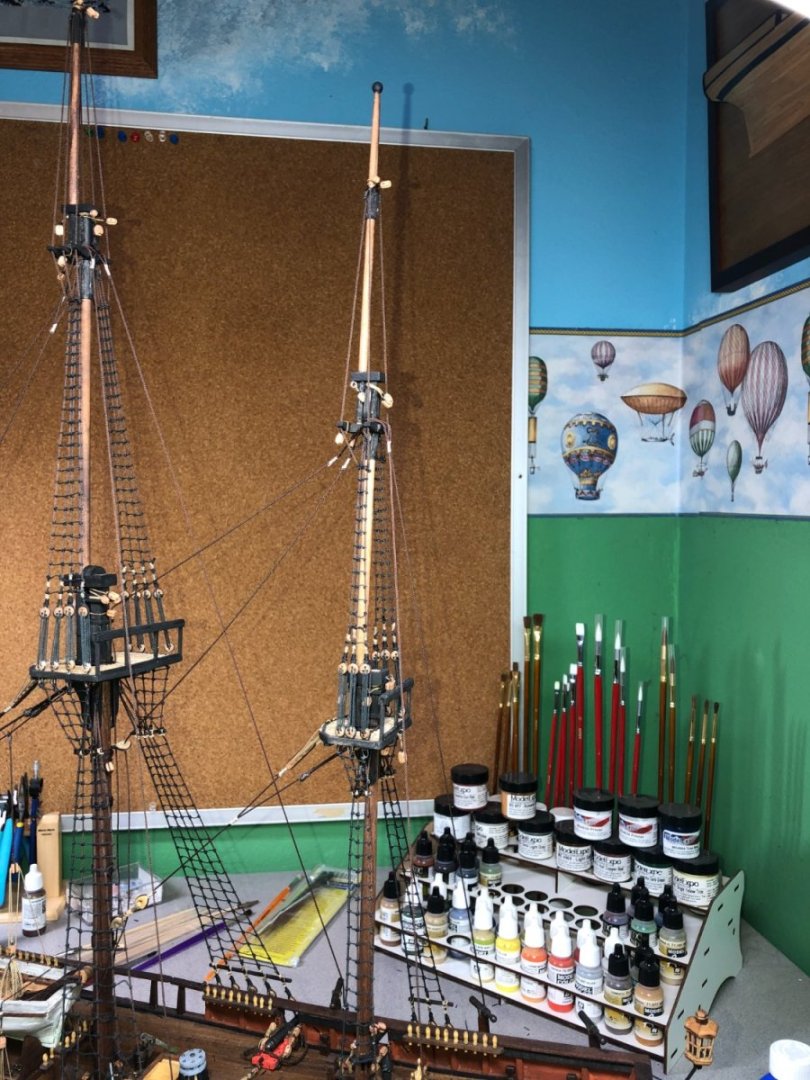
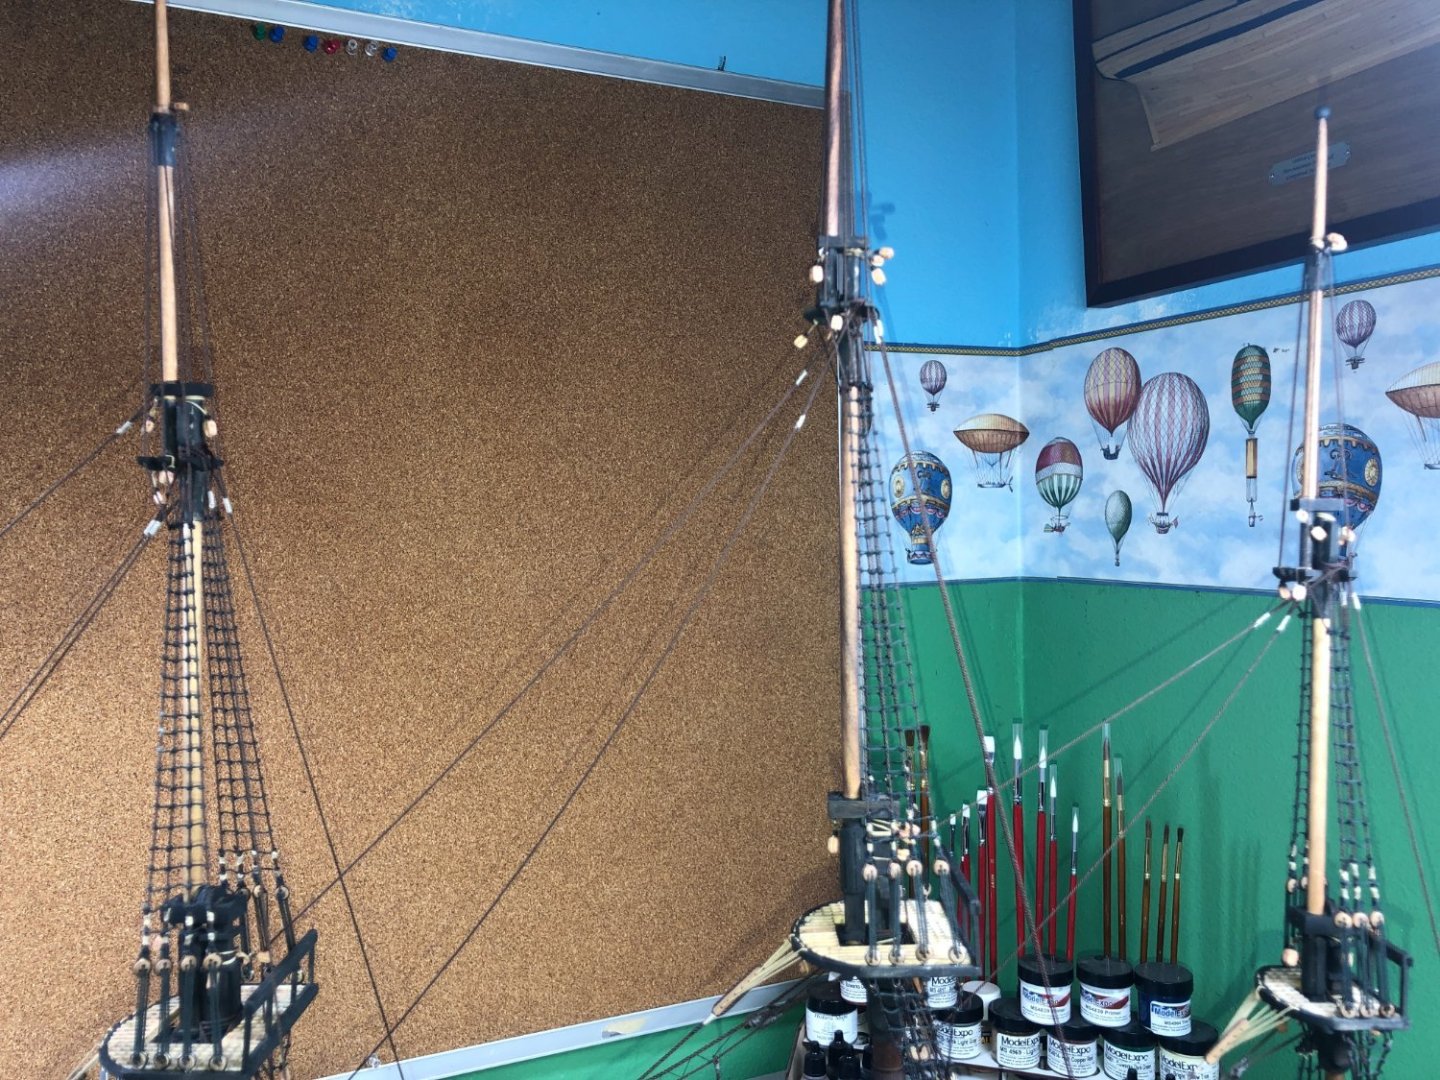
Standing rigging completed! Some odd things with this kit on the location of the backstay tie offs... took a while to figure out but that's the norm for this kit! I'll start on the yards next. Also, I'll get some better pictures of the standing rigging in a few days. Not really a lot to talk about as the rigging was pretty straightforward. Especially, using the books mentioned further up the log! Next up date during the yard construction.


-
Thanks Dave and Andrew. Appreciate the comments... getting close, was hoping to complete her before boating season gets going. Not gonna make it but can't rush these things! 22 drawings that breakdown the rigging and I'm only on the sixth! Plus, I still need to make all of the yards!
-
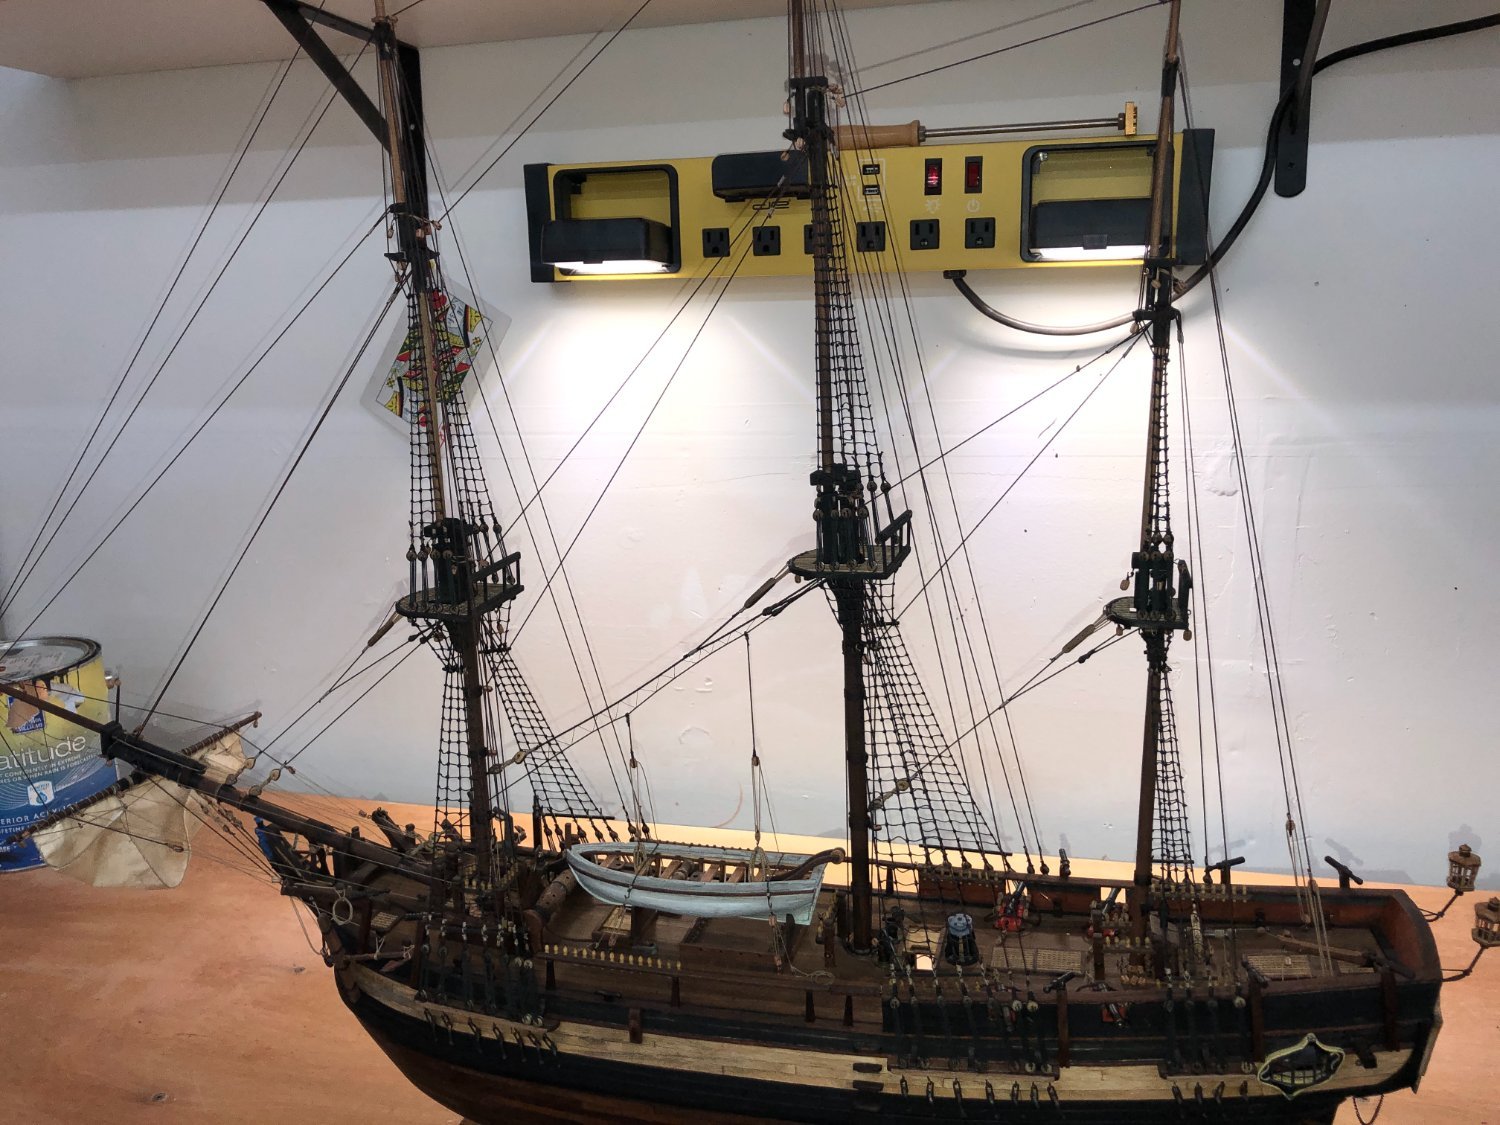
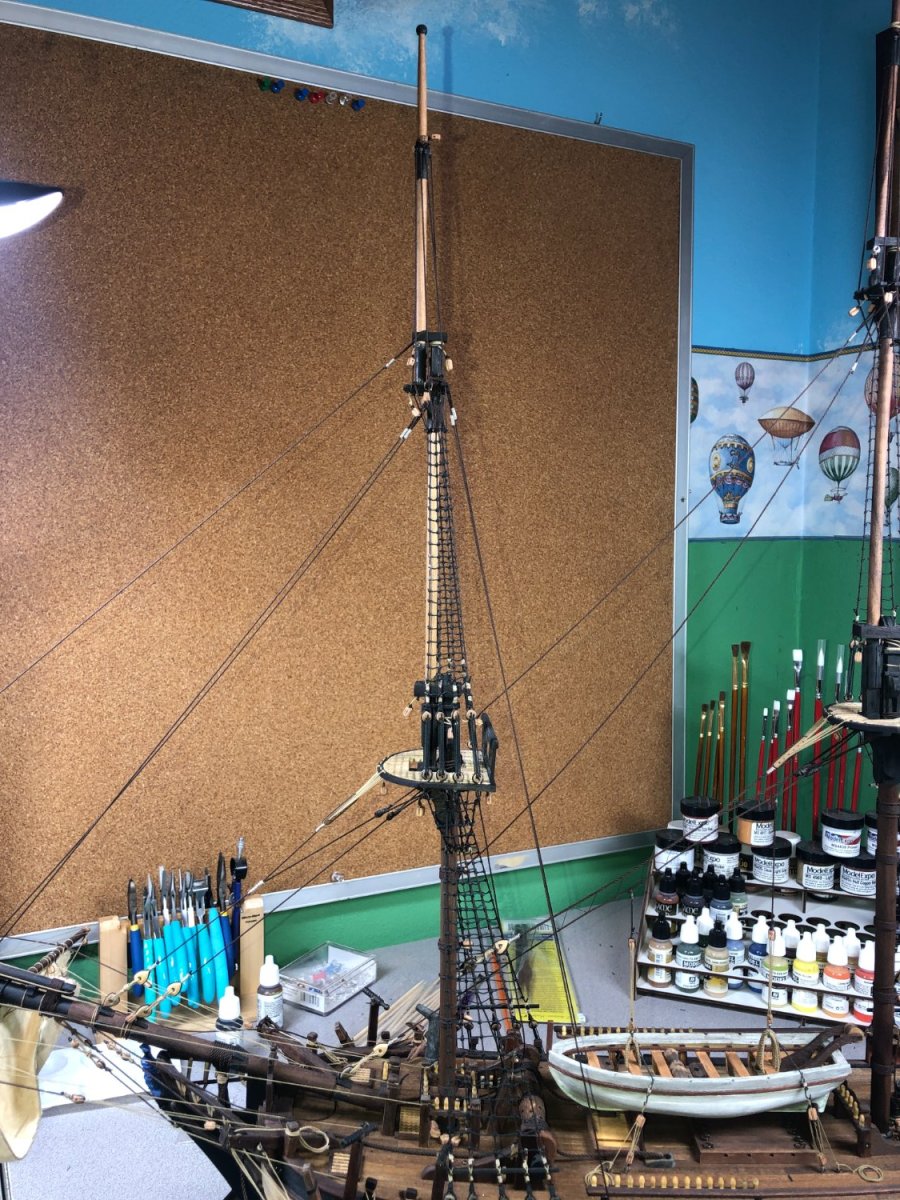
After 925+ knots, the ratlines are complete!! The shrouds are completed and a good portion of the standing rigging is in place ready to be tied-down. Not much commentary for the below pictures... just a LOT of clove hitches!


-
Ha! Thanks for the comment! I laugh because most have not noticed or bothered to mention them! Those are "Fancy toothpicks" purchased at the grocery store... worked out pretty well! Thanks for stopping in and commenting. I am currently working on the shrouds and ratlines... port side is done, starboard side in progress. An update coming soon!