DanielD
-
Posts
653 -
Joined
-
Last visited
Content Type
Profiles
Forums
Gallery
Events
Everything posted by DanielD
-
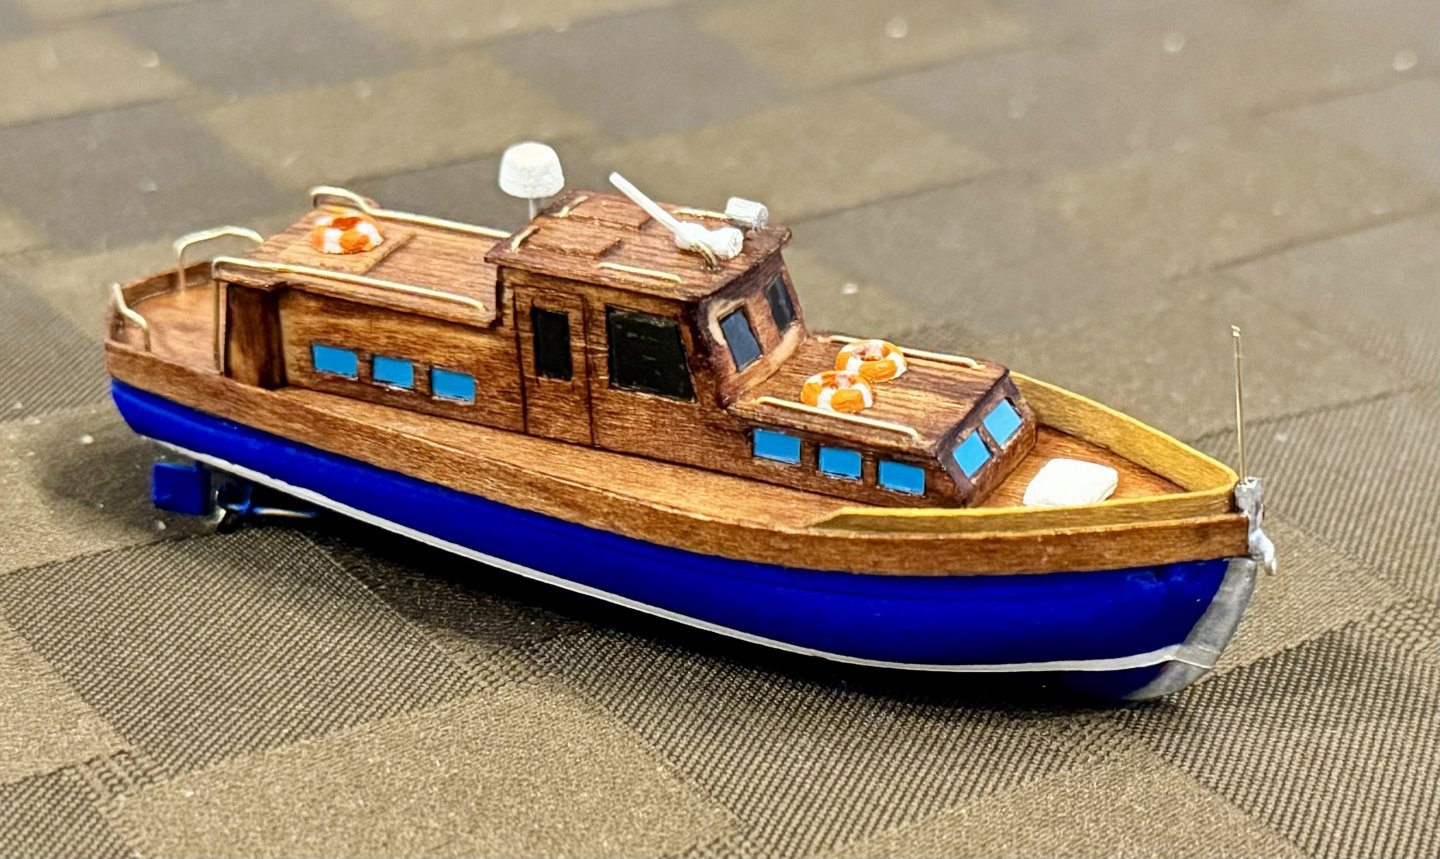
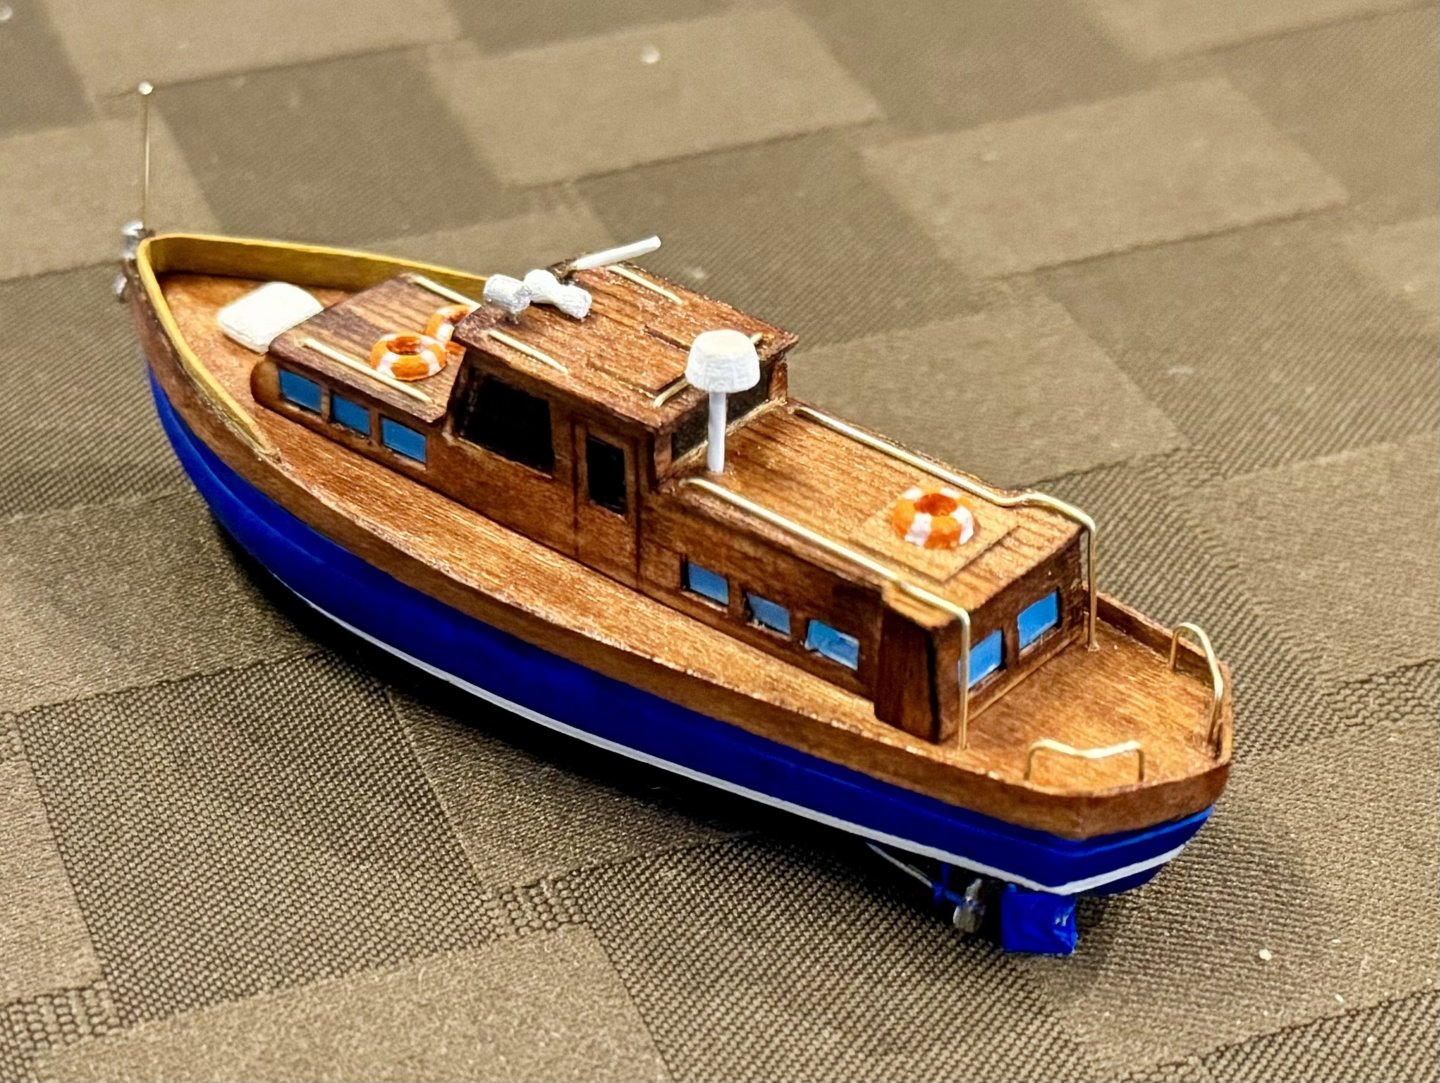
 Good evening mates, the last week or so I have been working on one of the small boats on board the AV. The first image is an actual photo of MCN 1675 and the next two my interpretation of that small boat.
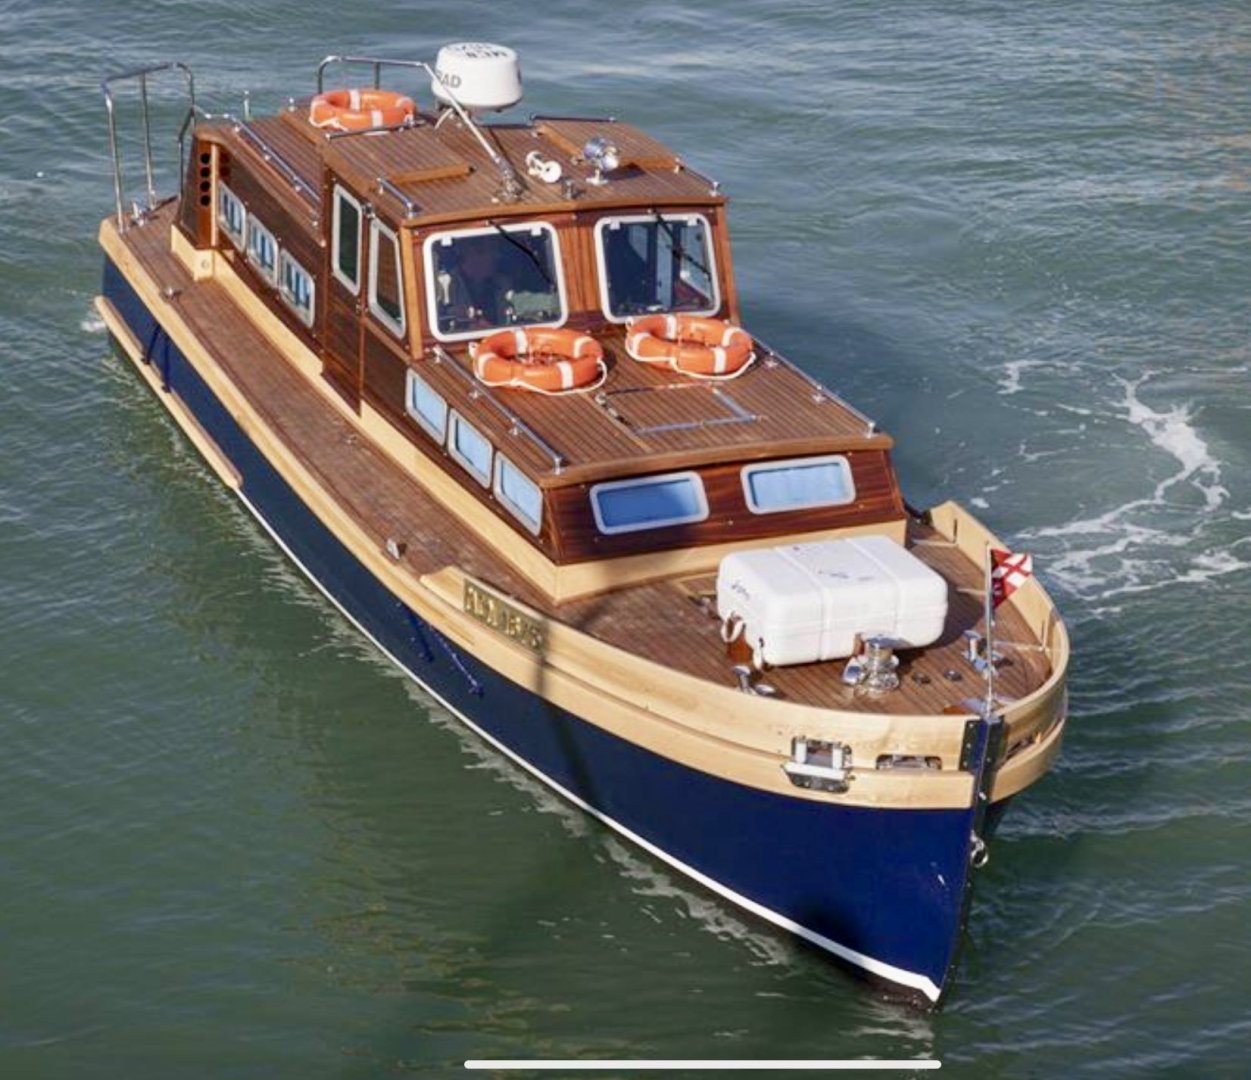
-
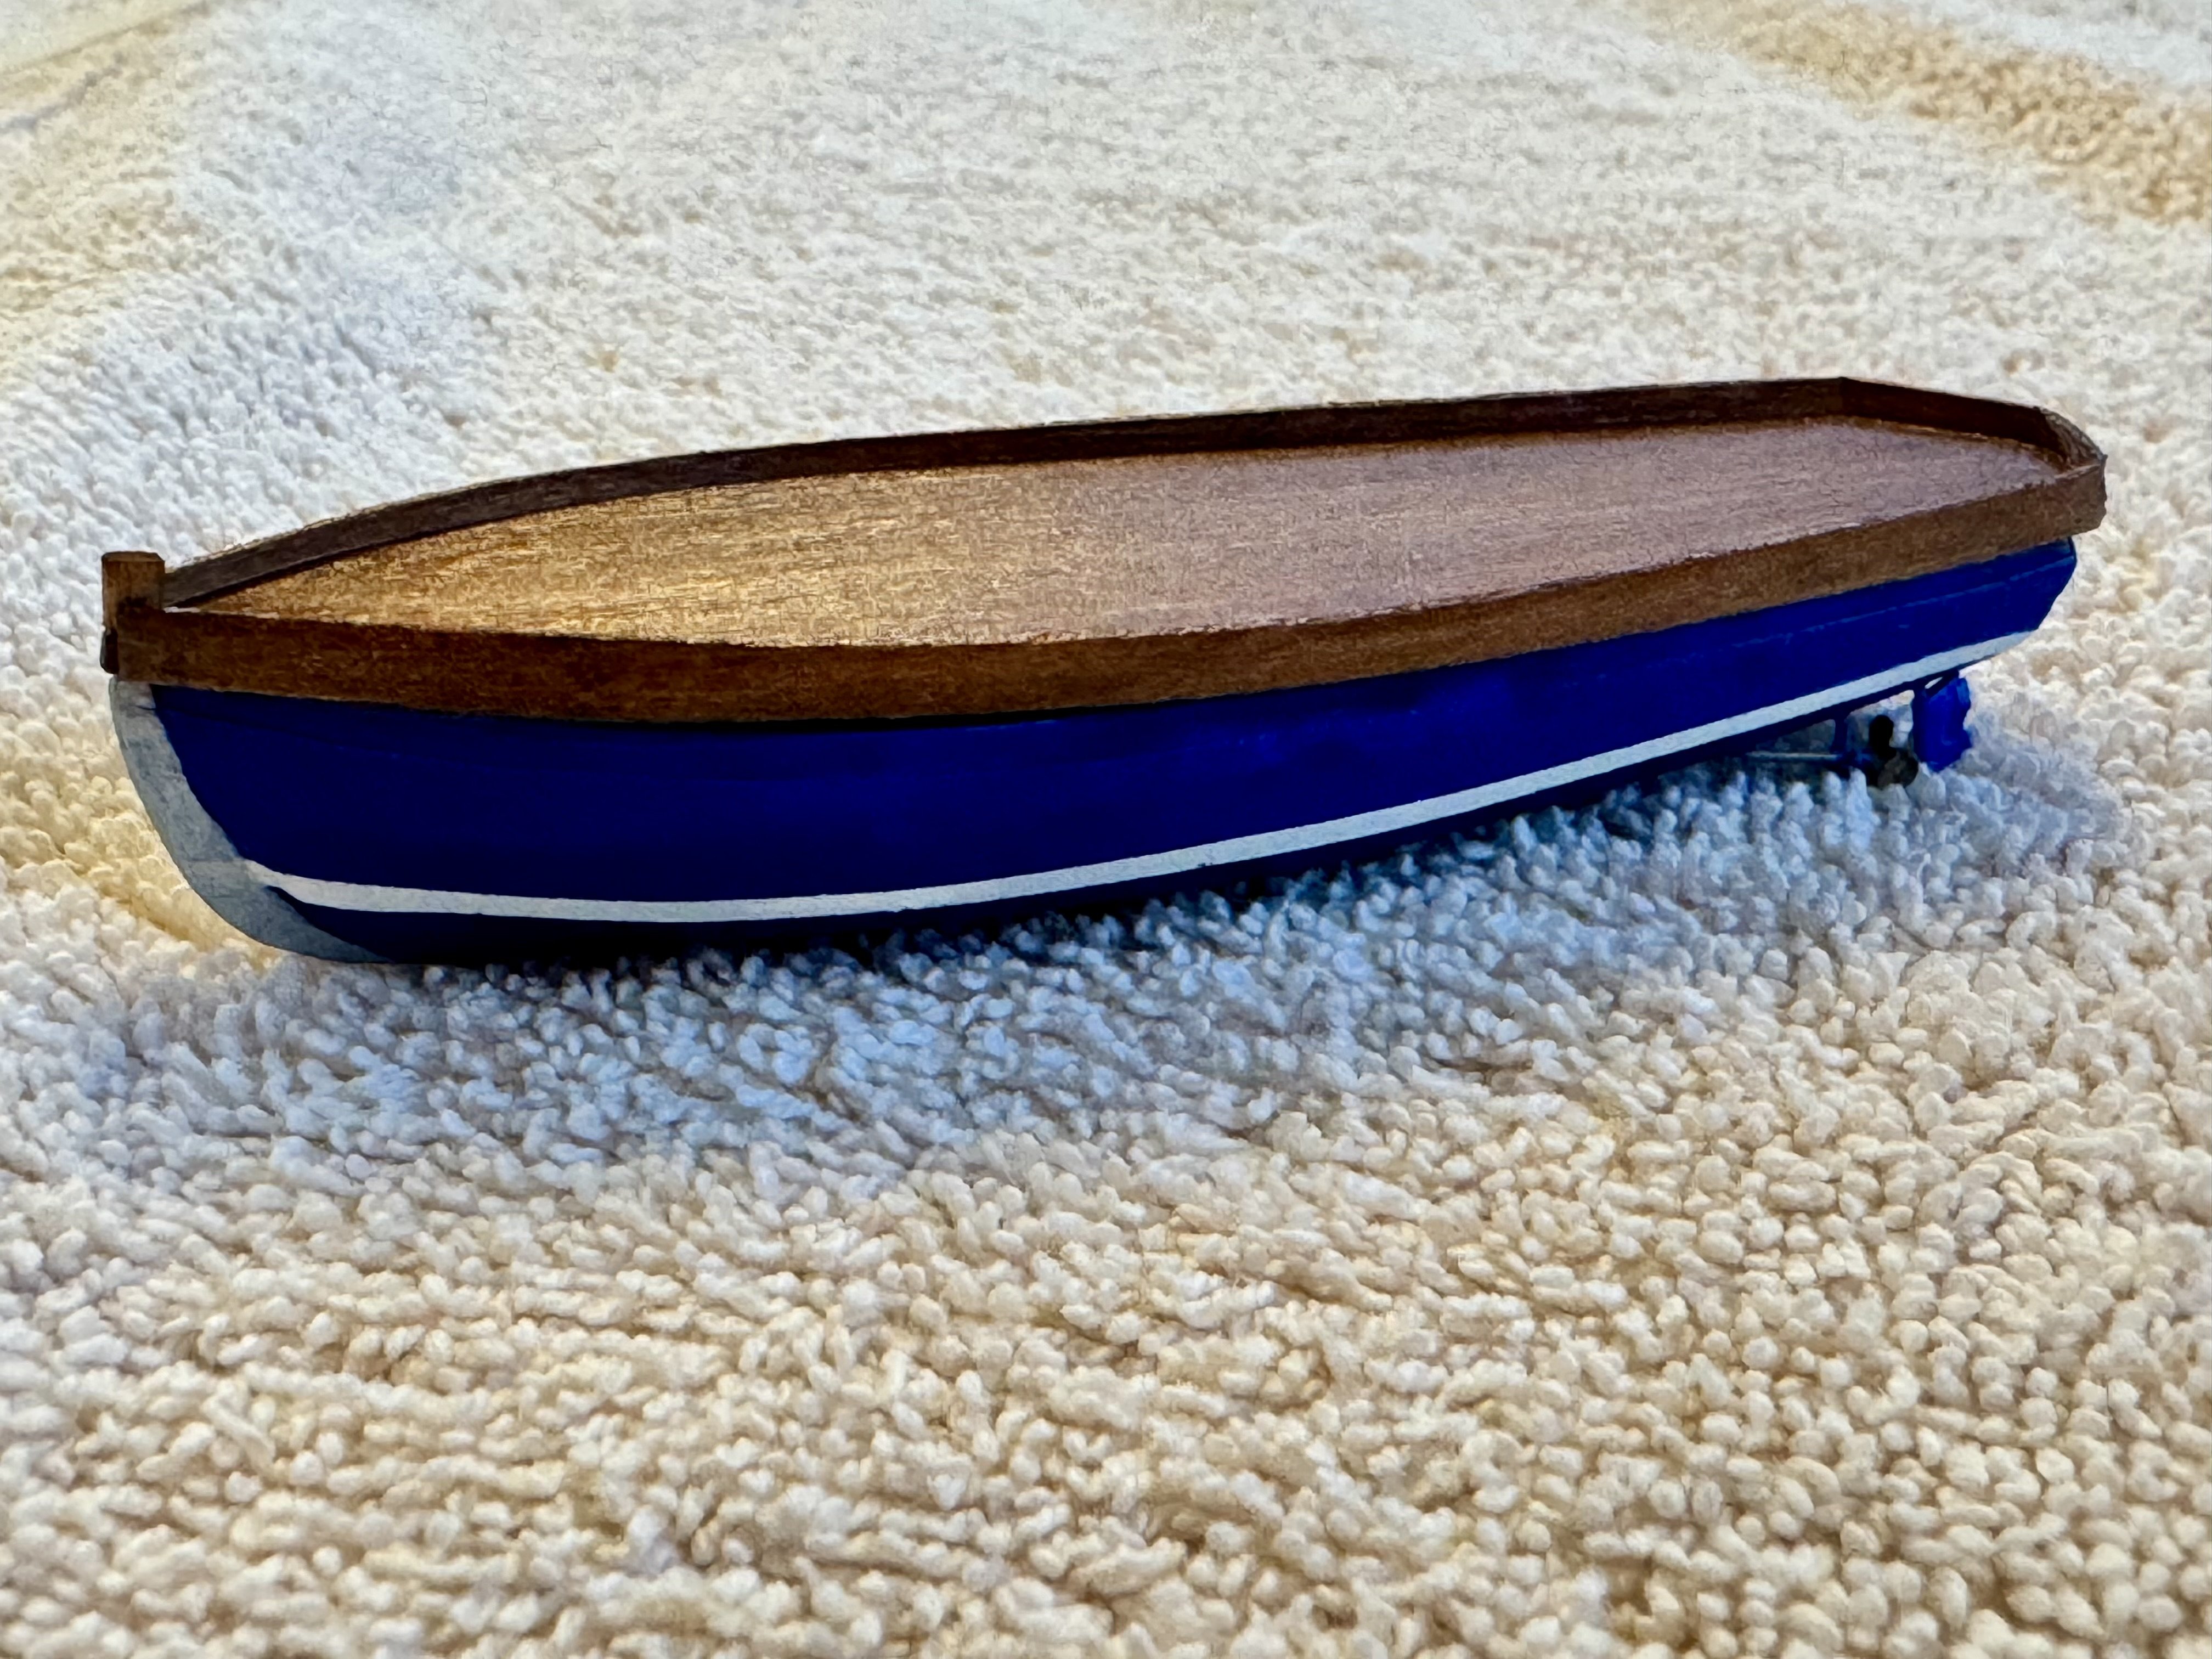
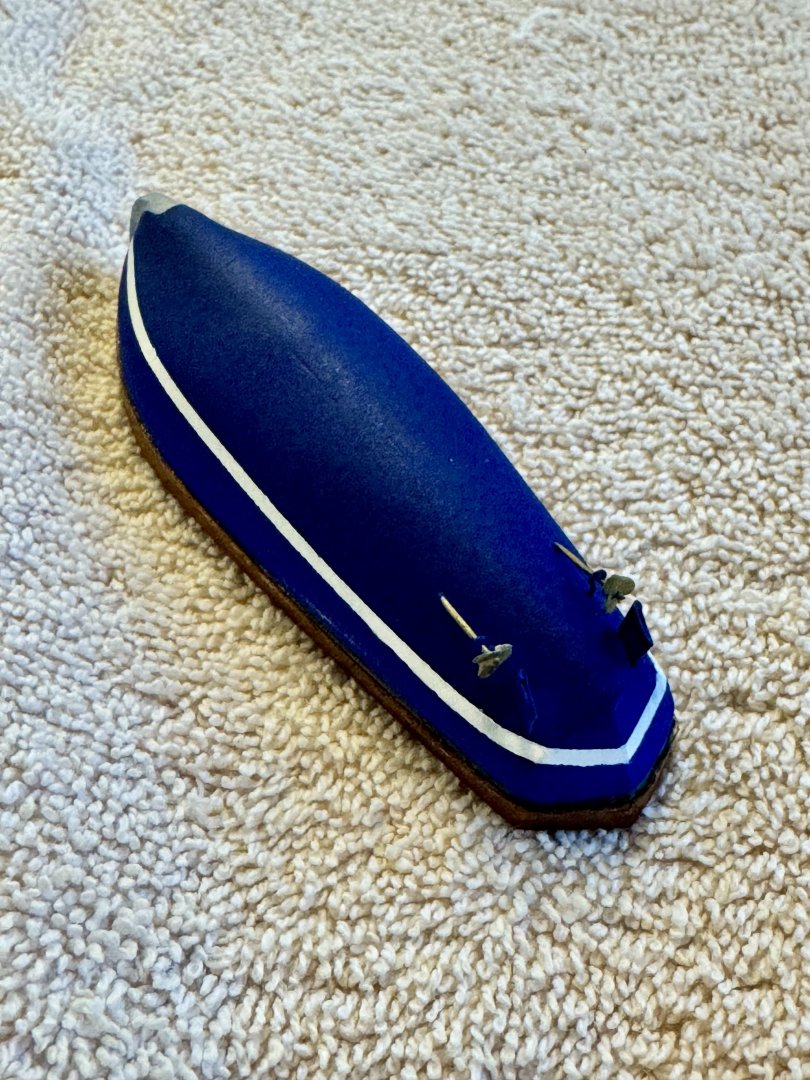
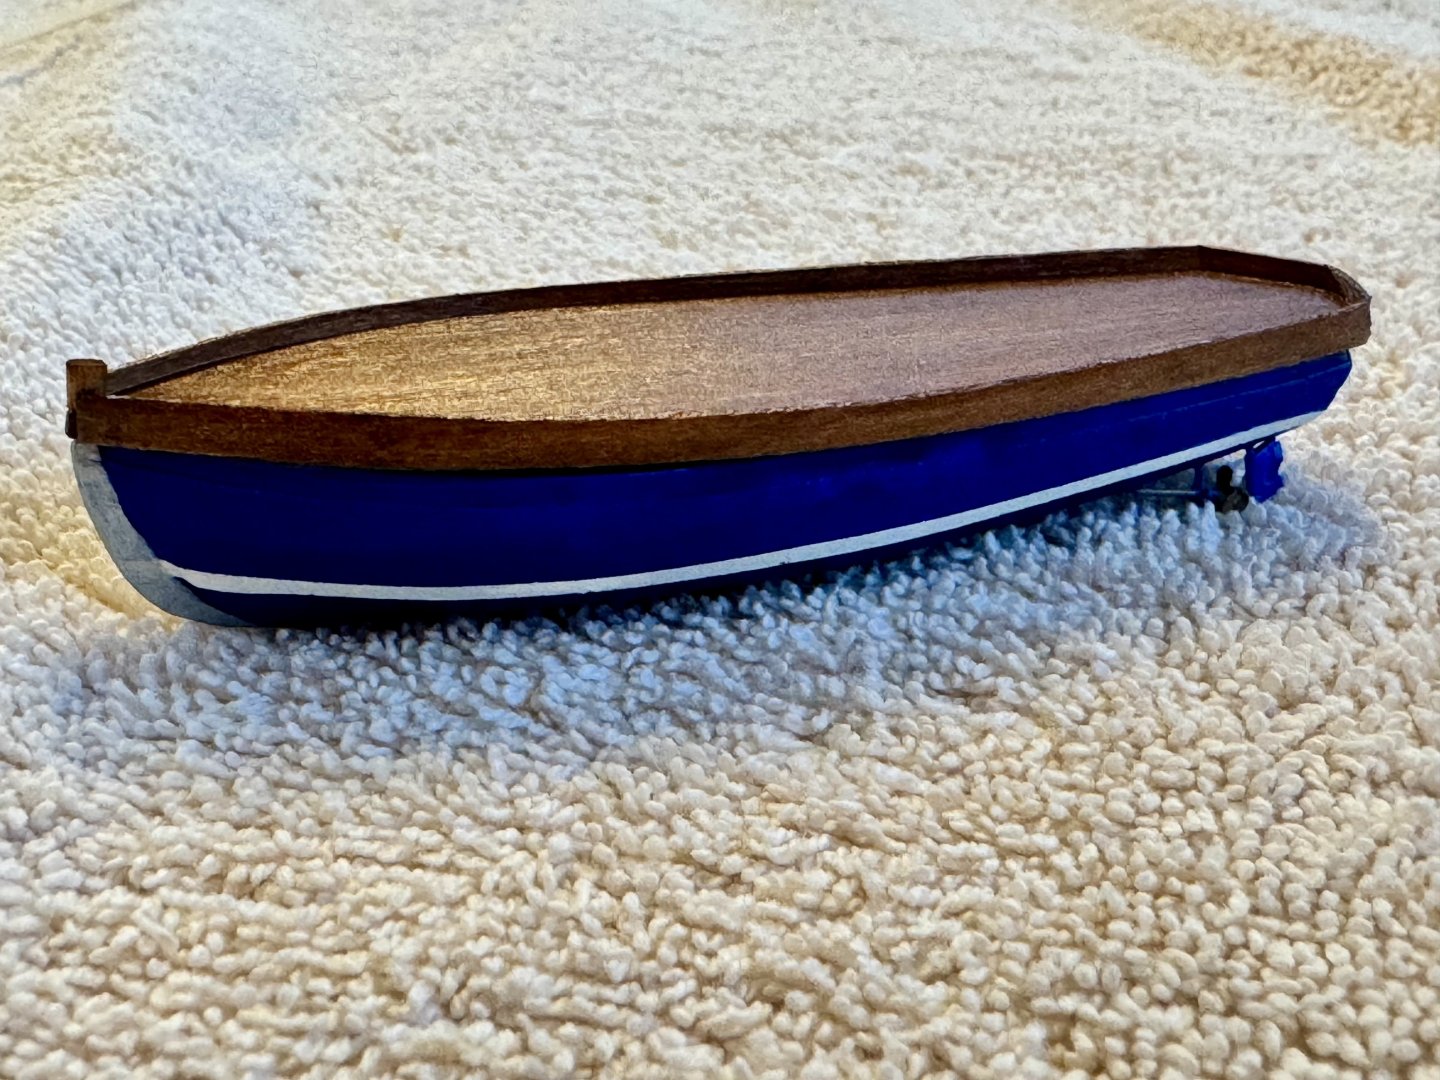
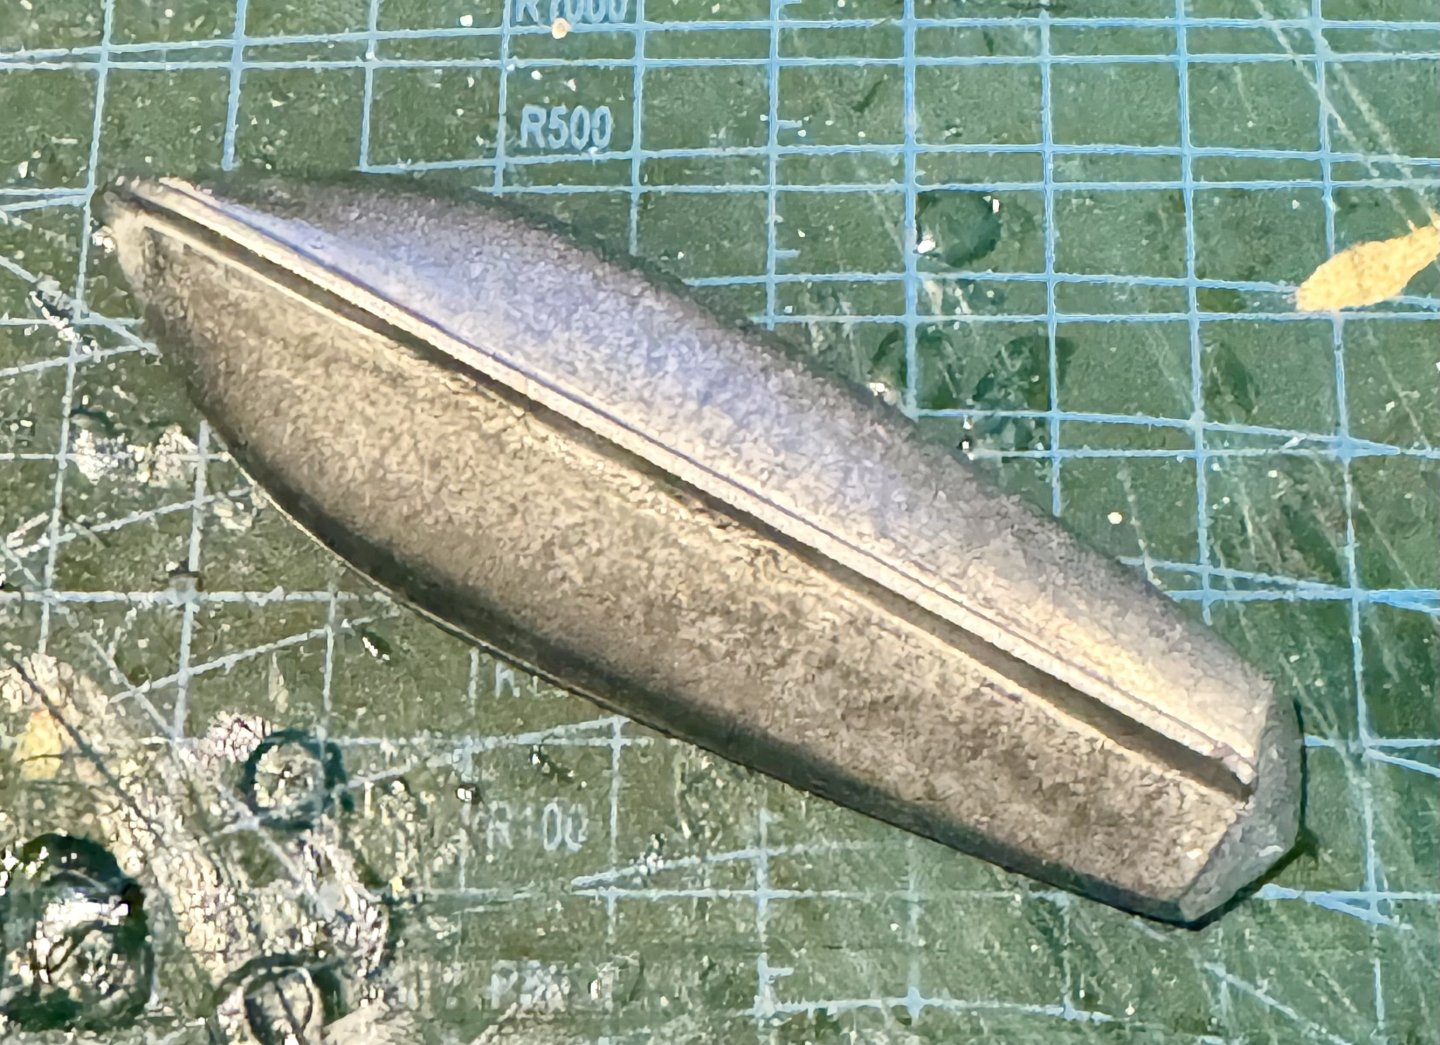
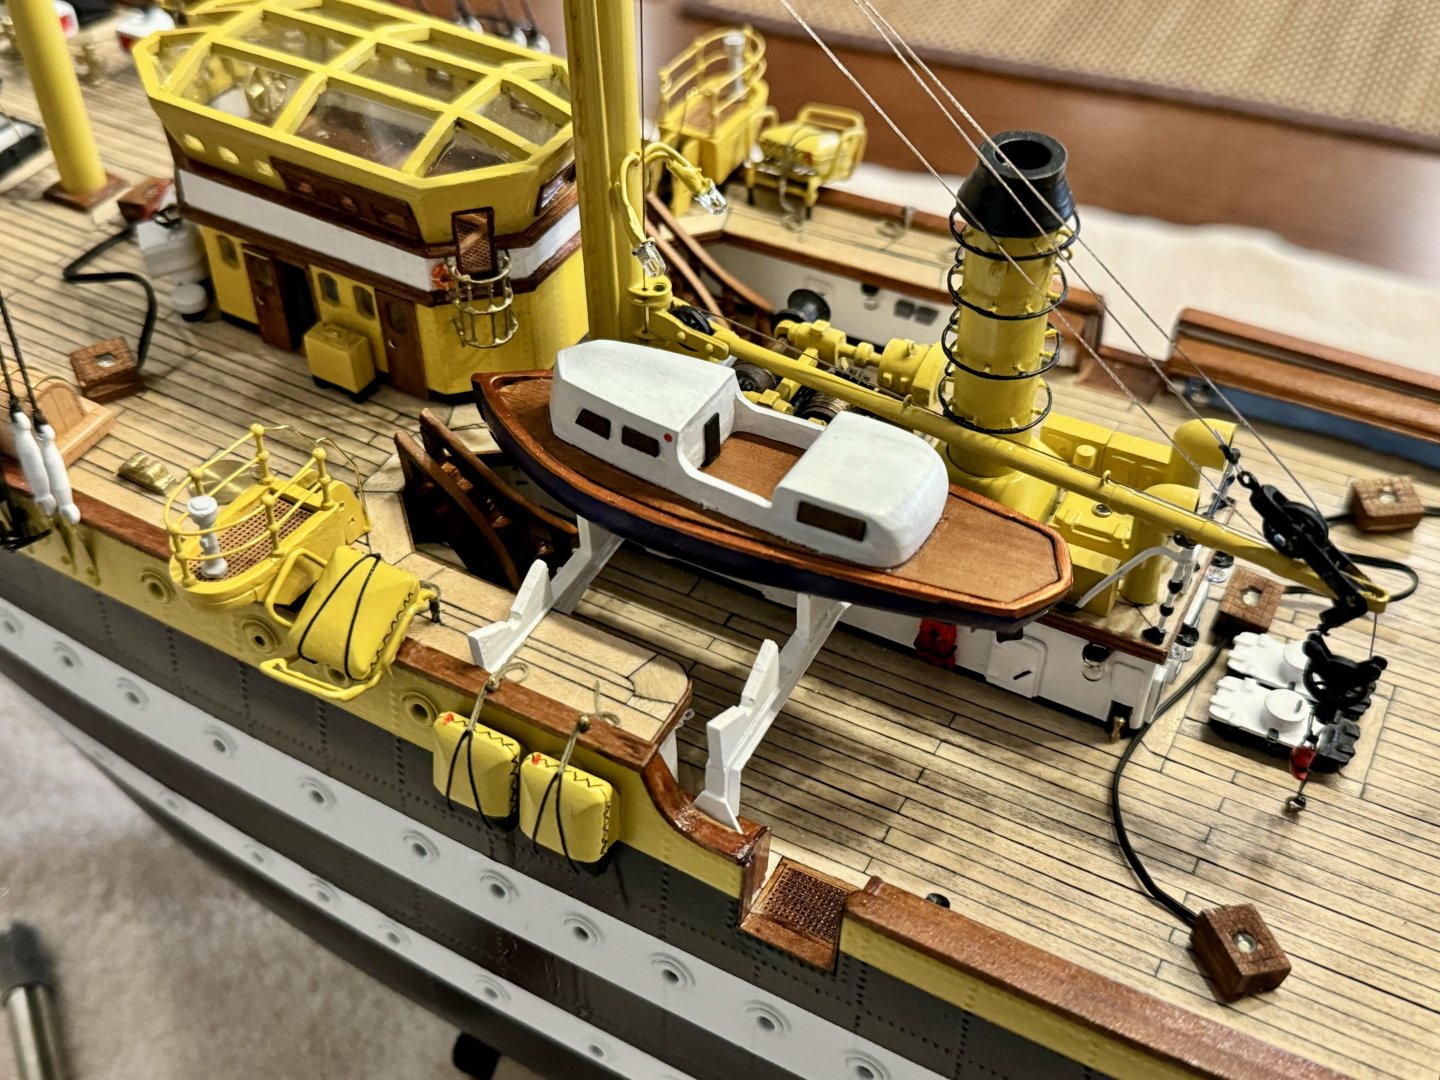
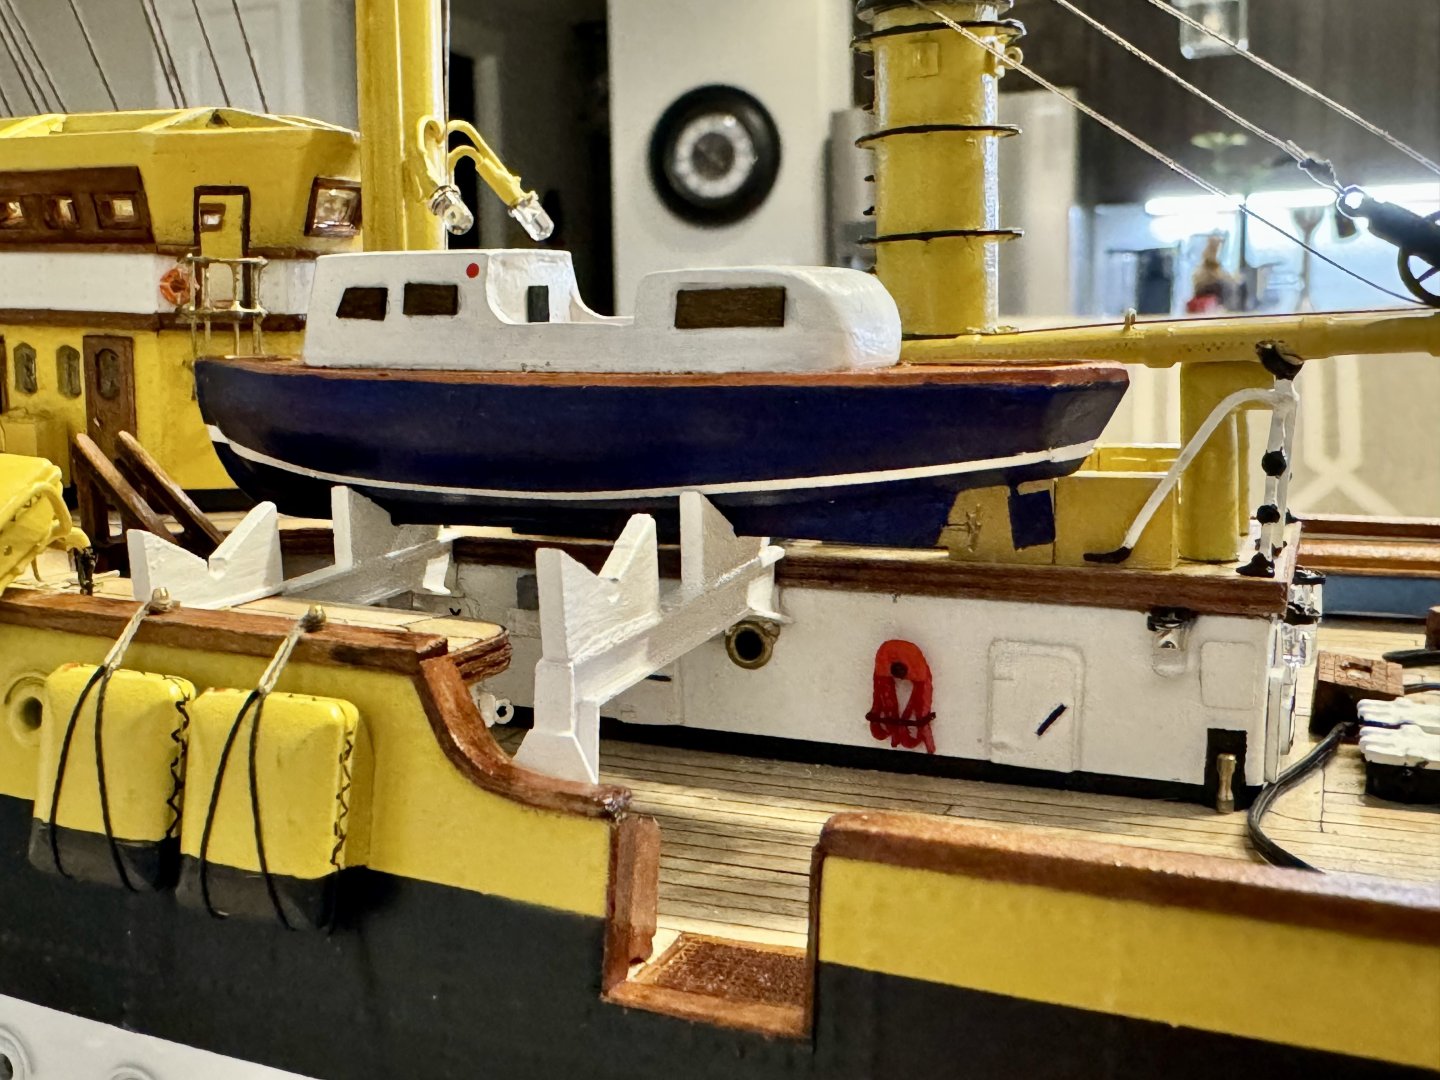
Good evening mates, today was a bit drippy in the northwest USA, which means more time in the shipyard. I decided to work on another small boat for the starboard side of the ship, specifically MCN 1675. I had to do a lot of modifications to the metal hull provided in the kit. As you can see from the first image, the real MCN 1675 is a flat bottom boat with two propellers and rudders. The blank provided in the kit is the next image with a pronounced keel. I had to file down the keel to make a better representation of the real small boat. Followed up with twin scratch built screws and rudders and completed with a nice air brushed paint job. Finally added a new deck (work in progress). One downside to how this boat is coming out…I’m not happy with the first one I built so I think I will tear it apart and build it again. I think I’ve subscribed to the thought process that it’s not about how fast you complete the build, but that you are happy with the result when it’s finished.


-
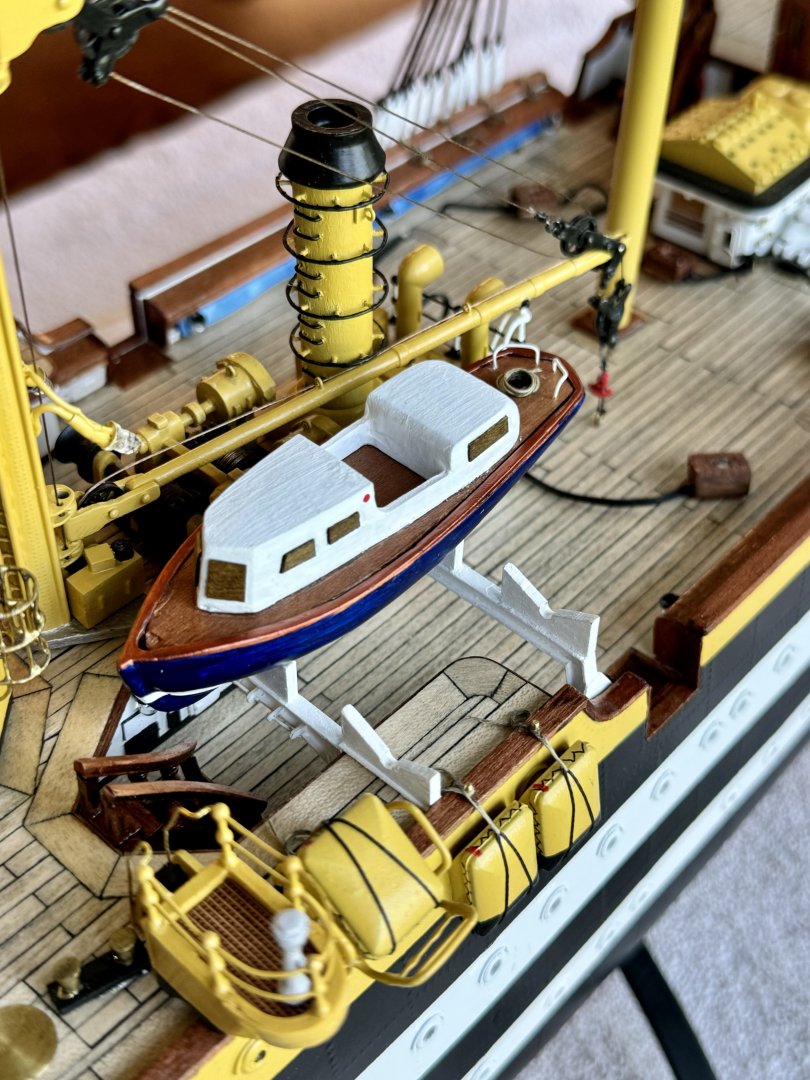
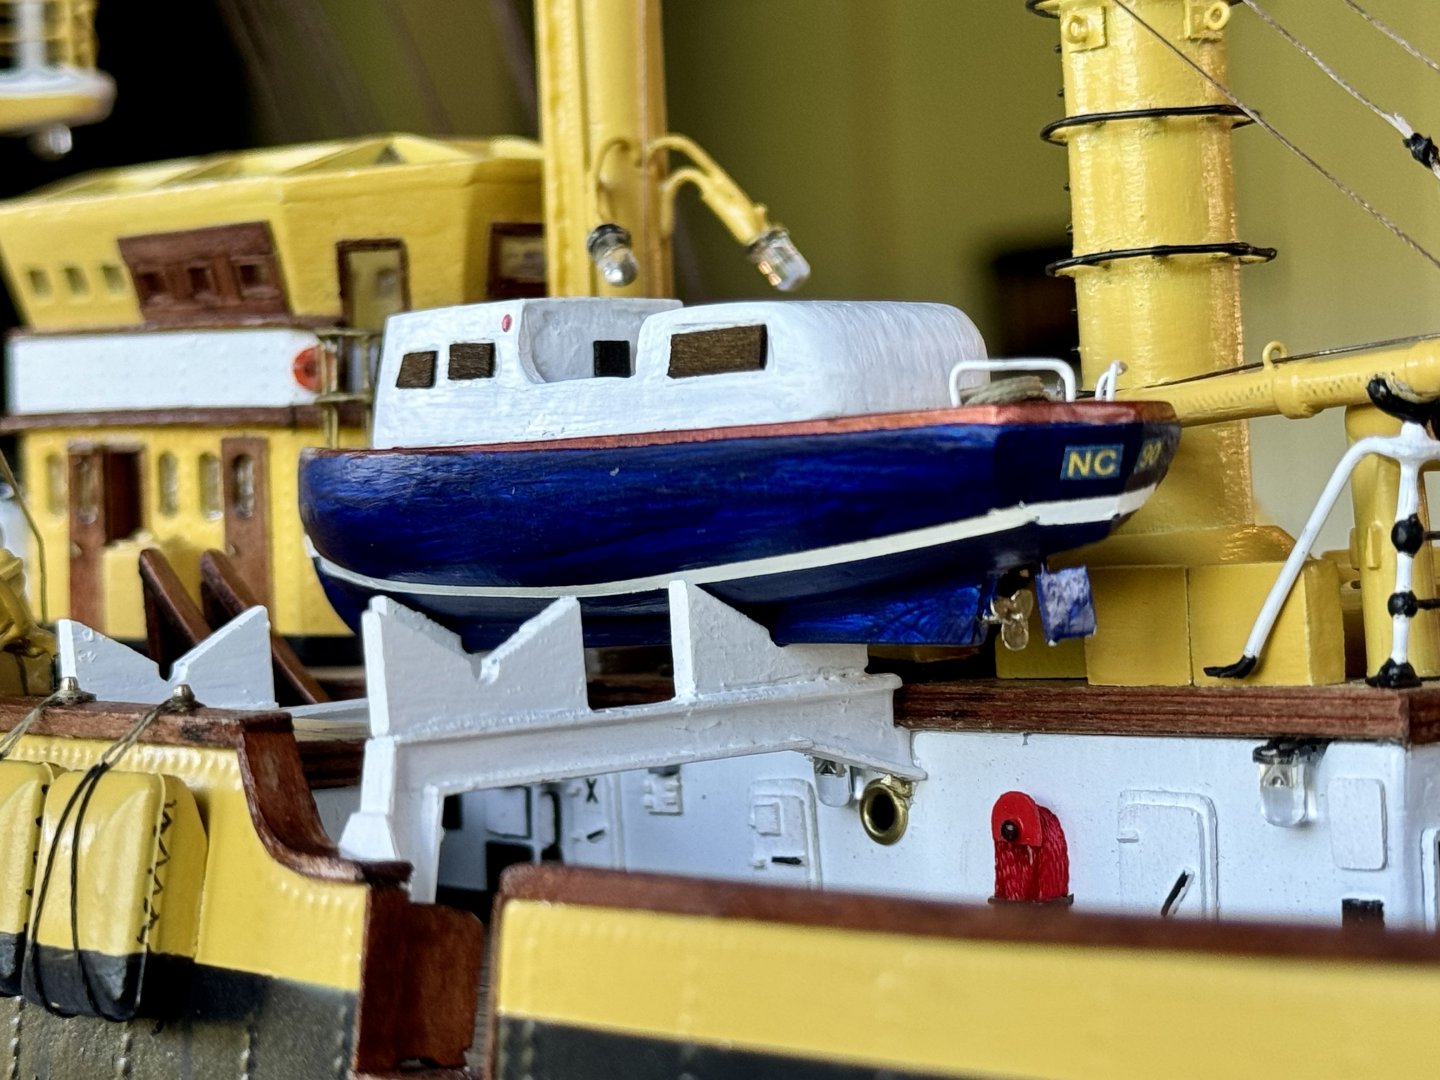
Good evening mates, I have completed the first of eleven small boats present on the Amerigo Vespucci. It’s as close as I can get as I have been unable to find many pictures of the NC 90.
-
Good evening mates, in addition to working on the small boat I-beam structure, I have been detailing the OcCre supplied hull to a more realistic small boat by adding a scratch built propeller and rudder. A few more details to add, small railing at the stern, rope coil at the stern and of course the boat ID, NC 90.

-
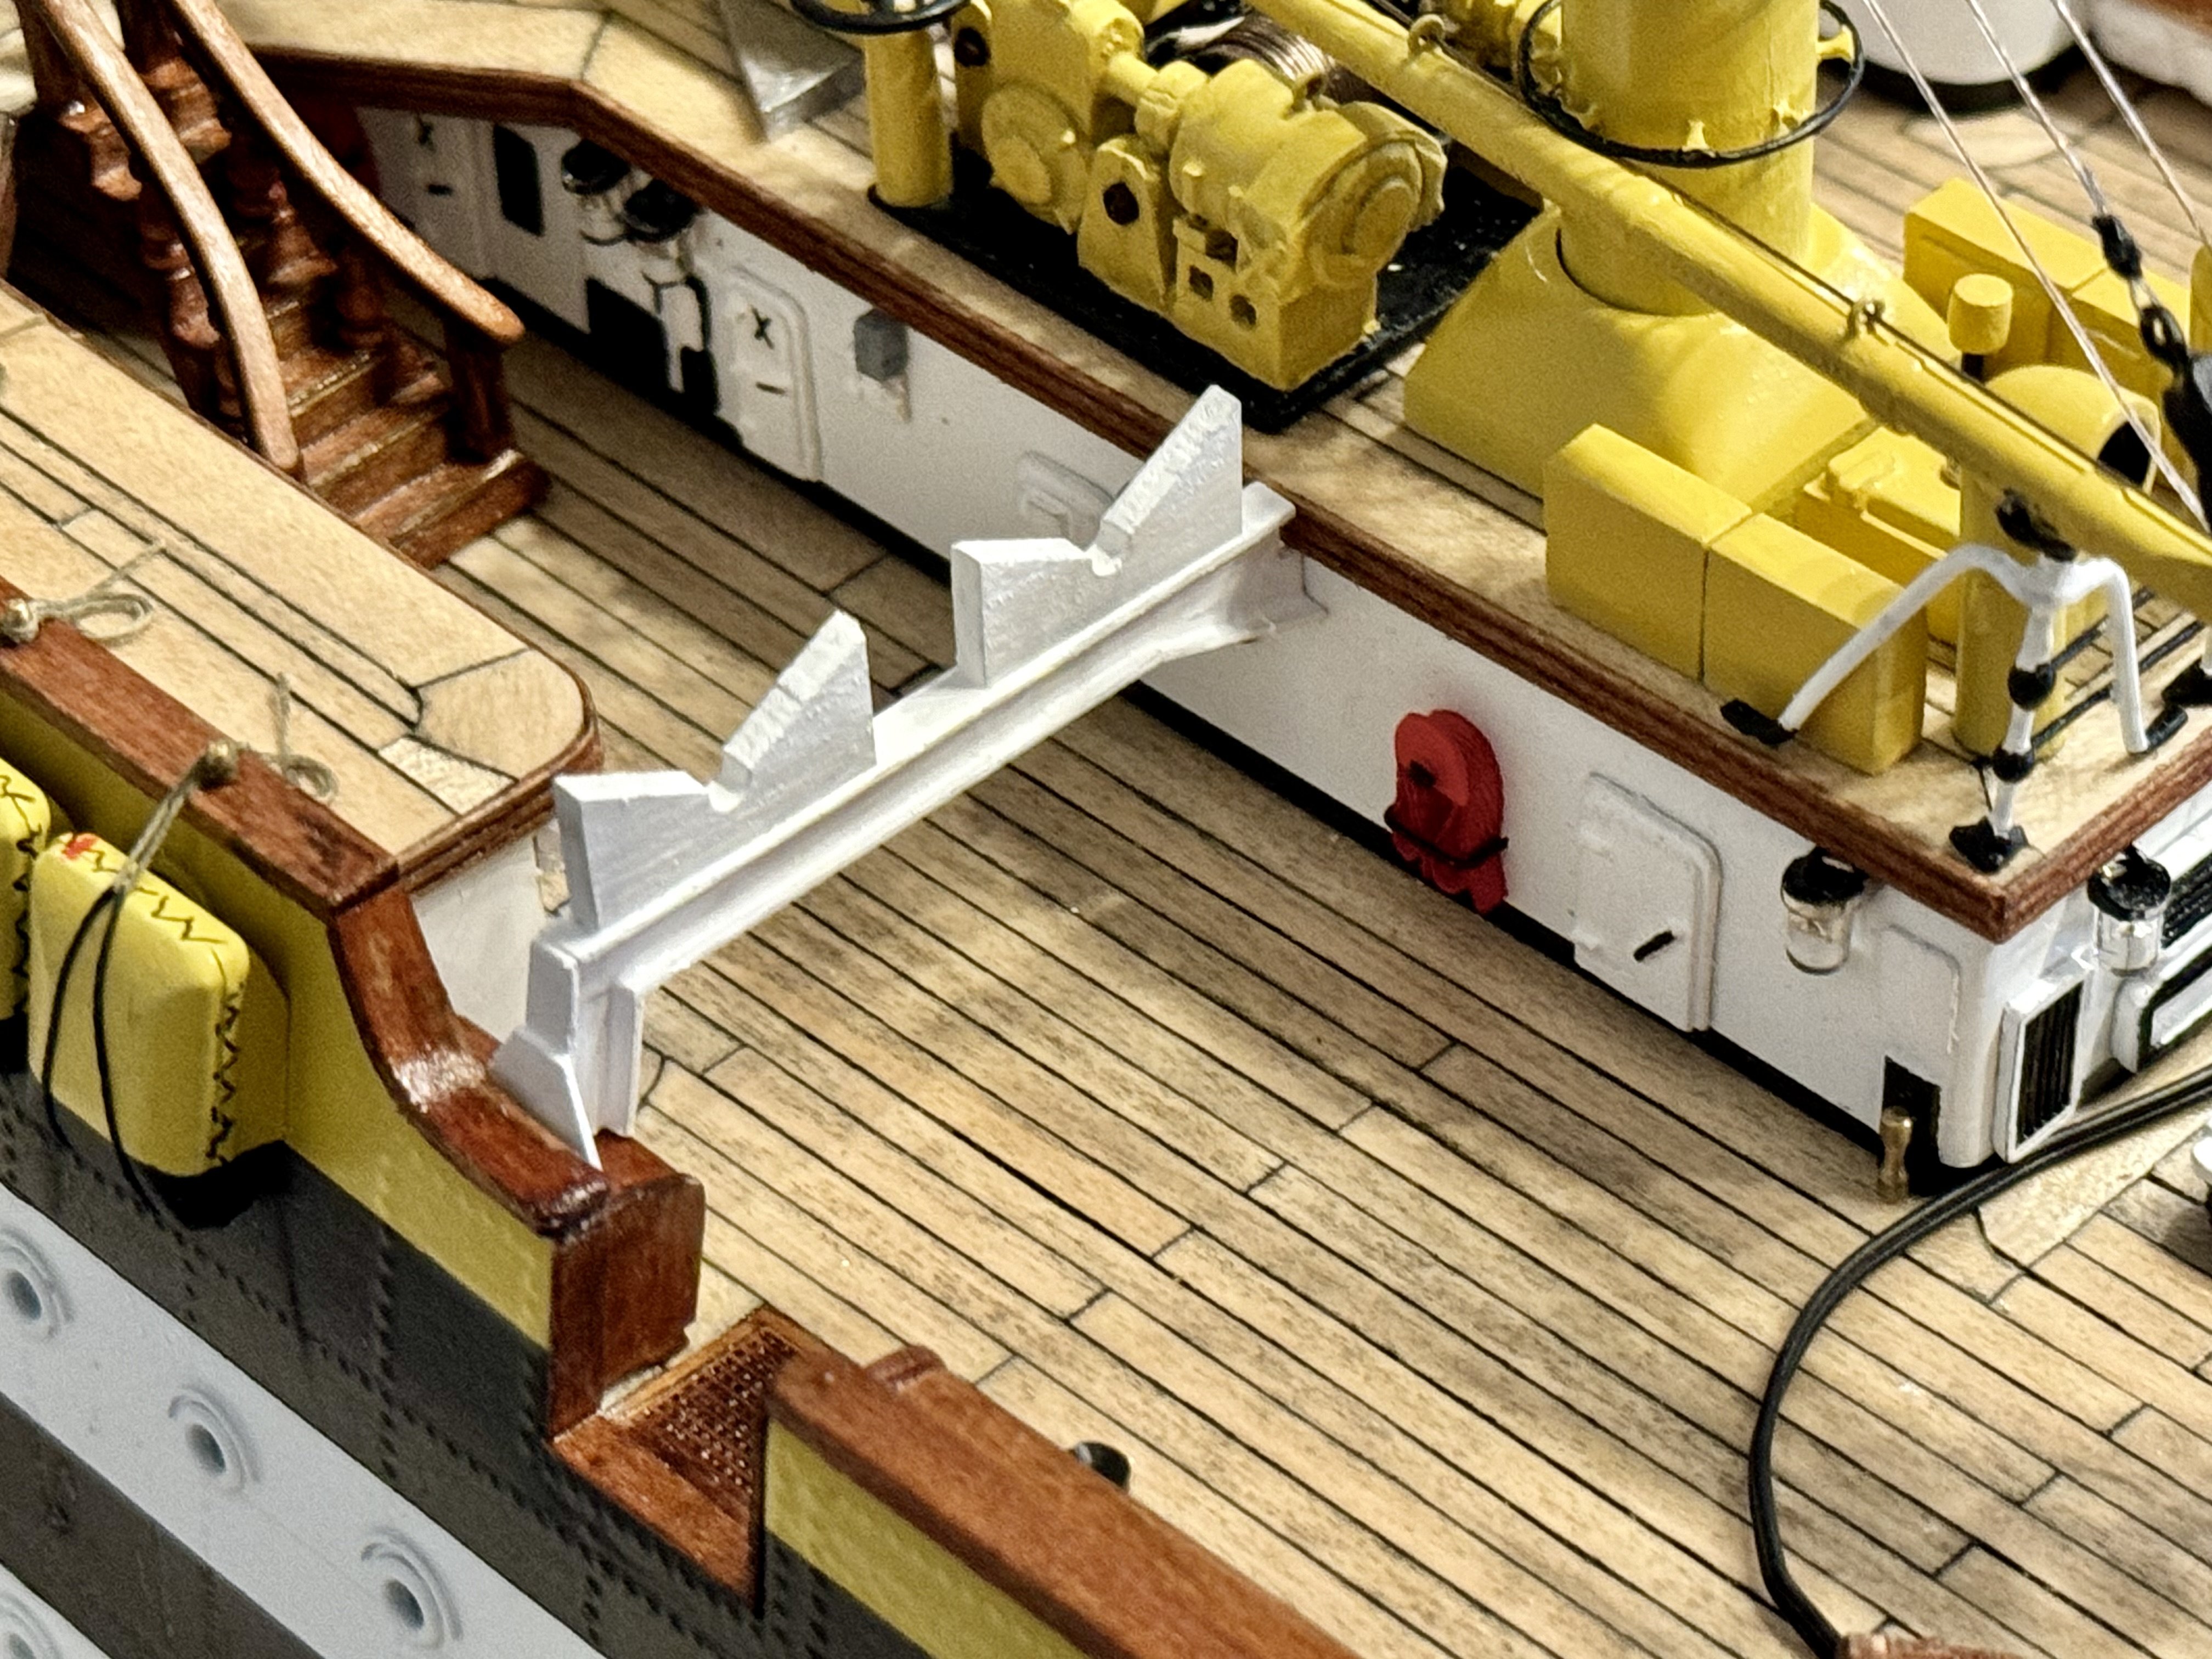
Good evening mates. I’ve been working on the first of several supports for some small boats on board the Amerigo Vespucci. The OcCre plans are a bit plain, so I spruced them up making them out of I beams, very similar to the real AV.

-
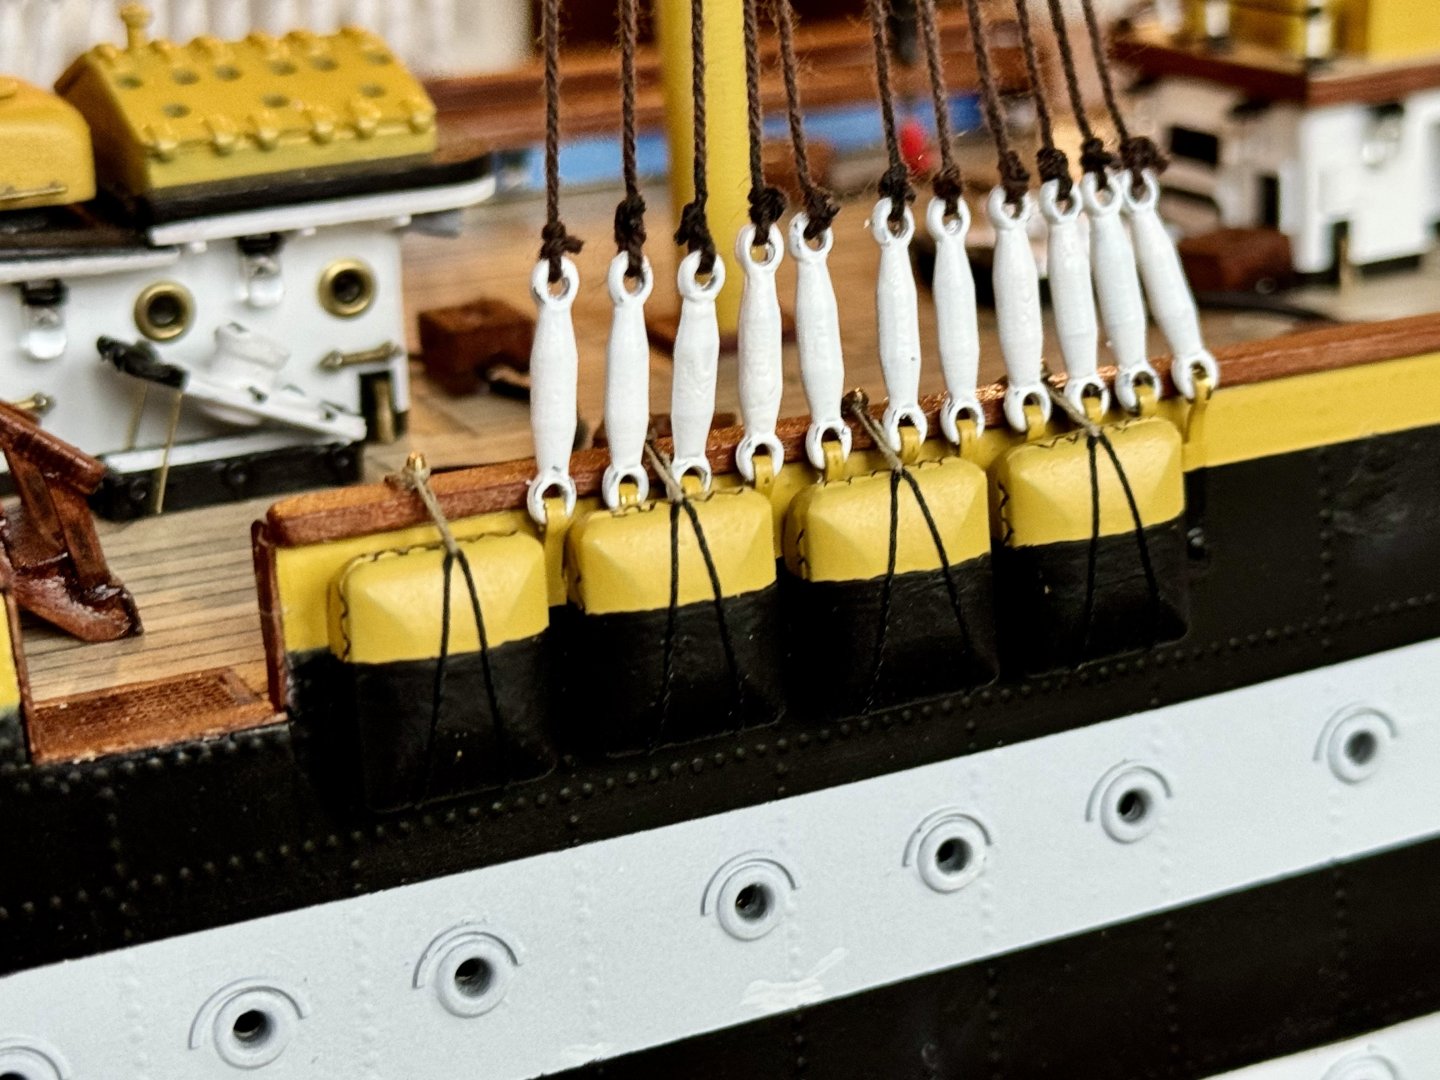
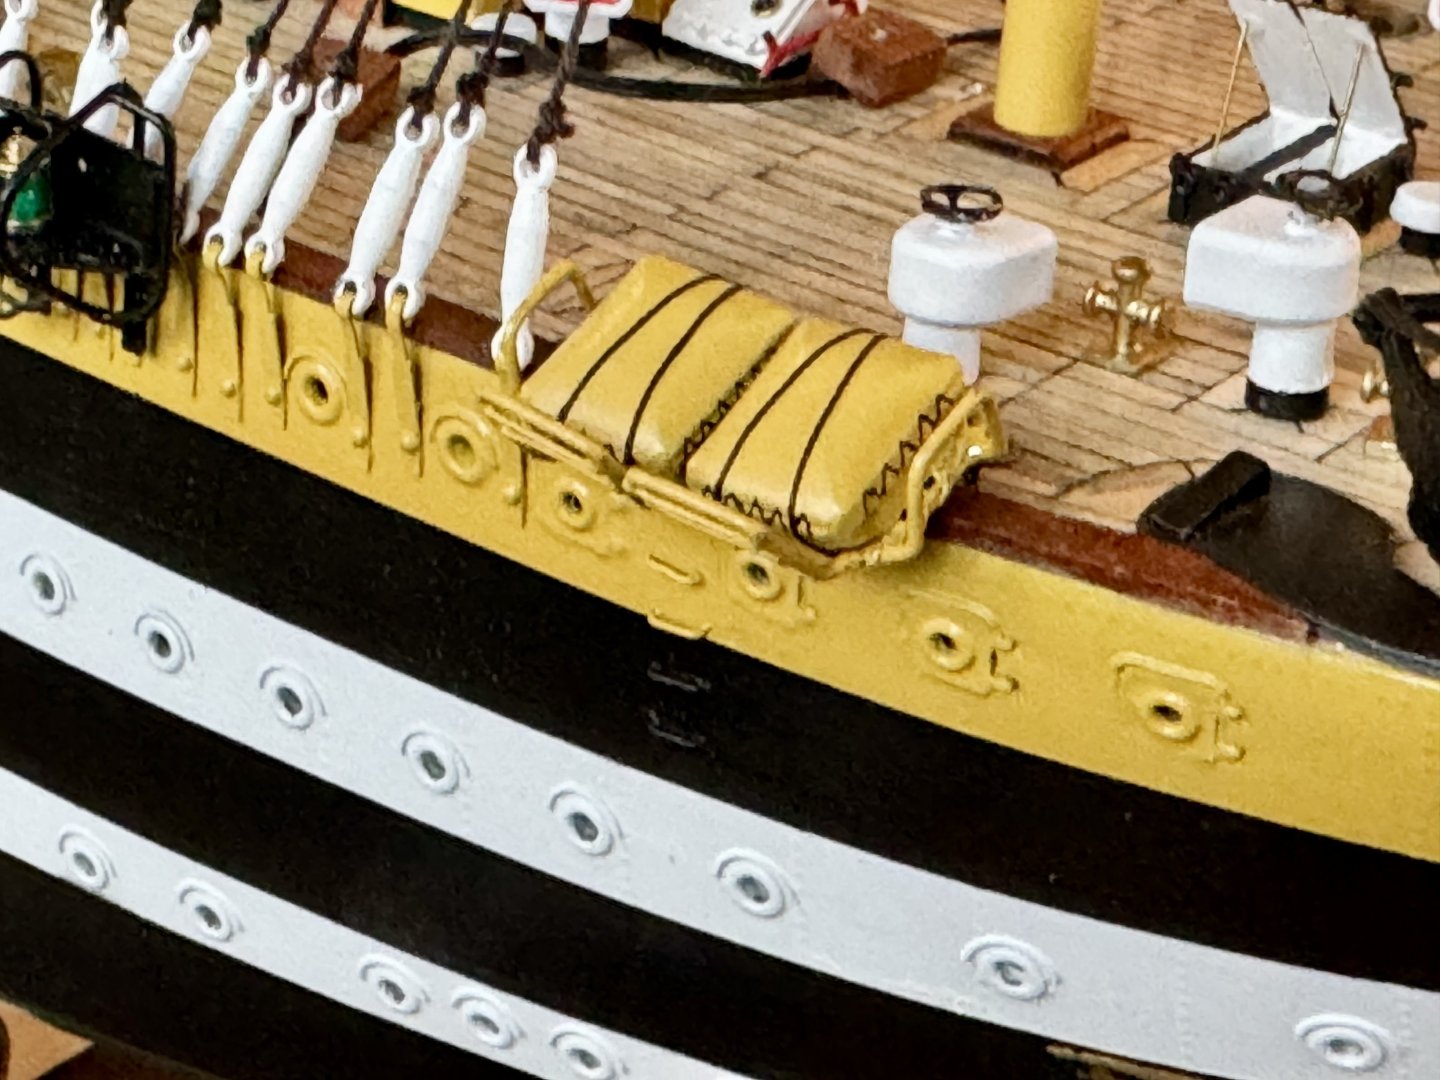
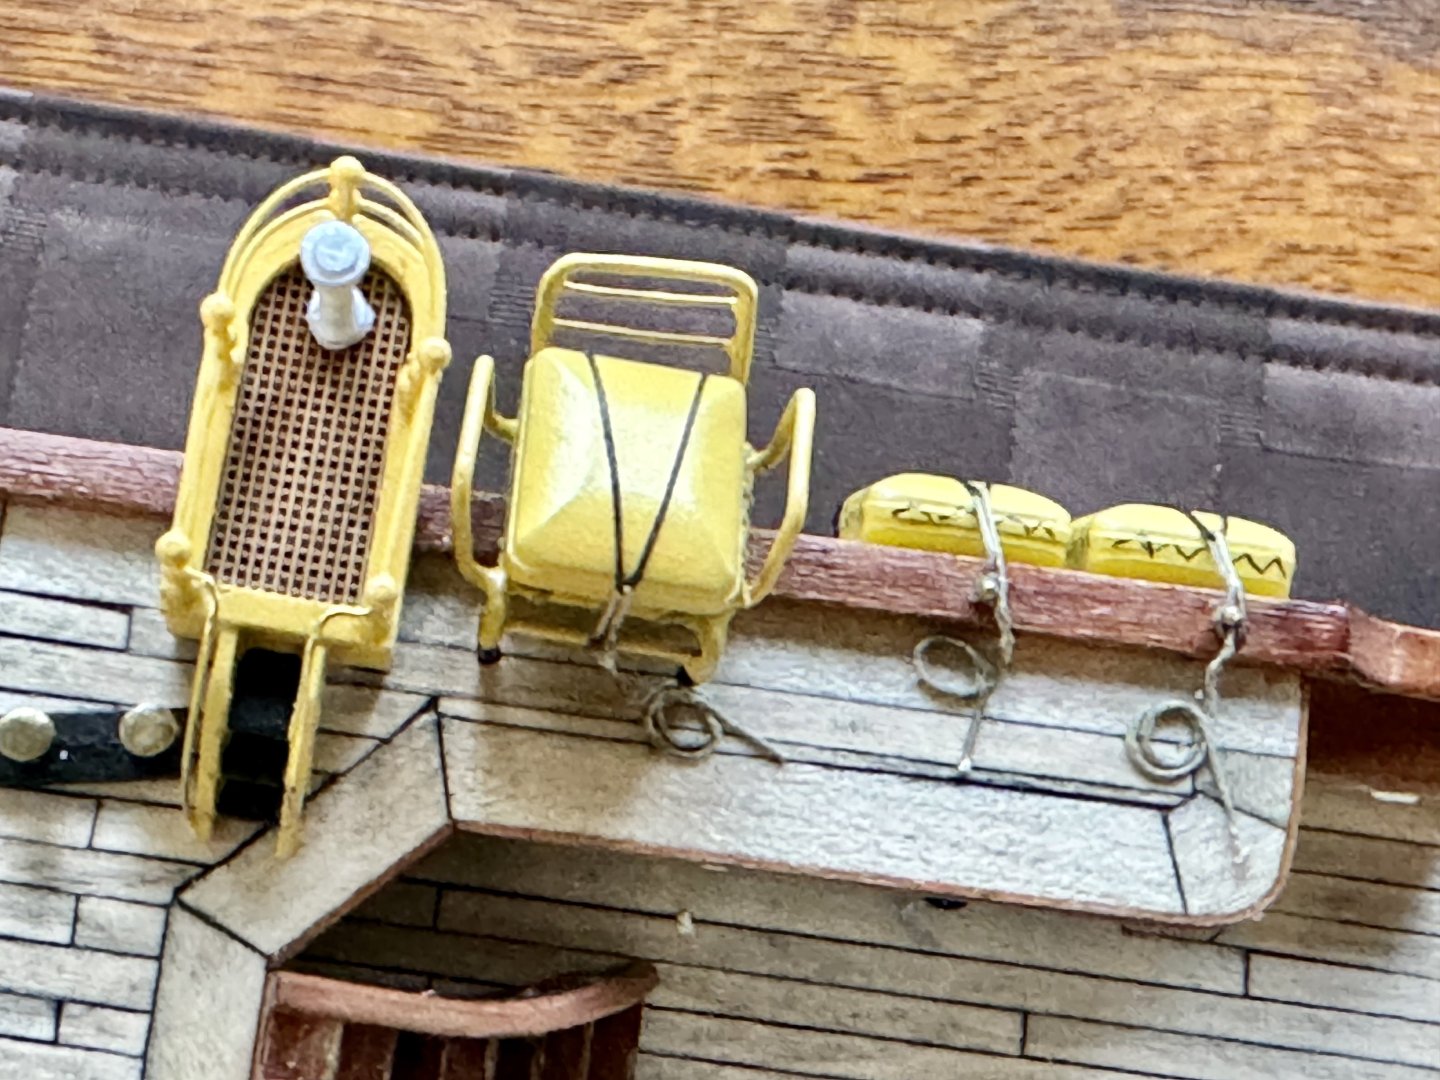
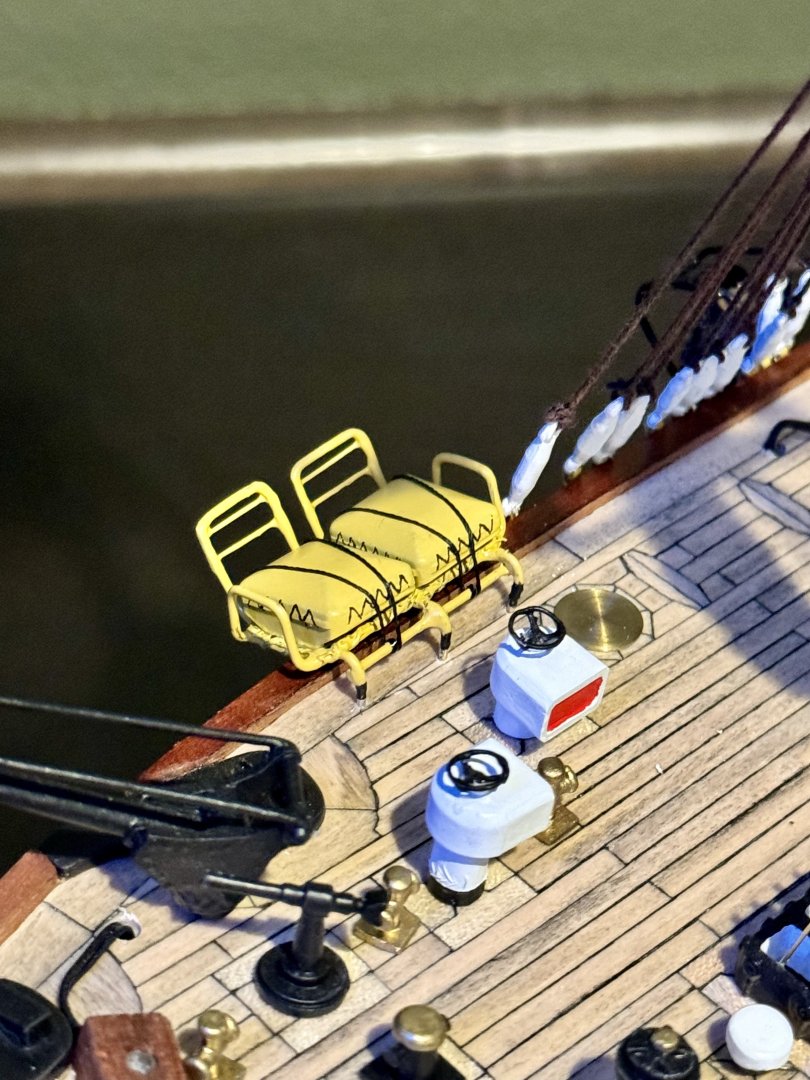
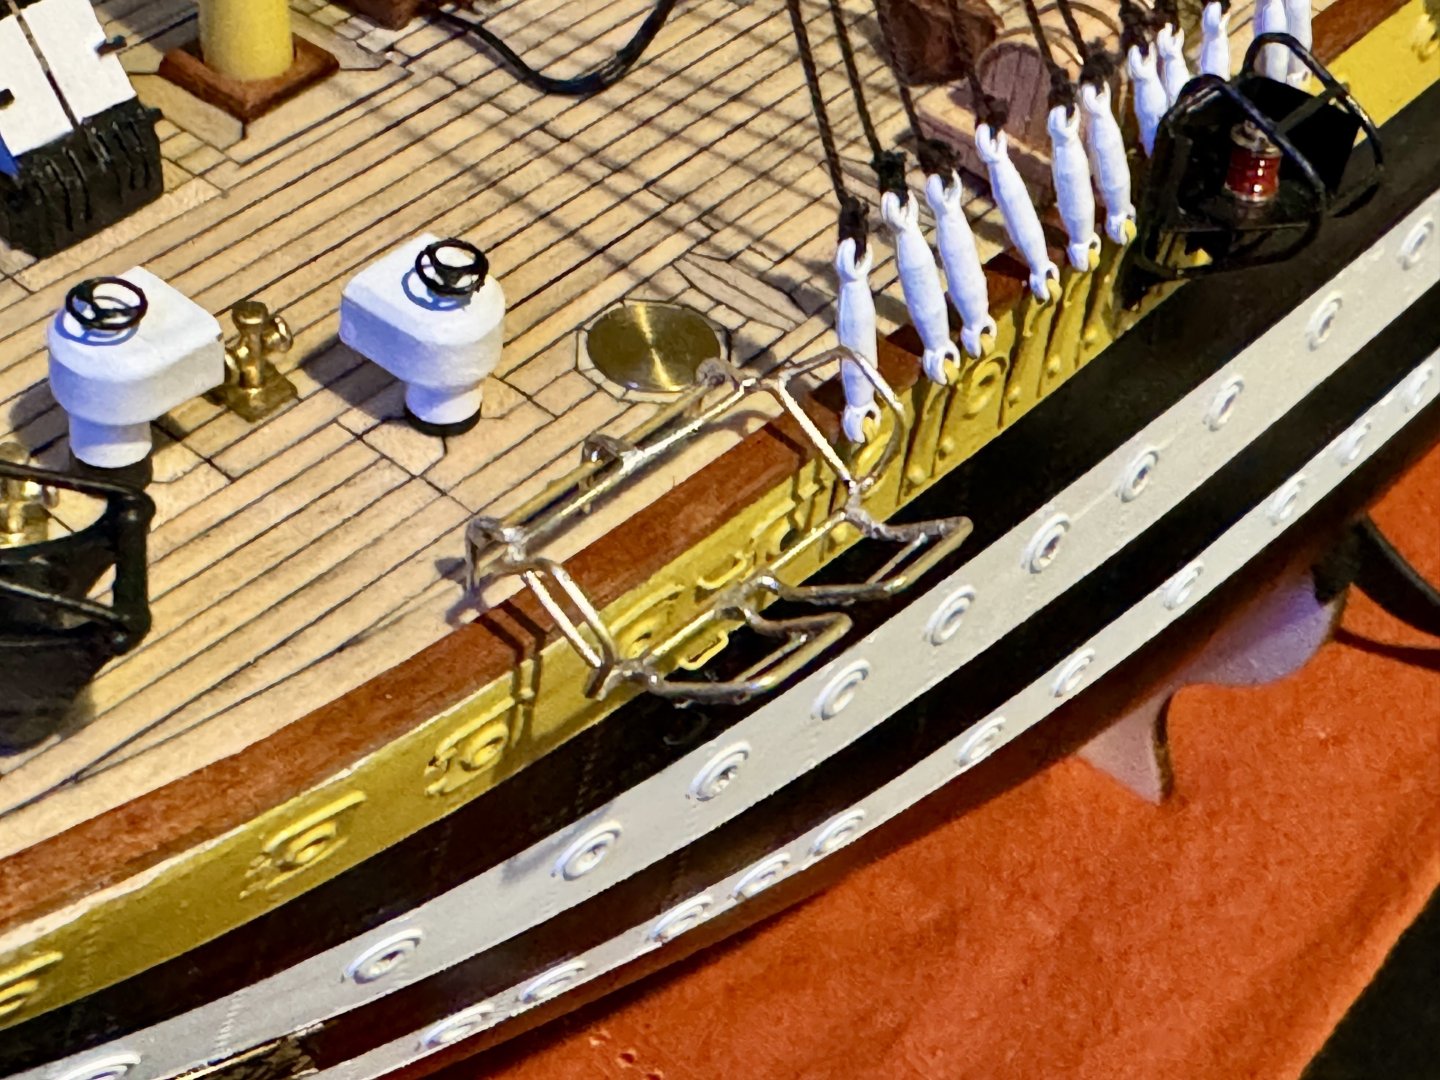
Good evening mates, time for a life raft update. I have the starboard side completed with only one left to manufacture for the port side.

-
Thank you for your kind comments! Daniel
-
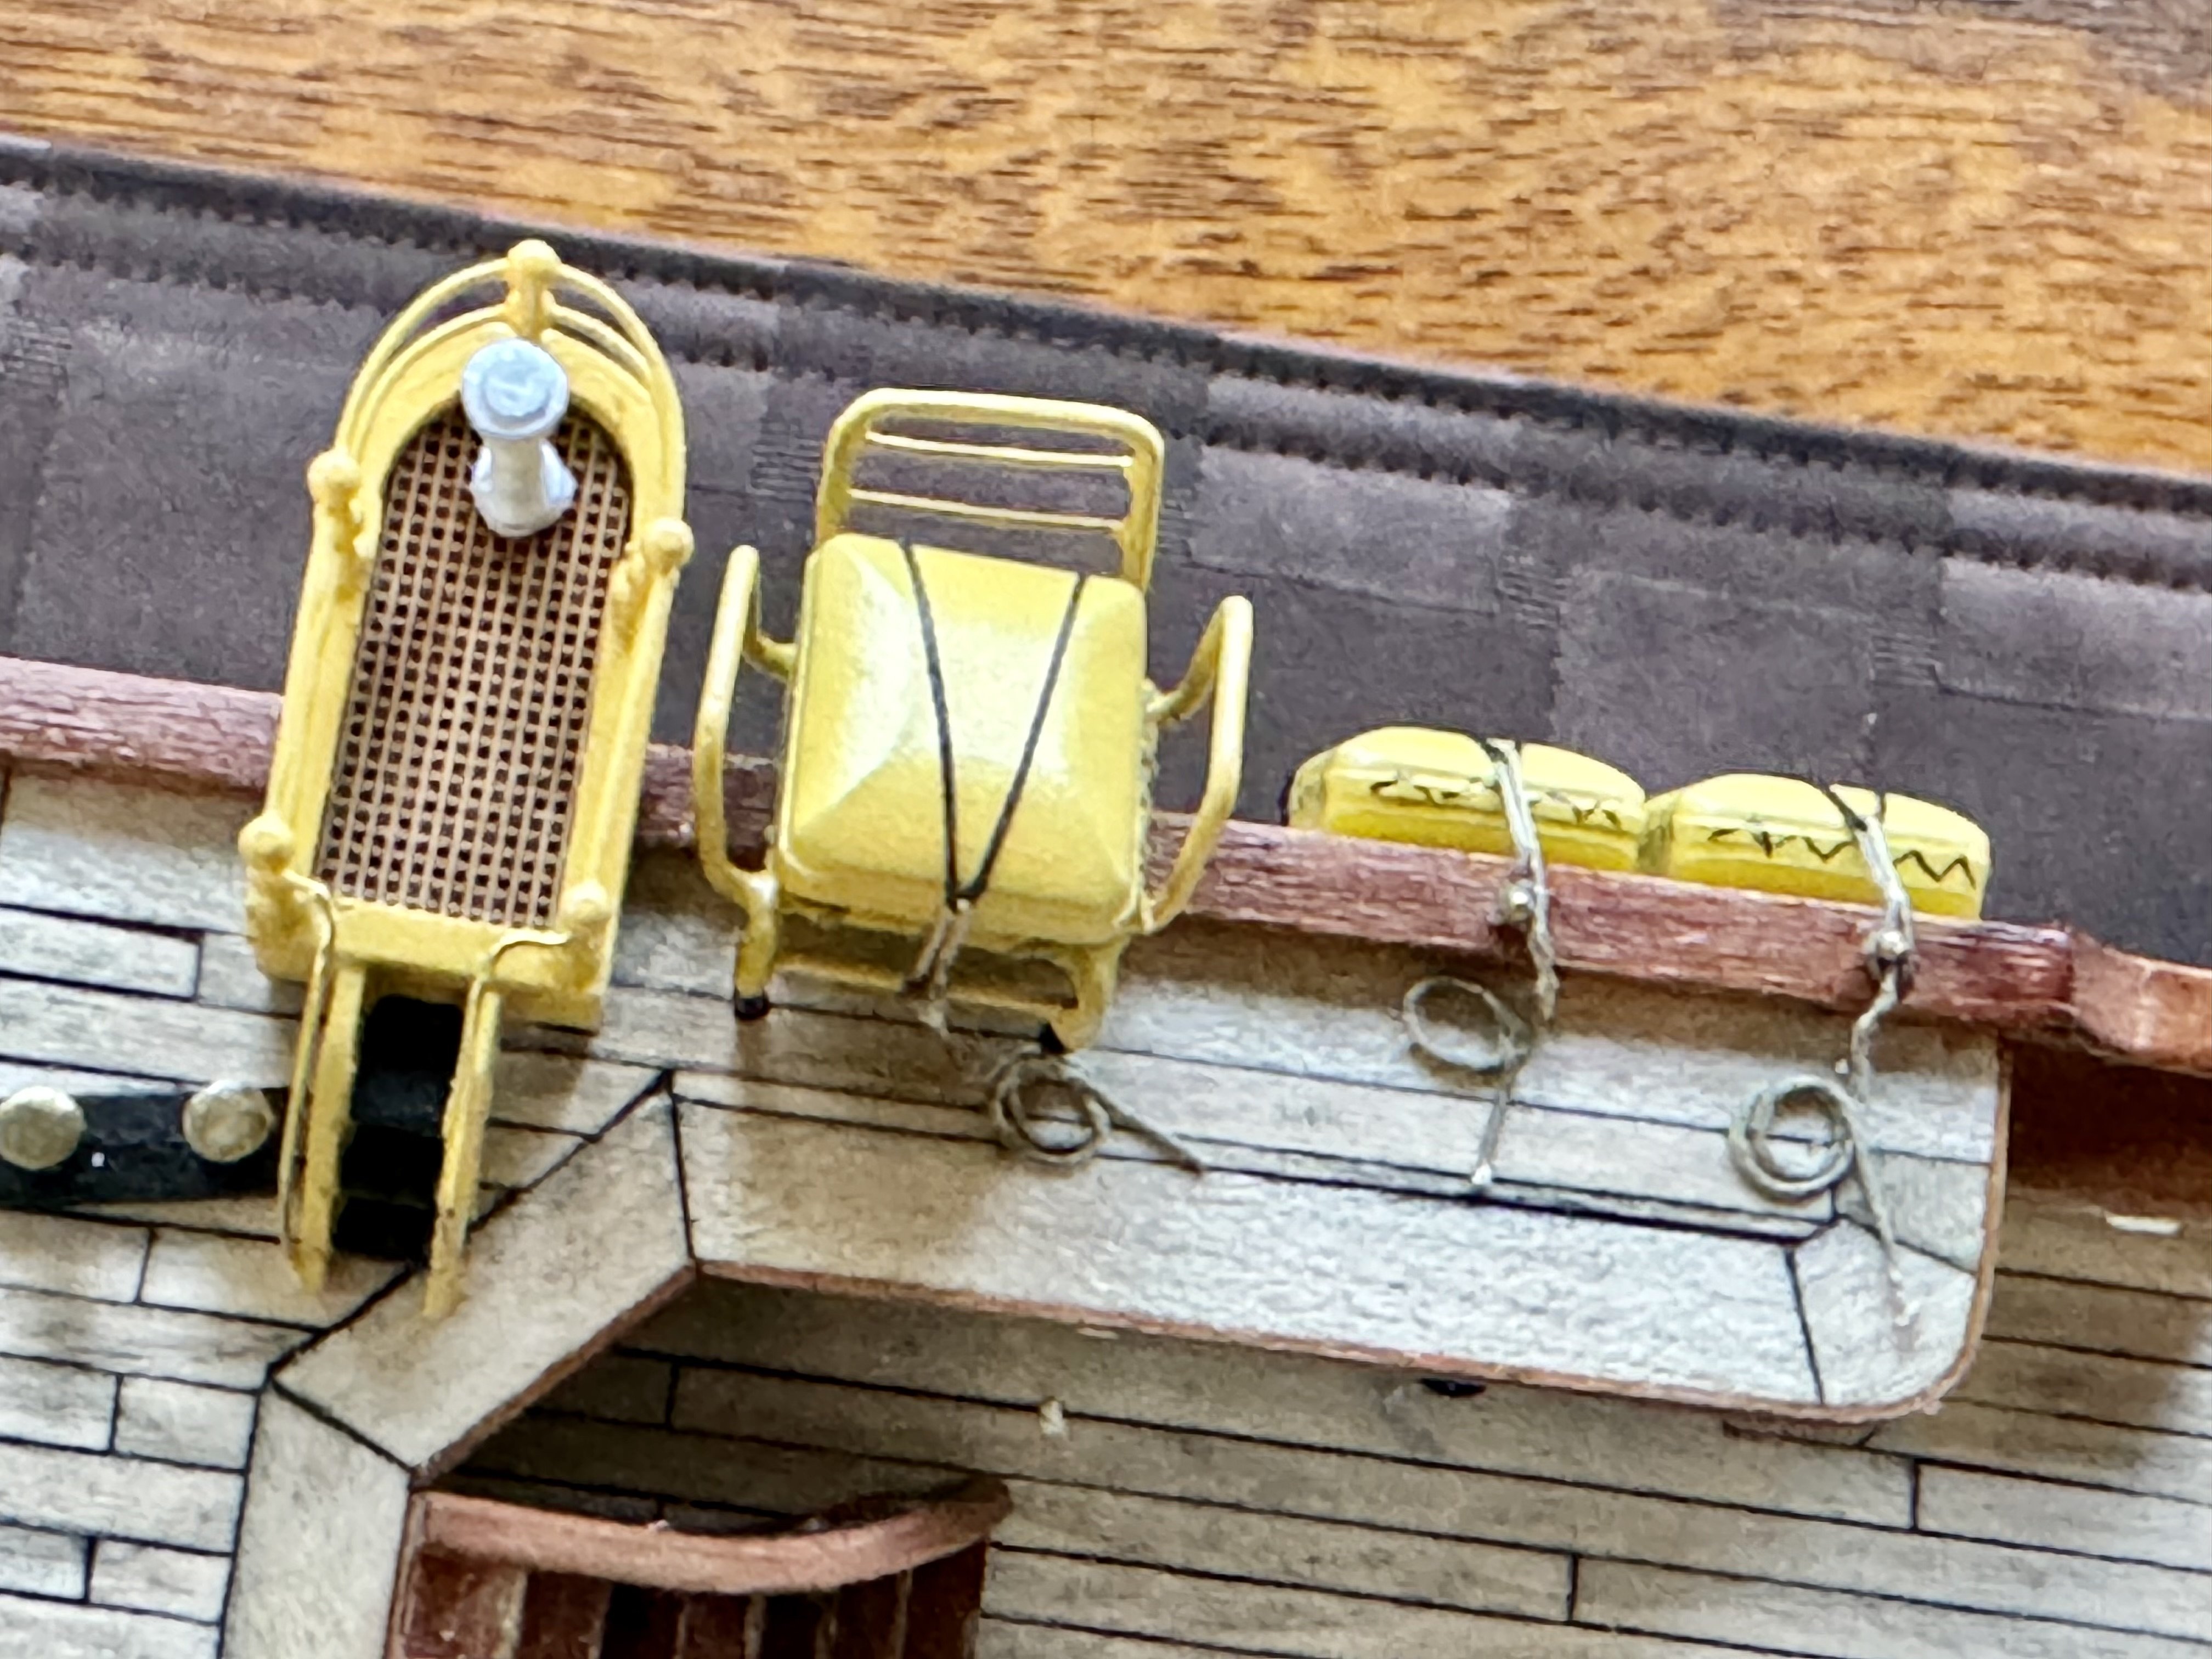
Time for an update…finished the first of two pair life raft supports, I broke the first one so it’s back to bare metal and starting over. Also, thanks to some ideas from the Admiral, I have completed the first of two canopies for the aft platforms. Slow steady progress.

-
New task at hand, working on the 18 life raft containers scattered around the ship. In these photos I have completed the frame of the first pair of rafts.

-
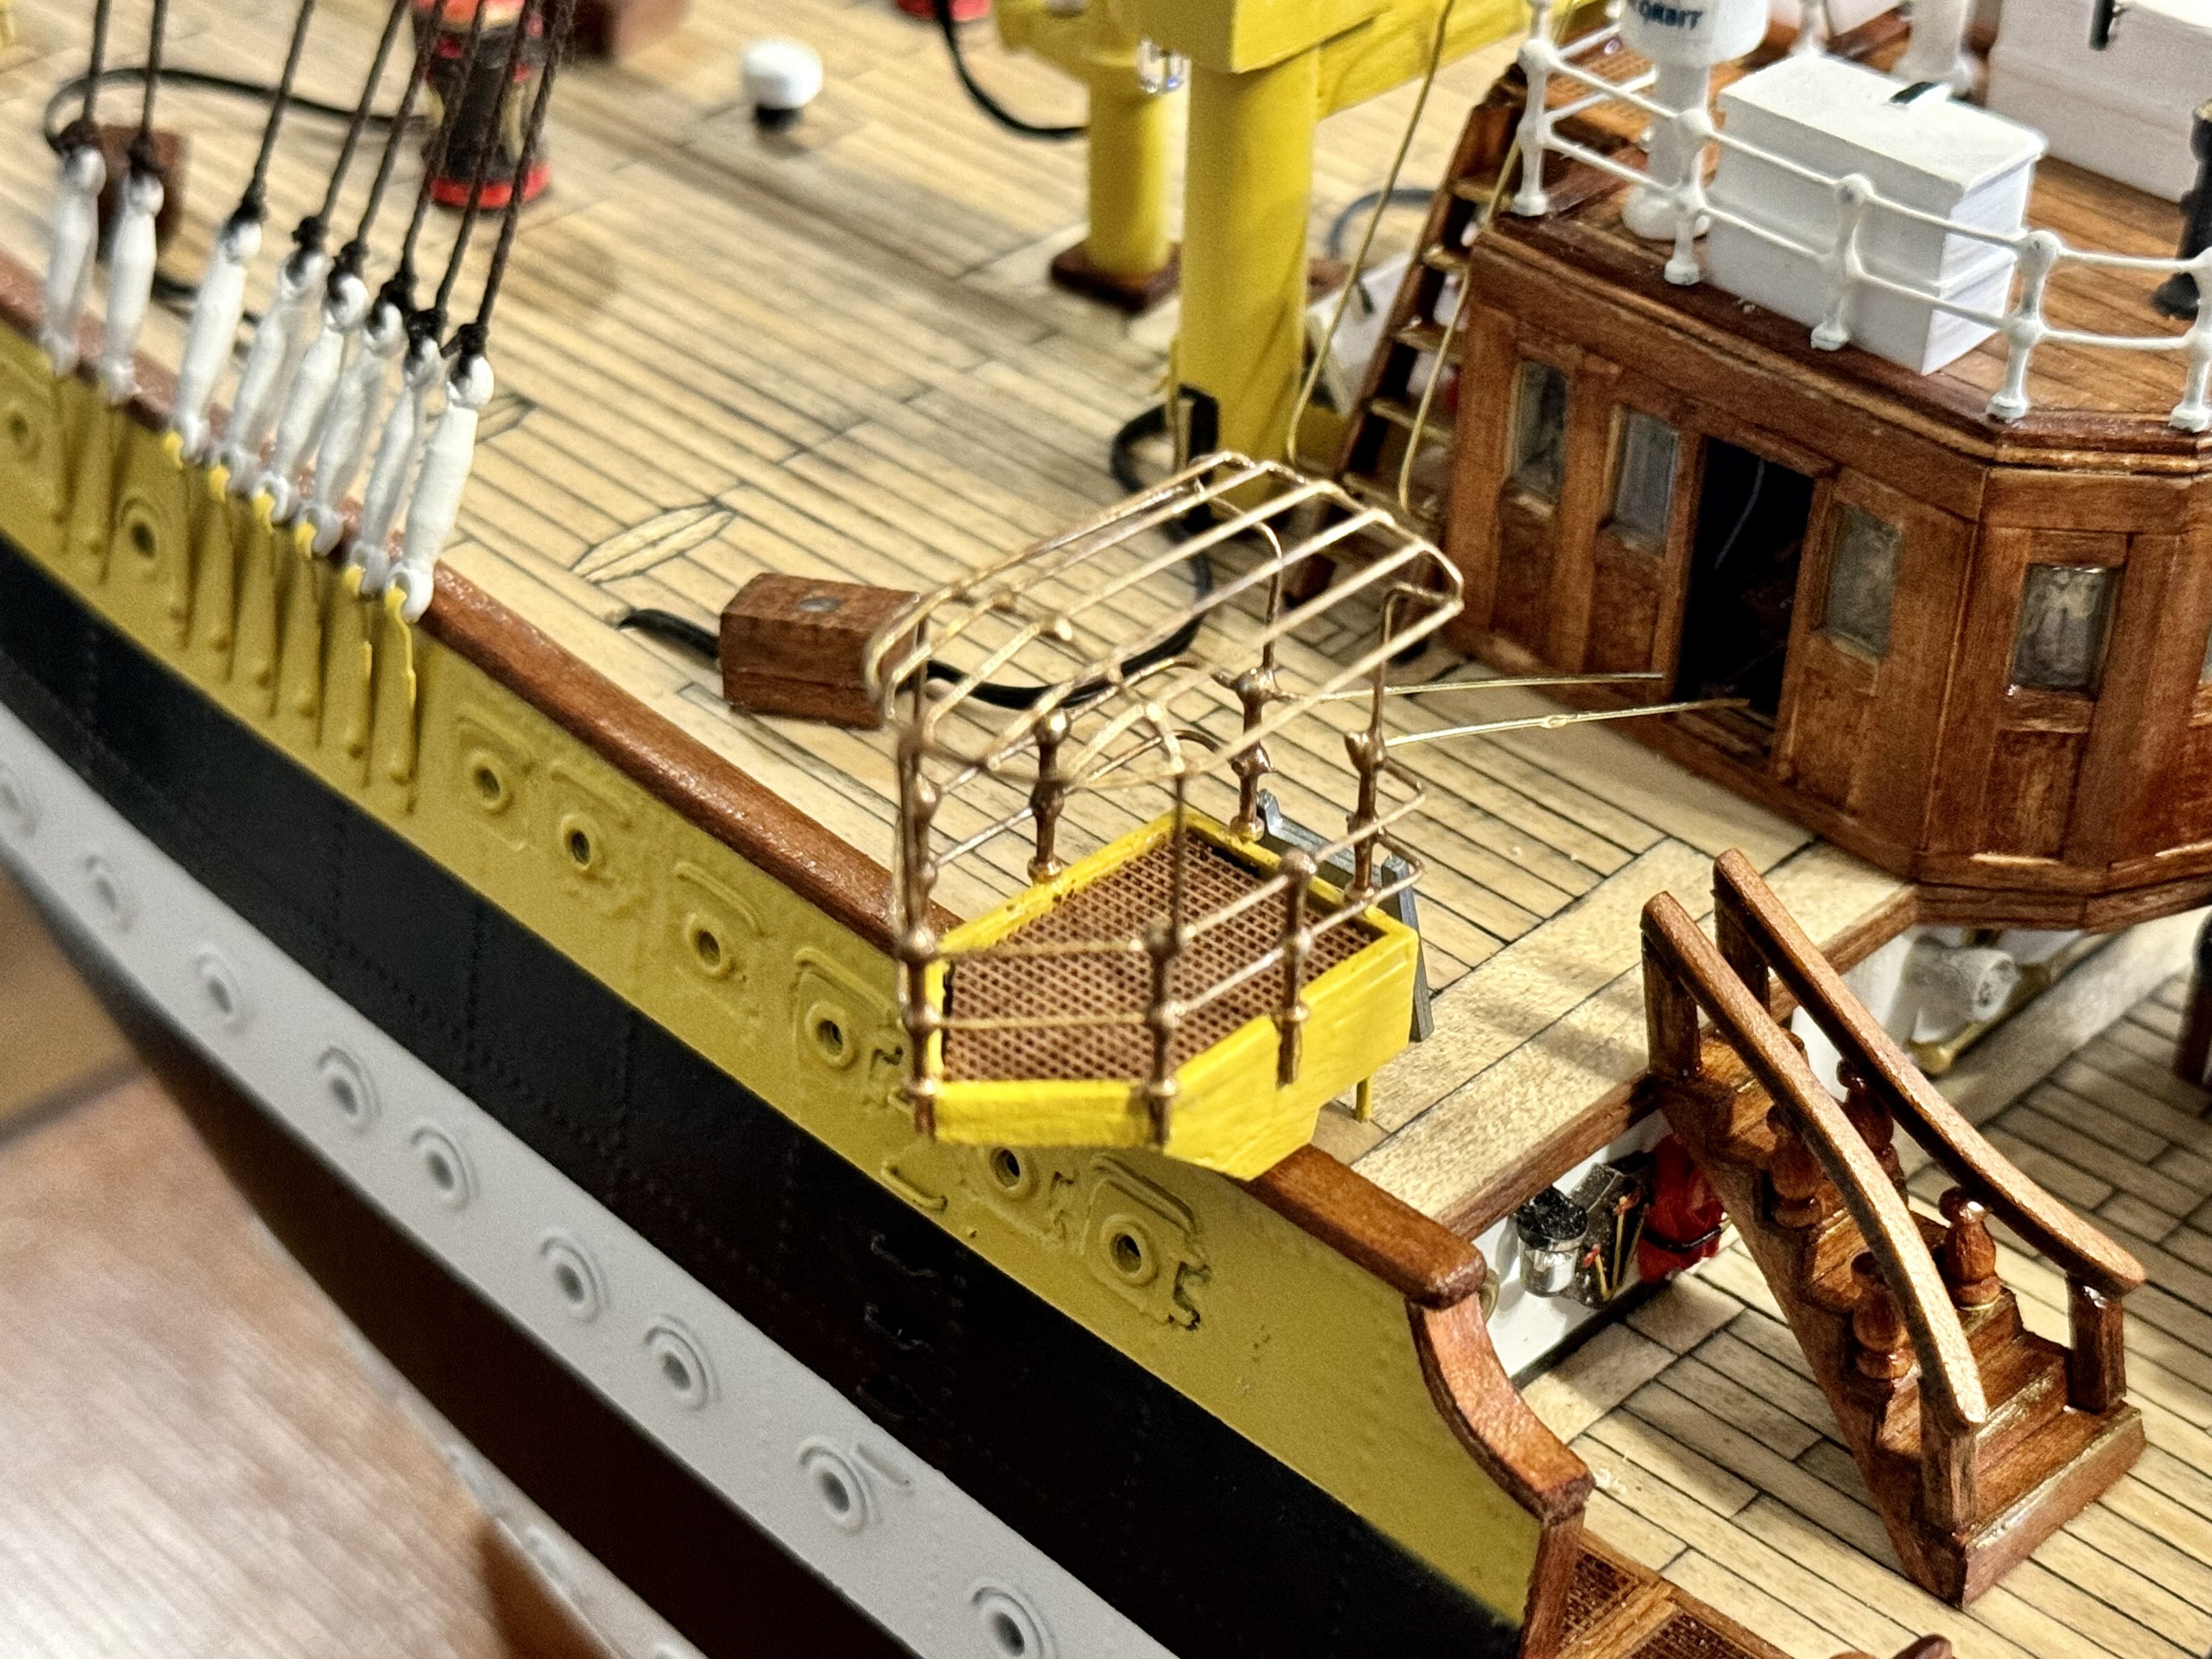
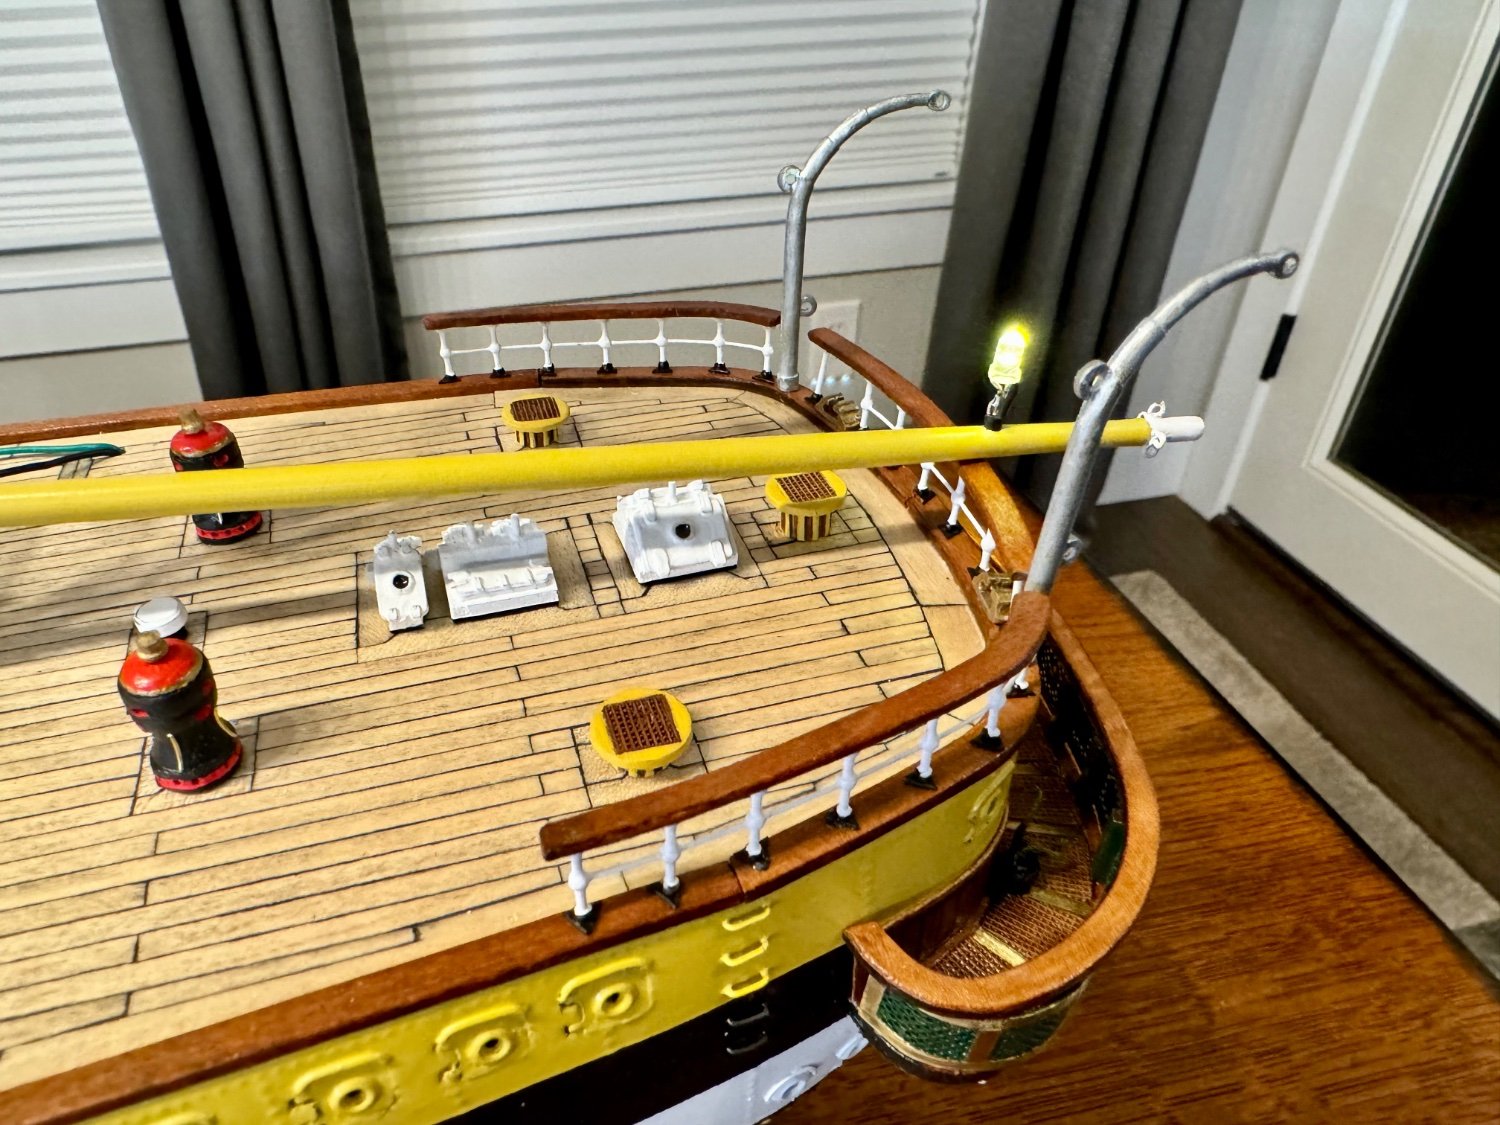
Good evening mates, I have finally finished the four platforms that hang off the side of the Amerigo Vespucci. Now on to the next task, I’m thinking the containers for the life rafts.
-
Good morning mates, been slowly working on a set of platforms for my AV. Nearly have the second one done, a few touch ups to do then figure out how to manufacture the canopy for this platform. Close…so close to be finished with these.
-
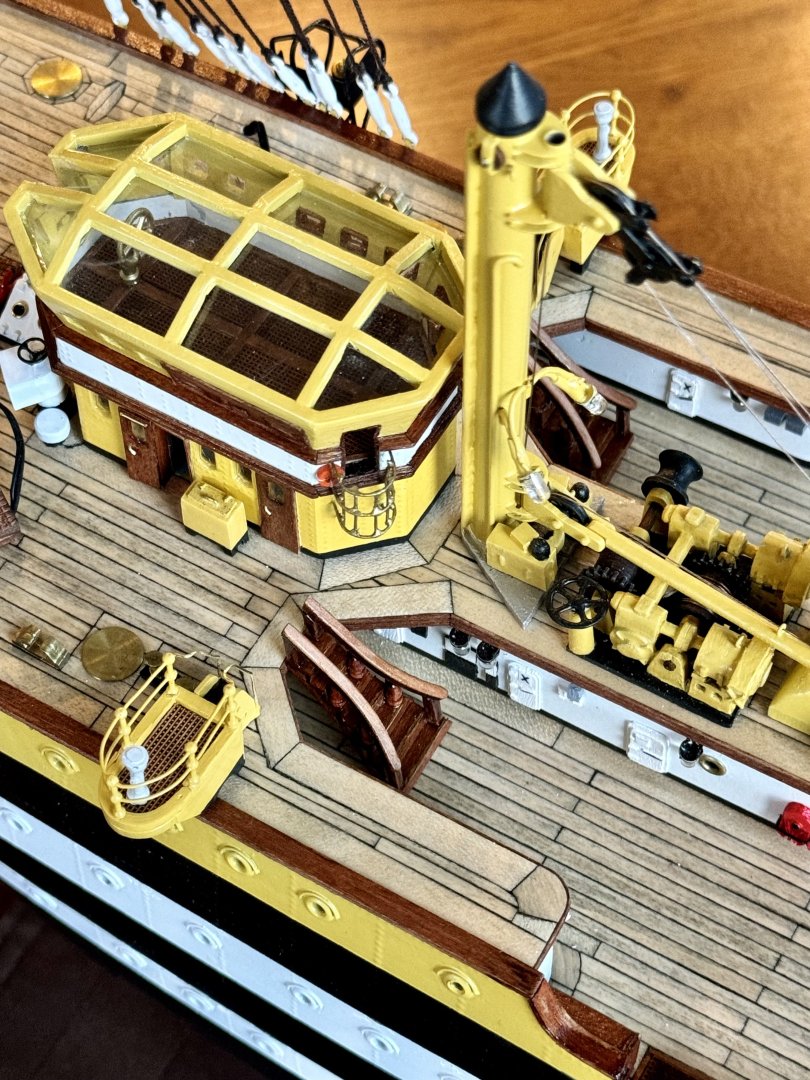
Good evening, more progress on some deck equipment. These platforms started from the kit parts, but rapidly moved into scratch built. 🤷♂️

-
Thank you!
-
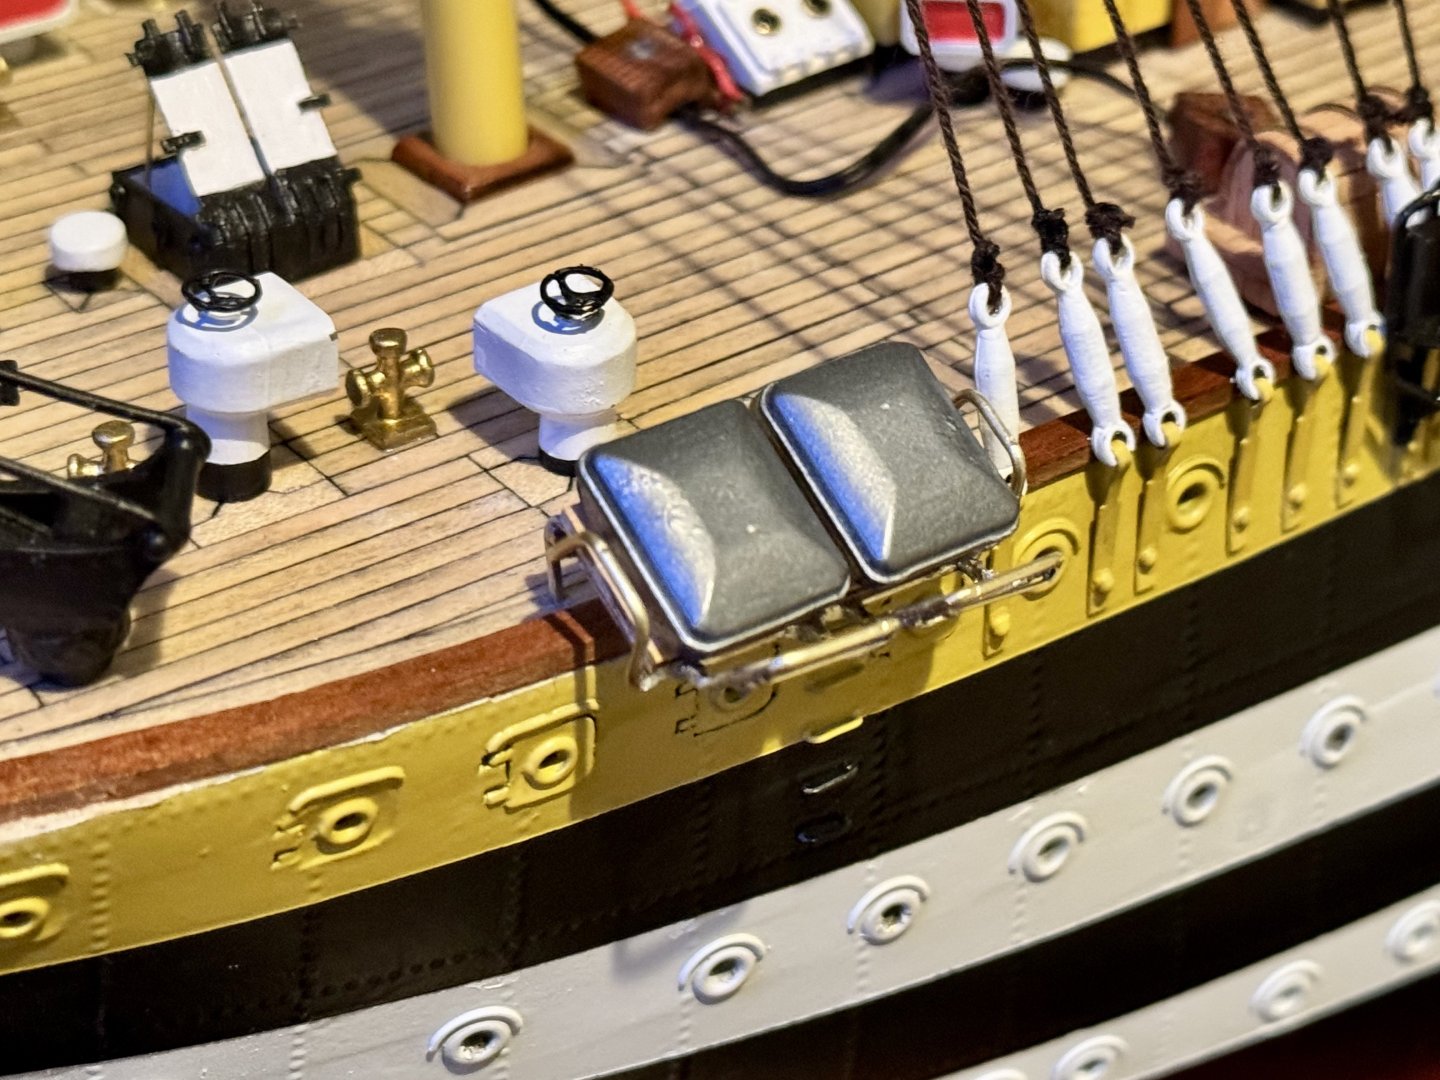
Good evening mates, it’s been awhile since my last post. Been working on the chainplates and temporary shrouds to get an idea where the rest of the deck equipment will need to go as well as equipment that will hang off the sides of the ship.

-
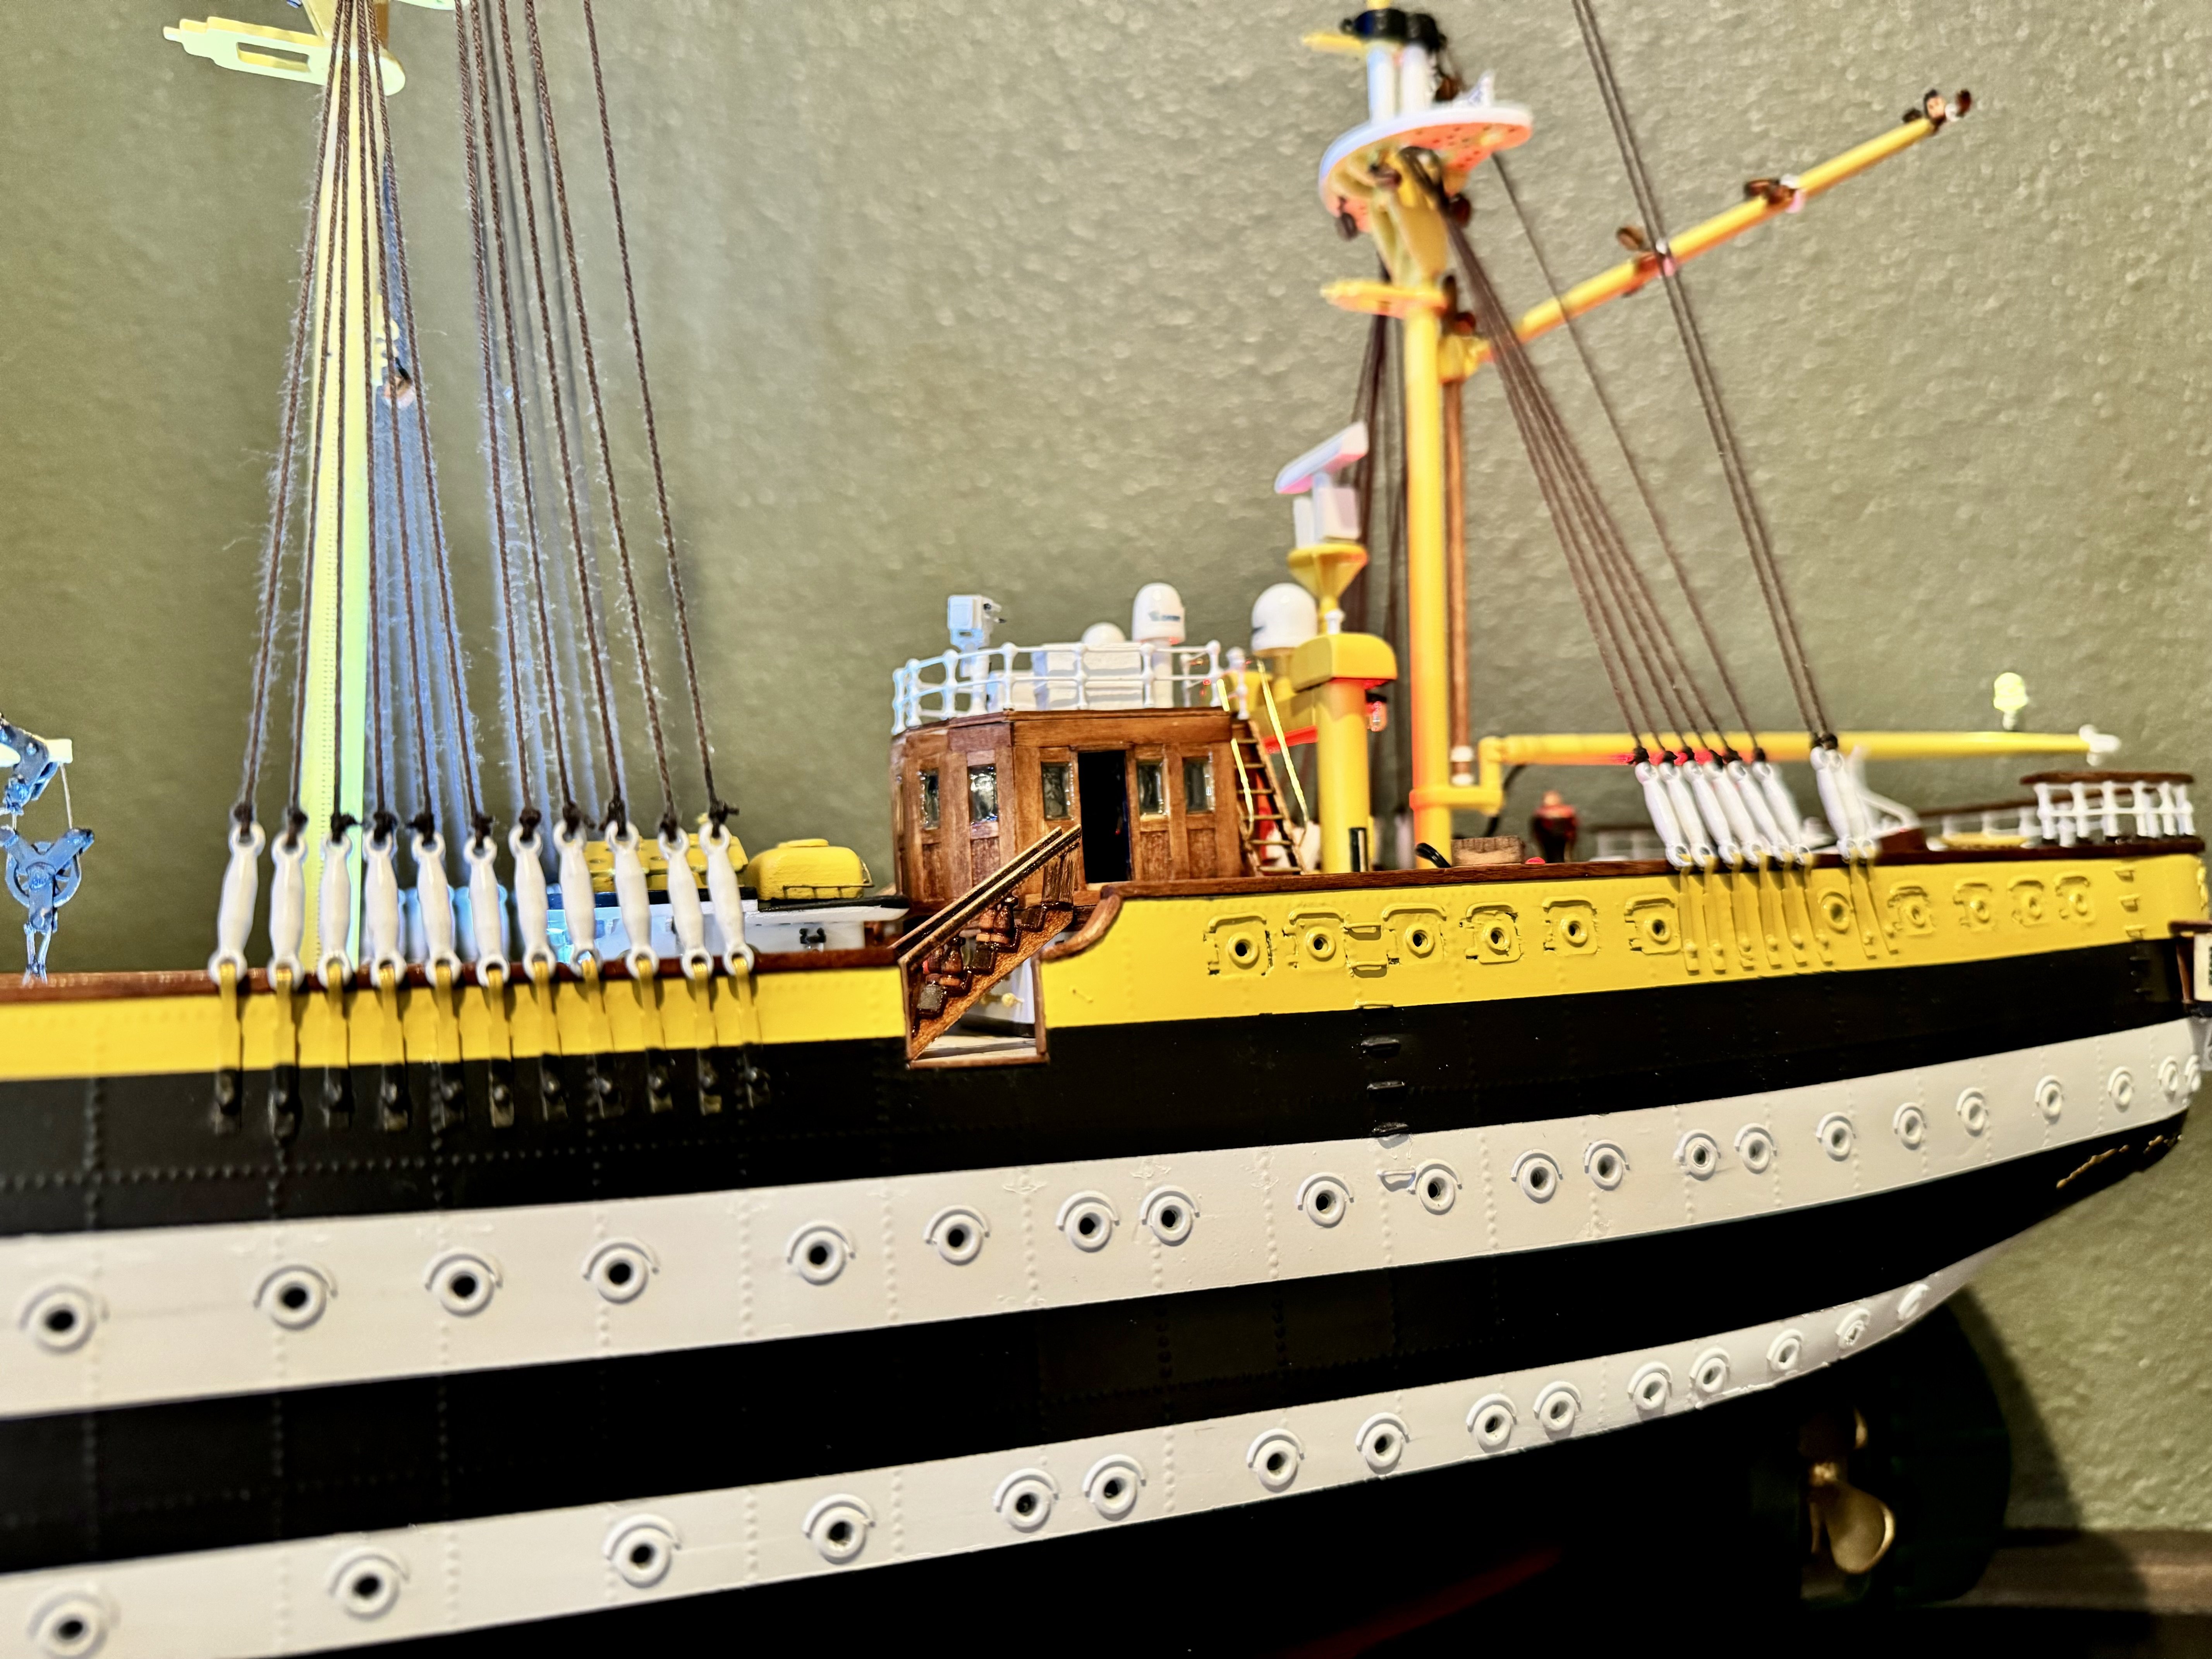
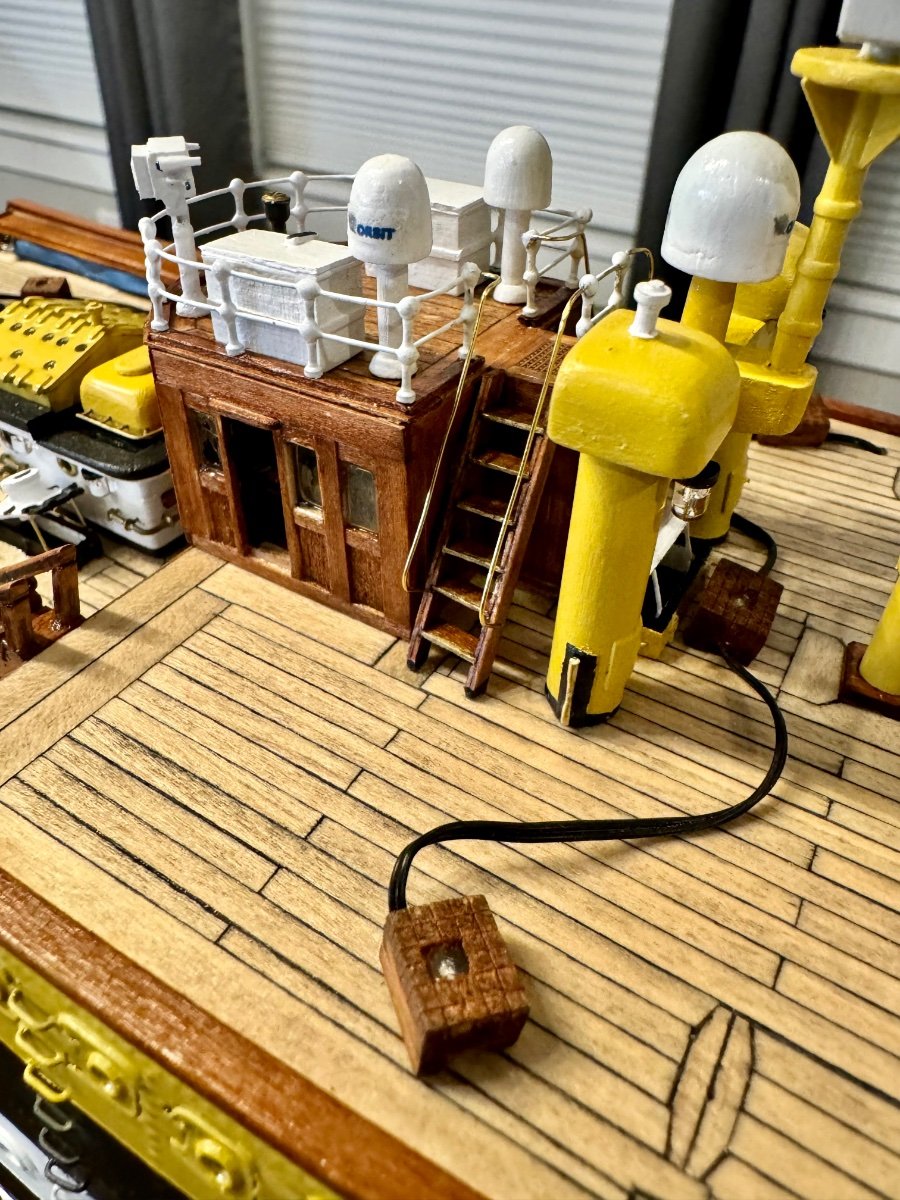
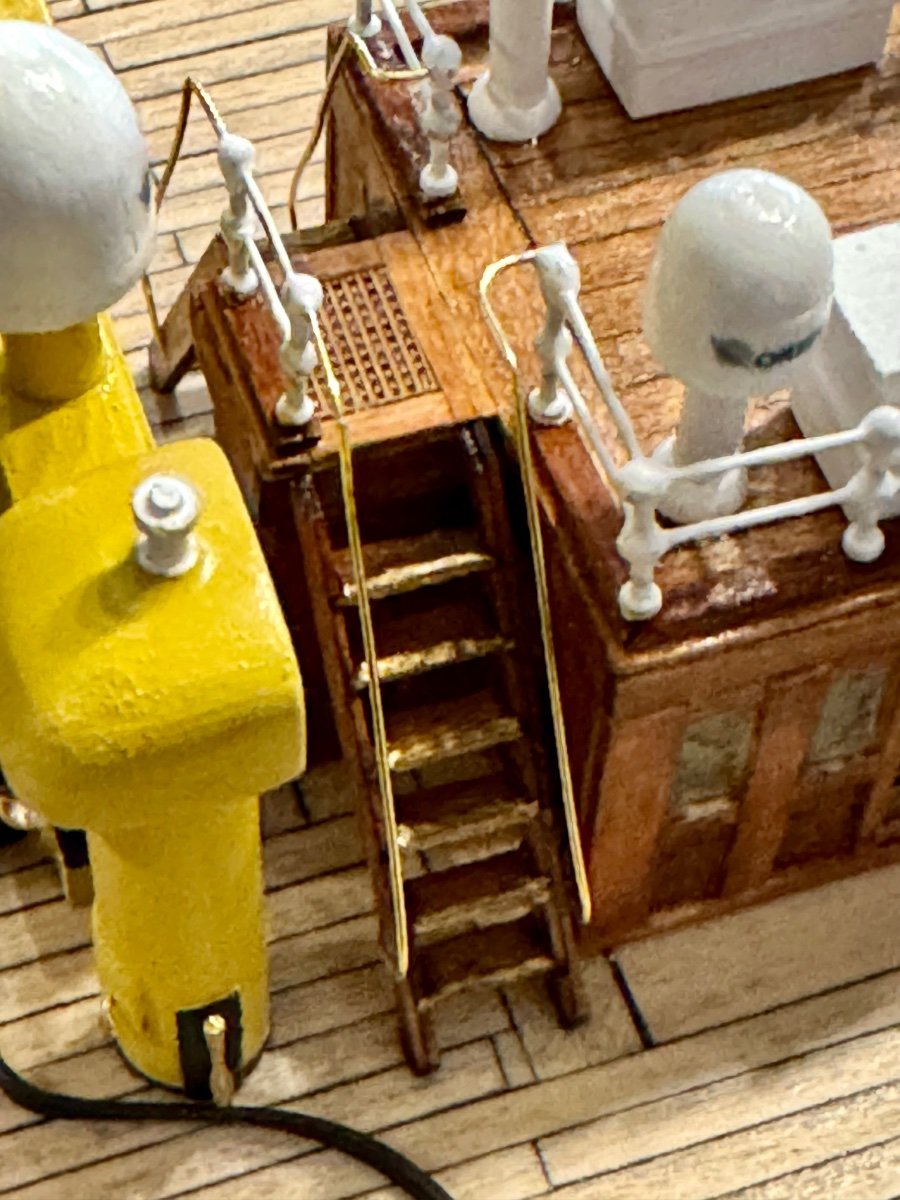
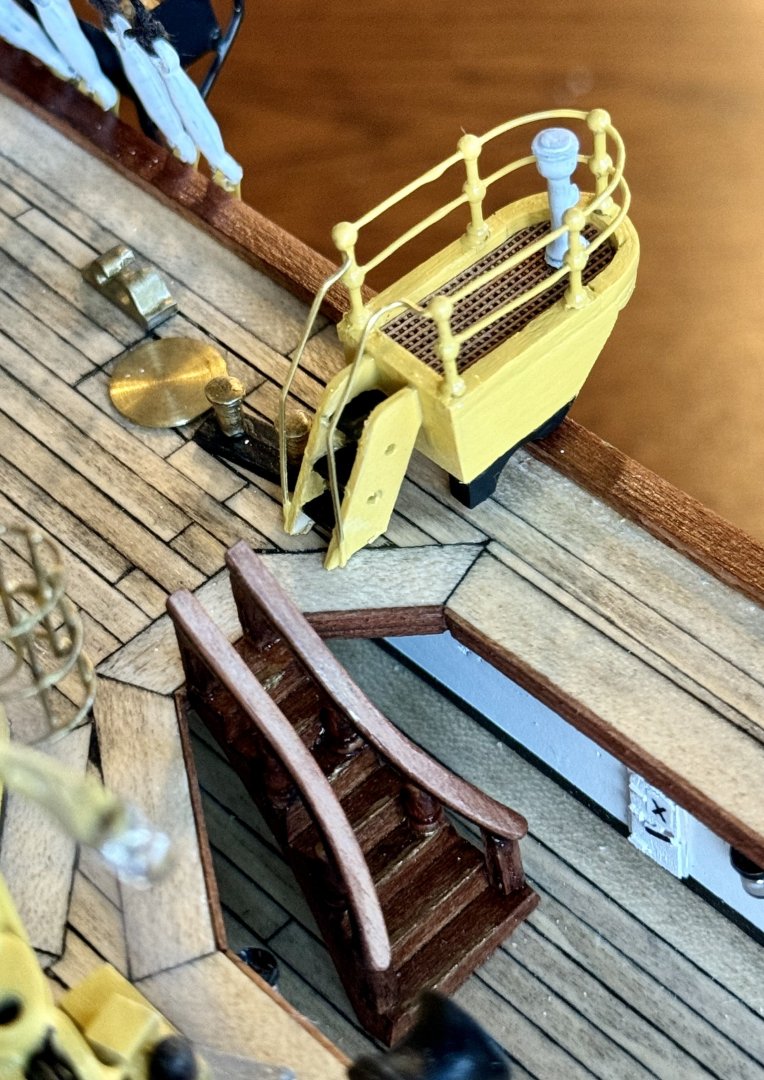
Good afternoon mates, it’s been awhile since last update…life has just been busy. Been working (slowly) on a set of stairs leading to above the main bridge. The real Amerigo Vespucci has wooden steps, almost ladder like, with brass handrails and brass stair tread protectors. I’ve attempted to build something similar.


-
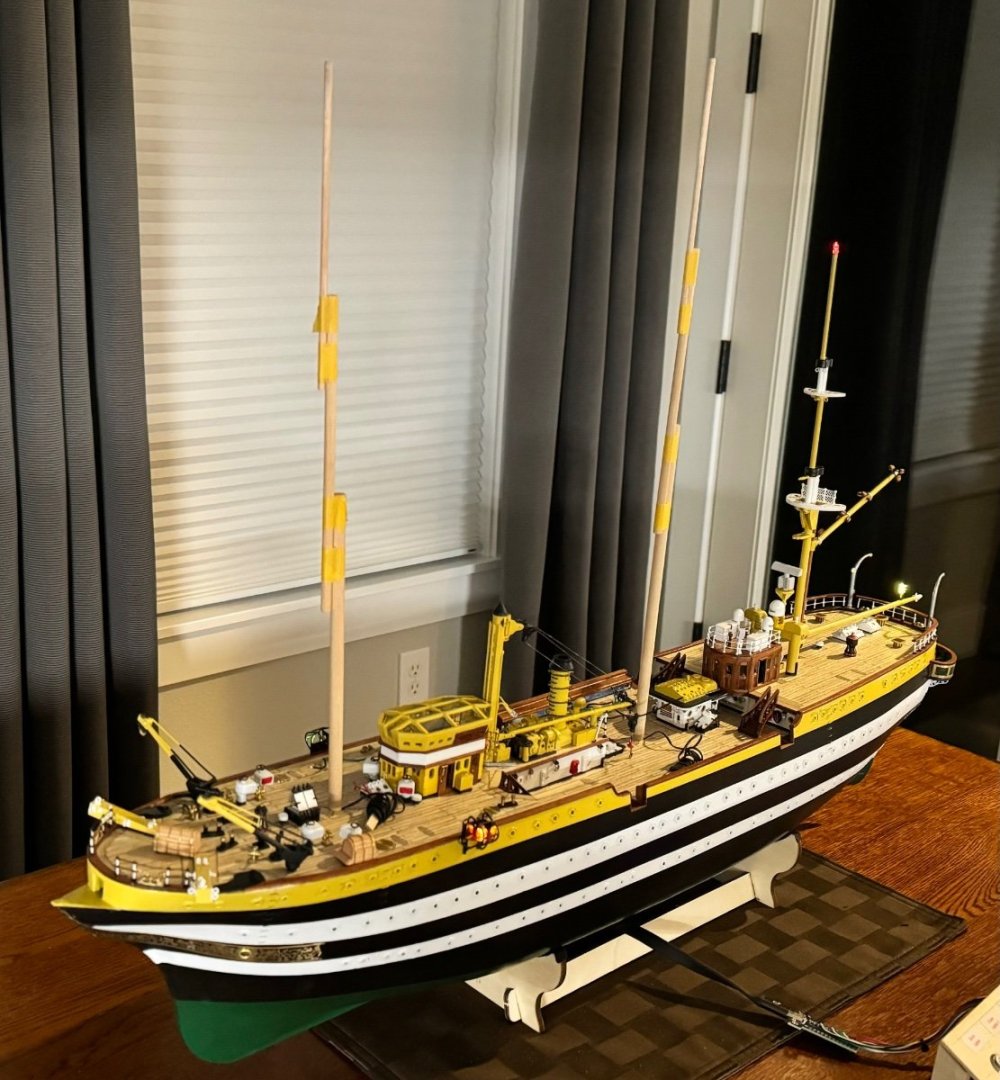
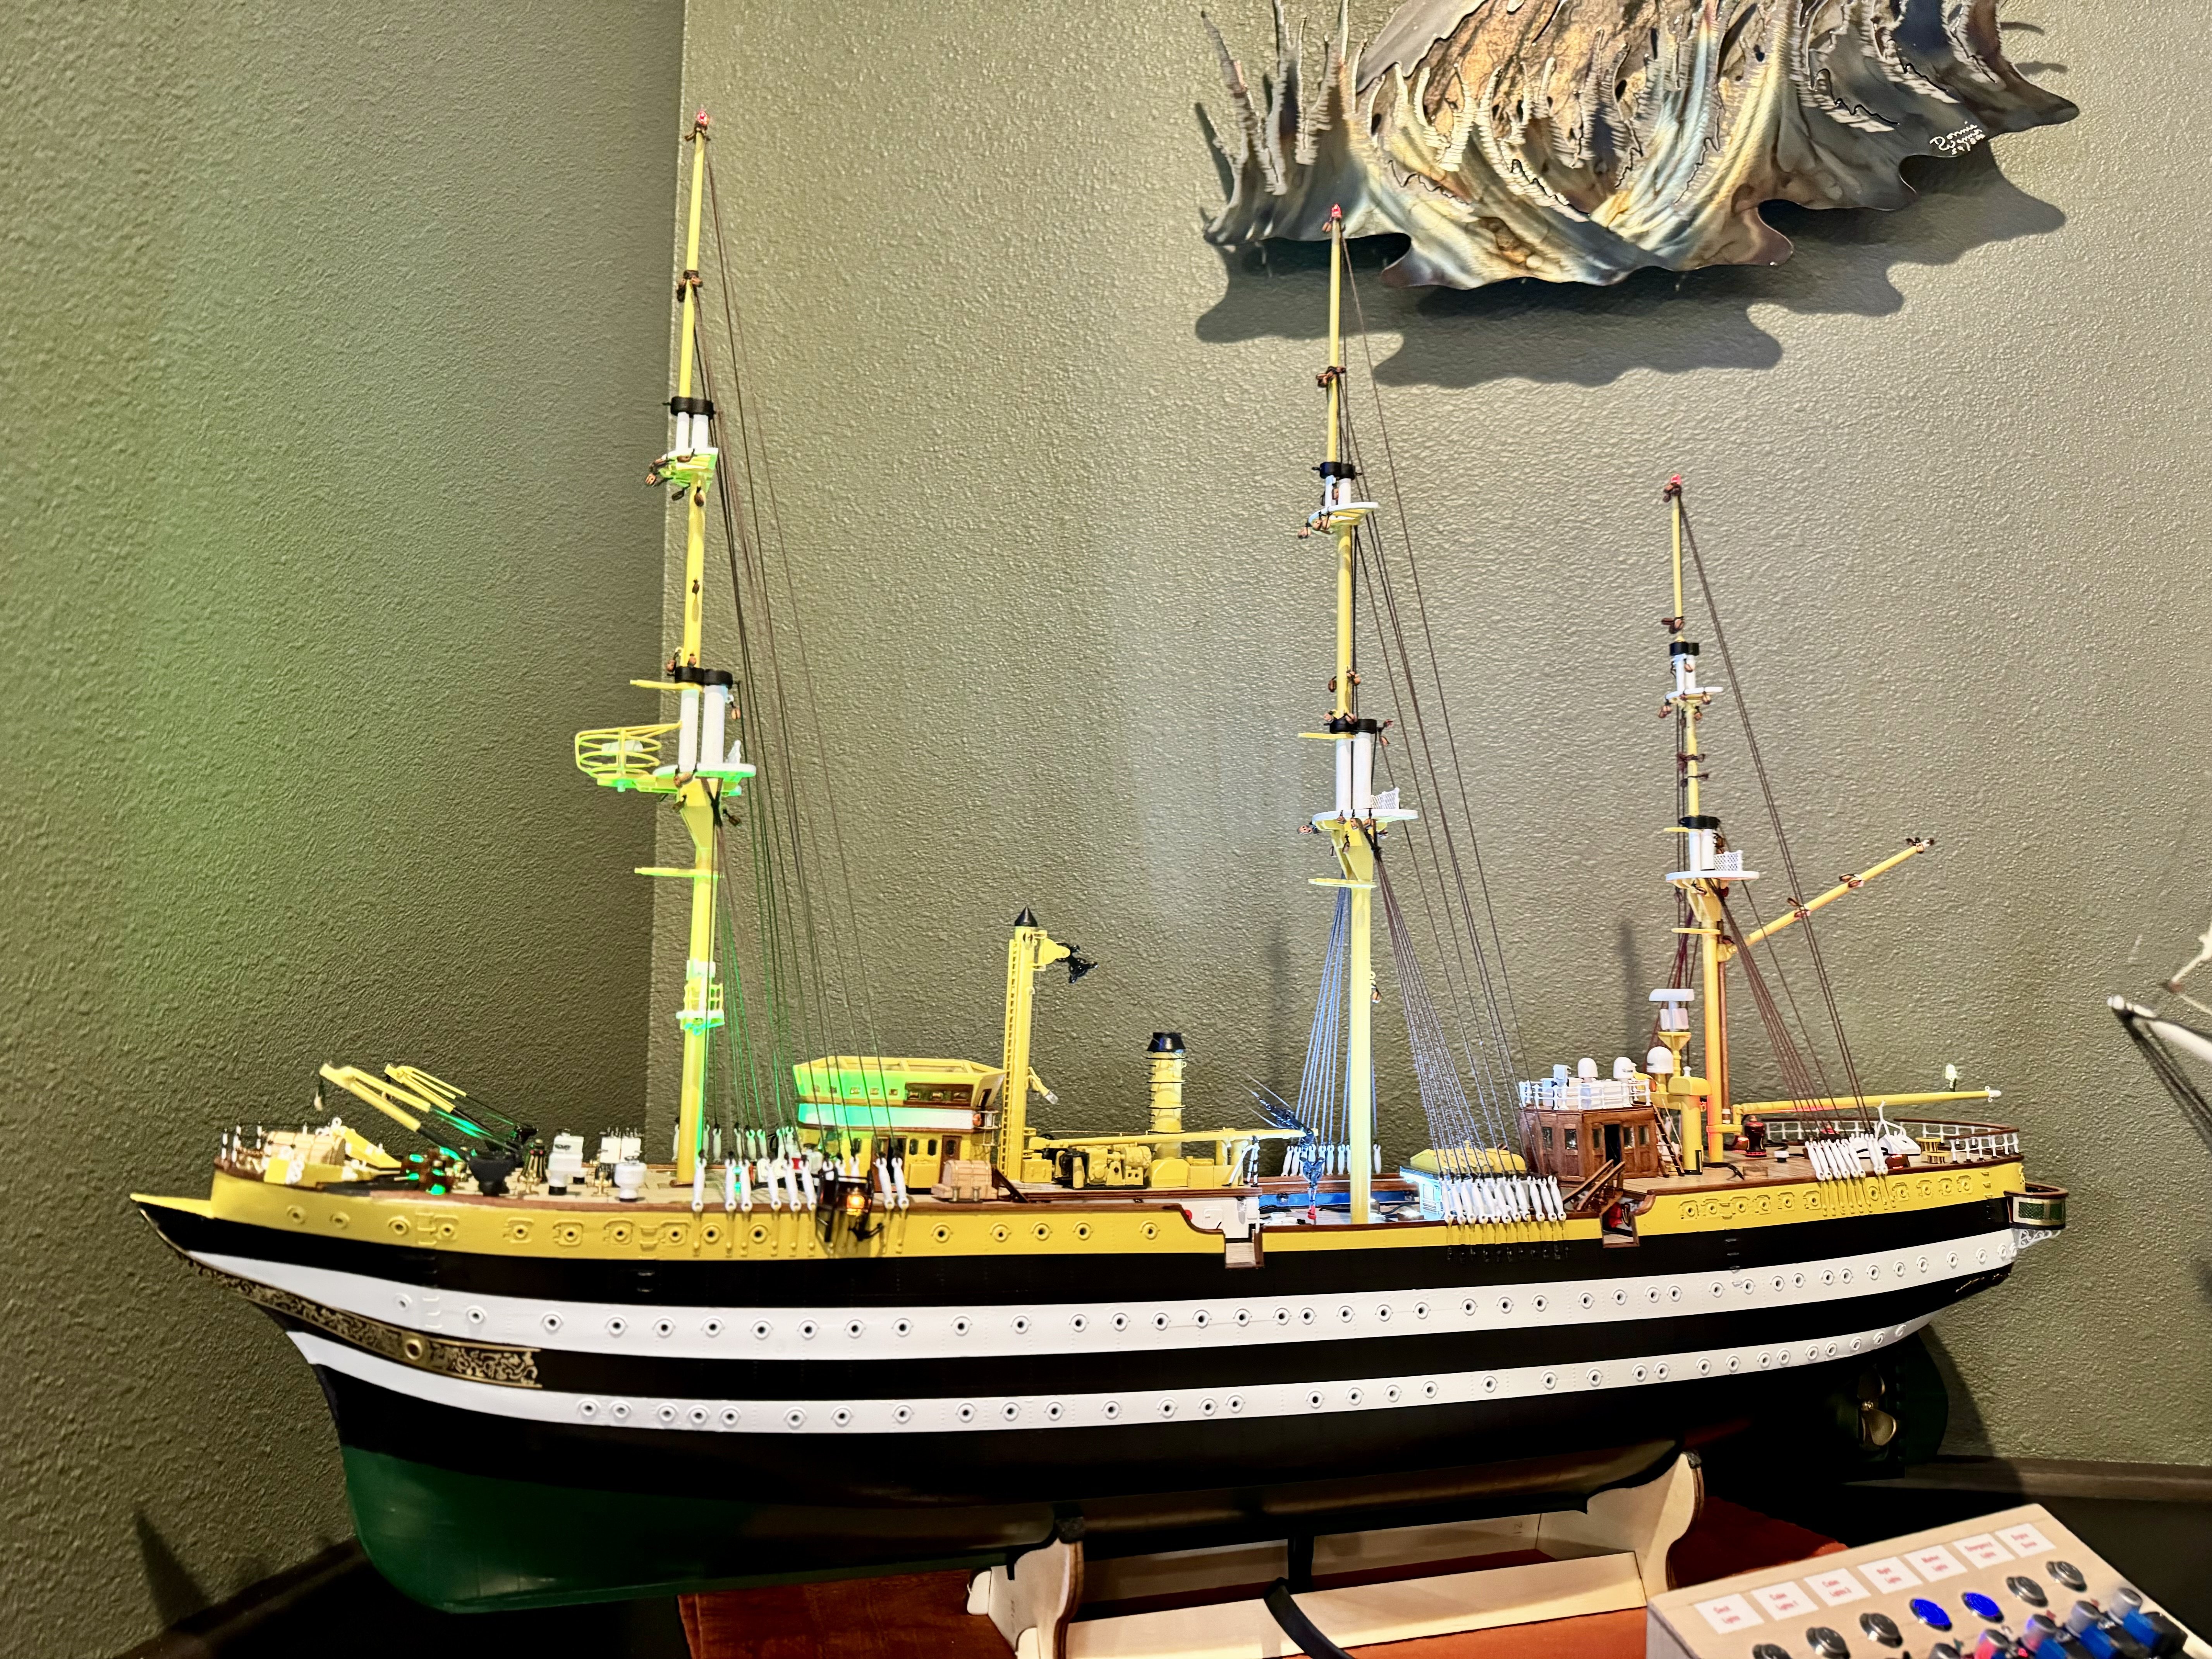
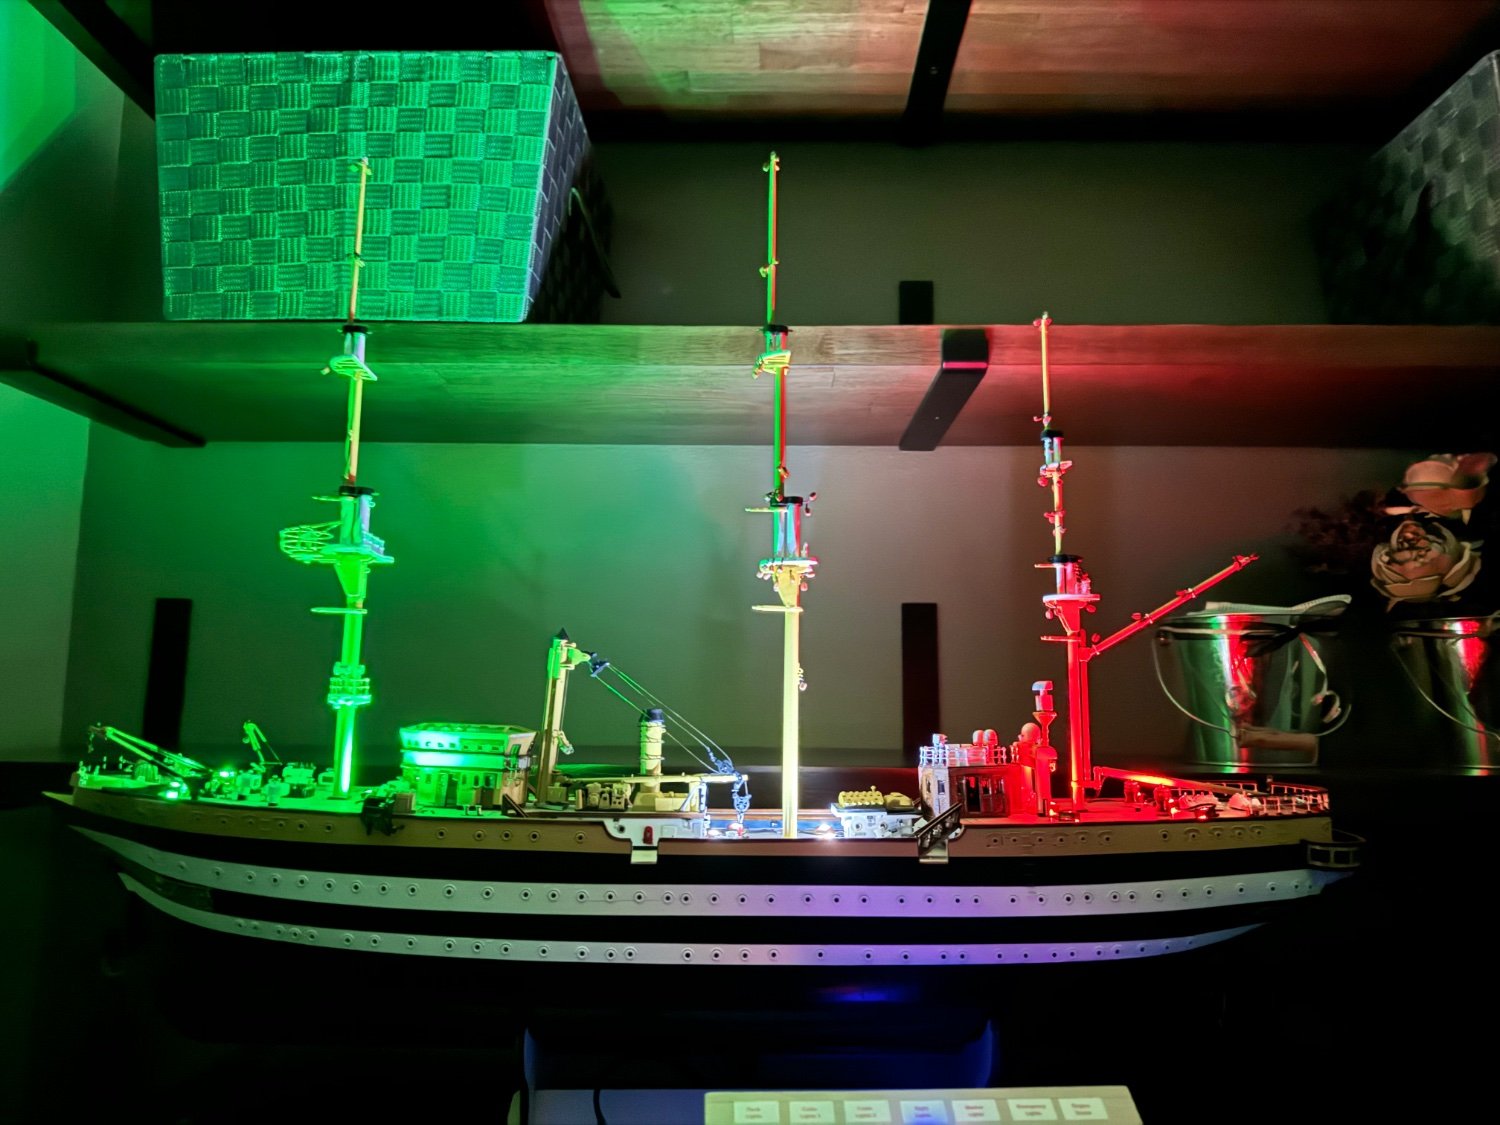
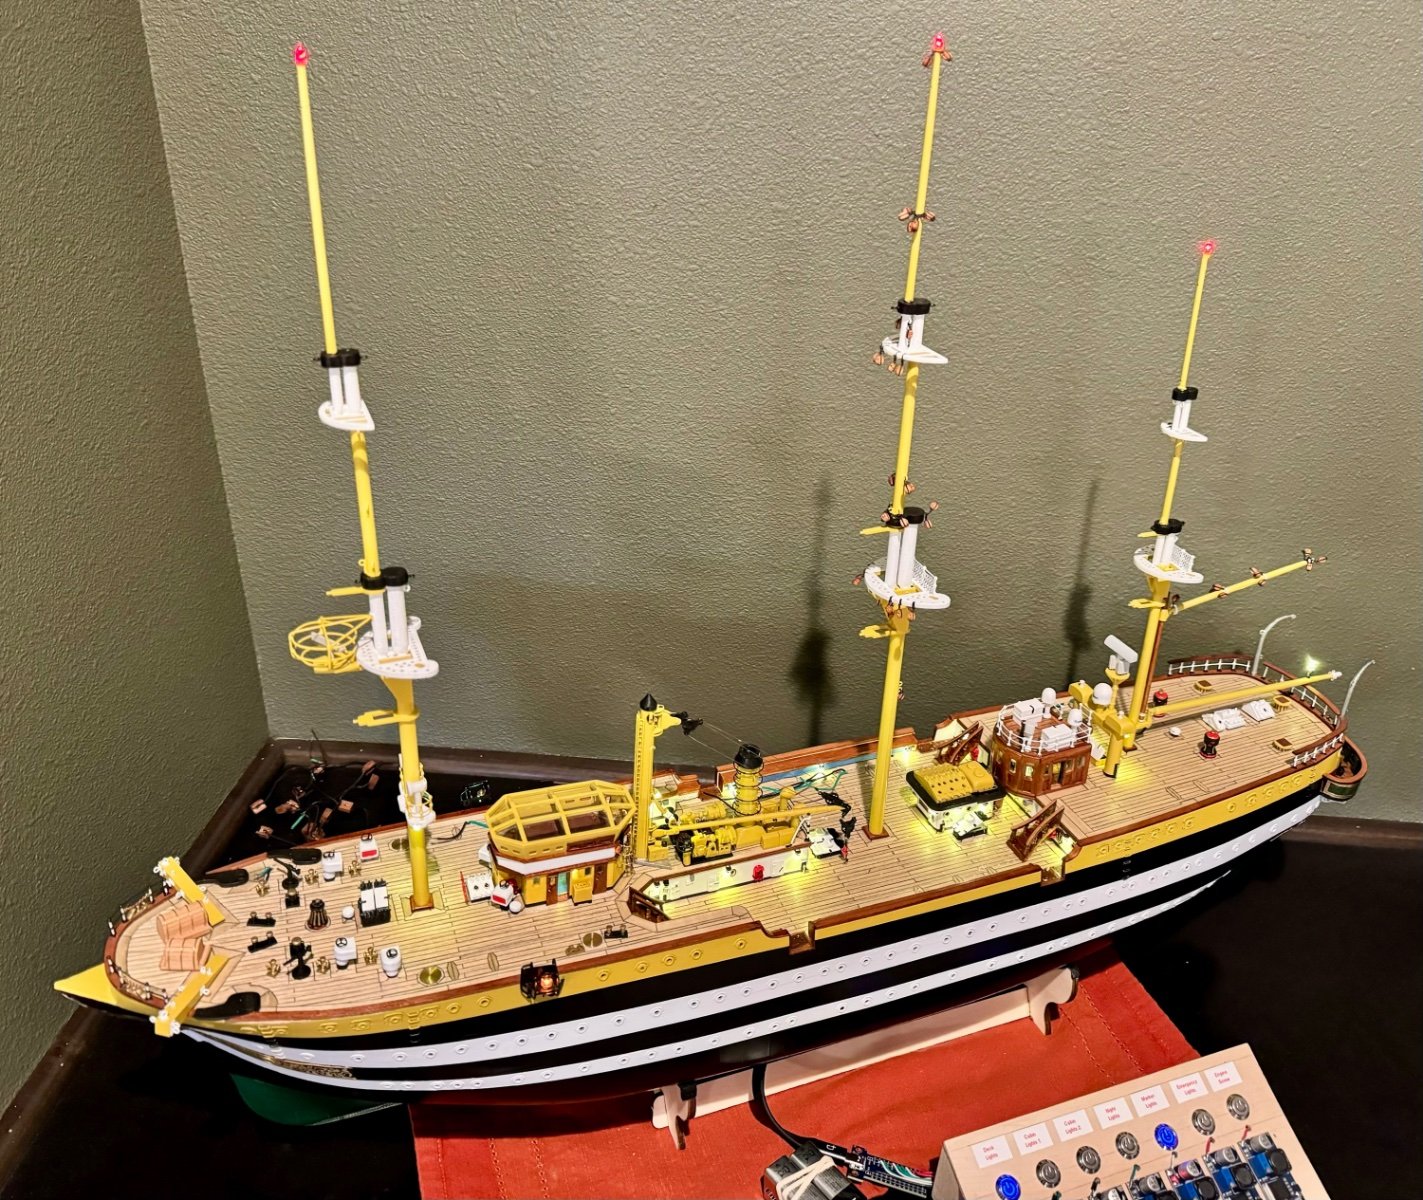
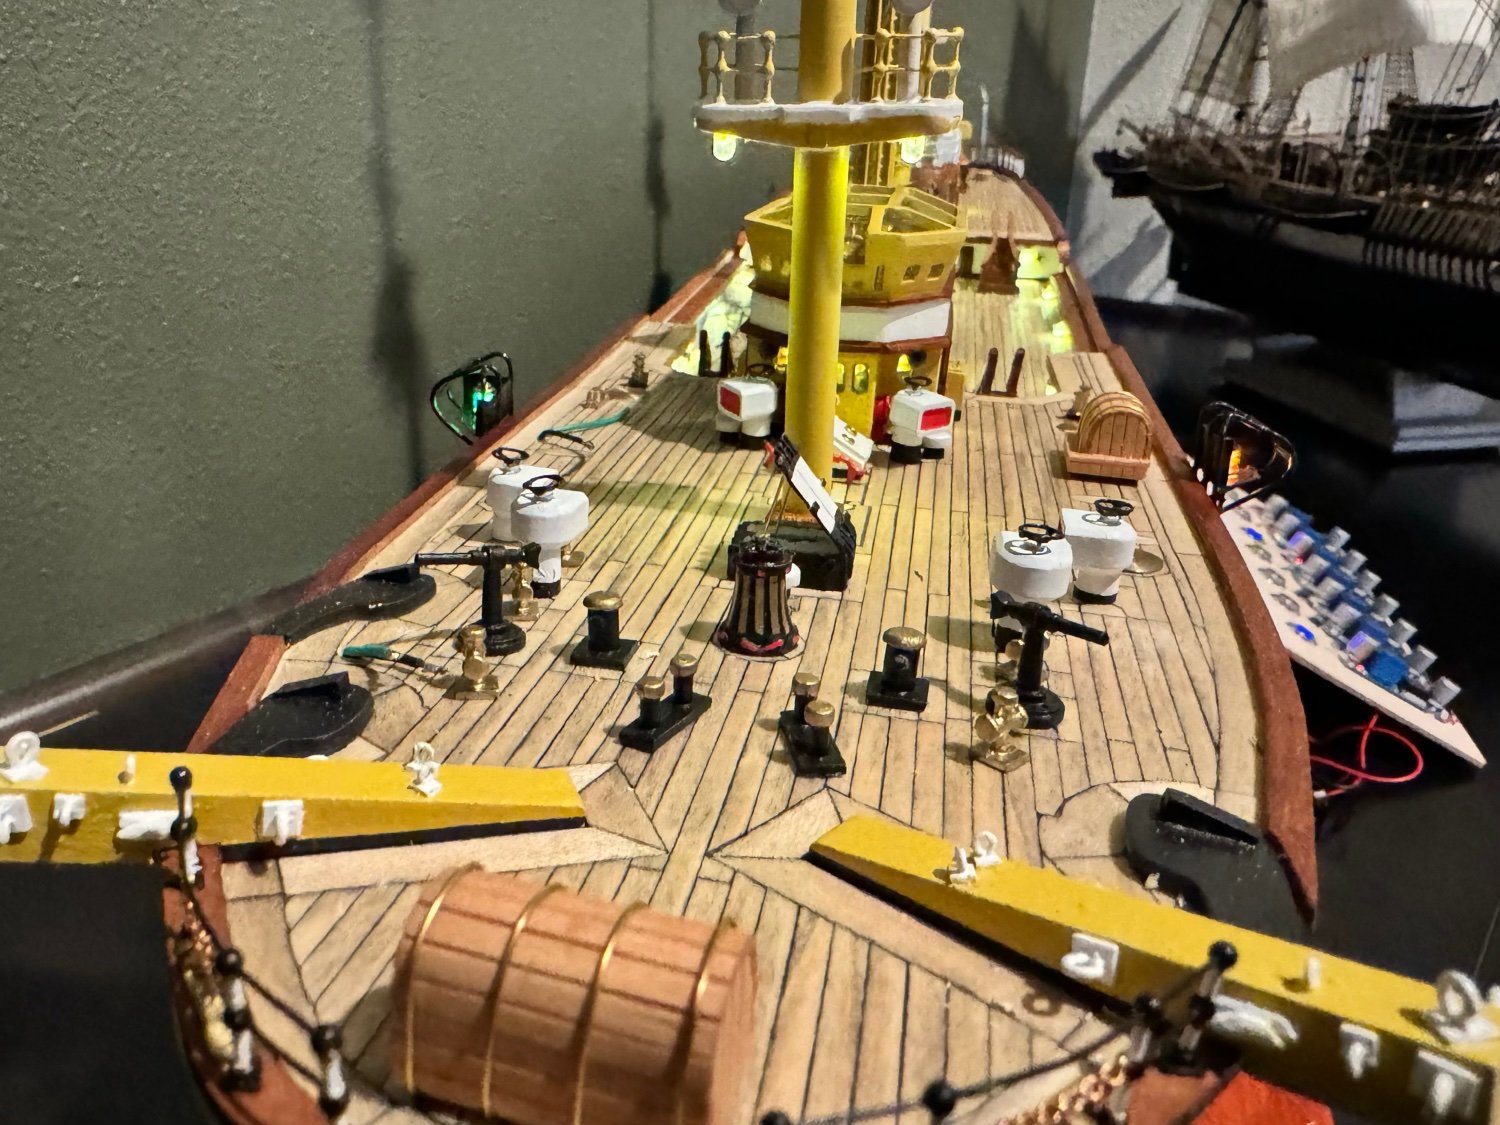
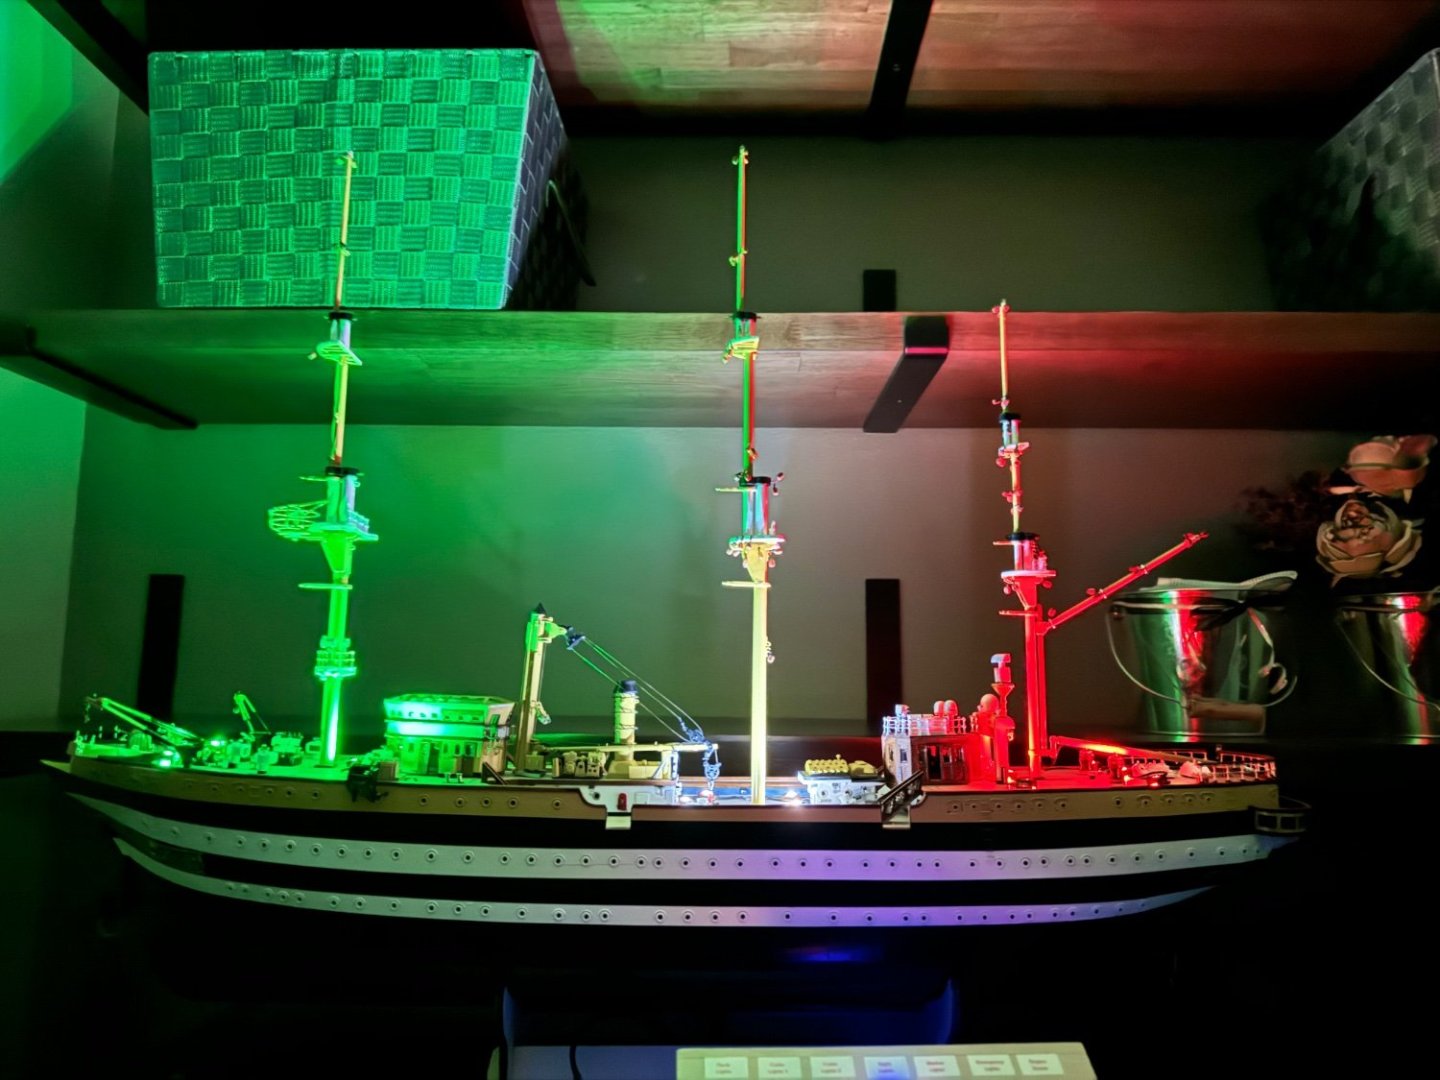
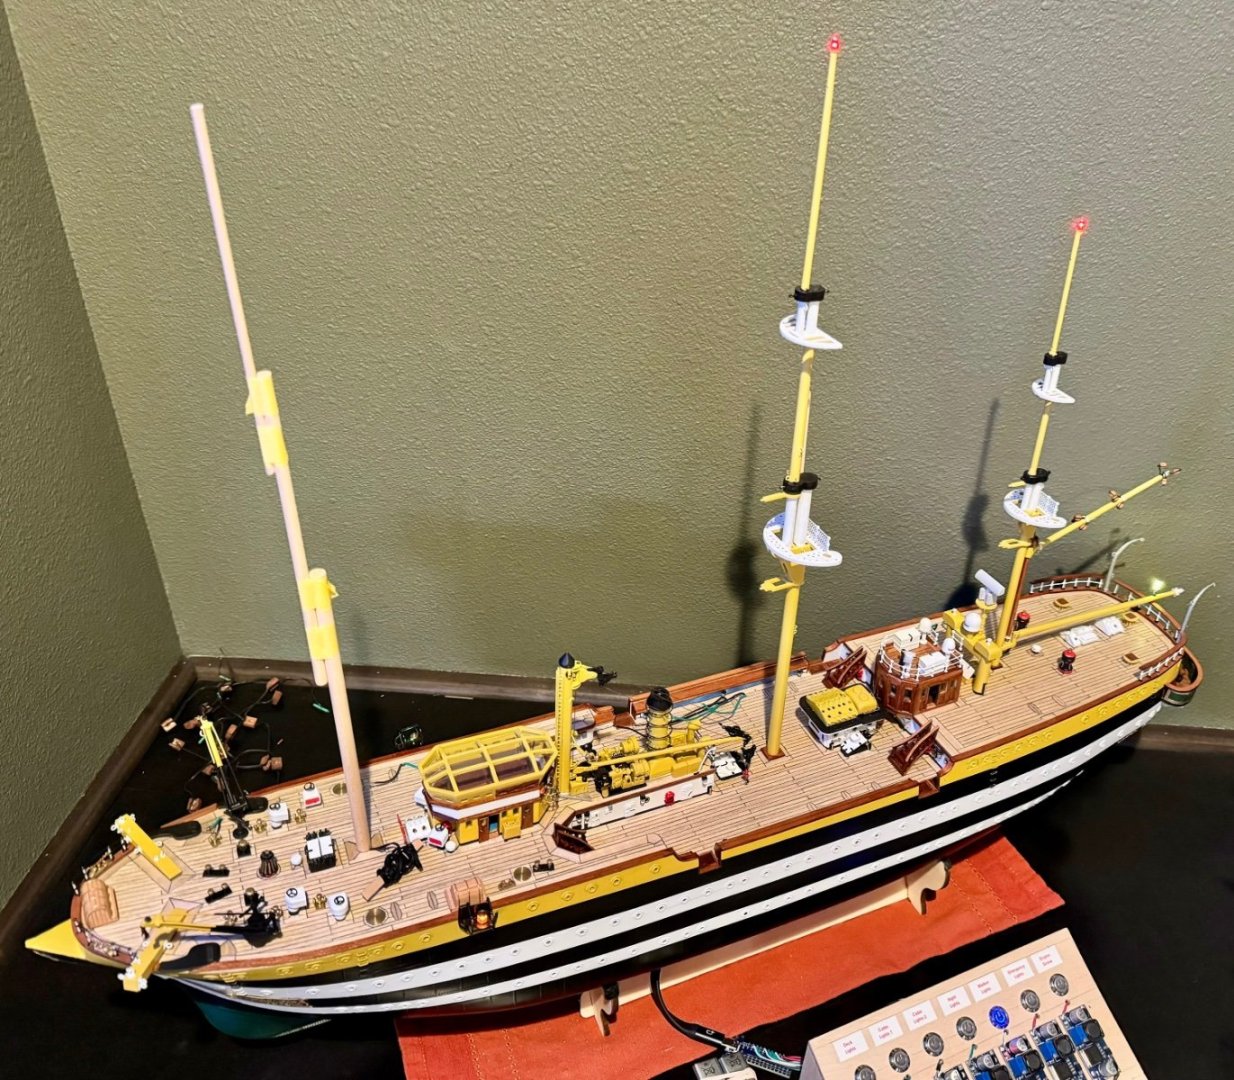
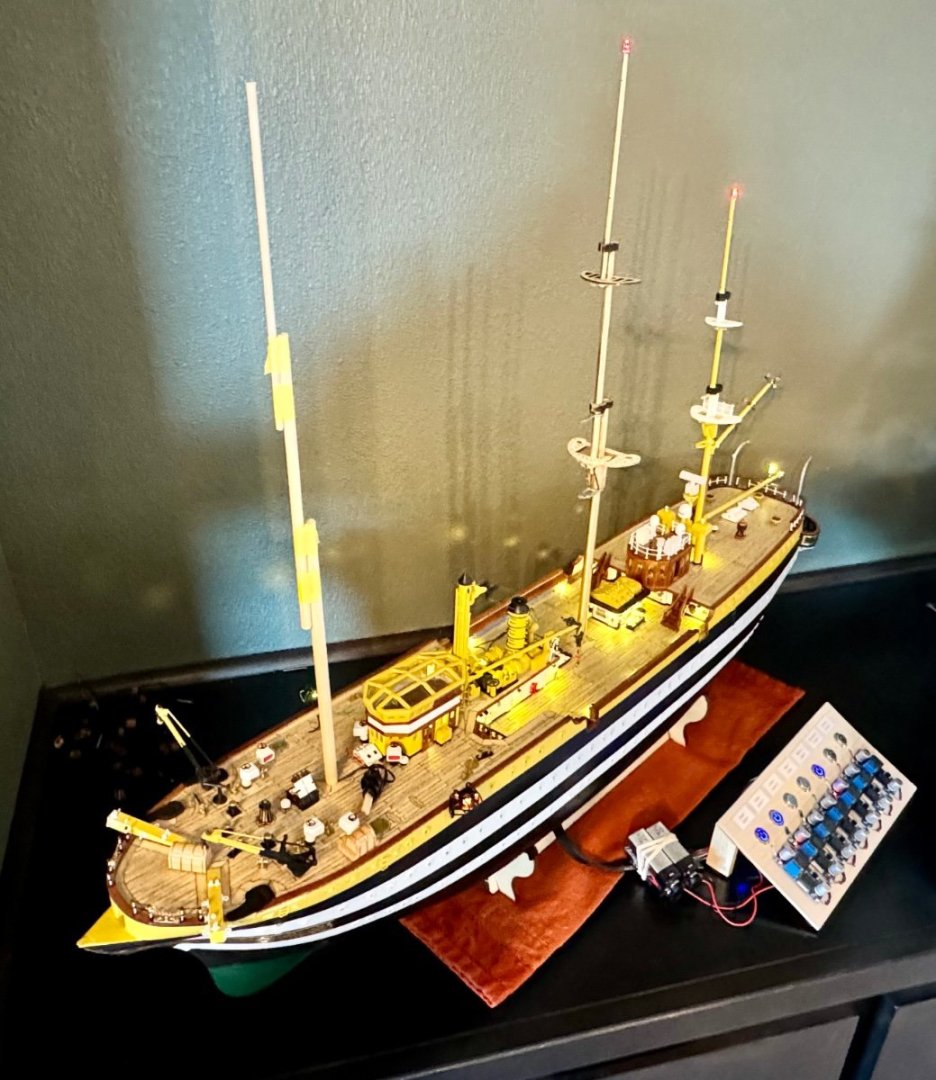
Good afternoon mates, I had a bit of time in the shipyard today and completed the installation of the last lighting effect, the Amerigo Vespucci traditional in port lighting. The only hard part…finding a location in the house that is dark during the day for the photo.
-
Hello from British Columbia!
DanielD replied to sixtythousandbees's topic in New member Introductions
Welcome to MSW! -
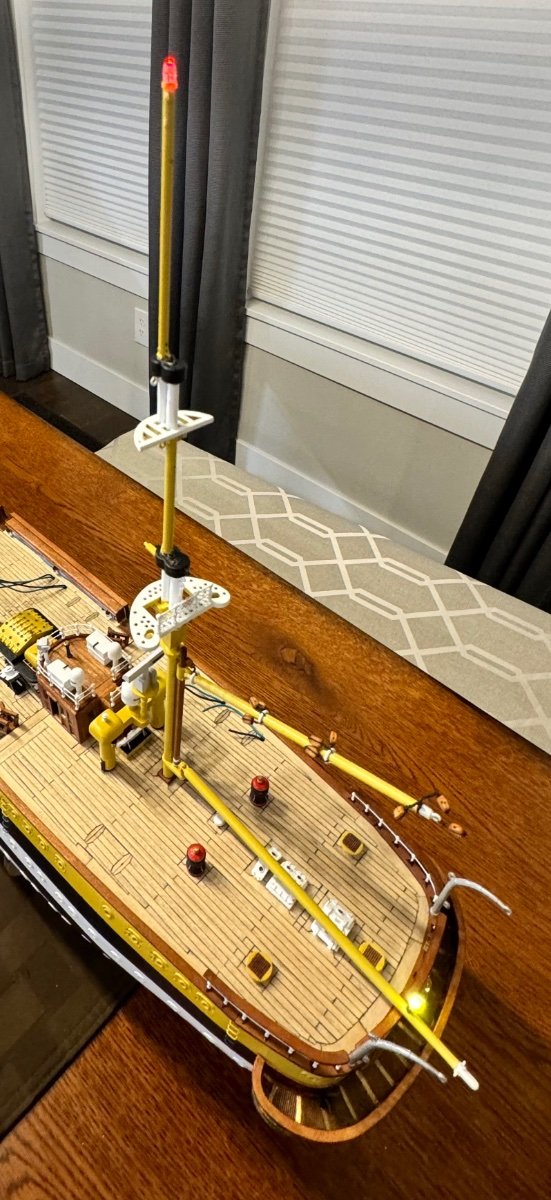
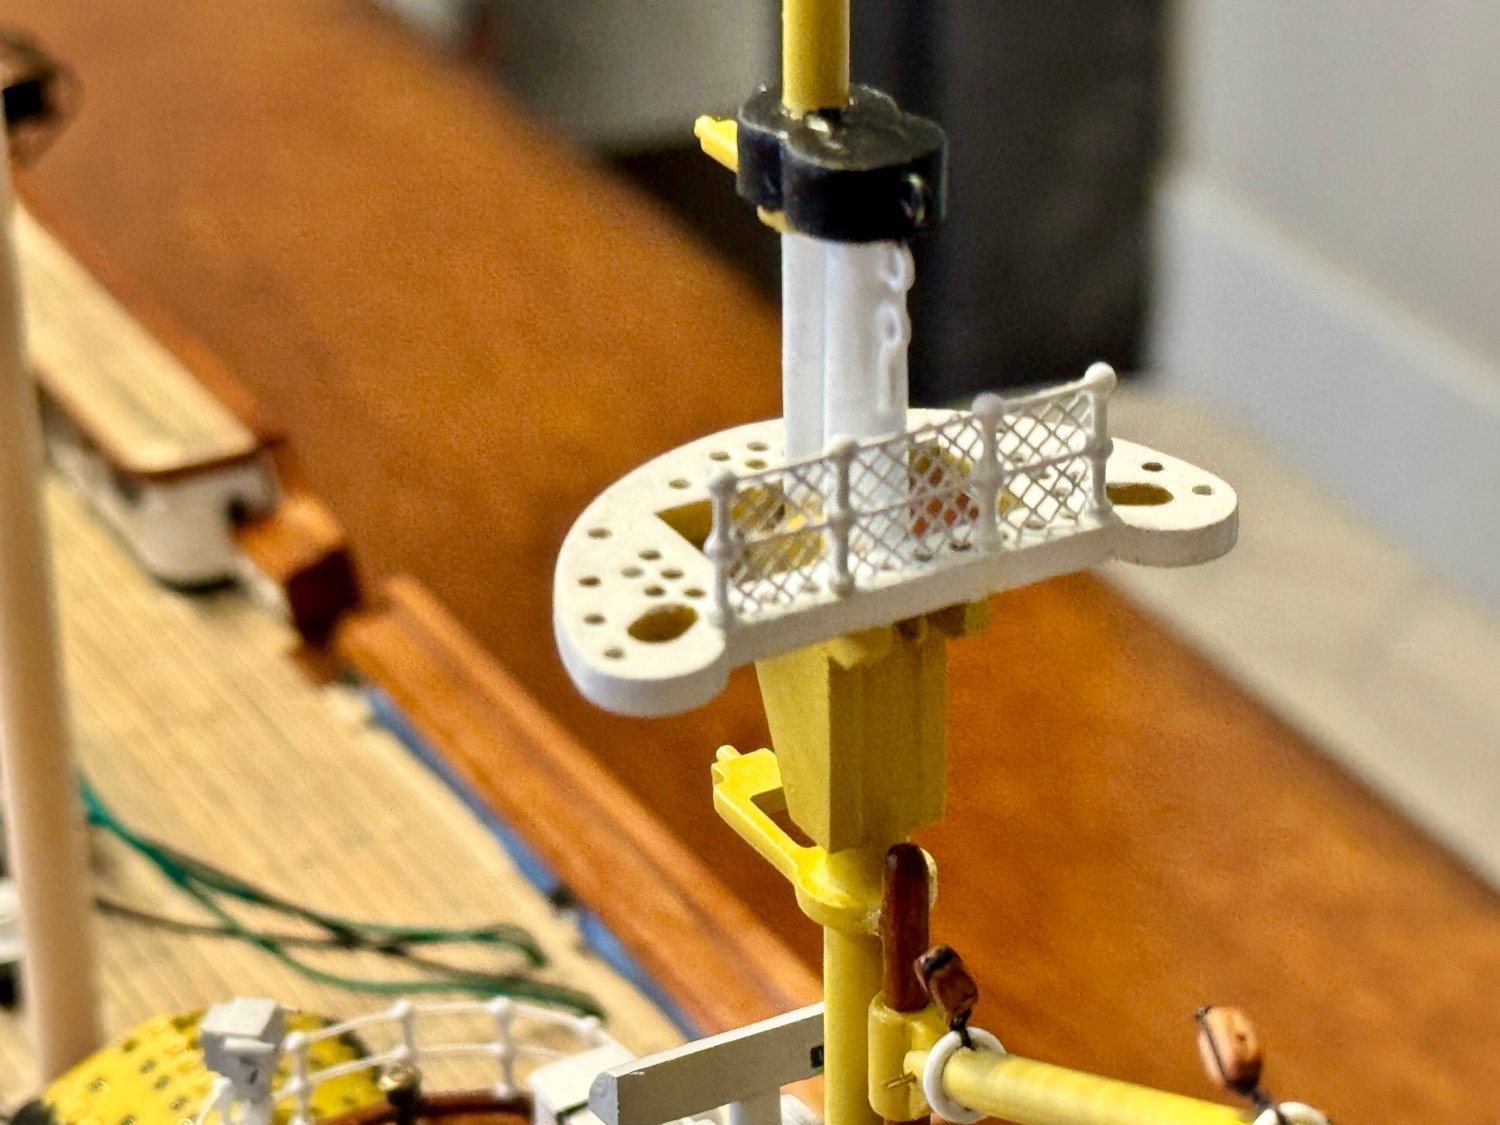
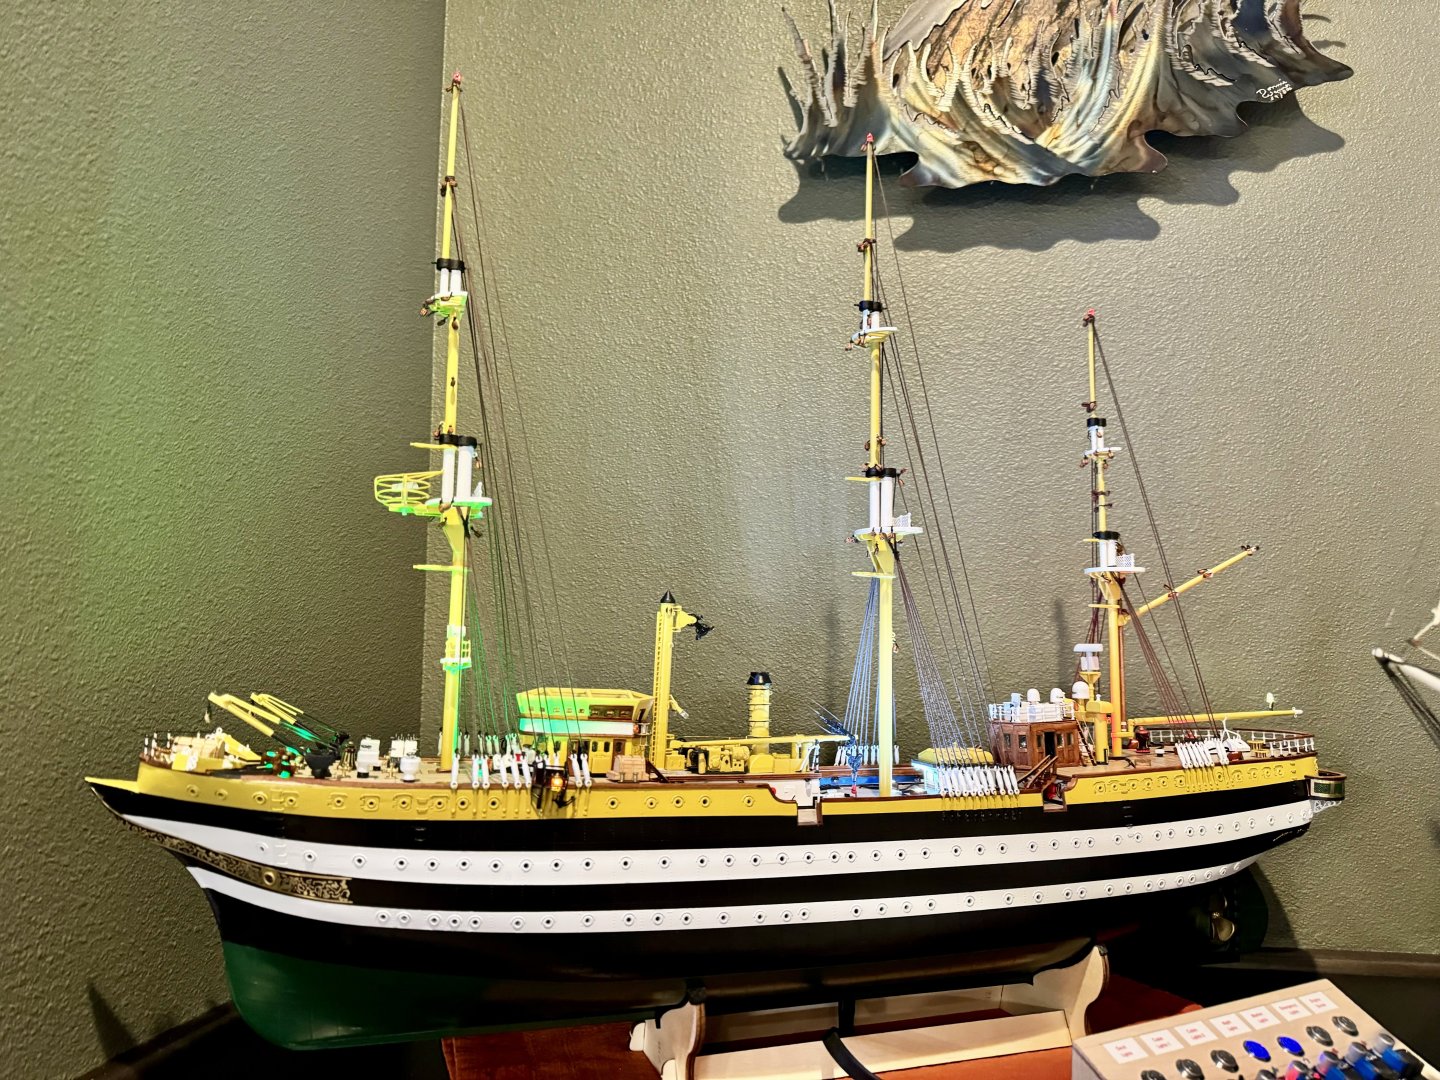
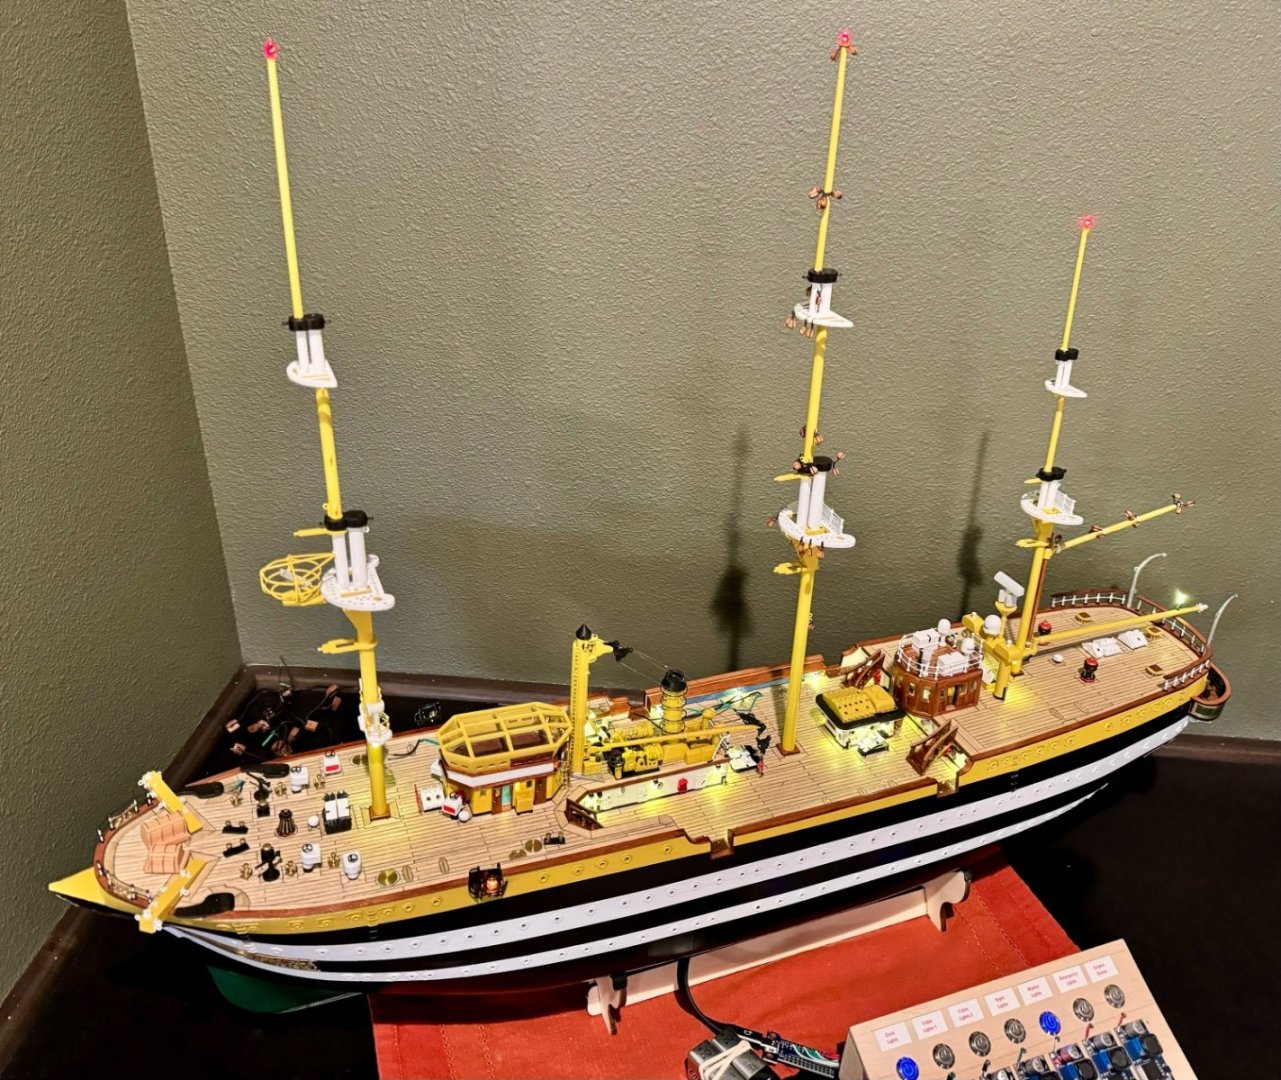
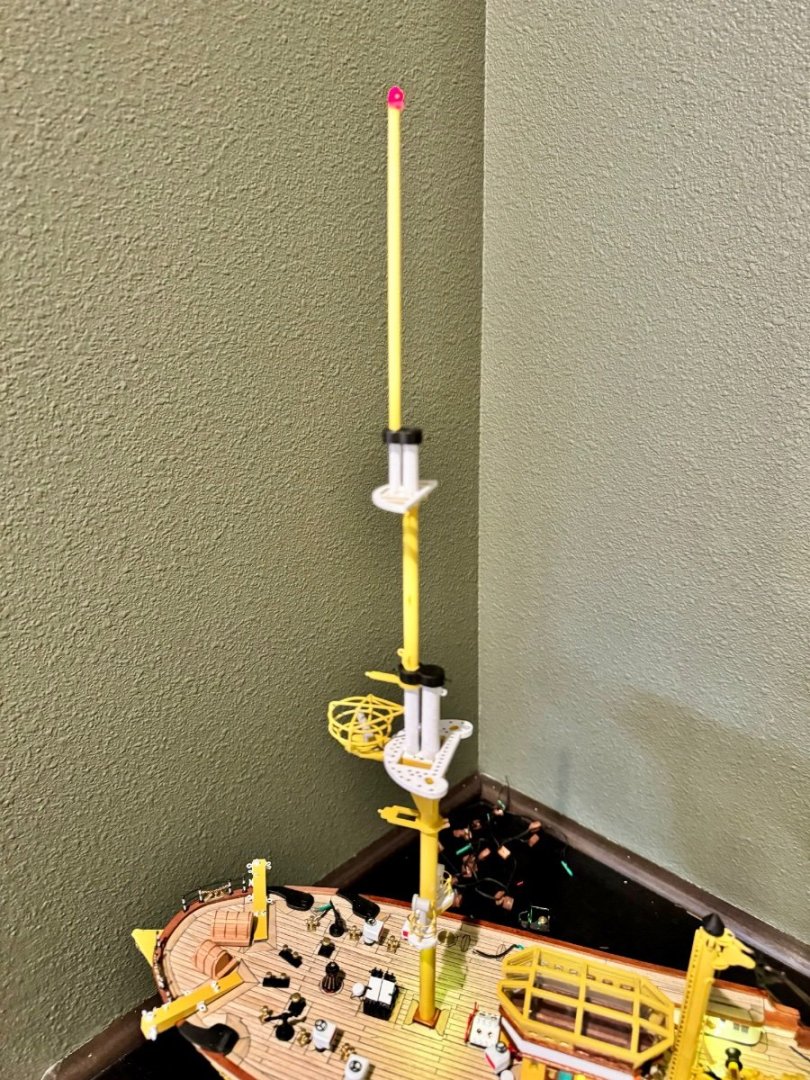
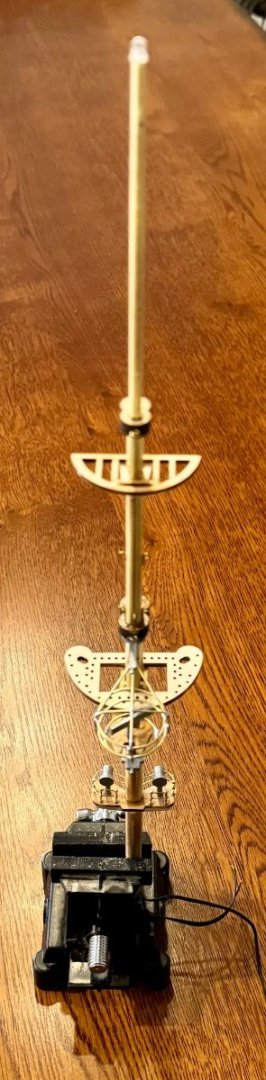
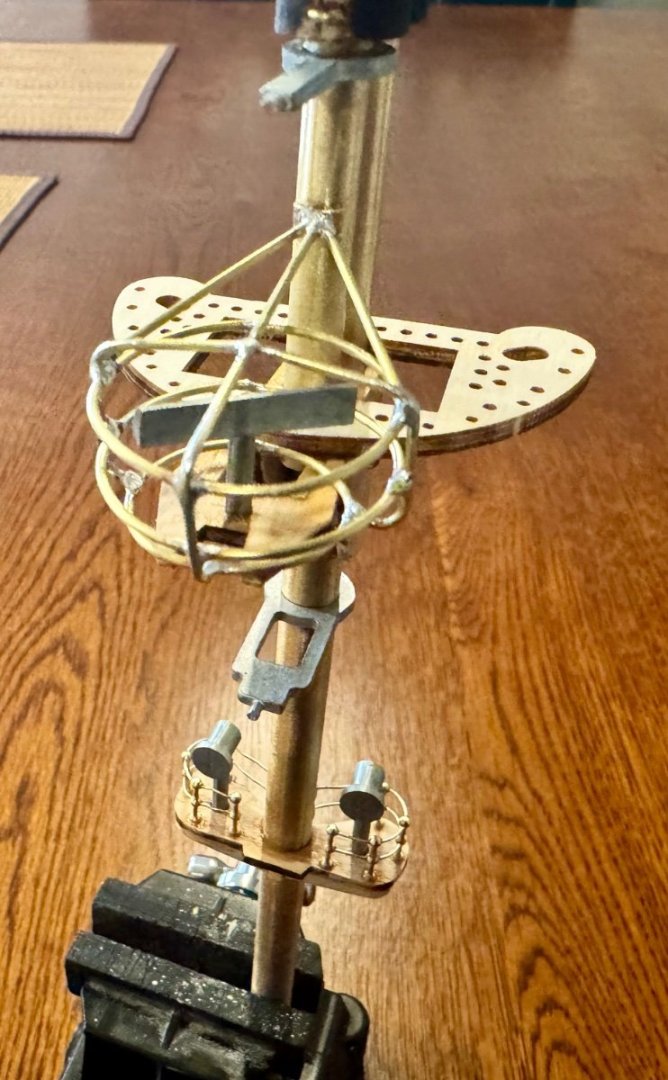
Good evening mates, finally…I have the fore mast and lighting finished.

-
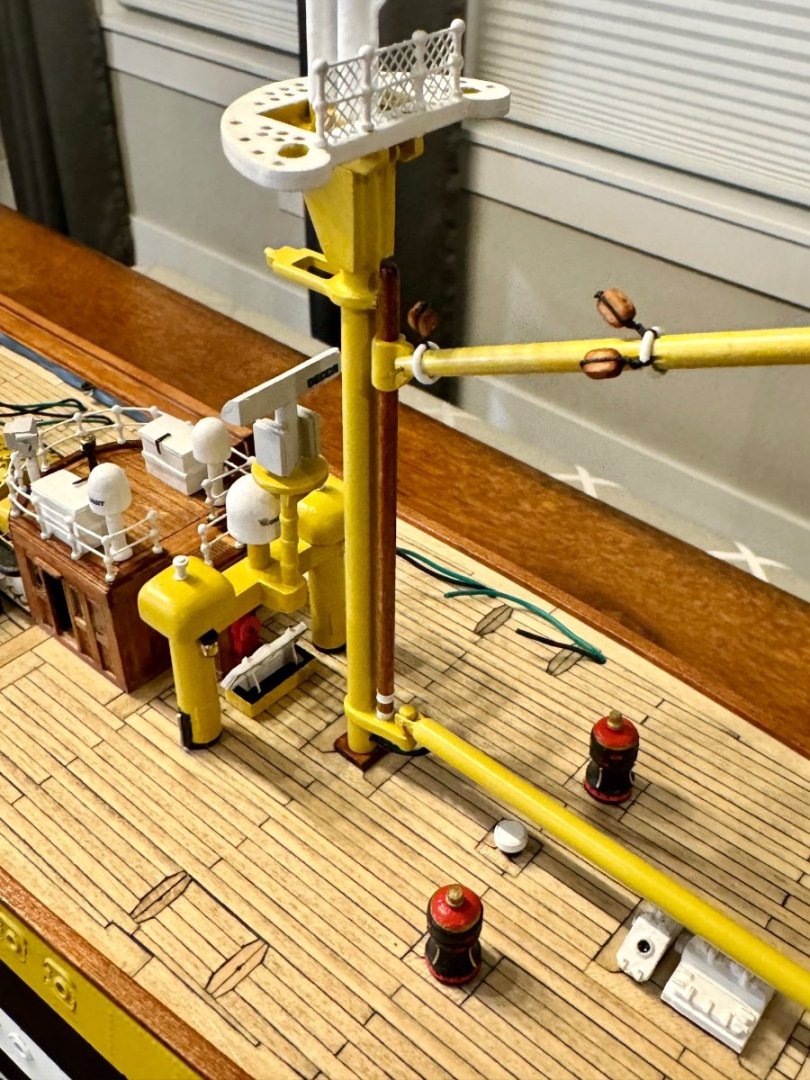
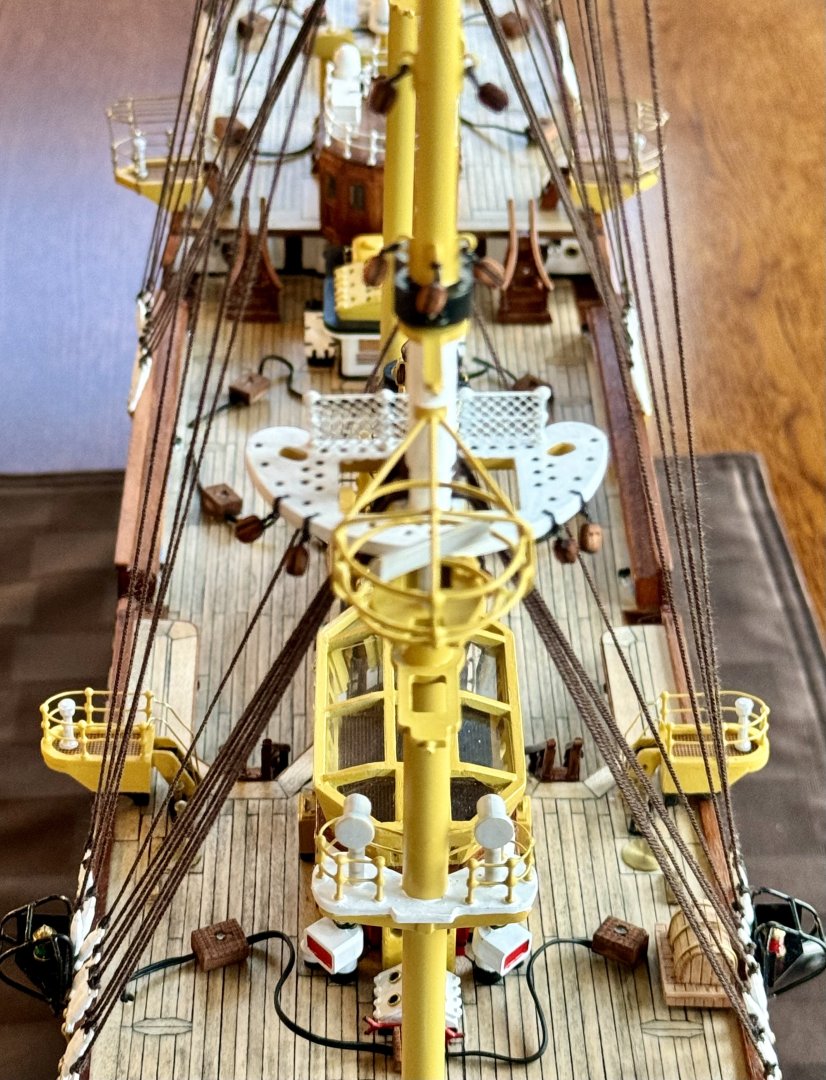
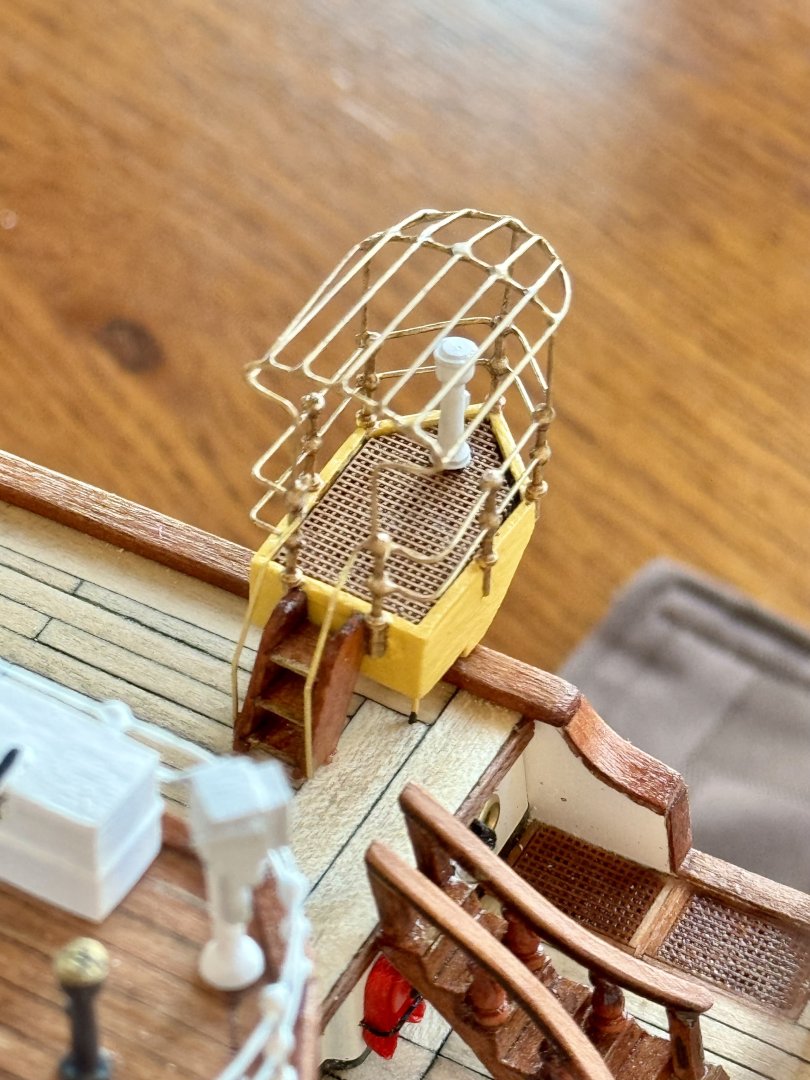
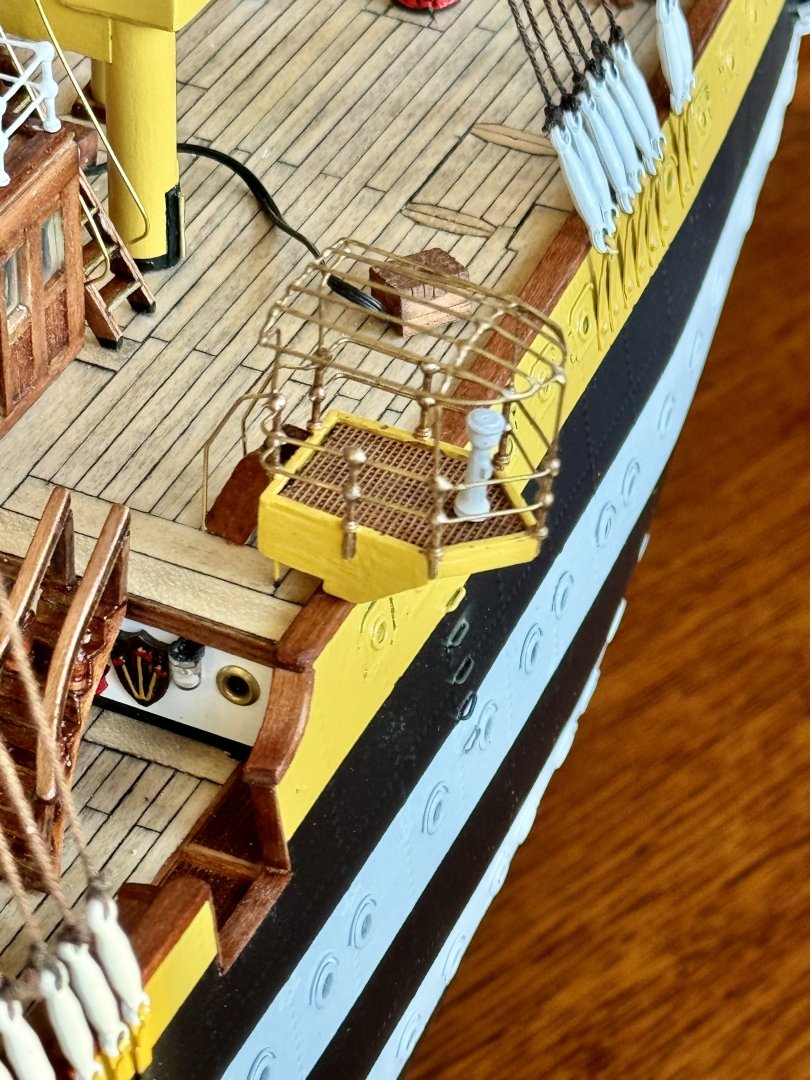
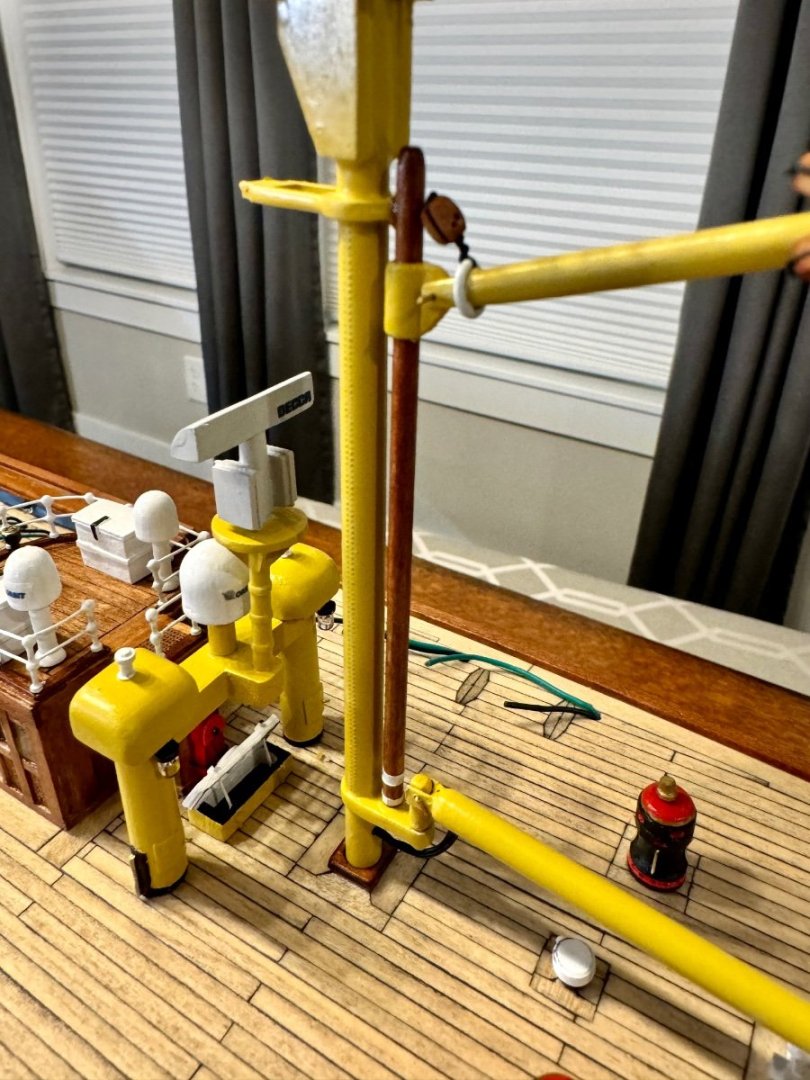
Good evening mates, it’s been well over a week since my last update. It’s not because I’ve been lazy, but rather the fore mast has been a bit of a challenge as it has an additional platform with spot lights and railings. Also, it has a radar installation with a wire cage that was a challenge to get to look more like the real AV. Not to mention the marker light at the top of the mast and deck lighting under the platform and all the associated wiring. It’s now ready to primer and paint. Should be another week or so before final installation on ship.

-
Good evening mates, just a quick weekend update on the progress of my Amerigo Vespucci. The main mast hardware and paint is complete and installed into the hull for the last time.
-
Good evening mates, one good thing about making mistakes, we learn from them and the next similar project takes much less time. Here is the main mast with working lights and all ready for paint.
-
Good evening mates, well…I’m finally back to where I was a few days ago! Mizzen mast installed with working lights.


-
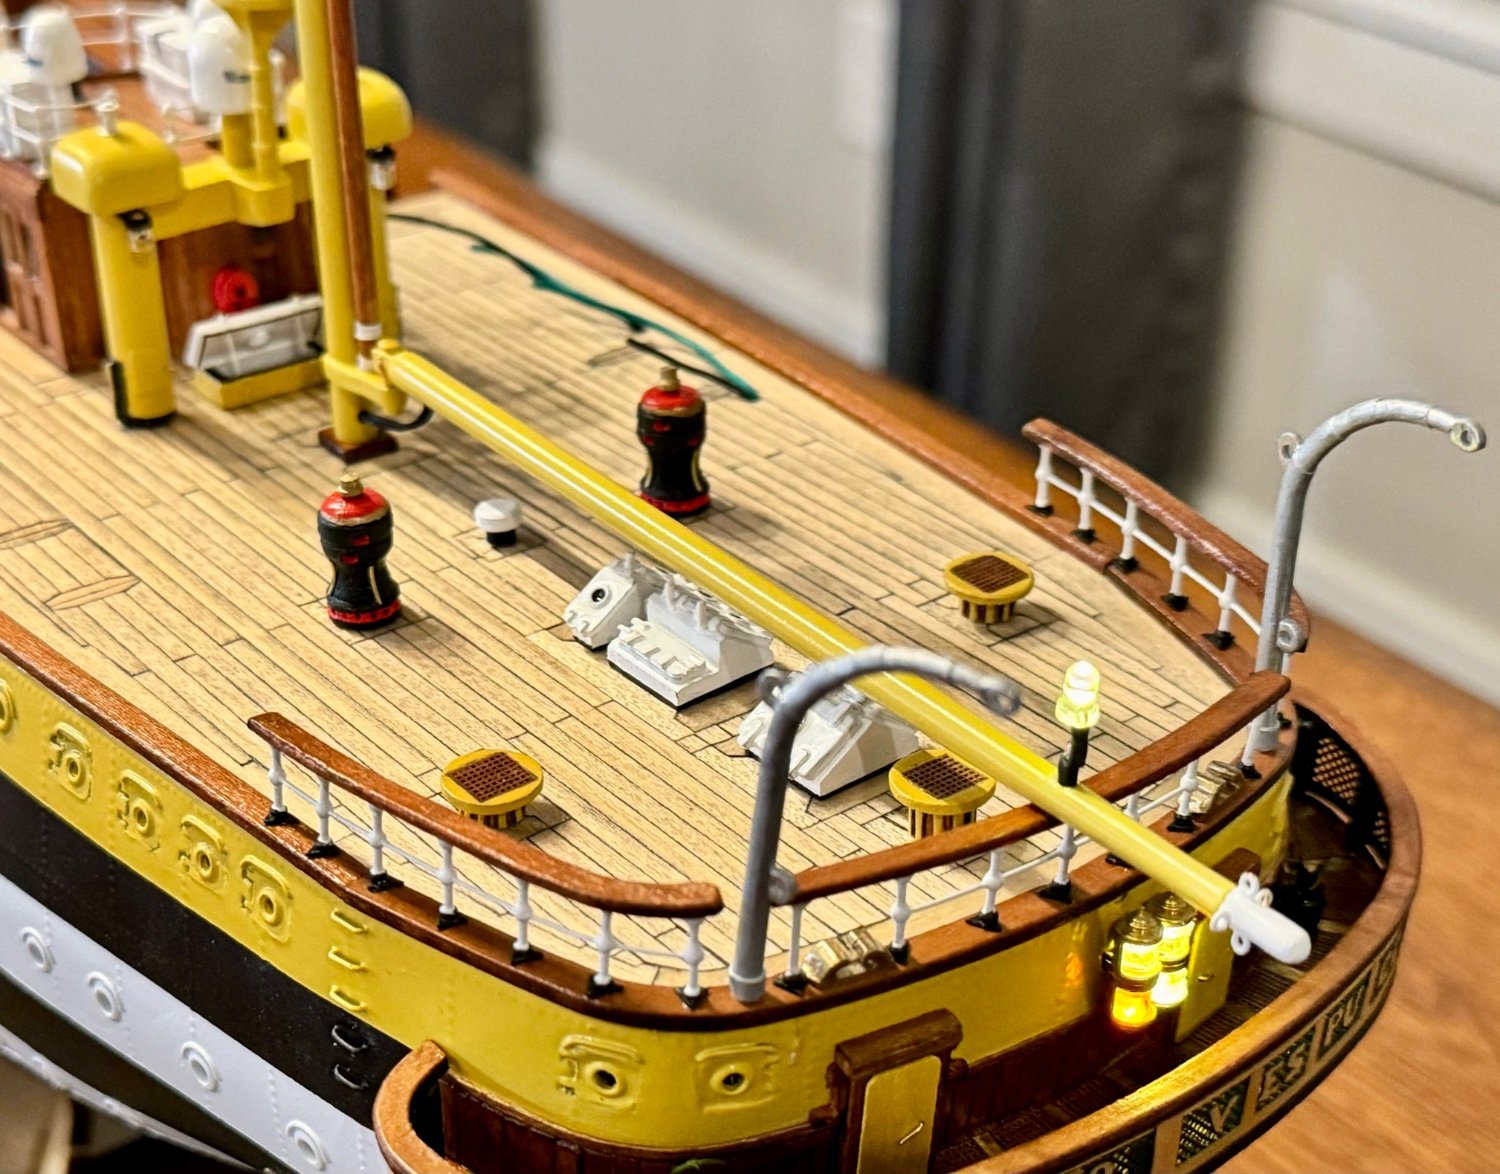
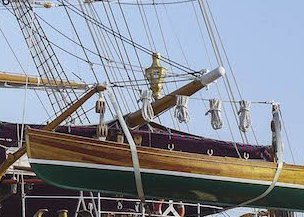
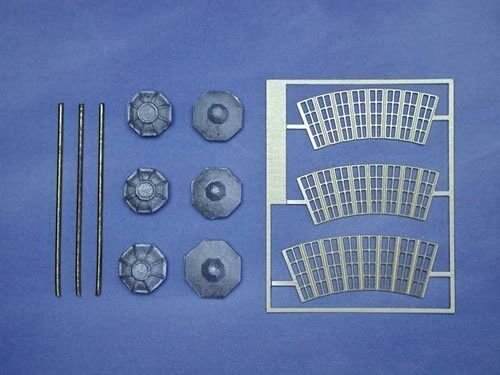
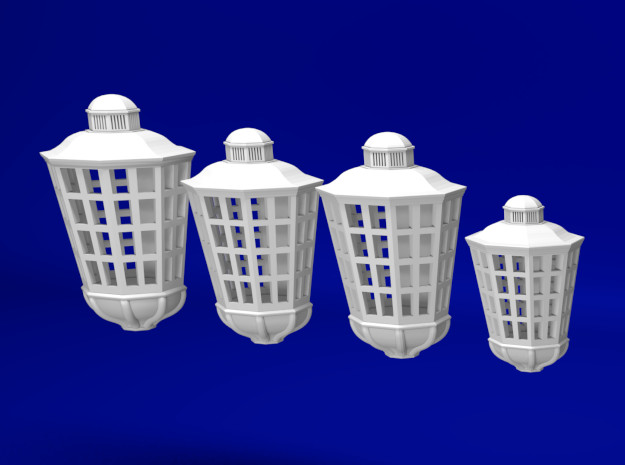
Update on my search for a lantern. Below is an image that shows a lantern on the stern of the Amerigo Vespucci. I believe this to be a decorative option that they sometimes install it when in port as I have seen many current and past images with and without the lantern. I have decided to showcase this lantern on my AV with LED illumination. To be close to scale, I need a hollow lantern that is between 10-15mm tall that I can paint to make look like brass. I have checked into the Caldercraft lanterns for the HMS Victory which are unassembled brass except that the smallest one available is at 16-18mm. This option is about $19 plus shipping; however, finding it available in the U.S. has been difficult. A second option that I found (smallest version) fits right in at 15mm is a 3D printed set of lanterns for the HMS Victory from Shapeways $13.50 plus $8 shipping arriving in about 3 weeks. Both of these options are viable. 1) Having a metal brass lantern would be wonderful, but hard for me to get, and slightly too big, and assembly may be a challenge. Option 2) 3D printed version manufactured in the U.S. without much assembly but delivery time is long as they are manufactured upon request so no stock on hand. Hmmm.... Has anyone used either of these options in their models? How have they worked out?
-
Good day mates. Have you ever had "one of those days"? Well, I have been having "one of those weeks!" It started when I realized that I needed to drill a 1mm hole in 3 places on my mizzen mast for future rigging. As you may know, I have wires running through the middle of the masts so these holes should have been drilled before I put the wires inside. My new plan was to gently drill the missed holes. Well...I apparently nicked one of the wires on my first try and as a result the red marker light at the top of the mast no longer worked. As such, I had to dissemble the entire mast, pull out the damaged wire, DRILL THE MISSED HOLES, reinstall the wires with a new LED as I damaged the old one getting it off, remove the paint and primer as I scratched up the mast adding the holes, and sprayed a new coat of primer. This time before adding the final color, I added the strings of rivets to the lower two sections of the mast I forgot to add the first time around. Last night I sprayed three coats of the final color and set to dry over night. Tonight I hope to touch up the white and black details and re-install into the ship (hopefully for the last time) with working lights! All in all, about an 8 hour mistake. What is your biggest model screw up that cost you more then a couple hours of time? Updated pictures coming once I have the mast installed again.
-
Good evening mates, here is the latest from the Amerigo Vespucci shipyard. Finished the mizzen mast except for the rigging hardware. The white light on the main boom is for a lantern that I have yet to source. Currently I’m looking at a set of lanterns designed for the HMS Victory. The main requirement is that I need it to be between 10-15mm tall. Any ideas?