Mirabell61
-
Posts
7,418 -
Joined
-
Last visited
Content Type
Profiles
Forums
Gallery
Events
Everything posted by Mirabell61
-
 Thank you Jason, from now on the design goes after the sequences requirements, I have a certain pattern im my mind, but still there may come some unforeseen necessity for short term adjusting here and there. If I were designing a "kit" one could say,,, the first prototype and see what comes out... Nils
- 2,625 replies
-
- 4
-

-
- kaiser wilhelm der grosse
- passenger steamer
- (and 1 more)
-
Sal, the way you did those stern- and badge decorations is fantastic, I love The stern view it looks great Nils
- 659 replies
-
- 2
-
-
- syren
- model shipways
- (and 1 more)
-
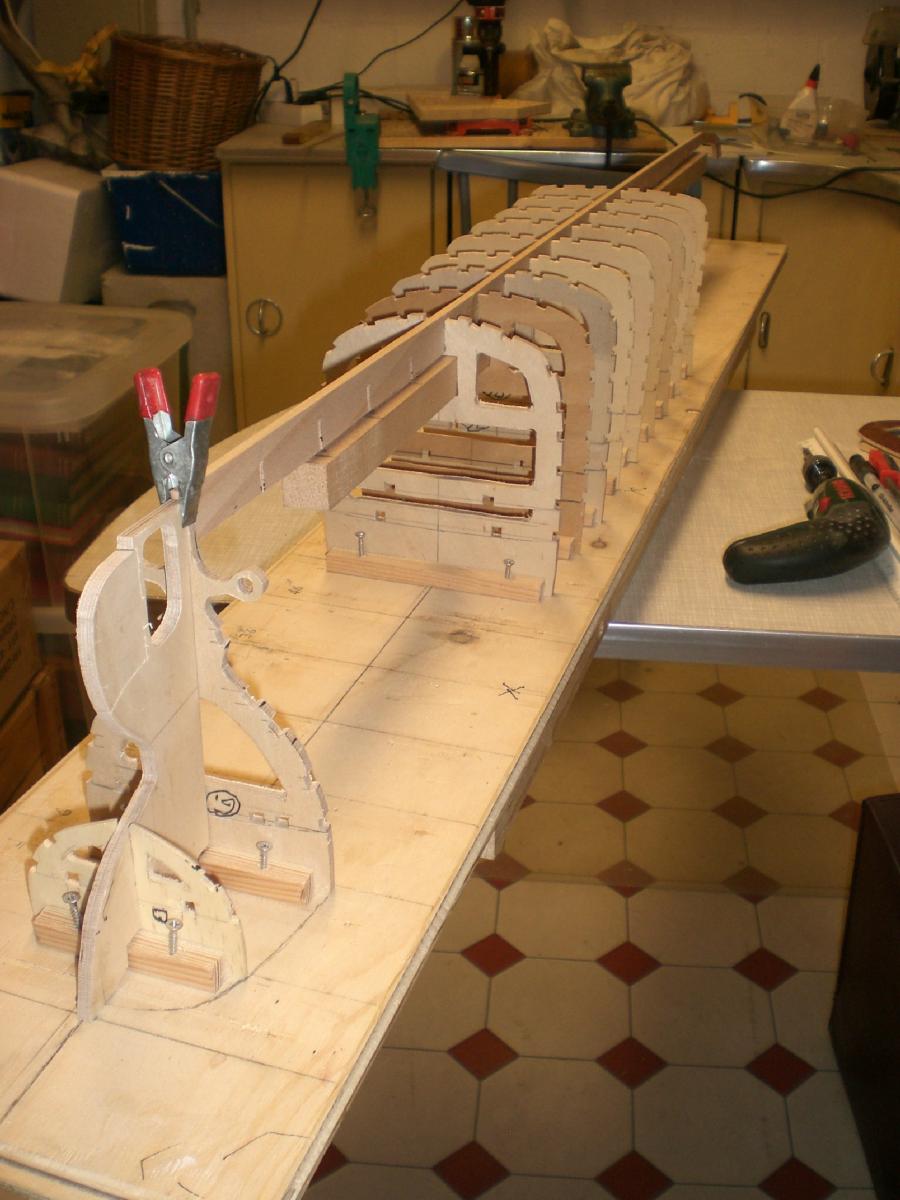
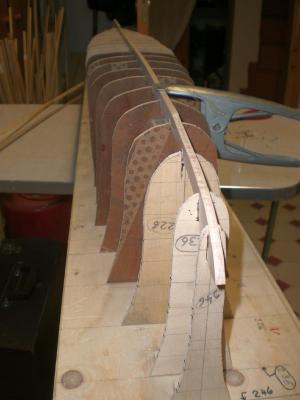
Ongoing framework....... the frames shown in the pics before were all still plates without outcuts. Now nearly every frame will get some outcuts ( to allow access when fixing the stringers and later on the planking. Also all the notch-outcuts for the stringers are brought in....... Also the reinforcement squarebar has become drilled borings in three places for the stand`s spindles and the locking nuts every frame is secured to the base with two srews (for easy removal, and bringing into position again) the keel is now flush and interlocked with the frames up to now no whether pins nor glue have been used on the framework (all only stuck together) . After the final check on all positions I will upply PA glue, to provide the strong hold Nils
- 2,625 replies
-
- 34
-
-
- kaiser wilhelm der grosse
- passenger steamer
- (and 1 more)
-
Cutty Sark by NenadM
Mirabell61 replied to NenadM's topic in - Build logs for subjects built 1851 - 1900
Nenad, your cathead Posts with 3 sheaves (laminated) look fantastic.... Well done ! Nils- 4,152 replies
-
- 4
-
-
- cutty sark
- tehnodidakta
- (and 1 more)
-
Hi Frank, your "Alert" is looking very good, you must be nearly ready for masting / rigging. Was it your Intention to have that weathered look on the wooden rails, that makes it look so real Nils
-
Hi Larry, Thank you for dropping in, sorry to say... no, relationship to a NYC Planetarium director, The ship was named after the former German Kaiser Wilhelm 1. in 1897, The adjective "der Grosse" is the German meaning for "the Great" Nils
- 2,625 replies
-
- 5
-
-
- kaiser wilhelm der grosse
- passenger steamer
- (and 1 more)
-
Many thanks Pete, not familiar with the phrase.....if I guess right, you brought her in relation to Alan Jackson`s lyric/song " ....She`s right on the money....." ? NIls
- 2,625 replies
-
- 3
-
-
- kaiser wilhelm der grosse
- passenger steamer
- (and 1 more)
-
Patrick, what can be seen so far of your Symphony is fantastic, and that done in so short time it`s like magic, well done ! Nils
-
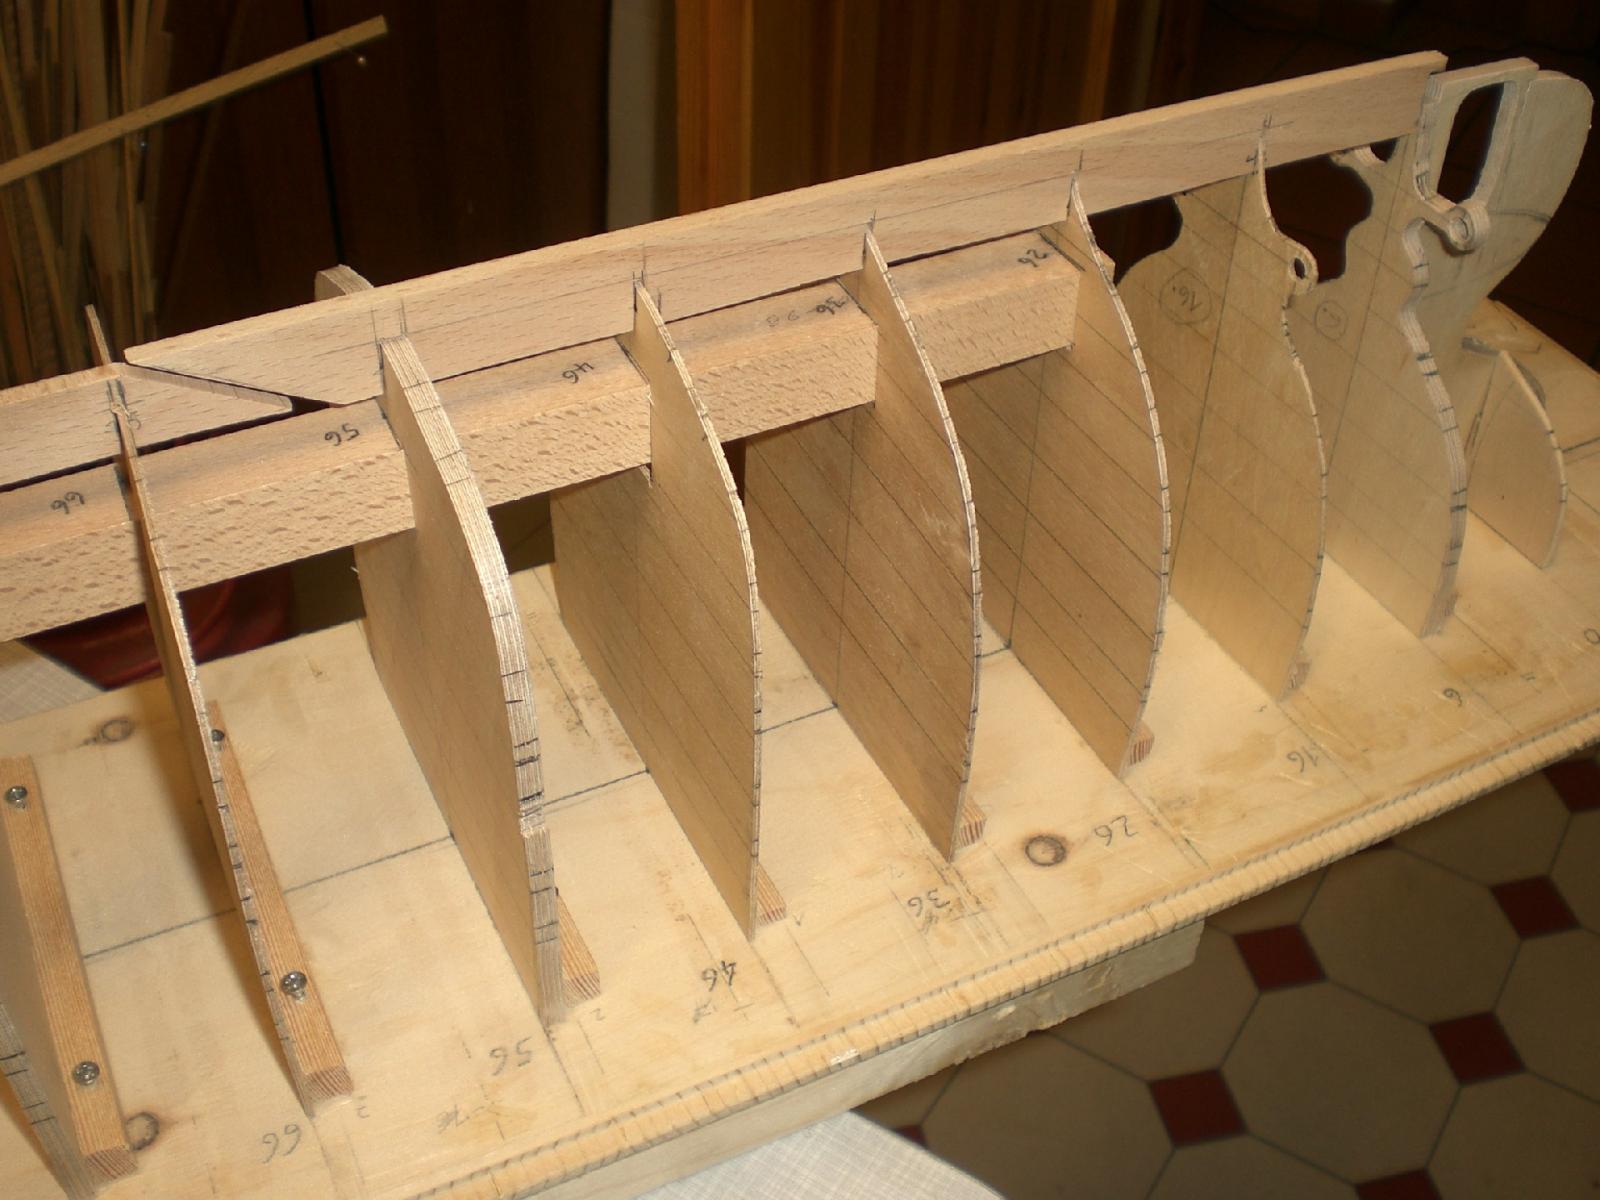
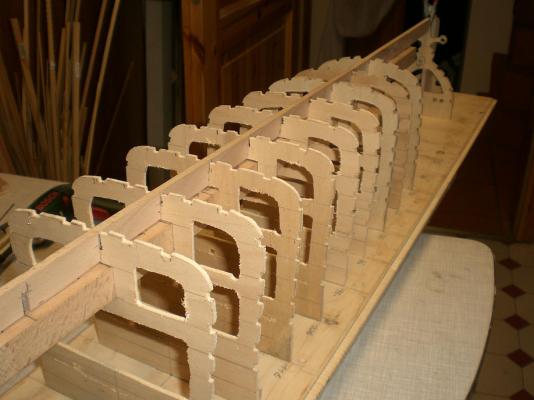
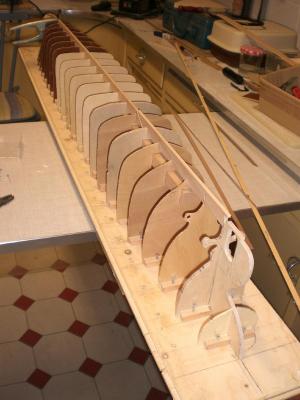
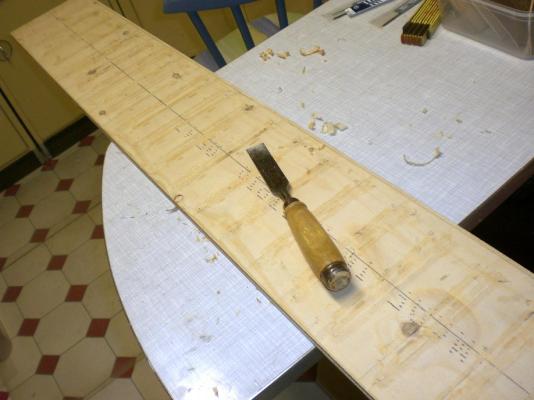
Frames, dry- fit of parts and marking for the stringer positions. Horizontaly the stringers will follow the individual deck-levels, although the lower decks will not be fitted later. To my relief the frame outer contours are straking so well, that slight fairing touch can be done when the stringers are already permanently fit on. The keel and bowpost comprise four 5mm thick plankparts made from beech. The frames will have an 5 mm wide outcut on the bottom centerline, allowing the keel to be placed appr. 8mm further down, when the appropriate slotted keel is nearly flush with the frames the keel will come down appr. further 8mm, when the frames also get slotted the keel, when interlocked with the frames, will then touch the reinforcement squarebar here the markings for the stringer notches can be seen some of the ply-frames are only 1,5 mm thick, I had fear that they might be too flimsy, but the will be stiffened out by the stringers afterwards. Nils


- 2,625 replies
-
- 25
-
-
- kaiser wilhelm der grosse
- passenger steamer
- (and 1 more)
-
Beautiful work Bob, I like the anchors shaped from Wood and blackened afterwards, also the bouys look great, very nice Fitting out details Nils
-
Nice Progress to be seen Mr. Pucko, the funnel also Looks great... Nils
- 113 replies
-
- 1
-
-
- bohuslän
- nordic class boats
- (and 1 more)
-
Many thanks to Patrick, Pete, Edwin, Robin, Crackers, and all the "likes"... Patrick, in generel the frames were spot on, except for 2 or 3 frames that did`nt come down flat on the base (because hooked up on the "backbone" squarebar. Should have seen that whilst preliminary mounting. I will dismount, rework / adjust those. All other will take normal fairing of outside contours. The planking of the stern areas will be an "experience" I know, but that makes out the spice in the soup Pete, many thanks, glad you like it, and stay tuned Edwin, Thank you for looking in, and you`re always welcome Robin, Thats a very nice complement I`ll pass on in the right direction, well appreciated Crackers, Thank you for the nice pic and your comment regarding to the ships history Nils
- 2,625 replies
-
- 7
-
-
- kaiser wilhelm der grosse
- passenger steamer
- (and 1 more)
-
Peter, thank you for your nice comment......, I hope that one day it will turn out a little bit like your super KWdG museums model...... BTW... I sent you a PM on 27.05, have you read it ? Nils
-
Crackers, thanks for joining in on the KWdG build, and many thanks also for your lovely and kind complement which is much appreciated Nils
-
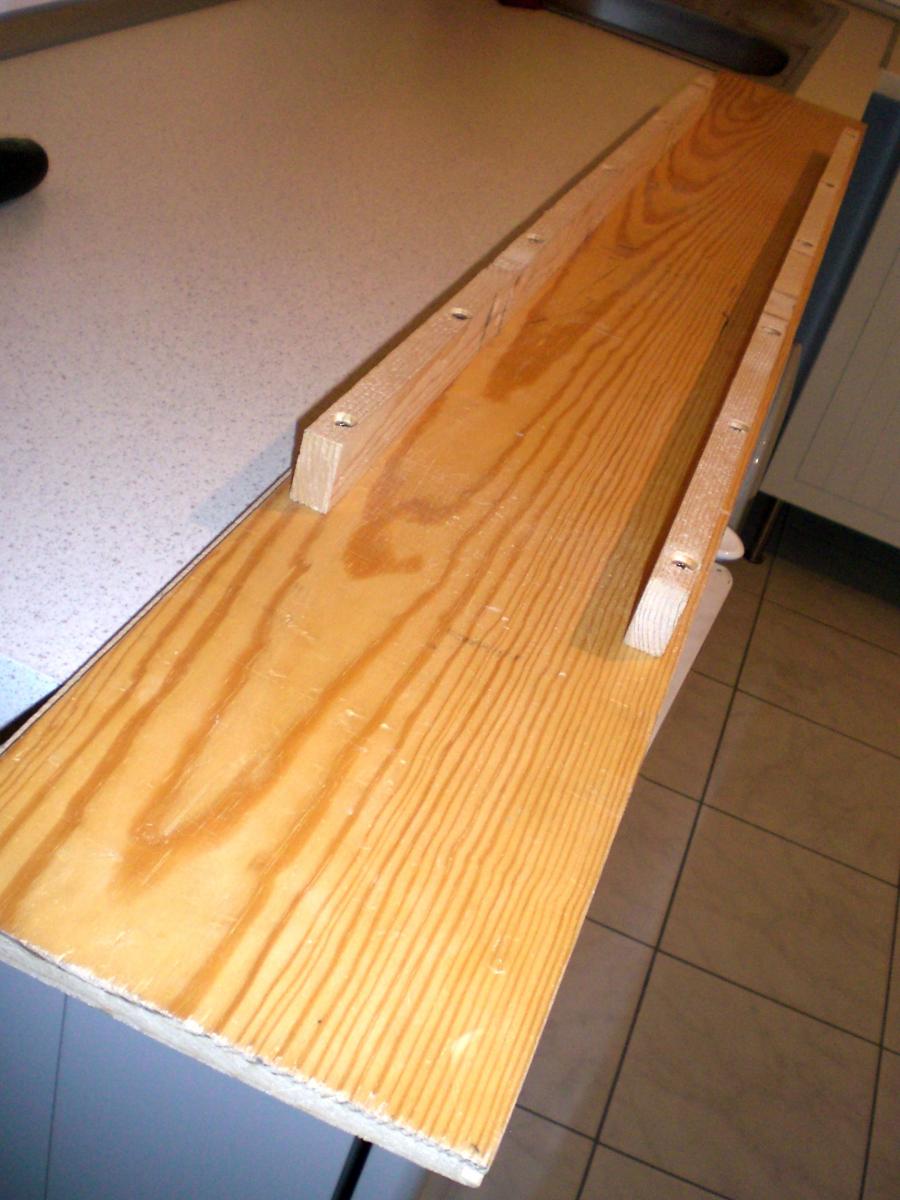
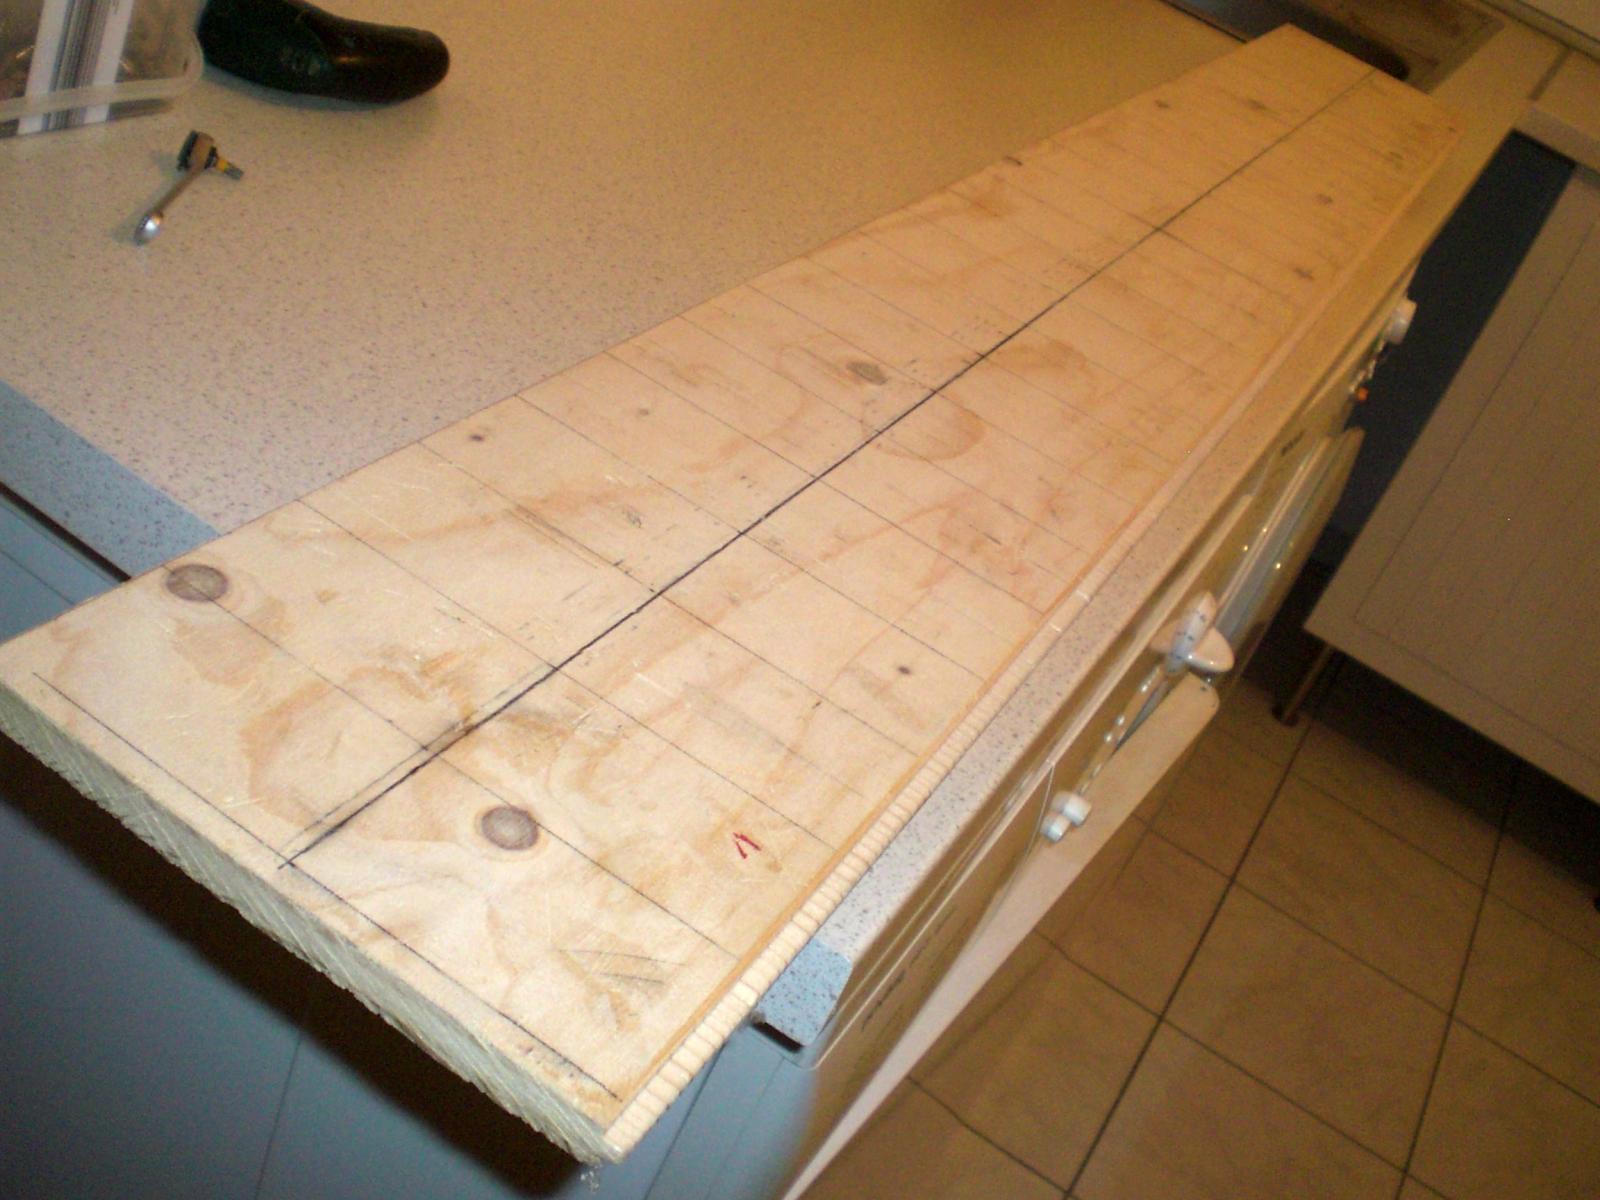
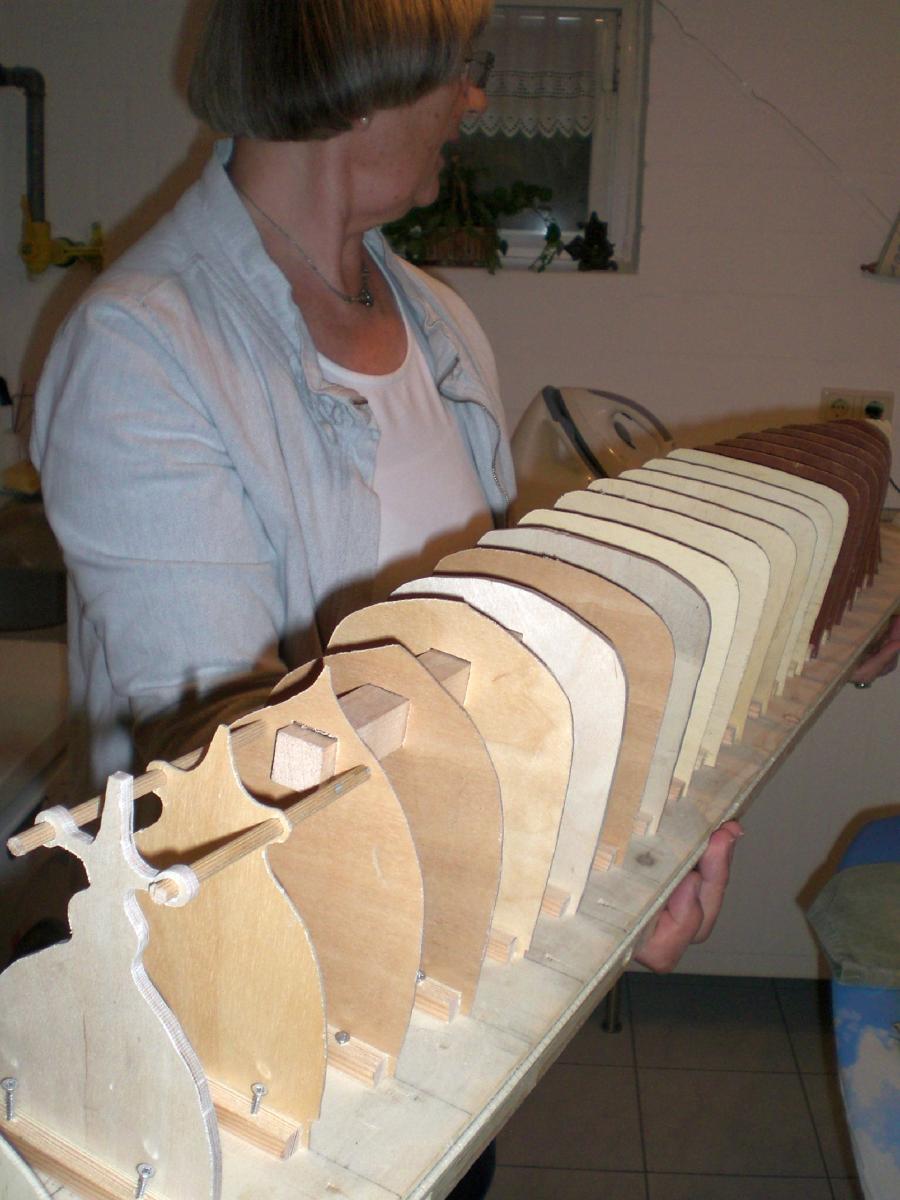
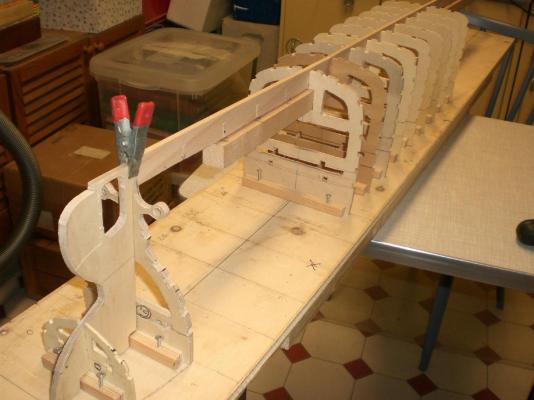
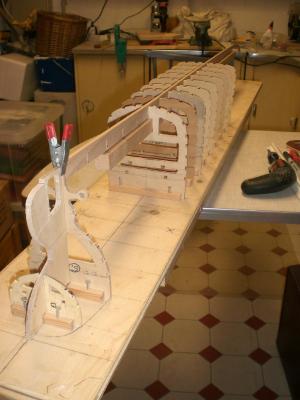
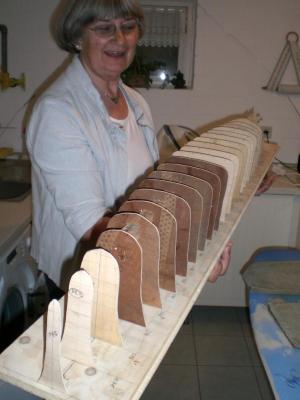
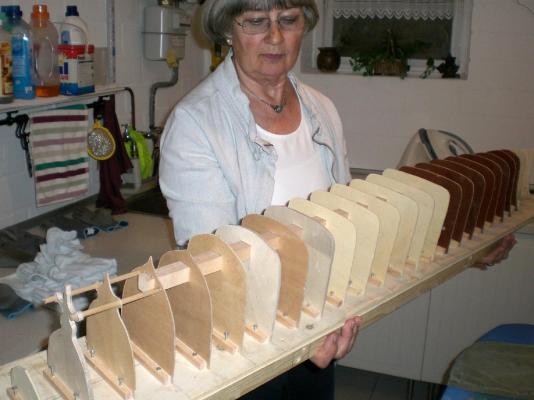
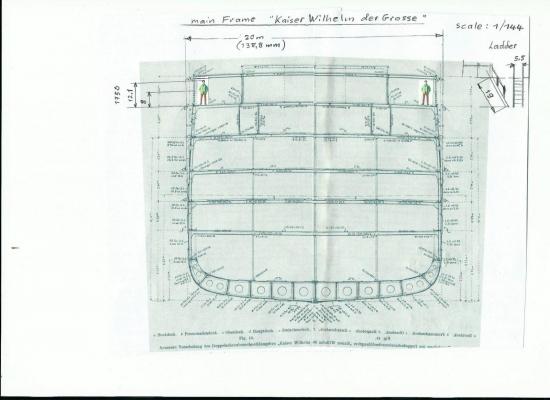
Build log part 4 Today is keellaying day, ...... the base plate has been reinforced underneath, and is now absolutely flat, and first preliminary frame set up of 26 single removeable frames, to see how the contours are straking, and what amount oif fairing to the outer frame contours shall be necessary. Then the positions notches for the stringers will be checked resp. corrected, before they are cut out. Also the keel will be fitted in as well as the stern- and bow post areas. The strong "spine" can be clearly seen here. I`ll cut away many of the dead wood inside the frames, leaving only the convex deck beams and reinforcements where necessary, where visable decks will be fitted later on. The 6 mm dowels to resemble the propshafts will be replaced later with brass tubes. The different color of the frames is due to the use of leftover ply, I gathered over the years. bottom side of reinforced baseplate upper side, with pencil centerline and lines for frame-distances the pile of frames the admiral was so kind to hold the "shipyard"...... ..... aft view different ply, in color and thicknesses Nils


- 2,625 replies
-
- 36
-
-
- kaiser wilhelm der grosse
- passenger steamer
- (and 1 more)
-
Many thanks Popeye and Patrick, Popeye, my Little toolpark is realy nothing sofisticated, but still to date all ship model have somehow been built this way..... Patrick, I`m lucky to have two of the basement rooms in the house.... now I`ll better be cutting out the Frames and do a dry set up, I`m so curious if the hull contour will be straking well without Major adjustments Nils
- 2,625 replies
-
- 5
-
-
- kaiser wilhelm der grosse
- passenger steamer
- (and 1 more)
-
Nice to see you posting again Jason, the HMS Snake is coming on beautifuly Nils
- 800 replies
-
- 2
-
-
- snake
- caldercraft
- (and 1 more)
-
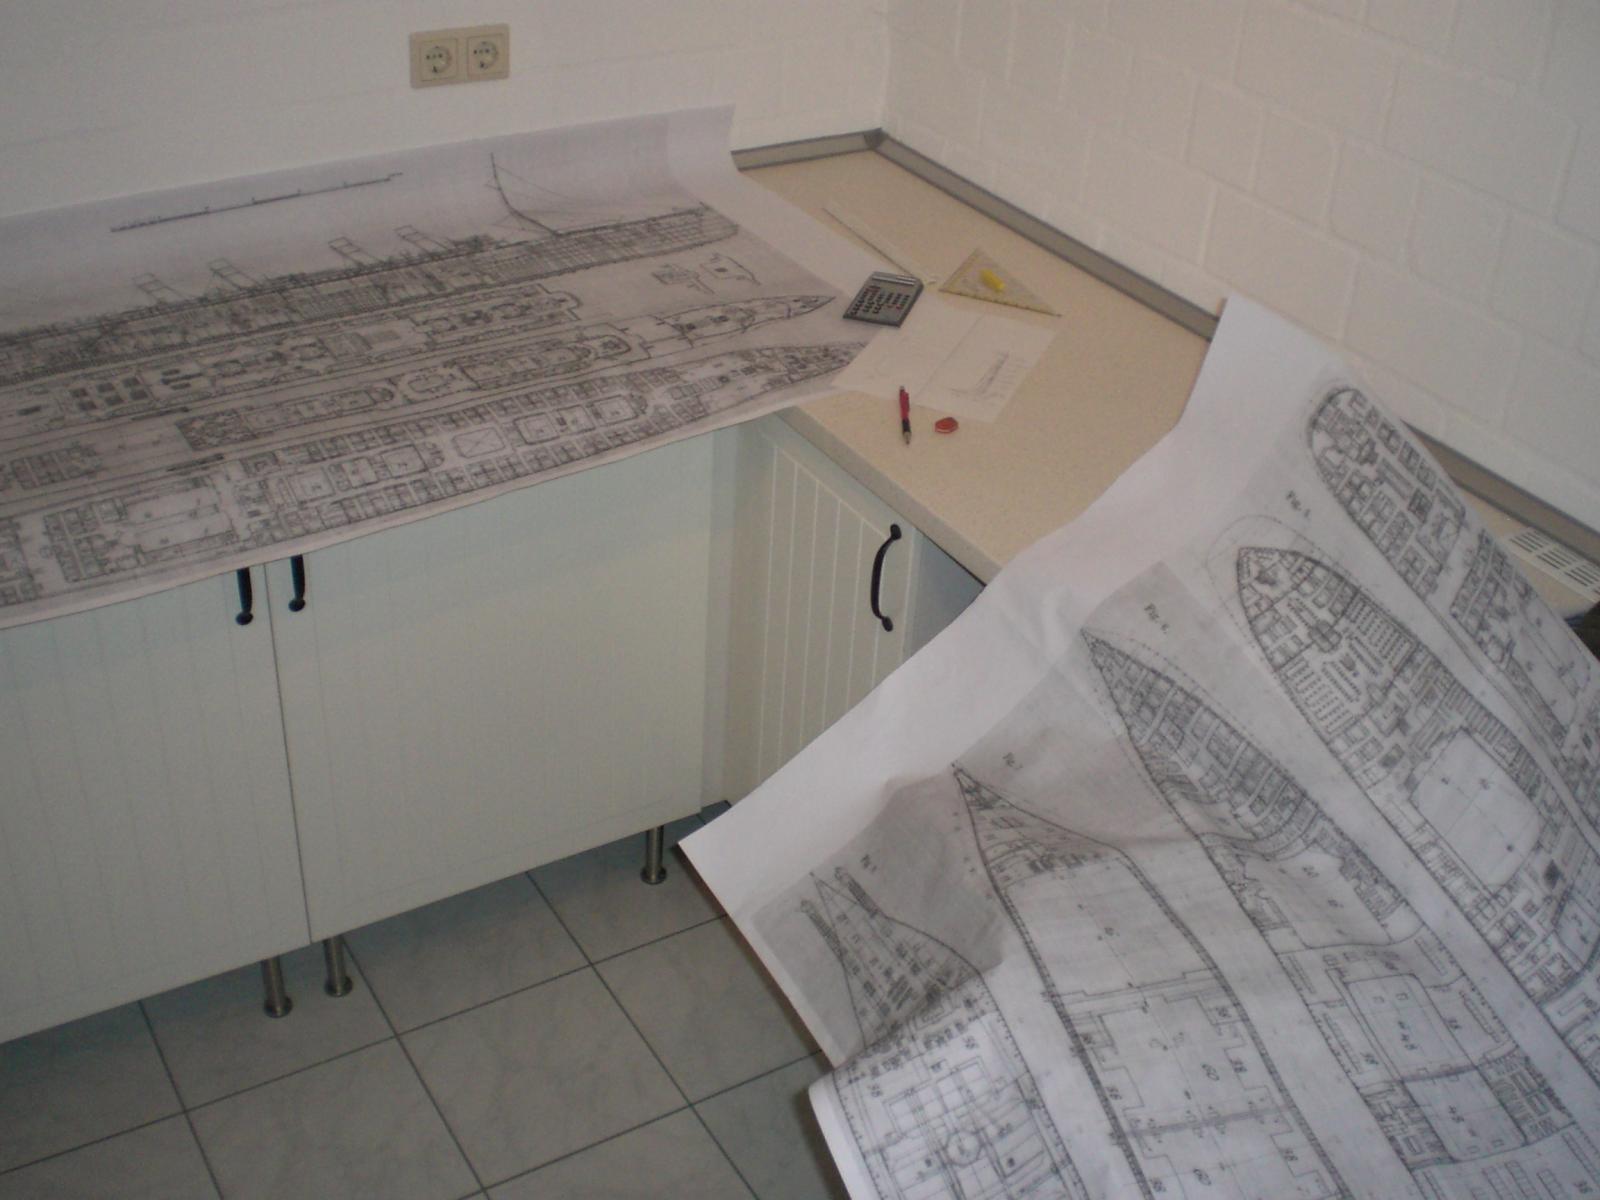
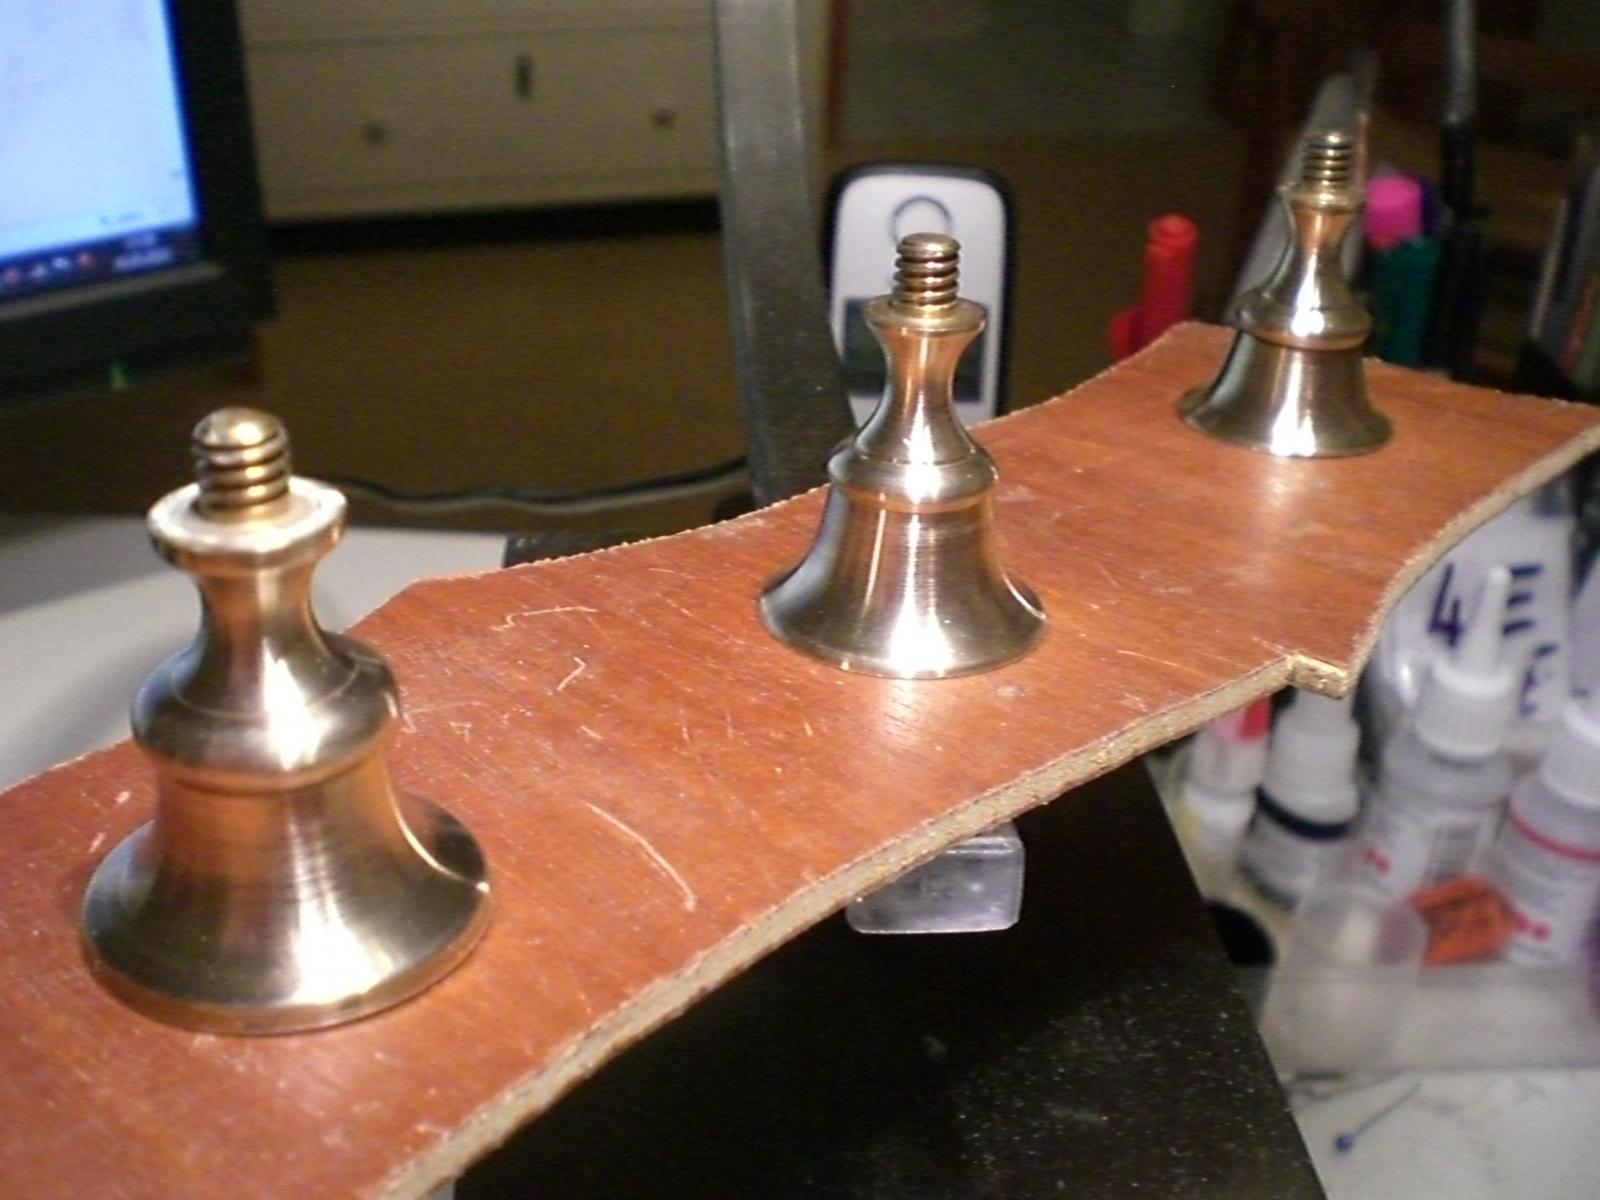
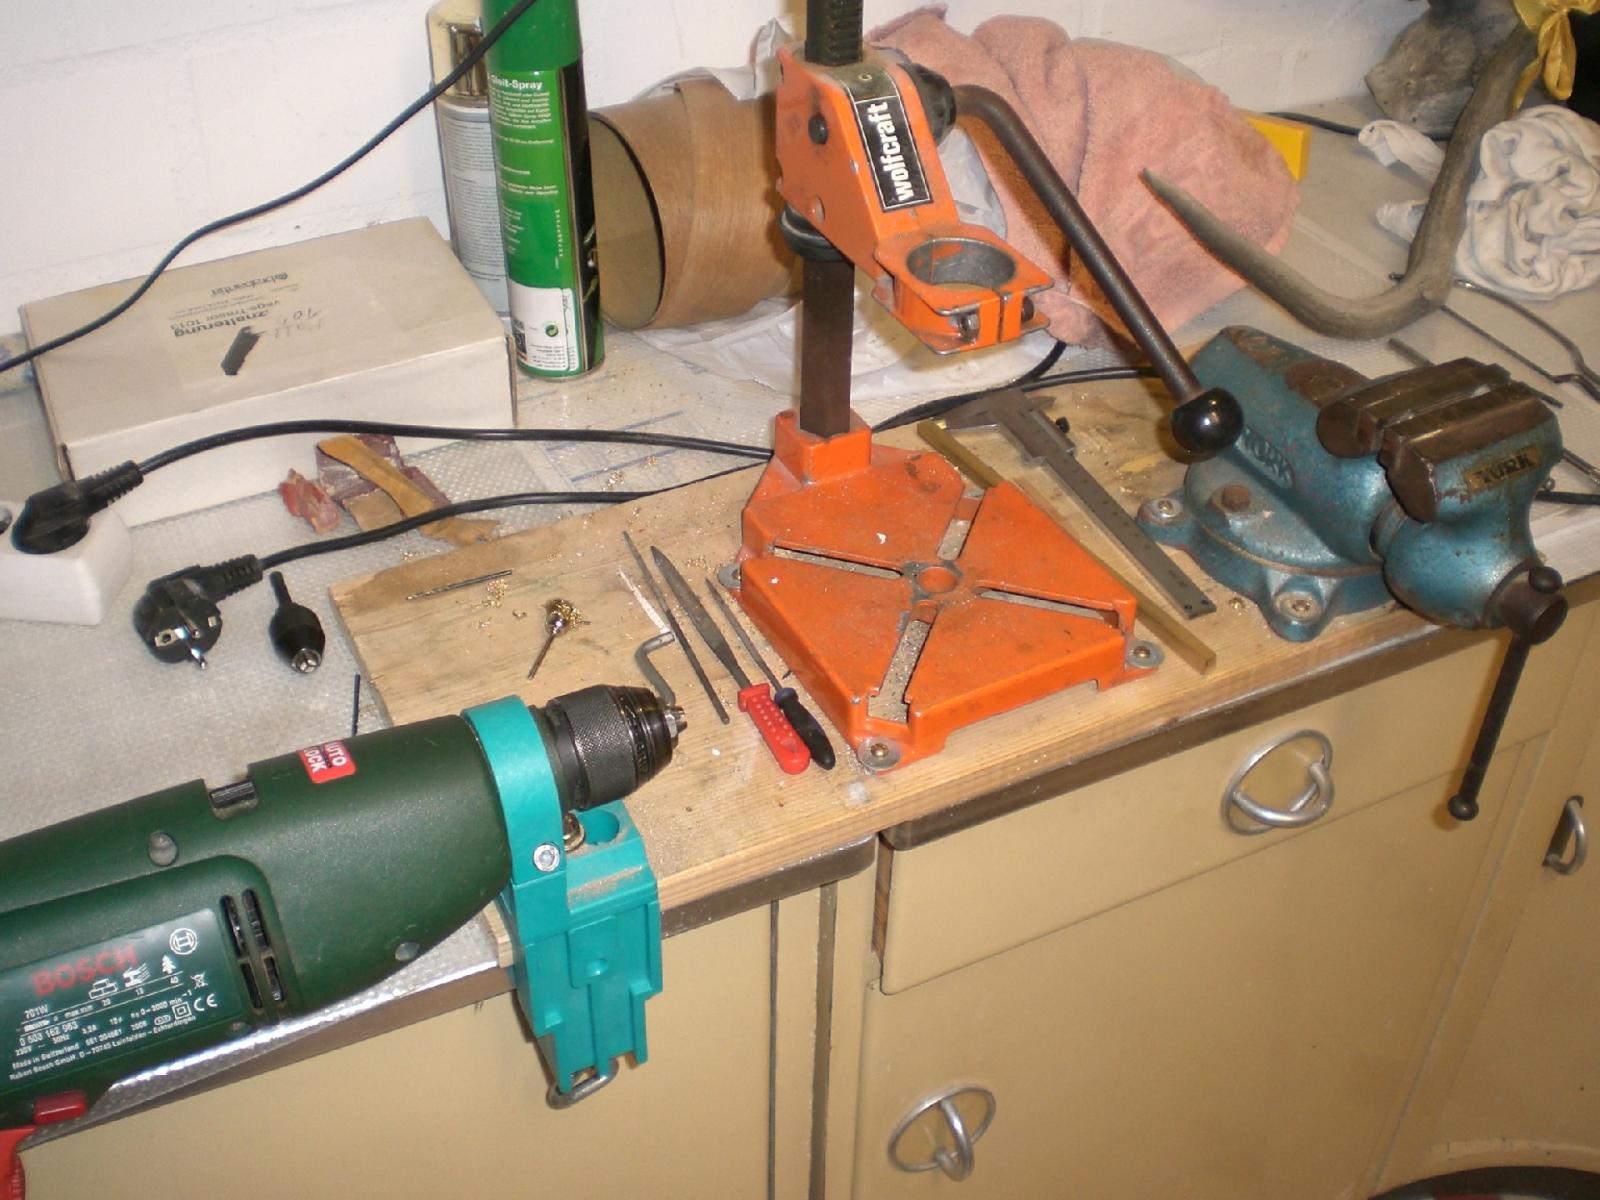
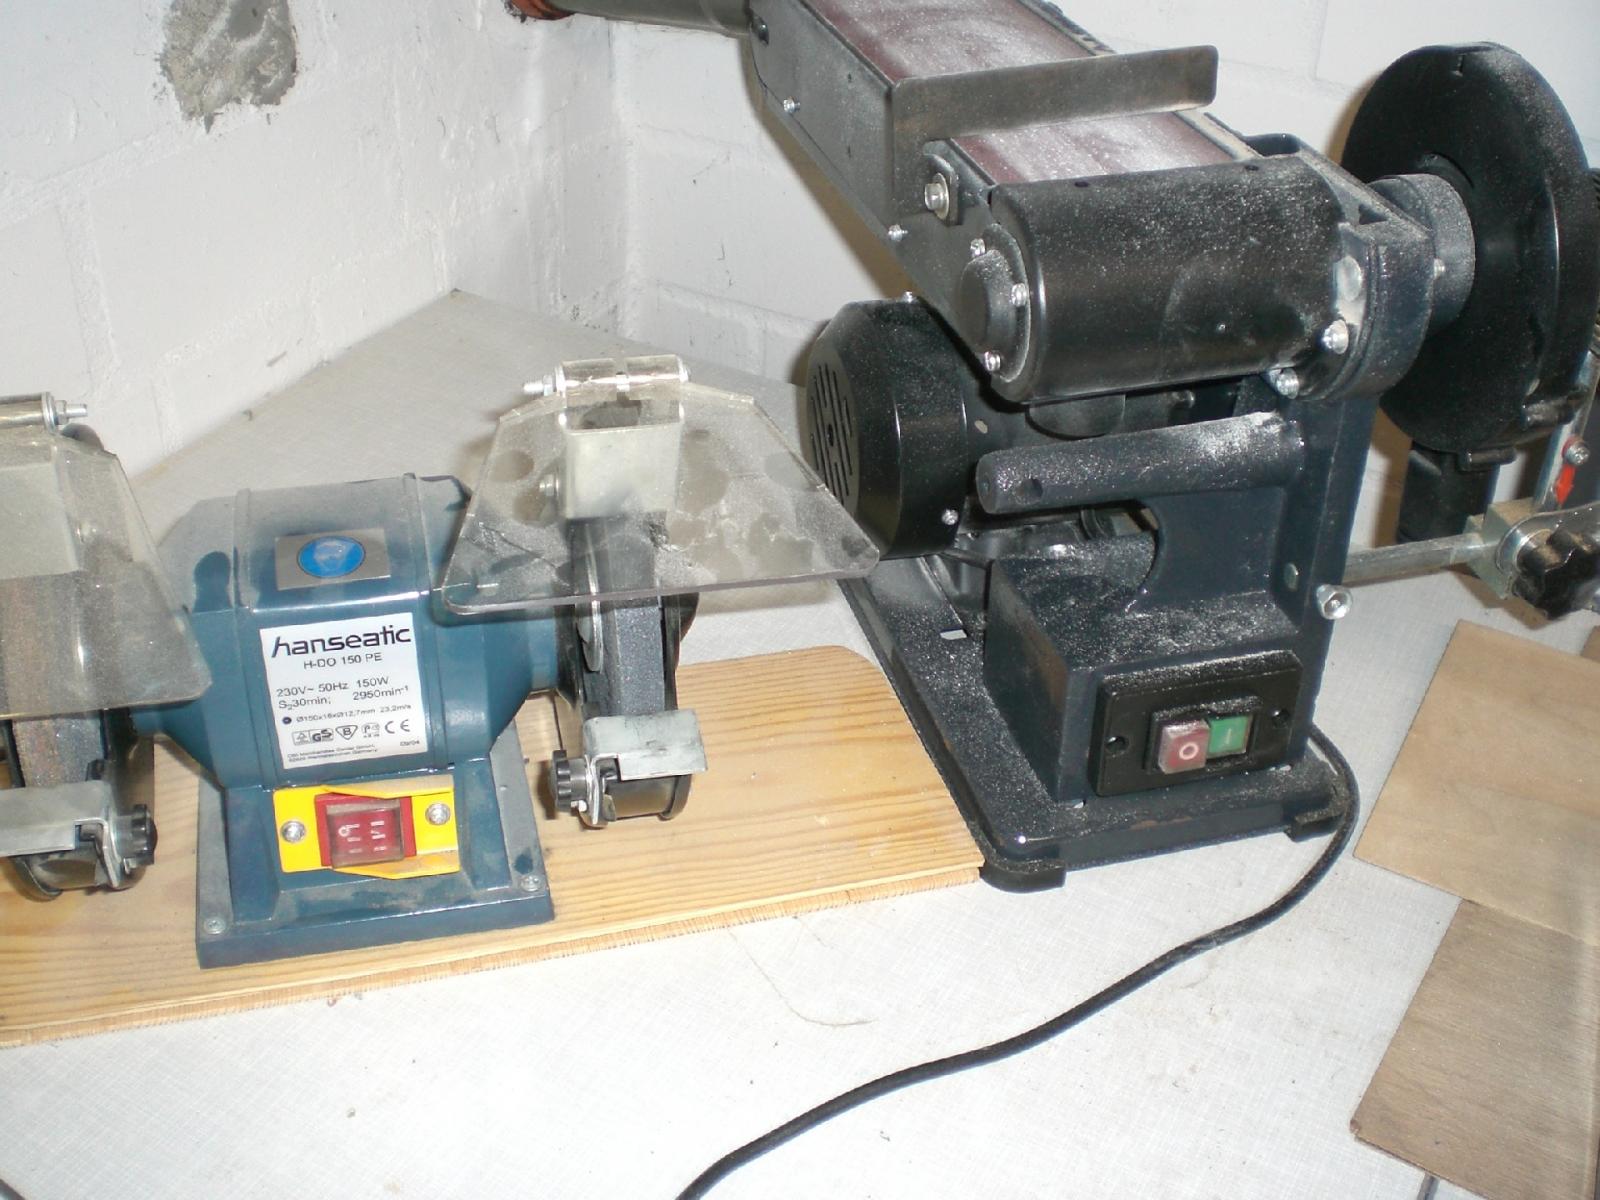
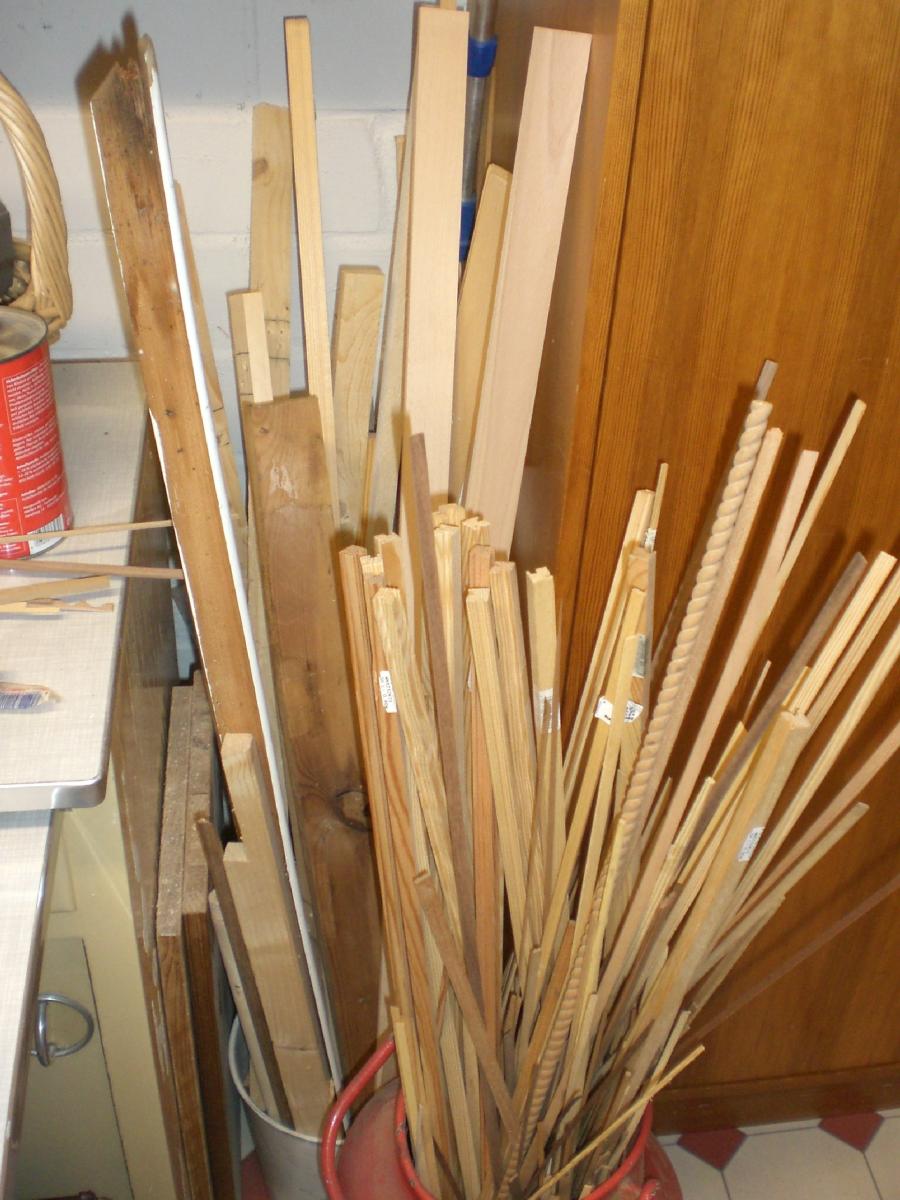
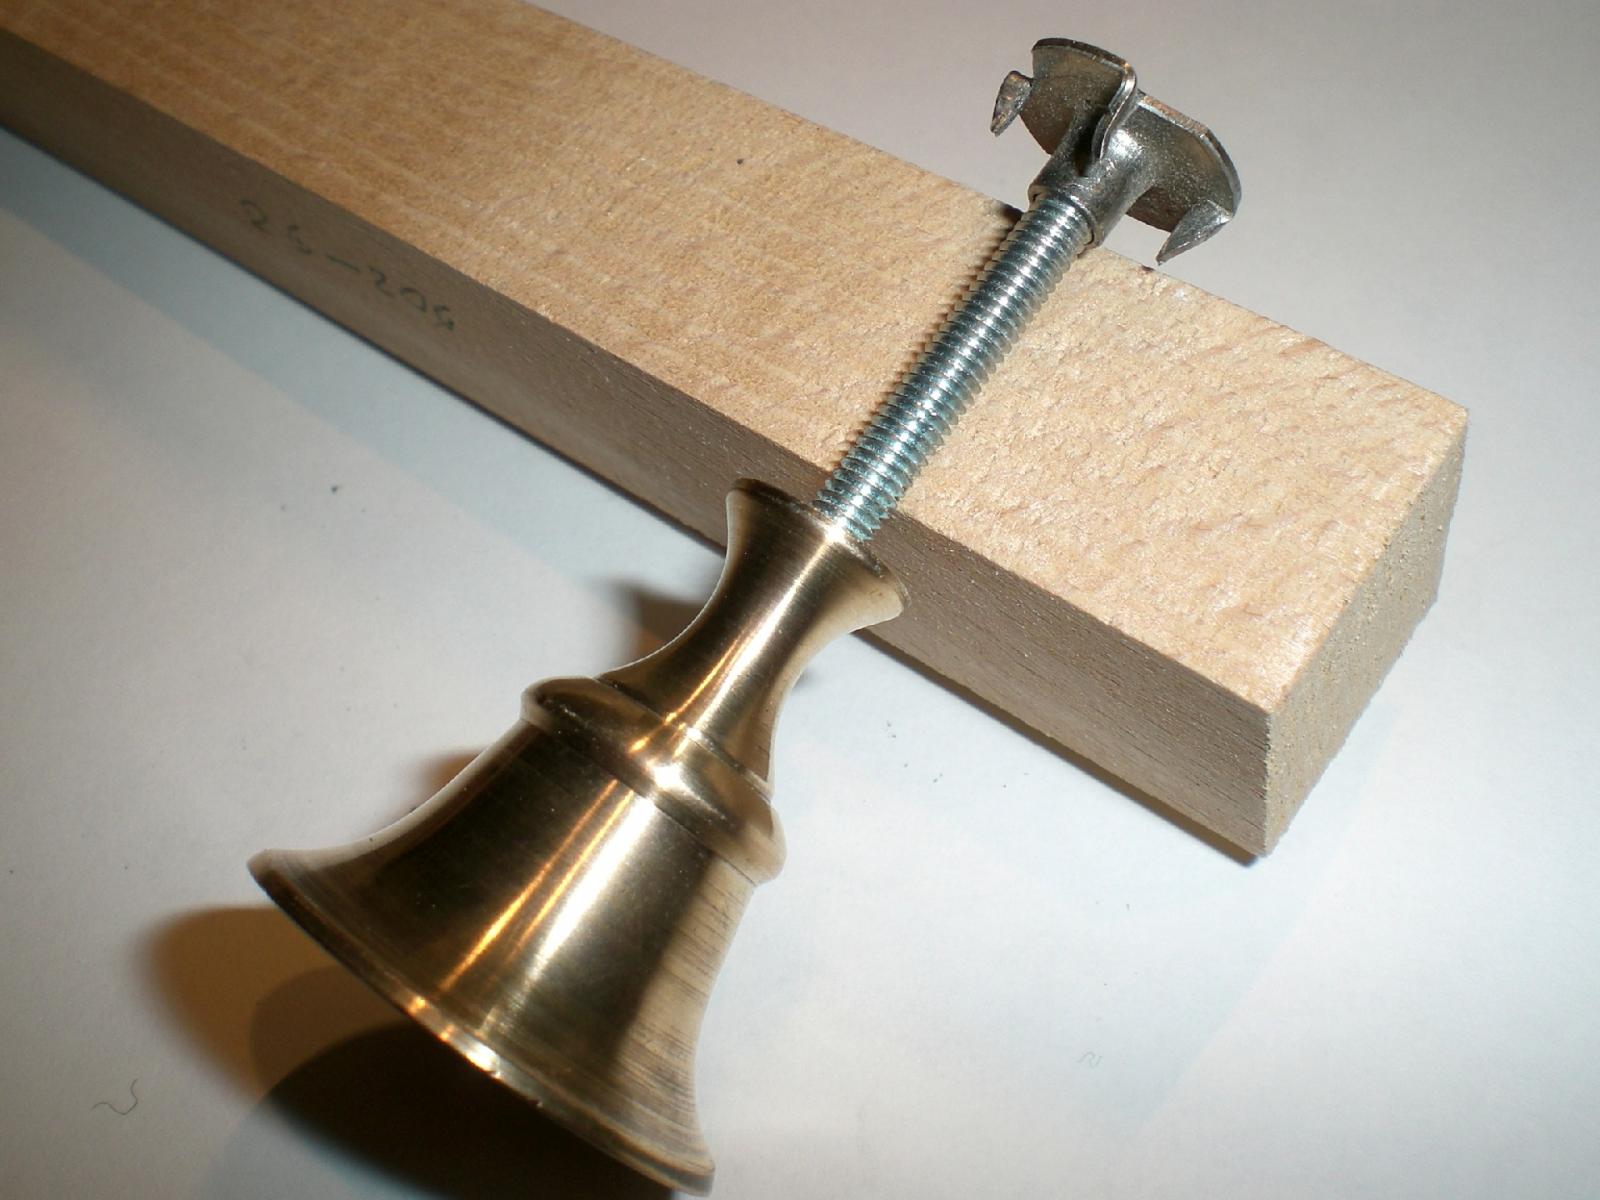
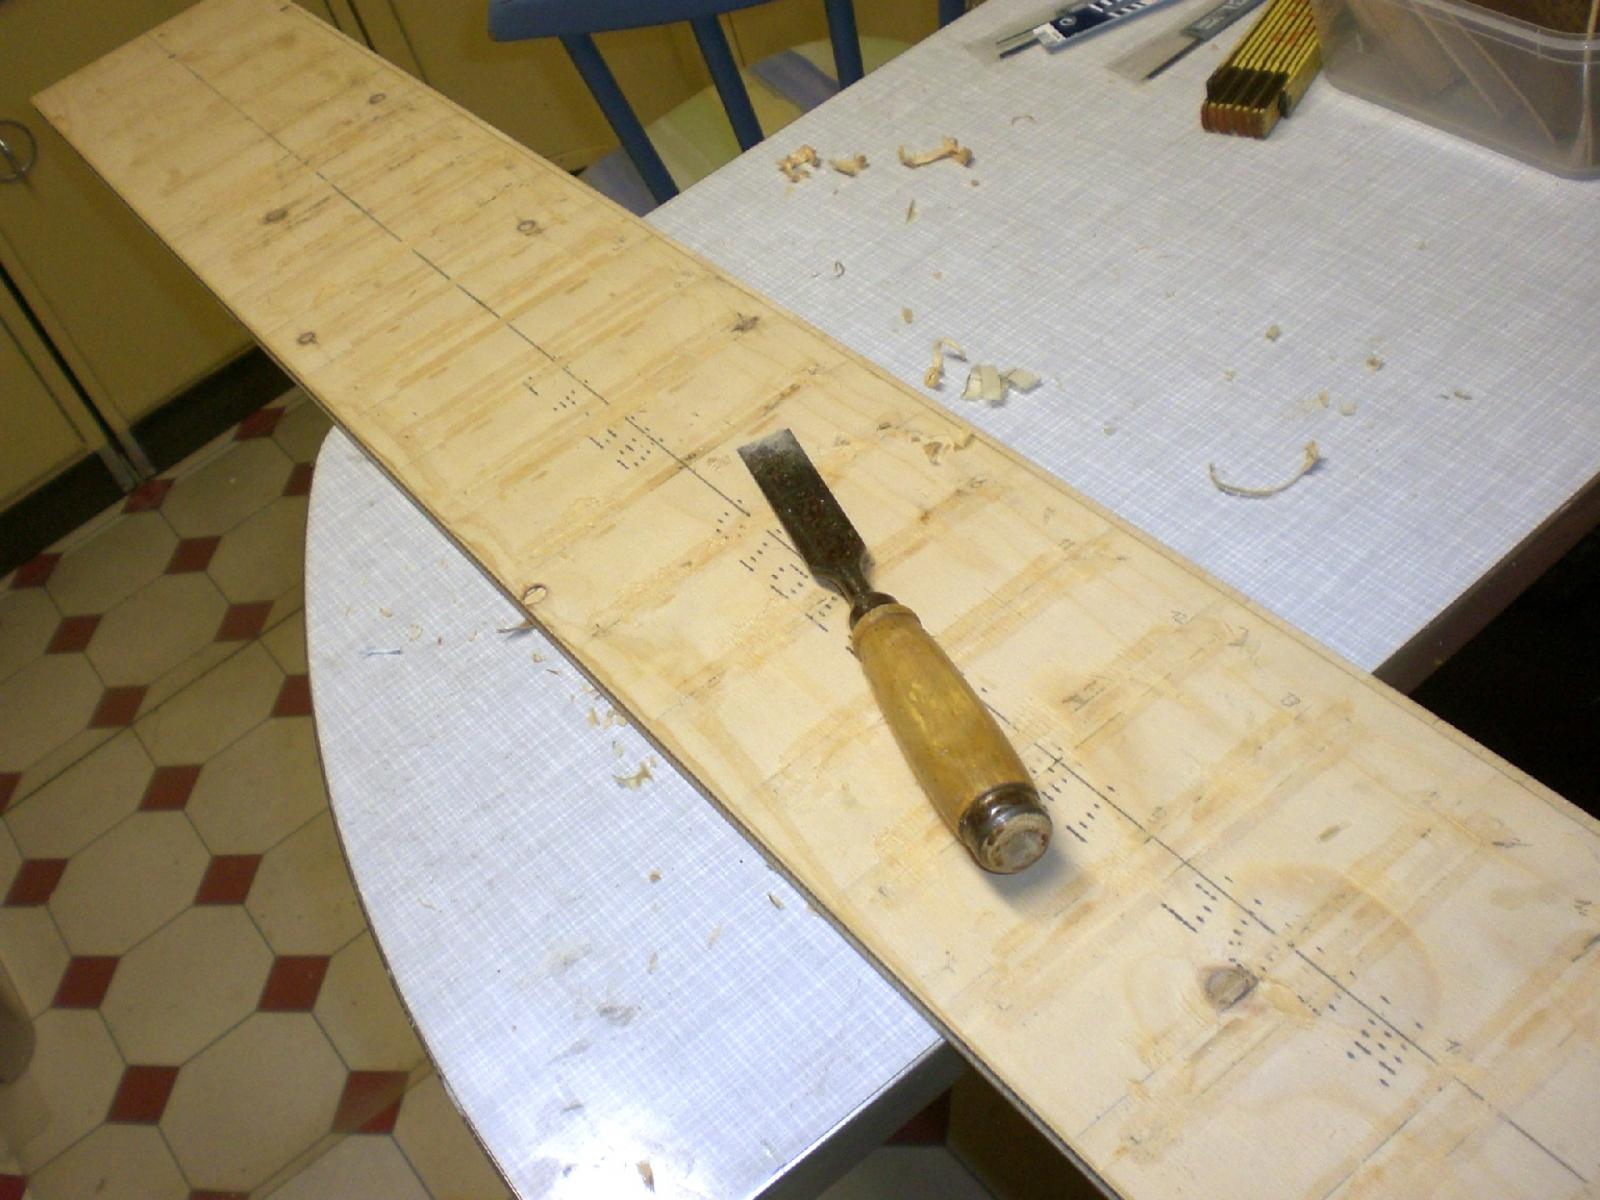
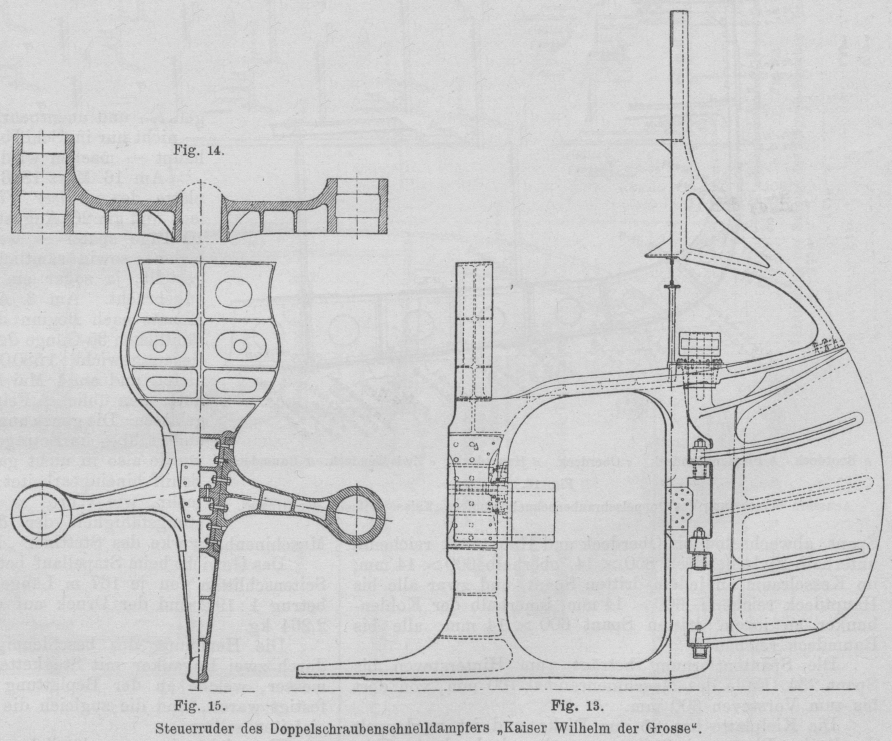
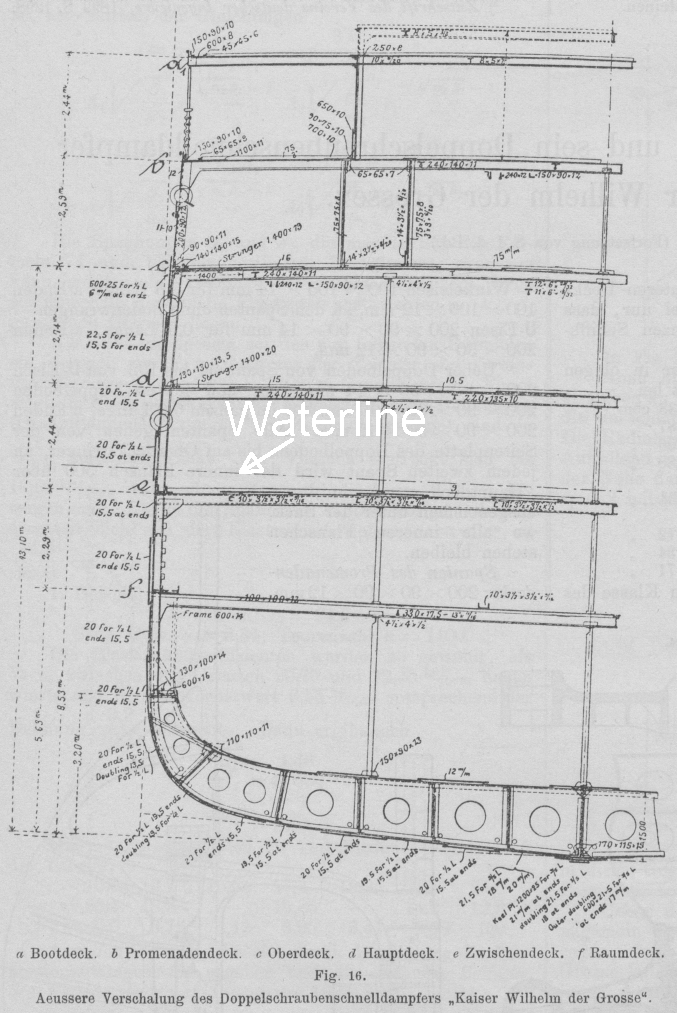
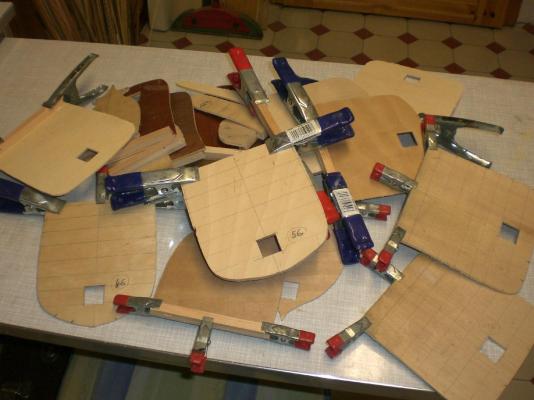
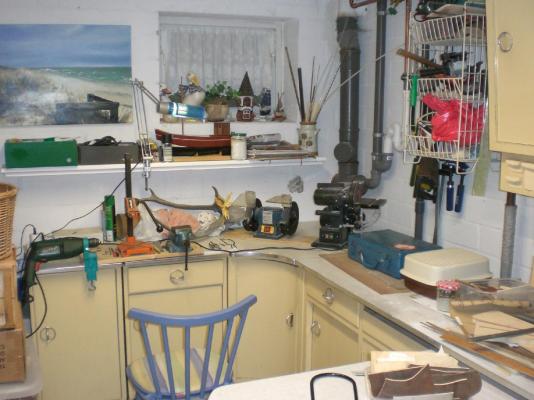
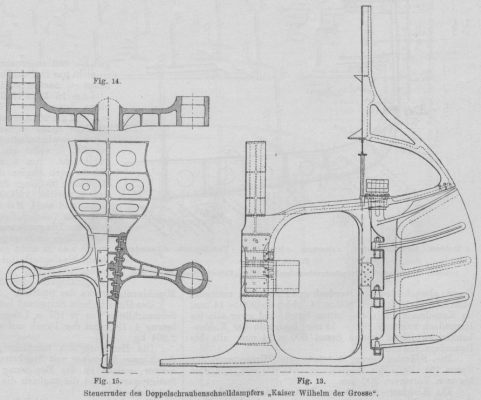
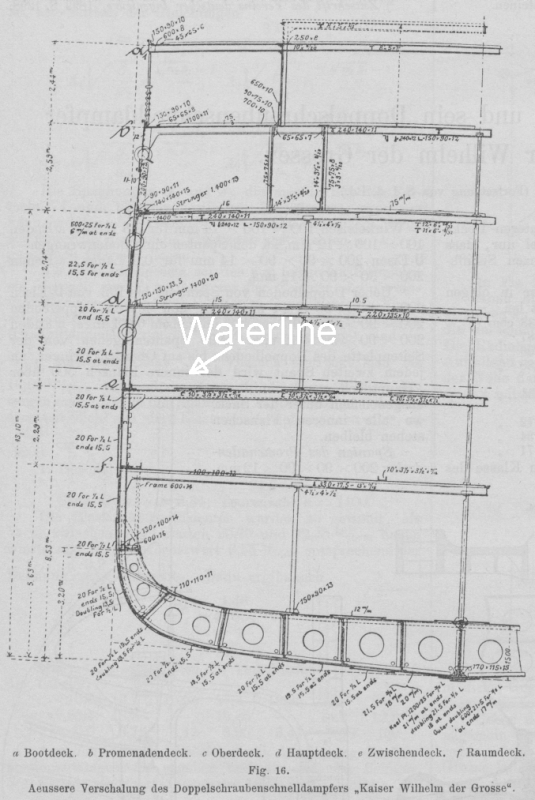
Build log part 3 Whilst the design work goes on, I`m looking for what material resources I still have laying around that can be used without buying new.... There are still 3 of those brass candle holders that will give nice pedestals for the model`s stand, they would be conform with the stands for my "Gorch Fock" and "Pamir", and perhaps the one or other odd wooden strips from the resources bin can be used within the hull making......The base plate for setting up the frames has already been prepared and smoothend to take the third ship built on it (my shipyard slipway) Although fingers are itching to get the new hull under steam, there is the strong desire to complete my "HMS Pegasus" within due time, she is looking at me sadly all the time need to spread out (just for a moment, otherwise I`ll be in for trouble) in the admiral`s washing an ironing kitchen taken partionaly from historic documents from the web... will probably do the rudder heel and the window out cut from brass. The section also shows the stagered lengths of the propshaft bearing supports here the three left over brass candle holders, ( the threads on top will be cut off, the center drilled through) fit M4 spindle and a "knock in" wood nut for anchoring the spindle in the ships reinforcement backbone, (20mm beech sqarebar) here is my humble hoizontal "latheing" and vertical drilling station I have two power machines, a grinding device for sharpening tools, and a multi belt/disc grinder my wood bin, with the "leftovers" this little room in our home basement I have occupied for the "rough" work, fortunately I have a second larger room for the more "clean" modeling This is the base board I shall use for the new frame set up. The board where it is laying on, can be swiveled back 90° to be out of the way. The hight of this swivel-board is lower that the surrounding ones and has just the right hight for working putting the sewing machine on (when sail sewing) Nils


- 2,625 replies
-
- 24
-
-
- kaiser wilhelm der grosse
- passenger steamer
- (and 1 more)
-
Many thanks to Piet, John and Mick, and to all the "likes"...... Piet, I remember we communicated about the "Musi", that will be very nice smaller coastal freighter, hopefuly you`ll get to starting it some day... John, correct, and the direction of rotation...., I would`nt mind putting them on the wrong side if I were only so far already (smile) Mick, yes I saw These ceramic hole-plates already and might be investing in one, seems to have much benefits when multiple parts soldering... Nils
- 2,625 replies
-
- 2
-
-
- kaiser wilhelm der grosse
- passenger steamer
- (and 1 more)
-
Thanks Mick, It realy was tricky with the soldering, with the second prop it hapened once (only payed a second less attention to the heatflow than I should have.... per gas tourch) and all 4 blades dropped from the hub, as I was soldering on the last one, causing a delay and keeping cool to get everthing set up for a new try again Nils
- 2,625 replies
-
- 4
-
-
- kaiser wilhelm der grosse
- passenger steamer
- (and 1 more)
-
Thank you for your words Peter, I`m very happy to share this with others and all who ever likes to stay tuned to this log will go through ups and downs with me, as the build sequences will have to be prepared as the minimum for the next stage requirements, and as they come, in lack of neigther a building instruction nor a finished building plan. In the moment I`m confedent that I`ll stand it through Nils
- 2,625 replies
-
- 3
-
-
- kaiser wilhelm der grosse
- passenger steamer
- (and 1 more)
-
Popeye, thanks for your comment... I have now smoothend down my shipyard building base, (my Little slipway) that has already been used for frames Setup on "Pamir" and "Heinrich Kaiser" hull , its just Long enough for KWdG as well. When all the self drawn Frames set up in well straking alignment way without much fairing of the contours and the stringers fit into the foreseen notches that will be another importent sequence in the hull making. I made good experience with a strong "spine" fitted above the keel, and due to the models length I`ll do this here as well Nils
- 2,625 replies
-
- 3
-
-
- kaiser wilhelm der grosse
- passenger steamer
- (and 1 more)
-
Pete, thank you for your nice comment Nils
-
Thank you Michael, was only a small sequence for the start, but very important for me that it worked out fine... Nils
- 2,625 replies
-
- 1
-
-
- kaiser wilhelm der grosse
- passenger steamer
- (and 1 more)