Mirabell61
-
Posts
7,418 -
Joined
-
Last visited
Content Type
Profiles
Forums
Gallery
Events
Everything posted by Mirabell61
-
 Hi Mmdd, lovely Pictures of a super built model. This is very tempting and sure is a great help, many thanks. Would you have enough pics to start a real Build log, this model is worth its own log here at MSW ? Absolute Museum Quality. How did you do the stunning golden Stern decoration ? that Looks great ! Nils
- 2,625 replies
-
- 2
-

-
- kaiser wilhelm der grosse
- passenger steamer
- (and 1 more)
-
Good work Per, hull planking, deck- and deckbeam timbers and gratings, all looks very neat, wish you further good success with the HMS Fly Nils
-
Thank you very much Bob, I`ll try to get everthing smooth and rounded, without applying too much of filler material. If I knock gently to the relatively thin outside skin it is as if I were building the resonanz corpus of a violin or so... (light, stiff, tight, hard). Expect the whole hull to be a lightweight construct when I take it from the "slip board". The hull must be smooth enough afterwards to enable an optimal metal plating Nils
- 2,625 replies
-
- 4
-
-
- kaiser wilhelm der grosse
- passenger steamer
- (and 1 more)
-
Peter, thank you very much for explaining your hull building method for Titanic and KWdG. I also had a good look at your Hohenzollern hull, and fully understand the method. You have created a shallow but hollow space between inner and outer strip-planking, and all is held well together by the 2nd layer of planking, which also smooths out possible slight curvature deviations of the outer skin. Well done ! It is a smart method to save weight (like the prefabricated walls of wooden Homes). The wood -layer shaping of the stern portions, like your pic shows, is self explaining Nils
- 2,625 replies
-
- 7
-
-
- kaiser wilhelm der grosse
- passenger steamer
- (and 1 more)
-
Many thanks - S.Coleman - Nigel - Pete, and all the "likes".... S. Coleman, yes, it`s a bit tricky, but I think it will look quite good afterwards... Nigel, I`m thinking of applying a minimum bit of polyester filler, where the wooden skin may become a little thin during fairing. Larry`s suggestion to use a spoke shave is still in my mind, but not for the narrow curves... Pete, thanks for your nice comment... Nils
- 2,625 replies
-
- 4
-
-
- kaiser wilhelm der grosse
- passenger steamer
- (and 1 more)
-
good work Nigel, you sure are upgrading that kit (quarter Badge) window, looks great Nils
-
Congrats Bob, that sloop looks fantastic, well done !! Nils
-
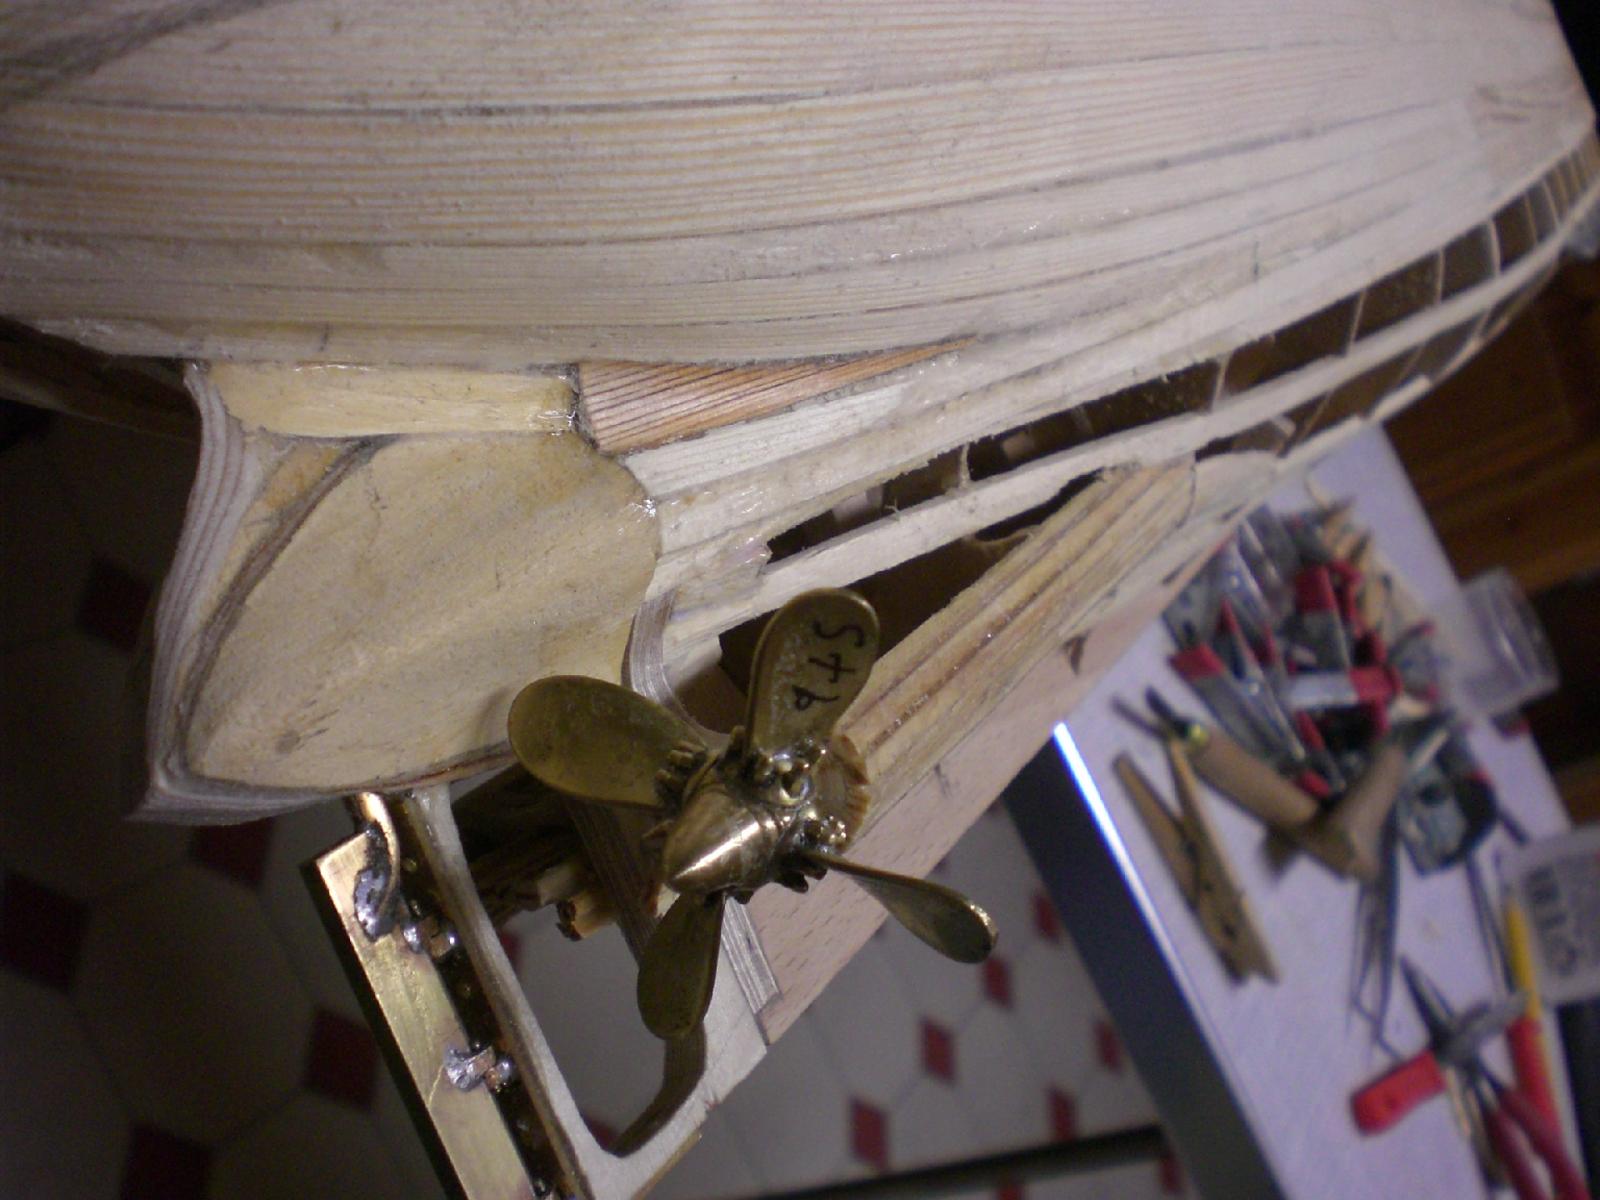
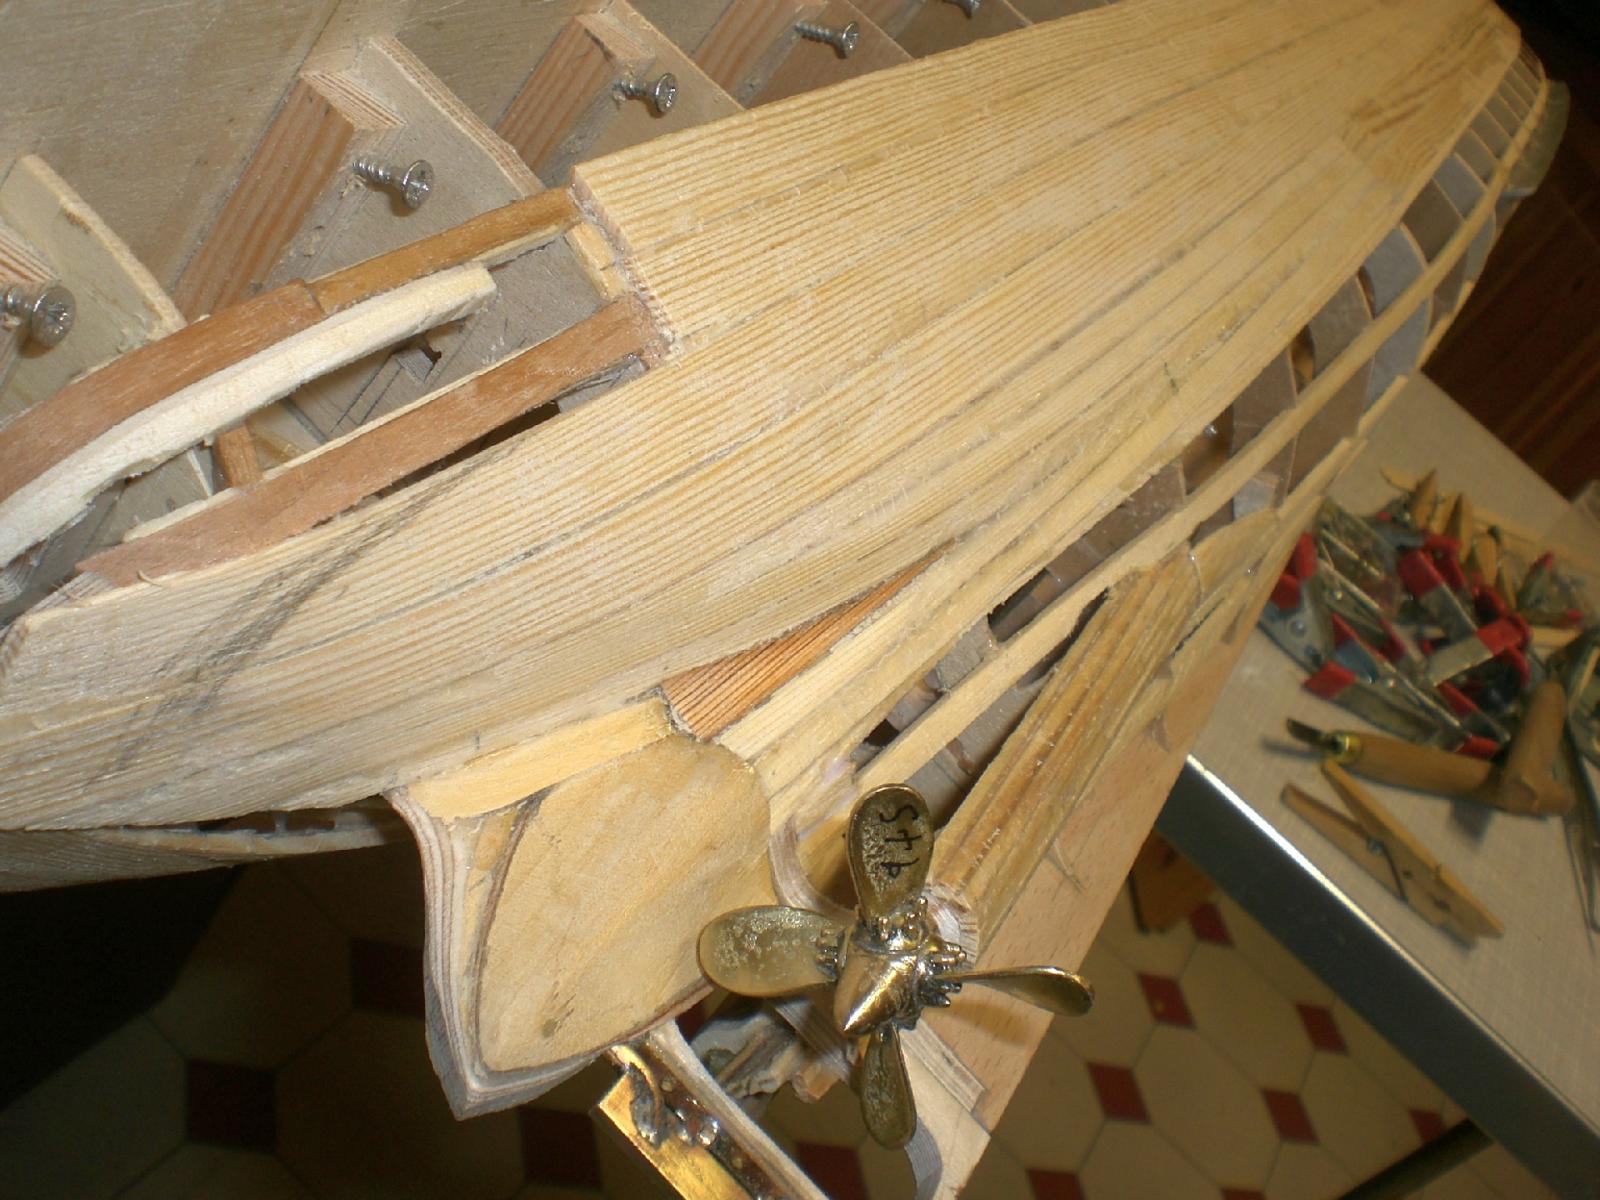
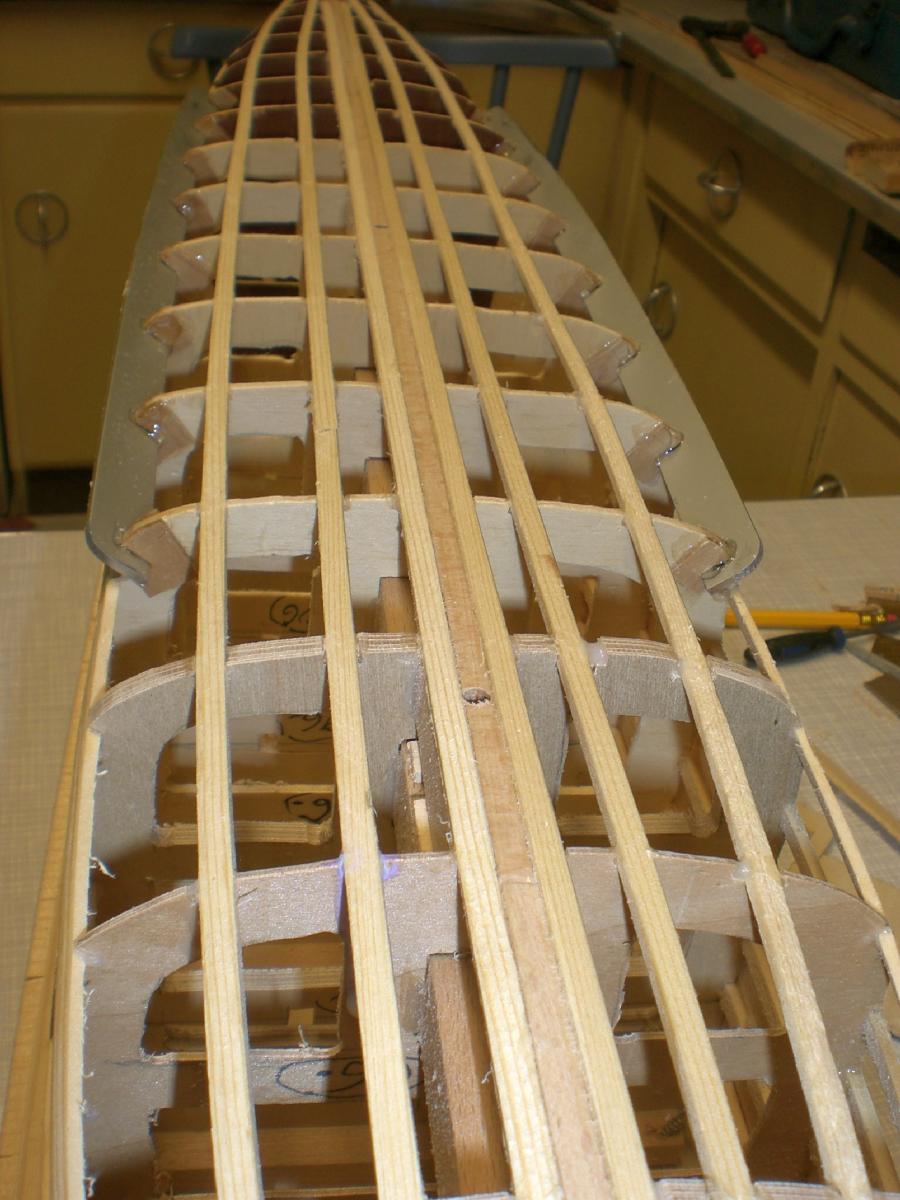
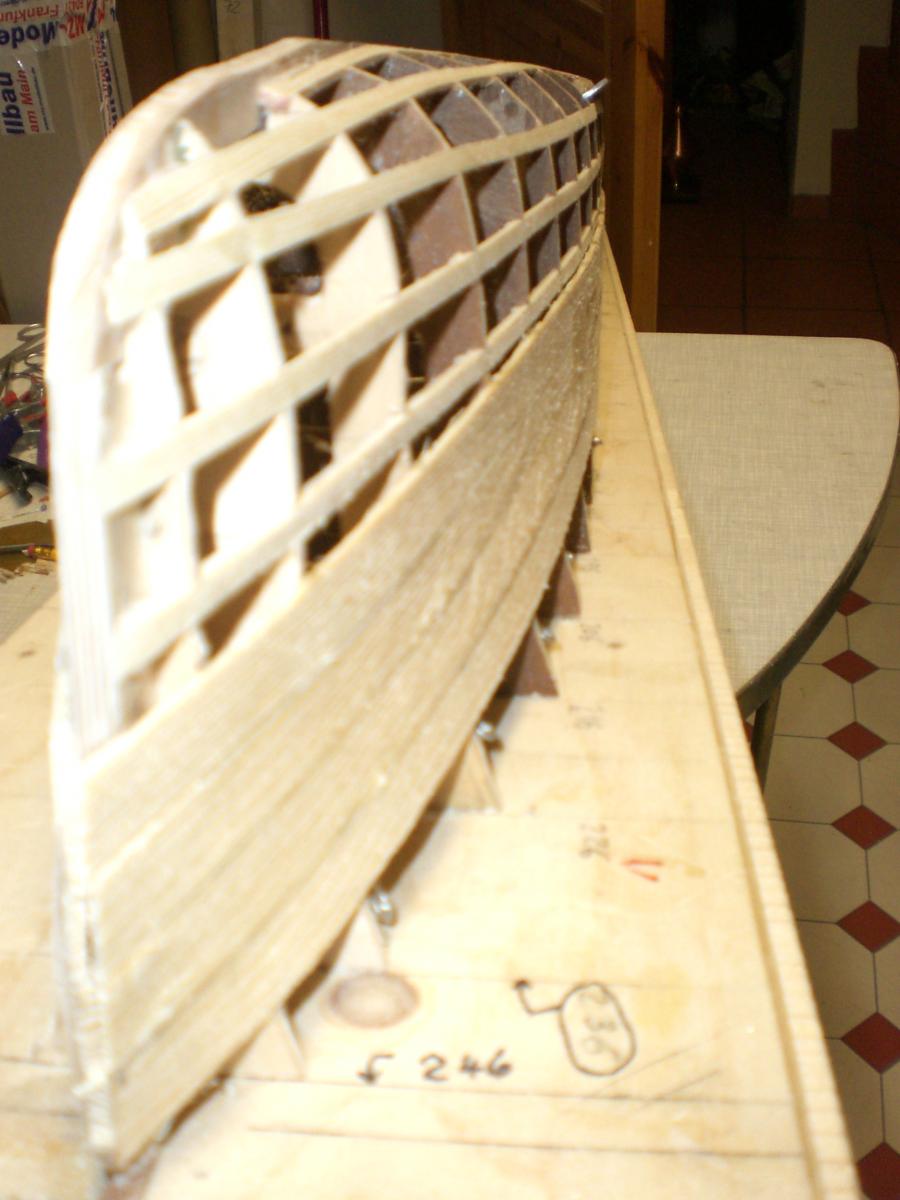
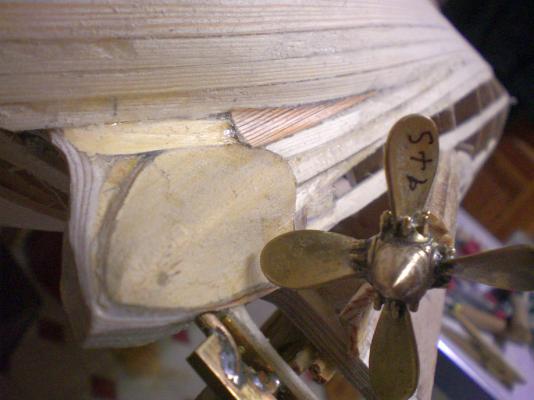
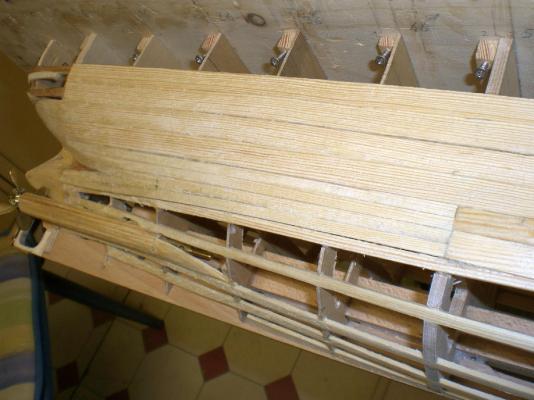
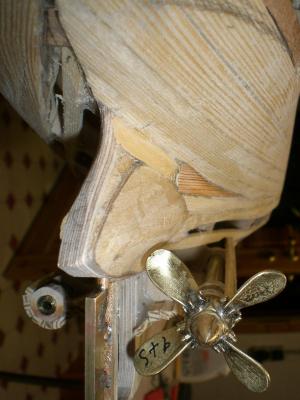
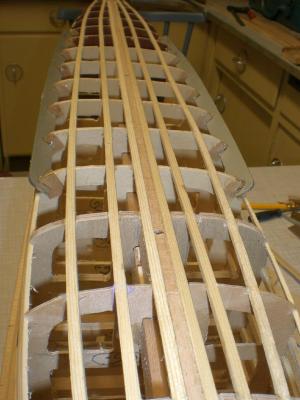
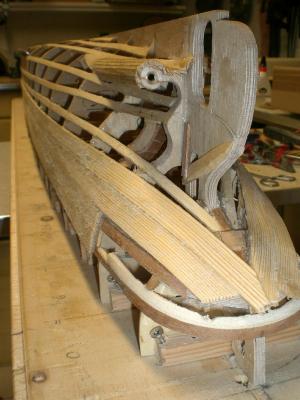
Build log part 9 slowly the streamline underwater- hull is developing as planed, after fairing it may need a little filler material here and there to get the surface and the spheric areas for smooth transitions...... Nils The last attached planks are only 5 mm wide. the next horizontal planks will have to match with the curvature of the propshaft housings here two steelers are fitted, whereby the darker colored wood one is spheric shaped. The small wood piece obove the tailcone half is a bit of filler wood the four 5 mm planks- portion here matches with the 13mm + 8 mm wide planks onwards to the bow The upper stern area will be timmed for vertical planking from the aft sheer downwards Starboard side so far OK, now the port side is brought to the same status the lines can now be seen clearly, and still the whole hull is safely mounted to the "slipway" board, I will take it off when the planking is completed


- 2,625 replies
-
- 25
-
-
- kaiser wilhelm der grosse
- passenger steamer
- (and 1 more)
-
beautiful Build, very nice work on planking and oars as well as the Fitting out Details.. Nils
-
Hi Larry, thanks for your explaination, I guess I`ll just have to try it out to get the feeling for the spokeshave.... Nils
- 2,625 replies
-
- 2
-
-
- kaiser wilhelm der grosse
- passenger steamer
- (and 1 more)
-
John and Bob, thank you very much for your kind appreciations... For the problematic area I`m using narrower planks, (before final shaping and trimming) to enable the curves better Nils

- 2,625 replies
-
- 19
-
-
- kaiser wilhelm der grosse
- passenger steamer
- (and 1 more)
-
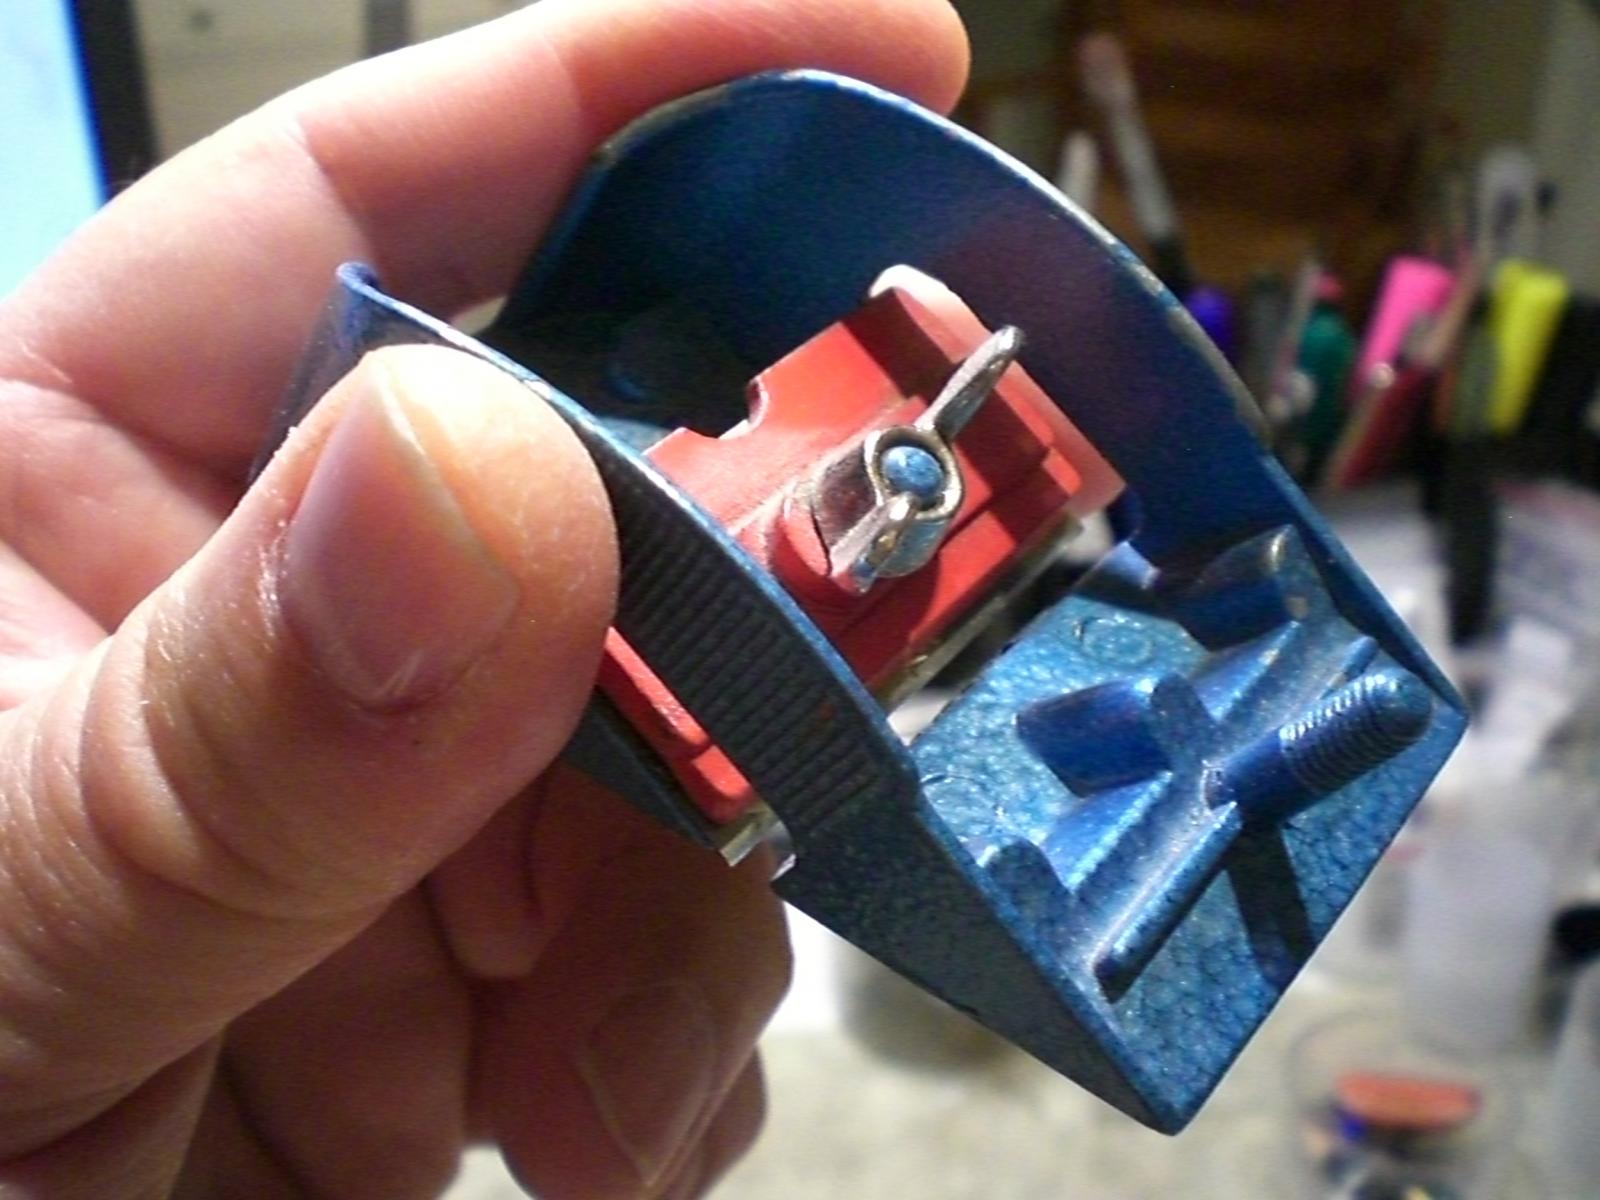
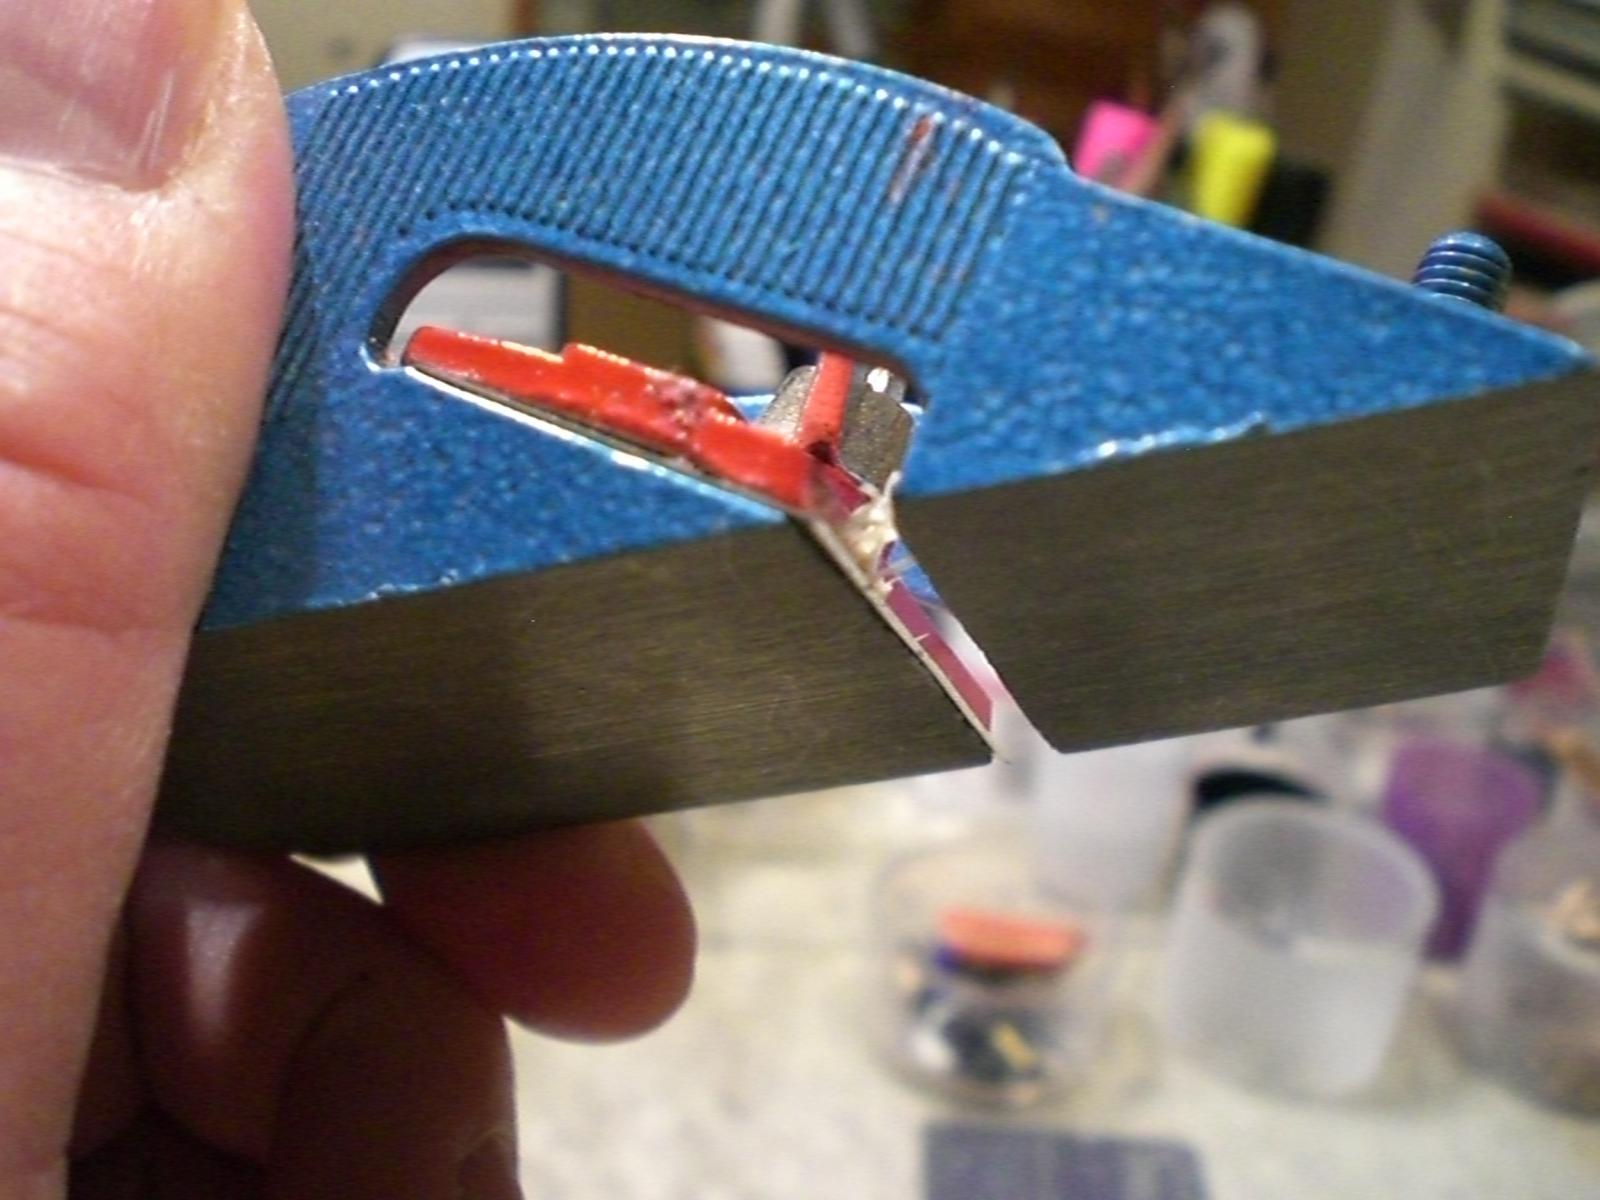
Hi Larry, I meanwhile had a look at the spokeshave function on U-tube. Trust it acts basicly as my little balsa hand plane does. I used this handplane for fairing the pine-planked hull of my "Heinrich Kaiser" steamship. Thanks again for your suggestion. There is a minor handicap when using either spokeshave or plane, its the possible opposite grain run of the wooden planks next to one another in longitudinal direction under the shaving blade. The grain run would have to be sorted to the same side before applying the planks, in order to get a pit-free surface. But I agree with you, the degree of dust in the air is terrible when sanding, it settles everywhere on everything in the room, and making curled chips on the floor can be sweeped up easily Here a pic of my balsa Plane, (for use of razor blades) I use for normal wood just as well..... Nils


- 2,625 replies
-
- 13
-
-
- kaiser wilhelm der grosse
- passenger steamer
- (and 1 more)
-
Boyd, lovely work, those Details are amazing and a joy to look at. I like those stairway balustrades and the Color giving, also that broken through cabin wall, providing sight to the interior with furniture in it is a wonderful idea of yours well done Nils
-
Hi Larry, welcome to this build, you made me curious about the spoke shave technique, I`ll have to look it up first, as I`m not familiar with it, but it sounds very interesting..... Thanks for you kind input, well appreciated Nils
- 2,625 replies
-
- 2
-
-
- kaiser wilhelm der grosse
- passenger steamer
- (and 1 more)
-
Hi Joe, wishing you a most enjoyable build with this famous "whaling mothership", shall watch this interesting log.... Nils
-
Hi Jason, on page 83, (Lennarth Peterson, Rigging Period Ship Models), it shows the clue block with a loop downwards that usualy goes around the eye in the topsail lower boltrope sail corner. The topsail sheet goes upwards with a large stopperknot at the end. This stopper knot can just as well go through the clue block`s loop, so you get the connection clue / sheet when there are no sails rigged. Nils
-
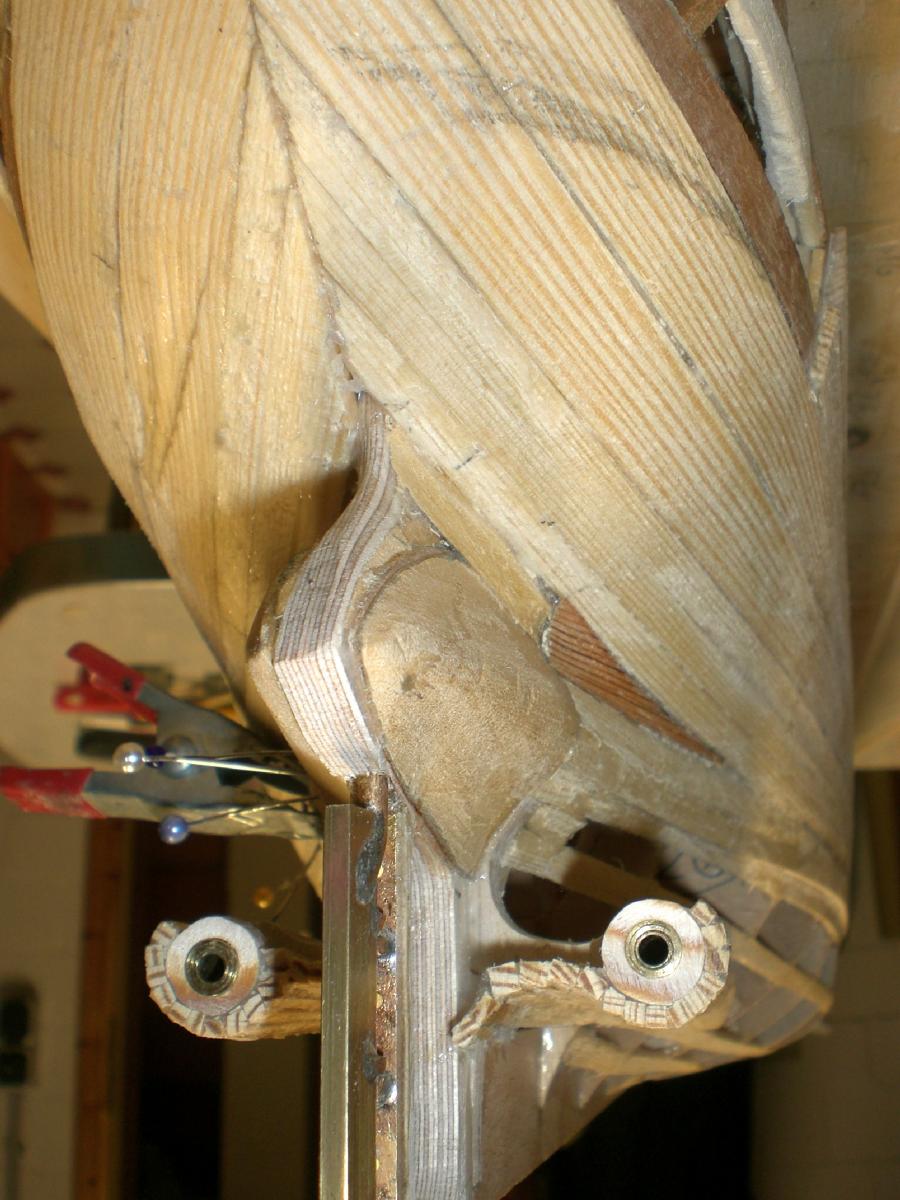
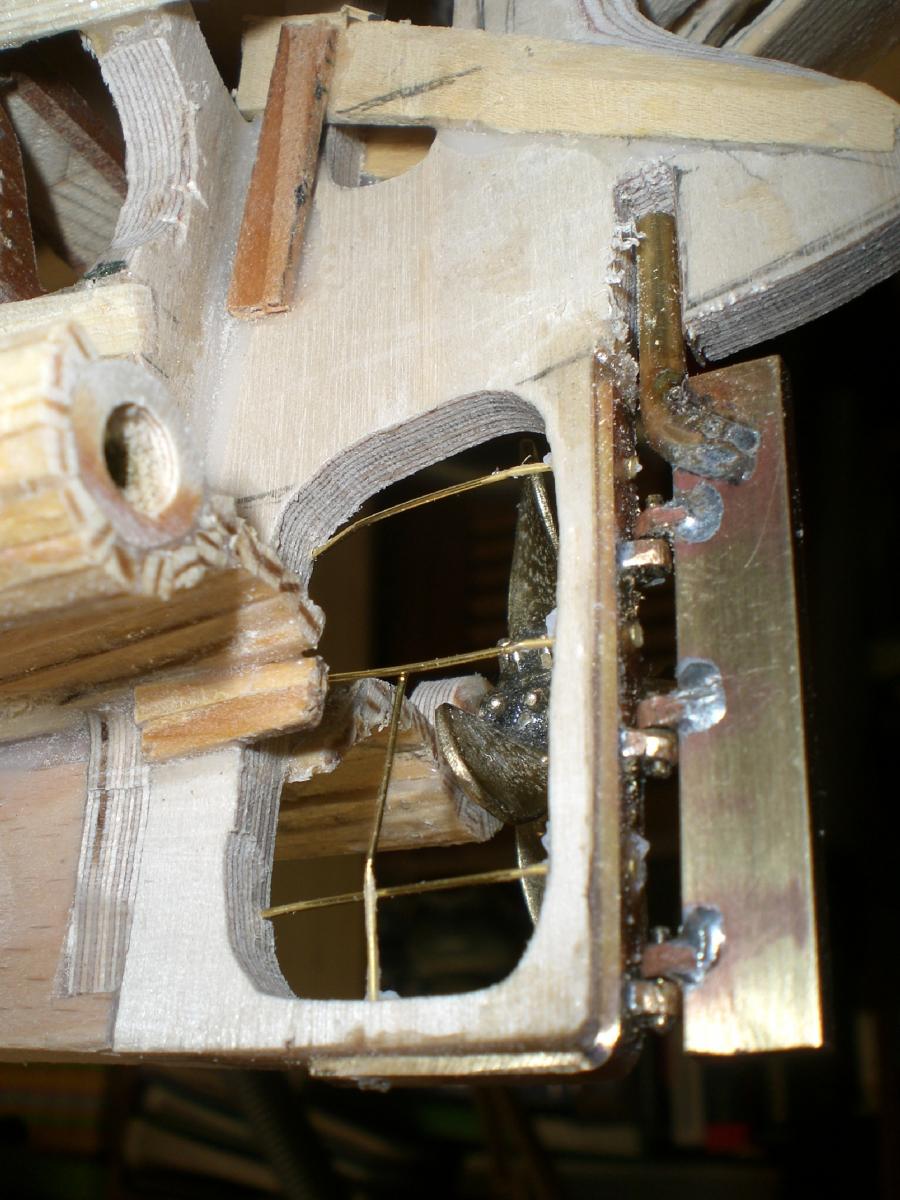
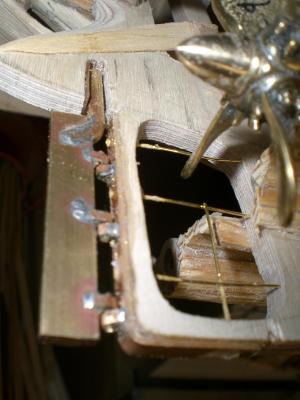
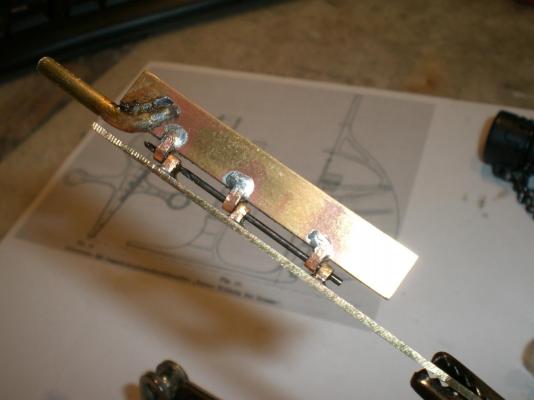
Mounting rudder to the keel heel..... Nils the brass reinforcement is glued in place with Epoxy 2 component glue, the 4 brass anchors are additionaly put on The long ends of the anchors will be clipped off inside the keel outcut

- 2,625 replies
-
- 21
-
-
- kaiser wilhelm der grosse
- passenger steamer
- (and 1 more)
-
I love those lines Keith, beautiful build, nice clean planking Job, it Looks great... Nils
-
Thank you very much - Peter - Pete - David, and all the "likes"... Peter, Thanks, I know, I`m not so happy with that Arrangement, therefore I take utmost concentration and care when operating it Pete, thanks for your remark, yes, I think the raw-hull will be done pretty fast. It will be faired and a nitro-Wood-bounder put on it, to get the Basic smooth surface for the metal plating Job later on David, I´m trying to get the hull the way it Looks like in those old dock photos Nils
- 2,625 replies
-
- 4
-
-
- kaiser wilhelm der grosse
- passenger steamer
- (and 1 more)
-
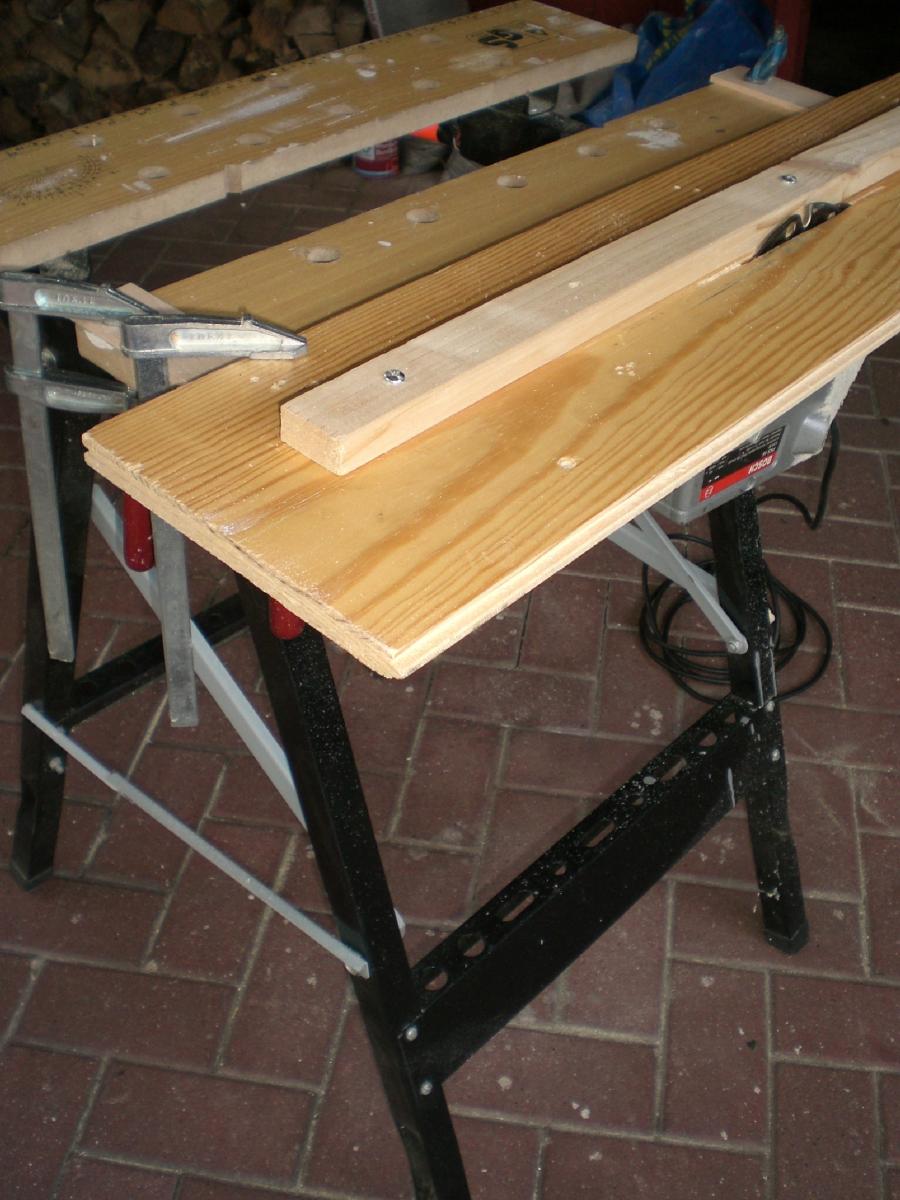
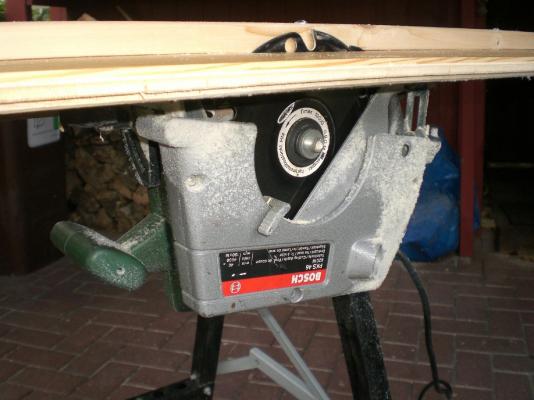
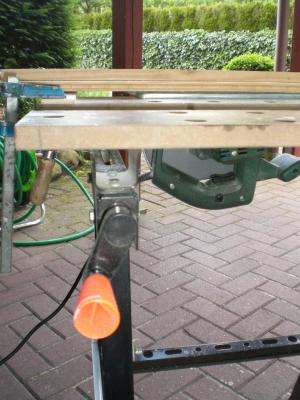
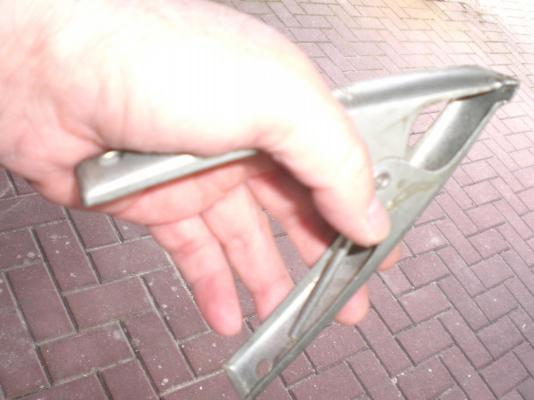
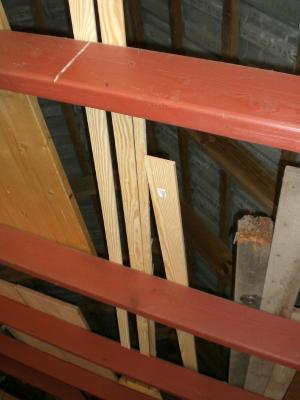
well Popeye, in that case you need some strong arguments, for saving money, and for making the planks in the dimensions you need (thickness, width, length, etc... added are some pics I shot under my carport, where I do the plank sawing now and then. The electric circular hand saw has a blade with tungsten teethtips, and I mount everthing on my mobil work bench. I`m taking in account, that the automatic shut-off is disabled when I "pull the trigger" with this big clamp-peg I put on it, when it runs. cheers, Nils the raw material for cutting the planks from are kept under my carport roof the handsaw "converted" to a table saw (mounted from underneath) The desired width of the planks is subject to the raw plank thickness chosen for cutting from to activate the trigger I have to reach under the workbench This clamp peg I put over the trigger in the saw`s handle (for safety reasons this ca`nt be recommended, utmost caution must be given during operation !! )

- 2,625 replies
-
- 11
-
-
- kaiser wilhelm der grosse
- passenger steamer
- (and 1 more)
-
thank you very much Patrick... Nils
- 2,625 replies
-
- 1
-
-
- kaiser wilhelm der grosse
- passenger steamer
- (and 1 more)
-
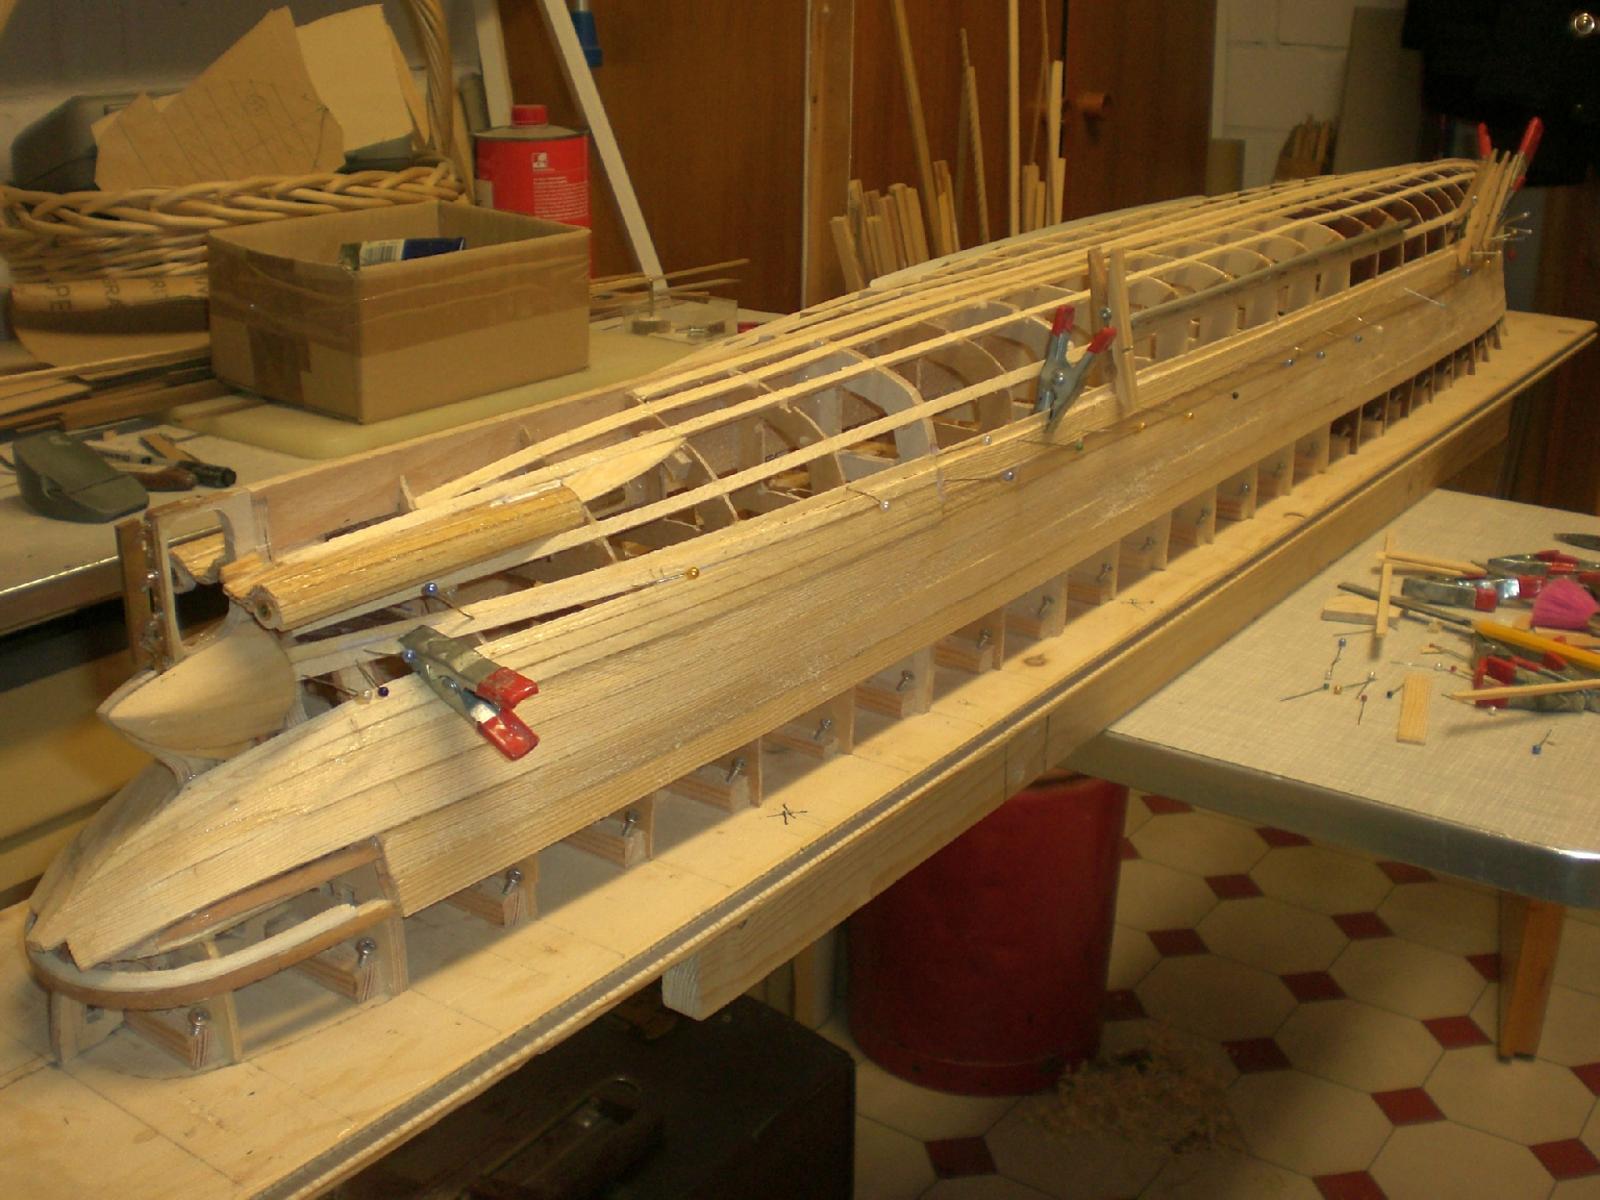
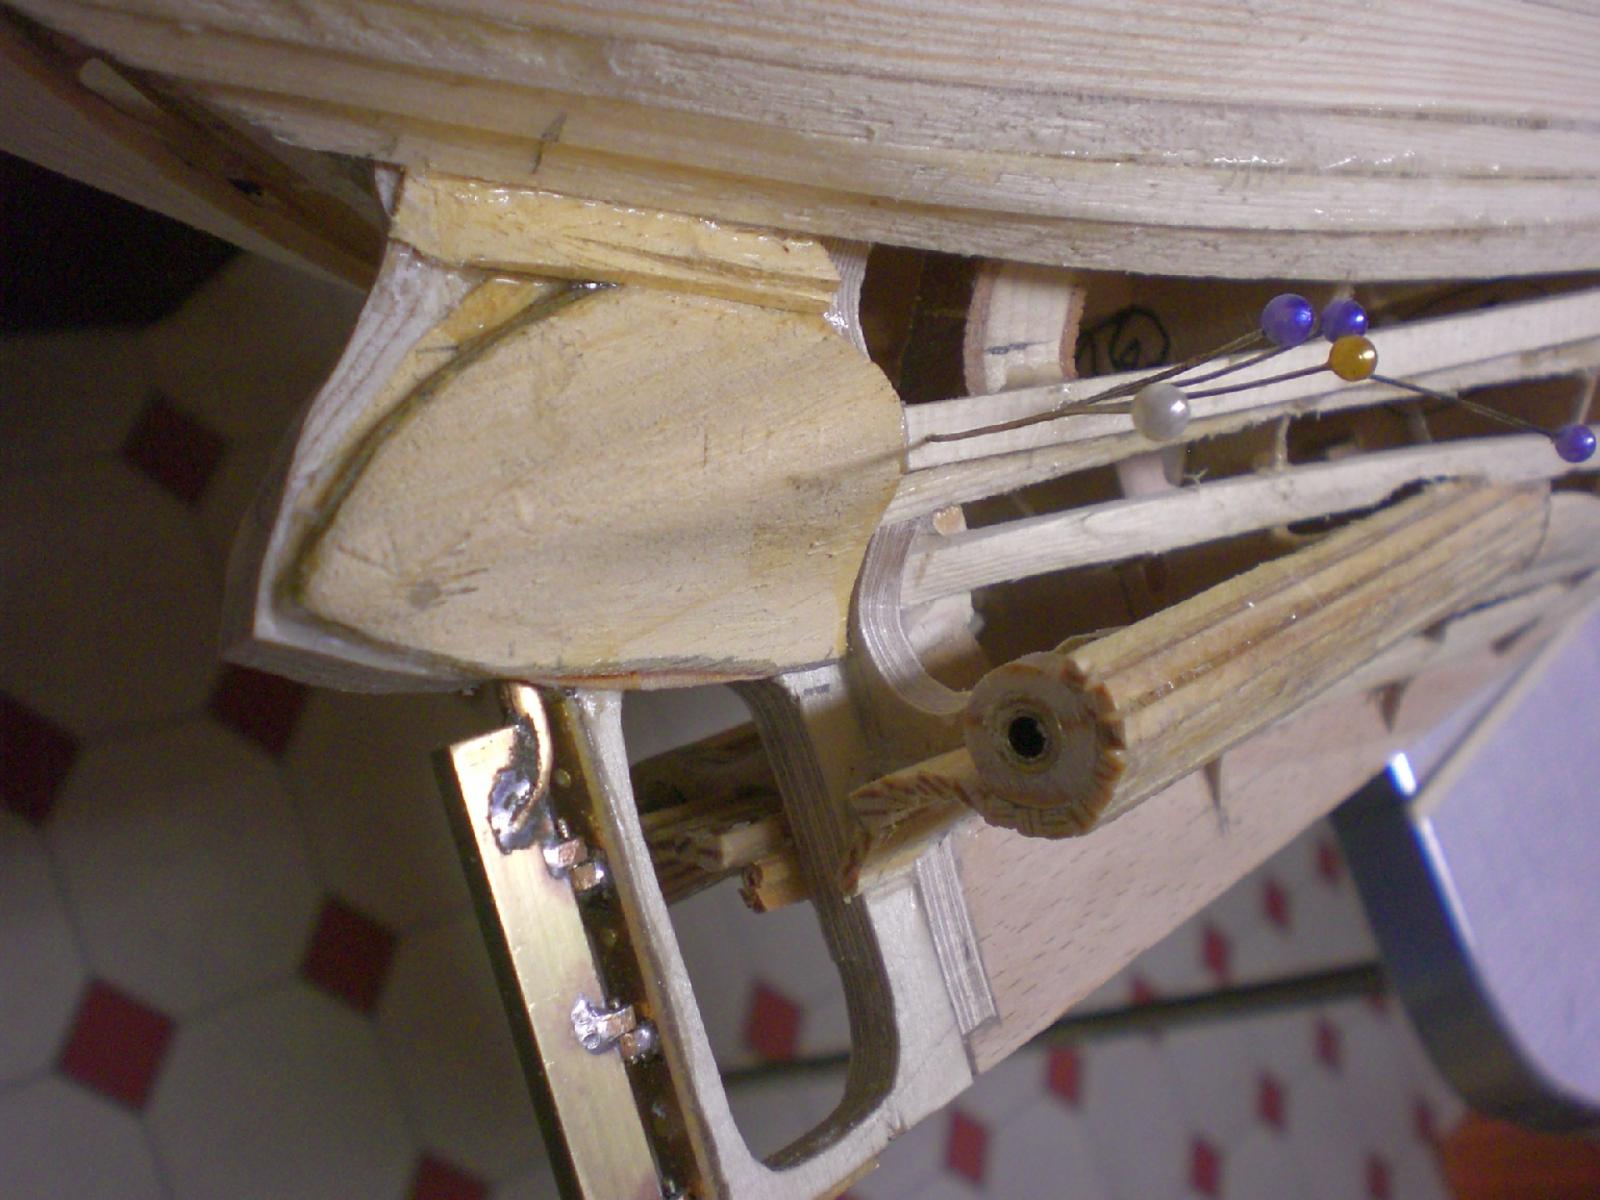
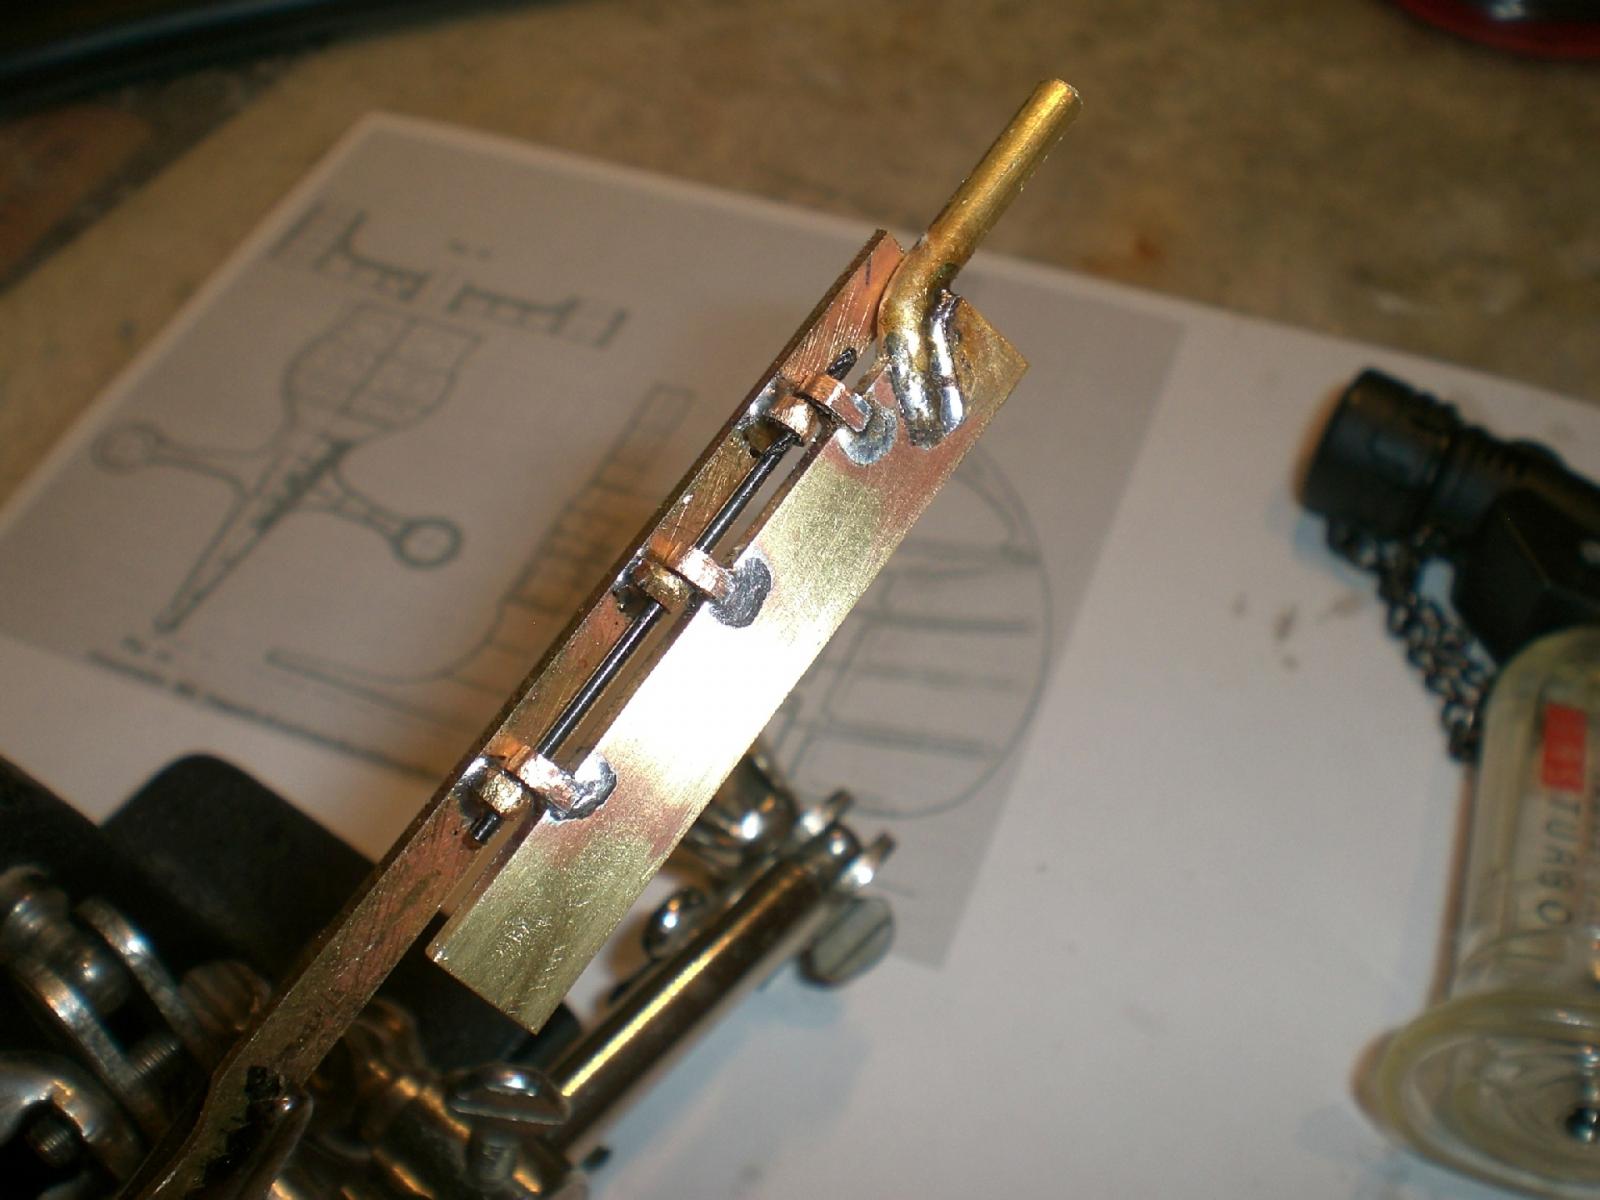
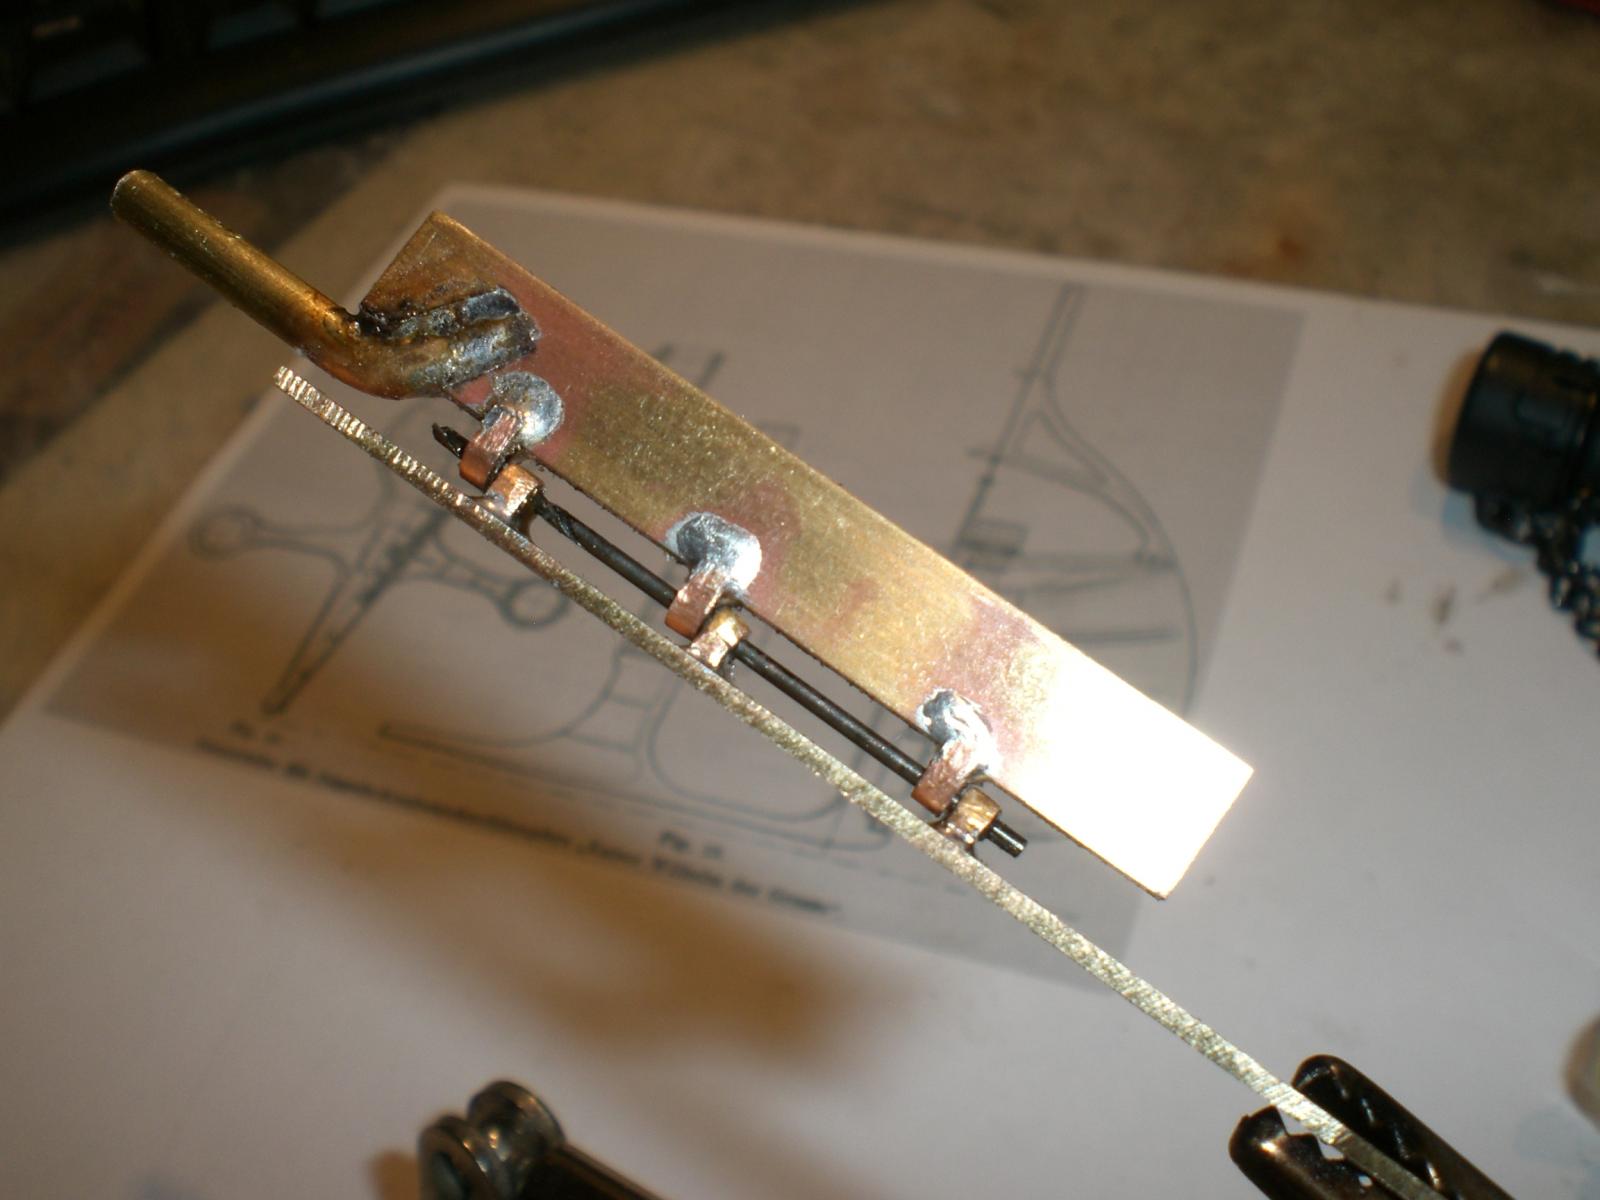
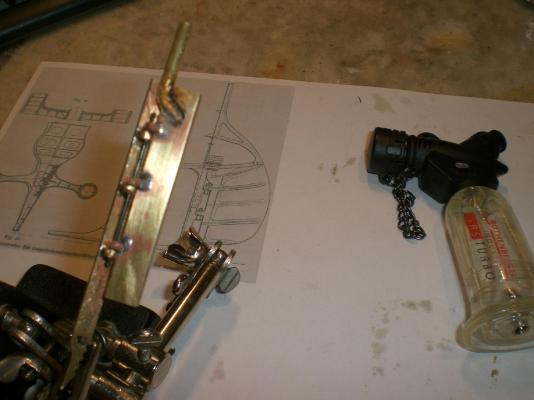
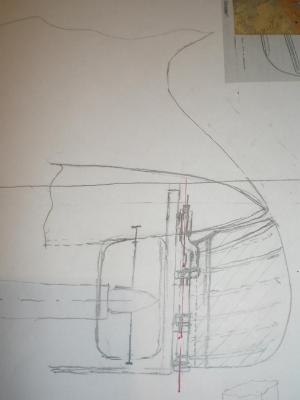
Build log part 8 starting with the geometry of the hinge mechanism of the underwater- rudder..... Nils first the obligatory handscetch.... the skeleton of the rudder bears the frame and will be sidewise cladded with brass sheet the other part (flat post) goes to the sternpost. Here I pushed a 1 mm drill in as preliminary pivot-pin The permanent fixed bilgekeels are mounted four 13 mm planks are put on each side will fit the raw, hinged rudder skeleton in place next, and then mount the tail cone filler pieces


- 2,625 replies
-
- 21
-
-
- kaiser wilhelm der grosse
- passenger steamer
- (and 1 more)
-
beautiful cutter for your "Vulture" Danny, very well done, and completed in a Swift pace that is realy amazing, a lovely litte boat.... Nils