DONATION DRIVE - SUPPORT MSW - DO YOUR PART TO KEEP THIS GREAT FORUM GOING!
×


Mirabell61
-
Posts
7,410 -
Joined
-
Last visited
Content Type
Profiles
Forums
Gallery
Events
Everything posted by Mirabell61
-
 Hi Erik beautifull work, I very much admire your build and was also very impressed of the Feature with the treenails (alone the amount of those to be set !!) When Thinking about this Point on the 1:64 scaled Pegasus I am currenty doing, I did some Trials with hollow injection Needles mounted to soldering tool and carefully burn-sinking the needle into the appropriate woodplank nail places, but had to give up this after many Trials Nils
 -
Hi Bob ...top aces work you are delivering, when going through this I decided to restart your buildlog sighting more relaxed from the first excitement and just relax and enjoy and study with great pleasure a top Champions build. Bob, thank you so much for sharing your buildlog with us Nils
- 81 replies
-
- 1
-

-
- kingfisher
- lauck street shipyard
- (and 1 more)
-
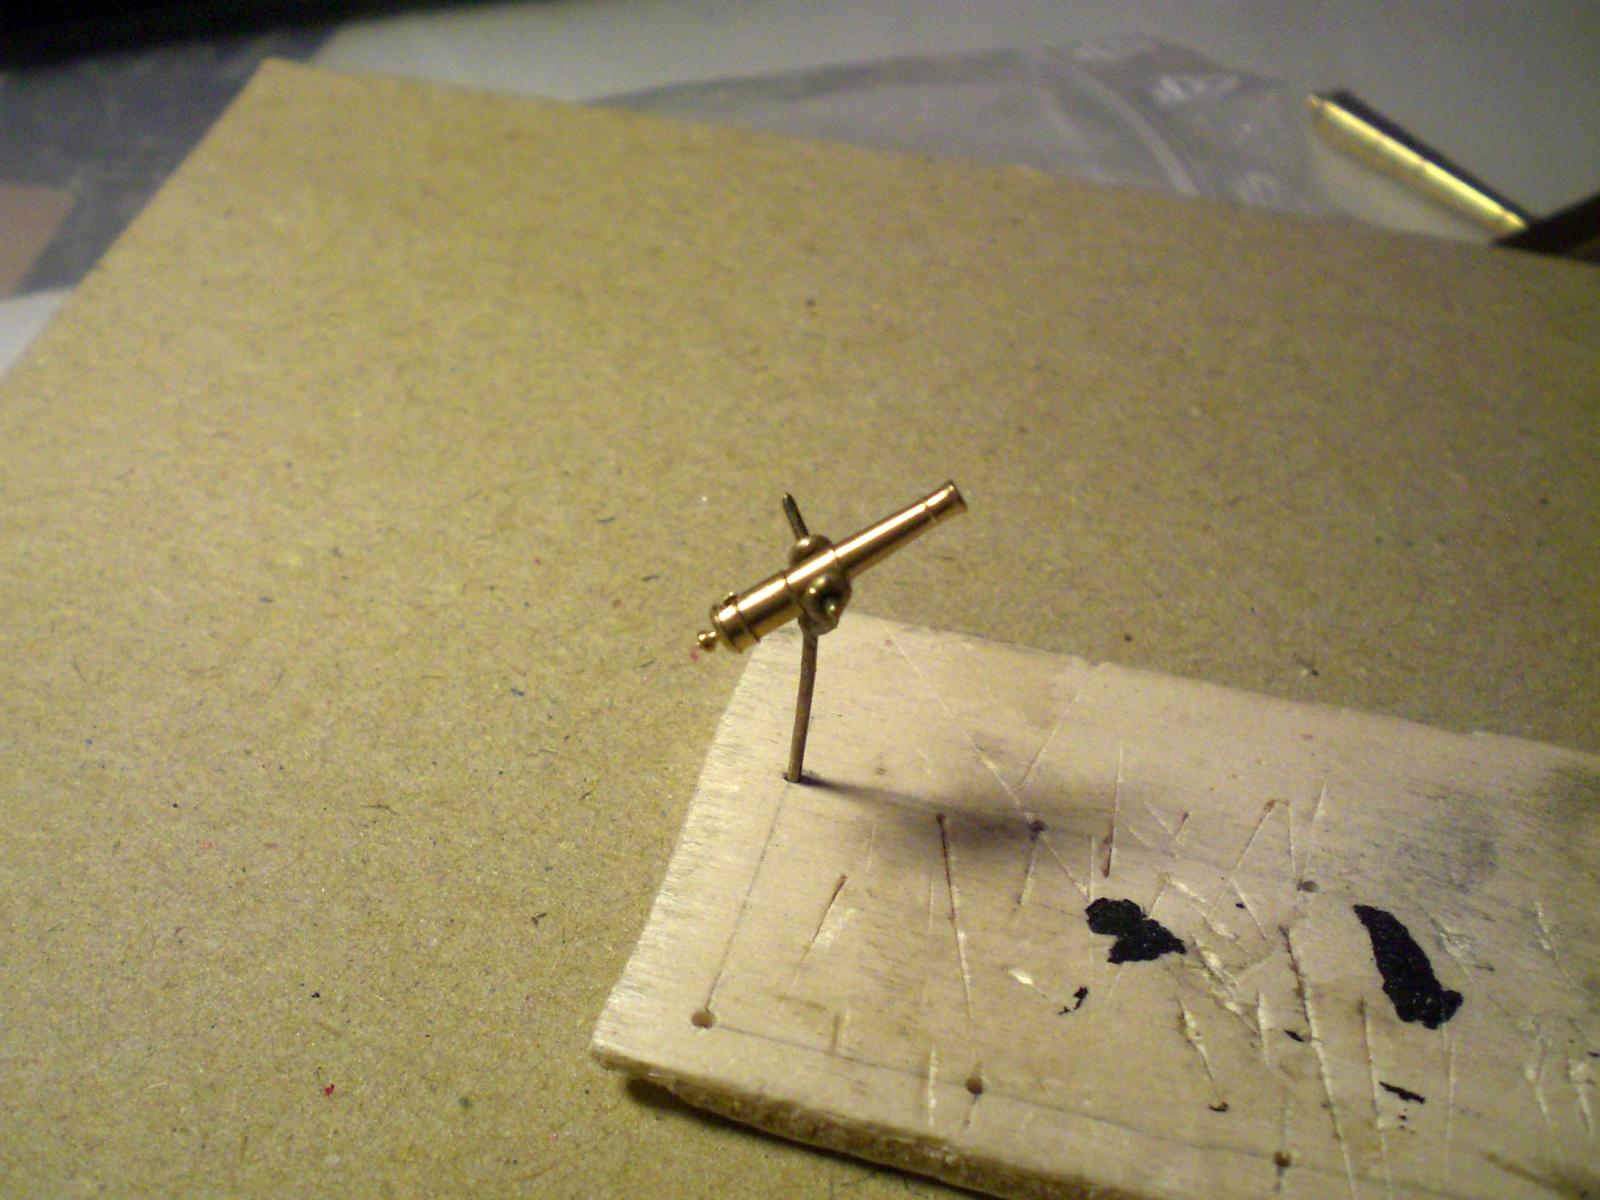
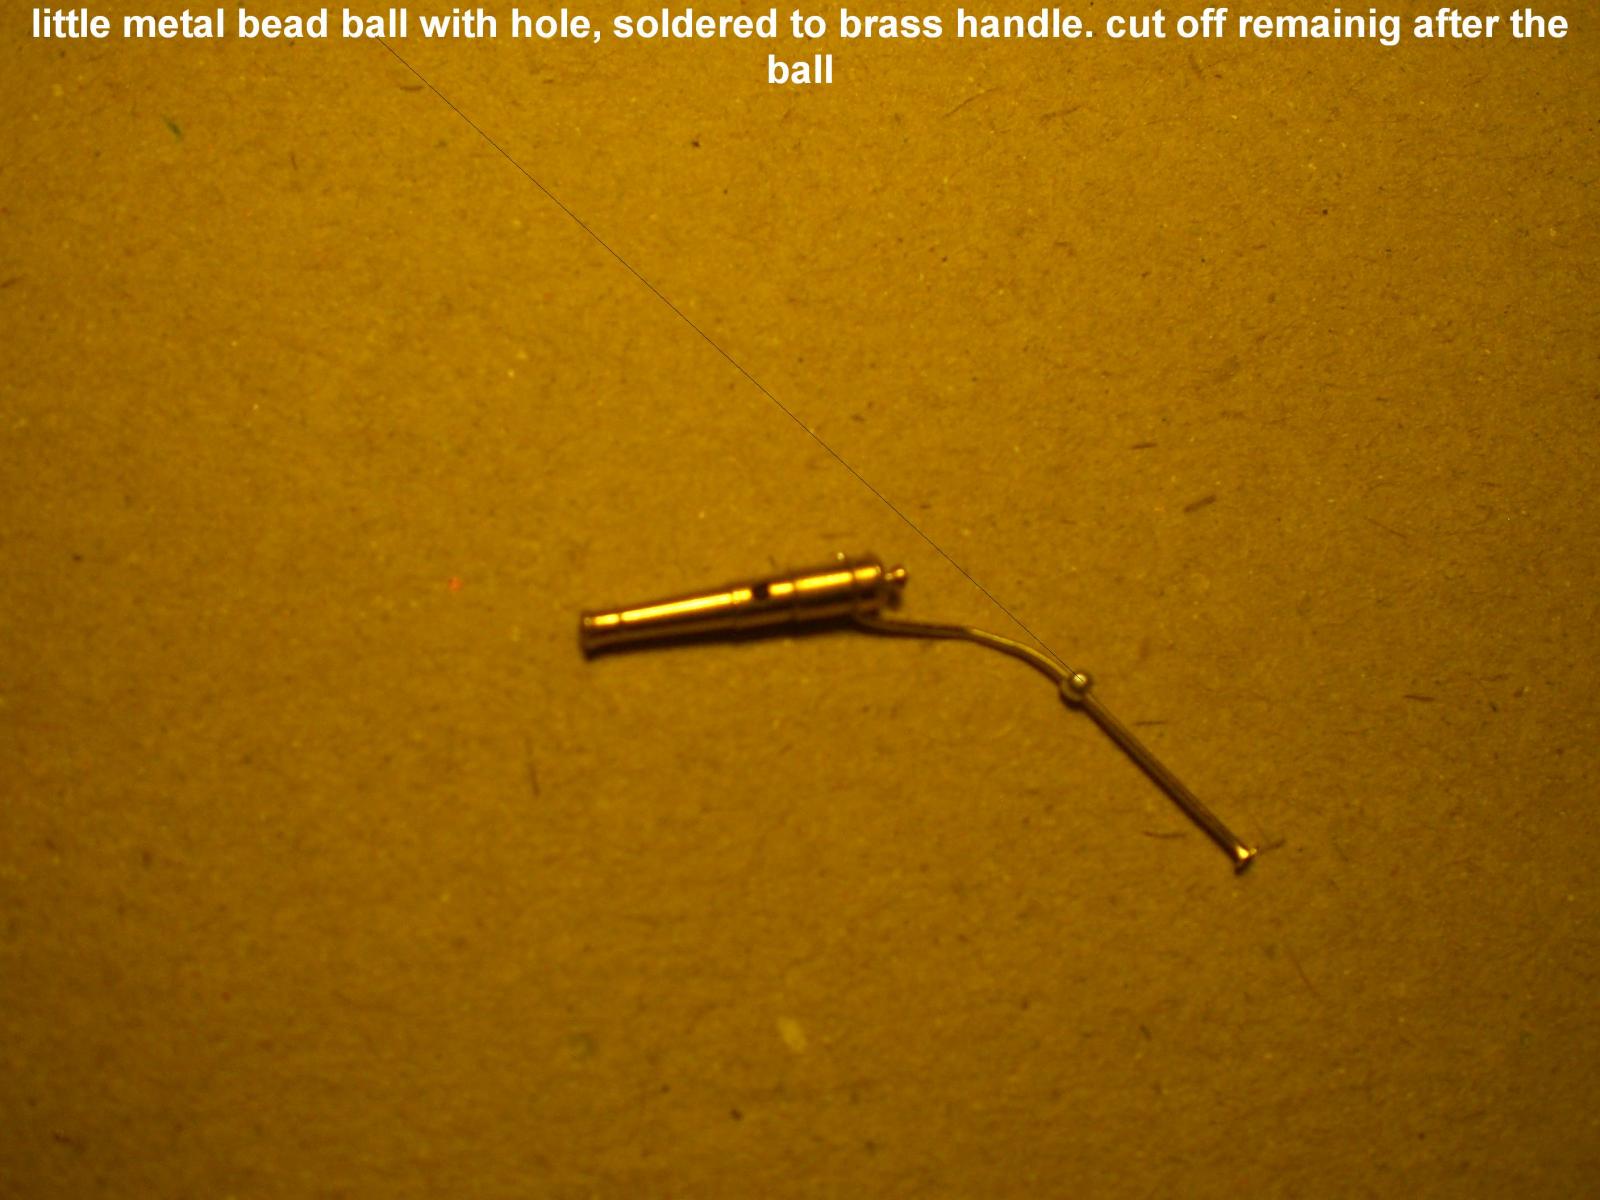
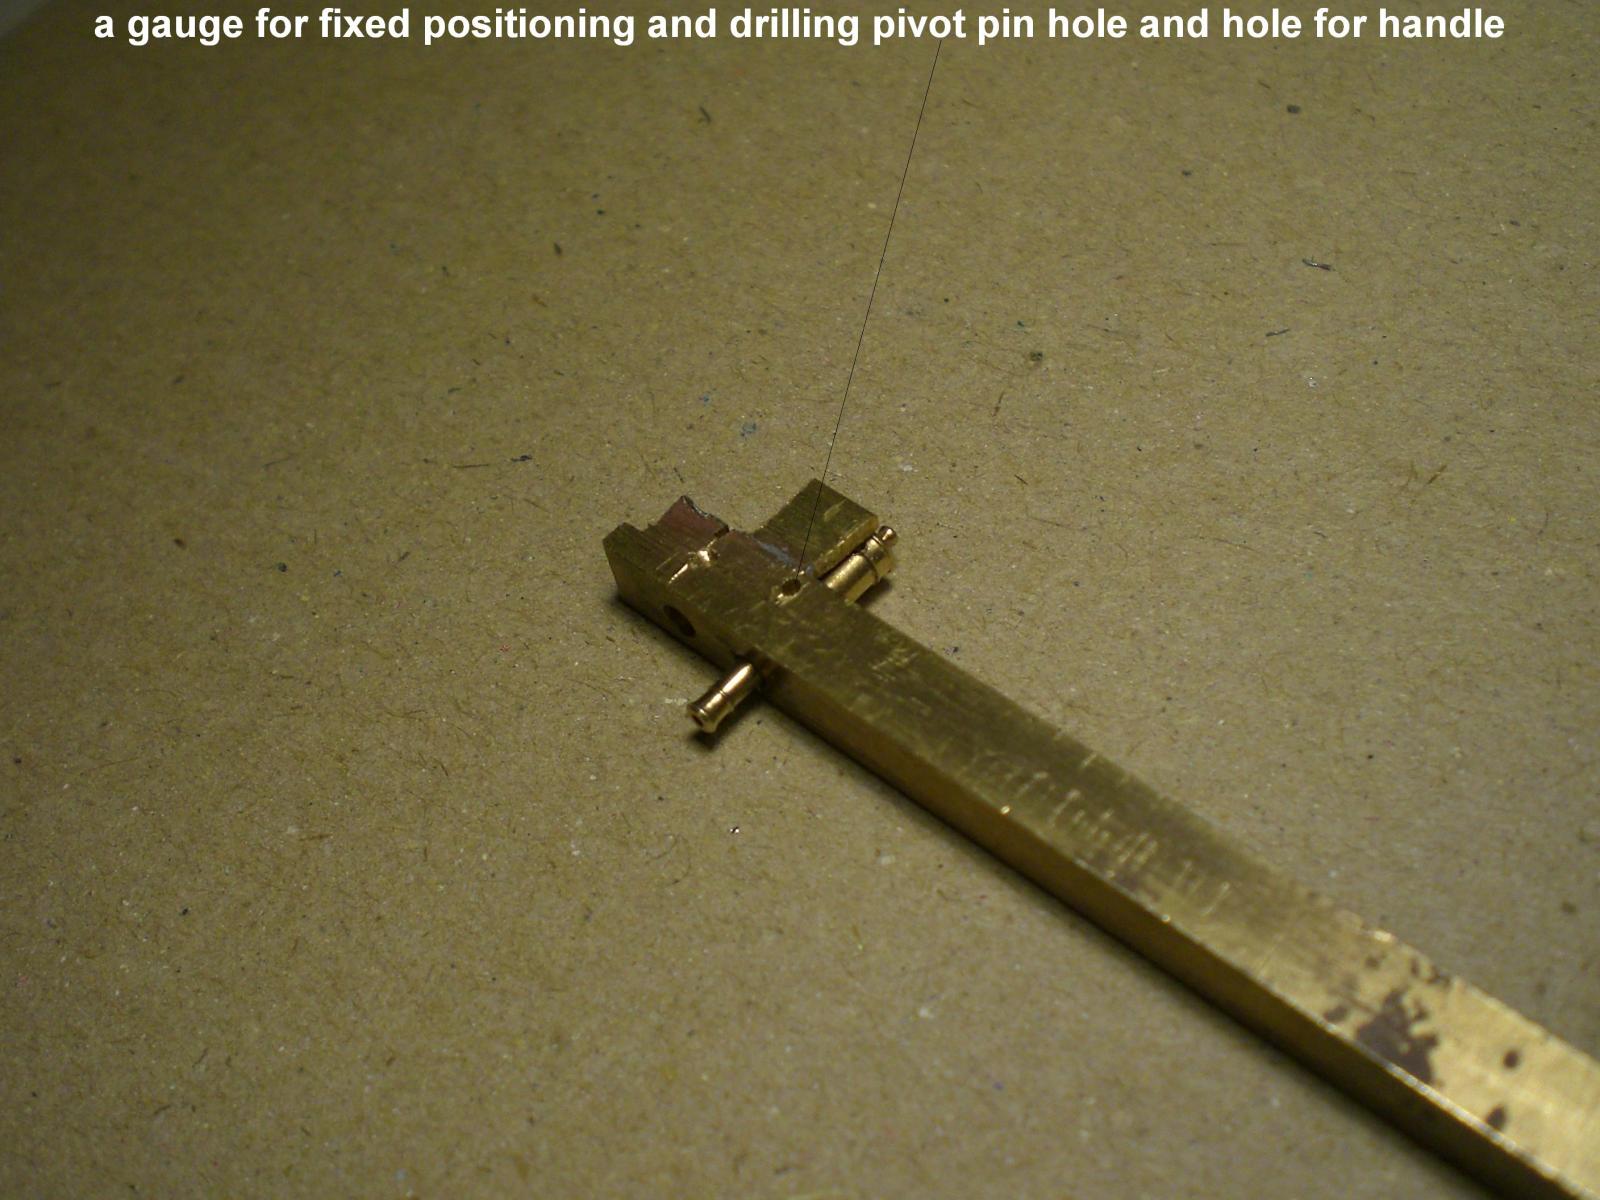
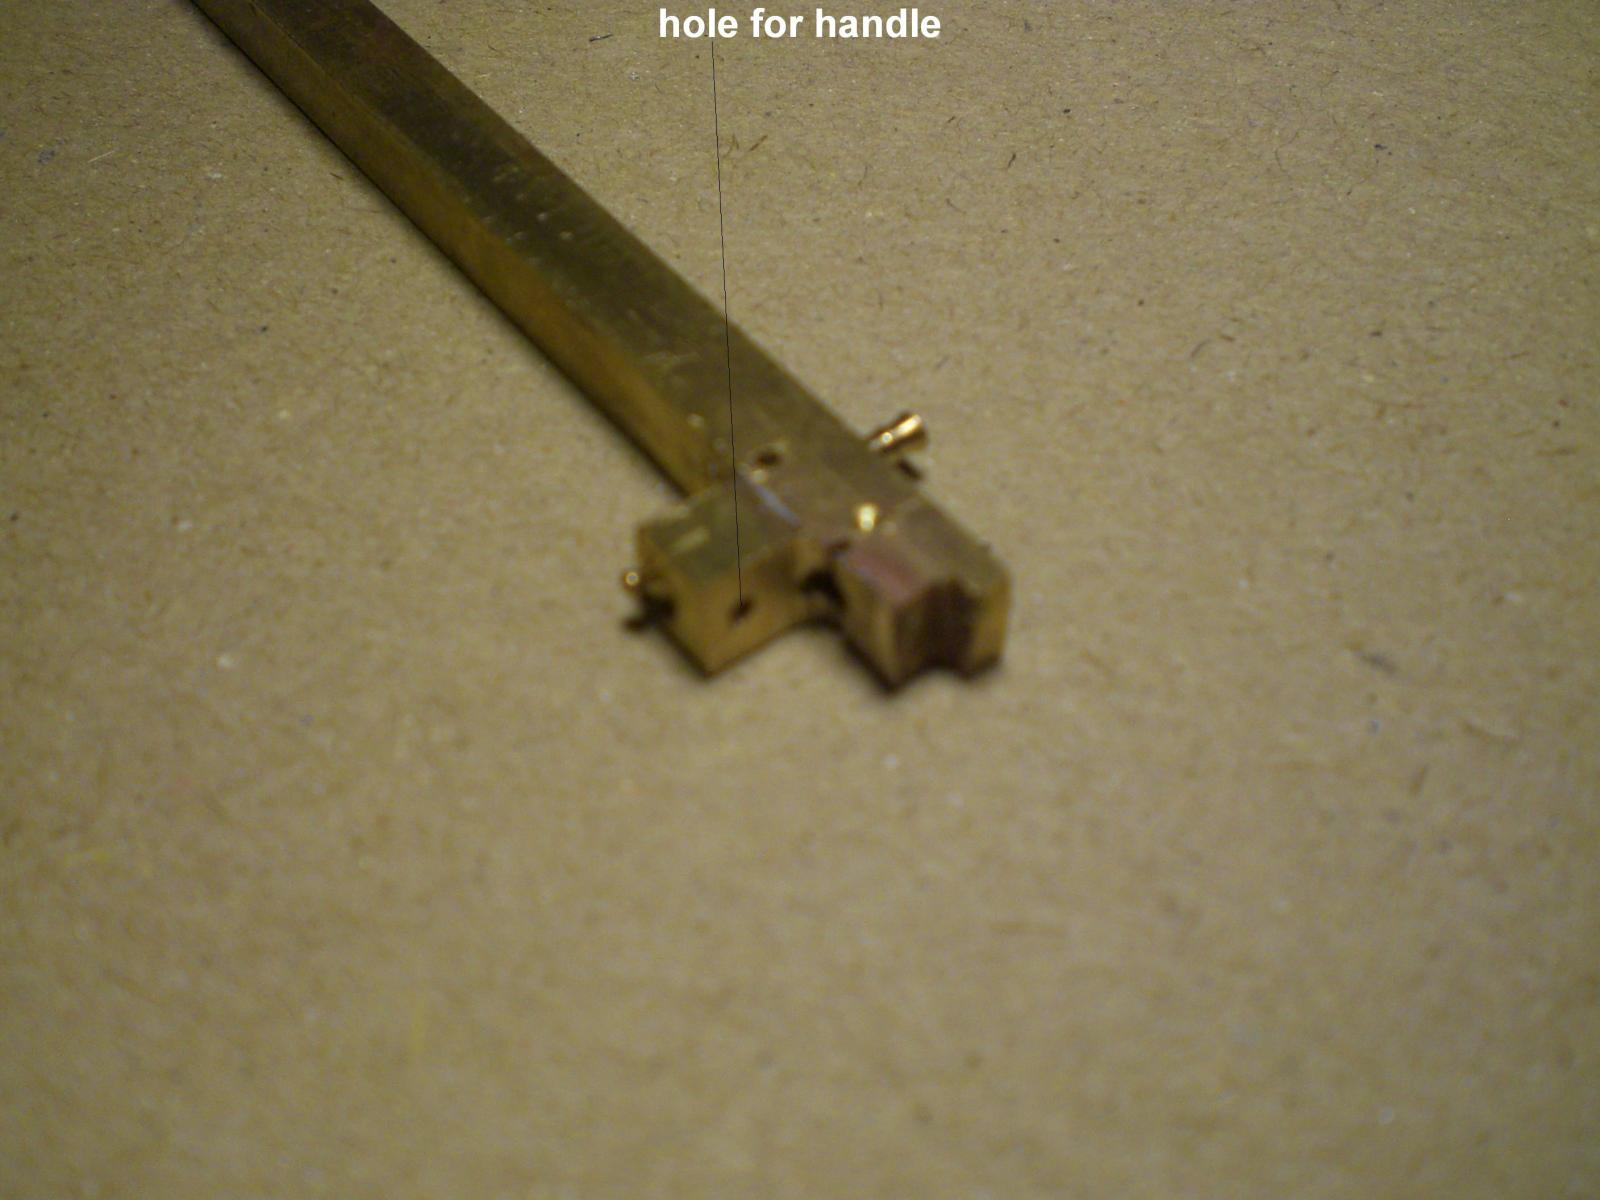
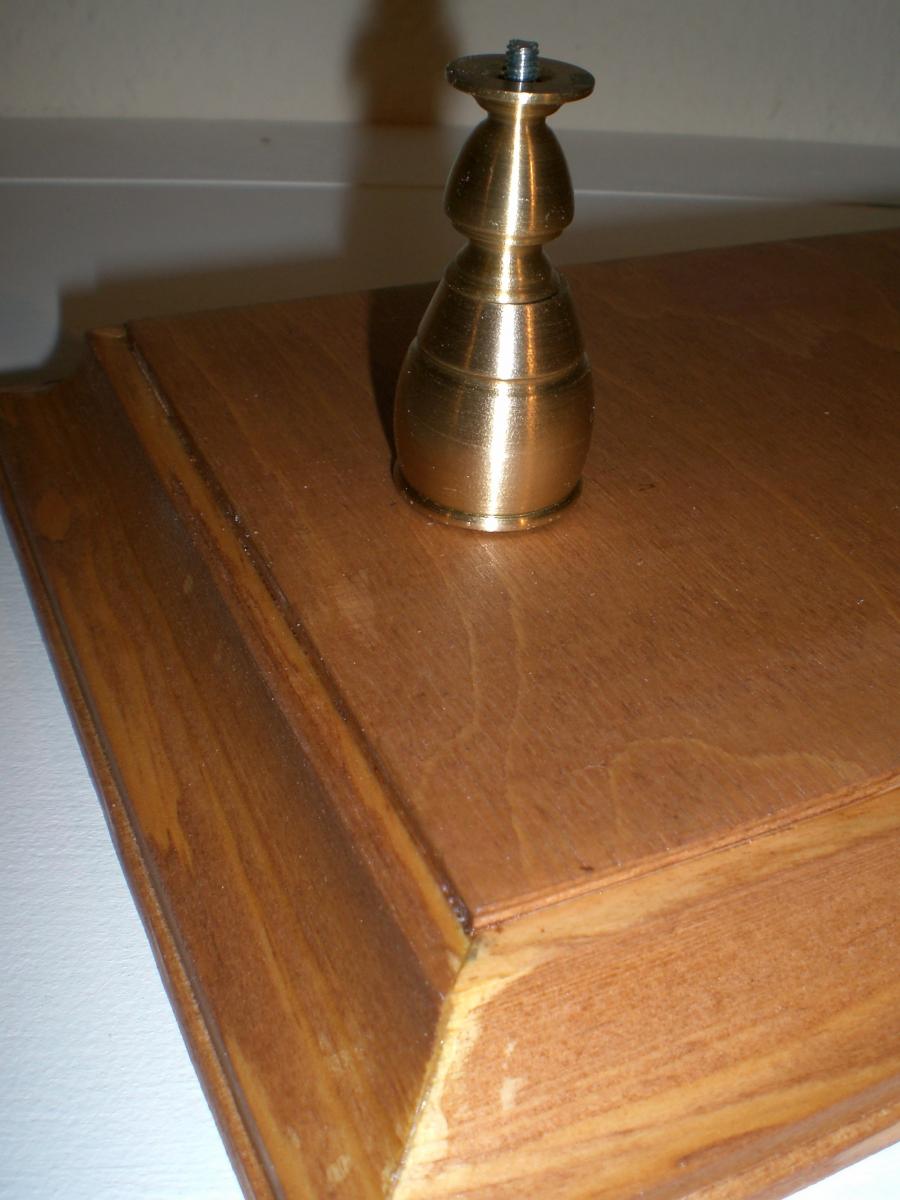
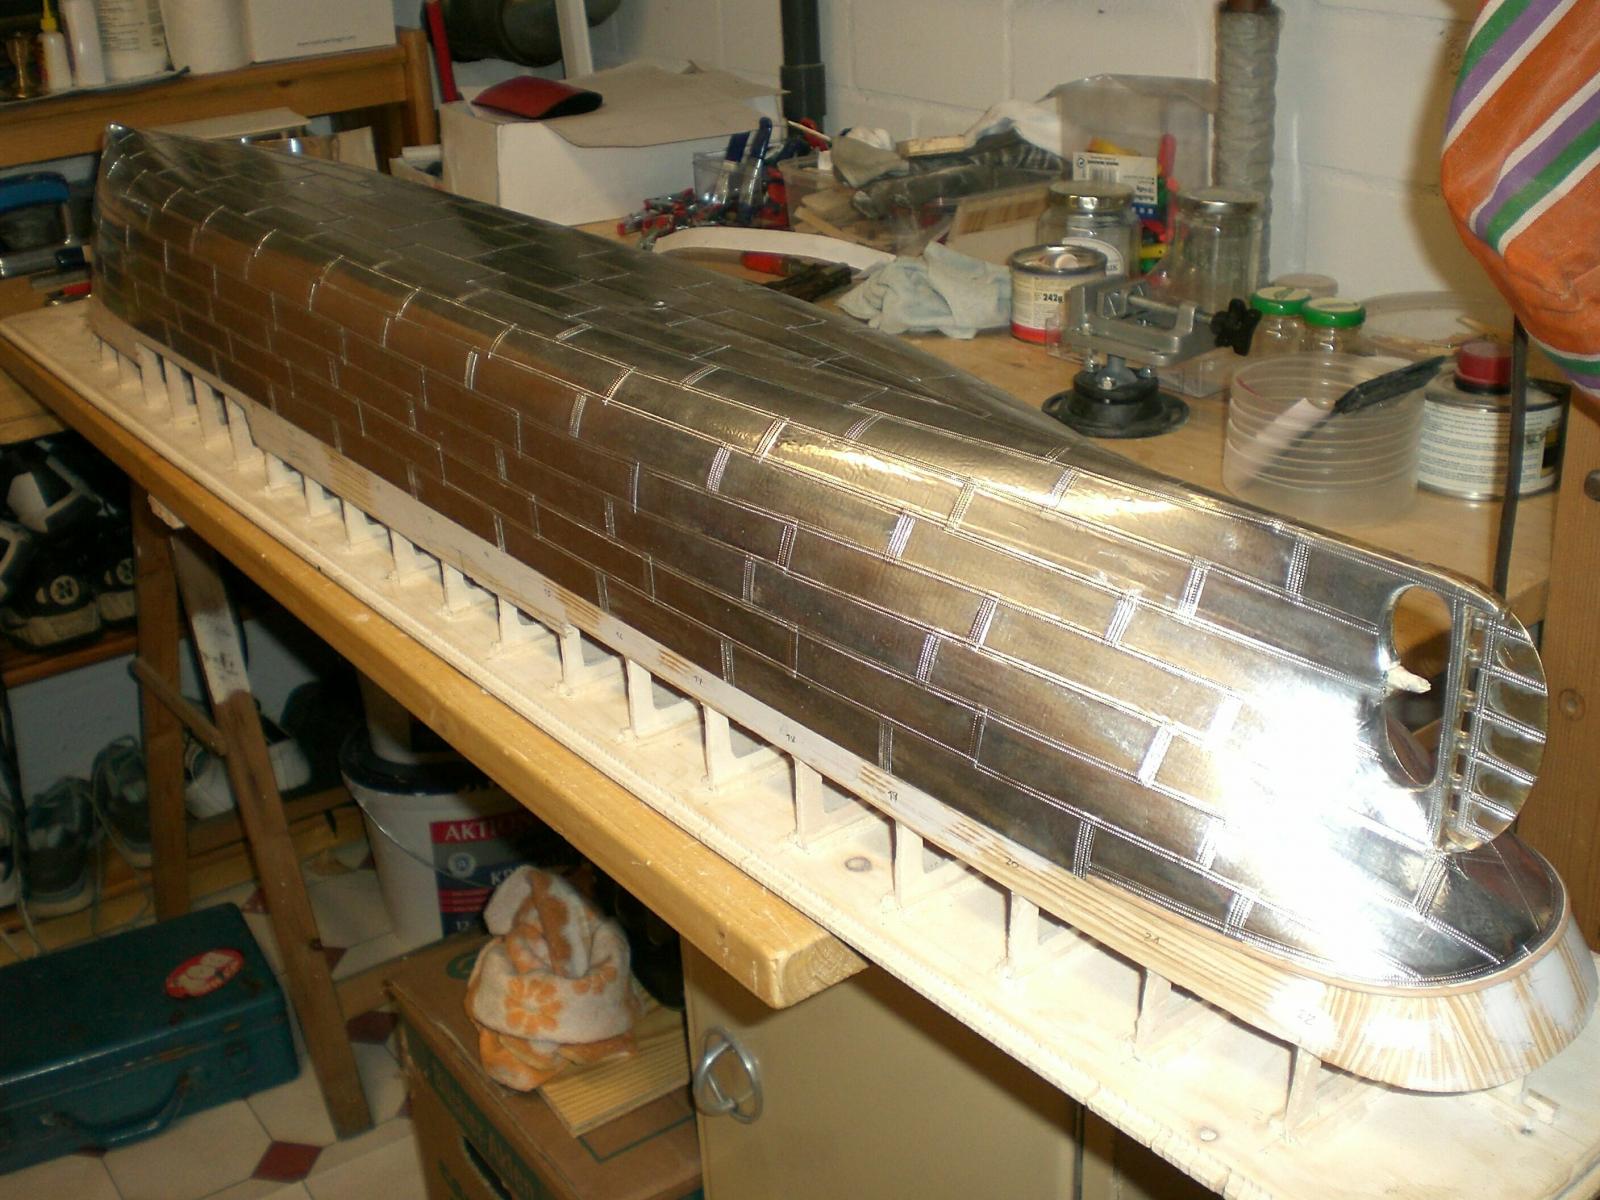
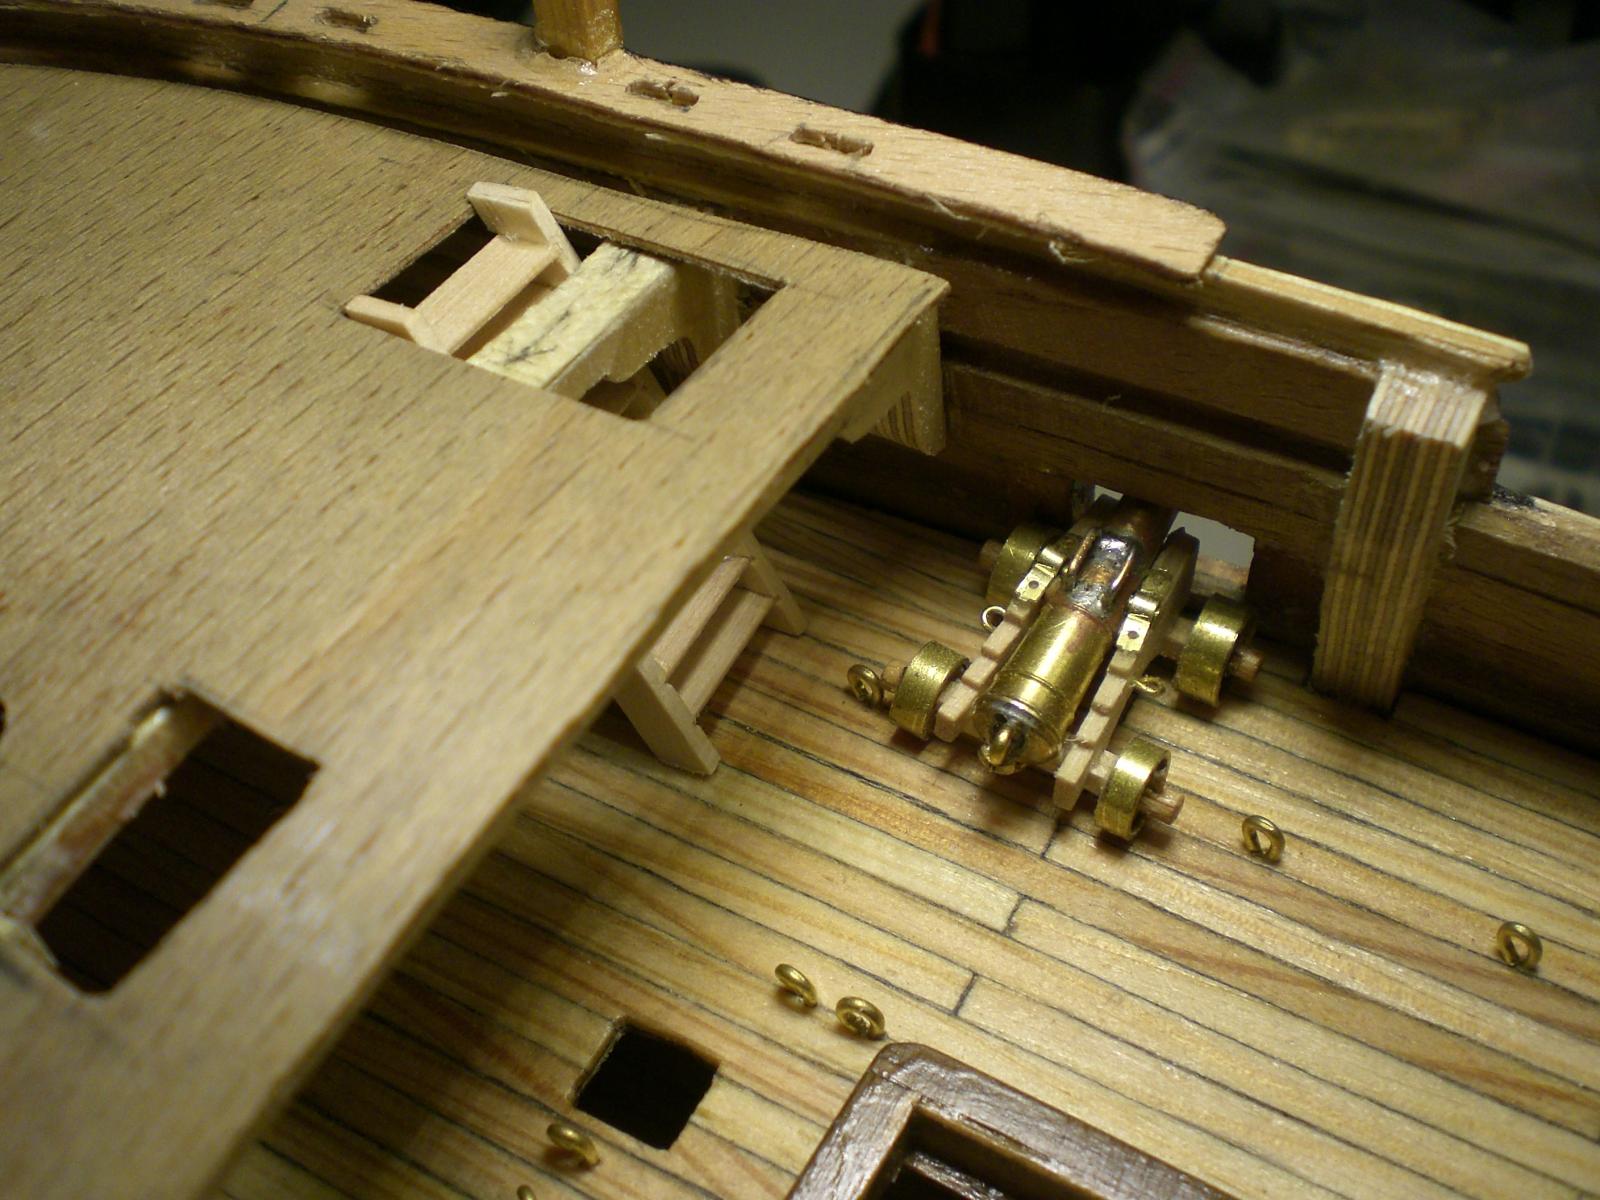
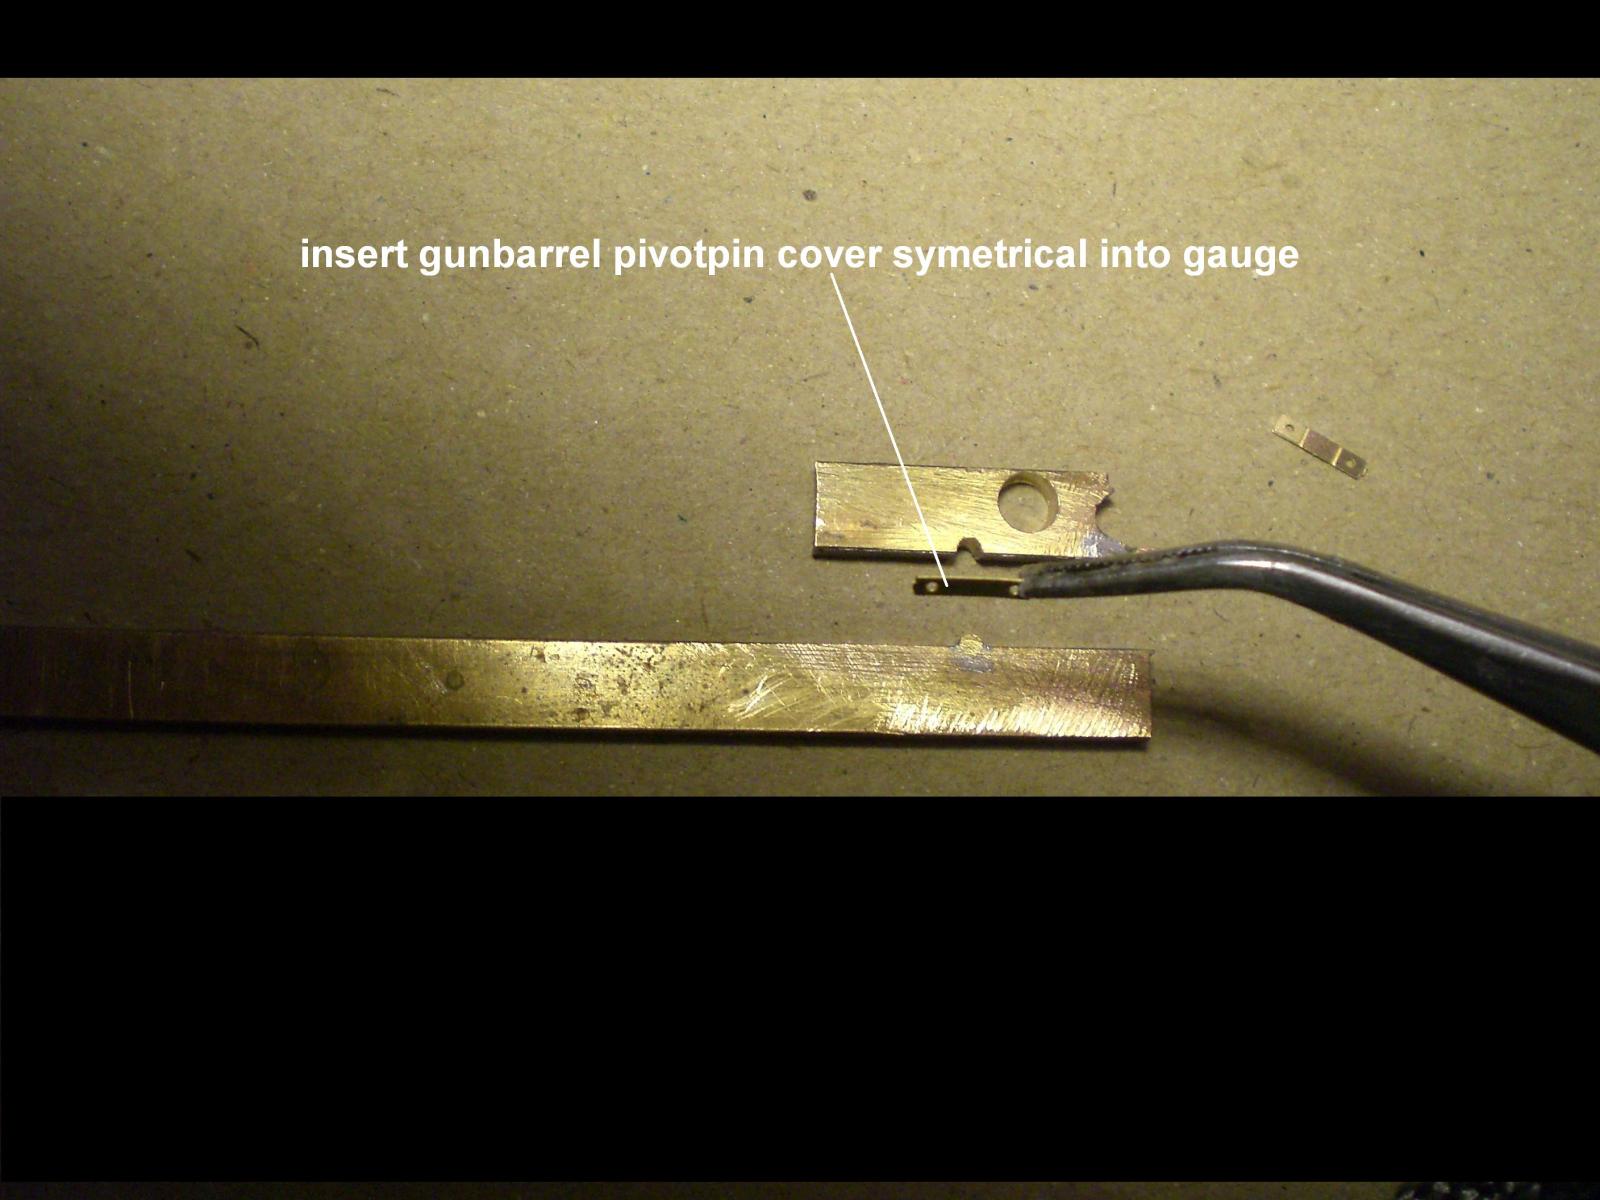
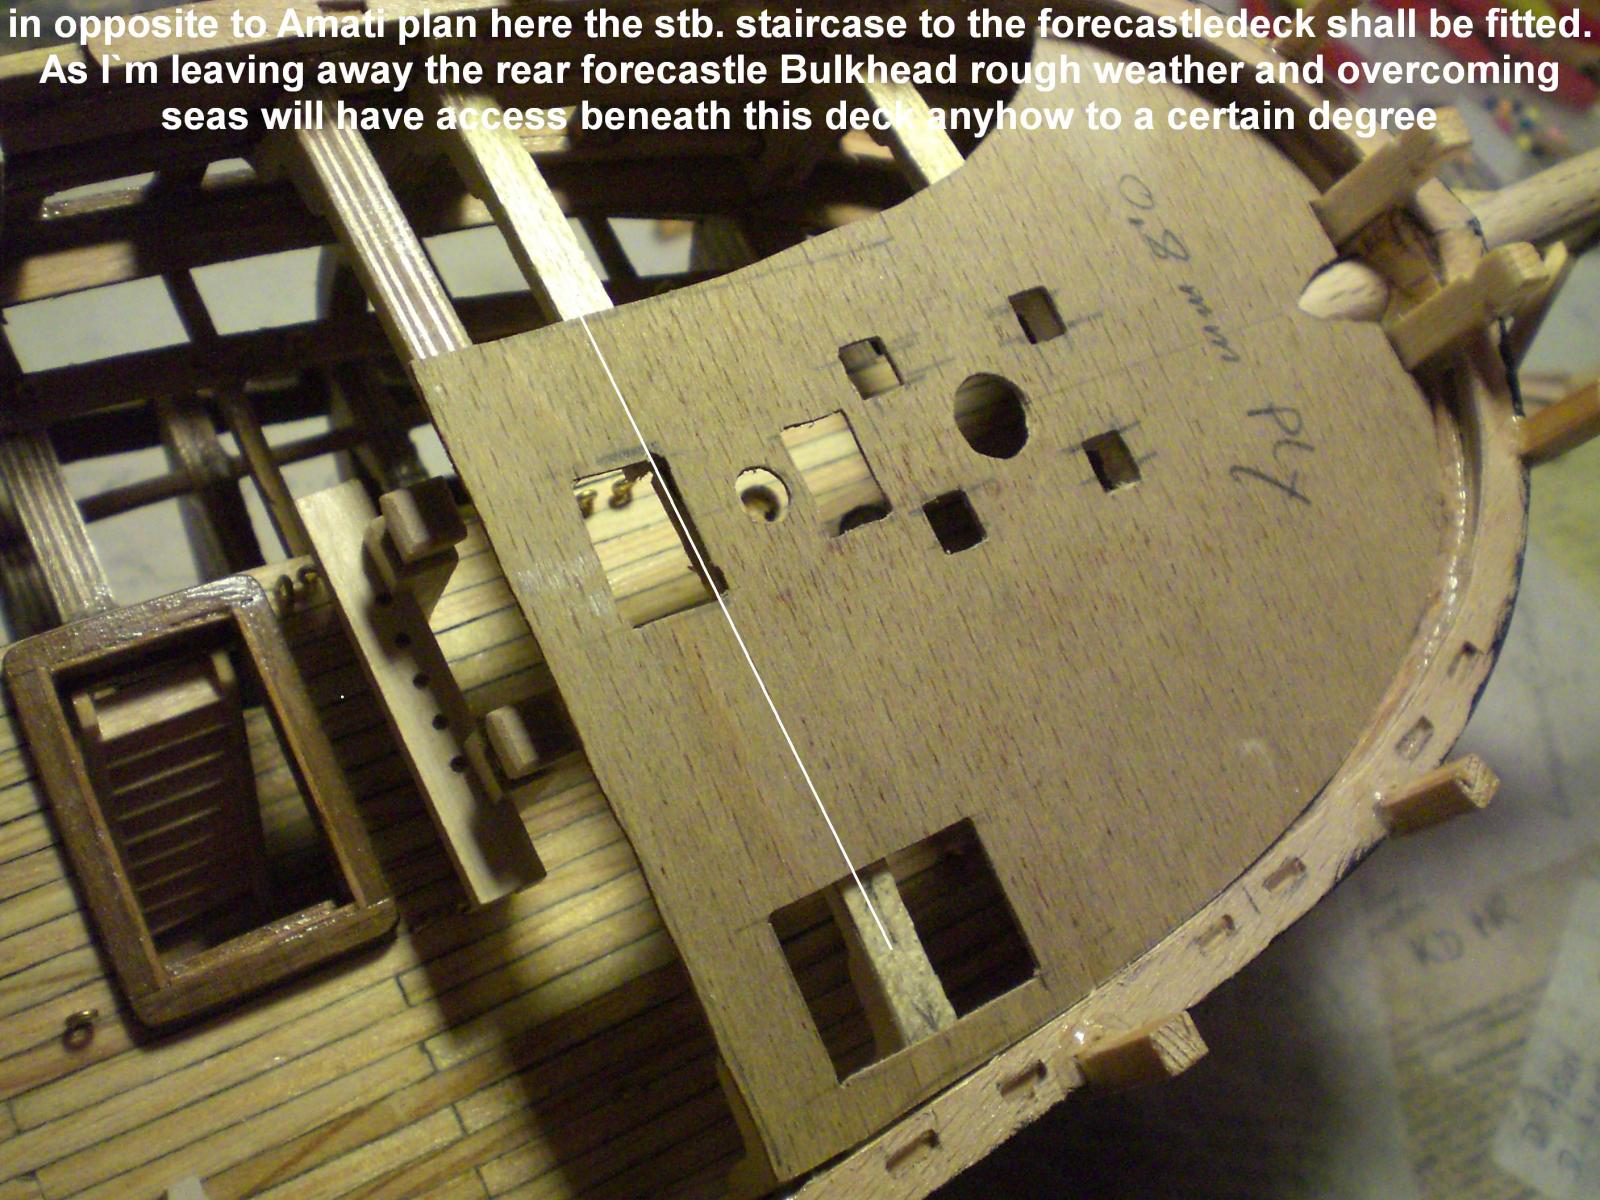
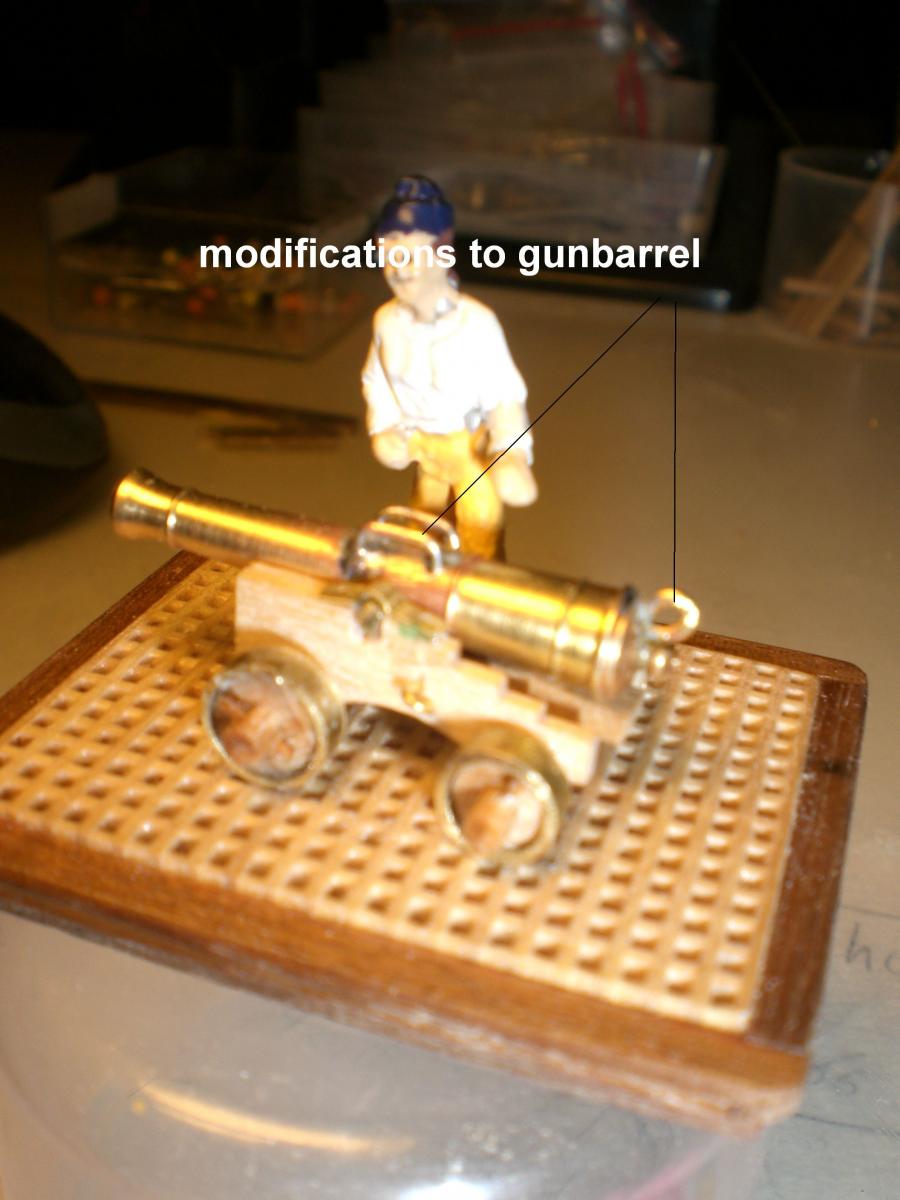
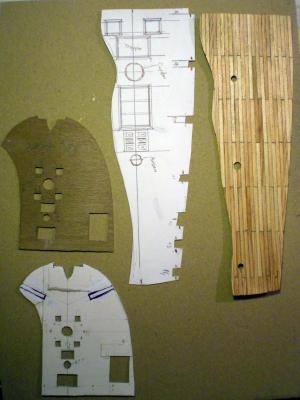
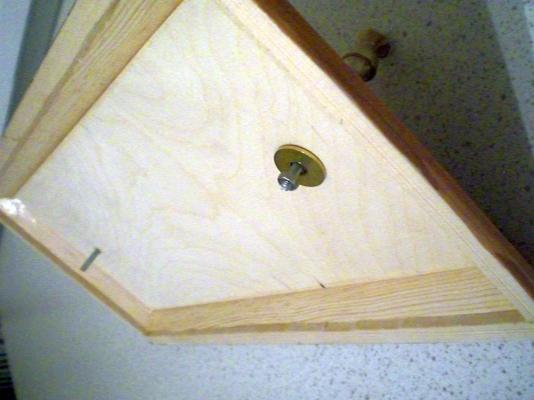
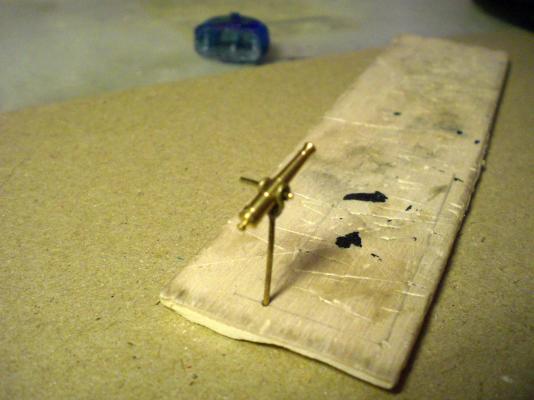
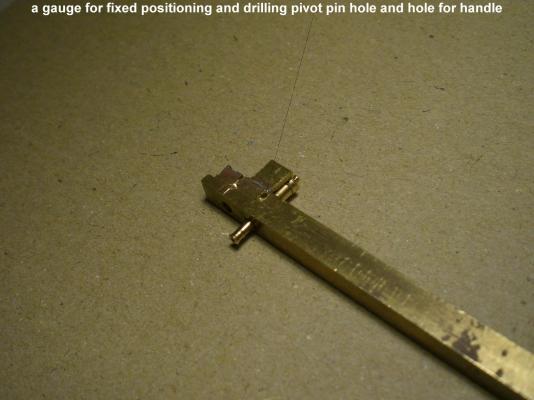
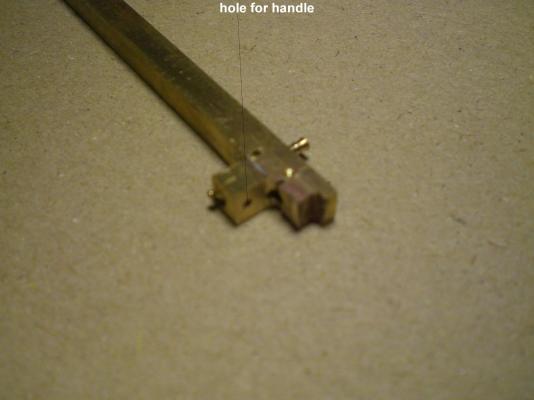
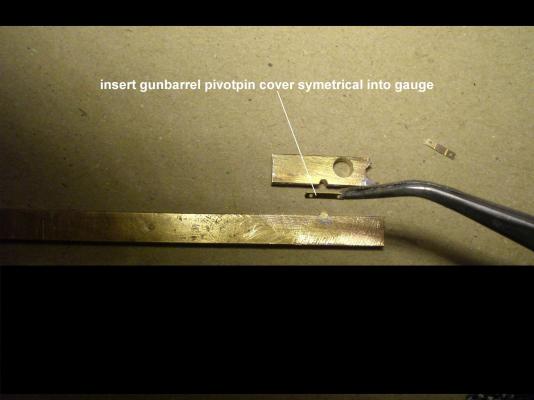
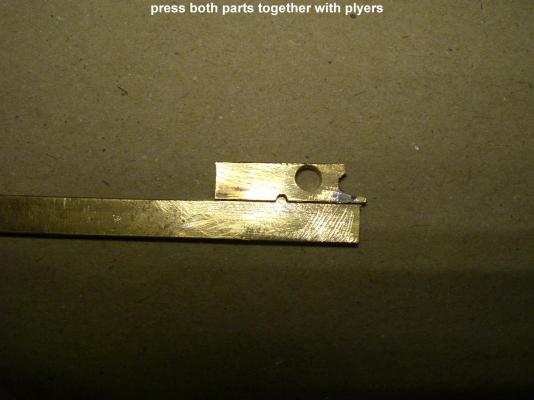
Here comes part 17 of my buildlog, after this I shall have to sort out the further logisticwise Approach in my actual build sequence, it may be the rudder System, Fitting out the rear cabins on the gundeck, or Gunport covers, or, or.... for decks I use cardboard templates for tranfering the shapes onto the 0,8mm ply, they allow easy necessary adjustments during prefitting this is the stand in view from below with the pedestal bolts coming through dealing with the first Trials on the swivel guns, using RB Model 15mm gunbarrels. I shall scrap this first Trial for the mounting device again. B.E. Shows us an excellent solution for the mounting brackets. I hope that Amati may take this up and provide an etchpart solution ammendment to the brass Sheets, because of the limited amout of brass hooks unfortunately my camera provides no macro Feature.... for the Close ups just an alternative solution, B.E. also here has a great alternative to Show, well done ! This Little jig supports during driiling pivotpin hole and handle hole into the unbored RB models 15mm length gunbarrels two more Pictures of the stand, this is an easy priceworthy way of getting a not too fancy stand At this buildstage ( I asked Forum members before in my buildlog) any Input on the question : coppering the hull or not ? would be appreciated. Pros and cons would be very welcome. I did a lot of "steelplating" on model hulls before, but that was representing iron/steel plated hulls in riveted Detail (like Titanic, etc.) on early steamships. this is what I meant, it`s showing the 1400 mm Long raw hull of the german/ australian line Steamer Elbing launched in year 1898 The 18th century coppering plates are more or less nailed (model : glued) on to the planking, but also hiding the wooden planking structure Nils


-
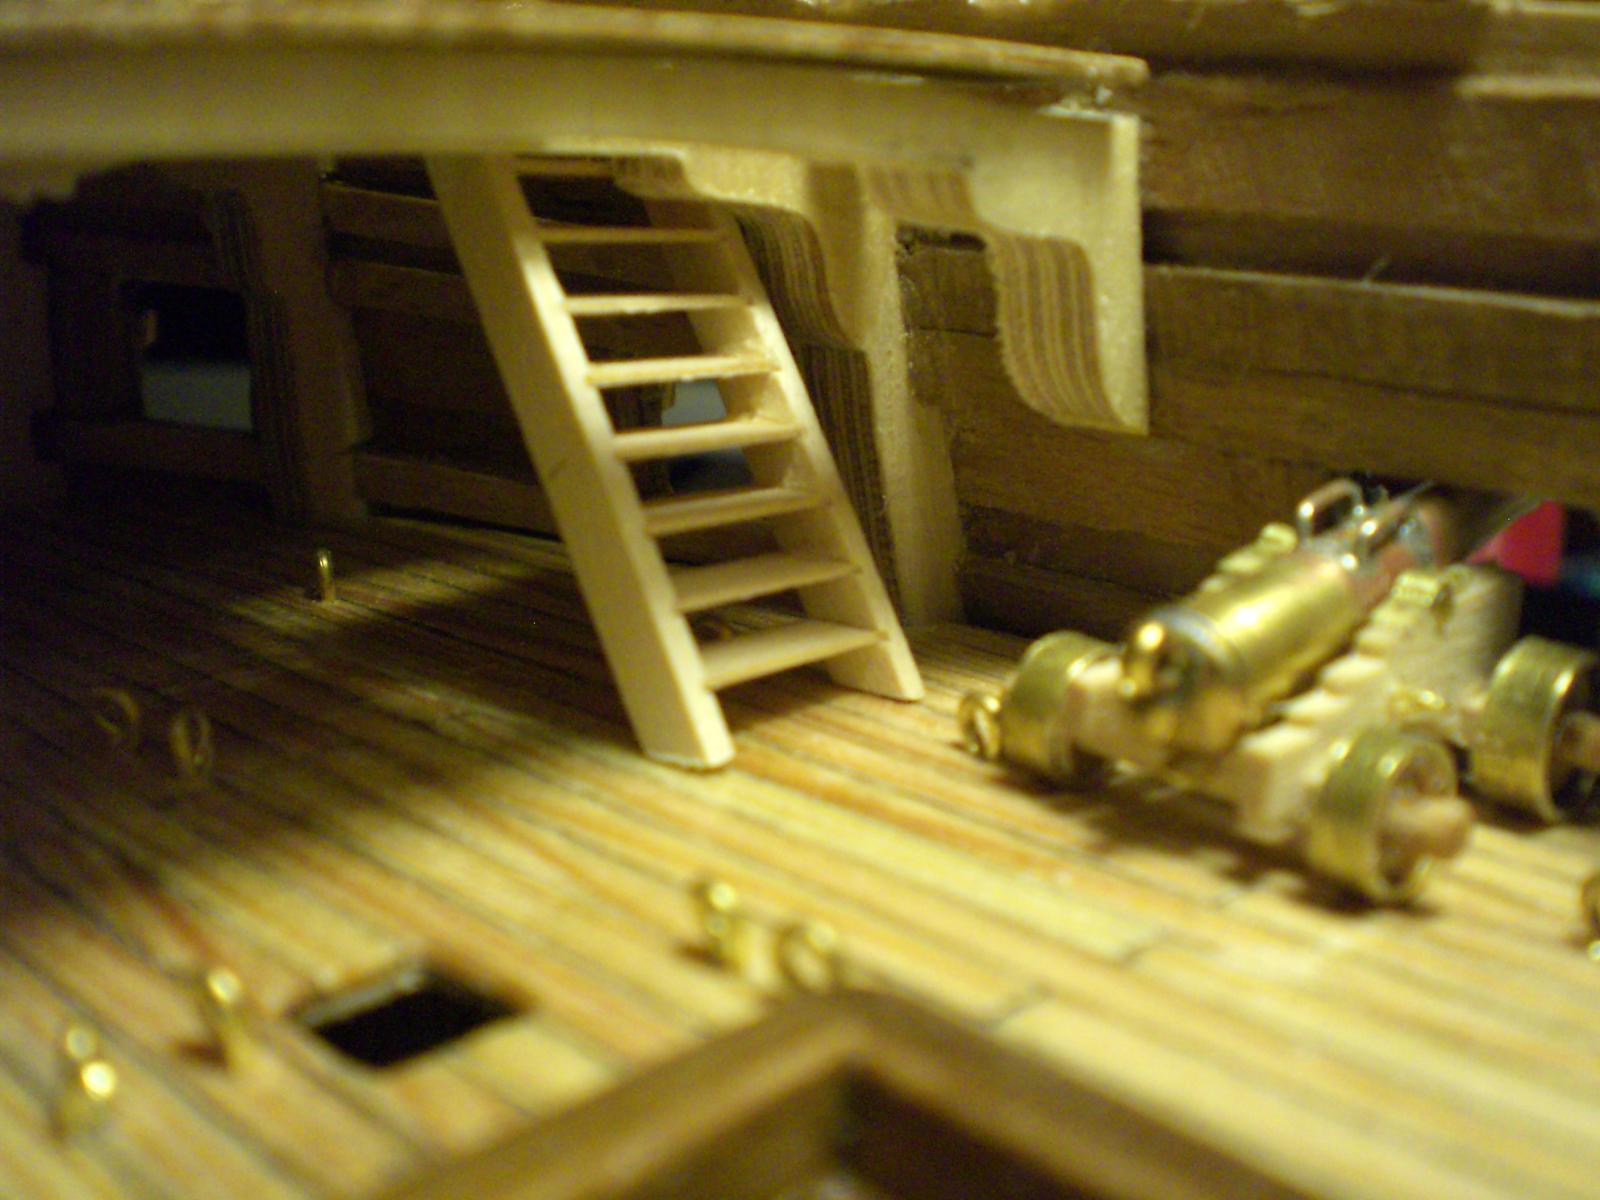
Good day B.E. here just a quick Illustration how I meant it with the space, the stairs and clearance to 1st and 2nd gun. The gangwayplanks you provided are still going roun in my head, because I really like them. What do you think about my stair Version in combination with your G-Plank Version ? The swivel gun attendants would not interfere with the heavy gunner Crew one deck lower in battle.... Nils


-
Danny wonderfull fellow builder advice..., I looked up your link Many thanks for the galley stove link in your own buildlog, it`s really great. I know you are building in 1:48, and if possible would like to adopt what is feasible into 1:64 from yours and from B.E.`s 1:64 splendid stove Version Nils
-
Many thanks B.E. this is an highly appreciated extra Bonus Information and shall certainly be of great help Nils
-
Thanks B.E. These are the comments I love between fellow members, I feel strong Supporting and know someone is actually reflecting my thoughts about Details. A Little handicap I momentarily have with all the naval ship related Features in english language. Pls excuse if I should not always find the correct nominations i.e in my buillog. I have meantime found an old sailors dictionary from Ebay with which I am happy at the Moment, but would Need to look up several nominations in your forestanding reply, allthough I think to see straight away what you meant. Please do`nt hesitate to use These and alike, it is very welcome, no Problem for me and in increasing my knowledge. now some answers.... Rails finetunig, exactly, here it was also my intention to get the woodwork in place at this time to find a sturdy base for finetuning in a seperate session in some time afterwards. Gangplanks versa ladders.... also exactly my thoughts when I saw your gangplank Fitting in the pics and which I liked and found nowhere else related to Swanclass. I thought I missed an important Feature when gathering Input. It is intended by myself to use the same Dimension stairs, rather than ladders same as other places between the decks. The Position of the first guns the required adequate angles of the stairs and the scaled size to suit the toughest sailor did spacewise not allow this on the gundeck and the naval inspector would not have approved this anyhow. Ammendment to this: definately no, the new stairs intended fit nicely with sufficient space to the first under deck gun Tackling and the Tackling of the second gun. Shall provide Pictures when this Feature is ready Fitting stove..... yes this is in "the sponge" allready to a certain degree, having seen your stove some time ago I looked up what I could gather from the web, and found it a pitty that the foc`sle bulkhead should hide such eyecandy. So leaving this bulkhead away there was no reason especially with the slightly increased (filigrane framecutting I provide)deckhights, to not providing an open durable staircase for safe and quick Access. My thoughts on the stove have allready been gently cooking along for some time. When the time Comes, I would gladly refer to your splendid and very good looking self explaining Pictures of the stove. Would love to Exchange more...., and looking Forward to futher comments happy modeling Nils
-
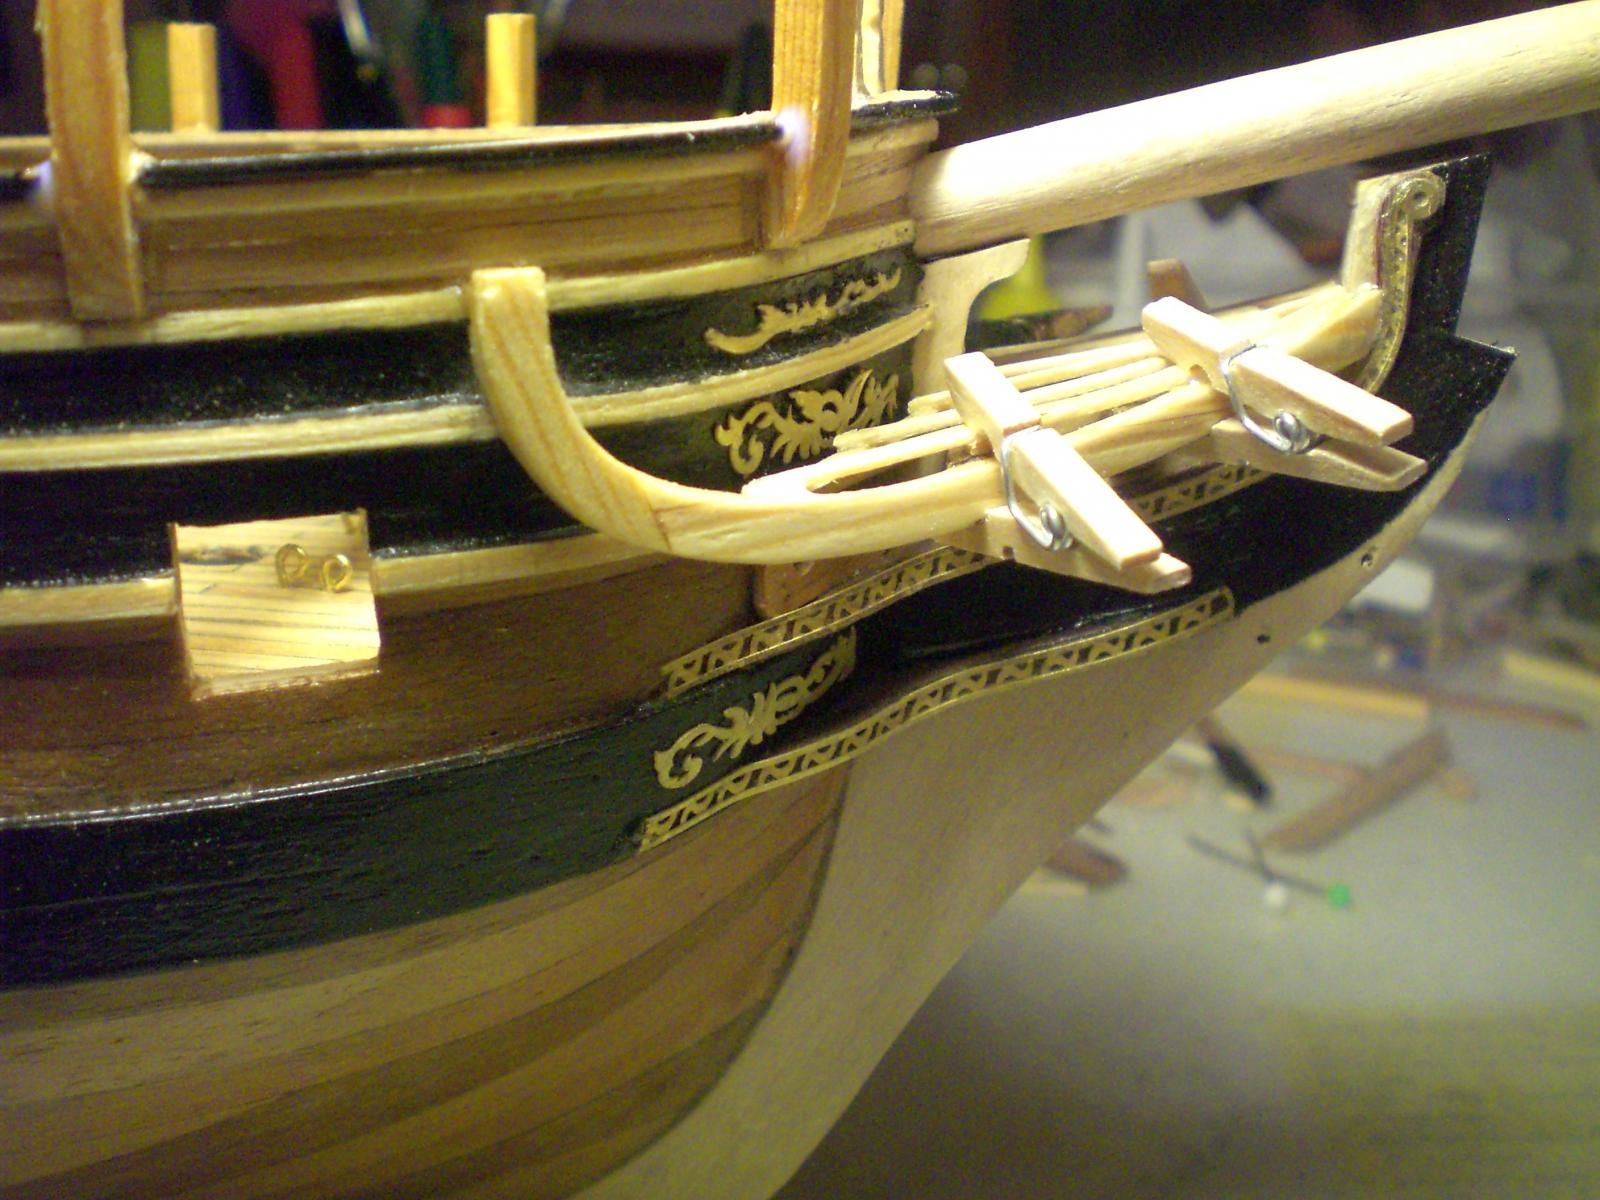
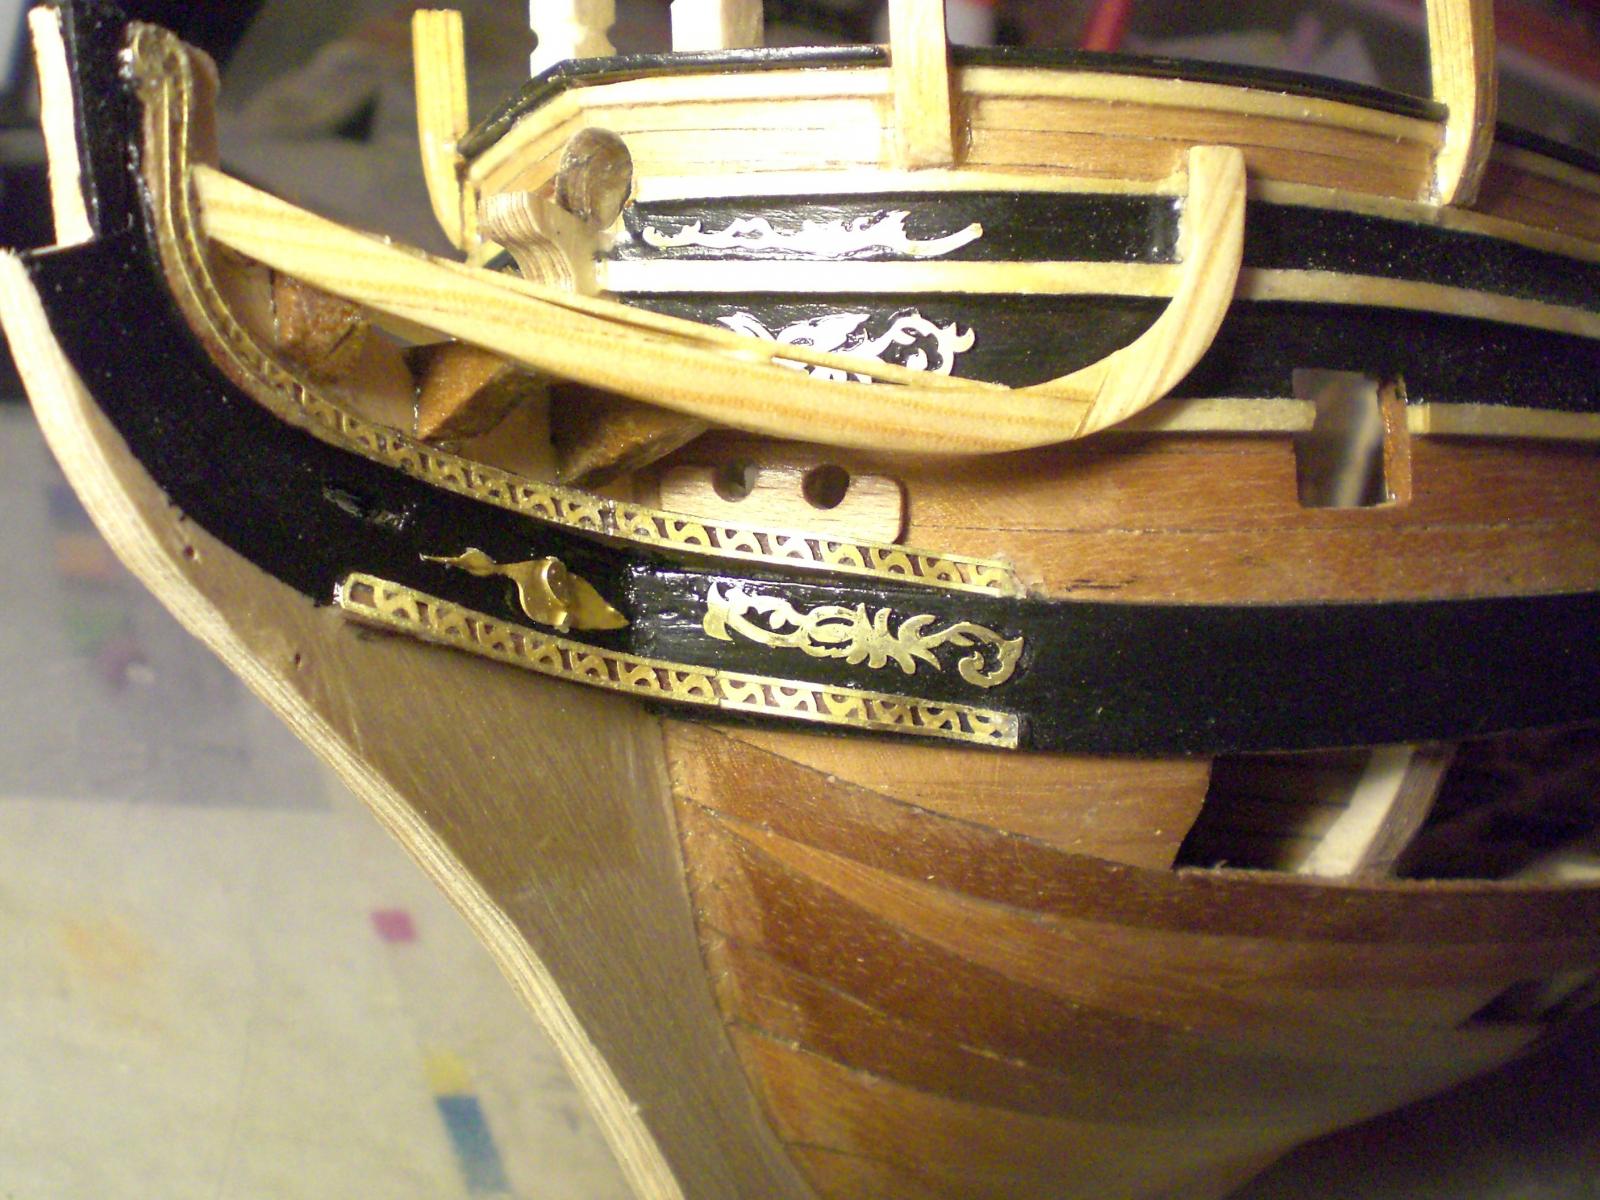
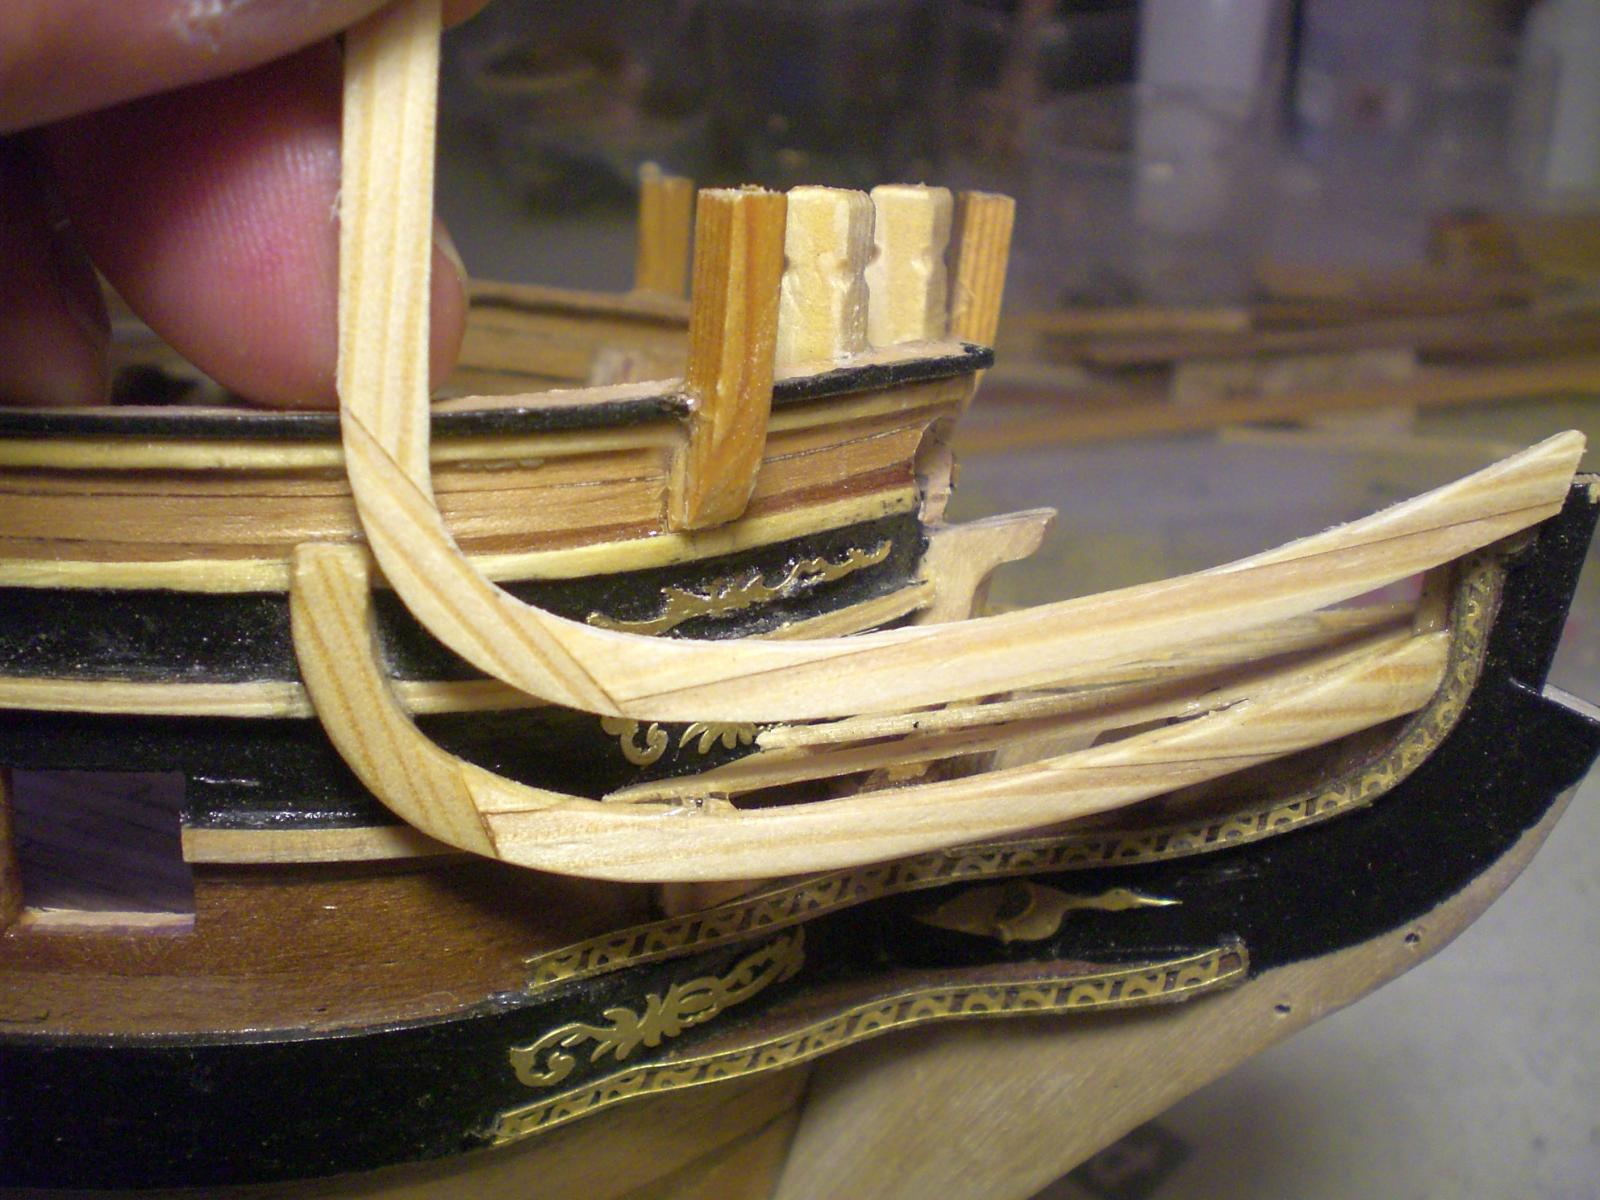
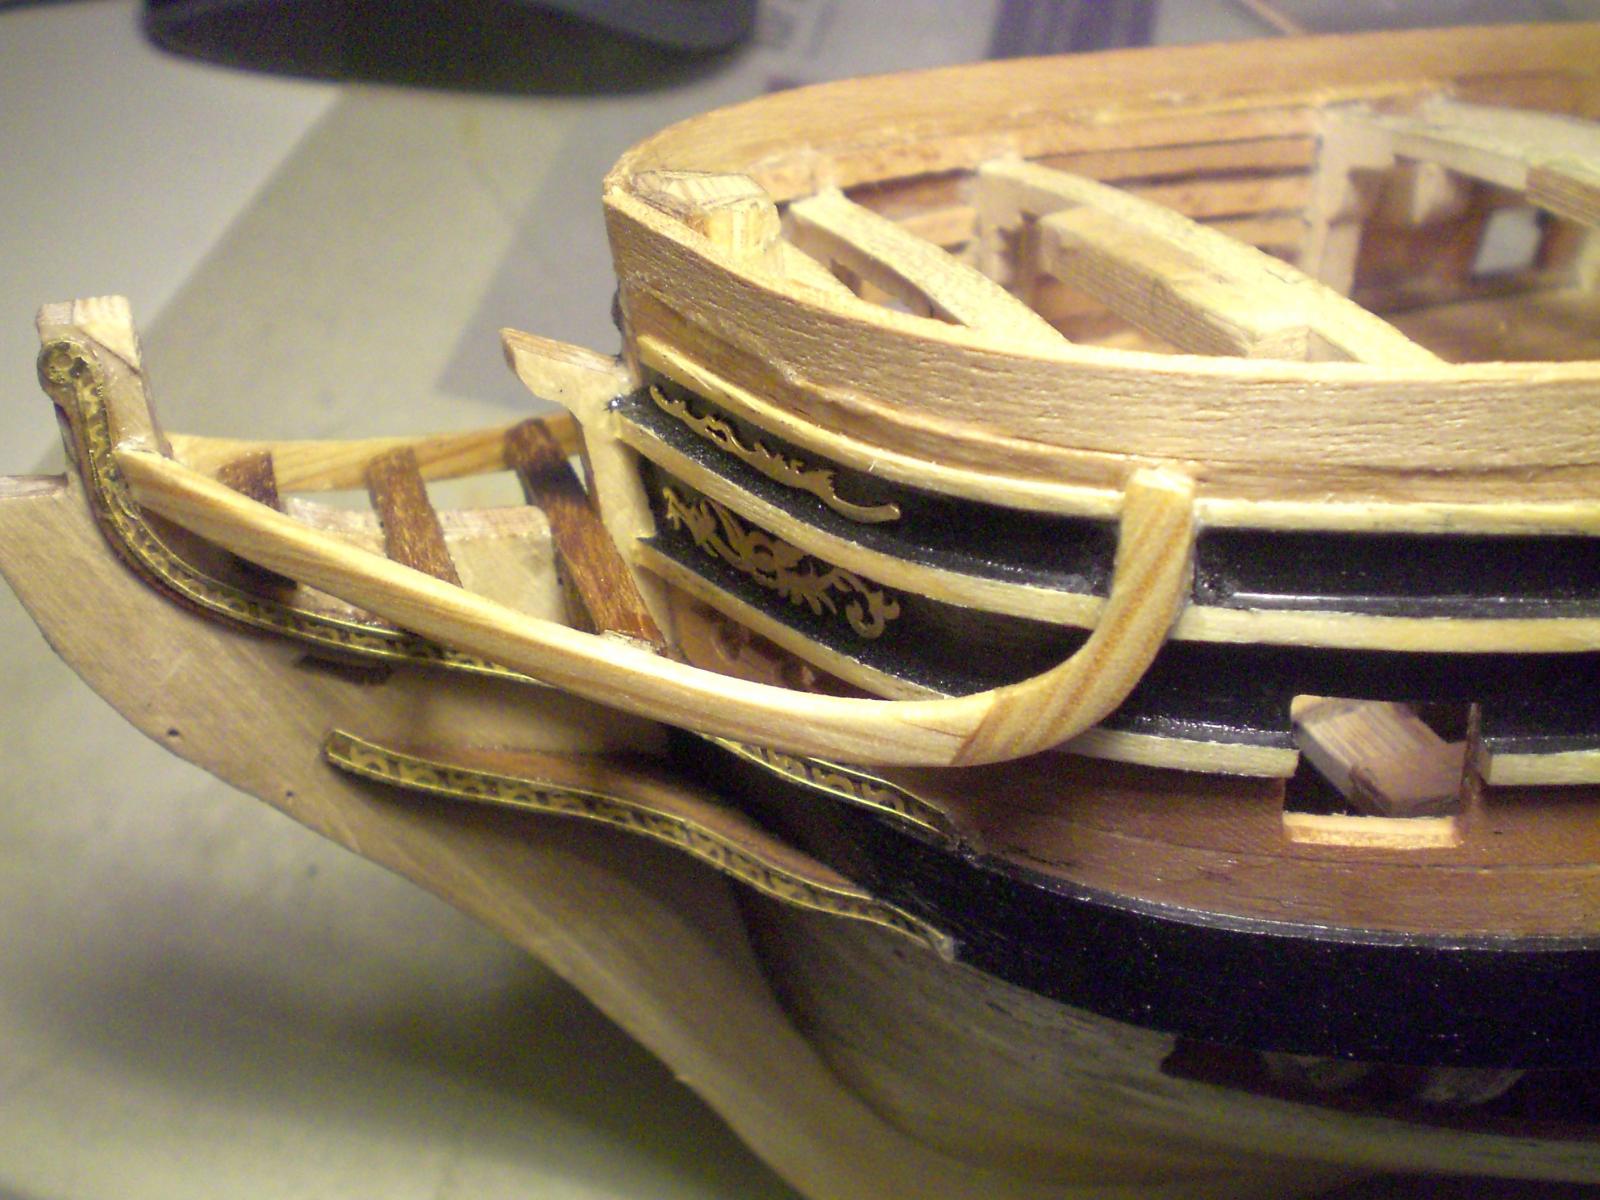
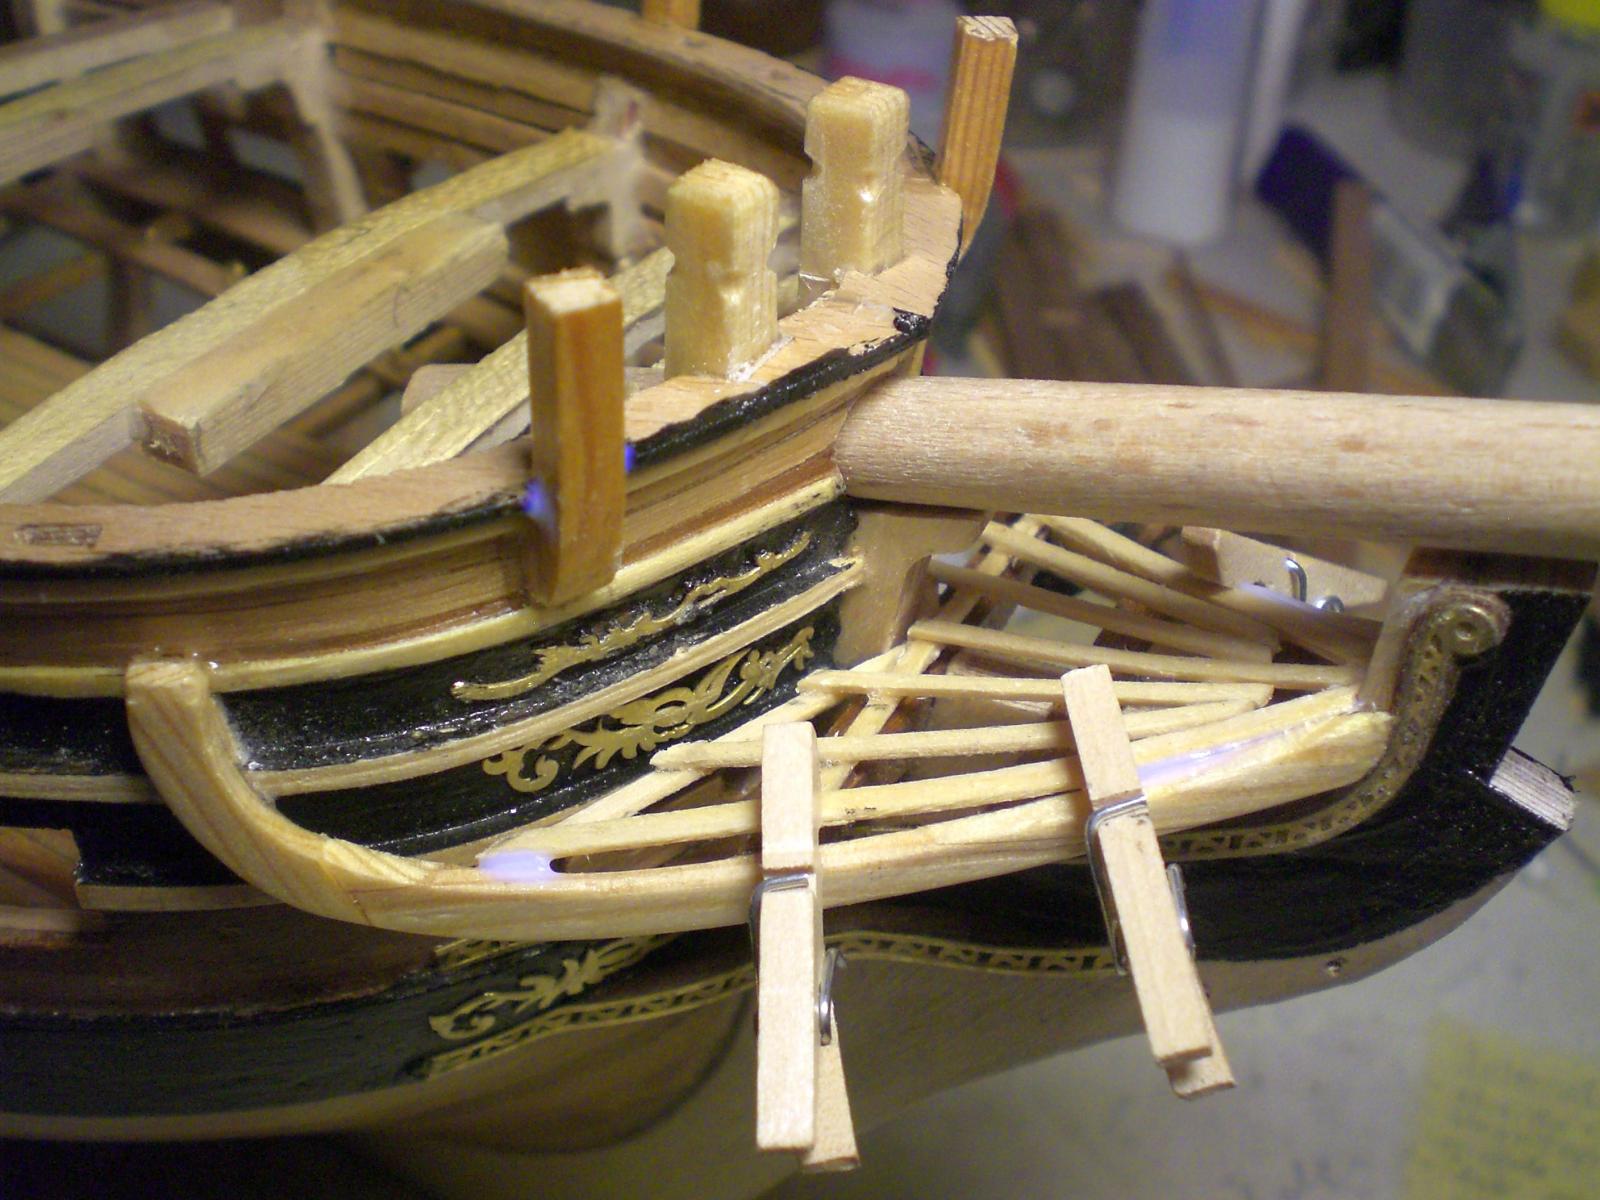
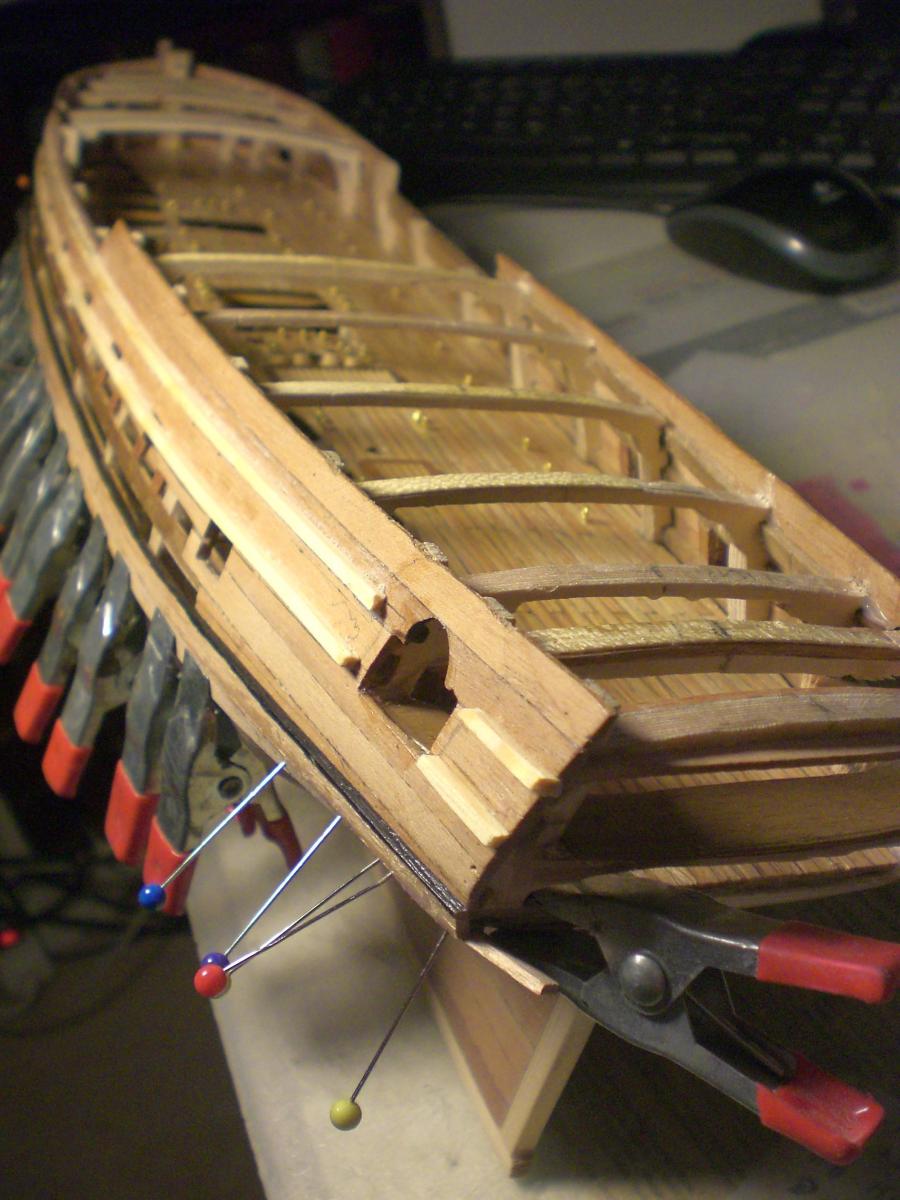
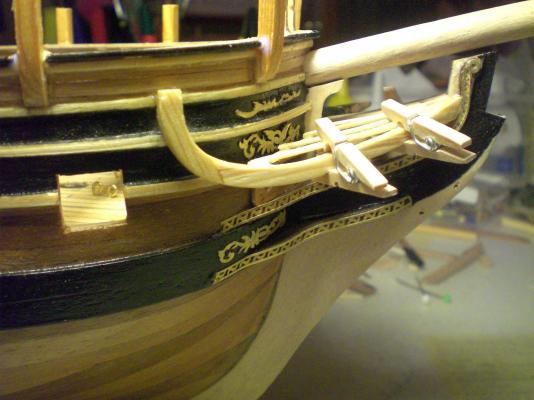
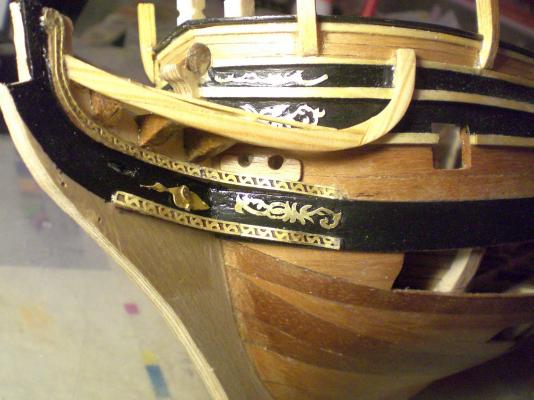
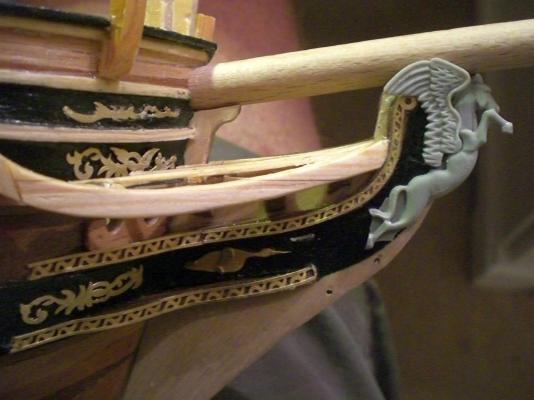
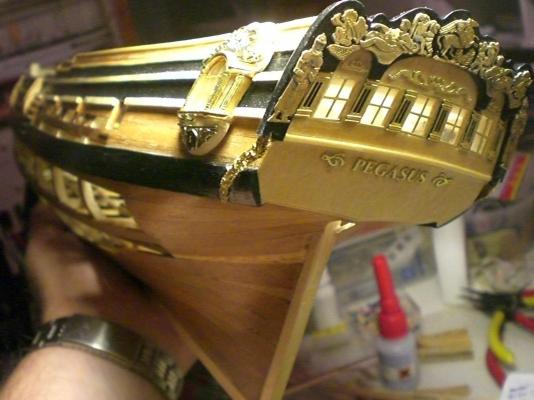
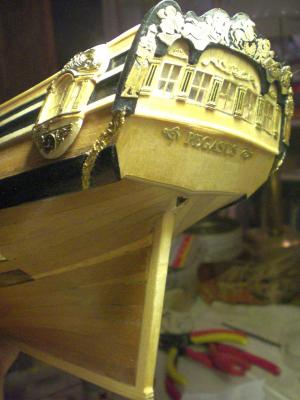
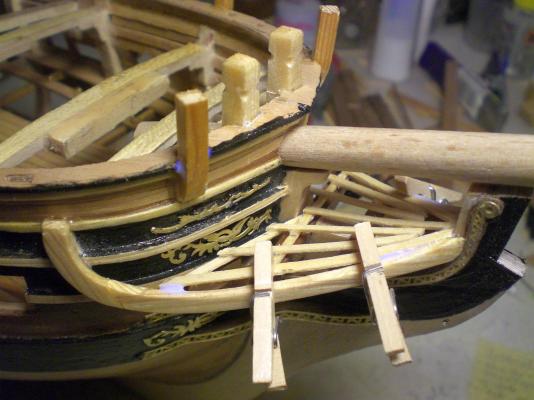
Lot 16 of my Pegasus buildlog there are still so many to do, I could carry on everywhere, but have to organise the futher build carefully.... I prolonged the black wale-stripe into the bow area, took off the Little brass bird figure before and Need to replace it again here is the Little duckie again... self explaining prefit of the namegiving figurehead, Chris Watton prefers resin as material, for shrinkage reasons, but still i`m mind pregnant with a brass Investment casting or so ( the sponge is still not soaked...) how to do by simplest means self explaining doing a litte bit further here I really am not pleased with the forecastle Access Little "pigion-ladders" squeased in between guns and forecastle aft bulhead as planed in the drawings, in lack of space, so here is my solution (B.E. Blue Ensign might be having a smile on his face allready)


-
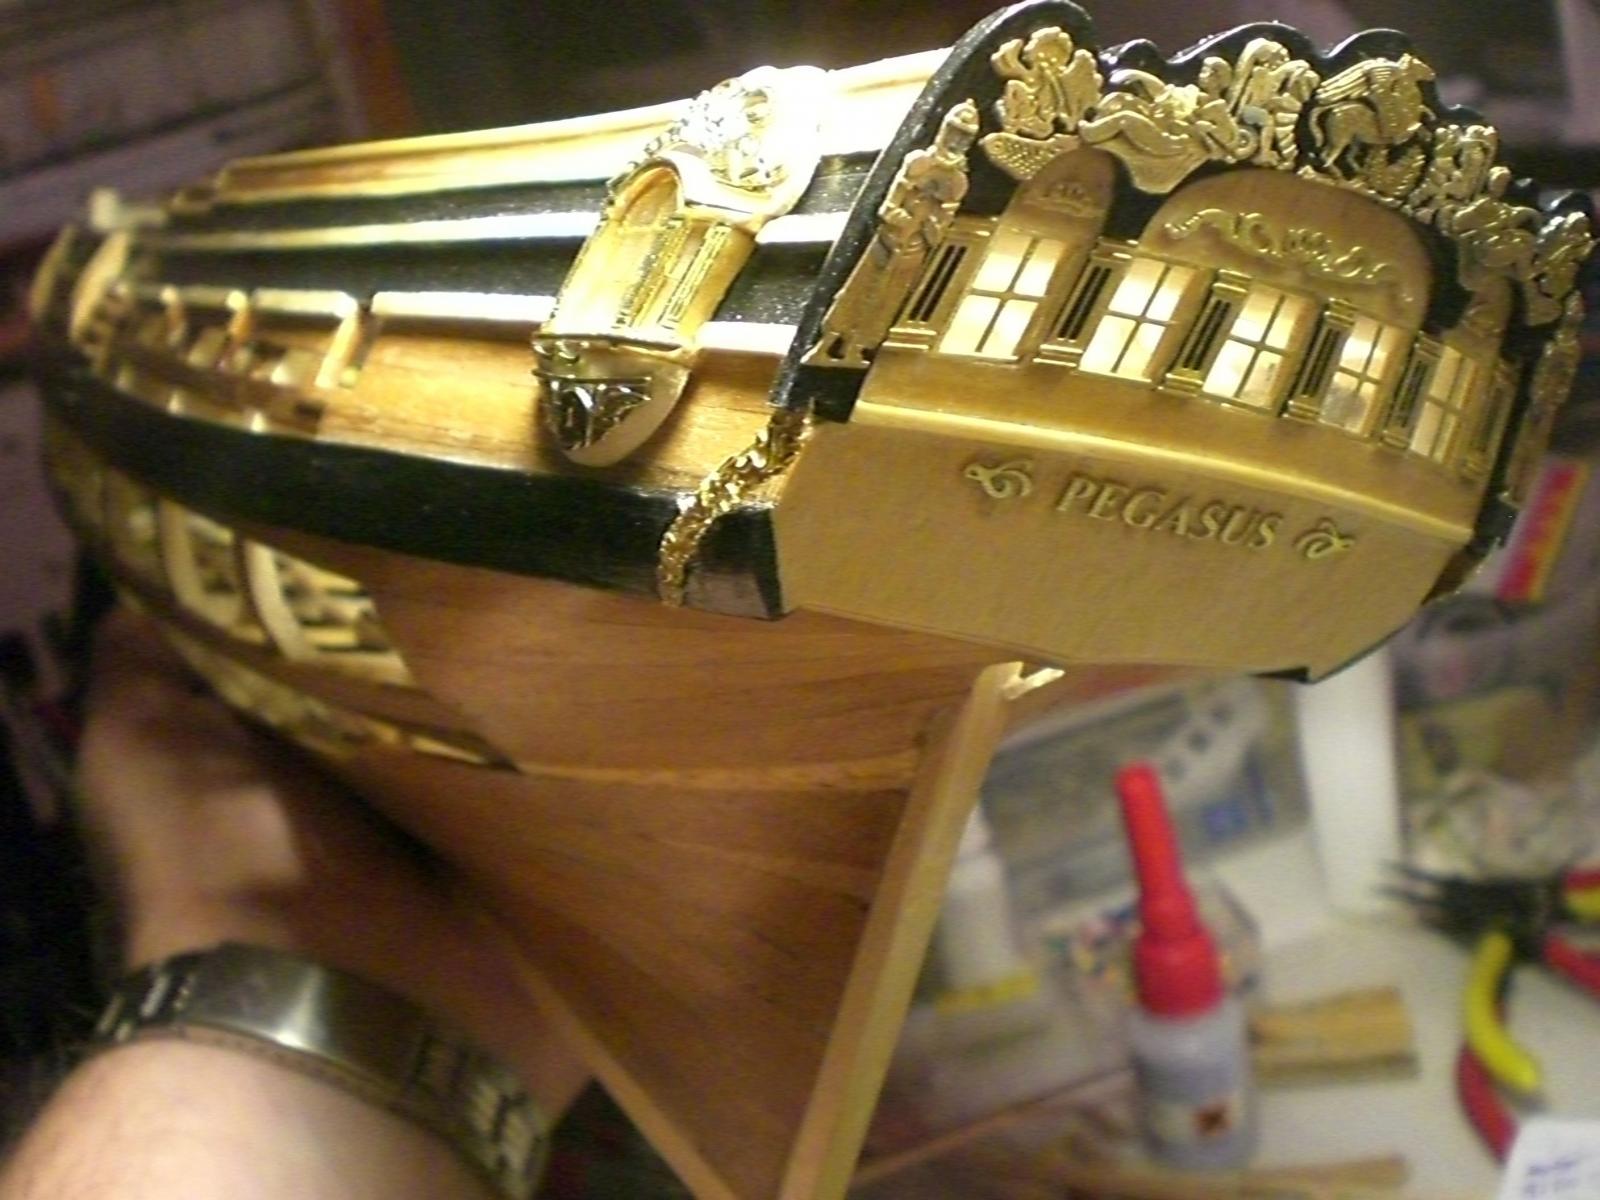
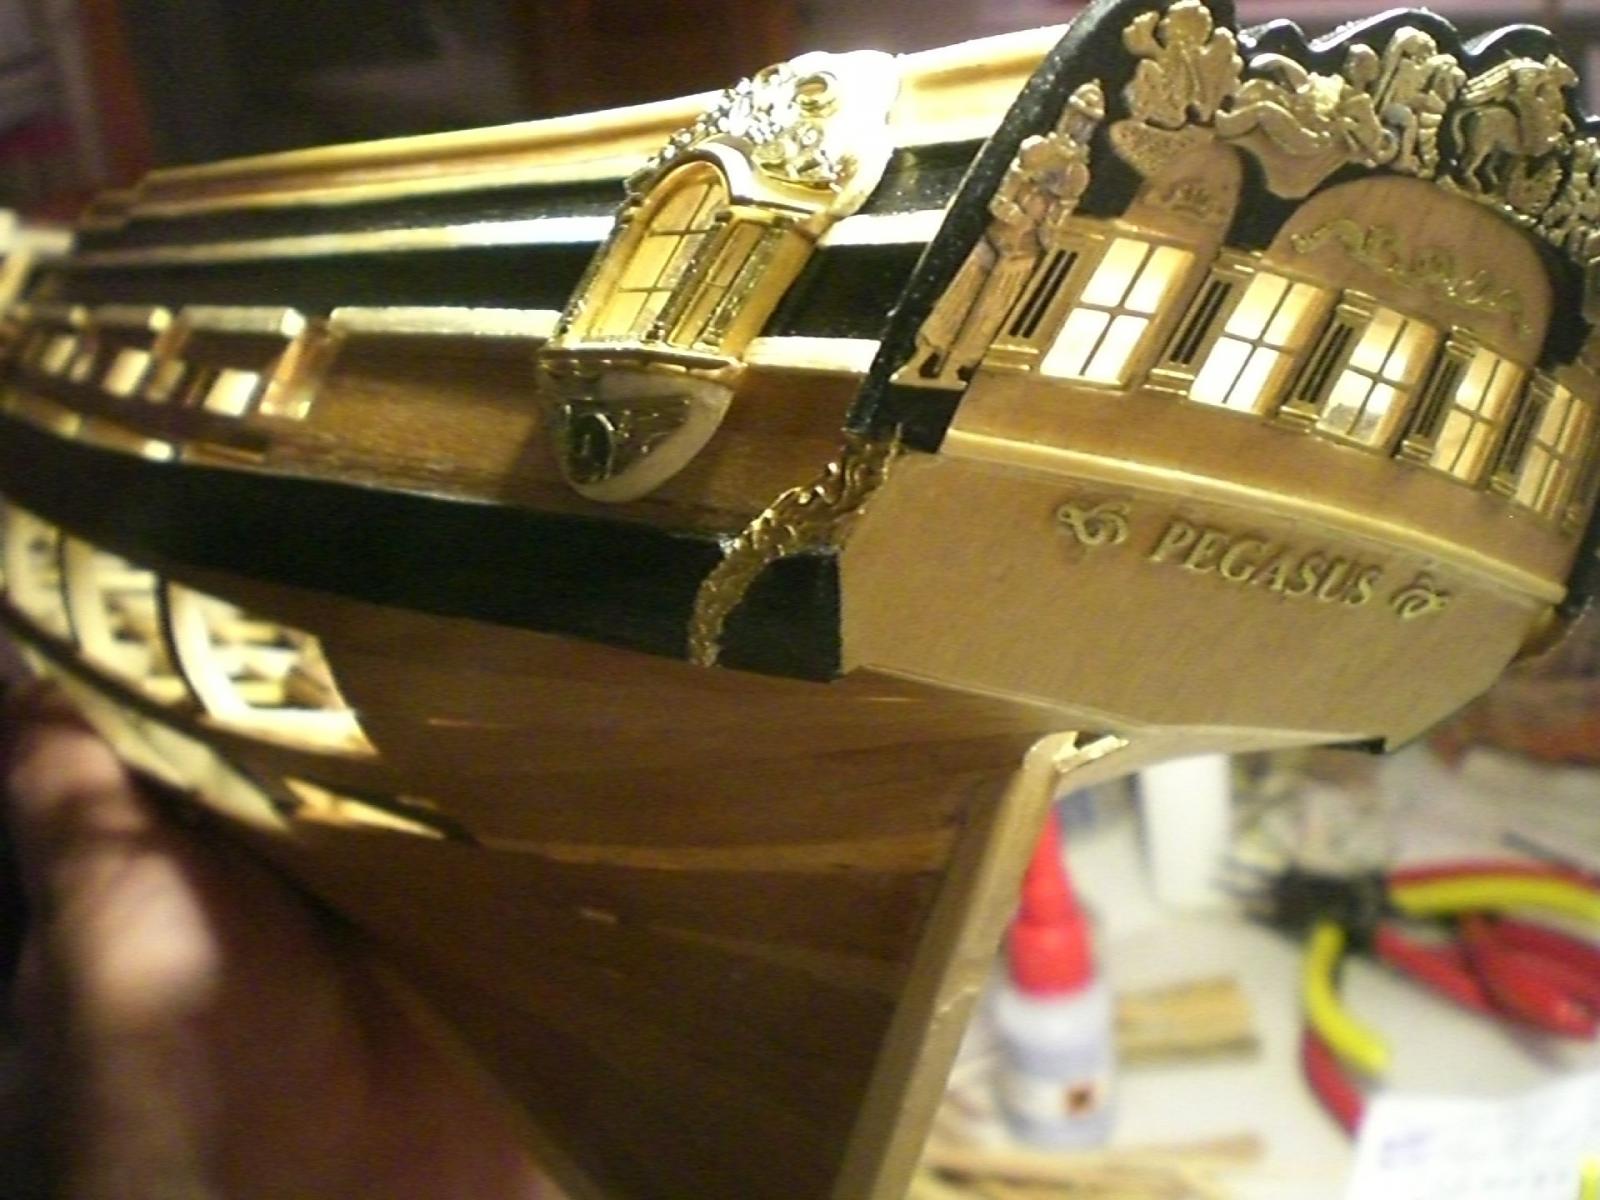
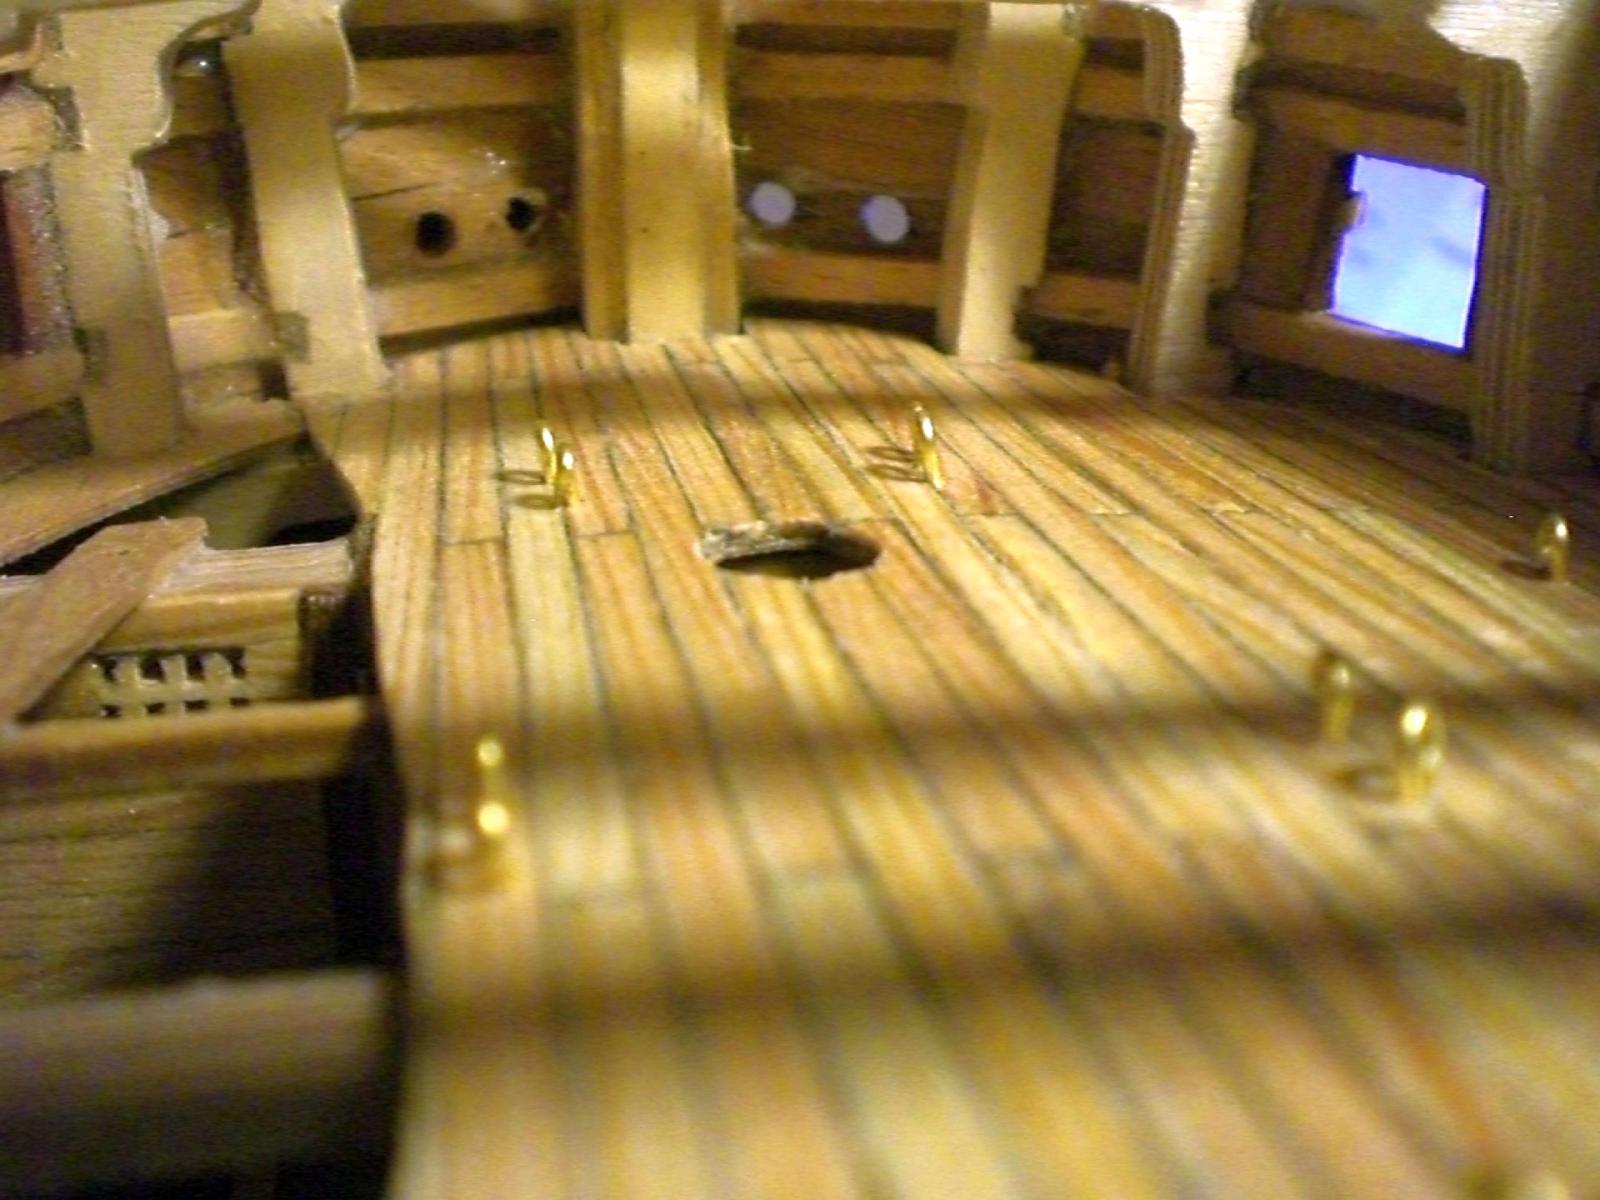
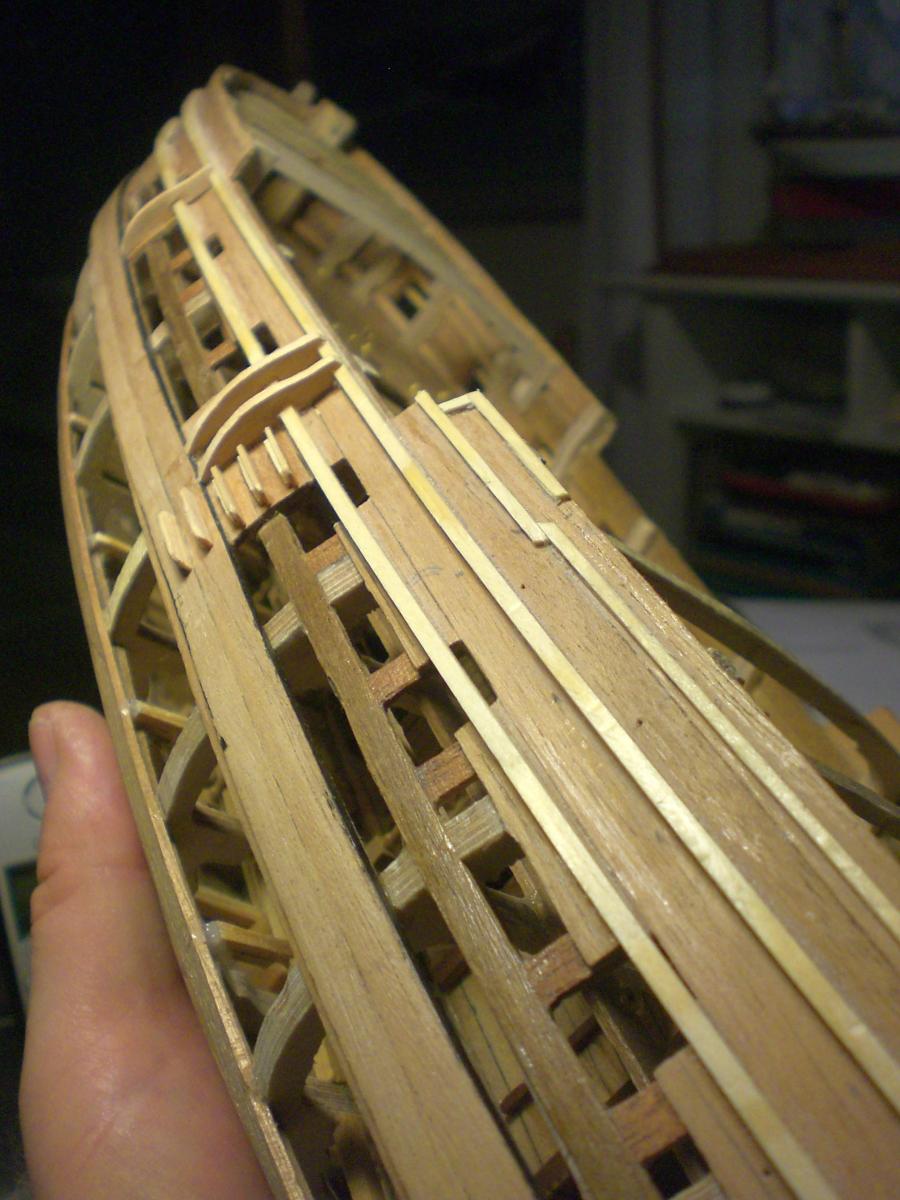
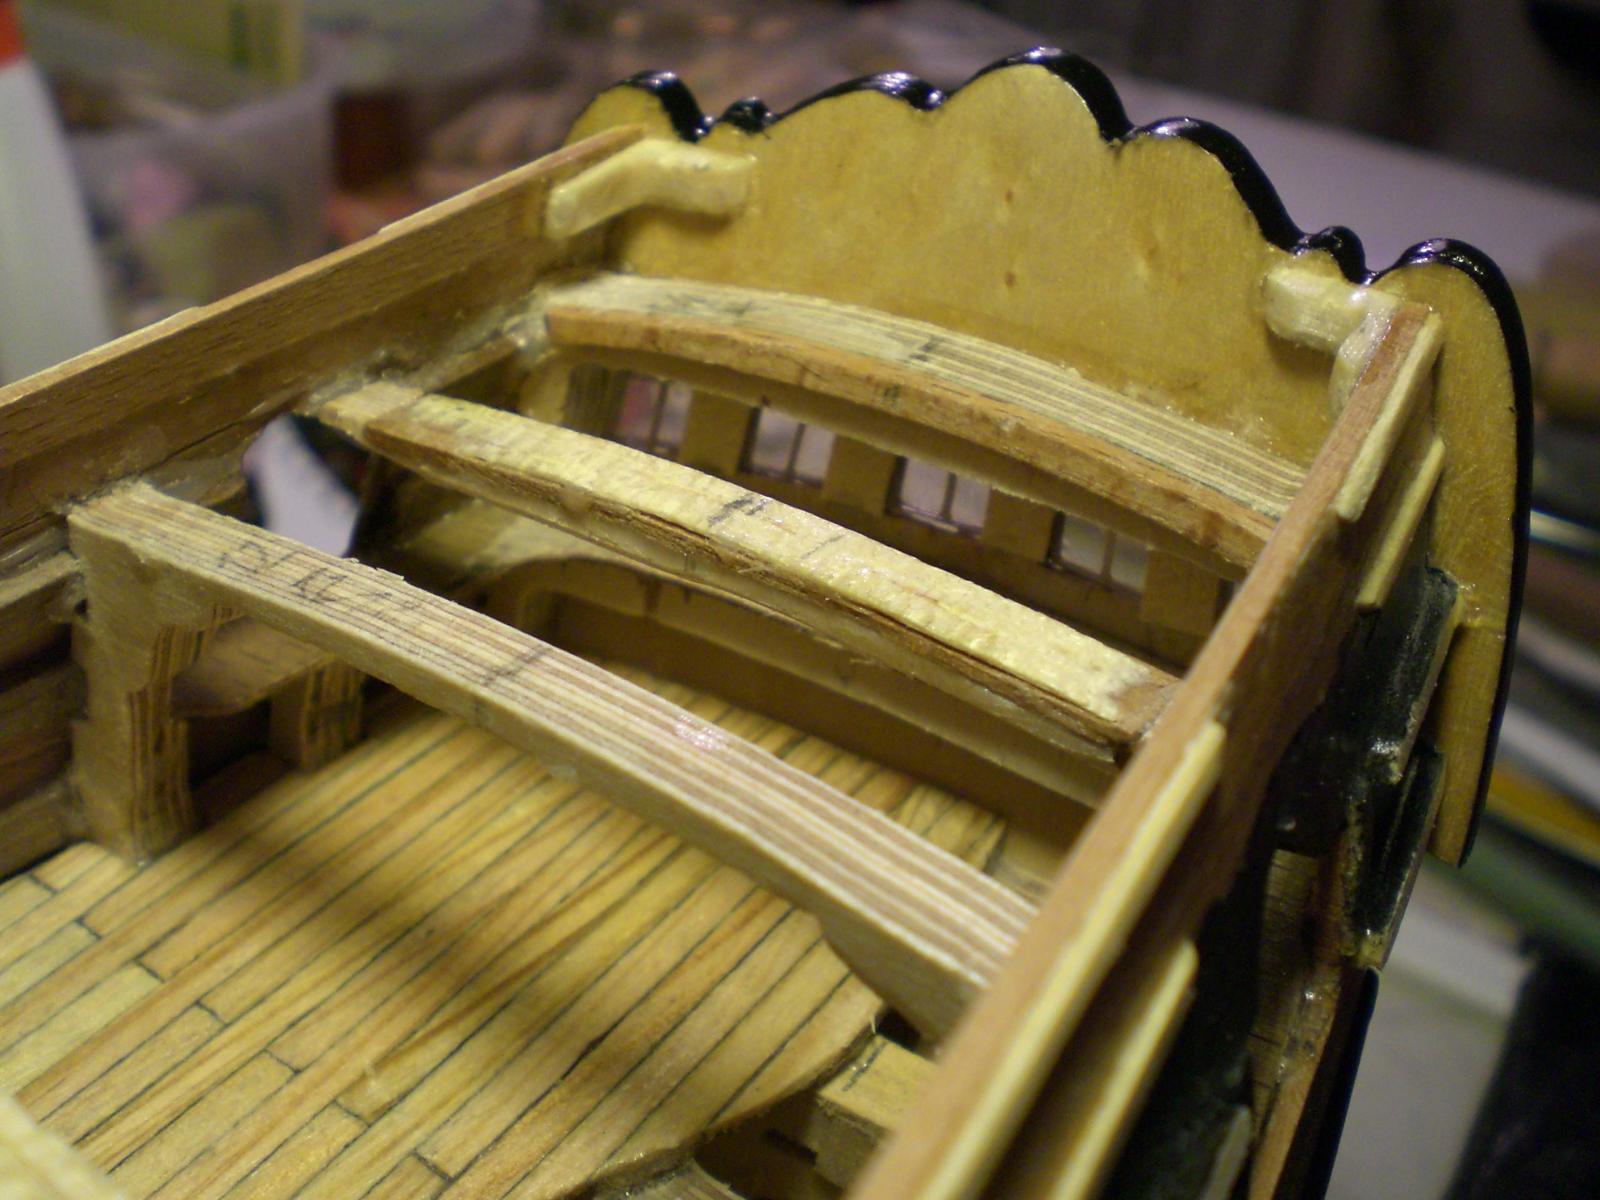
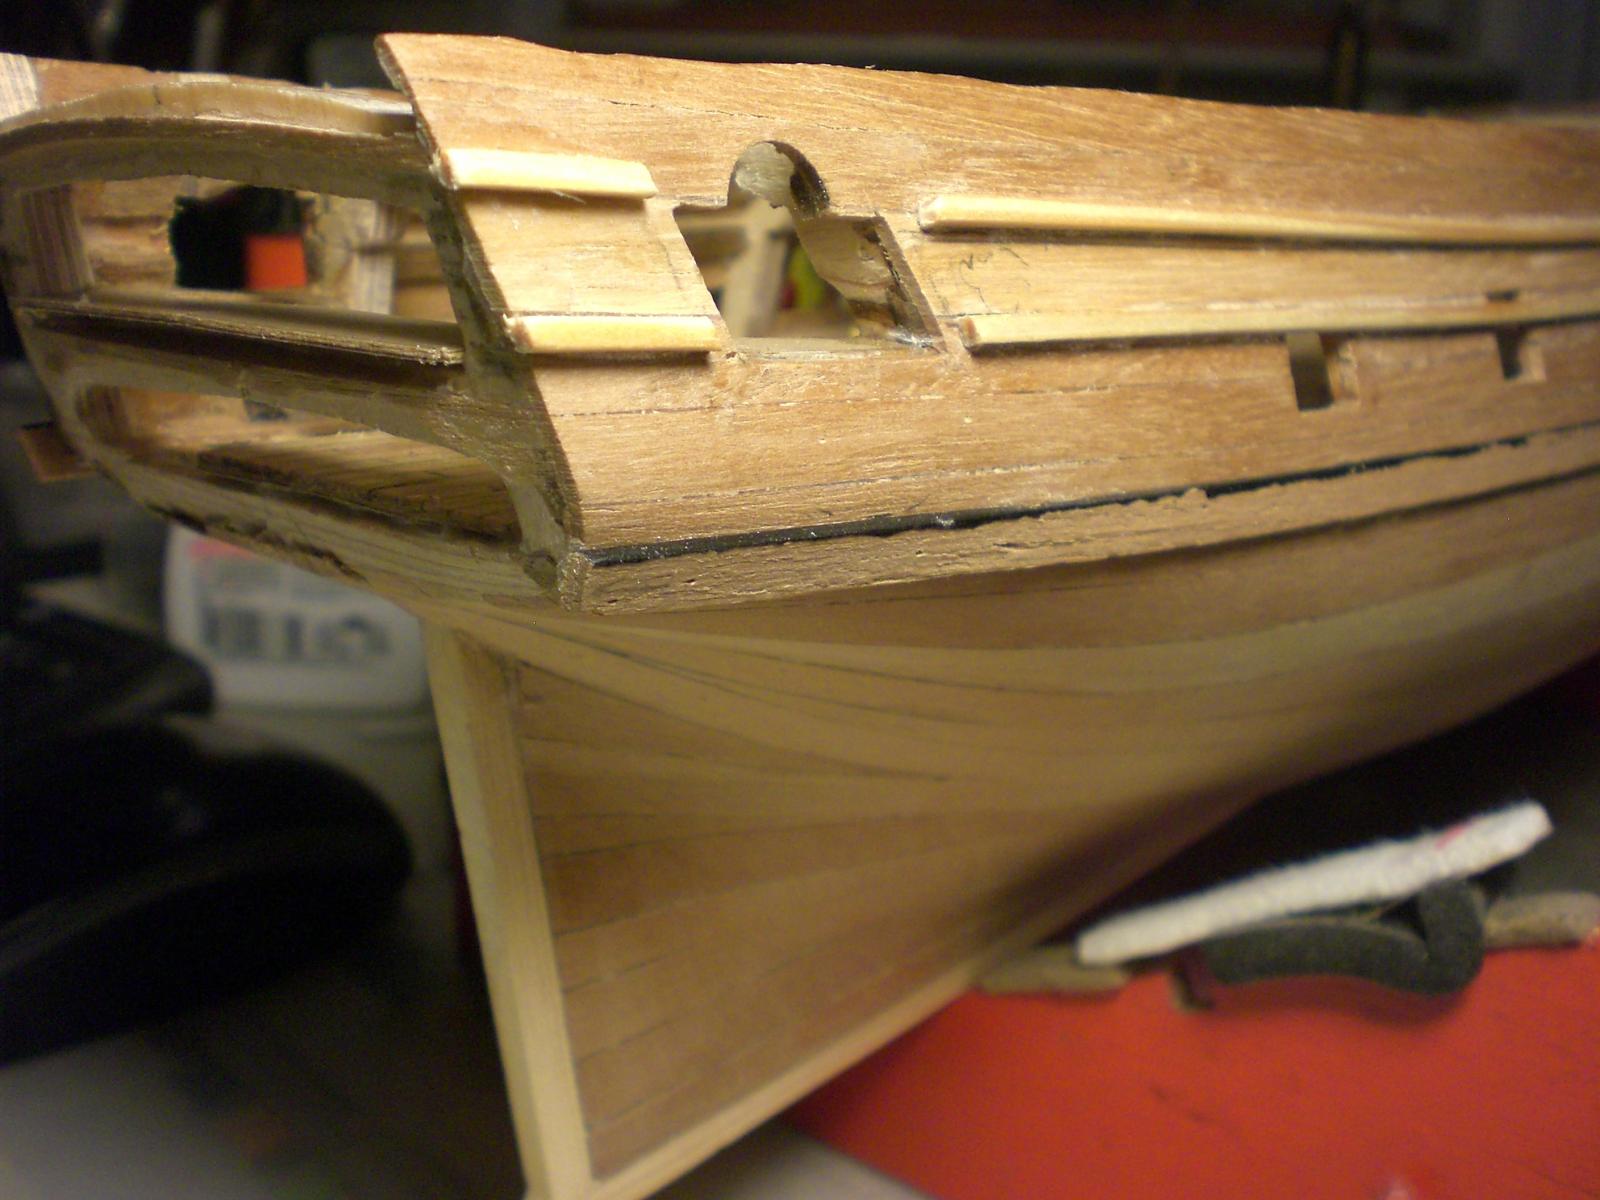
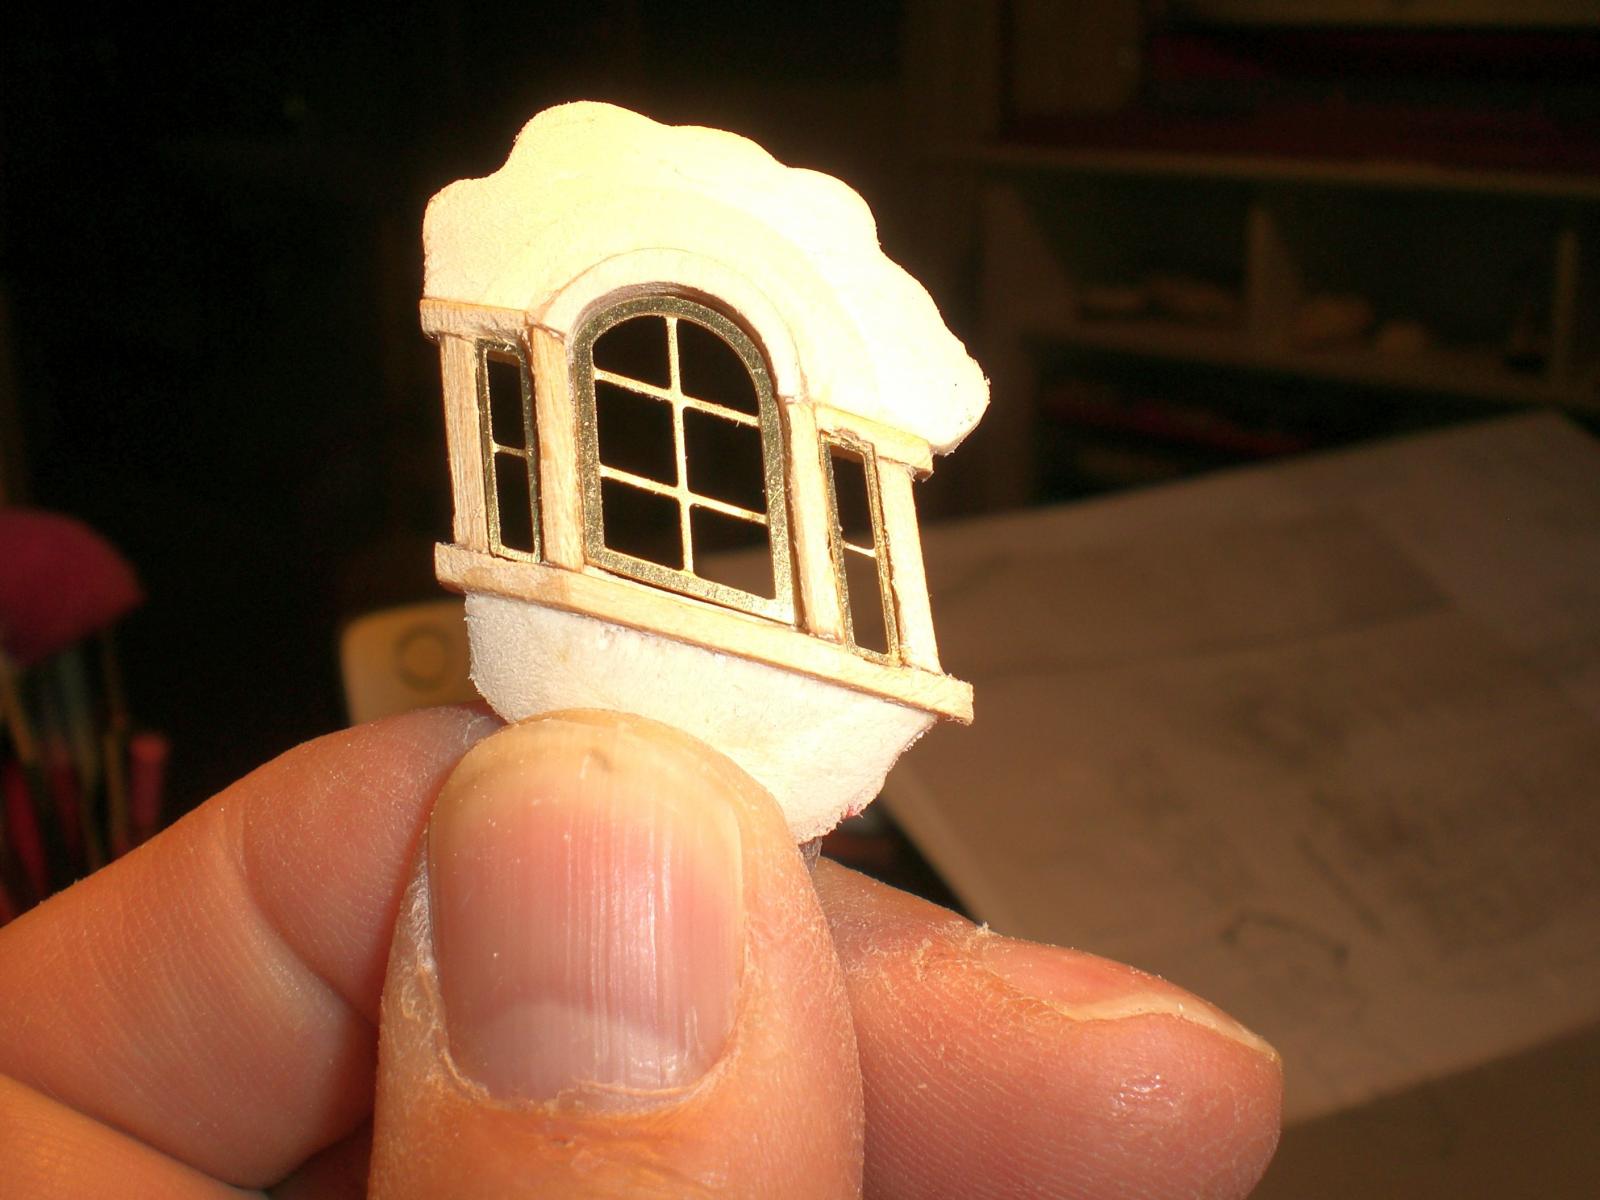
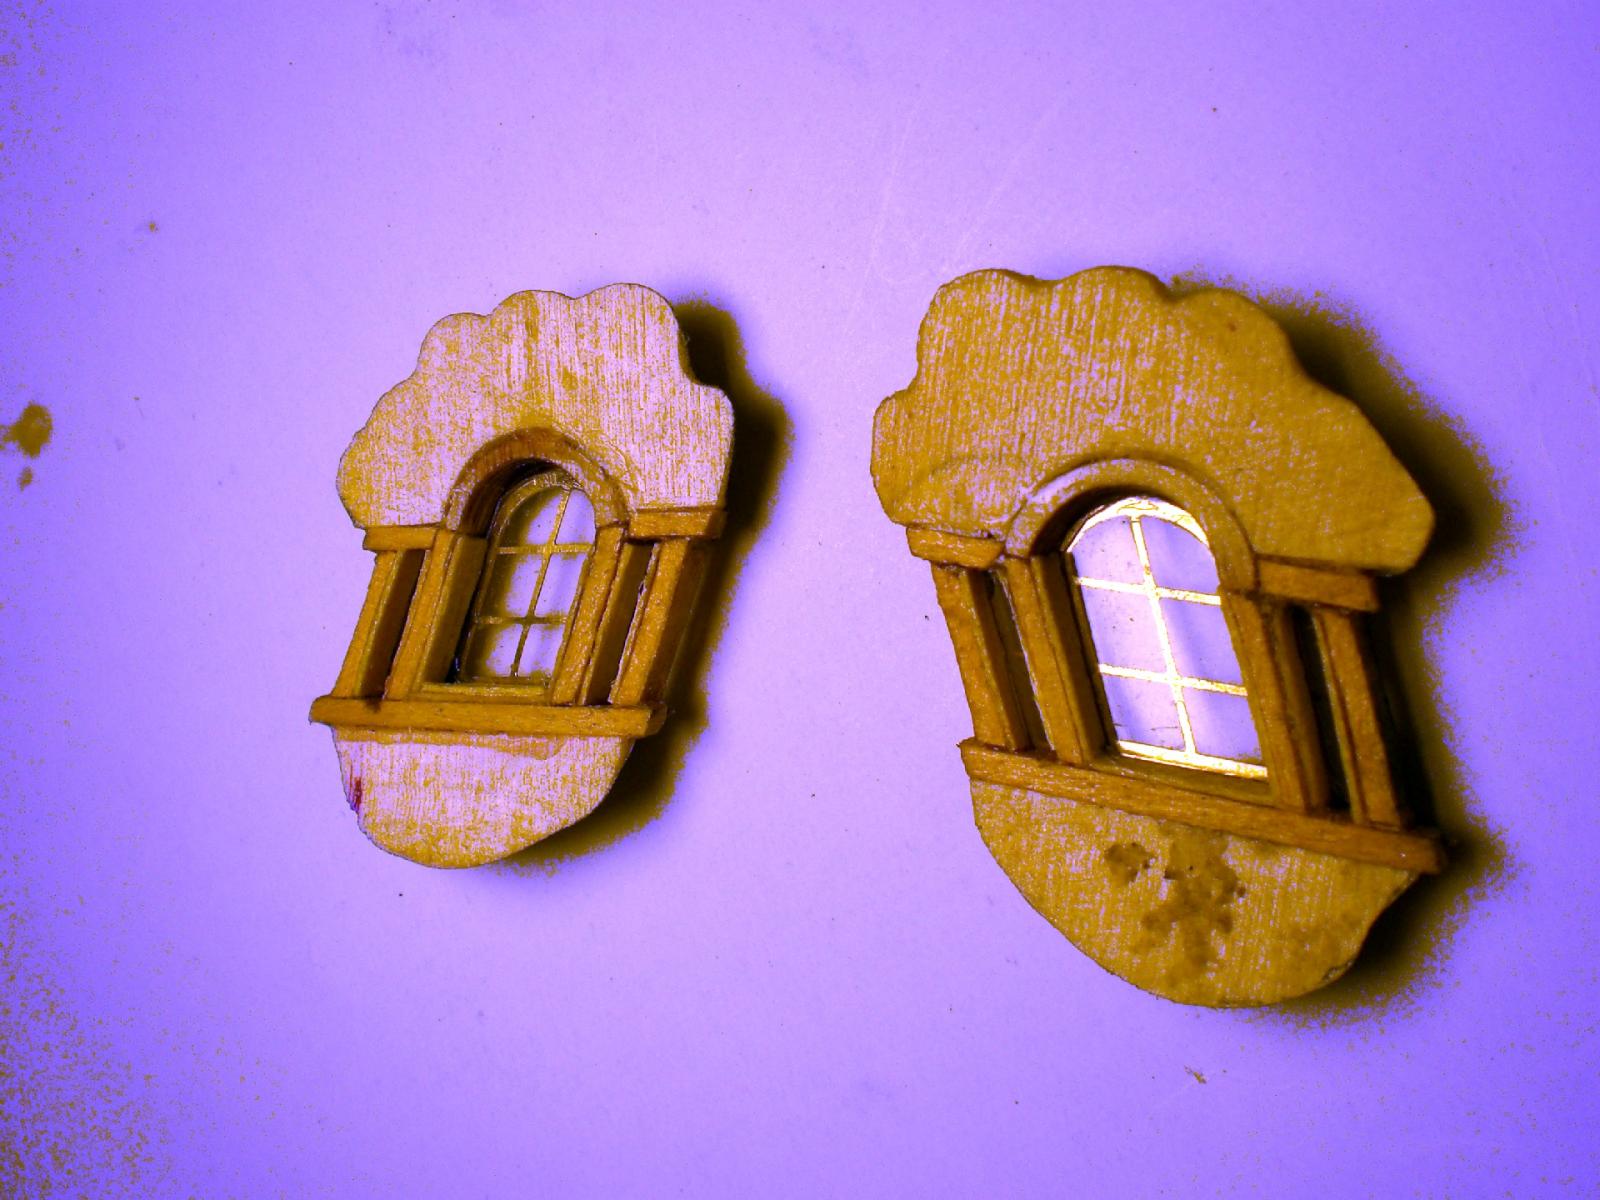
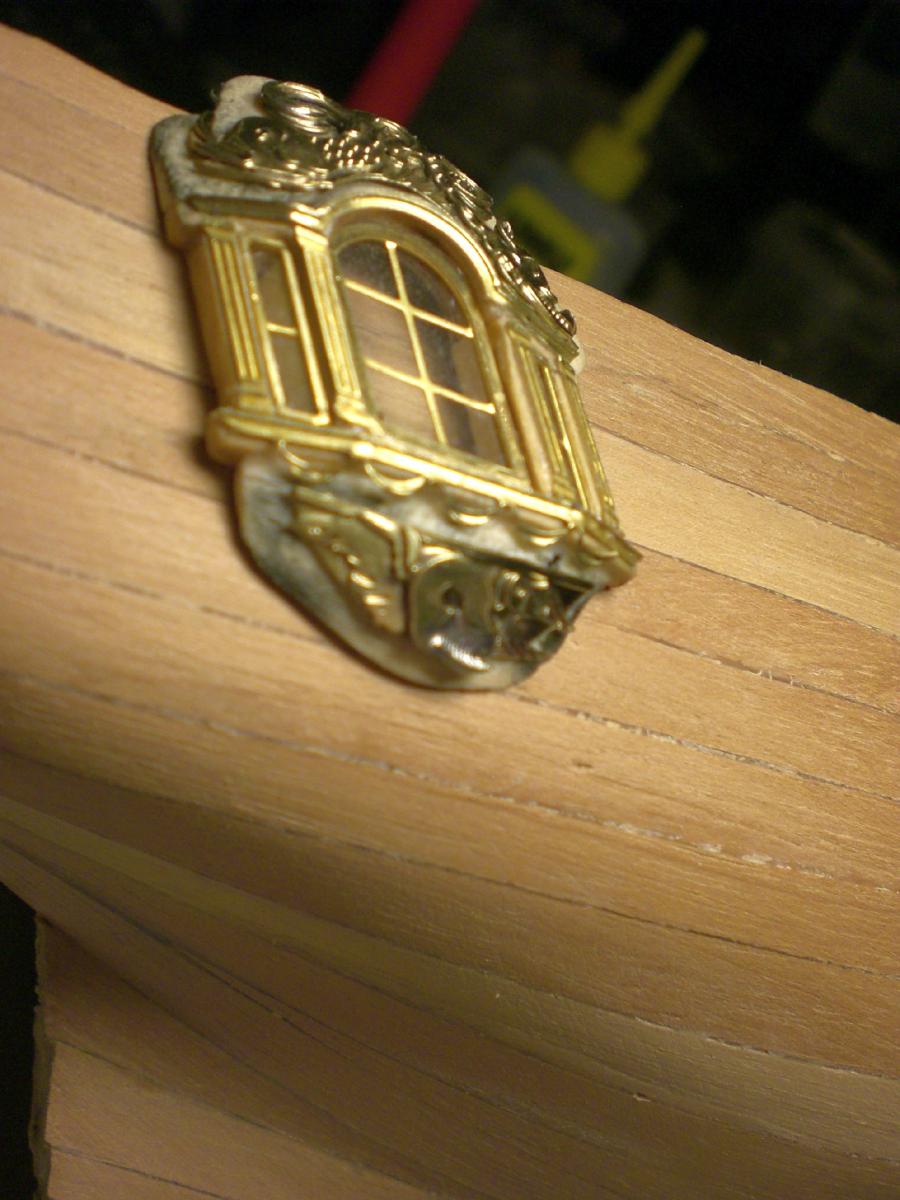
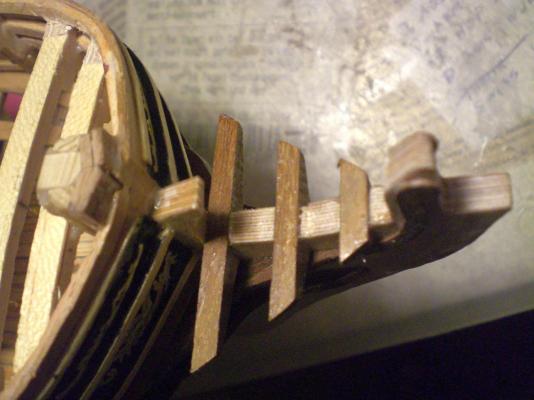
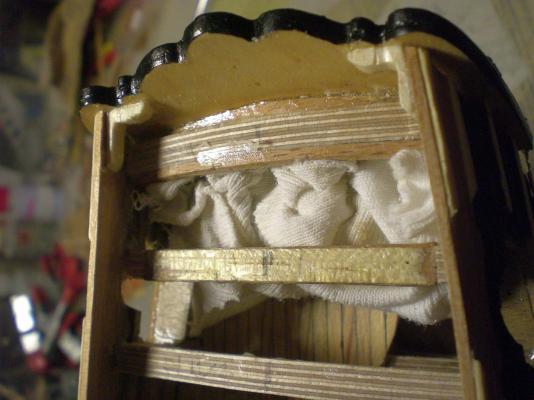
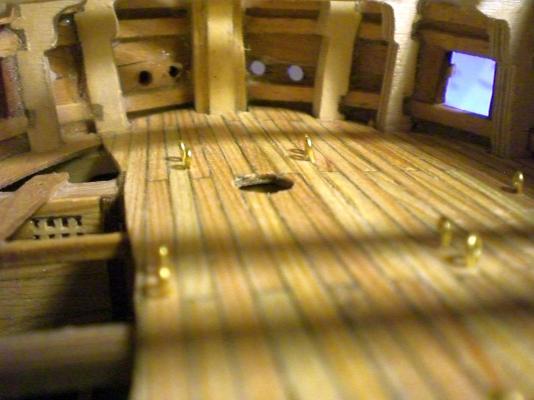
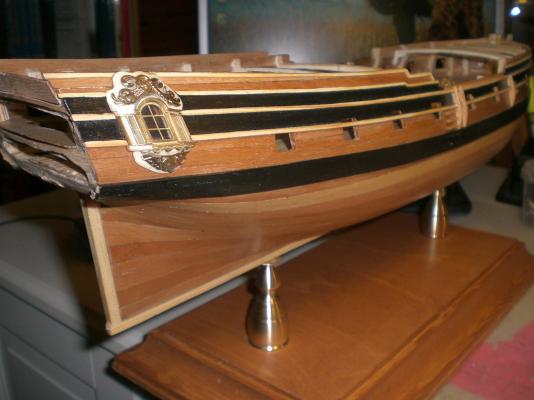
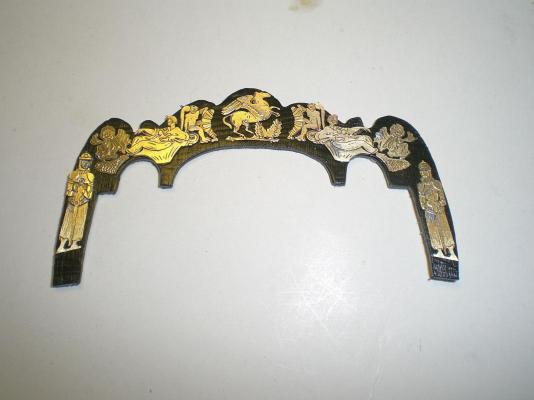
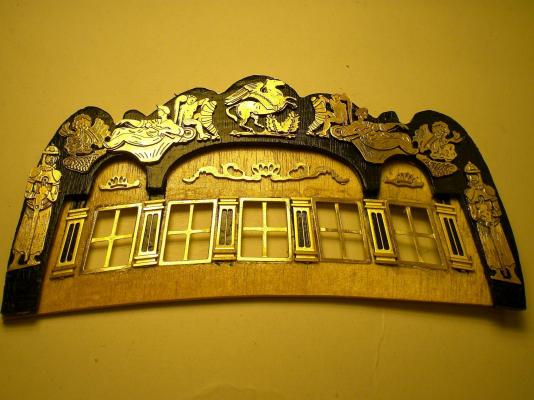
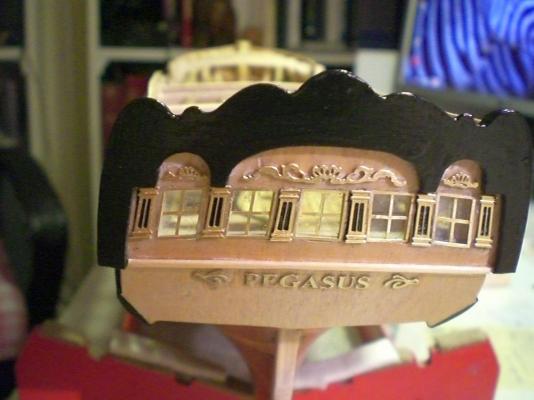
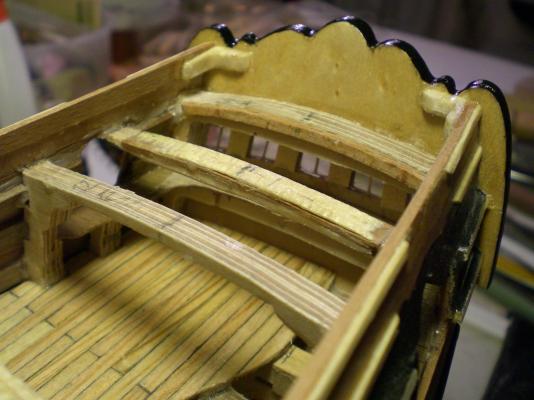
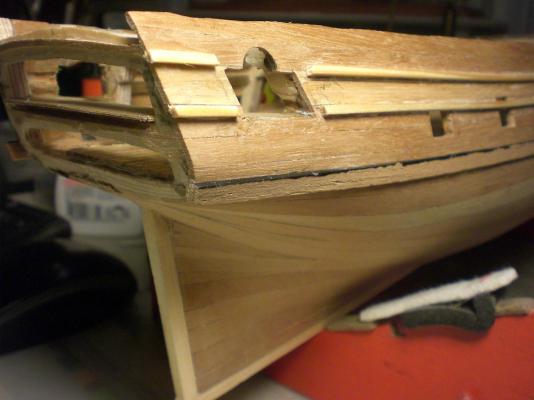
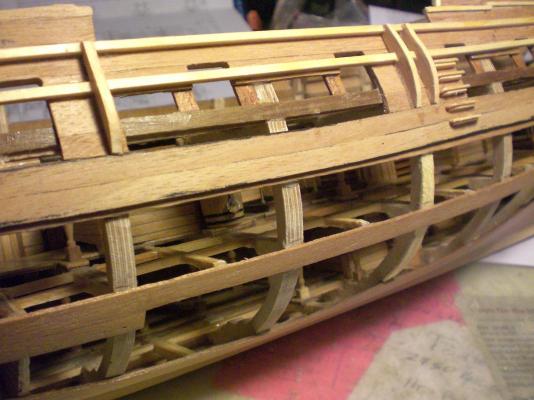
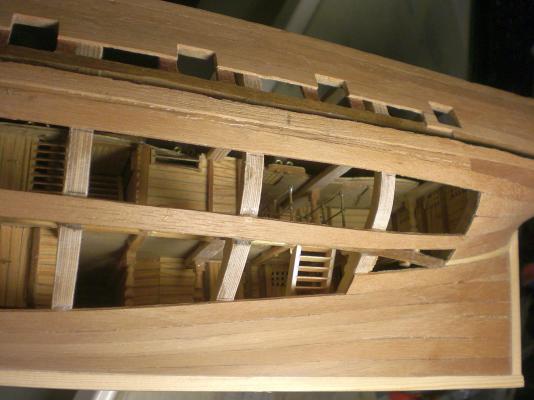
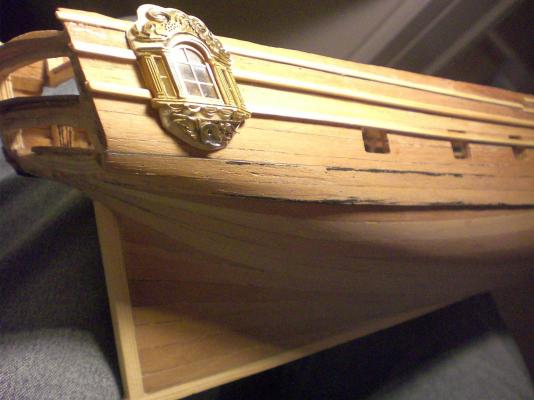
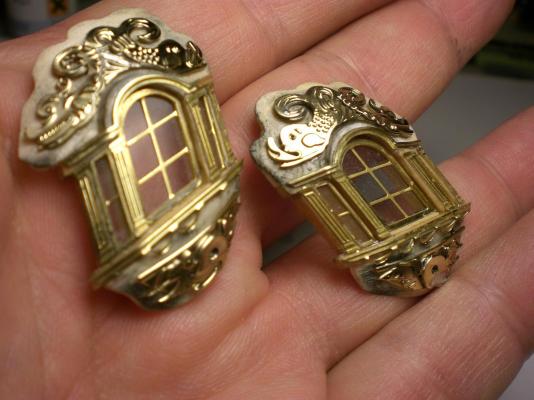
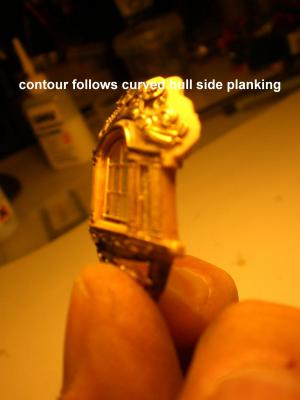
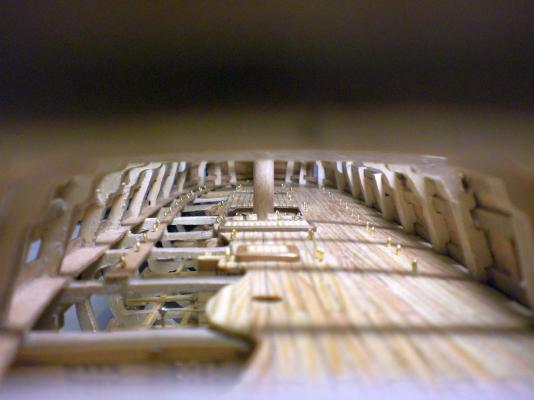
Lot 15 of my Pegasus buildlog rear Windows completed window Panels mounted, but badges remain removeable untill a later building sequence the raw opening for the rudder shaft and a small centerbore allinged through all decks above has allready been done sorry the pic could have been taken sharper starting on bow decoration and woodwork there These 3 beams should be strong enough... have to protect somehow the aft cabin Windows from inside against sanding dust view under rthe forecastle deck a Little further on Looks riged enough for adding the fine-work on to the preliminary 8mm bow dowel fits in perfectly


-
Hi Eddie if you should`nt allready have seen it.... tune in to U-Tube in a spot staring Gregory Peck and Anthony Quin " The Boston Man" in probably the best and breathtaking bluewater Gloucester fisher schoner races ever on film. Whoever is intending to model this type, shall be grooved in real quick in making up his mind afterwards. Nils
-
Thanks for your words Eddie, I`m glad you like it There will be some more Input from my behalf tomorrow during the day..... By the way... I know now where I have seen Information of the "Elsie" you are building, it was many years ago in a book I have of Carlo Sciarelli, (unfortunetely not published any more) titeled "DIE YACHT" , published by Delius Klasing & Co. in Germany. I picked the Bluenose instead at that time because it came out from Billing Boats, sad to say it is still 3/4 completed but on the shelf. My wife is allway pushing me to complete it, before I start any other new Project. Would love to see and follow your Project well proceeding as it moves towards the finishing line Nils

-
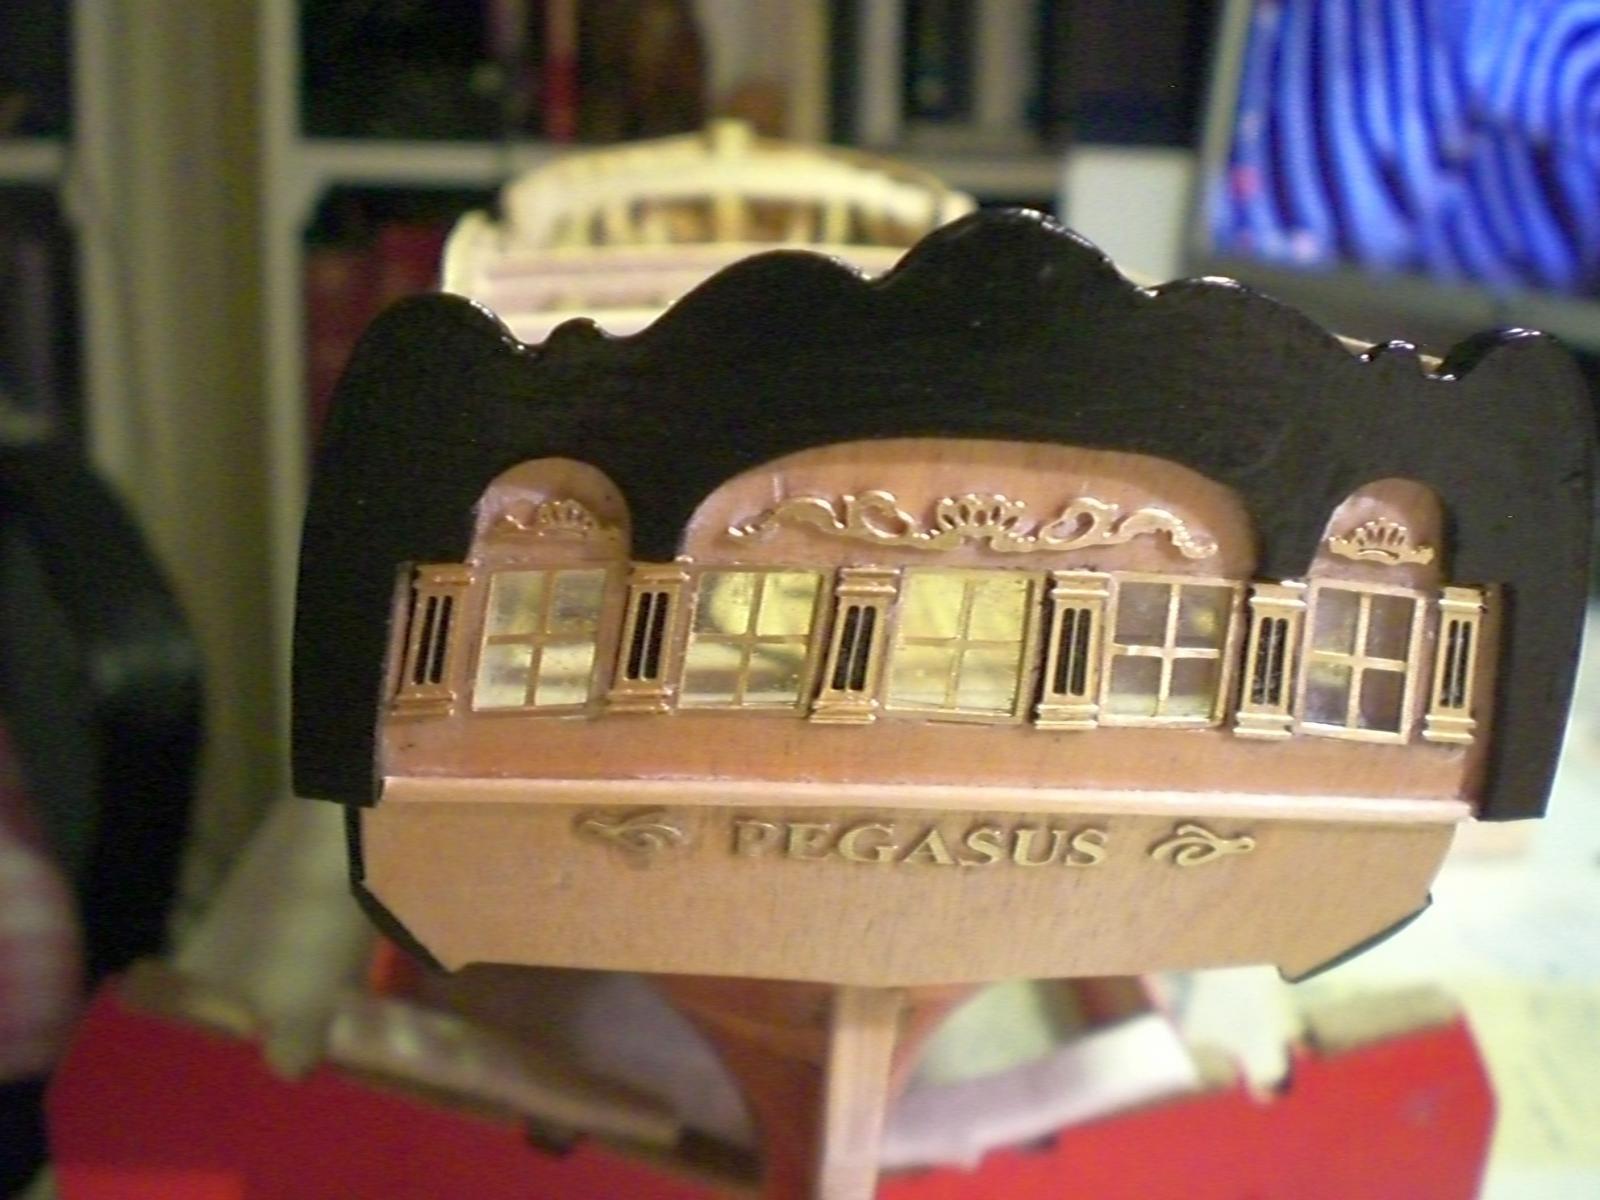
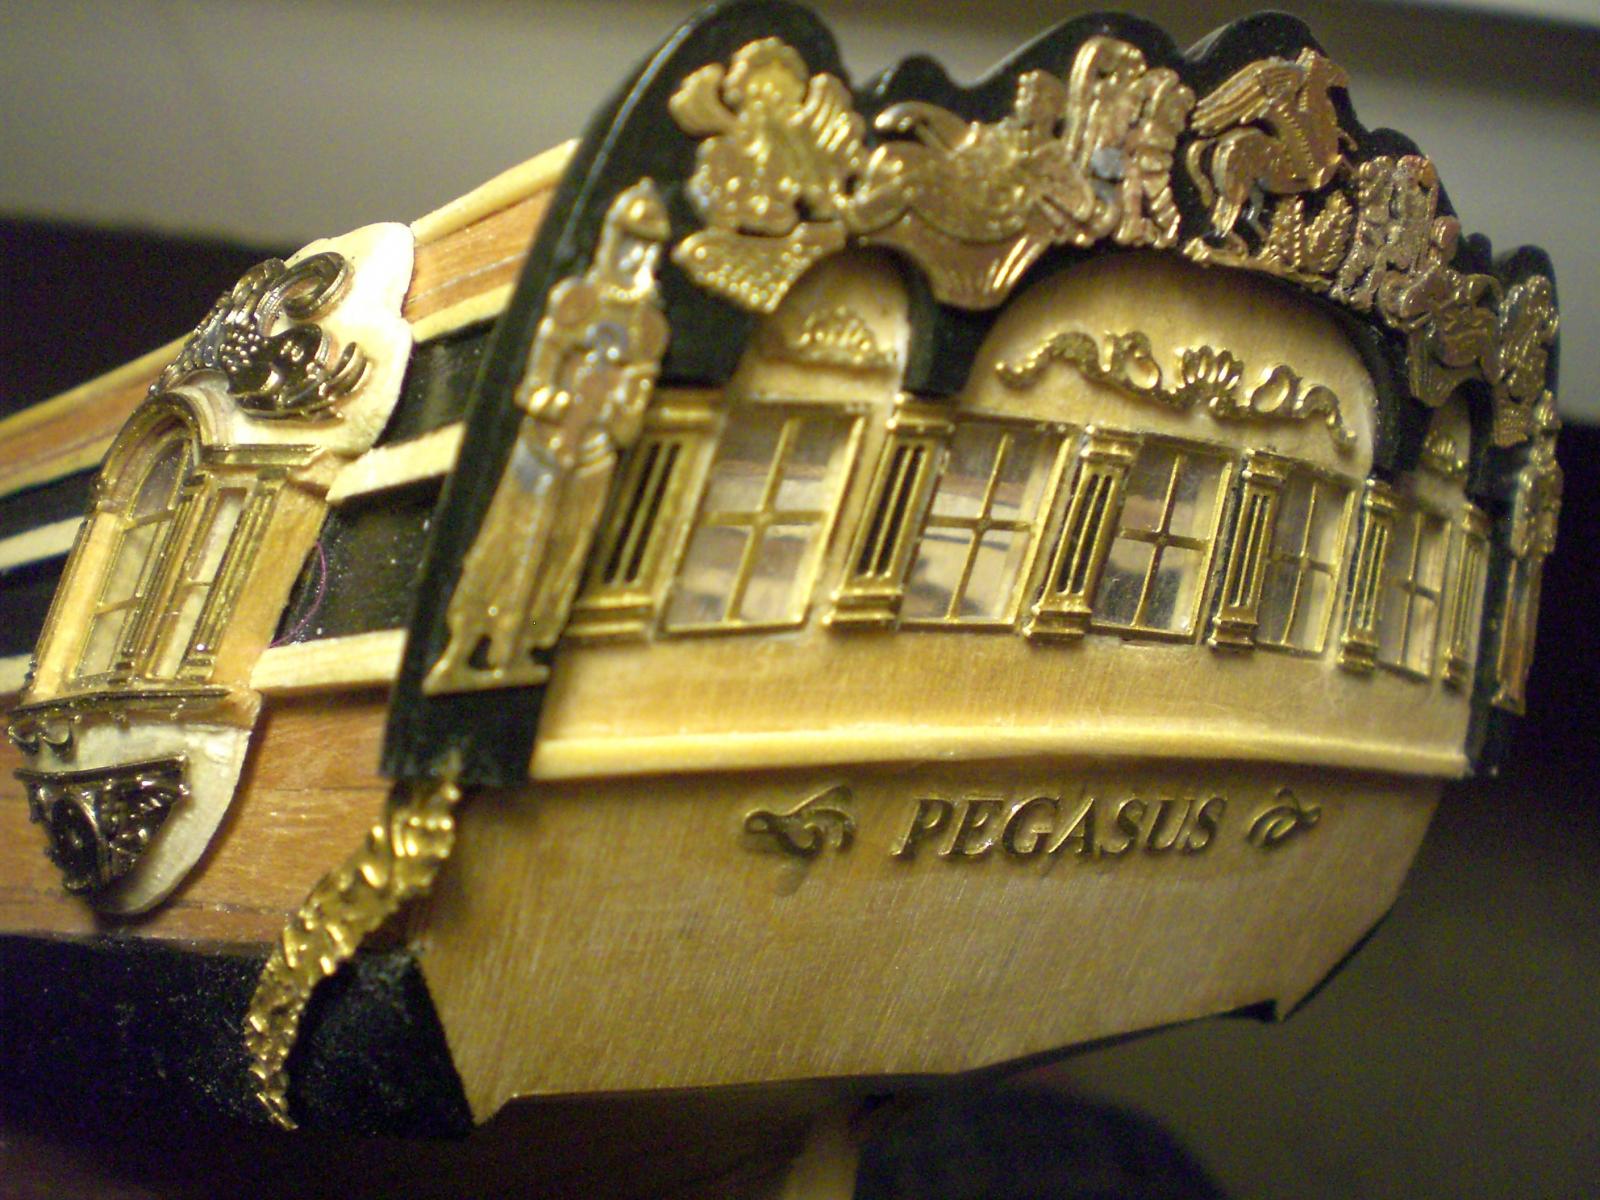
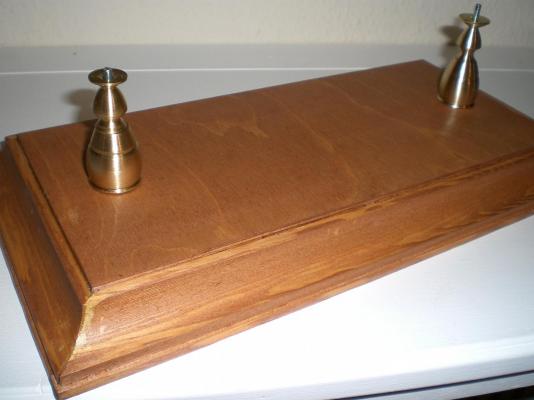
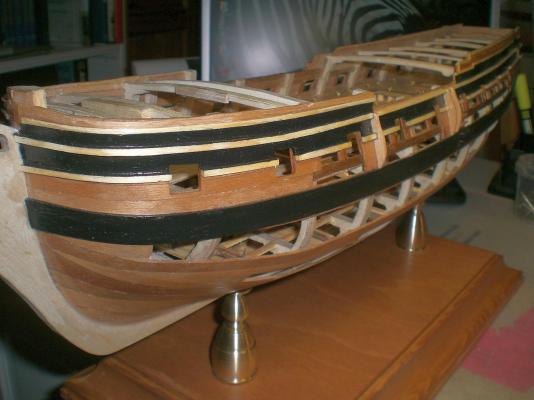
Lot 14 of my Pegasus buildlog... portside ready for applying silk black ready done in the appropriate Areas here the stand Comes into the game..., use pine Wood board combined with 1/4 hollow profiled Woods and rectangular stipes for below. All is varnished in 2-cover Cherrywood stain, this covered with silktouch clear varnish. The pedestals are made from very priceworthy old brass candleholders from the local fleamarkets around Hamburg area only preliminary test on testing distances and lengths of Stand pedastel bolts positional check for soldered "3D etch layers" onto fries Support further positioning check, note the heights, the Amati plan template I find was too low in height Ships Name and window panes permanently assembled poop bulwarks increased in height and Support brackets mounted to the rear plate. One of the next days I shall Need to tackle Fitting out the Stern interior and the appropriate bulkhead Panels things are moving on now. I think I will leave the brass character to the decorations and therefore pre-conserved the shiny brass surfaces with a coating of high gloss varnish


-
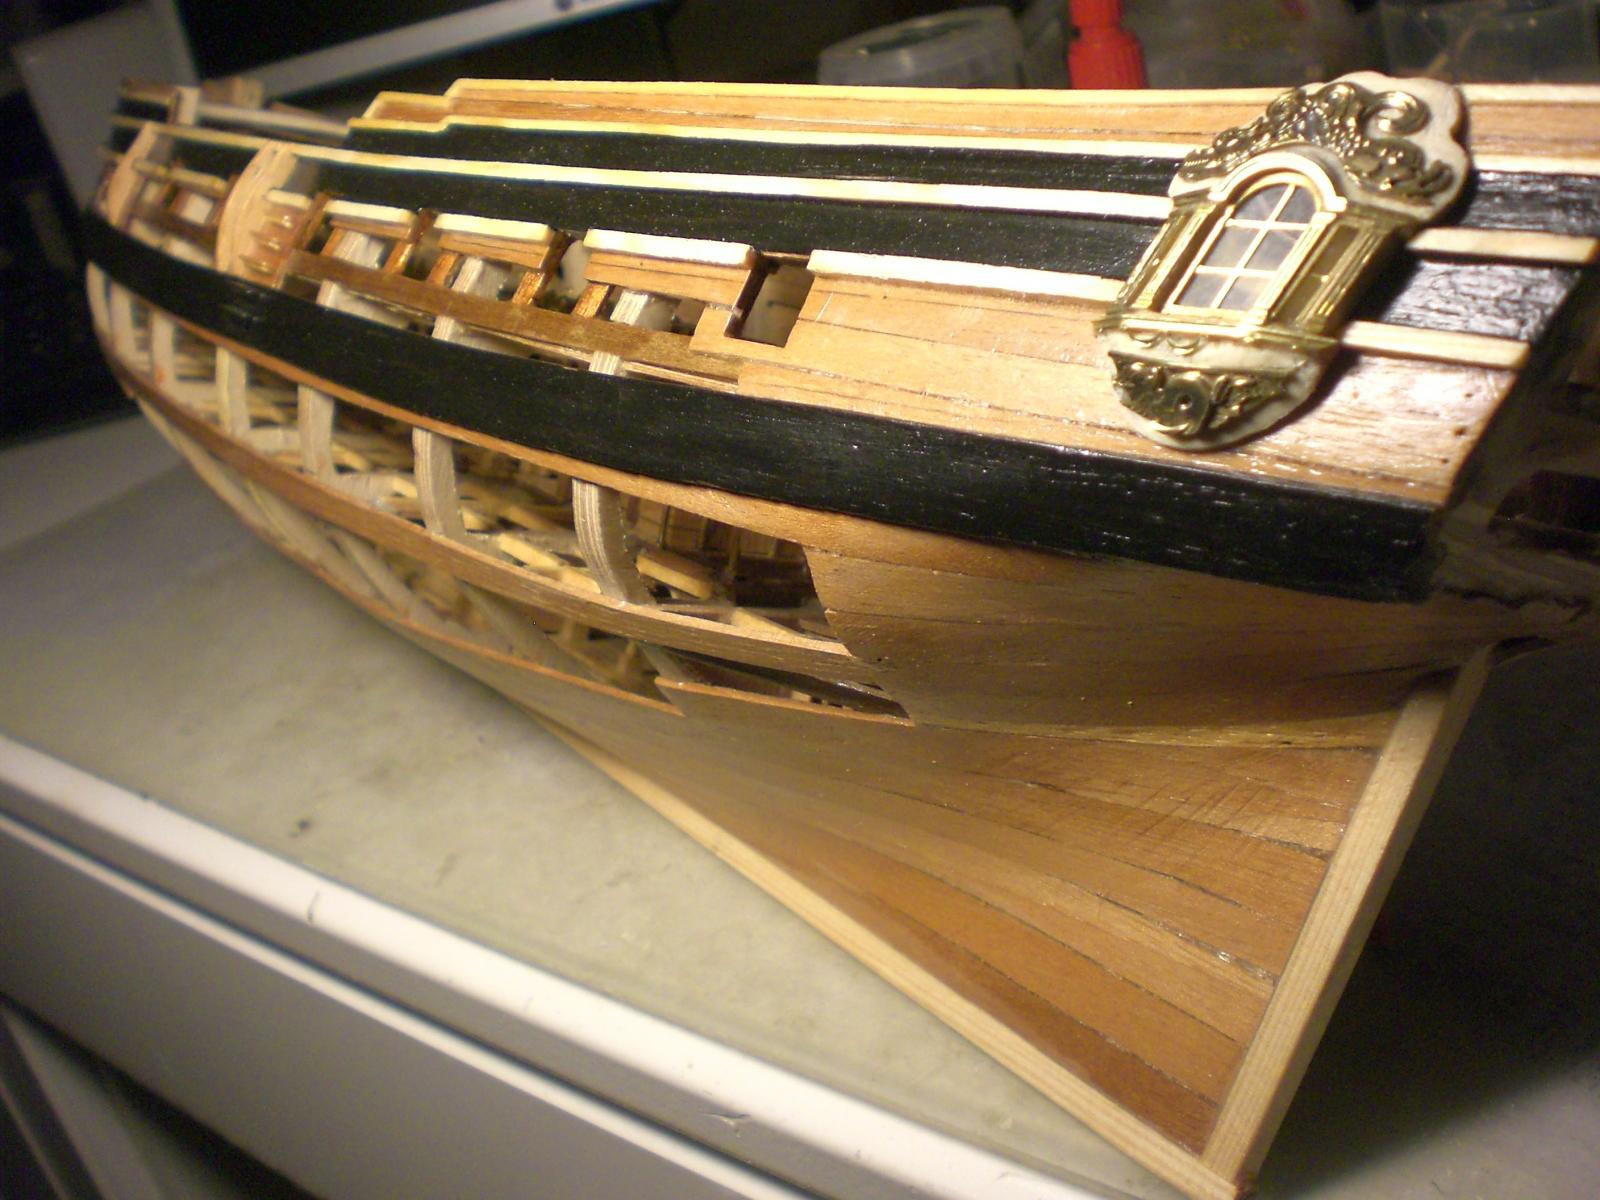
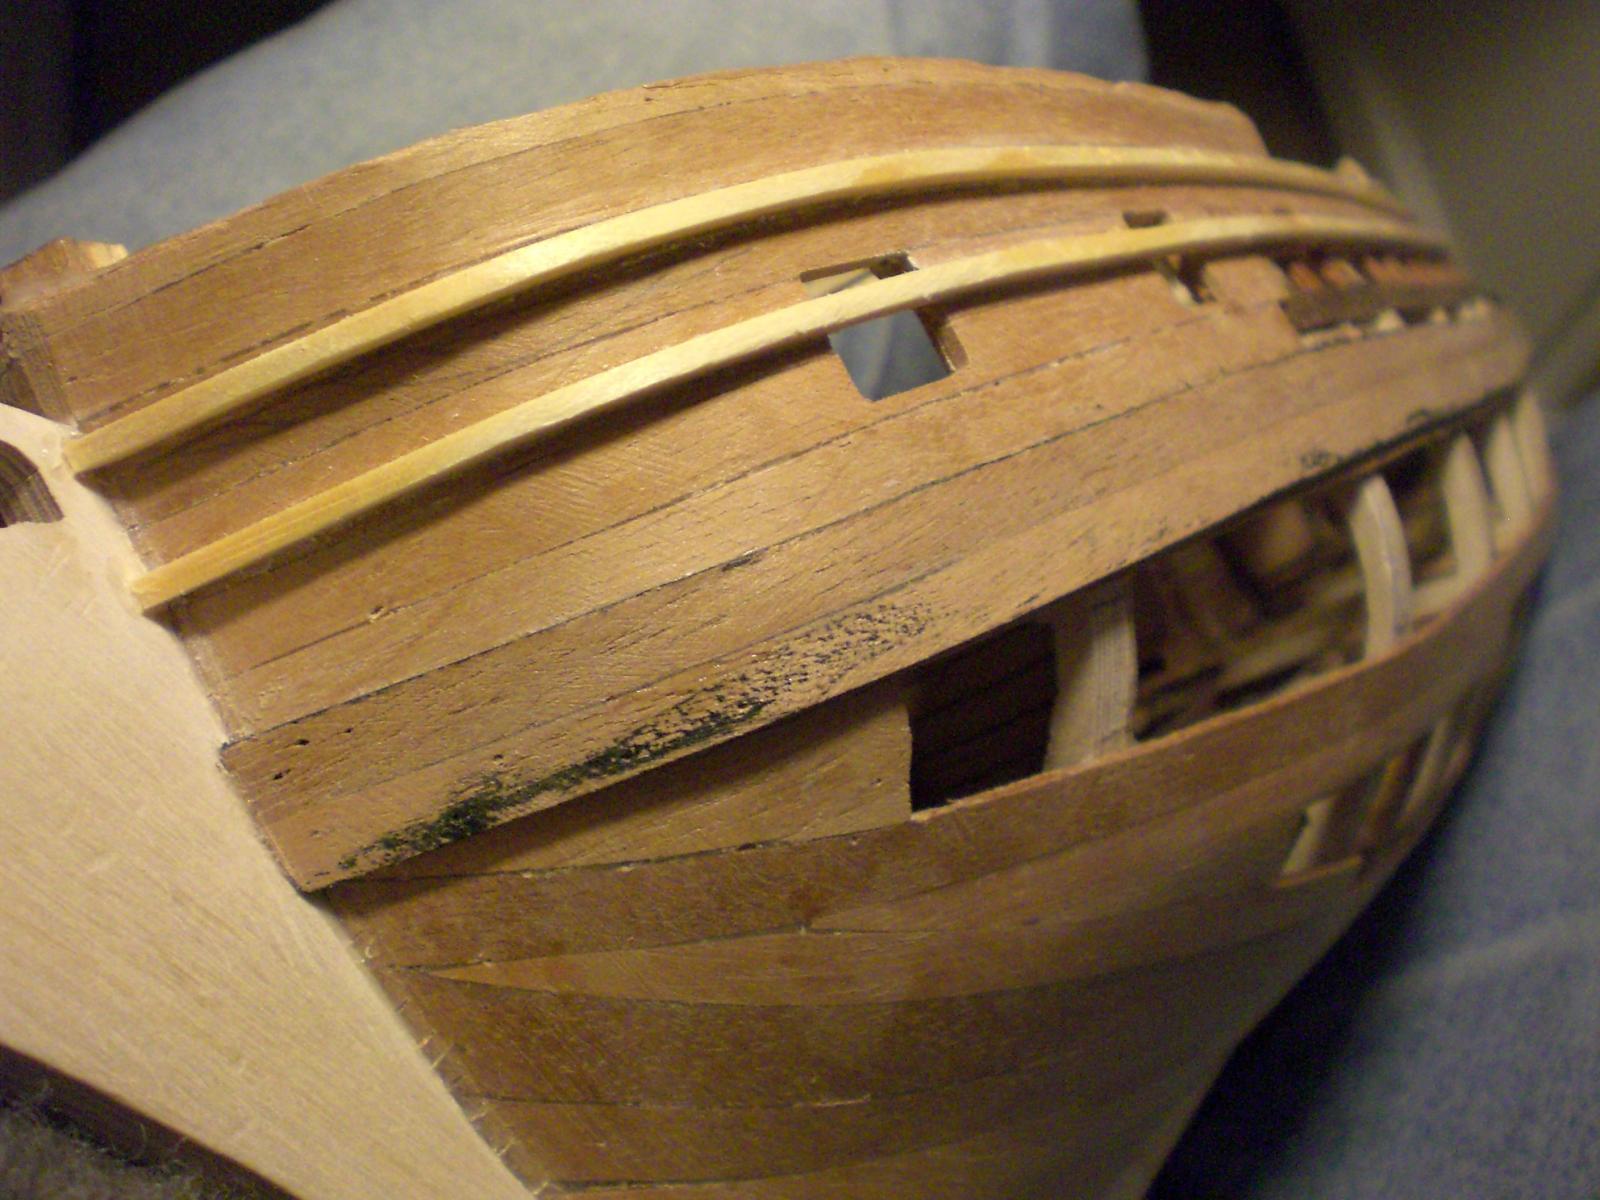
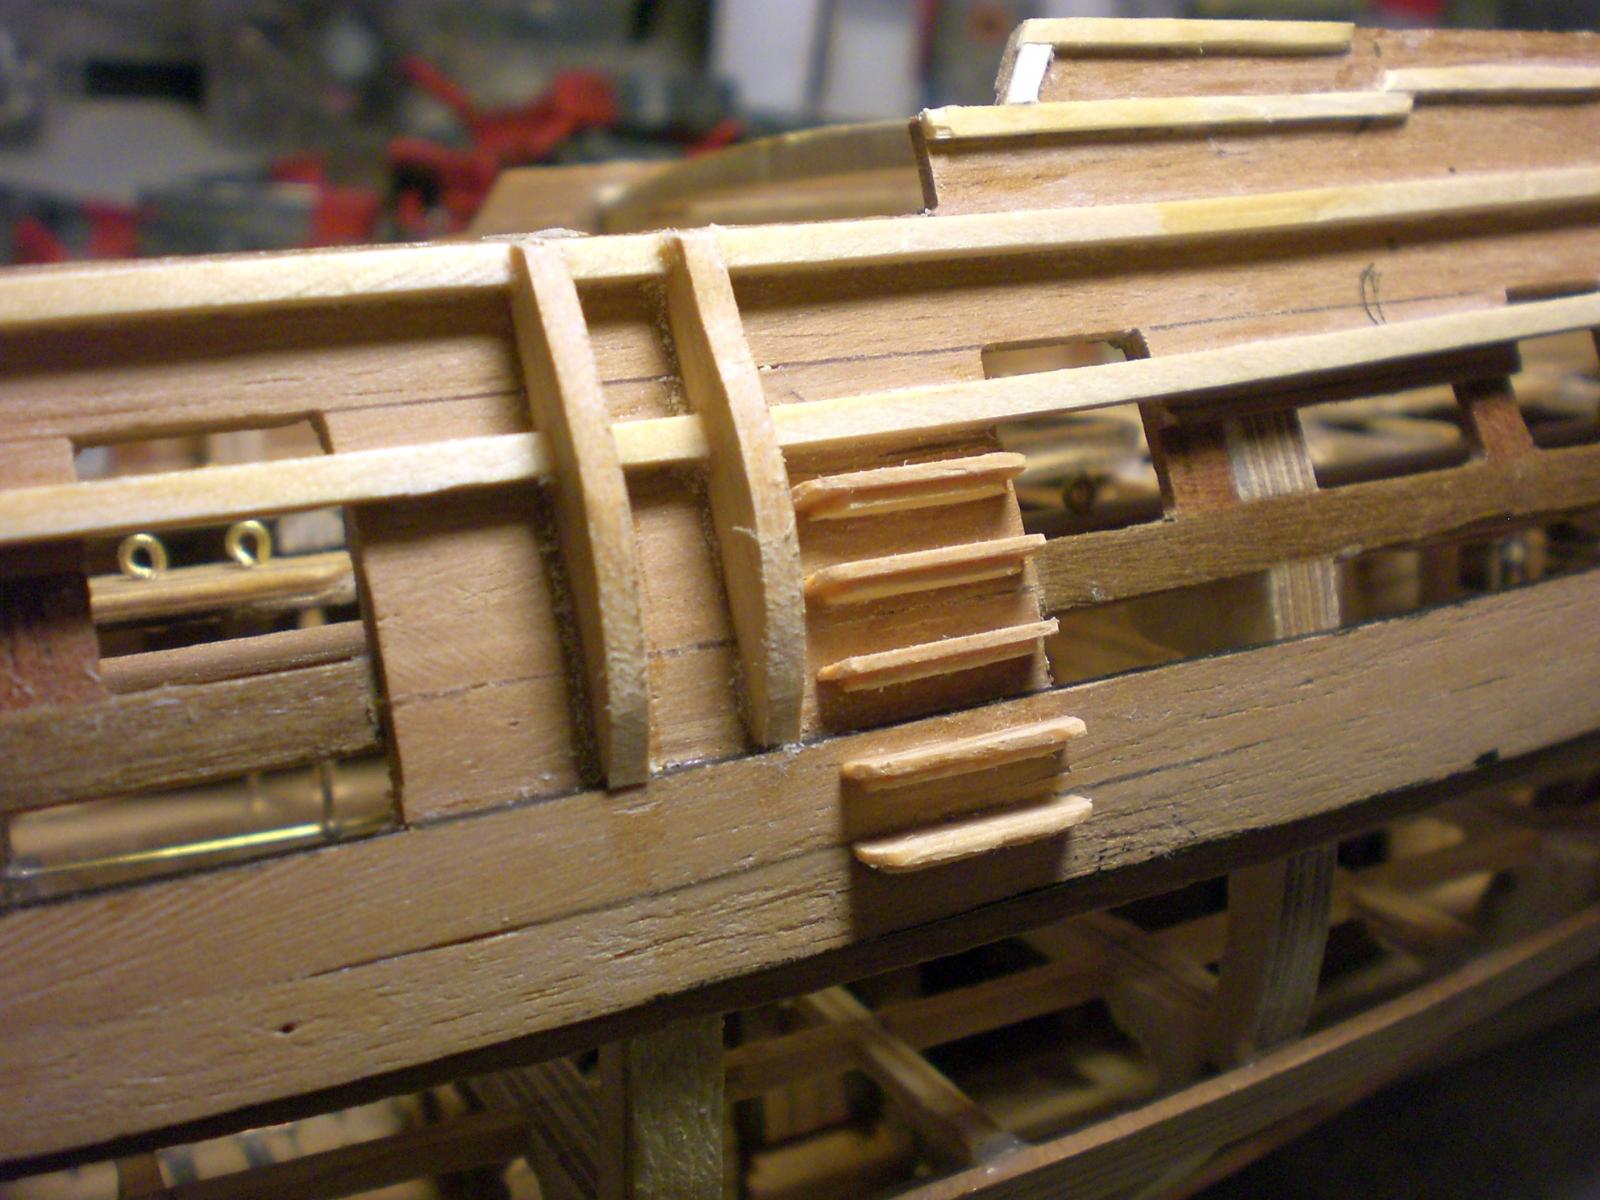
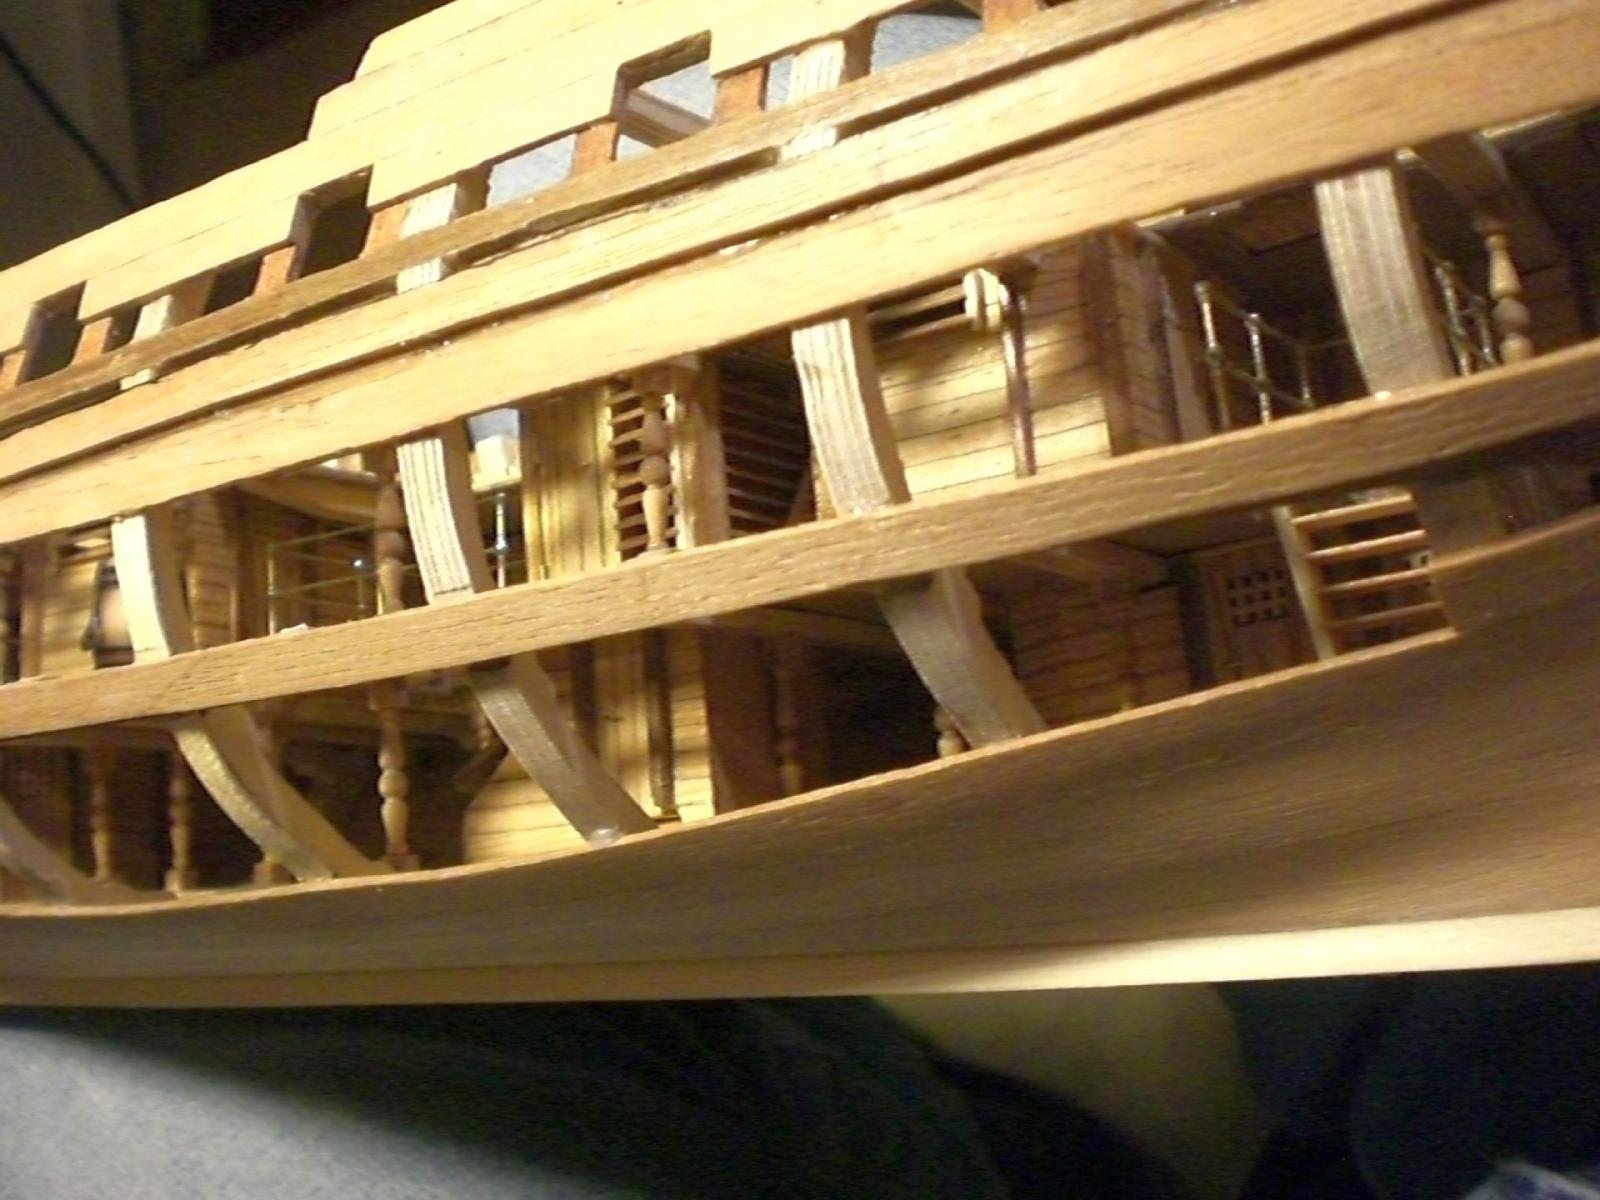
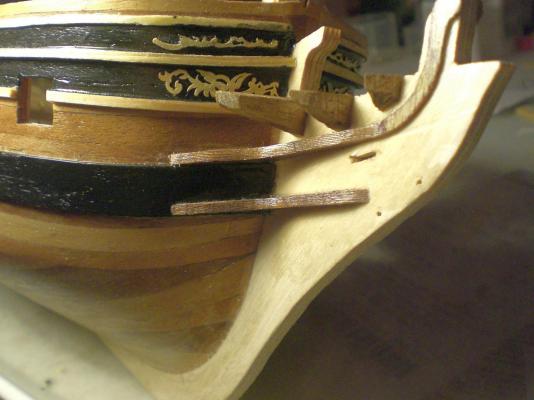
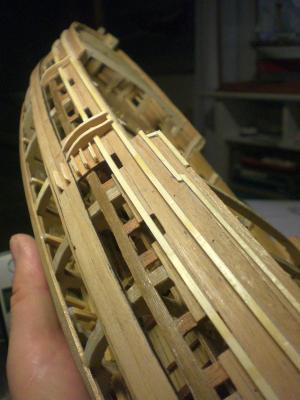
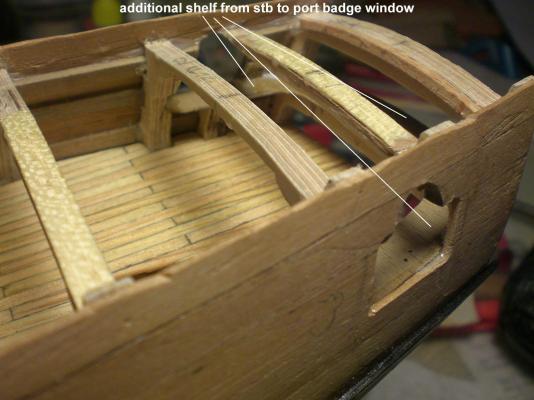
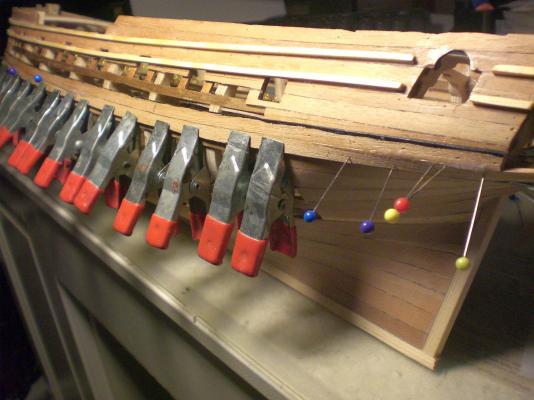
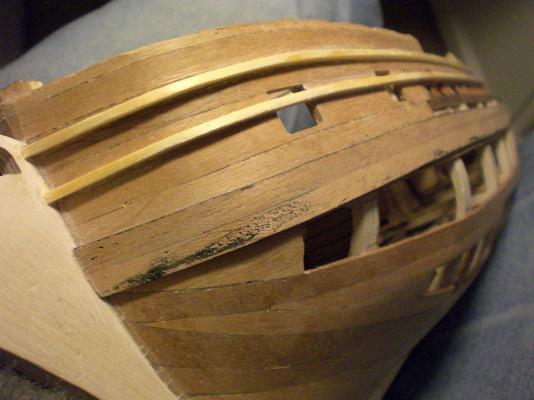
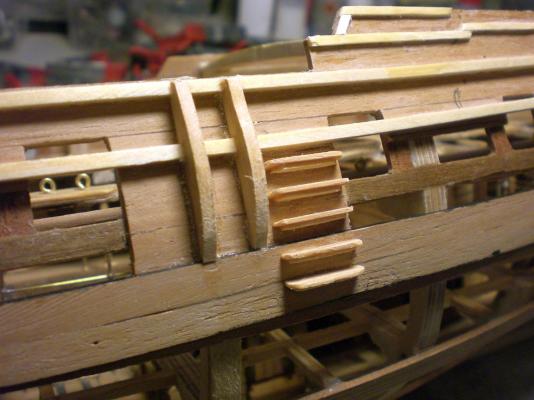
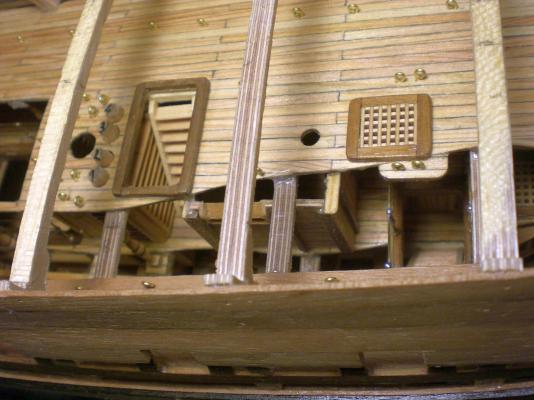
Lot 13 of my Pegasus buildlog... when doing the window outcuts the inner Frame at this Position had to be partially removed, I left the lower remains Standing and used this for Fitting a "3 side around the Stern" window shelf into the masters cabin the upper of the two waleplanks is fitted at stb. the lower waleplank on port side is permanently fixeed into place (edges pre blackend to ease later black silk varnishing of the waleplanks upper port aft view lucky for me the upper two pine stripes followed easy around the bow without breaking and just by prewetting with the toung. Use semi thicsotrope super acettate glue for this. I would not be able to provide Fingerprints after the Acetate session ! the tight fit grating has been removed here to give view to the aft donward staircase from gundeck to intermediate deck. stb side Barrel slide supports and outer Boarding steps likewise on portside. Here additional bits of planking were required, but I think they do`nt hinder the view into the hull in the Moment I am questioning my brain how and where it would be best to fasten the deadeye tackle on in not desturbing the Riggung optics and view to the inside later on


-
Kevin thanks for commenting the work on the badges, and also for that link to seawatch books, have filed and saved down this . Trust that the next coming buildlog sections shall provide more Details on the Stern section Nils
-
Mark again many thanks for your advice concerning "Swanies" publications I shall do some digging in the web. Yes, the keellaying of my build was 3rd April this year, but as I mentioned to Aldo in my reply some days ago, fortunately after my retirement I have the time to work in more or less steady flow. I`m intending to drop in one or two more reply Posts on my buildlog during the day Nils
-
Hello B.E. I would have liked answering to your Christian Name, obviously not known to the Forum comunity to date, but never the less highly appreciate and thank you in finding helpfull advice from such a knowledgable and talented british naval ship model specialist. I thank you for your comments and confirm that you senced a bulls-eye hit for the intentions I may have had had along with this build. I picked the Swan Class vessel type because I fell in love with the lines, the not too difficult skill Level, the size it shall take in an selfmade glasscasing afterwards, the reasonable Prices for Amati plan and the high precision Quality of the etched part Panels. I then started seeking Input , by doing so, also came across this superb Forum and was so lucky to find even detailed buildlogs of high skilled fellow builders. New to me was to see builds even in scale 1:48. So the idia was Born to, implement impressions of what (that could possibly be adopted to scale 1:64) should find into my own build. Unfortunately I found no literature nor publications on the internal Fittings. So what you see from my Pictures is referenced to notes I made when sighting These lovely open hull buildlog sequences I admire so much. I never had any layout plans for the individual decks except the Amati ones displaed in the plan. Usually I prefer scratch build Projects, so studying the Amati plan gave the innitial kick-off. Also many thanks for your comments on the british naval gun Features, and please if you would`nt mind, I would appreciate If you would kindly feel free drop a line whenever you like, if you should see Major deviations to historic Approach in the further sequences of my build. As the gun from the Pictures is only a Trial one and my mind was free to pickup impressions of naval guns out of the web, the protyp was made basicly for dimentional checks. I also intend to provide full sails rigging, knowing that my experience with recent tallship rigging i did is a different Story compared to 18 century rigging. So I`m starting to seek like a sponge for Input on this Feature as well. Regards Nils
-
Hi Eddie your "Elsie" buildlog reminds me that I still have a 3/4 finished Billing boat Version of the "Bluenose" (nearly same lines) on the shelf. Pls. Keep Pictures of your nice model and of your buildlog coming in Nils
-
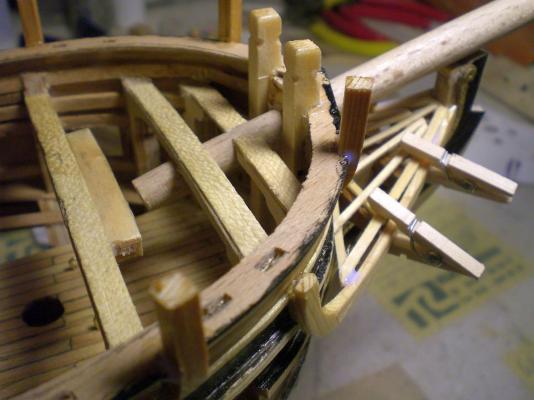
Hi Rob Tanks for your response, of corse you recognized the jokie about the chained slaves... but at this time I unfortunately ca`nt afford the David Antscherl publications and would highly appreciate any Input i.e. about how These oars had been inserted at the bulwark pivet Points, If not into the unbuffered square litte bulwark outcuts. I gues they would`nt have used 12 oars at a time, and where could These oars be stowed away ( perhaps next to spare mastparts next or under the cutter?). This is really not so important it was just going round in my mind. Nils
-
Augie thanks for your Swift reply. I share Your remarks for using wooden stocks, that also was the reason for my question when sighting the Detail. The assembly of the anchors in my own build are still many days ahead but you know yourself that the modellist allways has sences Aware for detecting things that could be of use in some time ahead. Shall furtheron follow your splendid build with great interest anyhow Regards, Nils
- 1,668 replies
-
- 1
-
-
- syren
- model shipways
- (and 1 more)
-
Hi Augie, Very impressive handcraft work, I must say outstanding !!!!, it is a pleasure to follow your buildlog. One of the many Details I like are also the anchors, are they available from any model web shop or are they scratch built? Reards, Nils
-
Hi Swan Class shipbuilders I have a question with the rowing of a 300 tons displacement vessel... in lack of wind ...who please would like to share his / her Knowledge in describing how a ship like this was moved by rowing. The Amati / Victory Models plan Shows 6 openings for oars on each side, therefore would asume the ship should be carrying at Maximum 12 heavy type oars somewhere. These must have been quite Long, so by limited space on board where were they stowed away during sail sessions ? How many men per oar, how did they find sit positions on the gundeck ?, any Special spheric bearings to stick them through ?, In my mind there is somewhere stll the picture as to the Ben-Hur Film with slaves in chains. Would very much appreciate any Input on the swan class rowing Nils
-
Hi Gary wonderfull admireable work, I get the Feeling of spending a day taking up impressions during a tour on a real heritage shipyard Nils
-
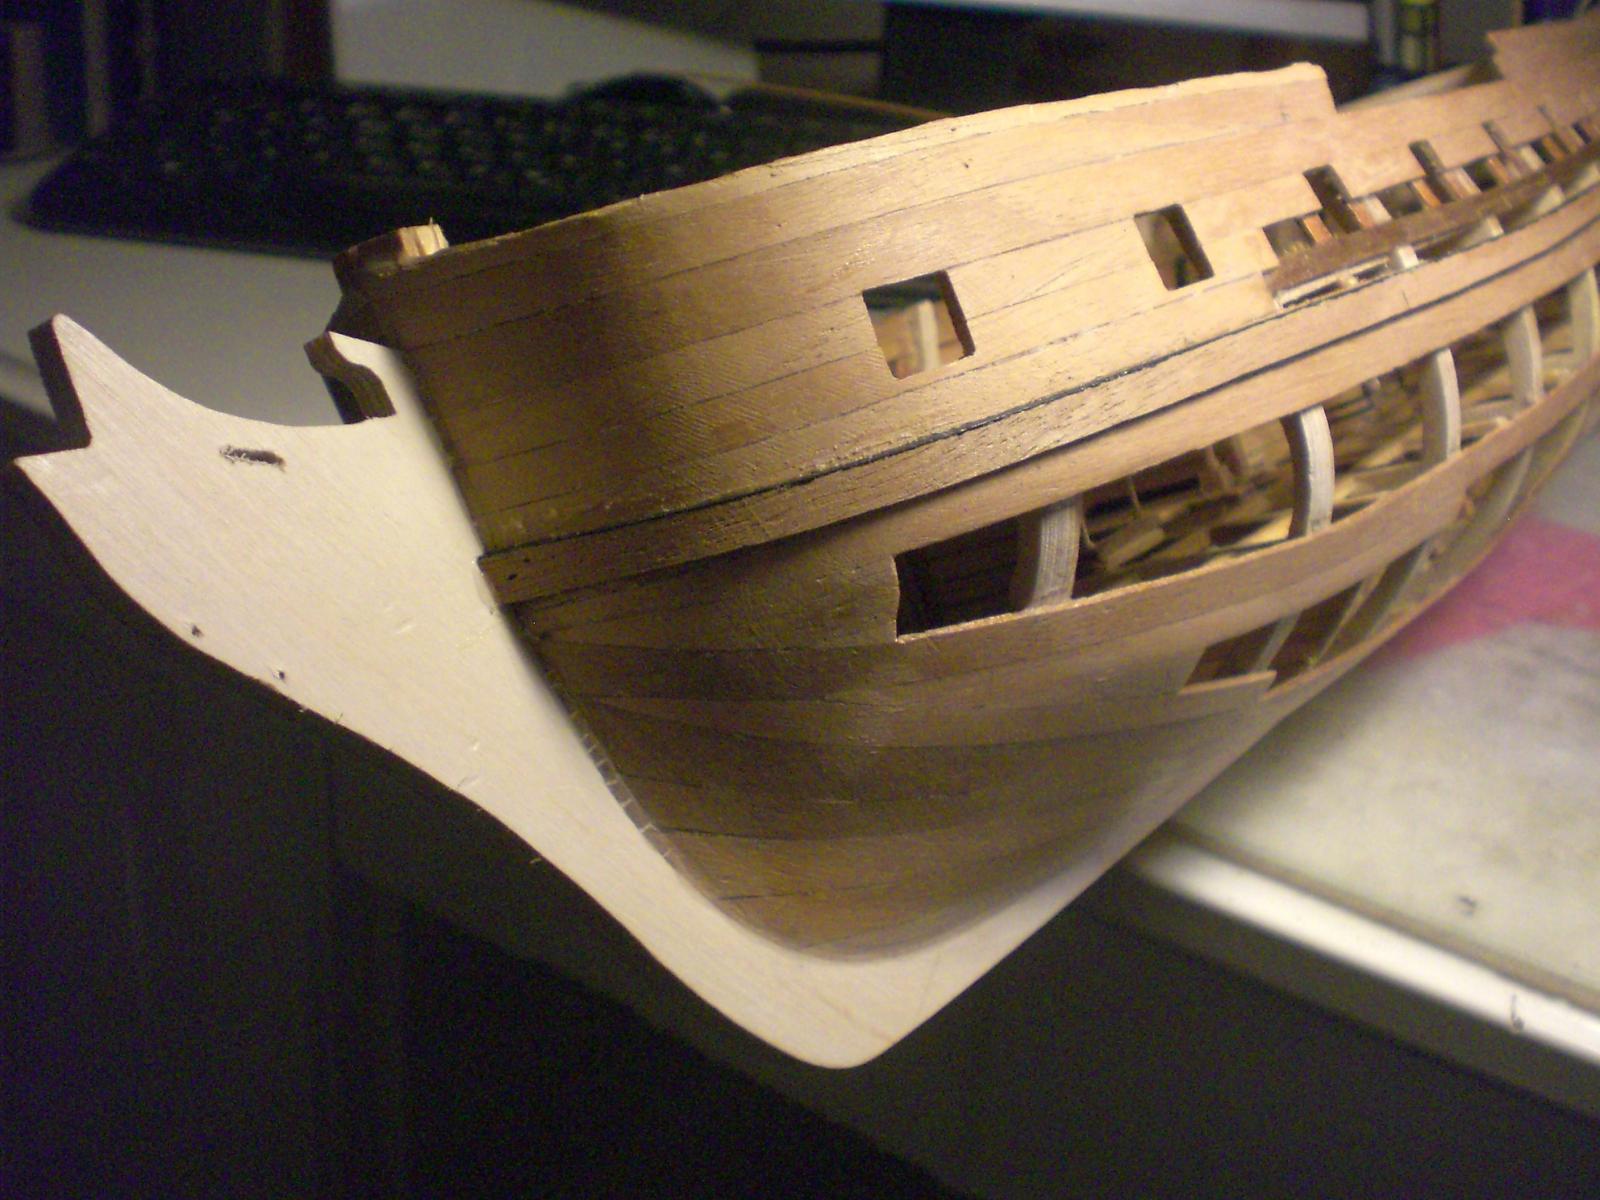
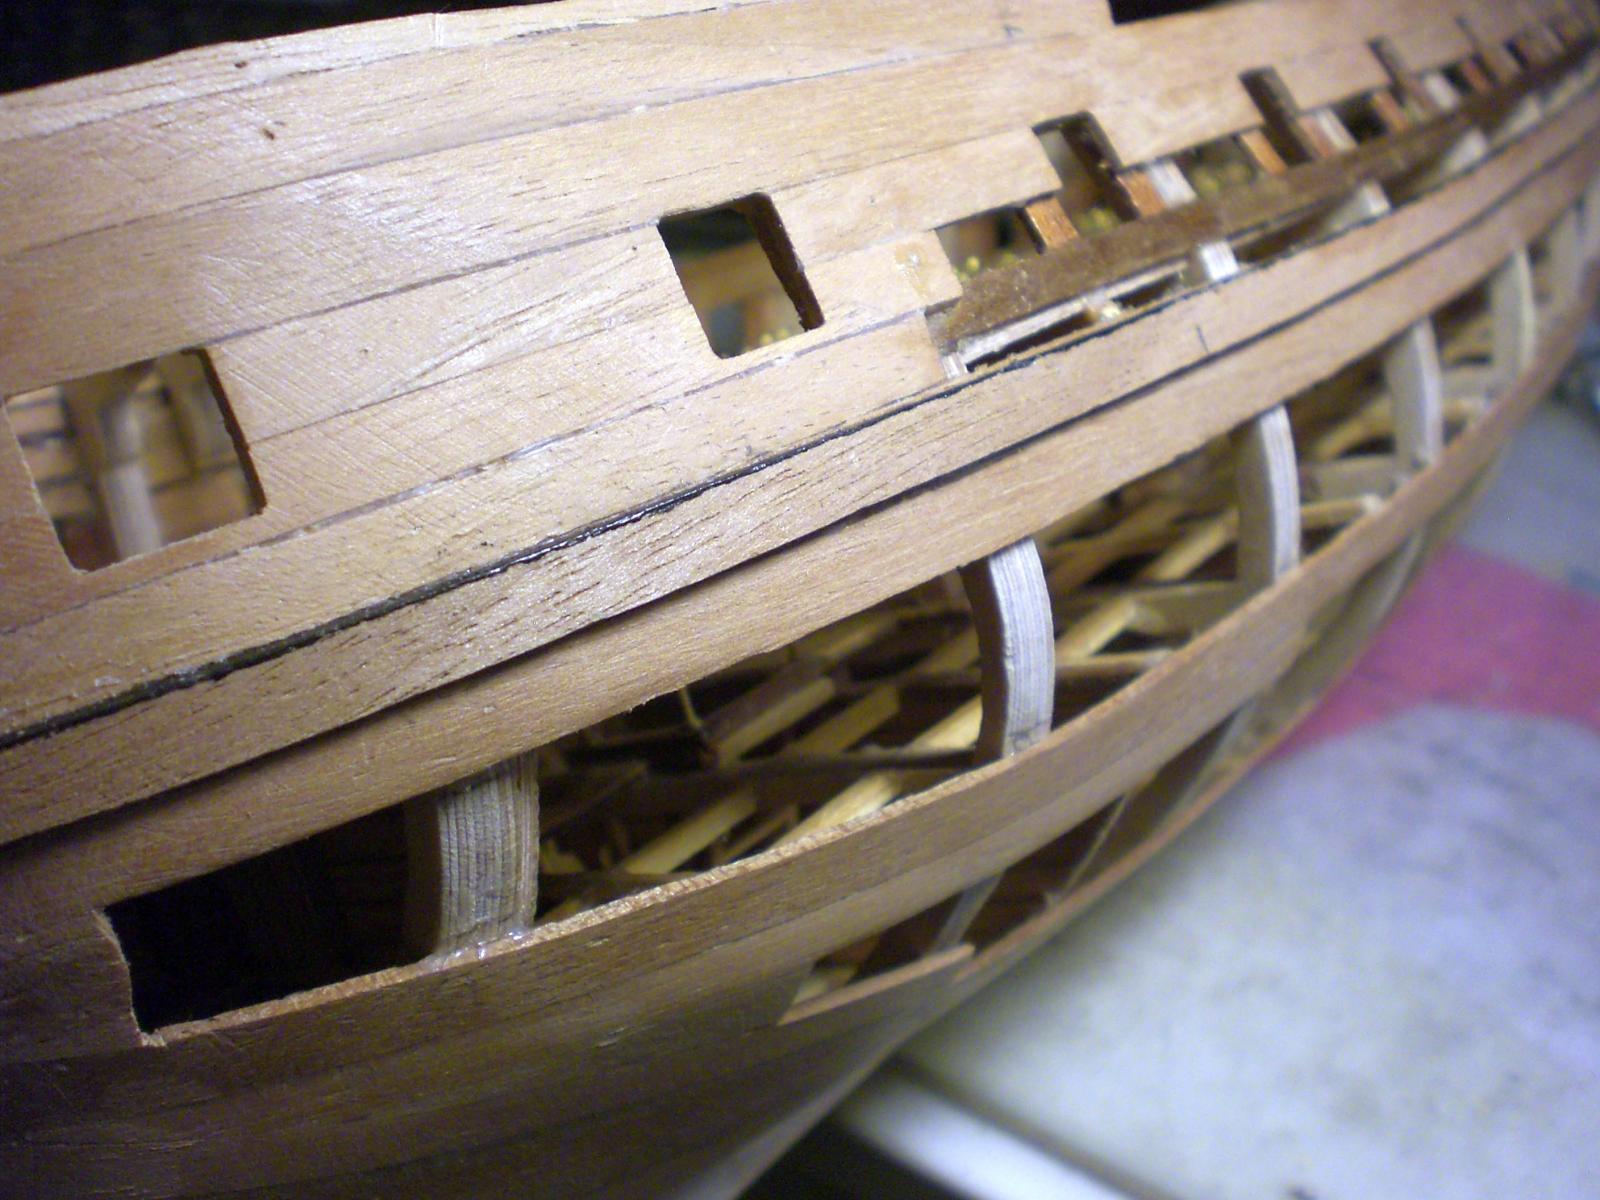
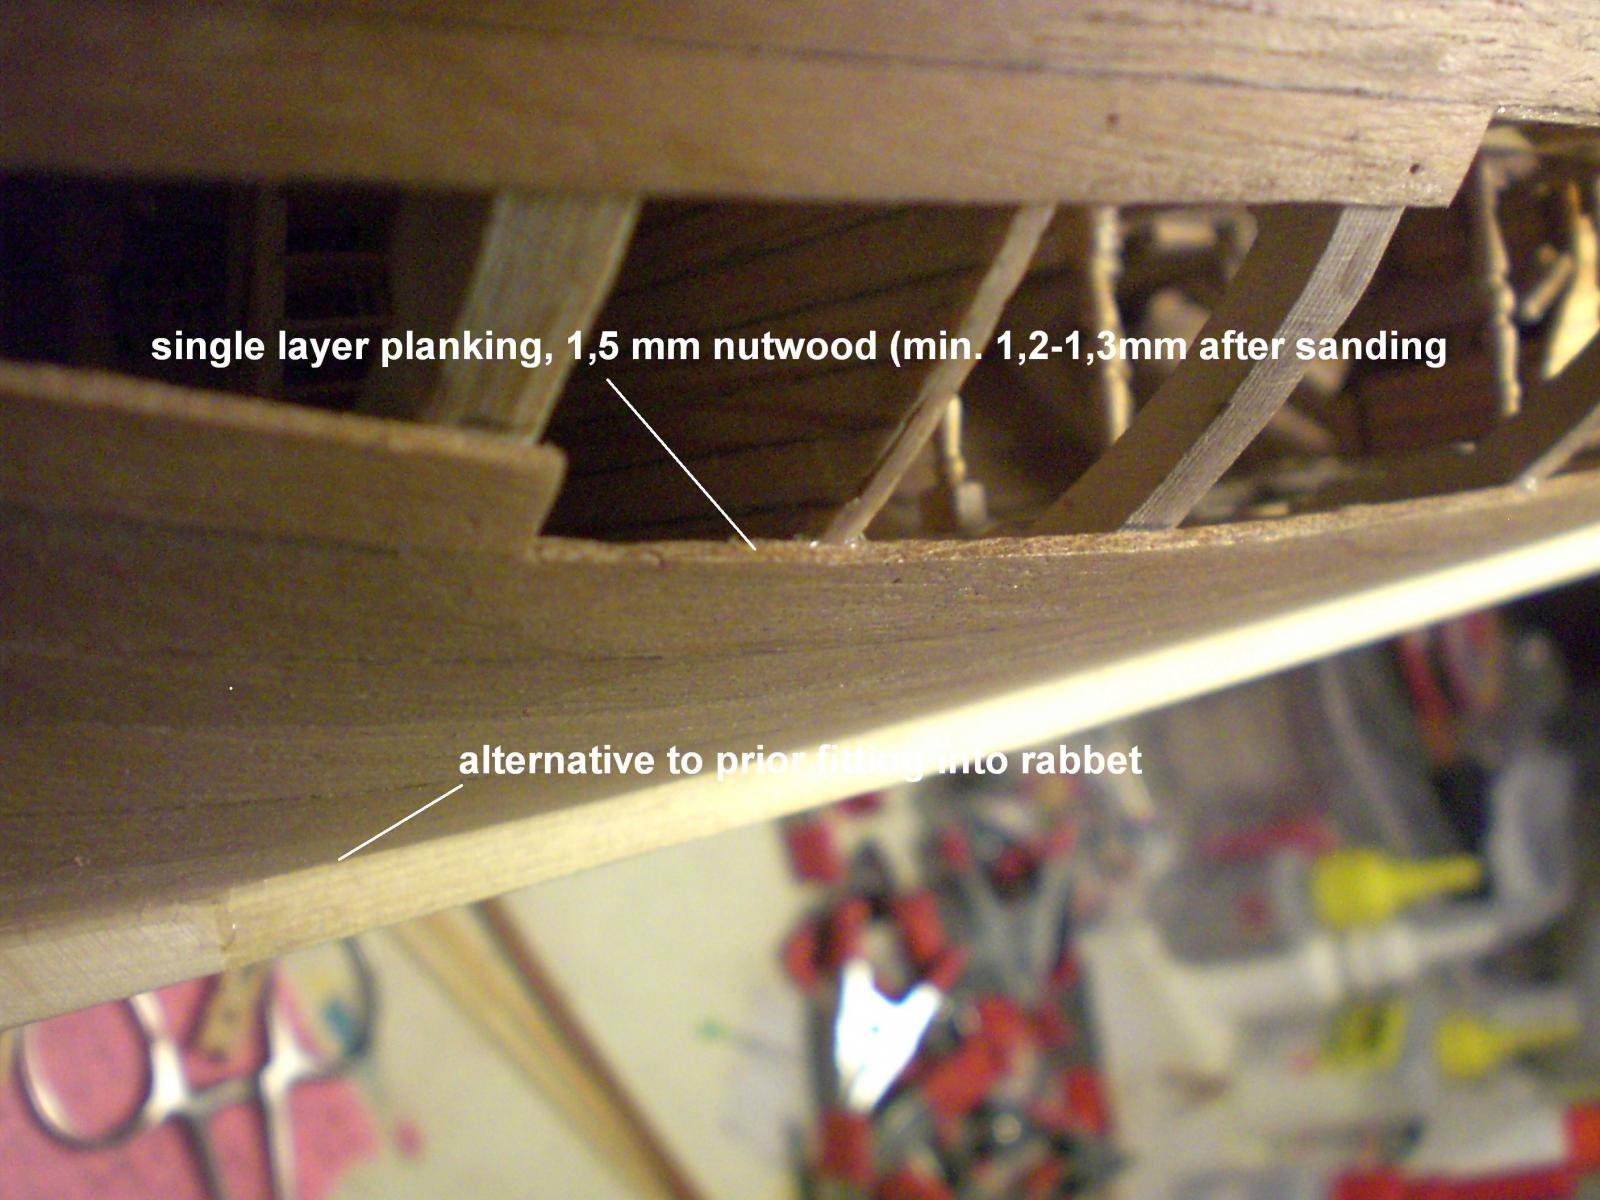
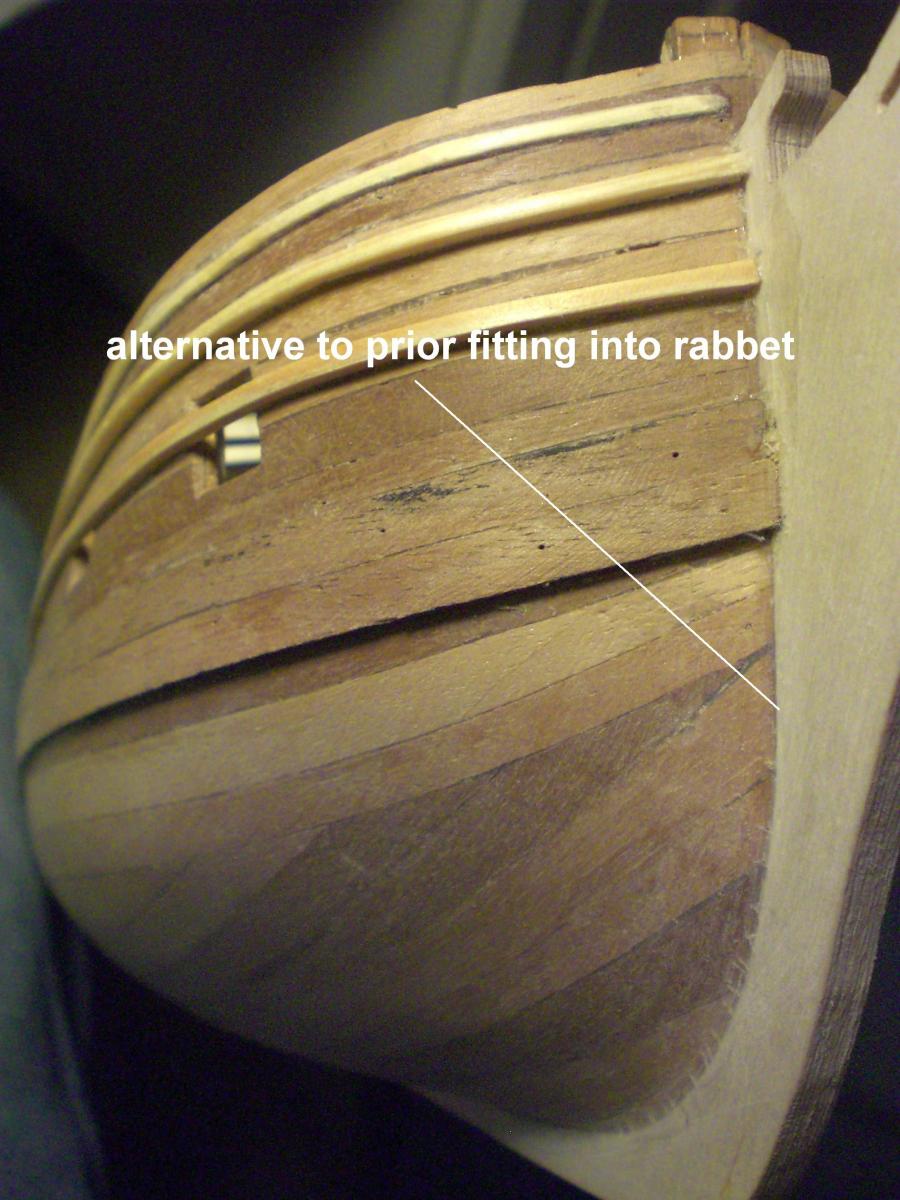
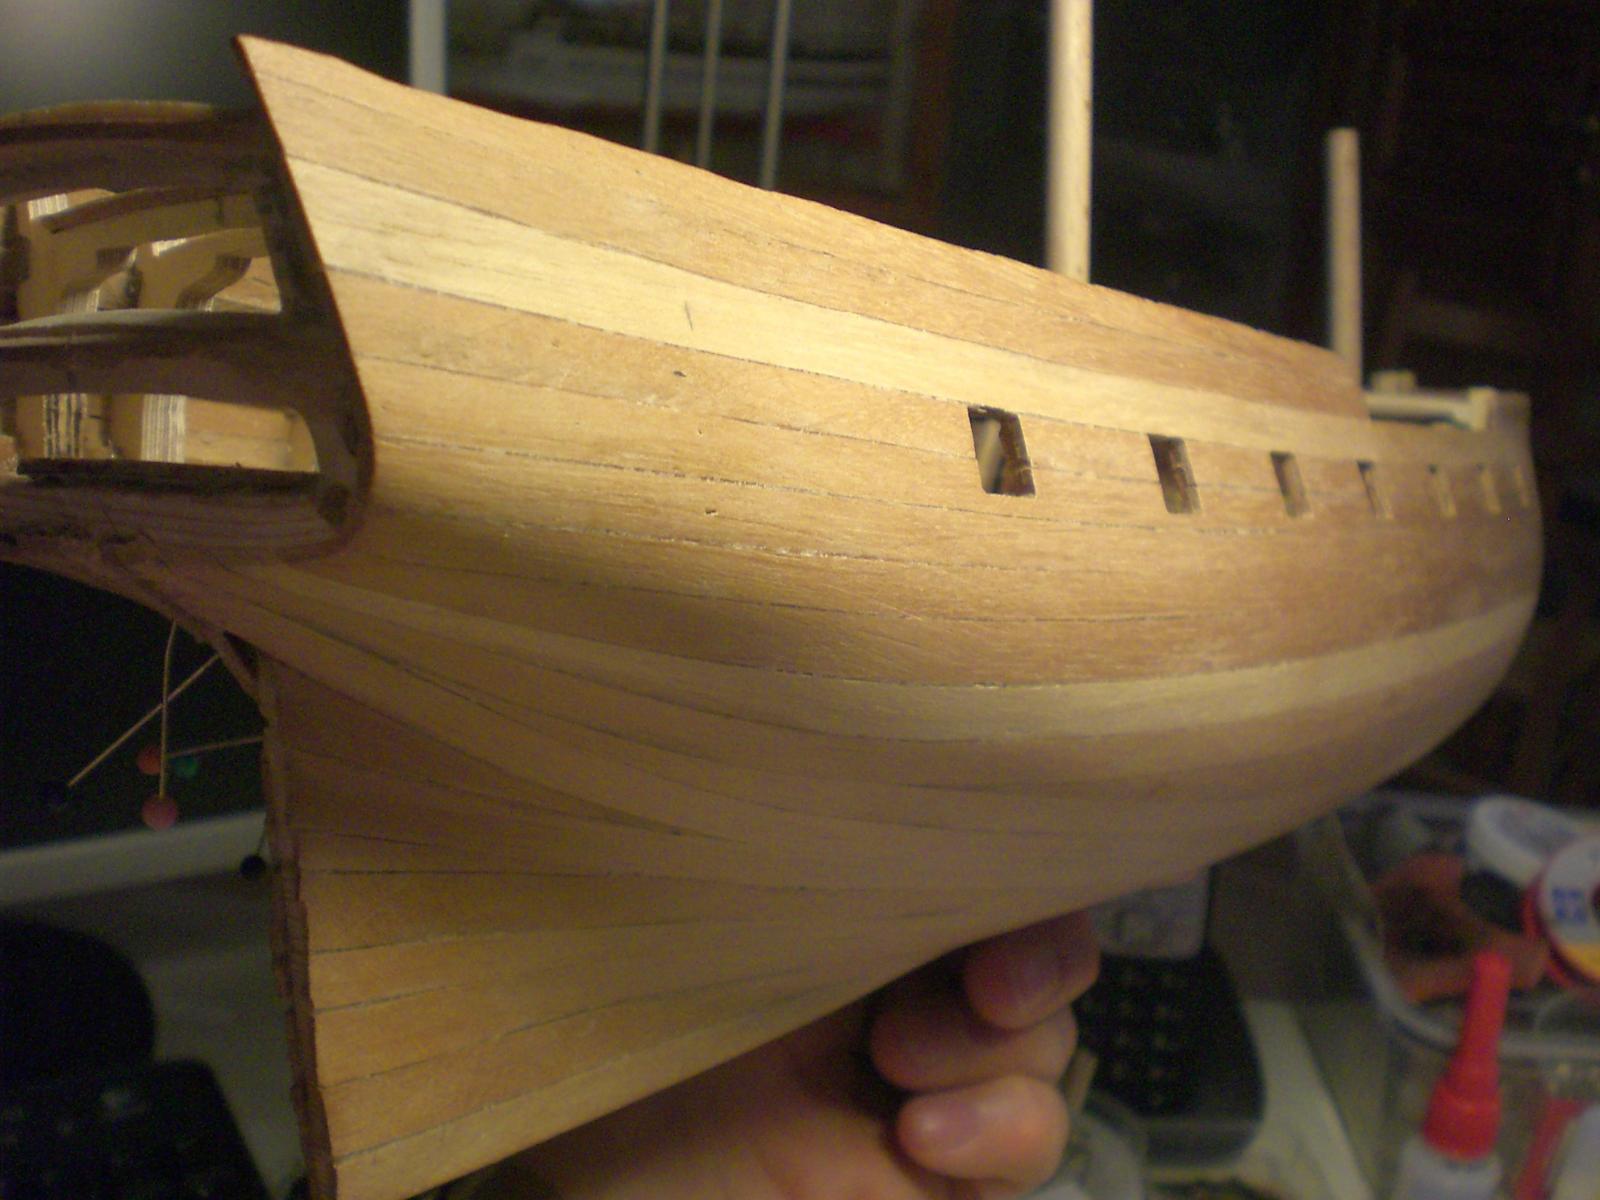
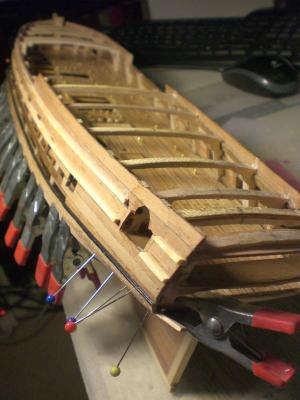
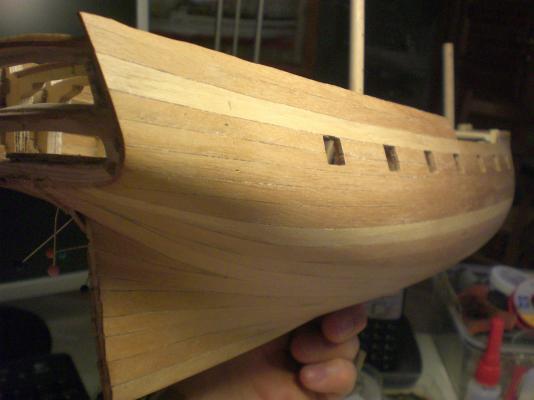
Part 12 of my buildlog..... portside also sanded and upper waleplank fitted (edges pre blackend) selfexplaining planked hull with upper wale Planks bothsides this is the extent ouf outcut in the portside hull the sectional gundeck is allready placed and view to aft staircase as well as the downward stairs between upper well and pantry (covered by grating) the round hole in the gundeck in front of the aft grating takes up the axis of the gundeck capstan a few planking details badge window outcuts made and the lower waleplanking added I`m quite pleased with the results for the optic Appeal because i di`nt cut rabbet bettings into keel and bowpost Prior to planking in the applied scale 1:64


-
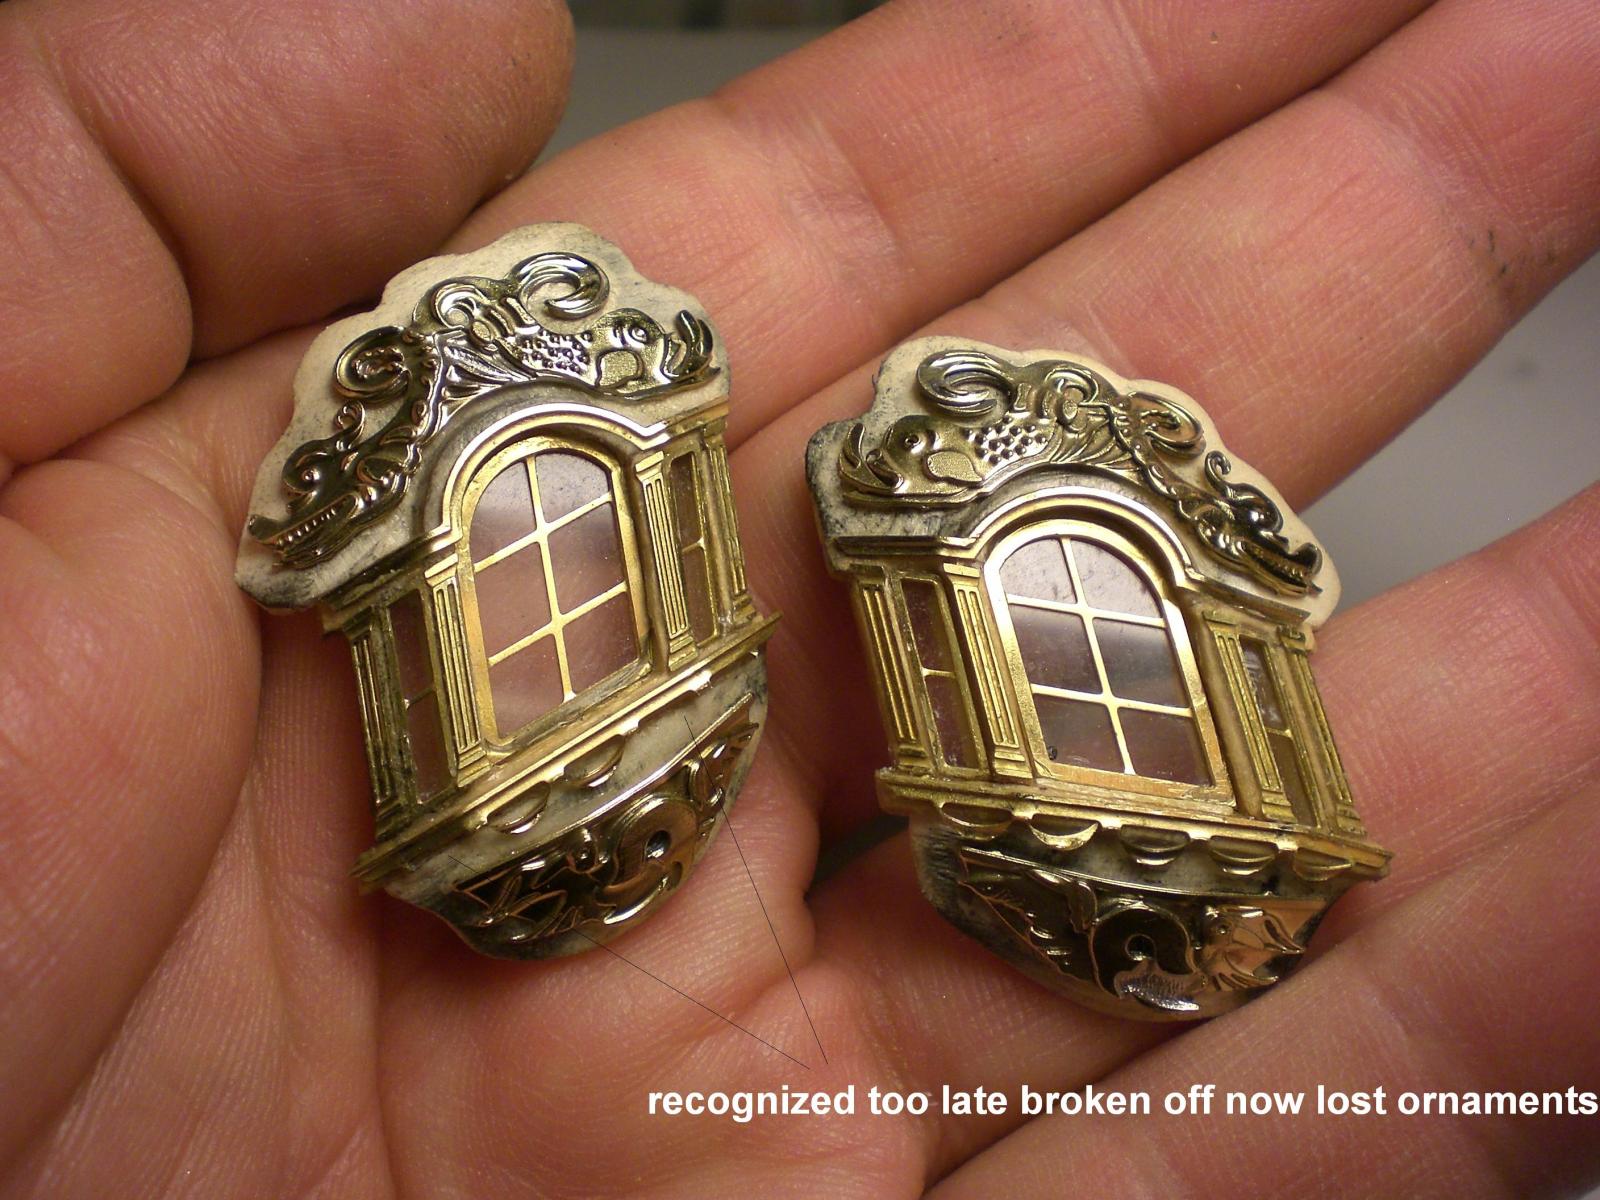
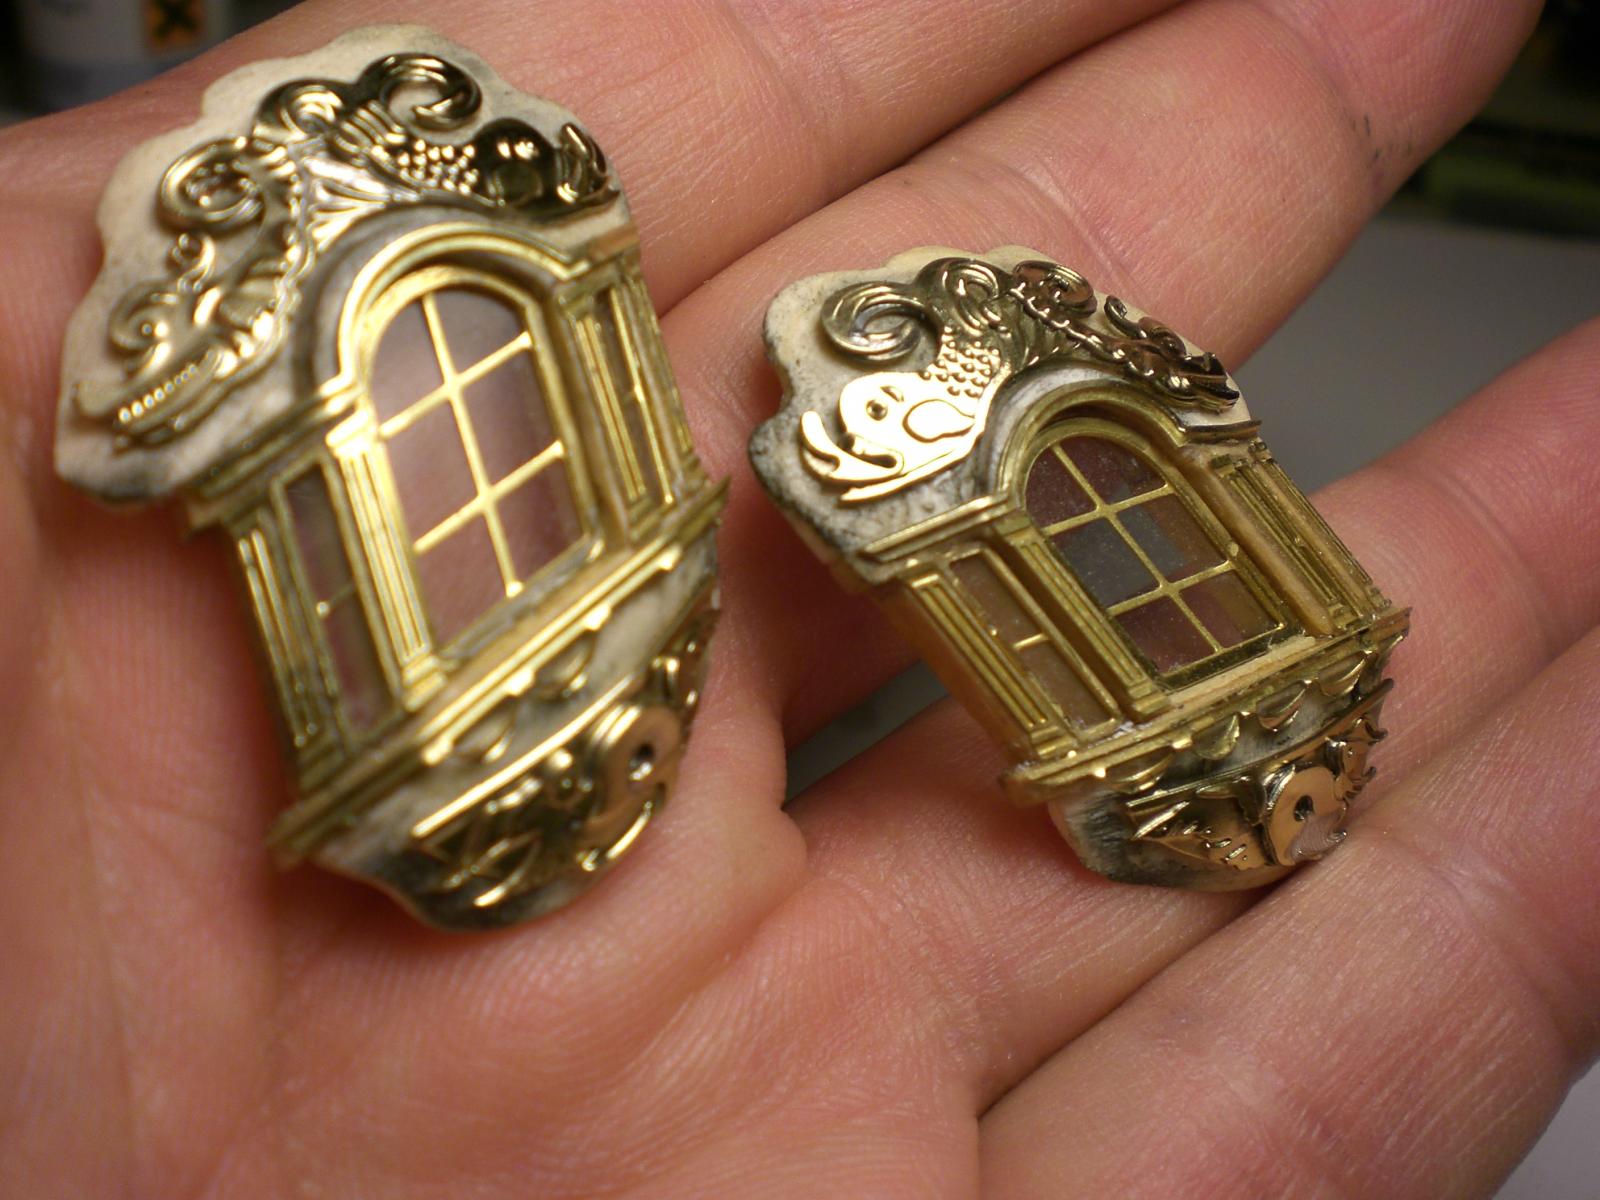
Part 11 of my buildlog..... raw build, ready for Fitting the brass decoration etched brass parts and celloloid windowpanels fitted selfexplaing sorry for Picture Quality with this one backside of badges pic taken before outcut in the aft planking was done pic taken through Stern window outcut of masters cabin rough Version of portside still without wales placed sanding of starboard hull side completed. It seems there is no square cm that is not somehow sphericly shaped some (trial) modification soldered to 6 pounder gunbarrel The next buildlog section shall present how the bowpost extentions, the outer keelbeams and the sternpost are fixed to the hull


-
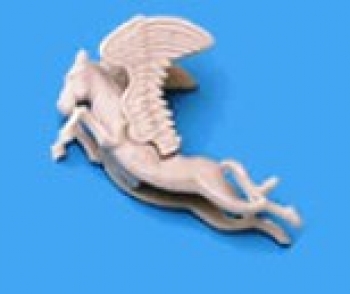
I have a question to fellow modellists and Moderators.... this picture I borrowed from the web is showing the Amati resin gallion figure of the Pegasus in 1:64 scale. I bought this but would definately prefer to a Version in brass or other metal casting or so. Does someone know where to contact ? having an Special Investment casting made fron a waxmodel would probably turn out very expensive, and I have been searching the web in vain for a metal made ( like metal necklace charm, keyholder charm, or so....) Little Pegasus that could be modified to suit. and hopefully in an appropriate scale. Regards, Nils