Ras Ambrioso
-
Posts
662 -
Joined
-
Last visited
Content Type
Profiles
Forums
Gallery
Events
Everything posted by Ras Ambrioso
-
 Merry Christmas and a happy New Year.
 -
Phil, I am amazed at the amount of detail you have put in your model. Your post is always welcome as we can follow the history of this vessel, the detailing and the construction methods you have used. You could write a book on this build. Congratulations
- 482 replies
-
- 3
-

-
- minesweeper
- Cape
- (and 1 more)
-
Thanks a lot guys. Your likes and comments encourage me to better my work
- 128 replies
-
- 4
-
-
- zulu
- sternwheeler
- (and 1 more)
-
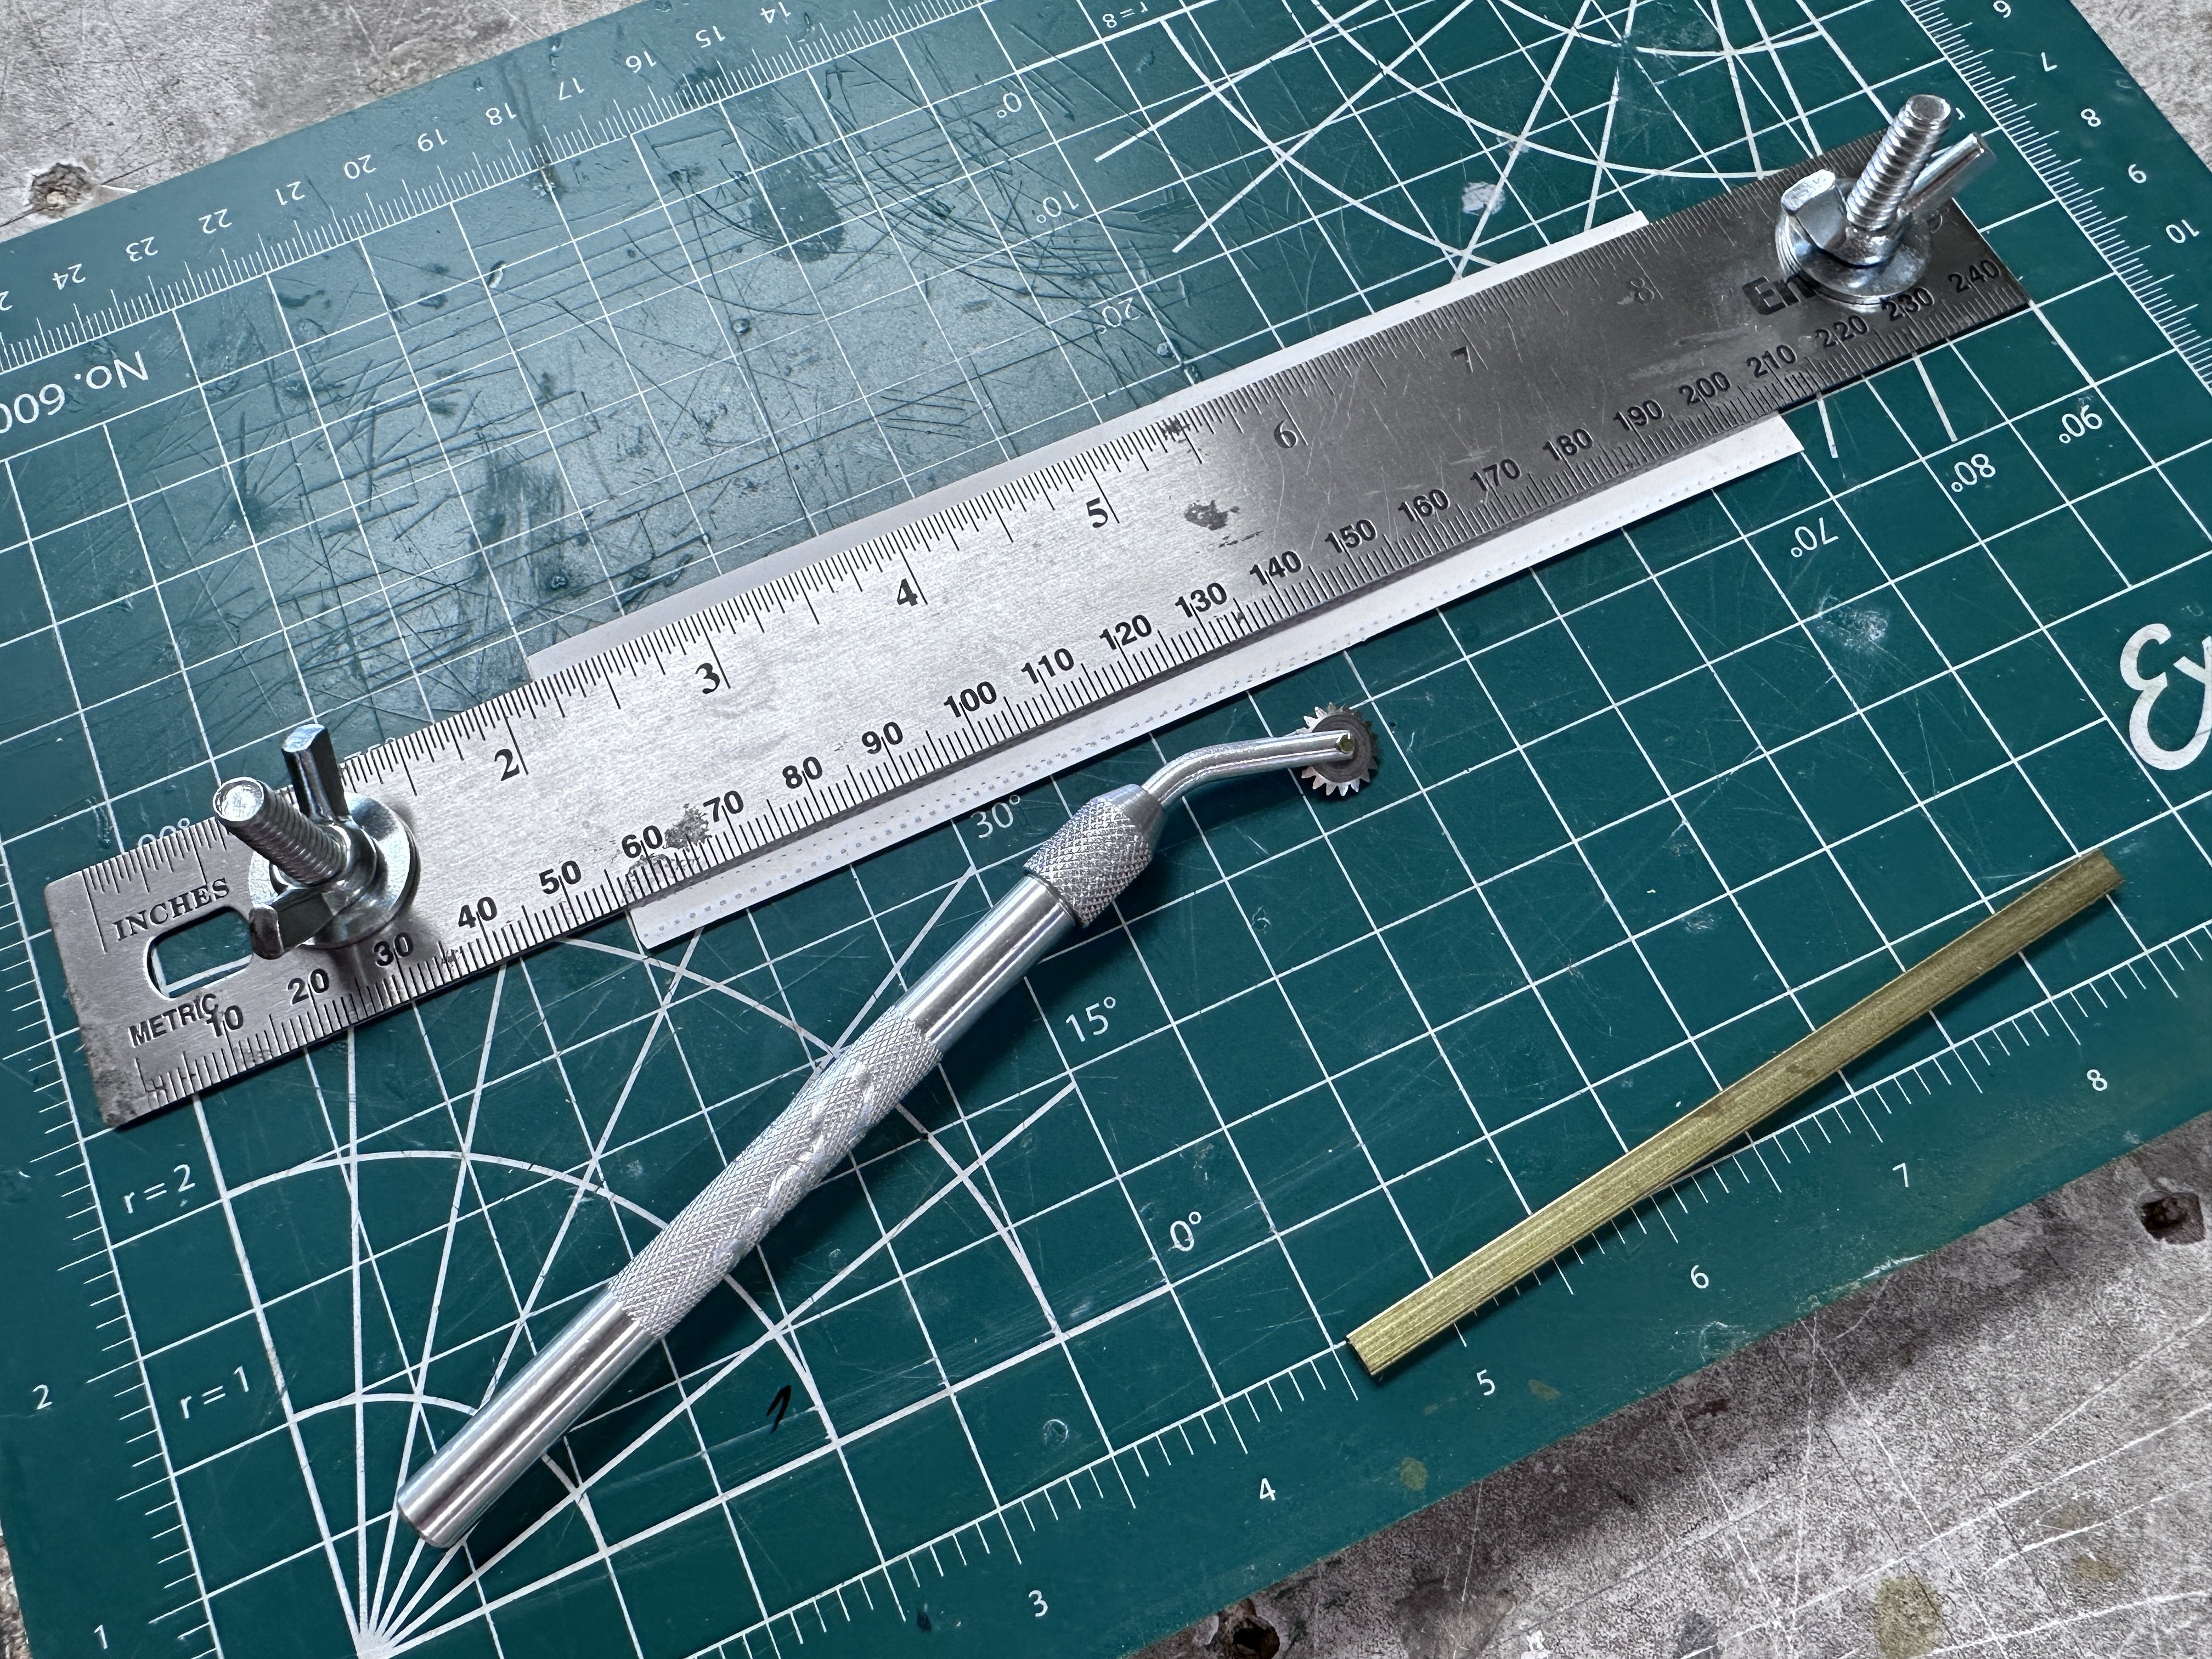
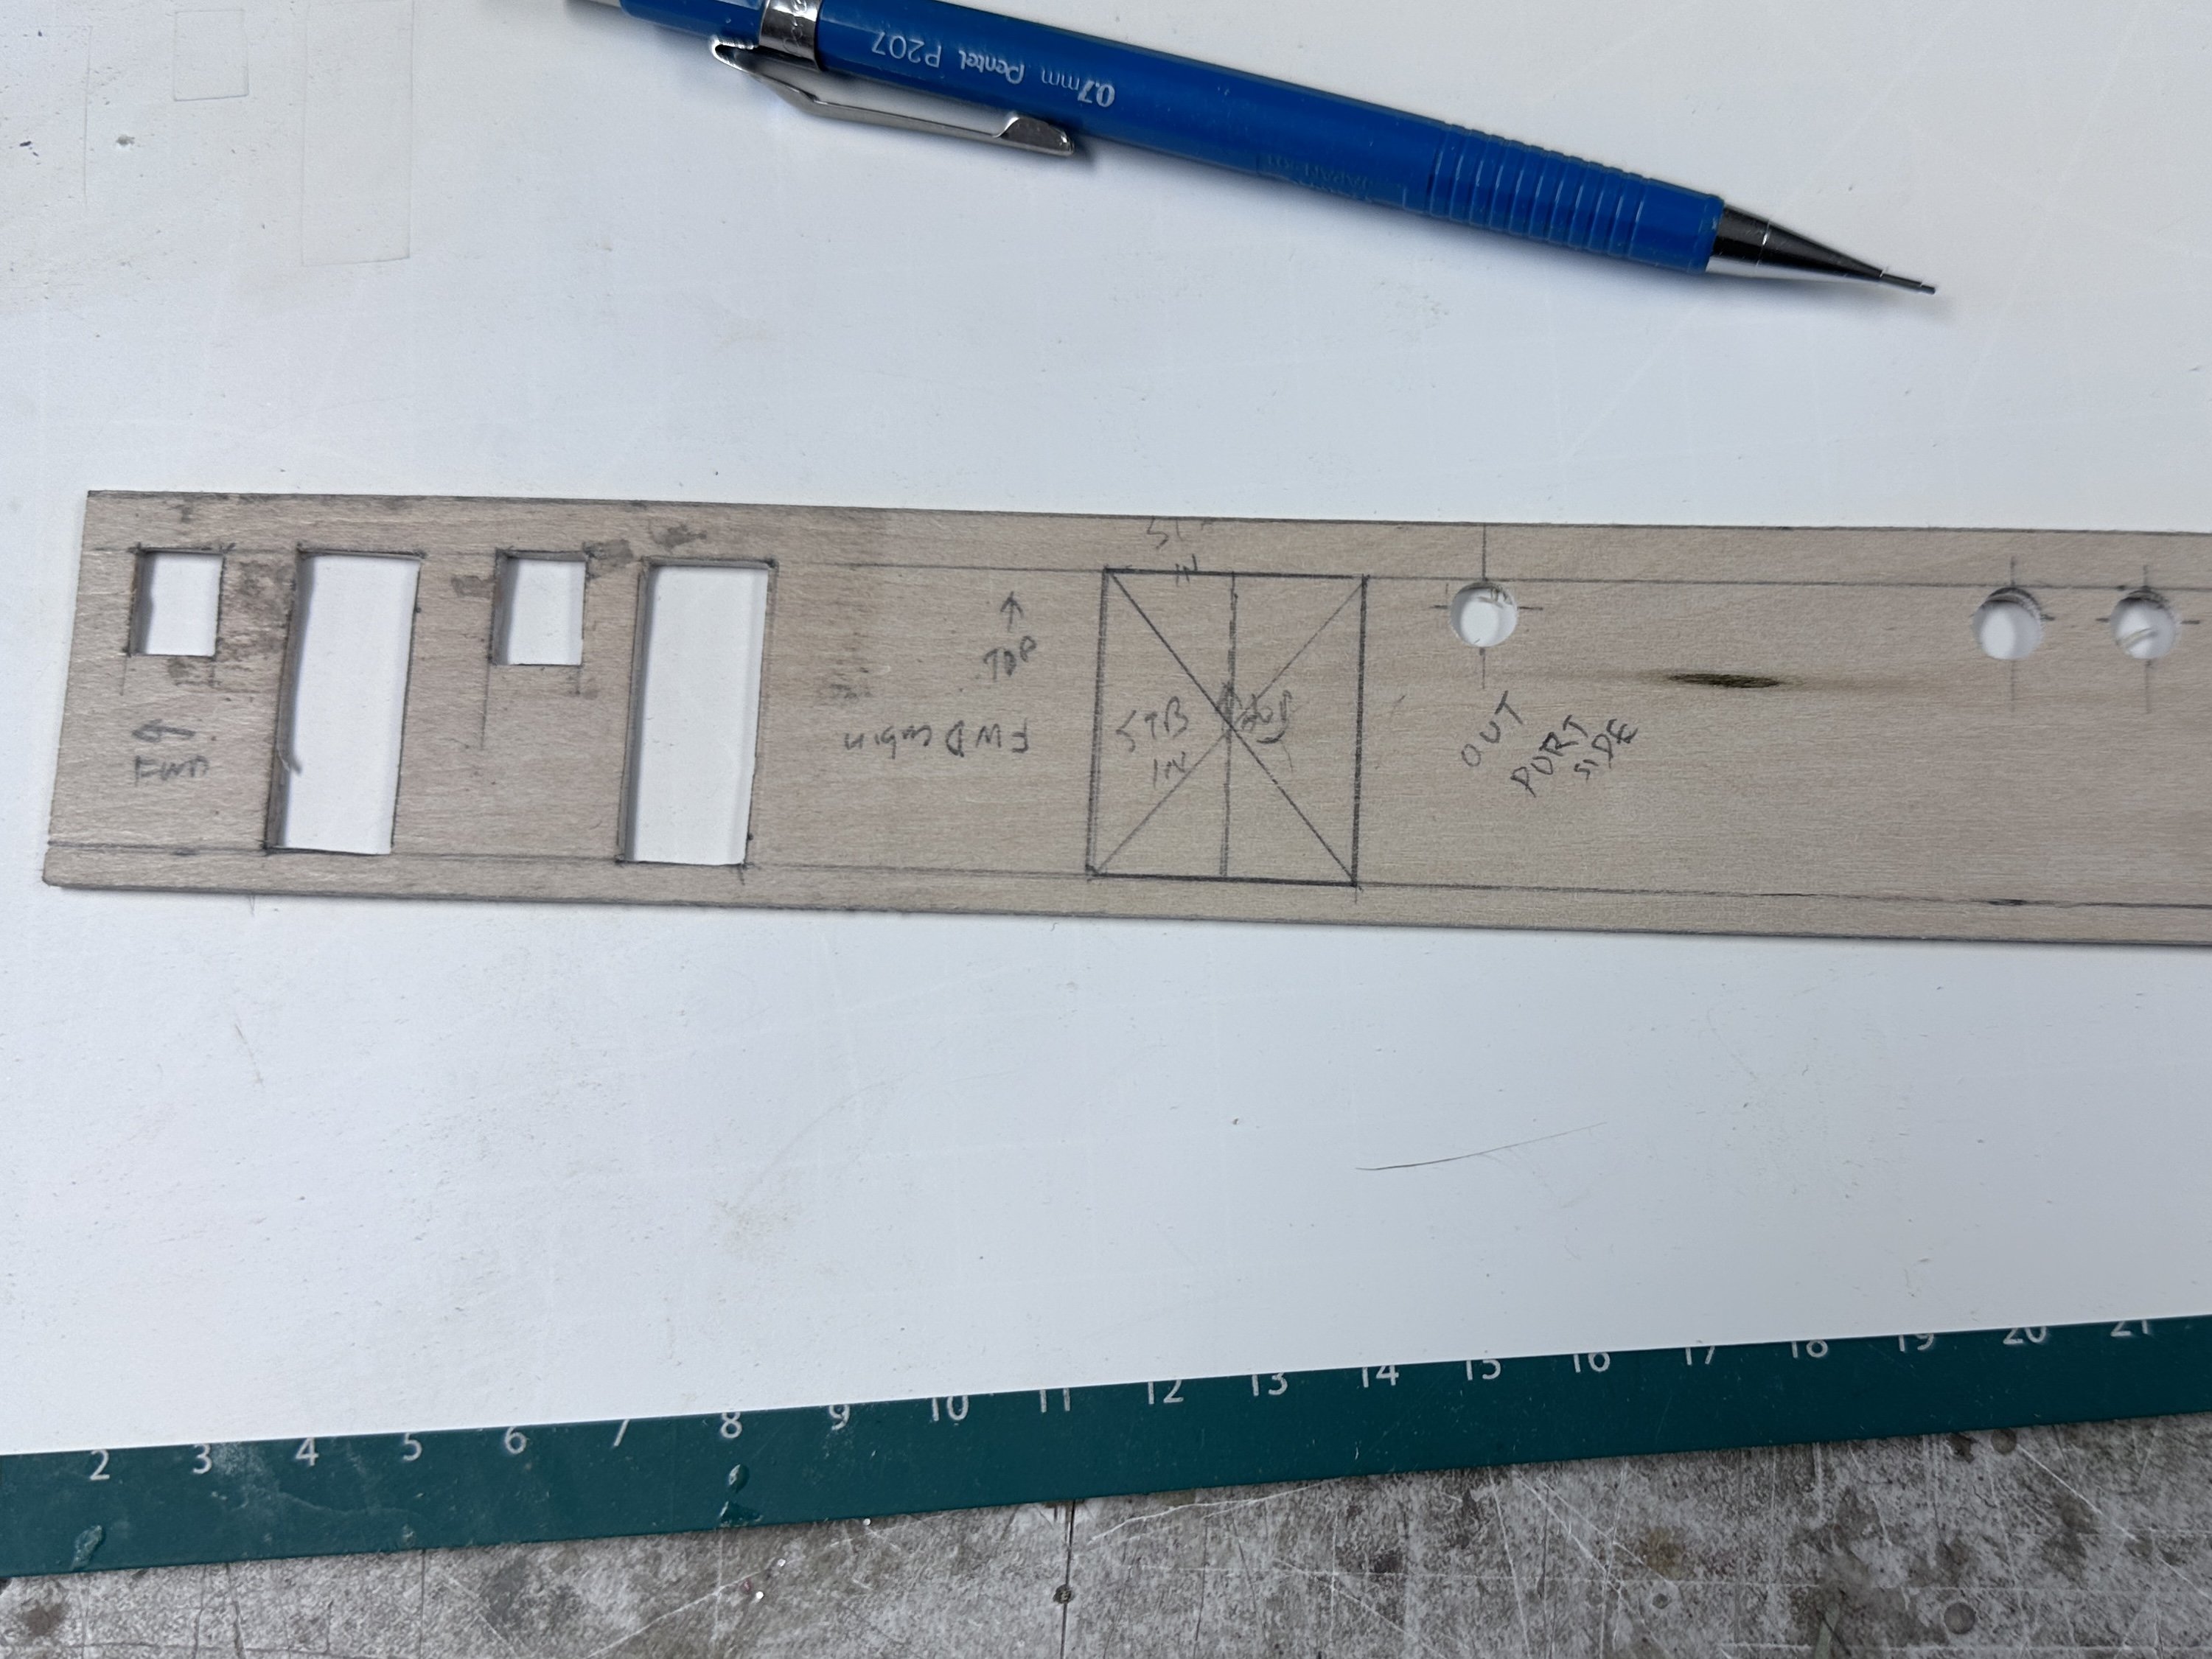
After a couple of failures trying to keep the row of rivets straight, I came up with an idea for a tool to help. Using a metal ruler, a cutting board and a couple of bolts with wing nuts I came up with this baby. This is like of the tool to bend etched parts. The results speak for themselves. In using this tool I found that you have to keep the pounce wheel tight against the ruler with equal amount of pressure and make just one round. Another thing to remember is that the rivets are rolled in the back of the sheet so that the rivet shows up at the front. Just wanted to share this with y'all.


-
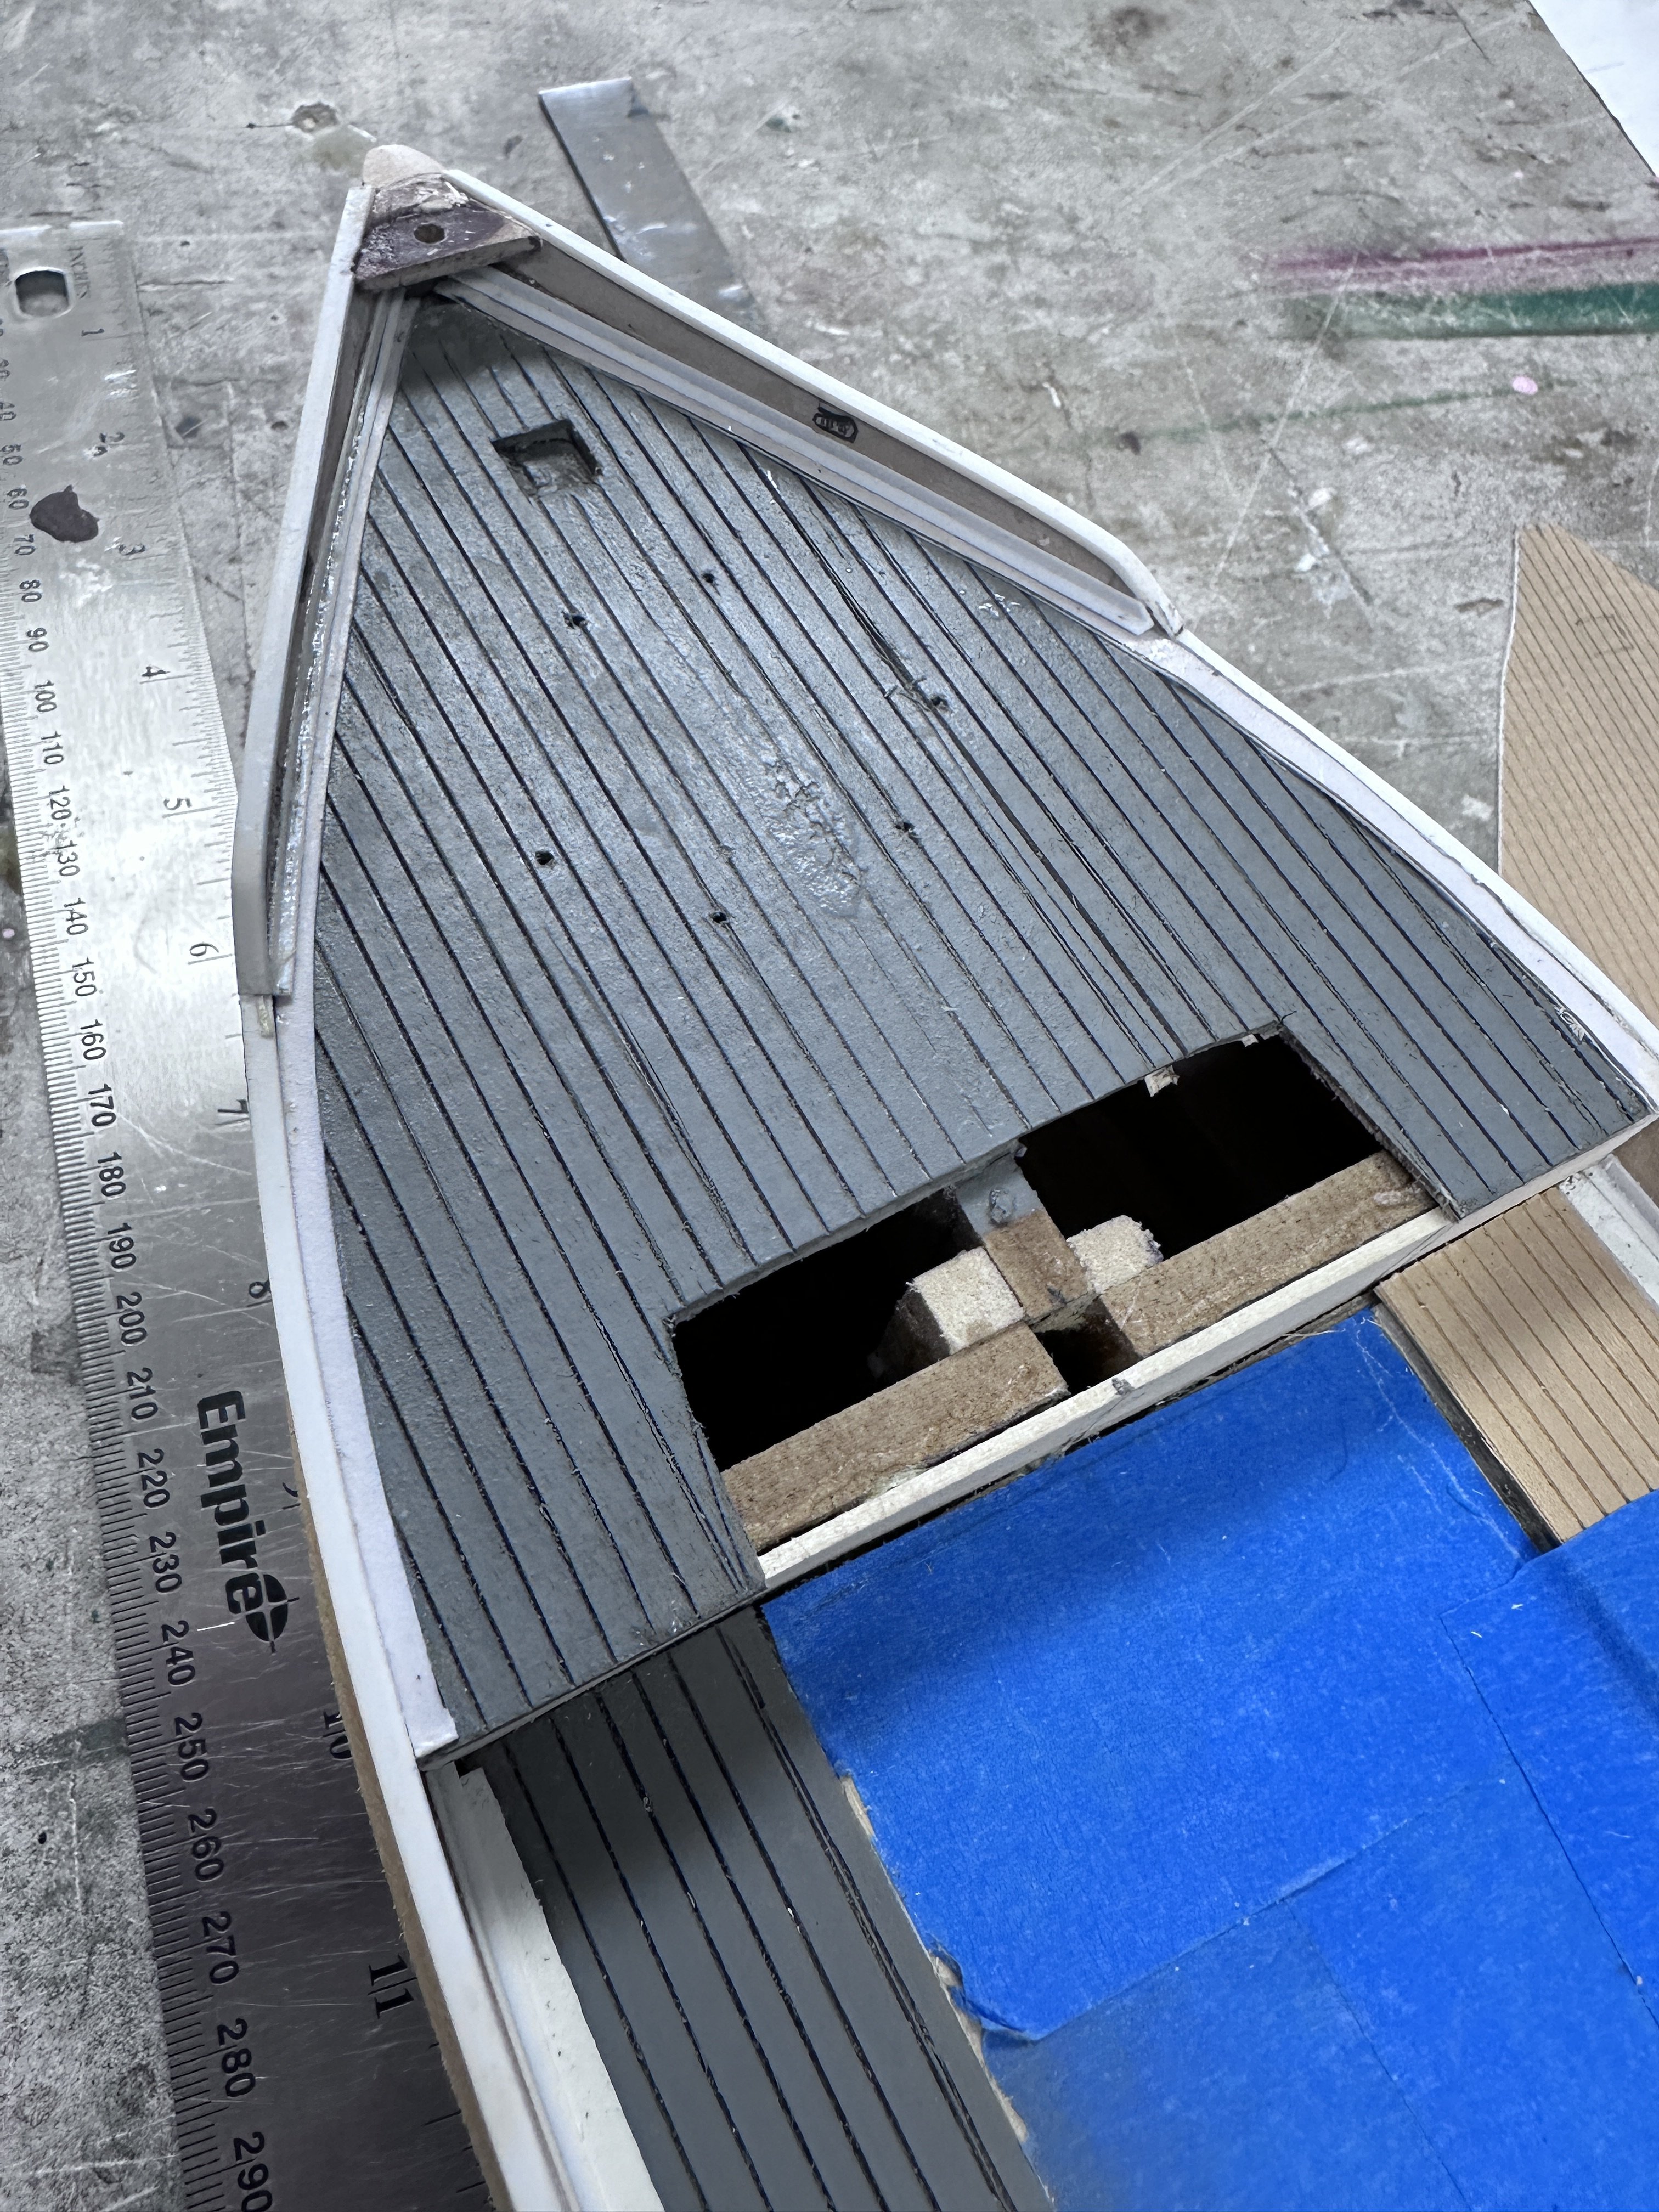
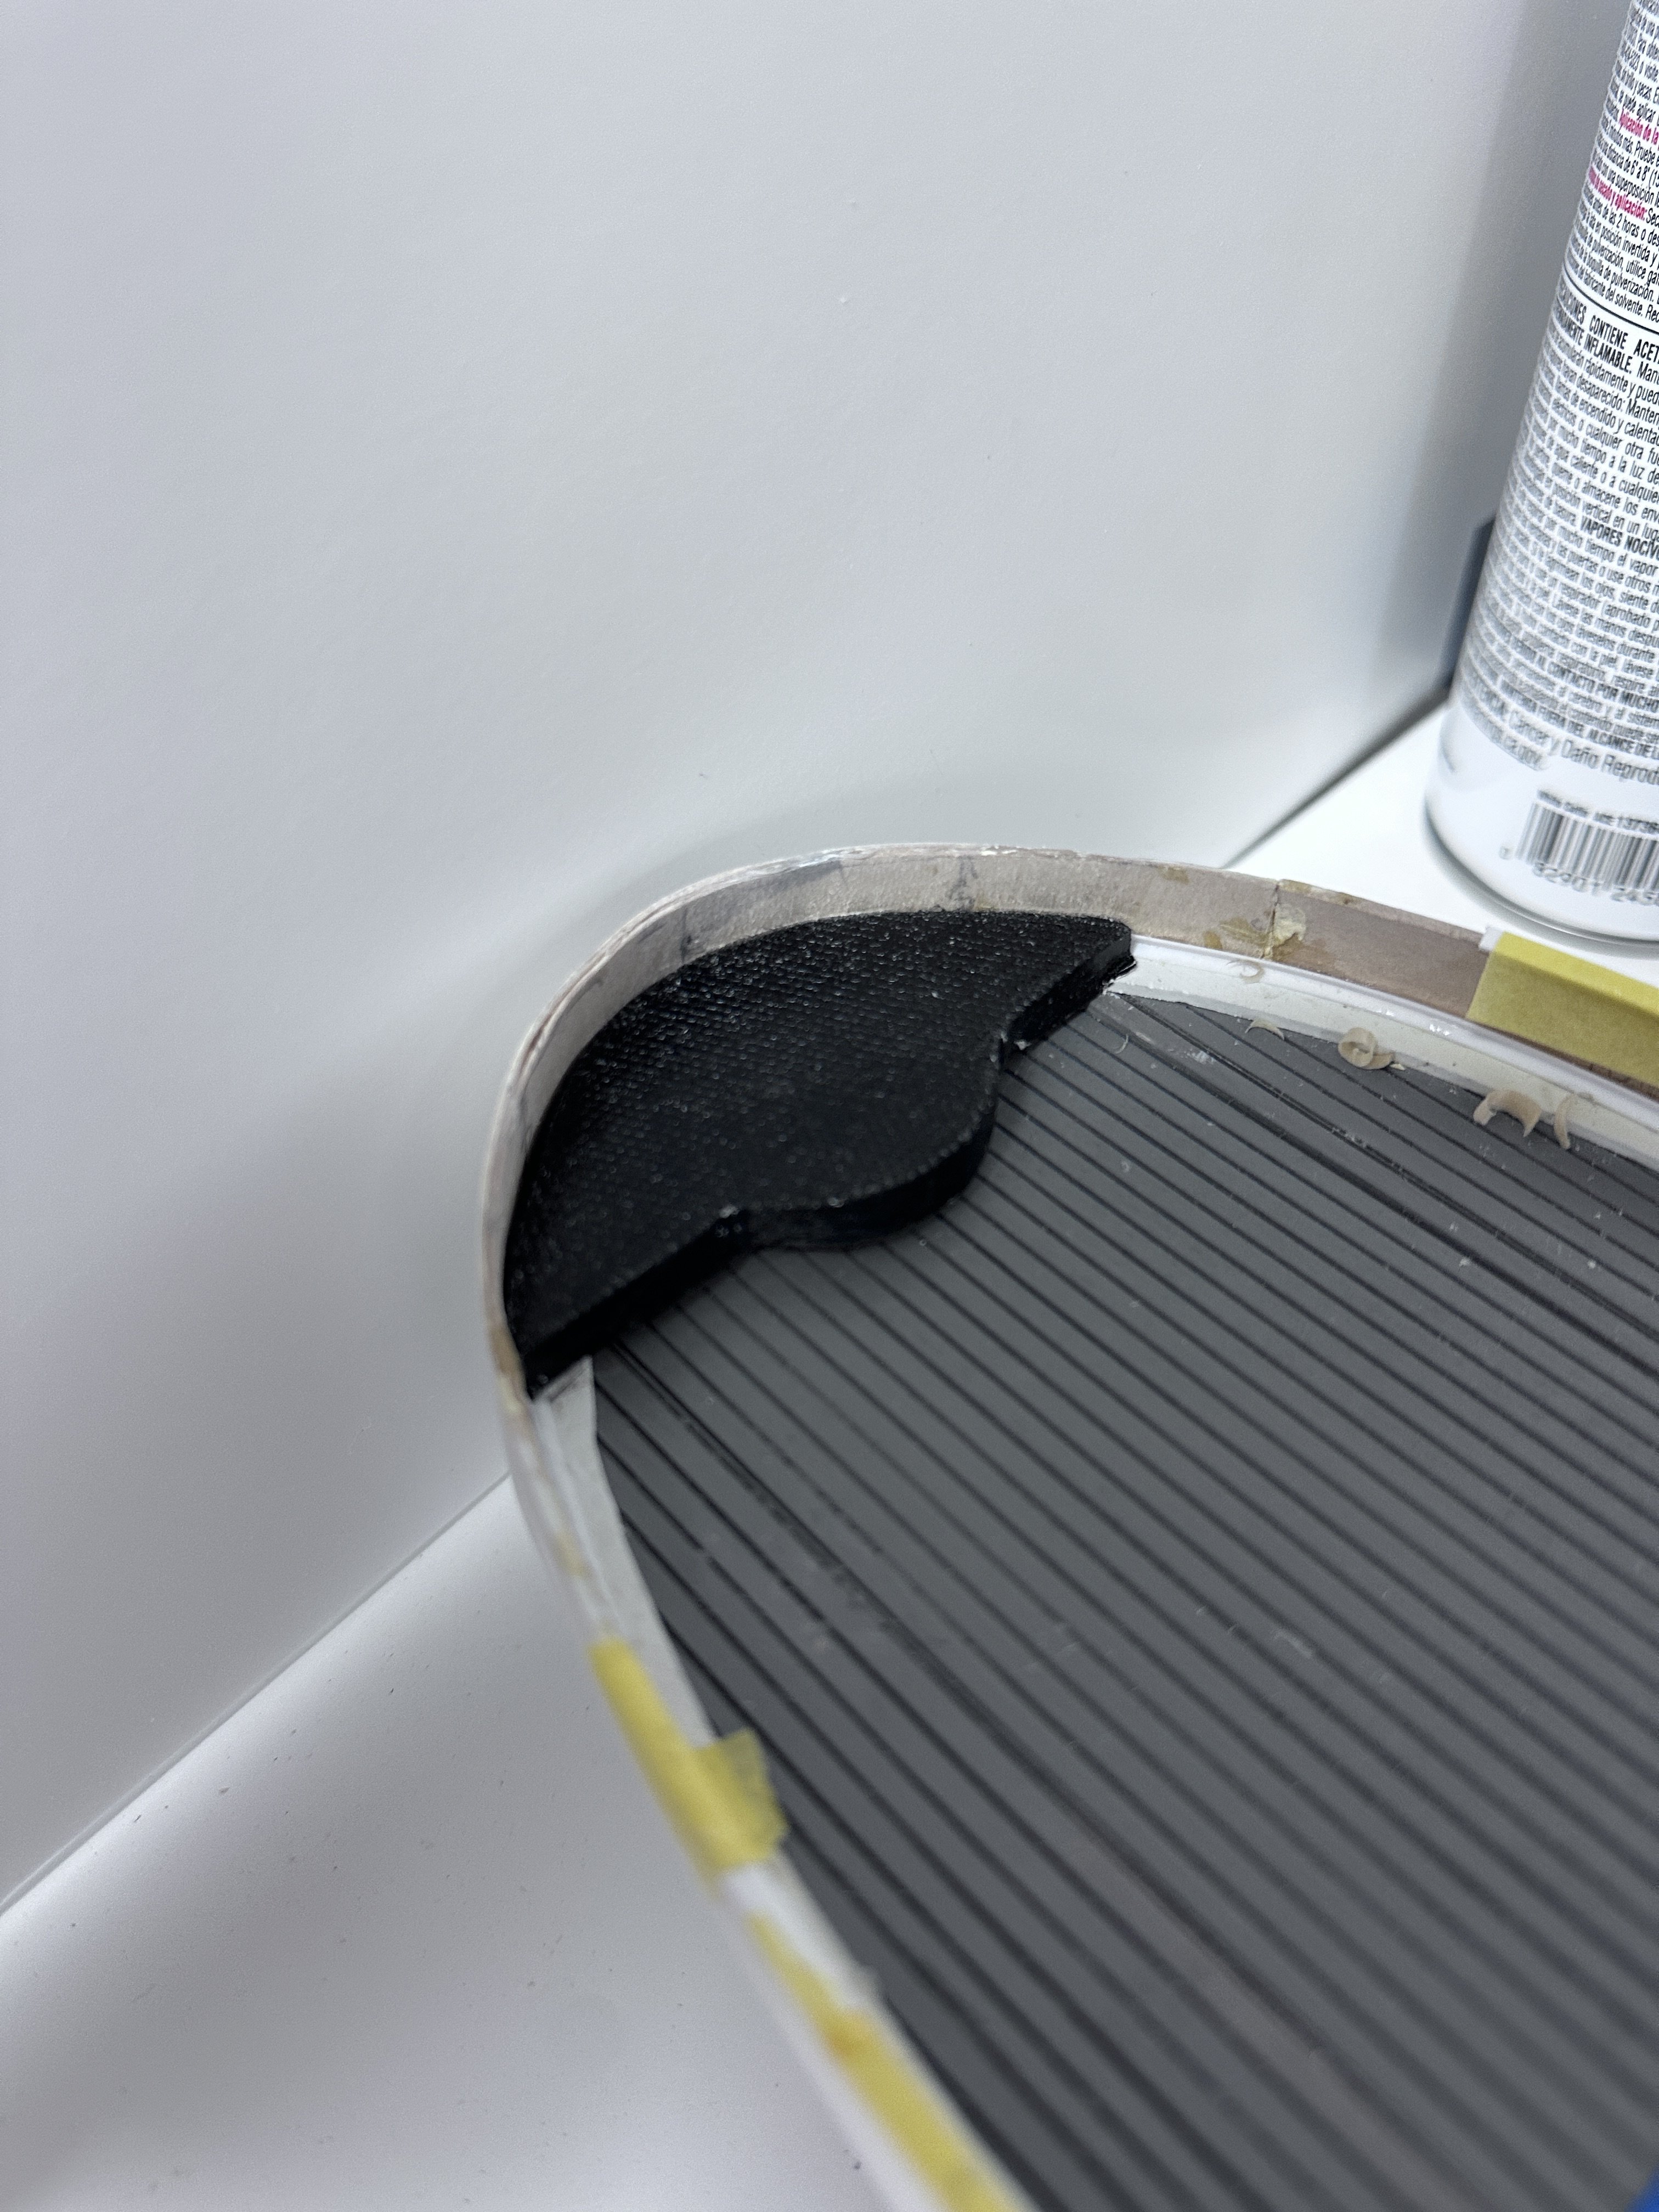
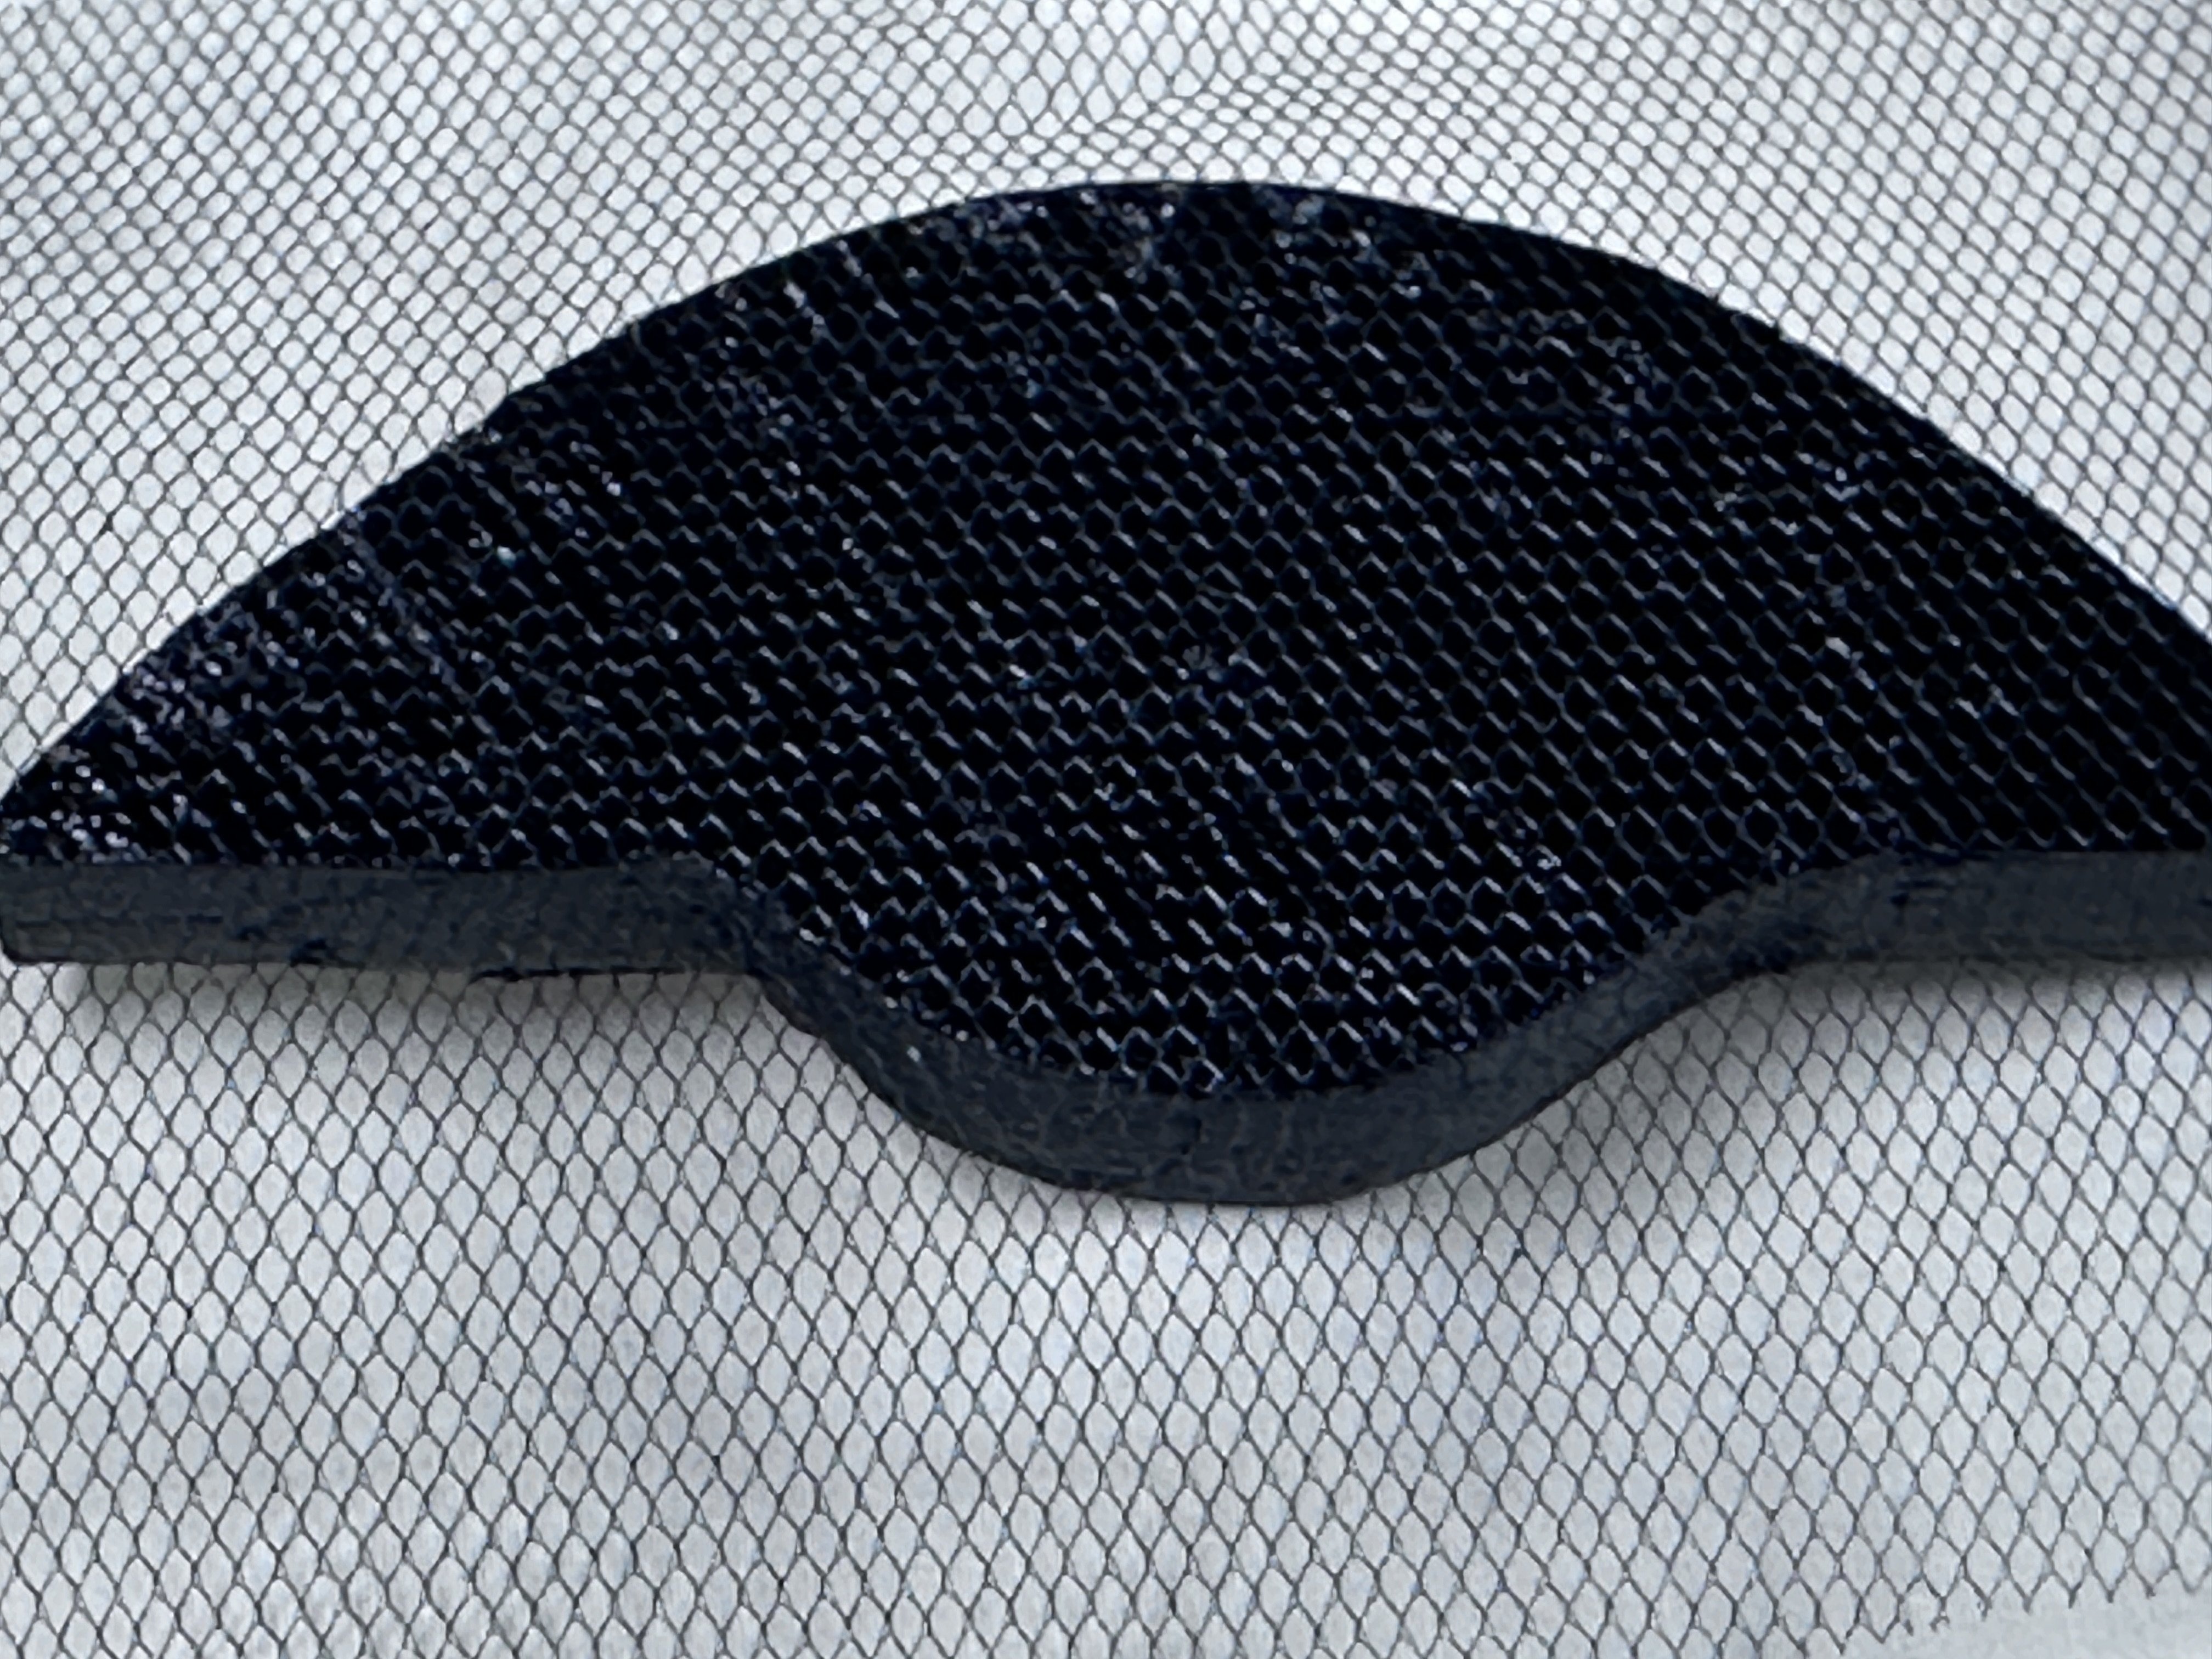
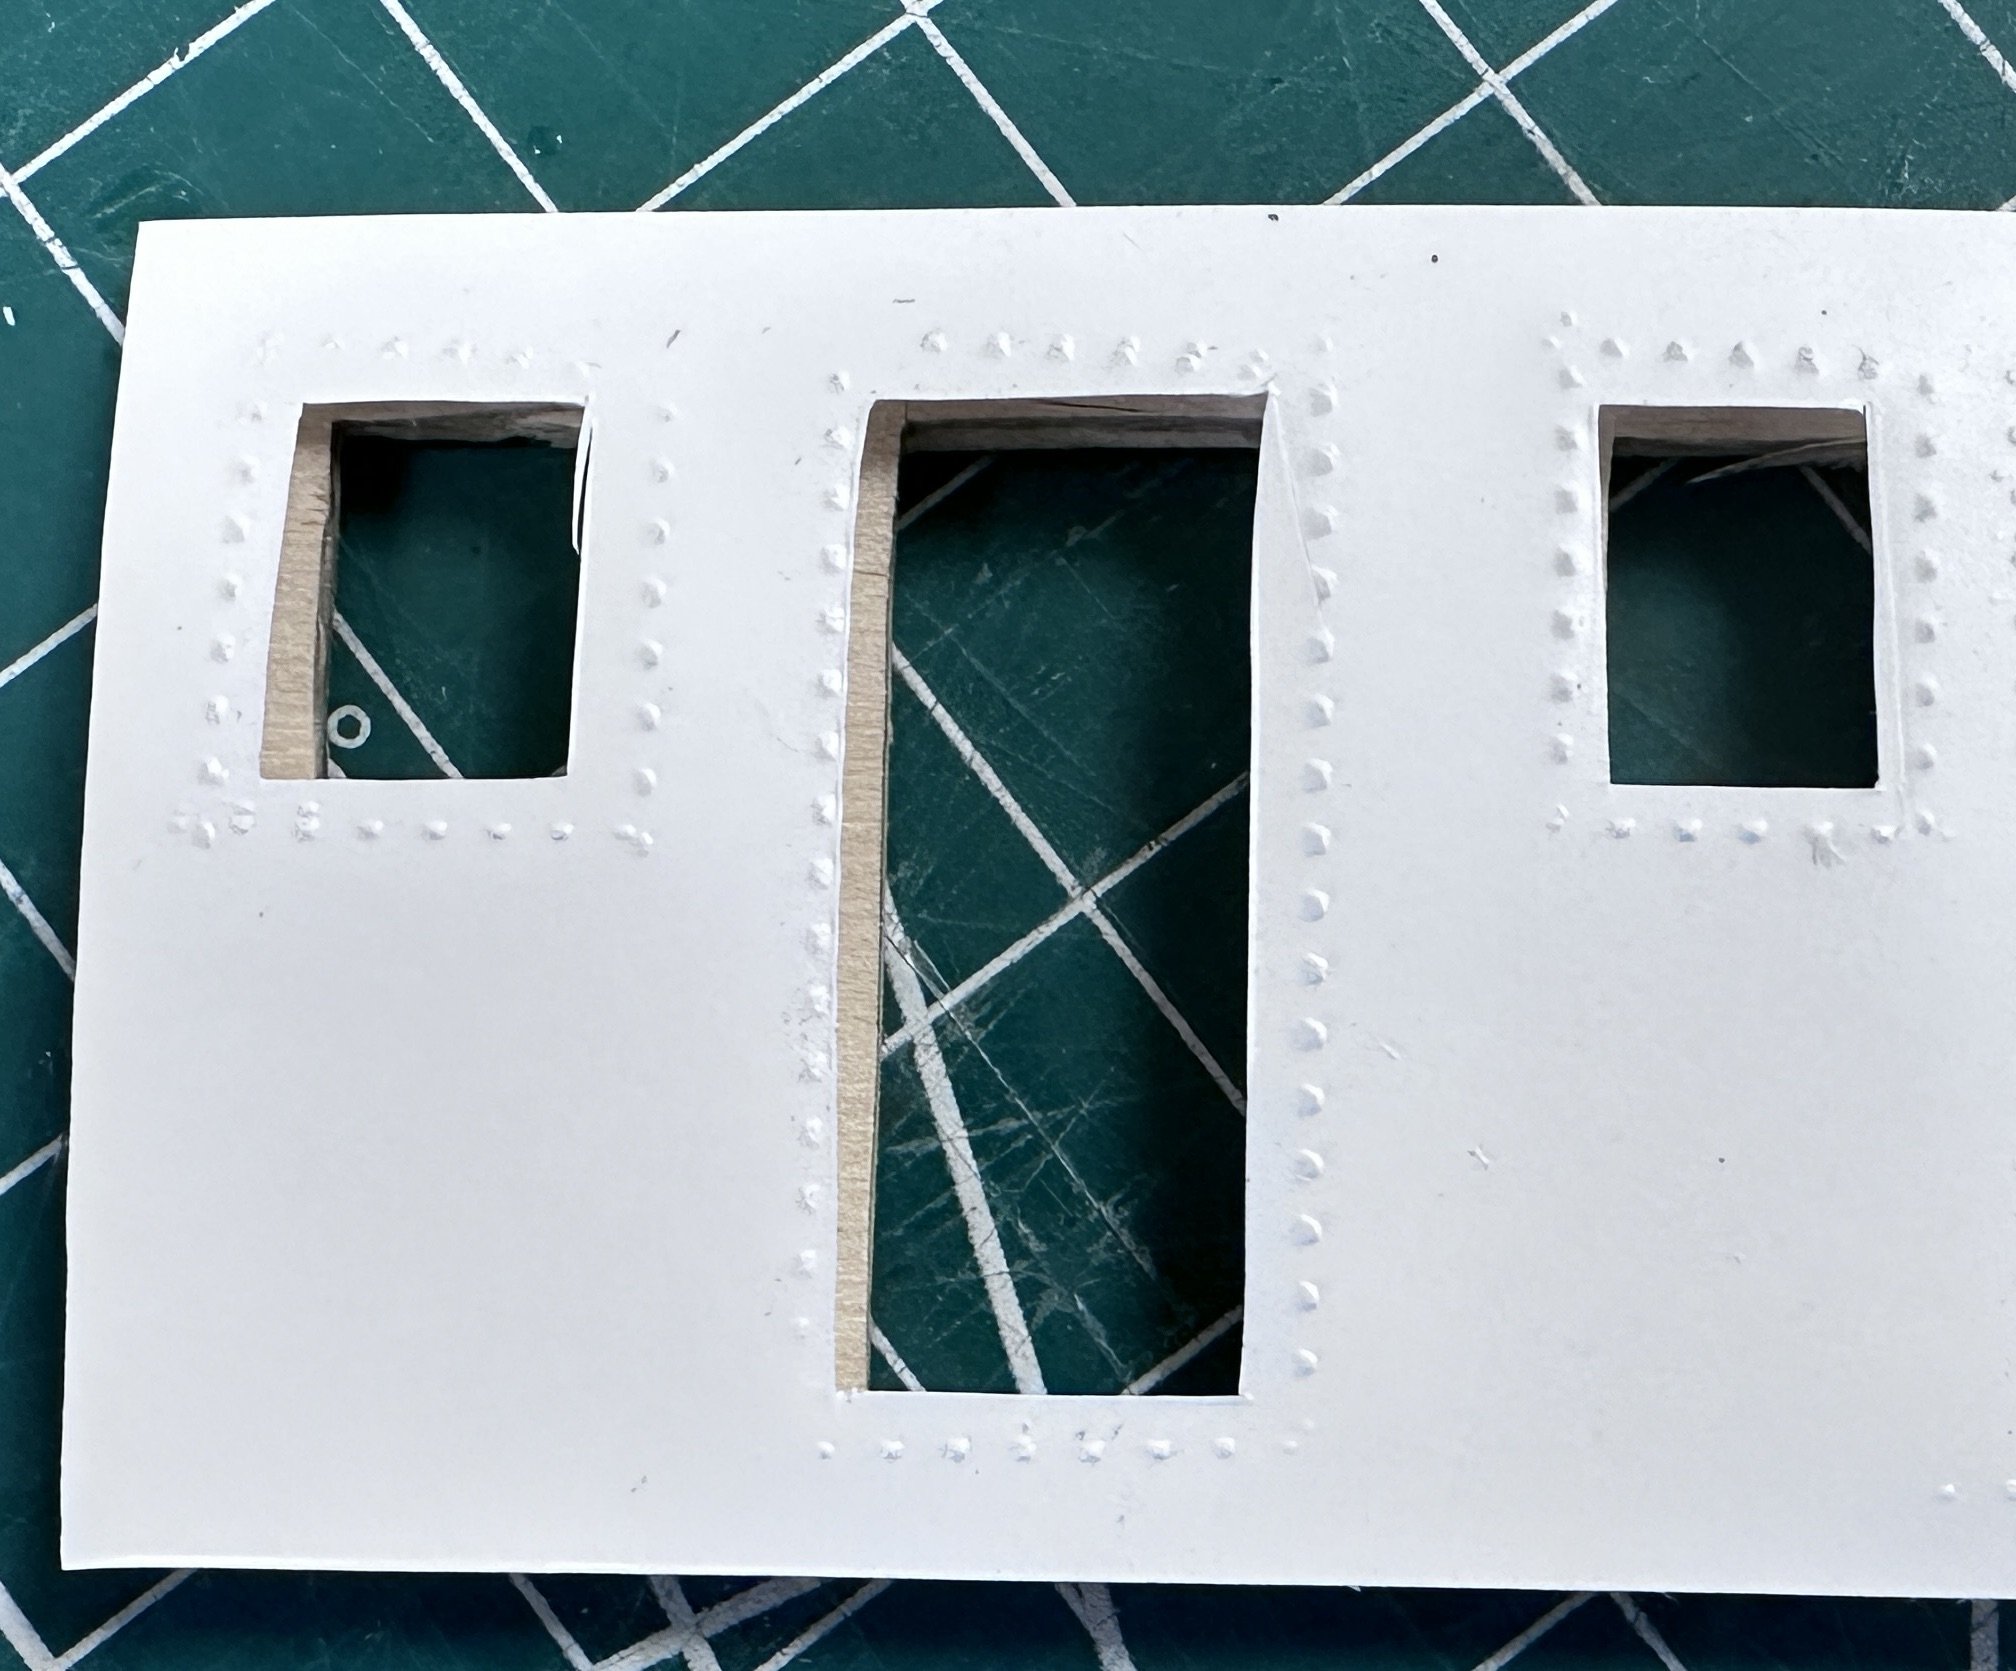
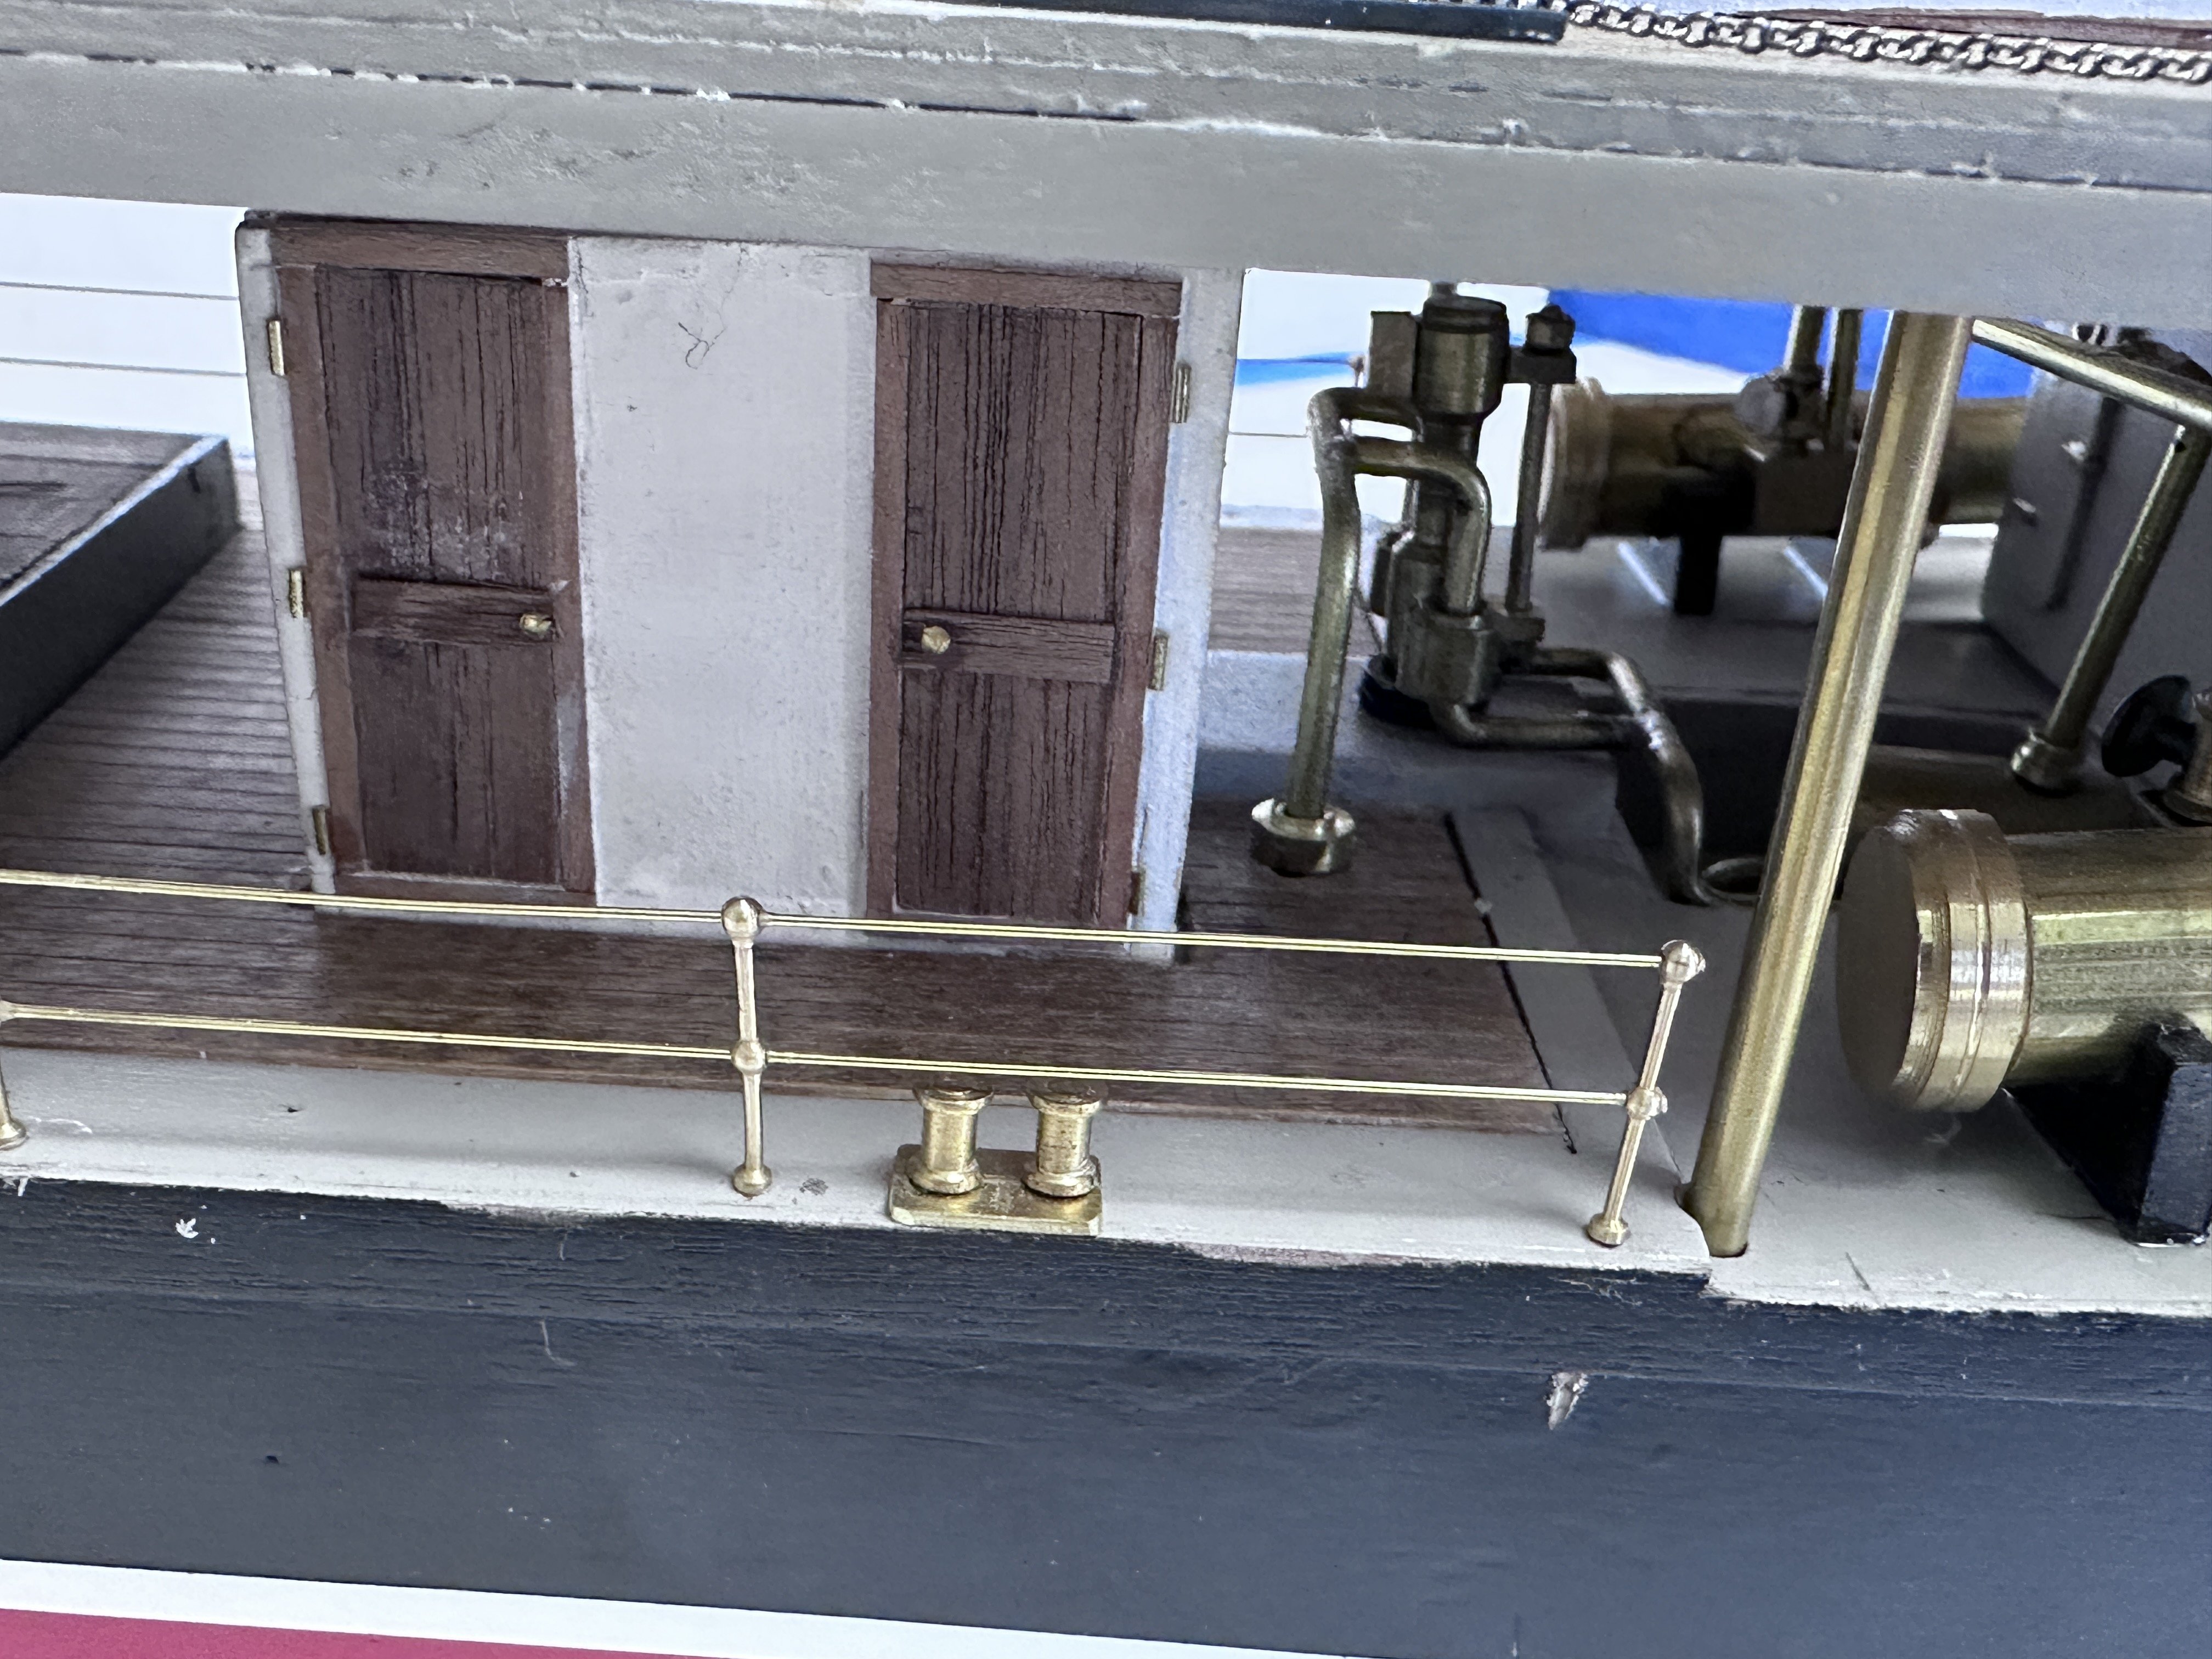
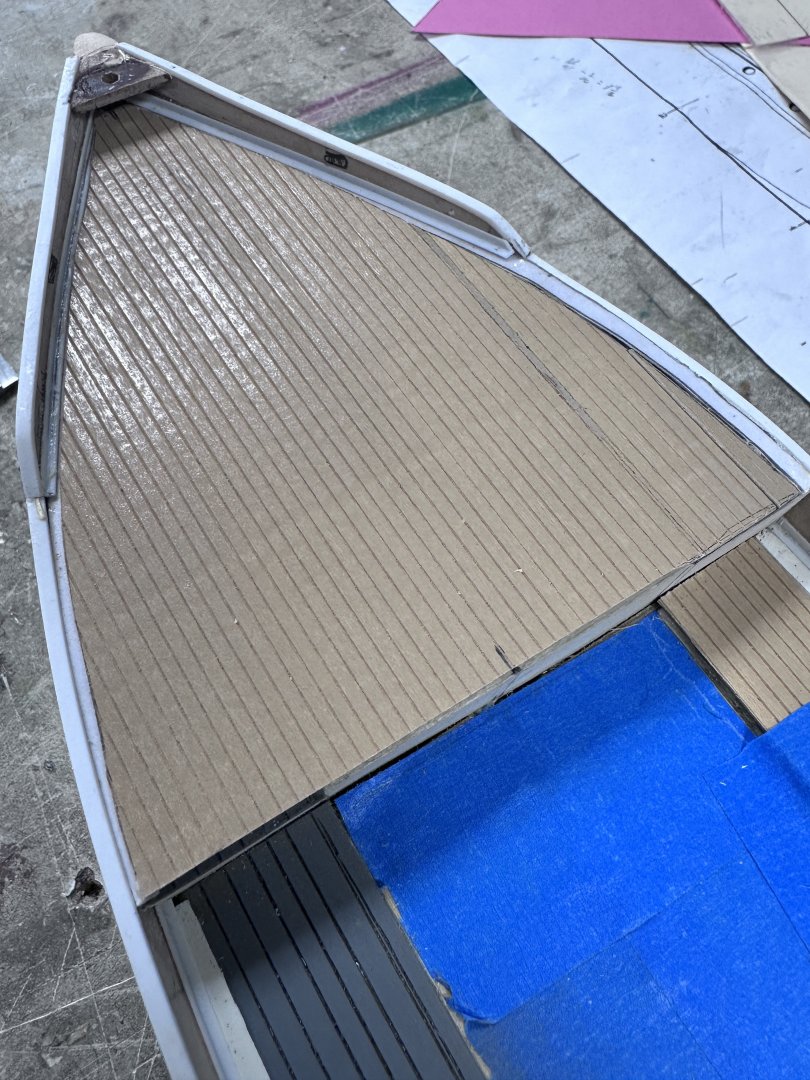
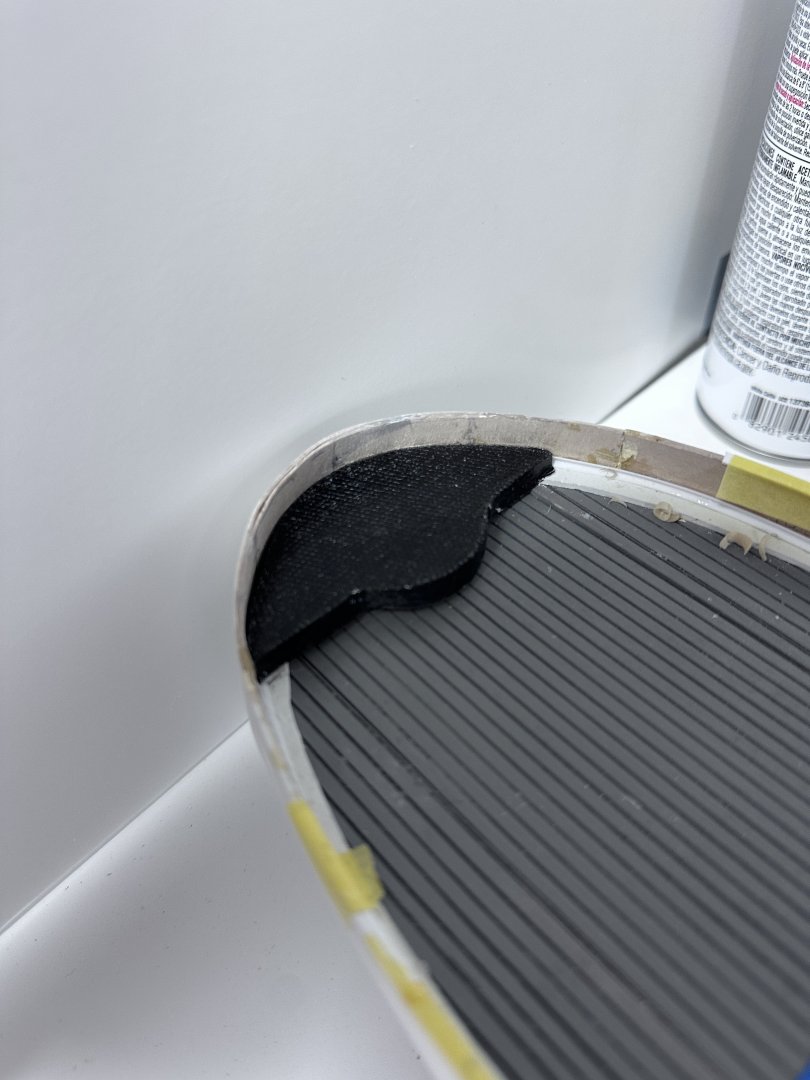
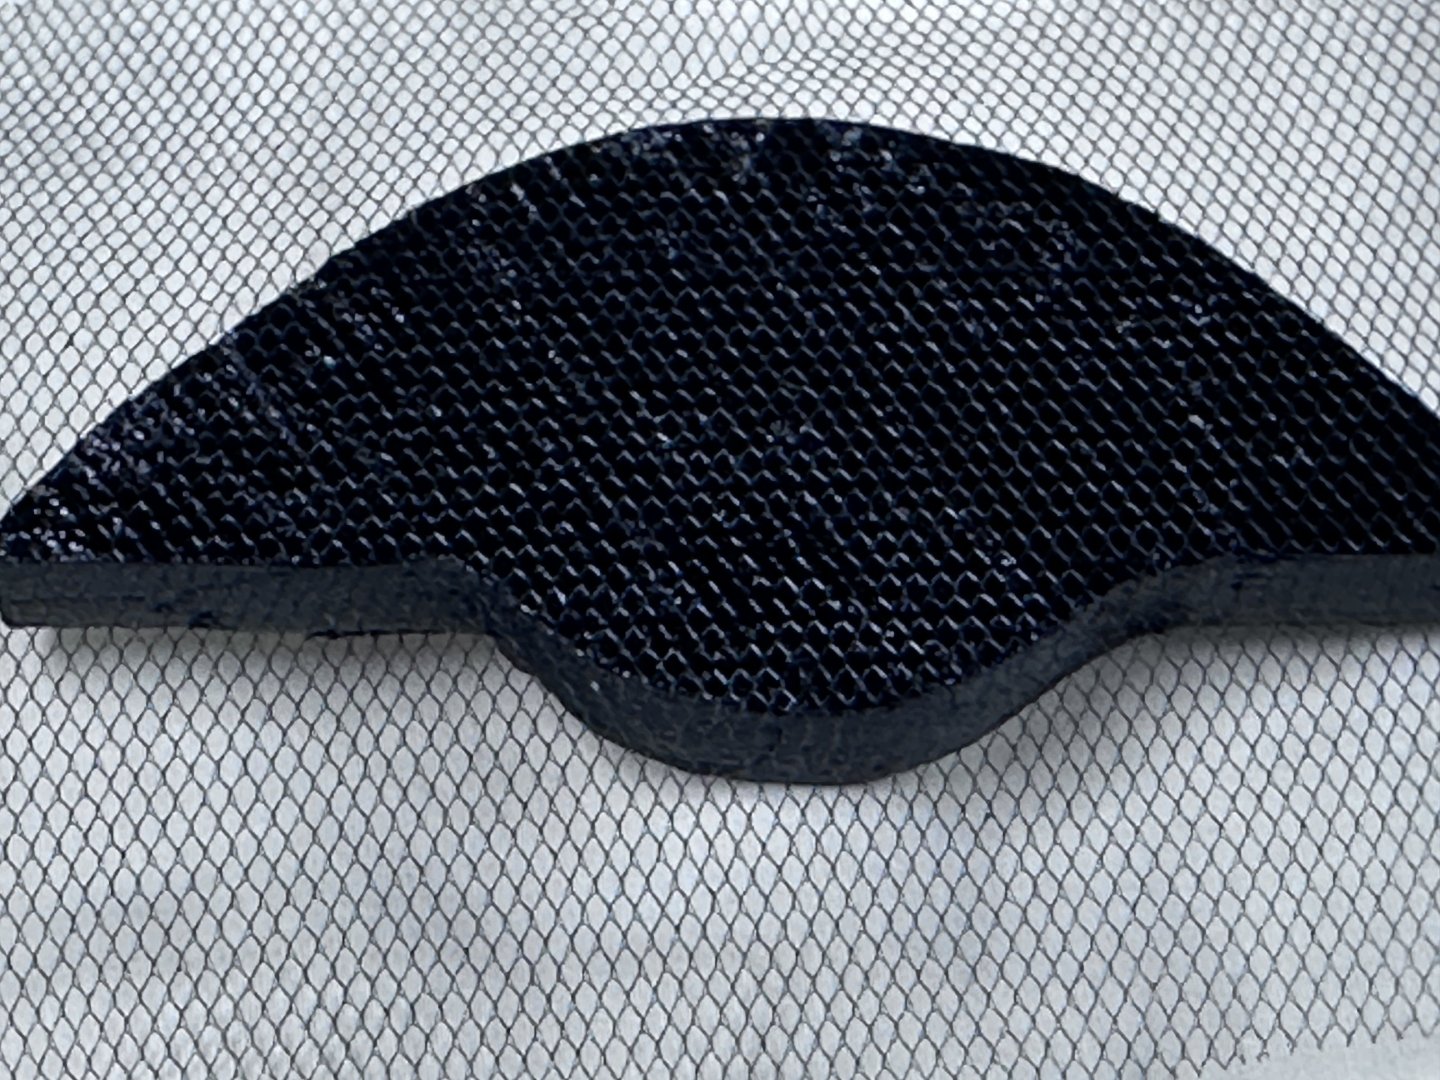
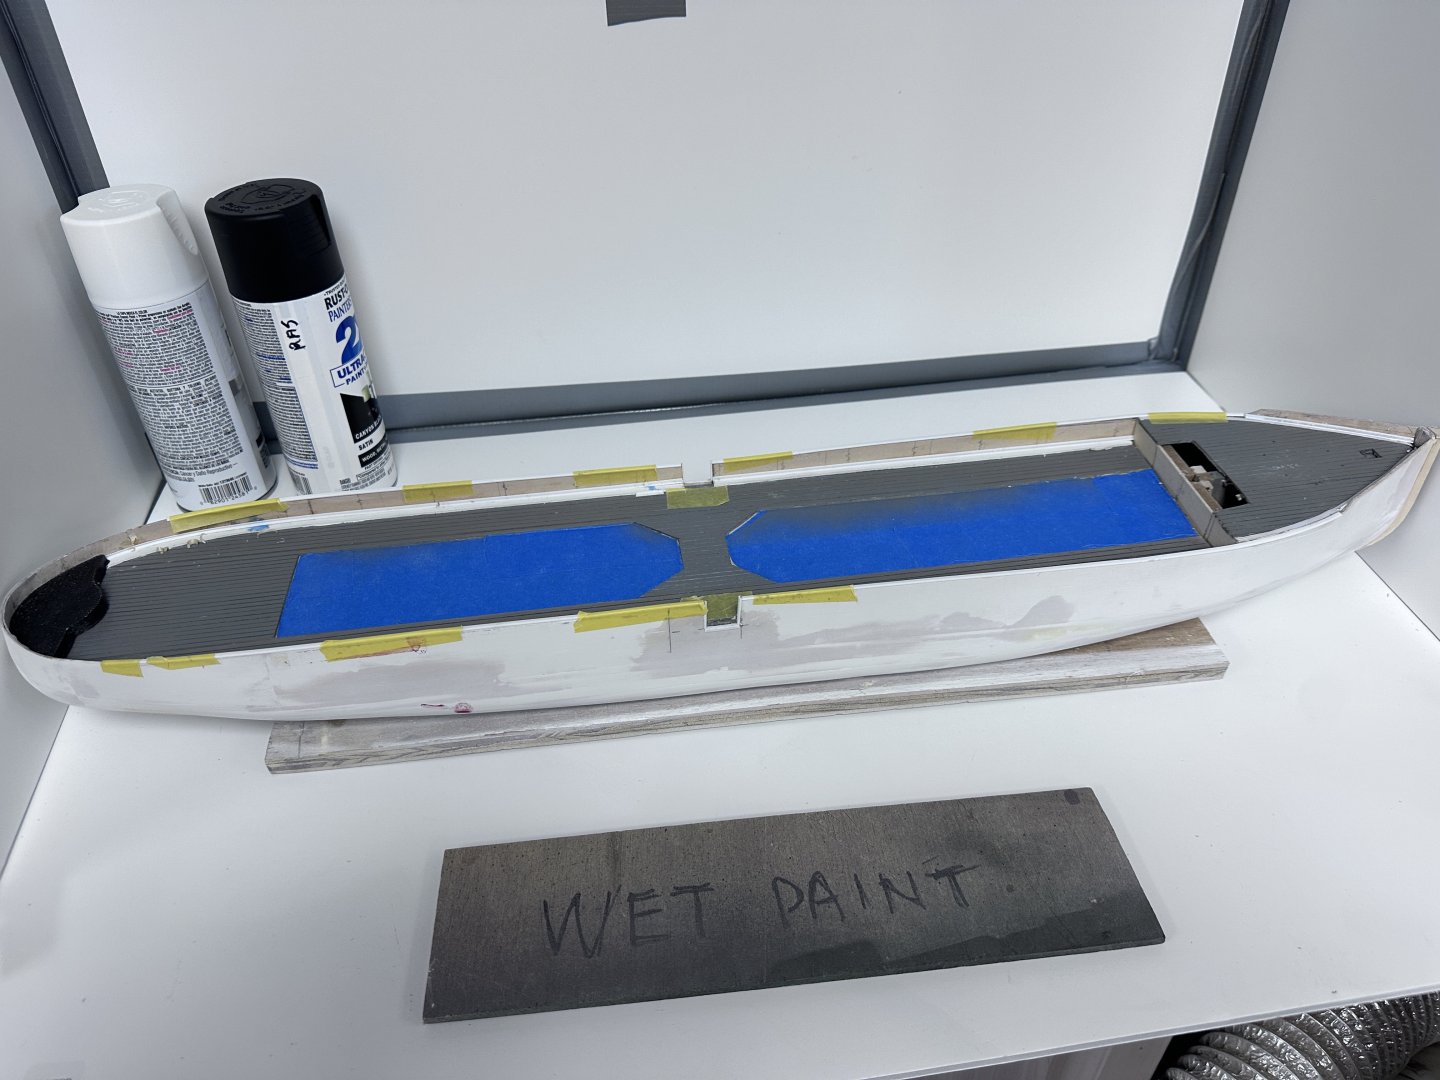
As I mentioned in a previous post, I changed the color of the planking in the main deck and the forecastle. Following is the before and after. I think the planks are now more to scale and the color is more compatible with the boat's white paint. Also started the development of the riveted joints. The panel was cut out of basswood and, using O.O5" thick polystyrene (almost like heavy paper), I reproduced the panel's outline and openings. Then, using a pounce wheel, the rivets were punched from the backside thus producing a very realistic riveted line in the front. The plastic sheet has not been glued to the panel and I will try to better locate the rivet lines. Also covered the fantail steering station with mosquito net painted black to simulate the tread plate surface. Thanks for the comments and likes.


-
Thanks for the likes, and Keith, I am my own sub-contractor with no deadlines and an ample budget. So good to be old and retired.
-
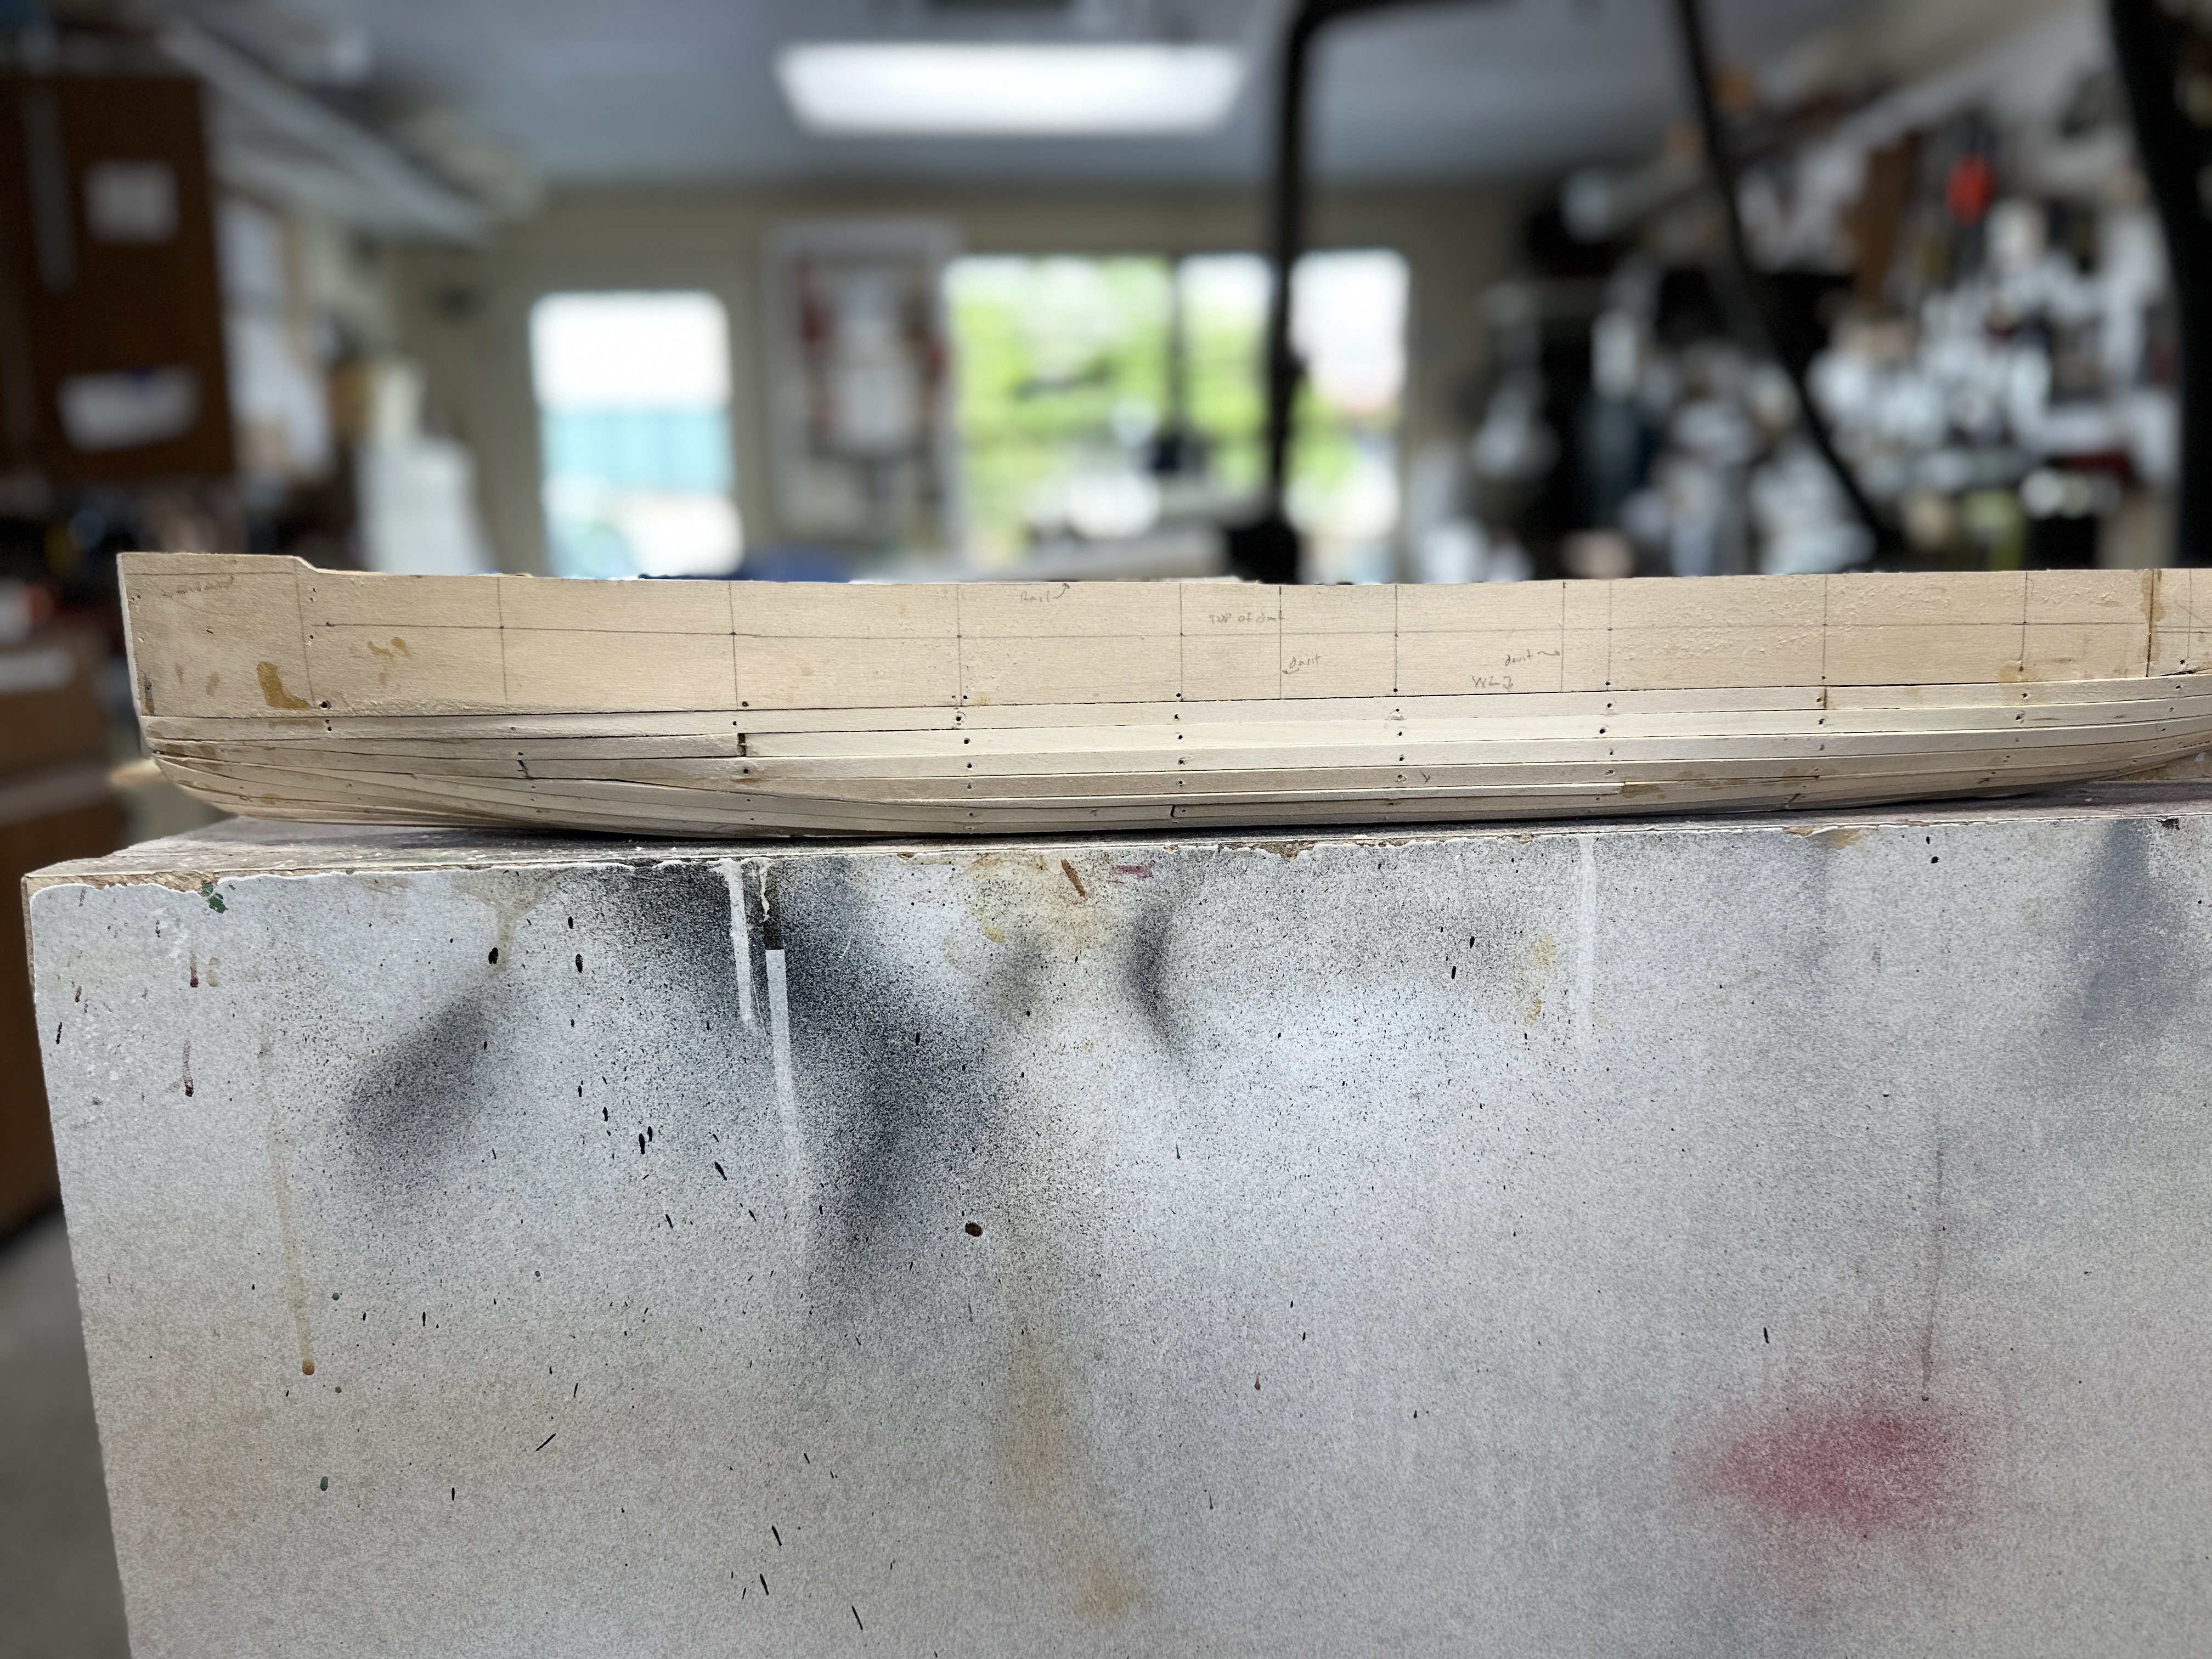
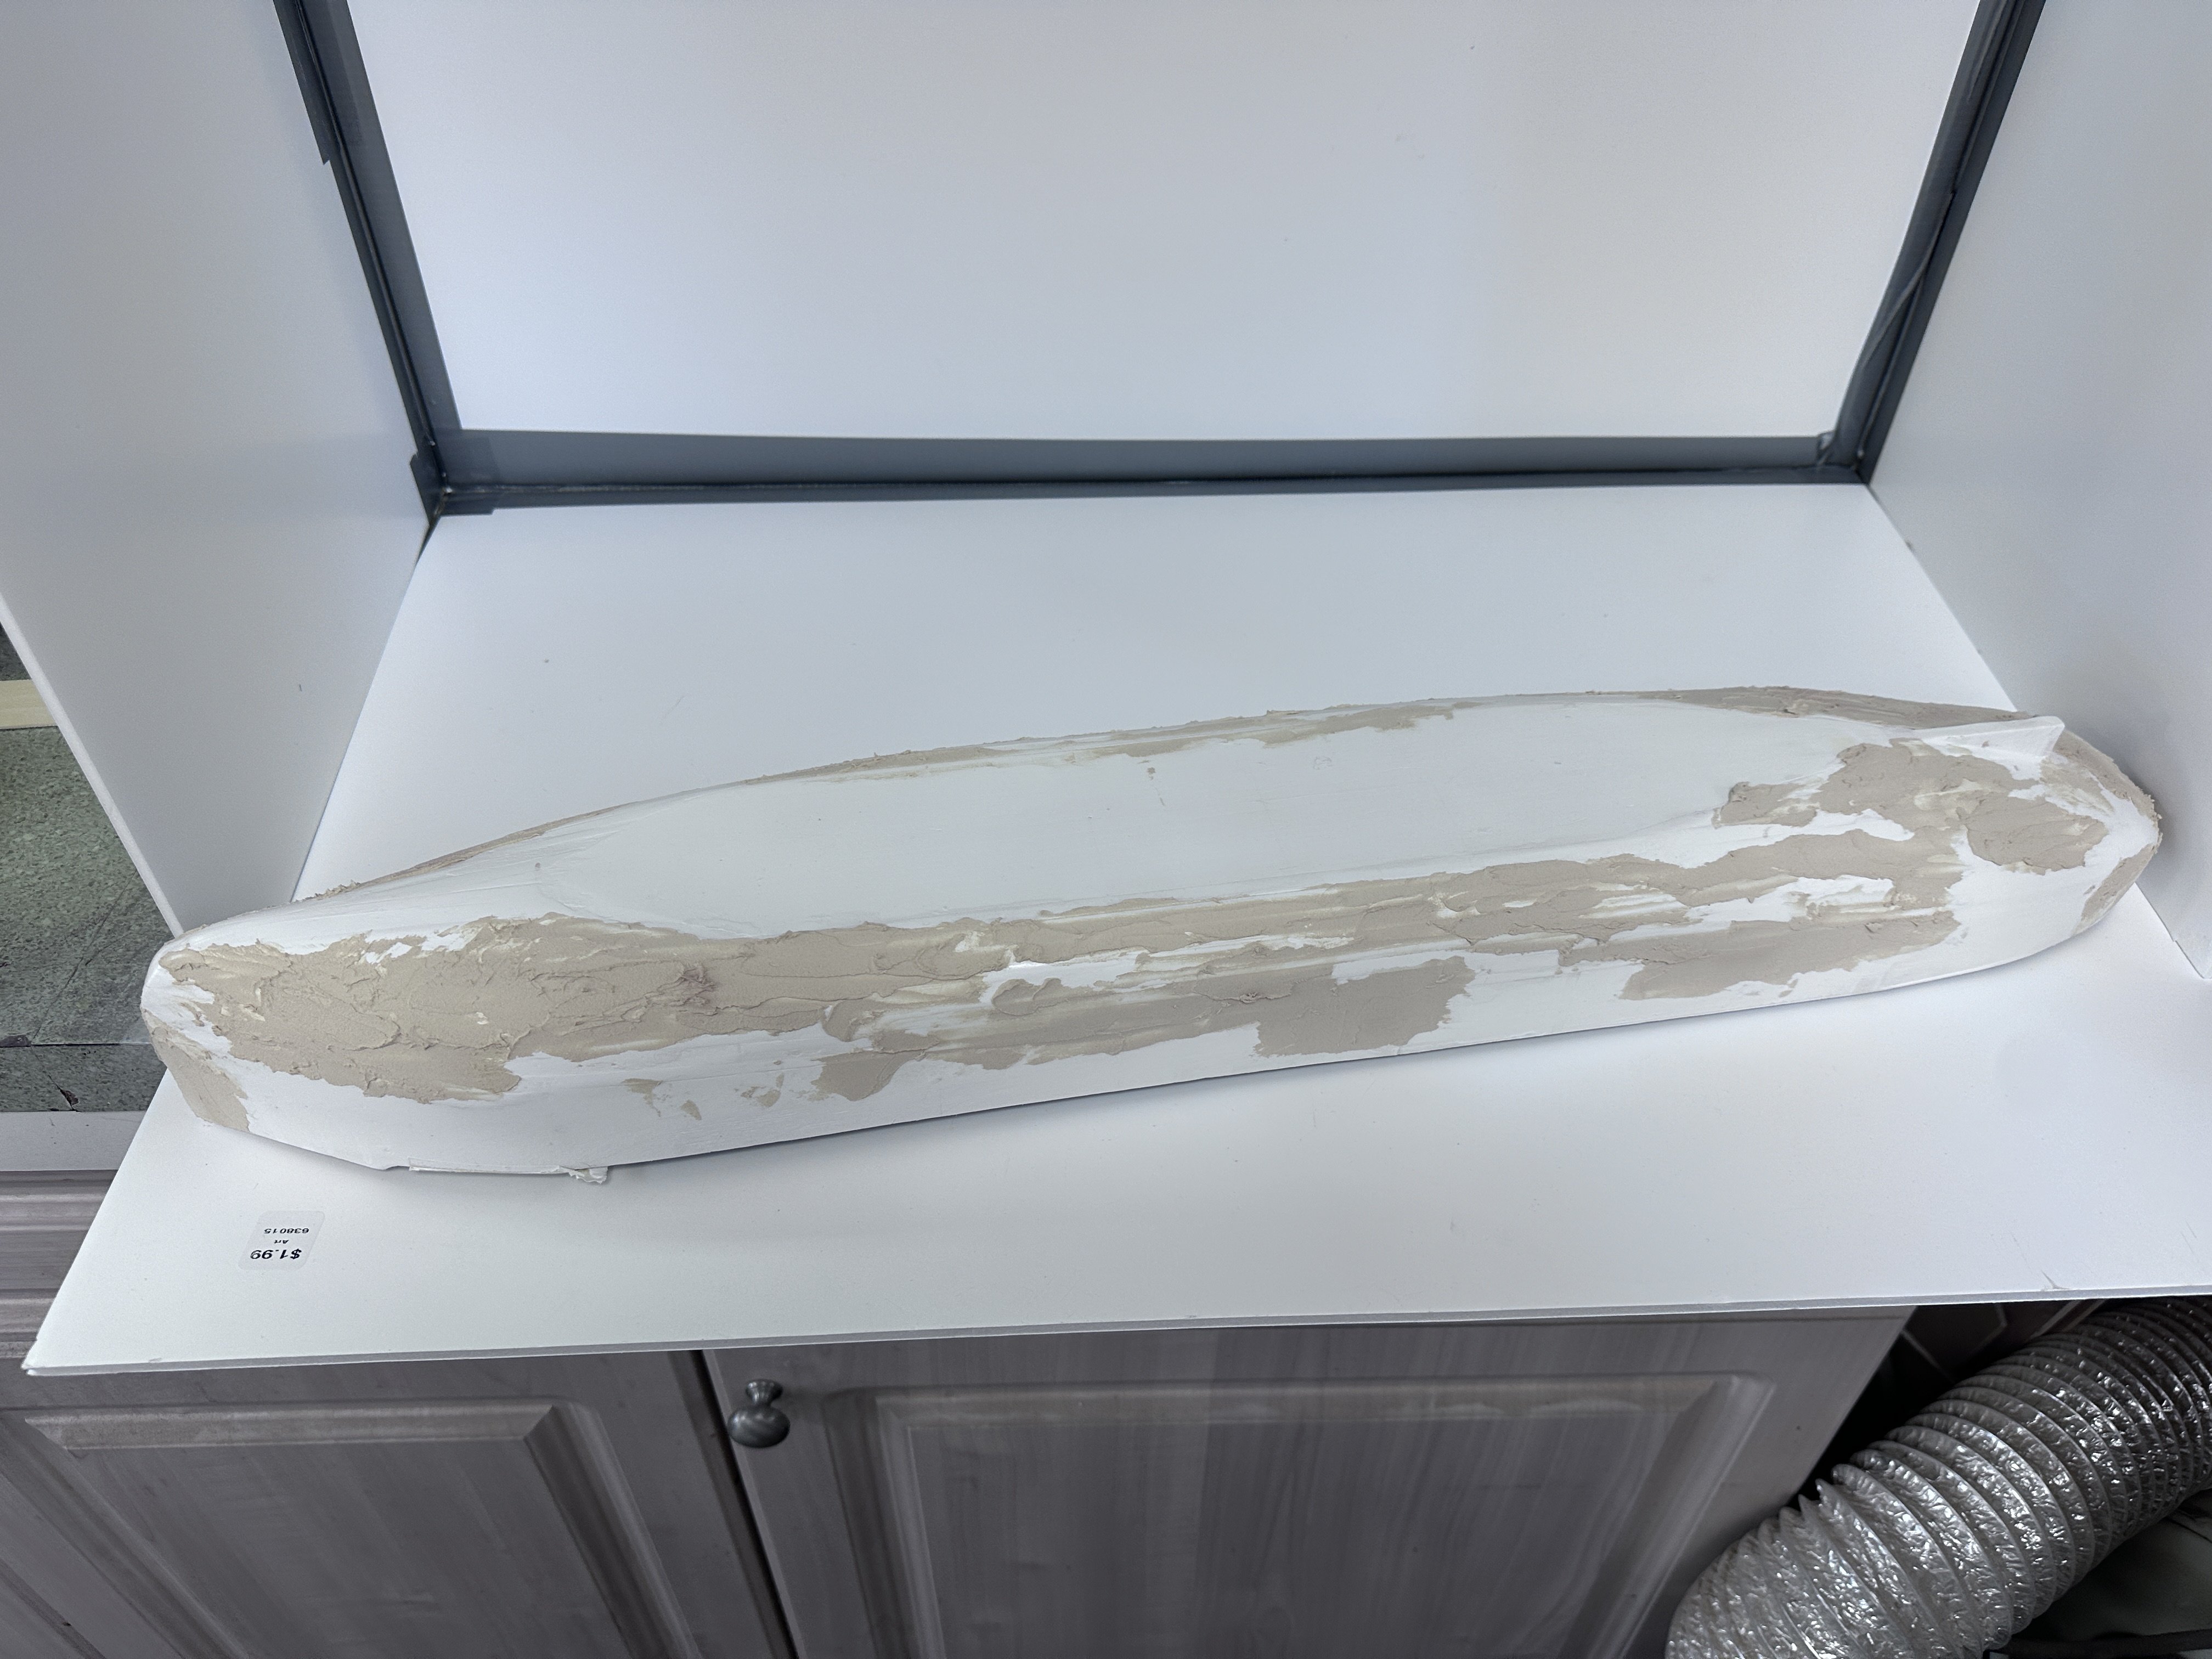
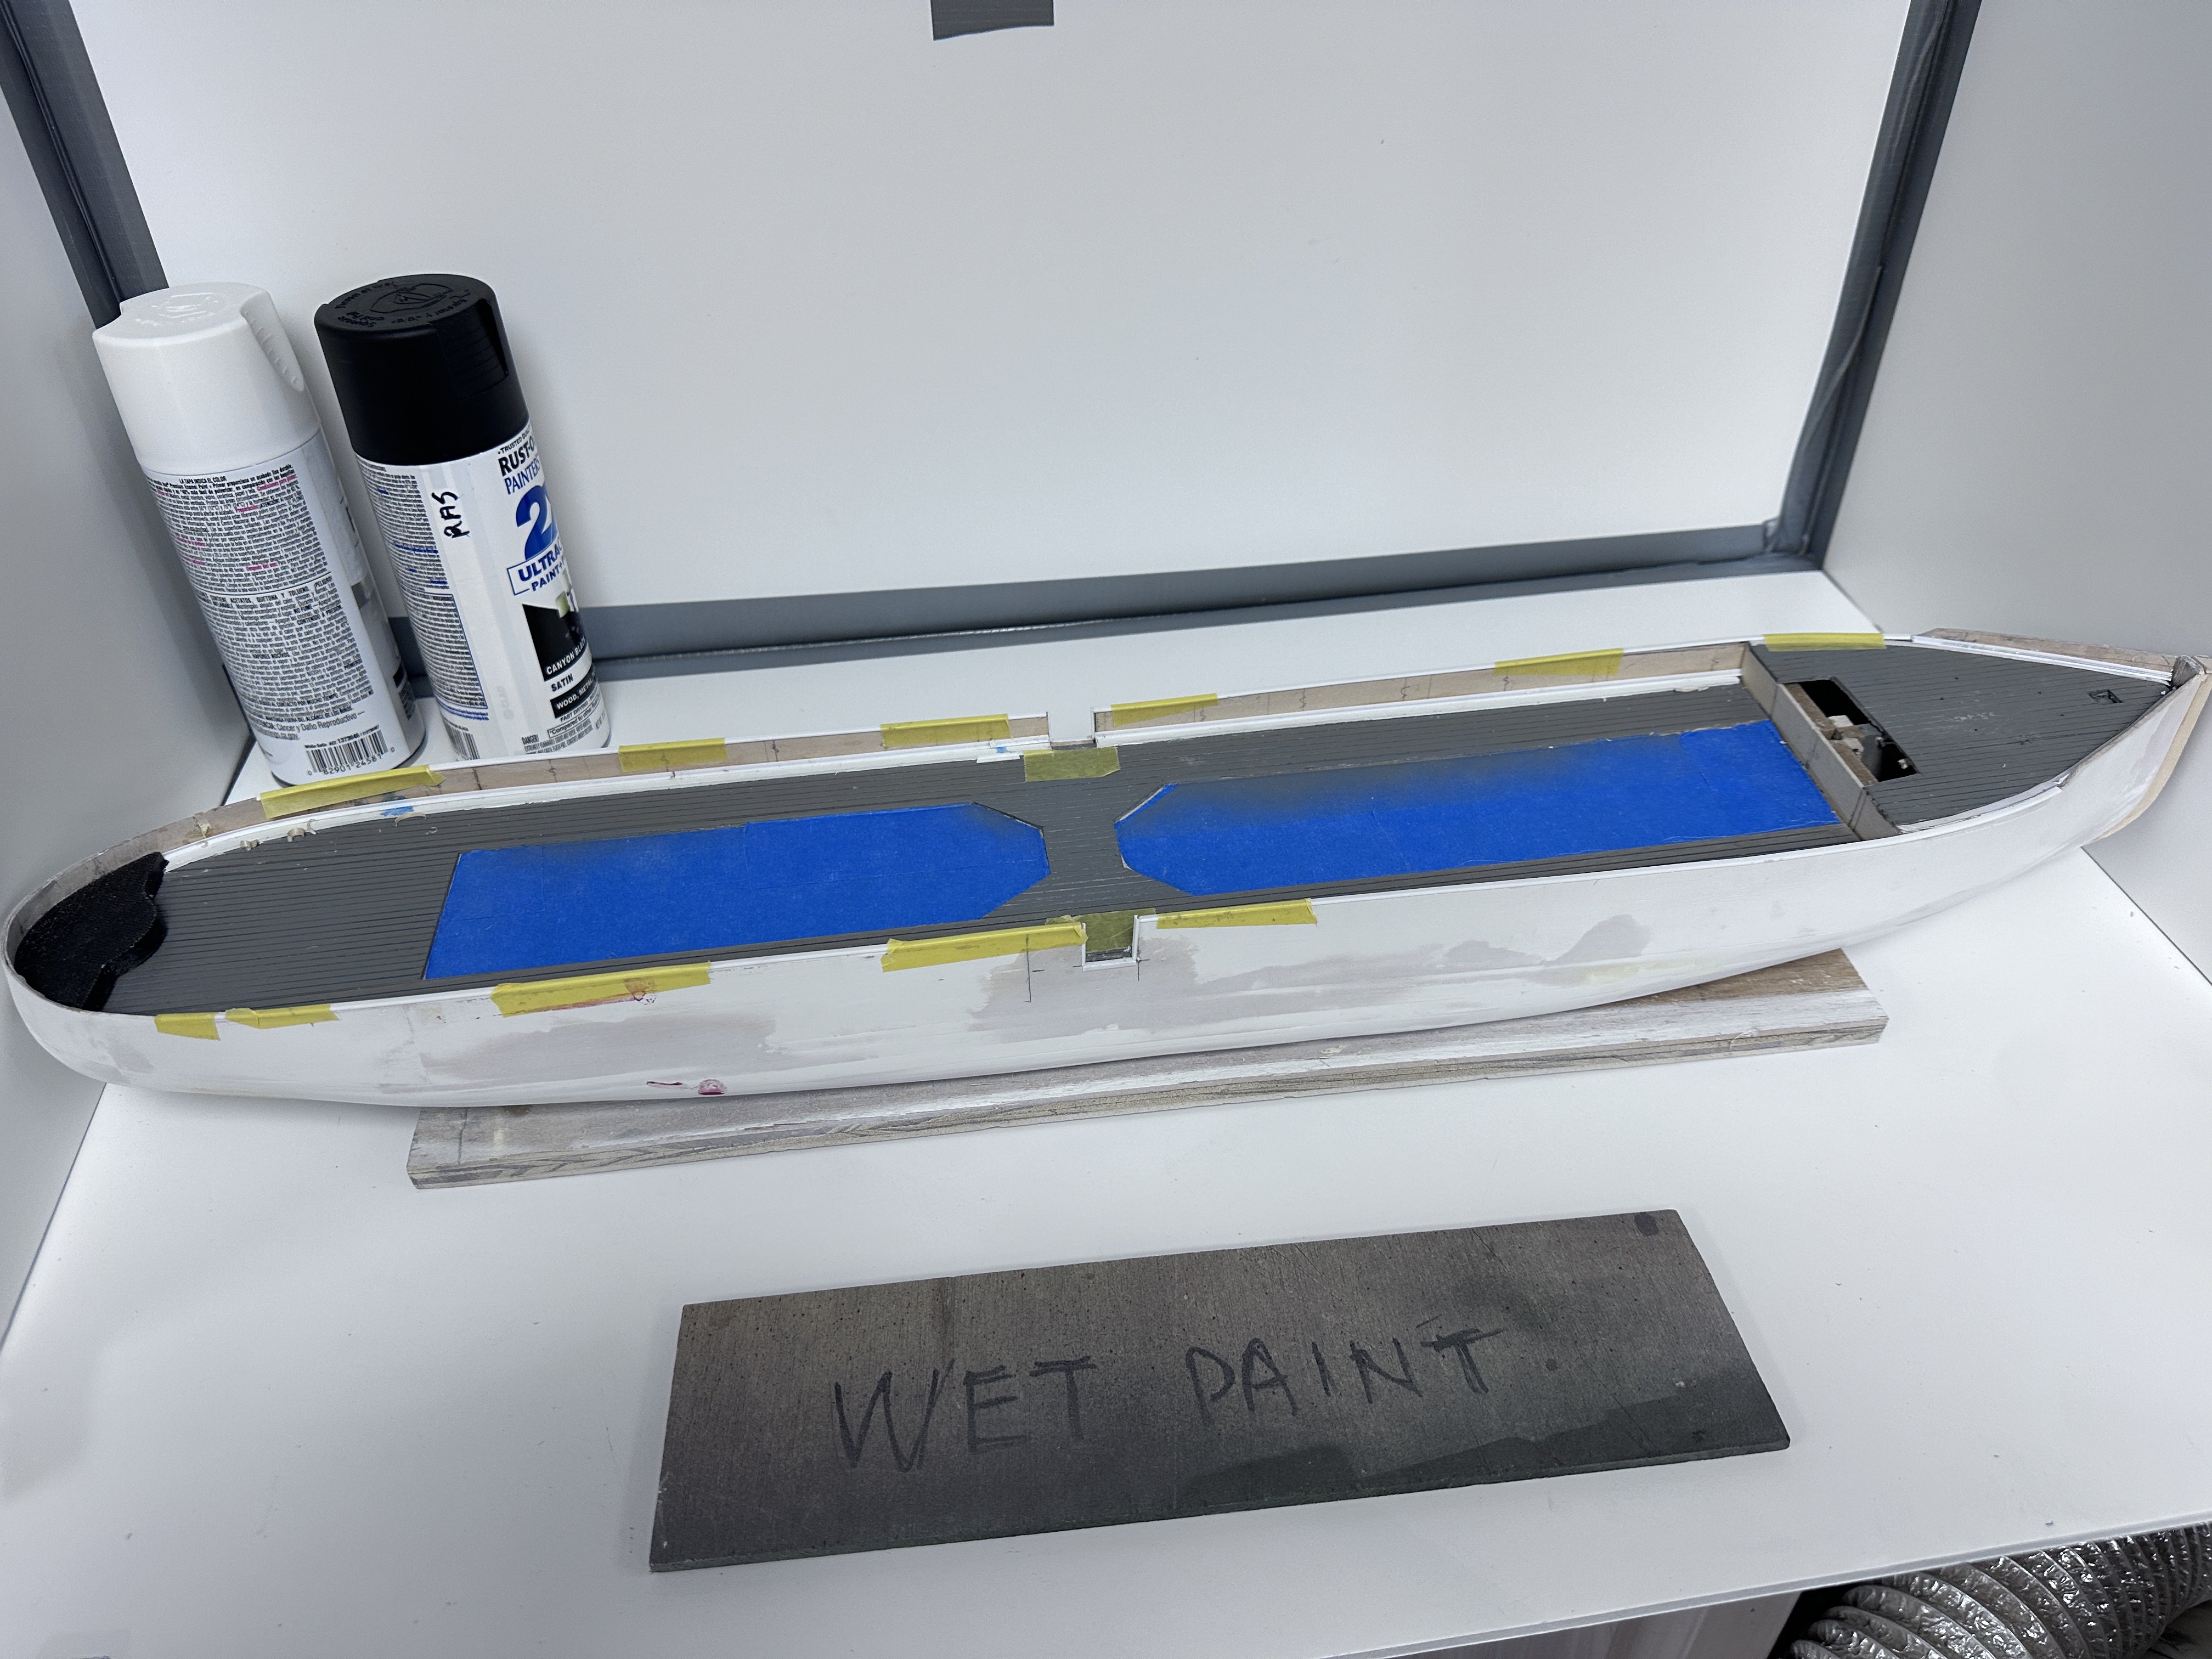
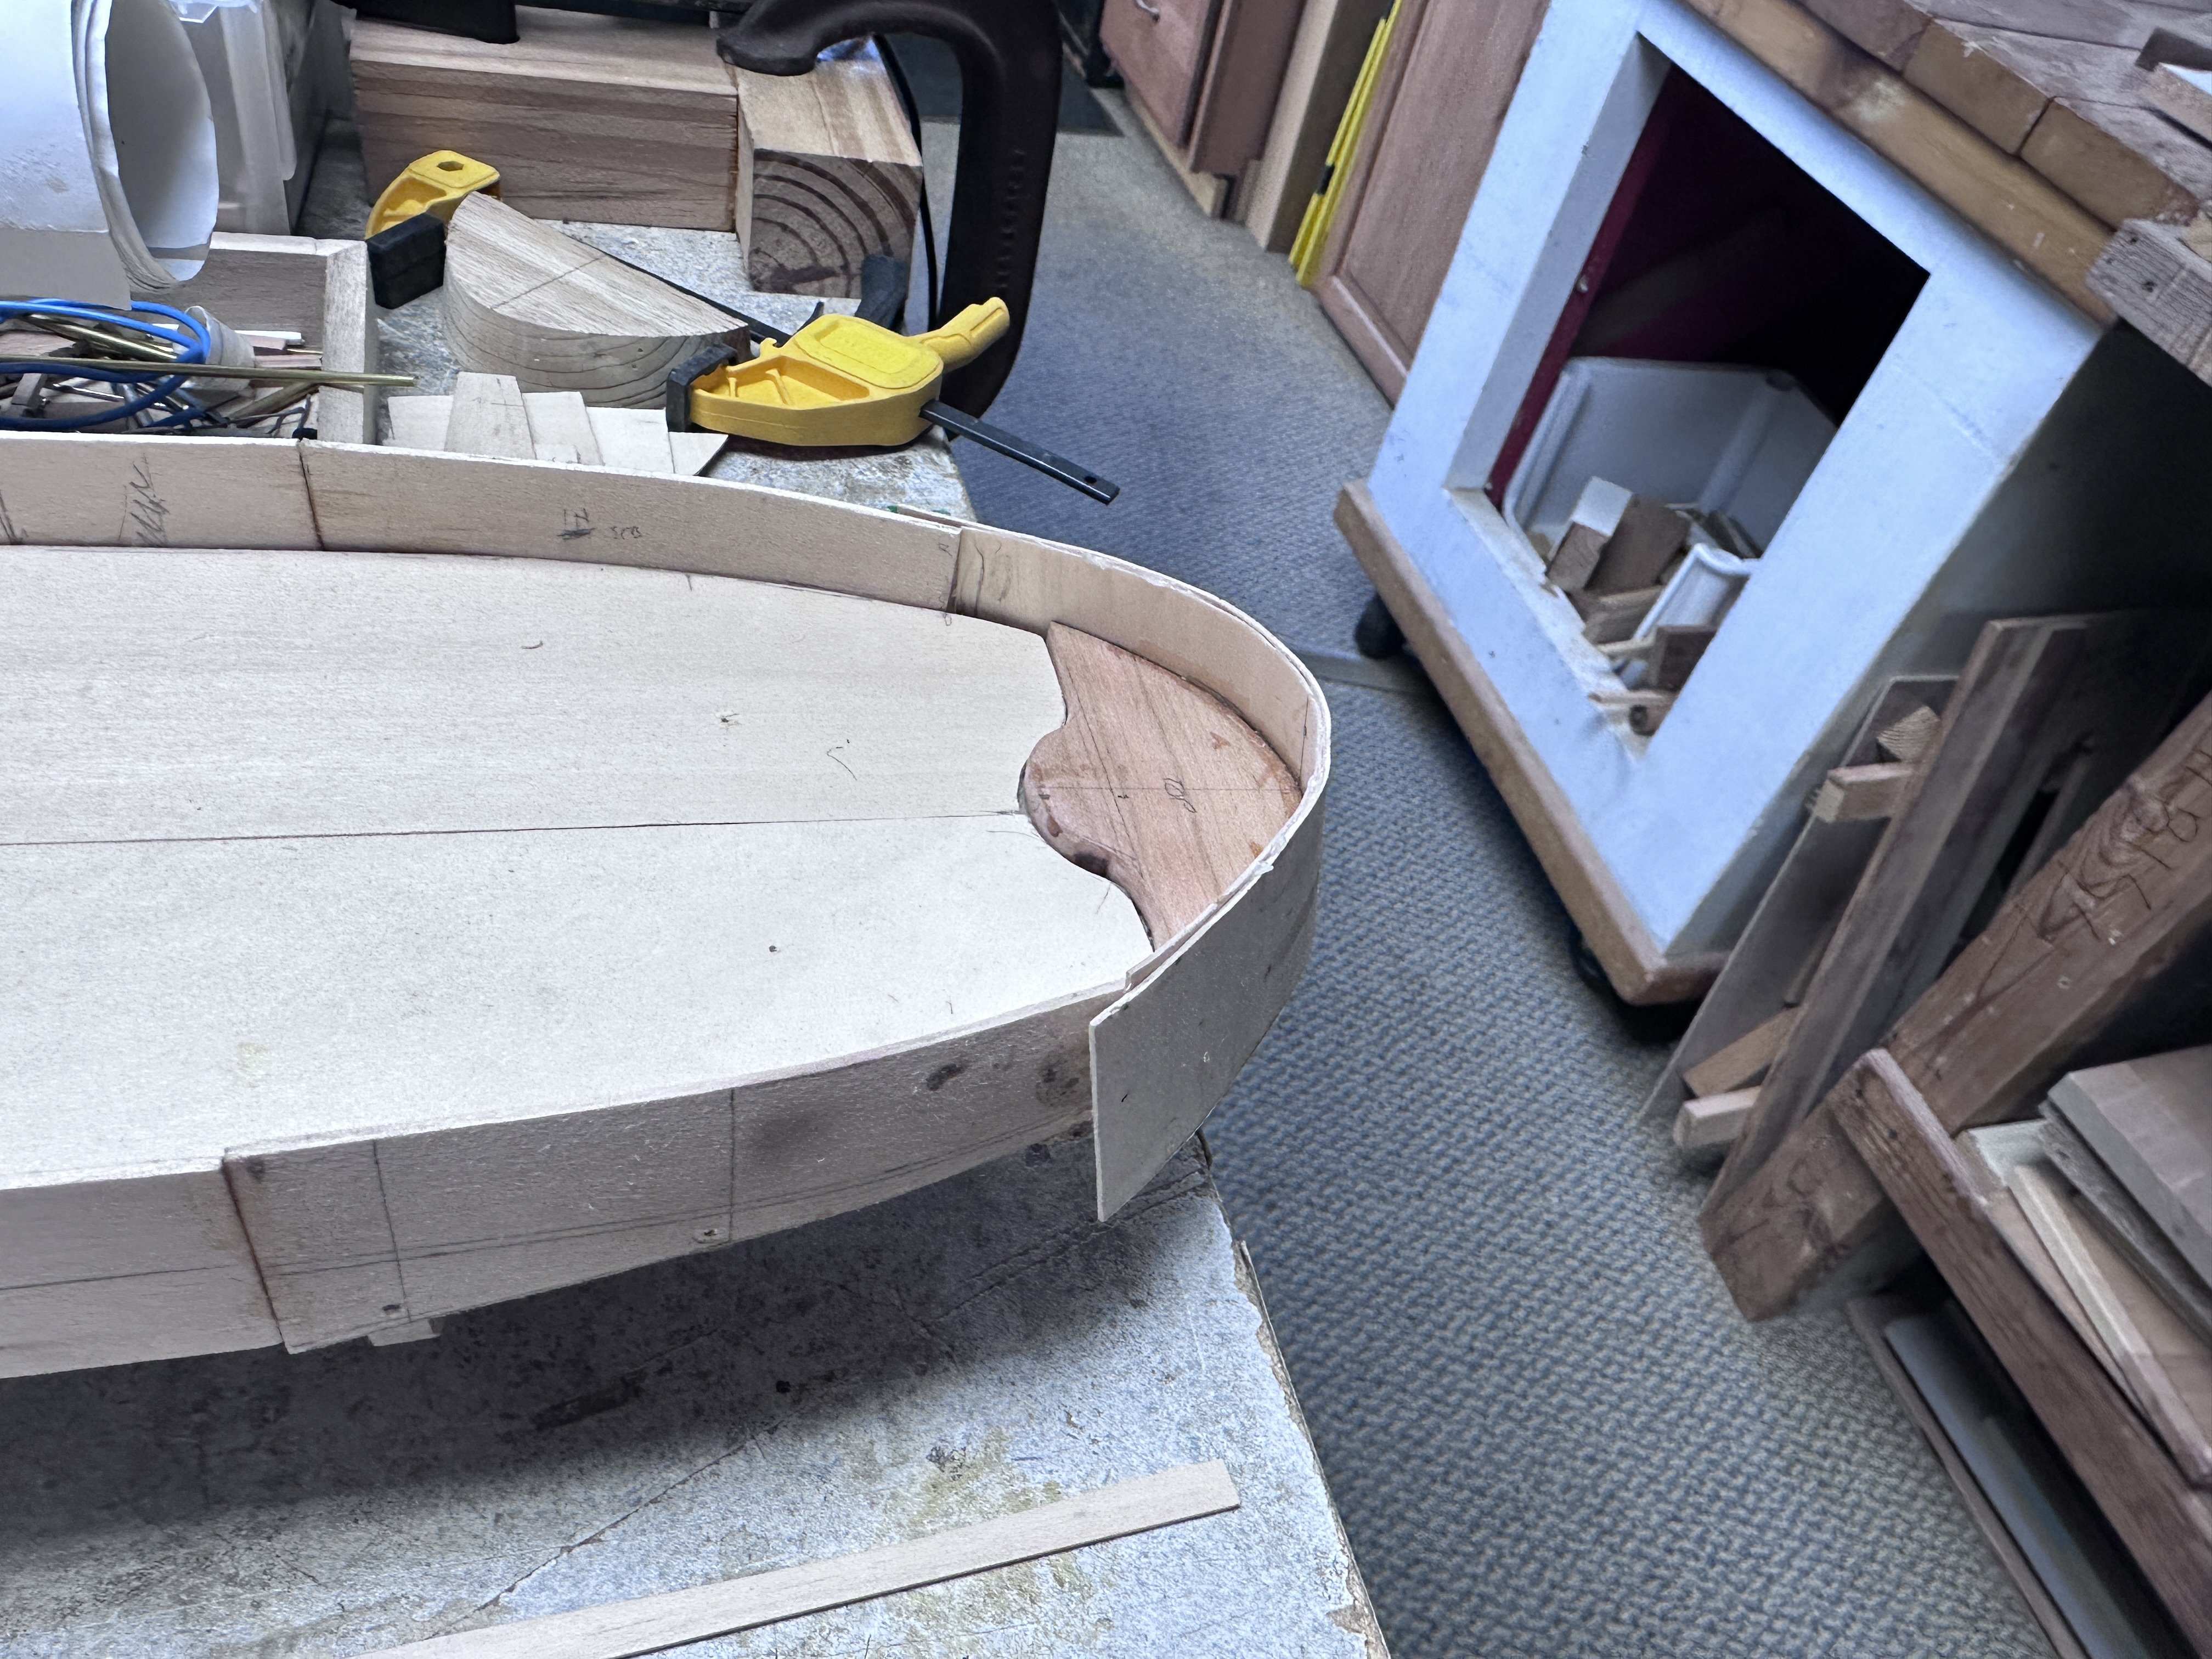
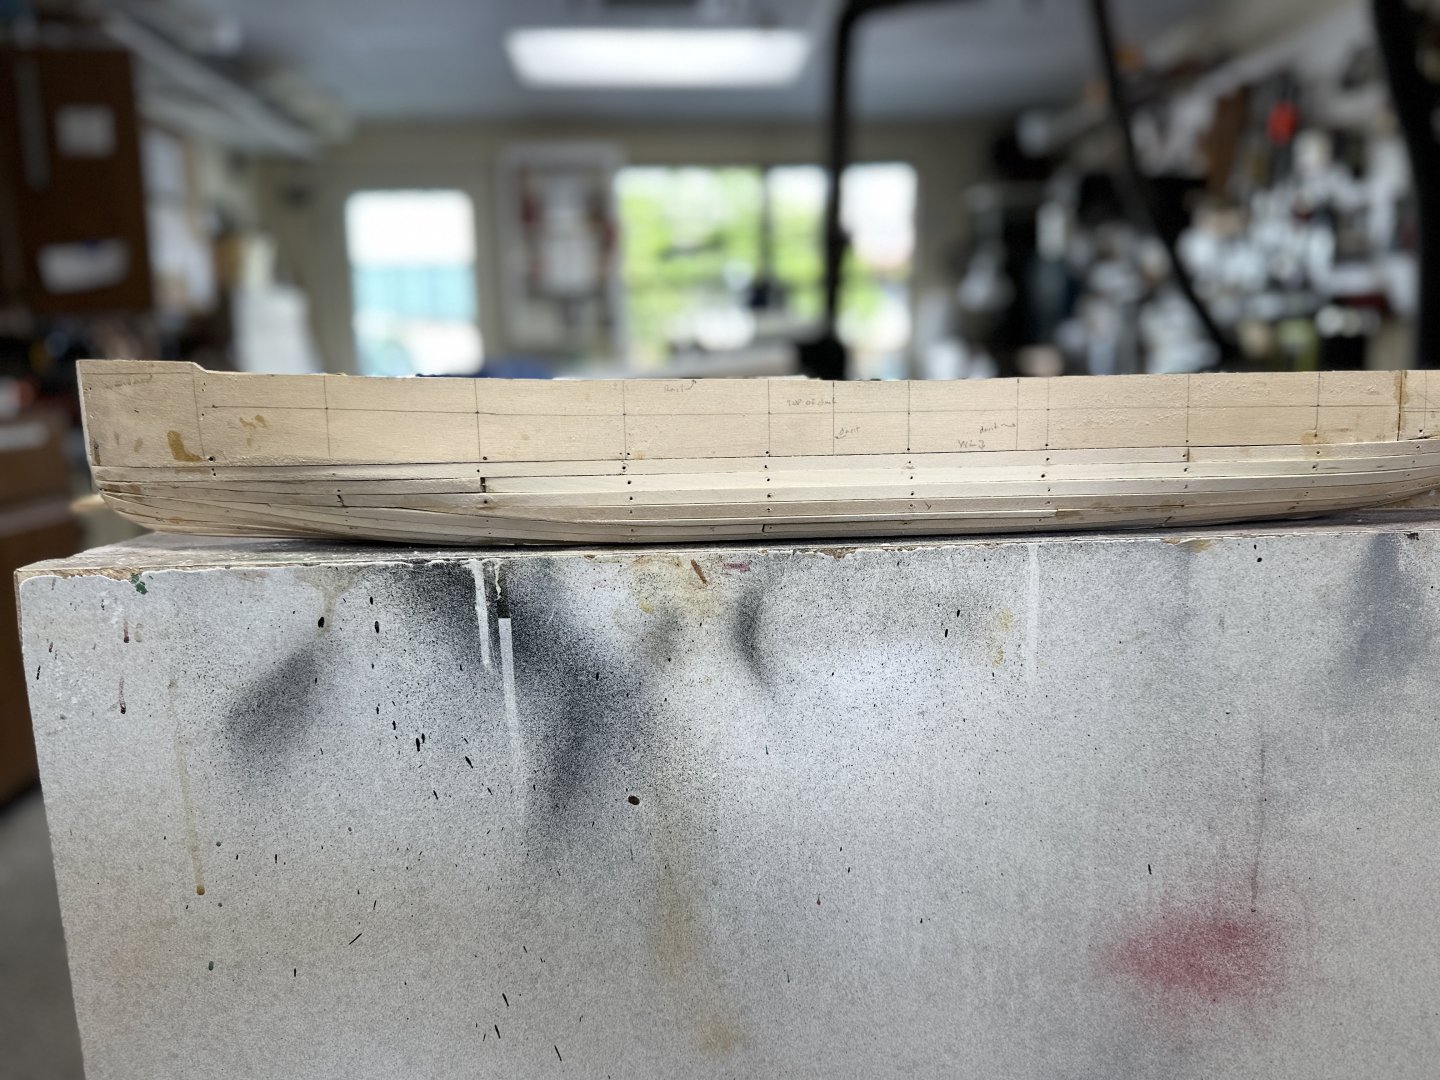
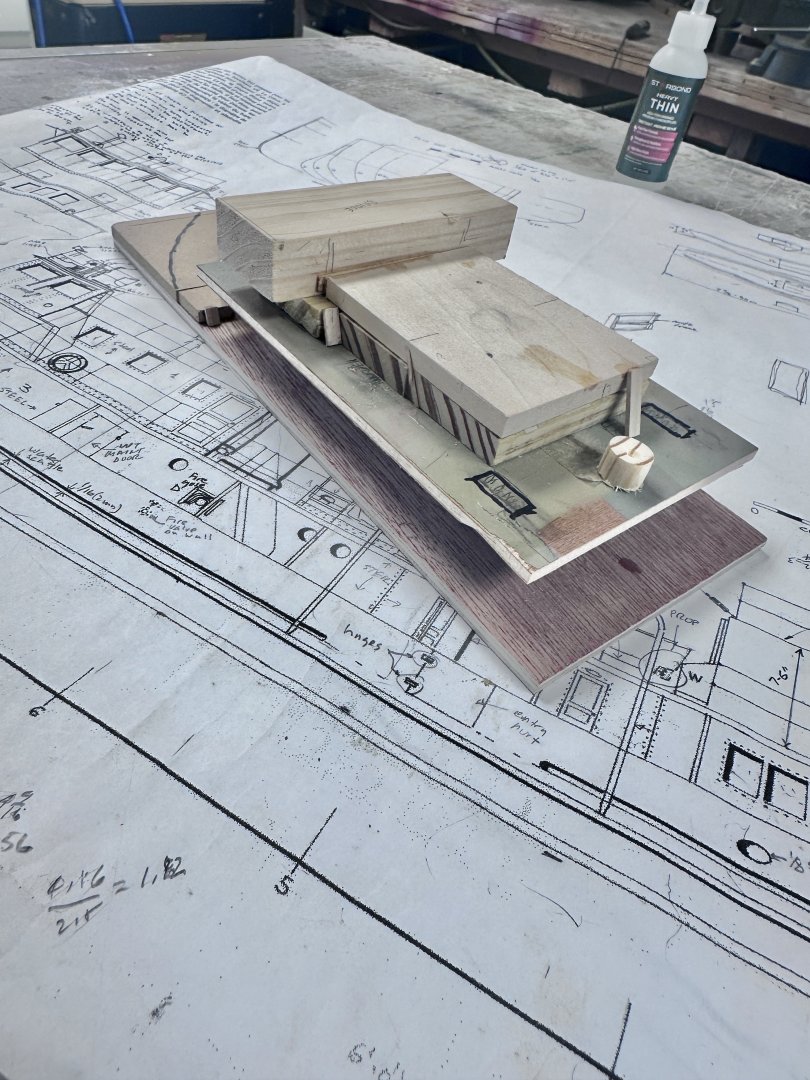
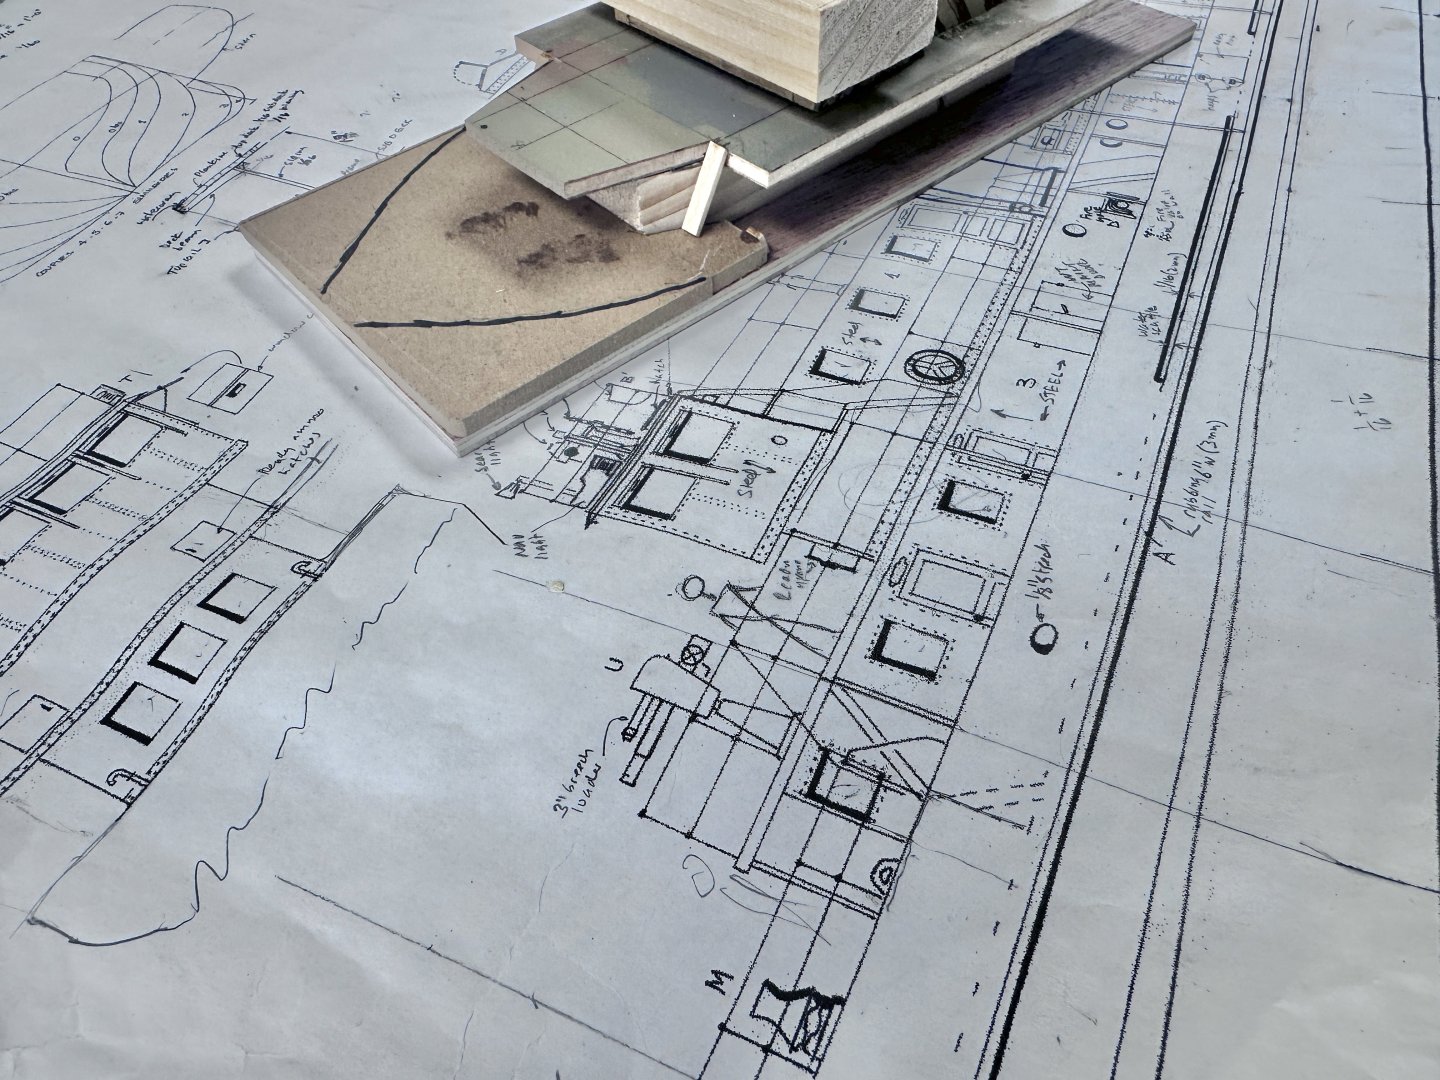
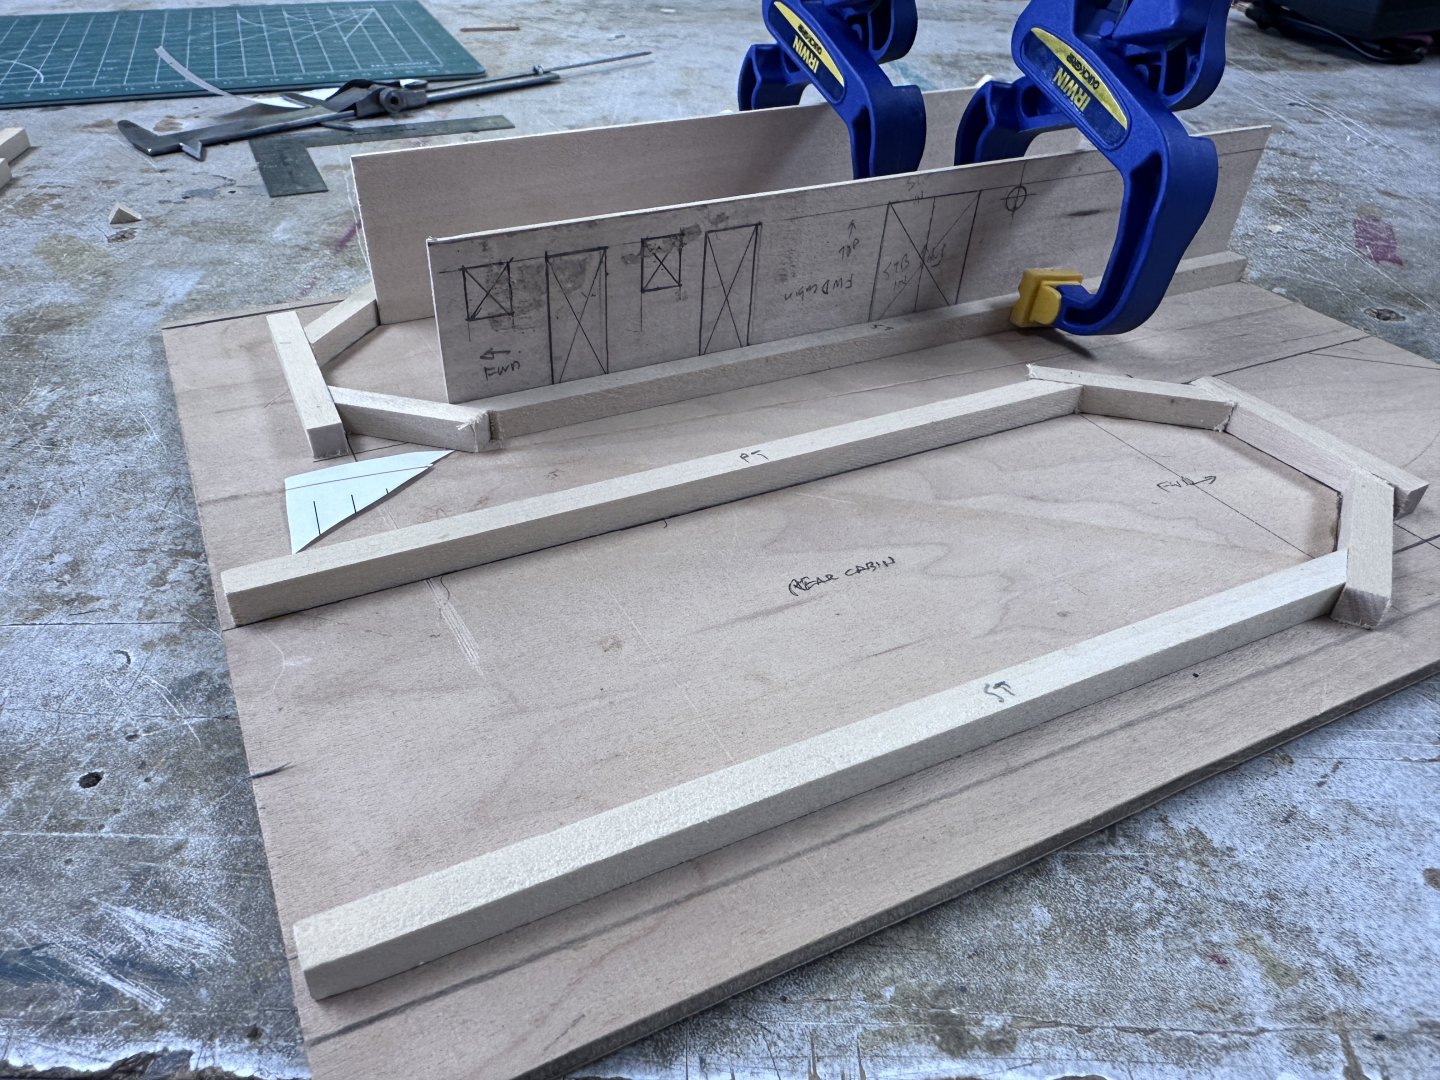
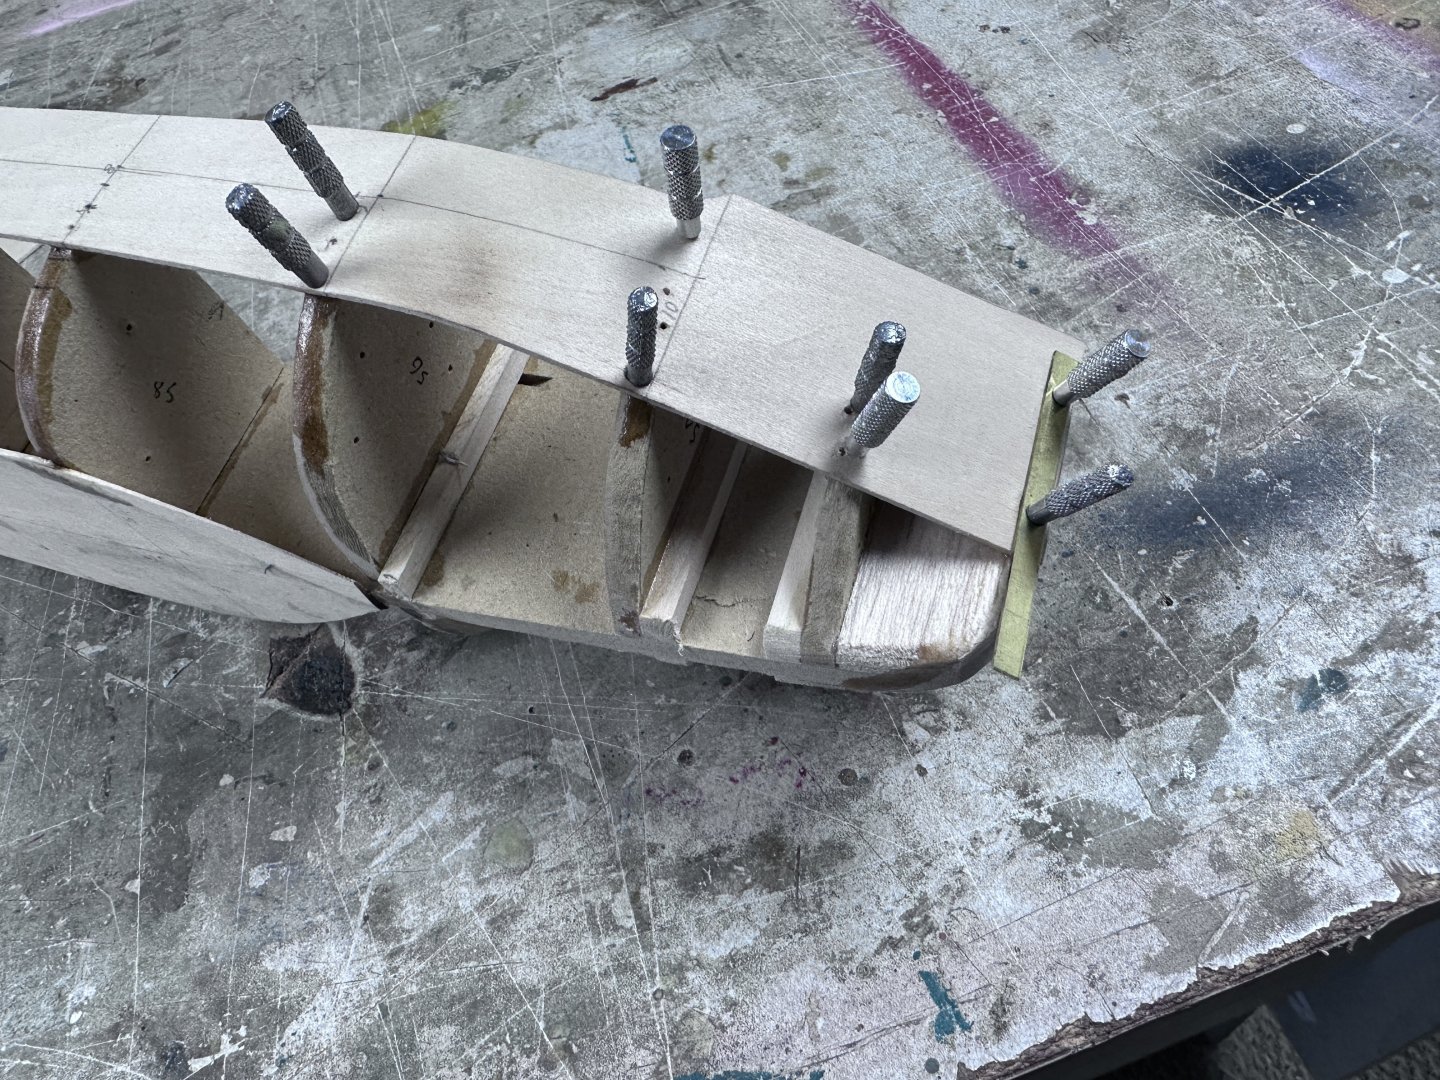
Finally, I get some time to post some progress. I have been busy elsewhere and also fighting mistakes made at the beginning of this build. The hull has been a total nightmare as I had a difficult time fairing the frames and installing the planks . I tried to save time by using plain sheets of wood and then wider planks. The results were horrible. Spent a lot of time filling and sanding. Also installed the main deck planking. But again, after looking at it for a while, I decided that the planks I selected were too wide: therefore I am in the process of replacing with smaller planks. Also I will change the color to a more subtle wood color. As a distraction from the above mentioned troubles I started to work on the cabins. All of the cabins, with the exception of the rear top one, are rivetted steel. I have been looking at different methods for representing the rivets. On Keith advise's I ordered a sheet of Archer's transfer rivers at a cost of $17.95 per sheet. They look great but the sheets are only 3" by 5" and with the large amount of rivets required by this build it will be a very expensive detail. I decided to make a wood panels of the cabins with their openings. Then then glue a very thin sheet of plastic on which I would have made the rivets using a pounce wheel. First I had to make a mockup of the superstructure since the plans are difficult to understand and, unfortunately, I have found a few mistakes in them. The mockup is not to scale but allows me look at the different levels in 3D. Followings the set up of an assembly jig and the first wall panels. Thanks for your comments and likes.


-
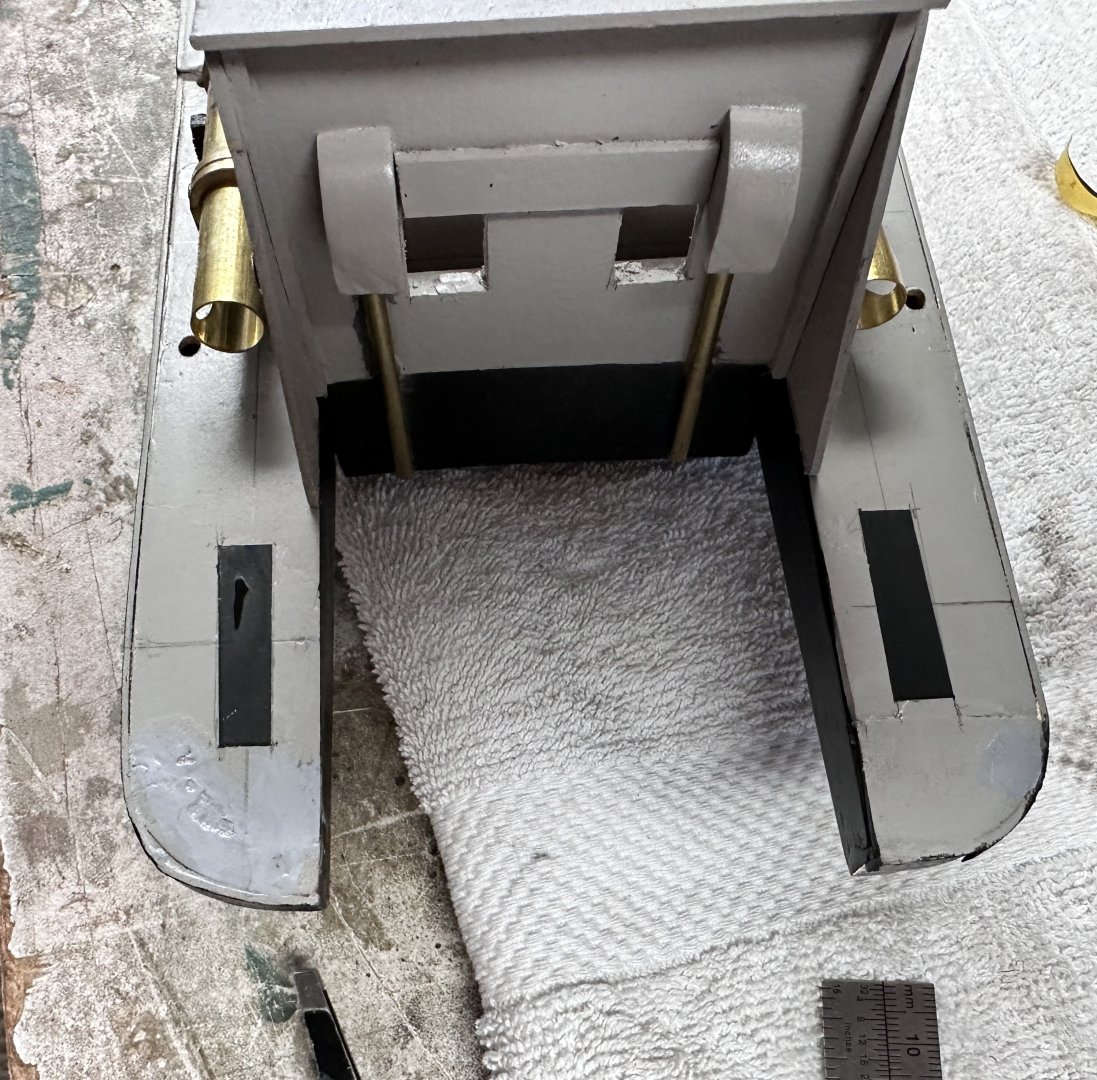
The fan tail bulkwark came out OK. Made a wood mold with the proper angle and used 2 pieces 1/32" thick. I also installed a sub-deck on the hull and started the planking. Thanks for watching .

-
Keith, thanks for the tip. I'll check it out.
-
Ives, thanks a lot for the pictures. They will be great help. That model is huge and this guy really went into details including the million rivets. In my scale I am going to try using pounce wheels with different spacing of rivets and hope it will show.
-
Thank you Keith. I am currently struggling with the hull. Planking is not one of my favorite tasks.
-
Thanks to all for your likes and comments. This is indeed a challenging model with many details that include rivets. Now I am still dealing with the hull construction.
-
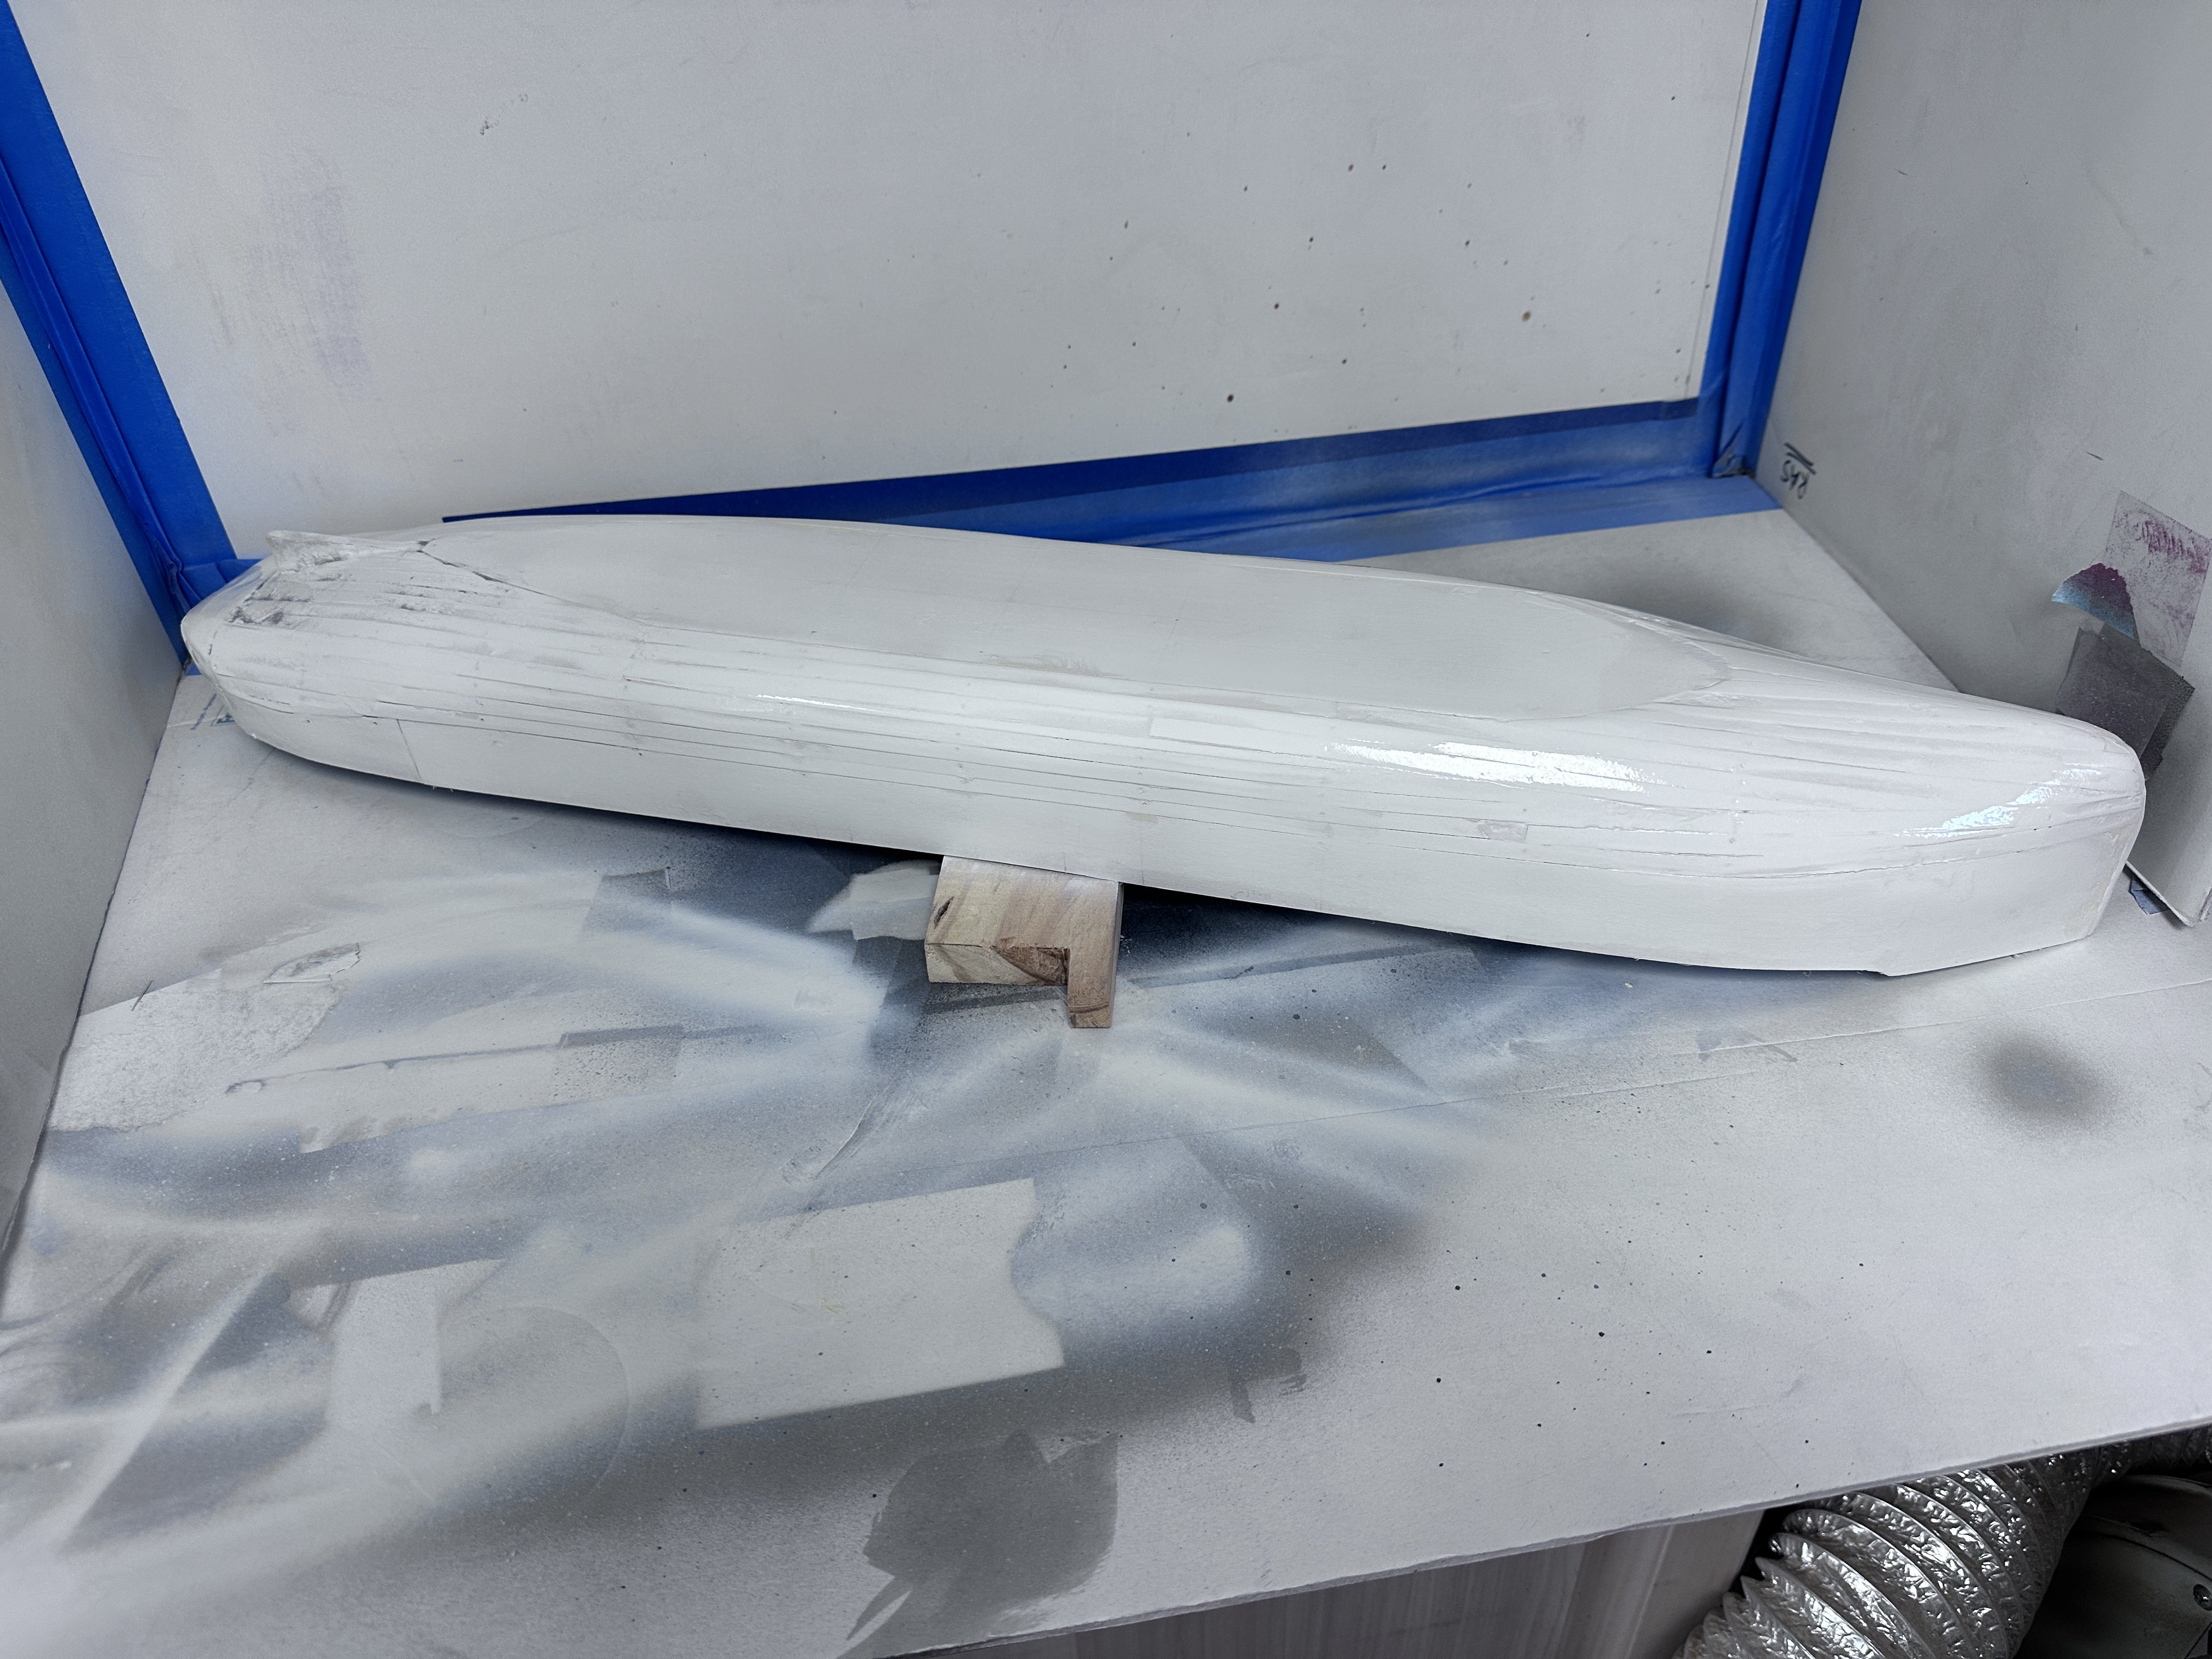
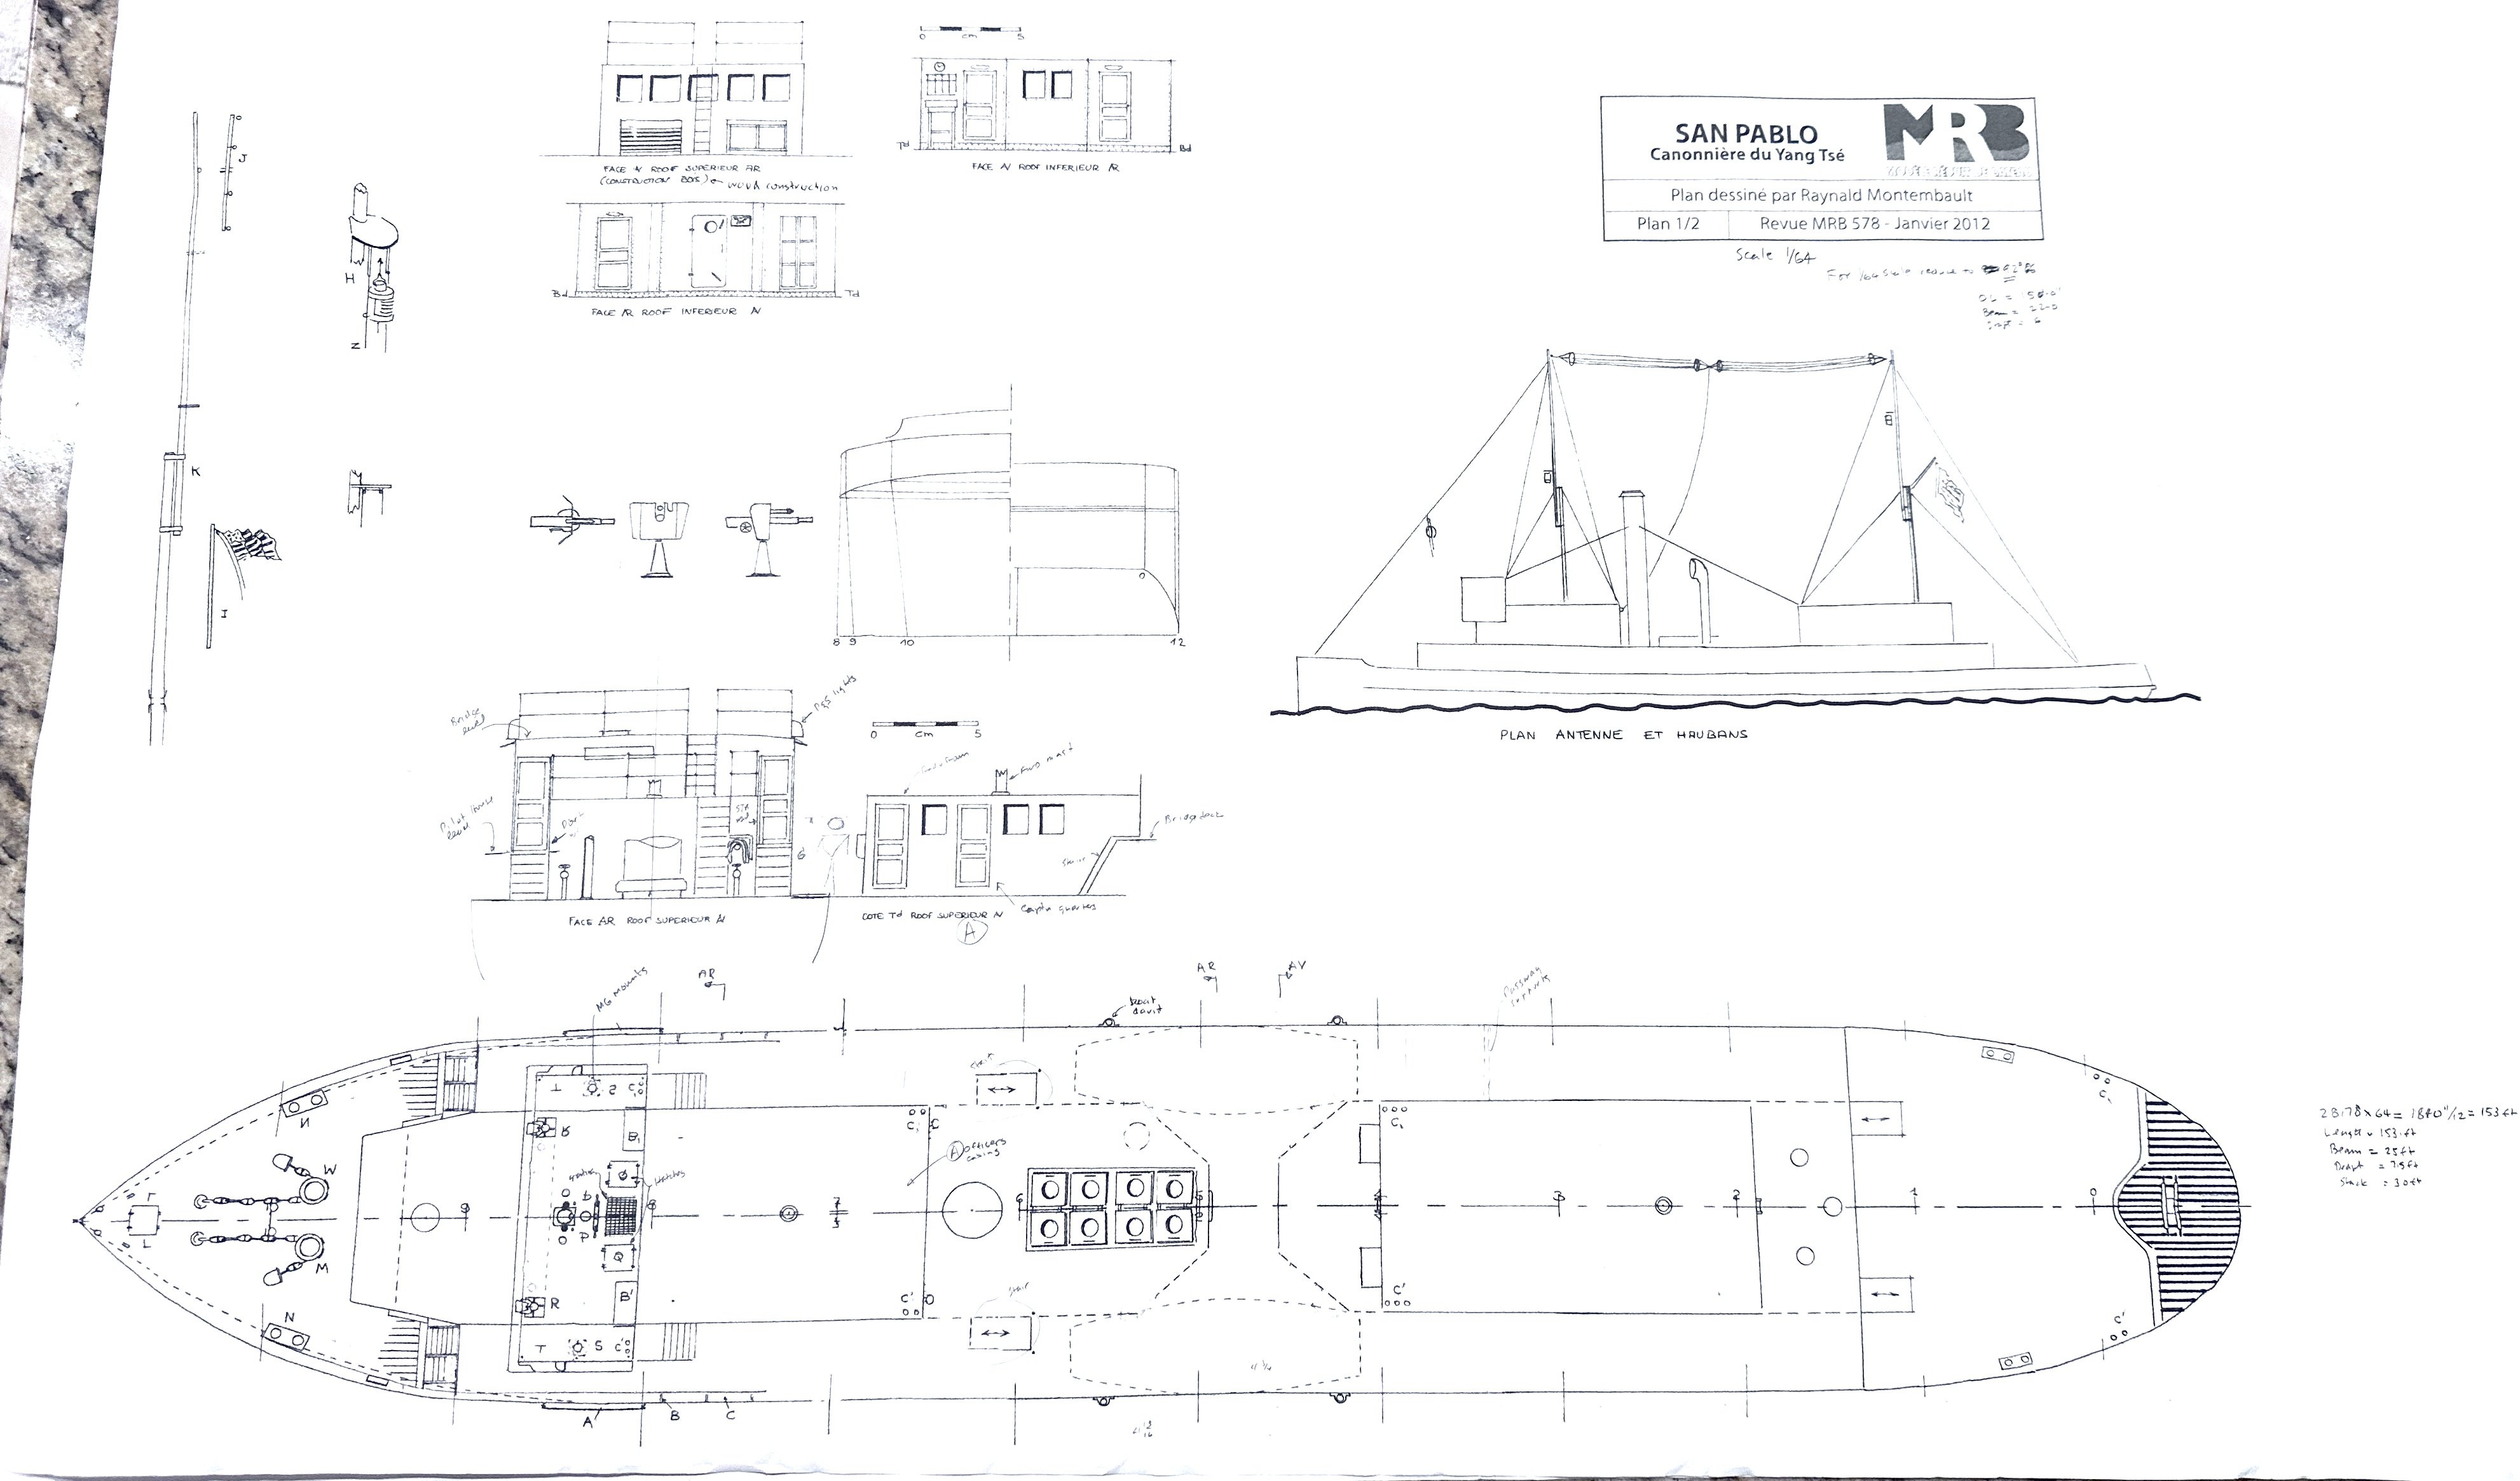
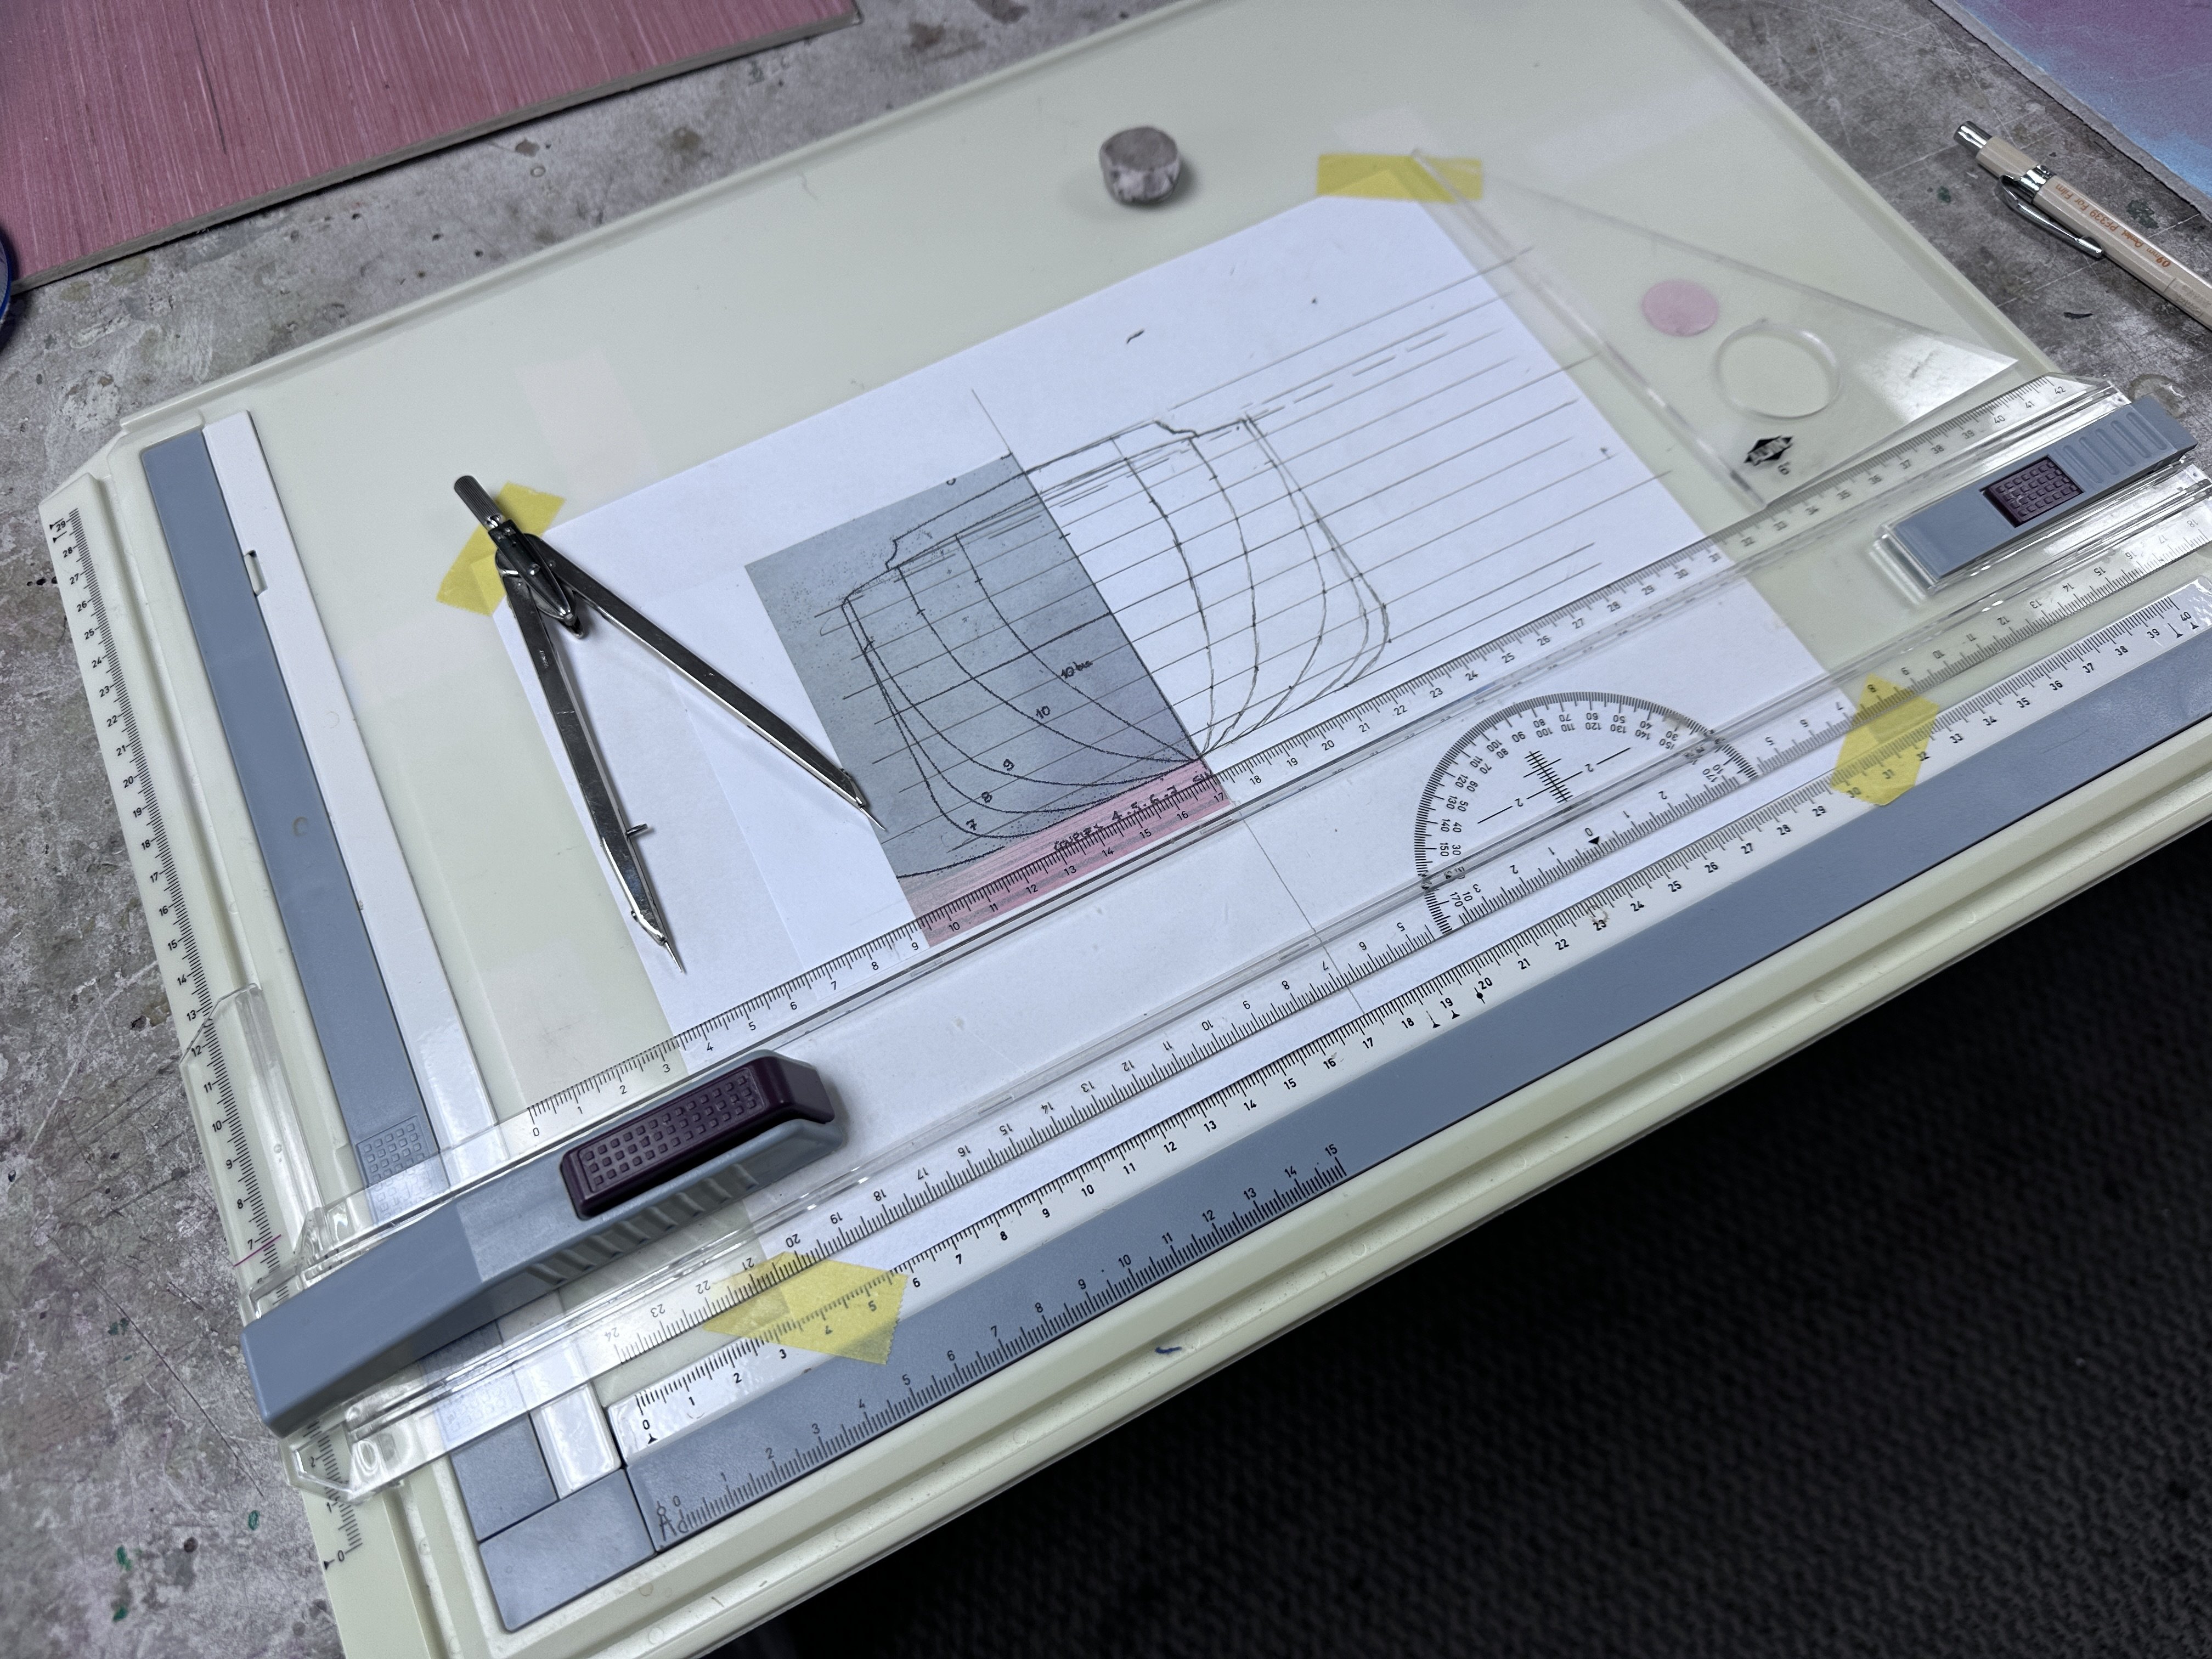
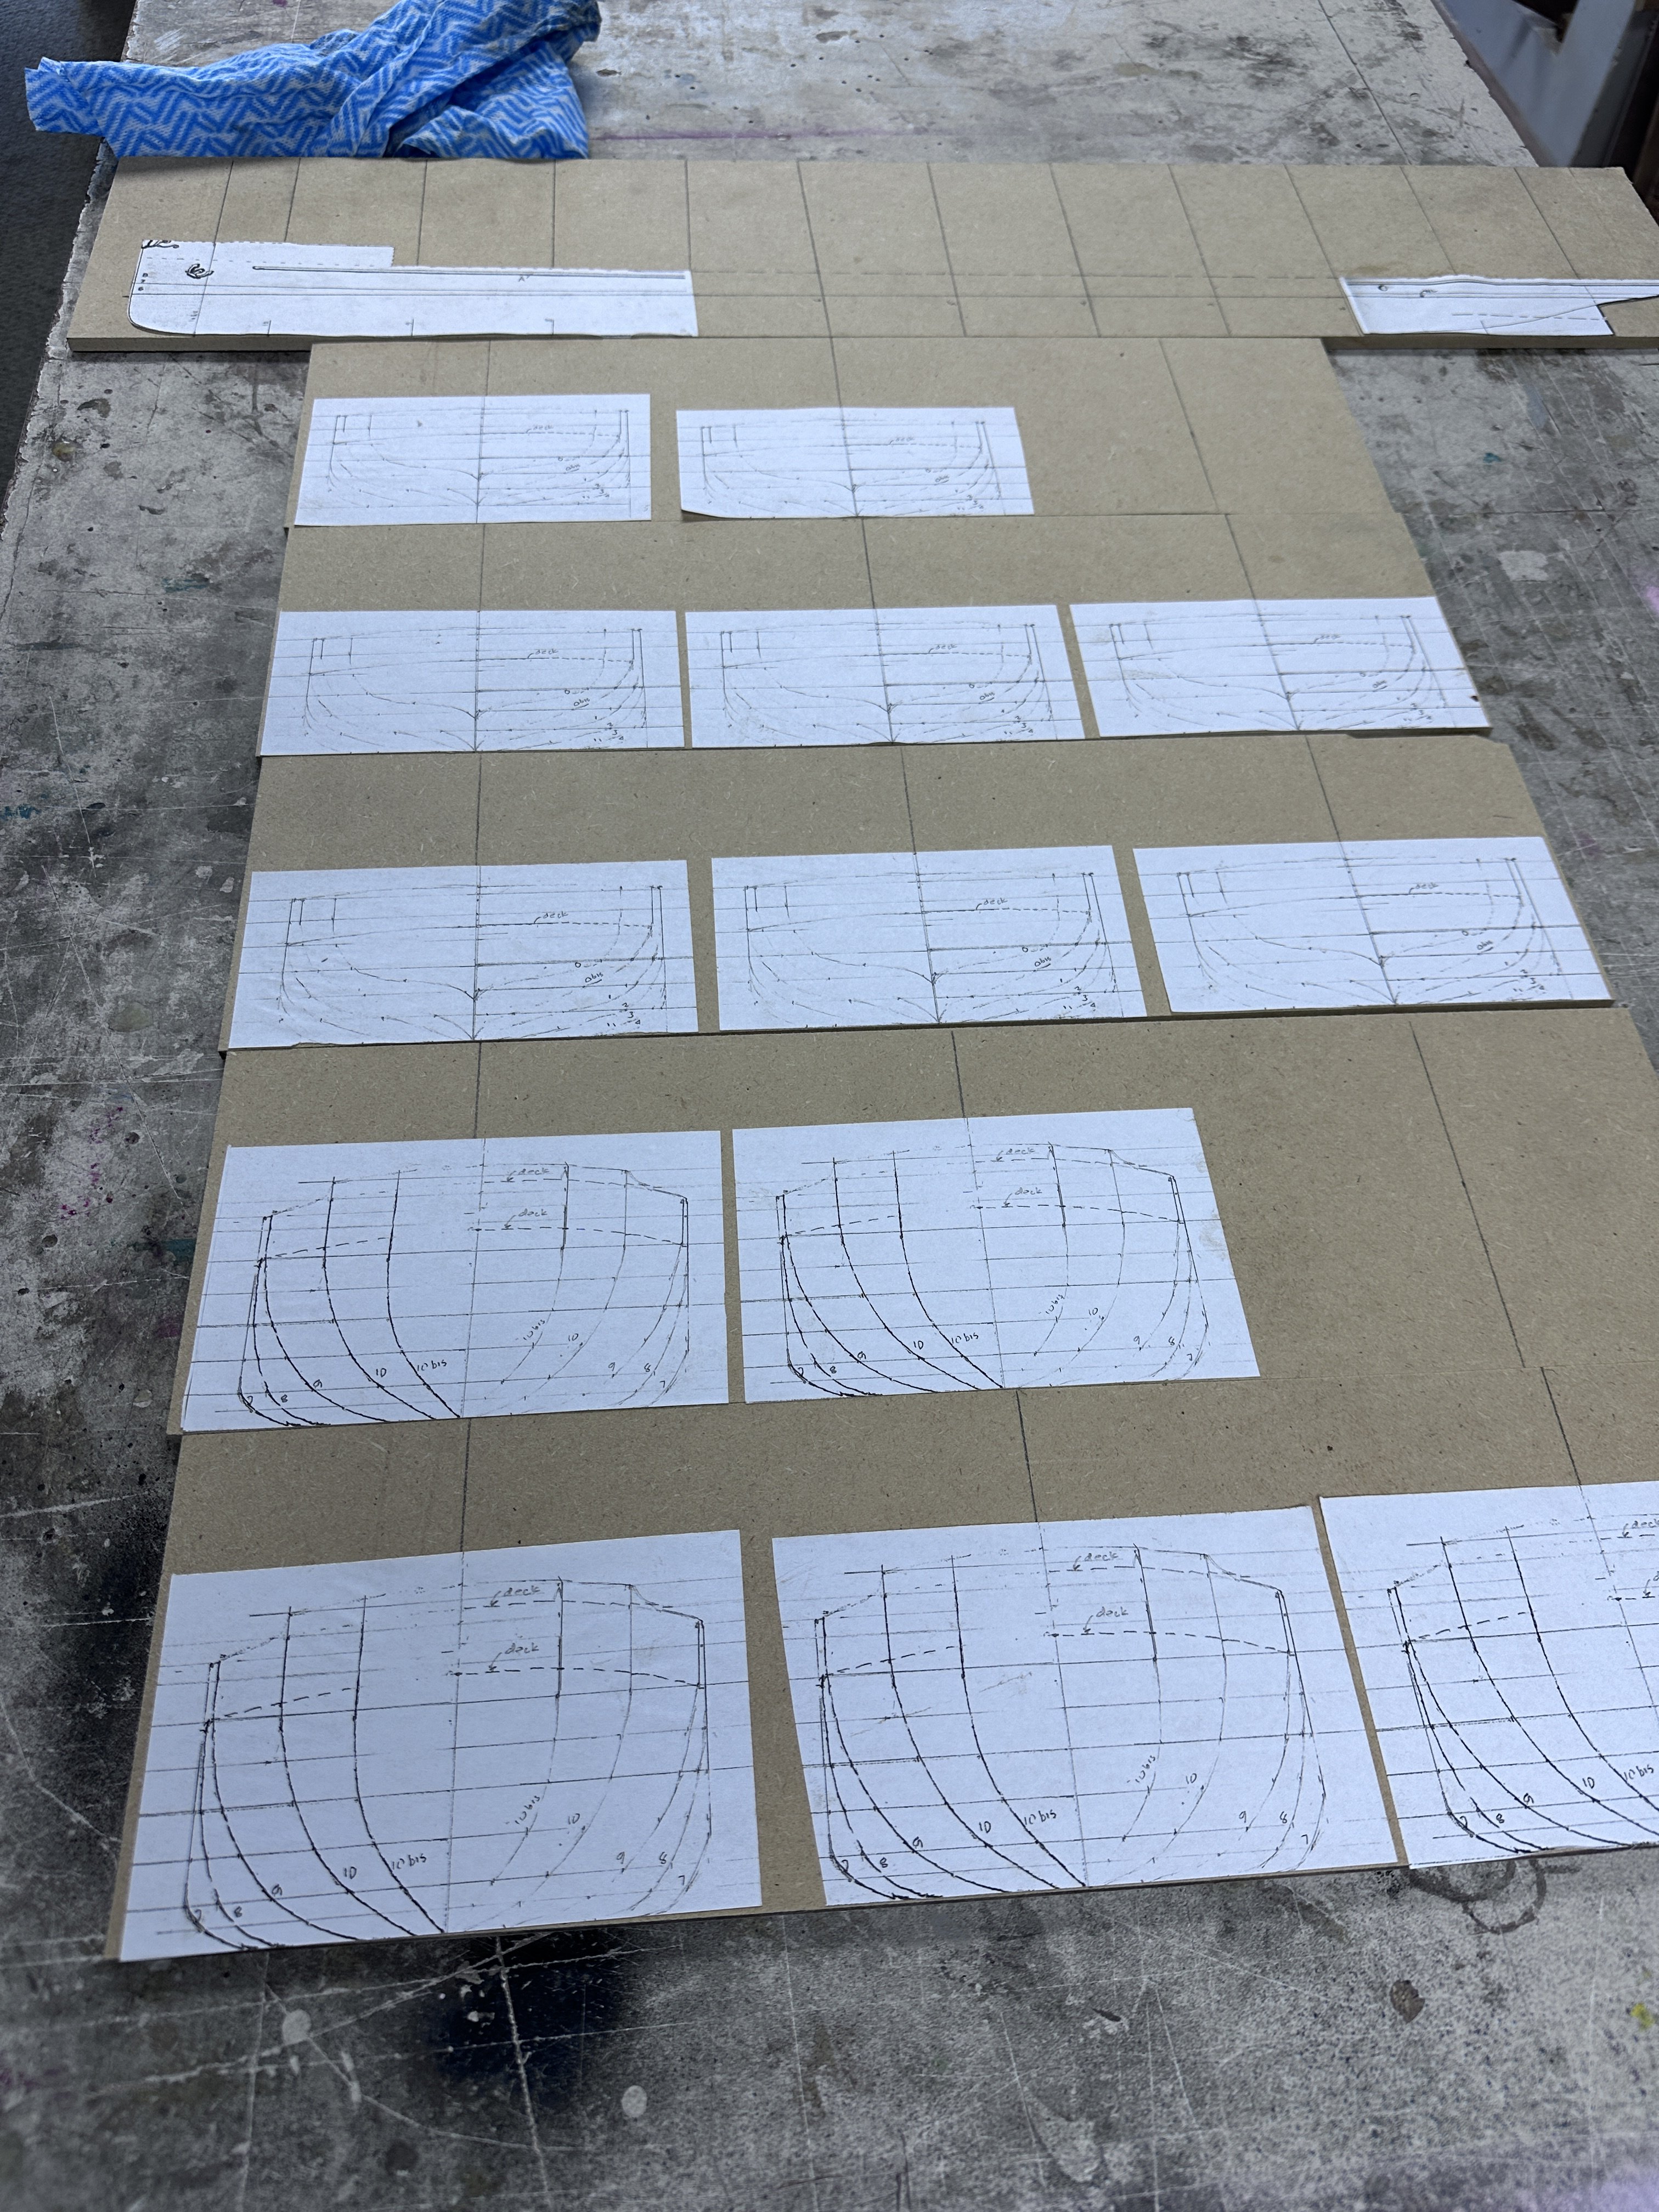
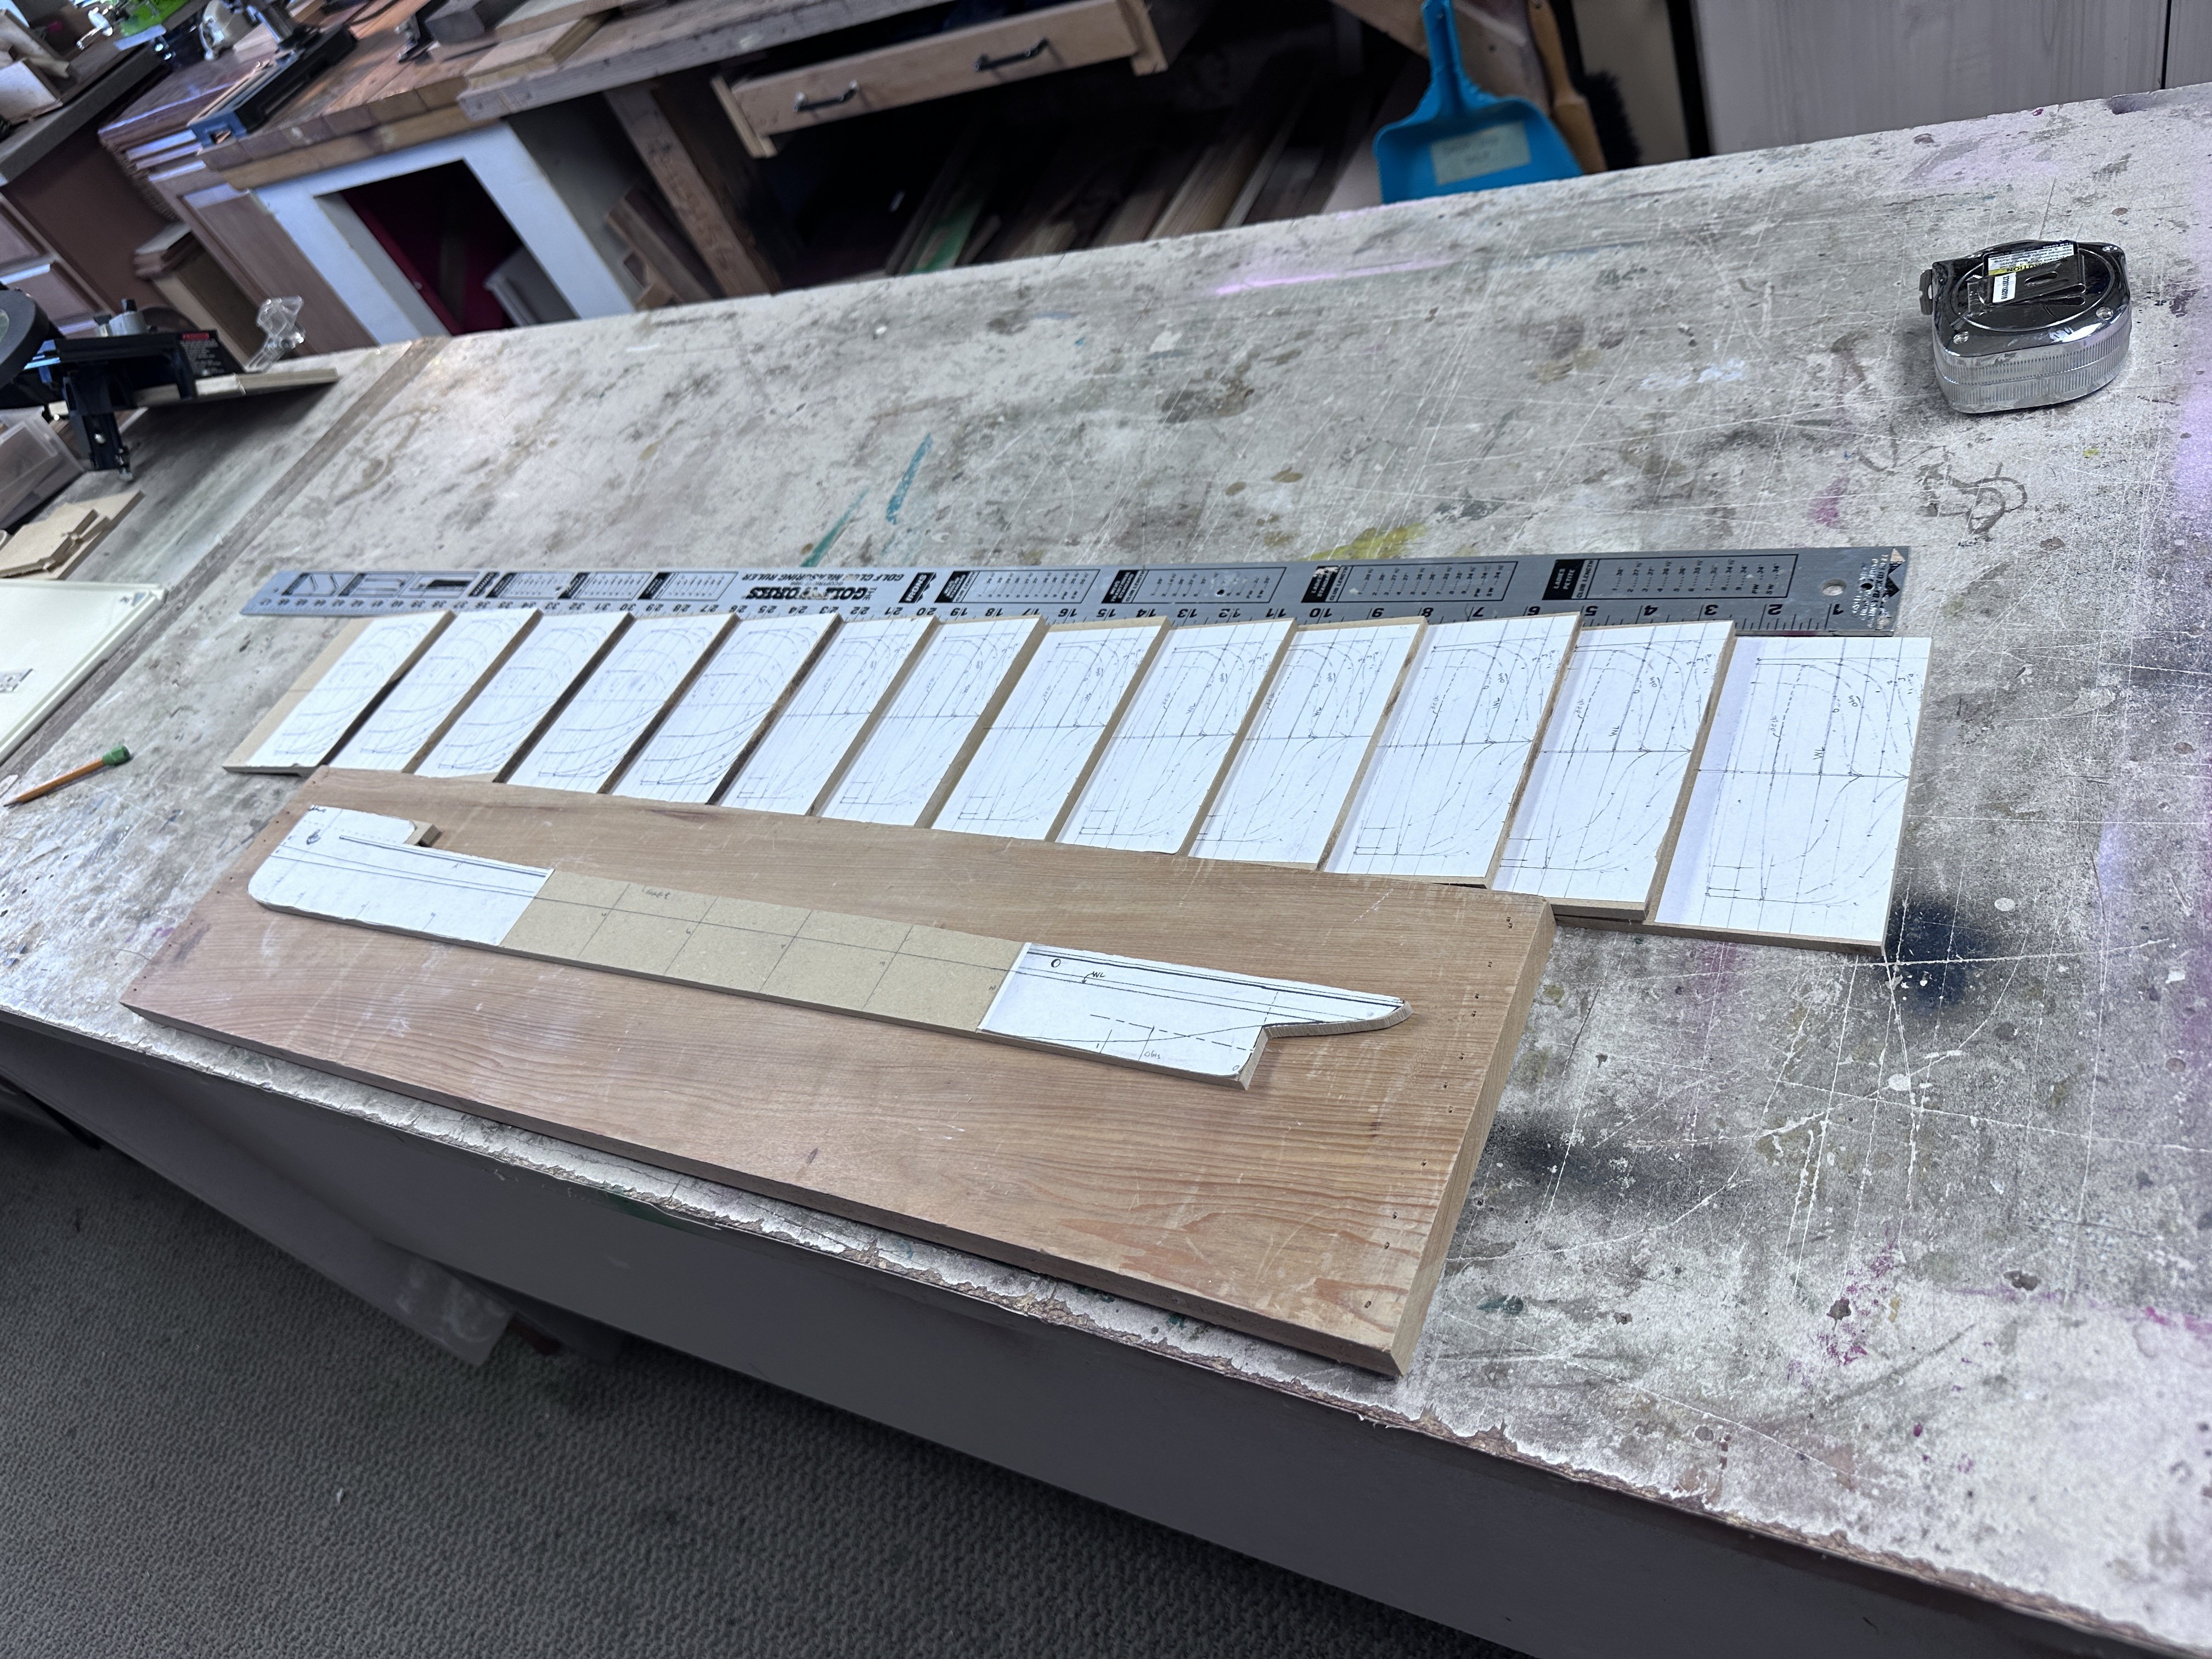
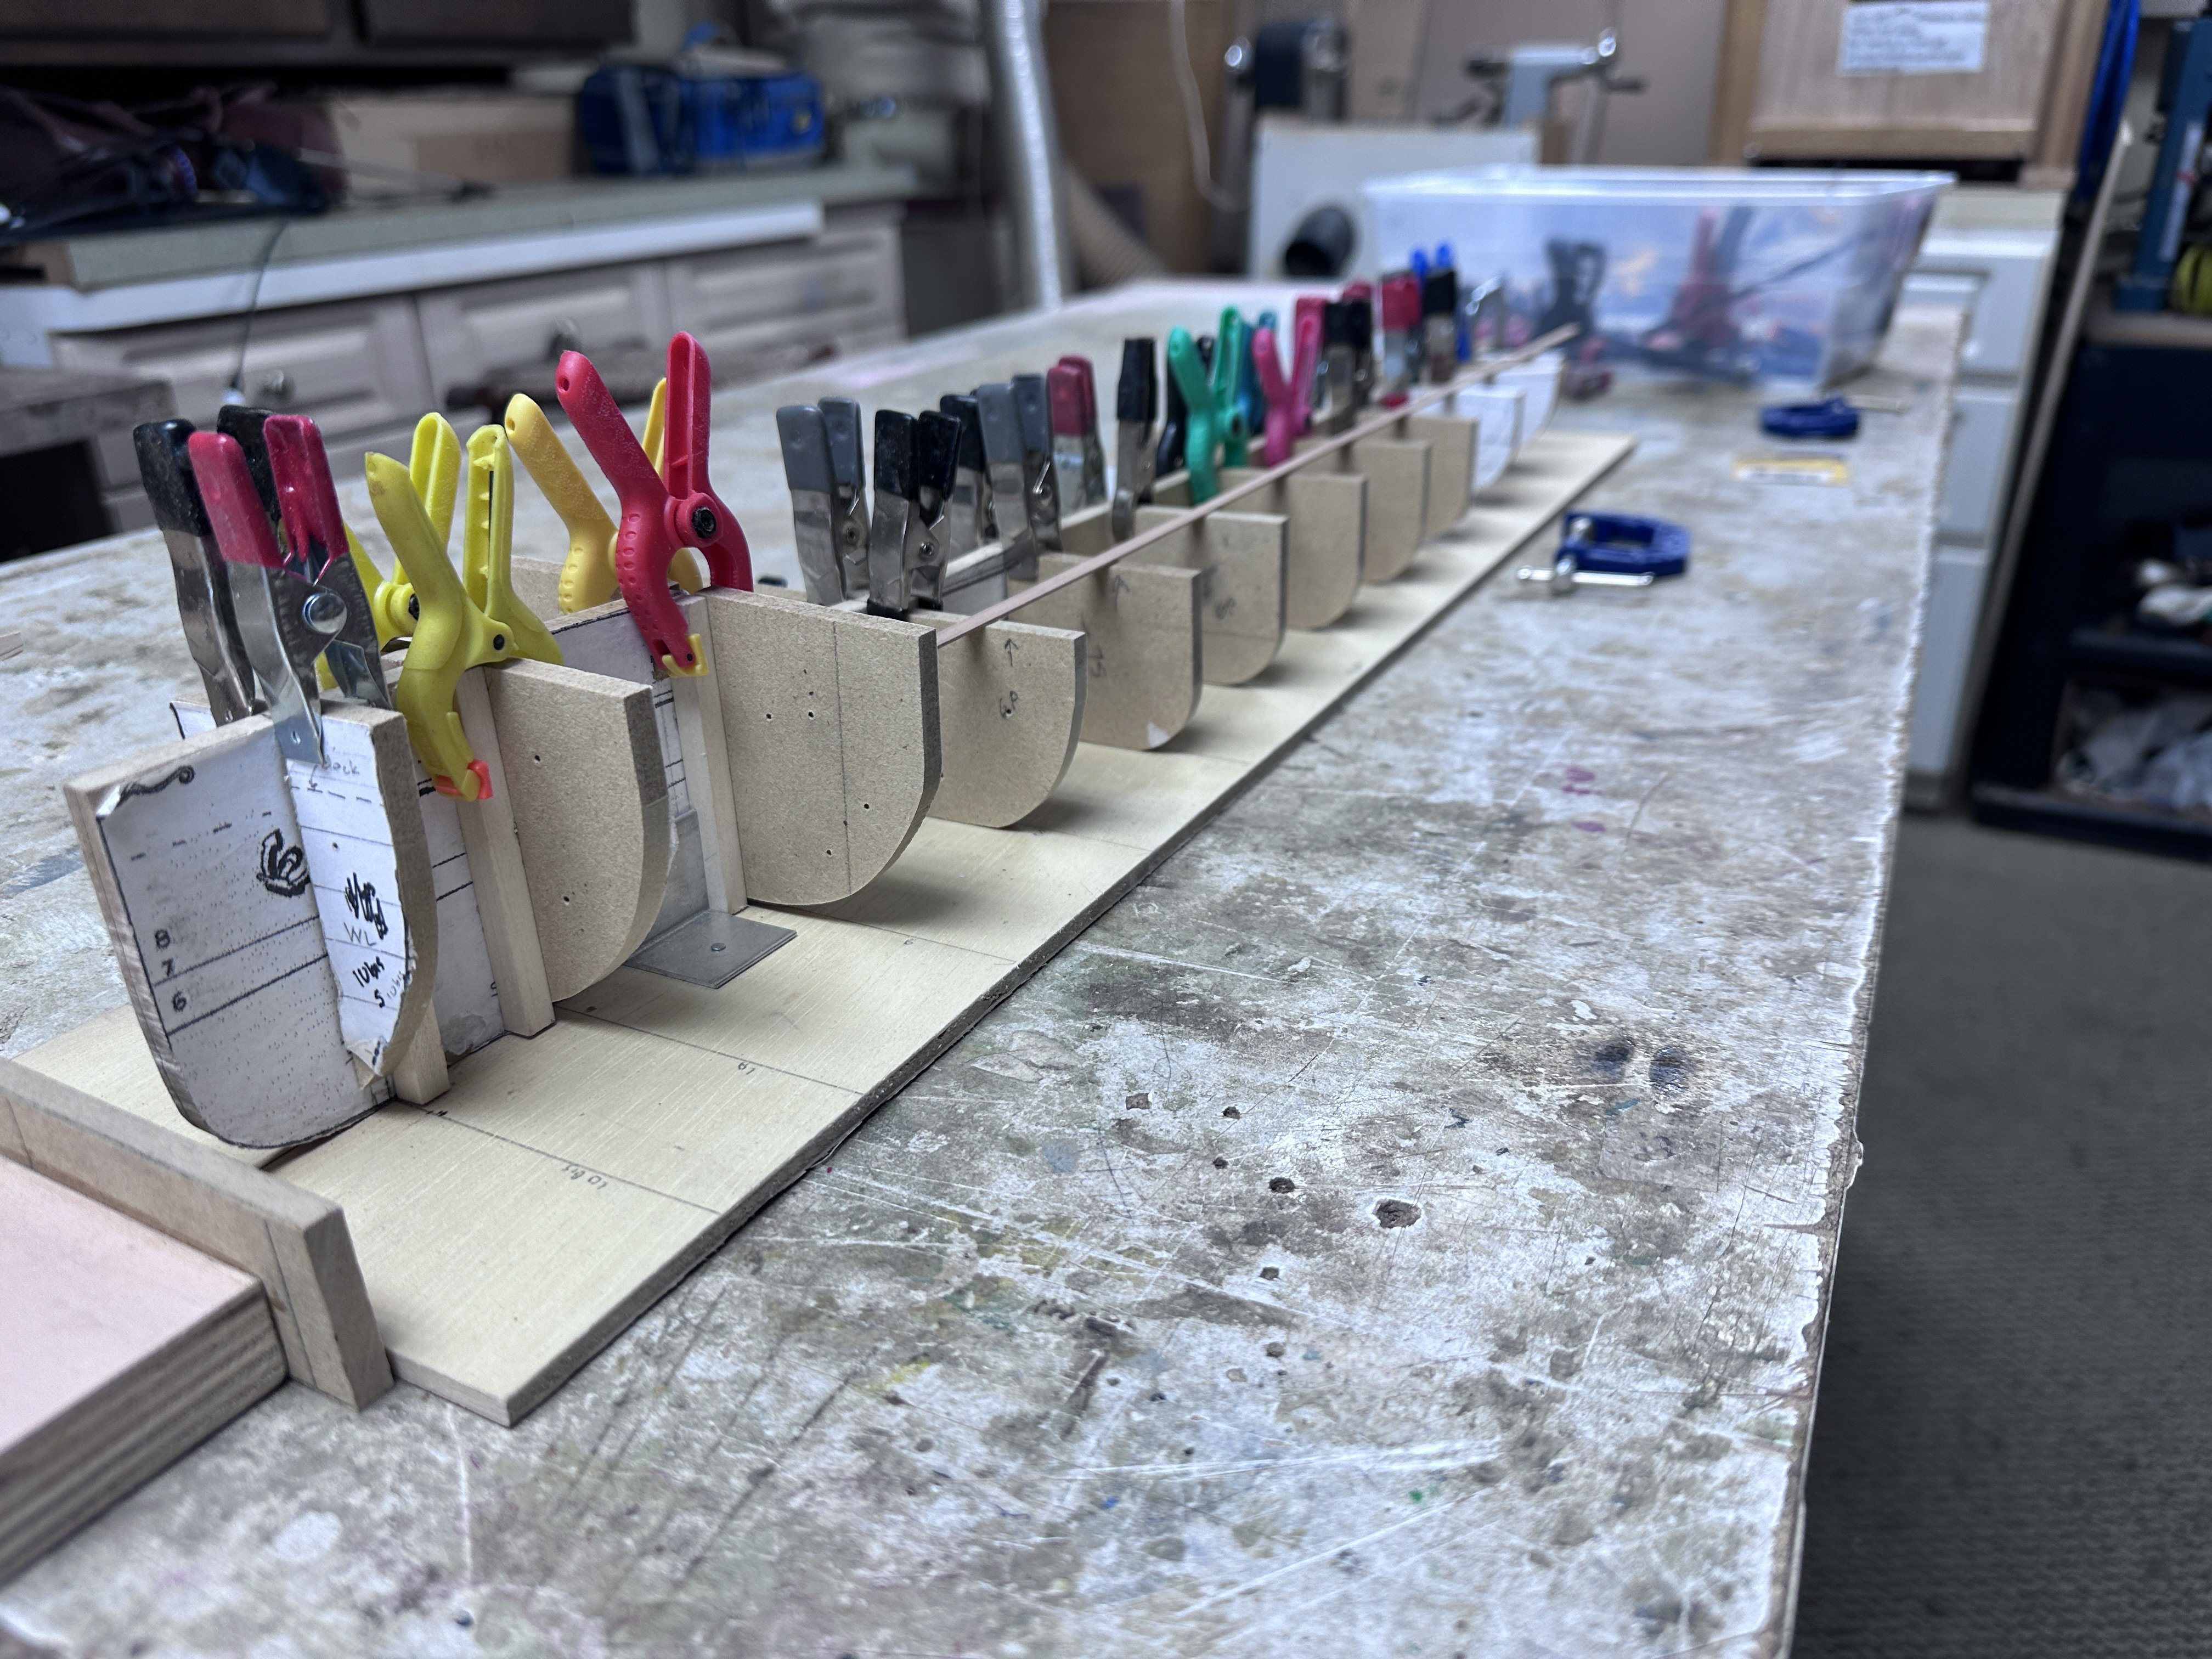
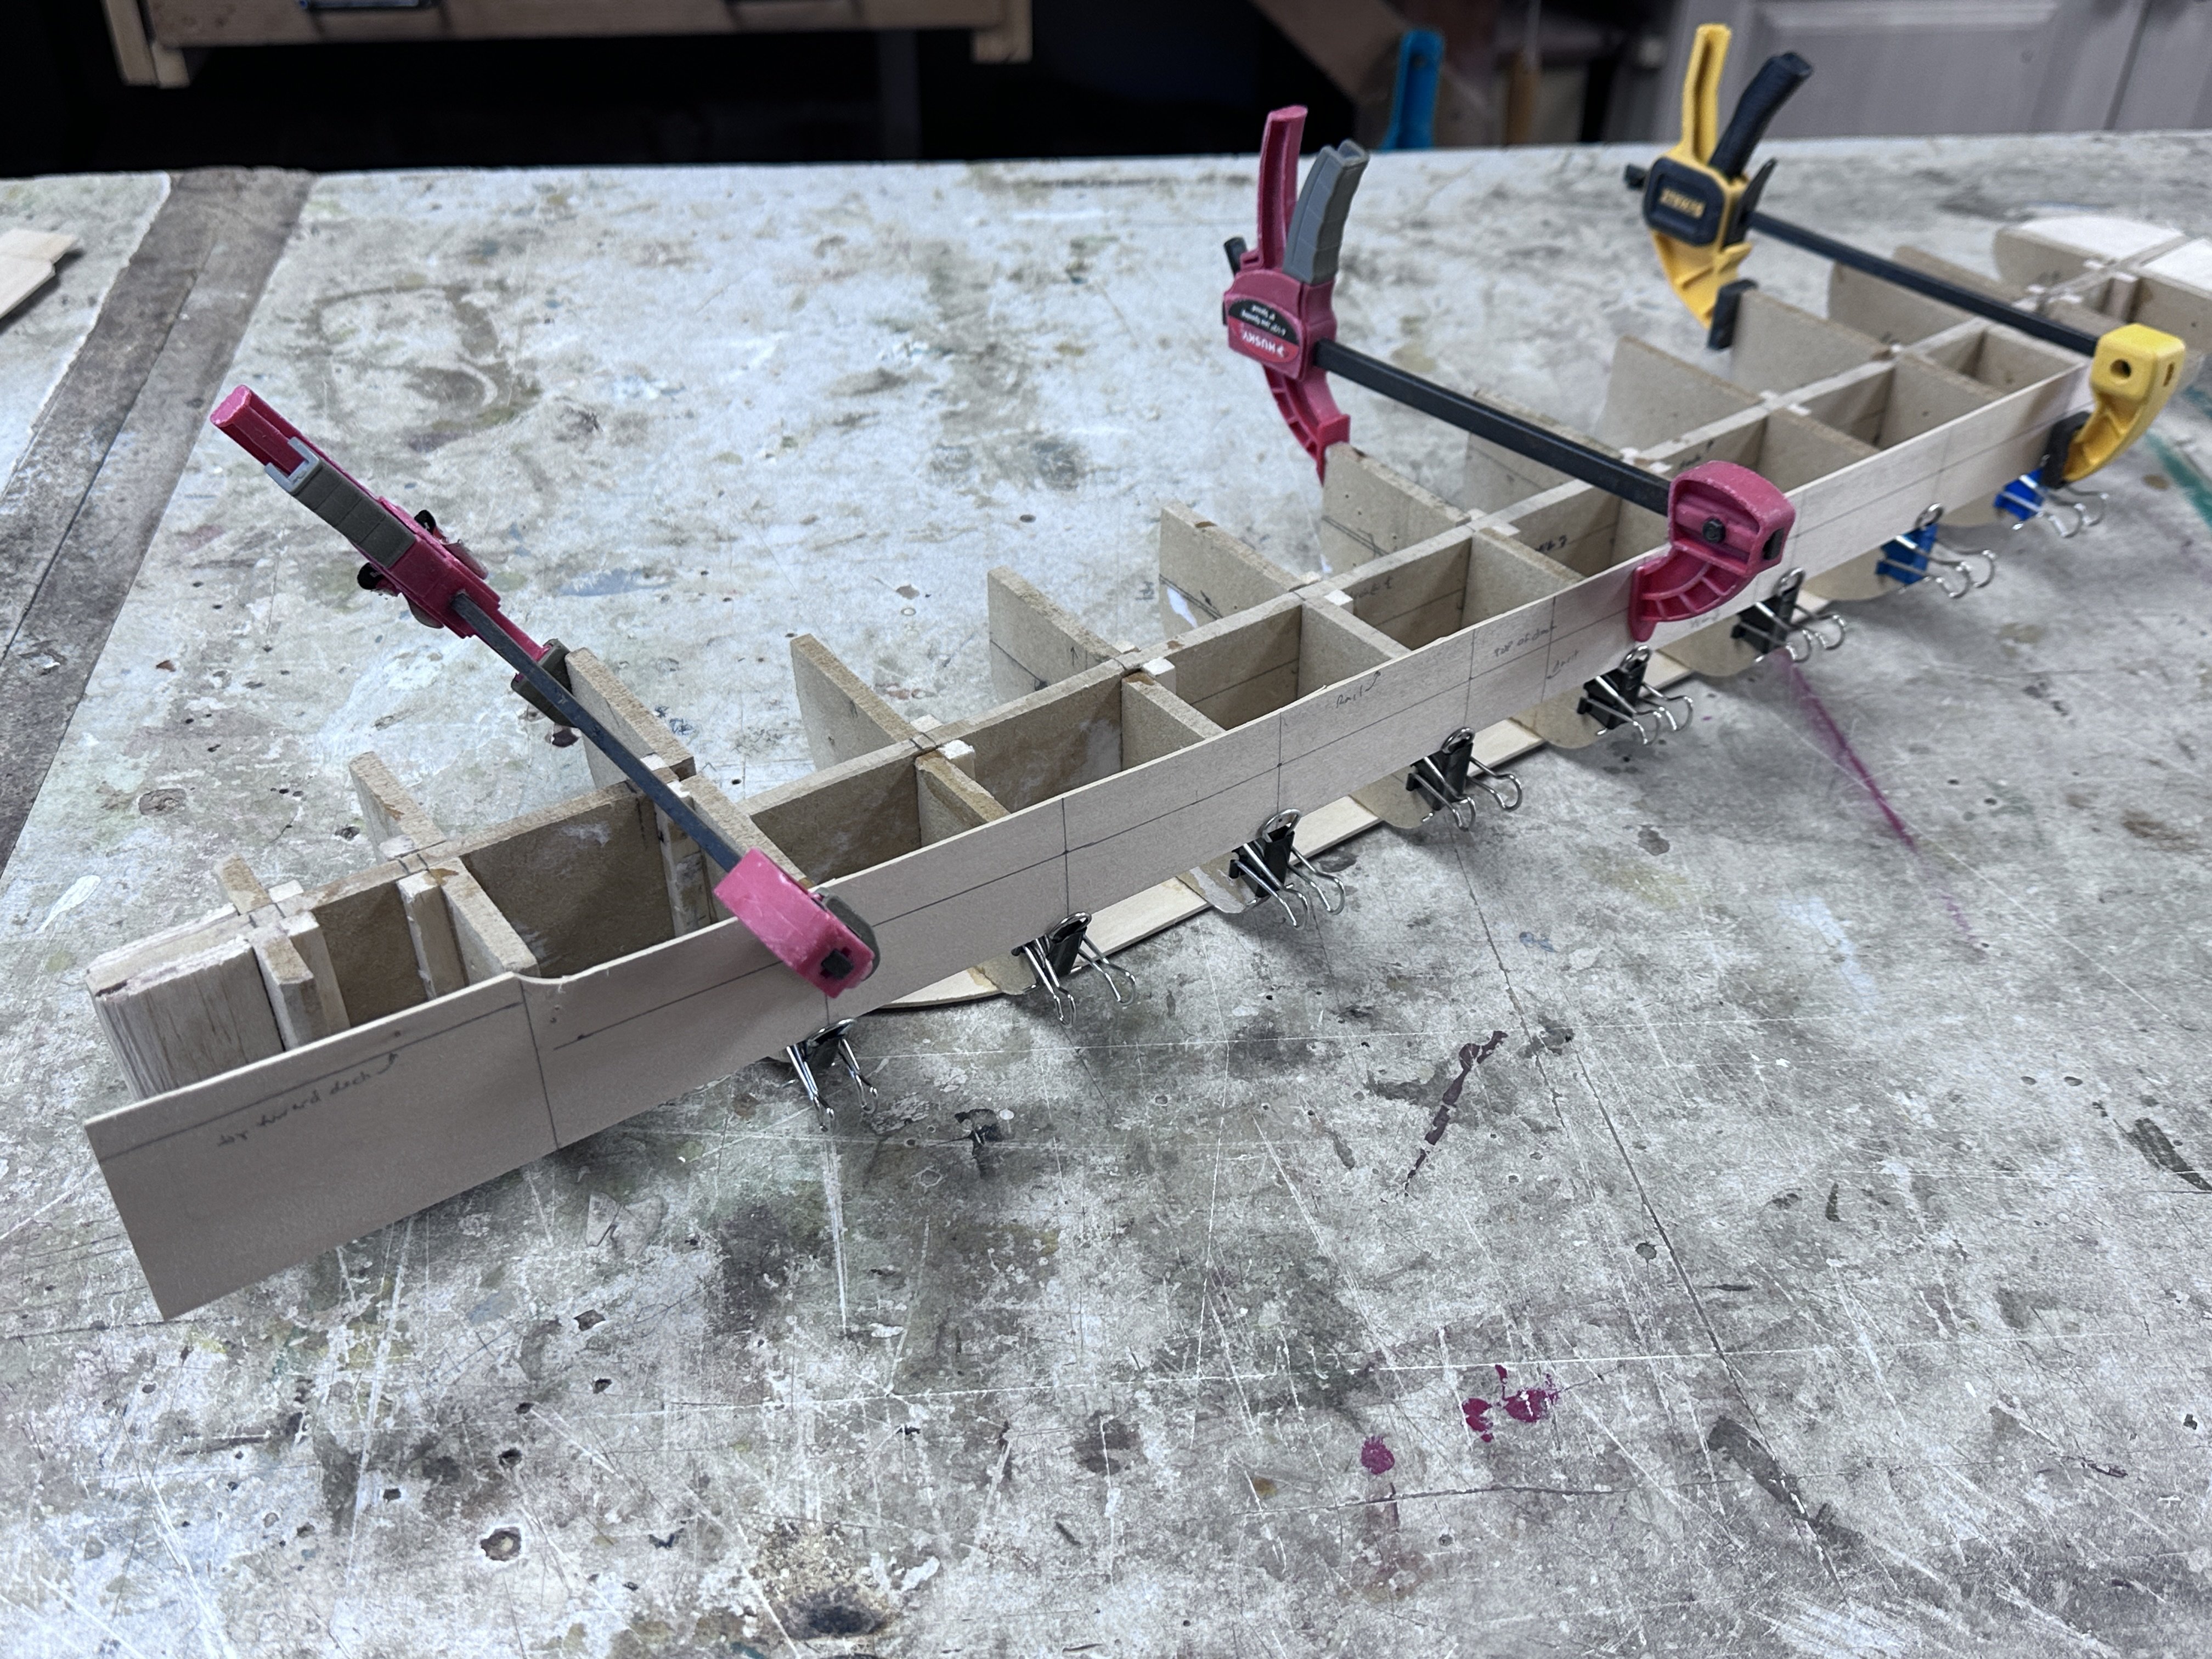
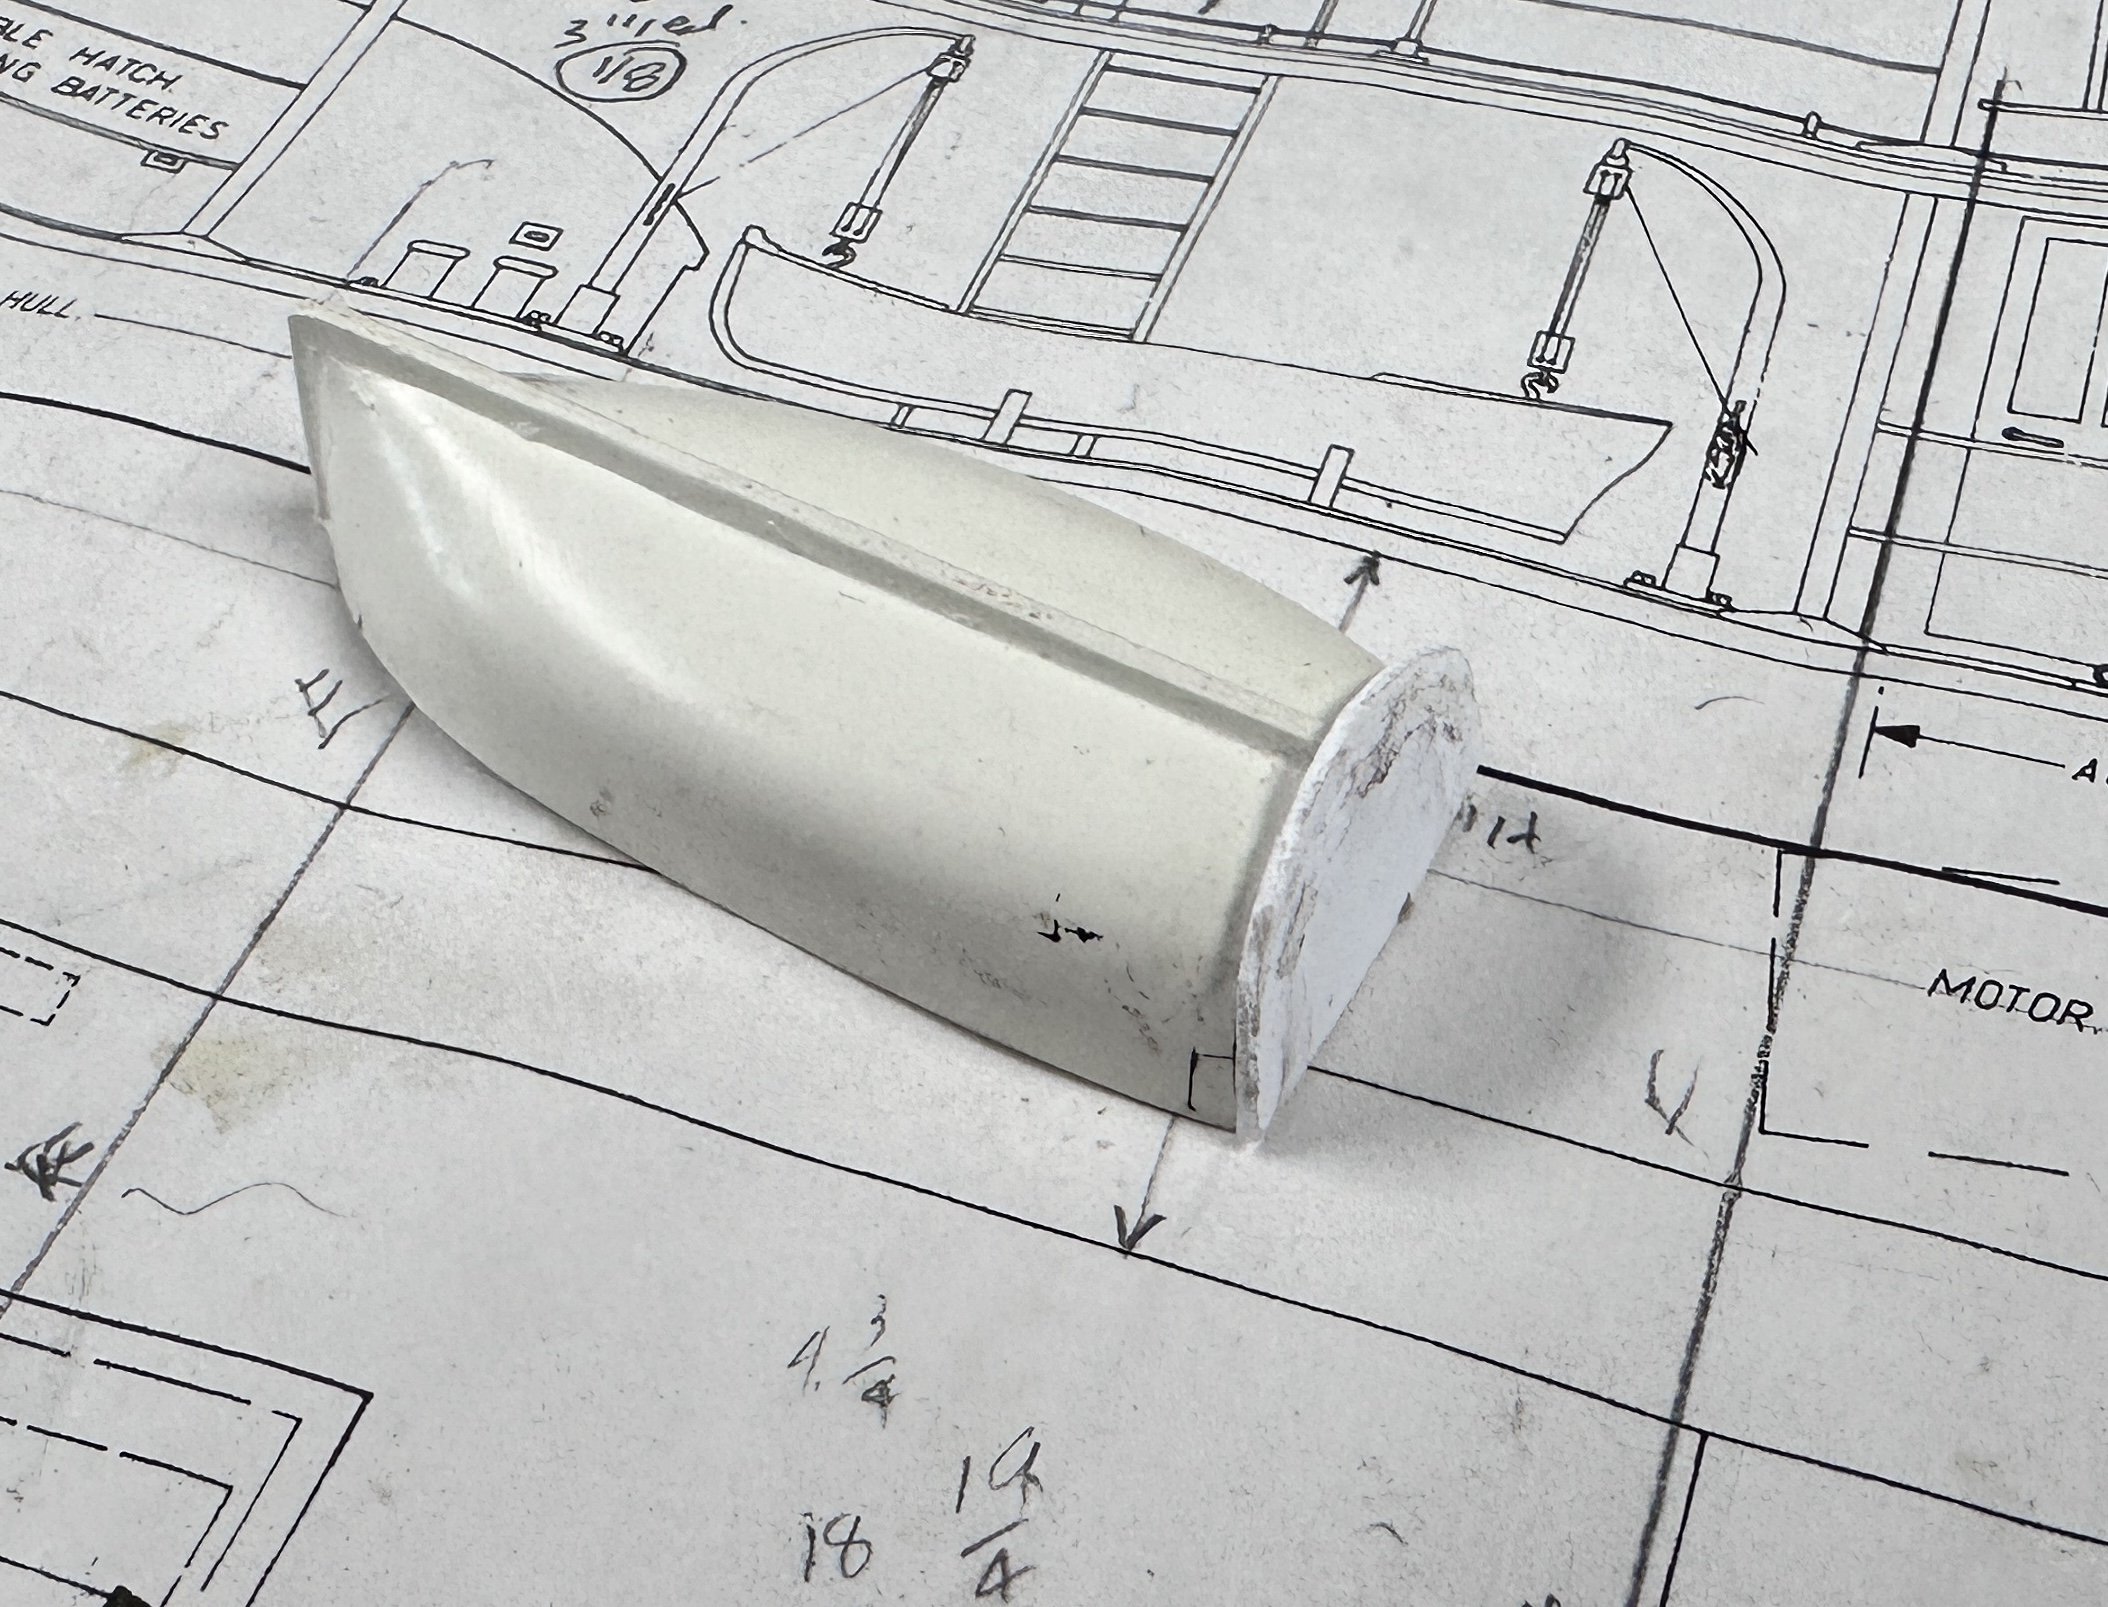
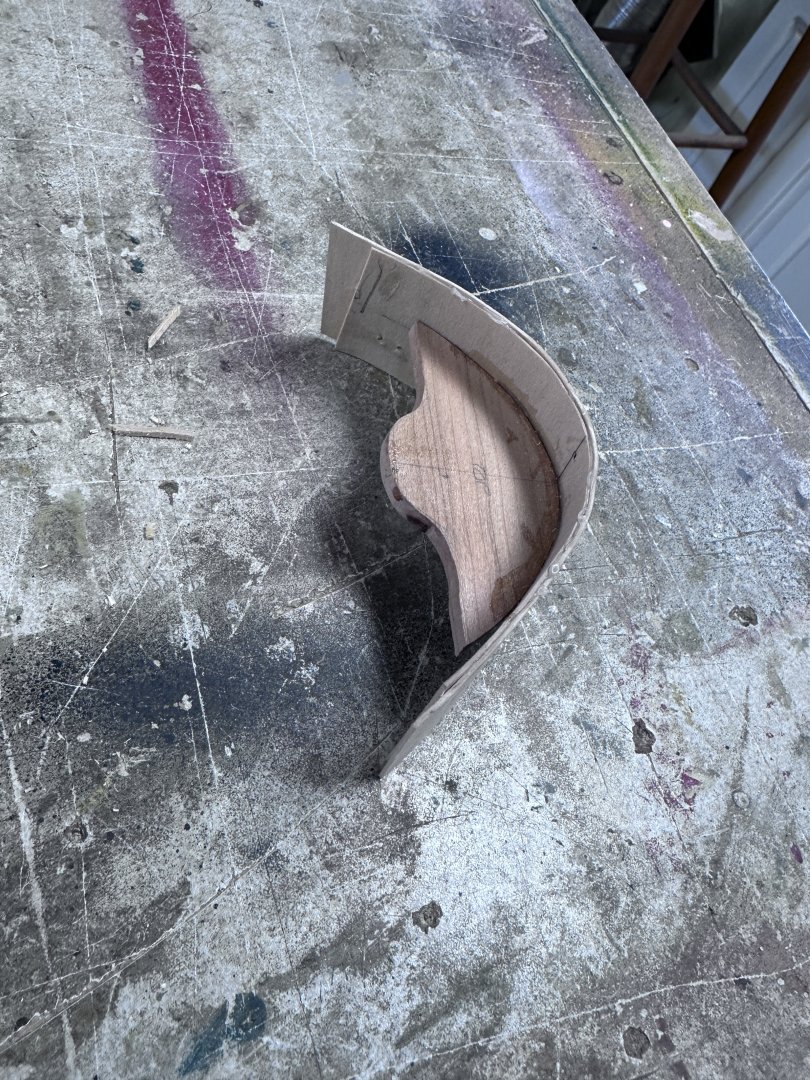
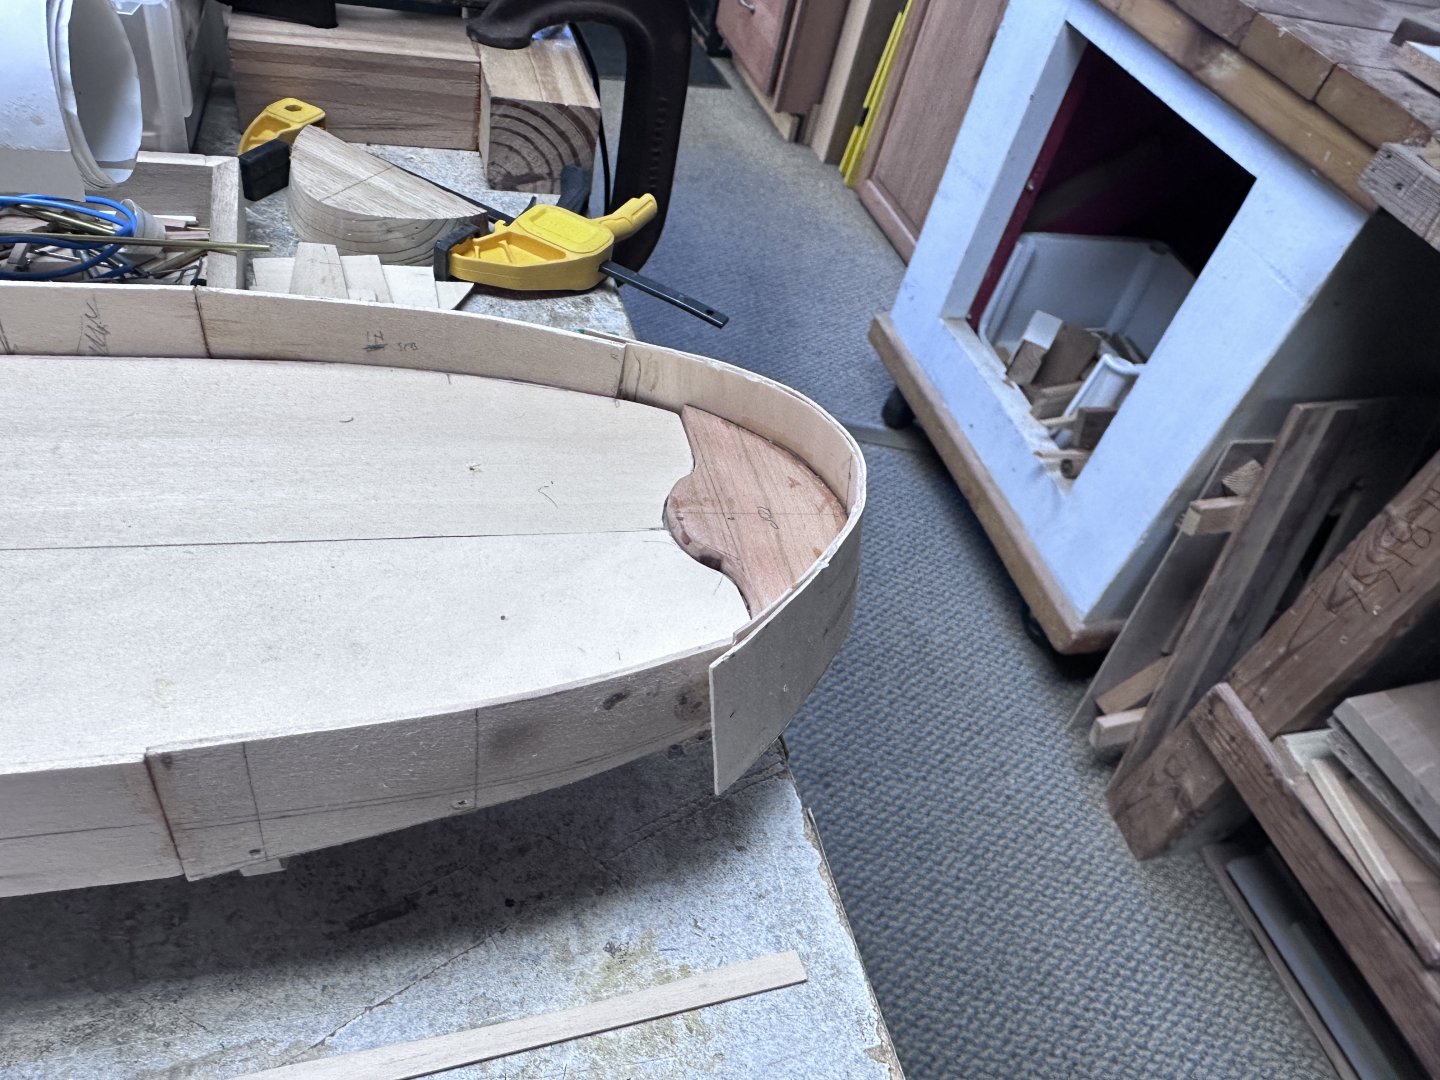
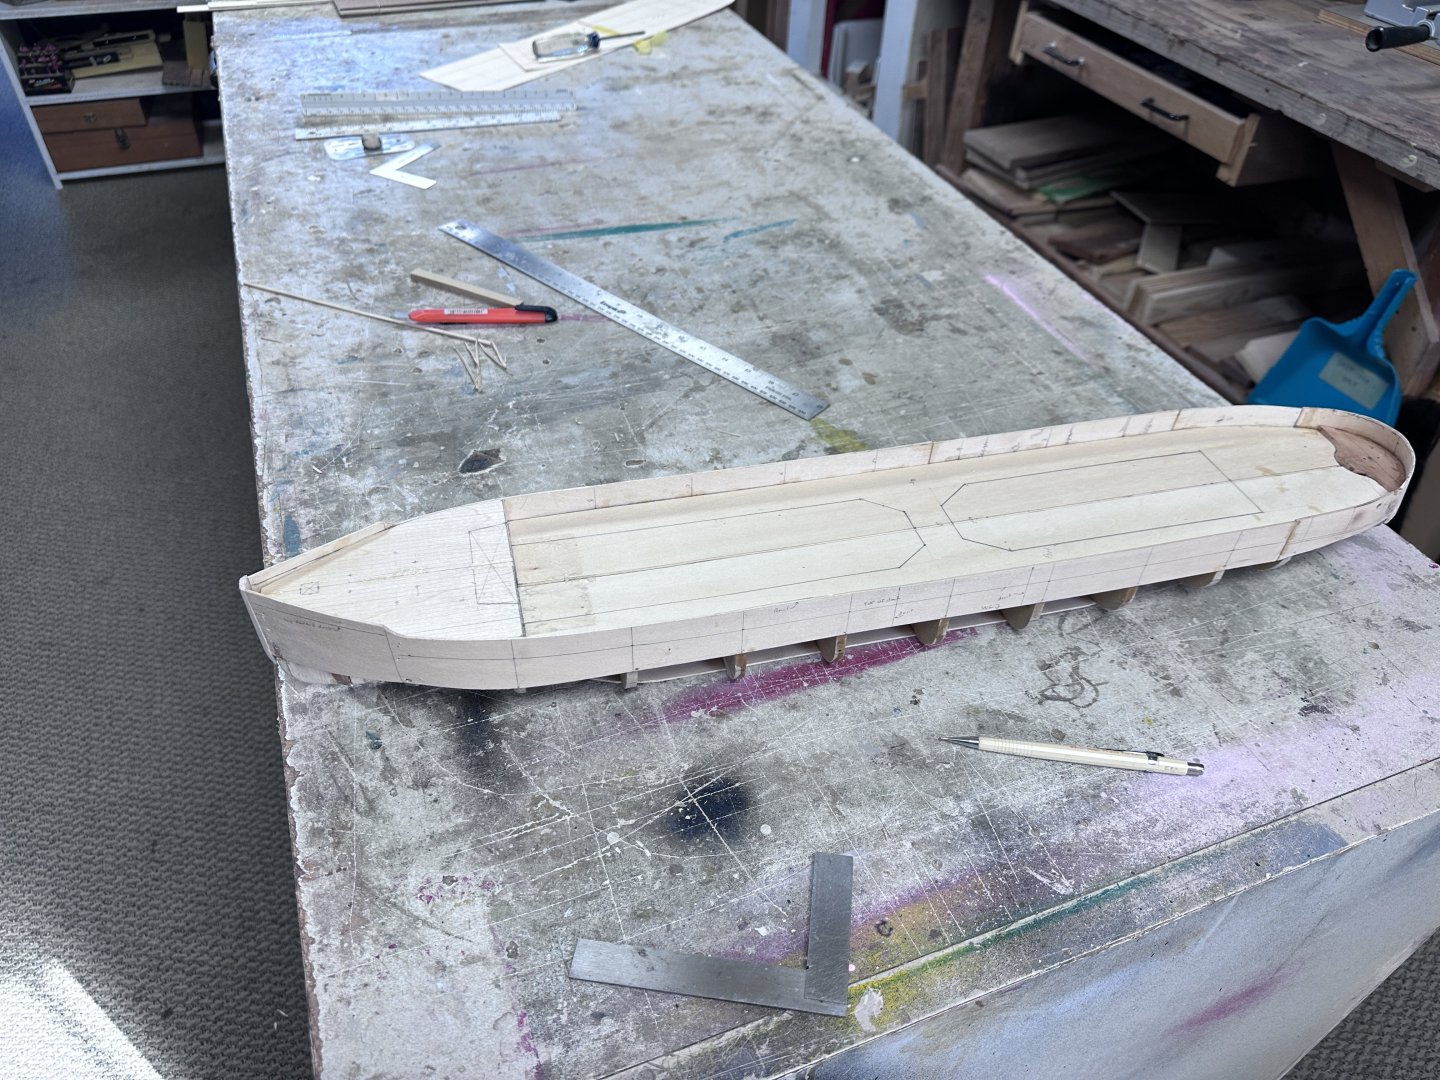
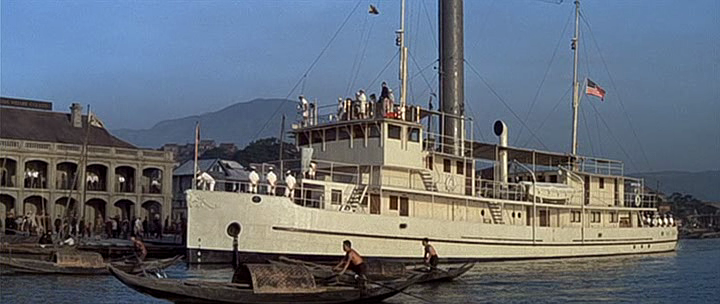
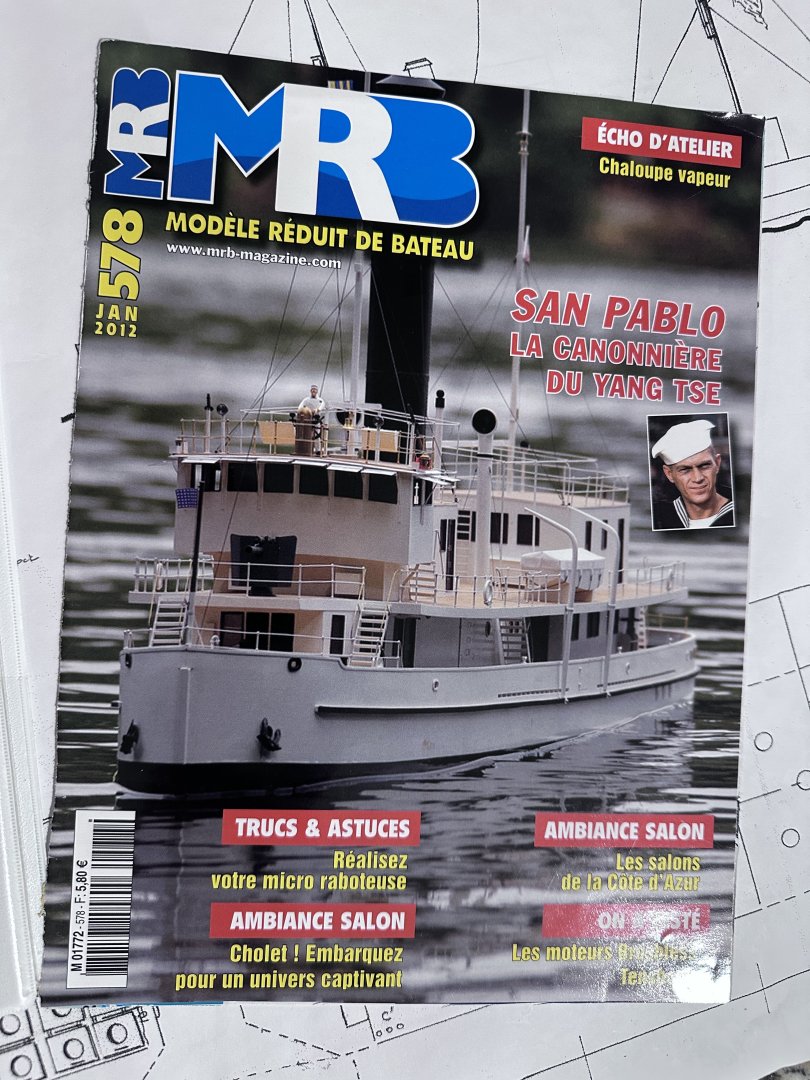
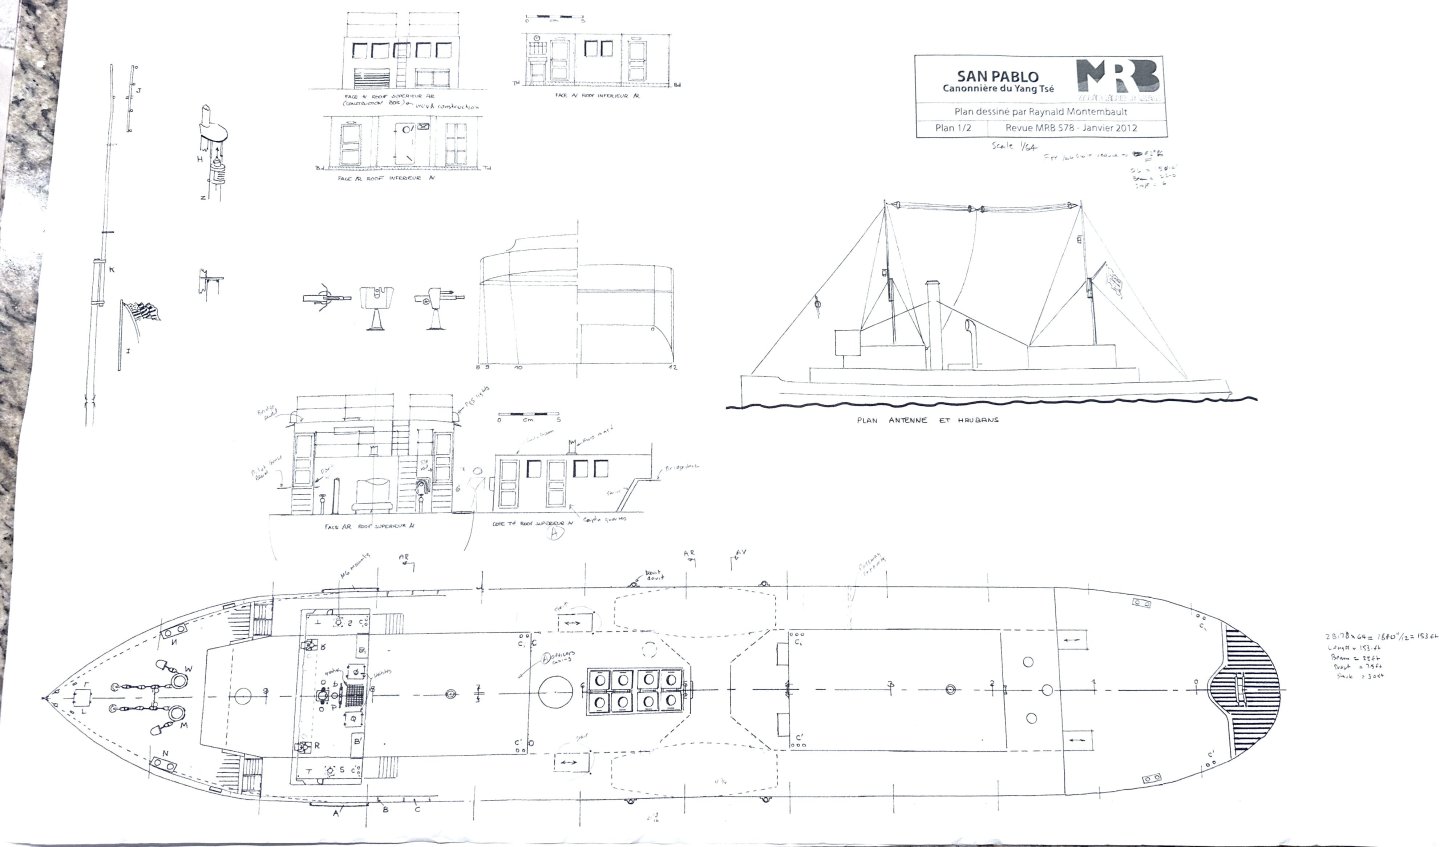
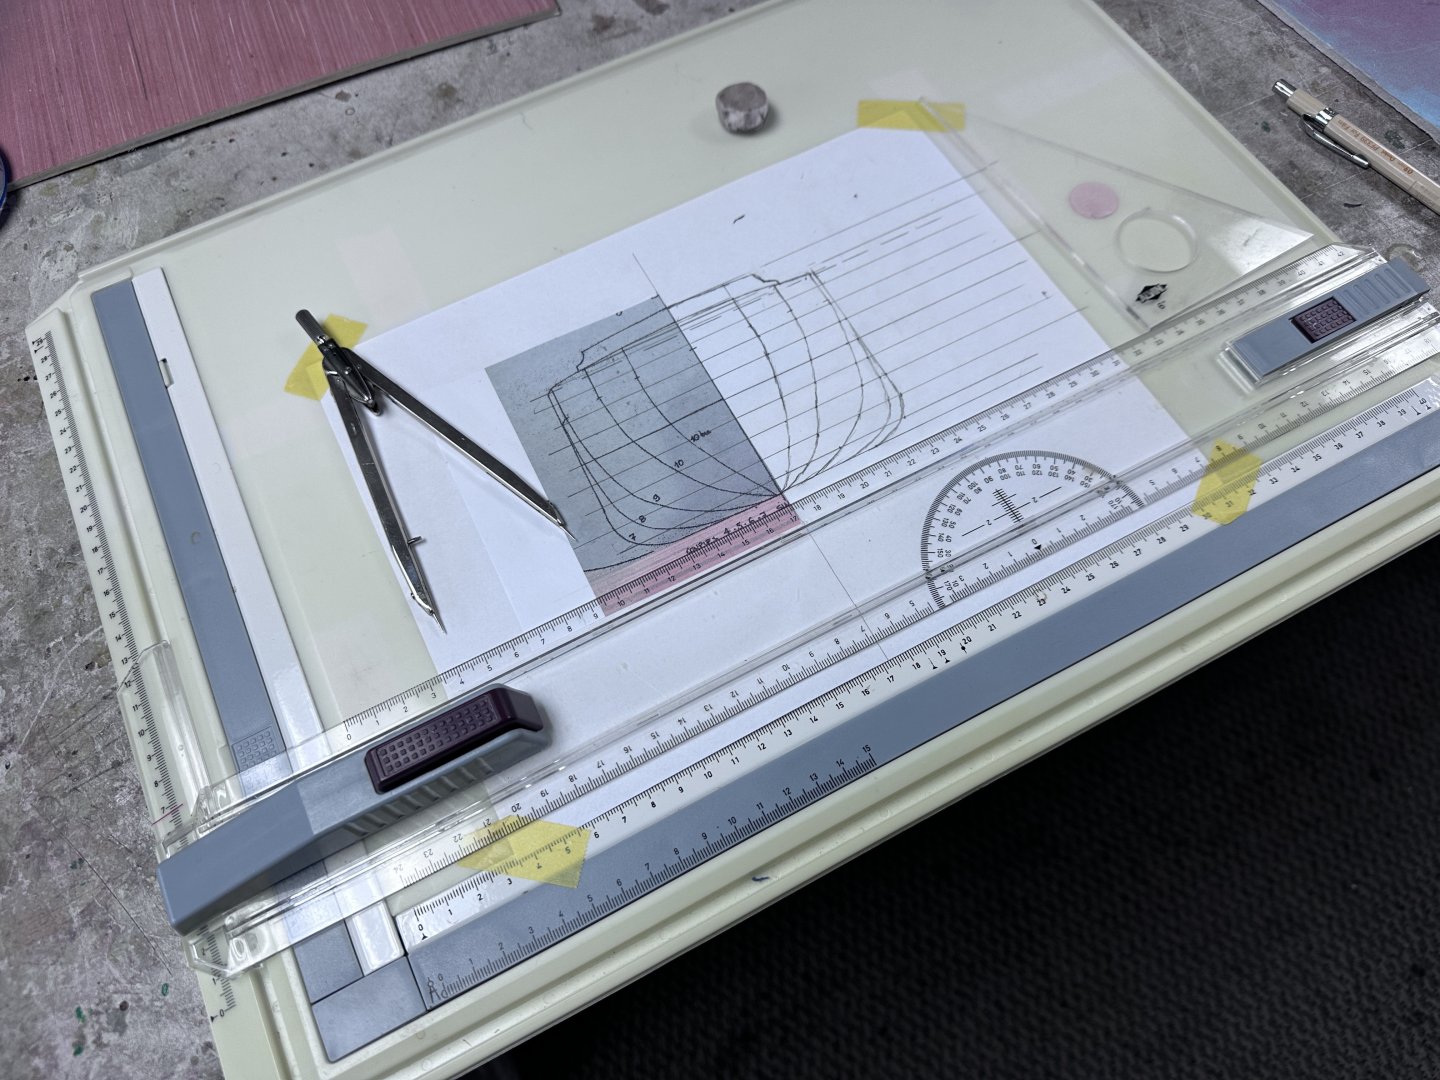
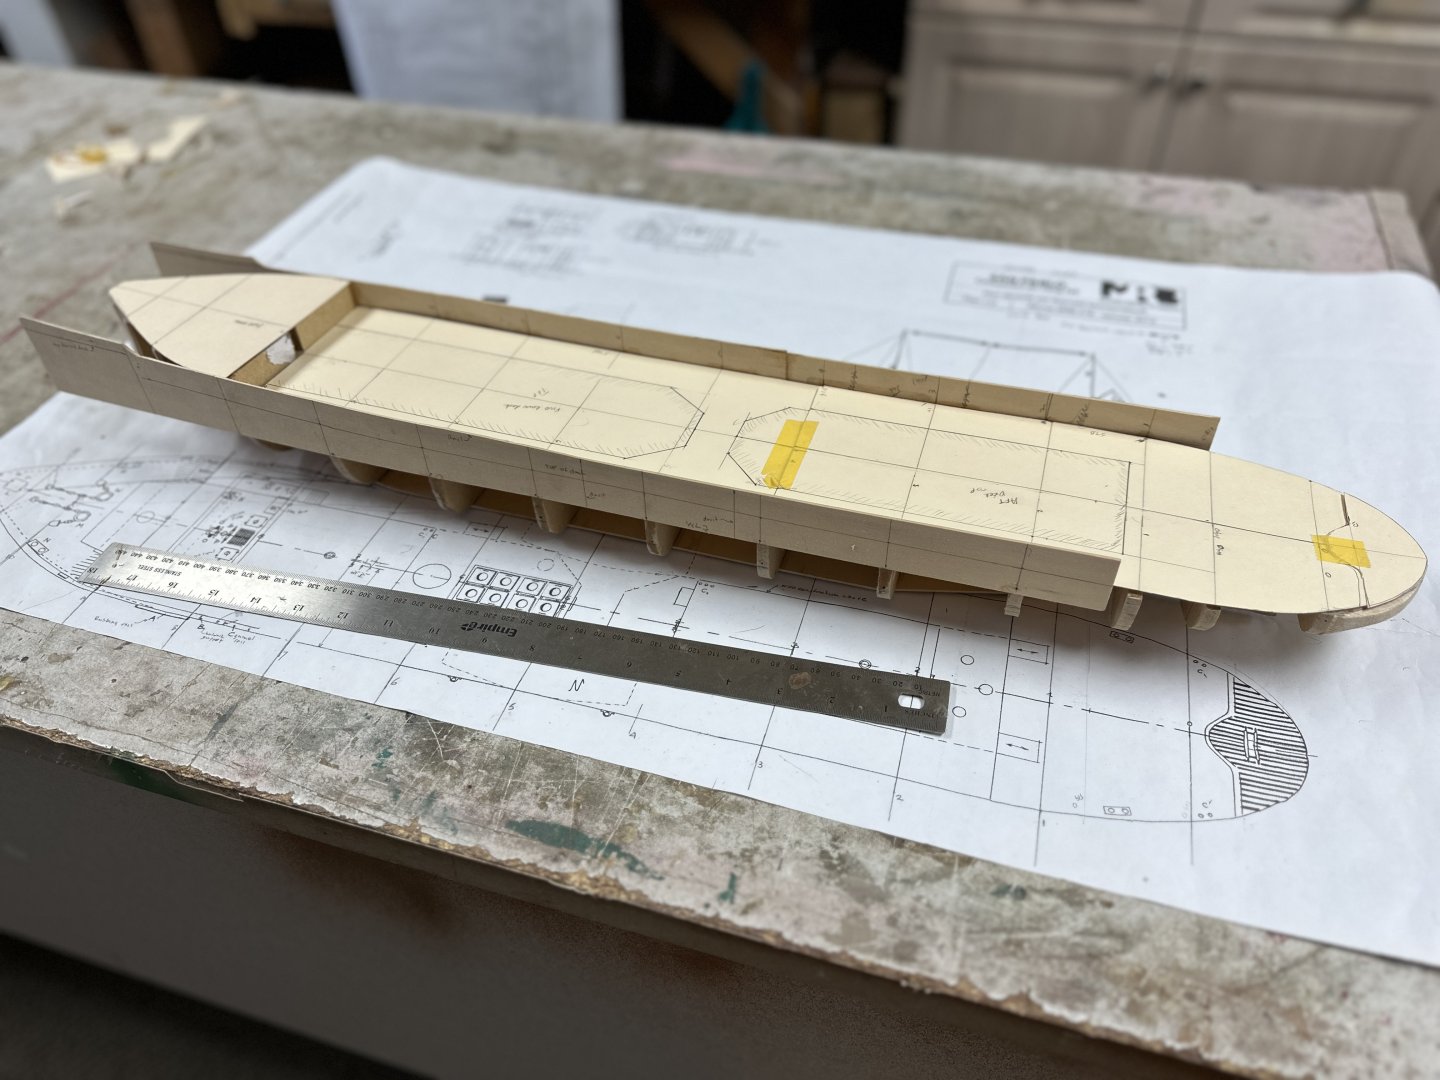
My next project has been on my “to do list “since I saw the movie The San Pebbles in 1966. The San Pablo represents one of the many gunboats that were used by the western nations to patrol the waters of the Yangtze River in China during the period of the Chinese wars between war lords, nationalists and communist’s factions. The movie involves a sailor in charge of the steam engine that powers the ship. The USS San Pablo was a 150-foot steel-hulled gunboat, built by Vaughn & Yung Engineering Ltd. of Hong Kong. There is a lot of information on the web about this ship and about the real US Navy ships that were used in this service such as the USS Panay that was bombed by the Japanese in 1939. Following are some links to sites on this subject. https://industrialhistoryhk.org/sand-pebbles/ https://www.thesandpebbles.com/naval_history/real_sandpebbles1.htm ttps://www.usni.org/magazines/naval-history-magazine/2000/february/real-sand-pebbles As I said before, I had this project in mind for a long time but could not obtain proper plans. Finally ,last year, I found a link to a French magazine that included the plans for this gunboat. The plans were at 1/45 scale that made the boat 40” long so I had the plans reduced to 1/64 scale with a length of a little more than 28 inches. I decided to build as plank on frame method used MDF boards for the spine and frames but the material I found was 1/4” thick and the resulting ship skeleton looks very heavy, but it will provide plenty of surface for the planking. Following is the progress to date. Developing the frames pieces Starting the framework. The first long plank. Then, the development of the conical shape and using a wood mold to bend the wood pieces that will form the aft bulkwark will come next


-
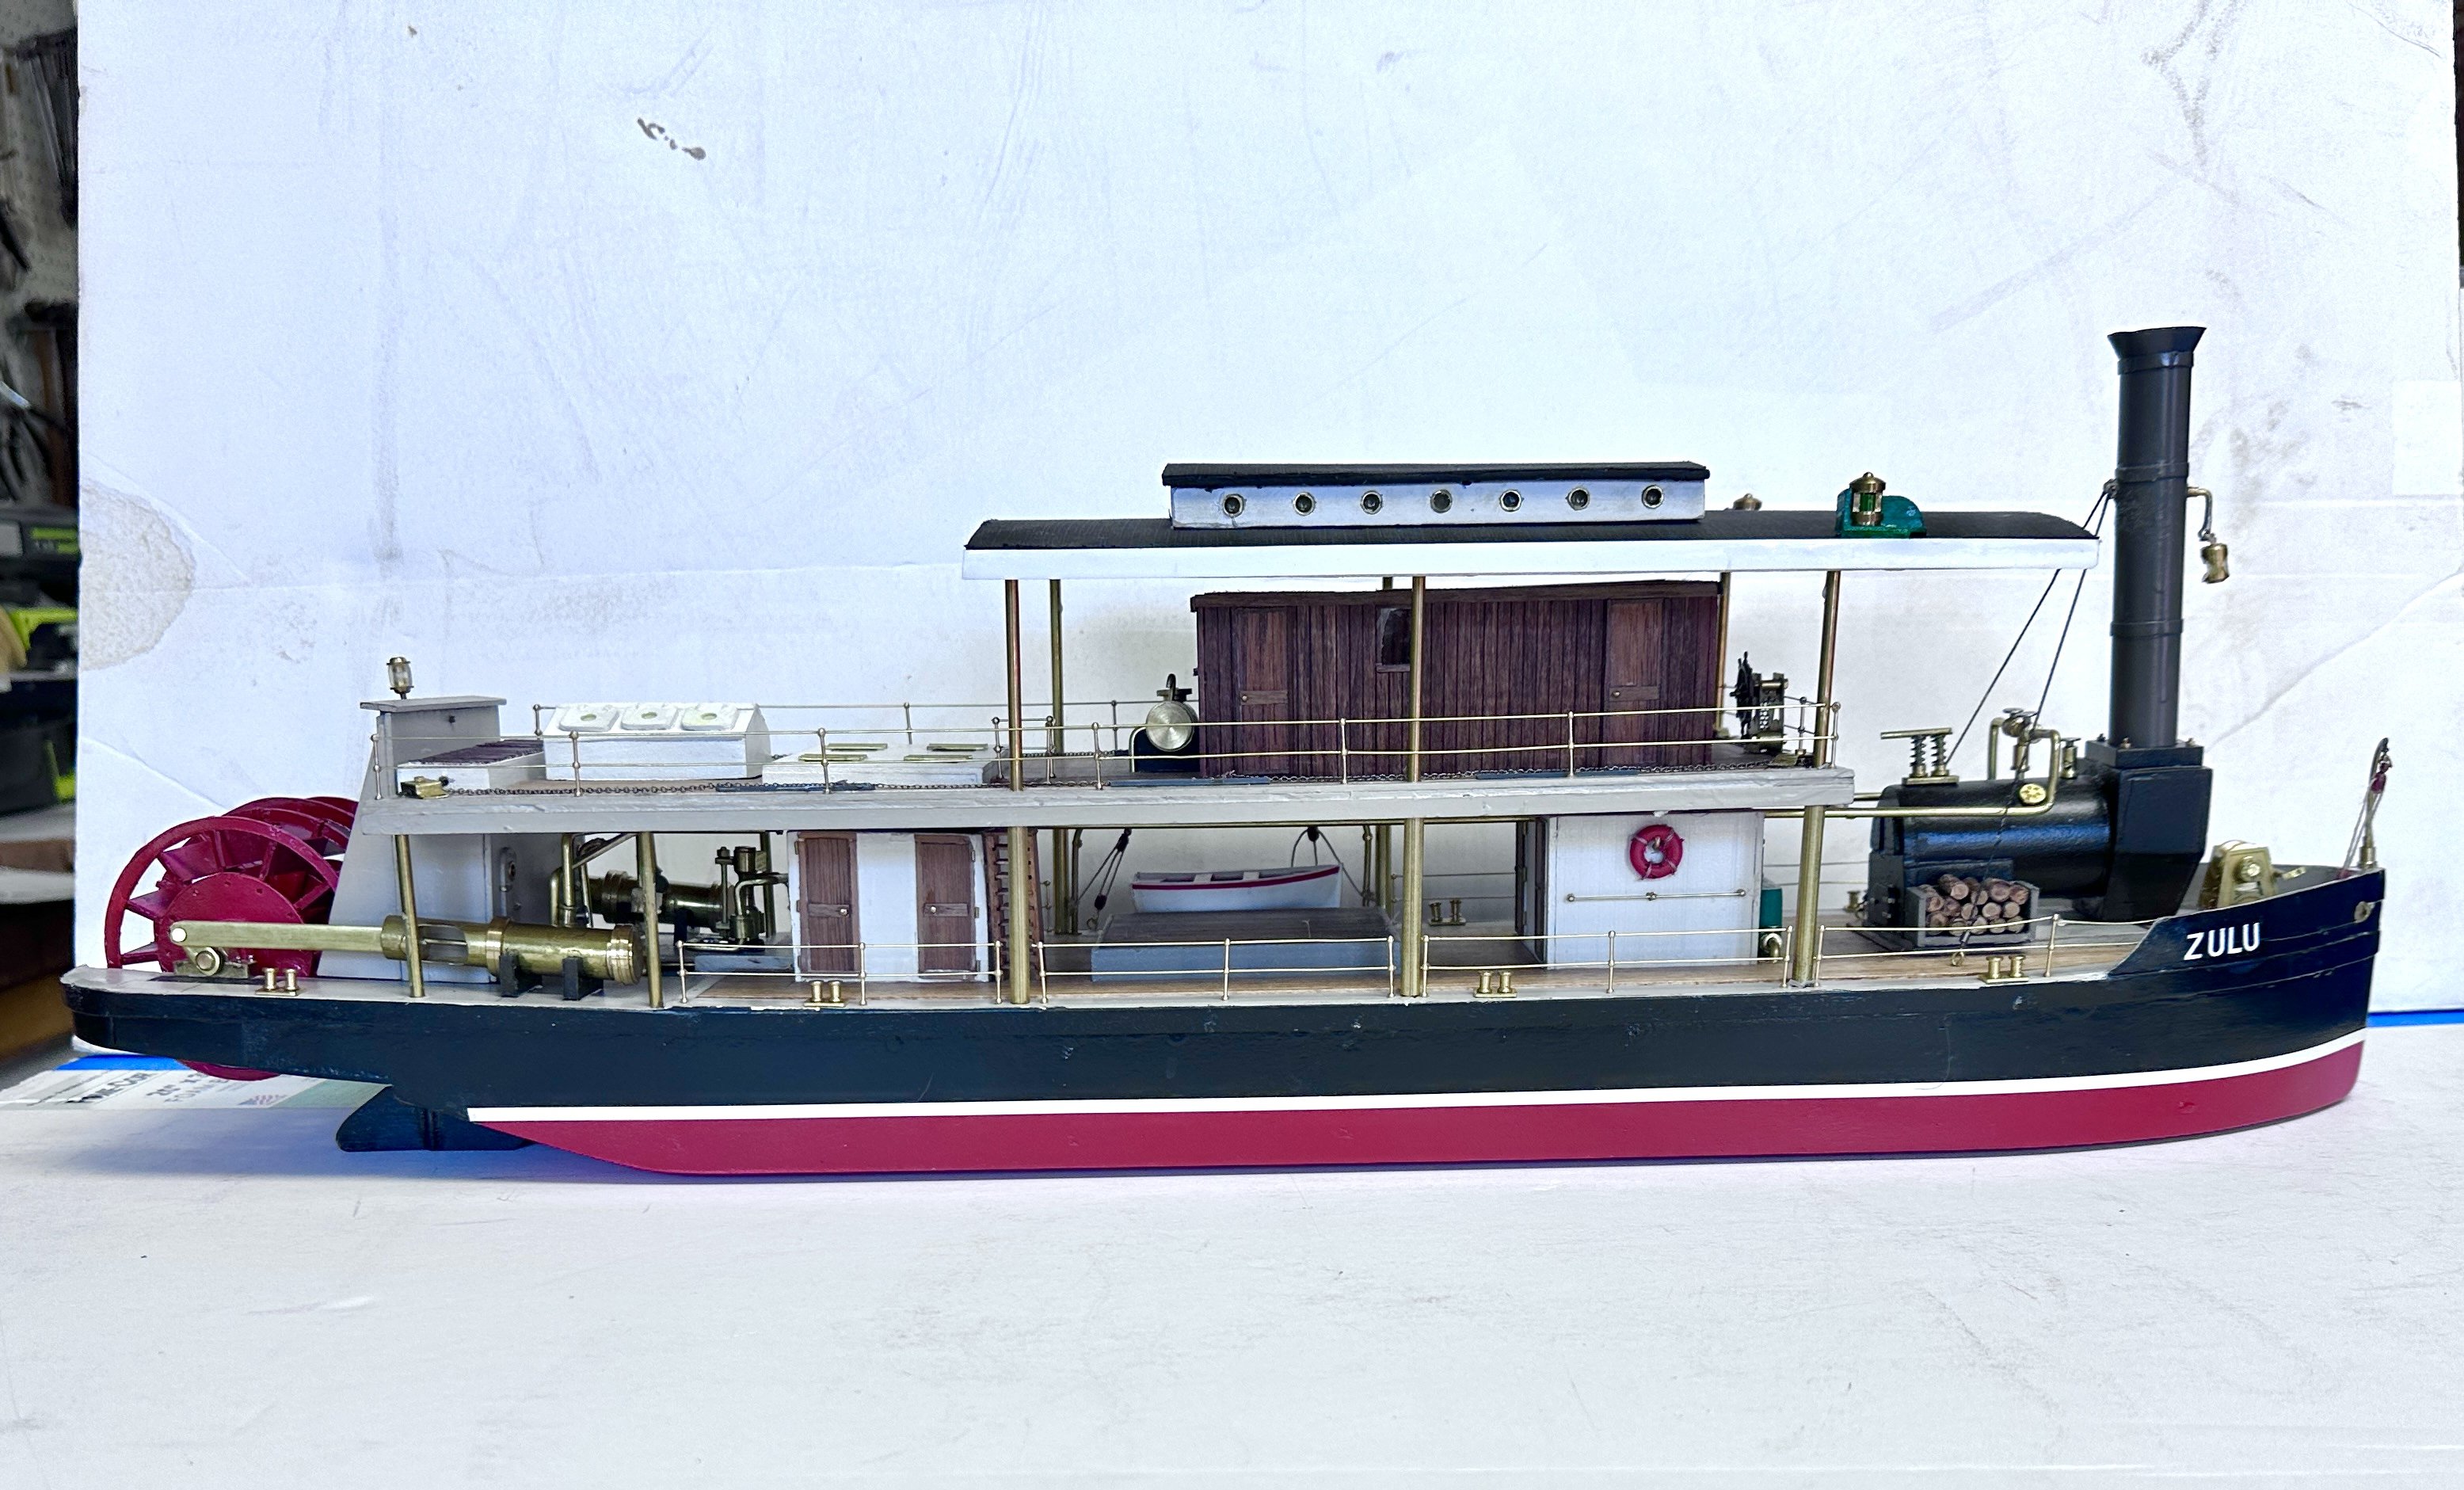
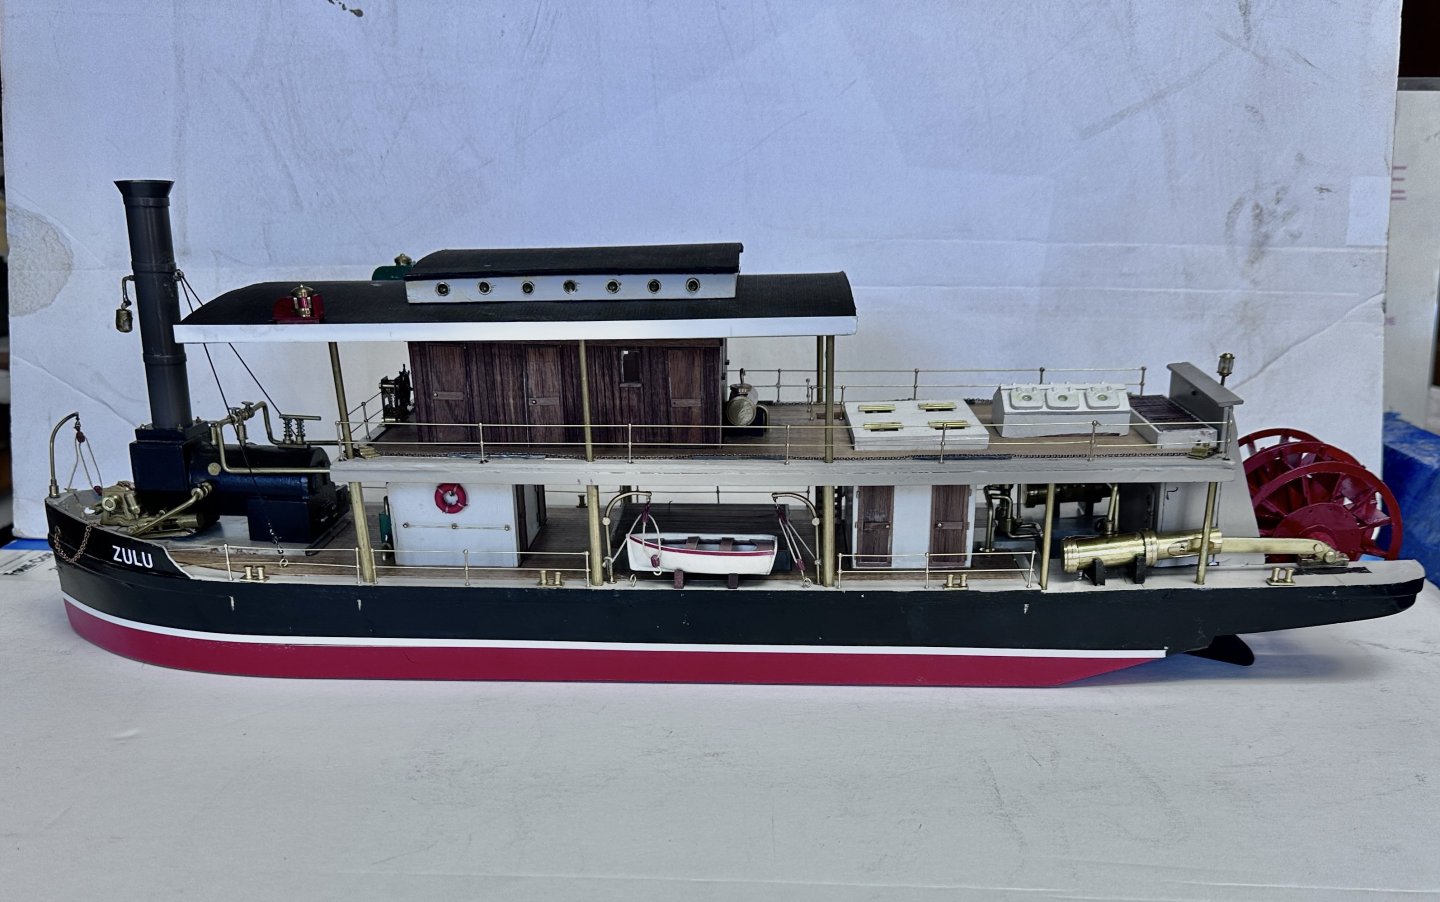
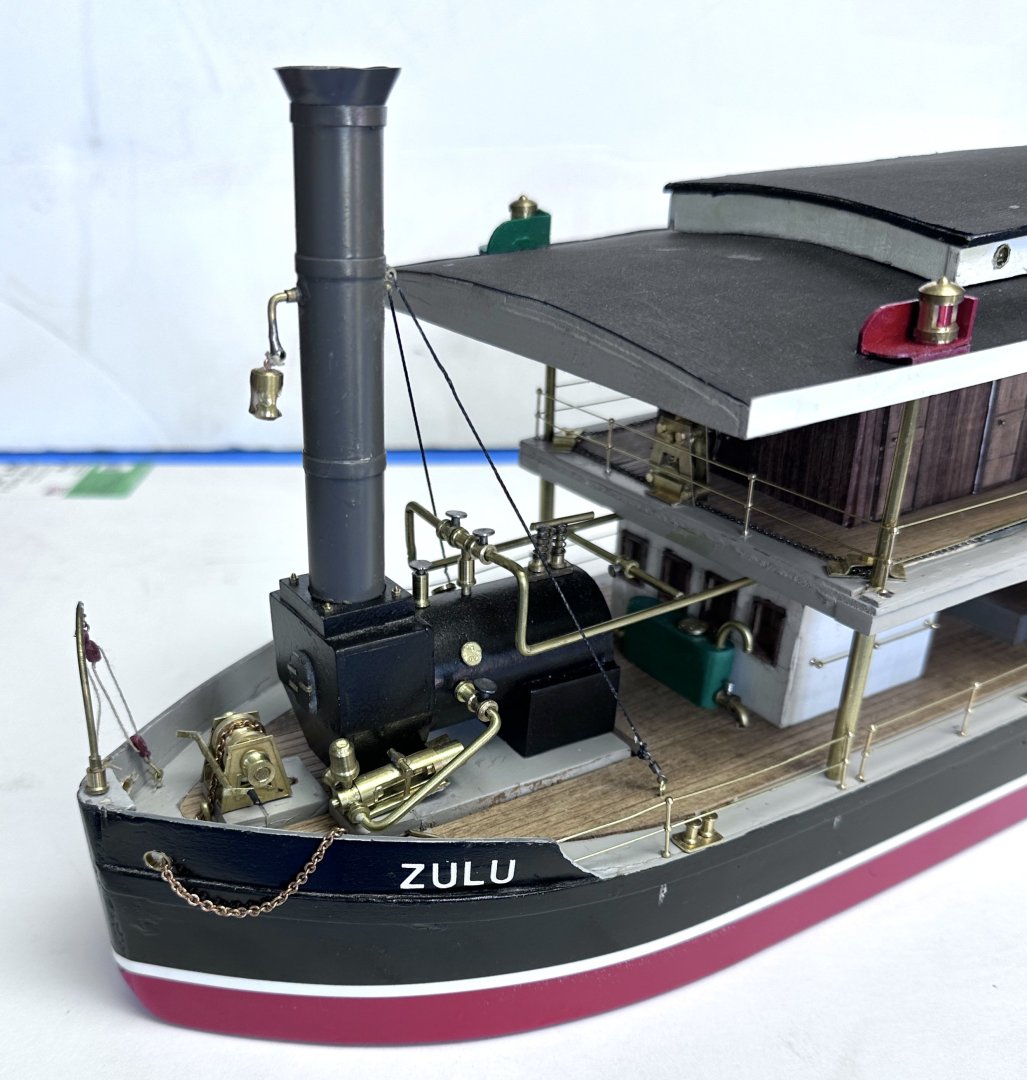
Keith, I just found your build and will be following it from today. I love the steam paddlewheelers and will be looking at yours in such a small scale. As you know, I just finished Zulu that is one of those with a very forward boiler that was positioned to balance the weight of the paddle and engines aft. I will go back and read the whole post to date. I am sure you will find a lot of my wows.
- 732 replies
-
- 5
-
-

-
- Lula
- sternwheeler
- (and 1 more)
-
Thank y'all (pardon my southern). I am overwelmed with your comments.
- 128 replies
-
- 3
-
-
- zulu
- sternwheeler
- (and 1 more)
-
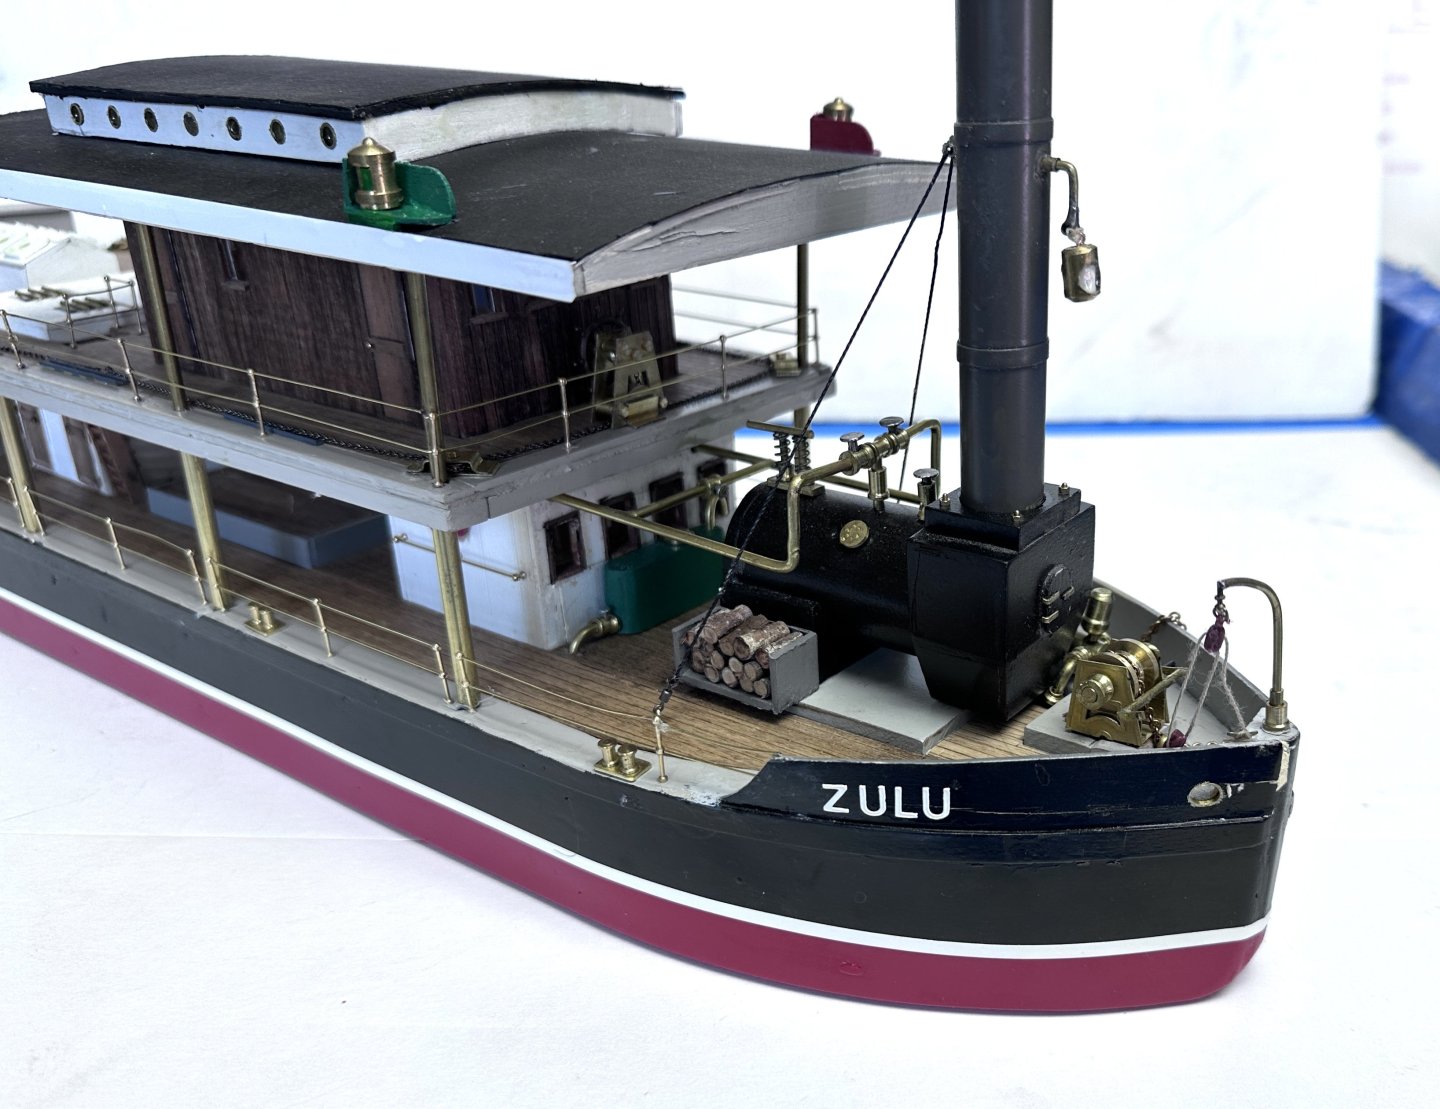
Well, here it is. Zulu is now completed. It has taken me one year and four month to complete which is nothing compared with Wefalk and Valeriy builts. This scratch built model of an Indian river boat is now FINISHED. I again thank all of you for the likes and comments. I learned quite a lot on this built and expect to do better in my next project: the fictional US Navy river gunboat San Pablo during the Boer revolution in China's as presented in the 1966 movie The Sand Pebbles, starring Steve McQueen. Ras


- 128 replies
-
- 19
-
-

-
- zulu
- sternwheeler
- (and 1 more)
-
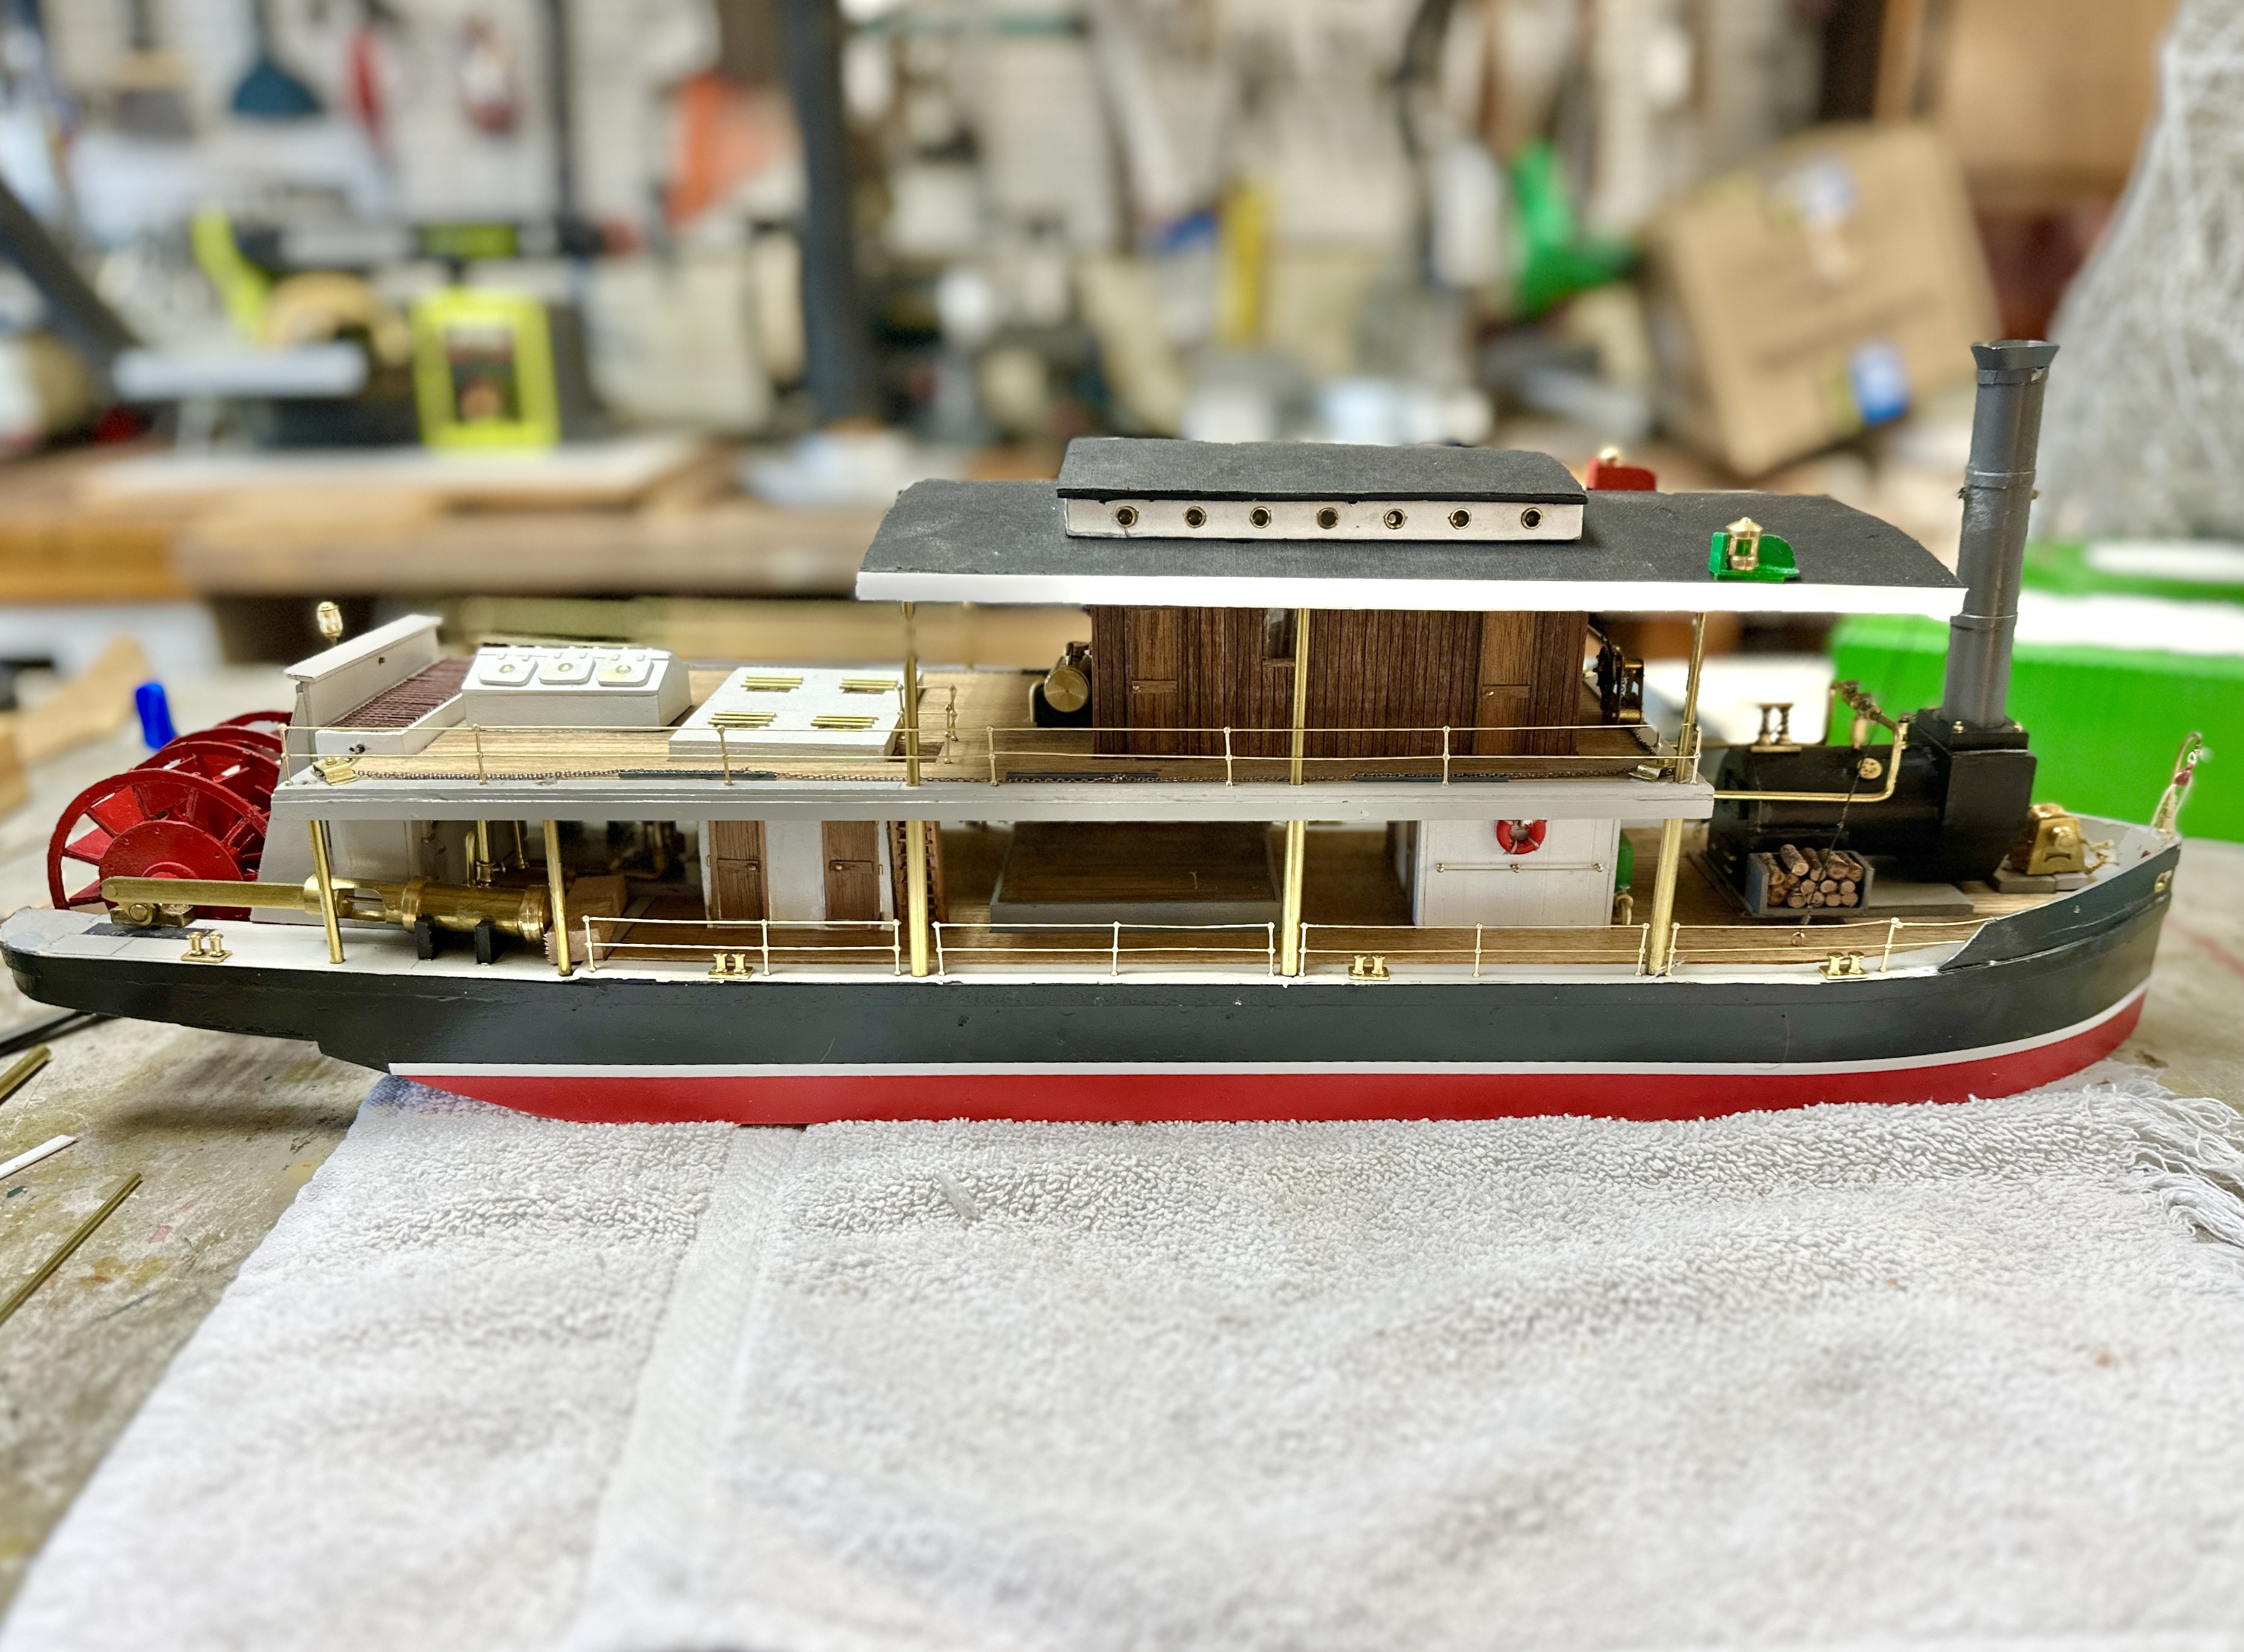
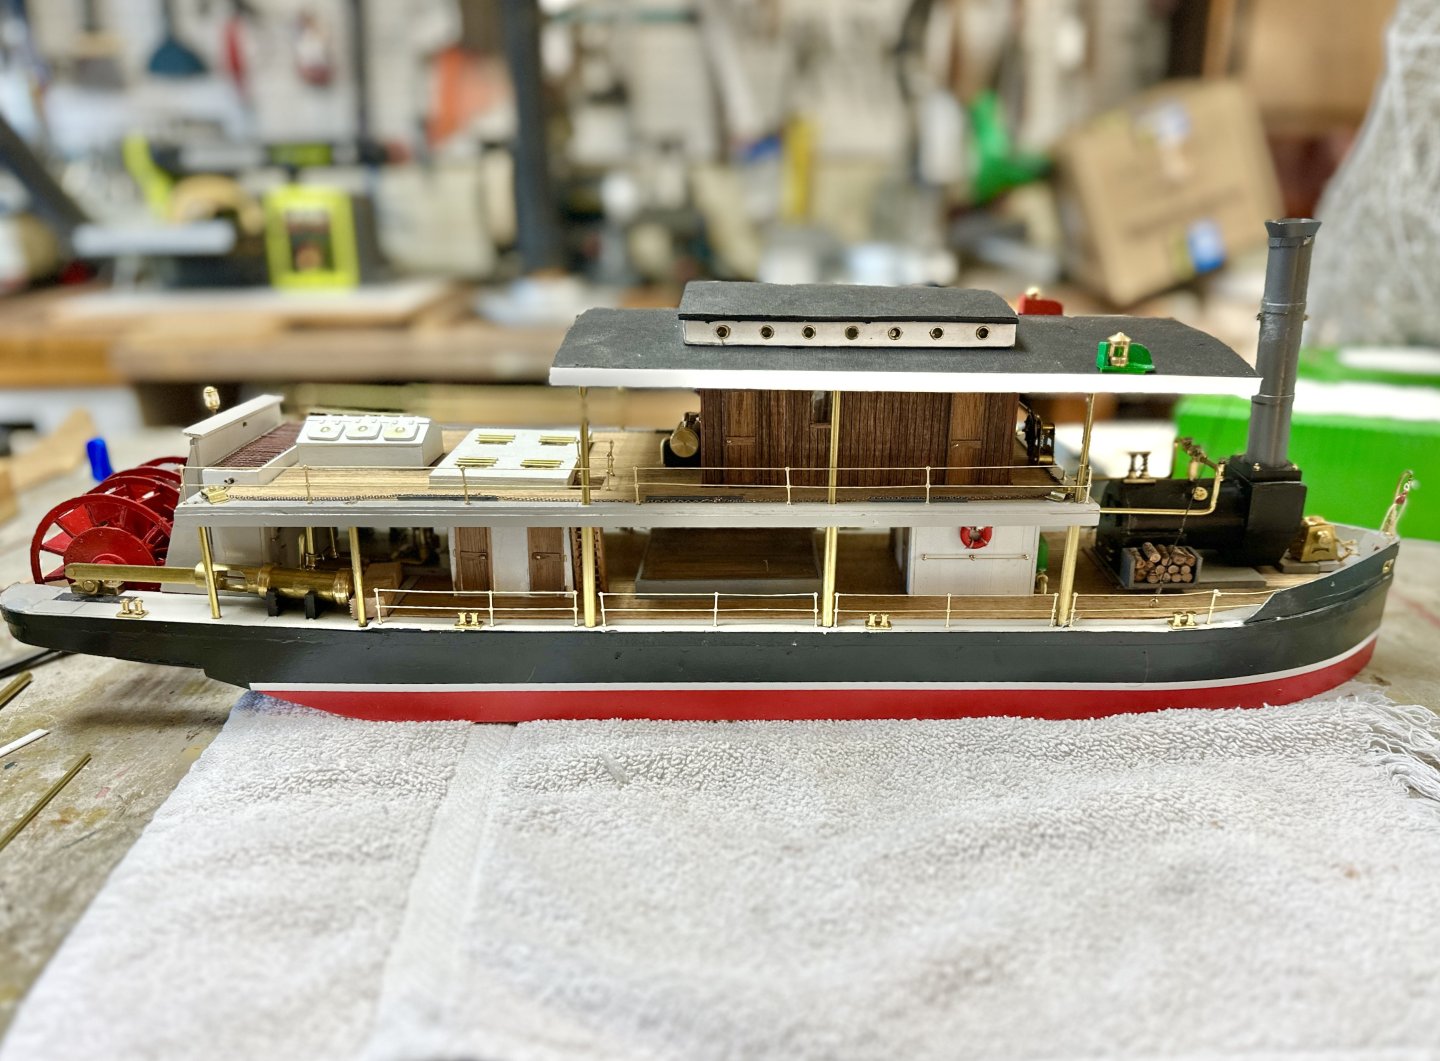
After several weeks with poor progress, today I achieved about 98.5% completion. Missing items are, the mast (stack) position light (that is now drying its clear lenses of gorilla glue) and its rigging. I could not make the decal for the white lettered "ZULU" for the ships name so I and wound up getting the letters from Amazon. Also necessary will be a check out of the handrails that have been damaged by the fact that I built the railing before completion of other tasks in the corresponding decks. I also used an extremely thin (0.25 mm) brass wire. Should have used thin thread. Also, I skipped the galley stack. But, I could not wait to show you the "Almost Finished" Zulu. Expect to complete it early next week and I will prepare an album for the gallery. I thank all you followers for you likes and your valuable comments.
- 128 replies
-
- 9
-
-
-
- zulu
- sternwheeler
- (and 1 more)
-
Great stories Phil. I am learning a lot about minesweepers. Thanks.
- 482 replies
-
- 2
-
-
- minesweeper
- Cape
- (and 1 more)
-
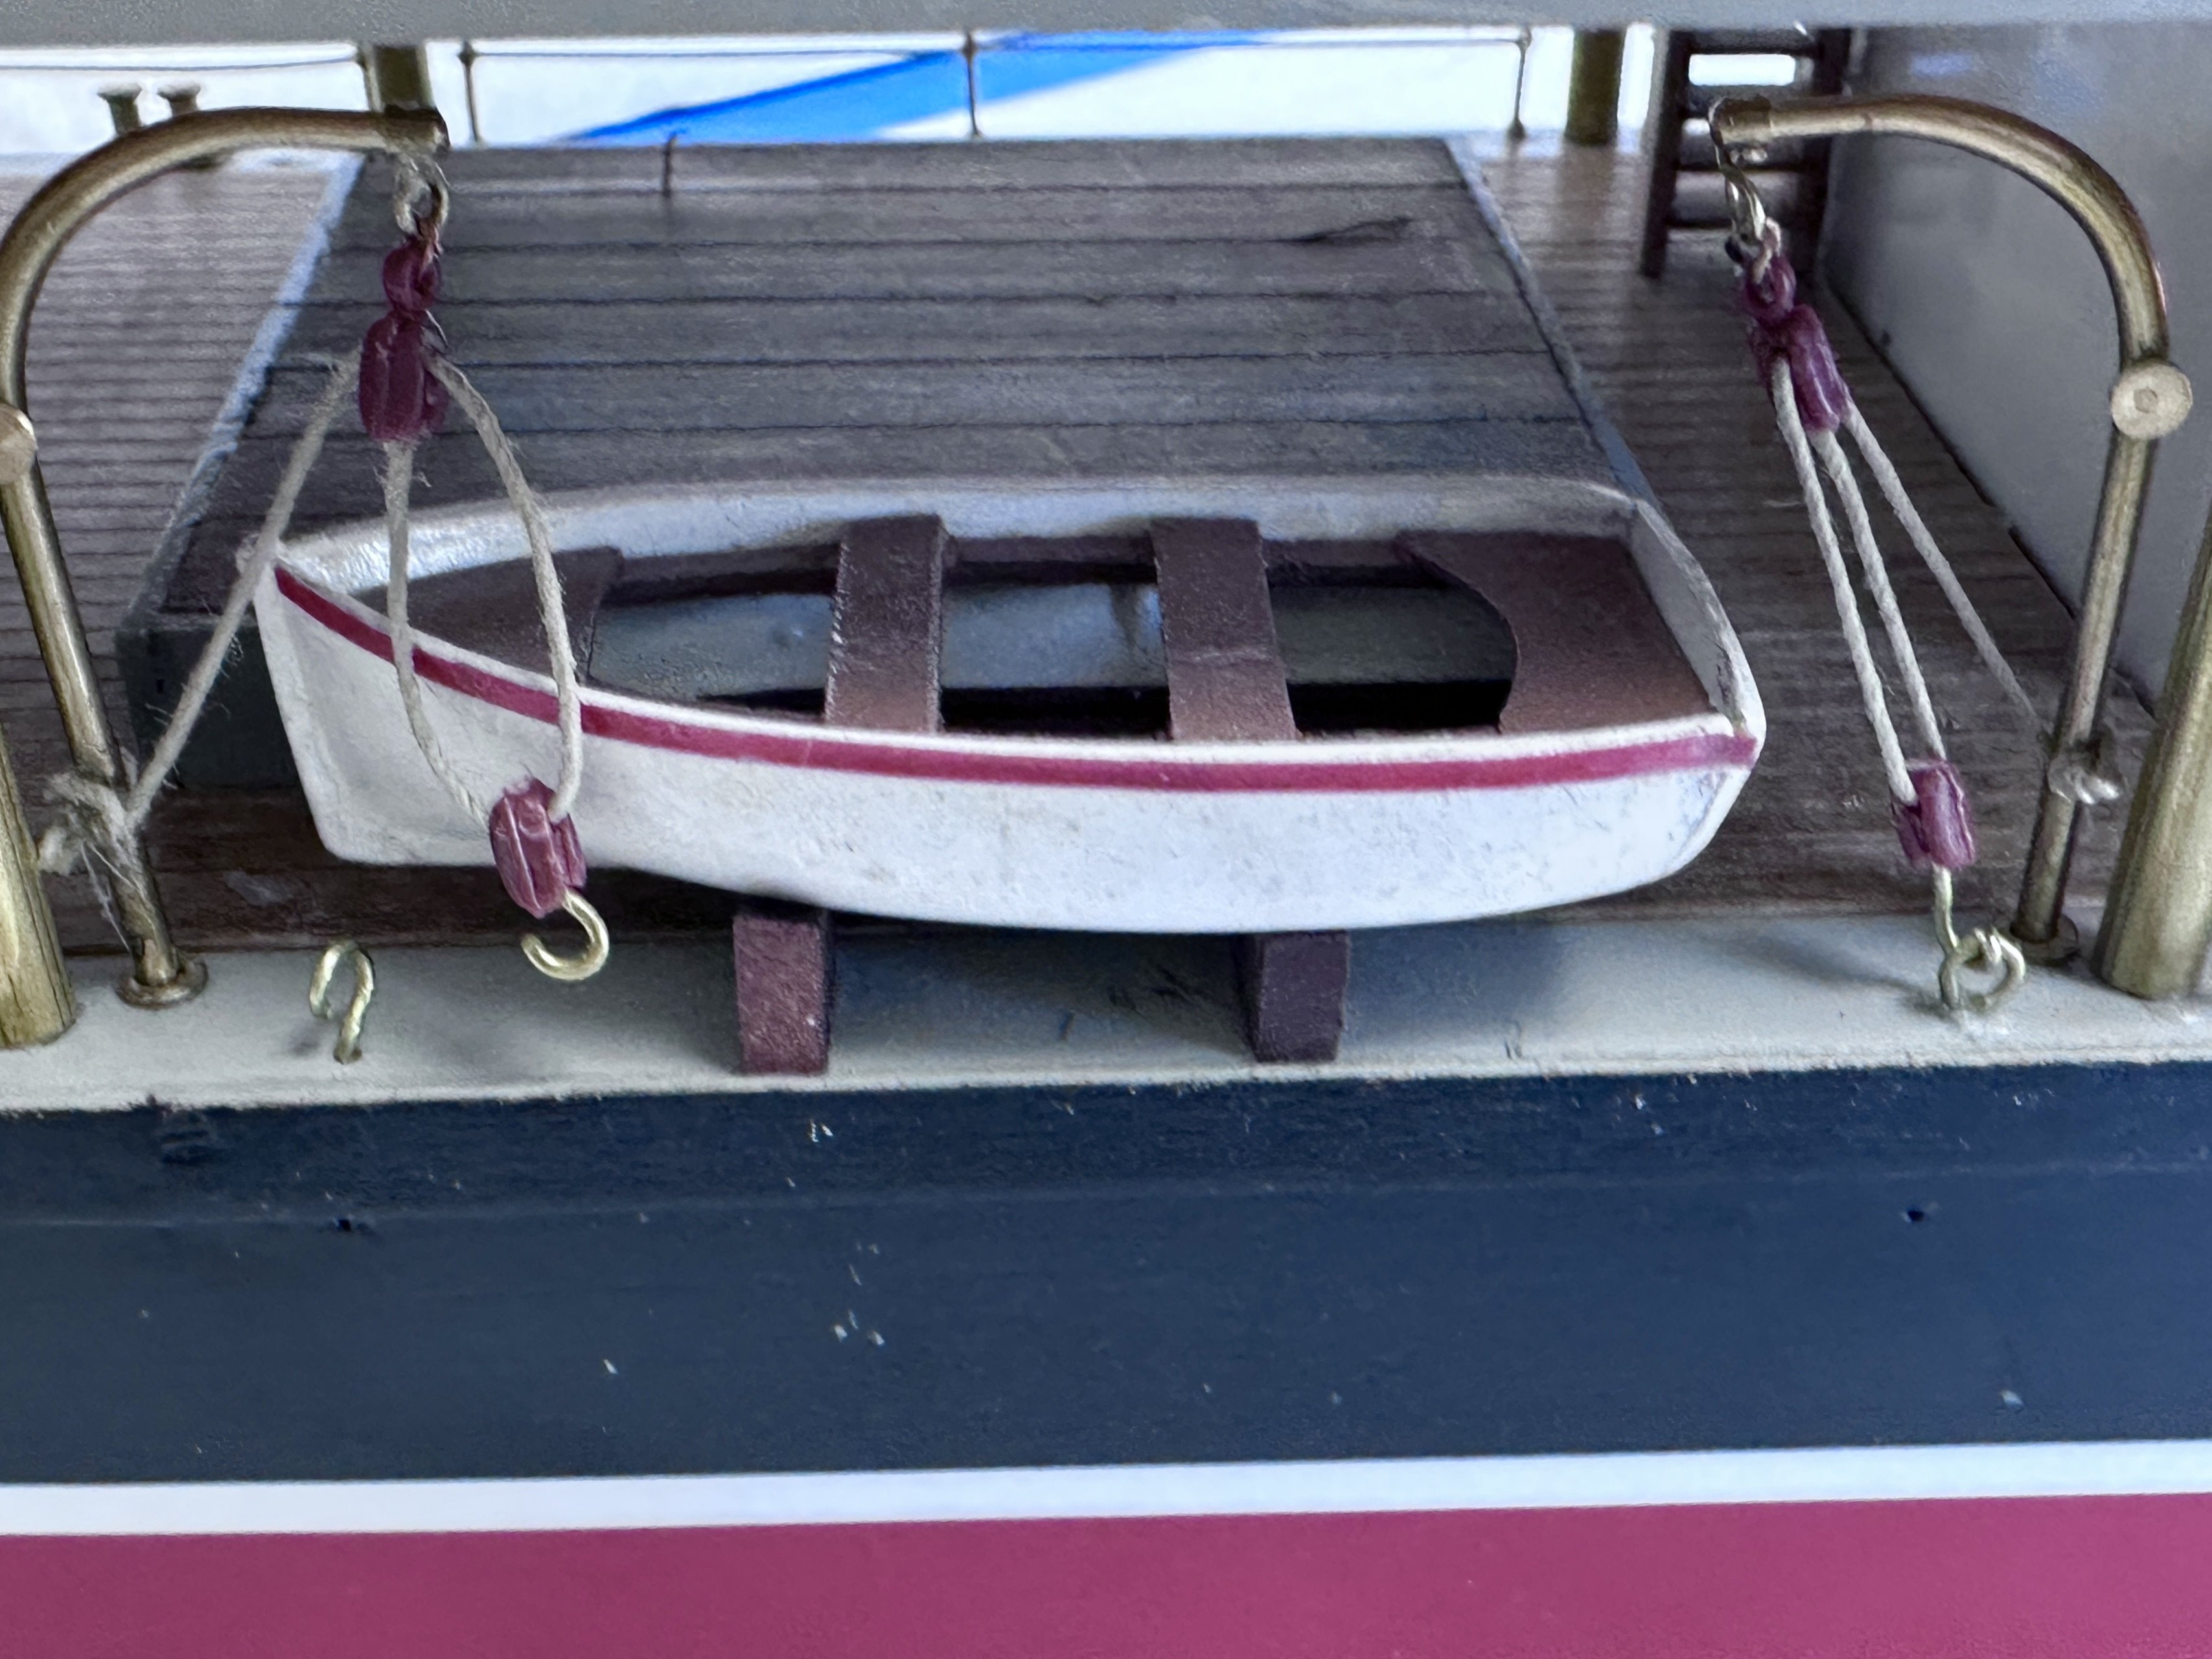
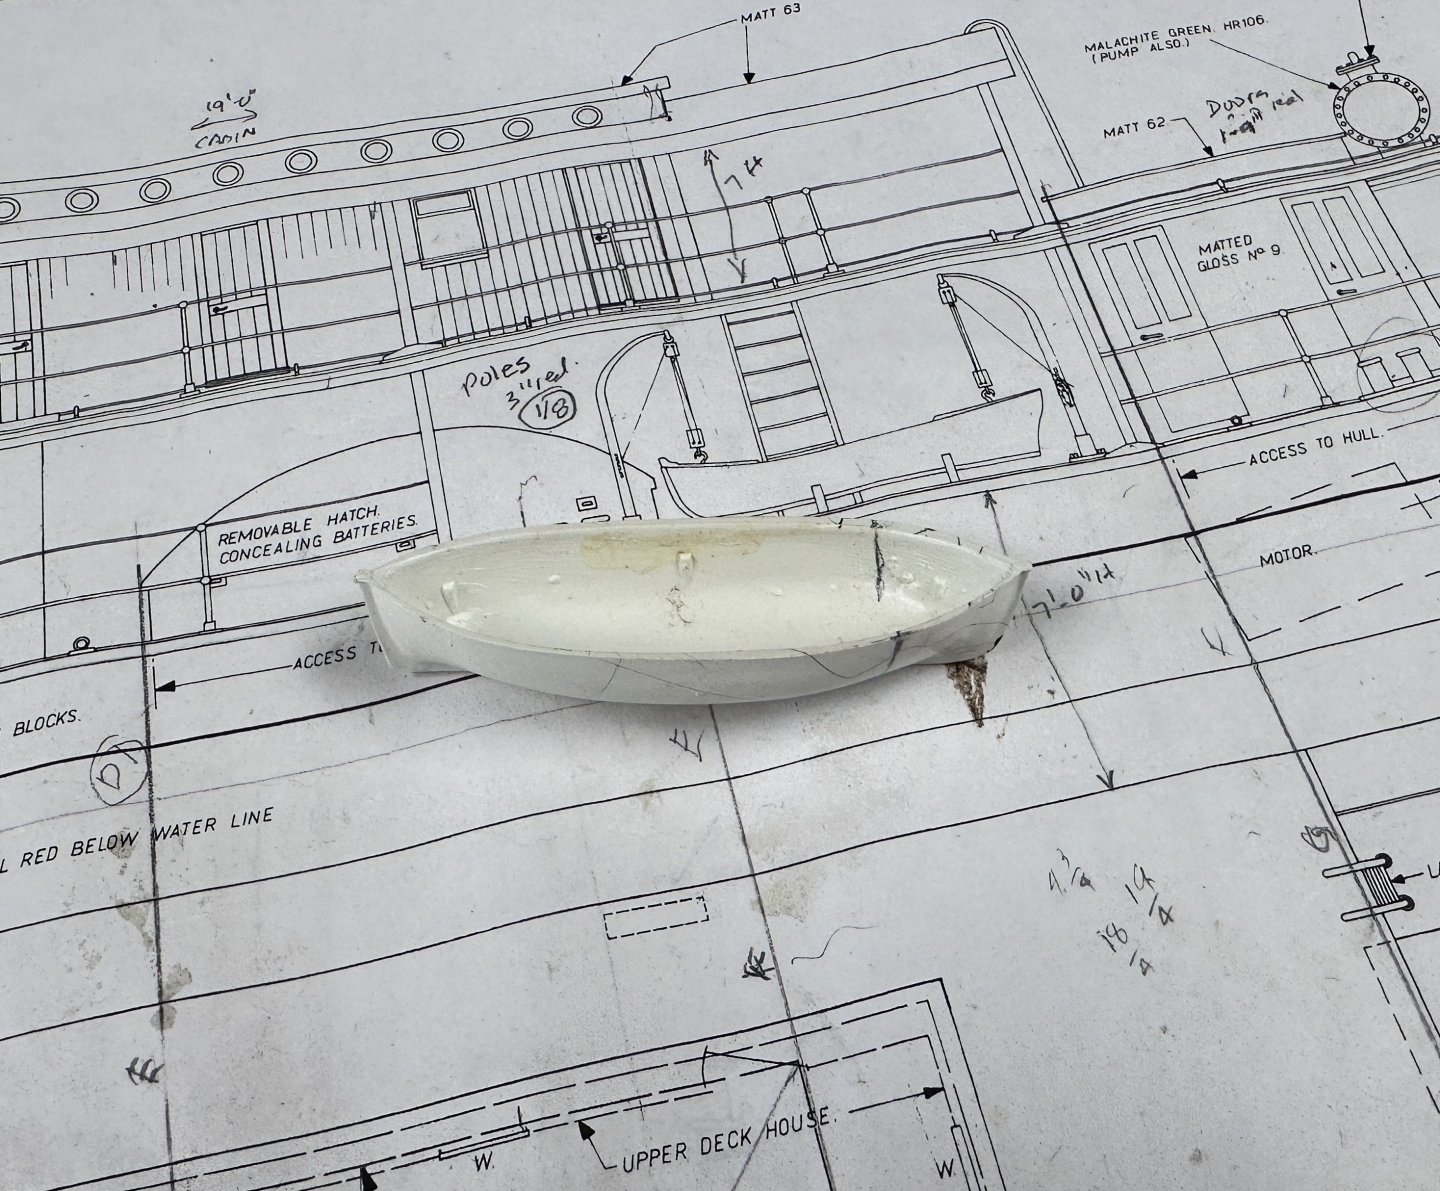
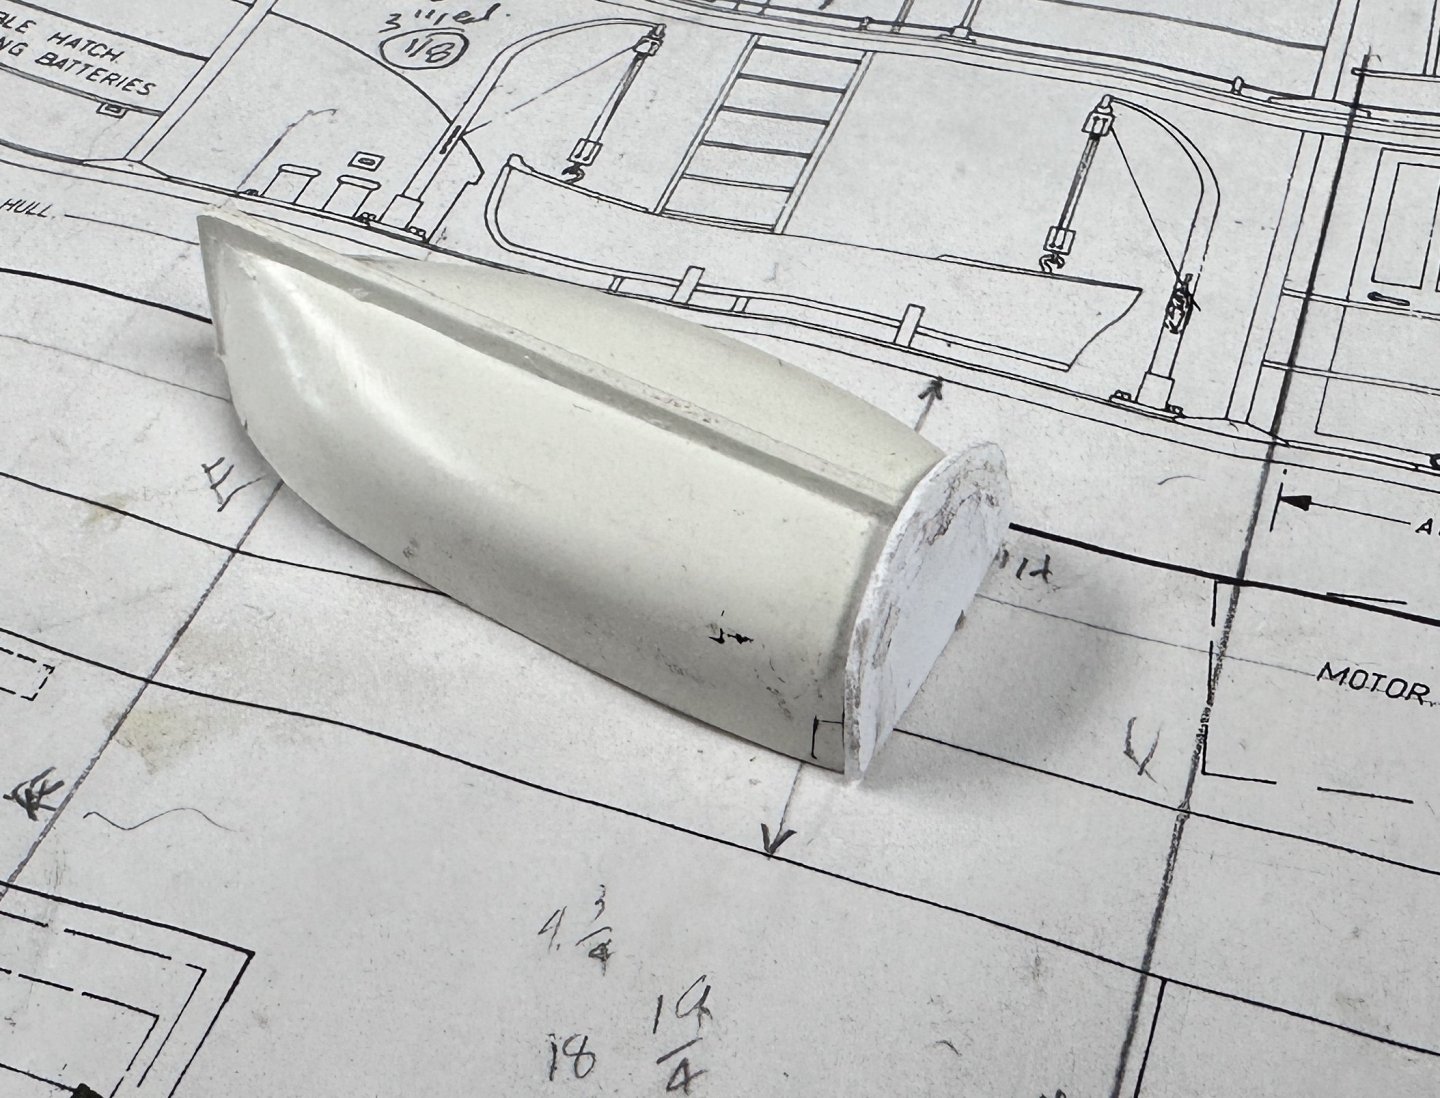
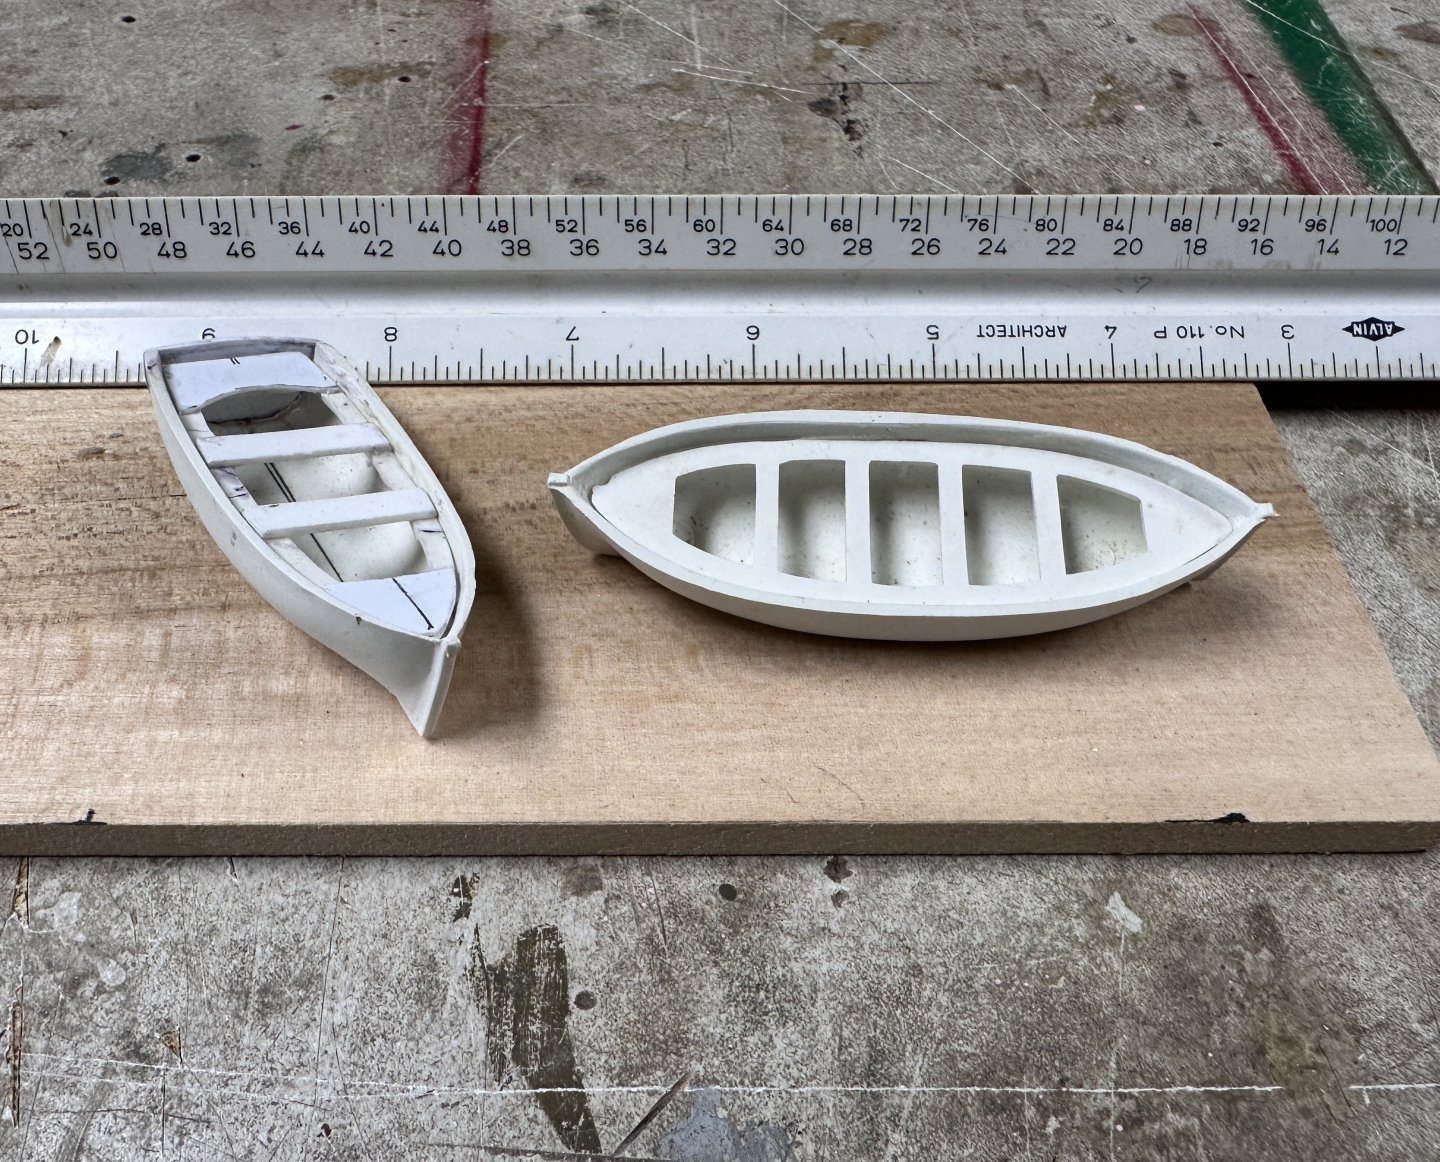
The main construction is done and now it is time to make the accessories. Some have been built while I waited for paint to dry or glue to set. This week I fixed the railings on the boiler deck and started the dingy. I was going to use the mold I made for Amapá but I had a few Billings ship boats at different scales and checked them out with the plans. This whaler hull was just about right. The stern was cut and a transom made from styrene was added: The original Billings was modified to match the scale size of the dingy: An here it is with its ancestor whaler: Trim and painting will follow. Next the davits. Thanks for the likes and comments.

- 128 replies
-
- 9
-
-
- zulu
- sternwheeler
- (and 1 more)
-
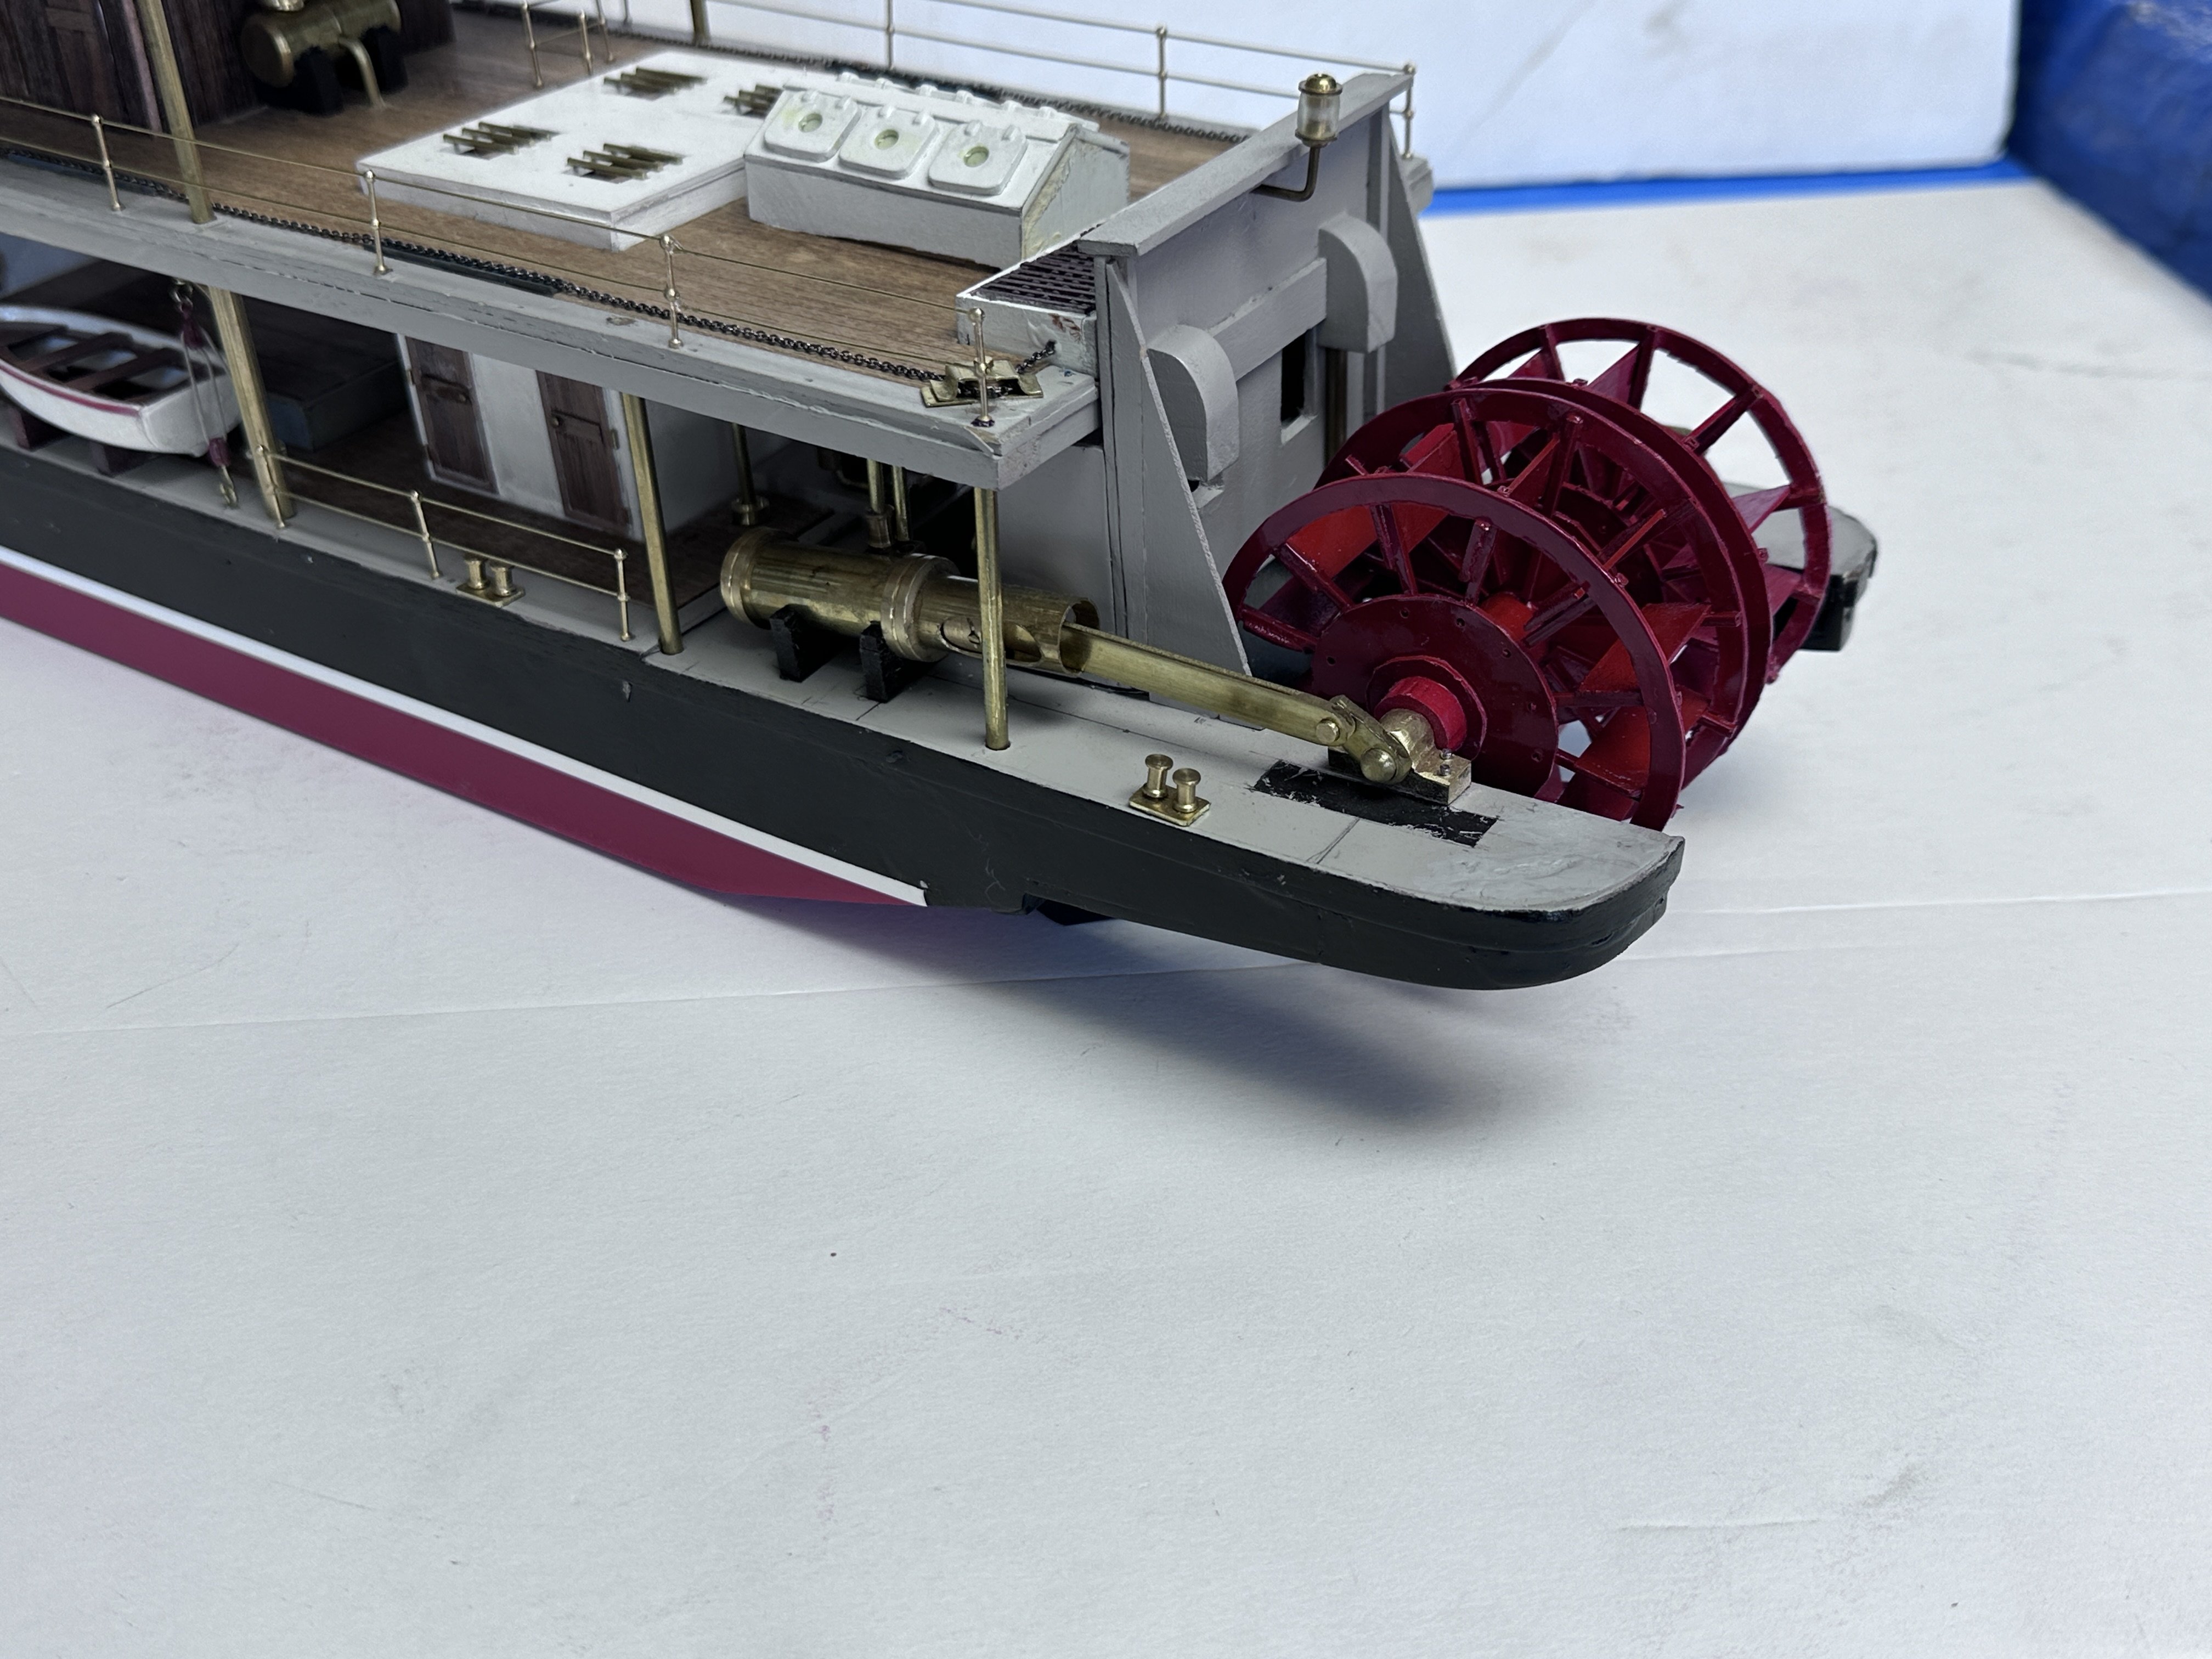
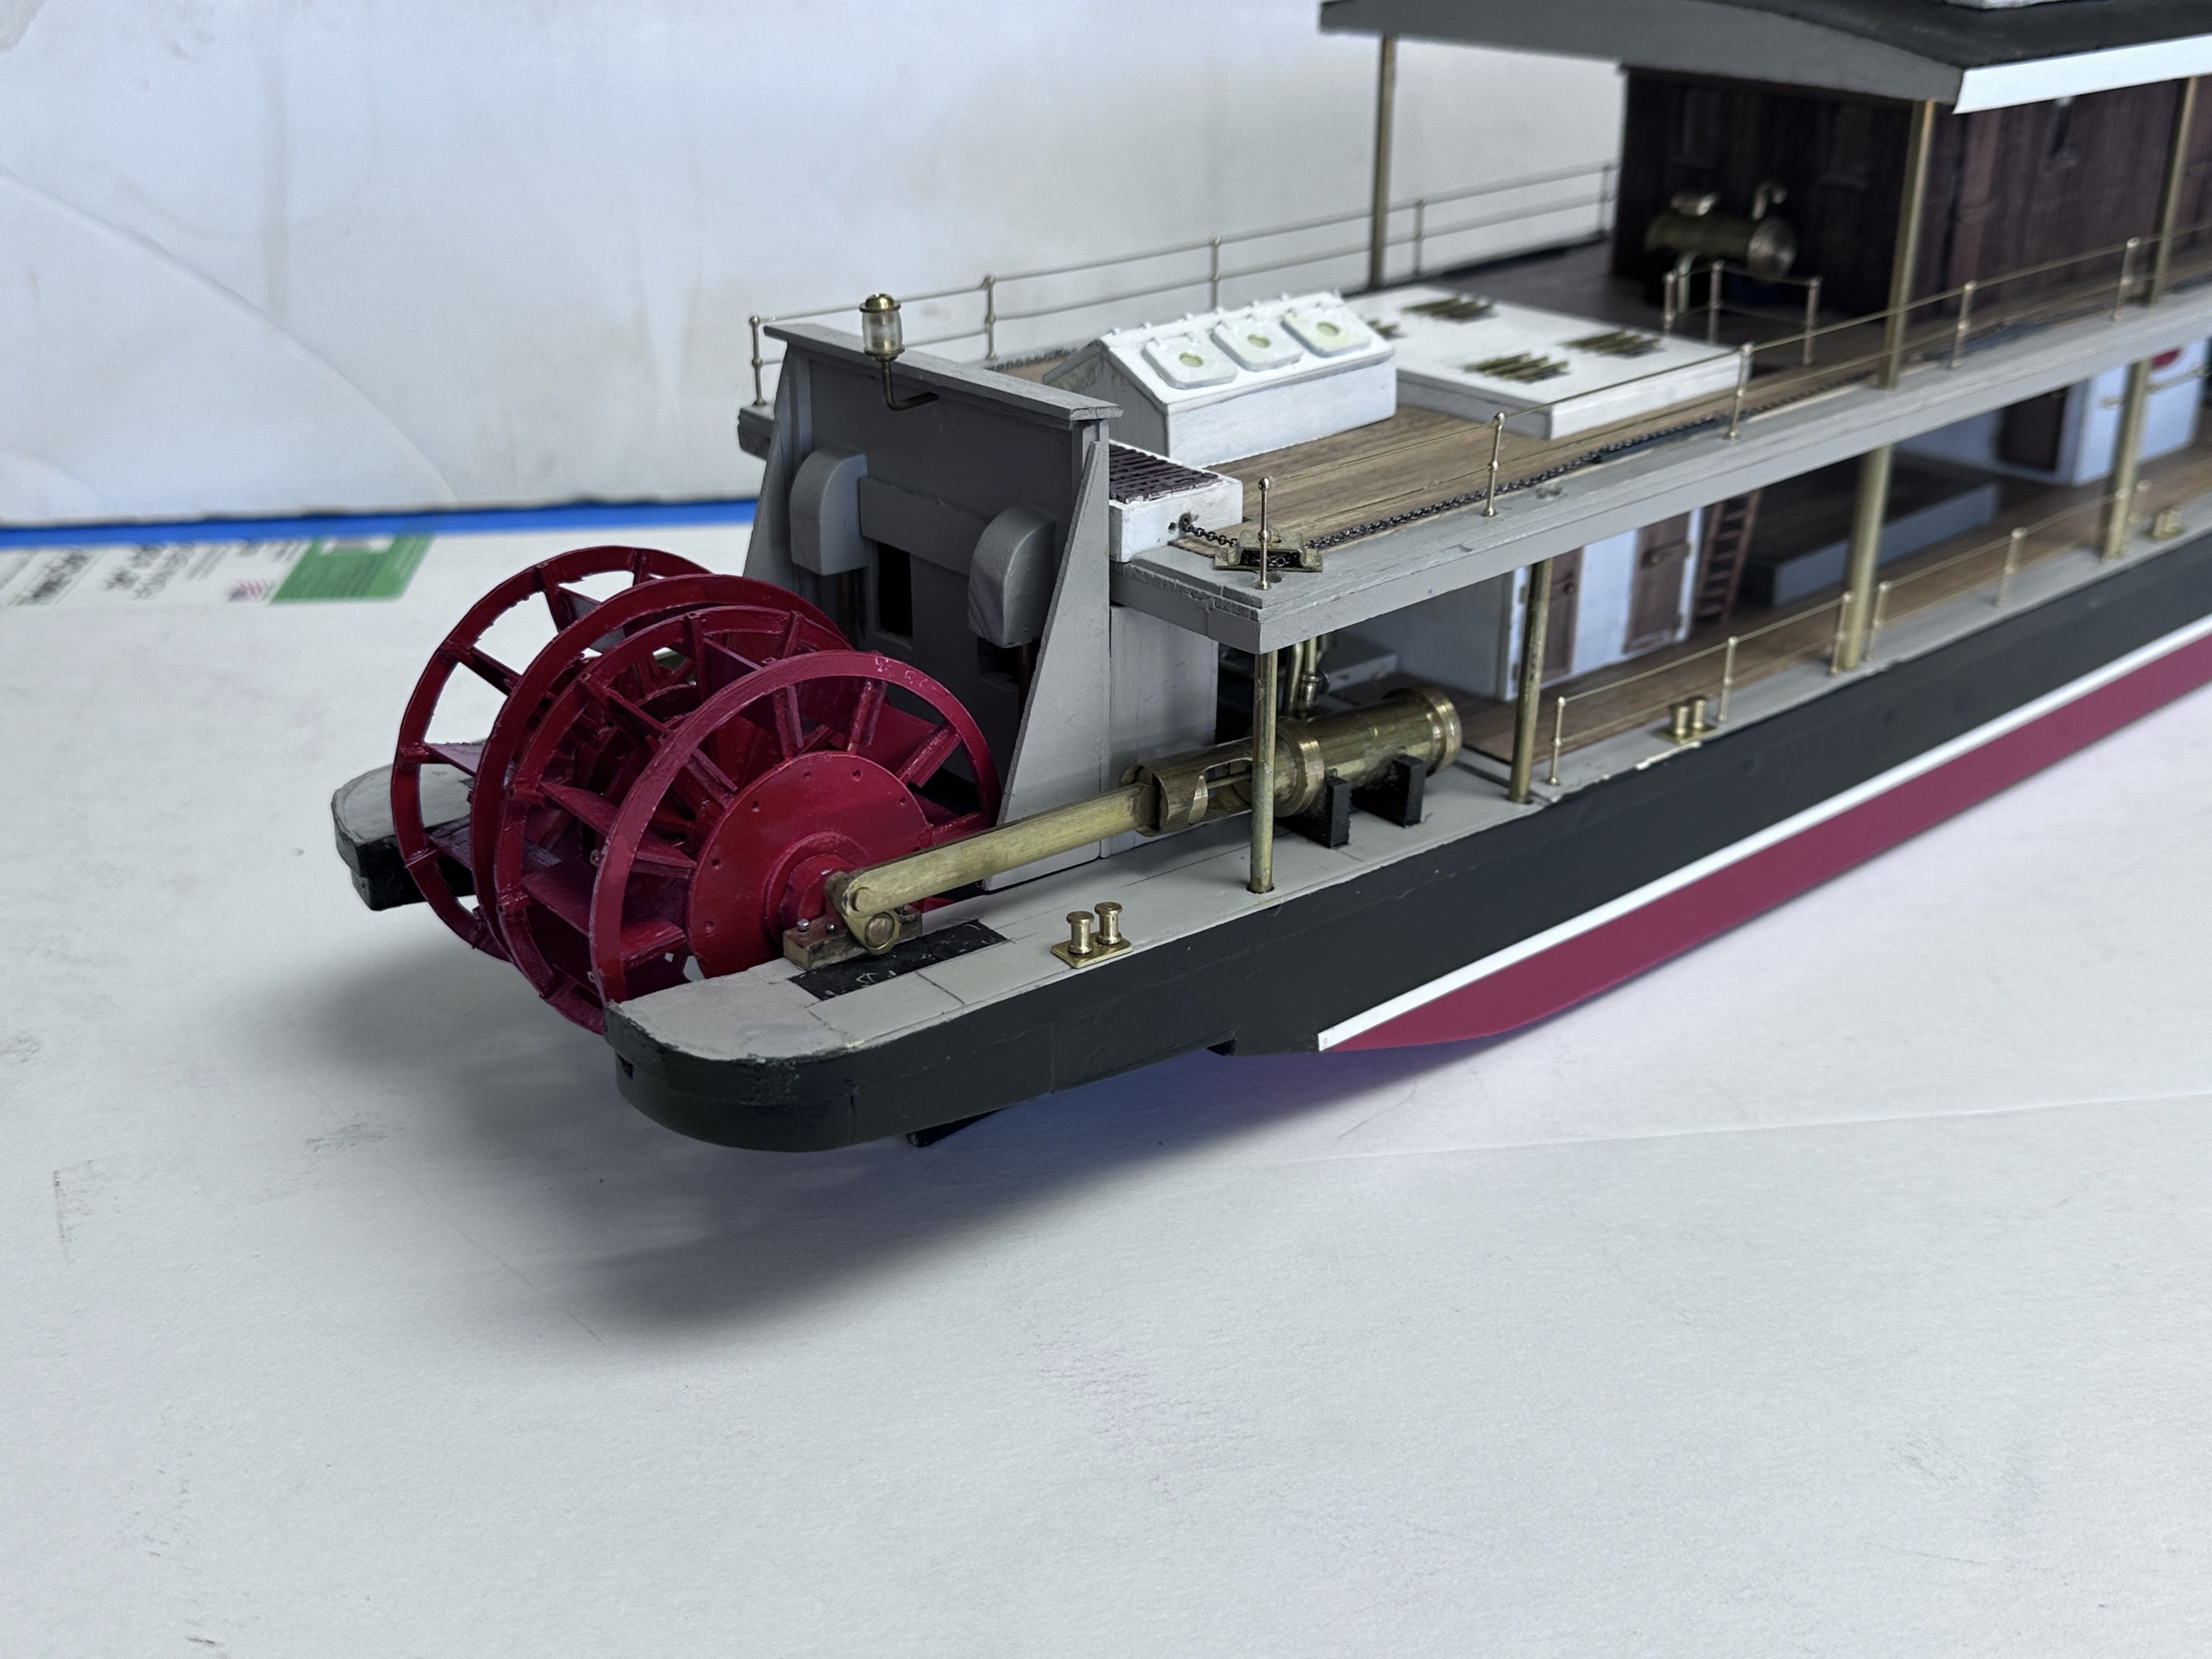
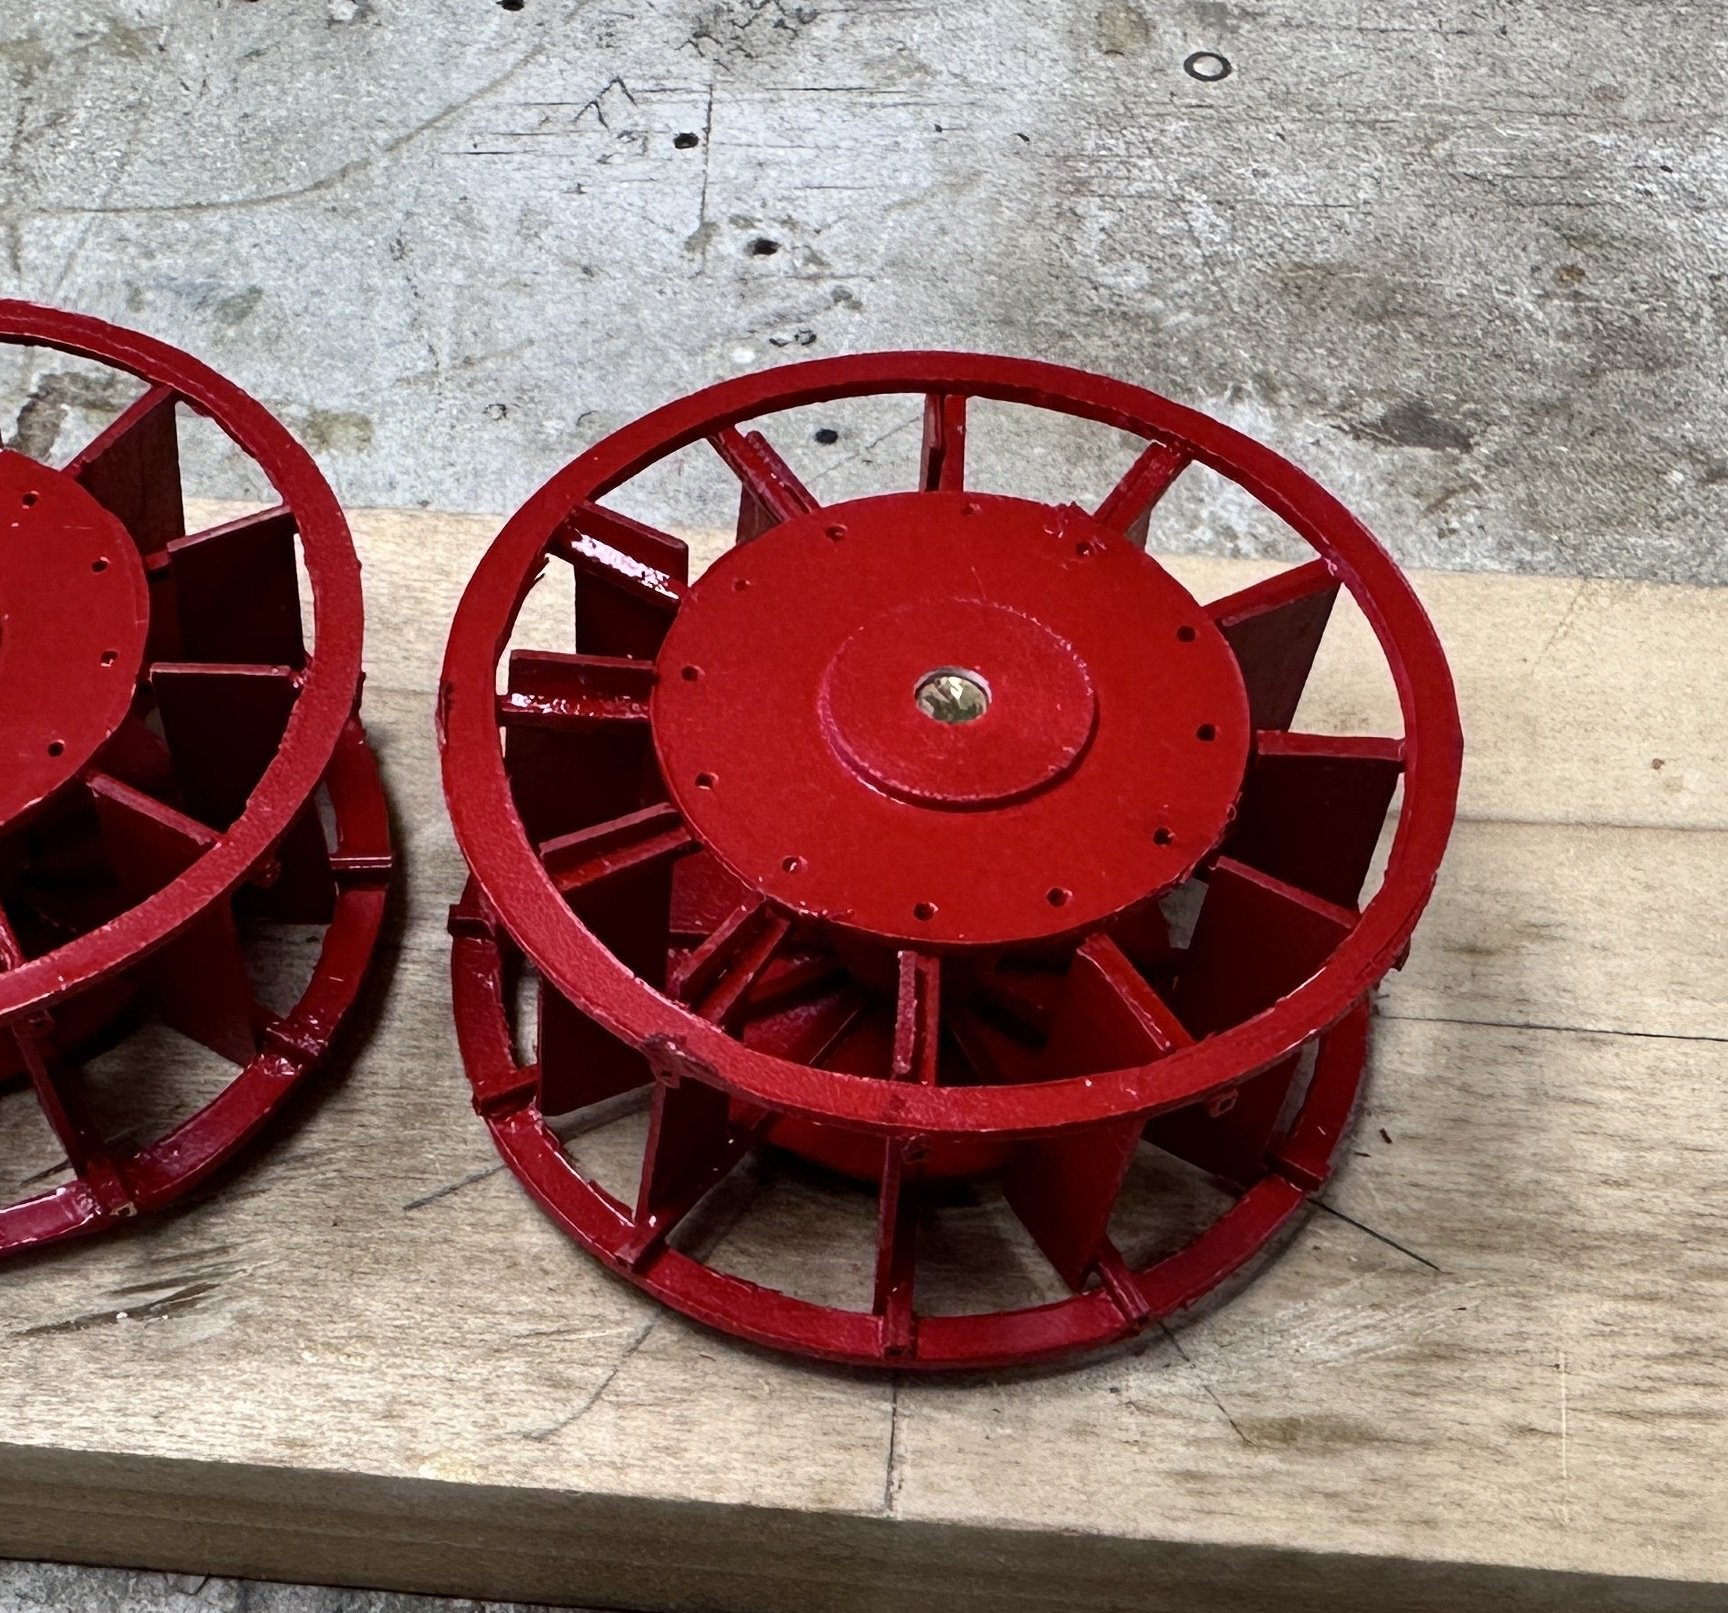
The construction of the paddles continues. I knew there was some use for those mini-cloth pins. The finished product. I am amazed I have not heard from any of my followers about the fact that the paddle wheel cranks could not complete a revolution. (See post # 94). While building the hull I used two solid wood pieces to make the sponsons. I didn't realize that the cranks will actually rotate below deck. So I just painted a hole in the deck since this is a static model. Hope you don't mind. More forethought in the next build. So here is the final setup of the propulsion gear. To be continued.


- 128 replies
-
- 11
-
-
-
- zulu
- sternwheeler
- (and 1 more)
-
The Florida central lakes is one of my favorite places with interesting towns like Tavares, Howie on the Hills, Mount Dora, etc.etc. The area comprises several lakes that are joined by beautiful canals where you can enjoy the primitive Florida. We boat on it regularly and have explored the Oklawaha river. This river connected with the St. Johns river around Palatka and from there with Jacksonville. While entrepreneurs like Flagler and Plant improved the coastal market with the railroads, the Oklawaha river connected central Florida with the market with its fleet of steamers like Okahumkee. After following your build I purchased the book and will put the steamer this steamer in the list of future projects. Thank you for bringing such historic ships to my attention.
- 40 replies
-
- 3
-
-
- Okahumkee
- sternwheeler
- (and 1 more)
-
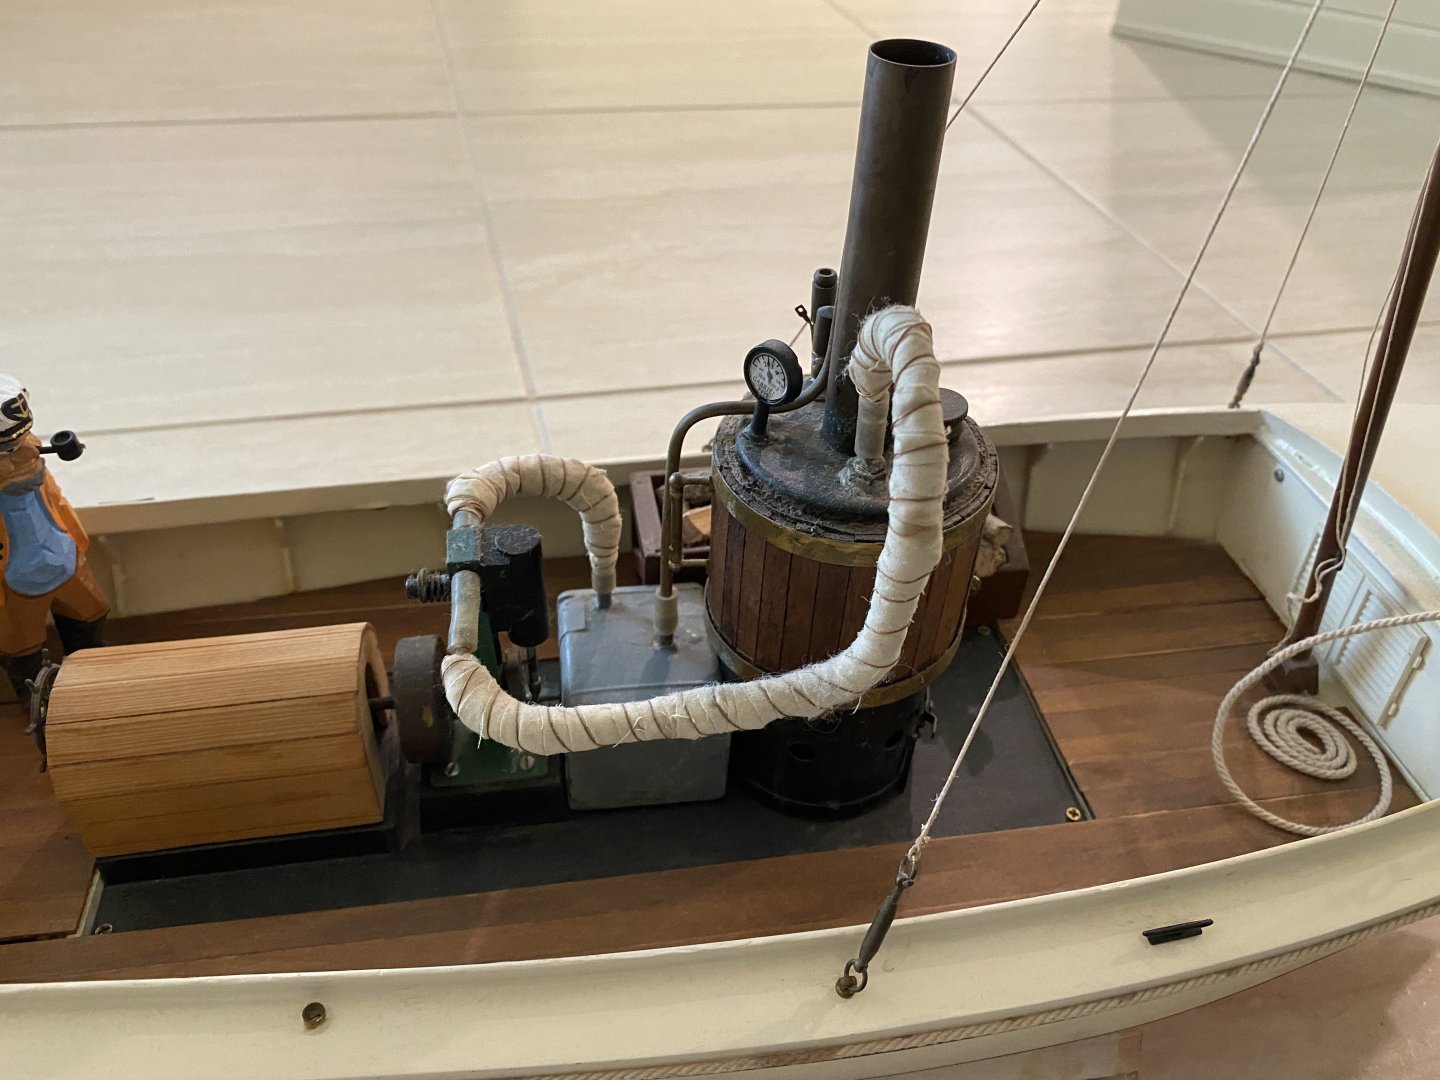
Maybe I am getting lazy in my old age. I agree with Wefalk on his system. I have used before. The African Queen And Krick's Patricia I have these model on the finished models gallery. They were done many years ago.

- 128 replies
-
- 9
-
-
- zulu
- sternwheeler
- (and 1 more)
-
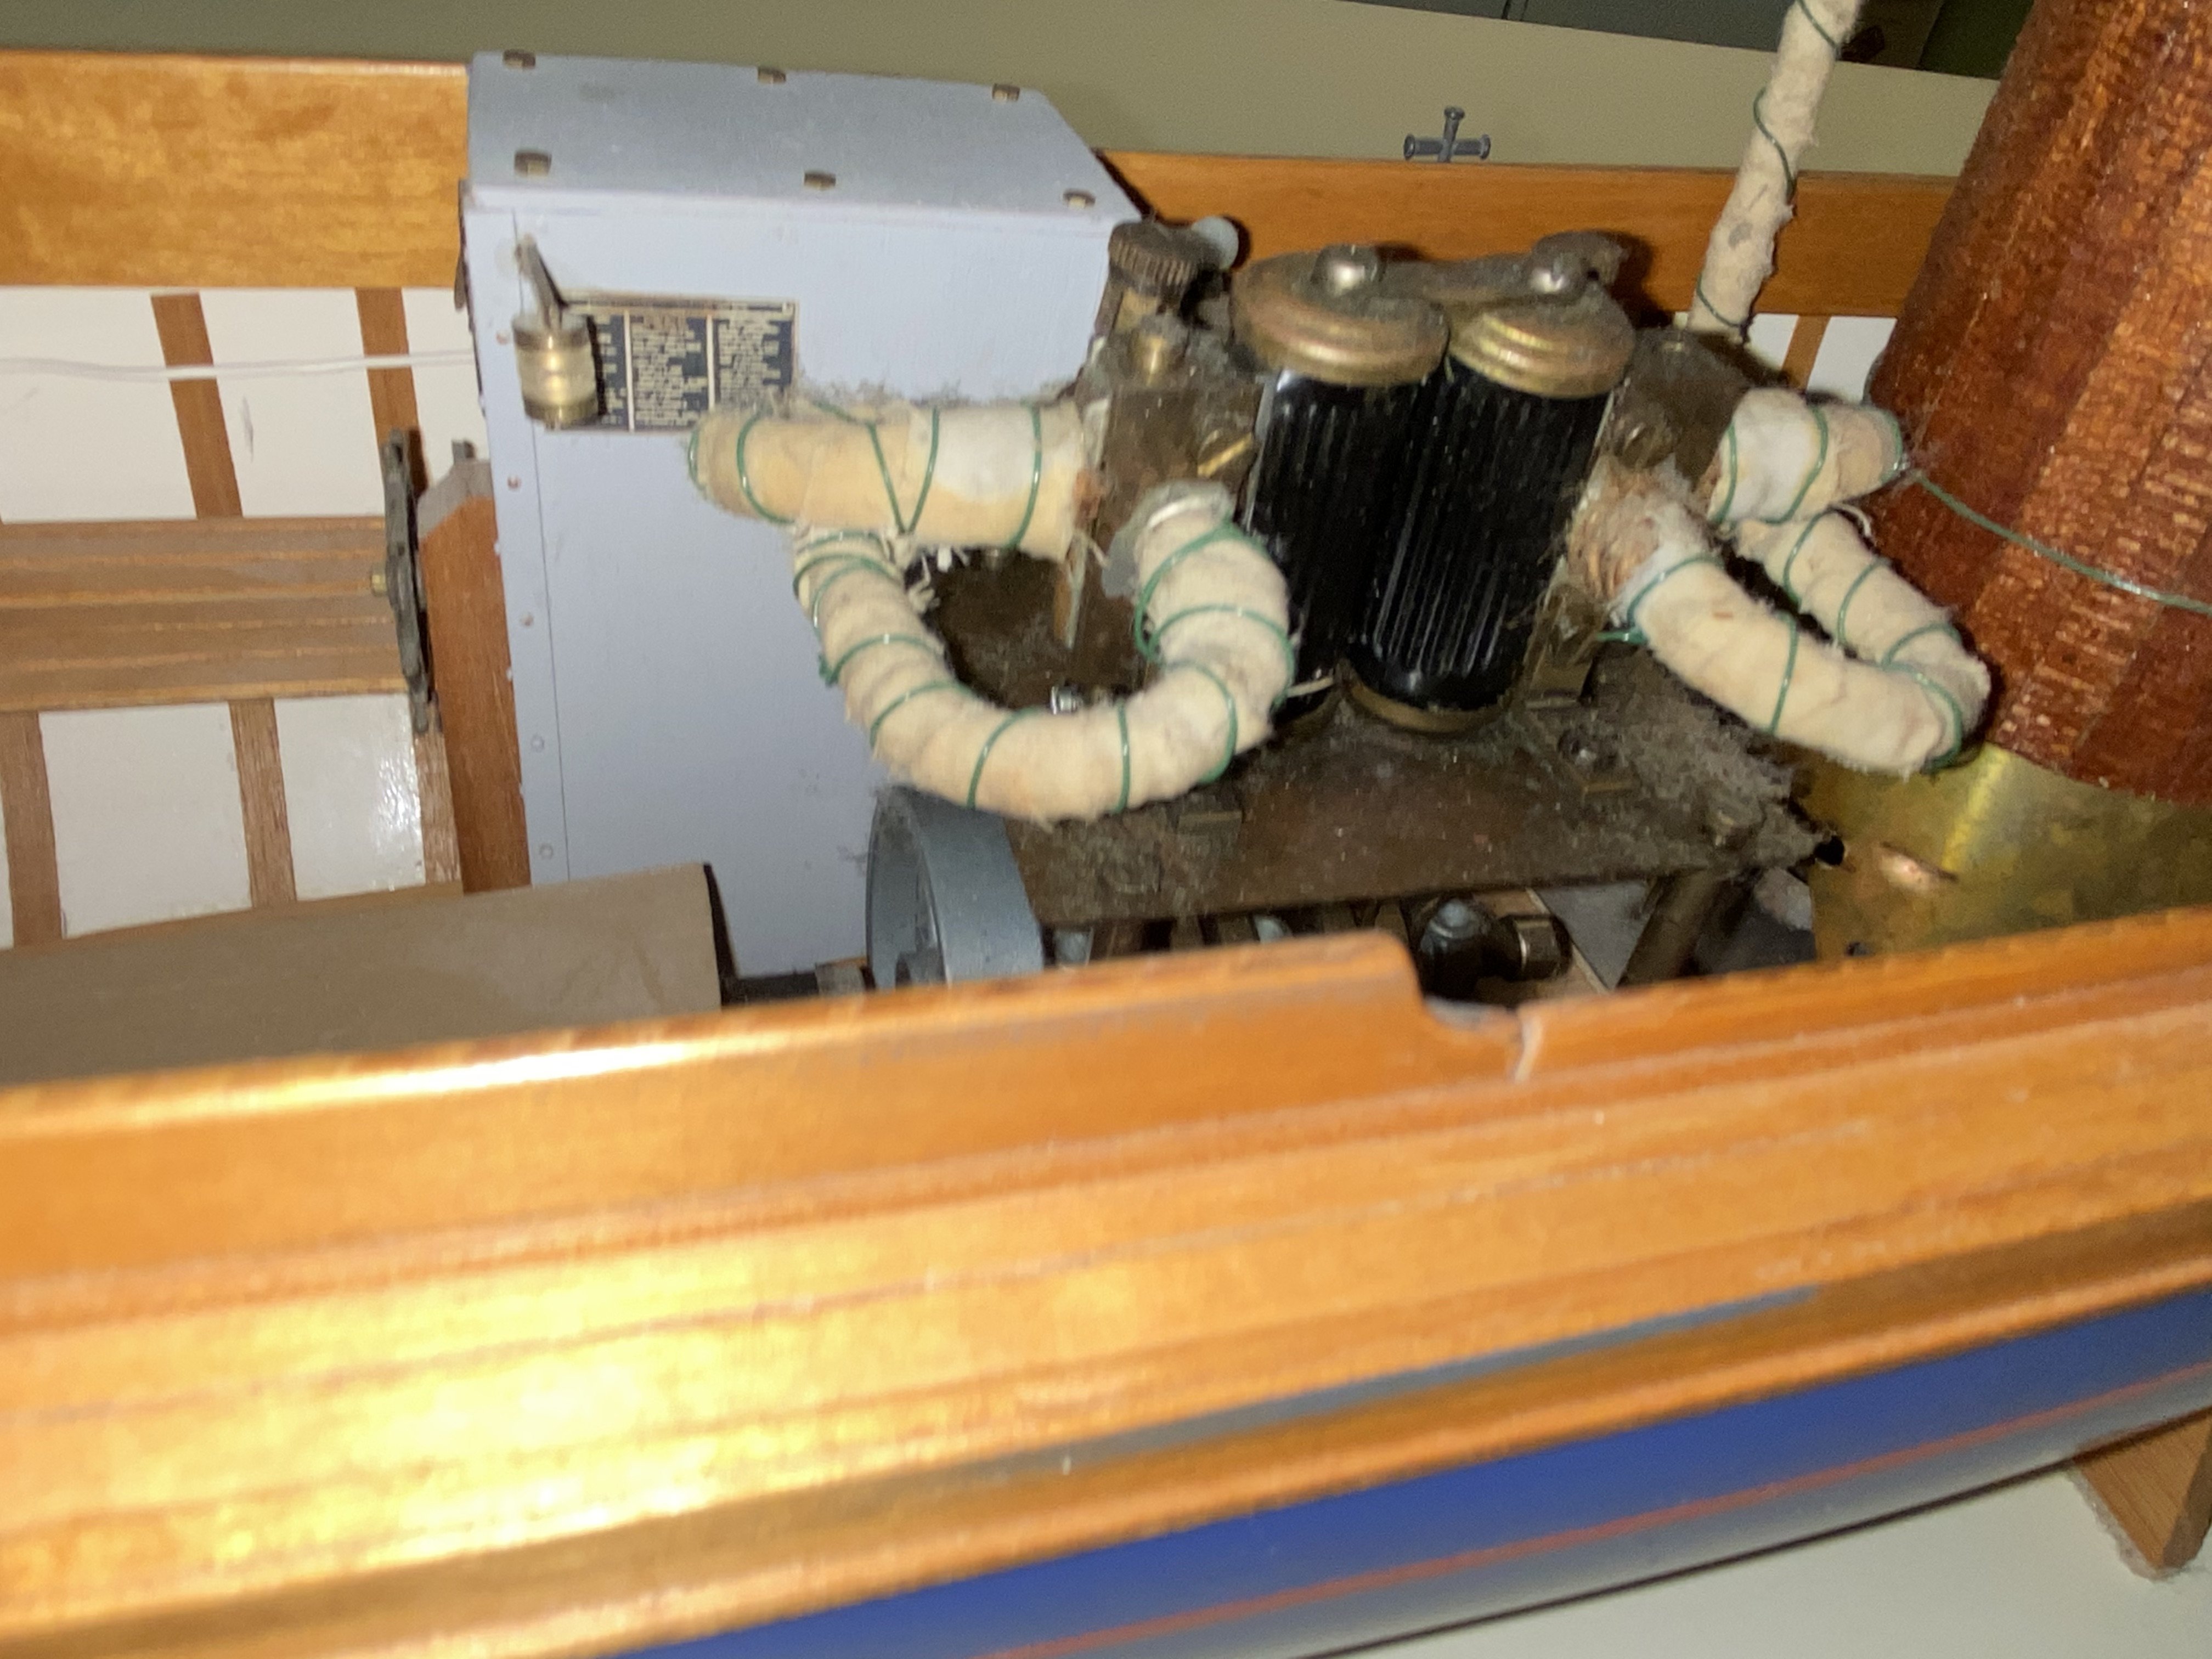
Have to say that there was another build (I think Peerless) where the insulating of steam pipes was discussed. In Zulu the steam pies are supposed to be 3" (at scale would be 1/16"), the insulation would be 1-1/2"(at scale 1/32") with a total of 3/32" outside diameter. The tubing used is just that: 3/32". Therefore, consider the pipes are insulated and painted brass. 😏
- 128 replies
-
- 3
-
-
- zulu
- sternwheeler
- (and 1 more)