modeller_masa
-
Posts
950 -
Joined
-
Last visited
Content Type
Profiles
Forums
Gallery
Events
Everything posted by modeller_masa
-
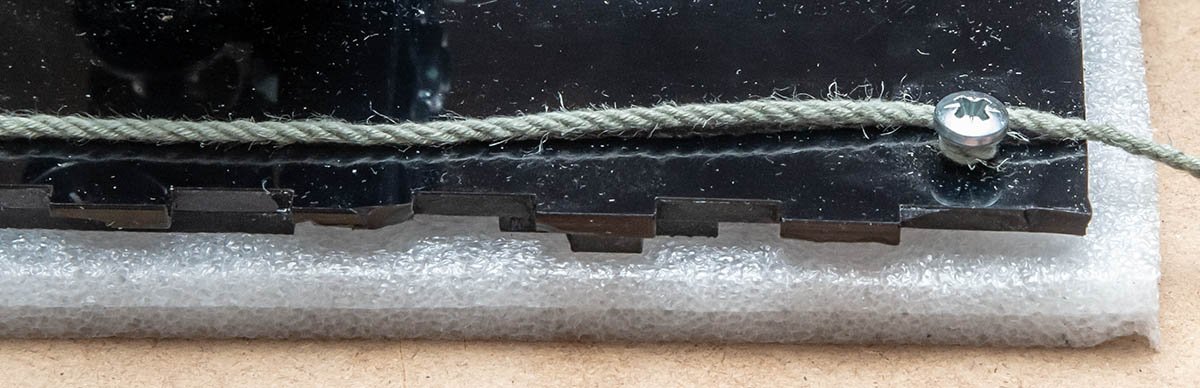
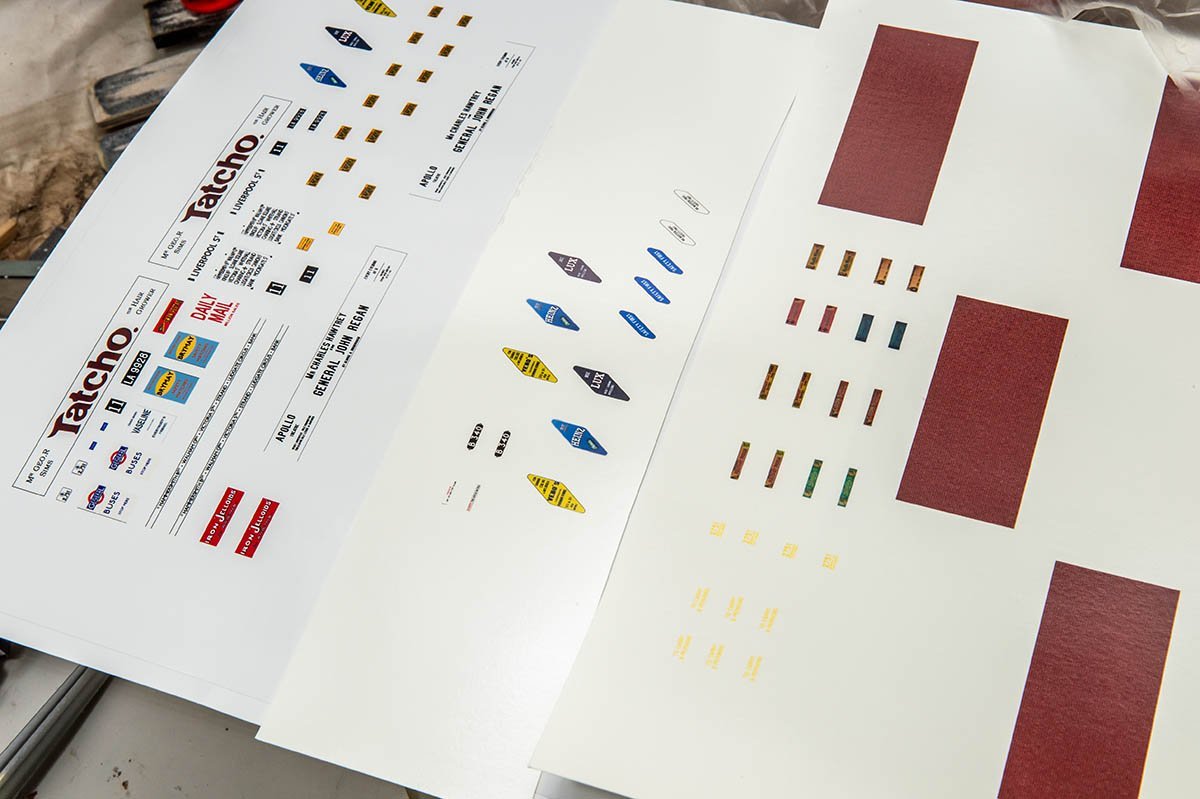
About a month ago, I bought fine photo printer and water slide transfer paper. It really worked well, and its detail almost beat commercial decals. I used photoshop and work space was 4800 DPI. I'll test that the heat transfer paper can hold the 2400x9600 DPI inkejt output and tack well on to a cloth. The reason I want to print all of 'sail thing' at once is my laziness. 🤪 I always want the best quality with easy and cheap method that even children can follow. If it works, I don't need to tan or sew reefing lines on the cloth. Probably the last hurdle is long term durability... I don't think the coating will last for decades.
-
Thanks for the good point, Allan. I didn't know that the hightest TC cloth can't beat the non-woven cloth. I already bought some finest woven cloth to cut and sew, but I should reconsider a material for high scale models. That's impressive knowledge that printer can print on silk span directly. It seems much simple and better result. I'll check the instructions and booklet. Many thanks again, Allan. Thanks for understanding me, Gregory. My goal is 'real looking' as you said. On the other hand, I'm an inexperienced modeller, so I don't know which way is the best to achieve the most realistic sail. As an engineer, I prefer to immitate and scale down real sail, and it is an Allan's approach. Therefore, both of Gregory and Allan understands me well. My printer is Canon's 2400x9600 DPI inkjet photo printer, and it is not difficult to find and buy various fabrics in Seoul, South Korea. As a dyeing technique, heat transfer paper can be an alternative option for non-flat surface material. I'll continue to research both material and dyeing technique. That's really impressive, Roger. The stencil technique with the vacuum machine will be very sharp. I'm not sure I can buy or use the vacuum machine, but will research the interesting machine. Greatly thanks to all. All the discussions expanded my knowledge. It's time to research and test each of them. 🤩
-
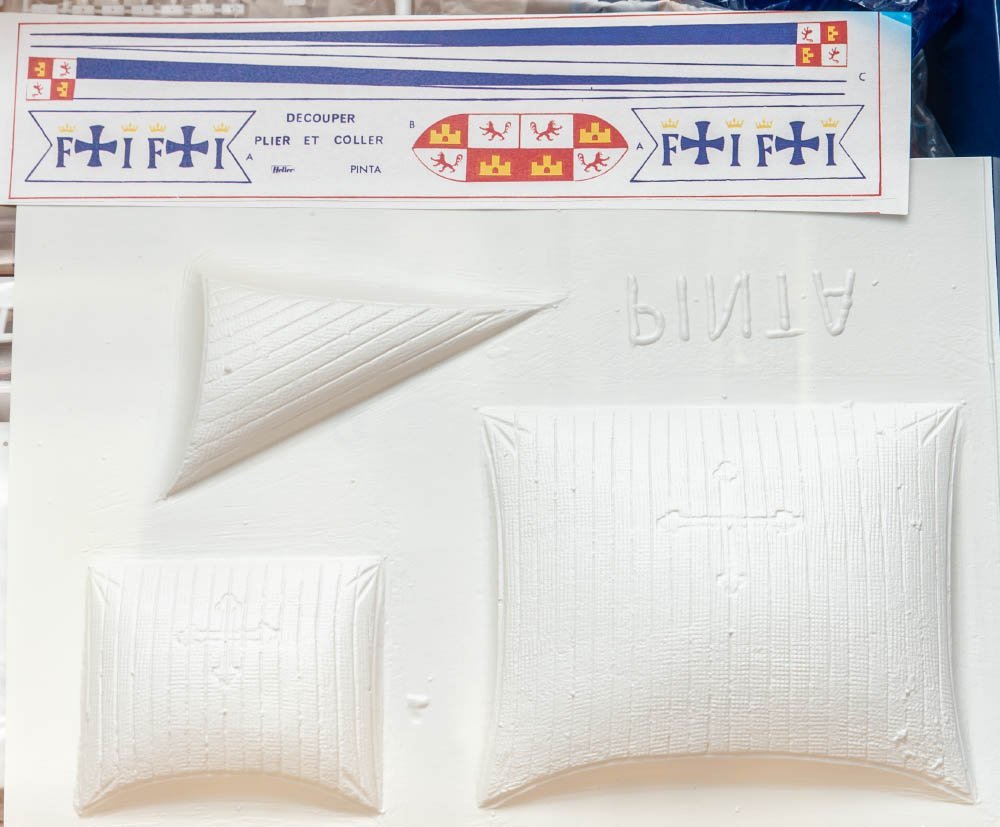
Hello. Heller Pinta 1/75 is my new side project. While I was investigating ideas about replacing plastic stock sails to realistic fabric sails, I realized that the 'red cross' dye makes it more difficult. I thought about stencil with laser cut OHP film, but its result is quite blurred. After that, I began to search any kind of 'water slide decal' for fabric, and found it. This is very common heat transfer paper for T-shirt. In my case, I'll print red cross, hole marks, sewing marks, reefing lines, and even shadows and dirty dusts. The hole marks will help to set the sails evenly. Also, I'll transfer mirrored image to both sides with some trick. If it is good, flags can be better than stock paper flags. How do you think about the idea? I ordered the paper today.

-
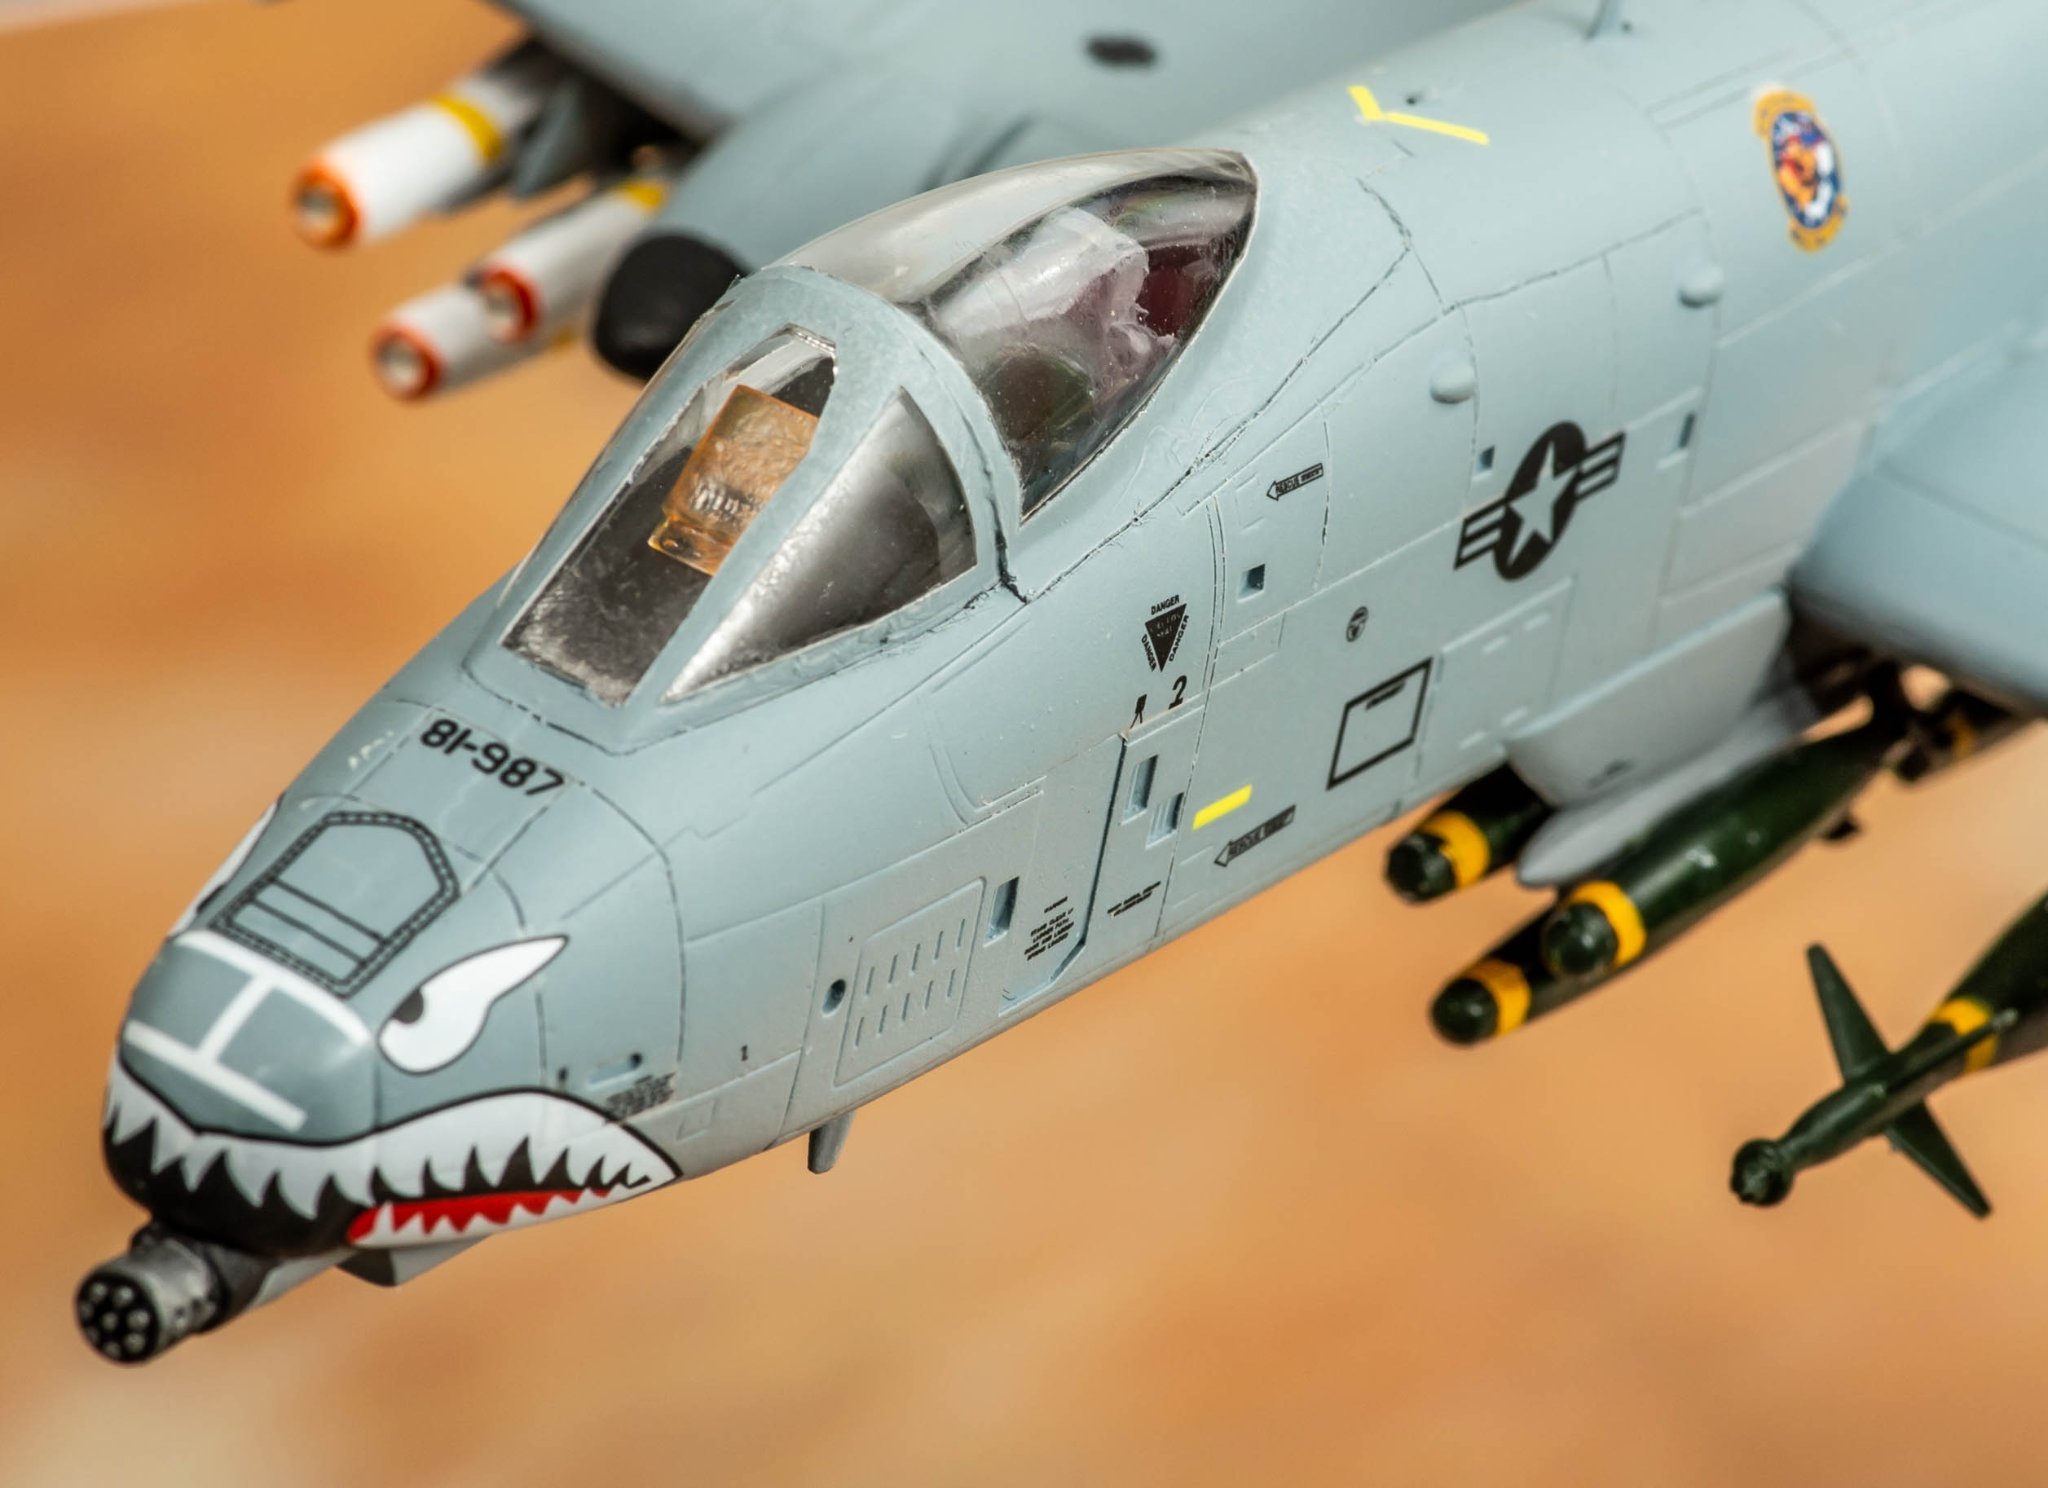
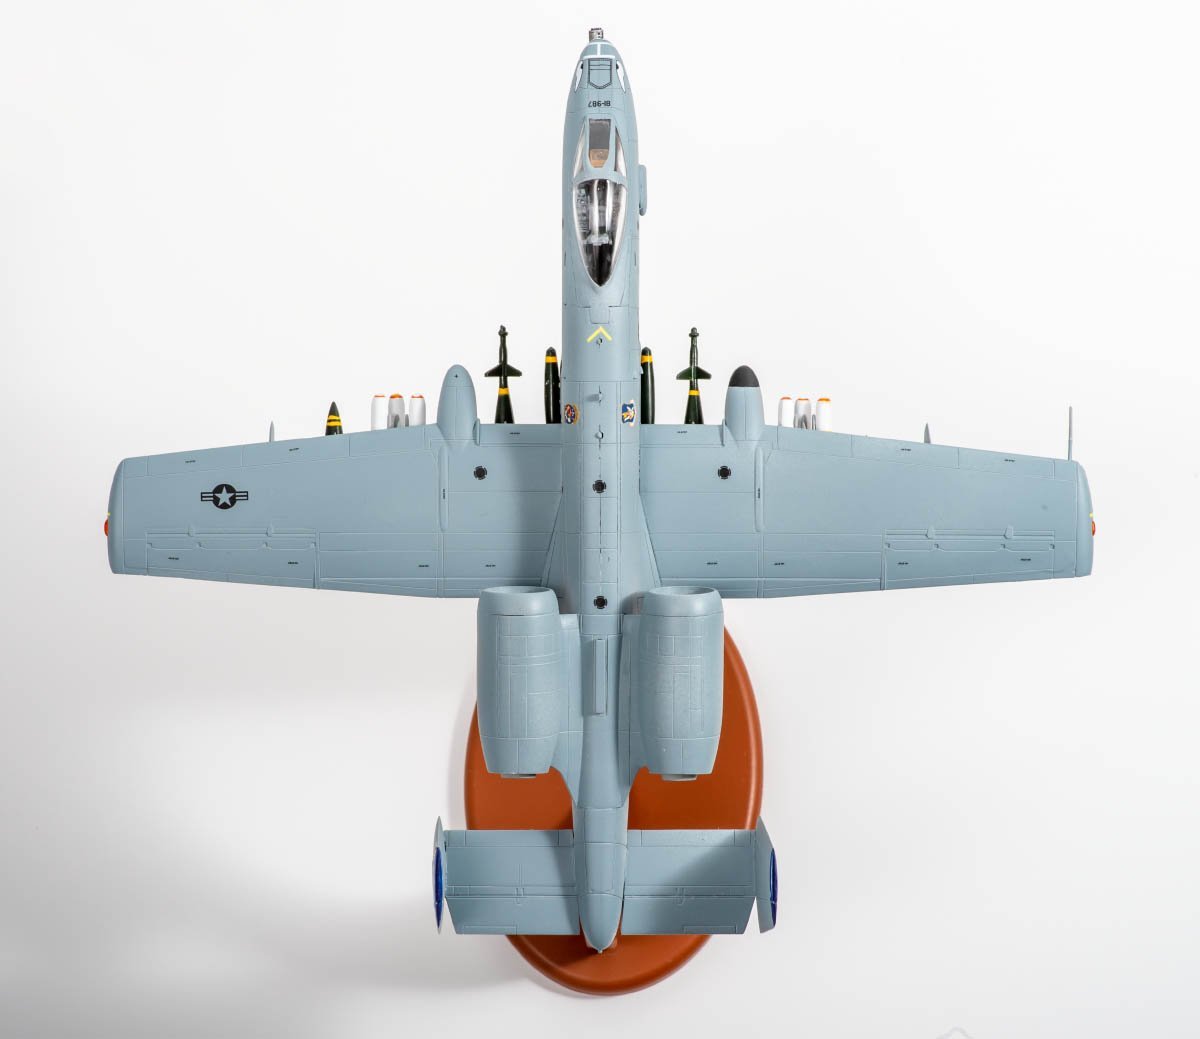
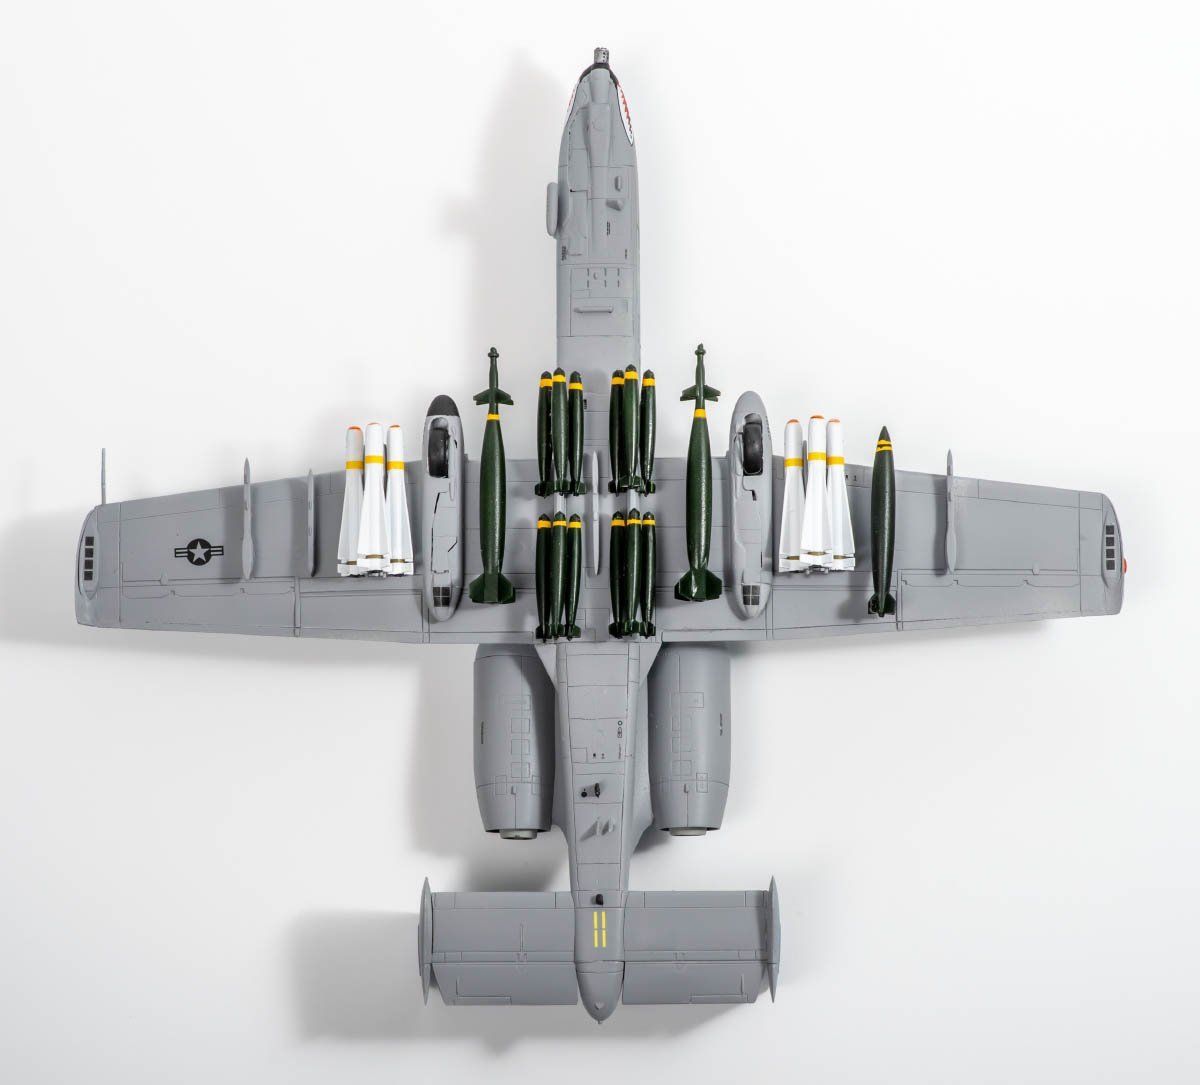
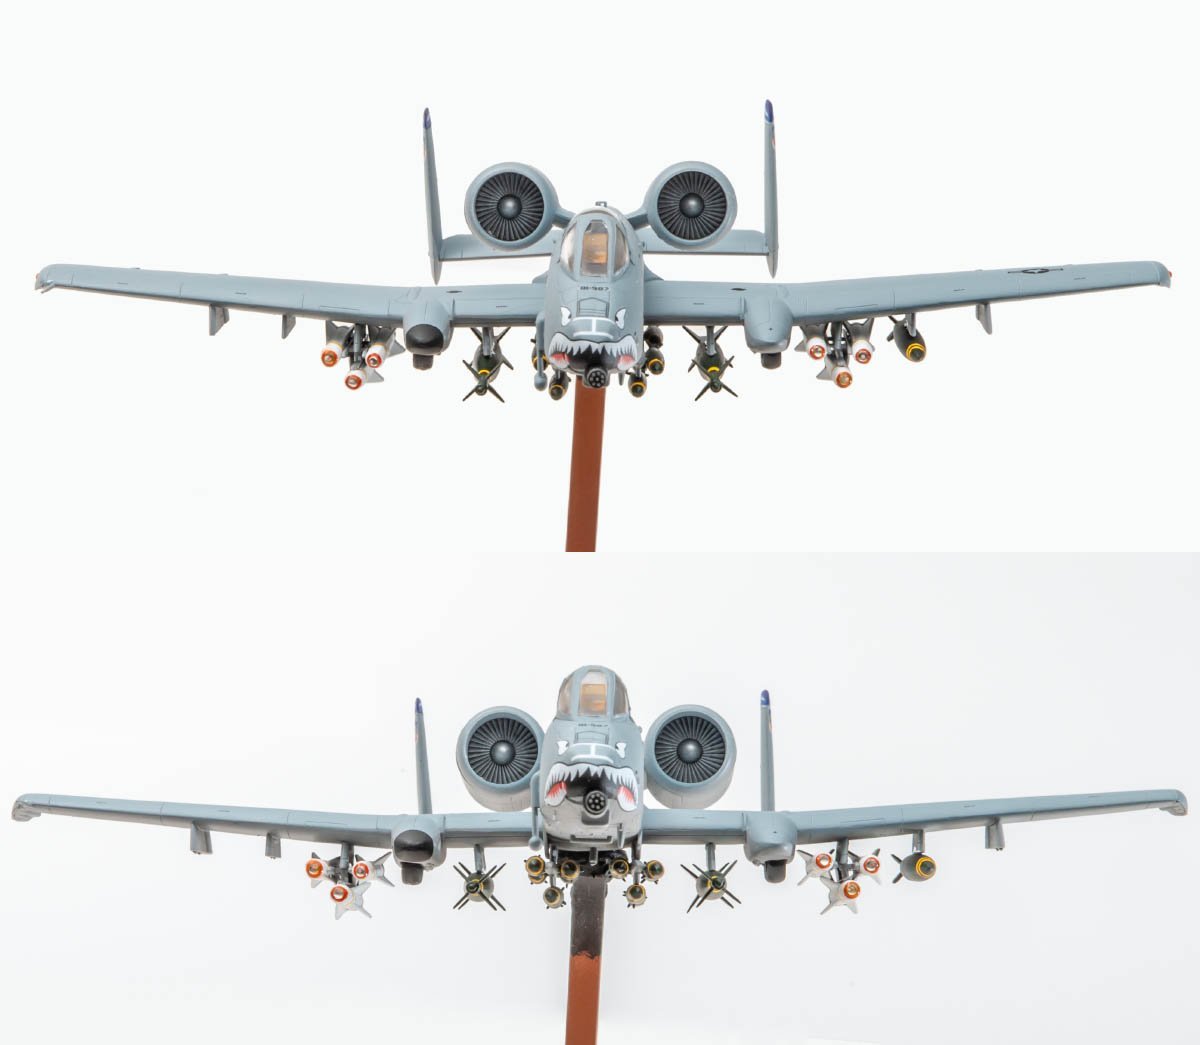
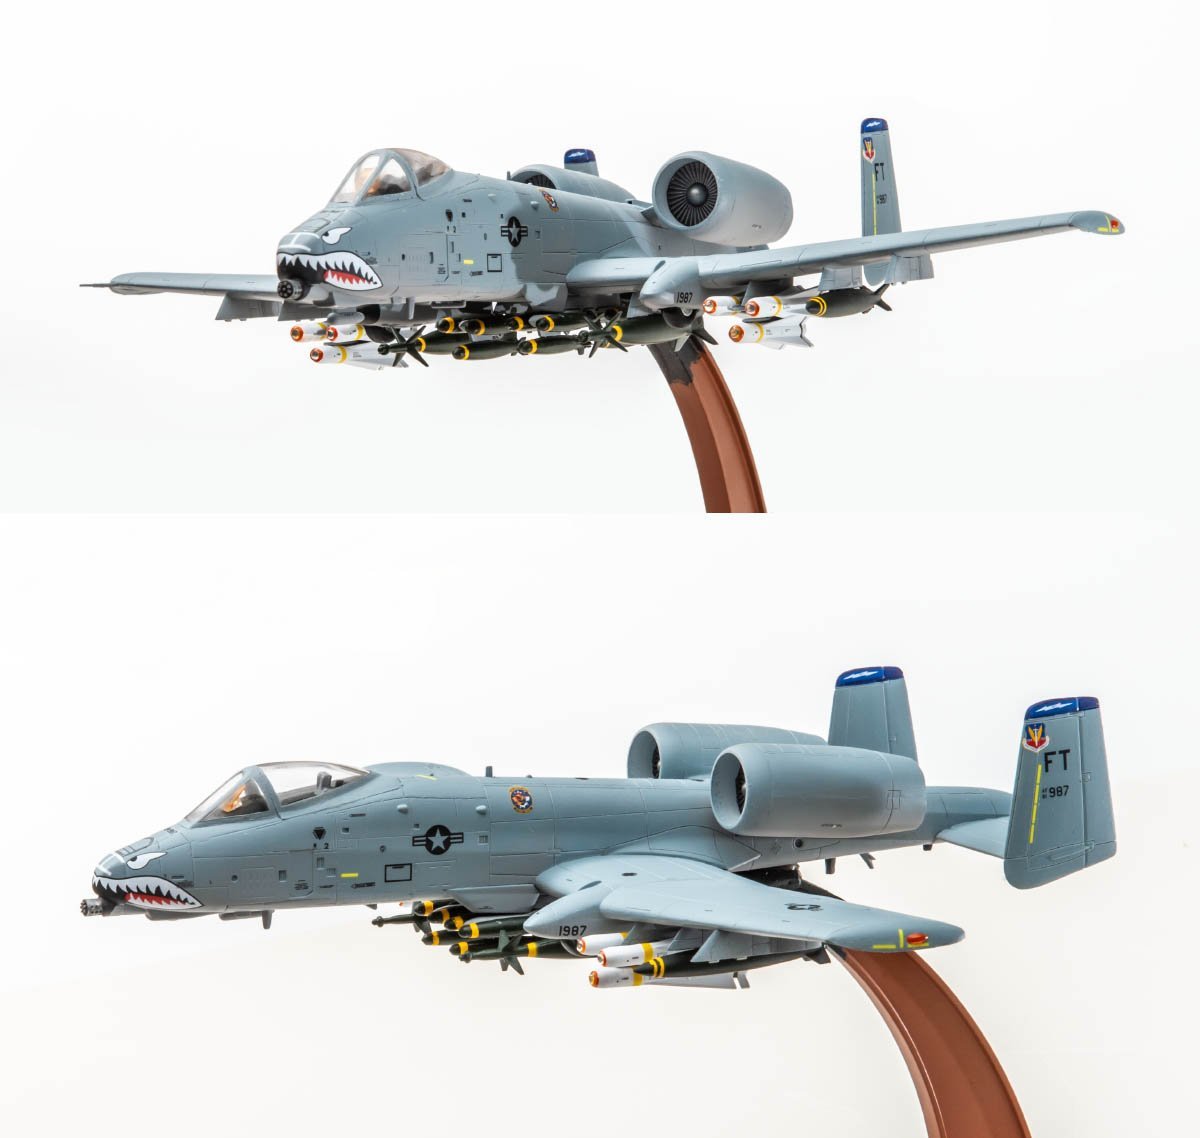
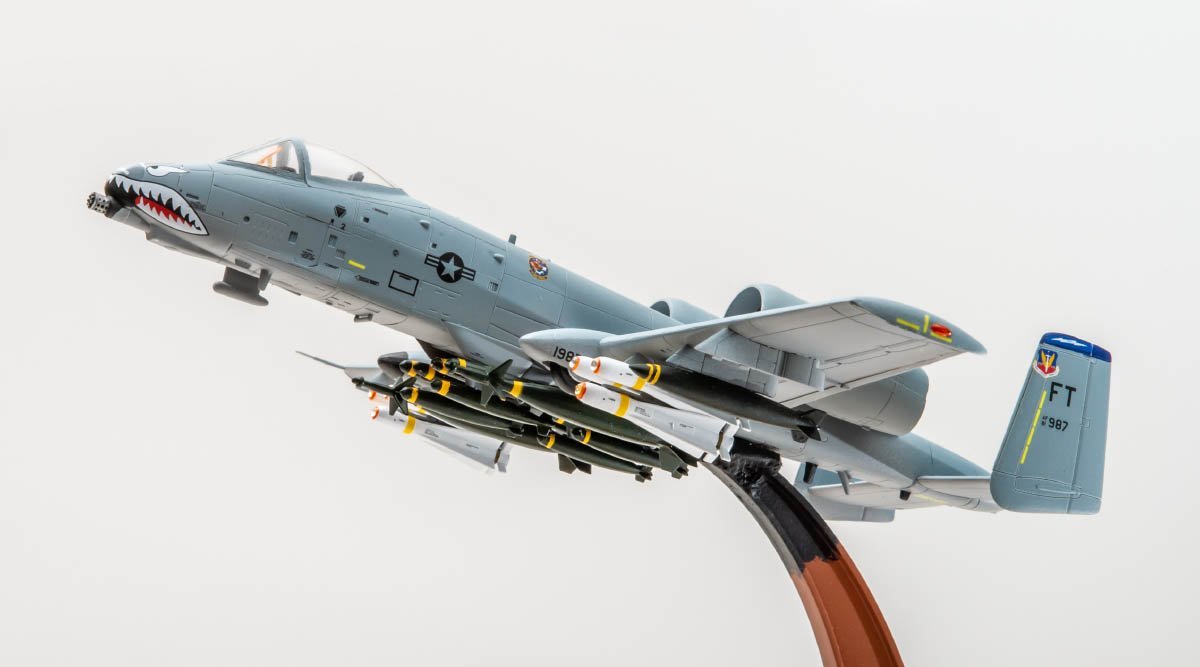
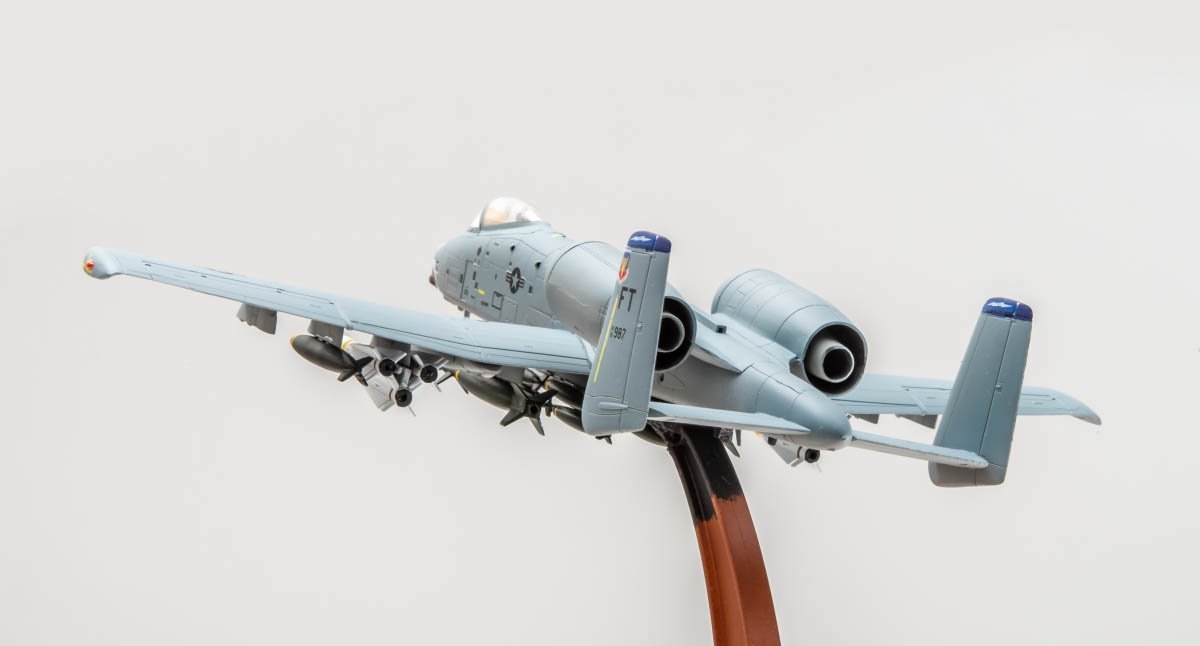
Thanks, popeye. I didn't forget the stone building. It's on my workbench now. 🤩 I forgot the word 'warthog'. 😱 Thanks for watching, Old collingwood!
-
canute // I appreciate to hear you enjoyed. 👍 Hermann // One more secret. The airplane has no dashboard and ejection seat handle. I forgot to add them. The pilot who refused to ride is really wise person. 😂
- 19 replies
-
- 10
-

-

-
Thanks very much, Egilman!
-
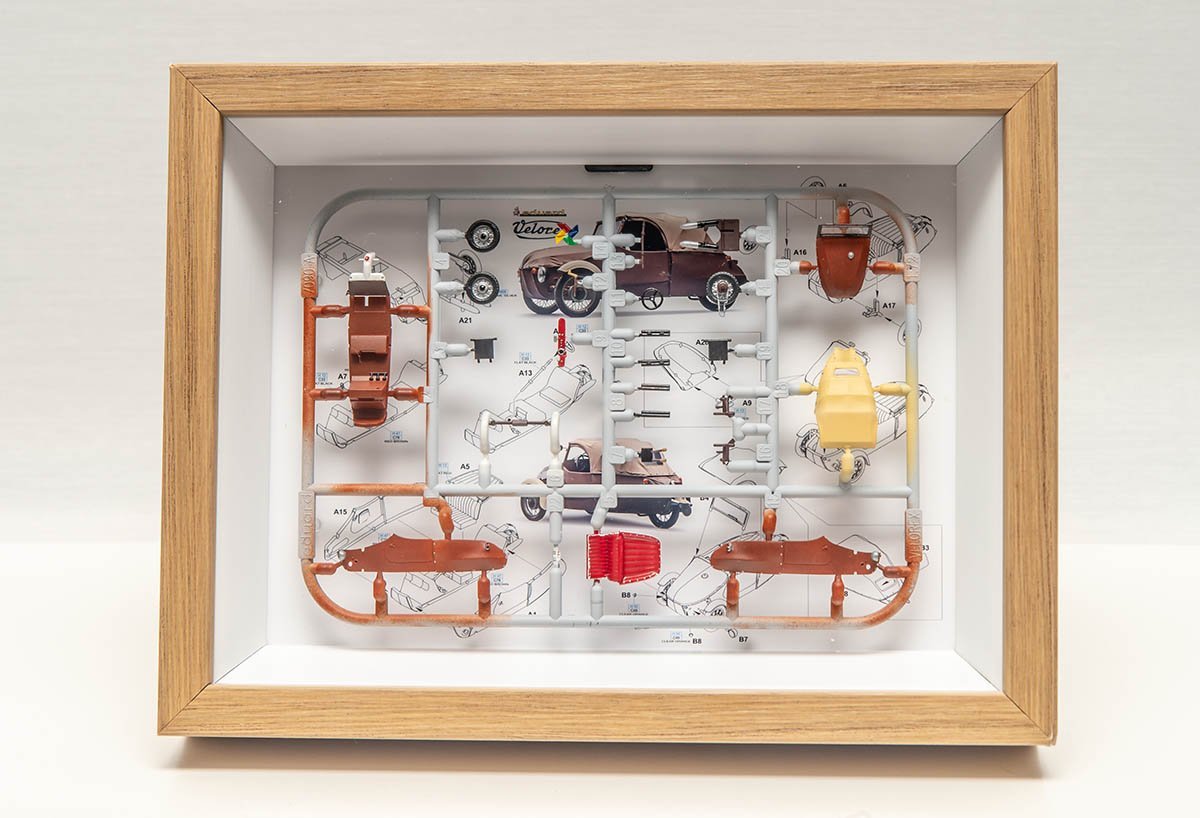
Oops, sorry. She is 10 years old nephew.
-
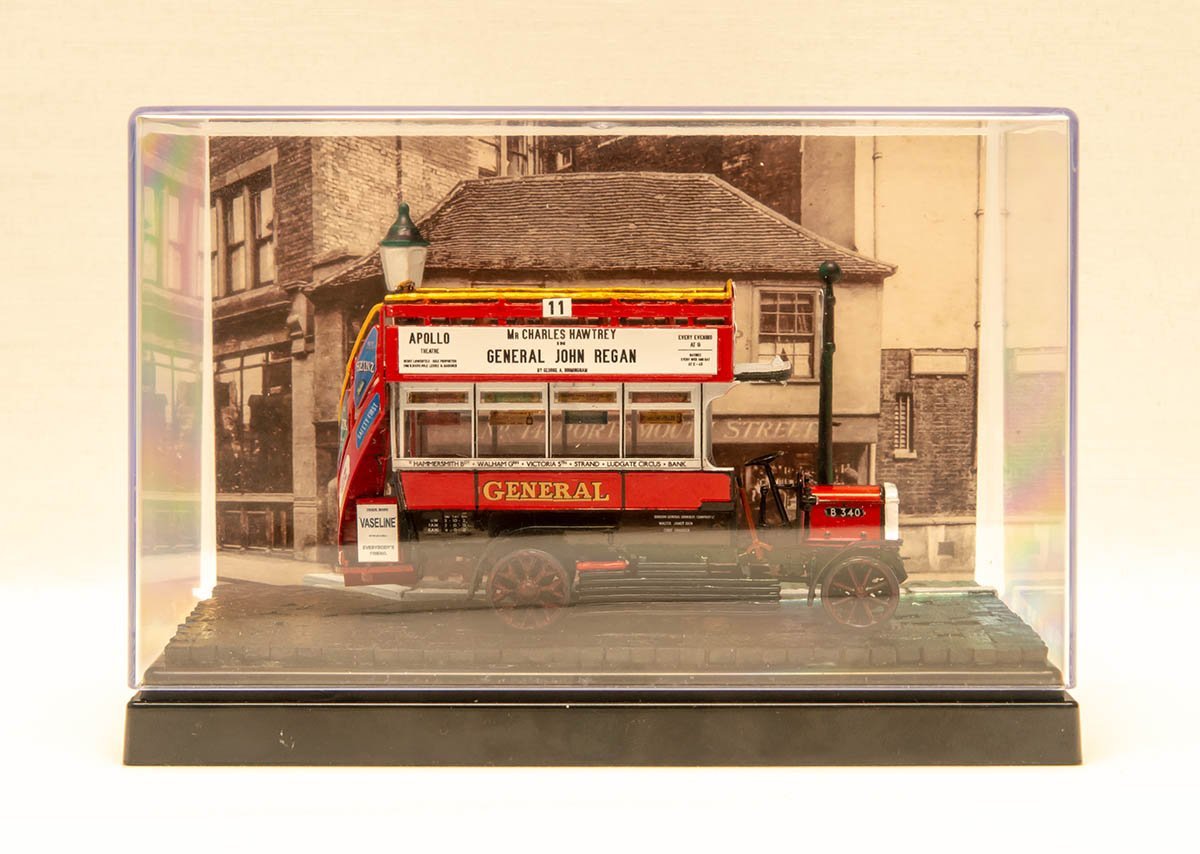
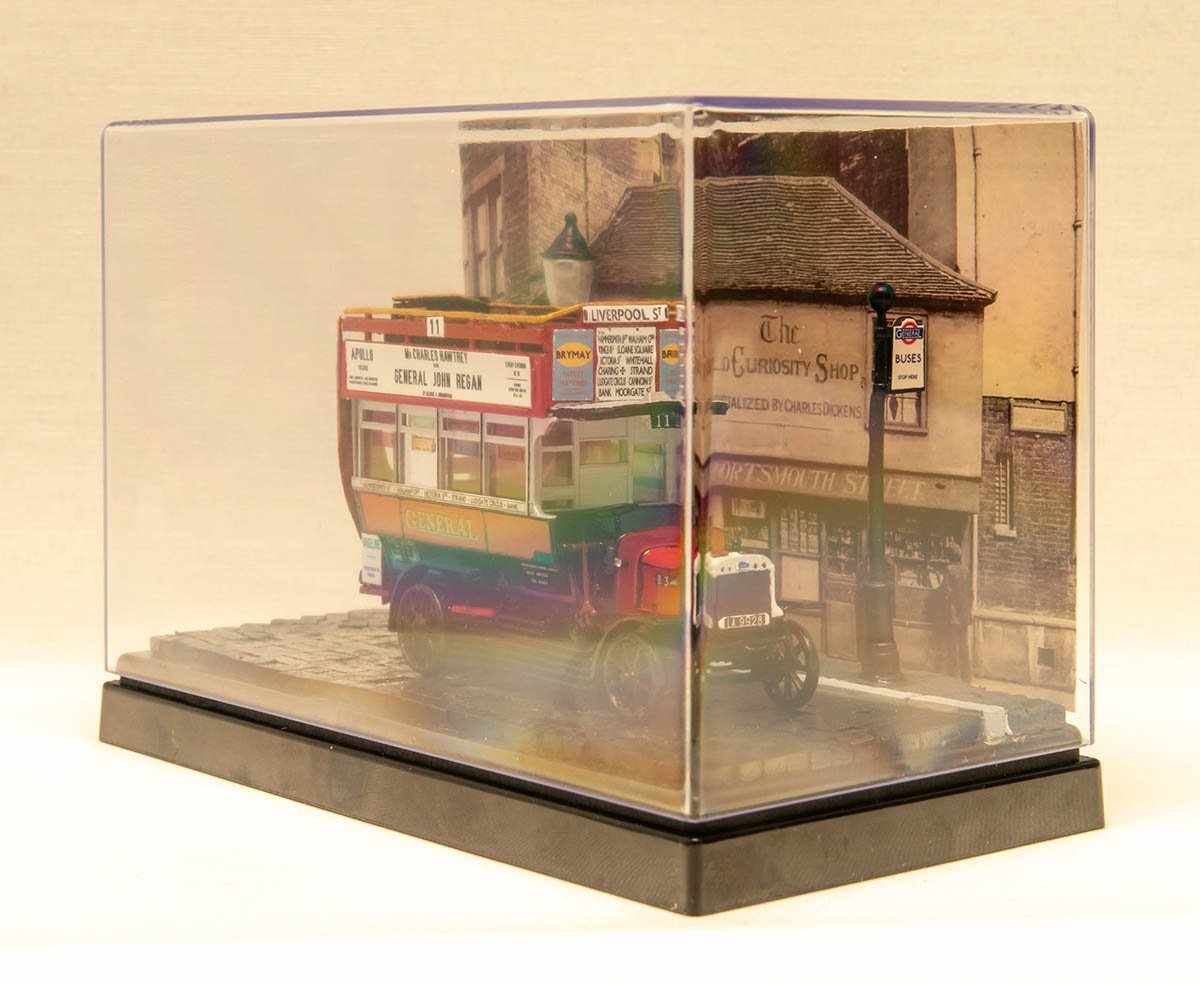
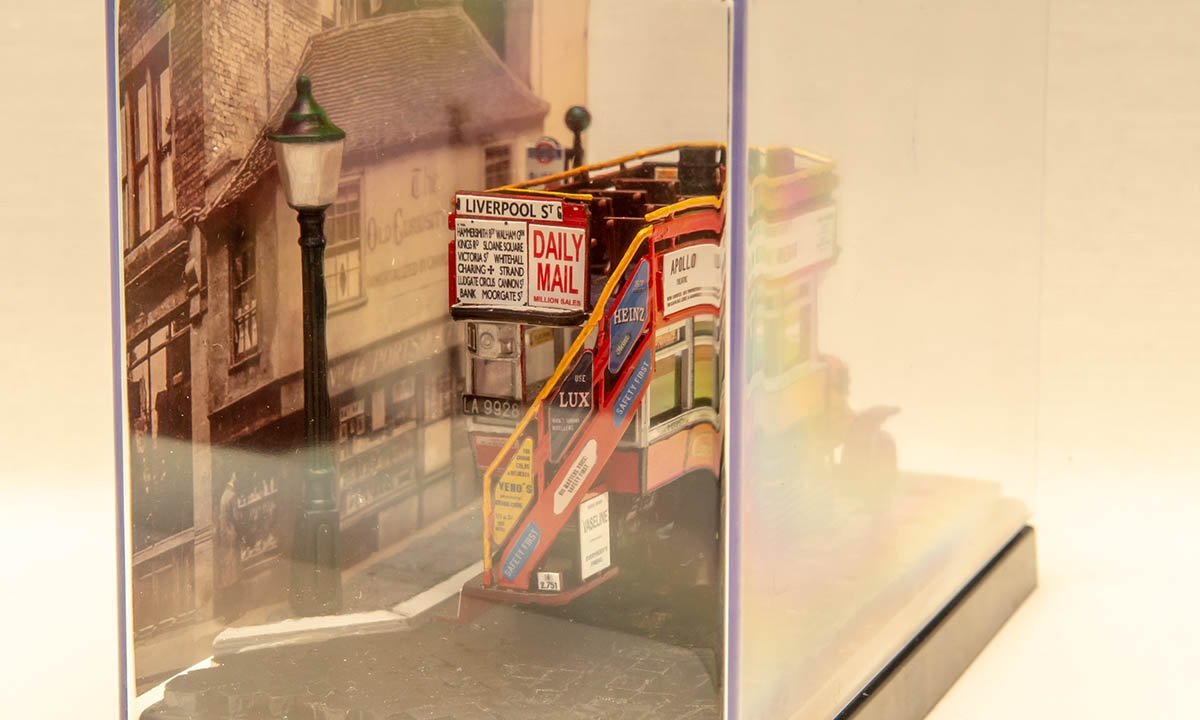
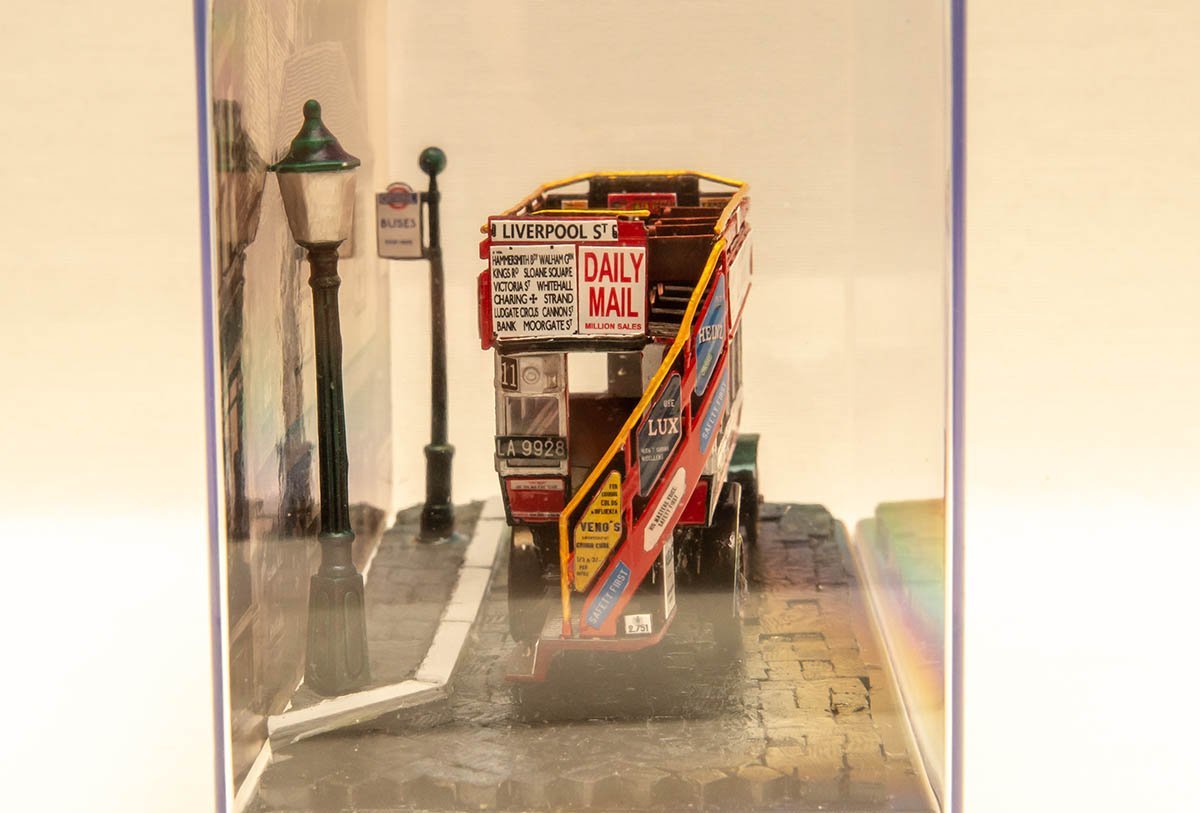
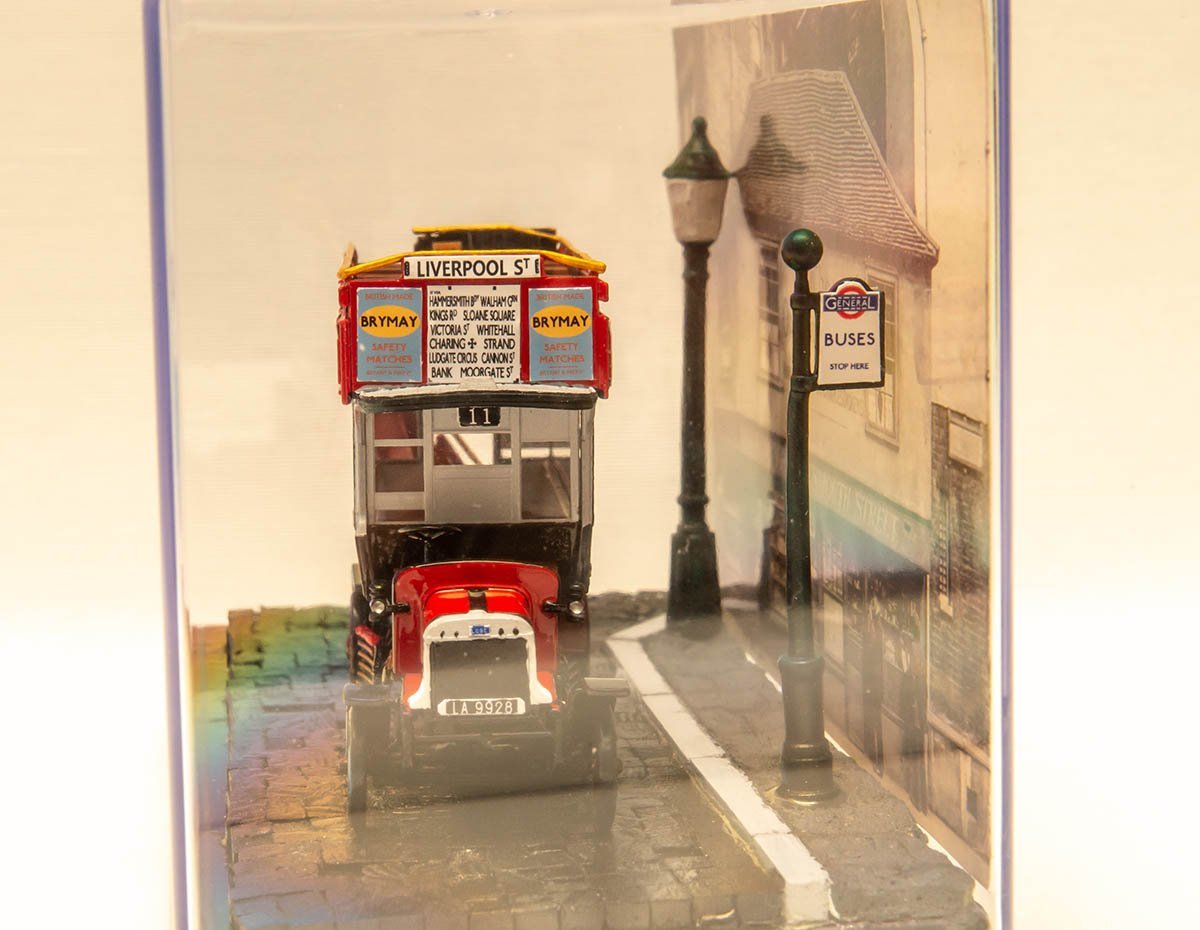
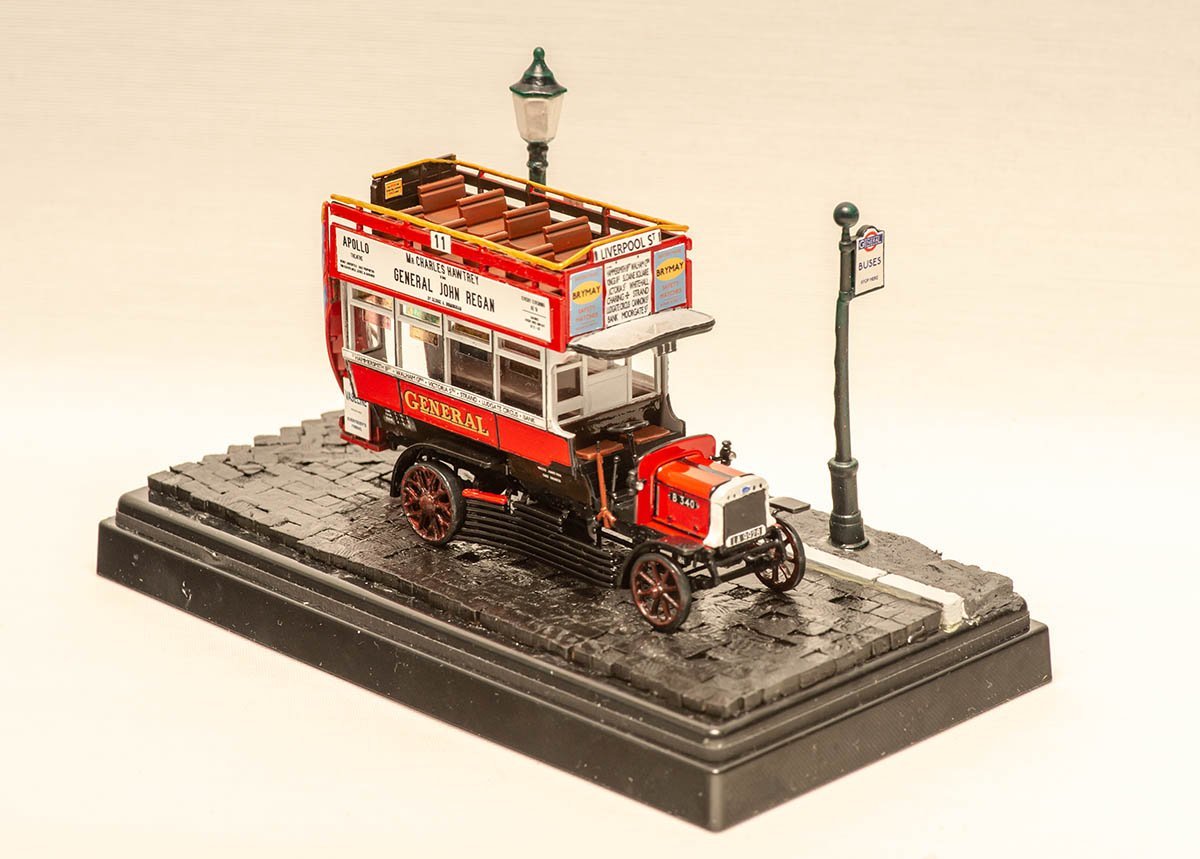
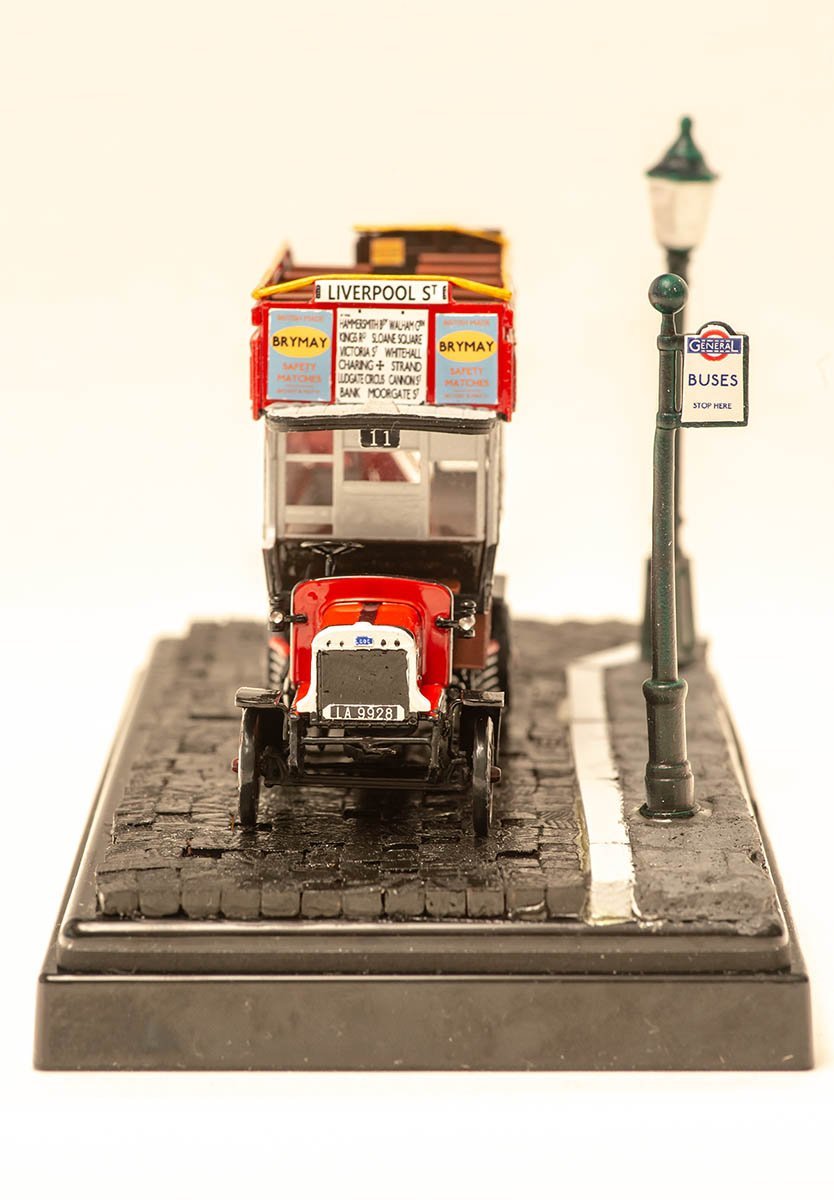
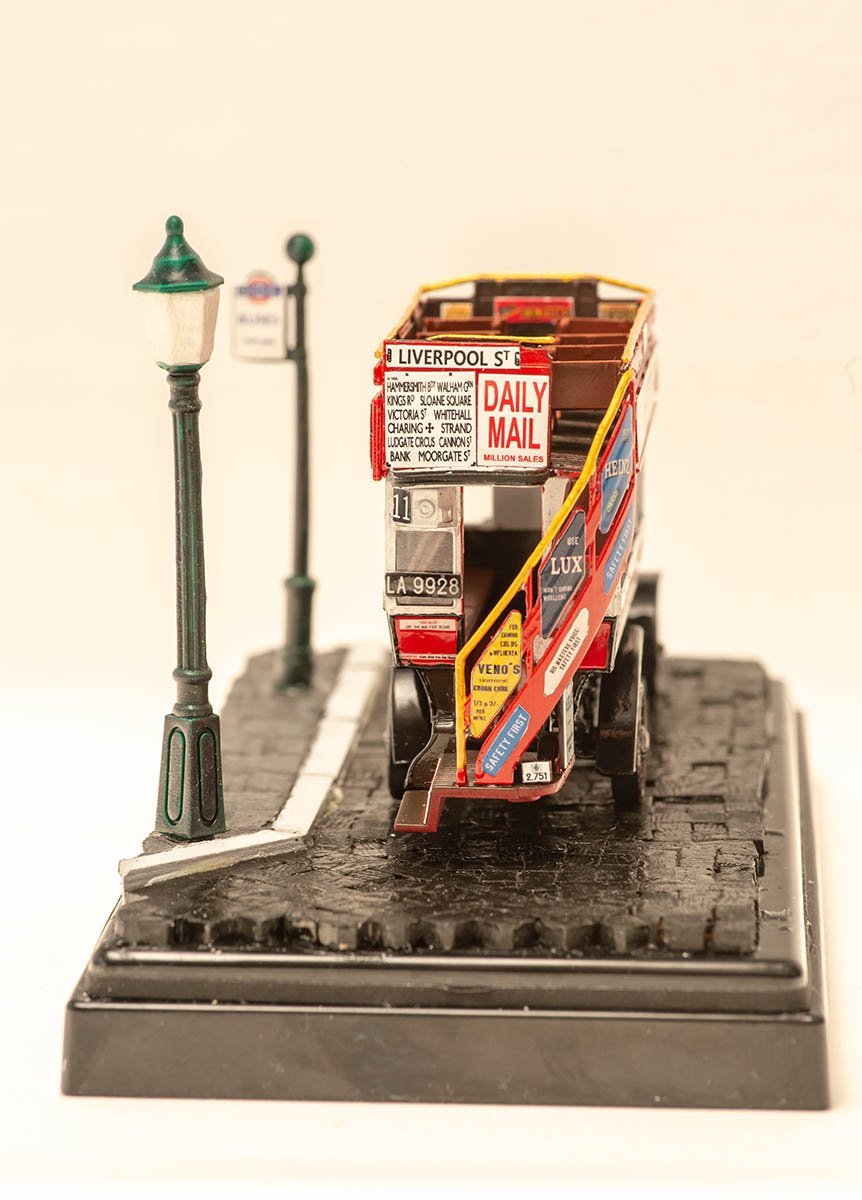
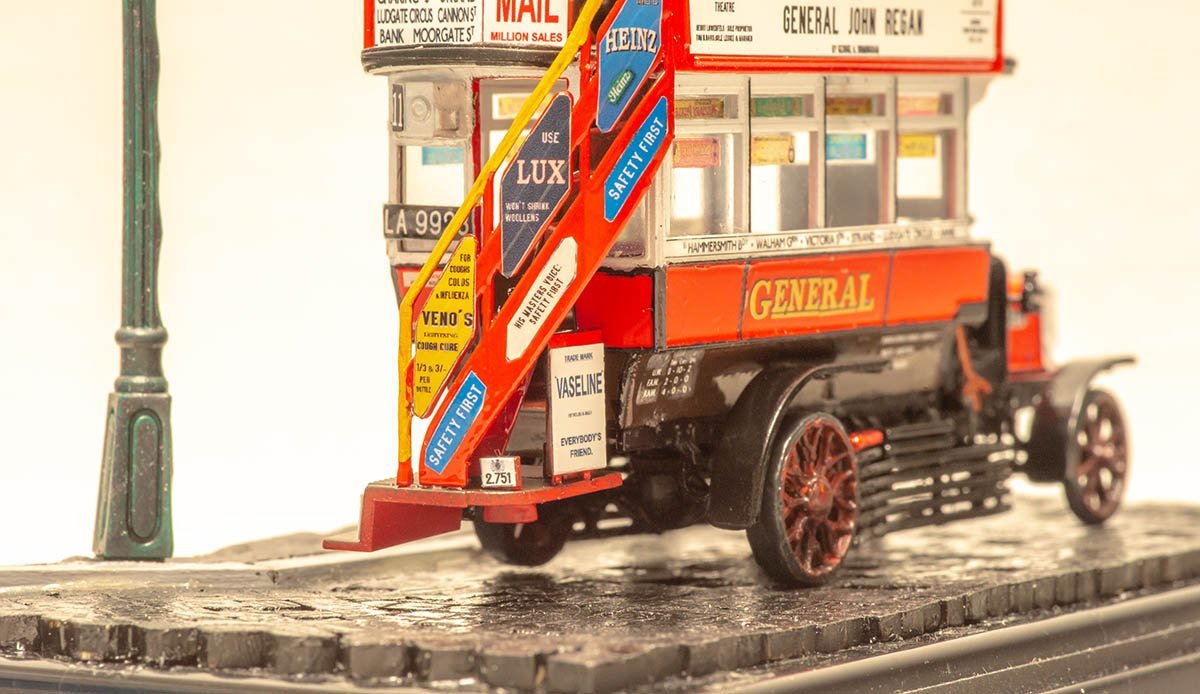
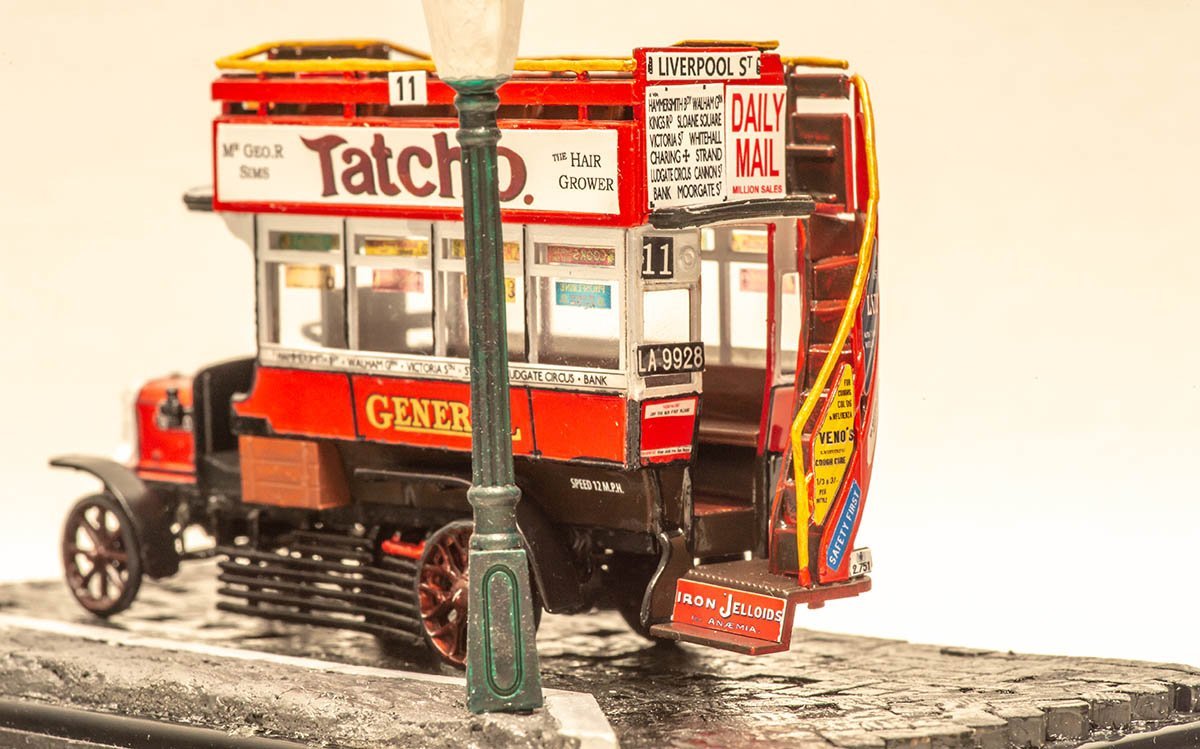
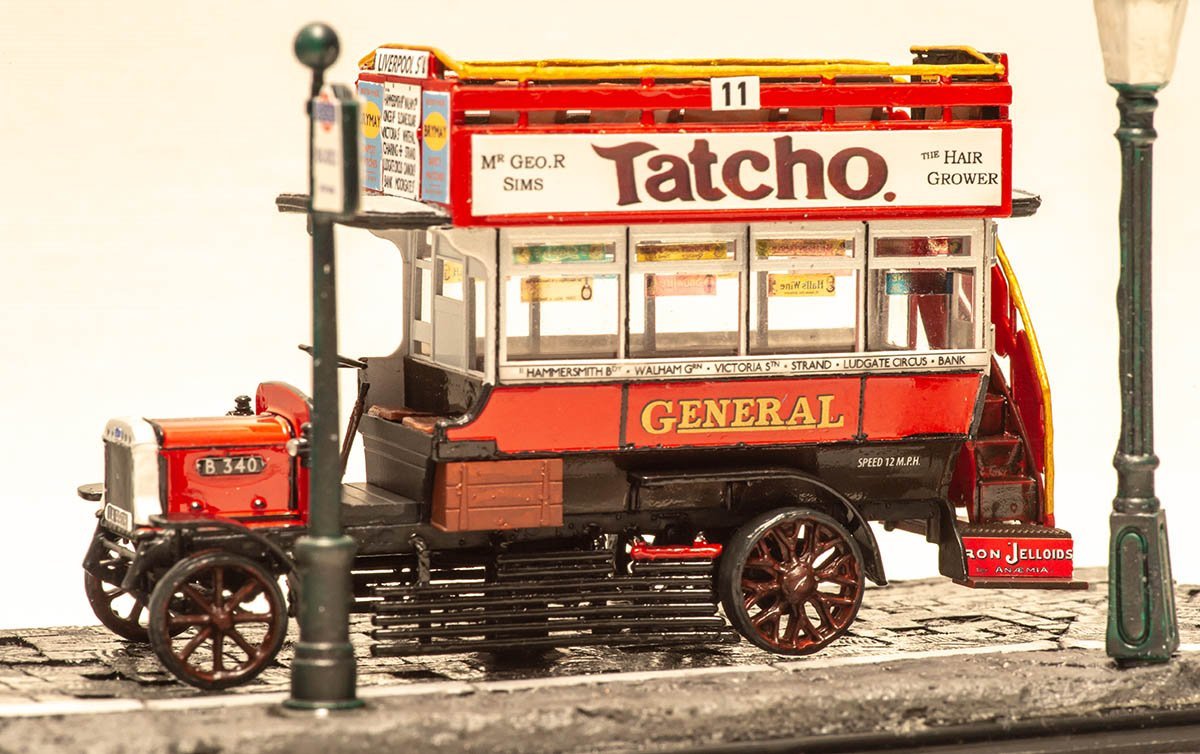
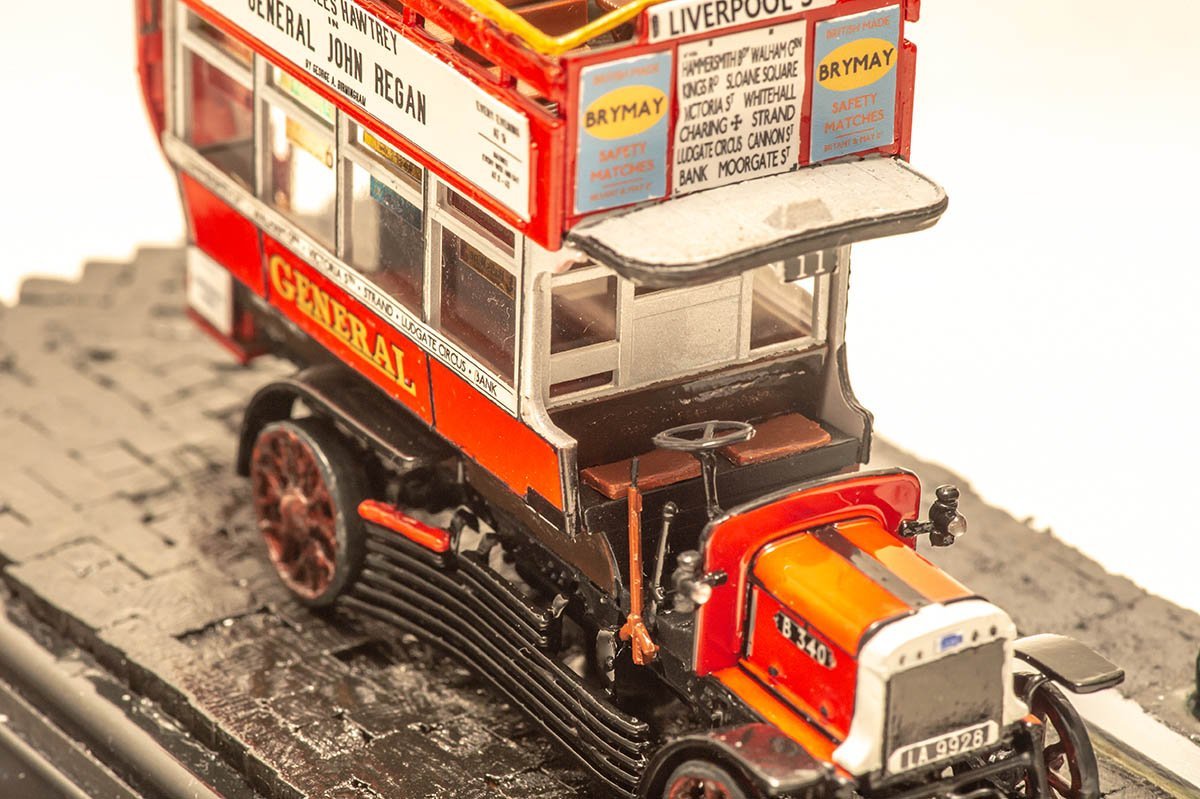
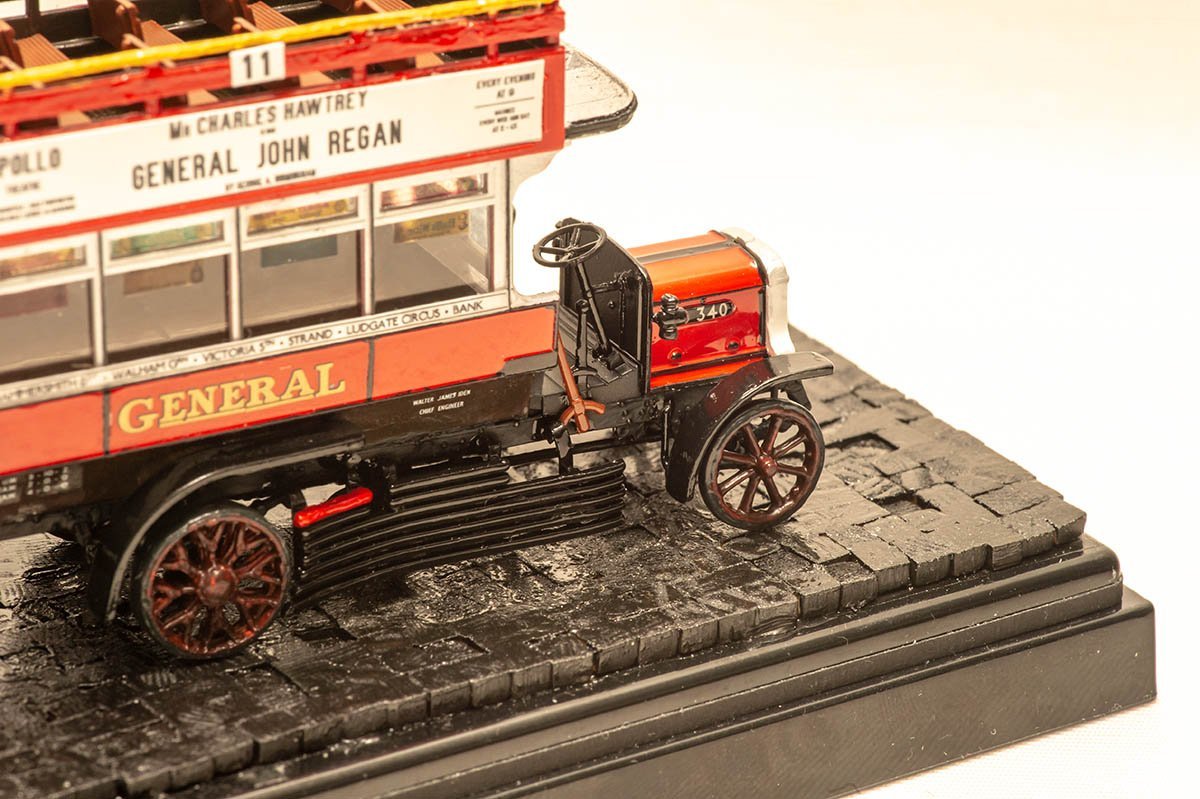
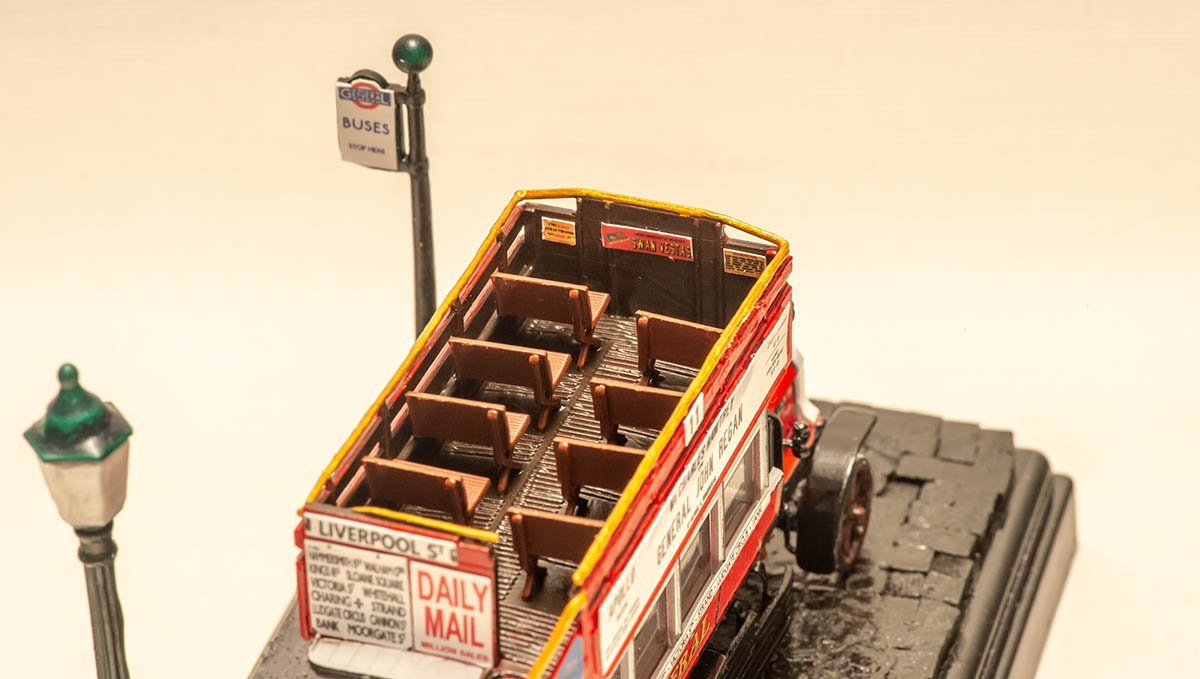
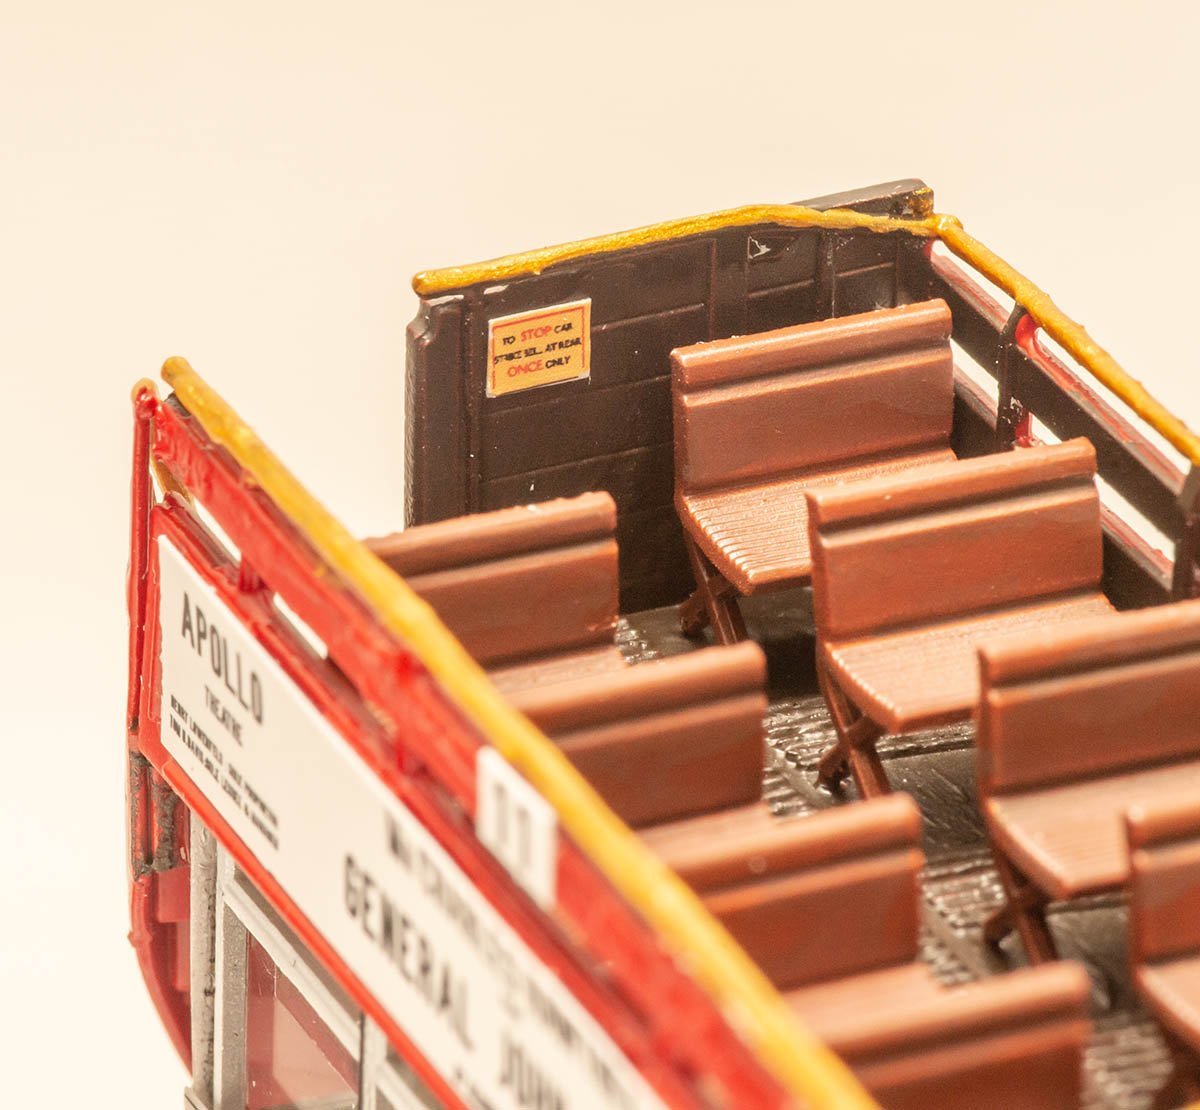
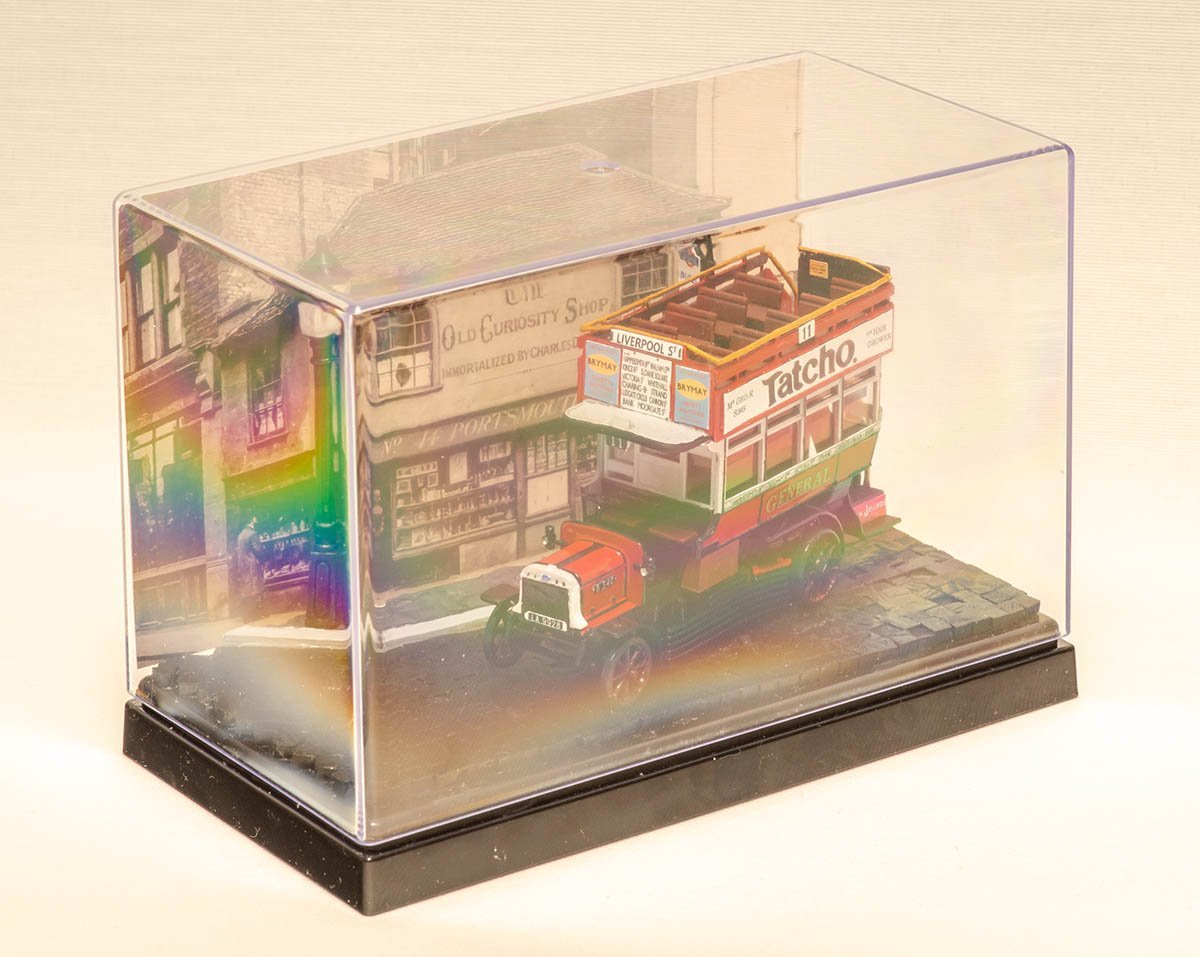
Correct. The magnet works well. 😆 Roden copied the airfix 1/32 kit and down-scaled it. Its structure is exactly same, and became more difficult due to thoughtless down-scaling. There are many unmatched joints and too slim parts that easily breakable. I replaced the broken parts to brass sheet or covered with CA glue. It is one of the worst kit I've ever seen, so I would like to recommend latest Miniart 1/35 kit if you are interested in the london bus. Unfortunately, there is no kit based on the world's first omnibus from France. 🤔
-
You should have seen her confused face. 😆 When the girl breaks and opens the frame, this kit will be 'complete'.
-
Thanks, Yves. I'm also inspired by another artwork, and there are some pre-painted kits on market. https://mmzone.co.kr/album/showcase.php?dbname=gallerymain&id=53935 https://www.scalemates.com/kits/squadron-sqm7002-p-47d-thunderbolt--1116572
-
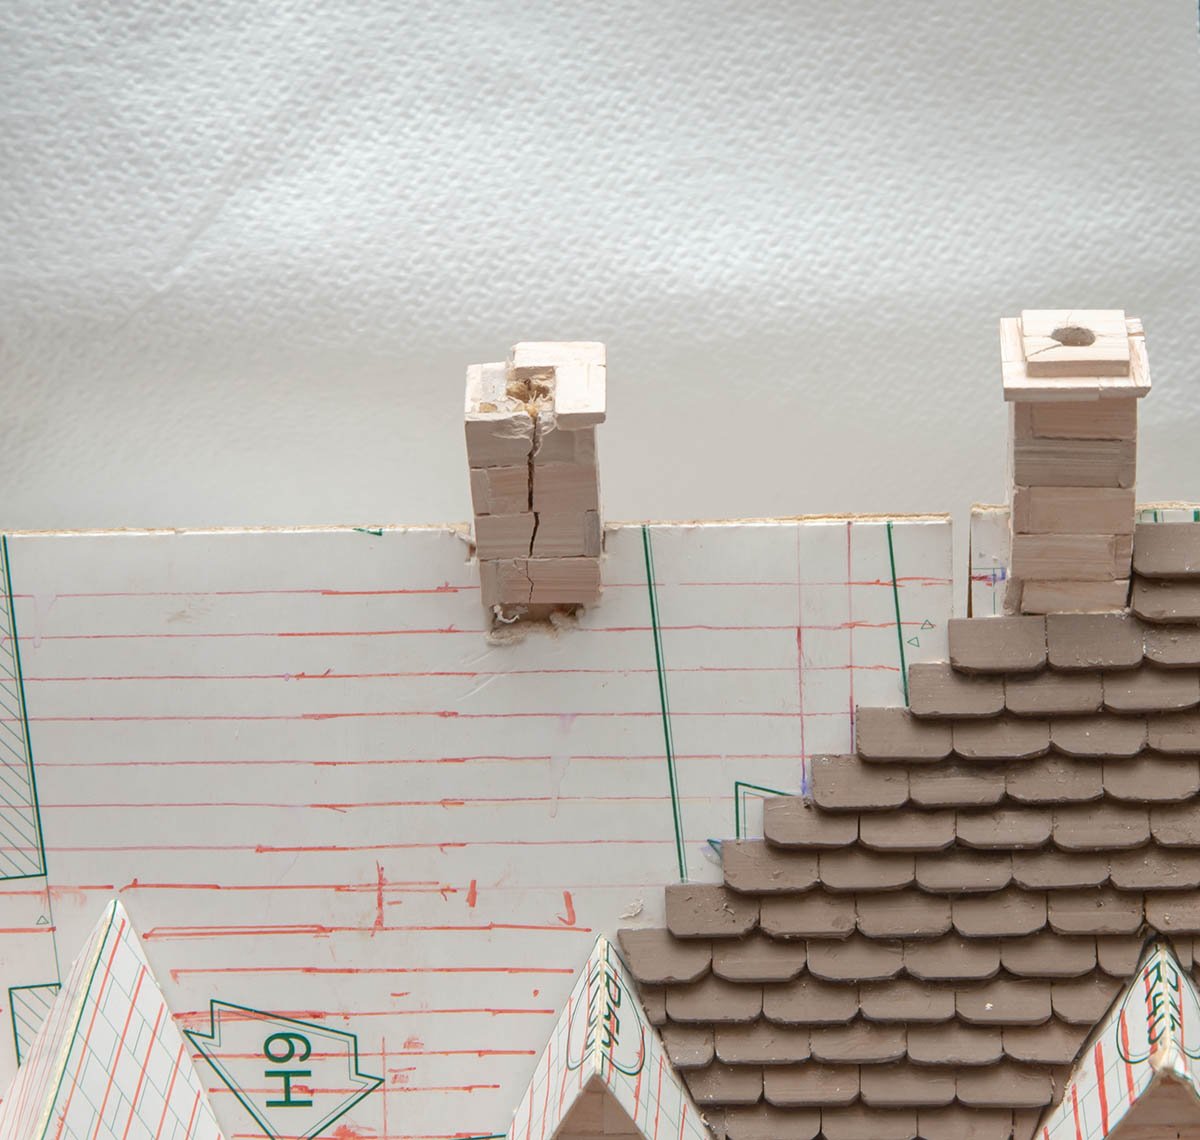
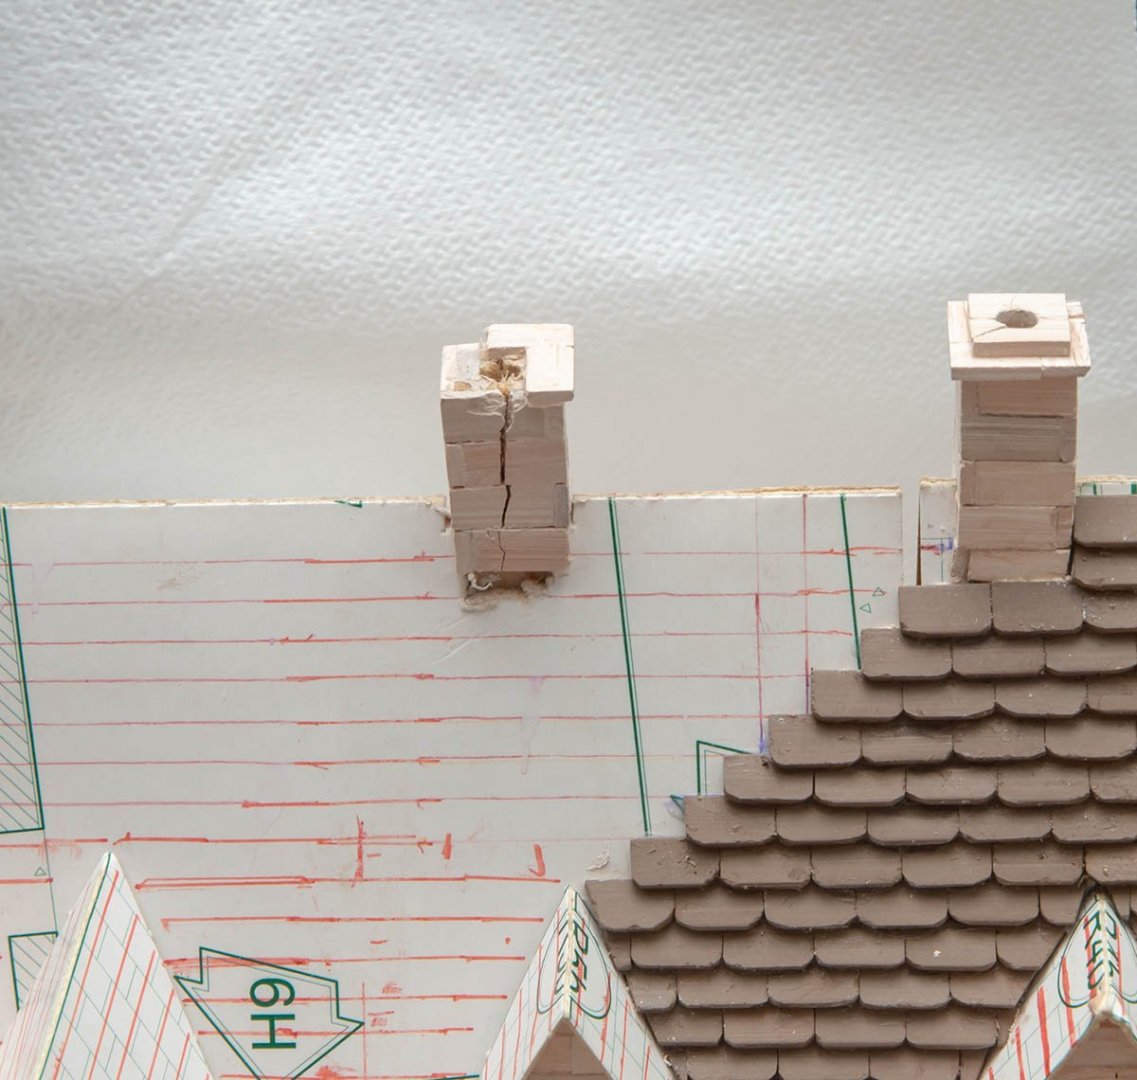
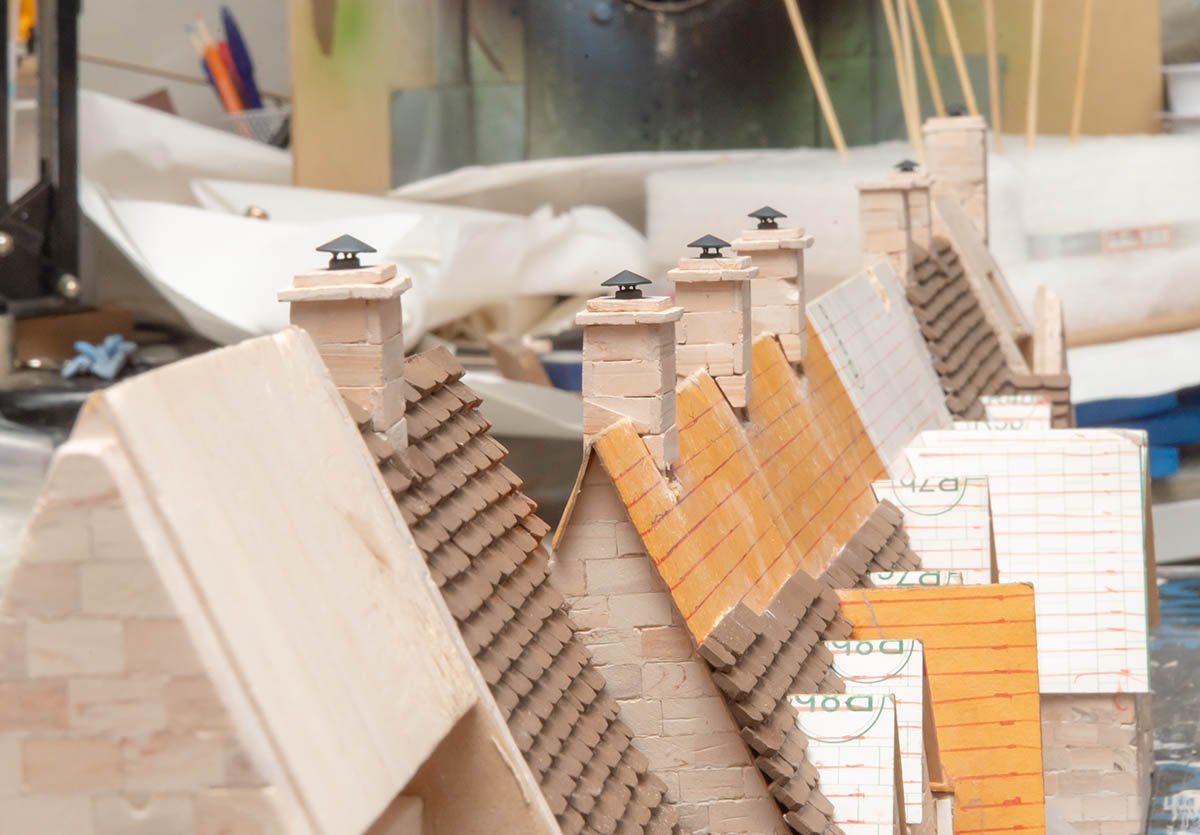
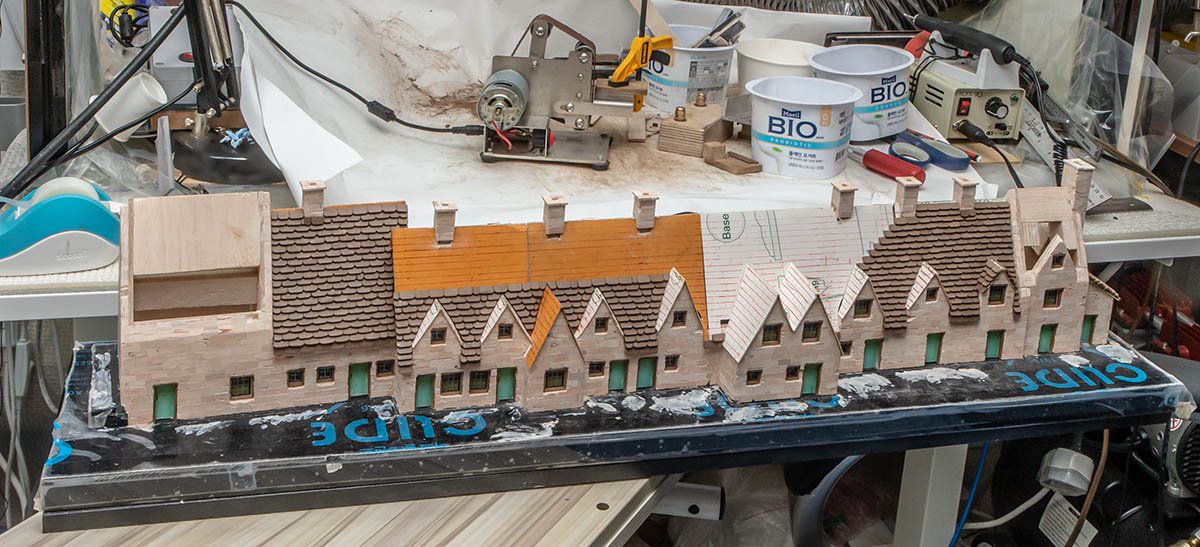
I made chimney stovepipes using 4mm brass tubes. Also, I made chimney caps using 3D printer. I wasn't sure to cut brass sheet circularly without error. I holded them with 0.35mm brass tripods using epoxy glue. This color is too darker than I expected, but seems ok. I mixed blue and brown to be bronze green. Maybe I should have mixed white lacqure a little bit. While I was drilling holes, one of chimney was broke. I'll remove it and make it again. Most of chimneys are done. I referred to real pictures when I designed, and I like my result. 👍
-
Thanks, Ekis! Your knowhow really helps me a lot. I understood that you spent tons of time and effort on sanding tiles, and weathering is one of many improving ideas. There was no easy way to achieve such great result. 😌 I'll apply these tips as much as possible to be more realistic.
-
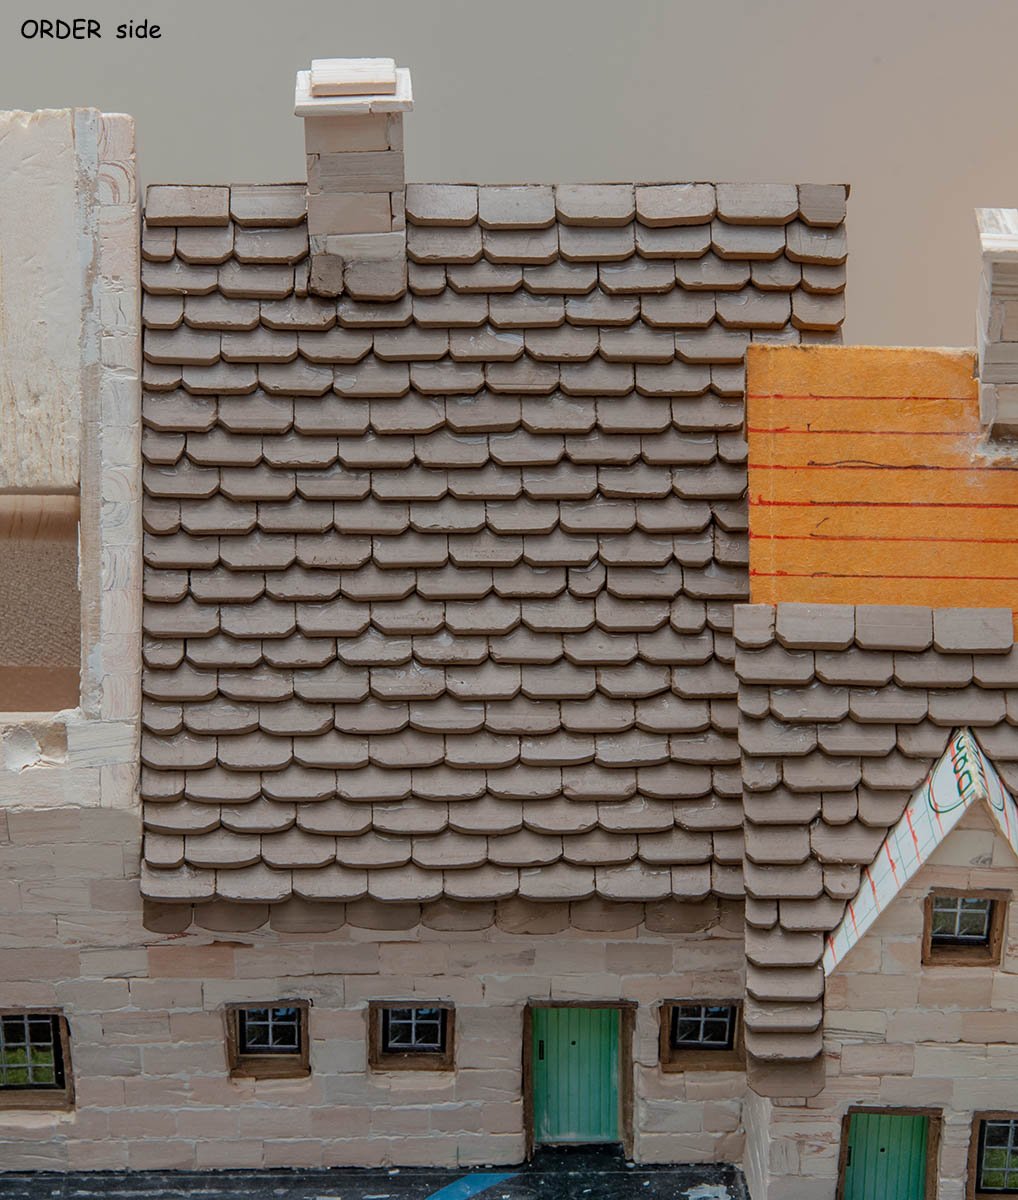
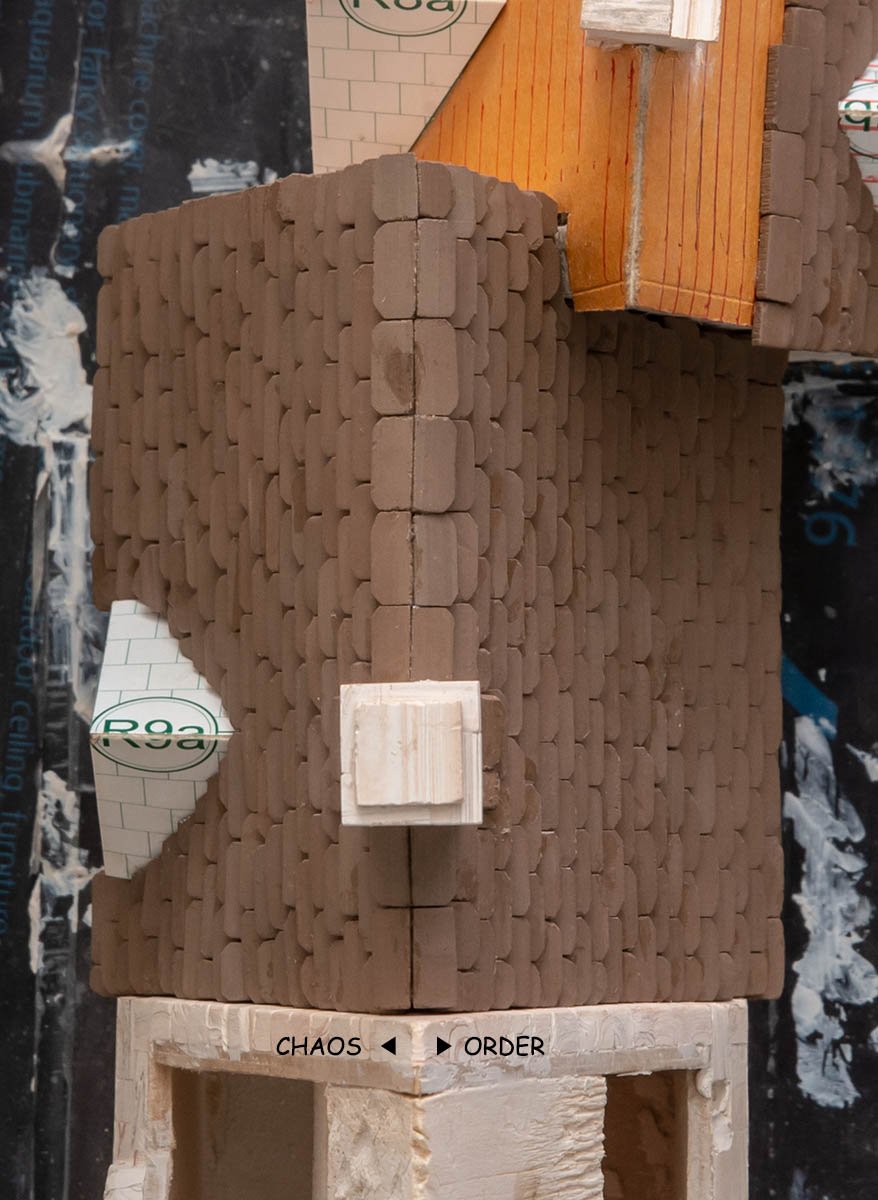
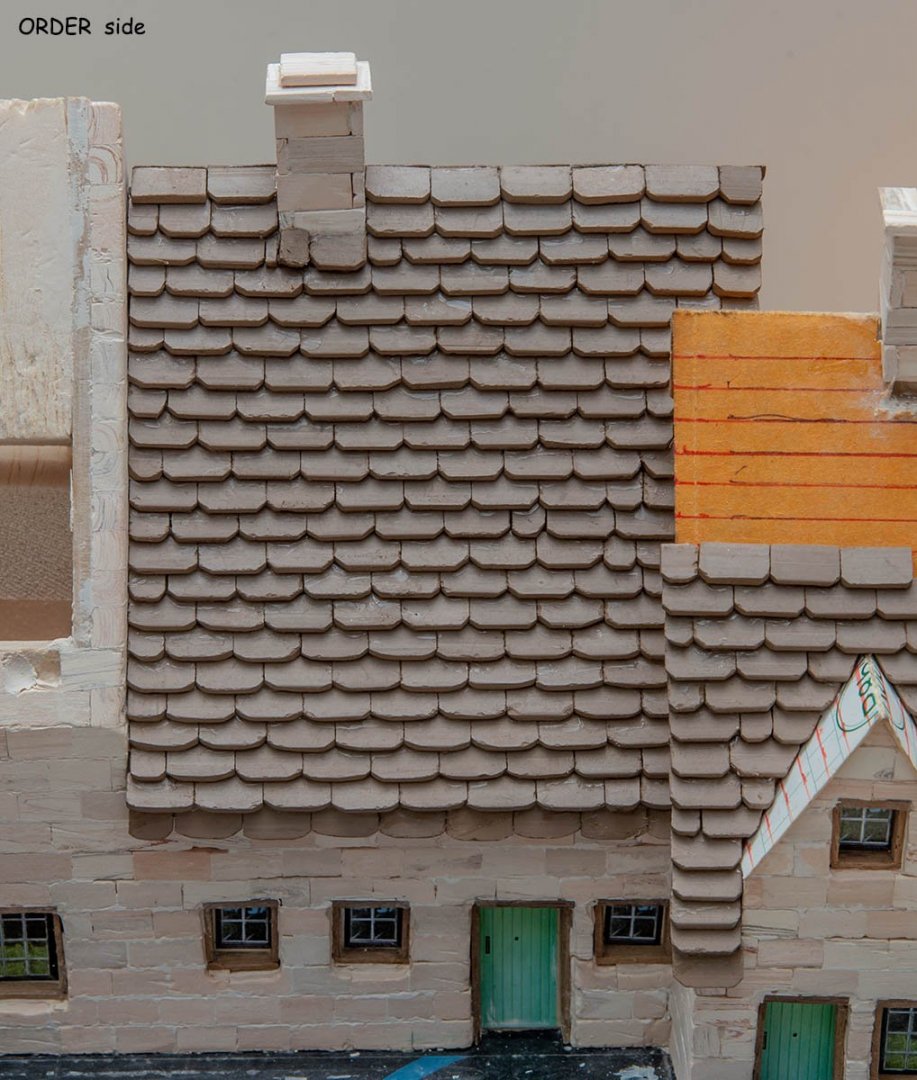
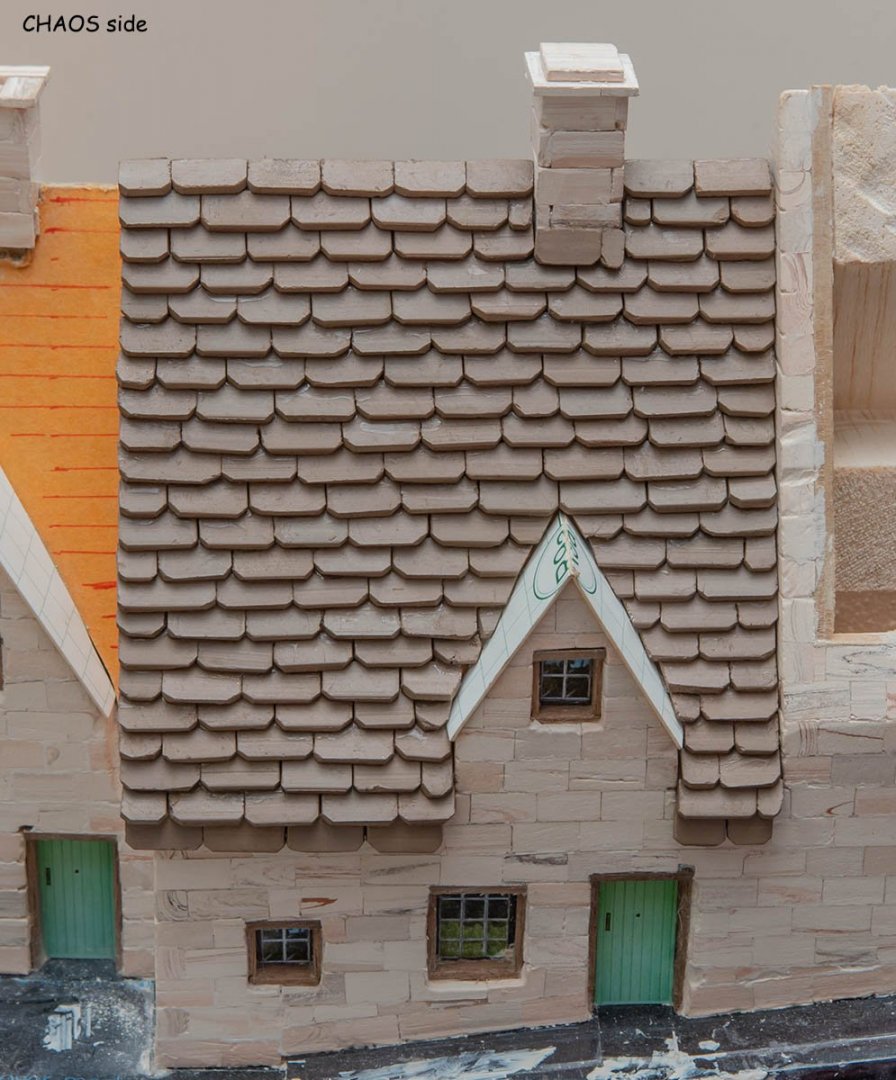
Hello, Egilman. Nice to see you again. I'm considering the Ekis' method. He used raw rough tiles with weathering technique. My precisely aligned tiles are very good, in itself. The result looks like printed roof of commercial doll house just I wanted. Every blocks has 10.0 x 5.5mm size. Unfortunately, the post processing is painful and takes lots of time. It takes about 1 minutes per each block, but it is enjoyable when I paste each tile on roof thanks to the standardized size. On the contrary, raw tiles doesn't steal much time. it is a bit annoying to paste tiles due to uneven size, but it ultimately saves 2~3 times more than aligning every tile. The order side is finished and polished, but chaos side is not. You may think that these photos are fine, but in real world, gaps between tiles and shadows is much visible, and it degrades overall qualities although entire exterior at long distance is ok. I can't satisfy with the raw tiles. The reason I pasted rough tiles is that Ekis successfully managed it with weathering technique. His weathering technique covered weakness of raw tiles, and made buildings more like impressive medieval ruin. I'm considering to apply weathering to half of this building. My only issue is lack of time... 🤪

-
Good to see again, Old Collingwood and Waitoa. Here is another great news. Ekis finished his masterpiece work on this February. As I said, I stick to an angle and lines because of uniformity, so I'm making every roof tile all same size. However, his splendid work with raw and rough tiles shakes my decision. It seems more natural expression for medieval buildings!
-
Hello! Long time no see. I'm happy with good news that people are overcoming the COVID19.🧡 It's been an year since 2020 deadline, and there are three weeks before 2021 deadline. 😱 I'm rushing my job, and hope to give the present sucessfully this year. Tiling roofs is a repeated task, so I will upload photos when I reach a noticeable step. (It should be within 3 weeks!)
- 75 replies
-
- 11
-
-
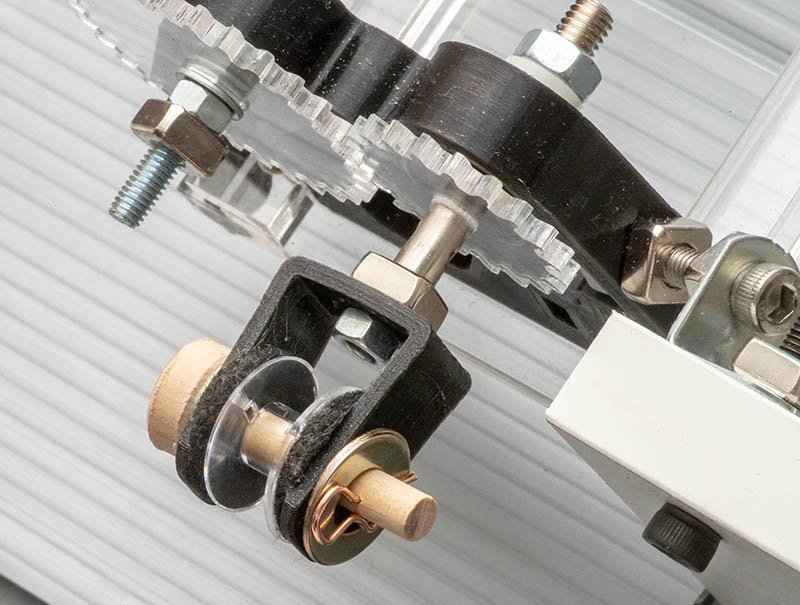
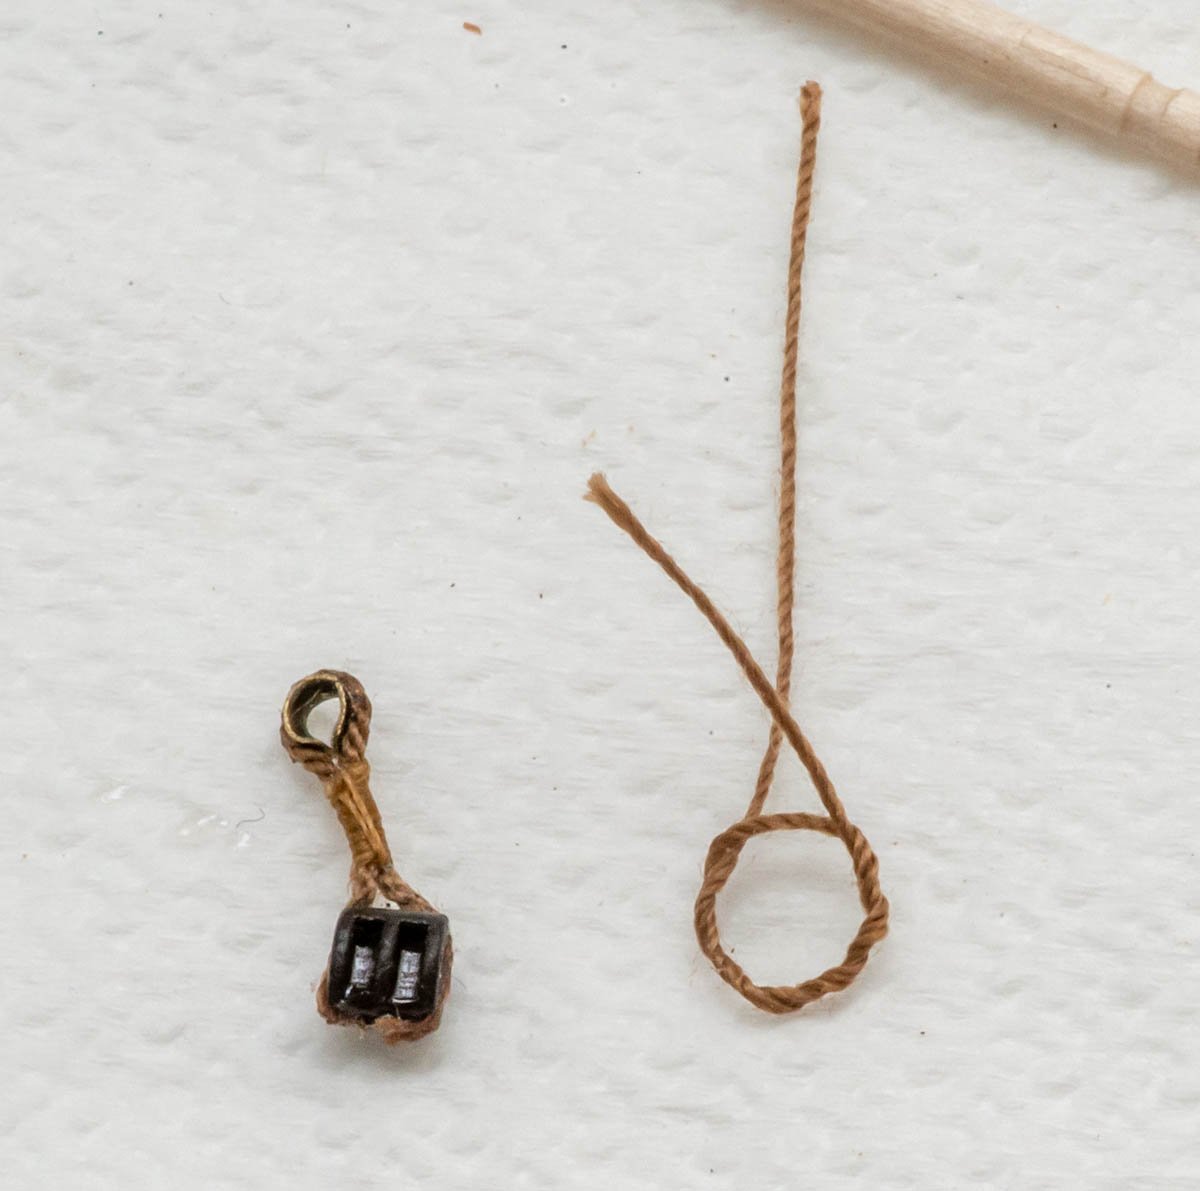
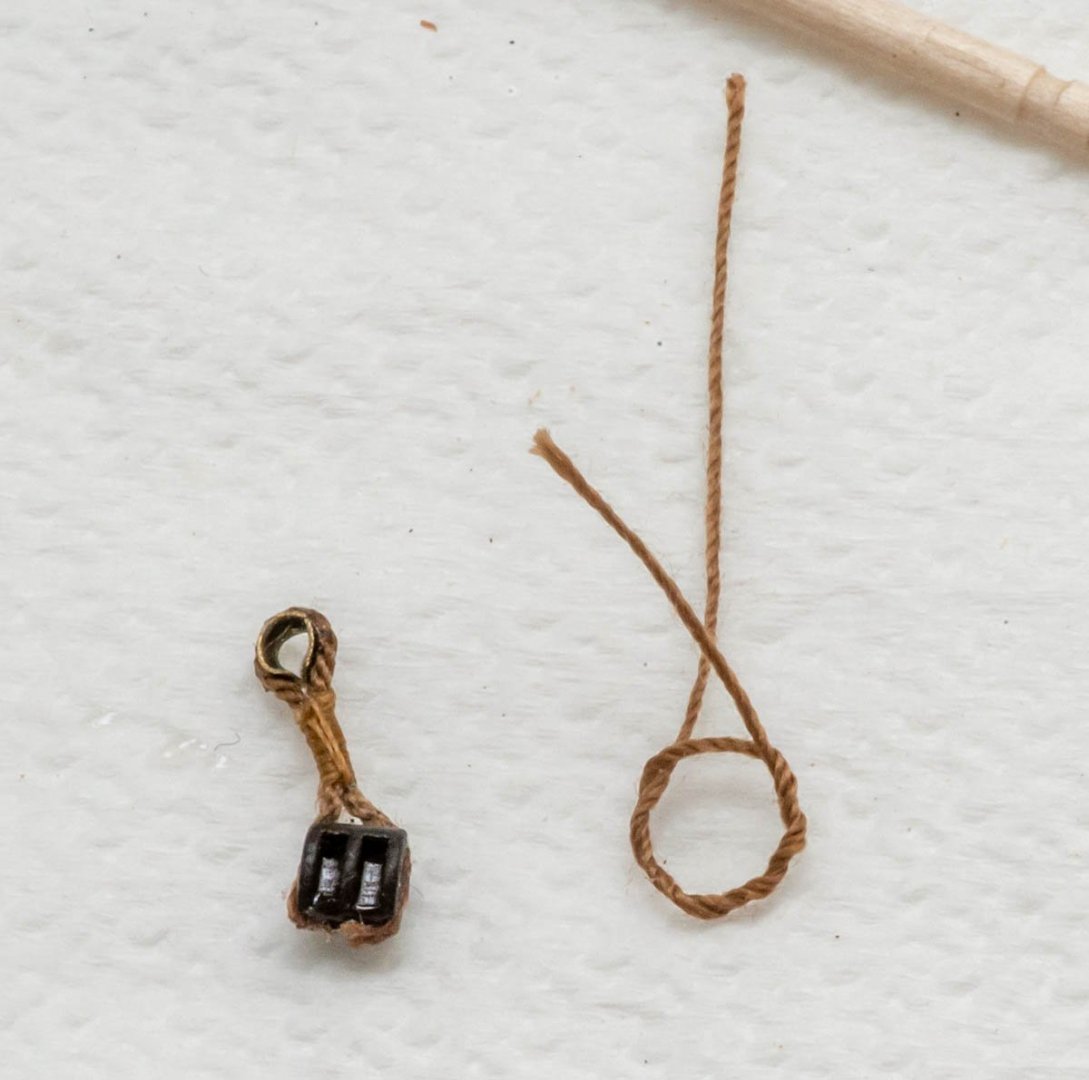
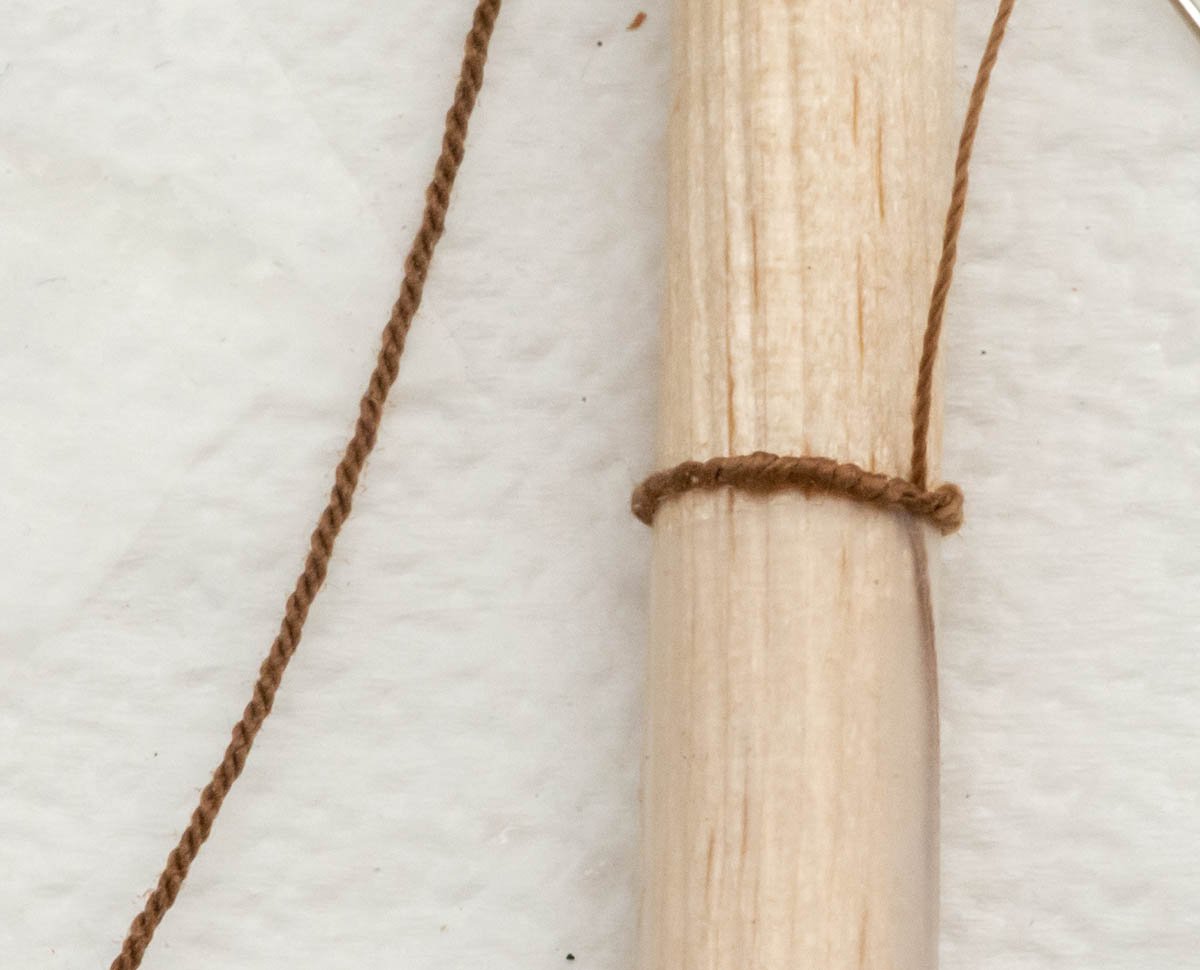
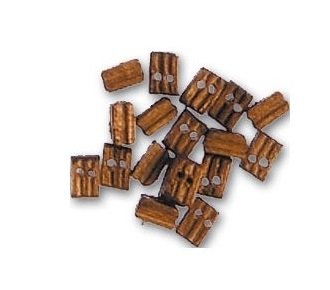
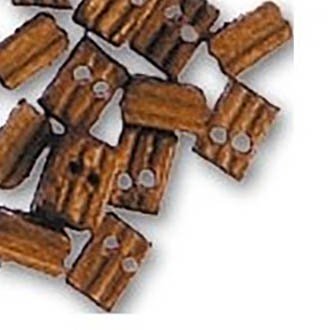
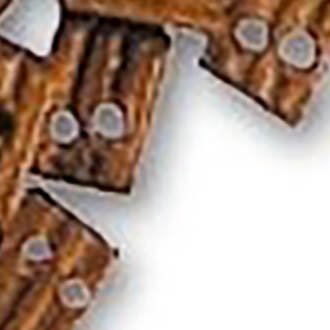
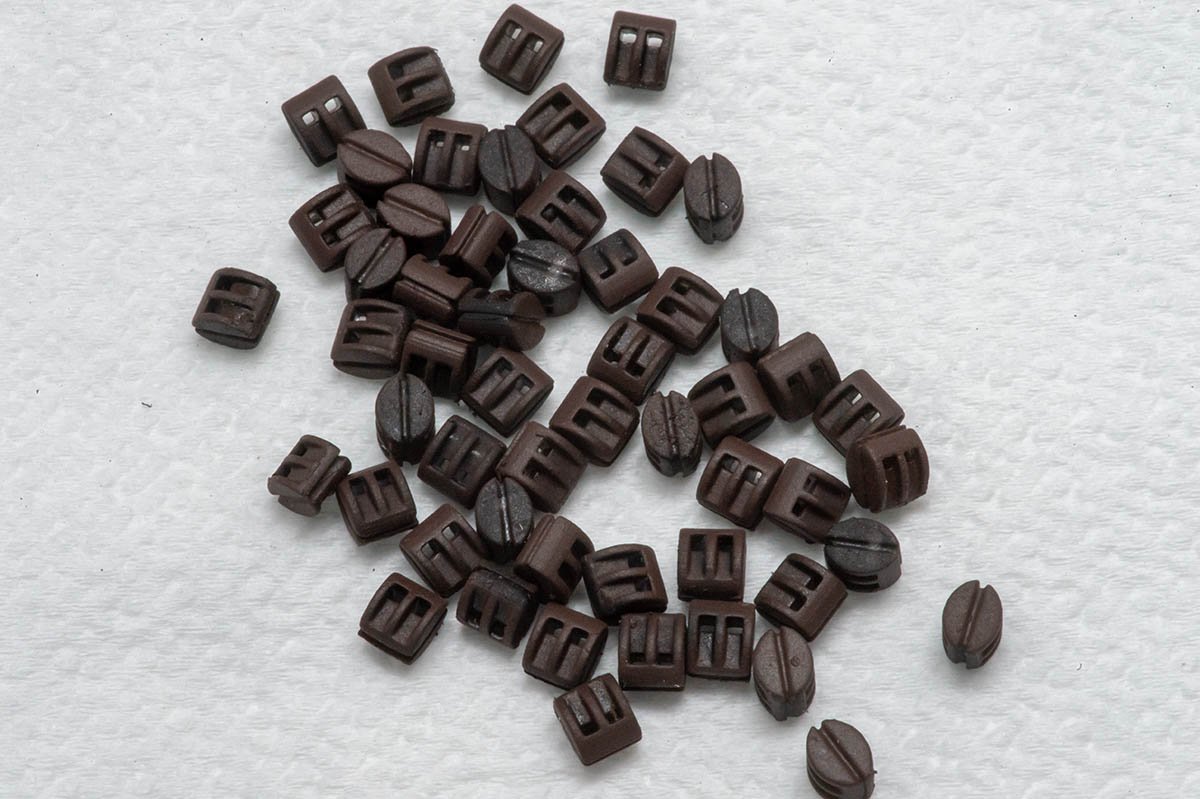
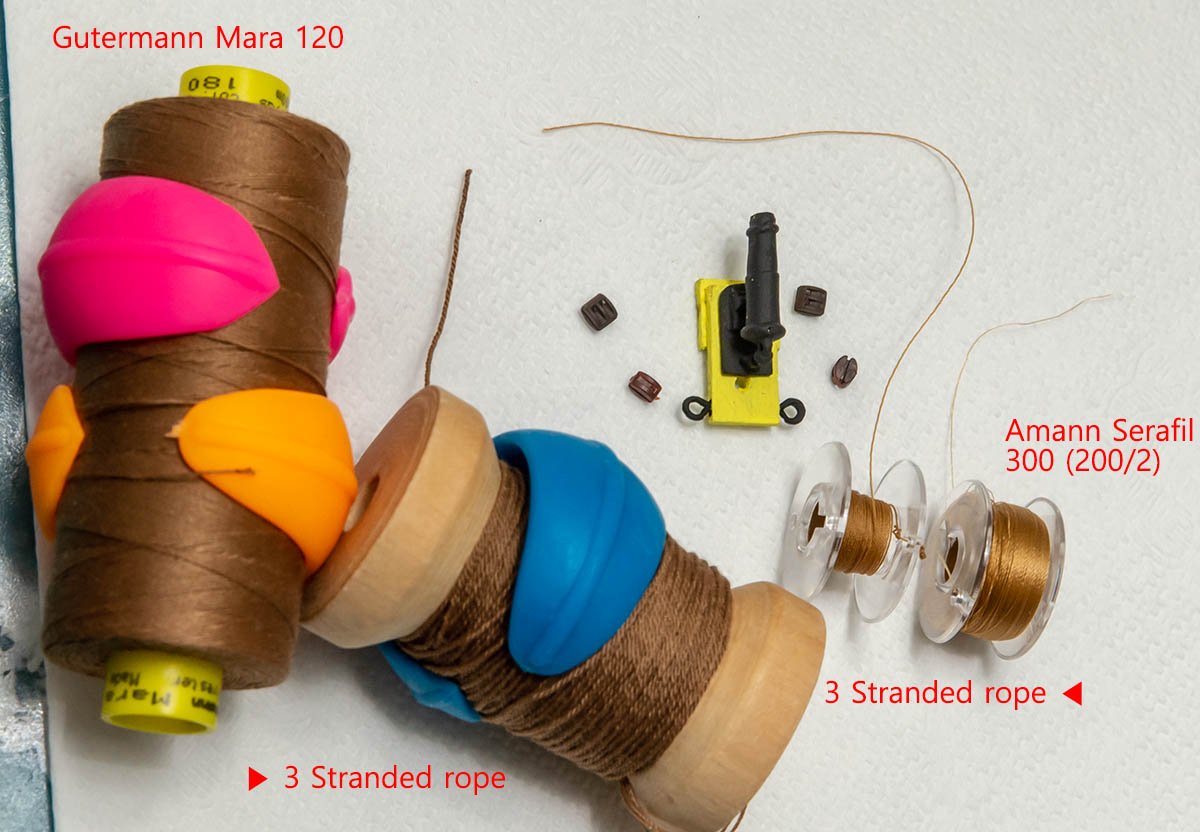
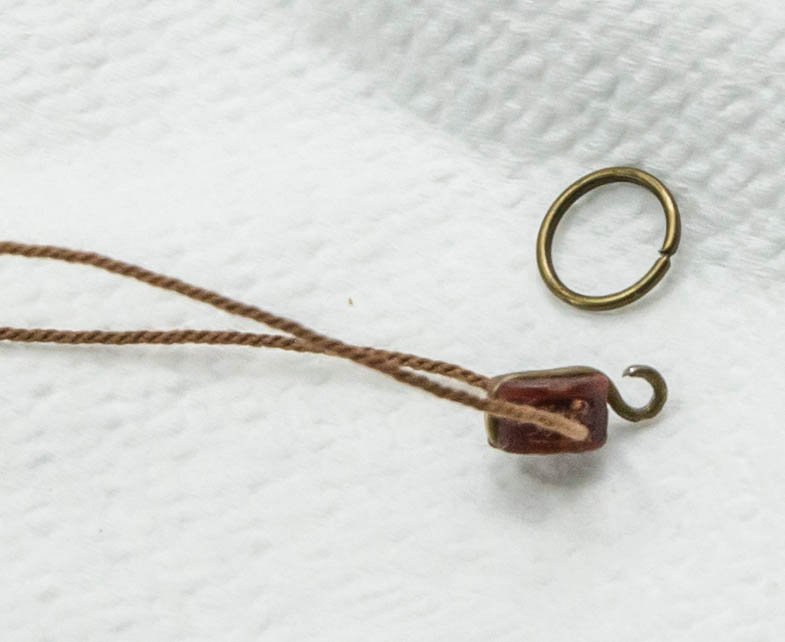
Hello. I have question about a component of rope stropped blocks - grommet. https://www.duckworksmagazine.com/02/articles/woodenblocks/woodenblocks.htm https://forum.game-labs.net/gallery/image/559-32-lb-carronade/ I would like to make (copy) the USS constitution's rope stropped blocks. (See the left corner of the picture.) To complete the rope stropped blocks, I prepared 4 components. a) 3D printed double block (2.7mm x 3.1mm x 2.9mm) b) metal thimble extracted from accesories c) 3 stranded thicker rope (Gutermann Mara 120, about 0.60mm) d) raw thread (Amann serafil fine 300, about 0.10mmm) I would say that this video explains well for non English speaker. According to the block manual, the next step is making a grommet that I stuck. I found this video is quite useful, but also found that it is not valid for scale model because of small size. Is there any way to make genuine scale size grommet for rope stropped blocks? I stuck at 7mm diamter size rope grommet. (right) I think it is almost impossible without special tools or machines. I searched and found more common ways such as color enameled copper wire or cut & knots. I cut the edge of the rope and glued epoxy bond (left) It works well, and the only issue is that it is not genuine rope stropped block. Here are some examples of model techniques. (Metal wire) Roger Pellet wrote an alternative method of simple rope grommet using wire. I tested his alternative method with threads. (He used wire.) I would say that this is more likely a served grommet if thread is used instead of wire. Thread can't keep spiral shape, so its final shape is ugly. I want to catch both external appearance and internal structure of rope stropped blocks. Have anyone make half inch size thread grommet successfully before? If not, I'll follow the wire guides... I add great topics that had same question. http://modelboatyard.com/stropping.html And this. The older posts I added have some interesting ideas that hiding cut & glues under neck thread. I'll try all the solutions.
-
- 1
-
-
What were your first tools as a child?
modeller_masa replied to FlyingFish's topic in Modeling tools and Workshop Equipment
Now I knew an original form of a toy I played! I played and made 'science box' series which seems very similar to the Gilbert erector set series. Amazing. 😍 (example picture)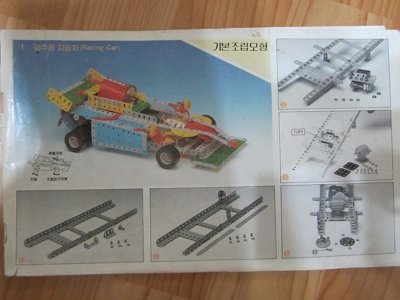
-
What were your first tools as a child?
modeller_masa replied to FlyingFish's topic in Modeling tools and Workshop Equipment
Plastick kit was dominant model hobby in South korea when I was a child and it is still be. I remember that I made my own diorama toolkit box which included colored dusts, glues, bonds, and pliers to assemble war vehicles and express battlefield. I found the toolbox recently, and extracted some useful things such as dried enamel paint and pliers. Resin bonds are gone, but enamel paints works agains after I refilled white spirits a little bit. -
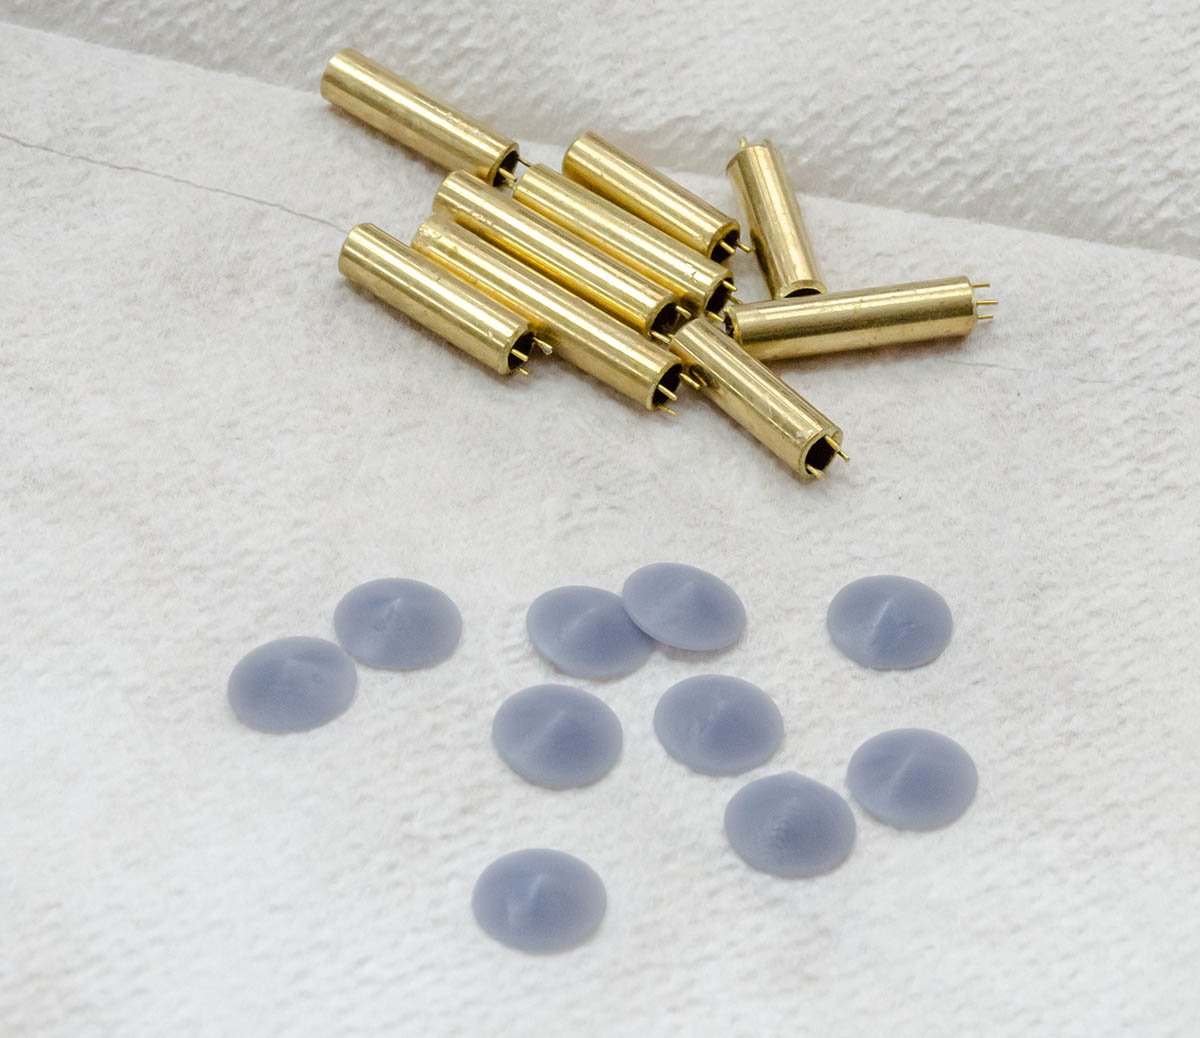
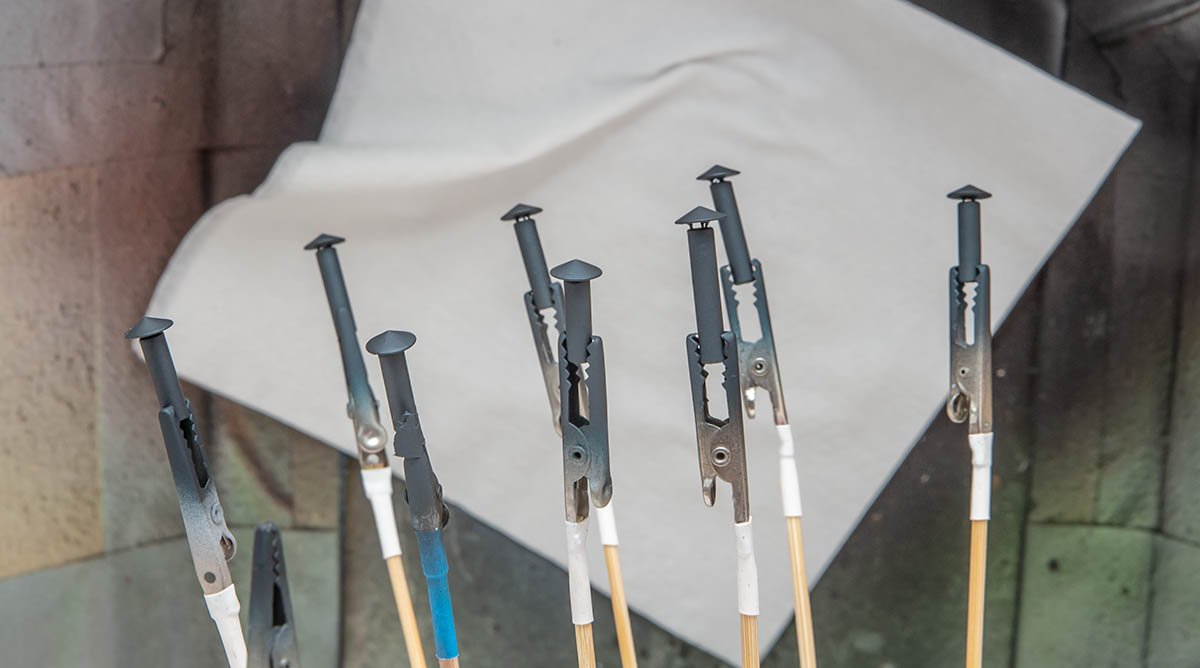
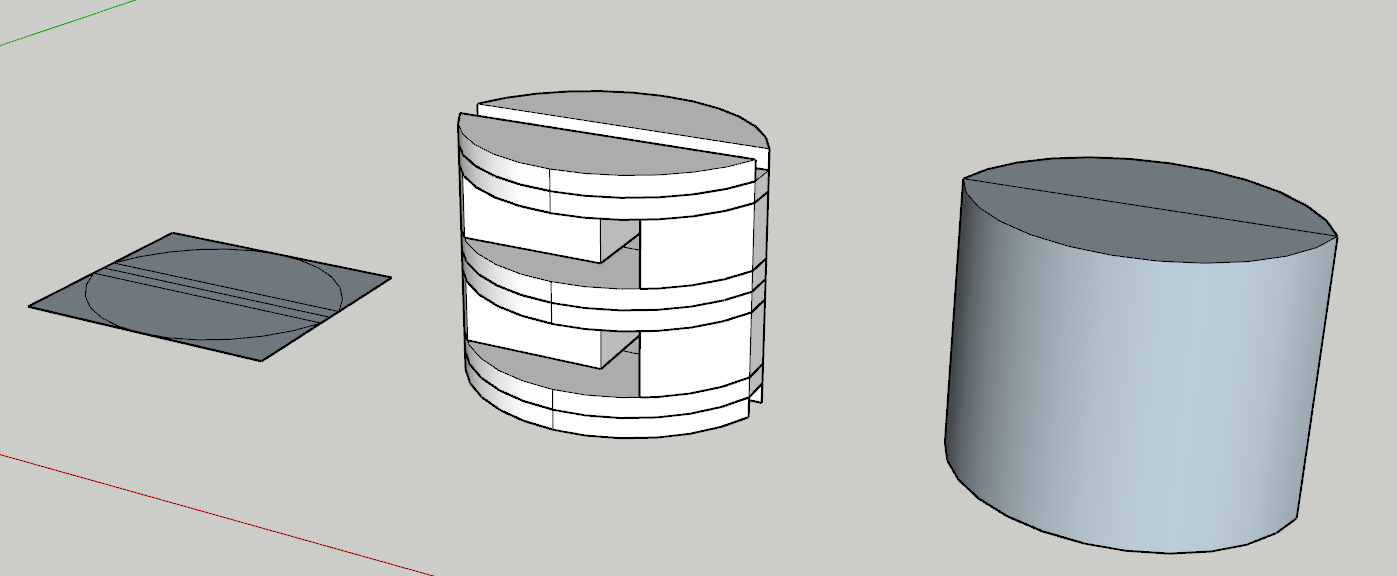
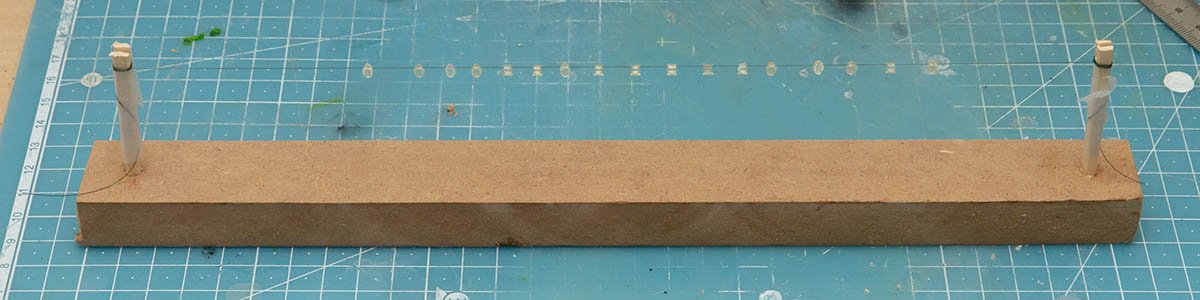
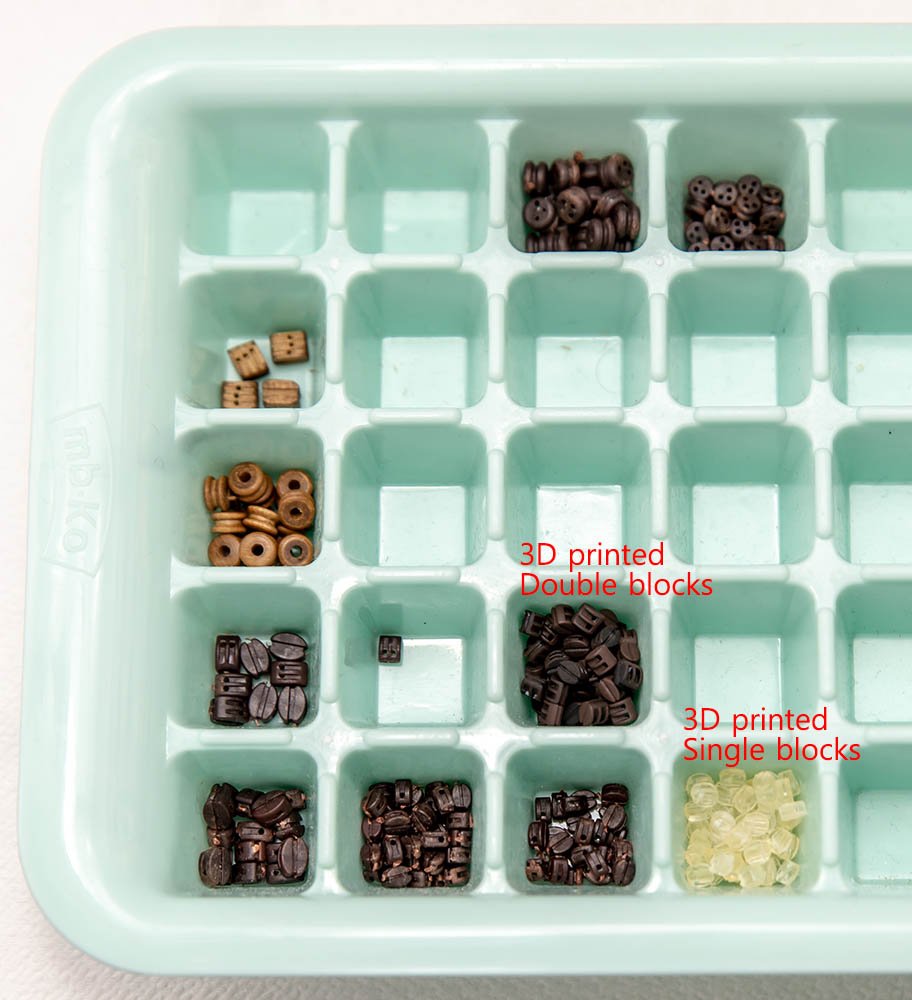
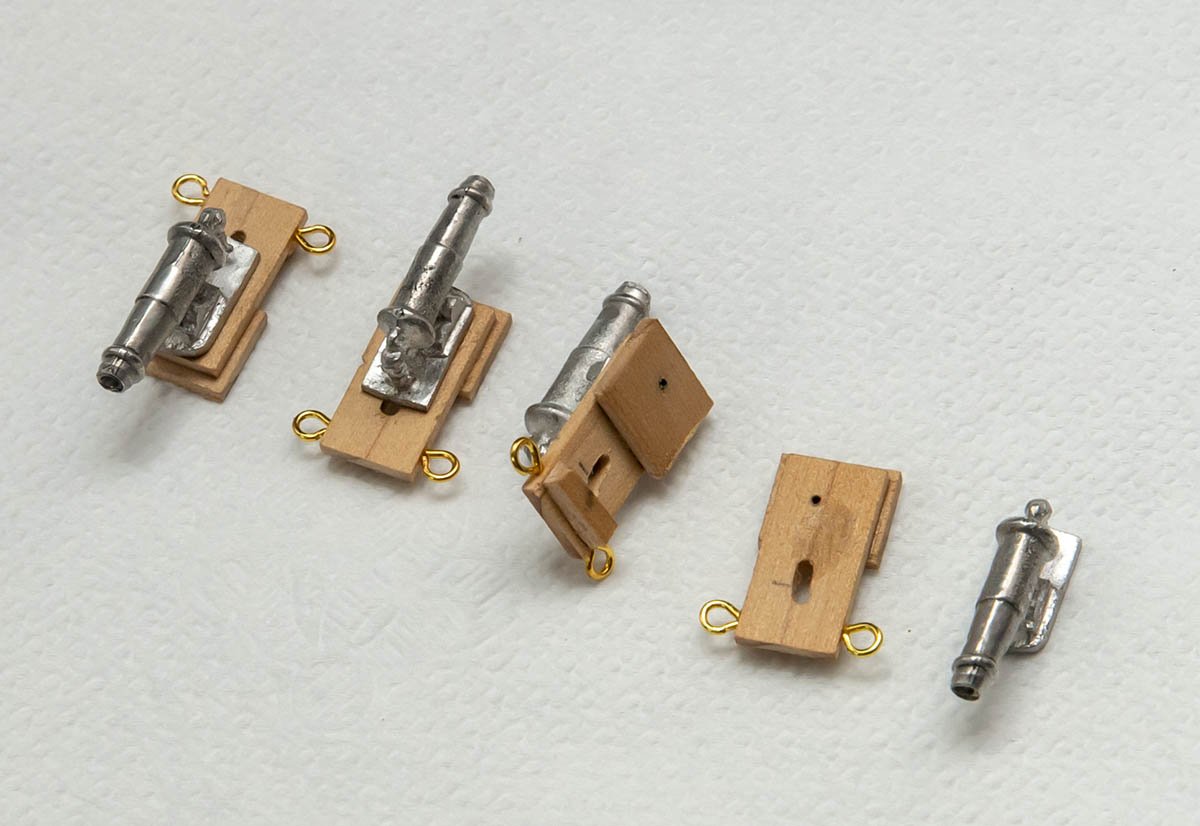
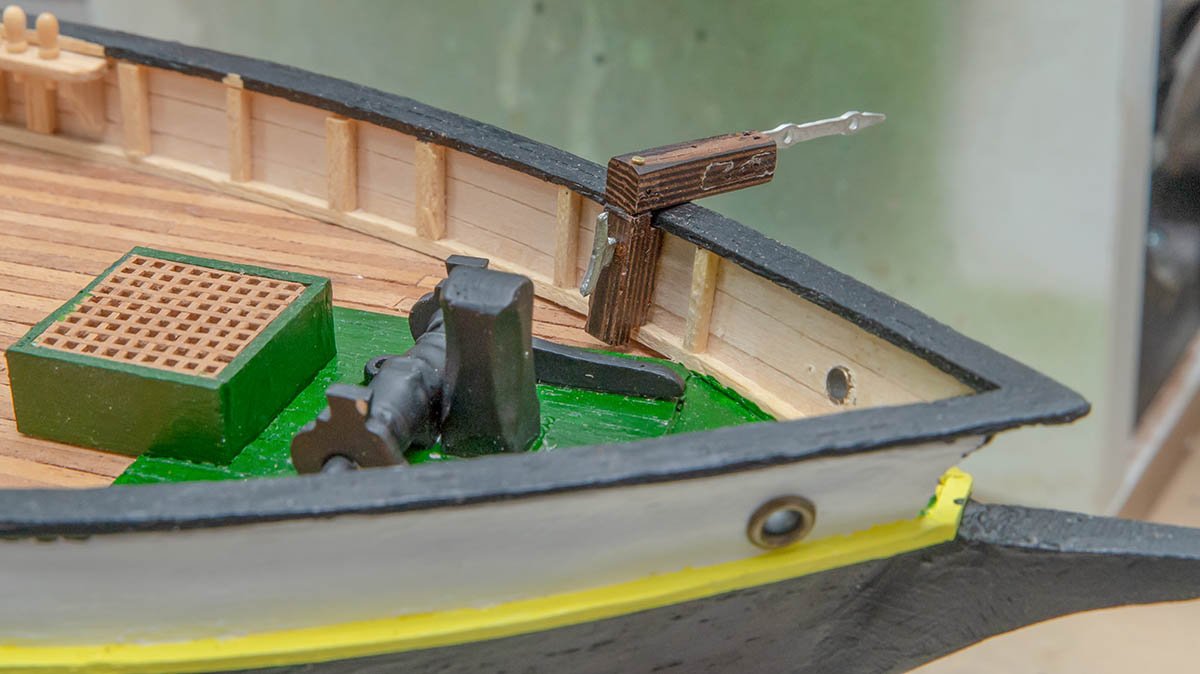
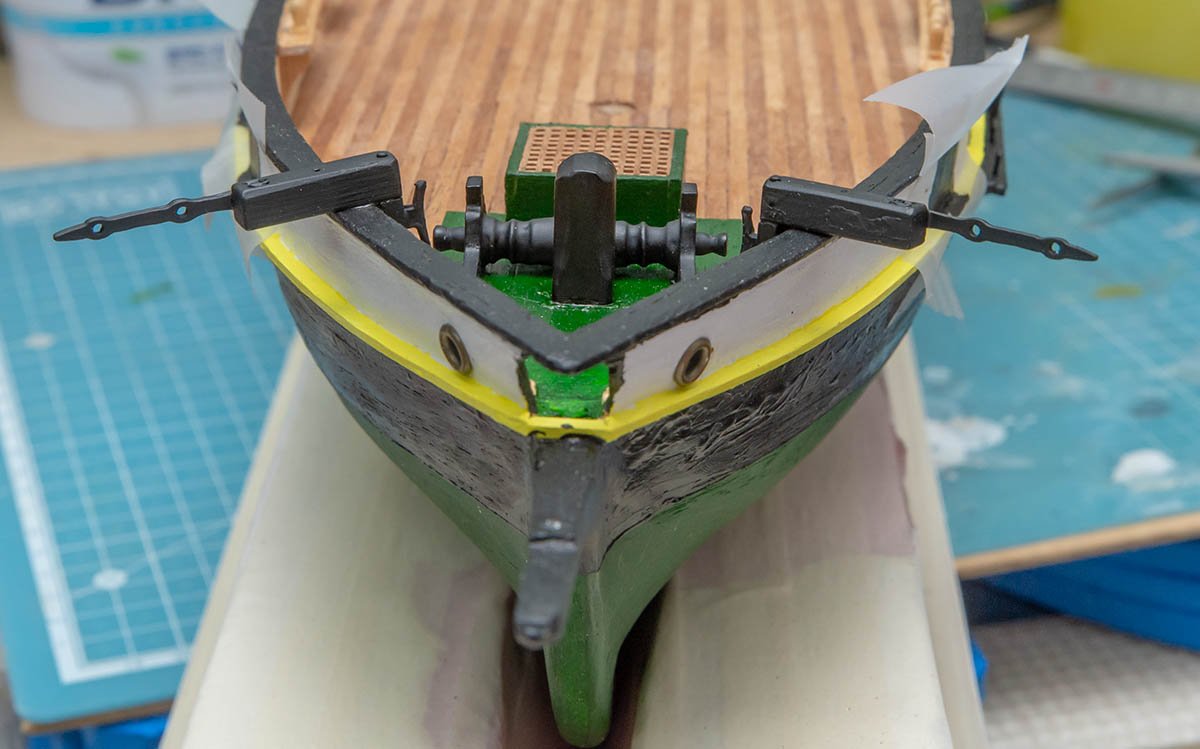
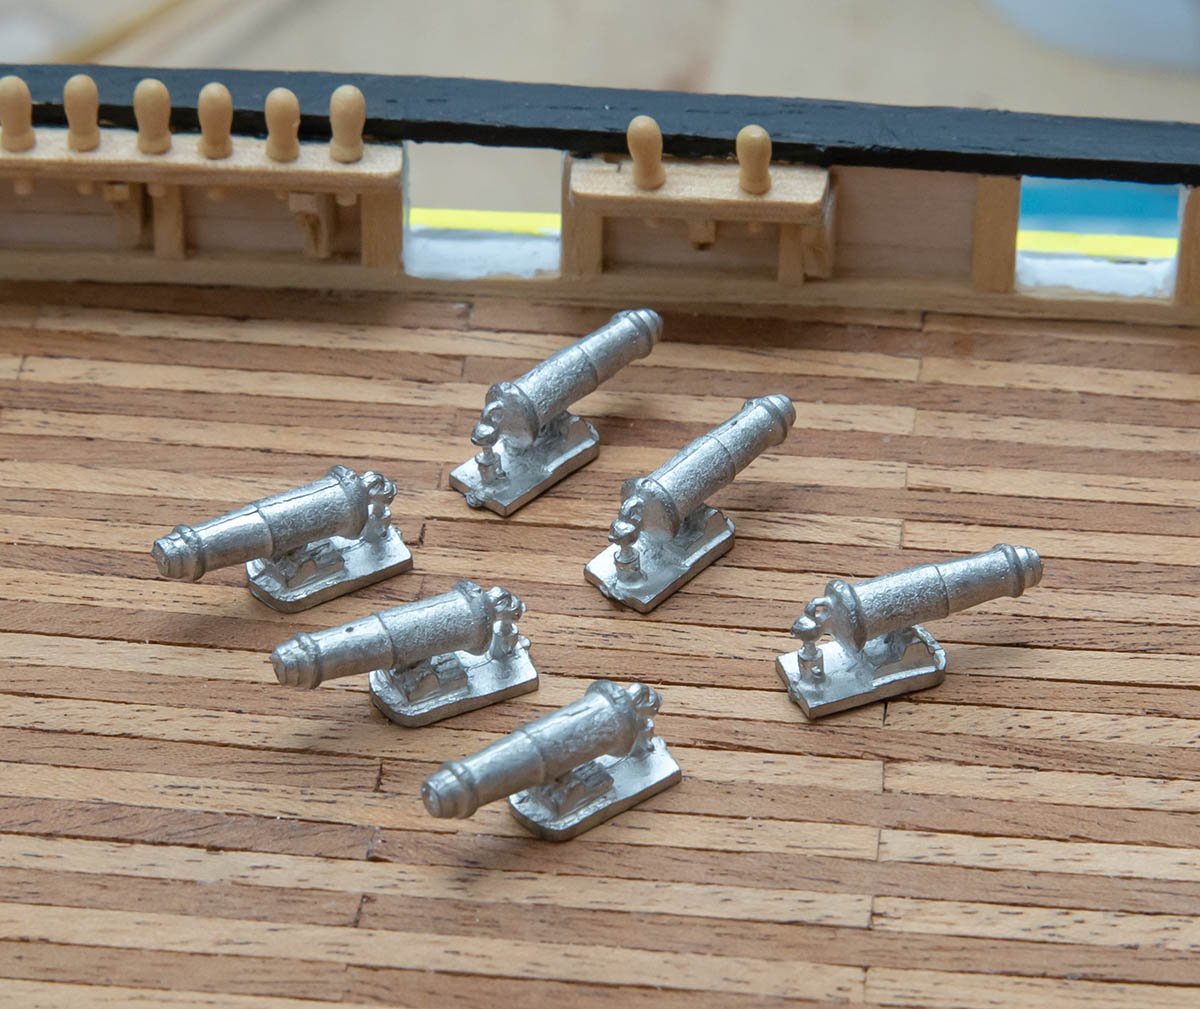
https://en.wikipedia.org/wiki/Carronade I referred the HMS Victory's 68 pounder carronade. Of course, the kit has no spare blocks and rigging threads, so I decided to buy them at local hobby shop. Looks like the artesania 3mm double block is only option I can buy directly in Seoul... Wait... ...... I decided to make my own double block using 3D printer. I read some DIY double block guides on internet, and immitated them. After some trials and errors, I successfully copied an original double block will be used for sail rigging. Estimated expense is 22 cents. I made simple jig for painting the transparent 3d printed blocks. The most important thing is thread. I used 0.20mm nylon thread. It is stiff and has no fuzz. It holds blocks well and keeps them clean while I spray lacquer paint. The size is 2.90 x 3.70 x 3.10mm, and its shape is more realistic than stock double block. 😉 I can make any size at hundreds times cheaper price. When I buy metal lathe and get 1mm brass rollers, I'll make full detailed blocks. I printed additional single blocks for the future rigging. And then, I made cannon stand which is inspired from HMS Victory's 68 pounder carronades. I'll use two kind of threads for cannon rigging as upper picture shown. I'm still having difficulties with controlling the Domanoff PL4-4 machine. It is sensitive machine...


-
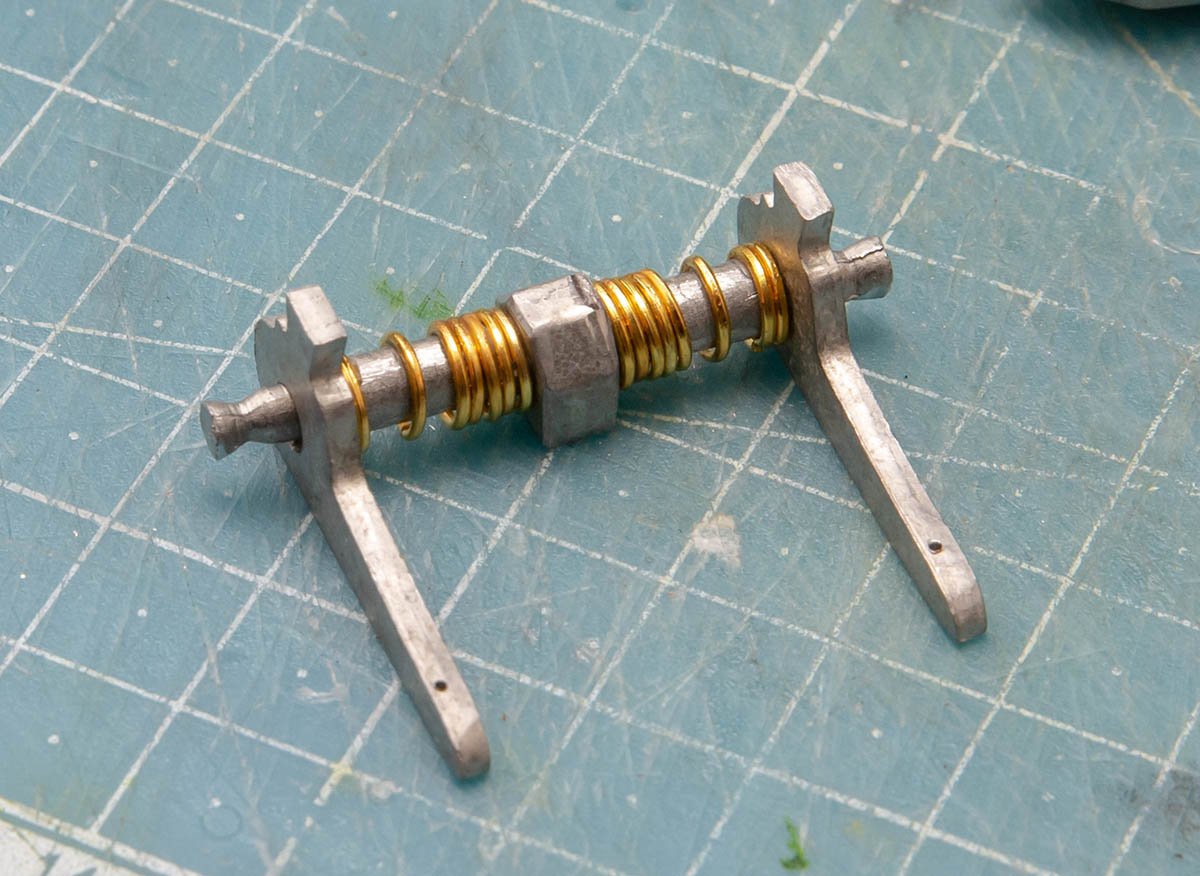
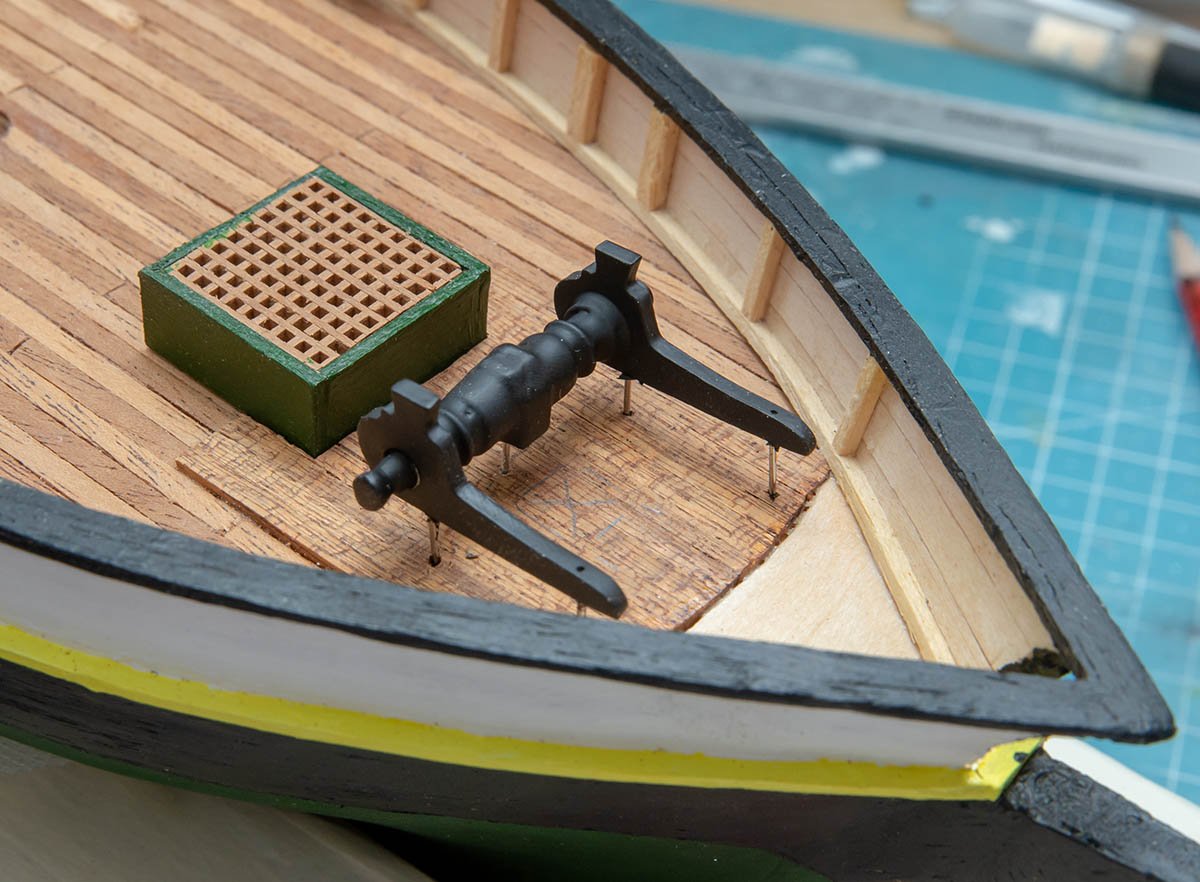
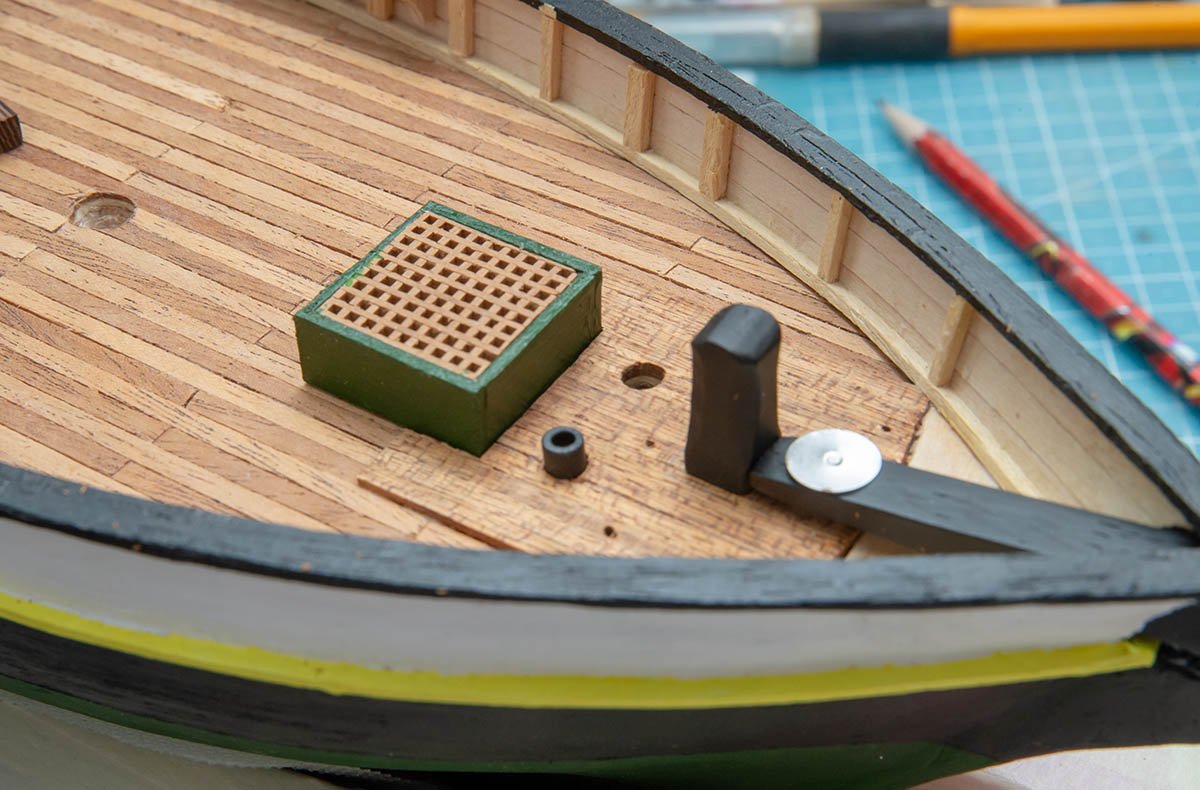
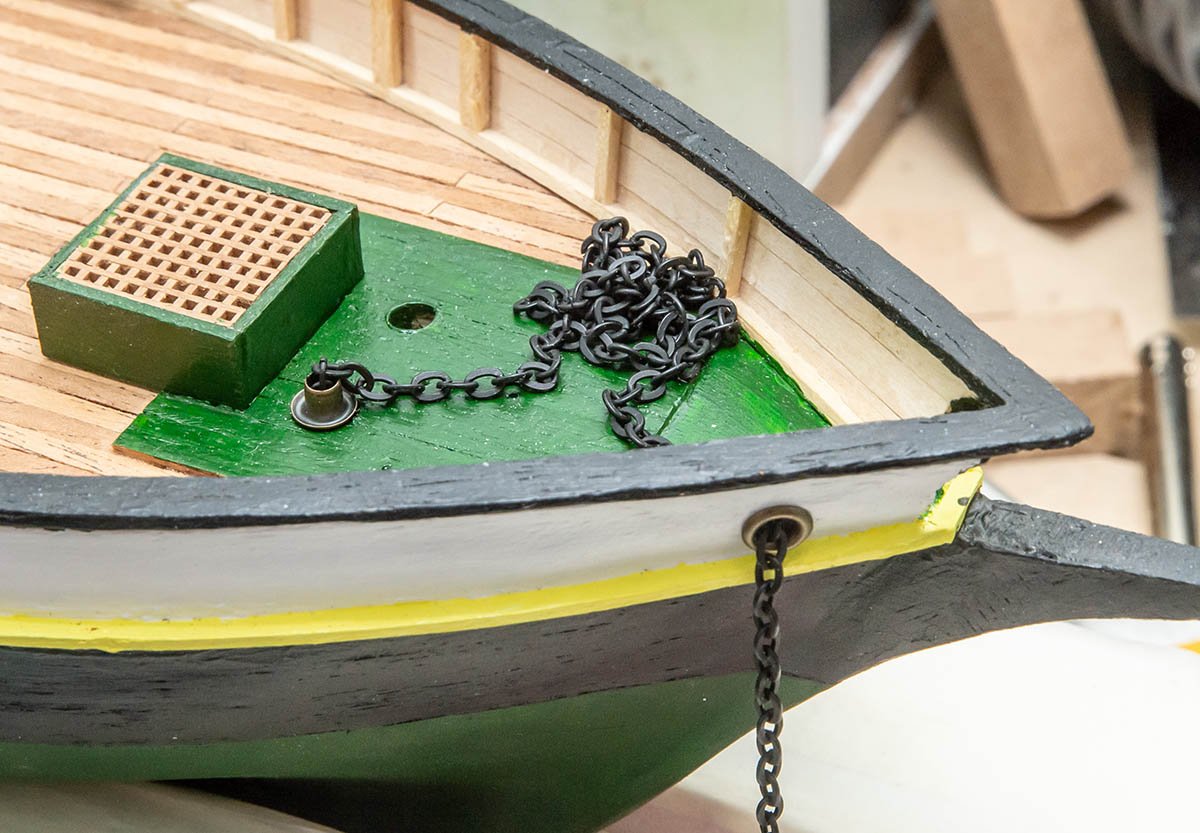
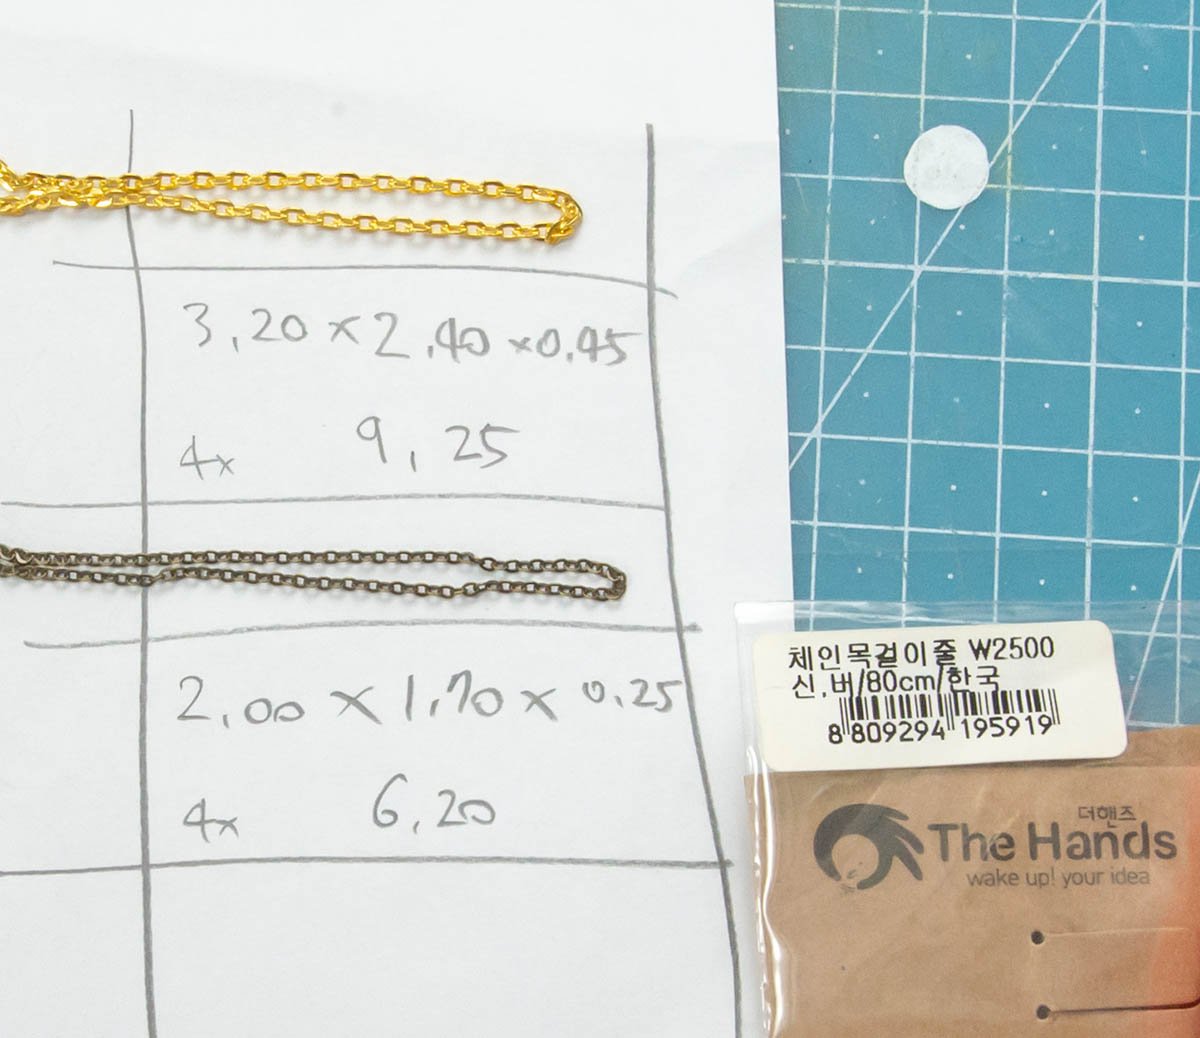
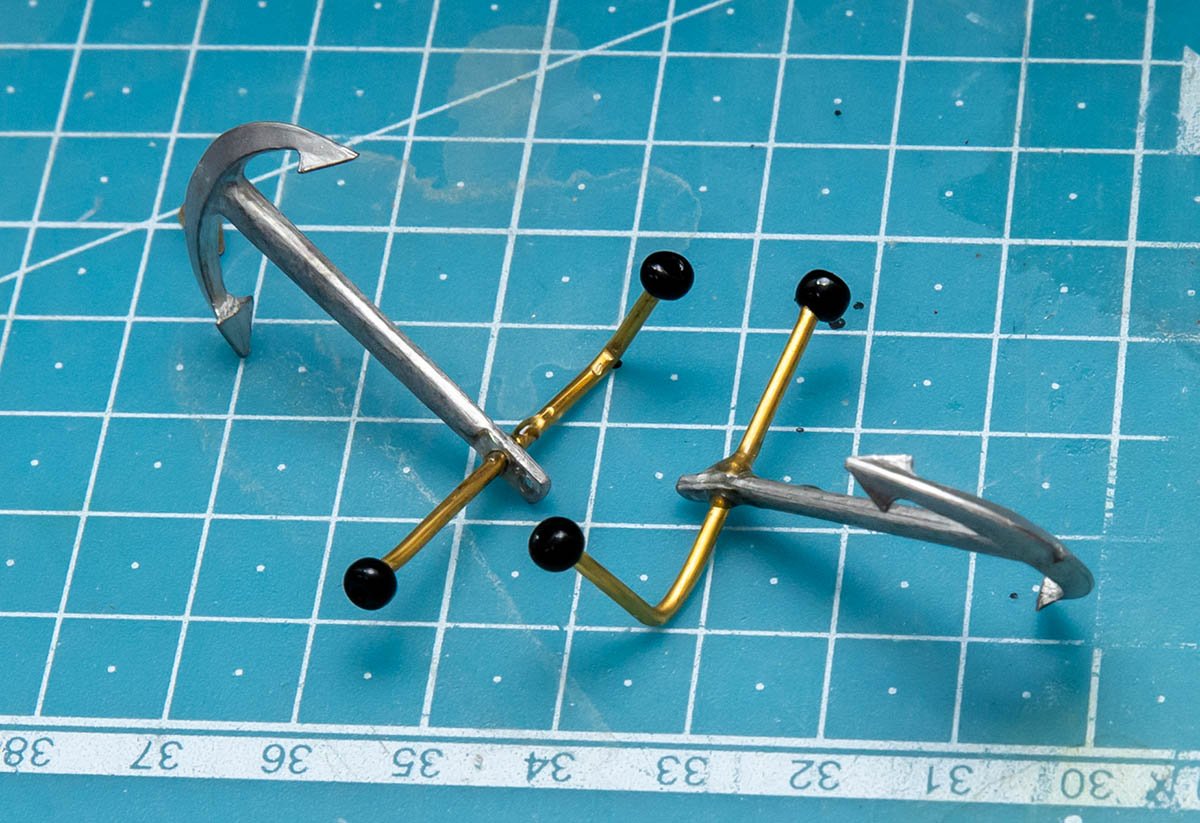
I slightly fixed windlass to be more realistic. I liked the matt black colored chain, but its size (4.40mm x 3.40mm) is not realistic. So, I bought new antique color chain. (2.00 mm x 1.70 mm) Too much exaggerated expression looks cheap. The manual doesn't show anchors' design, so I copied another schooner's design. Insufficient manual made me to study cathead. I had to research what kind of cathead is in her. I'm not sure it's correct... I made new 3 stranded rope with Gutterman Mara 120 thread. Found that it's not a time to rig anchors. 🤔 Glued them with epoxy bond. The next and final deck accessory is cannon. Of course, the manual omits explanations on the cannon's rigging and stand. I'll refer to the USS Constitution's 32 pound carronade which seems to be the most similar. And then, bowsprit, masts, rigging, and sails. 😀

-
Worx Makerx Tools
modeller_masa replied to rhephner's topic in Modeling tools and Workshop Equipment
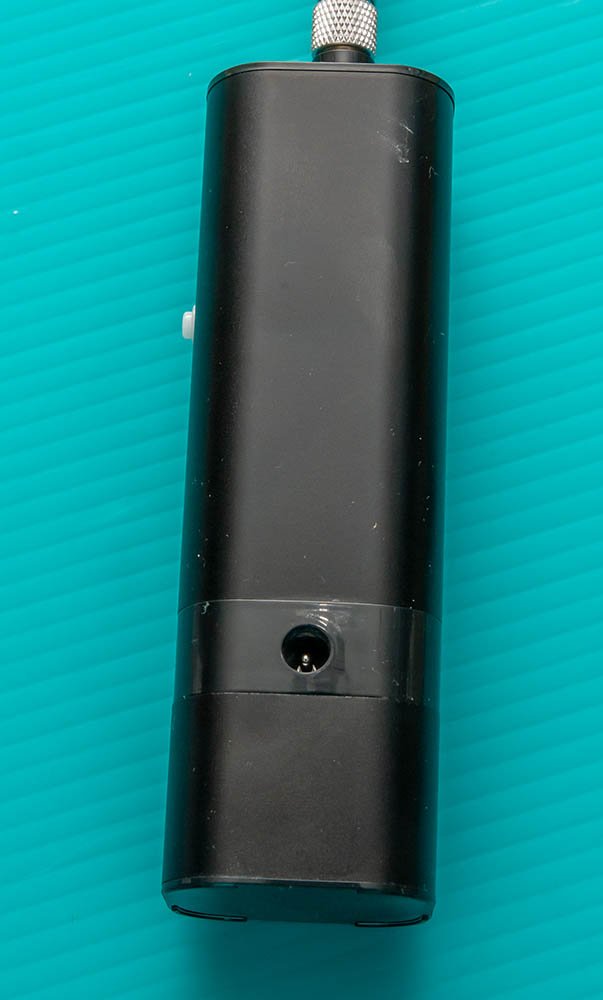
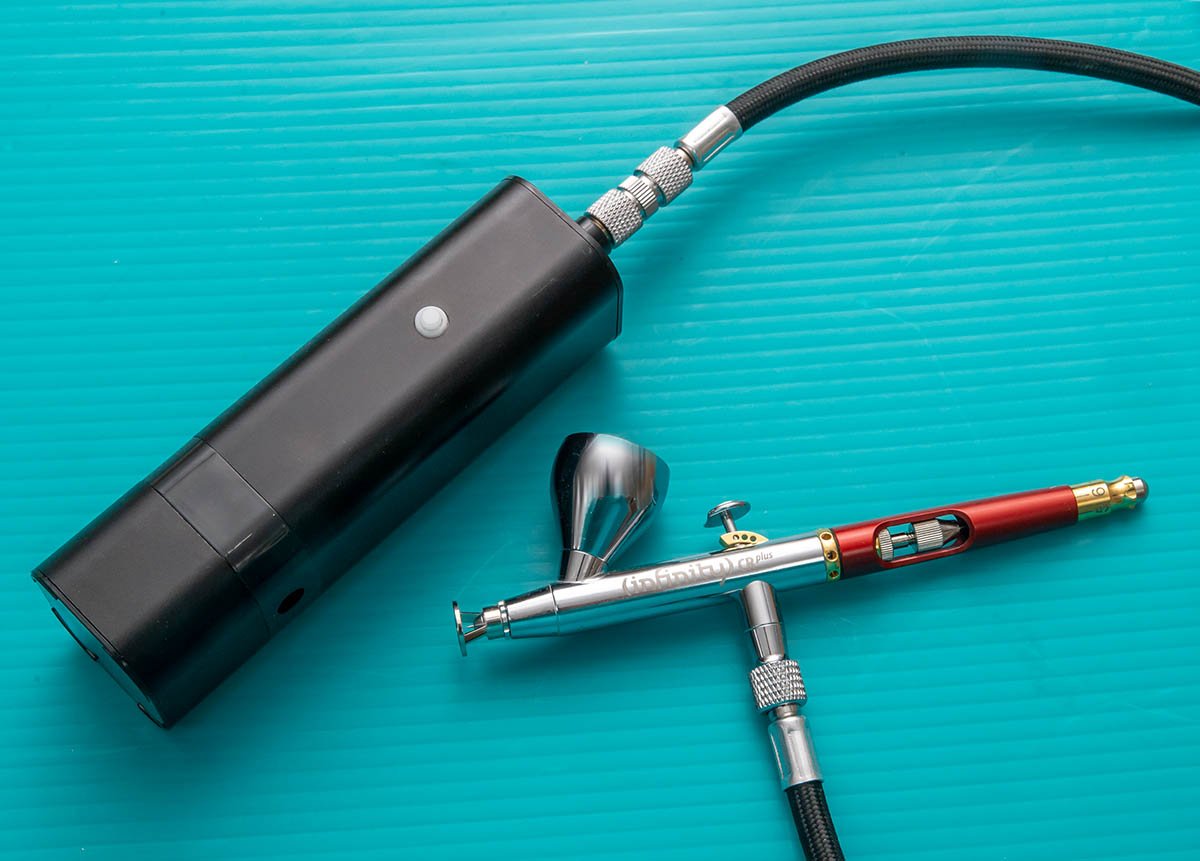
I bought an upgraded version of the wireless compressor. Its price is about $50. The white toggle switch is power button. This is power port. It comes with USB cable. Its battery time is about half hour, but I can use it while in charging. The reason it is called second generation of wireless compressor is that it has pressure sensor inside. The first and cheaper version has no pressure sensor, so they blow air always. If you use it with regular airbrush, the inner pressure will increase till the end! To avoid the design failure and potential breakdown of compressor motor, they use modified airbrush which has single action lever only. It is possible to use conventional or masterpiece airbrush with the old wireless compressor, but you may need to turn on and off power switch each time. https://serviceapi.nmv.naver.com/flash/convertIframeTag.nhn?vid=2AEC7BDA593EDACD62AA5DC5E934FEA3BB71&outKey=V125363b07846d87f5ce329717e6f14f6a6fa3b6897472869472529717e6f14f6a6fa&width=740&height=416 (I took a video.) This new version has pressure sensor and turns off automatically when pressure reaches at certain level. With the sensor, I can use it like usual huge air compressor. Another benefit of this mini compressor is low noise. 55 dB means your family won't wake up in the middle of night. Drawback is low pressure. its maximum pressure with Infinity CR2 is about 0.05 Mpi = 7 Psi which is barely acceptable for fine lacquer particle. Such low pressure is not suitable for acrylic paints that requires 0.15~0.20 Mpi = 21~30 Psi. I'll use it for lacquer painting or cleaning.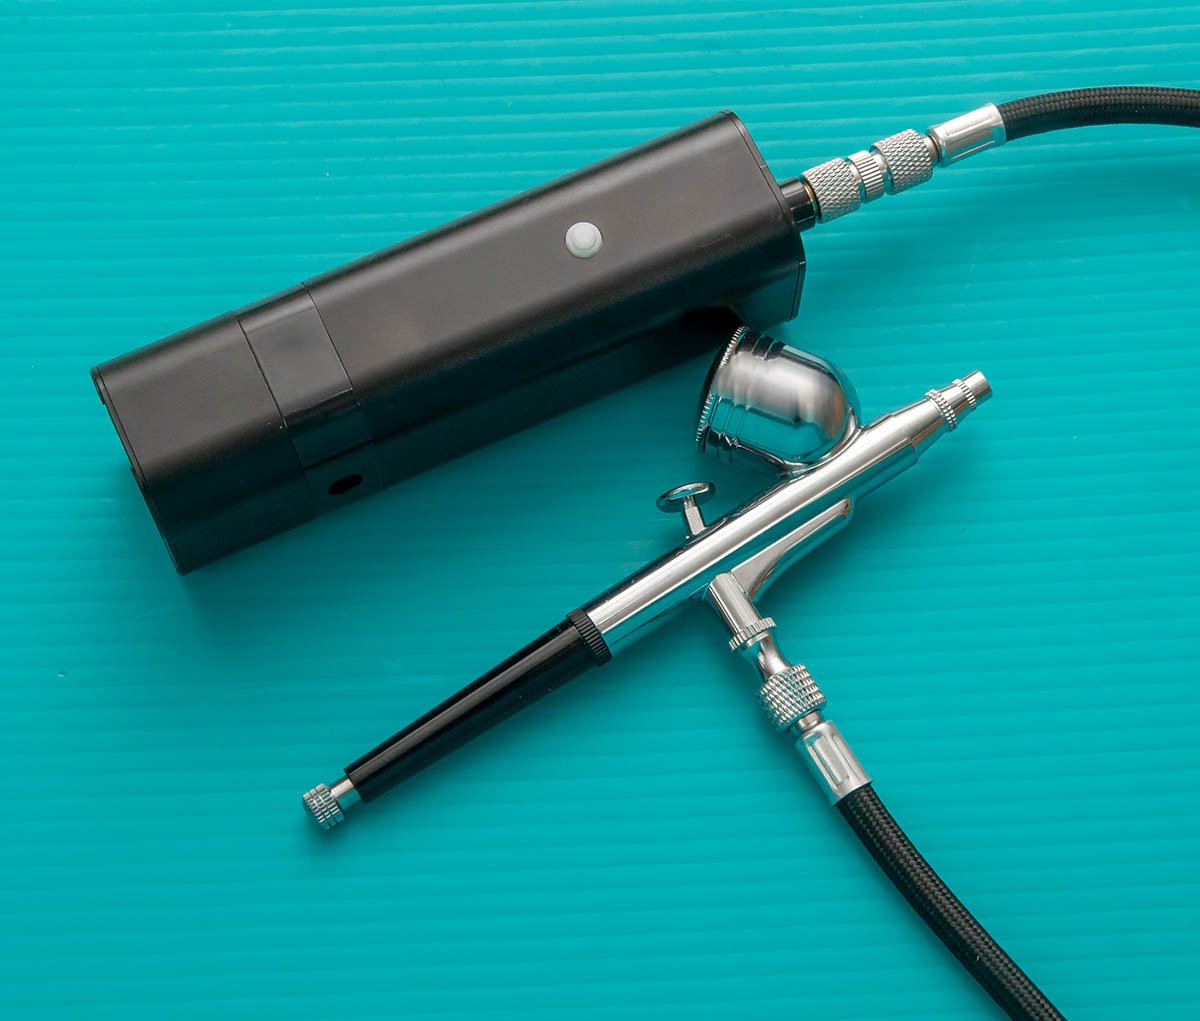

-
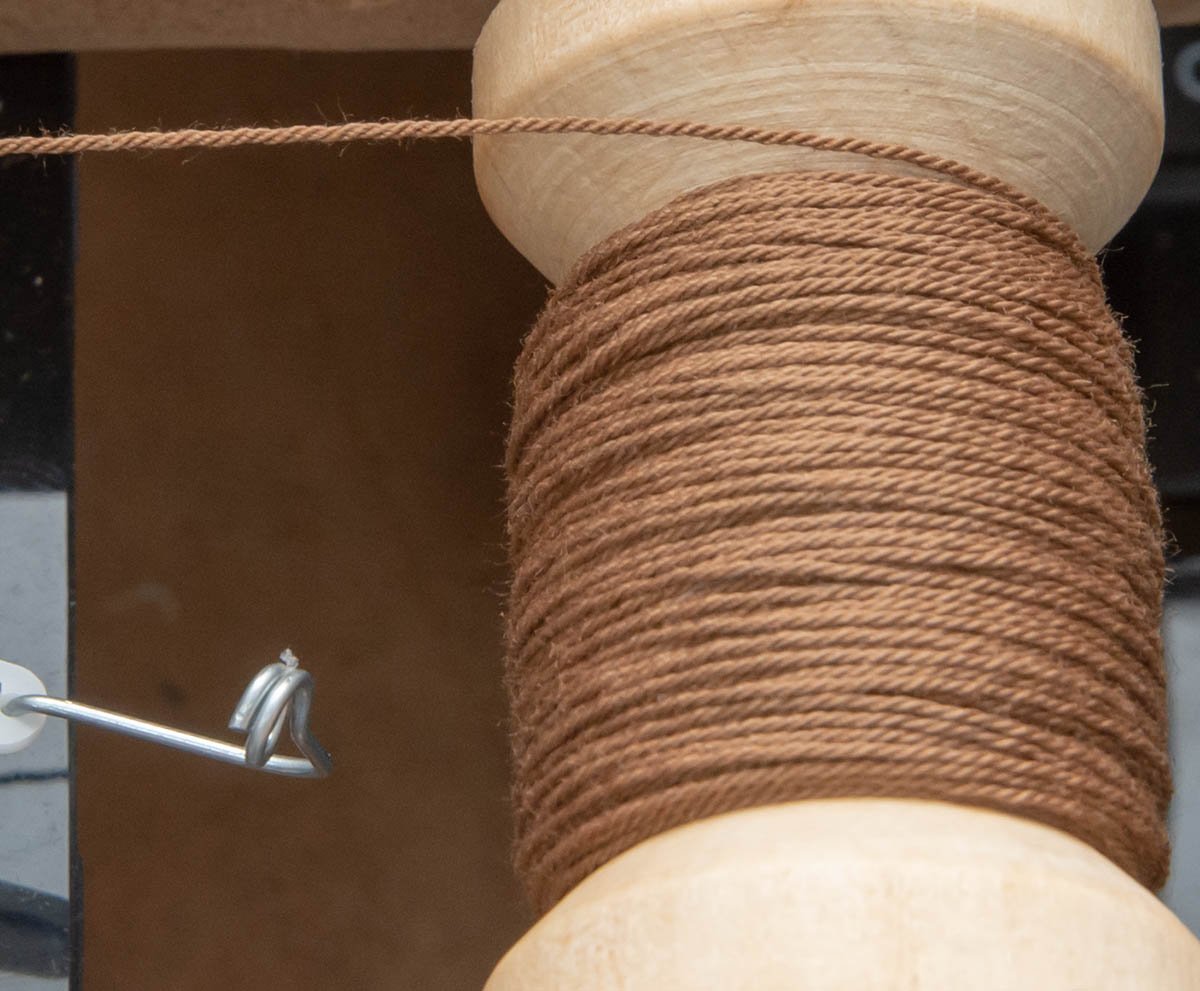
Domanoff ropewalk PL4-4 modification
modeller_masa replied to modeller_masa's topic in Masting, rigging and sails
Sorry for wrong post. I misunderstood a concept of this device and performed reckless modification. I checked all the manual and description, and found that this is a special machine. His manual is very compact, but very dense. I shouldn't have skip some sentences. I believed that this machine can do anything because of the most expensive price, and the self illusion made me to modify it to be an universal machine. I was yelling that my new motor boat is not flying, and was welding wings. 😂 I followed the instructions, and (heavily modified) Domanoff PL4-4 works pretty well in that way. Most issues I encountered above were out of manual, and some good results I considered as a beginner's luck were as instructed. Equal tension on supply bobbins is a bit frustrating, but I believe I can manage it with simple tool such as spring balance. It is inconvenience as wefalck said, but I want to stick to manual and learn skills now. Thanks again for hearing my pointless complaints patiently. I won't do this next time by reading manuals carefully. The wood bold with R-clip is only valuable result from this project. It works with Domanoff SM4 serving rope machine idealy. I'll report it to Alexey. --- wefalck, I thought about multiple spindle motor-computer driven device. It can count every twist and strength of tension in theory. I think it seems like 3D printer.