HOLIDAY DONATION DRIVE - SUPPORT MSW - DO YOUR PART TO KEEP THIS GREAT FORUM GOING! (Only 36 donations so far out of 49,000 members - C'mon guys!)
×


Rick310
-
Posts
785 -
Joined
-
Last visited
Content Type
Profiles
Forums
Gallery
Events
Everything posted by Rick310
-
Rob, I just came across the pictures of the Snow Squall.. The model is in tha Maine Maritime Museum in Bath Maine, right next to the forefoot of the actual Snow Squall. I have multiple pictures of the model and have used it as a reference for the Flying Fish. Interesting to see the model under construction. Where did you find the pictures? Rick
-
Thanks for the advice Nic and George. Will consider sanding if zi can find a way not to damage the wood Rick
-
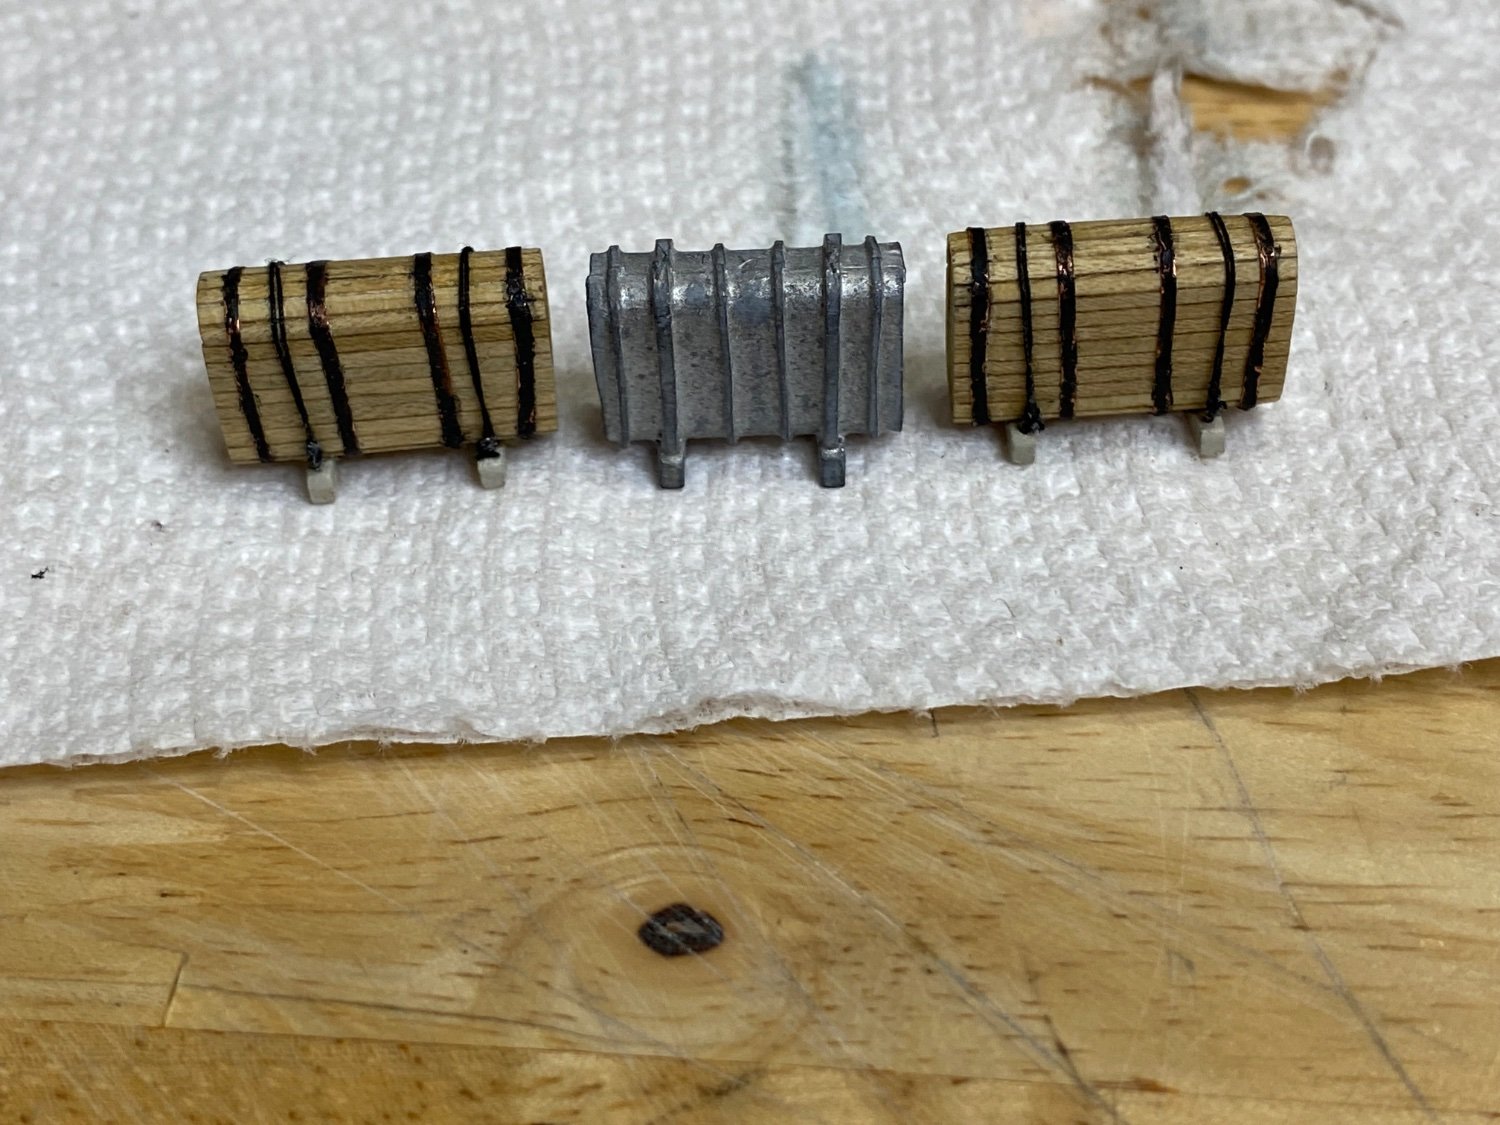
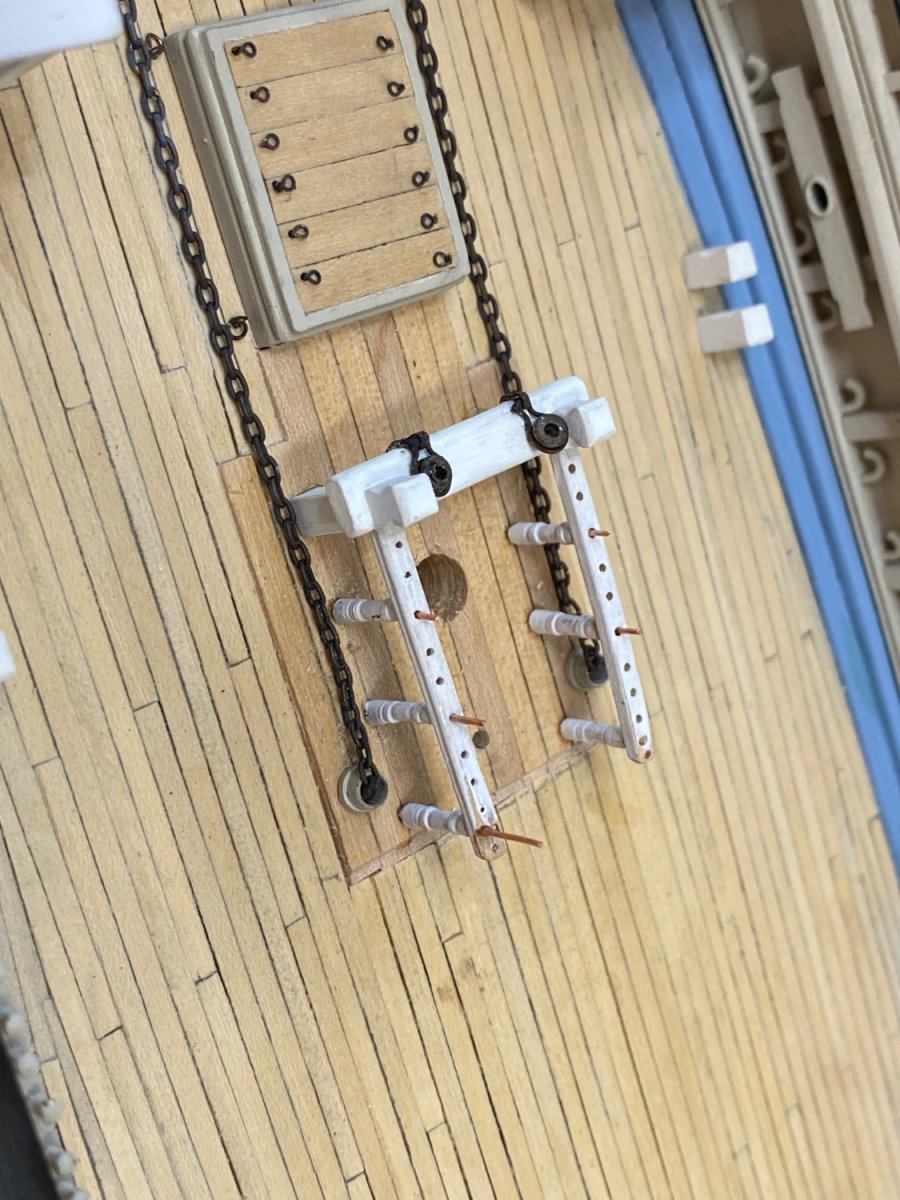
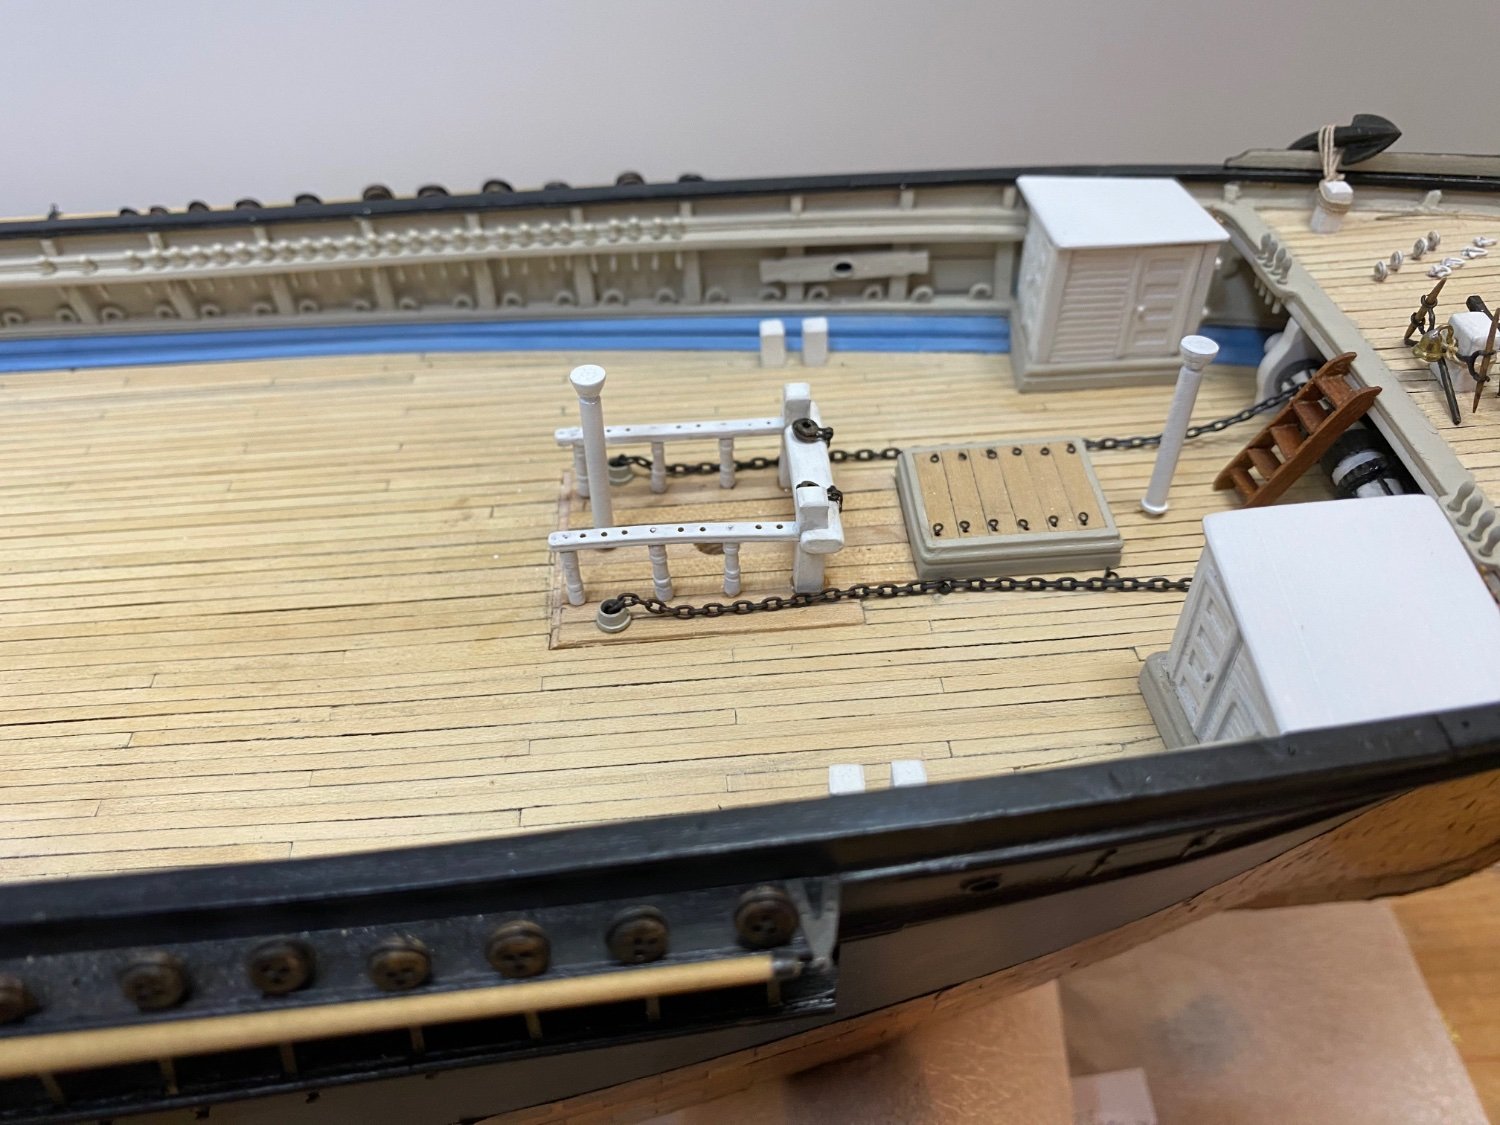
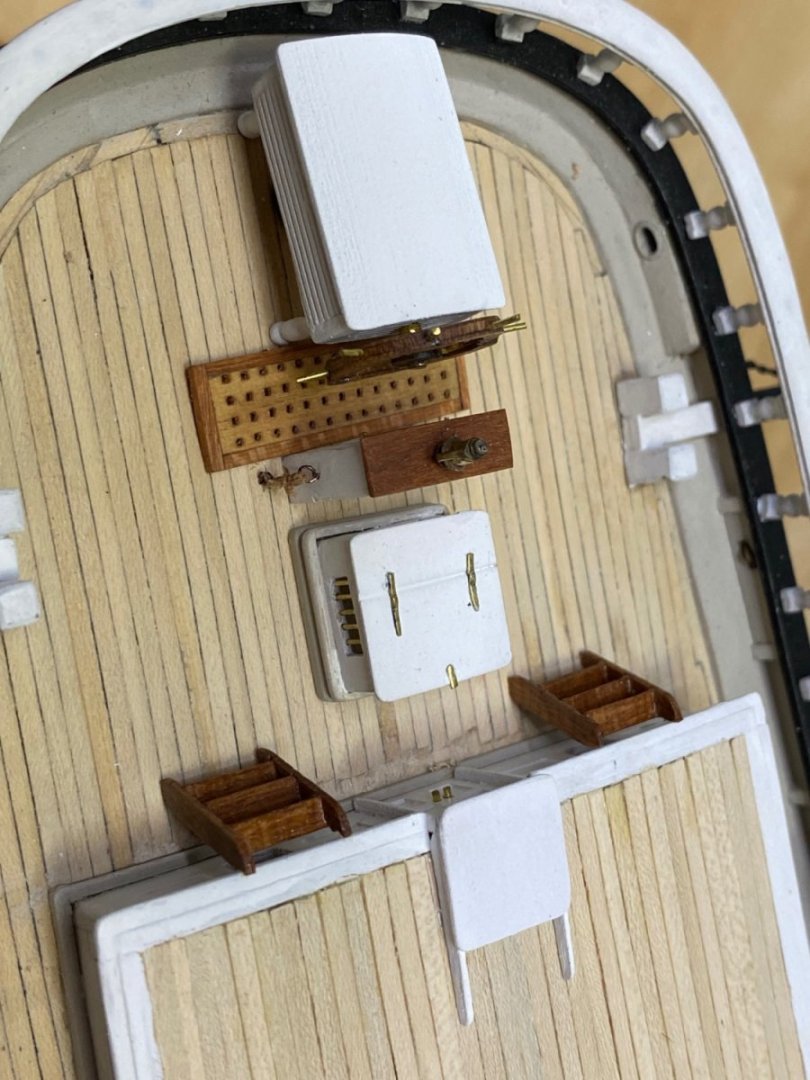
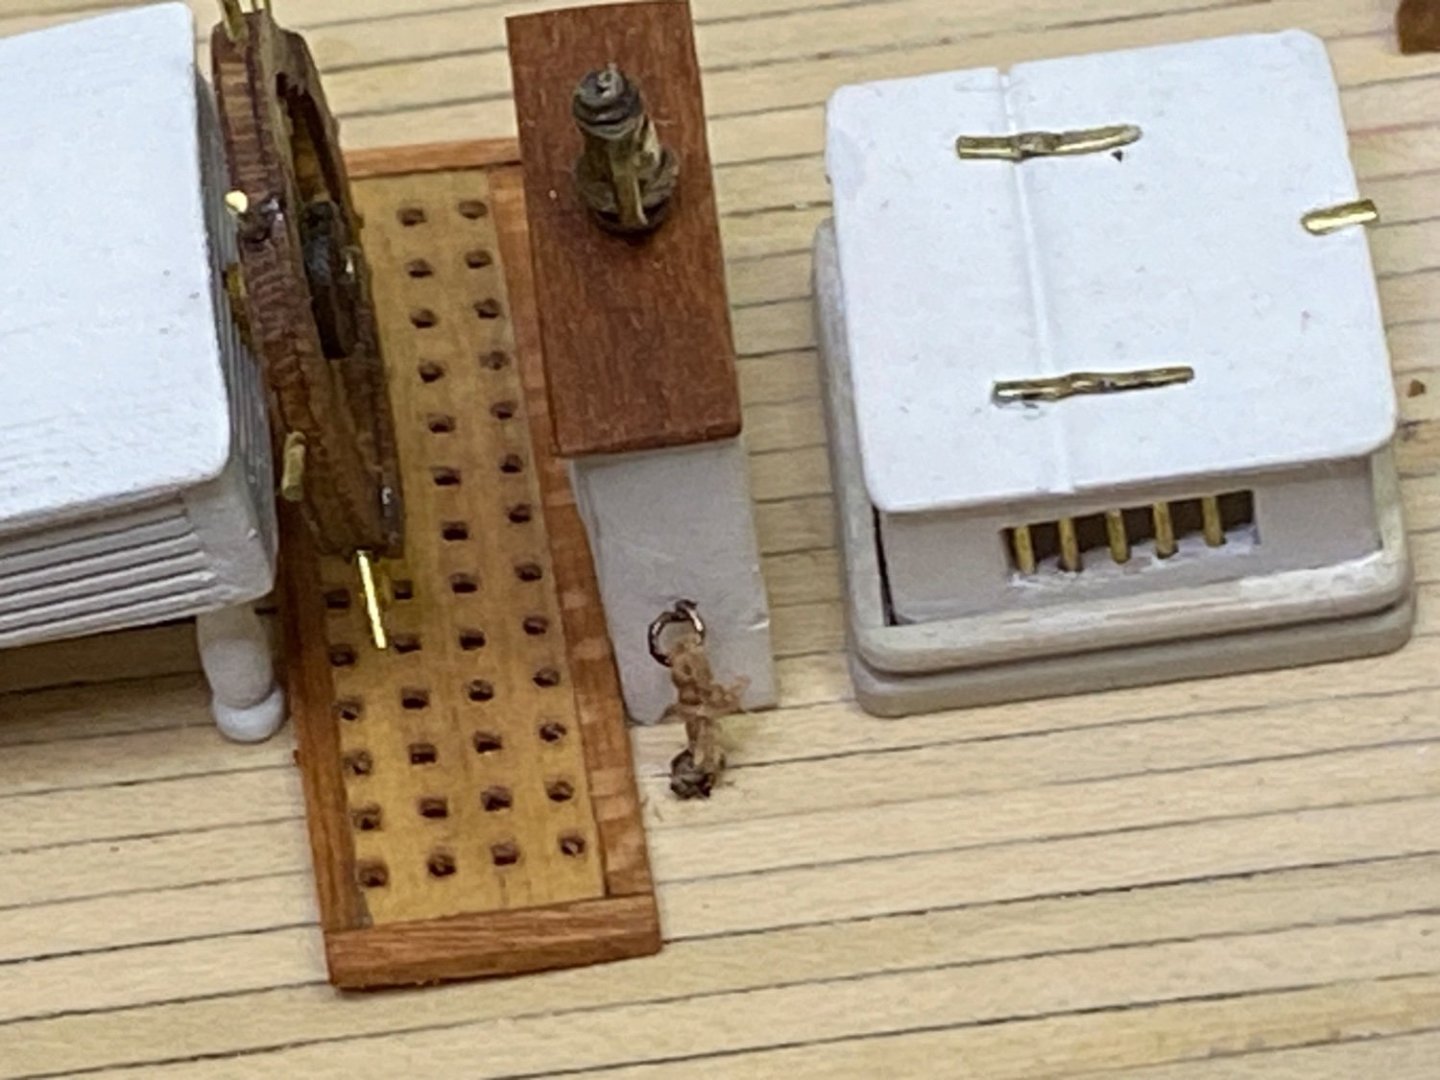
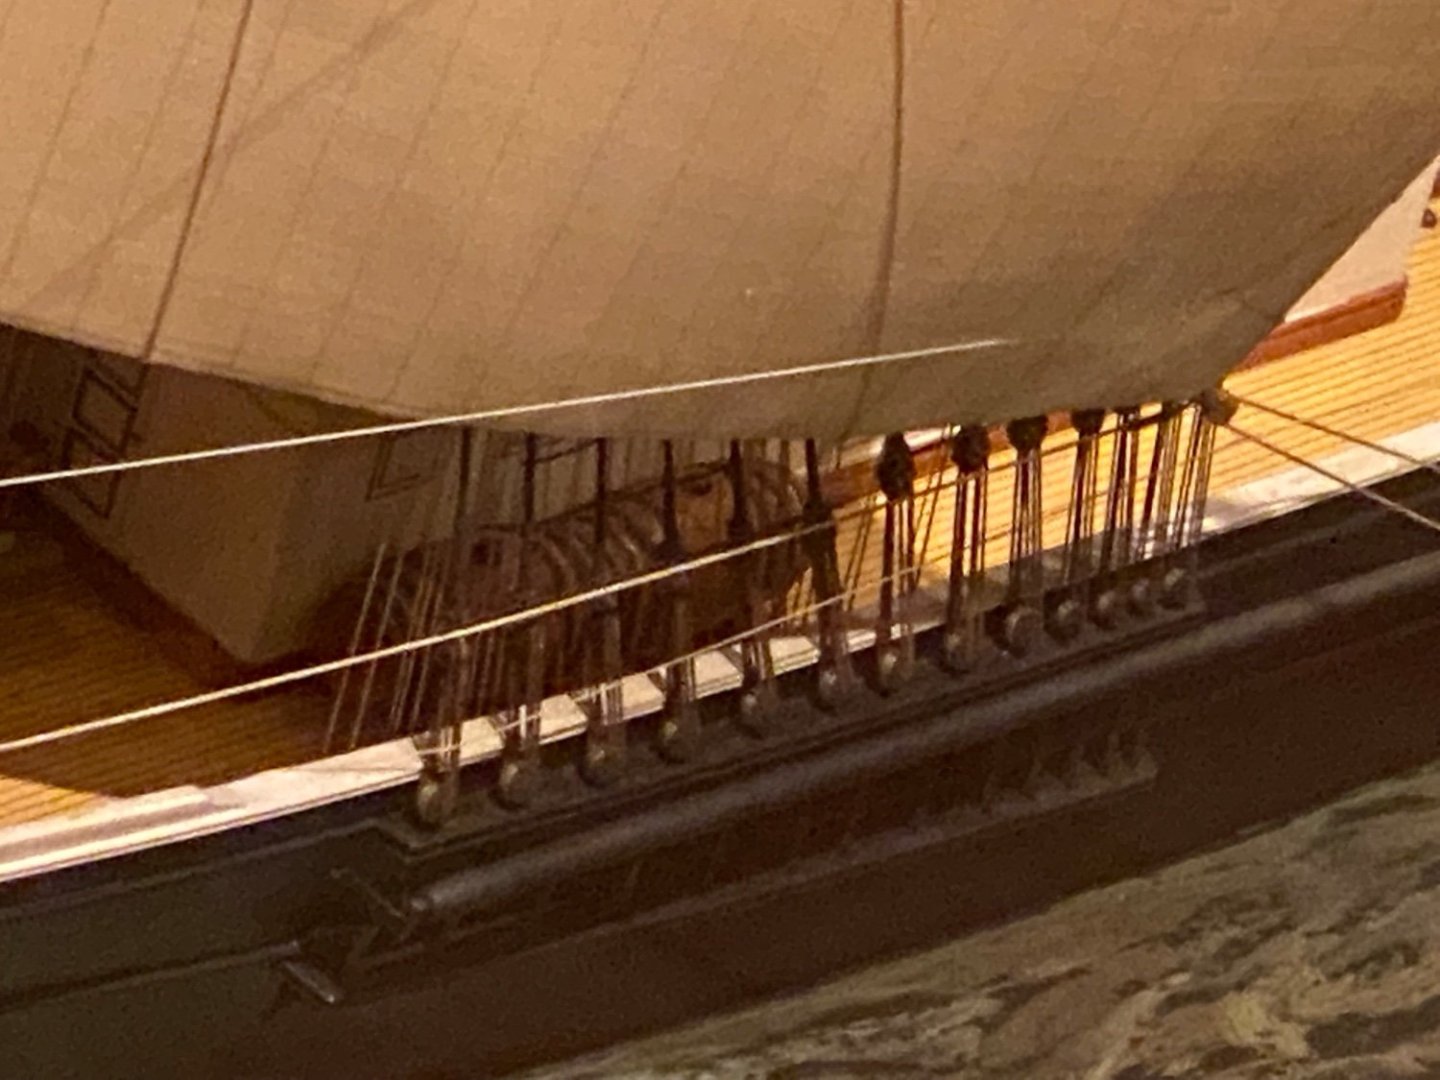
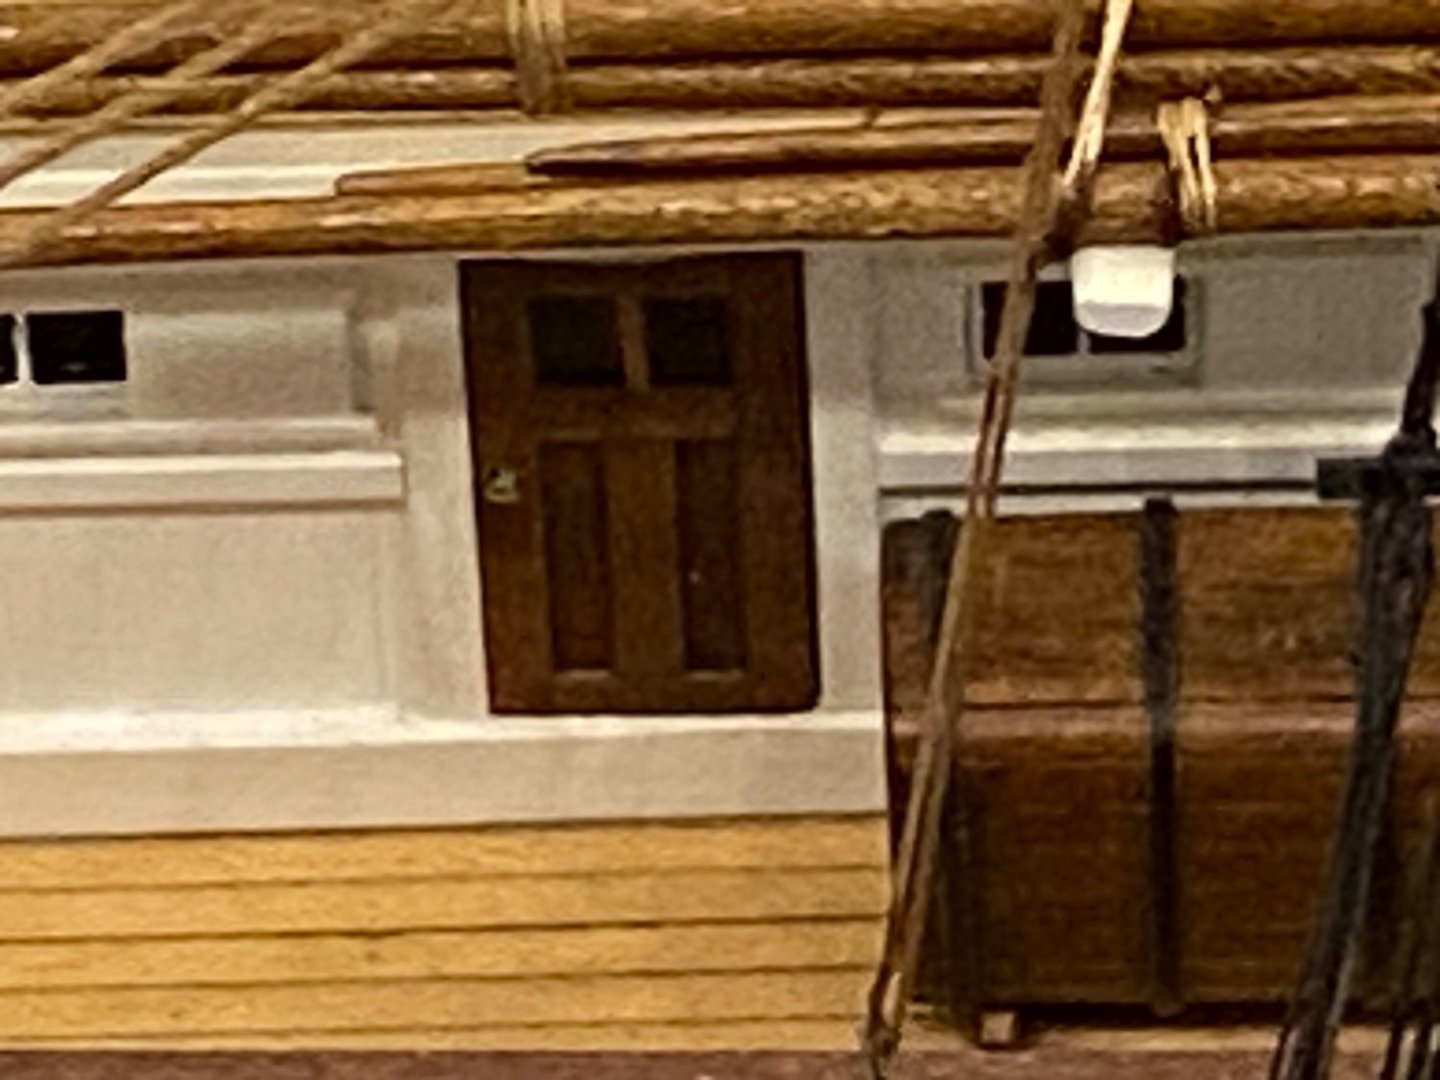
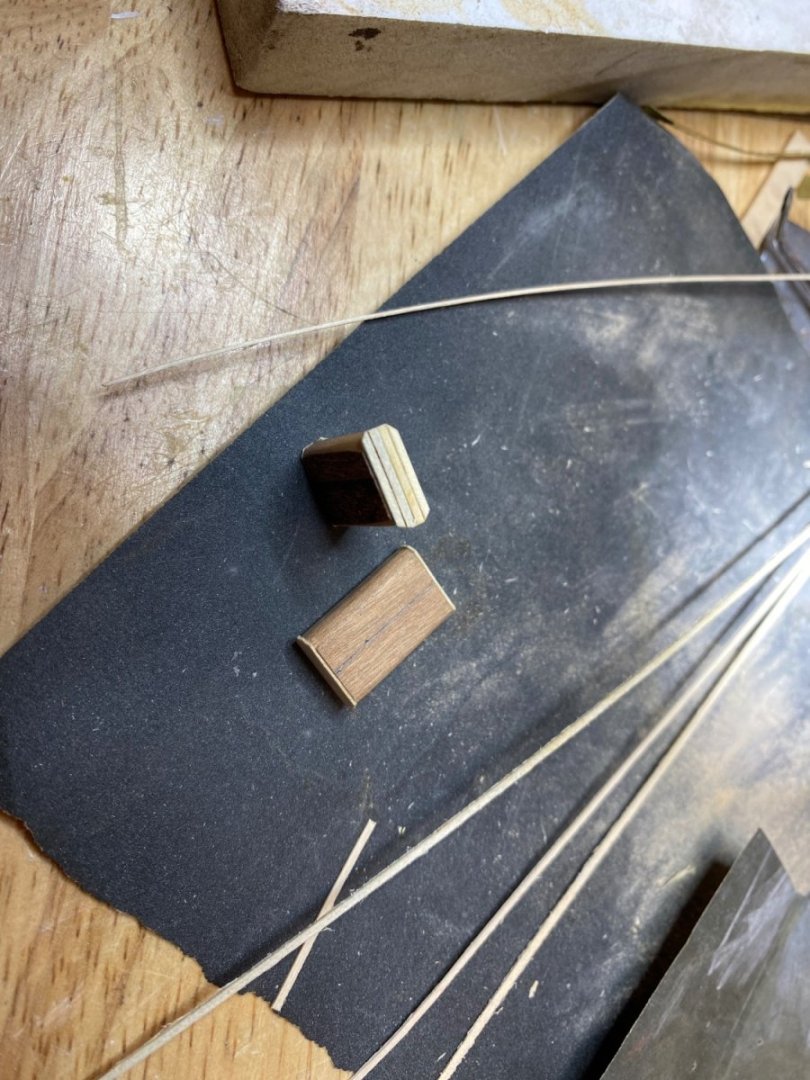
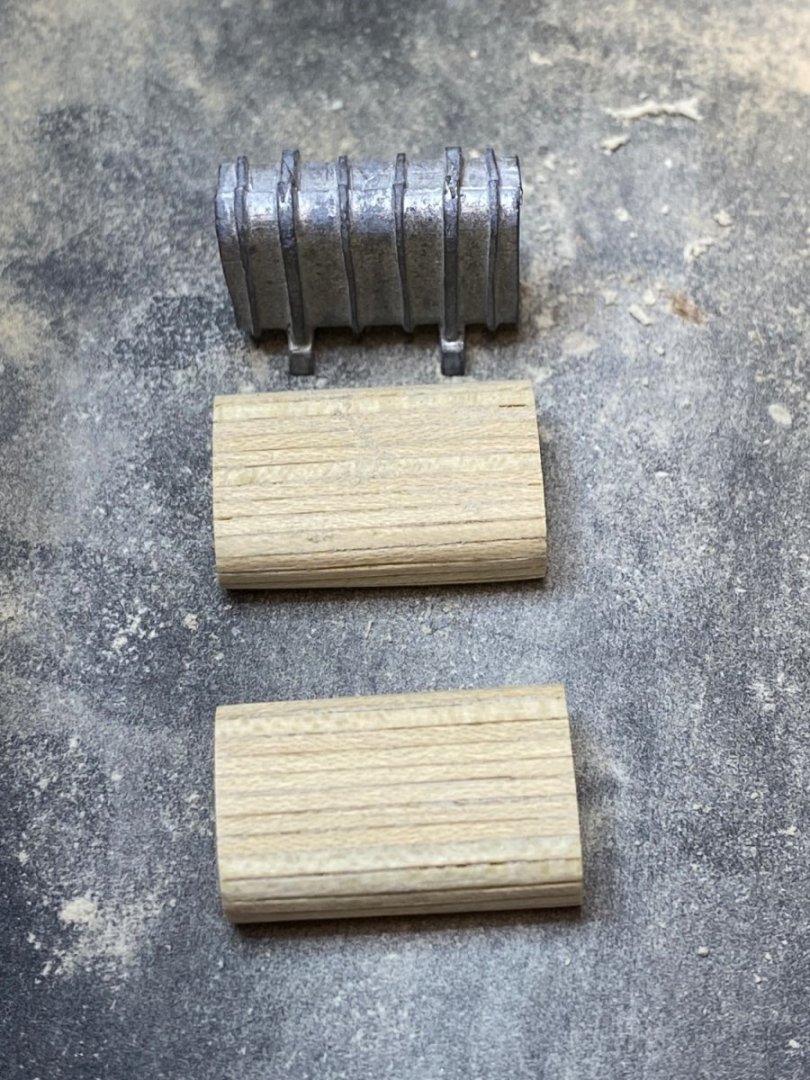
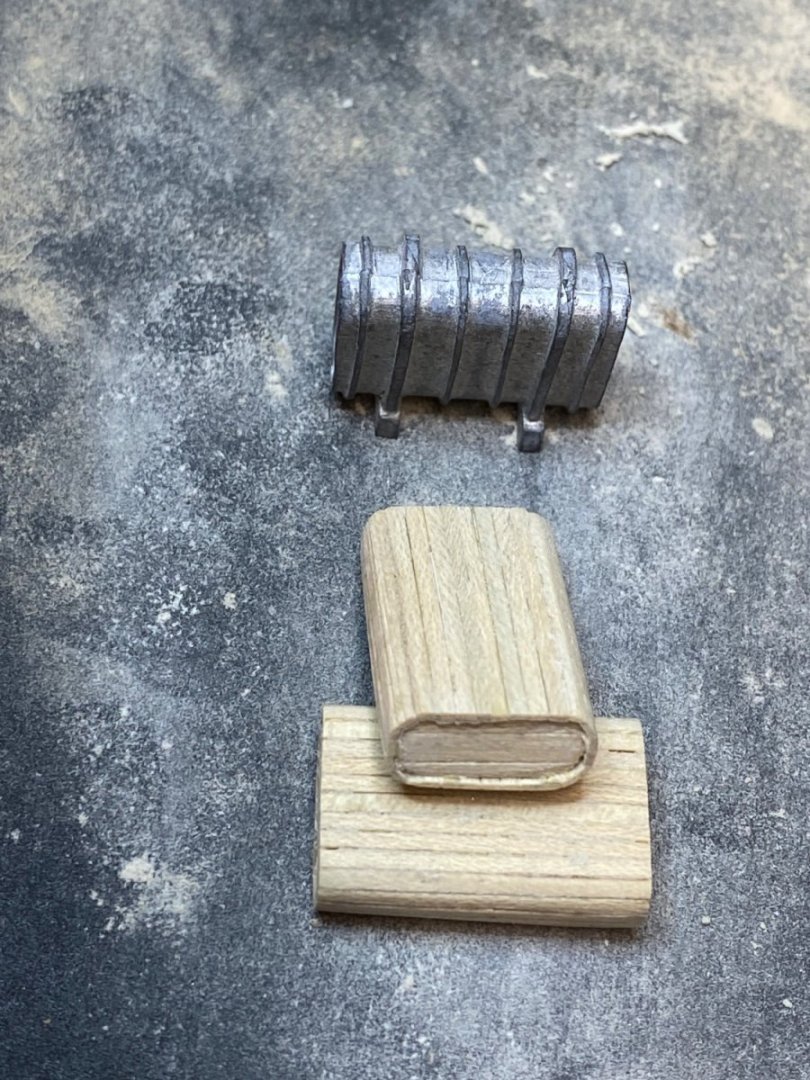
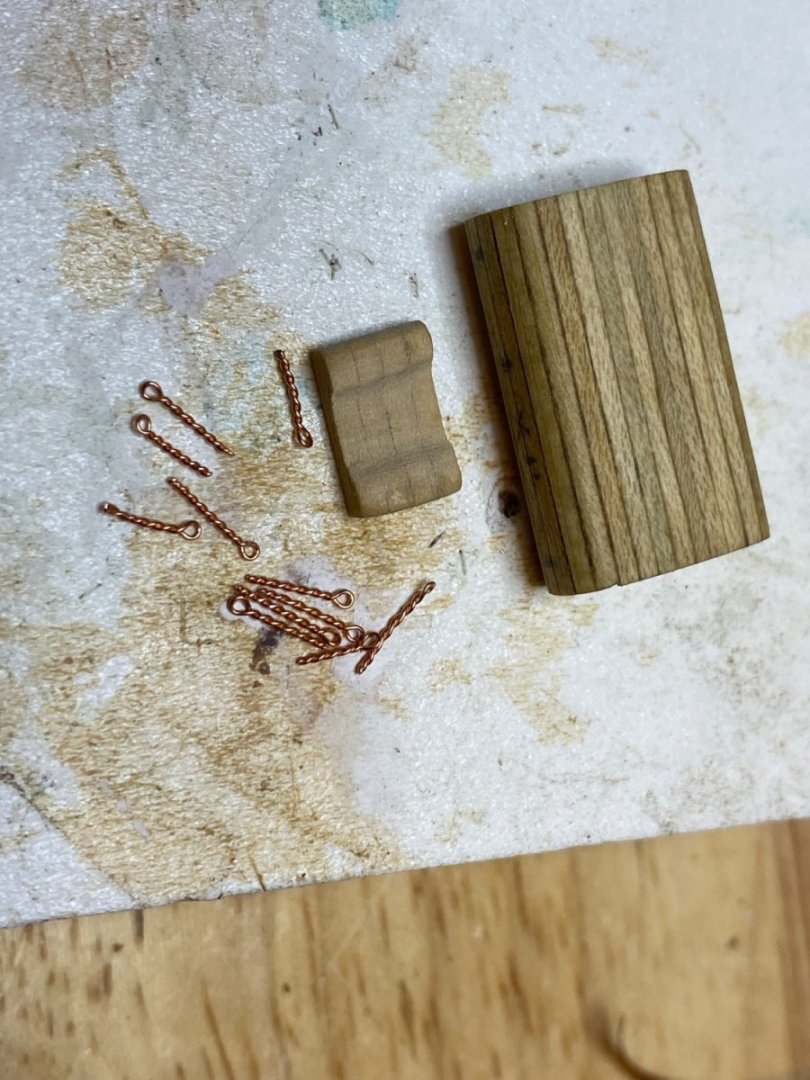
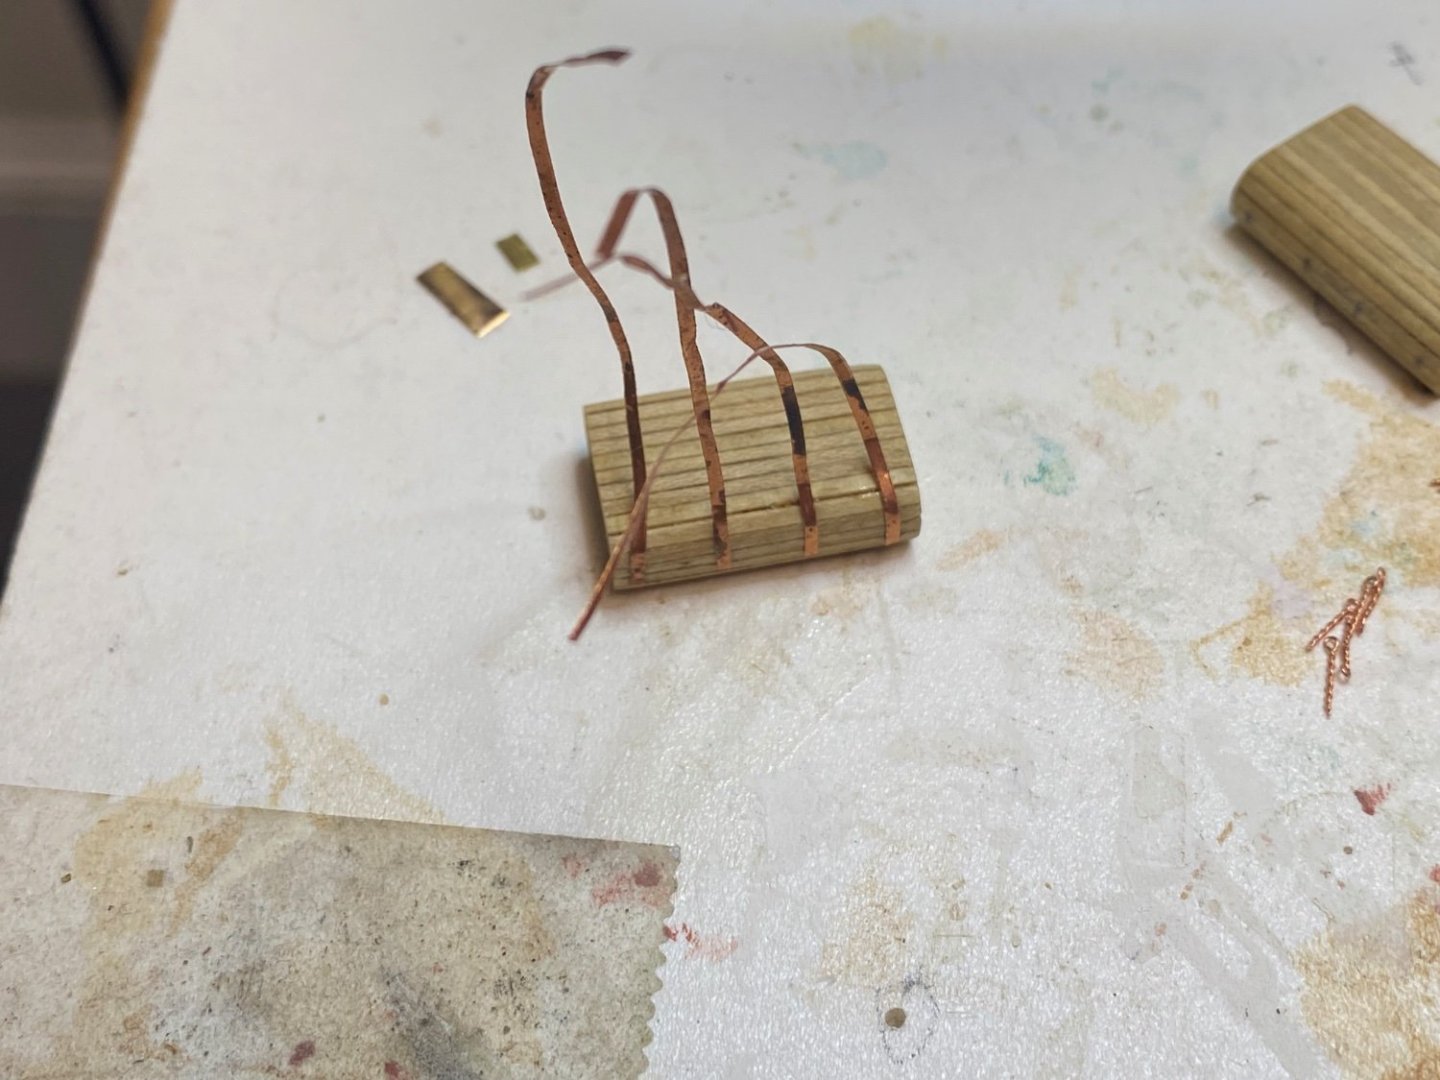
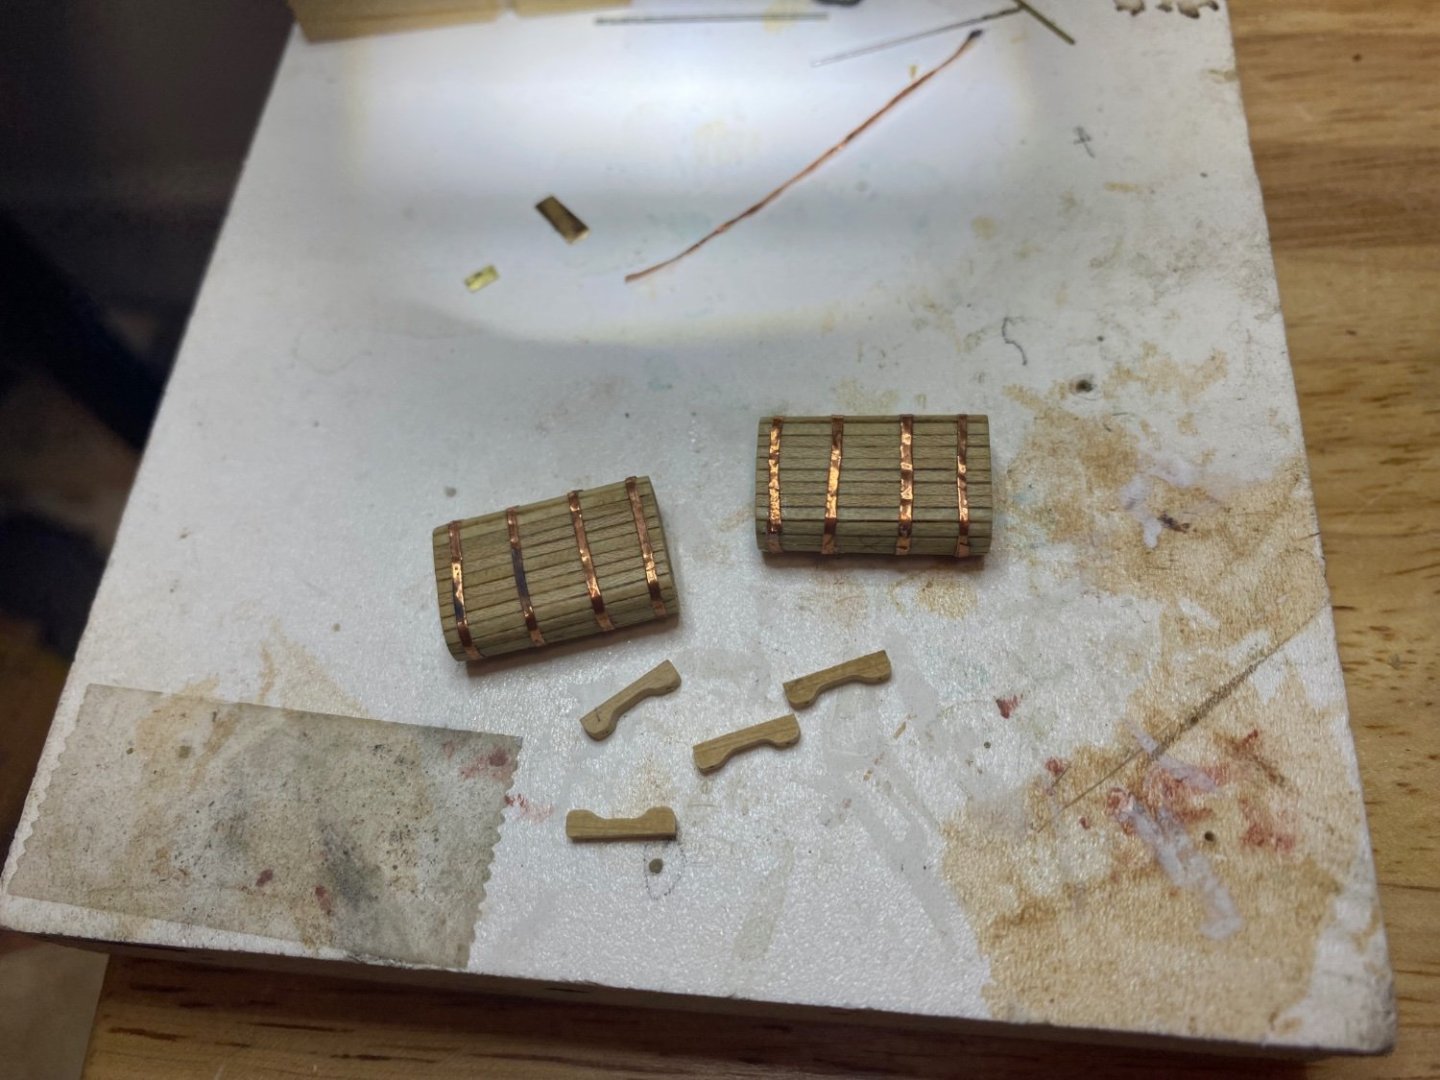
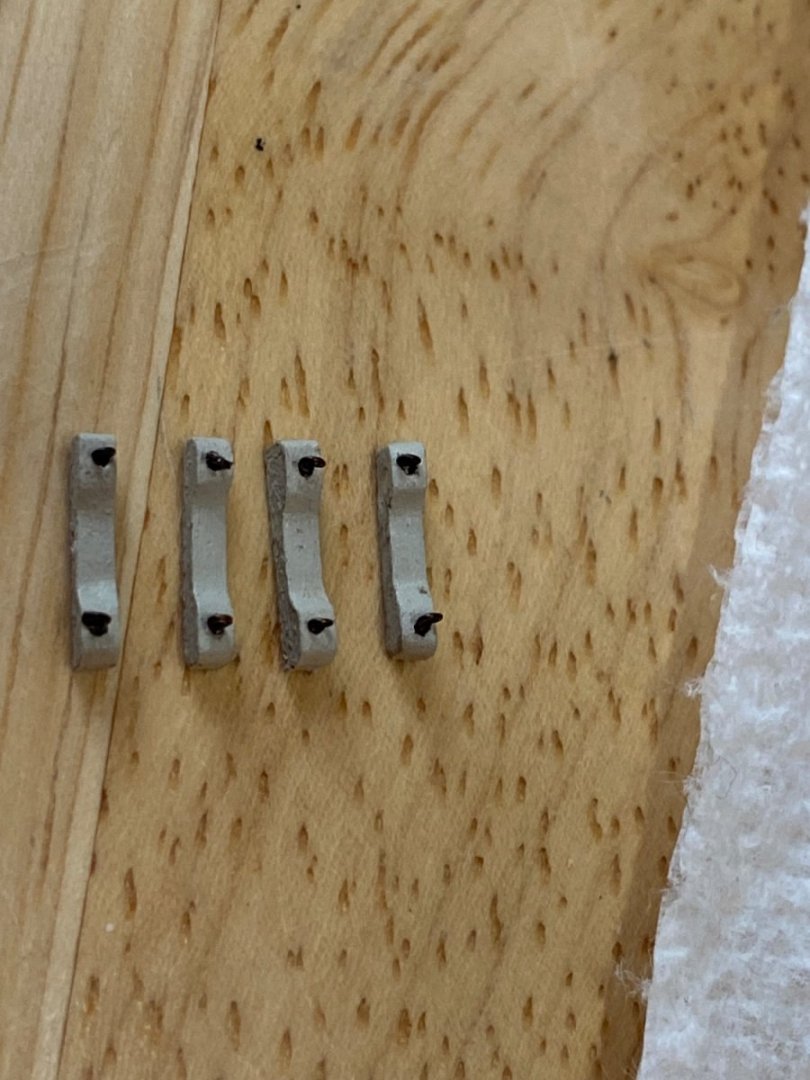
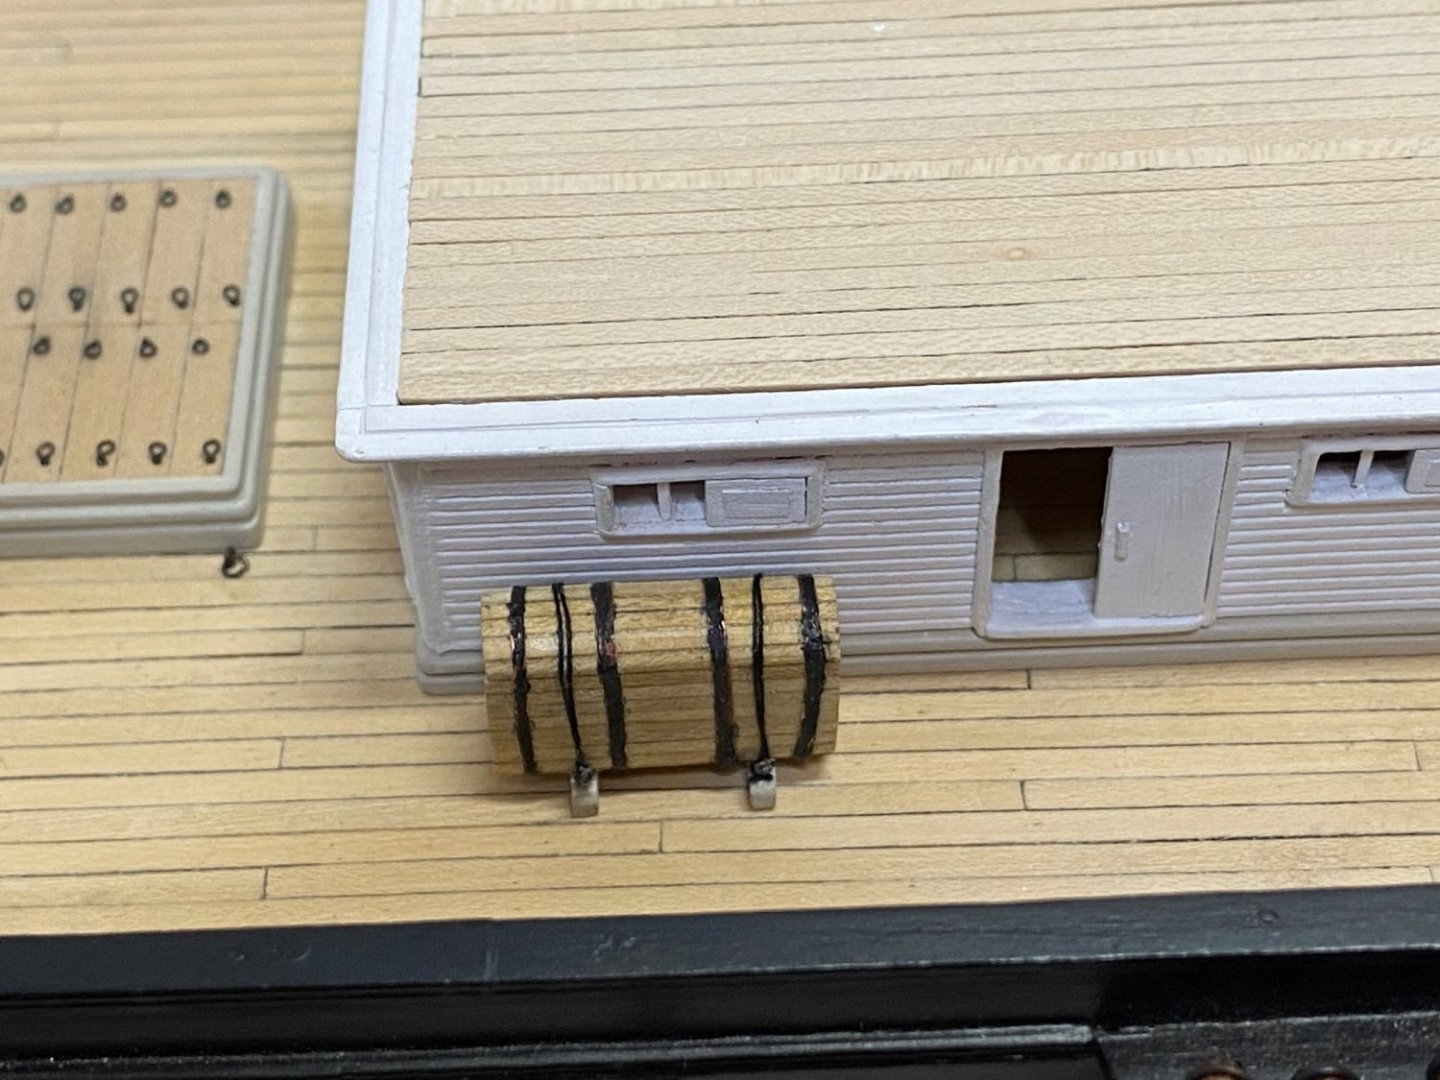
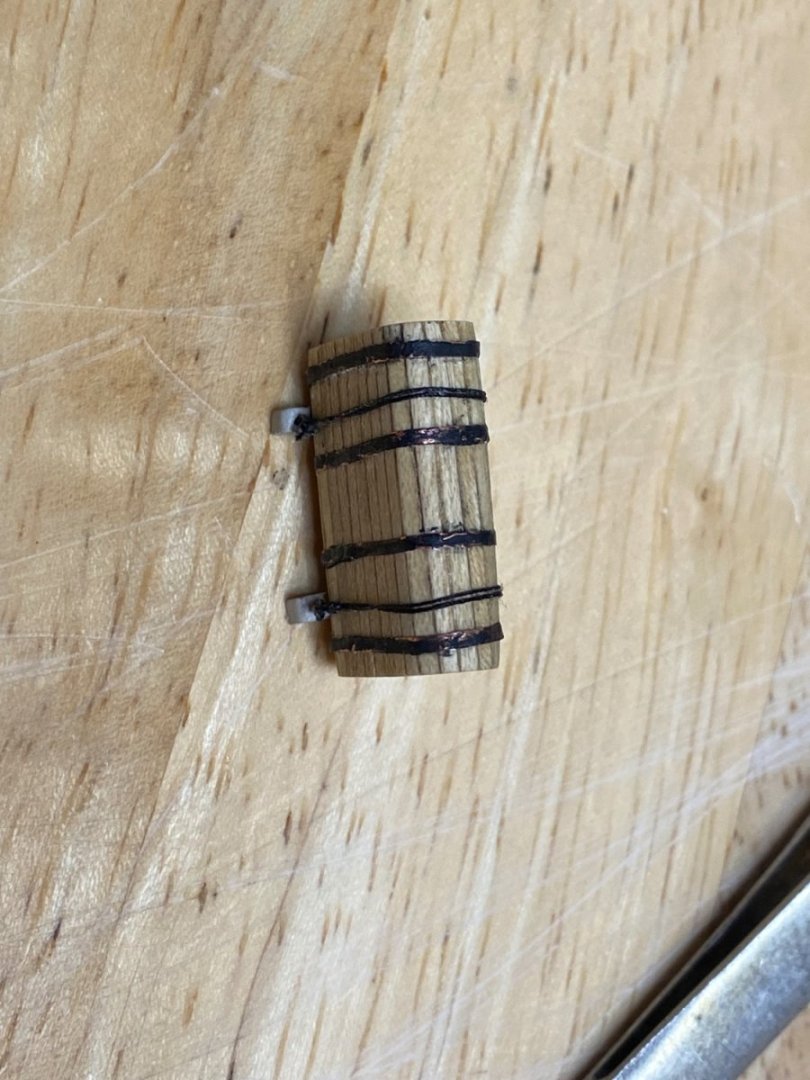
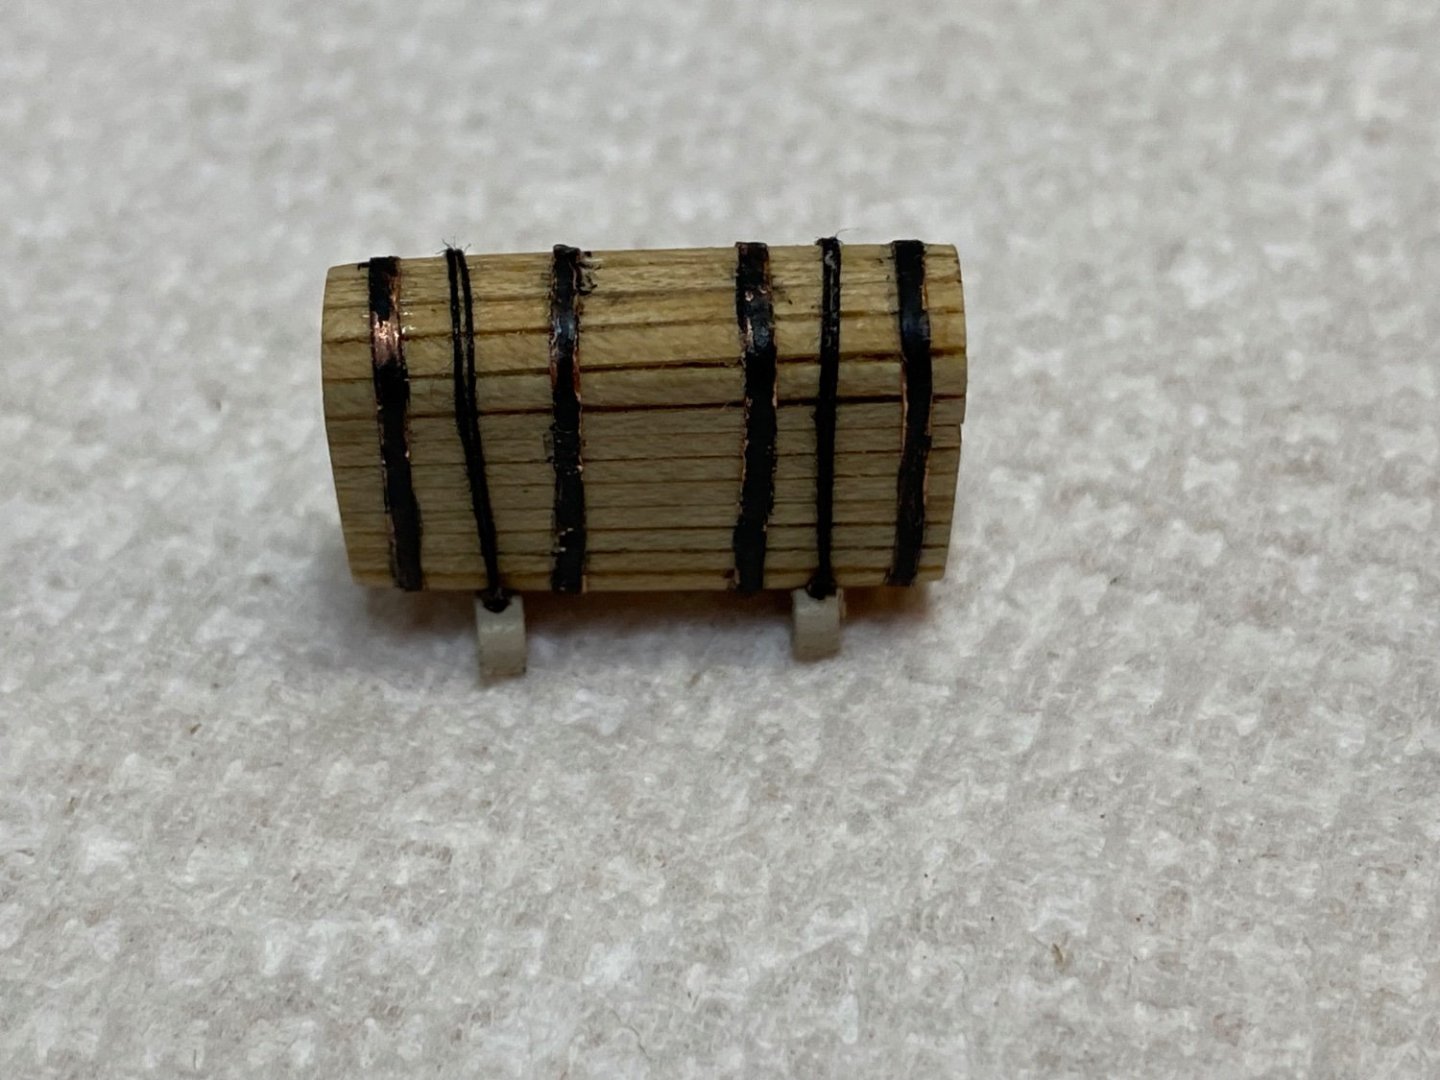
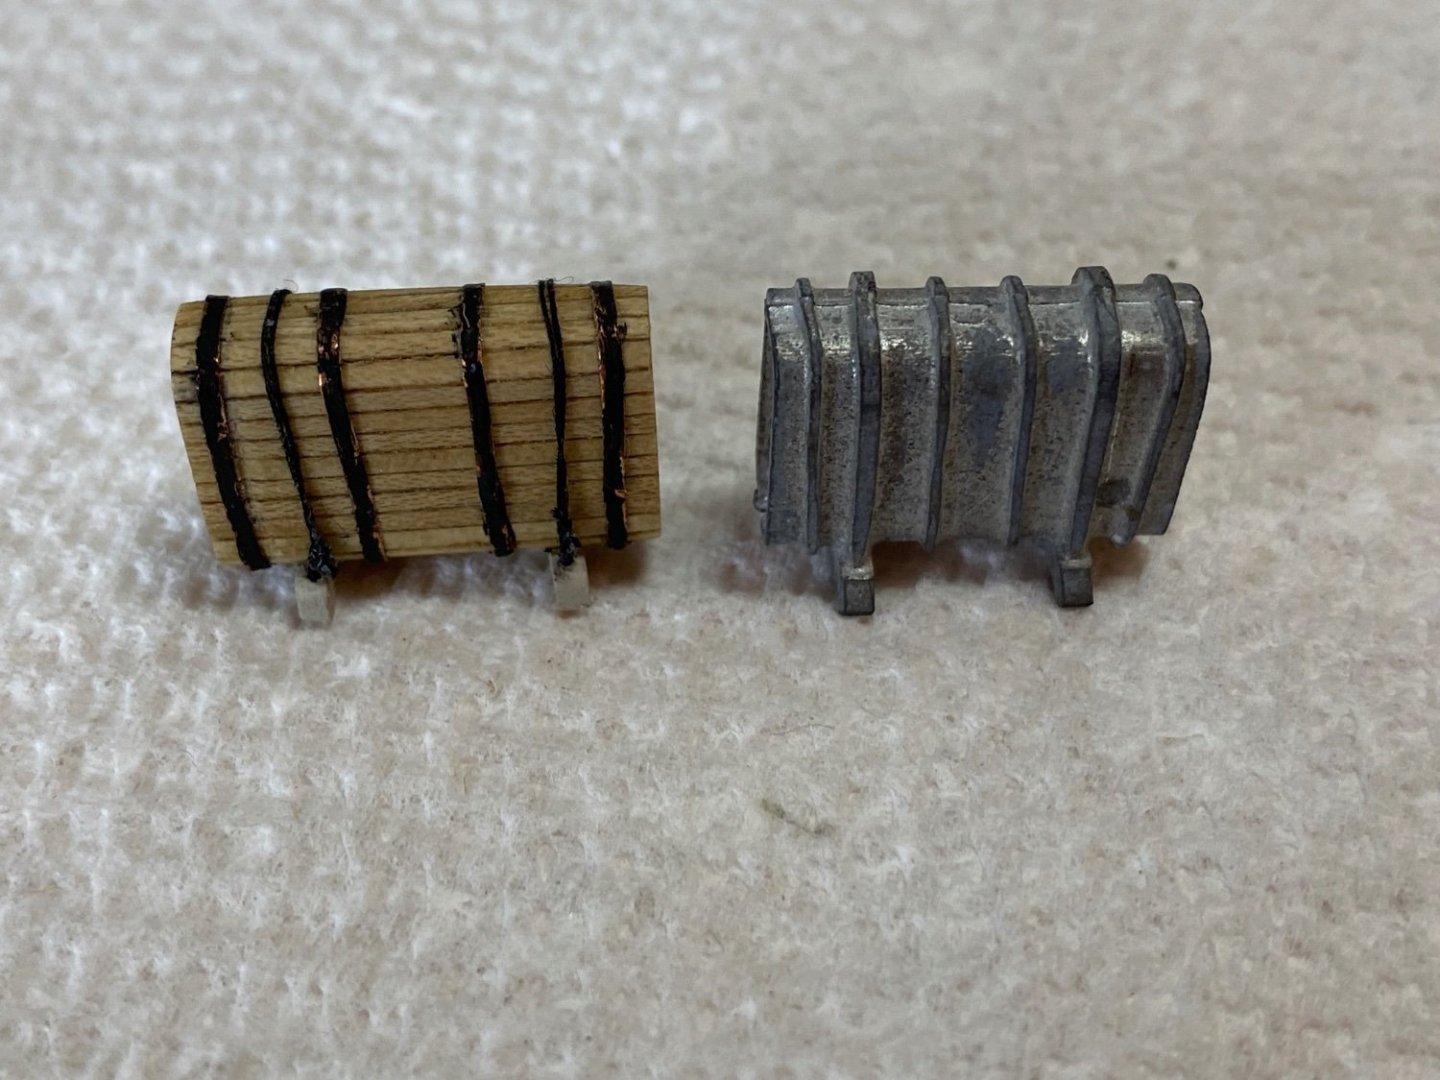
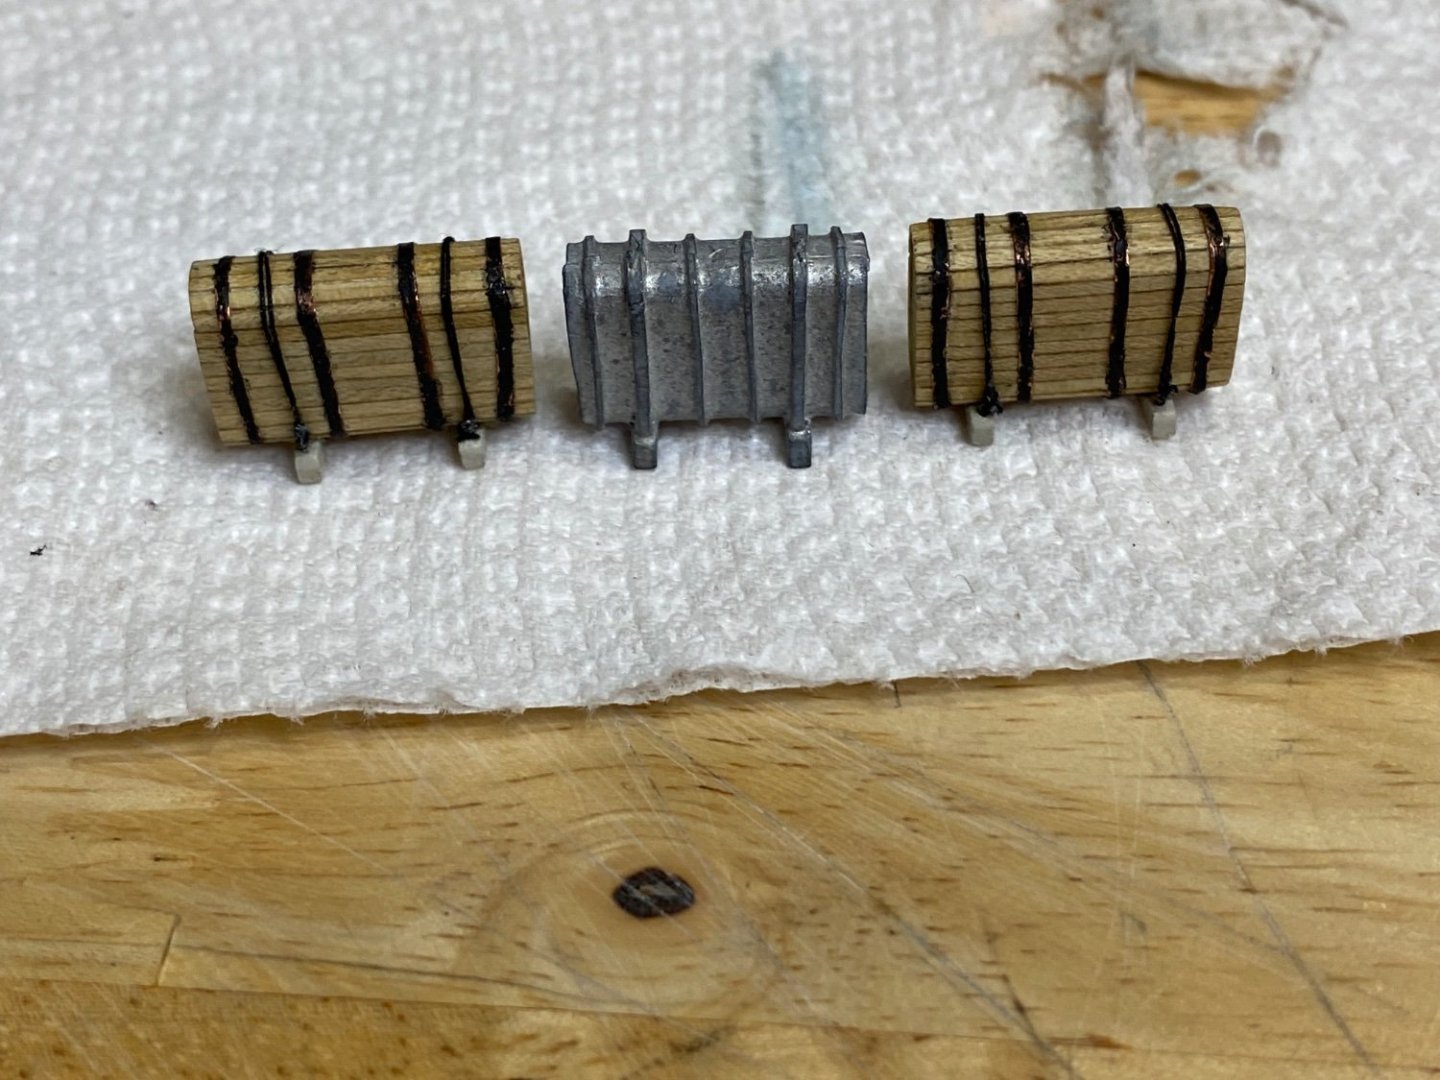
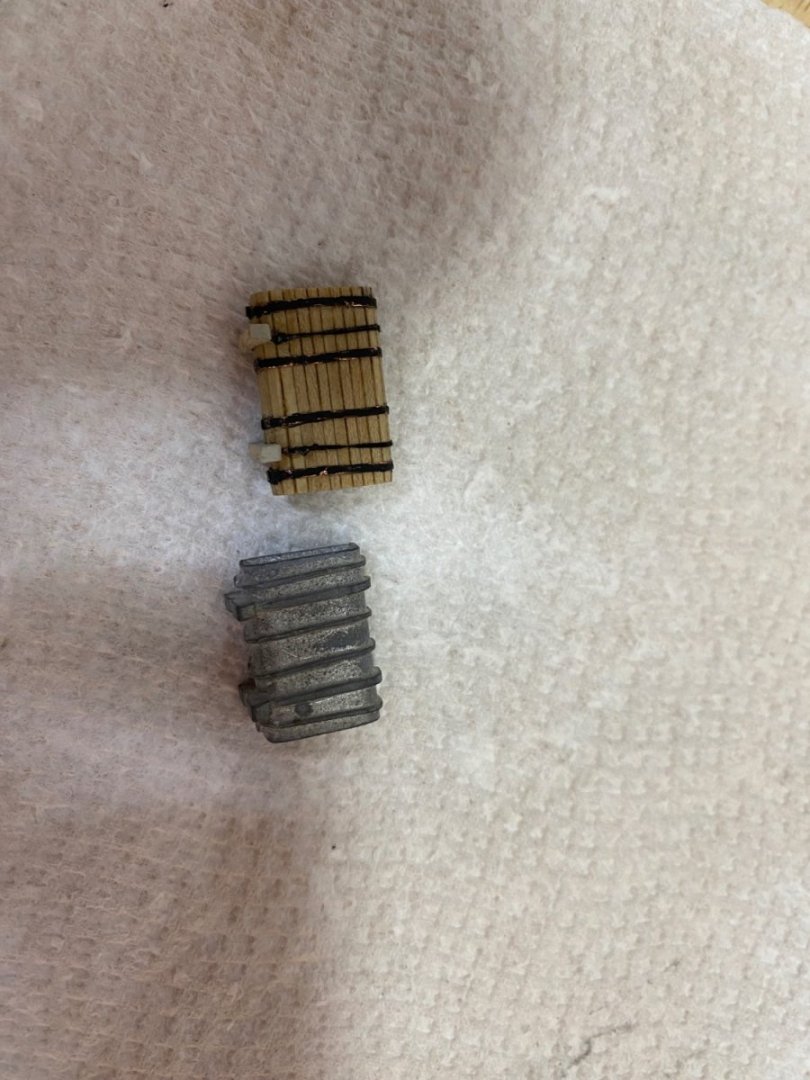
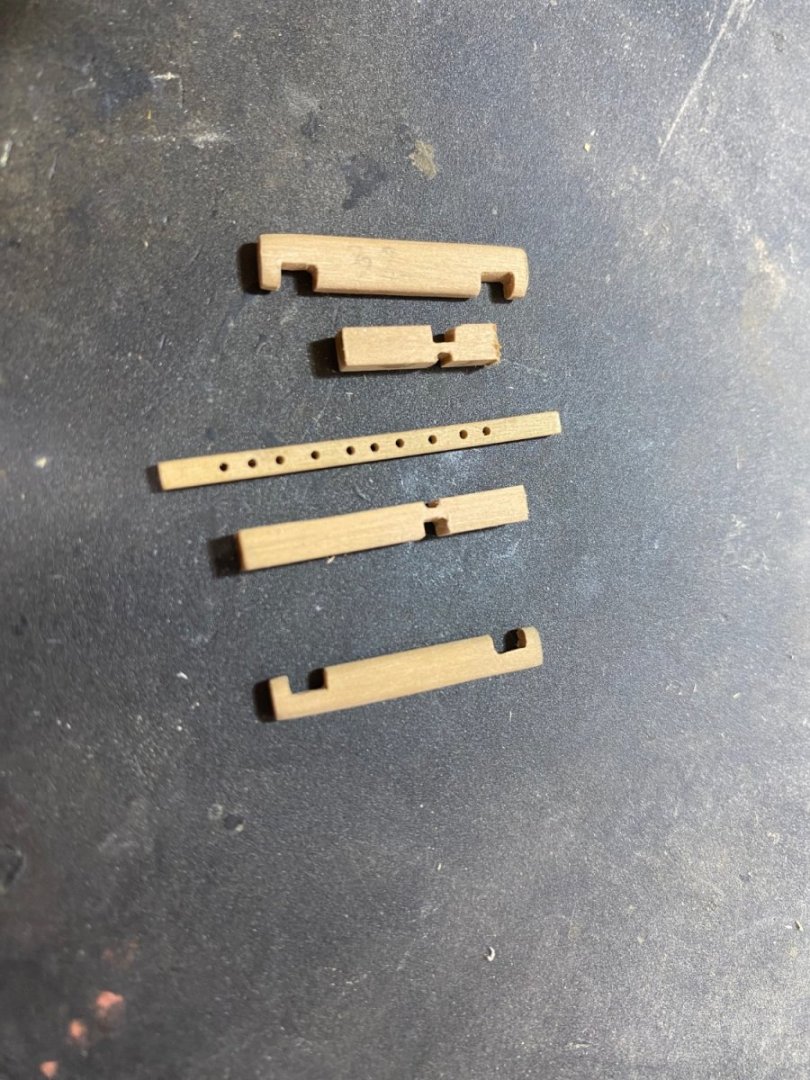
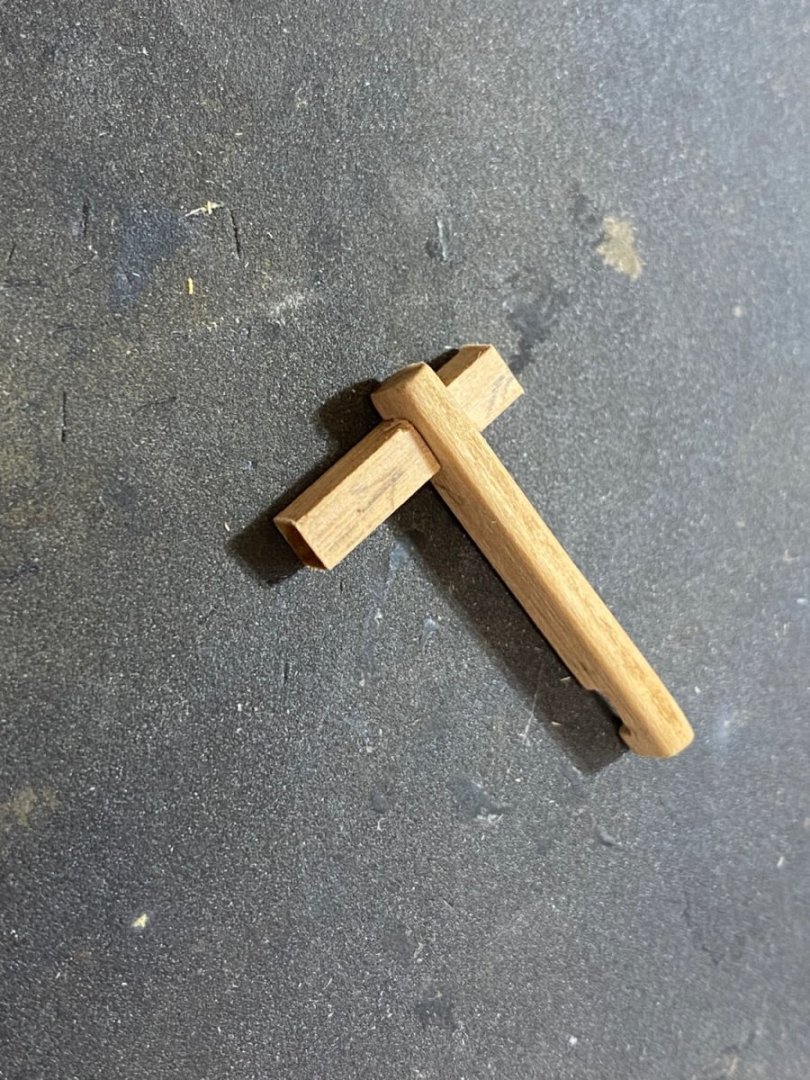
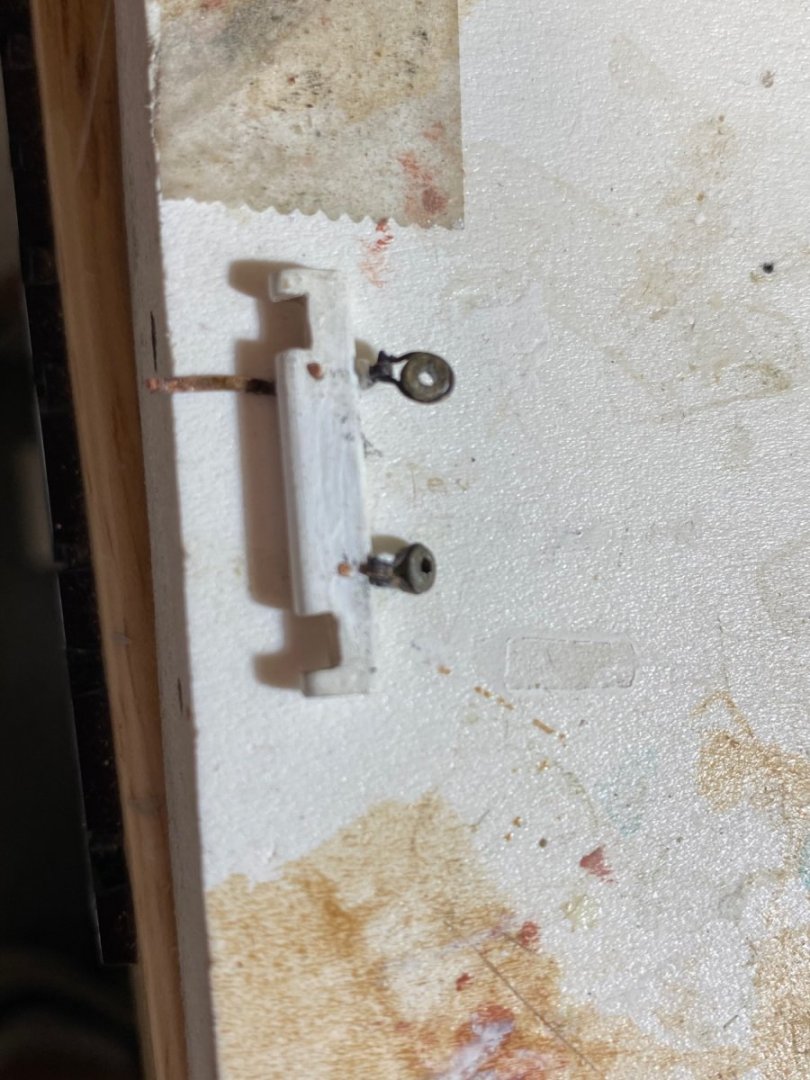
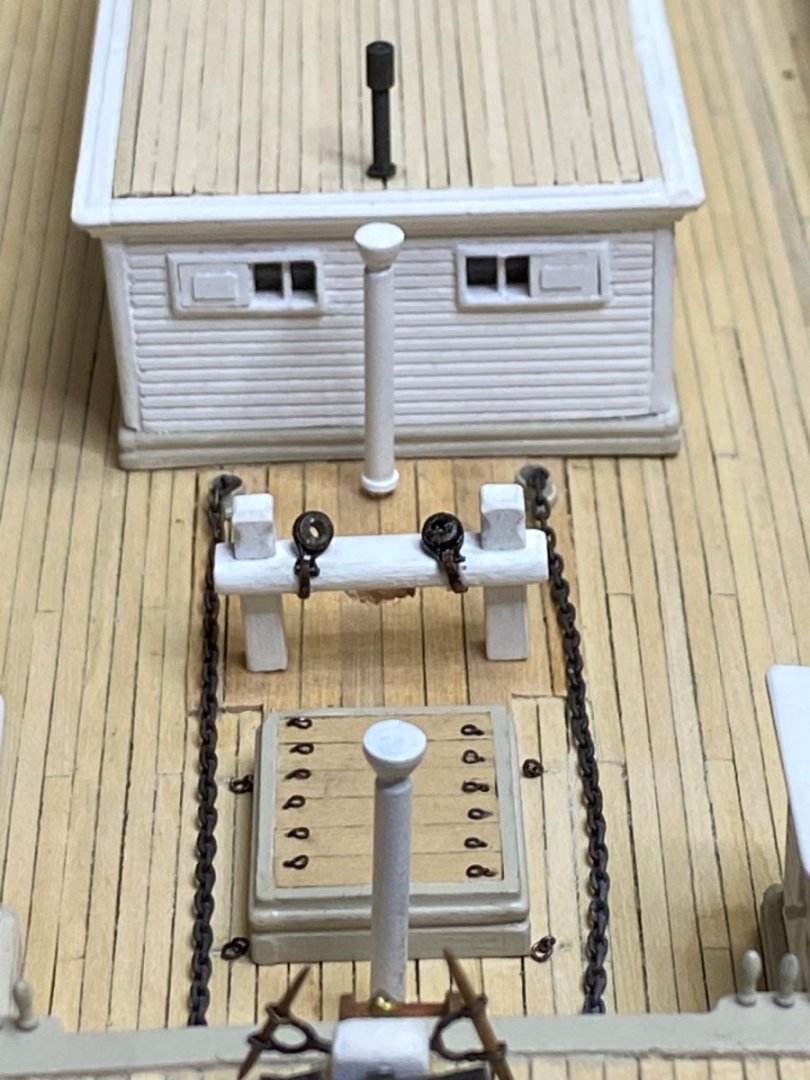
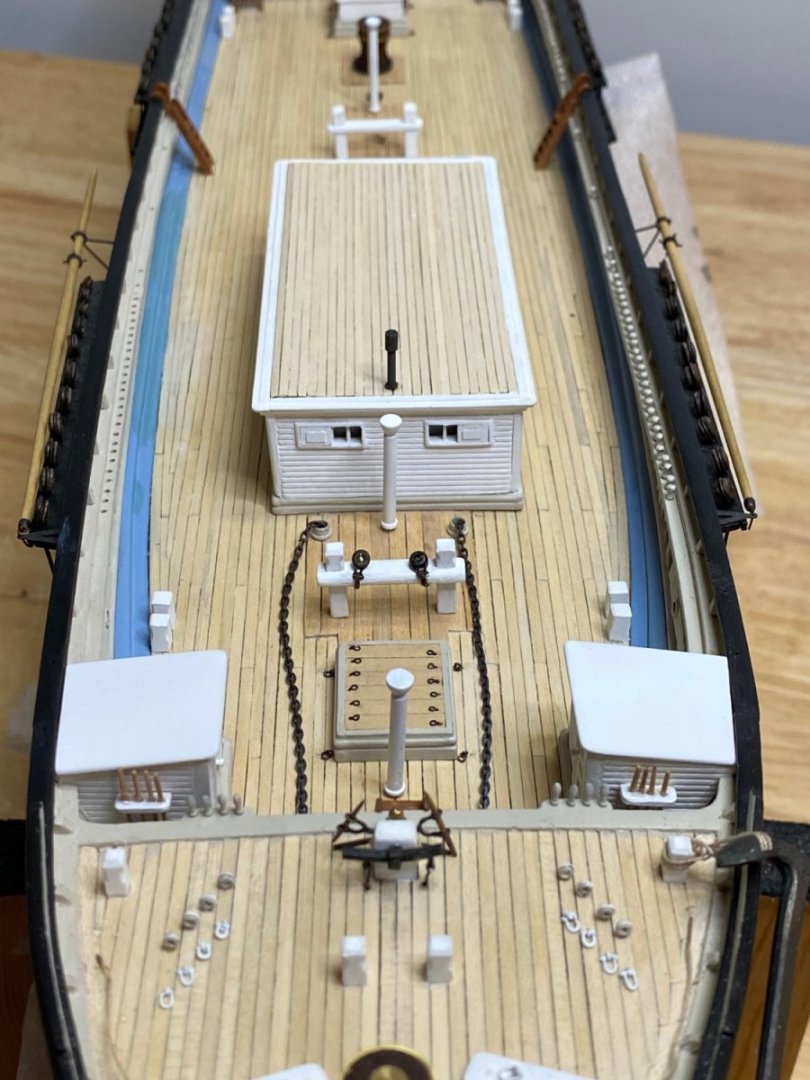
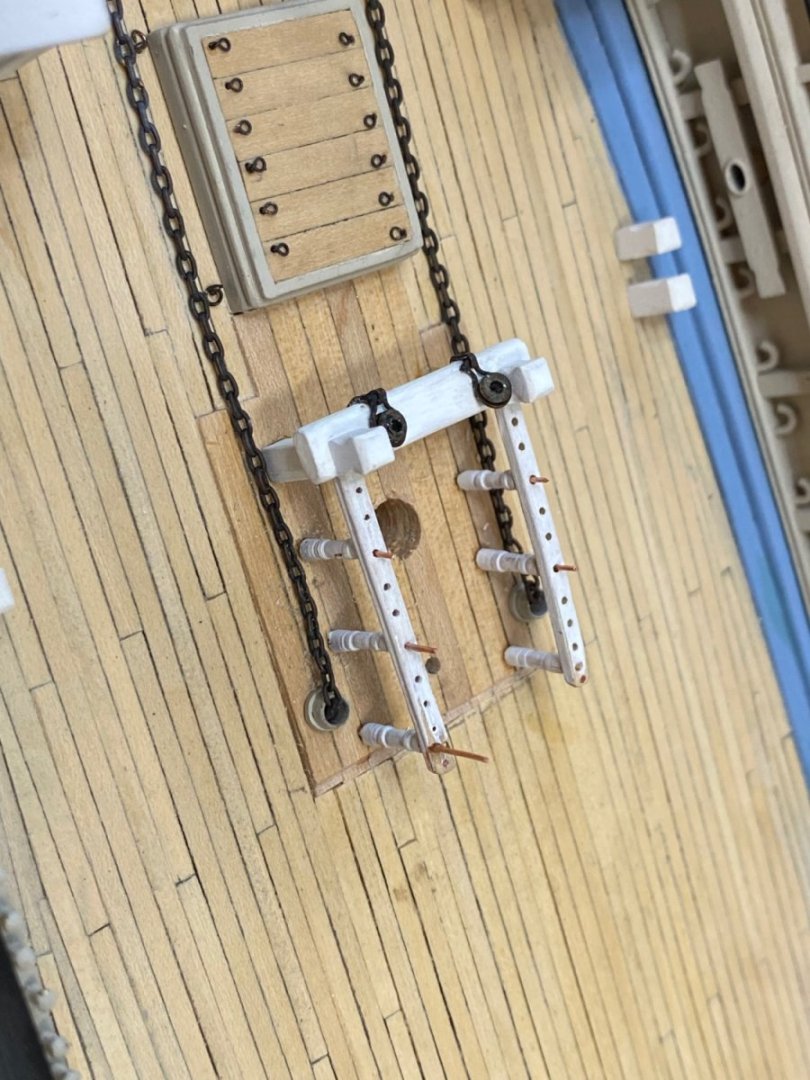
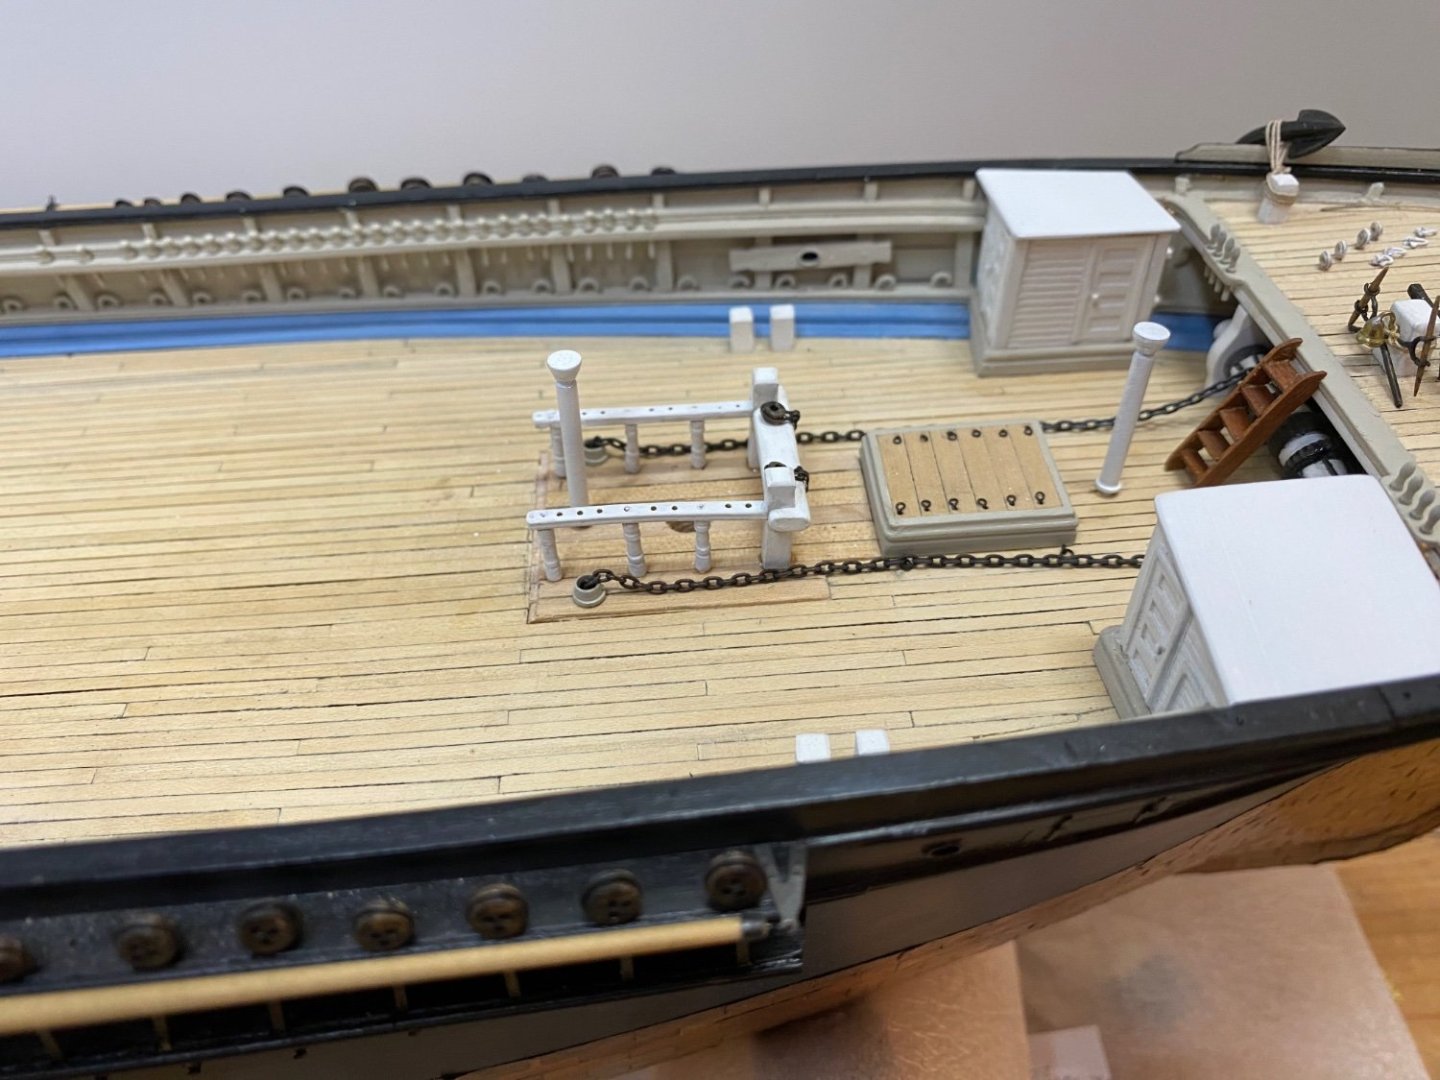
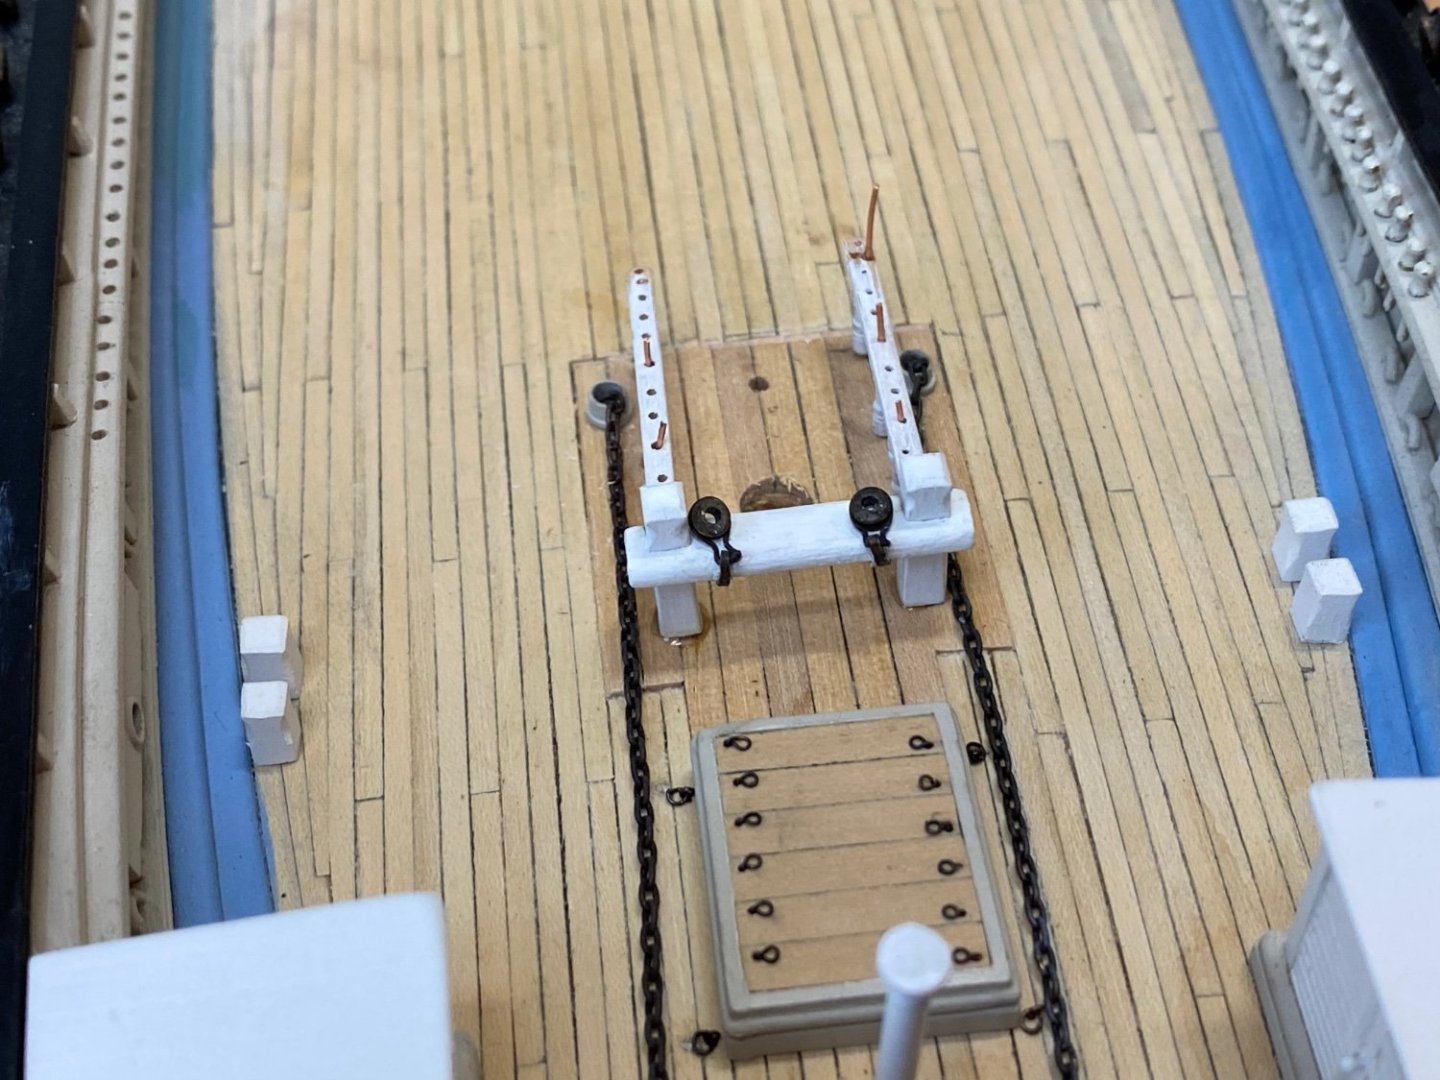
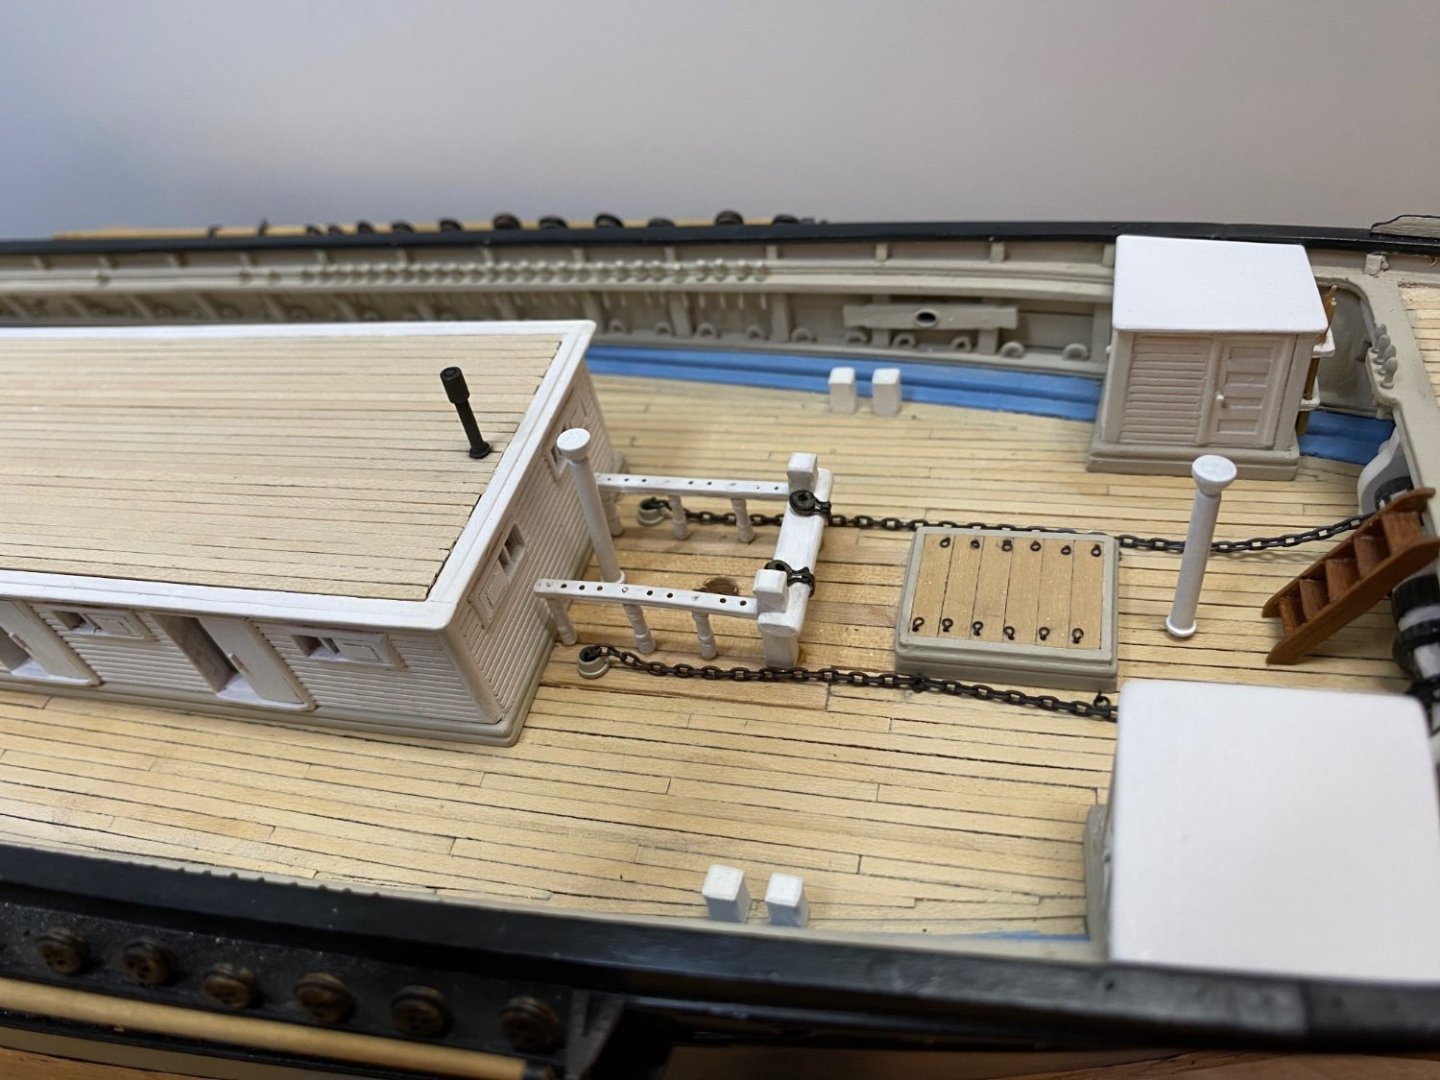
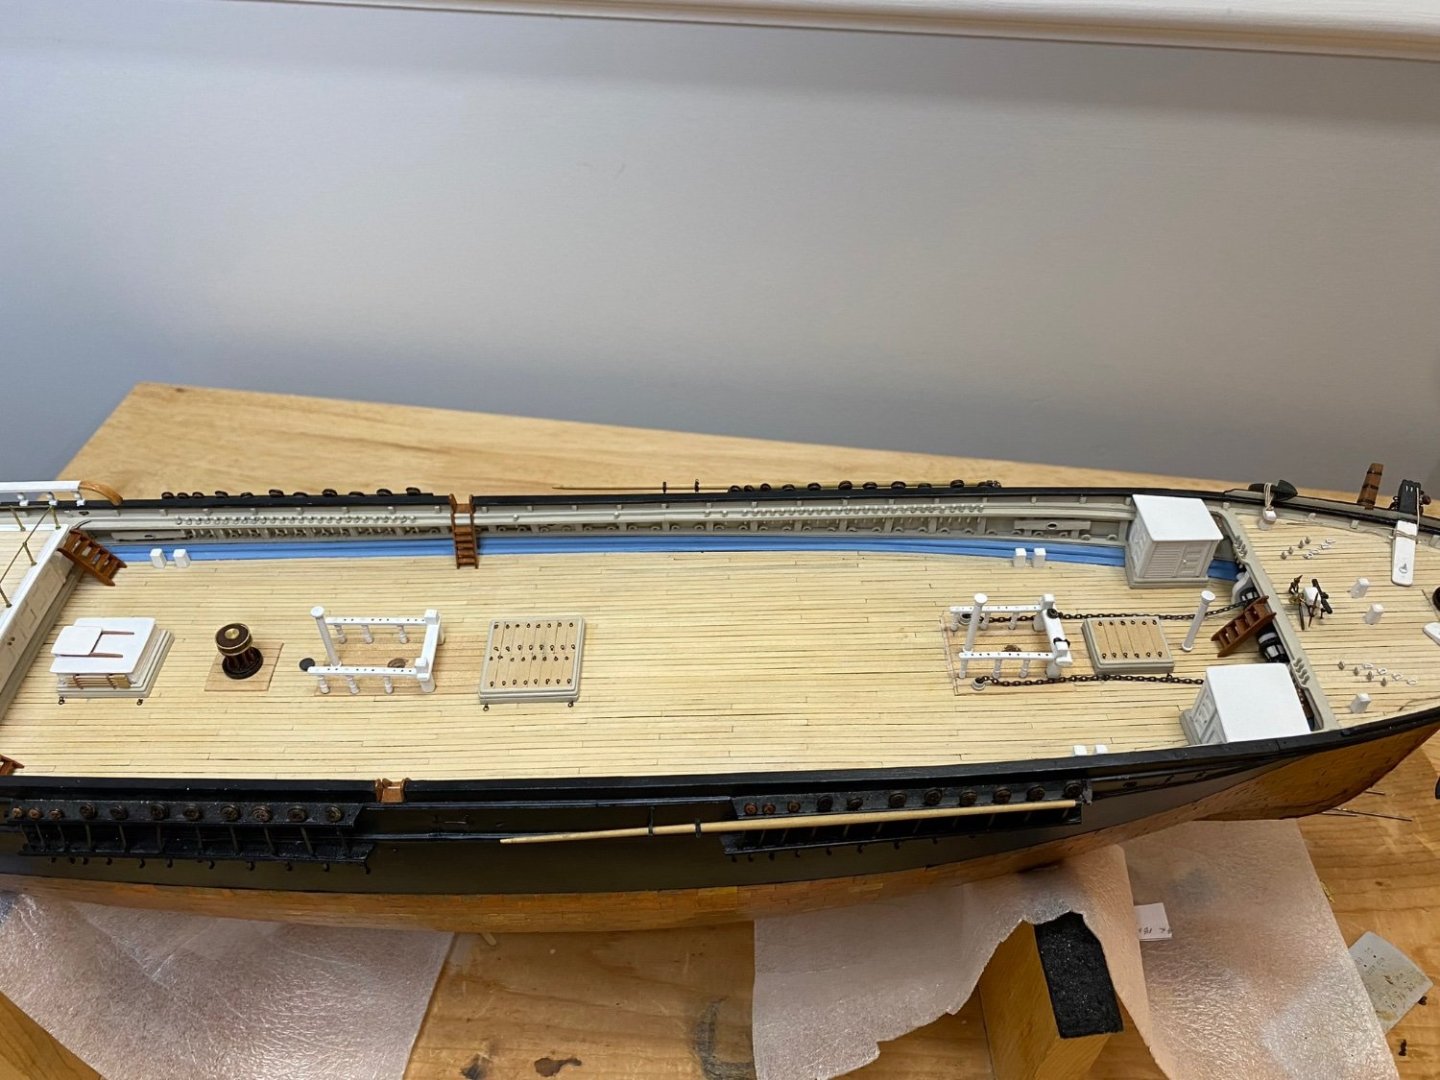
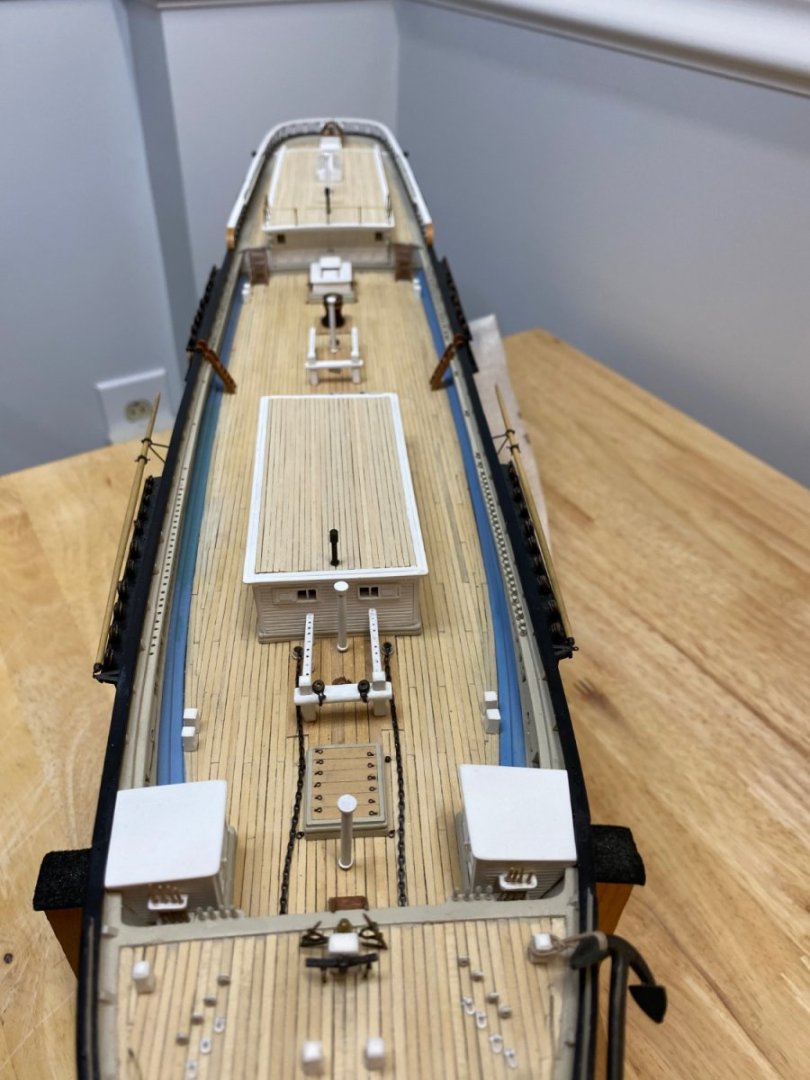
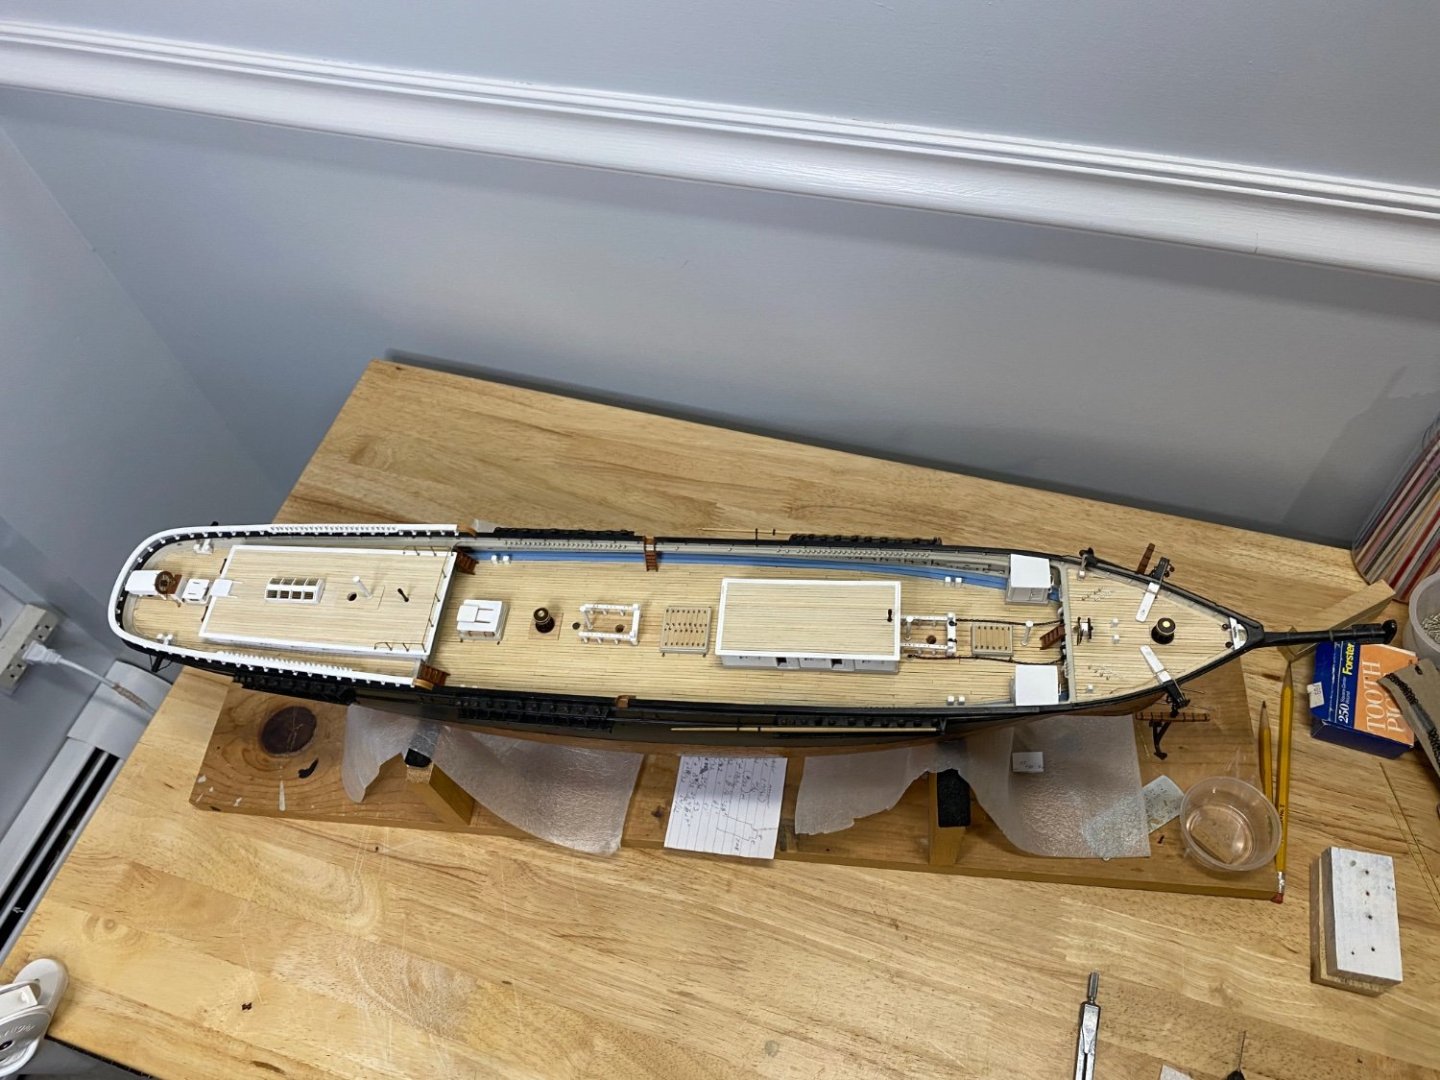
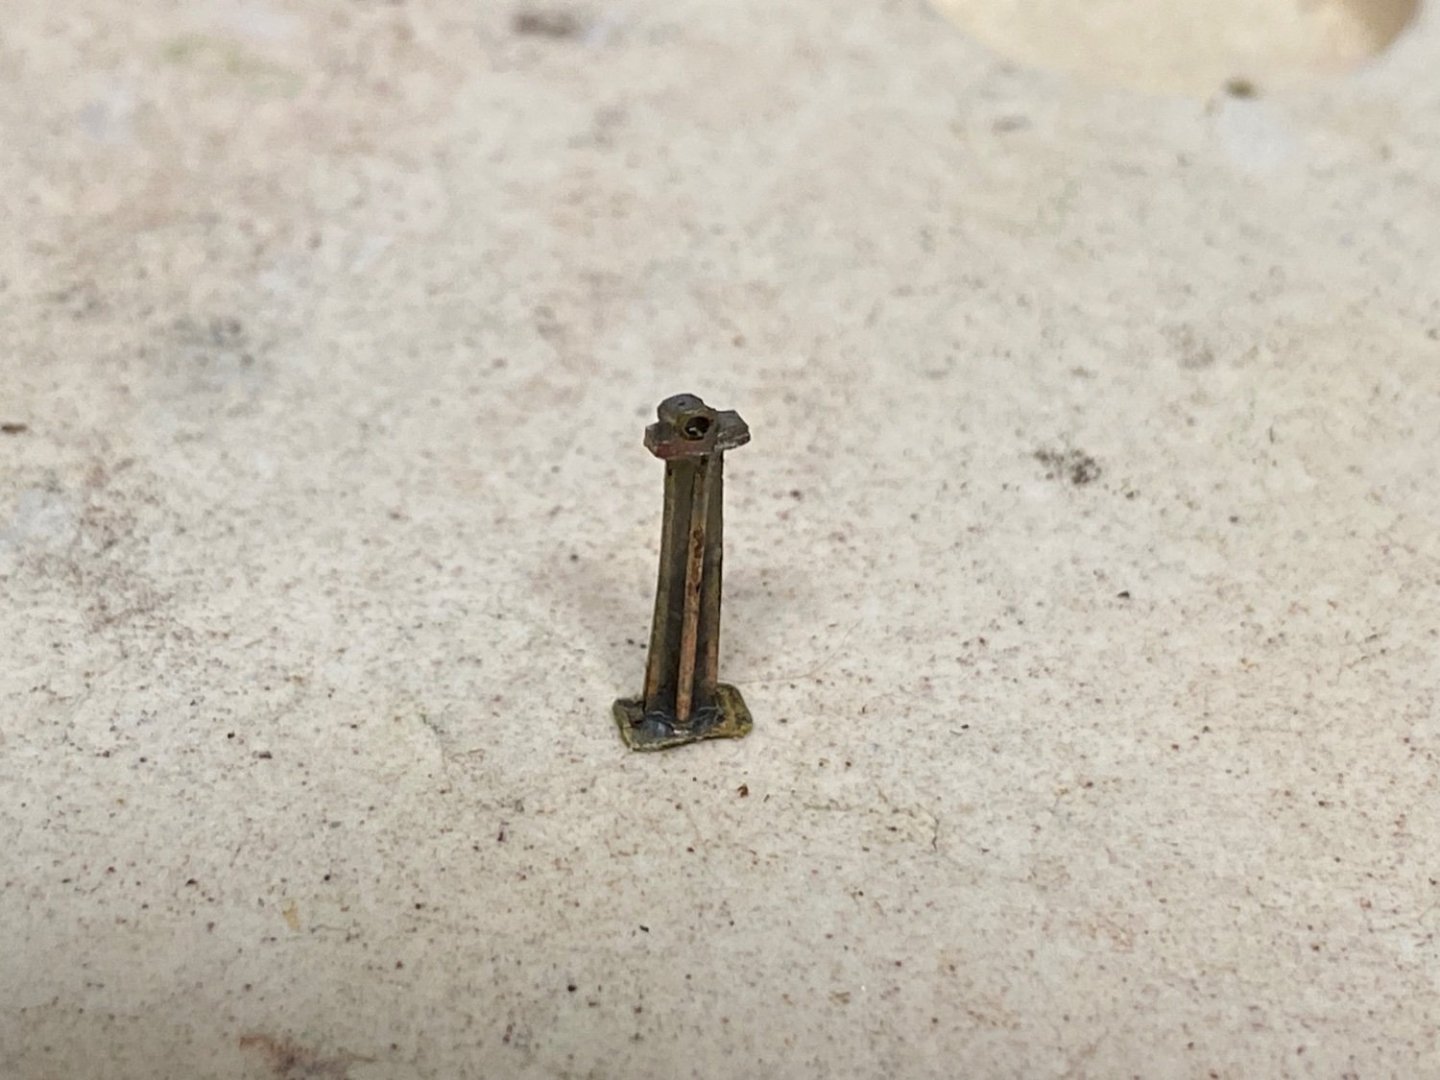
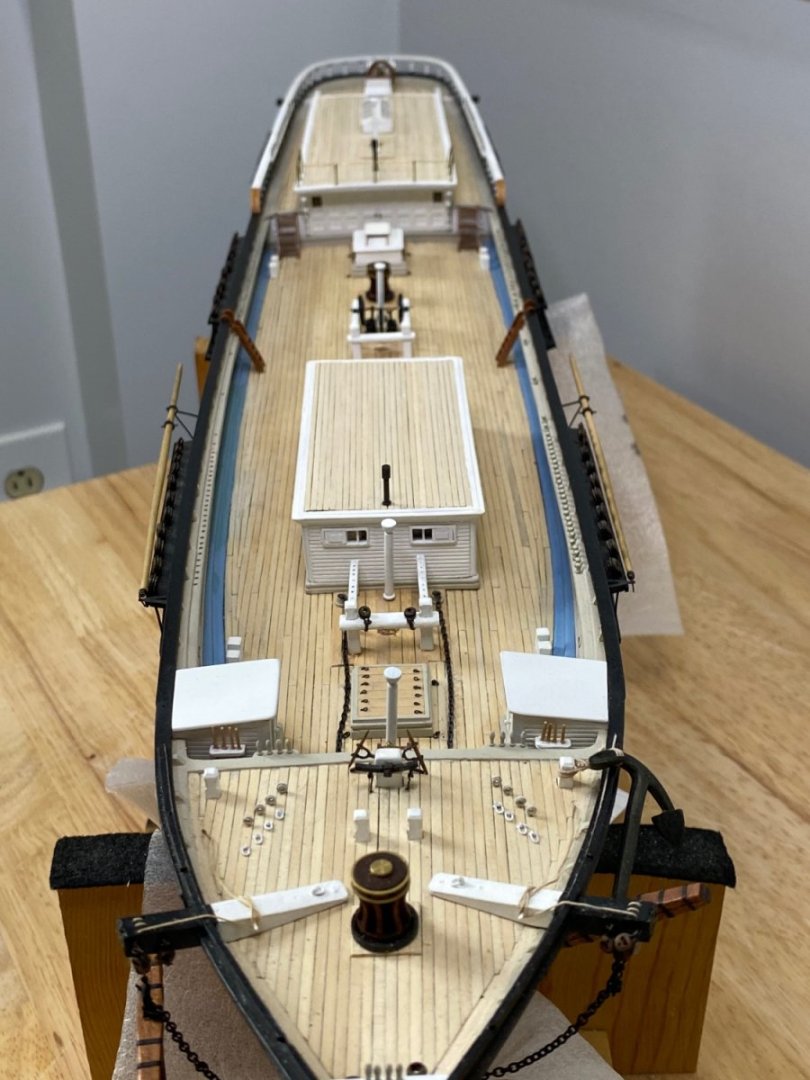
I decided to finish some of the deck fittings before moving on to masting and rigging. The grating by the wheel was made from .04 inch boxwood and the holes were drilled on the milling machine using a .034 drill (which looked about right), spaced at .07 not inches. The holes look a bit to big, approximately 5 inches in scale. These were then marginally squared up the a square file. I decided not to redo the grating in the interest of moving along but I I would make them smaller if I ever do this again. The frame was made from some scrap cherry or mahogany, not sure which. This was sanded down to closer to .032 inches or about 3 scale inches and stained with Ipswich pine. The boxwood doesn’t take stain well, but I like the contrast with the frame. The next item was the water casks. I had already made the decision to make 2 and place them on the sides of the fore cabin per the model of the Snow Squall and the Flying Cloud. I started by shaping a piece of cherry and cutting 2 to length. Previously, I had experimented with some left over holly that I used for planking the decks. This was 1/16 x 1/32. I thinned this to .02 inches on the thickness sander and then reduced the width on the table saw to approximately 1/32 inches. To do this, I cut a slot in a piece of basswood that fit over the blade and kept the holly from breaking and going down the throat by the blade. I also used a piece of sacrificial wood to hold the holly down as it wanted to curl up as it passed through the blade. These stripes were then glued to the casks starting with the ends and then the sides. The chocks were made from boxwood, 4 were cut to length, glued together with Elmers glue, shaped, then immersed in water to separate them. Holes were drilled with a #75 drill bit for the eyebolts that were made from 30 gauge copper wire spun around a #75 drill bit. These were blackened. The straps were cut from copper tape on a paper cutter and glue with cyano by gluing them on the bottom. Once set, they were wrapped around the casks and again glued on the bottom. Unfortunately, these would not blacken and I was left trying to paint them. They also didn’t take the paint well and I’m not pleased with the results. Next time I‘ll paint them first and then cut them. The chocks were rigged first and then slipped over the casks and glue on. There was not enough room to rig the retaining straps with the chocks glued on first.

- 345 replies
-
- 3
-

-
- Flying Fish
- Model Shipways
- (and 1 more)
-
Really well done!!! I like your idea of rigging the staysail’s before adding the back stays, with the shrouds holding the masts in place. Rick
-
I find that Matt medium works well and is easy to use. Great Job!!! Rick
- 166 replies
-
- 4
-
-
- Maine
- BlueJacket Shipcrafters
- (and 1 more)
-
This is beautiful George, You are really getting close now !! Very exciting!!
- 602 replies
-
- 1
-
-
- Flying Fish
- Model Shipways
- (and 2 more)
-
Roger and ClipperFan, Thanks for your very kind words!!! Every thing seems to take much longer than I expected, and it seems that I have to constantly remake items because I either don’t like the first result or I break something trying to correct it or I just plain loose it when I drop it or it flys out of my fingers/cotton pliers. None of this would be possible if not for EdT’s remarkable books on building the Young America. I have attempted to use the processes he describes in the 3 volume set. I have found them to be invaluable. Without them I would be lost. Roger, your own model is amazing!!! You are truly a master at metal work, which when done well, takes a model to a whole other level. I am learning a lot from your build as well and can only hope to come close to your level at some point. I really like Great Lakes ore carriers, being from Ohio and having lived outside of Cleveland for 36 years. My grandfather was a helmsman on a whale back freighter for a while after WW1. Again, thankyou both for the encouragement. Rick
- 345 replies
-
- 1
-

-
- Flying Fish
- Model Shipways
- (and 1 more)
-
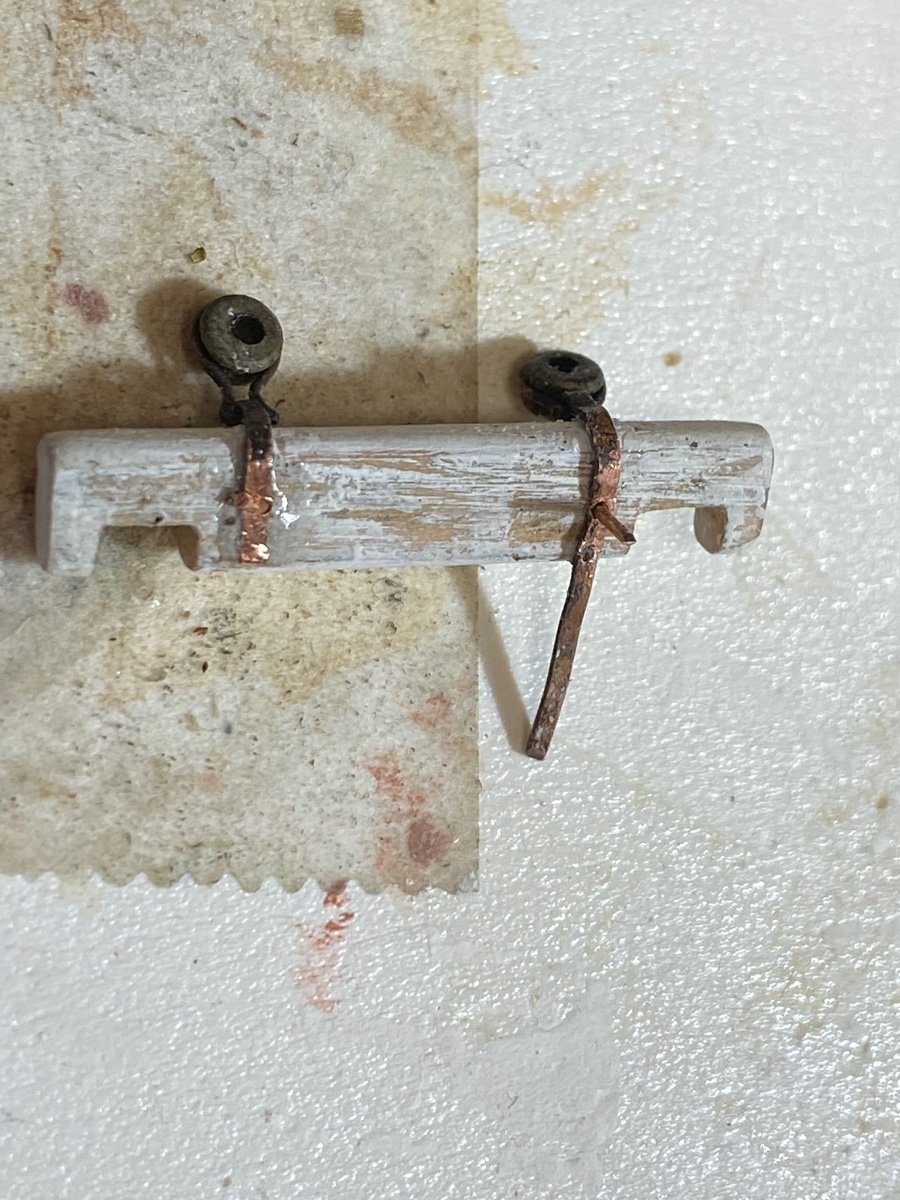
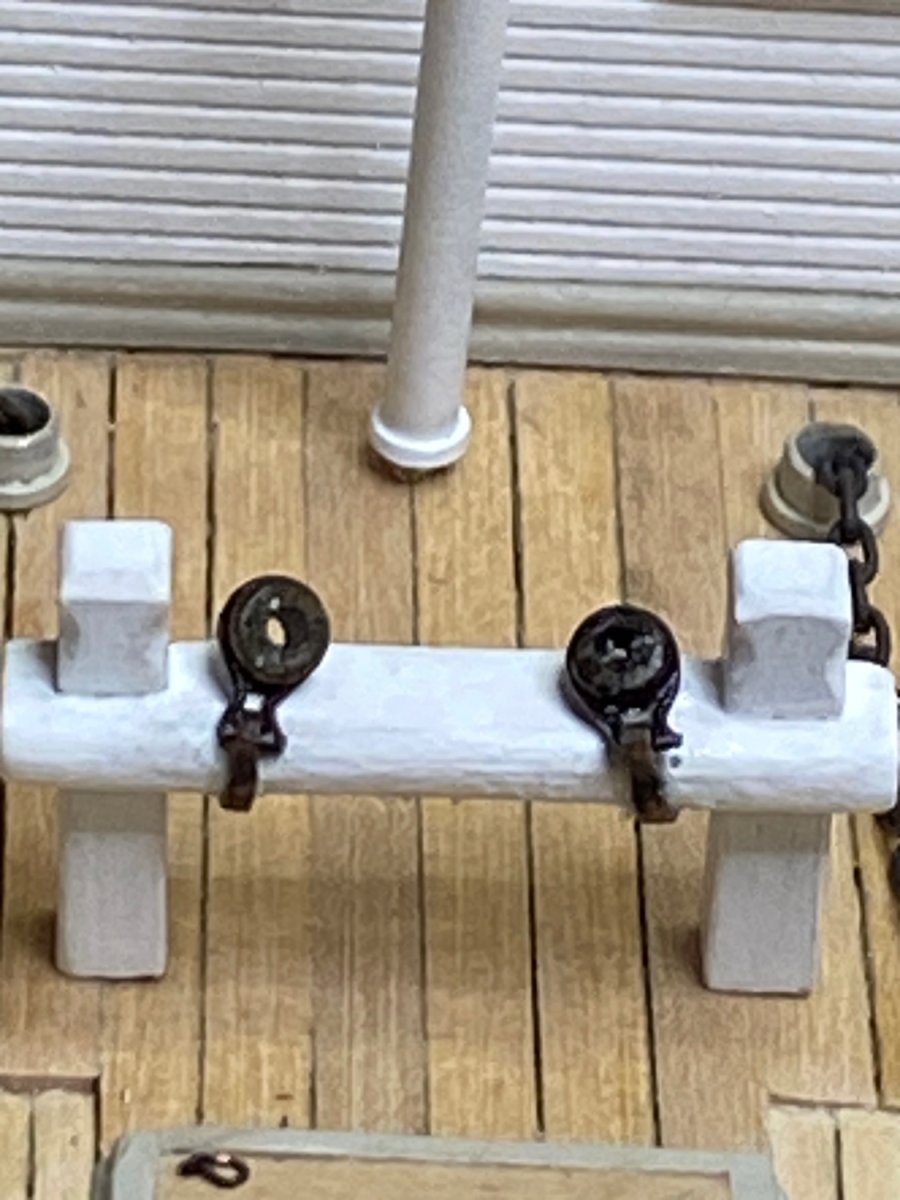
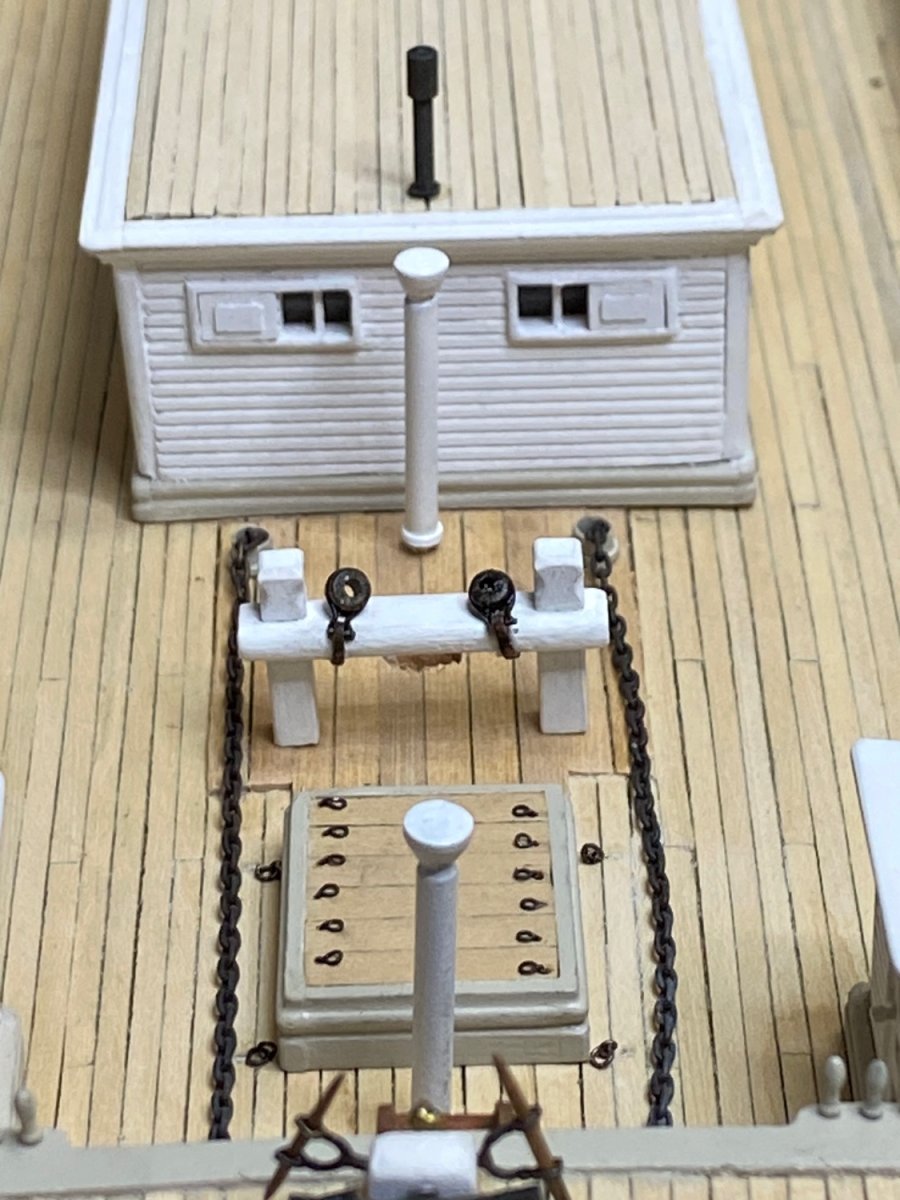
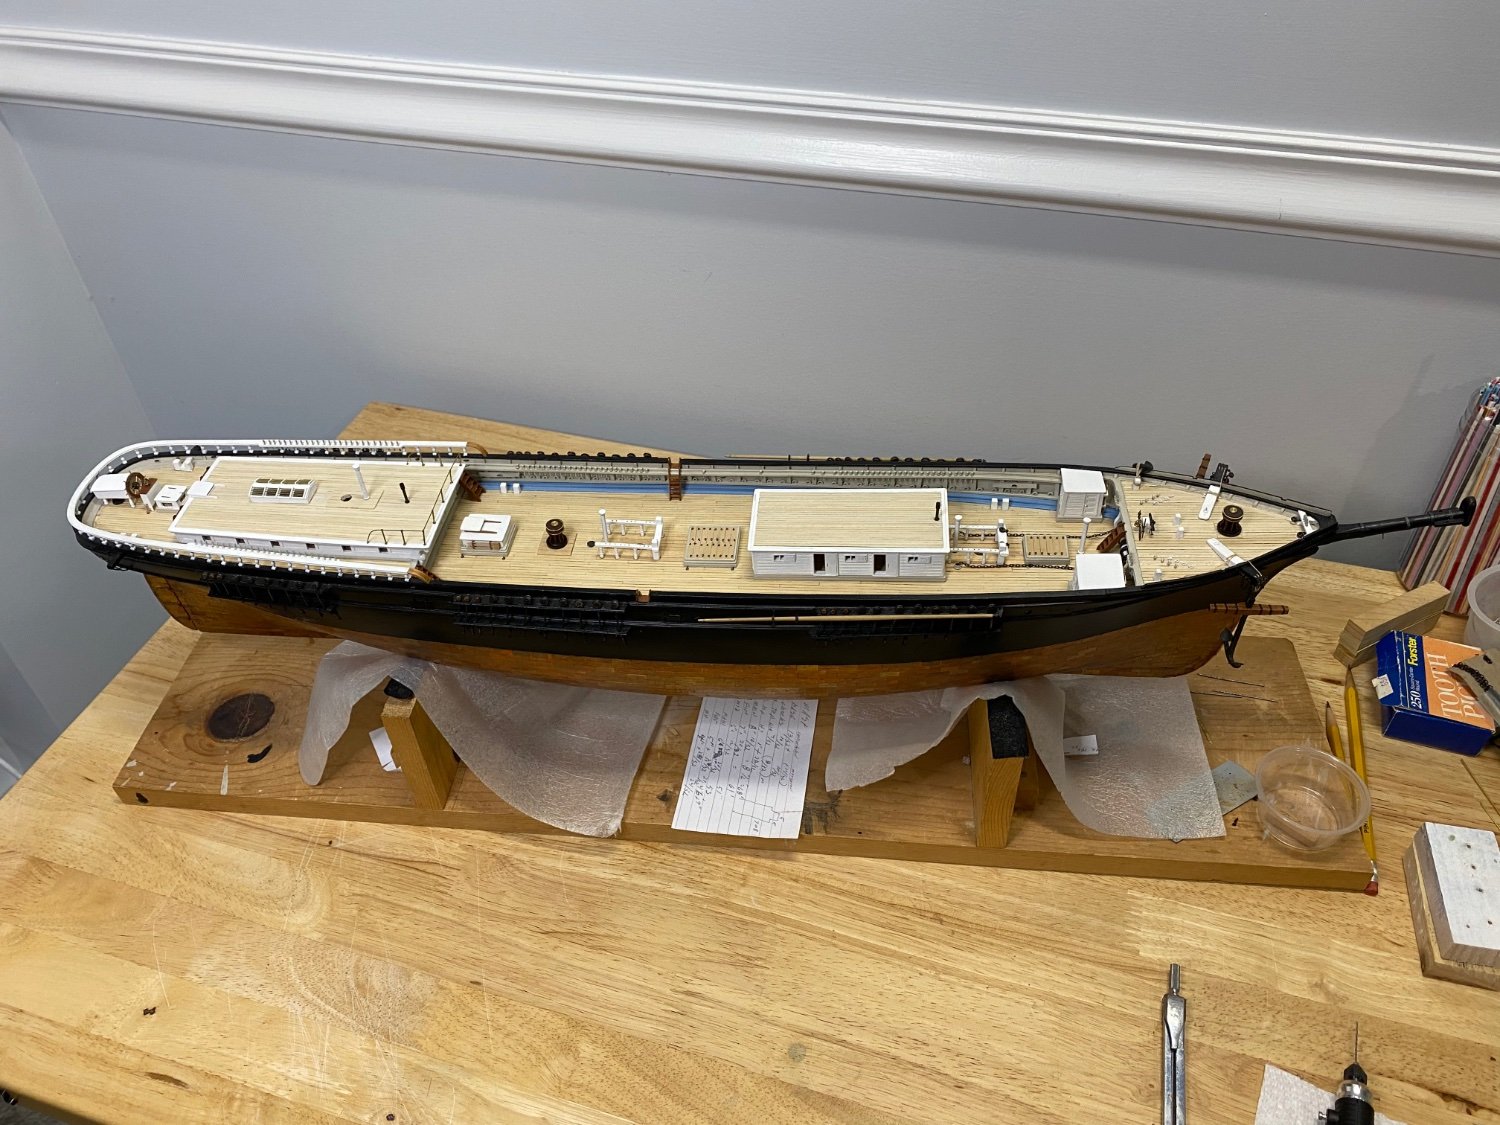
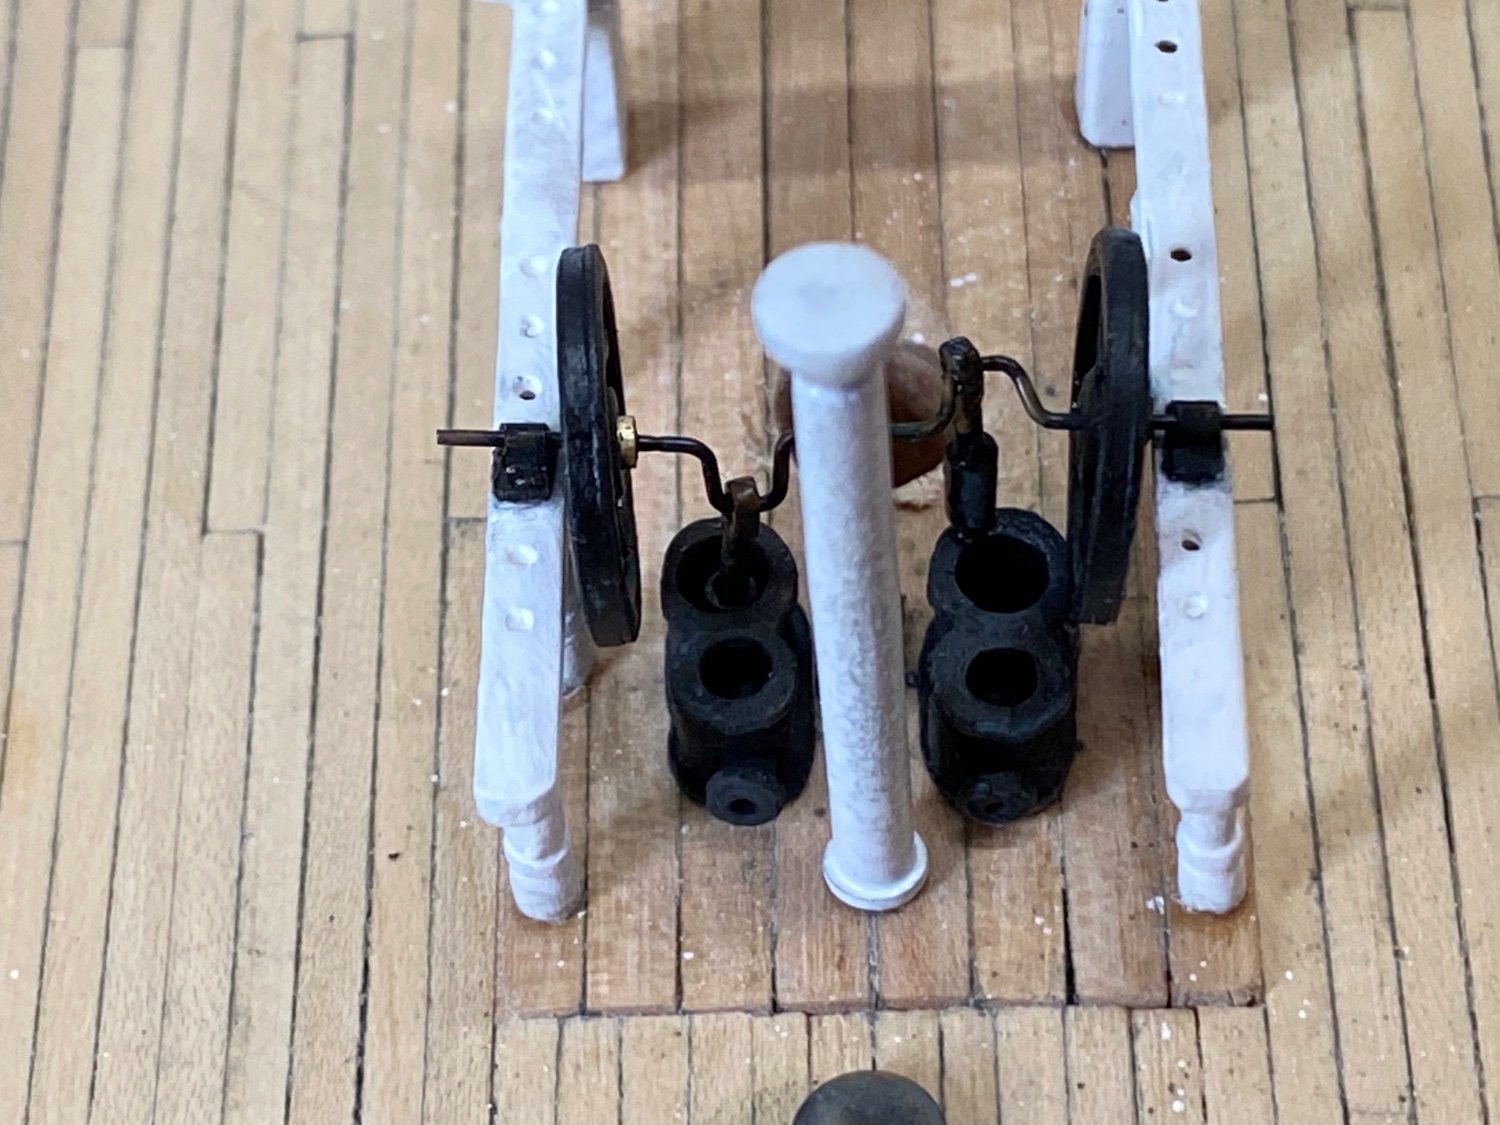
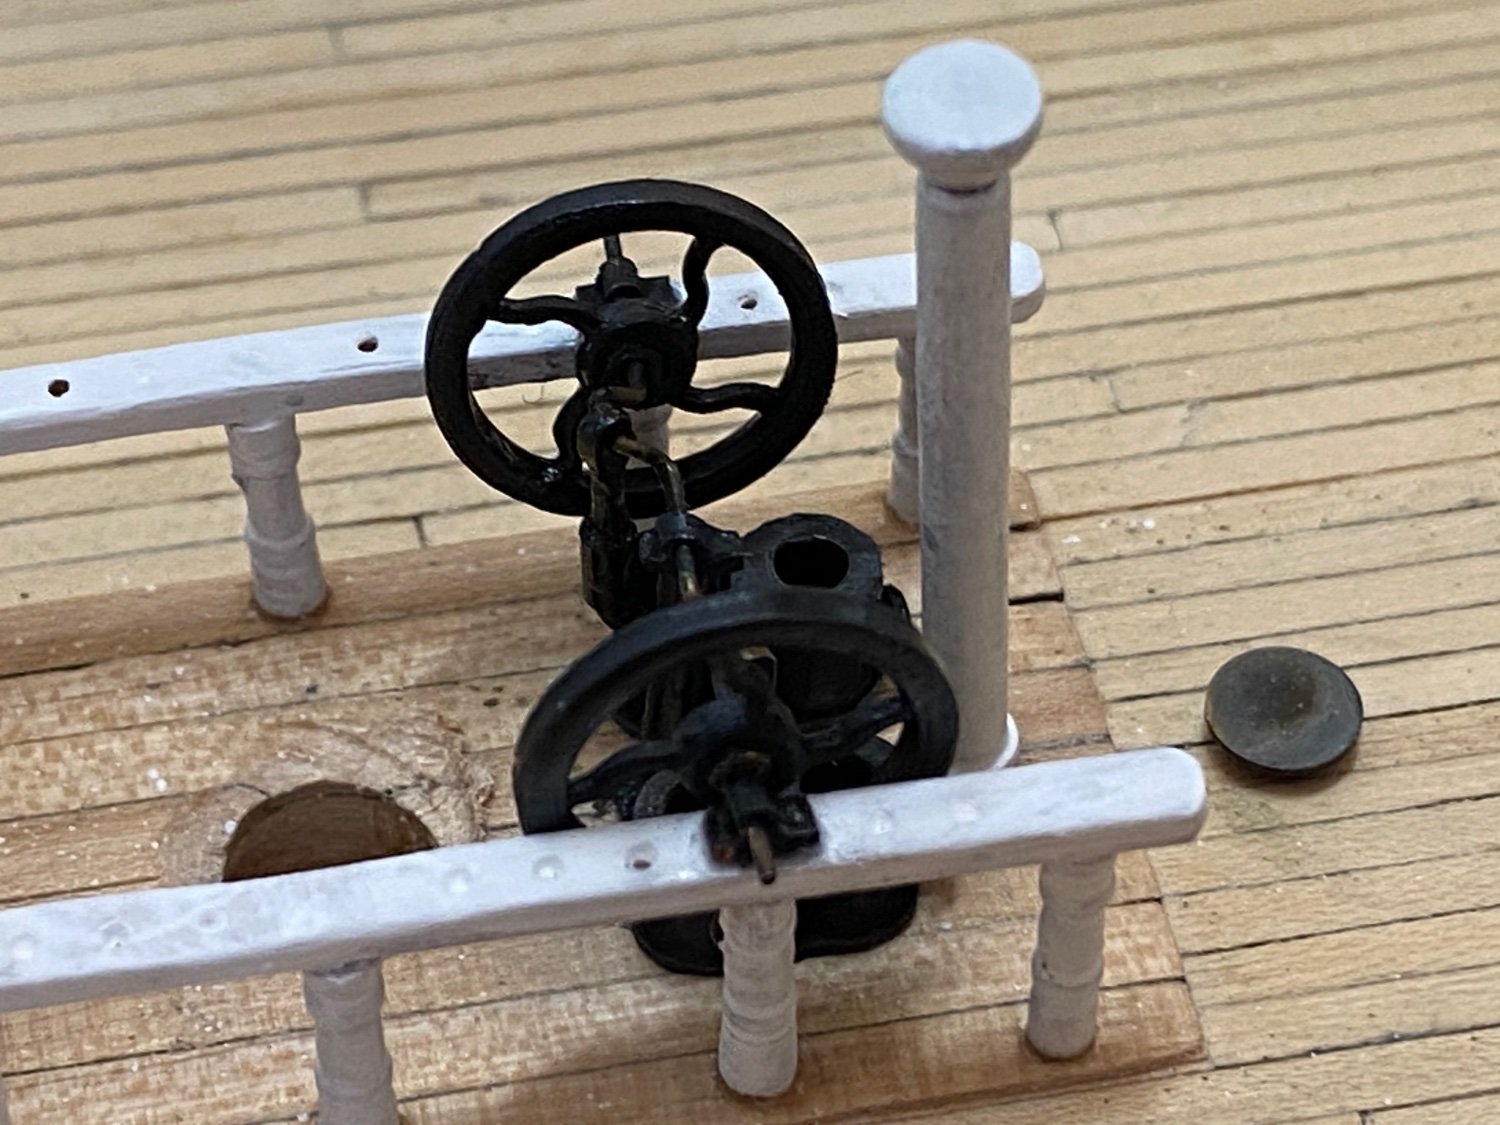
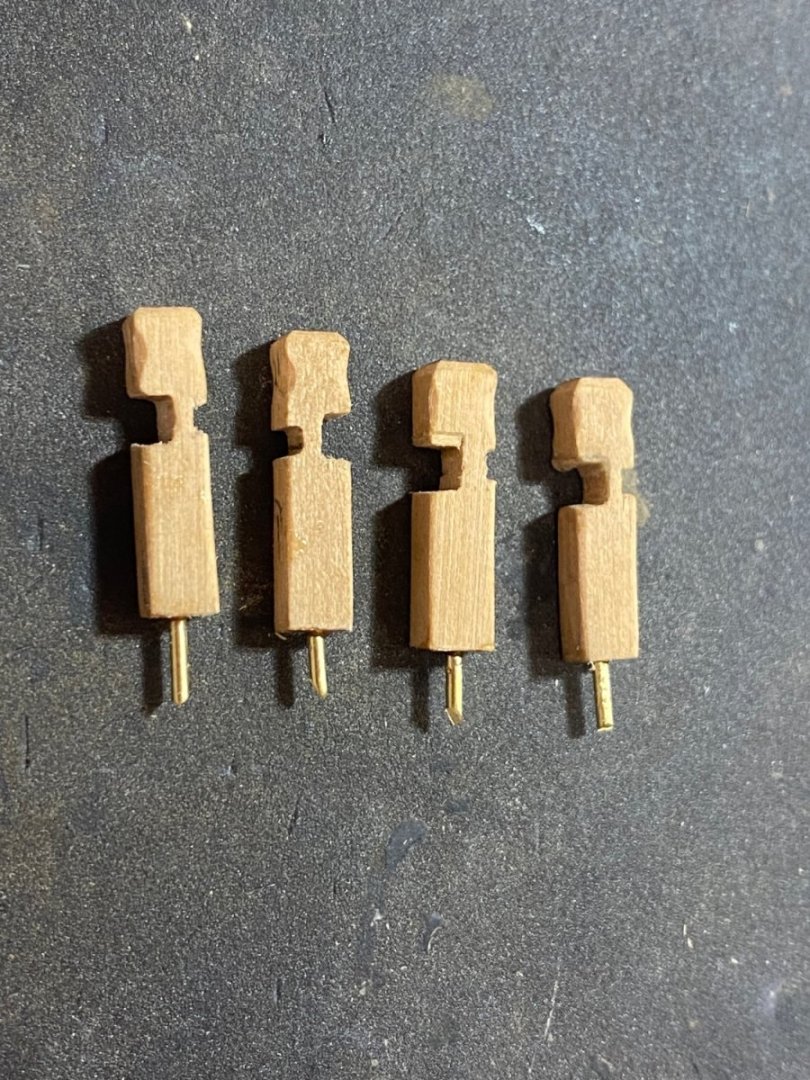
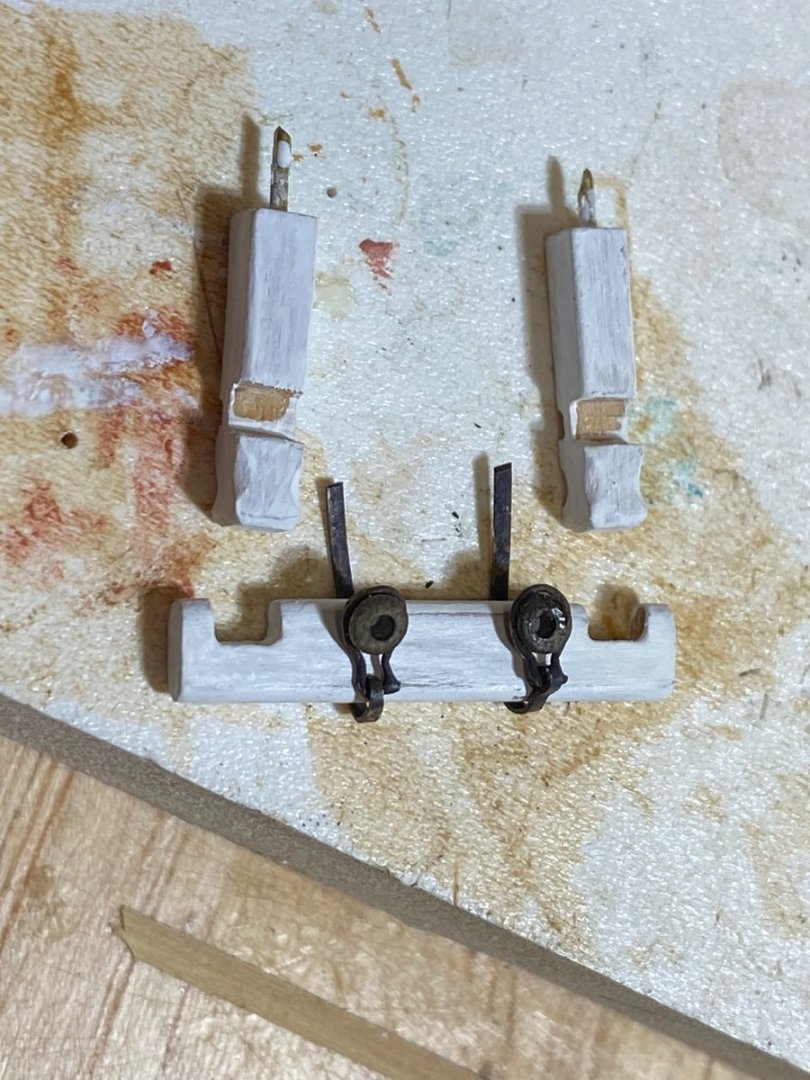
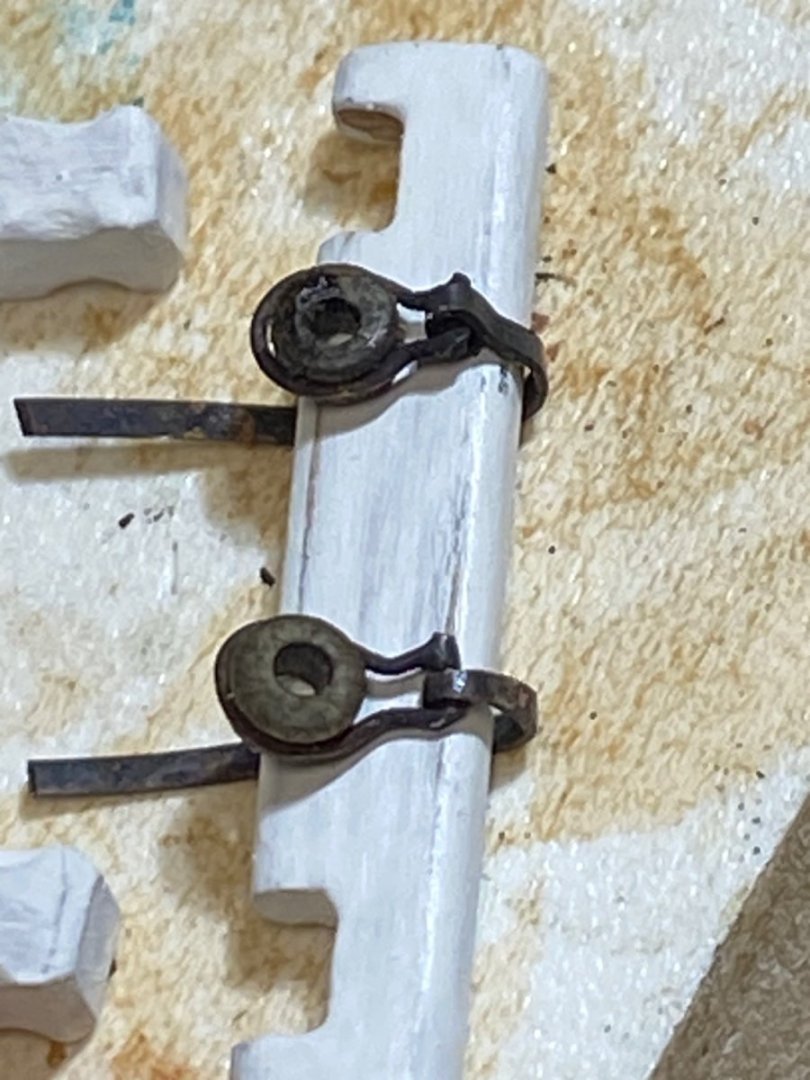
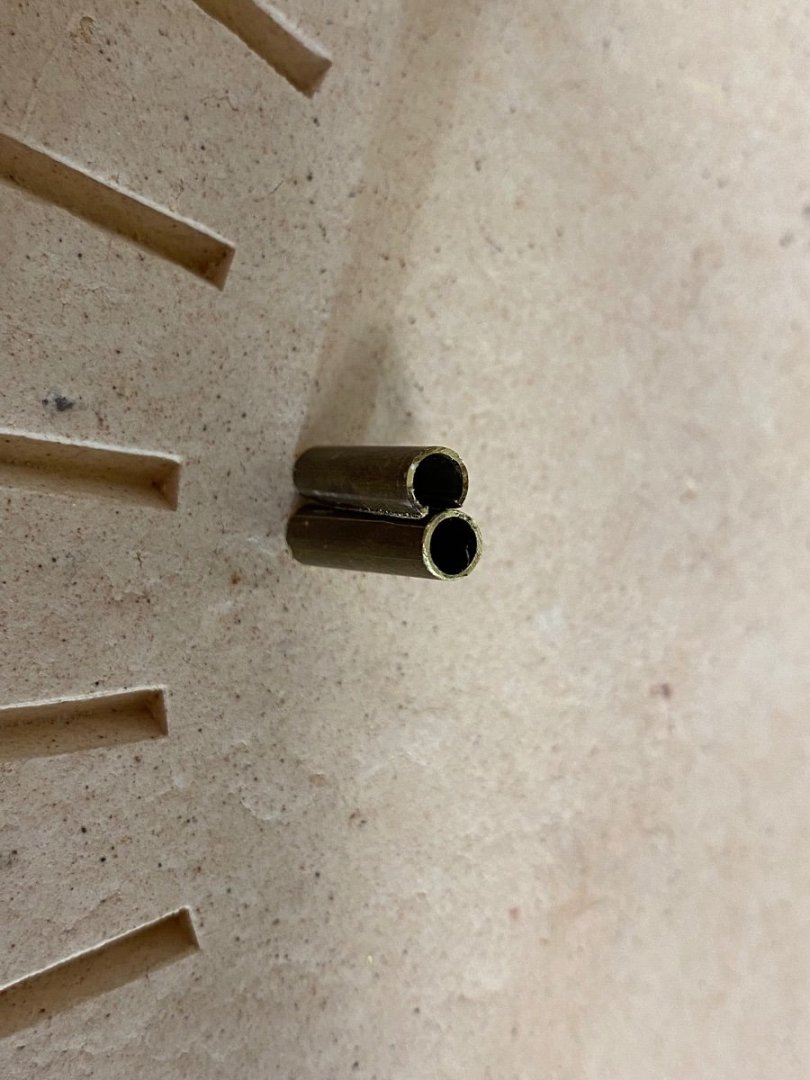
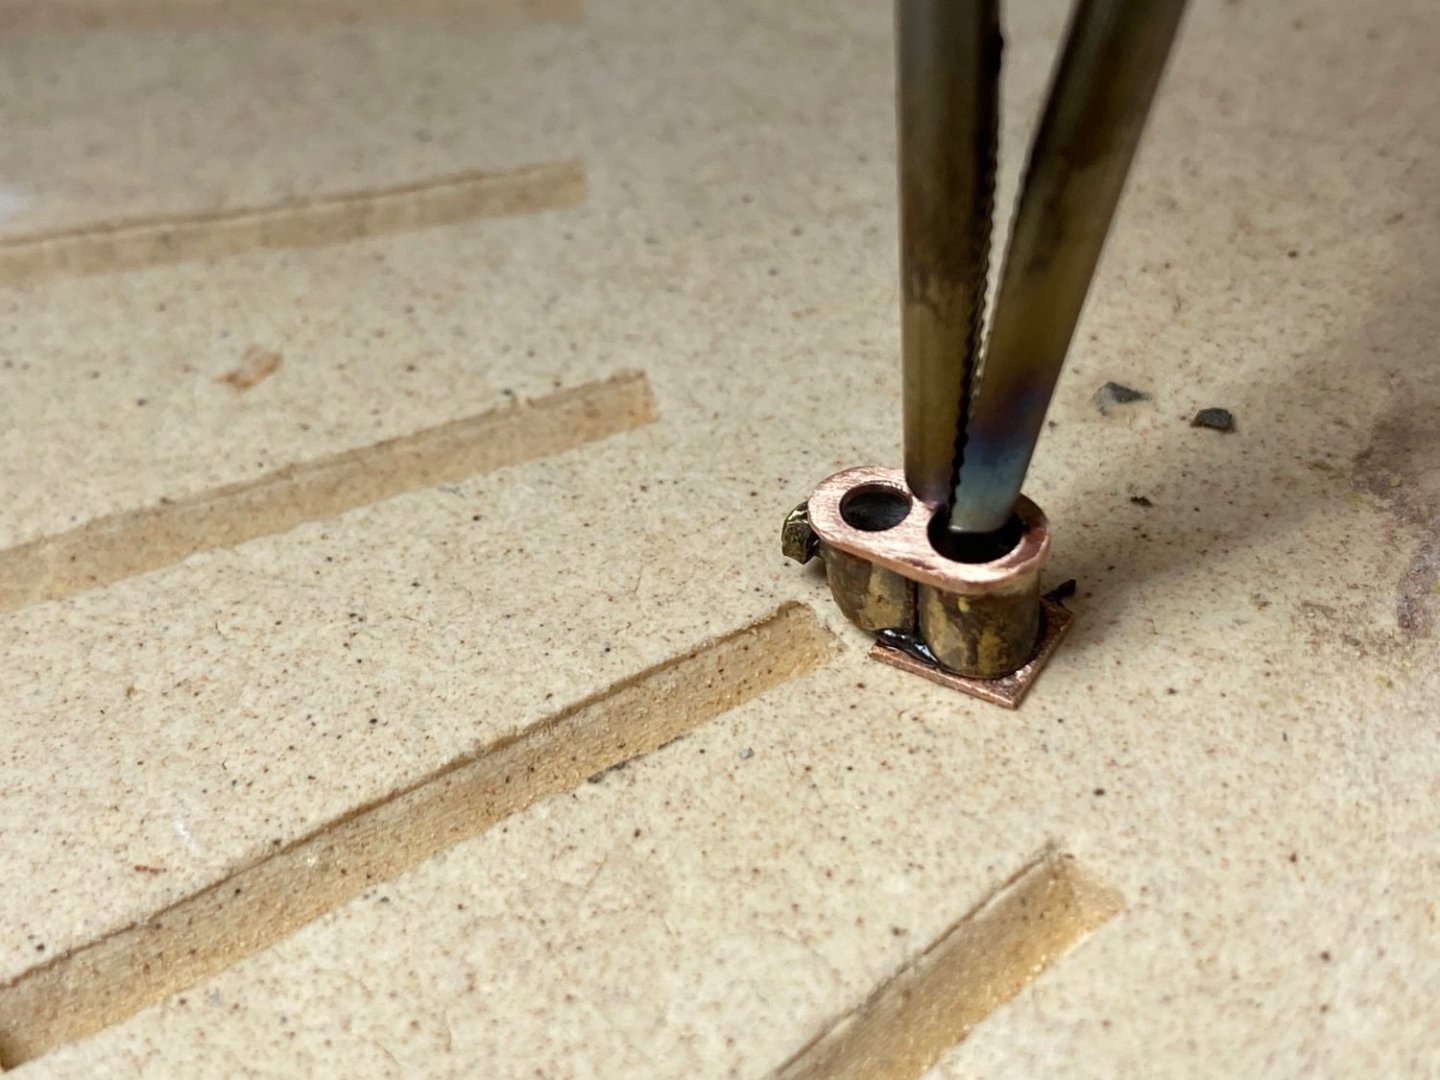
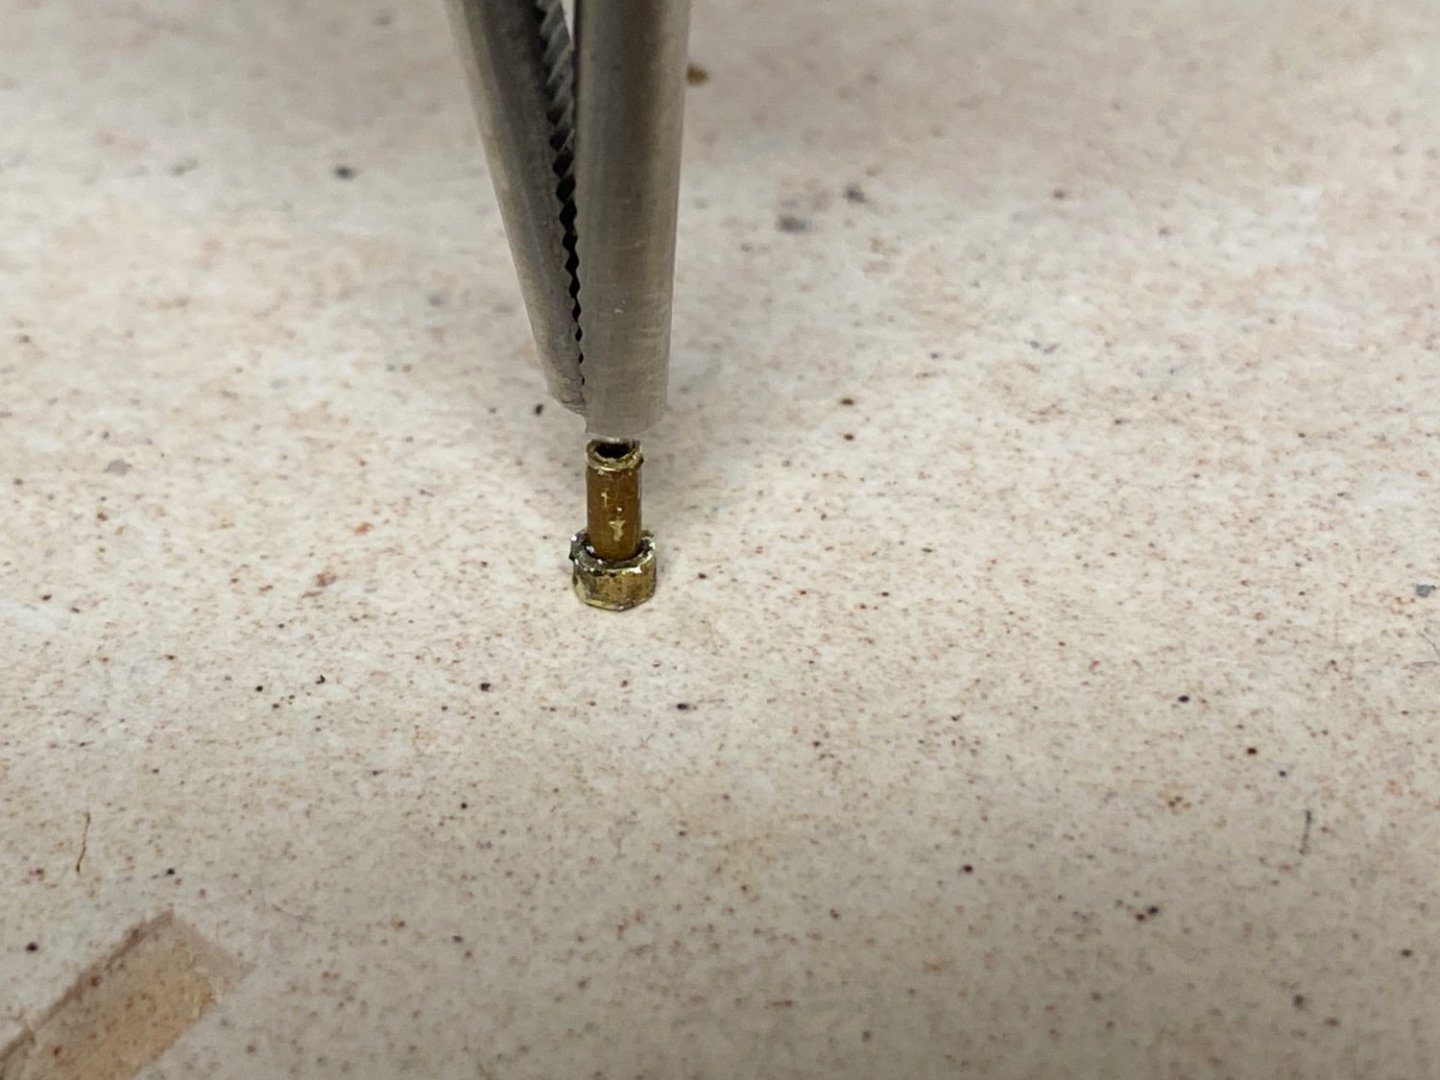
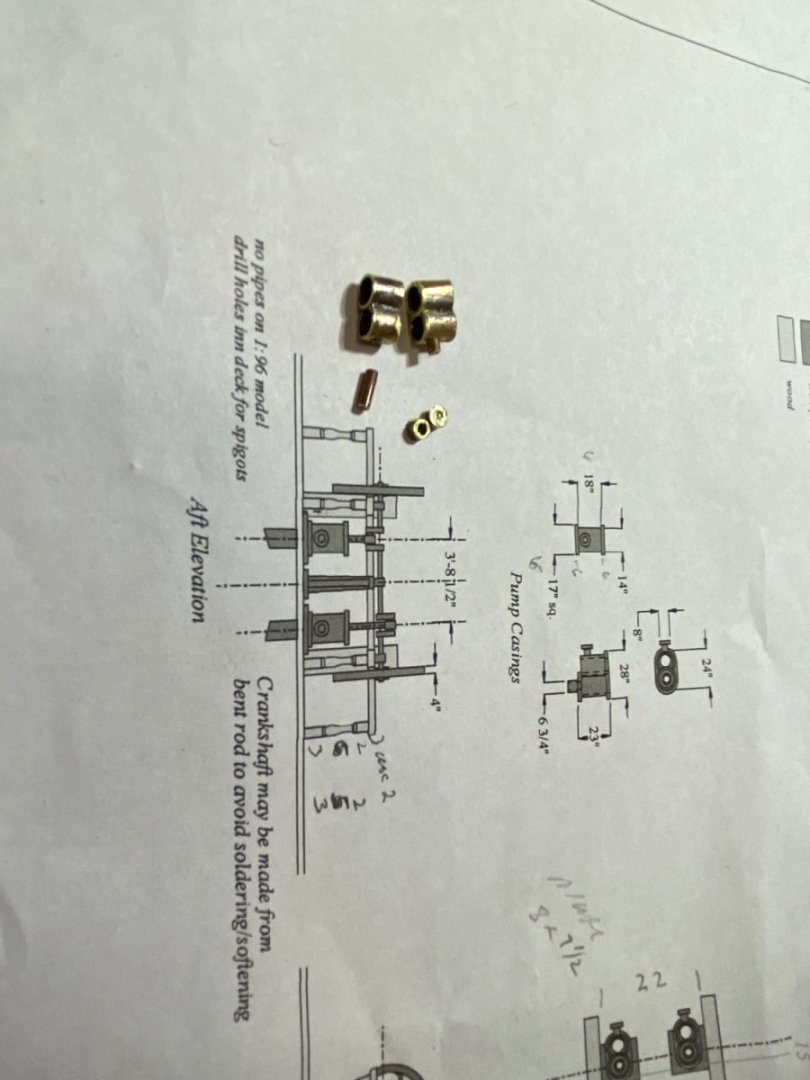
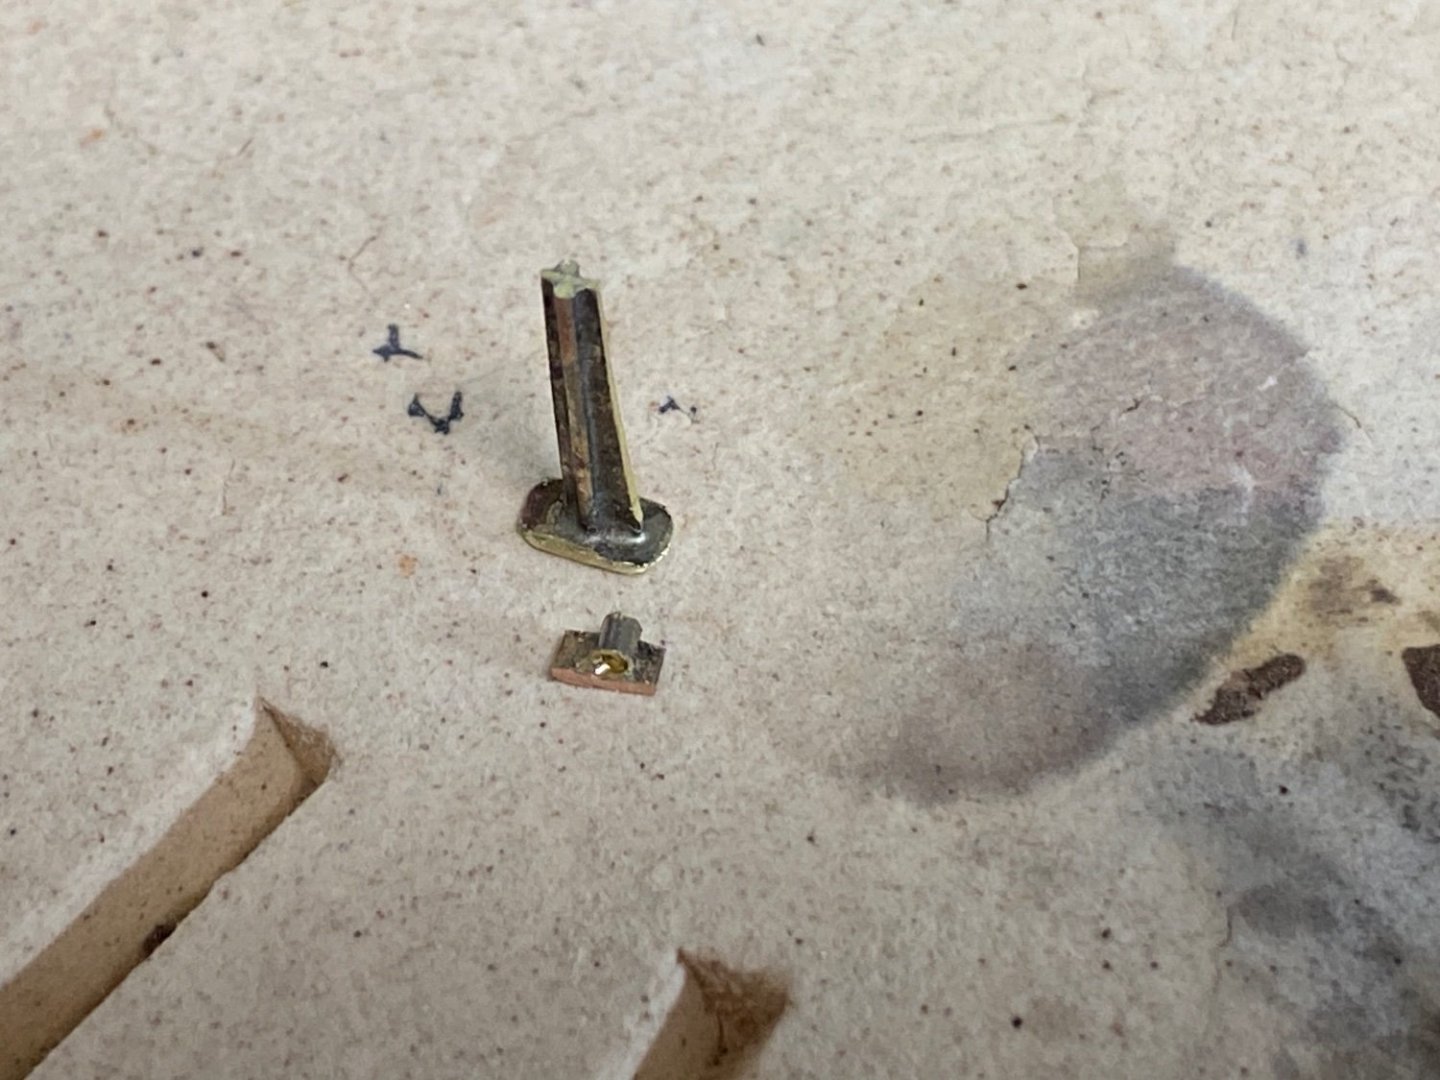
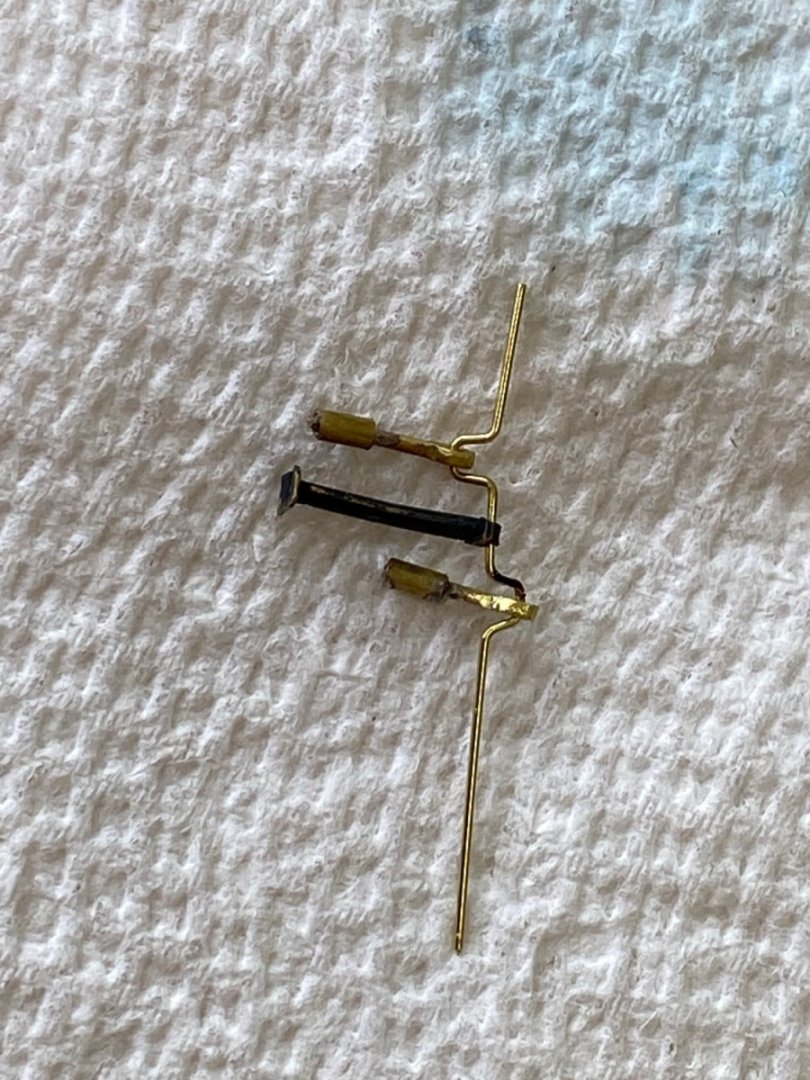
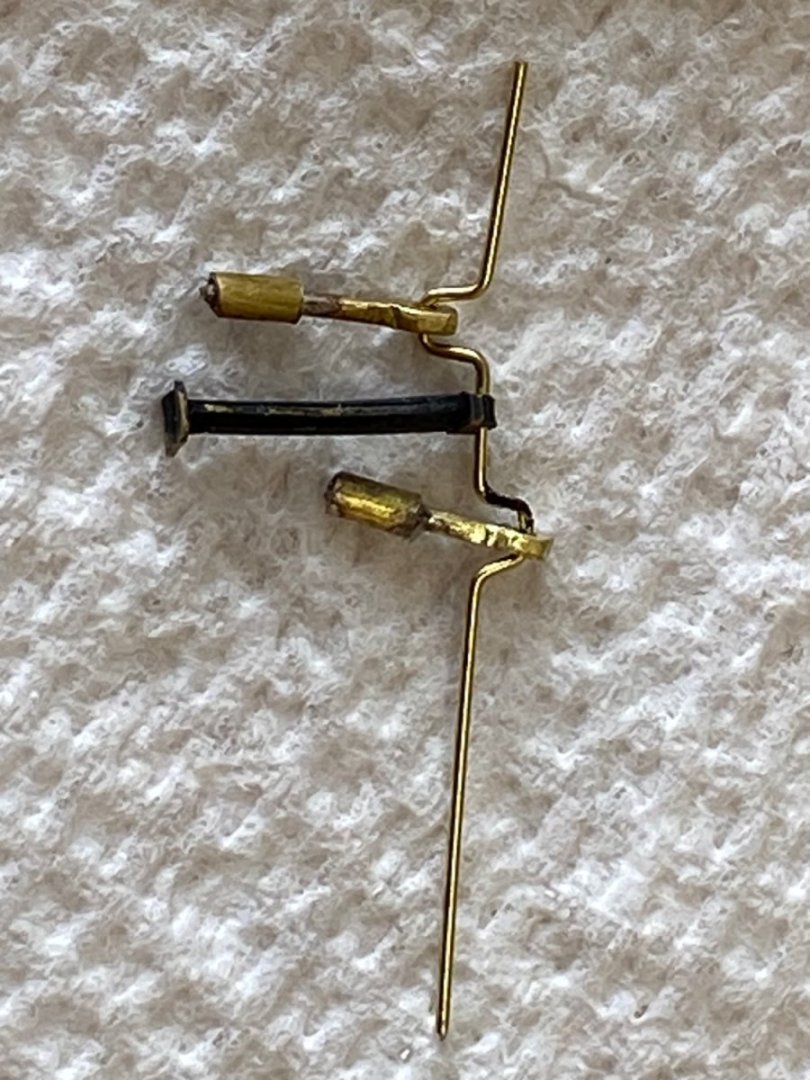
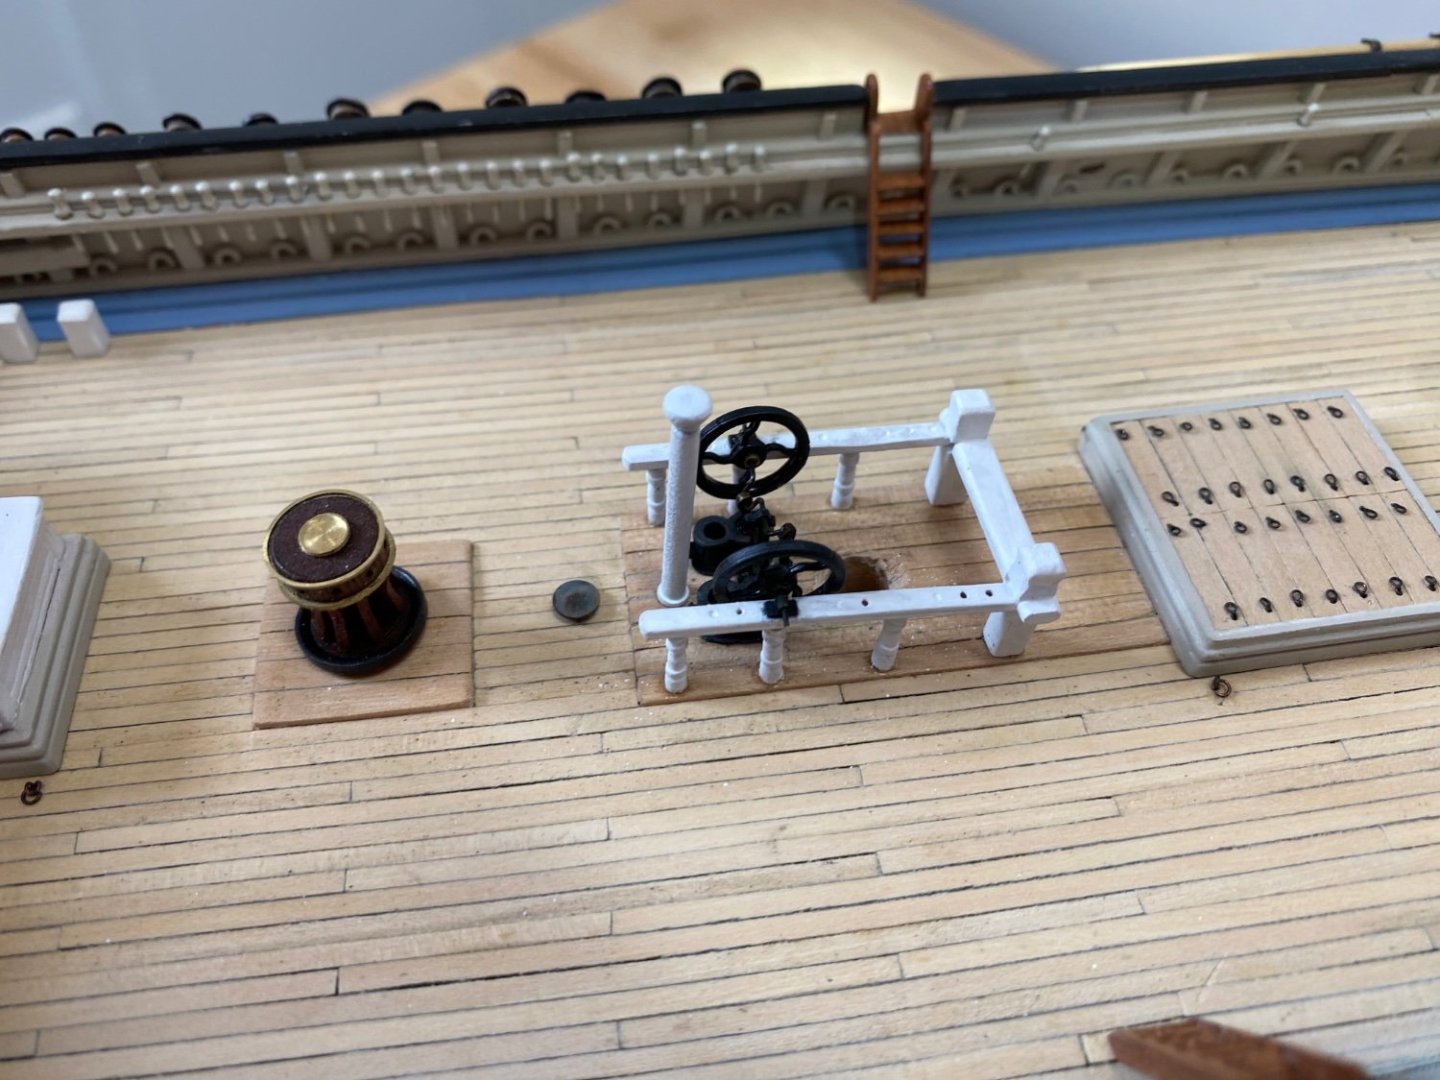
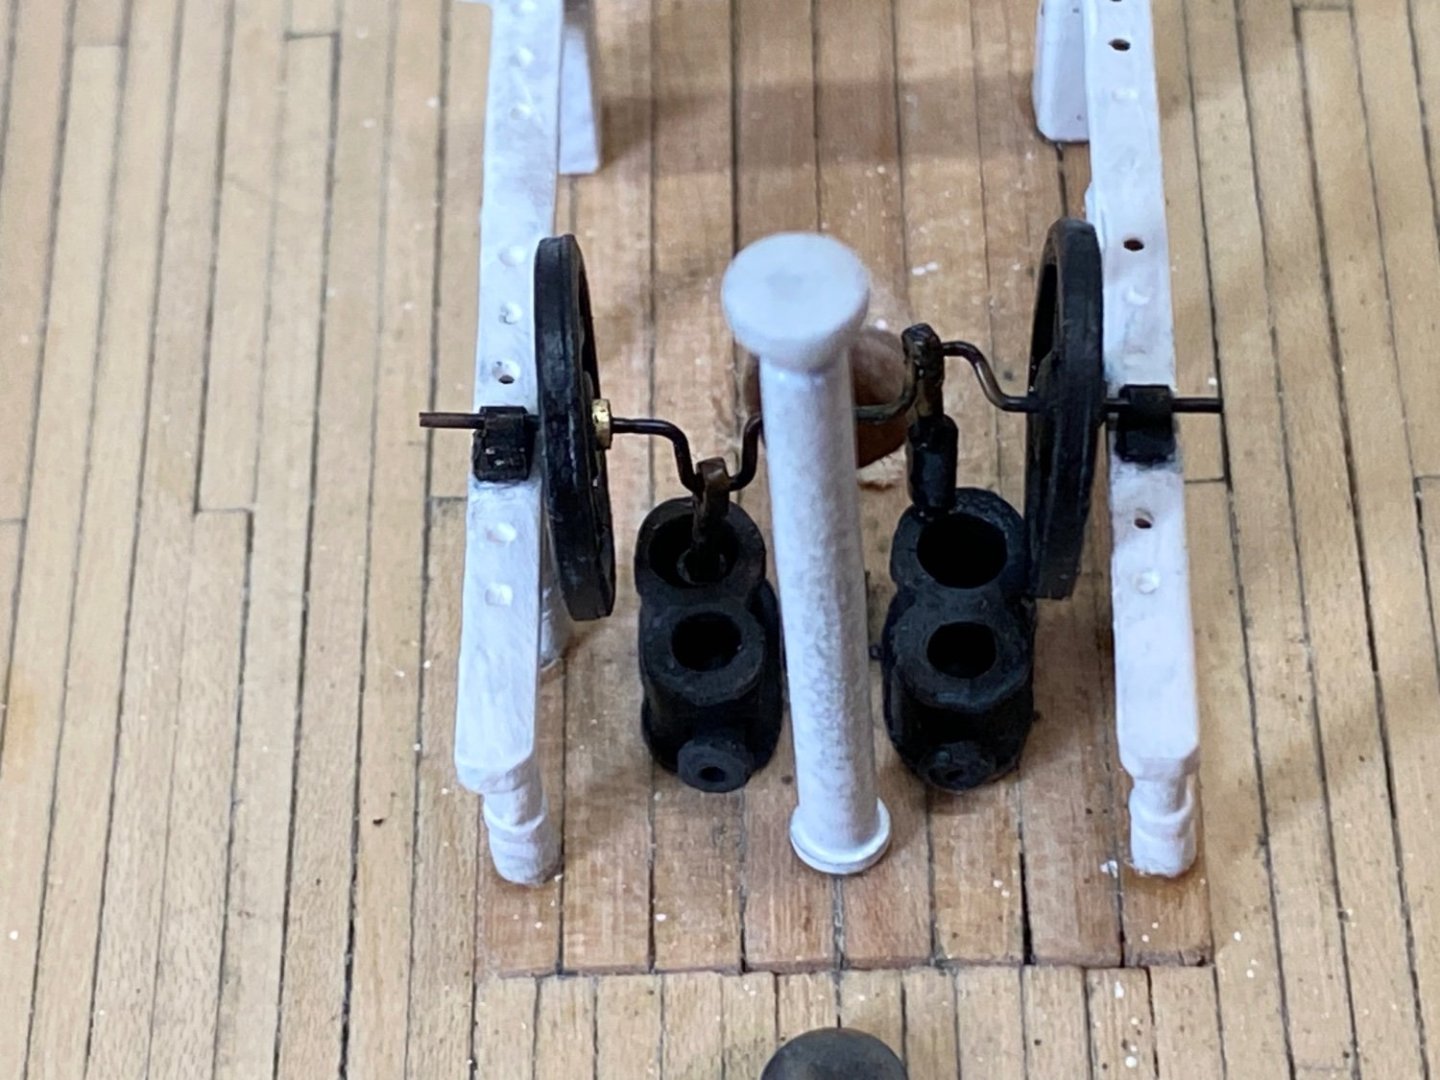
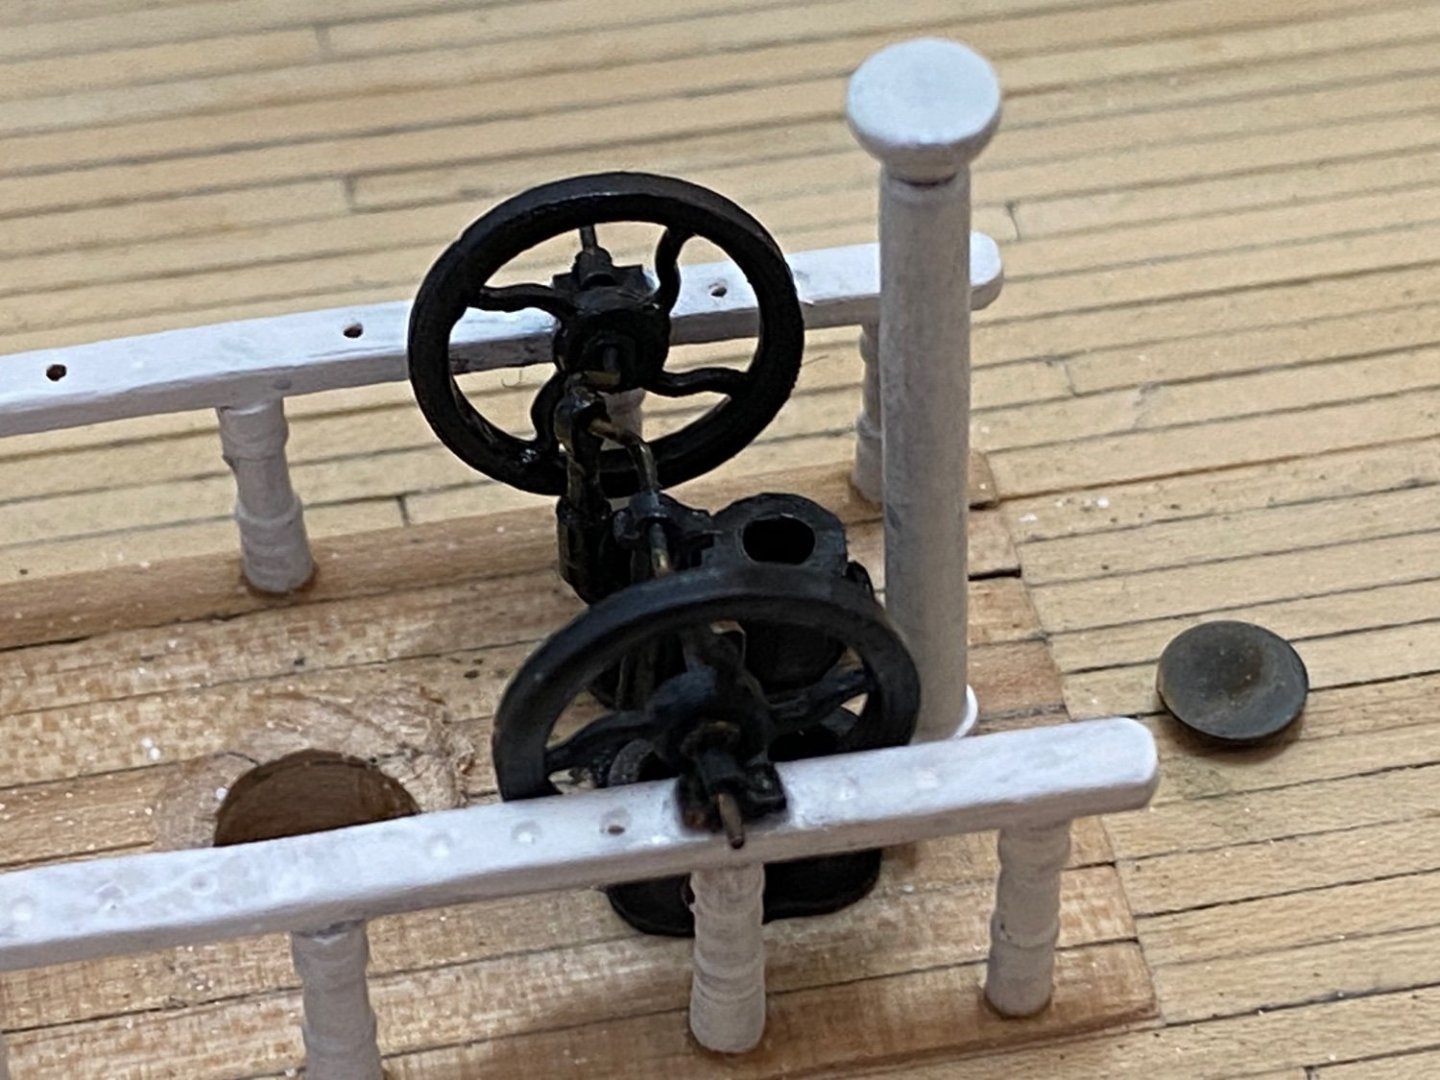
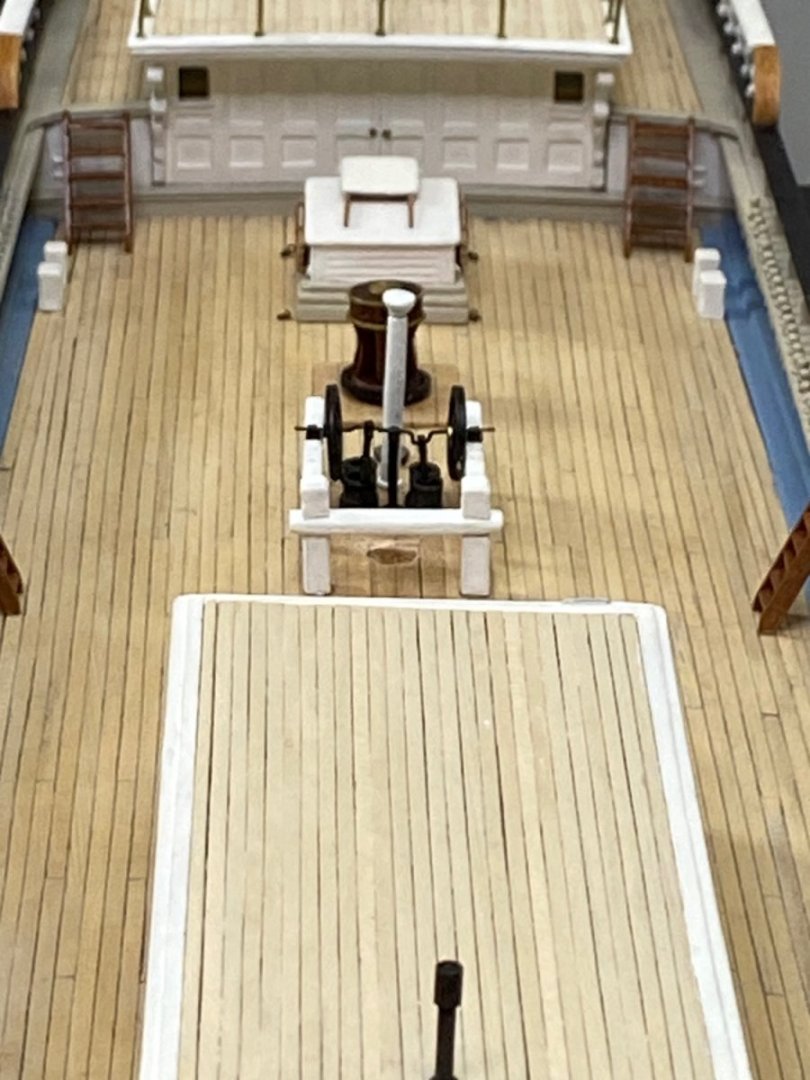
Thanks for the info Clipperfan. Very helpful! I tried to bend the sides of the aft cabin to follow the curve of the stern with little success as the sides were built up and too stif to bend adequately without breaking or cracking them. After 6 straight weeks of out of town guests, finally got back to the Fish. Finished the topsail bits, fife rails and bilge pumps. The topsail bits, fife rails and stanchions were made from boxwood. The stanchions were turned on the lathe. The cross piece (bolster?) on the fore topsail bitts is larger than the one on the main bitts as the fore takes the strain on the main stay. I made the straps and shackles from copper sheet and wire per the chain plates for the deadeyes. These were secured to the cross piece with cyan and functional copper bolts. This was the first time I tried them and it worked well I hope. The bilge pumps were made per EdT and YA. I used his plans for them. I wanted to make the fly wheels but ended up using ones from Bluejacket to save time and have something acceptable. The pistons were too short but still difficult to put all together.


- 345 replies
-
- 2
-
-
- Flying Fish
- Model Shipways
- (and 1 more)
-
ClipperFan, Good to hear from you. I’ve been following your posts with George and Jared, good information . I have yet to take a close look at the tops as I’m still trying to finish the hull, but will definitely keep your information in mind. Thanks, Rick
- 345 replies
-
- 1
-
-
- Flying Fish
- Model Shipways
- (and 1 more)
-
Glad to hear that your case is mild! COViD is confounding for sure. Both my wife and I have had all vaccines and boosters, but my wife came down with Covid a year ago. I did not isolate from her and I didn’t come down with Covid or test positive. I tested every day and stayed negative. I contacted COVID in May but don’t know how I got it. My case was also very mild with no respiratory symptoms at all, just aching, chills and a fever for about 36 hours. Feel better soon!! Rick
- 602 replies
-
- 1
-
-
- Flying Fish
- Model Shipways
- (and 2 more)
-
Feel better soon my friend!! Model looks great!! Rick
-
Jared, As far as I know, the Flying Fish was launched before widespread use of wire for the standing rigging. I recommend using thread/cord for all rigging, both standing and running. That is what I am going to use. From what I understand, Underhill’s book really relates more to the later Downeasters and vessels built around the third quarter of the 1800’s. See the note in the instruction manual on typical iron work for the time period of the FF Rick
-
George, Really great job!! Getting close now. Every painting I‘ve seen always shows a sail on the crojack( lower mizzen) yard although they are rarely portrayed as set. This may be because when set, they would block the wind to the main course. The term crojack yard may be a holdover from earlier times. Where are you getting your blocks from? I am trying to get some more from Syren but they have been unavailable for some time now. Rick
-
Welcome back! Glad to hear you are doing well! Rick
-
ClipperFan Good to hear from you. I have the Duncan McLean article and Ben Langford, who revised the original FF plans from the 1930’s(?) for Model Shipways used those dimensions in the plans. I think the error that was made was combining the lengths of the yards plus the length of the yardarms for the length of the yards. This error was corrected in the 1982 (?) revision. Rick