HOLIDAY DONATION DRIVE - SUPPORT MSW - DO YOUR PART TO KEEP THIS GREAT FORUM GOING! (89 donations so far out of 49,000 members - C'mon guys!)
×


Rick310
-
Posts
811 -
Joined
-
Last visited
Content Type
Profiles
Forums
Gallery
Events
Everything posted by Rick310
-
Really well done!!! I got the book for our 6 yr old granddaughter for Christmas this year!! Pne of my favorite books growing up! Rick
-
Well done! I live in Belfast, when is your talk? Rick
-
Coming along nicely. I’ve had to spend much time thinking through the various steps on my Flying Fish build. Rick
- 193 replies
-
- 1
-

-
- Flying Cloud
- Mamoli
- (and 1 more)
-
Nicely done!! Rick
-
Beautiful!! Rick
-
Interesting! Rick
-
Thanks George, They look great!!! Rick
-
George, nicely done!! How did you cut out the slots? They look remarkably consistent. Rick
-
Really beautiful!! WOW !! Rick
-
Thanks George, Glad to get them done! They are not consistent, hard as I tried. probably won’t be noticeable to most people! Tick
-
Thanks for your kind words Rob. It is interesting why McKay did what he did. I believe he left the rigging decisions to Nickels, the ship’s captain. Rick
-
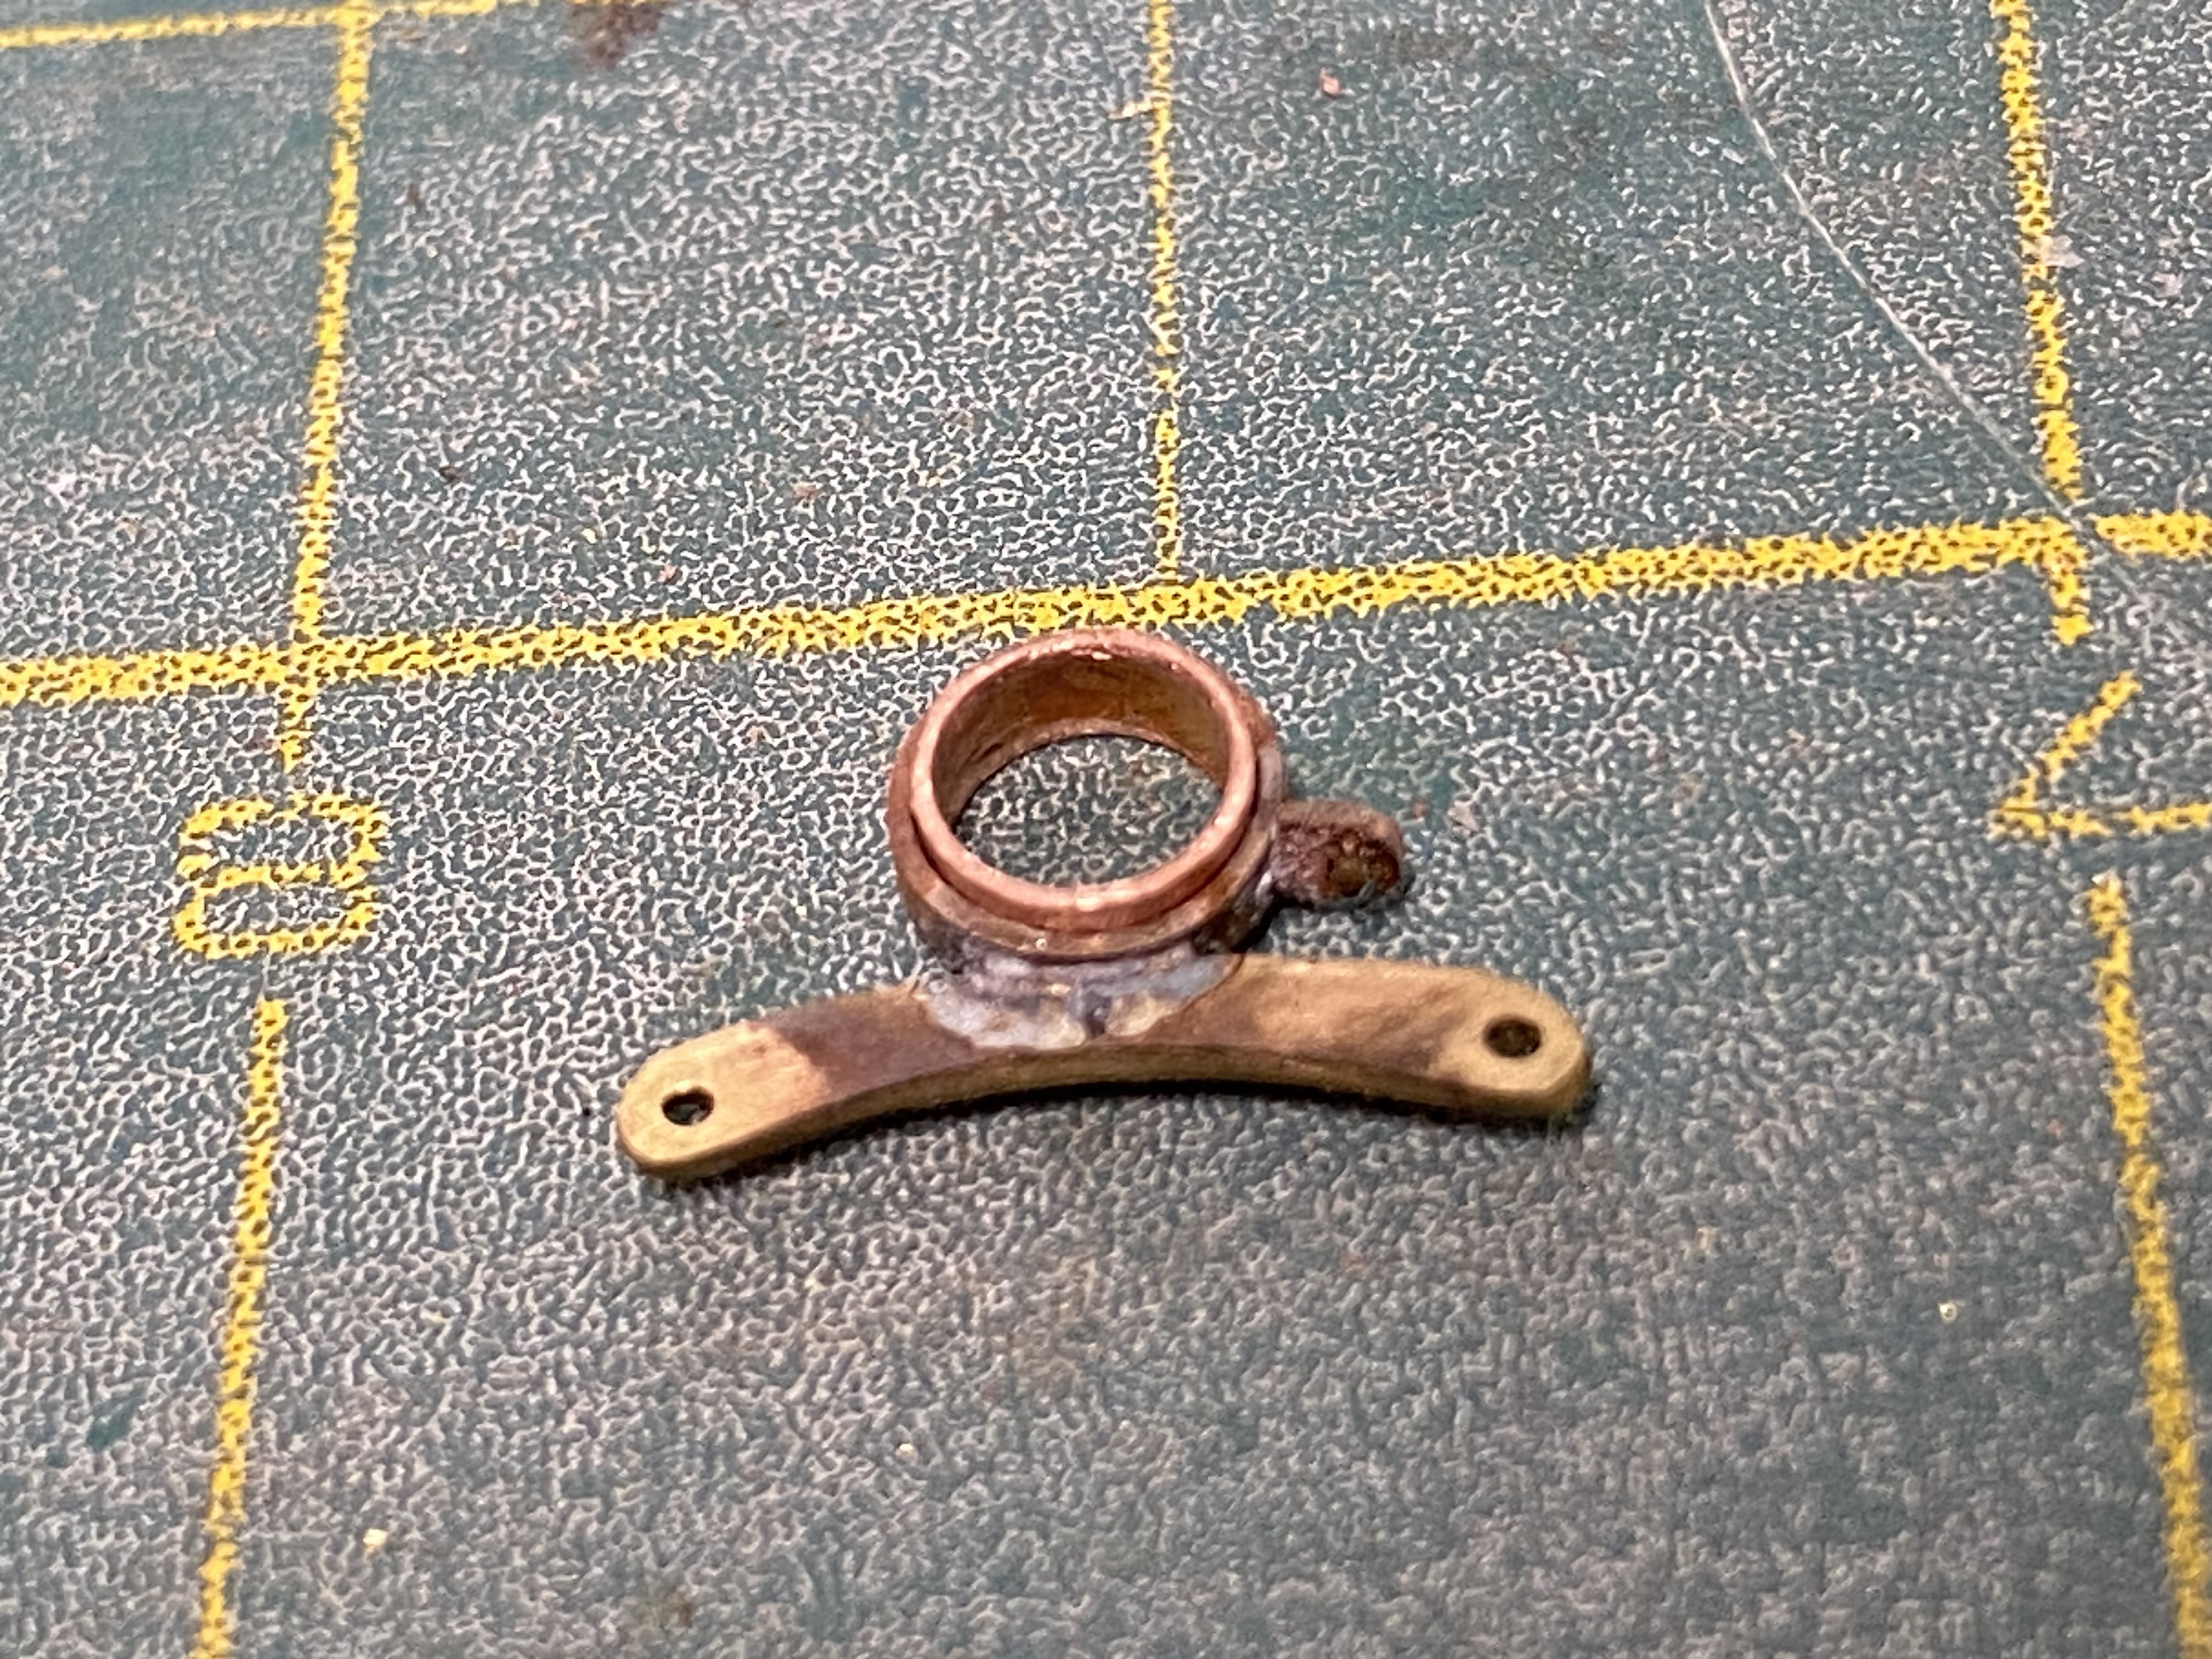
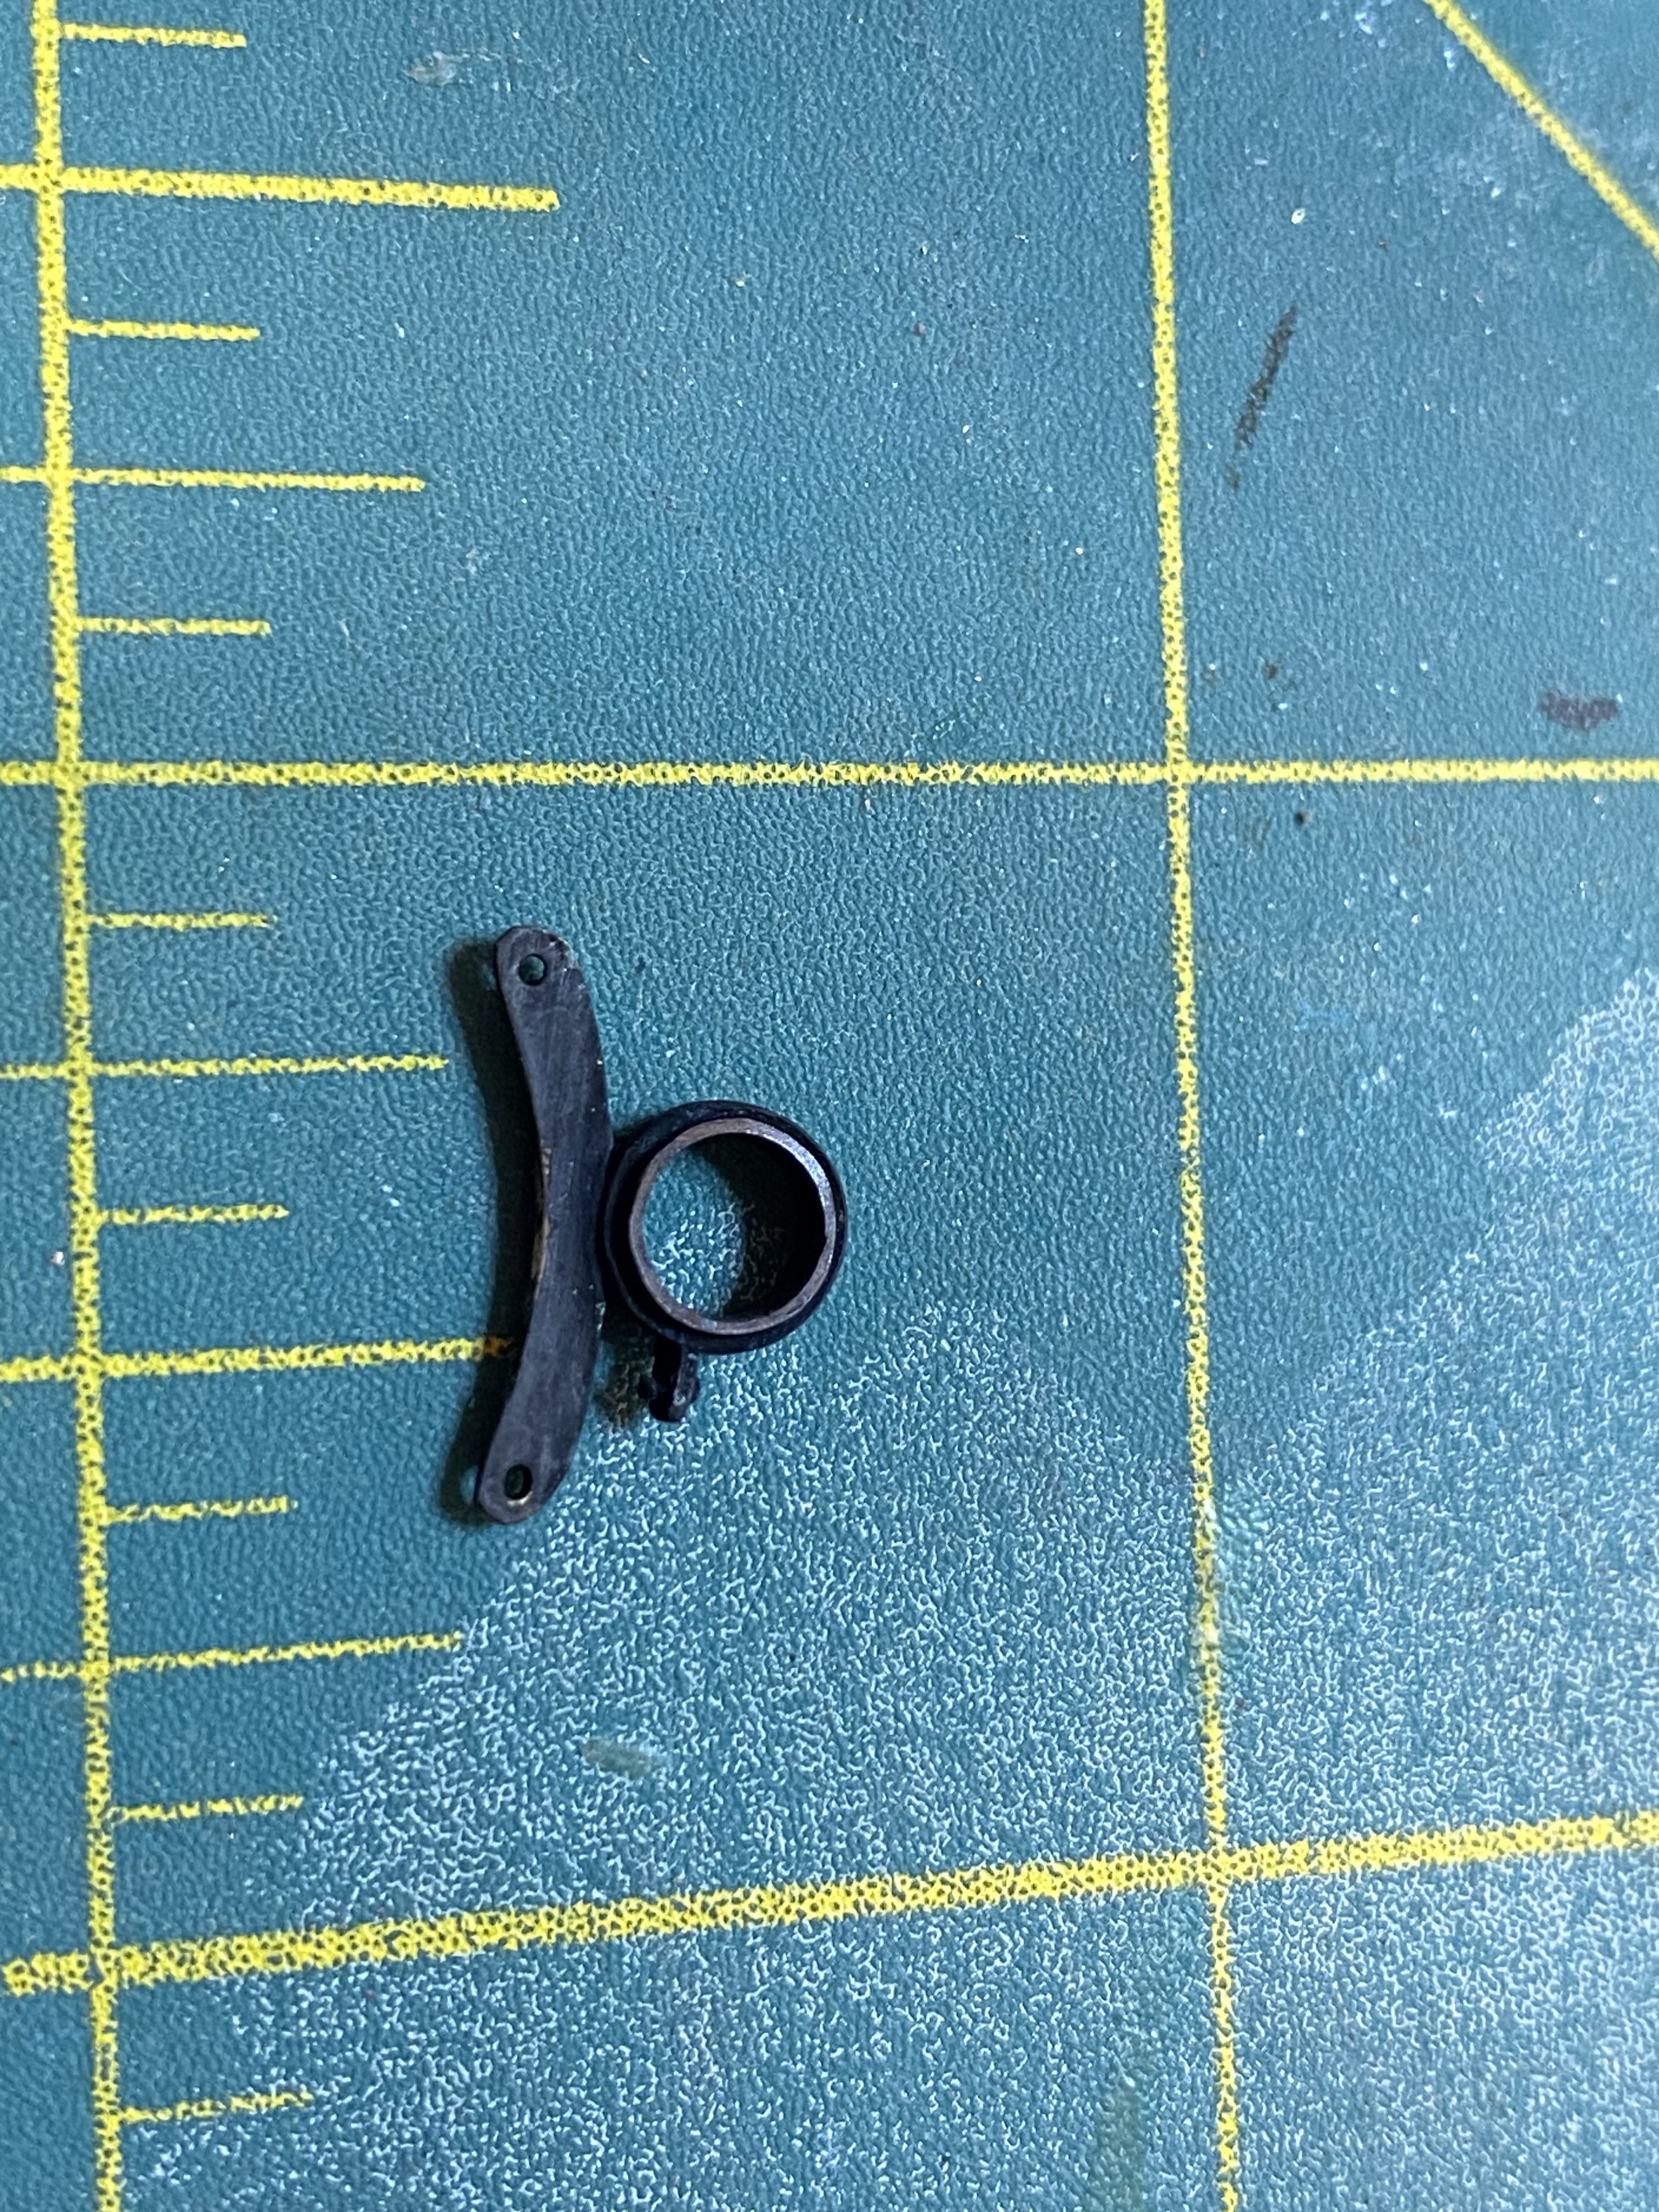
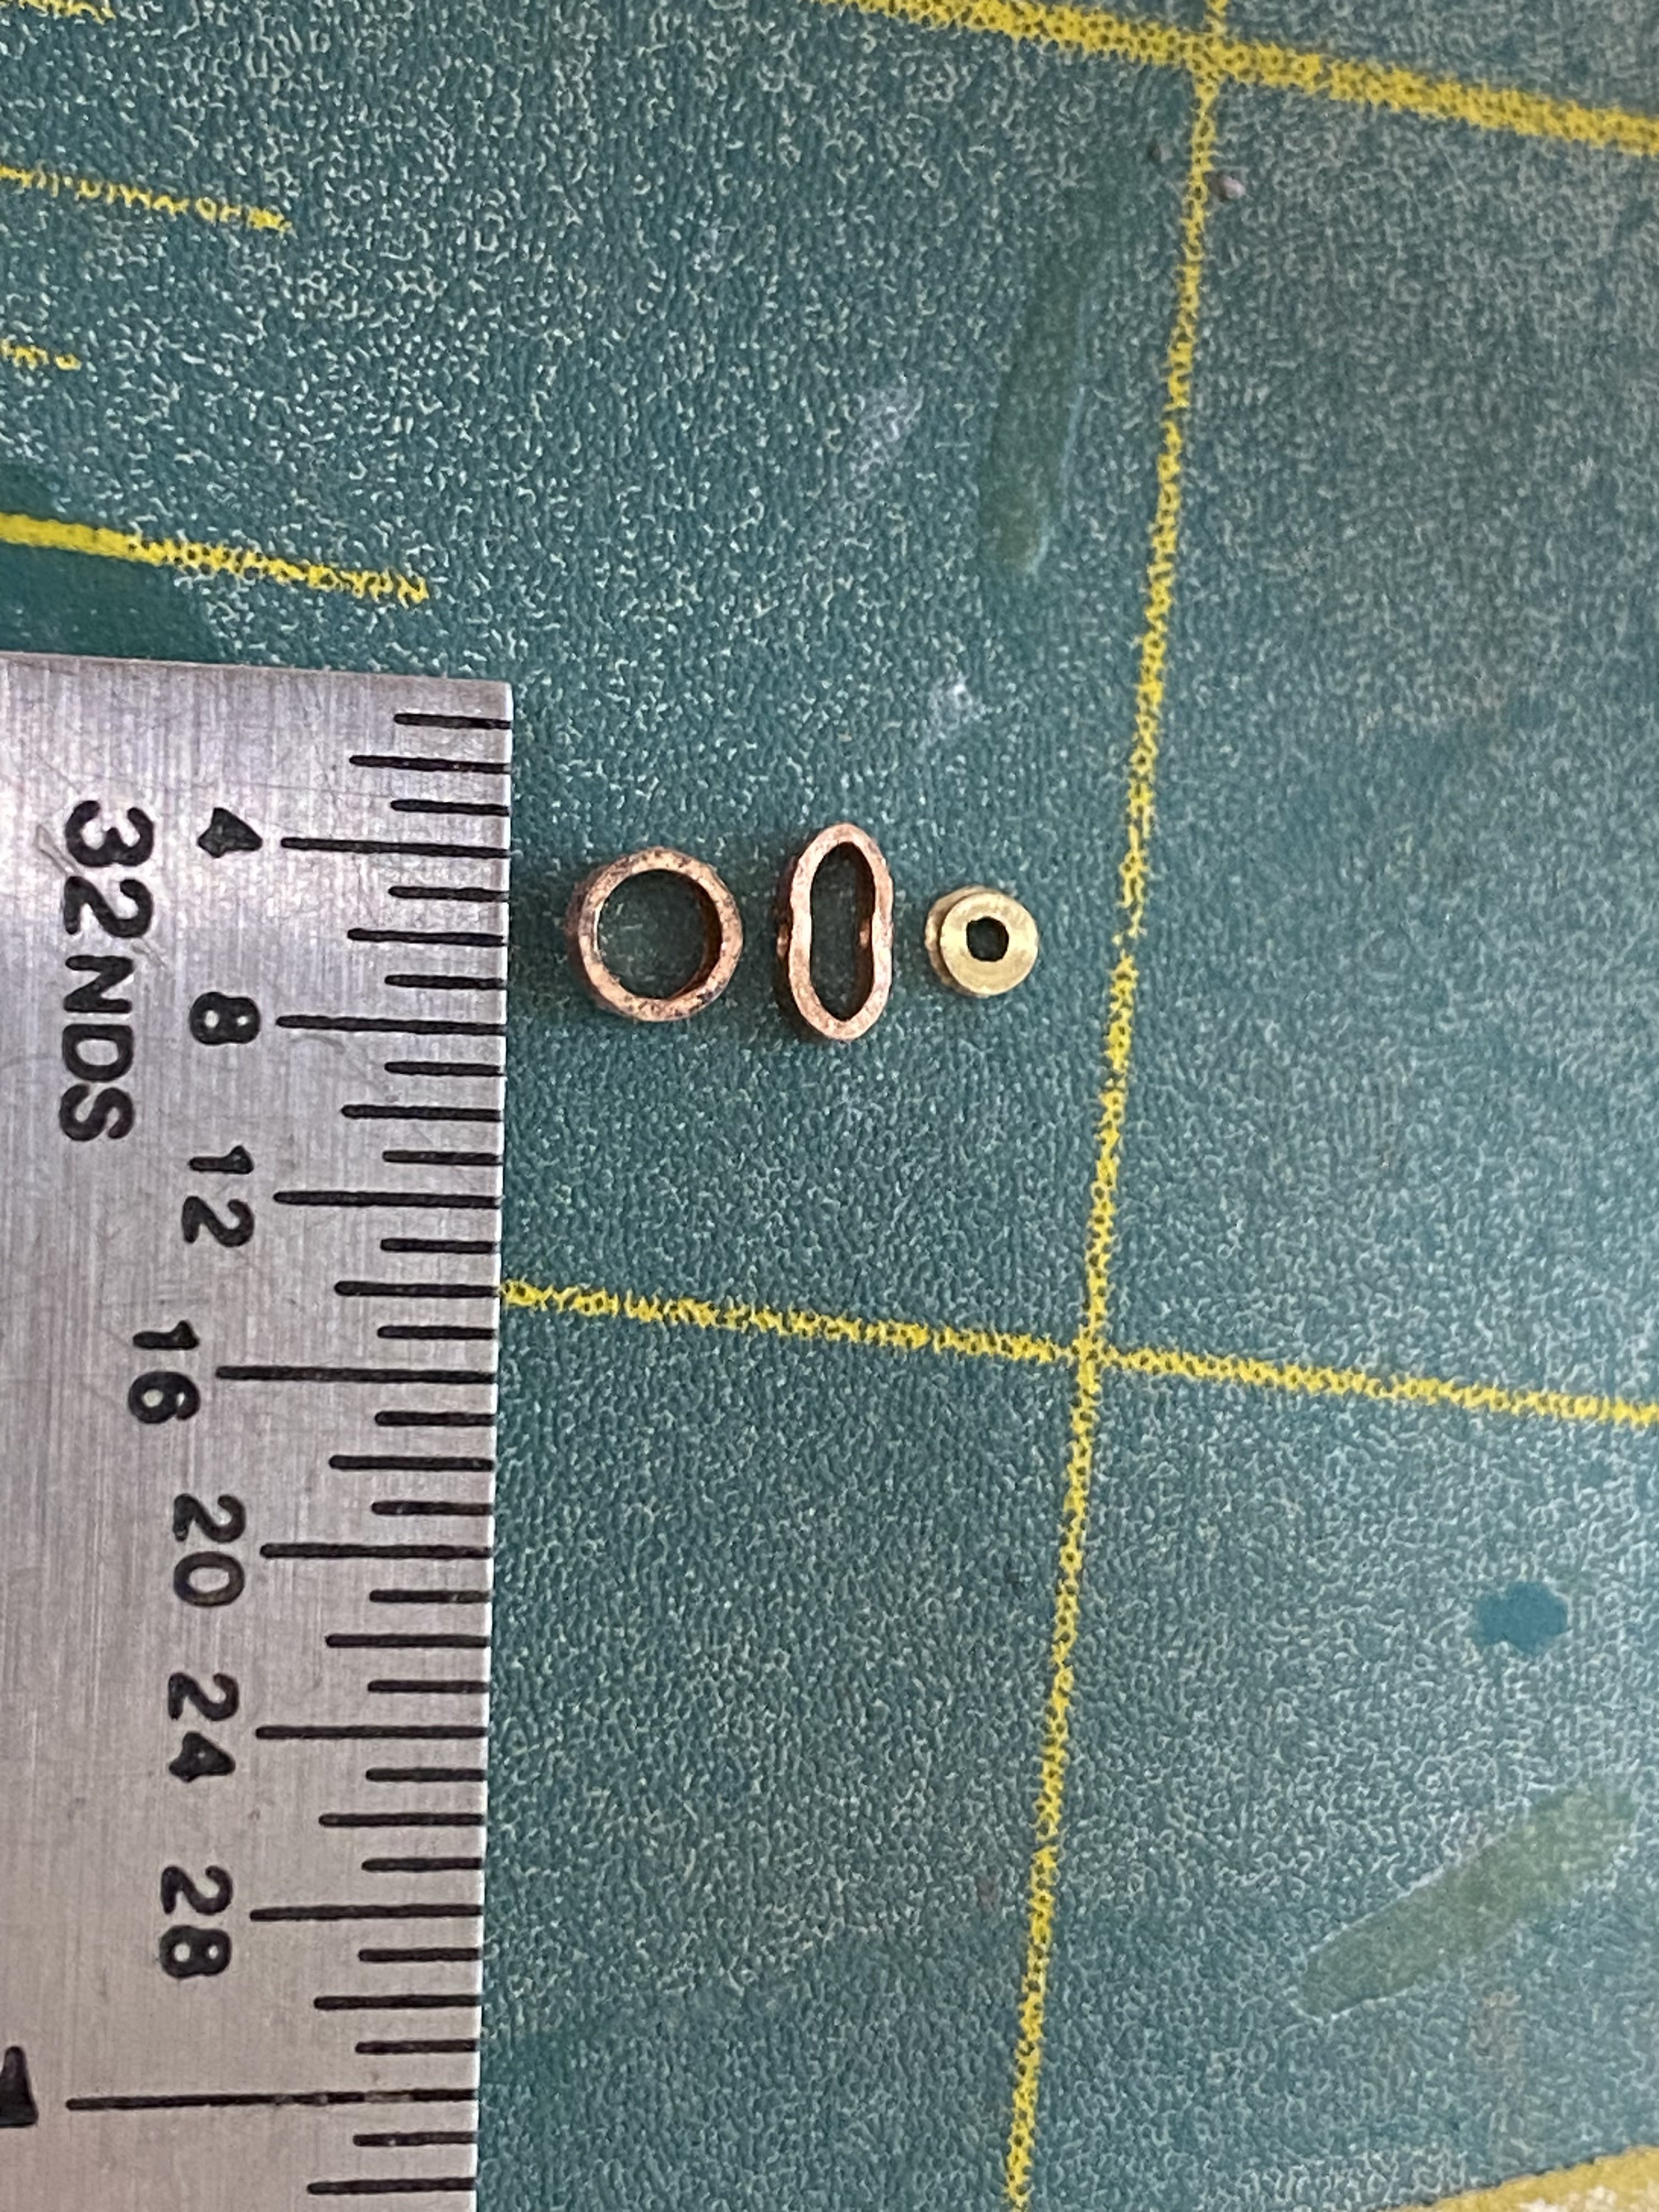
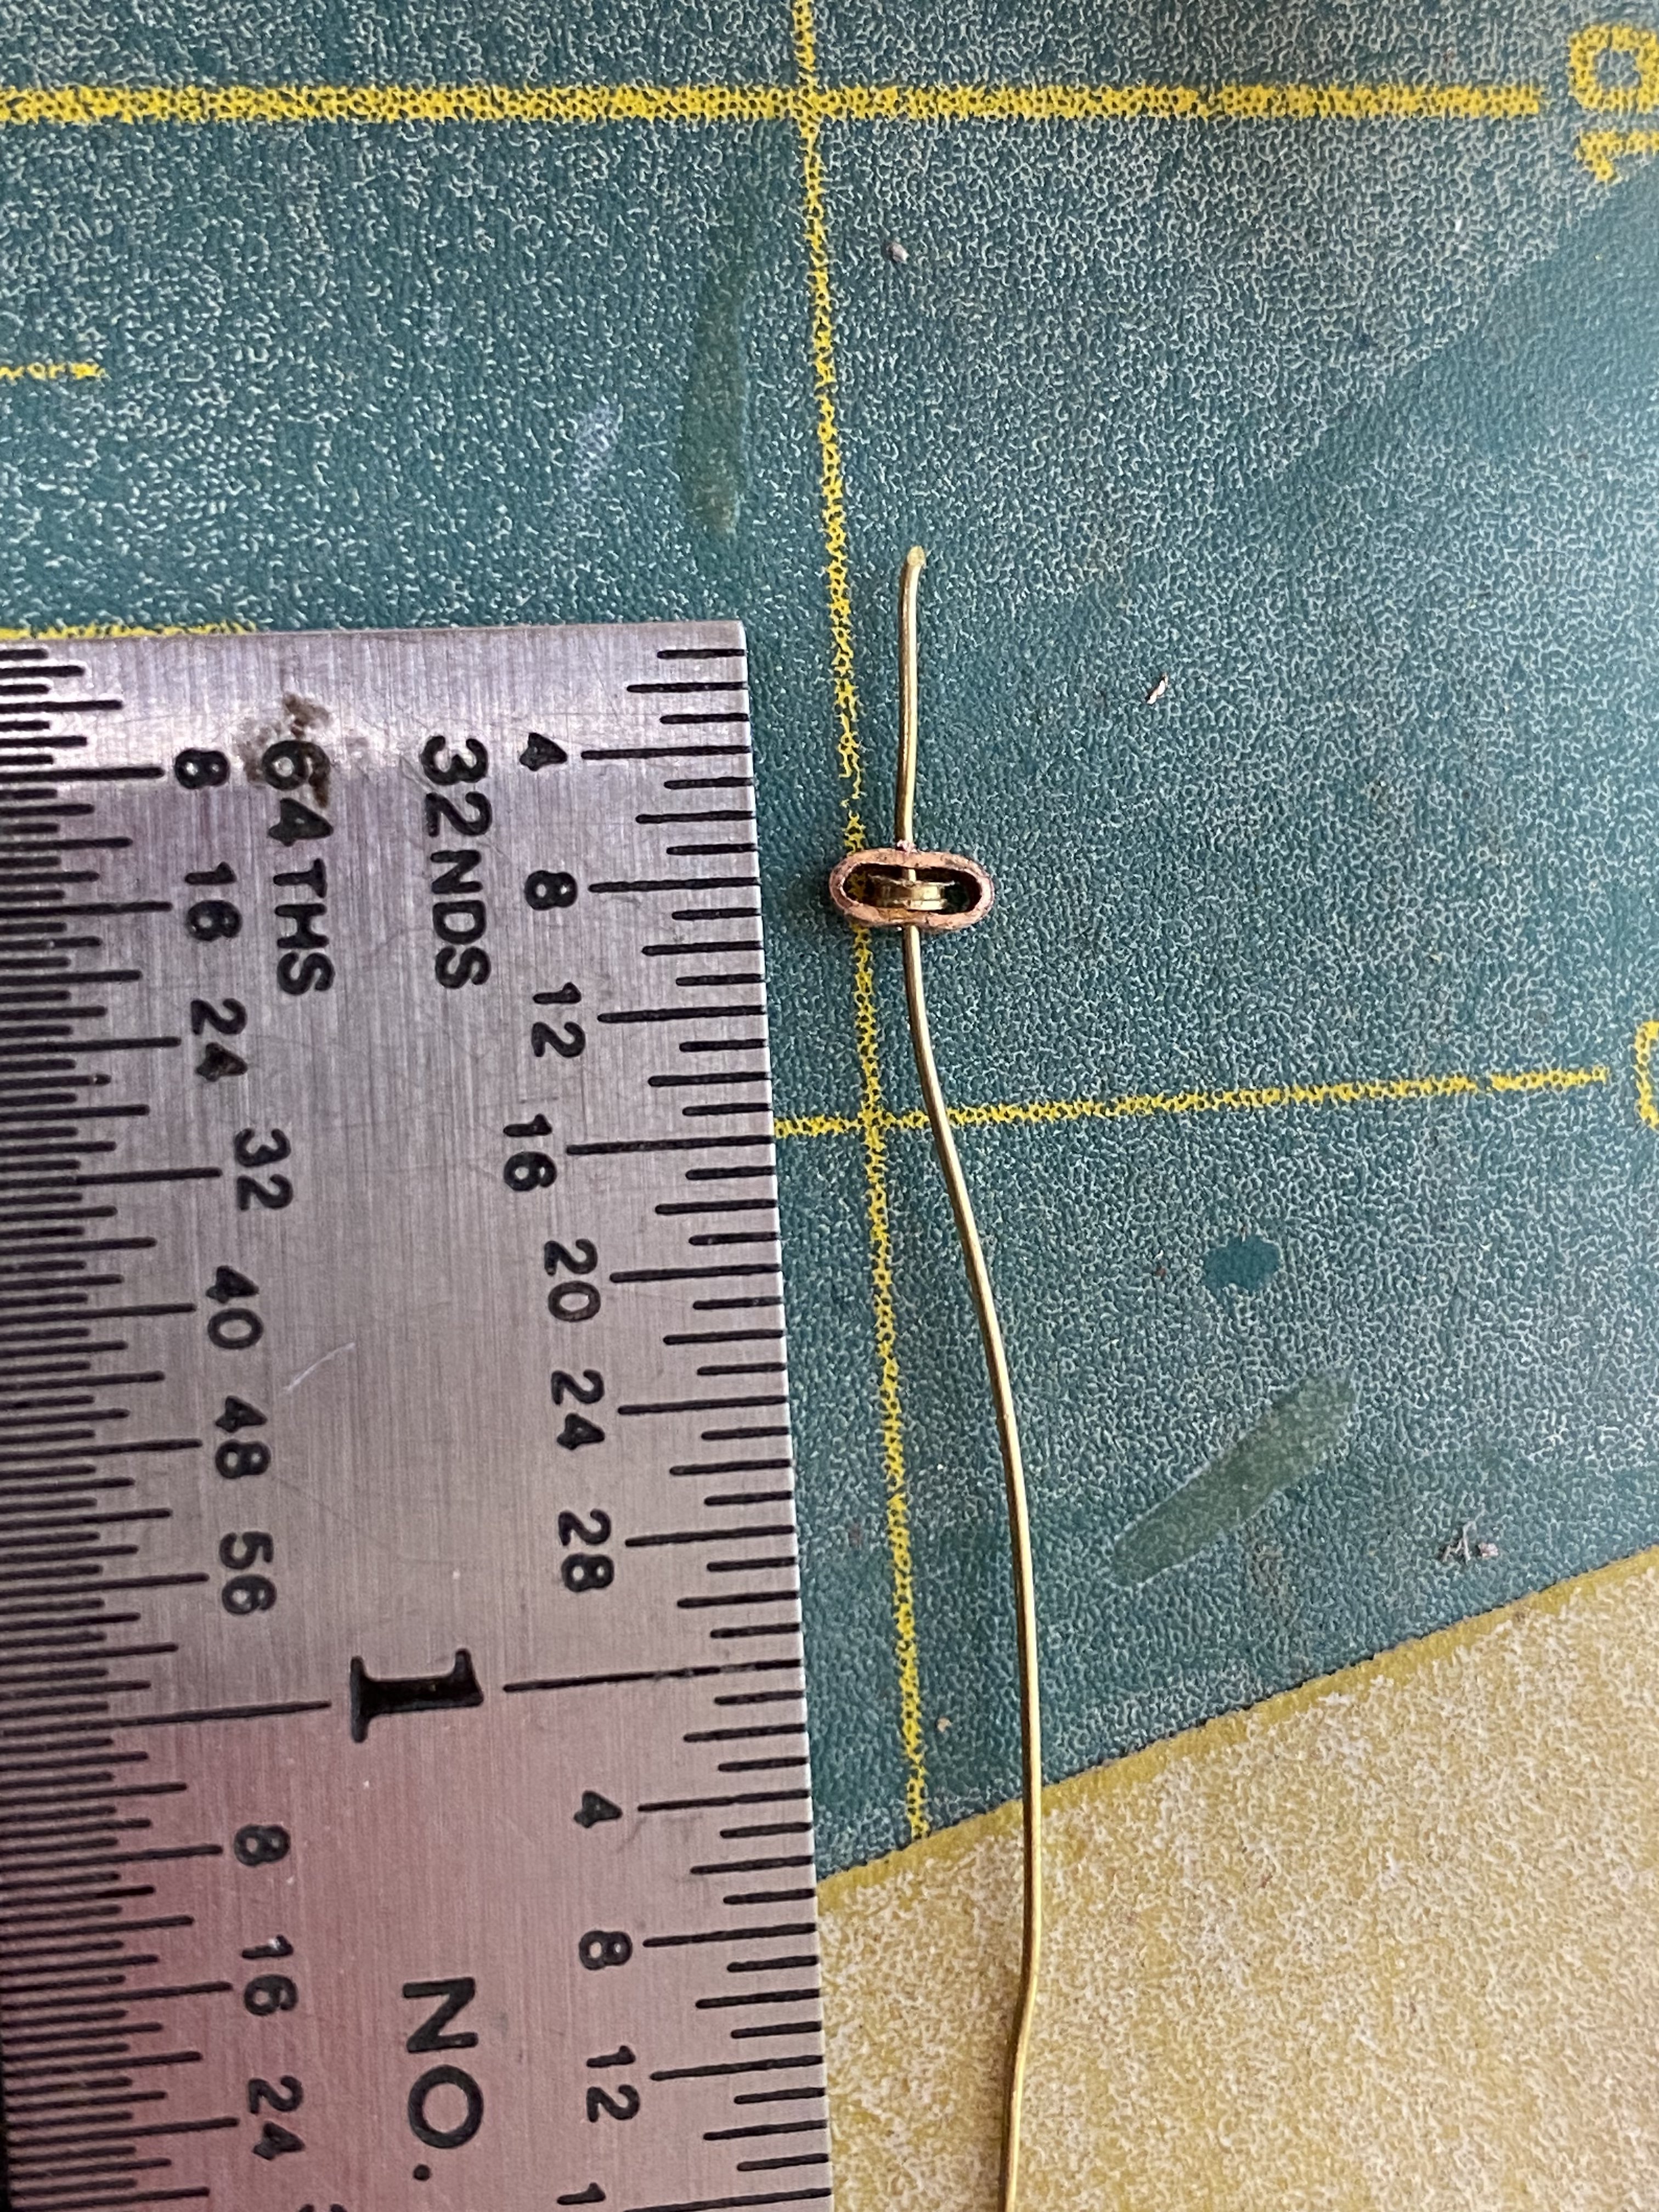
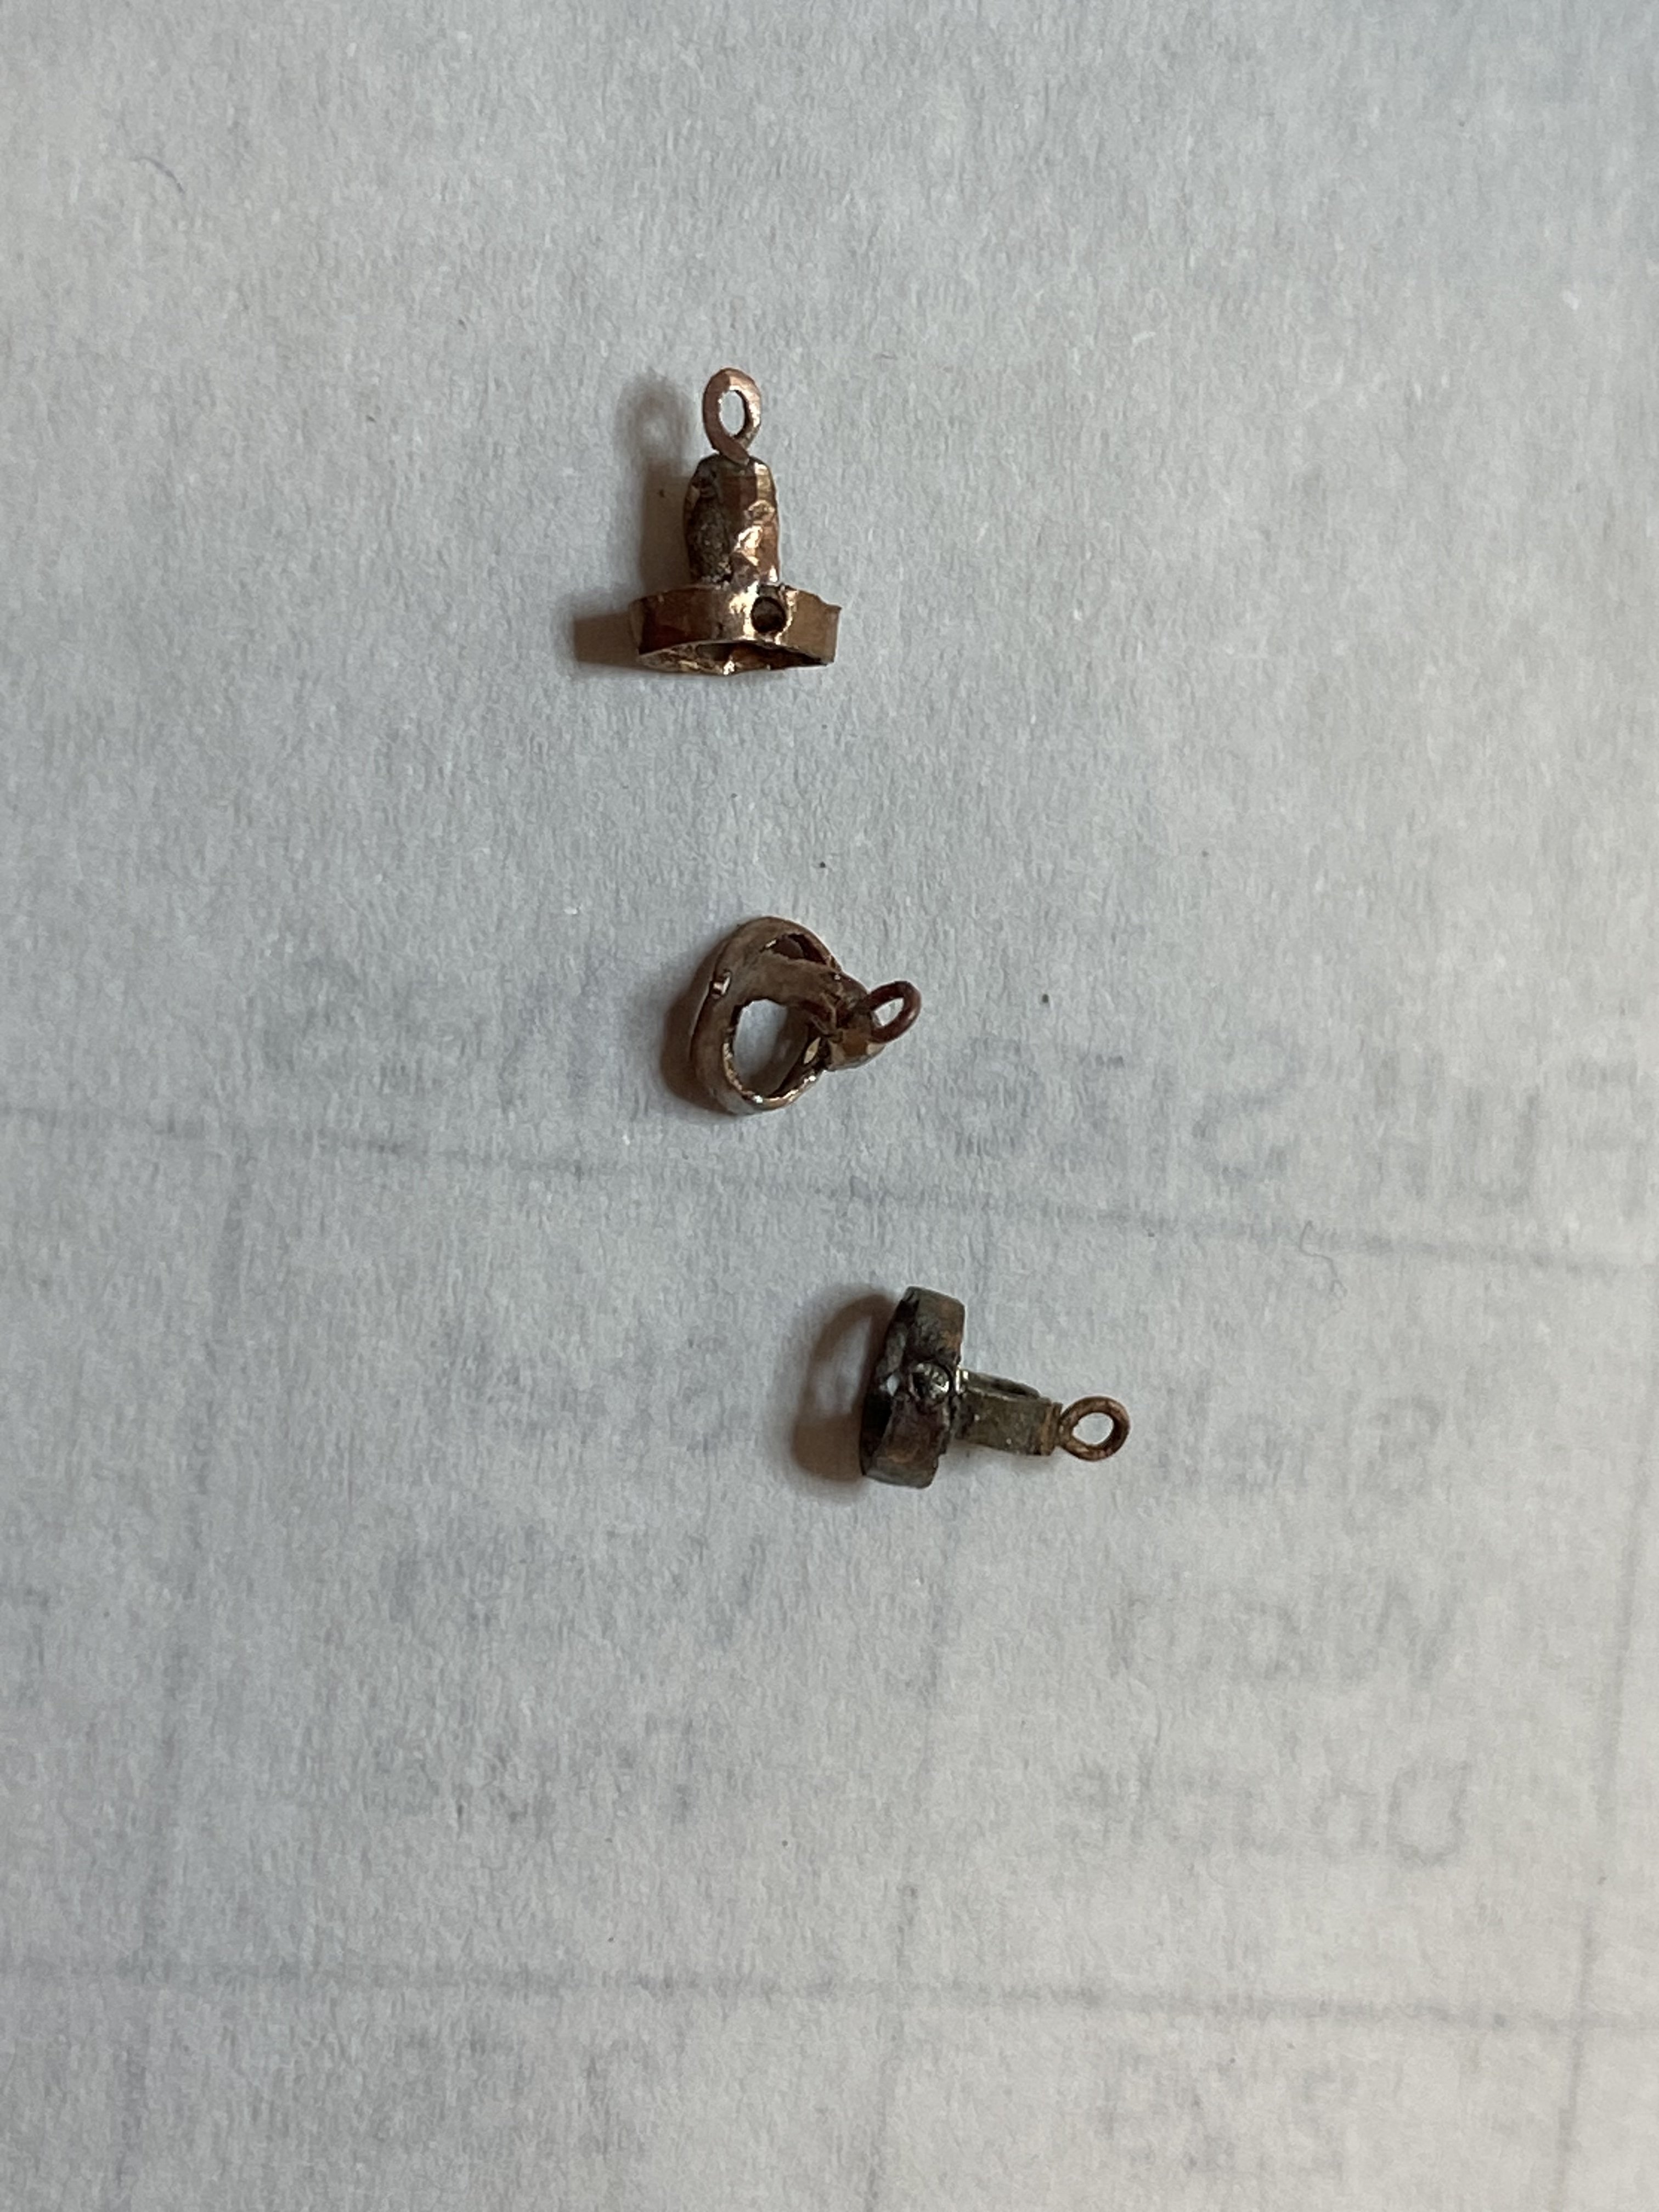
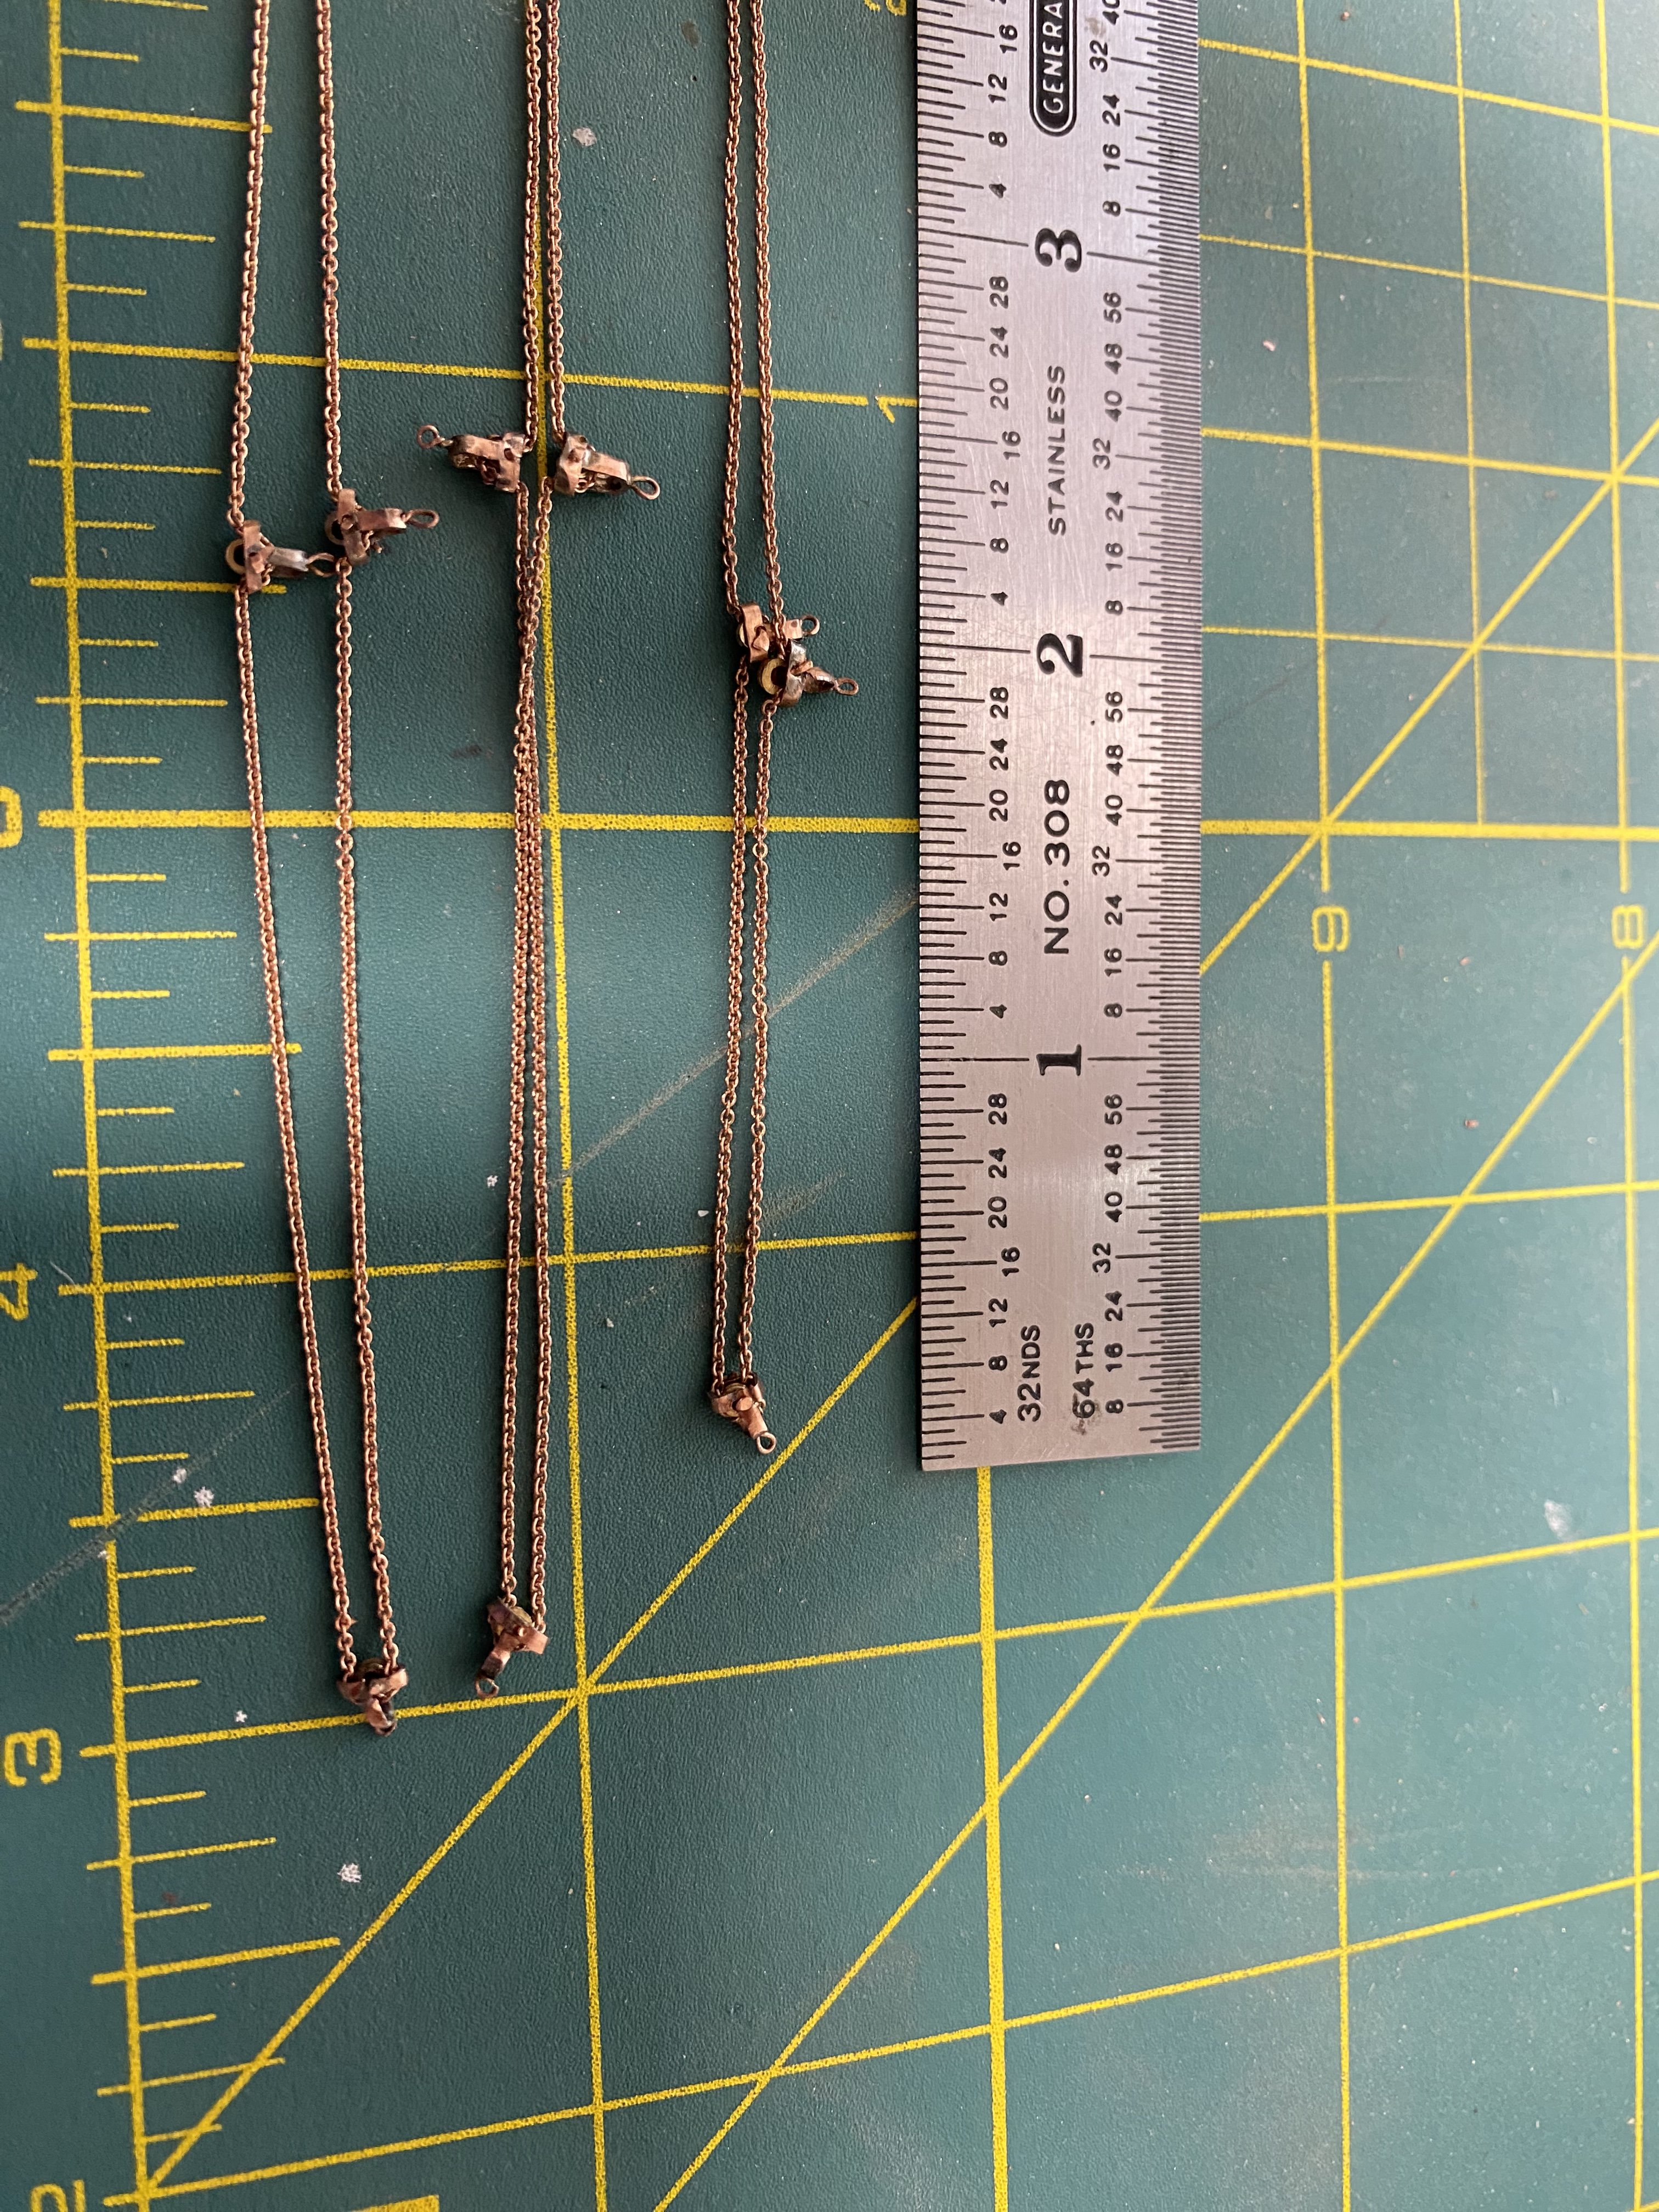
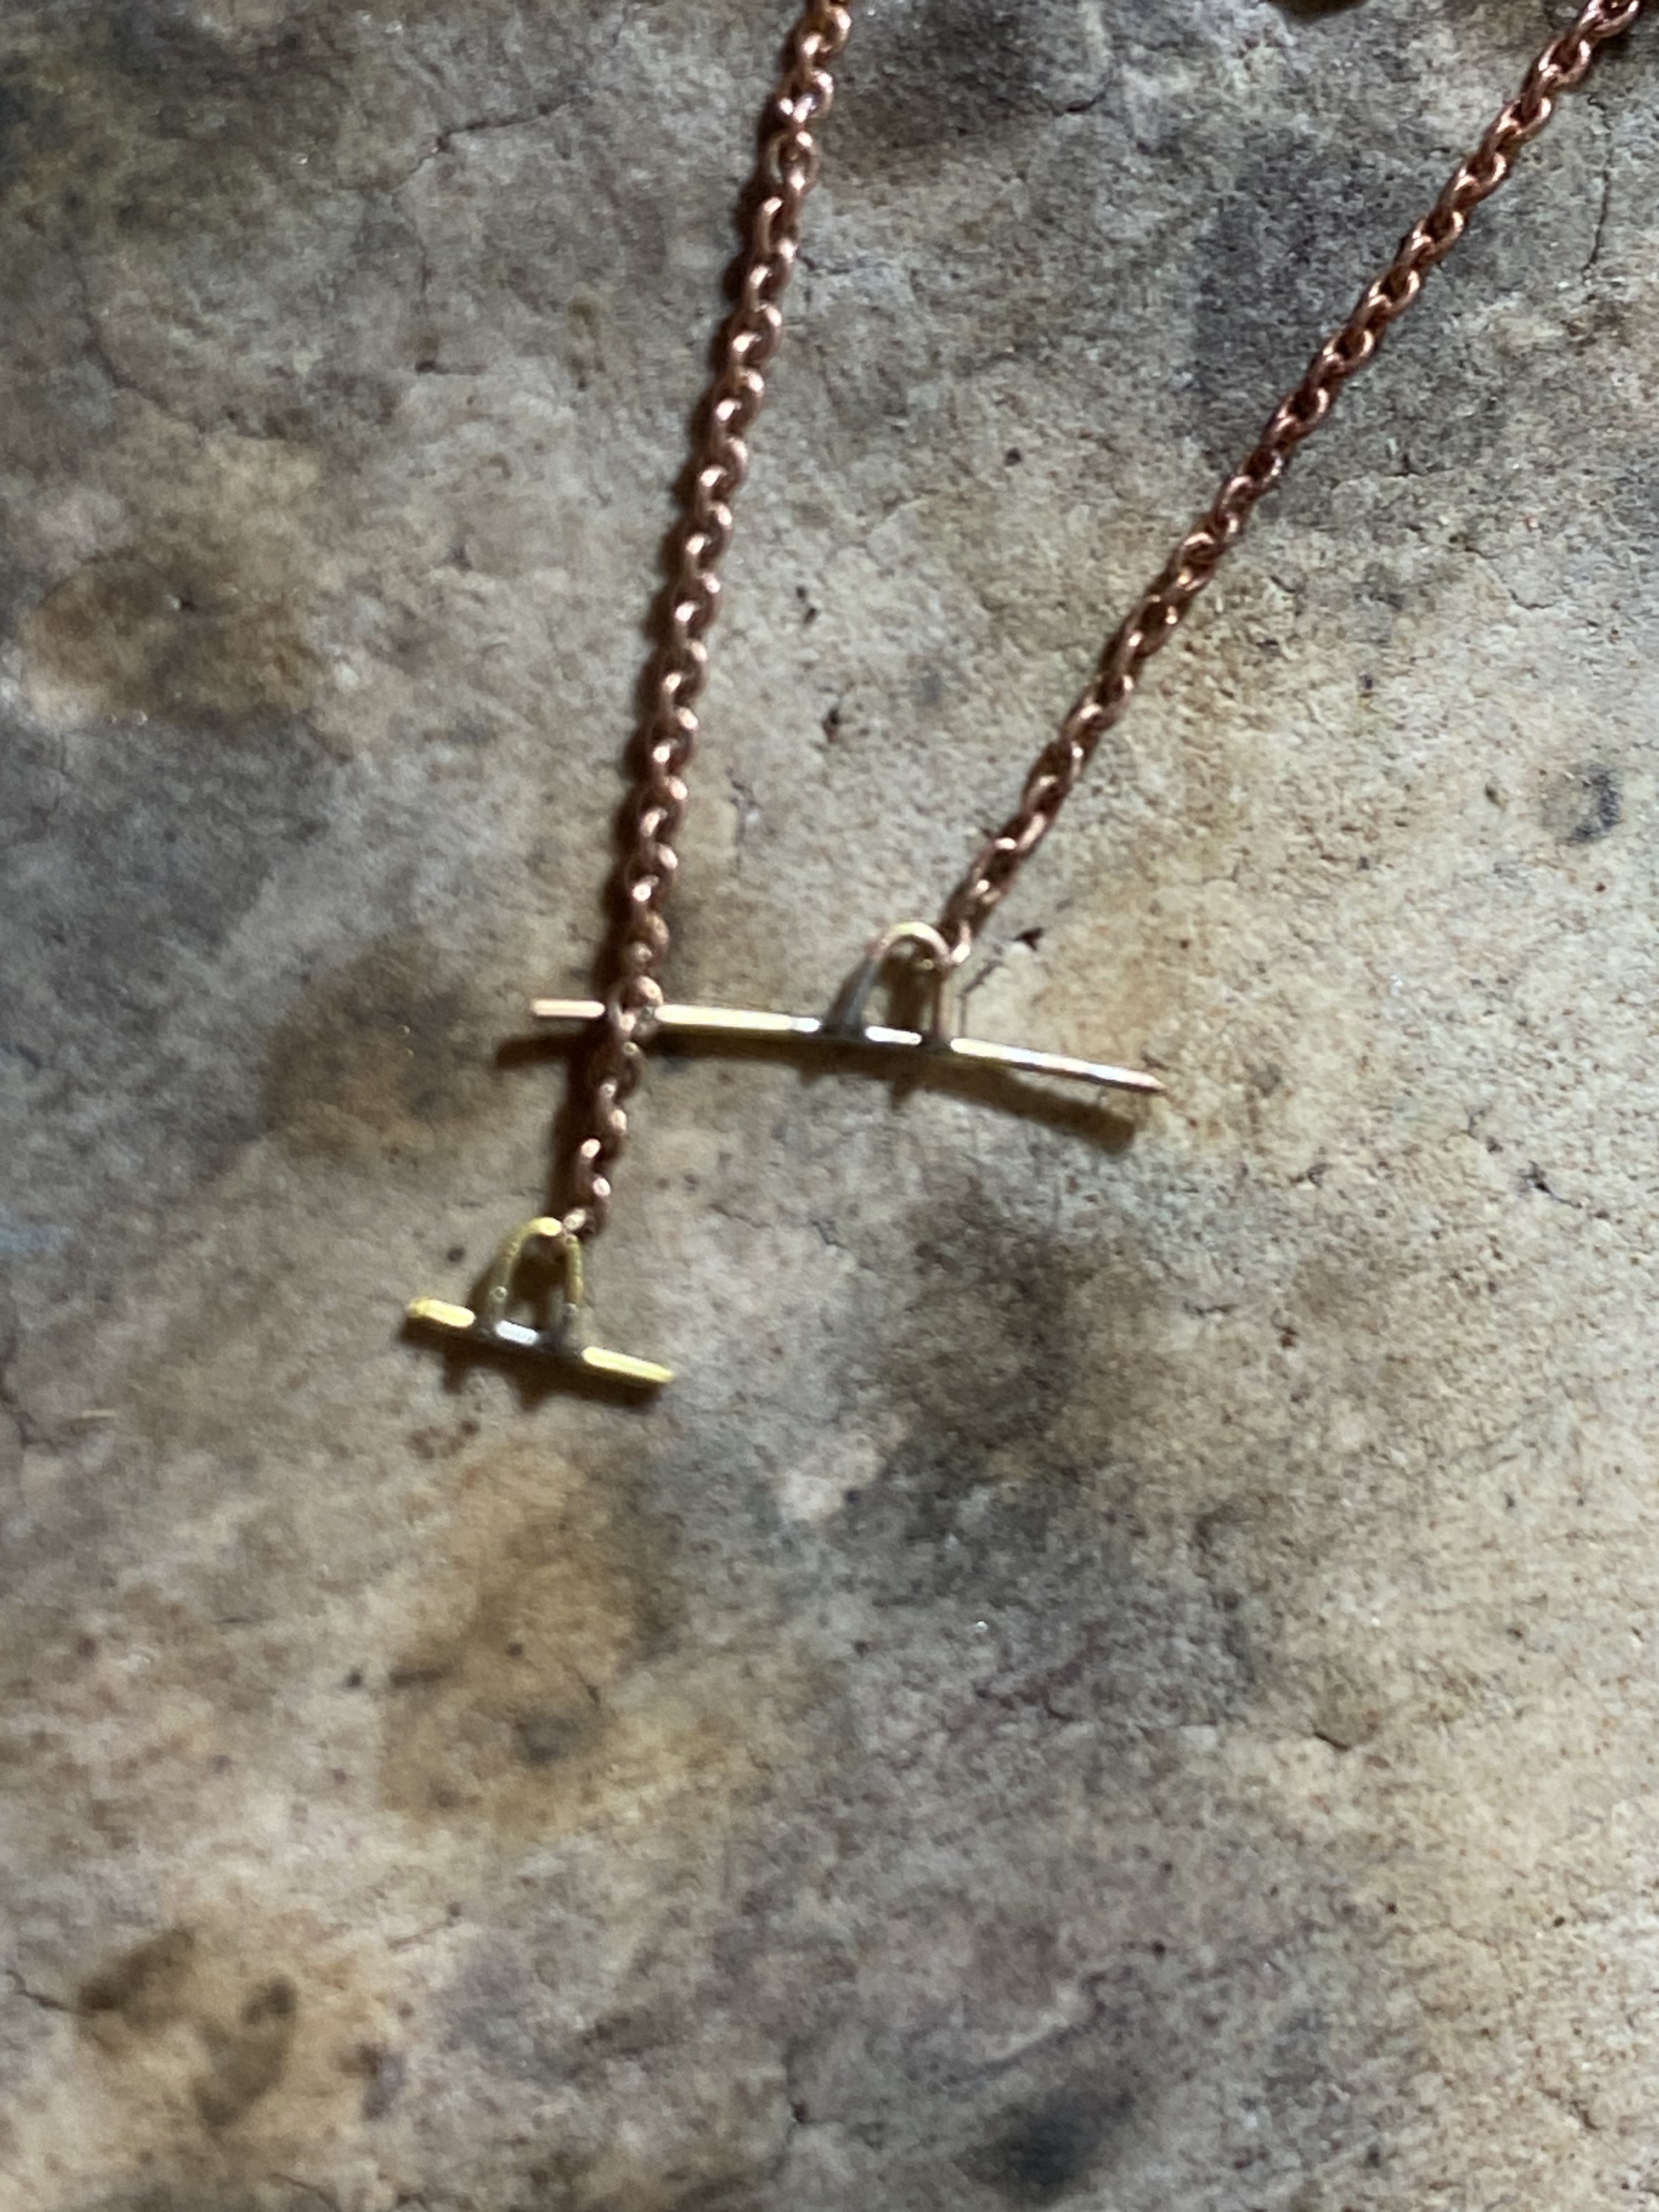
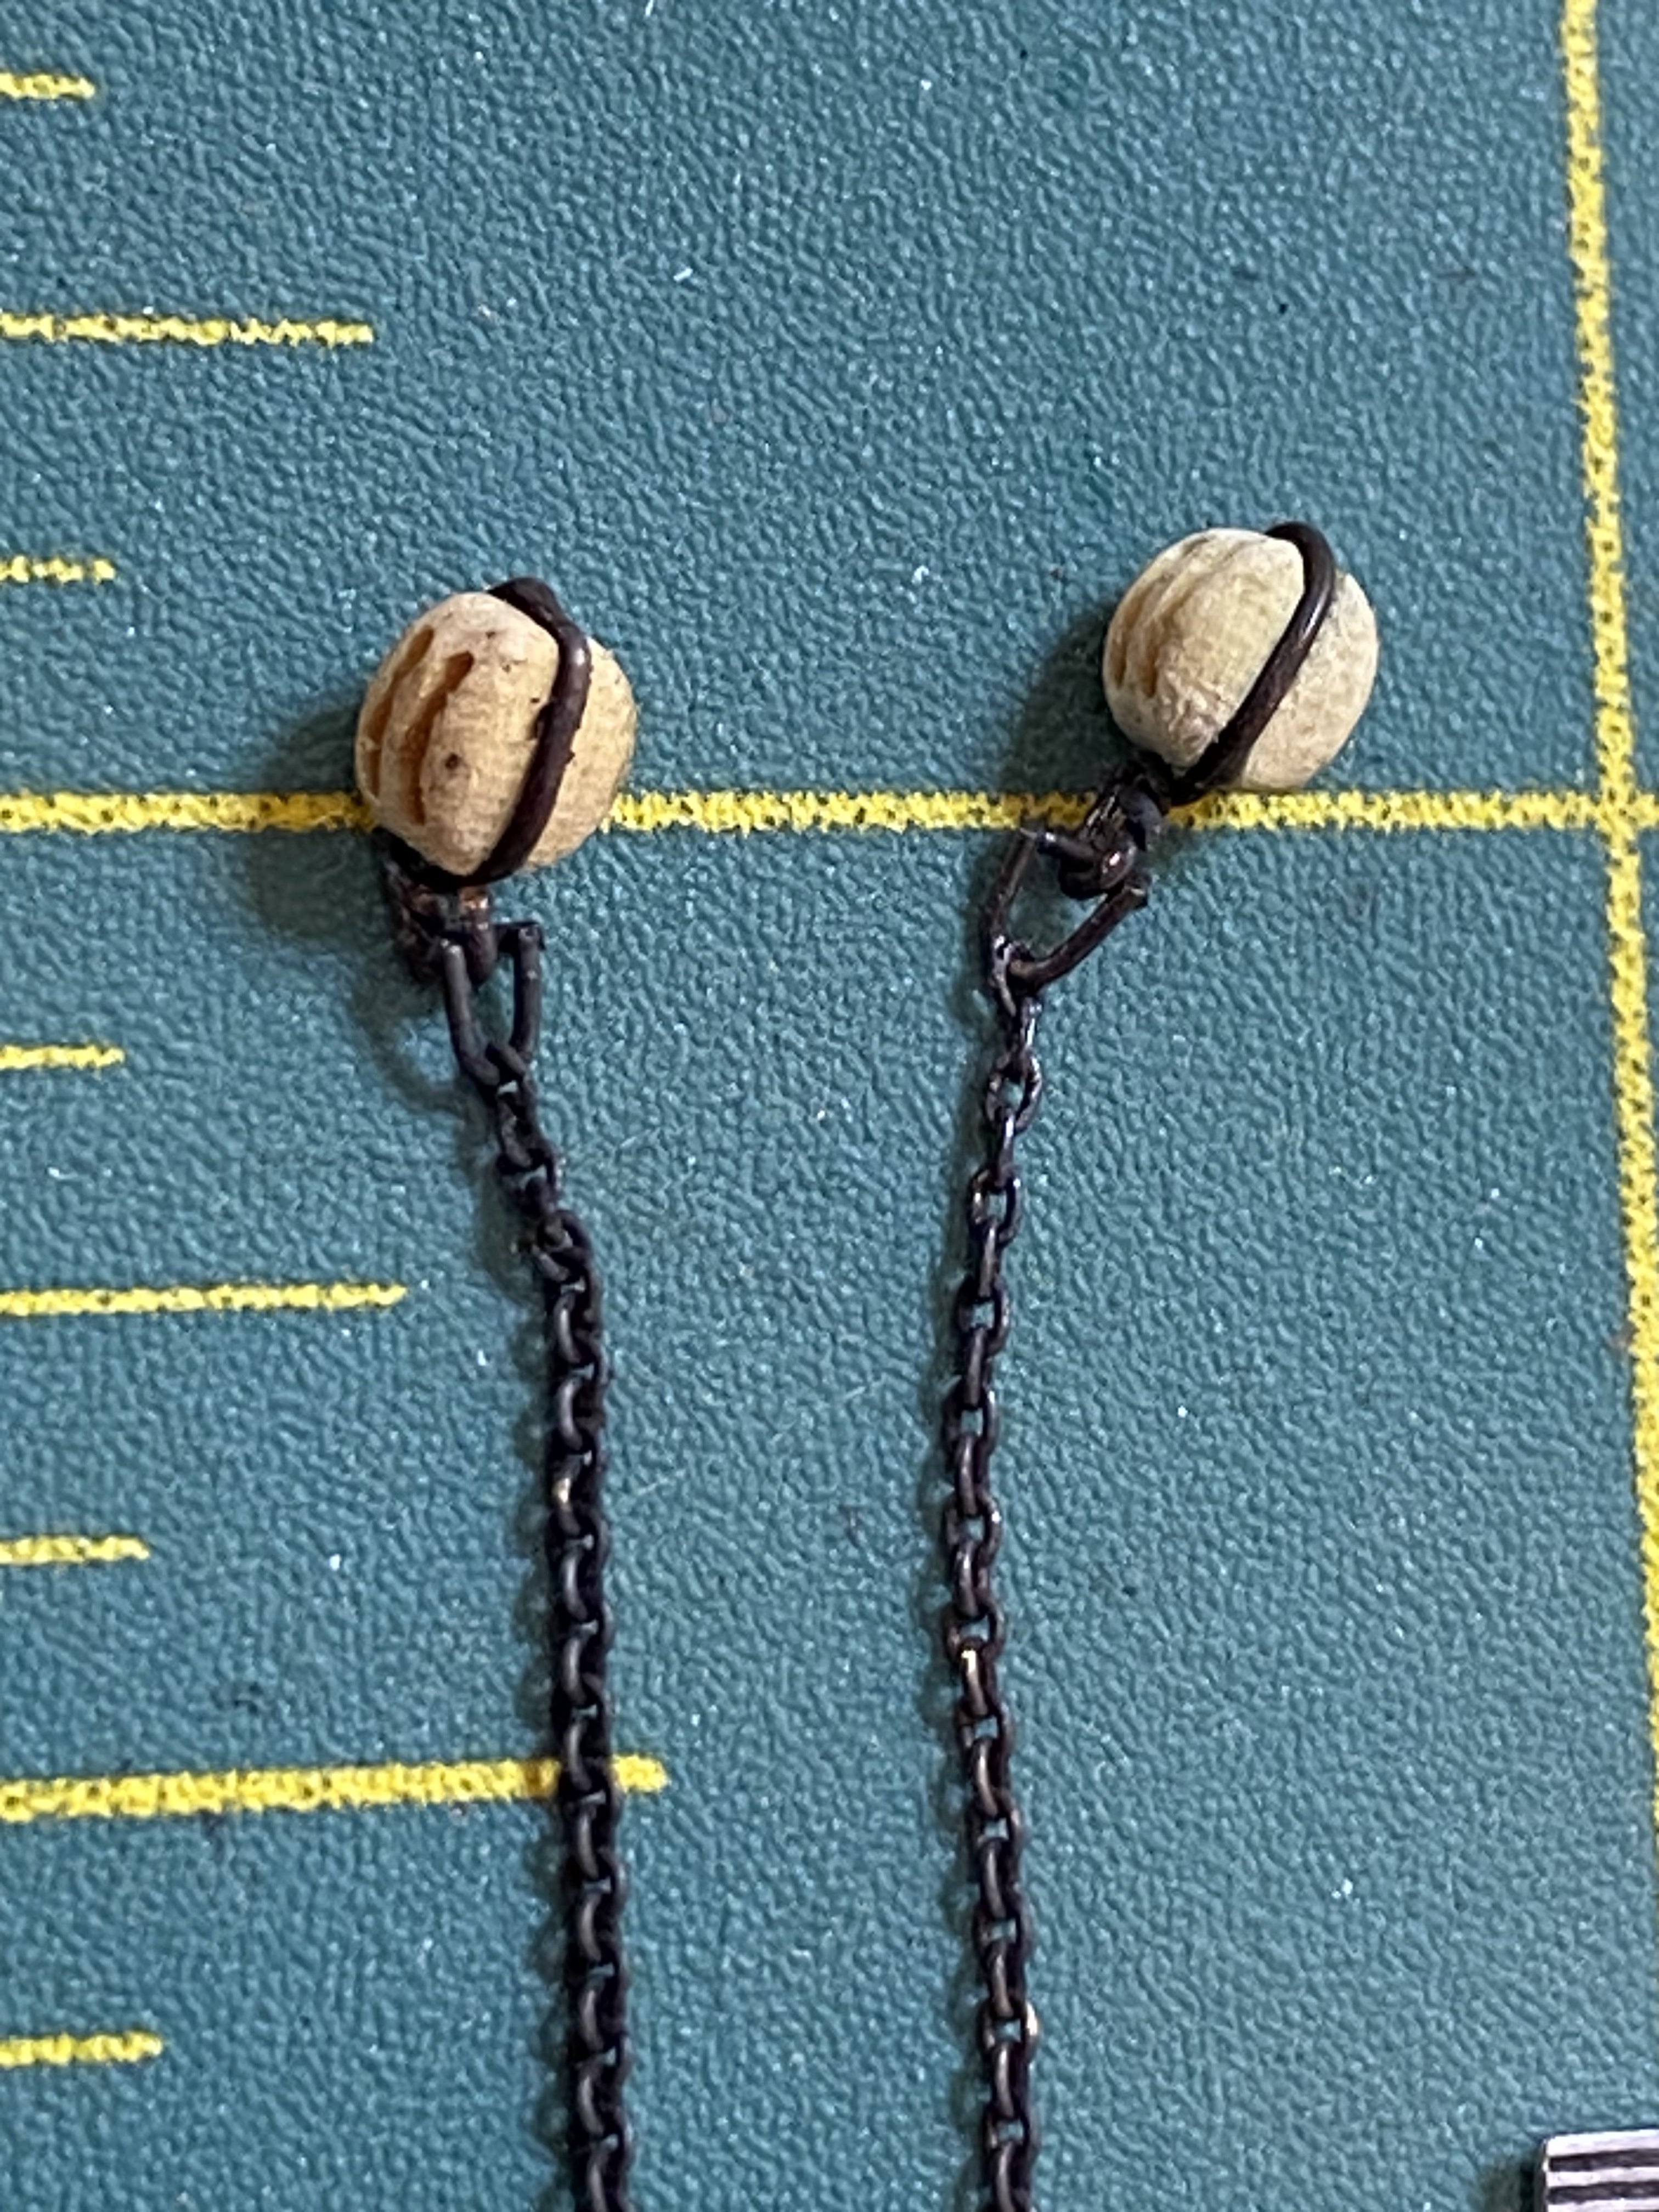
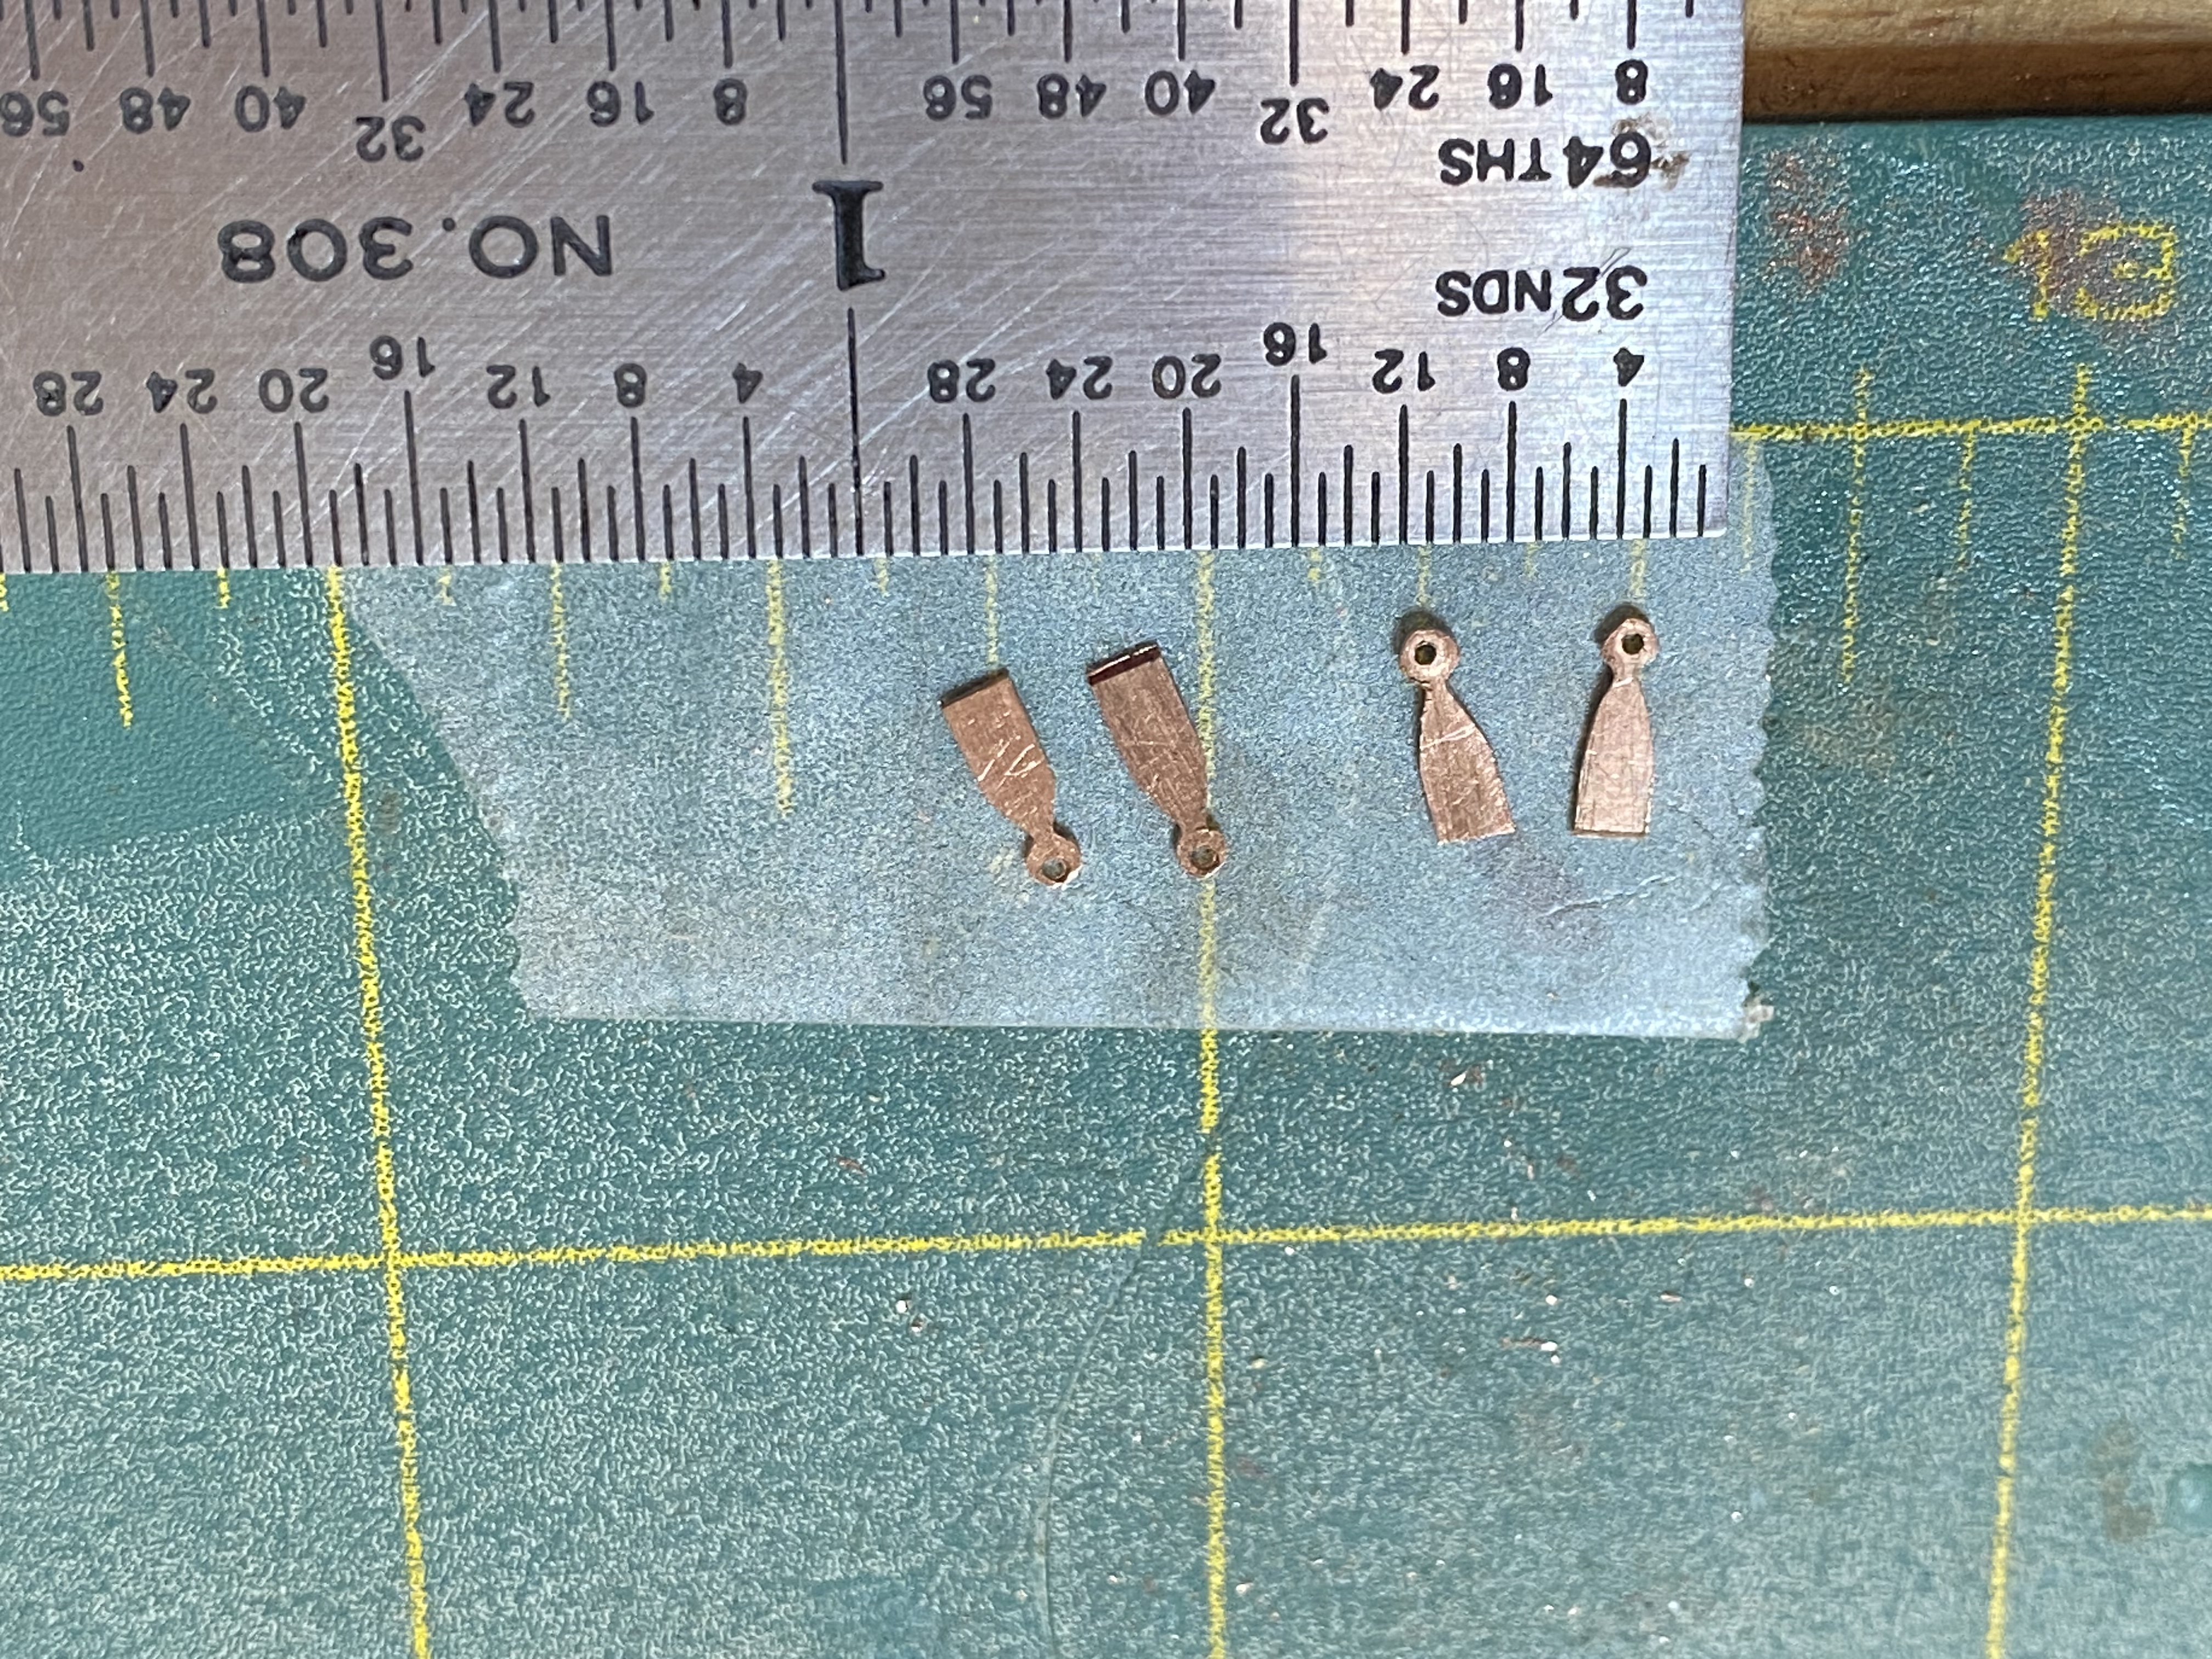
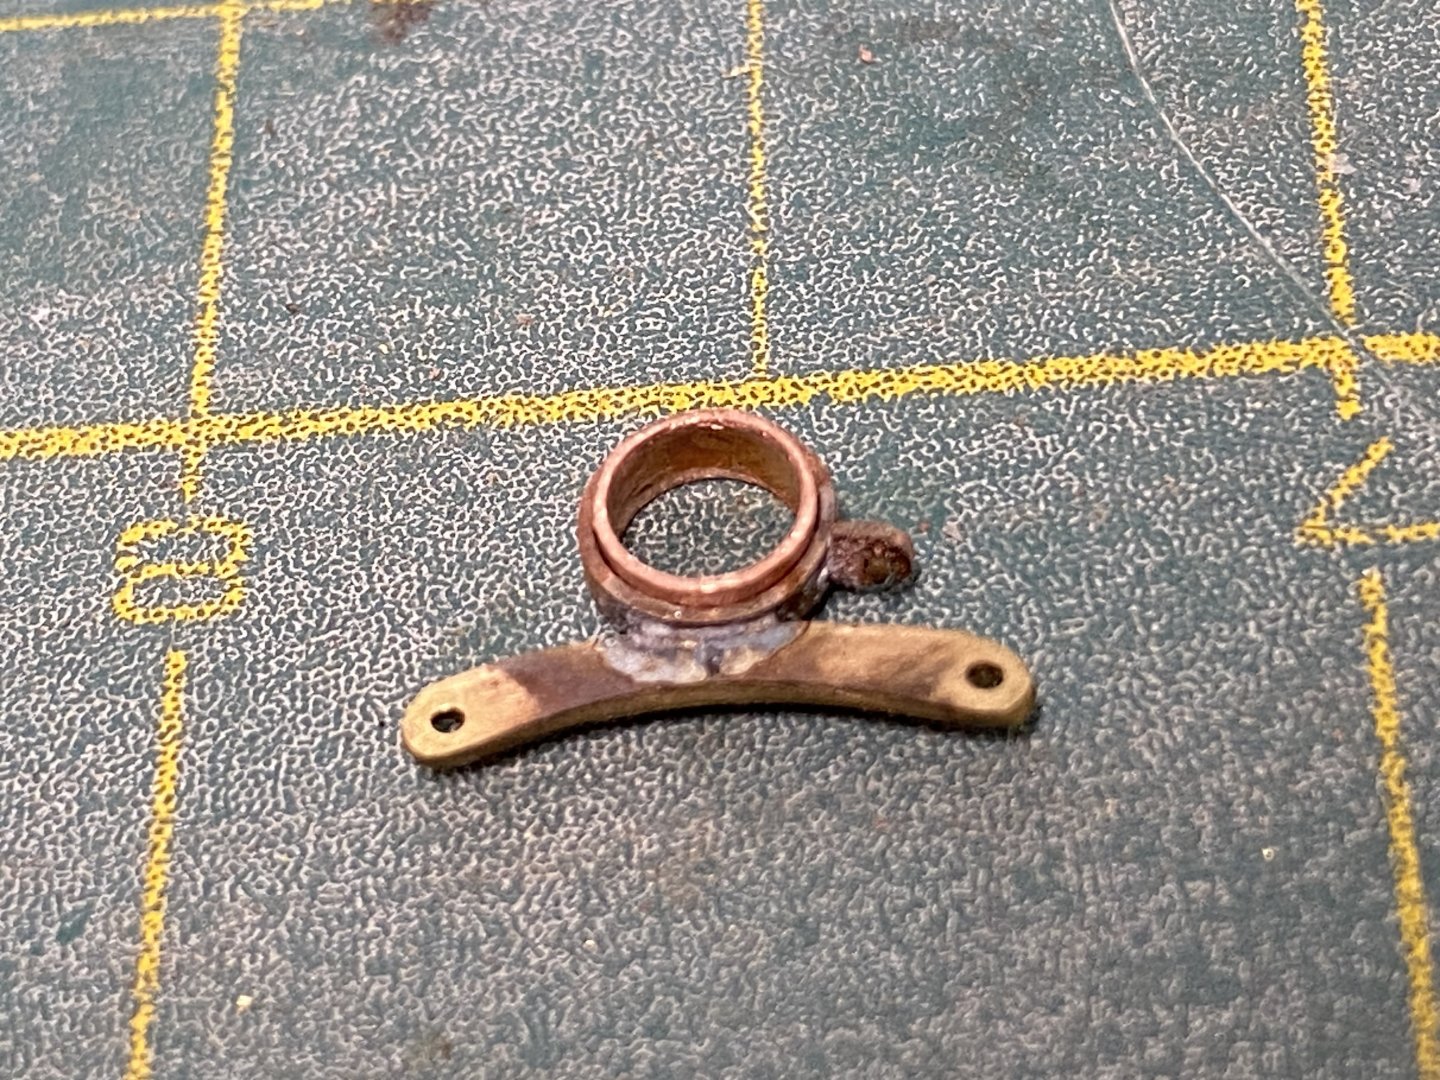
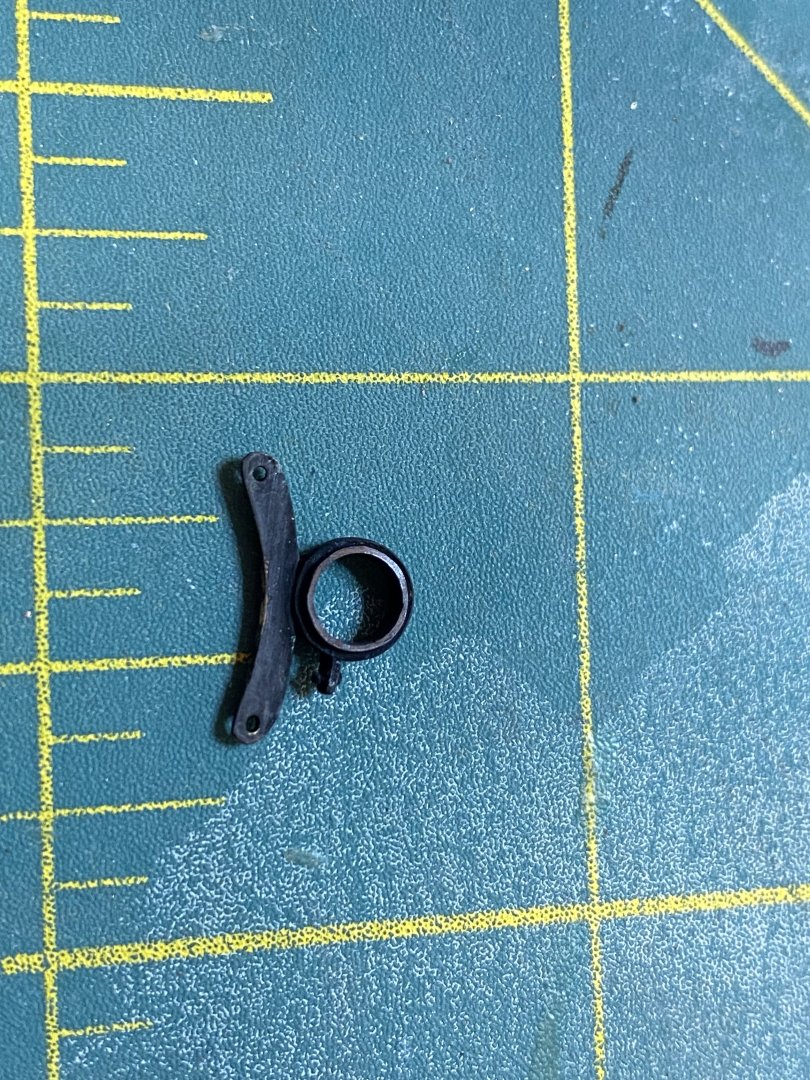
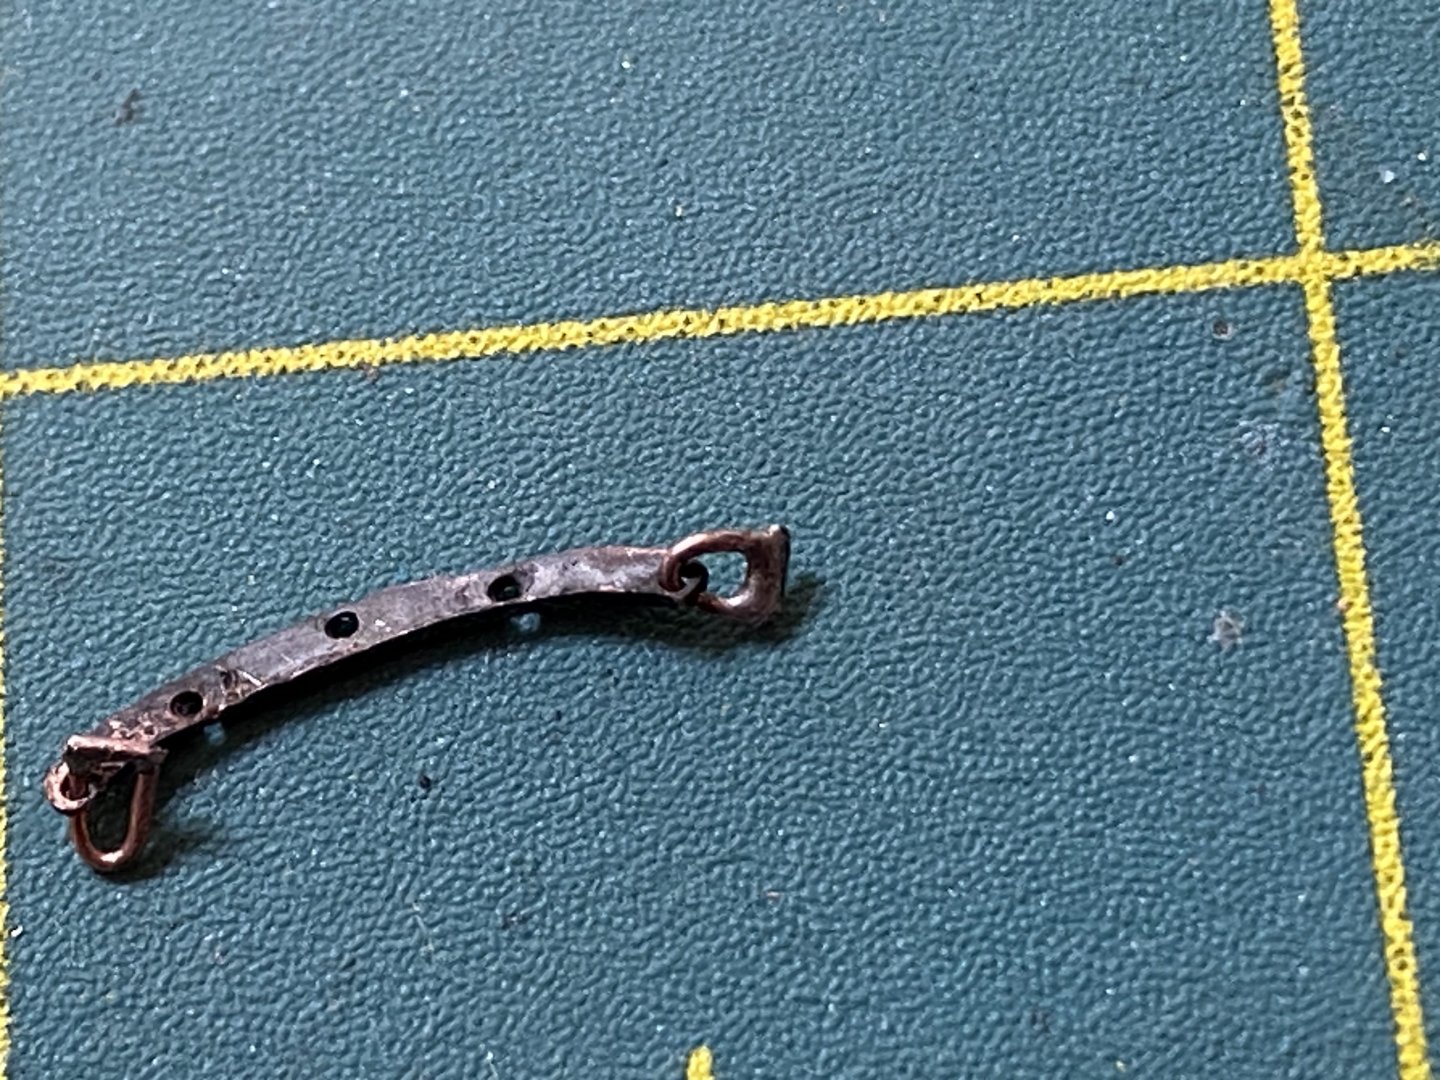
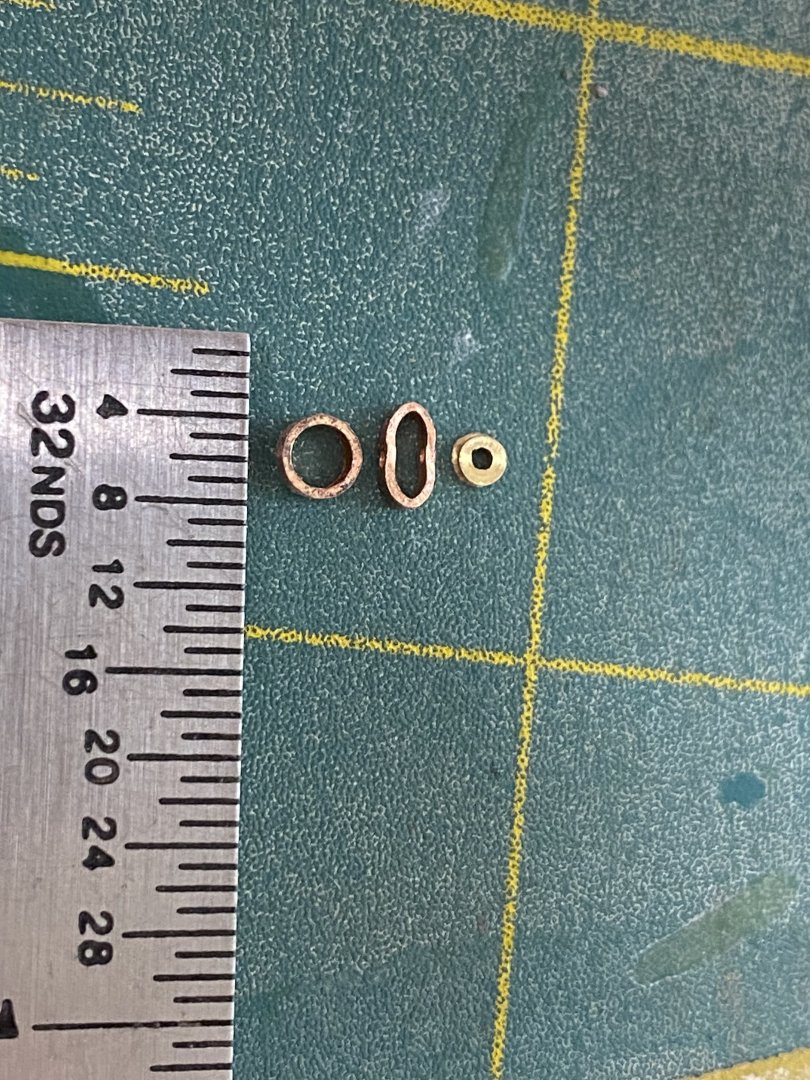
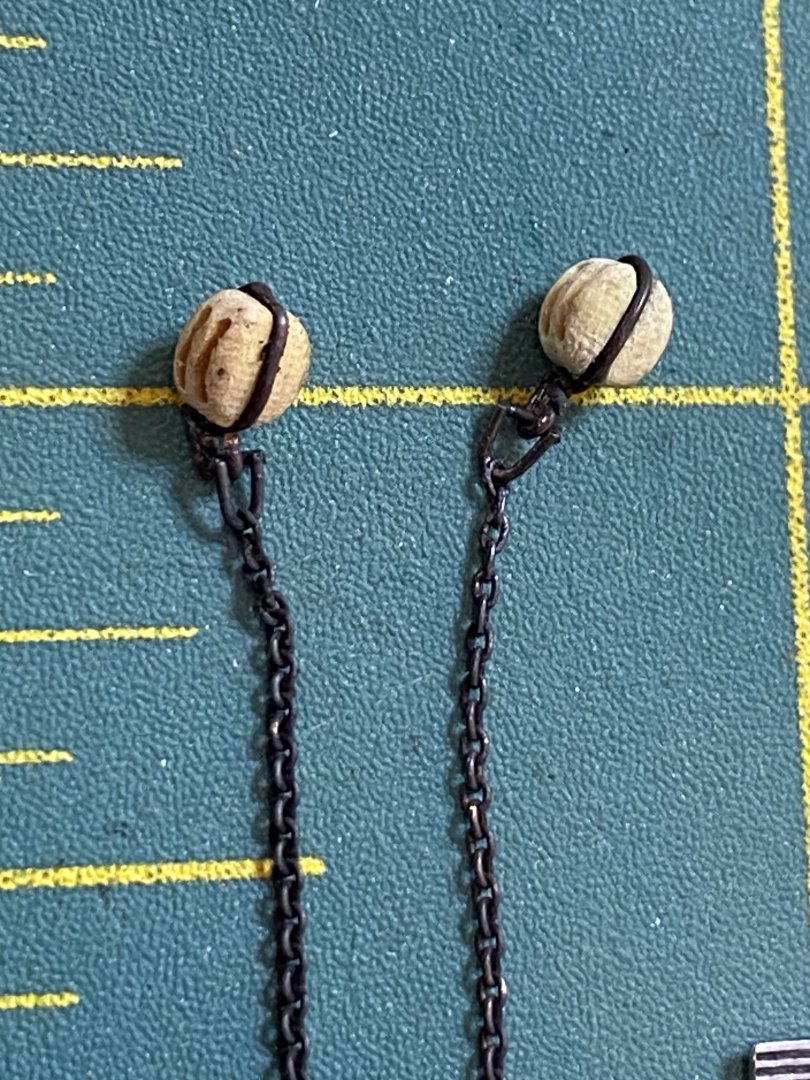
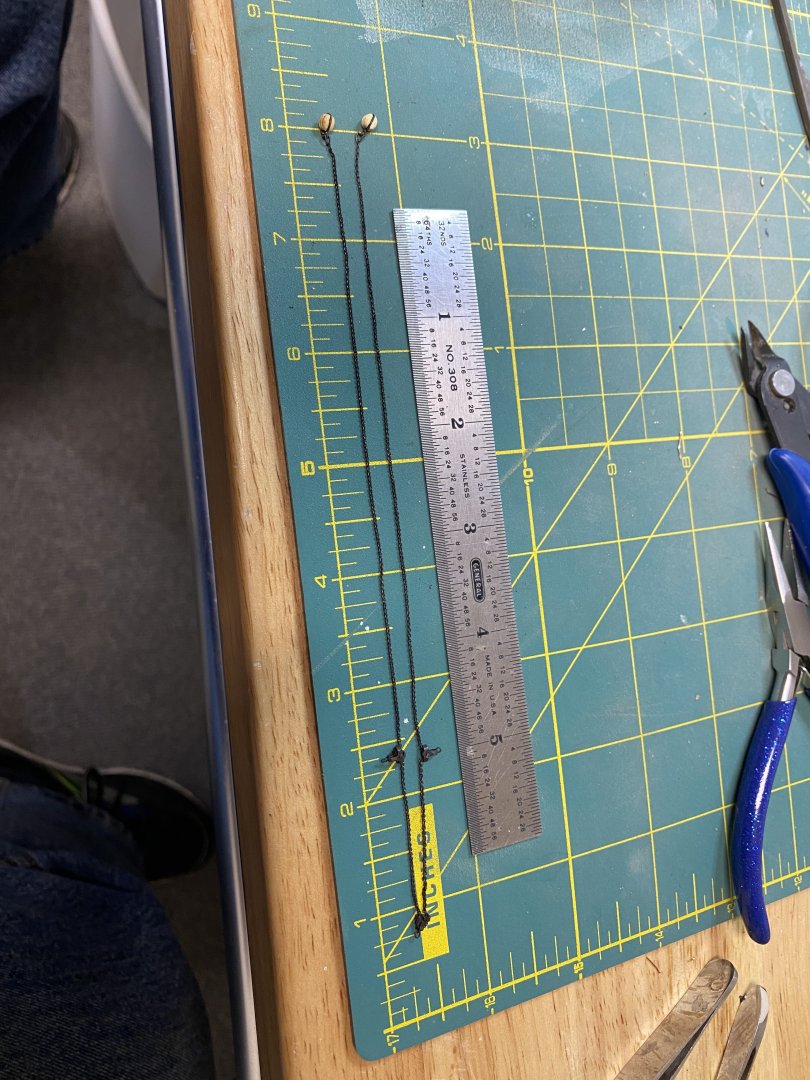
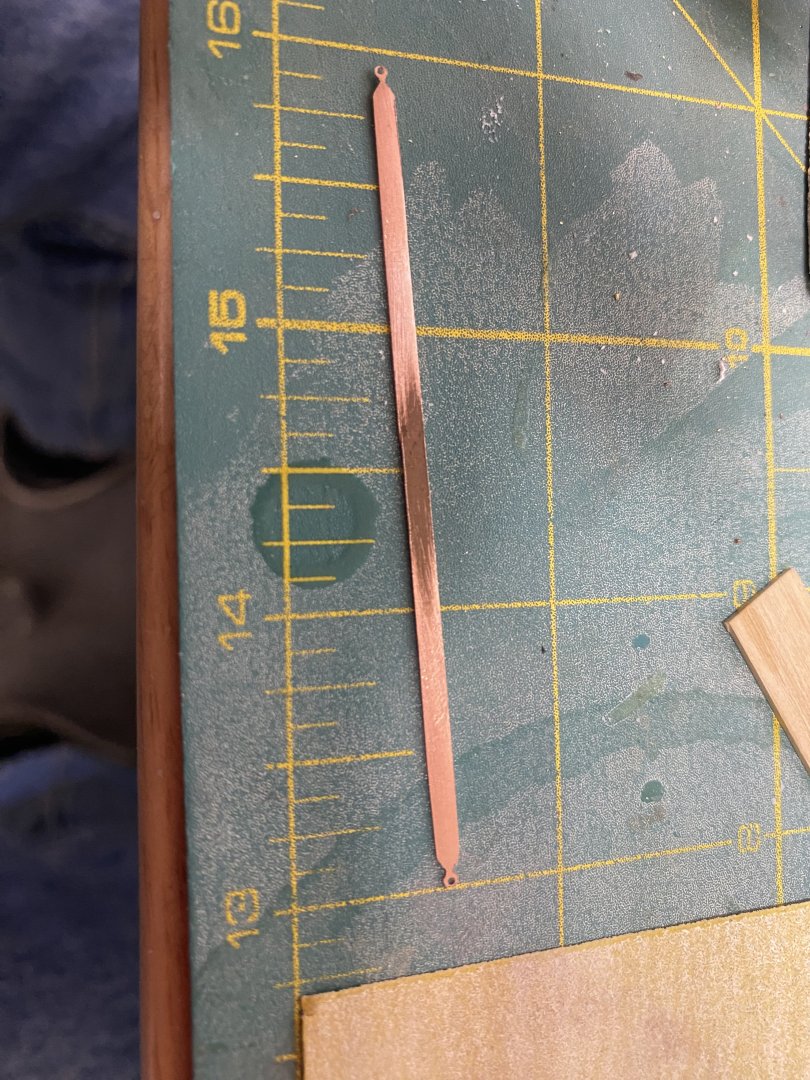
Two months ago, I thought I was close to completing the mizzen mast when I realized I hadn’t considered the parrel band for the topsail yard or the chain halyard with its associated gin blocks. Since I’m not planning on having a working hinge, the band must be mounted on the topmast prior to attaching the topmast cross trees and futtock shrouds. It also occurred to me that mounting the topsail yard to its band would be a challenge once the band was mounted on the mast. Therefore I would need to make the topsail yard as well . This has led me down the rabbit’s hole making the parrel band and chain blocks. The arm for the band was cut out of .030 brass sheet and filed to shape and the holes drilled. The band was made from telescoping copper tube and the soldered together and blackened as illustrated in the plans. I opted not to make this sevel as there or no tackles on the toping lifts as there are on the course yard.I also added shackles to the bracket that holds the blocks for the toping lift for the mizzen course.The gin blocks were made per EdT as described in the YA 3rd book. I found these to be extremely difficult to make with a high casualty rate at every step of the process. I probably attempted 30 or more to get 9 that were acceptable. I decided to make all of them at the same time, fore, main and mizzen. Years ago I purchased shieves but found them to be too big. I mounted them on a round diamond file, which was chucked in the lathe and filed down to shape . Surprisingly, several of them actually sort of work 36 links per inch copper chain was threaded through the gin blocks and shackles were soldered on the ends. After blackening, double blocks were attached to the shackles . After frustrating results trying to blacken copper, I bit the bullet and bought some liver of sulfur which works great, easy to use and can be applied to the copper stropping on the boxwood blocks without staining the wood. the brackets what attach the gin blocks to the cross trees were filed out of copper sheet. I also made the cloverleaf blocks which I will describe next. As an aside, the YA books have been invaluable! Also, so is EdT’s blog on building the YA. Lots of good information there that didn’t make it into the books.


- 351 replies
-
- 2
-
-
- Flying Fish
- Model Shipways
- (and 1 more)
-
I love this project!! One of my favorite books growing up, I bought a used copy on Amazon and gave it to our six year old granddaughter for Christmas! And she loves the book also! Rick
-
Very impressive as always Keith!! I still see her almost every day. I hope there is a buyer in her future. Rick
-
Nice build, I will enjoy following your progress! Rick
-
Looks really good!! Rick
-
WOW!!! Rick
-
George, really nice result!! Looks great. keep up the good work. I really enjoy following along! Rick