HOLIDAY DONATION DRIVE - SUPPORT MSW - DO YOUR PART TO KEEP THIS GREAT FORUM GOING! (89 donations so far out of 49,000 members - C'mon guys!)
×


Rick310
-
Posts
811 -
Joined
-
Last visited
Content Type
Profiles
Forums
Gallery
Events
Everything posted by Rick310
-
Beautiful!! I like the Tung oil on it he deck! Rick
-
That’s a beautiful rigging job Rob!! The foot ropes look great!! I see what you mean about the length of the stirrups. I’m going to try painting the foot ropes black also. Rck
-
I really like the idea of placing the foot ropes first, that way they are the same length . Harder to do when threading the foot ropes through the stirrups. Rick
-
I really like that technique! I think I’m going to try it as my results with the varnish have been somewhat inconsistent. Rick
-
I’m in awe of your beautiful work! Rick
-
Amazing work!! Really enjoy following along! Rick
- 299 replies
-
- 4
-

-
- lightship
- Feuerschiff Elbe 1
- (and 1 more)
-
Nice job. Looks really good!! Rick
-
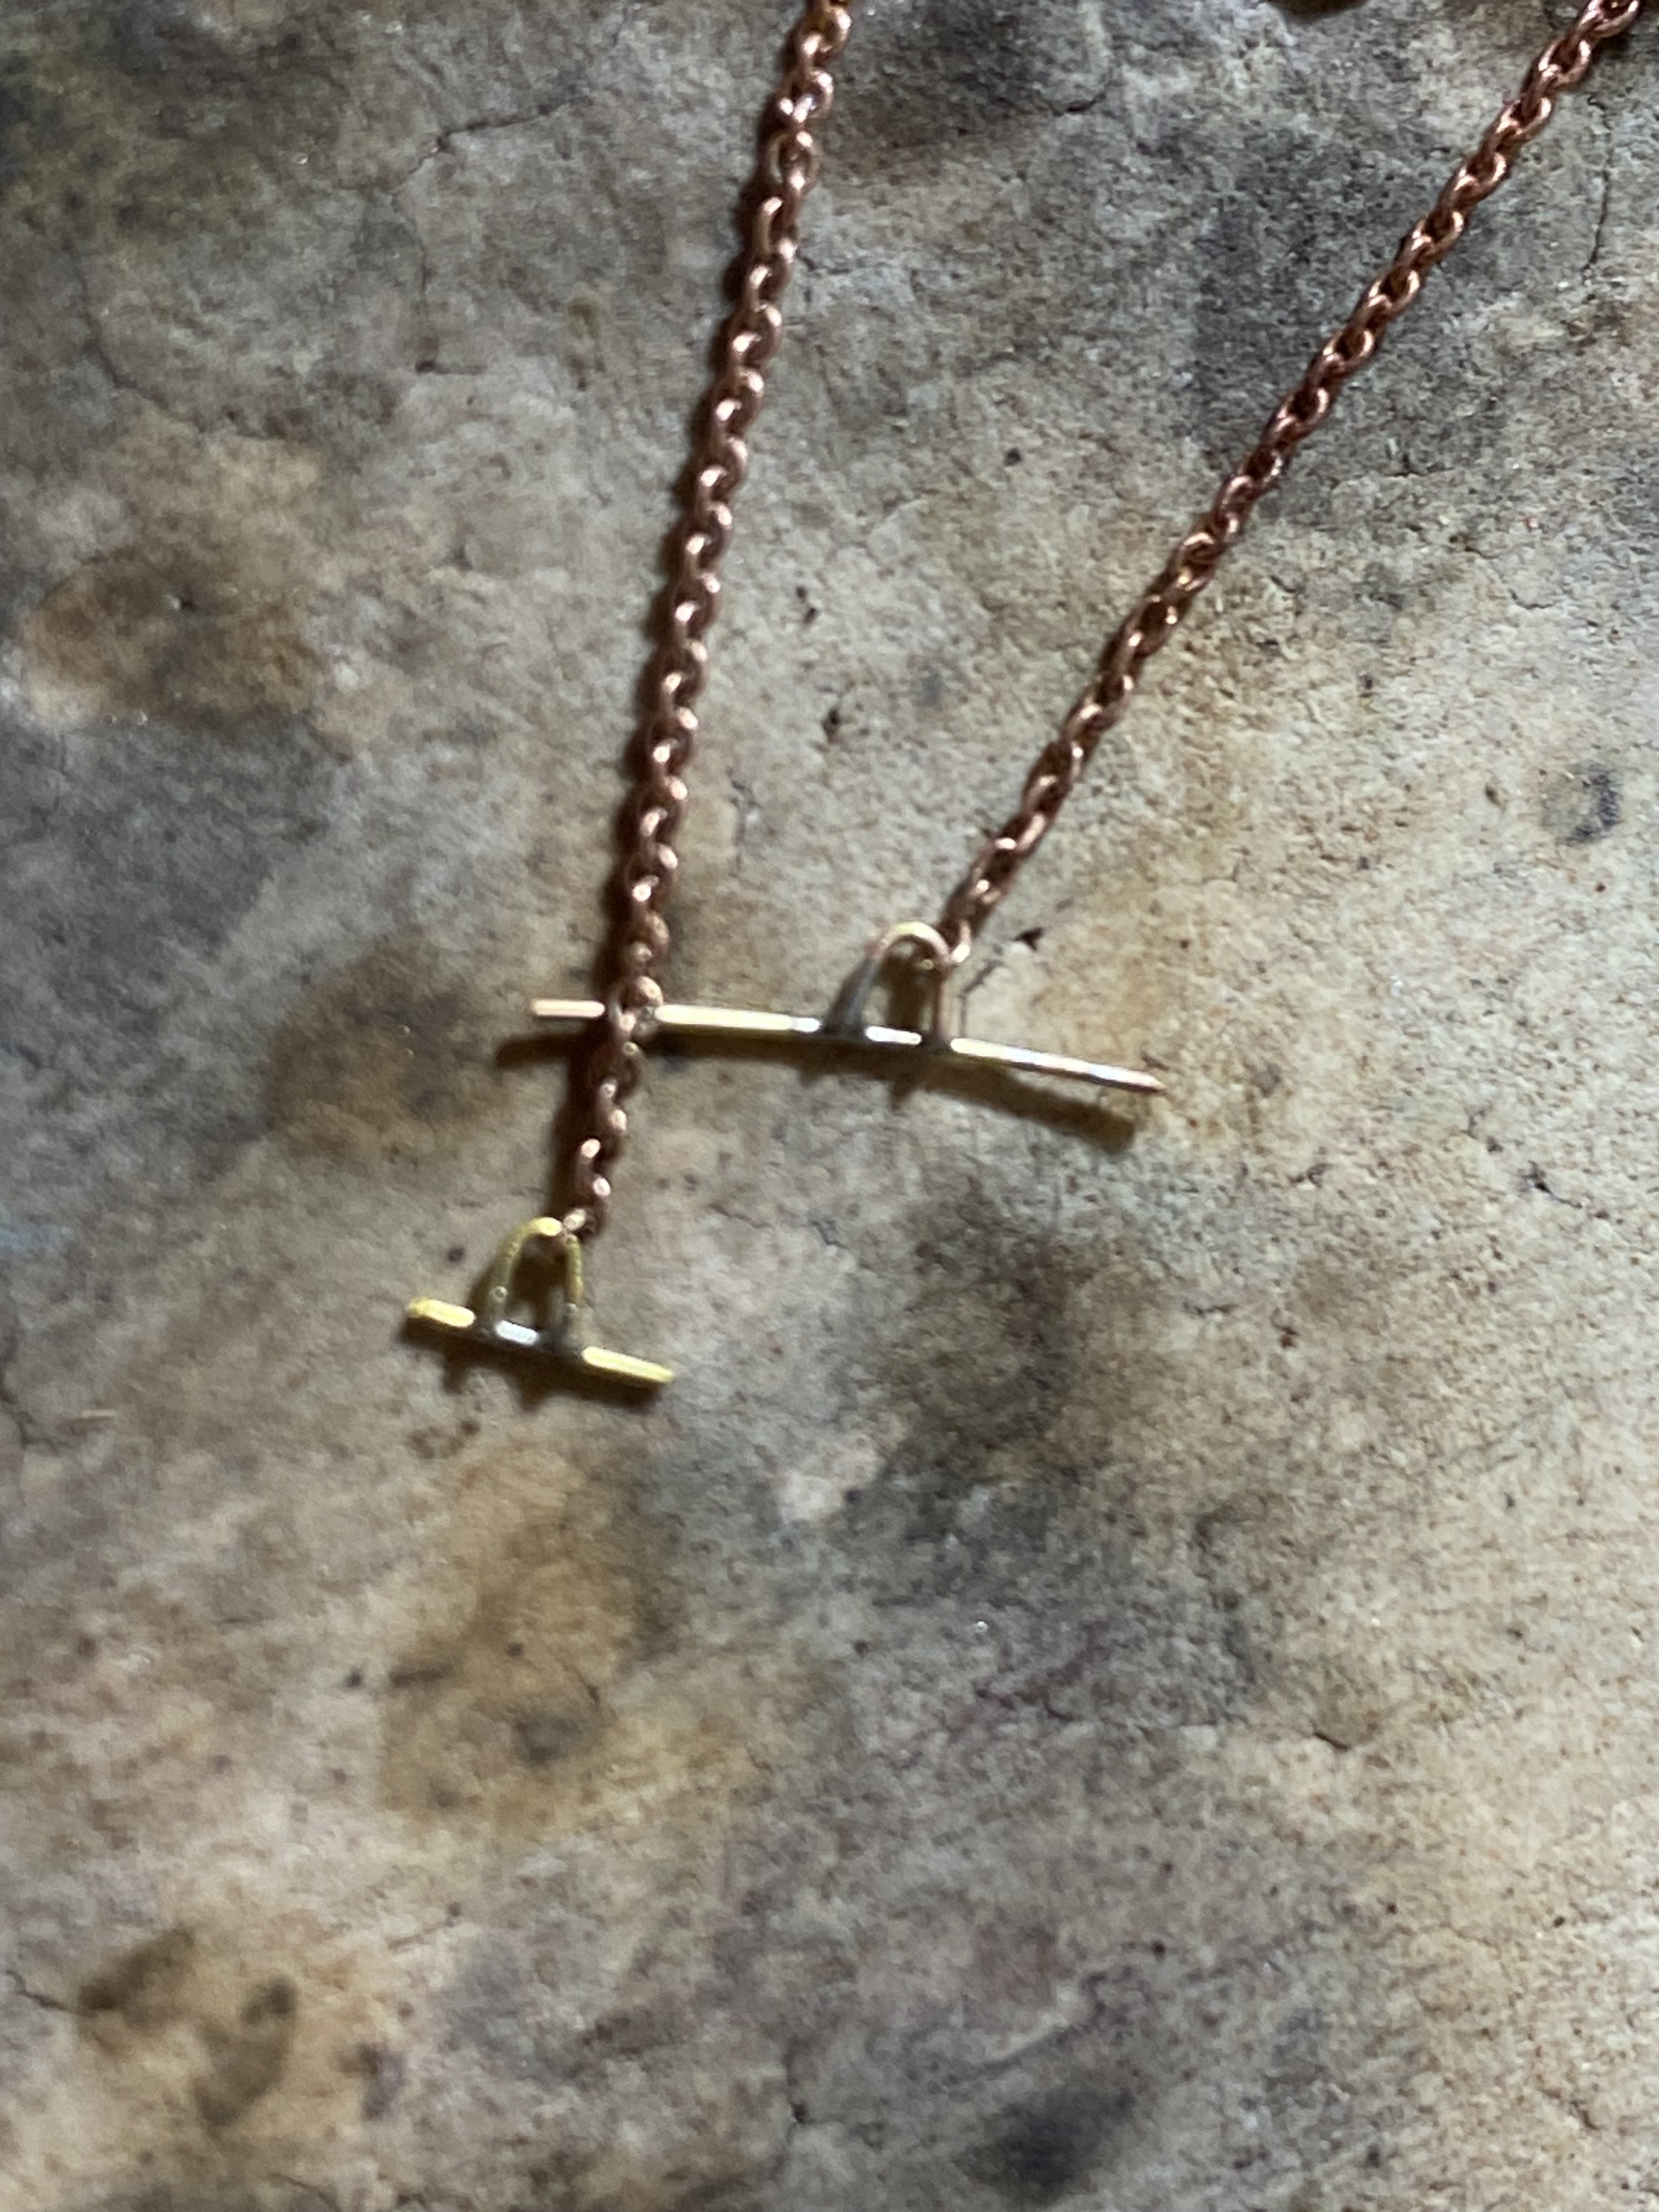
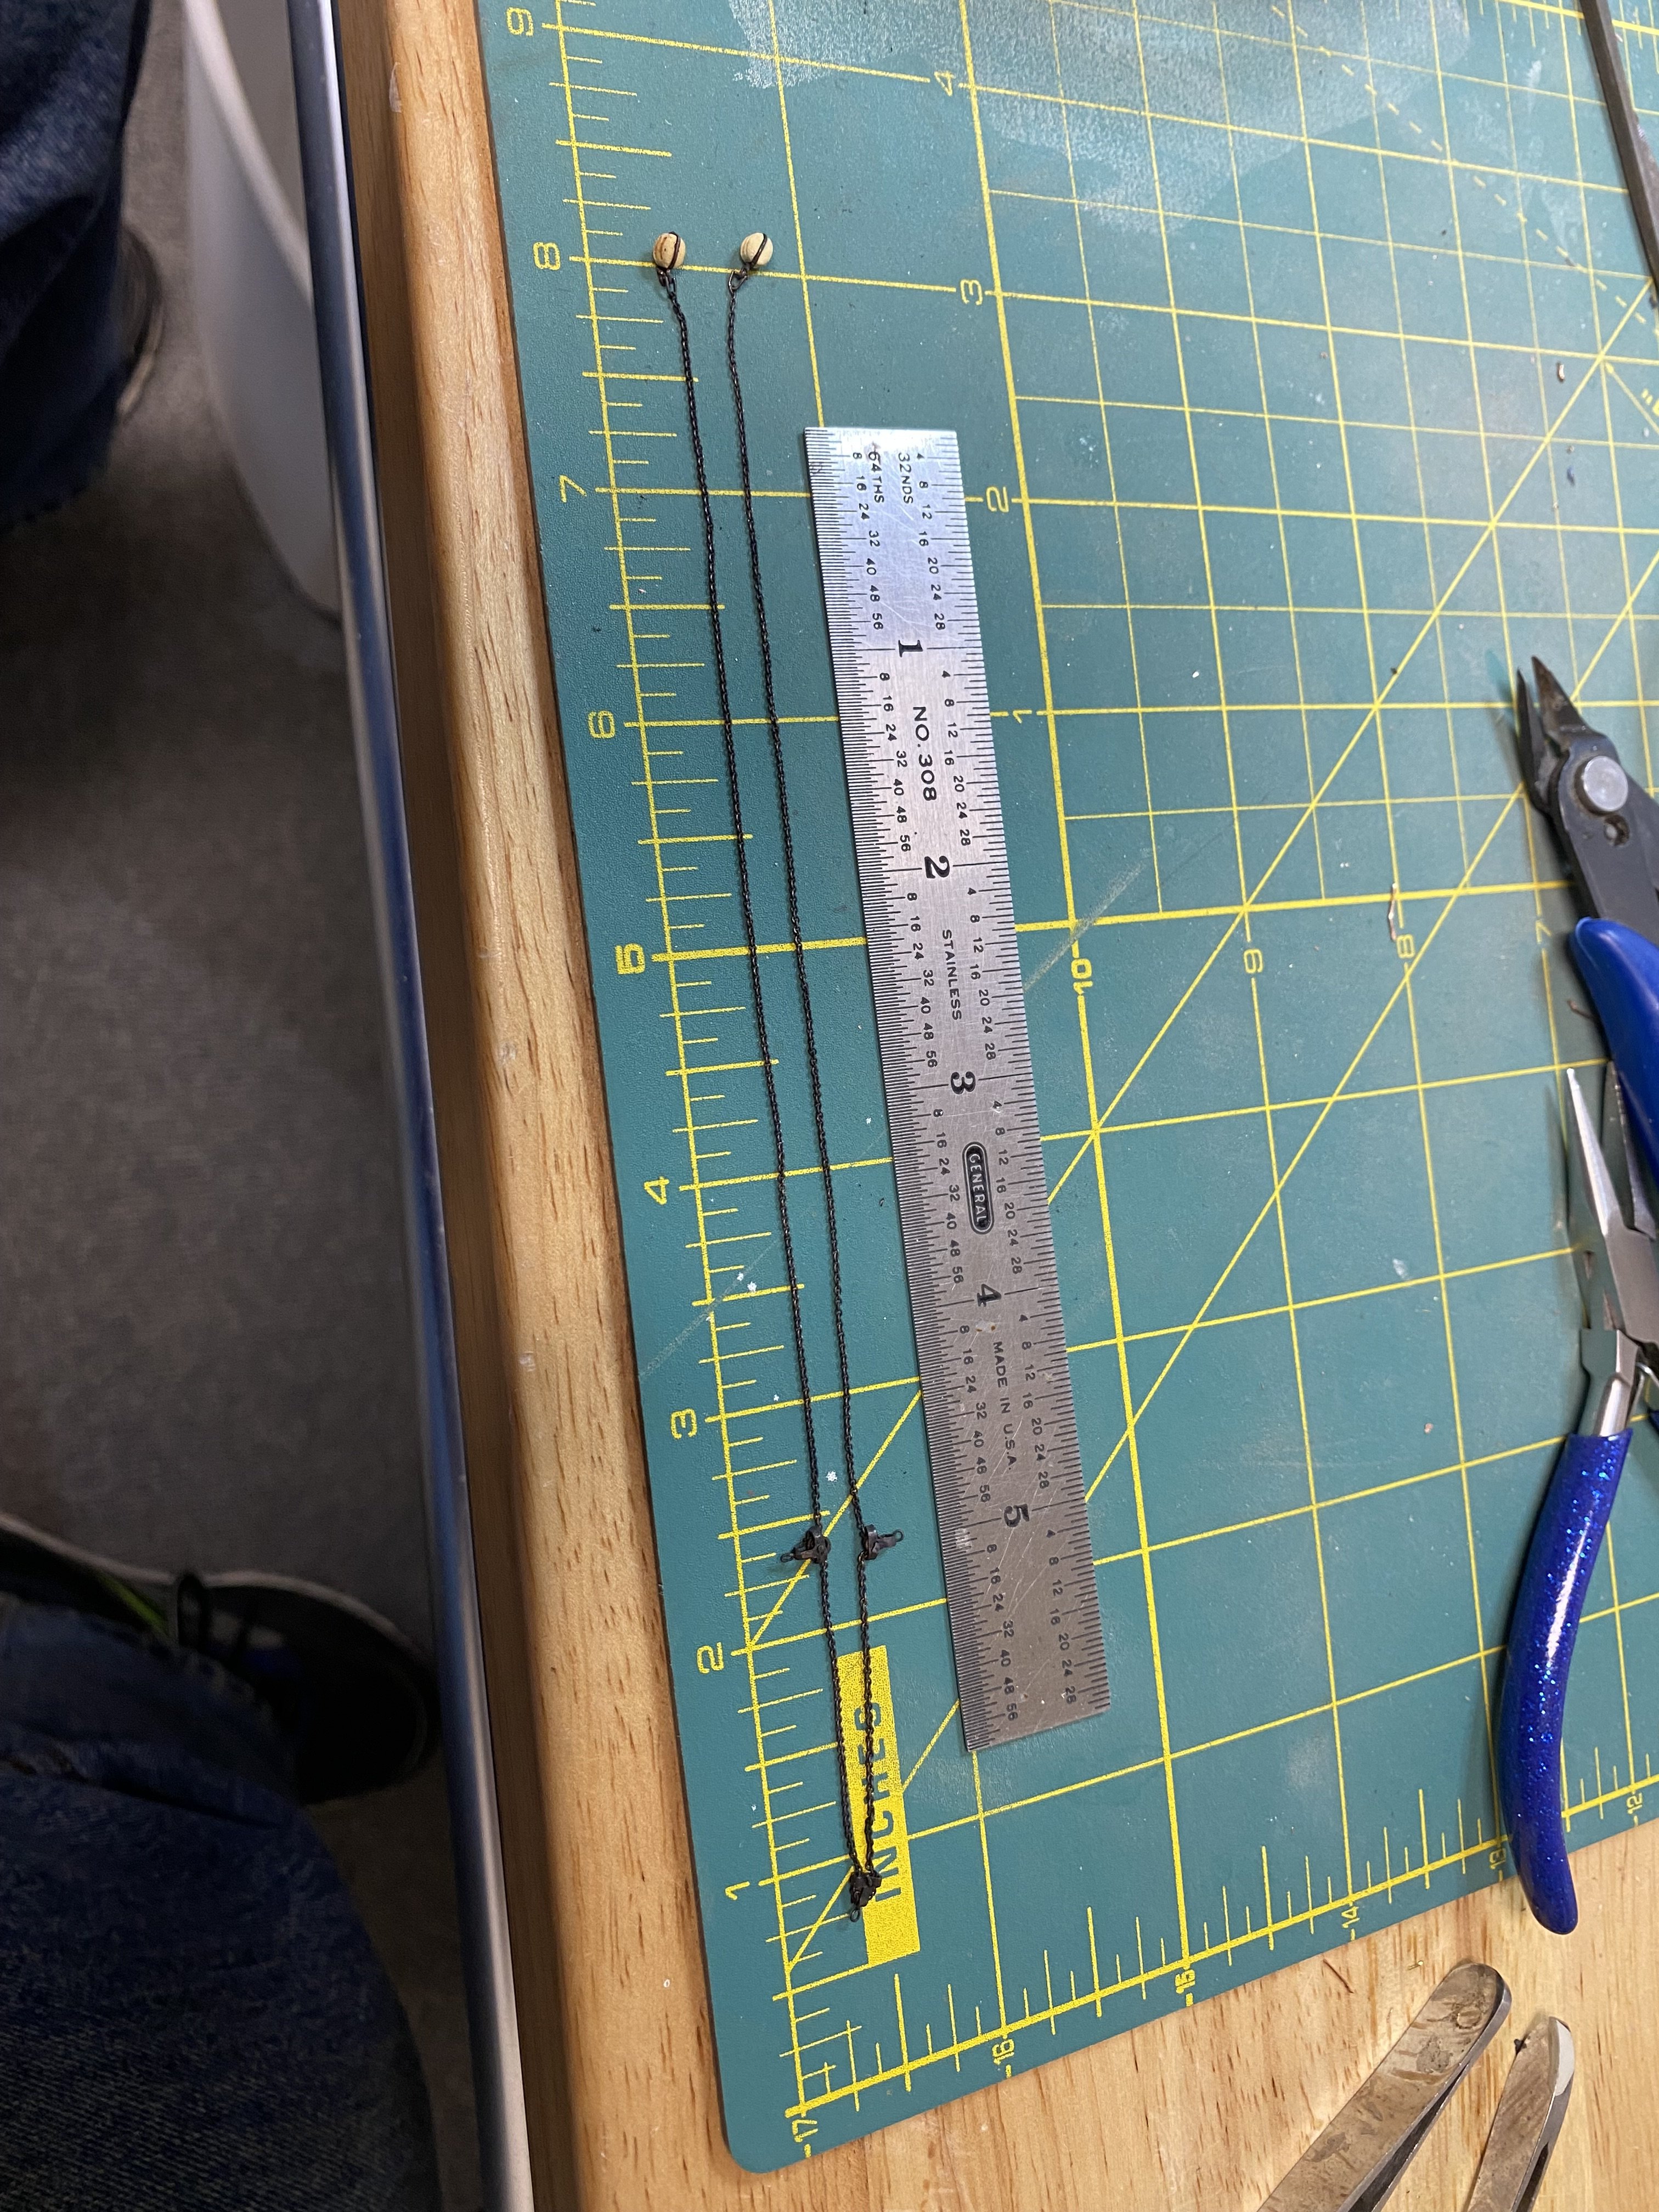
Ic, I used 28 ga copper wire for the stirrups and .012 black thread for the foot ropes. My intention is to apply Matt varnish to the foot ropes and shape them to the proper shape after I finish the rest of the work on the topsail yard.I’ll see if that works Rick
-
Thanks Rob and George for your input. I am currently out of town helping my daughter plan her wedding (my input not required, just my approval). I will check everything when I get back. Rick
-
Thanks for the input Rob, really appreciated! I’ll go back and re-measure the stirrups, they’re supposed to be approximately 3 1/2 ft. Rick
-
John, Red Jacket is looking really good!! Bluejacket’s fittings are really well done! Rick
- 165 replies
-
- 1
-

-
- Red Jacket
- Marine Model Company
- (and 2 more)
-
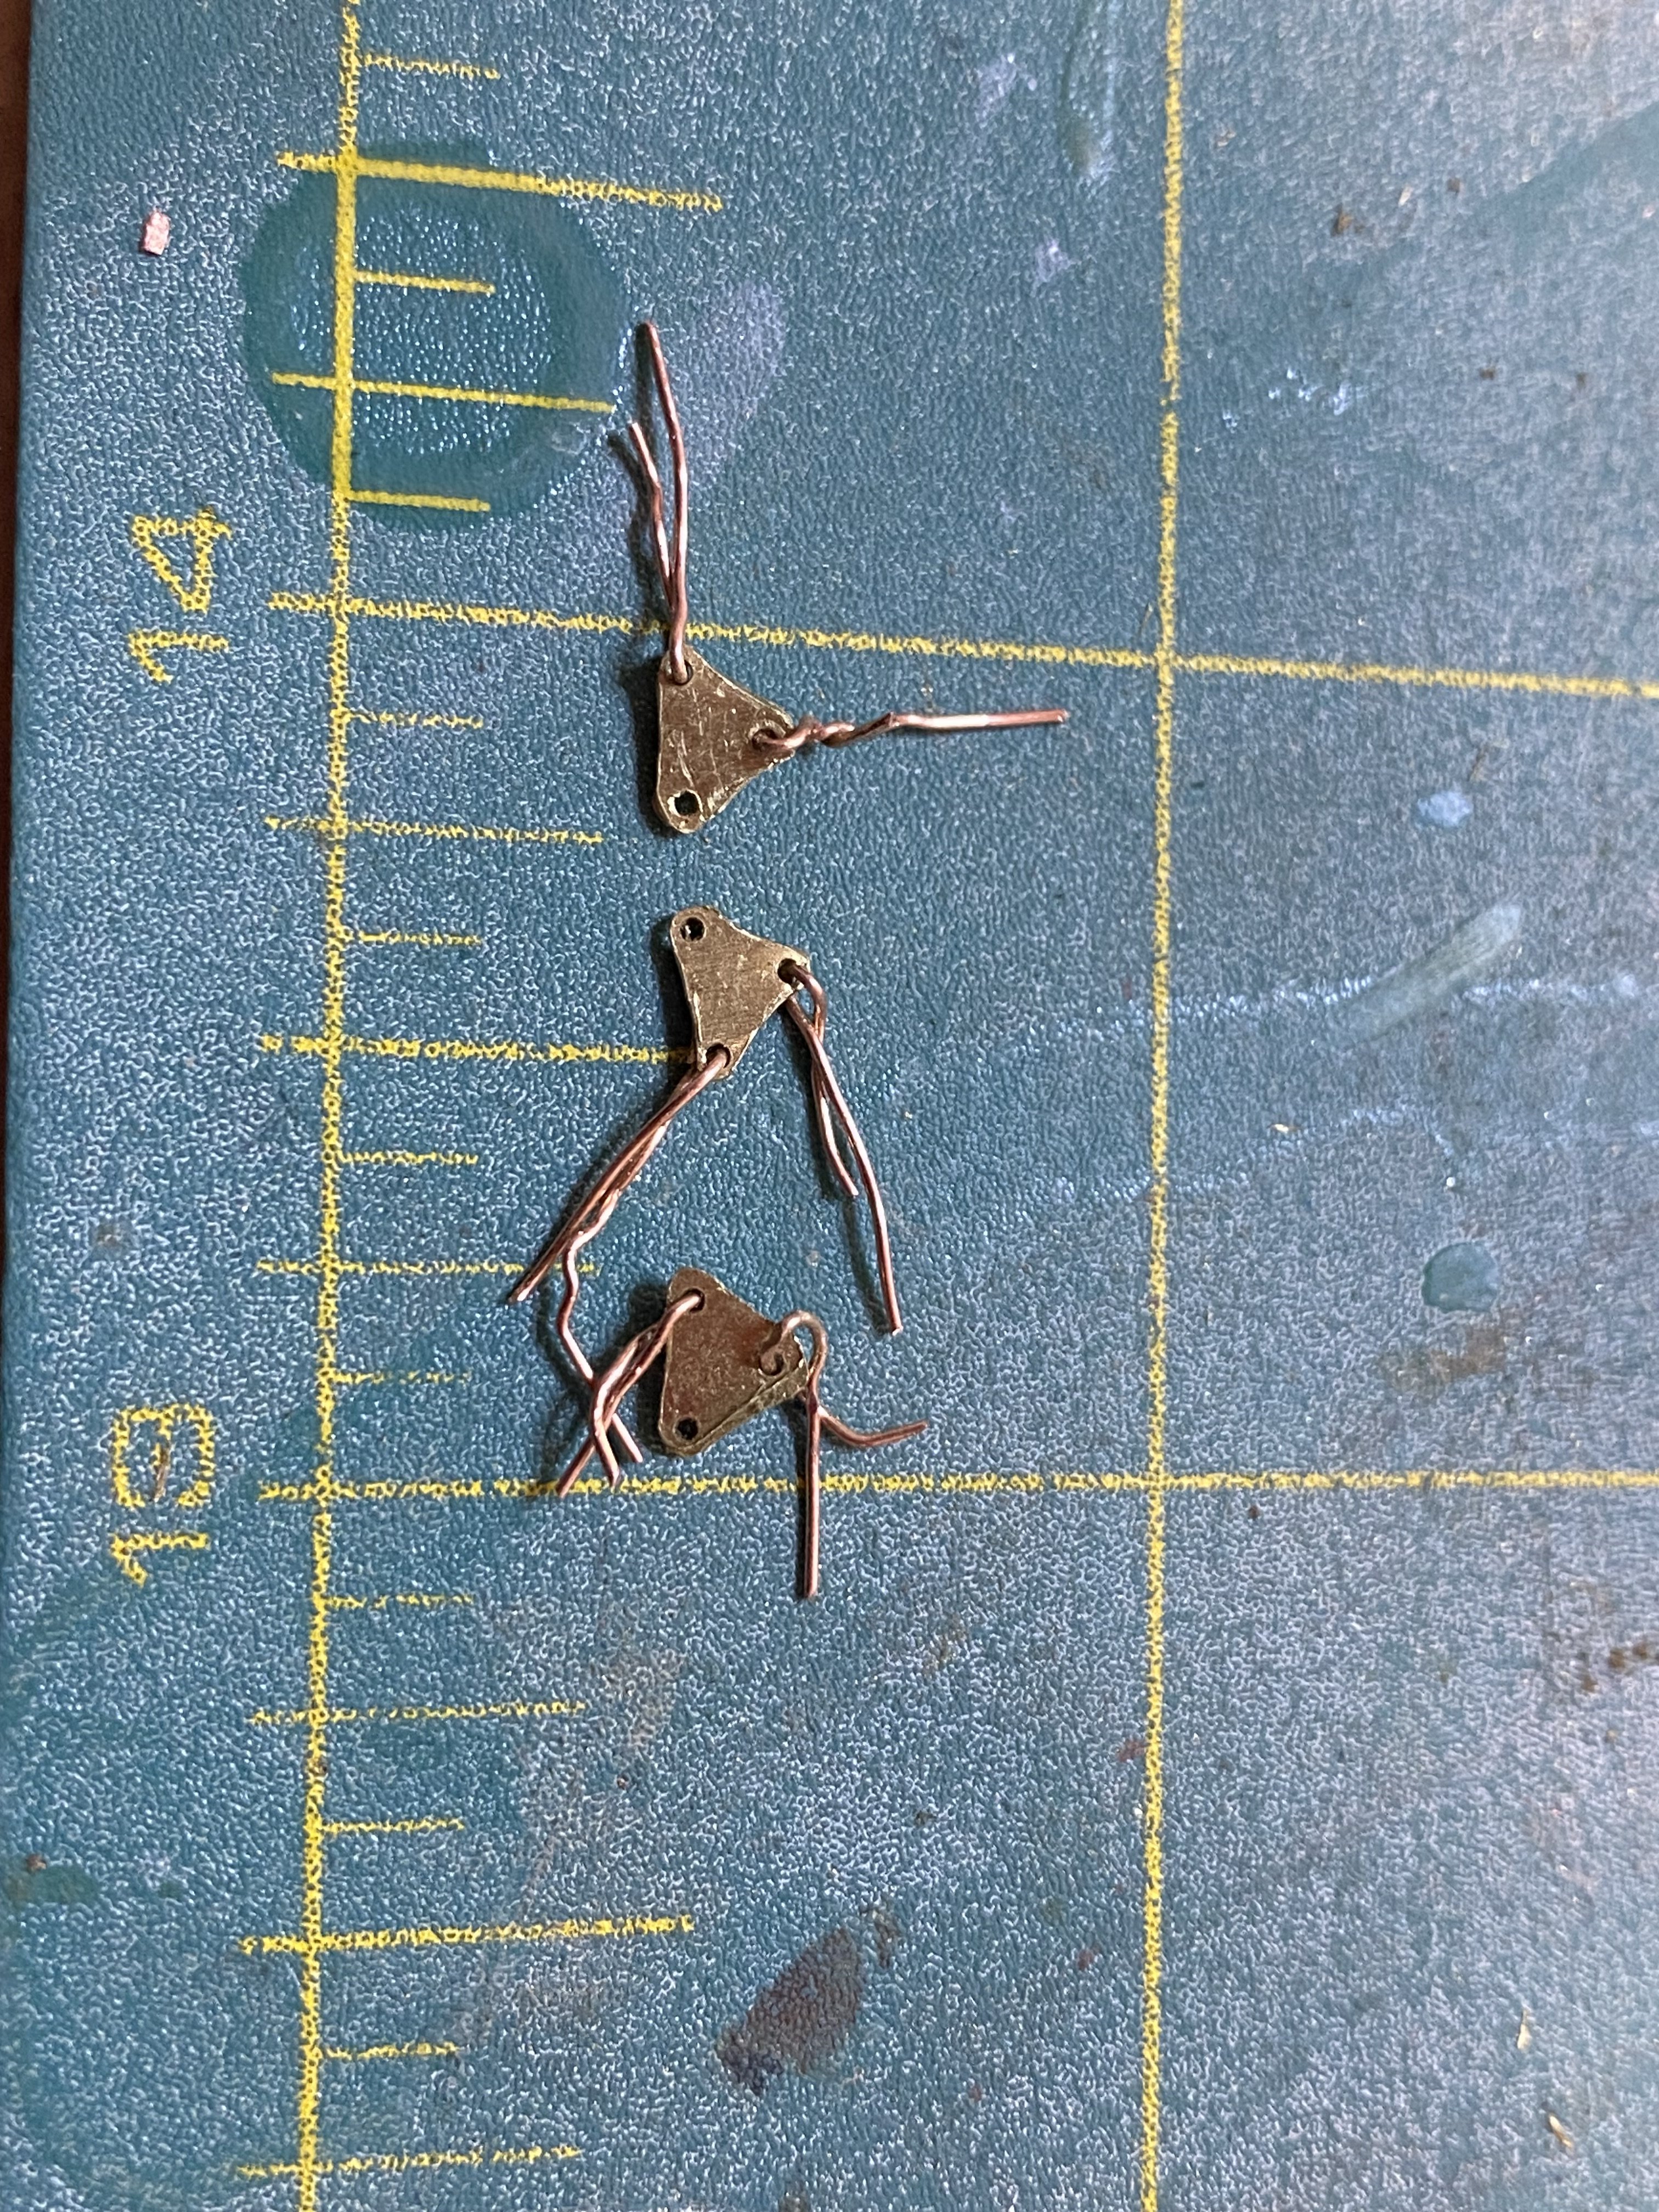
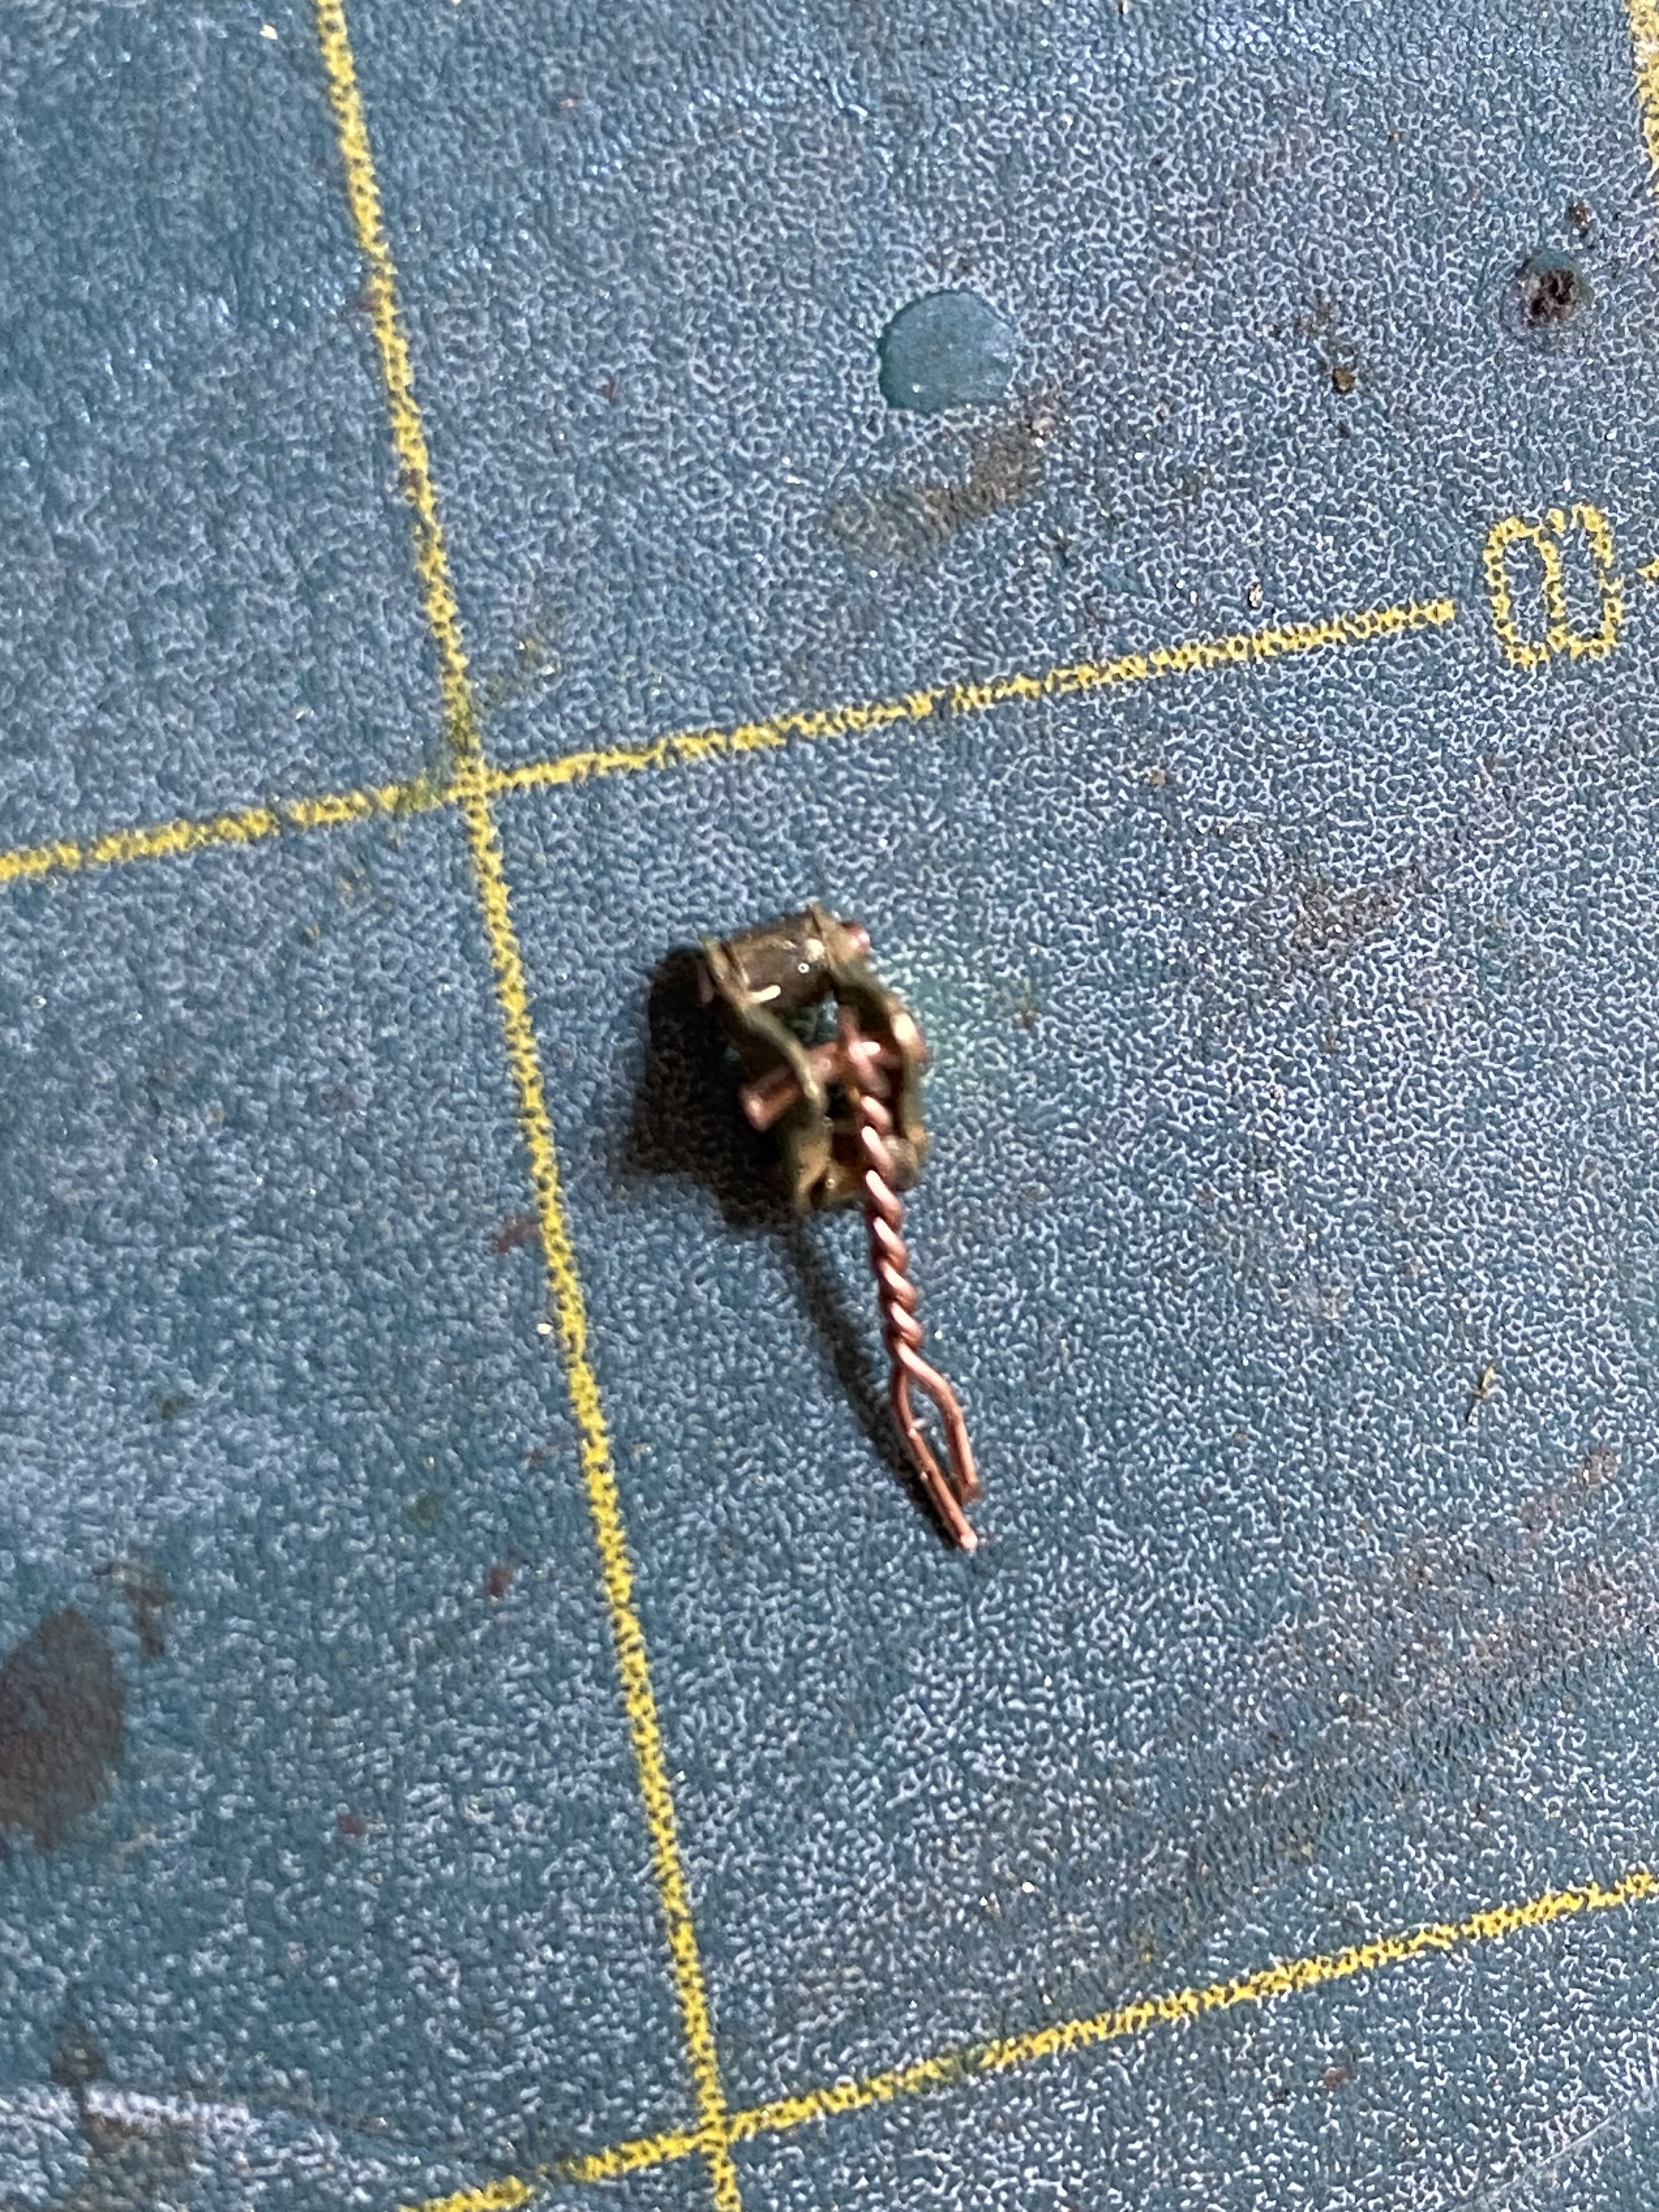
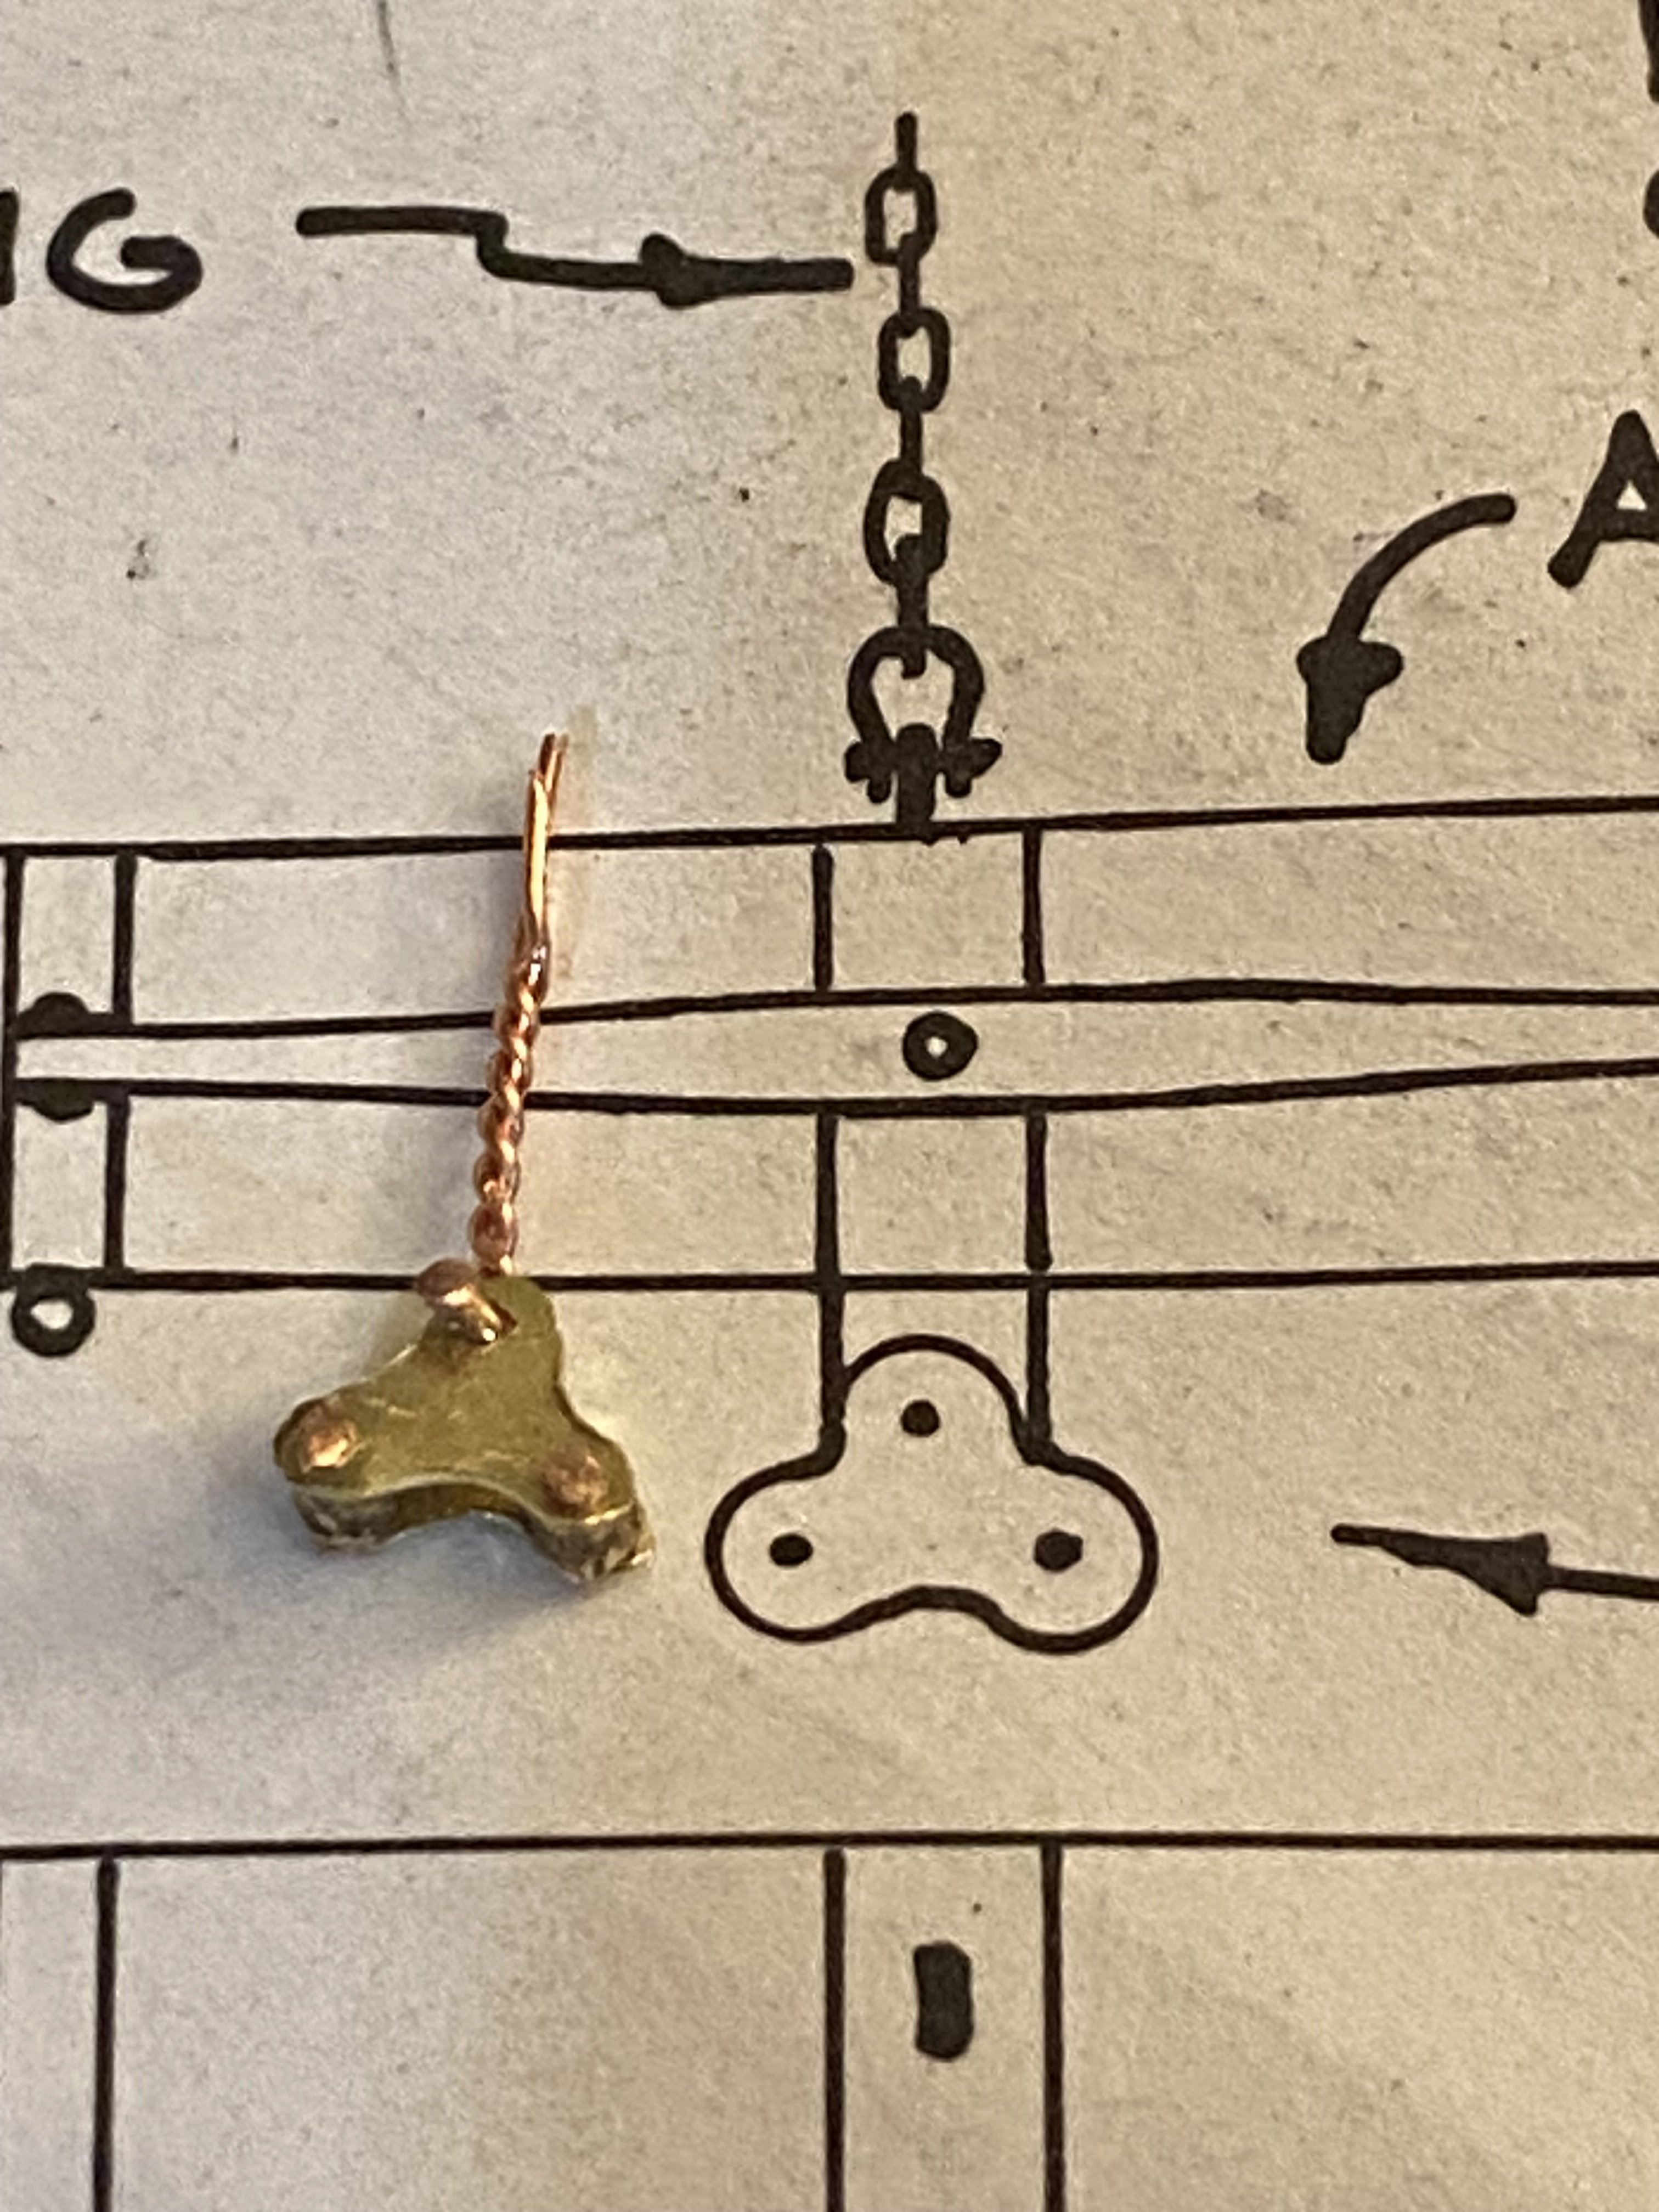
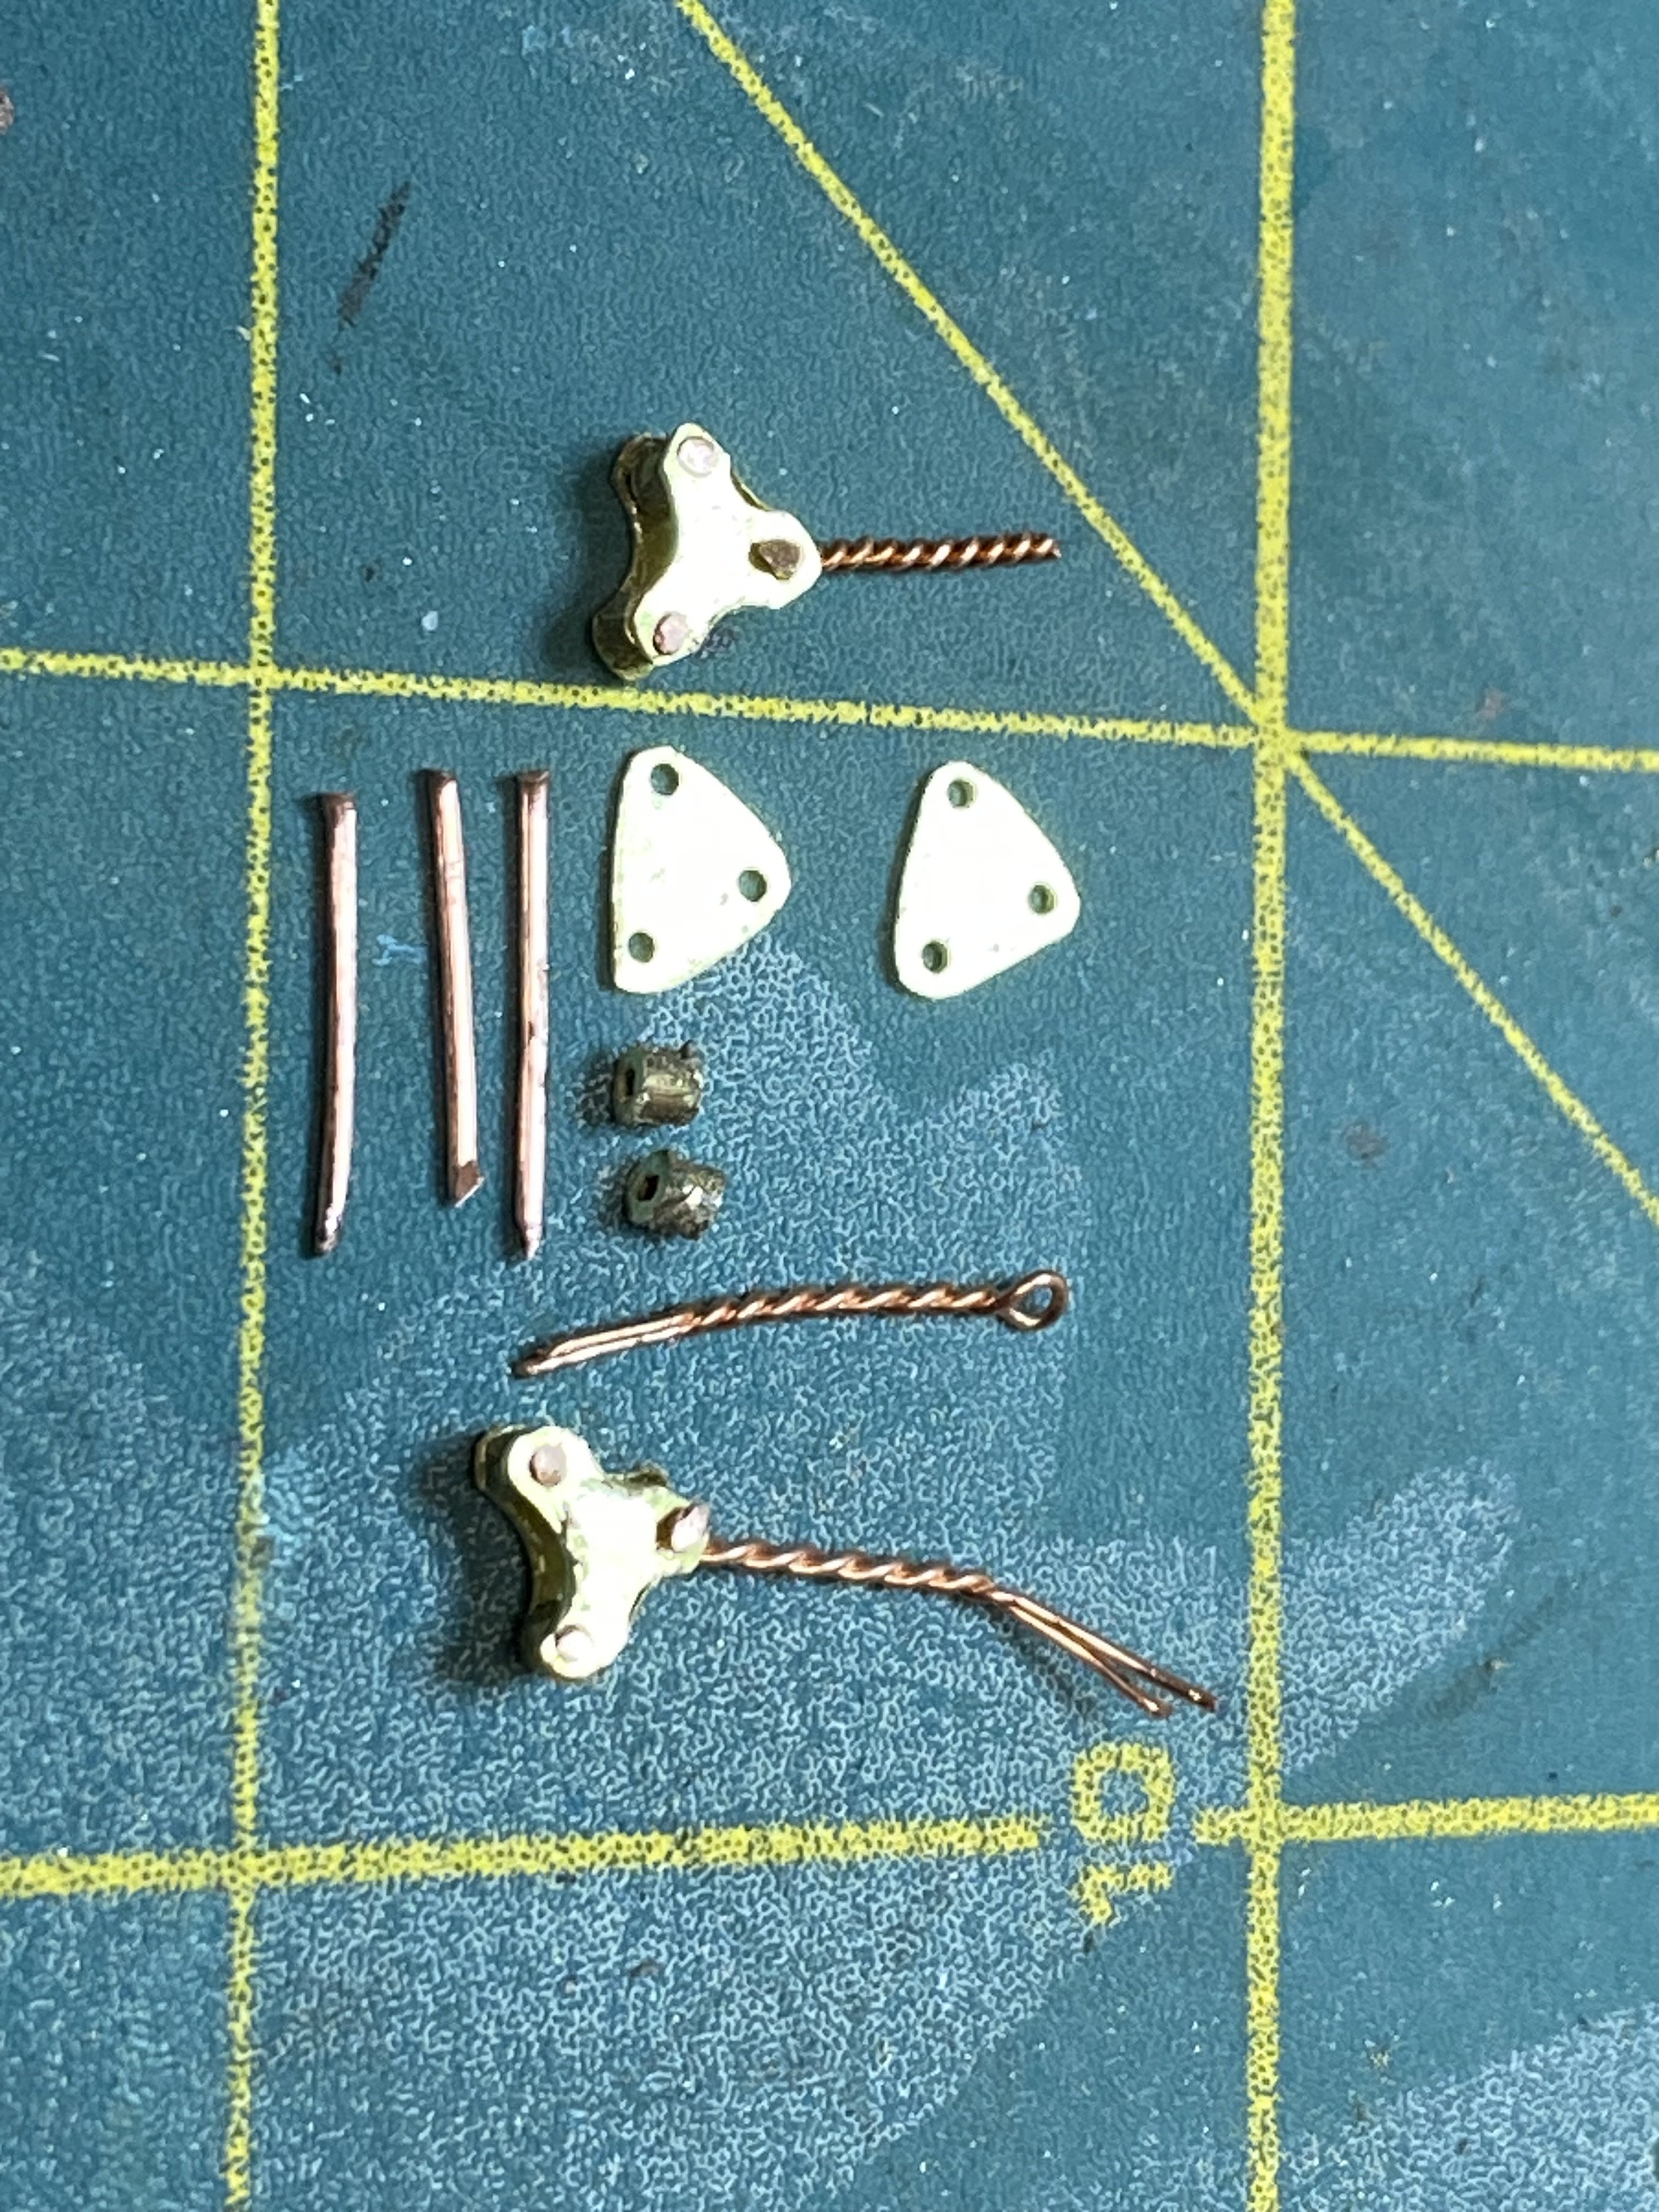
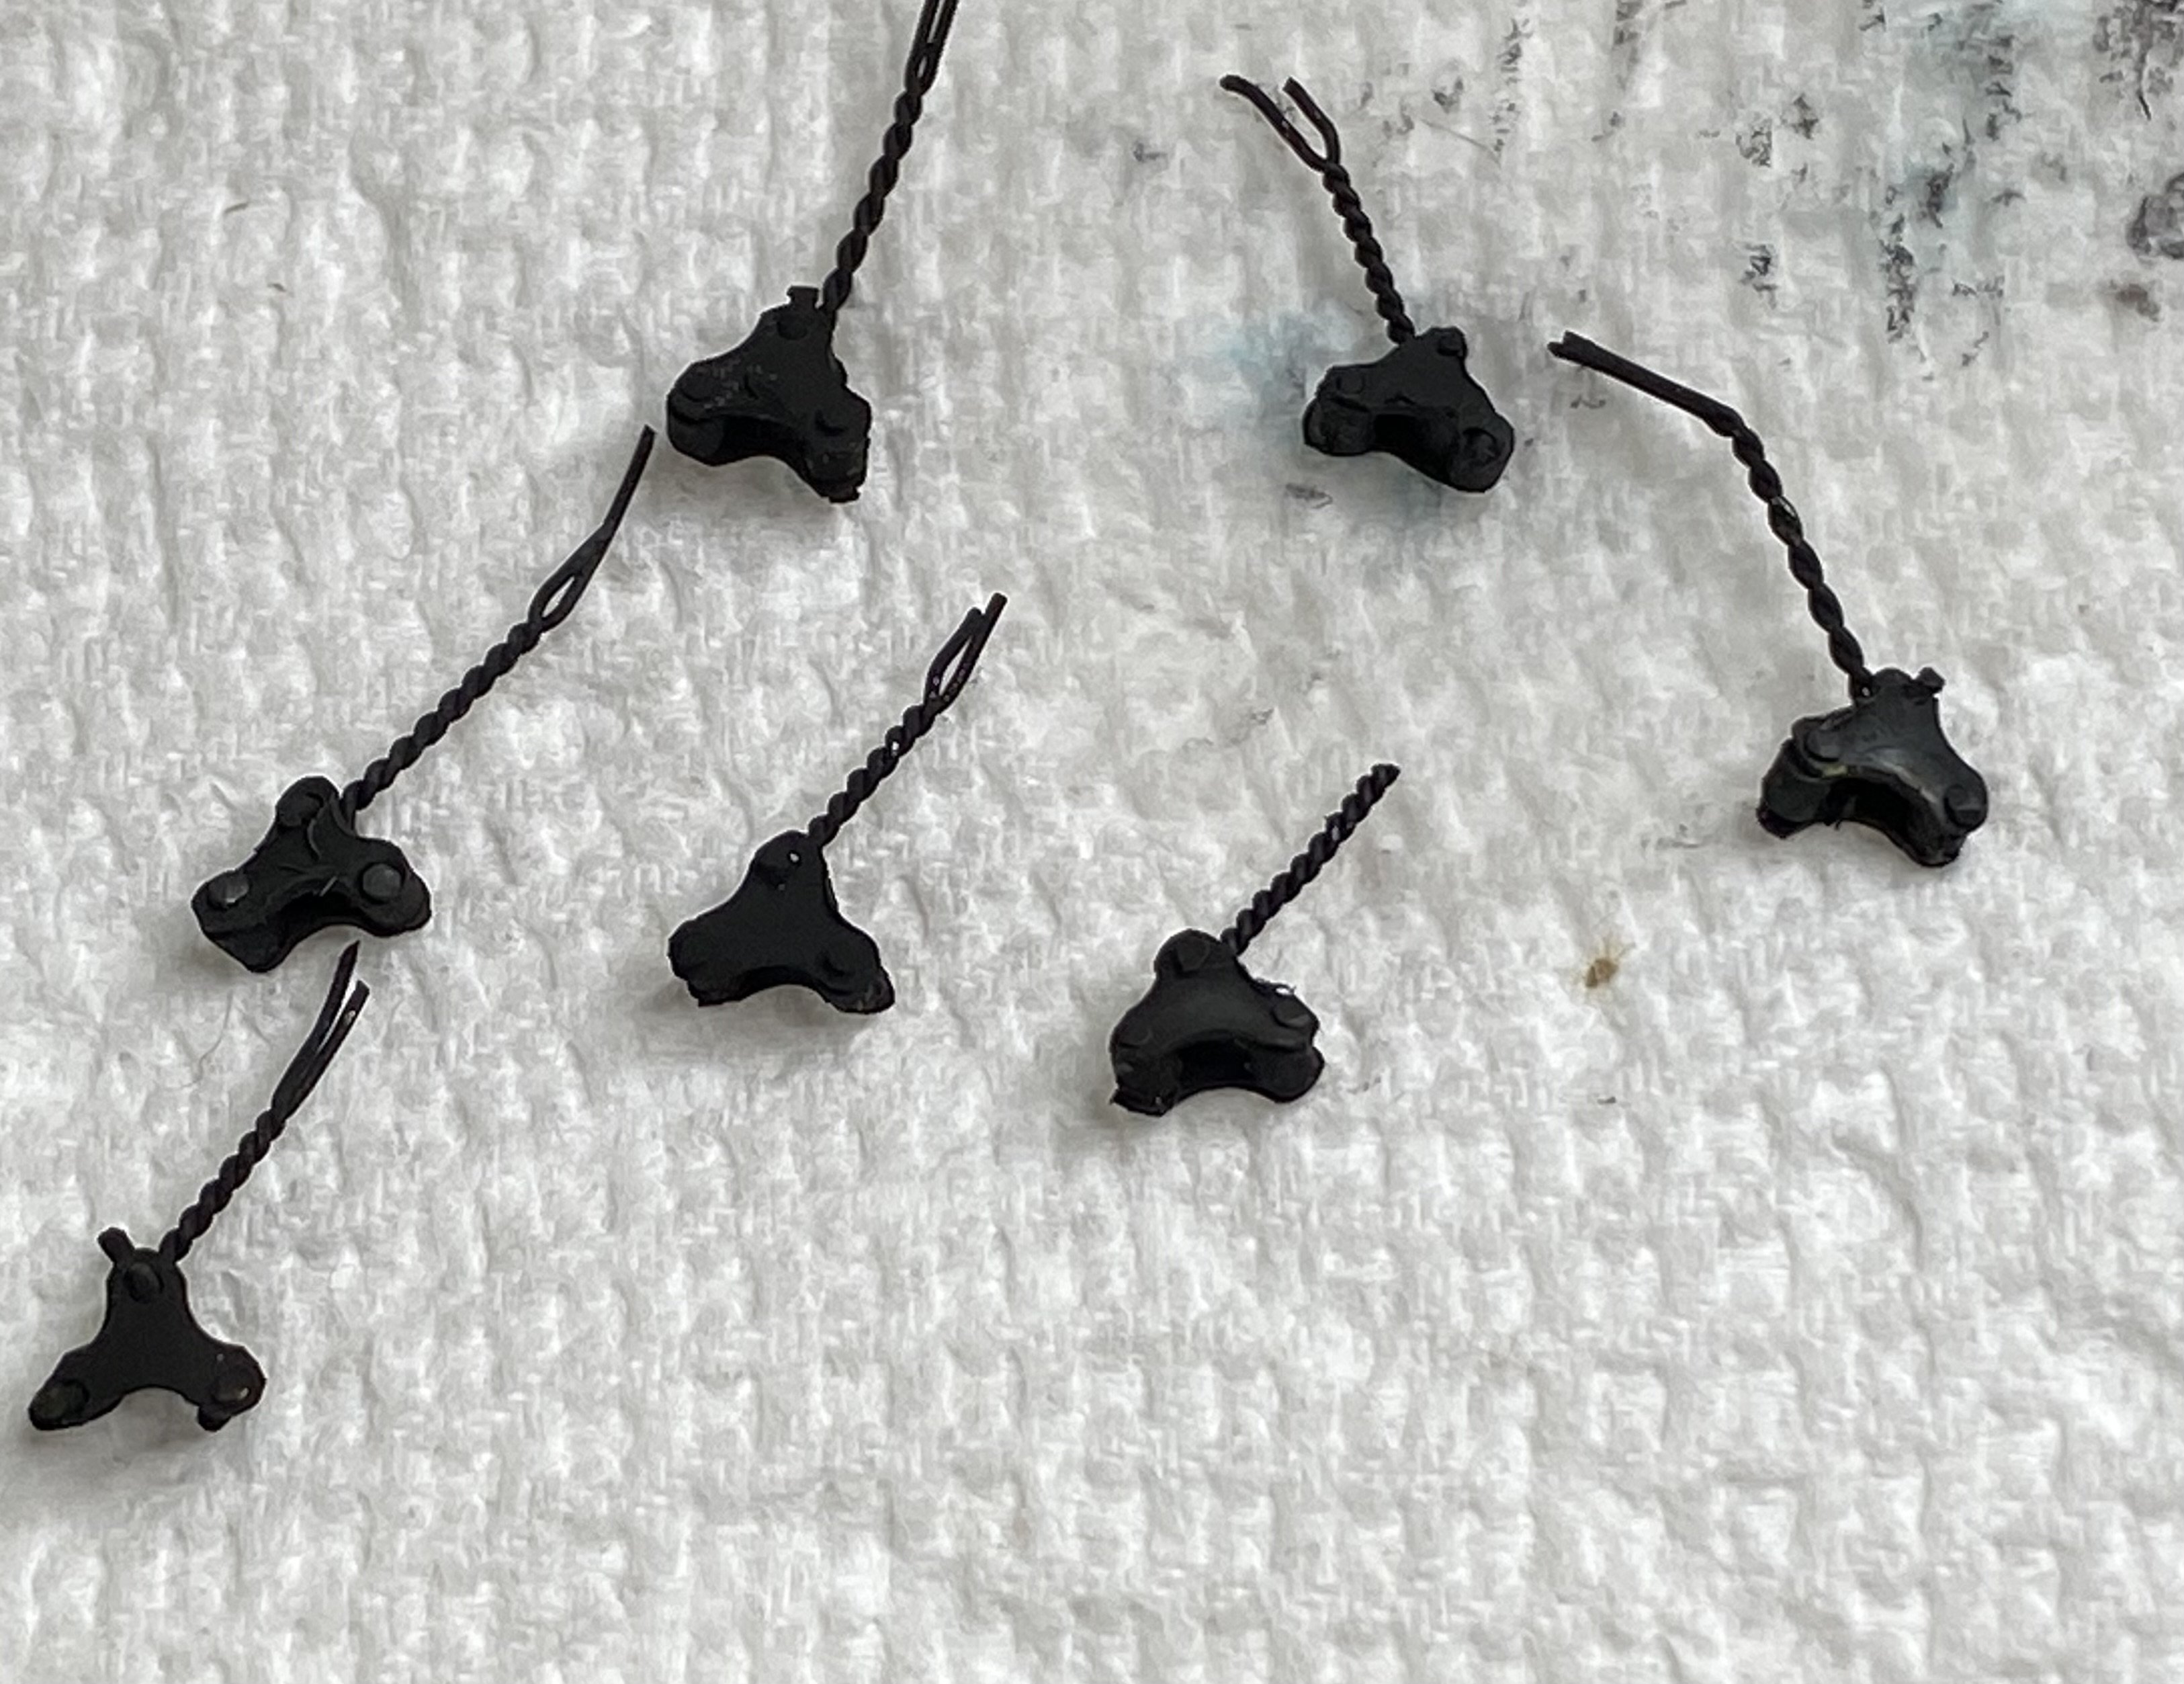
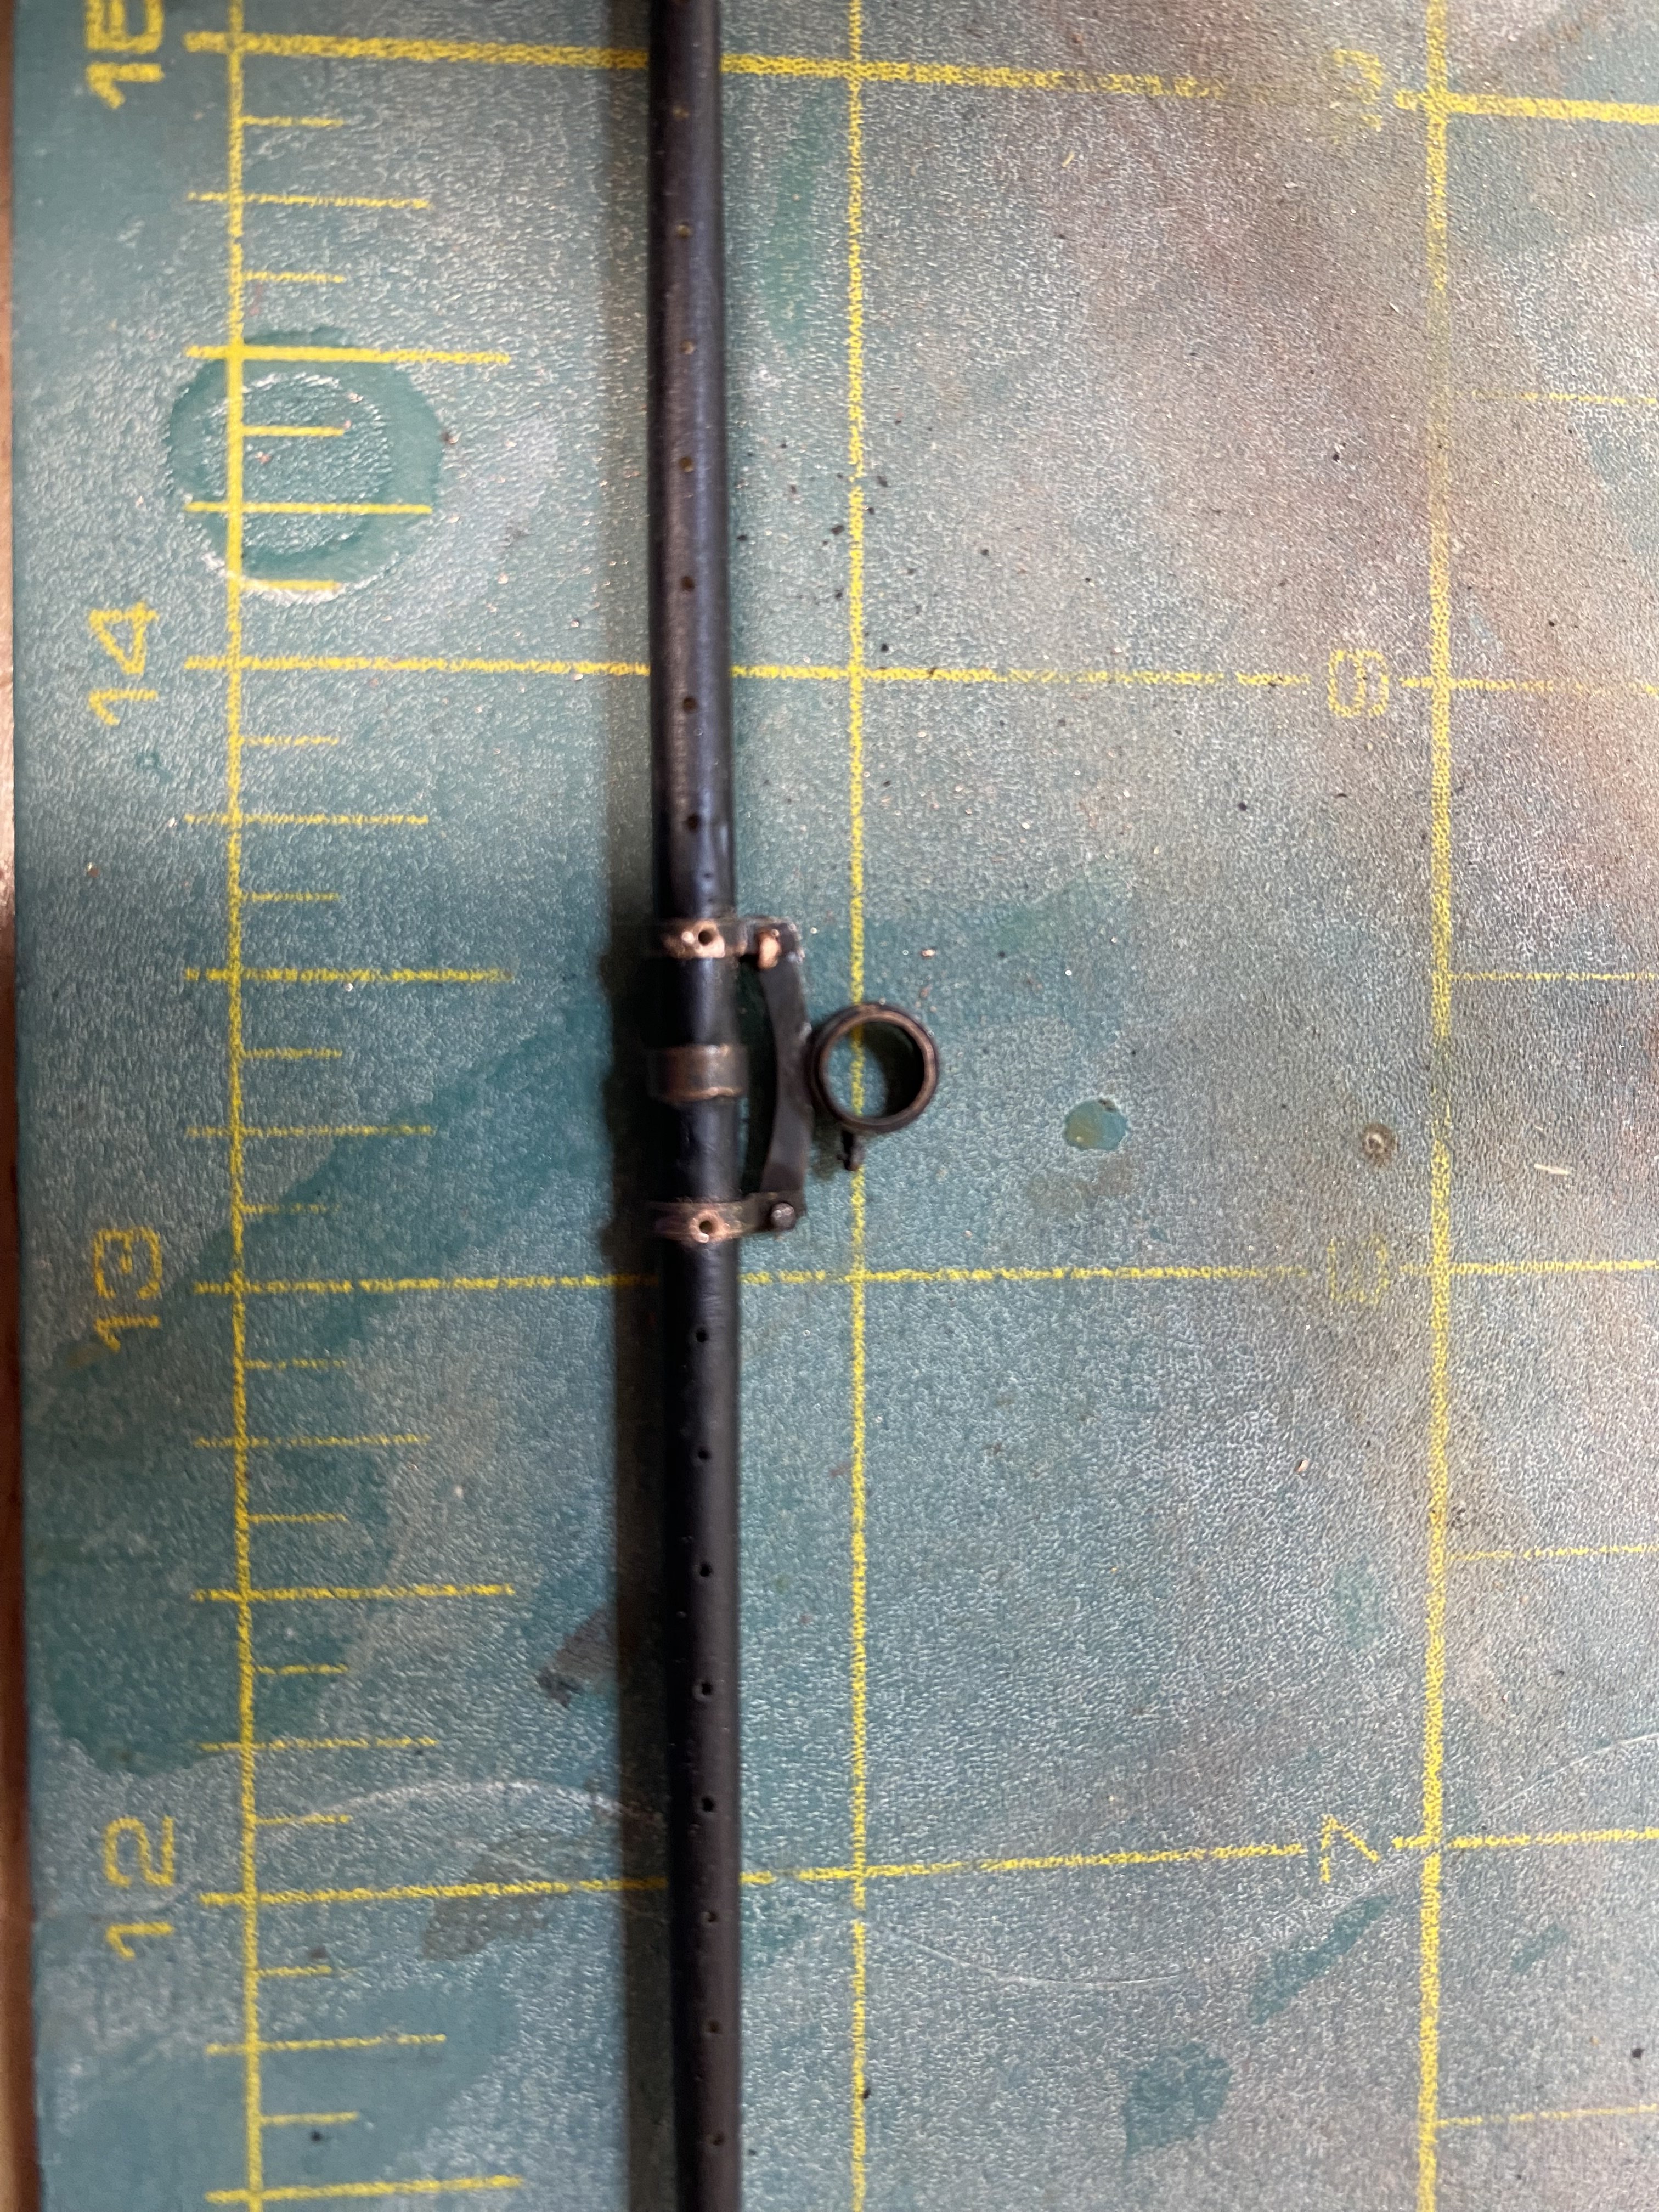
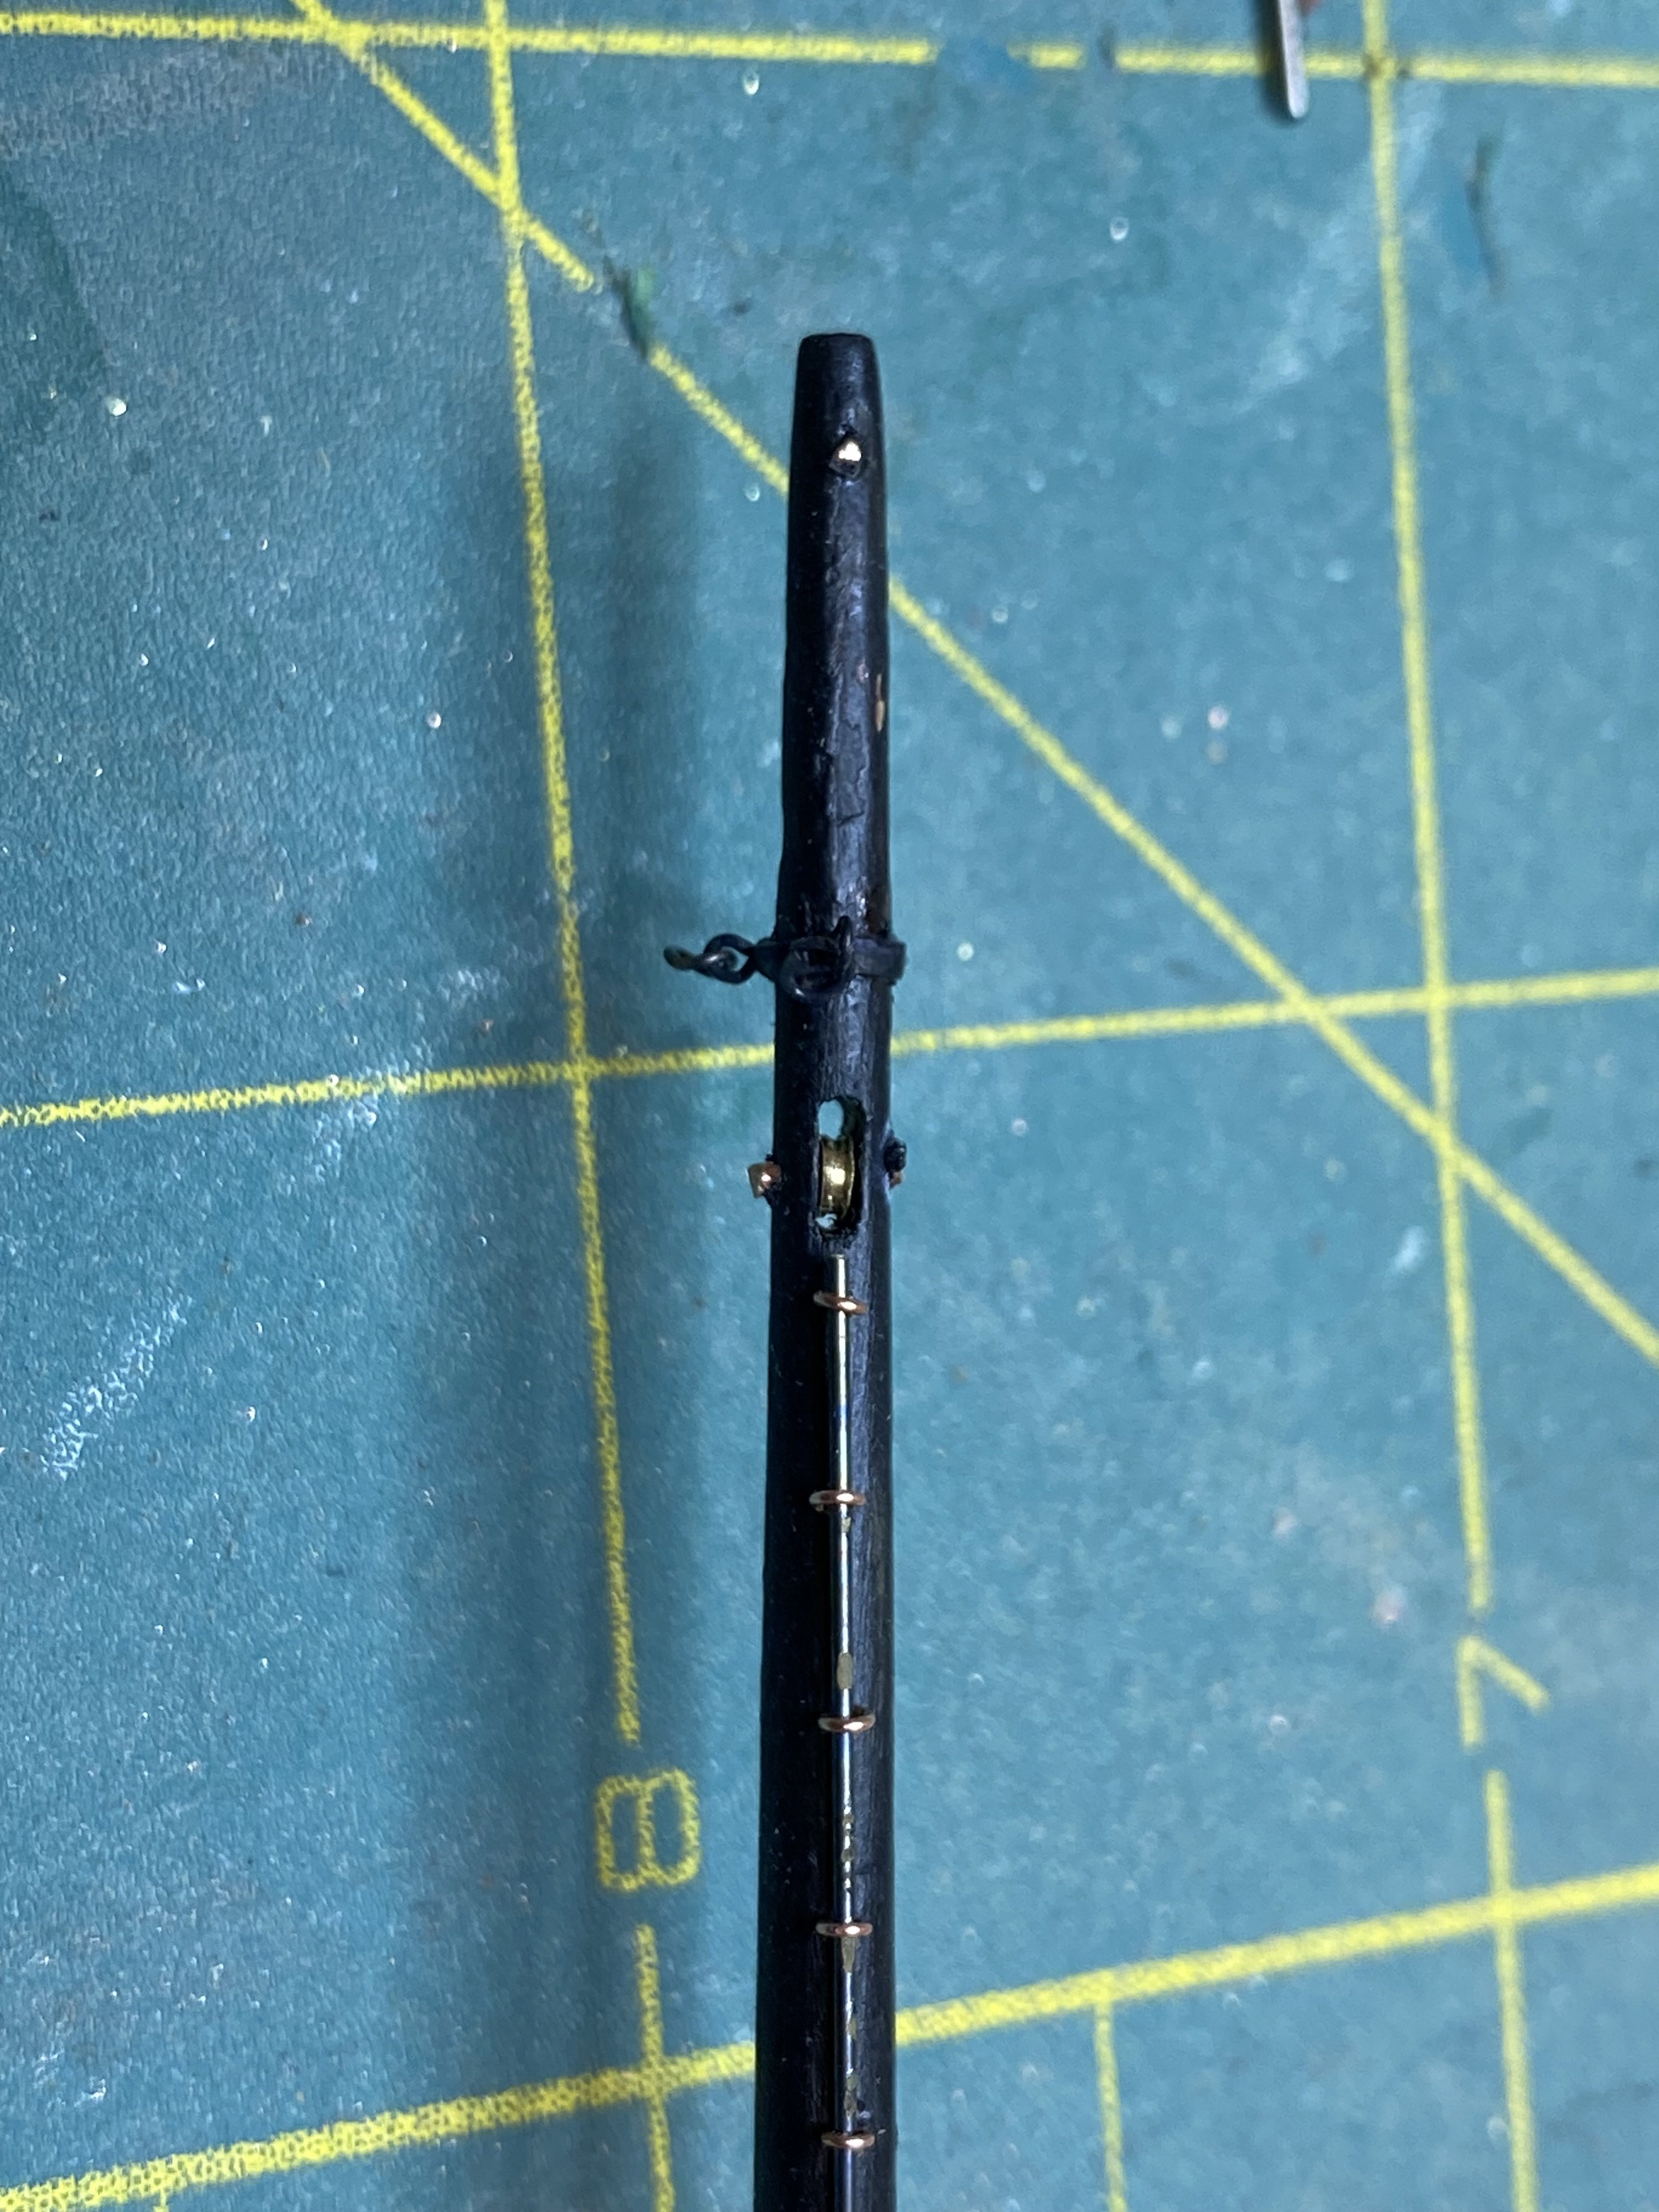
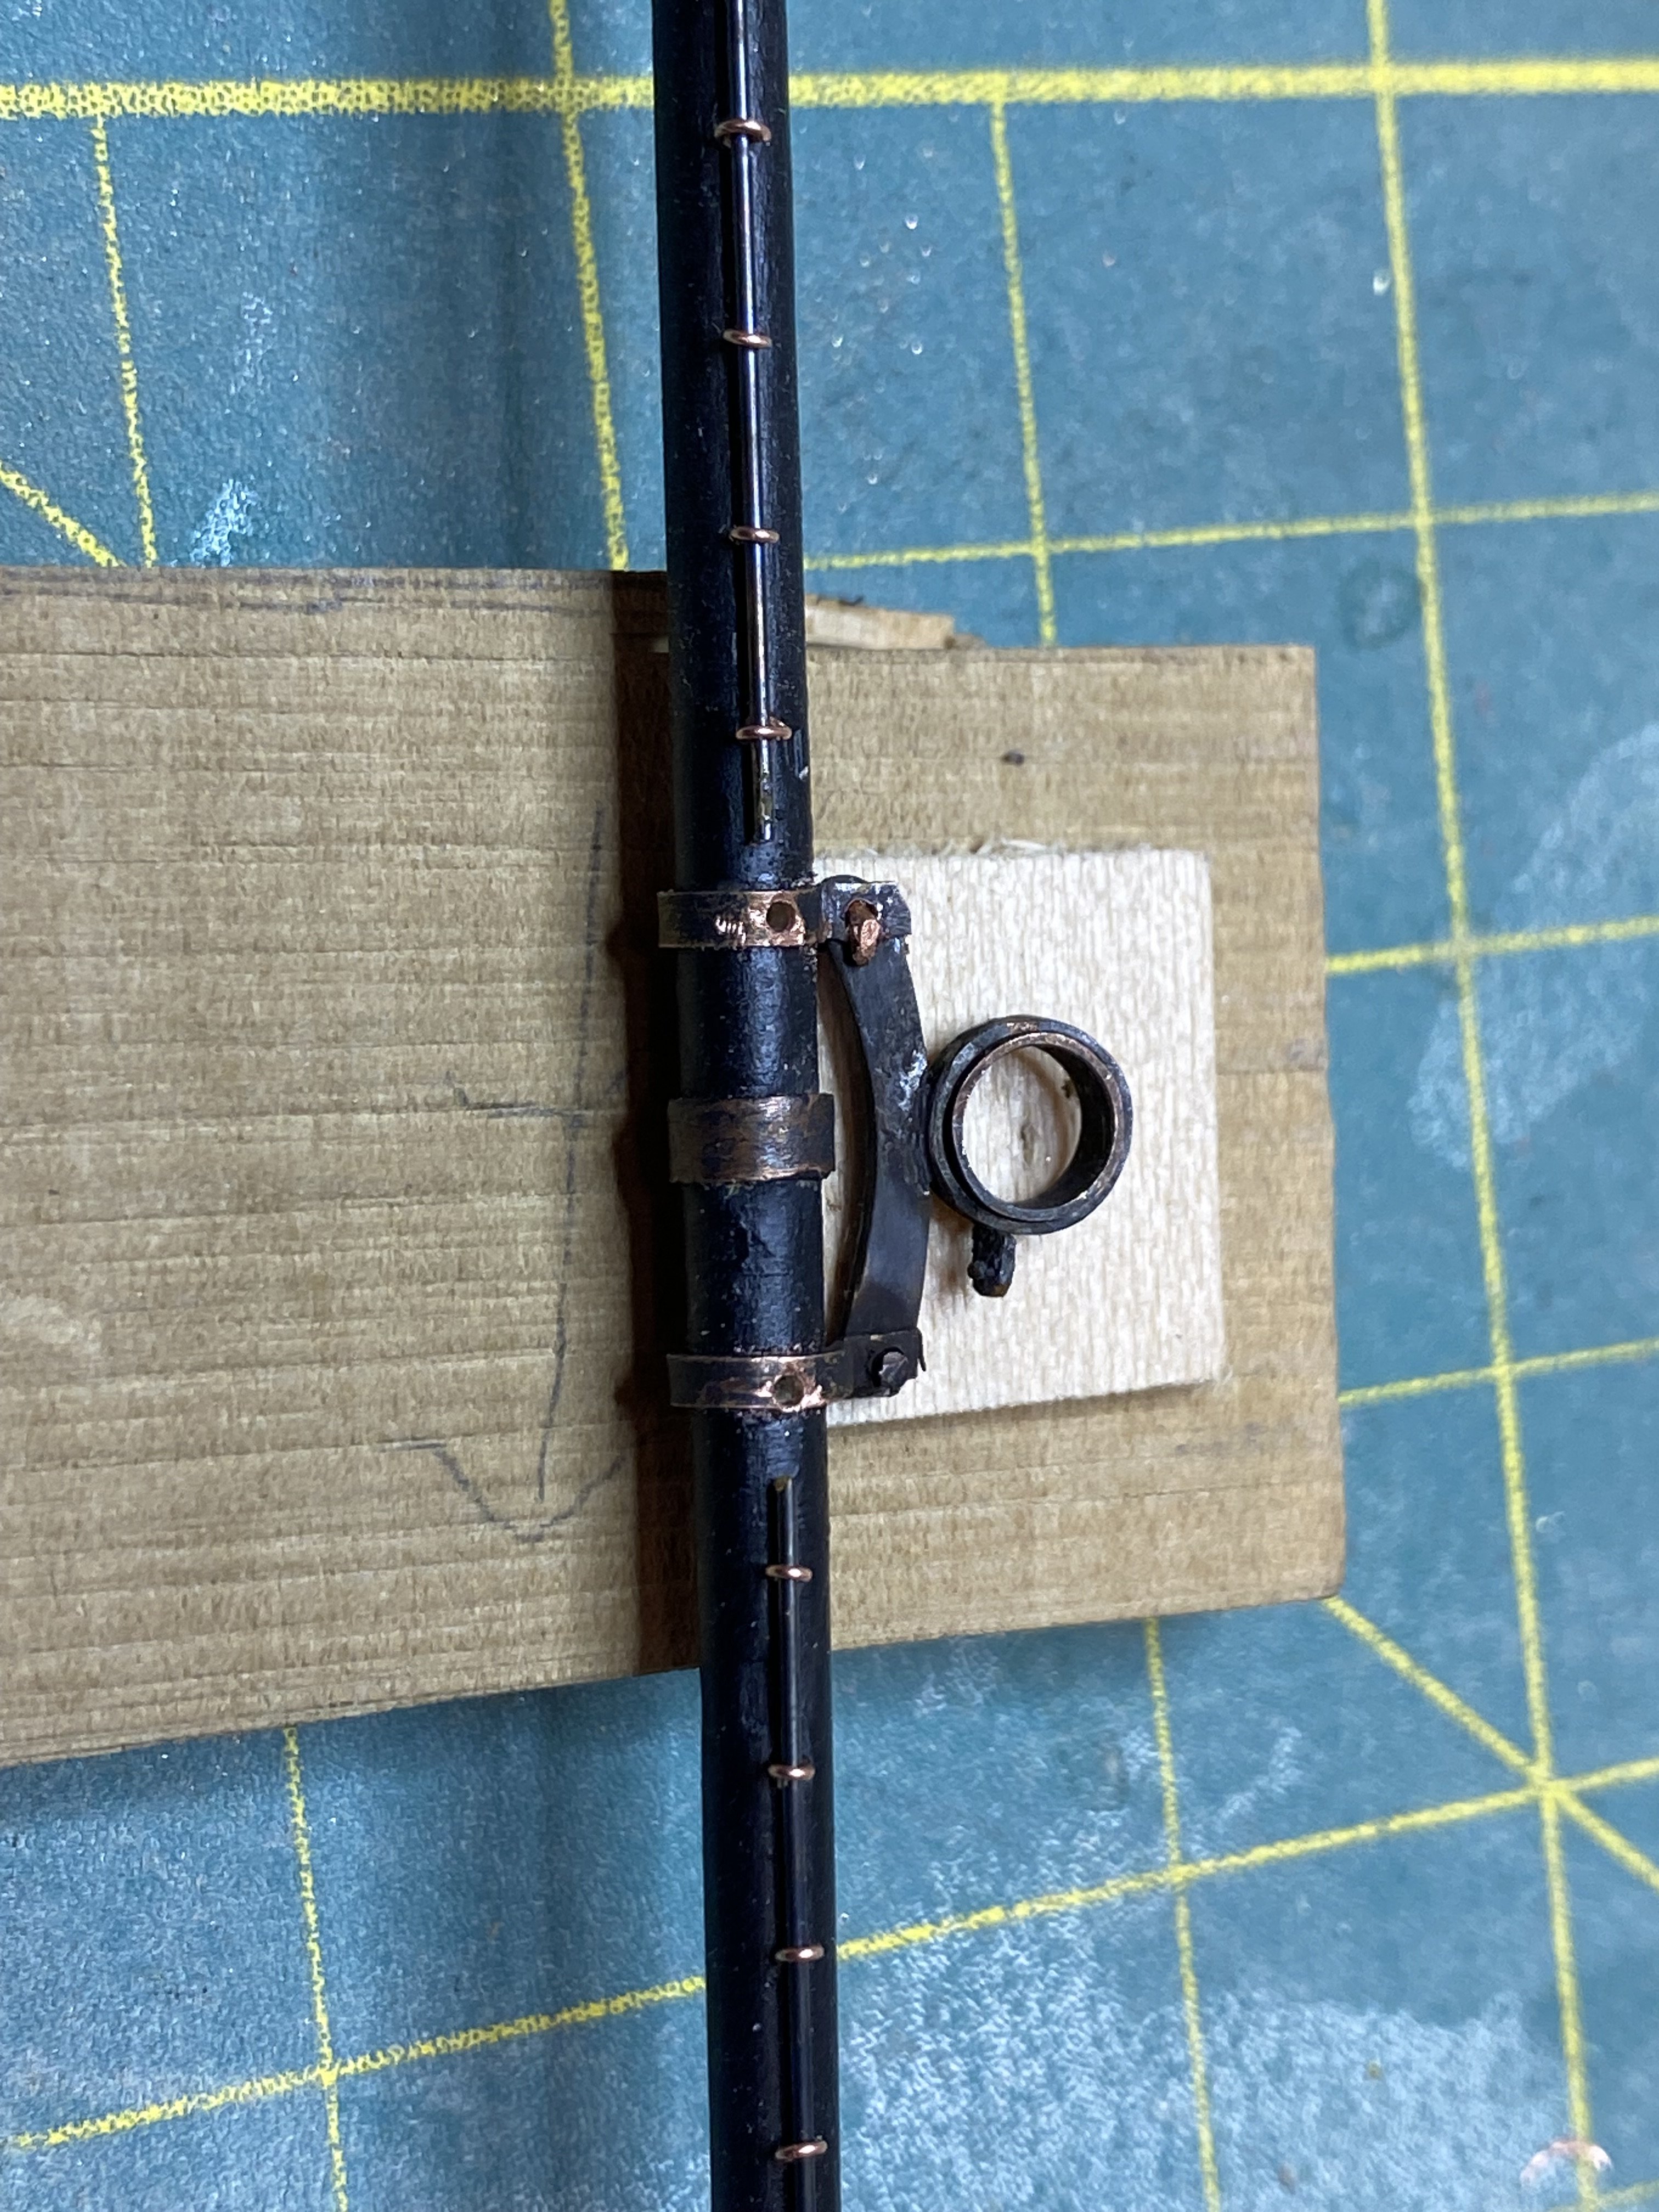
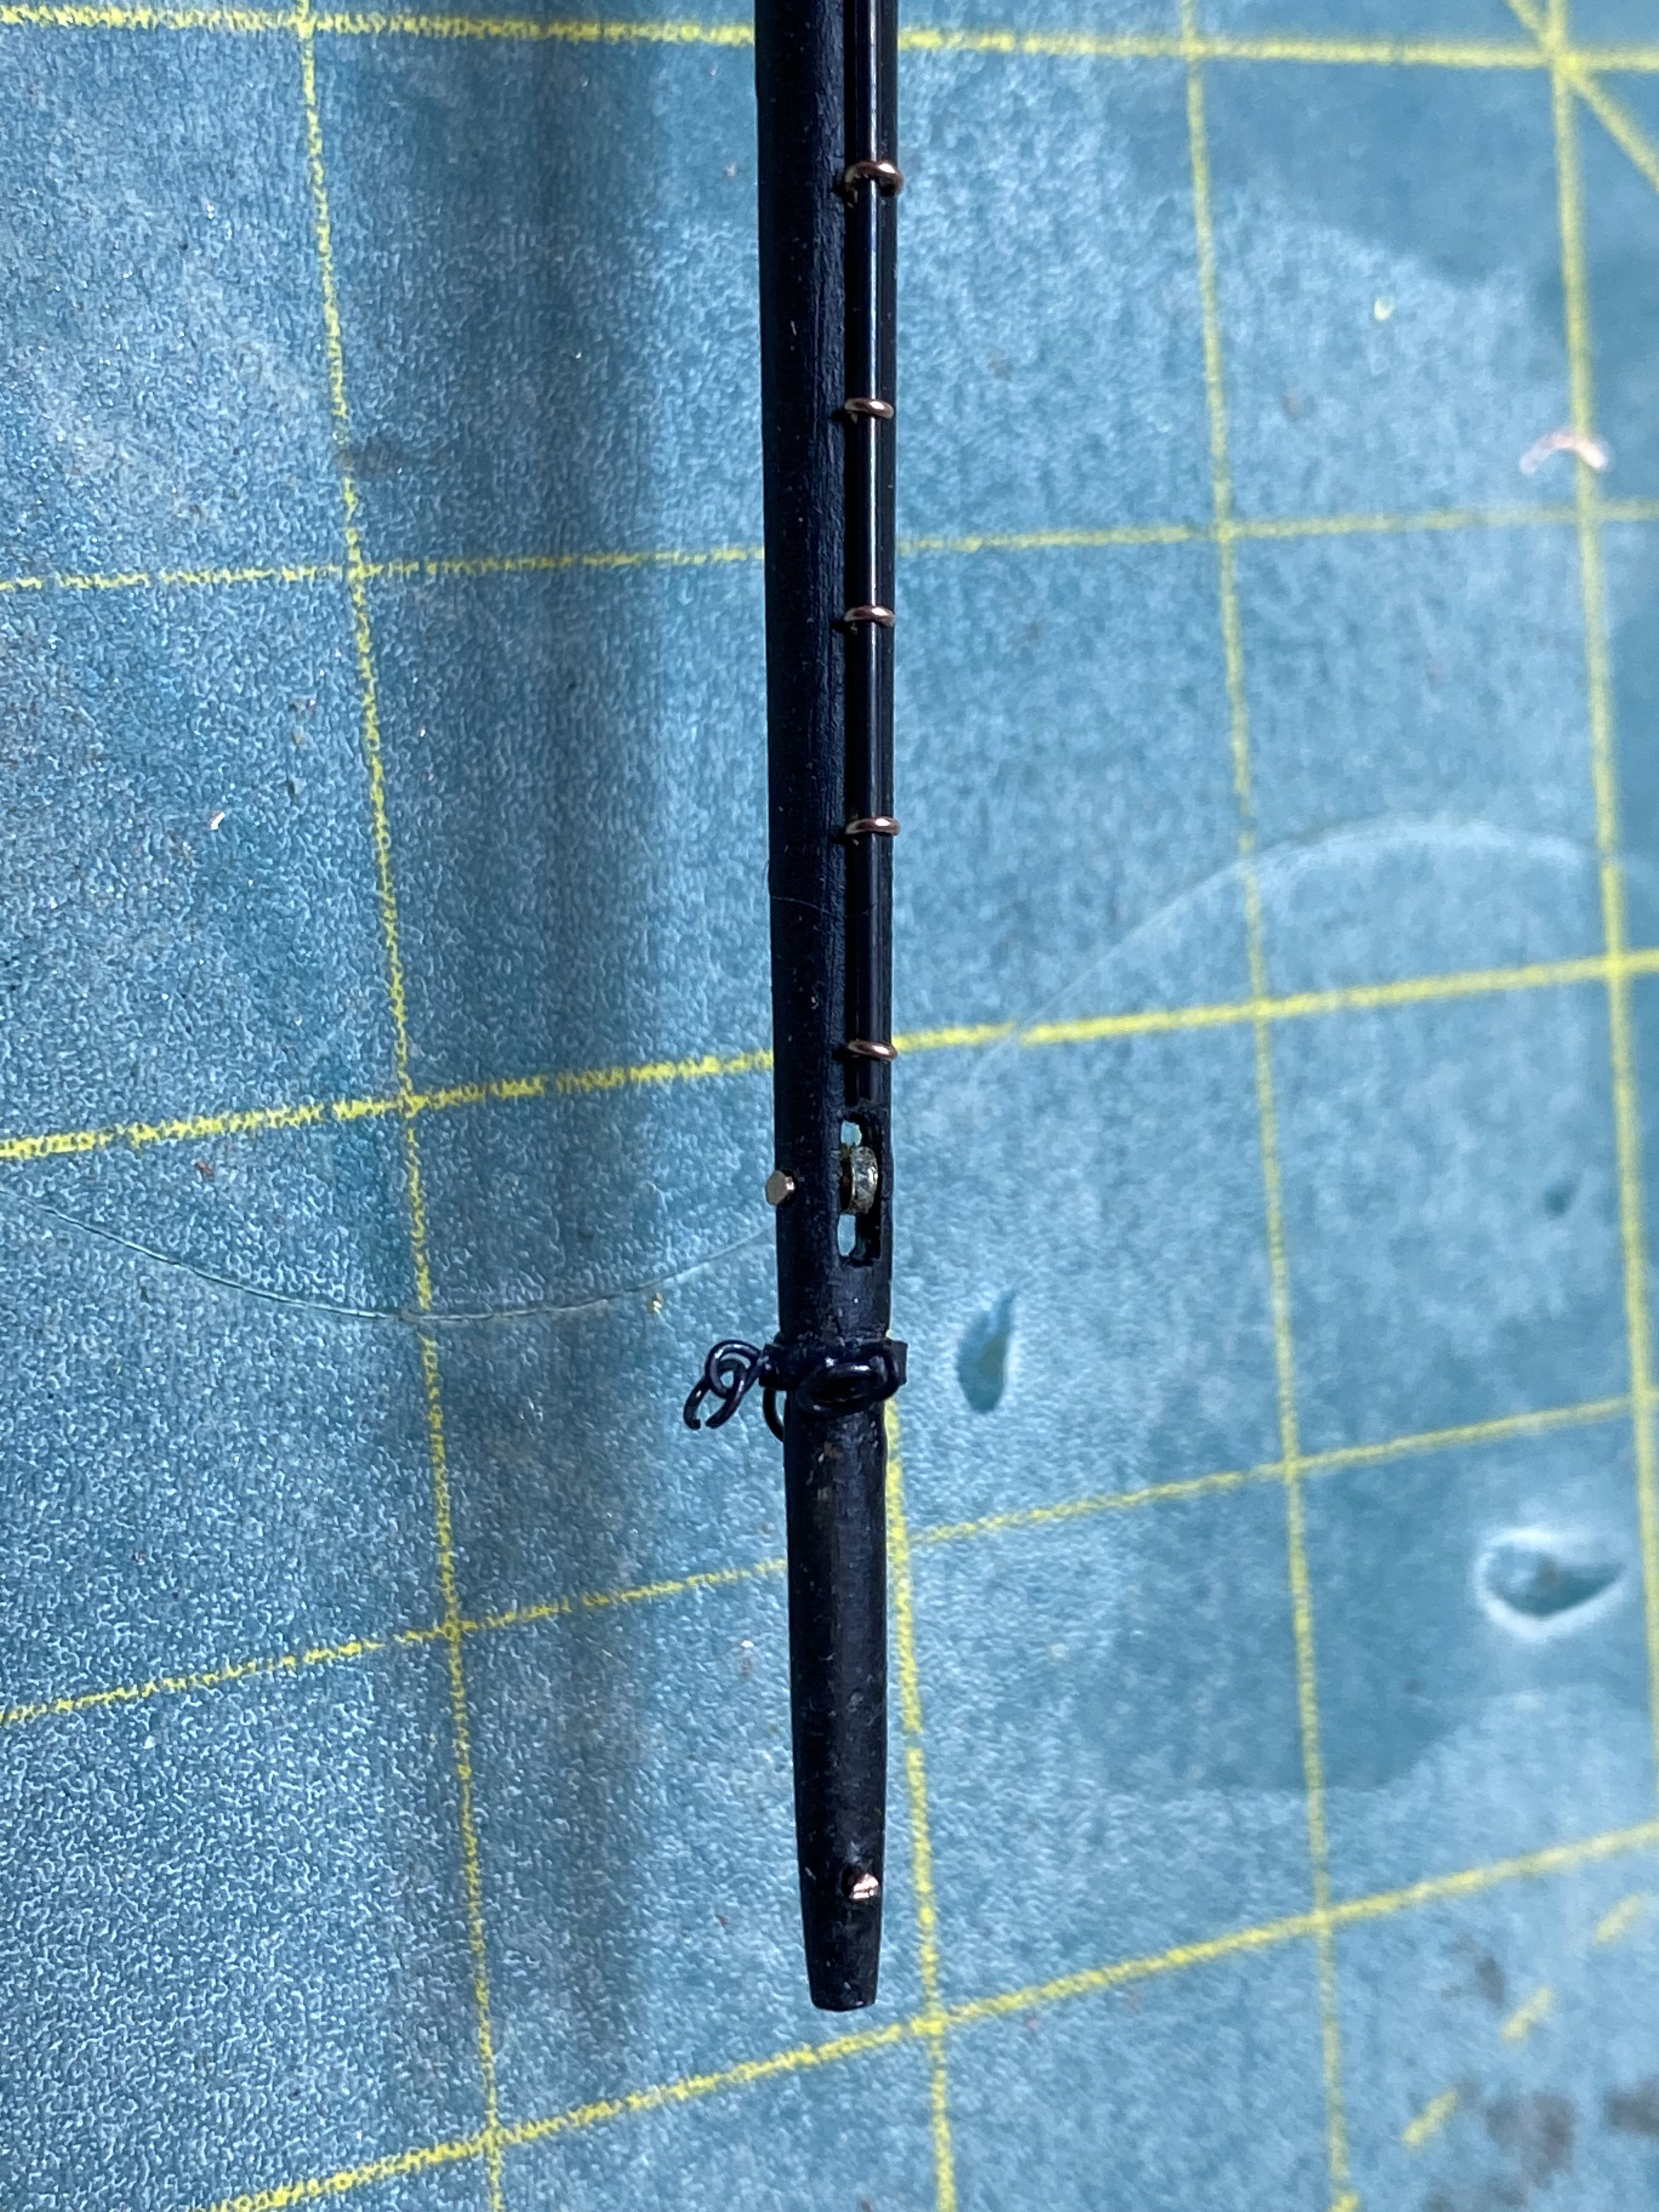
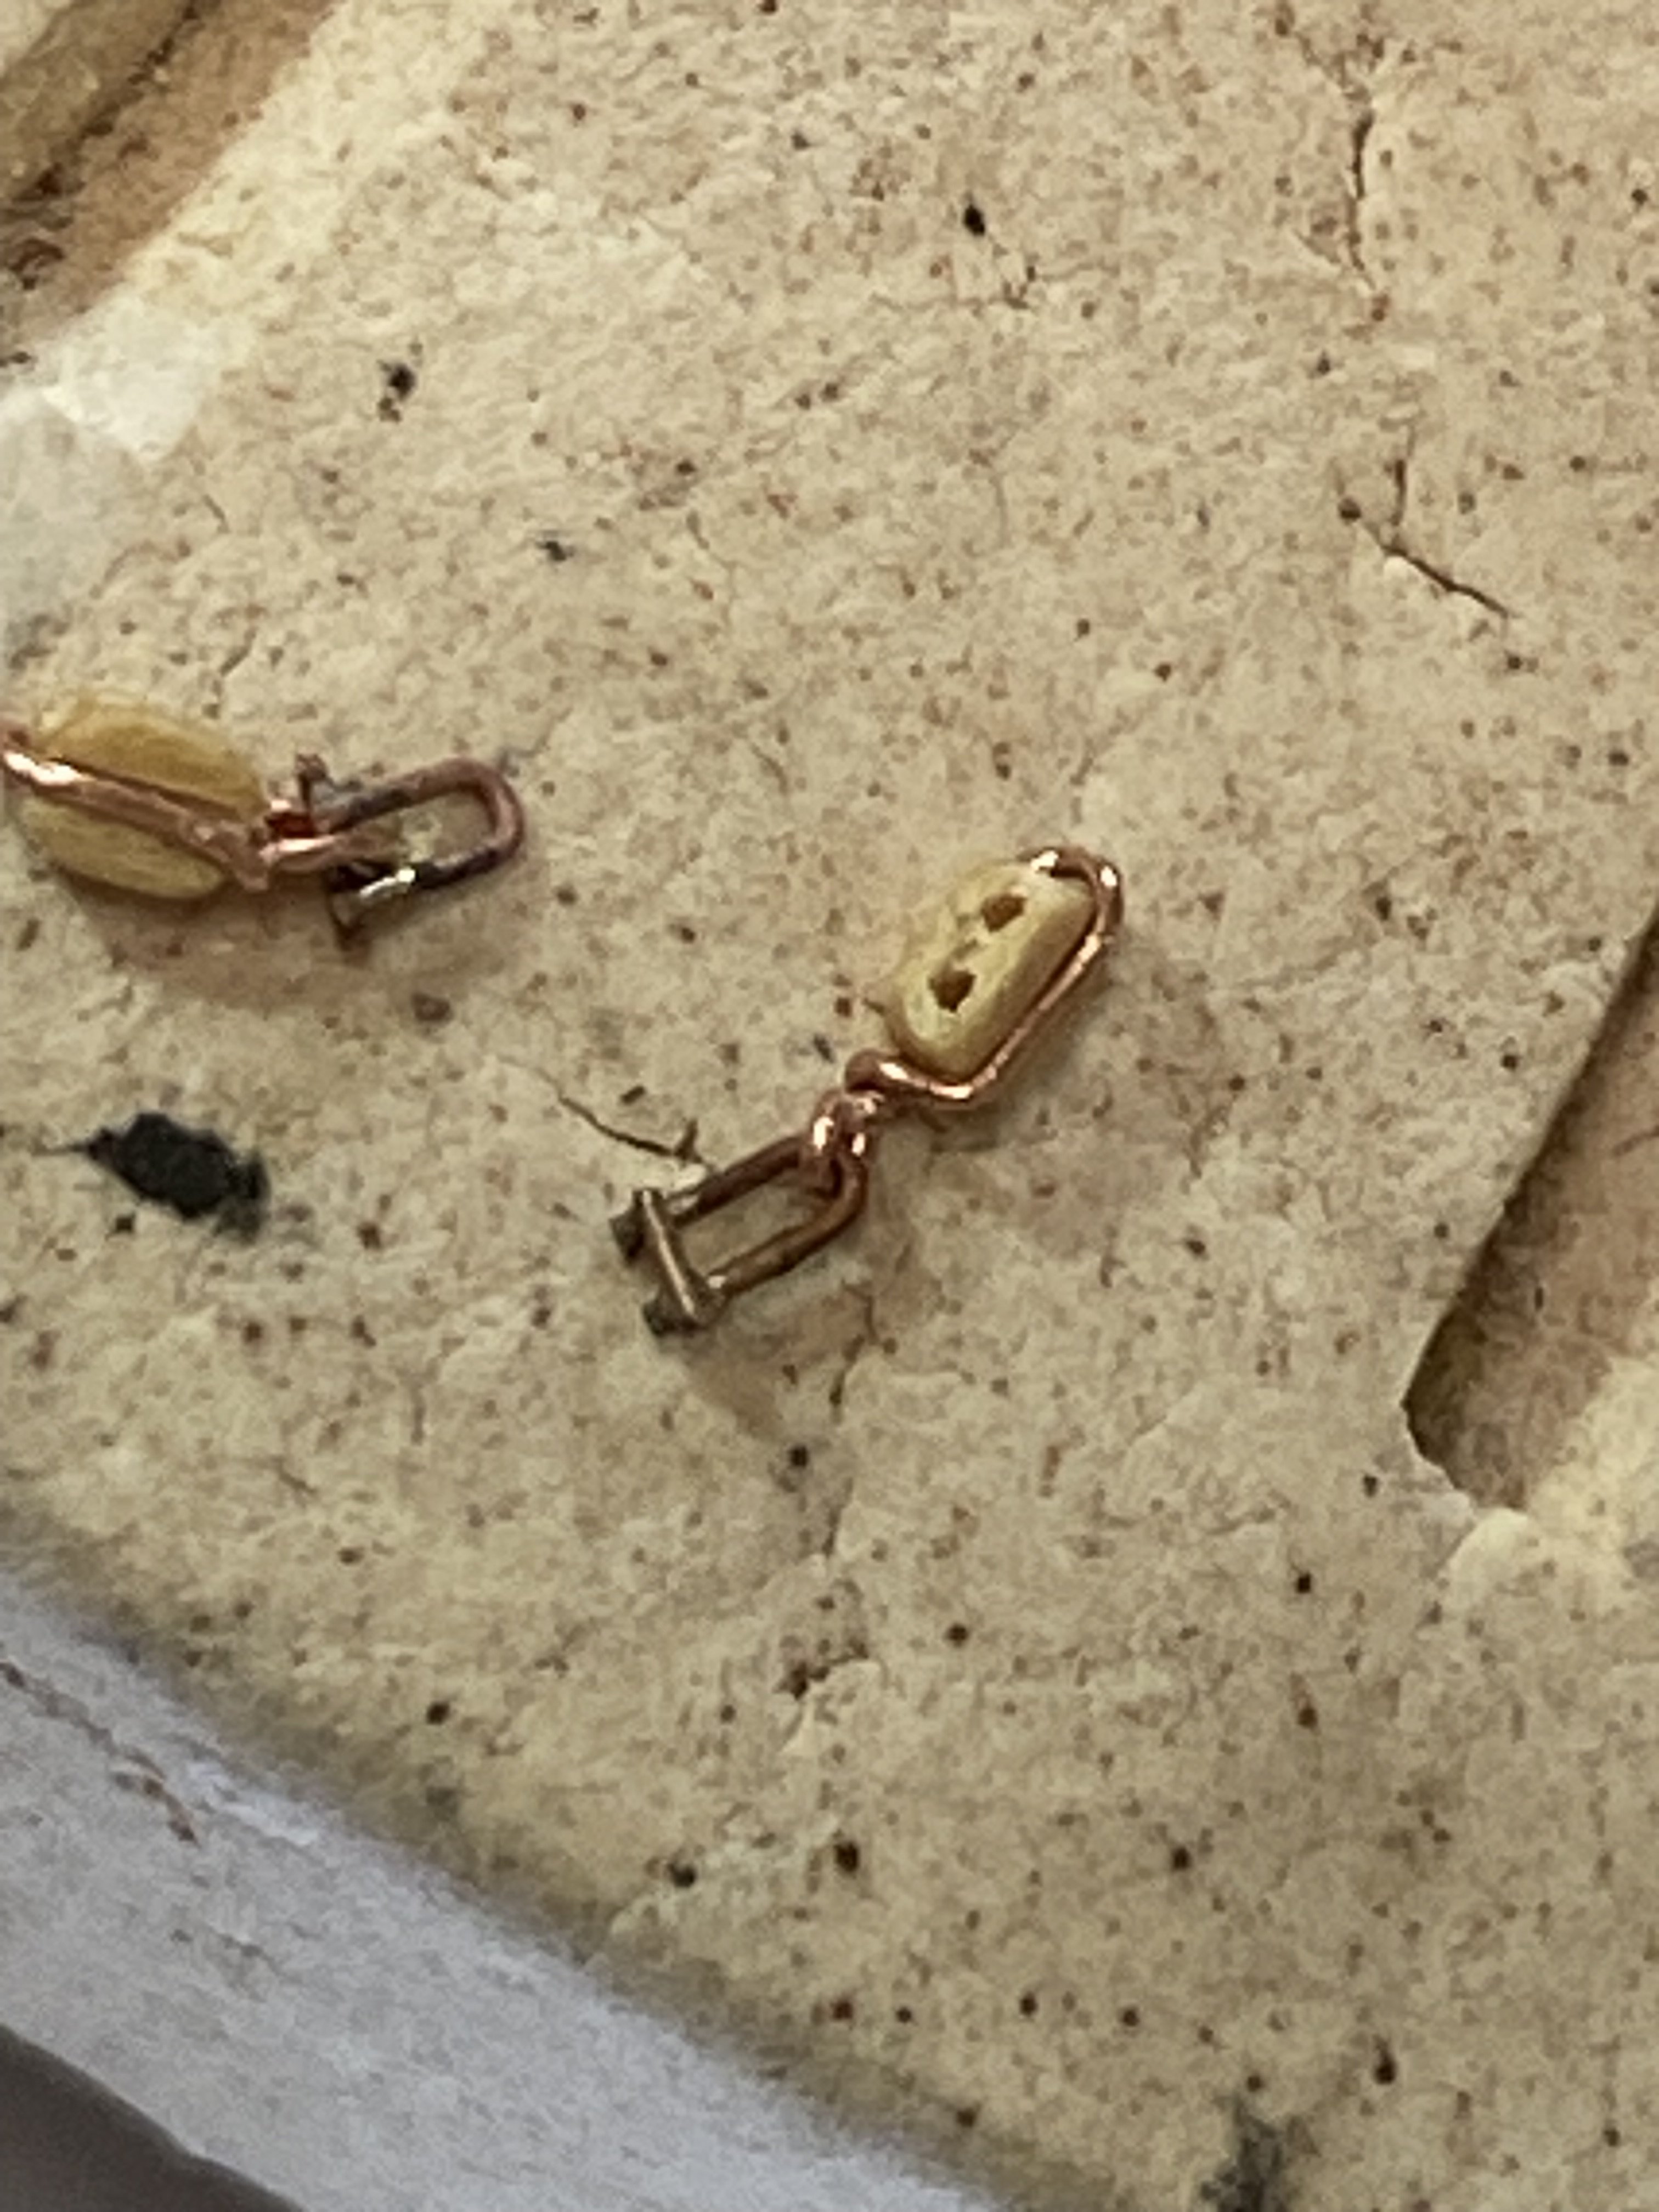
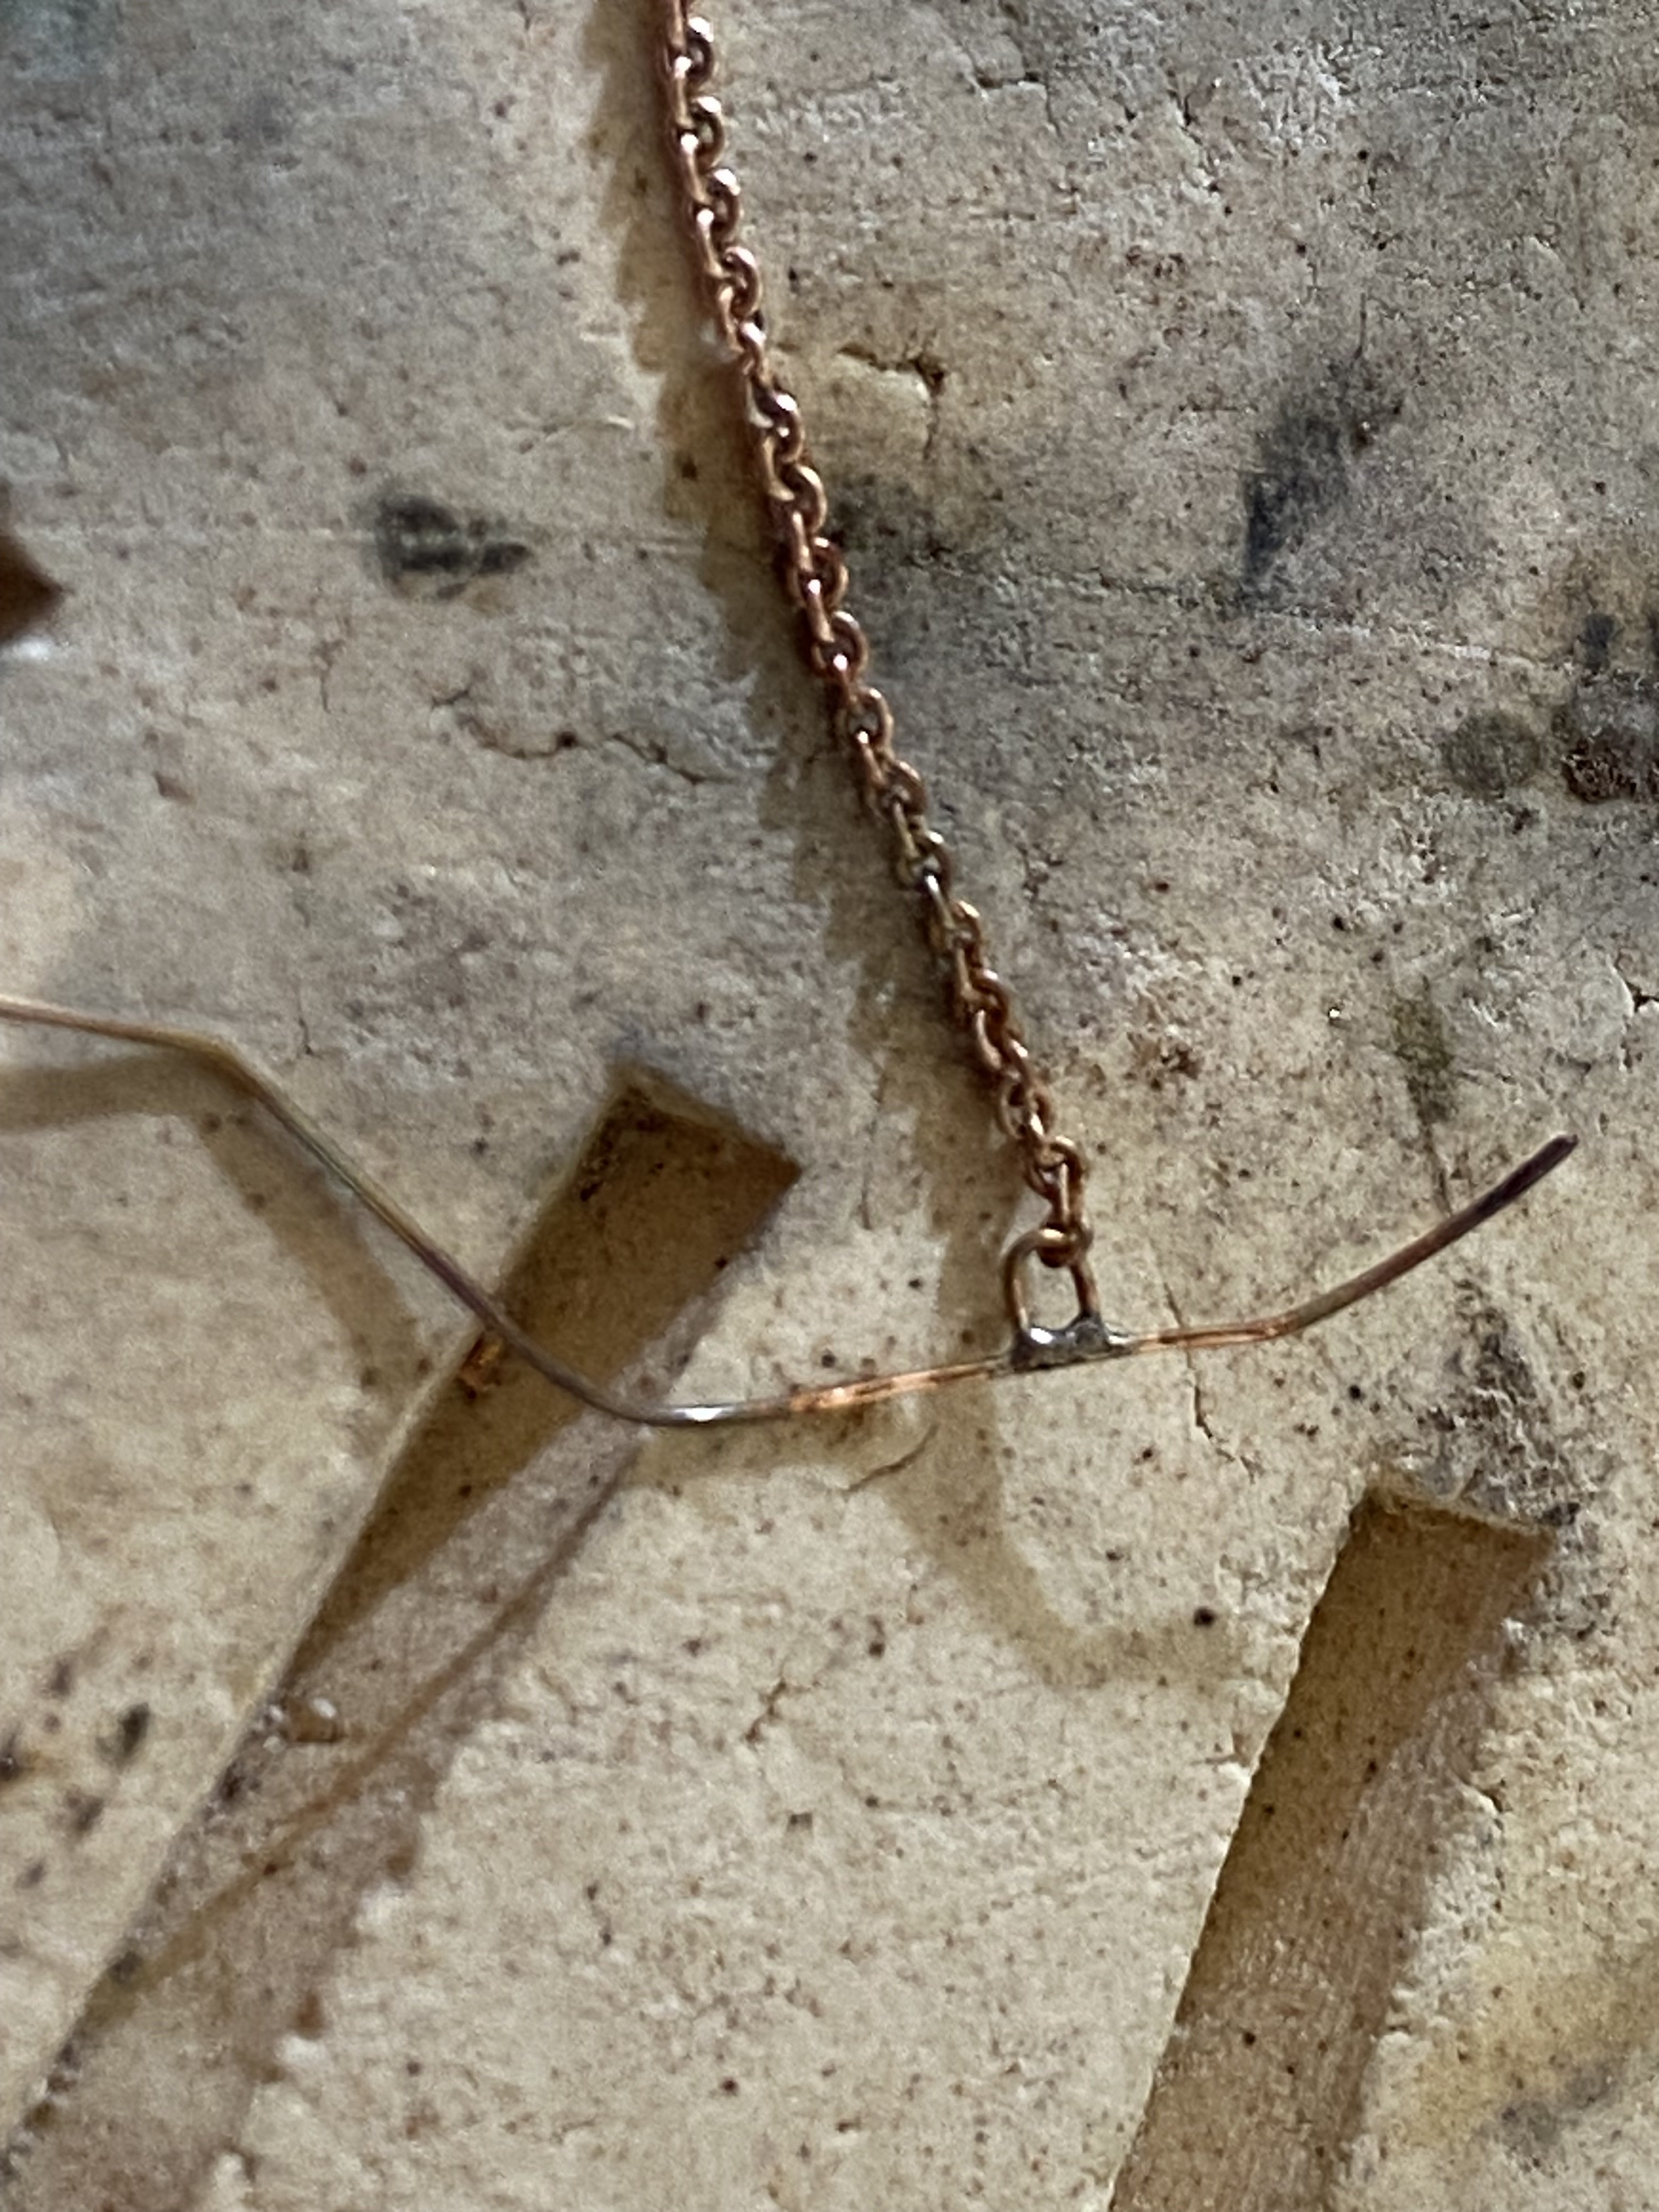
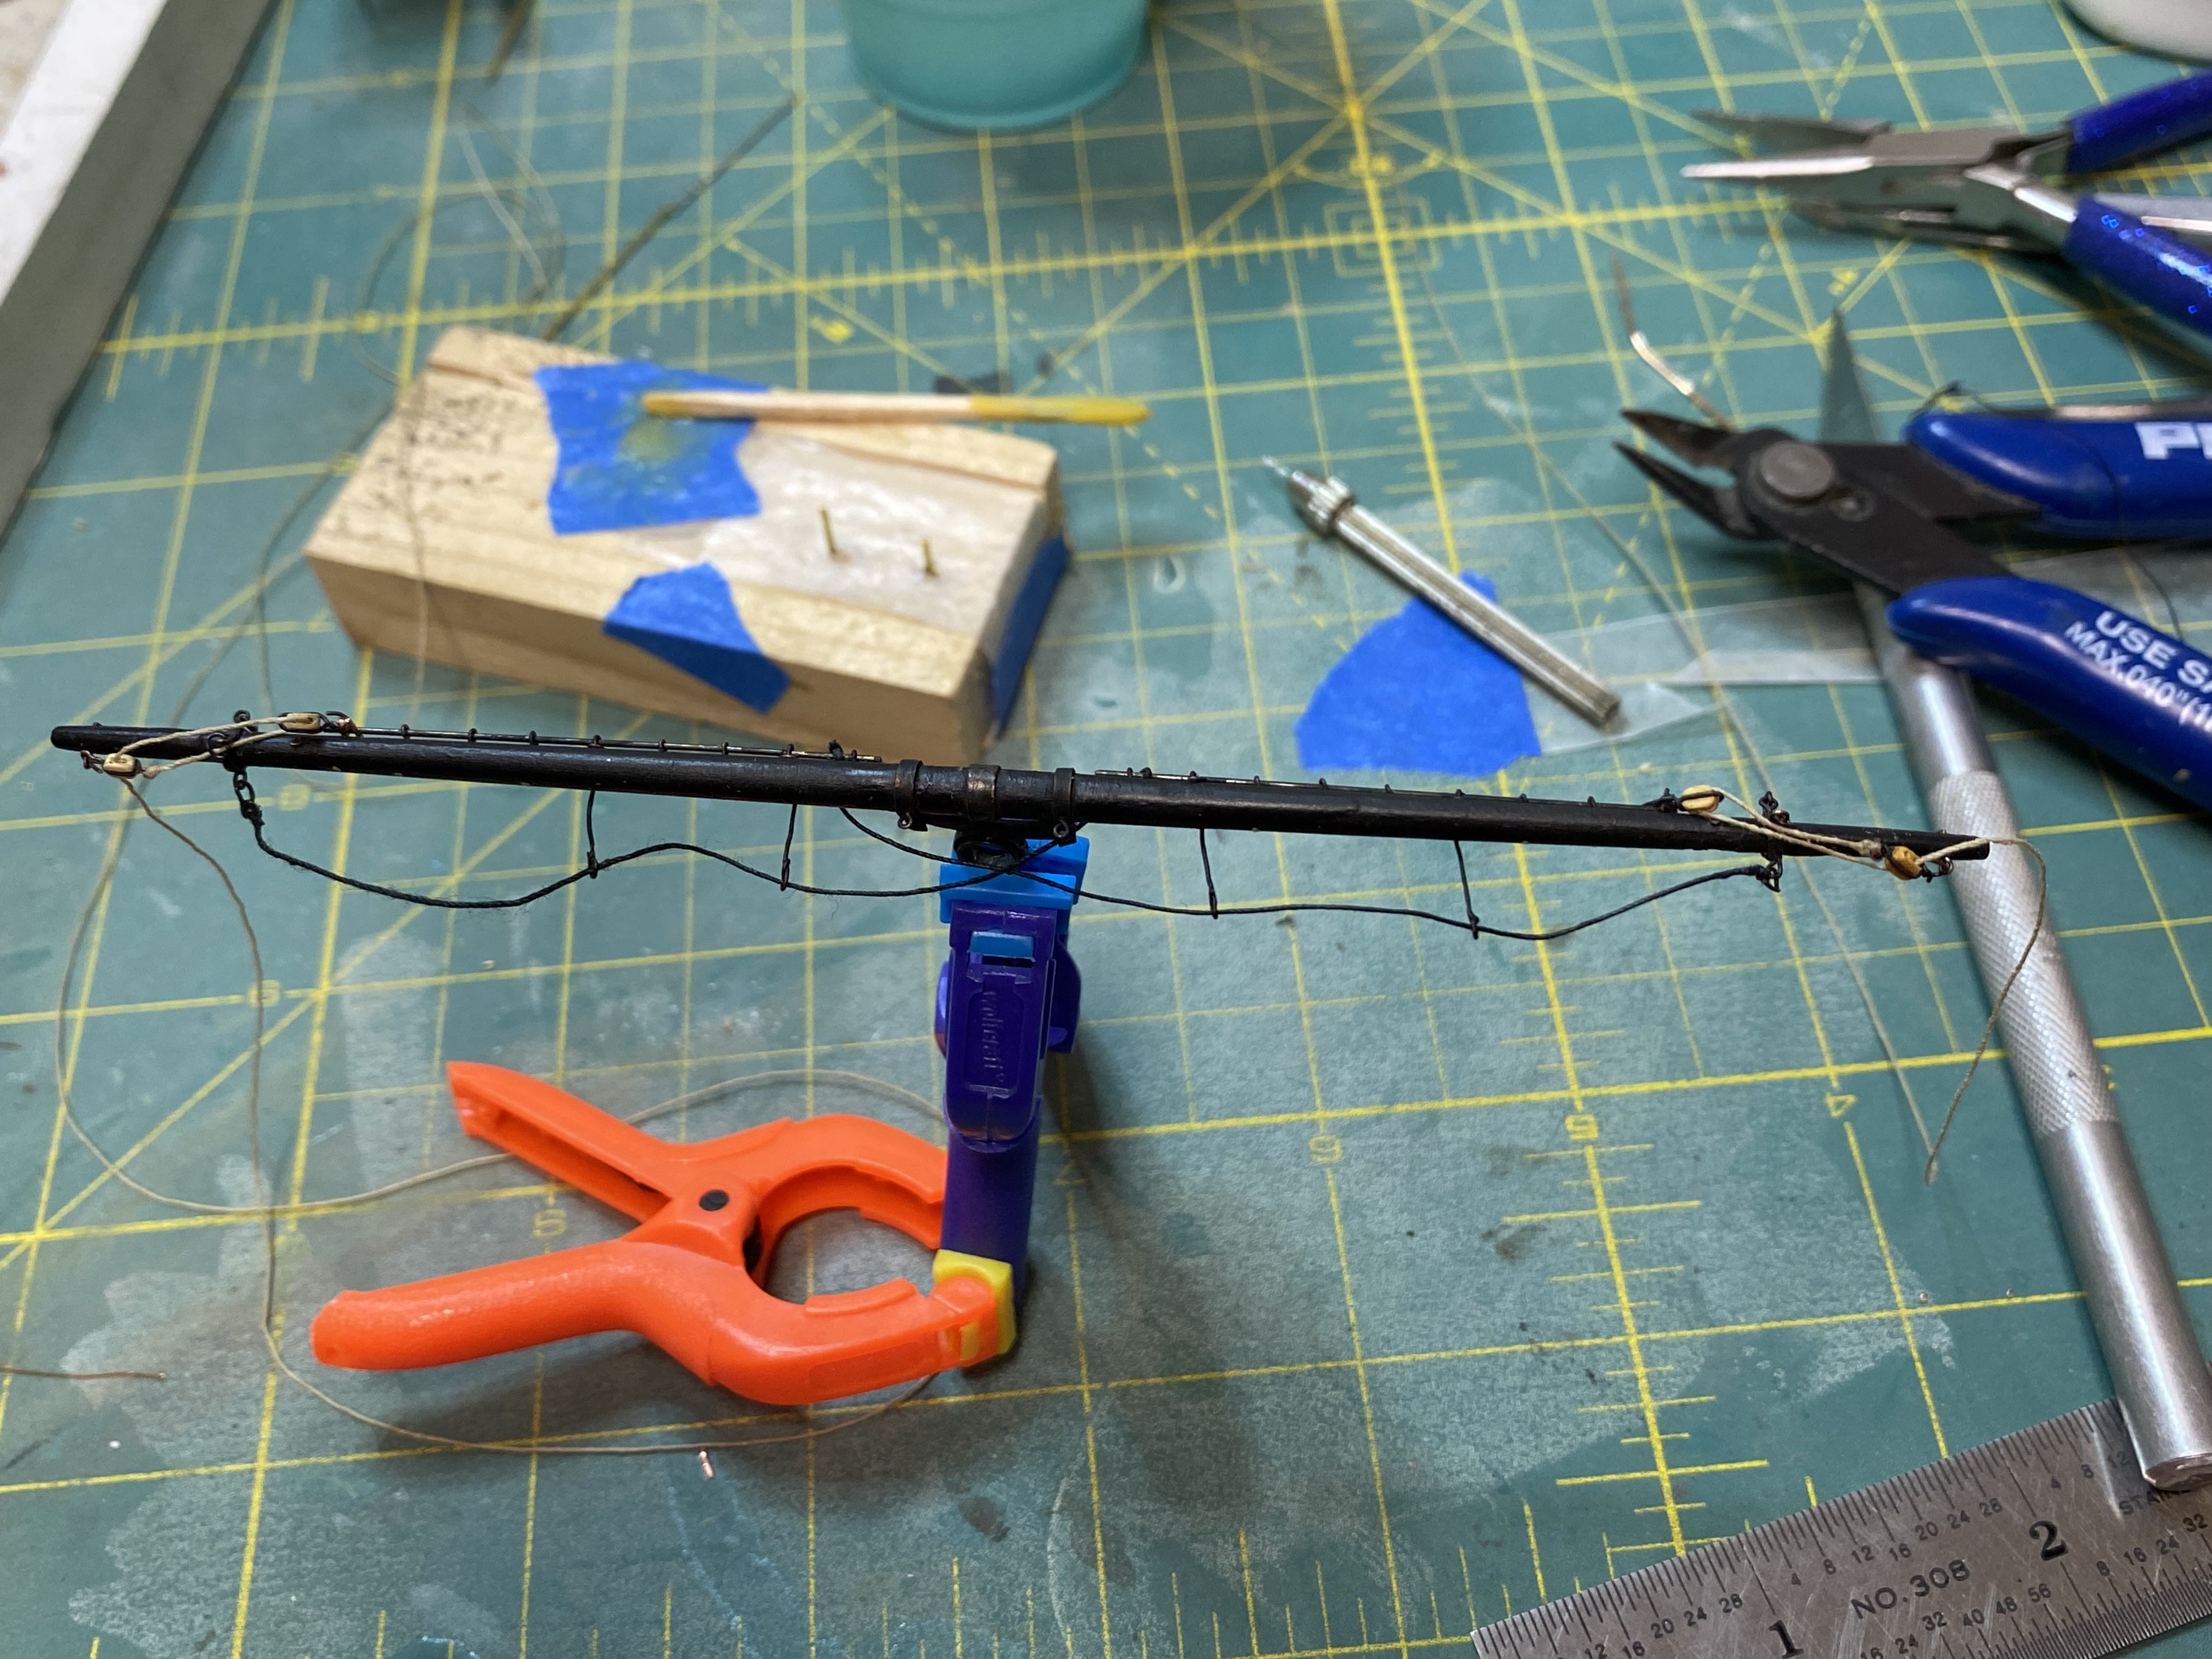
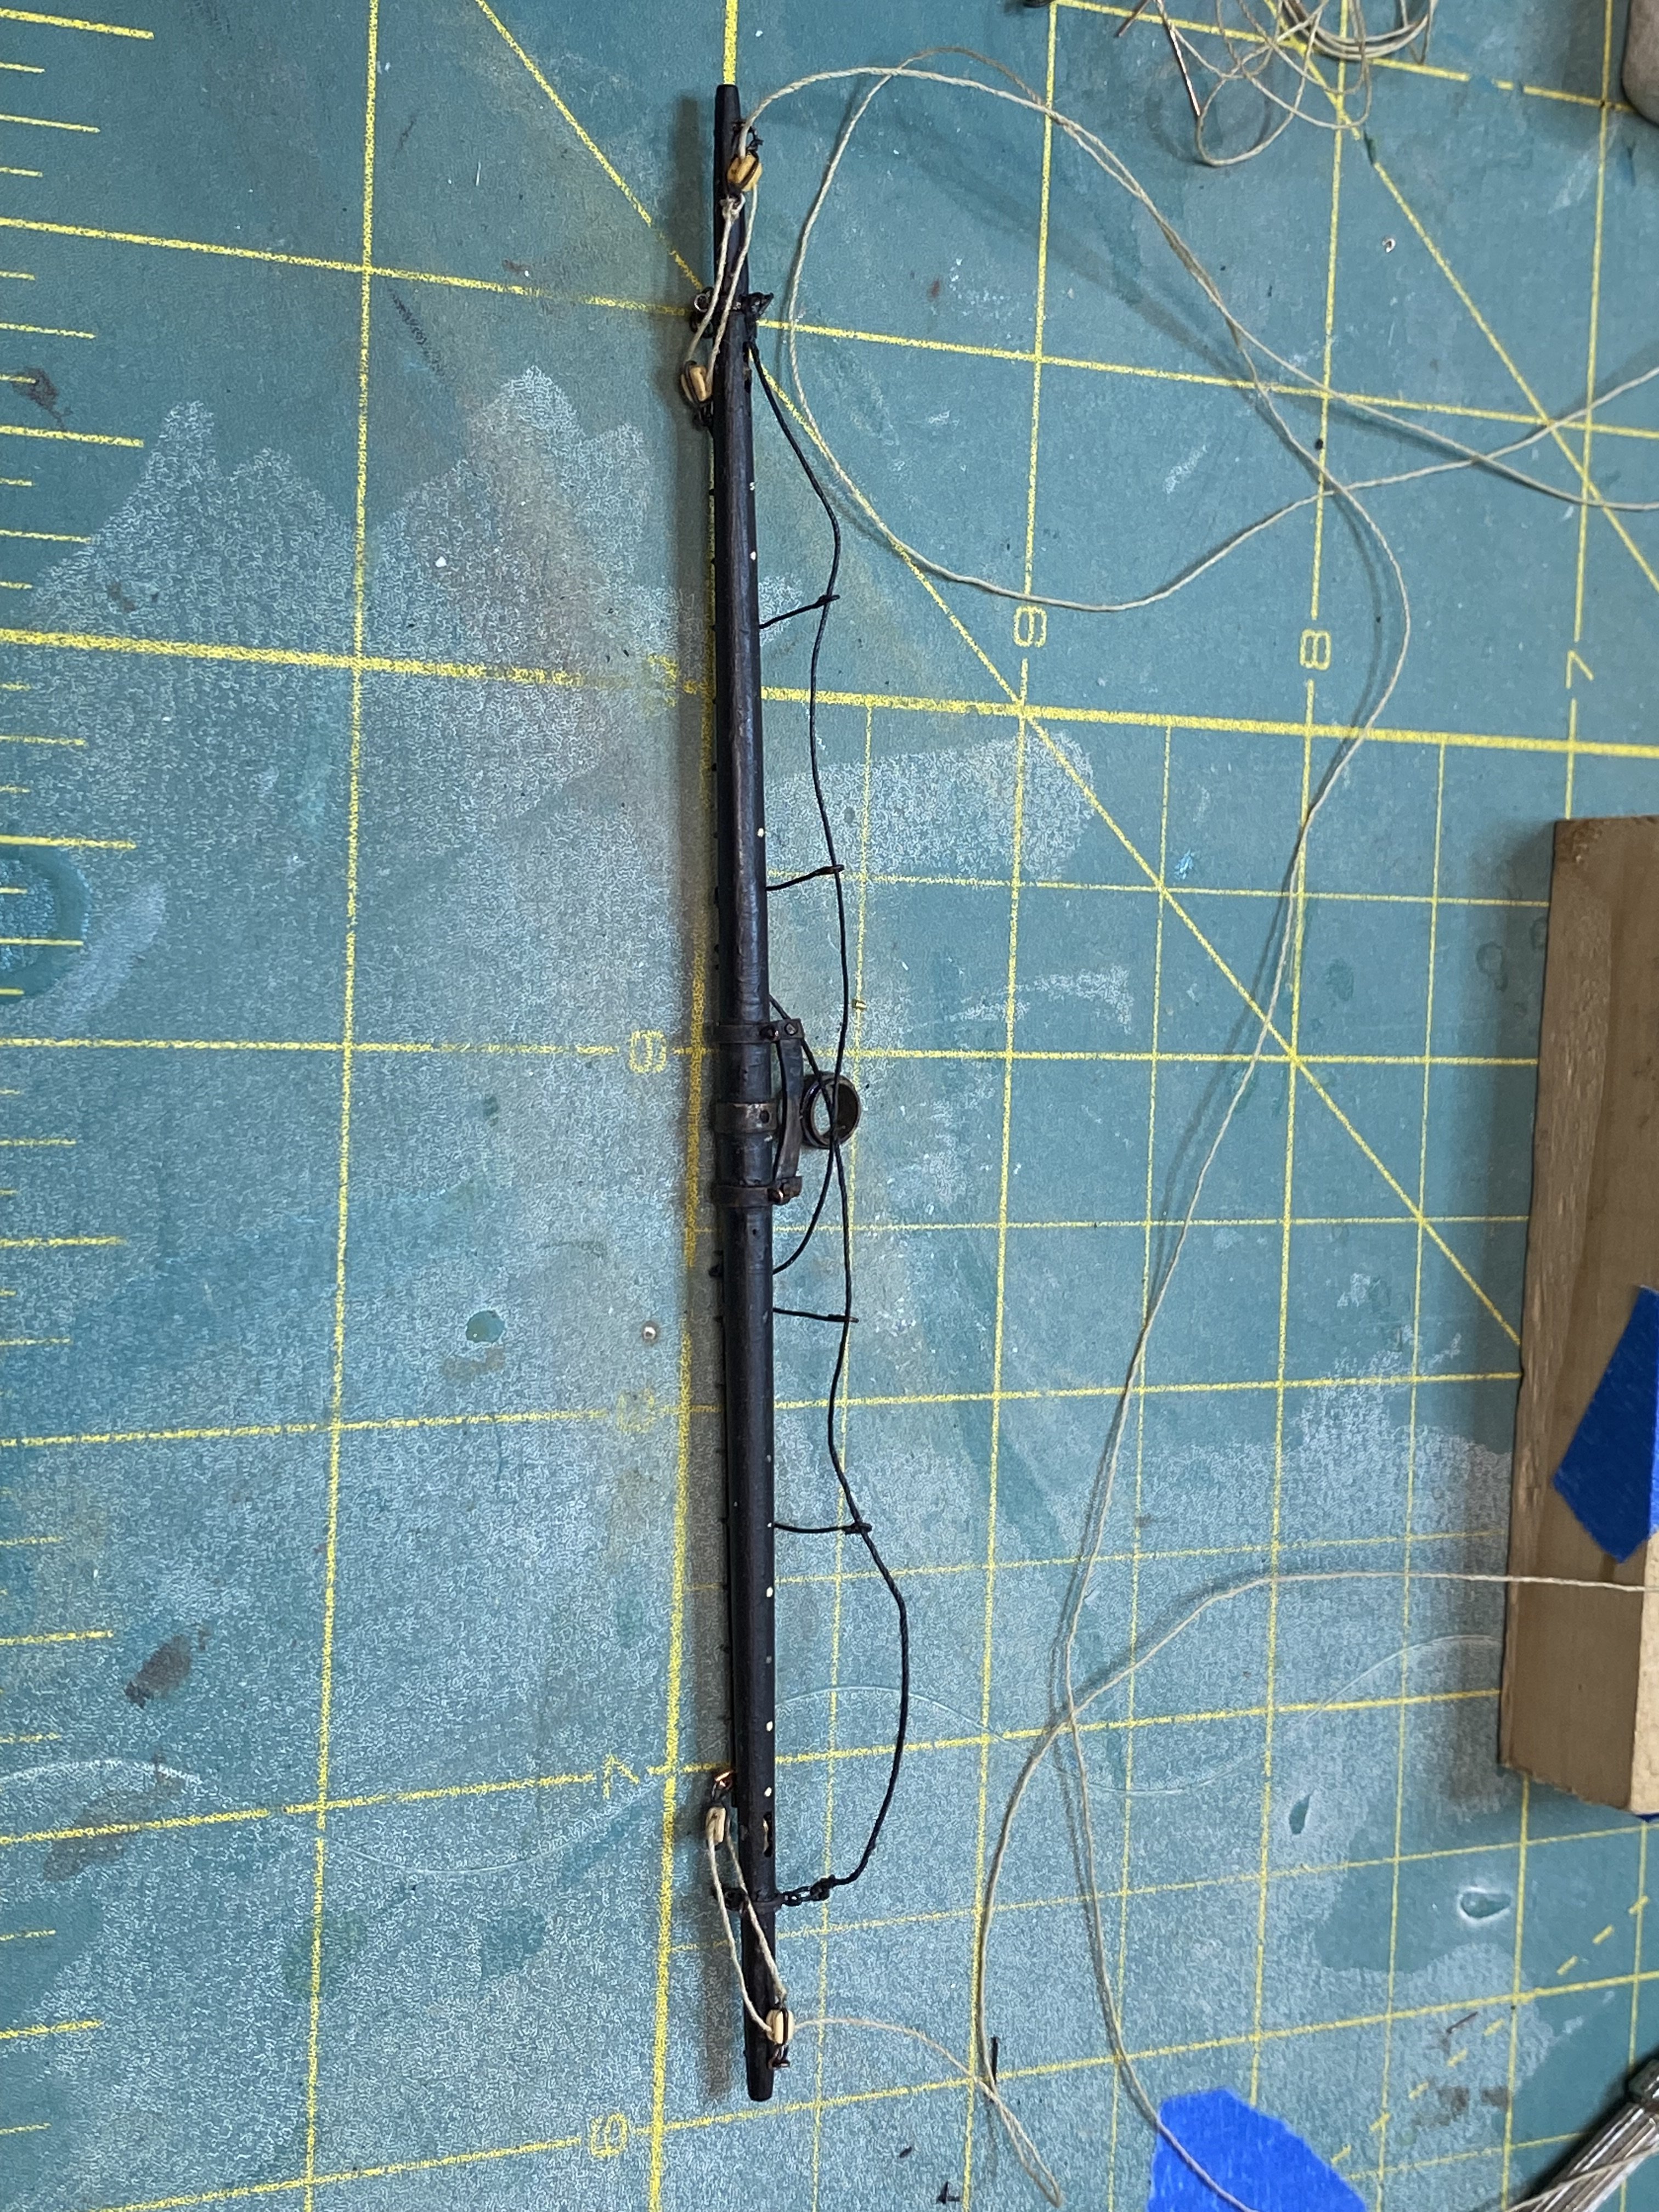
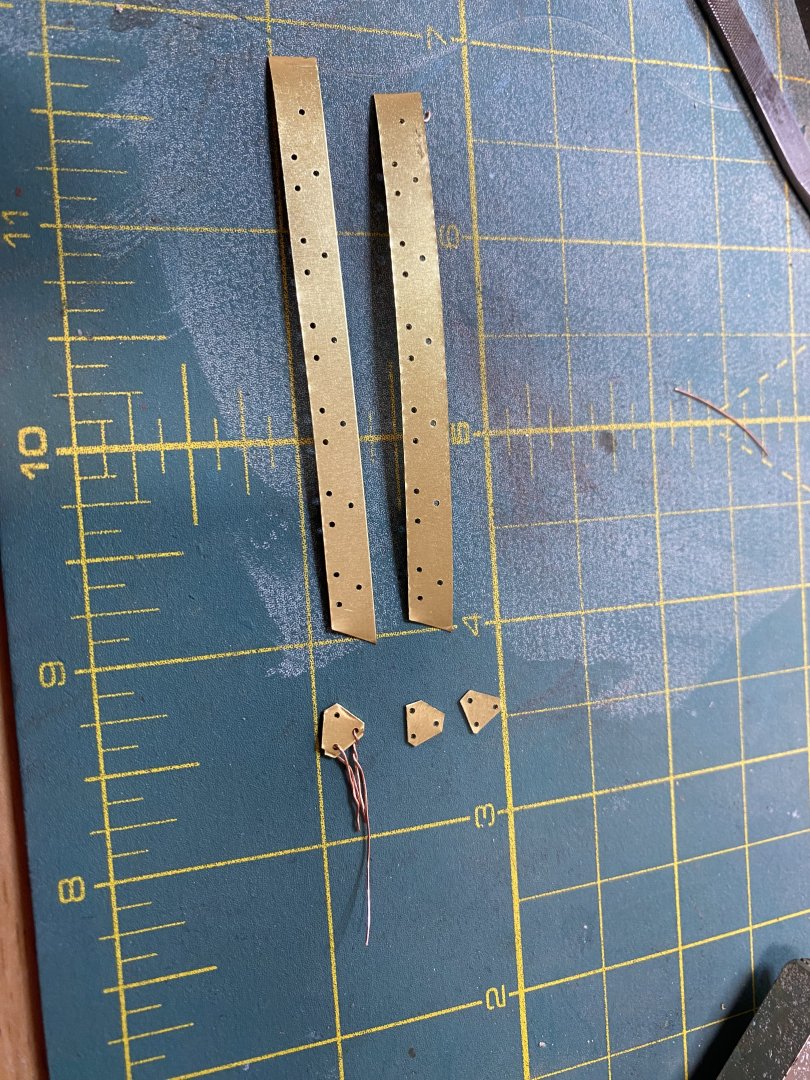
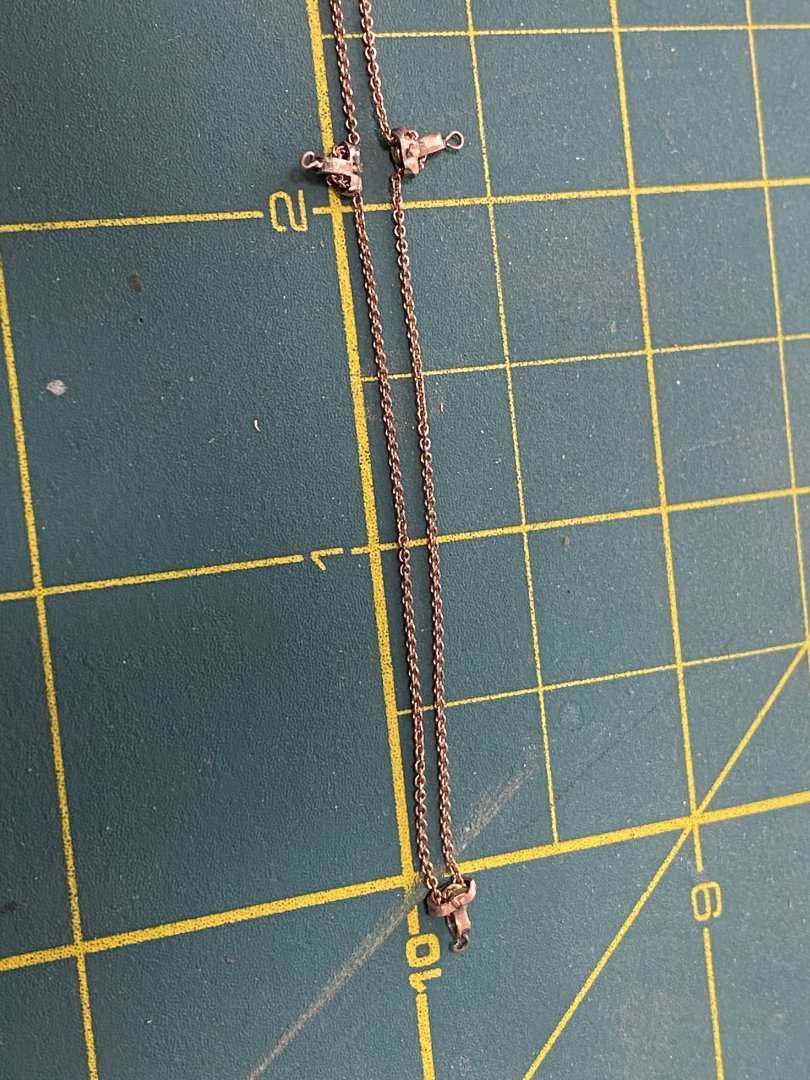
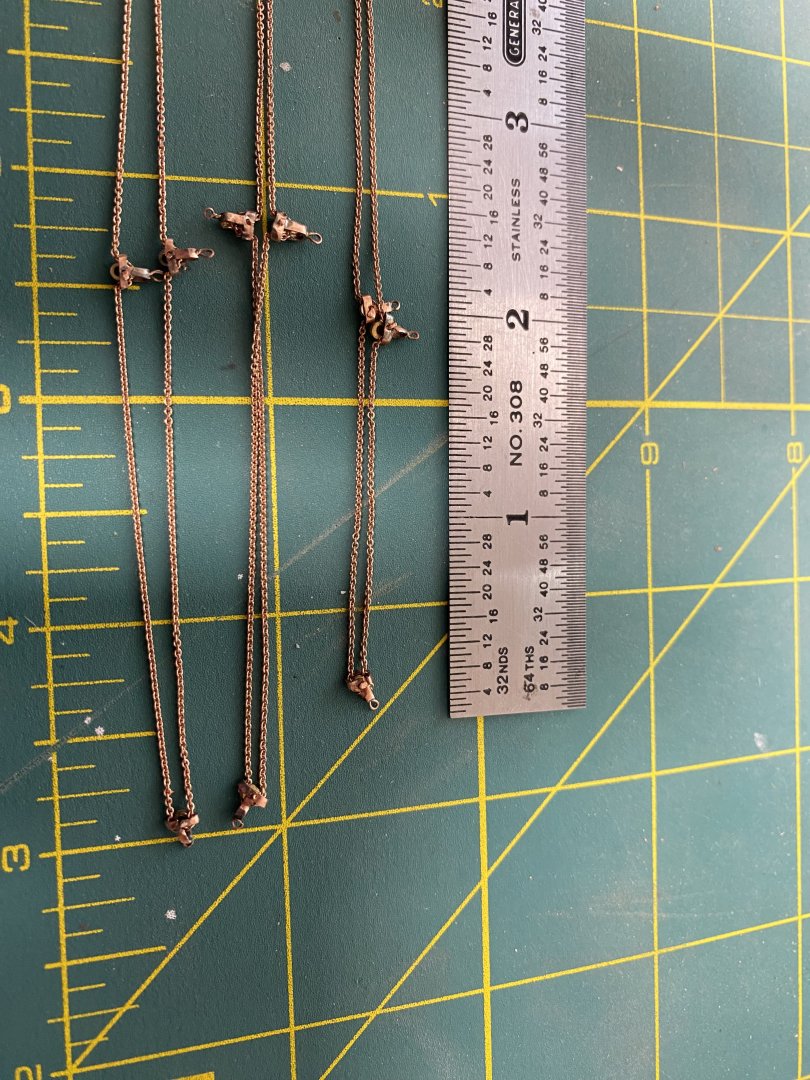
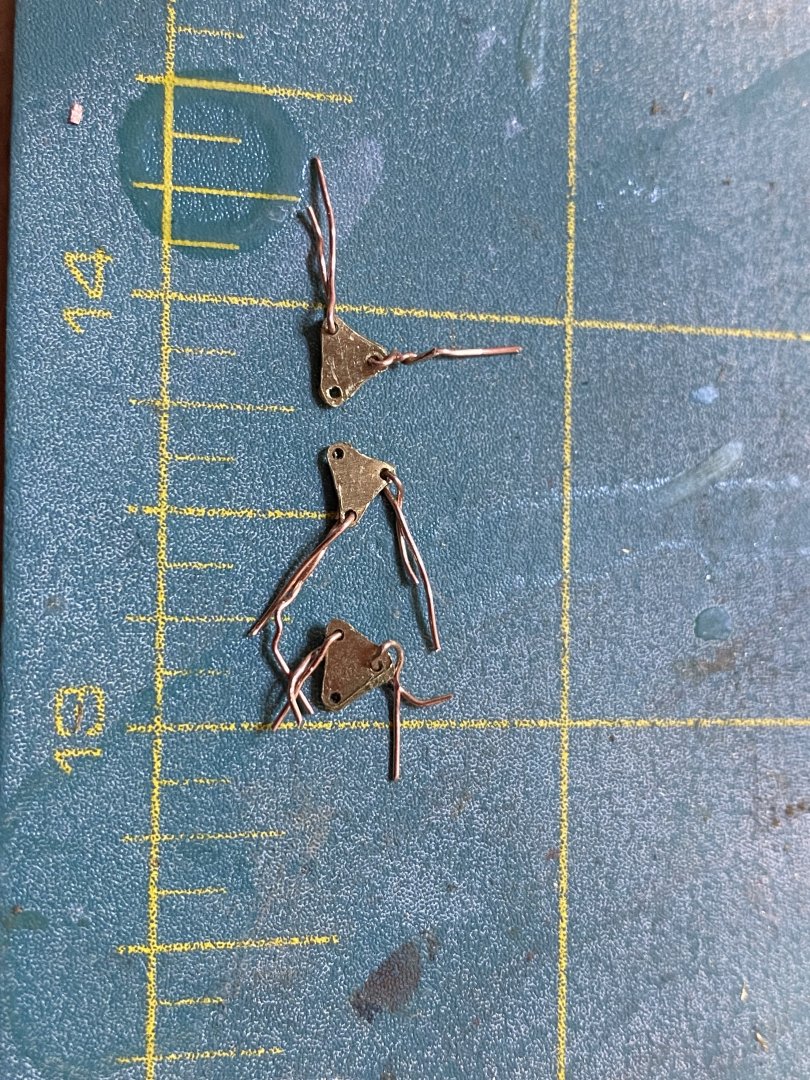
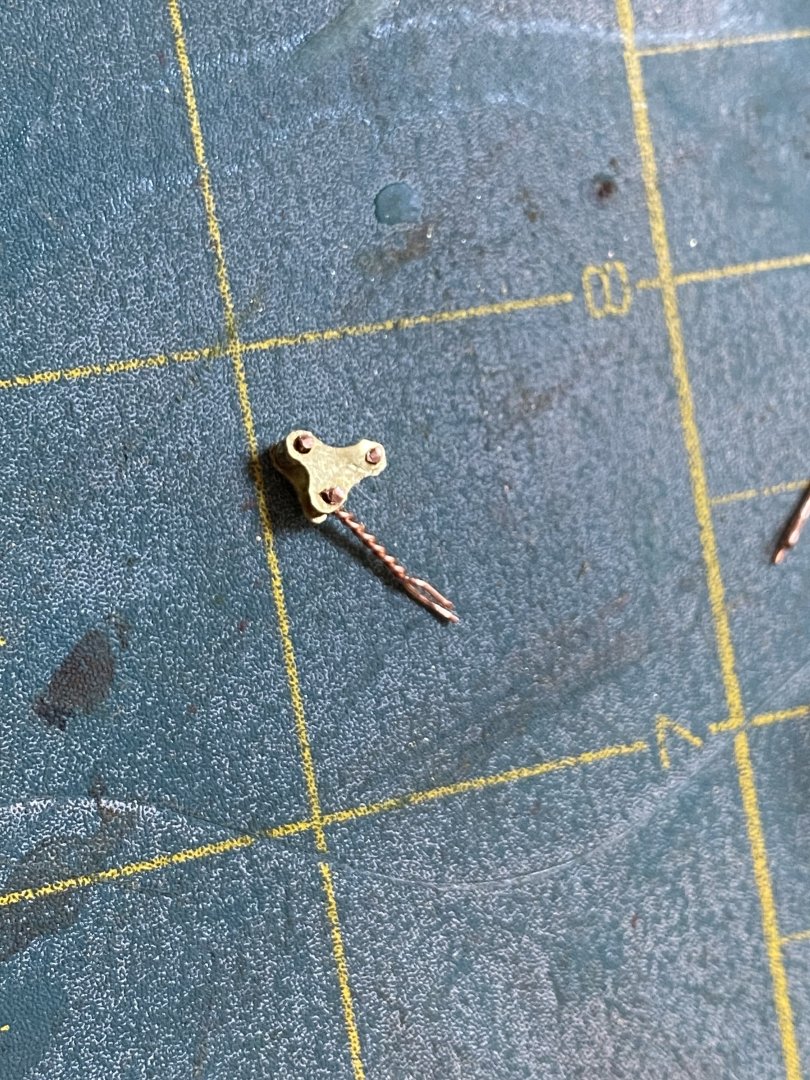
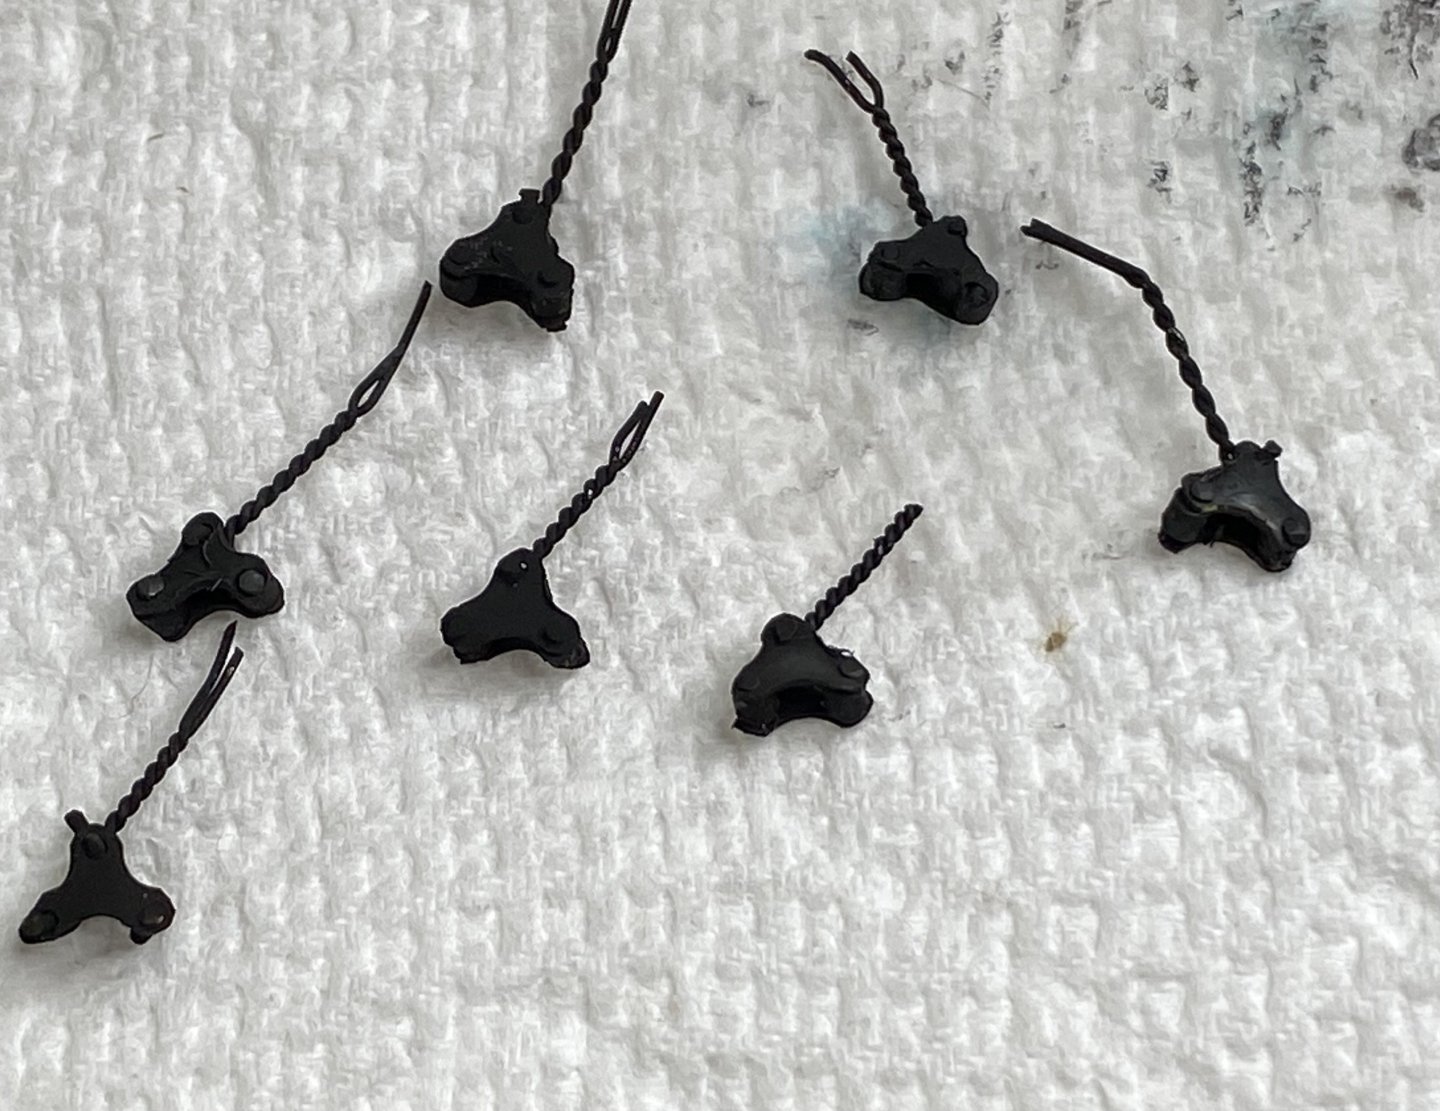
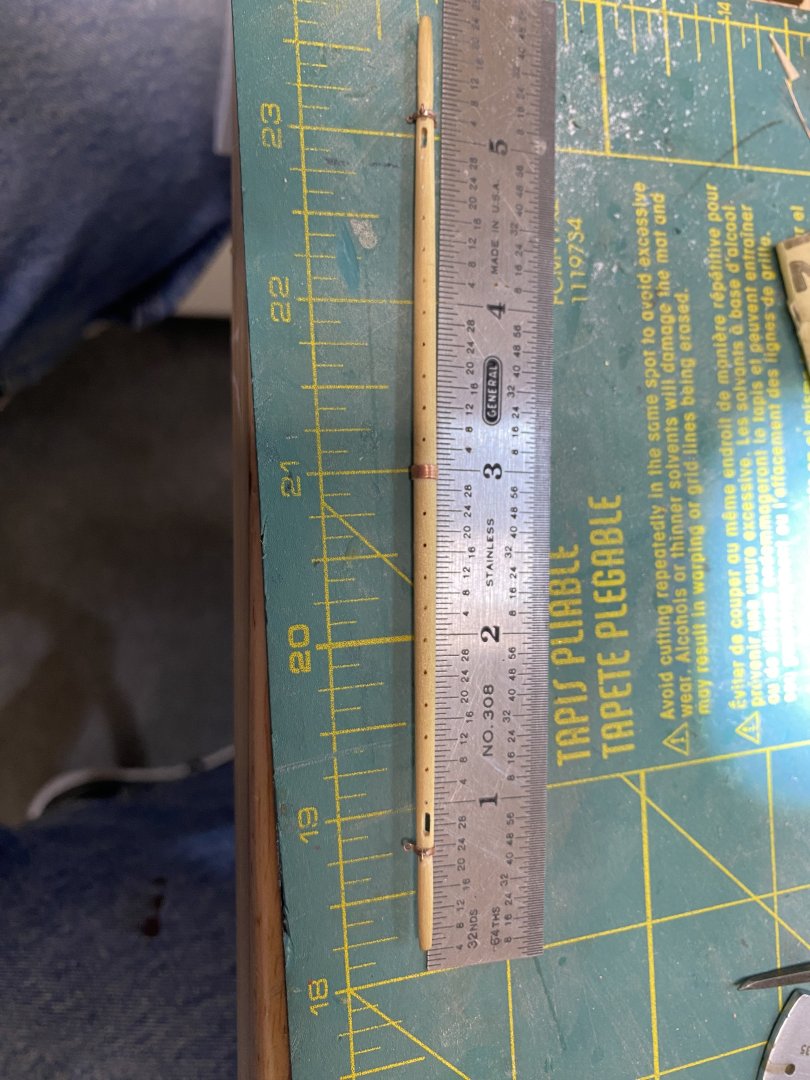
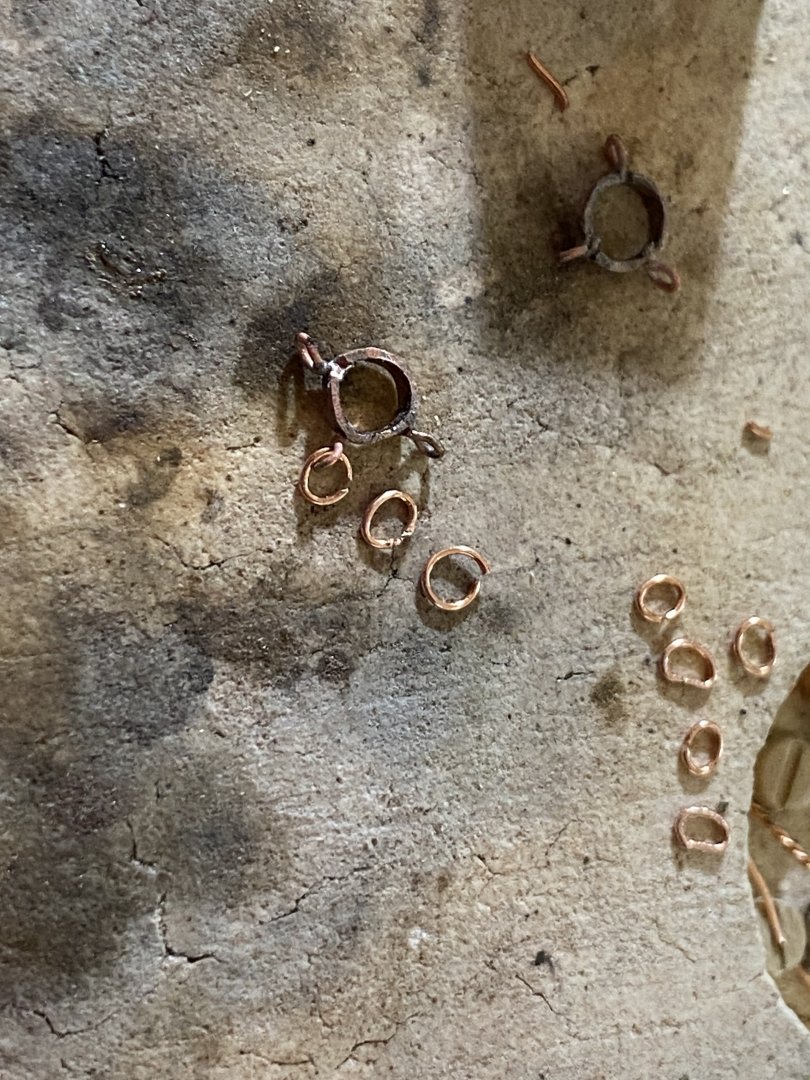
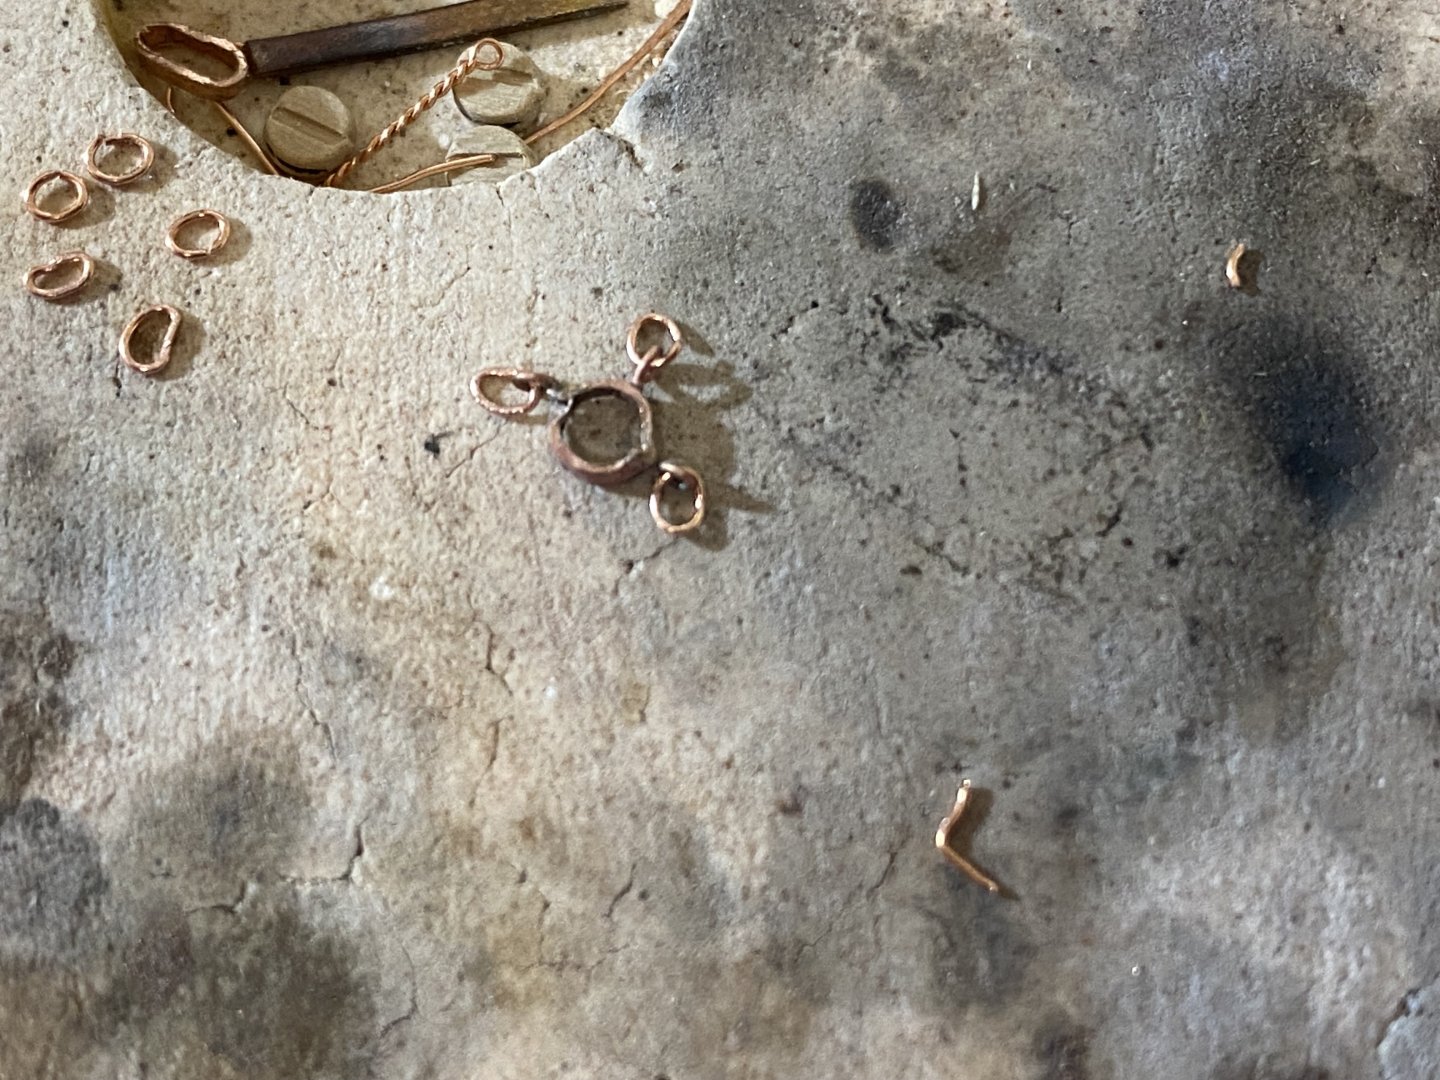
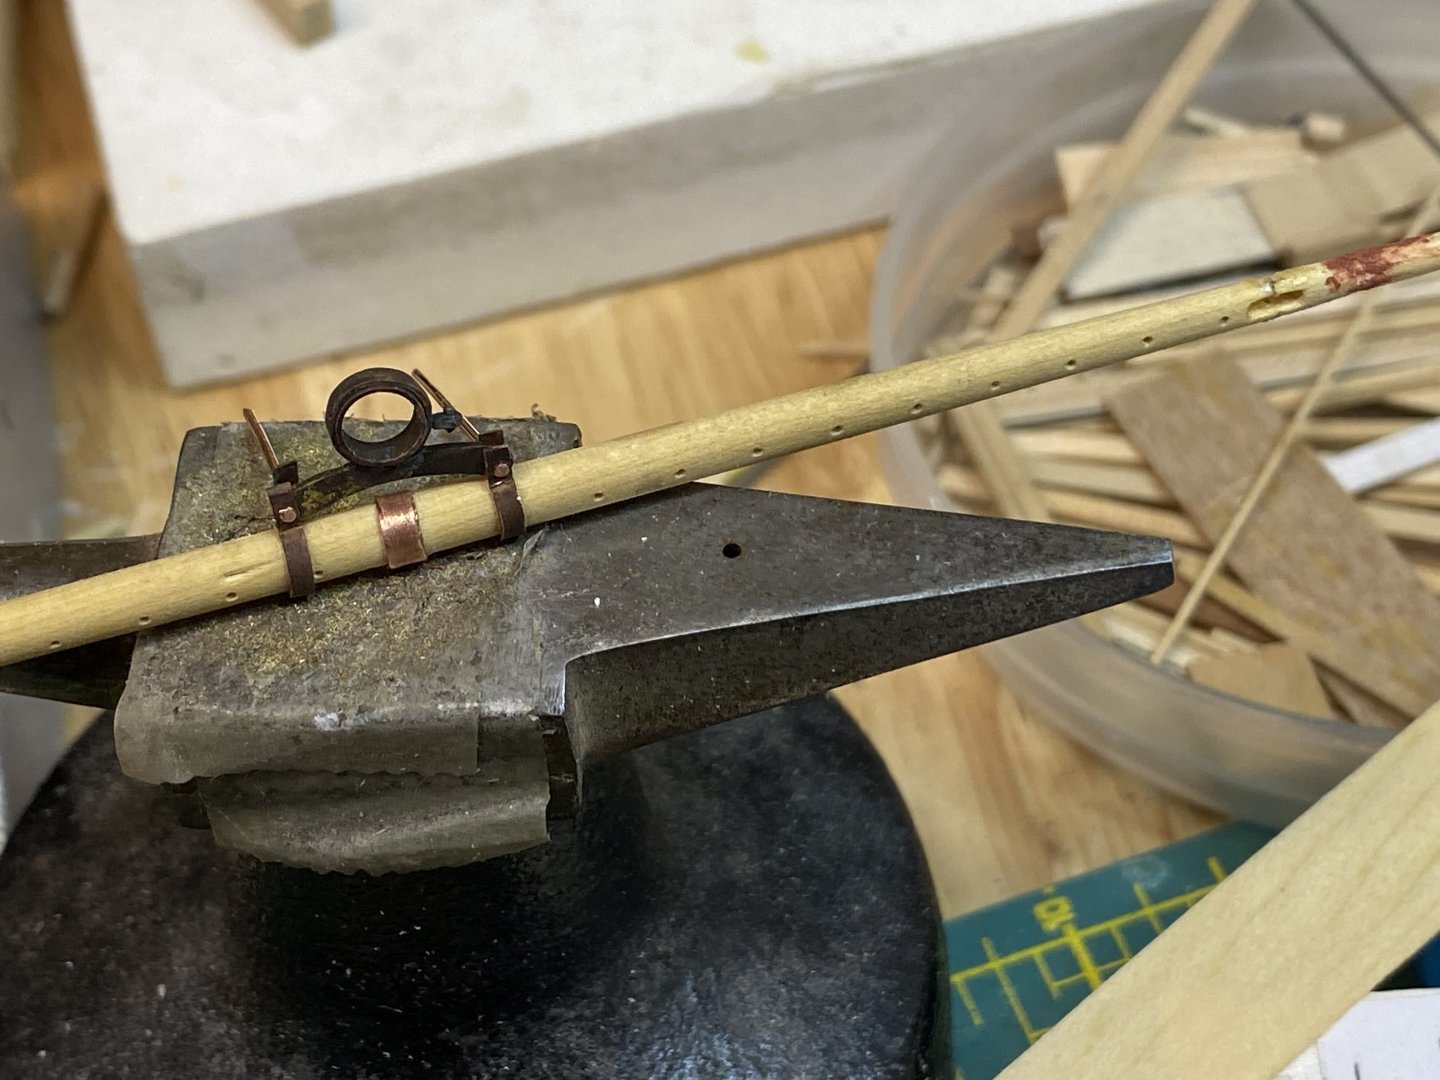
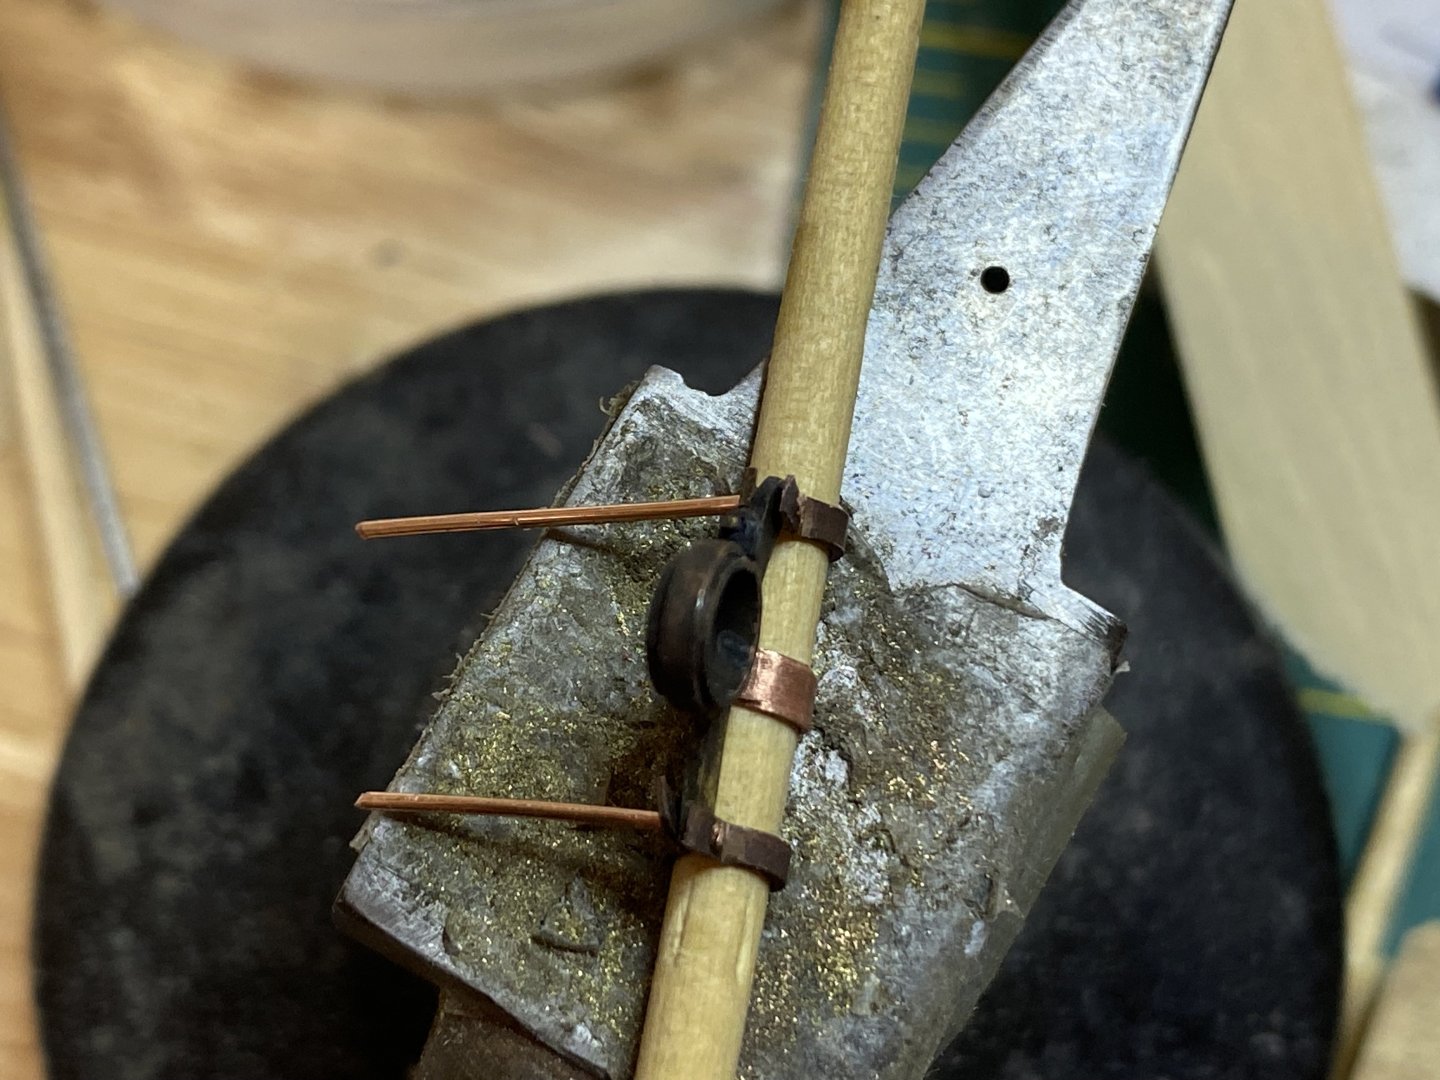
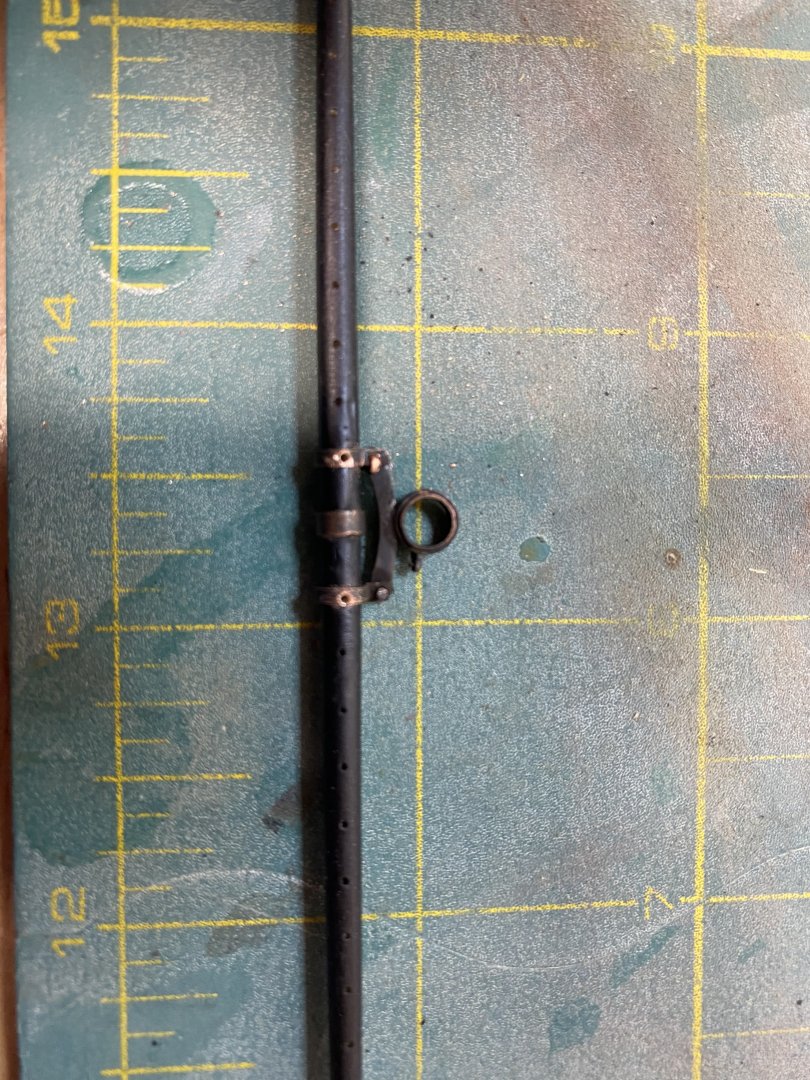
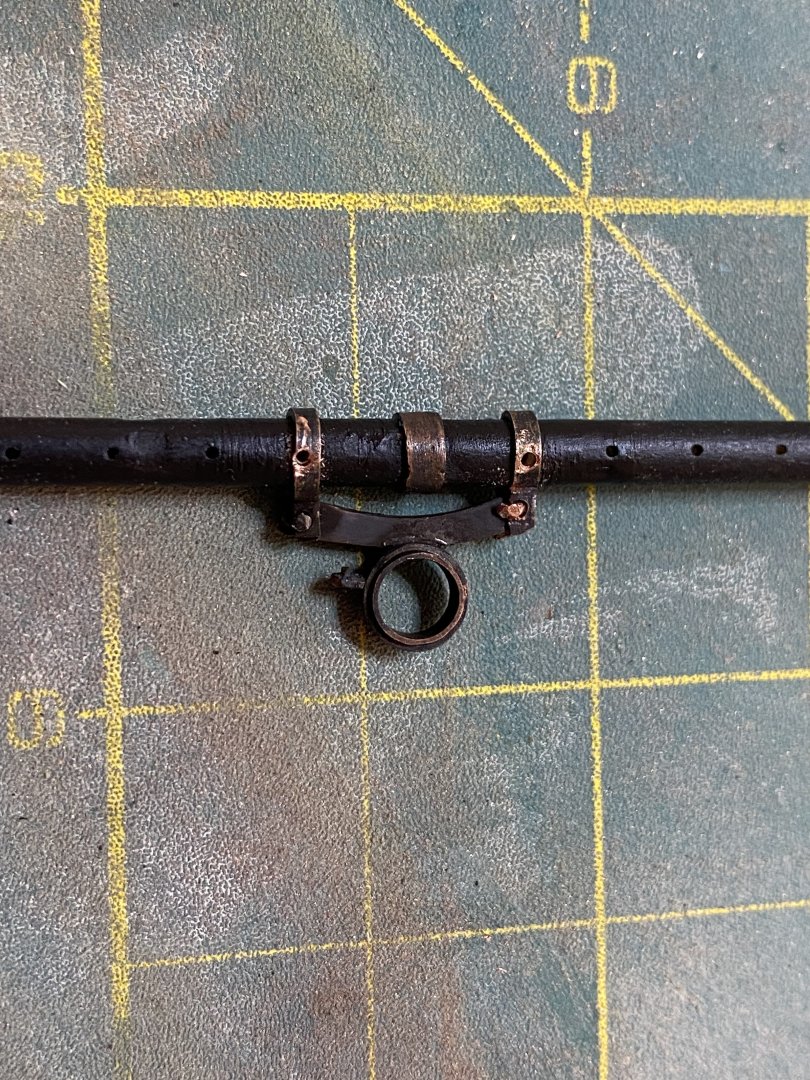
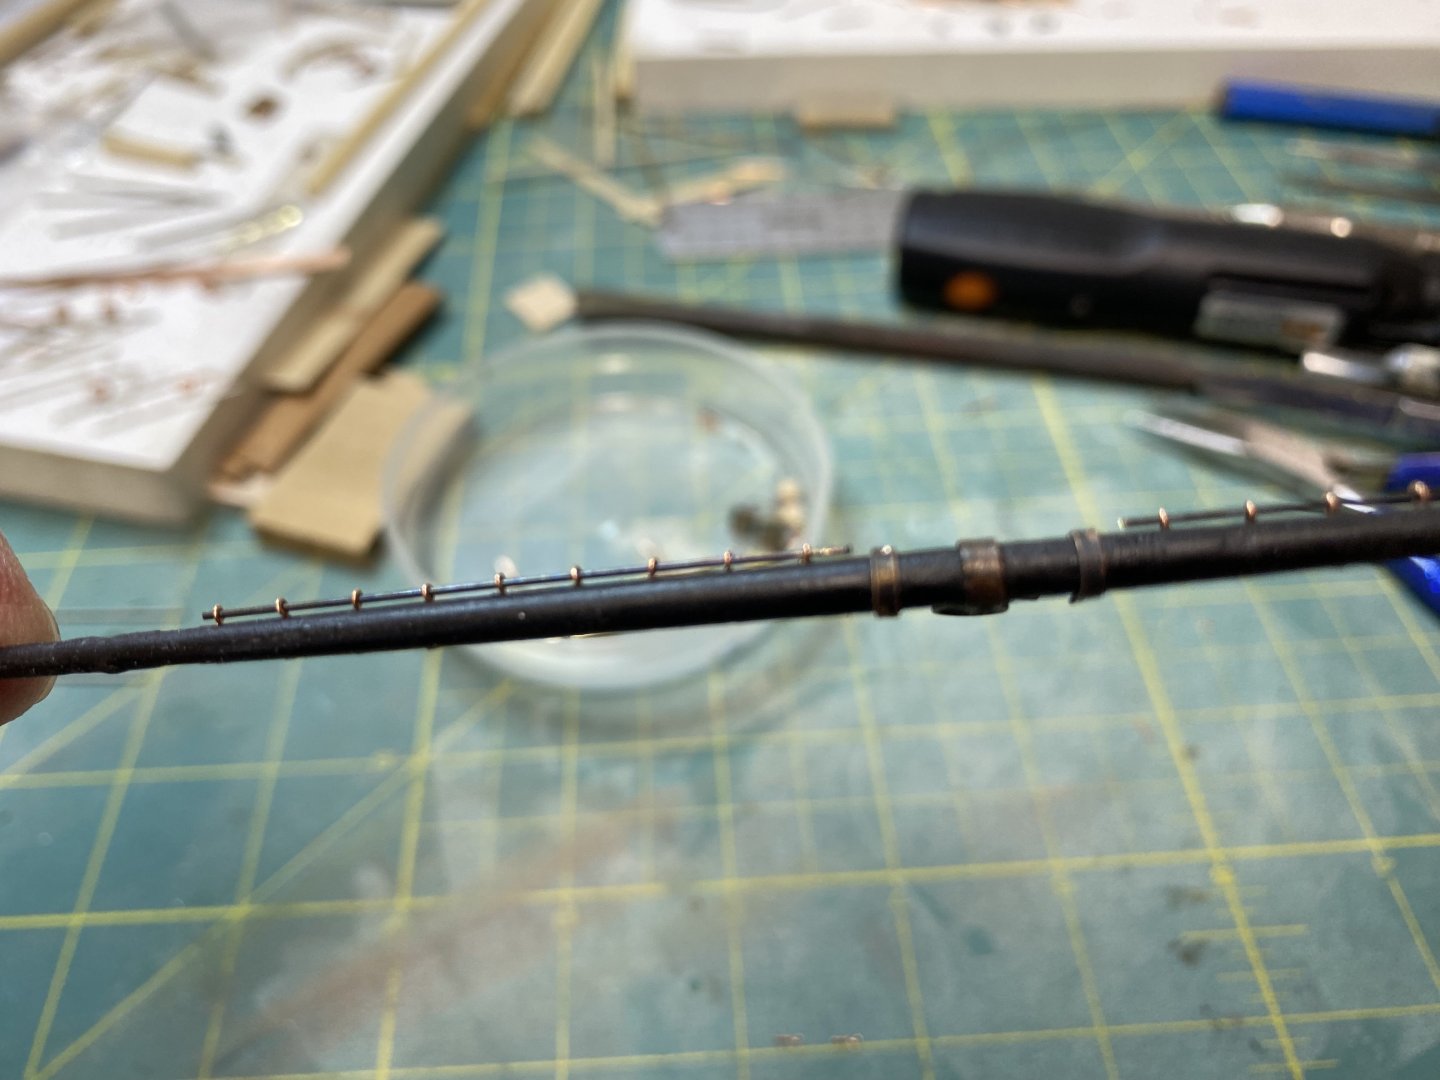
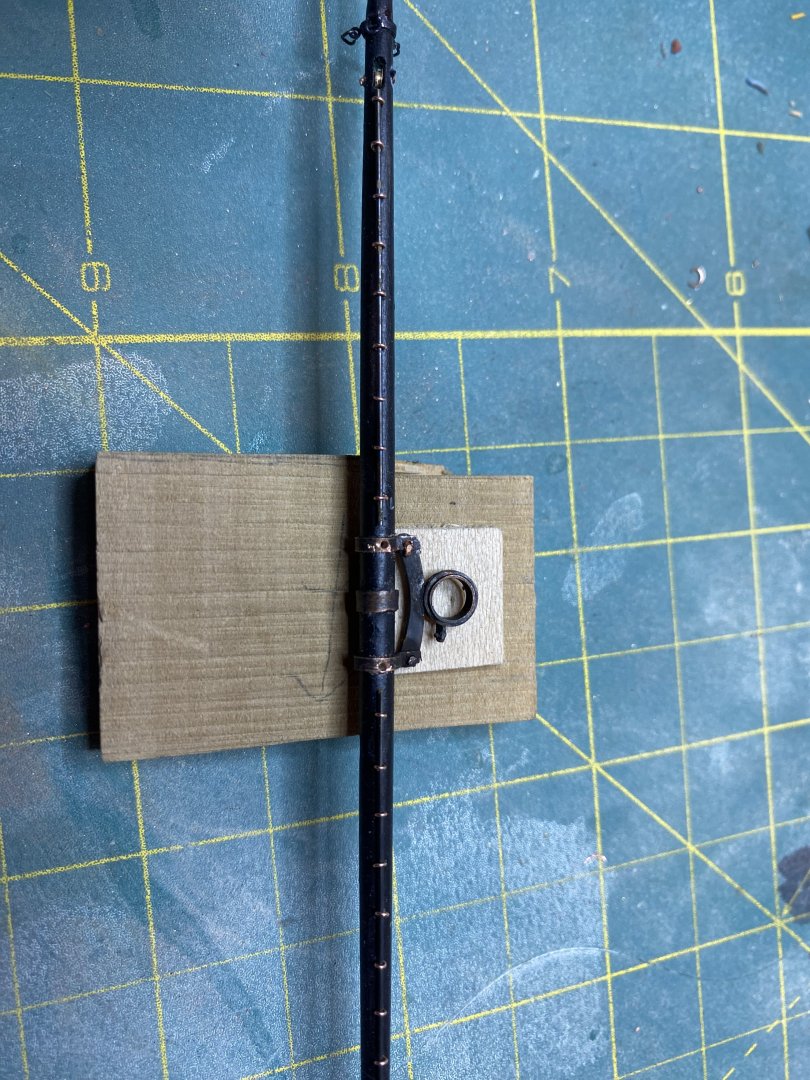
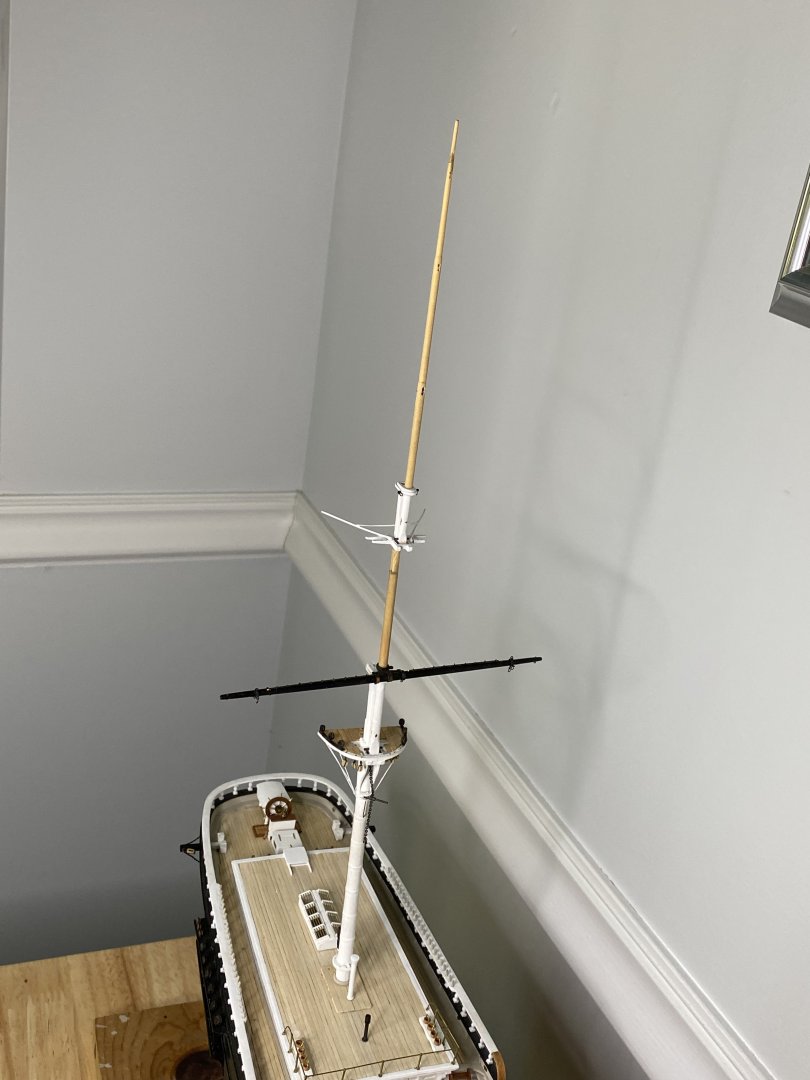
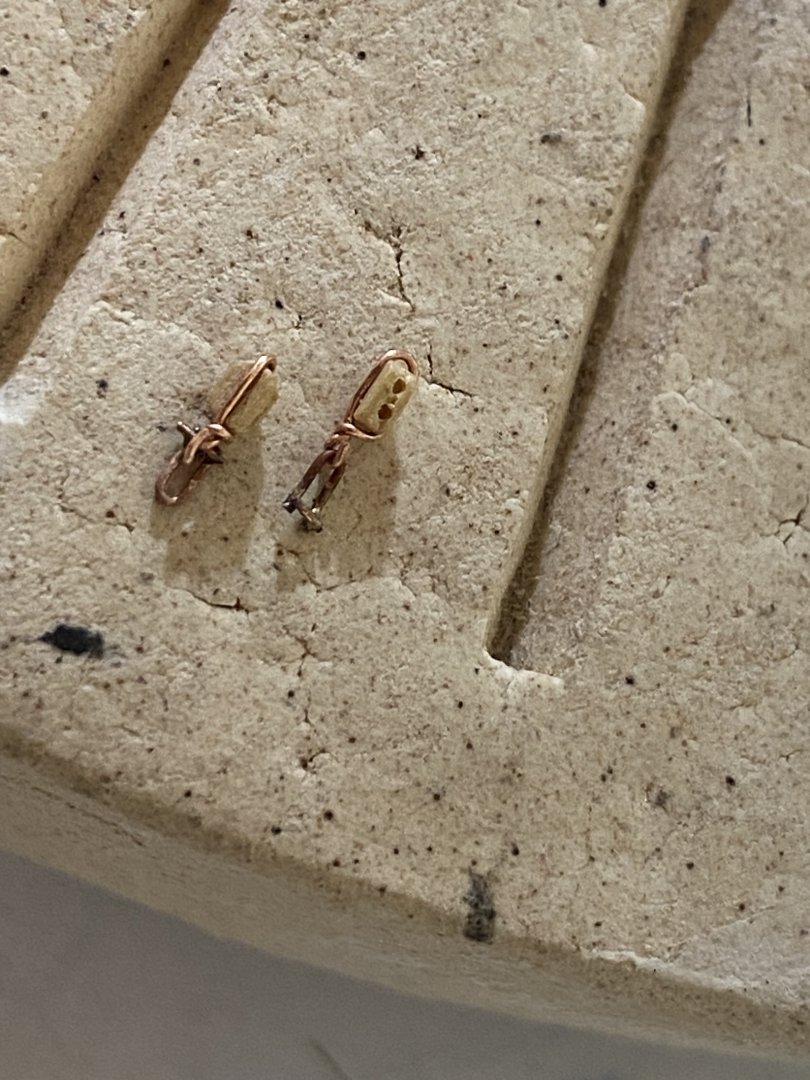
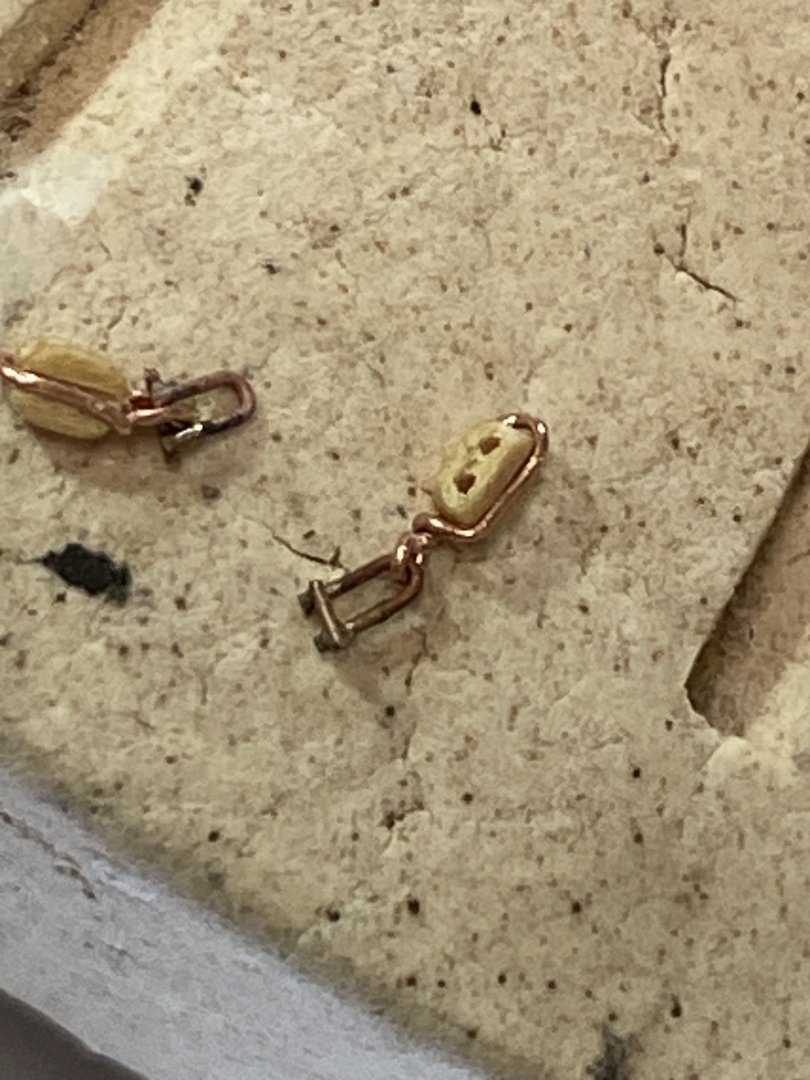
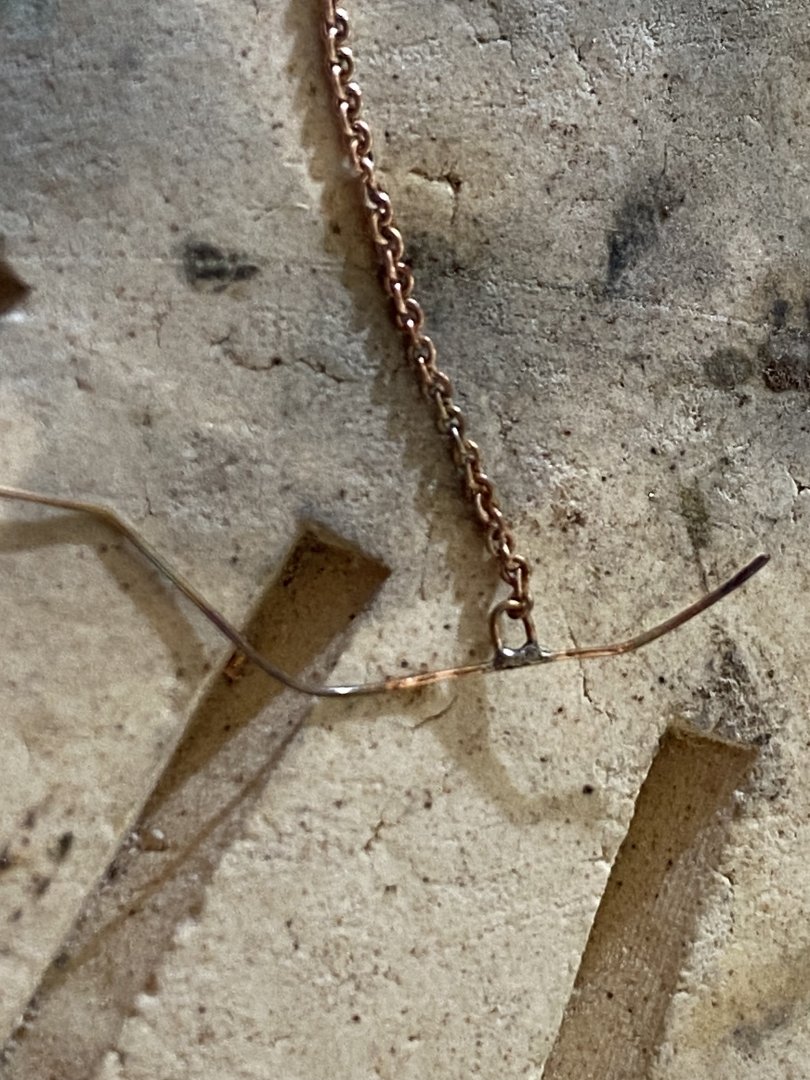
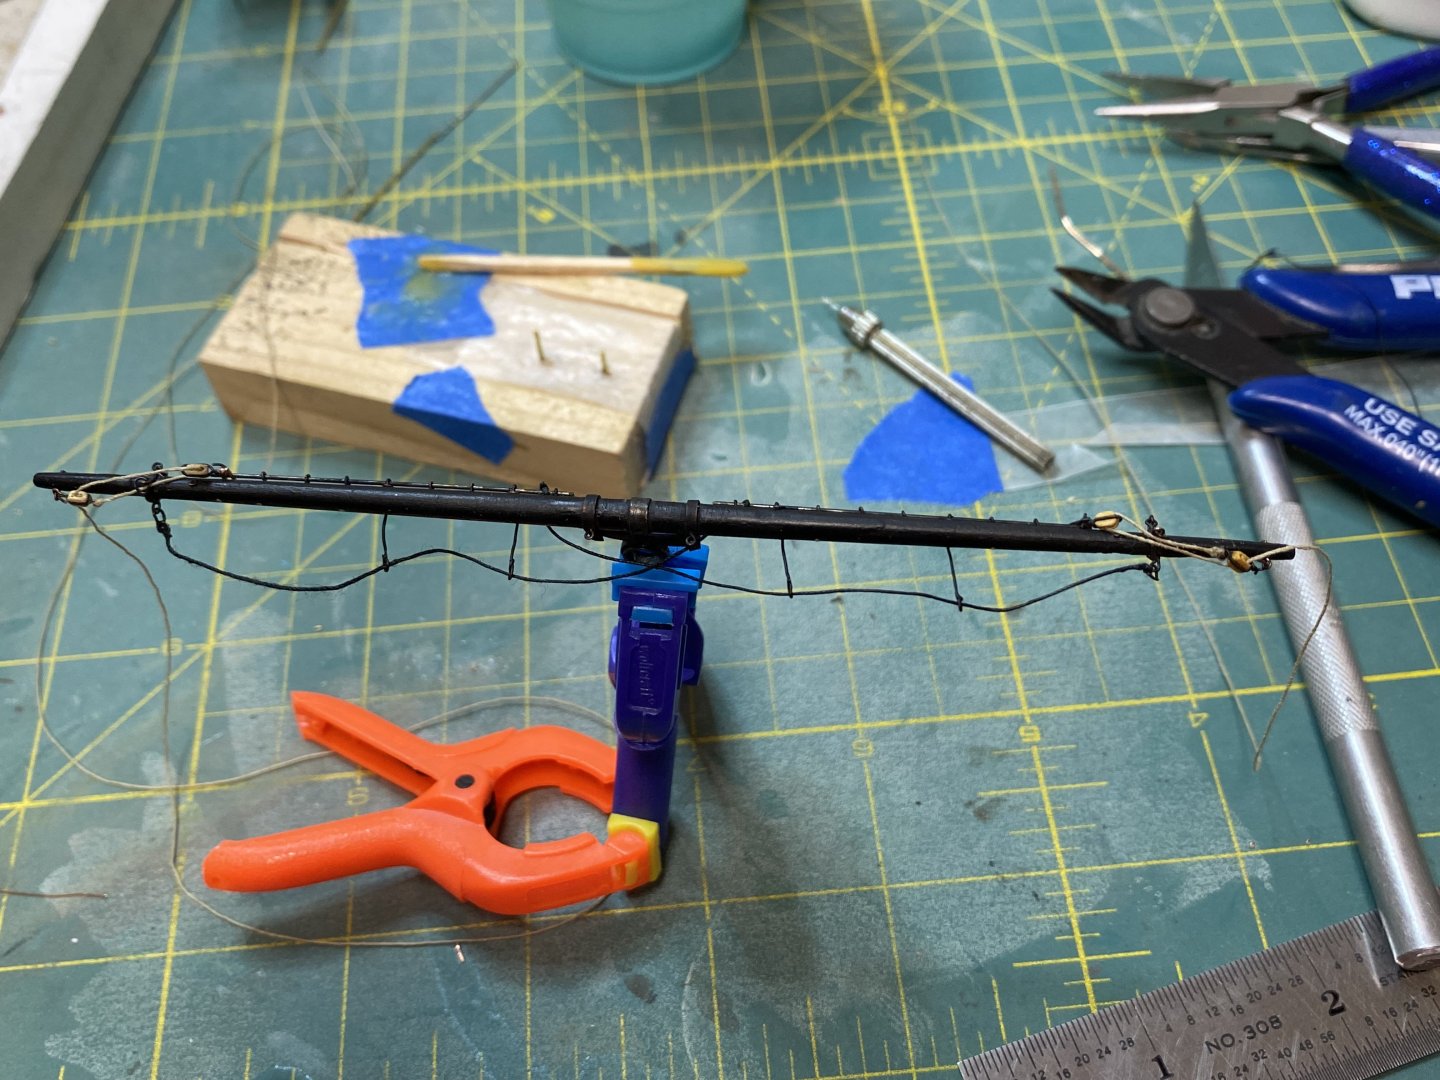
I While still down the rabbit hole, I decided to make the cloverleaf blocks for the topsail and topgallant chain sheets, 6 of them. They should be 2 different sizes but I made them all the same size for convenience as the difference is small and I wasn’t sure I could make them any smaller. They were fabricated per EdT. Two 0.010 inch strips of brass sheet, 1/4 inch wide, were clamped together and the 3 holes drilled in the milling machine ( EdT used 4 holes). I modified the spacing for my convenience and ease and the holes were drilled with a #68 drill which corresponds to a 22ga copper wire bolt. The sheaves were made from 2mm brass tube cut to a 1/16 inch length. The sides of the blocks were cut from the brass sheet. This was all fairly straightforward. The real difficulty came in trying to preen the copper wire bolts. I first preened a small head on one end of the wire bolt, assembled the parts the cut off the bolt. Preening the other end turned out to be a nightmare as the head didn’t want to flatten and the block wanted to distort. I finally got 7 made( 1 spare). These were filled to shape using a jeweler’s drill. Since then I have been working on the mizzen topsail yard. Yard bands were made from copper tube and sheet, jackstay eyebolts from 28 ga copper wire and the jackstay from.02 brass rod. The stirrups are 28 ga copper wire and the foot ropes are.012 black thread. Tried to make the stirrups out of thread also , but no luck. The blocks for the reefing tackles are from Syren, their 2 mm blocks. Still need to add the chain sheets and halyard, as well as the bowlines.


- 351 replies
-
- 3
-
-
- Flying Fish
- Model Shipways
- (and 1 more)
-
A great place to visit!! I live 6 miles away and try to stop in frequently. Nic is a wealth of information, their fittings are top notch and I love to see their display of finished models!! Well worth the trip! Rick
- 165 replies
-
- 3
-
-
- Red Jacket
- Marine Model Company
- (and 2 more)
-
Very funny, very true!!! I fear the consequences as my wife is the oldest and has 4 younger brothers! She ruled with an iron fist ( according to her brothers)!! Rick
-
Really nice Keith!! Would never have noticed the deadeye if you hadn’t pointed it out! I’ve come to realize that over time I don’t see the mistakes that I once thought were obvious. Rick
-
On my Flying Fish build, I’m trying to make as many of the parts as possible, vs using the parts supplied with the kit. I think anything you can make will be much better and you will be much happier with the results. Rick
- 193 replies
-
- 2
-
-
- Flying Cloud
- Mamoli
- (and 1 more)
-
No congratulations on a job well done!!! Rick
-
Really great job!! Brings back a lot of memories!! Rick
-
It’s coming along nicely! Rick
-
Congratulations Nic!! Well deserved!! Rick
-
Really beautiful Keith!! Love the planking! Rick
-
Good advice Rob! Flying Cloud is coming along well! Rick
- 193 replies
-
- 1
-
-
- Flying Cloud
- Mamoli
- (and 1 more)