


Rick310
-
Posts
392 -
Joined
-
Last visited
Content Type
Profiles
Forums
Gallery
Events
Posts posted by Rick310
-
-
-
-
George,
Really great job!! Getting close now.
Every painting I‘ve seen always shows a sail on the crojack( lower mizzen) yard although they are rarely portrayed as set. This may be because when set, they would block the wind to the main course. The term crojack yard may be a holdover from earlier times.
Where are you getting your blocks from? I am trying to get some more from Syren but they have been unavailable for some time now.
Rick
-
Welcome back! Glad to hear you are doing well!
Rick
- KeithAug, Keith Black, mtaylor and 1 other
-
 4
4
-
ClipperFan
Good to hear from you. I have the Duncan McLean article and Ben Langford, who revised the original FF plans from the 1930’s(?) for Model Shipways used those dimensions in the plans.
I think the error that was made was combining the lengths of the yards plus the length of the yardarms for the length of the yards. This error was corrected in the 1982 (?) revision.Rick
-
Almost done !!!
Great Job!!!
Rick
-
Also George, I also thought that sts’l referred to the stuns’l , not the staysails and it took me awhile to figure that out as it didn’t make any sense.
Rick
-
Thanks George,
I have the revised plans from 1982 ( ?)when it was discovered that the yard length were miscalculated and were too long. However, the sail plan is still the same as the original and they don’t have the little diagram naming all the sails.
I have the plank on bulkhead version still in the box so I’ll have to go check those plans. I never heard that the sail plan was corrected for the POB version but it apparently was. Thanks again for info!
Rick
-
WOW!!!! That’s one good looking model!!! Very impressive!!
Rick
-
Thanks for the compliment Nils. I’ve been following your build also beautiful !!!
George, Jared,
I was looking over the rigging plans last night and I believe that the plans have missed labeled the head (jib) sails. Per Underhill in Masting and Rigging, I believe that the most forward head sail is the flying jib, then the outer jib, the (inner) jib and finally the fore top mast staysail. If true, this changes the belaying points for the downhauls, the sheets and the halyards or at least the labels.
Am I missing something?
Thouhts?
Rick
-
It’s been a real pleasure to follow your journey!!
Great job!! Beautiful model!!
Rick
- Keith Black, Canute, mtaylor and 1 other
-
4
-
Looking great Nic!!!!
Rick
-
Jared. You are doing a great job, your masts are really well done!!.
when I did the eyebolts for the shackles on the forecastle of my flying fish, I use the technique that EdT used on the Young America except I modified it to my needs. I took a micro drill that was approximately the thickness of the inside diameter that I wanted, and then used 28 gauge copper wire, because it’s softer than brass looped in parallel pliers, placed the loop over the drill, bed held in a vice, and then just hand, twisted the eye, this was easy to do and fast. When I finally get to making the yards in the mass, I intend to place the eyebolts through the holes in the mast. This will elevate the jackstay rod slightly above the yard which should be close to scale.
Rick
-
-
Really well done!! You’re doing a wonderful job!!!
Rick
- VitusBering and Keith Black
-
2
-
Thanks Jared,
Each piece has taken multiple attempts to get something acceptable as I am learning as I go. Nothing is ever as good as l hoped but better than I expected. Pretty steep learning curve which is why it has taken so long.
I really enjoy seeing what parts I can make myself.
-
You’re doing a great job!! Looks like a really fun build.
Rick
-
-
George,
my daughter and I started coming to Pemaquid 30 years ago when she was six years old. We have always come the last two weeks of July now for 30 years and I am here now with my wife and my daughter and her boyfriend.We would get here Saturday evening after having stopped in North Hampton, New Hampshire to visit a nautical antique dealer, and go sailing with him out of Wentworth, we would get up to Pemaquid late Saturday night, and every Sunday morning we would celebrate, beginning our vacation by going to the Seagull for breakfast and blueberry pancakes!!
I used to live outside of Cleveland, but moved to Belfast Maine 3 1/2 years ago.
I still keep my 2 weeks in Pemaquid every year!! No place I’d rather be.If you get back up here, let me know, would very much like to get together with you sometime.
Rick
-
Getting really close now, FF looks great!!
I’ve been on vacation in Pemaquid Maine for the last 2 weeks so I’m really itching to get back to working on the model.
Well Done!!!
Rick
-
George, I couldn’t agree with you more.
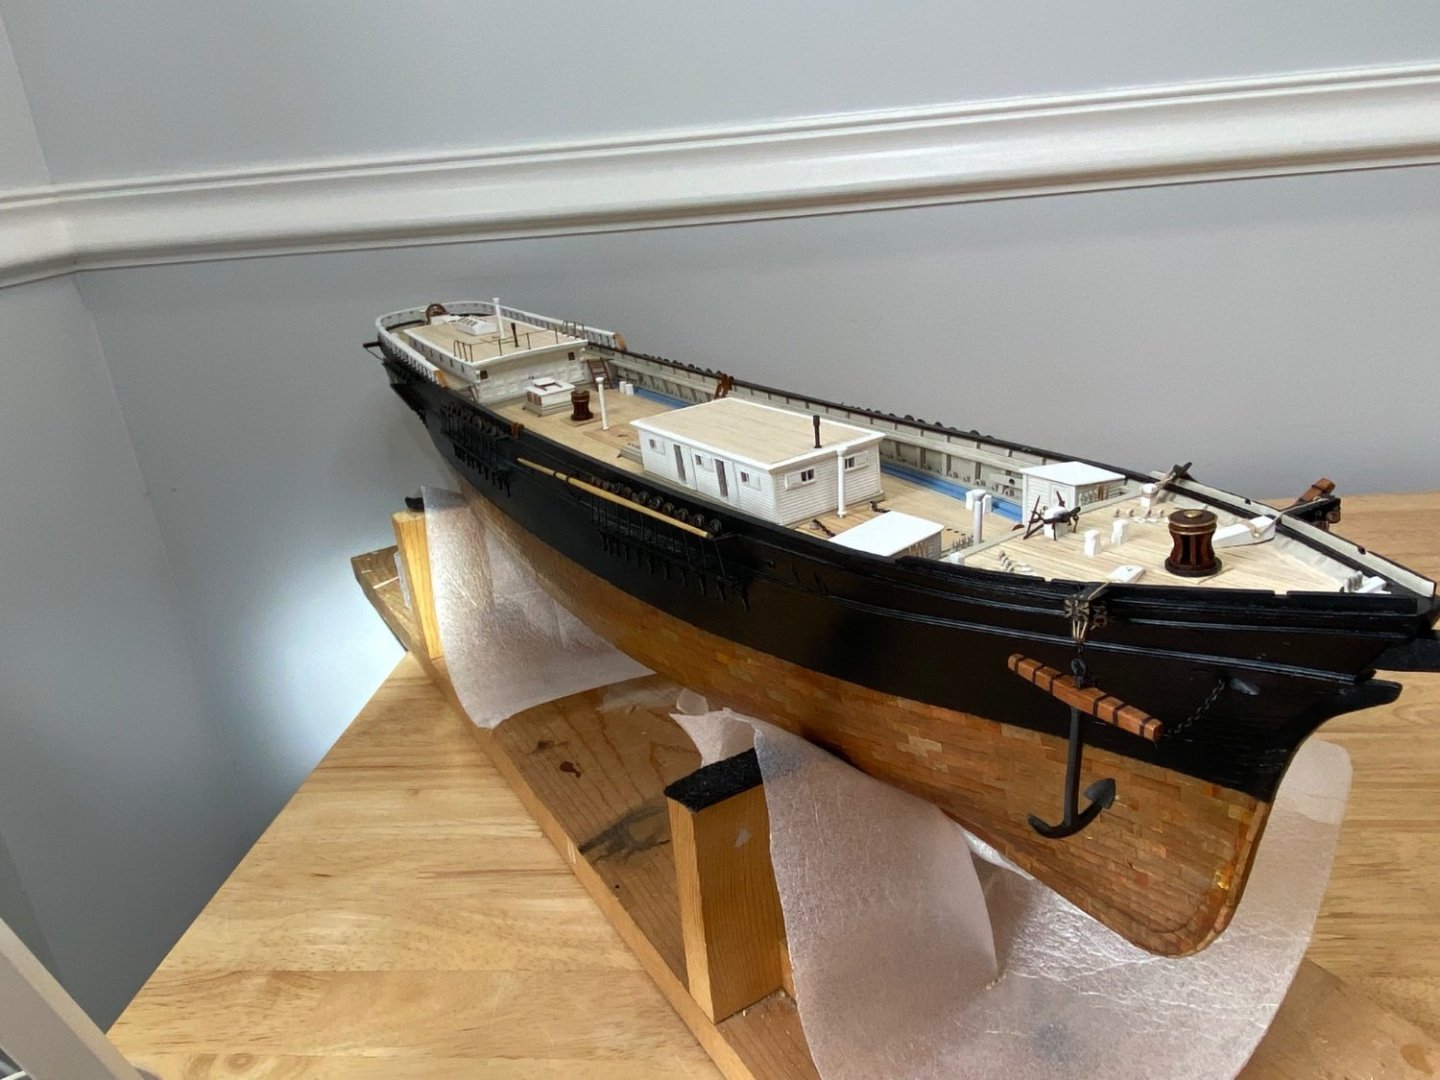
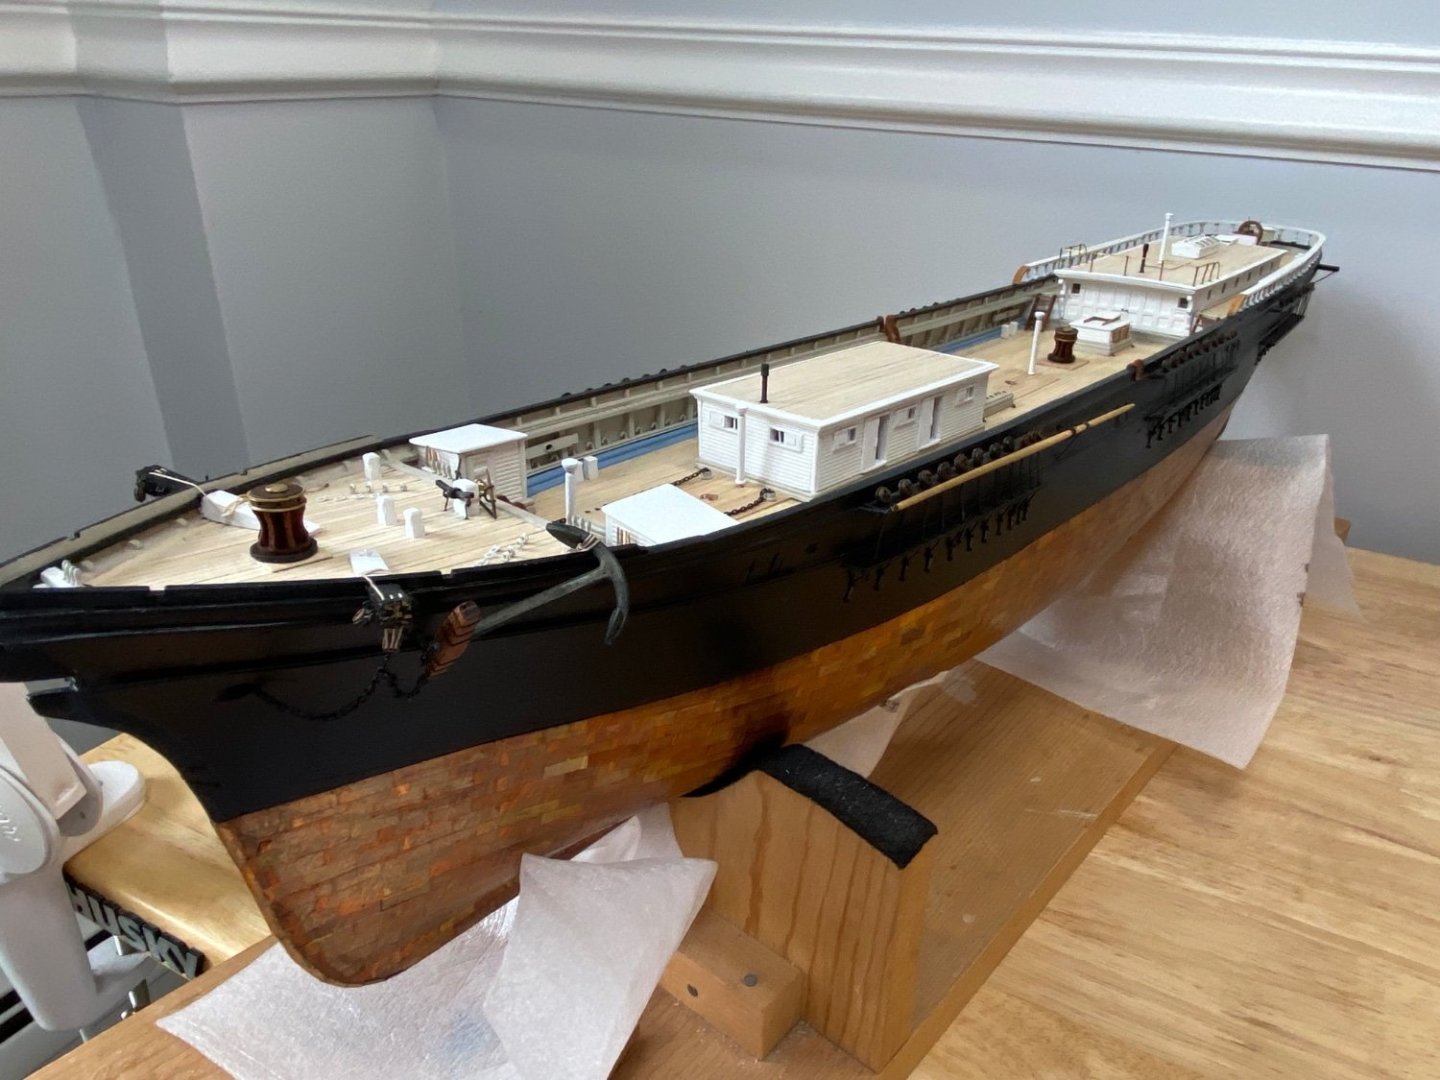
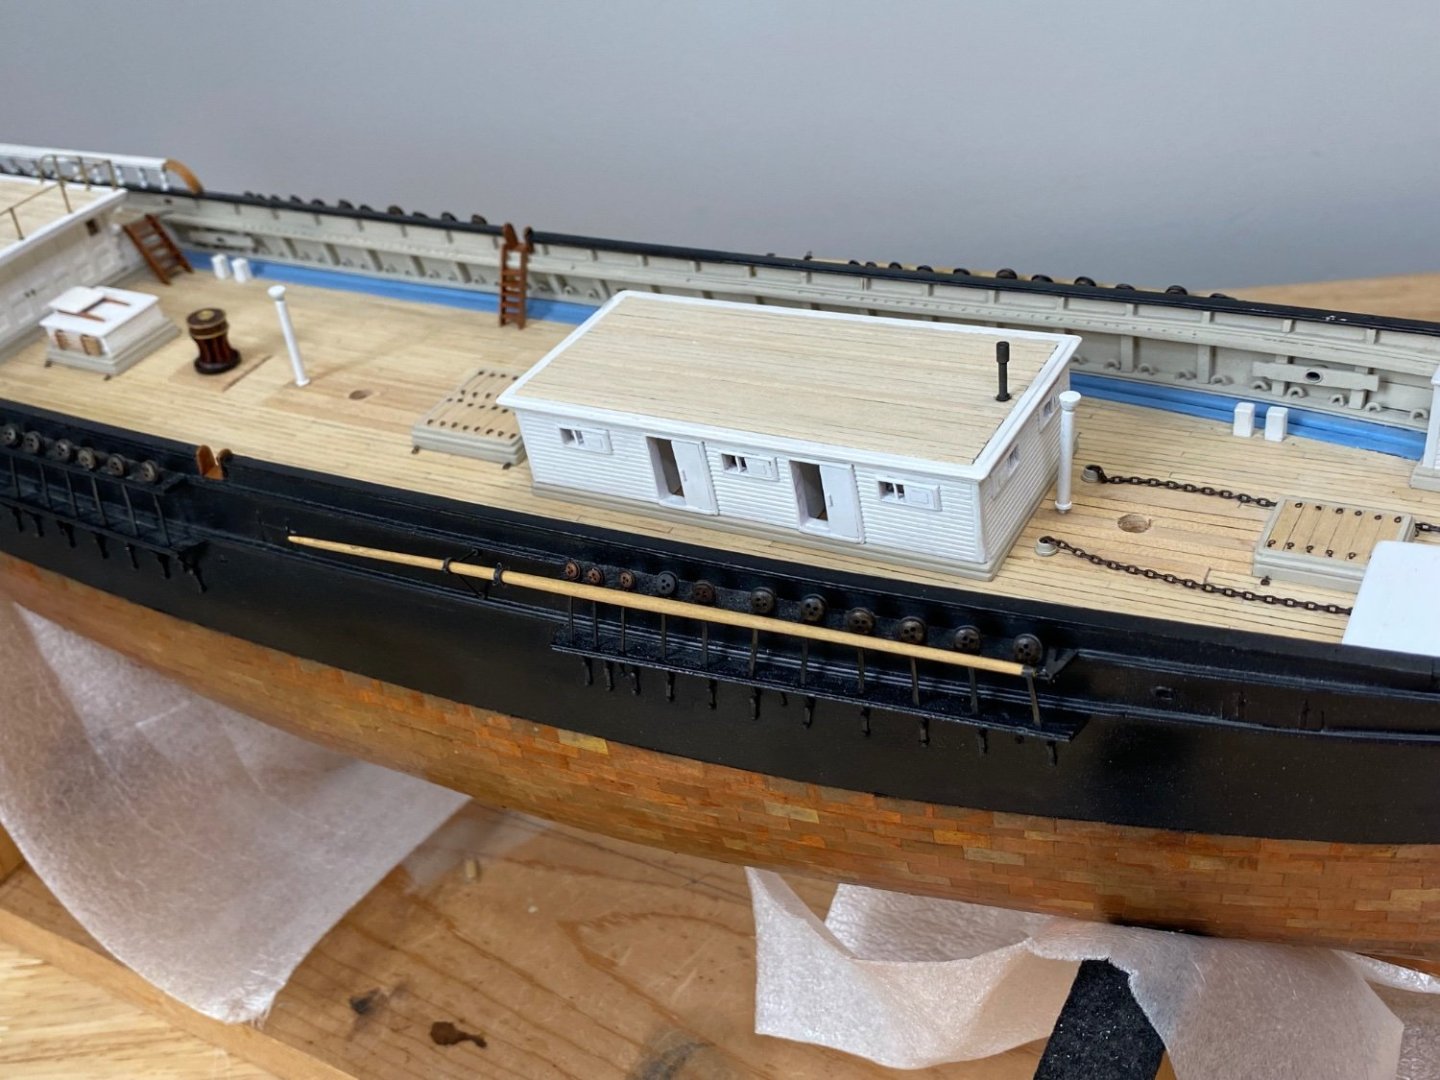
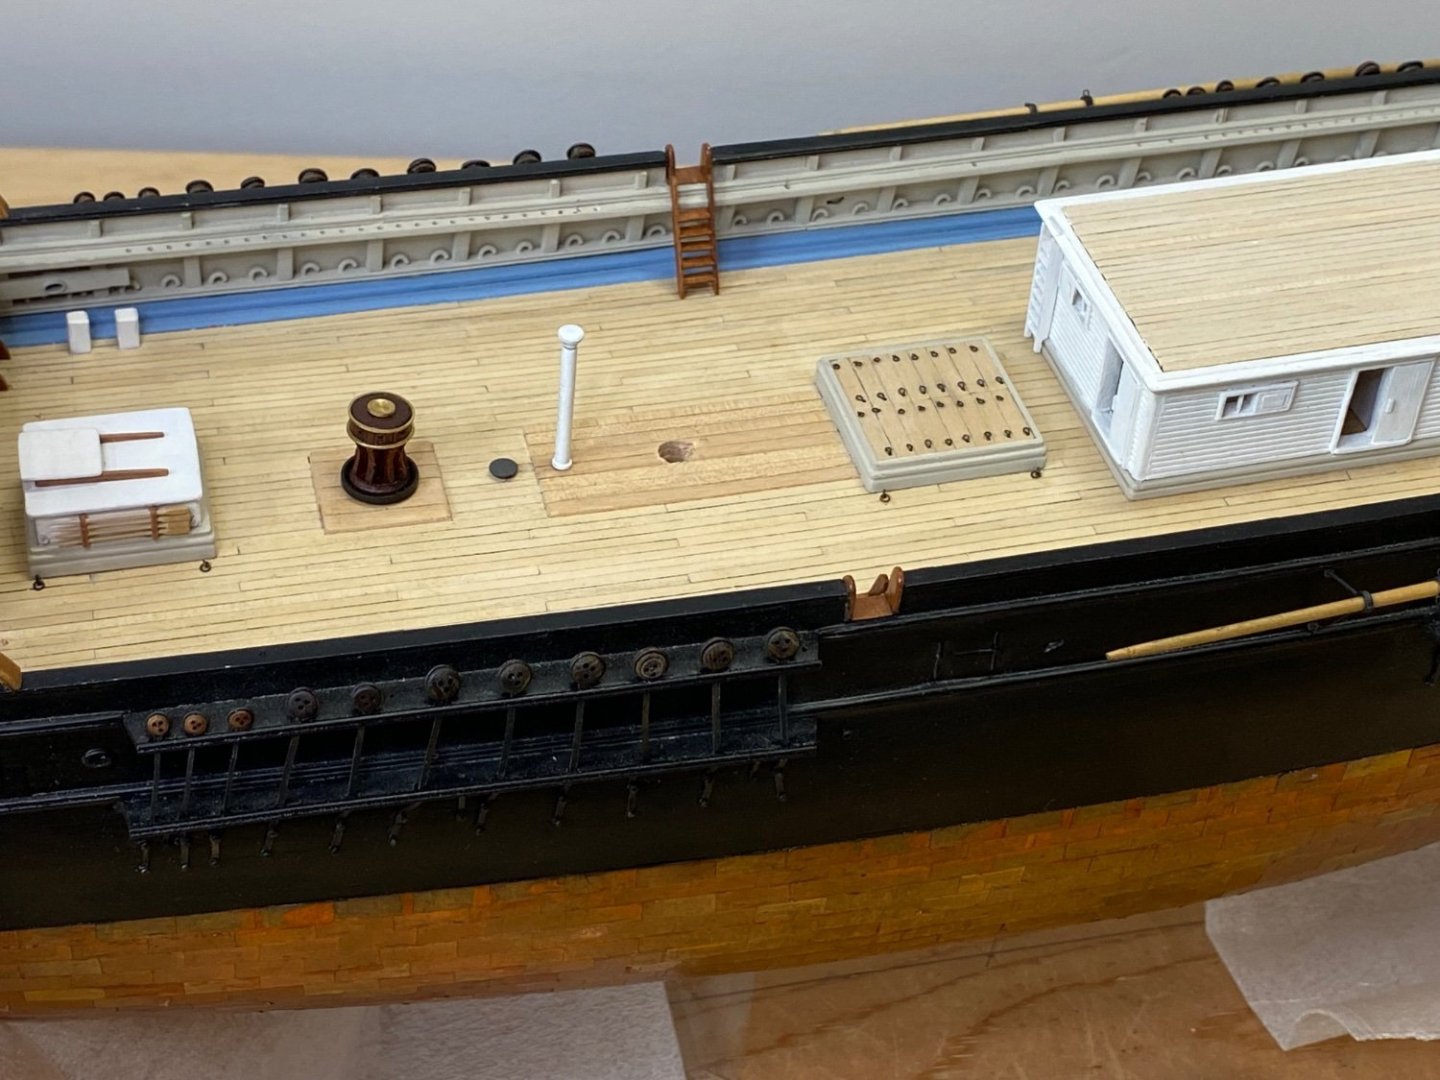
Anyone building this model will need to buy more chain, wood, eyebolts, brass and copper sheet/strips. Over the years I have bought multiple lengths of chain when ever I could find it, especially in the smaller sizes. I also had difficulty finding the right size chain for the anchor chain and ended up using chain that was smaller than called for. But better than too big.
The fittings supplied are pretty bad.
Great job on the model.Really looks good, very impressive!!Rick
-
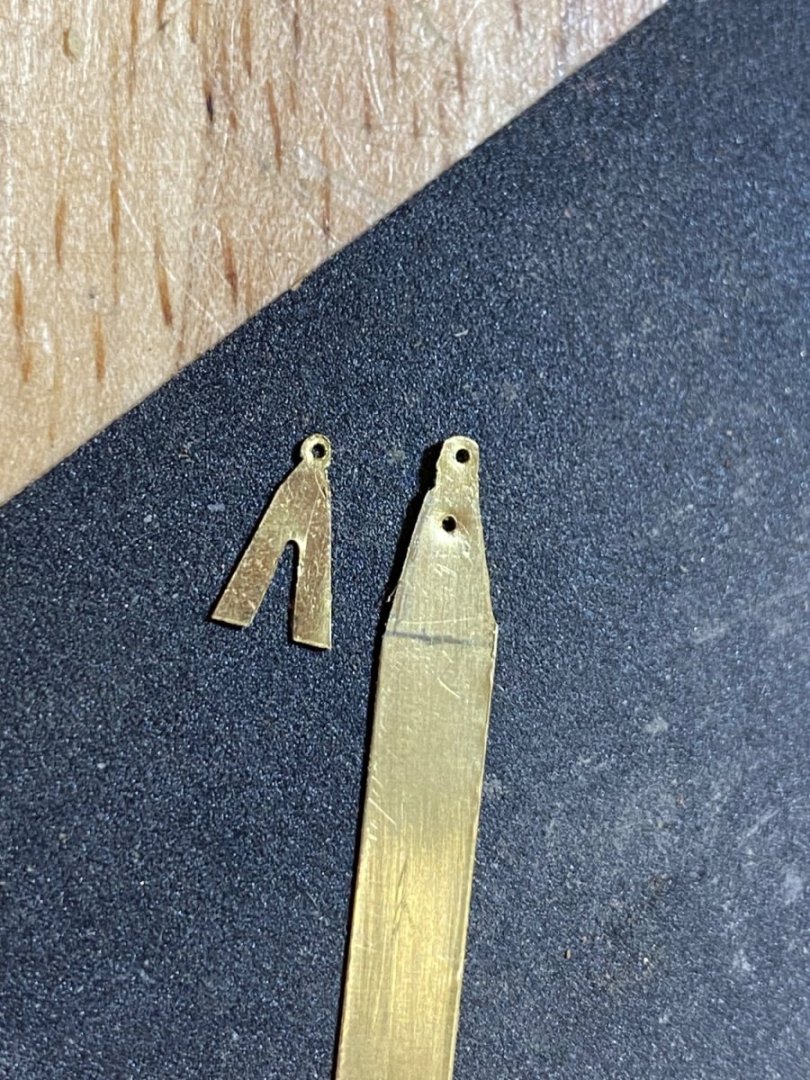
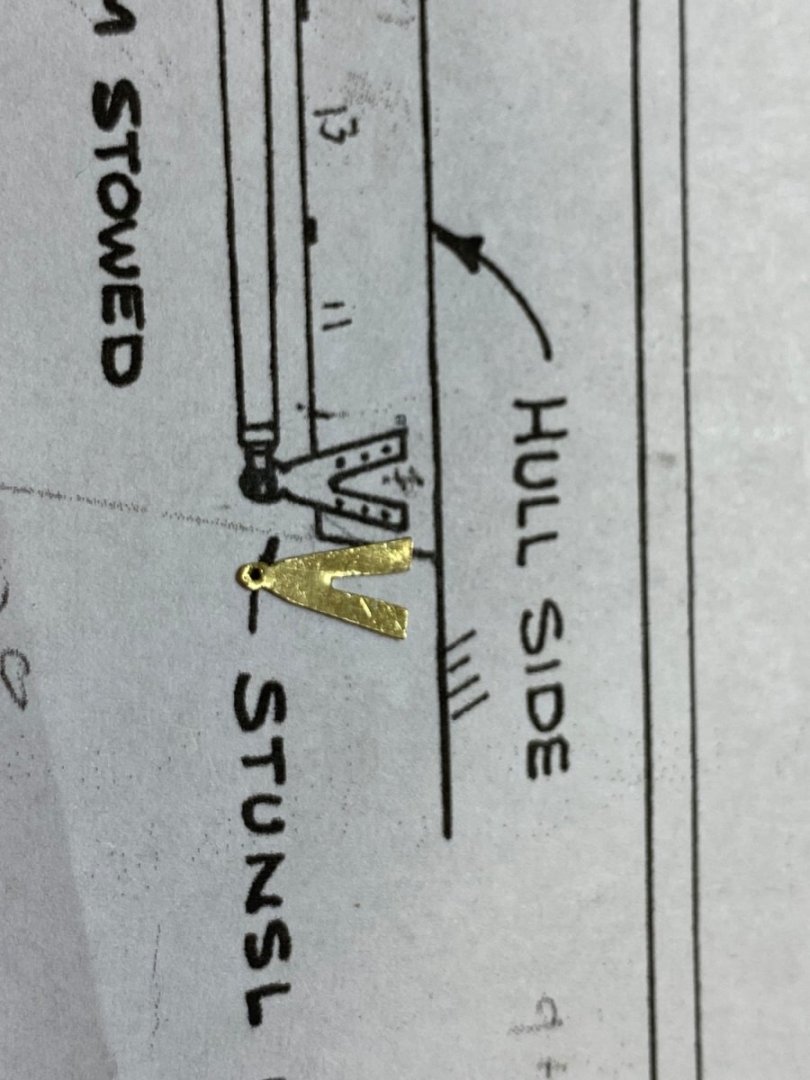
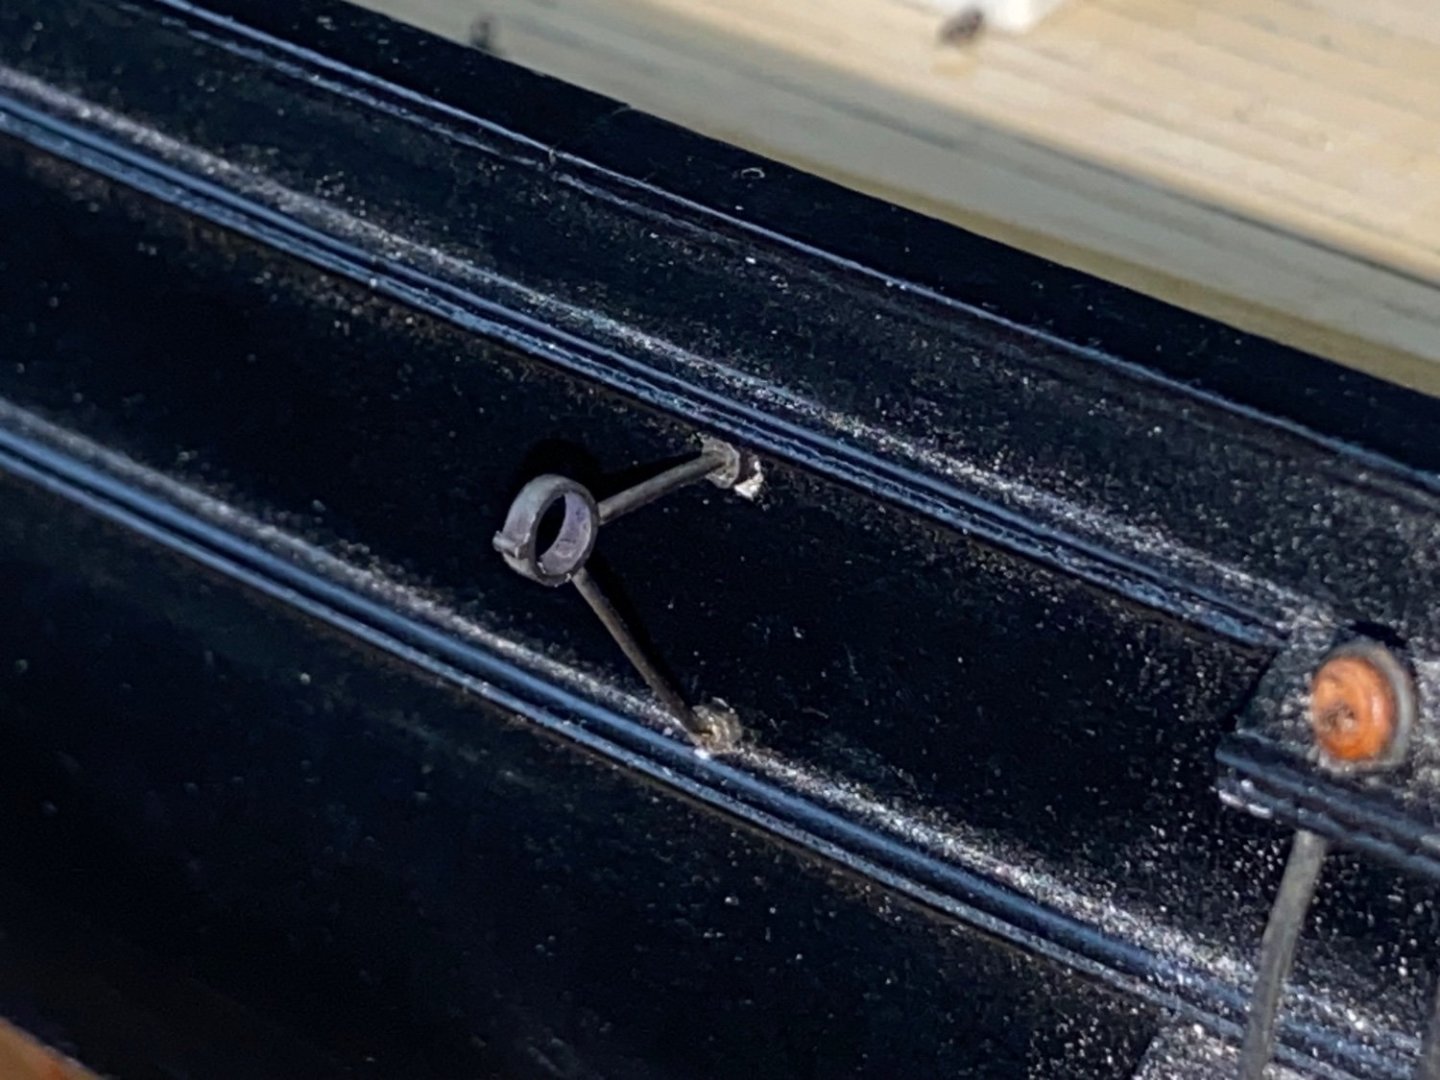
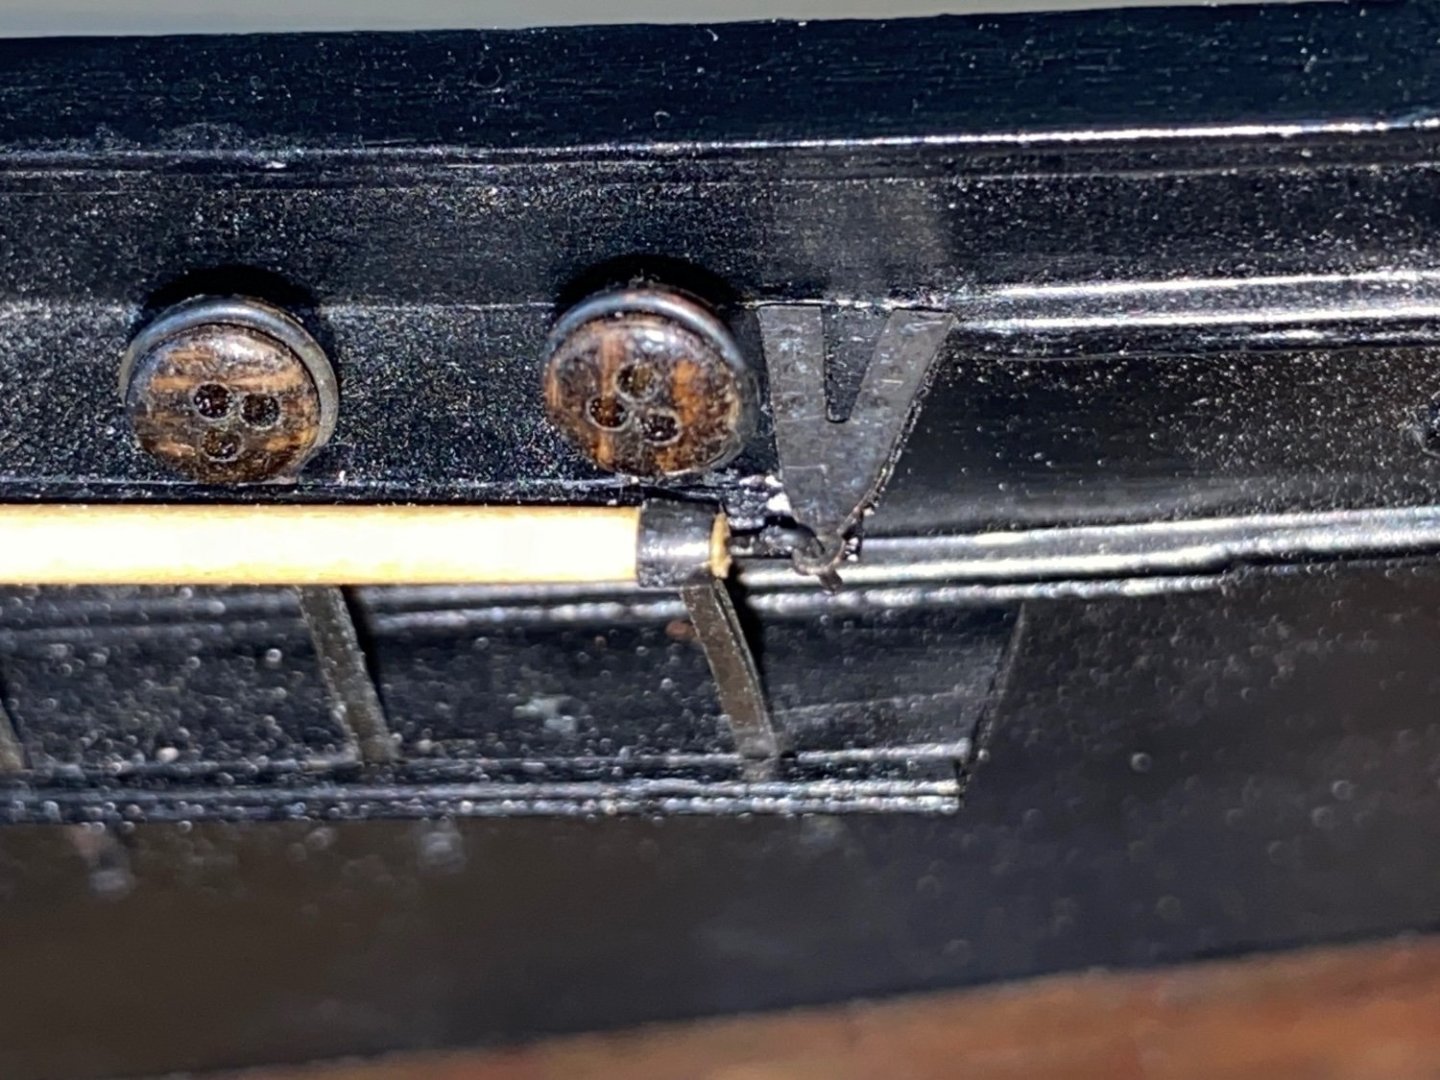
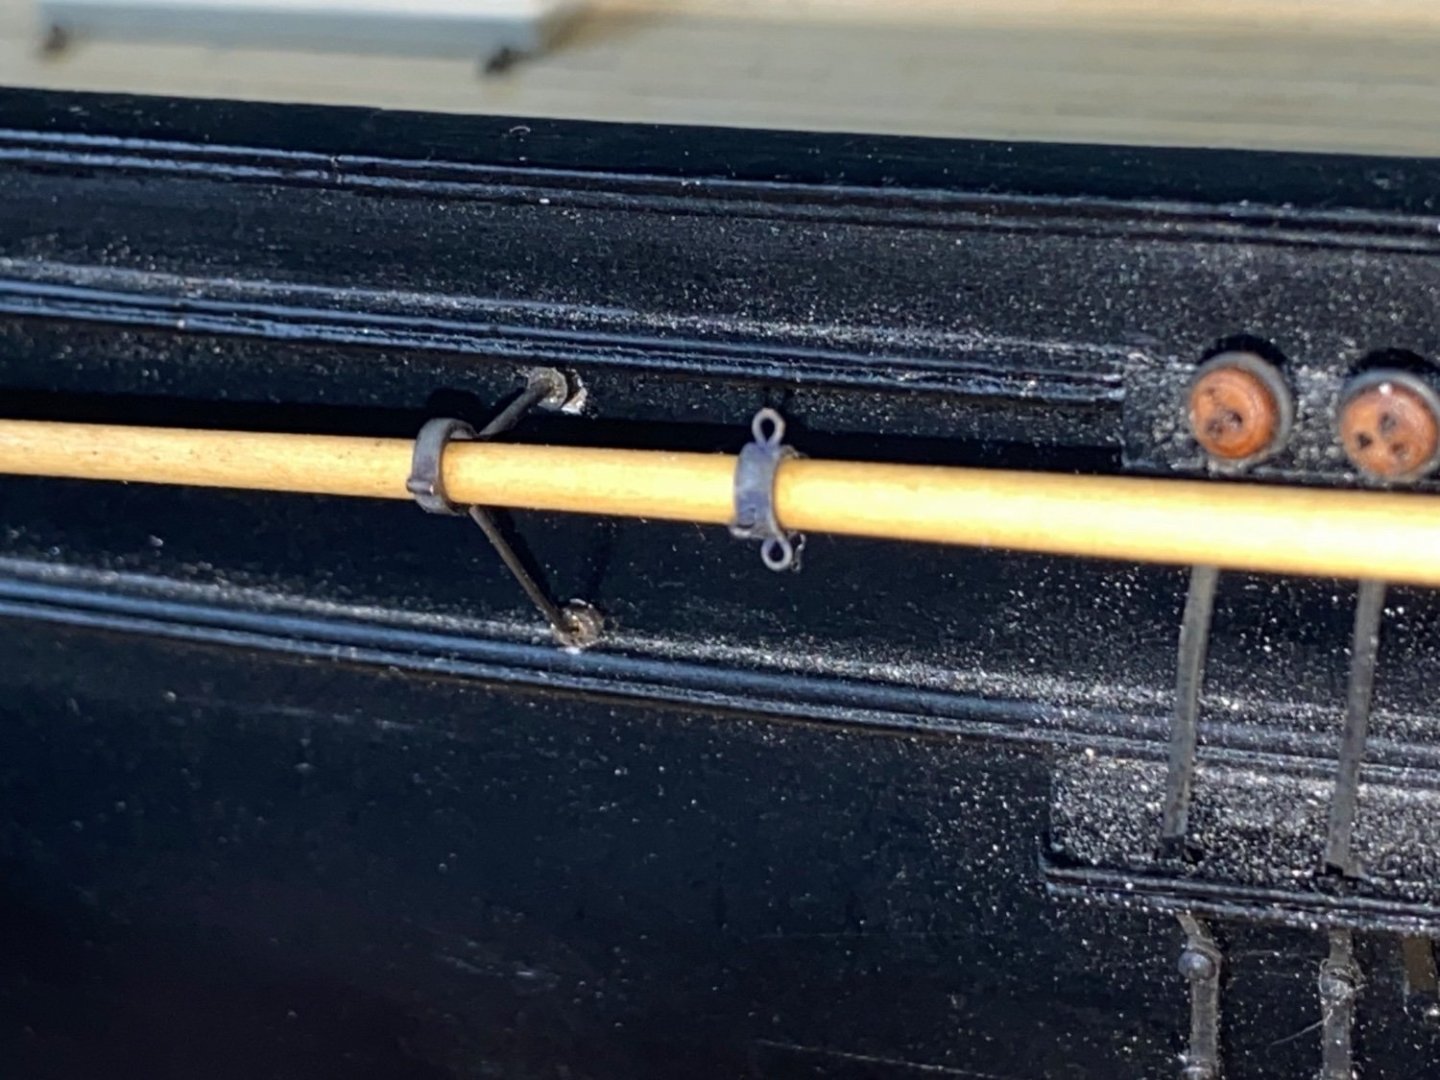
Thinking I was getting closer to masting and rigging, I realized that I had multiple small items to make first. I decided to start with the studding sail booms and brackets.
The booms were made from Costello boxwood that I shaped by hand. I didn’t do a very good job on these, making 4 to get 2. Good experience at shaping yards; but I’ve got to find a way of making them better. These were stained with Ipswich pine stain which did not change the color much. All in all I think these will work alright, not great. The first problem I encountered was that there are 2 different sizes for the booms given on the plans. Both the sail plan and the hull plan show the booms longer than the masting and spar plan. These are significantly longer than EdT’s YA.. I ended up using the shorter boom which I shortened further by 1/8 in for a total length of 6 inches or 48 scale feet. The center band with 4 eyes was made from brass tube cut to 1/16 in wide and drilled for the 4 eyebolts with a #75 drill bit. The metal eyes were made from 30 ga copper wire which the shanks fit in the drilled holes. These were then soldered together. These came out well except that the 30 ga copper wire is so fragile that the eyes broke off several times while manipulating the bands to polish, cut off the shanks inside the bands (I used a small chisel as I found it almost impossible to file without bending/breaking the eyes) and fit them to the booms. This required redrilling and soldering on new eyes which was easily done although frustrating.
The bands at the end which takes the gooseneck fitting was made from brass tube that I tapered and reamed out to fit the end of the boom. The hook was made from.02 brass wire bent to shape. All were blackened. The center band were glued first with cyano 1/3 of the way in from the outer end as shown in the plans and described by Underhill in his Masting and Rigging book.
The “V” shaped brackets that take the gooseneck were cut and filled from brass sheet. As always the first one came out well, but it took 3 try’s to get the second one.
The legs were embossed to represent bolts as I was afraid to drill them for real bolts due to their small size.
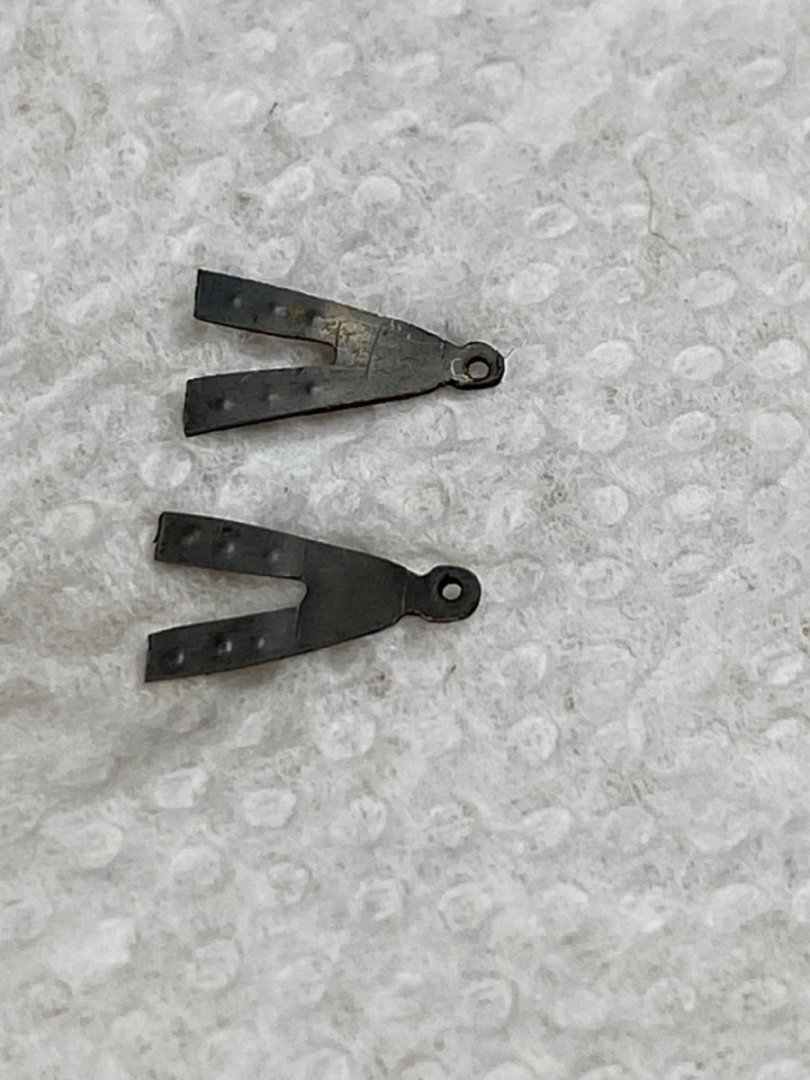
I realized that these couldn’t be attached to the fore channels before the rear brackets were made and fitted. I deviated from the plans in that I used brass rod for the struts per Underhill. The main horizontal strut is 1/32 rod as is the hinge and the supporting strut is .02 in rod soldered to the band. The brass tube was cut at 1/16 in width
I made flanges for the struts which are extremely small and probably not worth the effort.
The V brackets were cemented with cyano, while the rear brackets are place but not get permanently attached so they can be removed for safe keeping.
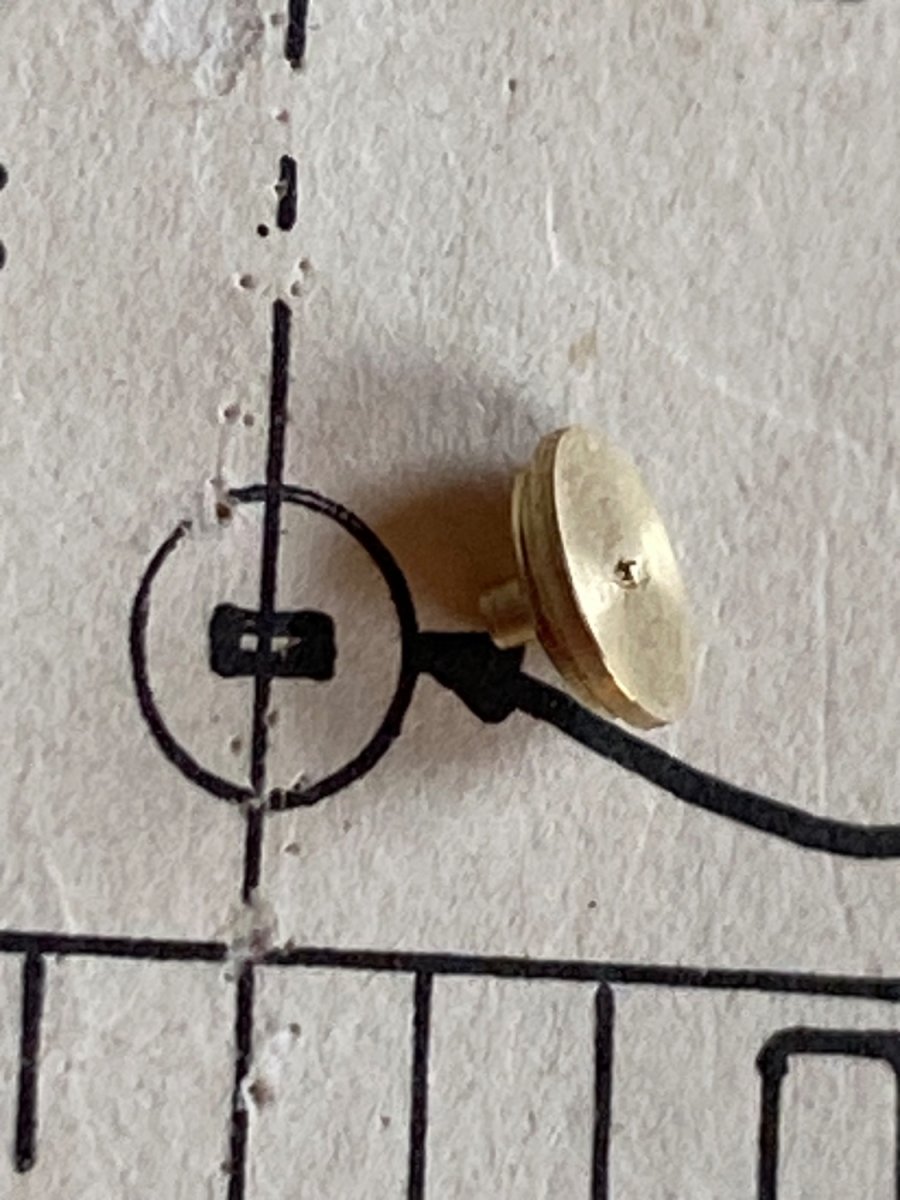
I also made the cap for the water tank. This was turned from brass rod
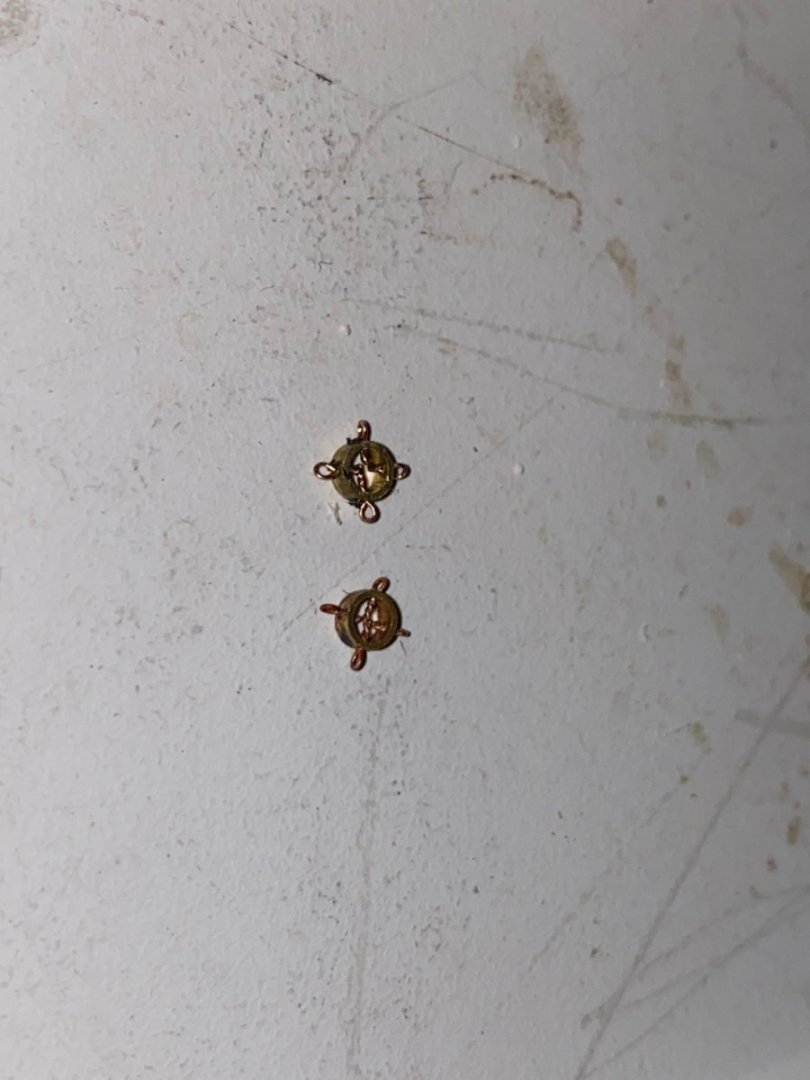 note , one is soldered and the other to be soldered
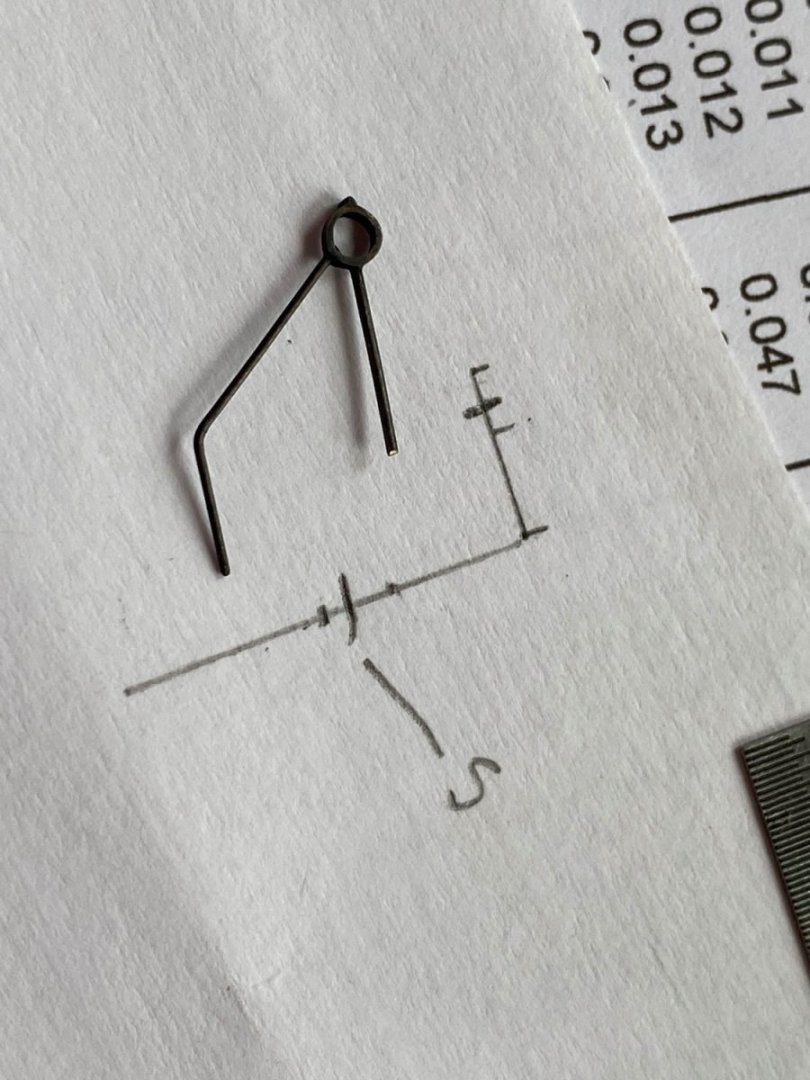


-
-


Newsboy by MrBlueJacket - FINISHED - Model Shipways - scale 1/8"=1'
in - Kit build logs for subjects built from 1851 - 1900
Posted
Looks really good Nic!!!
Rick