HOLIDAY DONATION DRIVE - SUPPORT MSW - DO YOUR PART TO KEEP THIS GREAT FORUM GOING! (Only 13 donations so far - C'mon guys!)
×


mcb
-
Posts
150 -
Joined
-
Last visited
Content Type
Profiles
Forums
Gallery
Events
Everything posted by mcb
-
Merry Christmas and Happy New Year to you and your family Keith. mcb
- 732 replies
-
- 3
-

-

-
- Lula
- sternwheeler
- (and 1 more)
-
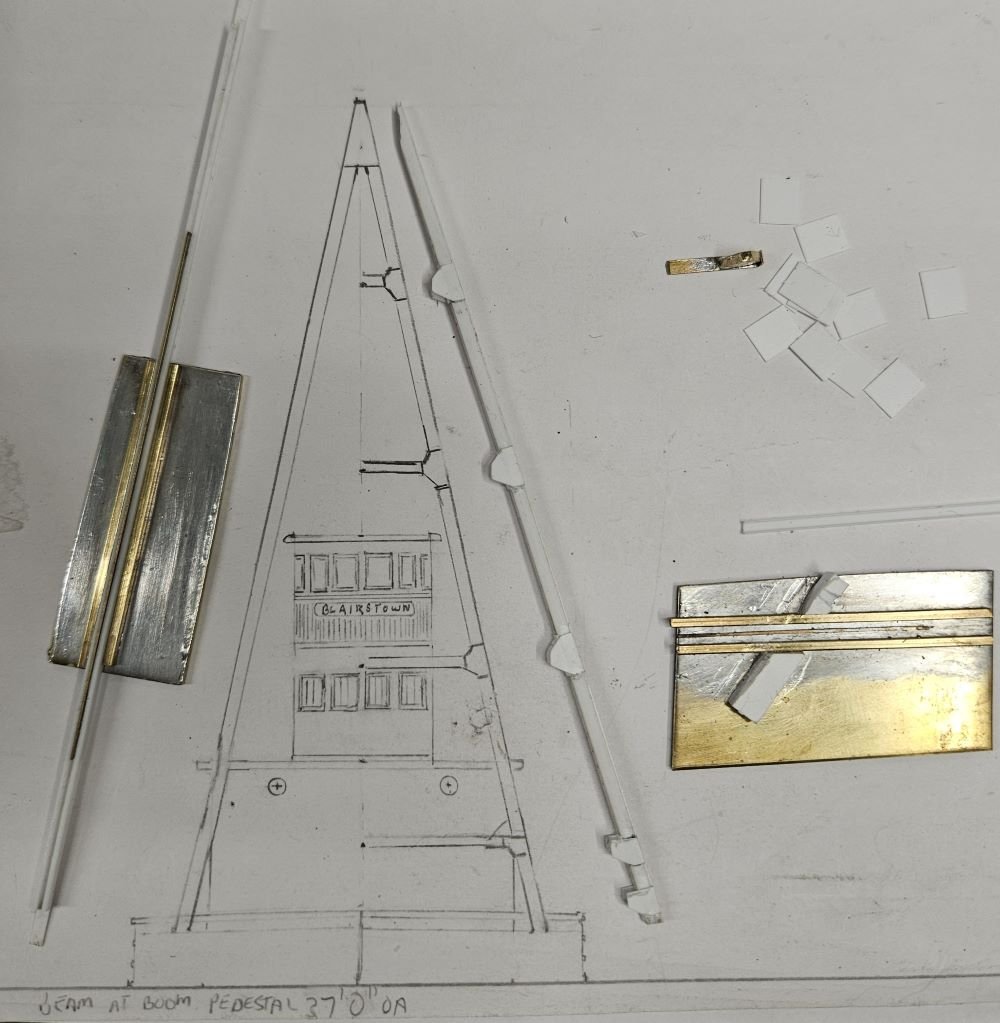
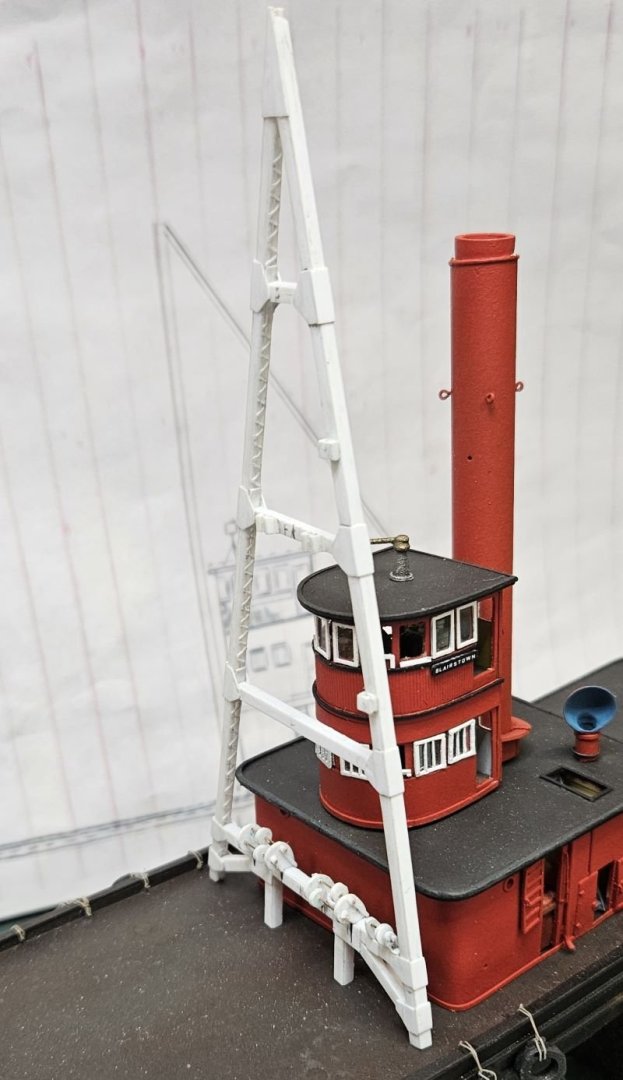
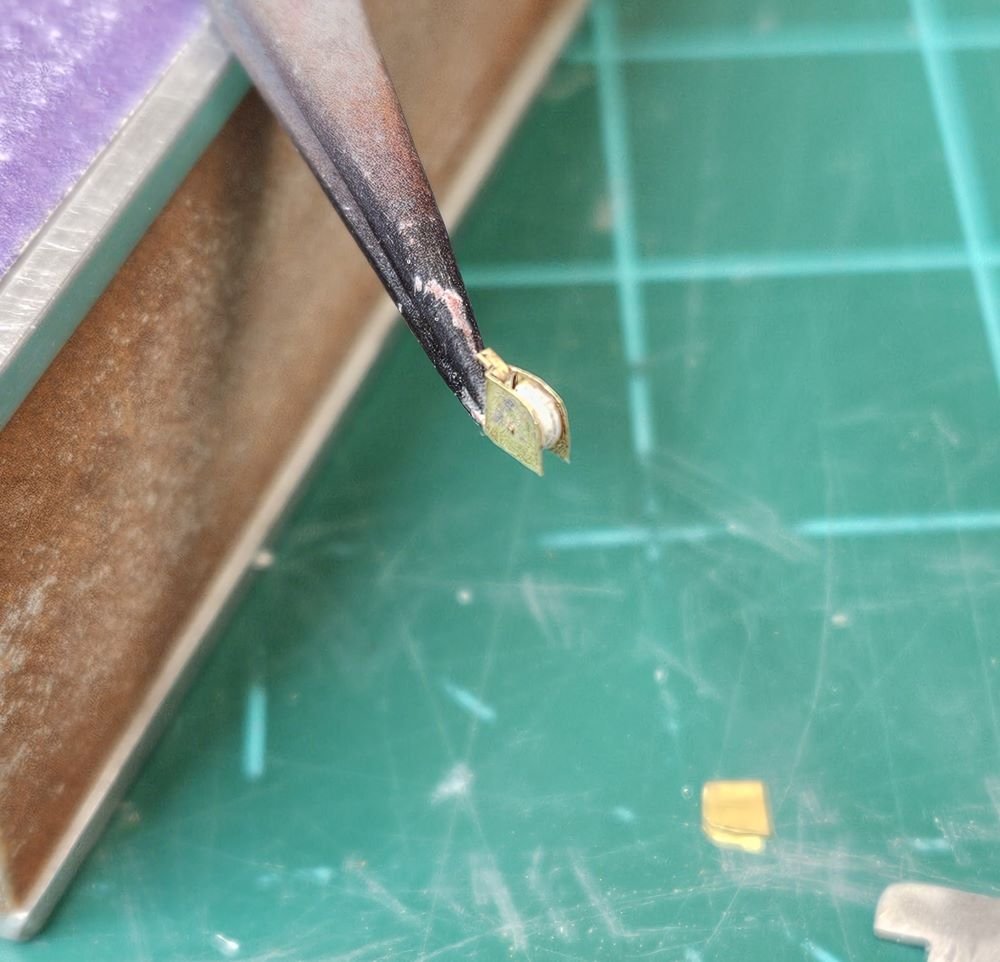
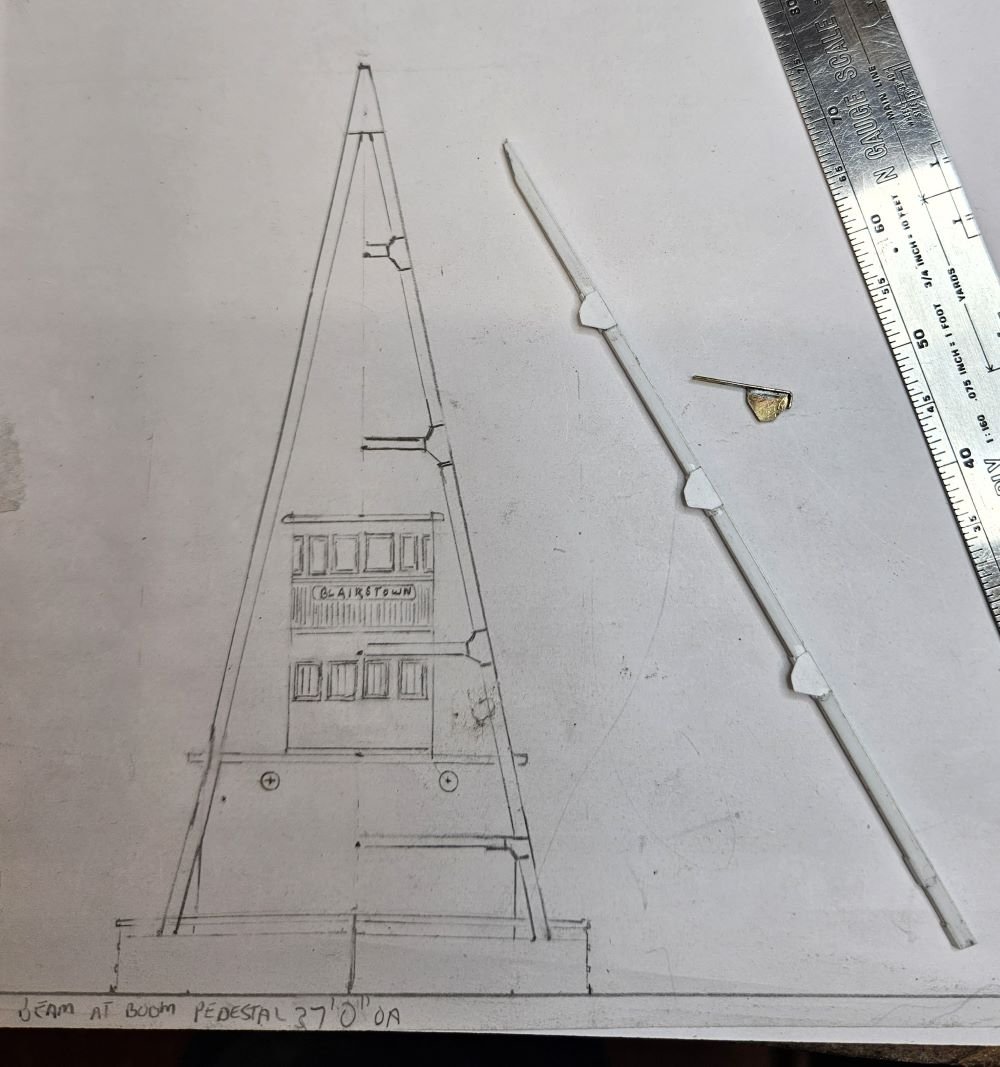
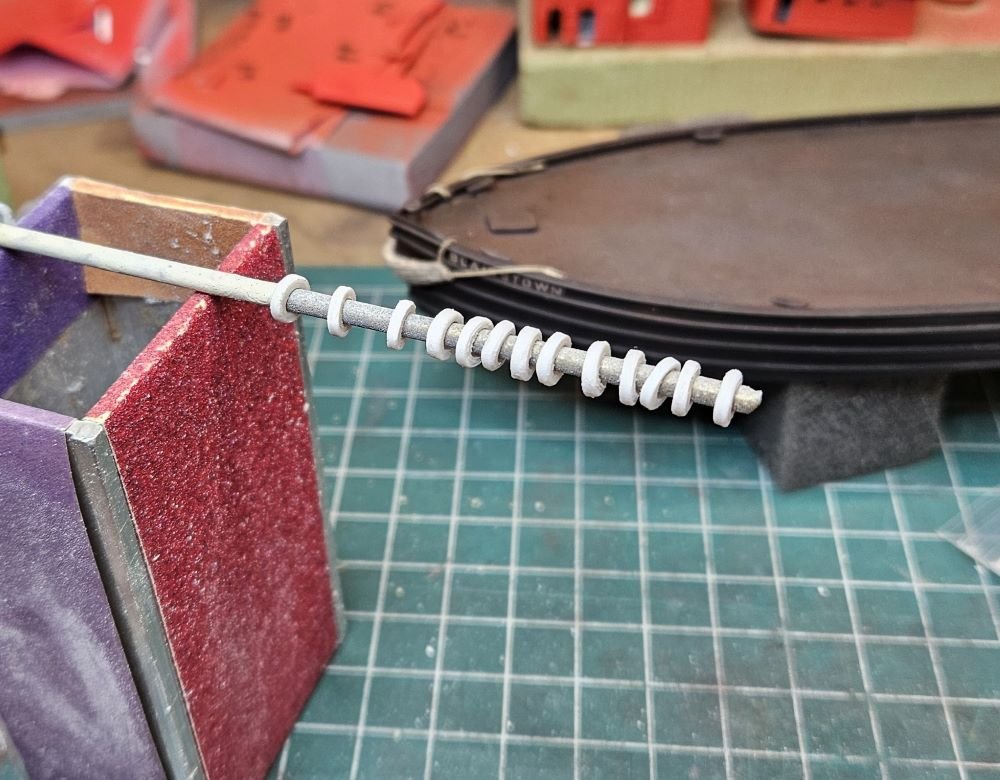
Hello everyone, Thanks for the comments Keith Black, Jim Lad and KeithAug. Thanks all for the likes. Just a small update here as progress continues on the forward derrick leg. First pic should show the fixtures for assembling the components for the 2 beams of the forward legs. with cross braces and gusset plates. next photos should show the assembled leg assembly with guide sheaves/rollers at the bottom and smaller guides further up on the derrick. Last pic is where I am currently. Preparing one of the 3 larger pivoting guide sheaves for the top of the derrick. There are also 2 smaller ones that must be installed just below. After this I will prime and fix blemishes, then I will probably put rivets on the gusset plates as they are quite visible in the picture that I am using for a model. Thanks for looking, mcb
-
Hi Keith, That looks good. Your pastels seem like the old chalks that I use, easy to adjust (until you clear coat it). This project is really moving along. Thanks for posting it, mcb
- 732 replies
-
- 3
-
-
-
- Lula
- sternwheeler
- (and 1 more)
-
Congratulations, well done. I especially like the muted colors. Looking forward to the stern wheeler. mcb
-
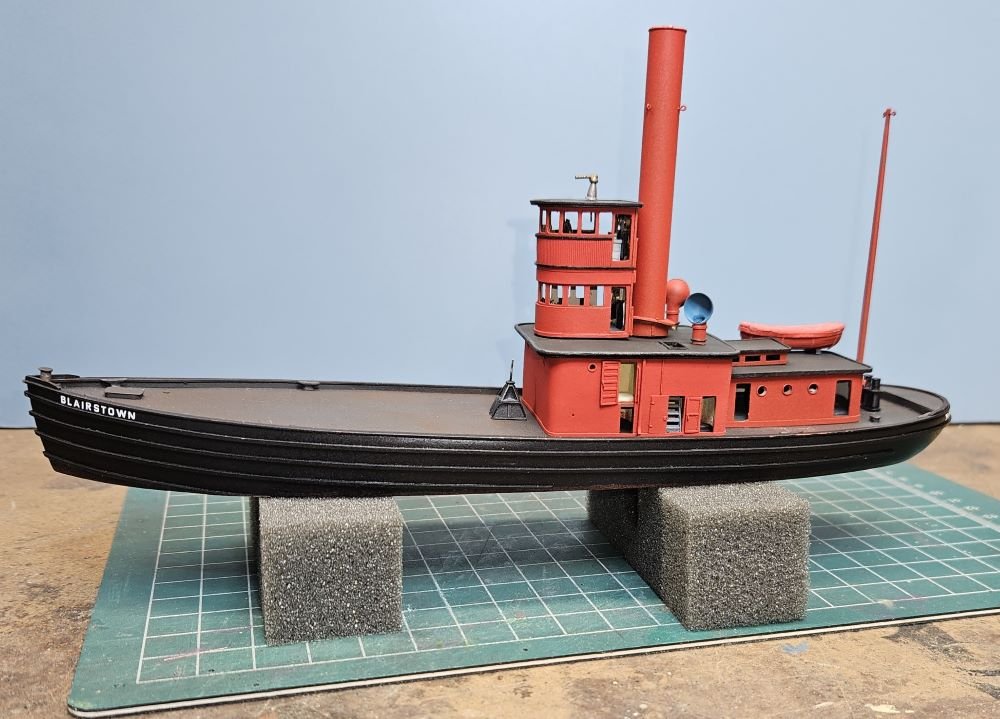
Hello All, Thanks for the comments Jim Lad, Wefalck, Keith Black, KeithAug, and Canute. Its been quite a while. I have been busy with the usual home maintenance and have actually started to build the modules that these harbor models will occupy. I had to set aside the 'BLAIRSTOWN' for a bit as well. As I mentioned above I was not happy with the windows I installed on the pilot house and winch house. This is because they were far too thick, especially on the winch house. I think they will have to go. I have a few ideas about what to try next for them. We'll see. As far as the color of the windows Canute's reply is exactly right. I am building this model as it was in ~ 1964 when it was operated by Petterson Lighterage. Black hull and deck, red superstructure, white windows (with black trim which I probably won't be able to do) and pale blue! derrick top, stack top and mast top. I am using the cover photo of Transfer #30, as Canute says above, for 90%+ of my info for this build. I really should see if I can get permission to post that pic so that everyone can see what I am doing. I agree the white is too vibrant in my photos above I will have to tone it down on the next try. It is slightly more muted in person. Meanwhile as I stew over the windows I have started on the derrick. I took measurements from the above-mentioned pic and began on (crude) drawings. Started with the front derrick leg, building it up from styrene strips and shapes. Thanks for looking, mcb
-
The weathering adds realistic depth. Well done. mcb
-
Hi Keith, The pile driver is looking good, it won't be long now before it's done. You found a good window size for your scale. I'm a fan of Tichy windows as well. Did you say this was going to burn wood? Thanks for posting, mcb
-
Congratulations for completing this outstanding model. I must thank you for introducing new methods, materials and knowledge to consider in my own future efforts. She looks good in the water with figures and flag. Thanks for posting, mcb
-
Hi Keith, Your pile driver is coming along well. I am anticipating the next models in the series. Box car red varied widely. I would be happy with any of the above suggestions as well as what you have already painted. I think we may be giving it far more thought than those who were responsible for the original. Just be sure to weather/fade it a little since the deck and hull are weathered. As for window glazing you may be thinking of Micro Kristal Klear which should be available in any hobby shop (if you still have a local hobby shop). It looks much like Elmer's white glue as Brian mentioned above. Kristal Klear, I think may be less cloudy, but worth trying the Elmer's first if you have it. Nice looking cutter. Let us know your impressions when you get to use it. Thanks for posting, mcb
-
Hi Keith, Pile driver is looking good. Weathering seems to be a very subjective thing. I usually like it understated, especially in the smaller scales. On the other hand, the real pile drivers were certainly filthy, maybe I would vote that way for this one. Mostly I use weathering chalks in layers which usually can be removed without too much trouble if one gets carried away. Thanks again for posting this work, mcb
-
Hi Keith, Pile driver is coming along nicely. It will be finished before you know it. I do like that ferry with a chain drive paddle wheel. I don't see a boiler though. Thanks for posting, mcb
-
Hello Keith, This is going to be good. I was going to ask about the choice of scale, but it's been covered. I think I may have some early 1900's views of pile drivers in the glass plate images I have saved. Let me know if you would like me to send them to you. You probably don't need them; it sounds as though you can build one from memory. mcb
-
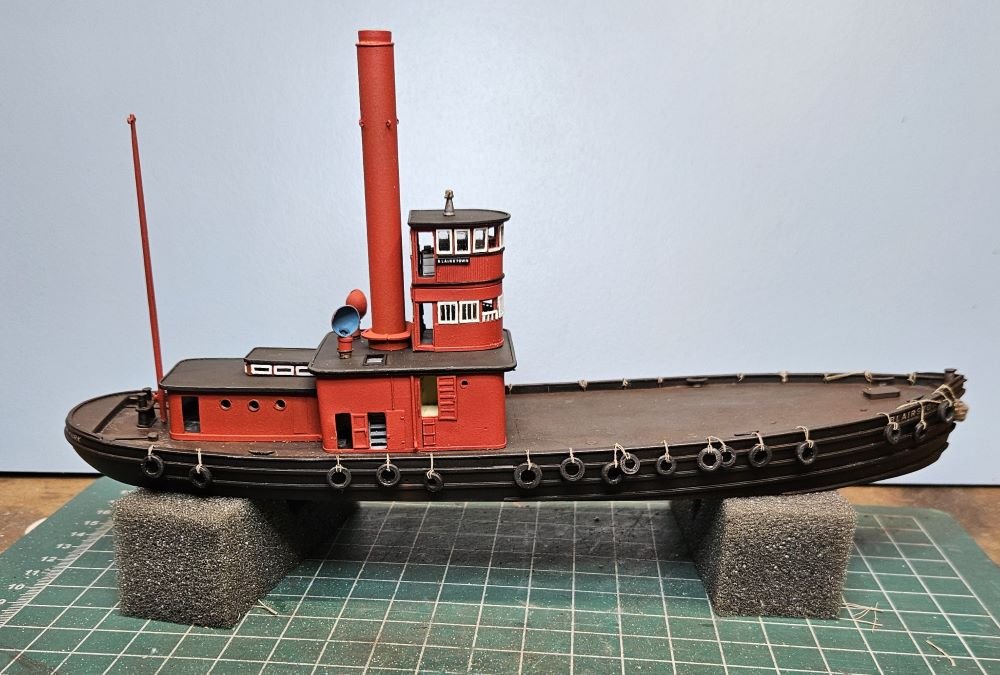
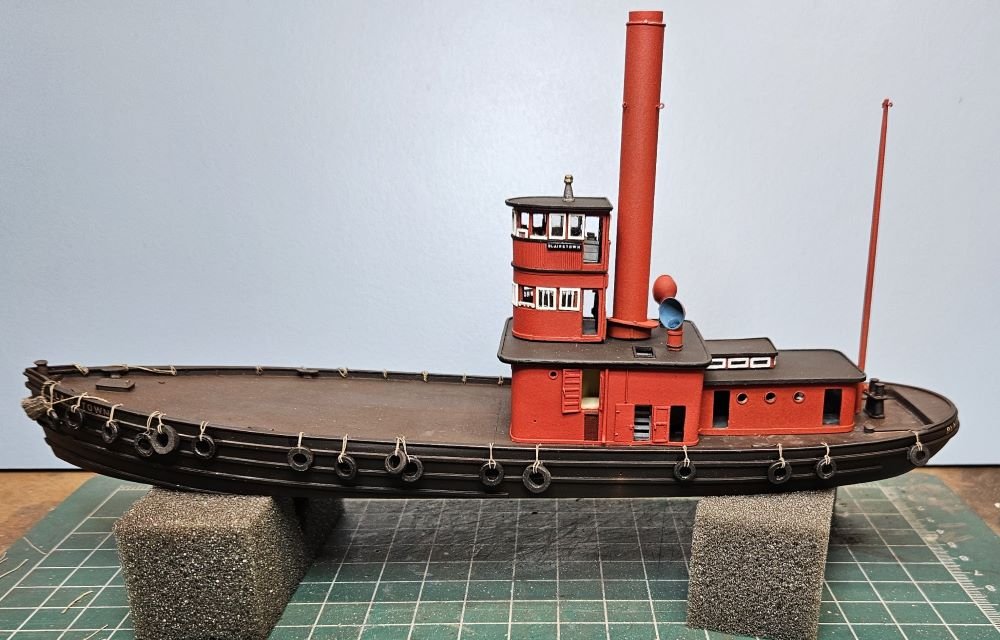
Hello All, Thanks Keith Black, Jim Lad, KeithAug, and Canute for the comments and thanks to everyone for the likes. Tire fenders are finished. The largest ones are castings that my N scale friend gave me, they are large, the size of tractor tires. I only used a few of those. The smaller two sizes, representing truck tires, I made from styrene tubing (4 sizes in all), one inside the other to make up the thickness. O-rings will be used, but for life rings, as I did for 'ISIS'. I think the hull is beginning to look properly dilapidated now. I also installed the windows that I built some time ago. I am not entirely happy with them. Progress reports may slow down as I most of the easy tasks are finished. Derrick, boom and railings are ahead. Thanks again for looking, mcb
-
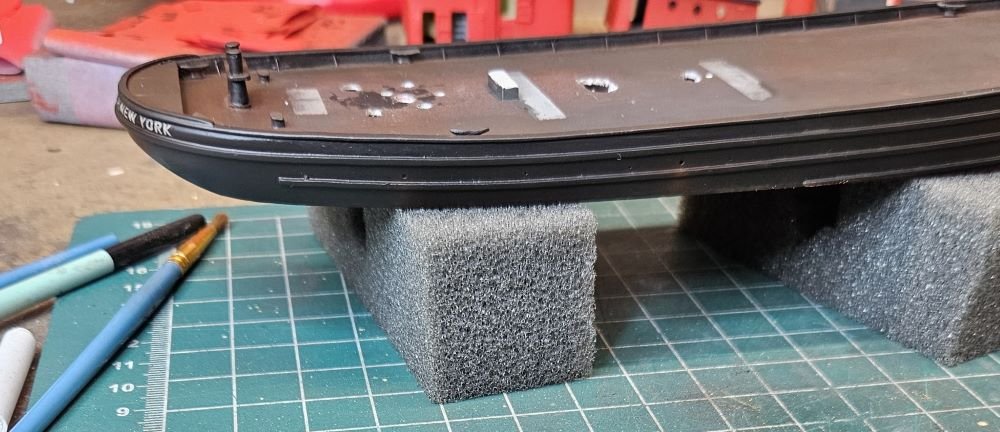
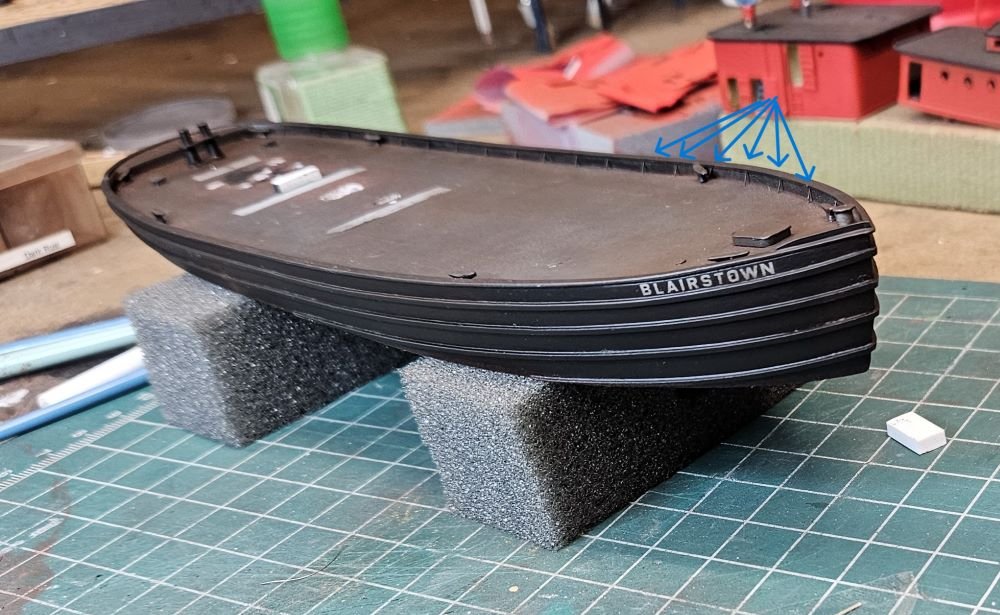
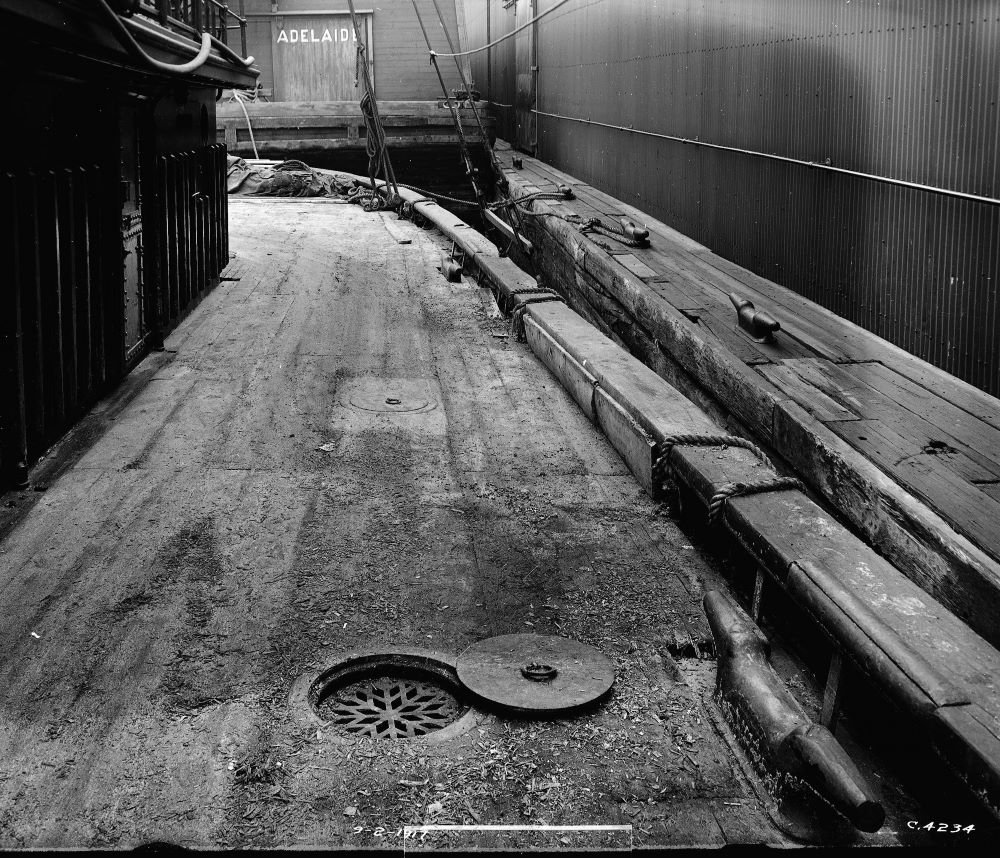
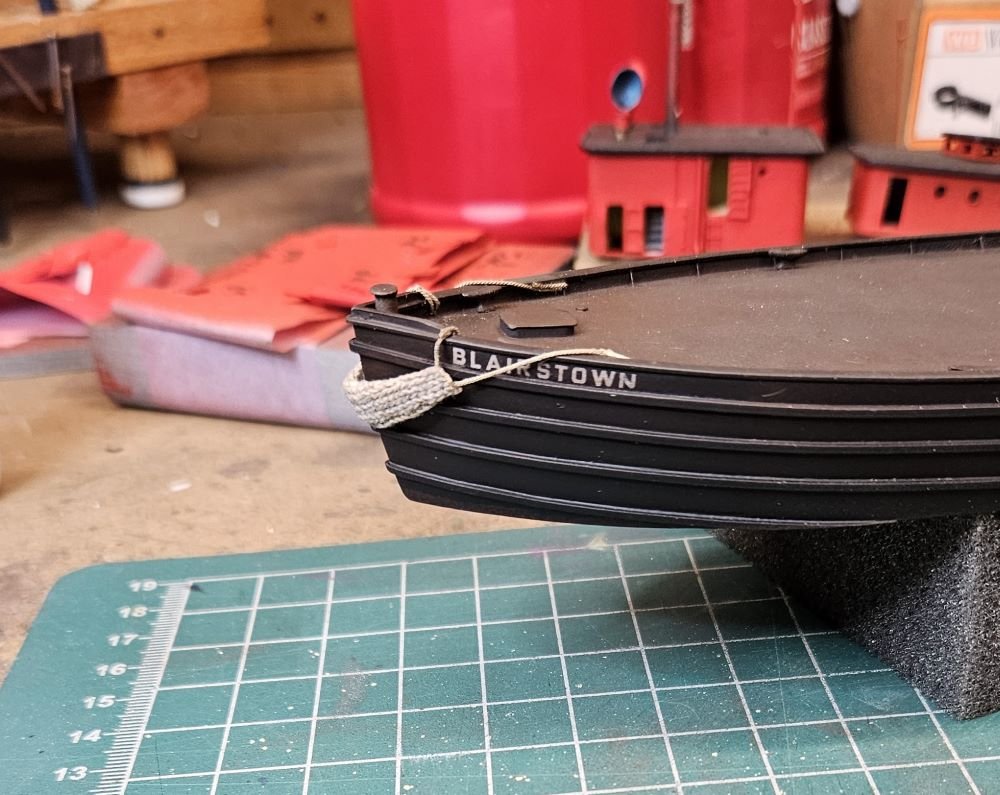
Hello Everyone, Thank you Jim Lad, Keith Black, and KeithAug. And thanks everyone for the likes. I have a small update on this project. I have weathered the hull somewhat and drilled openings for steam and pump discharge and smaller holes for deck drains. Pic#1. Since I soon will have to hang fenders on the hull I had to determine a method. I have no clear pictures of 'BLAIRSTOWN' that were definitive so I chose to use vertical bars under the 'caprail' to the deck. Alternatively, there may well have been a continuous horizontal rail under the 'caprail'. I am not sure. I drilled through the 'caprail' into the deck at regular intervals all around the deck and inserted blackened, .012", phosphor-bronze wire. Arrows show these rods in Pic#2. Pic#3 is a shot of the steam derrick lighter 'CHESTER'. Some of these rods can be seen along with some other interesting details. (Photo Watson B Bunnell, Steamtown NHS, National Park Service, Glass plate photo collection). I hung the bow fender. I don't remember the correct term for it but I'm sure there is one. It is made from a piece of tack rag since its open weave resembles netting. Pic#4. The version of 'BLAIRSTOWN' I am going for is from the early 1960's so it will have old tire side fenders rather than old log fenders as on 'ISIS'. Pic#5 is a part of the old tire production line. Various sizes of styrene tubes sanded/carved slightly for an impression of texture along with a couple of castings a friend gave me. I hope I get the pictures in the correct order. Thanks for watching, mcb
-
Nice gaiters, that worked out well. And thanks for posting all of these interesting old photos of a seldom seen (at least for me) subject. mcb
-
Looks good to me. Like everyone else I would never have noticed the particular block, and then only after I had to hunt for it. You are in good shape now, if I remember correctly, you have much of the ratlines done already. Thanks for showing your work, mcb
-
Thanks Jim Lad, Actually, I took some liberties with my depiction of the name on the stern. The model will hopefully represent the vessel as it was in the early 1960's after it was sold by the Lackawanna Railroad to NN Petterson lighterage company. The decal font is close, but I don't think I should have the underscored 'of' there (or possibly 'New York' as well). I could not resist the 'of' being so quaint (see pic in 1st post). I can always paint it out if I change my mind I suppose. Thanks Keith Black, The ship's boat is solid styrene, made up bread and butter style, then rough shaped, with a .030x.030 square strip stem, sternpost, keel, finally 'planked' with .010 x .040 strip. The cover is a piece of masking tape (idea from this forum) lightly painted in the same superstructure color, then cut out from the outline made from the assembled boat. Tie-down straps cut from the same, laid over the boat, then the cover put over with edges folded over the boat. A ~8" scale 'hem' or trim strip from the same painted tape was put around after the cover was folded down to hide the rough edges. Hard part is getting the cover reasonably centered. Tape so far sticks well enough, no need for glue. BTW, I found the previously mentioned lost little door but it is unpainted so I will have to get the air brush out again. Thanks again for the likes, mcb
-
Nice work, I have a couple of sets of those unpainted Preiser N scale figures, but I only use them occasionally. I never yet tried surgery on them. Thanks for posting those historical photos, they are interesting and informative. mcb
-
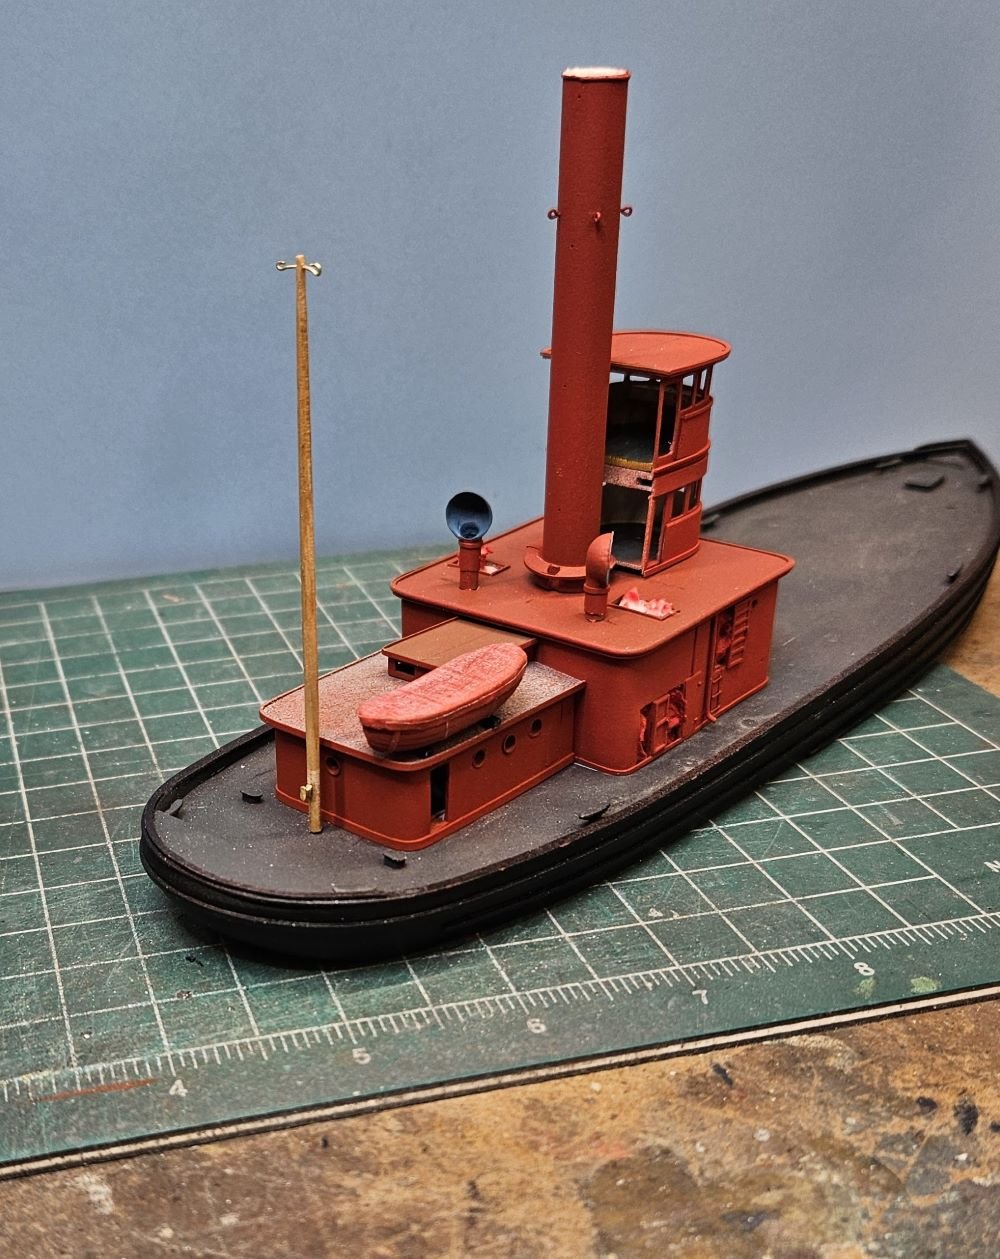
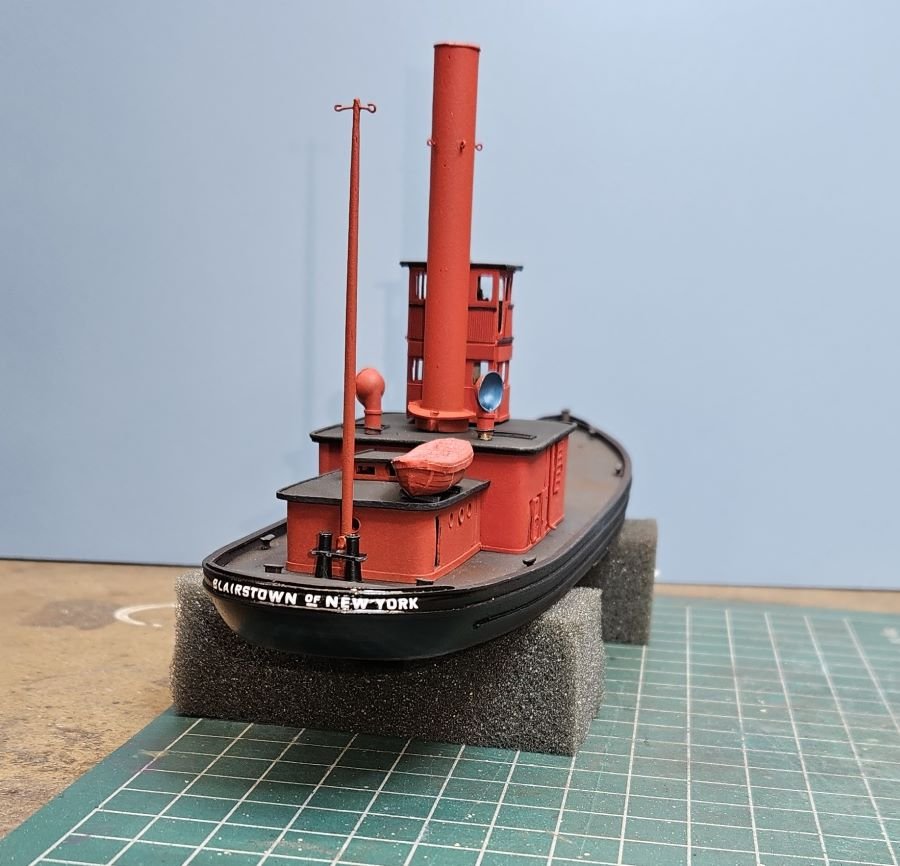
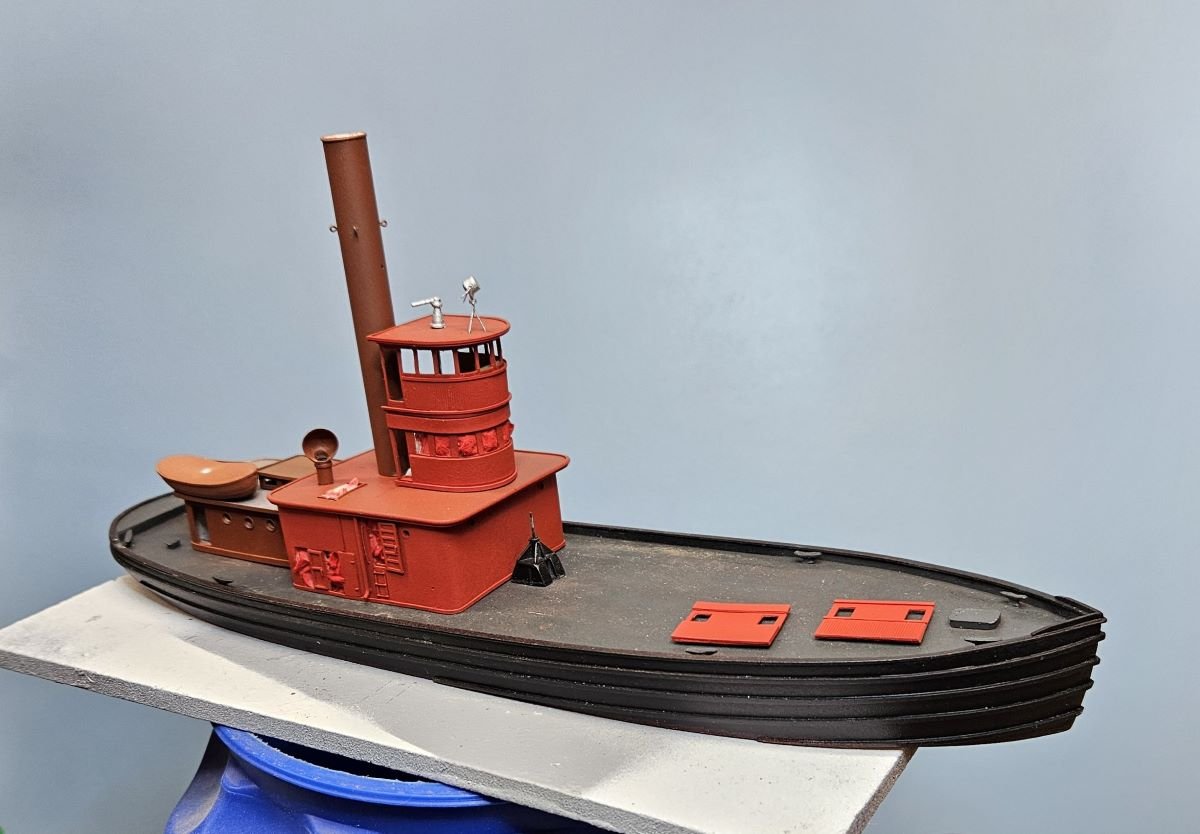
Hello All, Thanks for the comments, Keith Black, Jim Lad and Canute. Thanks all for the likes. Time for a small update. Most of the super structure is now in its final color. Started applying decals. Everything is only sitting in place, not glued. I will not fasten much down until the end of the build as there will be more assemblies going over the superstructure and things may get complicated. Added towing bitts. Some detail (including the pin for the fire monitor) can be seen through the window openings after all, at least for now. And I promise the next New York Harbor boat will not be red. Looking at one of these pictures I notice a small door is missing. I'm off to look for it. Thanks for looking, mcb

-
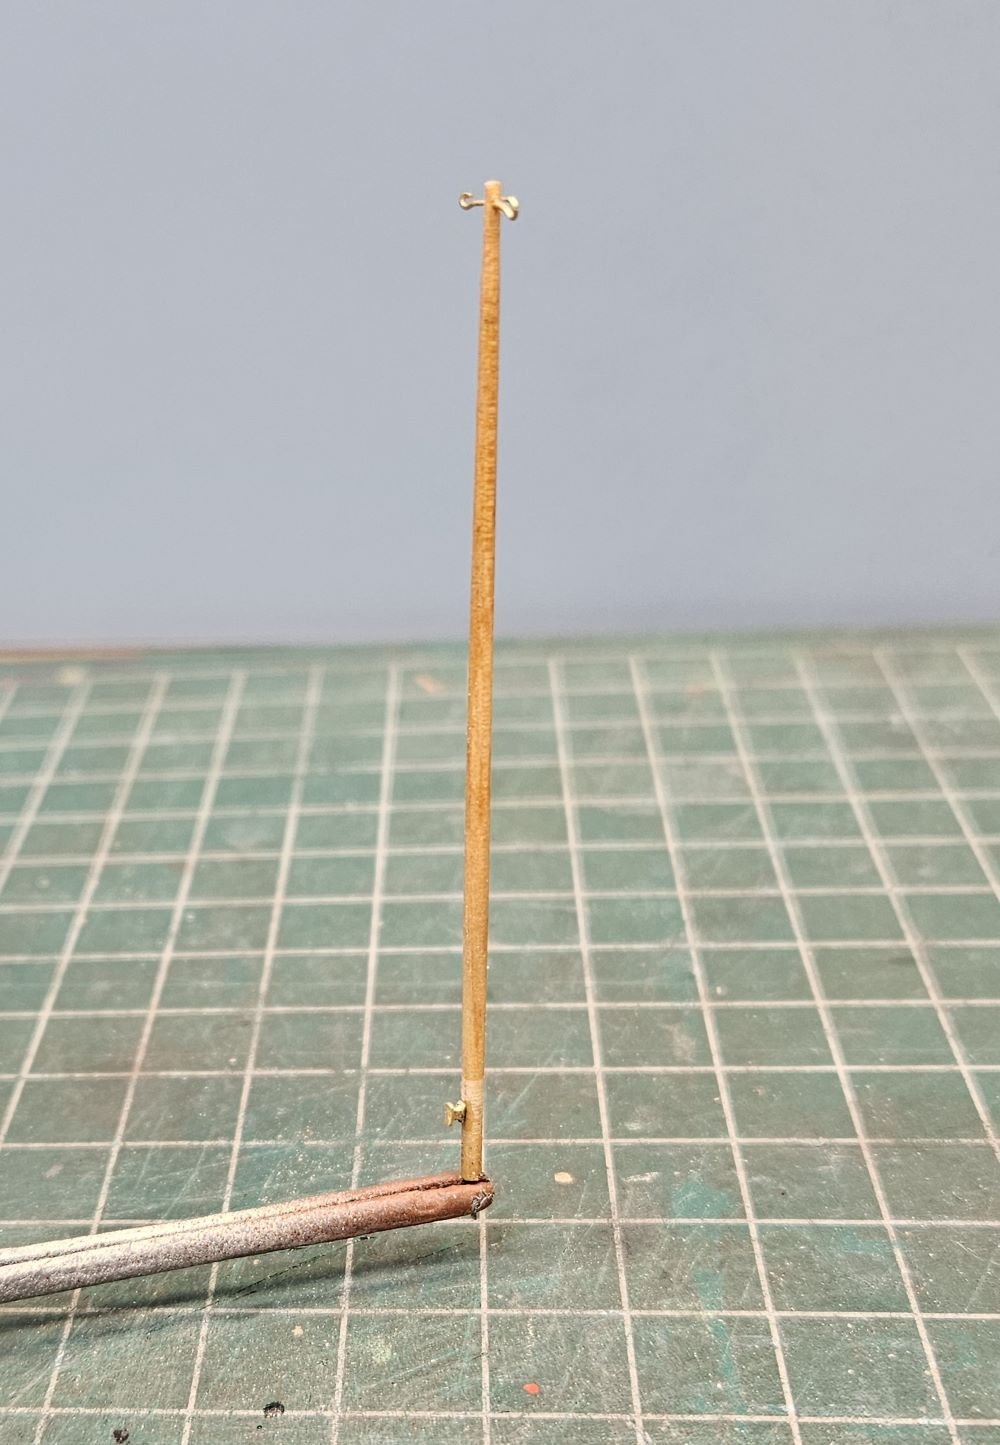
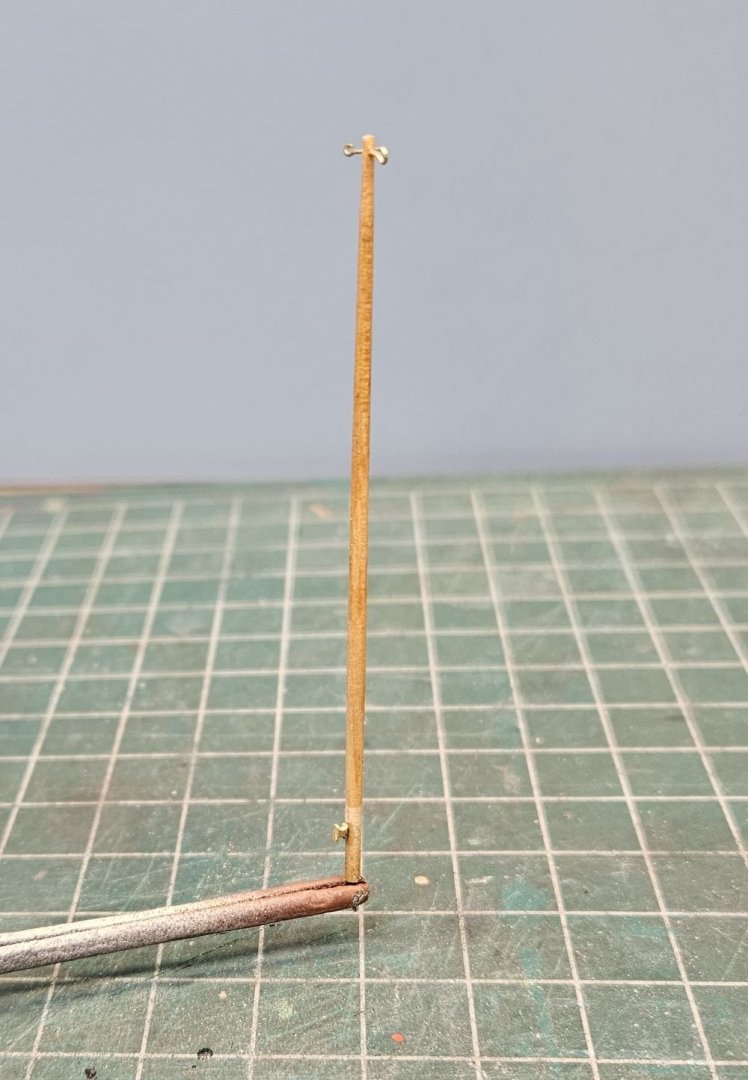
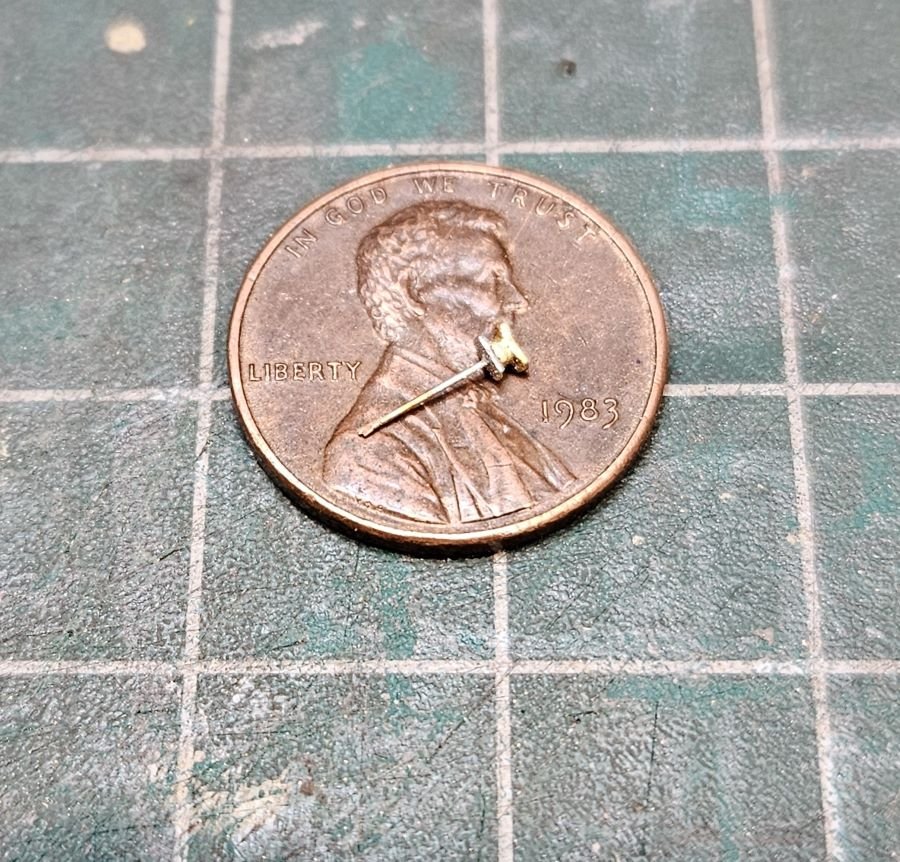
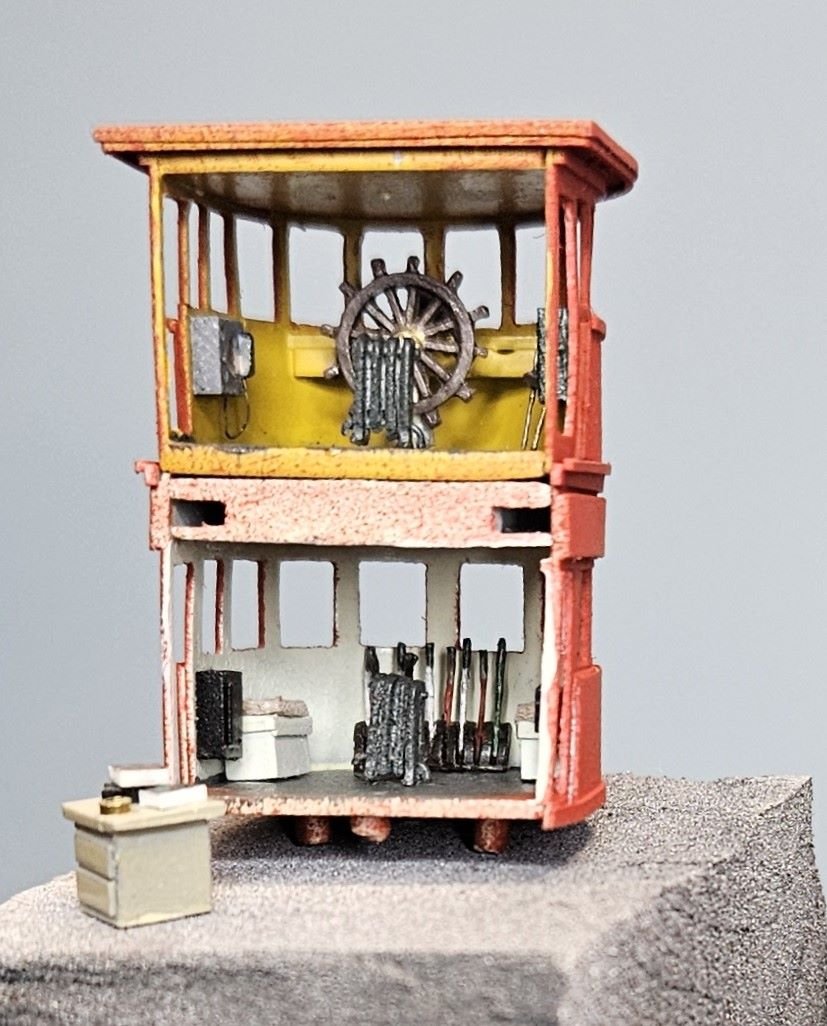
Hello All, It is time for another small update. I turned a mast on the drill press. I think it is the only wood on the model. Added hooks and cleat for the anchor light halyards. The cleat is about as small as I can work. Also added interior details for the pilot house and winch control house. Probably overdid it. Very little, if any of it, will be visible in the end. Thank for looking, mcb

-
Hello All, Thanks everyone for the likes. Wefalck, thanks for the comments again. I hadn't thought about condensers. Although I am not sure, I am leaning toward this vessel not having a condenser for the reason Roger Pellet states above (cost of the equipment). Yes, in most cases, in the old images I look through, the company name on the stack is on sheet metal that stands off from the stack itself. This is all interesting to me. Scottish Guy, Thank you for the comments. I was lucky, didn't need any glasses until 45. Now I use readers and usually optivisor for this work. And I'm still a puppy. Thanks Roger for the comments and especially for the book recommendation. I will be looking for that one. Thanks Canute, yes those glass plates are great. I have viewed many of them, I probably would not be doing all this NY harbor stuff otherwise. Thanks for the link to the trainweb website, haven't looked in for a long while. Noticed a new, (to me, pic of 'BRONX') should be useful in the future. By the way, I built a n scale (static) model of Harlem Transfer #2 about +20 years ago. Hope to update progress in the near future. Regards, mcb
-
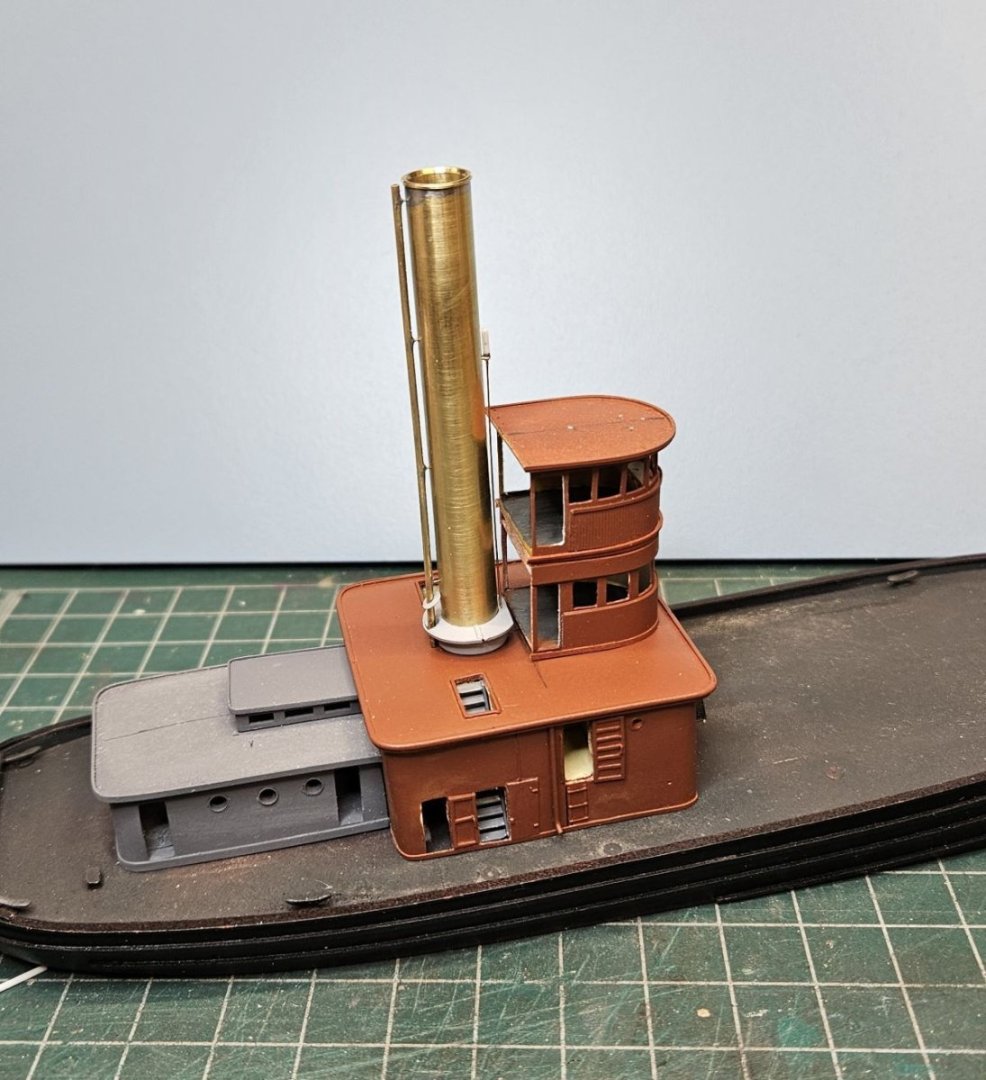
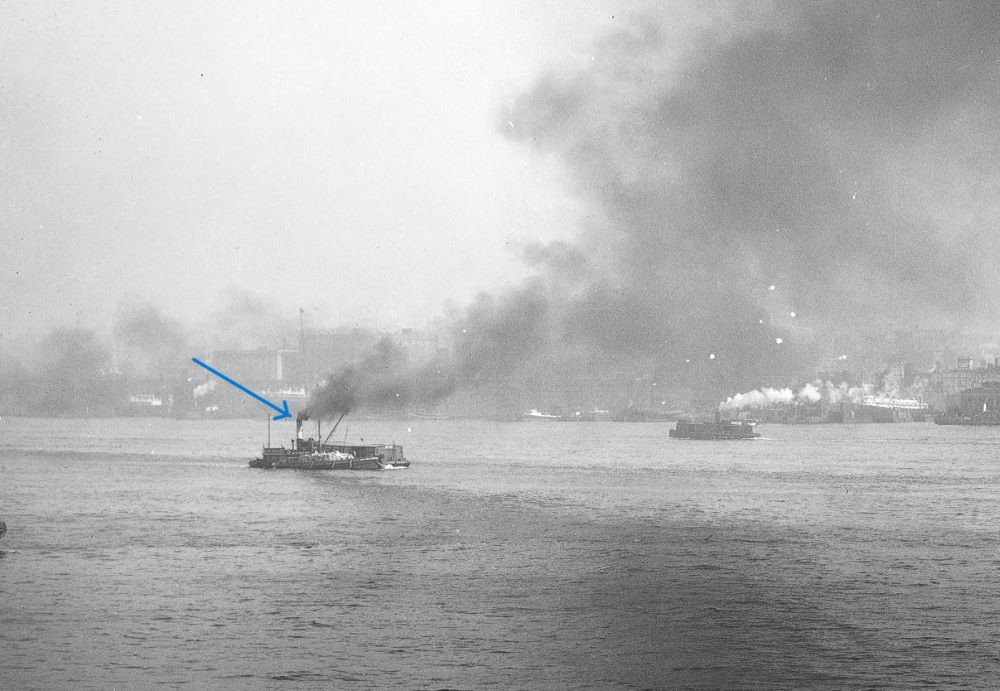
Hello All, Thanks for the comments and the likes. Keith Black, thanks, that cracks me up. My wife would hide hers if she saw that. Wefalck, thanks for the comment. All the NY harbor craft, tugs, lighters, ferries, etc. pictures that I can remember have closed pilot houses. Mine are open until I have the painting done before I install the interior parts. jerome, thanks for your comments. I also think that there would be a liner. It is difficult to tell from that cropped picture in post #7 above. There is none obvious, but I suppose that it could terminate below, out of view, or perhaps flared over the outer shell. Do you have a build log for that restoration? I may have missed it. It looks nice. Nevertheless, I still would like to know why the liner isn't filthy. 🙂 Another steam derrick lighter, c., cropped from NPS / William B Barry (Steamtown collection). This focus on the stack got me thinking about something that was bothering me. In a couple of pics I thought I could discern a faint trail of steam about 1/3 of the way down the stack. I wonder if that could be the discharge from the pressure relief valve and that the relatively large pipe attached behind the stack is the exhaust steam from the engine. I had thought that exhaust steam went up the boiler stack (as it would in a steam locomotive to improve draft) and that the large pipe was the RV discharge, but this doesn't seem to make sense the steam would condense in the tall, relatively cool stack. If so, I have some more work to do. Perhaps one of our experts can inform. Meanwhile I started to paint some of the sub-assemblies. The pilot house, winch house and forward deckhouse are in the final color now. The sub-assemblies are set in place temporarily, in most cases with pins for convenience. Thanks again for looking, mcb
-
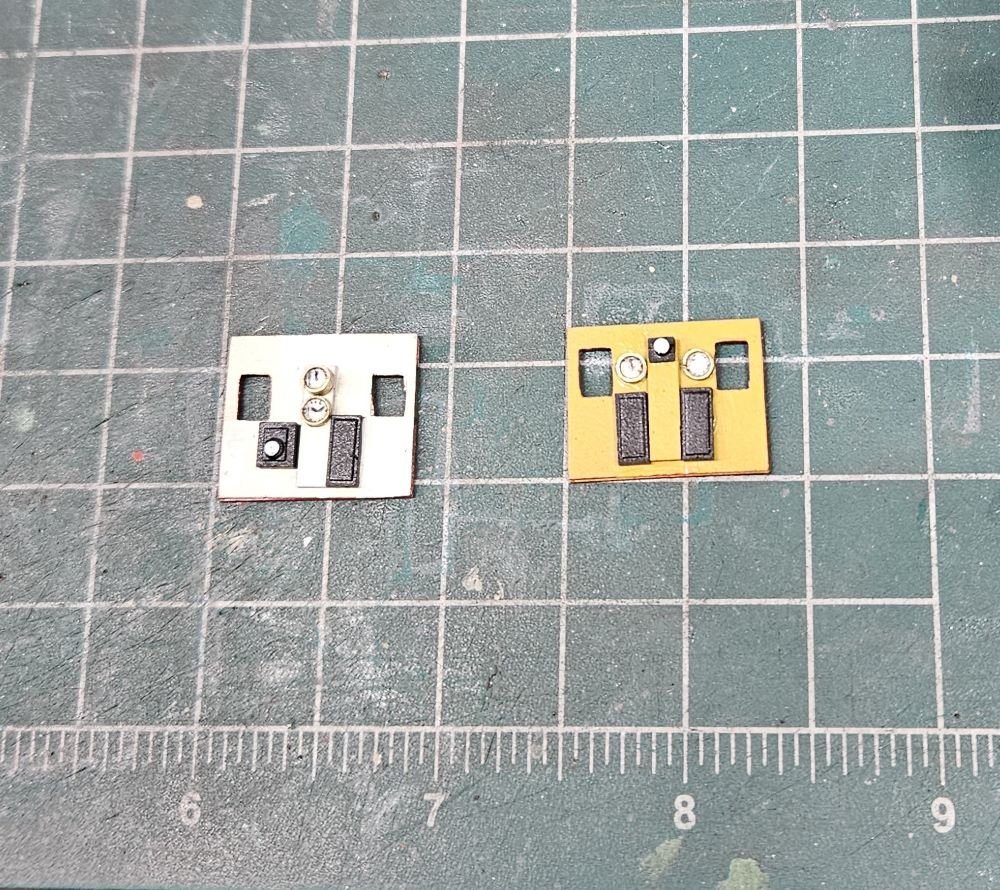
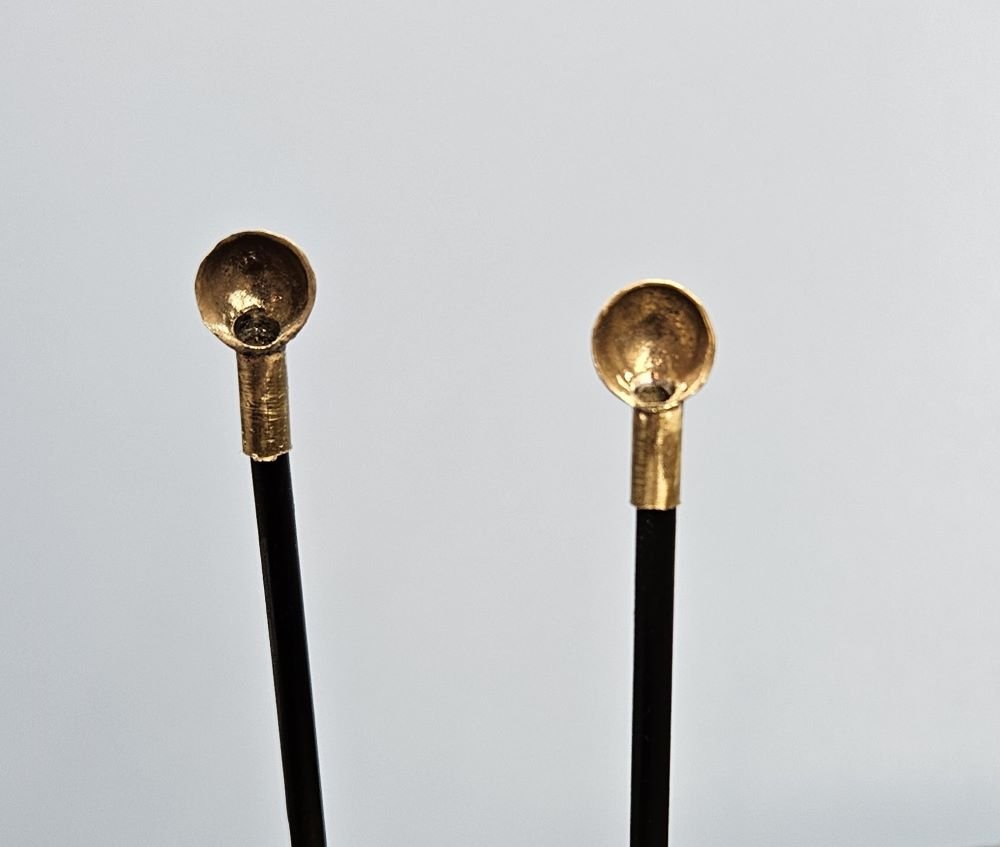
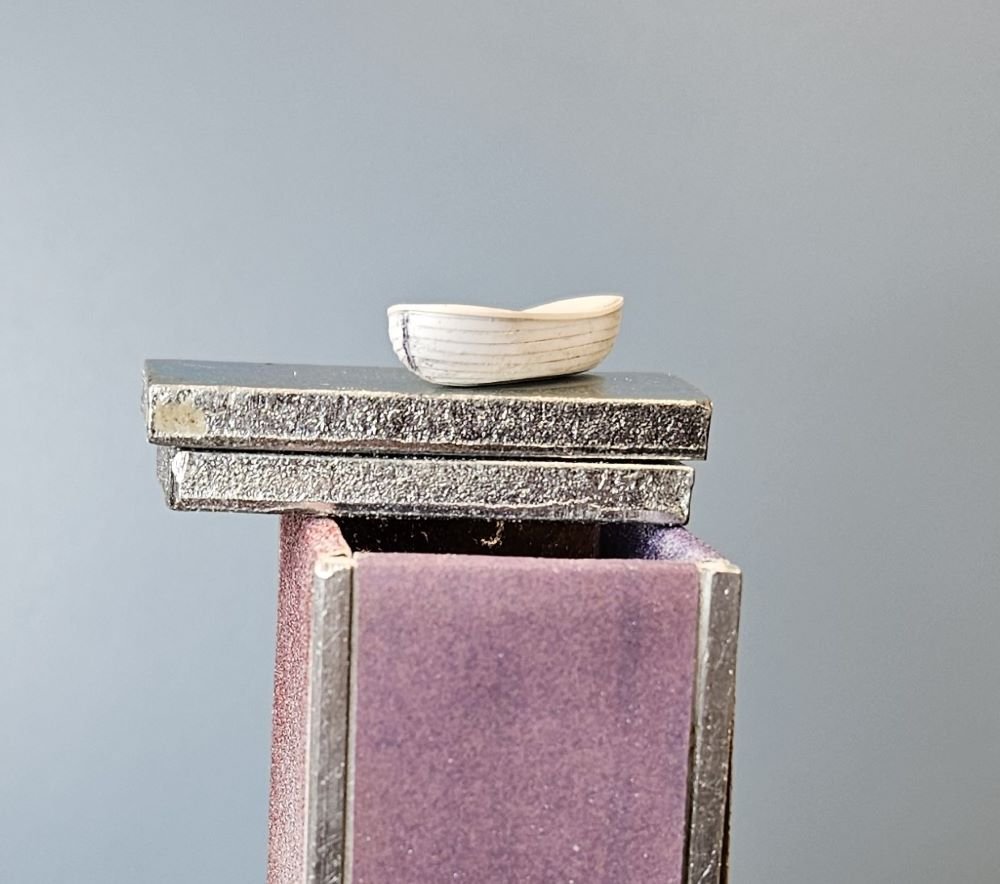
Hello All, Thanks for your comments, Jim Lad, Canute, KeithAug and Keith Black. And thanks everyone for the likes. Another short update here. Hoping to use more scratch fittings on this boat than the last one. Tried to make some cowl ventilators in brass, somewhat ratty looking. Made a ships boat in solid styrene with .010x .040" styrene strip, 'faux clinker'? Luckily its going to be covered. Still have to make engine house doors. The time is flying by on this one. Thanks for looking, mcb

-
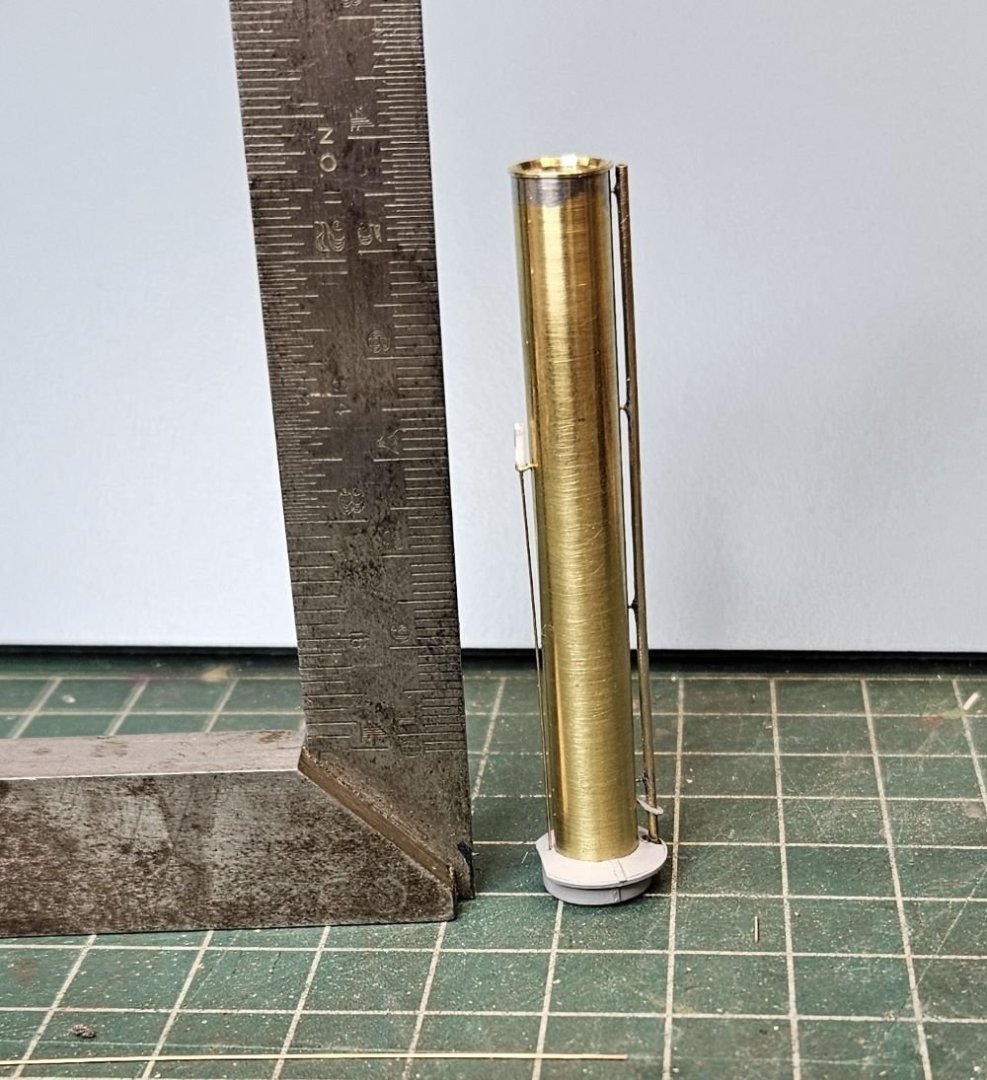
Hello everyone, Thanks for the comments Roger, KeithAug and Jim Lad. Thanks everyone for the likes. Short update here. I have the pilot house and winch house doors built; need to do the engine house doors. Working on the stack, whistle and RV discharge. I think I may have a large enough batch of parts to paint soon. Thanks for looking. mcb