Gaffrig
-
Posts
190 -
Joined
-
Last visited
Content Type
Profiles
Forums
Gallery
Events
Everything posted by Gaffrig
-
 Thank you Julian! I try my best to go slow and be as accurate as possible! Gaffrig.
 -
That sounds great! I wish I had the knowhow and equipment to do that.. It will be fun to see how they turn out. Gaffrig.
-
Hello, and wlelcome from a fellow Norwegian! I also have the occre fram kit in my stash. I highly recomend the book Fram by Tor Borch Sannes. This is out of print unfortunately, but it shows up on finn.no every once in a while, and most librarys have it. Hope you do a buildlog when you start your Fram. Gaffrig.
-
Thank you Mark! I’m happy with the way it turned out. Gaffrig.
-
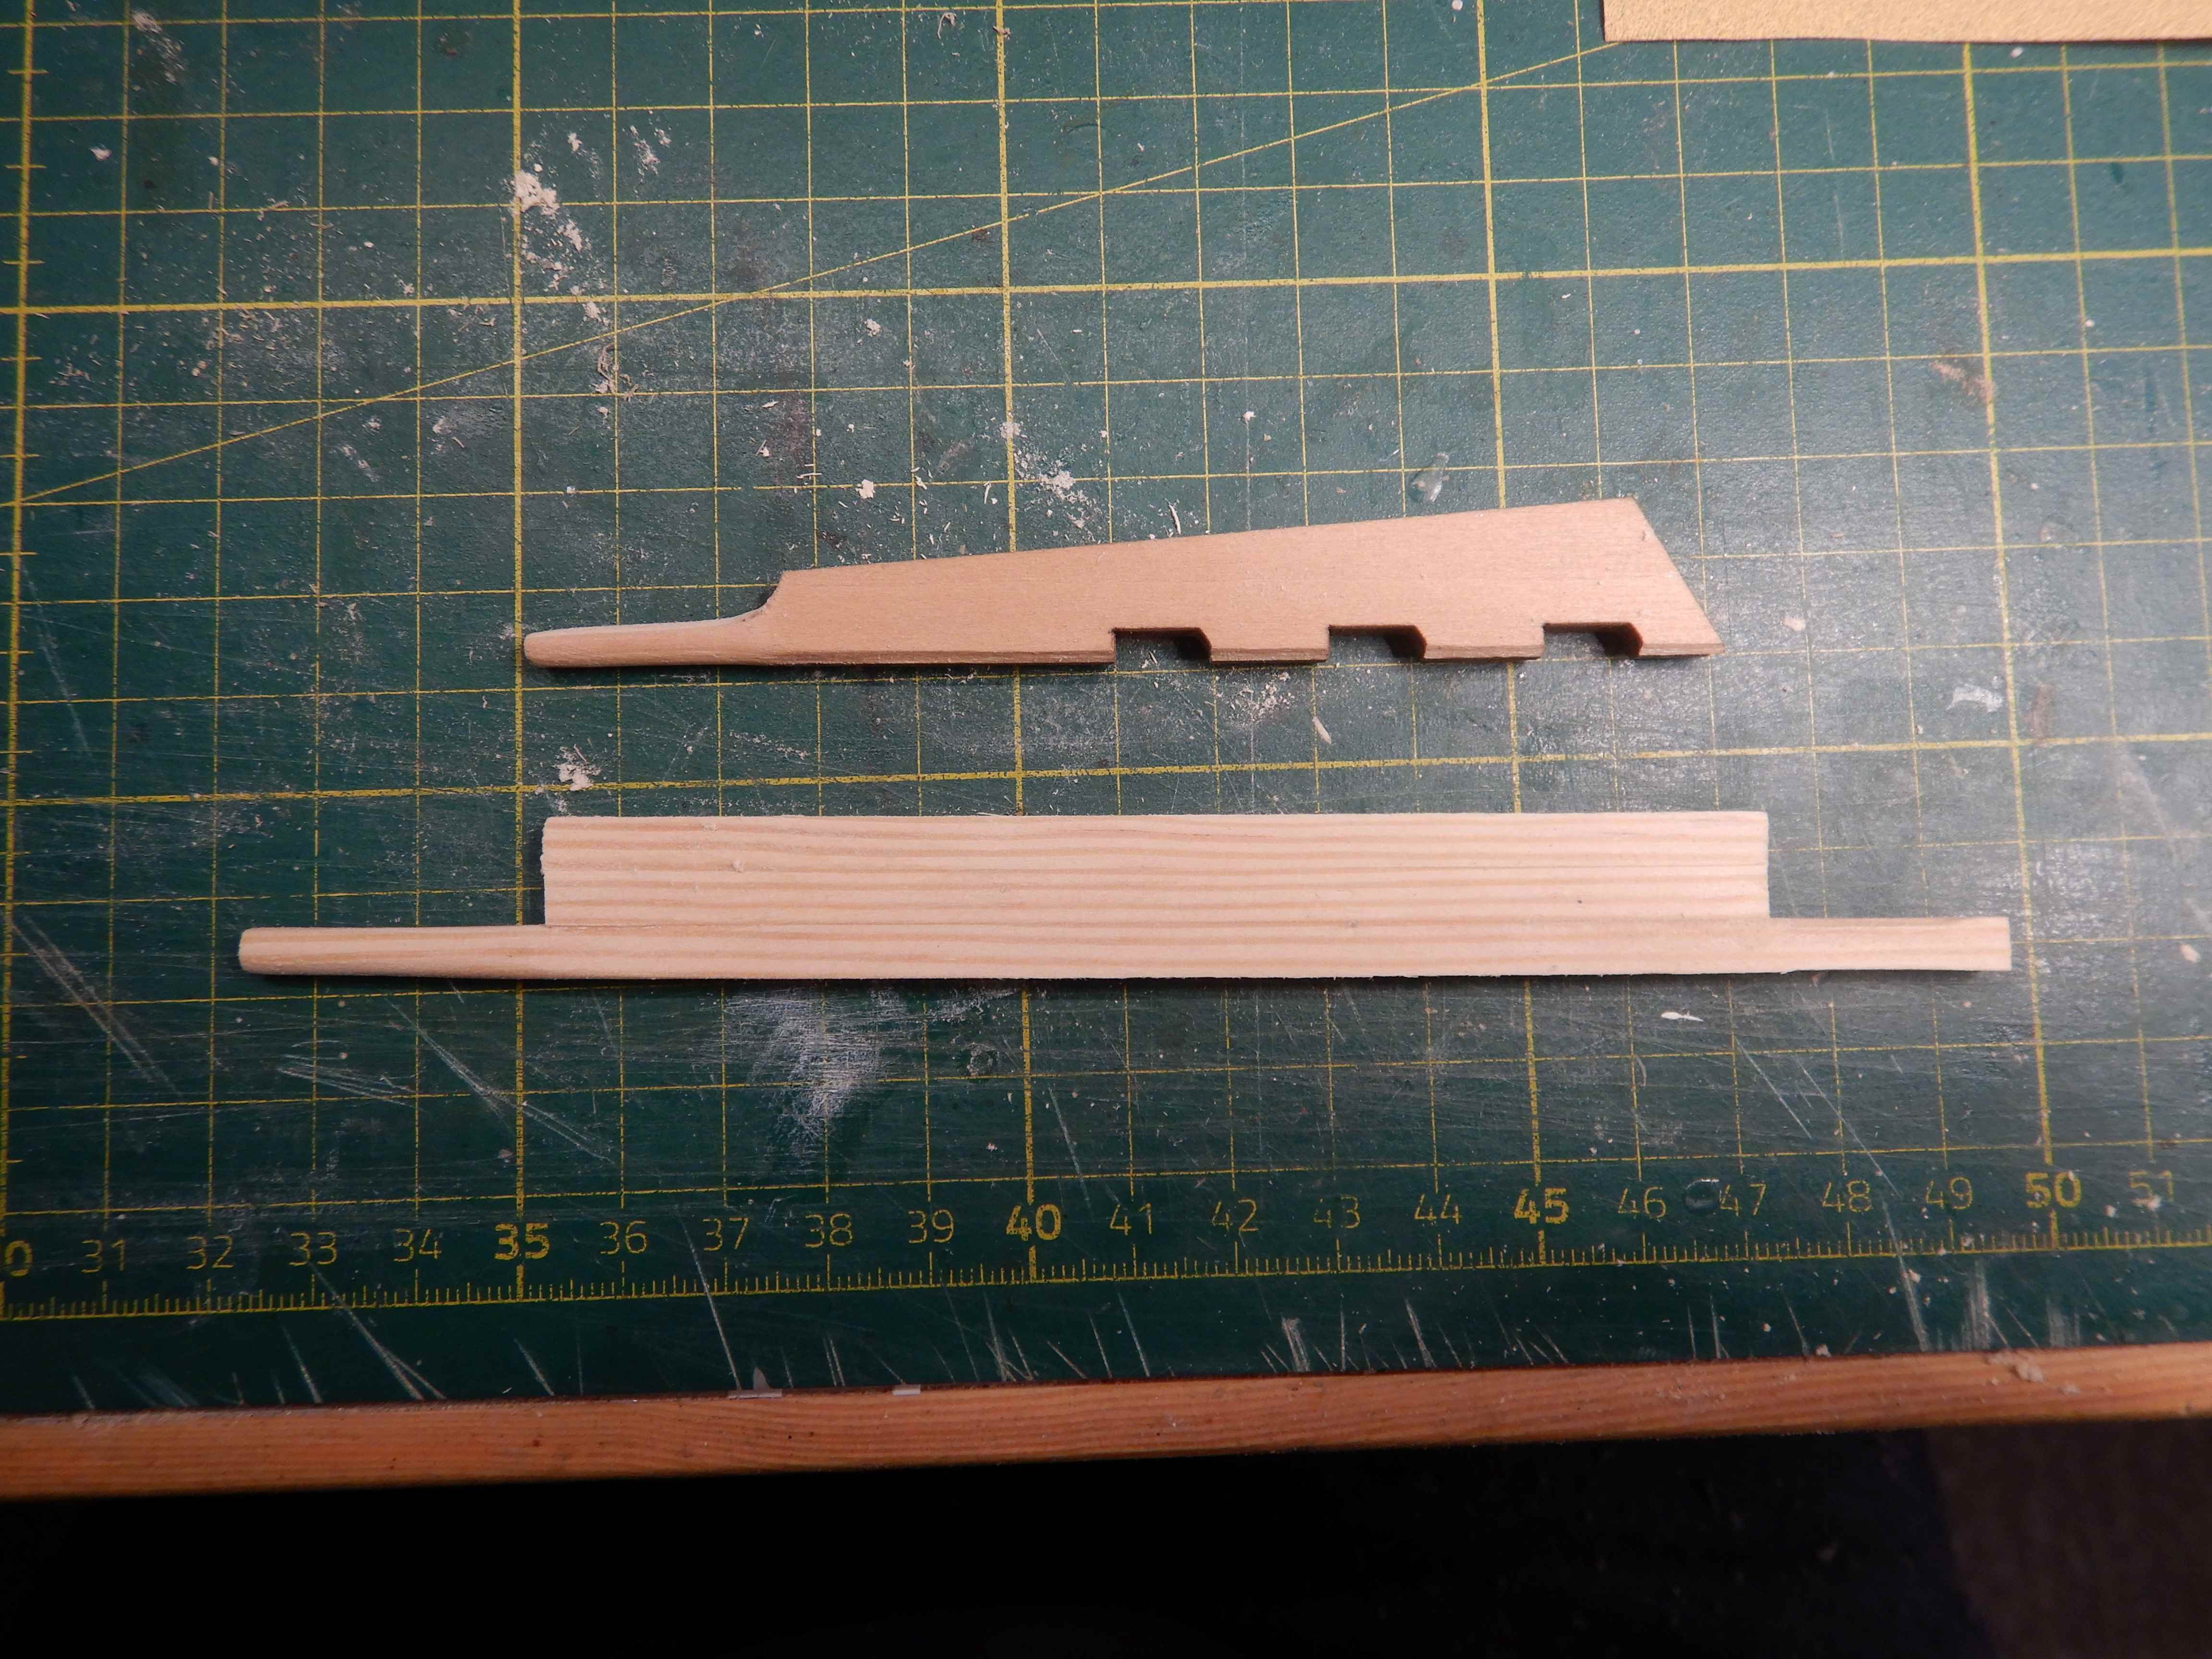
Hello all, and happy new year! I have made a little progress on Lynx over the christmas holidays. Decided to tackle the channels, deadeyes and chainplates. Again, the kit parts leaves a lot to be desired... So I decided to scratch my own. This turned out to be a lot more work than I thought, but I think the end result is good, and worth the work. My parts vs. kit parts. The ring to go around the deadeye is to small, and the deadeye at 5mm I think is to big. I also think the width of the chainplate is to big. This is how I made them.. Cut brass strip from a 0,3 mm sheet, and used 0,5 mm brass wire wound around a filehandle to make rings. Folded the strip double over the opening of the ring.. Then soldered it together.. I bought 3D printed 4mm deadeyes from Syren Models, and squeezed the ring around it.. Then primed with black primer.. I glued the channels to the hull, strengthened with brass pins.. Then I used a dowel in the masthole with a temporary shroud to find the angle the chainplates are to be mounted. I then cut and rounded them to correct length, and drilled two holes. I thougt my brass nails were alittle to big, so I put them in a power drill and filed them down. Looks better.. Before mounting them I rubbed down the hull lightly with sandpaper and gave it a new coat of paint after. And this is how it ended up.. That's it for now! Happy modelling! Gaffrig.


-
Tool to Take Measurement Inside of a Hull
Gaffrig replied to ChrisLBren's topic in Modeling tools and Workshop Equipment
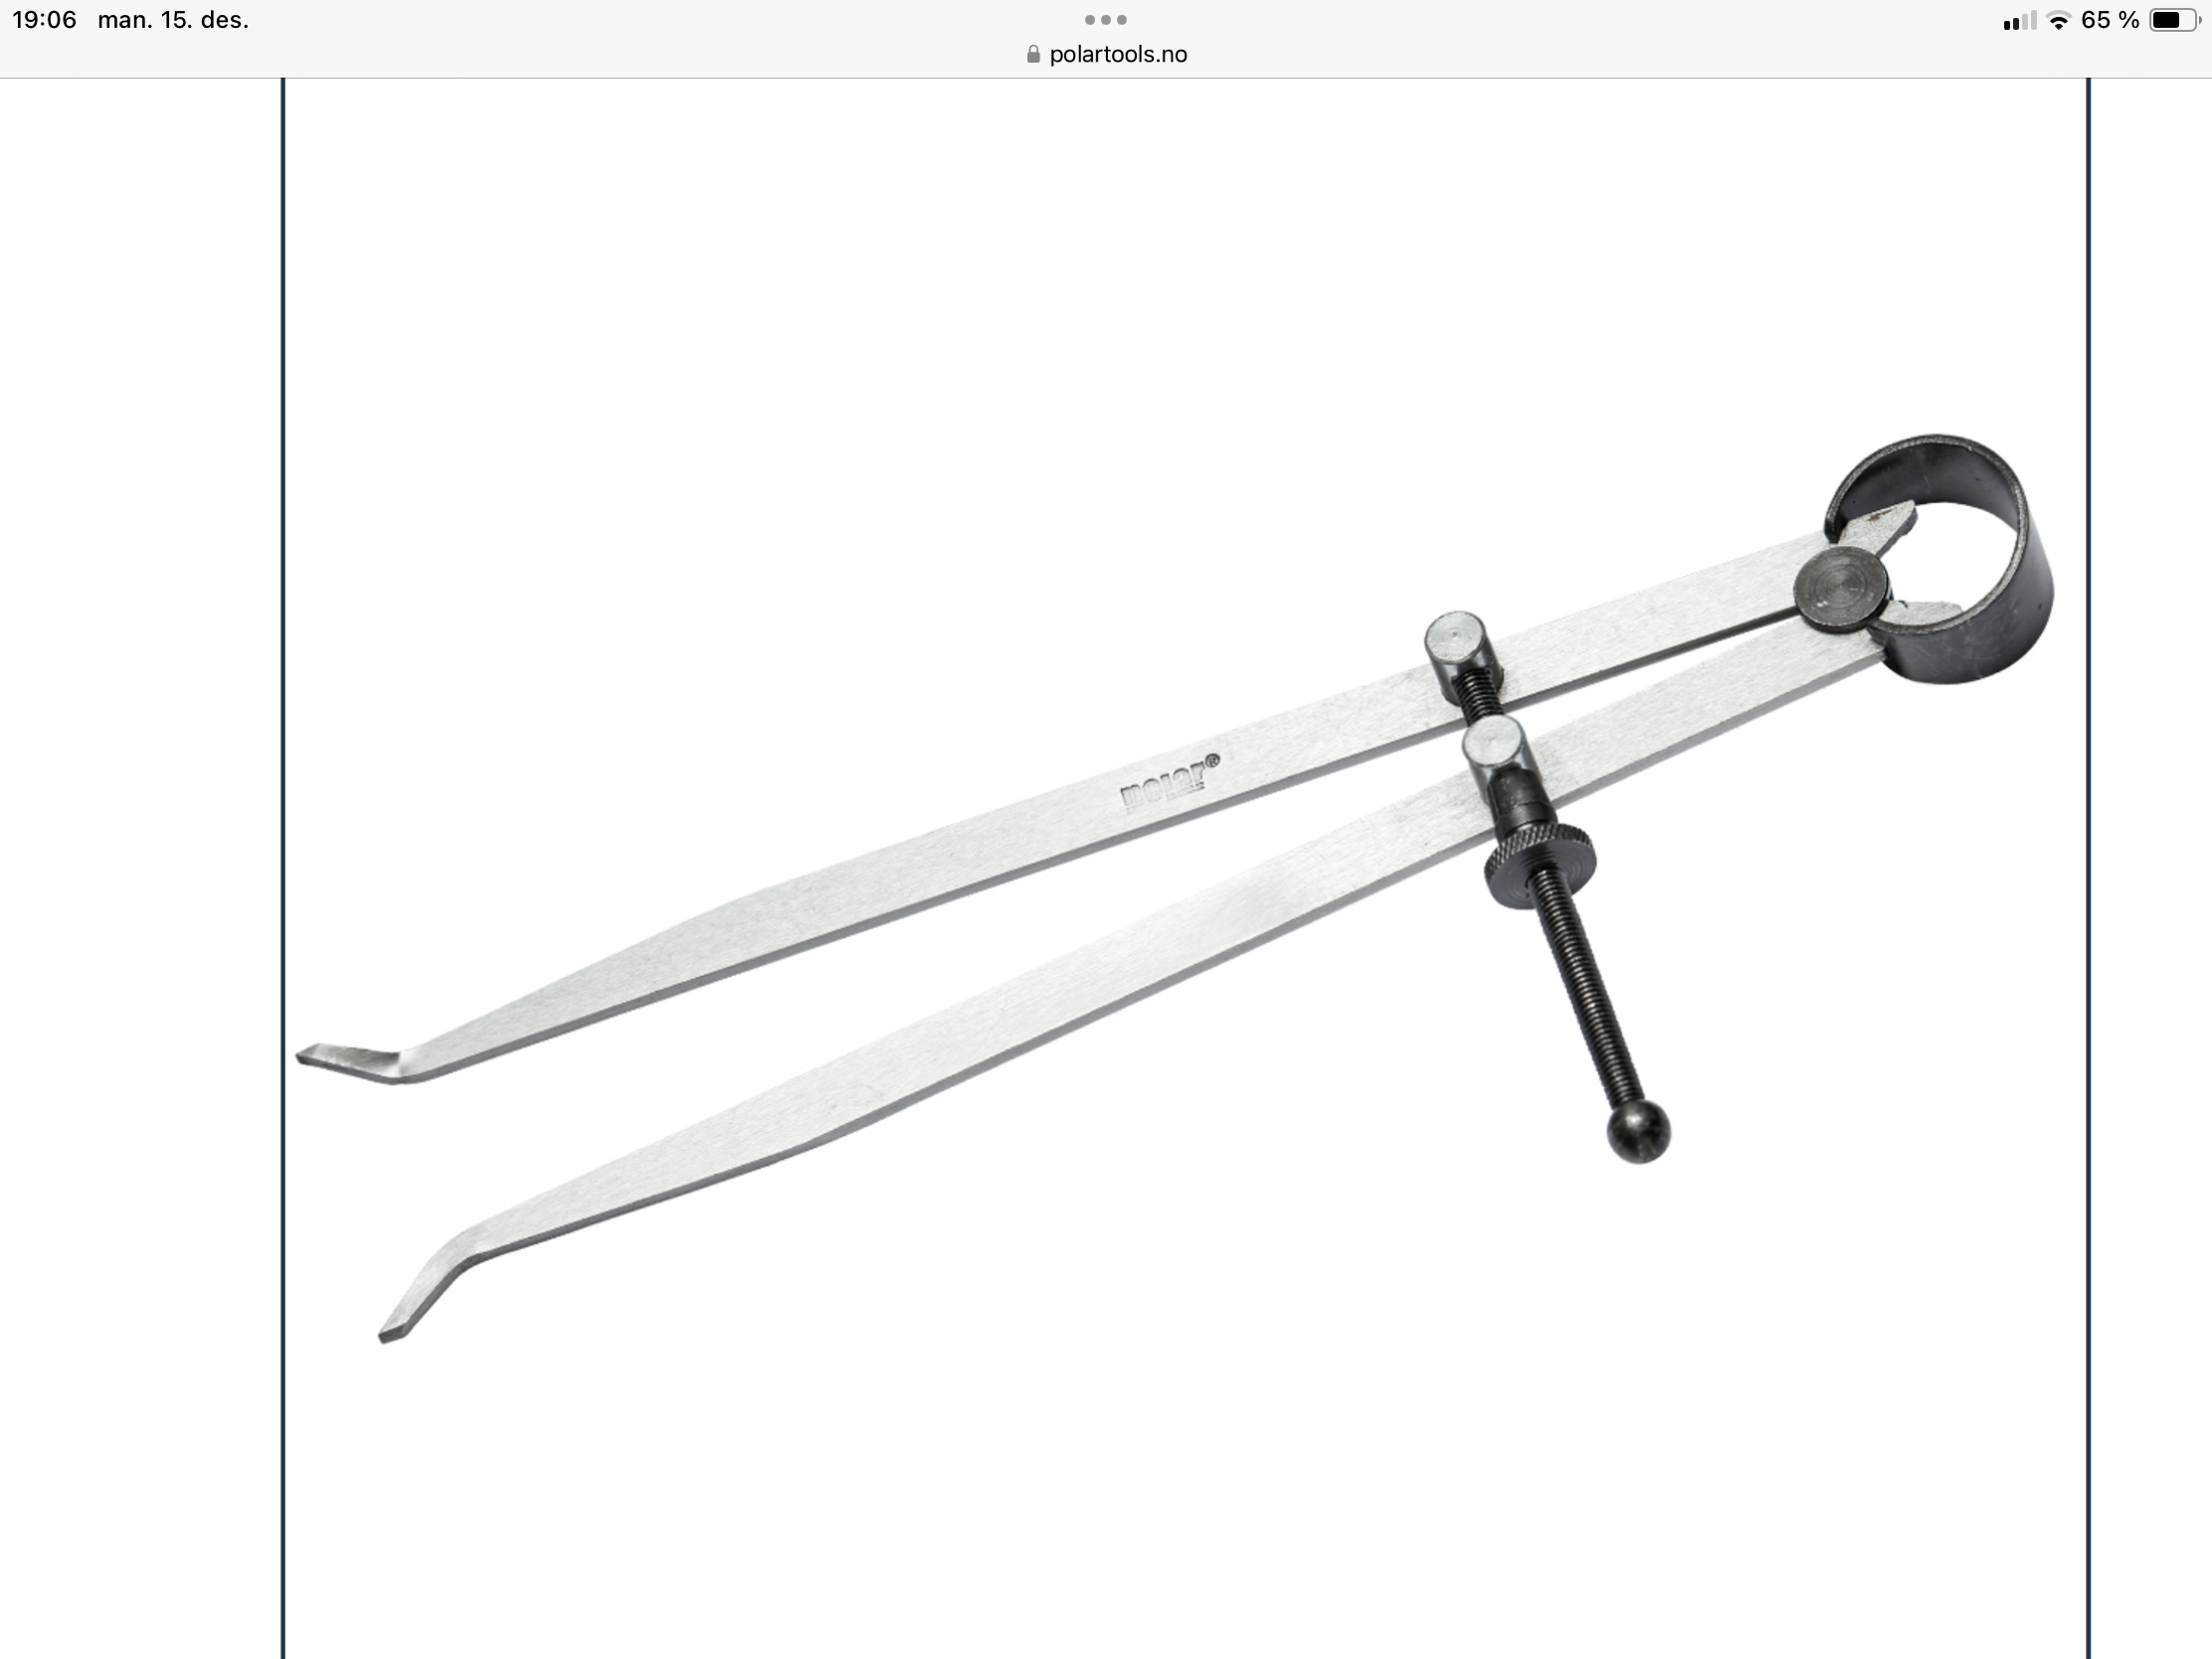
Hello! I find one of theese (or similar) handy for such measuring. Then measure the compass with a ruler or caliper. Gaffrig
-
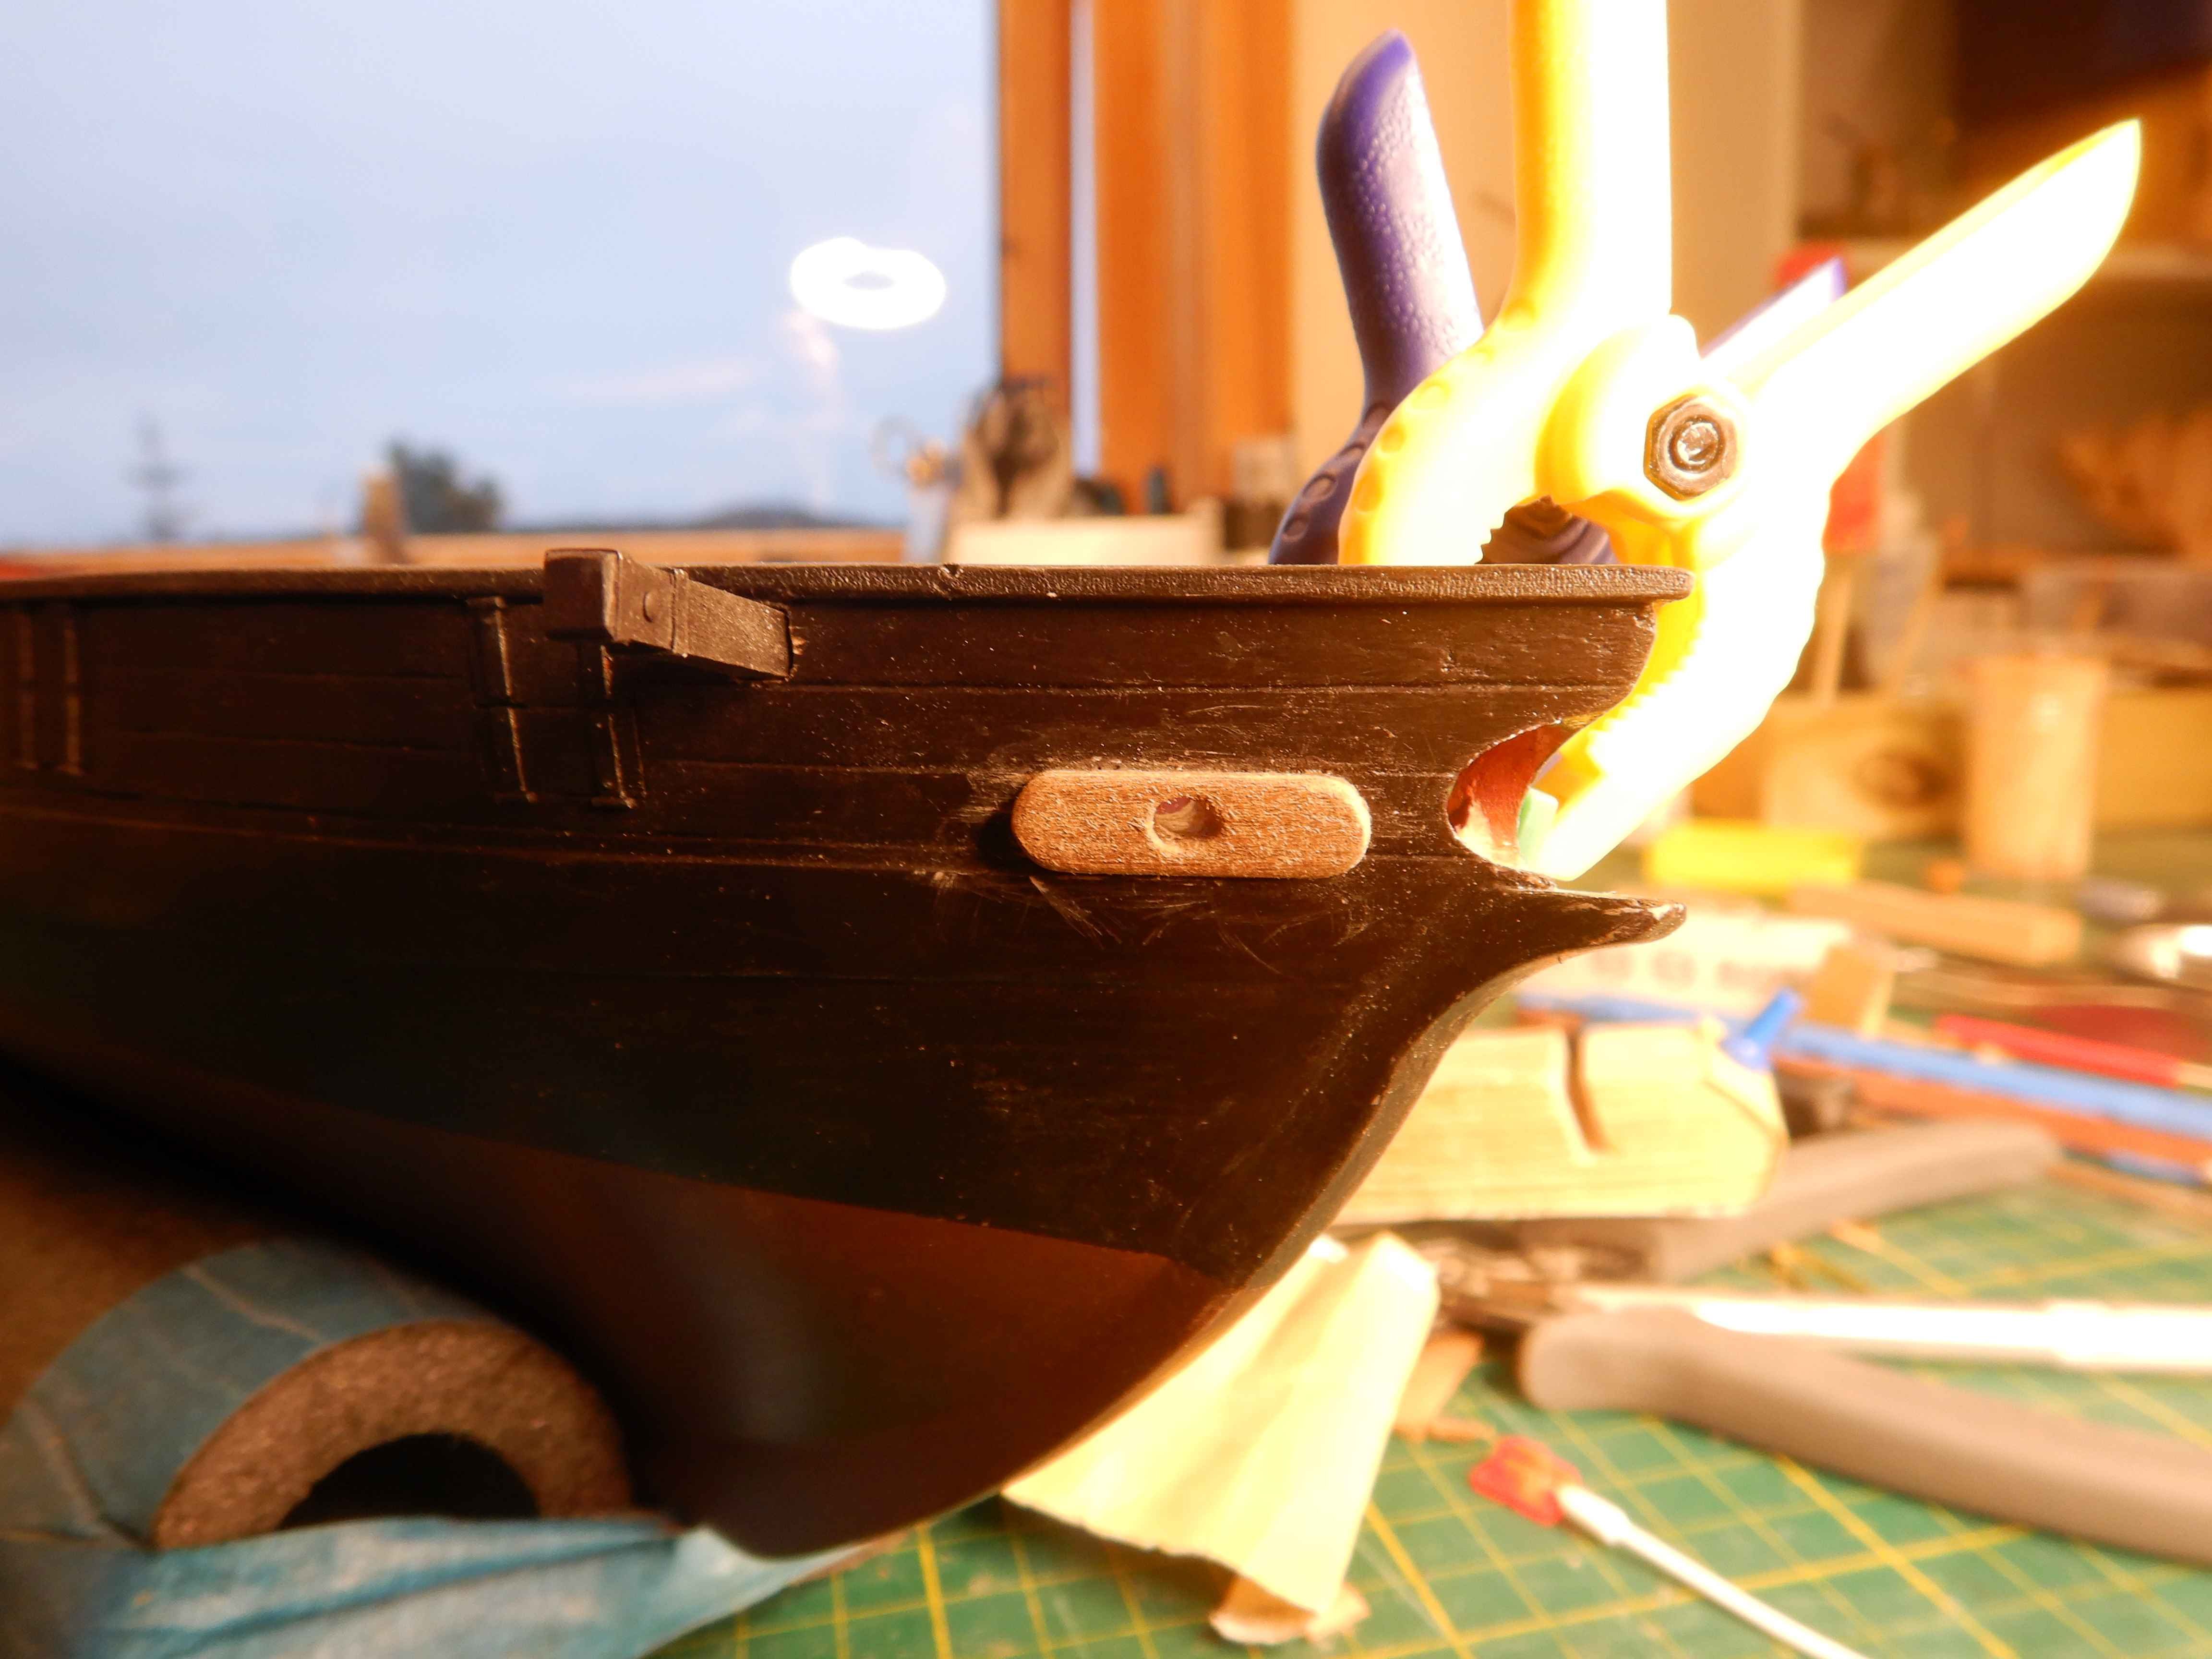
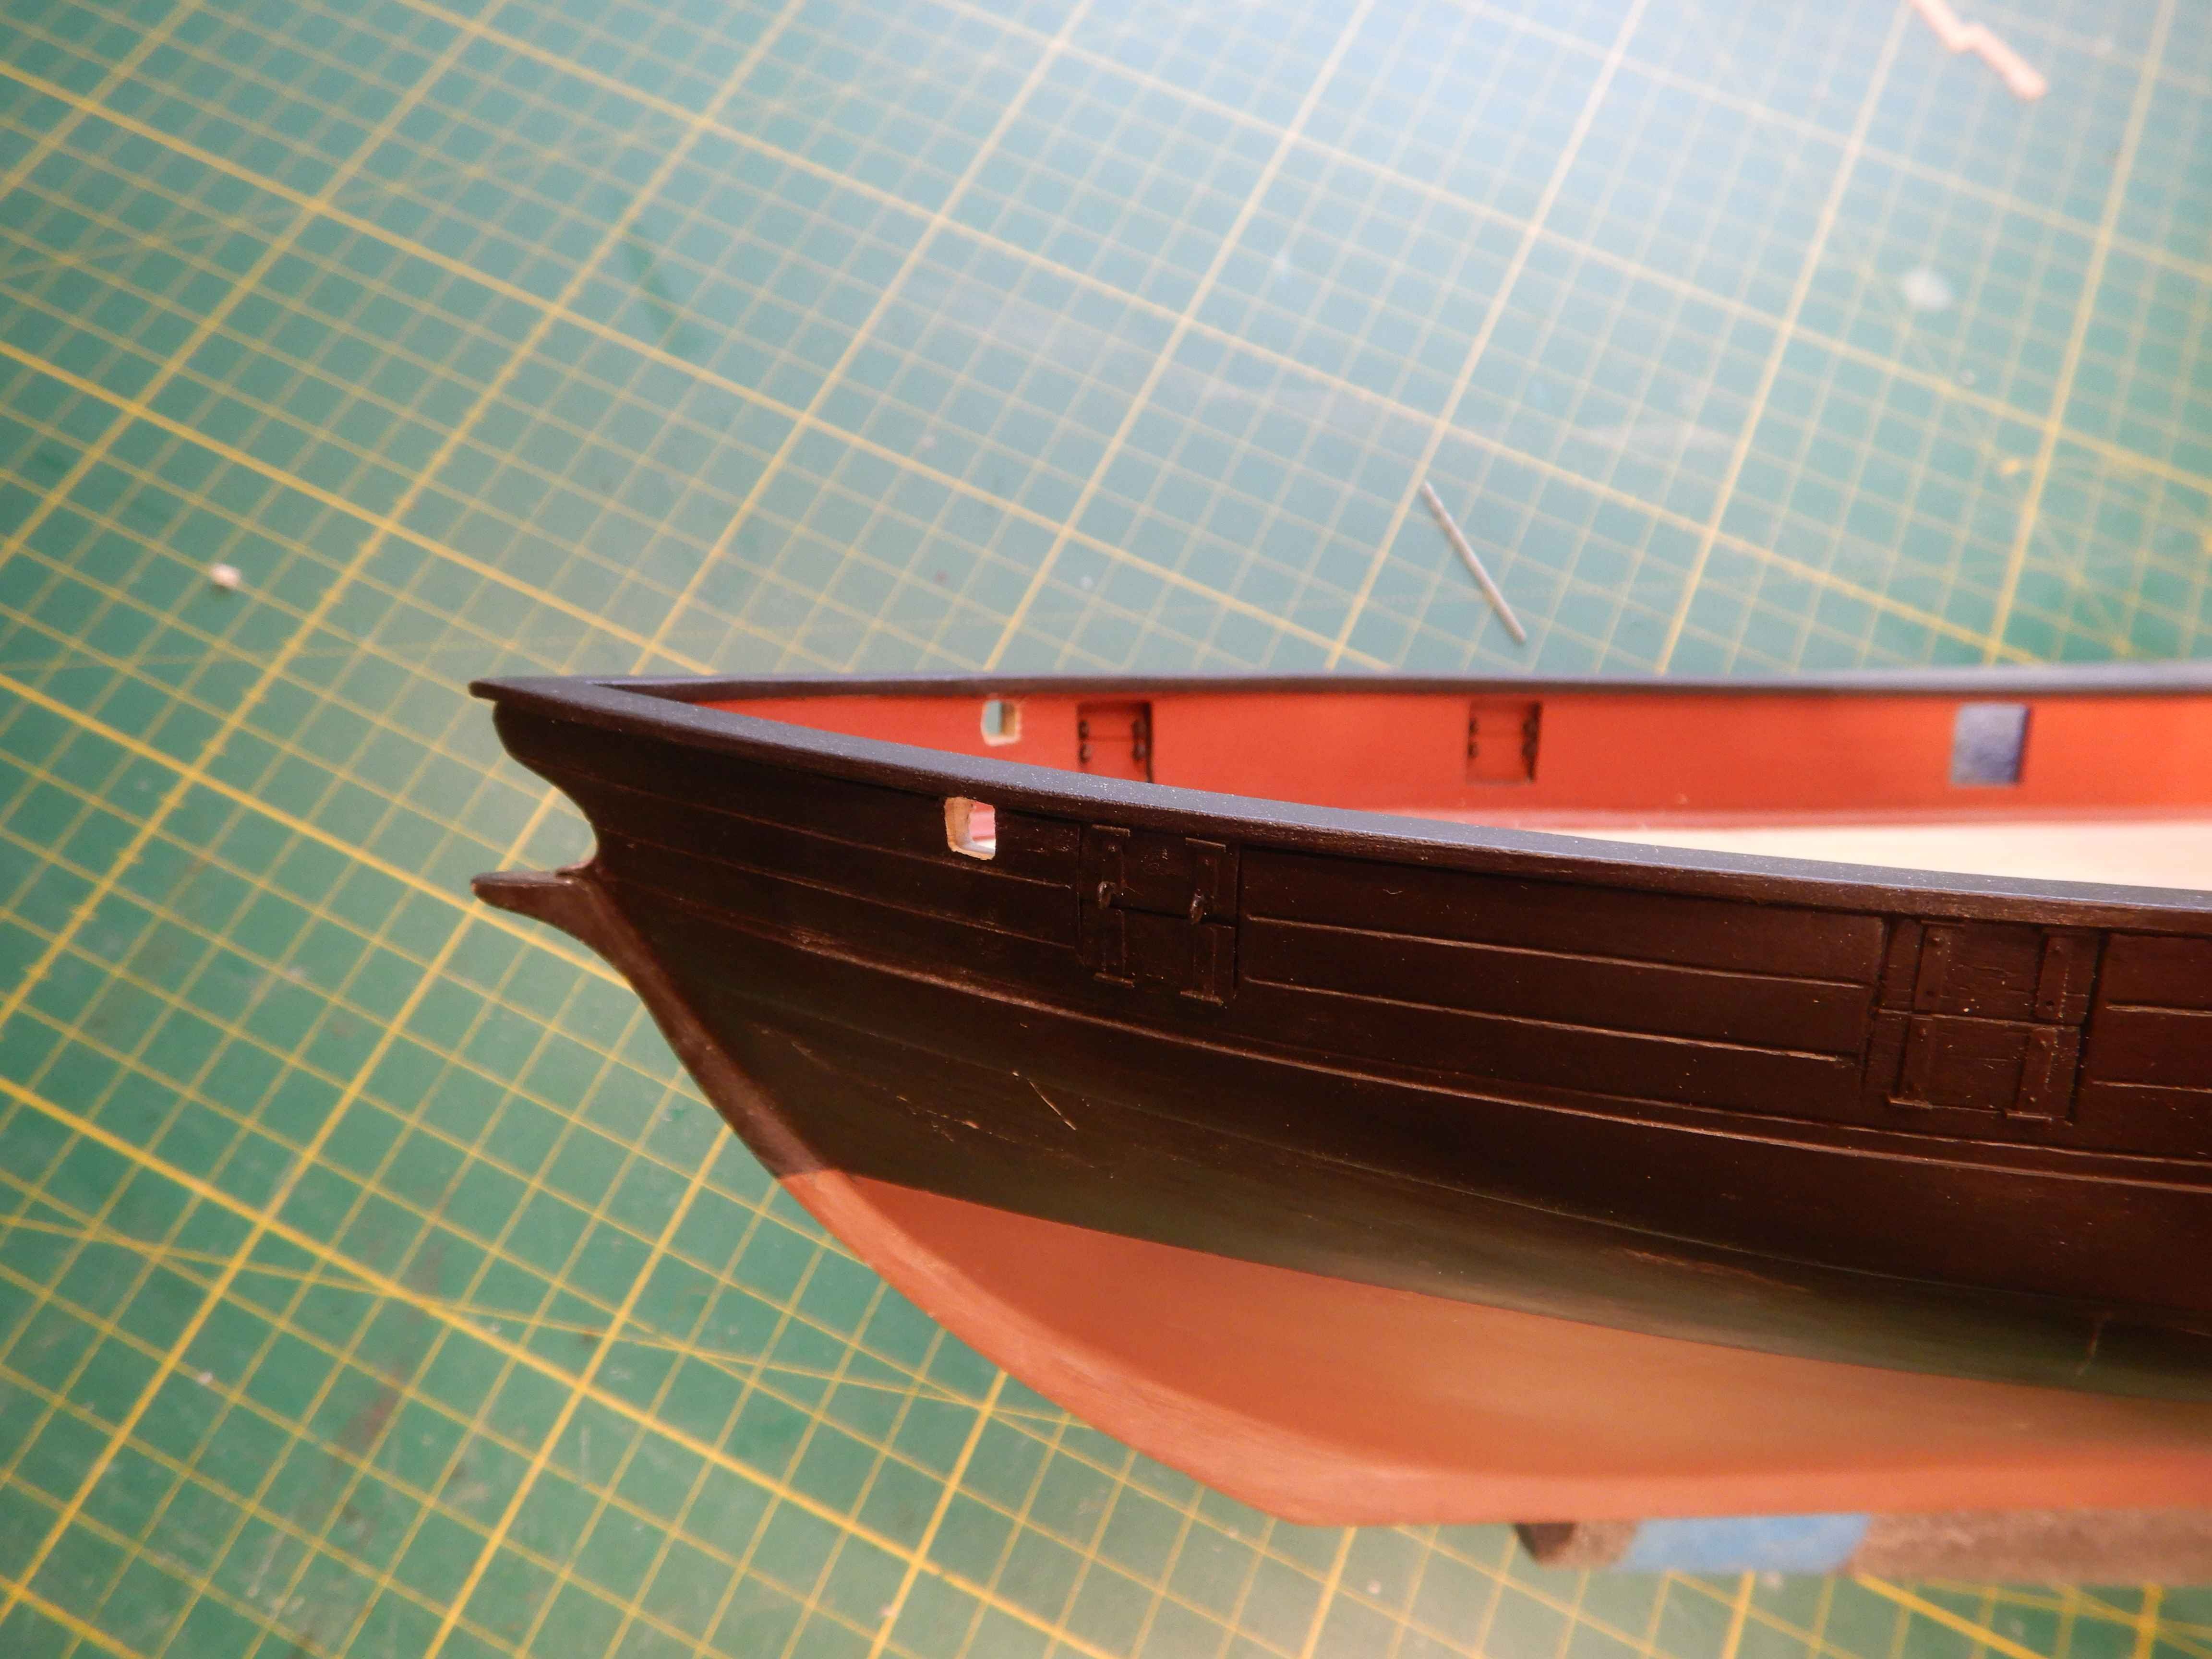
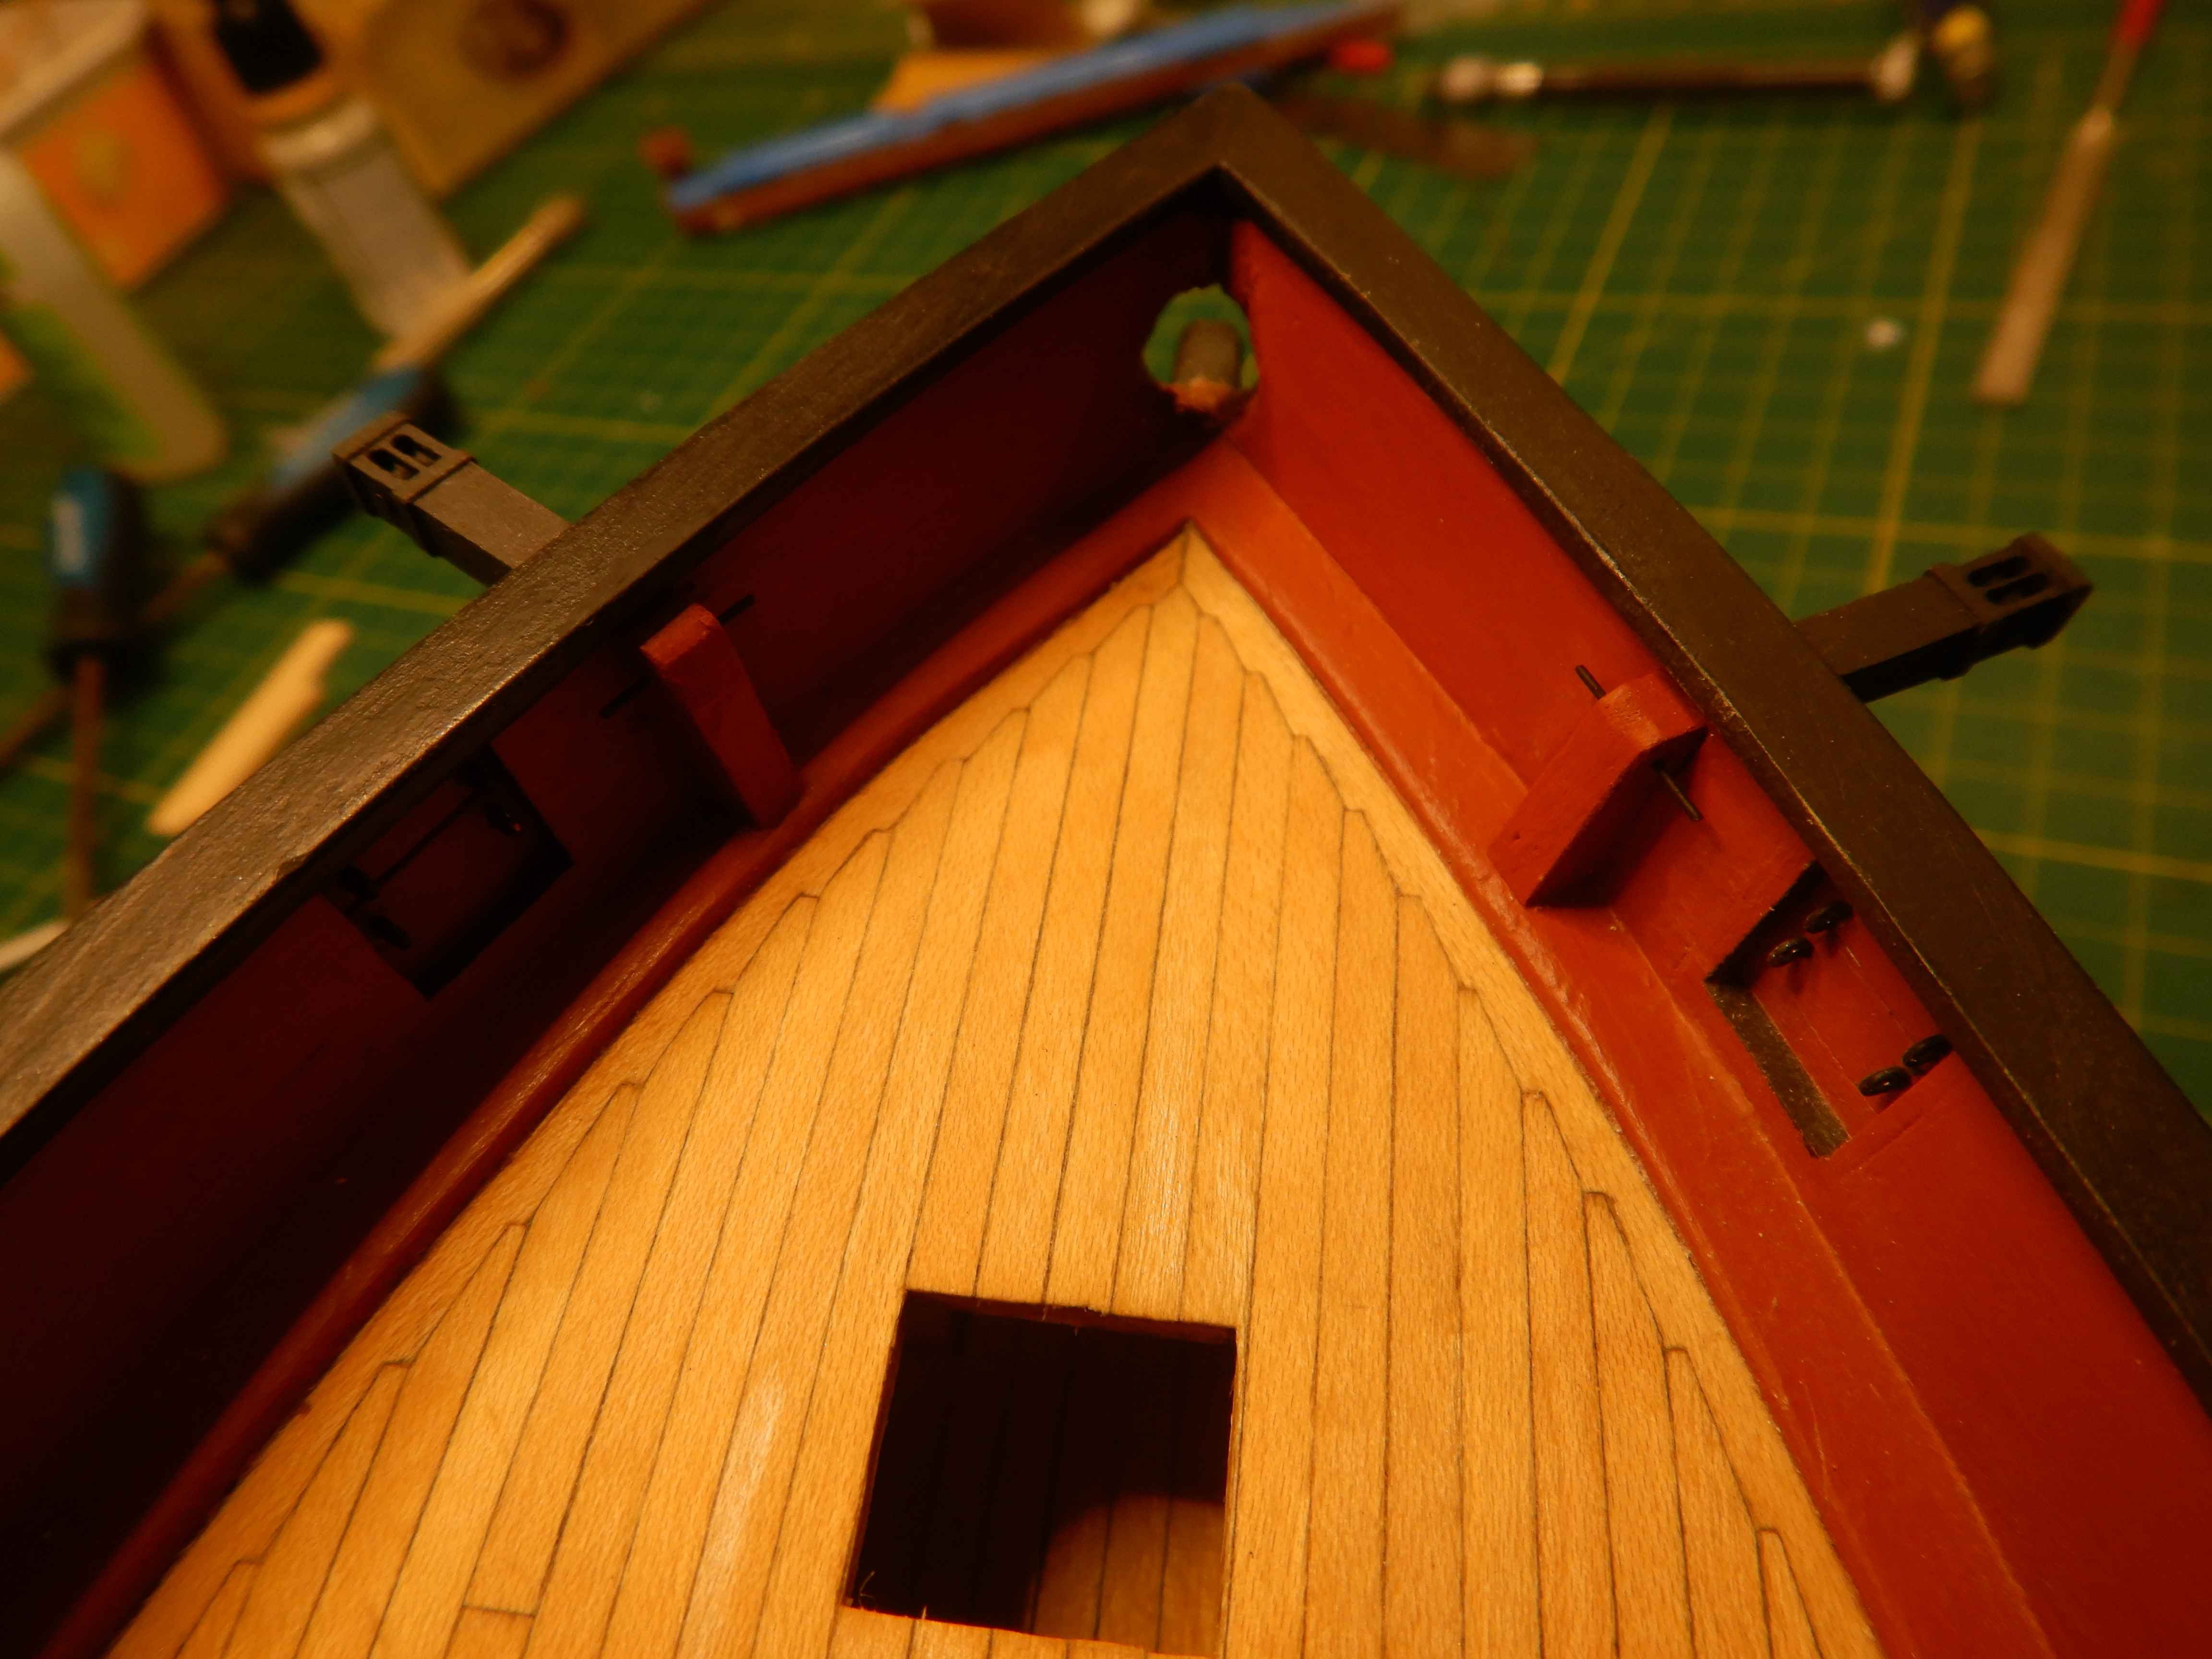
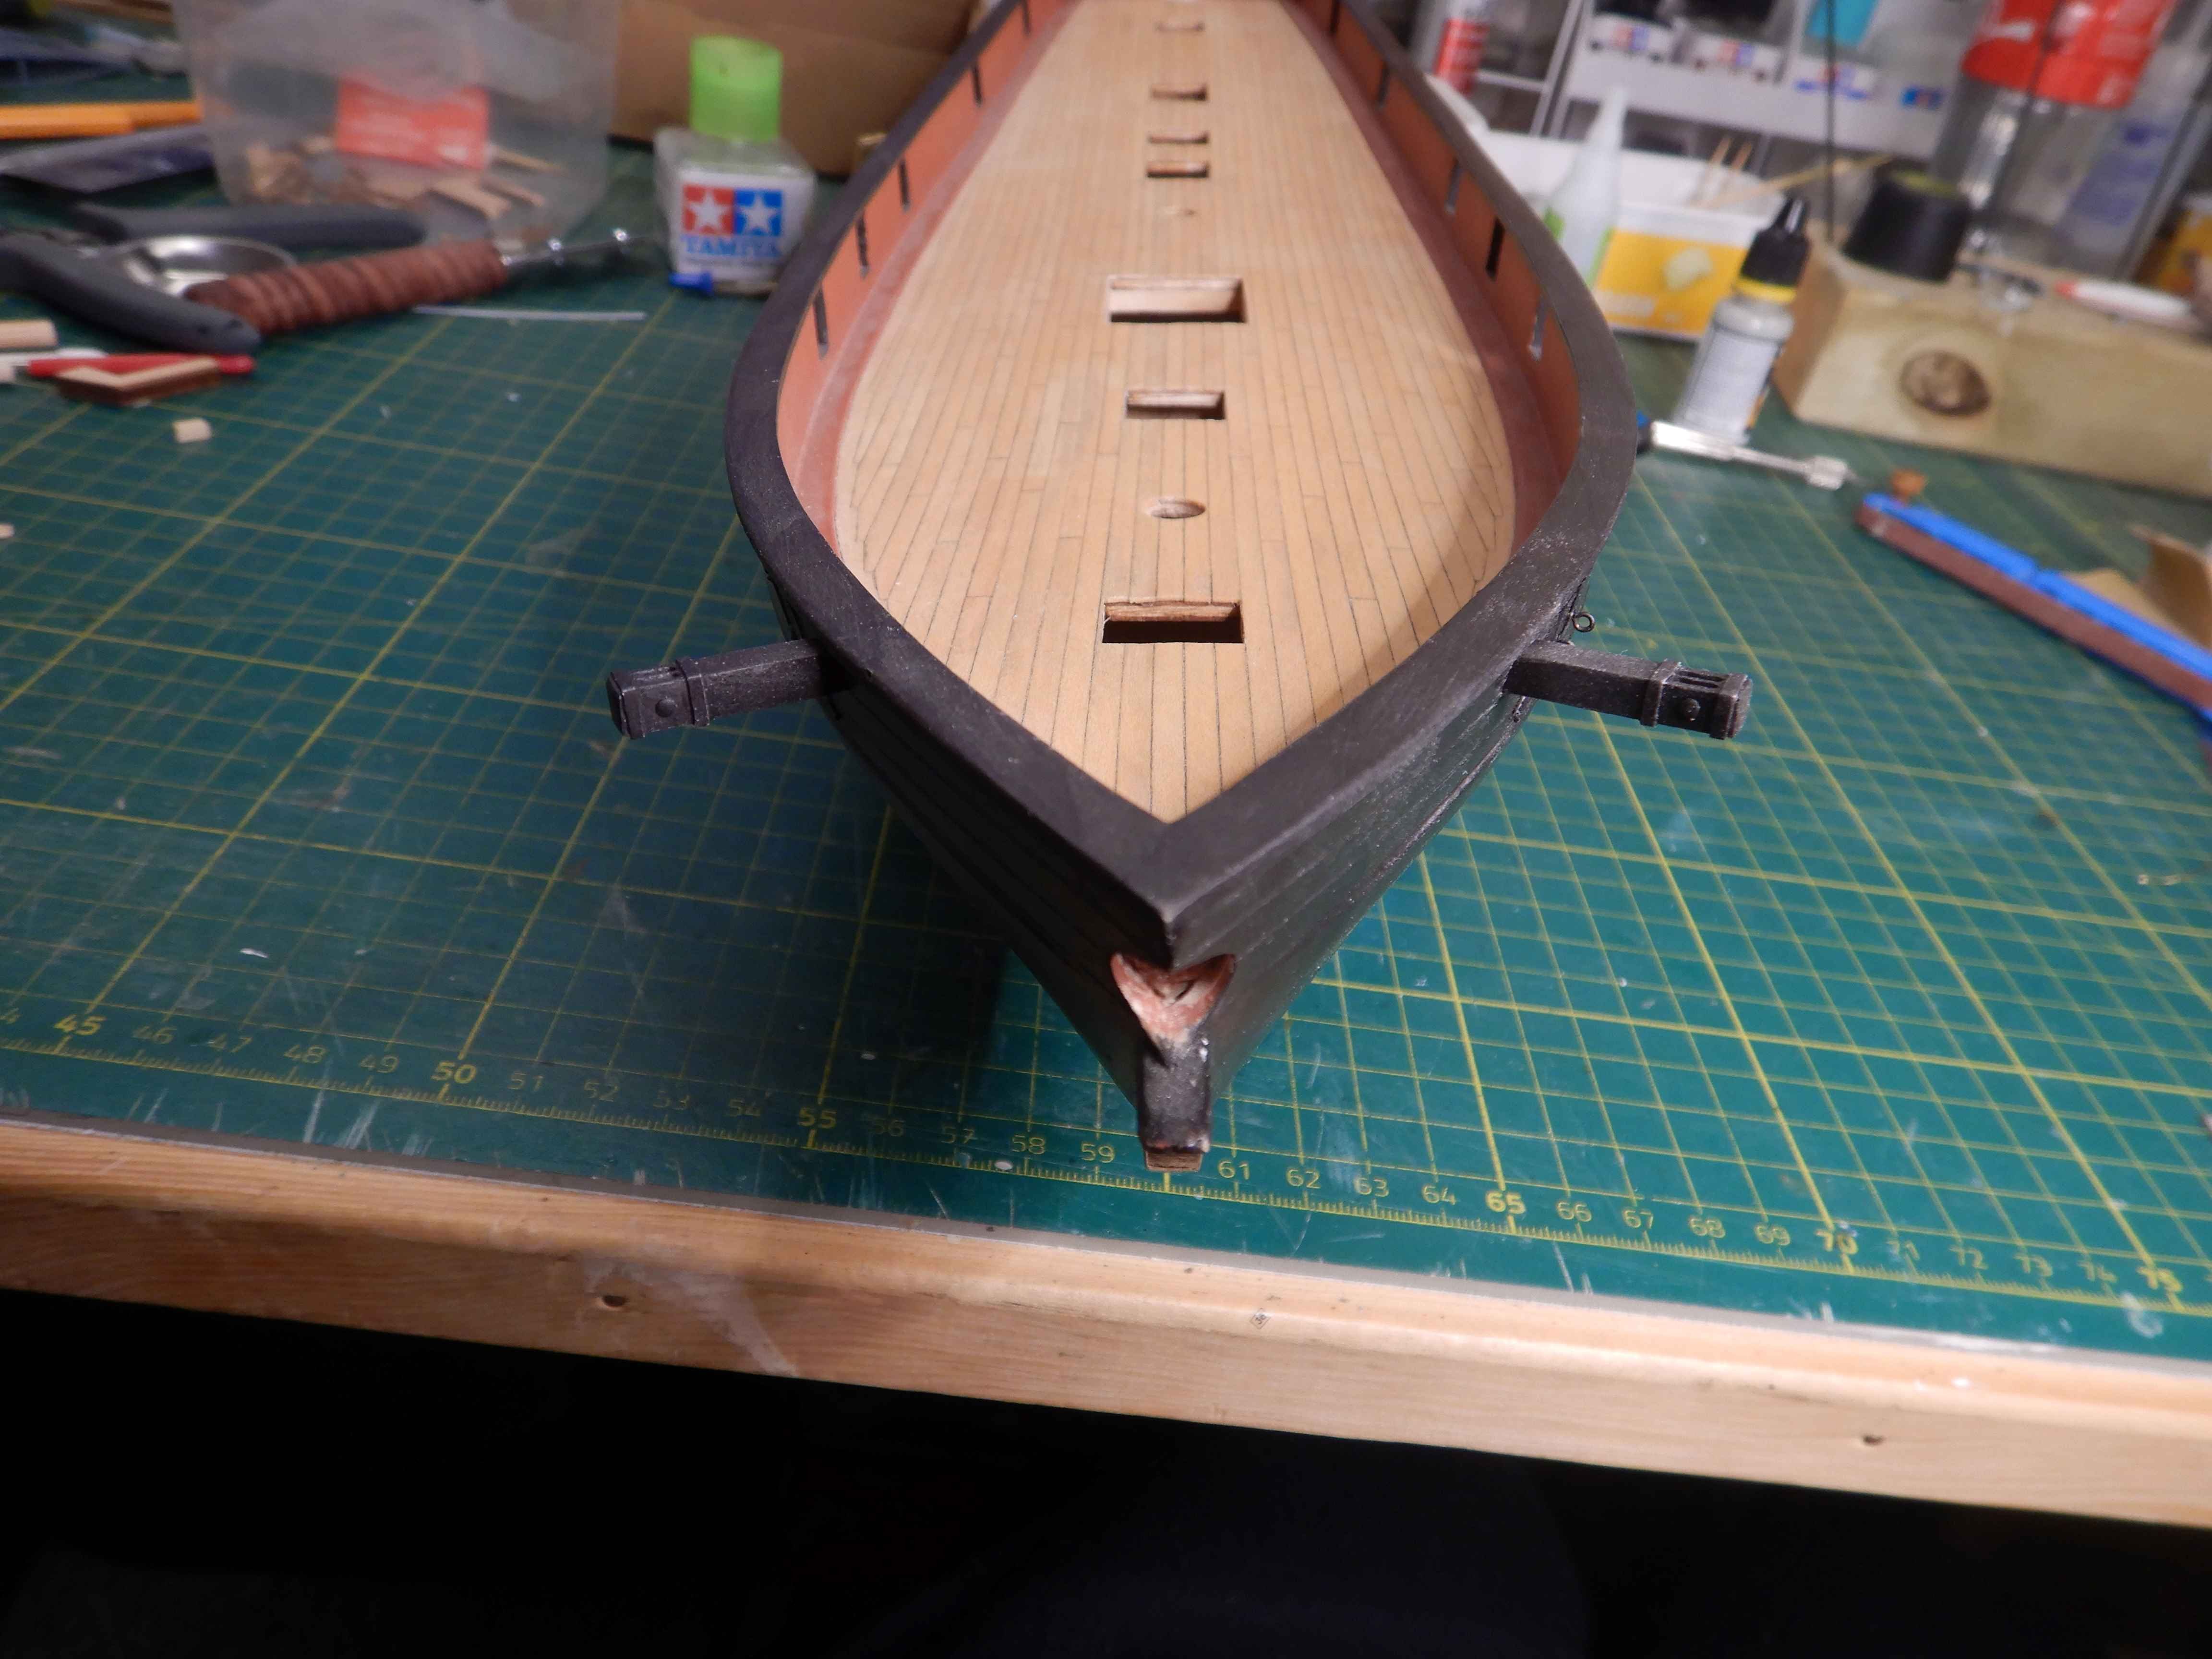
Hello all! Another small update. I drilled the hawse holes and added the bolsters. The bolsters that came with the kit was plywood, and a little big, so I made new ones out of some walnut I found in the kit box.. I also made and added the ringbolts/eyebolts for for the breech rope/gun tackles. I predrilled the holes where the guns will be added, and rig those rings on the guns first, and mount the gun with tackles and rings later. That's it for now! All the best! Gaffrig.


-
Thank you Mark. Feel free to «steal» any ideas you want. Sharing ideas and tips and tricks is what this whole site is all about I think. Gaffrig.
-
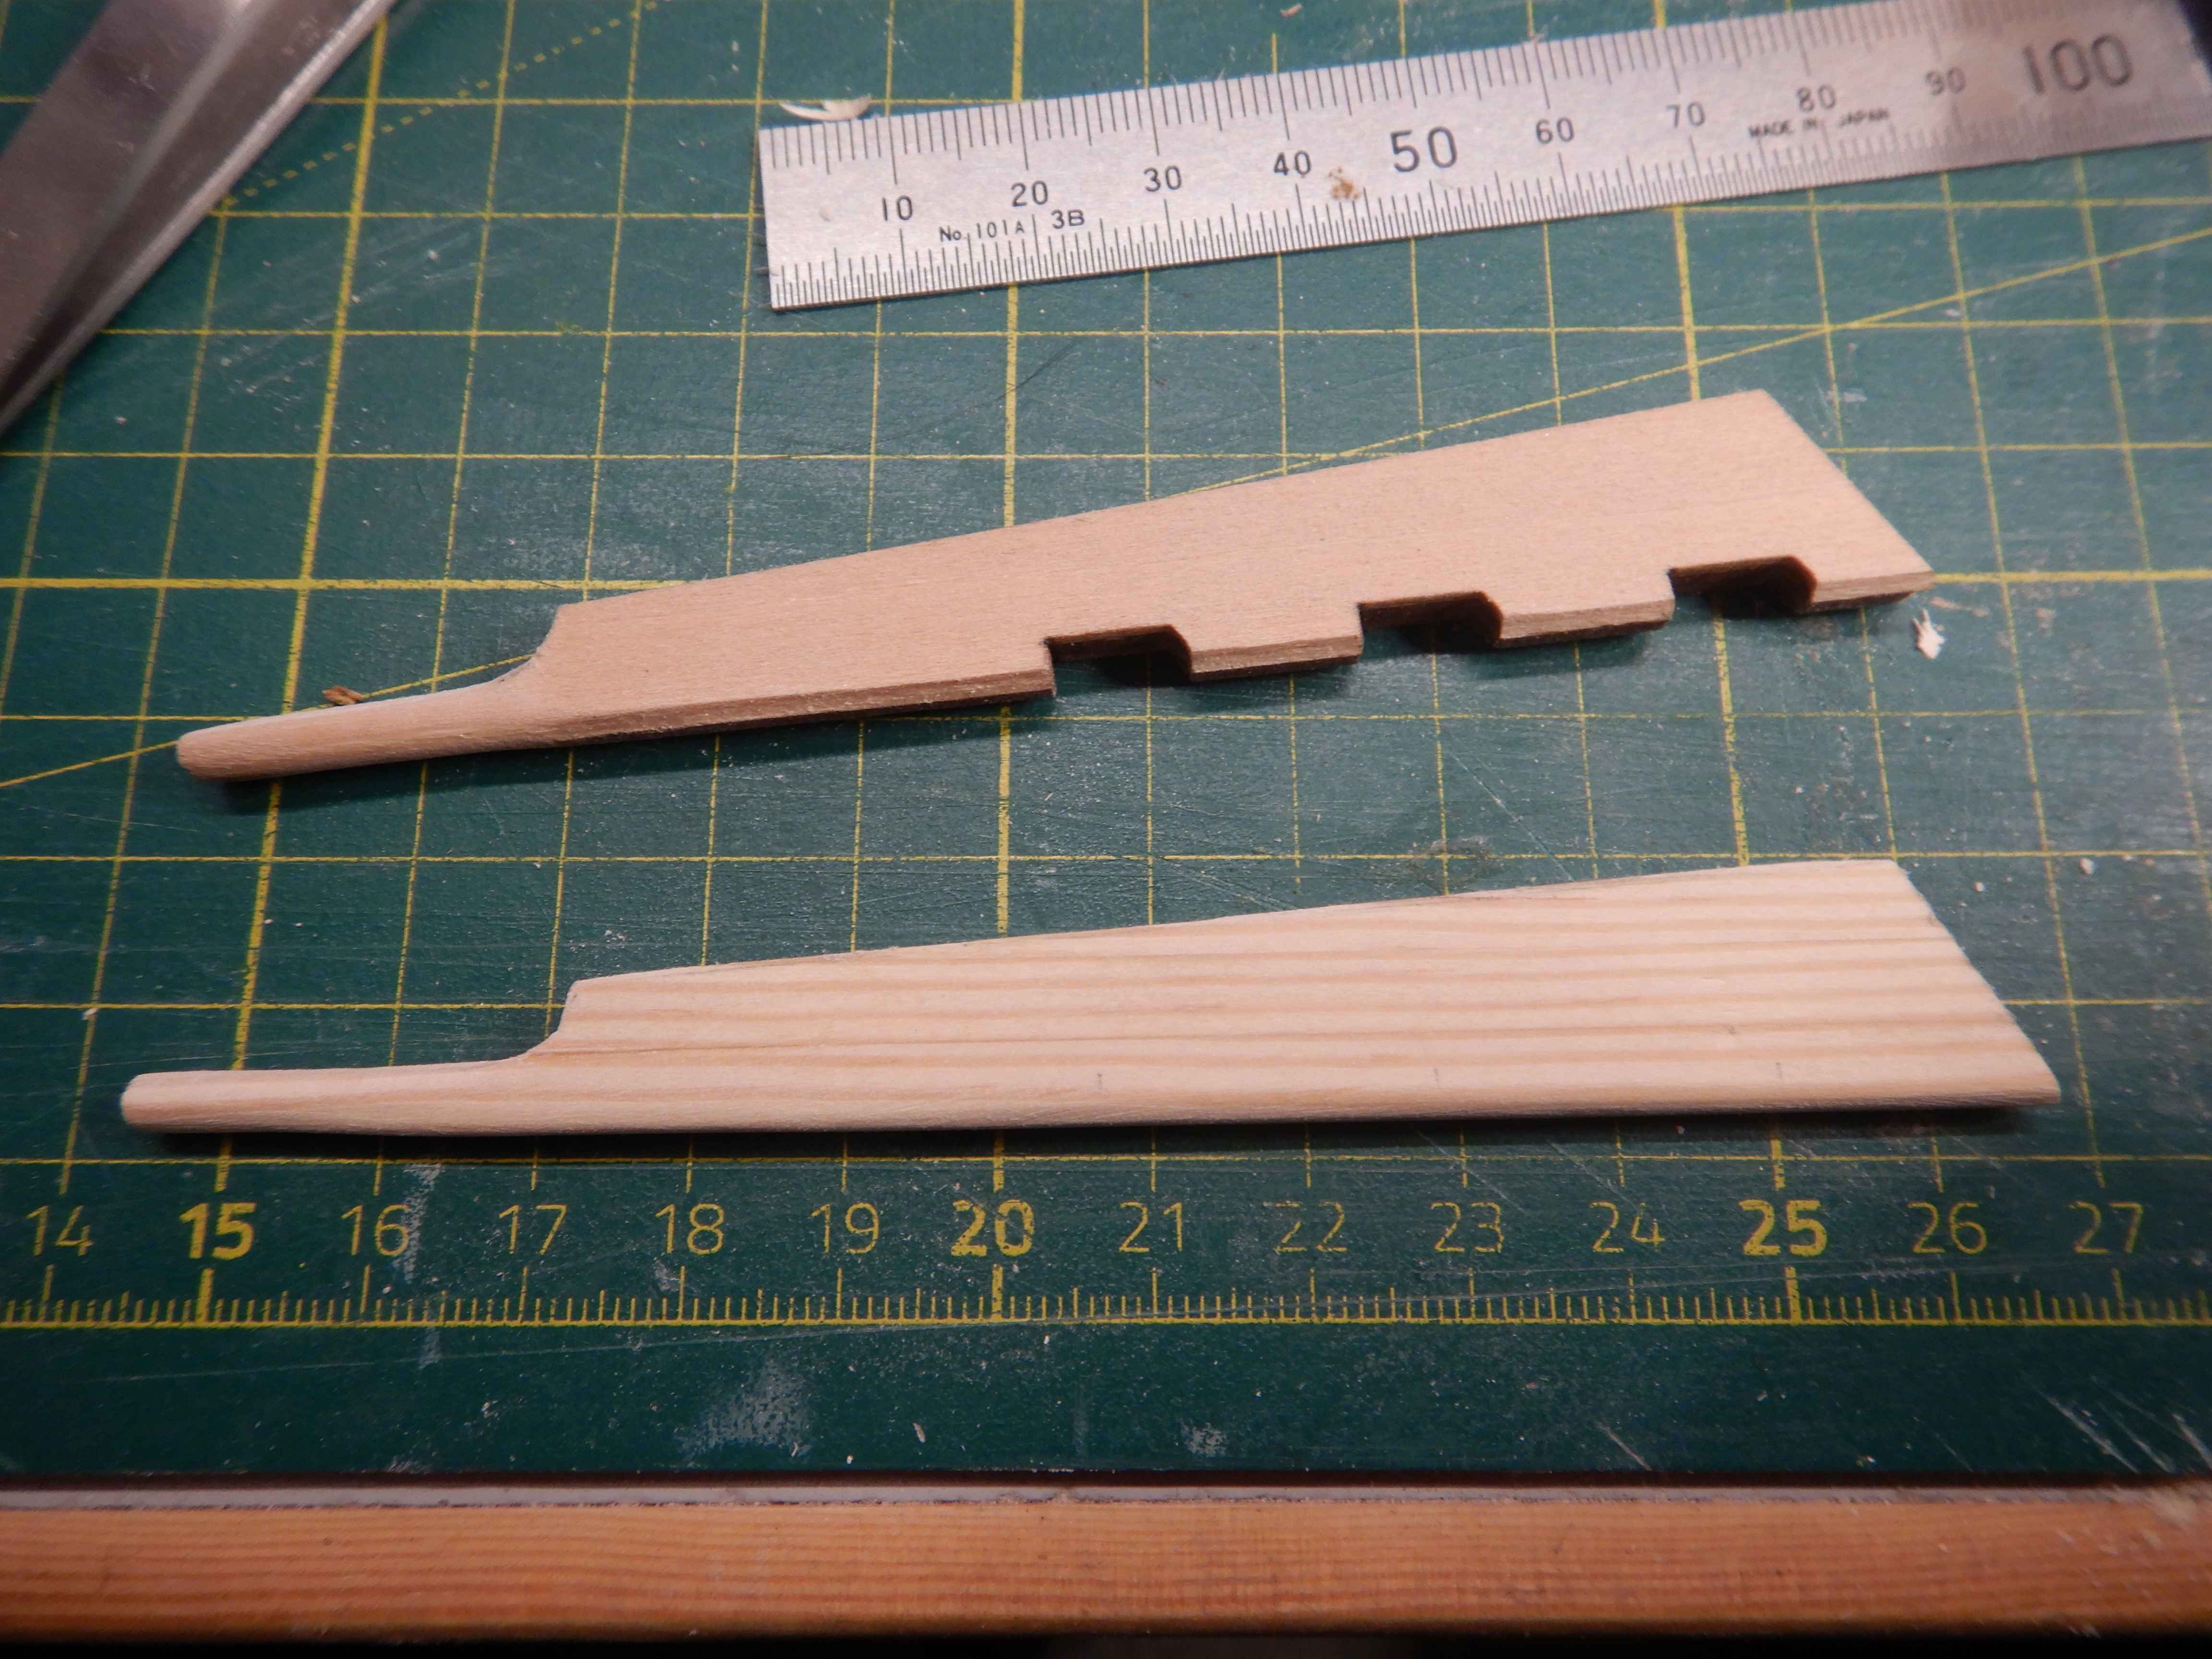
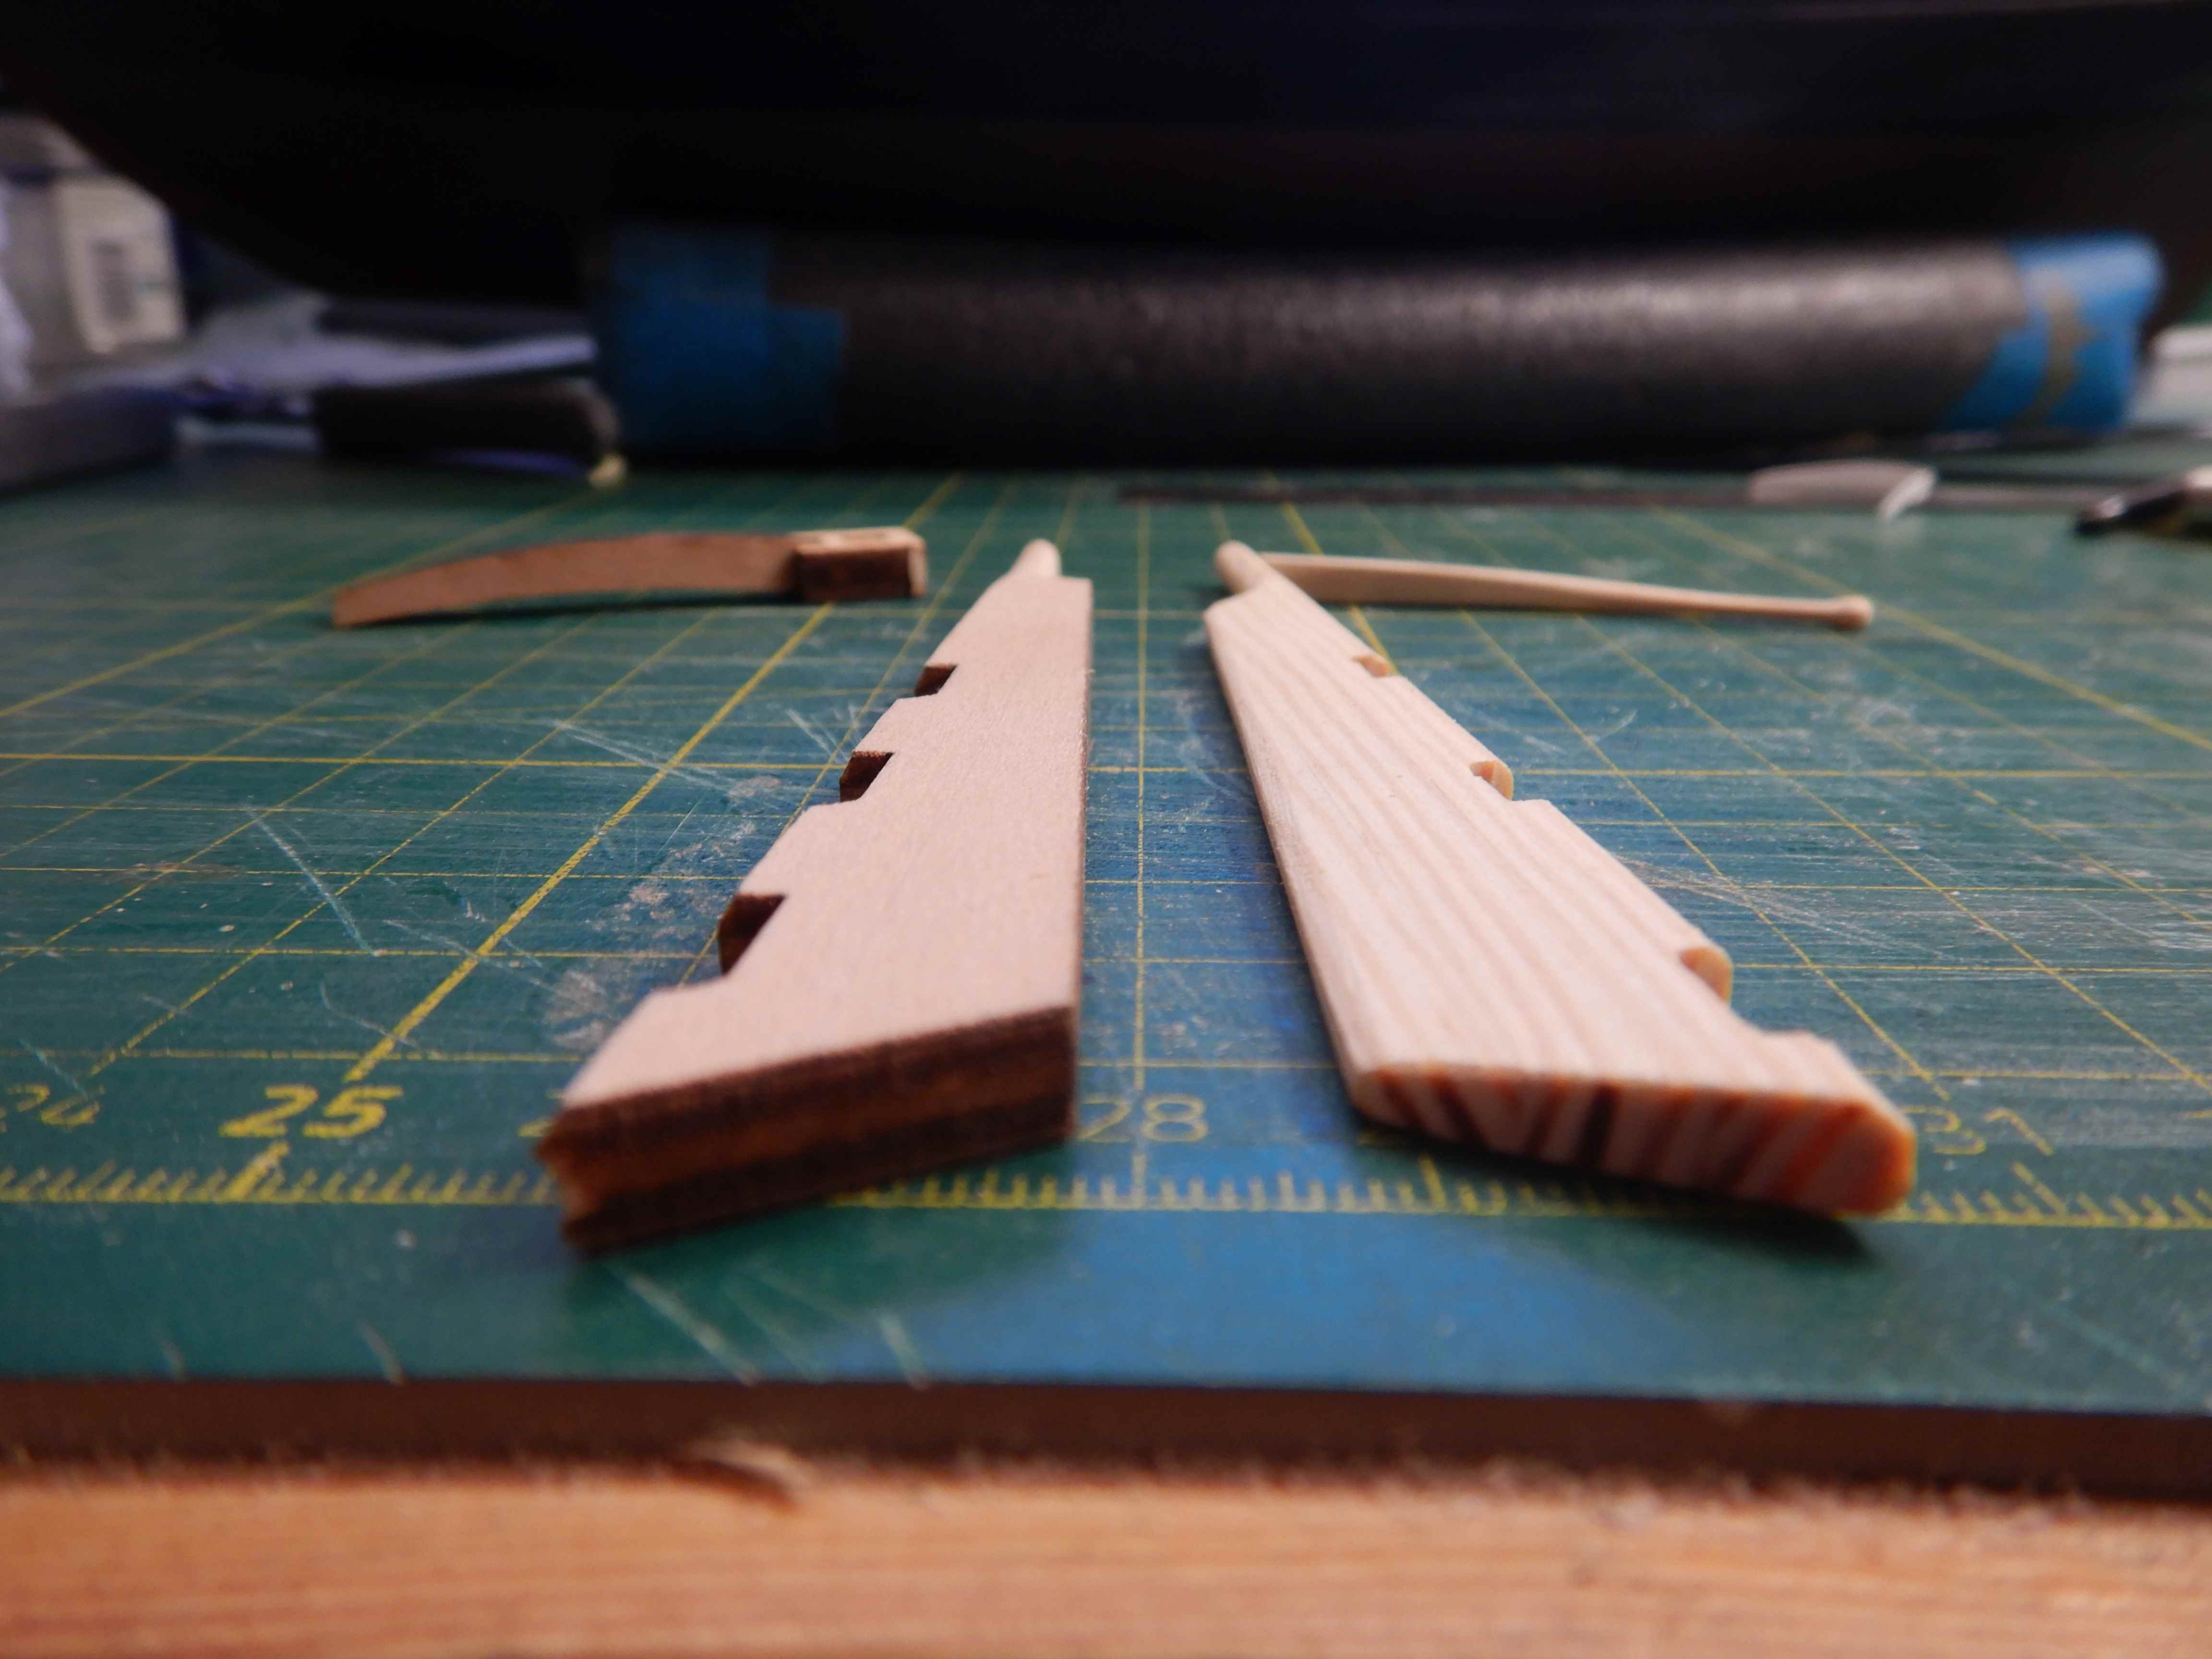
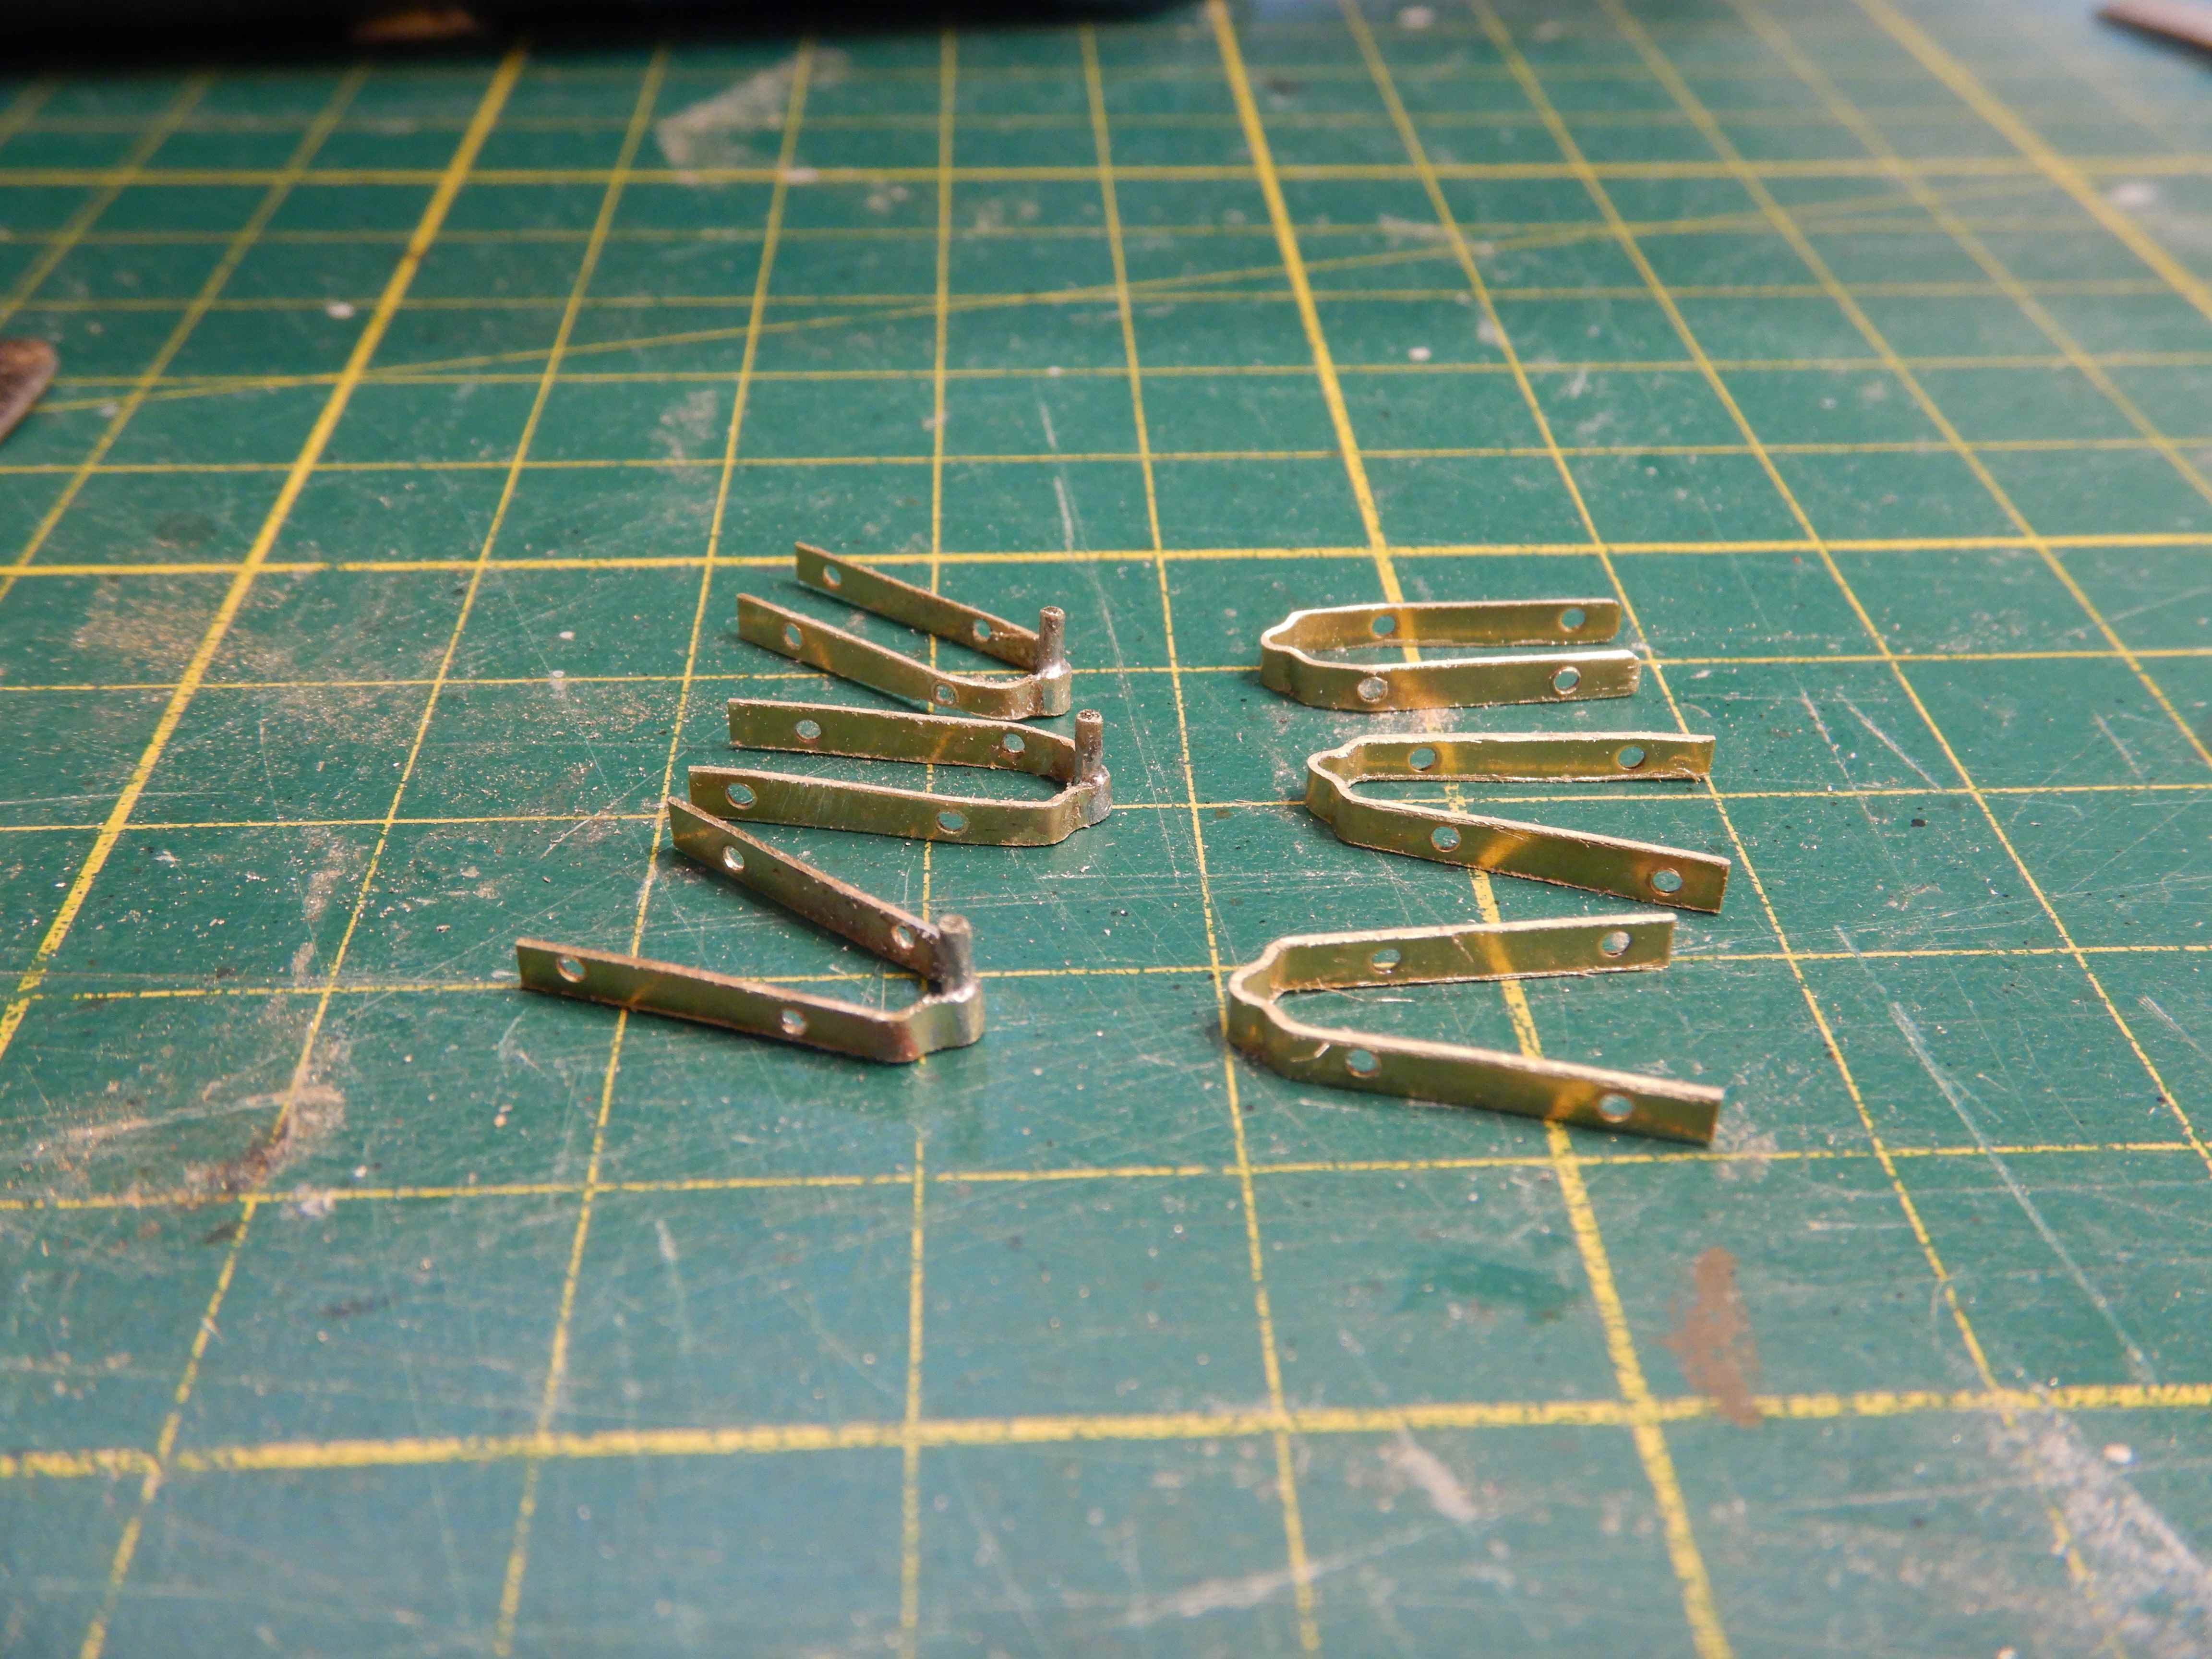
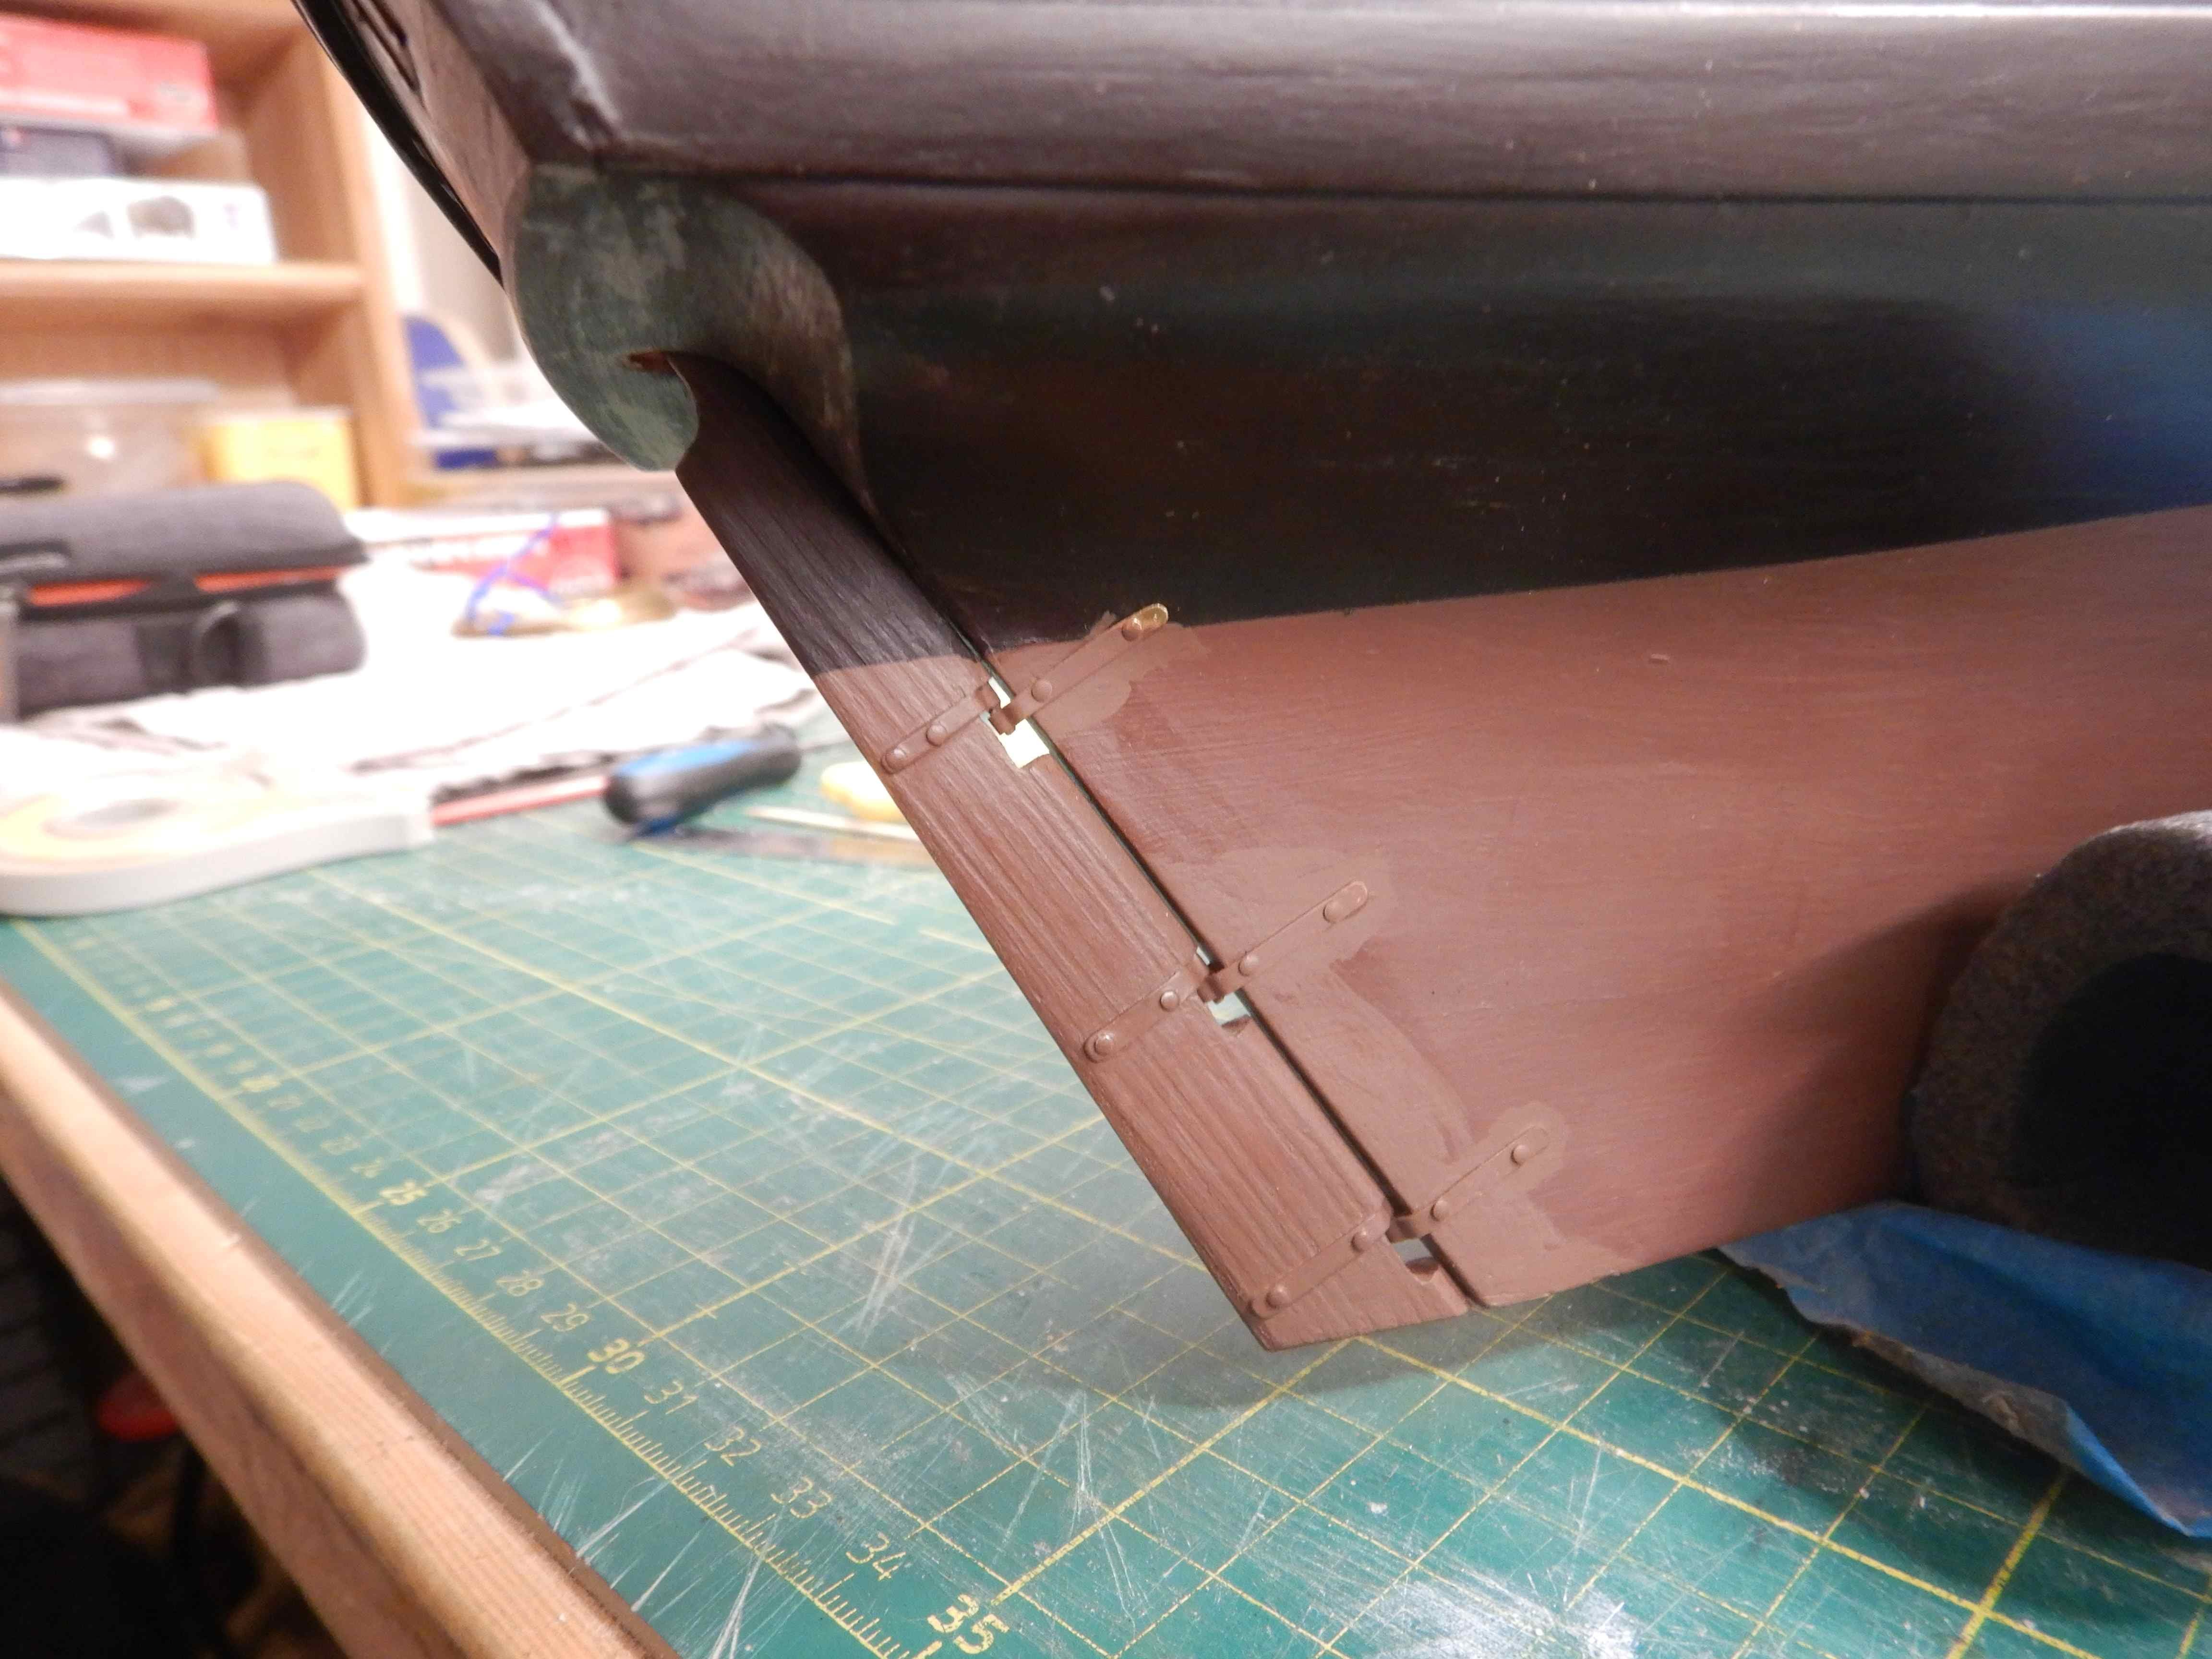
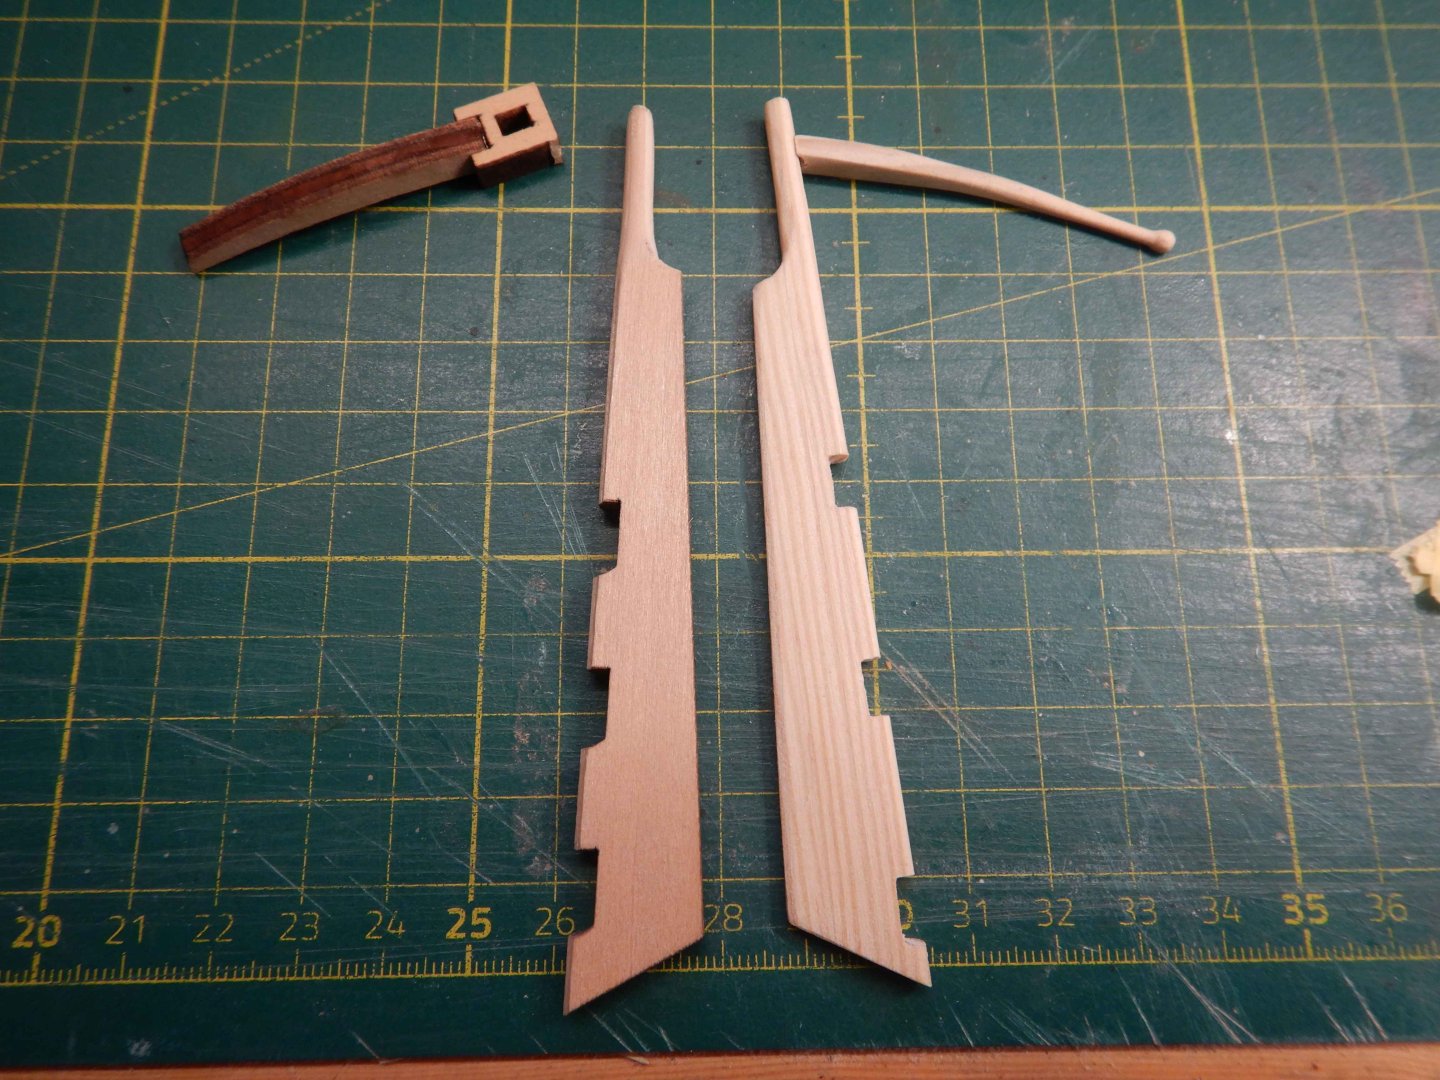
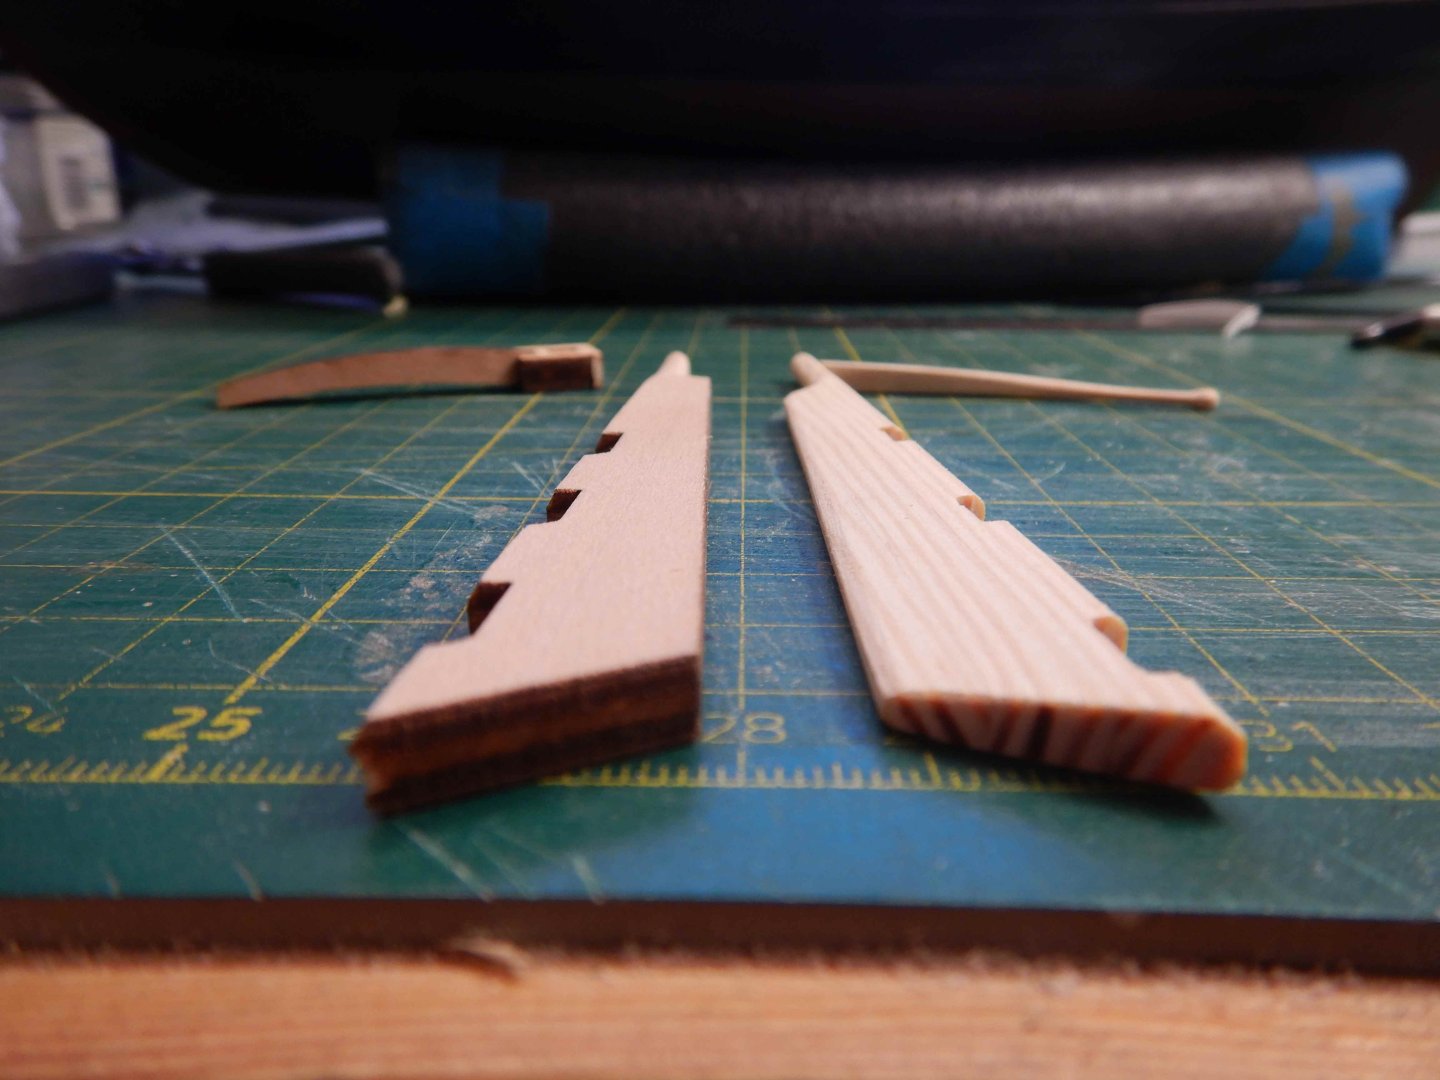
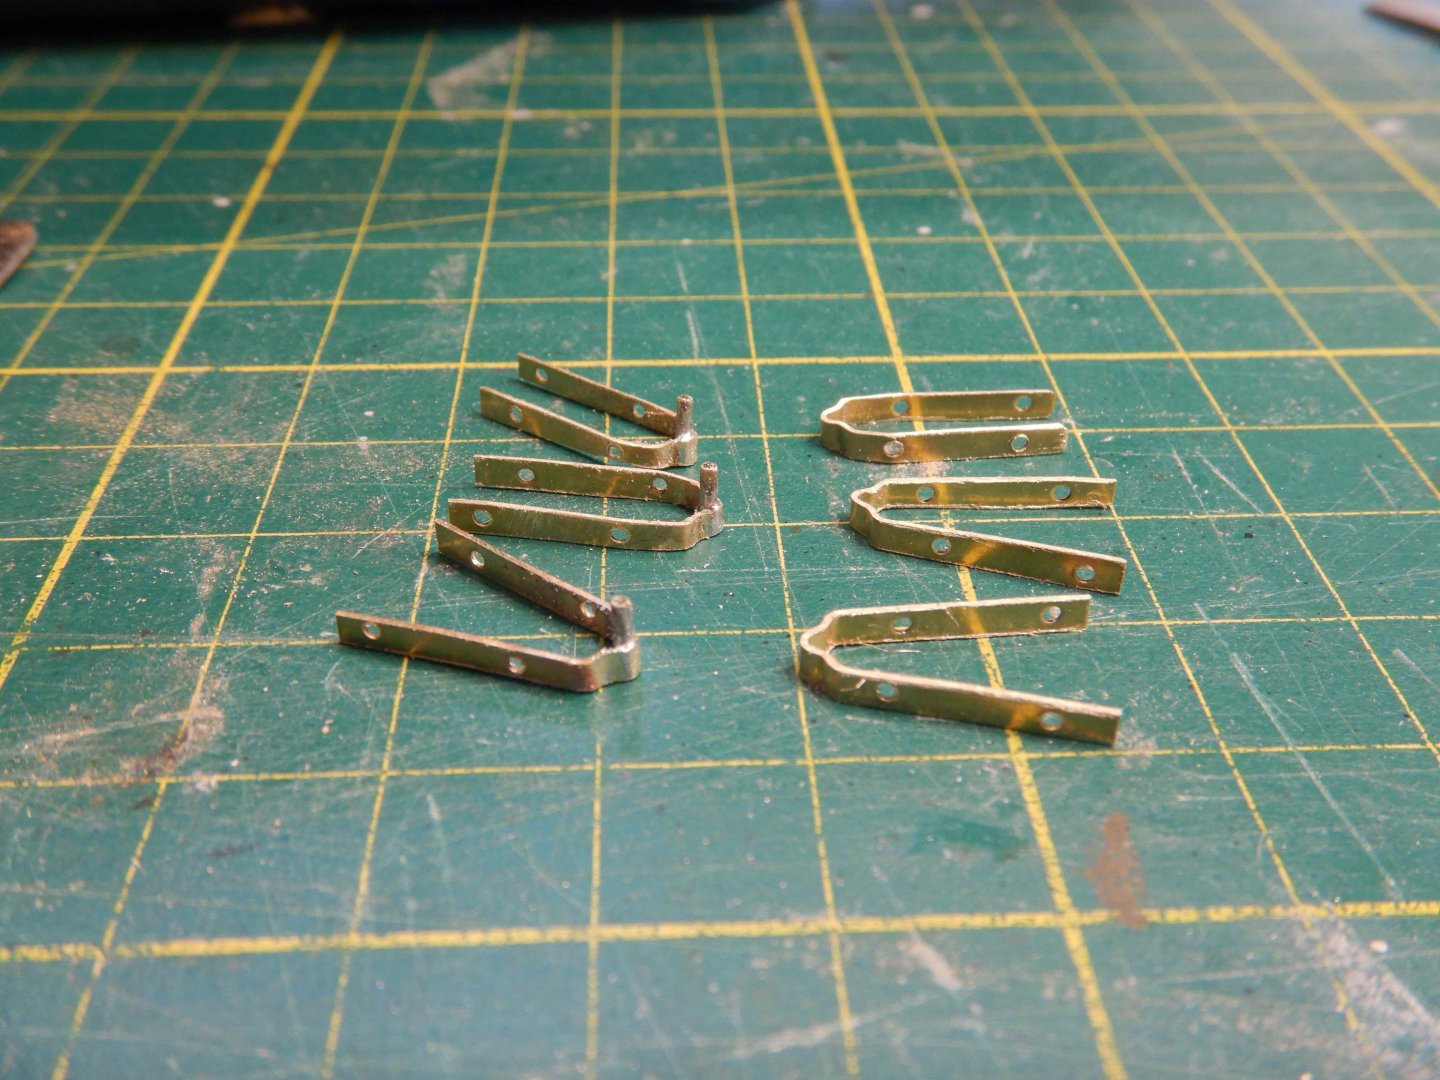
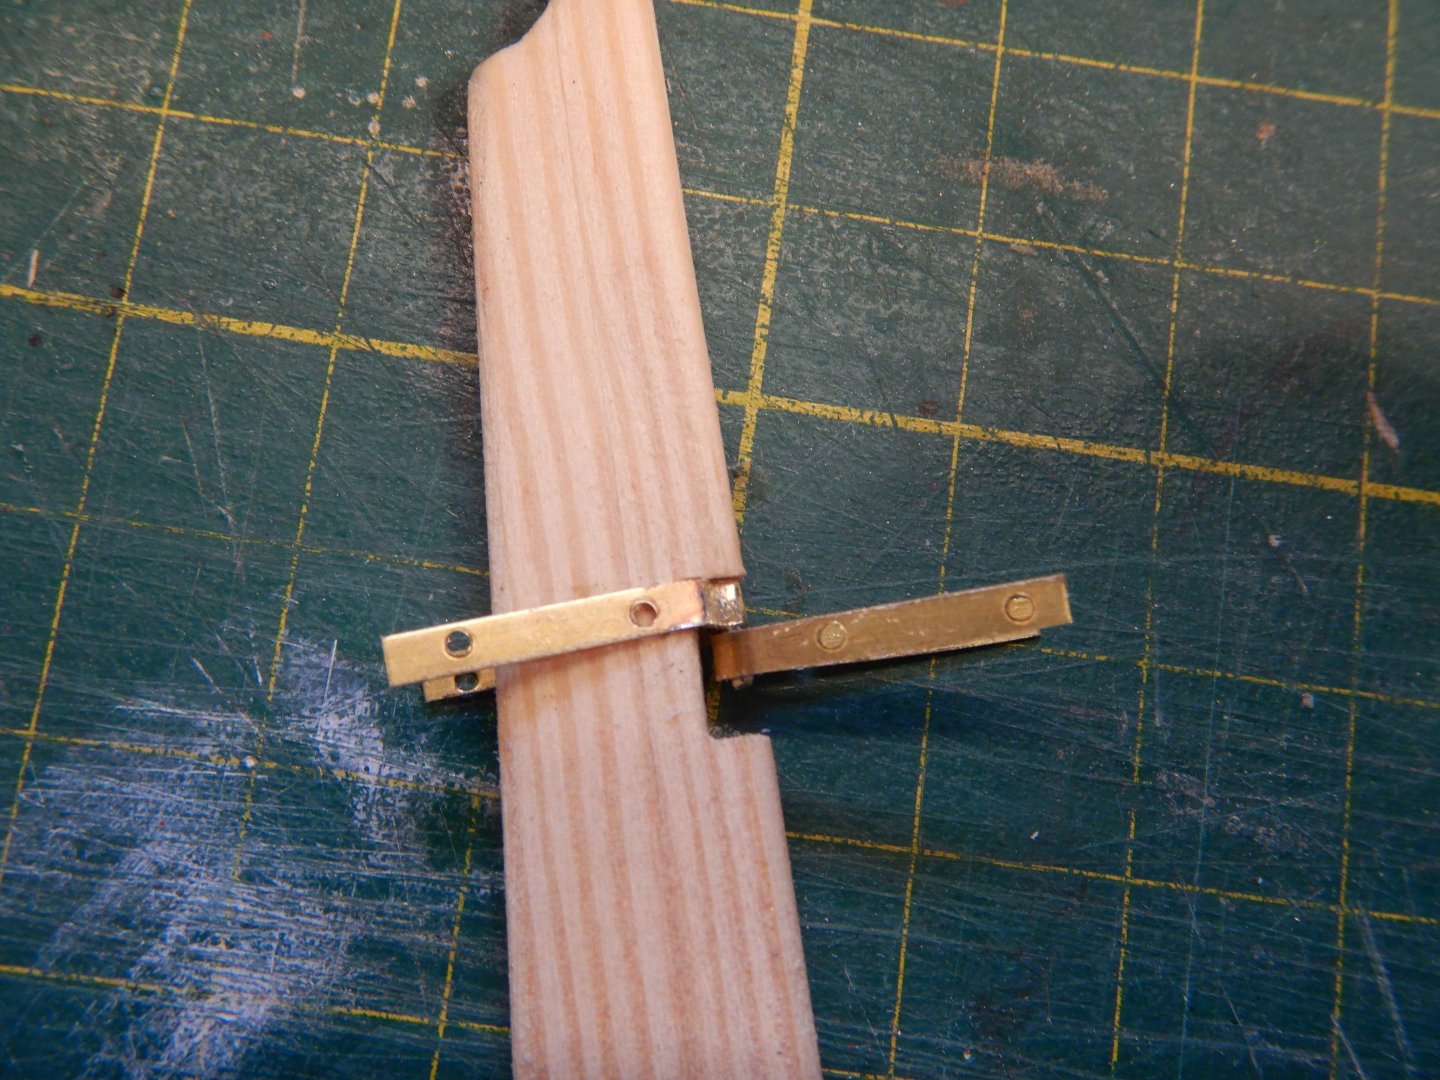
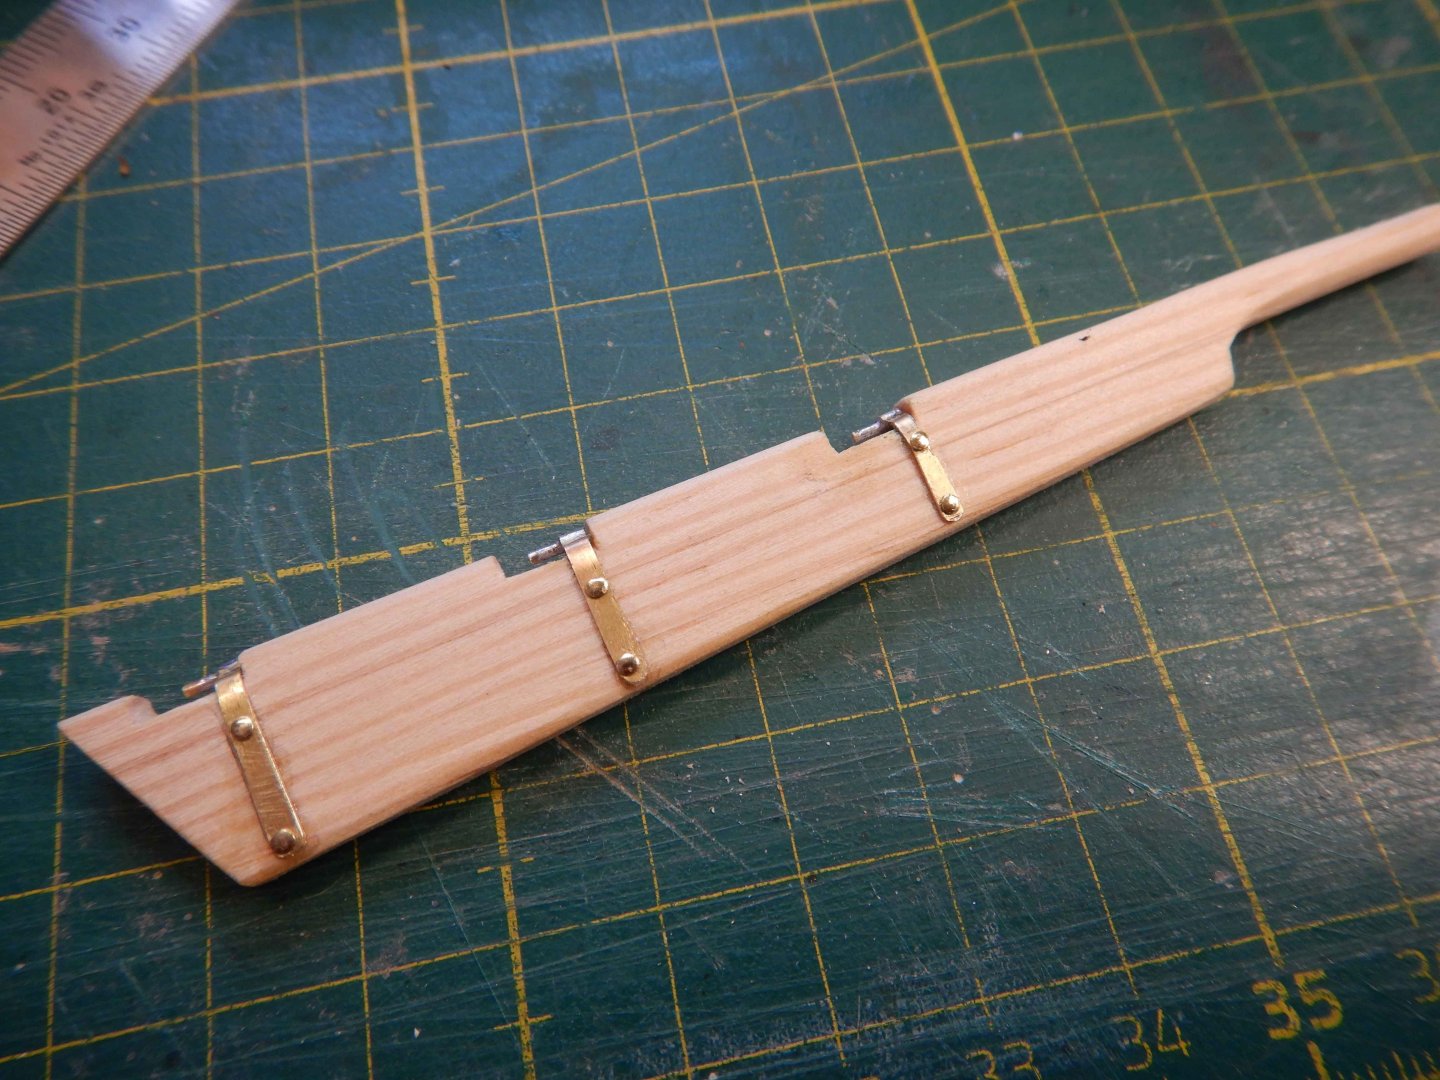
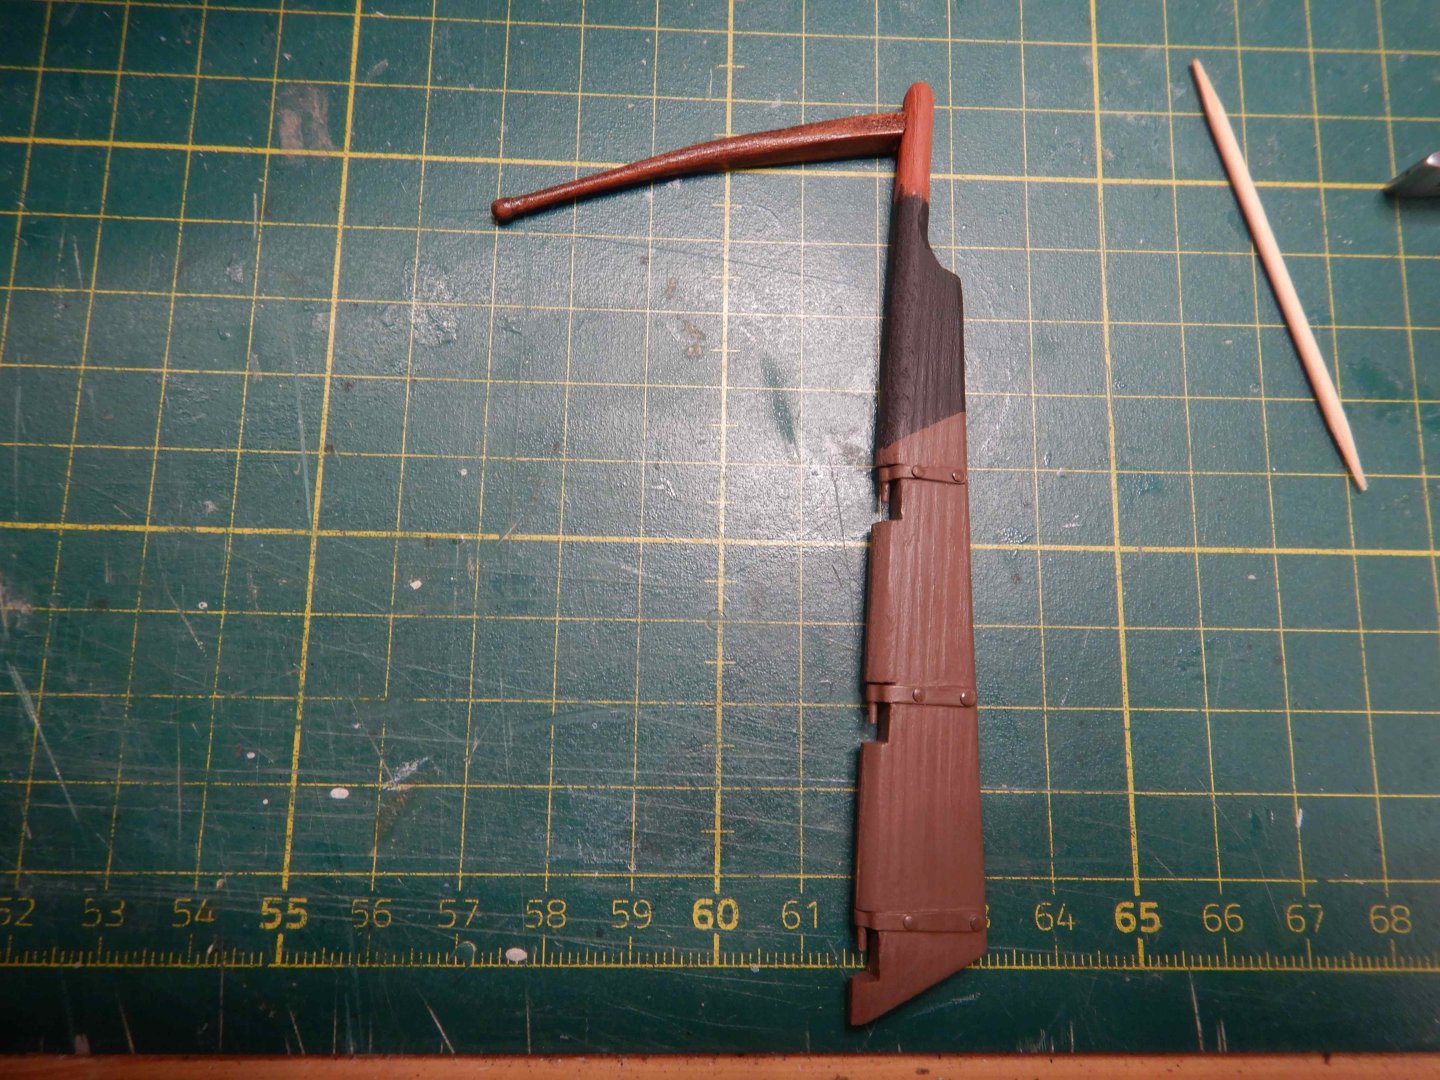
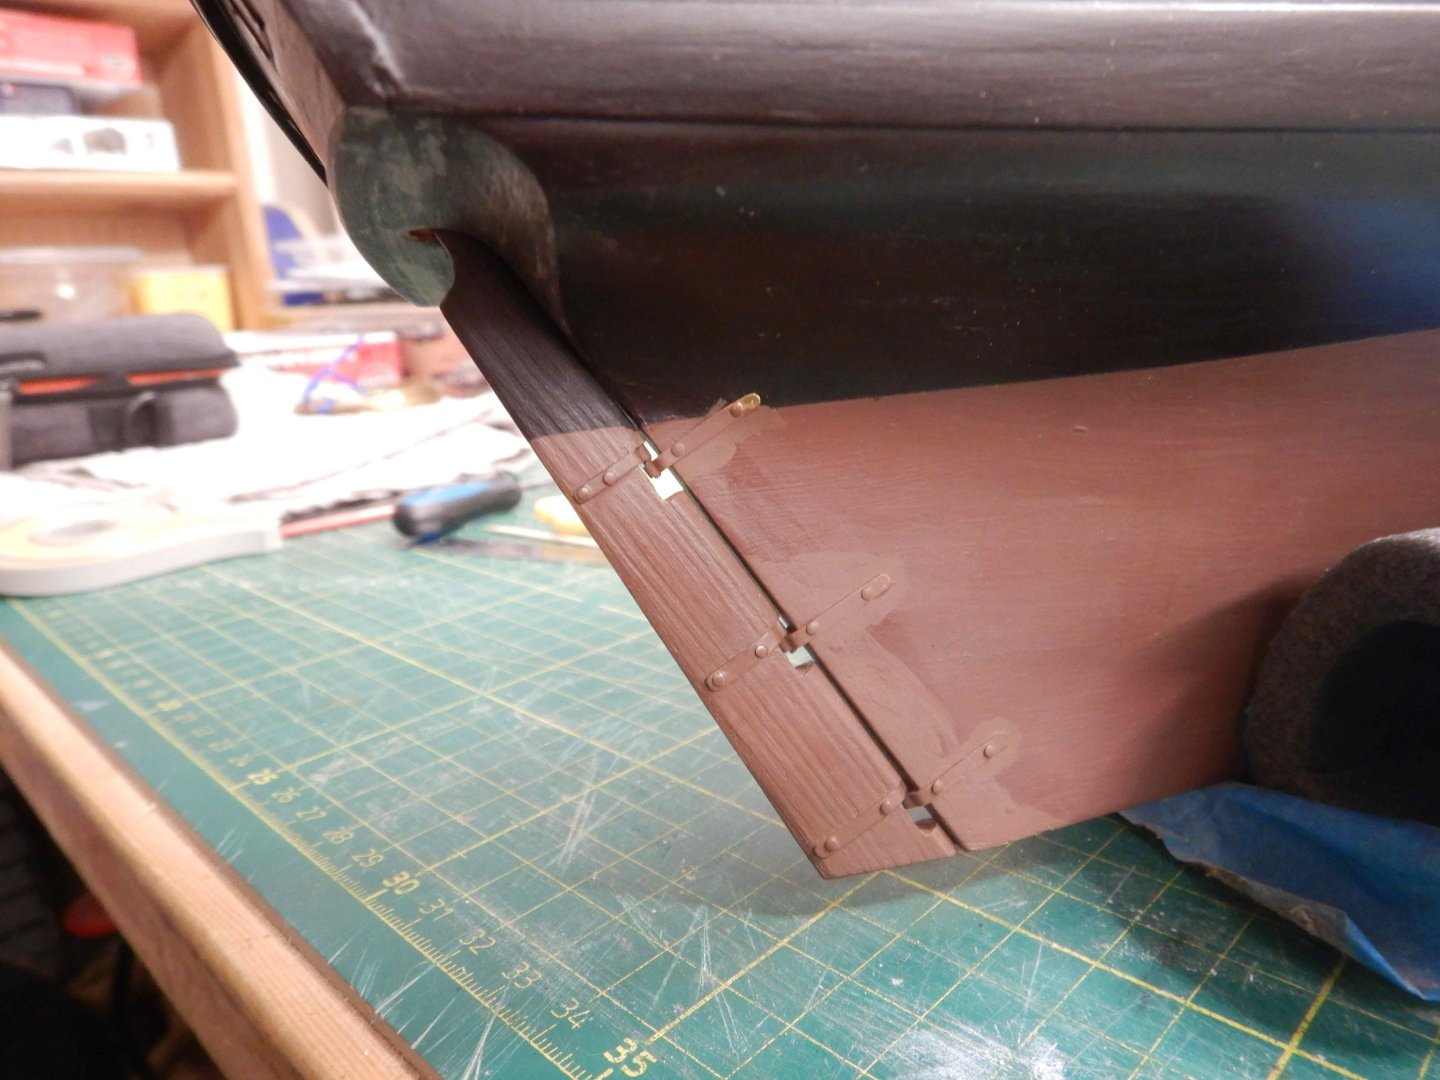
Hello! Another little update on my Lynx build. As mentioned in my previous post, I have made the rudder. I didn't like the plywood part, so I made it out of some square 5x5mm stock I had. I put one piece in the drill and sanded the end that would be the rudder stock round before glueing three pieces together ti get the right width. I ended up with this... And after some shaping and sanding it looked like this.. I bent another piece to a slight curve, and made a tiller. Kit parts for comparison. I also made the cutout for the hinges smaller. Then it was time to make the hinges. Here I used the kit supplied parts, but I filed the width down to 2 mm as I thougt they looked a little big. I then soldered on a pin on the half that goes on the rudder. Then they were cut to length, and new holes were drilled. I fixed them to the rudder with CA glue and brass nails. Then, some paint.. I gave the tiller a coat of mahogany stain and varnish. Not sure if I like it, might paint it.. The tiller will get a metal fitting that goes around the rudder stock, but this will be mounted later. I will also make stopper blocks to prevent the rudder unshipping, but I won't mount the rudder permanently just yet.. That's all for now! Gaffrig.

-
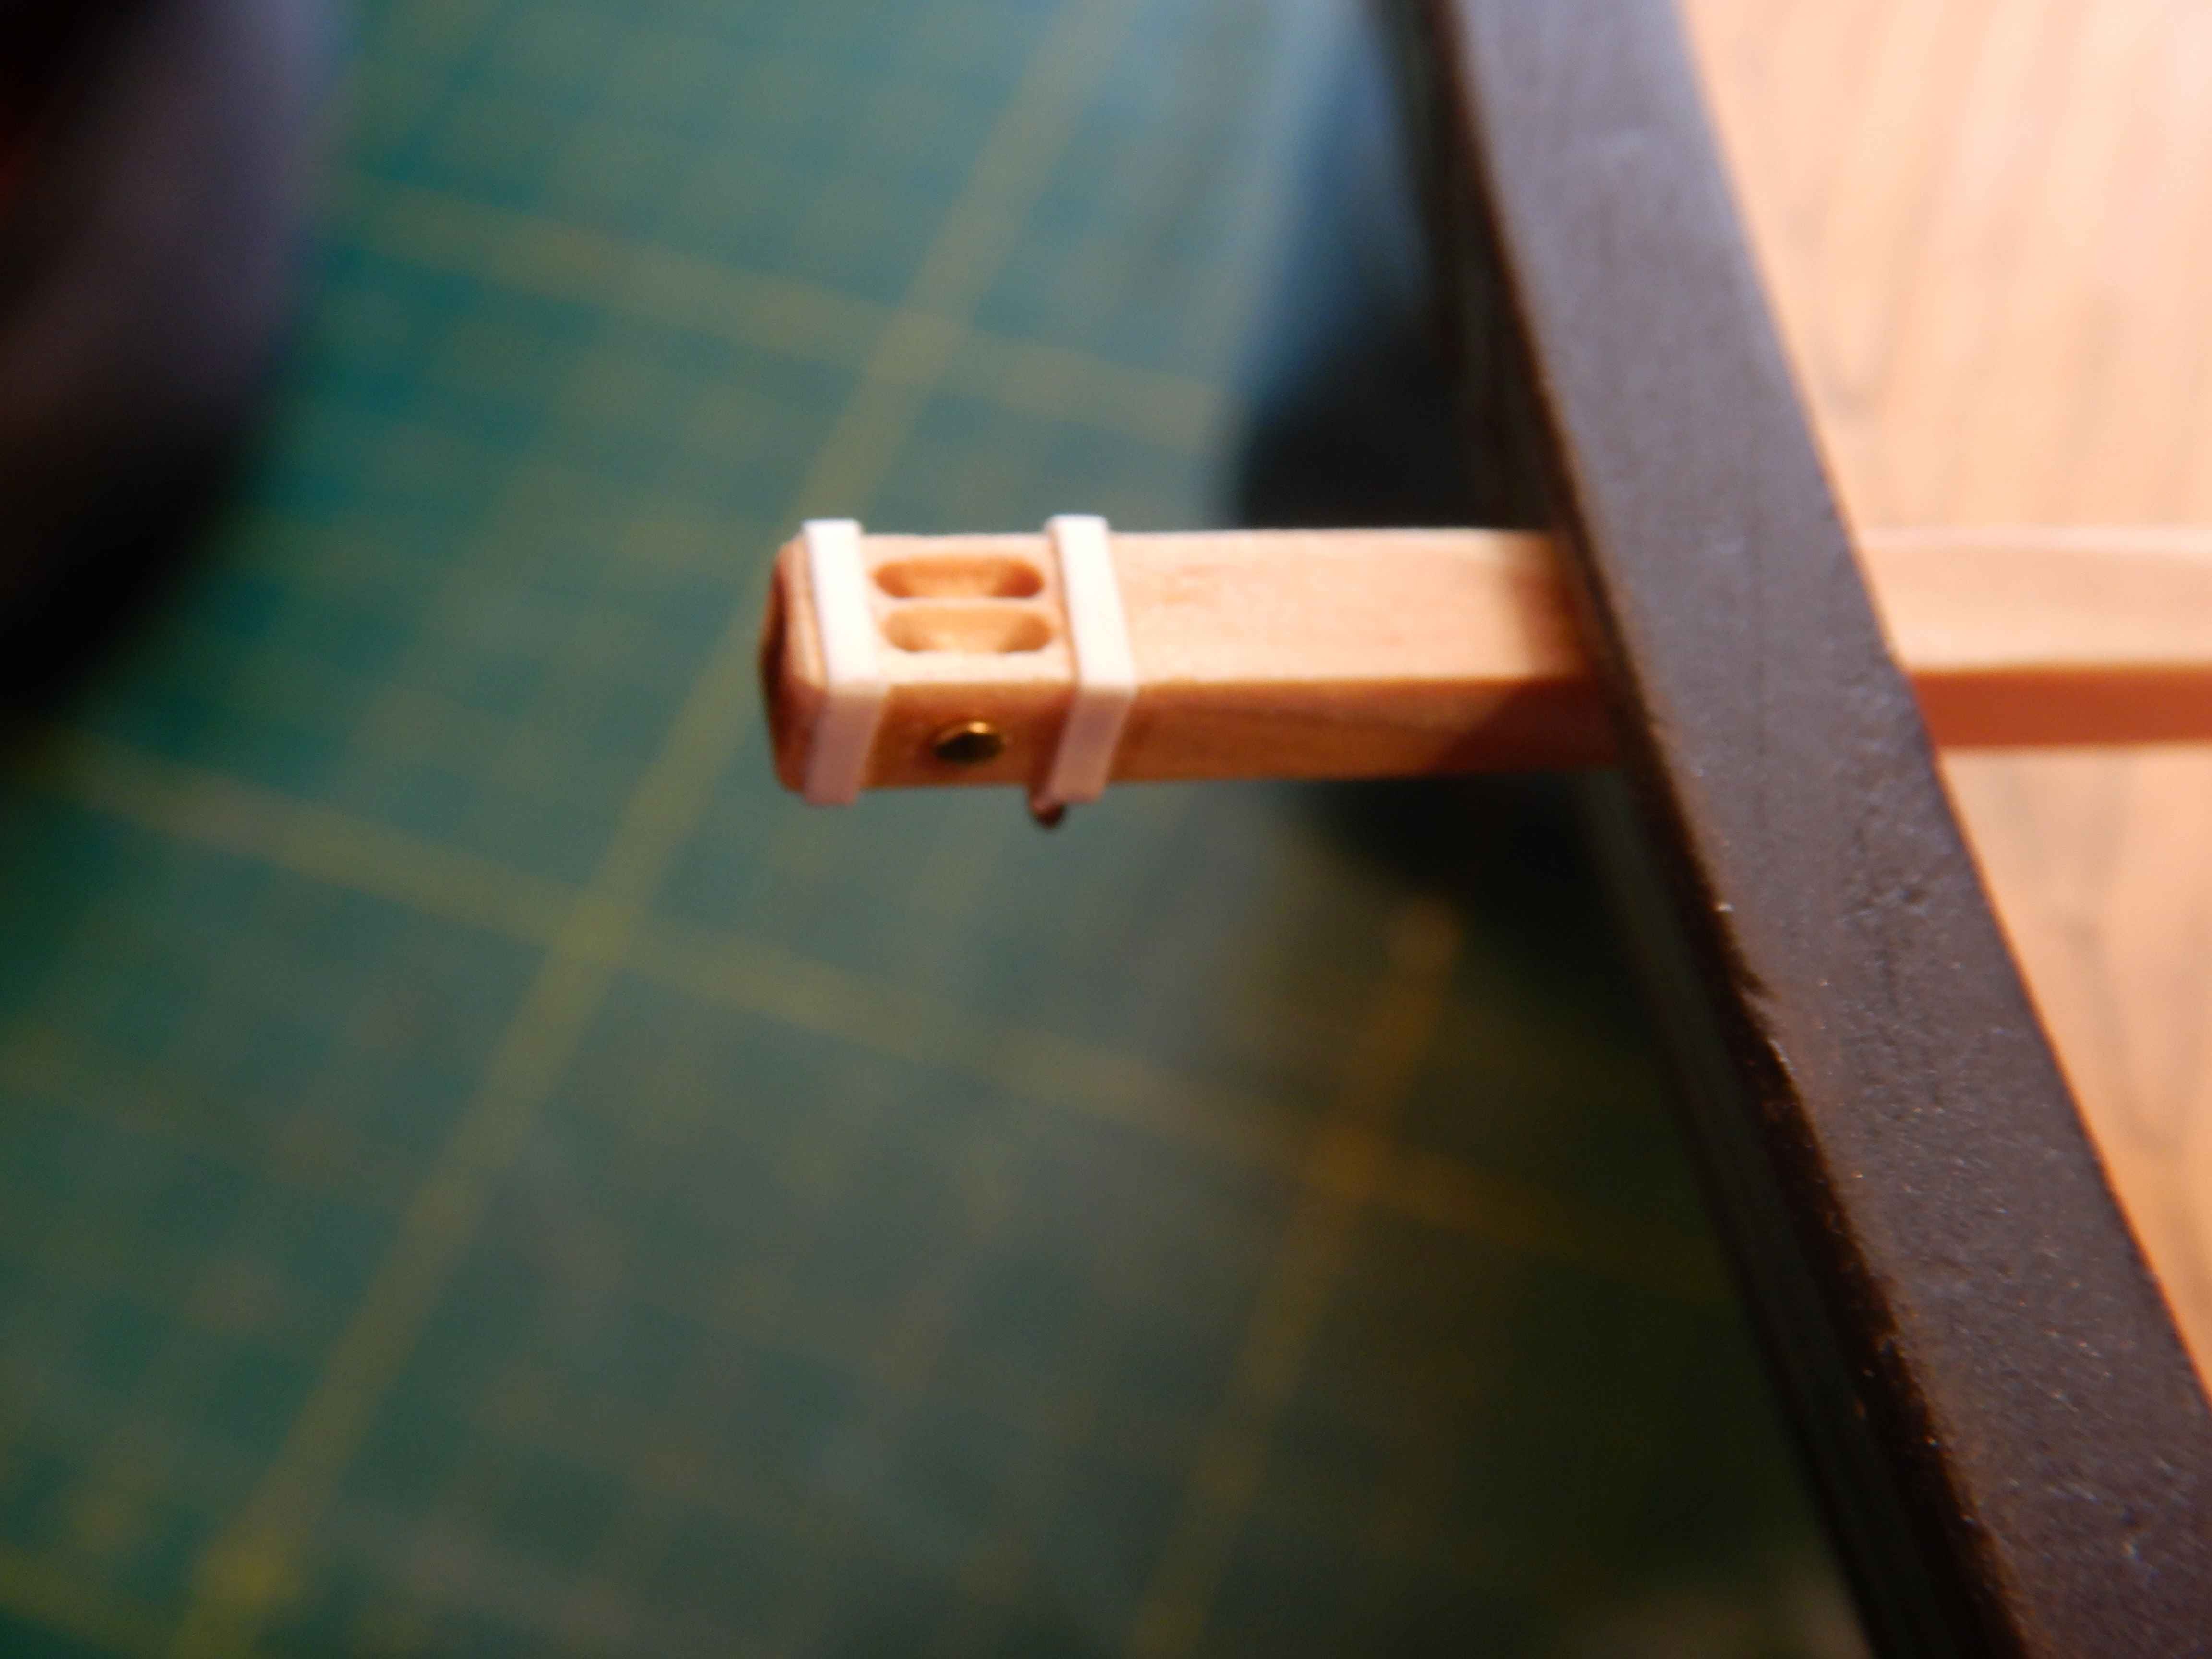
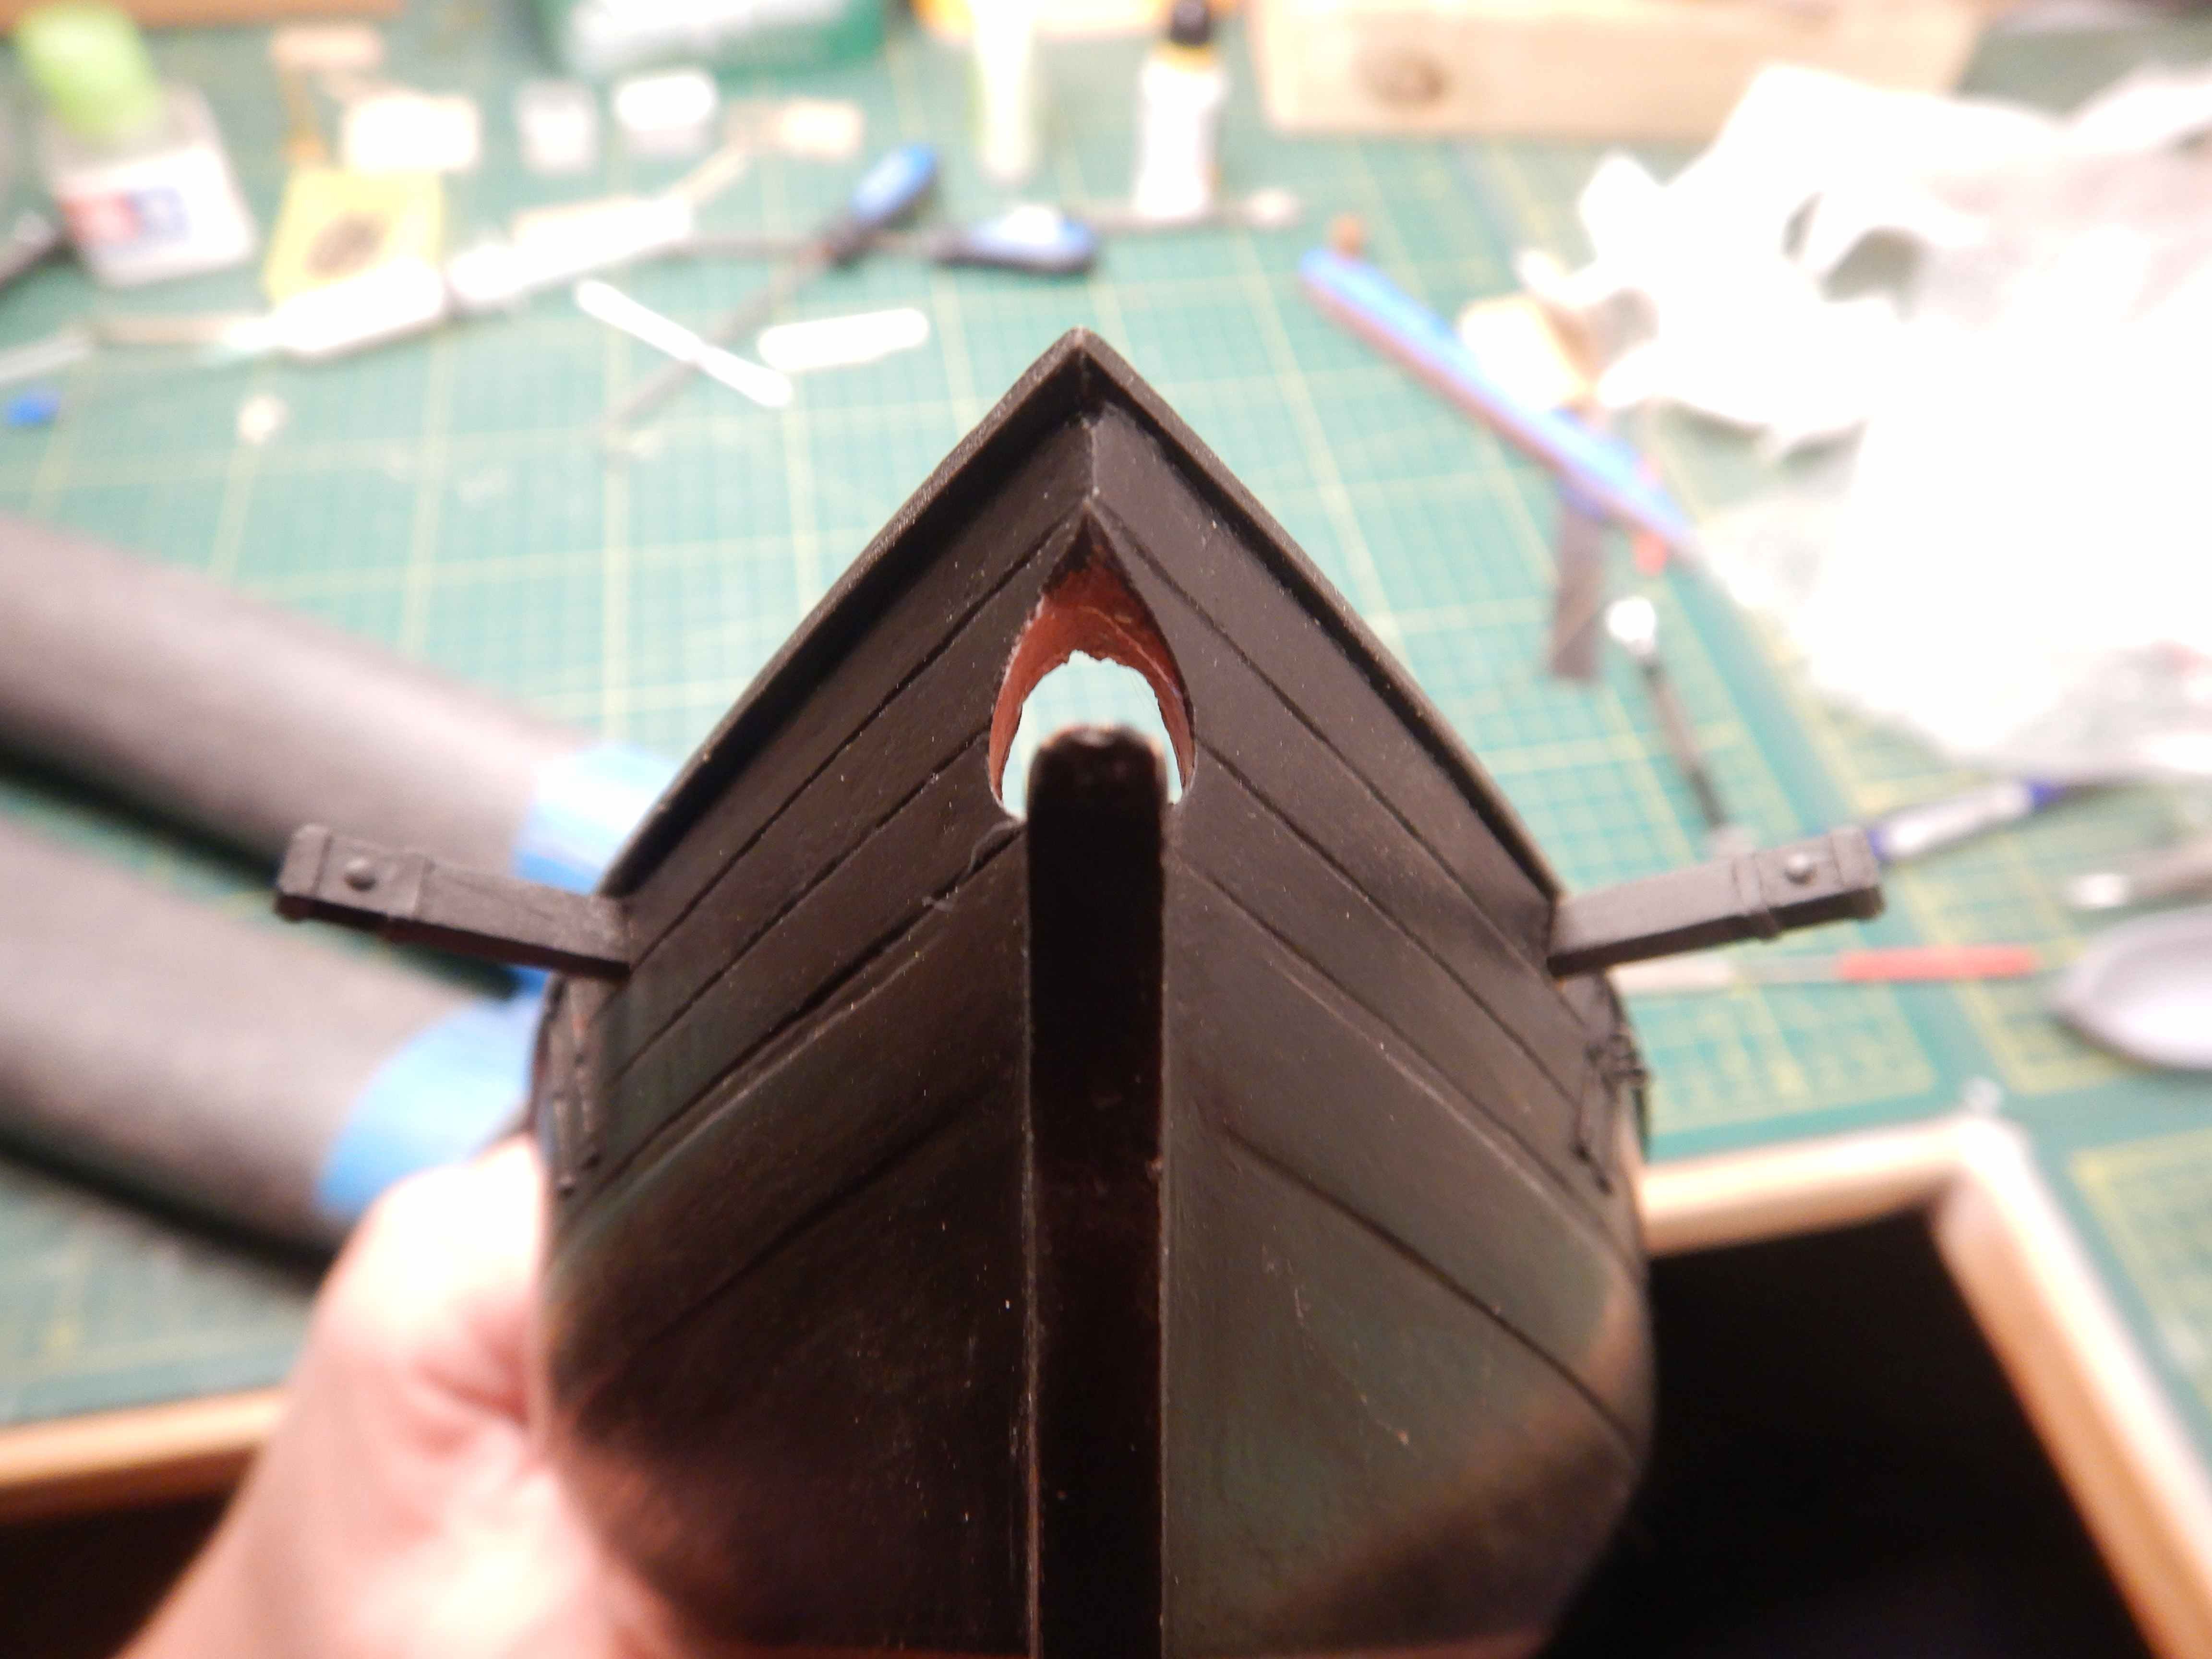
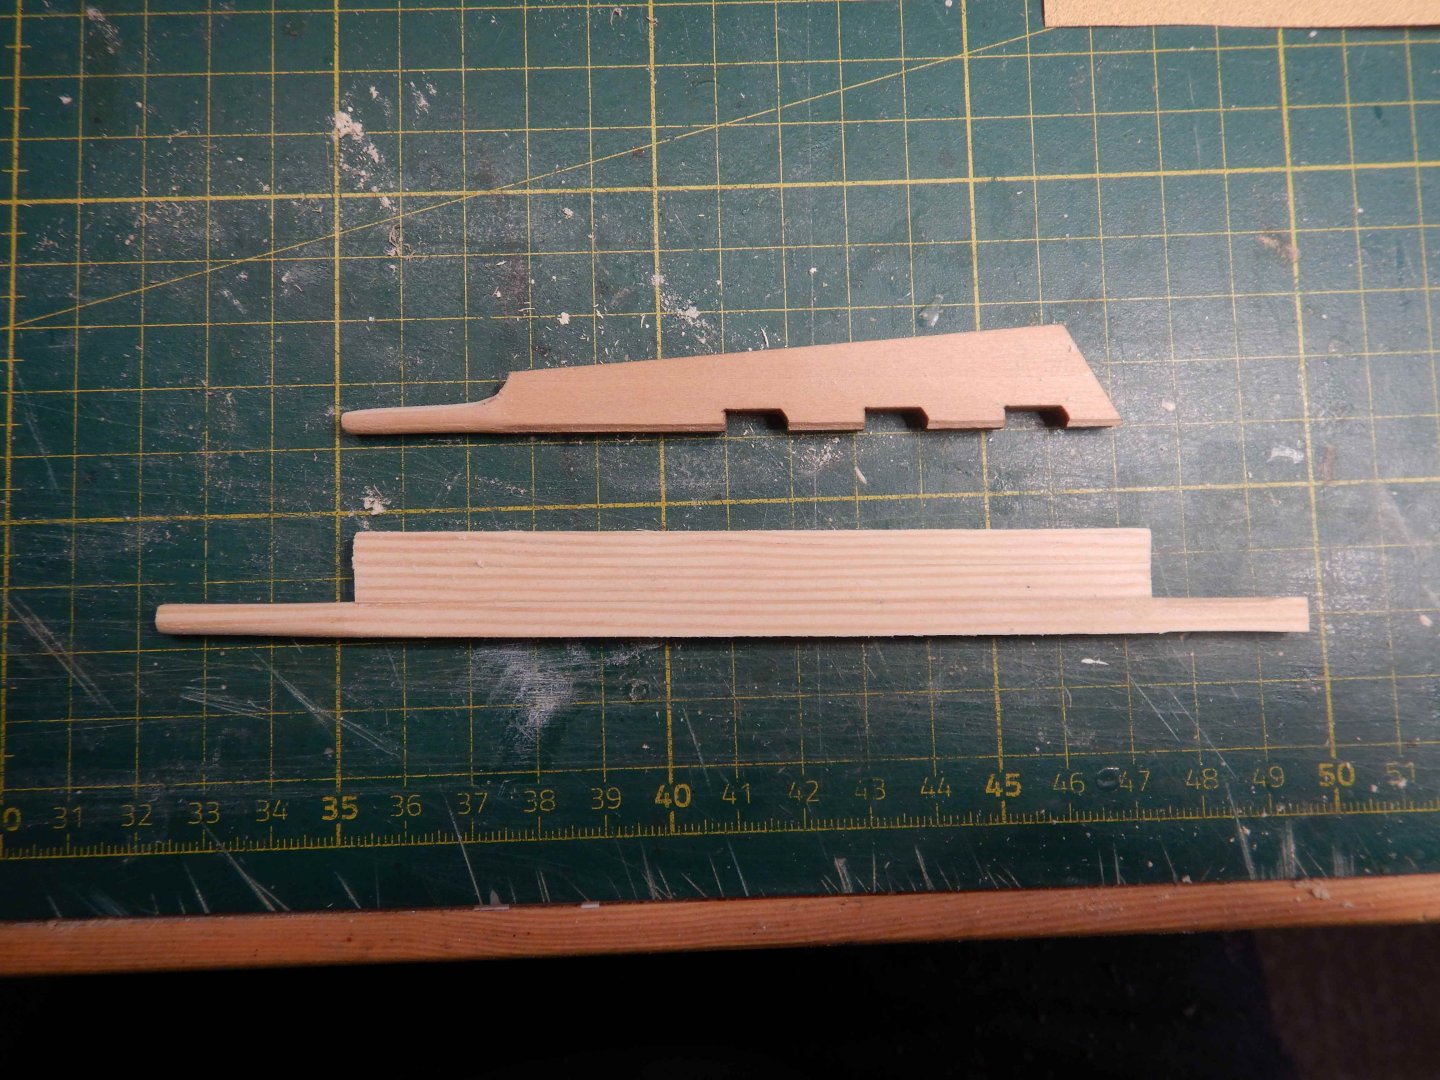
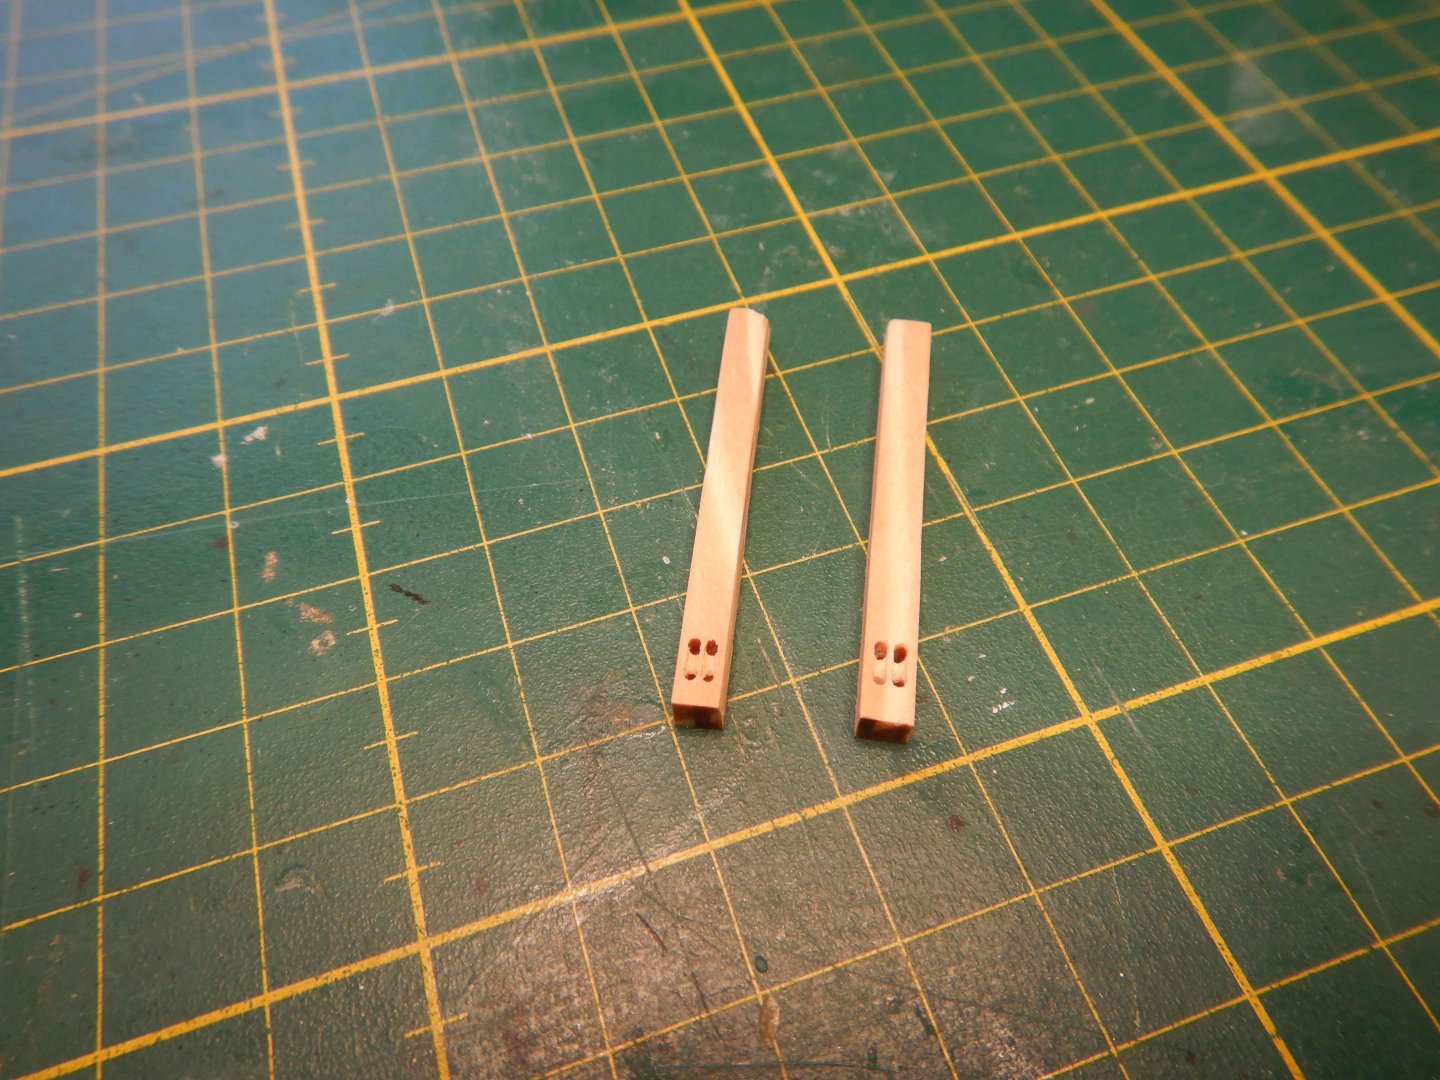
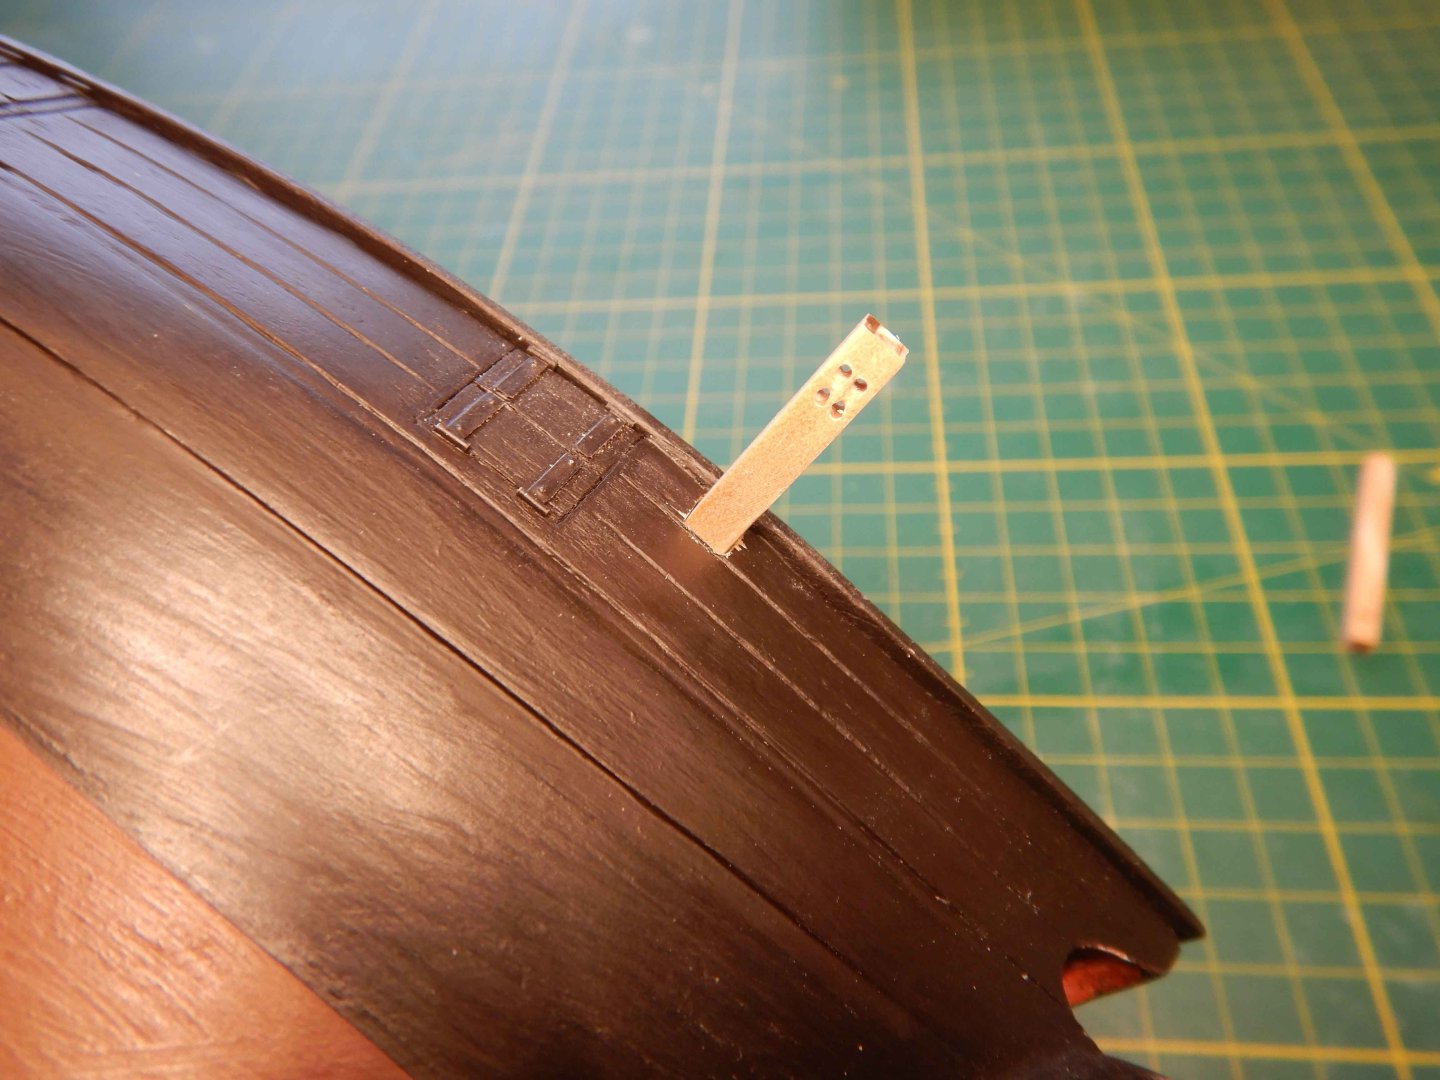
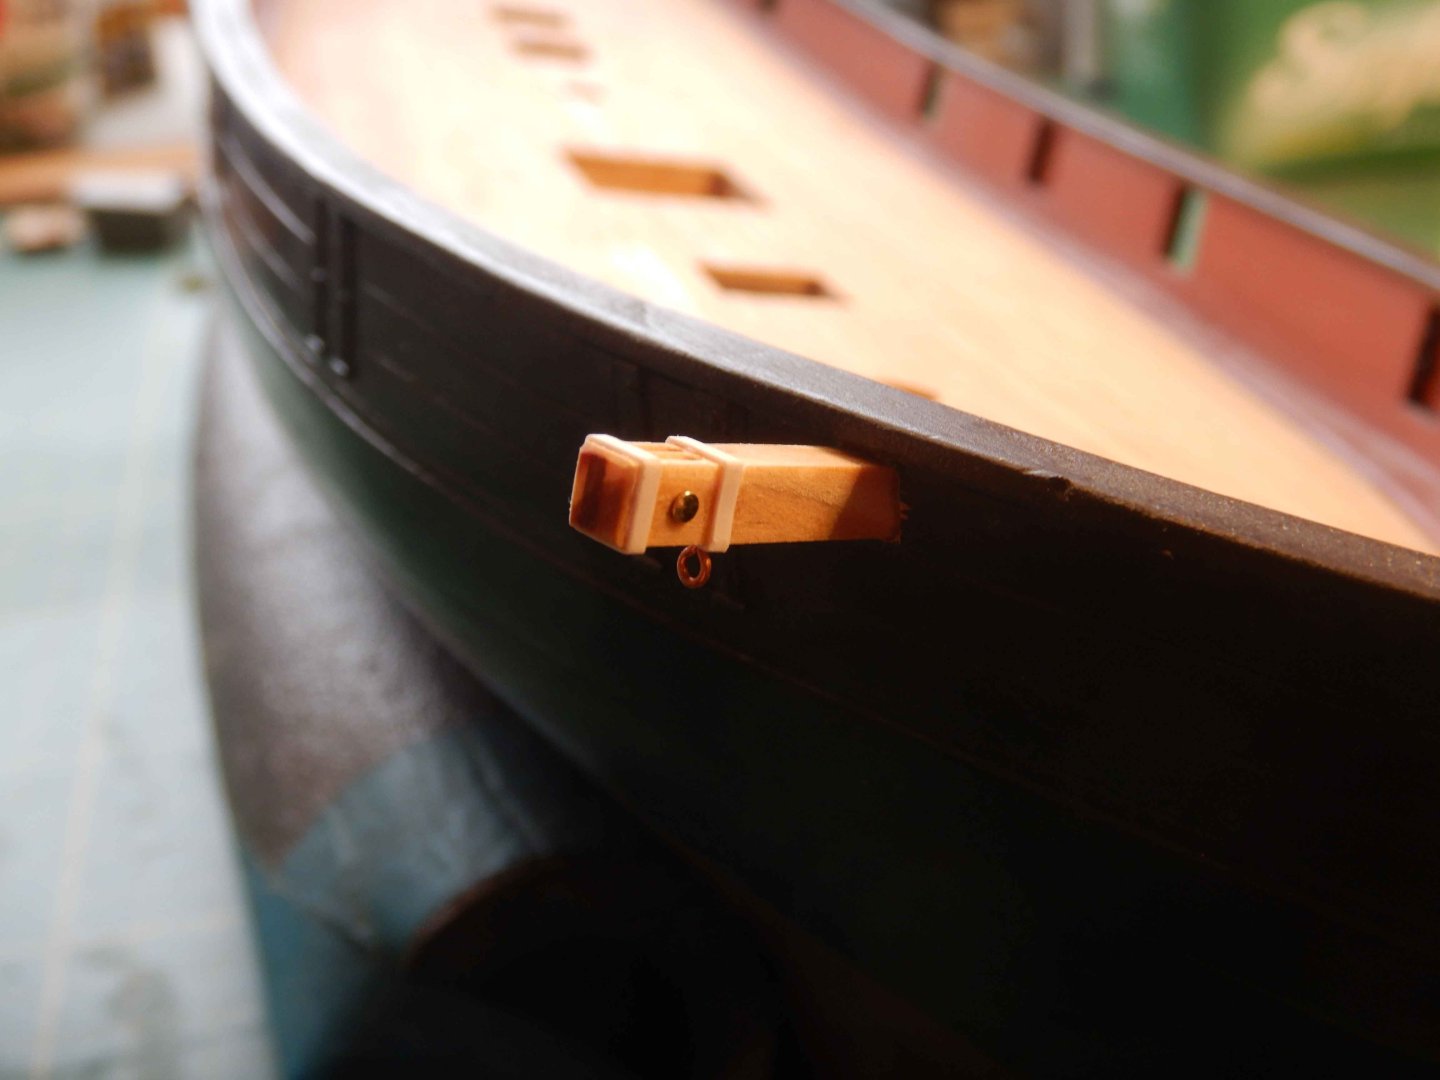
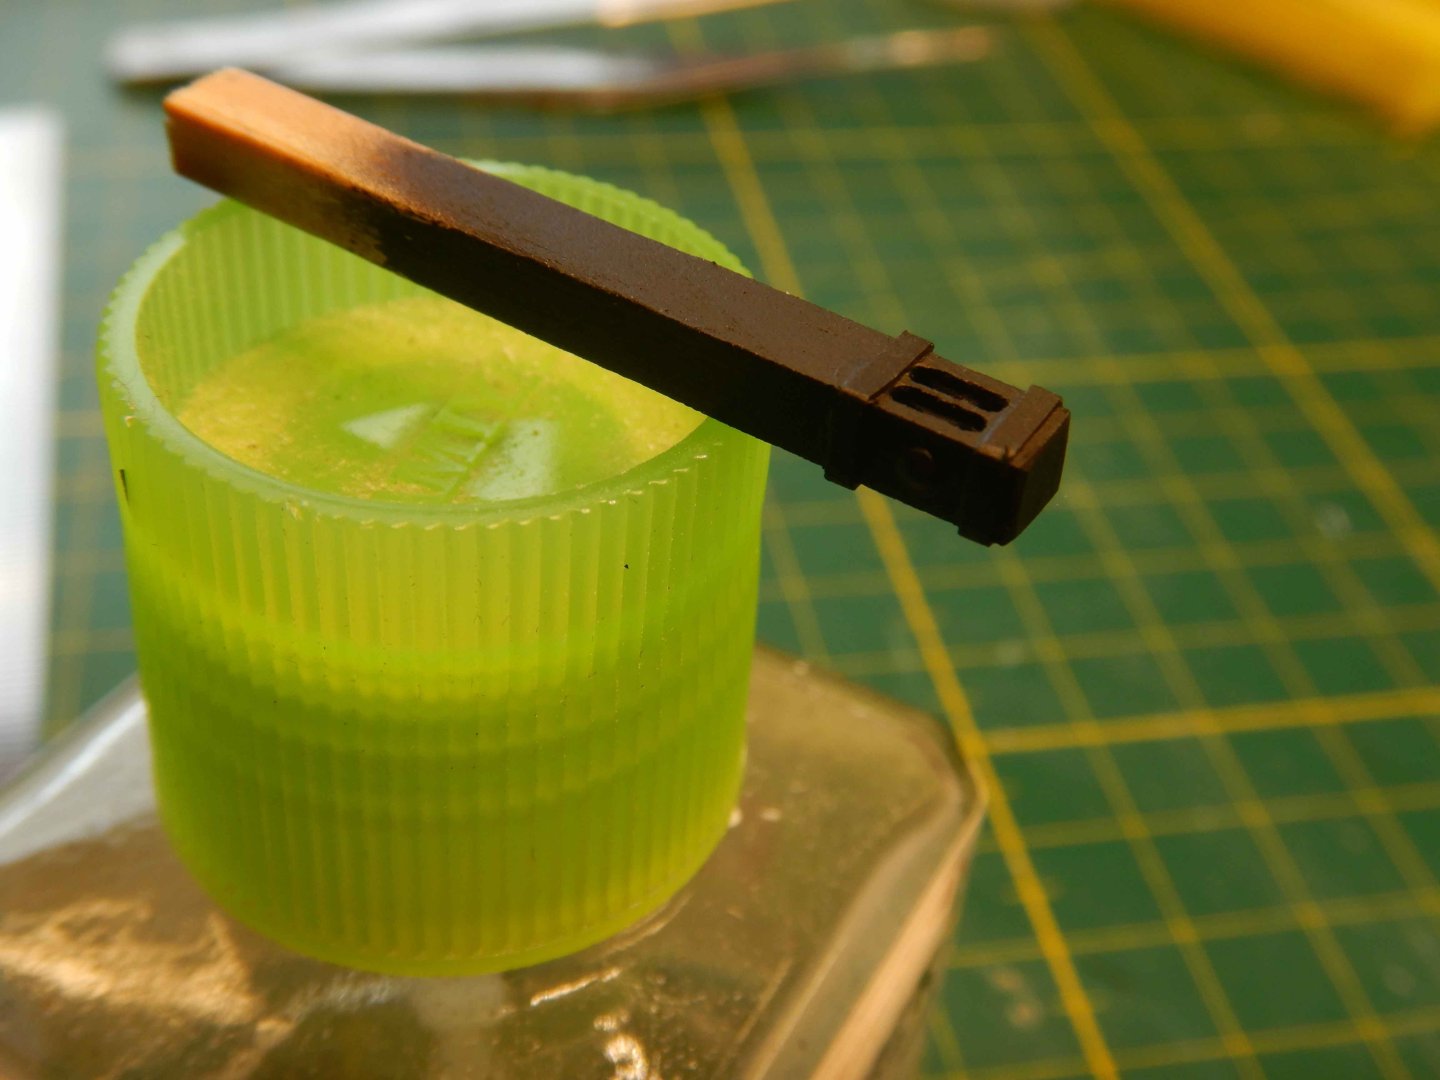
Hello! After life has gotten in the way for too long, I have finally been able to find some time to blow the dust of my model and make a little headway.. Spent quite some time to get my bearings and figure out where I left off and what to do next.. I decided on cutting holes and fixing the catheads inplace. The kit part is a oversized plywood piece that leaves a lot to be desired... So I figured I'll scratchbuild theese. I had some 4x4 mm that I used and drilled/milled some holes/grooves to fake some sheaves.. I added some styrene strip to imitate iron bands, and brass nails for the sheaves. Also added a eyebolt for the end of the hoist tackle. I removed this again because I think it is easier to "splice" the rope in a loose eyebolt rather than one fixed to the model. Then added some paint.. Made the innfill pieces, glued it all inplace and painted and voila! my interpretation of Lynx's catheads are done! Next I think will be the rudder. Another plywood piece that I might end up scratch building. Gaffrig.


-
Wow! I’m late to the party! This build has gone completely under my radar… Great looking build! I’m building the same kit, and have had a lot of the same issues you have had. Life has got in the way for me for too long, but now I’m gonna dust of my kit and try to make some headway! Keep up the good work! All the best! Gaffrig.
-
Could tops just mean topsides? Meaning the rails? Just a thought. Gaffrig.
-
Gregory, that’s a good tip, thank you, I’ll look at build logs for those and see what I find. Gaffrig.
-
Gregory, the source is just looking at different builds here on the forum, and the thread carriage gun rigging has a few sketches. (Can’t get the link in here for some reason but search and you shall find!) Alan, thank you for the pictures, the extra ringbolt there seems closer to the gunport than I have seen in other pictures. The plot thickens… 🤣 Gaffrig
-
Could it be that in ships with equal distance between gunports, there is an extra eyebolt in the middle between two ports used by both adjacent guns for pointing? Gaffrig.
-
Hi Gary. That is an interessting point, makes alot of sense to have both. Thank you for your input! Gaffrig.
-
Hi Alan. Yes, this seems to be the dominant way it is done. I’ll likely go for this way. Thank you! Gaffrig.
-
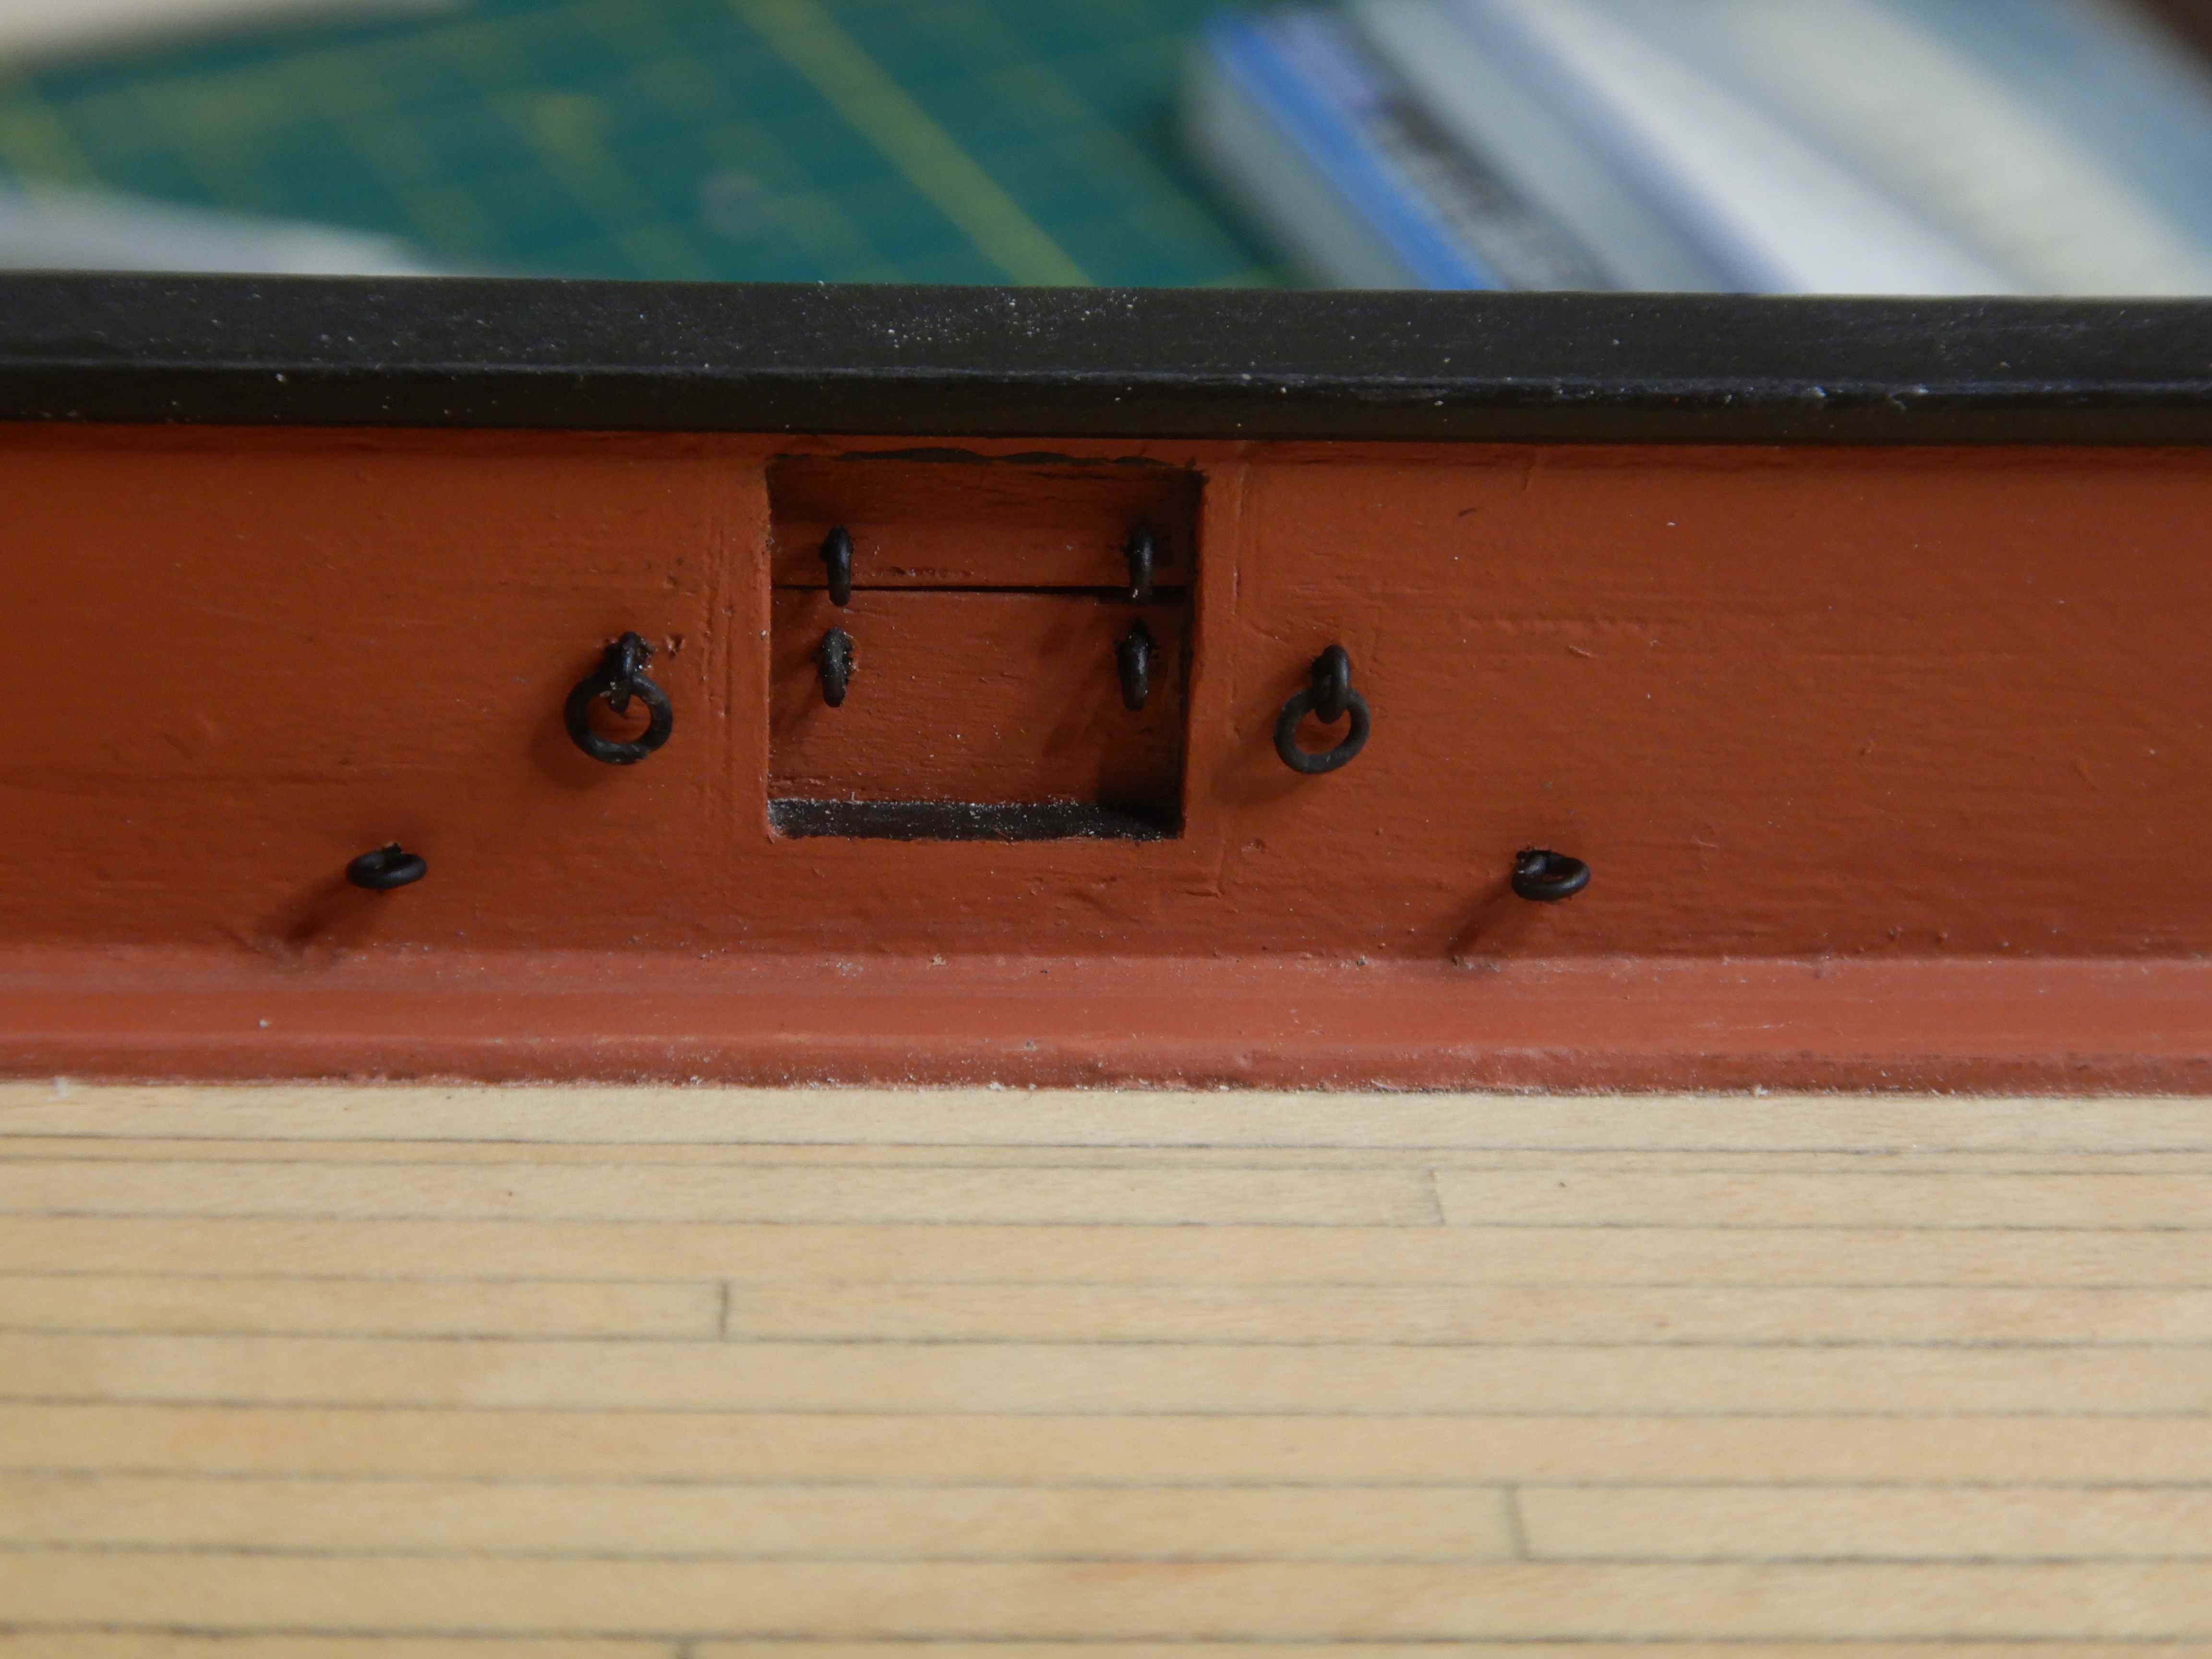
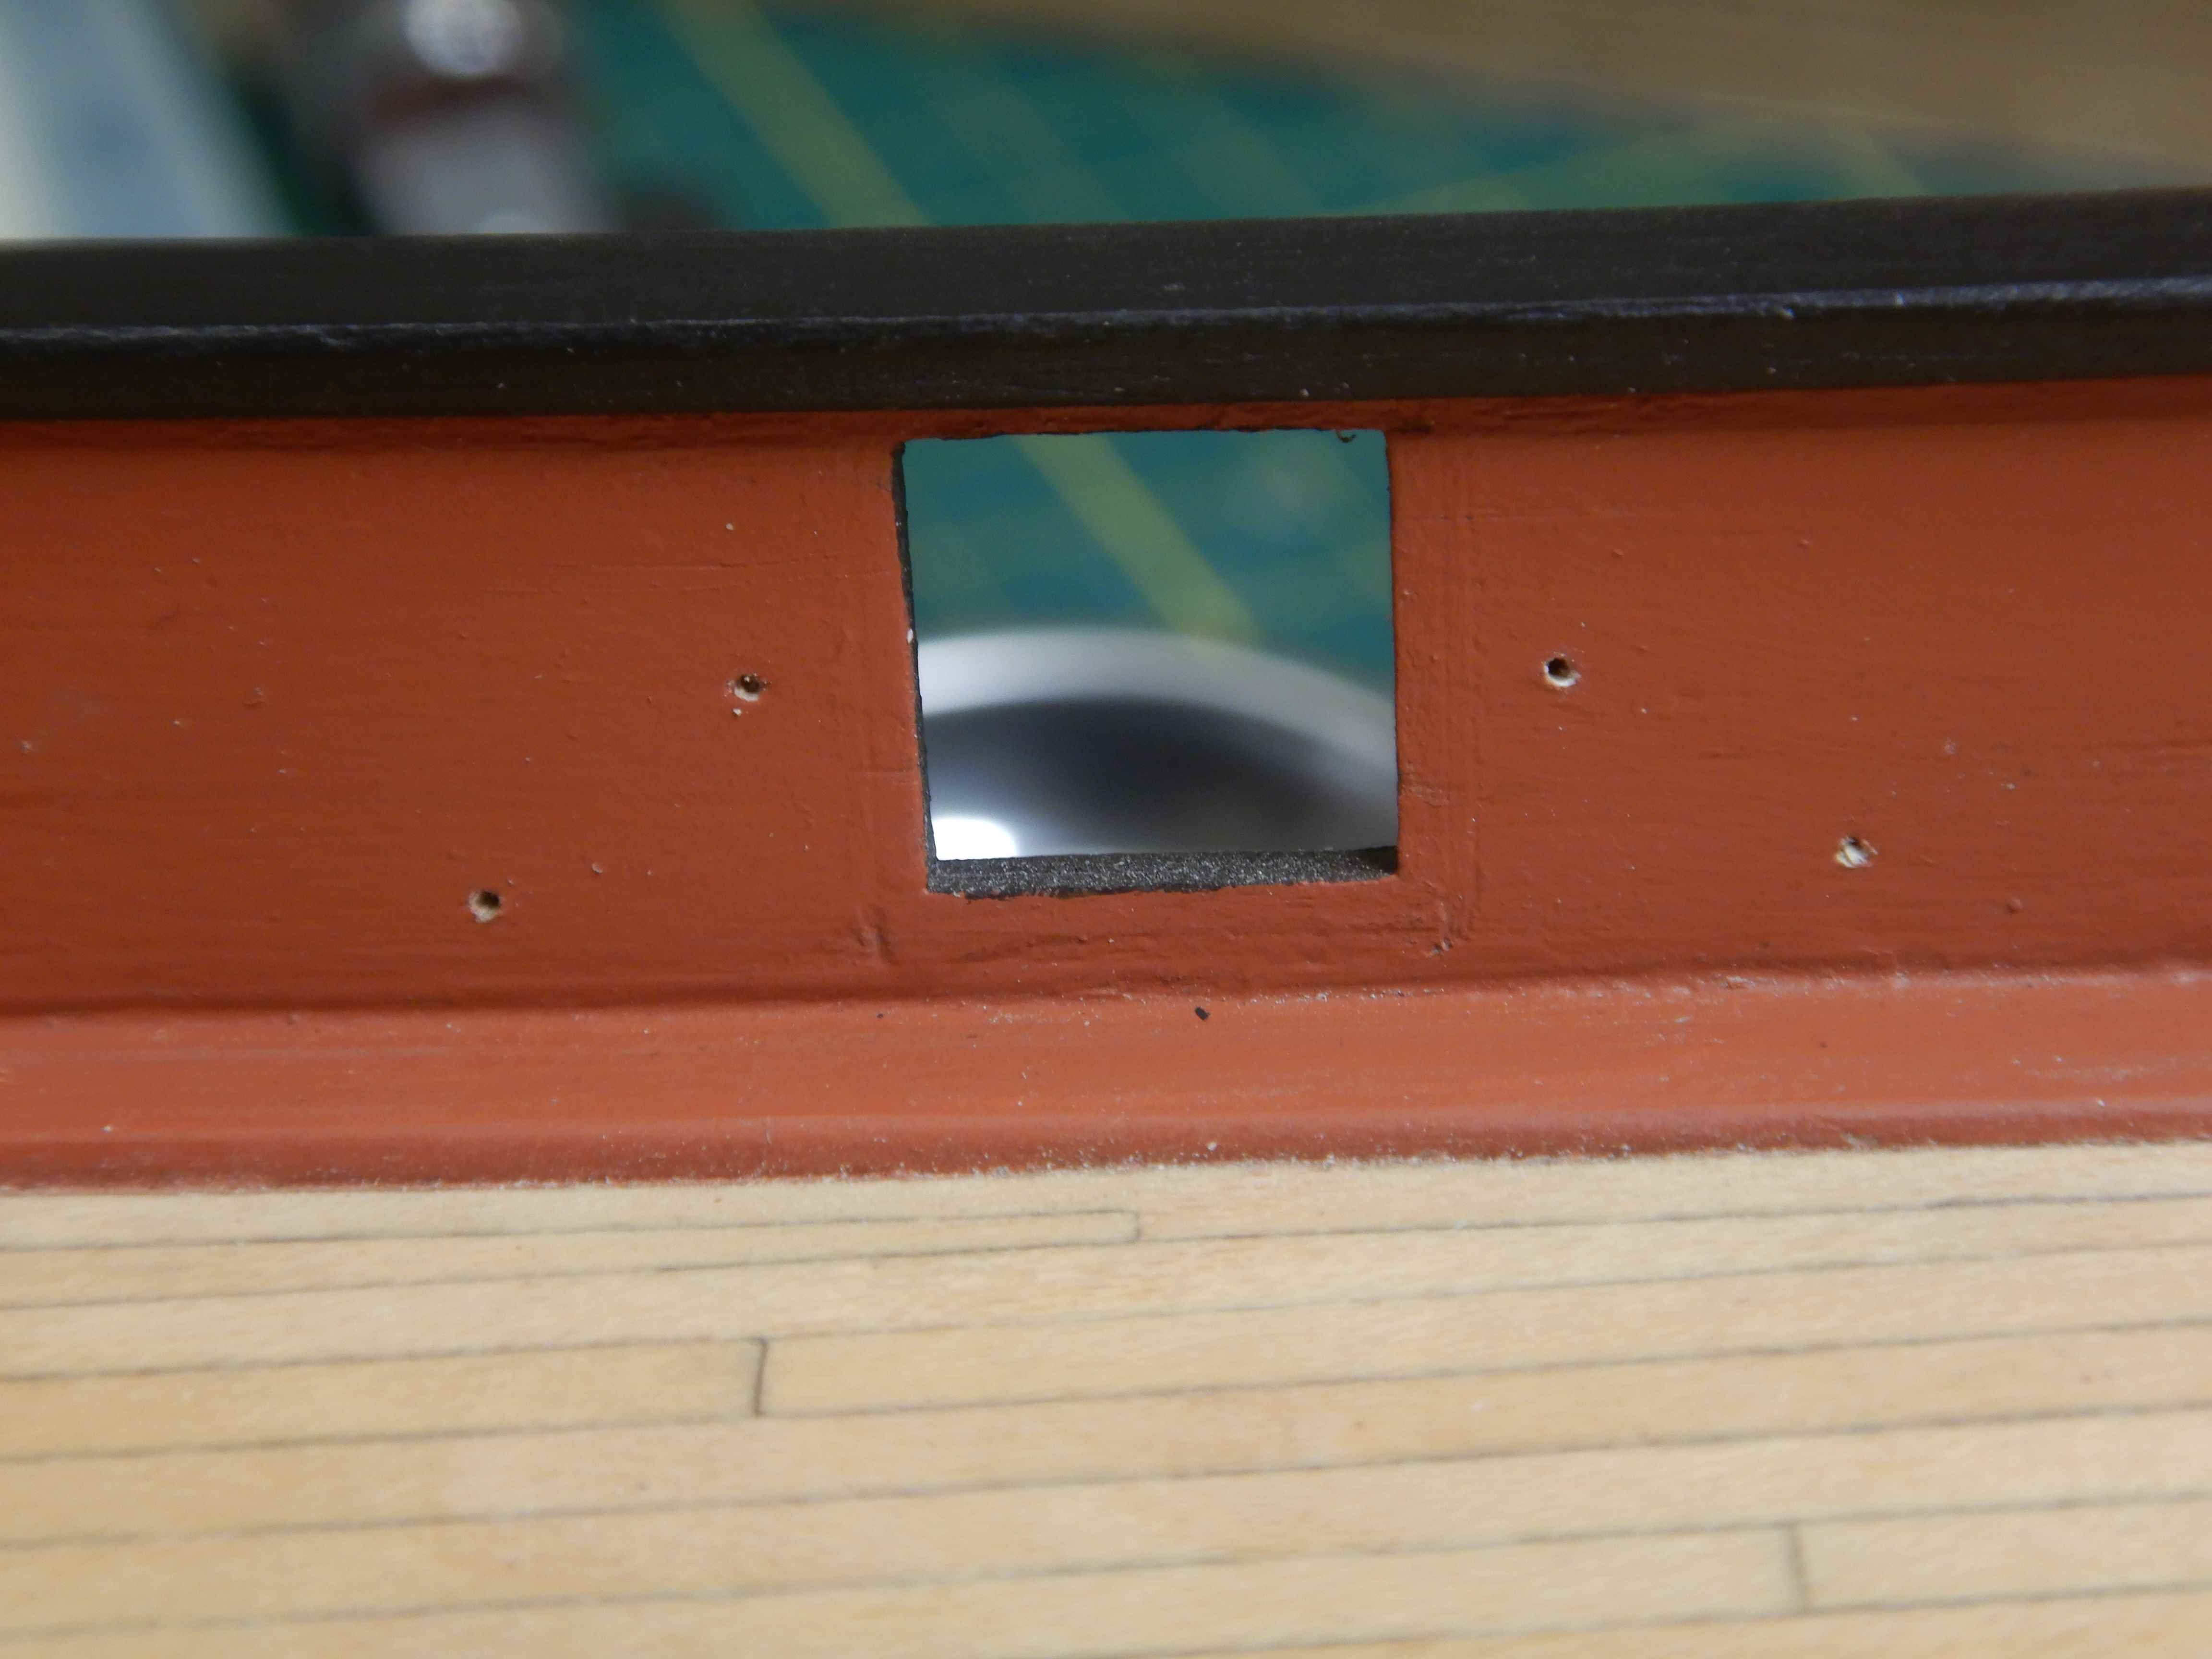
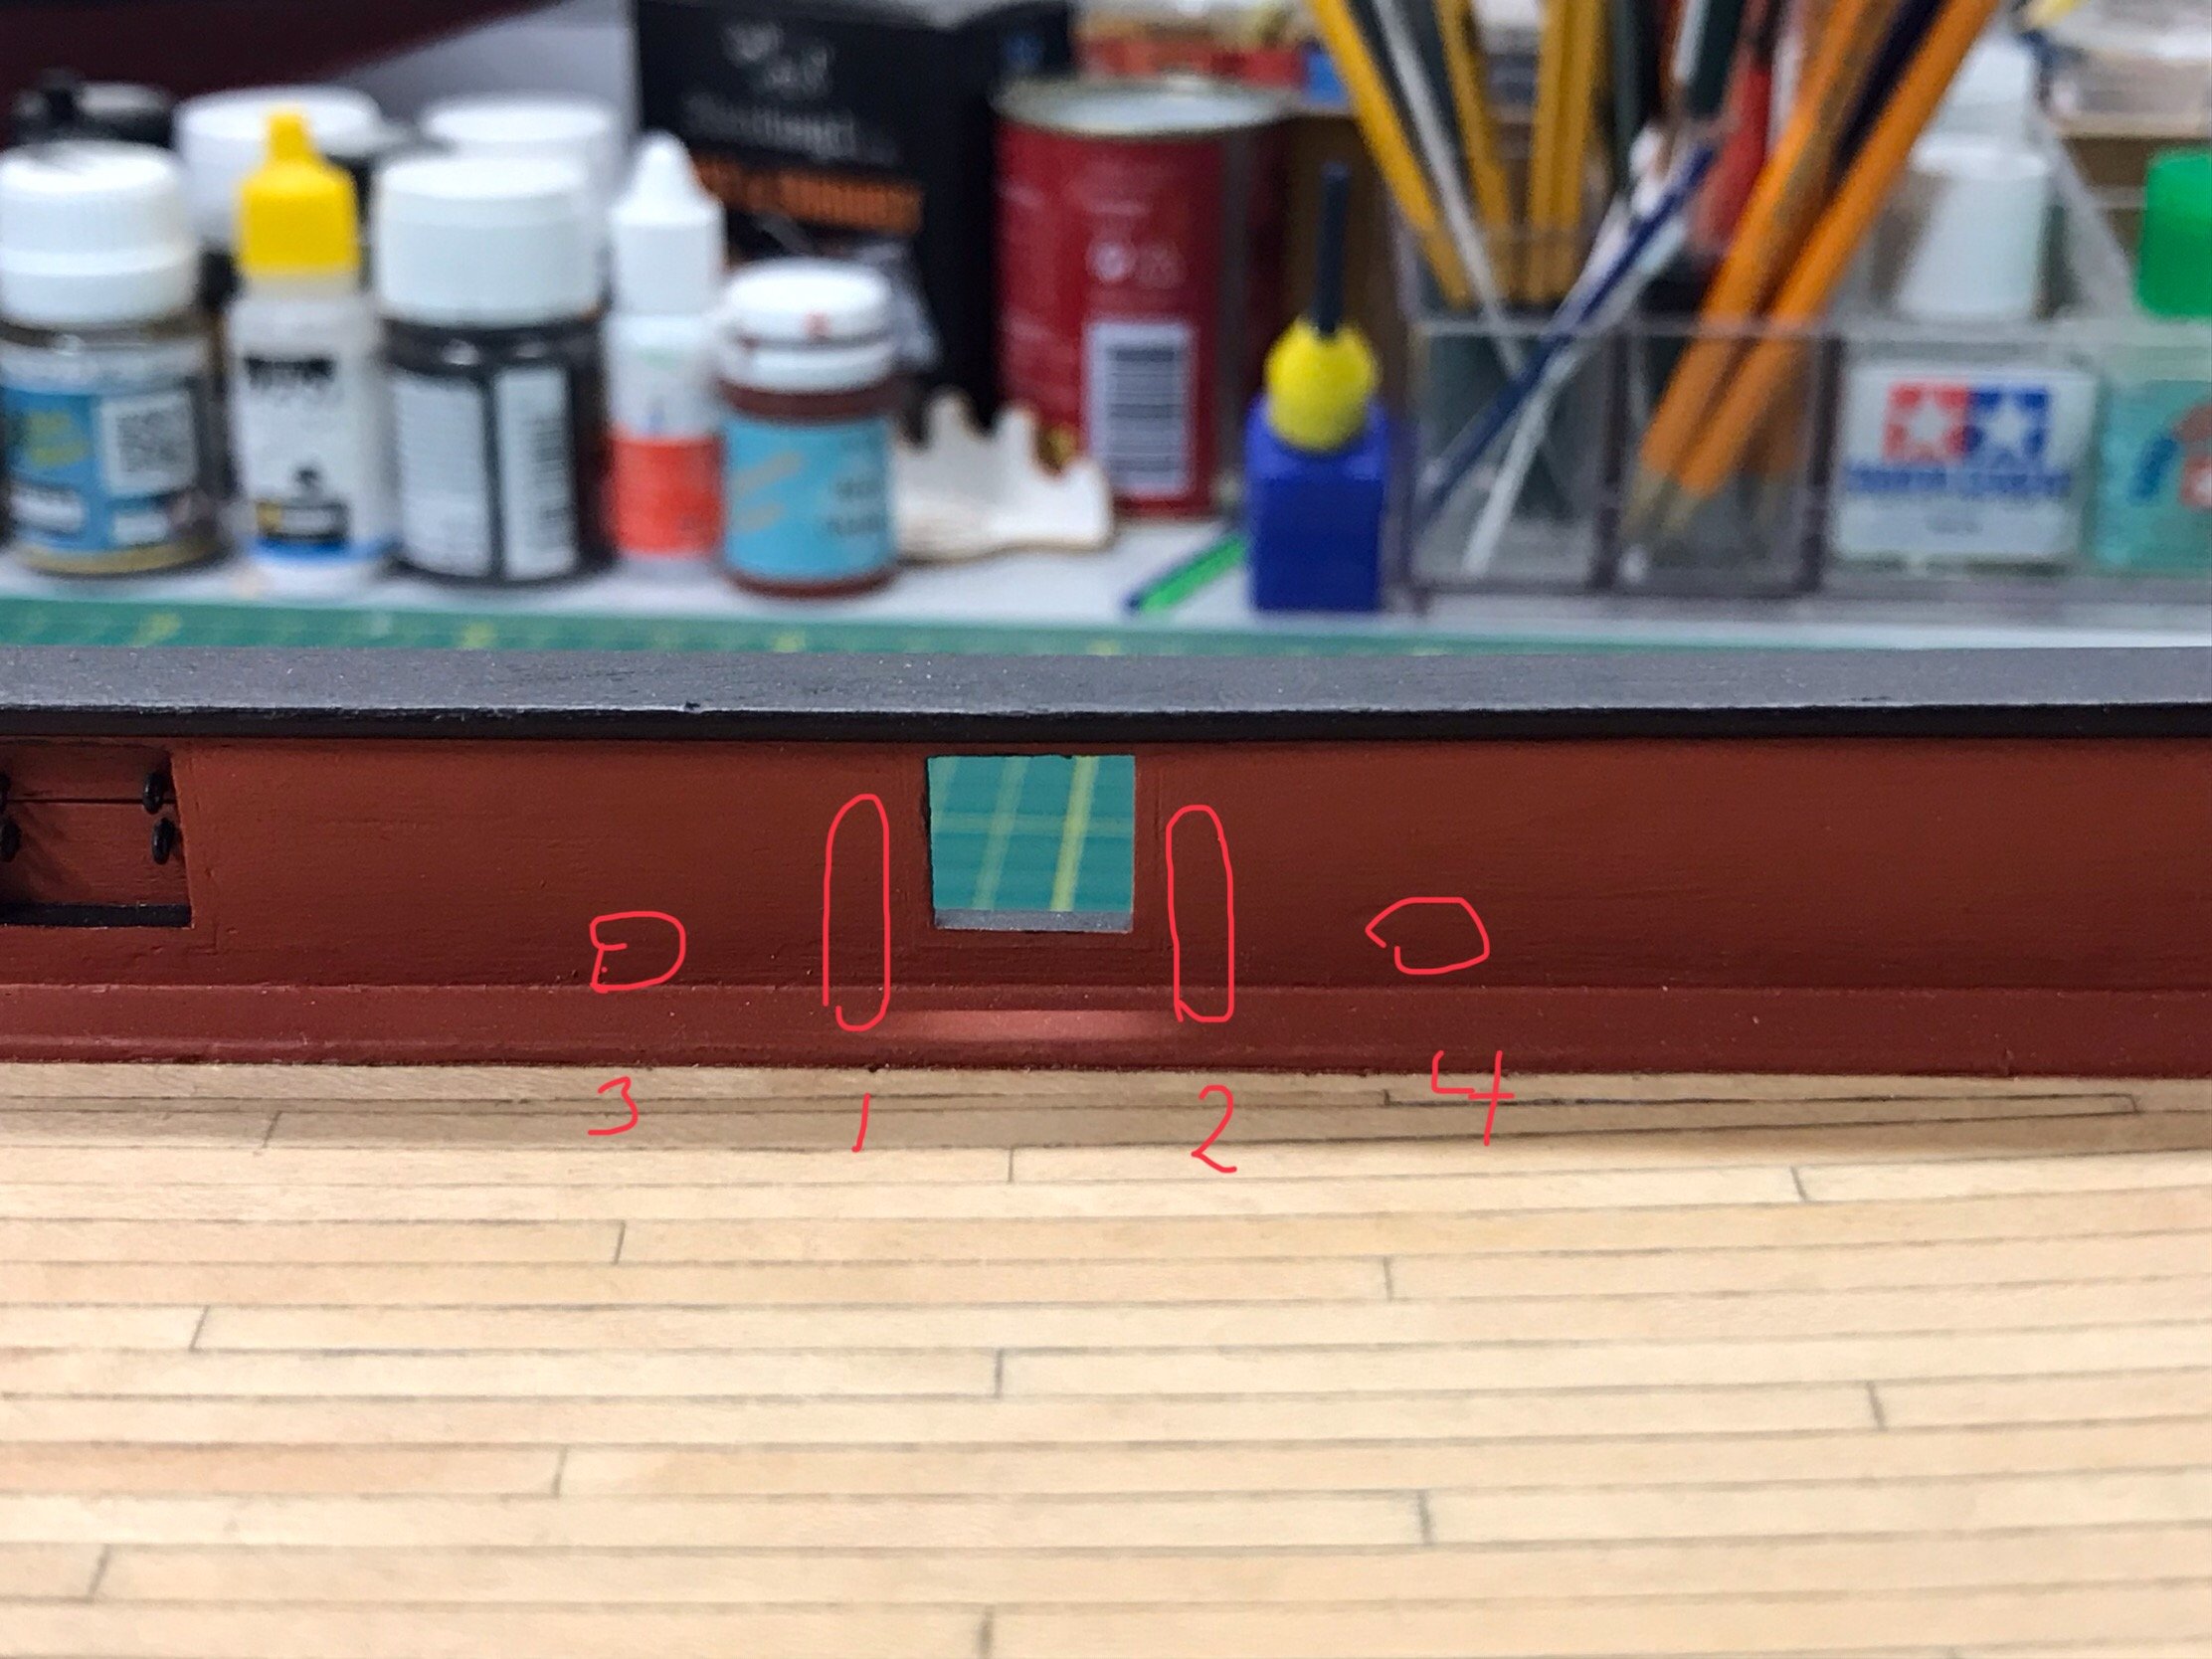
Hello all. I’m currently working on my model of Lynx, and would like to drill the holes and install eyebolts and ringbolts for the gun tackles and breech ropes before I start «cluttering» up the deck with various bits and pieces. My question is where do I put them? Looking around various builds here it seems to be several ways to do this. Many models have them above eachother in area 1 and 2 in my pic below, whereas some have the gun tackle eye bolts moved further away from the gunport in approx. Area 3 and 4. The plans/instructions are useless here as there is no rigging on the guns at all. Hoping to draw from the immense knowledge from this site to get an answer to this before I start drilling! Gaffrig.

-
October 21, launching day of uss constitution?
-
I need help, Pen Duick, Artesania Latina, old version
Gaffrig replied to Belco's topic in Wood ship model kits
Hello. I found this on youtube, haven't looked through all, but maybe you can find what you need there? Gaffrg. -
I need help, Pen Duick, Artesania Latina, old version
Gaffrig replied to Belco's topic in Wood ship model kits
Hello. You can find the instructions at artesania latinas webpage. Tried to copy the link here, but it didn’t work. Gaffrig. -
Hello Dan. Thank you! I used the materials supplied in the kit. They are listed as lime tree, so I guess that it’s limewood! I used a product called finishing oil from the manufacturer Liberon, and this brought out a nice level of detail and glow in the wood. Gaffrig
-
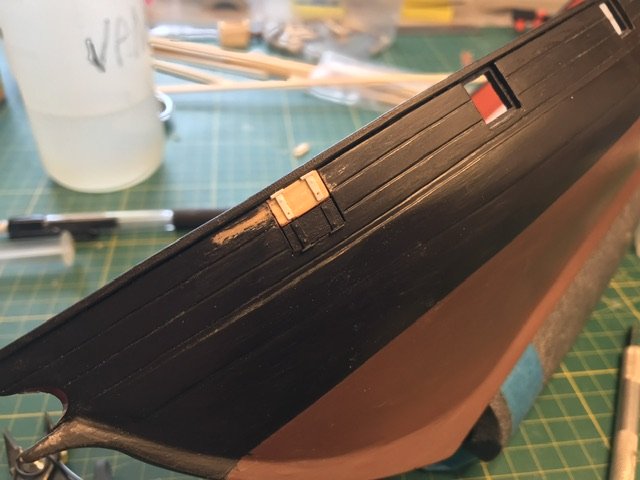
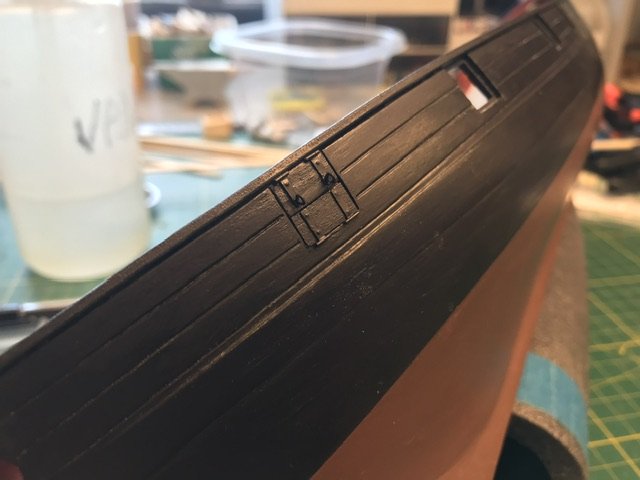
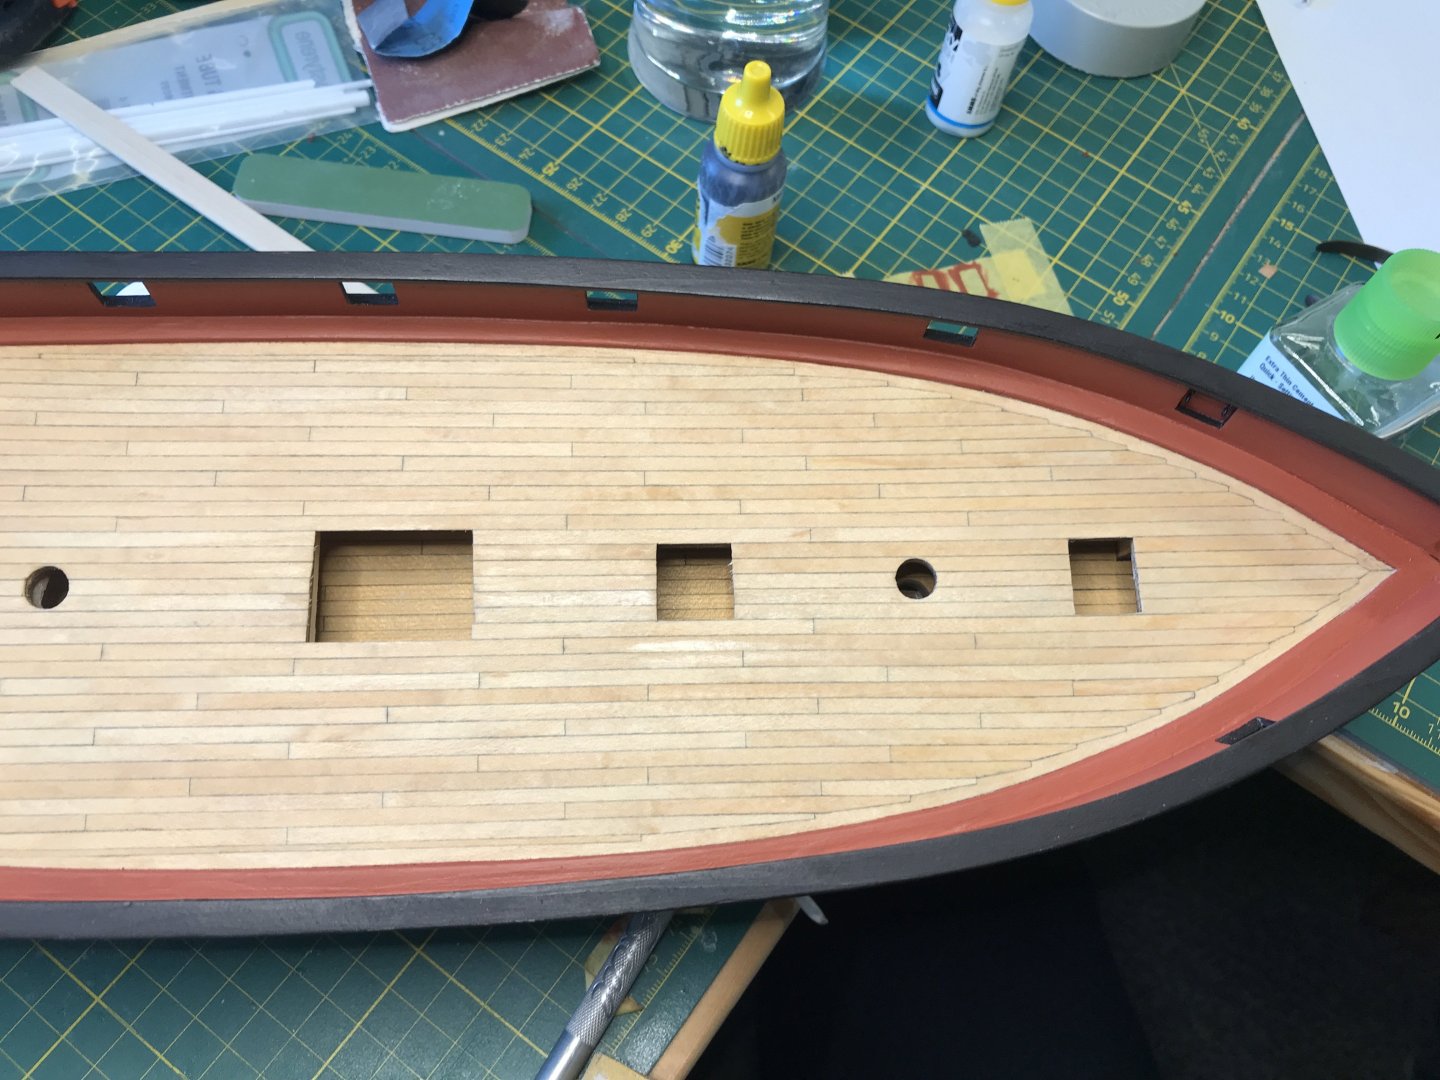
Hello all! Thanks for looking in and commenting and liking. It’s very inspiring! I had planned to start the deck gratings/coamings but decided to try finishing the gunport lids that is closed first. Didn’t really have a plan for how to do this other than a general idea. Made the port lids of scrapwood and cut a groove where they overlap eachother. I decided to use styrene strip and rod to make the hinges. I imprinted with an awl on the backside to imitate bolts. Glued them on with ca glue, added eyebolts and painted.. And added eyebolts on the inside aswell. I think I have found the way to do these, as I think the result is acceptable. I have also given the red another coat of paint after sanding the deck. I first brushed a coat of matt varnish along the masking tape to avoid bleeding. This worked great! No bleed at all. Recomended! Gaffrig.

-
Very nice planking. Great job! Looking forward to see the build progress. Gaffrig.
- 88 replies
-
- 1
-

-
- Lady Nelson
- Amati
- (and 1 more)