.jpeg.1d7190af6e3786a2d59bfffad3392cdd.jpeg)
NewbyMark
-
Posts
63 -
Joined
-
Last visited
Content Type
Profiles
Forums
Gallery
Events
Everything posted by NewbyMark
-
.thumb.jpeg.e1b5ee83df798f4023f2c0dc8dfb19ac.jpeg) To be honest the photo doesn’t really show the finish well. I’m not great at photography. But there’s no milky finish at all. However I think I’d probably prefer an oil based finish. You can sand this finish off. Water based products only sit on top. Oil penetrates the wood. However, I’m pleased with how it turned out and will try to take some better pictures over the next few days. Thanks for the comments - keep them coming please - I’m here to learn...
To be honest the photo doesn’t really show the finish well. I’m not great at photography. But there’s no milky finish at all. However I think I’d probably prefer an oil based finish. You can sand this finish off. Water based products only sit on top. Oil penetrates the wood. However, I’m pleased with how it turned out and will try to take some better pictures over the next few days. Thanks for the comments - keep them coming please - I’m here to learn... -
Yes the instructions in this kit are outstanding. I will just take it slow as you say. It will at least keep me sane during this lockdown!!!
-
I am very used to working with PE but I am not looking forward to it! It will really ruin the model if it’s badly done so I suspect it’s going to take some time and become quite tedious....
-
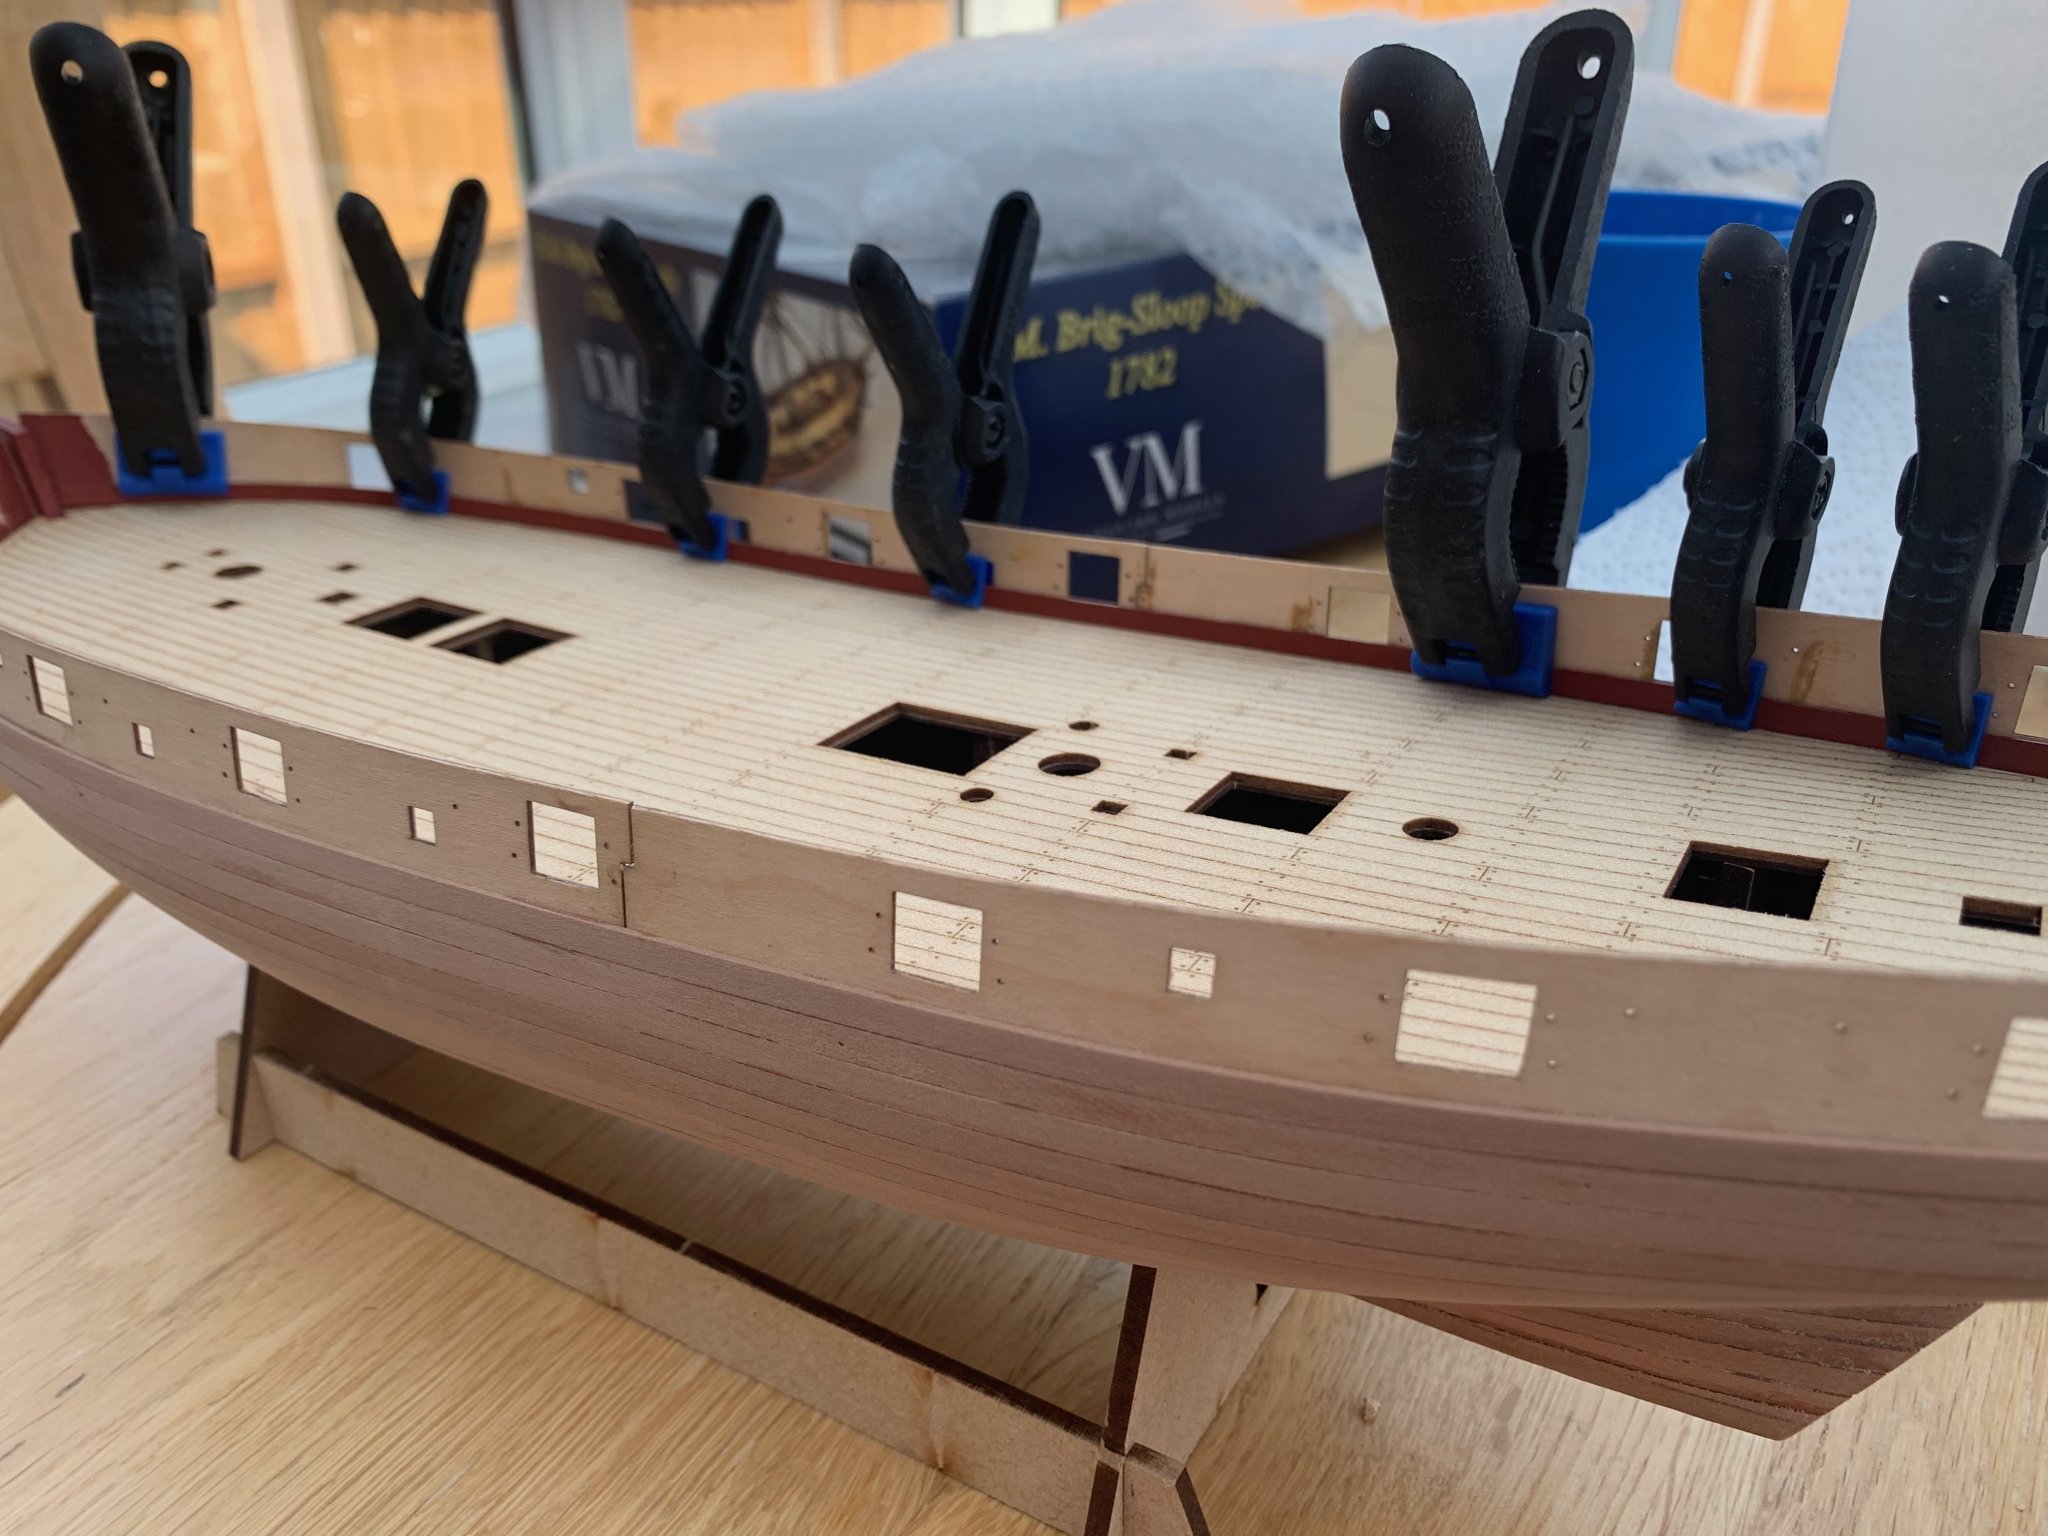
Well I couldn’t resist applying a finish. I applied the pearwood satin finish and I liked it so much I didn’t bother with the Matt. It’s darkened the wood nicely, covering some of my errors without losing the beauty of the wood. I also attached and painted the Wale. Just have to sand down and touch up, then it’s keel and the dreaded copper!

-
Thanks for your kind words, Derek. I was reasonably happy with how it turned out. It was my first time using CA for planking. I noticed that in some cases small gaps between planks were actually filled with CA and so you can't fill them. This was a downside, although the lack of pin holes was a positive. I am not the most experienced but it came out ok. I will post some more pictures once I've got the keel on and applied some finish. Good luck with your build. Cheers, Mark.
-
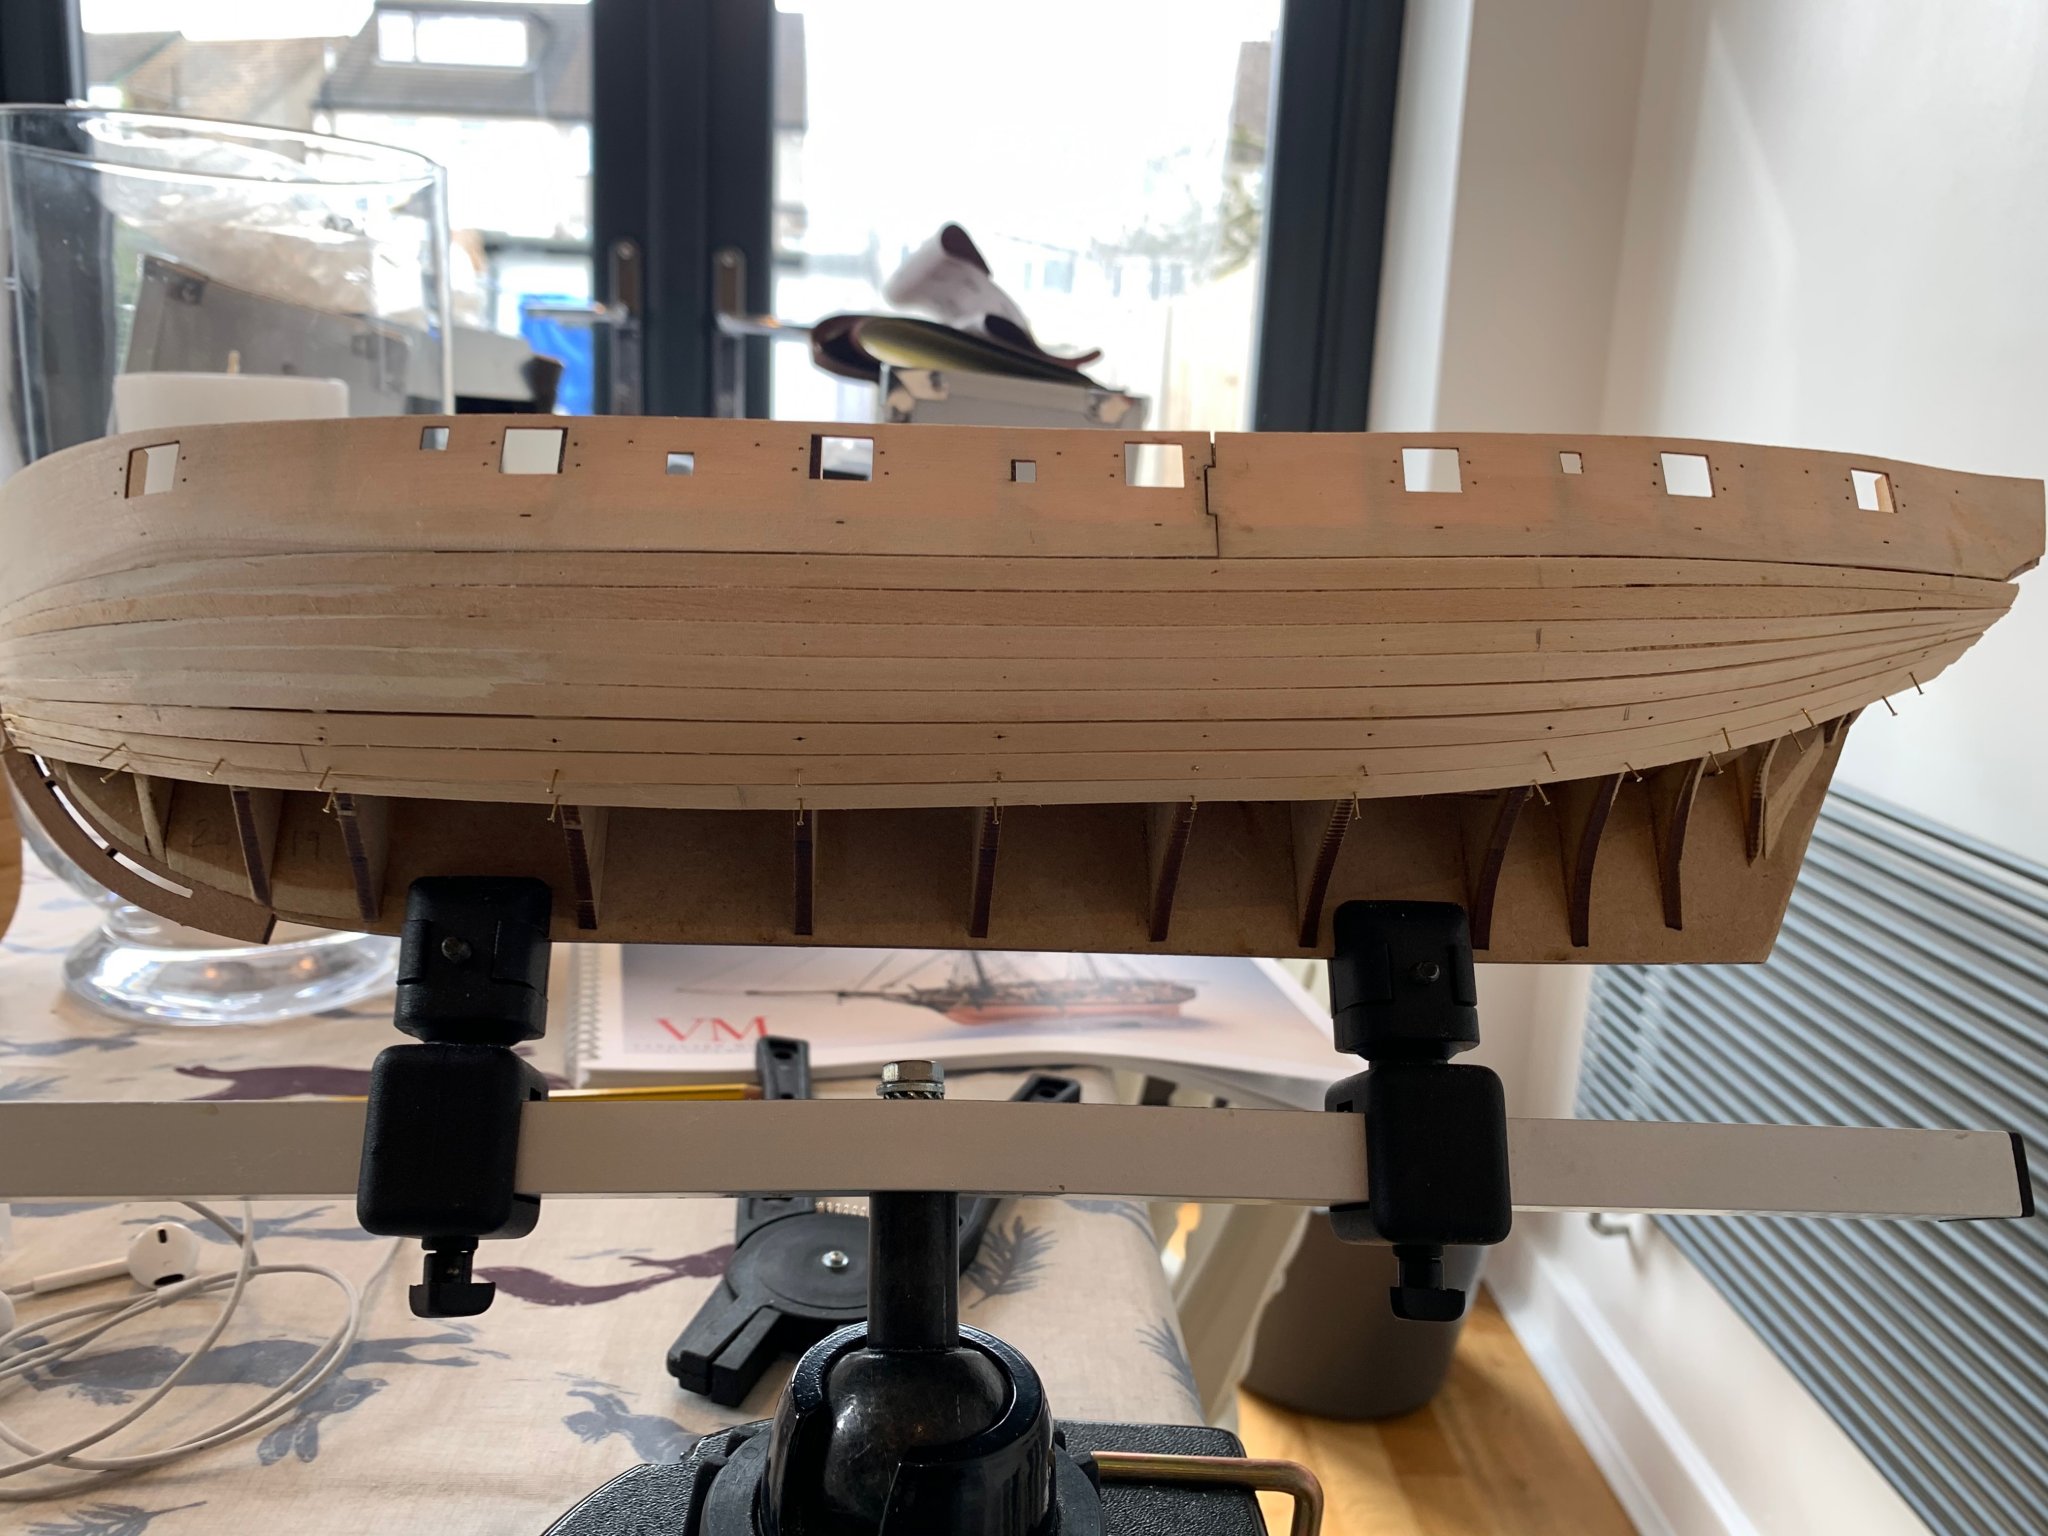
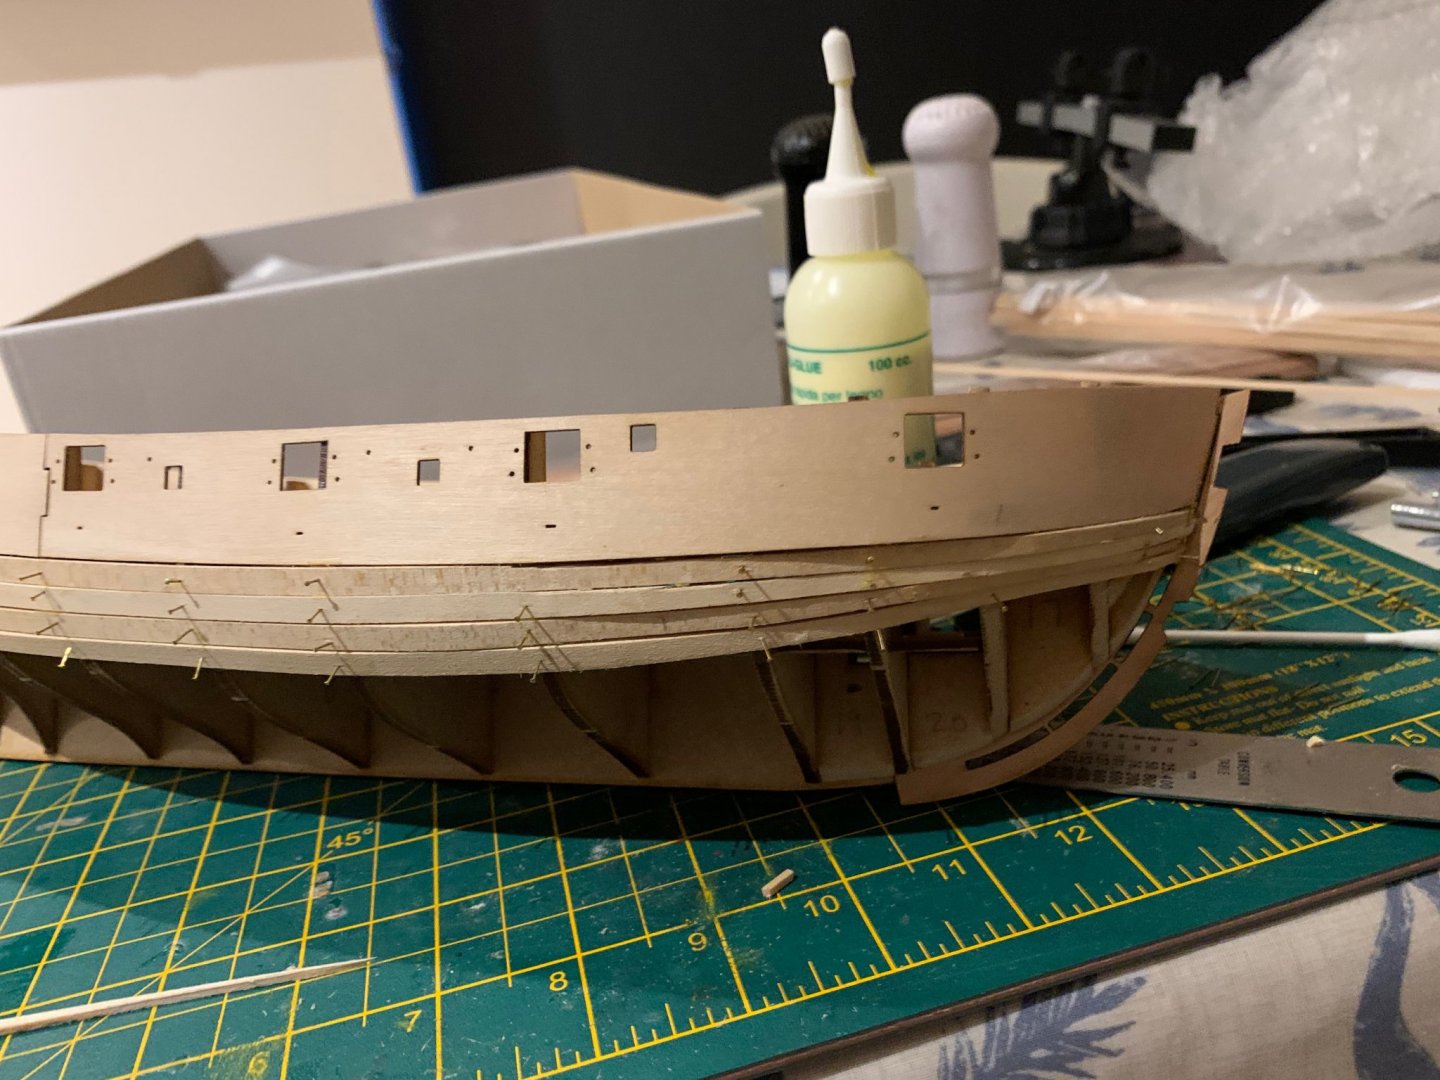
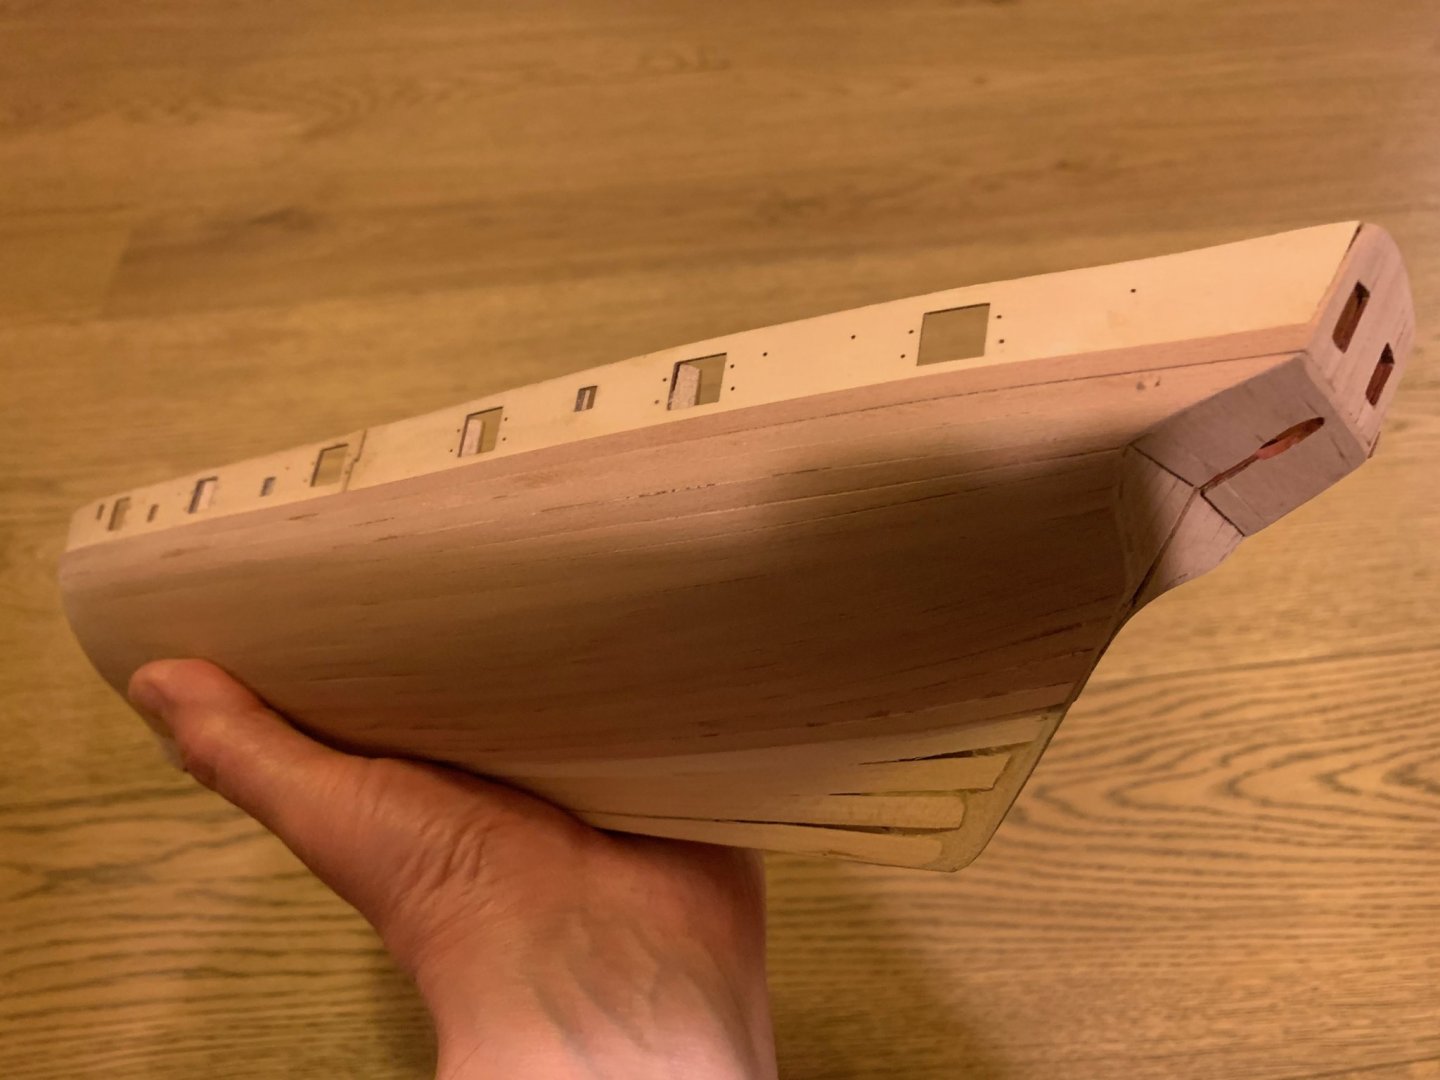
Well, I'm now done with outer planking aside from filing out the ports and sanding the top edge flush. I made a mistake here, which it's probably worth mentioning for those following behind as I had to remove some planking, which left me with a bit of a mess and some filling I really didn't need on visible planking. I cut my strips between the ports and glued them, realising only when I came to the final plank that it was not lying precisely flush with the port, and I would have had to either file them out oversize, or remove the planking and do it again. I chose to partially remove the planking. So when you are doing this watch very carefully where you need to cut the planks short and where you should let them run over the port and file back to the correct size. I have some more sanding to do but I'm reasonably happy with the finish. I think I have settled on airbrushing a coat of Ronseal pearwood and then a couple of matt coats to finish, but I won't do this until I've progressed a bit further. All in all, enjoying the experience if a little irritated by my mistakes!
.thumb.jpeg.9207da0c87017ef02a35edf24b168a8f.jpeg)
.thumb.jpeg.5fb67a20317b0aec2dc6fe8637d9a4c1.jpeg)
-
Yes I agree and I've found the history of Speedy fascinating to read about. Certainly a colourful history and it definitely adds a dimension to the build. I am just about done with the planking now and starting to experiment with finishes. I'm quite a slow builder but will post some progress pictures in a couple of weeks, from carefully selected angles to show only the best bits 🙂
-
Thanks Chris, I was looking for glass but I might drop them a line and see if they can offer what I'd like. I figure once I get to the details the model will get increasingly fragile so wanted to get something by the time I complete the hull. Thanks for the steer.
-
A brief update. Although still early on in the build, I've been giving some thought to how I might display the model. I have been in contact with the helpful people at the Greenwich Museum, who have original line plans for Speedy and Flirt here : https://prints.rmg.co.uk/products/lines-and-profile-plan-of-vessels-flirt-1782-and-speedy-1782-j5045?_pos=11&_sid=ae2f71793&_ss=r They can supply this as a JPG file to me, for personal use, so that I can print at any size I wish, and I'm considering if I could display the model with the line plans fixed inside the case somehow. Does anyone in the UK have any recommendations for manufacturers of cases? I'm wondering if I could get something with a double wall of glass at the rear so the plan could be captured inside it. Hopefully an interesting way to display her and an inspiration to keep going!
-
I didn’t mean to cause a stir with my comment - apologies if any offence caused. I’ve ordered a few different options to compare to the kit parts as I personally didn’t like PE, but totally respect that you were going for scale appearance with your choice Chris. In case it hasn’t been clear, I love the kit. You only need to point some glue at it and it almost builds itself. It was just one area I’d have preferred a turned part. Anyway I won’t hijack this build log just wanted to apologise if I’d caused any offence!
-
I took the alternative view. I could not stand to see them without restraints, so I have ordered the required parts. I also ordered replacement belaying pins because I didn't really like the PE pins (not sure PE is really suitable for these parts). I think they were the only two changes I'd make to the kit though, thoroughly enjoying the experience otherwise. Your build looks great, looking forward to seeing her finished!
-
Agreed. And if you fancy bringing out a Brixham Trawler kit in 1:64 Chris, to save me the bother of scratch building one, I would be very grateful! Great job on this build, James. Inspiring.
- 100 replies
-
- 6
-

-
- zulu
- vanguard models
- (and 2 more)
-
Thanks Glenn. The second planking was all CA. I just didn't want to use CA close to the deck as it's a bit unforgiving! To my mind, both glues have their place. Thanks for that tip. I was thinking that when I start the coppering I was going to place the bubble wrap from the box in the cradle first for that reason, but I like your idea better 🙂 I might give that a go. Thank you.
-
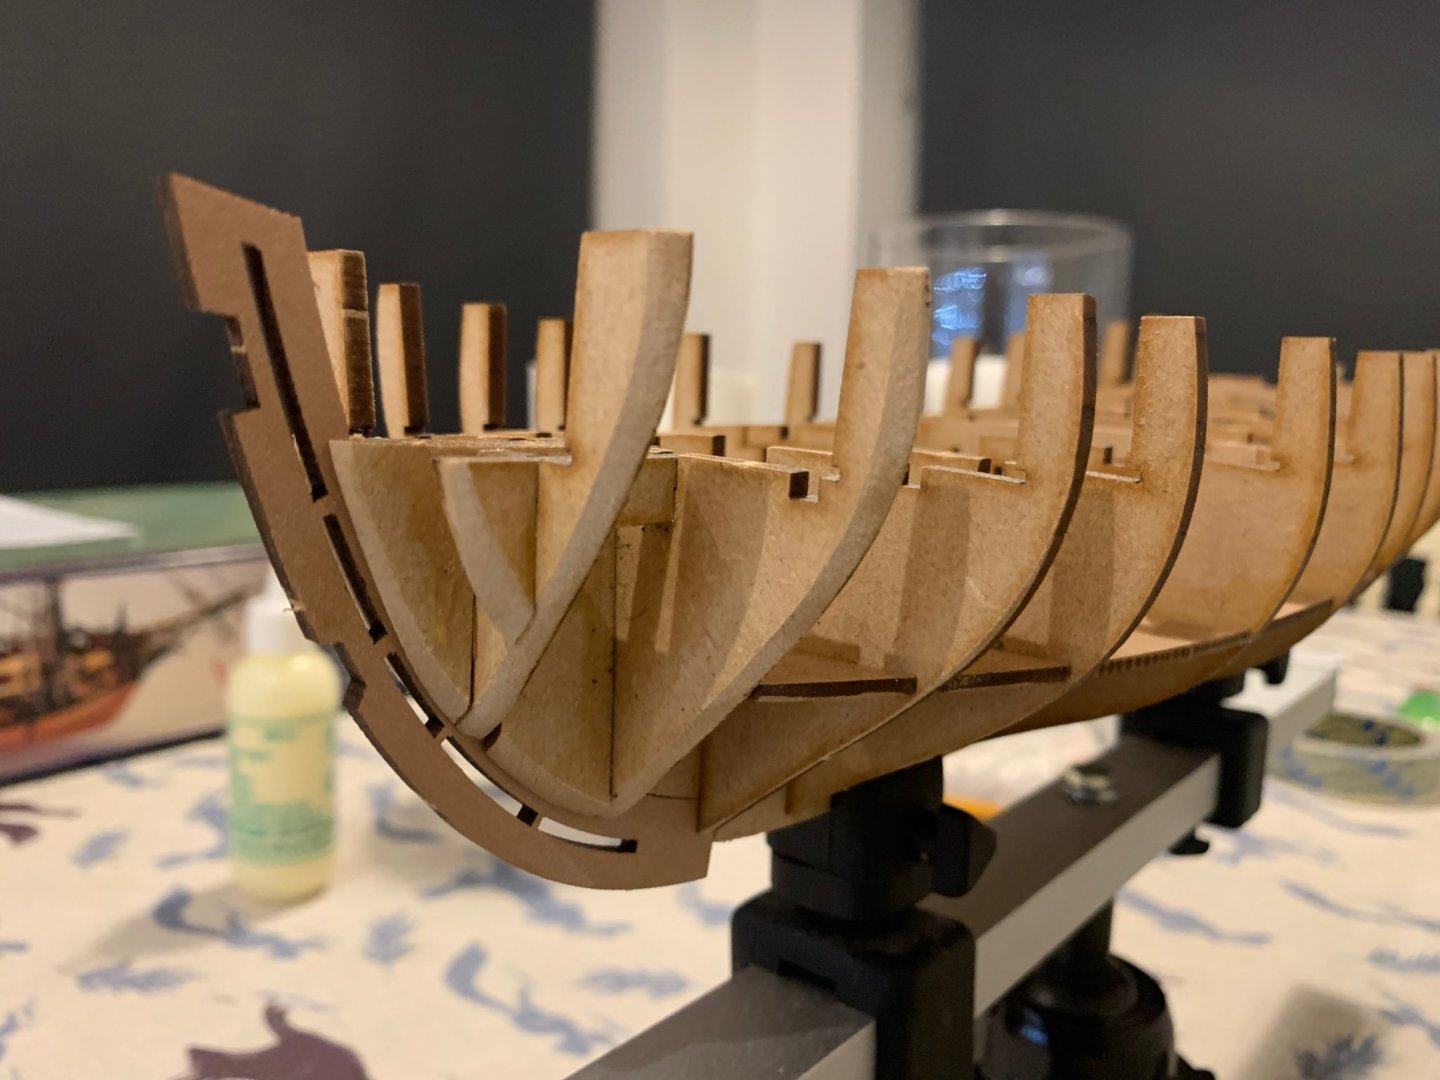
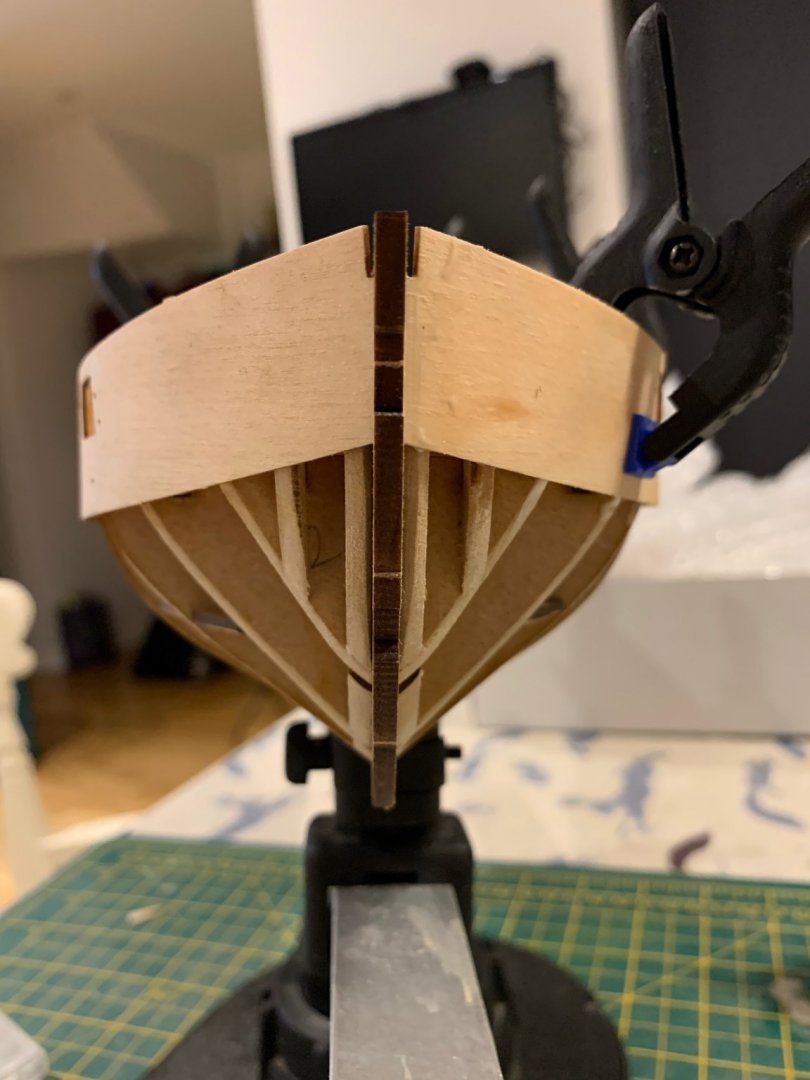
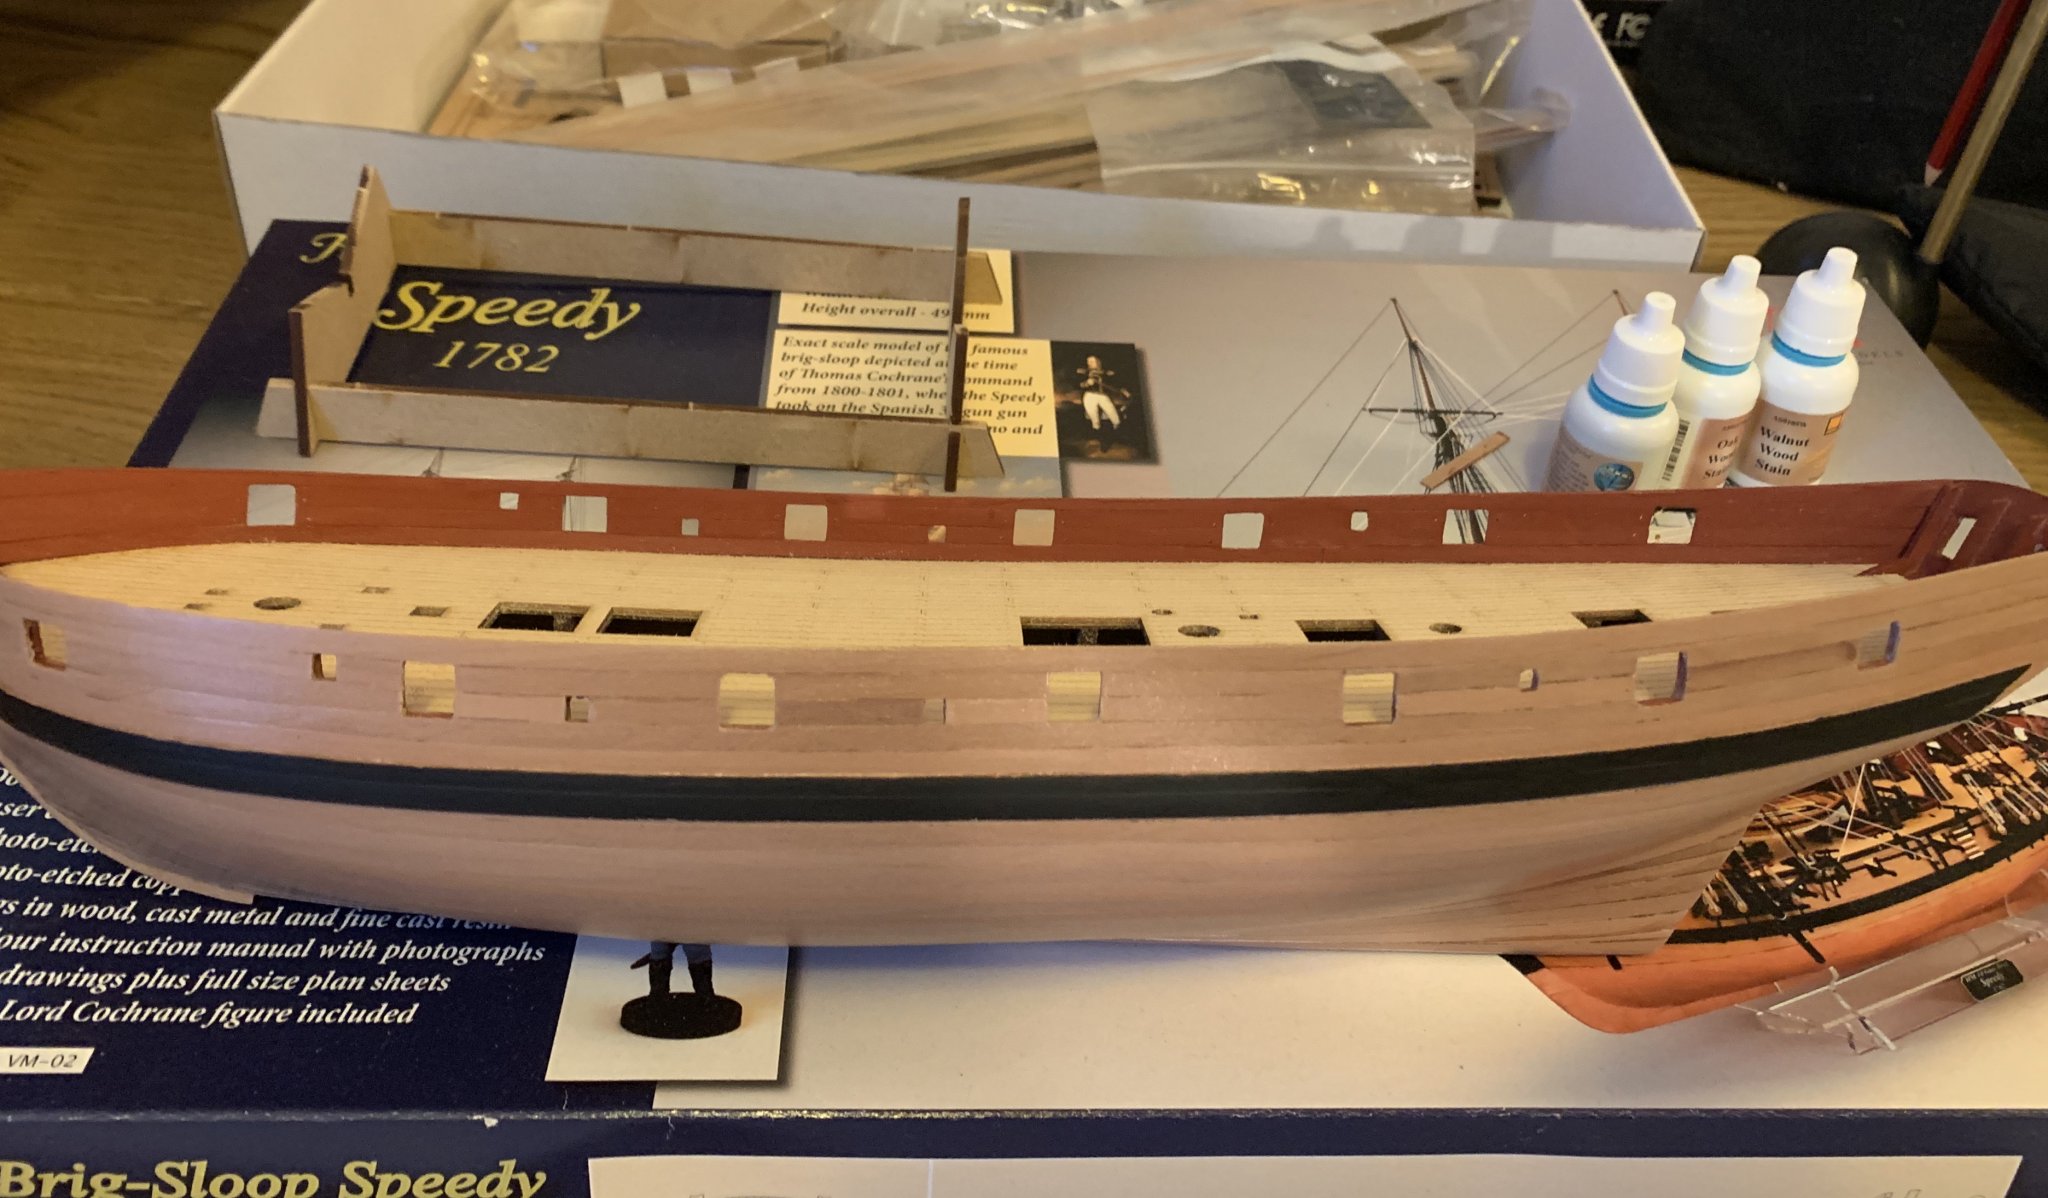
Hi all. Really enjoying this site and have returned to ship modelling after a long break. There are already several HMS Speedy logs, and I've hesitated to add my own because I'm not particularly talented at modelling ships. My background is mainly multi-media car kits, but I really enjoy working with wood and this particular kit is really so well thought out and with such great materials that I am thoroughly enjoying the experience. I've started the log in the interest of learning from those of you who are clearly more experienced and talented than me. So feel free to comment or suggest improvements. I'm up to the second layer of planking and have just started planking the inner bulwarks. I've made plenty of mistakes, but so far it's looking ok aside from using filler which is not a good colour match in the outer planking. In general I've found the pearwood a bit pale anyway so I'm looking at staining it before airbrushing a varnish - hopefully it will work out ok in the end. Chris has been patient and helpful where I've had issues, for which I've been grateful. A few pictures of my progress so far below.


-
Lovely looking build - looking fantastic. Following from down the road!
-
Thank you for your response. I have built ship models before, but I am certainly no expert. I will experiment with these stains on some scrap and see what looks best. The pear strip is a bit pale for my liking.... Enjoy the rest of your build!
-
Hi, very nice work on your build. I arrived at your log searching for colour samples of Admiralty stains. Is that what this picture is showing? I am thinking of using an oak stain on my HMS Speedy build. How have you found the stains to work with? Thanks 🙂
-
Hi Richard, I haven't built a ship model for over 10 years (and even then am certainly no expert), and have re-started with one of Chris' other models HMS Speedy. I can say confidently that the kits are really well designed, well put together with good materials, and have a few 'fail safe' features in the design to ensure you get things square, etc. Chris has been very helpful and I think you will probably not go too far wrong with this kit. I certainly intend to buy one even though I would like to take on a scratch build and have limited space to display models in my home. It looks too good to pass on. My philosophy is to enjoy the build and learn from mistakes. Take it slowly and ask questions and I'm sure you will do well. In short, go for it!
- 100 replies
-
- 4
-
-
- zulu
- vanguard models
- (and 2 more)
-
I think you are being highly modest 😊 Looking forward to the next instalment.
- 100 replies
-
- 4
-
-
- zulu
- vanguard models
- (and 2 more)
-
Looks good to me! I'm just starting my second planking so will come back to your photos for additional help when I start my copper. Really nice job!
-
I have only been on this site a short while and I am simultaneously amazed by some of the work I’ve seen and also feeling like I may as well just give up 😂 What a great site this is. Love this build - thanks for sharing.
- 100 replies
-
- 3
-
-
- zulu
- vanguard models
- (and 2 more)
-
Thanks - I'm sure you will sell more than a few. I planned to start a scratch build after my Speedy as a long term project, but I am sorely tempted by your kit! I think a Zulu will need sails, but I'd probably prefer to make my own..... It will take me ages to finish the Speedy so I doubt I will be in a position to purchase immediately on release, but I will keep an eye on your website! Thanks for the quick reply.
- 100 replies
-
- 5
-
-
- zulu
- vanguard models
- (and 2 more)
.jpeg.d44f89003362ec9265f6d24de6b42edb.jpeg)
.jpeg.6f07949bea25efa8c3bf0d7c6dcf1a87.jpeg)