


Egilman
-
Posts
4,384 -
Joined
-
Last visited
Content Type
Profiles
Forums
Gallery
Events
Everything posted by Egilman
-
 Just don't try and mask it, it's what was suggested I use over Uschi's metal powders to seal them in... as long as it's down they were good but when masked they pulled right up using light tack frisket tape after four days.. I also found out it is not IPA proof... IPA will soften and remove it.....
 -
Thorough research is always the best....
-
Oh yes, enough to know that the brothers here are masters and I'm just an apprentice.... They are an adventure.... and once your done, you will have increased your model skills at least twice over....
-
Building a Medieval fortress - by Waitoa - Del Prado 1/87
Egilman replied to Waitoa's topic in Non-ship/categorised builds
EXCELLENT! Hate to see a good modeler leave his talent in the closet.... I'm, in... -
Ahhh, here we go, Another effected with the plastic mania.... Good Deal! Welcome to the club... the satisfaction of taking a poorly made/researched kit and turning it into a work of art is just as great as building a wood ship from kit/scratch, just using different materials and techniques....
-
Yep I can now report that it takes a clear coat, both Future and Testors ultra clear very very well without lifting and no noticeable darkening... I can also report that it masks better than paint... the Future was brushed on in a very thin coat so even with the pressure of brush stroking it didn't lift... (after about three hours curing time allowing the wax to completely harden) If you apply it with a brush you can clean the brush with paint thinner Testors regular thinner/brush cleaner takes it right out of your brush with no residue.... (don't get it on your freshly buffed finish on the model though) It's like this product was made for modeling BMF's on airplanes....
-
Well it's made by Amaco (American Art & Clay Company) Rub & Buff there is supposed to be 12 colors and you can buy direct... Michaels only carries gold leaf, silver leaf and antique gold... It's not that expensive and goes a long ways... Again, no affiliation with the product in any way.... EG
-
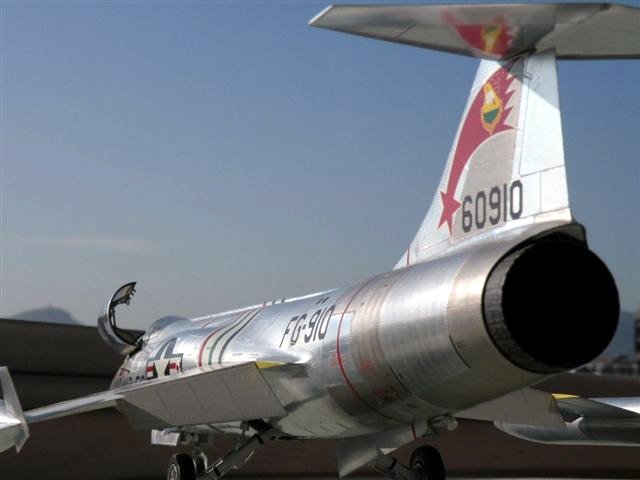
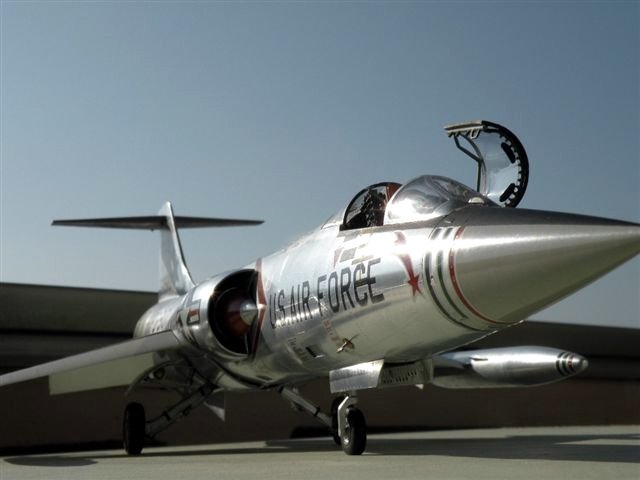
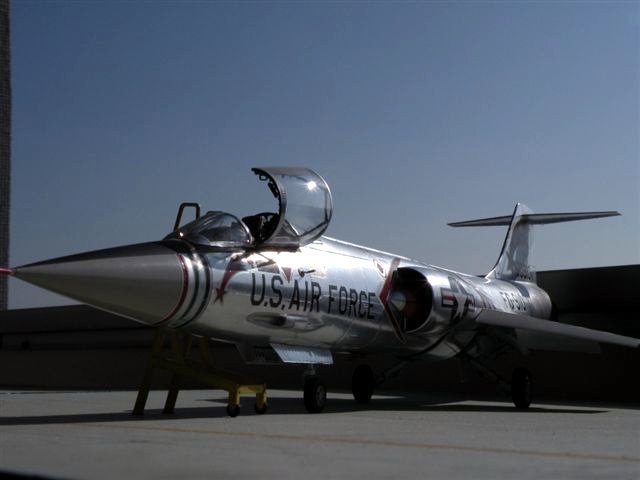
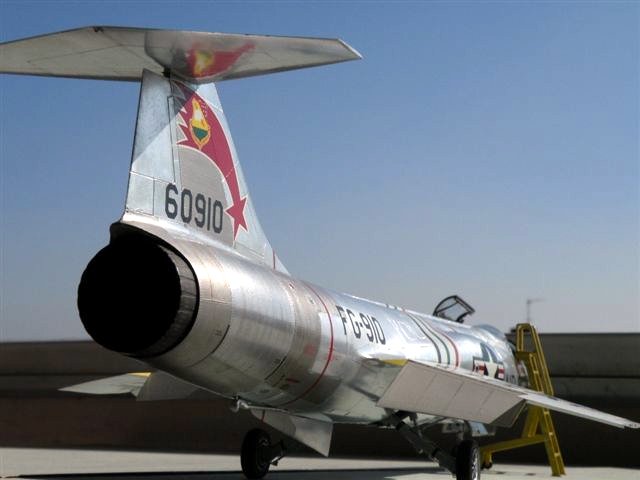
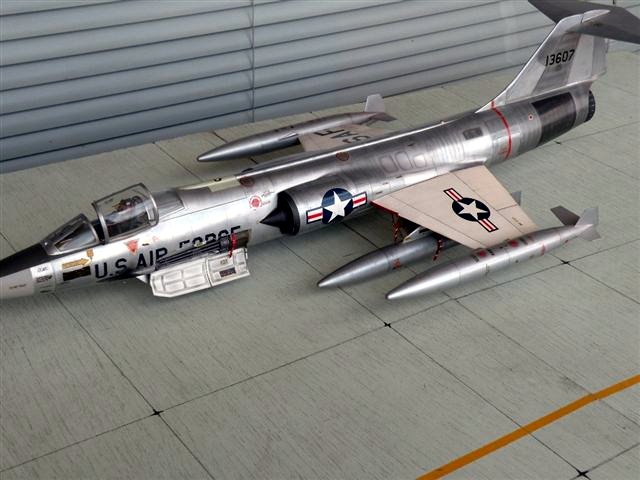
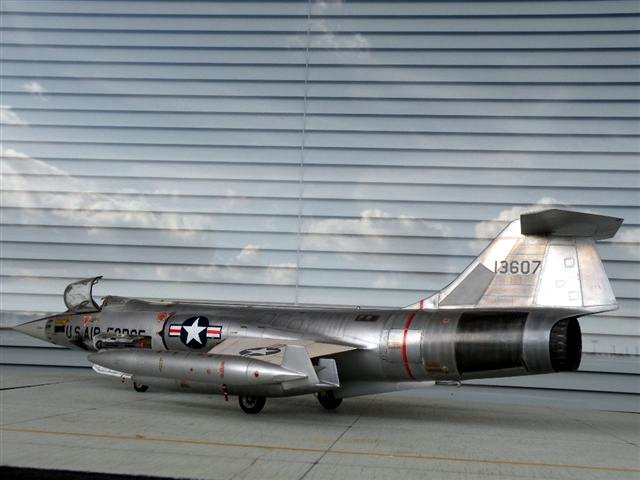
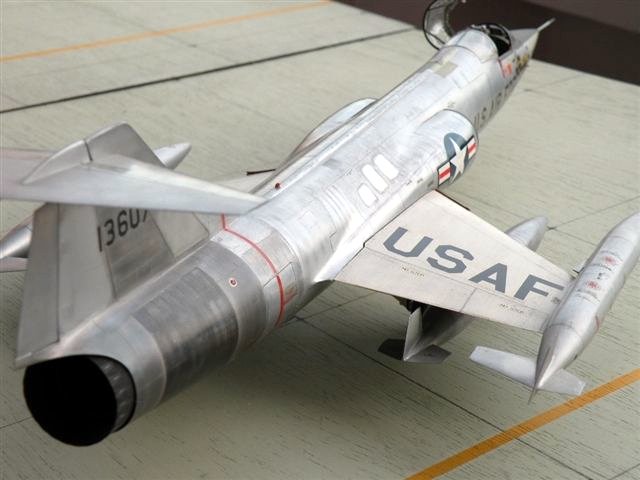
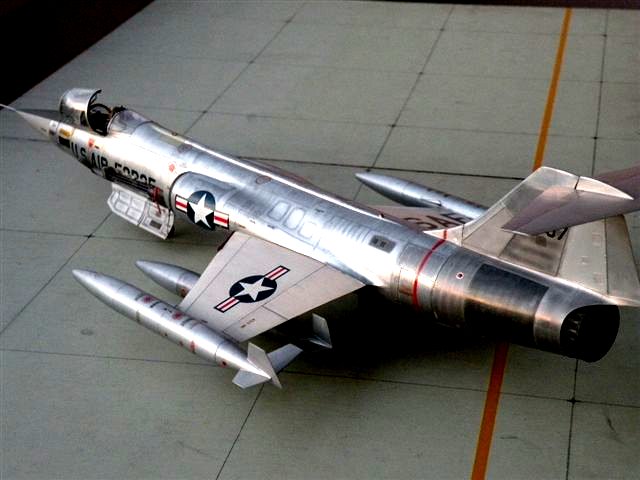
It was seeing Paul's work on that F-104C Craig that got me onto an accurate BMF... and I vowed I was going to duplicate it... His application is flawless in the pictures.... almost looks like a real aircraft, hard to tell the difference when compared to pics of the real thing... I haven't tried clear coating it yet but my first test will be Future, and then maybe Testors ultra gloss.... Paul didn't clear coat his, (you can tell by the noticeable decal edges in one of the pics) but other than that gorgeous work... Those pics have been my inspiration..... And I have an F-100 in the stash as well.... now that I know how to do an accurate BMF........
-
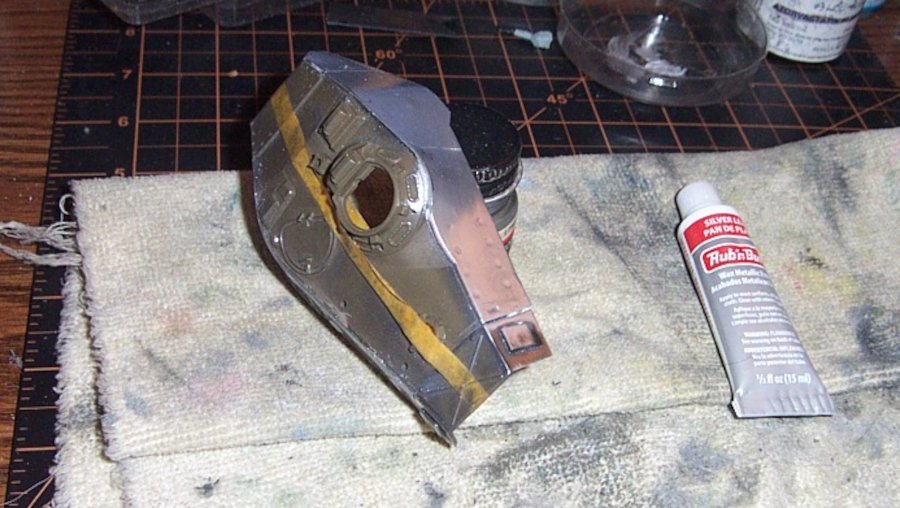
Ok, I did a quick and dirty test just to see if it's as advertised.... (I've seen so many products that aren't over the last two weeks) This is a pigment powder infused carnuba wax.... (the same stuff you wipe on and wipe off your car) The idea is to take a soft cloth, put a dab on the cloth and just polish the surface..... I'm using the old M-41 turret upper, figured I would polish the sides.... Remember wipe on polish in.... That took all of three minutes..... Other side.... That took two minutes... It is hard shelled and will not wash off when completely dried.... No fingerprints either.... It should handle decals without problem... So as a supreme test, I went and applied it to the unpainted insides of the turret, bare dirty green plastic.... It went down there just as easy as the outer surfaces did... A little goes a LOOOng way...... Polished metal finish in a few minutes... YES, It is this easy... (no it can't be that damned easy) YES, it is... All it took was five minutes, no muss, no fuss as easy as polishing your silverware.... The amazing thing is this product has been around for decades all those years of fretting over BMF's, paint formulations, powders and chrome, and this product, which makes it super easy, has never really been seen..... I only stumbled across the example pics in a generic web search for bare metal finishes.... Now I know what I'm doing..... Thank you all for following along.... EG I"ll do a more detailed test if anyone wishes it, but for me I'm done looking.... I've found it...
- 518 replies
-
- 12
-

-
I found the source of the pics, it's a product called Rub-n-Buff...... I got the pics from a different site..... (but they are all here and more) The builders name is Paul Coudeyrette and it was built back in 2009.... Hyperscale..... F-104C, and the F-104G His claim is that it is entirely Rub-n-Buff.... I've got a tube of the silver and am about to test it.... EG
-
Ok maybe If I show my brothers what I'm trying to do with the finish on my zipper they will understand why airbrushing paint isn't going to cut it....... 1/32nd scale Hase F-104 C..... And he replicated this finish on a Hase 1/32nd F-104G.... That's is what I'm trying to replicate and it ain't happening with paint.... that I already know.... there is a product out there that will put a polished metal finish on plastic that looks like real metal in scale and will take decals and finishing... Uschi's powders come very very close to that.... but can't take decals or be finished..... I've tried contacting the builder but he's fallen off the planet.... Now this is where a stubborn streak comes in, it's been done, I WILL find out what product or products do this finish on plastic.... There is no paint product that can match that.... EG

-
Yeah I know, I'm hearing ruminations from the Admiral along those same lines. But she doesn't understand what I'm trying to accomplish..... (and she knows that she doesn't understand) It can be done..... I have photo proof...... Will post a series of what I'm trying to do on a model in a minute.... (it's been done before) Trying to replicate what someone else already did.....
-
I tried that too, polishing rouge are powders are very very fine abrasives, they only work on very hard surfaces like steel, they strip painted surfaces.... Thanks for the suggestion Jack....
-
Yes Brother, I've tried them and I call them false advertising.... They don't work, for anything... Thanks for the suggestion...
-
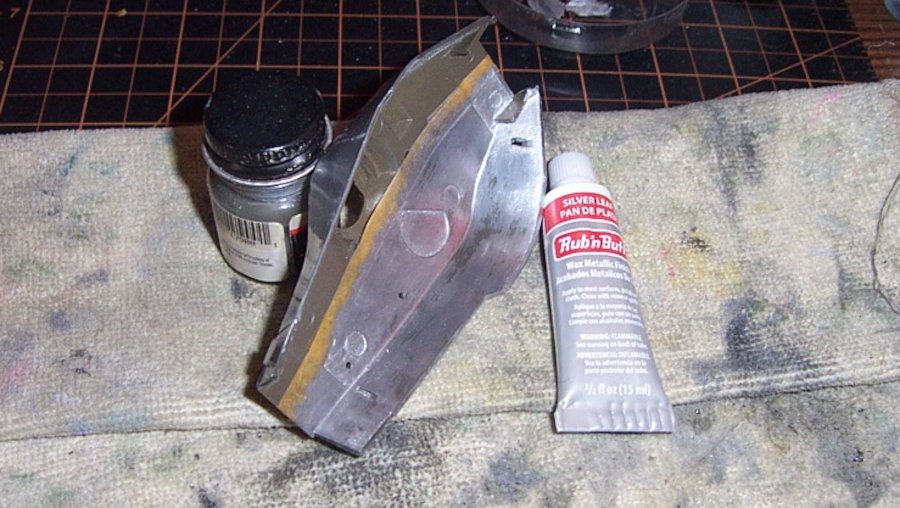
It looks like fine aluminum paint when it goes down, the can says let it dry for an hour then buff it... so when you buff it it lays down and starts to shine like polished metal, or is supposed to... Testors reccommends shooting it over bare plastic, forget that, doesn't work, just looks like blotchy paint... putting it down over ultra clear gets about half way to a NMF but it is still blotchy also, same with Future except more blotchy.... Over the gloss black paint, does nothing... except come off.... This isn't working at all.... I had better results with uschi powders over gloss red with a thin coat of future.... Now, it's becoming a real challenge....
-
Yeah I did, isn't cutting it either... and if you happen to hit an edge..... OUCH!
-
My hand and an old t-shirt.... thought about using the dremel but I think that would be too much. anyway, I don't seem to be getting the results they show on their pics.....
-
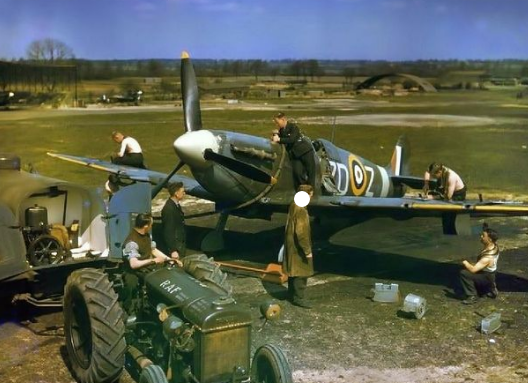
Ah, I guess while I was off researching you came to your own conclusion on your own... Good Show.... Yeah, your right, full service base is where you would find such equipment... (and not near the aircraft)
-
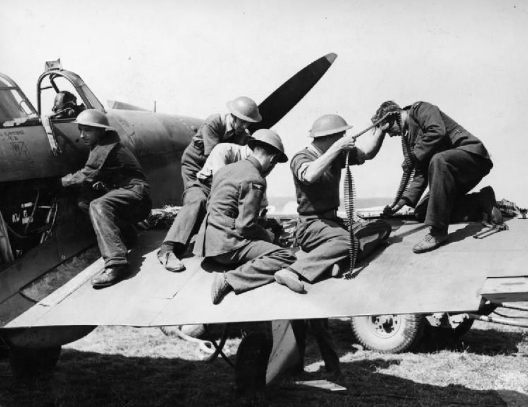
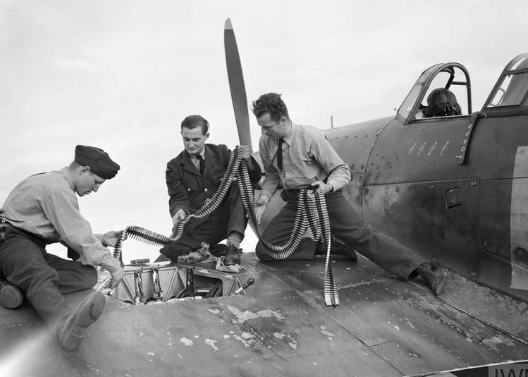
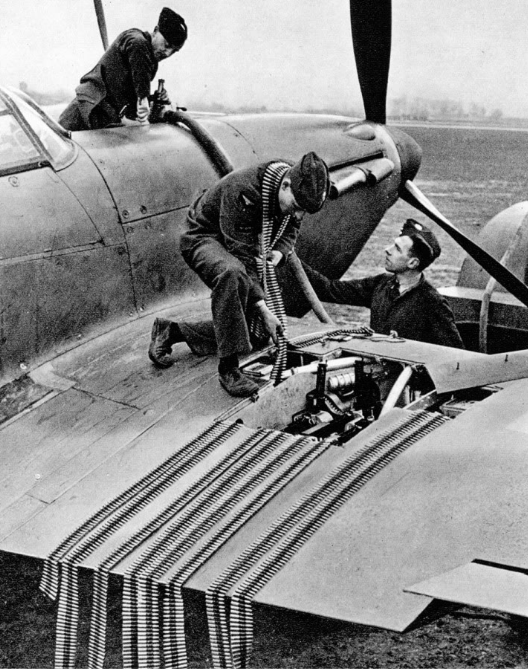
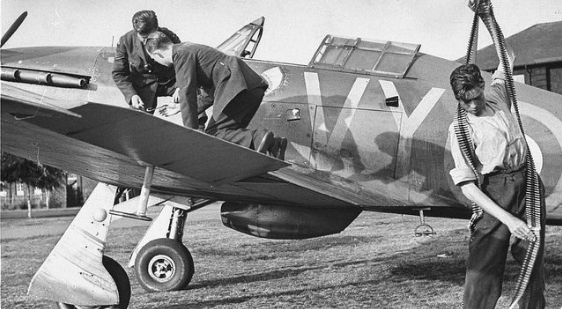
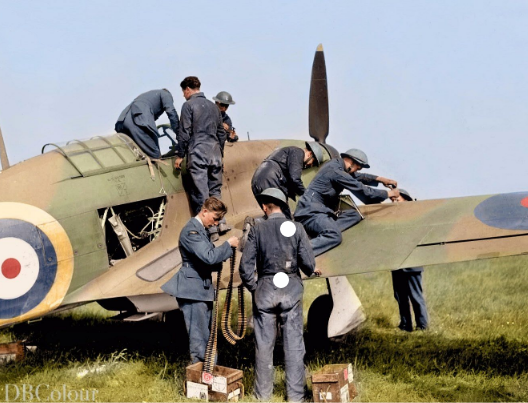
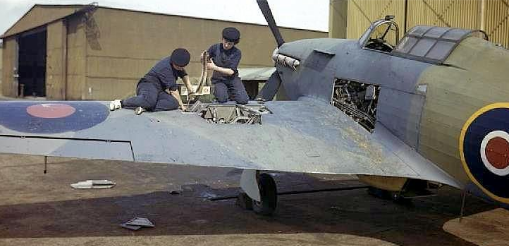
Ok, what your looking at in those pics are "Armorers" (anyone they had available) making up ammo belts.... Now one must understand that the British by 1936 were using the disintegrating belts in all their machine guns un aircraft as were we and the germans... Also note, they are doing it by hand.... they have no device to assist them... It's not difficult.... Take two clips place them together and insert a round into the ring that is formed, once the round is inserted and snapped into place, the ring stays together, add another ring half and round and you could make up belts as long as you wished... The machinery for making belts was not something that went to forward bases, Such was reserved for established airfields. I believe OC that your depicting such an airfield? so the machinery would be there, but it still wouldn't be near the aircraft.... But it's neither here nor there by 1944 there was no threat of attack in southern England except for V weapons aimed at the cities your bomb carts, starter cart and oil browser would all be equipment at a regular RAF station and most of the time wouldn't be present at a forward airfield.... I've included some shots of arming fighters during and just after the Battle of Britain.... As you can readily see, there is no ammo handling and assembly gear around when loading aircraft ammo, they are hand loading it form ammo boxes.... The fields depicted include North Weald, Yeovilton and others.... That was a piece of equipment that just wasn't around the aircraft....... and you would only find it at full service airfields.... That's my story and I"m sticking with it... {chuckle} EG
-
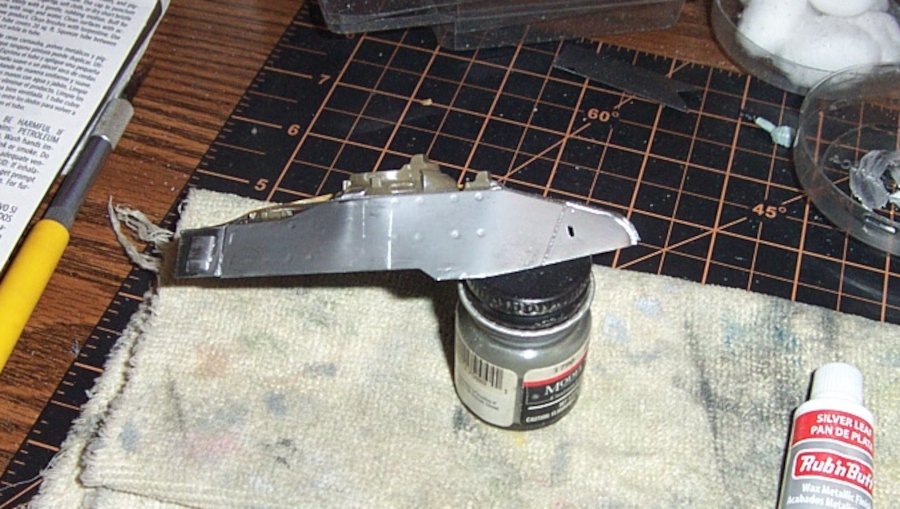
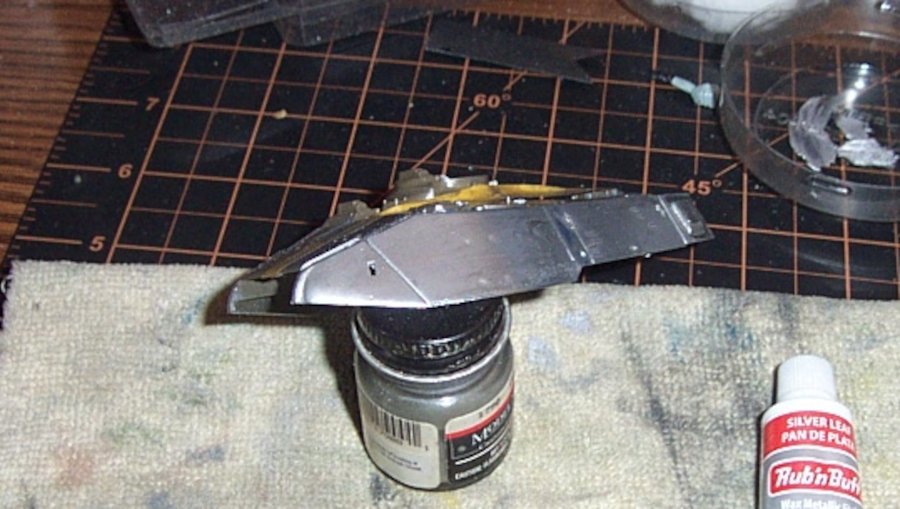
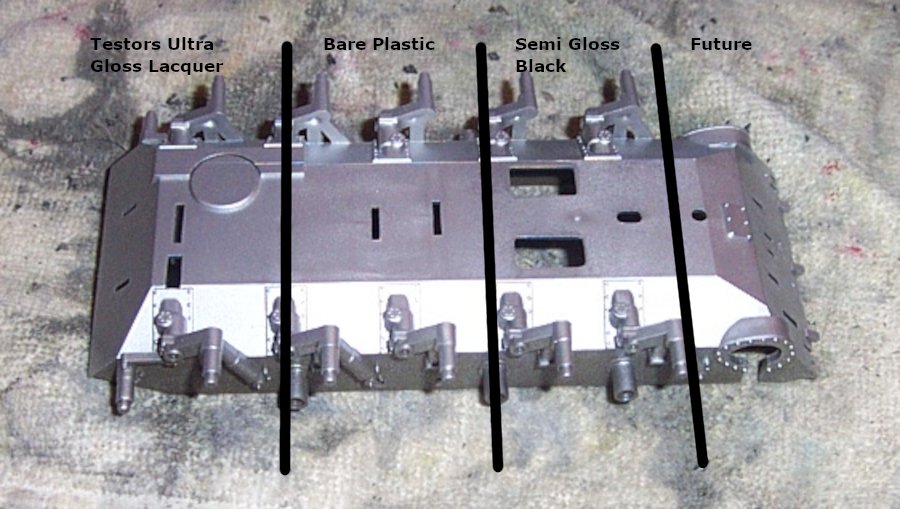
Ok, New paint test..... Testors Metalizer Rattlecan aluminum Plate (buffing).... I took the lower hull of my junk M-41 and prepared it for the buffing test this way... On the left is an undercoat of Testors Ultra Gloss To the right of it is bare plastic (green tamiya styrene) To the right of that is Krylon Shortcuts Black (supposed to be gloss but is actually a semi gloss) And on the right is a finely brushed coat of Future.... They are all oversprayed with metalizer buffing aluminium plate and the can directions say let it dry for an hour... It has dried.... Time to do some buffing..... EG
-
Yep, she was shooting for the women's world land speed record of 512 mph....... She had made a previous high-speed run at 483.227 (good looker too) She was my neighbor.... Fastest woman on wheels.... Rest in peace sweetheart....
-
Porsche 934 by kpnuts - FINISHED - Tamiya - 1/12 - PLASTIC
Egilman replied to kpnuts's topic in Non-ship/categorised builds
Yeah, I suppose it is easier to just let the plastic take it's own color..... and more natural that way.... Shame I was hoping that there was a specific technique.... -
Hasegawa did N104RB Red Baron in 1/48th back in 2007.. https://www.scalemates.com/kits/hasegawa-09749-f-104-starfighter-red-baron--101097 Esci did it in 1/72nd about '83 or so.... From what I can see there are no 1/32nd scale decals, although images of the Hase decals sheet are available if one wants to do it in paint.... (or duplicate, scale and print them in white decal paper for a red airplane)
-
And it shows what one little minute detail can do to such endeavours.... they forgot to secure a battery near the tail gunners compartment, in the rough ride to get to the improvised runway, it bounced out of it's bracket and threw a spark which ignited some flammables which quickly spread to the fresh paint.... It filled with smoke in seconds and was a smoking lump of melted aluminum in minutes..... If it had a full crew it would have been saved..... but by the time the pilots realized they had a fire it was too late.... A real heartbreaker.....
-
According to daily sales data Diet Coke surpasses the next nearest competitor by more than 2x..... Surpasses regular Coke by 50%...... It's what the people actually buy.... I drink predominantly Black coffee with a pass towards irish creme occasionally....