
HOLIDAY DONATION DRIVE - SUPPORT MSW - DO YOUR PART TO KEEP THIS GREAT FORUM GOING! (Only 75 donations so far out of 49,000 members - C'mon guys!)
×


Egilman
-
Posts
4,377 -
Joined
-
Last visited
Content Type
Profiles
Forums
Gallery
Events
Everything posted by Egilman
-
 Michael, looking at the strap bolts, I take it you pressed the strap end? cause the eight bolts lined up against the vise jaw don't look like the strap end is big enough to cut it... Nice work btw, I wish I could machine that small...
 -
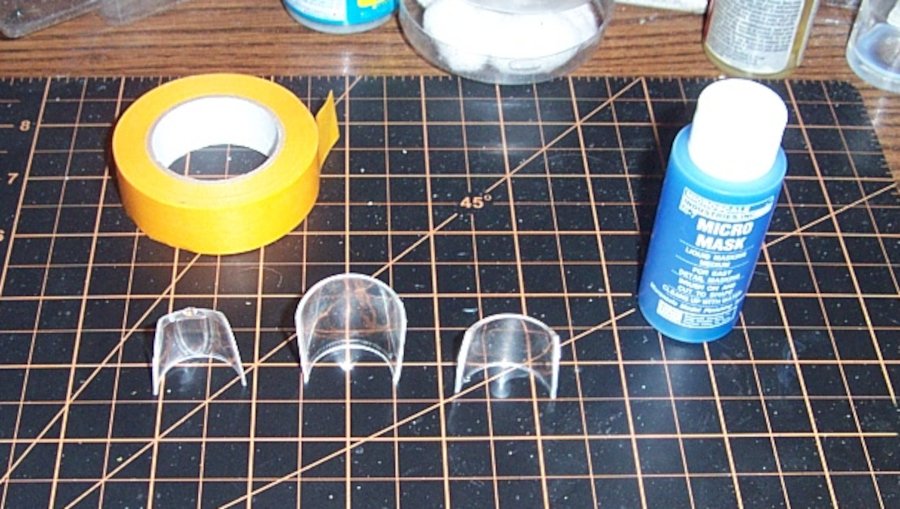
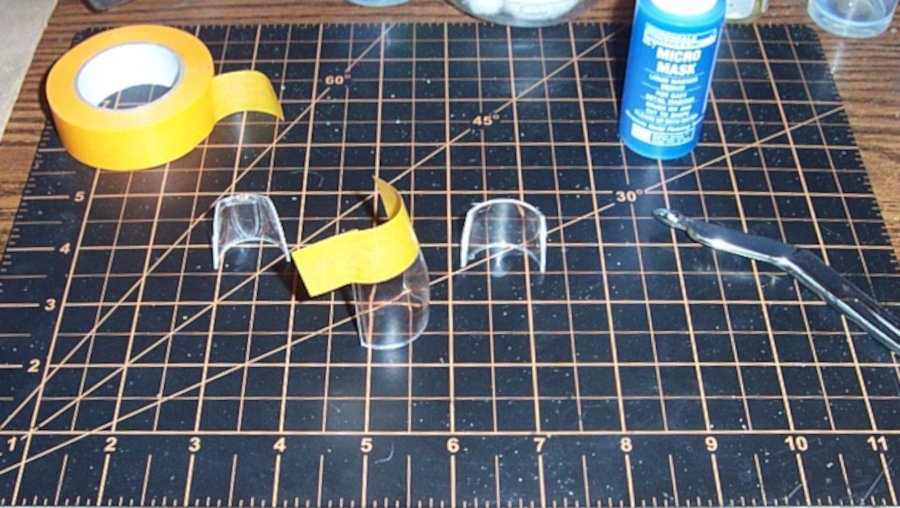
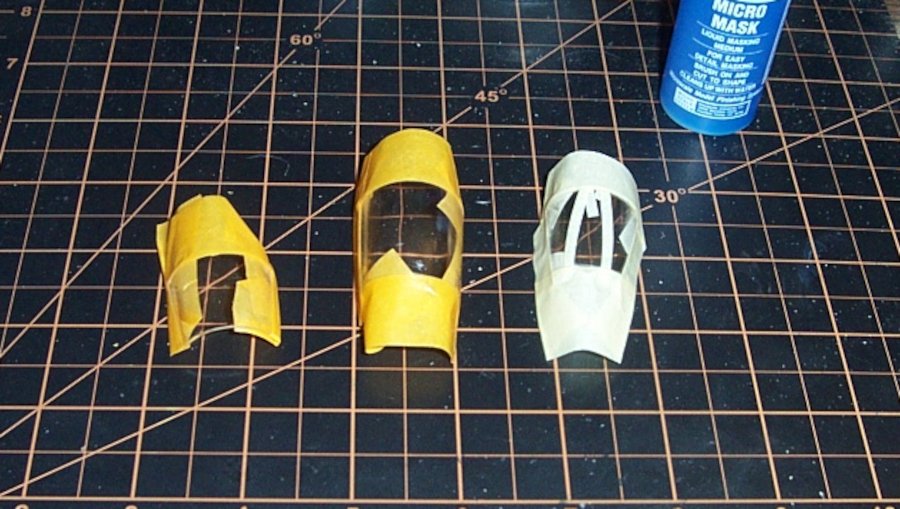
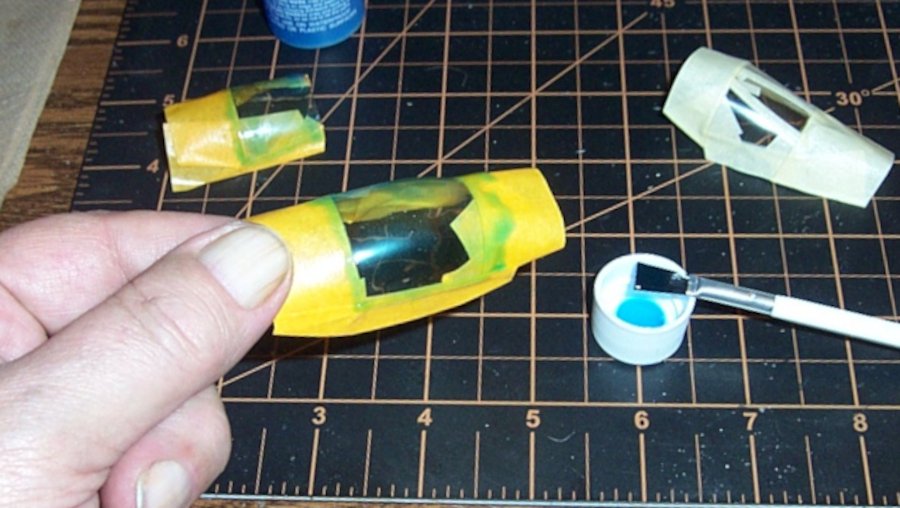
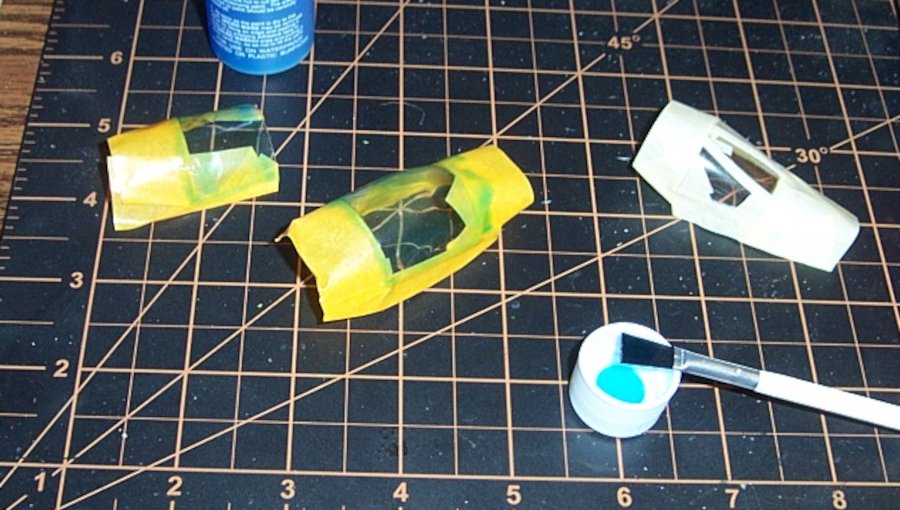
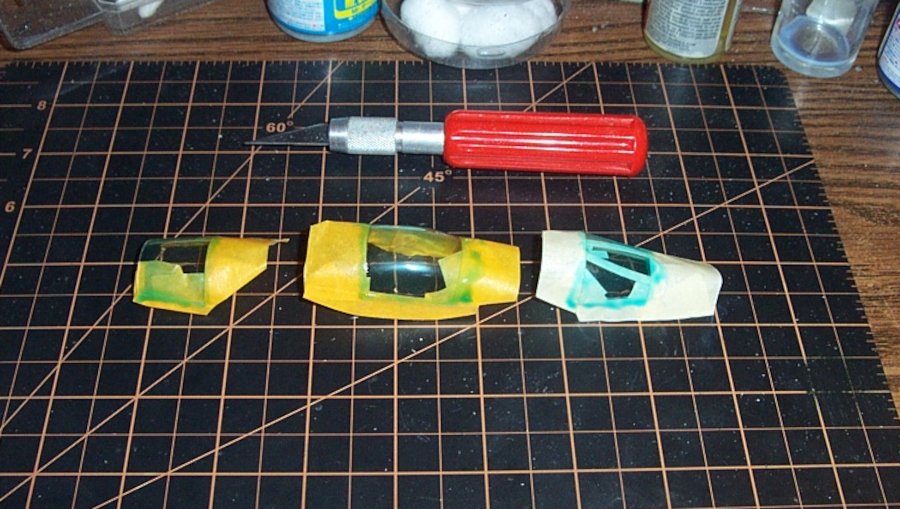
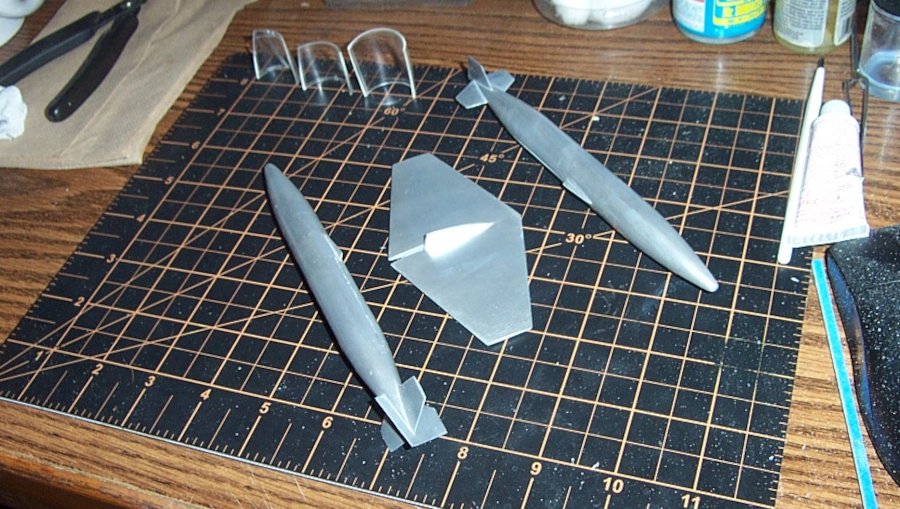
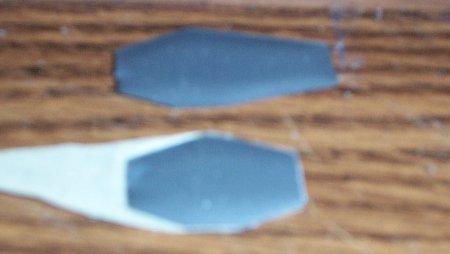
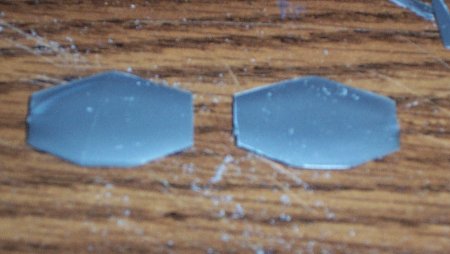
Another update.... Masking, the (now) old fashioned way.... Most everyone who has built model airplanes is familiar with painting canopies The original way was to directly paint them. But that was hit or miss as some manufacturers would cut canopy molds with generous ribbing which allowed you to flow thinned paint in between the ribs that outlined the glass, wasn't accurate but got the job done.... And some manufacturers molded little lumps for canopy ribs that would have been better if they left them plain..... Along comes Micro Scale to solve the canopy painting problem by borrowing from the artists world.. Masking fluid designed for the modeler... Micro Mask was a revolution in it's day some 40 years ago... just paint it on the surface of your canopy, it dries in minutes and cut away the parts you wanted to paint with a sharp exacto or razor blade... worked extremely well for those canopies with decent ribbing detail. One problem remained, you could easily slip with the sharp blade and ruin your canopy.... (I know this cause I have done it more times than I care to remember) I came up with a solution to this problem..... Masking Tape..... My method of masking a canopy using Micro Mask..... Materials.. One three piece canopy, a roll of 1/2" frisket tape and Micro Mask..... The first step is to mask off the canopy using the masking tape...... (say what? I thought we were using masking fluid?) You only mask off the portion that YOU WANT TO PAINT...... leaving the rest of the glass portion clear.... There are reasons, #1, the masking tape hanging over the ends and sides gives you natural handles to hold the canopy while working on it.... And #2, the masking tape acts as an edge to run your knife blade against so you don't go skittering across the clear portion or cut through the masking scoring the part you want painted..... The Micro Mask is painted on with a cheap soft brush, don't go using your good detail brushes for this.... Paint it generously lapping over the tape on the sides and ends... That overhanging tape makes a pretty good handle.... As you can see I used the Frisket tape for the two canopy pieces the windscreen I used regular masking tape the reason for this is frisket tape is stiff and low tack and with the windscreen the two middle ribs curve so I cut thin strips of regular masking tape that can be bent following the curve of the rib... Remember we are only using them as guide edges so if a little bit manages somehow to get under the tape we deal with that later... Painted and waiting to dry, (it doesn't take long 10 to 15 minutes) I usually give it an hour just to make sure. I prefer a wide handled knife for detail work, I feel I get more control with it than a thin handled knife... In today's aftermarket world, a kit is released and very soon afterwards a company comes out with canopy masks made out of frisket tape, I've used them and they are very nice. With this bird I was lucky to get one set of masks made for it, (the Italieri masks don't fit this bird) they are out of production and you are lucky to find them for the Hasegawa kits... so it is both cheaper to brush off the old canopy masking skills and see if I still have it.... Besides, there might be some younger modelers out there that didn't know how to deal with masking canopies without mask sets and AM manufacturers only produce for the most recent kits so this is still a necessary skill to have in your tool box. And I believe my innovation makes this a much easier proposition for less experienced modelers.... (we might have a few around) Next up cutting the masks and removing the tape... EG
-
Thanks Ken, I'm hoping it comes out at least as well on the fuselage after all the abuse it's taken...
-
Thank you OC, Not sure yet "Nailed it" is the term, but I'm close...
-
Thanks Jack... I figured that since I was out of everything I might as well restock..... And I think I'm a convert on Rub n Buff.... {chuckle} It's amazingly easy to do a very good BMF with it...
-
Well I sorta kinda did when I said I was going to get some outside light on the subject.... {chuckle} They have a full range of finishing products, (mostly surrounding decals and their installation) most of them are well known..... I just wish they would expand their decal lines....
-
I hear ya brother.... I generally don't have a shelf of doom, (where models that don't come out right get put, usually before being finished) Mine usually get a long fight to the finish and when I finally say enough is enough it gets binned... I then think of another way and try again... I'm kinda stubborn that way I like to take it to the bitter end.... (and I usually win) This one was going to be one of those, I saw it done, and decided that I was going to do it.... Hopefully I still can but yeah my emotions on this one are now quite a bit lighter.... Thanks my friend for the understanding....
-
Just caught up with this one brother, my condolences on losing your life friend/helper buddy....
-
So your doing just a piece of the battle, cool, Infantry supported by heavy Calvary... Will still look spectacular..... 👍 Maybe you could give a few step by step tips on how you do your figures so those of us not figure friendly can learn how....
-
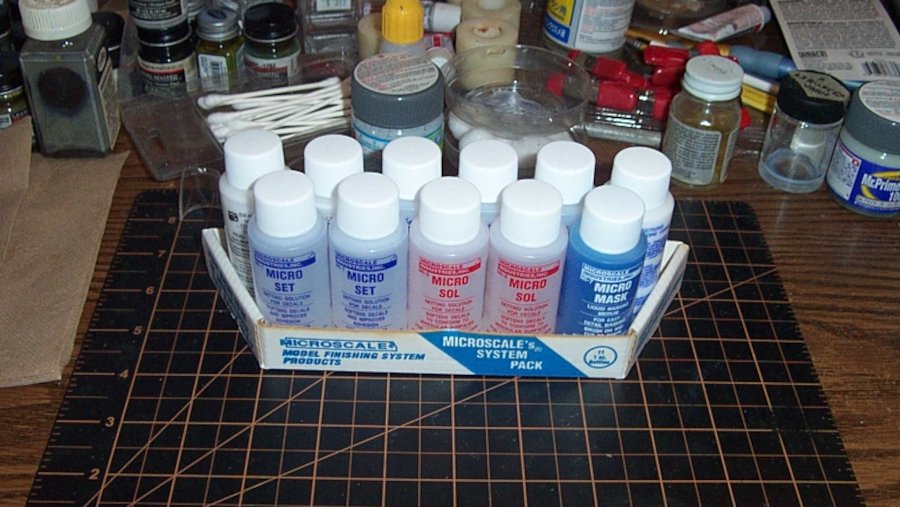
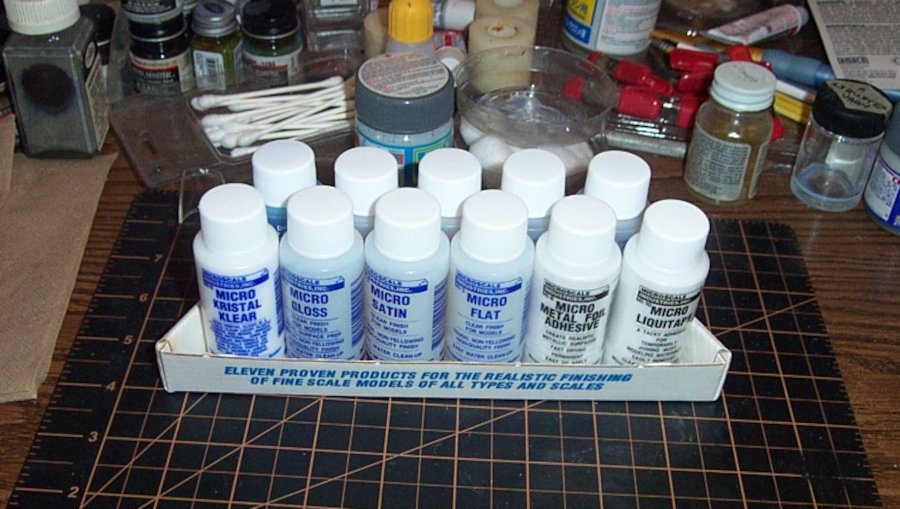
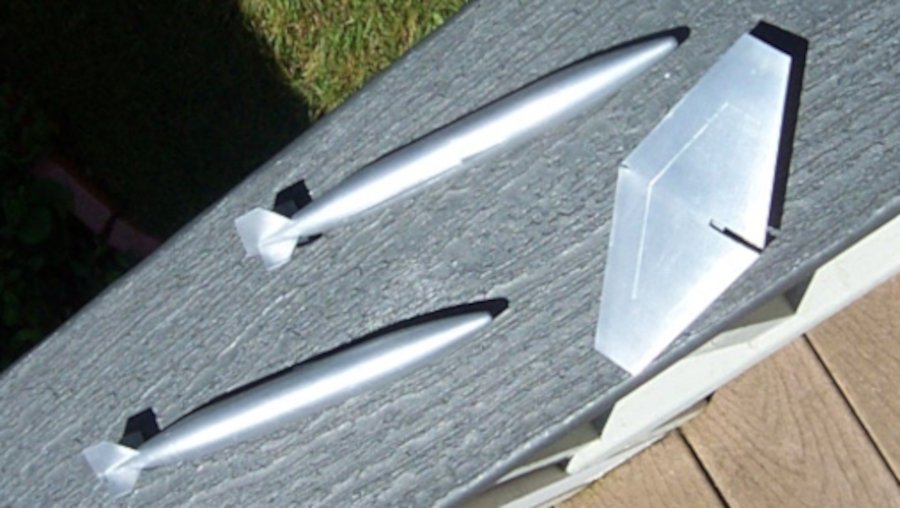
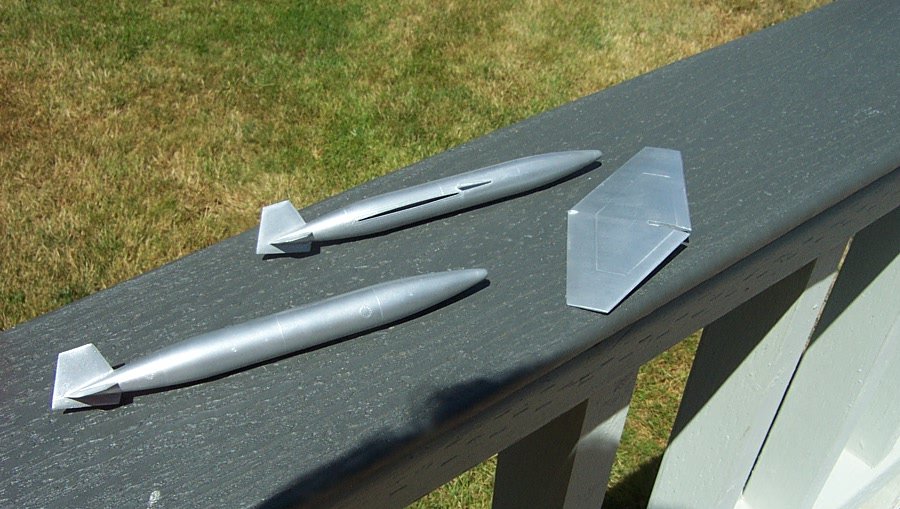
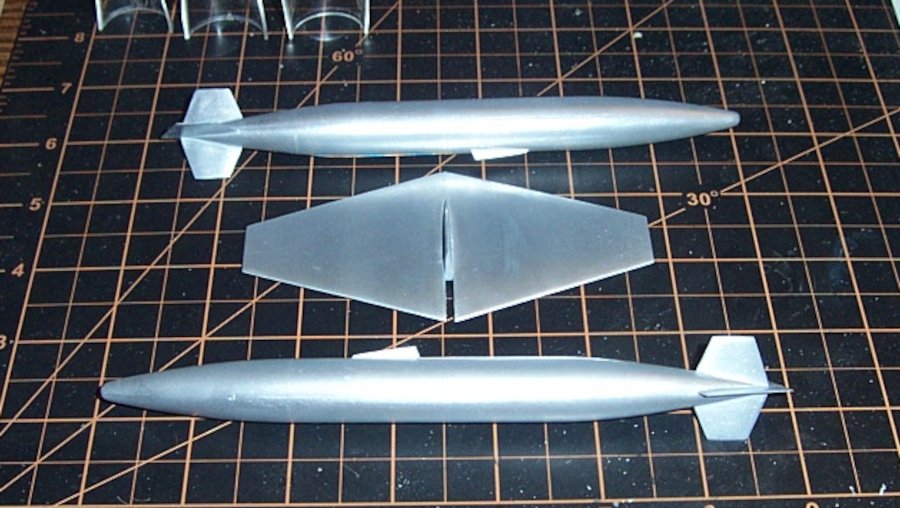
My care package arrived.... Decaling solutions.... And a few other niceties to aid in my endeavours in scale..... And early as well for a change.... Didn't really need the liquitape of foil adhesive but I"m sure I'll find a use for them.... was cheaper buying the full pack rather than the individual bottles... Also, this is the international pack, in which they substitute two bottles of adhesives they cannot ship overseas for a bottle each of Microsol and Microset.... PERFECT for what I need.... (I gots a pair of huge two part decals coming up in the future, I'm now well supplied) Anyway I also took the opportunity to shoot the metalized parts out in the full sun.... I'll let them speak for themselves... Needless to say, I'm very happy with the look.... at the right angles it catches flashes that can blind you but at normal angles very seeable... Perfect! EG
-
Another wax product that does the same thing.... I think wax is the ticket as a carrier of the metal pigment, it stays liquid enough to spread thinly and allow the metal to lay down like it needs to, then dries hard, very hard to seal it in.... Great stuff...
-
Anything less than 1/72 is an exercise in assembly and paint.... very fine work.... Takes a real artist.. I'm in....
-
So your talking what, 200 to 300 figures.... lets see the Germans, British, French, there were some Austrian and Flemish troops as well I believe... Relying on memory here cause I'm too lazy to look it up... One heck of a task my friend, will look spectacular when done though...
-
Thanks Mike, yeah I'm in some serious anticipation states also, but I have to slow myself down and not get in a hurry.... I know enough now to know it's my go to for BMF's on aircraft..... Like everything else I'll get better results with practice/experience using it..... This is only my first one....
-
Thank Ed..... I'm happy with it, it does look like metal and goes down thin enough to not lose any details. Very hard shelled when it dries and it is fingersafe, no fingerprints after it is dry.... My first time using it and I think it came out well for what little experience I have with the product.... about 98% of the finish I was looking for.... the more I use it, the better I'll get at it... Reserving final judgement for when I get the fuselage done, but I already know it's going in my toolbox of must have products..... and this product has been around since the '60's and almost no one in modeling knows about it! Amazing to me.... Thanks for commenting my friend... more on this to come.... EG
-
Two way to do this... the first you already guessed. pait a white underlying disc.... the other, a white disc decal with the insignias overlayed on it.... My experience, it's required on a yellowbird....
-
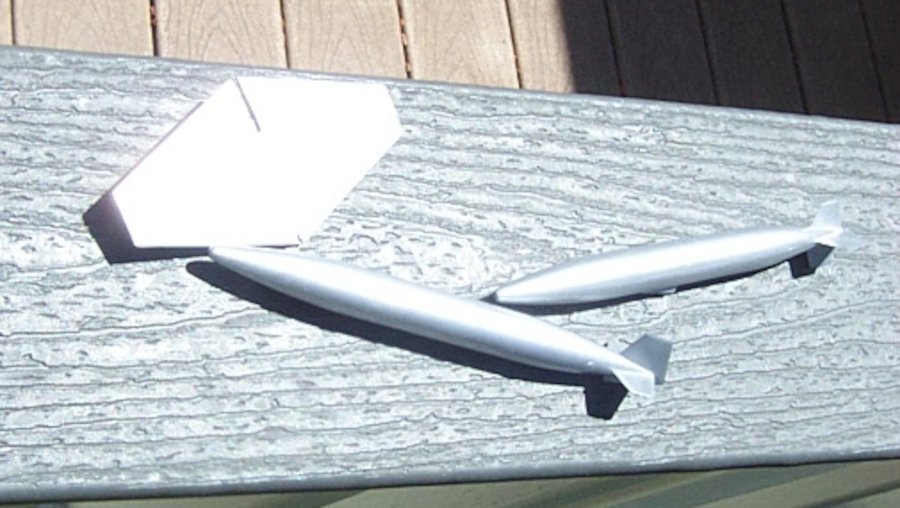
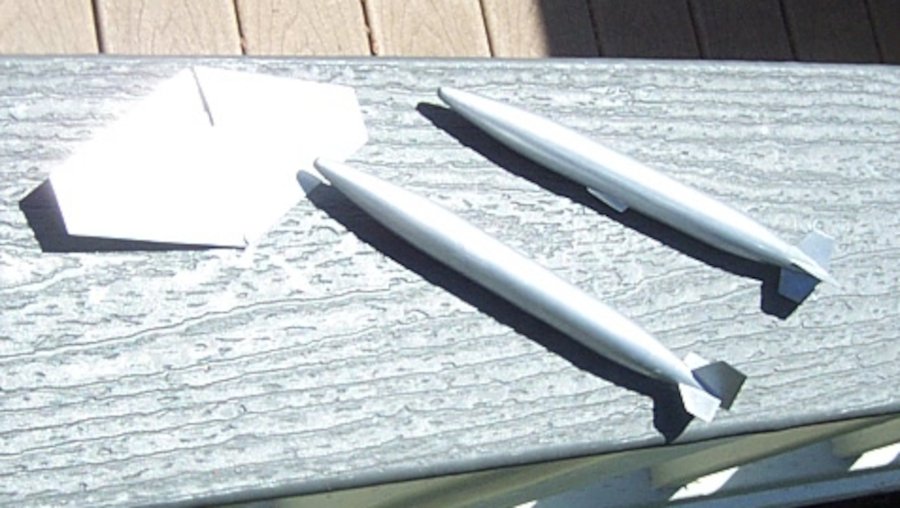
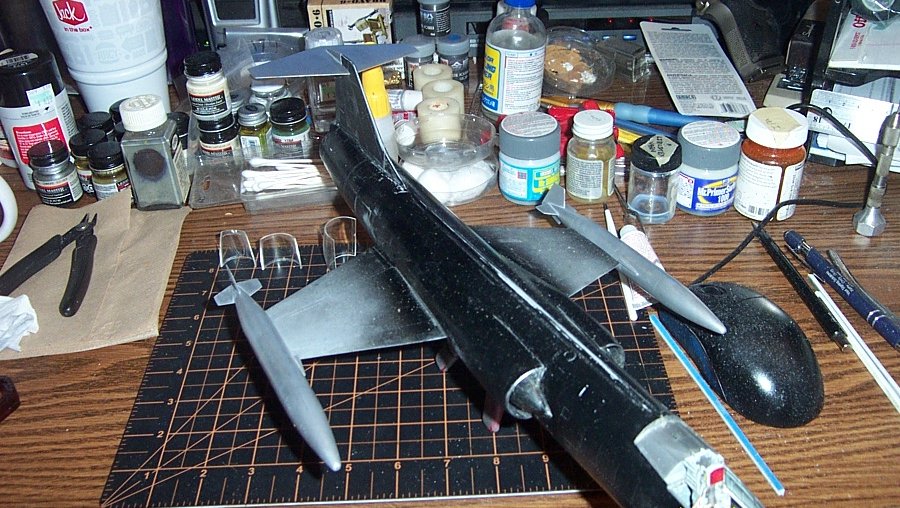
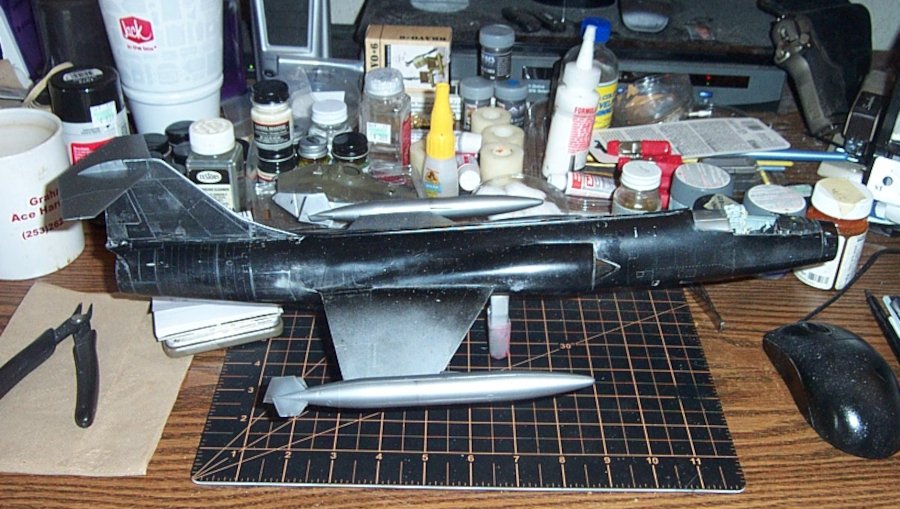
Well another update... The method I used in my experiment with this wax on the disposable turret top was to brush it on and rub it in..., that is not the way to do it... you can get to where you brush on wax too long and the wax hardens before you can polish it... It is a true hard shell, rub on wax.... put a very small dab on your finger or soft cloth and rub it on/in.... and then buff it while it is still wet... It will harden while buffing into a pretty nice shine... still looking for the mirror effect, but I am getting a metal finish that surprisingly looks like aluminum..... Also this is kinda a test, I put it on over Tamiya grey primer so I don't know if I'm getting the deepest color effect I can get, but it does look good.. Primered... First coat on and buffed... It does have that sheet aluminum look to it..... Reflective, but not polished.... I went and remounted them on the fuselage They do look the part, just wish there was a touch more reflectiveness to them.. maybe after it is almost done, decaled and clear coated the reflectiveness will come..... I'll have to get them outside in the sunshine and see what they look like... Natural light always presents a better image... Anyway, this is where I'm at, I think I've got the idea on how to put this on, I'll stick with the primer grey undercoat for this one cause there are already too many coats of paint on this and I'm beginning to lose some of the fine details to paint..... But the next one will be over a semi-gloss black coat see if it makes a difference like it does with the alclad products... Tomorrow I start on the fuselage again... EG


-
Gorgeous work brother... Very Very Nice...
-
Porsche 934 by kpnuts - FINISHED - Tamiya - 1/12 - PLASTIC
Egilman replied to kpnuts's topic in Non-ship/categorised builds
Nice Work! The heat does wonders for fixing clear finish issues doesn't it.... that's a little trick I learned several years ago.... but you have to be careful you don't get it too hot or the re-sprayed finish dries too fast..... Beautiful job! Somehow I just knew you had an answer for the finish that refused to cooperate..... -
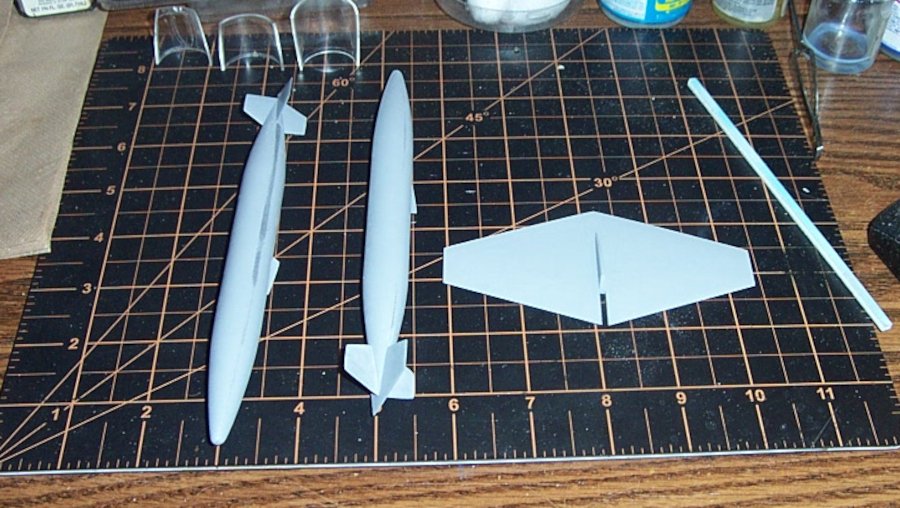
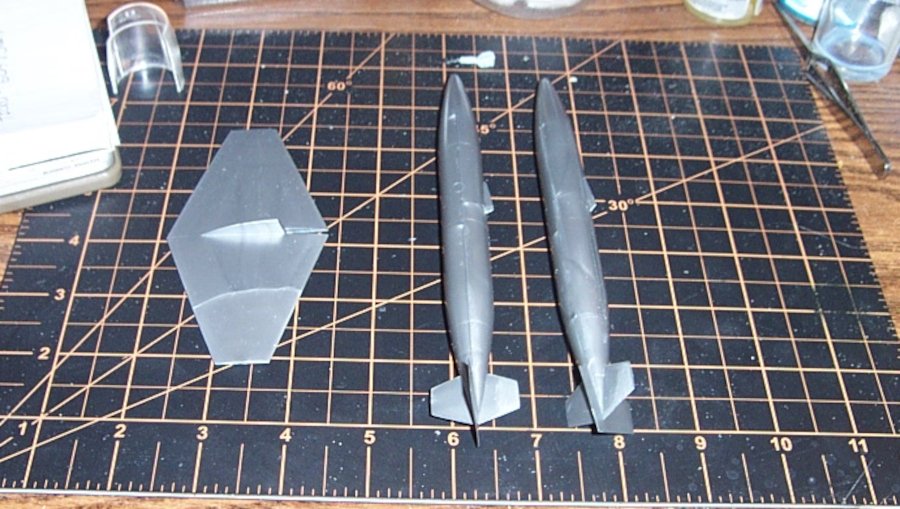
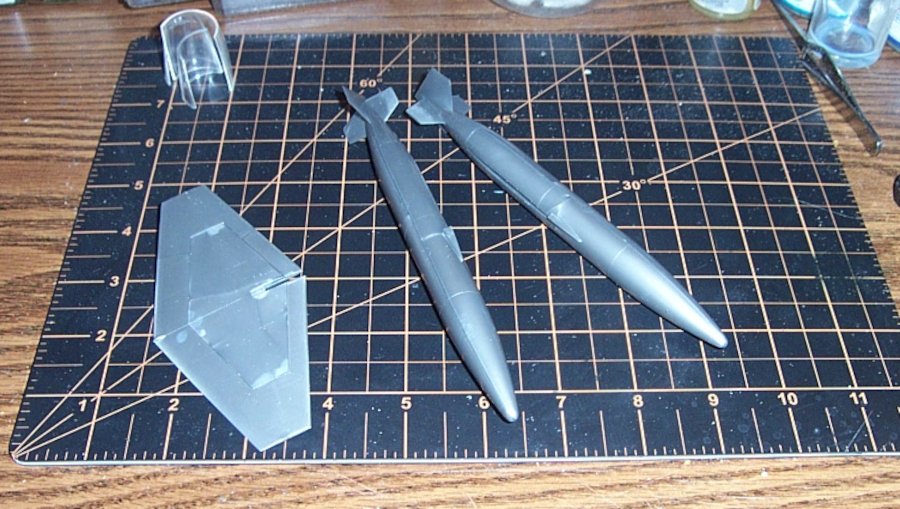
Well a small update..... Figured I would get the wing tanks and live tail ready for finishing .... they are smaller parts and I can practice/perfect waxing them a lot easier than the entire fuselage.... First step is trimming the fins for the tanks..... Now this is a Japanese kit, so I am assuming that their pattern for the model is an F-104J which is a bare F-104C with a few upgrades. (license built by Mitsubishi with the first few modified by Lockheed) this is the reason you have some discreptancies from a real USAF F-104C. little things like the Euro spoked wheels, the longer inner fin in the wing tanks little things like that.... To make a USAF "C" model zipper one needs to trim the horizontal tank fins so they are equal from side to side cause the USAF never mounted the foreign tanks.... Kit fins... Then the modified fins.... Sorry for the fuzzy pic but you get the idea. the cut fins are not sanded smooth yet.... I also went ahead and glued the two stabilizer parts together..... Then gave a test fit to the fuselage... (just to make sure) Like I said earlier, I'm probably going to work up the tanks and stabilizer first as they are lots smaller parts and perfect the technique of metalizing it with RnB so when I do go and do it I will hopefully have enough experience so I don't botch it up this time.... Onwards... EG
-
Hi Mark, and thank you both.... Mark I saved you a piece More experienced? That's what she said after the fact..... Thank you my friends... It was a good day.... And the post office is going to grace me with a birthday present tomorrow, my supplies are supposed to arrive.... Yay! Onward!!! EG

-
Building a Medieval fortress - by Waitoa - Del Prado 1/87
Egilman replied to Waitoa's topic in Non-ship/categorised builds
Every occupation has a bigger hammer, some of them have even bigger hammers...... -
Porsche 934 by kpnuts - FINISHED - Tamiya - 1/12 - PLASTIC
Egilman replied to kpnuts's topic in Non-ship/categorised builds
Looks gorgeous... psst: how did you fix the body? or did I miss something.... Nice recovery btw.... -
Yeah I'm backwards half the time as it is myself so it's all good..... Thanks Carl......
-
I was wondering what that date was all over my records... I guess that is it... Older? nah, you just have passed a few more mile markers than I Lou.... On a side note, I considered suing 7-11 for using my information as the name for their business till I found out that they have passed more markers than both of us..... {chuckle} Thanks my friend..

