


Egilman
-
Posts
4,384 -
Joined
-
Last visited
Content Type
Profiles
Forums
Gallery
Events
Everything posted by Egilman
-
 Welcome to the build Allen.... That is a striking scheme, it is a beautiful airplane.... (in any color scheme) Darryl was one of the few civilians who had the privilege of being in the Mach II club.... an amazing man as well as airplane..... The biggest privilege of being a model maker is being an inspiration to a fellow modeler... Thank you most deeply for your gracious compliment...... EG
 -
They had two different crank devices for dealing with machine gun ammo, one made up the belts, (which is what that one looks like) and one to load the belts in the magazines that were not removable from the aircraft... Unfortunately, the belting board would be in an ammo shack and nowhere near the actual aircraft..... The ammo would be carried to the aircraft in standard ammo cans or drums in a trailer, the feed chutes would be attached to the device, and the belts of ammo cranked into the magazines..... spare ammo would be loaded in 200 rnd ammo cans (.30 caliber) & 50-75 rnd cans (.50 caliber) basically each can held one belt.... Fighter aircraft usually got one 200 rnd belt per gun so they were loaded by hand from ammo cans... Bombers with huge 600 rnd boxes were loaded with a cranked device from a drum.... Prior to that they used individual ammo cans loaded in racks... They would have several of those at the airfield my friend, but it wouldn't be in a trailer on the back of a jeep.... EG
-
Well that what my cardiologist tells me, all the red meat I can eat.... (although I do prefer a nice medium well 20 oz. sirloin, an earthquake will pass in a pinch) and Americas favorite drink is Diet Coke and has been for at least two decades....
-
Well, they do need some traction.....
-
Not right now, but then my blockage between the hours of 11:00 am and 6:00 pm here has come back. I did take my test piece out to the spray area and hit it with the metalizer over everything... tomorrow I'll be buffing it up over the various finishes and see what it does.... And yeah I made sure the recommended bare styrene was there.... Should have the rest of the stripping done tonight, then have to remask the canopy after I test some clear in super clean to see how it handles clear styrene..... And RL is trying to make itself felt..... but it will pass as well...
-
To me it is no better than Jack-in-the-box or Wendys, they all sell basically the same things.... Me? I'm a triple whopper kind of guy when there are no earthquakes to be had..... (fair only nowadays)
-
So am I.... It's a large pop cup from a local burger joint Carl. I hear a lot of people like their stuff, I wouldn't know, I"ve only bought pop from them... Called Carls Jr...... I don't know why they call it that.....
-
Porsche 934 by kpnuts - FINISHED - Tamiya - 1/12 - PLASTIC
Egilman replied to kpnuts's topic in Non-ship/categorised builds
That's more than luck my friend... The blower fan on top of the motor, the fuel tank in that off white pasty semi-translucent plastic? I"ve tried for years to replicate that look with no luck at all... -
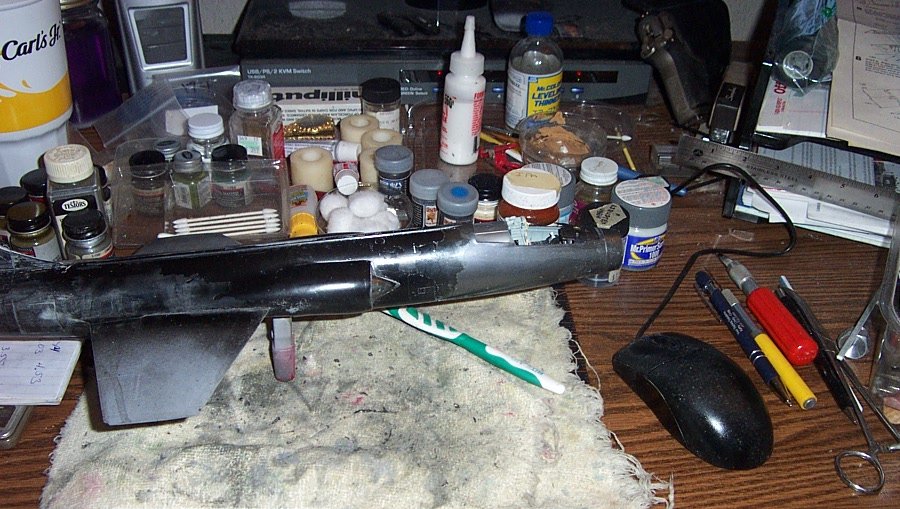
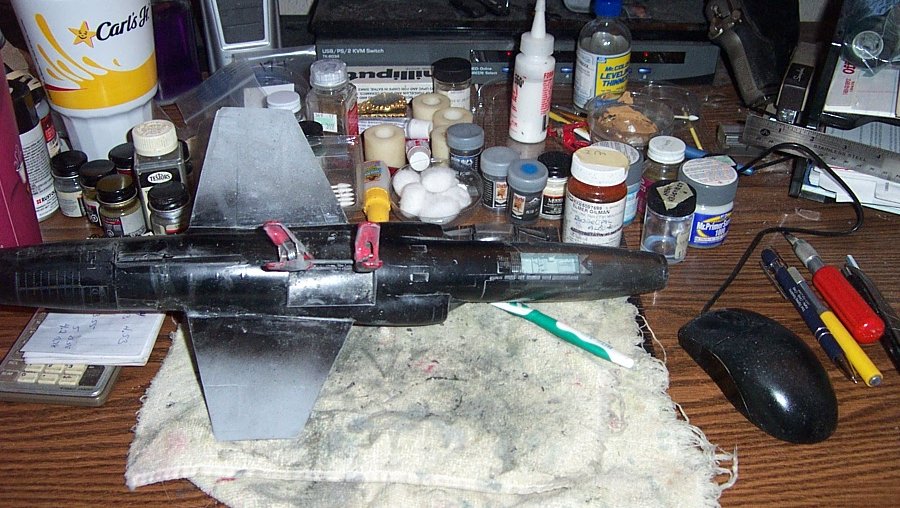
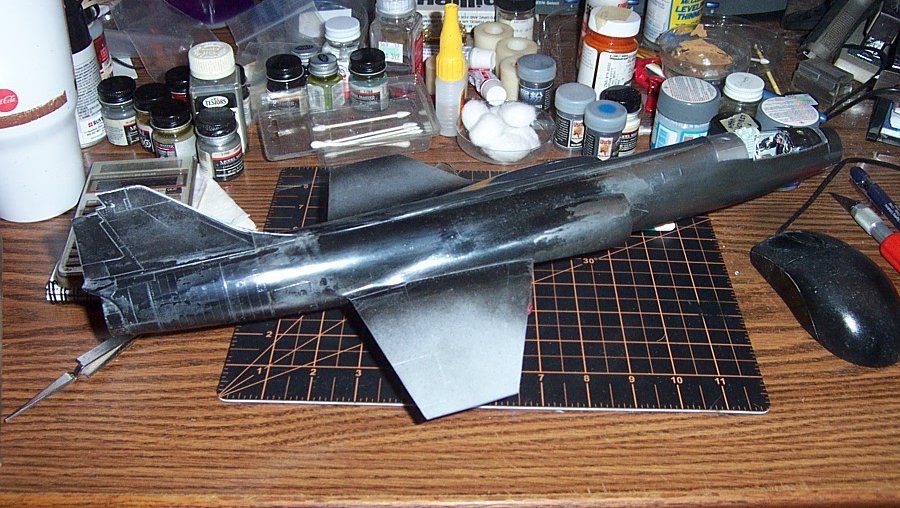
Well it's time for another update... The ugly work of cleaning off past mistakes goes on..... Pretty much just the nose left, from here a light (very light) sanding and priming in the near future..... Thankfully the IPA doesn't really effect cured paint, (if you don't leave it too long) but it does take off/craze cured Testors high gloss lacquer somewhat and everything else.... It doesn't matter the brush has scratched the paint in a few places so a reprime is a requirement..... I have acquired a rattle can of Testors aluminum plate metalizer, (two more on the way) so I will be testing that on another scrap part in a few to see if what I've been told by the experts is true........ More to come... EG
-
Thank you Michael for stopping in here... It's appreciated.... Love your work btw....
-
Having done New England style 18th century timber framing in real life, (for restoring/rehabbing/building old barns, it's it's own art form) doing it in miniature is another level of precise, and what they do on ships? I really don't know if I could replicate such timbering work in real life much less in quarter scale..... Yes it is very humbling indeed.....
-
Thanks for the link Craig... The model is almost 17" long that needs the foil treatment... (the fuselage mainly taking two full sheets) At 6" x 11.5" I would need a minimum of three sheets, four if I expect errors and yeah being it's me doing it, I would expect errors.... So a three pack of base chrome and a single of matte aluminum... but they are out of matte..... then I would have to figure out if it needs a transparent filter coat to cut down the shiny to a scale appearance..... More research needed...... Thank you.... EG
-
Porsche 934 by kpnuts - FINISHED - Tamiya - 1/12 - PLASTIC
Egilman replied to kpnuts's topic in Non-ship/categorised builds
Agreed on all counts, the stand, which is a display/storage stand, would at least be a cross bracketed Pratt truss in rectangular tube steel. That engine is at least a half ton of metal.... And yeah, it's worth restating as many times as possible, Beautiful Work!!!! The only thing I would like is on one of his builds he goes thru the step by step process and show how and what he uses to get those finishes.... especially the white molded UHMD plastic parts.... one of the most difficult finishes to replicate, harder than BMF..... -
YEA YEA YEA PLEASE!!!!! We need to expand the Miniature Masons Guild, sign up some apprentices and start training..... +100 votes for this.... we need more..... (with the way the world is going we may need the knowledge in the real context in the very near future)
-
Yep that's my absolute last option fall back position although on a model this size it will be a very expensive thing to do... Bare Metal Foil isn't cheap..... and I'm not in the kitchen foil club, I think it looks completely out of scale.... and has it's own issues as well.... Silver leaf is an option, but there is almost no info in using it to replicate polished metal... (I haven't really done the research into that as it would be even more expensive than the foil) Thanks Craig for trying to help sort this and figuring out the options.... It's much appreciated...
-
I've always got a plan brother, even if it involves the occasional binning of a disaster.... This is far from the binning stage at this point....
-
I guess we were getting a lot of traffic from the ship builders seeing what was going on here.... And yeah they had to make a distinction.... This is after all the Nautical Research's Guild's forum and Ship modeling is the backbone of that forum.... Not a general modeling site.... So the response is appropriate..... The thing is even if we have to do a bit more legwork, it is still the best modeling forum around IMHO and what we become is that little hidden corner gem of a spot where all are actually welcome... It's the only modeling forum that actually practices what they preach..... the more we post, the more we will draw others through the search engines it ups their hits and brings people to ship modeling in a way I'm sure they didn't expect. So I can appreciate their need to stay focused on their main mission, but am glad they can see the benefit of keeping this little corner of their world open for us.... Best modeling site on the net I say.... EG
-
Thanks Ed, but in the lessons learned and re-learned department, it is best to ask first before you spent hours and hours beating you head against the wall..... I thought I learned that one years before...... I guess not.... But I only have myself to thank for all this work I now have to do.... But that is part of the adventure of modeling.... Anyway, I needed to paint the wings first and get some gloves for handling it so it all for the best.... a change in approach.... I located a couple of cans of aluminium plate and they are on the way... They also reminded me of the process for brush painting the testors metalizers so I went ahead and bought some Stainless steel and Titanium for doing the aft fuselage panels that need it.... I'll probably be happier in the long run with it this way...... No point in being demoralized, if this is the worst thing that happens I'm doing good...... Just a slight detour on the journey to finishing my first BMF airplane.... Onward.....
-
Yeah, and a decent airbrush..... (chuckle) Actually I"m in the middle of stripping all the old metal and varnish finish off down to the gloss black paint....... So much for the indestructible artists varnish... IPA takes it right off........ Probably have to throw a coat of primer on it again.... Still working on/researching a solution for the BMF.... so far, without an airbrush there is only one product in the spray realm..... Testors Plate Aluminum Buffing Metalizer..... There is another way, Bare Metal Foil.... but that has it's own issues to deal with I've been told a similar method is spray glue and kitchen aluminum foil will do the job also.... I've talked to two modelers who have won contests with BMF finished airplanes and they say Testors is their go to for BMF finishes on airplanes. But there is a caveat, you HAVE to wait for them to fully cure... 18-24 hours after spraying before you buff them out. if you try to buff them out before that, they will come off on your fingers..... So once I get this clean, we are going to try again.... They agreed, Uschi's metal powders are great at creating polished metal finishes, but you can only use them for small parts or parts that aren't going to be handled and not for overall final finishes.... in fact none of the burnishing metal powders are..... Anyway, onwards... I will get this done... one way or the other... EG
-
I had a 12 hr blackout yesterday 6AM on the dot until 6PM on the dot..... so far that has been it... Trace route shows the ping making it through Tacoma, then Seattle, but when it hit Chicago, Nothing, deader than a doornail nothing on multiple attempts.... I suspect they were doing internet backbone server upgrades or something of that nature.... and another thing, they all went to the same server..... which I thought was something the internet avoided... Anyway the modem is certified by the ISP to be functioning correctly (after several Xfinity restarts) they don't know what happened either but suspect the same as I do.... someone had a backbone server node offline for a while.... The thing that stumps them is why the internet didn't re-route the request to another node.... They have started an inquiry into why.... Strange things happening ......
-
Just a humorous note... I searched "Sealing "Uschi's" metal powders" in Google, and this thread came up as the #3 result!!! People try for years to get on the front page of a google search, we made it without even trying.... {chuckle}
-
MRAP ATV by CDW - FINISHED - Rye Field - 1:35 Scale
Egilman replied to CDW's topic in Non-ship/categorised builds
This one? I think your going to like it..... I could have picked up the full interior version, but I passed on it as well... The tracks alone look to be several hundred parts... (probably an exaggeration, but they do look like that much)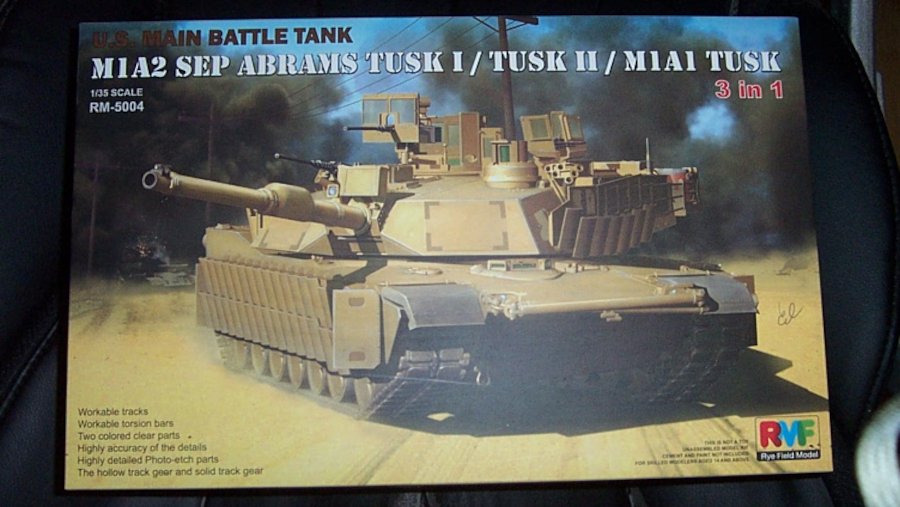
-
They did make a selection in rattle can, four of the 16 different colors i believe, There were also non-buffable, brushable lacquer versions and there is a technique for using the airbrush versions them with a brush..... I just have to remember what it was... And hope I can find someone with an old stash willing to part with a few... Testors metalizers have been out there for 25+ years, it was the announcement some 15 years ago of them being discontinued that caused these other companies to jump into the market...... I know the airbrush versions don't adhere very well also... It was one of their failings that a lot of modelers complained about... and like all other powder based spray on finishes they darken when sealed..... Testors metalizers I'm familiar with.... They don't give as good a surface representation as the Uschi powders though, that was the biggest draw to the powders, the accurate polished finish they give... Shame they can't be sealed... (or I haven't discovered the right technique yet) Thanks.... still looking...
-
Thank you Craig, but I've seen them. I know everyone likes the presentation and he's not using the alclad base black lacquer that everyone seems to have problem with from time to time. That being said, what he does is nice, but it's also not what my minds eye says is a bare metal aluminium finish.... A preference thing I know, and his presentation is kinda nice, but you have to use an airbrush... which was a point of what I'm trying to accomplish, doing an accurate BMF without one...... My head is running towards the old standby of Testors buffing aluminium plate in rattle can if I can find some.... Thank you very very much for the search effort.......
-
Yeah I looked him up, he mentions it a few times, but offers no real definitive examples of uses or applications..... he still posts occasionally but the last was about a year ago....
