HOLIDAY DONATION DRIVE - SUPPORT MSW - DO YOUR PART TO KEEP THIS GREAT FORUM GOING! (Only 20 donations so far - C'mon guys!)
×


Egilman
-
Posts
4,377 -
Joined
-
Last visited
Content Type
Profiles
Forums
Gallery
Events
Everything posted by Egilman
-
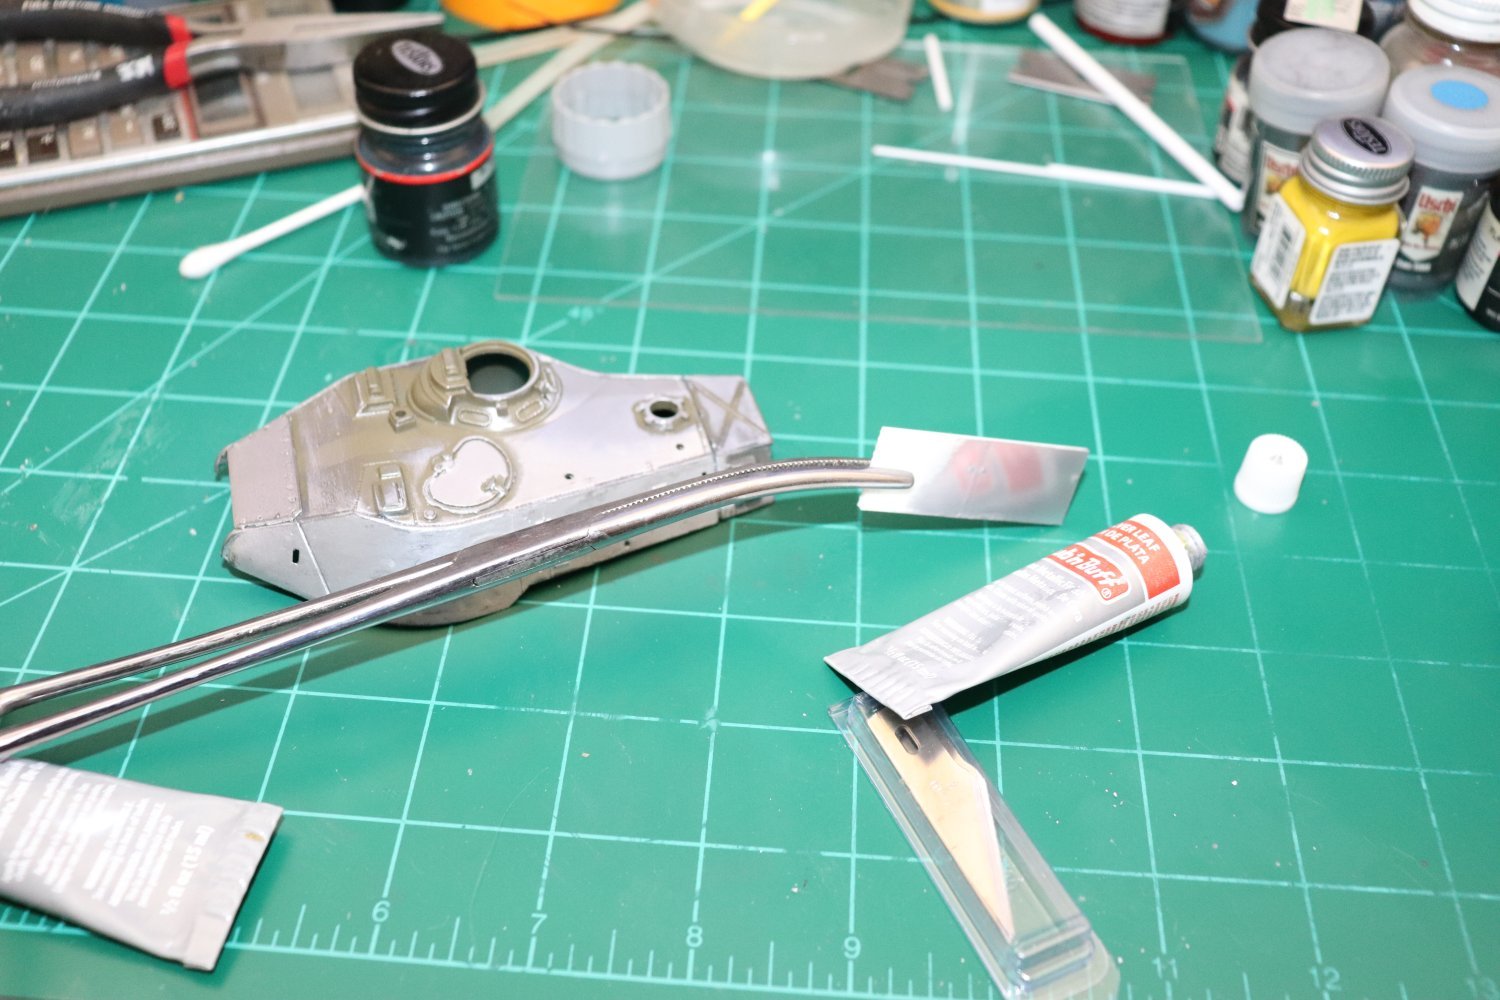
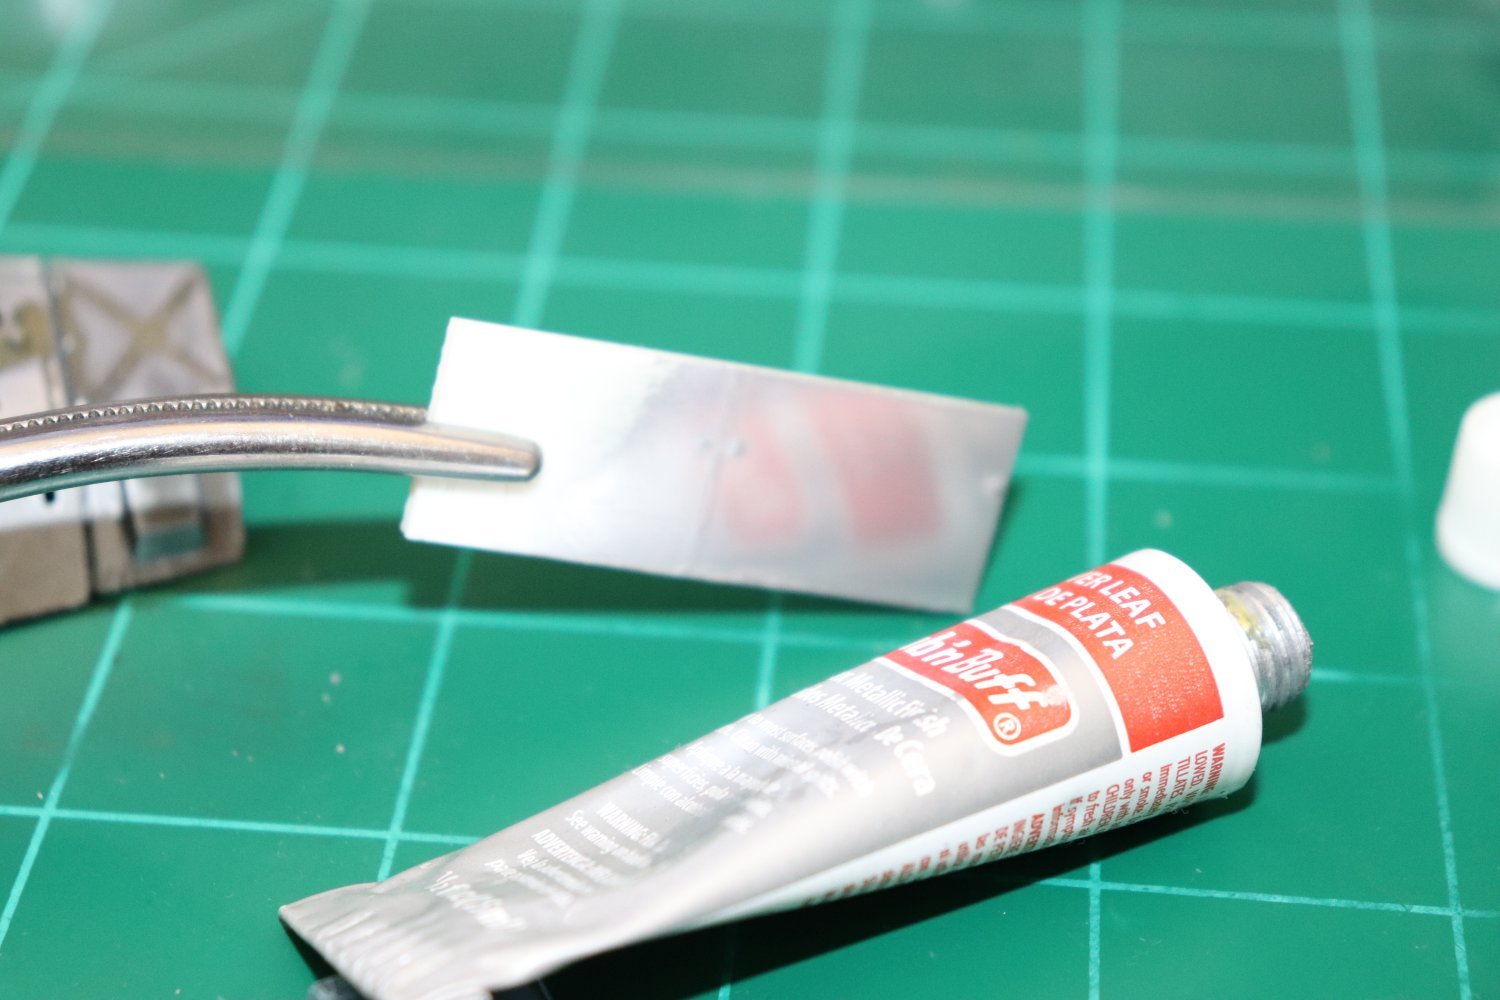
 Ok Brothers, my first not so scientific test... Remember the old turret top I used the last time? well I used it again cause the top was un touched and the ideal is putting RnB over bare plastic... The section covering the hatch & behind the cupola, back to the storage bin... The half behind the cupola to the end of the turret, (not including the bin) was daubed with a q-tip dunked in Future and allowed to dry... The coloration did darken a smidgen not enough to really notice and the reflection remains..... That semi test came out well so I figured I would try it on a plain white scrap of model plastic.... In real life, you can read the lettering in the reflection... That's straight Rub N Buff took all of two minutes to apply... It seals with Future and it produces the exact same polished surface on plastic you see in Paul's pics of his models... Excellent!!!! Need to practice a few more times to get a better feeling for it, but what is said about it is true, you want a natural metal finish that actually looks like metal in real life this is the product to do it... There is no paint that will do this...

- 139 replies
-
- 11
-

-

-
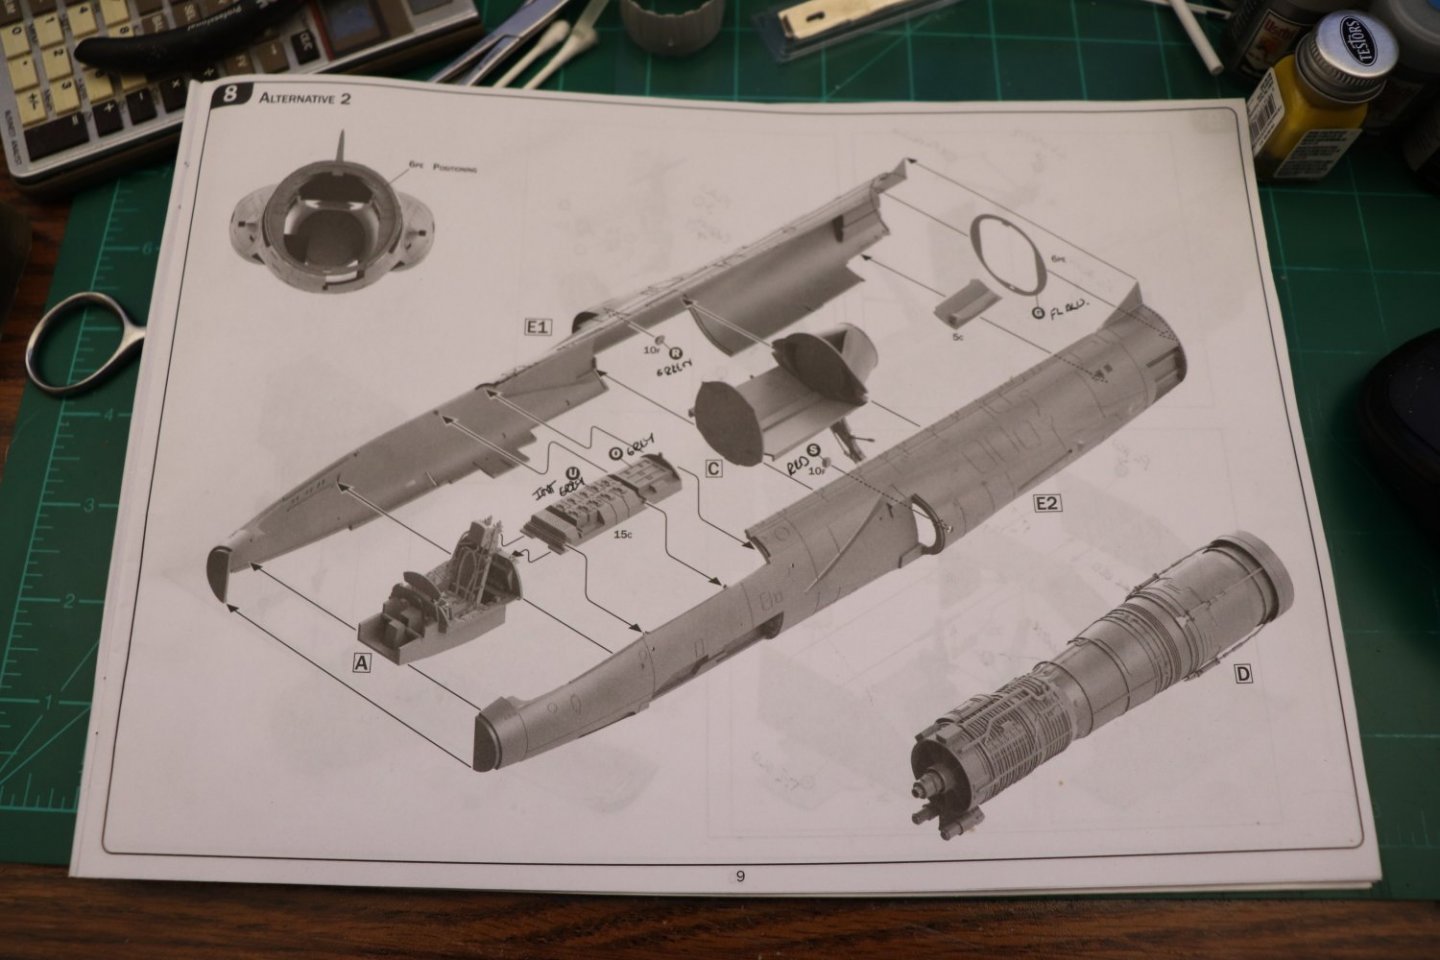
Ok Brothers, I'm still here.. Was a bit under the weather again so I took the opportunity do so some research into F-104's and Paul Coudyrette's Rub n Buff Technique... Found a lot of pics of his models especially his Bare Metal birds... It appears to me that he's built most of the various manufacturers bare metal aircraft models, in his 50+ year modeling career, including the B-58, the B-25, the B-17 and all the various fighter aircraft... He was a master of brushwork/fingerwork, never used an airbrush, in fact he didn't even own one... You will see why I want to learn this technique... These are all Paul's builds... Yeah, that's what I said as my jaw was breaking when it hit the floor... Unfortunately there is no tutorial on his technique and he passed some six years ago... Of the numerous requests in the forums he frequented was to do a tutorial, he would always say he explained his method in other forums/threads, occasionally giving a hint of what he does, but never in detail... I did find one post where he outlines his technique, (probably cause he got tired of answering the questions over and over) but then when you spend decades figuring out how to do something like we see above, it is time to admire and not question... (I also found a post on what he uses for those colored heat stains on RnB and pretty much all his tinting for BMF's) There is a video of his technique being demonstrated but it is in French and although it does show the finish as applied in basic technique, it doesn't go into a lot of detail in what was happening while doing it or how to finish it off... So I need to do some more testing... I want to make sure I understand his technique fully and that was his advice, try, try and more try... He was willing to point the way, but he stated more than once that the best way to learn it was to try it and experiment, just like he did over 60 years of modeling... I think that is why you don't see very many models done this way (almost none except his) No one is willing to do the work to learn and perfect his technique... Paul Coudyrette, A master modeler, maestro with a paintbrush..... Anyway, This is my next step... Yeah putting the main fuselage halves together without doing too much damage to the painted finish... This is alternative 2 because I'm leaving the engine out, in fact I'm thinking through how I want to present this plane again... Feeling a bit uncomfortable with the everything open look, it's not my style... So I think I'm gonna go back to the image of what she shows in the video and let it be that.... Like she returned from a successful mission... Anyway onwards, testing won't take too long... and I'll probably do a few simple parts first like the wing tanks just to make sure I got it right...

- 139 replies
-
- 11
-
-
I will be seriously interested in the steps you use to paint these figures Brother, they are the same ones I have for mine...
-
Very Very nice kitbash to correct the obvious shortcuts the mfgr took... Well Done!!!
-
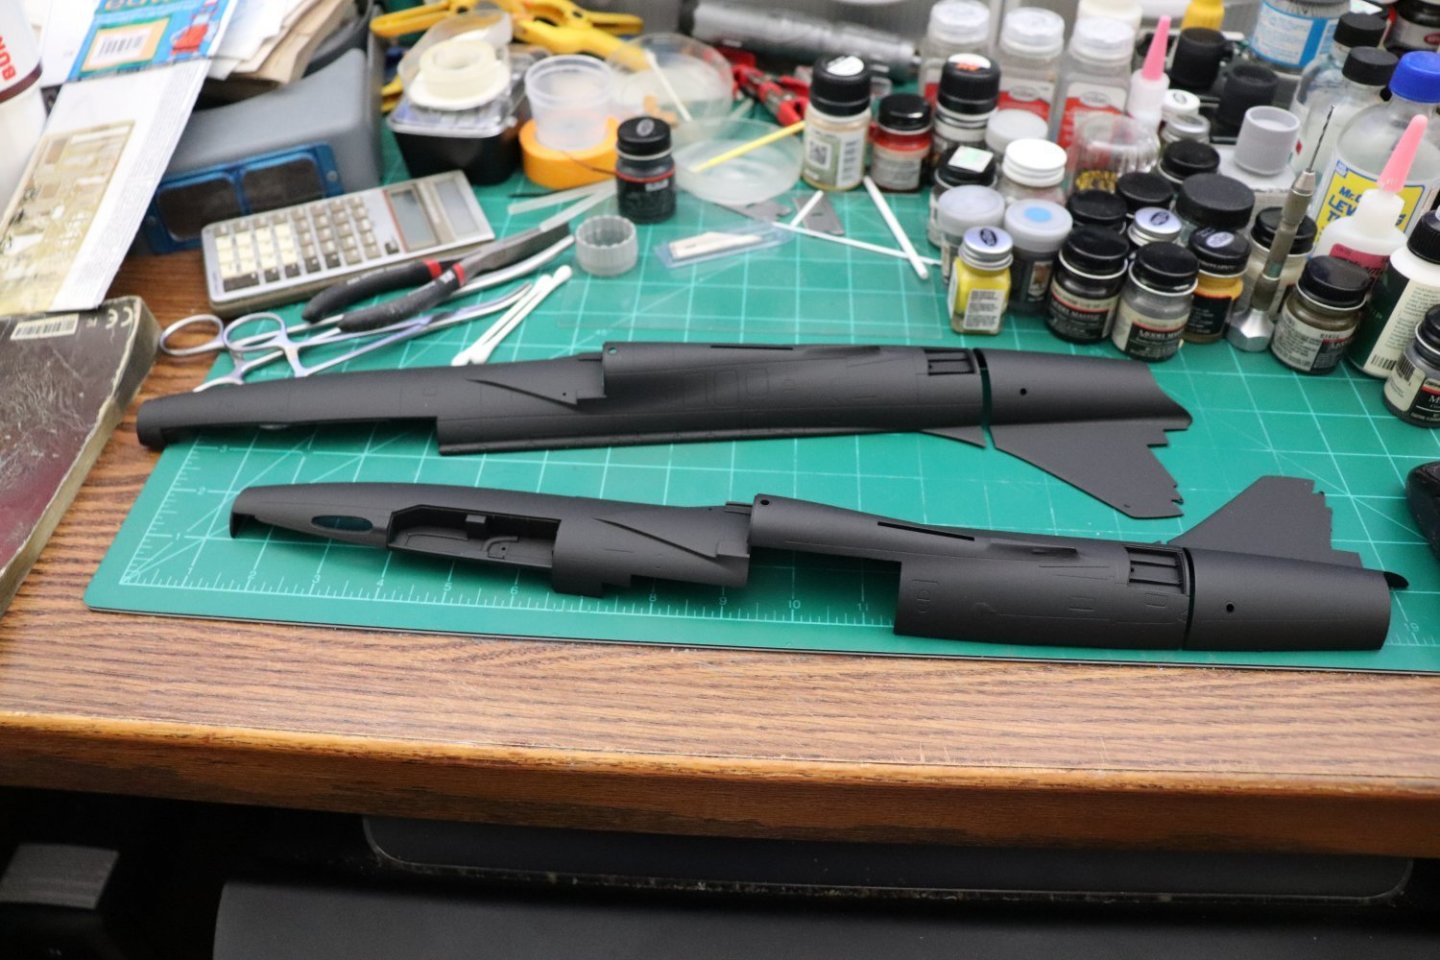
Hey Brothers... Today the weather got warm enough so the Shop could be successfully heated by the wood stove sufficient for painting... I took all the major parts that will need a metal finish and primed them with Testors Flat Black.... It went down very smooth and even... Getting ready soon for the first major construction... Onwards...
- 139 replies
-
- 11
-
-
My pleasure, I've never tried inks before, food coloring was always what I used cause it seems to mix well with whatever I put it in, besides, I have a ready supply of it from the Admirals baking supplies... My technique on tinted glass panels was to dip them in a little cup of the solution of coloring and Future rather than paint them, then place them face down on a paper towel allowing the paper to wick the colored future off the surface.. After a few minutes, (3-4) I would move them to another section of the towel so they didn't dry to the paper... Once dry, then dip them in completely clear future to give the outside a clear and shiny appearance... (also if the outside still had a bit of tint you could clean it off and the second dipping would restore the shine) Dipping ensures a smooth even coat which is what is required for tinting clear plastic and future dries ultra thin so an even coat is vital... I'm sure there are other techniques that will do as good a job, the secret is to get an even thin coat on the surface you want to tint... I'm sure you will find a solution that will work well for you...
-
Thanks Dennis Yep I've decided to keep it outside since they give you a very nice and accurate engine stand as well... It's already on my display shelf next to my F-4J.... I'm using the old Hase engine to support the tail cone so it looks right in a closed up fuselage.... Still working out which direction I need to go from here, I have to depart from the instructions build sequence cause to prime the fuselage flat black would mean having to mask off a ton of already completed fine detail... If I follow the build sequence... So I'm working out a way to get them primed before I assemble the fuselage... flat black should be easy to fix if I damage any of it before laying down the finish... (I have individual clear formation lights to tint and install as well before assembly, so it would be easier to prime it first... It's not going to be as easy as the Hasegawa fuselage for sure...
-
Alan, that tinting is the polarization of the viewing ports so they don't get glare and reflections when the look thru them... On my kit of the Abrams I have the aftermarket films used to replicate it... you see it on all the glass where they look thru it from the inside, including the targeting and range finders... and yes it is different colors on different glass panels... You guys are going really trying to get me to start this thing aren't you.... {chuckle} Two ways to go about it putting that tint on the windows, get the various colors of clear paint washes, or cheaper, food coloring mixed in Future/Pledge acrylic finish coating the insides... Just enough to give a decent coloring to the future... Then, when colored and dry, dip the entire part in clear future to seal it in...
-
One of the great things about this forum, the living history... Thank you all for your service...
- 139 replies
-
- 10
-
-
No more for me either... I sincerely empathize my friend... two laminectomies here T6-7 & T7-8... docs tell me I'm lucky to be walking.... Take care brother...
-
Yep, thousands of dollars a pop... and will travel halfway around the world for the opportunity... all on their own dime.... But I imagine doing it 4 times a year can get to be old quickly as well...
-
Thanks Gary, my luck is holding for now.... Will do my best...
-
A lot of it was like that back then, sign on the dotted line and we can do whatever we want with you... The thing is, given what they advertise today, a lot of it back then was OJT, "Hey we gots this job to fill here it's pretty dangerous who's the next guy in line?;, does he have any experience?;, Nooooo.... well stick him in there any way and educate him on it!;, YES SIR!!! ... "Hey son, come over here,, You have been assigned to me,, have I got a job for you......."
-
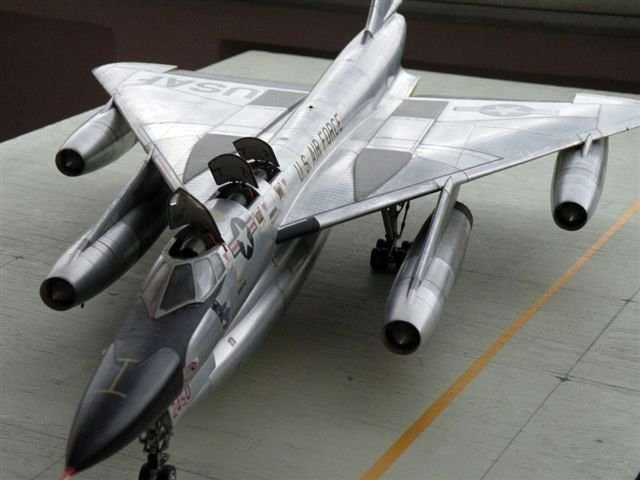
Thanks Alan, I've gotten it off the bench and into the display case to keep it from getting damaged... now figuring out how to mount the other tail cone into the tail when the time comes... Probably going to use the engine from the old one as the support for it so it sits in the right place... I'm happy with the way it turned out...
-
Thank you Mark, that was what I was hoping for, I have put it in the case next to the F-4J so it is out of the way and kinda fits the presentation... (I know it's not the correct model for the airplane though) Man that is some rough training, but required to stay proficient...
-
Well True North says two to eight days.... The last time I ordered from them it took six days to get here and four days for my PO to deliver it... ME to WA.... Only place I could get both colors of ZC in one purchase for a reasonable price... although I did break down and pick up a small bottle of Testor's yellow from Hobby Lobby today.... (along with a few other supplies, I just happened to notice they had a bottle)
-
Yeah, that Bosun's chair, (bounce chair) does have an unfortunate habit of getting people wet from time to time, I wouldn't want to sit in one for very long either brother... (right or left handed sky hook)
-
Looking good my friend.... Can't wait to see the paint effects...
-
I'm here brother...
-
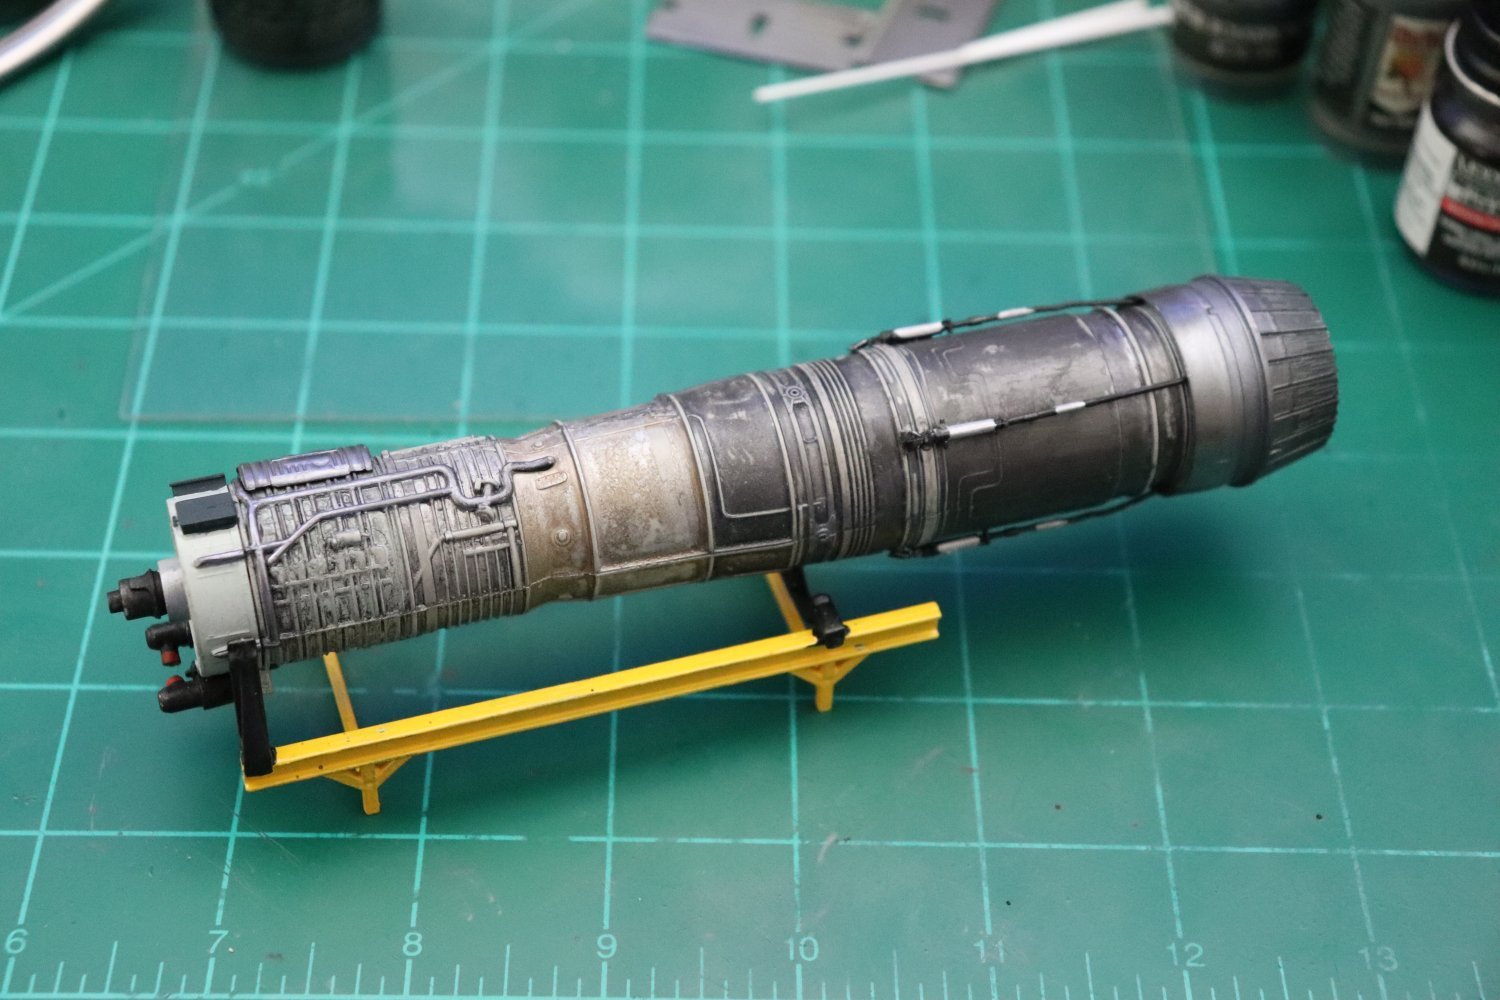
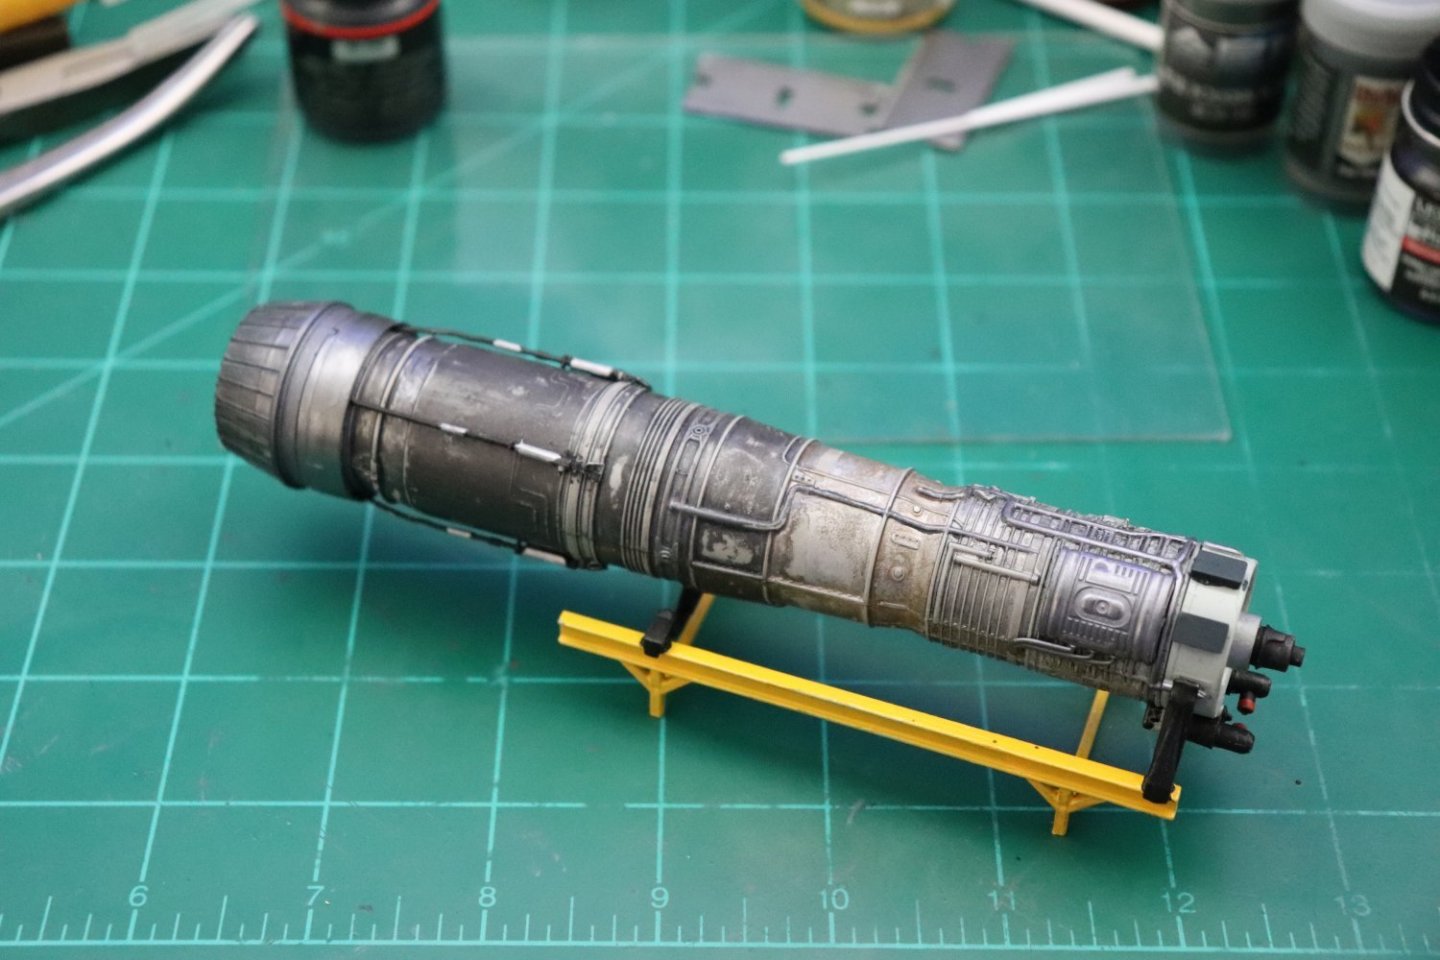
As finished, one J79-GE-7... Used but ready to fly again.... Next step, prepping the fuselage for joining.... Gotta take a break for a bit, going thru my stash of paint I found out that I have no Zinc Chromate Yellow, (green either for that matter) Yellow is required for some of the interior spaces on this bird that are going to be open for viewing... so they have to be painted before the halves go together... Ordered them today from True North, could be here Tuesday, or next Wednesday depending on how USPS does.... Besides I need to do some research on this bird, and I could use the break.... Thanks for following along brothers be back at this shortly... EG

- 139 replies
-
- 10
-
-
Thank you Dan, I'm posting two as finished pics taken in natural light, we'll see what everyone thinks... I think its good enough to display with the bird herself...
-
Never got the opportunity to pull the face curtain Mark, and glad of it, but I have had to go back and read the instructions a time or three... But only when it REALLY went wrong... {chuckle} Thanks for the complement my friend, it does have a used look but not a worn out look, I think I'm gonna leave it outside the plane on it's stand... that's what they intended for it anyway... It will look good sitting next to it with other panels open.......
-
Thanks Ken if anyone knows what a used J79 should looks like, you do... The browned, heat discolored Aluminum is difficult to replicate... That is MM flat aluminum sealed with future then flood washed with tamiya brown panel line accent color then left to dry, once dry it was finger rolled for a few minutes so the hand oils will lift and move the thinner spots and vary the coloration.... It looks close to the real thing doesn't it...
-
Thank you Alan, it was a bit touch and go to get the right coloration and make it look used as well.. Believe it or not, the nozzle started out blue... I learned a long time ago it's backwards to the way the mind wants to see it, you put the tint on as the base color first, then bring the tones into the shade you want... It looks like burnt/discolored titanium... It's strange the way the mind works sometimes...