HOLIDAY DONATION DRIVE - SUPPORT MSW - DO YOUR PART TO KEEP THIS GREAT FORUM GOING! (Only 13 donations so far - C'mon guys!)
×


Egilman
-
Posts
4,377 -
Joined
-
Last visited
Content Type
Profiles
Forums
Gallery
Events
Everything posted by Egilman
-
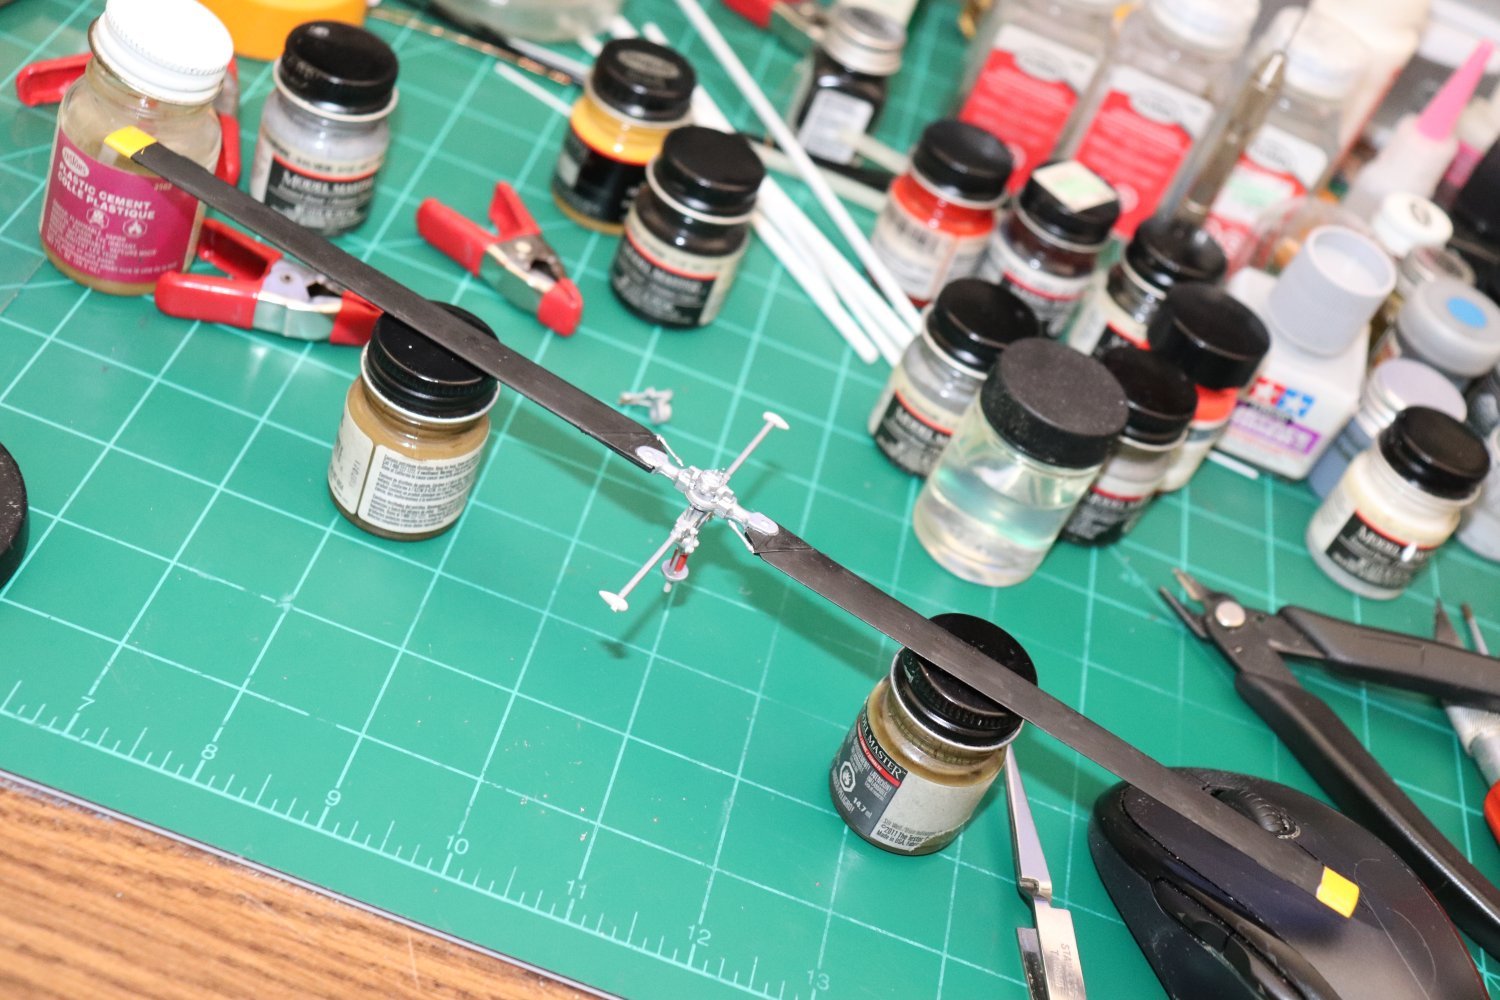
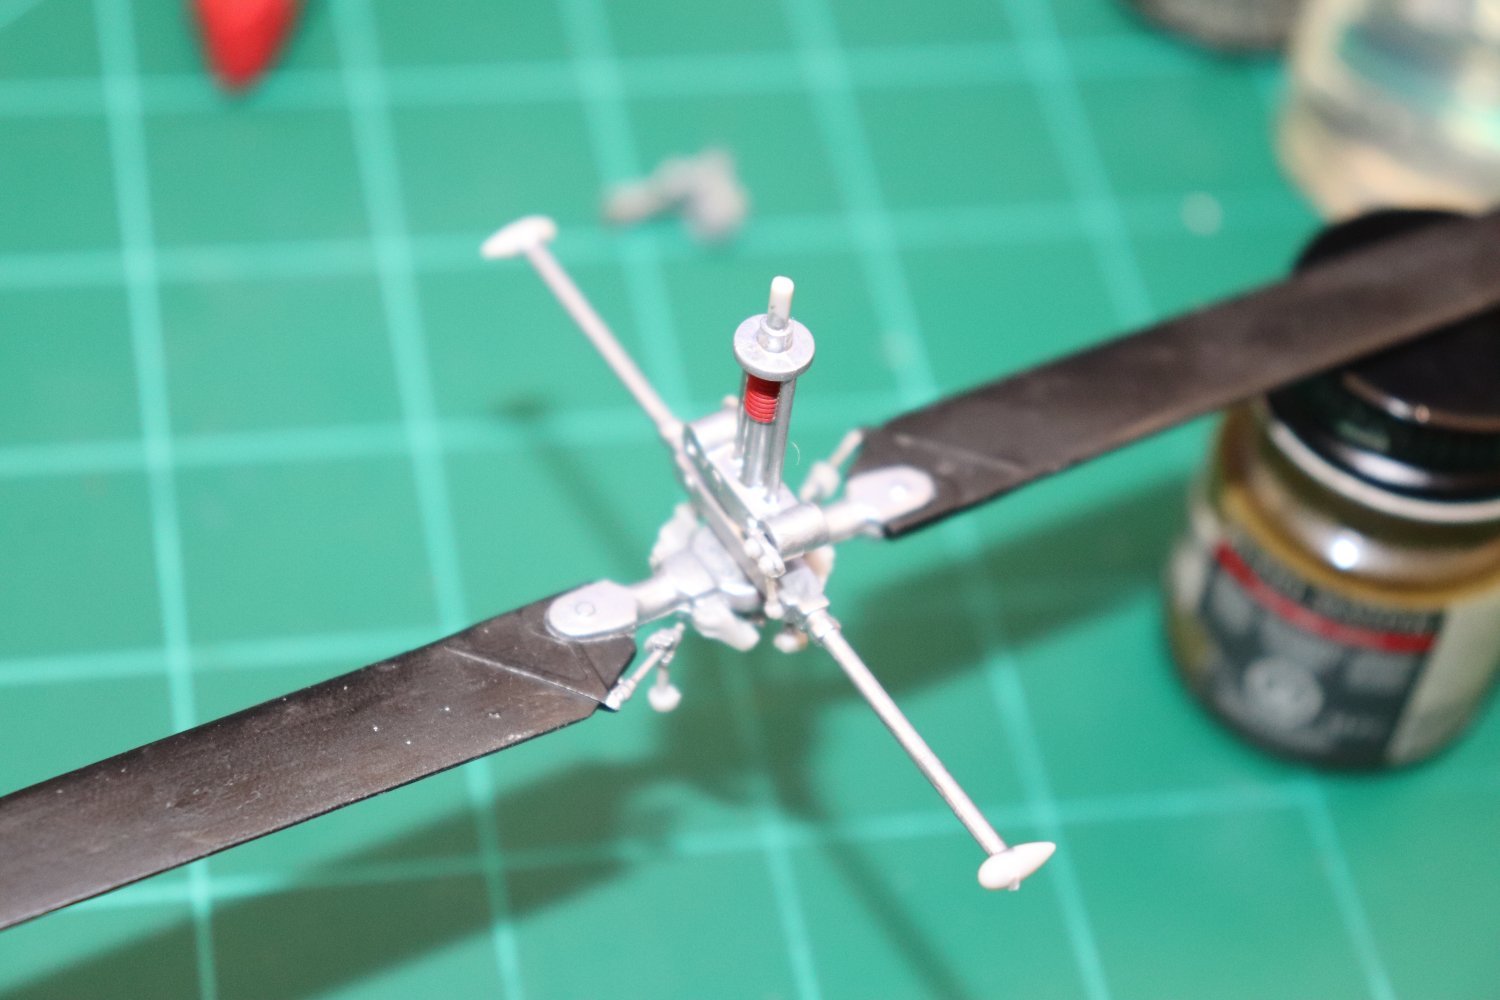
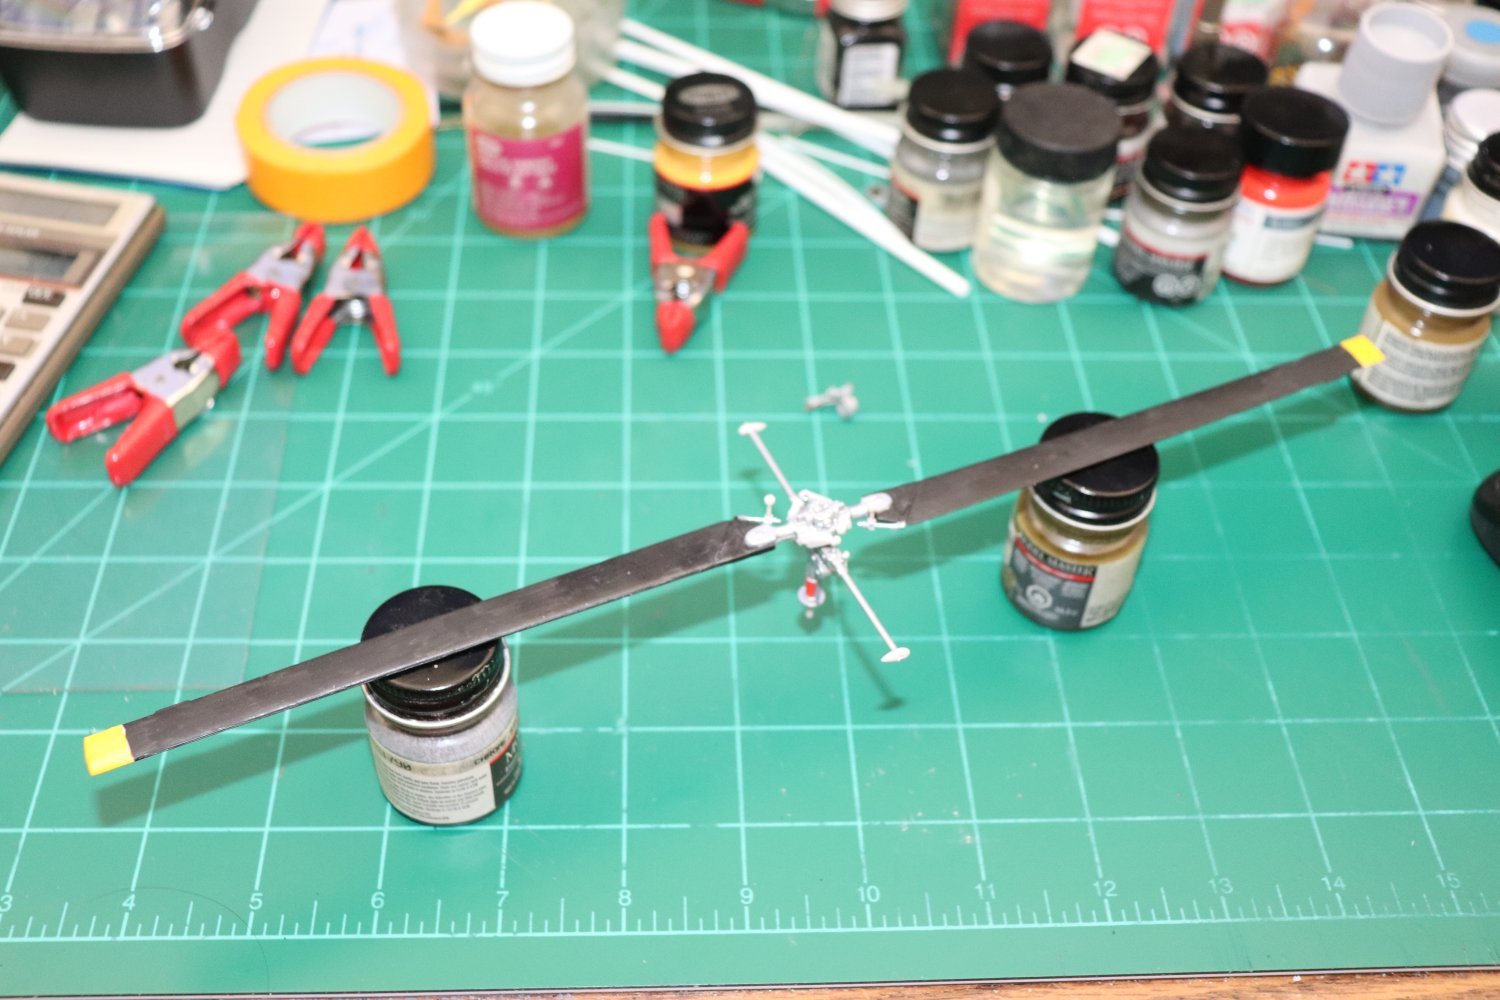
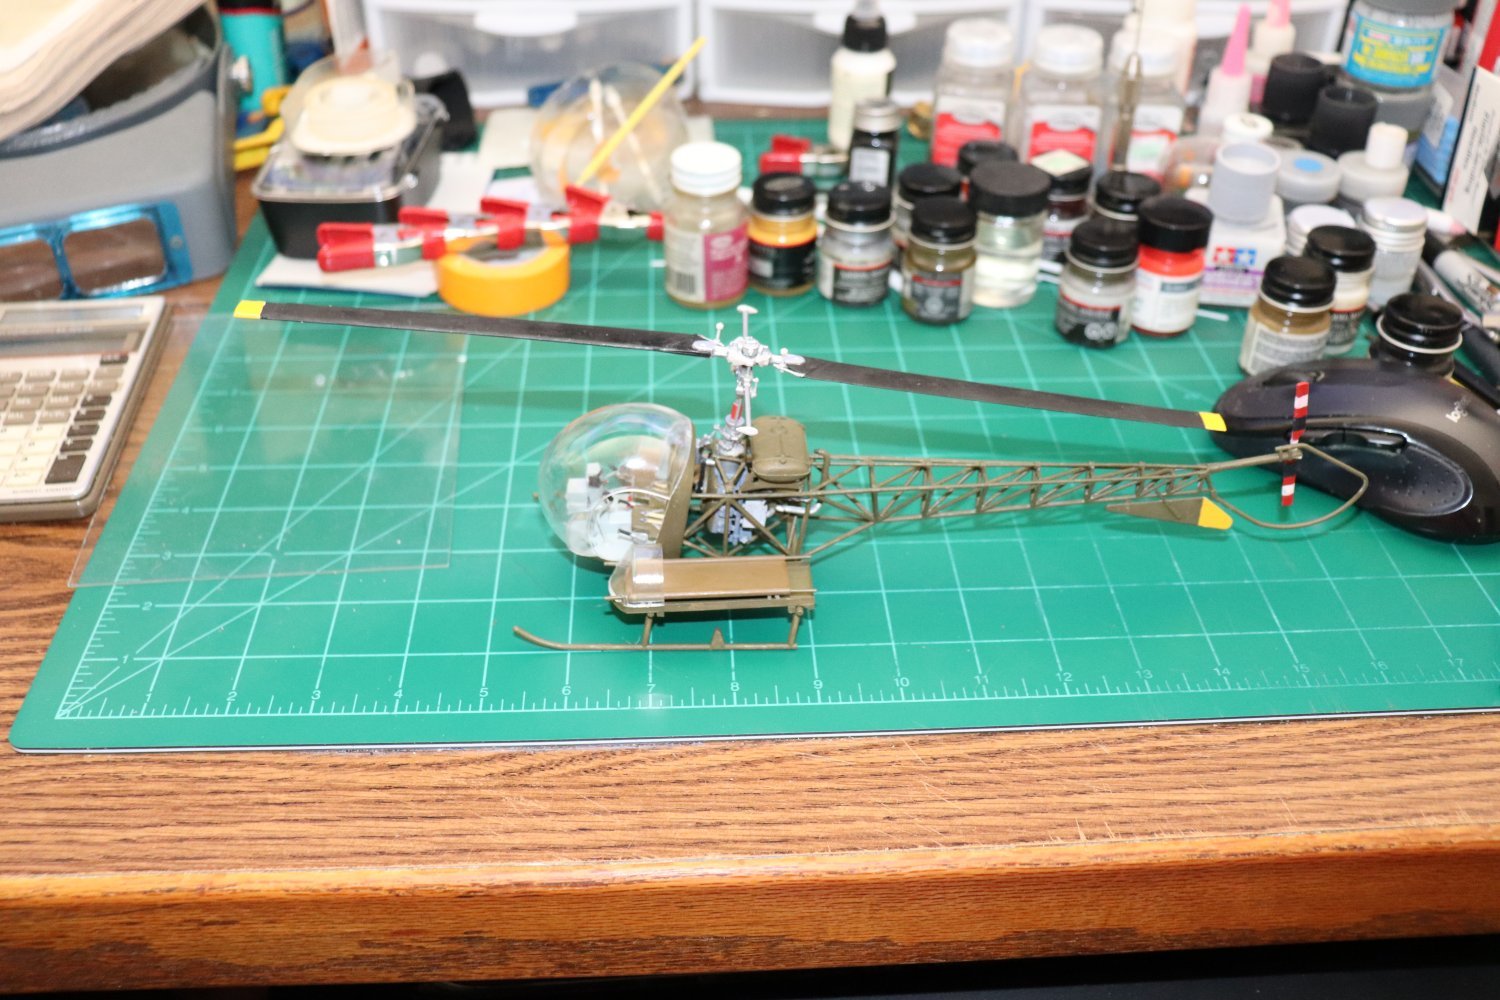
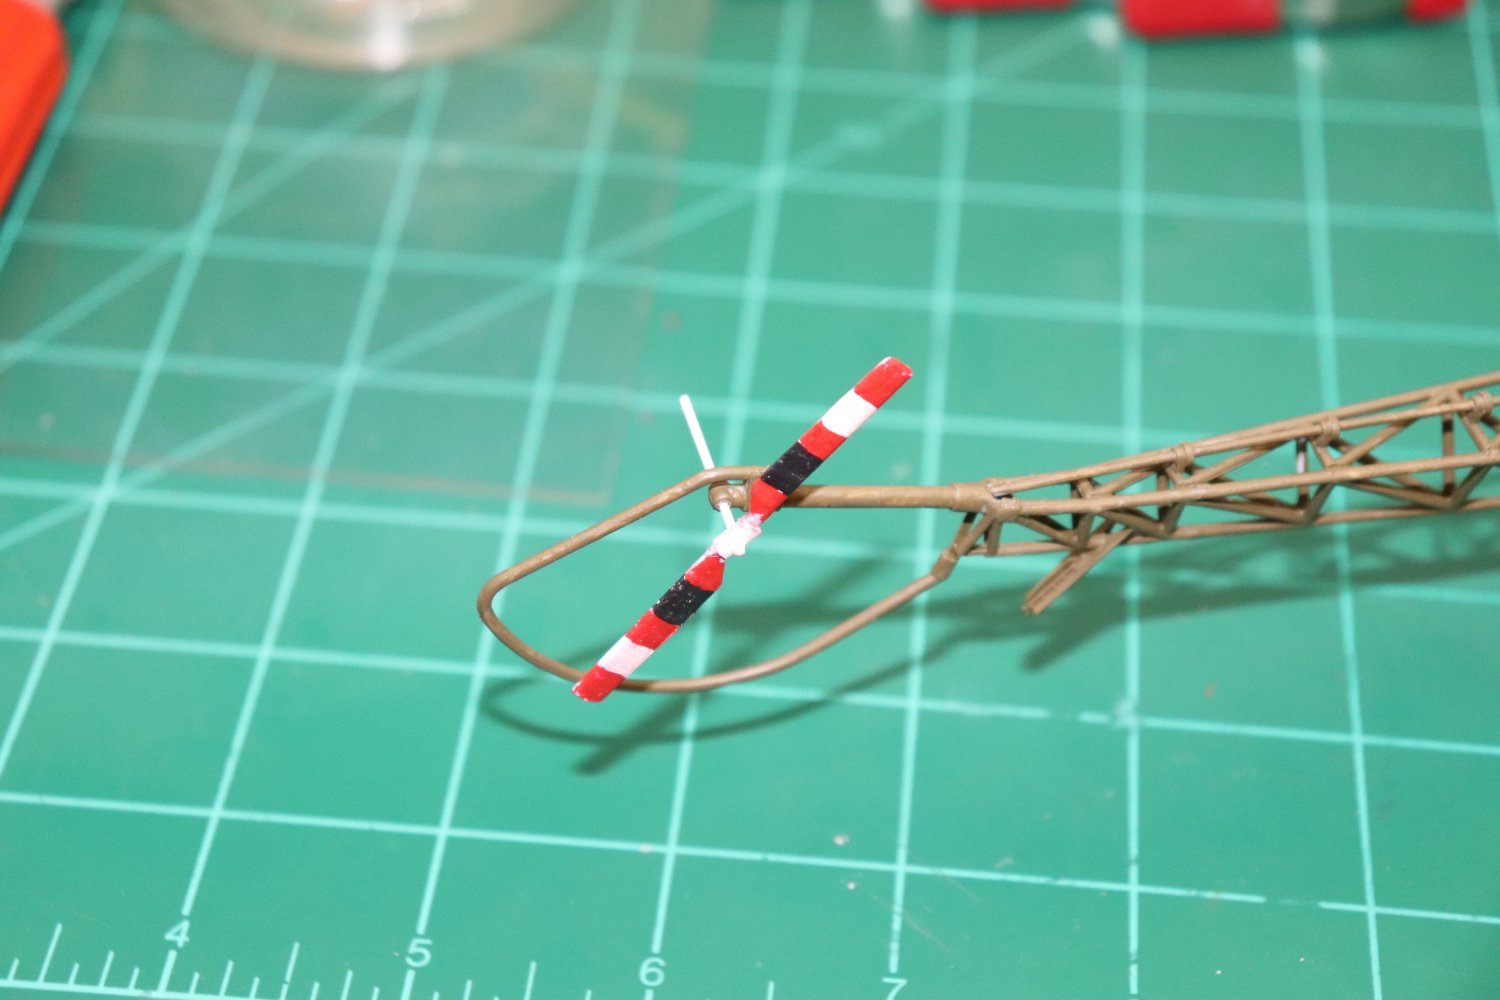
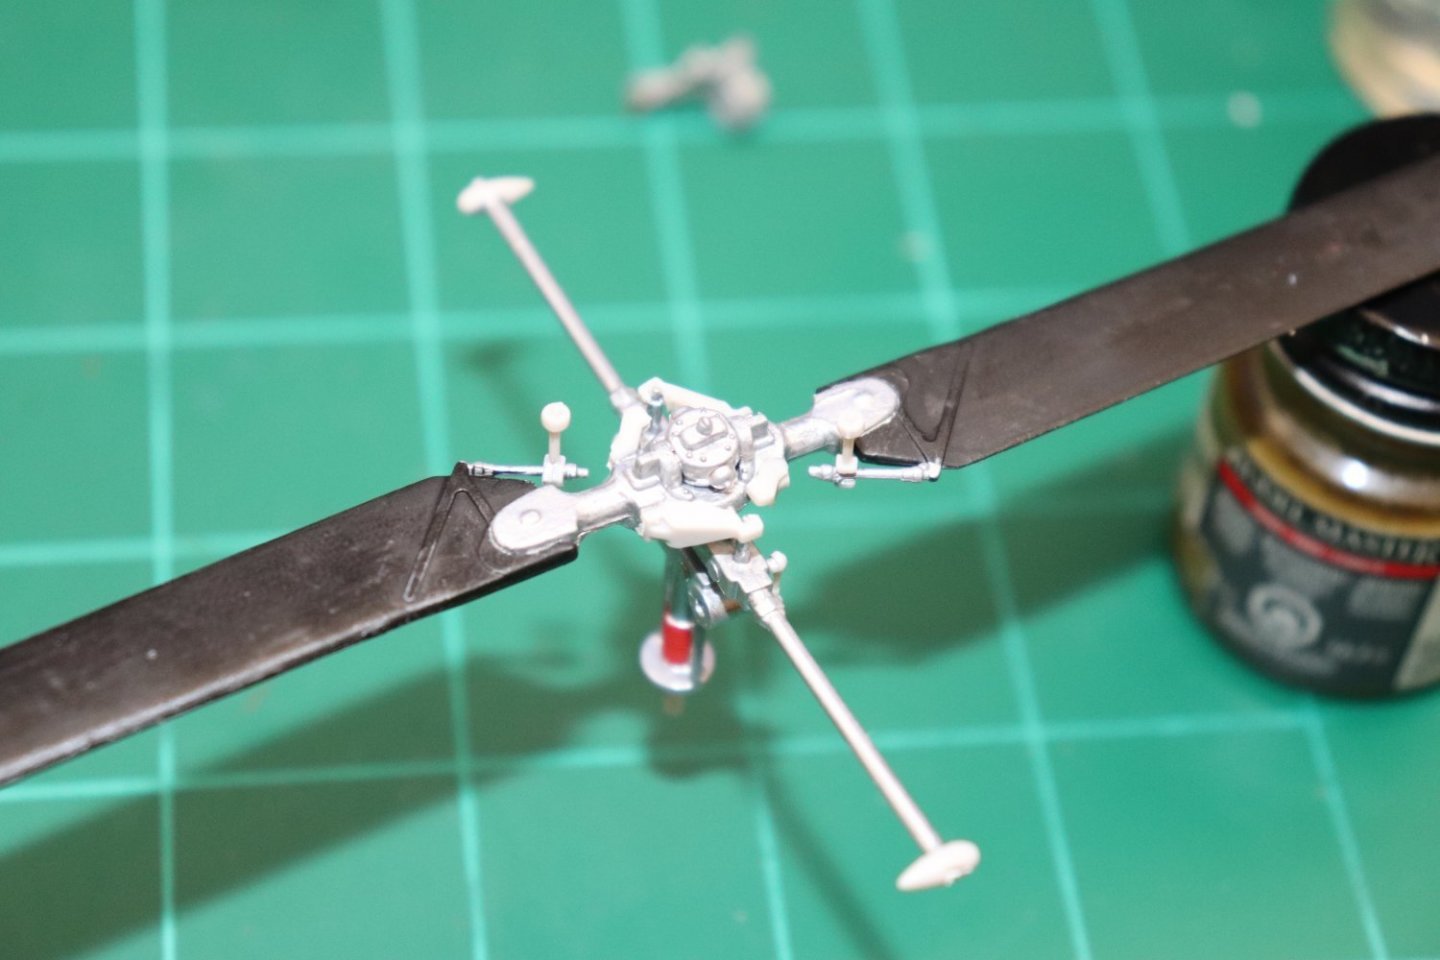
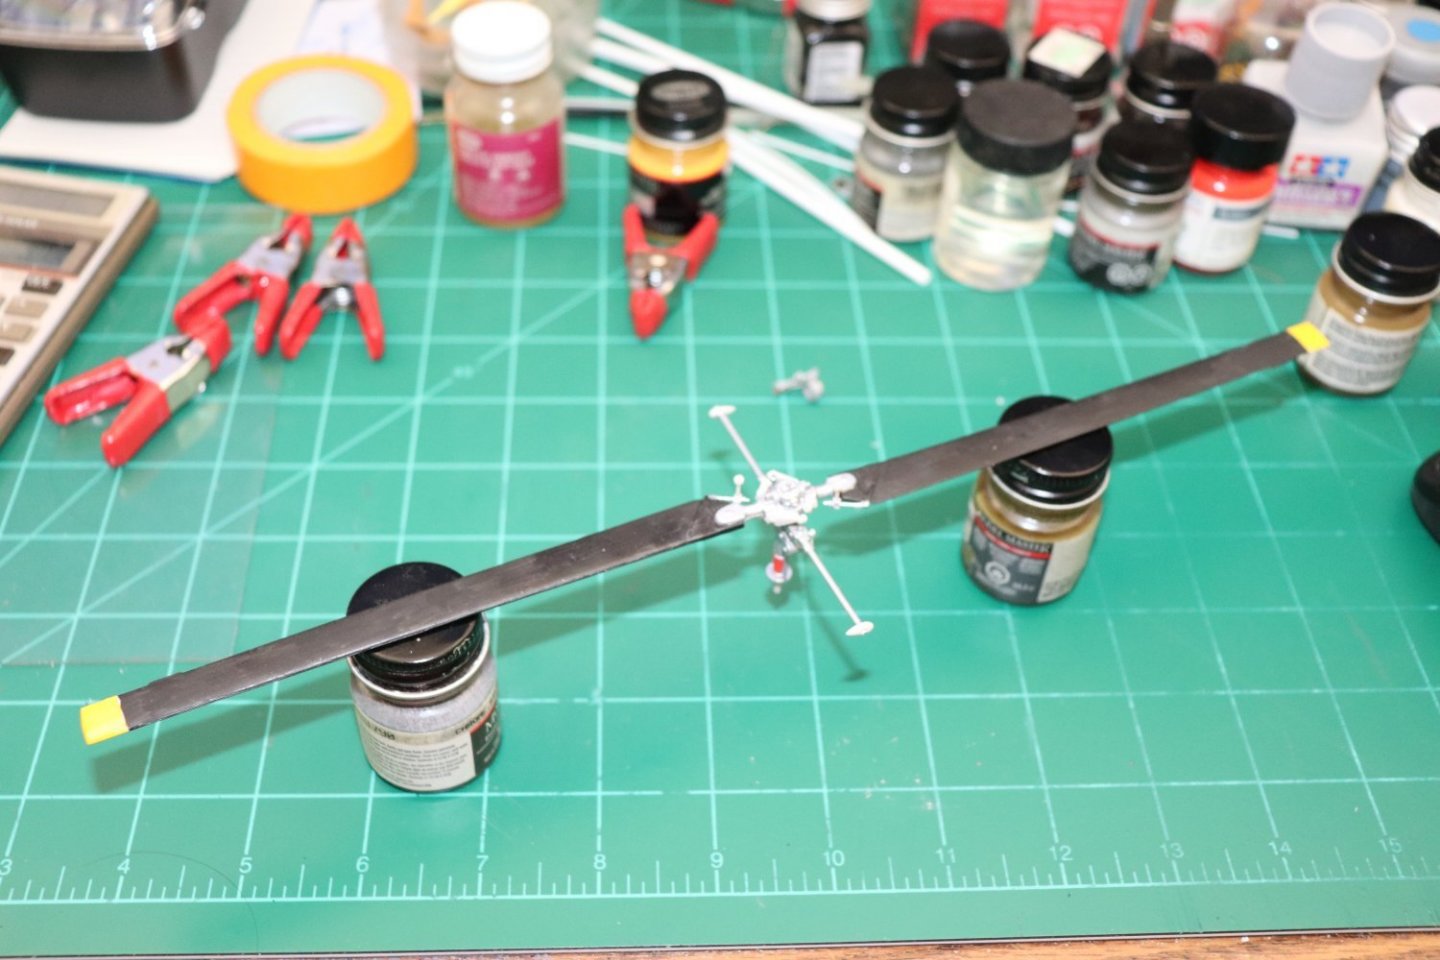
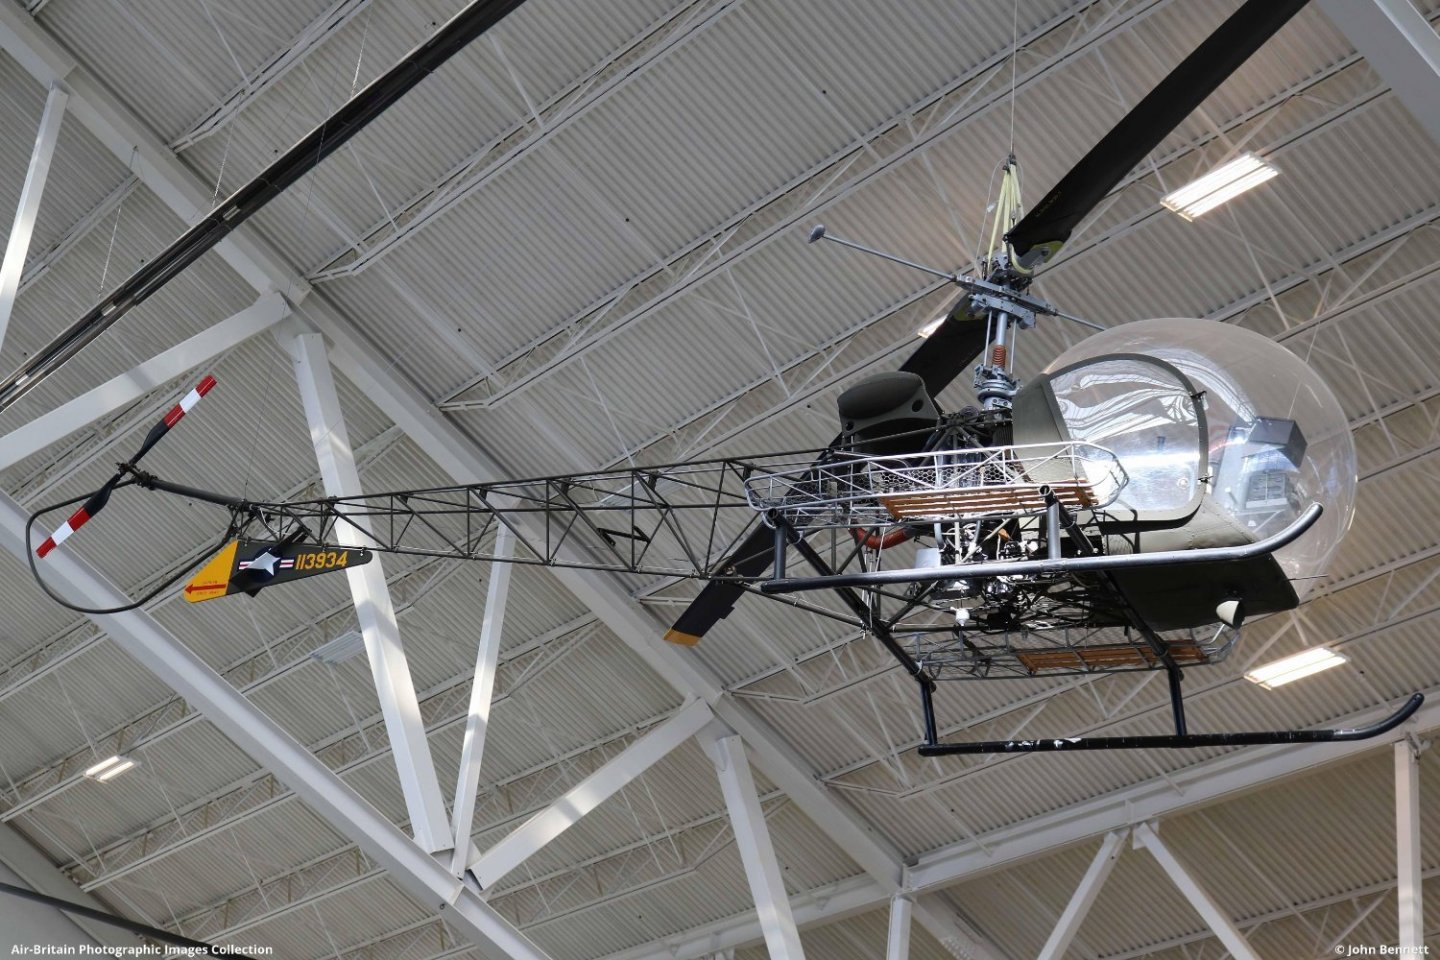
 Another update brothers.. Mast and Main Rotor... I decided to do this one with an unpainted mast, pretty much all the museum birds have painted masts so it was difficult to find good images... This is my interpretation... Basic Mast and Rotor without all the details..... I painted it in MM chrome silver as it had that polished appearance then dry brushed it with a bit of metallic gray to break the sheen a bit... Black wooden blades with yellow tips... The control horns, Shock absorber links and Counterweights come next... Bottom... Top... And the full view assembly complete... All the basic assembly is complete, now to let it sit for a day or two to fully cure while I finish up the H-13H.... An overall view, the mast and rotor isn't glued yet so if it appears to have a Lttle bit of a lean that will be cleared up when the final assembly after decaling takes place... A little bit of paint, decals and she is done.... H-13H from Ft Wolters coming next.... Onwards....
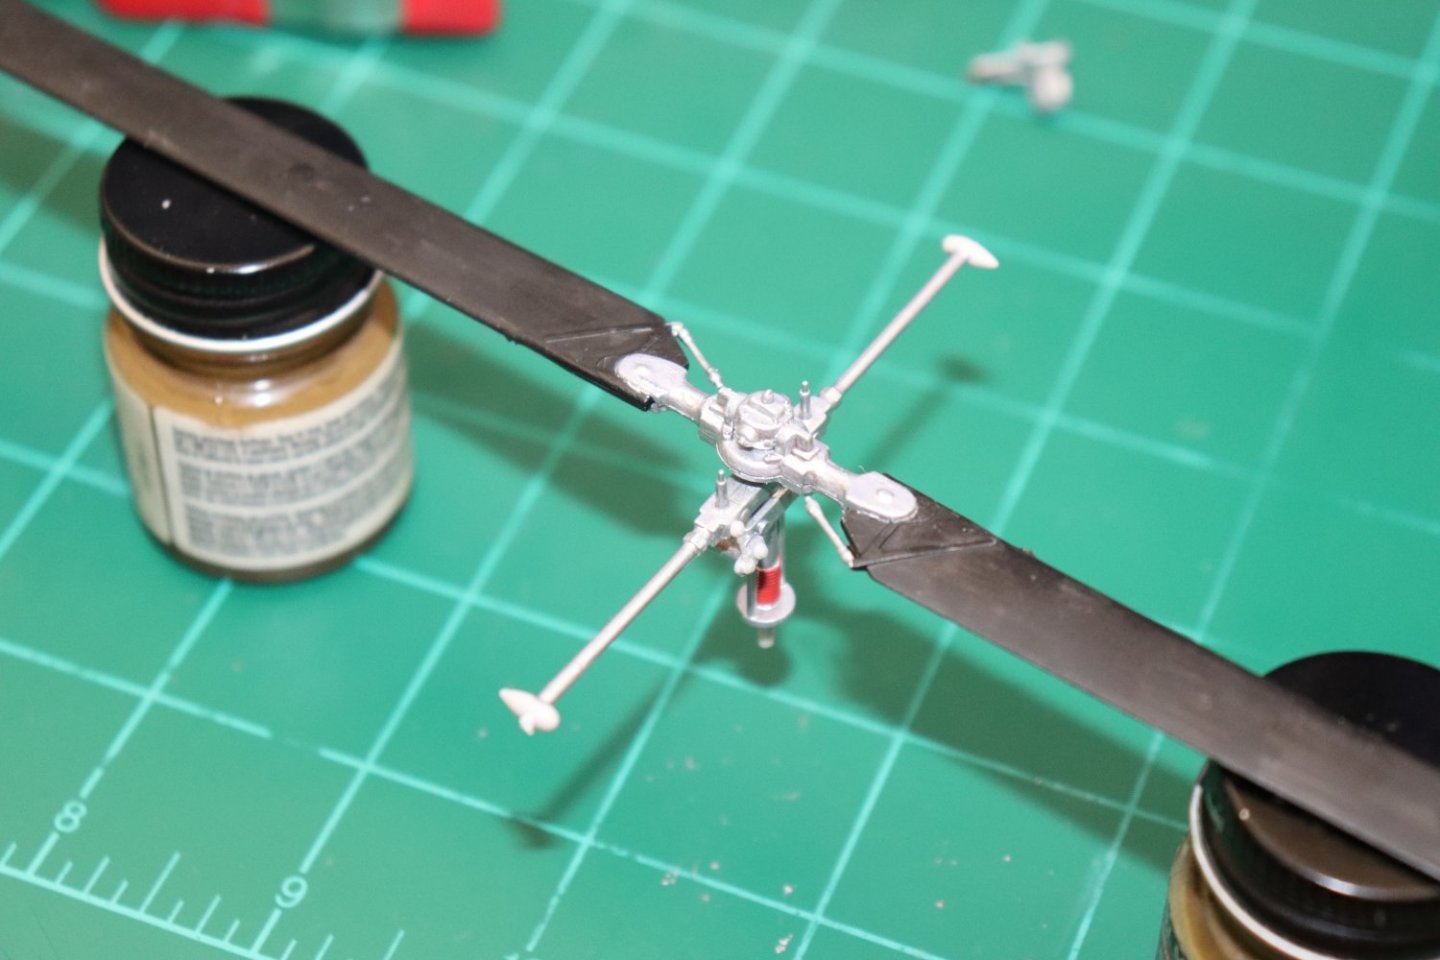


- 169 replies
-
- 14
-

-

-
Your a lucky man.... {chuckle} He definitely has a special one, doesn't he....
-
Thanks brother, I hope it is...
-
Fantastic work Aydin... More artistry on display.... Very Very nice....
-
Inspiring, very inspiring.... A work of art...
-
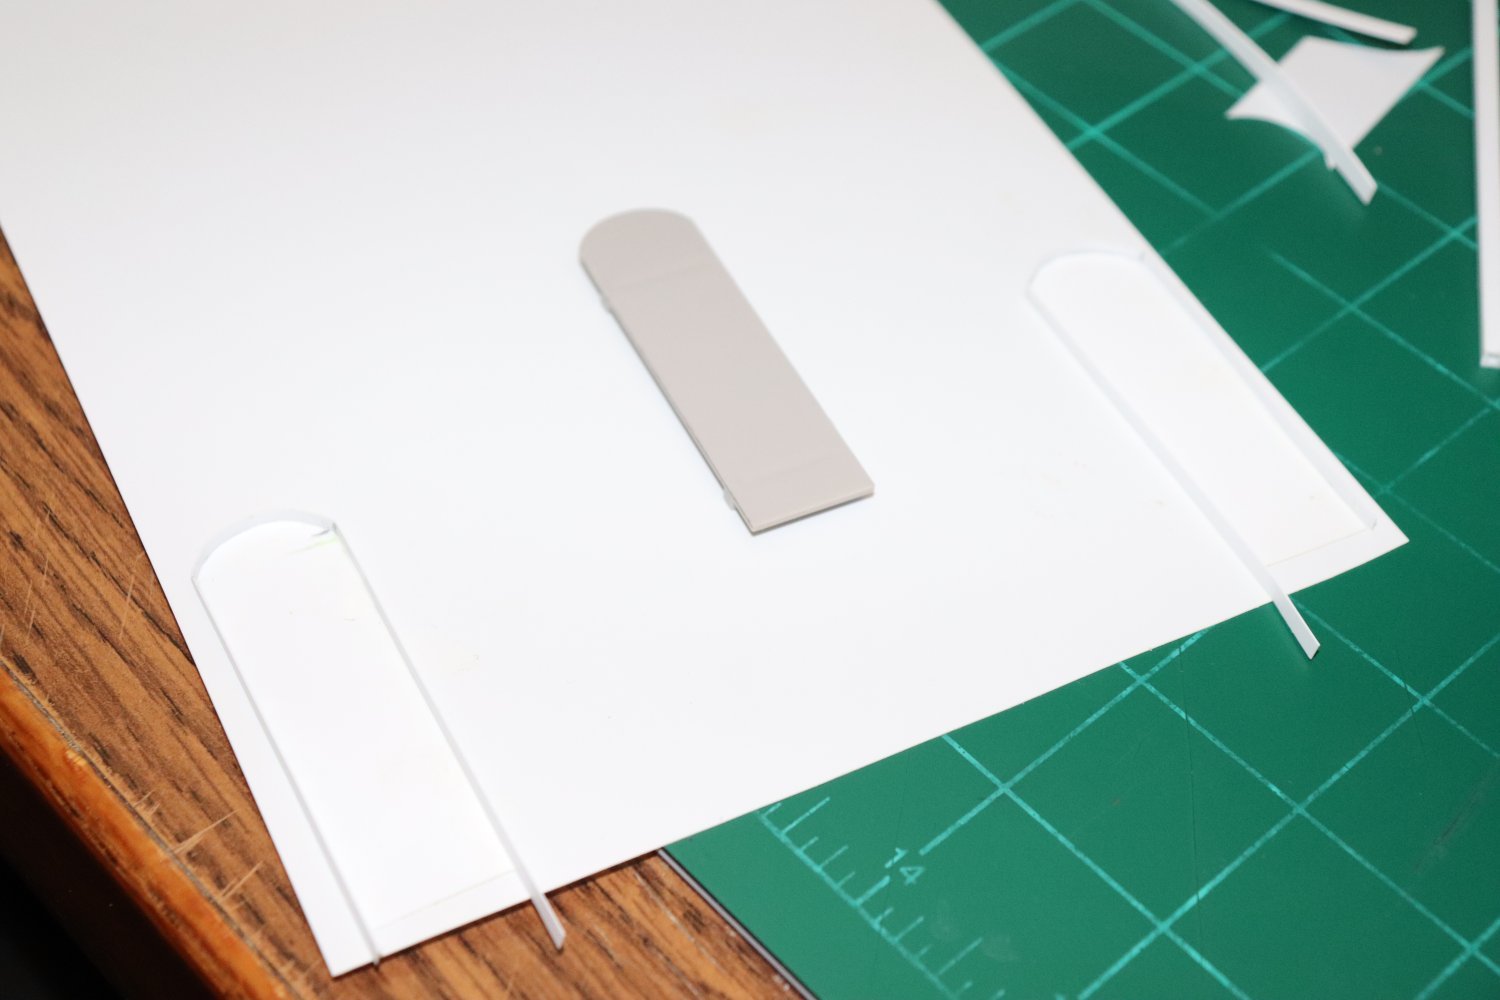
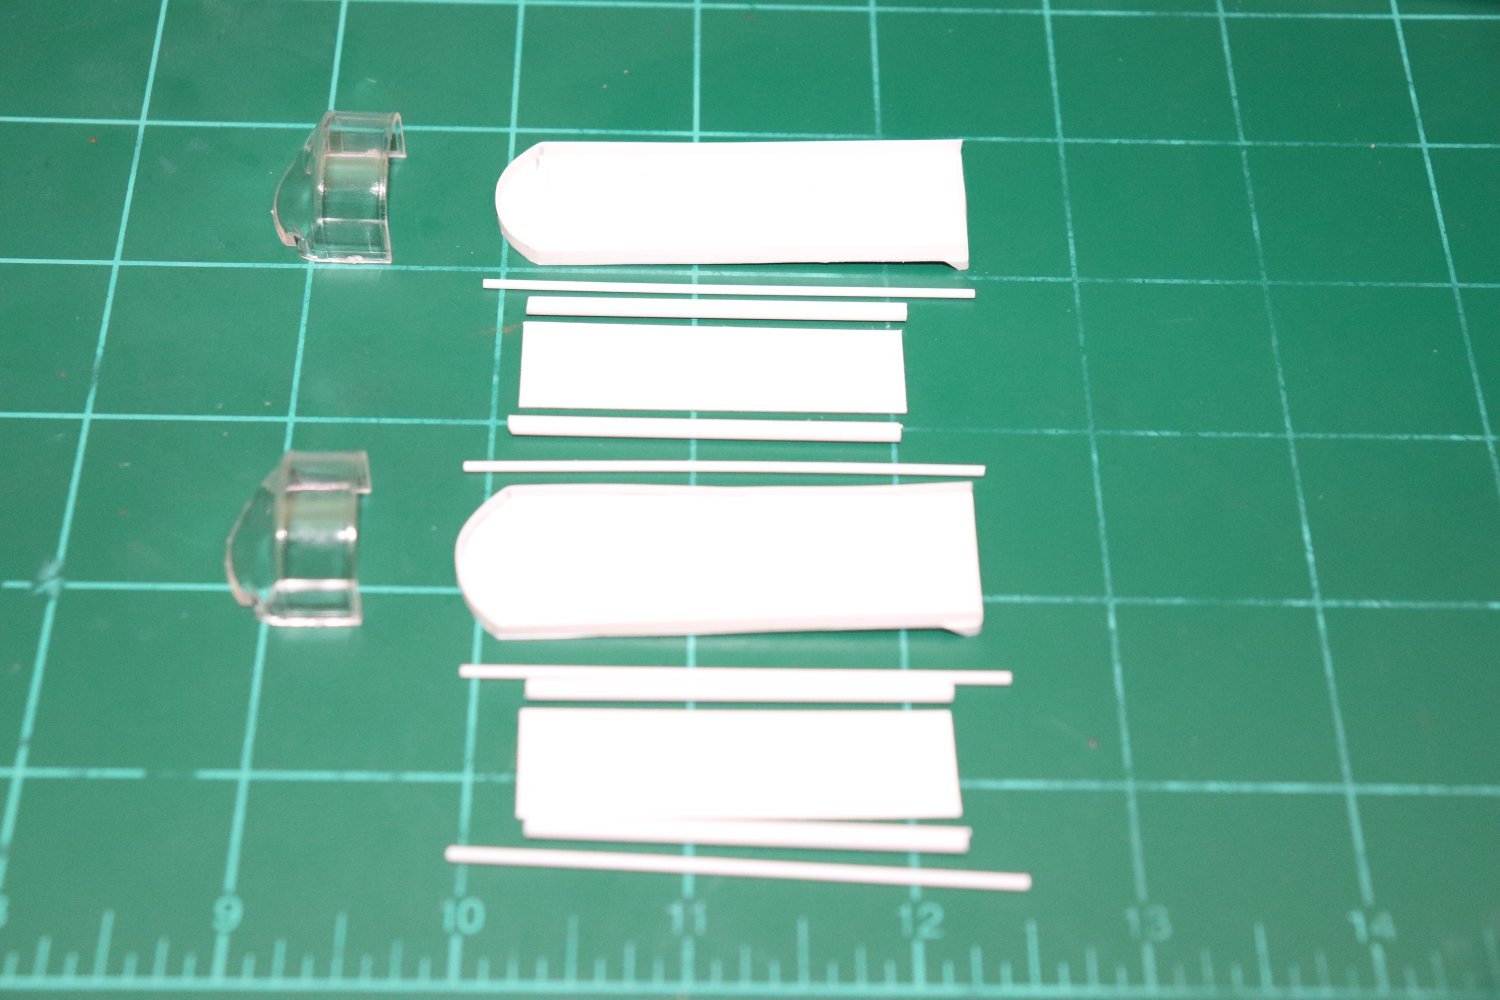
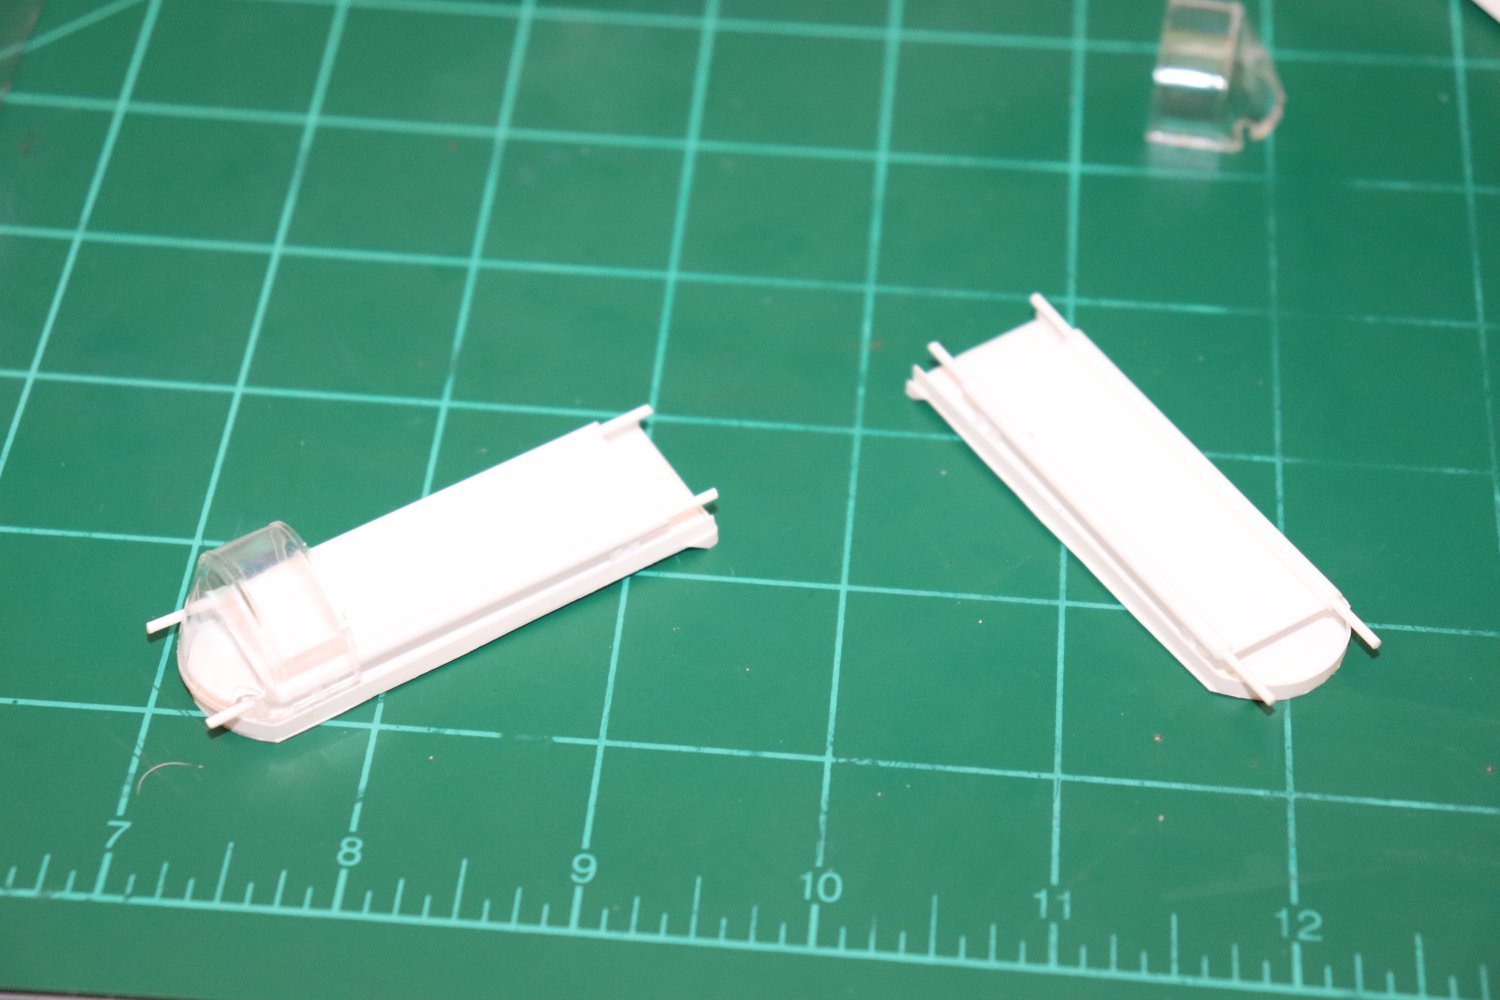
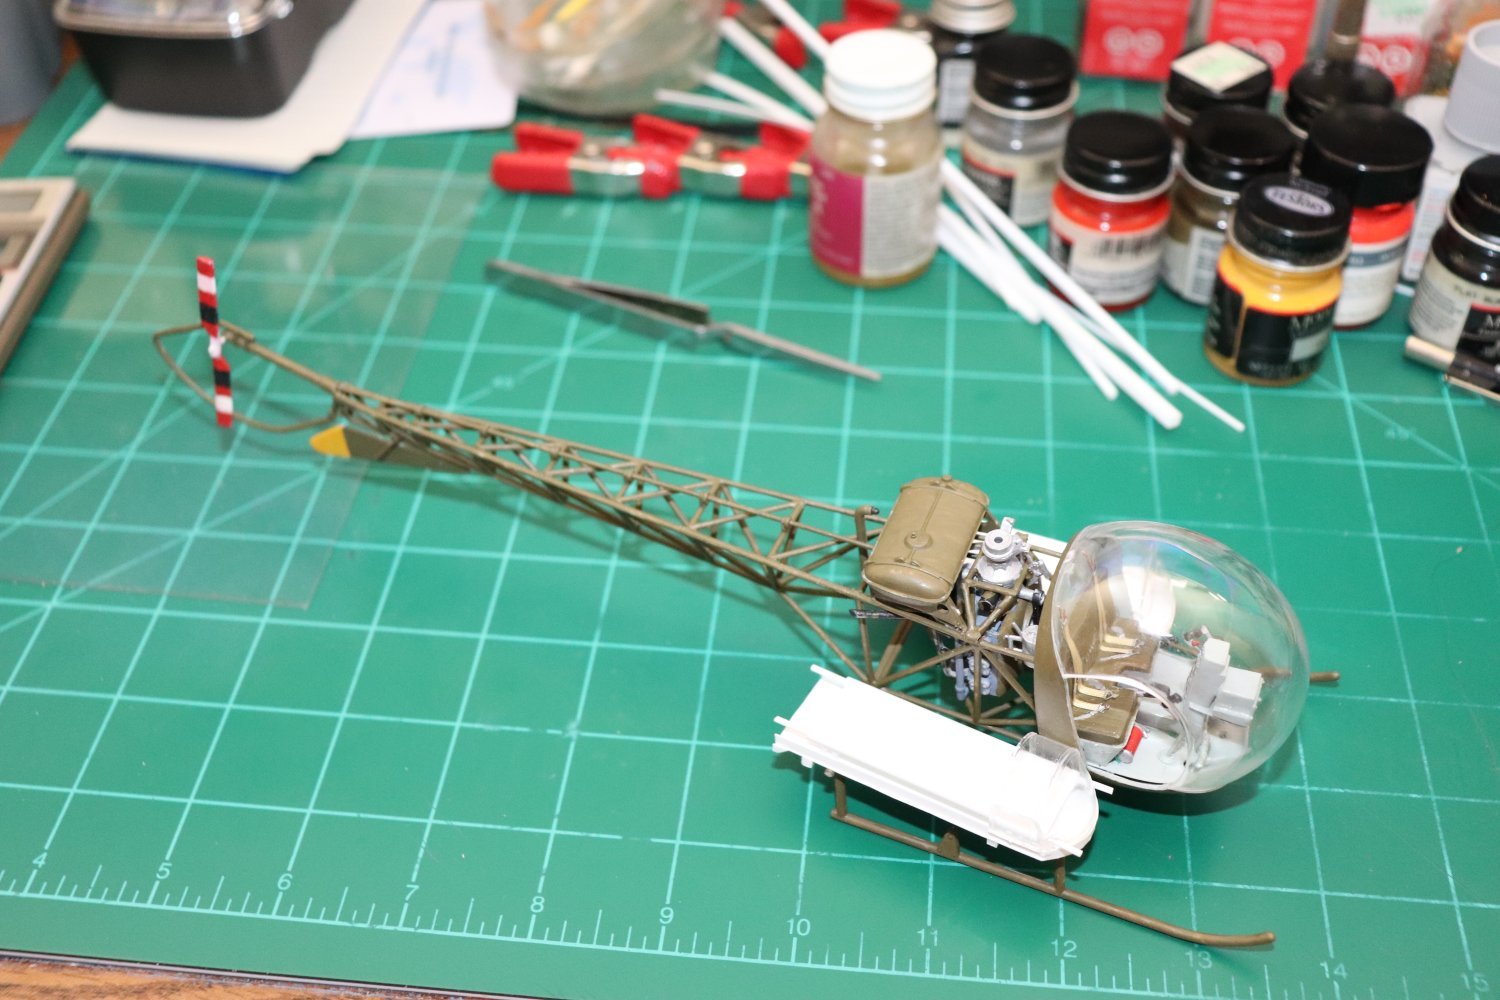
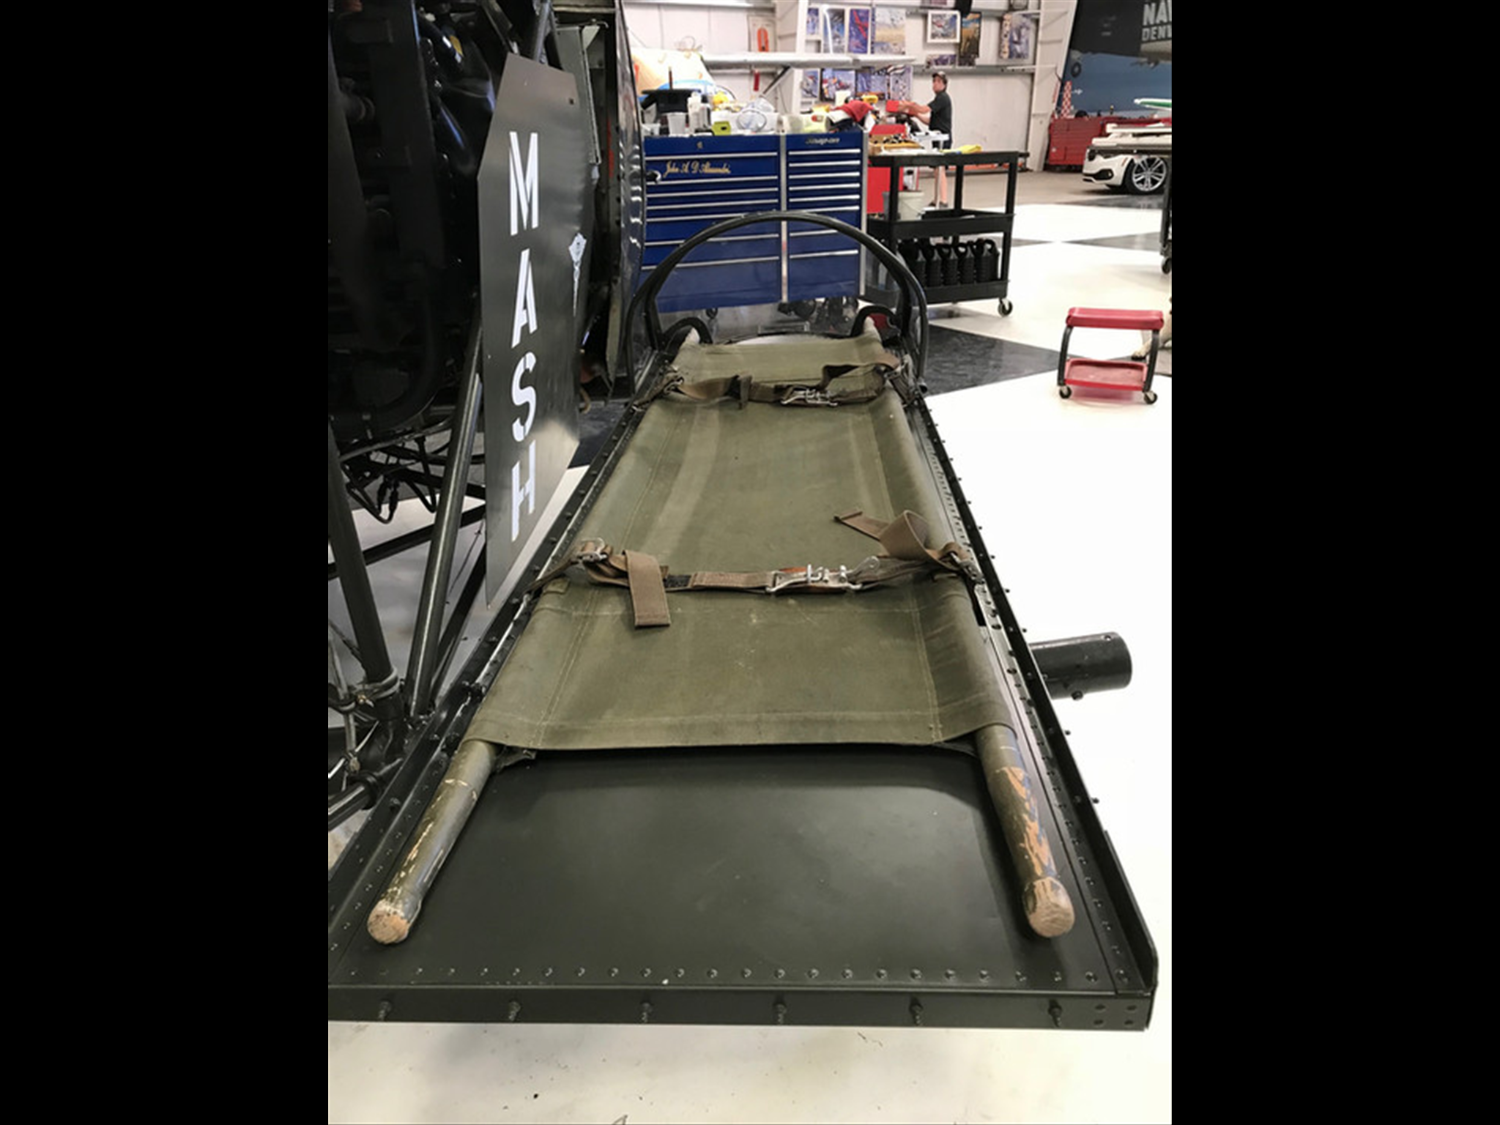
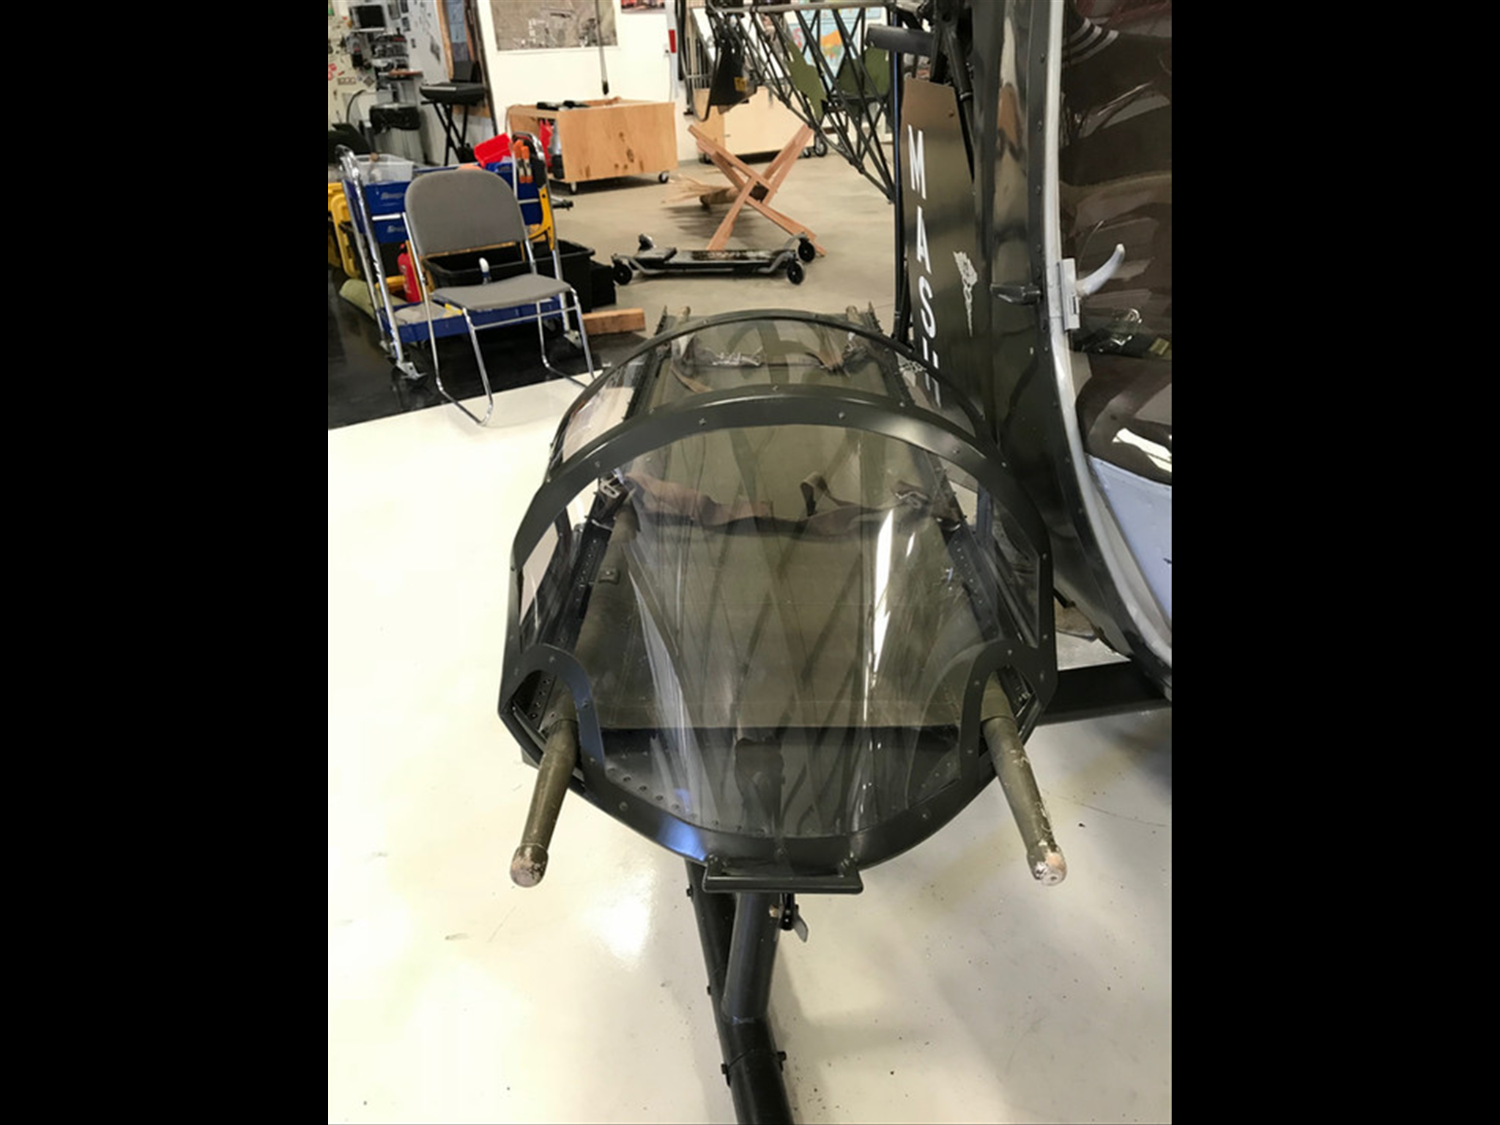
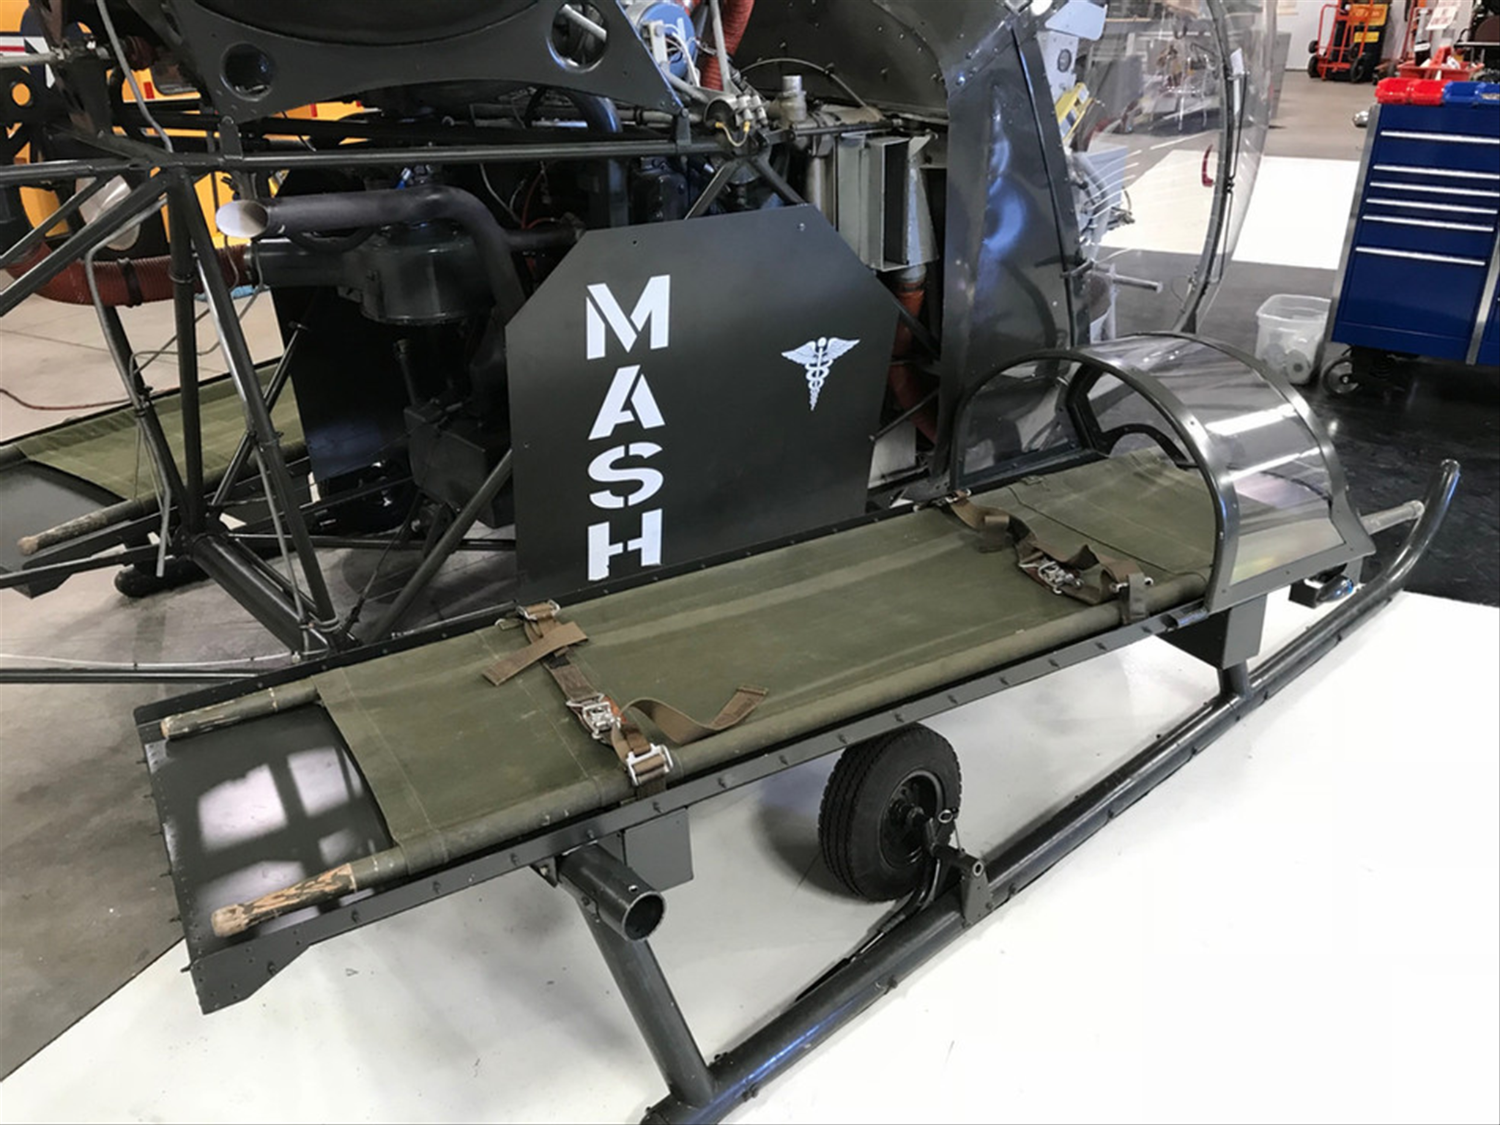
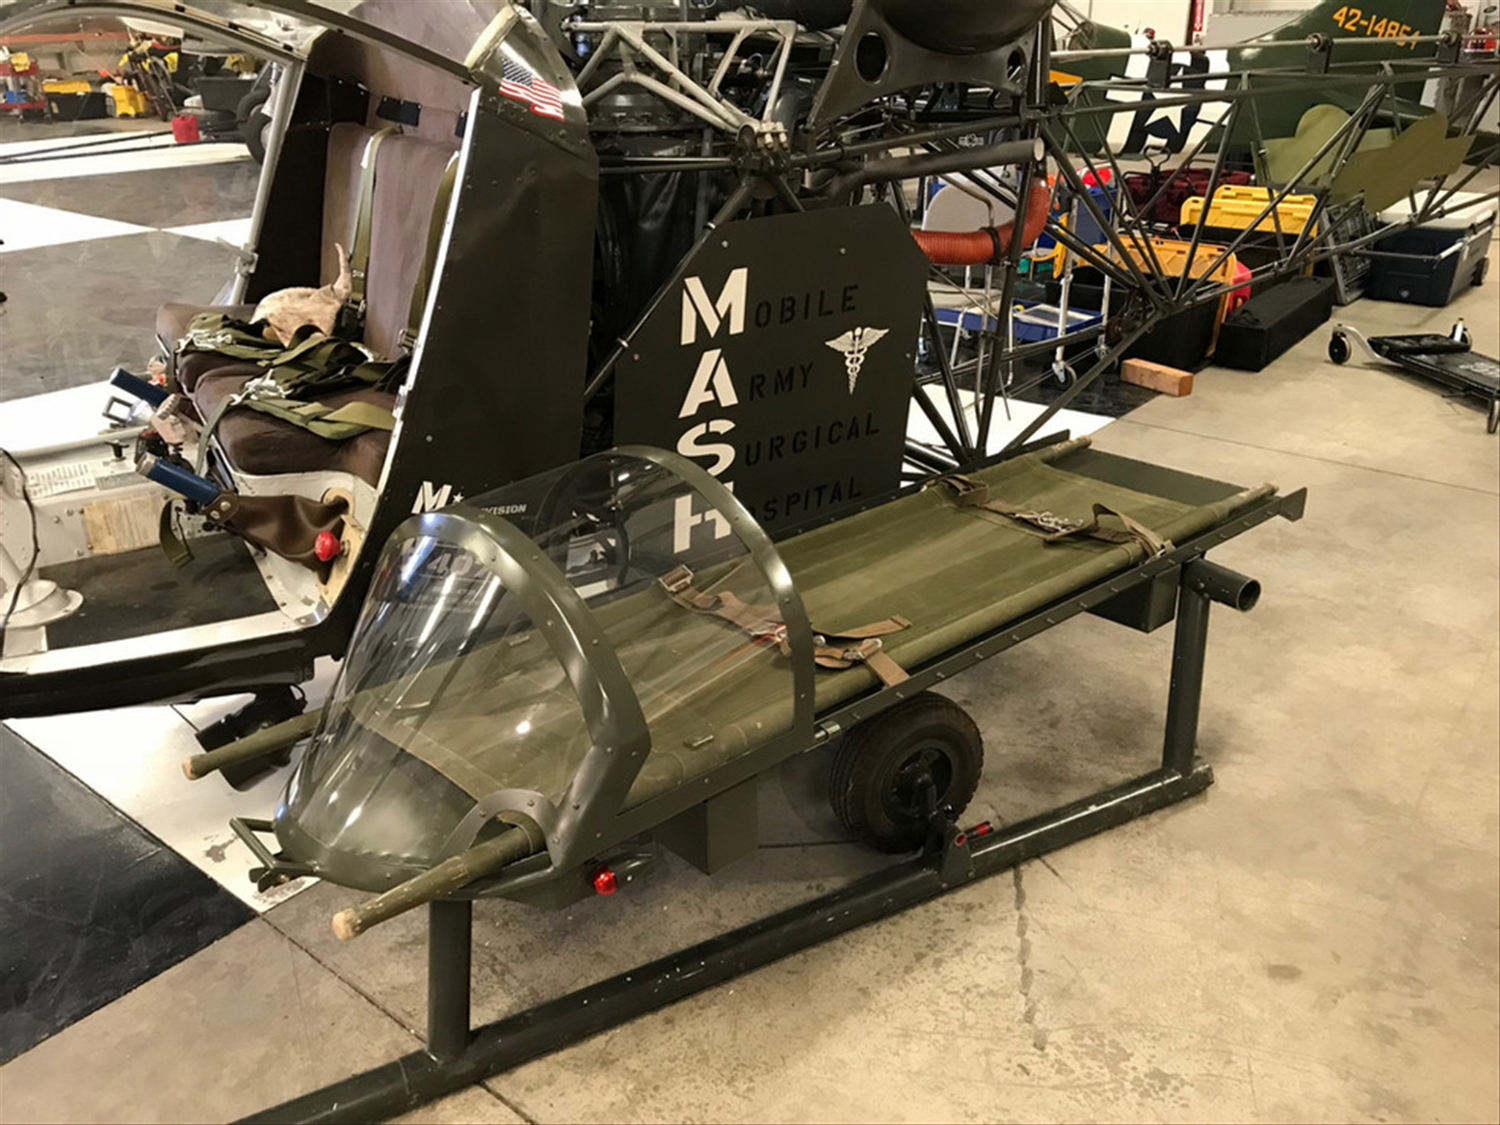
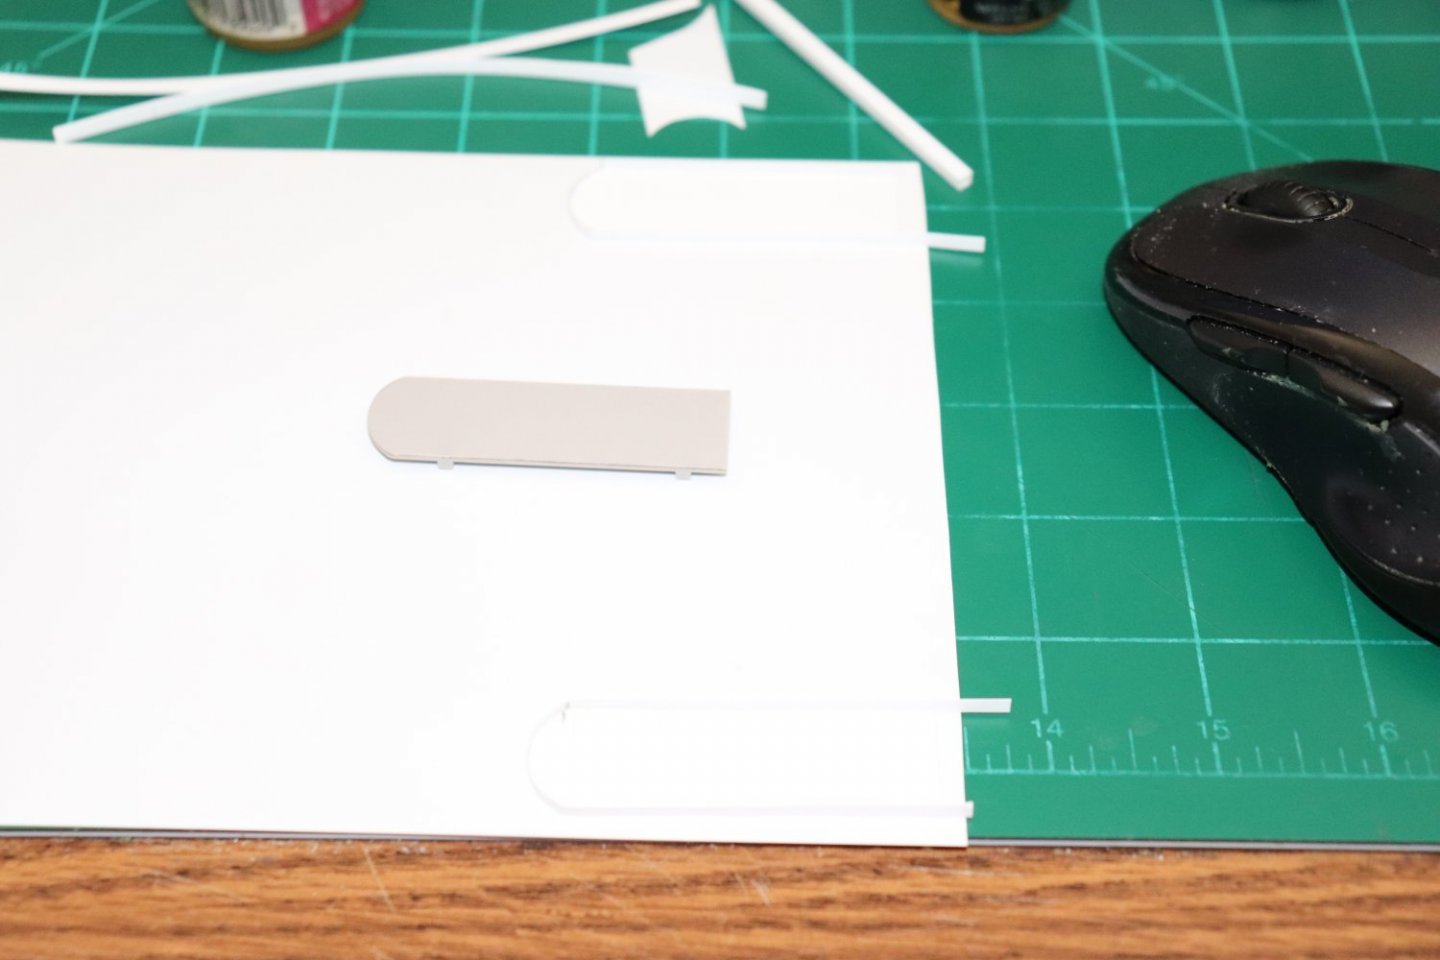
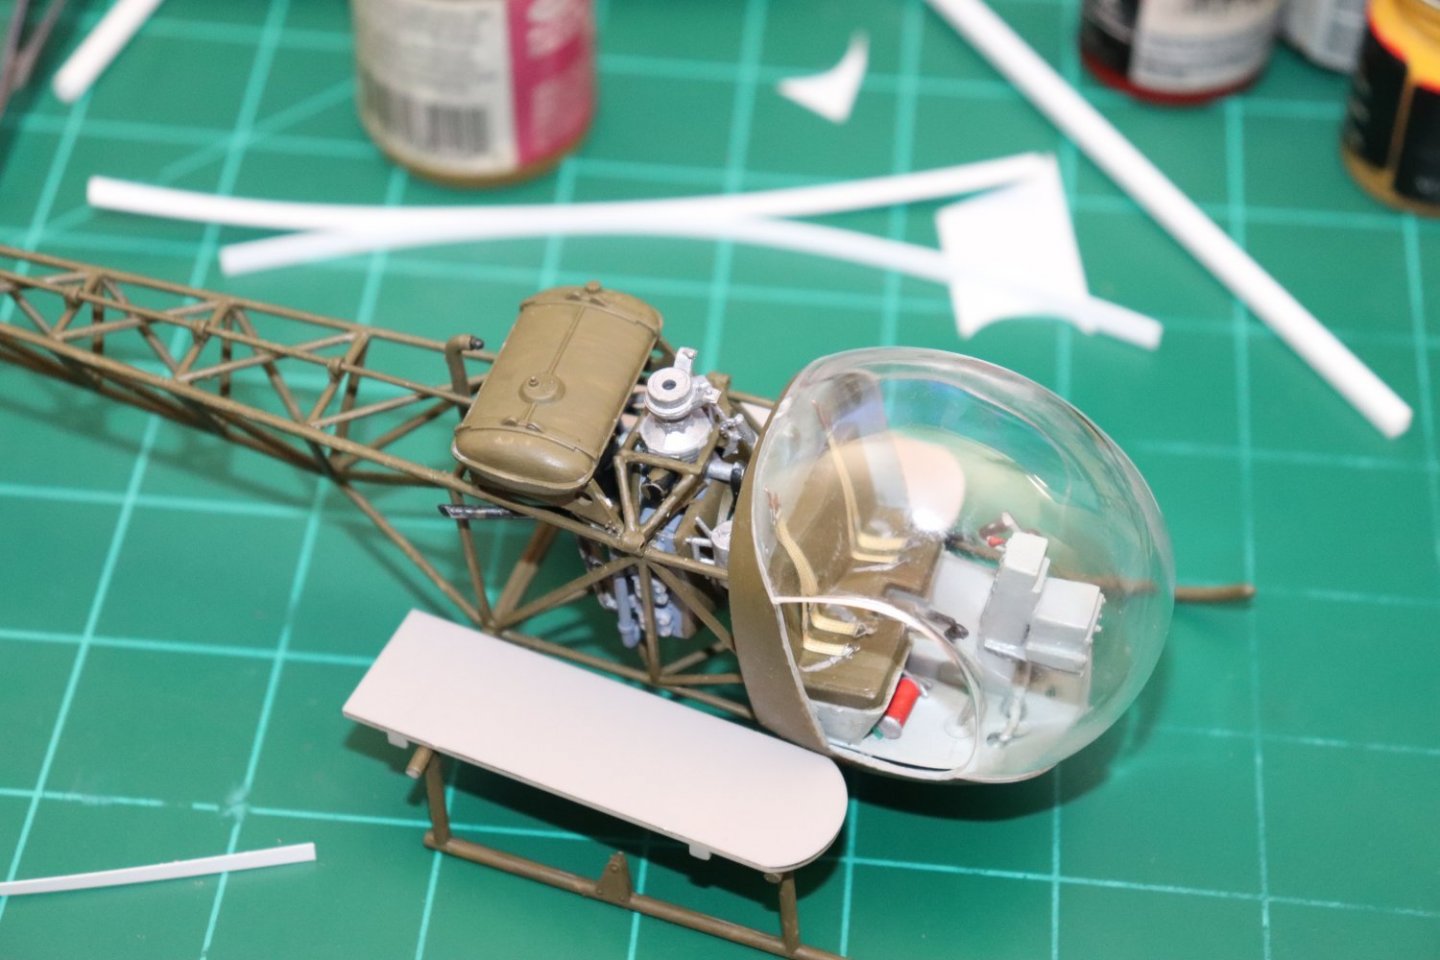
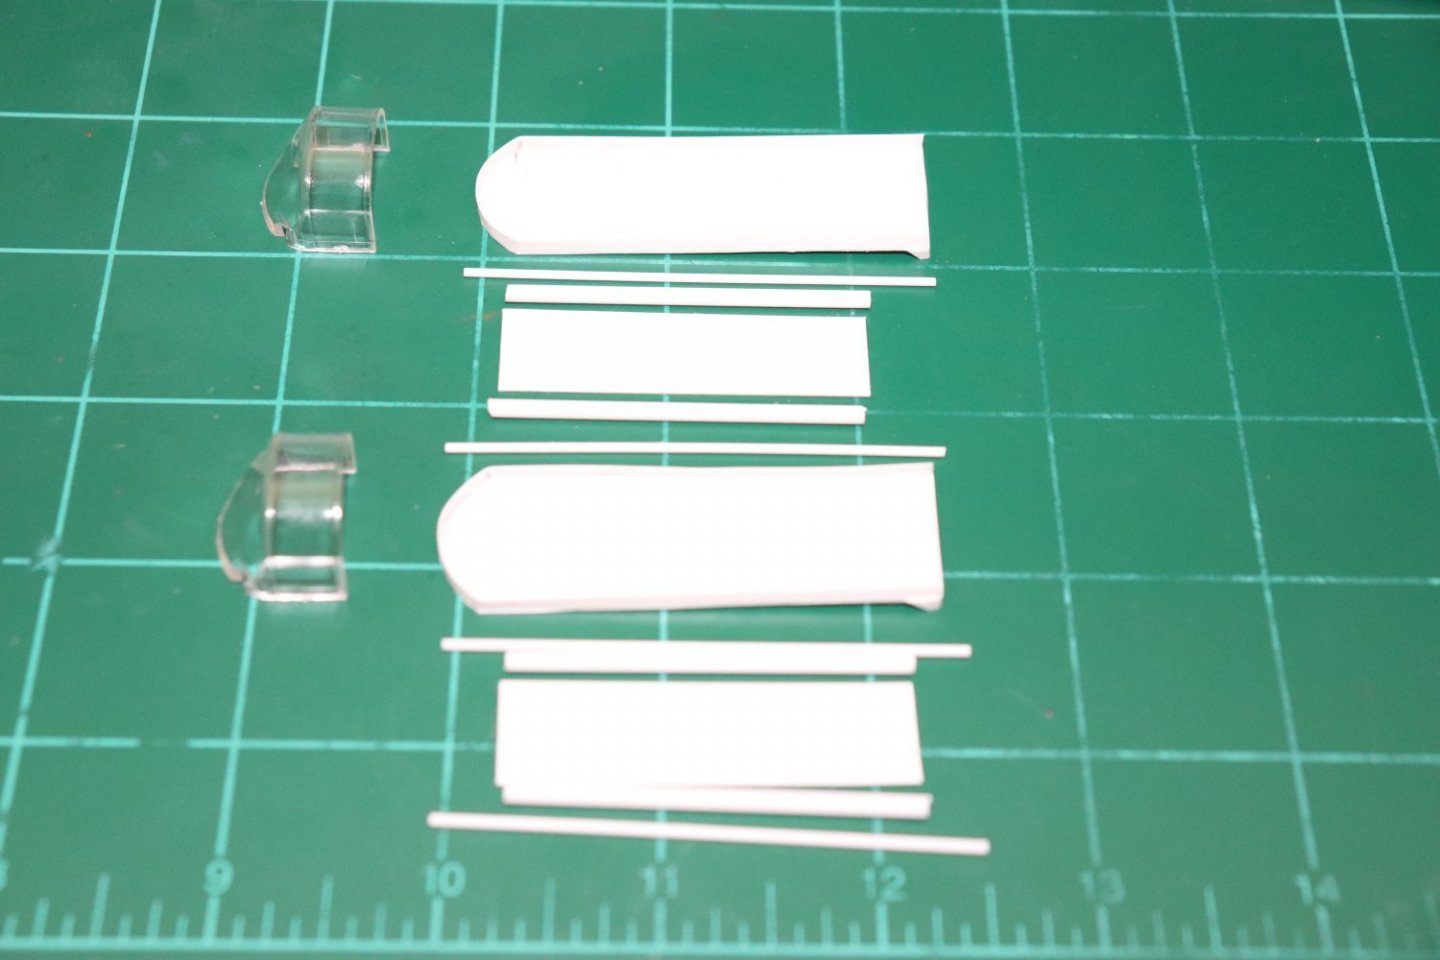
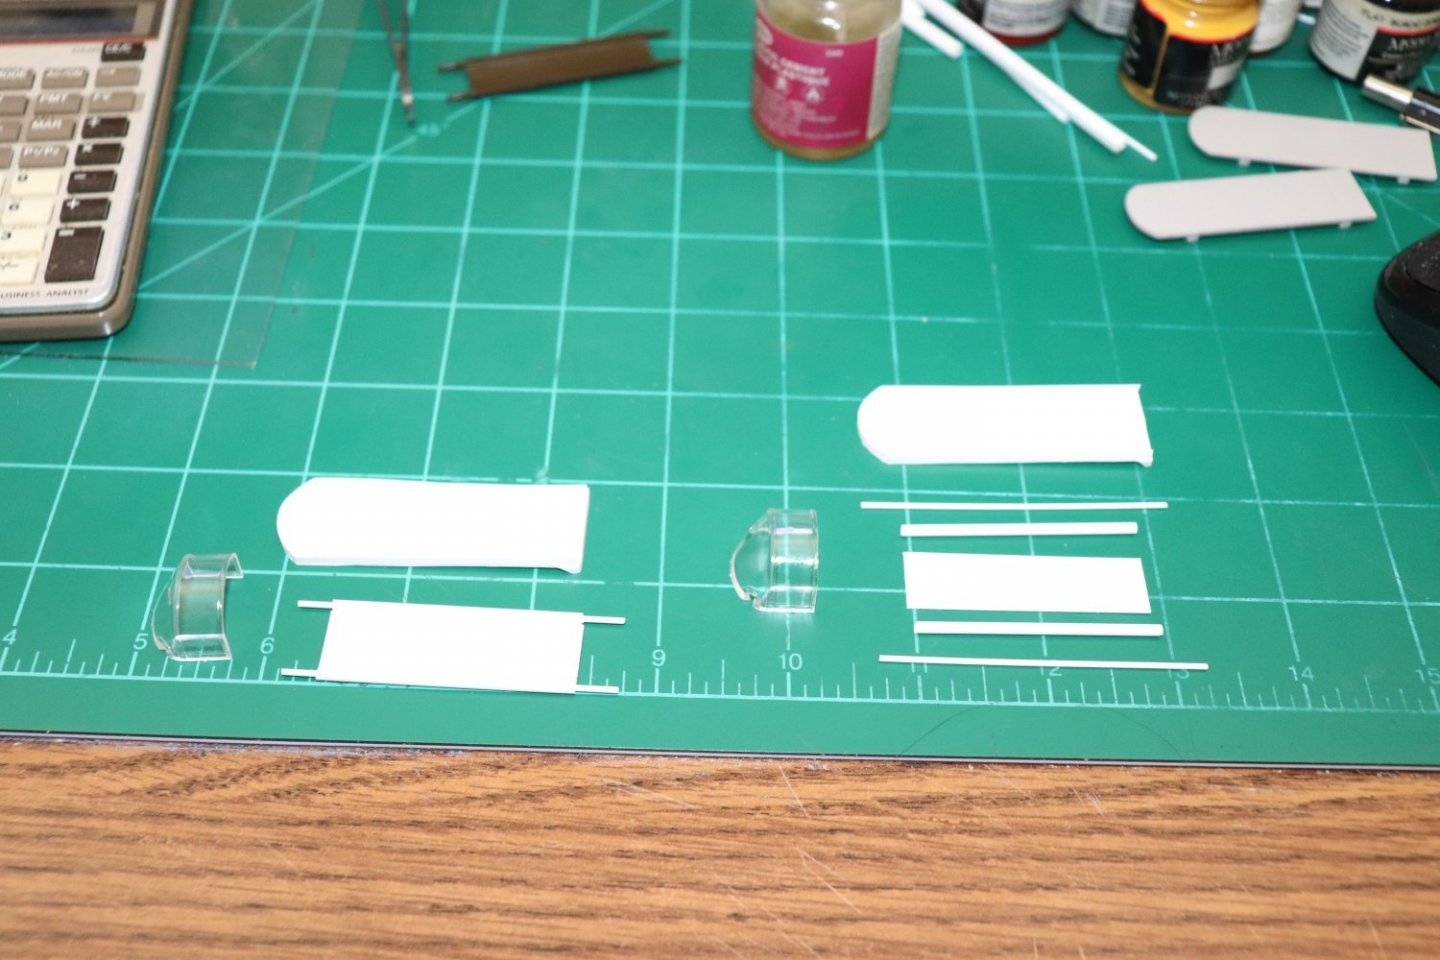
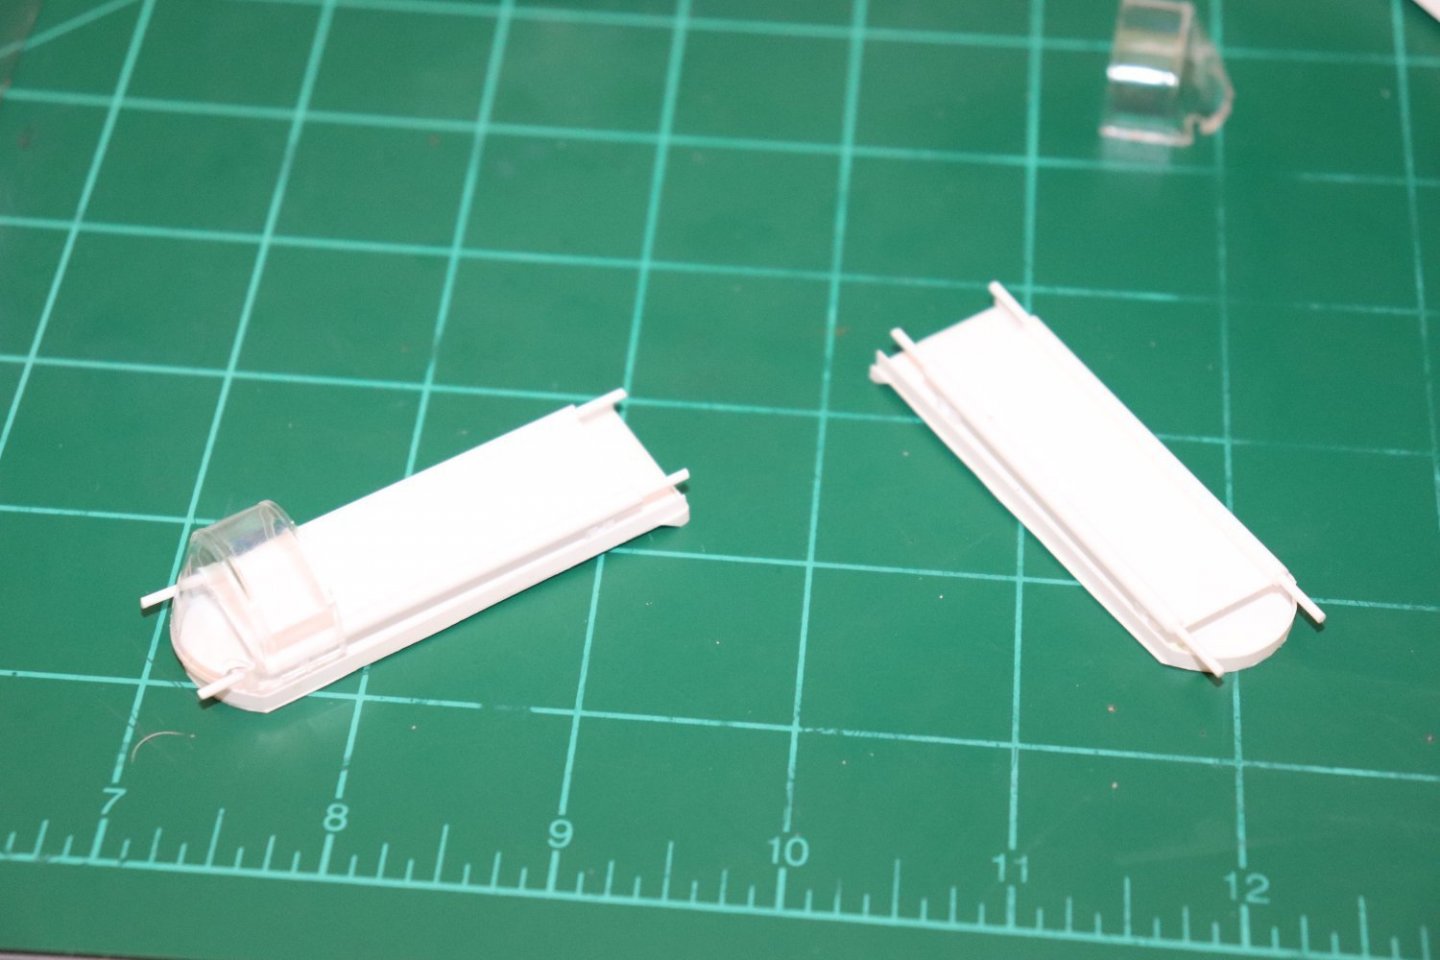
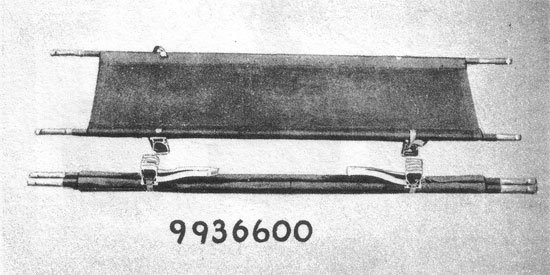
And time for an update.. The next step is the litters and litter carriers.... Unfortunately I have misplaced the litters... I have the thick platforms they call carriers but no litters... So I have to replace them.... Then, looking at the carriers... I decided I might as well replace them as they are way too thick to represent the real thing.... Here is what they look like in real life... Clearly they are a lot thinner than the kit supplied platforms... Constructed out of 12 gauge steel, seven feet long and reinforced with angle lining the edges with the rear edge facing downward... So, using .010 plastic sheet I cut two replacements... I took those replacements and laminated them to a sheet of .010 plastic.... this gives me an edge the exact shape of the platforms.... I then took a 1/16th inch strip of .010 and lined the edge with it at right angles.... Using scissors, I cut them out of the sheet and checked them for size and installed the end strips to represent the angles on the ends... Then I set about making the litters... A US Army model 1943 collapsible medical litter, 7 feet long, 6 foot canvass bed, four legs that hold it off the ground and two braces that lock it in the open position... Made of 1.25" steel tube with wooden handles... some had the knobs cut on the ends but most were just straight round handles... Another piece of .010 plastic cut to appropriate size... with two tubes for poles and thin rod for handles.... Sized to fit the carriers.... Tubes are glued to the edge of the sheets, and rods are inserted into the tubes and glued into position.... Then simple 1/8" square tube is used to replicate the feet on the litter... Checked to make sure they fit the carriers when dry... And making sure the kit's windshields fit the replacement carriers and litters..... I added the reinforcement bars to the carriers then fitted them to the skids to make sure they looked appropriate... Voila! two litters and litter carriers.... That actually look the part.... Still need to paint them up, they will not be permanently attached till after the decals are applied, but it is the final step before building the mast and Main Rotor.... The bubble also needs some attention as well and is just tacked into place just to keep it out of the way.... This is turning out to be a fun kit and is beginning to look like something.... Onwards brothers...


- 169 replies
-
- 11
-
-
-

-
I'm sure it was just a niche release in '93 Lou... When the first version came out, it wasn't a hot seller at first... And yeah, it is questionable on the depth of research, no doubt of that.... I have several of the original "Box" scale kits on my collectors stash Ken and I agree some of them are nothing but assemble it yourself toys.... These models came out in the early 90's when we were well past the "box" scale era and the issue I believe was marketing was dictating the amount of effort more than modeling accuracy... Money was still dictating effort at the time... This was just before the Banner experiment, and the outright demand for accuracy resulting from that effort... Today it is firmly entrenched in the modeling world that with the advent of the internet and forums like this one, the accuracy and buildability of a new release comes paramount and first impressions can make or break a model release... Right now the internet fueled and modeler driven design and production period of models has ended and companies are back to the we will build what is easiest and cheapest again framework... The Trumpeter revelation in the modeling world that the existing companies were not fulfilling the demand has passed, Companies have come and gone, but they are adapting to demand a lot more than they ever were before... But it's falling back into the easier and cheaper partial redesign system and the desires of modelers is again not being listened to... Golden age? not so sure that hasn't passed as well... We are not seeing a lot of completely new stuff being designed and released anymore, but some companies are still updating their lines... There are some very relevant models that are simply not being produced cause of the costs associated with new production... Market saturation is an issue as well as an aging demographic in the industry.... Although there are some companies that have dedicated themselves to historical accuracy which is a good thing for us builders... I'm not trying to compare the Italeri from the 90's to the Italeri of today, it's no comparison, the technology of injection molding alone has pushed the envelope way past what was possible in the 90's and 3D printing still hasn't reached it's potential yet... (not even scratched the surface) It's hard to do a build and review of old kits compared to today's modeling environment... But I think it does push us to be better modelers... And turn out better art.... And there is nothing wrong with that... And I also agree, we need to see a lot more of things other than the latest iteration of the P-51 or Tiger Tank or Me-109 or USS Missouri... I was holding out great hopes for Trumpy to do more large scale helo's but that seems to have become a forlorn hope... But that's been a decades long lament about manufacturers, they like to produce what makes them money and that seldom jives with what we as modelers want.... The day is rapidly approaching where the manufacturers will become moot, probably not in our lifetimes, but the signs are clear, download and print your own in any scale you want is the future... (or at least going to be a big chunk of it) It's an exciting time, but a depressing one as well... But as modelers we are accustomed to such.... {chuckle}
-
Thanks my friend, it was just something that stuck when I started thinking about painting it and figured I should check cause it didn't seem "right".... I think the MRC/Italieri ( BA109 1997 Float upgrade to MRC/Italieri BA102 1993) kit was just an updated response to the Revell (#4334 1994) Kit which caught the public imagining and was found wanting by so many.... BA102 didn't do too well in the marketplace before that.... And since the MRC/Academy/Fujimi H-13E series of kits are all the same Italeri designed kit just reboxed, it suffers from the issue of a low demand kit at the time of release so they didn't sink a lot of effort into research... Just enough to get something passable out there that had never been done before... Never expecting it to ever really amount to anything... And then the Mash nostalgia and Revell doing their thing and producing a very excellent effort in the research department but a less than stellar execution in the molding design department.... Modelers when building it quickly pointed out the deficiency in the molding and the response from modelers was to do their own research of available kits and hit on the MRC/Italieri kit as the alternative... and of course it didn't have what was felt as the glaring molding issue of the Revell kit so automatically became the standard of better where H-13's were concerned... And people just accepted that and ran with it... Now comes along someone like me, who likes accuracy, and does a pretty solid amount of work on research and finds both wanting... Although I've gone against the conventional wisdom that the Italieri designed kit is better... The Revell kit has two issues #1 it is a fictional aircraft from a TV show and it is the wrong model of aircraft depicted so it doesn't even represent the show well and, #2 the obvious molding issue... The Italeri designed kit has any number of issues... That are clearly plain to anyone who actually does the research, shortcuts were made is probably the best way to put it to keep costs down on a kit that really wasn't going to draw a lot of interest... (until the MASH mania hit the market) Neither one is a beginners kit, they do take some experience to build, they are simple kits though not difficult to understand.... But my conclusions are, the Revell can't be beat where it comes to details of an actual H-13H Although incorrect for a Air Ambulance version, will build pretty much most any early to mid 60's H-13 and do it very well... You can detail it to whatever level you want... The Italieri designed kit depicts nominally an H-13E and has provision to do any early variant including a "D" variant (and the even rarer "C" variant as well) but they surely didn't do complete research and to make an accurate model out of it is going to require some work and research for the modeler, it would probably pass out of the box if all you need is an H-13 on your shelf.... Not if you want an accurate one though, that will require some scratch building.... (as I've detailed here, and there are missing details I'm not going to add) Both kits suffer from the age they were designed, anyone designing one of these for production today with the advances in molding tech I'm sure would do a stellar release if they didn't ignore even basic accuracy... Neither one will ever be mistaken for something other than what they are... And, we will probably never see another release of this model cause the market just isn't there for it... But who knows, stranger things have happened....
-
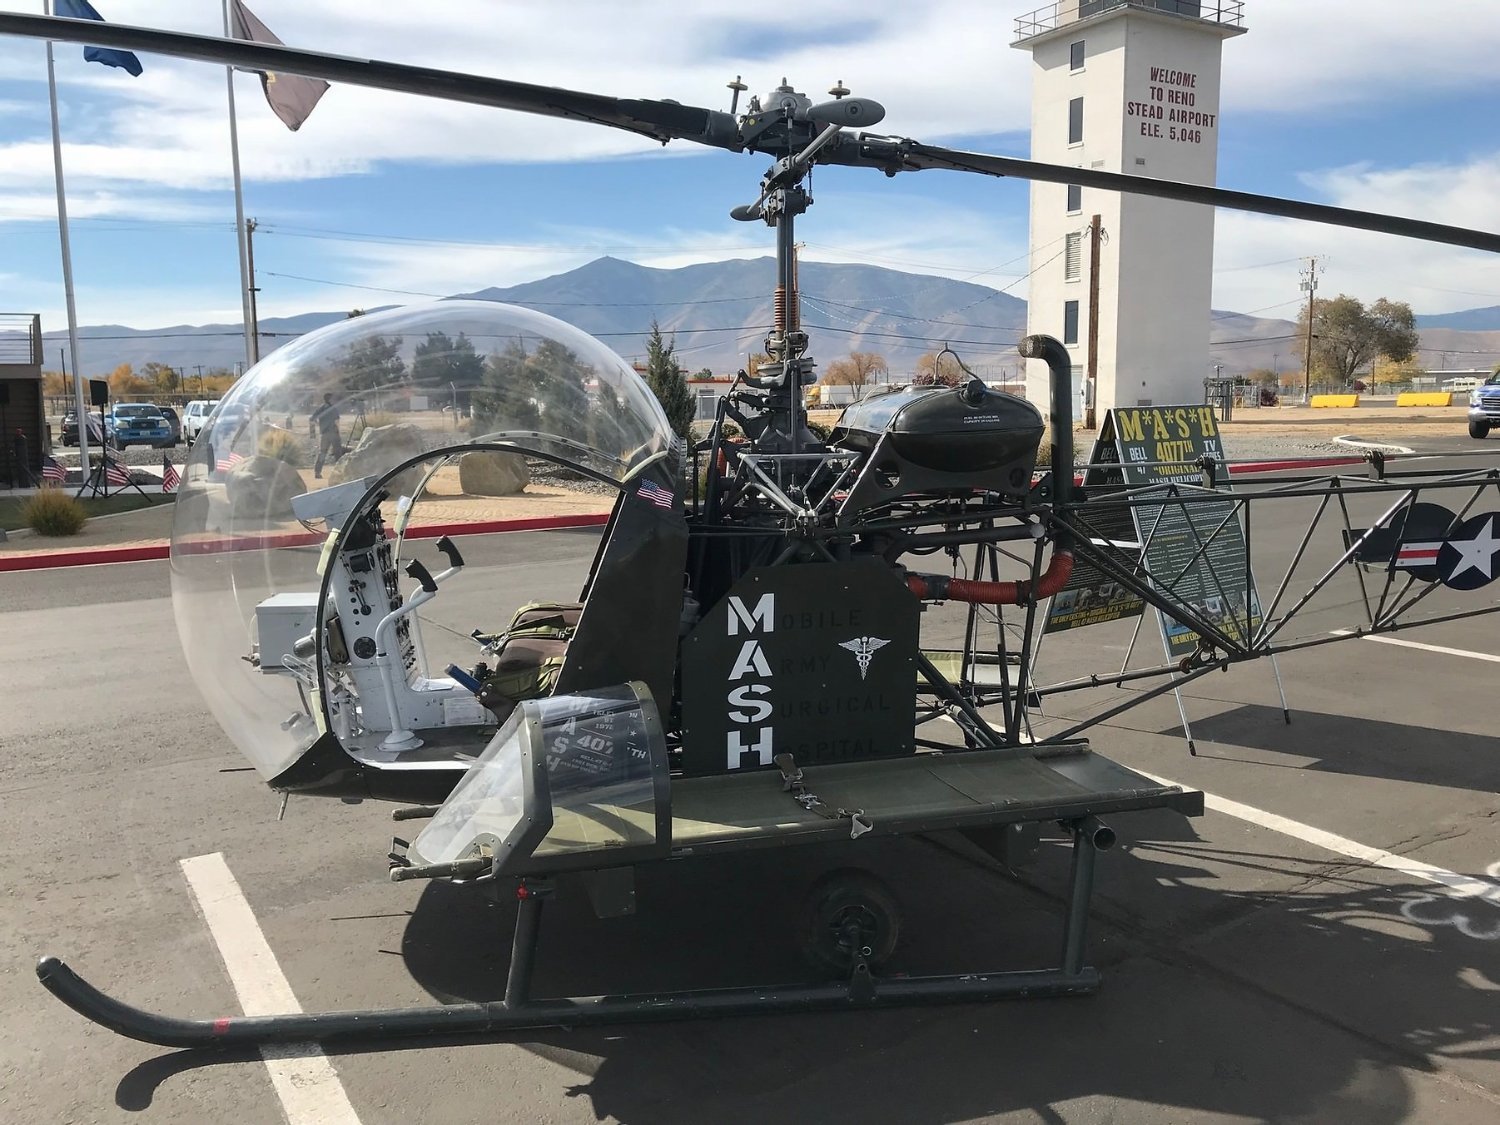
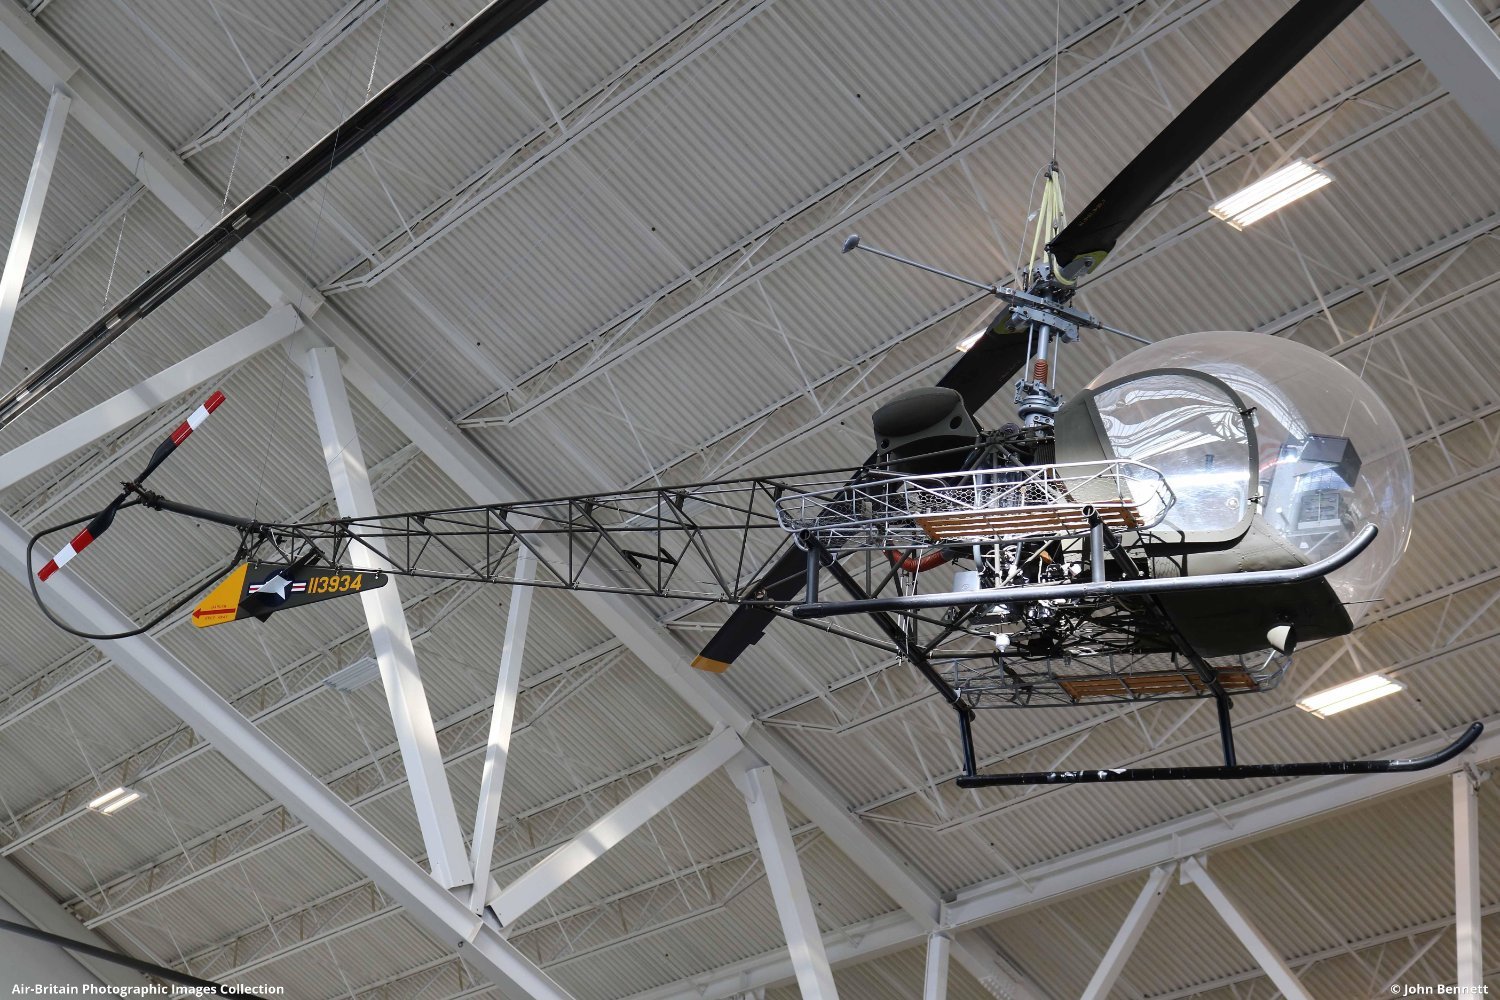
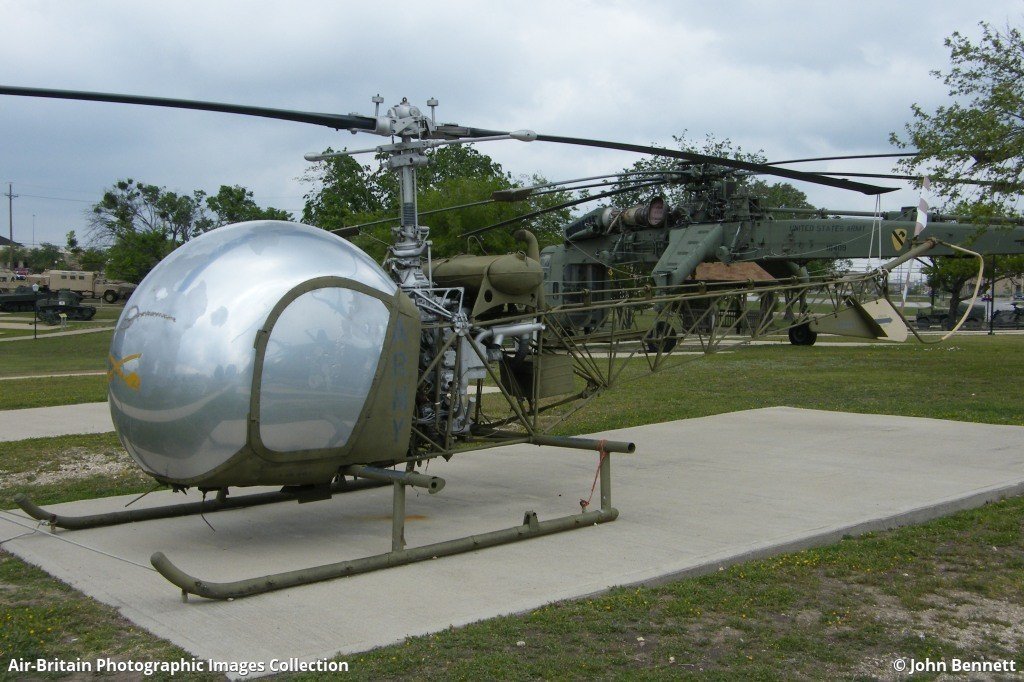
Thanks Alan, It came out passable given the engine is oversized a tad bit... It does look the part.... Today I found another issue with the Italeri kit... The tail rotor is backwards.... The real deal.. Looking at the right side of the aircraft the tail rotor turns right handed, the blade going over the top is moving forward... The kit as built as a air-evac chopper... Looking at the left side of the model the blade is turning right handed the blade going over the top is headed aft... It's backwards.... Chuckle, it never seems to end, when they screw up one detail it seems there are always more... So I've corrected this and reversed the tail rotor blades so they turn in the appropriate direction. I did check the Revell Kit for this and no, it's fine, they got it right... I'm at the point where I need to diverge, the build sequence on the two kits makes it difficult to do a step by step on both at the same time from this point on... So I'm going to take the H-13D/E to the point of decals then go back to the H-13H... It's just easier to now separate the two.... Current assembly status... Getting closer.... Onwards...

- 169 replies
-
- 10
-
-
Ok, back to where I was two days ago.... Hopefully no more corrections needed.... Onwards...

- 169 replies
-
- 12
-
-
Thank's Mike, Movin in that direction, I hope they live up to expectations... Small update... Given the nature of this beast from Italeri I'm unable to do a complete upper engine frame, so I'm going to fake it... It looks like one is there but it's not actually doing anything.. it's there to make it look right only... Still a little wet paint but it should look the part when I reassemble it... OH and my Orange Red pain arrived from True North.... Look good and very close to the color I'm seeing in the pics.... FS 28913 TN# 1058 Now I can move farther down the path.... Onwards!!!

- 169 replies
-
- 11
-
-
Ducati 1299 by Moonbug - Pocher - 1/4 Scale
Egilman replied to Moonbug's topic in Completed non-ship models
Do a build log on models like that, they would throw us all in jail... (oh, there was supposed to be a car in that pic?) -
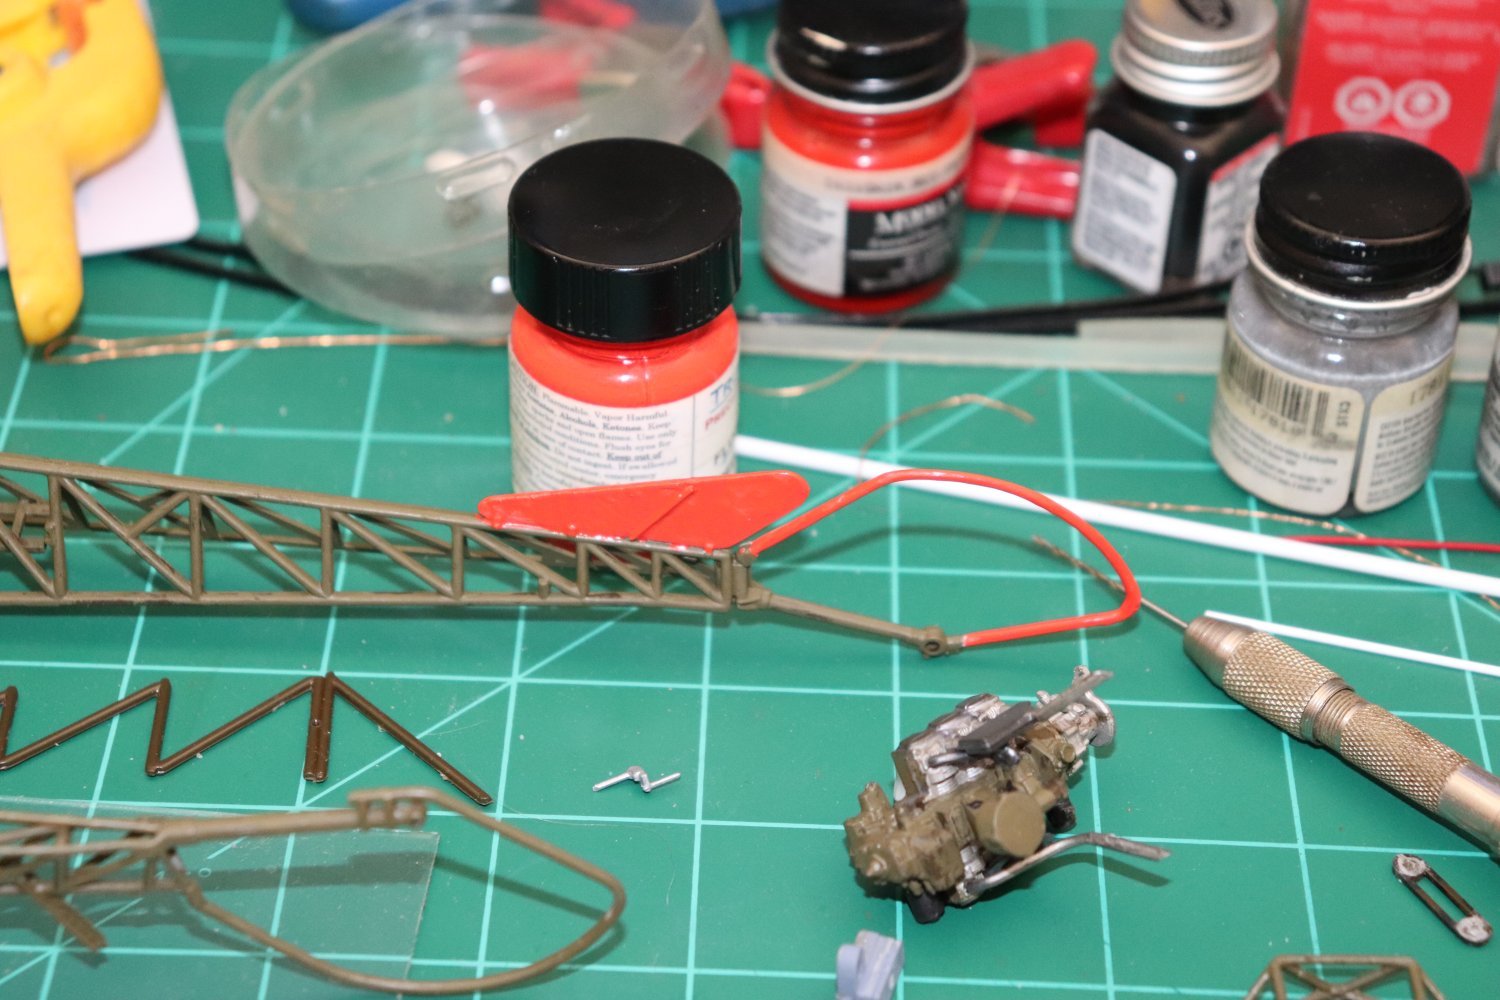
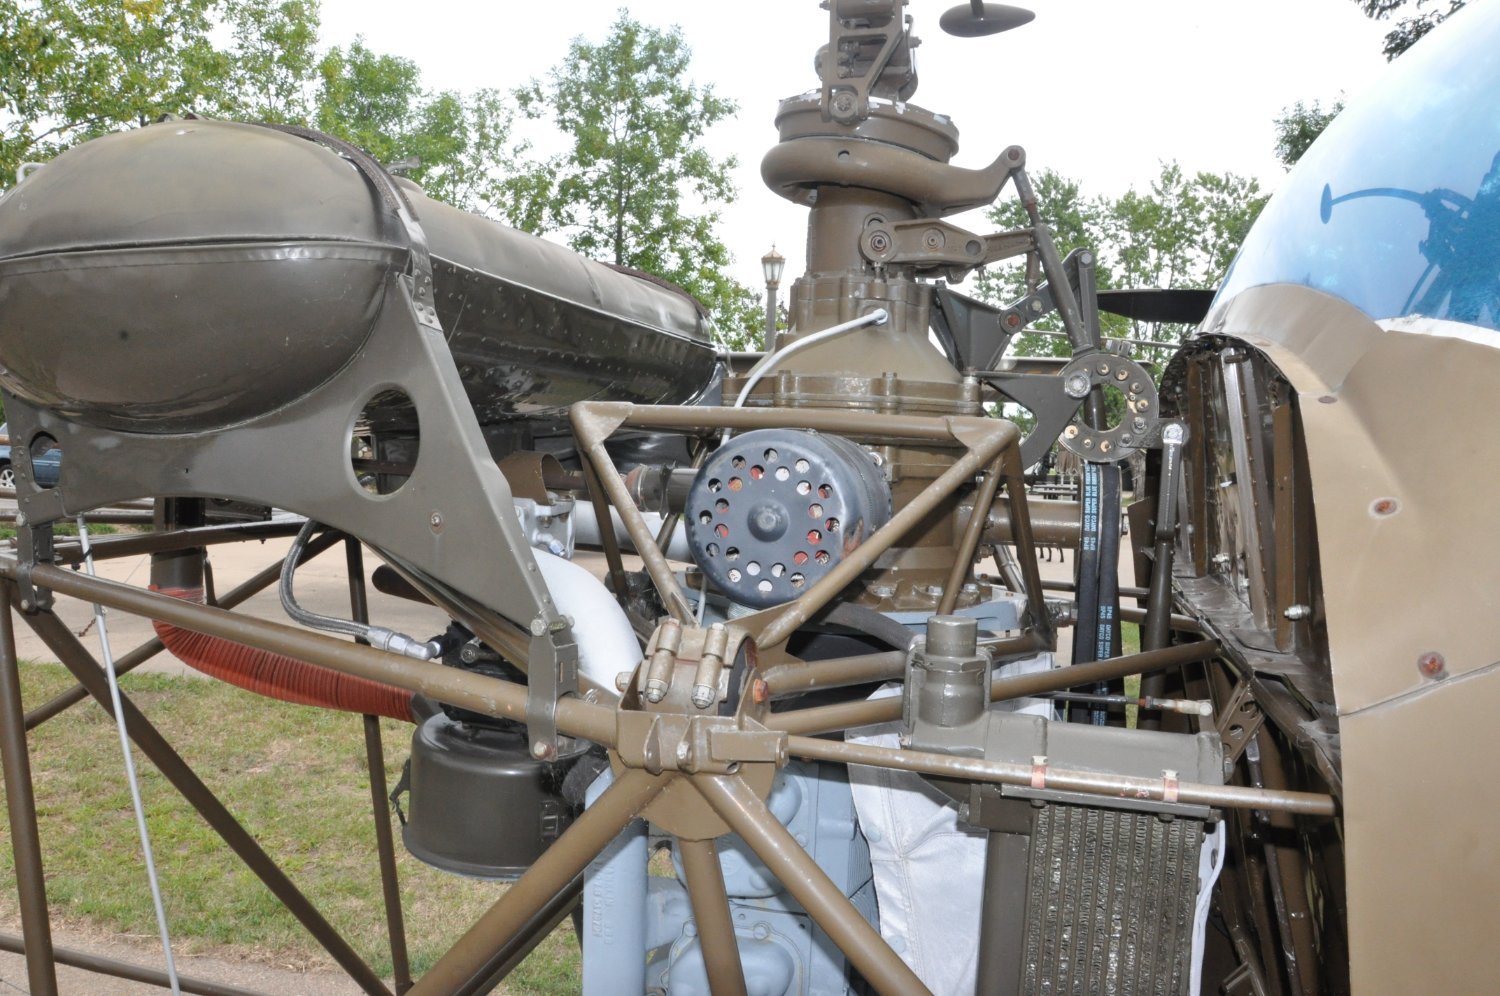
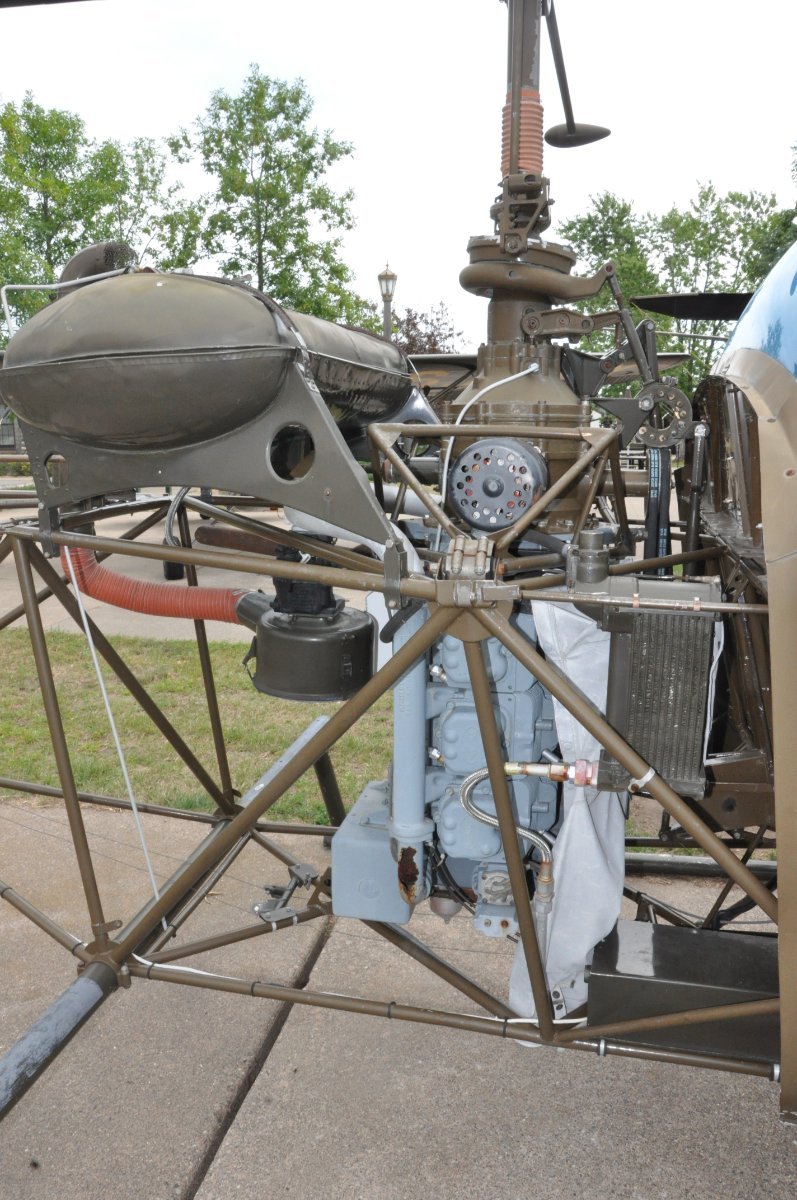
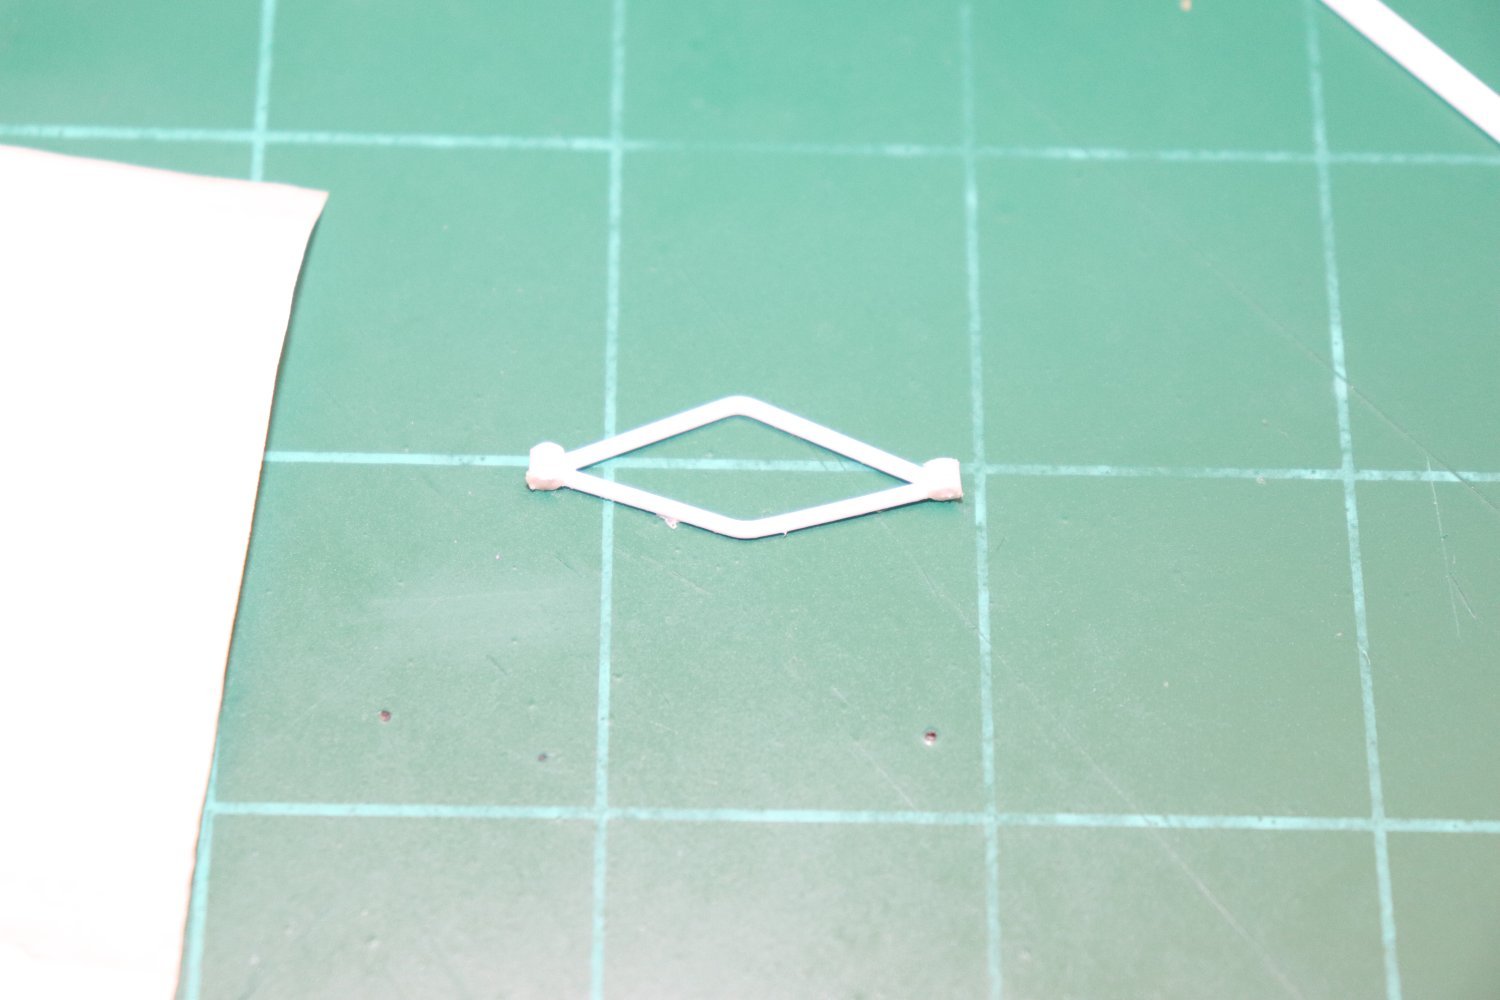
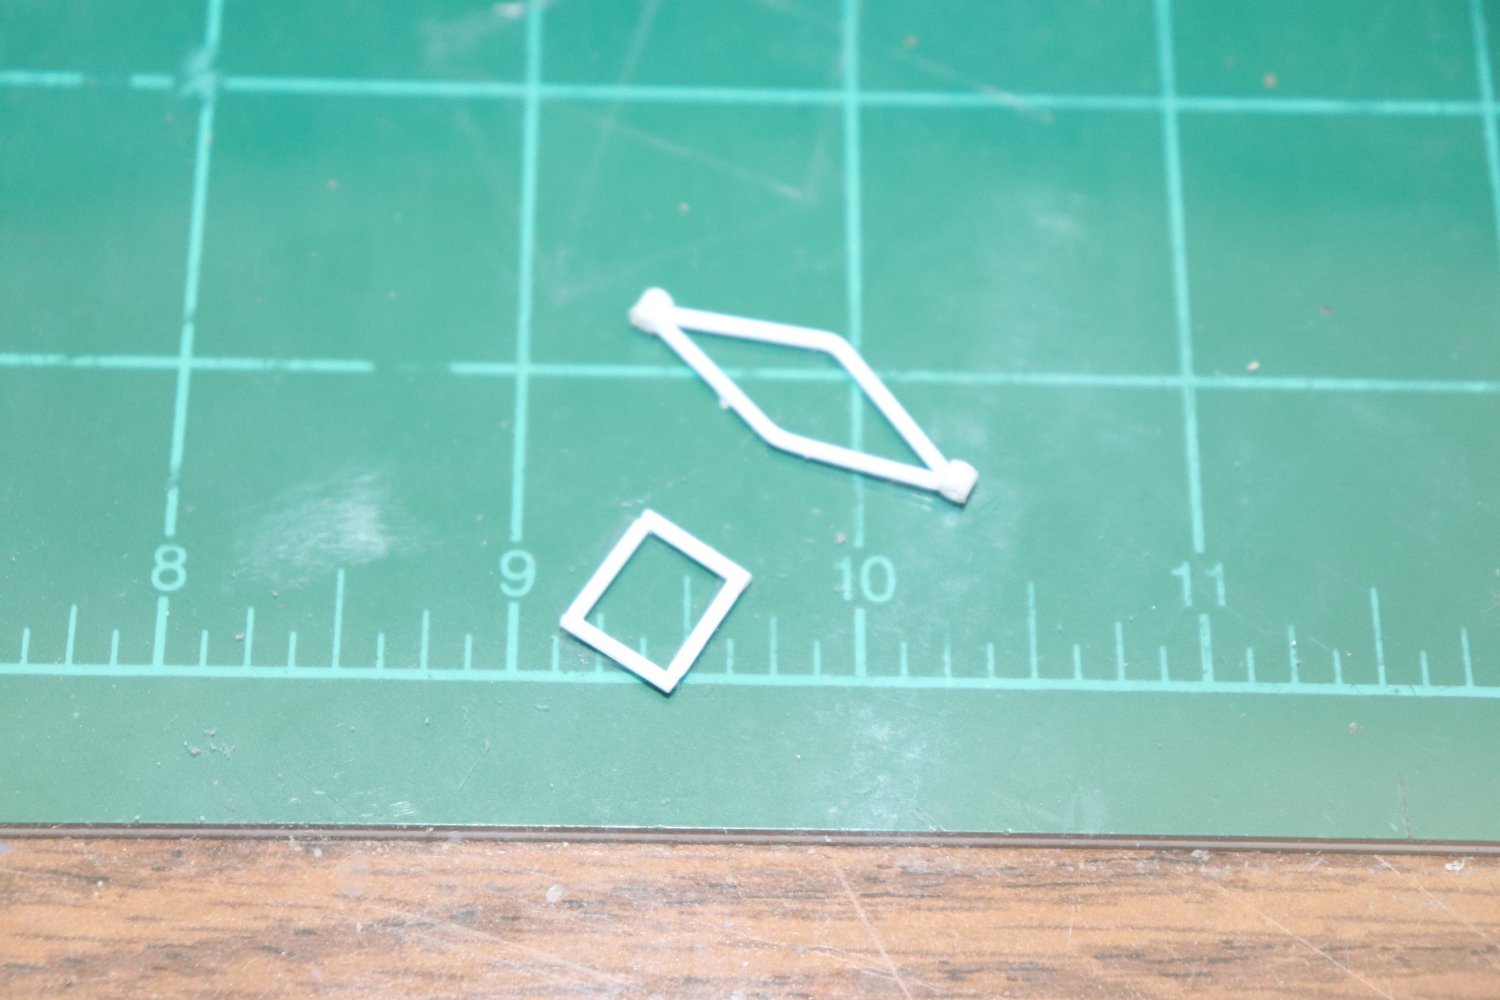
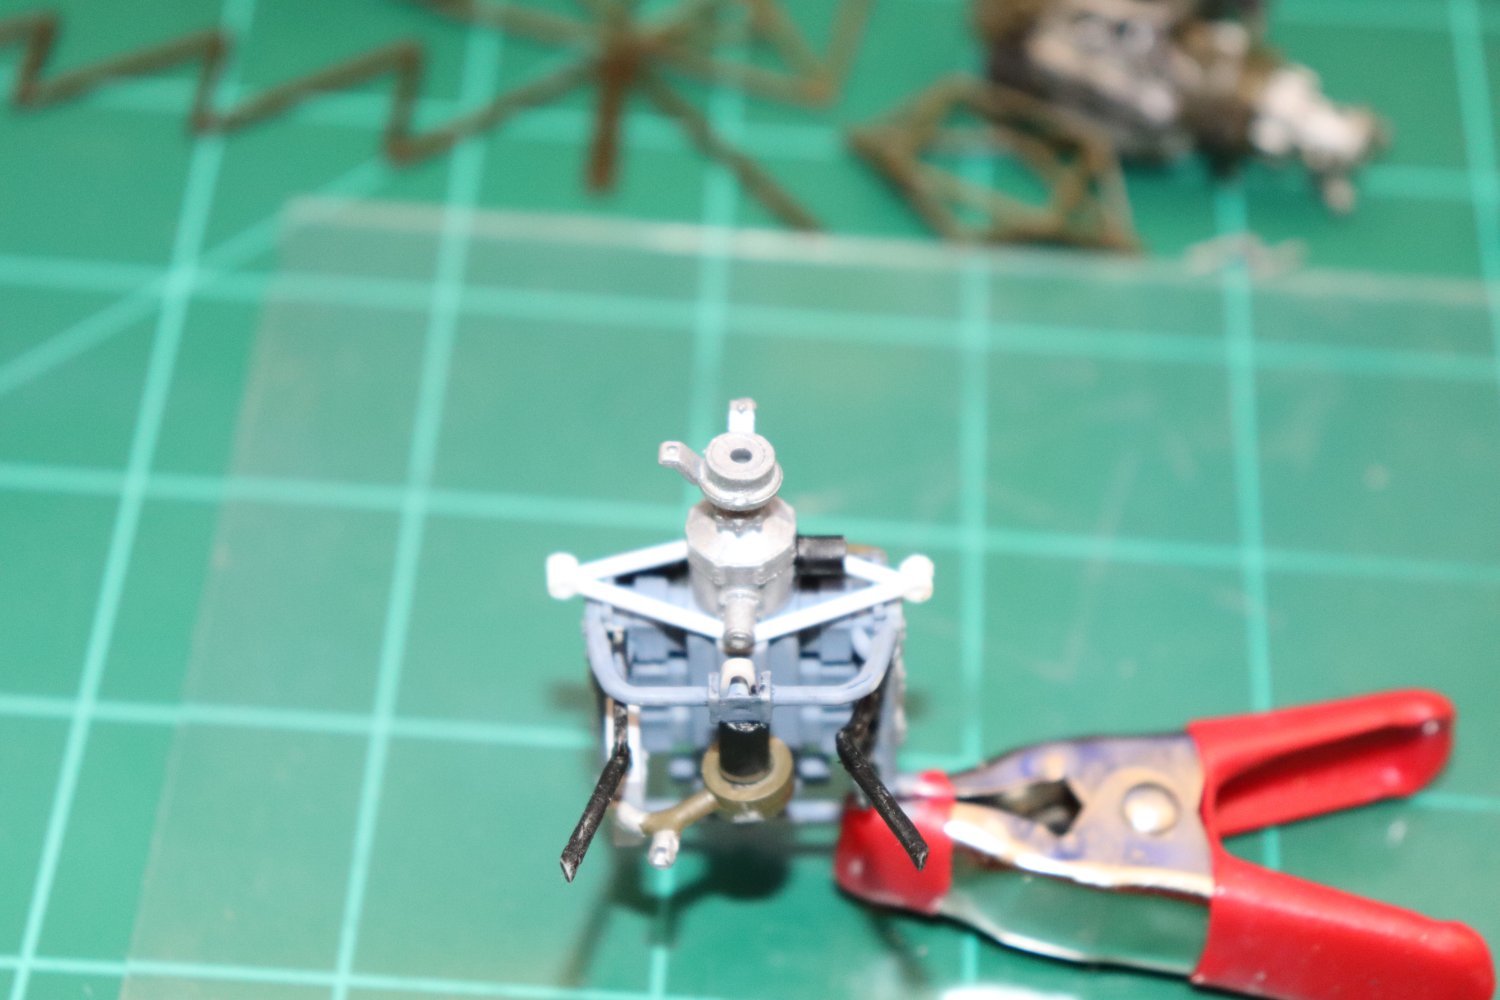
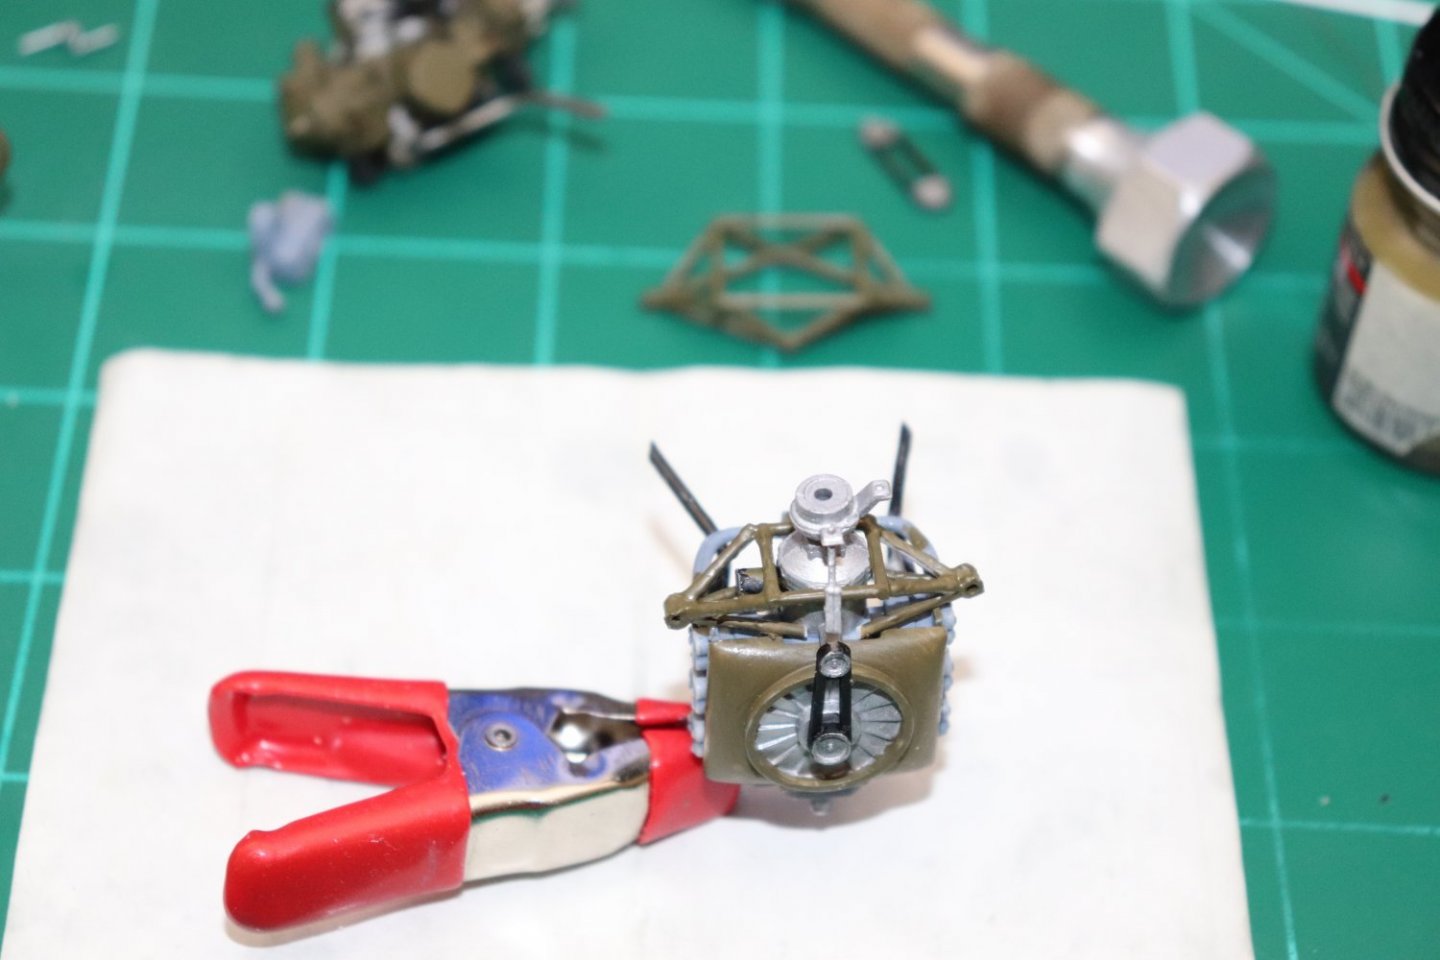
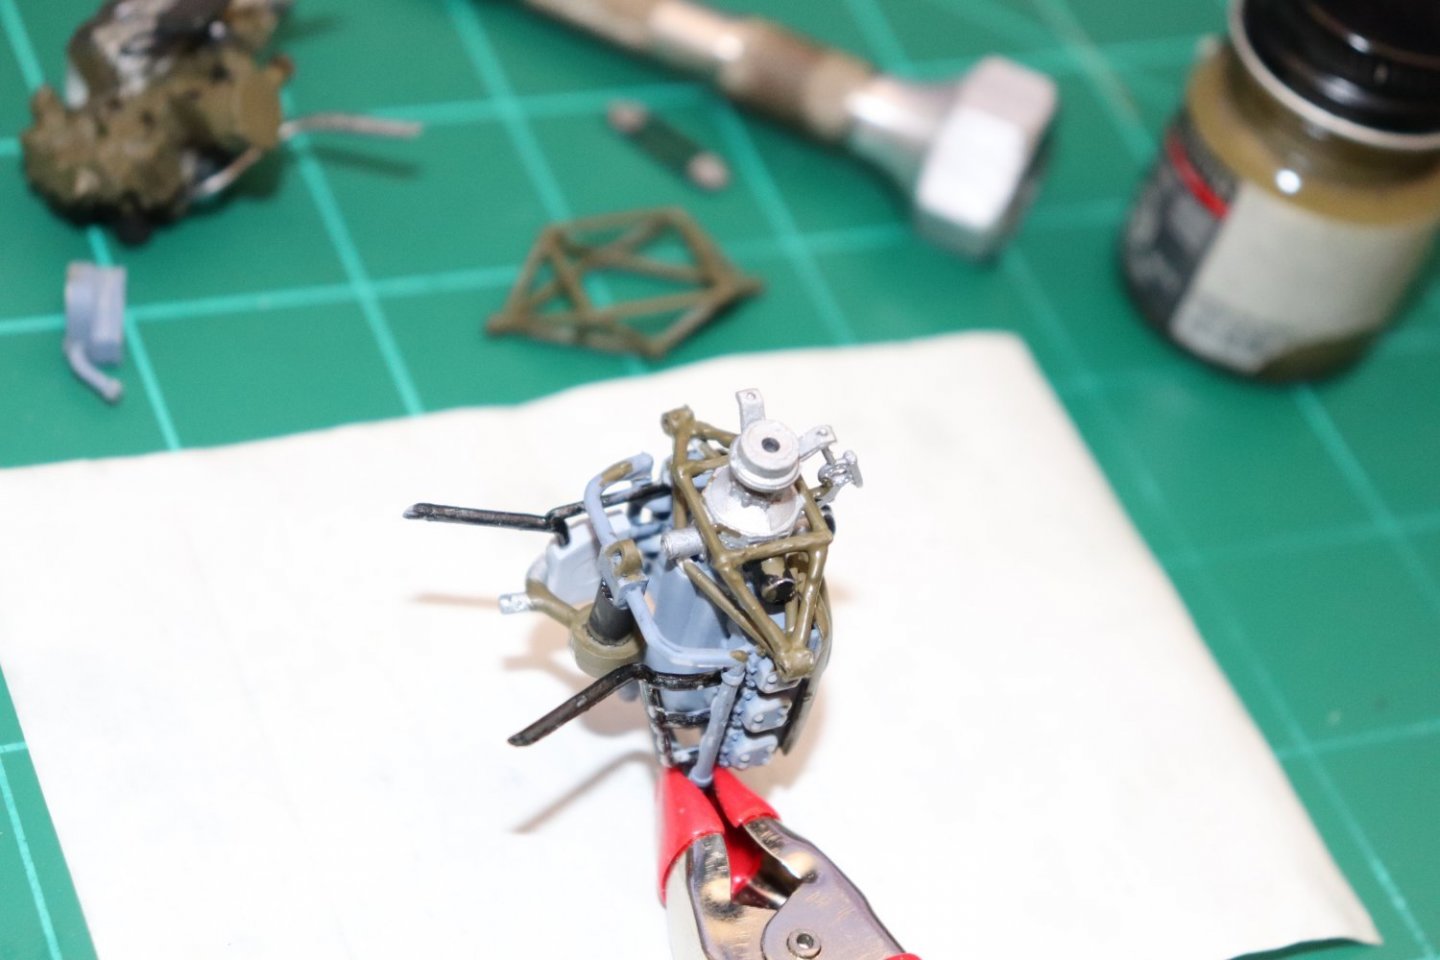
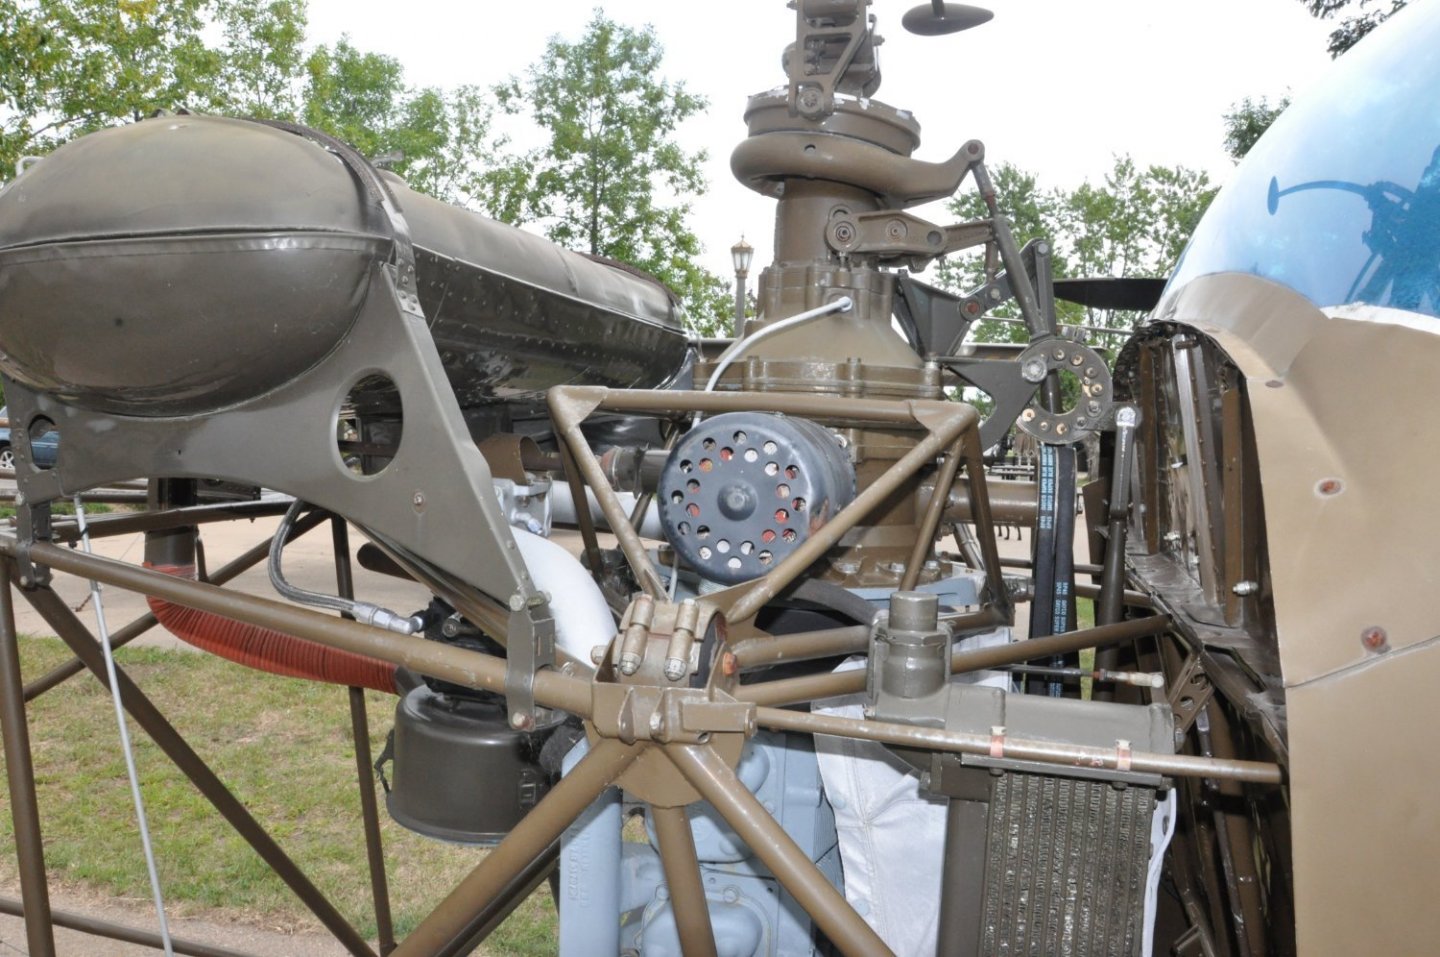
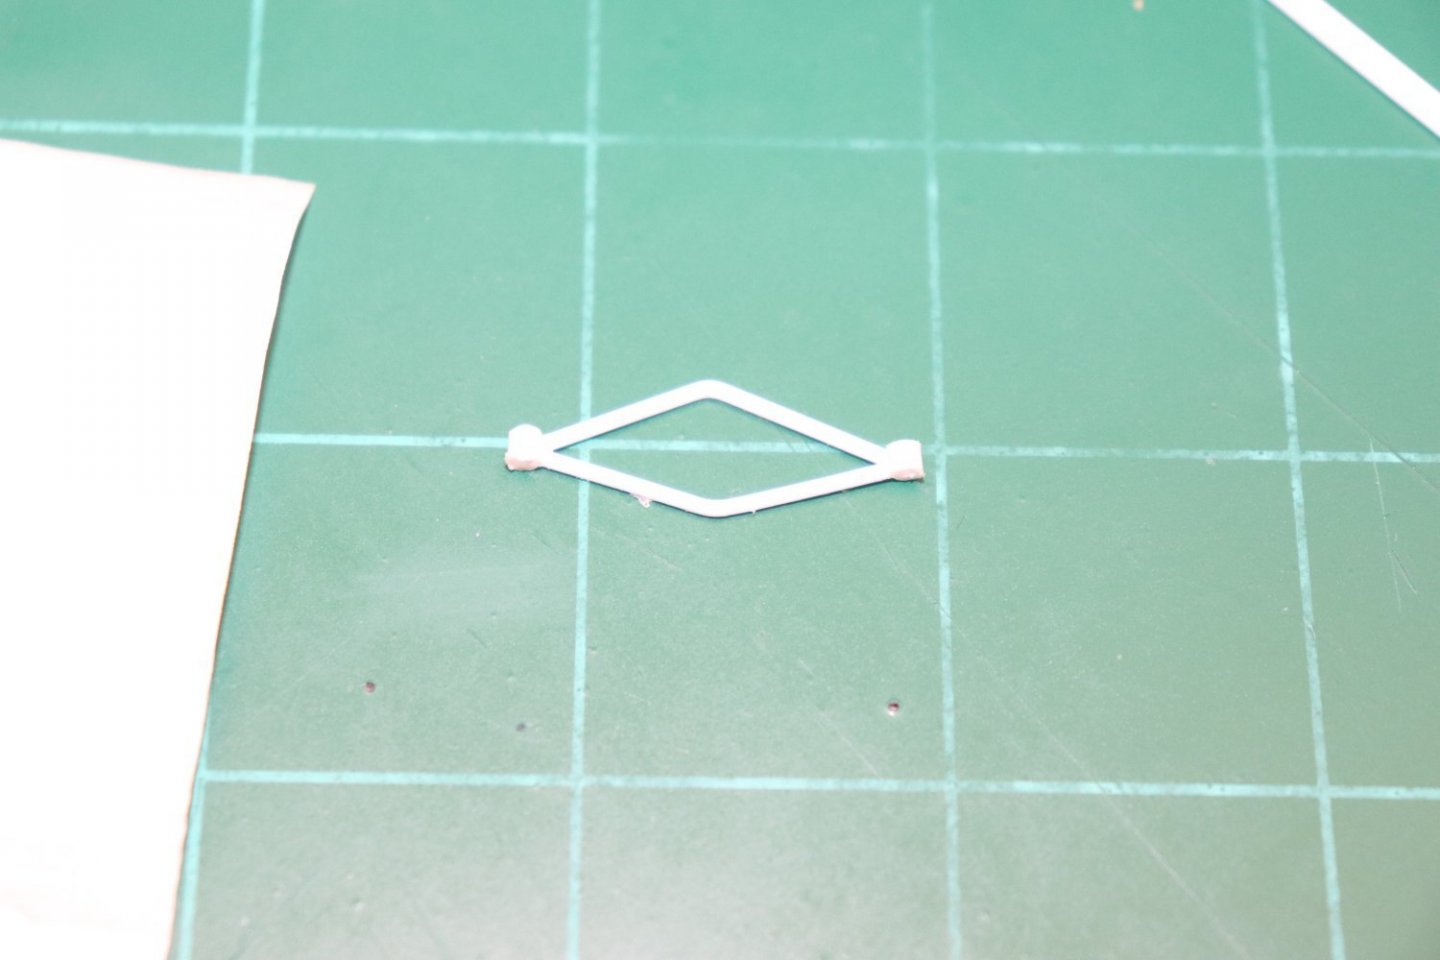
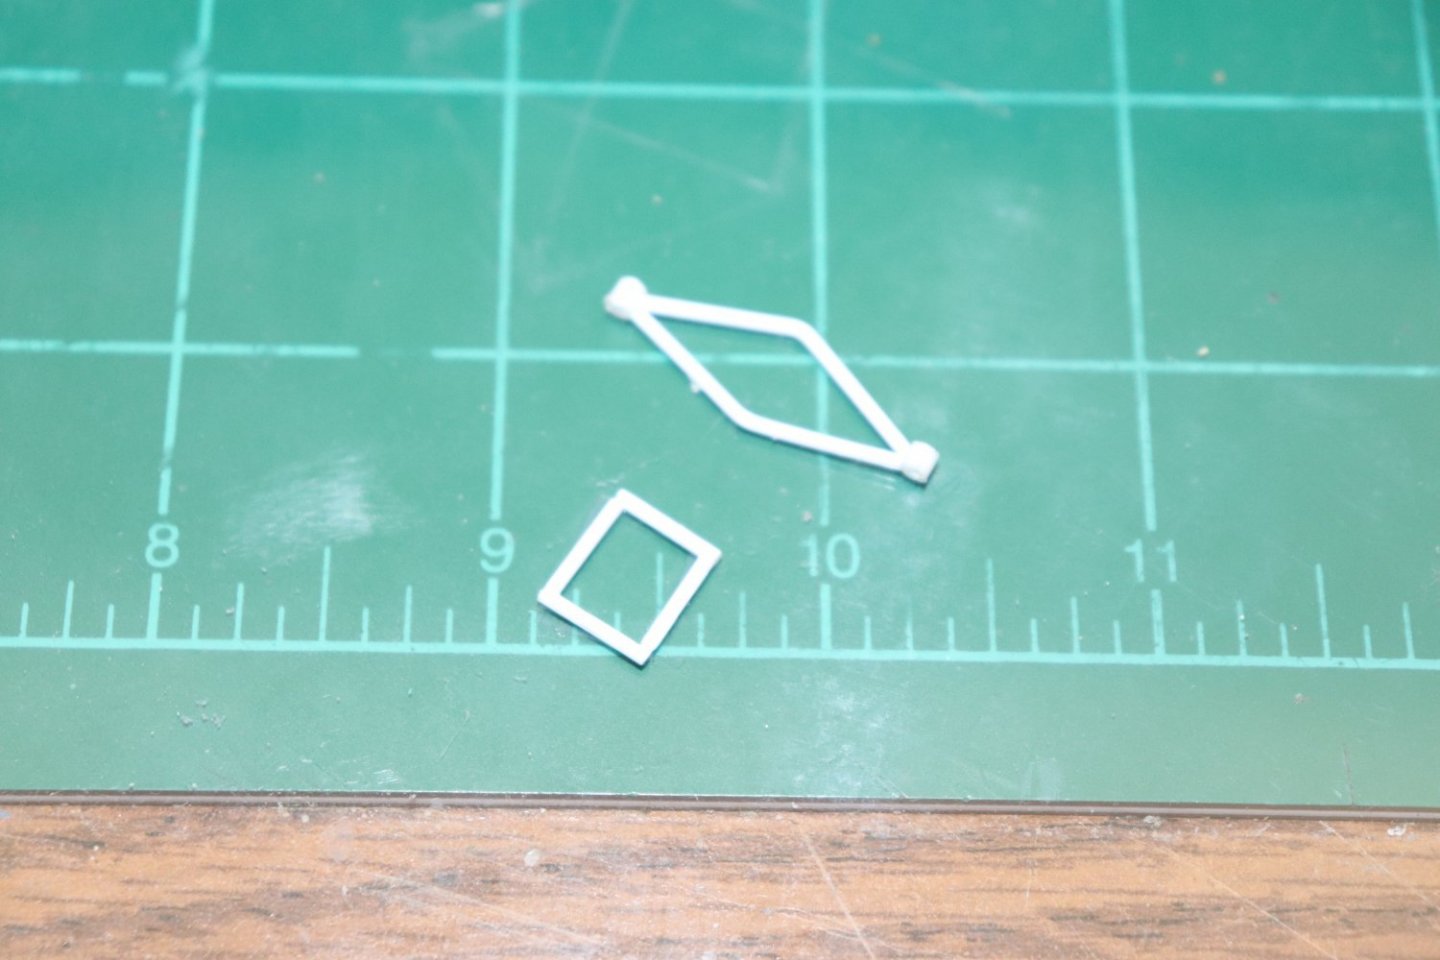
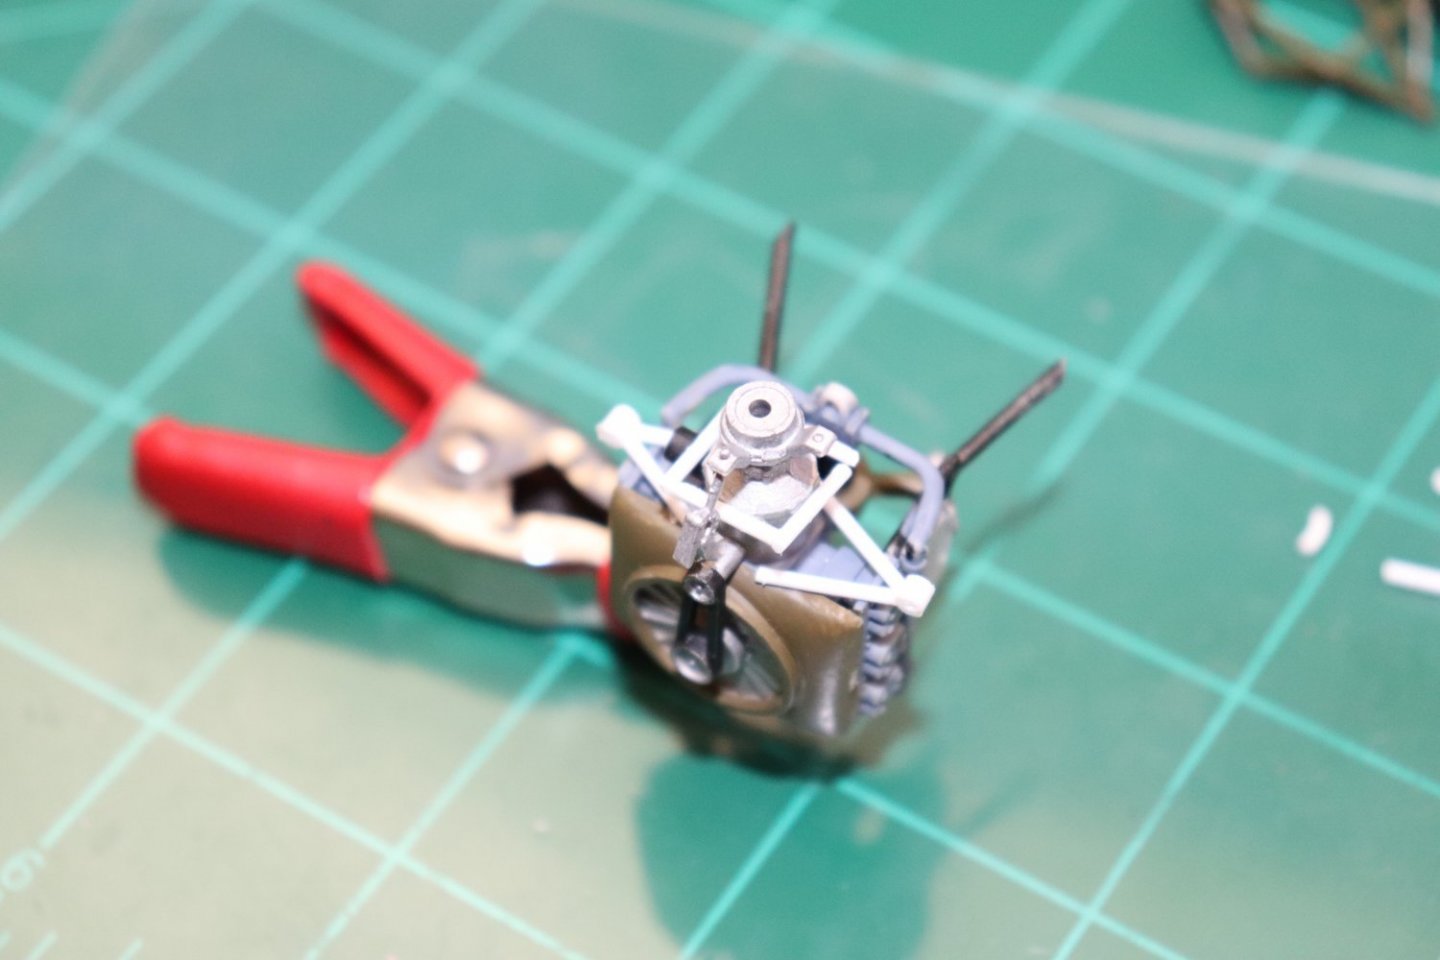
Building an Upper Engine Support for the Italeri H-13D... The mount... AS you can see it is required... It consists of two frames connected to the engines and the frame of the aircraft... The bottom frame is a diamond shape and forms the connection to the aircraft frame through rubber bushings... The upper frame brackets the Transmission and helps provide the lateral stability to keep the engine vertical side to side... They are connected to each other by diagonals at each corner of the upper frame, which descend to the diamond points of the lower frame connected to the aircraft frame... You can easily see where it passes underneath both the driveshaft housing and the fan pully housing... Unfortunately, I cannot make it pass under the fan pully housing on the model... So you see a gap where it approaches the fan pully housing, it will hardly be noticed when finally assembled and painted Olive drab as that is the color of the fan shroud it will have to glue to... Unfortunately this tells me that the engine is also a tad larger than scale as well... but there is nothing I can do about that... Right now, I'm planning on supergluing them in place and checking fit on the aircraft frame before I add the diagonals.... At least it will look the part.... Onwards...


- 169 replies
-
- 13
-
-
Being very good with card to start with, I can say I'm seeing your techniques improving with each and every build you post here... Getting a Halinski from booklet to built model is an achievement in itself... I've tried several... Sometimes when I read the German papermodel forums, I get jealous, but they are the masters of the craft.... I think you belong in that club as well, at least knocking on the door.... with this example, they should let you in... This is a skill that few can master... what you guys do is majic pure majic.... Very well done...
- 130 replies
-
- 12
-
-
Well Tim, looks pretty darn perfect to me.... I guess is must be proper technique....
-
Thanks Ed, Yeah it was much ado about nothing me thinks, more rivet counter angst than anything about the actual appearance.... I received the pending delivery notice this morning so the paint will arrive today... But in prep for the final steps I went ahead and built the skids for the H-13D... and noticed something else.... there is an internal diagonal brace missing.... In the square frame below the engine end of the driveshaft there is a brace that runs from the upper left corner to the lower right corner, it's not in the kit and not even in the instructions... No problem I have plenty of .050 plastic rod to install it with... But then I noticed something else.... Another part that is missing from the italeri kit... Look at the Revell Kit at the top of the engine and the Italeri kit at the same location... What's missing? The upper engine mount/brace... Yep that triangular saddle brace that anchors the top of the Engine/Transmission... It's not in the kit, not the instructions, and there isn't even any mounting points for it on the frame... And as you can see, it is too prominent a detail to let go... You could get away with it on the Revell Kit cause the saddle tanks obscure it, (except the engine would flop around loose.... But not the Italieri, it's right there in the open... That's going to set me back a day or two, luckily I have the materials on hand and an example of the mount in scale as well... Now I just have to make one to fit the Italieri Bird... That's three blatant mistakes with the Italeri molding of this kit... Somebody out there dropped the ball badly... Oh well... Generally the Italieri Kit is rated better than the Revell kit is, but I'm finding the opposite here, for accuracy, the Revell kit tops the italeri by a long way.... Well, two steps forward one step back, the life of a modeler... Onwards...


- 169 replies
-
- 13
-
-
Well my paint didn't show up today, Post says it will be here tomorrow... went ahead and proceeded as far forward as I could on the H-13H frame, installed the engines on both and now I'm stuck til the paint gets here... So once the frames were completely dry, I figured I would mount the unfinished cockpits temporarily so I can get an overall look see at how they are turning out.. These are those shots... I think they are going to turn out ok..... Onward....


- 169 replies
-
- 13
-
-
Build Log, Where for art Thou Build Log..... {chuckle} I for one Gary would love to see it as well...
-
Yep, The brothers here are definitely an inspiration.... I do miss them during periods of lifus interruptus...
- 789 replies
-
- 10
-
-

-
M29 Weasel family 1/72 (scratch) by Backer Finished
Egilman replied to Baker's topic in Non-ship/categorised builds
A full platoon at a time... each major variation.... Excellent work my friend... they match my fathers WWII pics perfectly.... he didn't have all the variations but the Basic Cargo, Ambulance and Improved Amphibious Cargo were all ones he actually drove, they look beautiful.... -
You know, just being a plastic hacker, I'm amazed at the metalwork you guys are able to simulate.... whish we could hear more on how you do it... Amazing work Tim... gonna be another stunner when done....
-
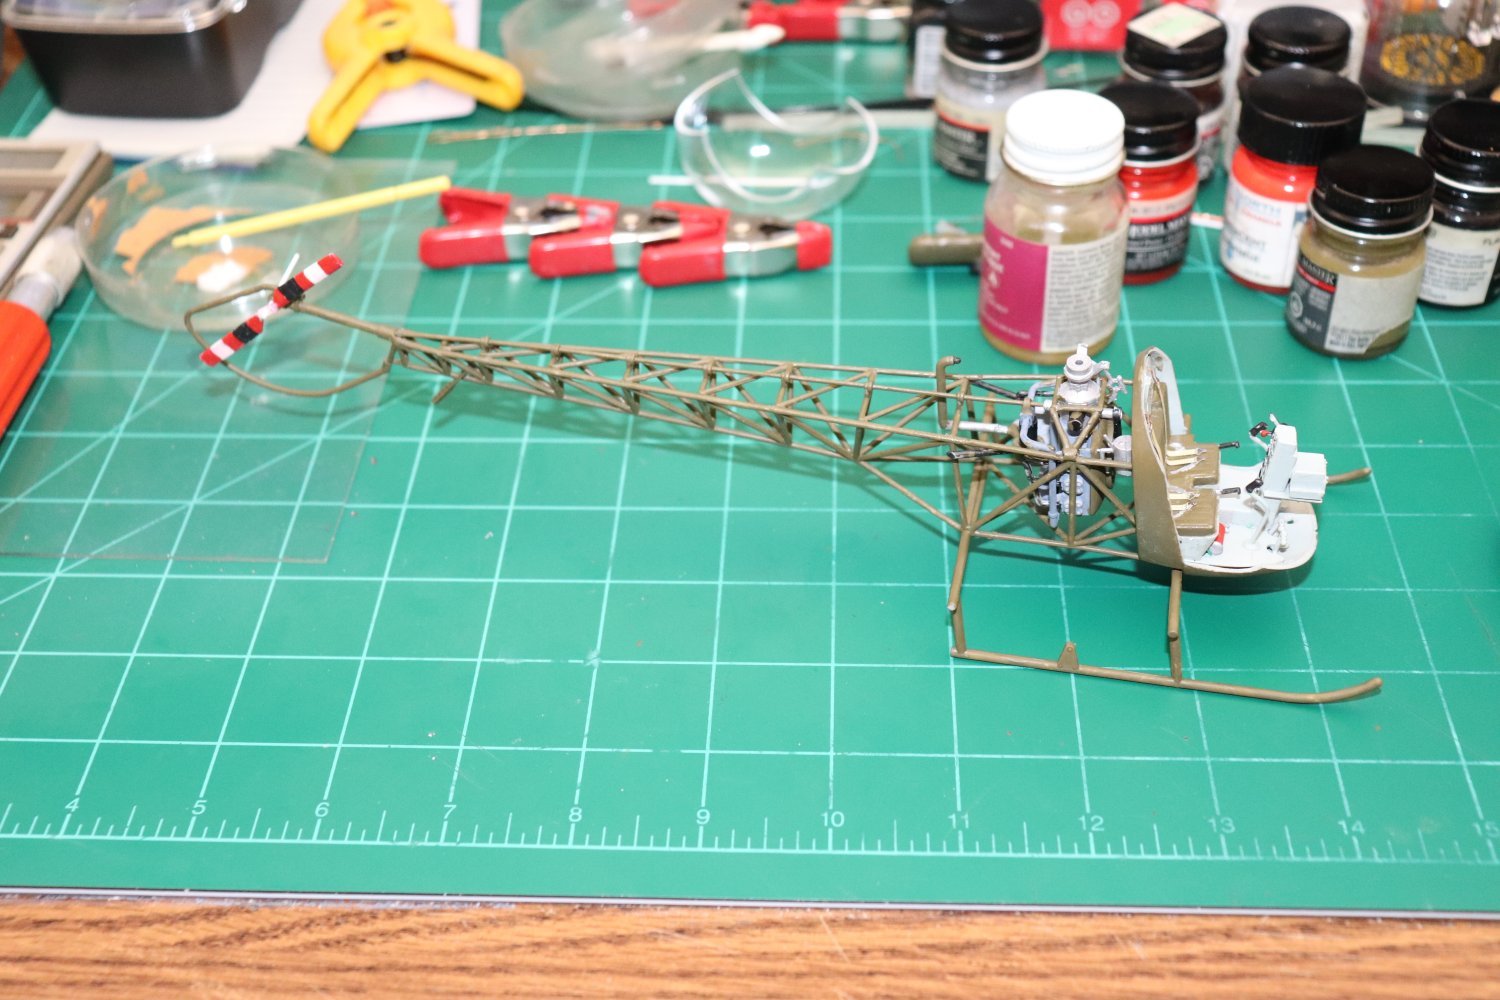
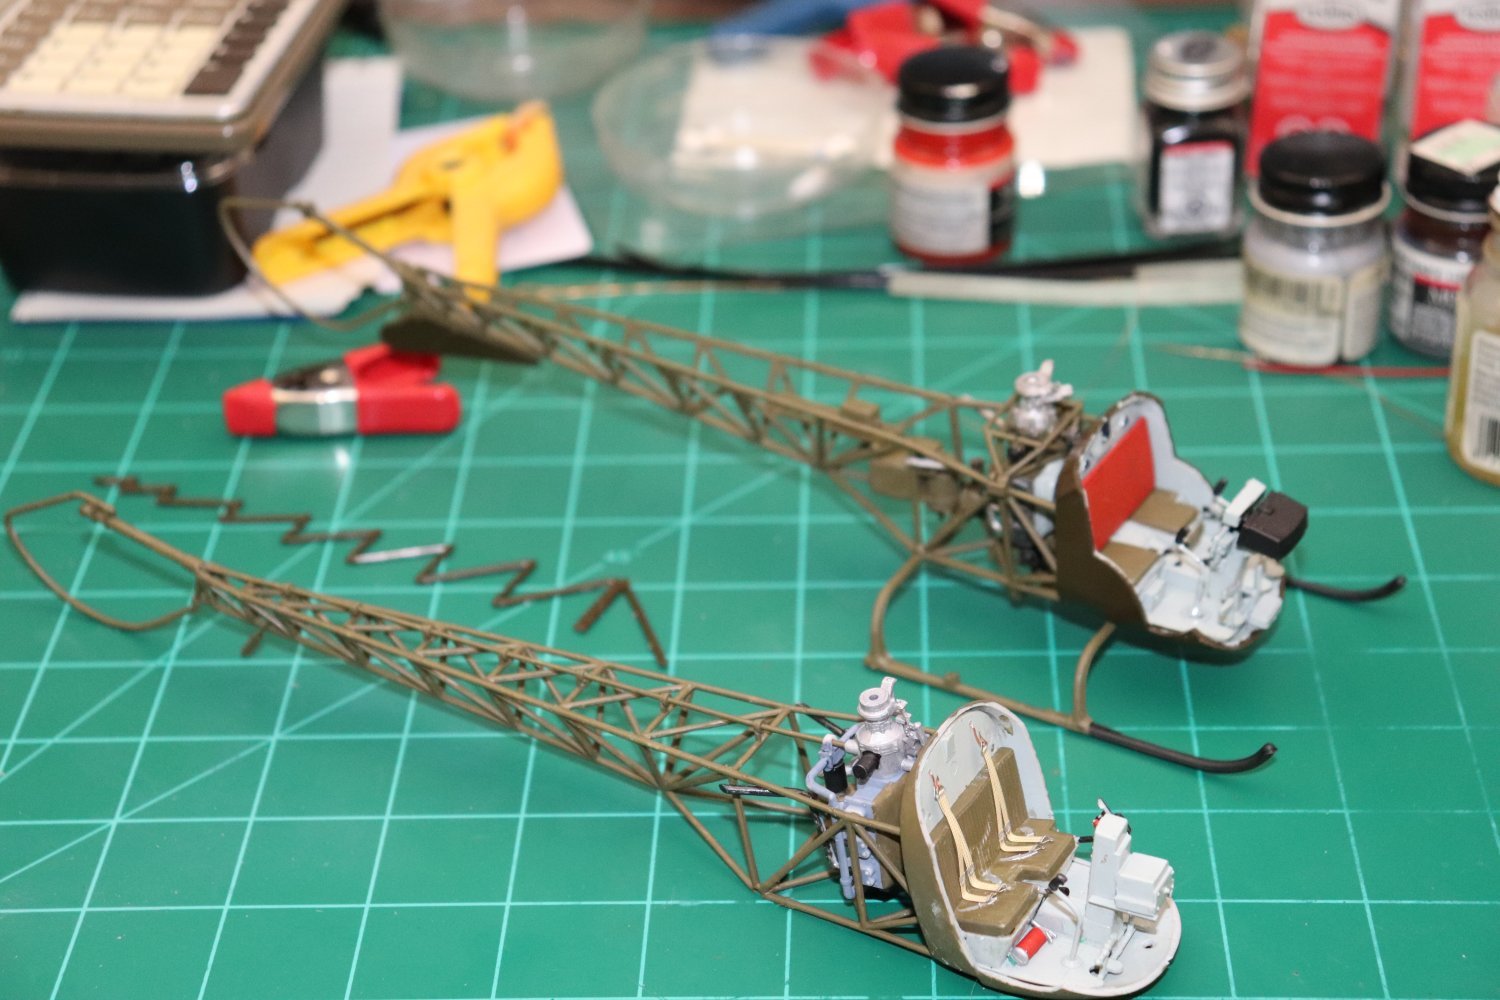
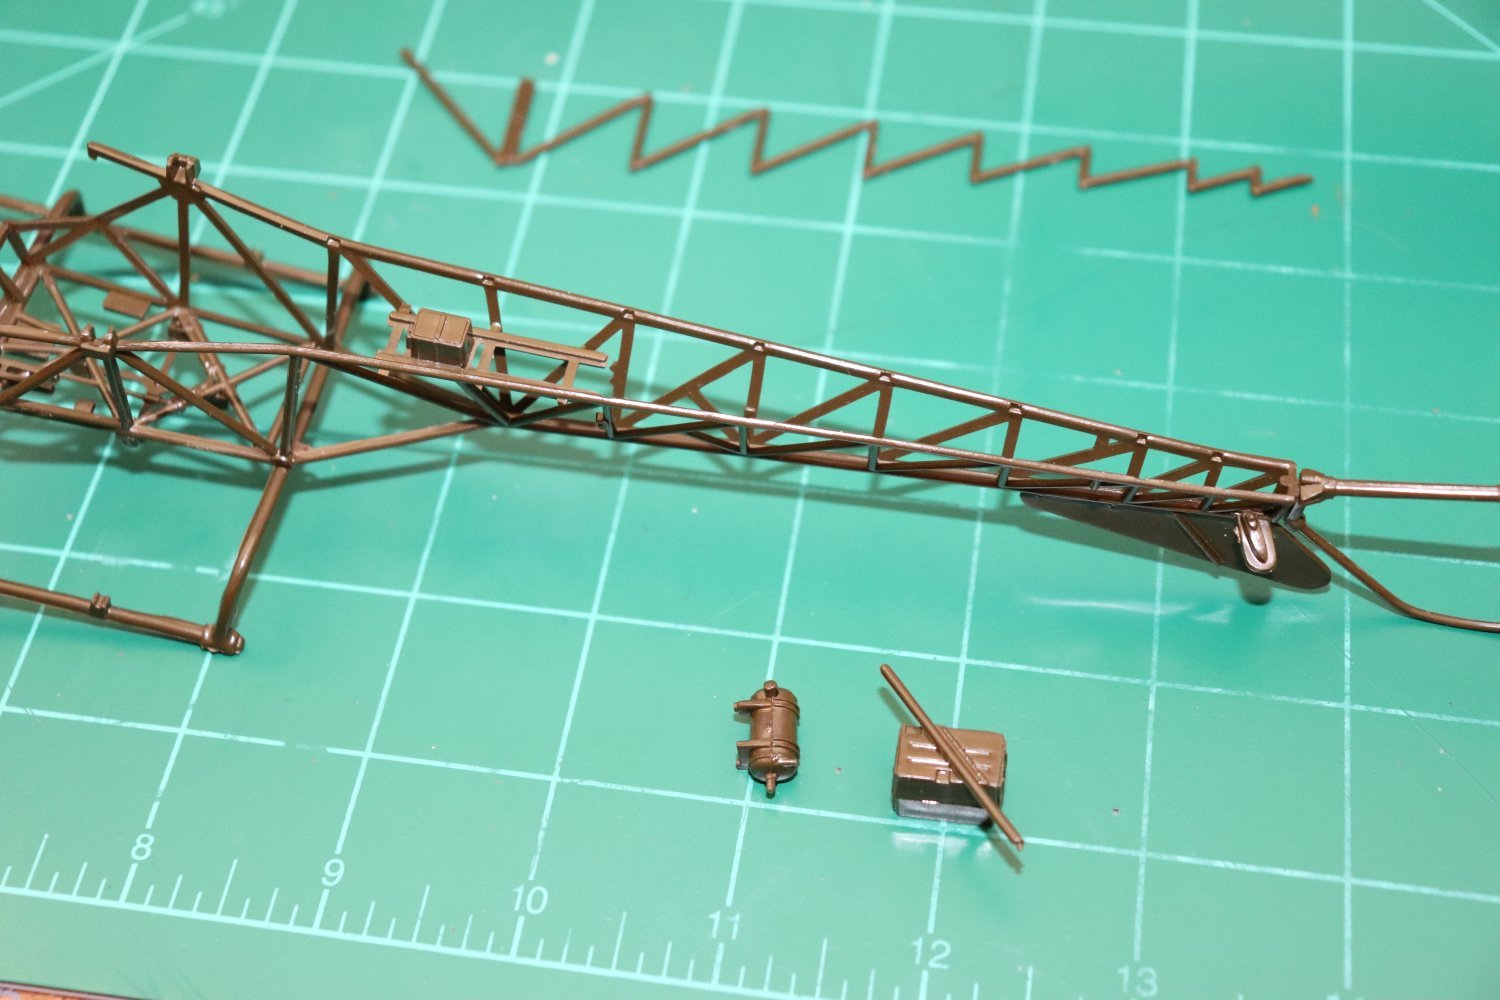
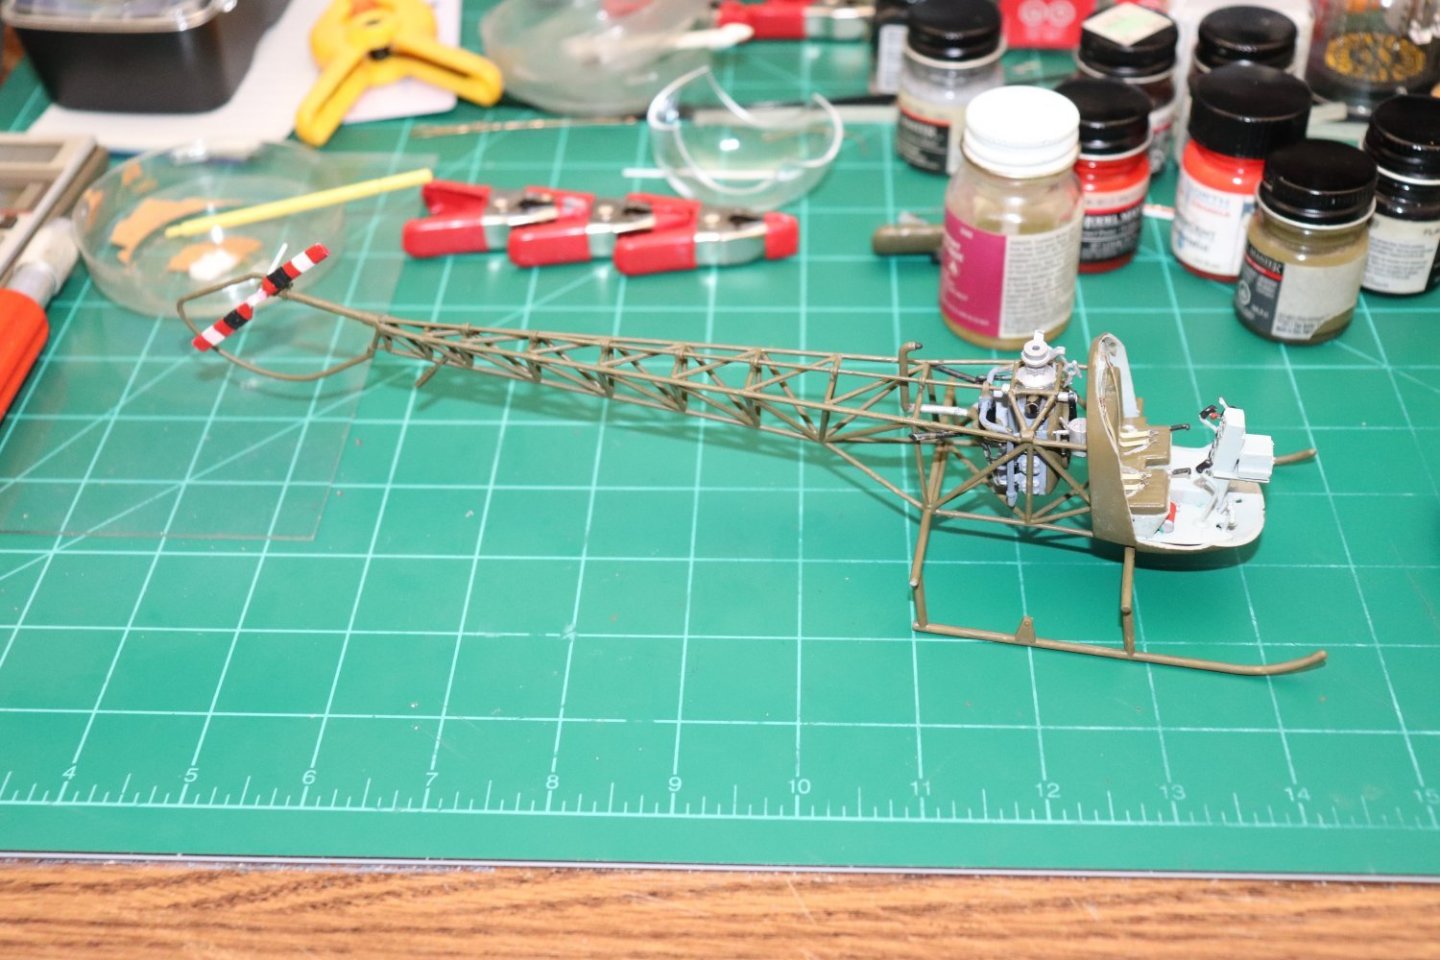
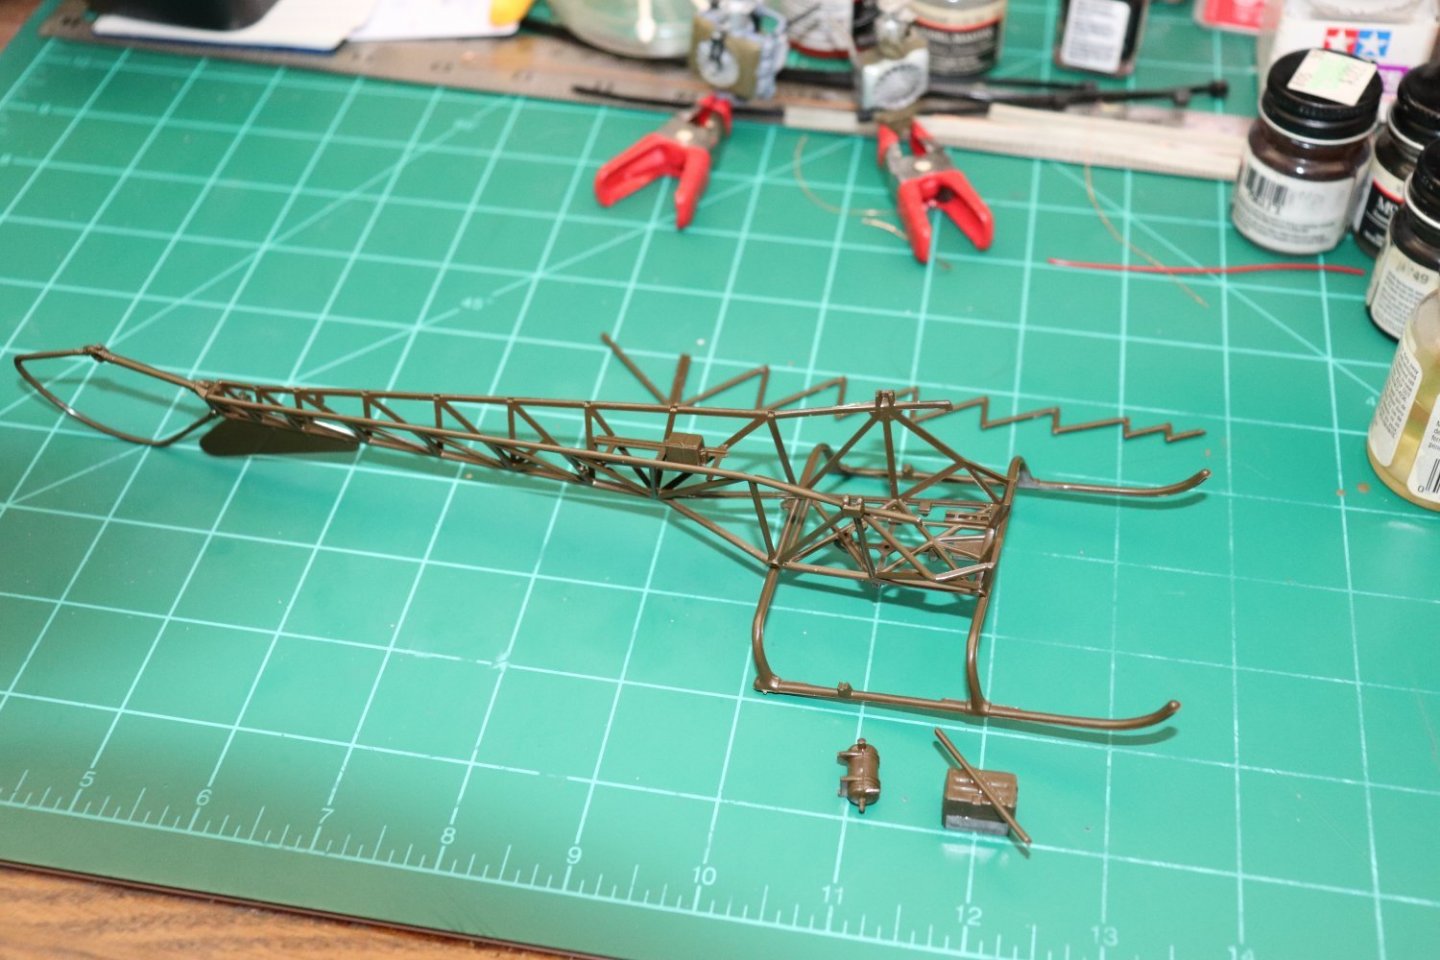
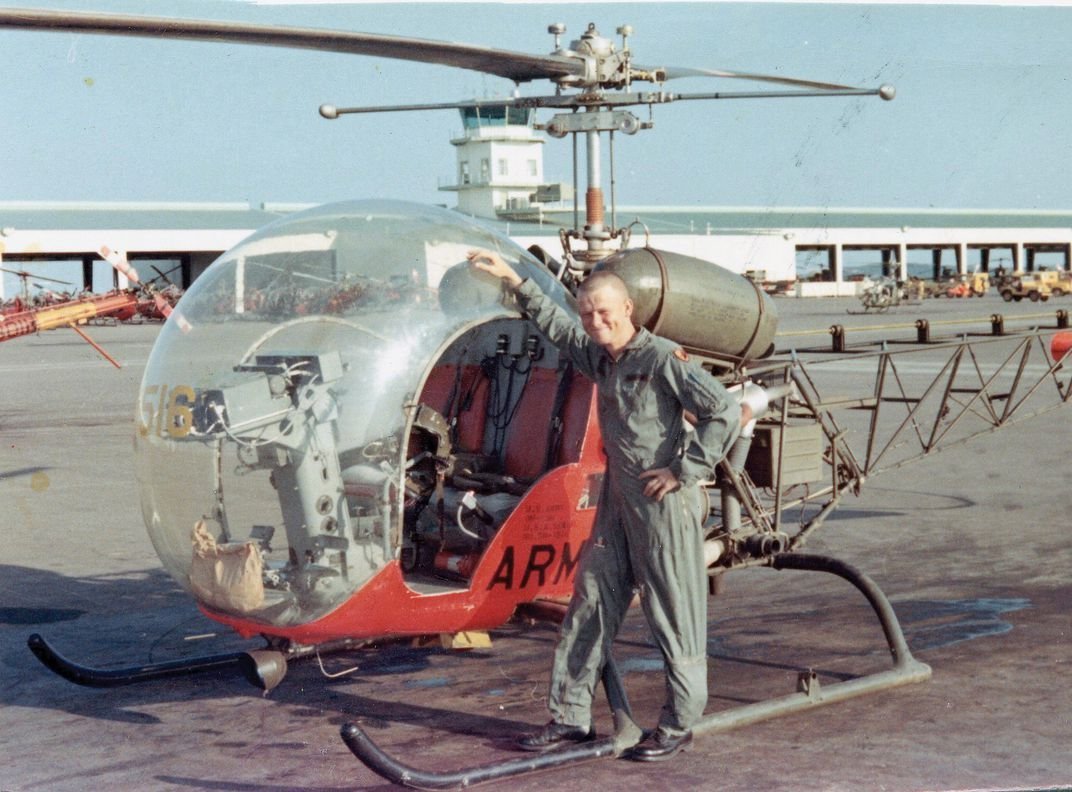
Thanks Dan, Alan... I tend to agonize over such things, My inner eye is always telling me that more is possible that physical reality will allow sometimes... I guess I'm a perfectionist.... Anyway here's the latest stopping point... the H-13H frame is basically assembled... Today I should be getting my paint... while I paint the H-13H frame... Getting closer to making them purty... The Revell Base Frame... First we mount the tail hoop, lower engine support and skids... Next comes the Battery Box, Avionics Box and Oil Tank.... Frame Assembly complete, next up paint, olive drab of course, sitting next to the complete and painted frame of the H-13D/E frame for comparison... the two kits definately have a different build sequence... You notice no tires, both birds in their environments had little need for wheels and tires so they were usually removed in service usage.. At Ft Wolters if they needed to move on around they had a dolly which they would slip under the skids so they could push them around, and in Korea they didn't go anywhere if it wasn't flying, beside where they operated these there was little to no paving all the time... Onwards....


- 169 replies
-
- 12
-
-
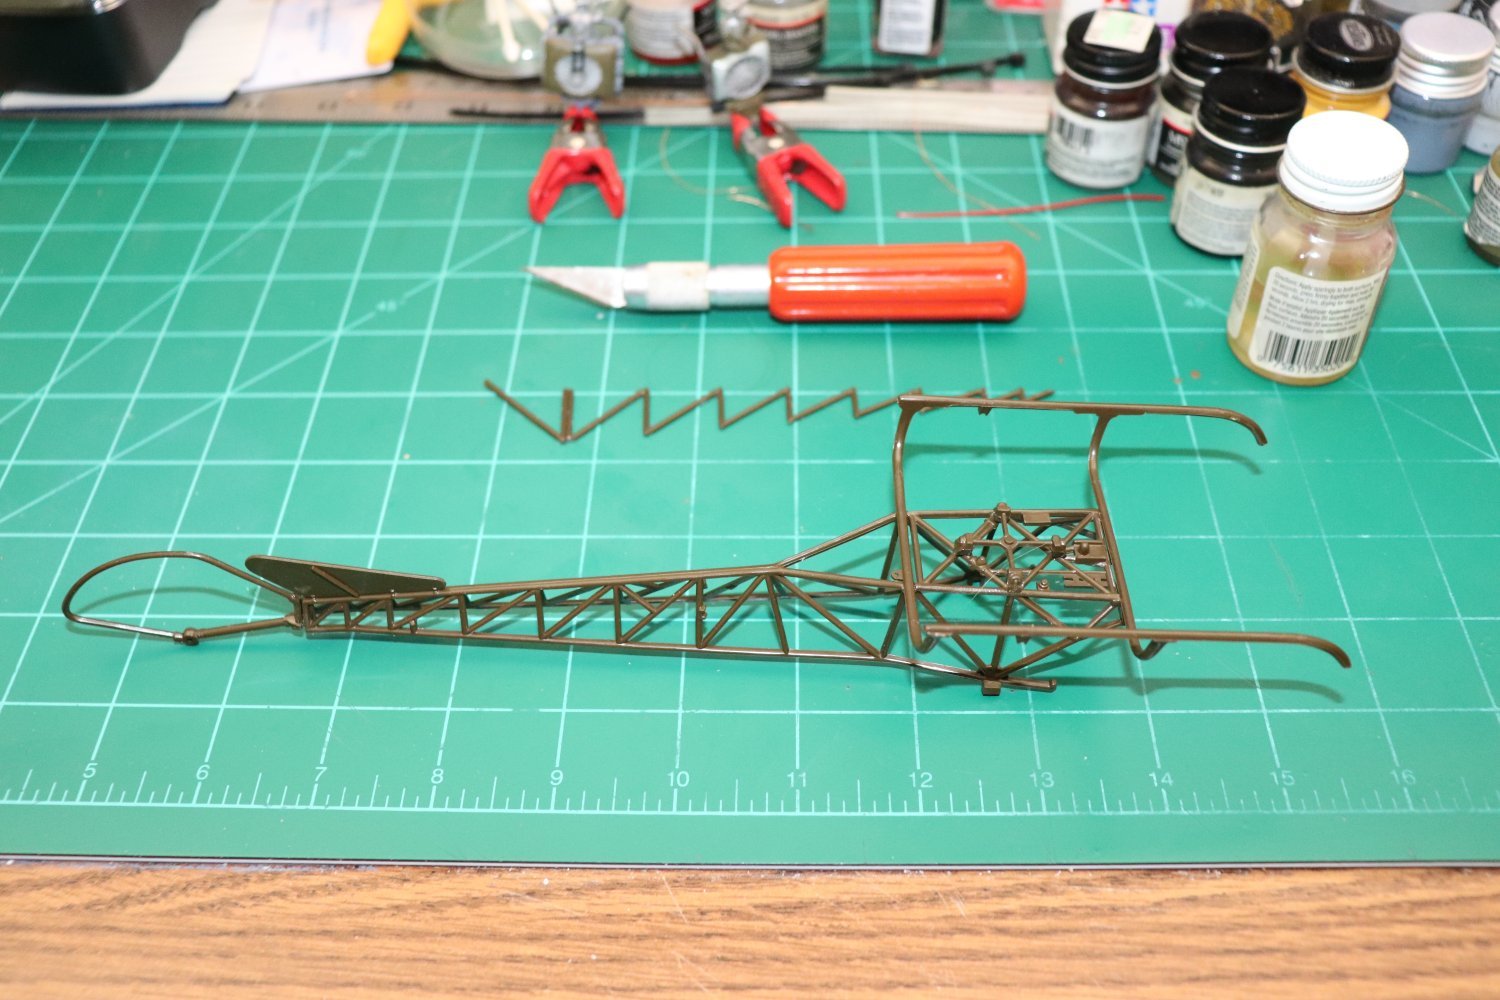
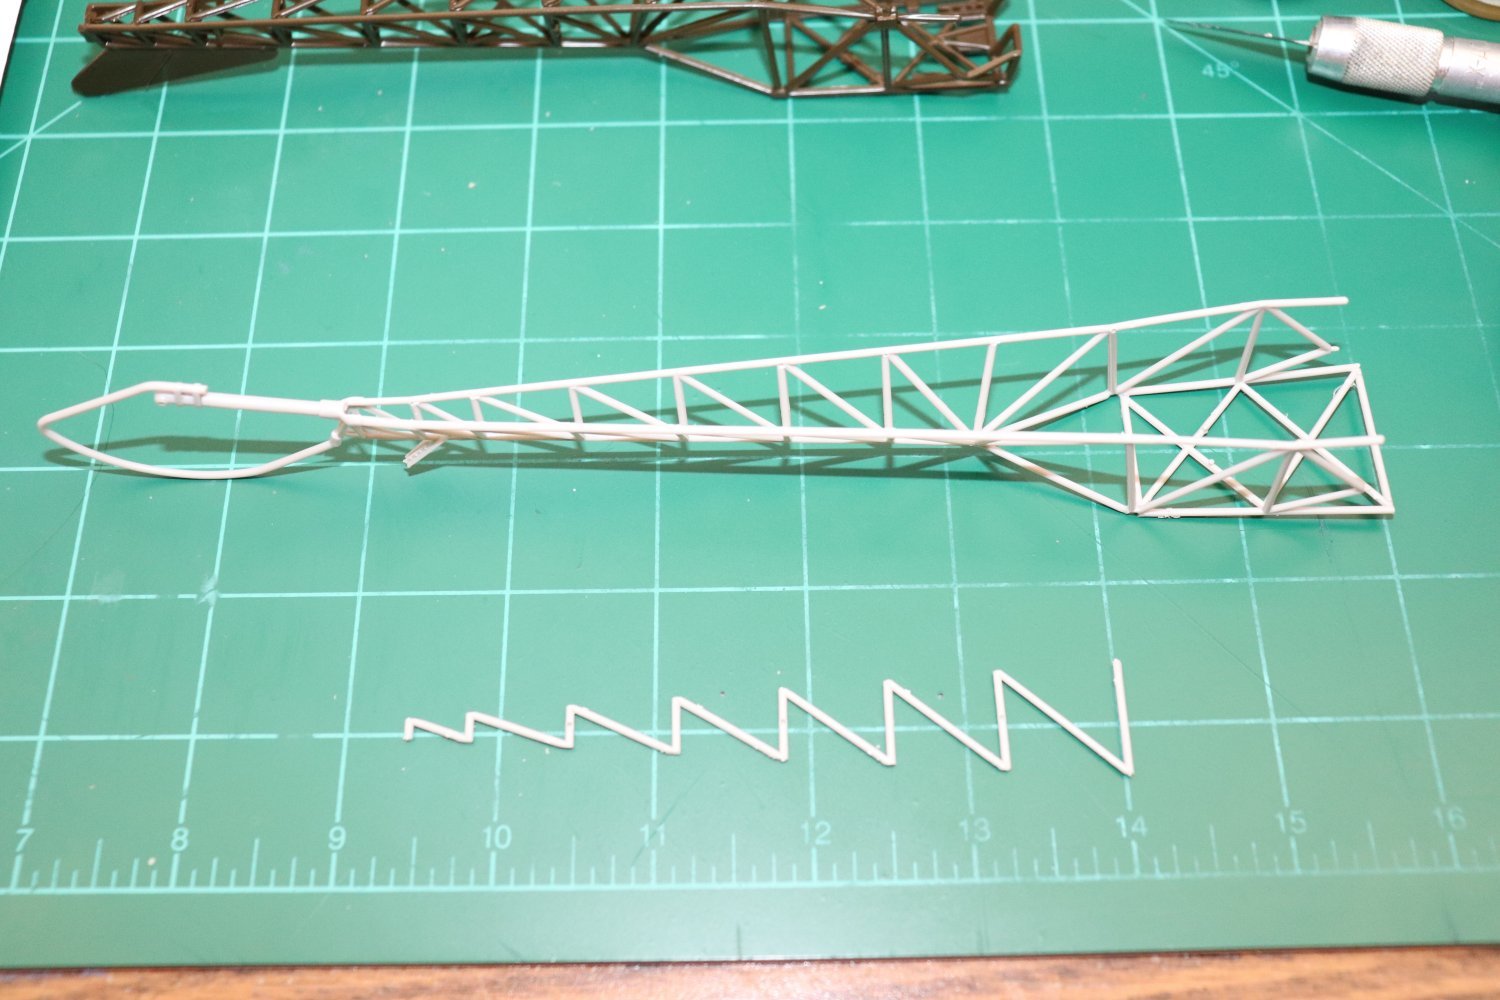
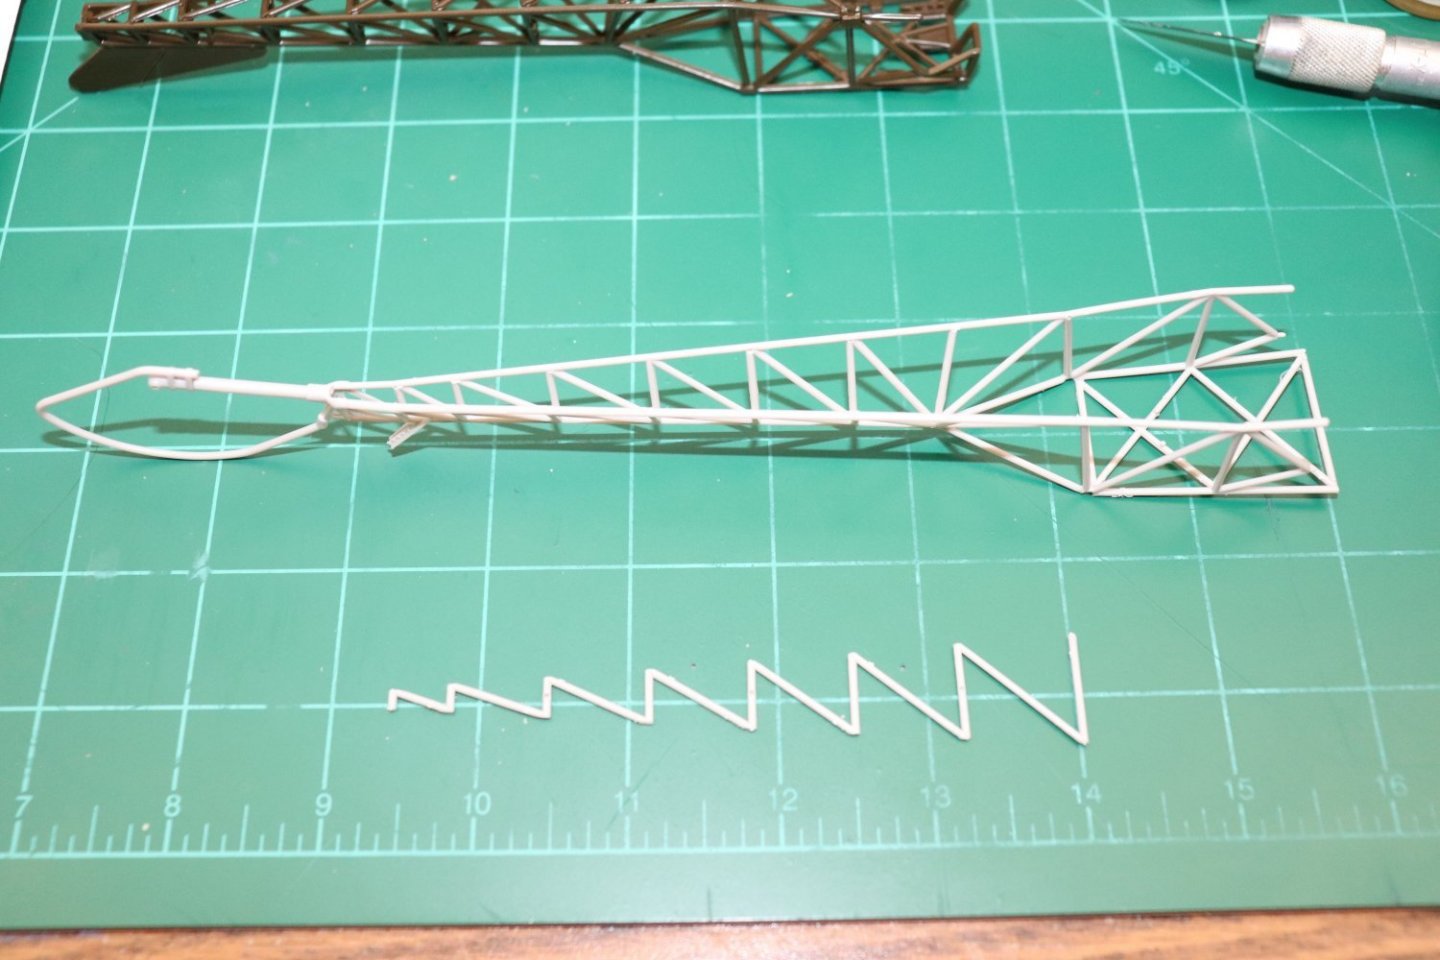
Thanks my friends... I should probably stop being so critical of myself and just get on with building... Ok Split the upper tubing out, (didn't break it) drilled the new driveshaft locating holes..... and glued it back into place.... It's easy now to see the differences between the two... I was lucky, the third hole closest to the tail split on one side and almost broke but I managed to get it back in without completely breaking it... It wasn't easy.... Anyways, thanks for the support brothers, It's APPRECIATED! You can't really tell the insides of the Revell boom are flat, so I don't know what all the fuss over the years has been with the kit, It's a fairly accurate "H" model of the Bell-47/H-13 with details that are not seen on other brands... (as long as you don't do the totally fictitious "Mash" version) All in all I think it's a nice kit, much better than it's reputation now that I've had a real detailed look at it.... Things should go smoother from here on...
- 169 replies
-
- 14
-
-
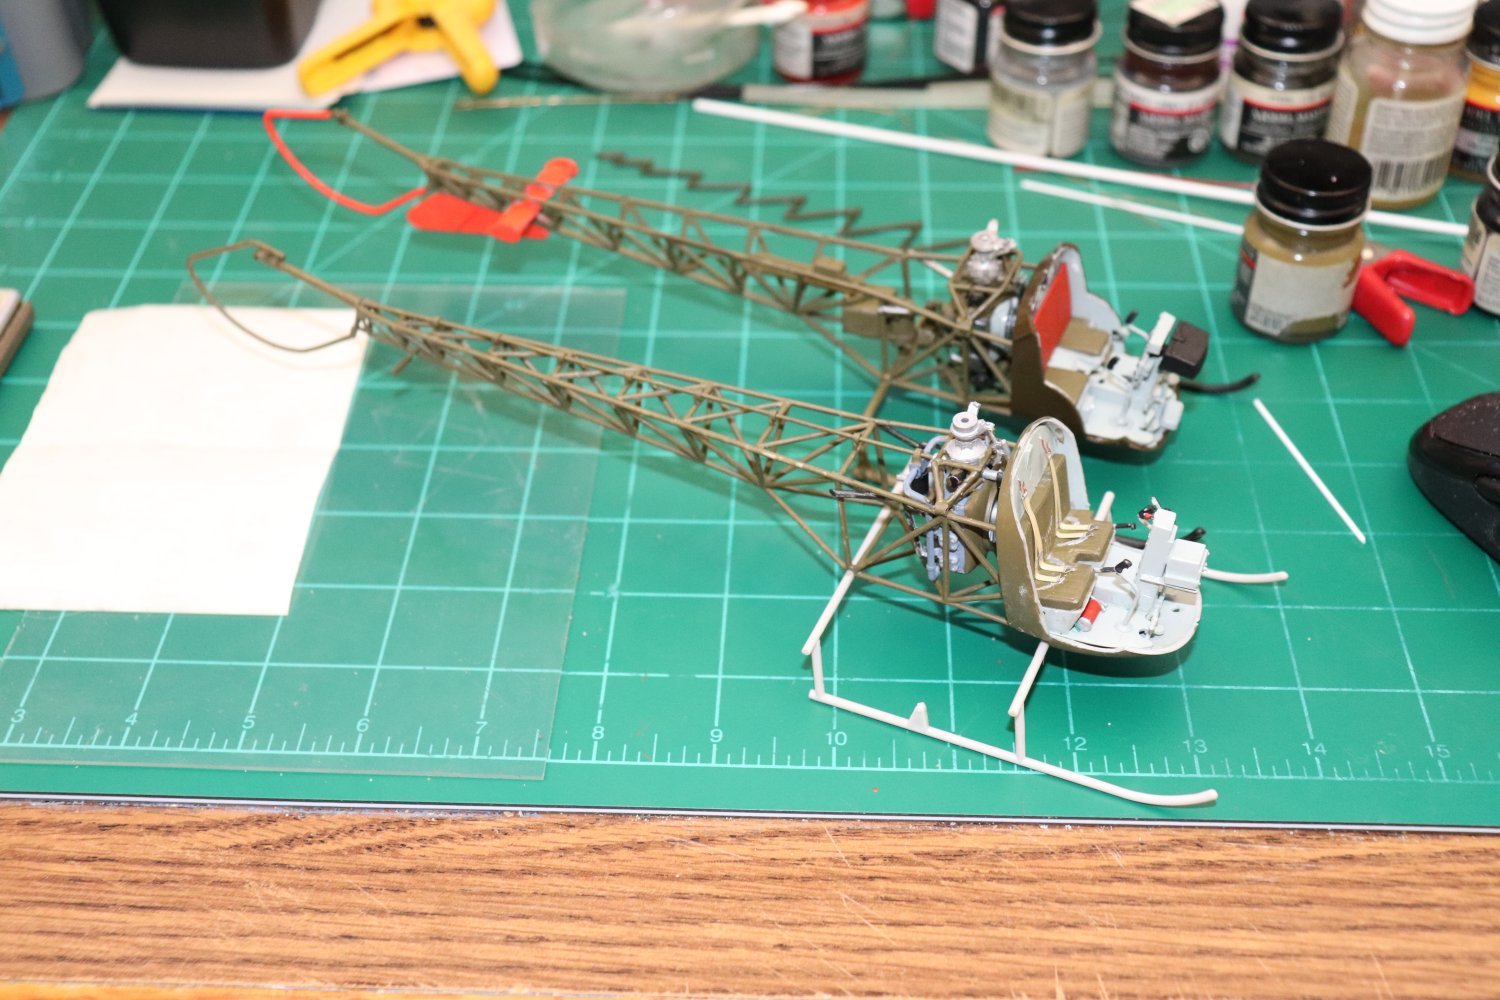
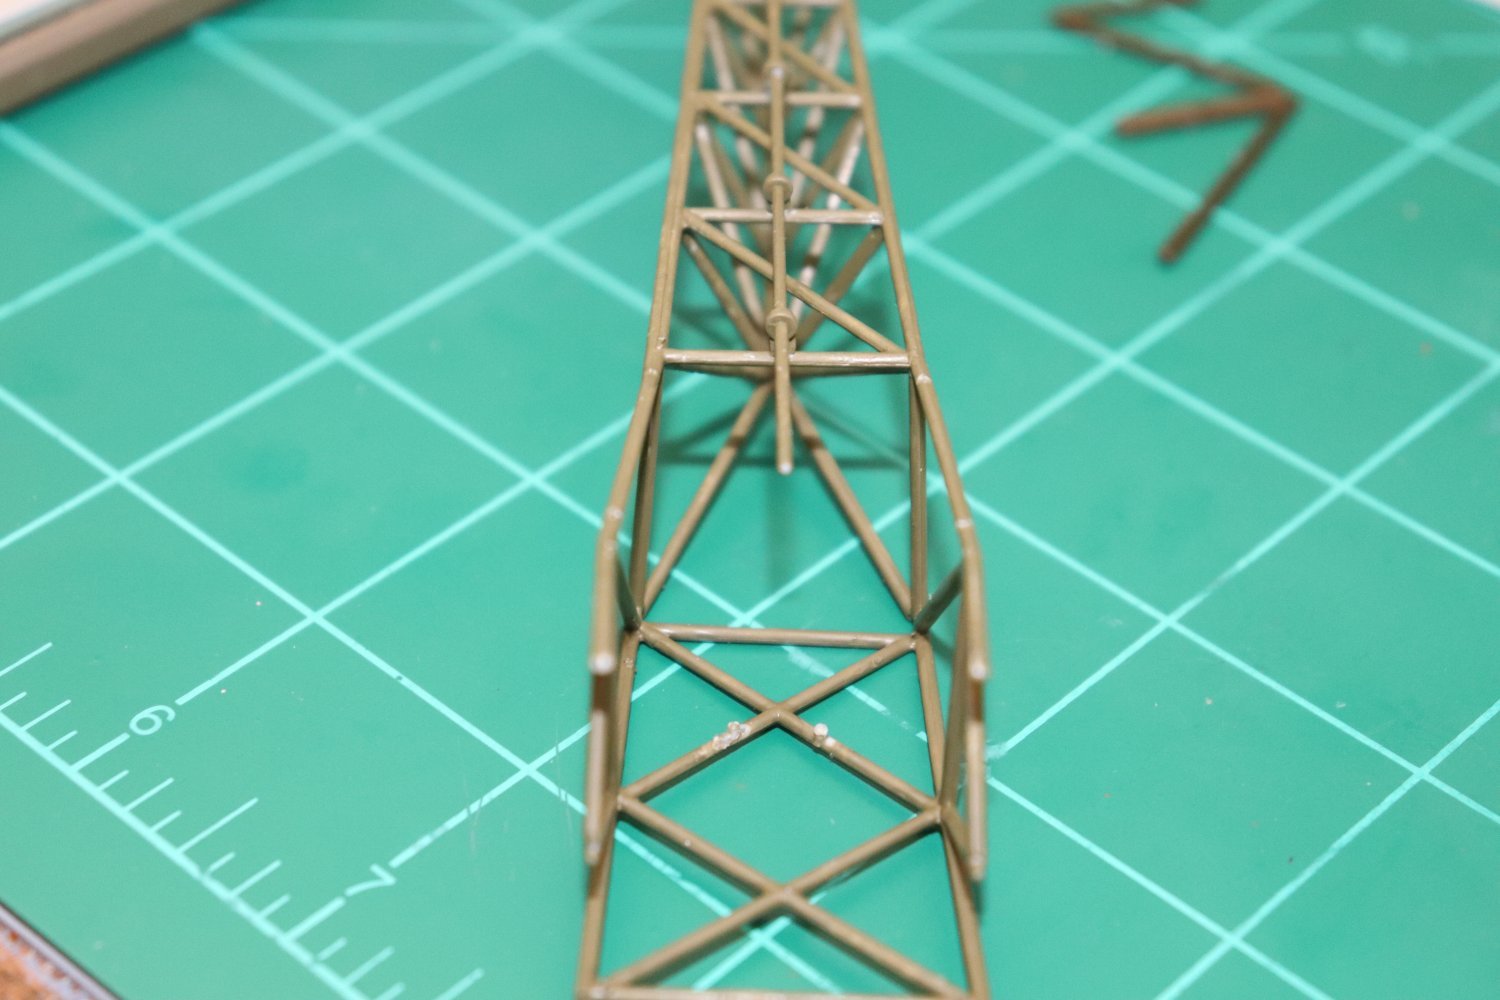
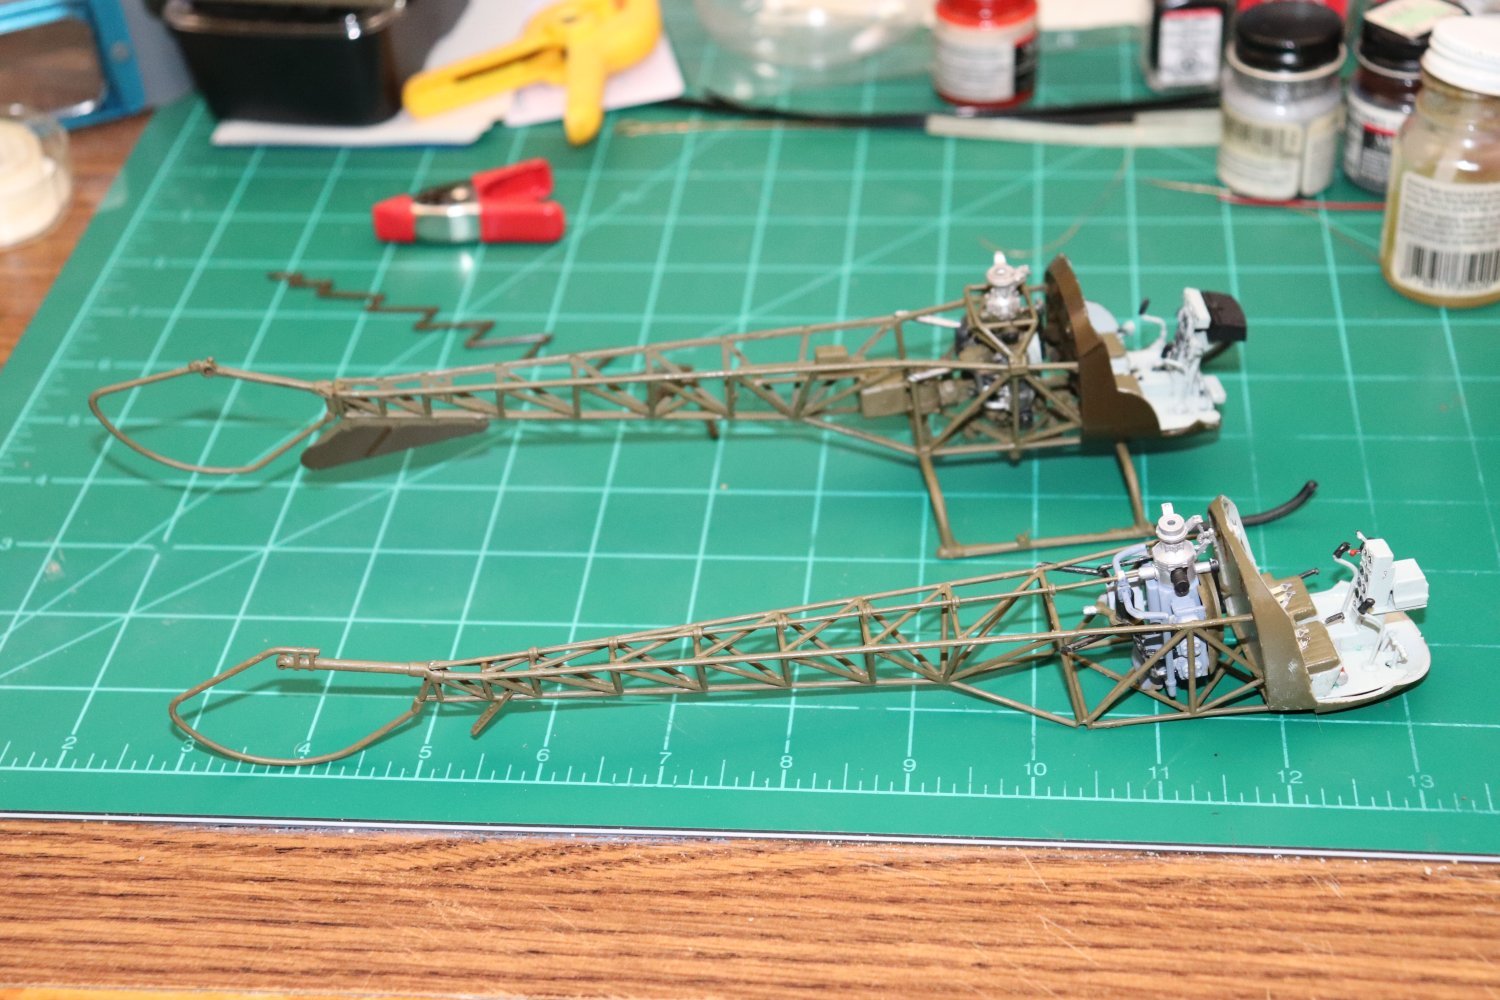
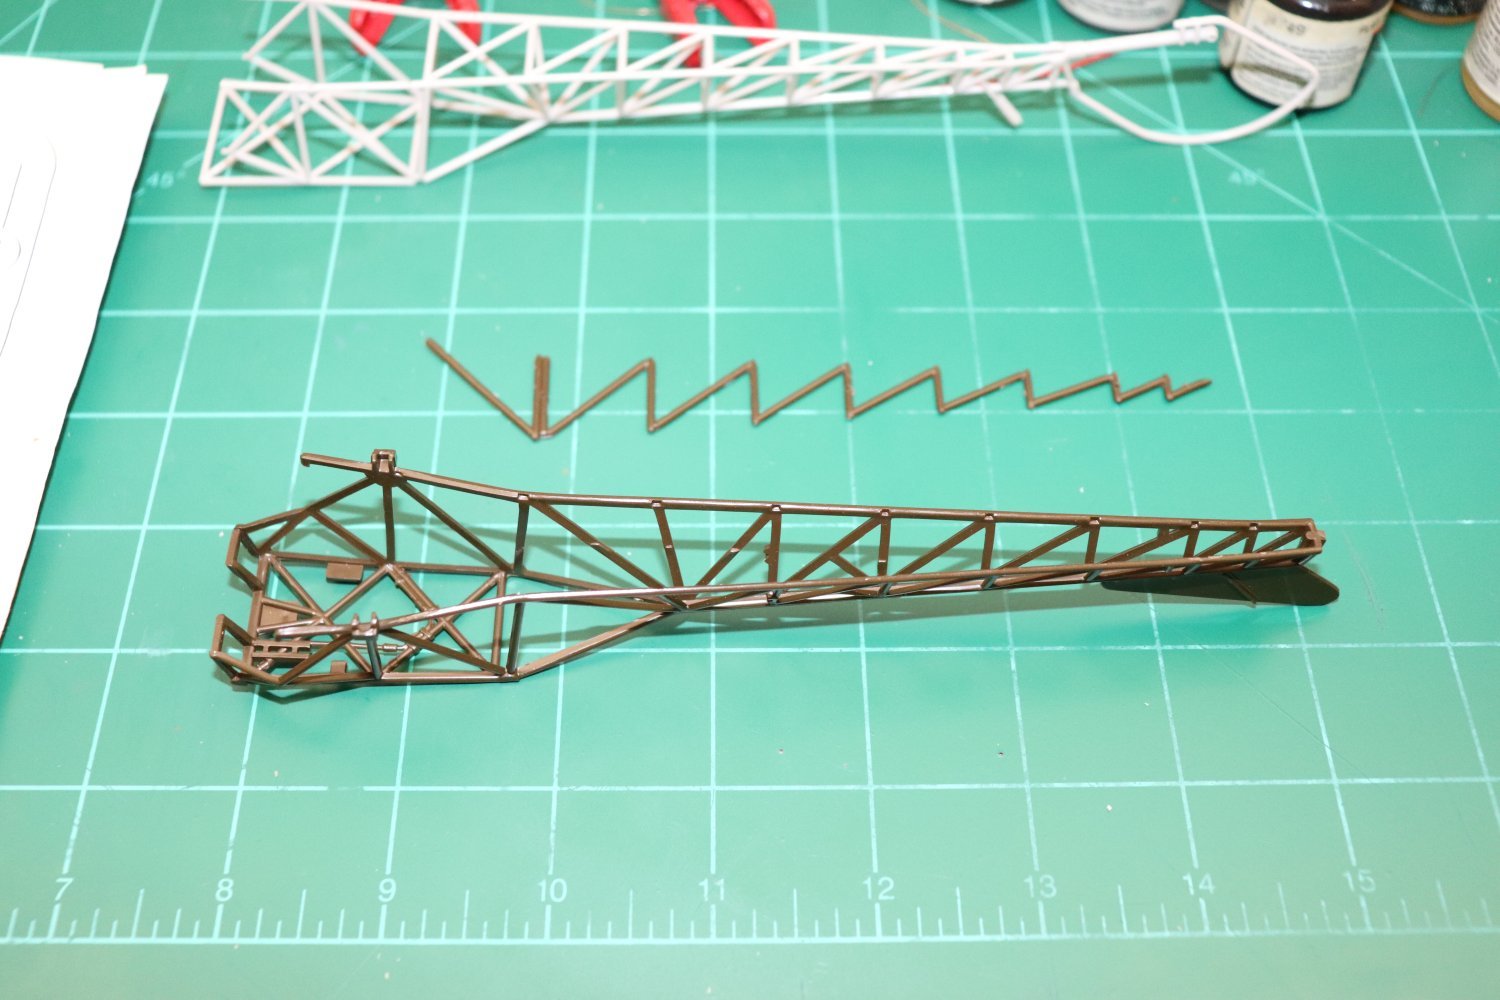
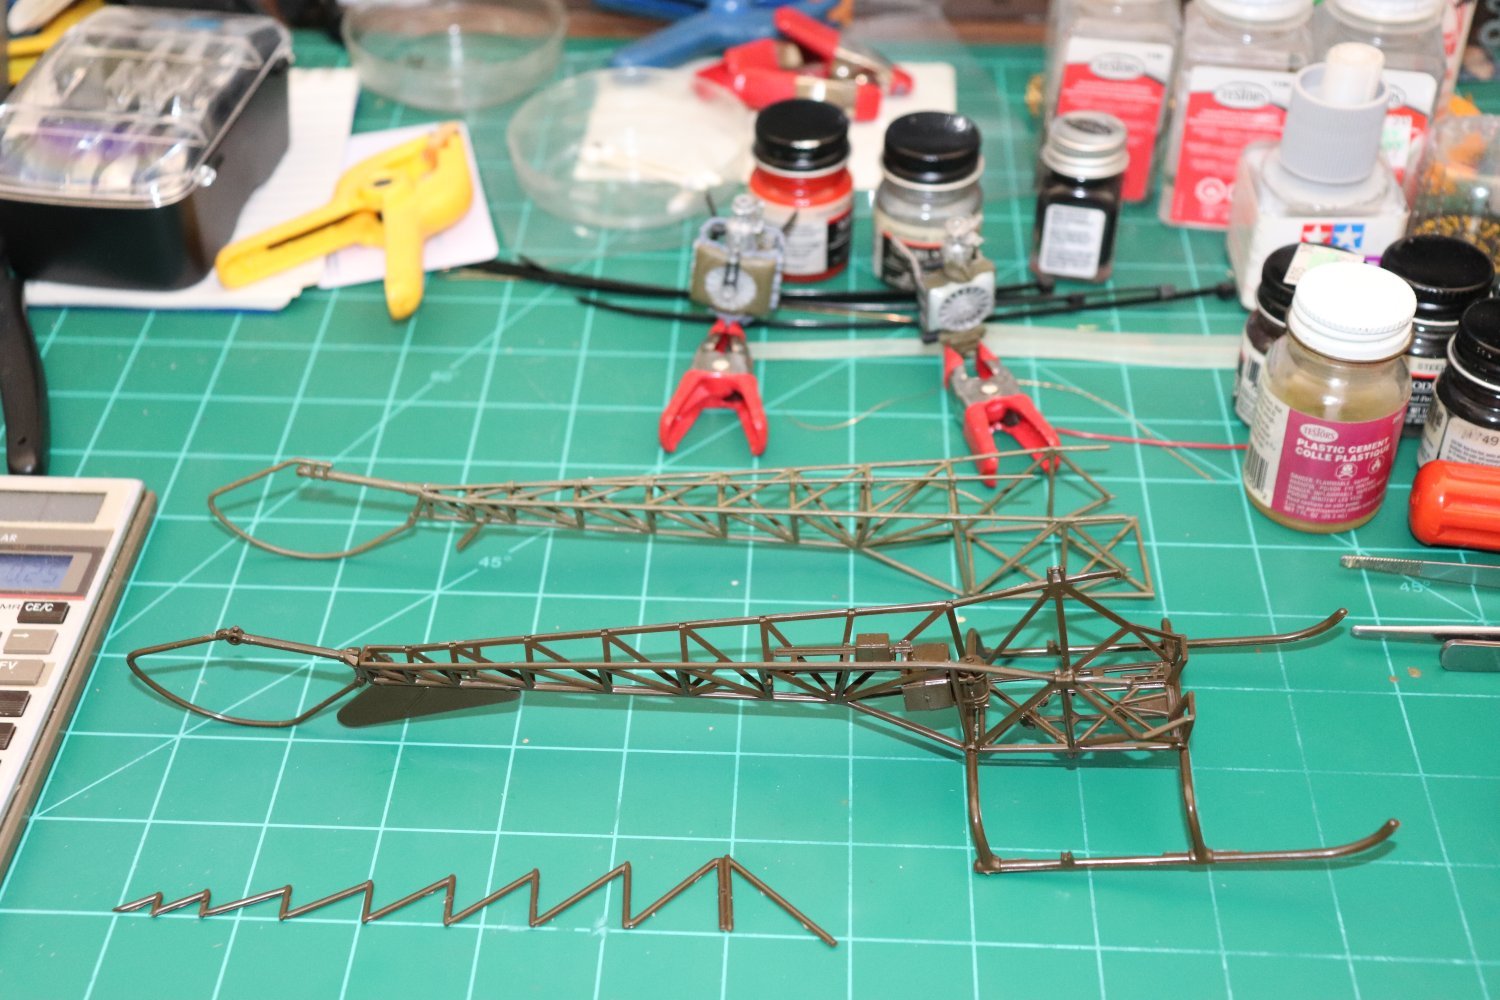
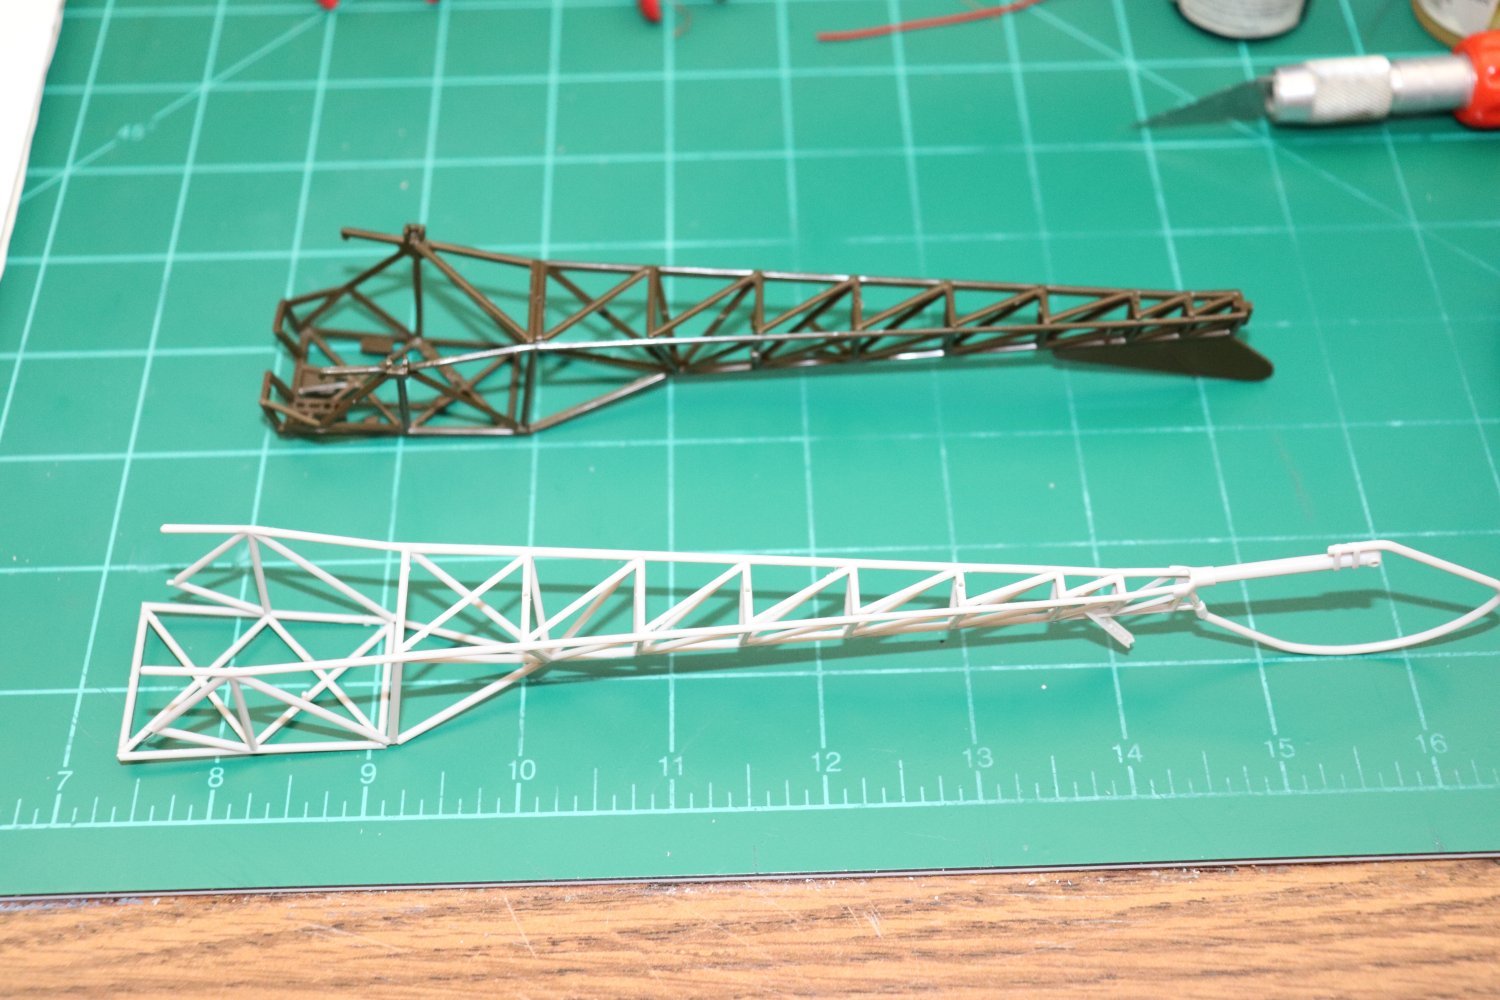
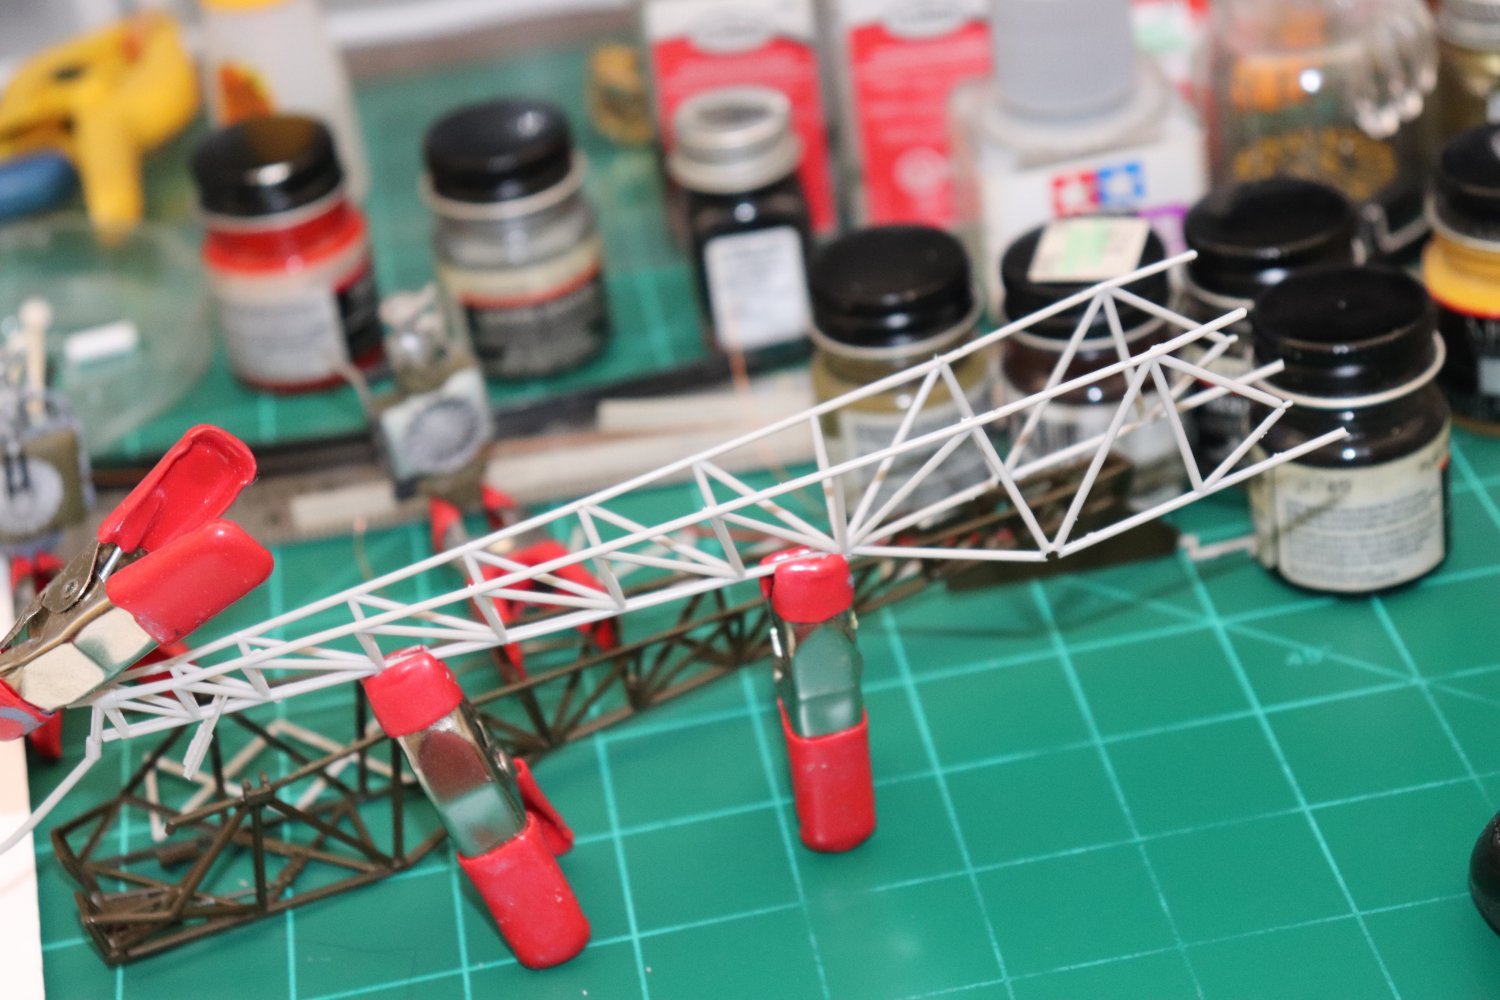
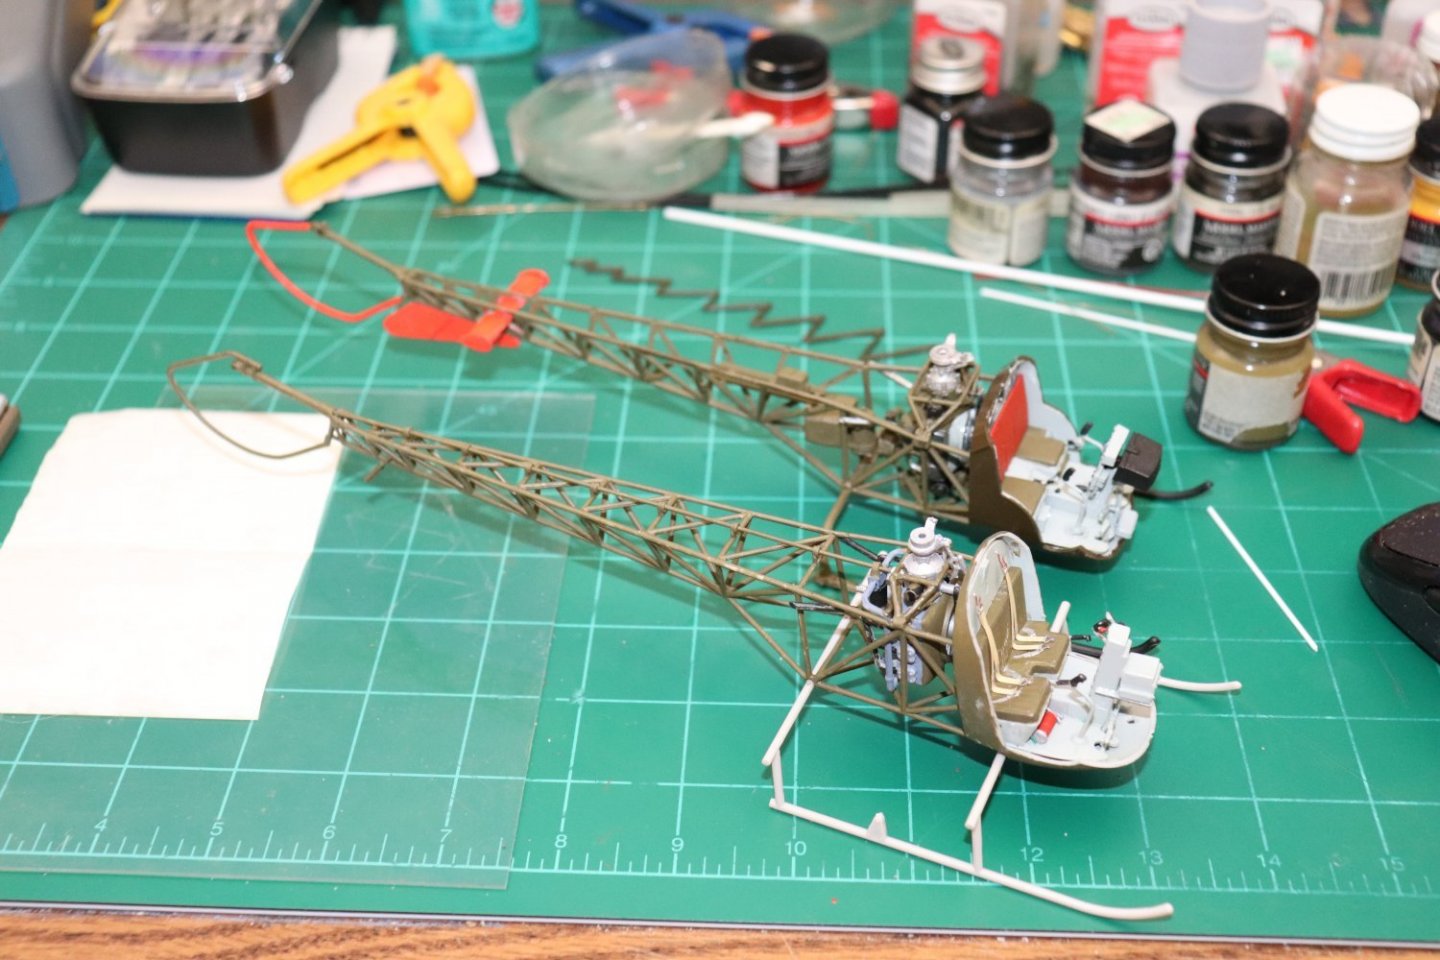
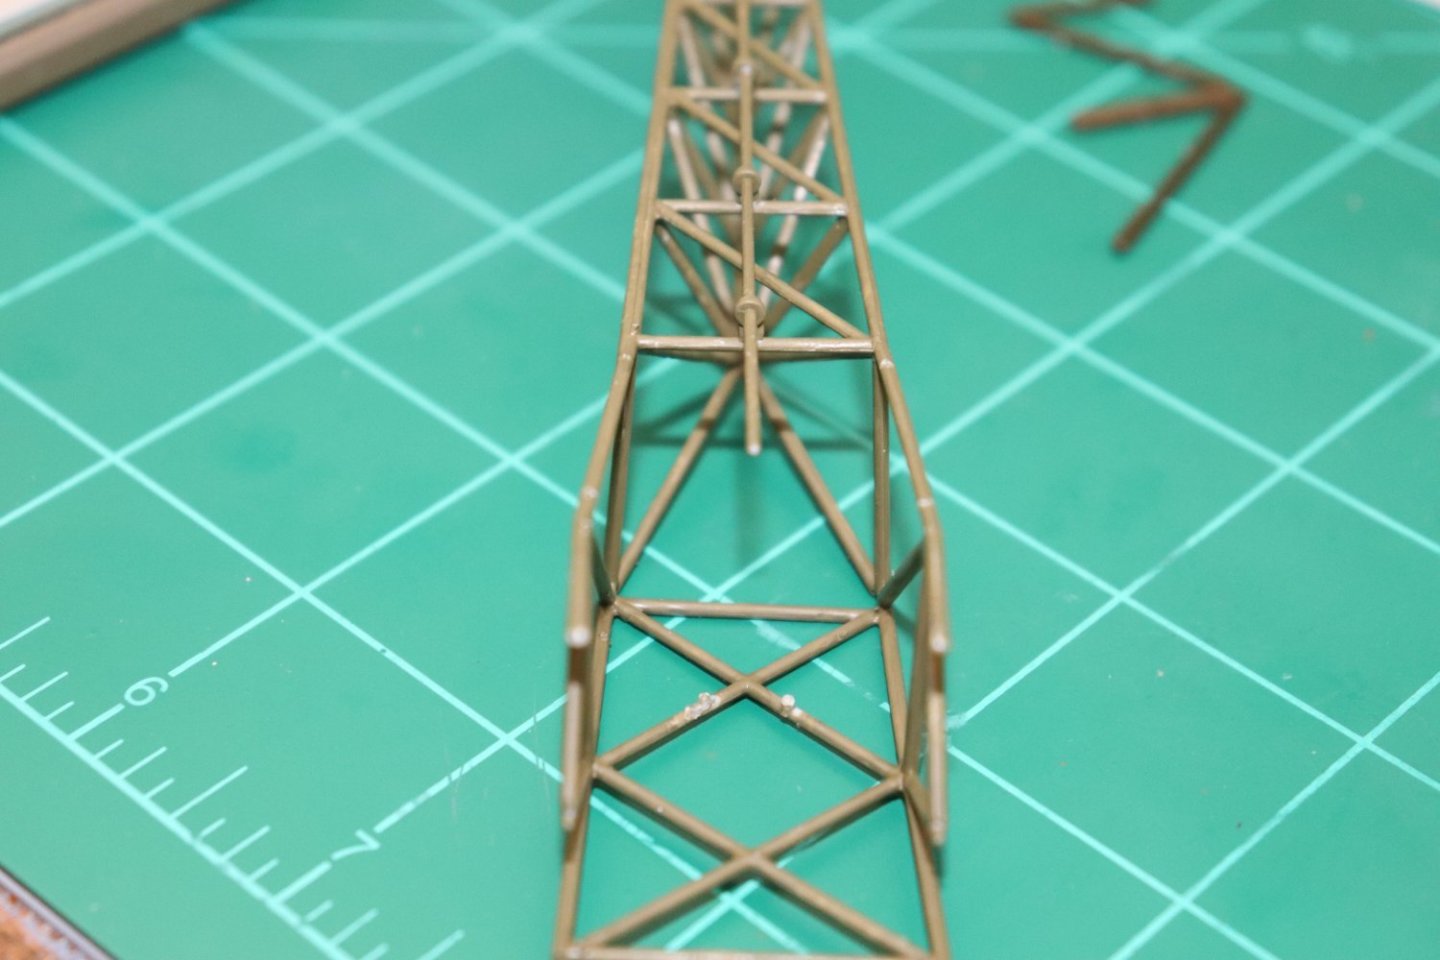
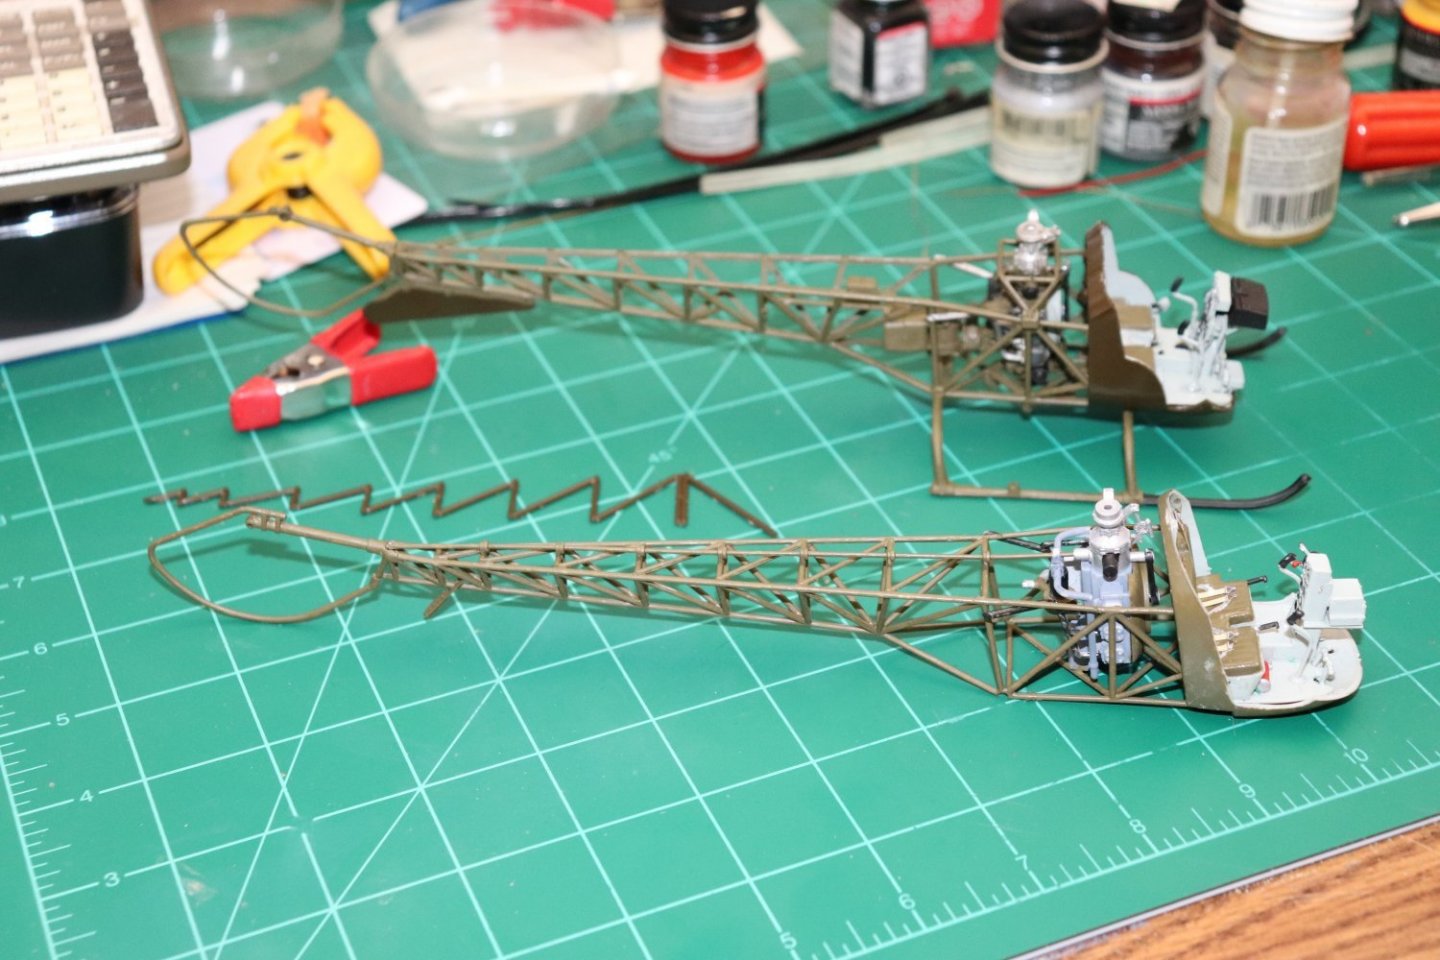
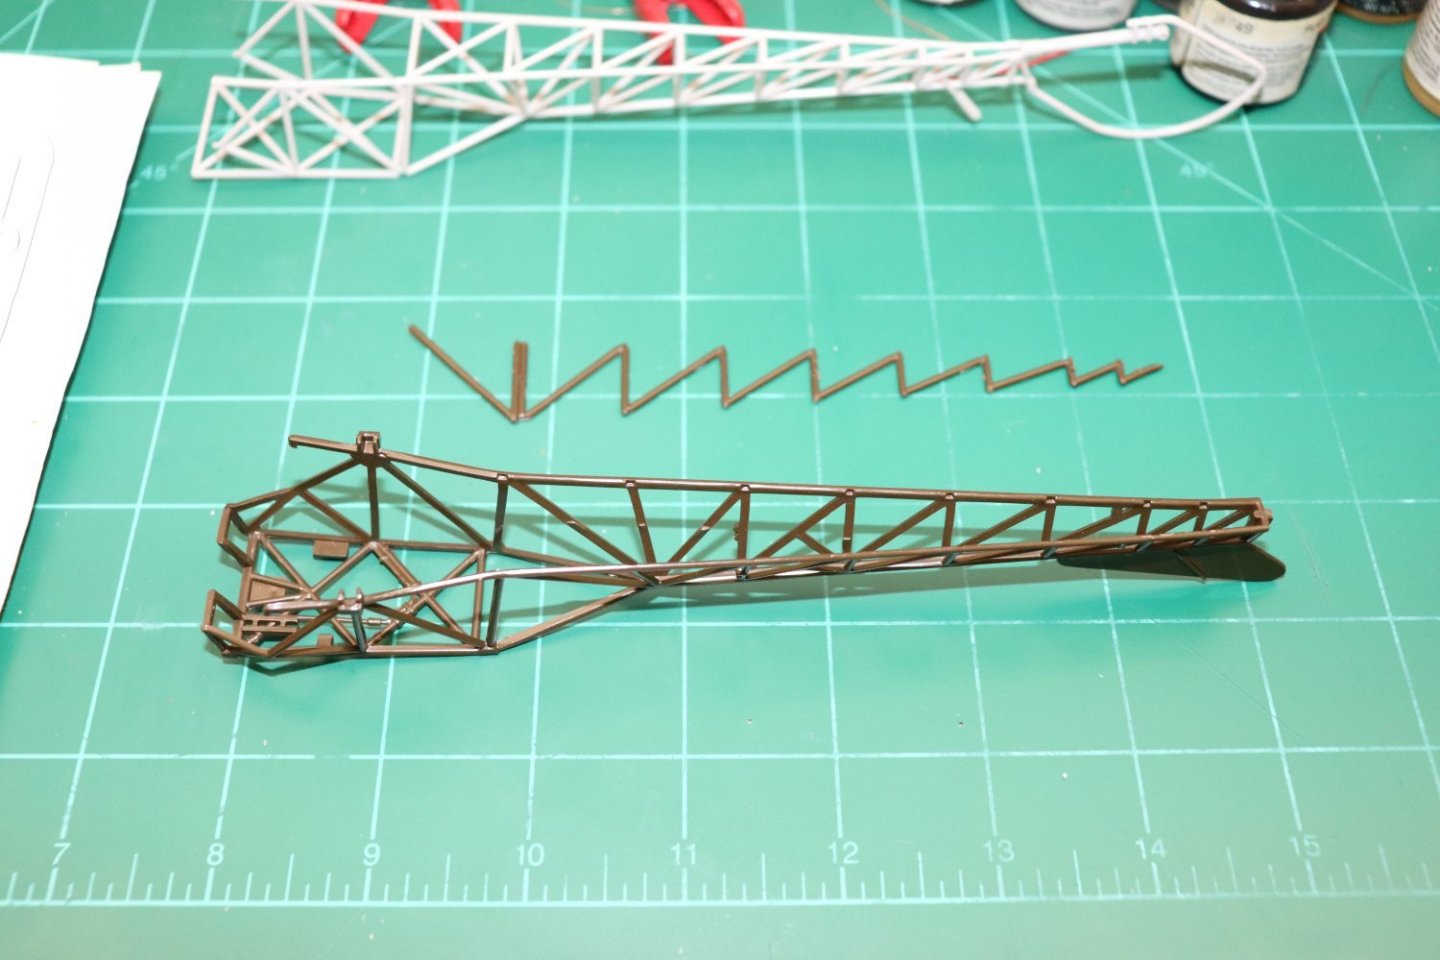
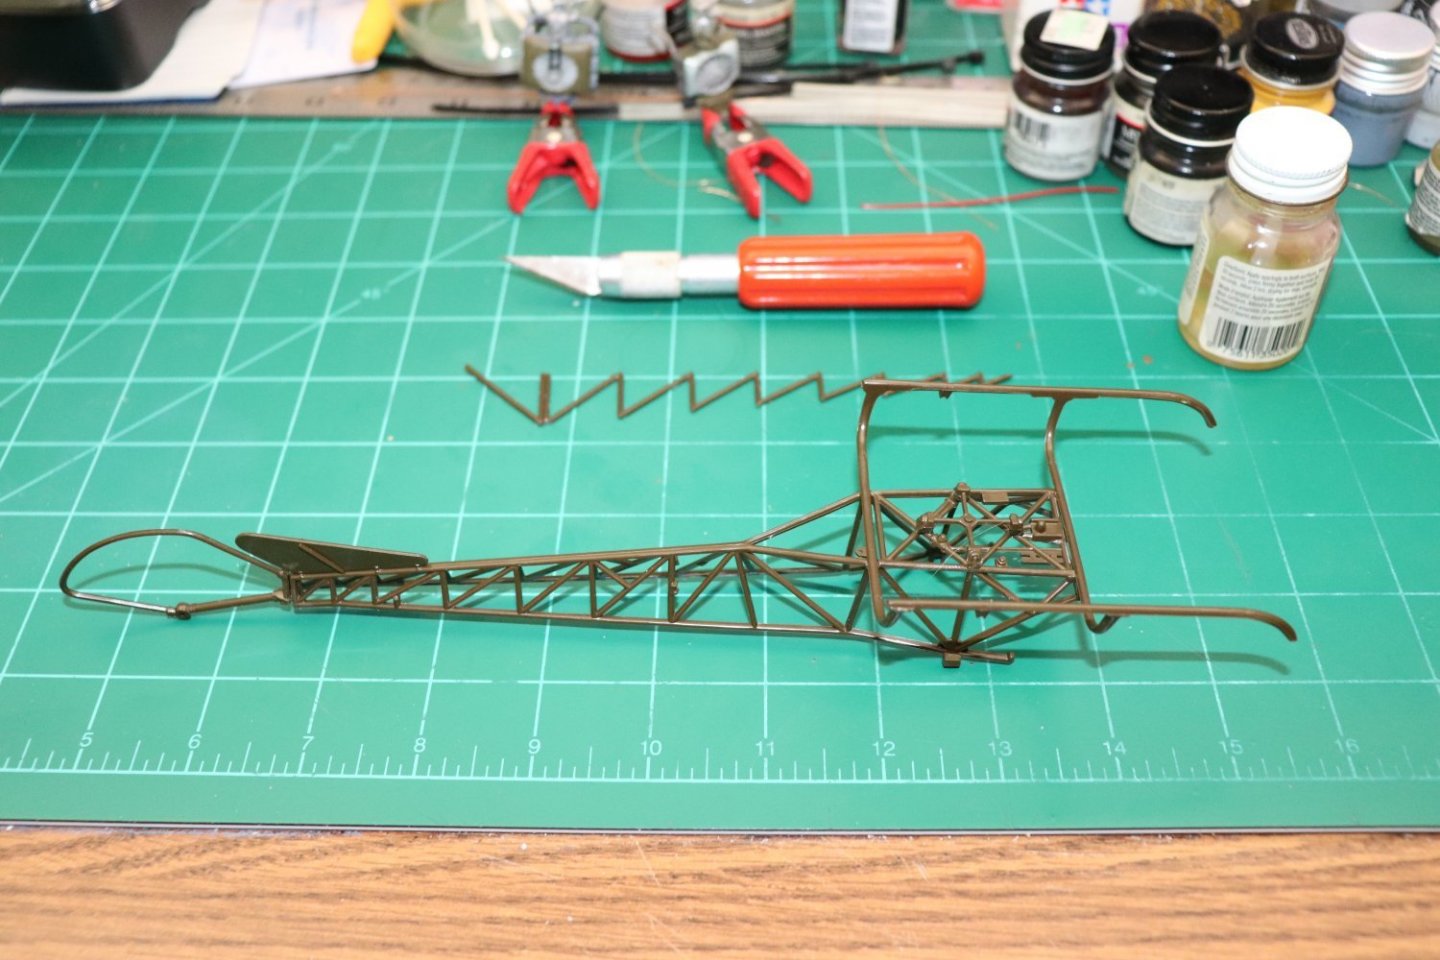
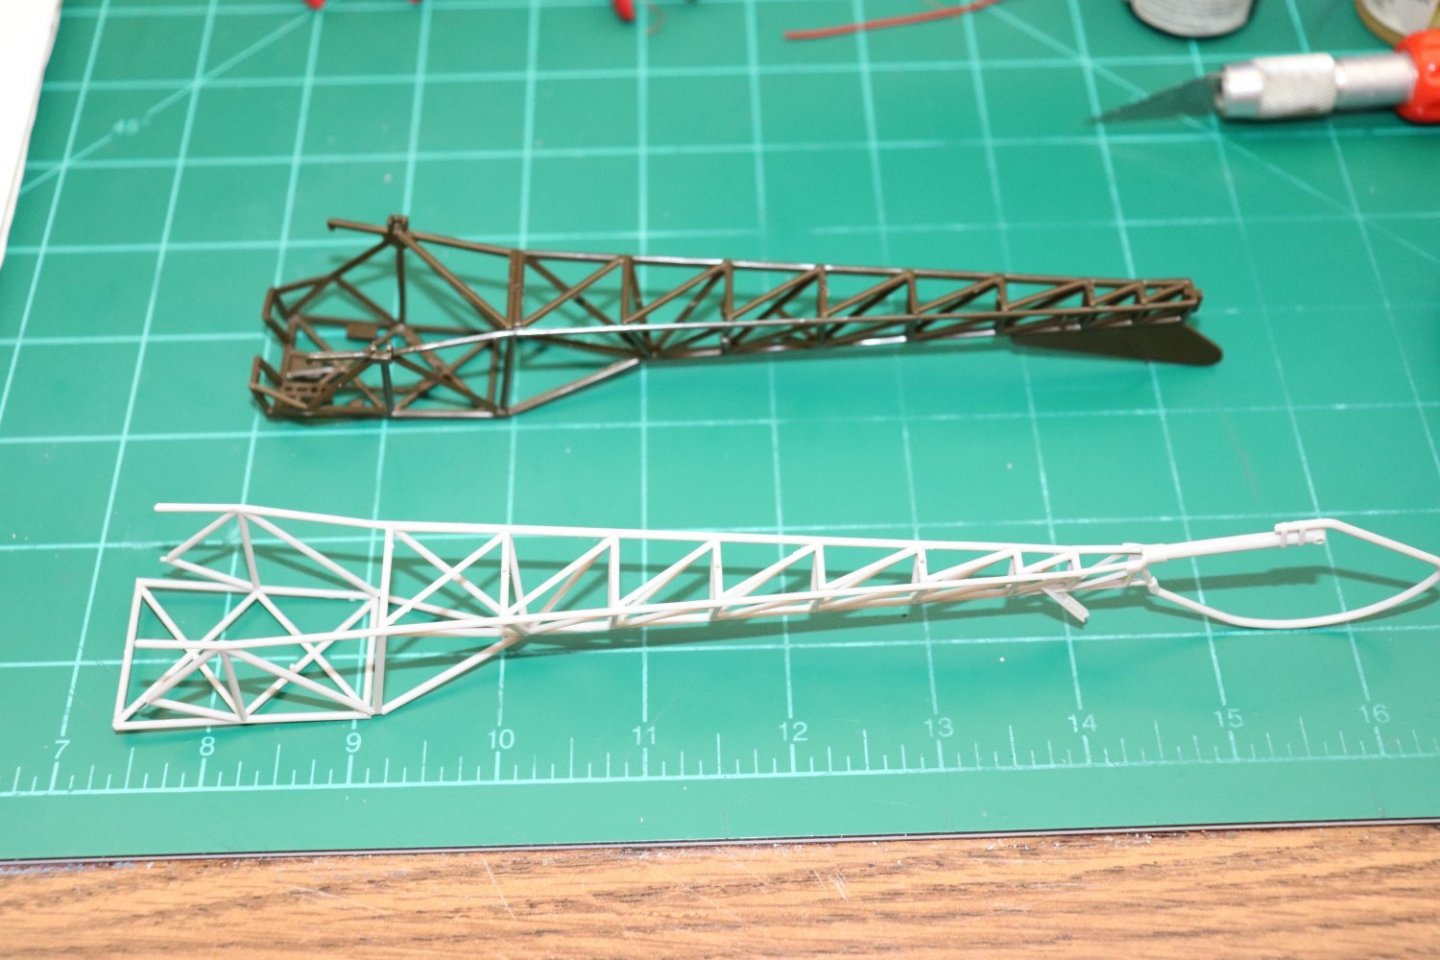
Thanks OC, yeah I'm feeling better now... and I was hoping this was going to be an easy reconstruction... but now I have the Italieri Frame together my heart sunk... Italieri got it WRONG!!! Yep they screwed it up... Here is a pic of the two frames side by side... The Revell Frame has it's top bars just fitted the Italeri Frame is glued... They do look nice what's the difference between the two... The direction of the diagonals on the top framing... the revell goes one way the italieri the other way... both have the locating holes for the driveshaft up as they should be.... So which one is correct and which is wrong... H13-D... The diagonals go from left to right, front to back... H-13H... Left to right front to back... they didn't change the design between models, so the italeri kit has the upper boom diagonals backwards.... Now it's not really a problem I can gently break each connection flip it over and go thru the gluing process once more... then drill new driveshaft positioning holes... One more reminder to always check your sources... It's not a mistake on my part... in some ways I wish it was, it is a mistake on the kit manufacturers part... But the experience with gluing .050 plastic rod is giving me second thoughts about building a new boom for the revell kit... there are other differences between the kits actually present on the real aircraft.... the boom is slightly narrower, the spacings are a bit different, the entire main frame is a different design which doesn't match very well with the "D" model boom... I think with the experience of gluing the Italieri frame together (and now having to do it a second time) I don't think I want to do an entire aircraft airframe one piece at a time in .050 rod.... I'm down for a challenge but that is a bit much of a challenge... (I didn't want to take two months to build these things) so I'm probably going to just do them out of the box... I mean I'm also looking at the pic of the two frames side by side, how much am I going to gain by all that work? Not a whole lot if you ask me... Obvious configuration errors in the kit I'll fix, but rebuilding a whole frame? not so sure.... Any advice or opinions? are you guys seeing what I'm seeing that the difference in presentation really isn't that much?

- 169 replies
-
- 13
-
-

-
Once you think it's through it's easy Mike, approach it like a hull half or fuselage half in balsa, keel and frames or bulkheads and it's easy peasy... With brass it would be a tail sitter, but there is a place on both models one could possibly stuff a half ounce of modeling clay into without it being seen, but it would have to be clay stuffed in, it's a very tight space.... The only tricky part would be the initial tapered trapezoidal frame, that would tell the tale on whether it would be straight or not.... once you got that, the rest is but sticking on pieces... Anyway I'm going to finding out... pretty quick.... Once I get the Italieri Boom assembled for the pattern... Gonna be a fun challenge...

- 169 replies
-
- 12
-