HOLIDAY DONATION DRIVE - SUPPORT MSW - DO YOUR PART TO KEEP THIS GREAT FORUM GOING! (Only 24 donations so far out of 49,000 members - C'mon guys!)
×


Jeff59
-
Posts
593 -
Joined
-
Last visited
Content Type
Profiles
Forums
Gallery
Events
Everything posted by Jeff59
-
Thanks Mike, think just marking of the hull for the plating would make a big difference if you’re up for that 👍 Thanks for looking in 🤛
-
Thanks Yves, you’re right, a ton of work, but l suppose the way lm looking at it, between the hull, deck and the first two deck structures this amounts to about half the model so know it’s going to take a while, don’t think l will get board though, shall enjoy the challenge 👍 thanks for your input 🤛
-
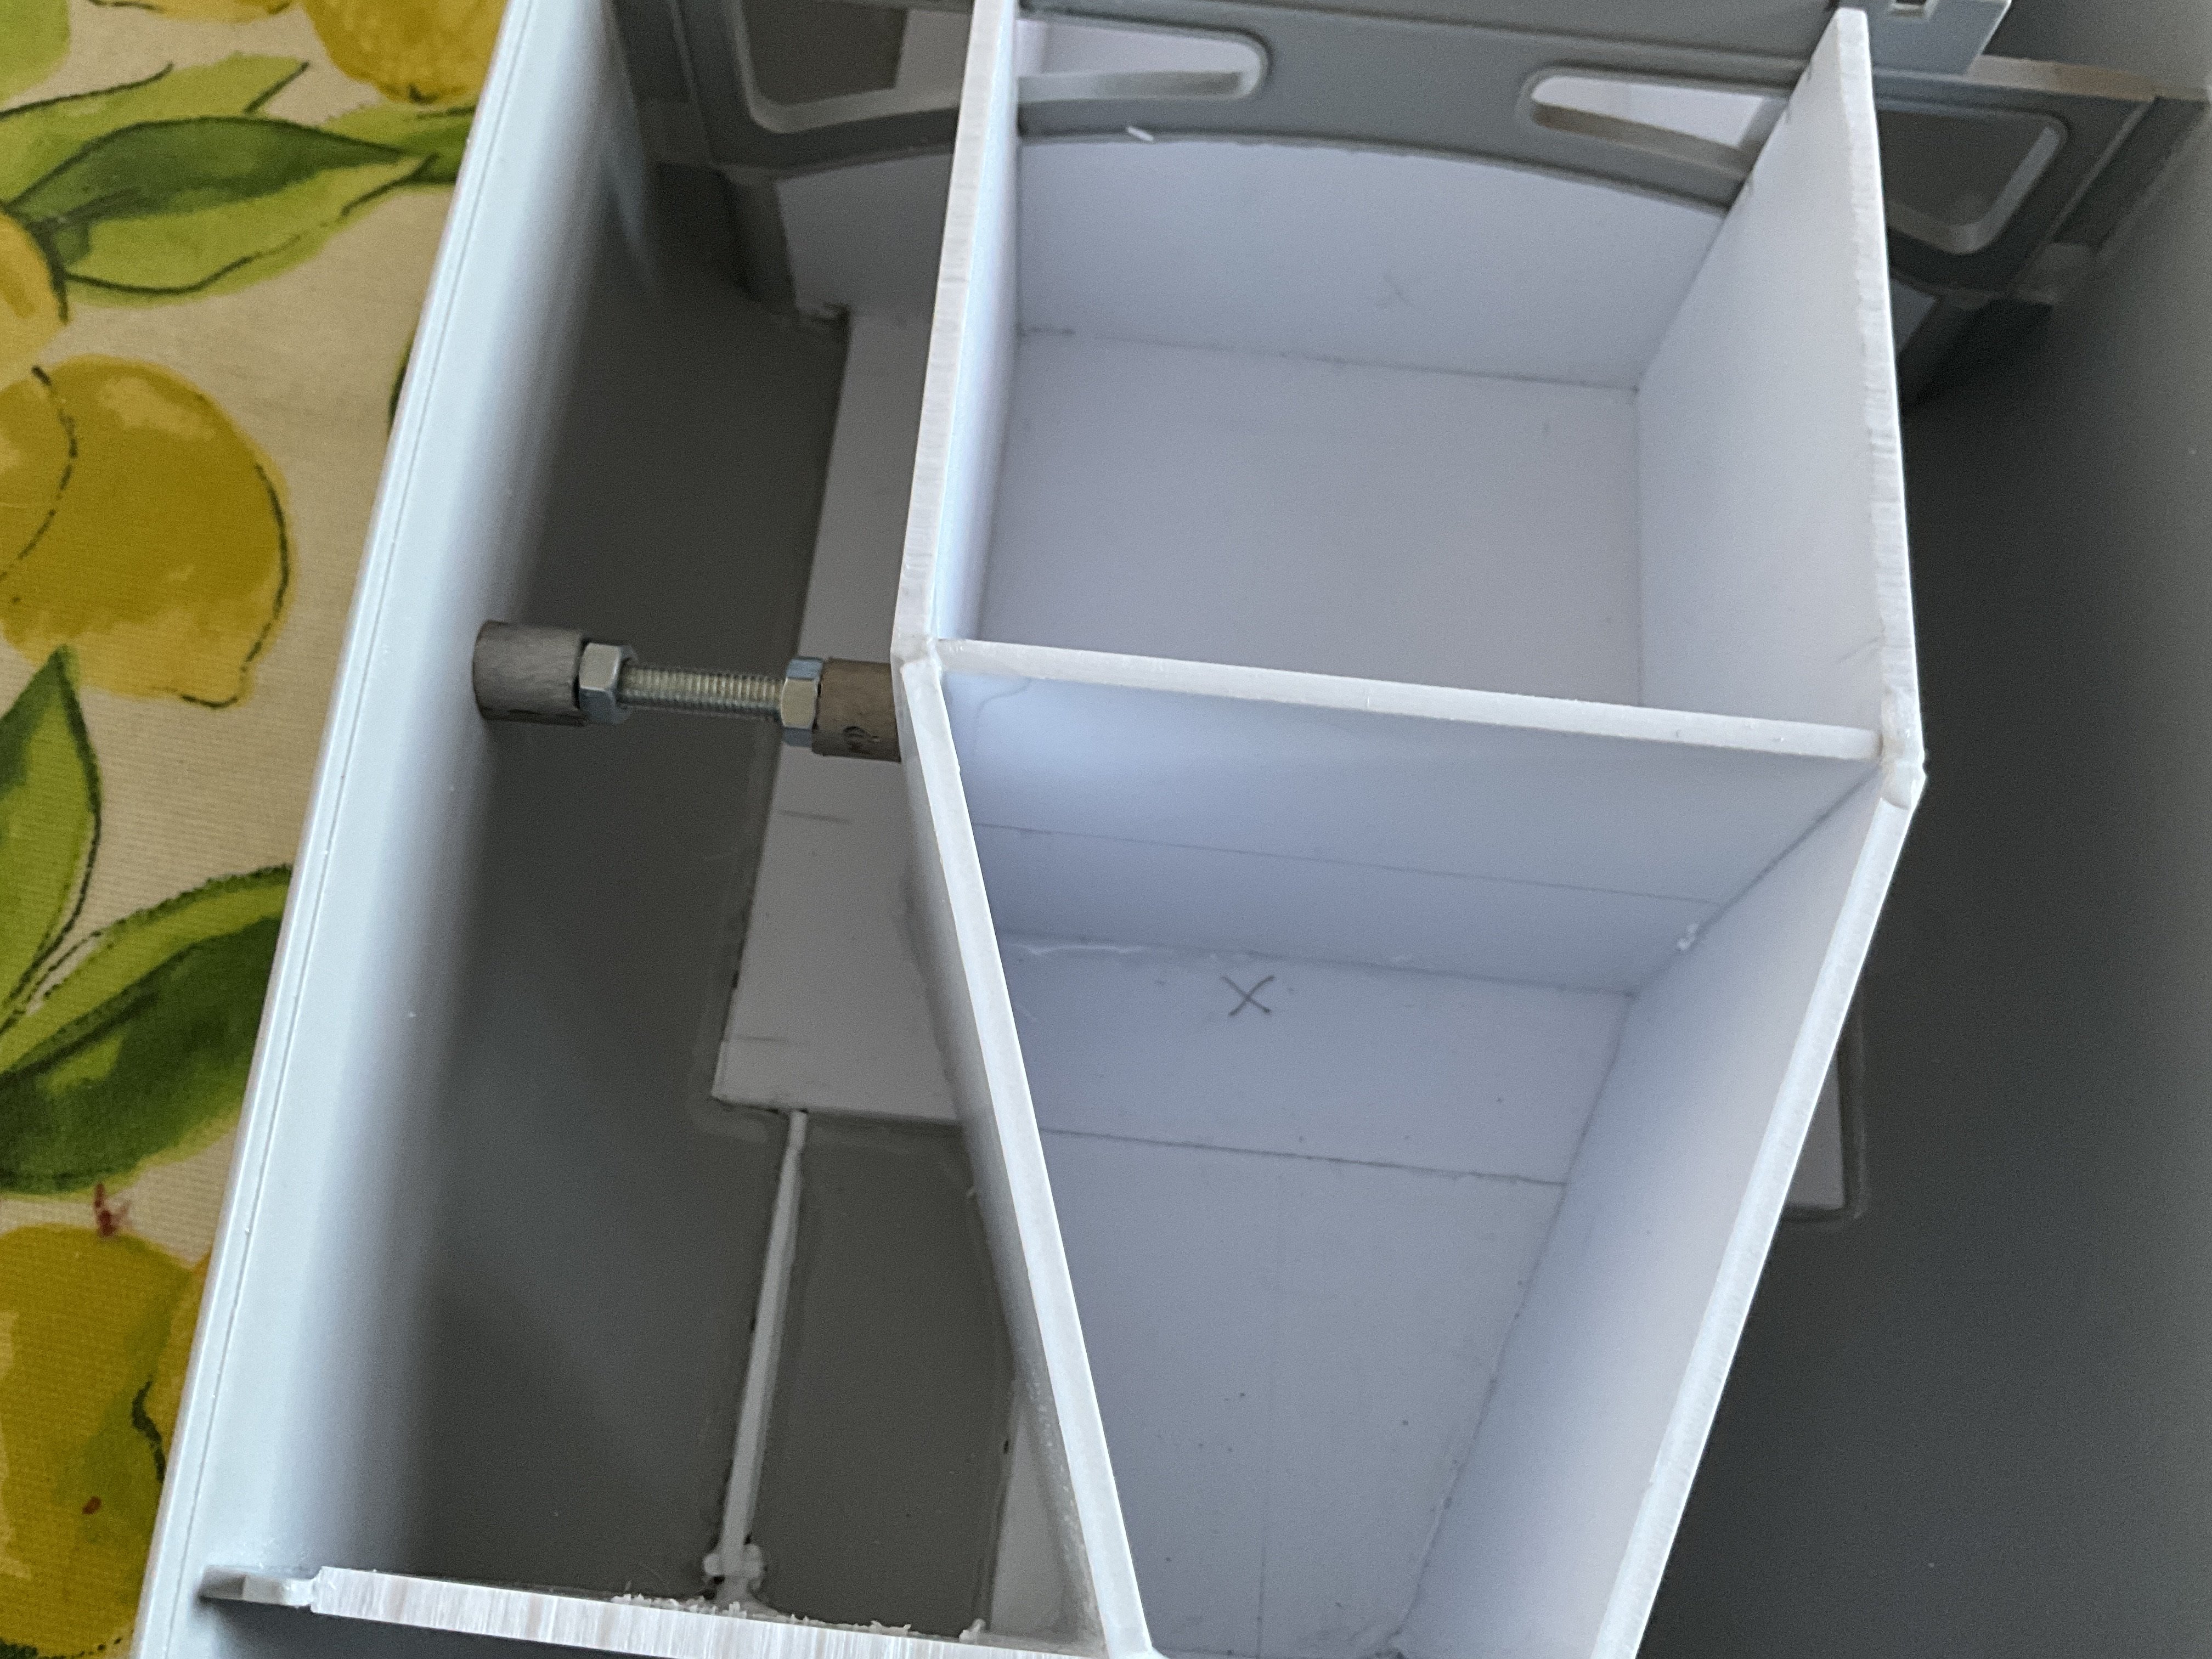
Another little solution for hull profile was this 5mm screwed rod and nuts with pipe to use as jacking system then glue in place when happy, think this shall help me as well, as it progresses, that’s me for now thanks, got a lot to be getting on with 😵💫👍
-
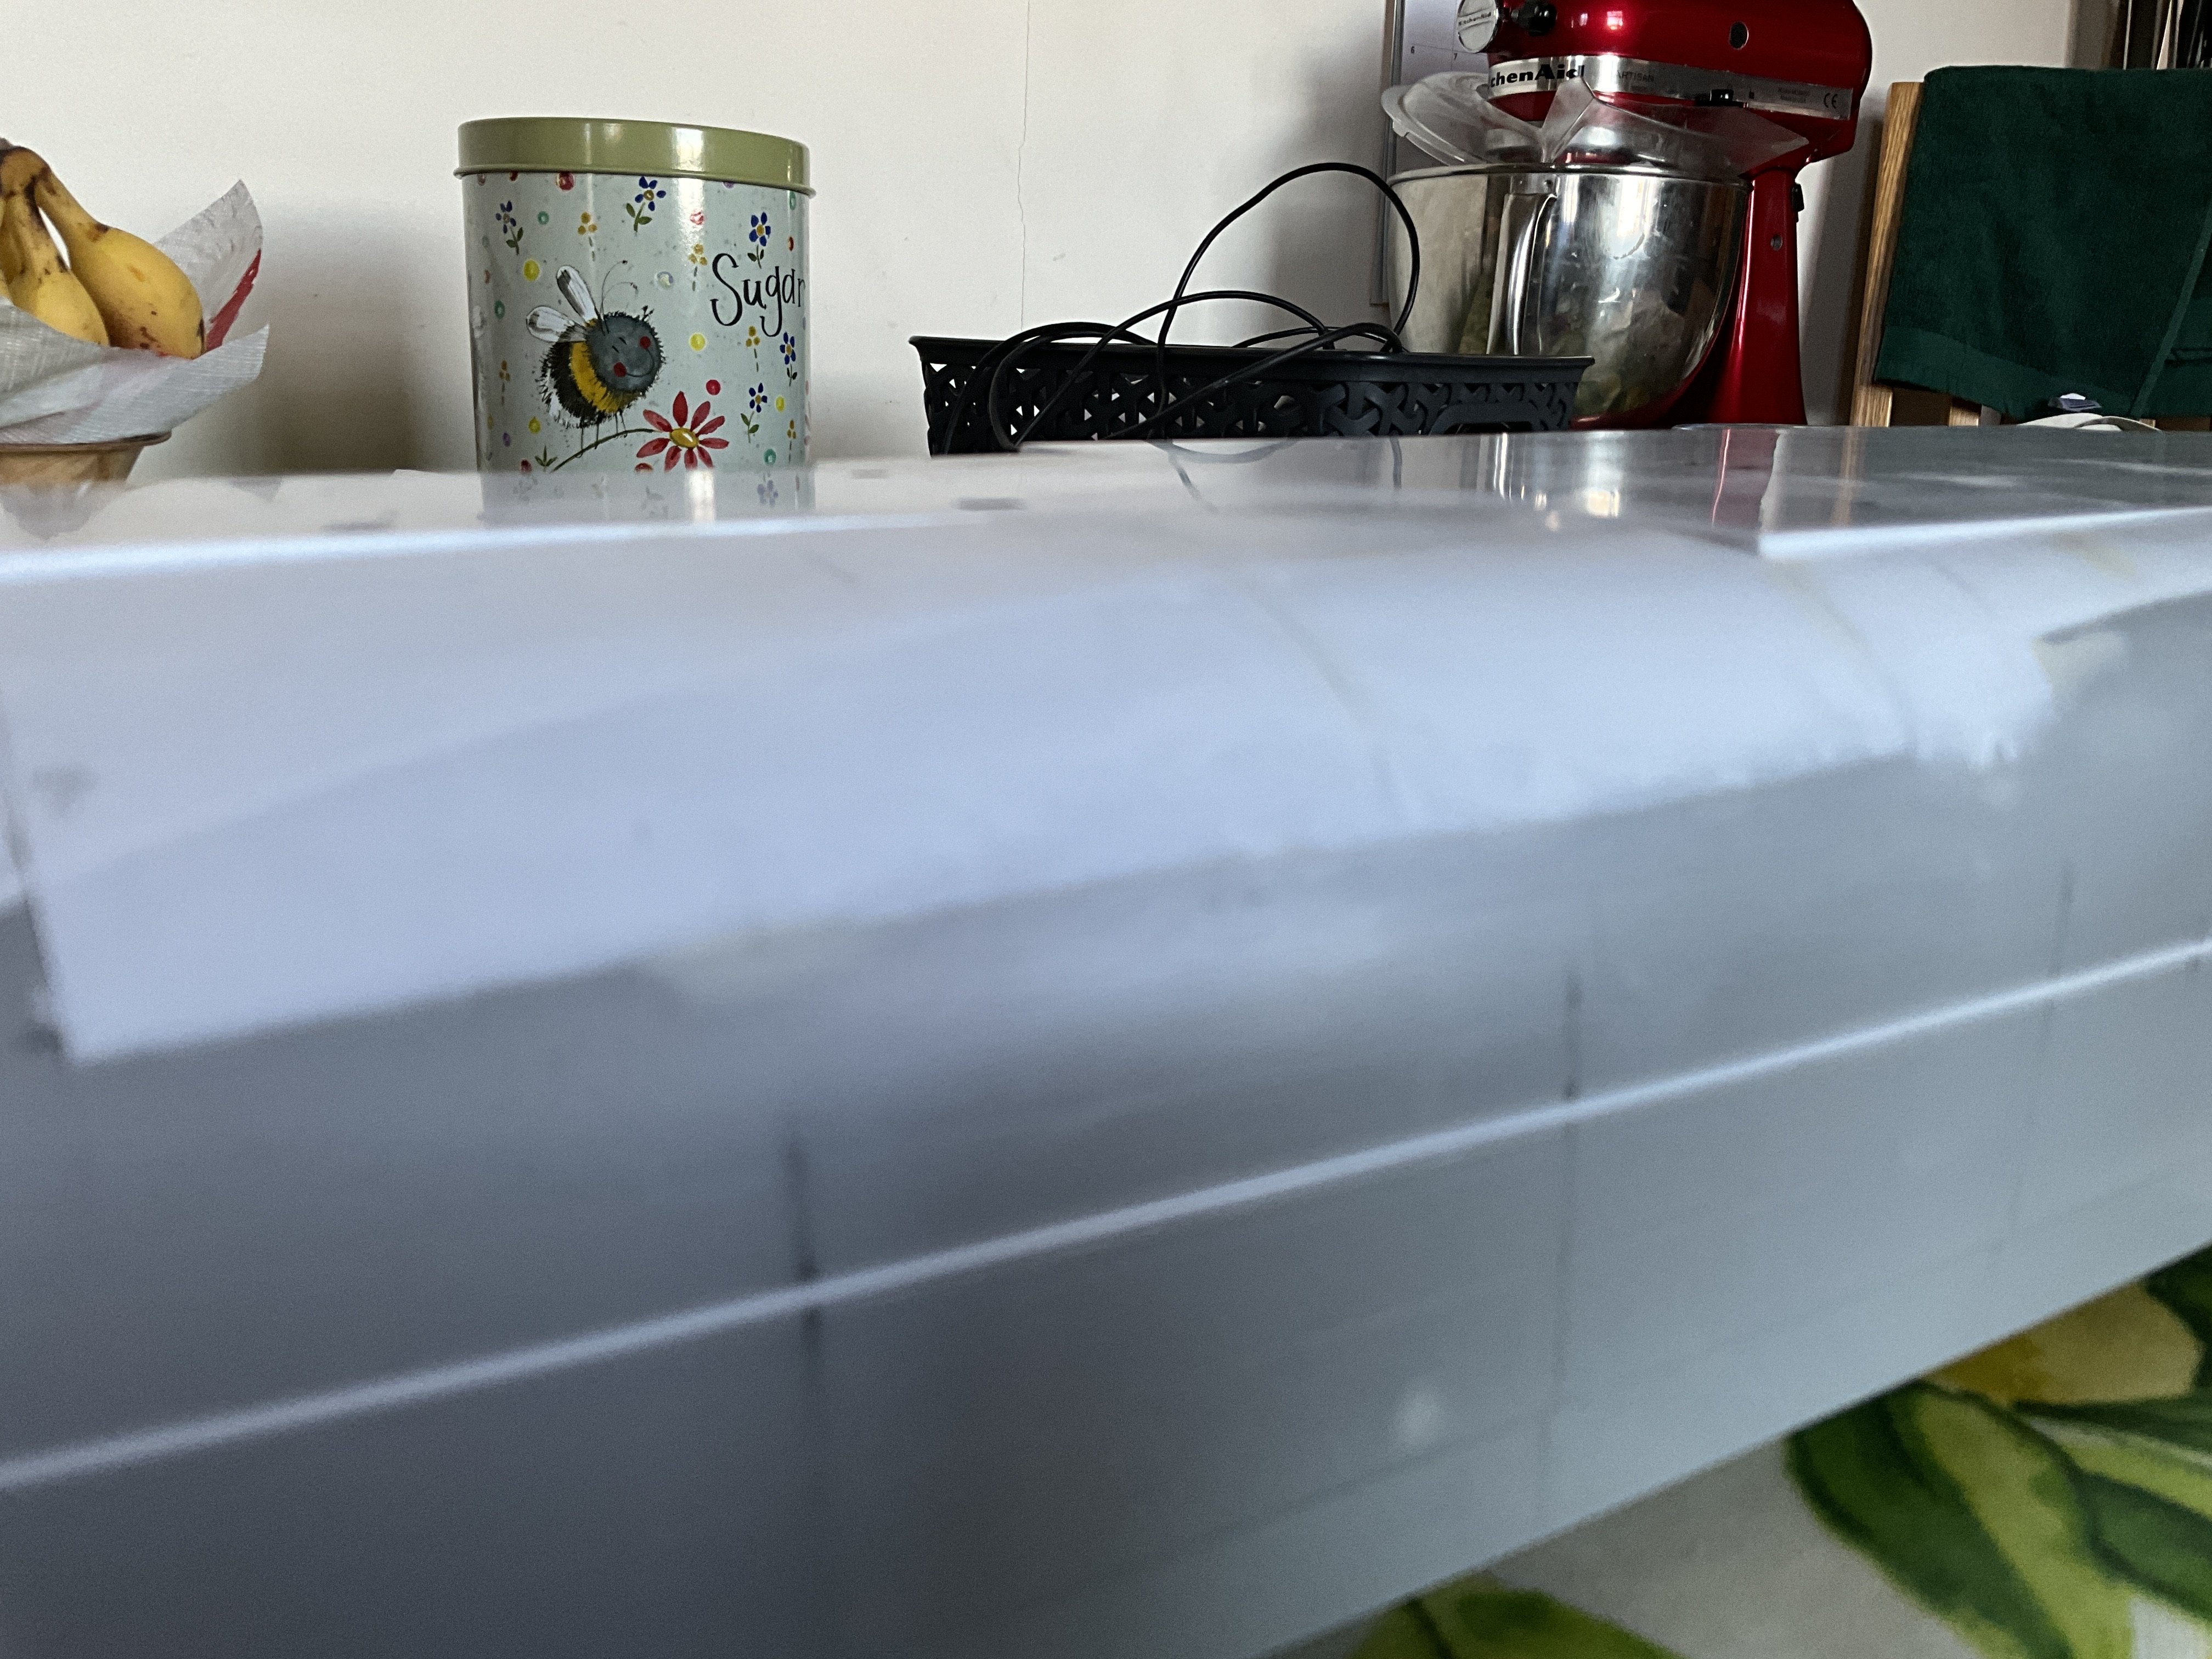
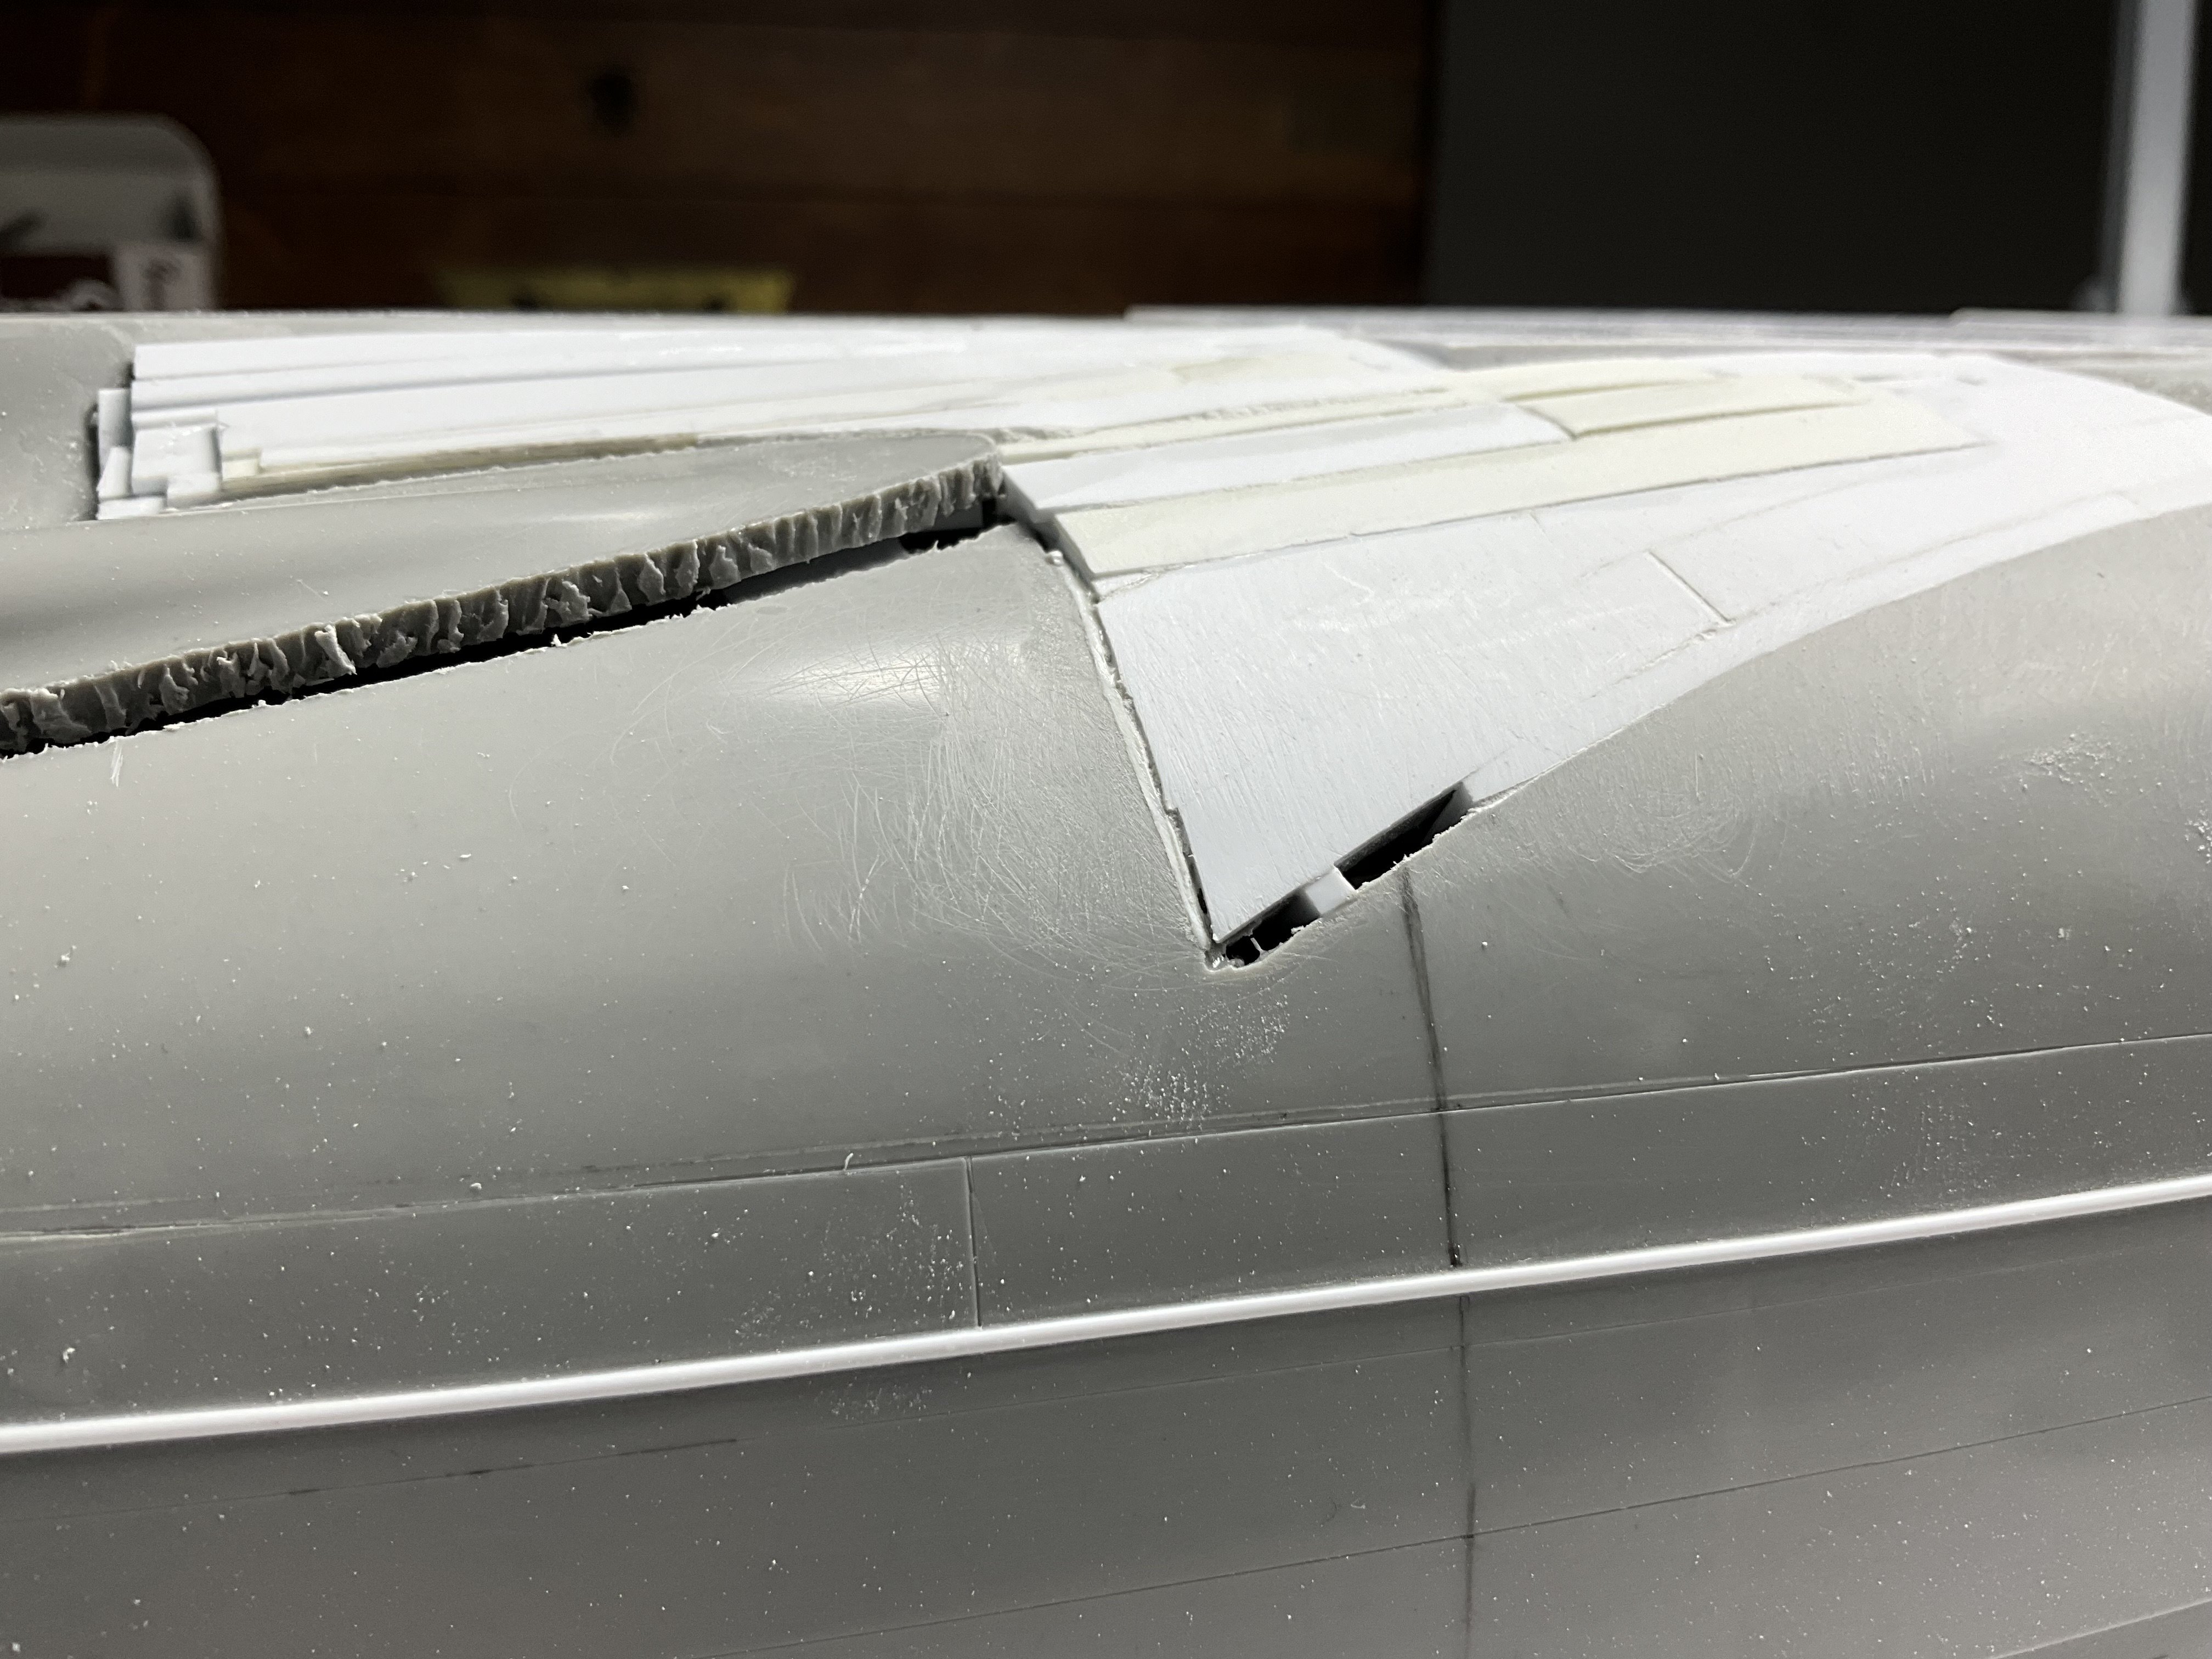
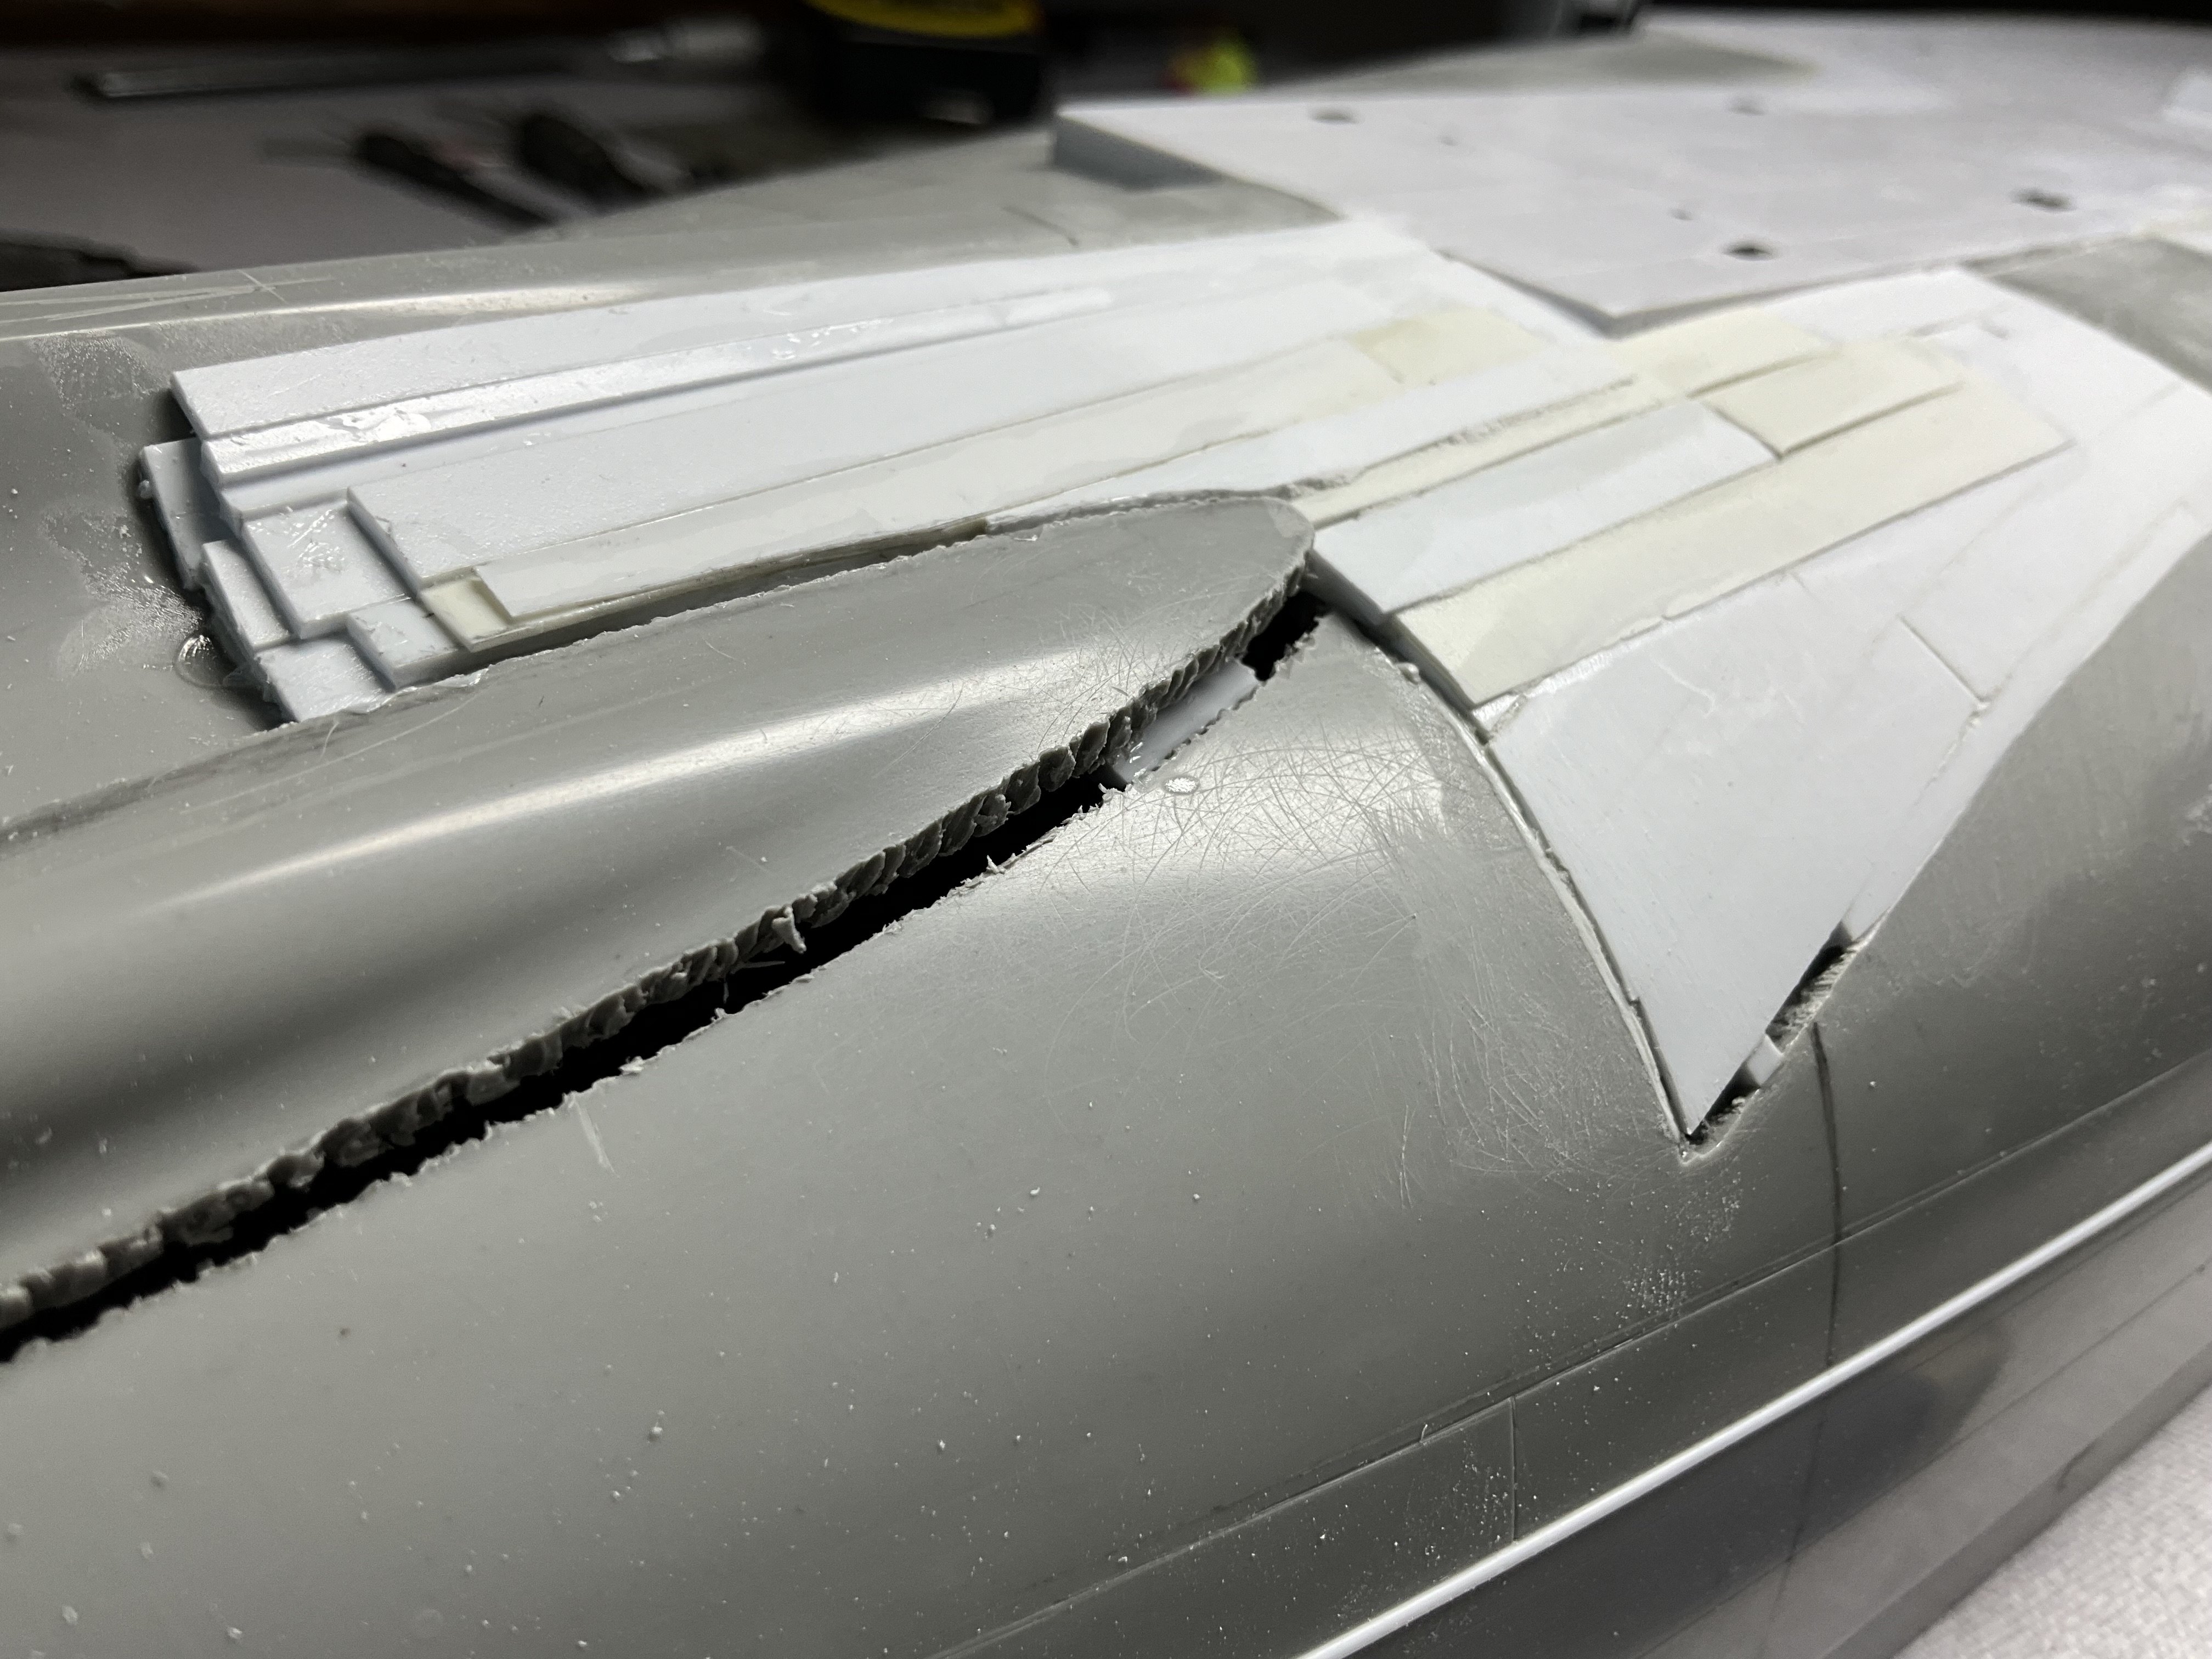
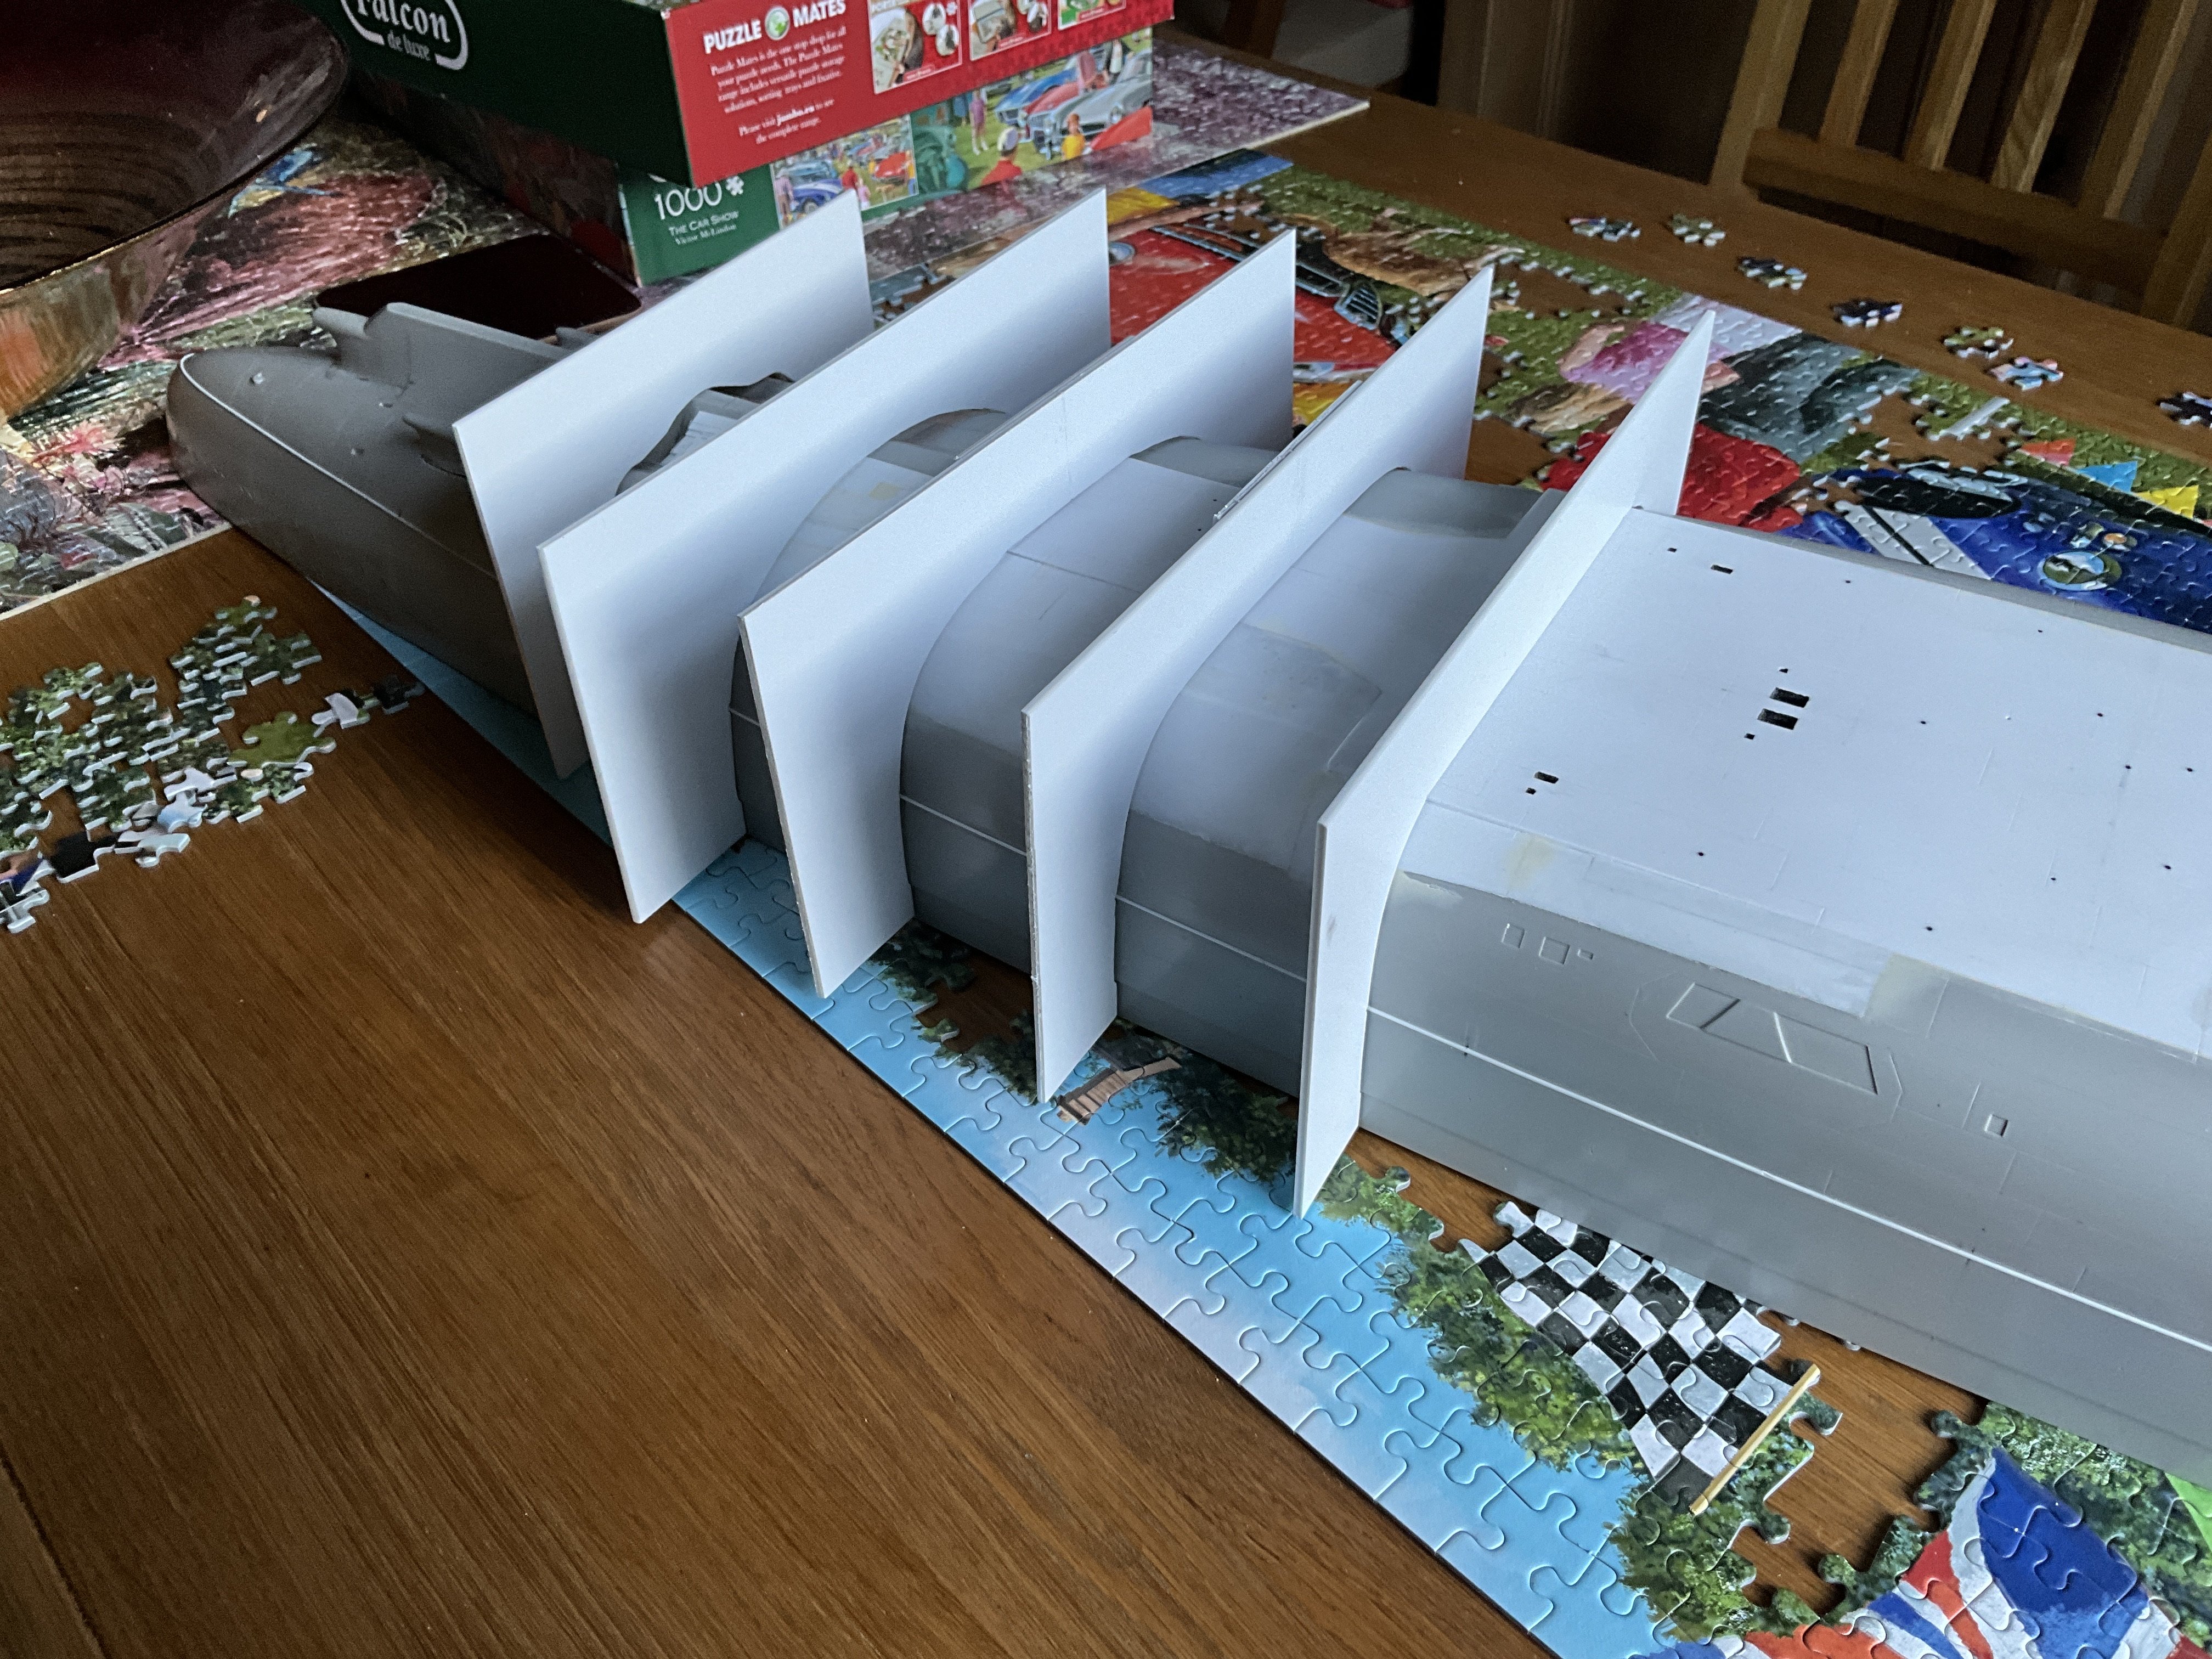
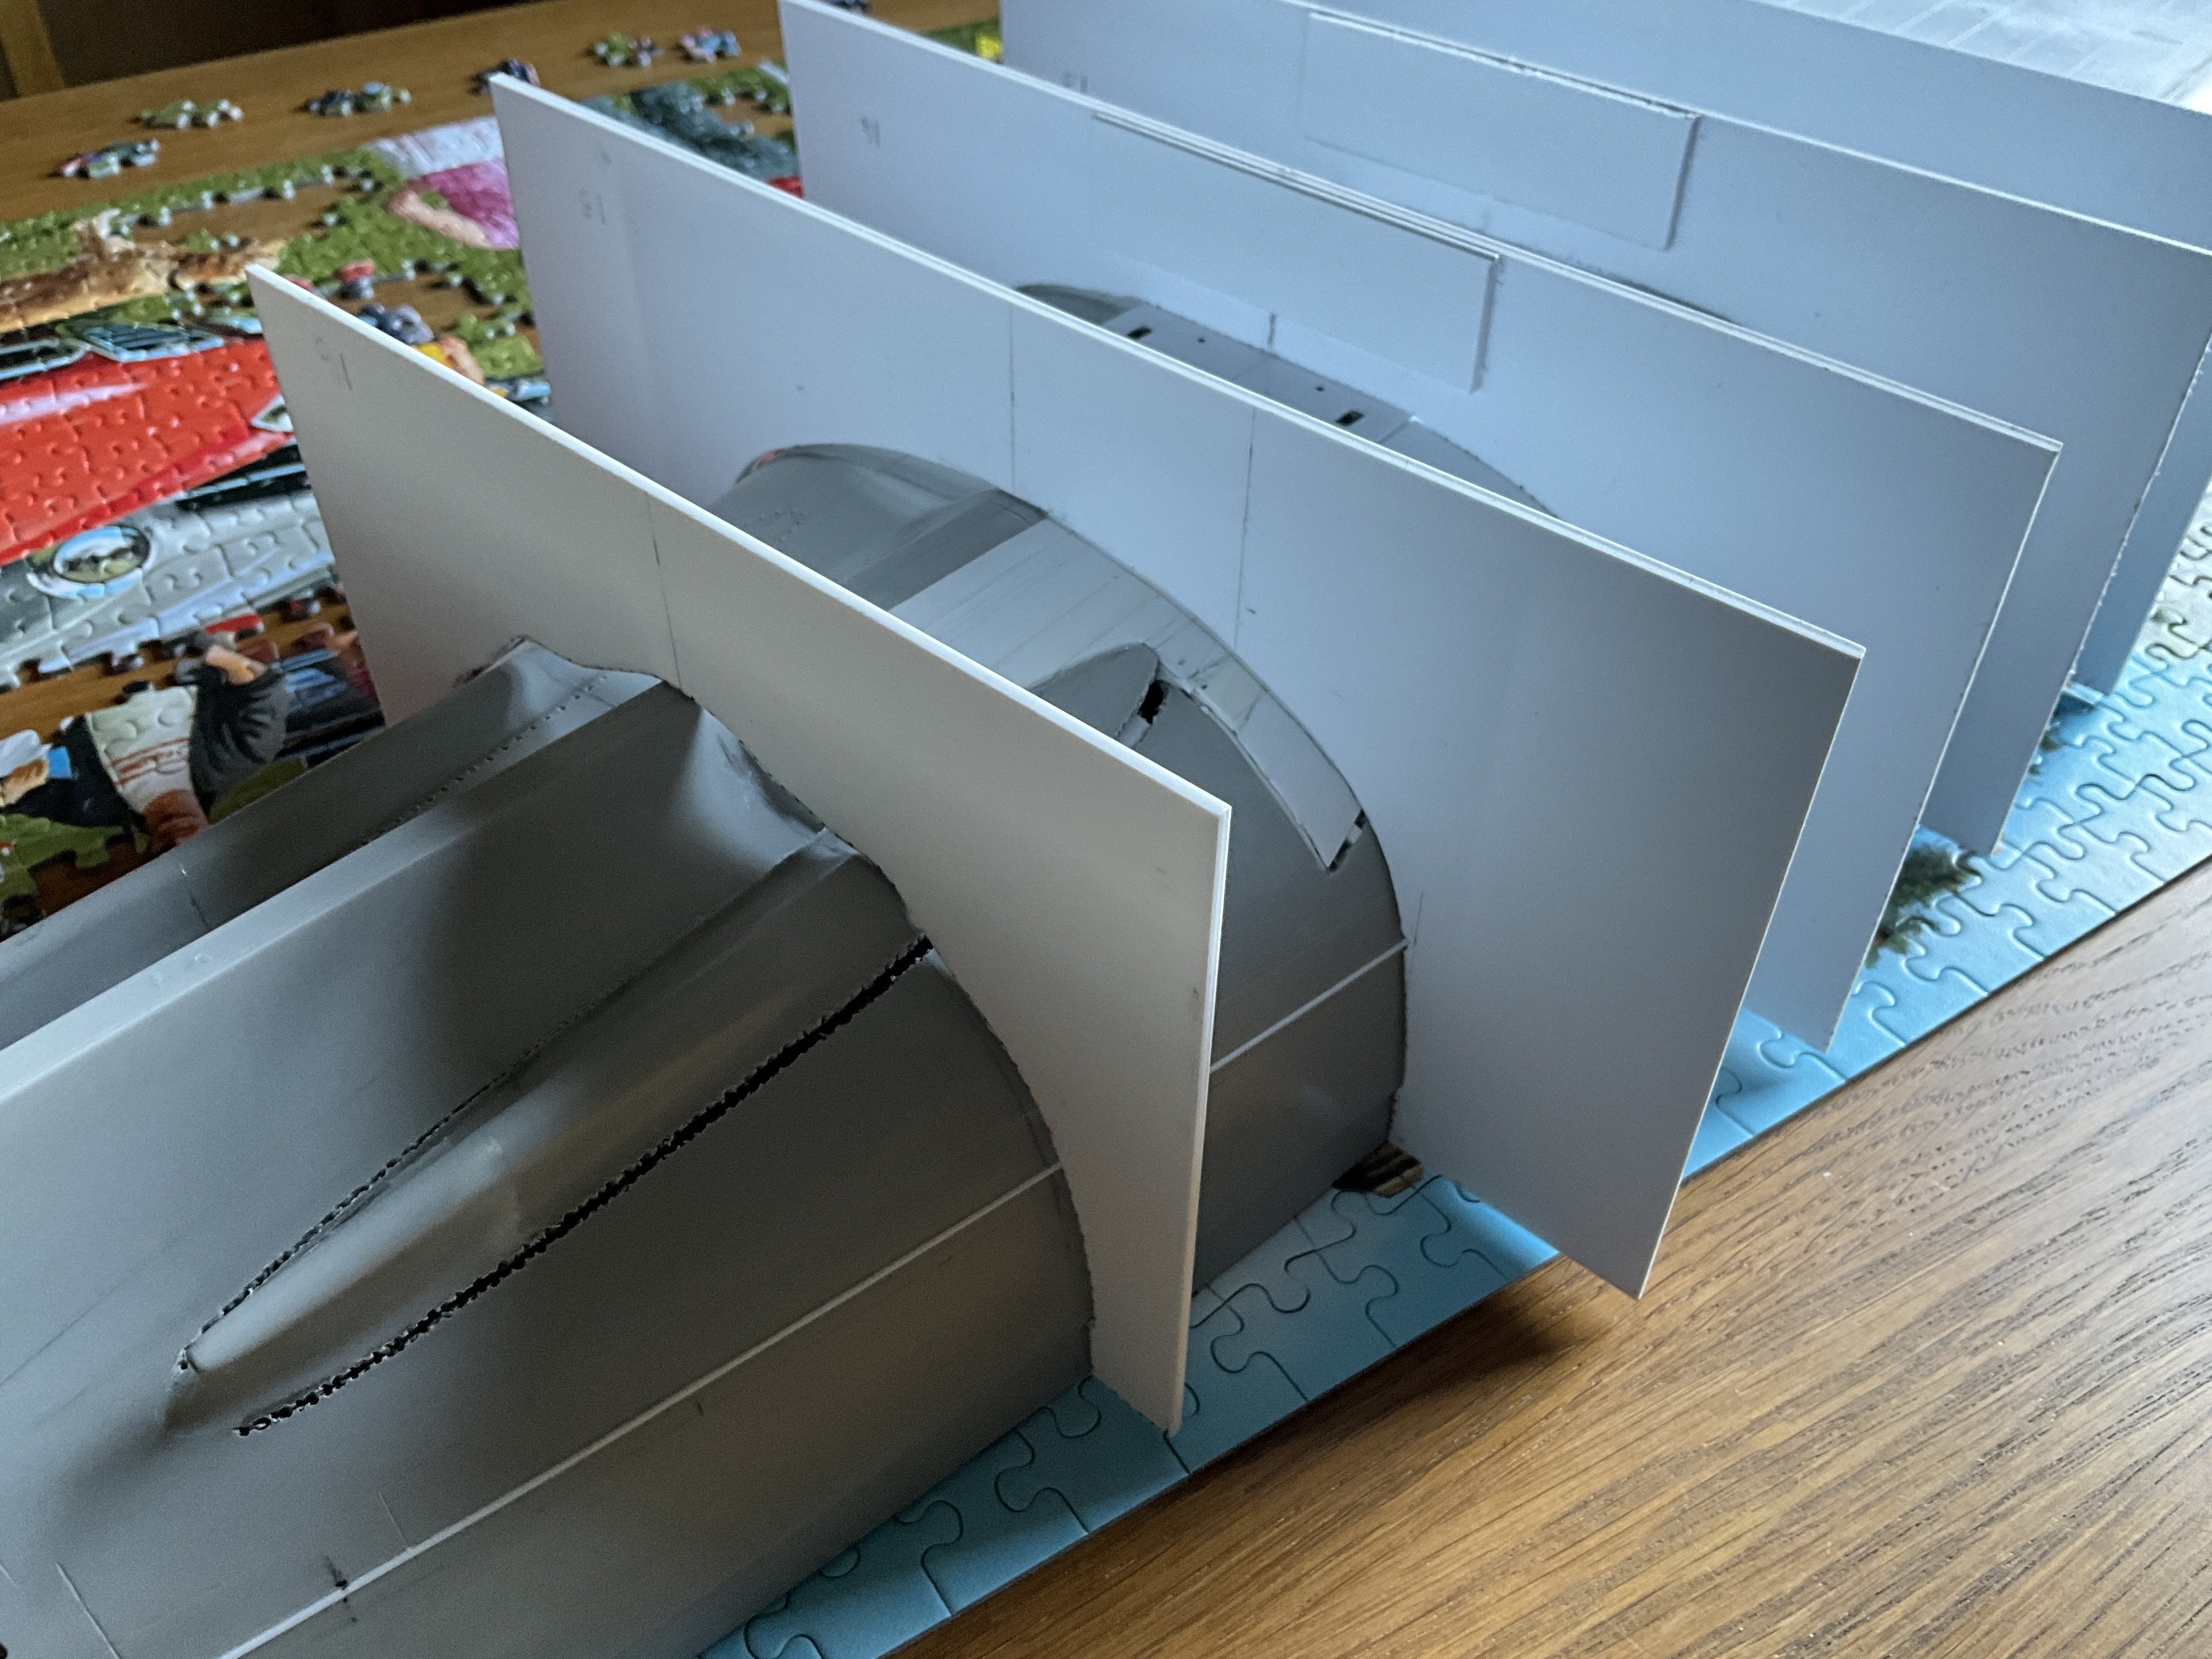
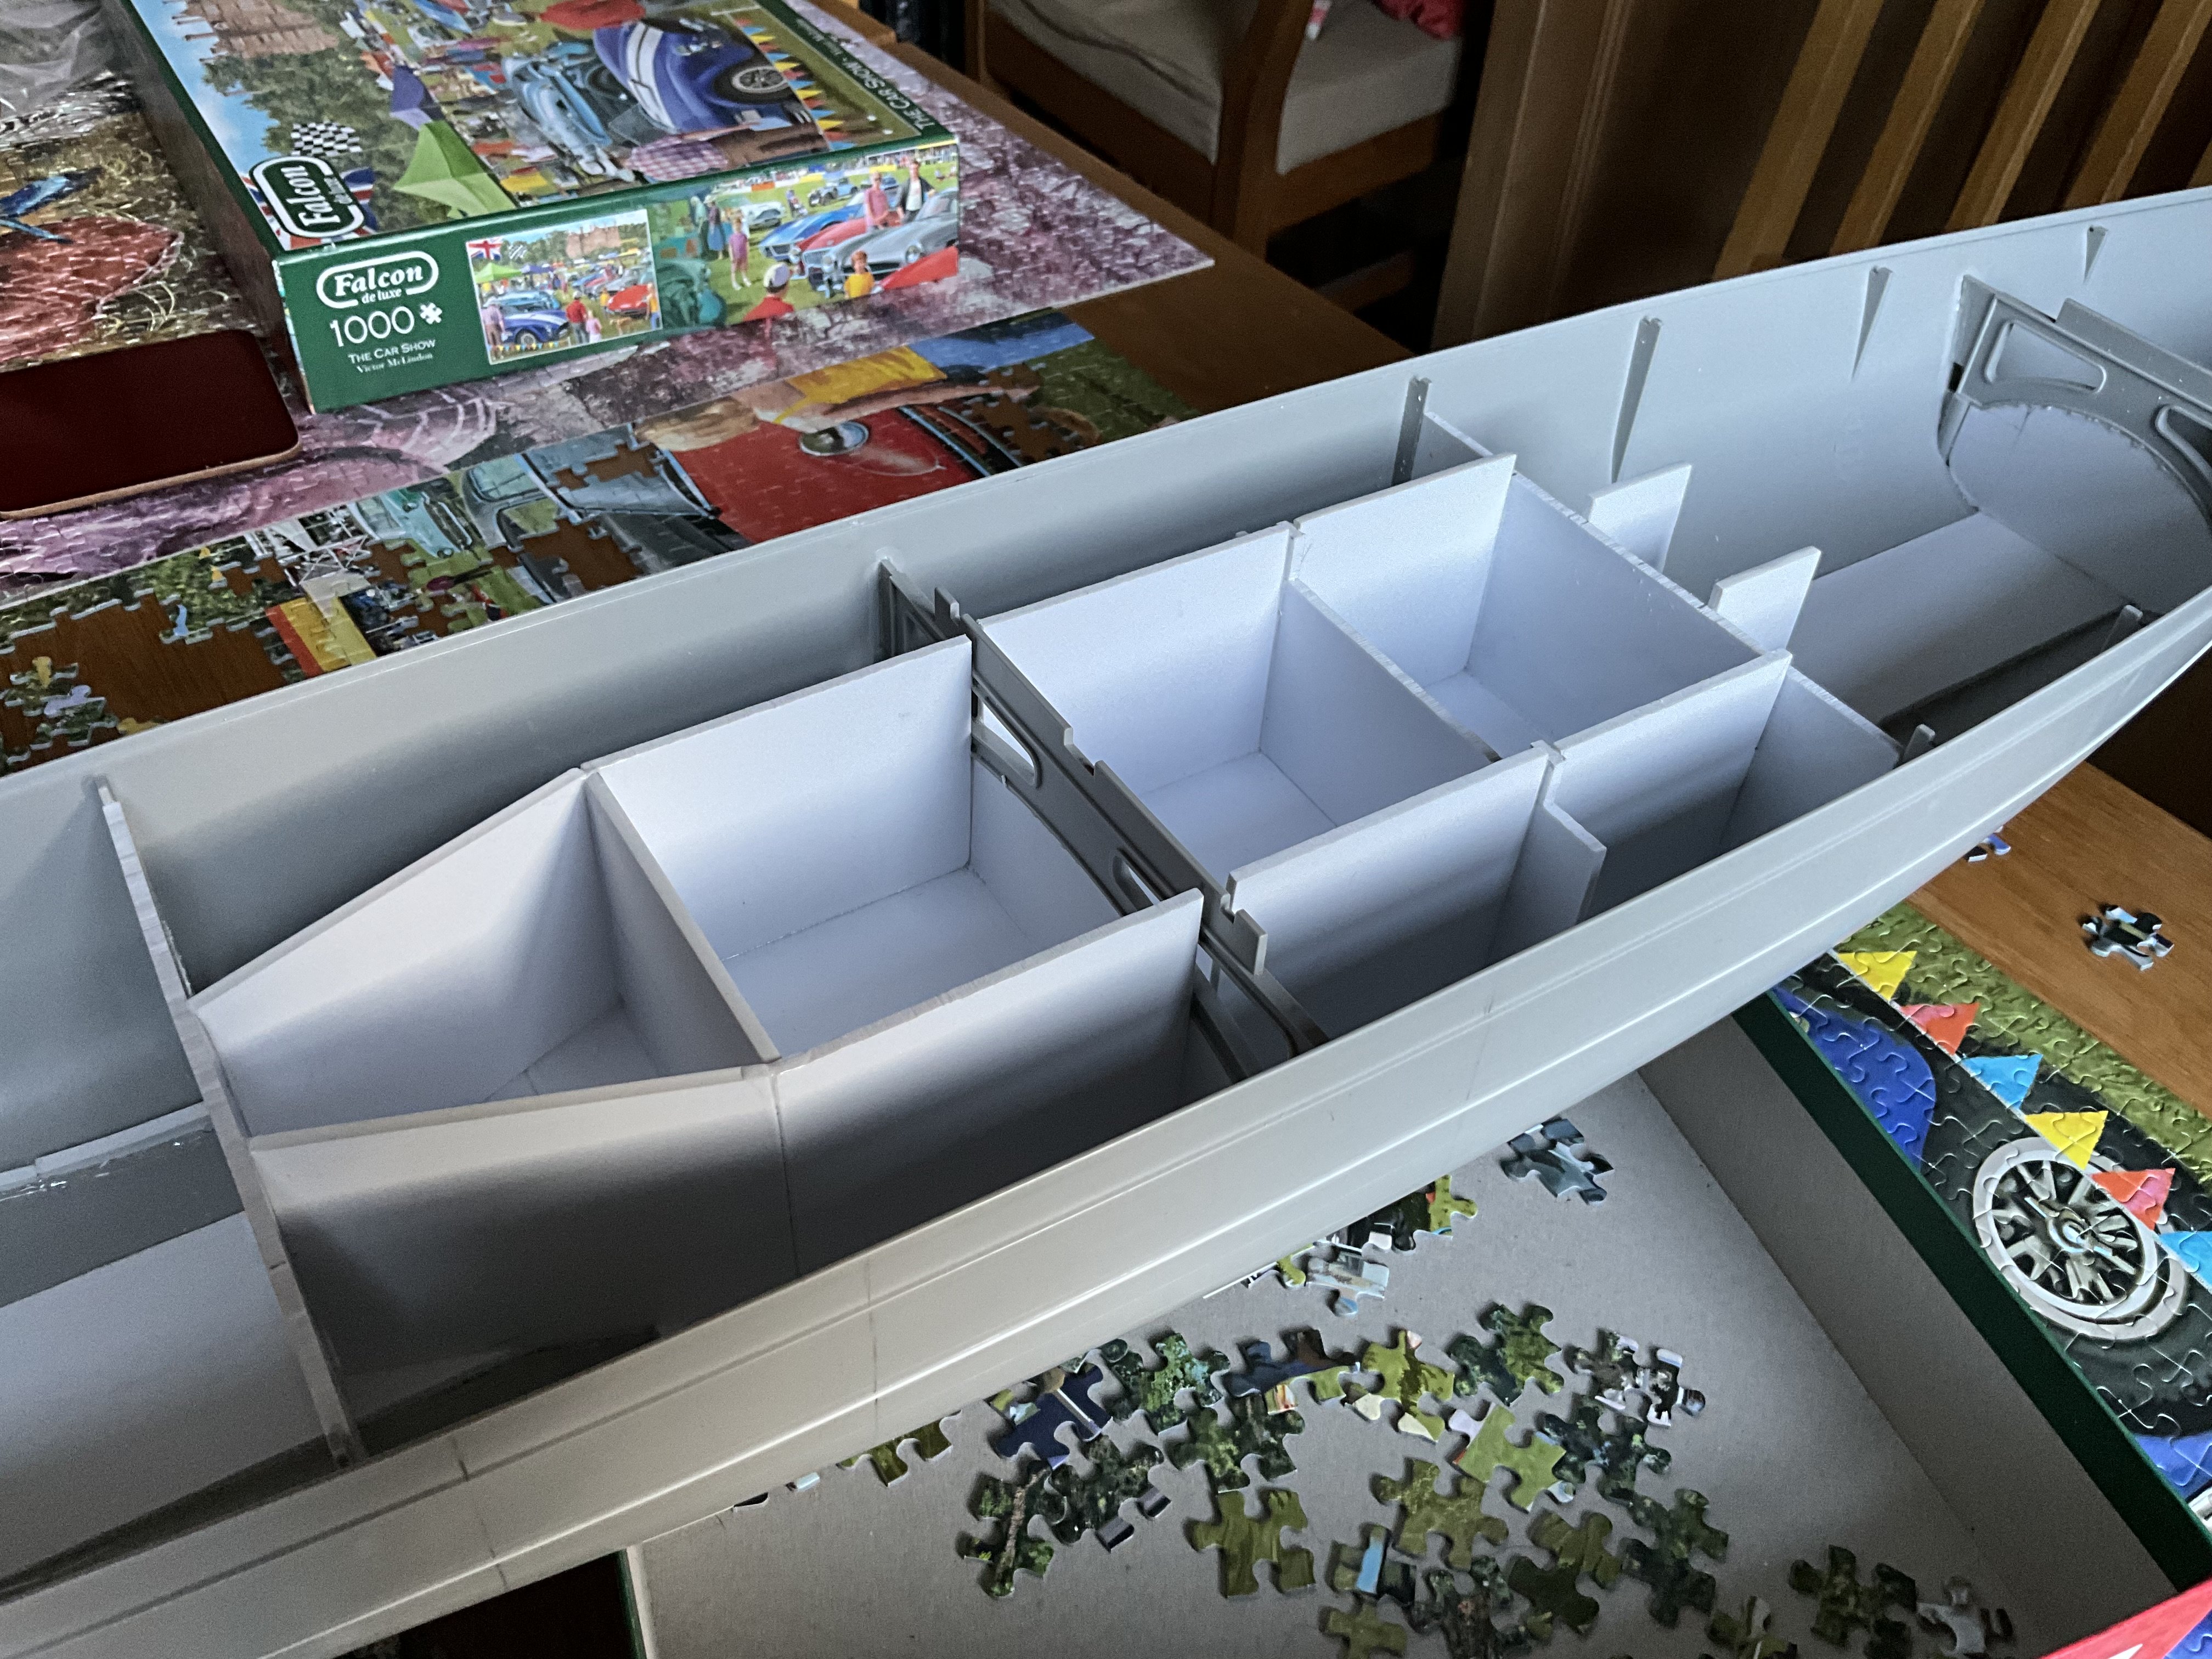
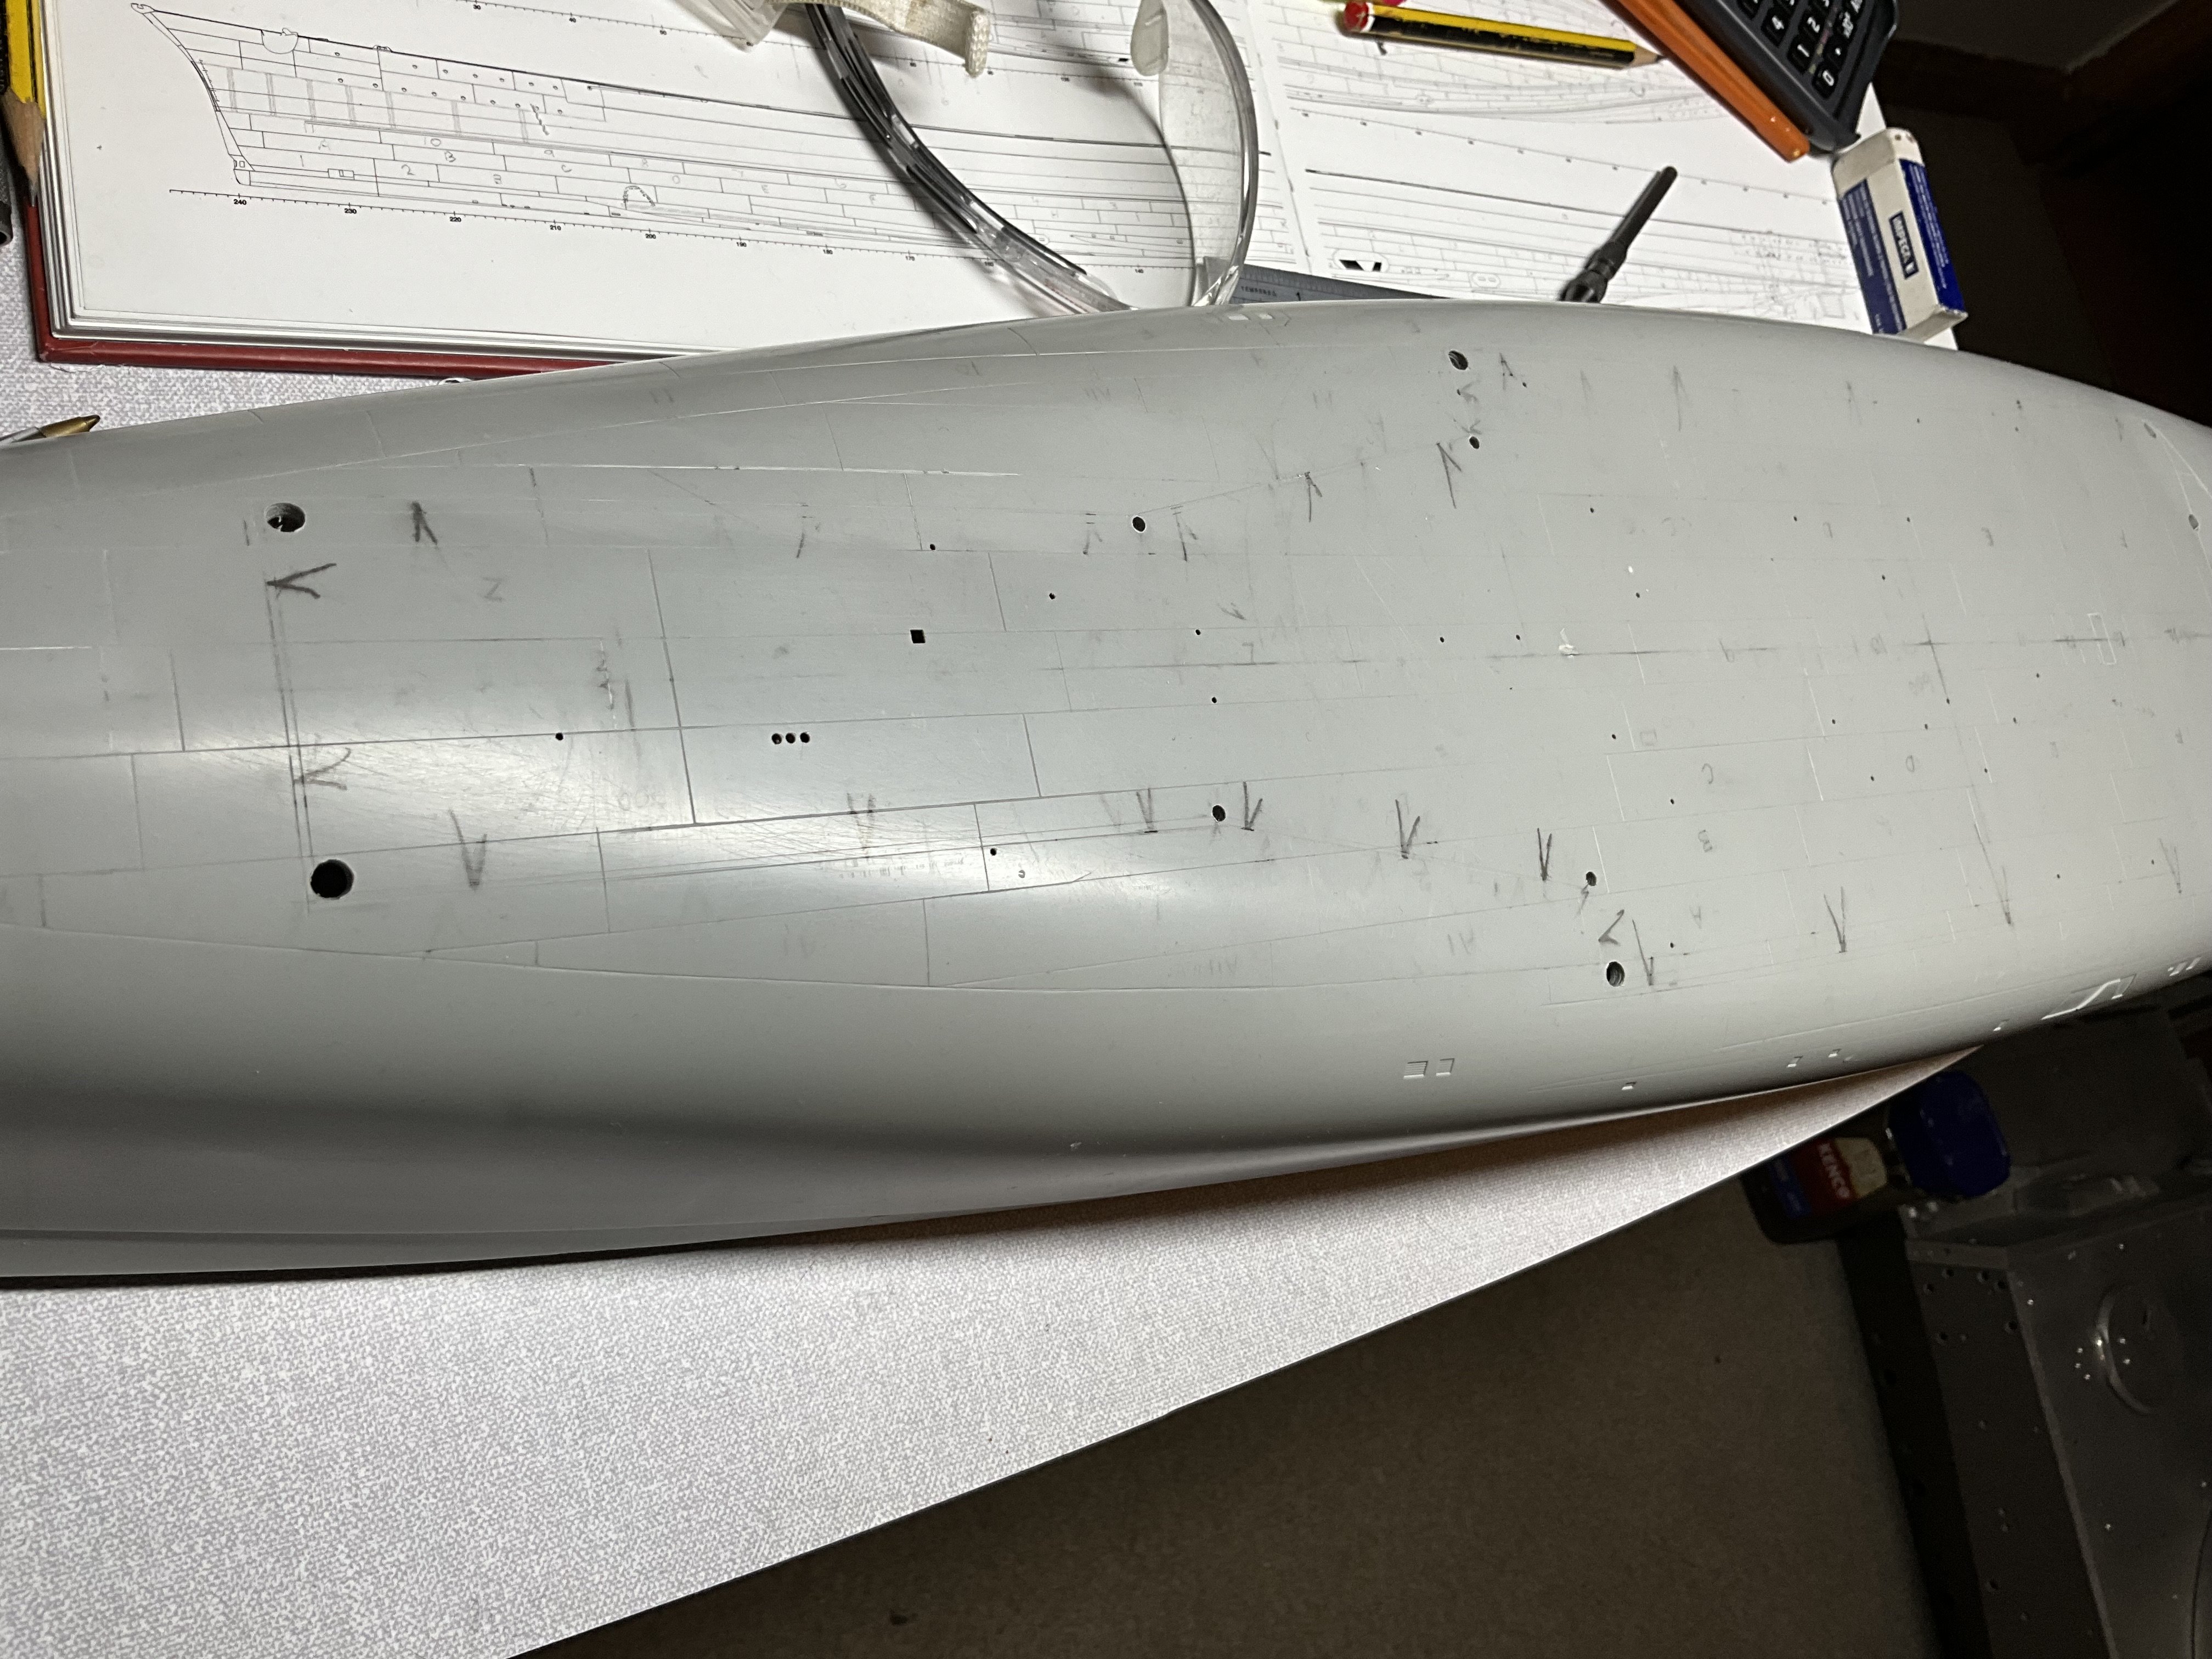
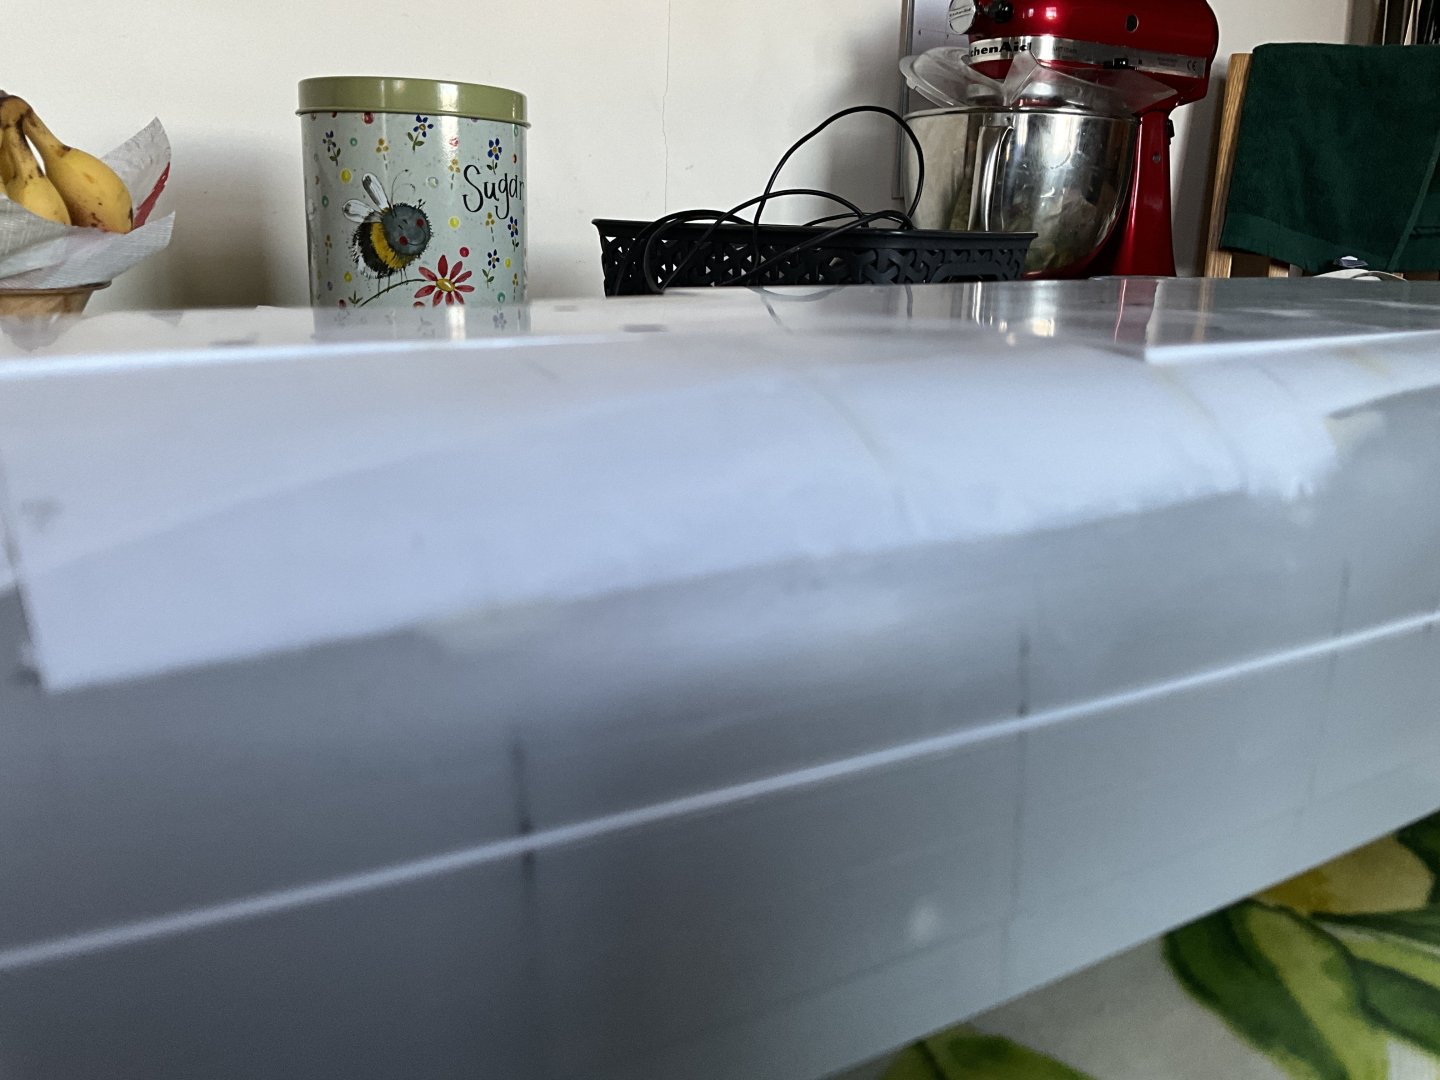
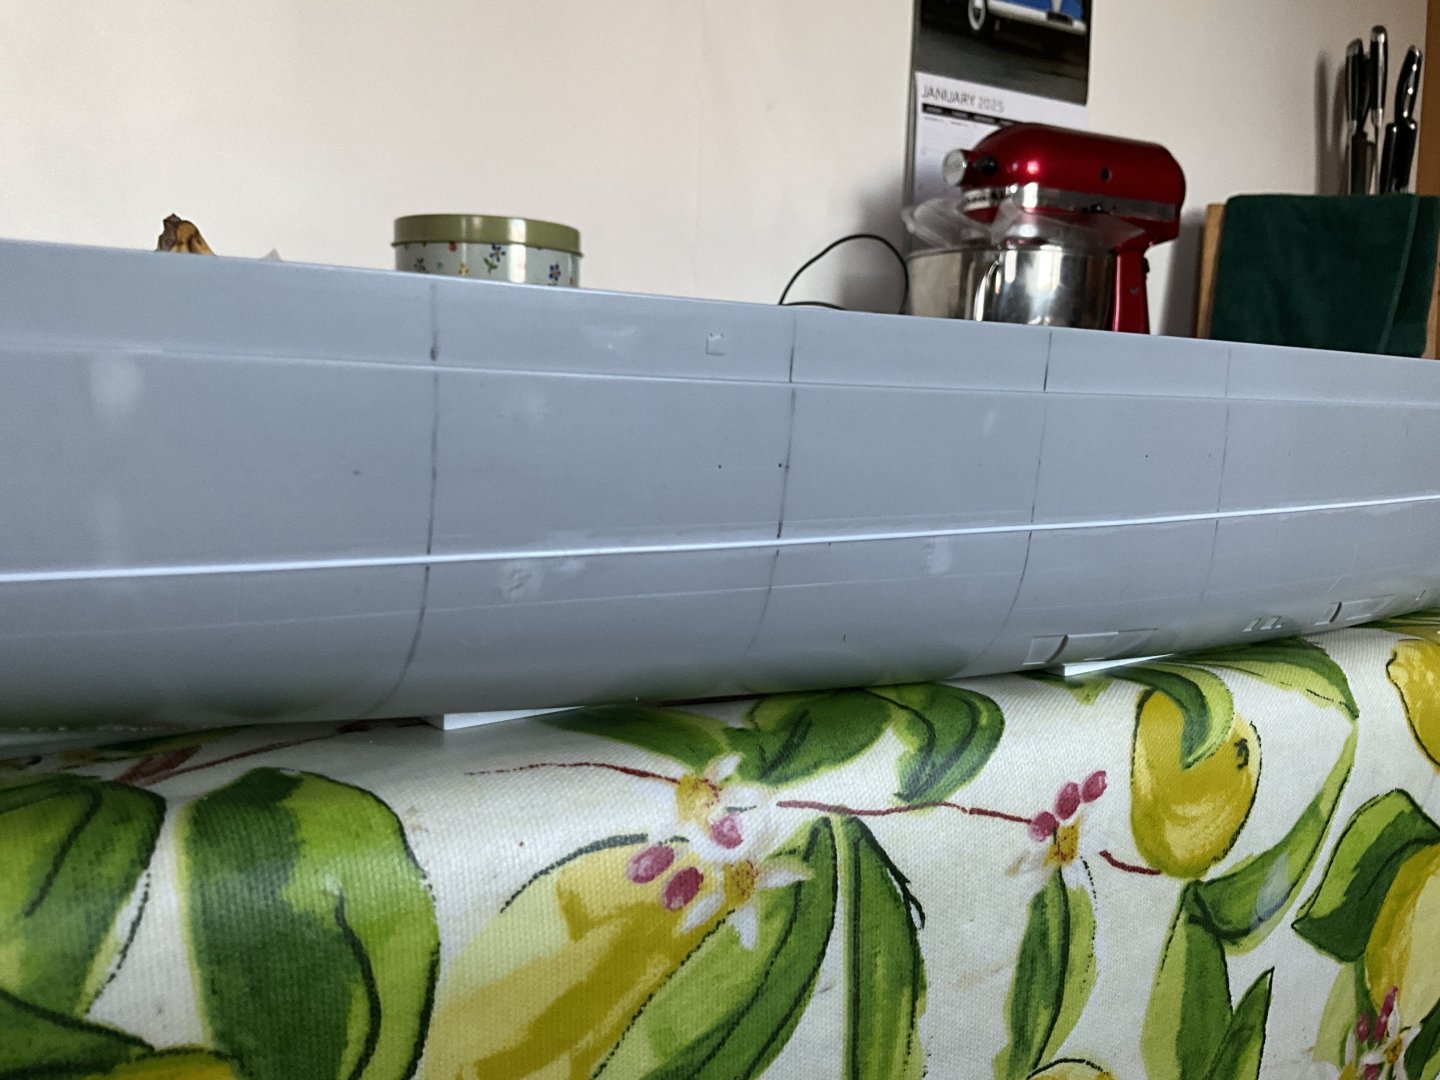
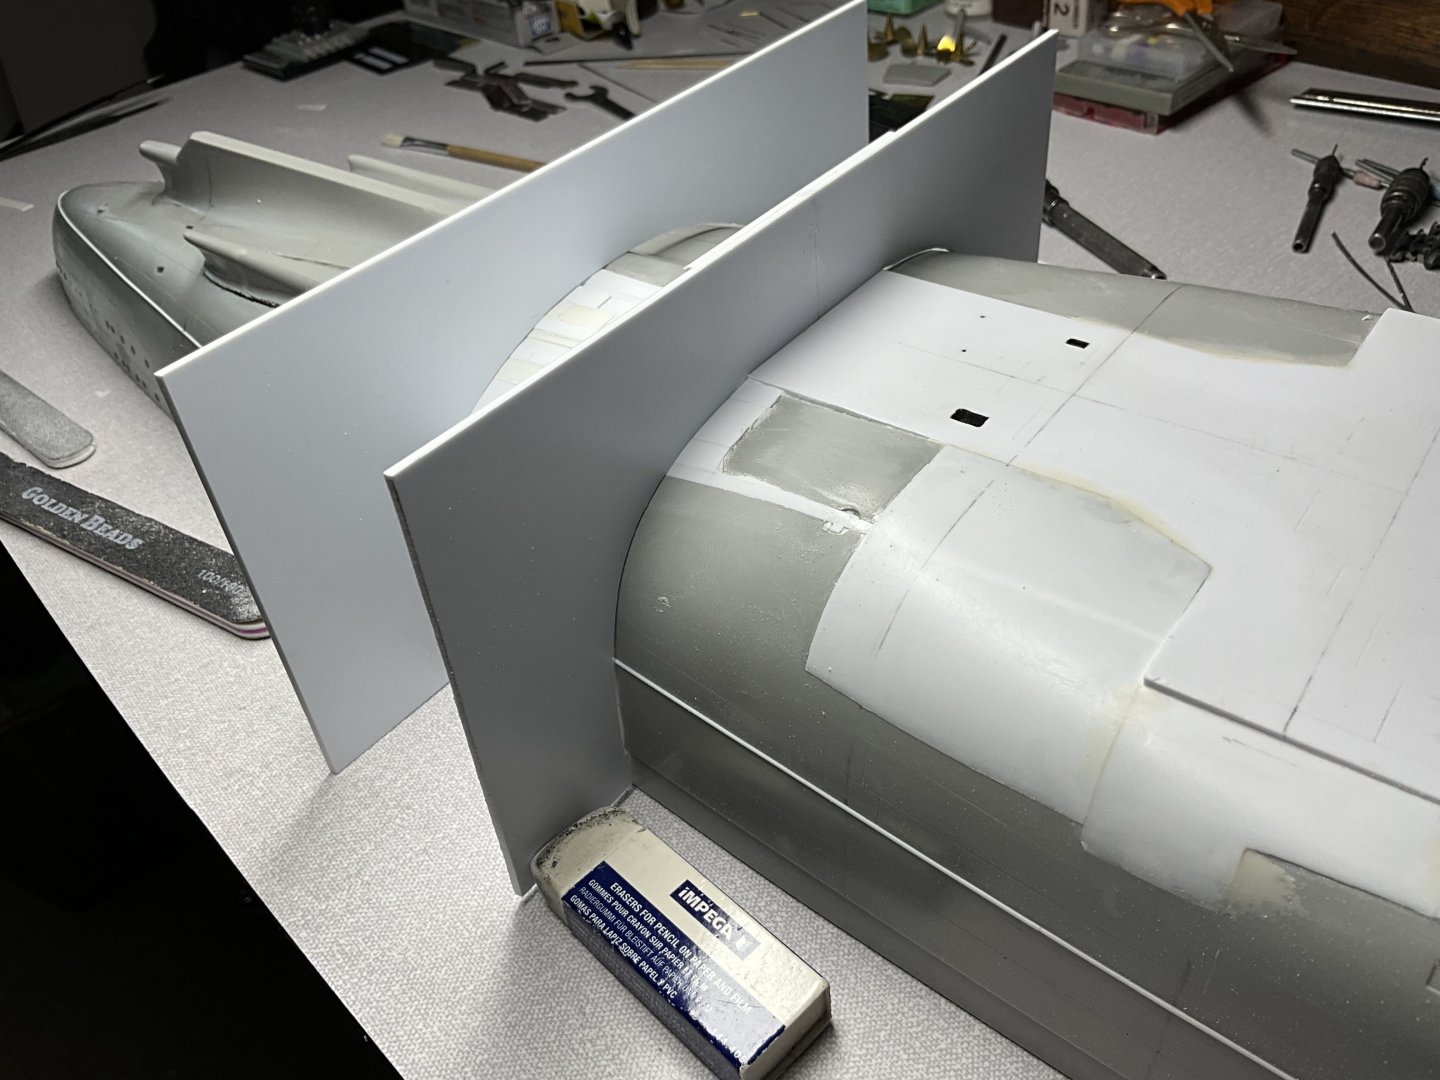
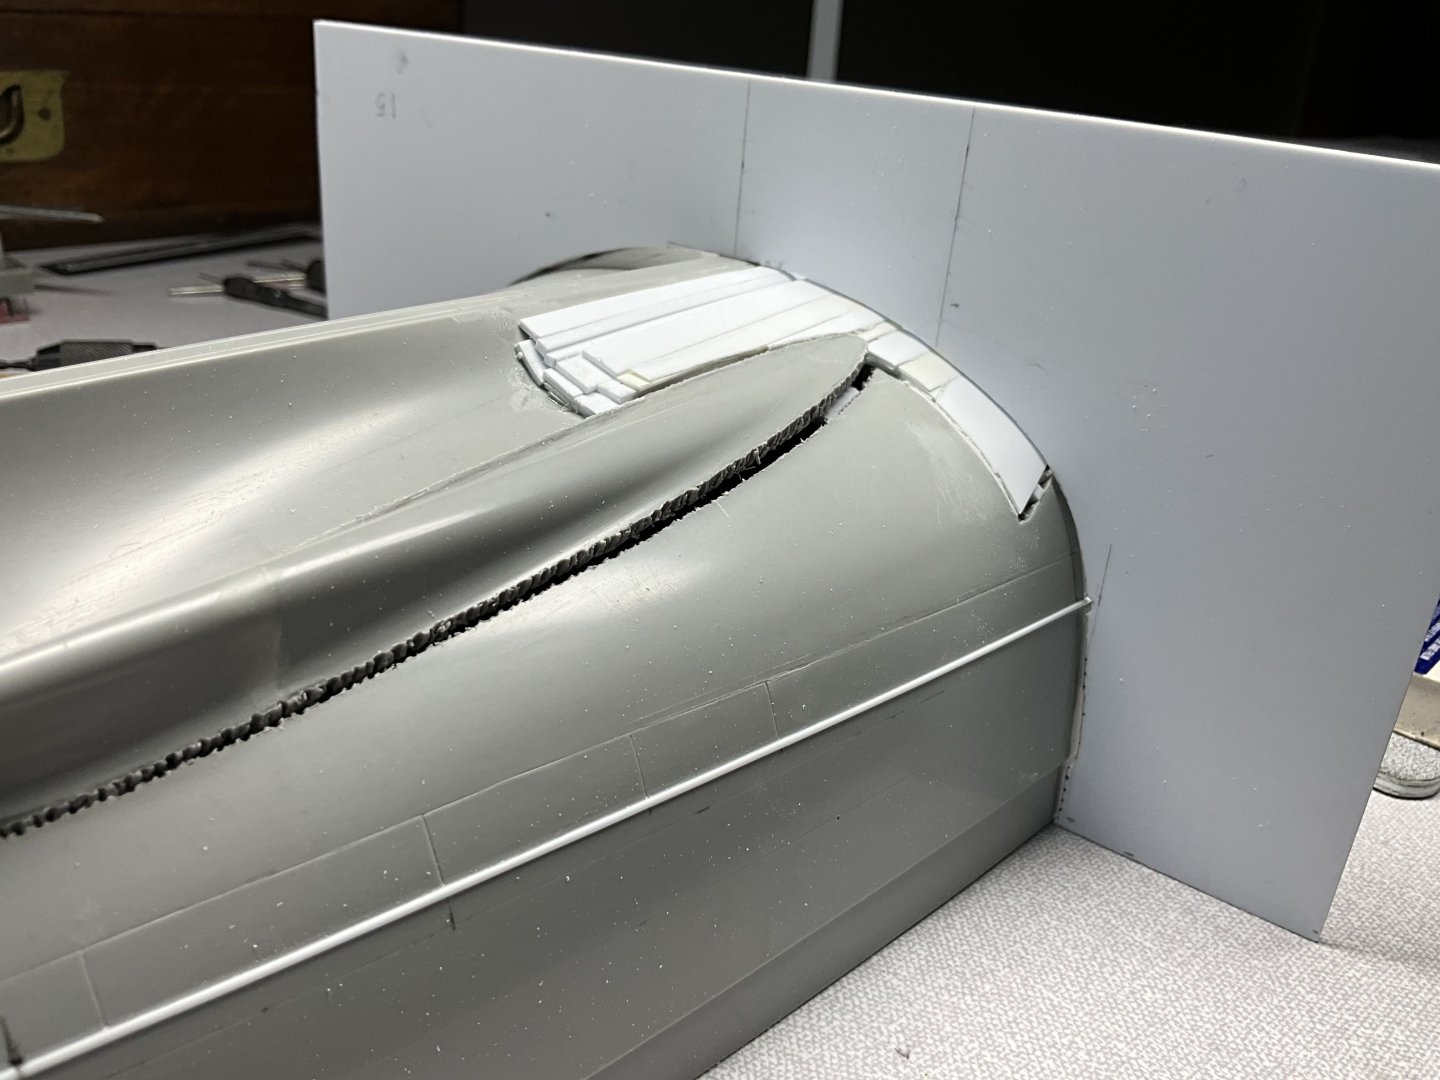
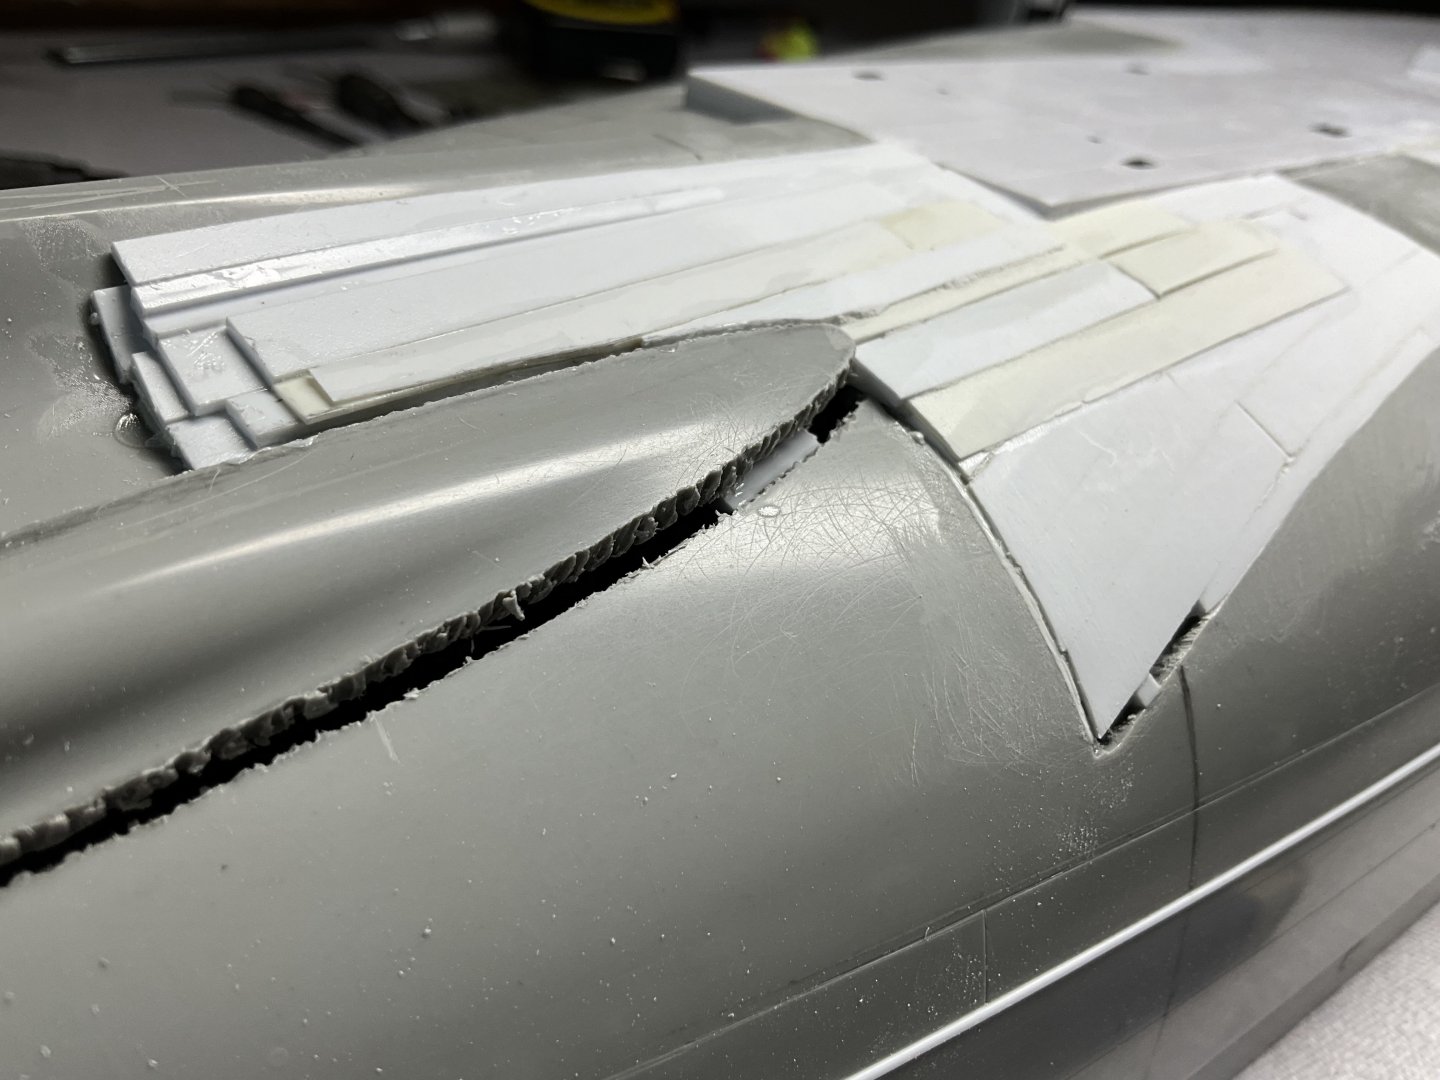
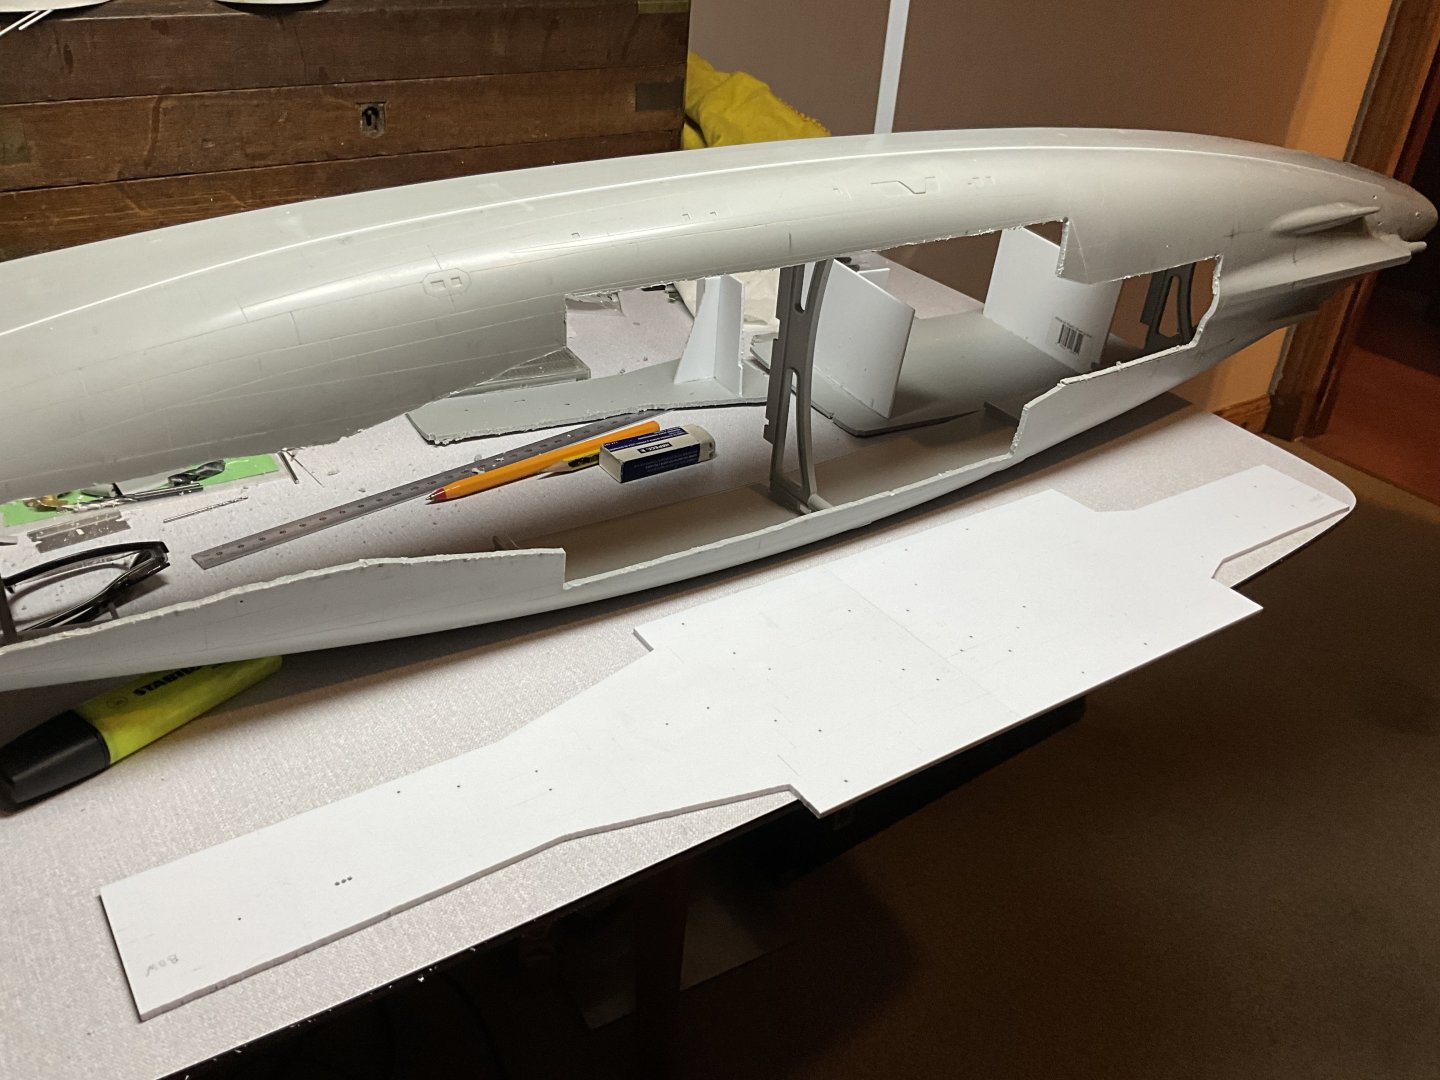
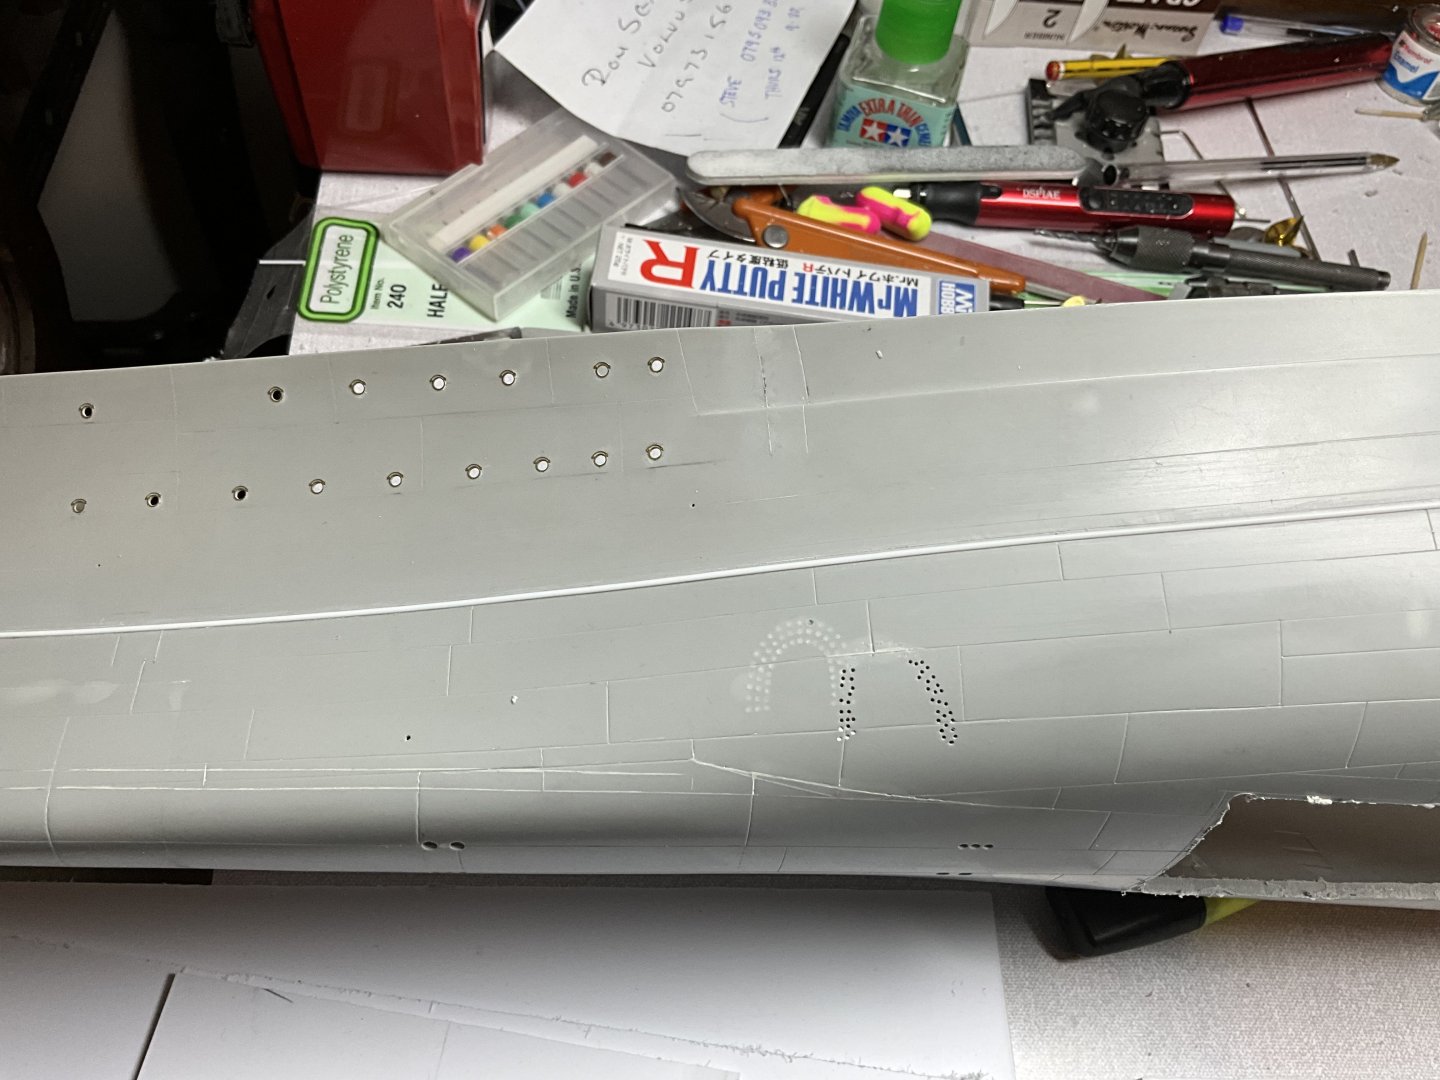
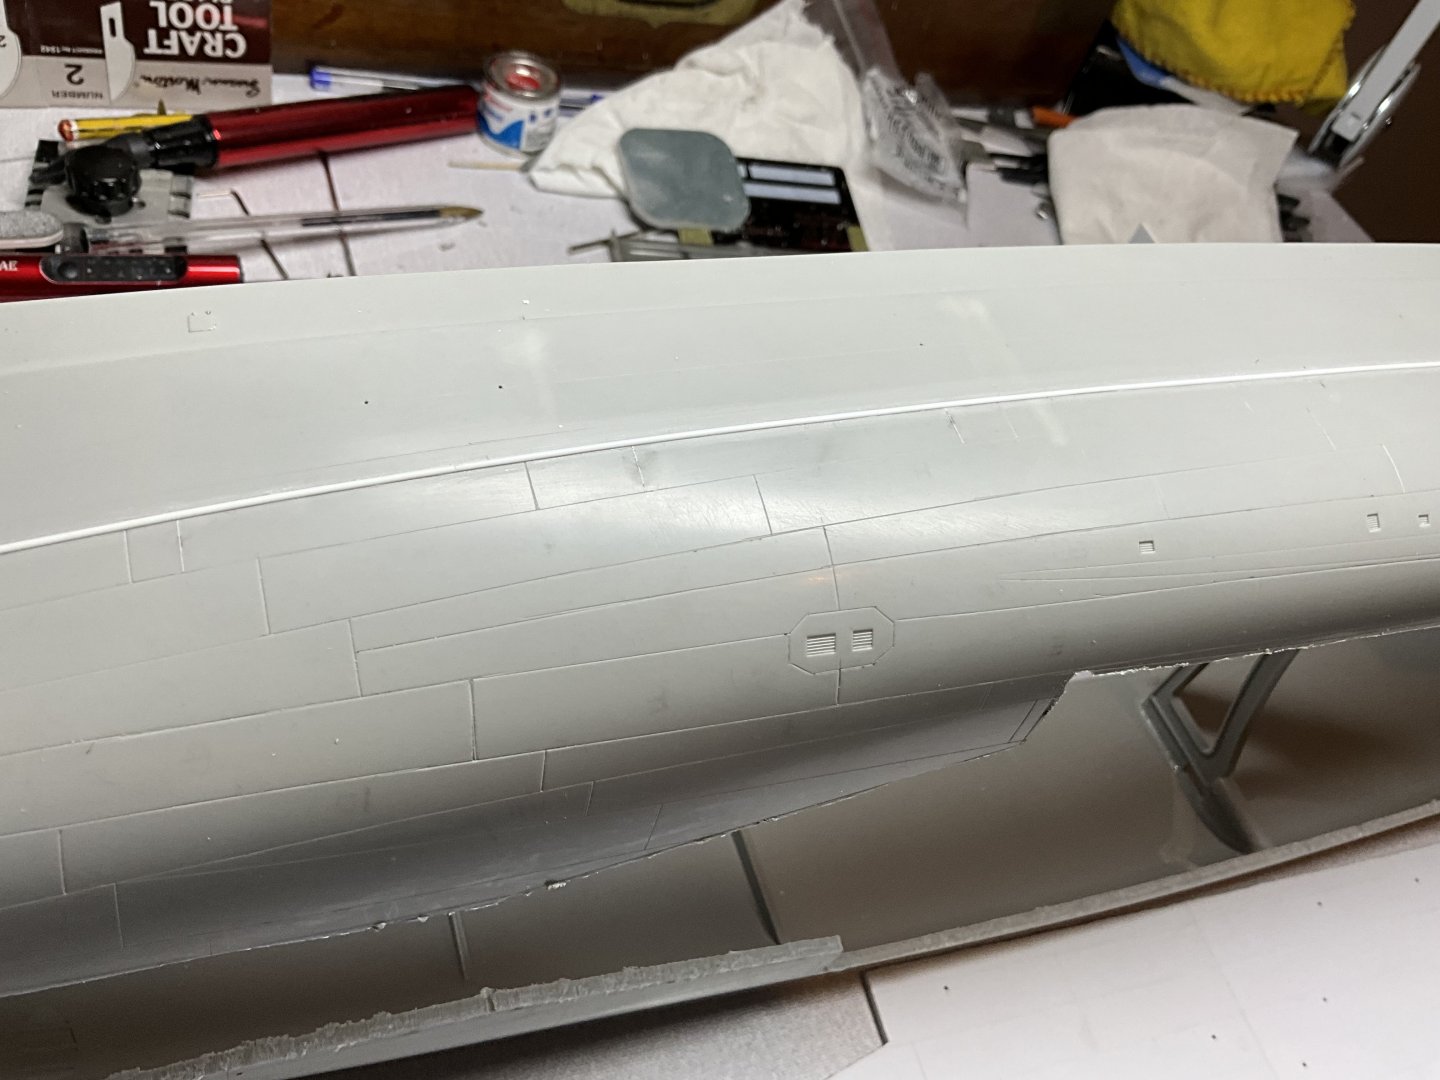
My solution to hull profile was splitting hull and forcing apart and building up outer profiles with styrene stock then dressing down the plastic till close to required shape, then when happy use thin styrene sheet to wrap on the outside of hull using liquid cement gradually forming around hull, then it’s down to filling and sanding, when satisfied it’s back to lightly engraving hull detailing back onto hull, yip, this is going to take a while 👀 on a lighter note the degaussing strip on outside of hull, 1mm half round styrene strip fitted around hull, straight out of packet, perfect , what a doddle 😂


-
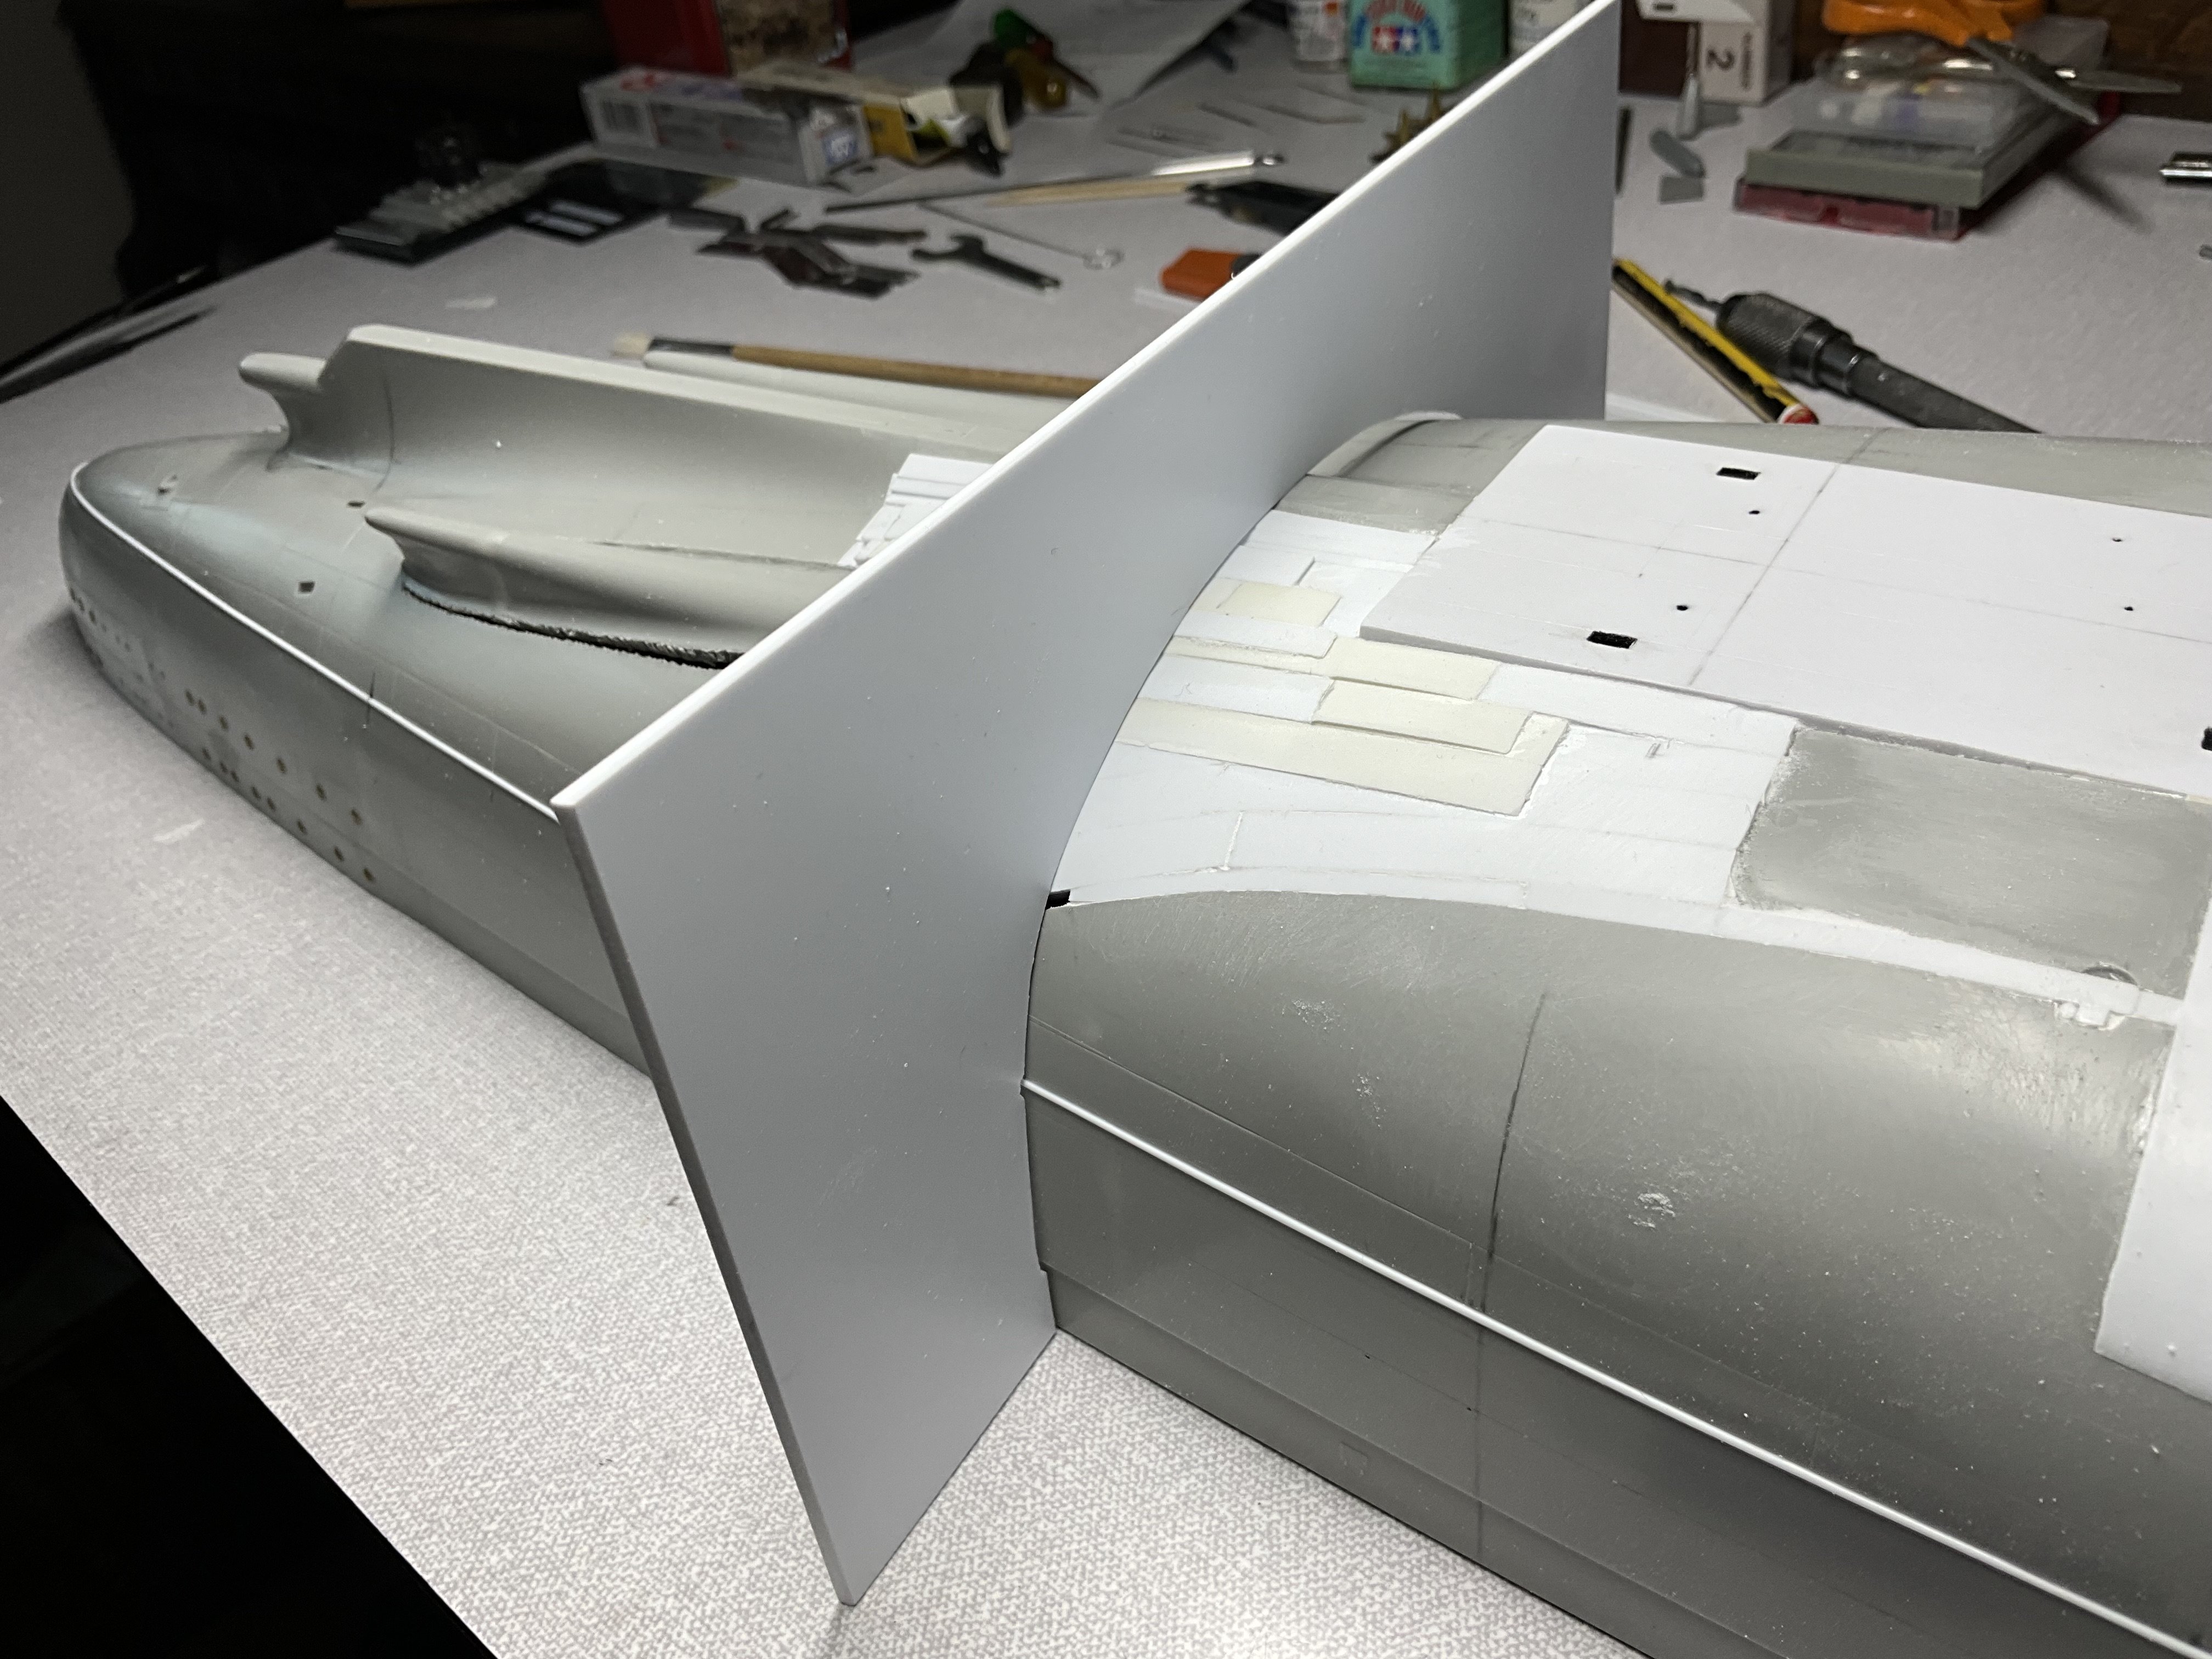
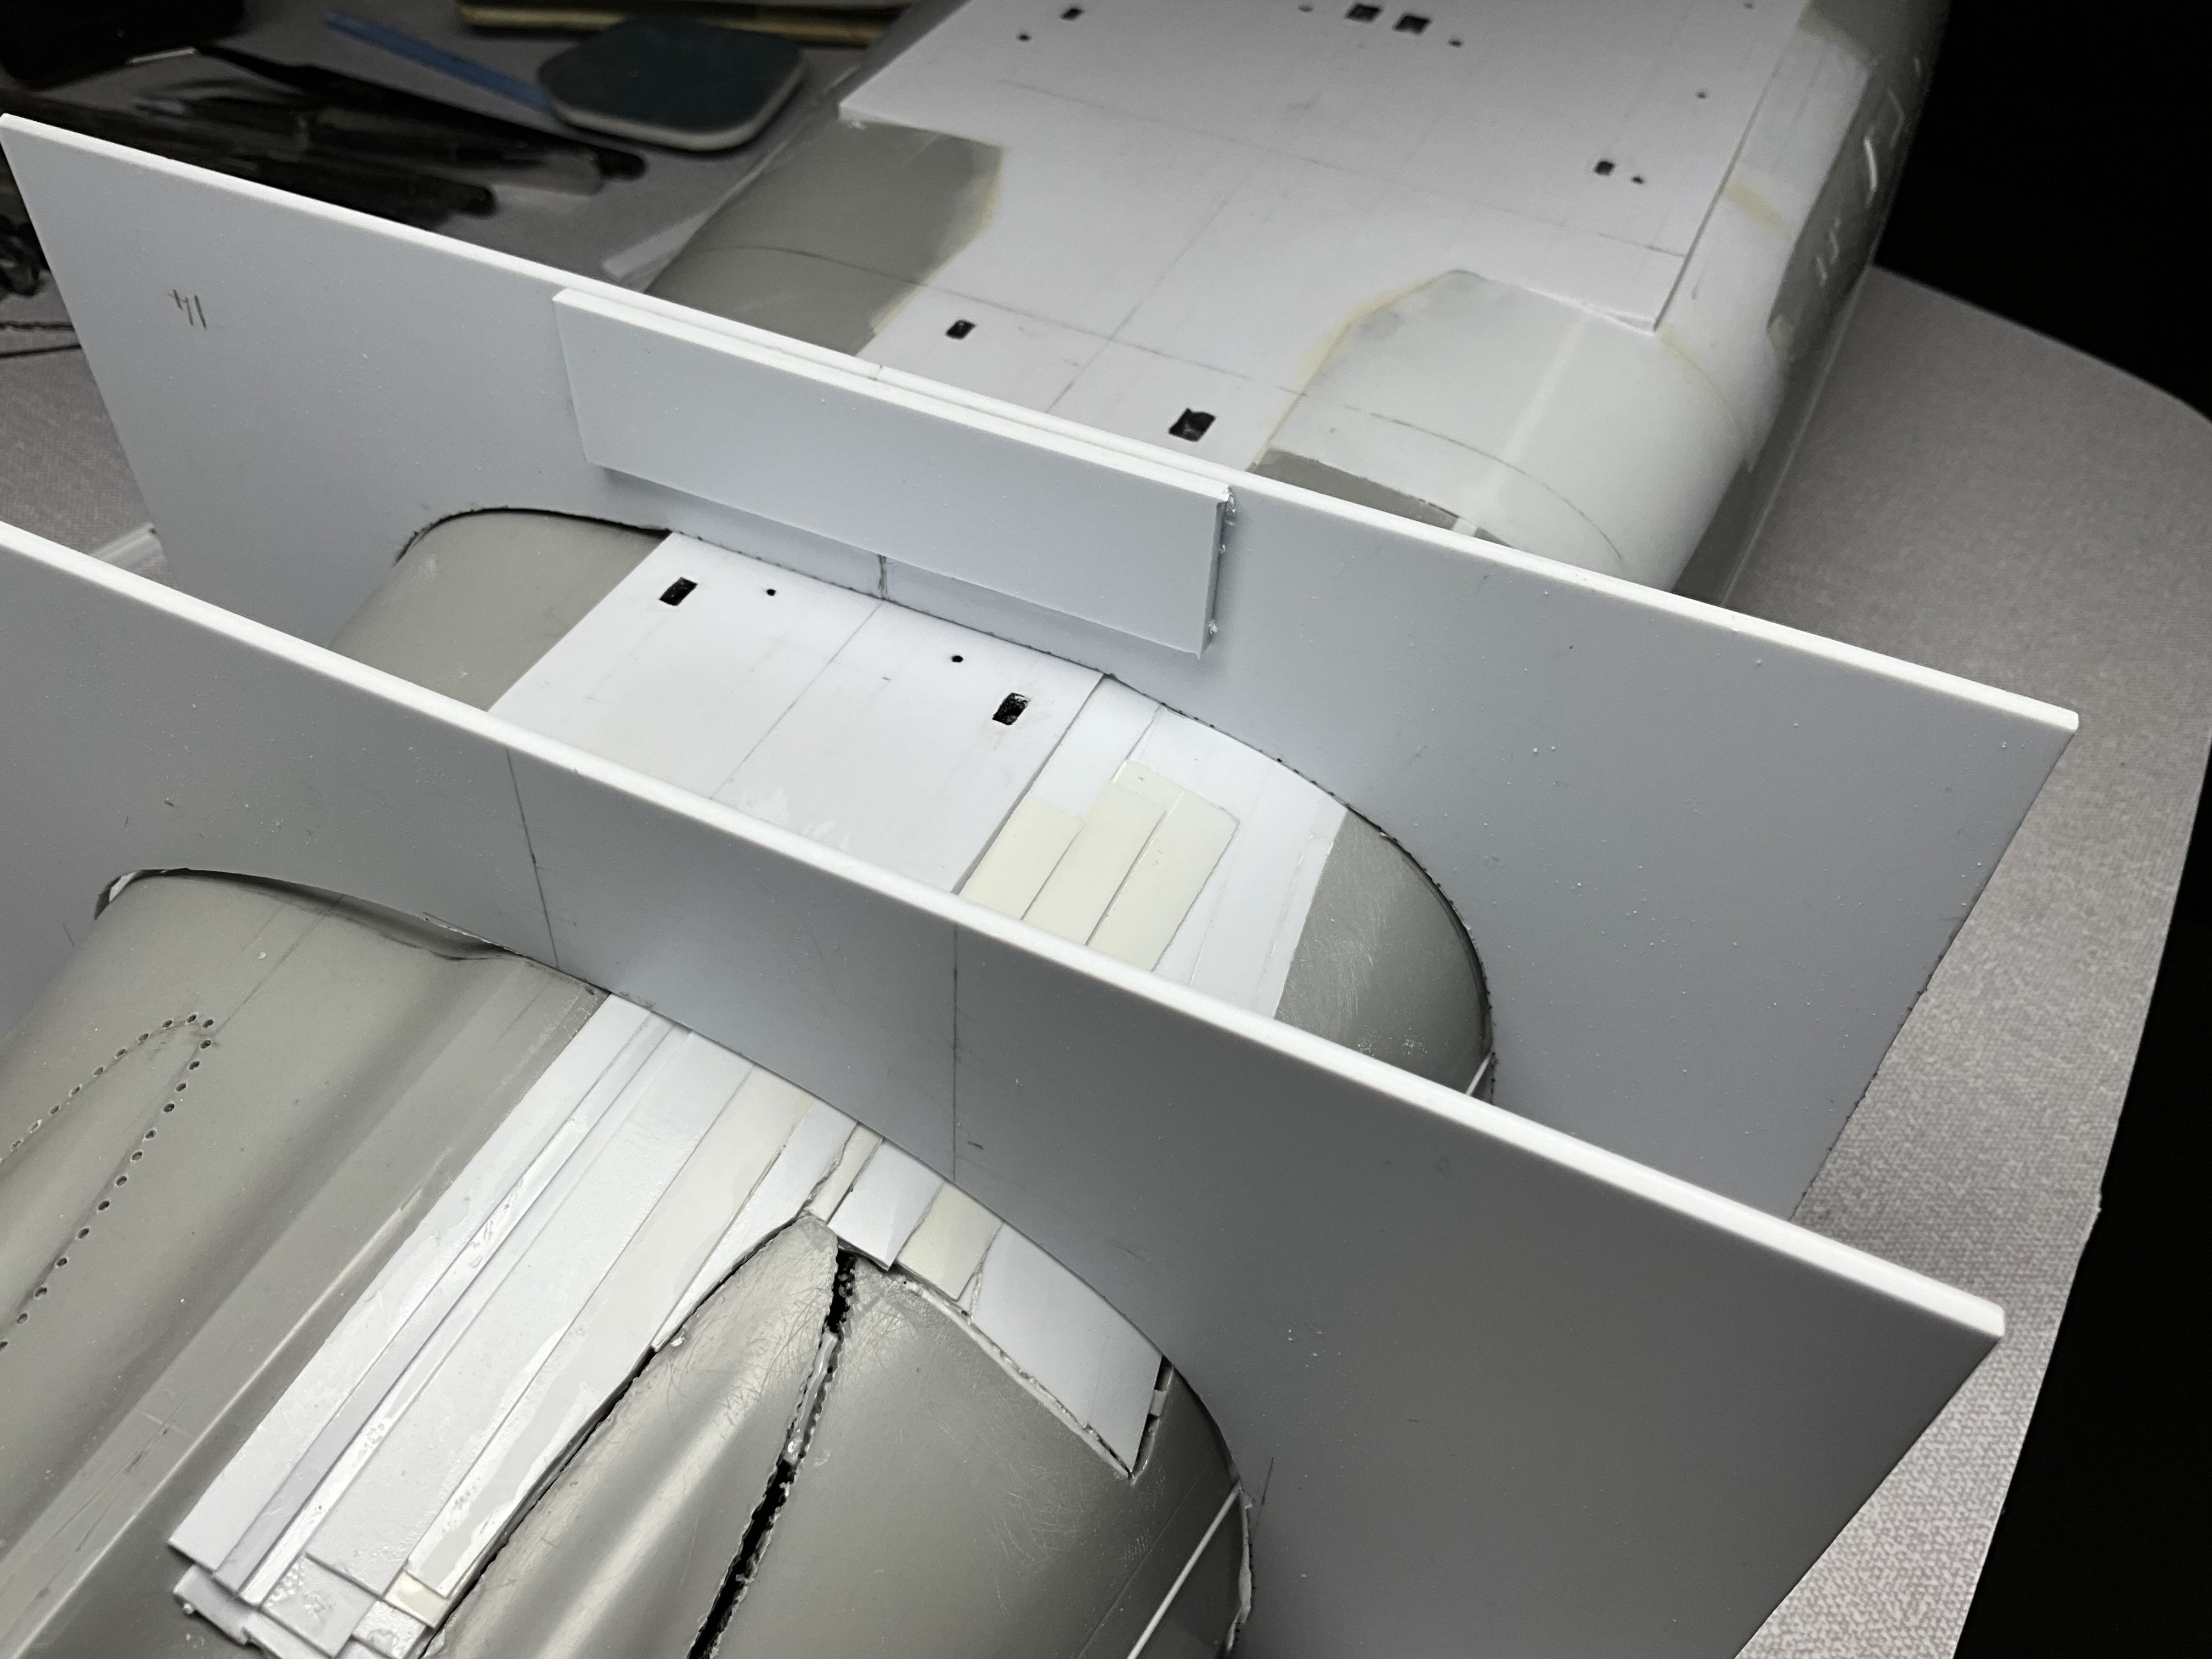
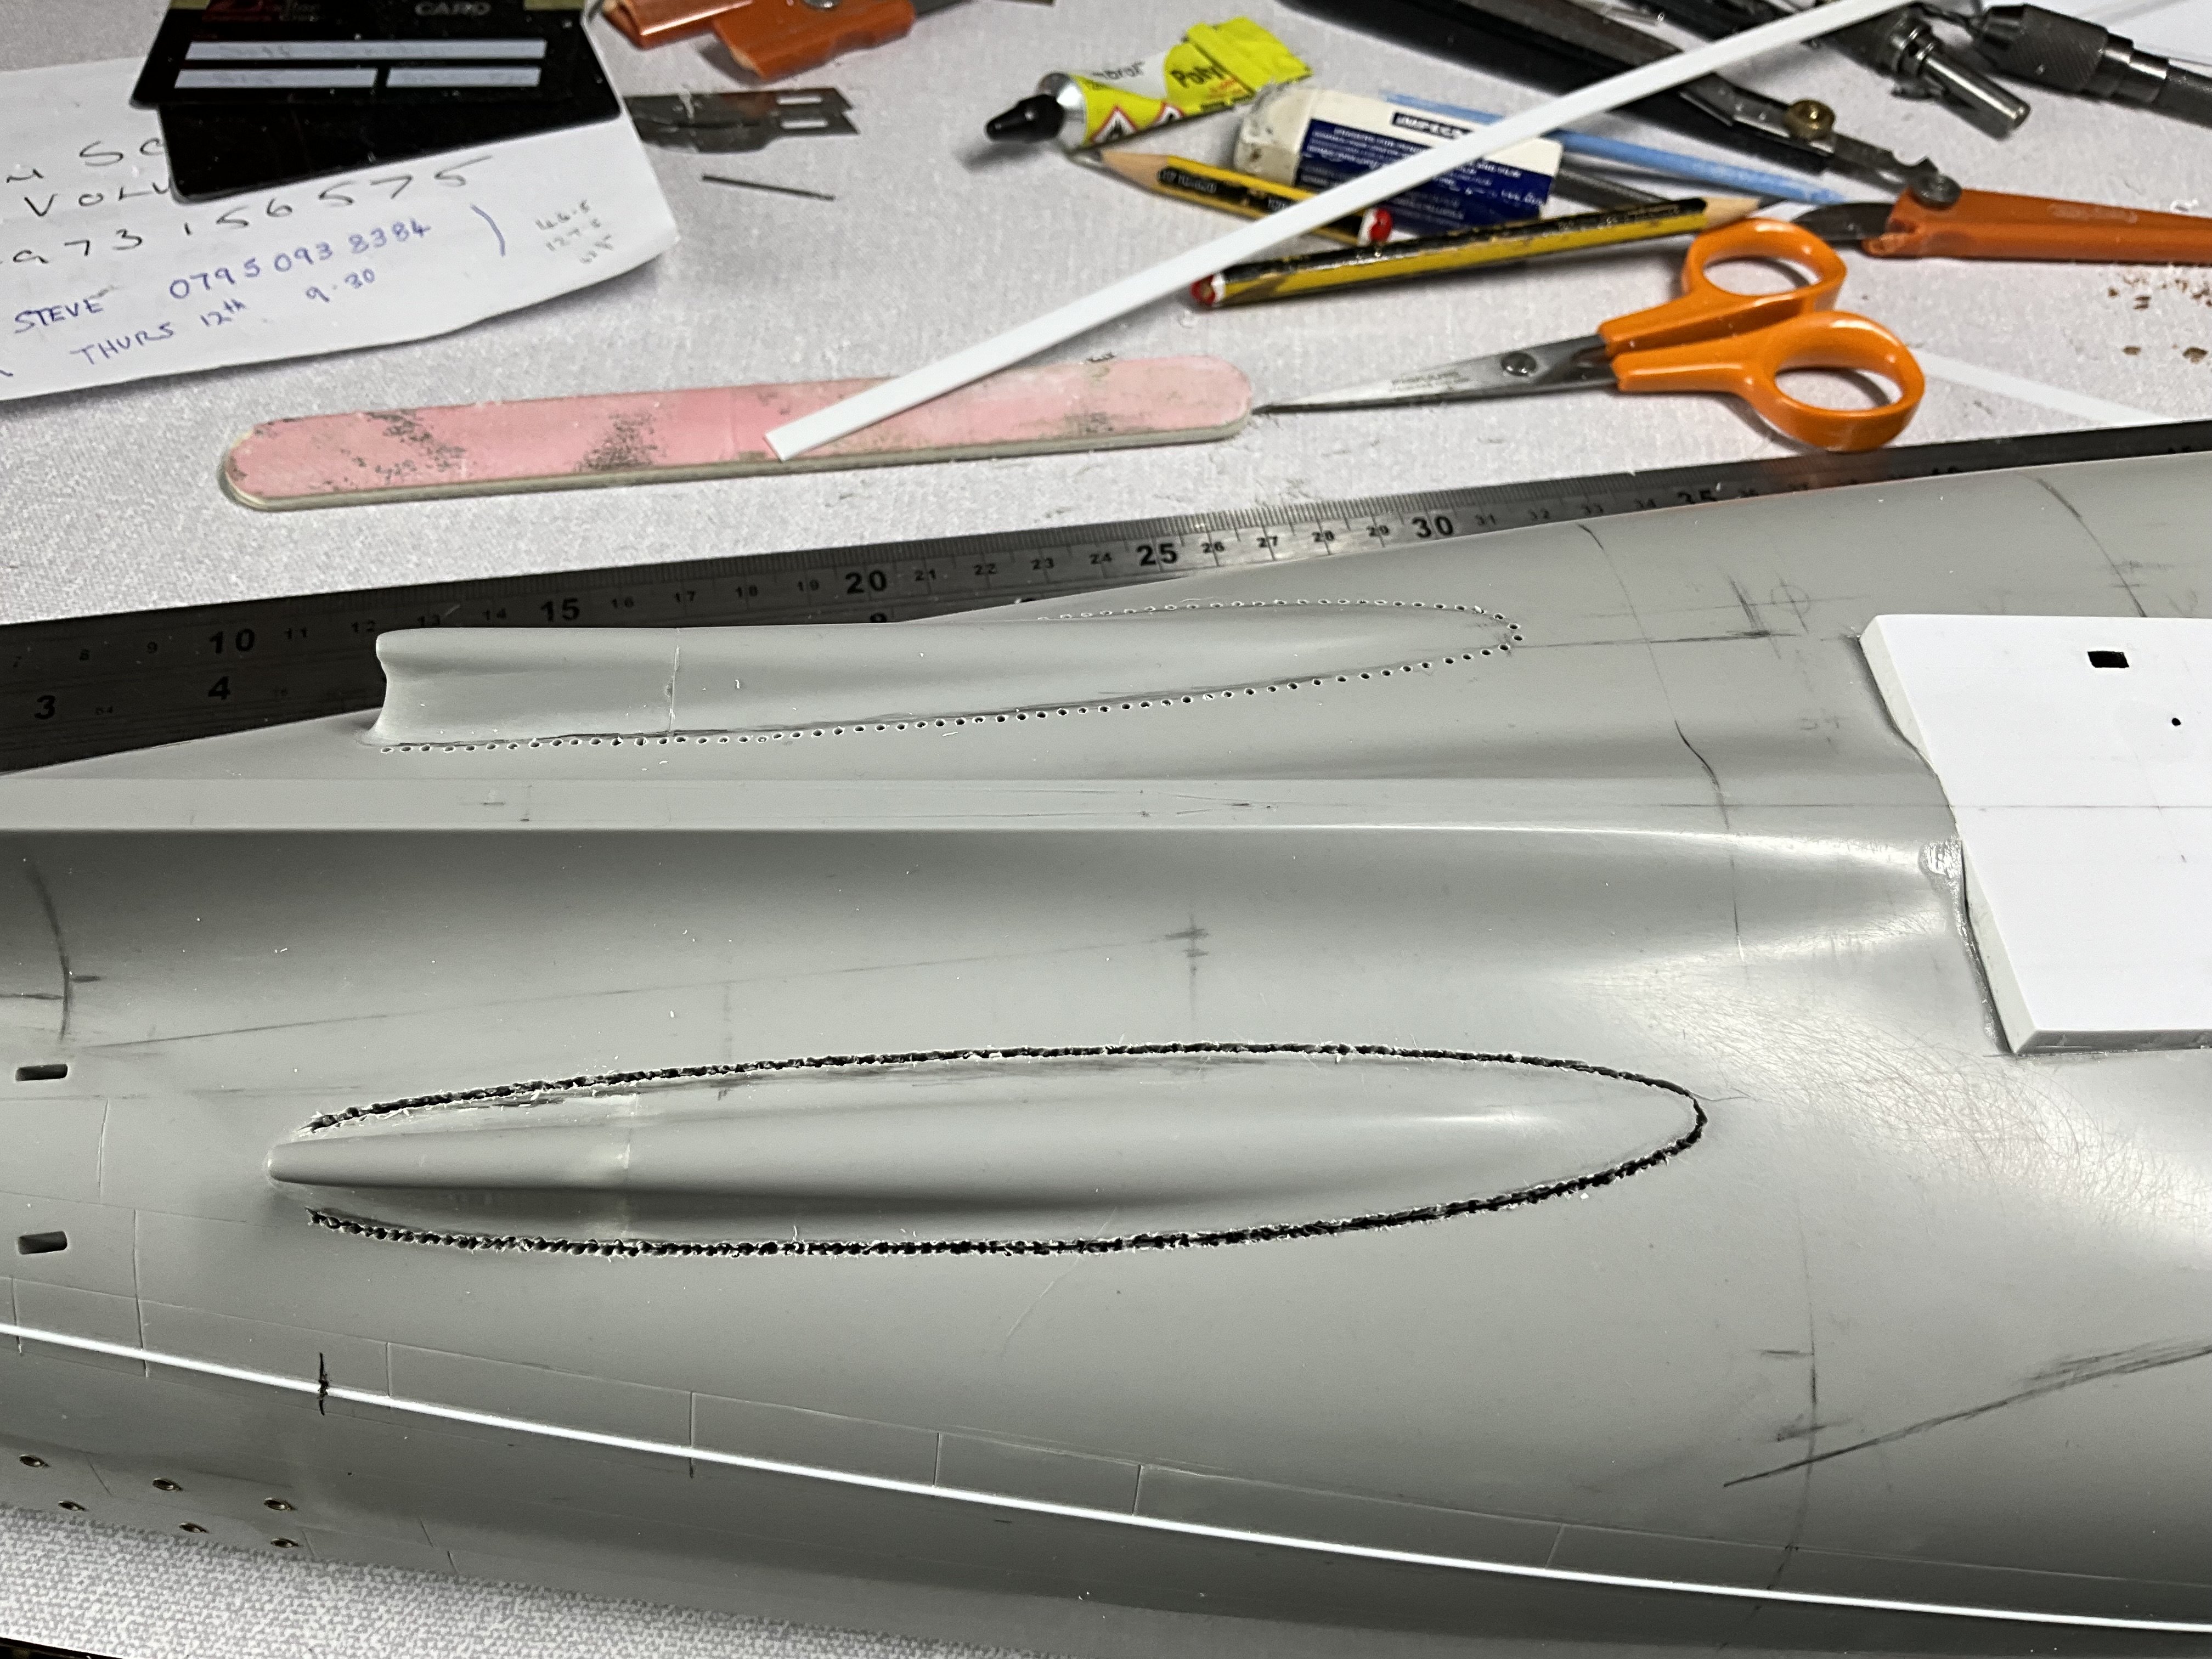
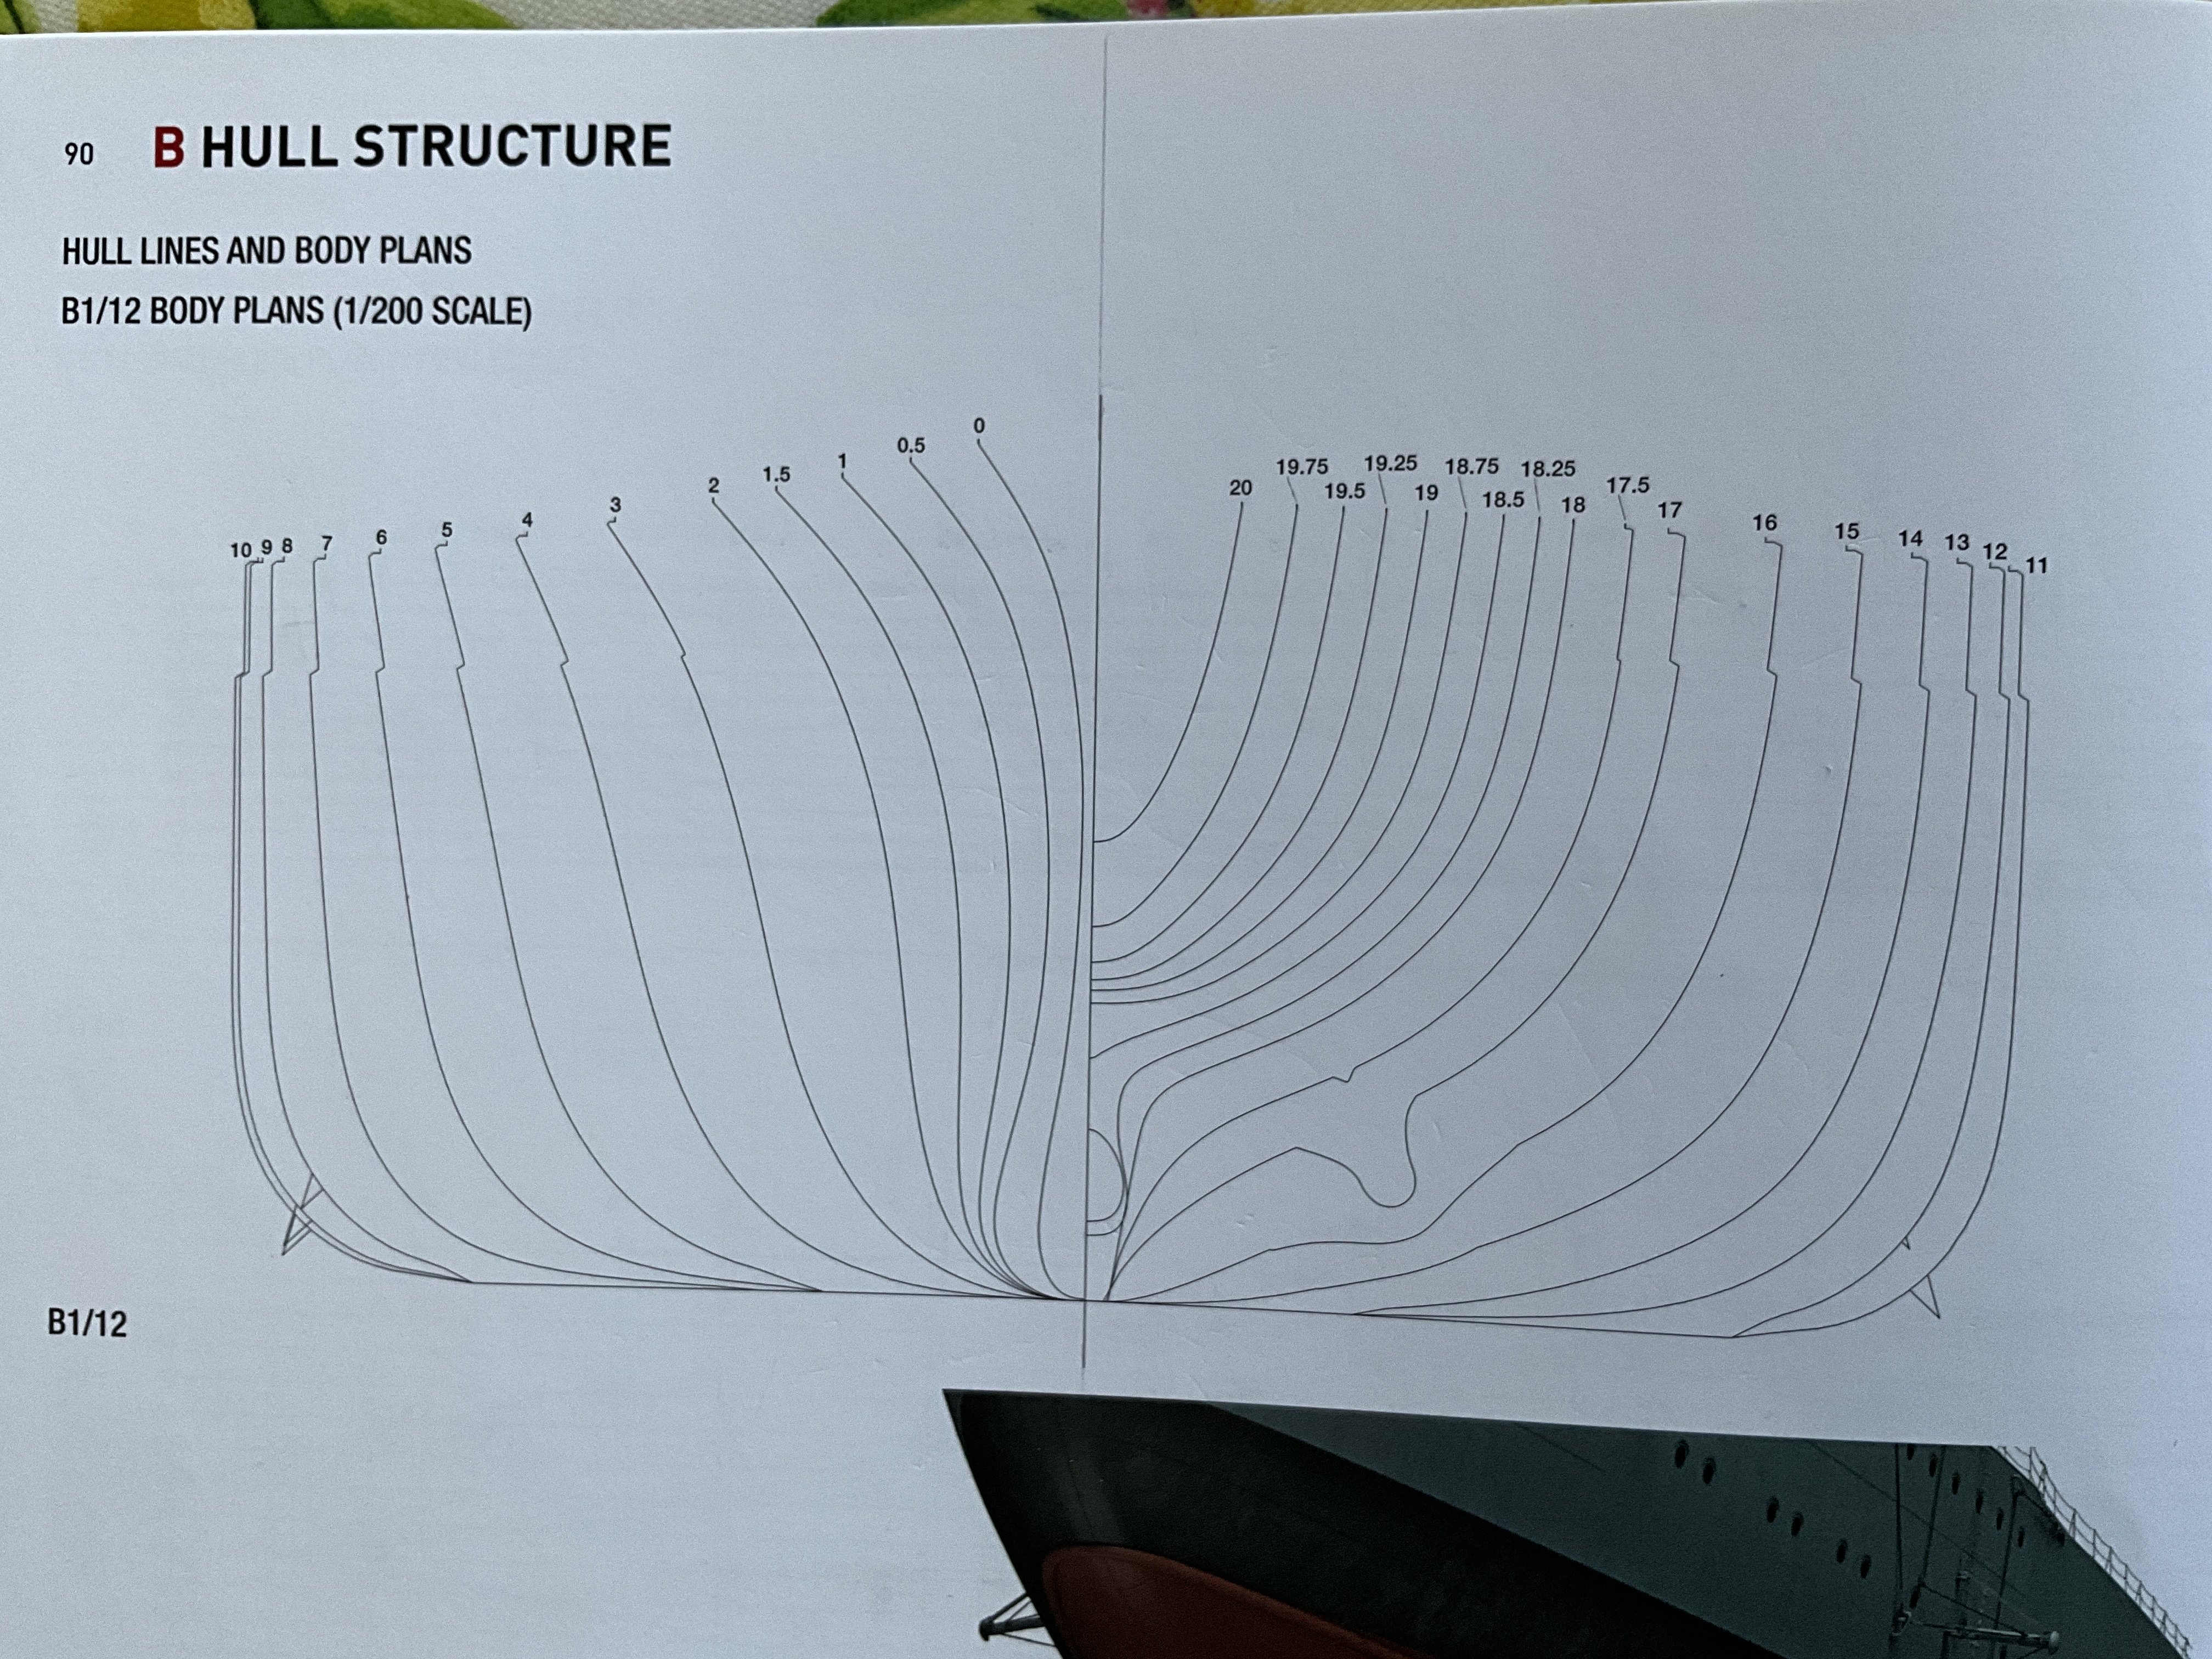
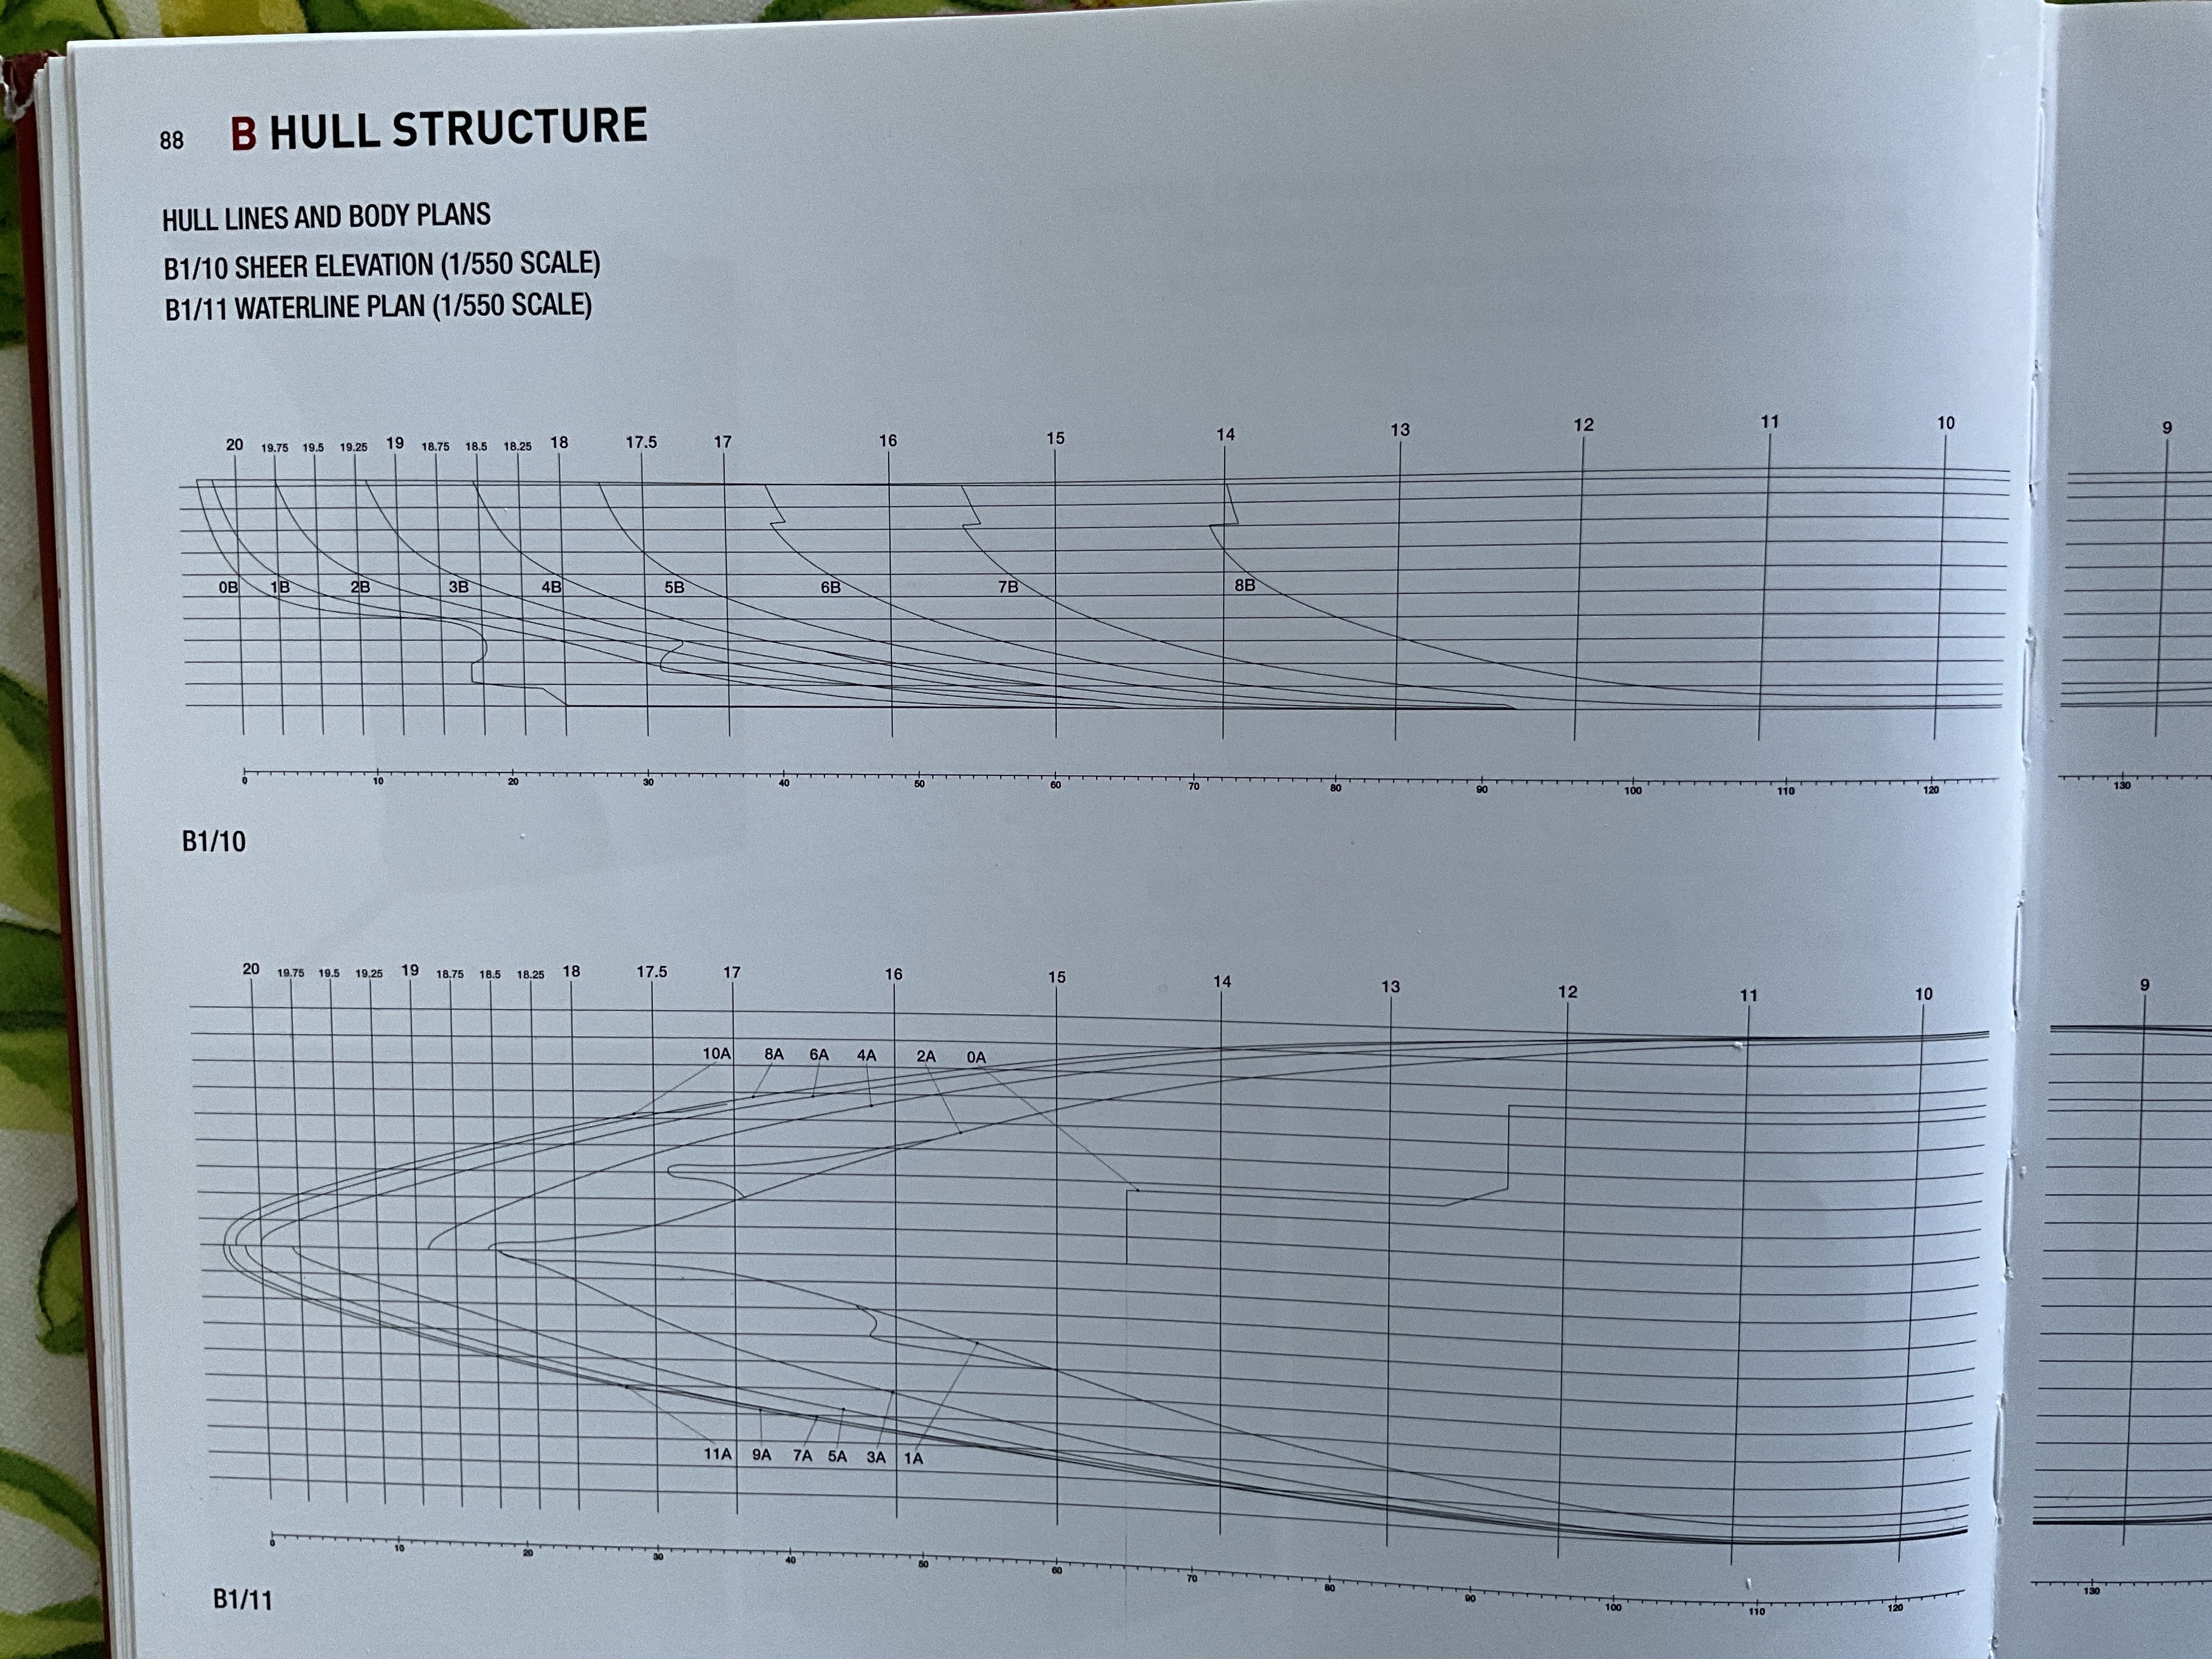
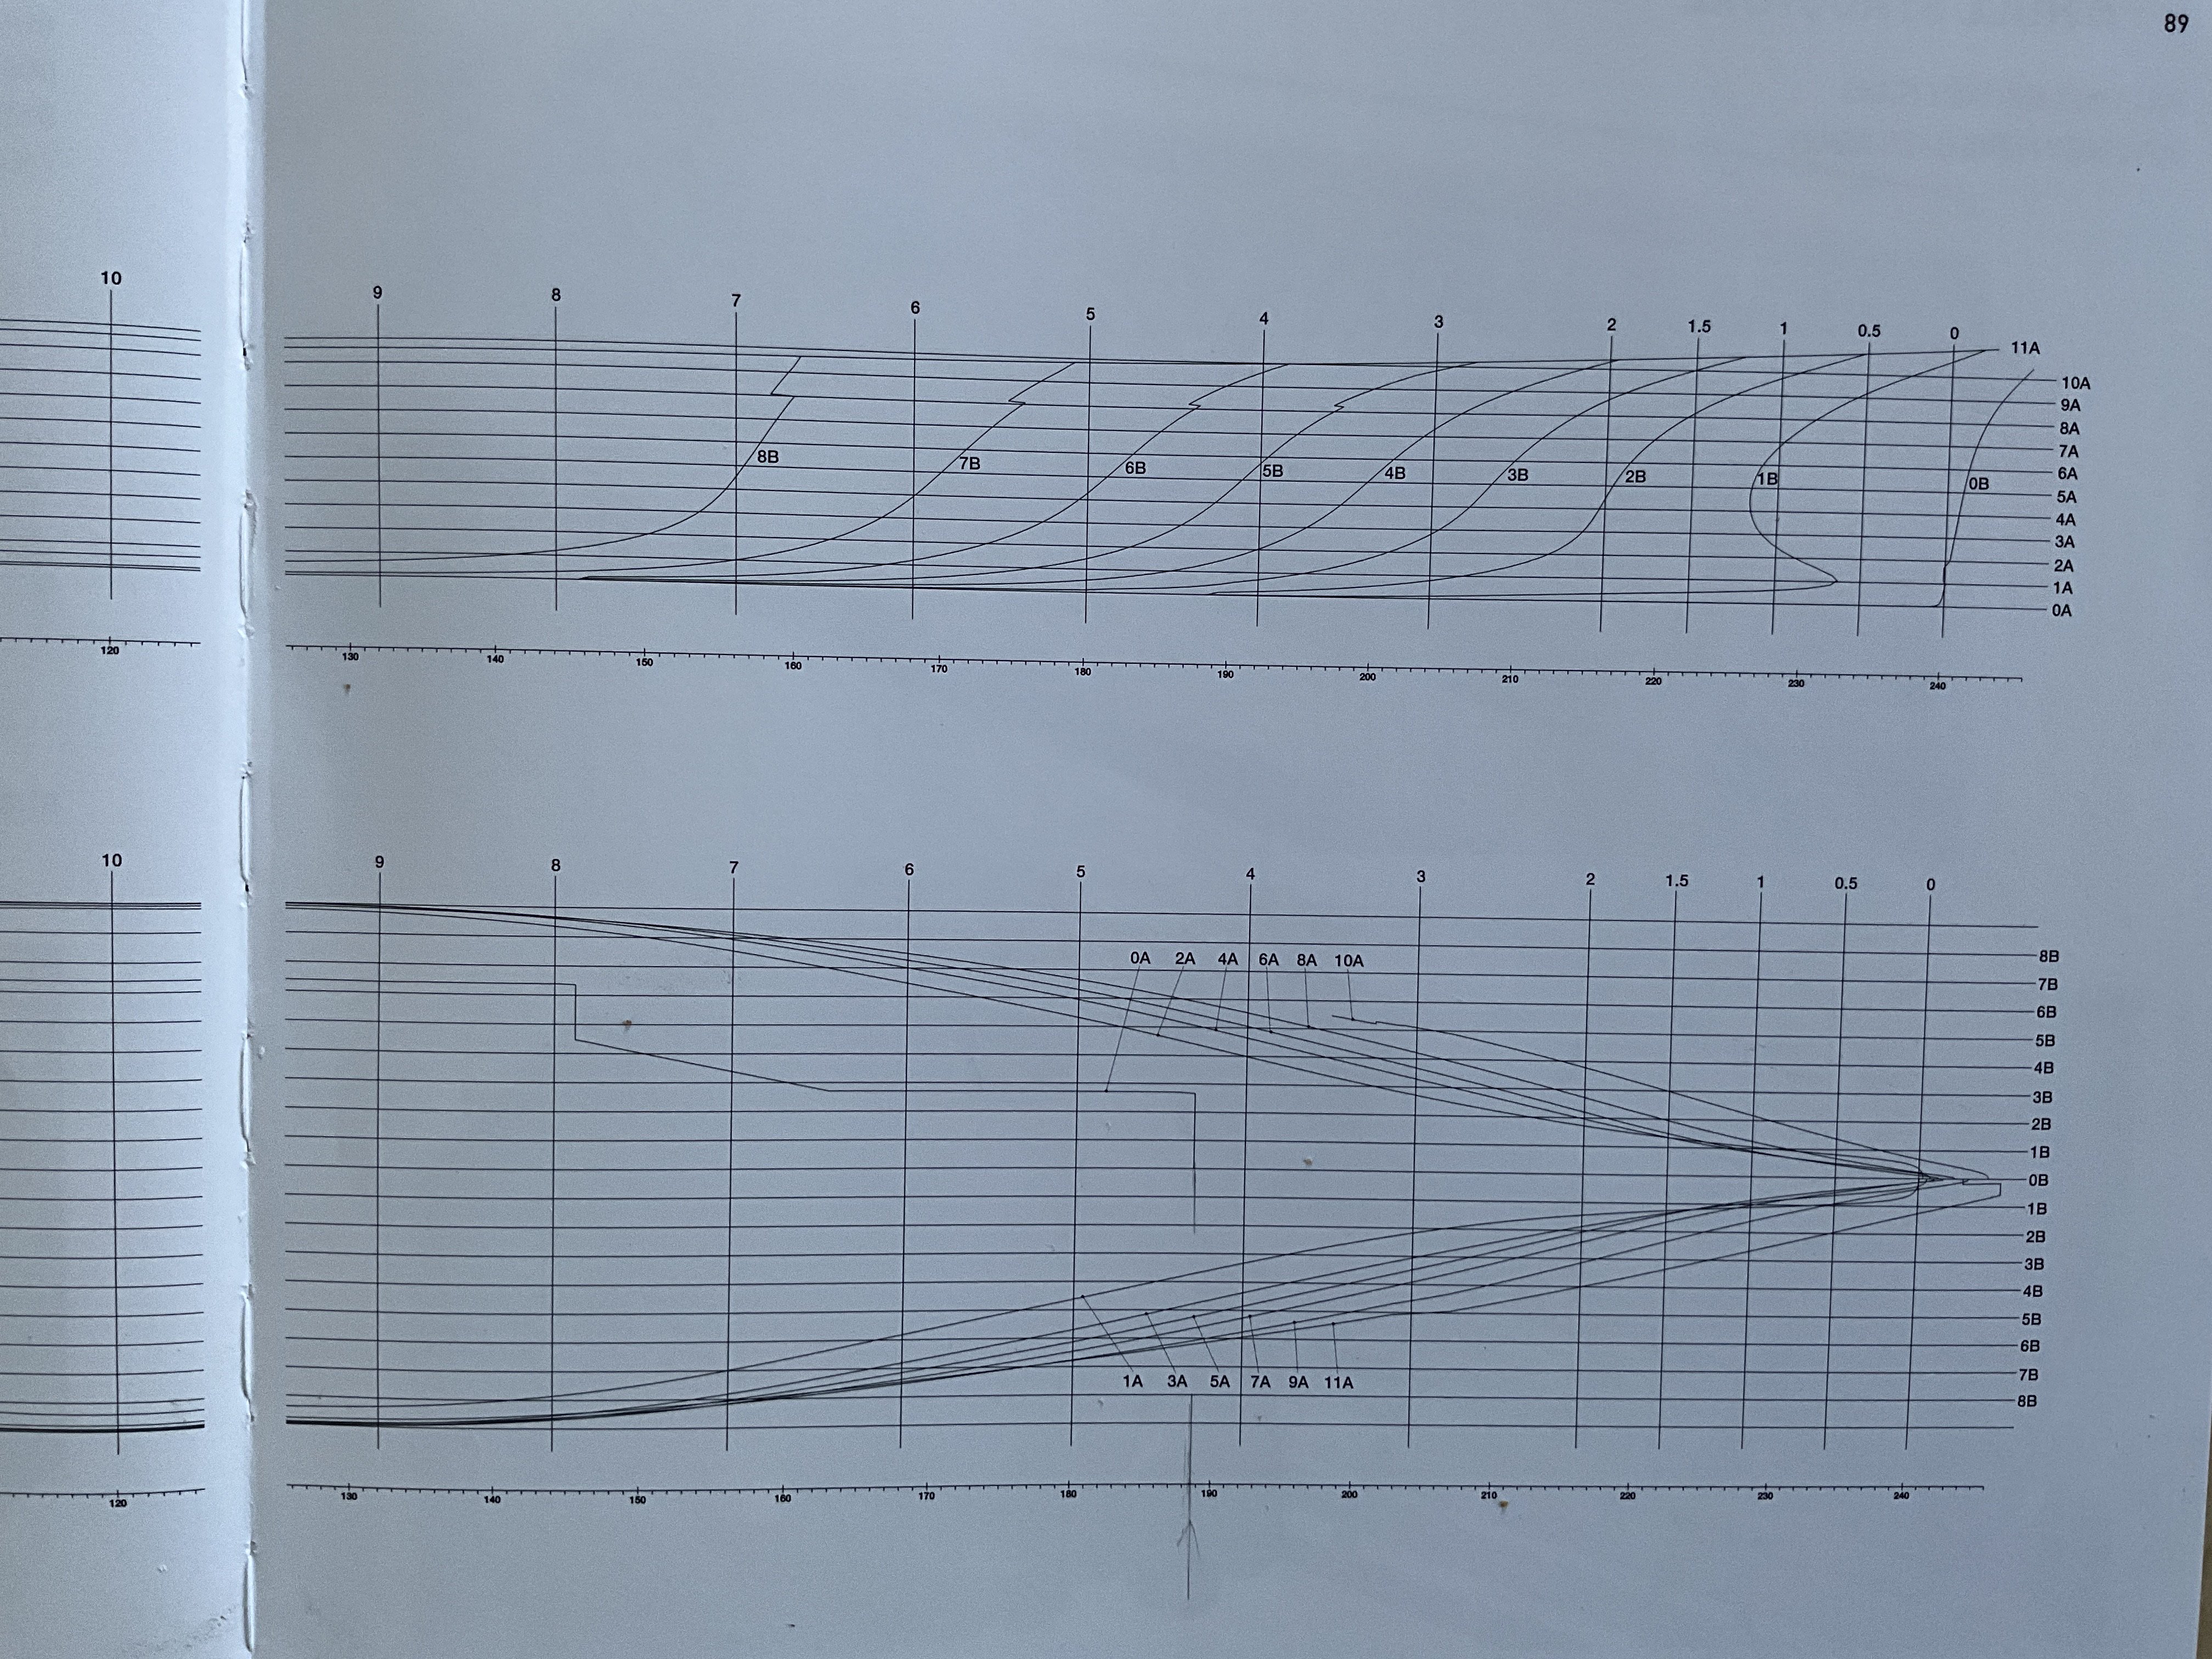
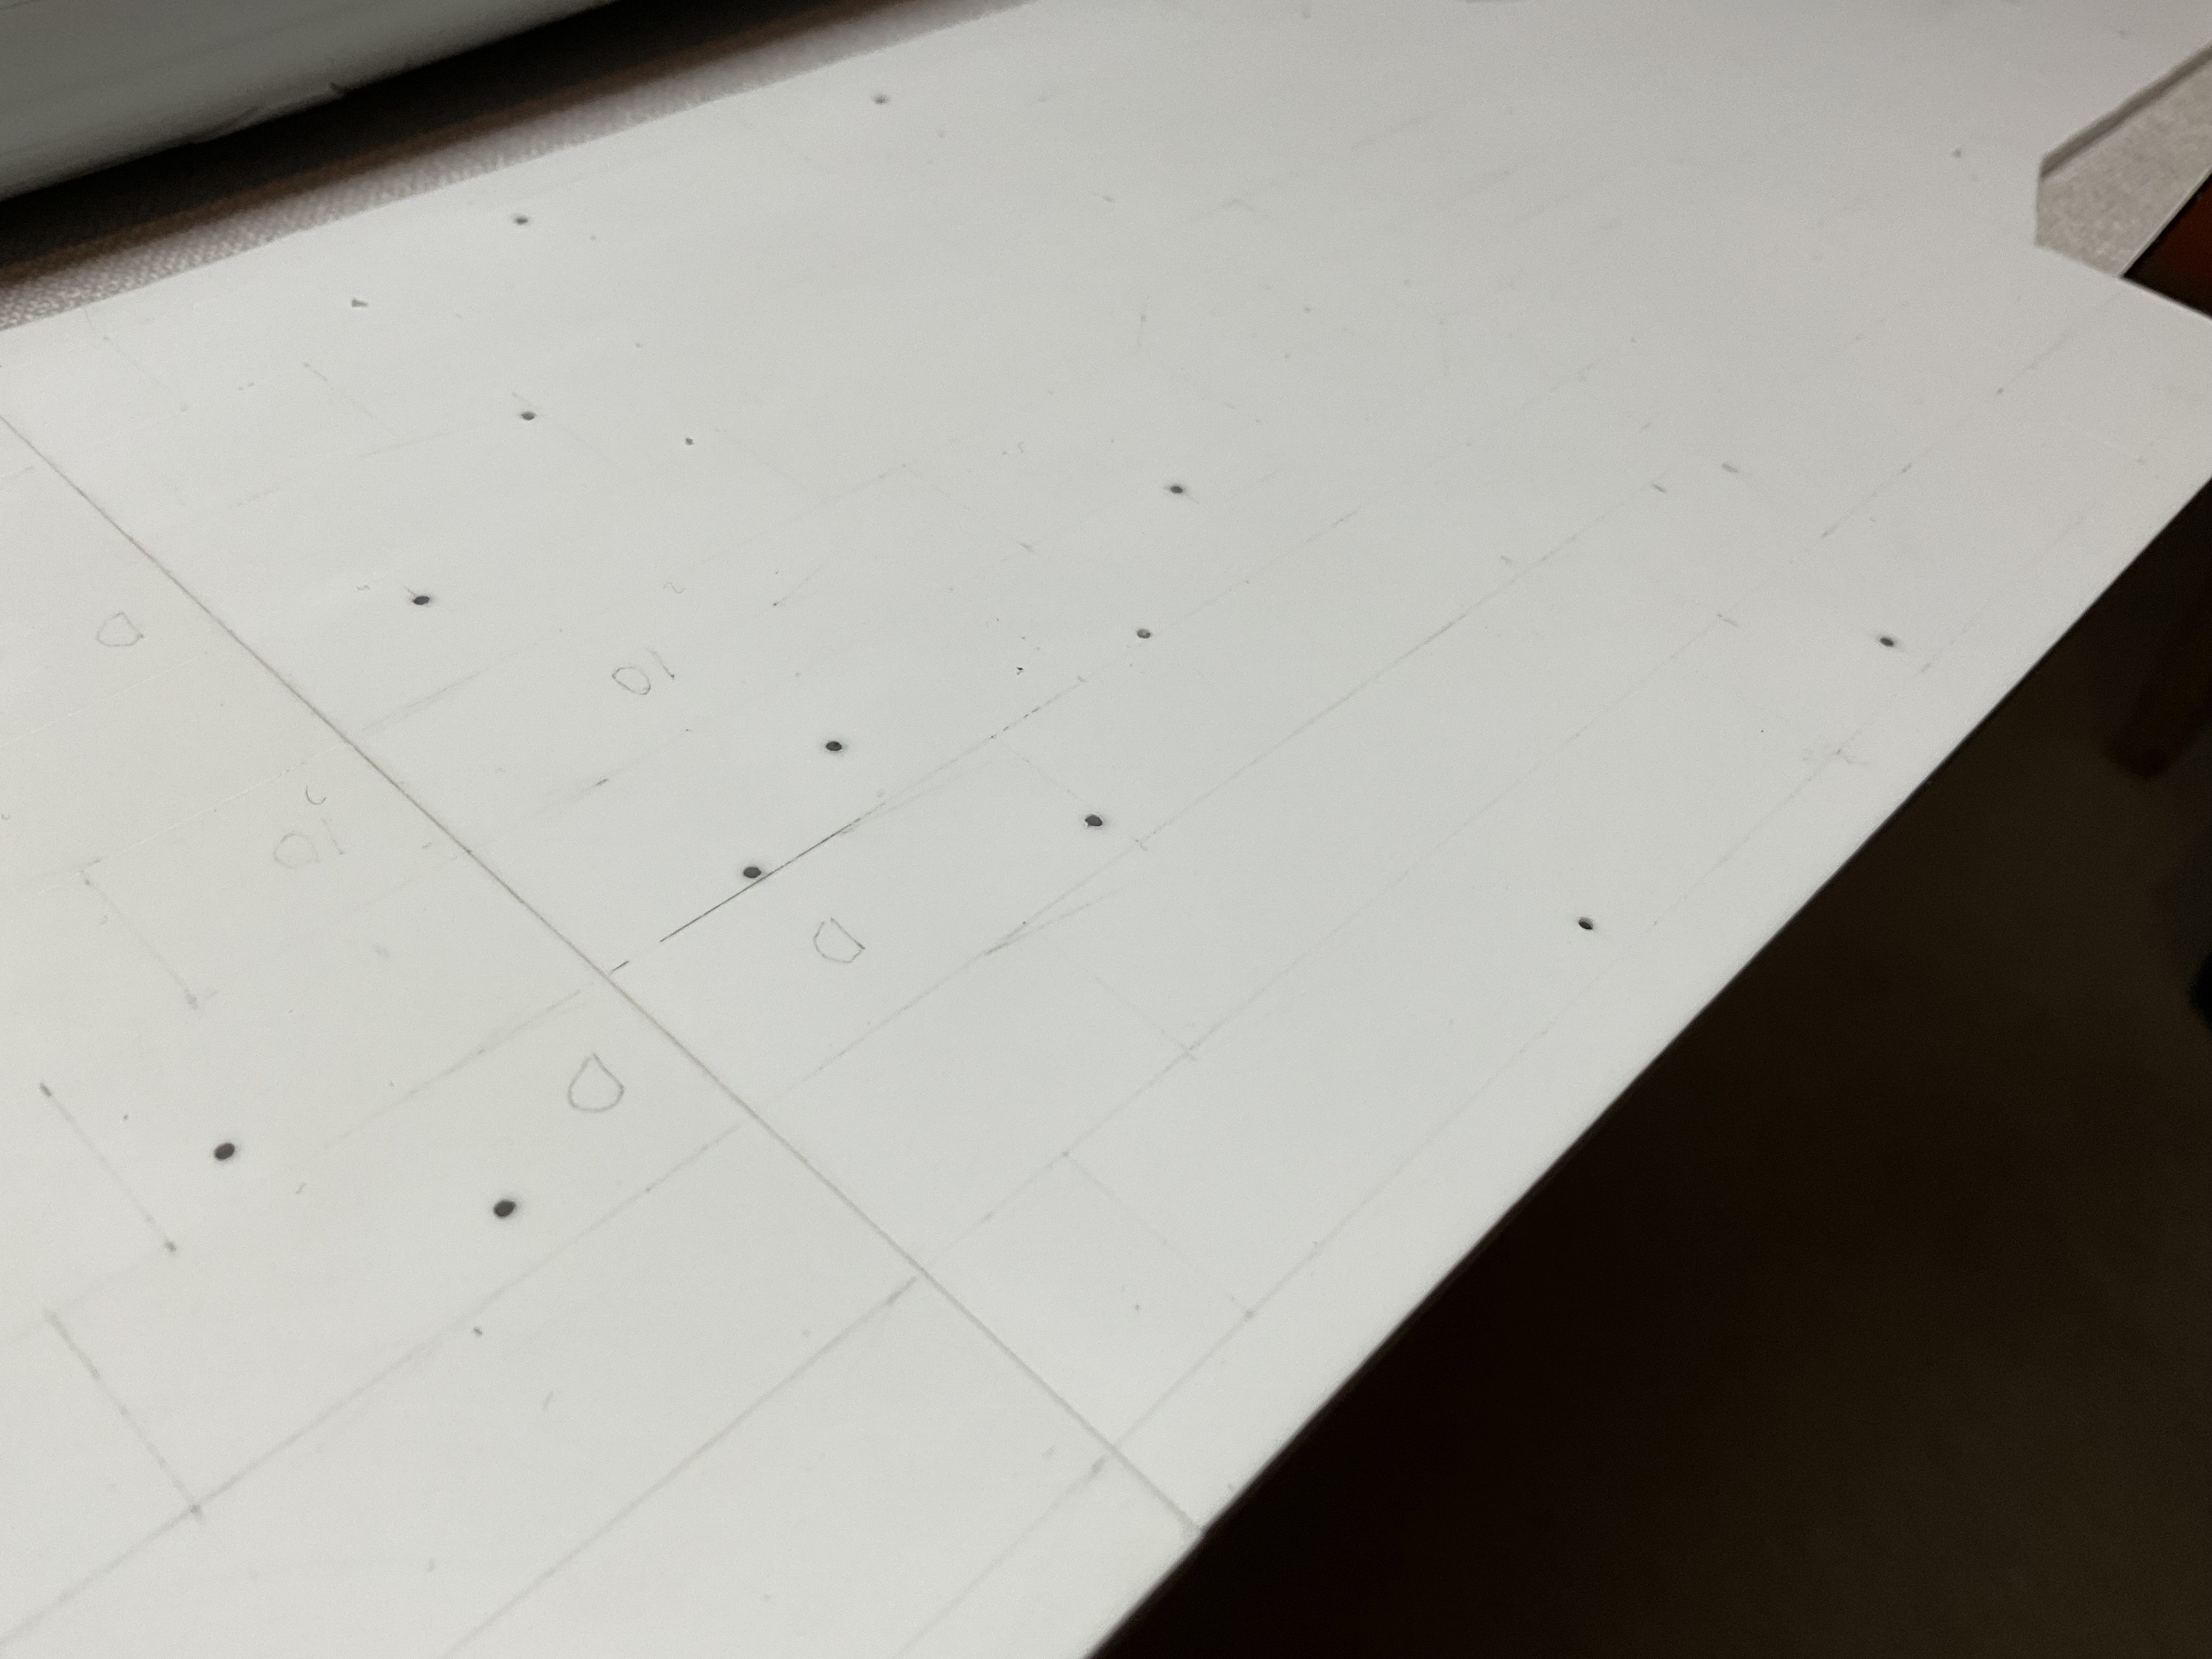
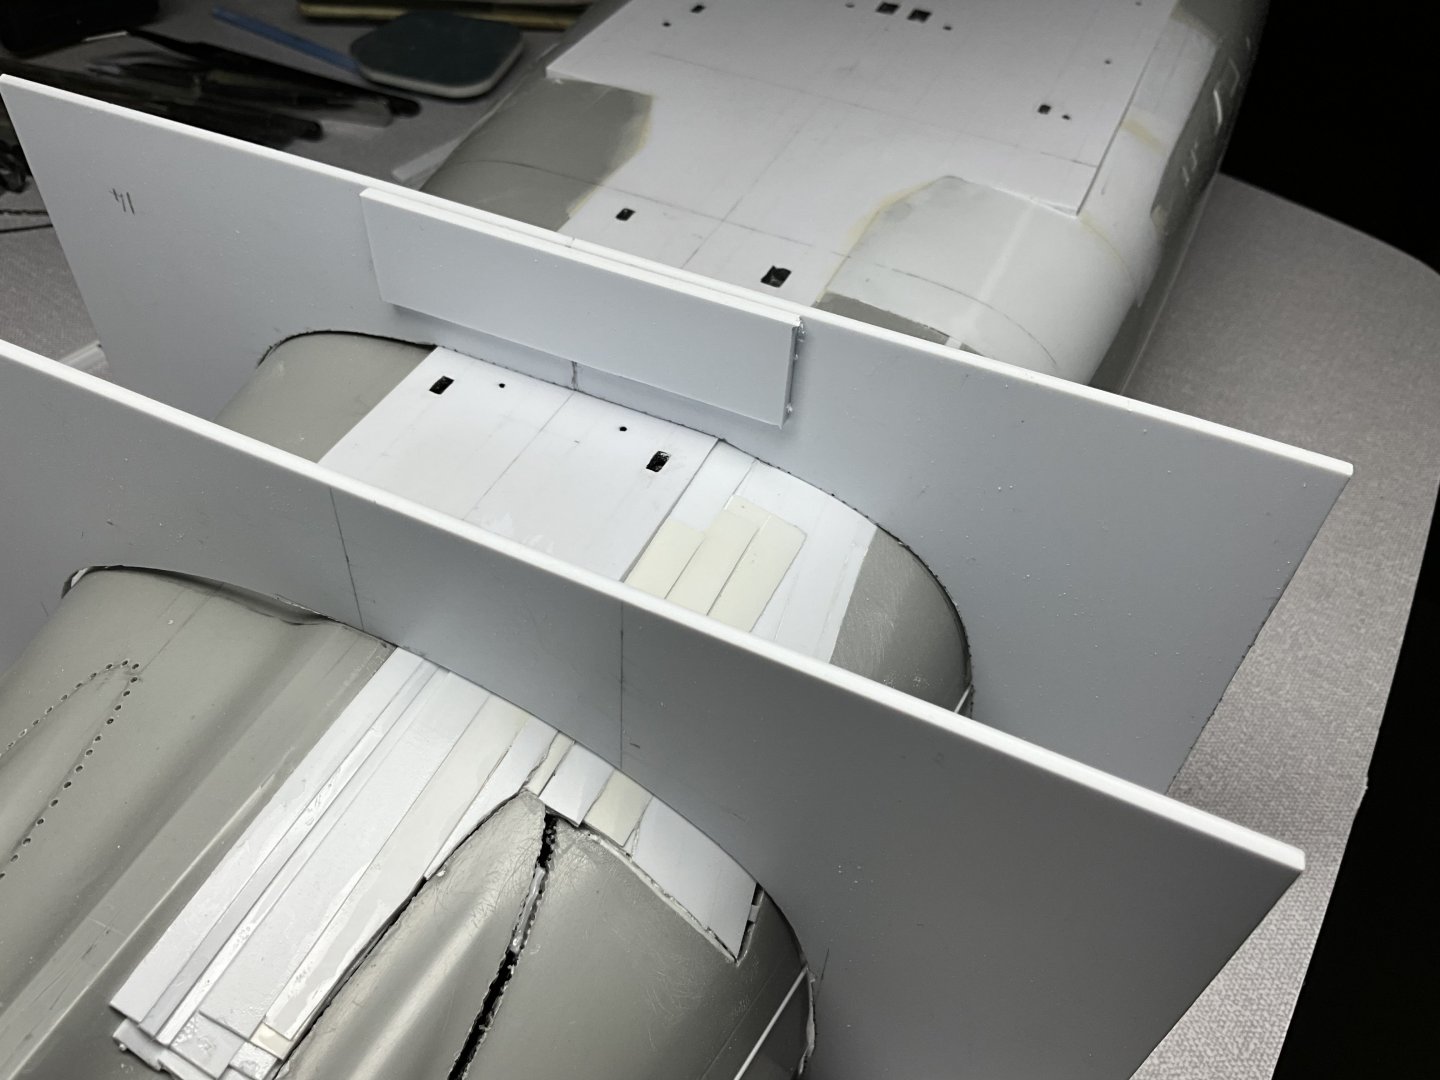
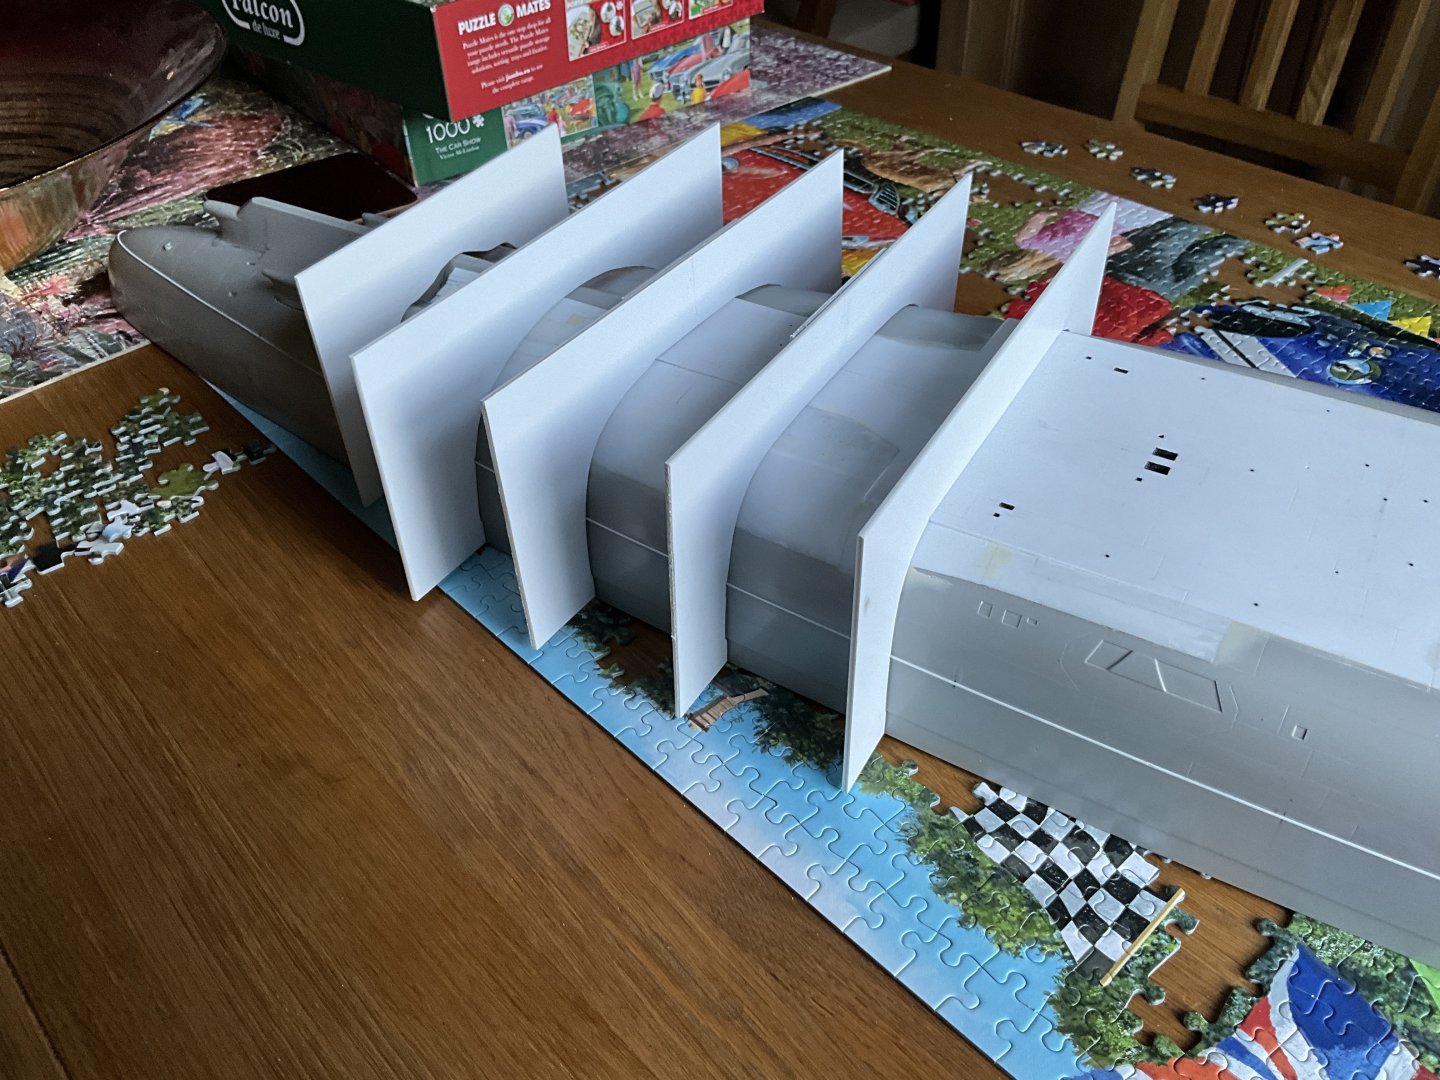
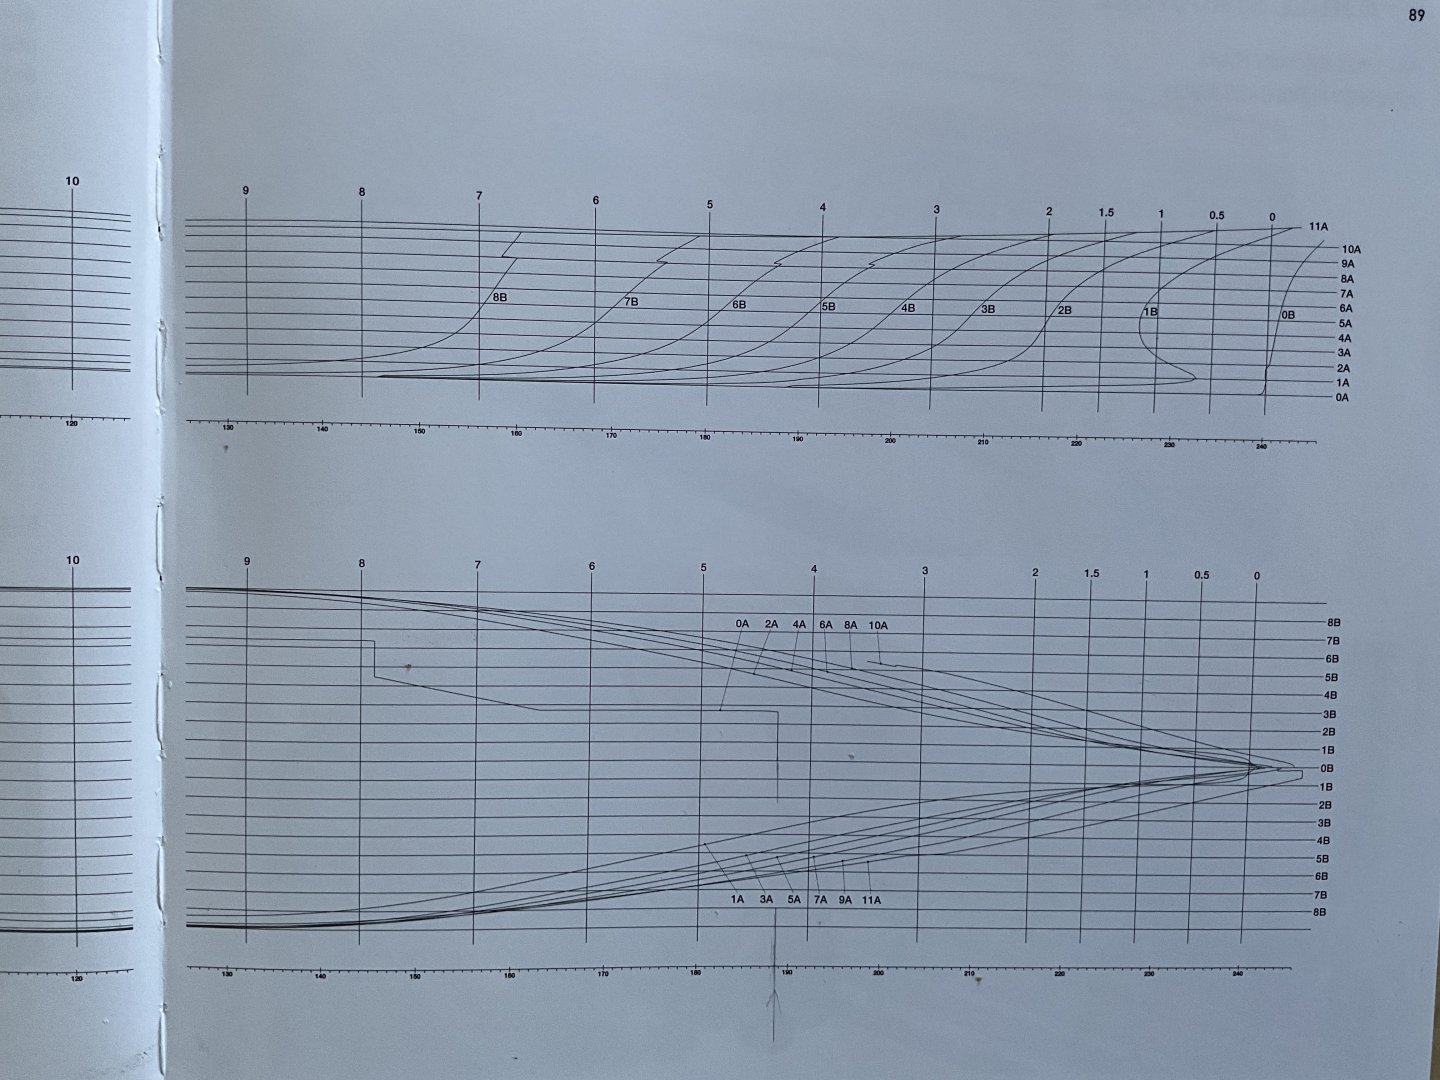
This lets you see my reference points, next thing was to trace the hull profiles from the drawings for frames l was requiring then transfer this onto 2mm plastic styrene sheets and cut these out so l had the outer profile of hull at these points. Then it was a case of marking of the hull, this really does show a clear difference on the hull. Next stage is how do l fix this. This is were you cringe, after pondering for a while l decided best plan was to cut through hull and force hull apart till it got closer to my template, ended up with similar solution for the shaft housings for port and starboard propellers, they were totally the wrong angle, shall put some more photos up before you go daft reading this.


-
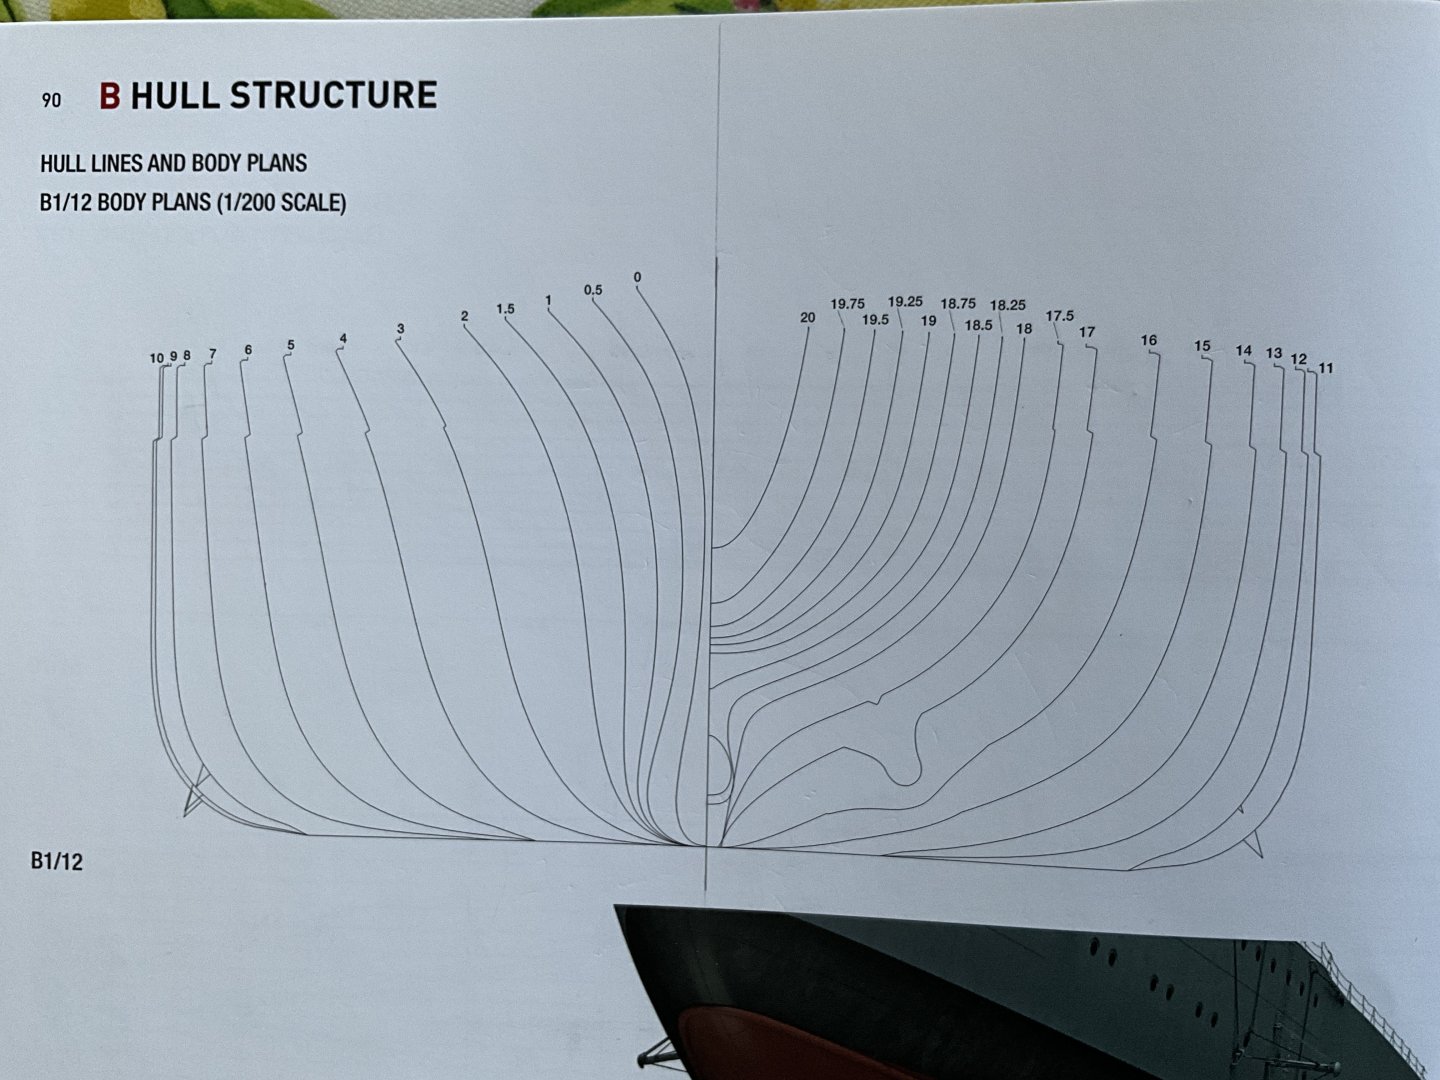
As you can see , had to change a few design ideas from earlier attempts as it progressed. Probably wouldn’t have went down this road if l hadn’t decided to mark off the hull detailing from Stefan Draminski’s excellent book, looking at drawings details highlighted the errors in the Trumpeter hull so have kind of been sucked into this approach on the model, not everyone is daft enough to cut their expensive model to bits, takes a certain madness 🫣🤪 Put some pictures up showing how the drawings work for hull profiles, right hand side is looking from stern starboard side, this is were I’ve started, this part being the worst part of Trumpeter hull, you can see the hull profile numbers at the top, these numbers correspond with the drawings on previous page showing their position on hull. Obviously the left hand side off this drawing shows the profiles looking from the bow starboard side 👍

-
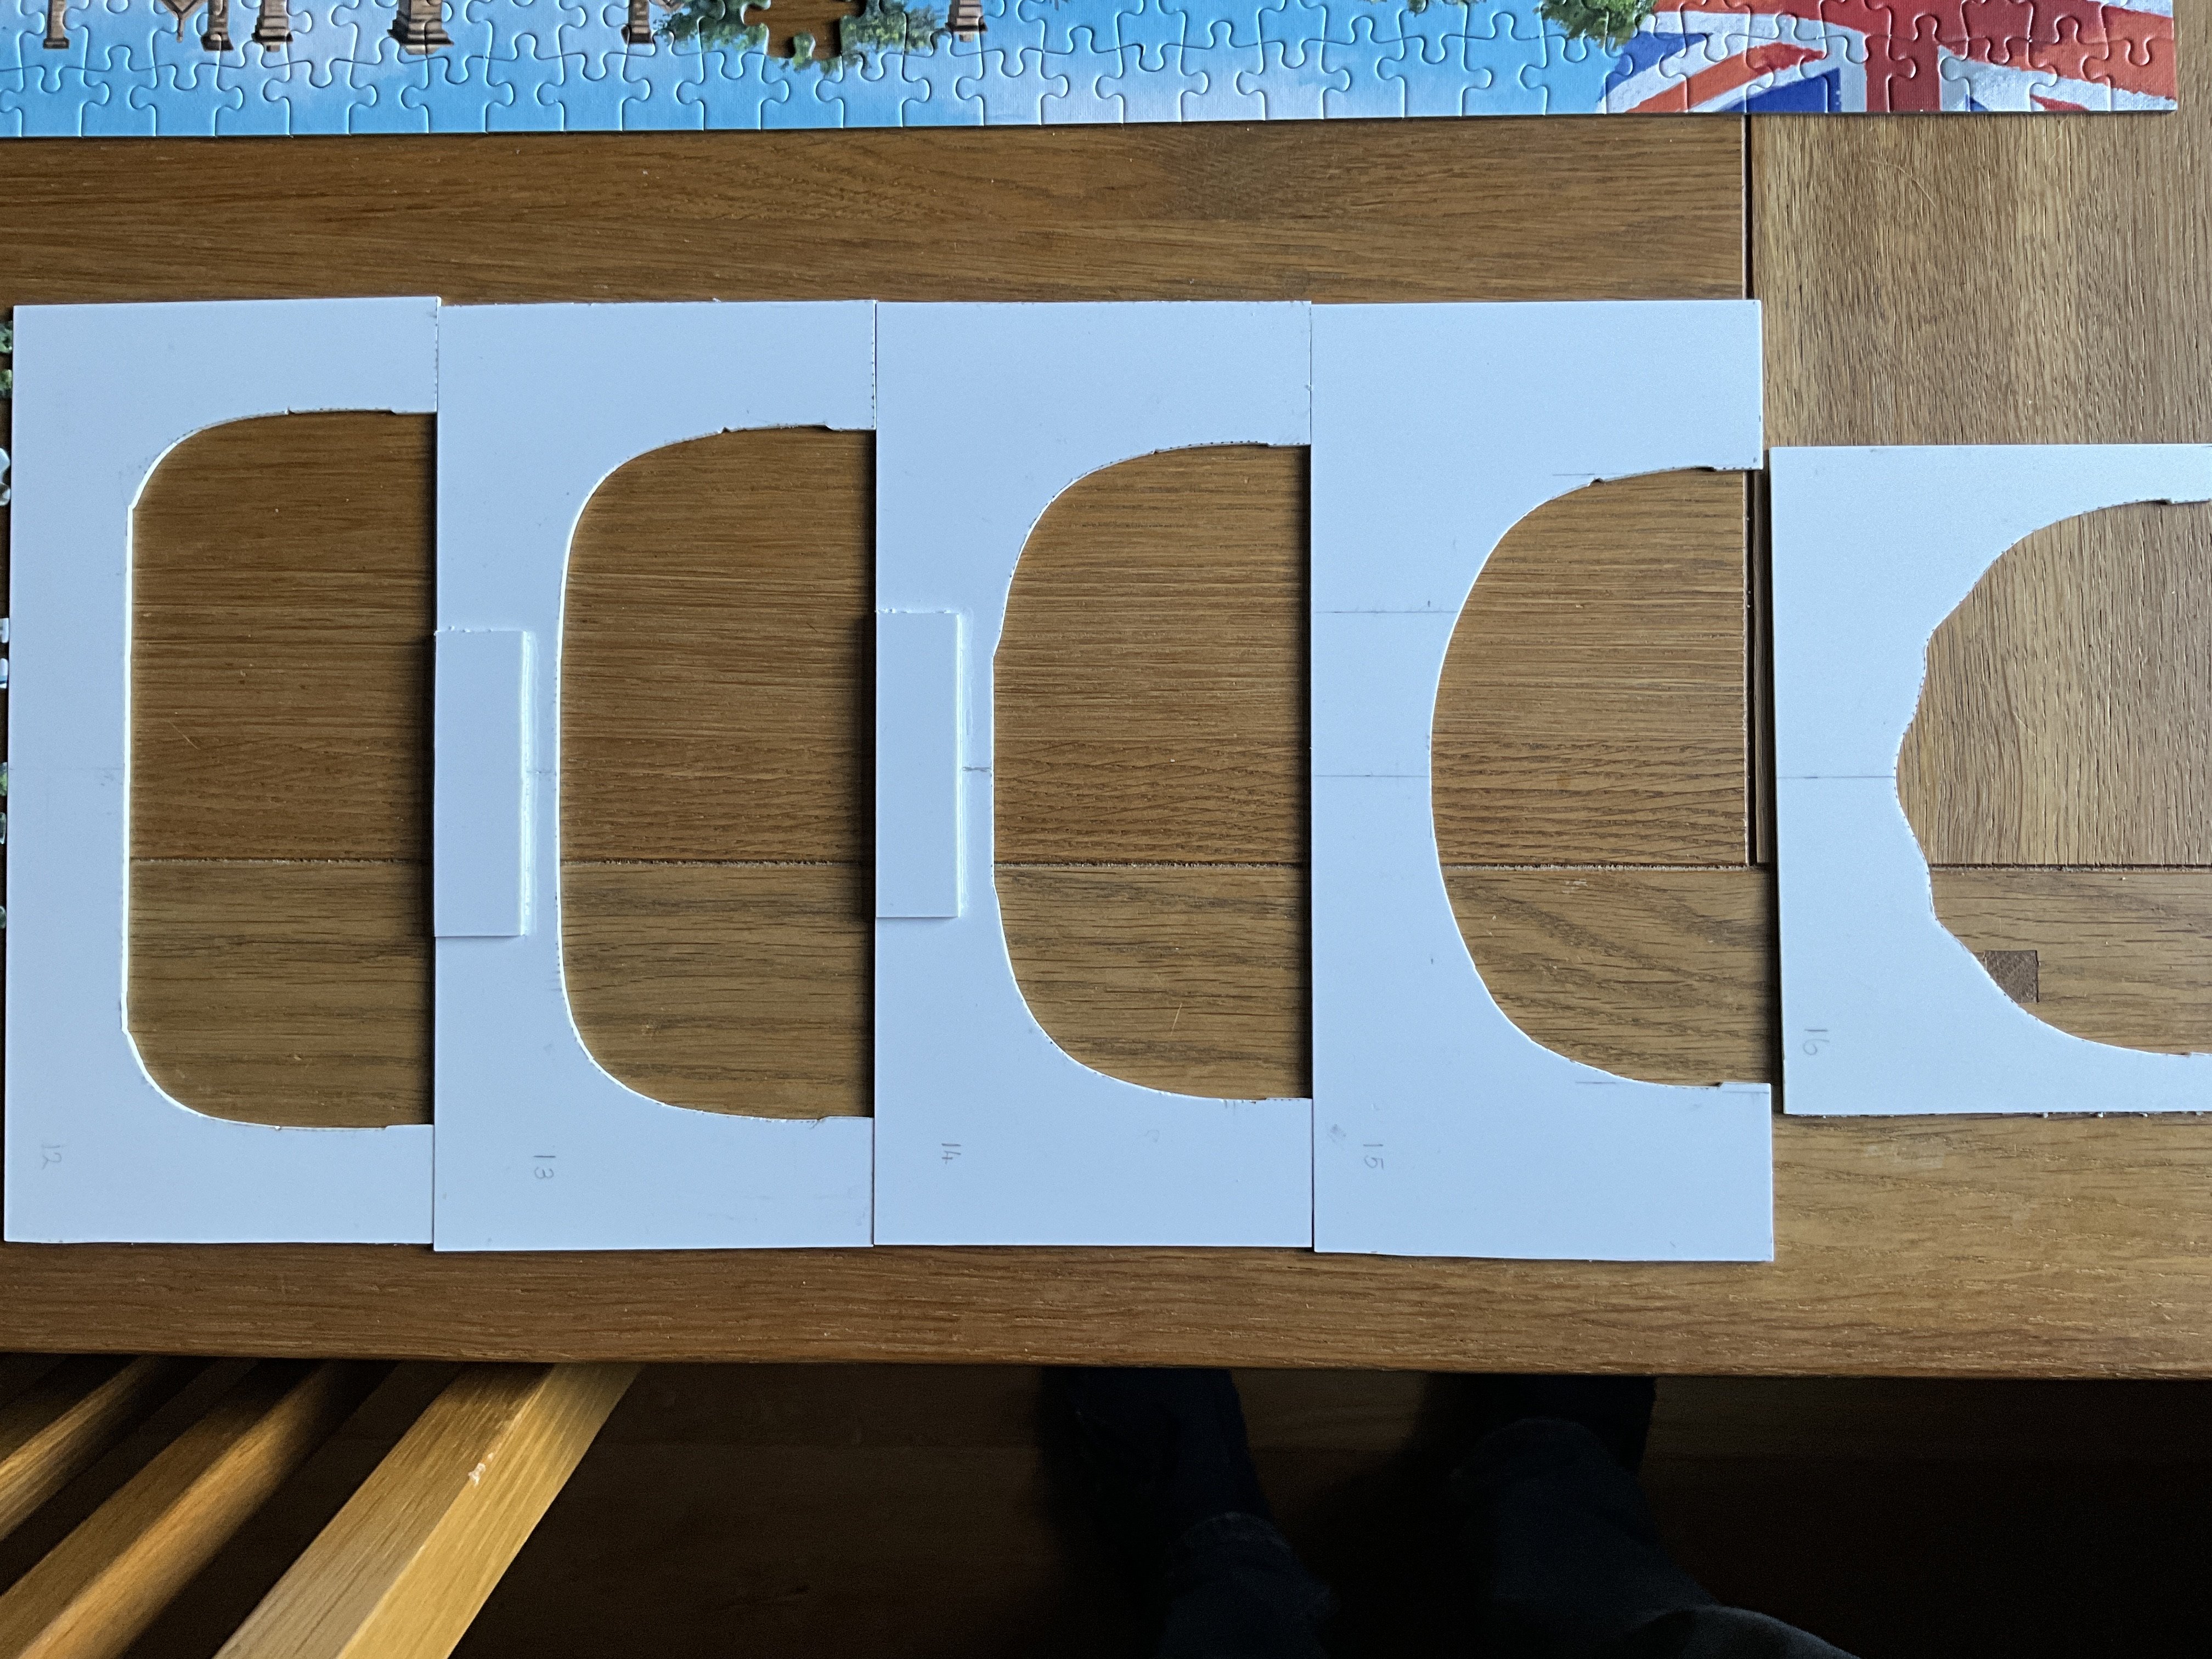
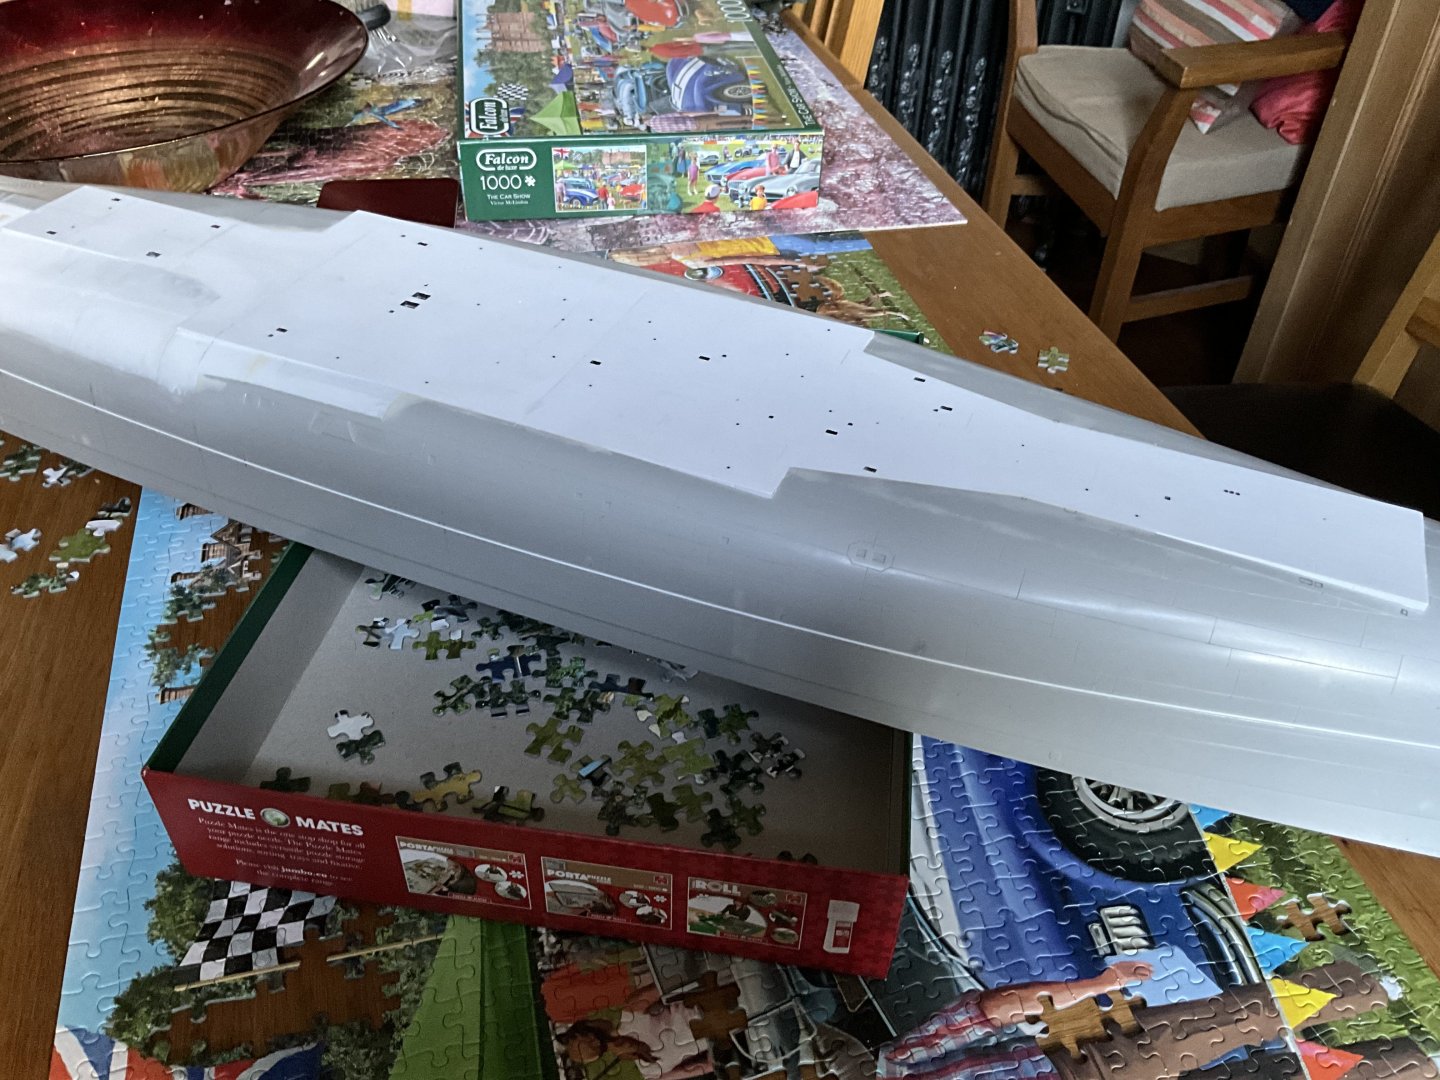
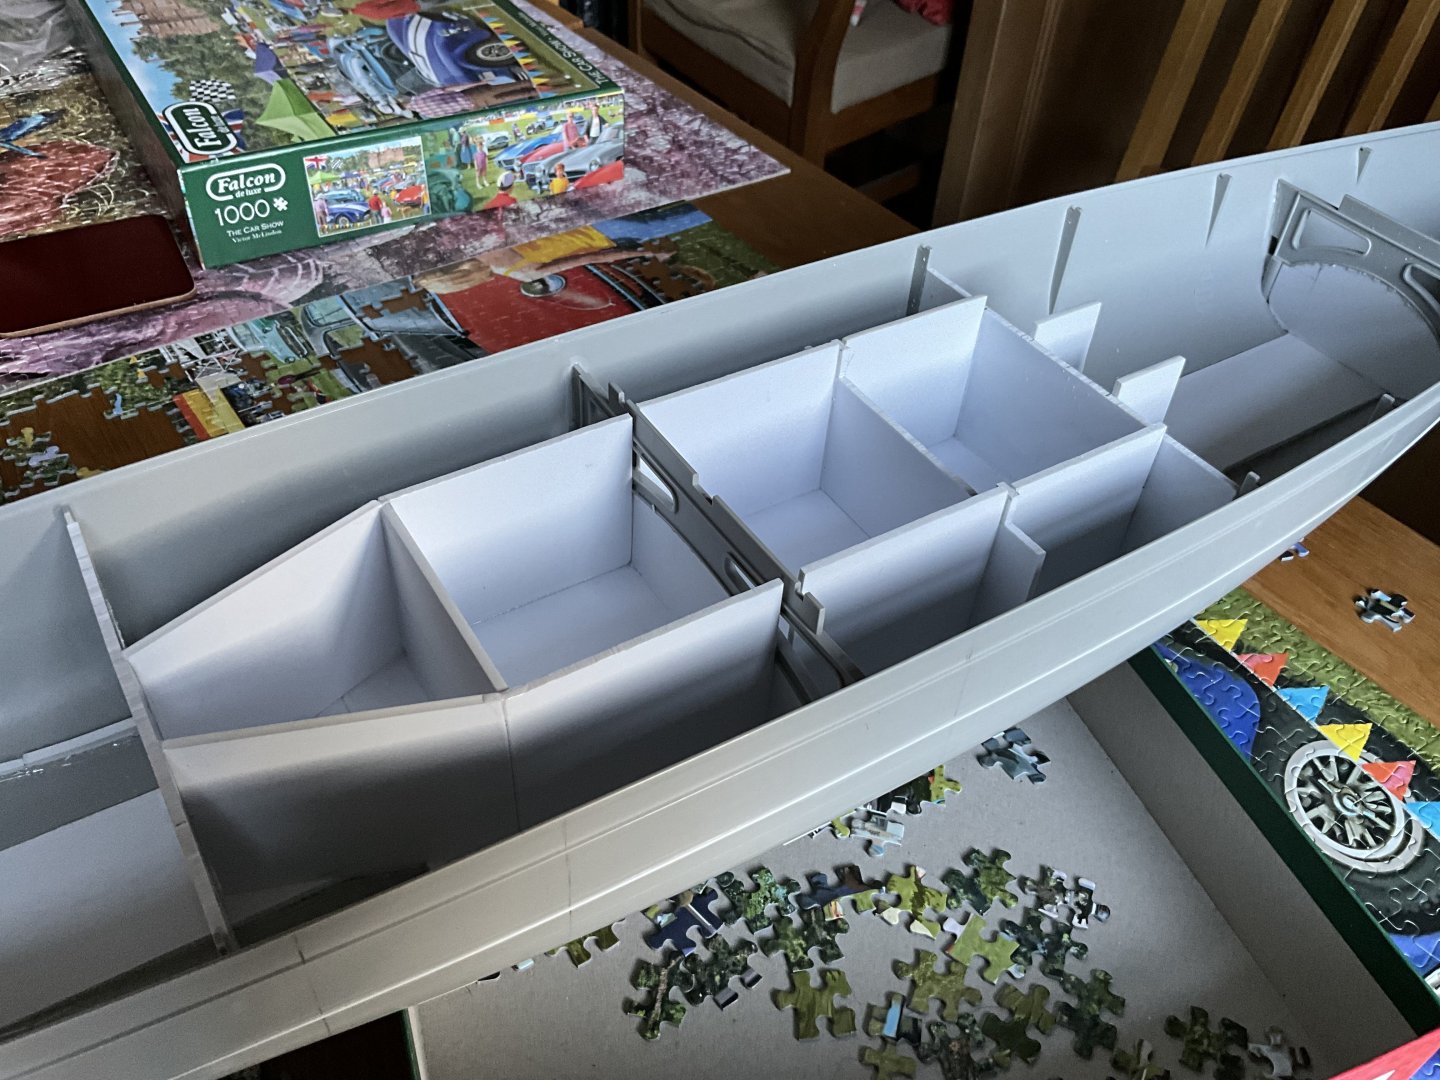
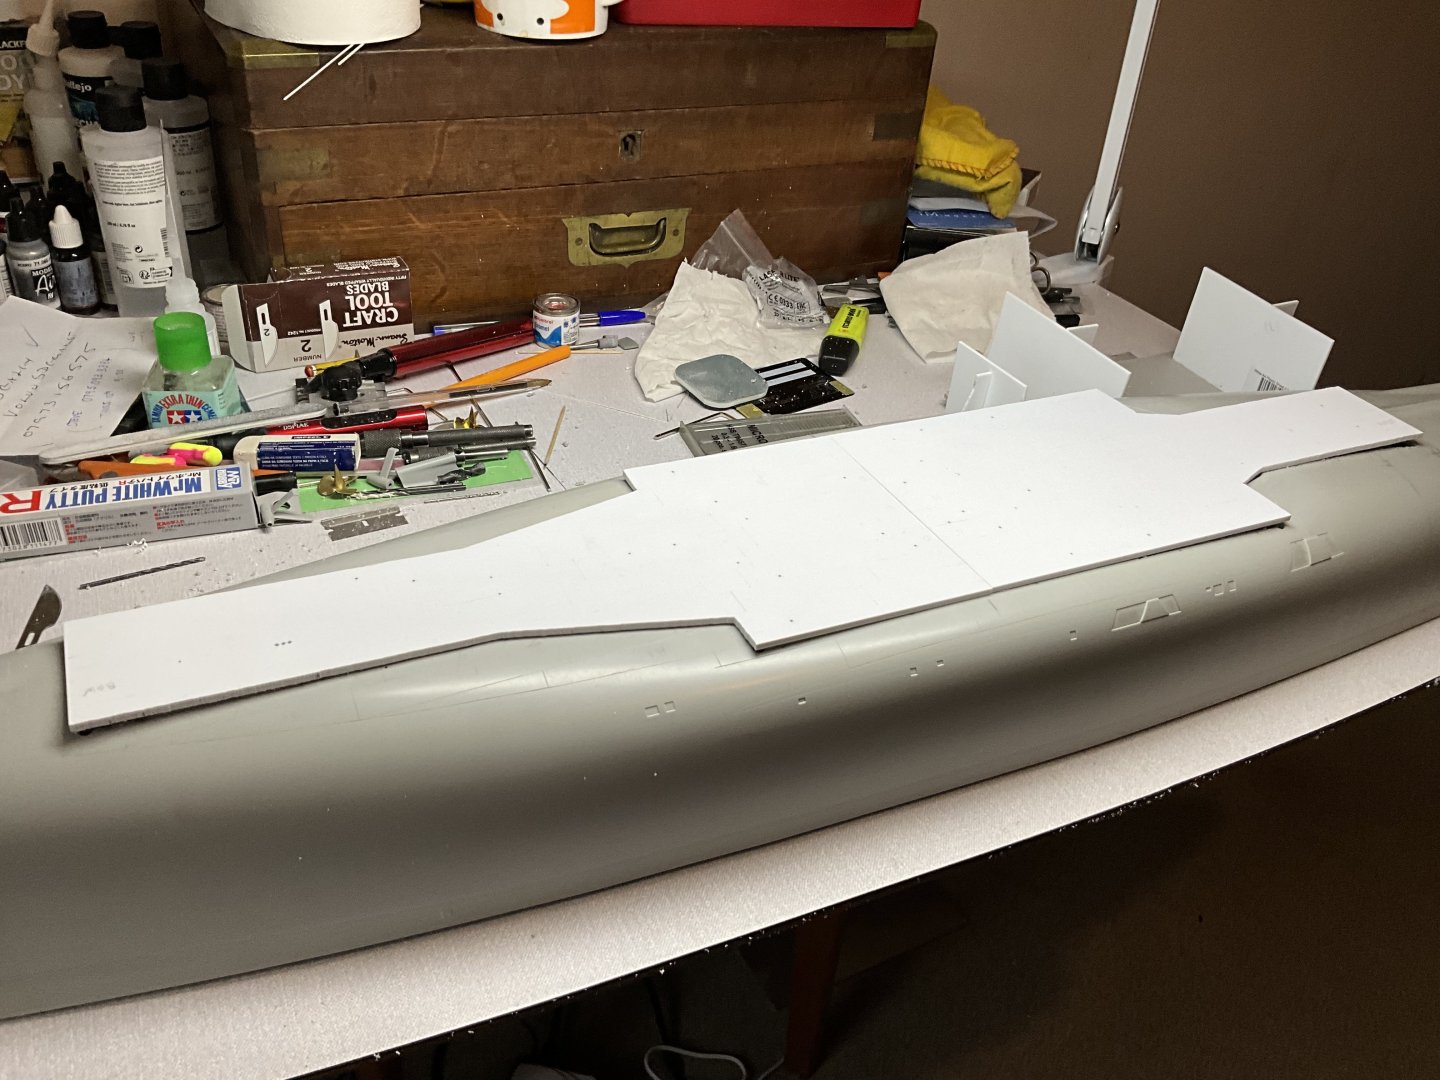
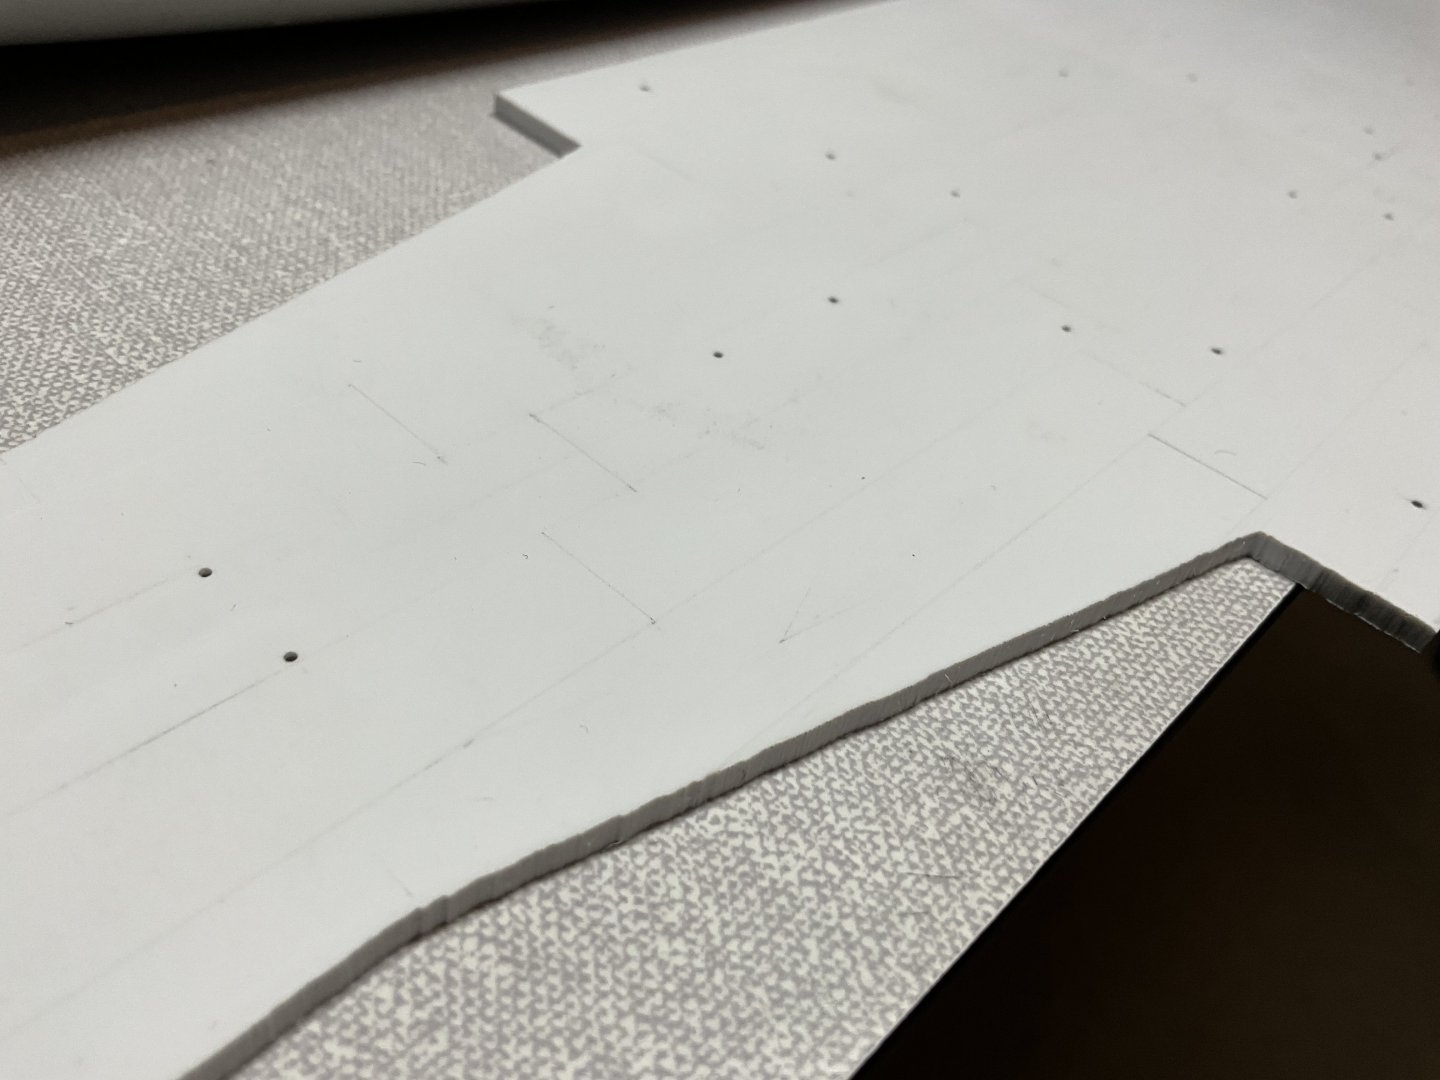
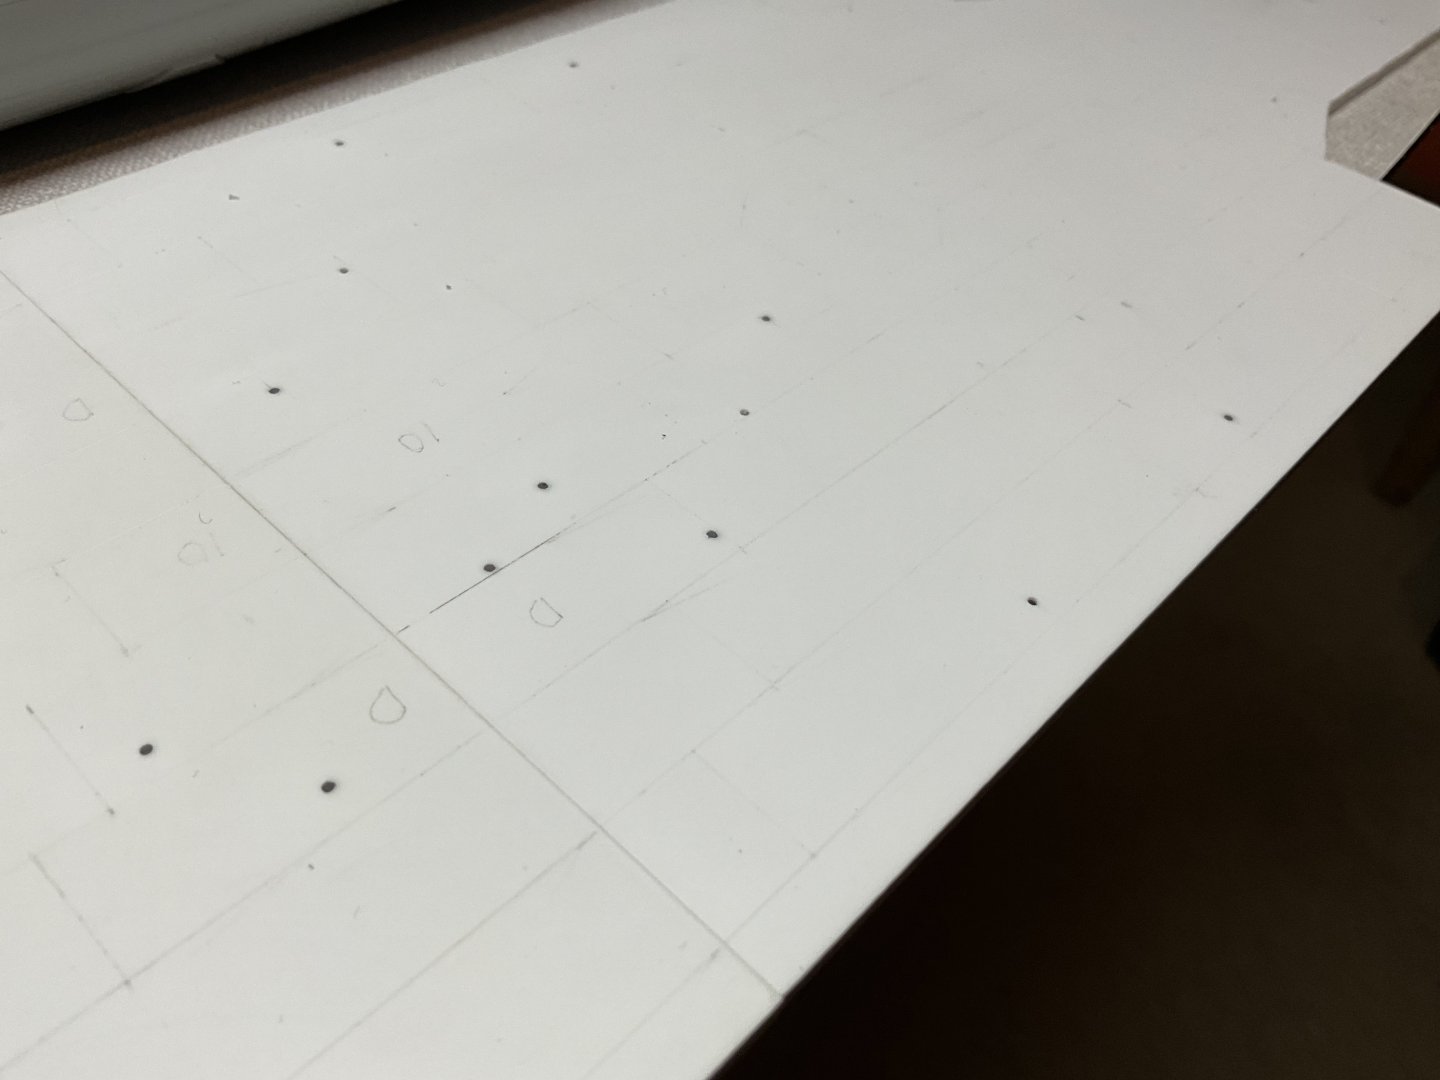
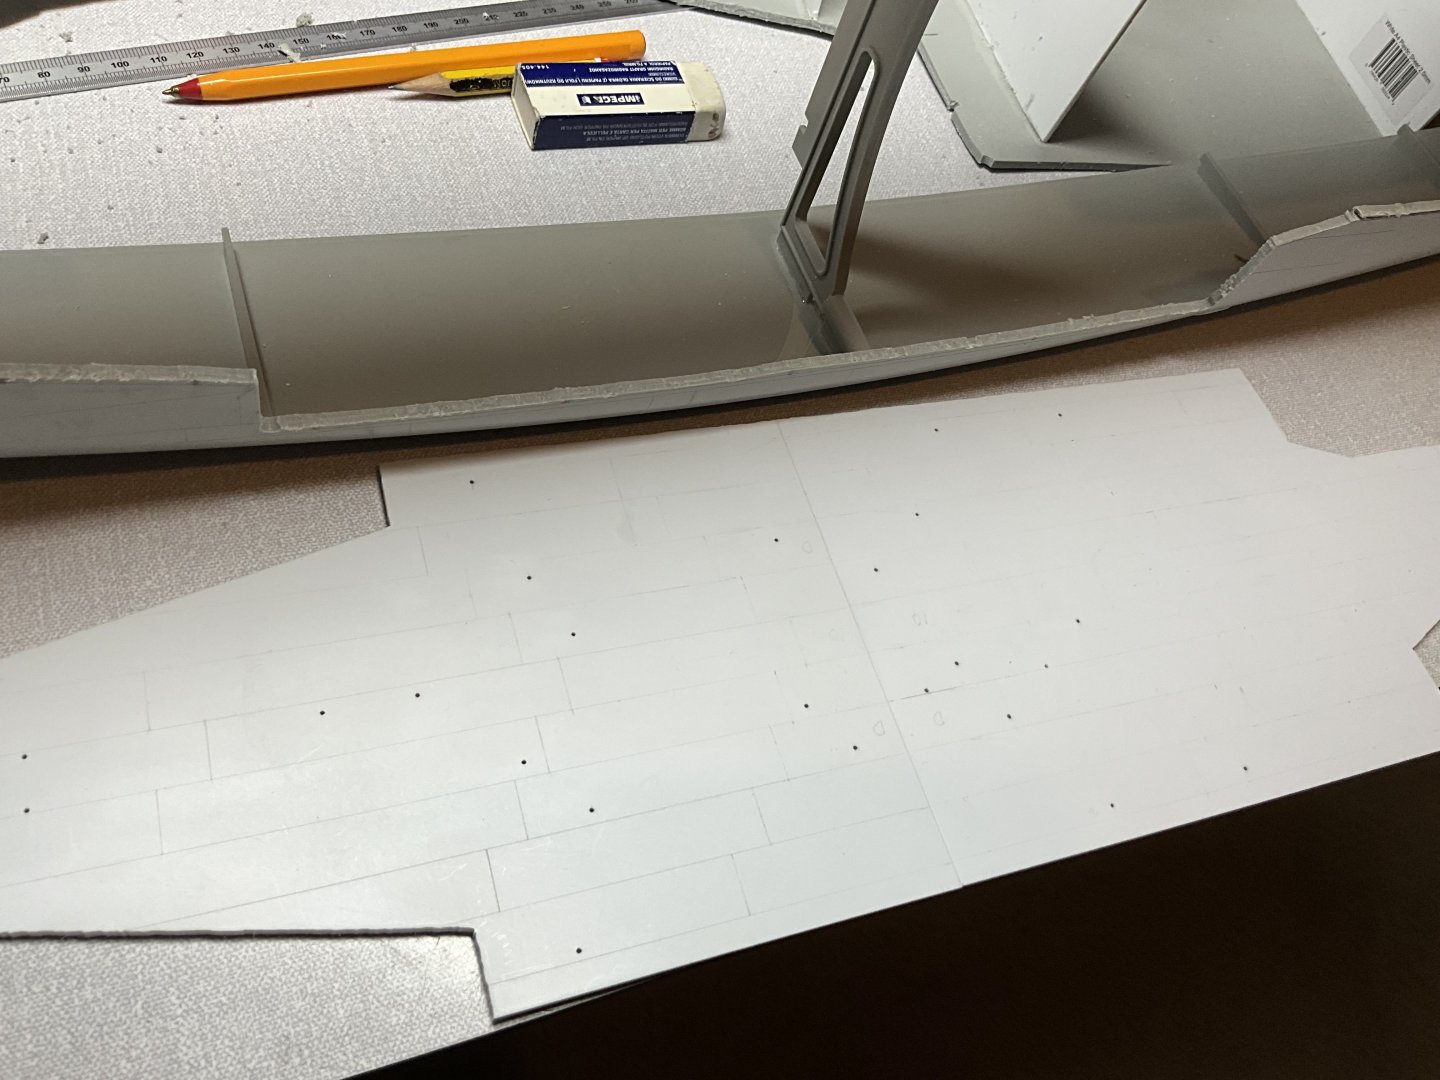
Happy New Year guys, hope it was a good one for everyone 🤛 said l would post when the bottom of ship was back in place so have been quite busy, made some good progress, we’ll progress for me that is, able to dedicate a bit more time to this now being retired, wished l had retired thirty years ago, would have been on my fifth model by now 😂, anyhow, still haven’t found the model mag that highlighted the Bismarck hull being wrong, it’s not Tamiya or Fine Scale Modlers for sure, hopefully shall find it eventually. On the flat bottom, two 3mm plates made up the outer part and a further two were used to strengthen and thicken this up to add strength and required thickness. I marked of the hull plating and drilled out all holes and apertures prior to laminating both sides together, ended up quite sturdy. It was then a case of carefully dressing till it all fitted back into hull then gluing in place, hull starting to look different even with this done, shall put up some photos cause know how it can be tedious reading without these to make it interesting, like a book with pictures 😂
-
Almost a shame to paint over all that lovely woodwork but necessary, very tidy modelling. Impressive 👍
-
Love seeing models built from wood, it’s a very artistic skill, think you’ve done a really nice job on hull 🤛
-
Had the same problem Jolle, only cured this when l purchased a second Pontos set to solve my dilemma that required two crane jibs and pulleys so ended up with spare parts for the other shortages around the model, could have a look and see if l have some of these these left over if you wish ?
- 193 replies
-
- 2
-

-

-
- Russo-Japanese War
- Mikasa
- (and 2 more)
-
Love this to bits, brilliant absolutely brilliant 🤛
-
This should keep you busy for a while, she’s a lovely looking ship. Micro Master do quite a few parts that might interest you 👍
-
Your doing another great job of the Mikasa, love that lighting, must look fantastic in the dark 🤛 👍
- 143 replies
-
- 2
-
-
- Mikasa
- Merit International
- (and 1 more)
-
Found this part of the build a slogging match, very time consuming, brilliant little guns though, bit of a pity they can’t be seen to much considering the effort that goes into them 😵💫 great to see you’ve been busy 🤛 painting awesome as usual 👍
- 193 replies
-
- 2
-
-

-
- Russo-Japanese War
- Mikasa
- (and 2 more)
-
All this hull plating must be driving you nuts 😂 not to mention the strain on your eyes. A really exceptional model indeed. I just know this is going to be very special.👌
-
Thanks Hof, my own one has been in storage for twelve years or more, so finally getting dusted of and started. Think us modellers all have the same problem, too many models in stash and not enough time for modelling 😂
-
Good to have you on board Peter, always need advice from previous builders, am only at start and enjoying it already, one of my favourite looking warships since l was a small boy off eight or nine, must have built this kit at least four times, remember leaving it in front of coal fire thinking this will help dry the glue quicker. Not one of my better ideas, as you can imagine, looked more like her at her end shall we say. 🤛
-
👍 great to see you sussed it out, one other thing that wasn’t quite right was the height of the 12 pounder guns on the main deck, they sit just a little bit high, the gun barrels don’t line up with the recesses for the barrels when stowed. Think the best solution is to rebate the deck slightly for the gun pedestal to sit lower, I reckon approx 1mm , I was to late to change this on my model, once those boat decks are down you’ve no chance, worth a look at. 🤛
- 193 replies
-
- 1
-
-
- Russo-Japanese War
- Mikasa
- (and 2 more)
-
Definitely Jolle, think I’ll be asking you for help in near future for what I have planned for her. The Veteran model details are definitely on cards as is Micromasters Main gun turrets, have to break this to Jacqueline gently further down the road 😂
-
Thanks Winnie, afraid this is going to progress rather slowly in my hands, at least I’m retired now so shall find more time to enjoy it 👍 Think will be stuck on the hull for months yet, but starting to enjoy the challenge of fixing it. Trumpeter seem to have a knack of pushing out their models like on a production line schedule and kind of lose focus on quality sometimes, seem to have had similar issues with hull on Arizona and Titanic, think they fixed the Titanic possibly because of public demand and interest. So this is a crash coarse on fixing Bismarks hull for me, love the look of this ship, when I was a young boy, eight or nine the Airfix 1/600 model of her was one of my favourite looking ships and still is, she just looks right, Anyway, got of the track there 🙄 thanks for compliment 🤛
-
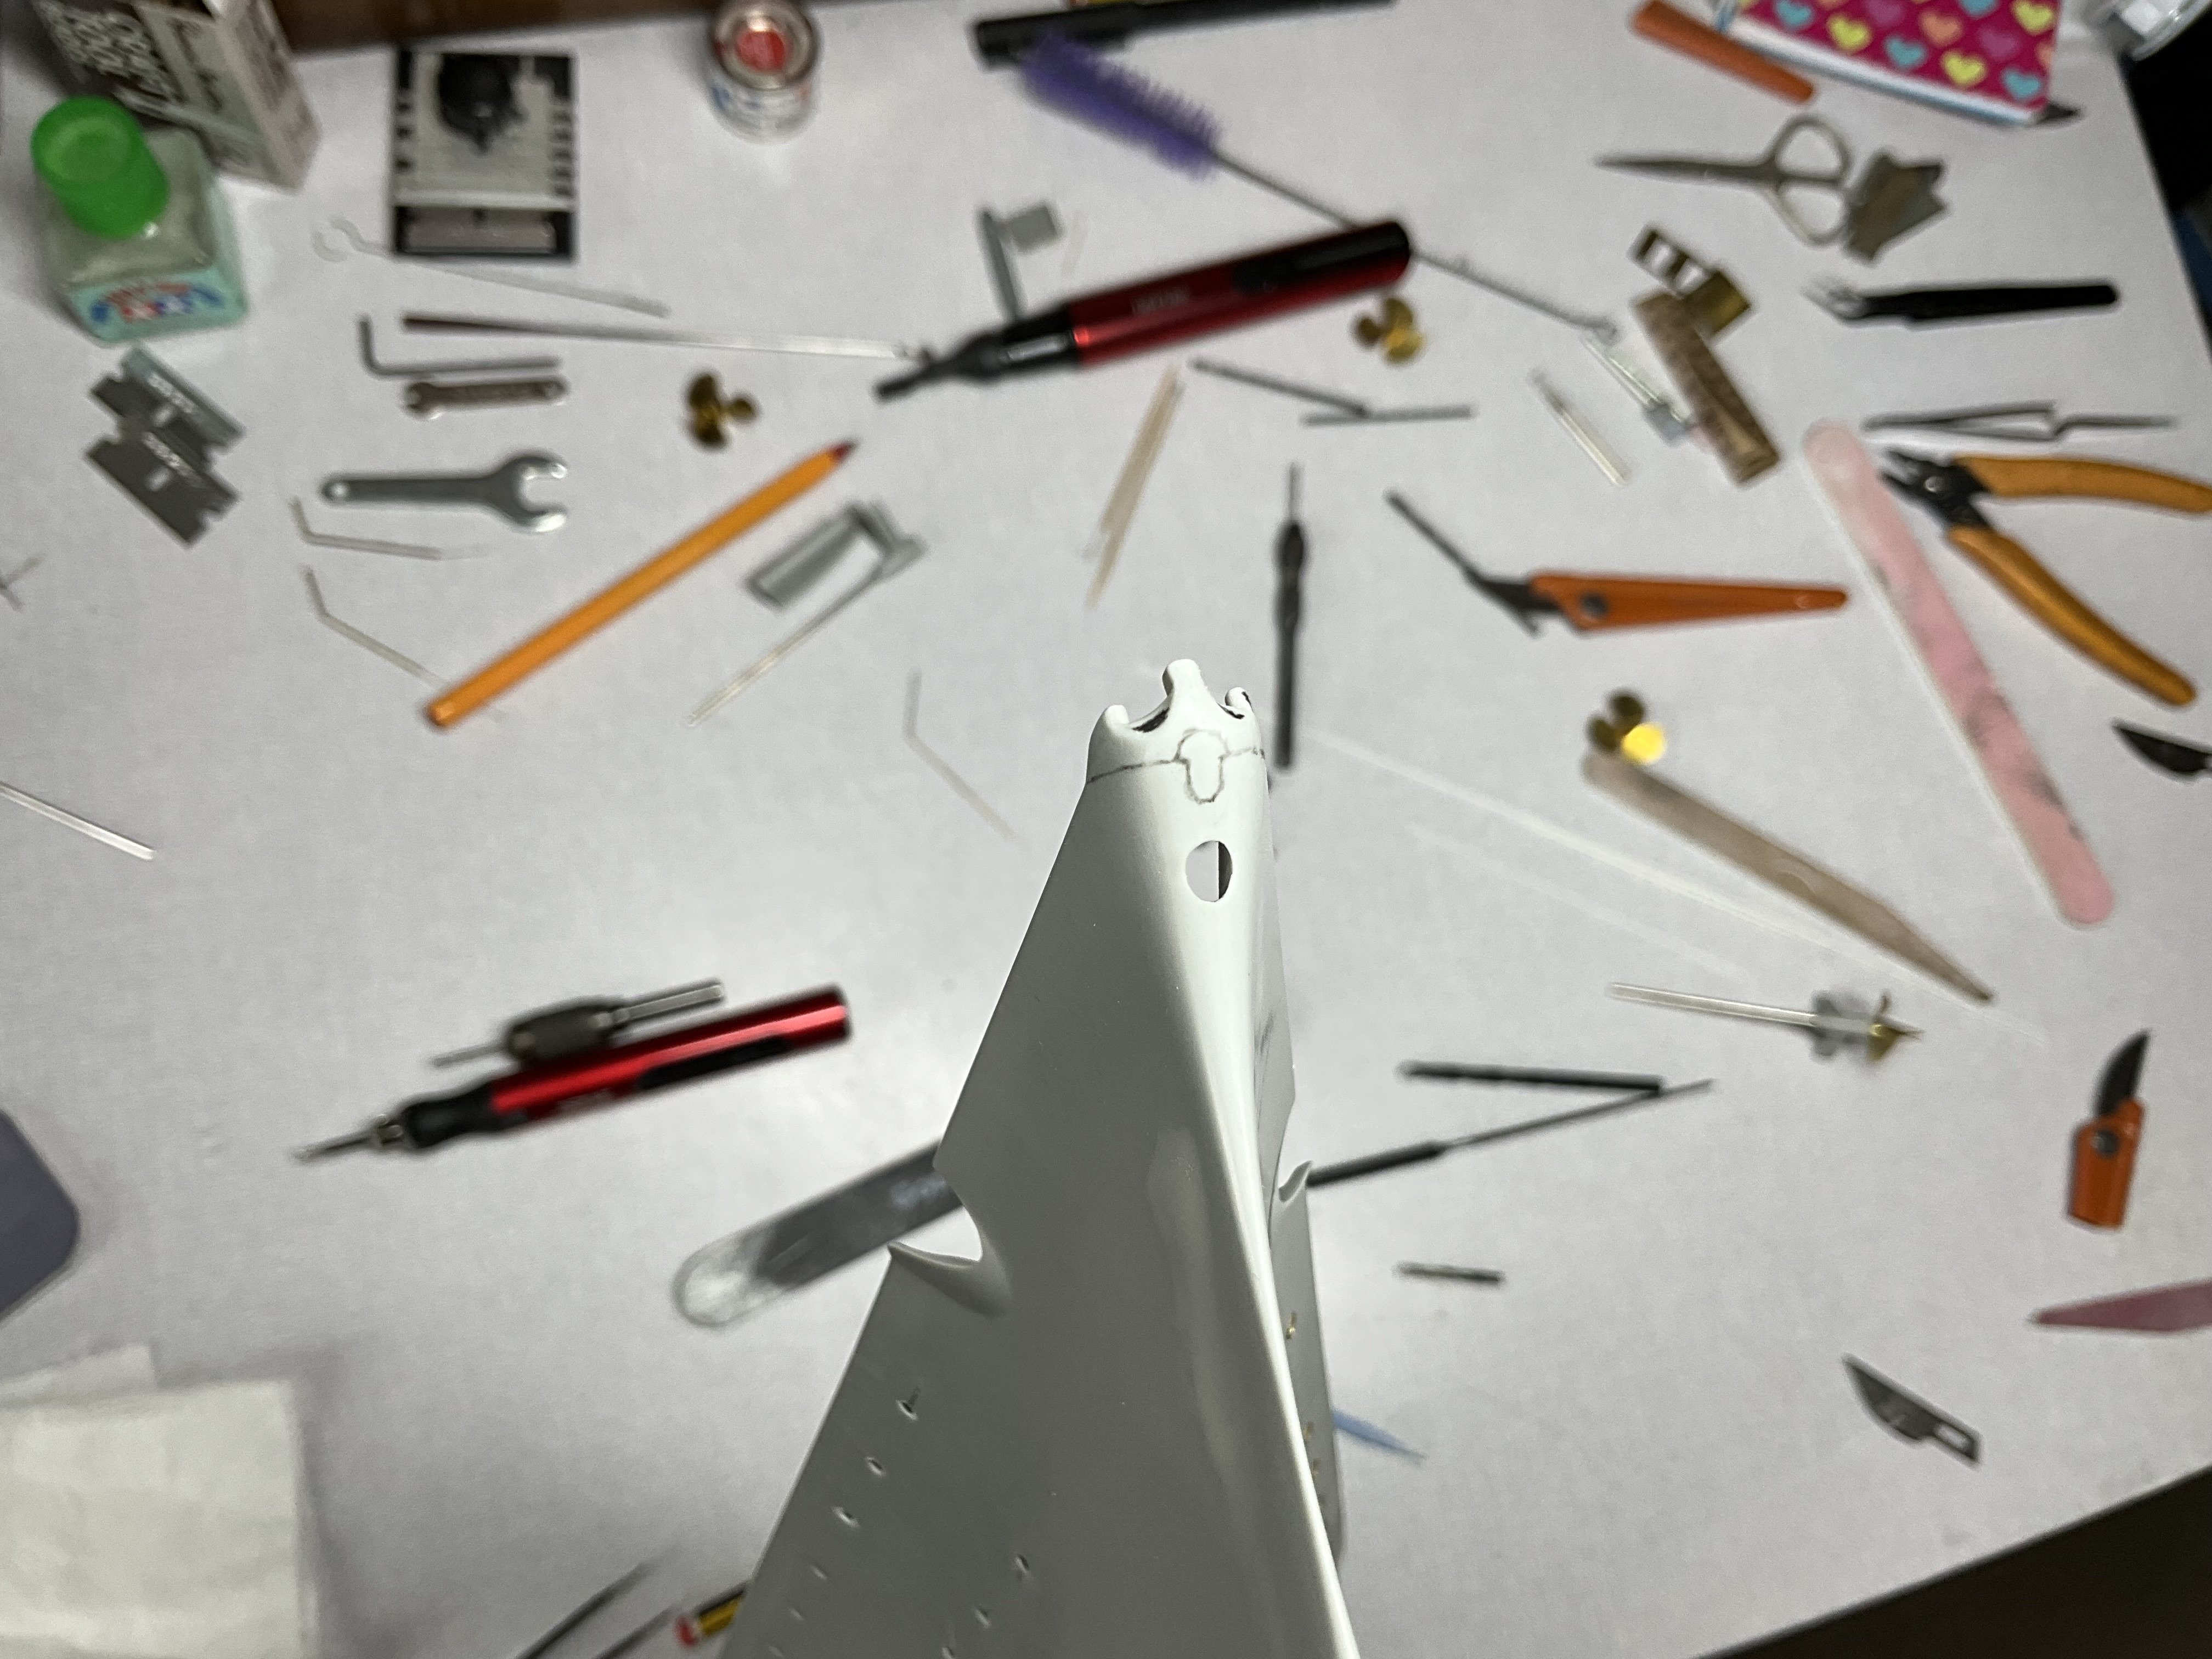
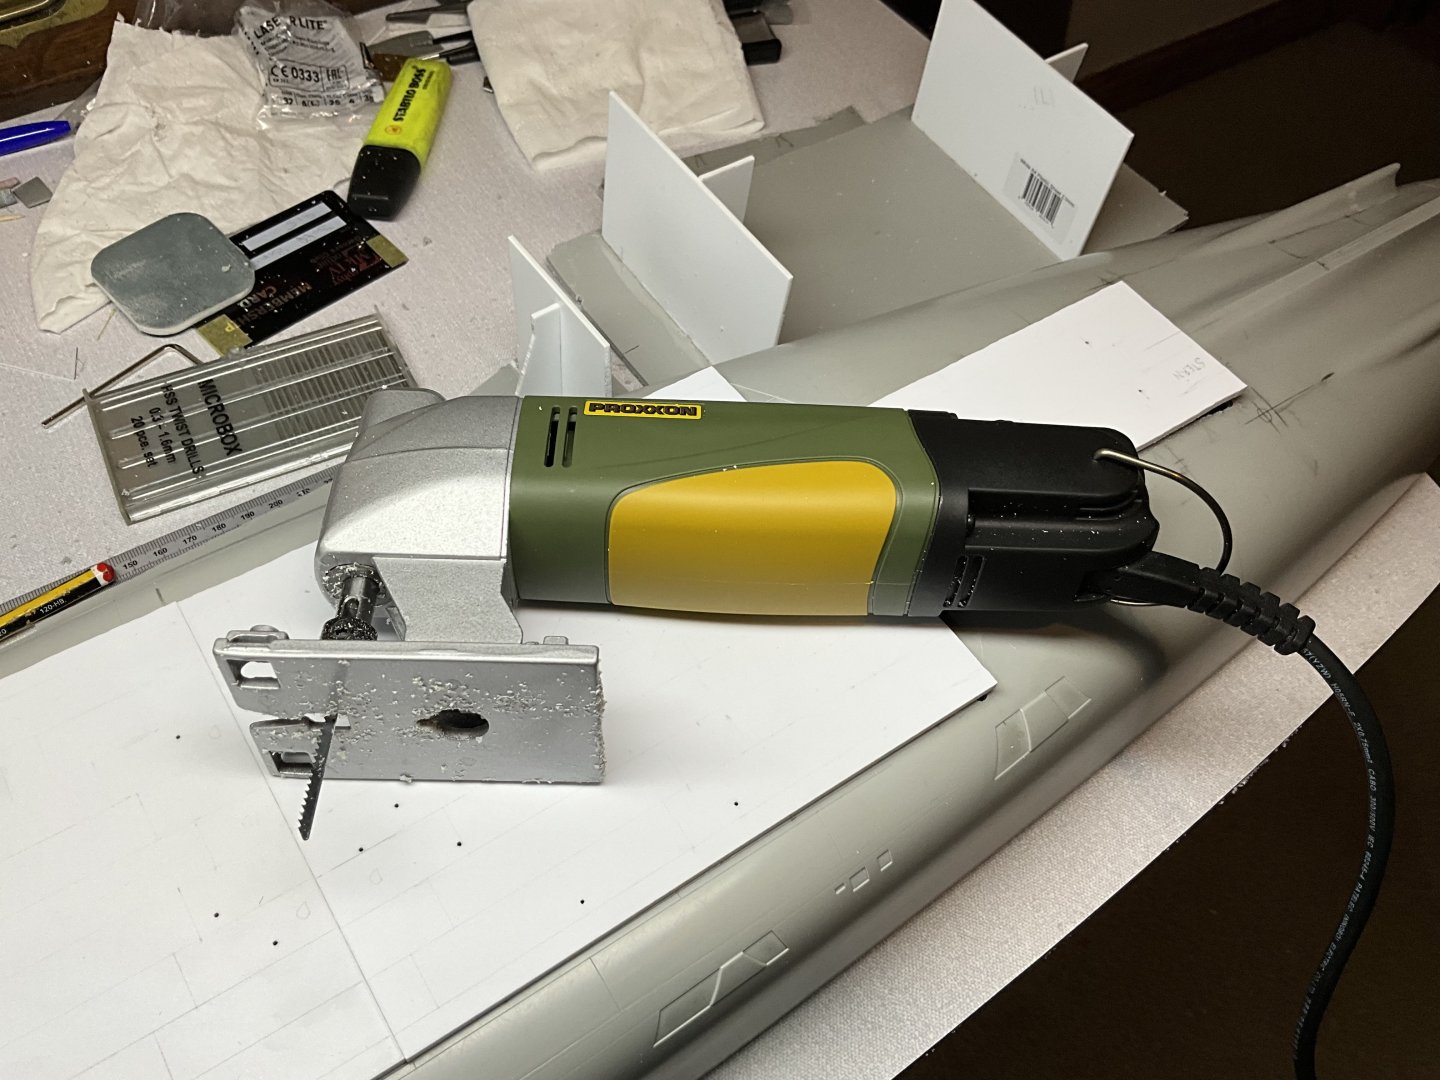
Bought this little jig saw to help me with removal of bottom, you can never have to many tools 😂
-
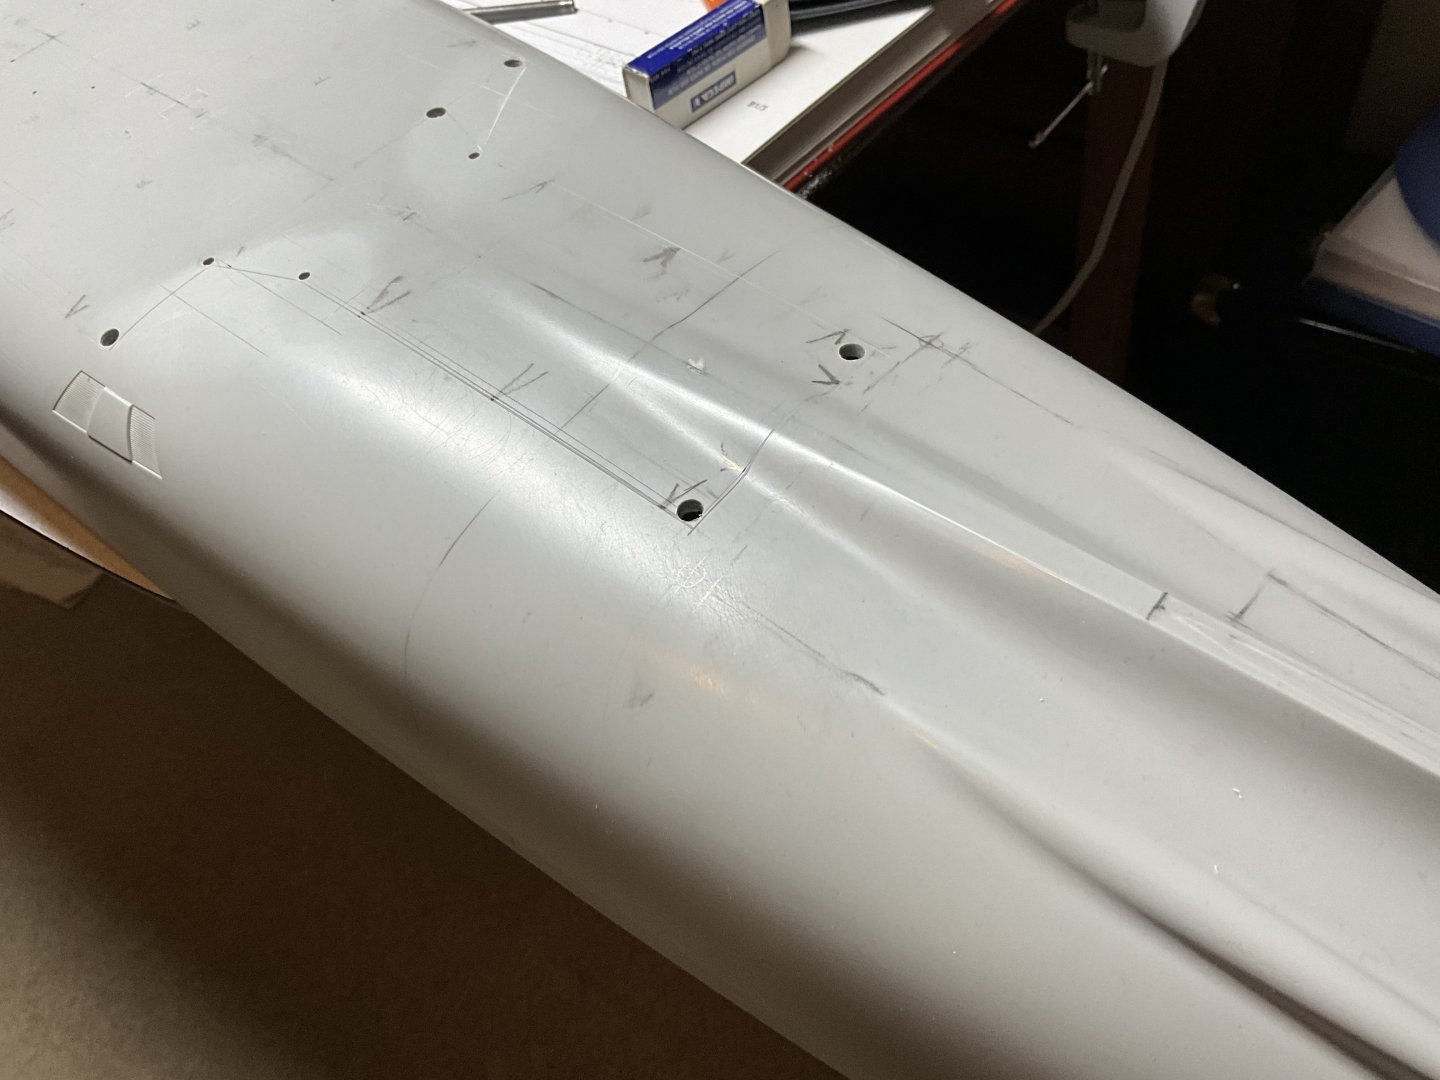
Hi guys, going back the way with Bismarck just now as l keep changing my mind, after spending a while marking off and grooving the lines, it started to show up irregularities in the shape of the hull, especially at the bottom towards the stern, also after a while getting to grips with the drawings and understanding how the flat bottom worked have decided to try and fix this discrepancy. I was aware that the hull had issues from back when the model was introduced, 2007 think it was, possibly a review in Tamiya magazine, shall have to try and find it, then post it. Anyhow, had to move the sonar microphone position again, hull plating showed it up still slightly wrong, third time lucky 🫰work is ongoing so shall put some photos up showing progress or lack of it and say next time l might have the flat bottom fitted back into hull, this should highlight the discrepancies.


-
Love the dedication to this, can see this build is going to be running for a while 😂 brilliant.