HOLIDAY DONATION DRIVE - SUPPORT MSW - DO YOUR PART TO KEEP THIS GREAT FORUM GOING! (Only 13 donations so far - C'mon guys!)
×


Jeff59
-
Posts
593 -
Joined
-
Last visited
Content Type
Profiles
Forums
Gallery
Events
Everything posted by Jeff59
-
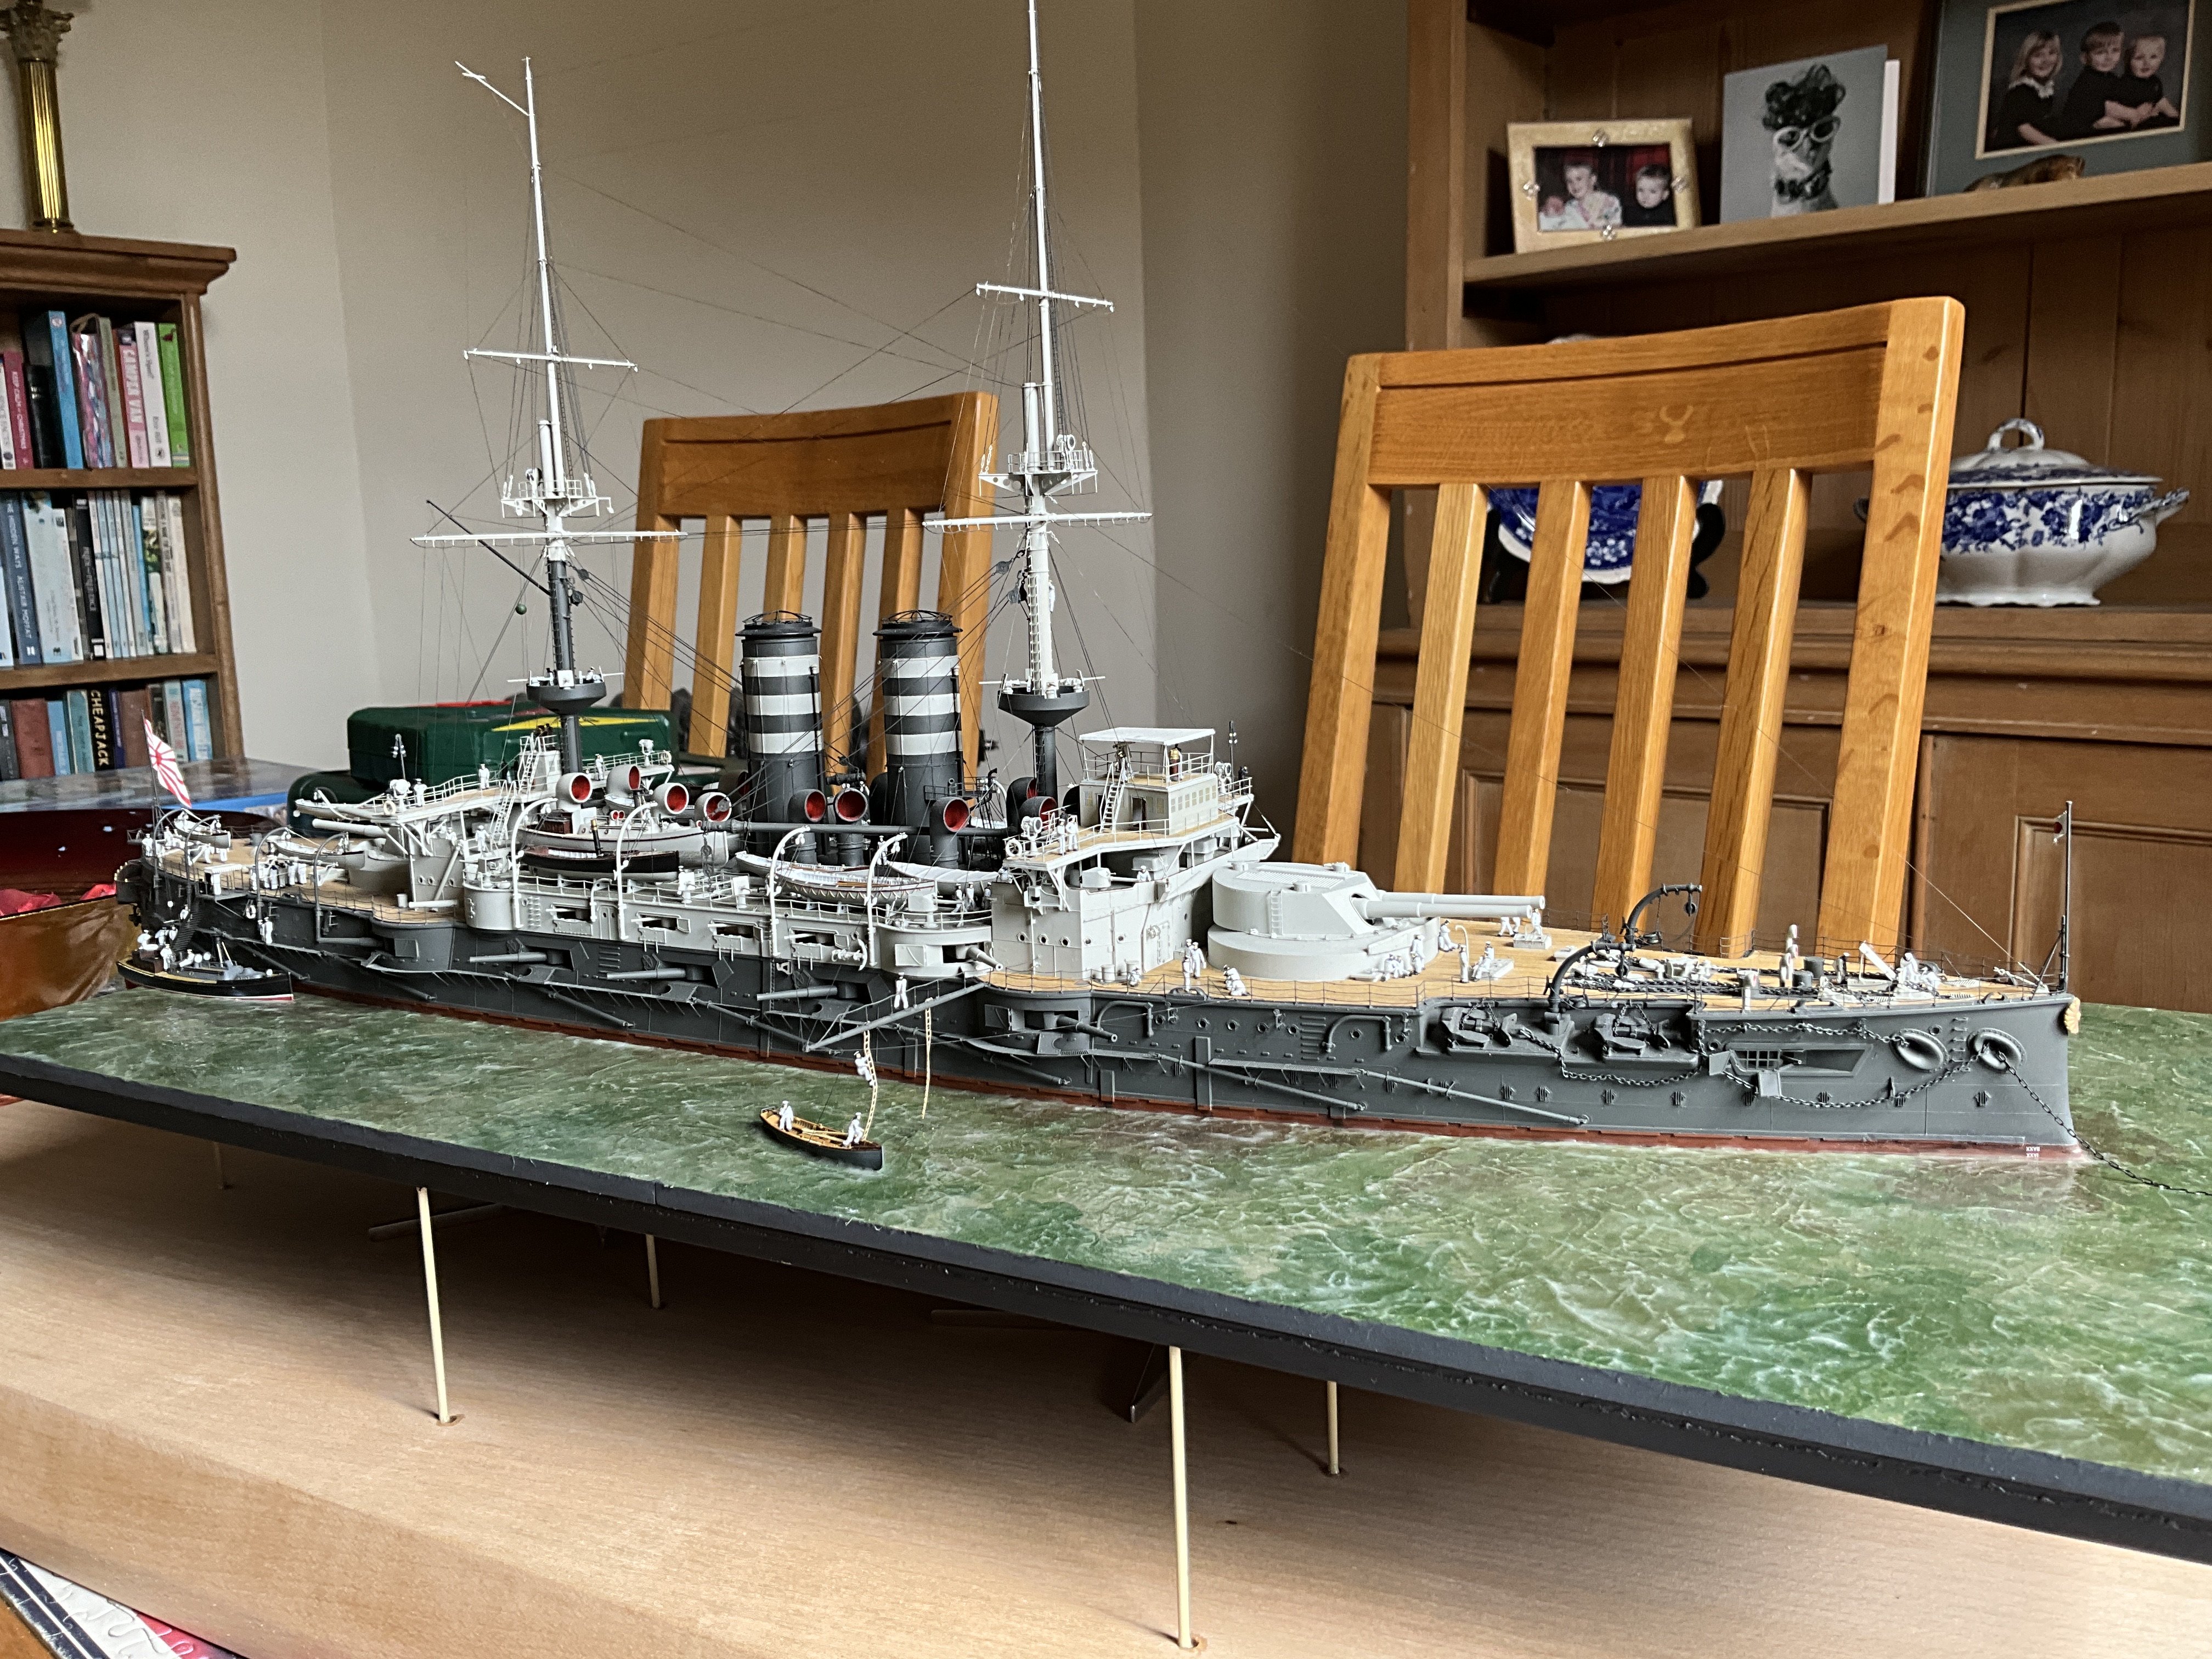
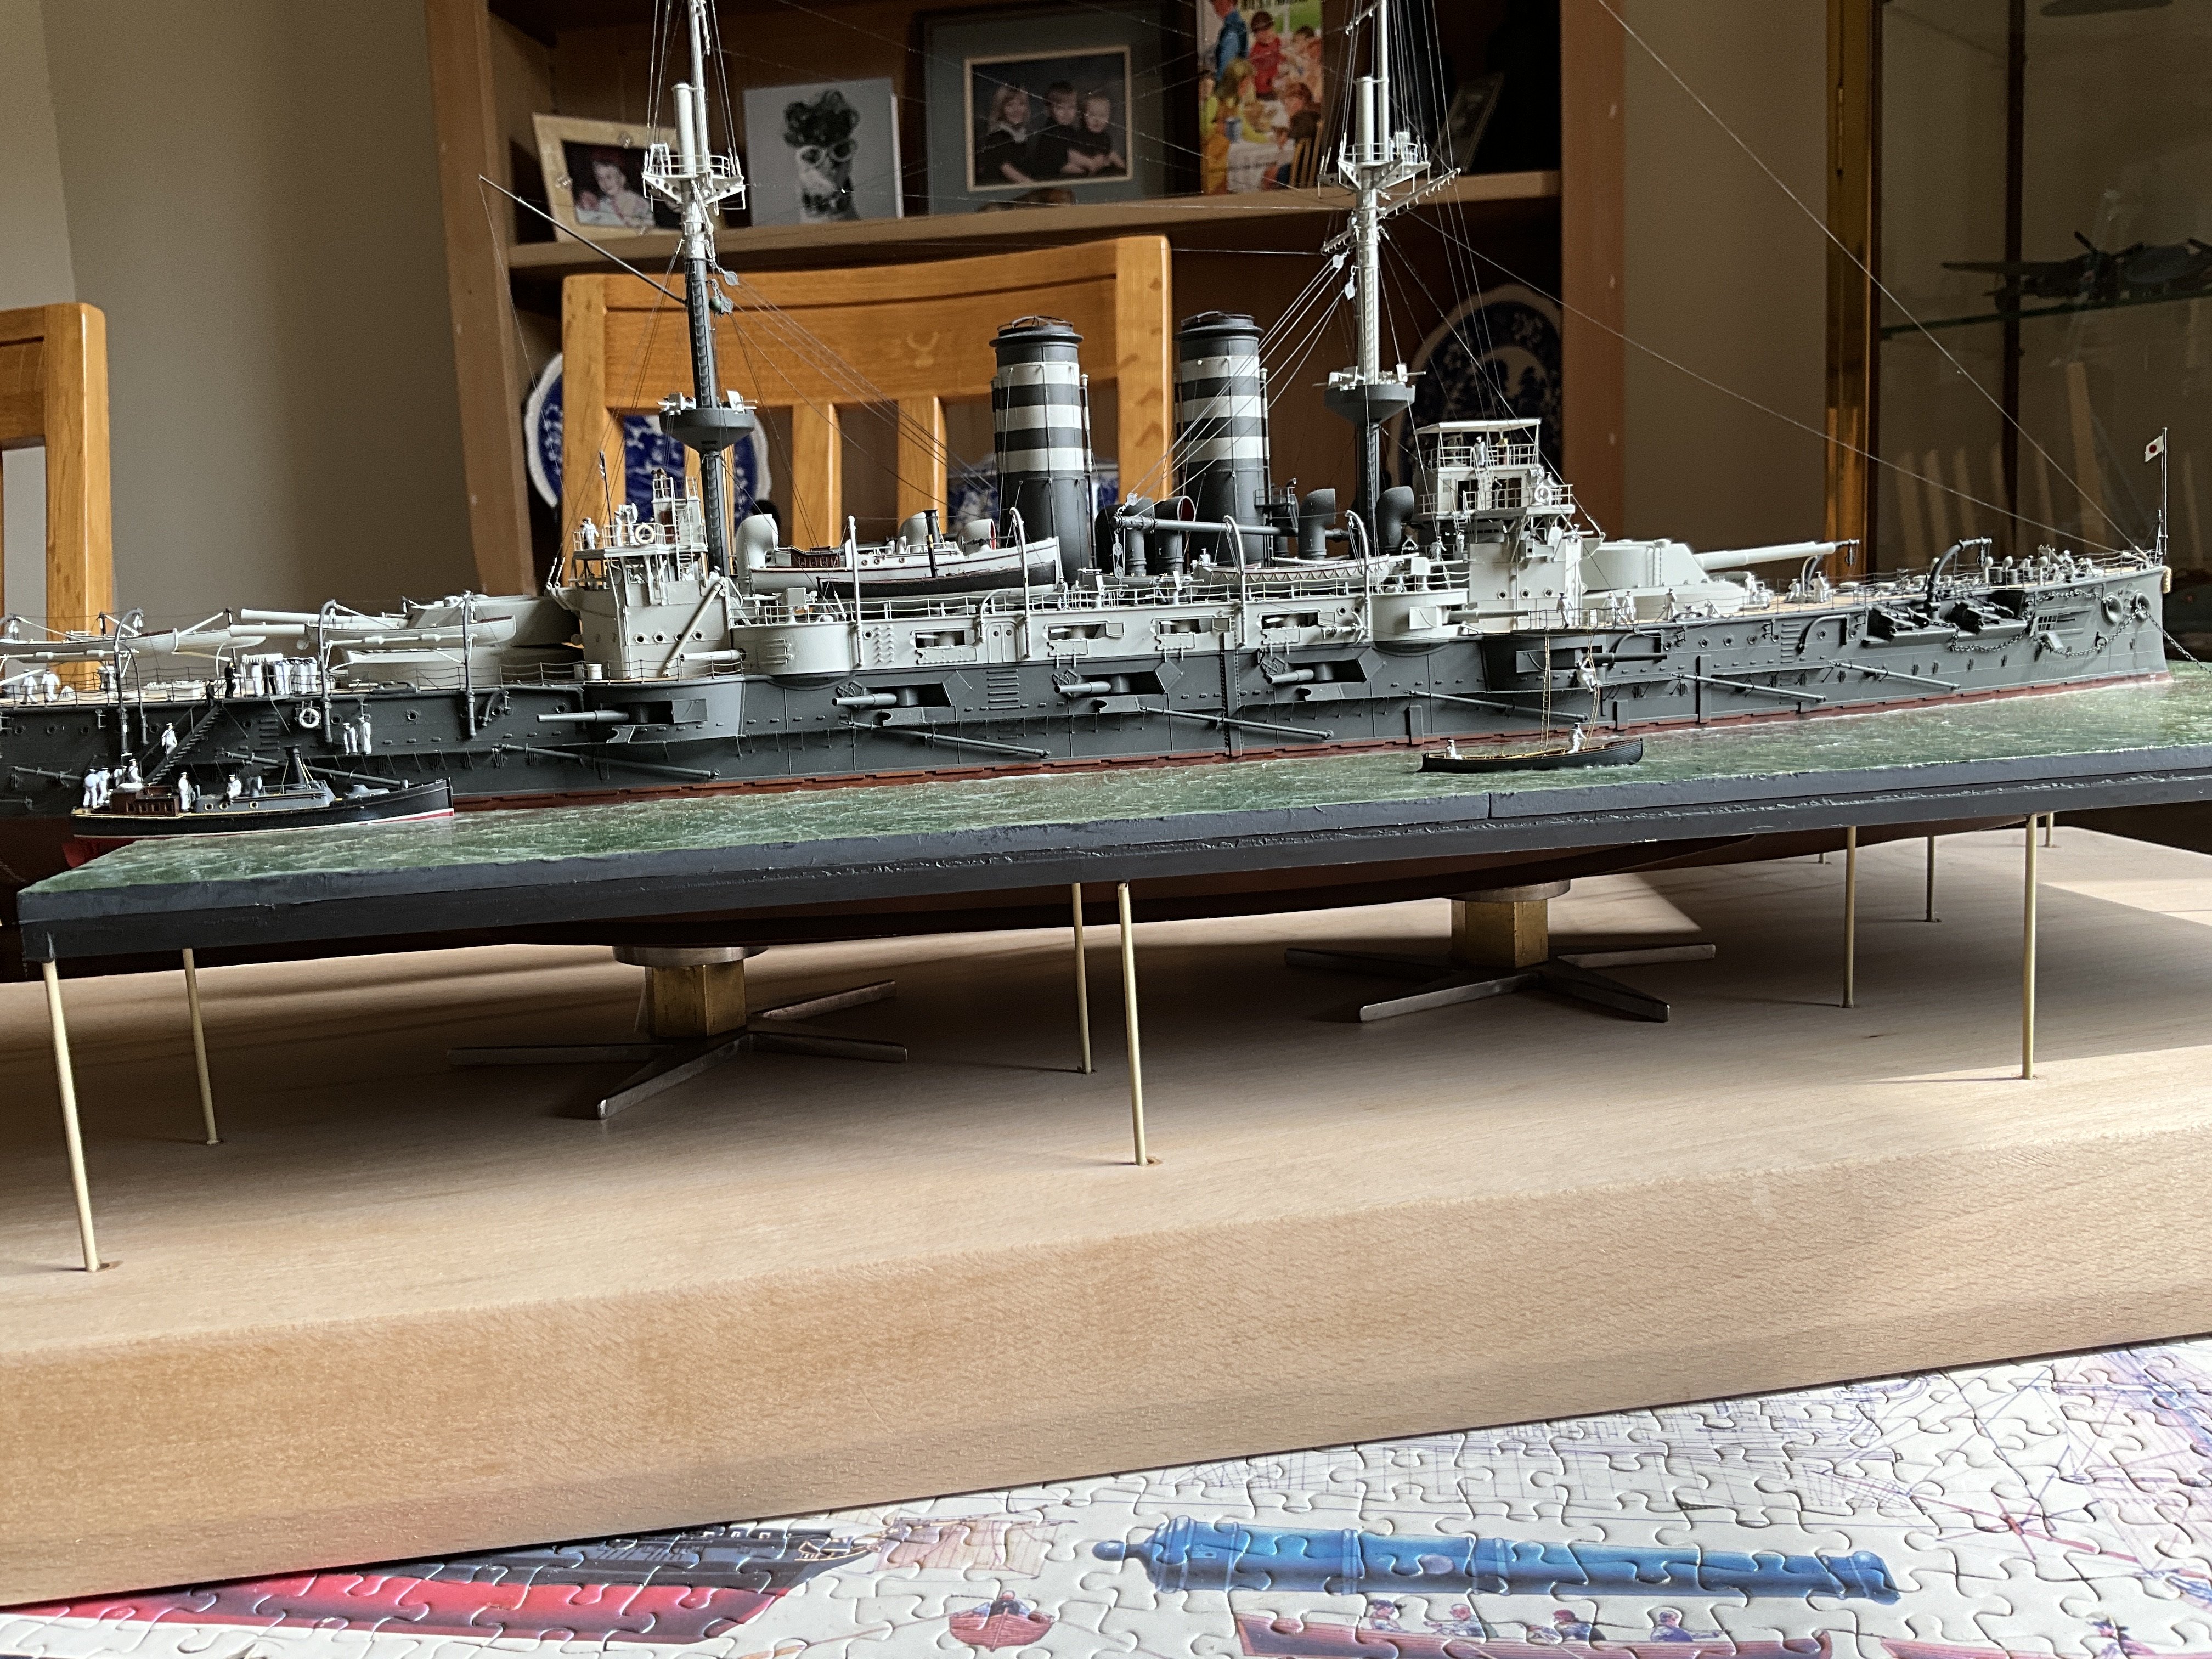
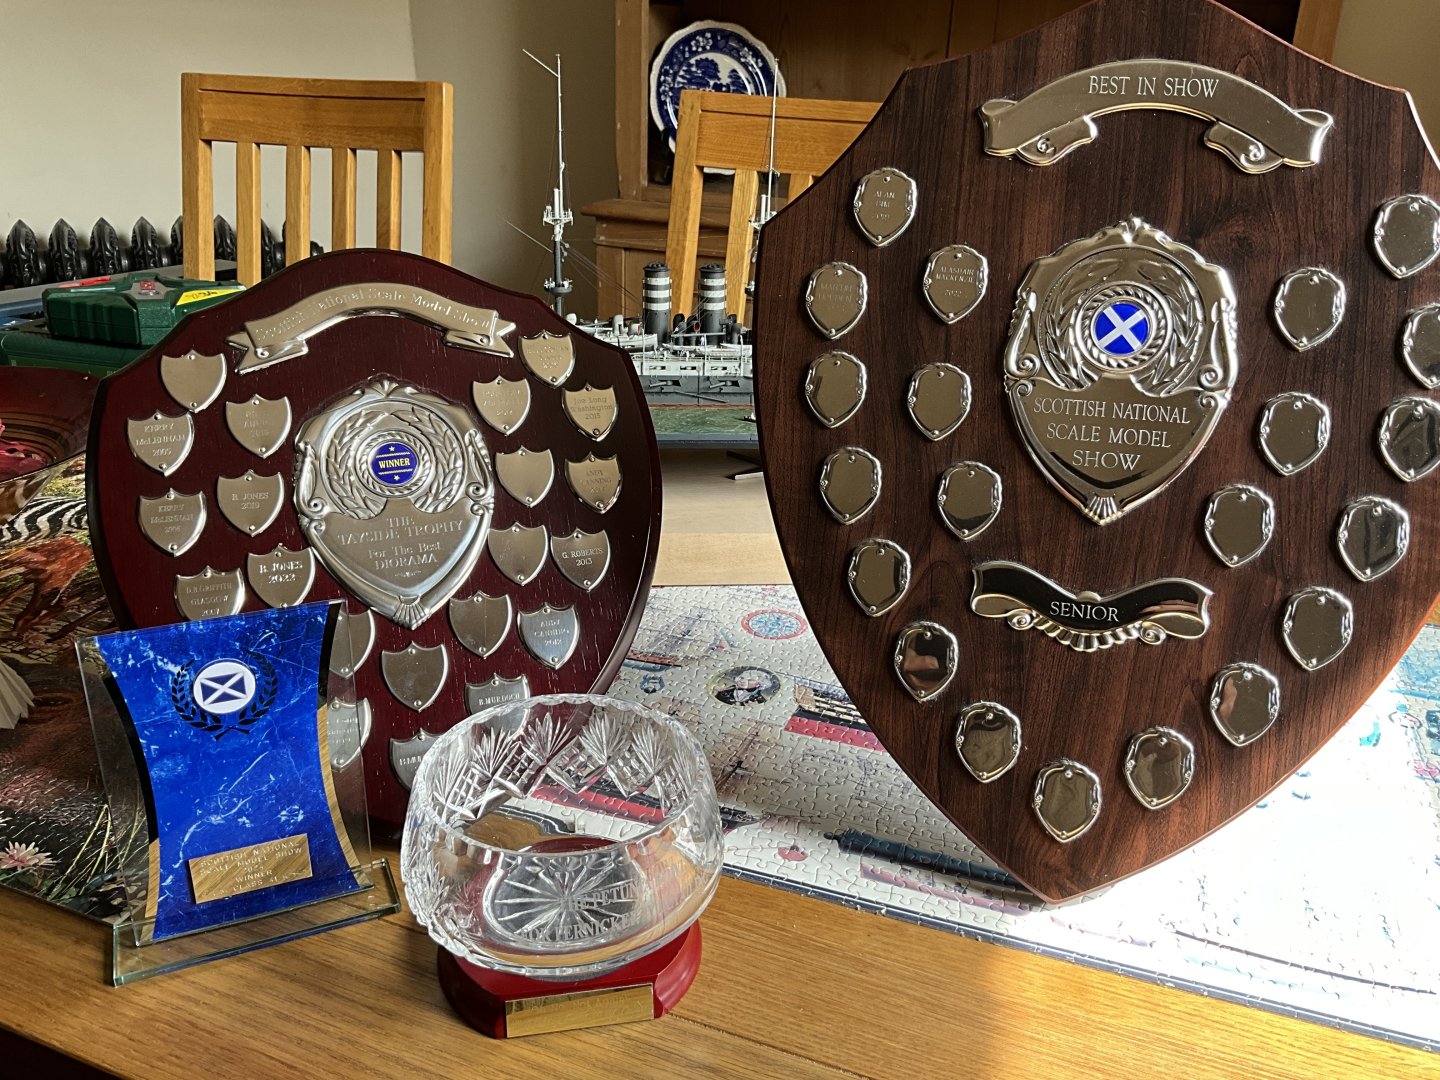
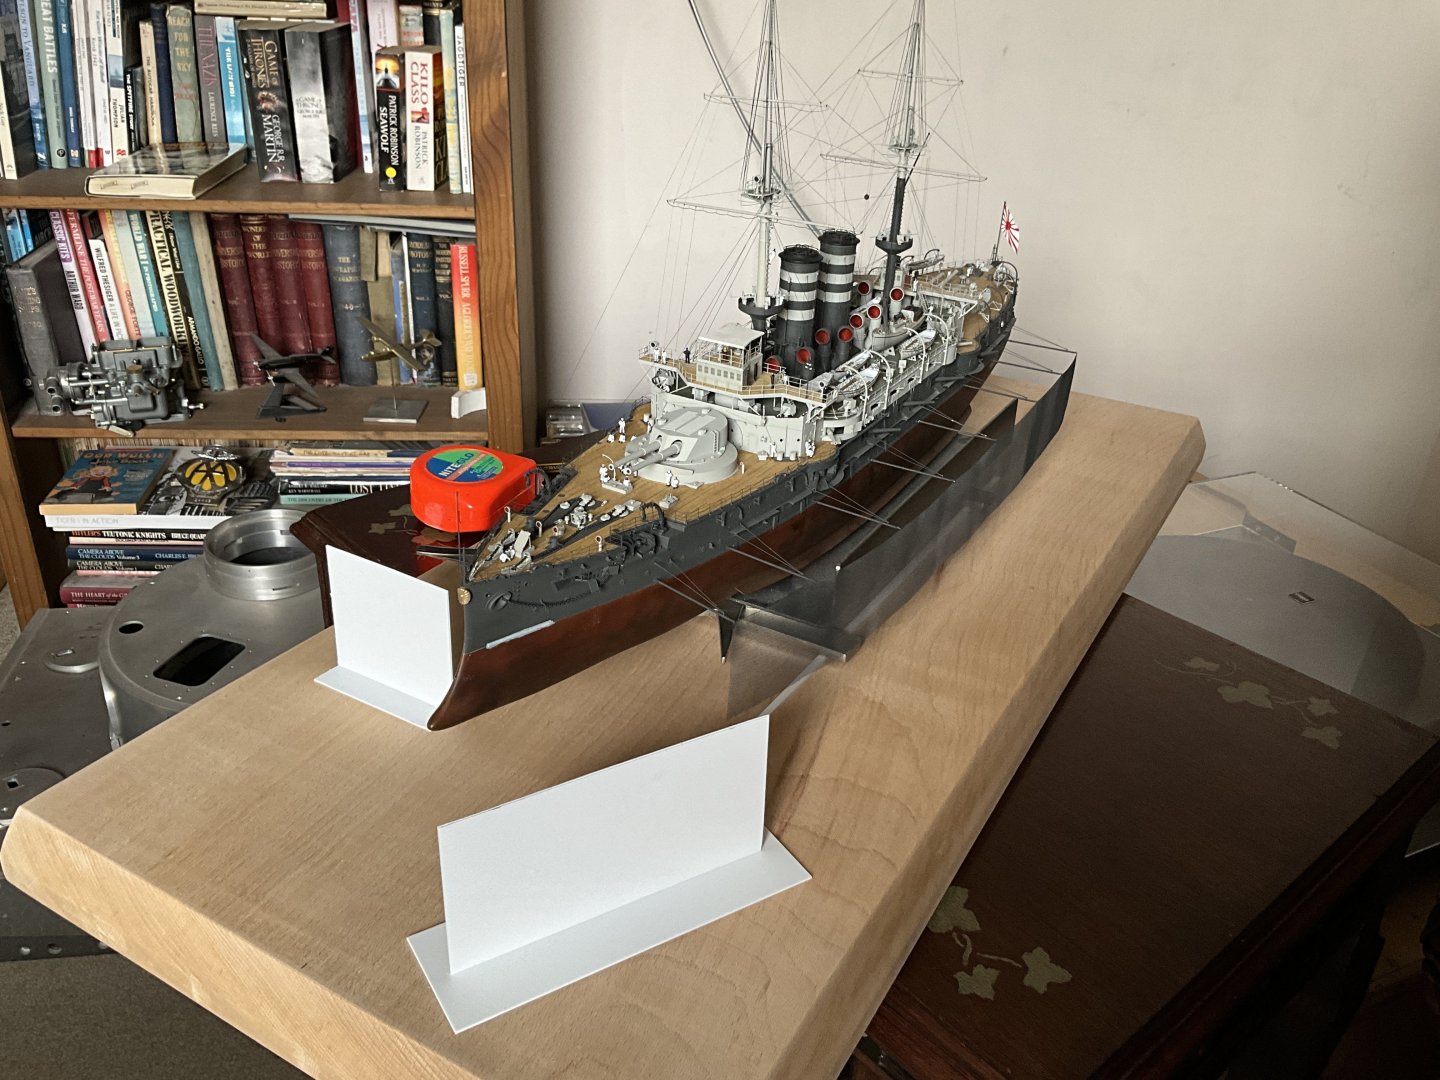
Thanks guys for following this through to its conclusion, it’s been an experience and a half for me. She also did really well at the model show, have to say floored me, winning four Trophies, boy that was unexpected
- 543 replies
-
- 13
-

-

-
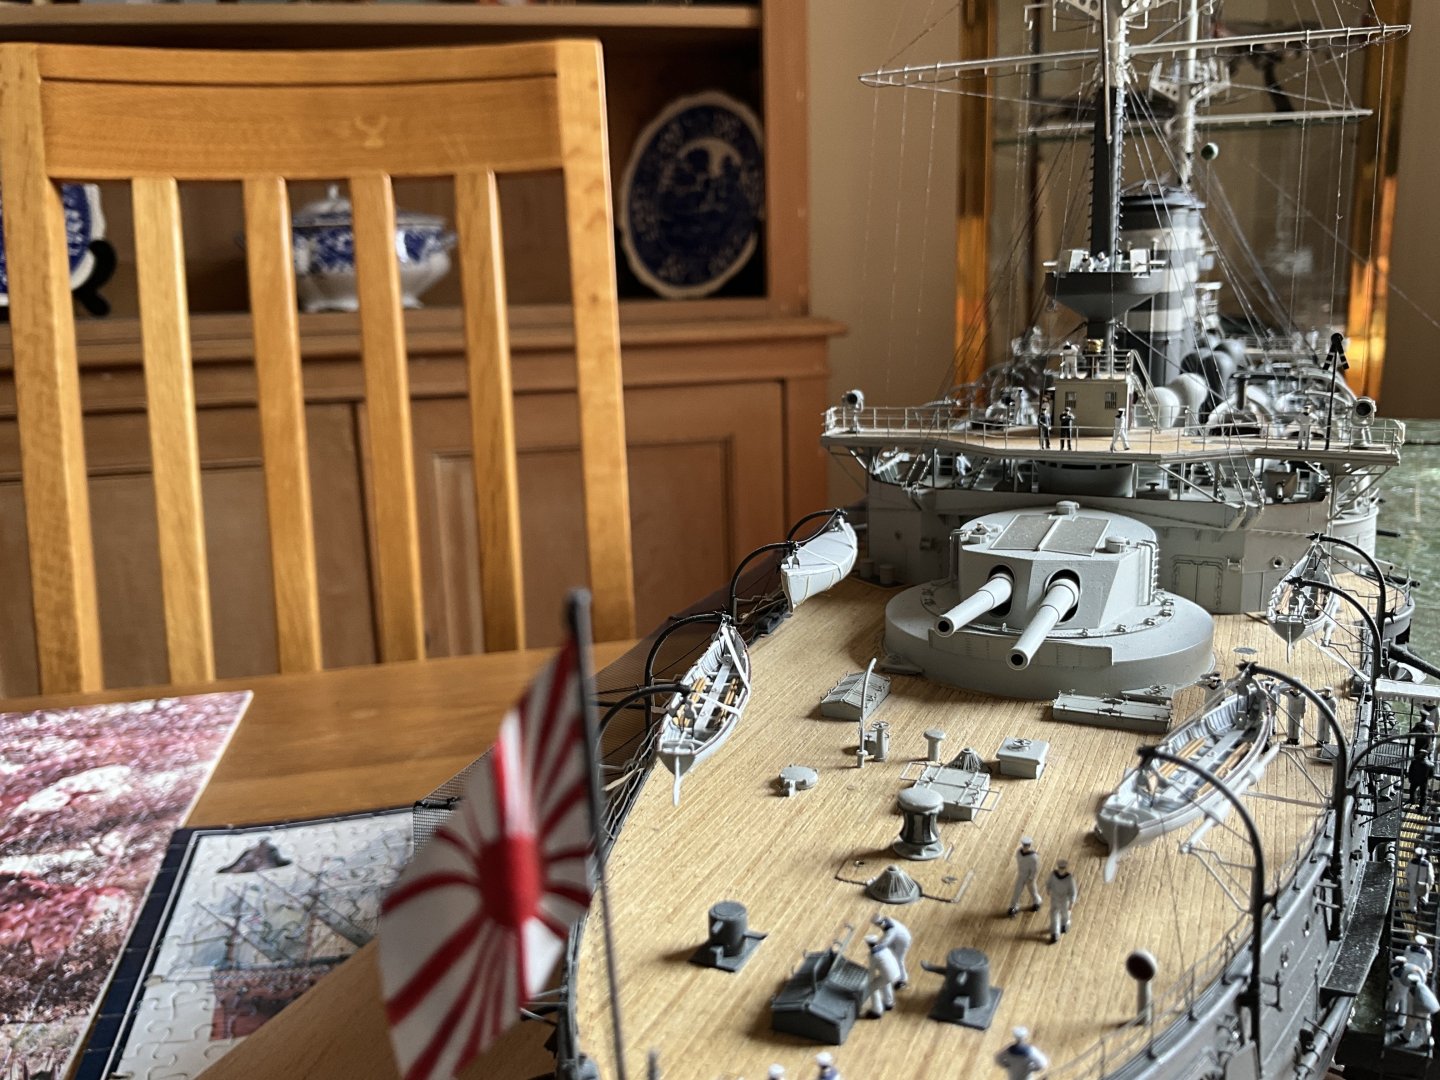
Well there’s the wee guy in the main turret, just about ended up with all the guys in photo 😂
-
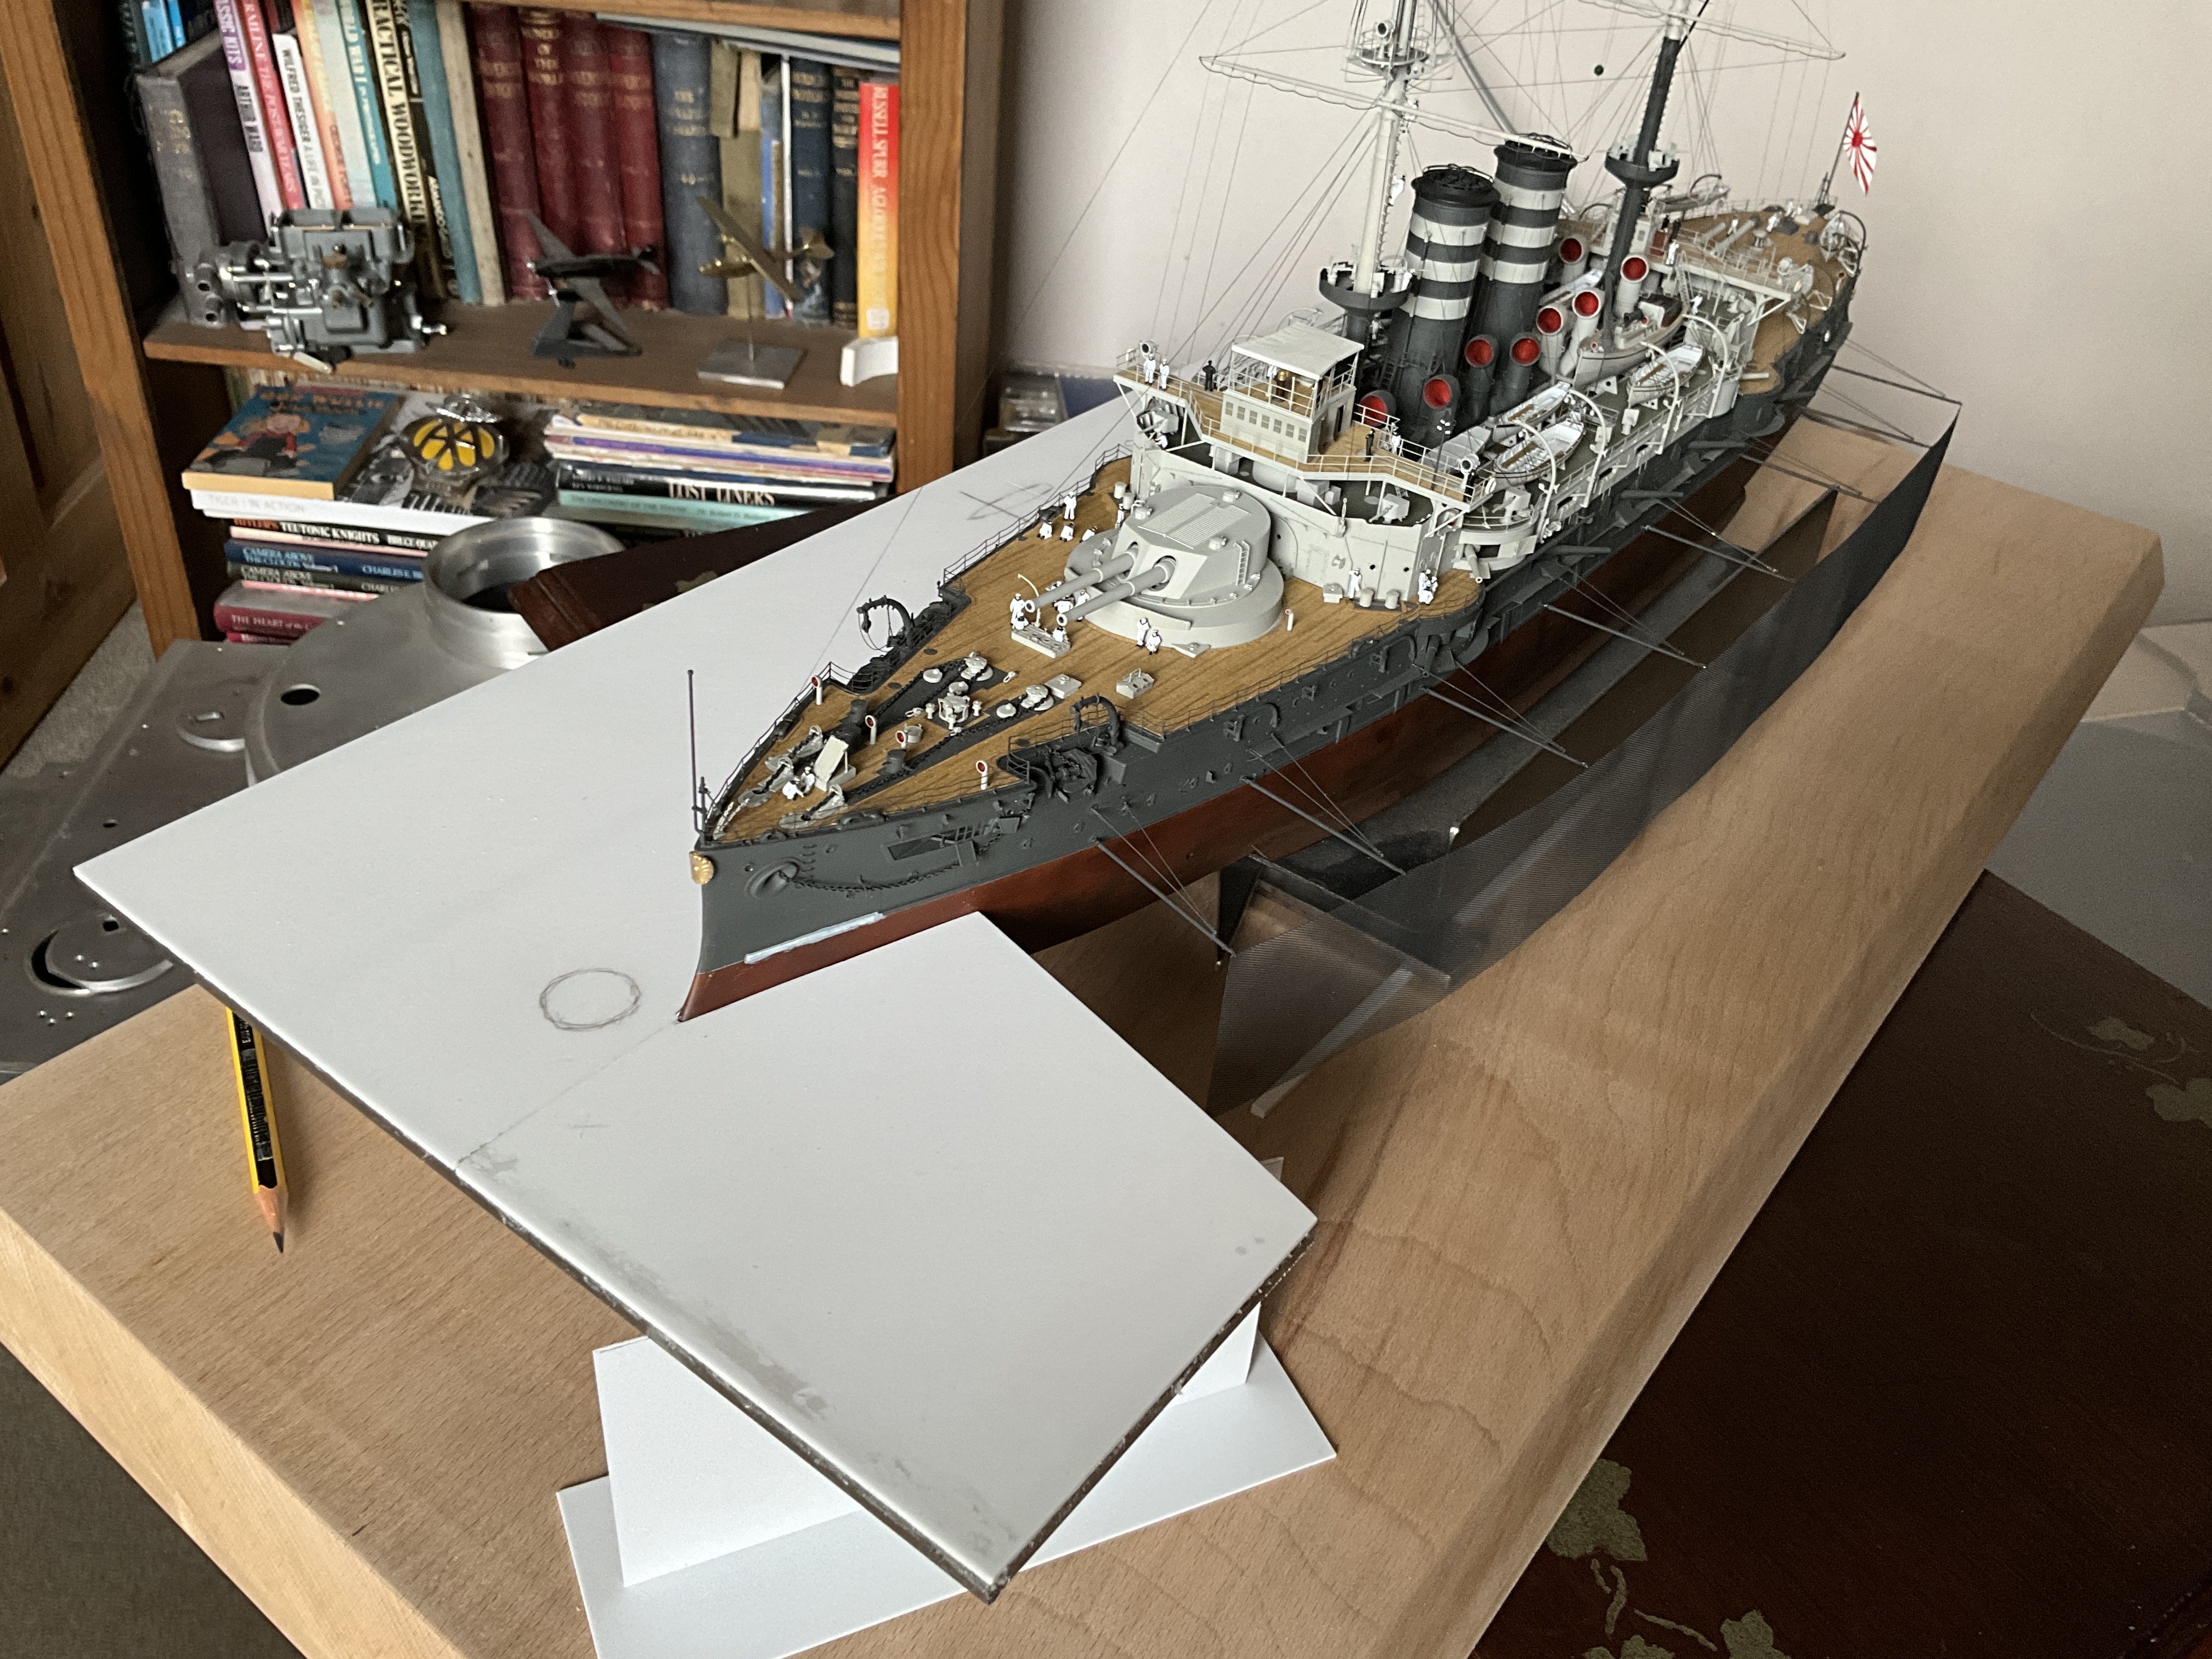
Well that’s as far as got with recording things, the rest involved final stages including painting another sixty odd figures, didn’t quite get them all done before show but finishing of her now, will have to approach my excellent joiner for making top piece of display cabinet, maybe when l get started next build log, Bismarck 1/200 for second Son shall slip a photo of her in case. 👍


- 543 replies
-
- 11
-
-
-
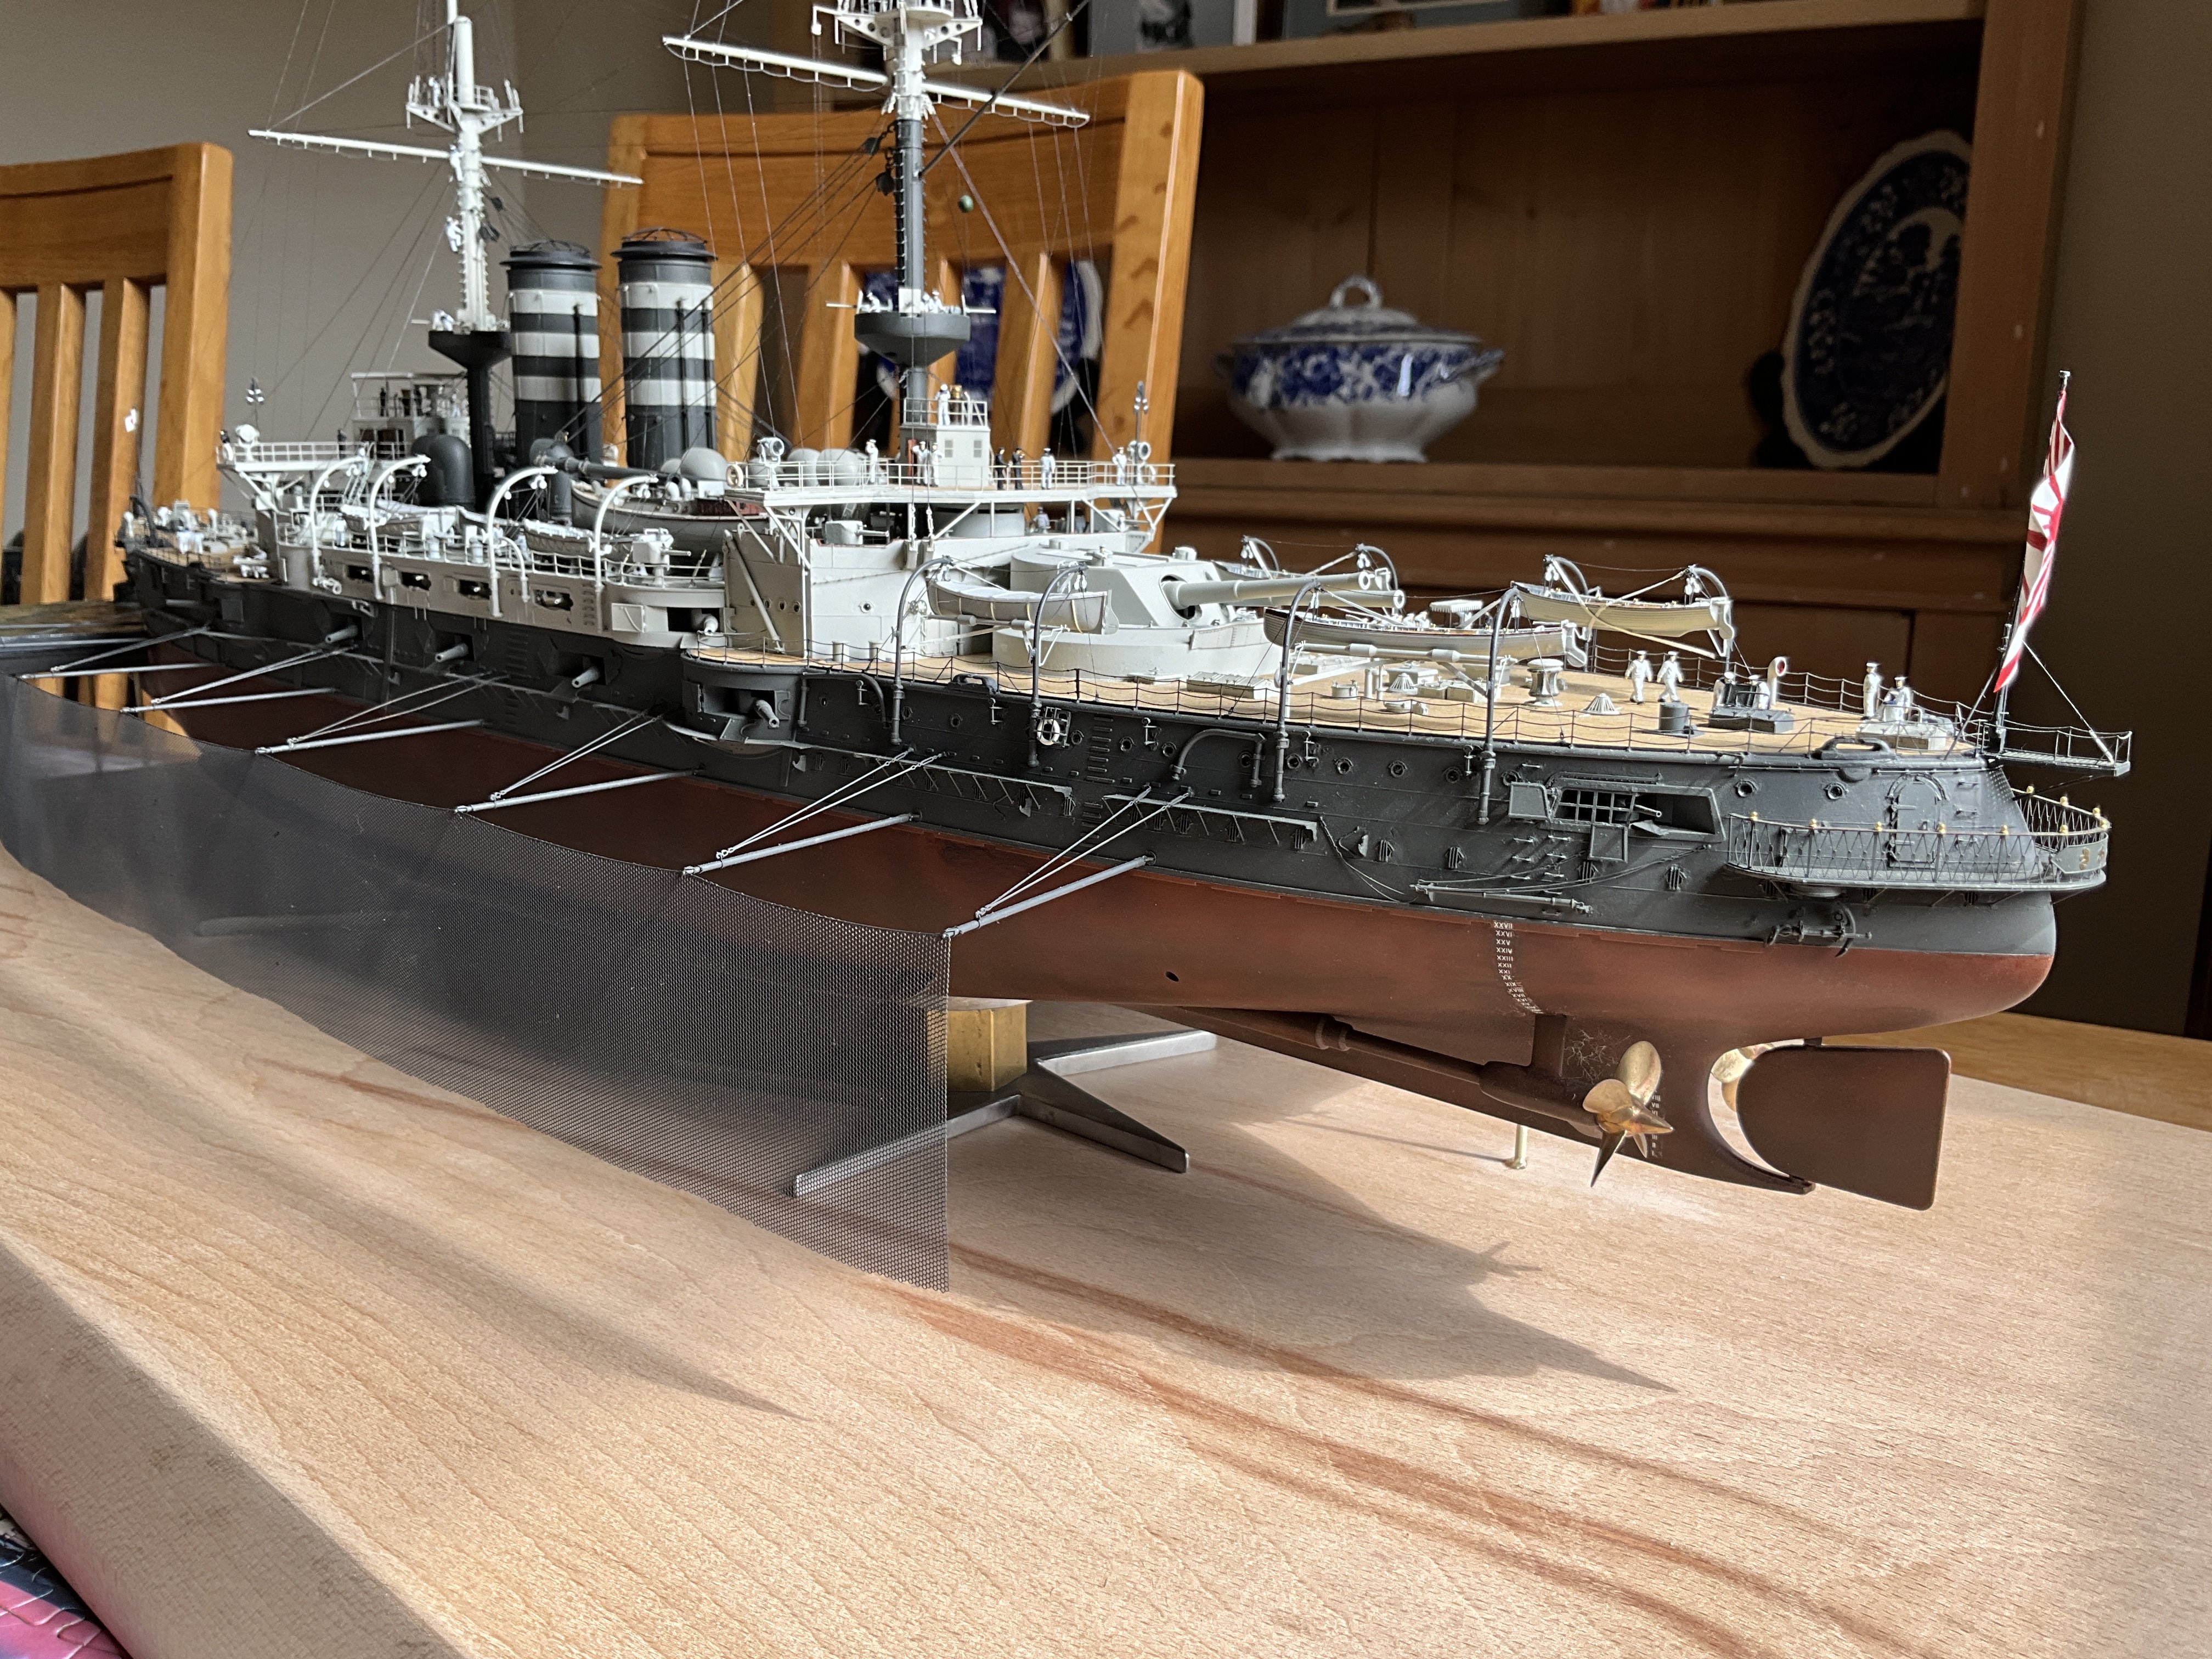
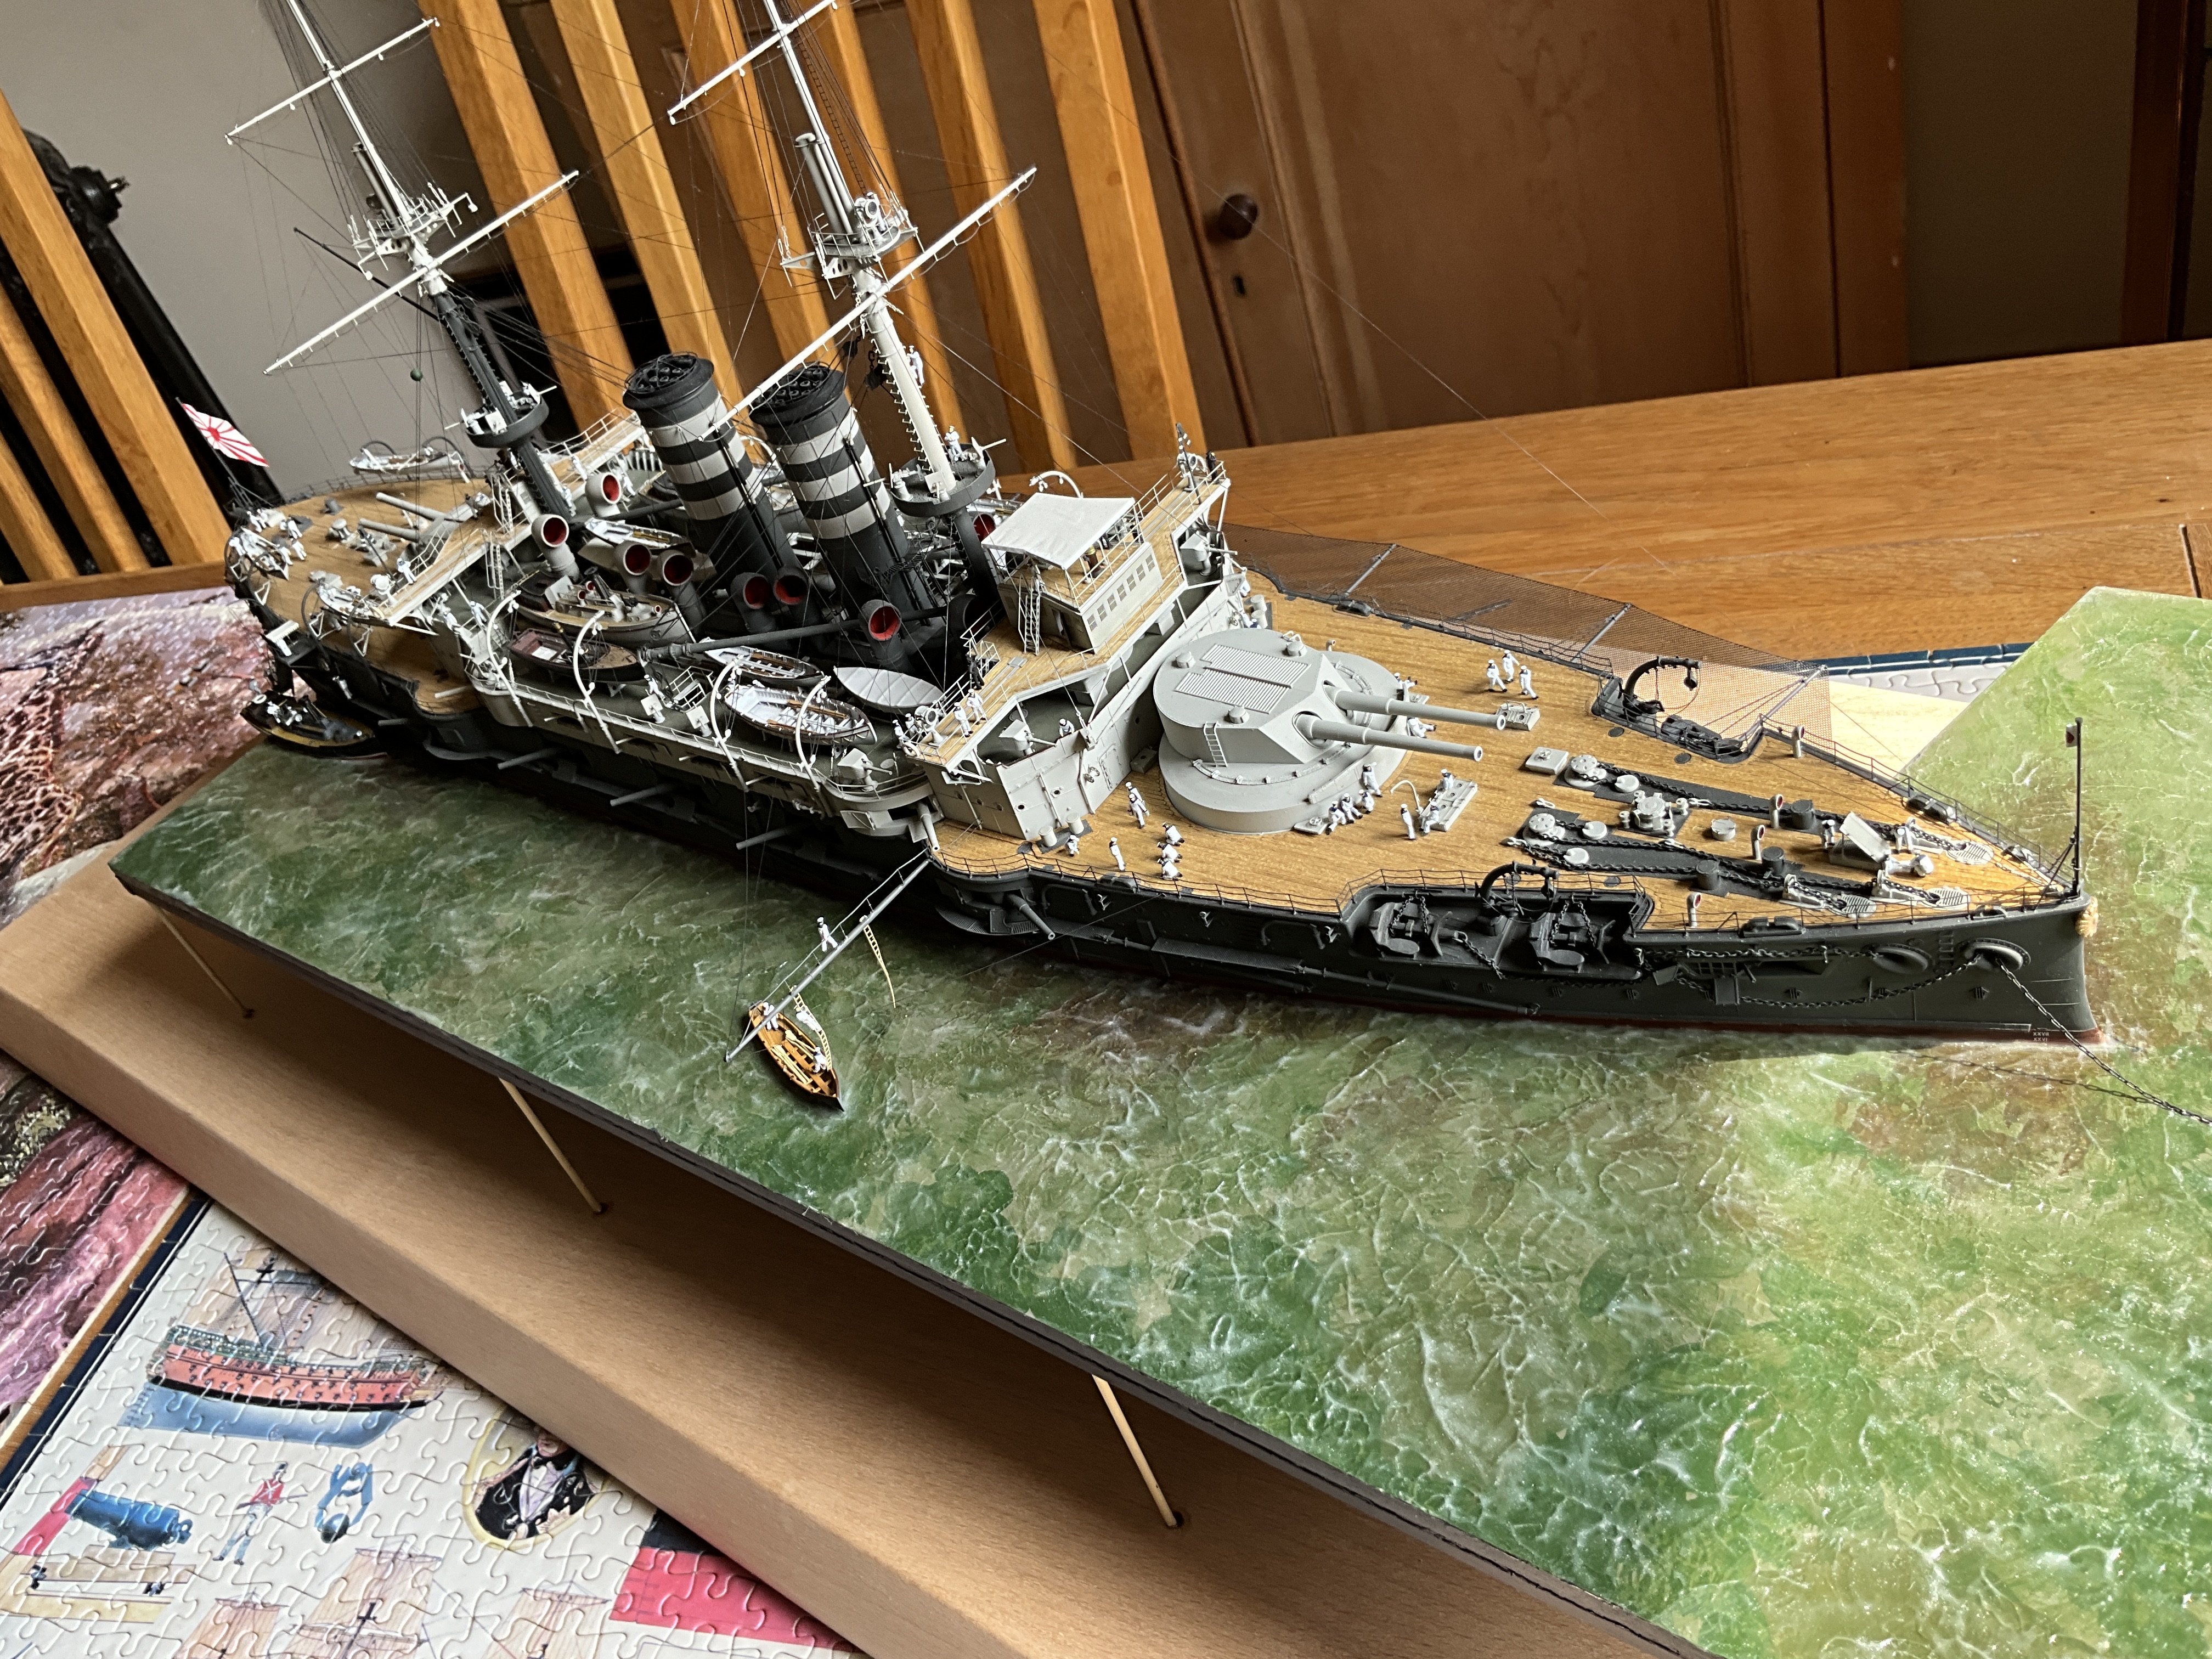
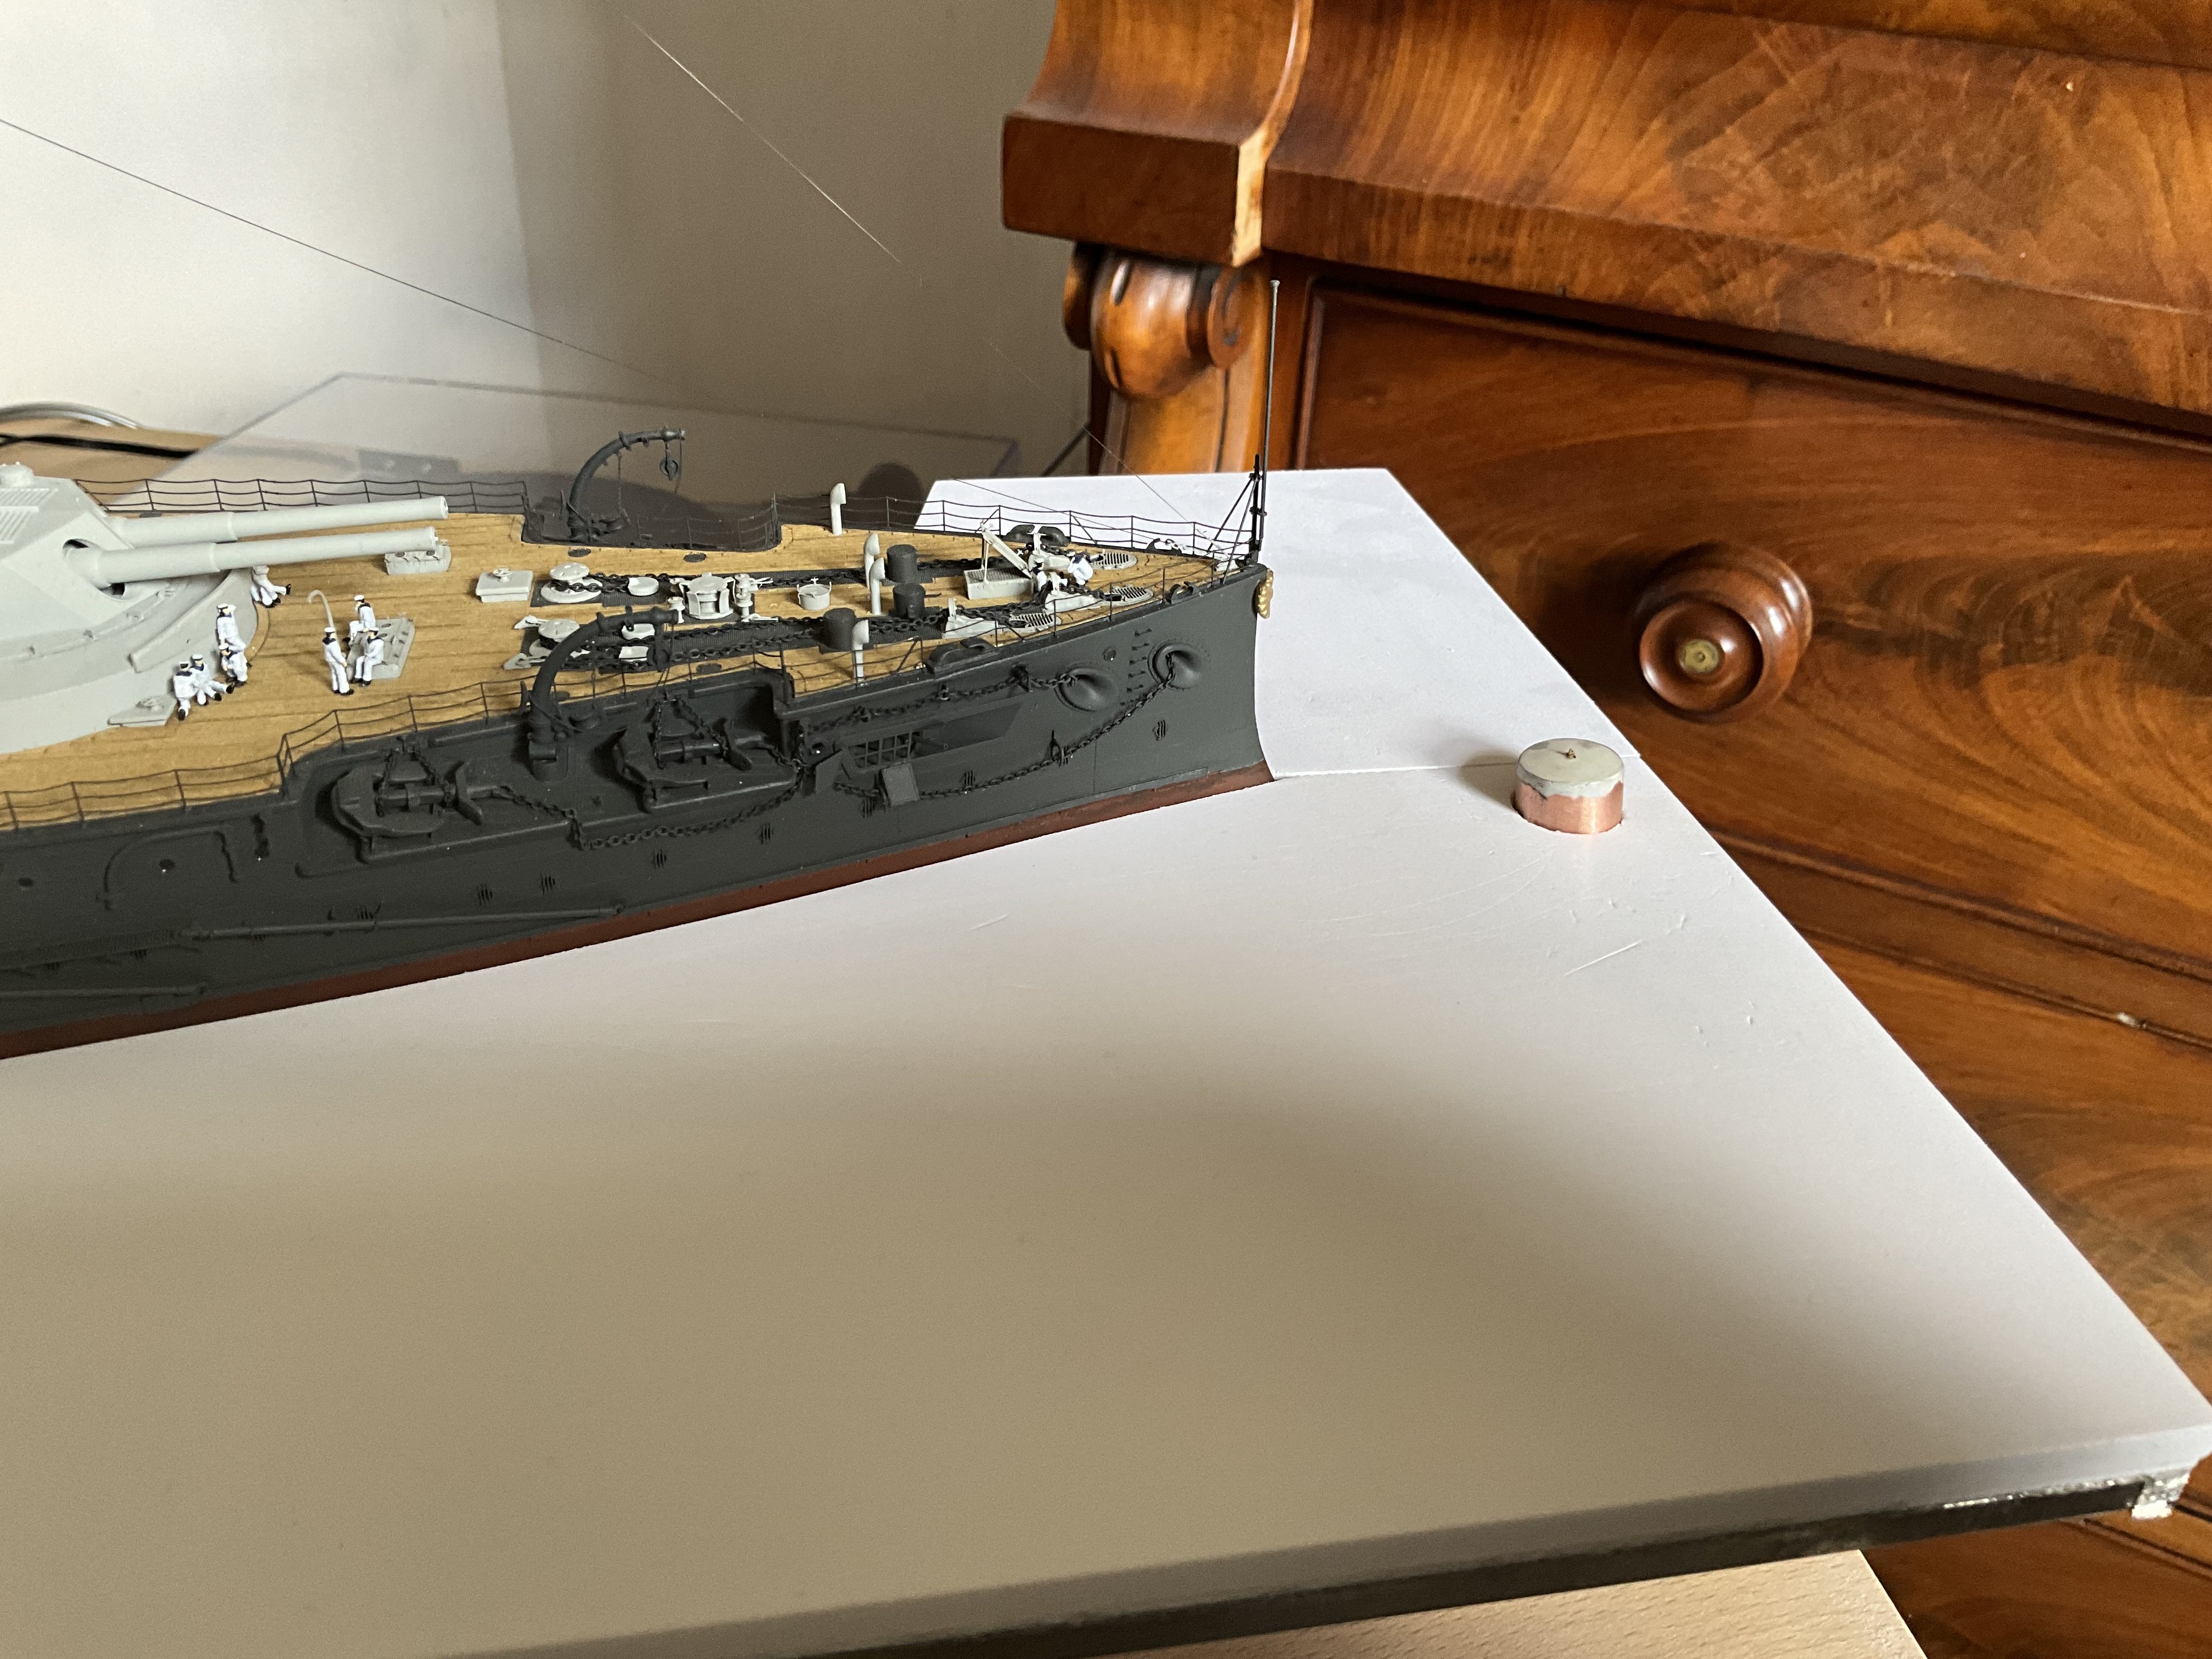
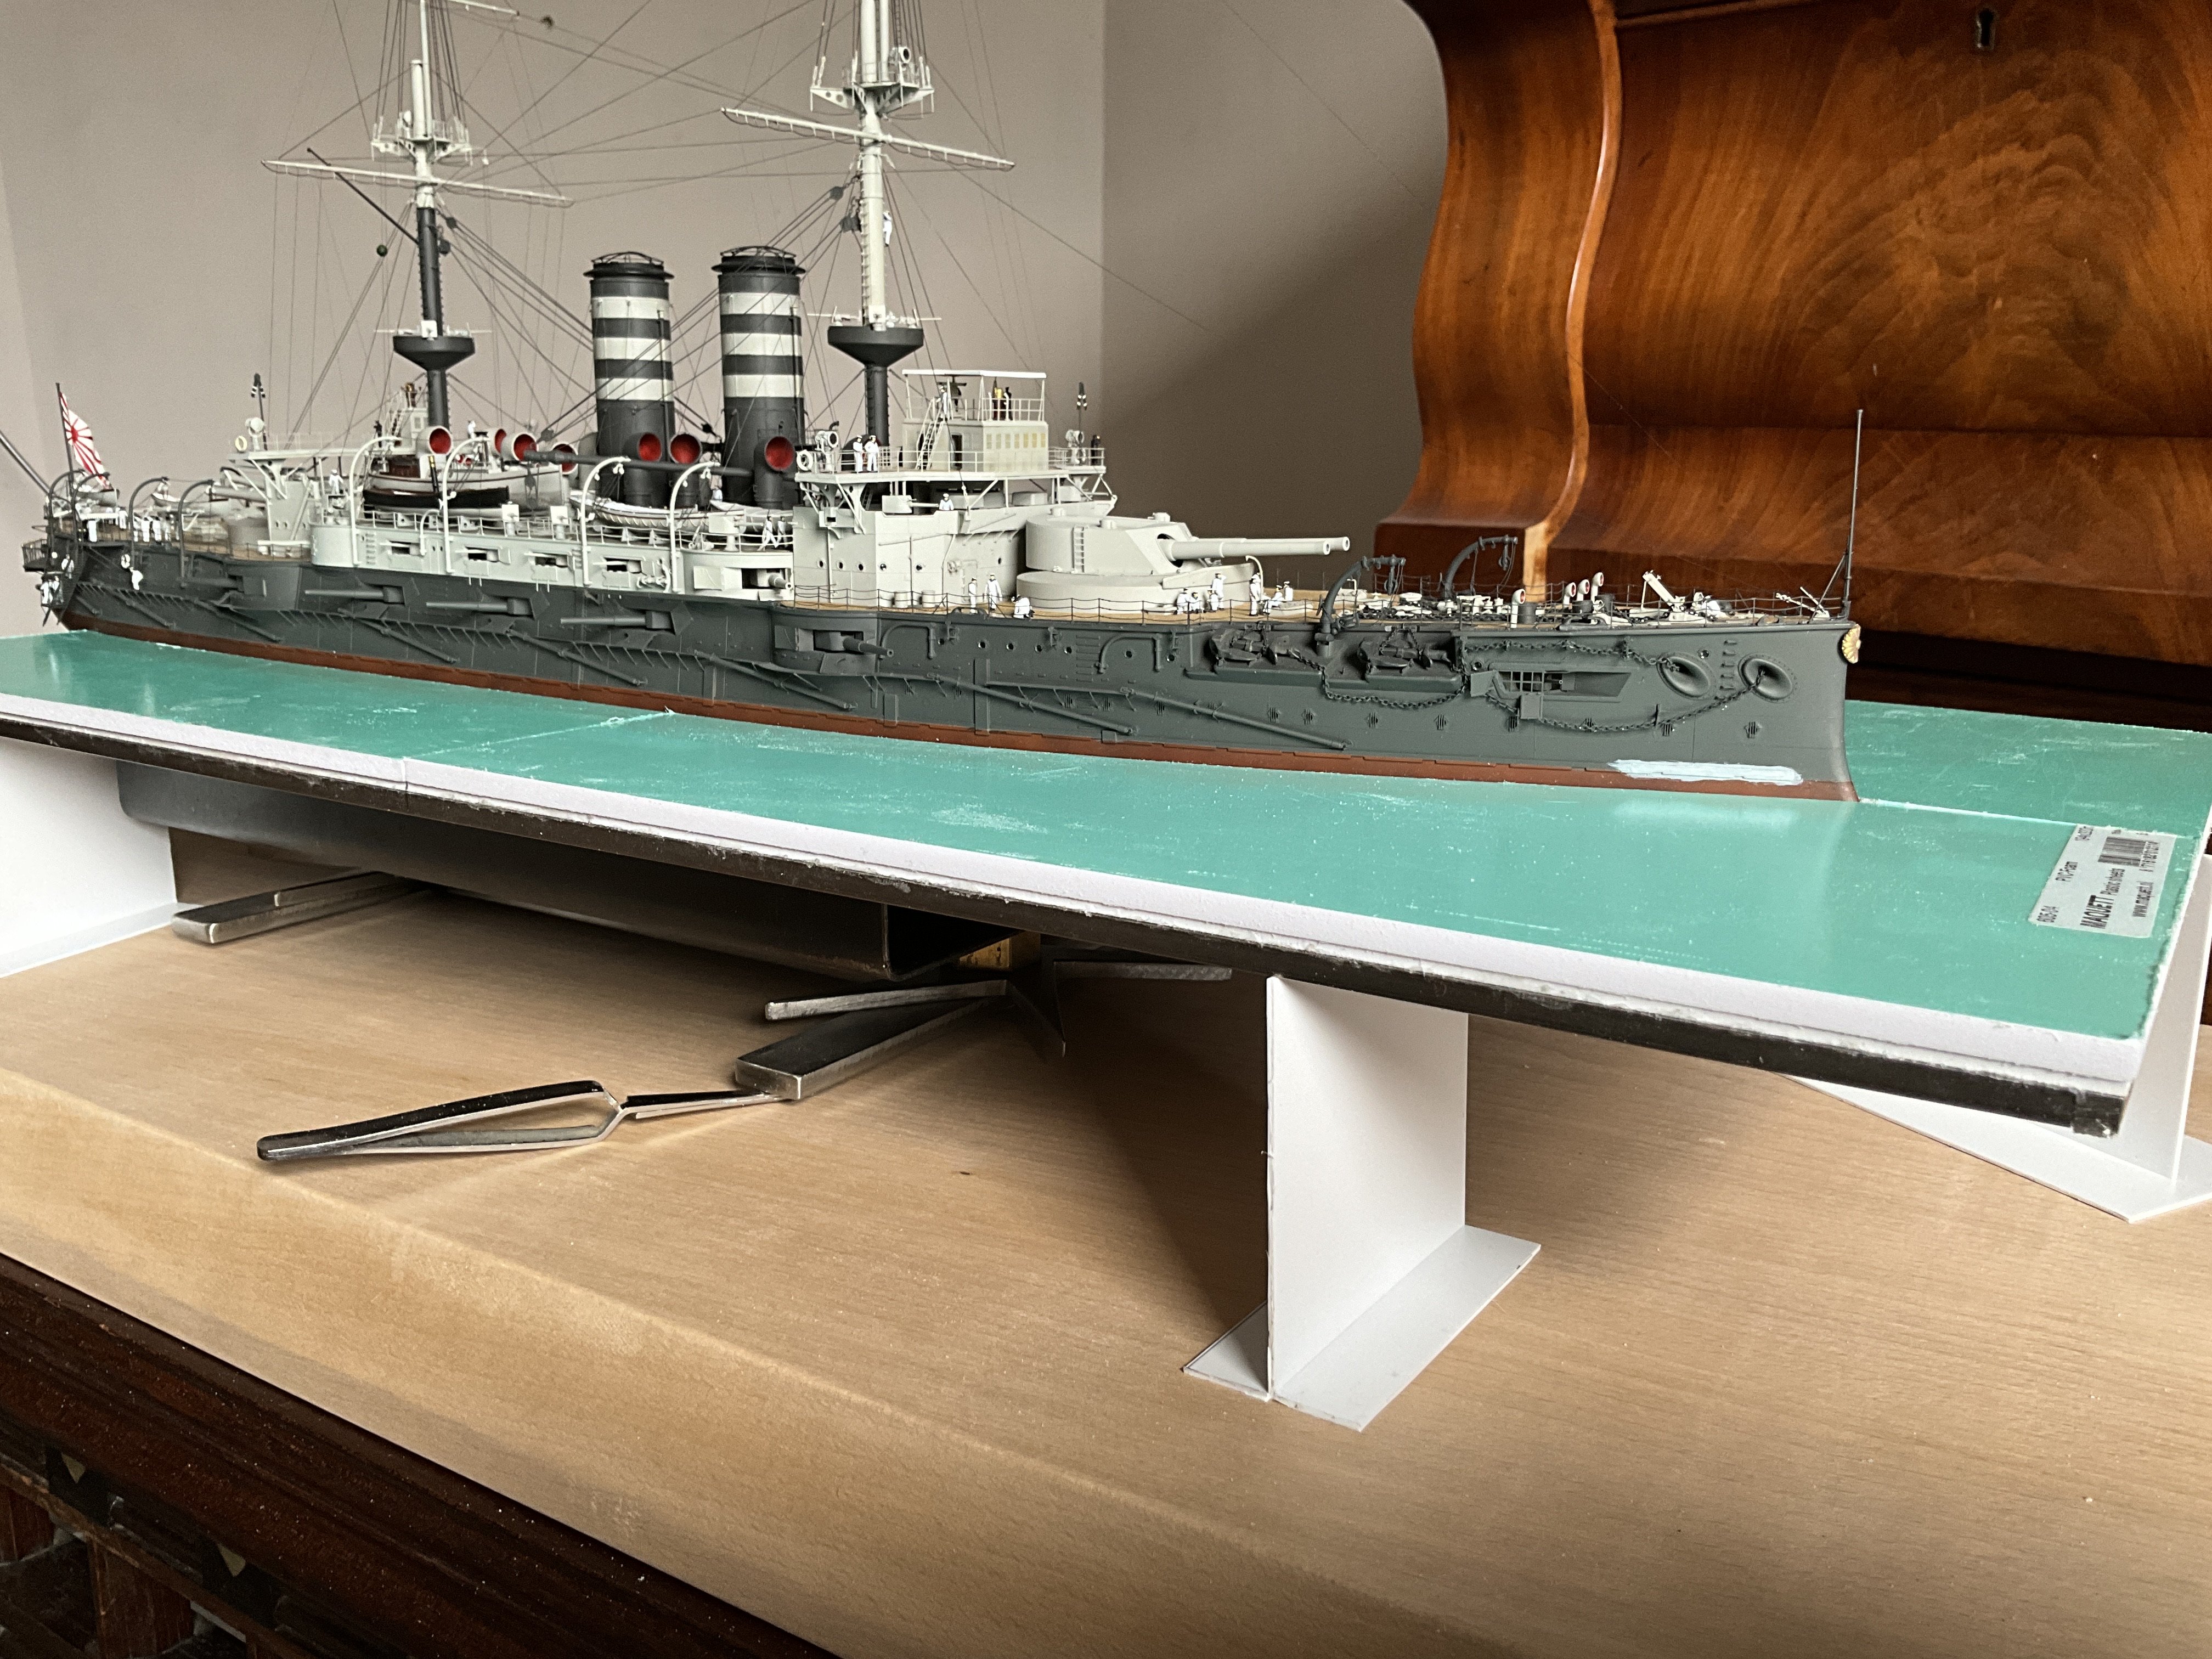
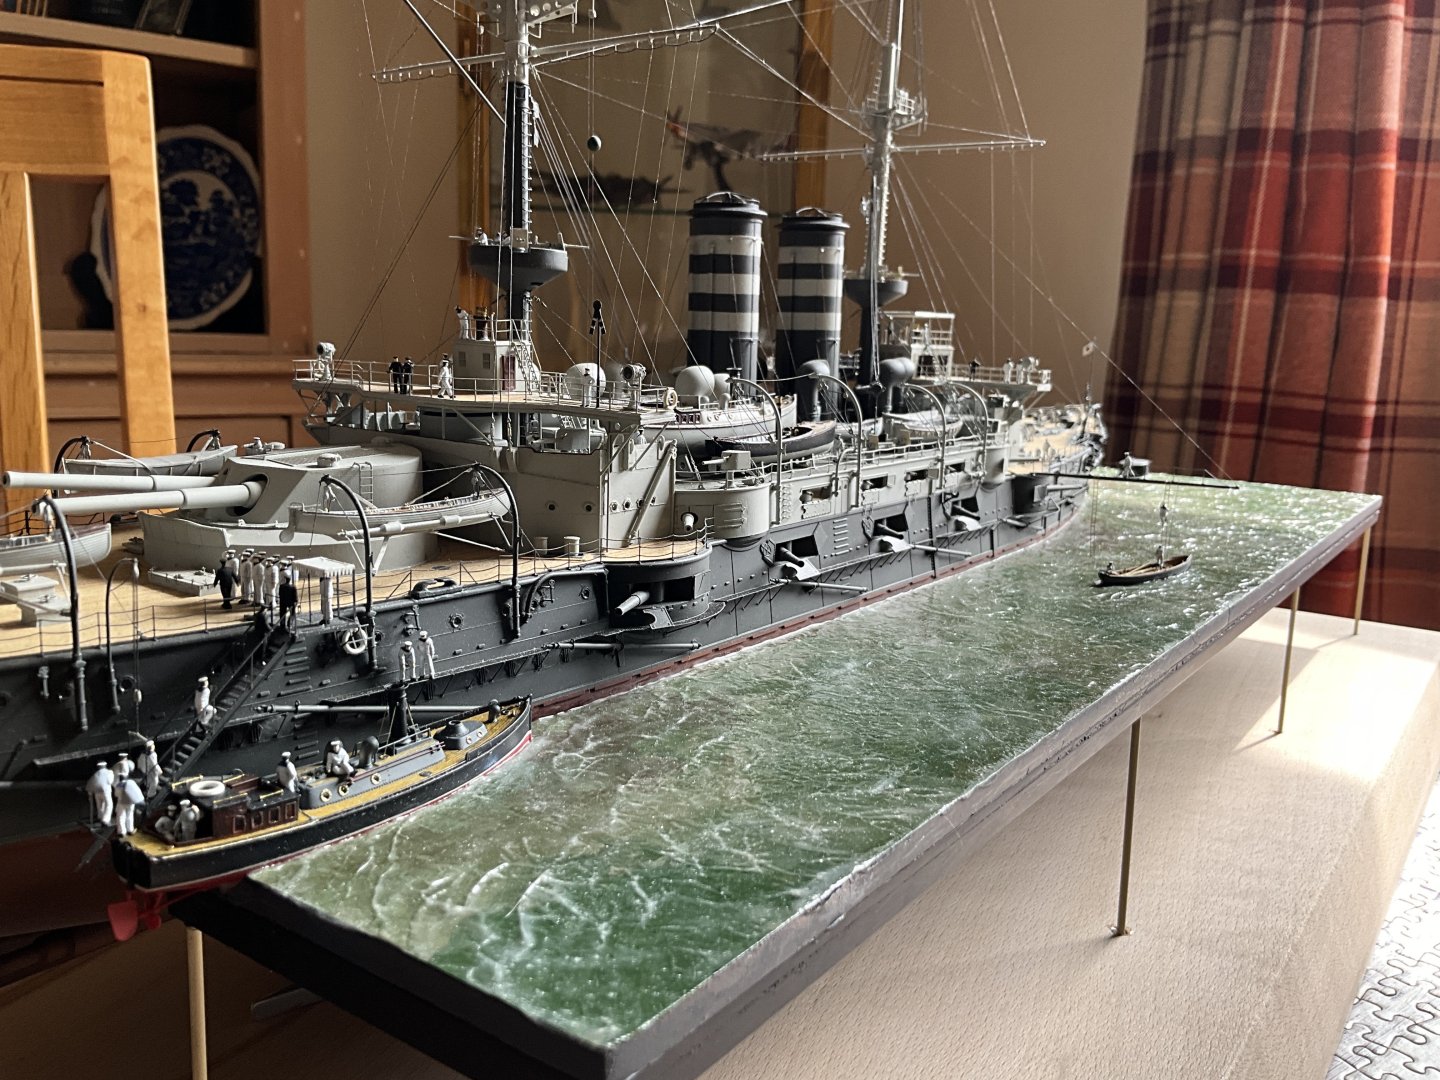
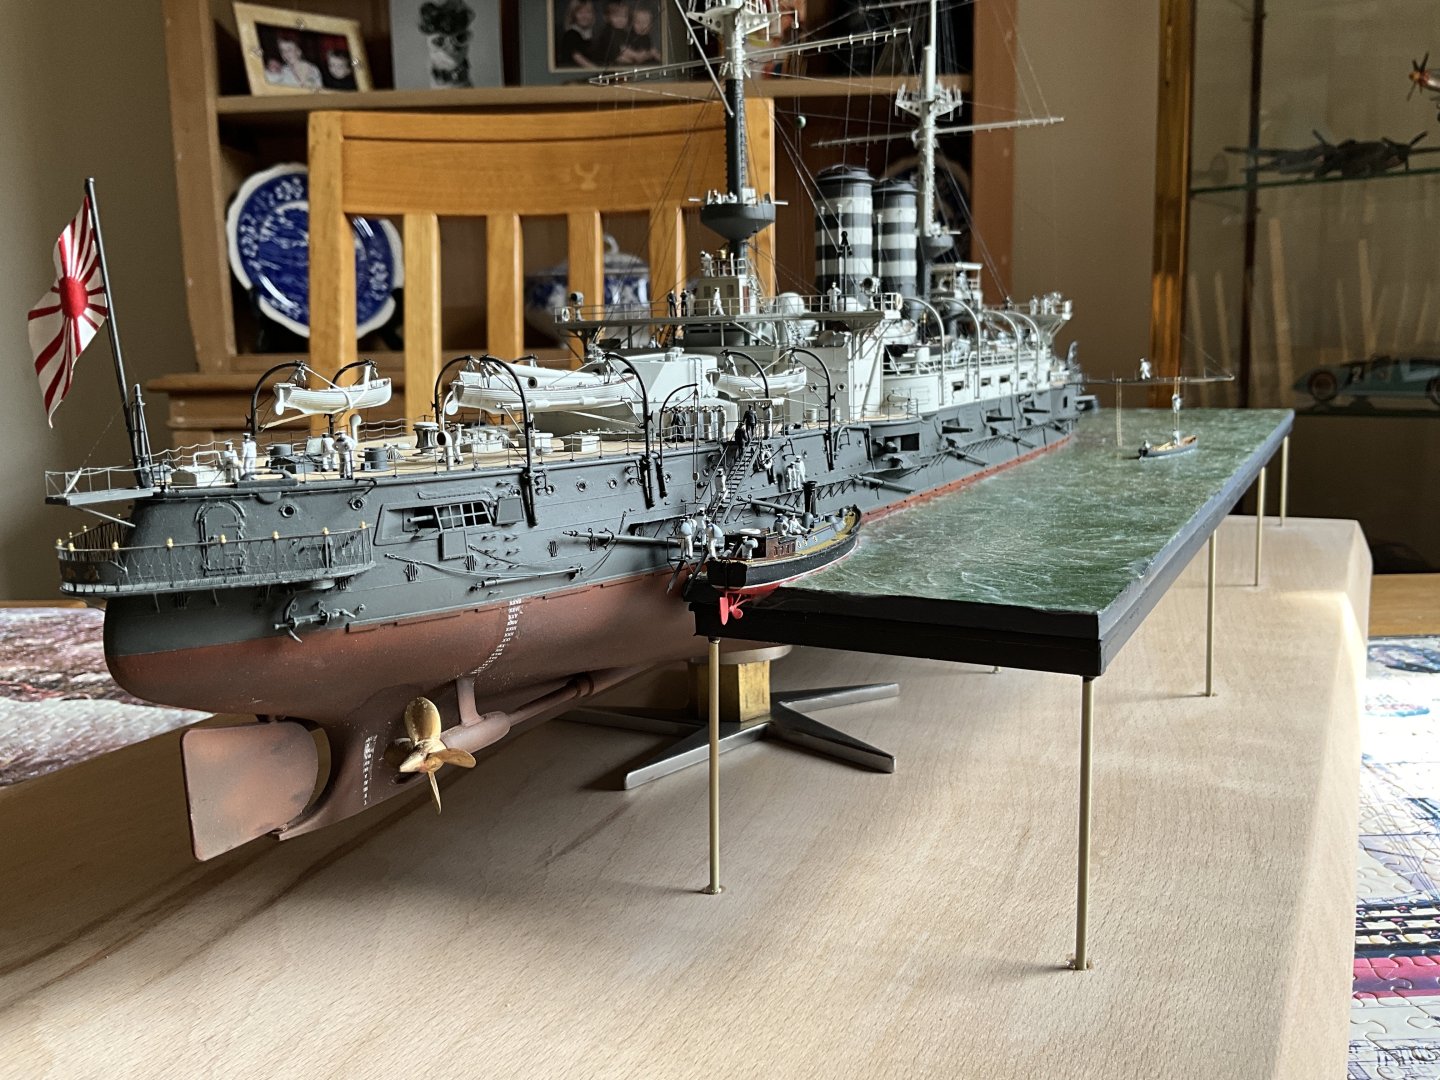
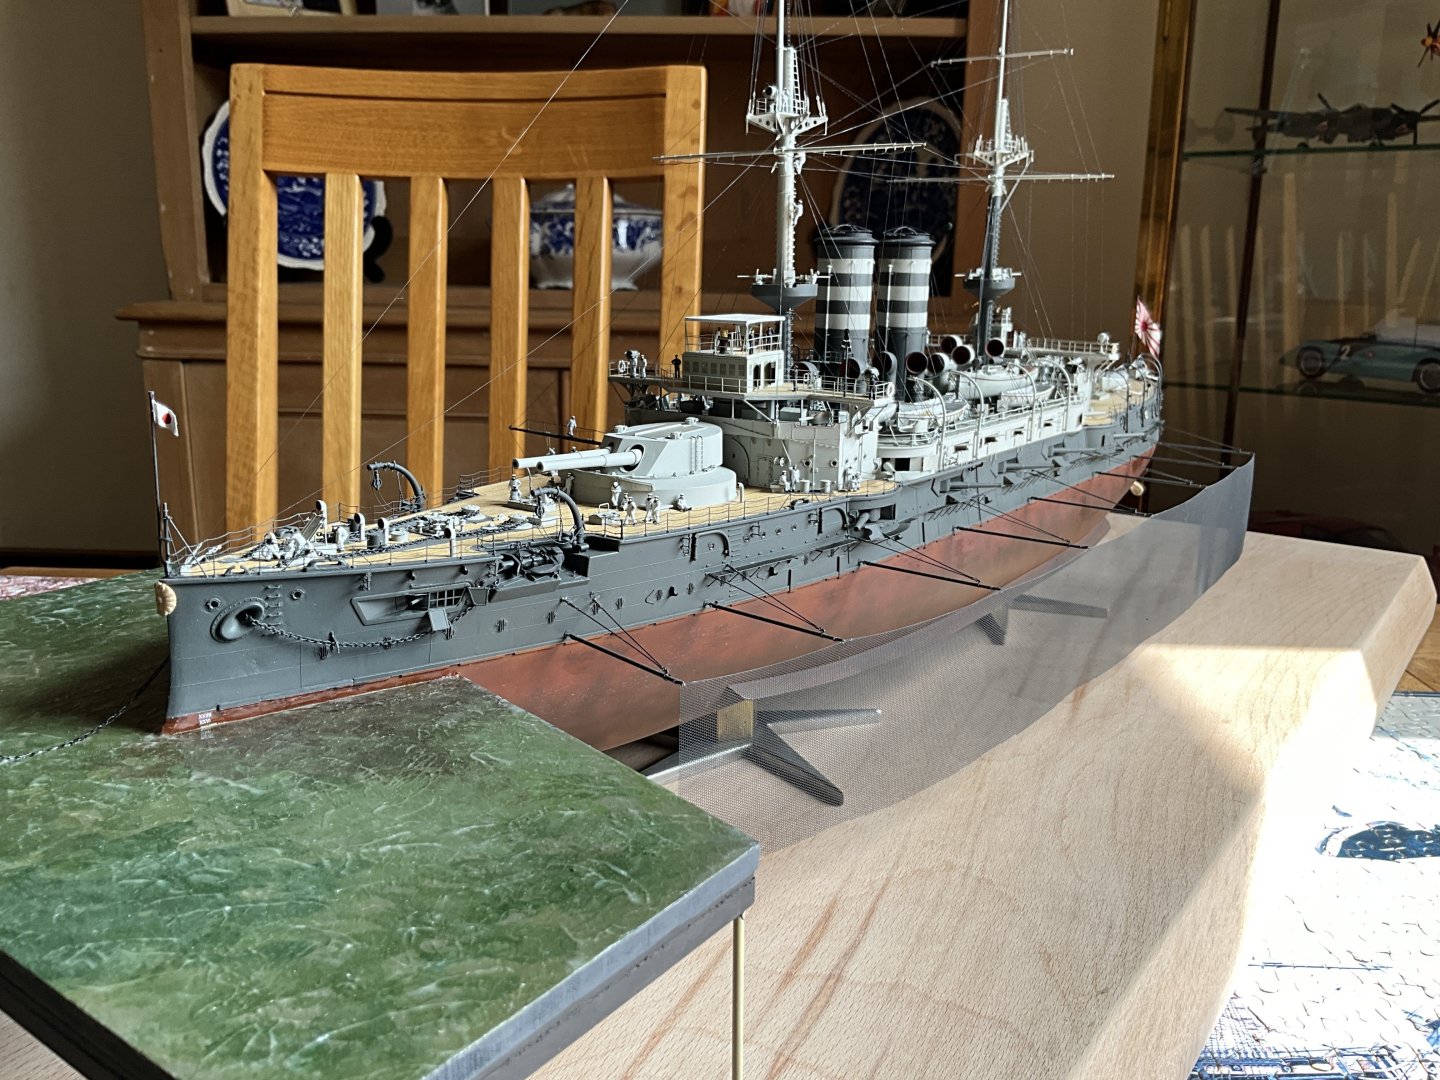
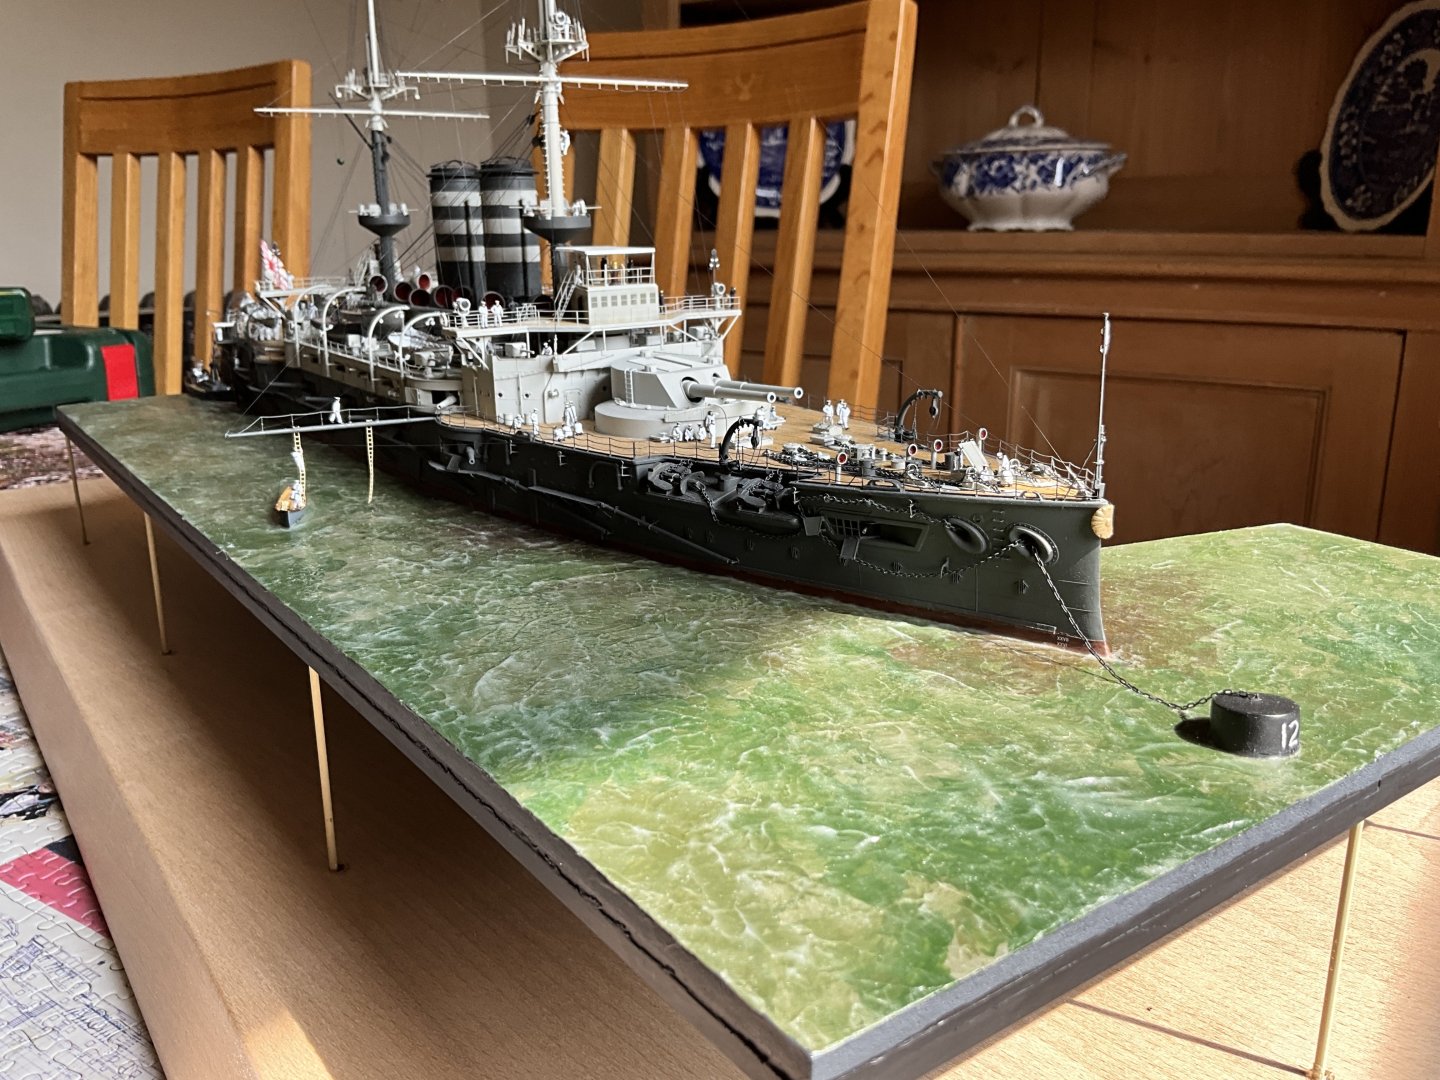
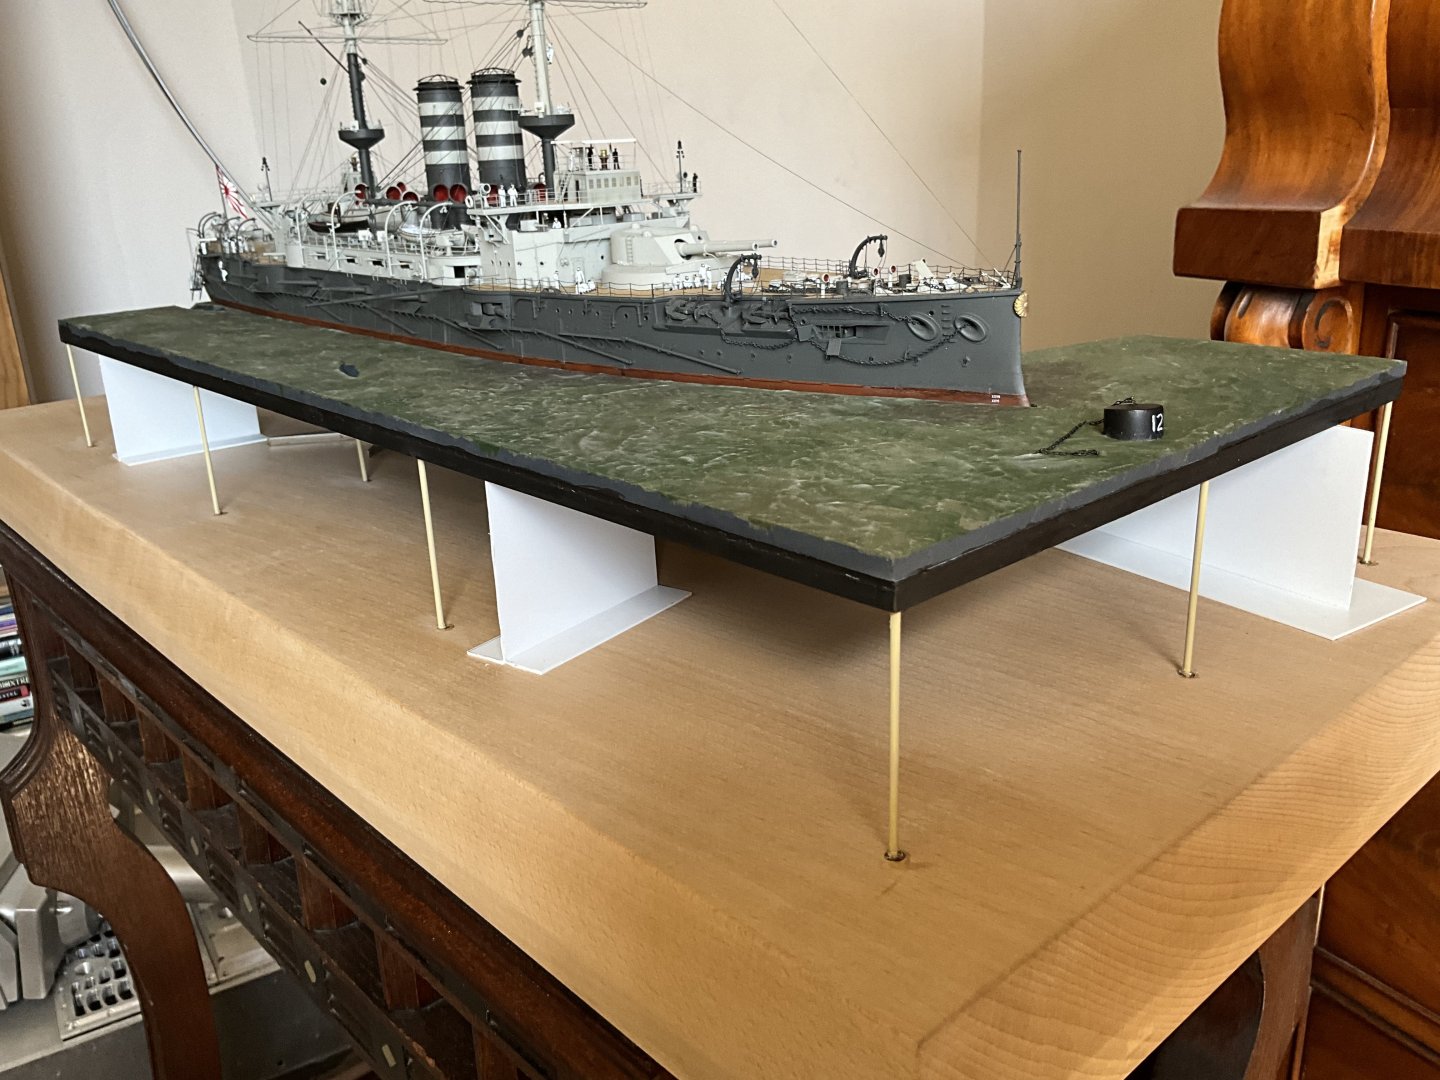
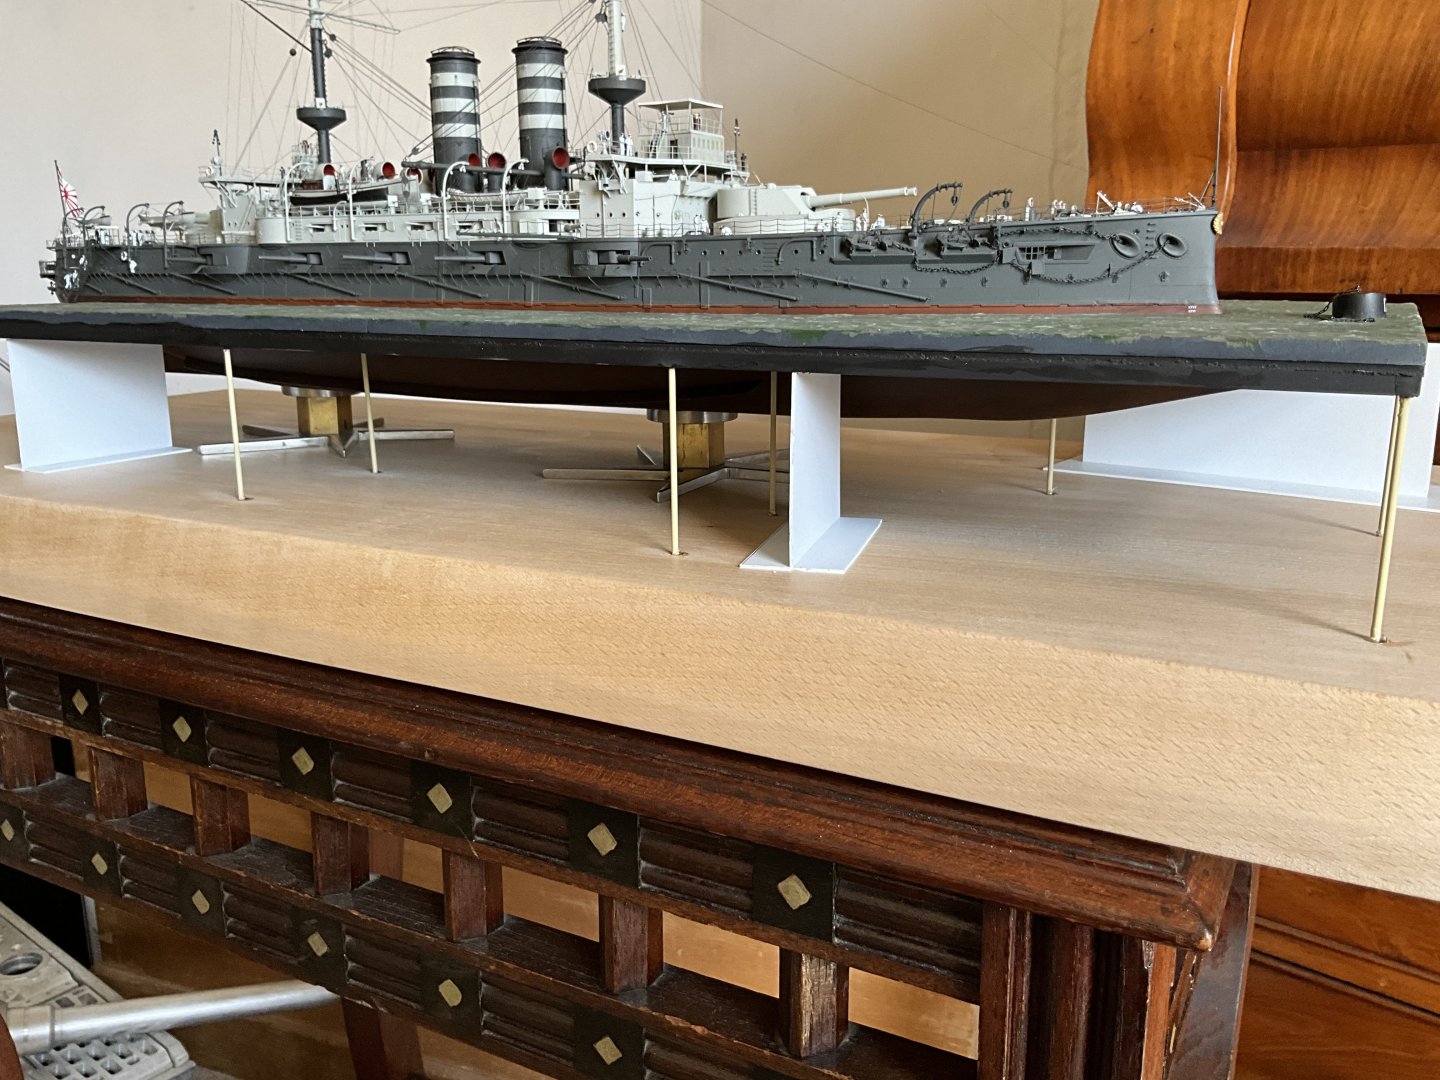
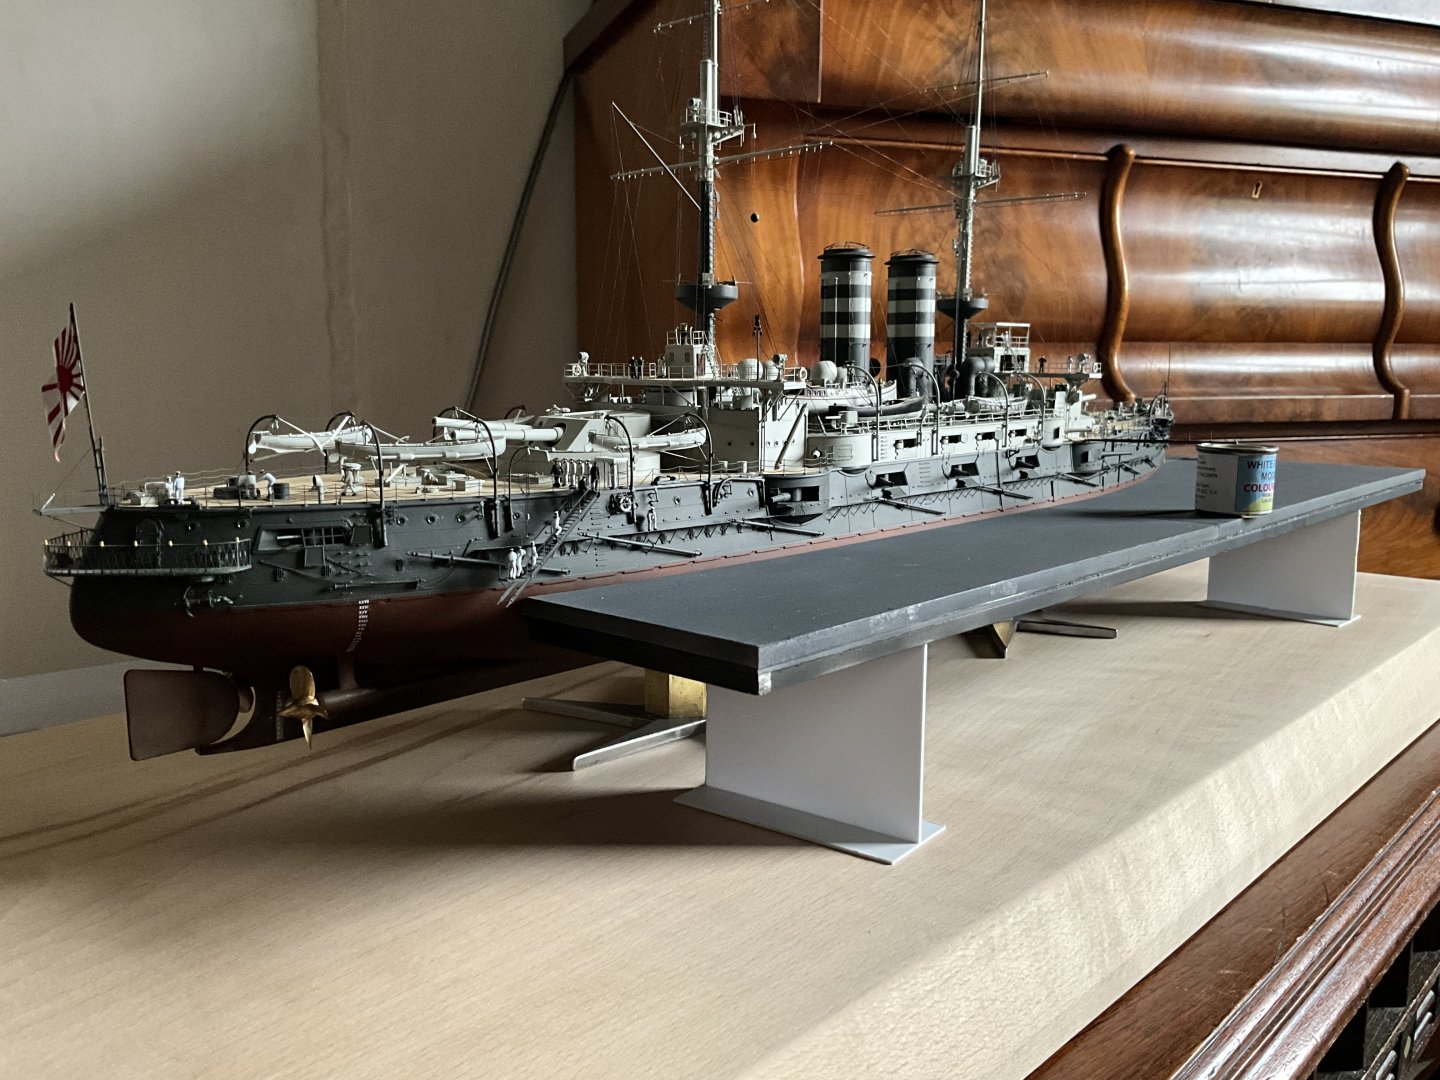
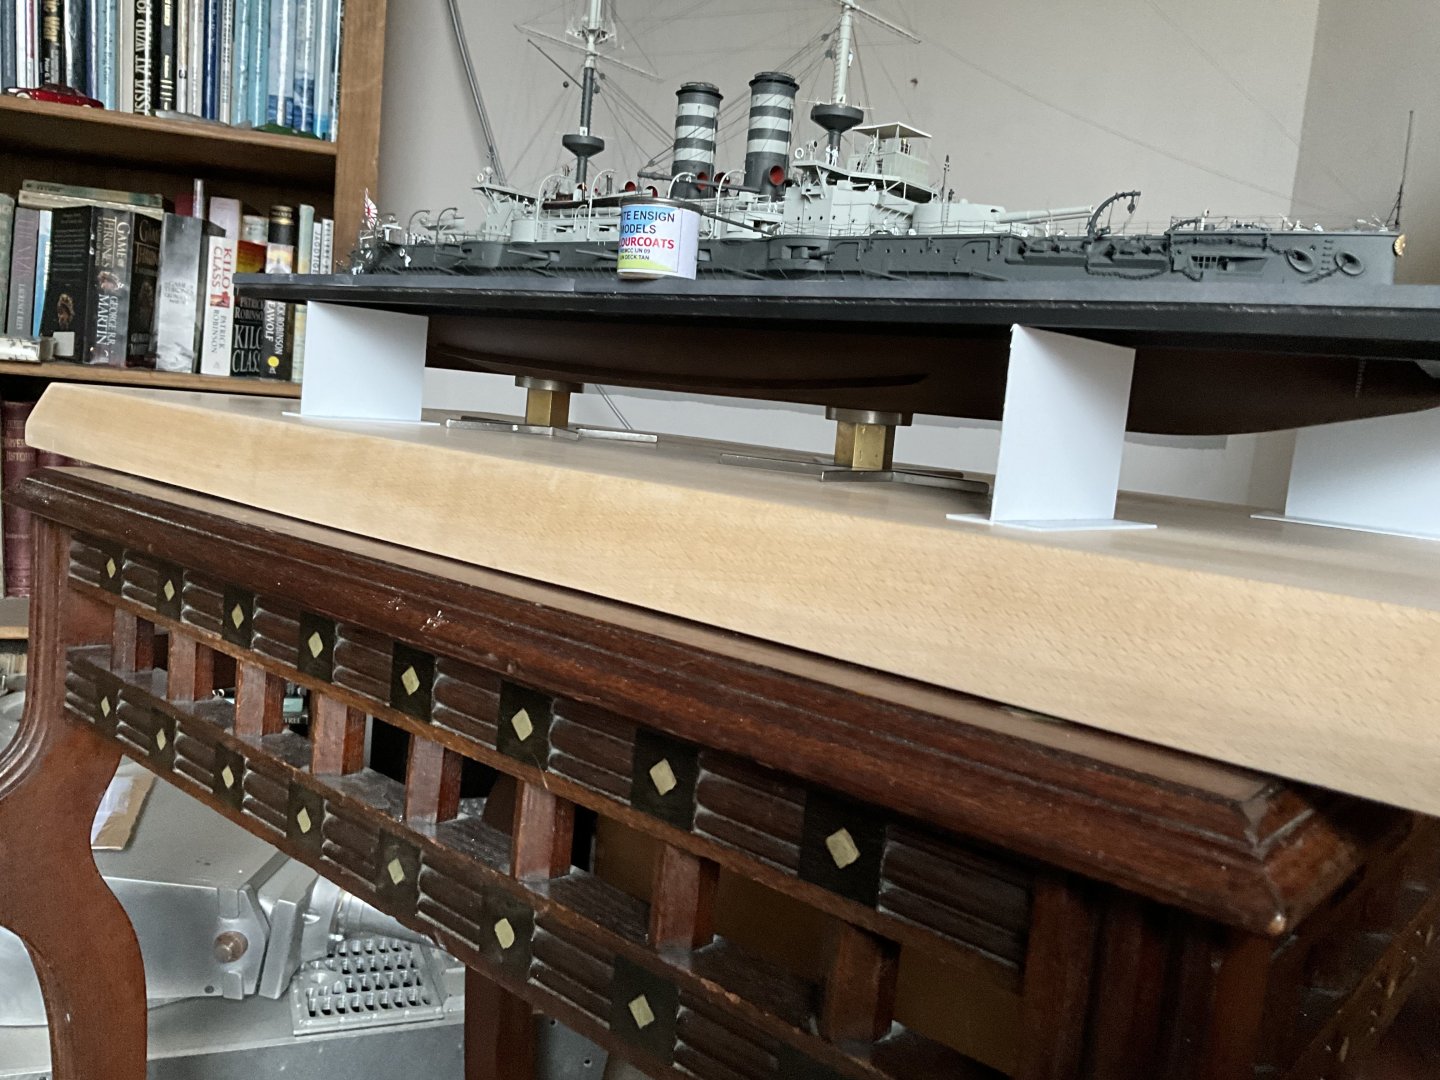
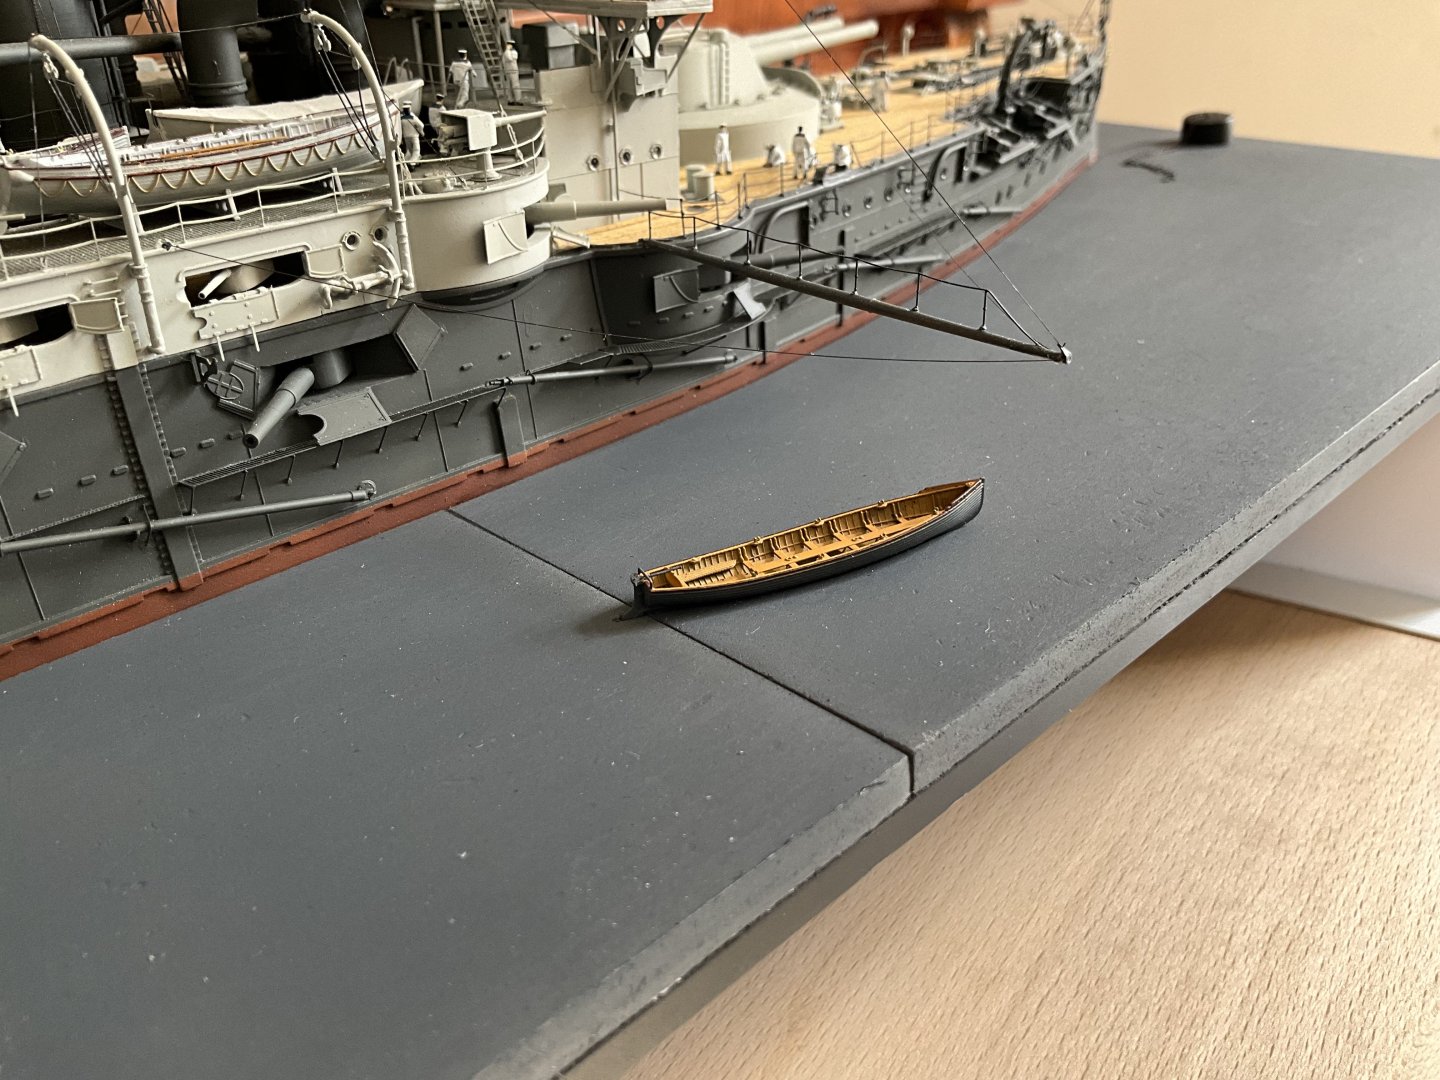
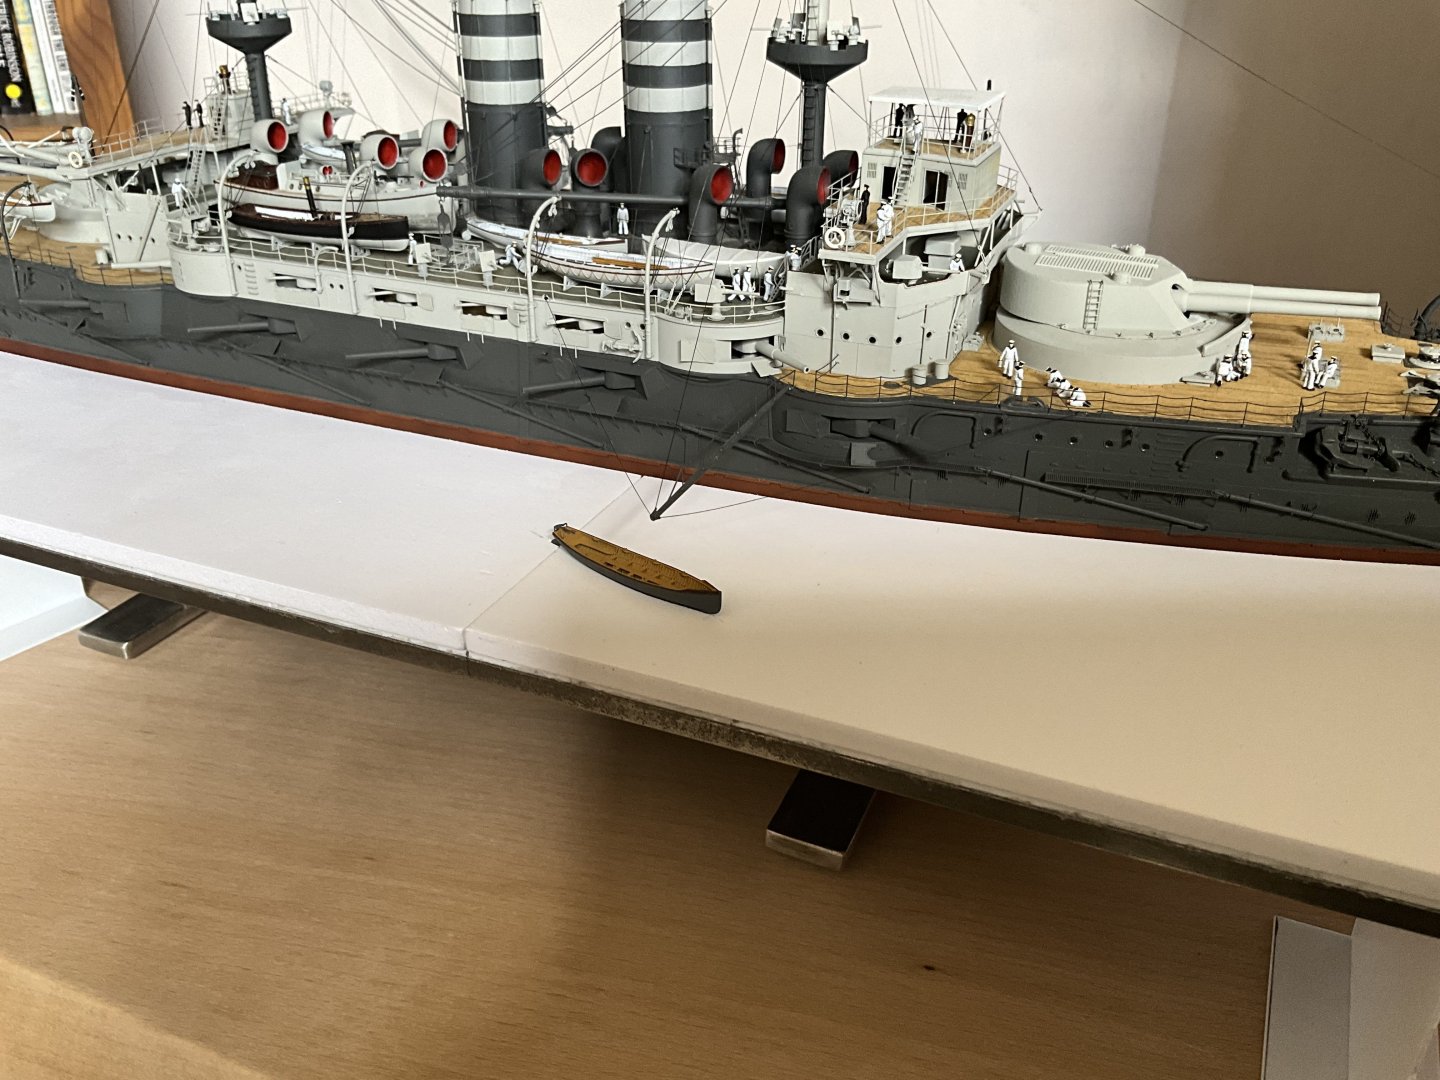
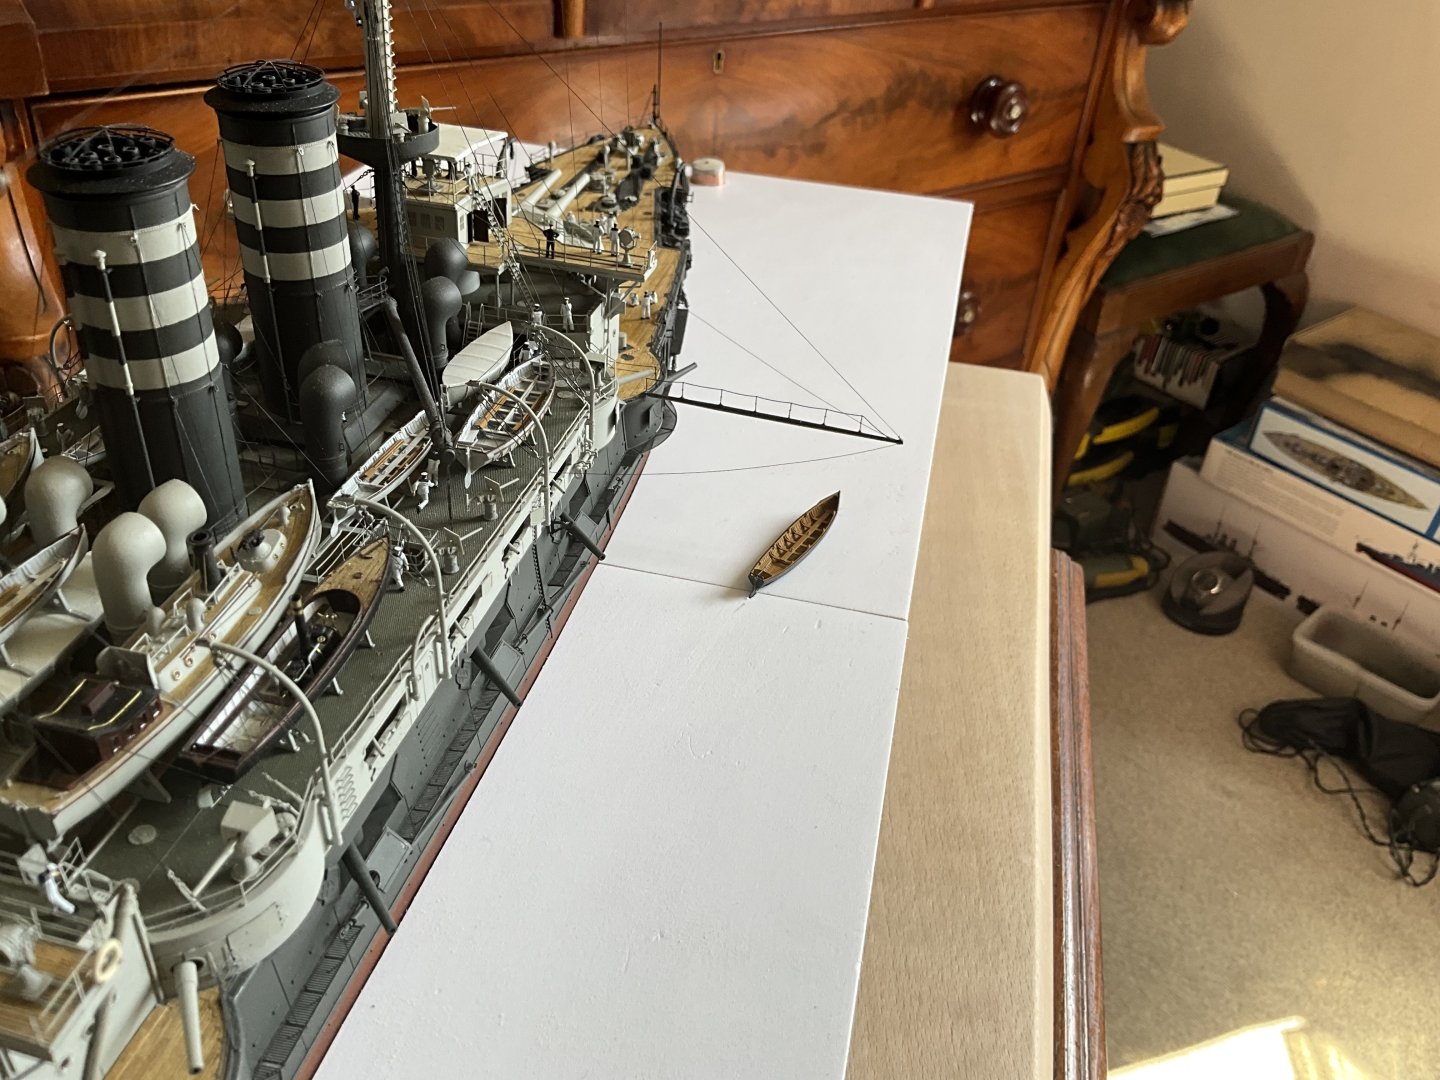
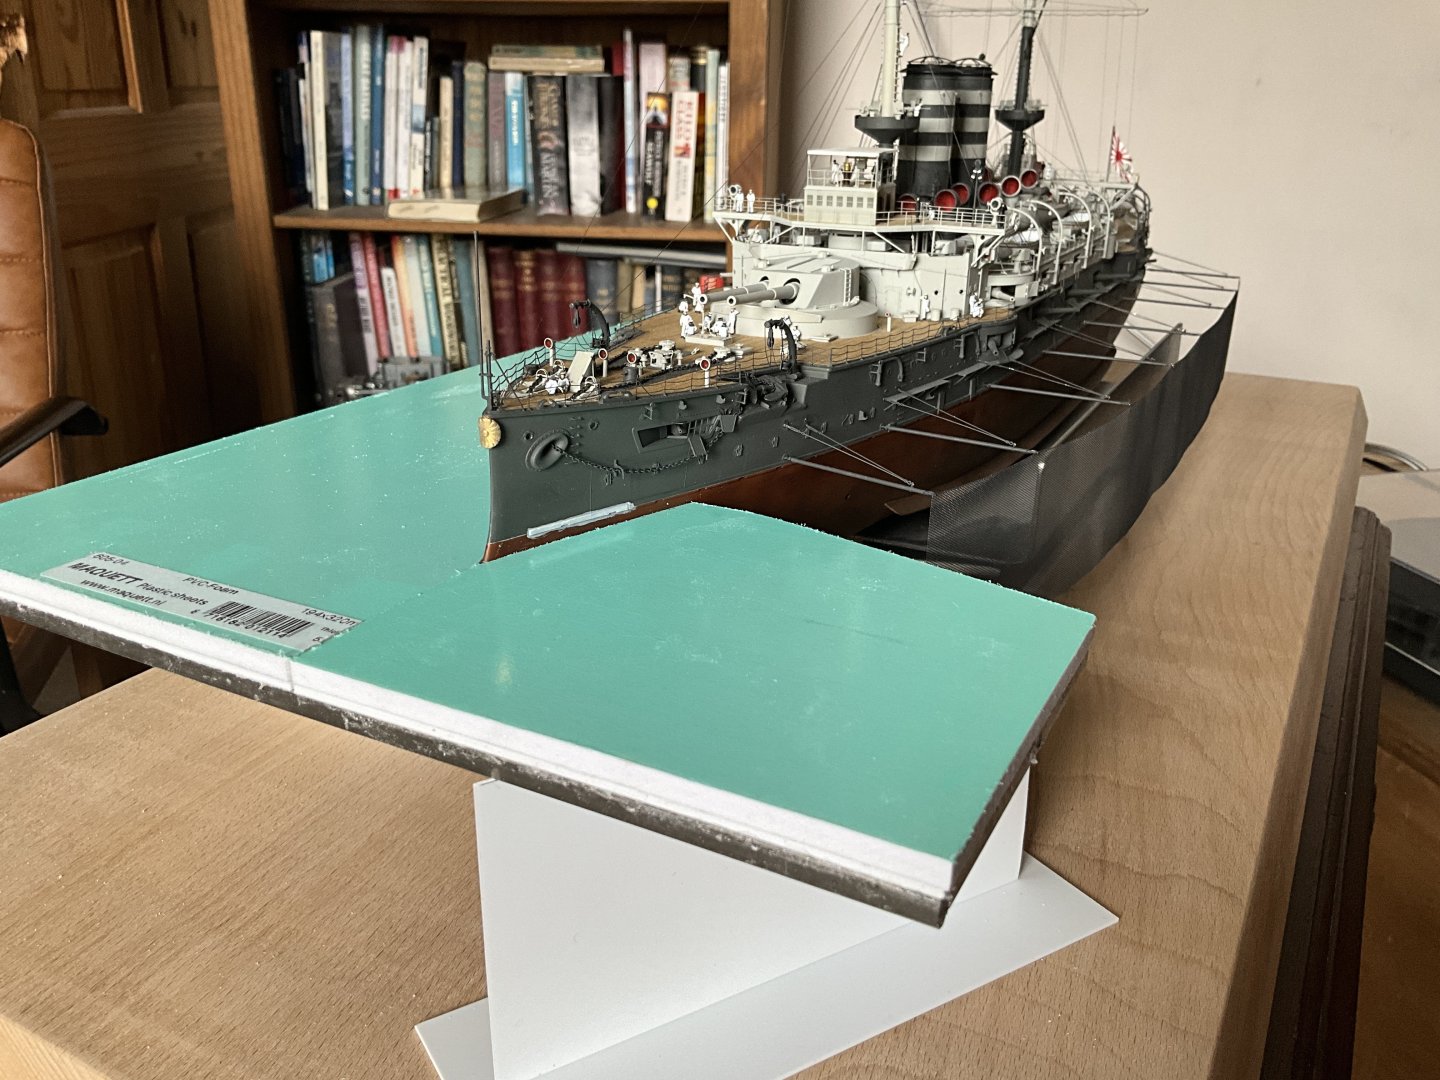
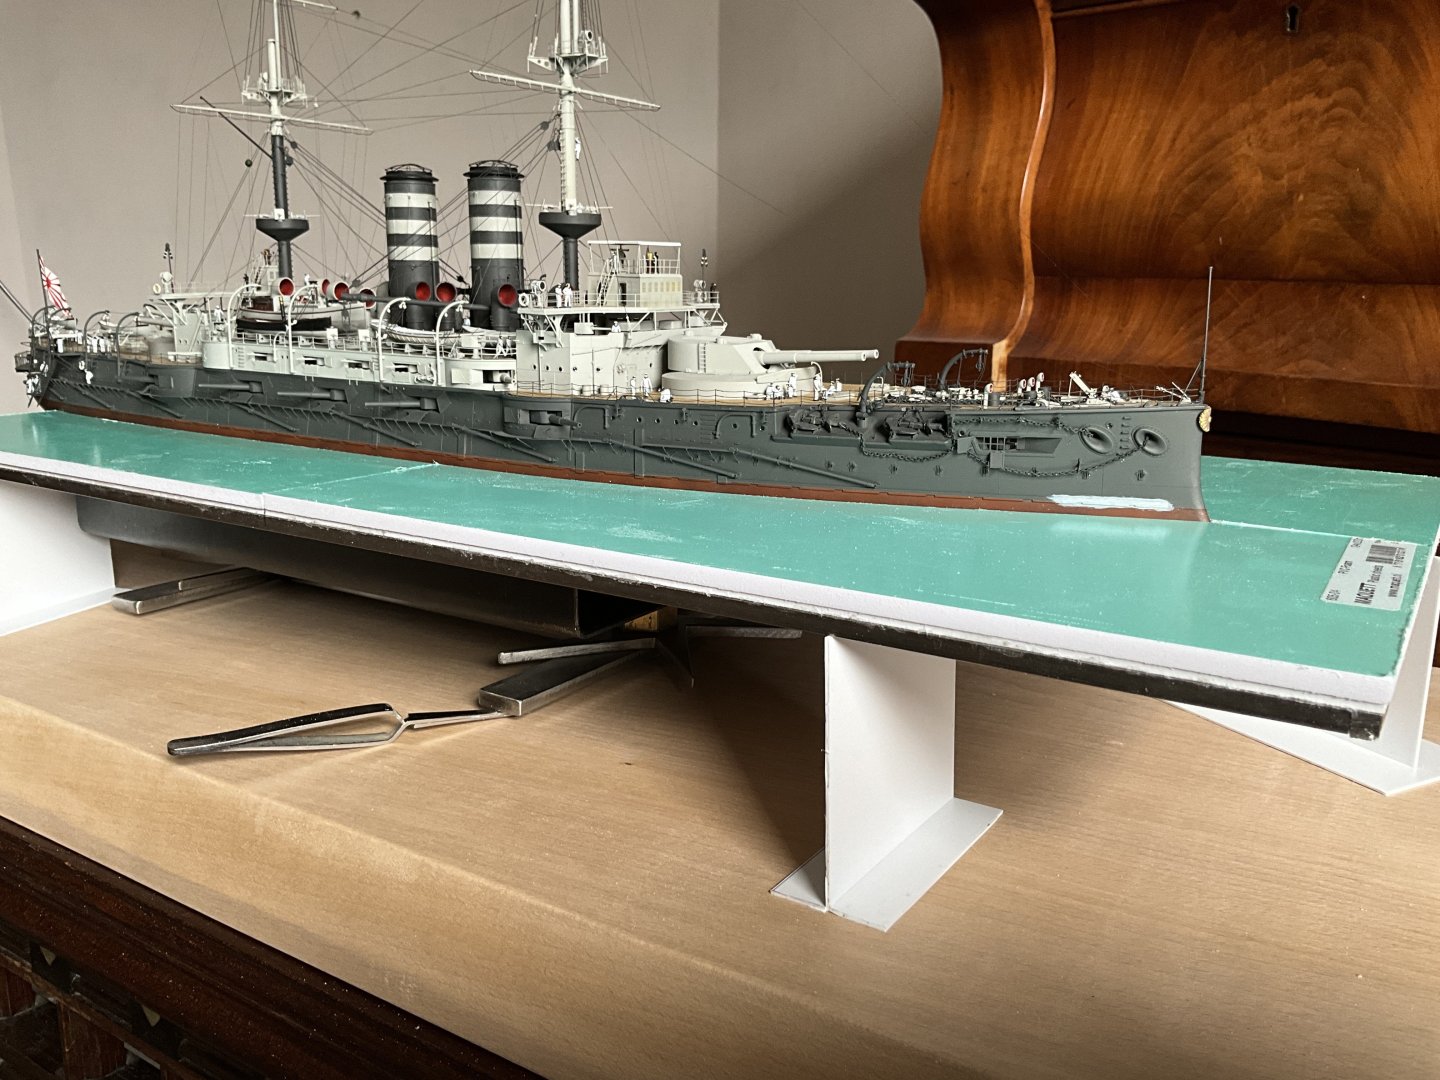
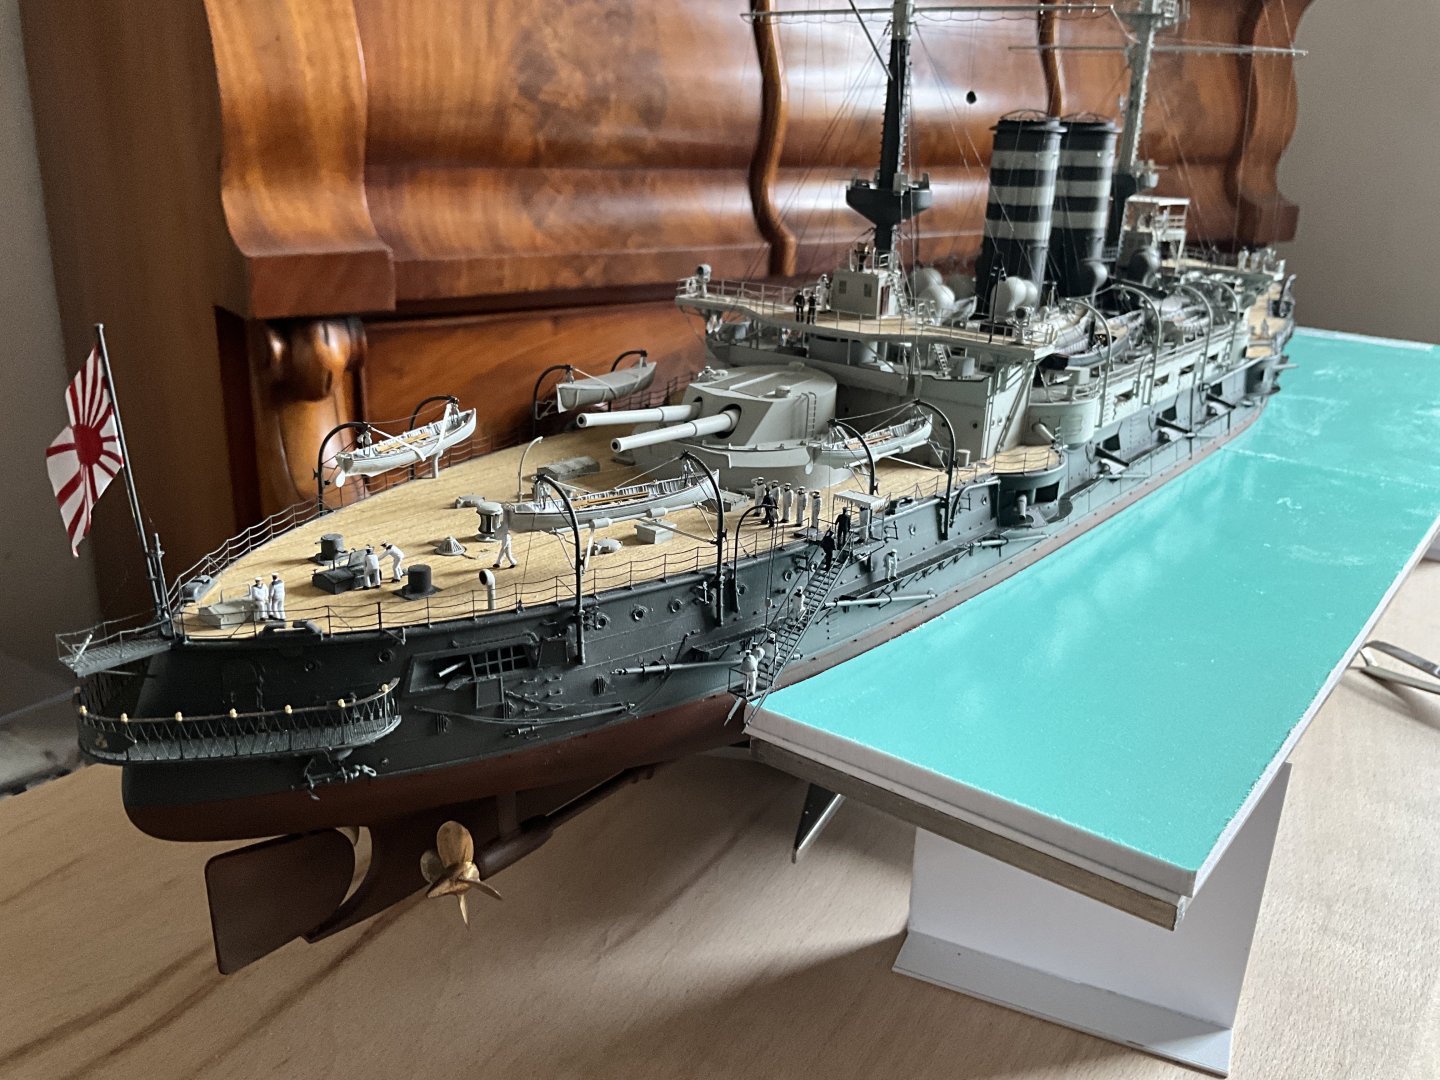
These are all photos before changing colour scheme of sea surface. Once the water base was completed it was another task to fix it to wooden base and model, this was definitely more tricky, the brass supporting tubing had to be 3mm longer for insertion int base witch meant that when l tried to carefully ease into place it was just to high to fit neatly around hull, was touching the rubbing strake around the waterline so couldn’t get a true marking for drilling for brass supports, sussed out had to slacken of model again on base and slip in 3mm packing, joy, got it though, marked around the supports carefully with pencil and removed everything so l could drill the base for brass tubes 3mm deep, yip then it was Gorilla glue around supports and in holes in base then carefully ease back in place without breaking anything, once in position had then to remove 3mm packing that was holding model higher, almost got it right but had to slacken model on base to line up for all pins to fall into holes, then nip up model, that was the tricky bit, not the curve to side of hull, sure you’ll agree 😂

-
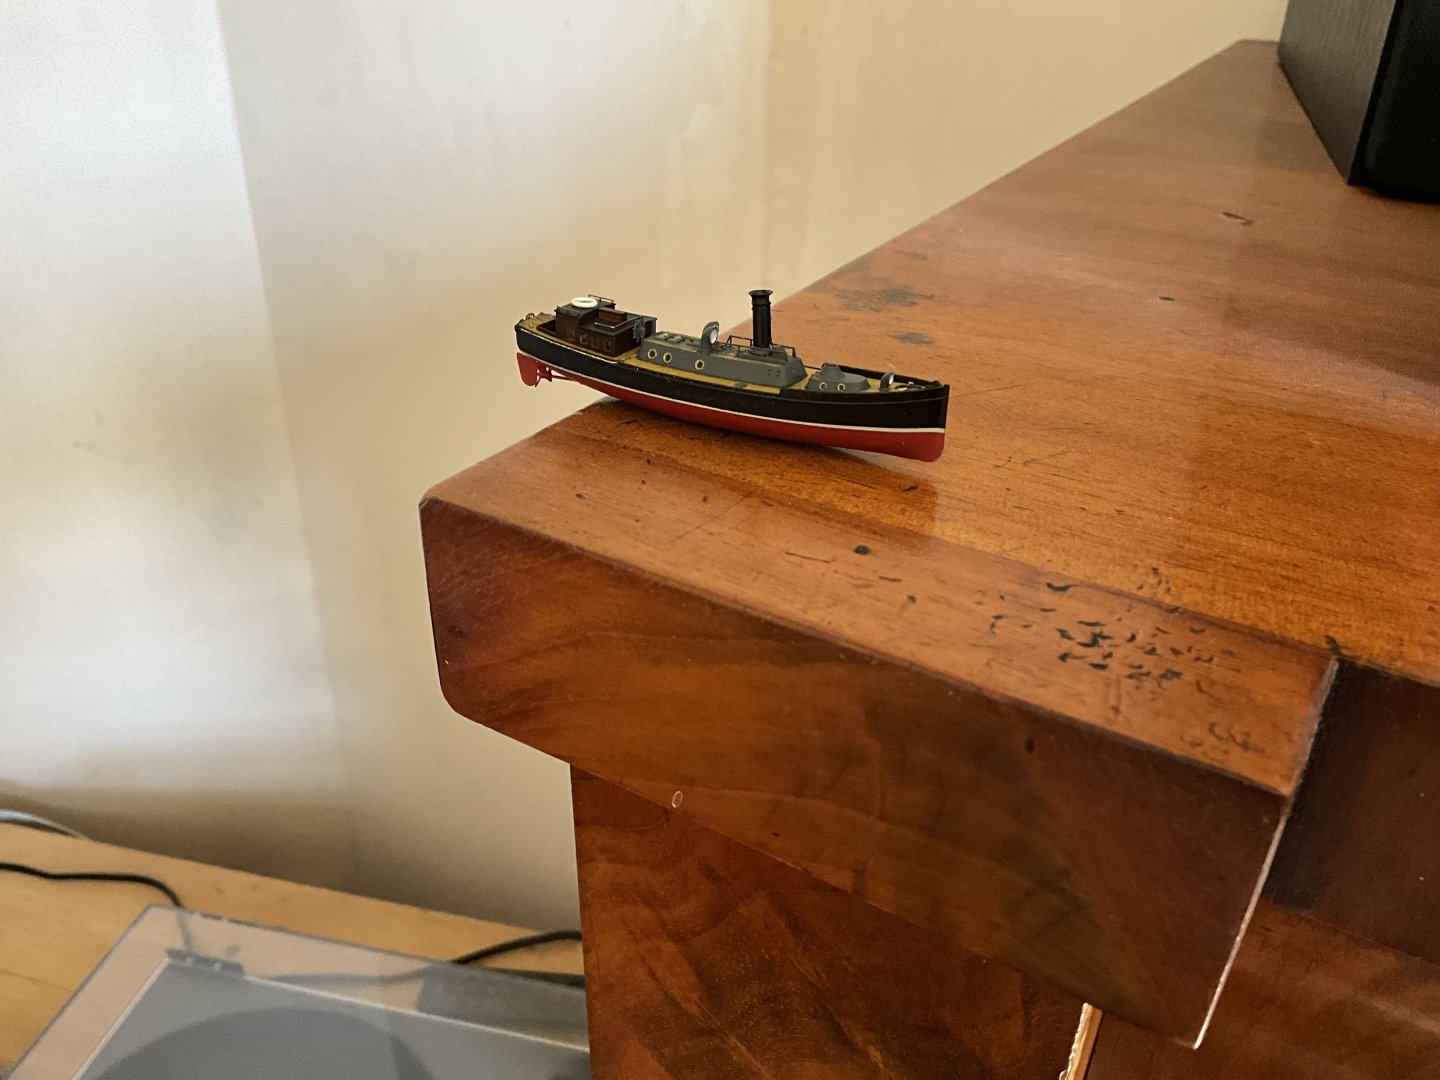
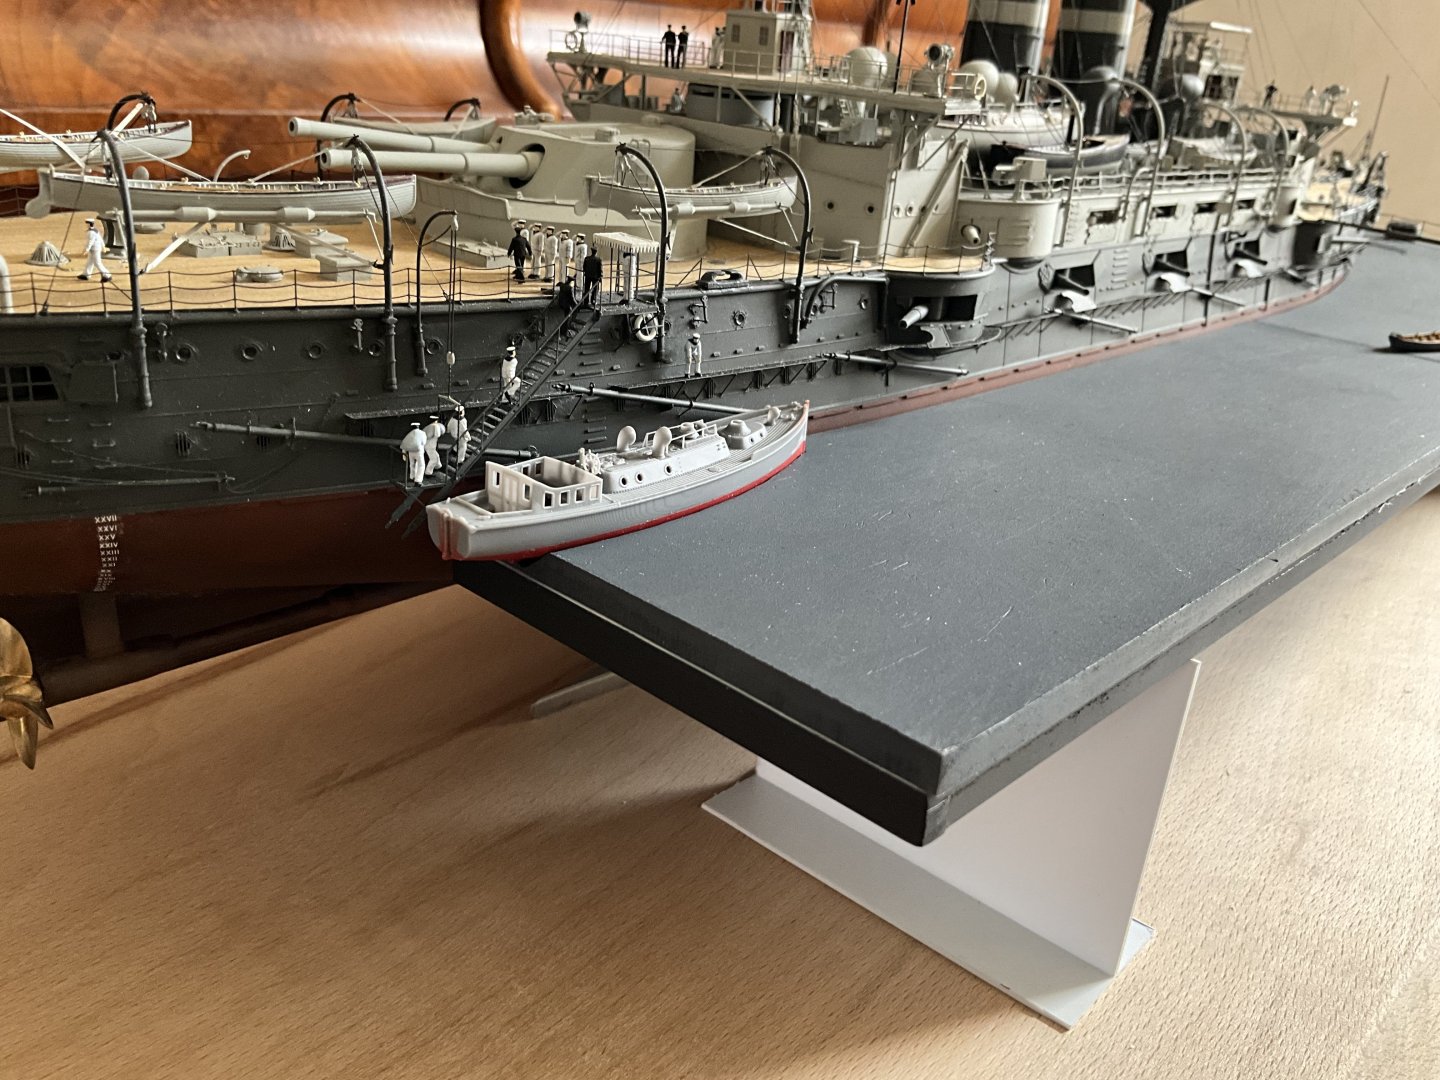
Everything seemed to be coming at same time regarding deliveries, fifty foot boat more figures and other things, can’t even mind. Decided to try and alter the fifty foot boat by removing the weather shielding in front of helm and cutting away and altering rear cabin, had a small book l purchased on these boats so used that for ideas. Was a model changing moment when l removed her from building cradle to fit her to wooden base, all be it very carefully, boy was l glad to see this in place. The boy at bow for anchorage, piece of 10 mm Copper piping, was about right size for me.


-
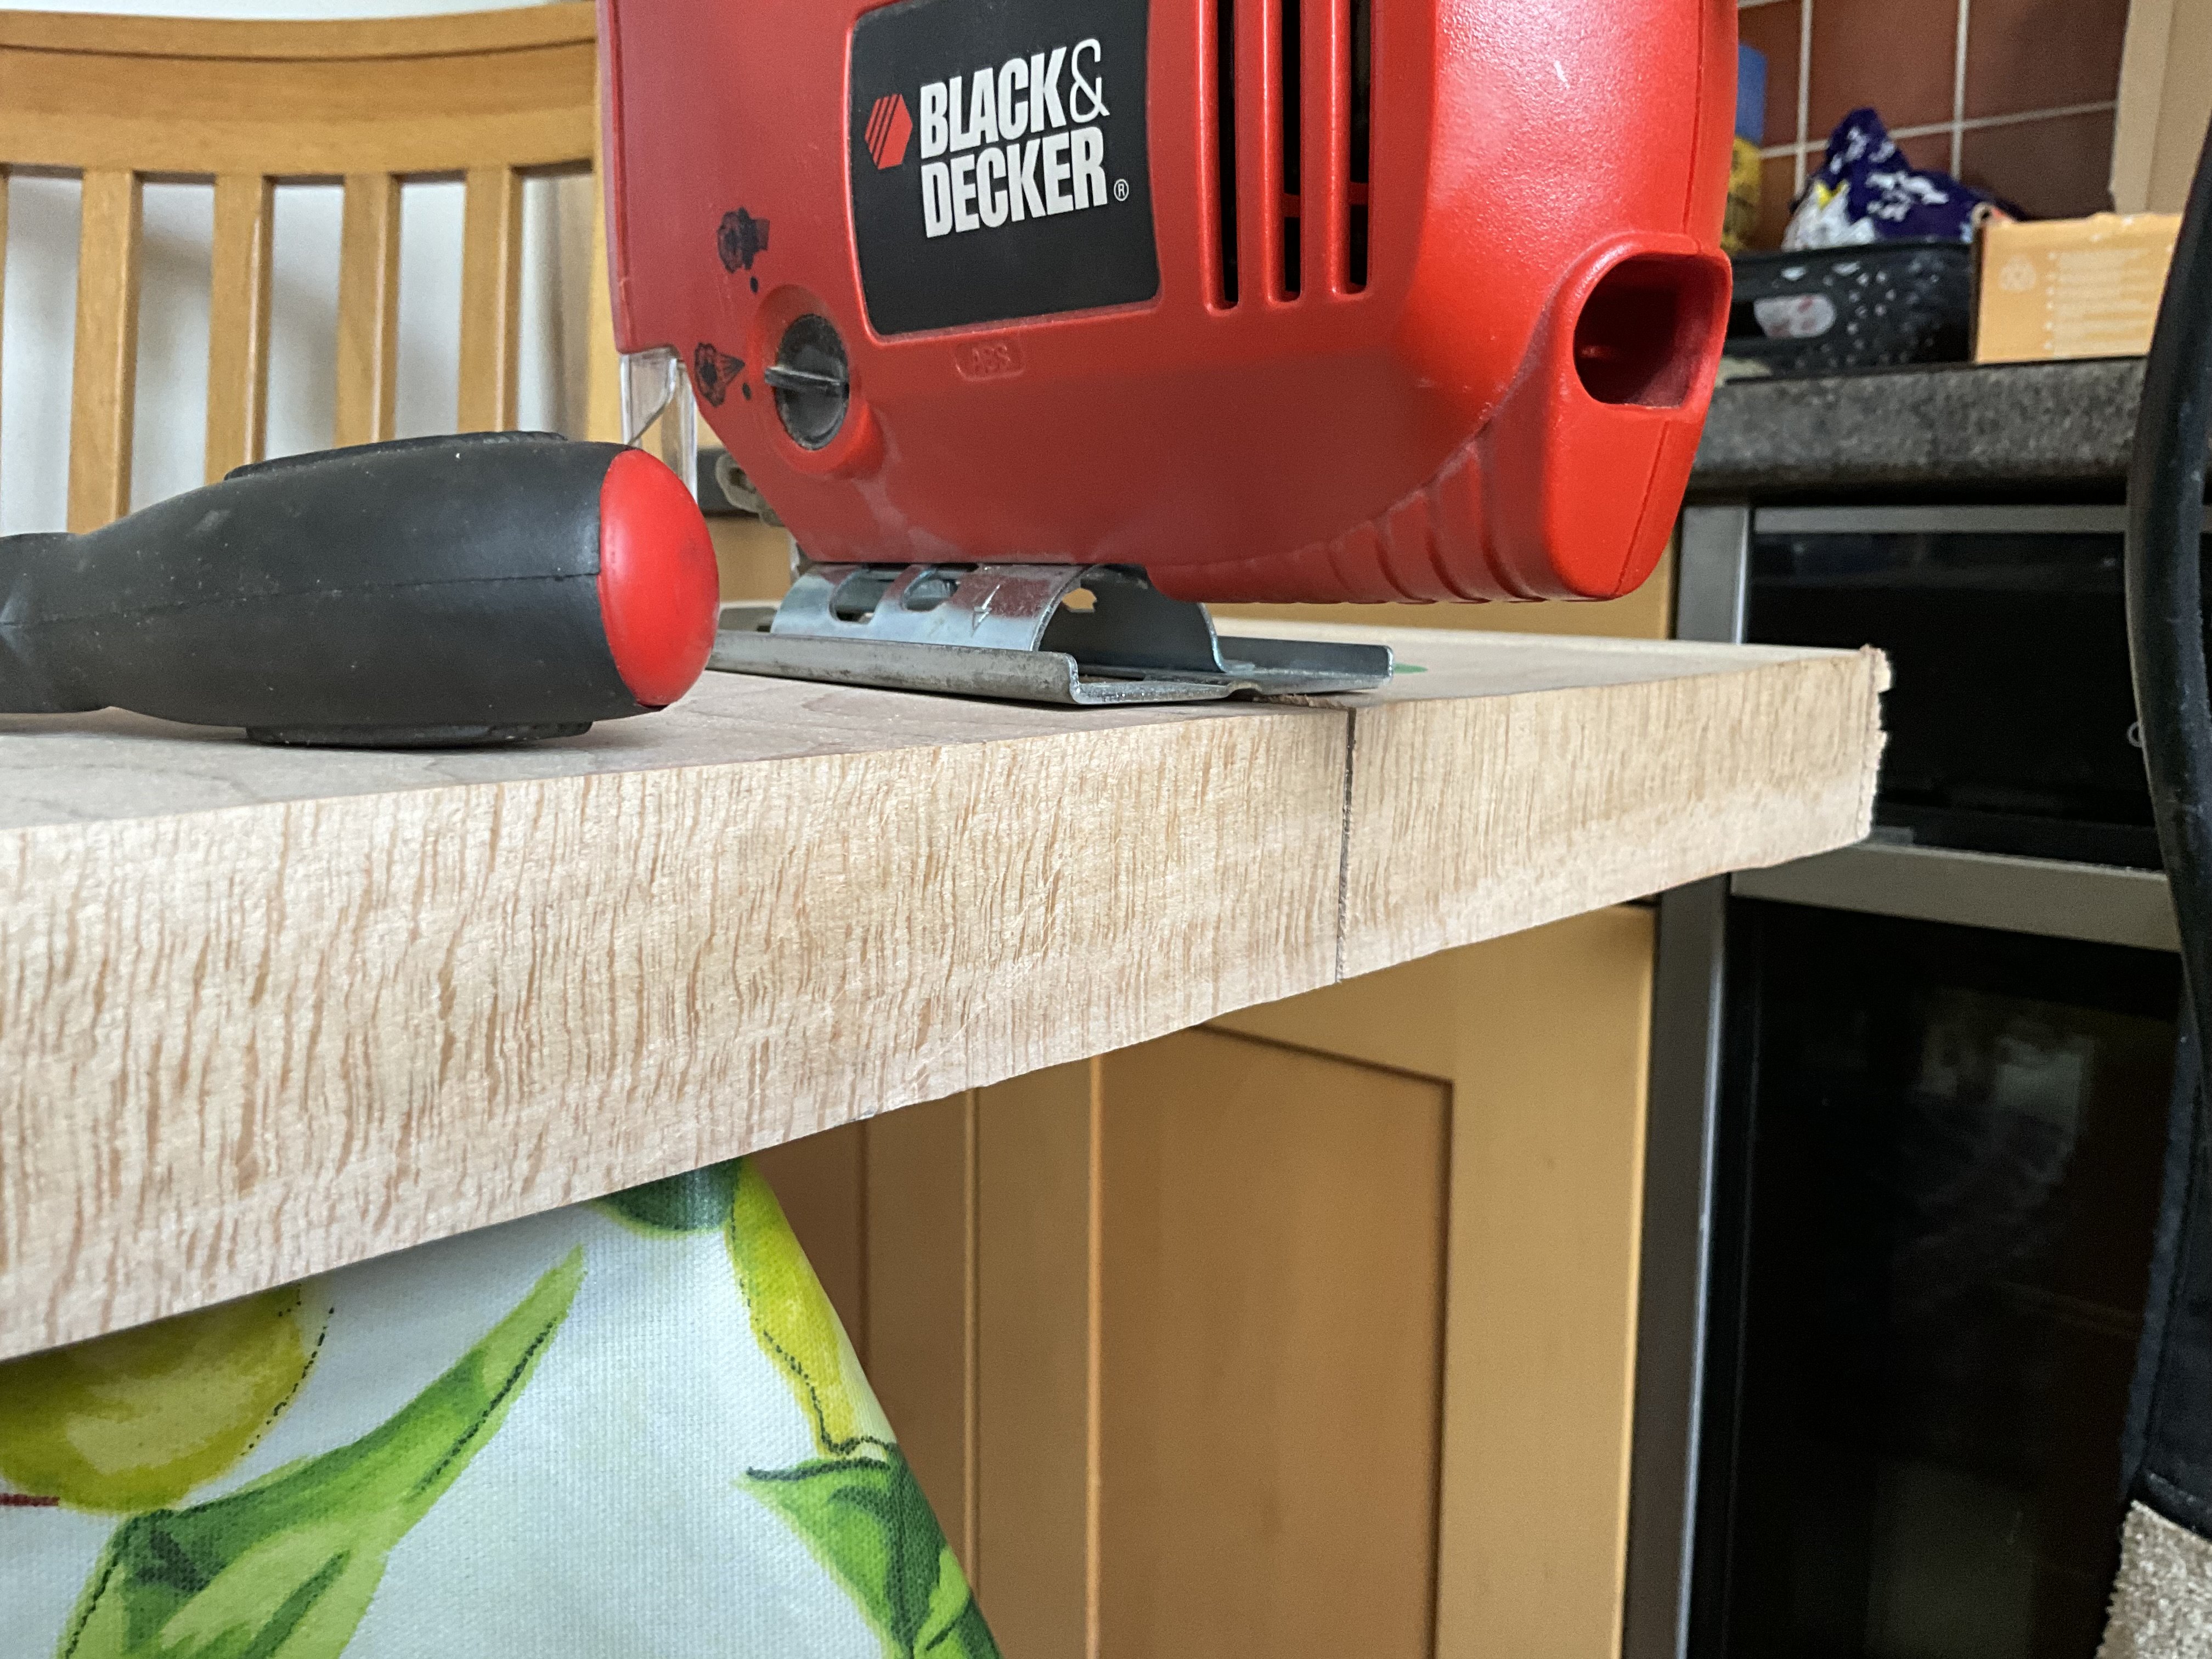
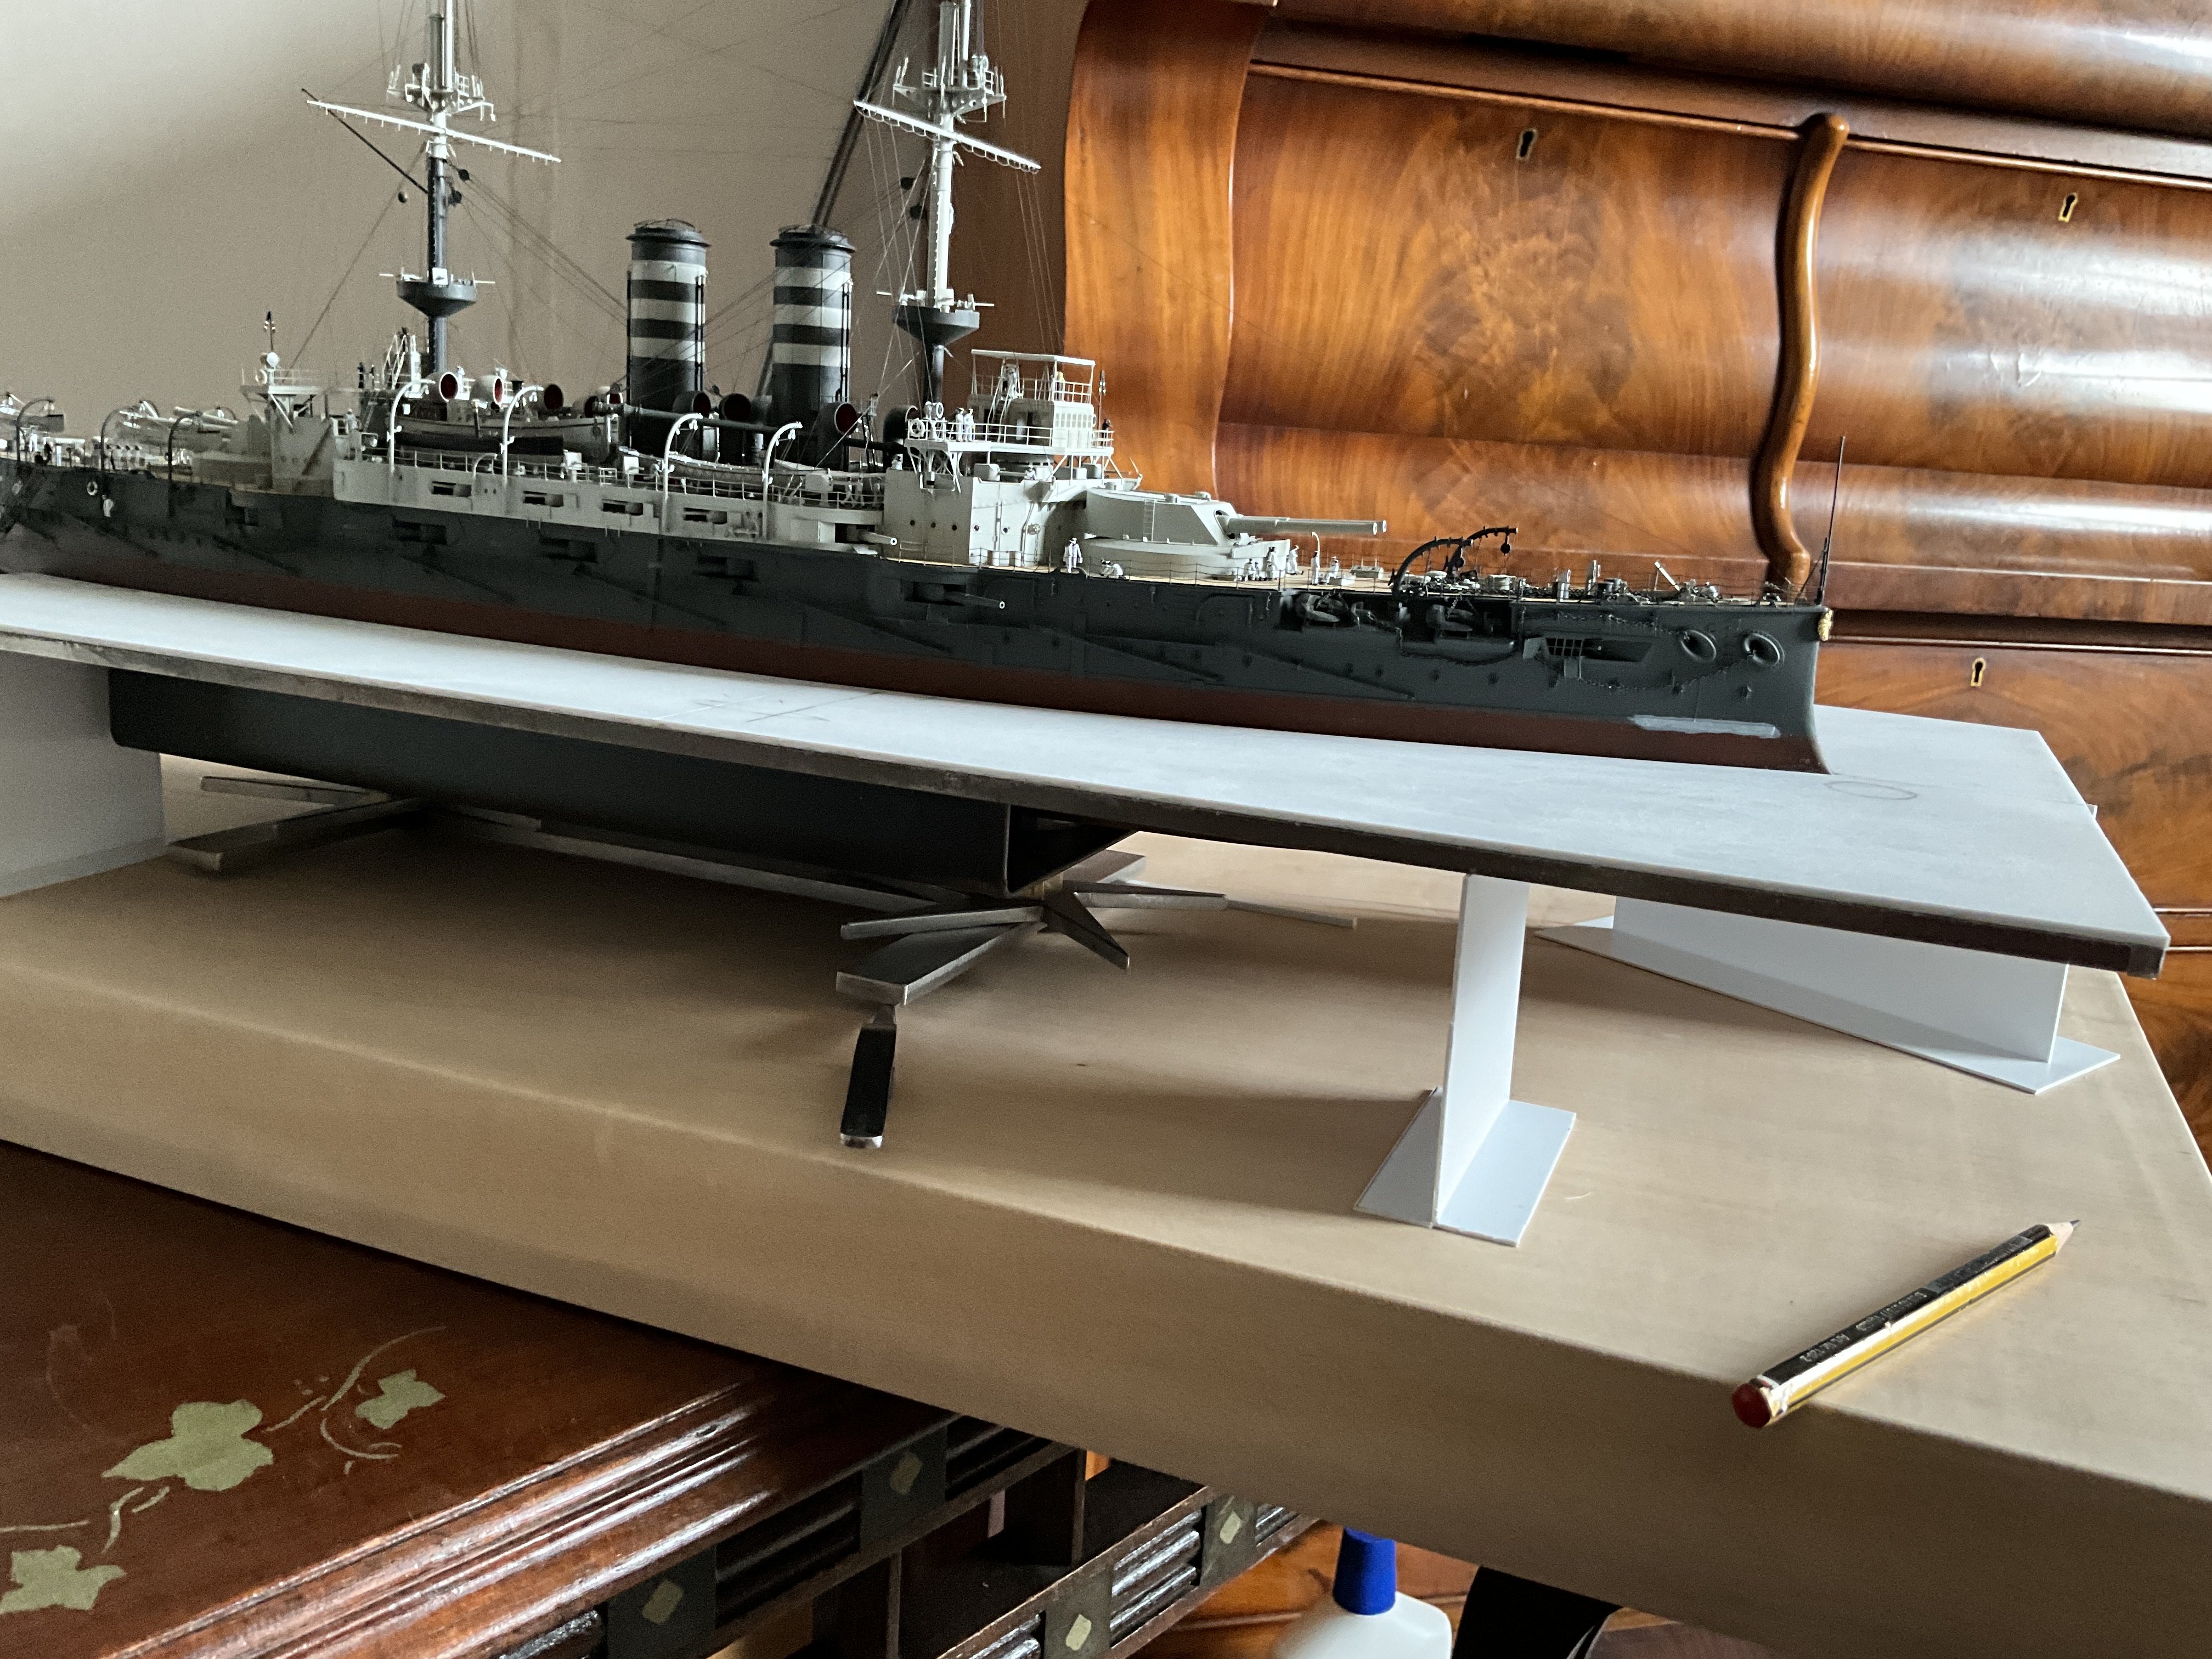
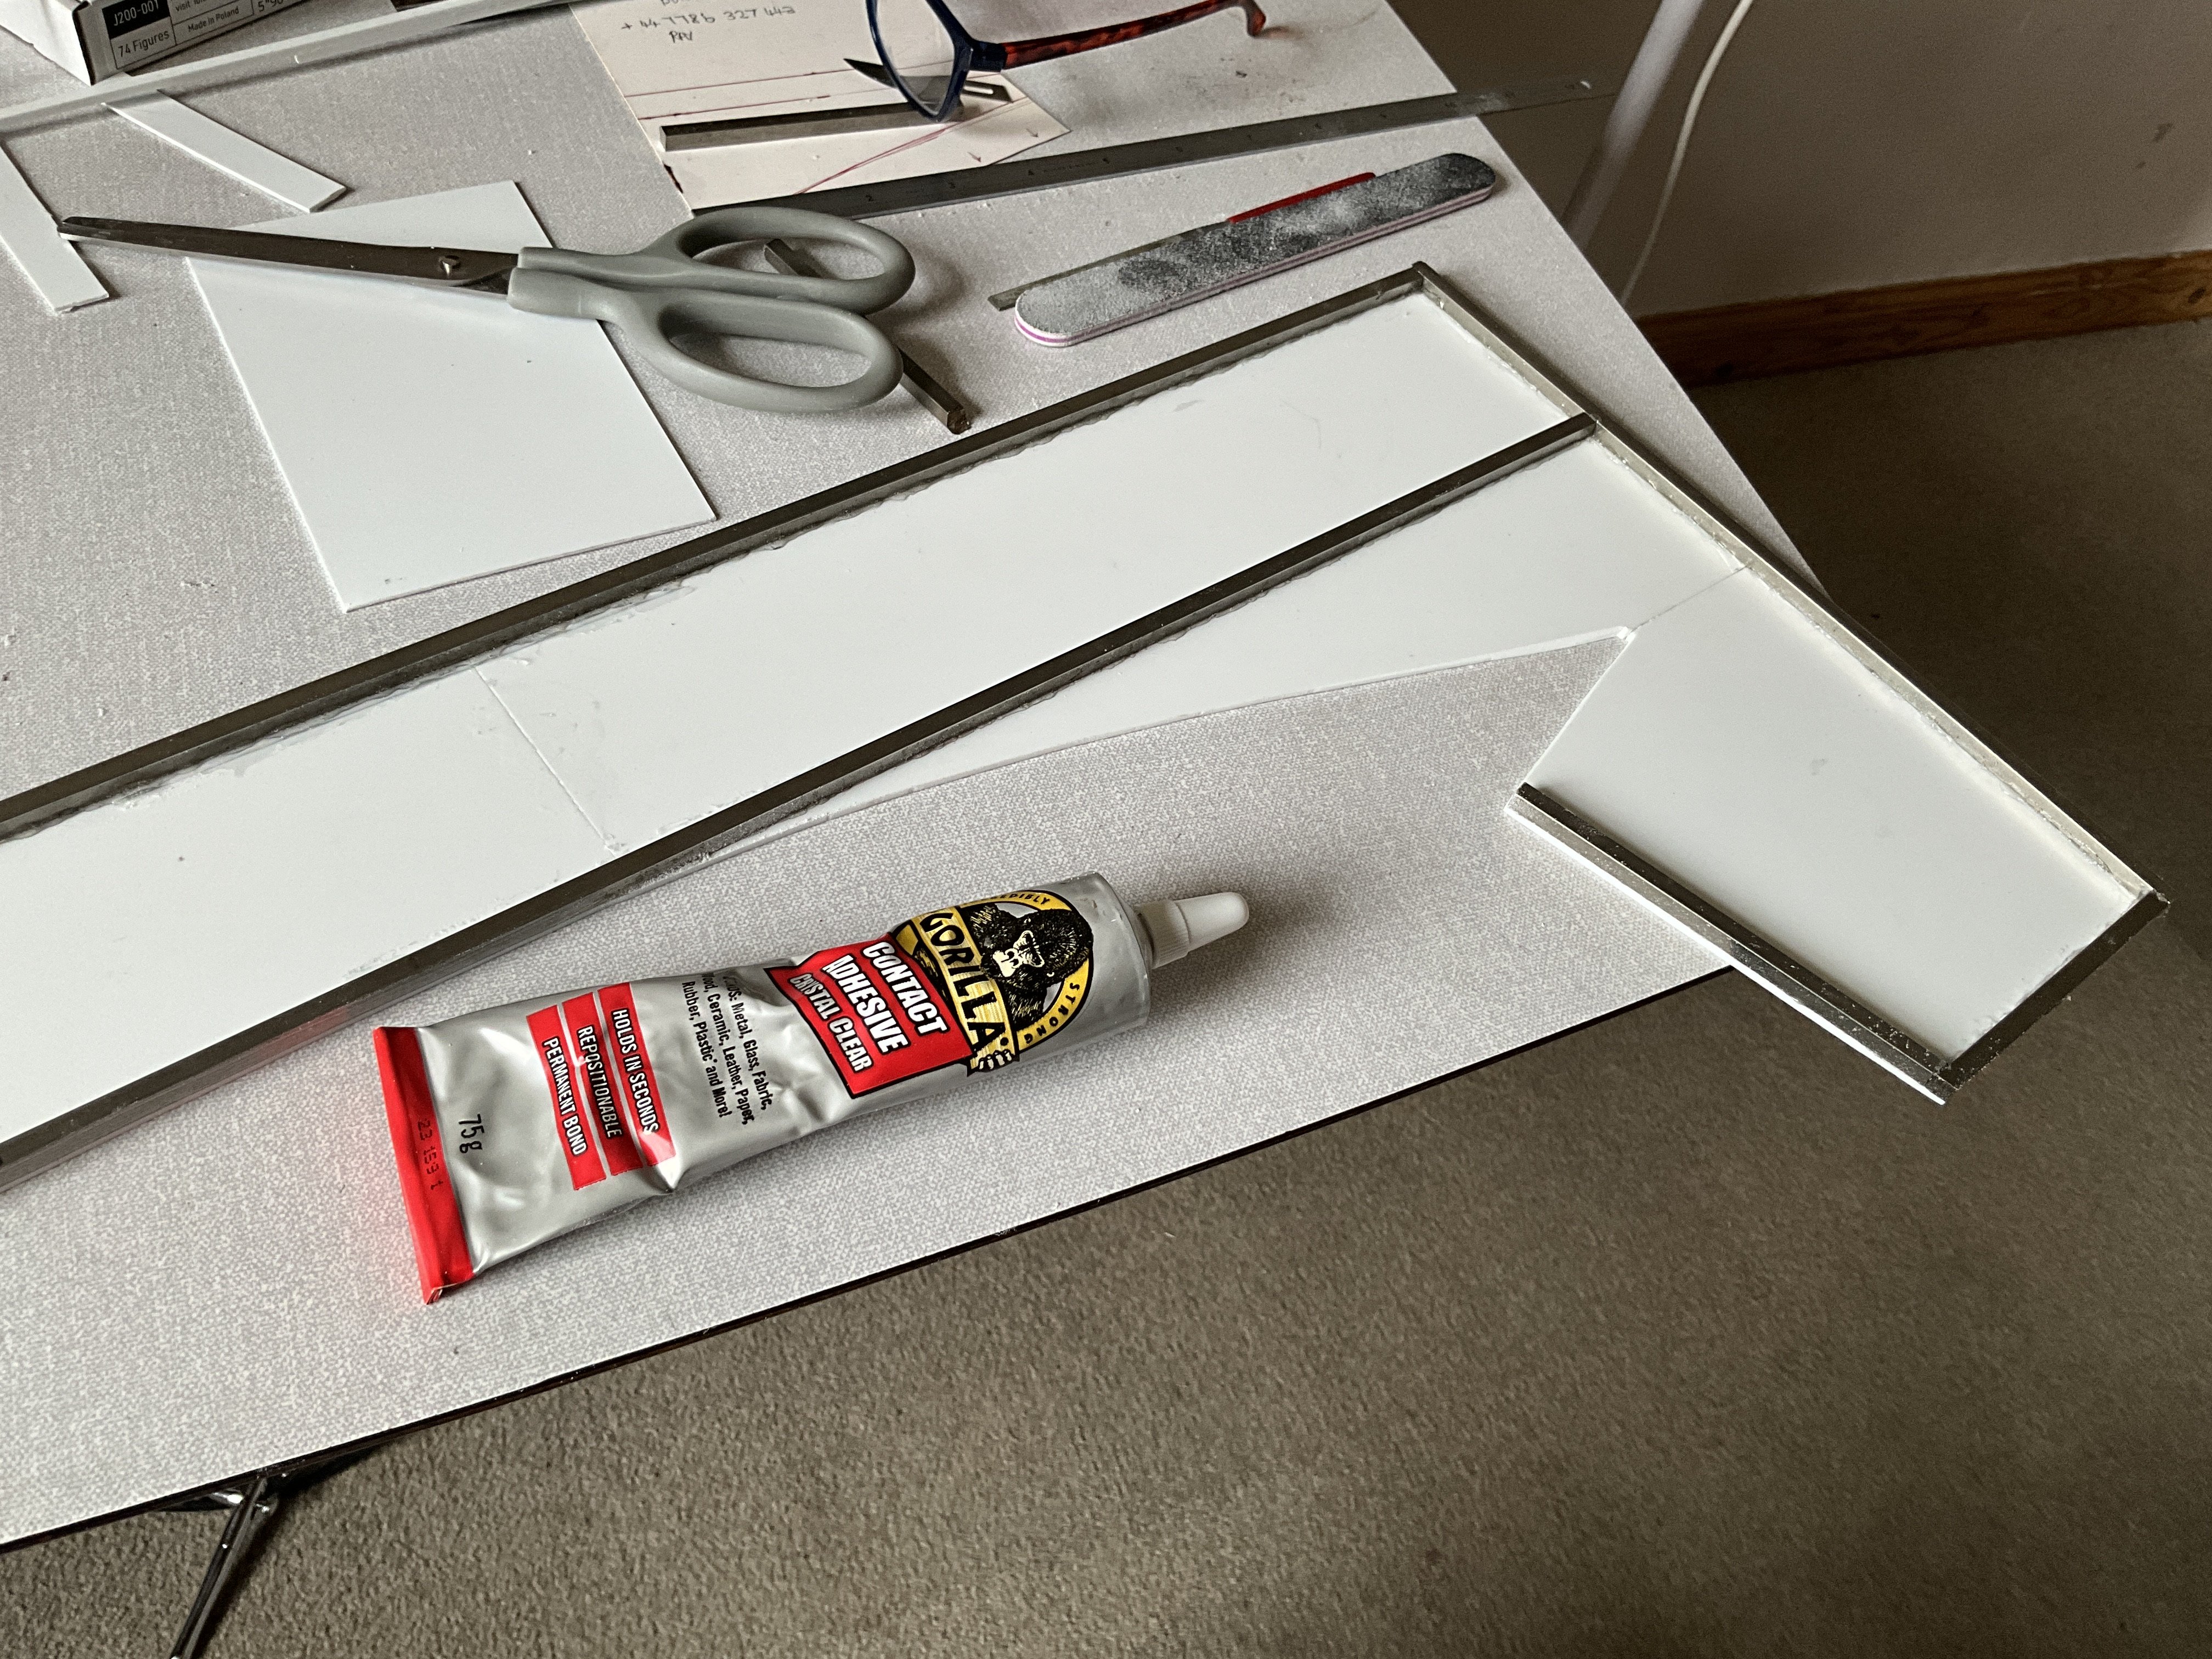
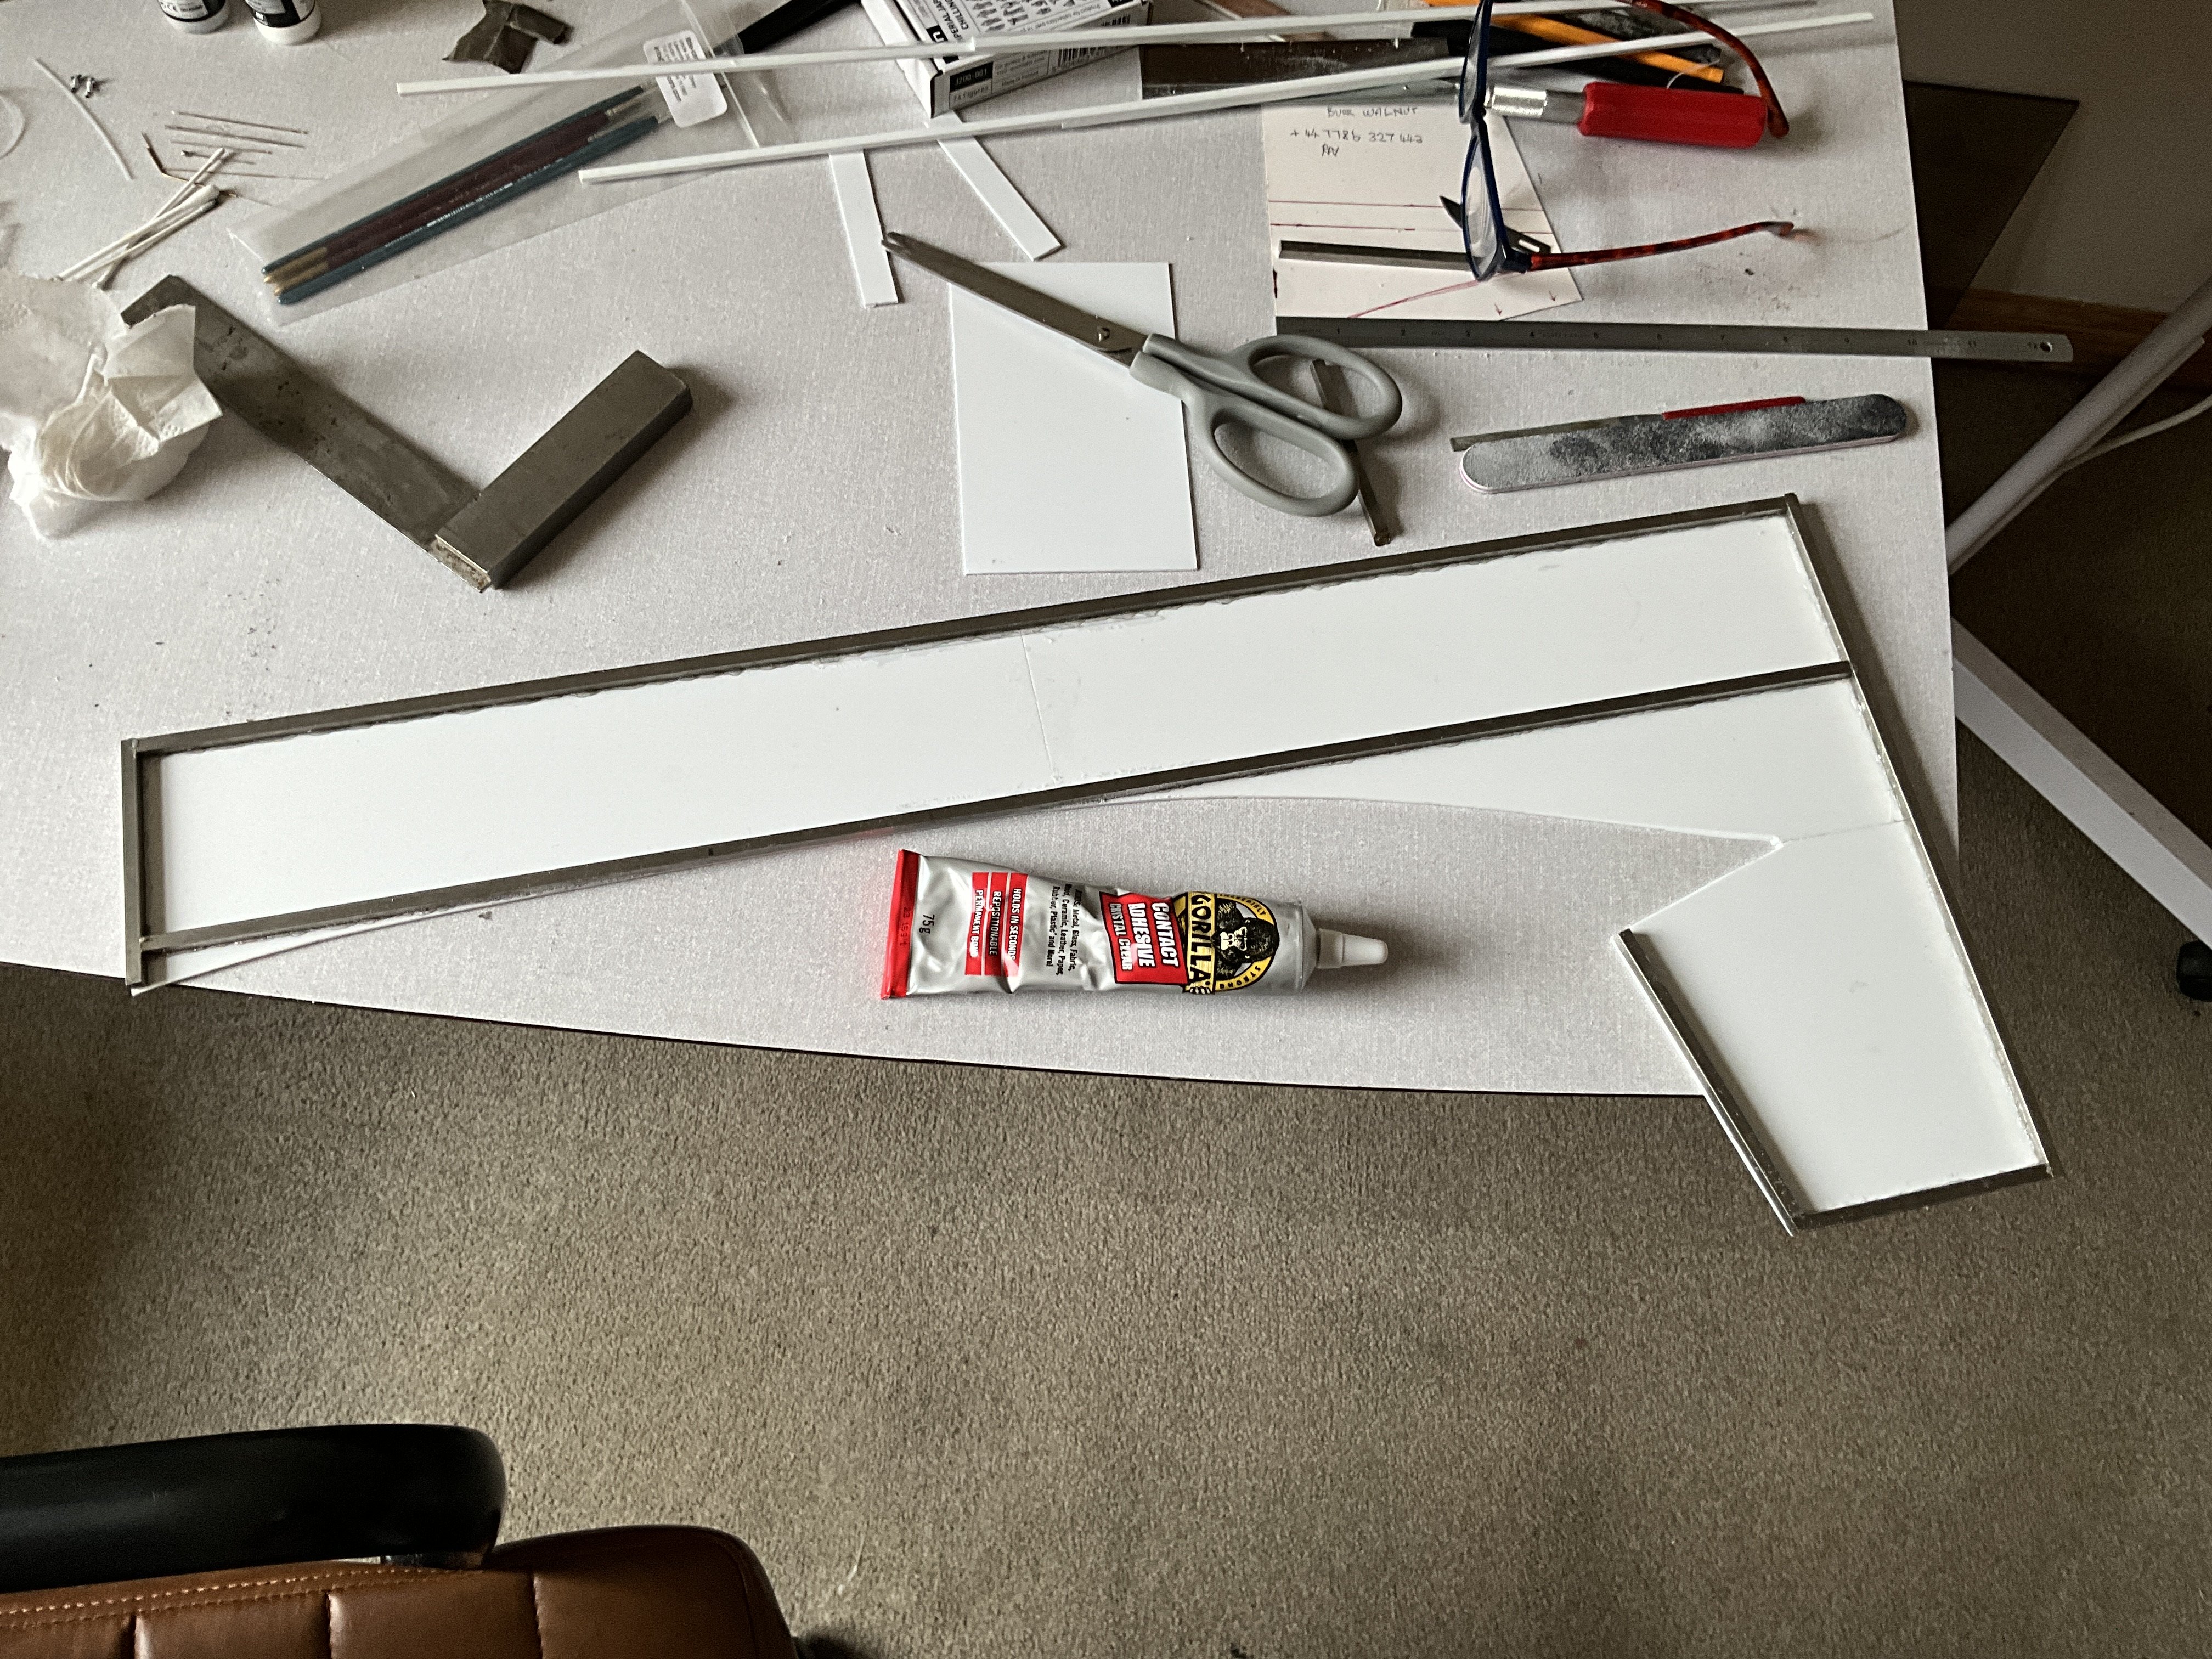
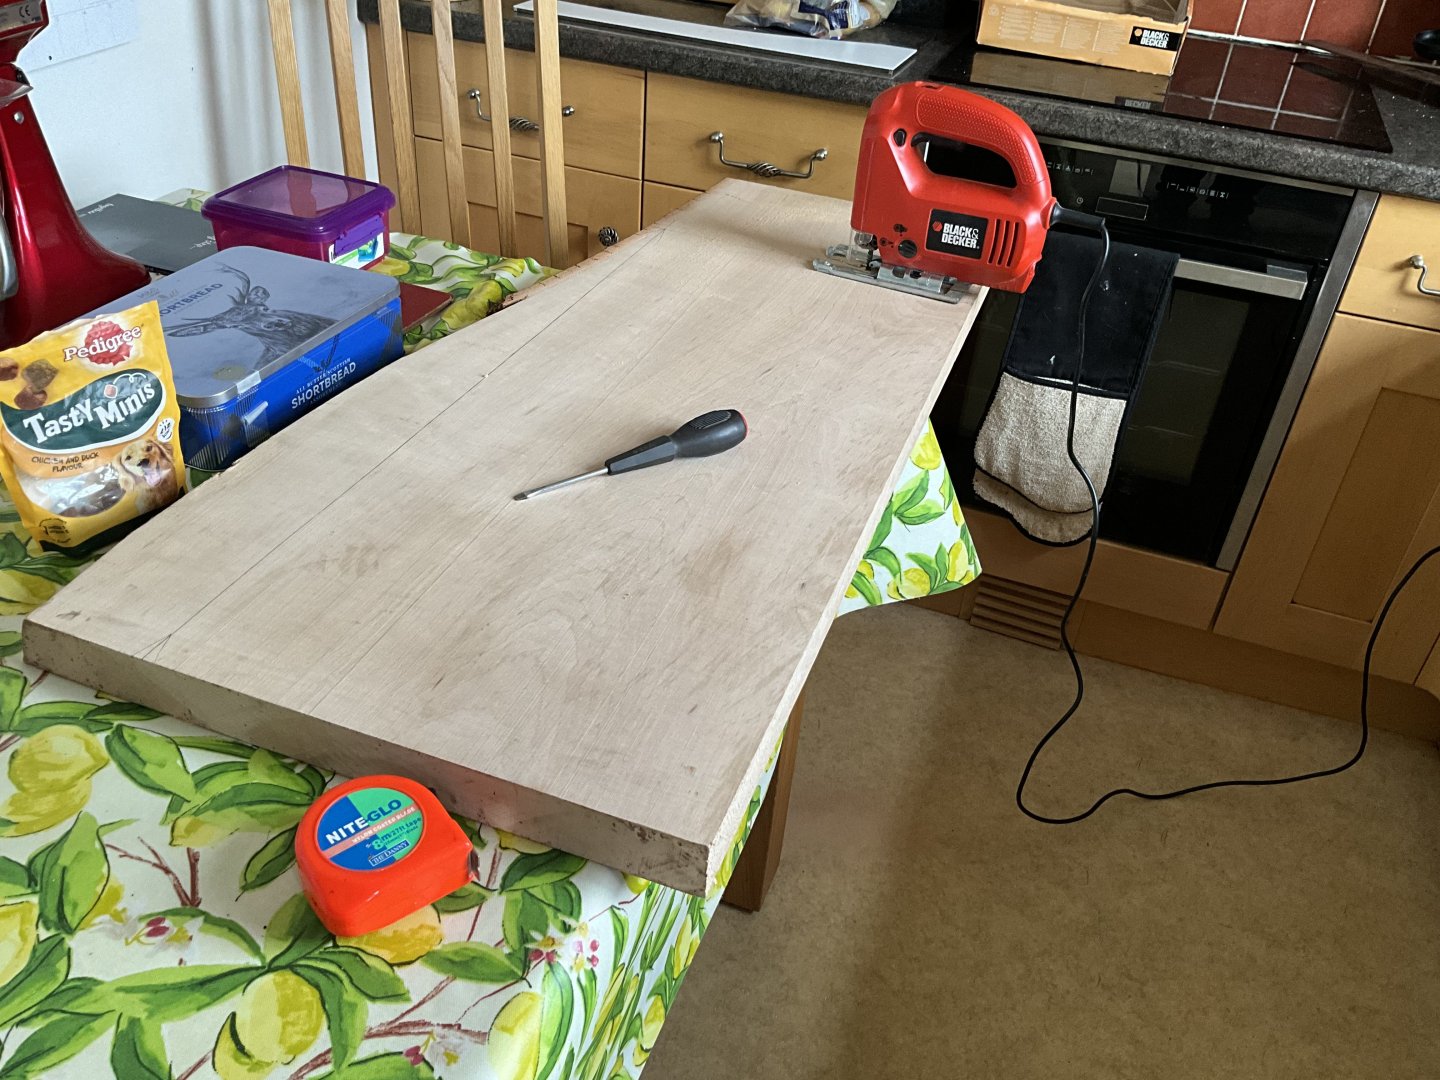
Think at this stage l also started to mark and drill metal frame underneath for brass tubing supports, then started playing with liqitex, cut a long story short, just played around on some off cuts till l thought time to go for it, forgot to say l notched out the foam for the two boats at side of hull before doing this, again using Micro Master boats, modified the 50ft steam Pinnace to make her look different, had this thought in my head of Mikasa arriving in Japan and being fully crewed up from other ships in fleet, hence making the boats looking slightly different. Once the sea surface was dry started fitting brass tubing to metal frame, again using Gorilla glue and trying to keep them all vertical and square. Also managed to purchase a nice piece of wood for base of cabinet, beech l think it is, maybe a bit over top but l think l can get this to work, jigsaw wasn’t a happy bunny though, neither was the wife when she seen all the sawdust in kitchen 😂


-
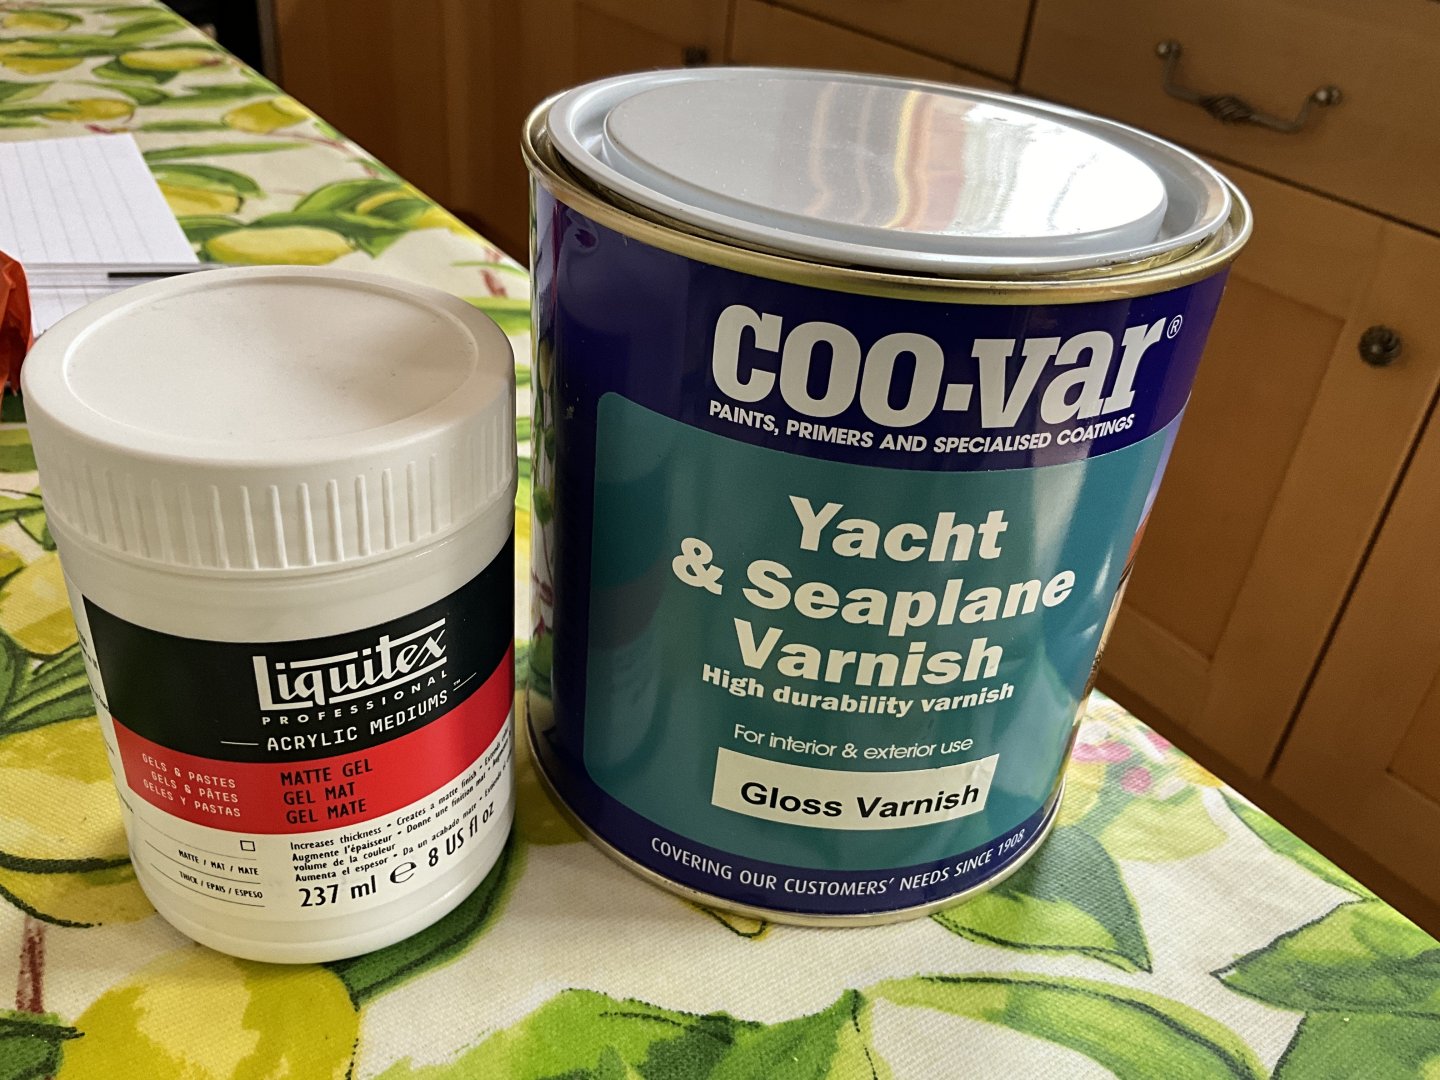
Once all fitting good to hull, was good to glue foam boarding to 2mm plastic base, just used gorilla glue for this, worked ok. After this next stage was trying to get right colour for surface of water, as this is totally new ground for me thought would try Vallejo USN Blue, figuring it’s got to be a Pacific Ocean sort of colour, wasn’t quite sure though so asked one of the more experienced members in model club for guidance, when he seen it he said it would be to dark, better going for shades of green. So back to the drawing board and repainted, unfortunately didn’t have time to take photos of this stage as l was racing now 🙄 Ray also gave me bit guidance in coating surface with liquitex Acrylic Gel, another first for me, also recommending Yacht Varnish for final covering.
-
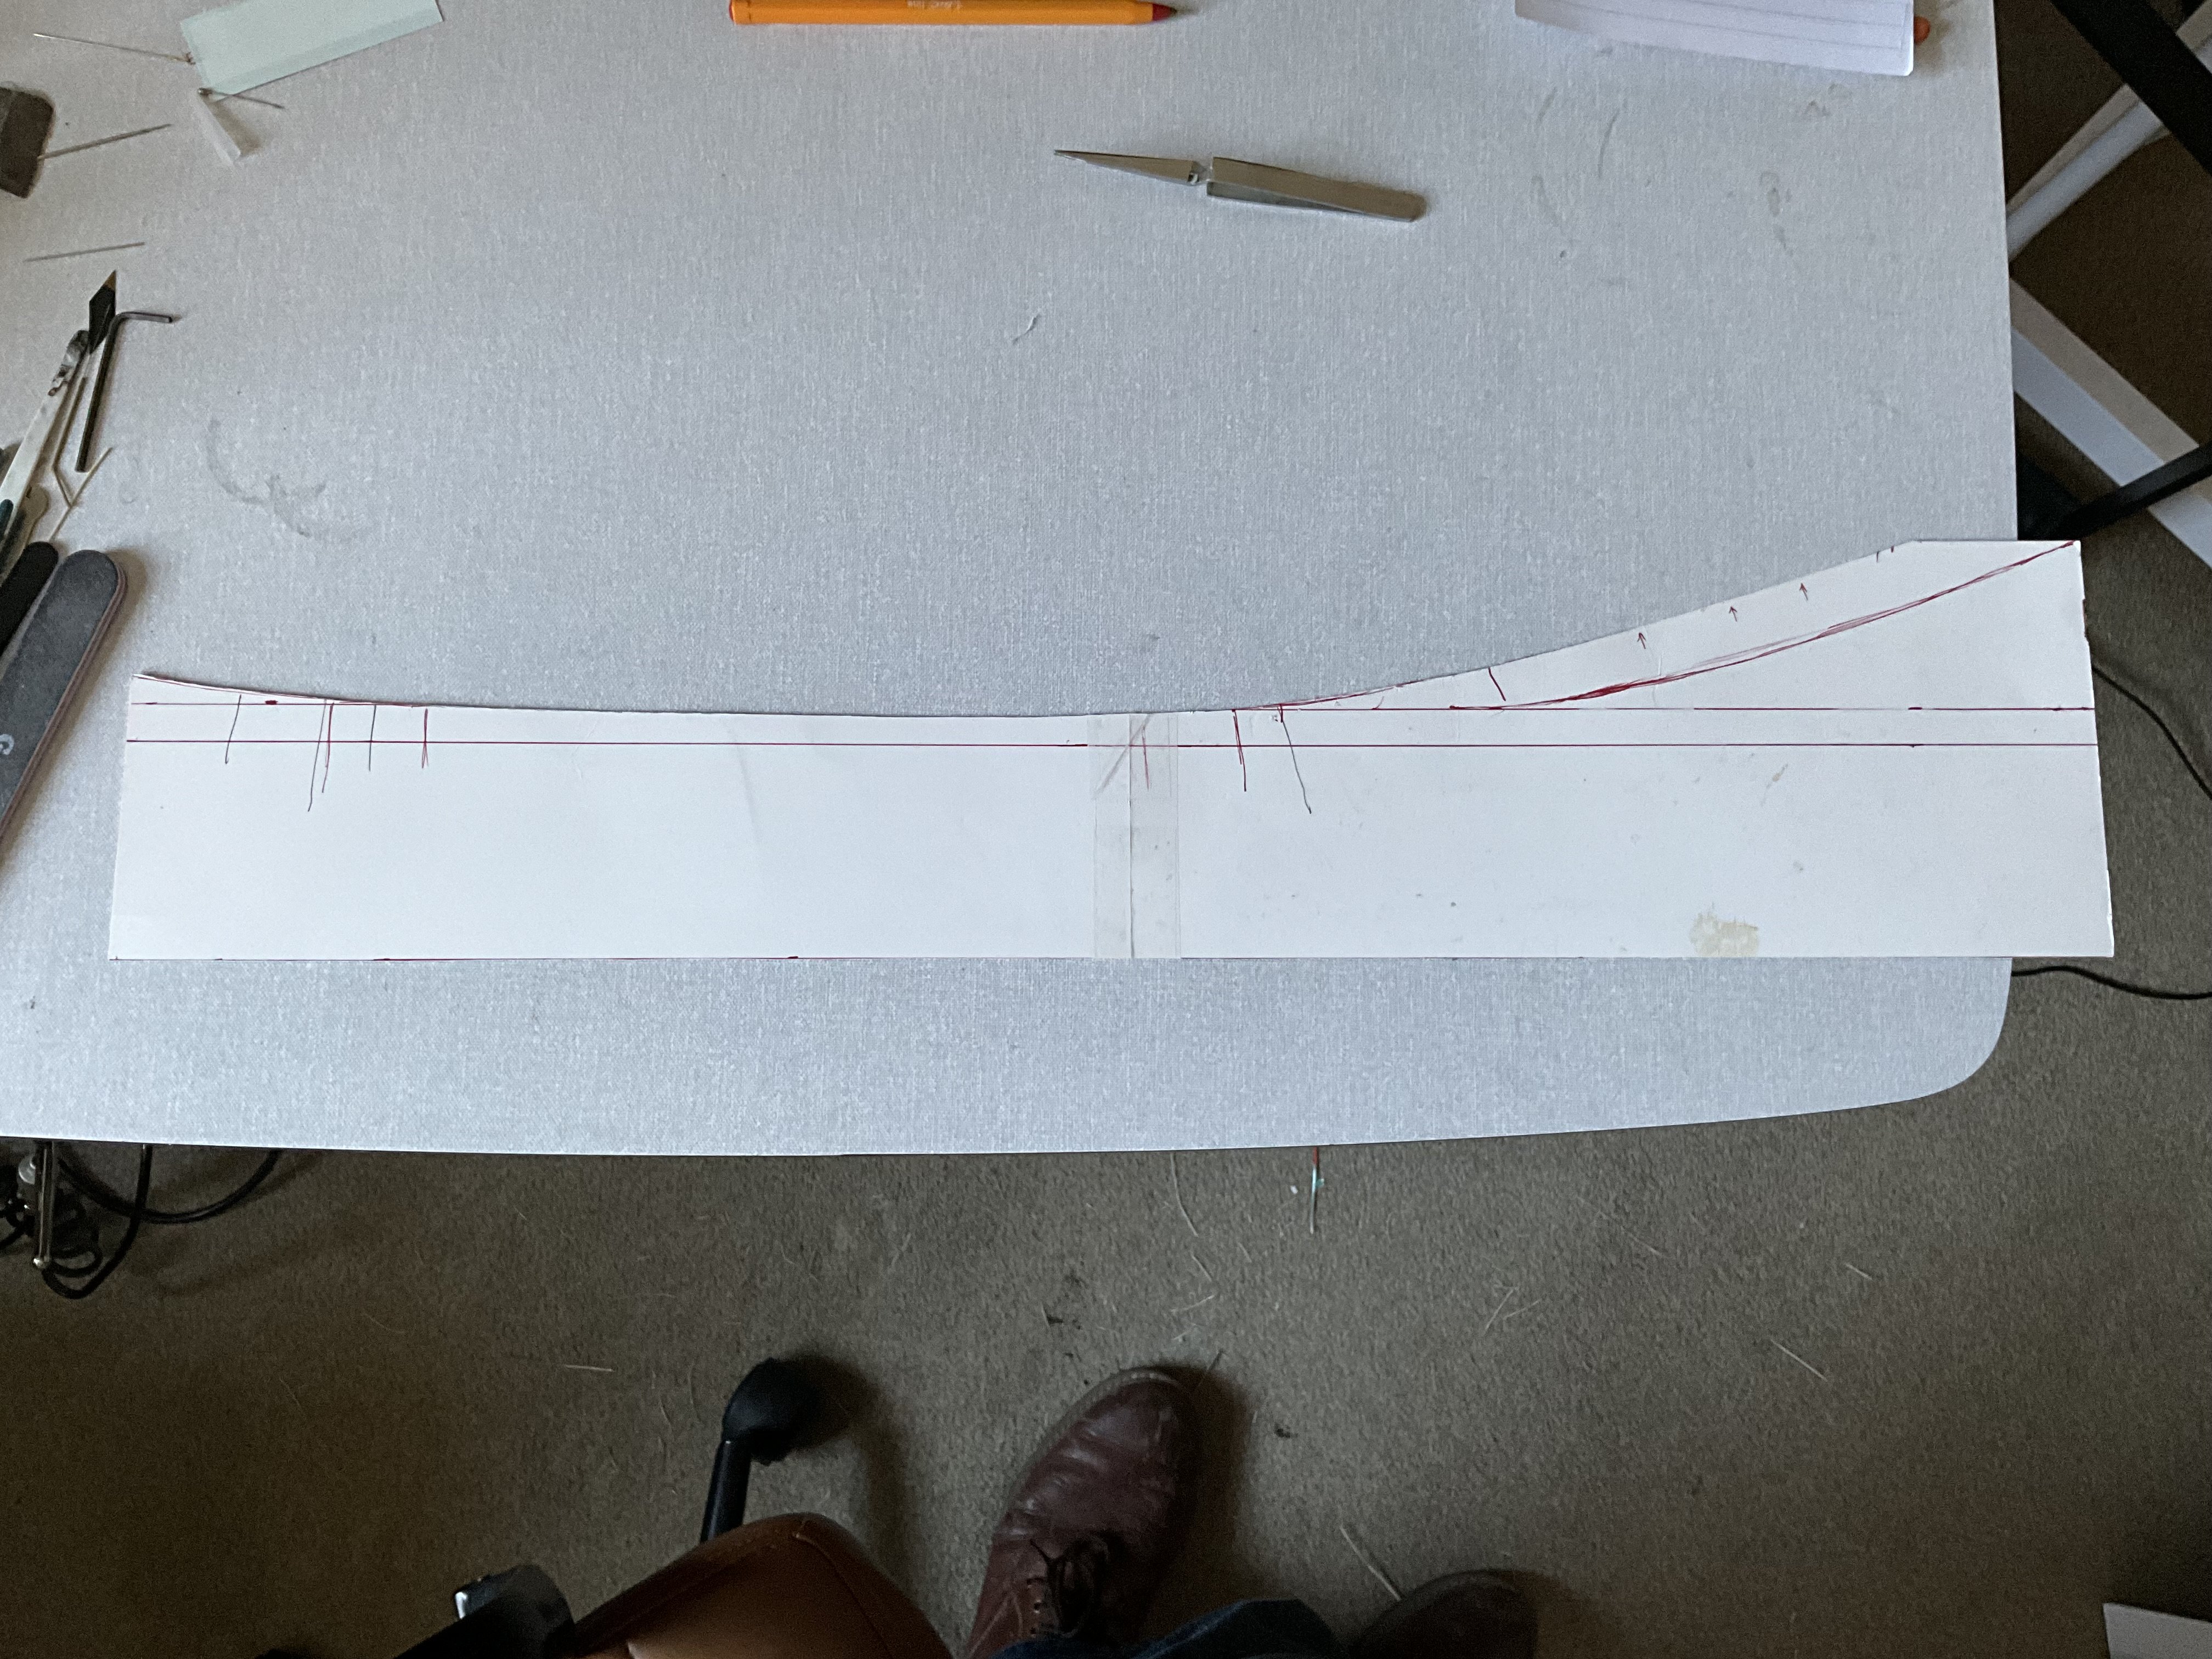
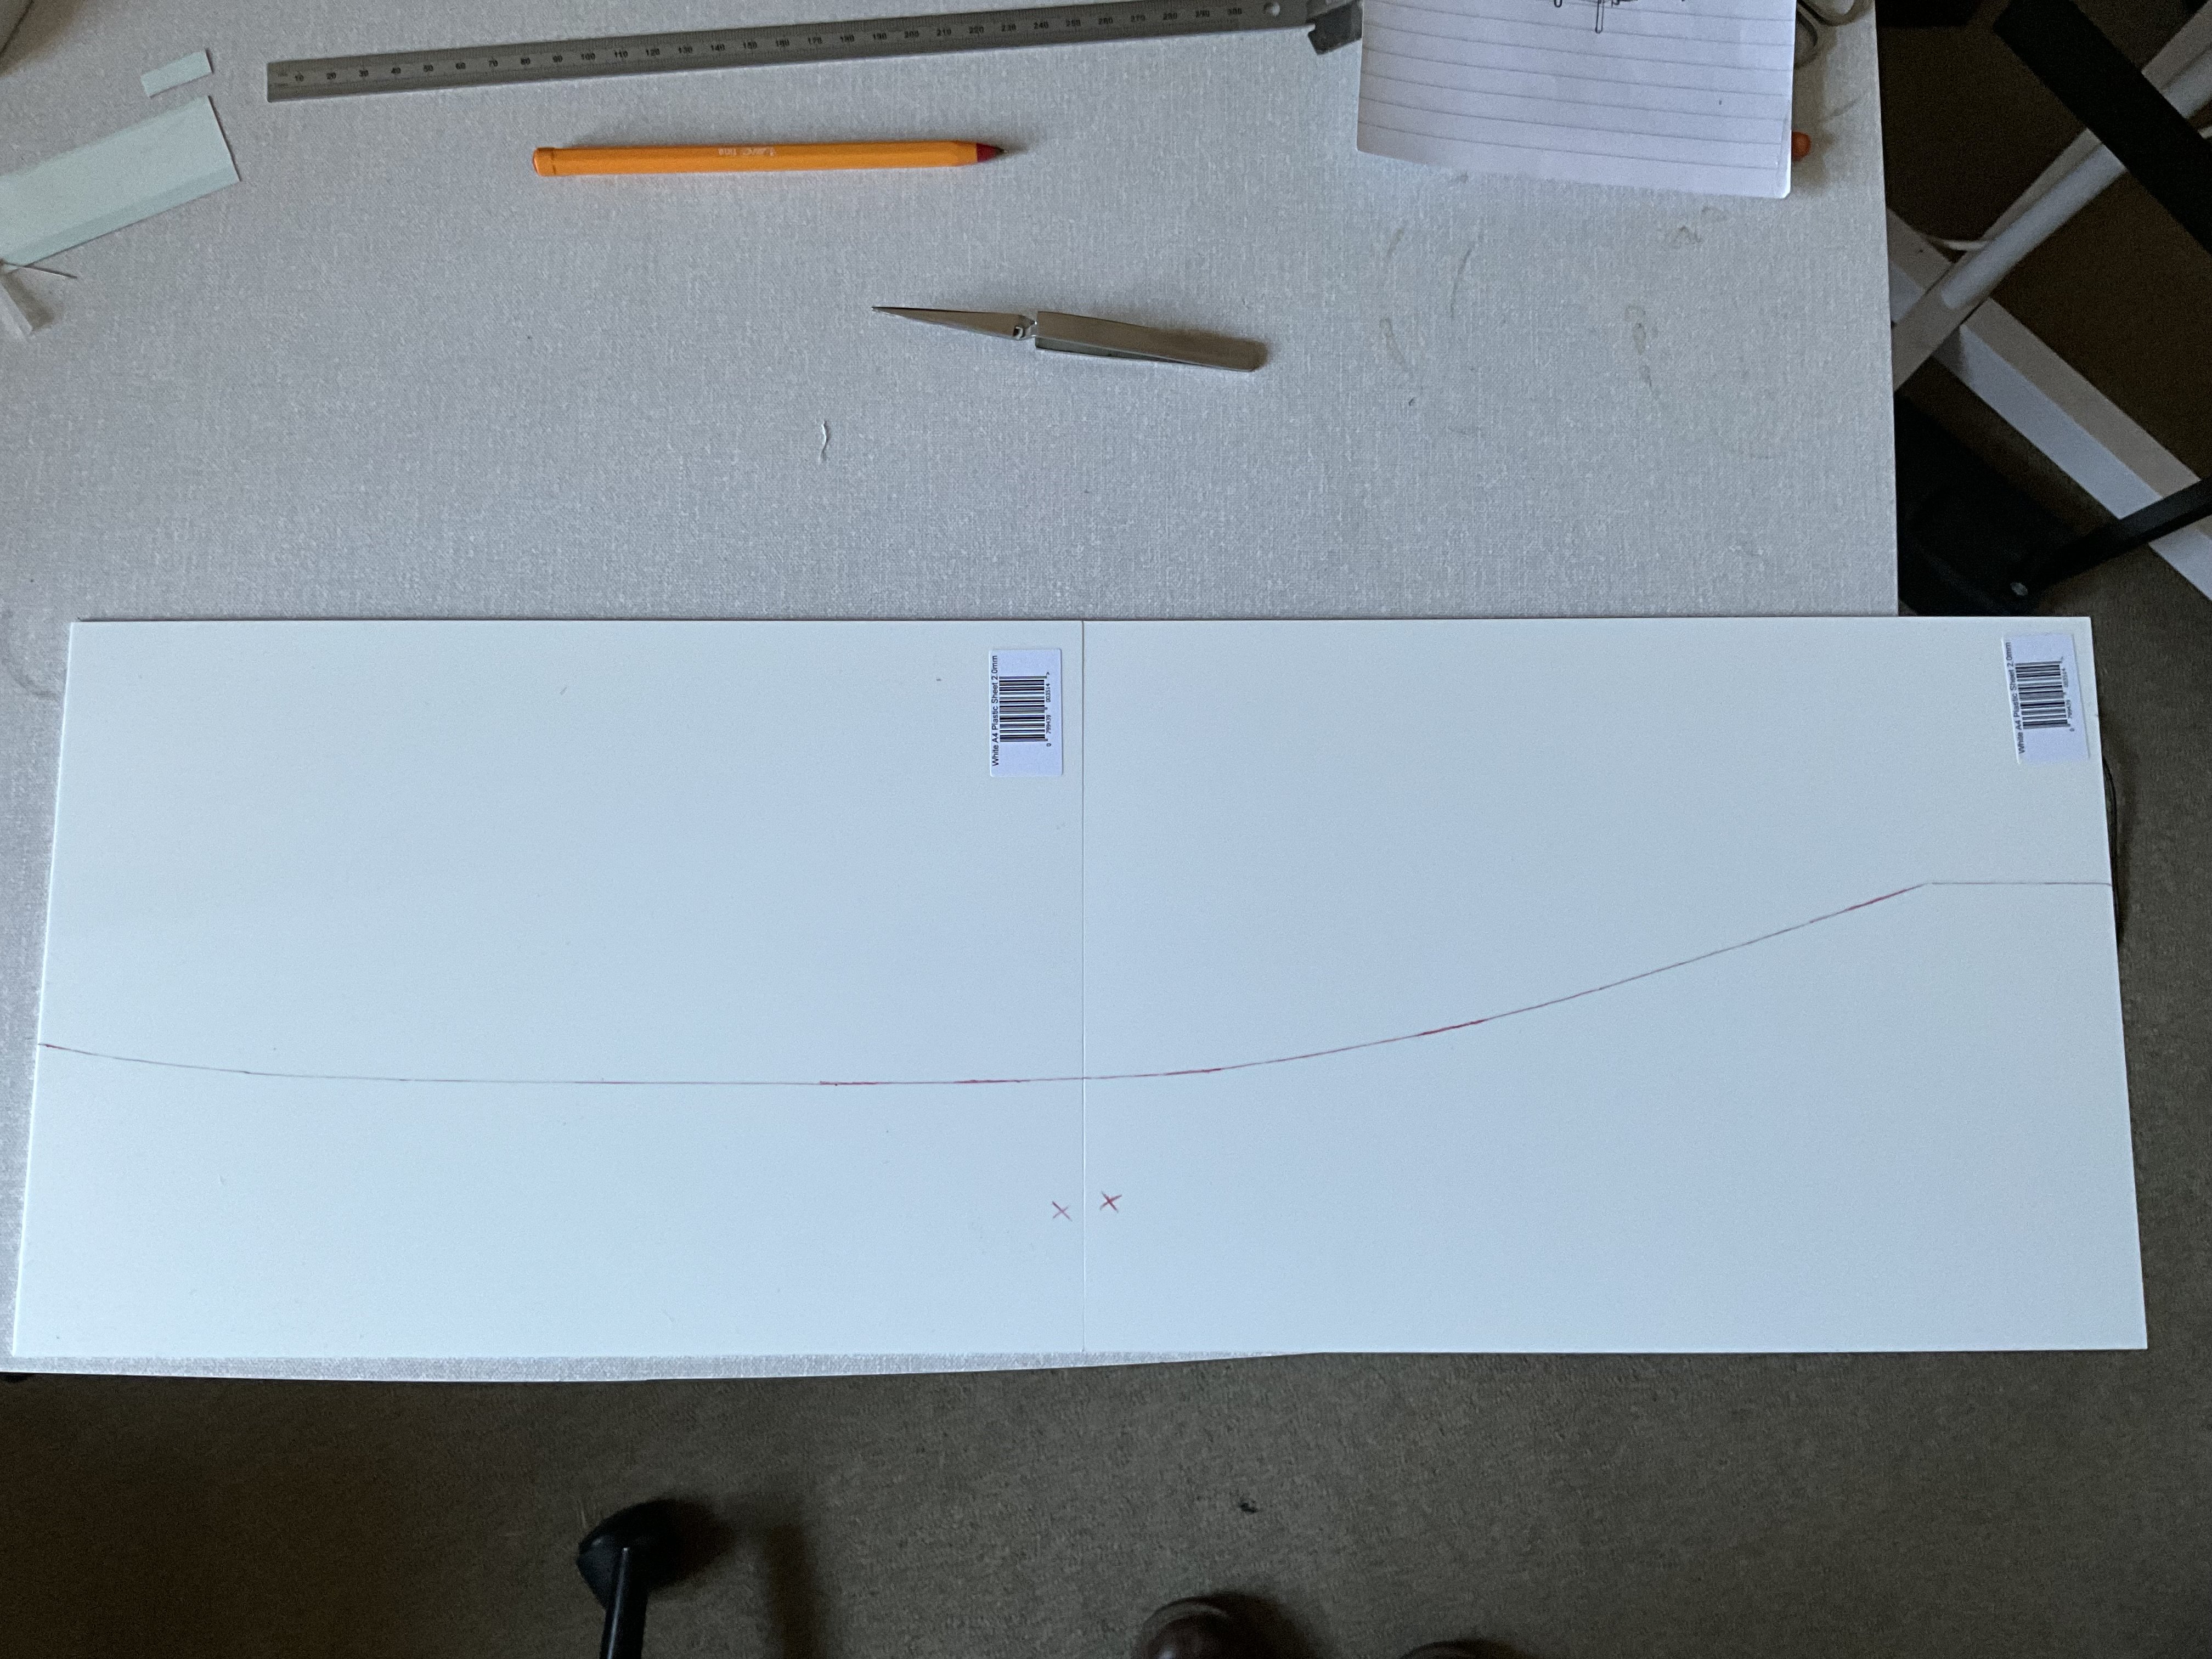
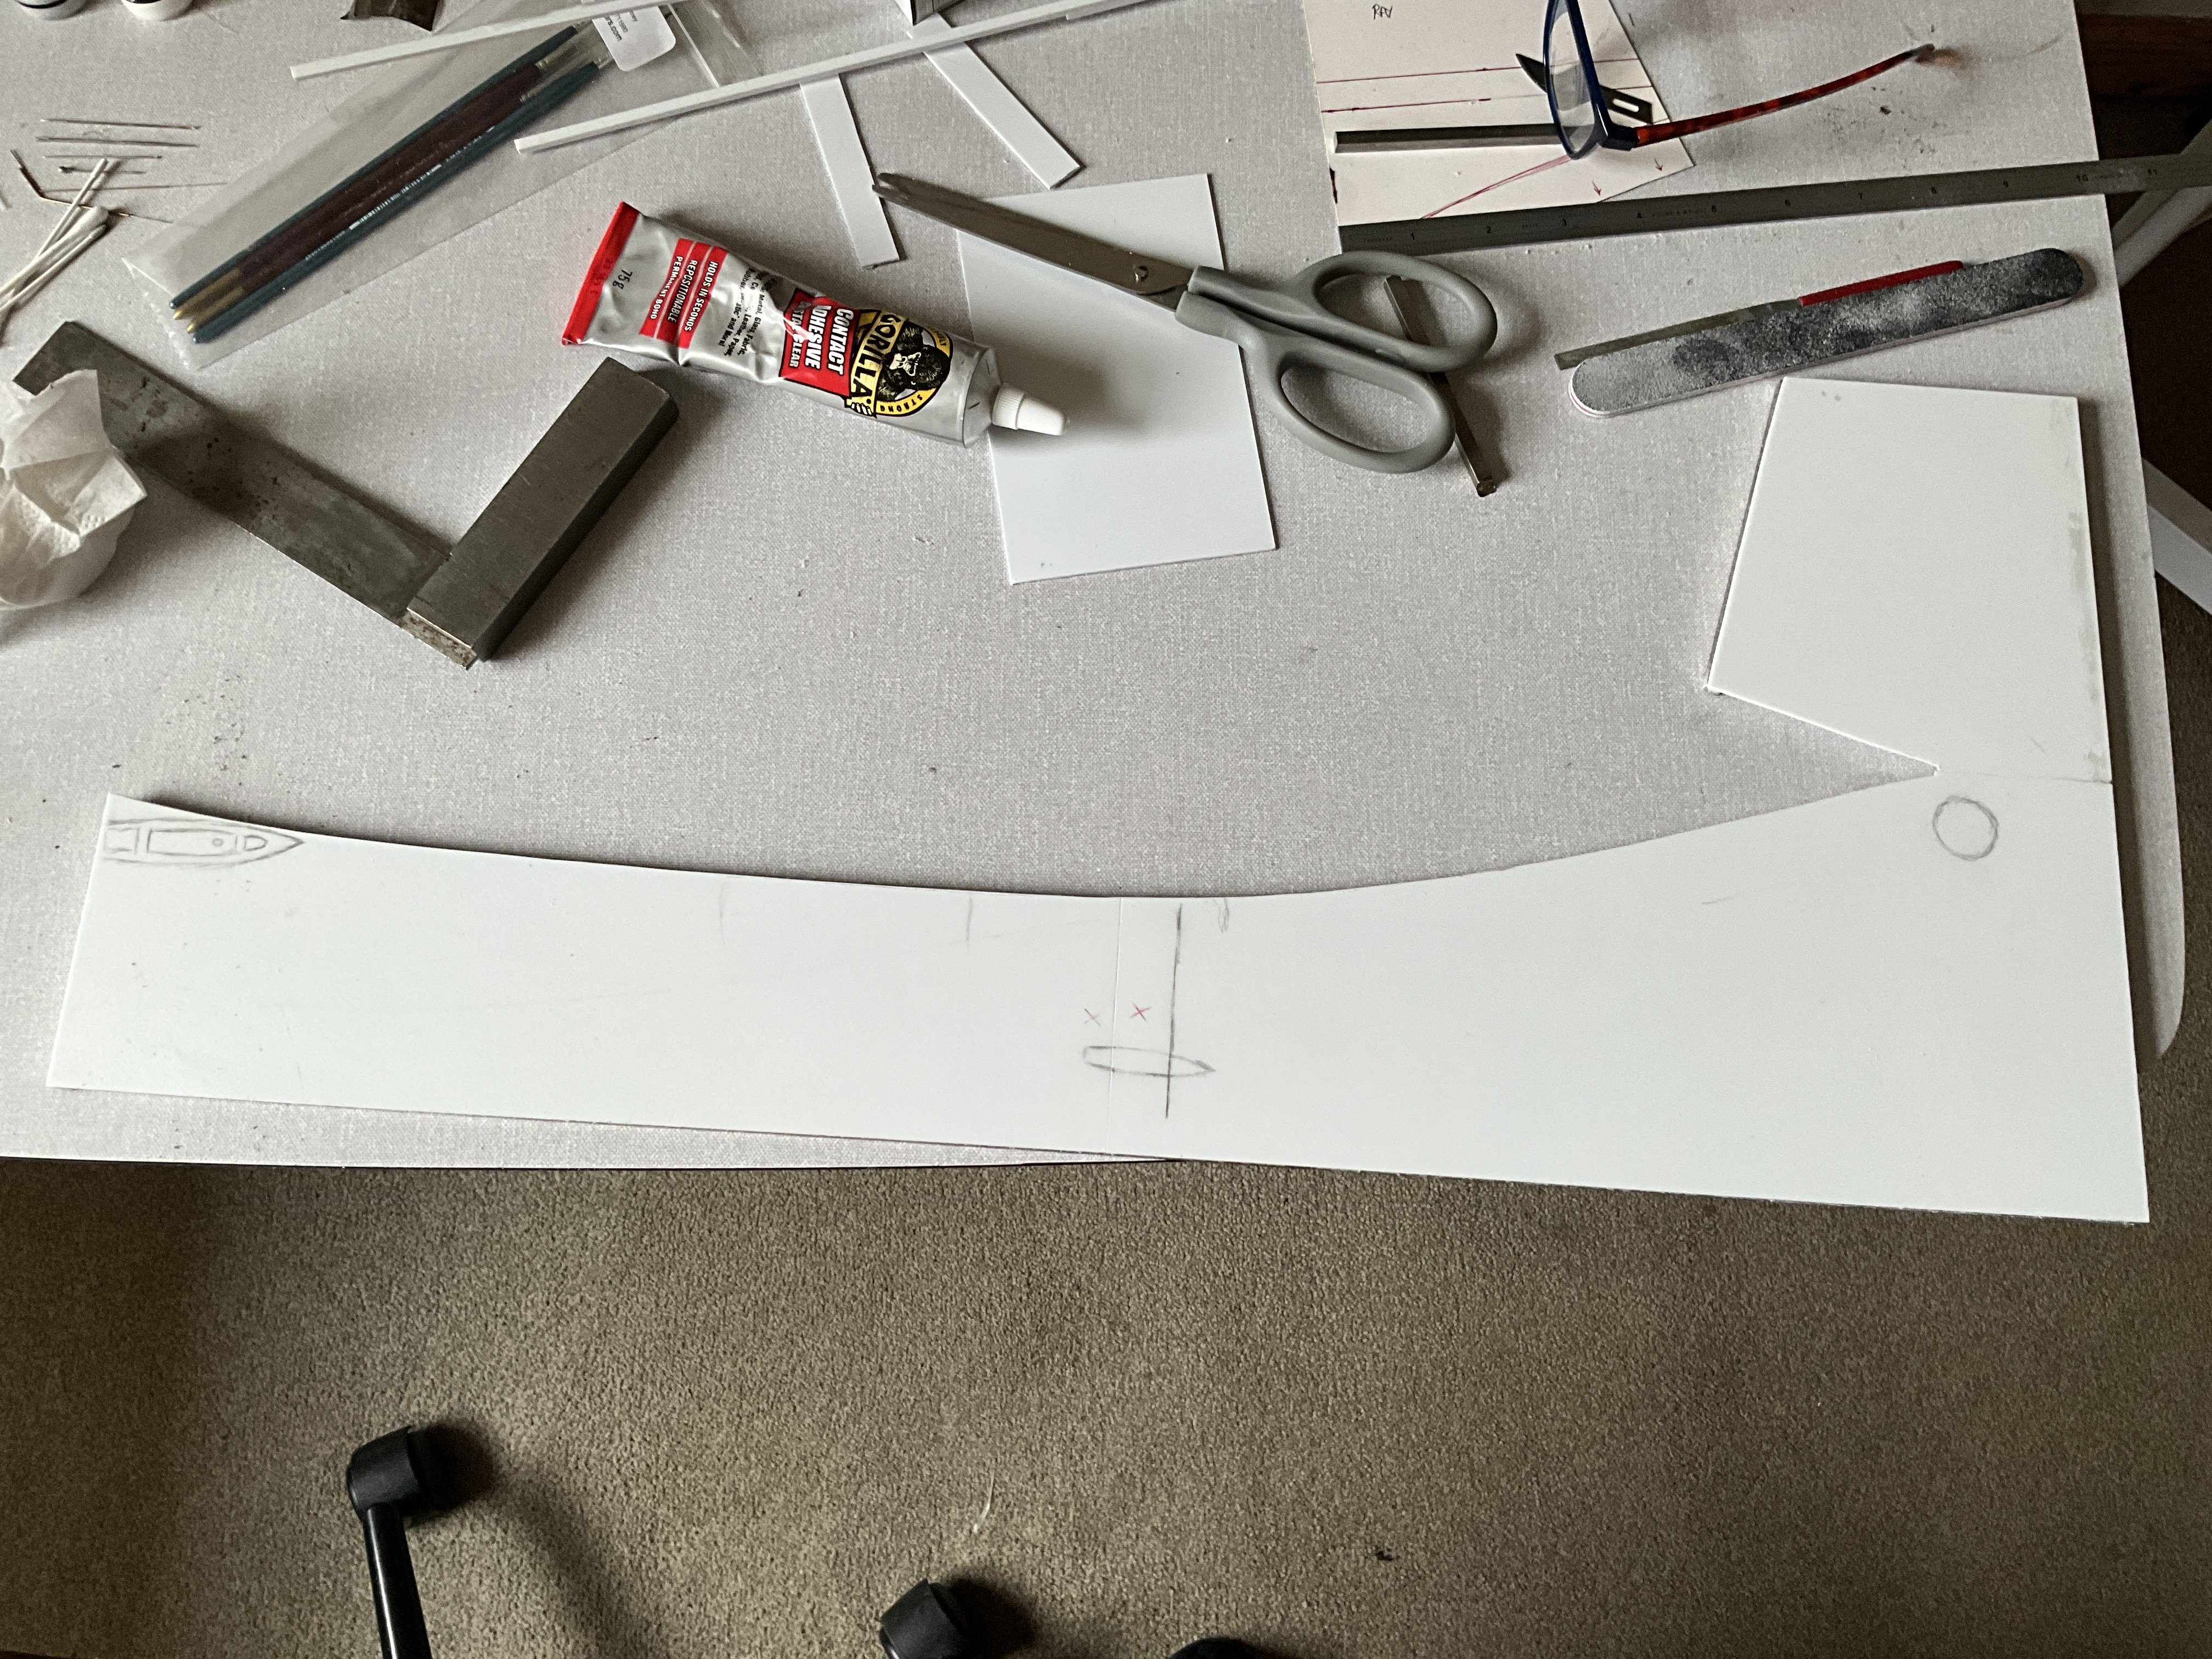
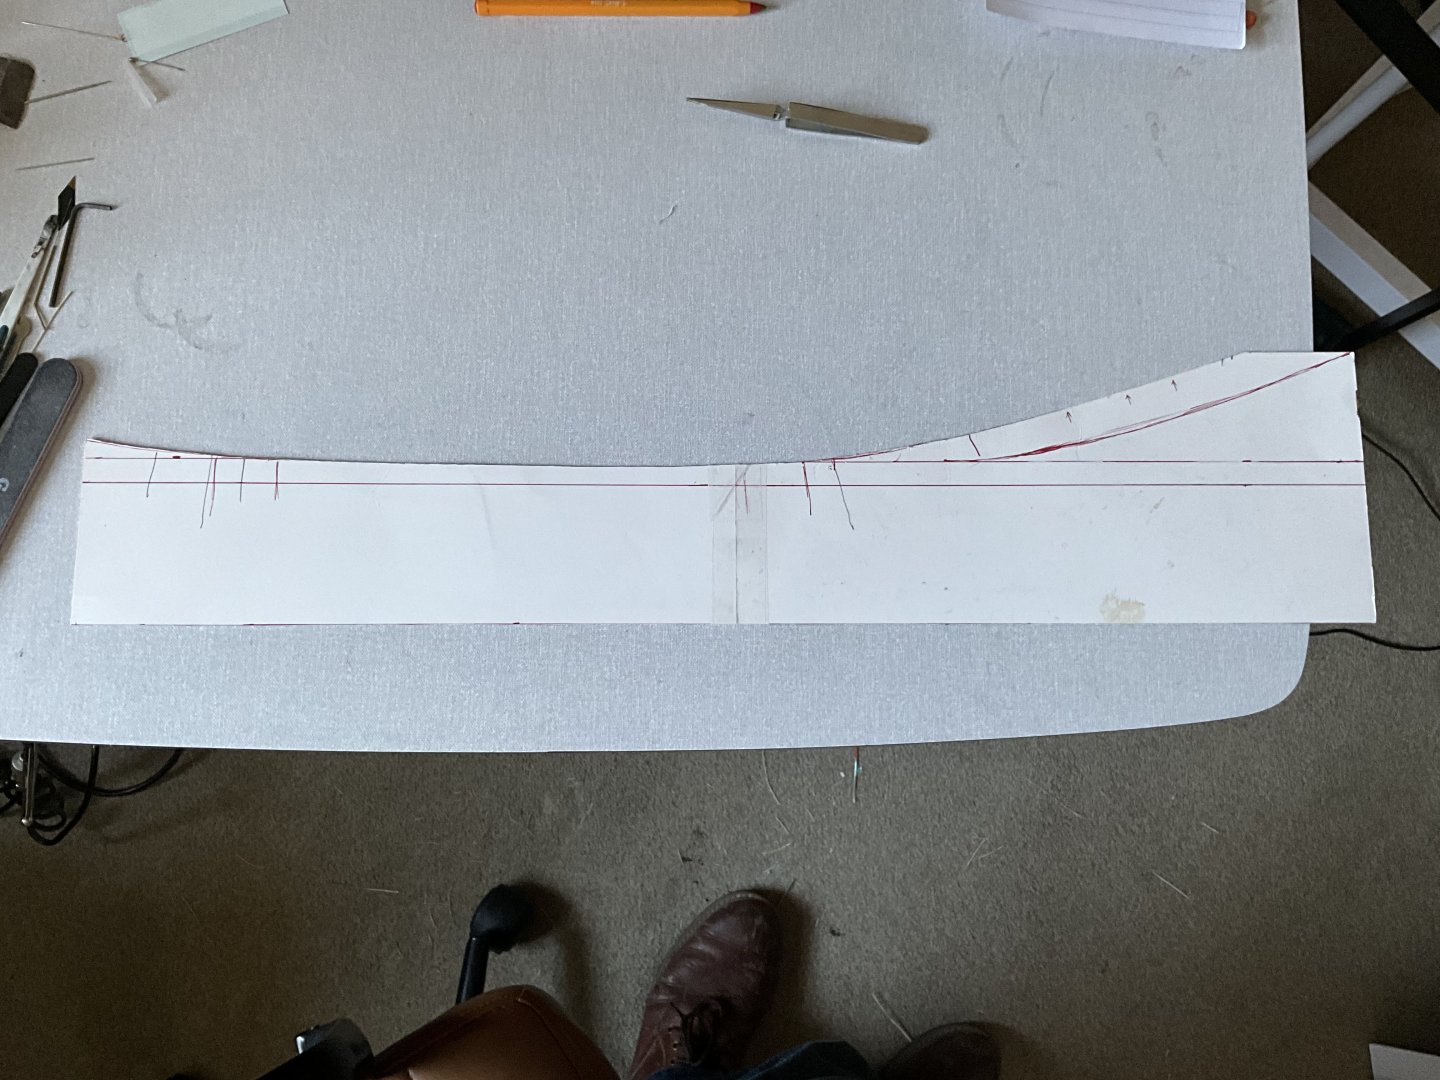
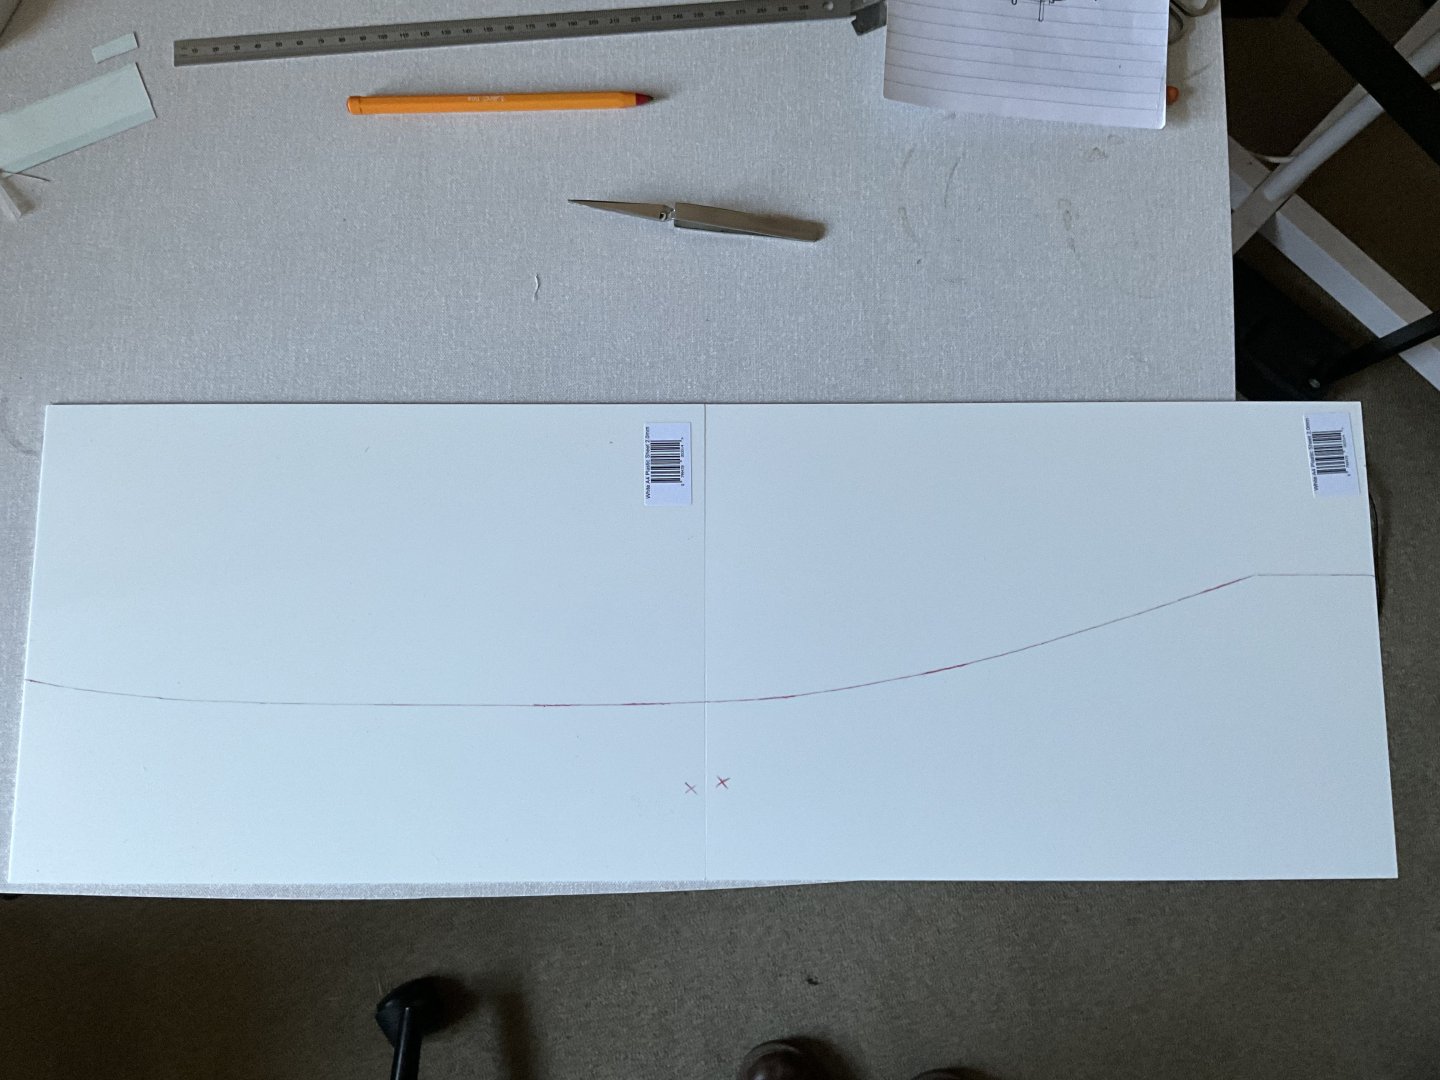
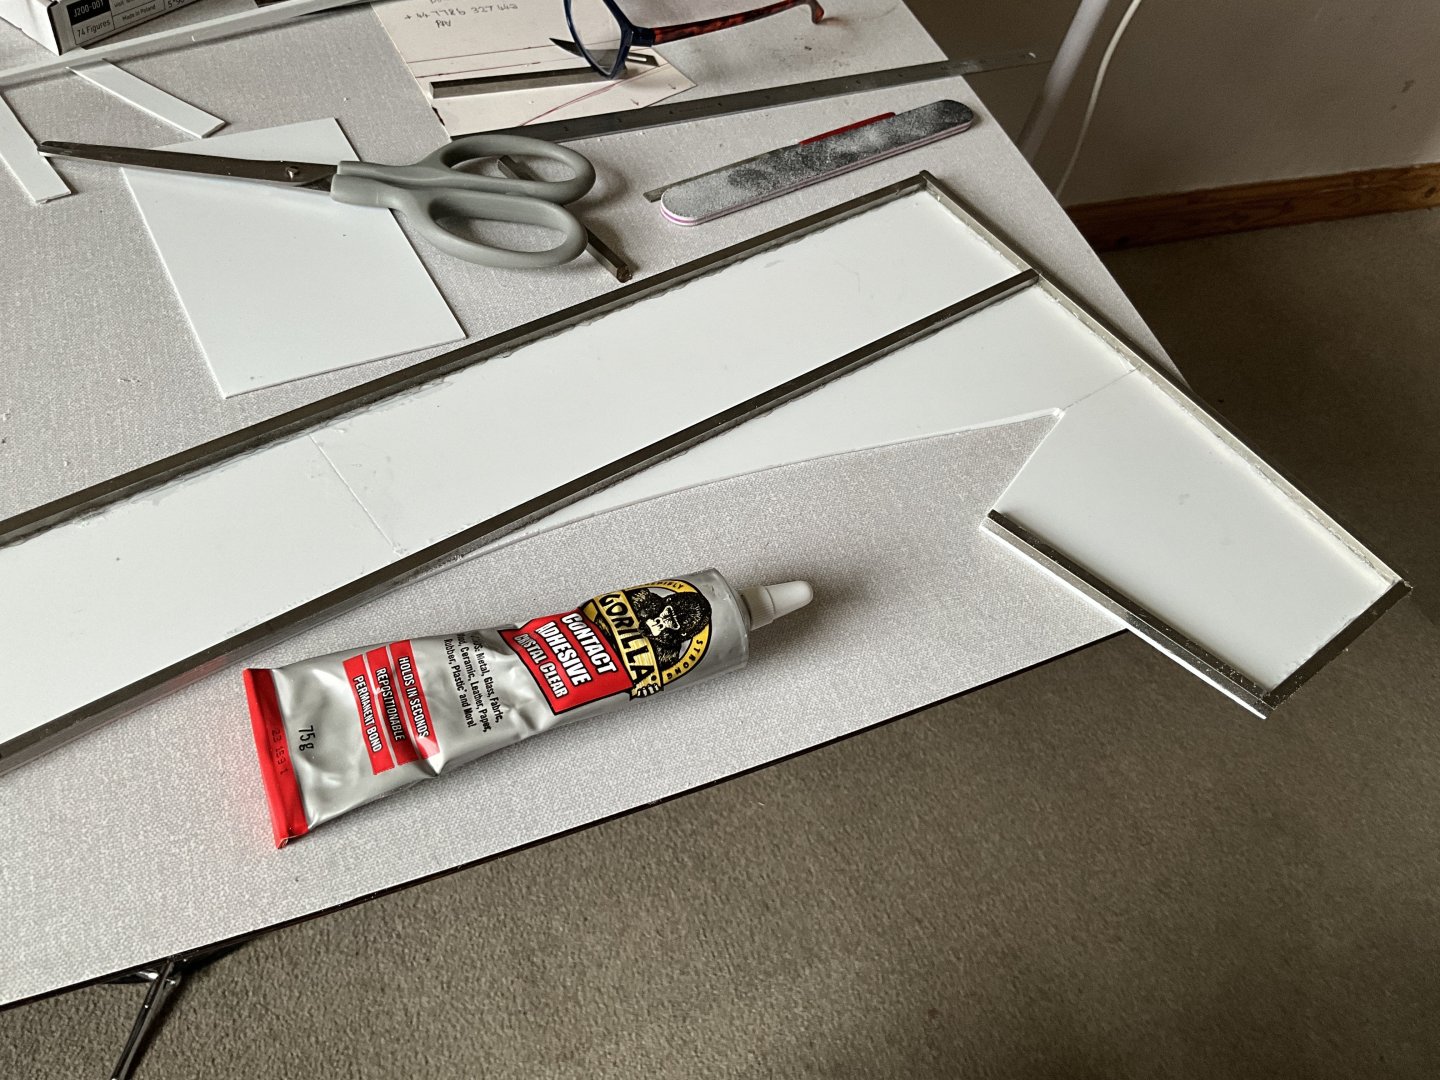
Hi guys, sorry for the time lapse since last post, but as l said was on a steep learning curve on limited time to finish her for the Scottish National Scale Model Show in Perth so was under a lot of self inflicted pressure to complete on time, in the end l was working till 11 o’clock at night prior to show, boy was l stressed out, thought modelling was supposed to be a pleasure 👀 glad that’s all behind me. 👍 shall try and keep this final update in some sort of order. Here’s what l meant about paper template to side of hull, easier if it’s slightly heavier card 👍

-
Thanks Evan, getting the contour to the hull not to difficult, just cut a paper template till you get it fitting good and then mark this onto plastic and cut it, then trim this part or parts till they fit to satisfaction. Same procedure for cutting the thicker foam sheet. Trust me the harder part has to come which is fitting the finished assembly to model and base in the final stages. Shall try an update after this weekend after the show and show finished model. 🤛
-
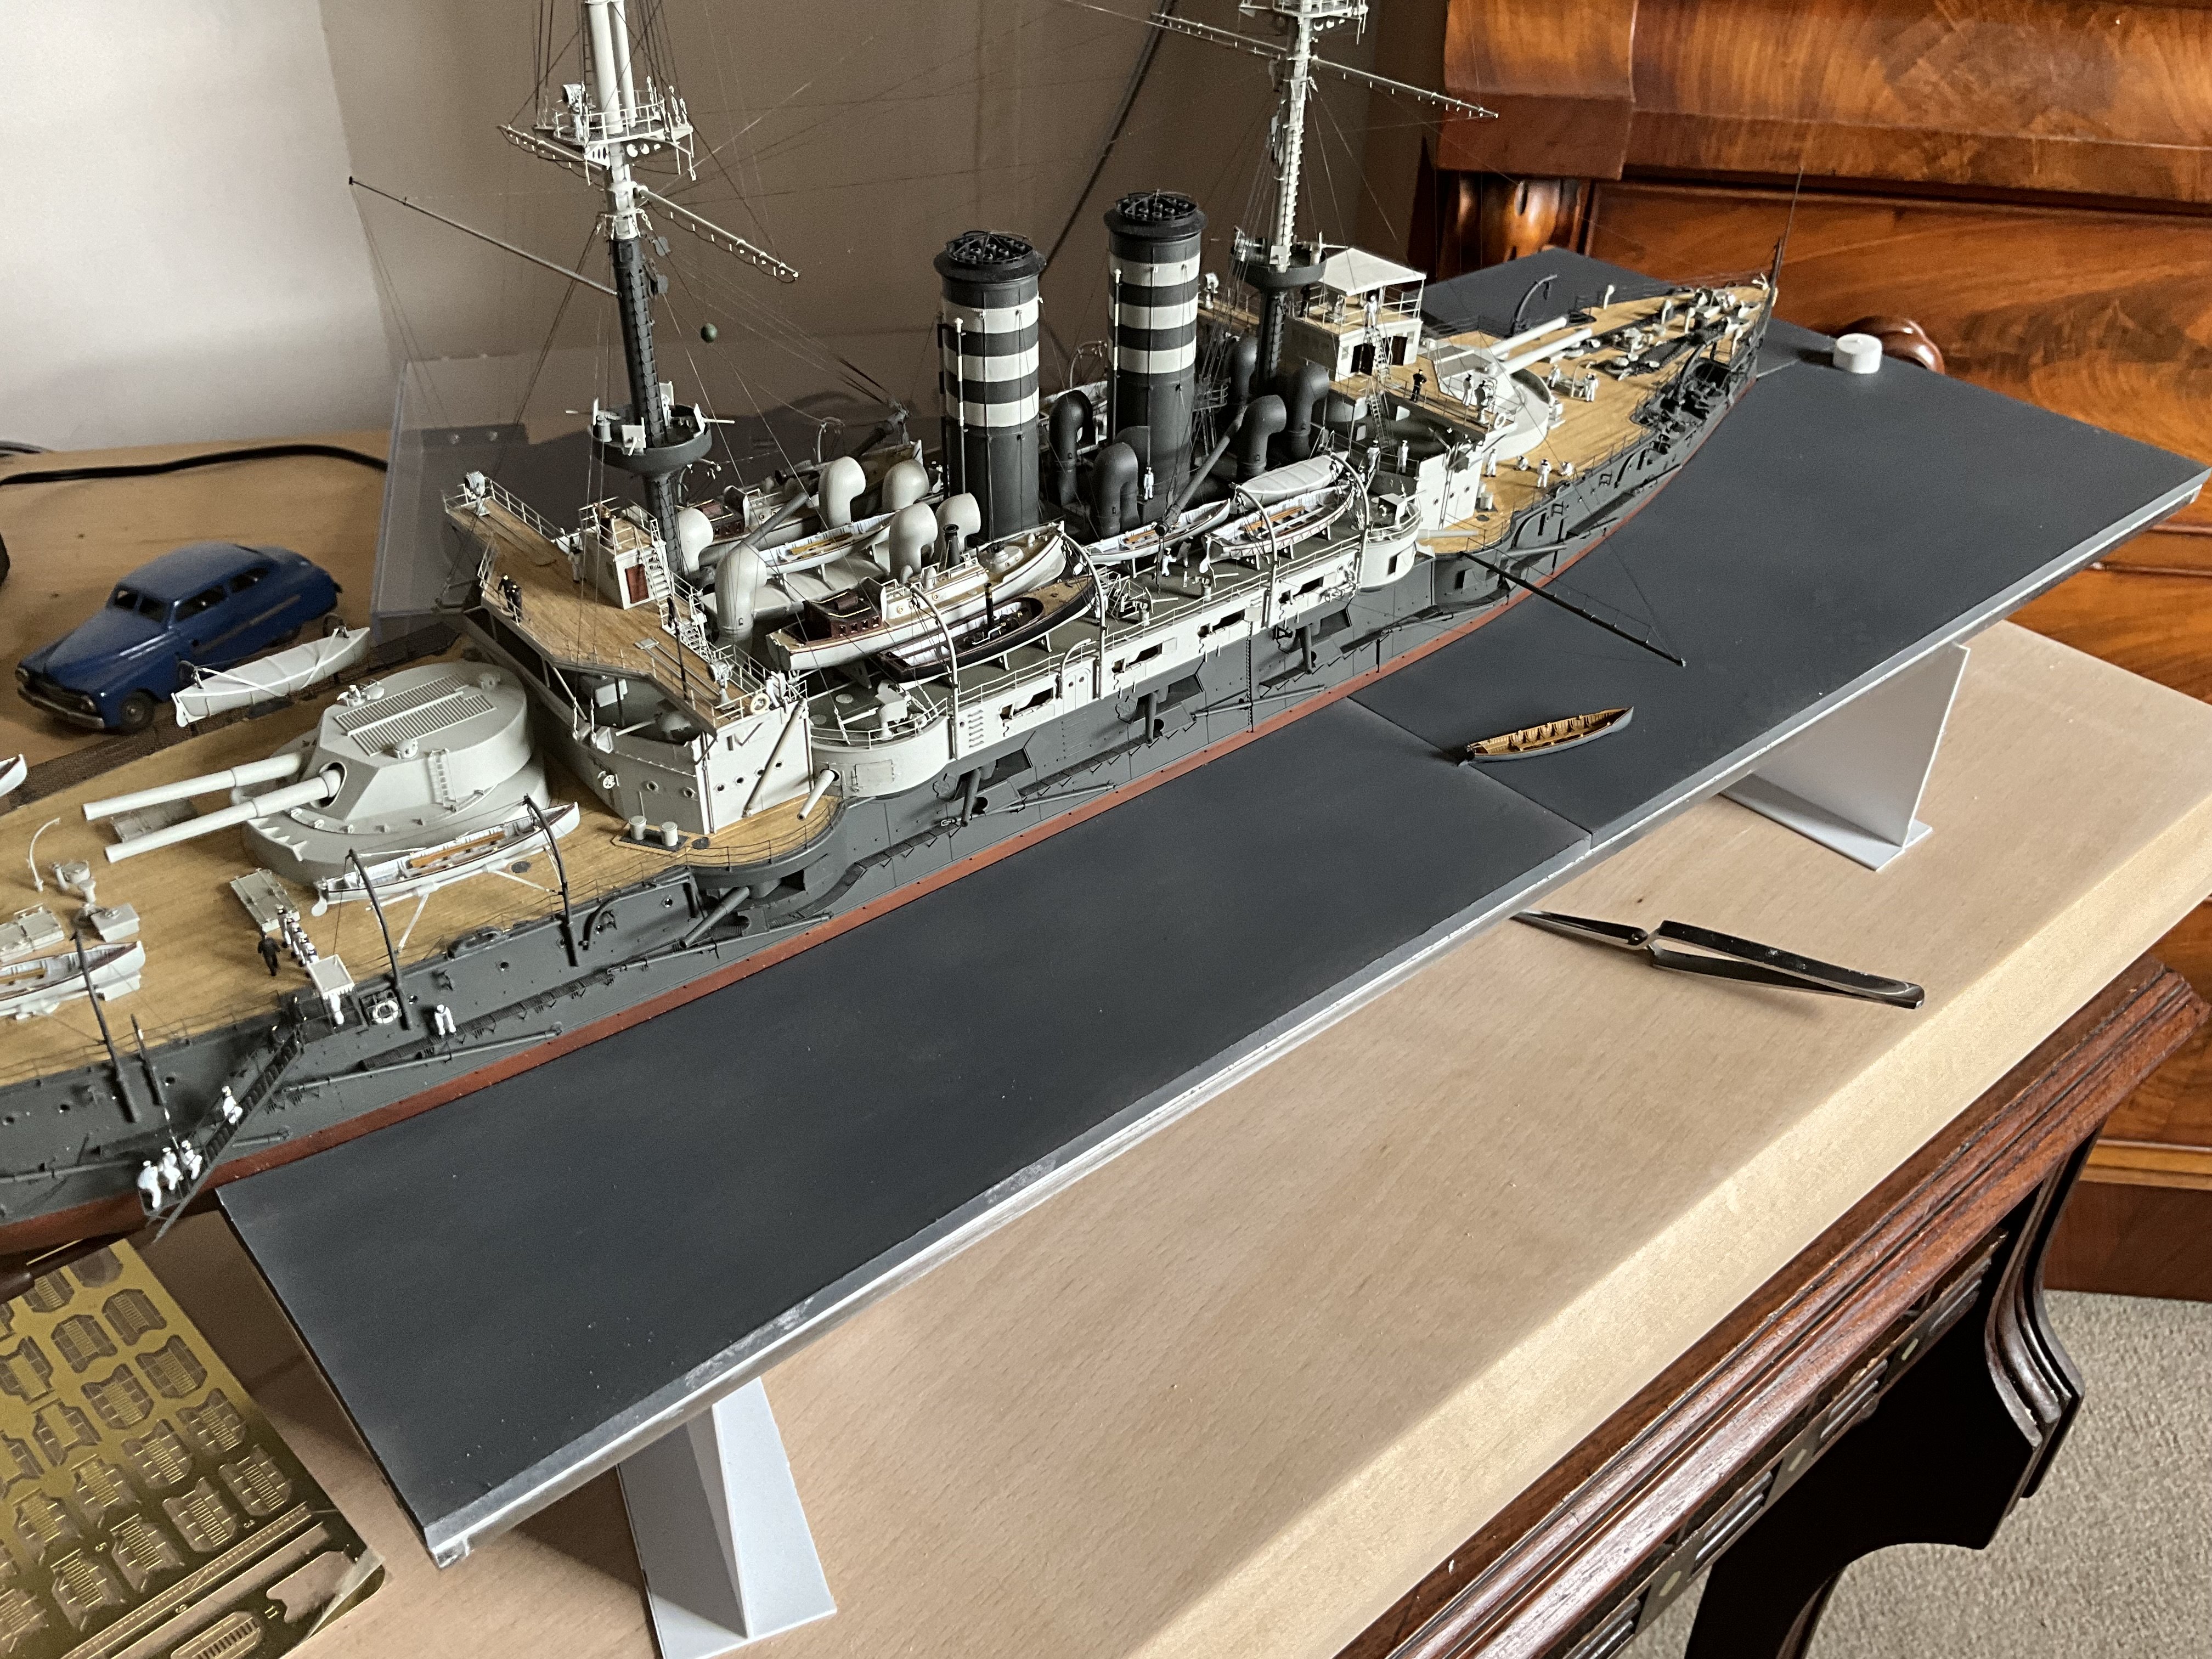
Thanks Yves, think you could say trying to get the best of both worlds 👍 first time trying this, so just about there, fingers crossed it works out 🤛 Great feeling being near the end and seeing it come together and thanks for all the kind and encouraging remarks throughout my build log. Started this over three years ago, that’s scary where the time goes.
-
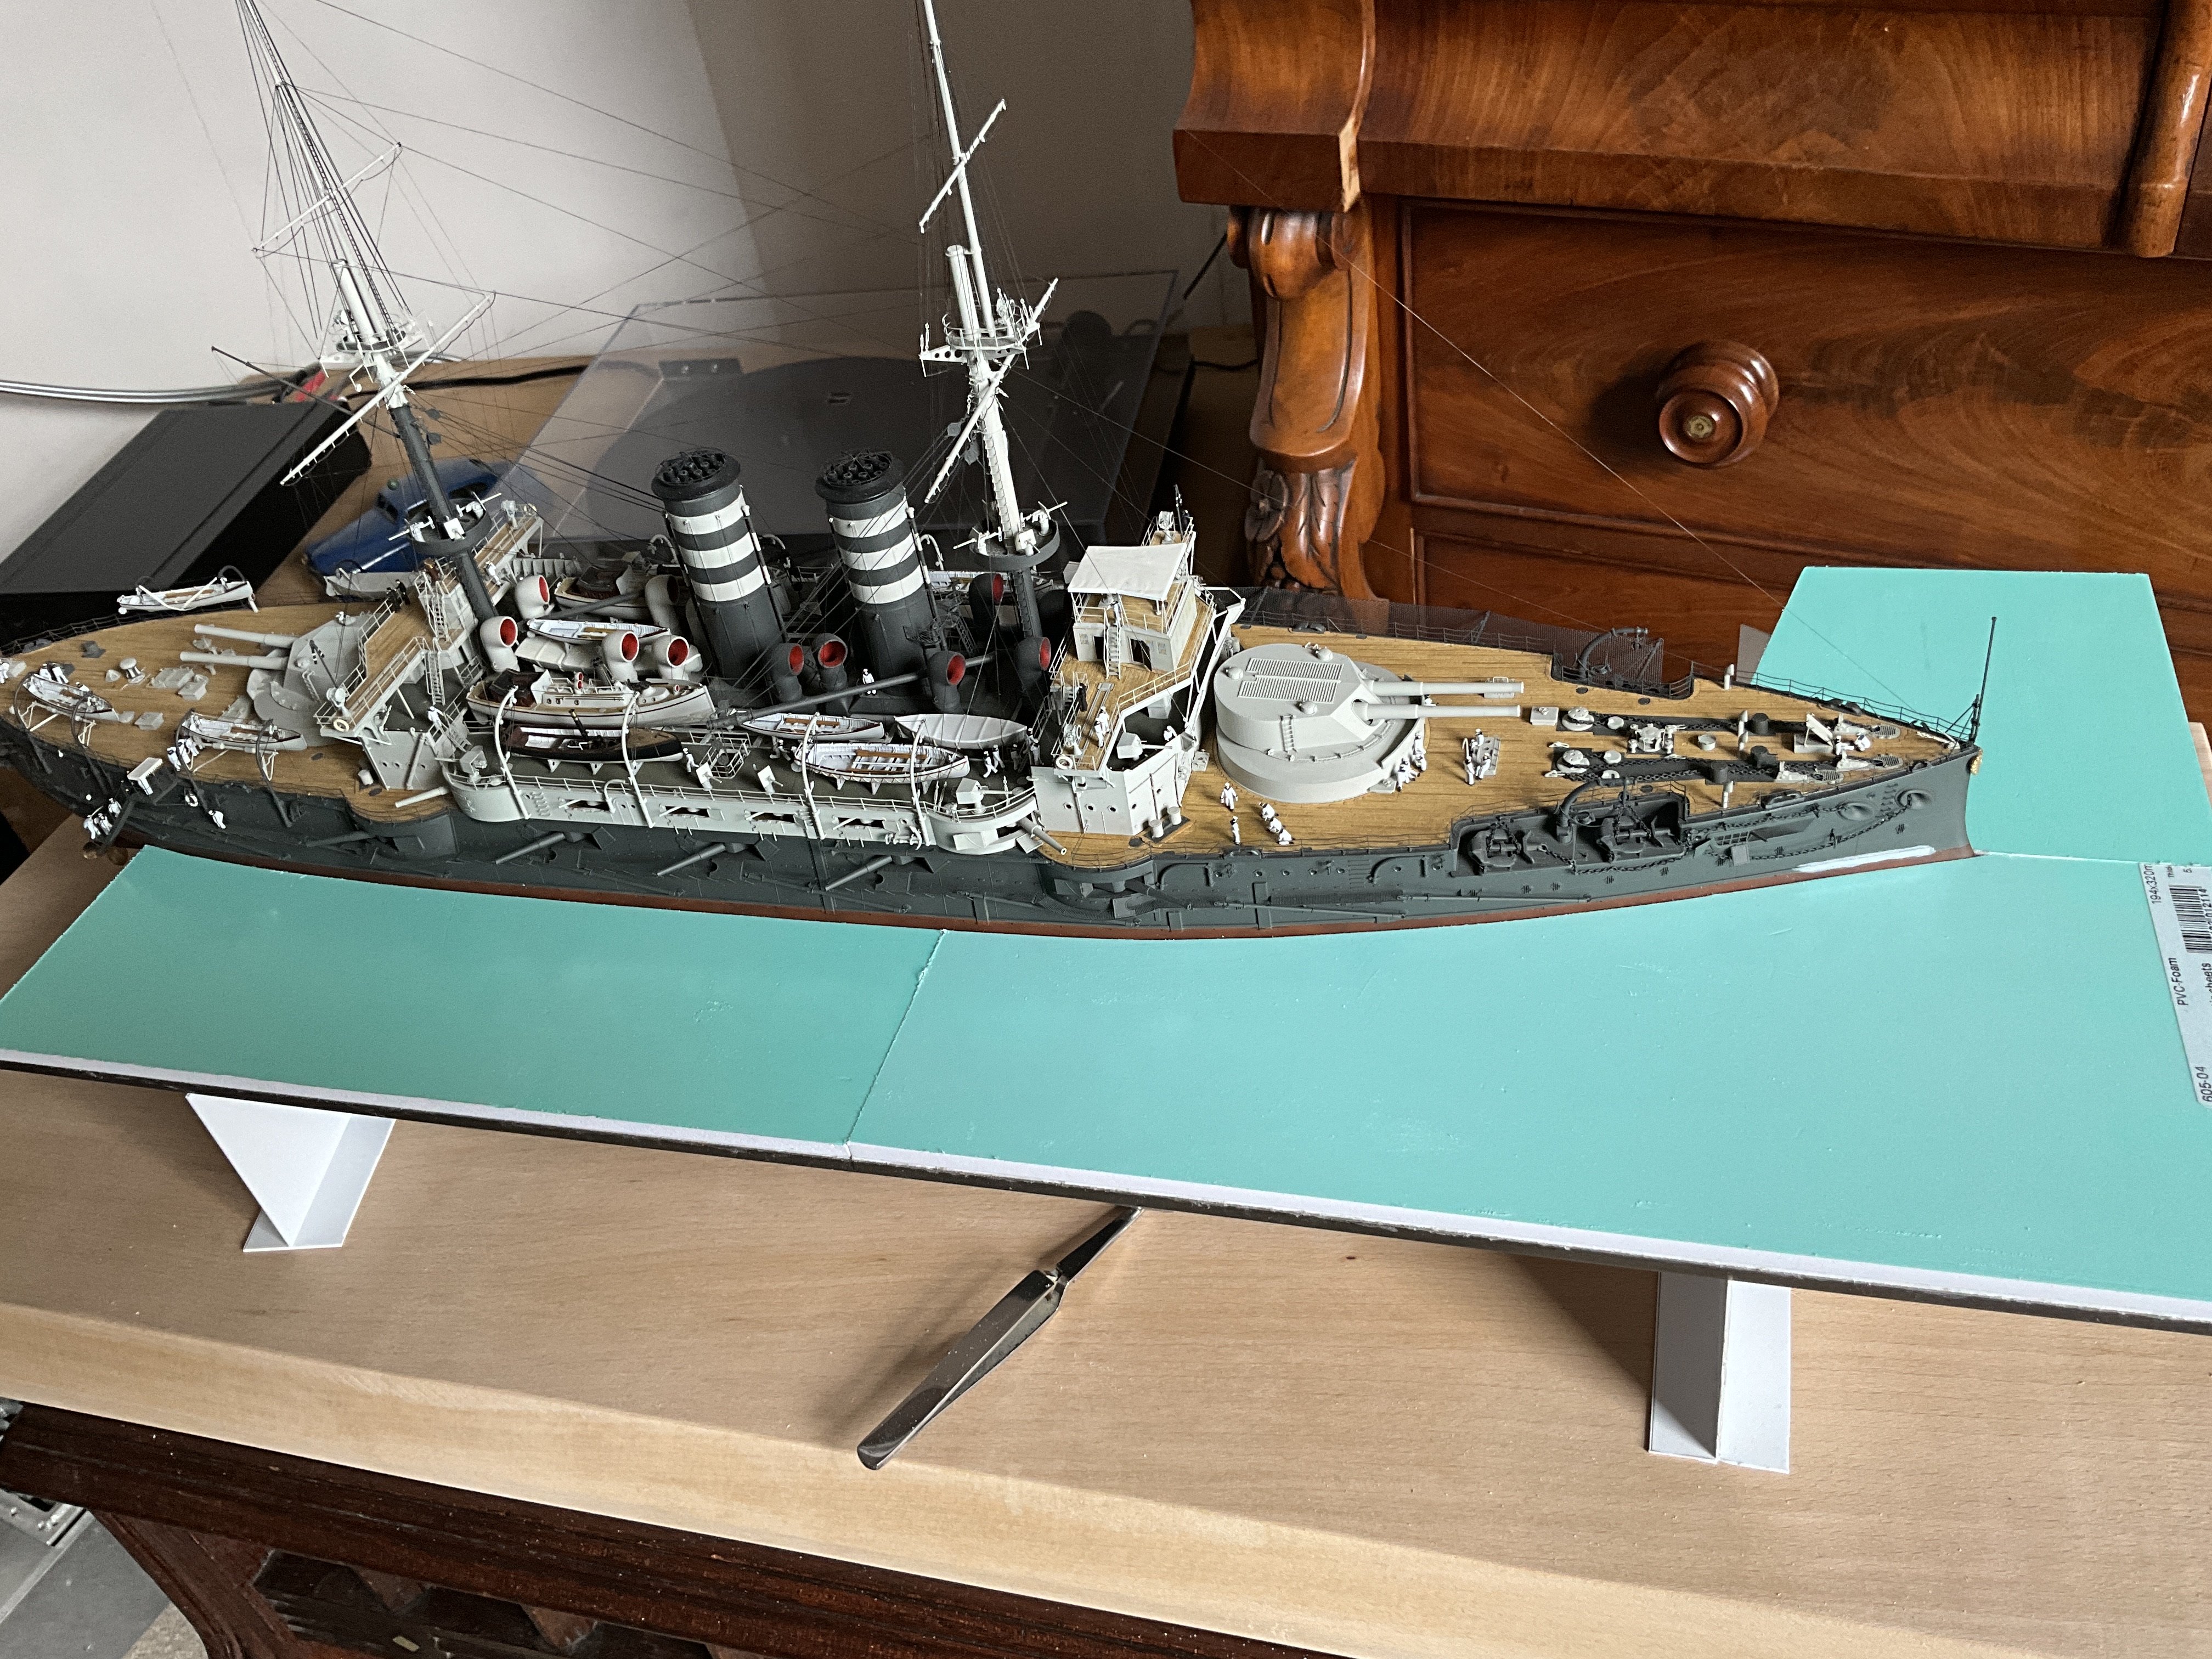
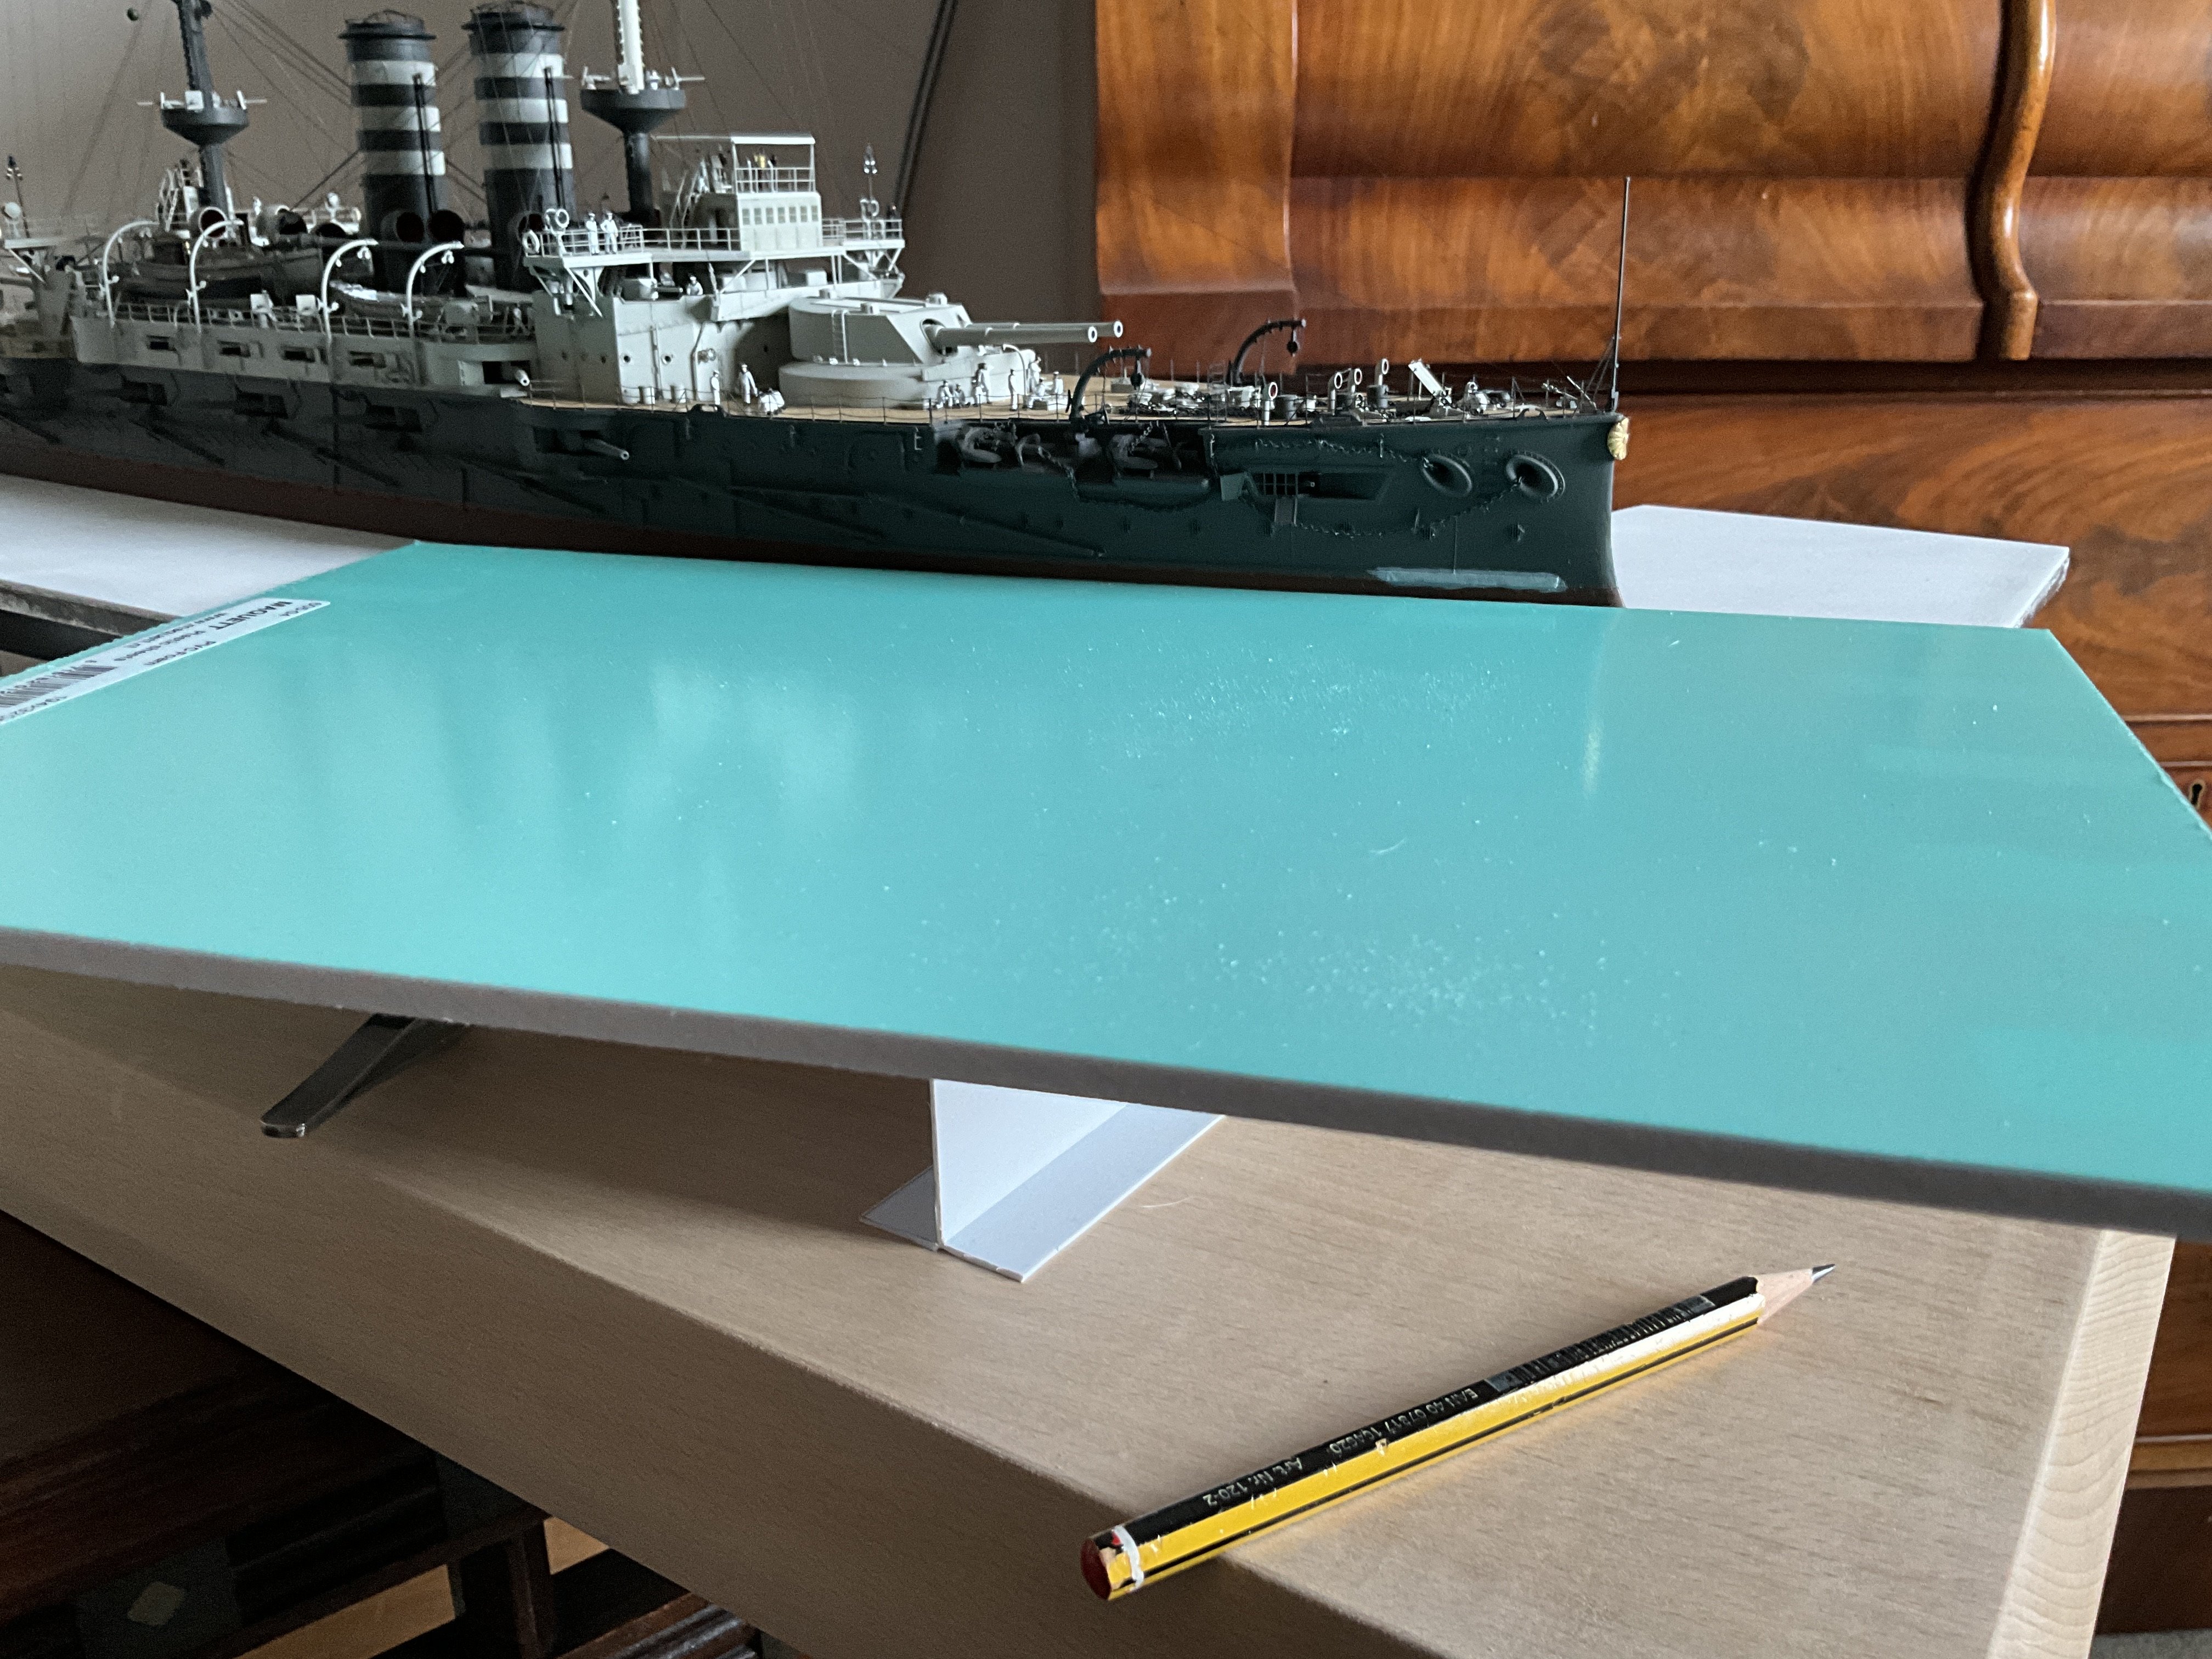
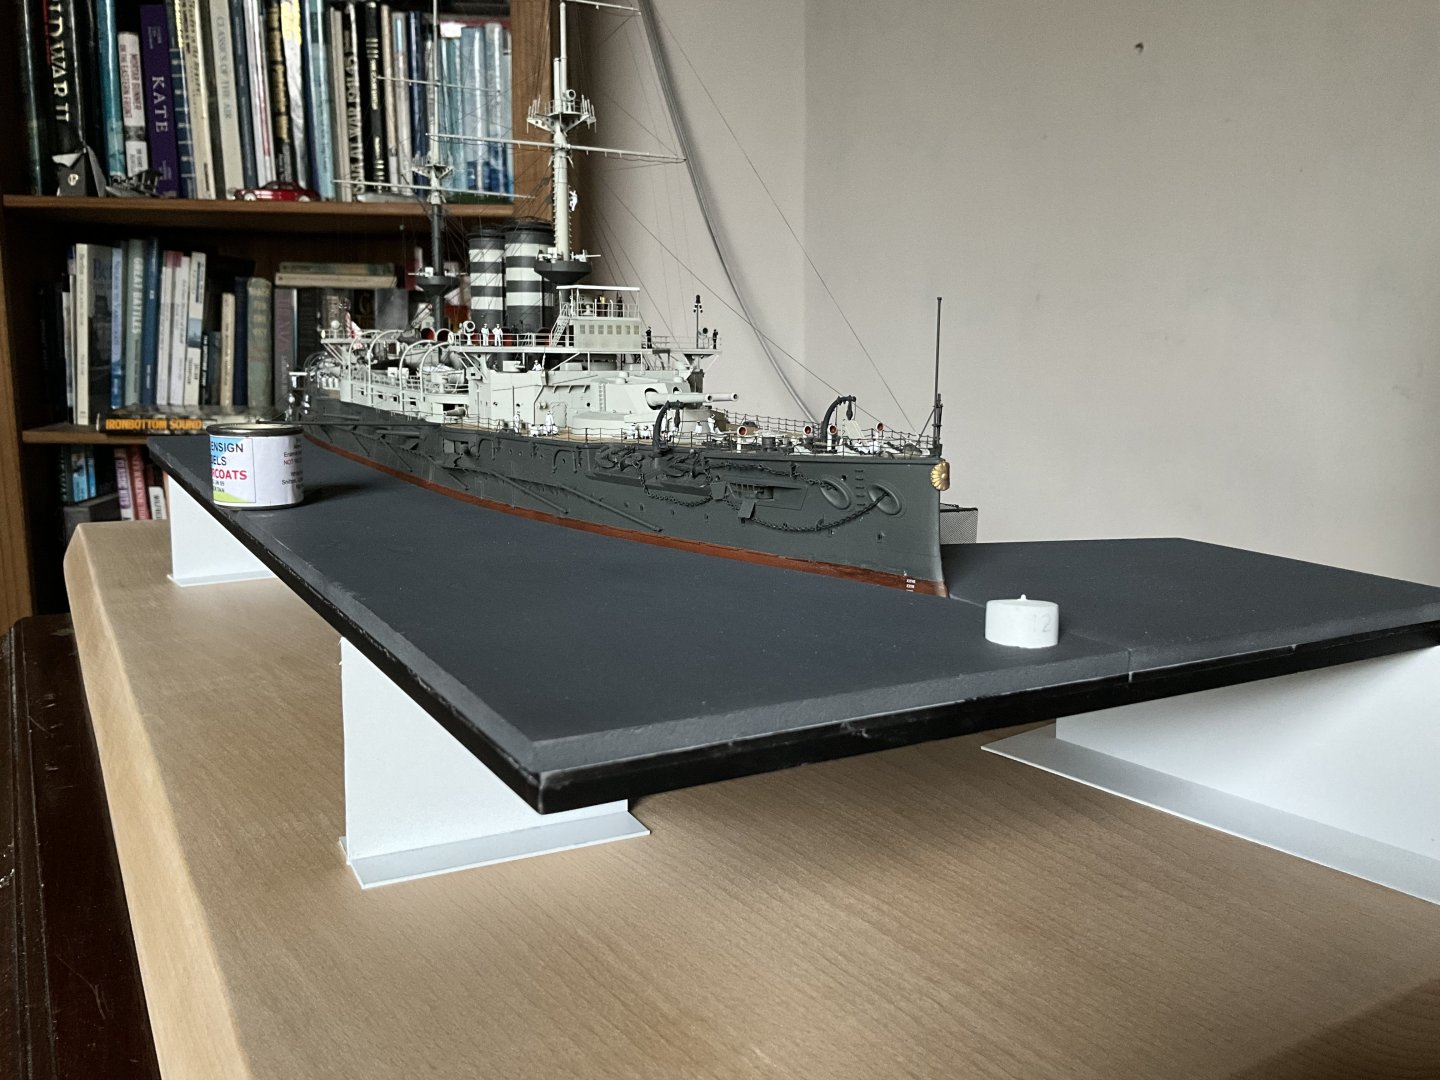
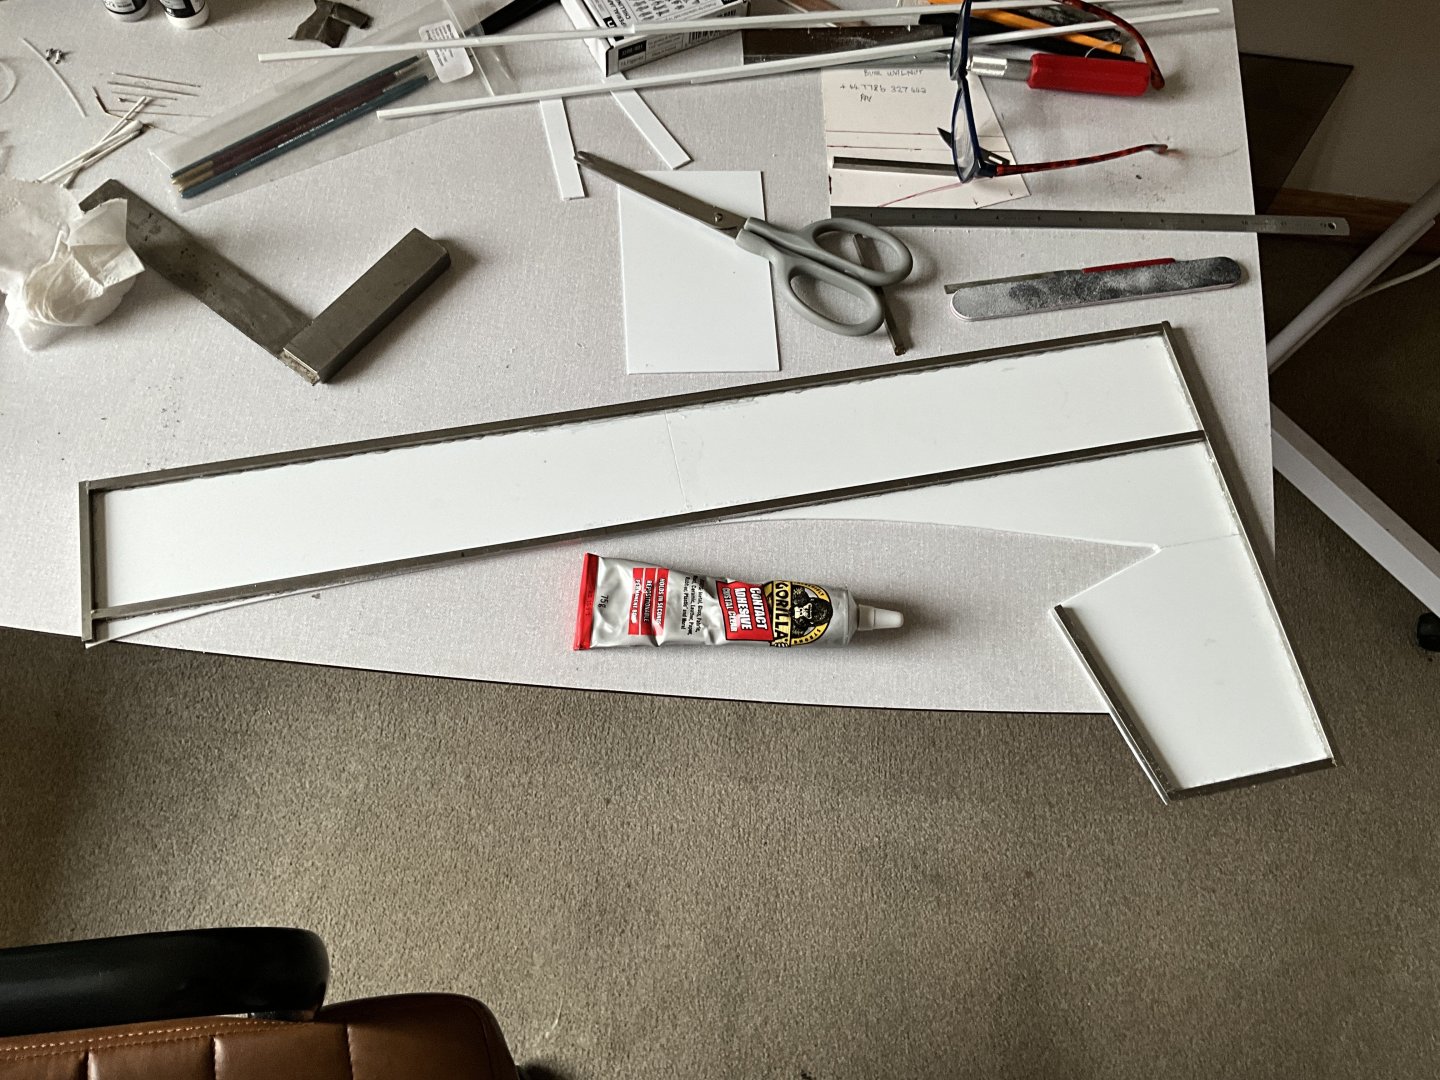
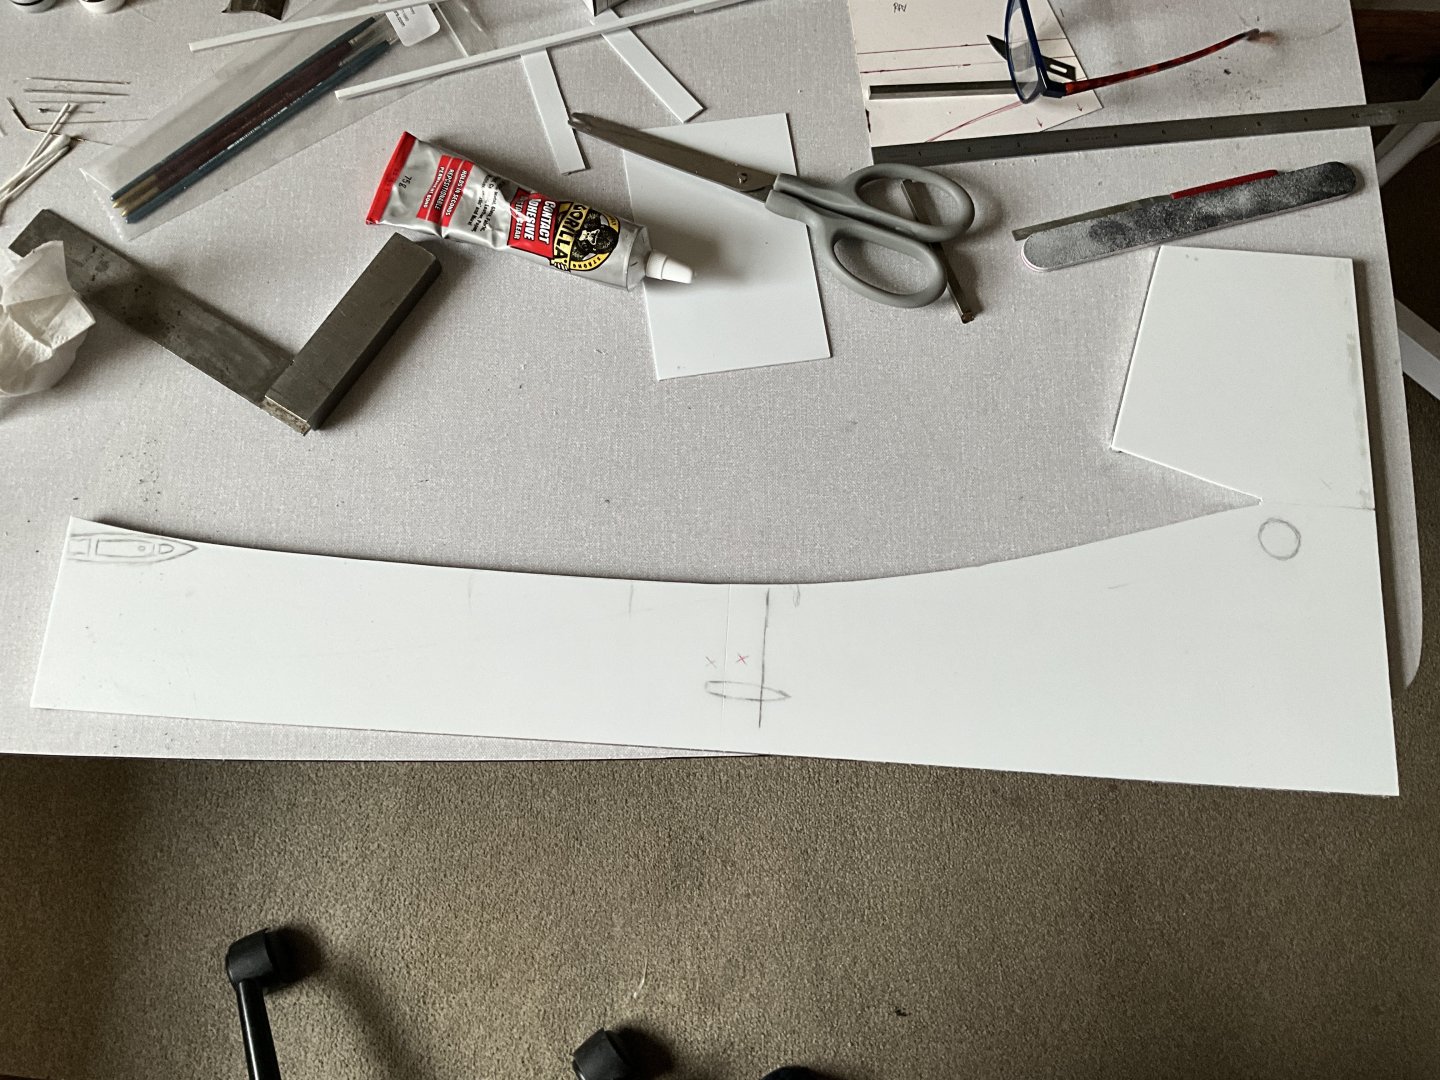
Back again with another step forward, got the PVC Foam boards cut and shaped to side of hull, happy with how this looks, you can see from photos were l am going with this now, this shall be sea level to the hull, just have to notch out for a mooring boy and two boats before gluing this to plastic underneath, see what l can come up with for a mooring boy, starting to feel like something from Blue Peter now 😂 wish l could say here’s one l finished earlier.

-
Oh by the way, one other thing l forgot when mentioning corrections was using wooden decking for boat decks and bridge superstructures, be nice to see one done this way too see difference, better to get this in whilst l remember. 👍
-
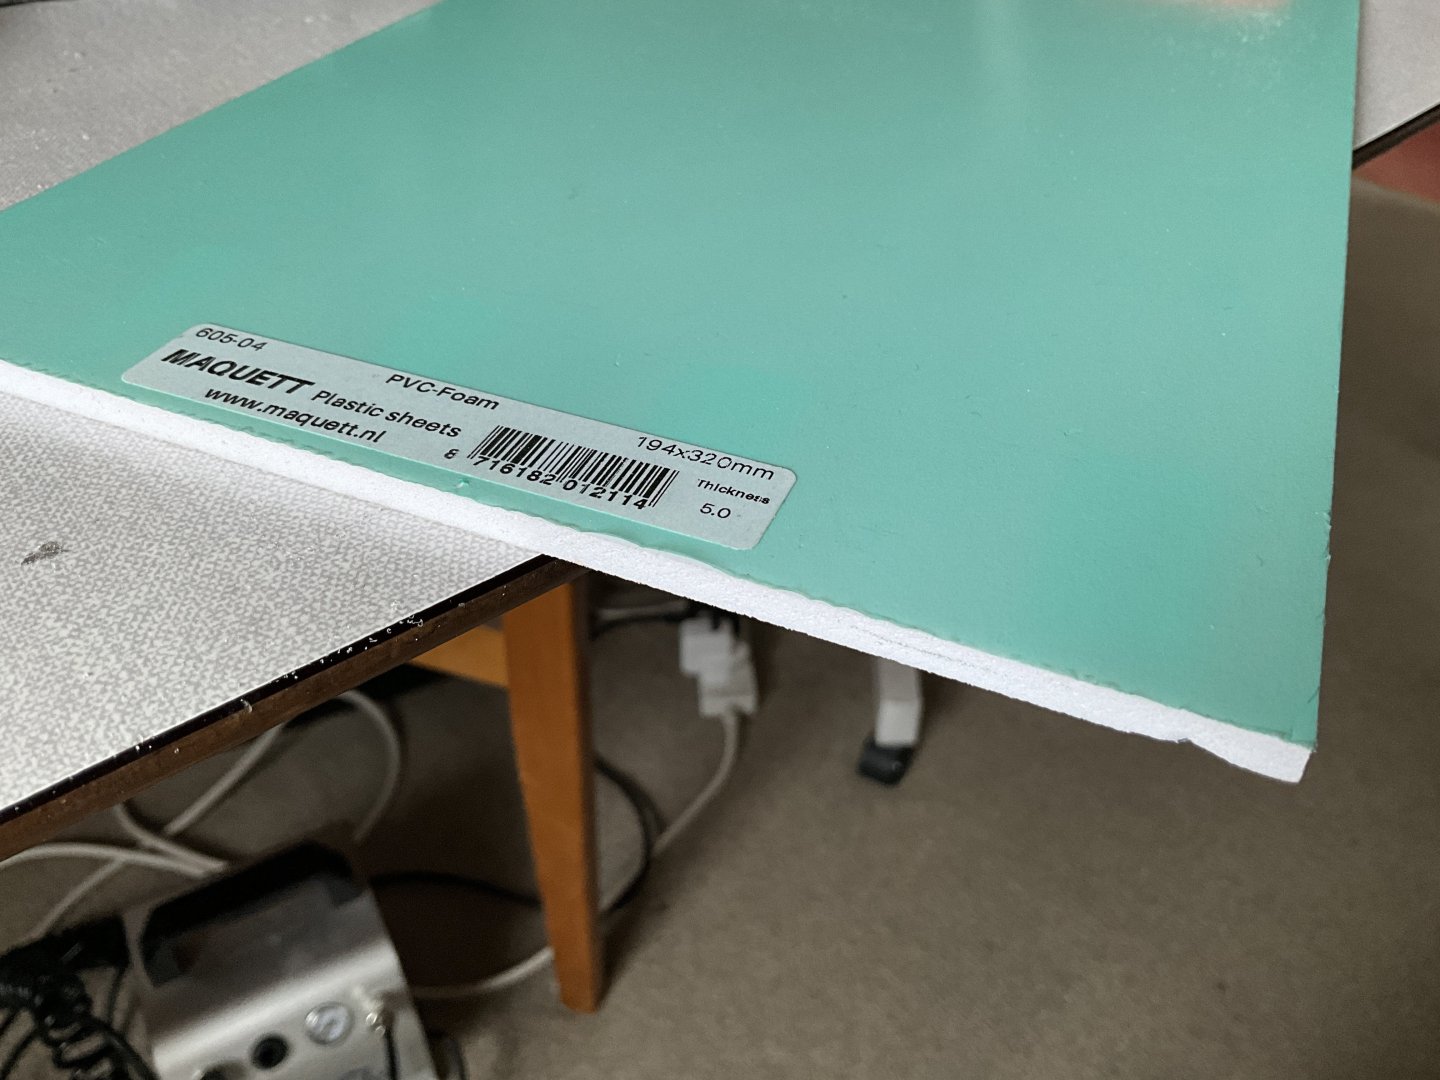
This now lets me cut the 5mm thick PVC foam, all be it carefully, this is where lm at just now. Still waiting on draught mark decals, another 50ft pinnace from Micro Master and more figures for crew. 🤛


-
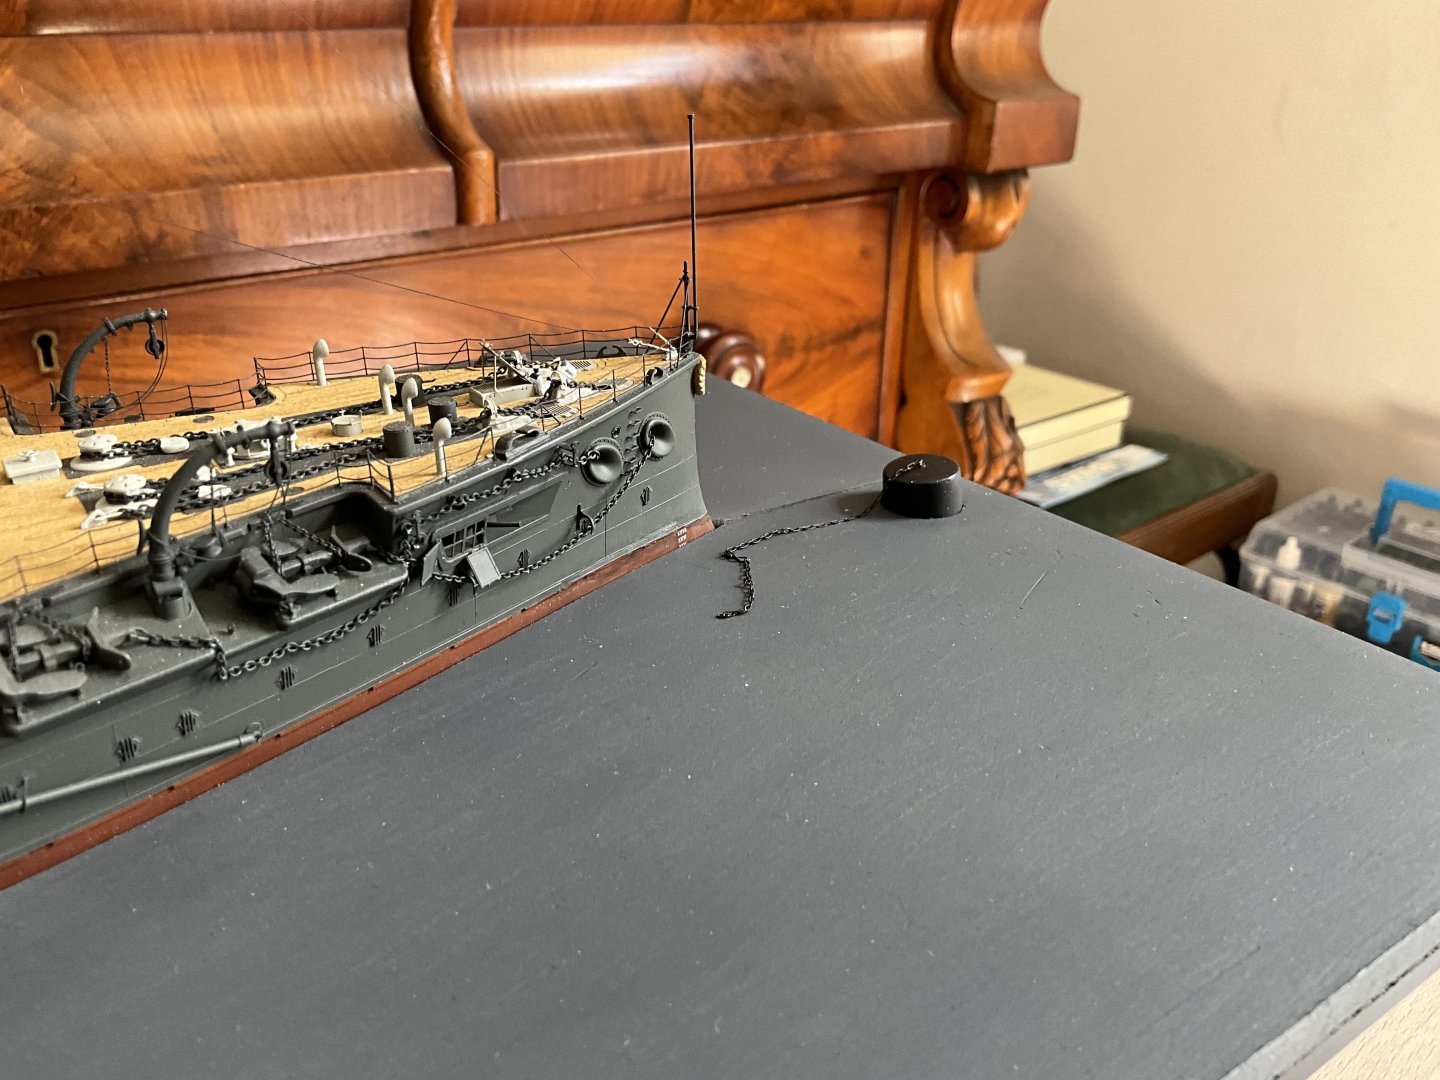
For the sea at waterline on starboard side l game up with this idea and solution, hope it all works in the end, all a first for me, the metal square bar was something out of stash in garage 5x5mm, the idea is glue this to underside and it will stop distortion, used gorilla glue here, incidentally this is what might have been better than my 10 second option for the masts 🙄. Shall drill holes into this to insert rods as supports 👍 Also using same solution as on supporting the torpedo net booms. 👍
-
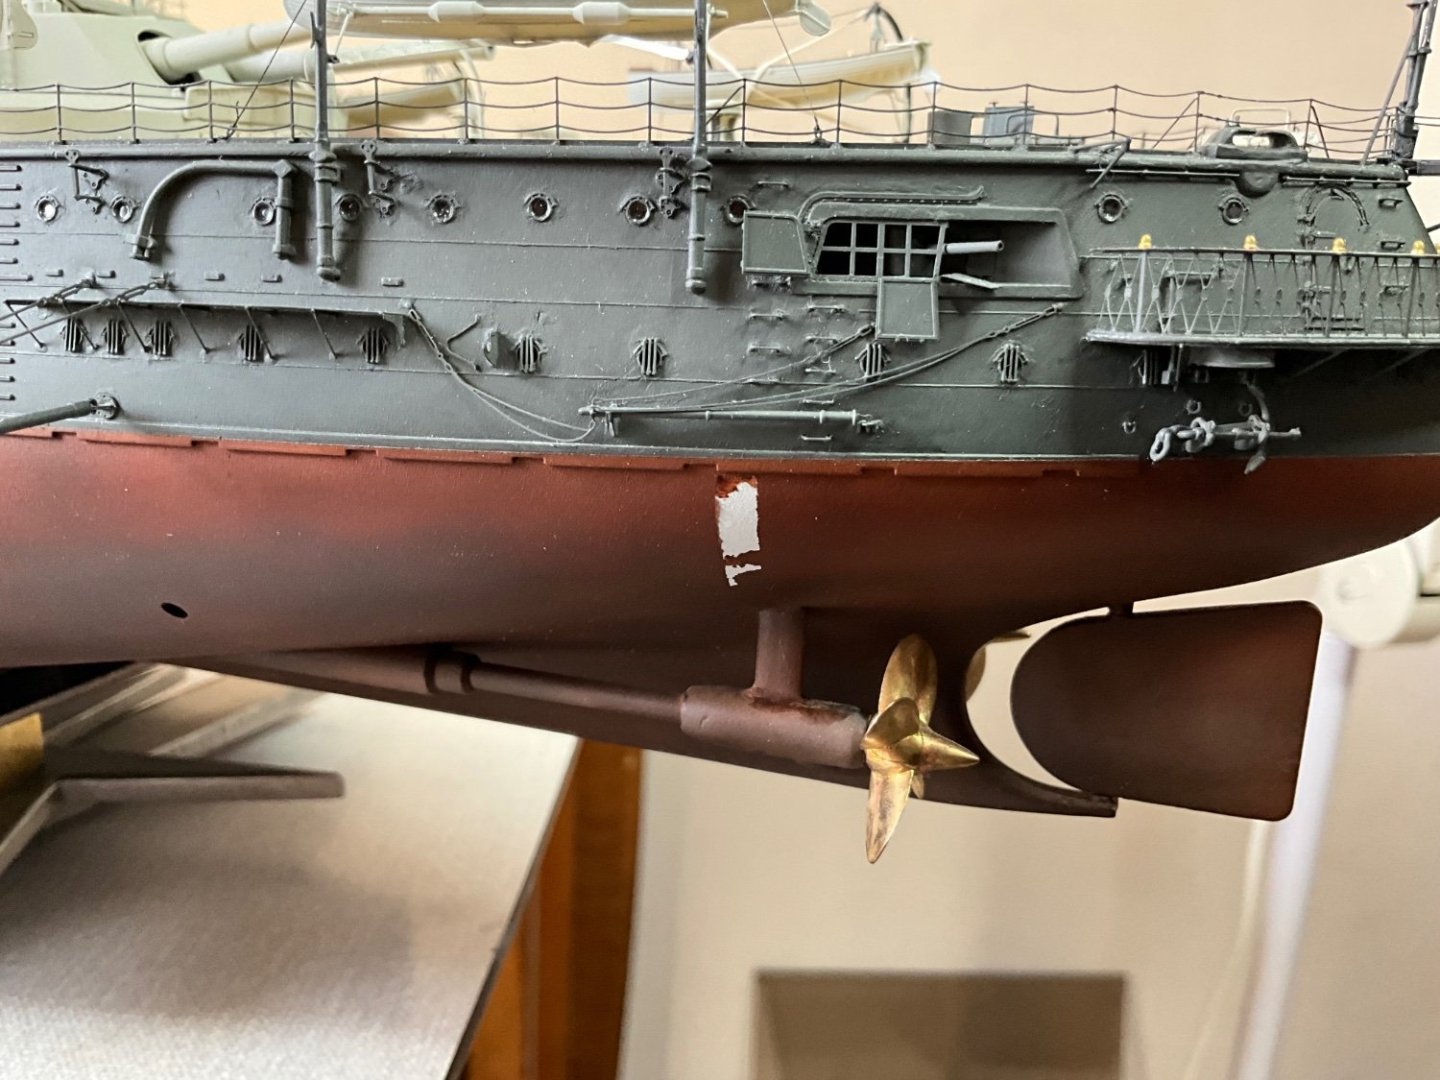
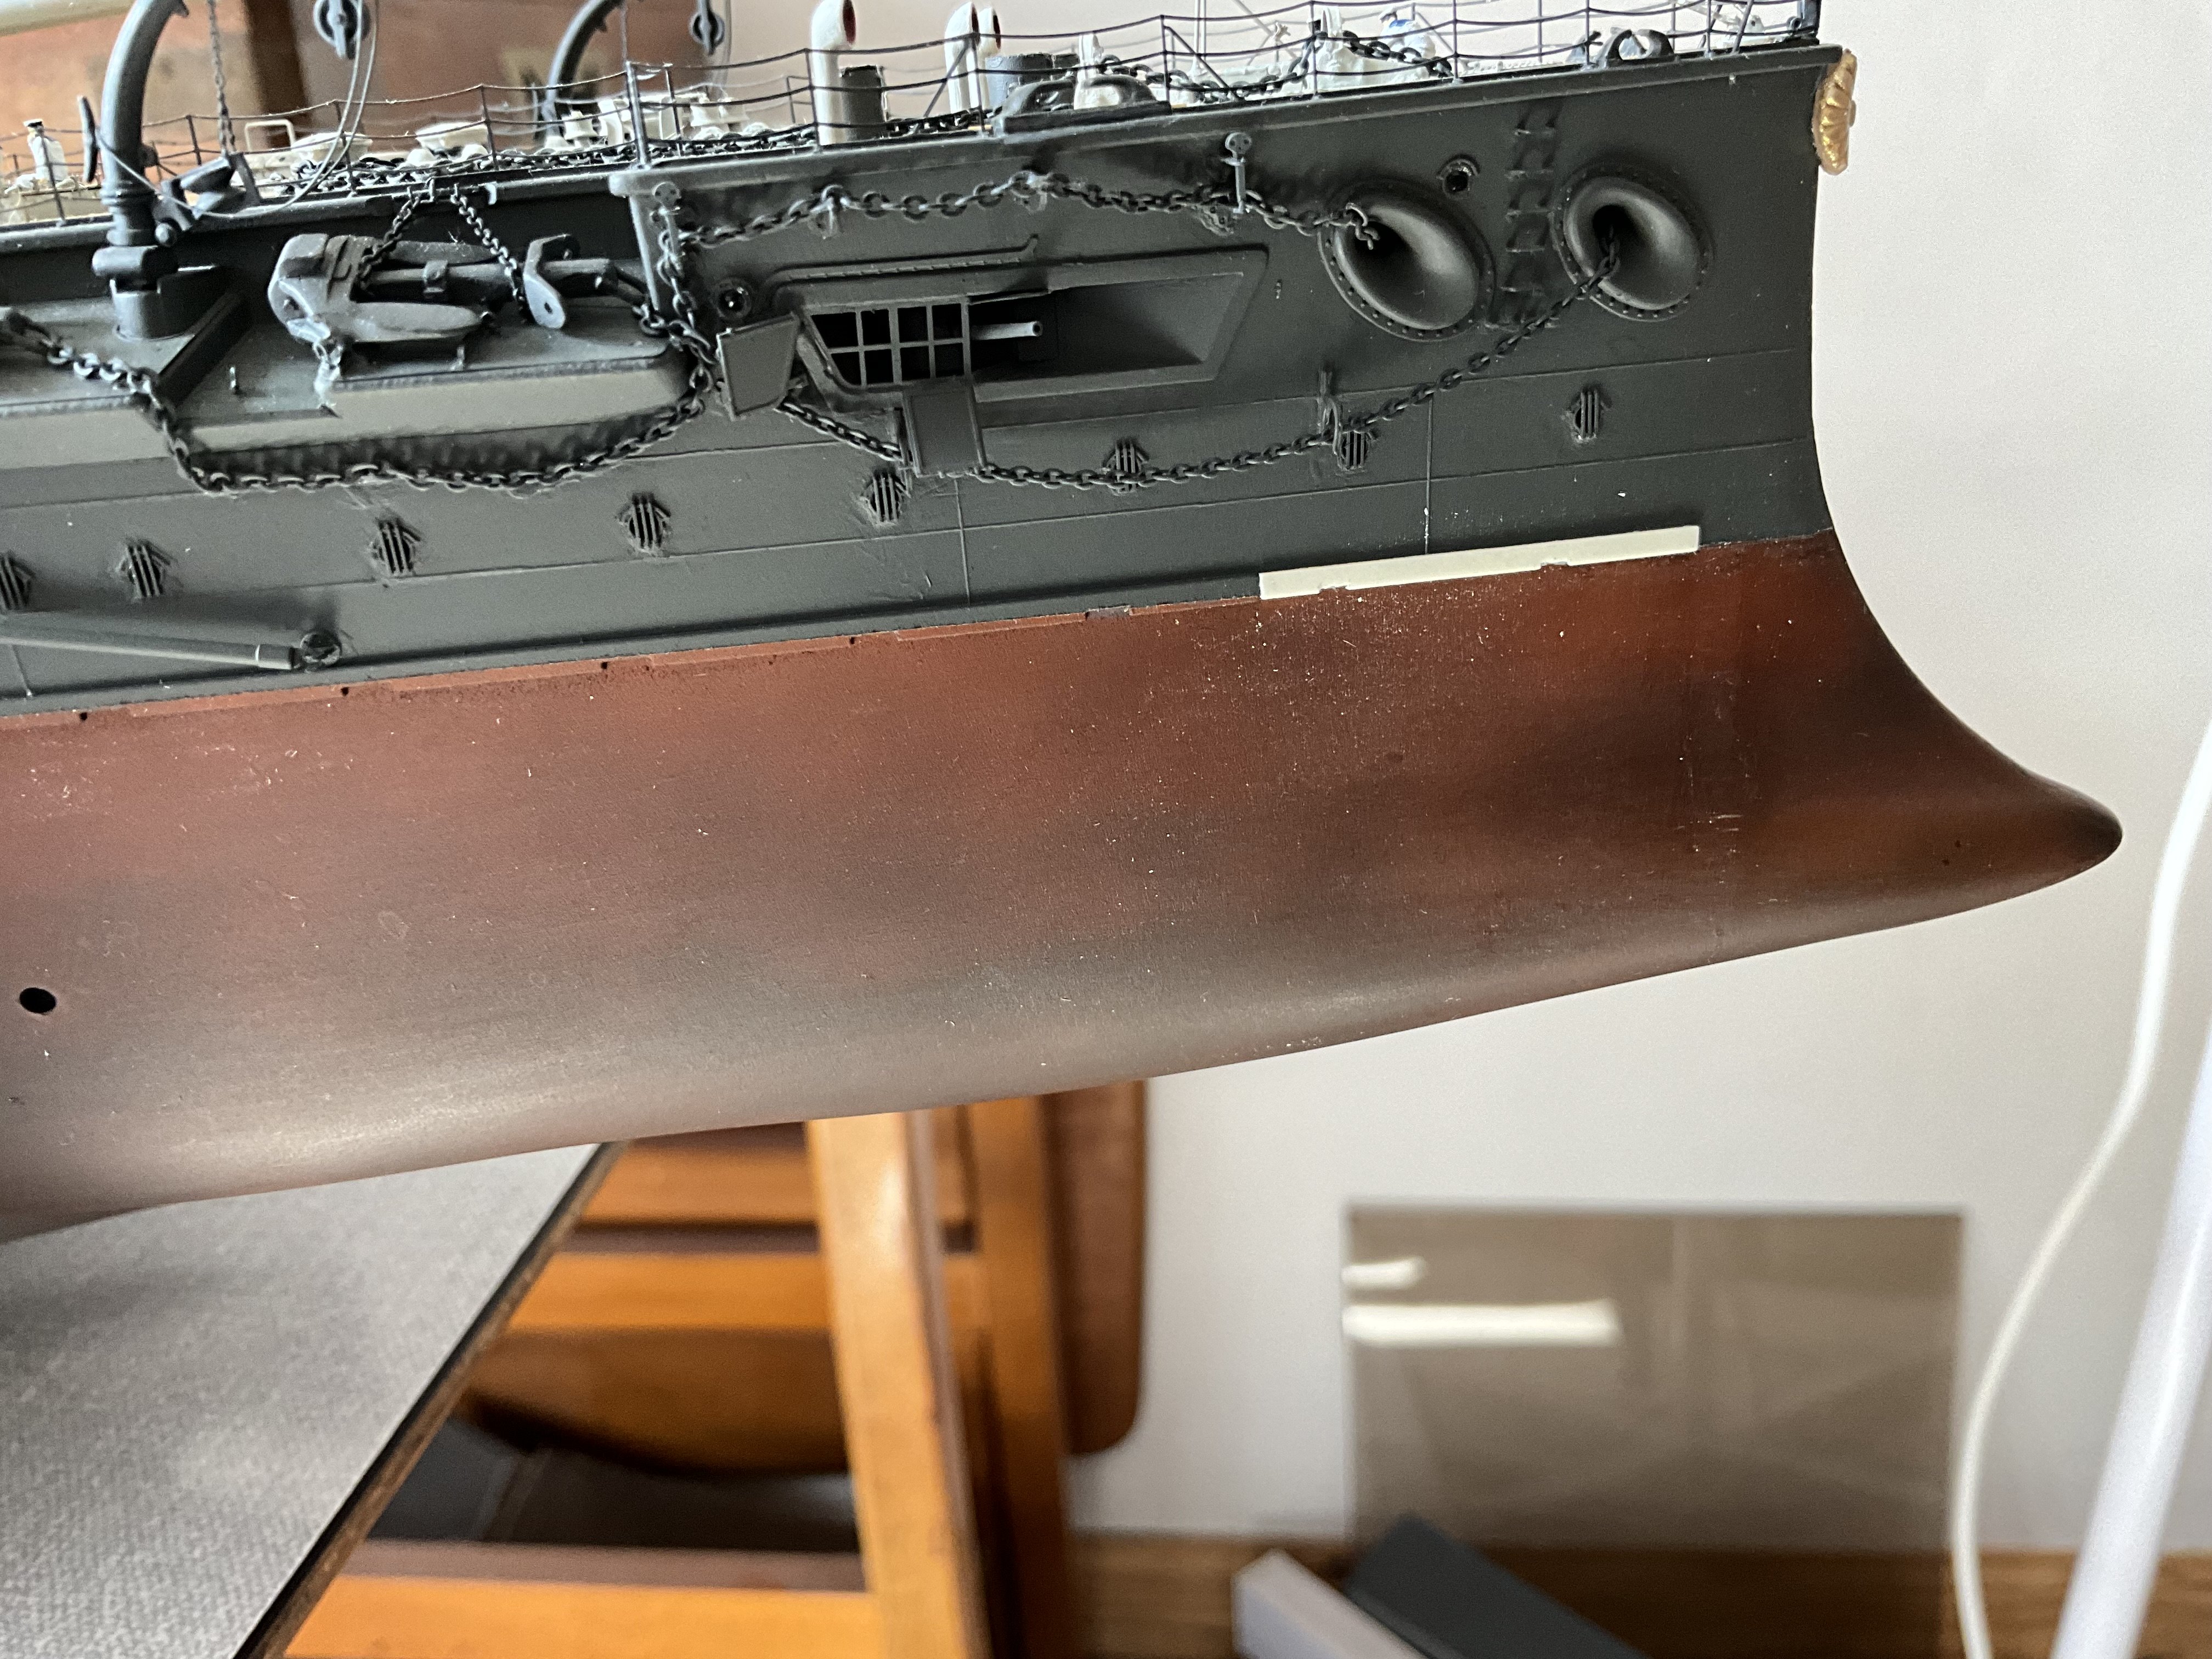
Hi guys, can do a short update, received some parts in post to allow progress, also purchased a piece of wood for display case bottom so have cut this to size and dressed for what l have in mind, shall have to remove model from this when it comes to making the top, needs grove cut in it to suit class when l get to that stage 👍 Made the small alteration to rib running along waterline at bow, just using a piece of styrene stock and dressing it down to size, not a hard thing to do this but since l noticed it thought fixing it would show difference, this is only for the 1902 Mikasa as by 1905 this was as the kit already is, was only killing time looking for things to do 😄 c


-
The other thing l would investigate is the mounting points for masts, when you make the brass and etched masts they are fairly heavy and delicate with all the details, l fixed mine in with white glue and this wasn’t strong enough due to rather short point of contact in deck for strength, wobbled loose due to weights involved, trust me using Gorilla Glue a bit scary 😂 ten second rule applies. Better making a more substantial fixing point to support the heavier mast that would allow white glue to be enough for purpose. 👍 Hope this helps. 🤛 Well that’s me till l get some deliveries, thanks for reading.
-
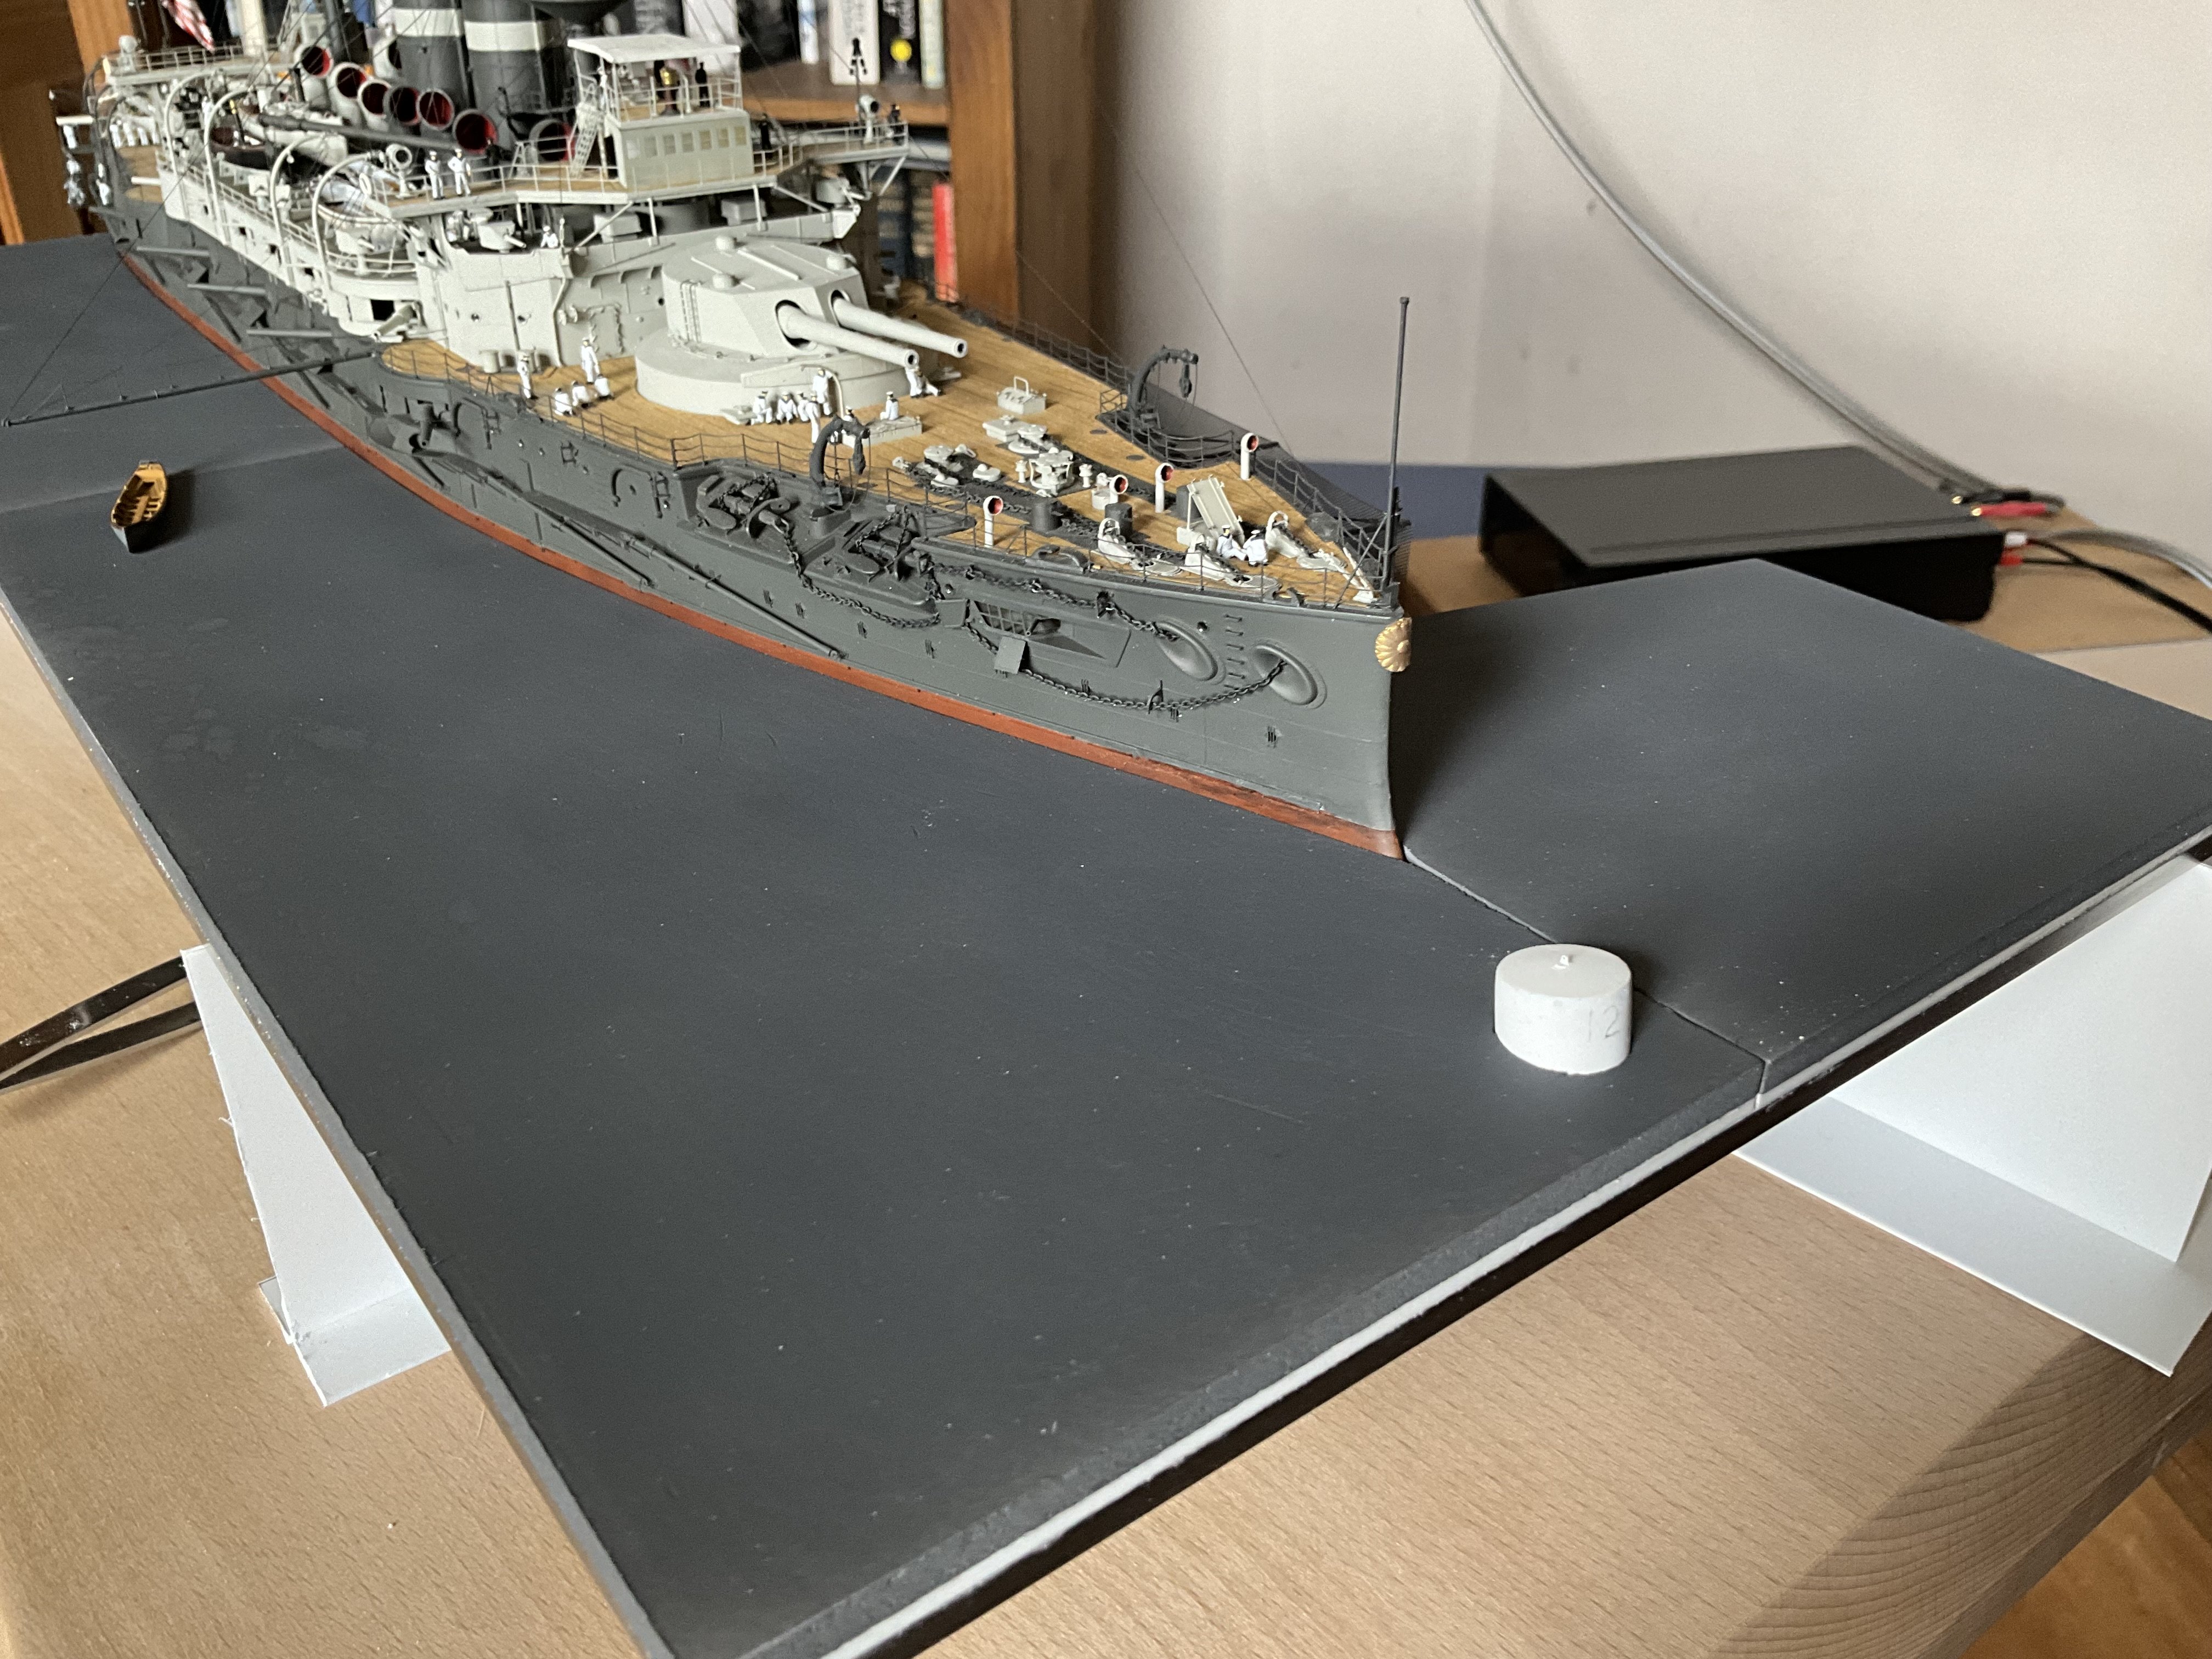
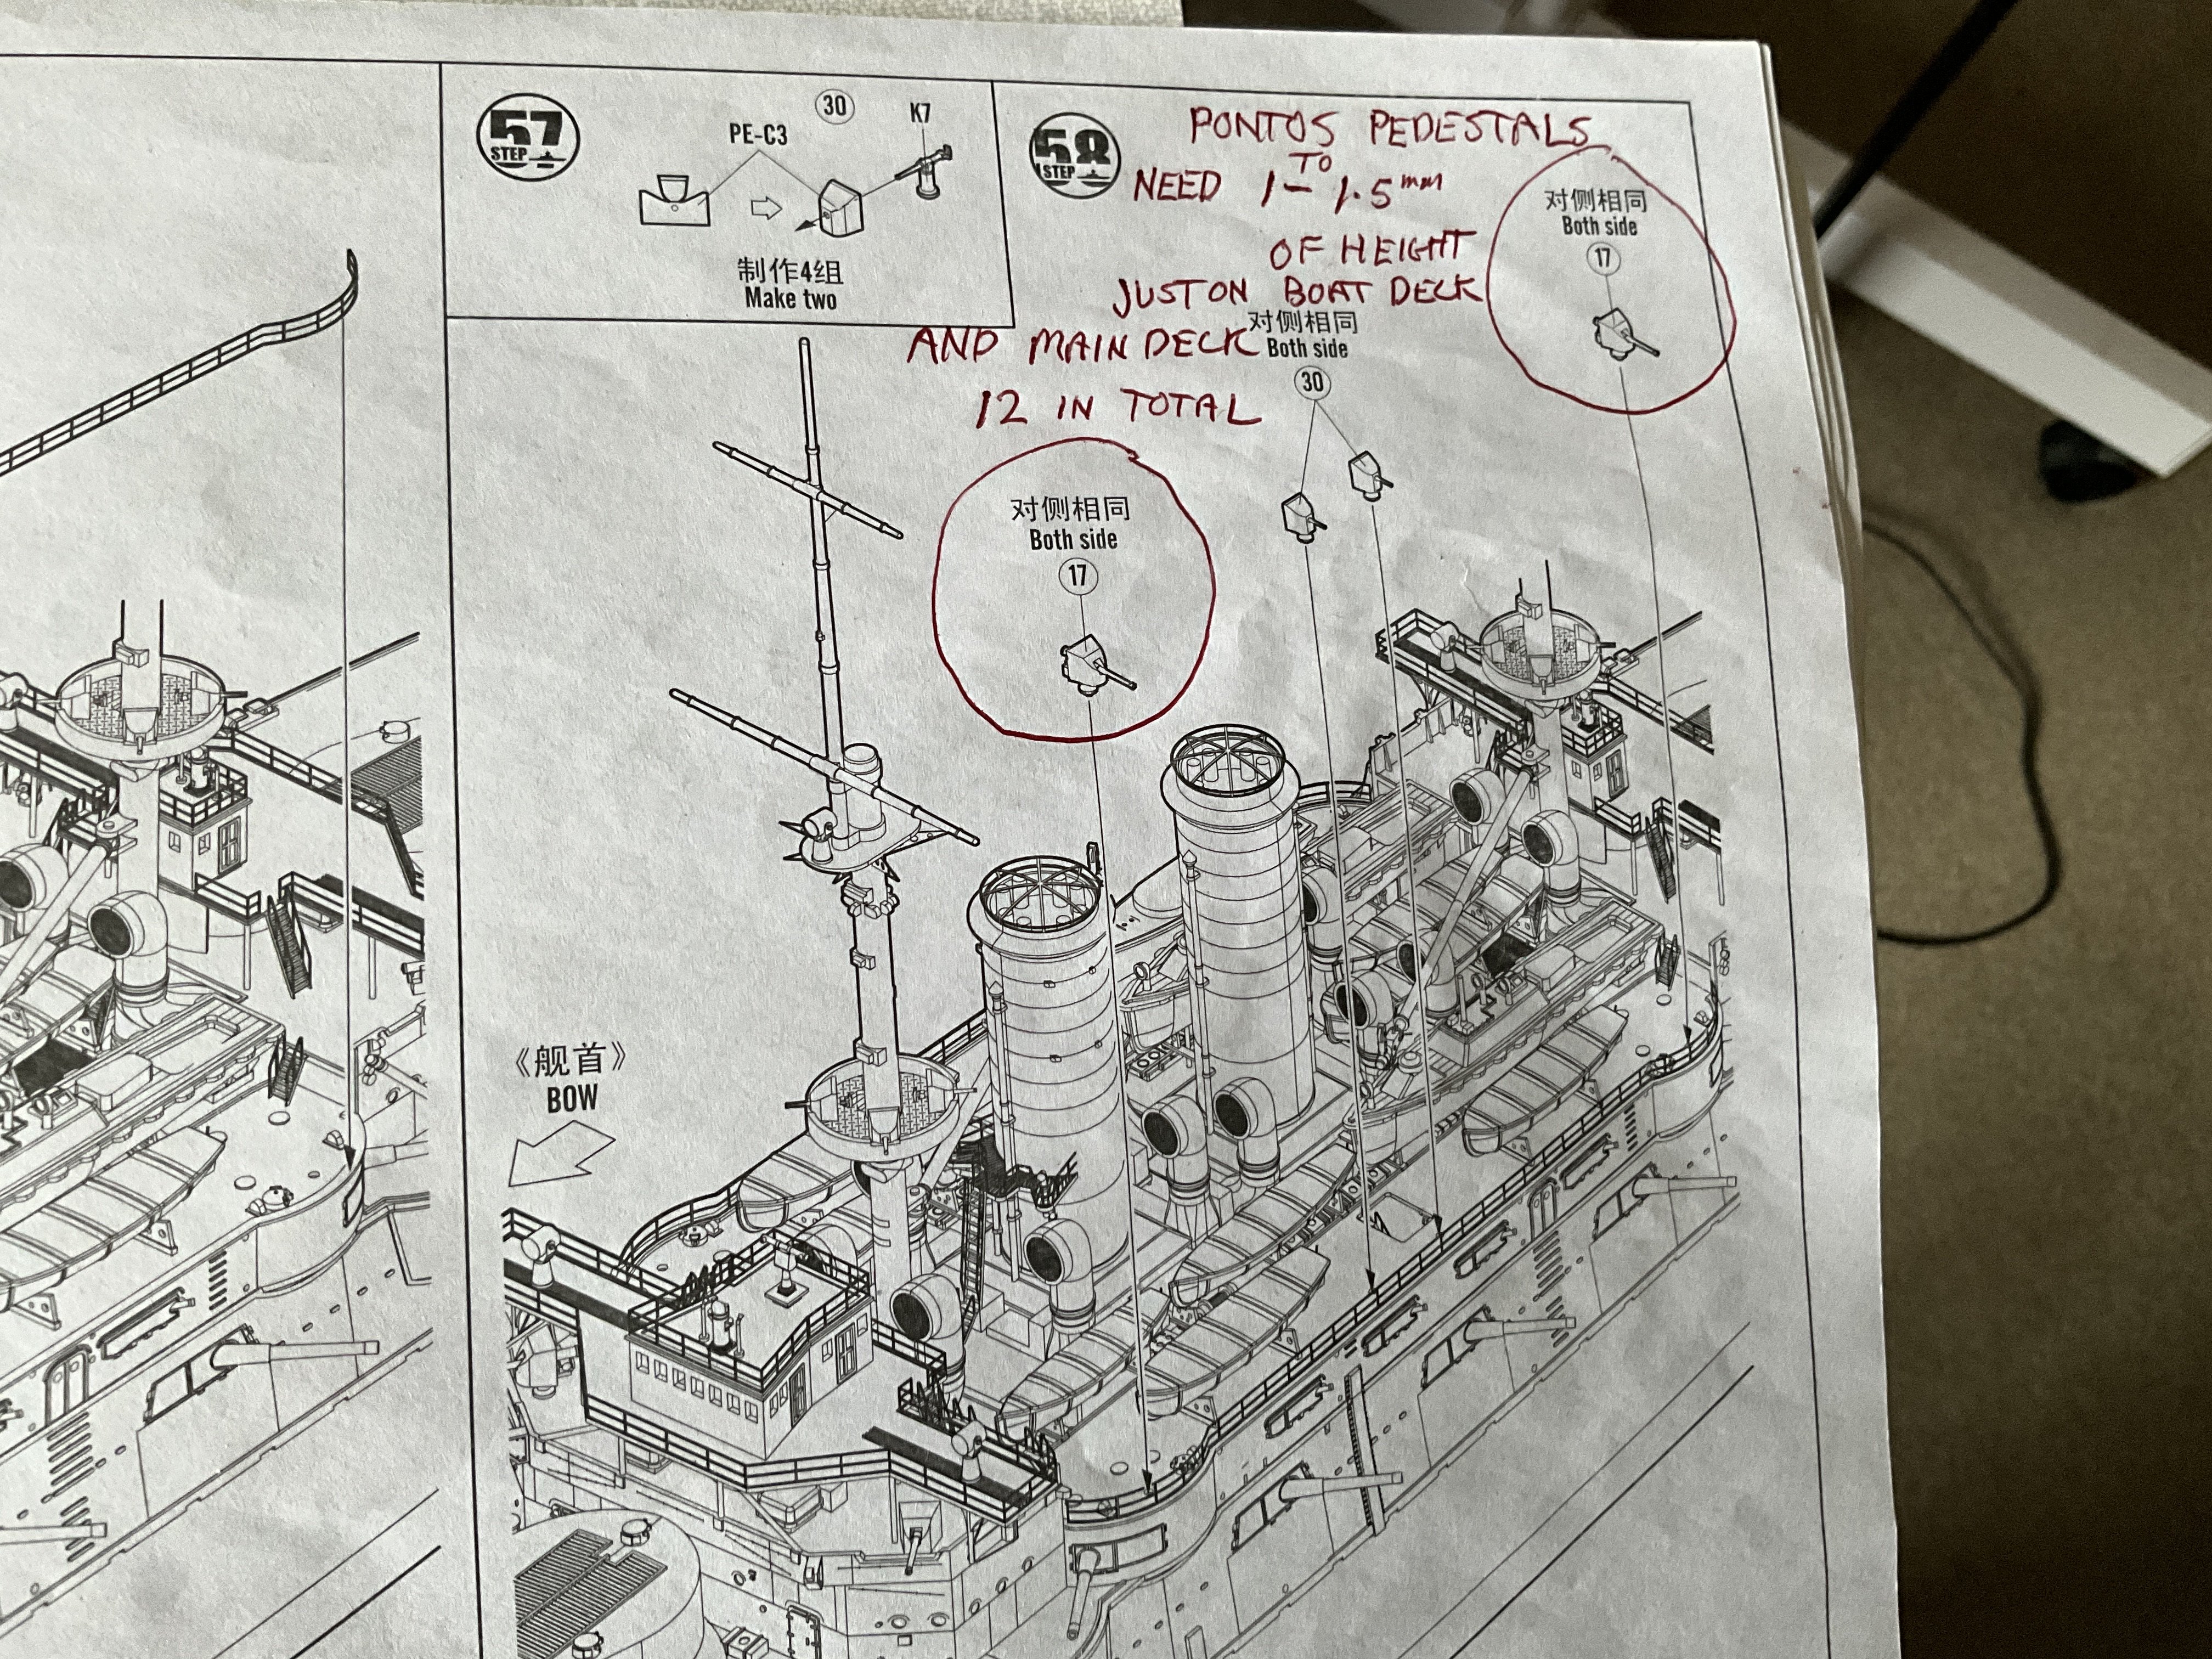
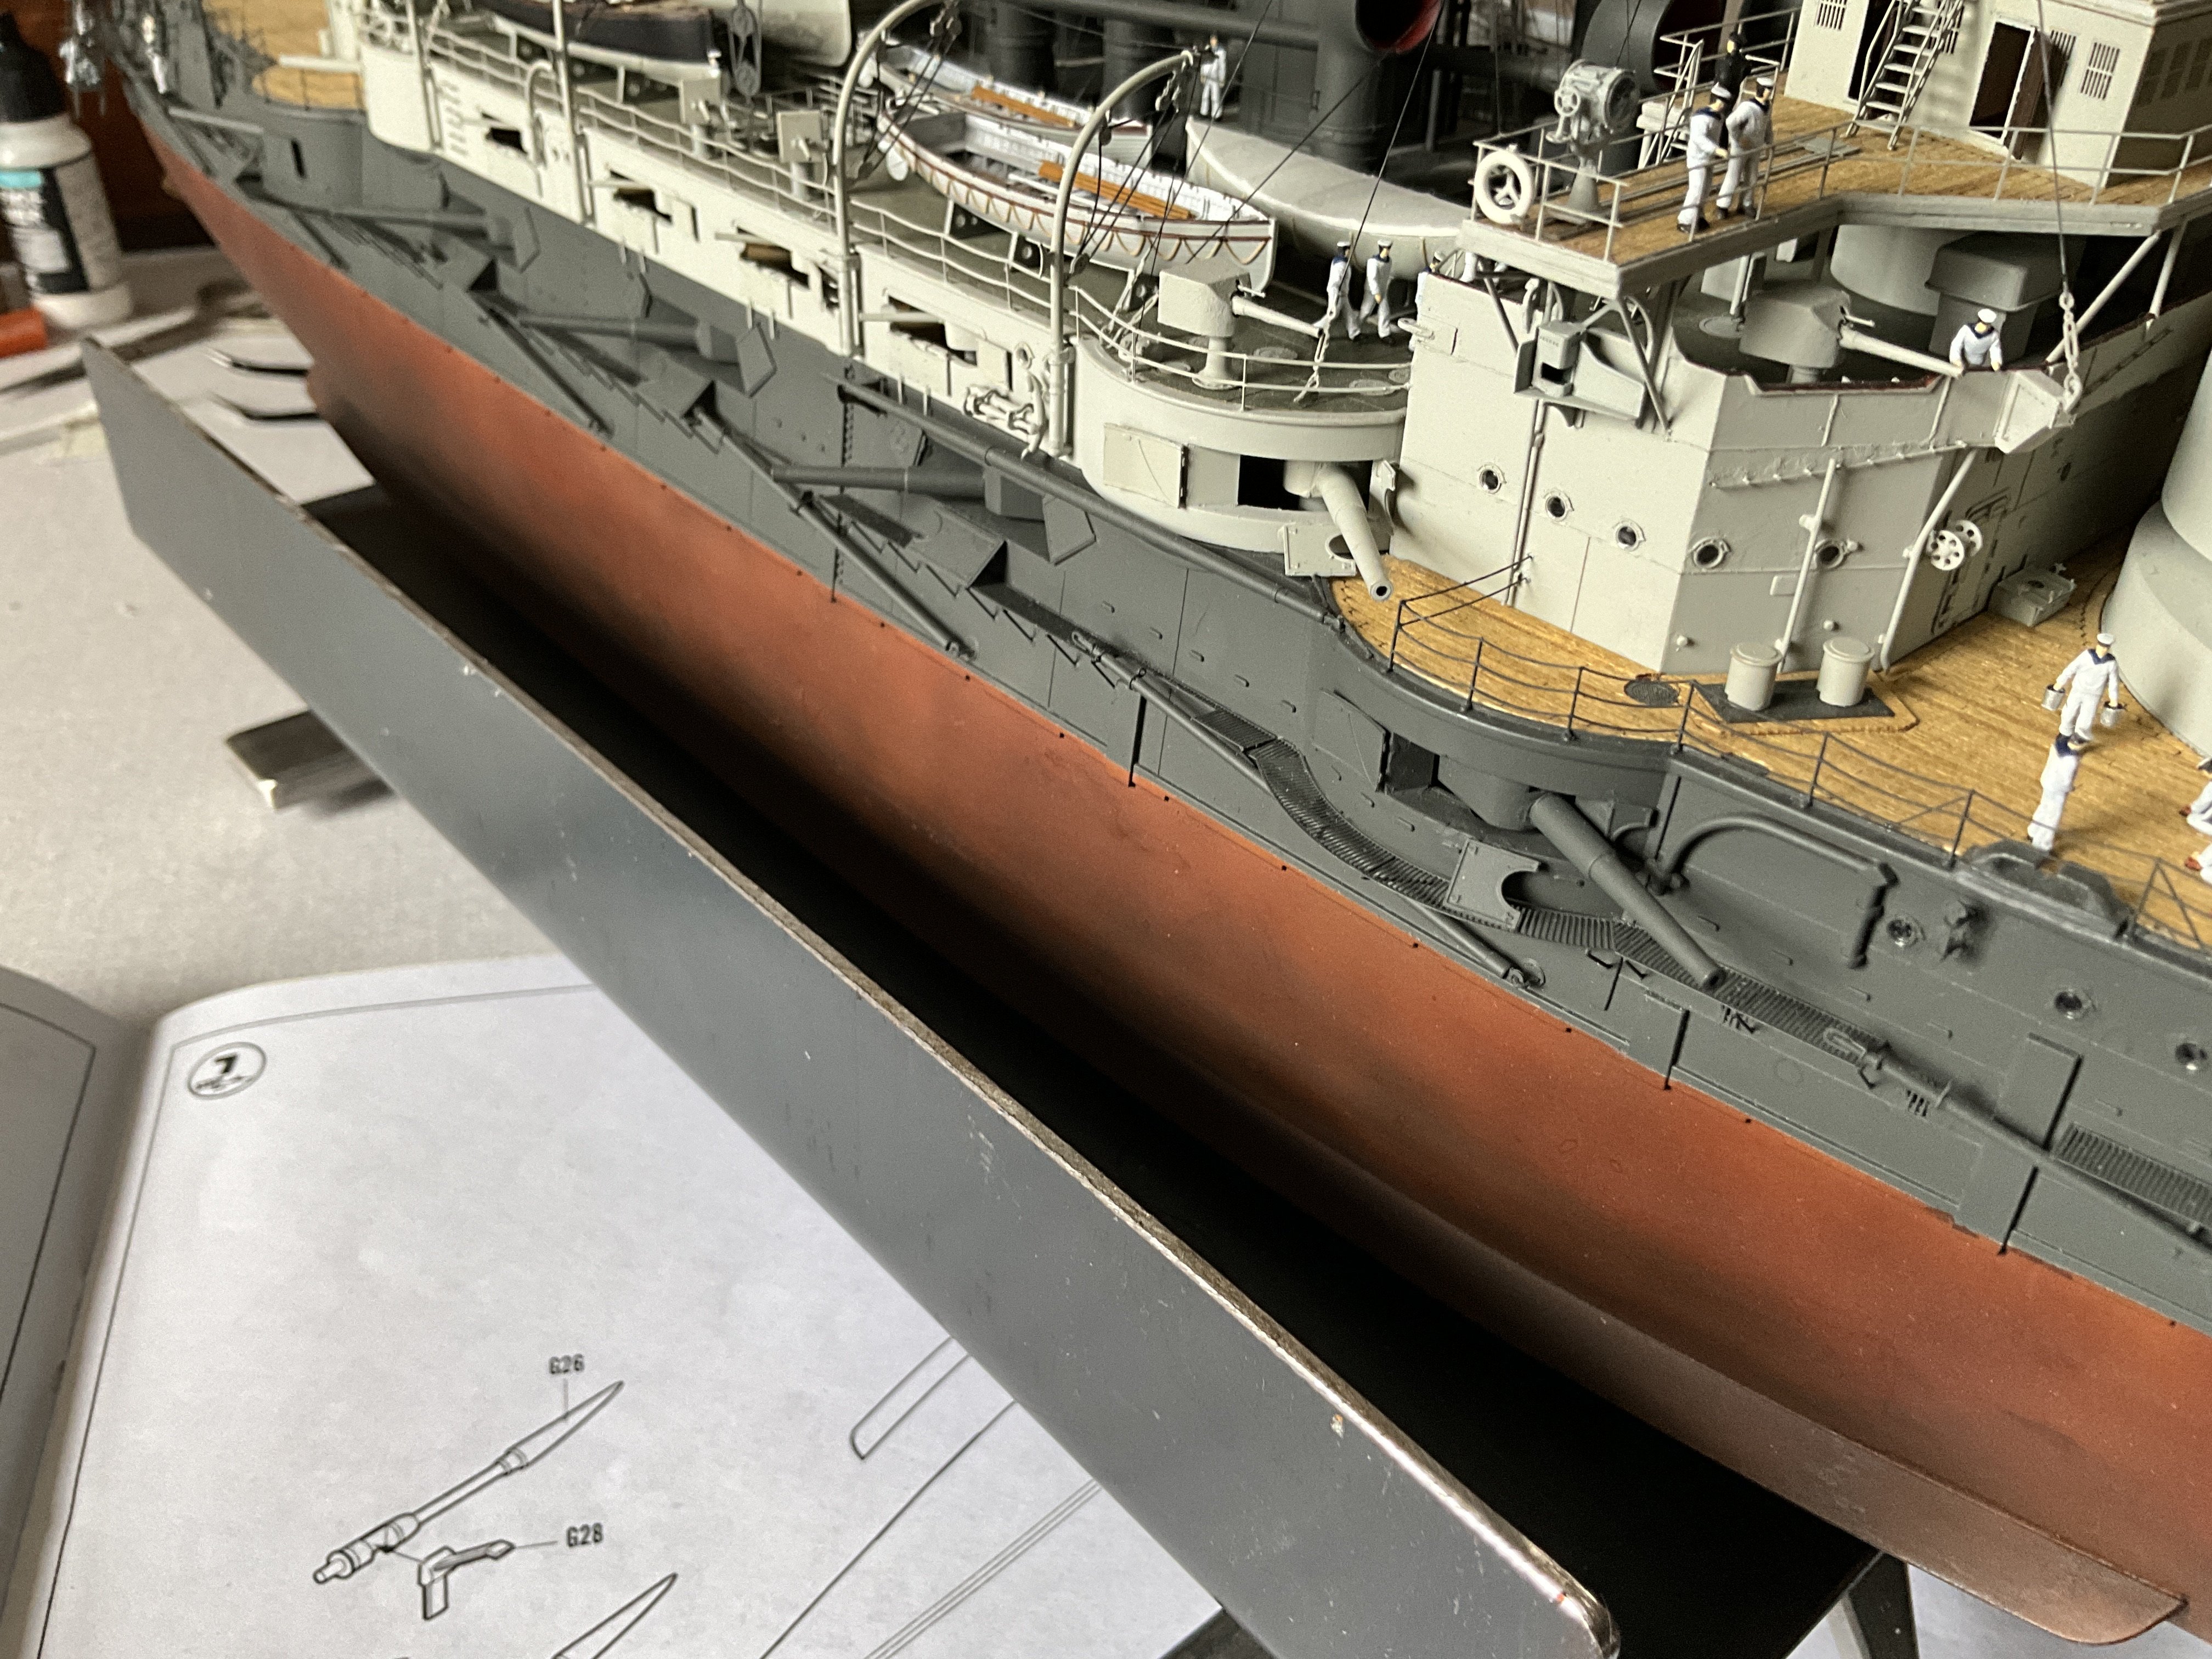
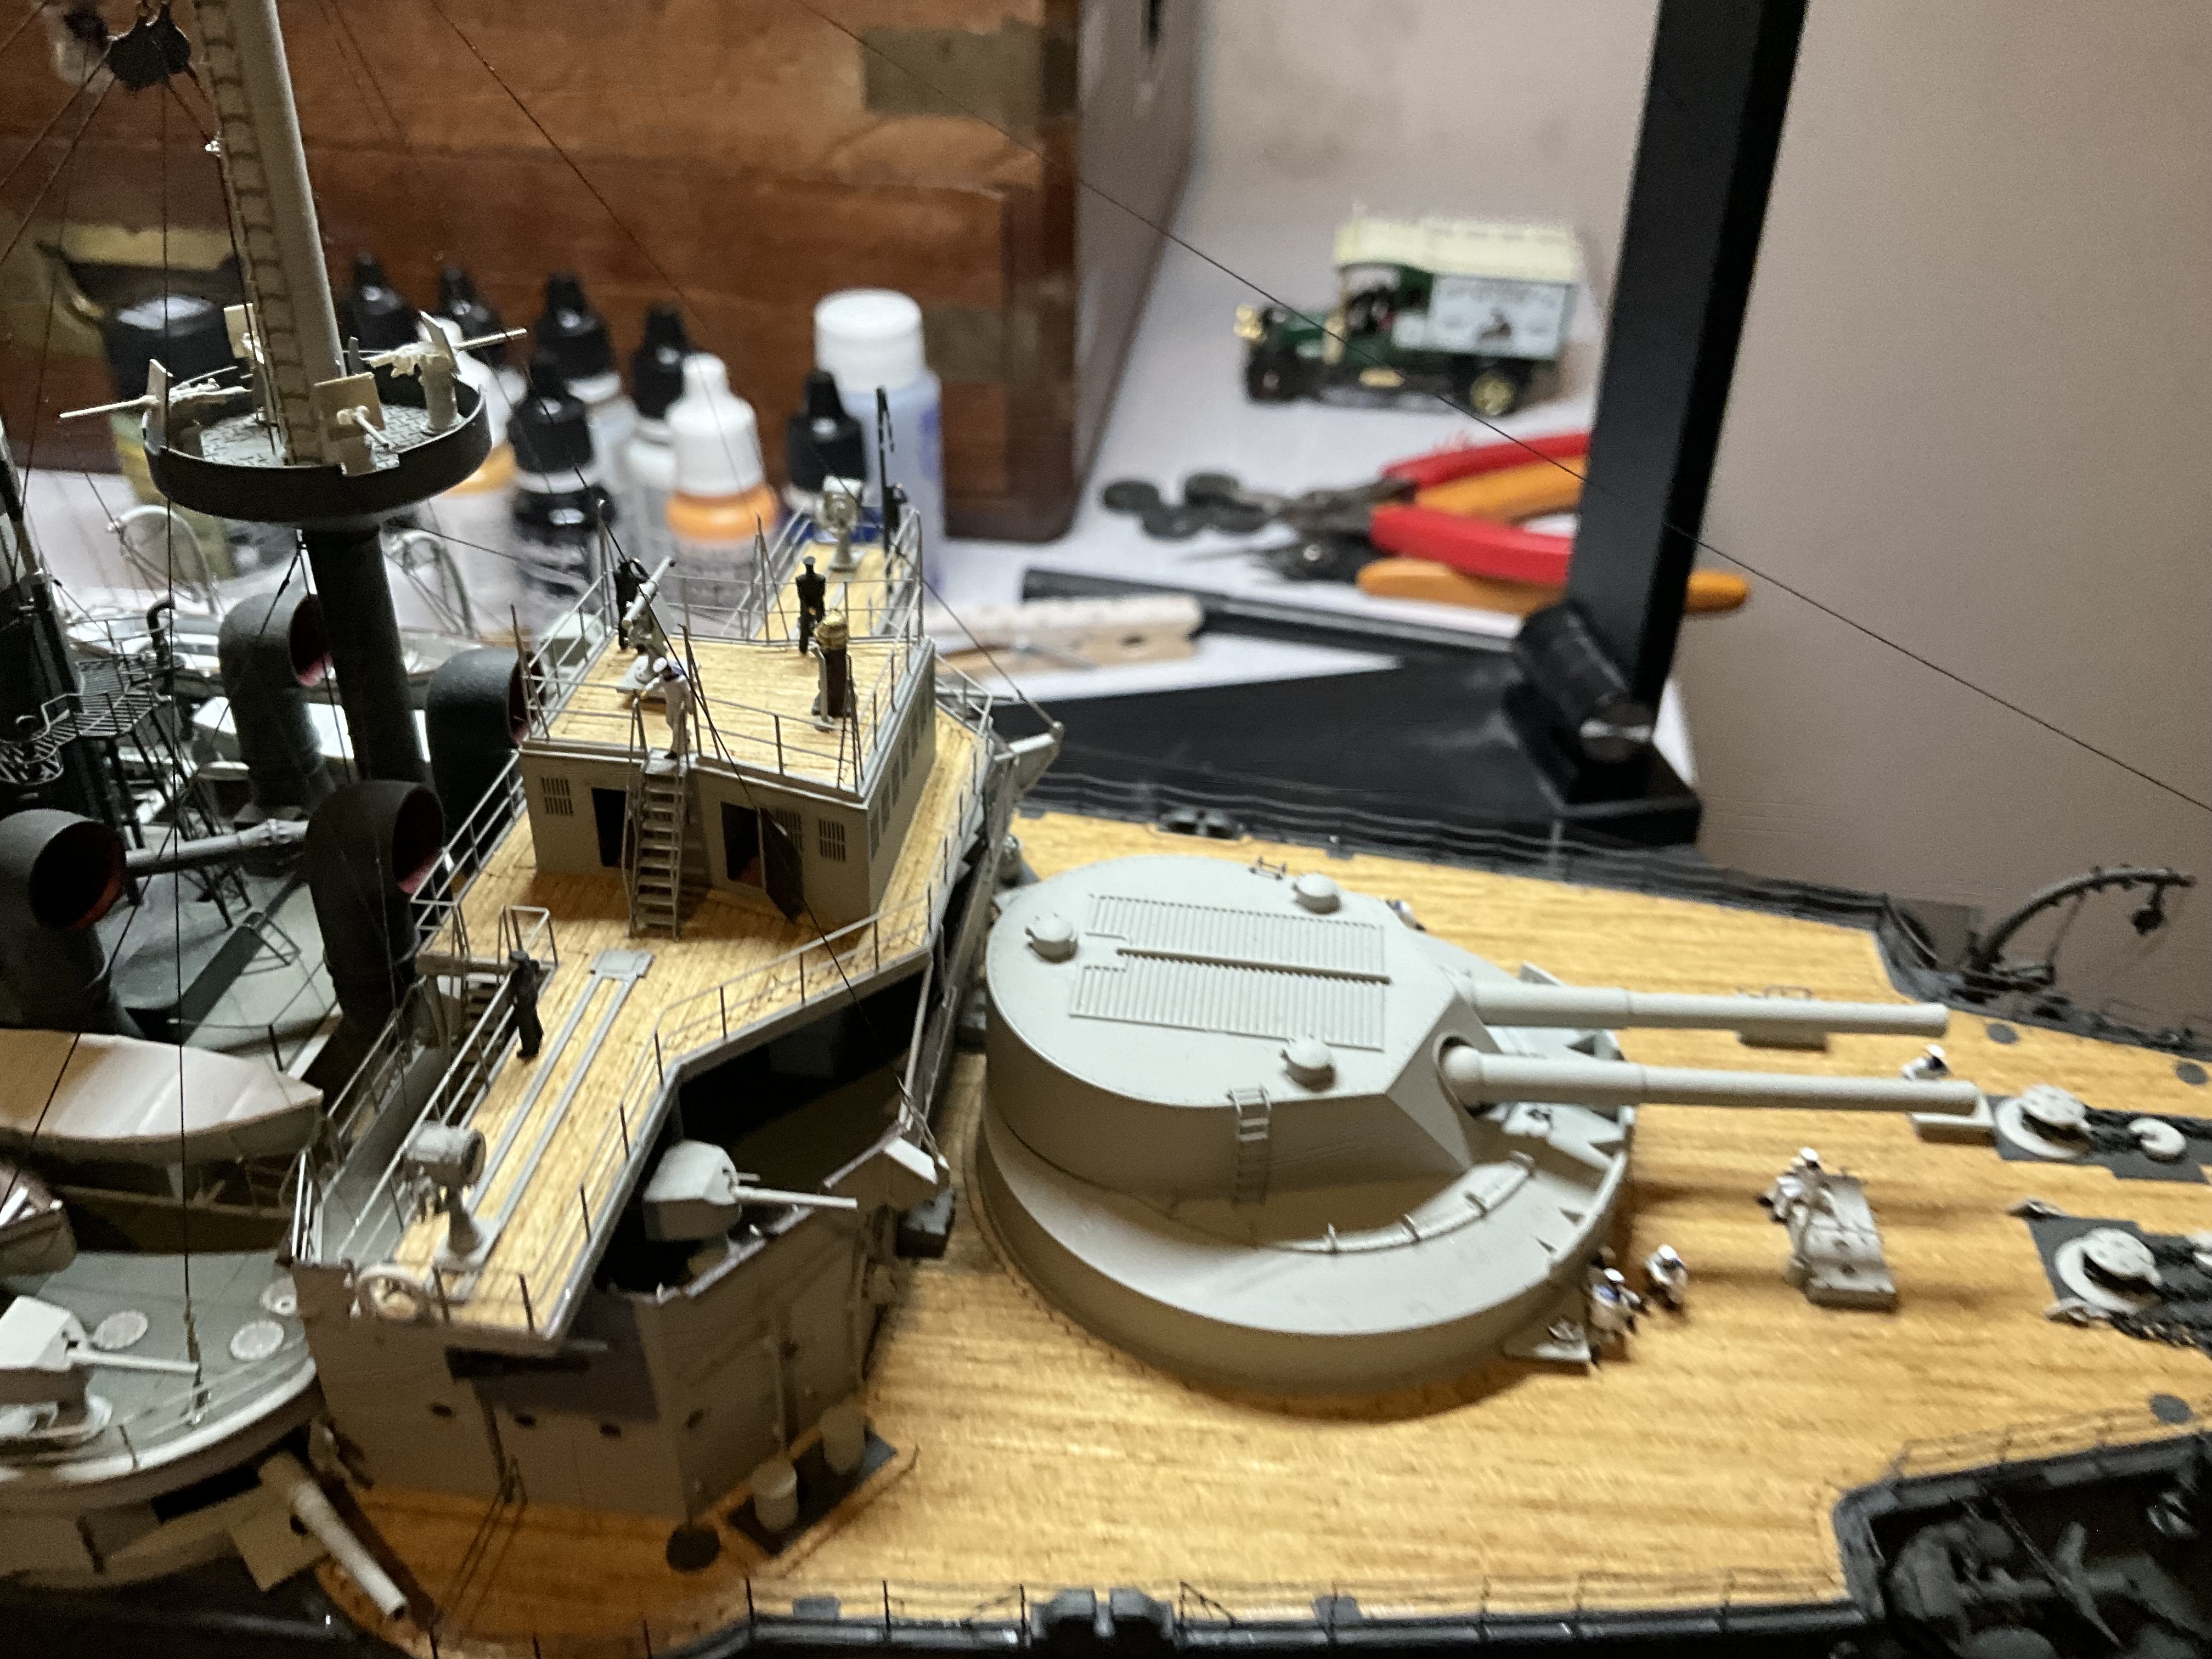
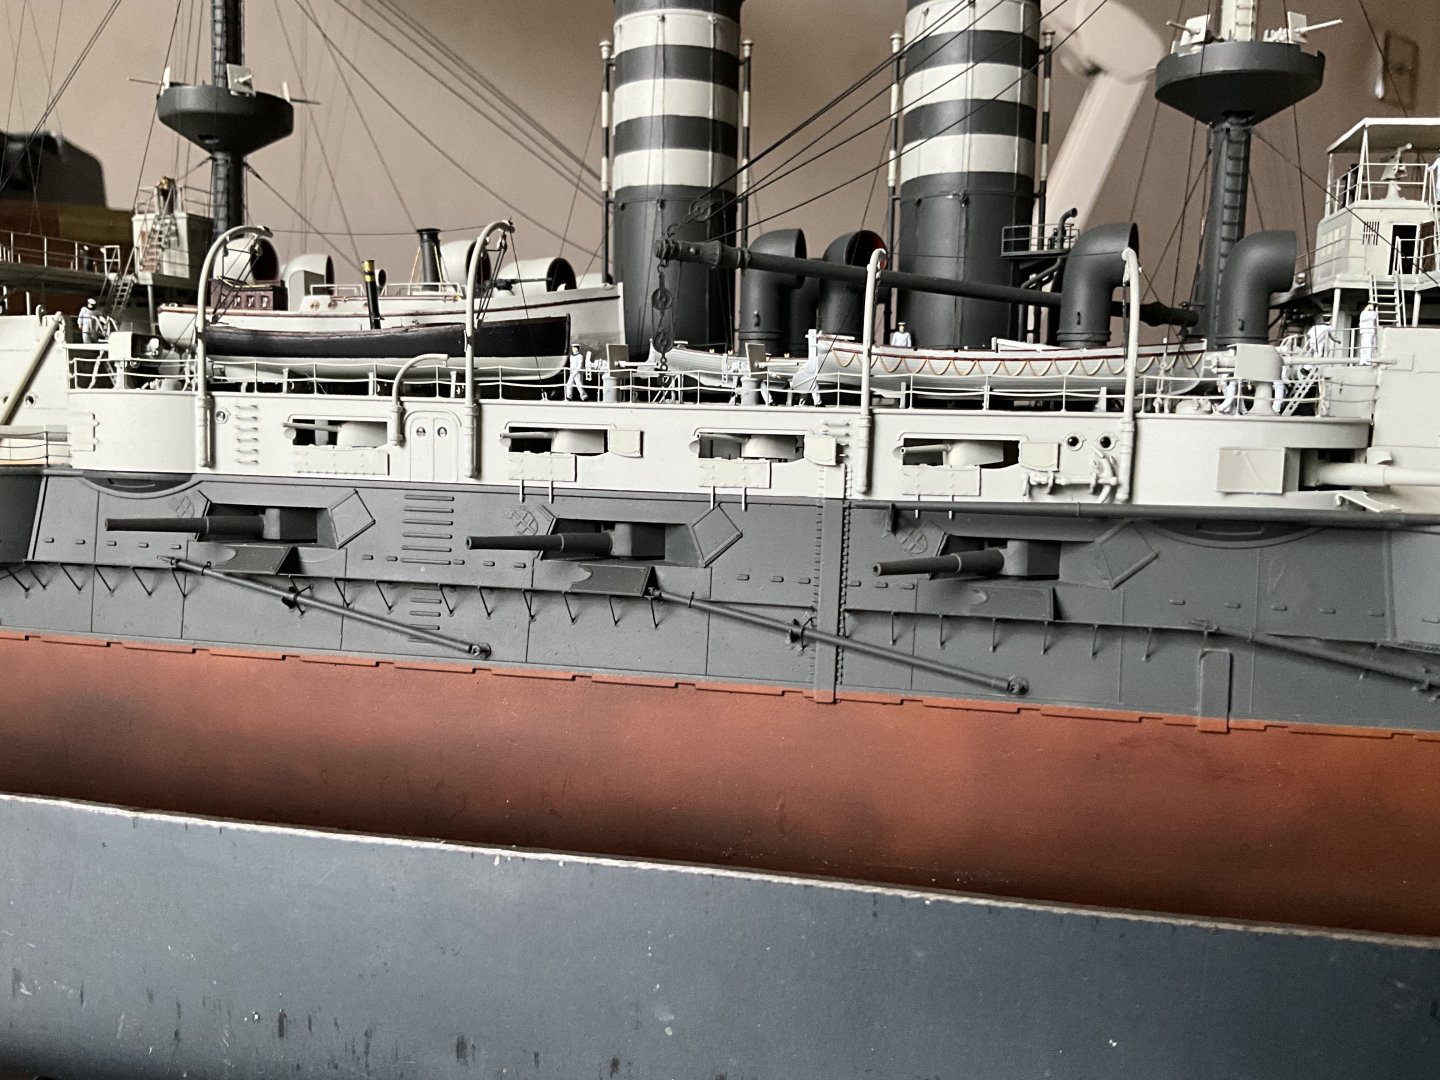
While we are on the guns, twelve pounders on main deck and the two either end of boat deck, the ones on the Bridge structure seem good to me, so we are talking about twelve guns needing altered here, don’t know exactly where the problem is, guns are slightly to high, 1 to 1.5mm my best guess, certainly something amiss here this is why the steps from boat deck up to Bridge structures are to short and the main deck steps up to boat deck half way along are to high, you see this in my earlier build logs how l had to trim these and how l added plastic to deck and painted green on the other steps at Bridge, it’s like if the whole deck was raised it would line up with elevations of guns and steps also lining up the notches in side superstructures for twelve pounders when stowed, problem is deck is at right height ties in with all the inner superstructures. Certainly needs looking at, shortening the pedestals think would work. Put a photo up, you can see how l had to point my guns down to try and disguise this.🤛
-
Just have to remove raised plastic mounting and reposition using kit parts as guide, might possibly have to insert some plastic here to get new fixing point. 👍
-
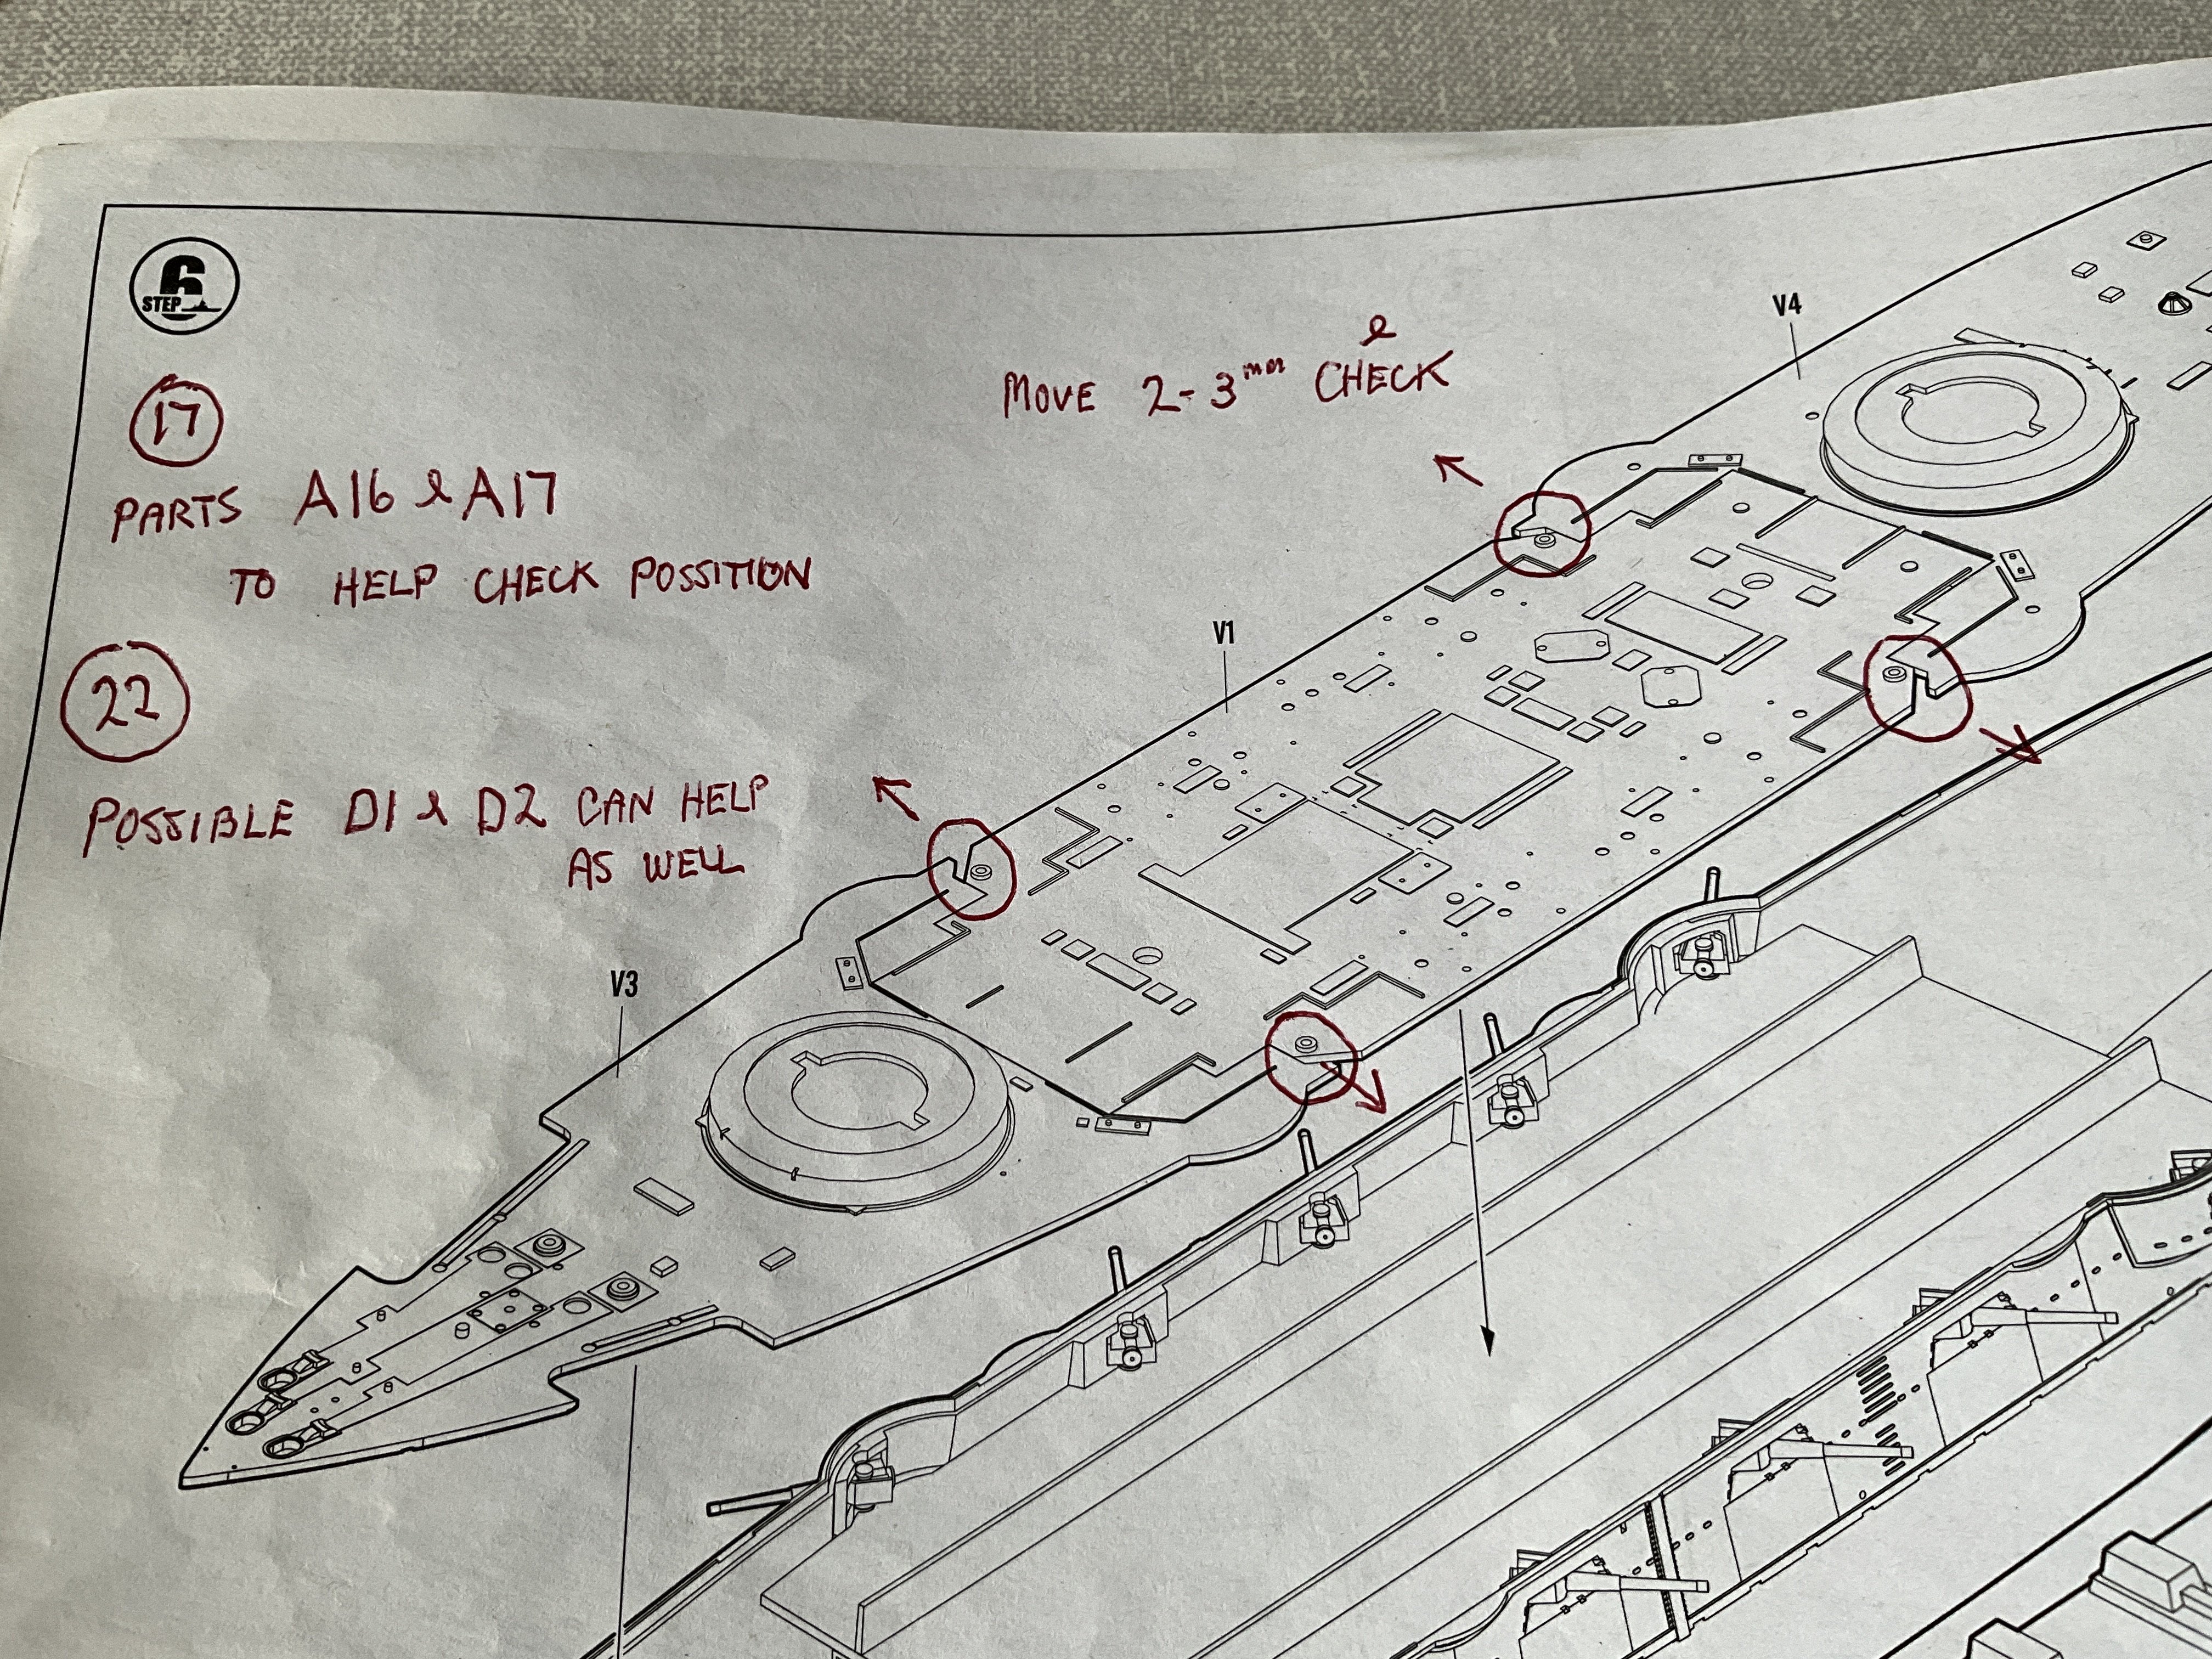
Shall try and put a list up of things l didn’t do that l would if doing it again, corrections and details. Tim Moor did a clever thing with his build with trying to replicate hull plating, since the model has no details on hull this is a excellent idea and adds a lot to appearance , well done Tim, you need to get that model fixed and complete her. 🤛 Here we go on missed corrections, on part 6 of kit instructions, part V1 main deck, the fixing points for six inch guns are out of position, l feel they could be moved outboard 2 to 3mm, this will put the gun more in centre of casement and let the gun transverse parallel to side of bridge as it should, take a photo of my model and you’ll see what l mean.

-
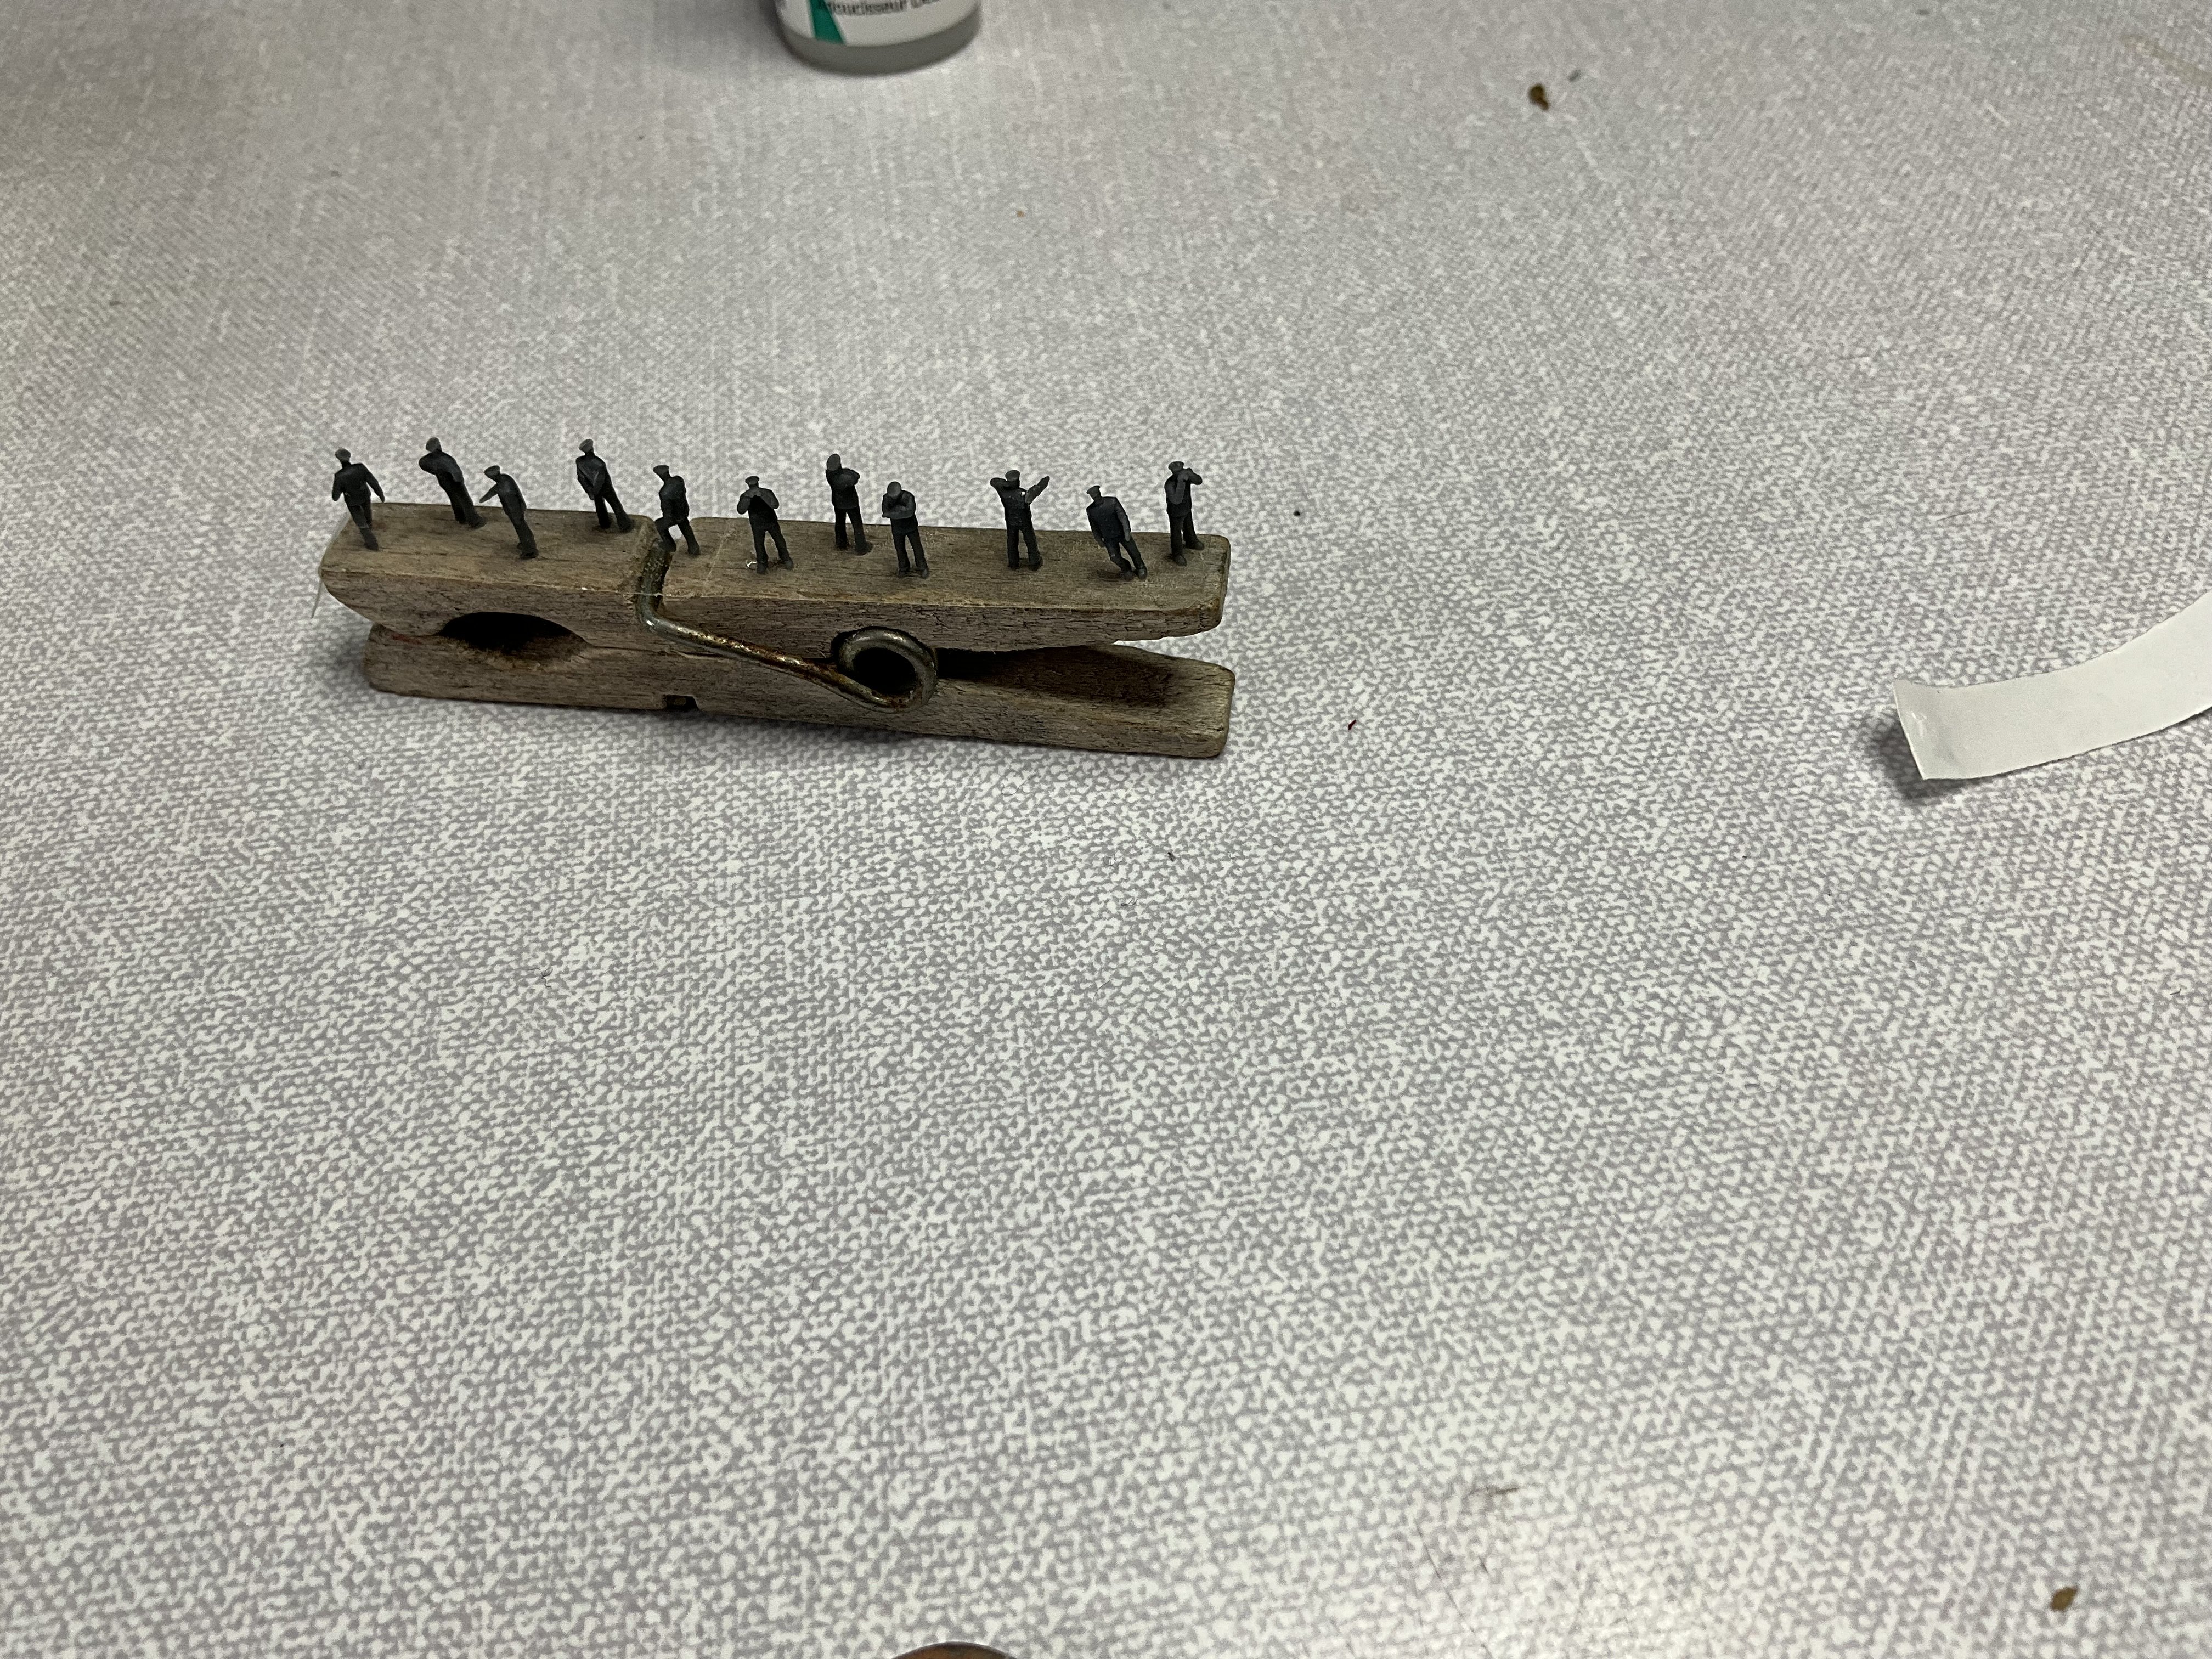
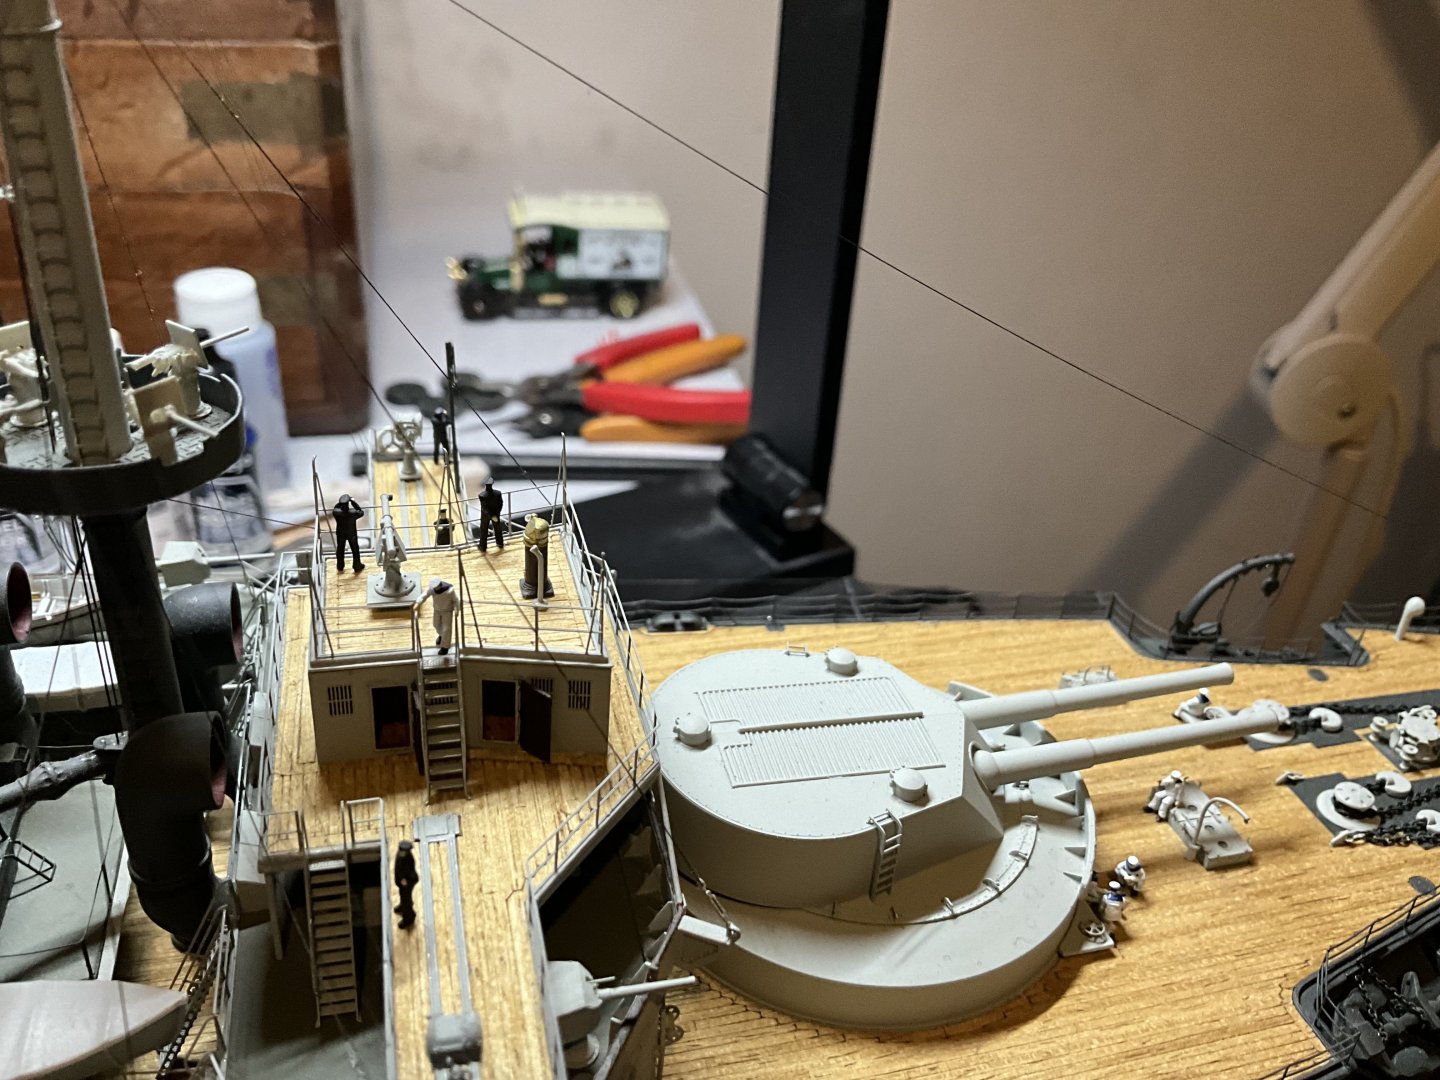
Hello gentlemen and fellow modellers, hope all are well. Not a great deal to show as yet, still trying to tie everything in at end off build. I tried the draught mark decals from the Hobby Boss kit using Vallejo Decal Fix, thought this would give me time to slide the decal into position and then blot out with tissue, minute it was on surface stuck like a limpet mine, tried easing into position gently only to watch the decal disintegrate 👀 accompanied by 😡 been a long time since l worked with decal’s, maybe lost my touch, but these ones seem extremely fragile, tried again few days later, this time using Microscale Liquid Decal Film, same result, Decal didn’t like being moved into position, just to fragile, never had this problem with Airfix. Not given up on this yet, have ordered water slide draught marks from another source, fingers crossed this has better results when they arrive. In process of painting and fitting small figures, really happy how these are turning out and how it changes the overall effect of model, sort of brings it to life and gives ship a better sense of scale as well, seventy three figures don’t half vanish though 😂 have had to back order some more, these must be selling like hot cakes, if they don’t come in time for model show shall just have to add them later 👍 l have also ordered up materials for attempting sea on starboard side and waiting on this arriving as well.


-
Hi guys, managed to get the dry draught marks removed, turns out l slid sharp part of tweezers under decal and gently peeled it of, just about got of without damaging paintwork, small bit to touch up. Shall try the normal decals see if l can get a better result. 👍