HOLIDAY DONATION DRIVE - SUPPORT MSW - DO YOUR PART TO KEEP THIS GREAT FORUM GOING! (Only 24 donations so far out of 49,000 members - C'mon guys!)
×


Jeff59
-
Posts
593 -
Joined
-
Last visited
Content Type
Profiles
Forums
Gallery
Events
Everything posted by Jeff59
-
Thanks Joelle, appreciated 🤛 found your build log on Bismarck and was blown away, absolutely superb, the details and paintwork are brilliant, funny we are on same models opposite way round but can say mutually beneficial to both of us👍 your build of Mikasa is also turning out shall we say rather special, shall be following this with admiration to the end, am sure you’ll find it a challenging model as l did, especially with lack of guidance for this ship model, looking at old photos and visiting the Mikasa museum is as good as it gets, the rest is guess work and artistic licence. It’s a great feeling to complete it though and have in collection. Slow and easy best way forward. 🤛👍
-
Hi Joelle; good to see you back where you belong, in a better place I hope, sorry to hear of your recent upsets, and condolences on the passing of your mother, always an extremely difficult time this. Try to divert your attention a little bit with an alteration l noticed could be made that never did myself. The six inch gun fixing points on main deck, four off, are set to far inboard by 2 to 3mm, easy fix at this stage, puts them in area where there is no plastic, not a massive problem for you. You’ll see what l mean if you try to point the gun parallel to the bridge structures whilst in stowed position, they don’t work, guns not in properly centred in casement, lm sure l mentioned a few points near the end off my build log saying things that l would correct if building it again. Hope this is of help to you 🤛 As l say good to see you back. 👍
- 193 replies
-
- 4
-

-

-
- Russo-Japanese War
- Mikasa
- (and 2 more)
-
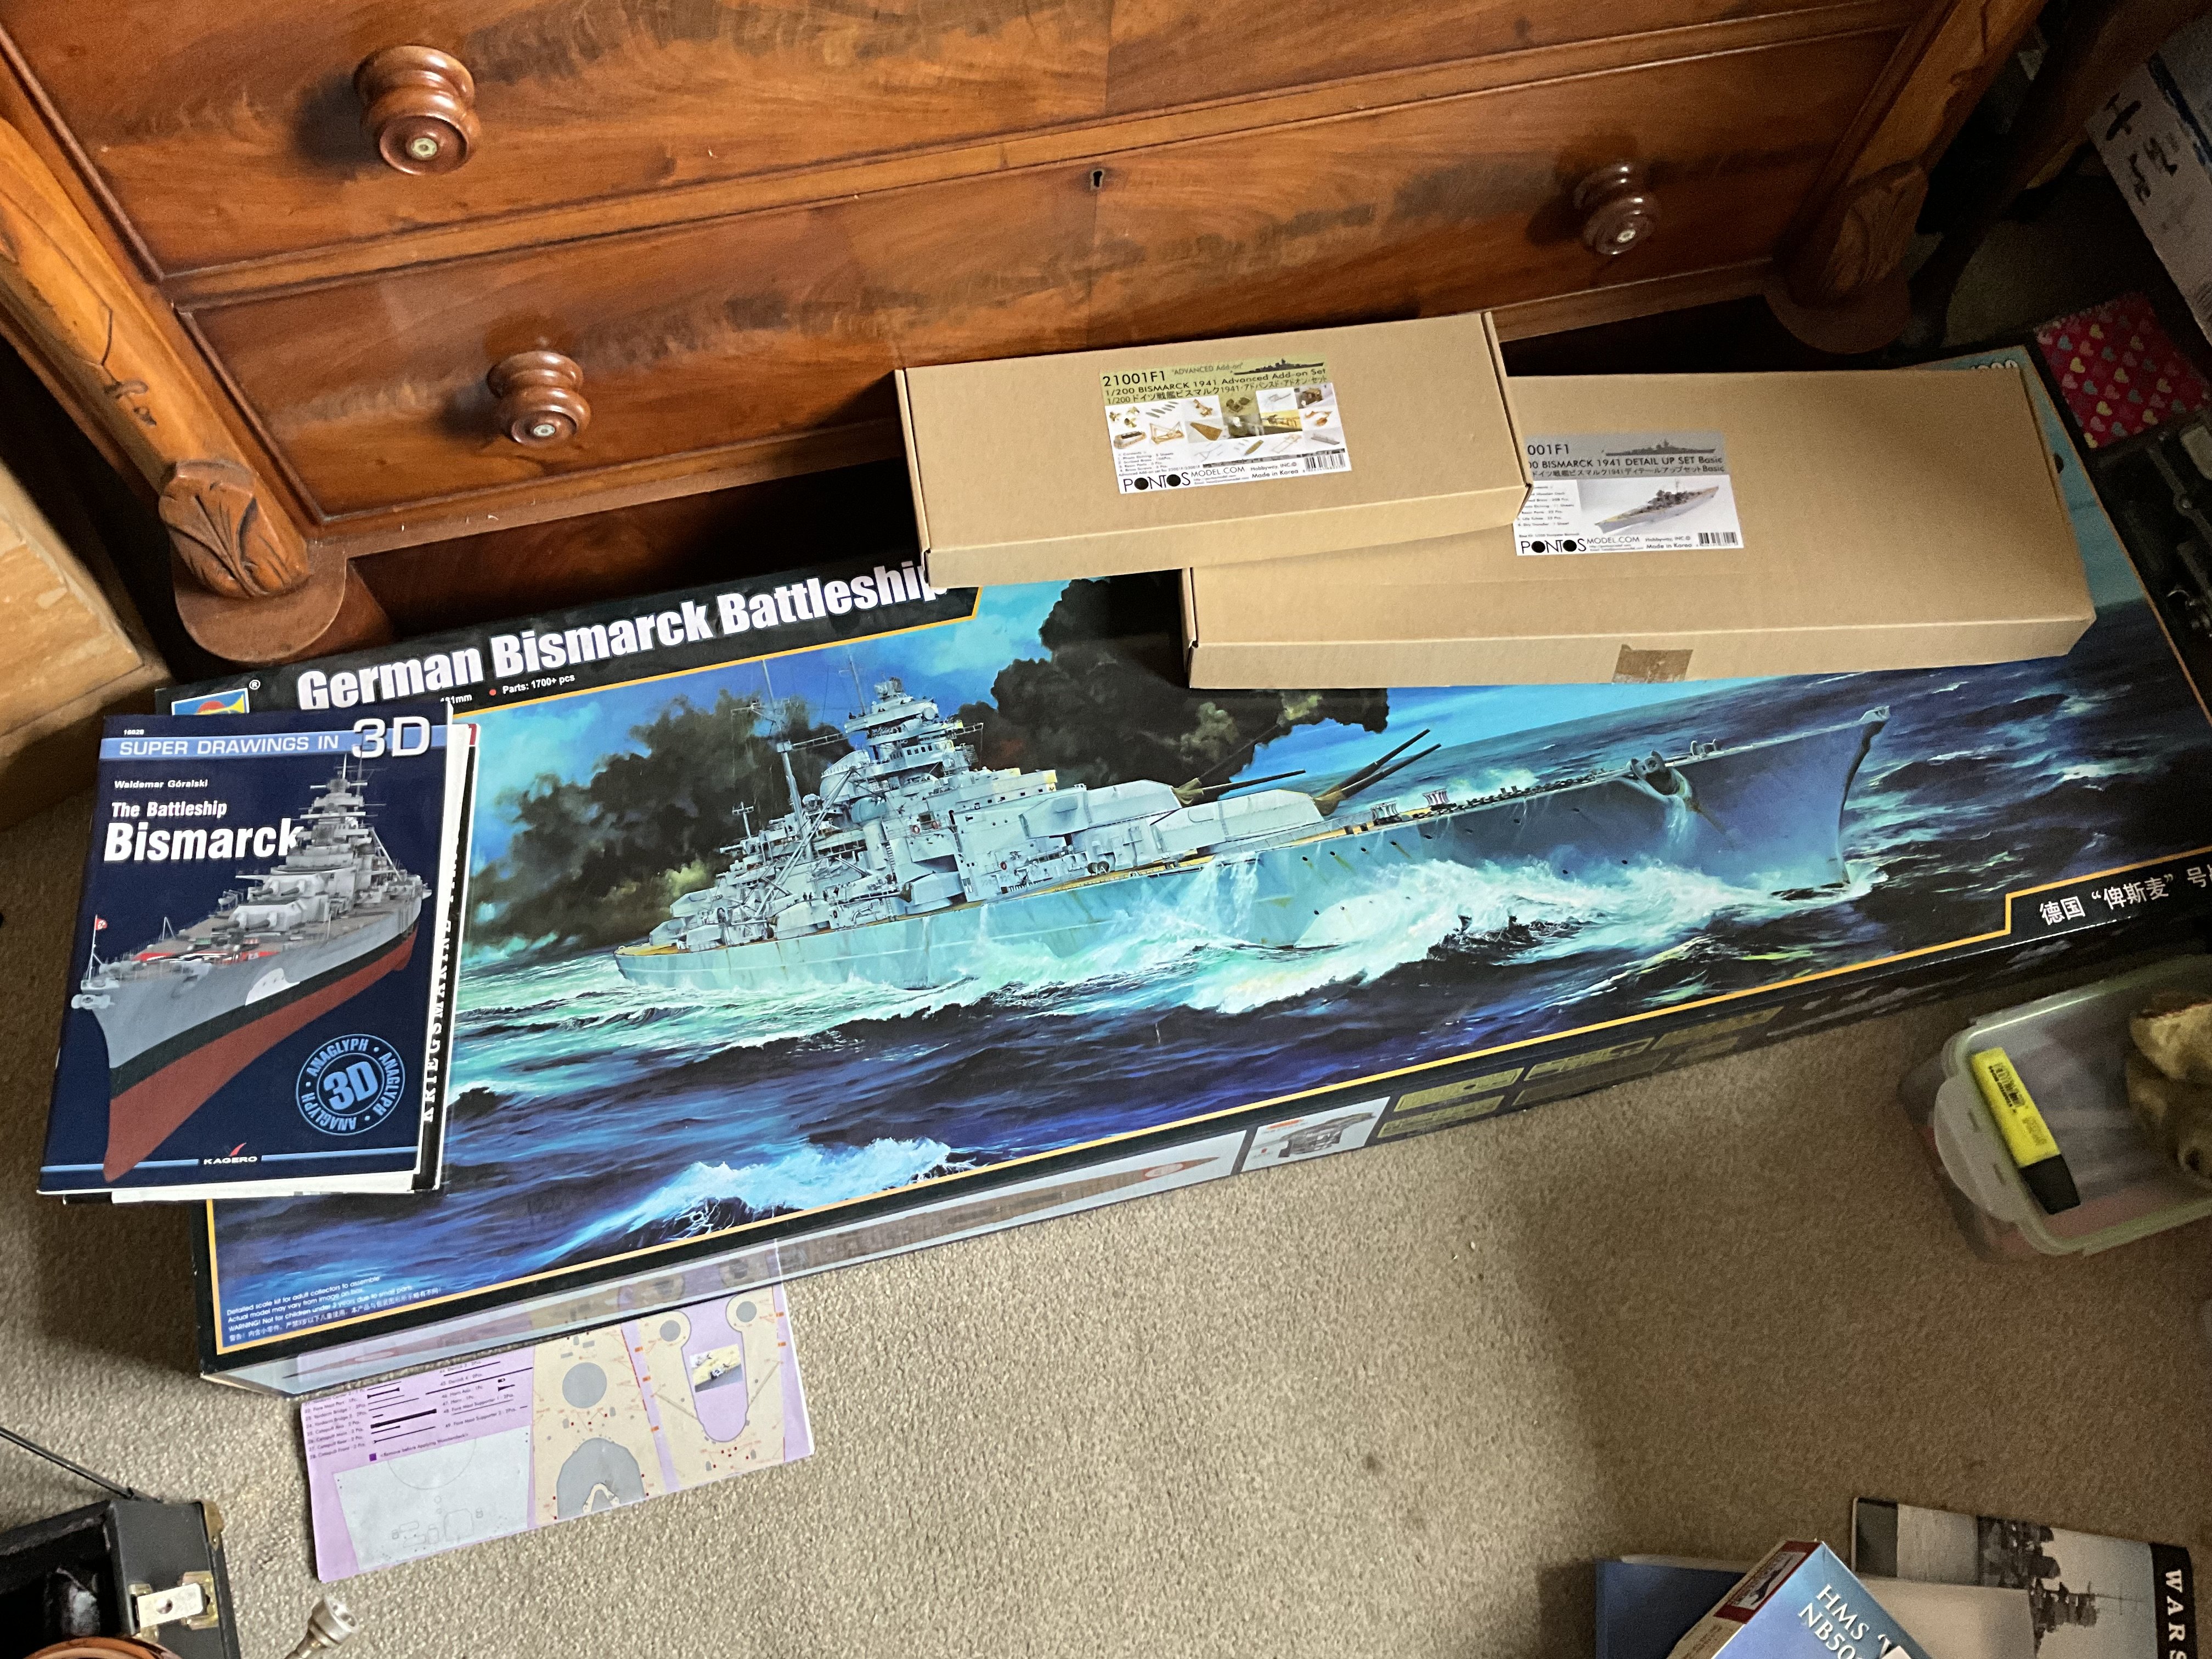
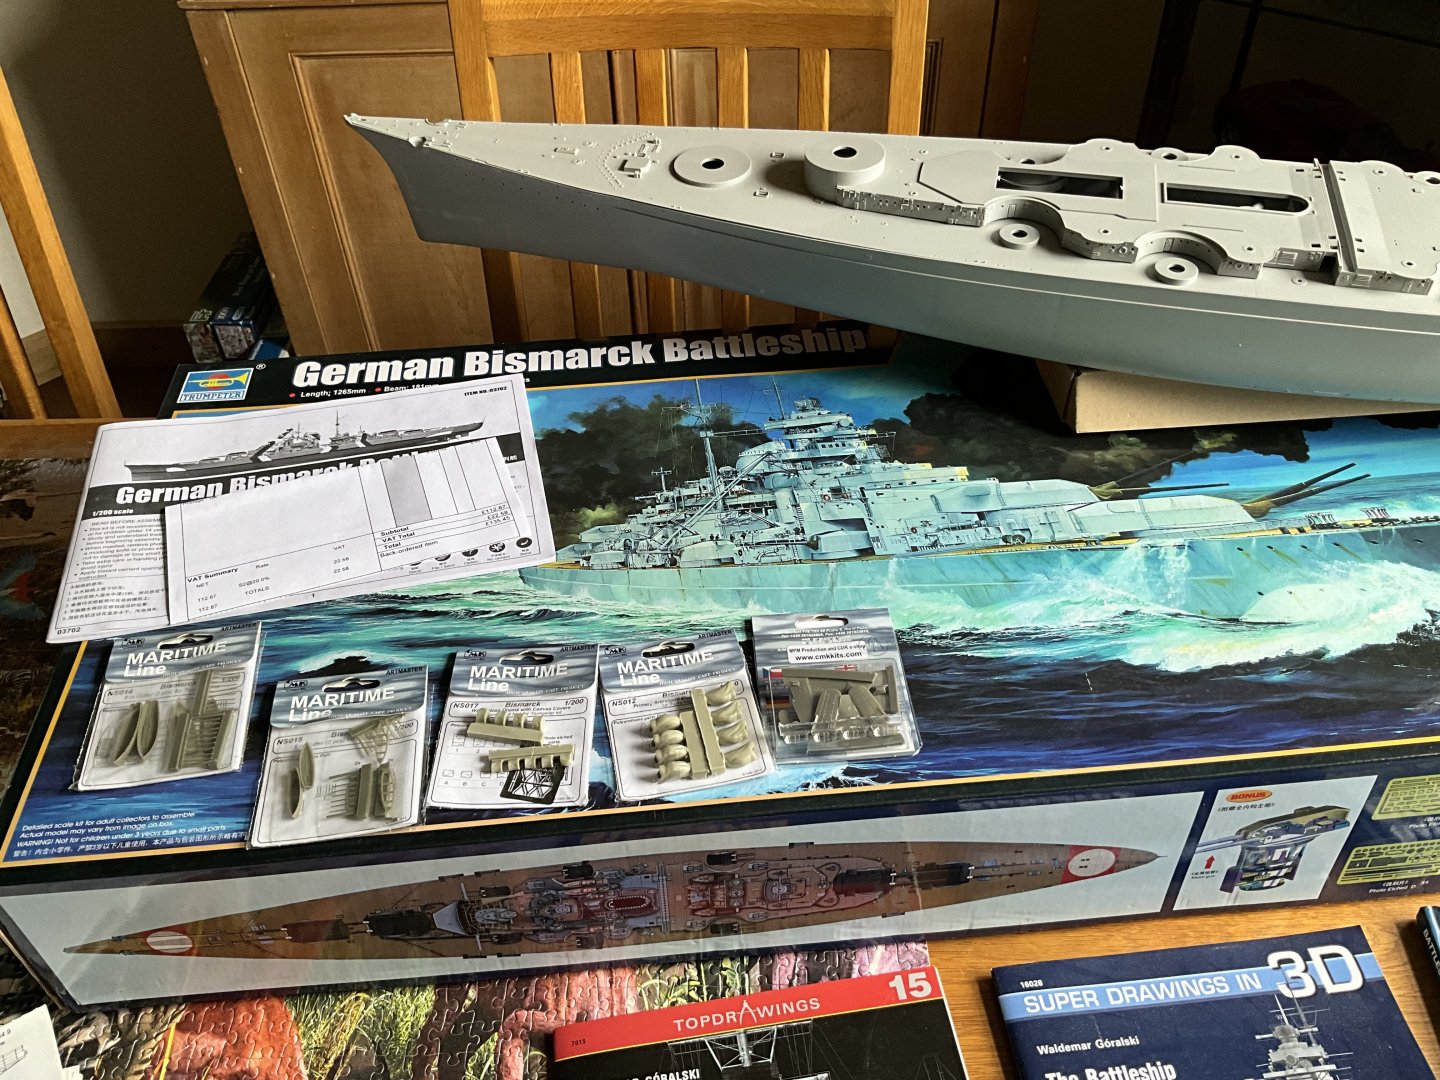
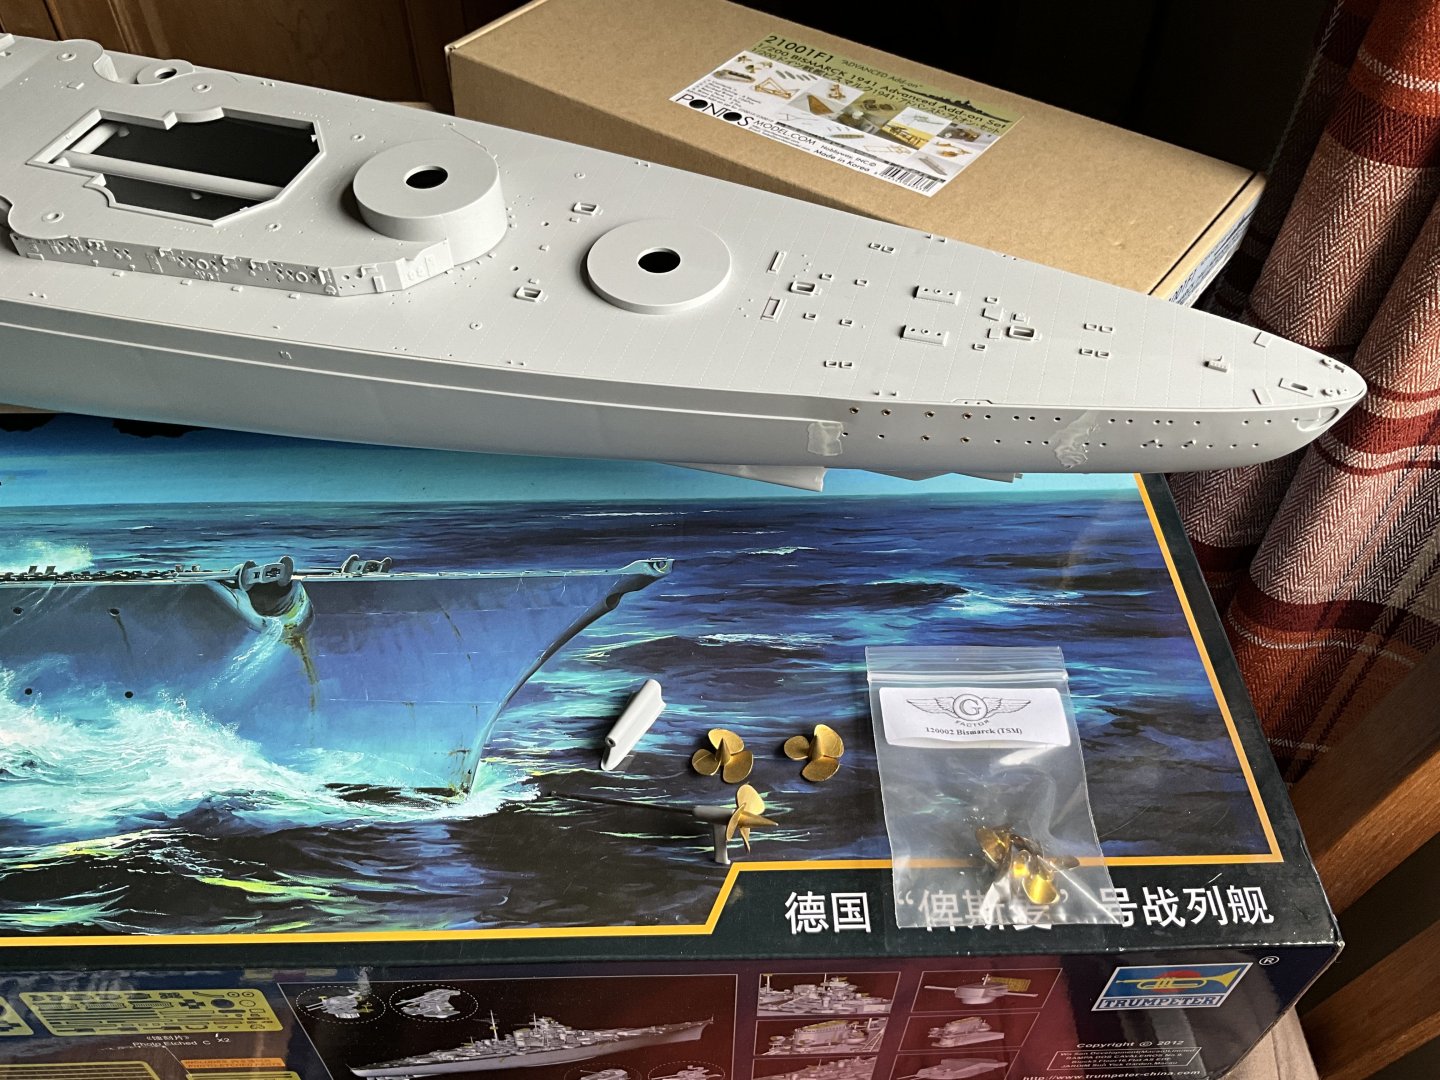
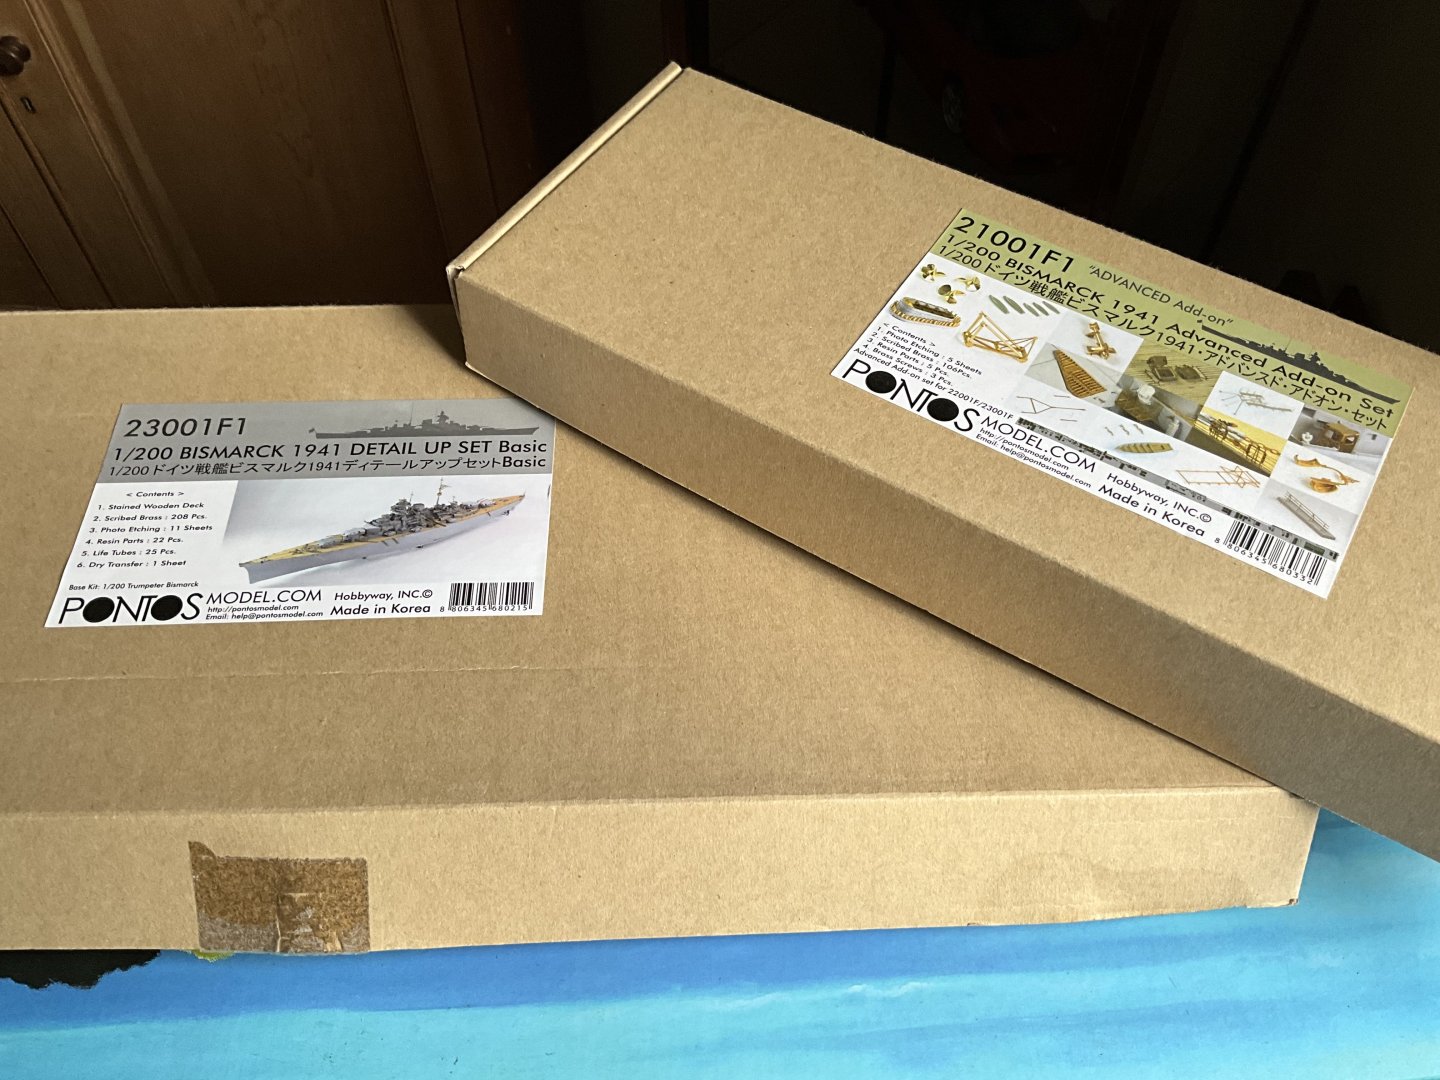
Forgot I had them, can’t even remember were I got them it’s that long ago I must have purchased them. They are certainly an improvement on kit parts, the Arado float planes are excellent, there seems to be a great selection of aftermarket parts for Bismarck in 1/200 scale, going to be mind blowing looking through it all. 👍
-
This is a brilliant model and well worth all the praise heaped on it. Well done Madtatt 🤛👌
-
Think lm going to look at simulating some of hull detailing regarding the plating, that might add a few hours. 🤪 That’s me up to speed for now, think lm going to look for previous Bismarck builds for help 👍 Take care lads.
-
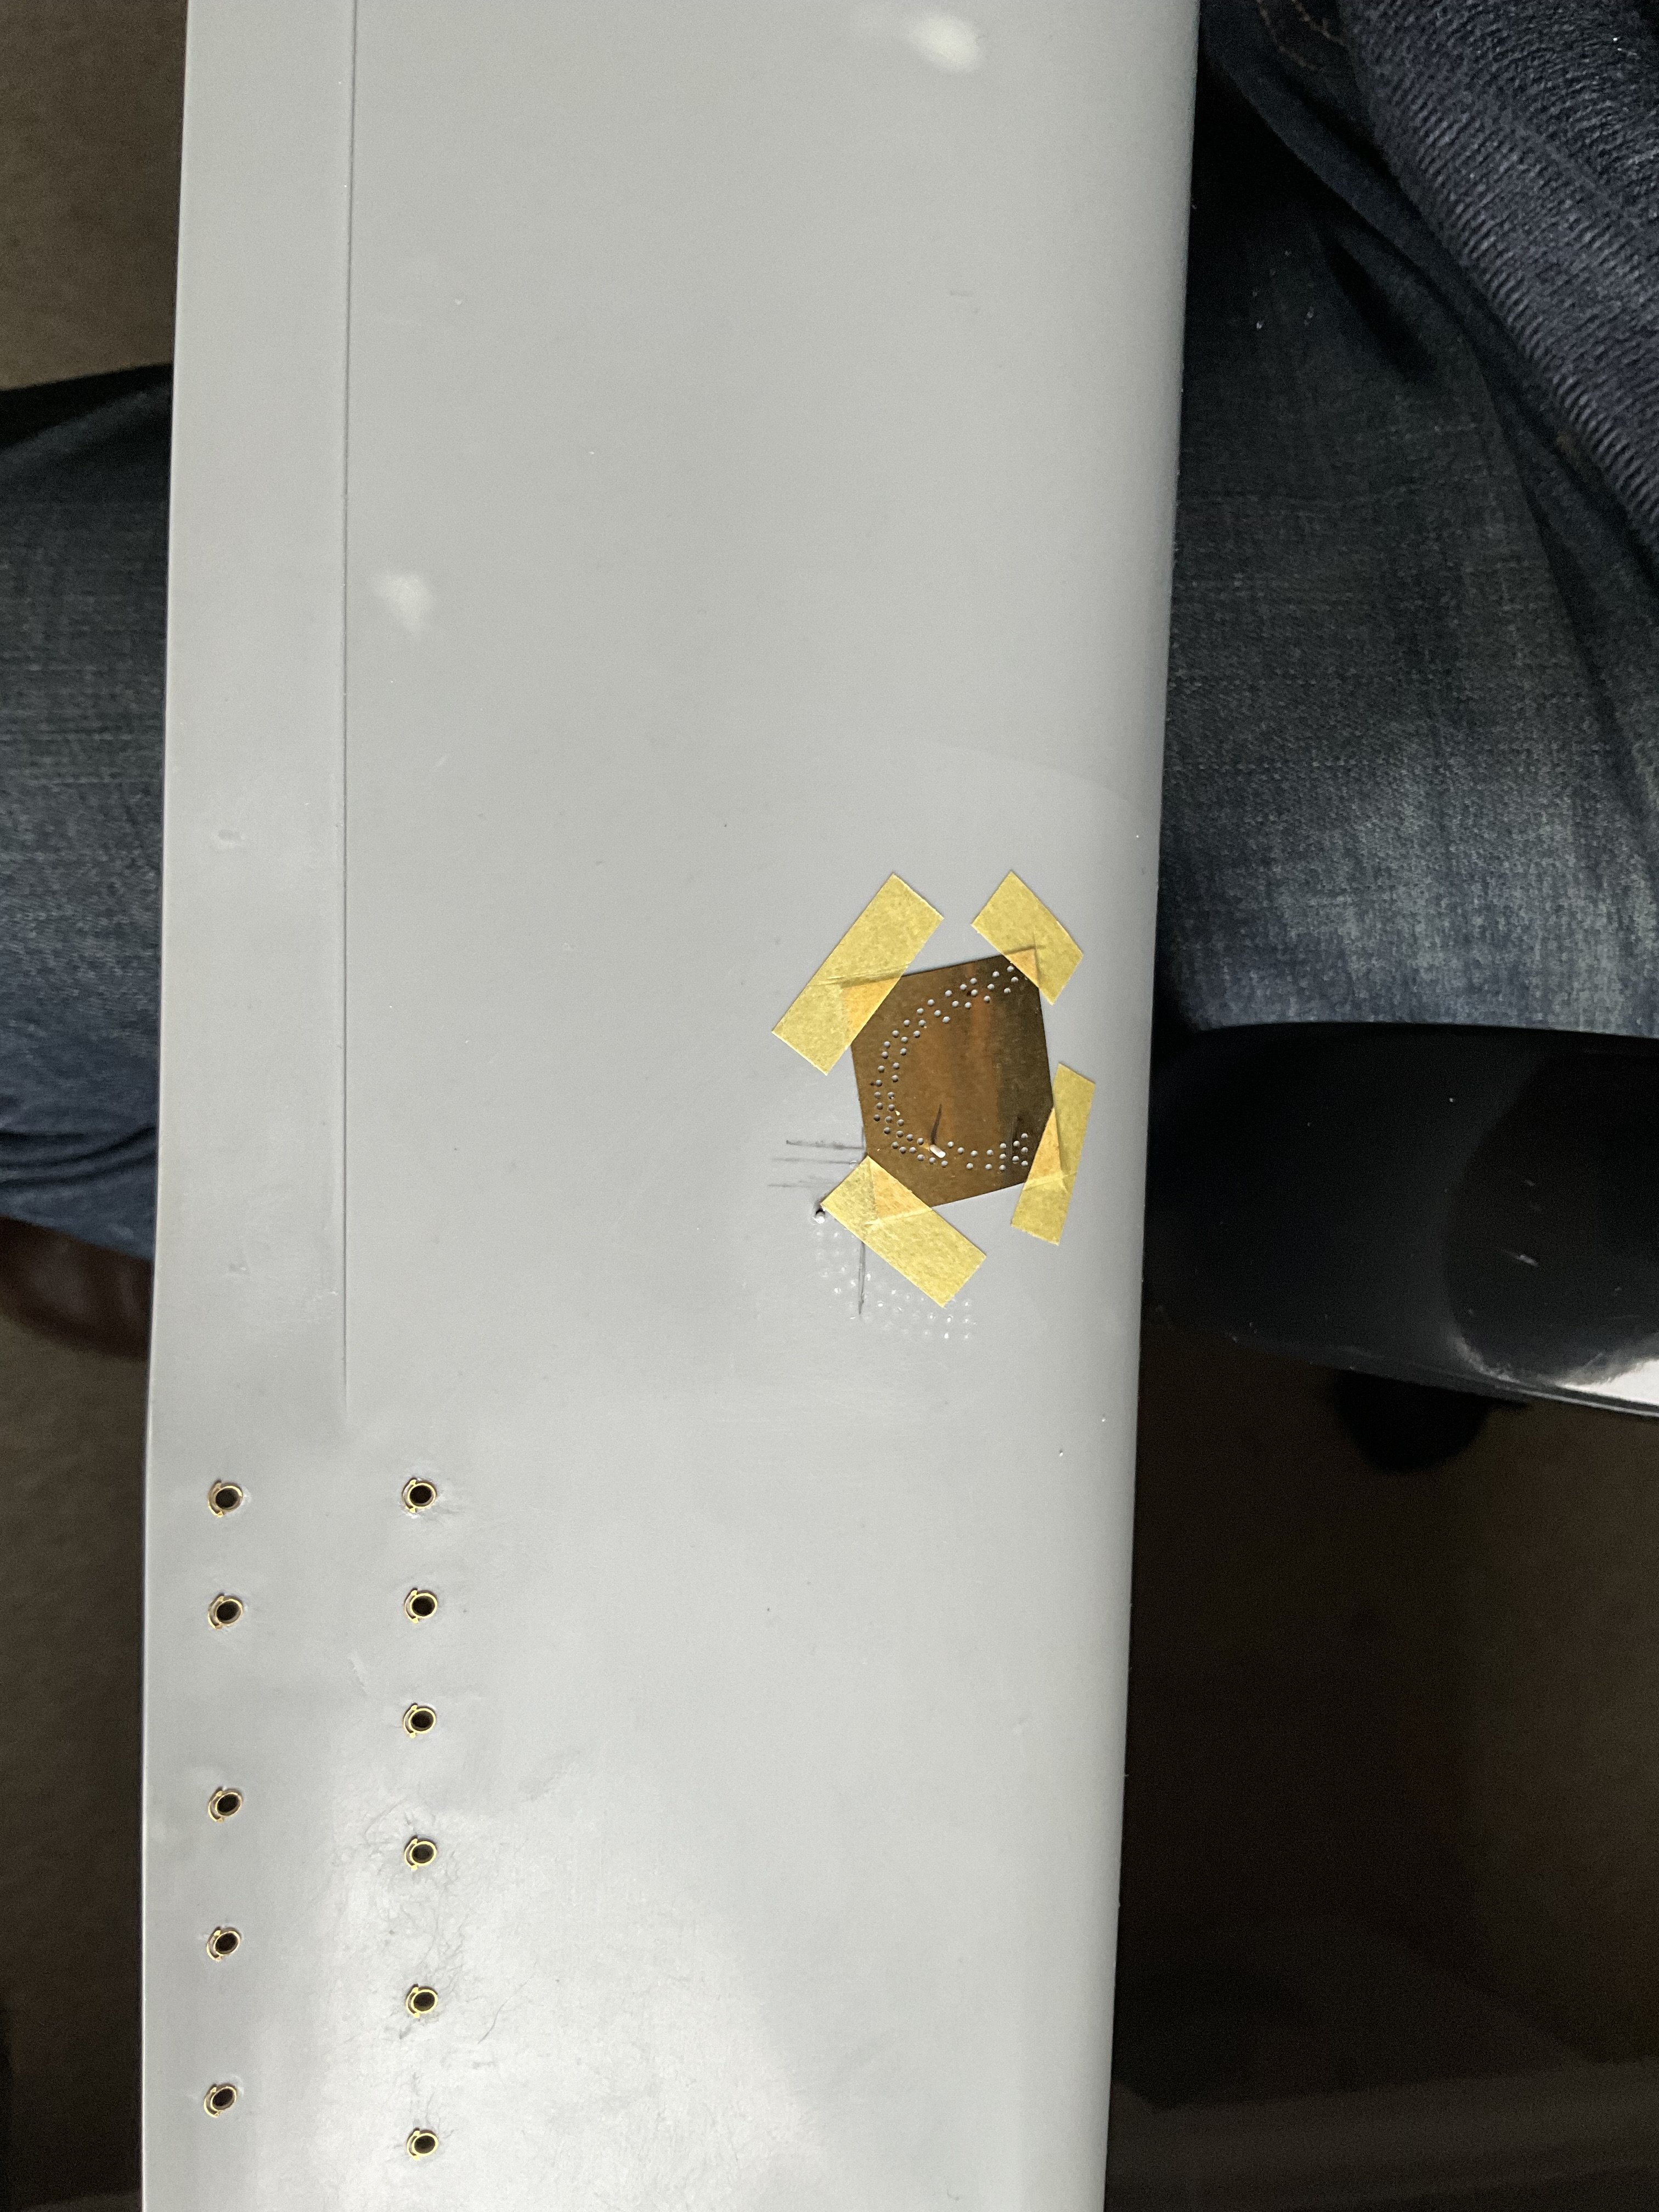
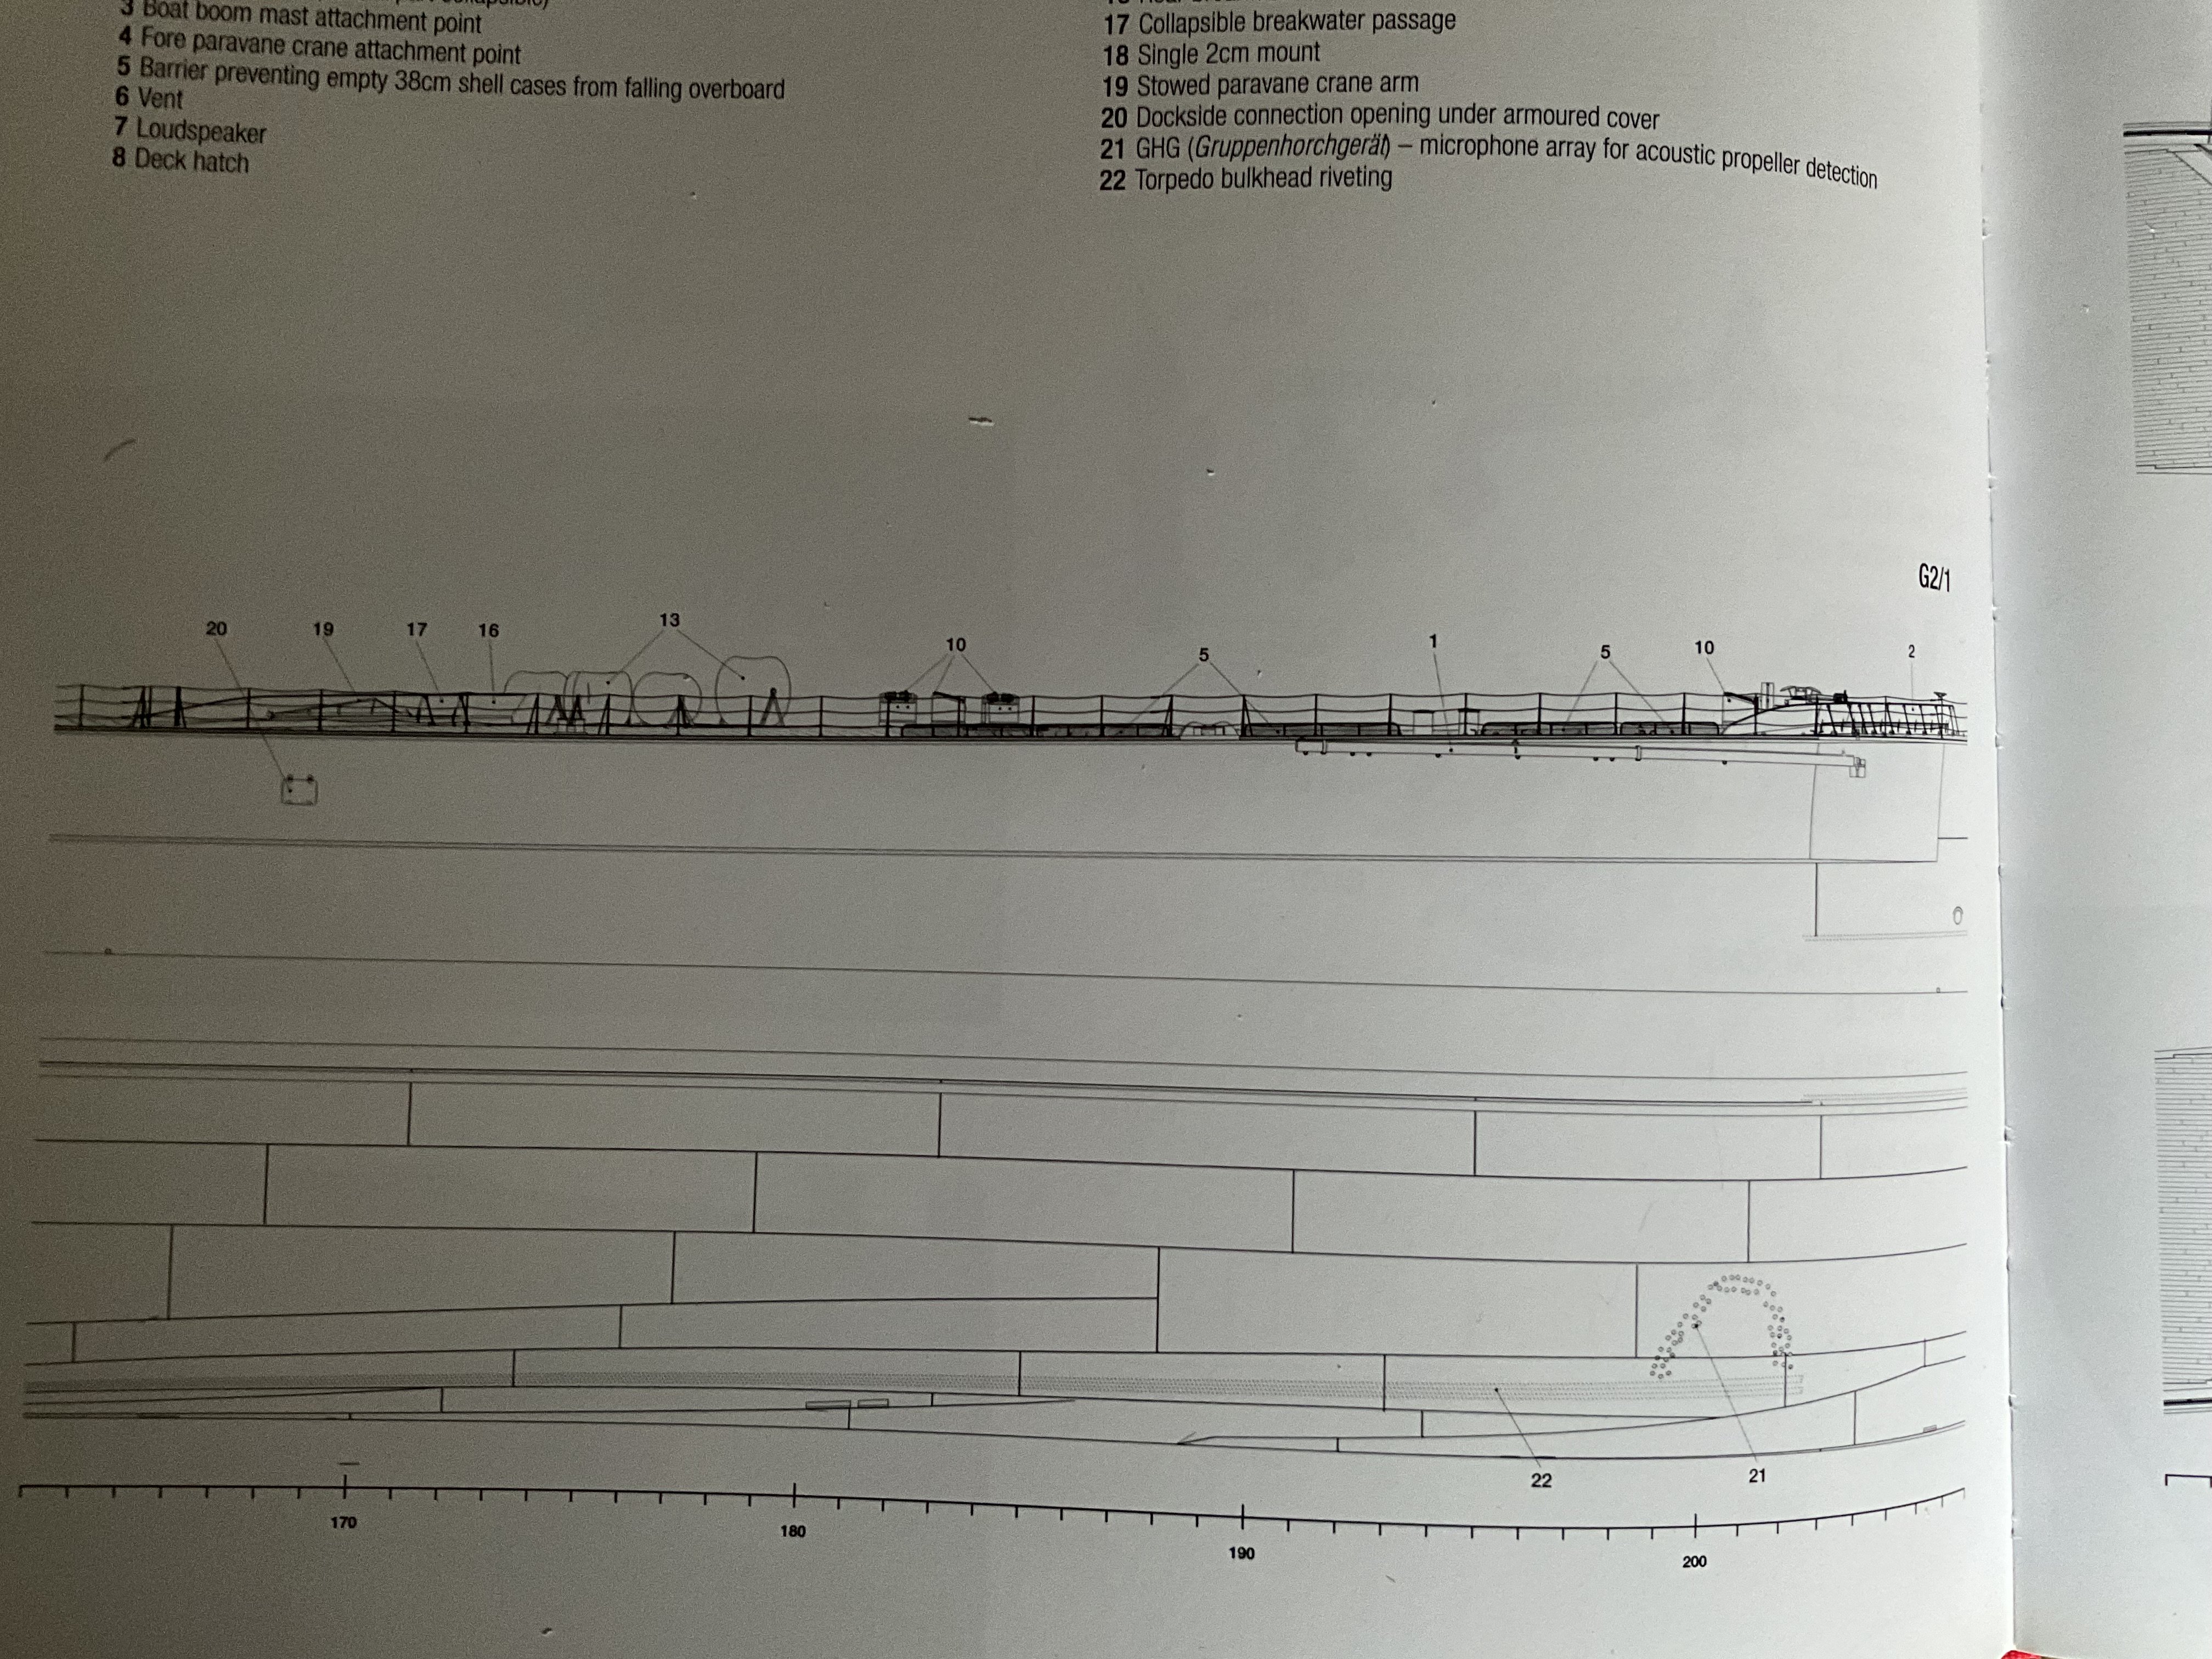
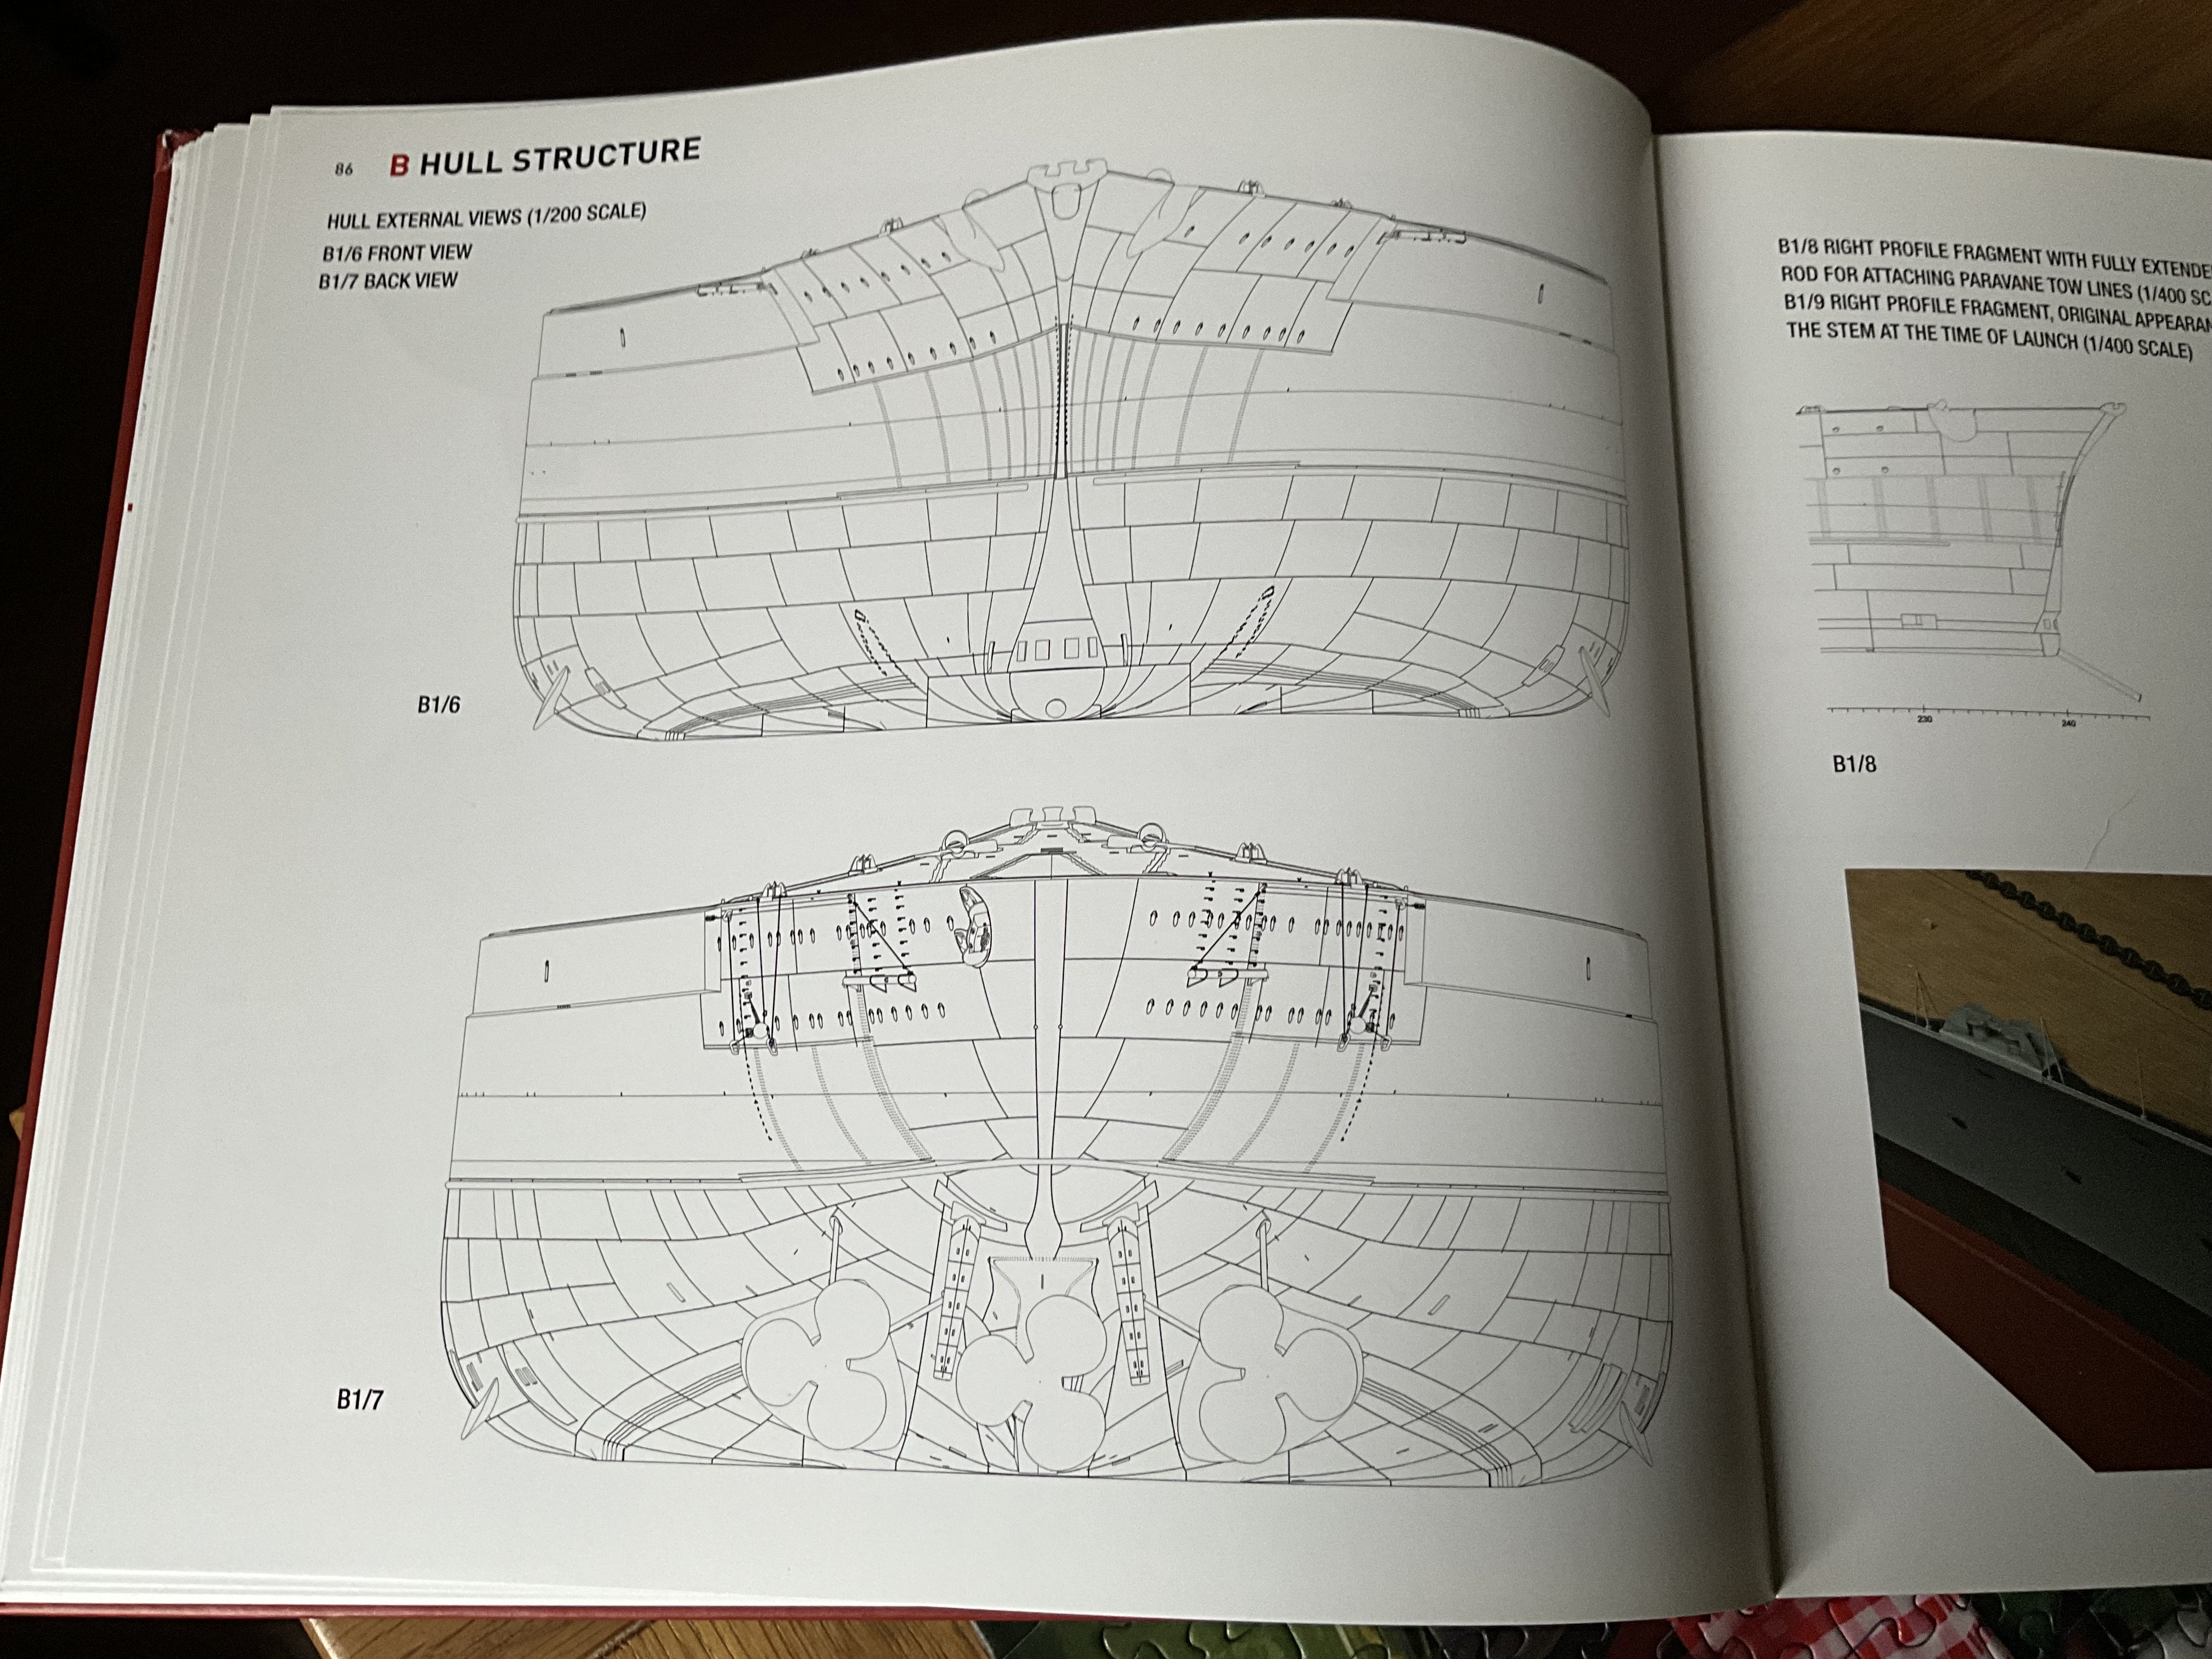
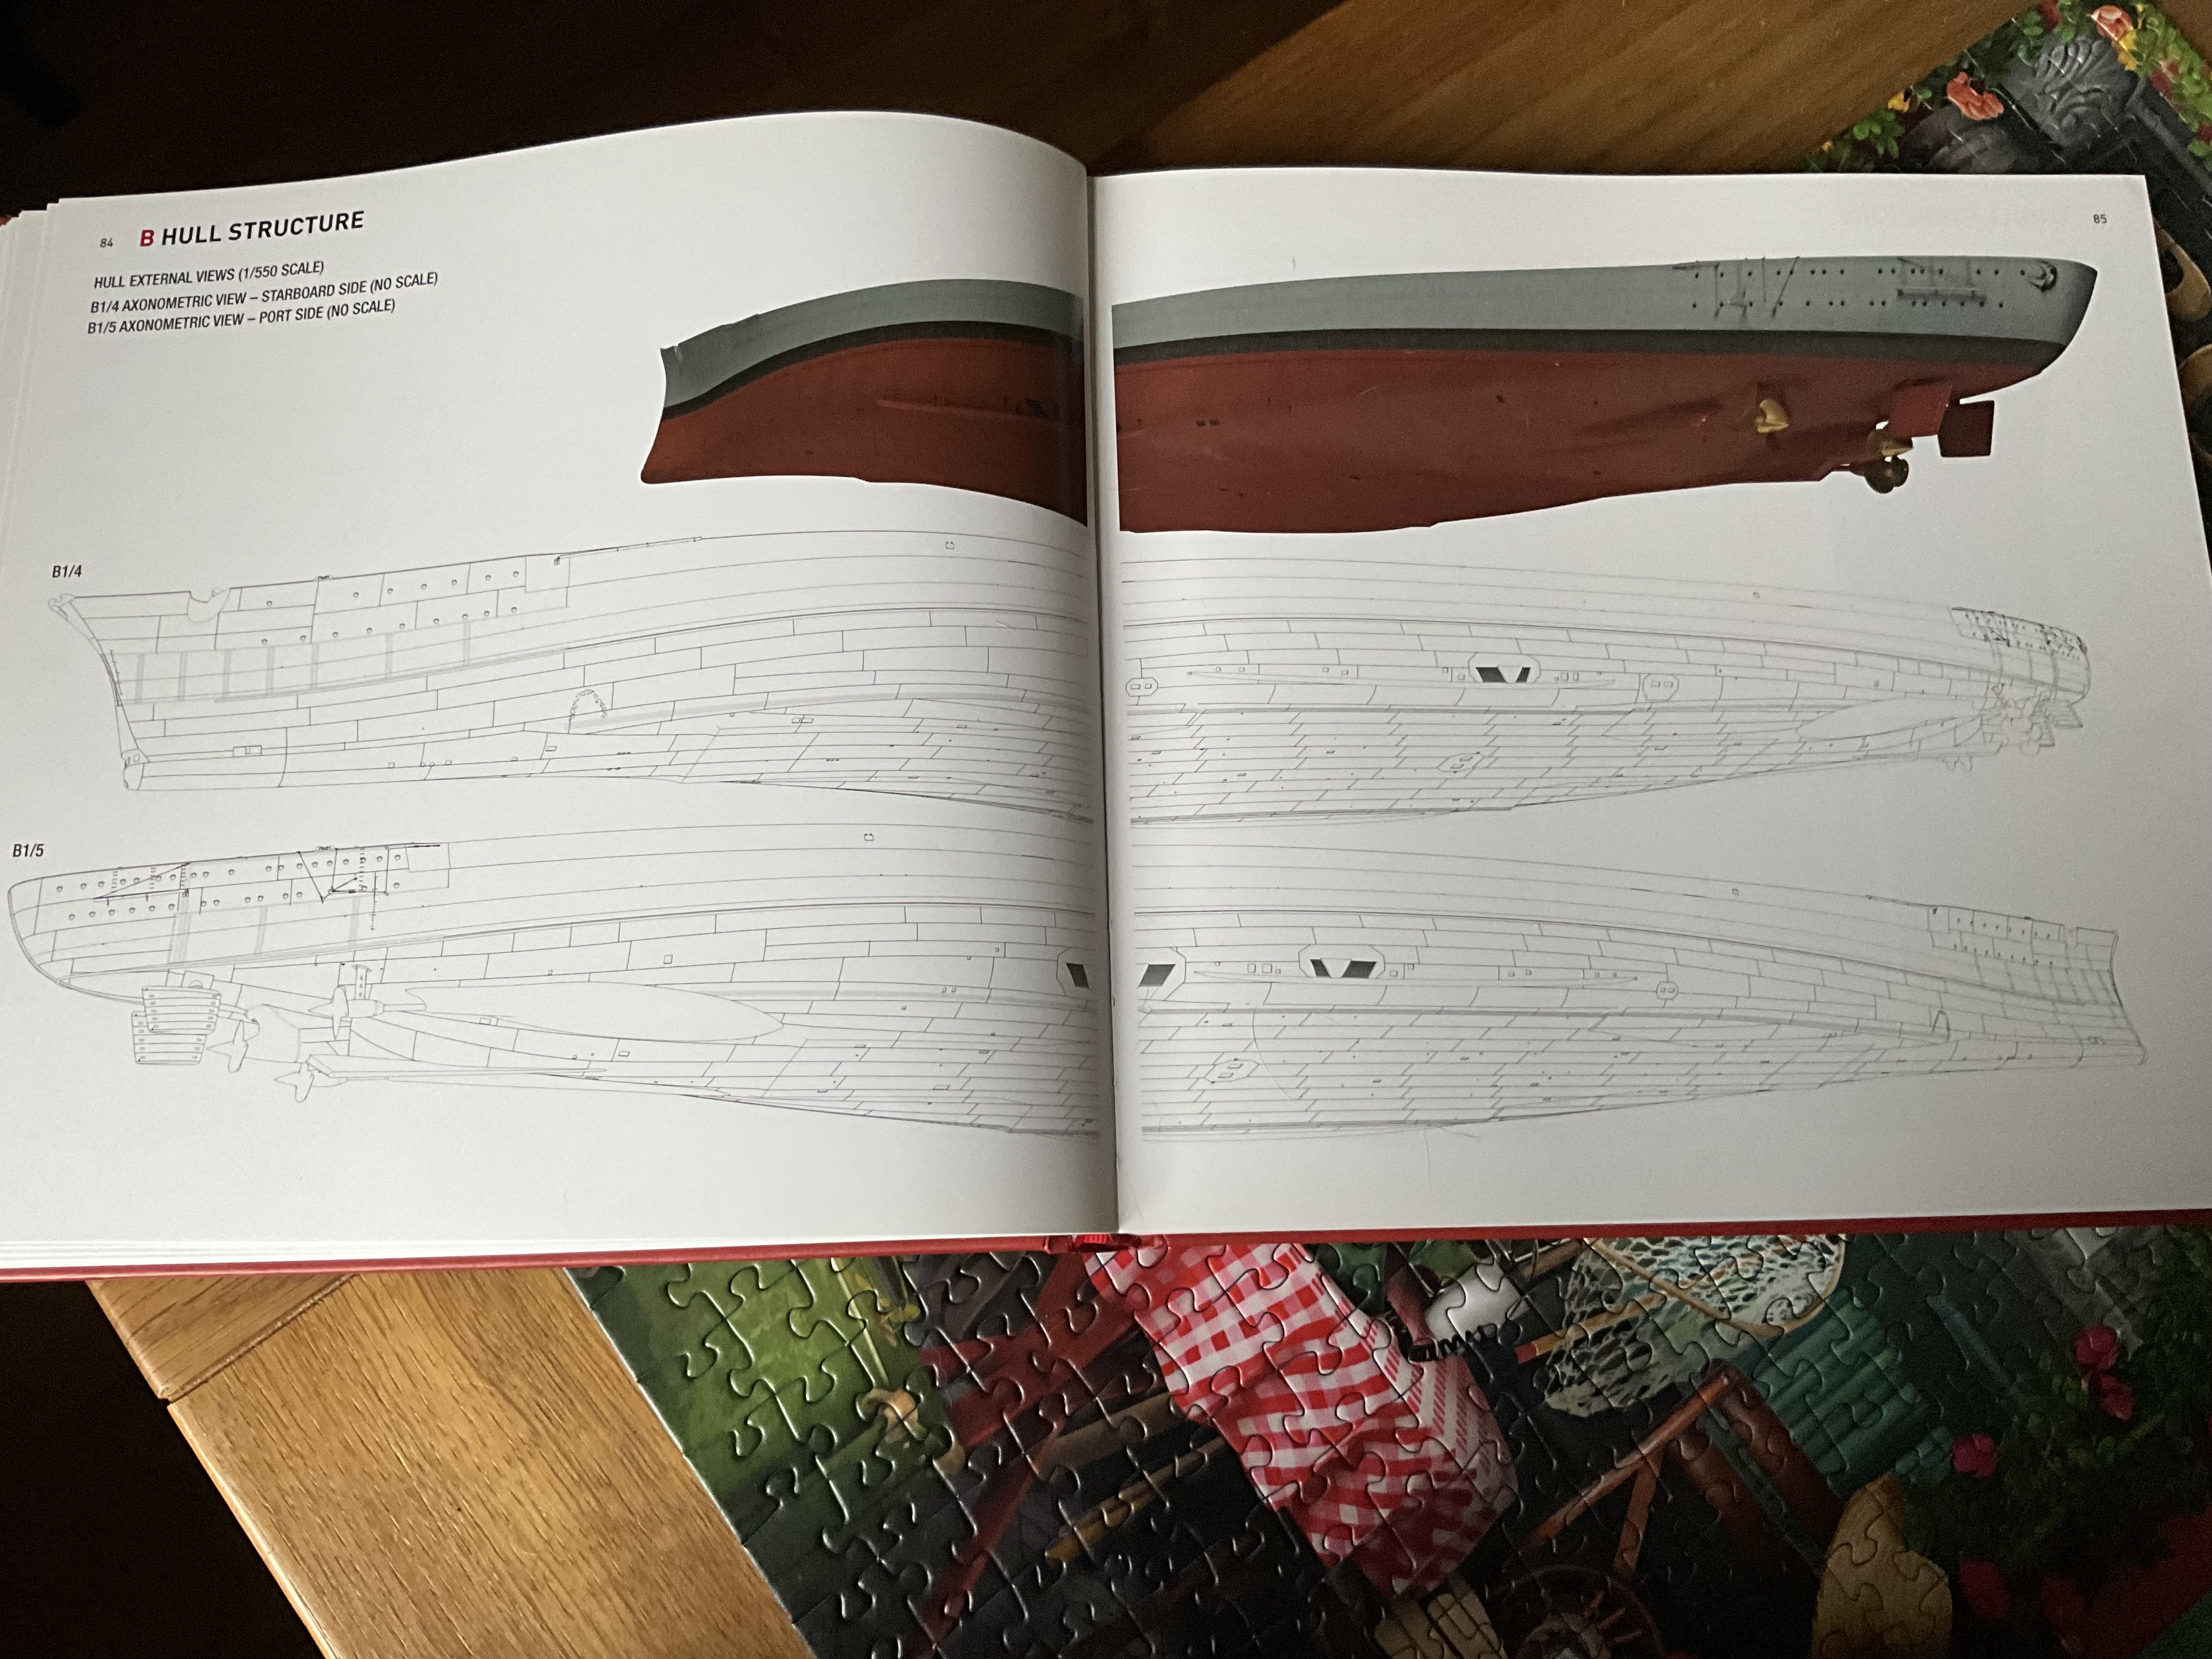
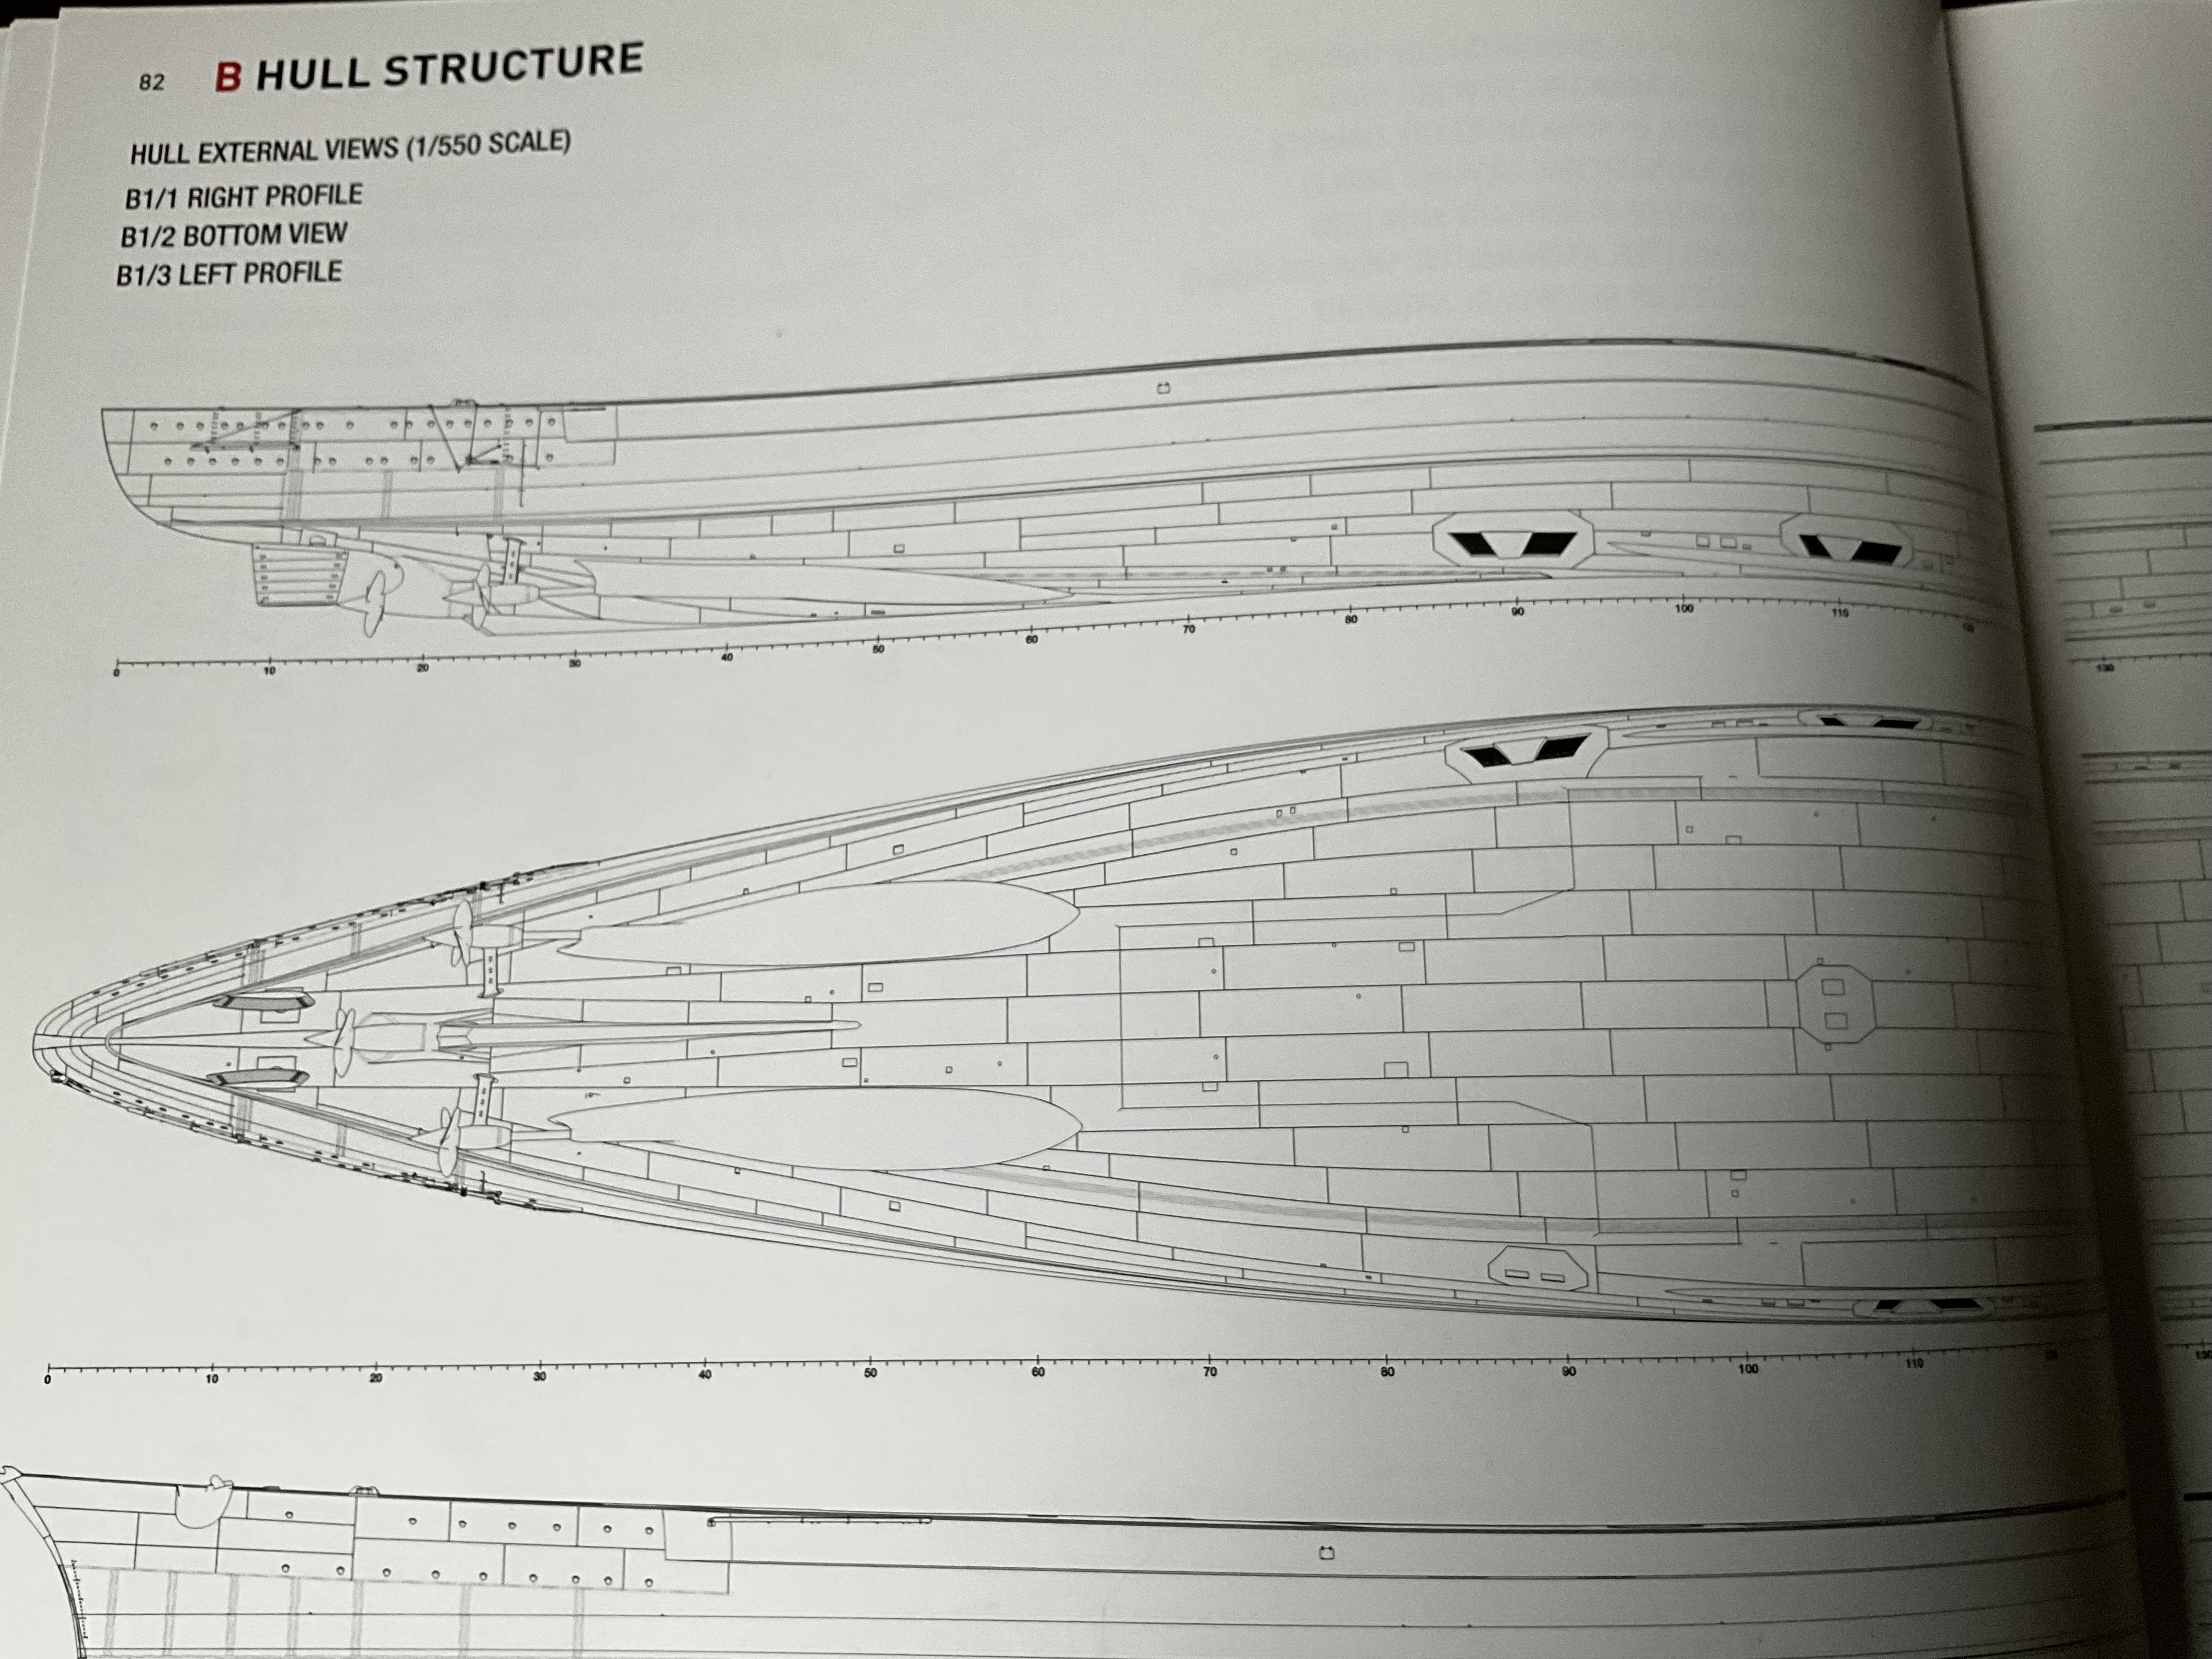
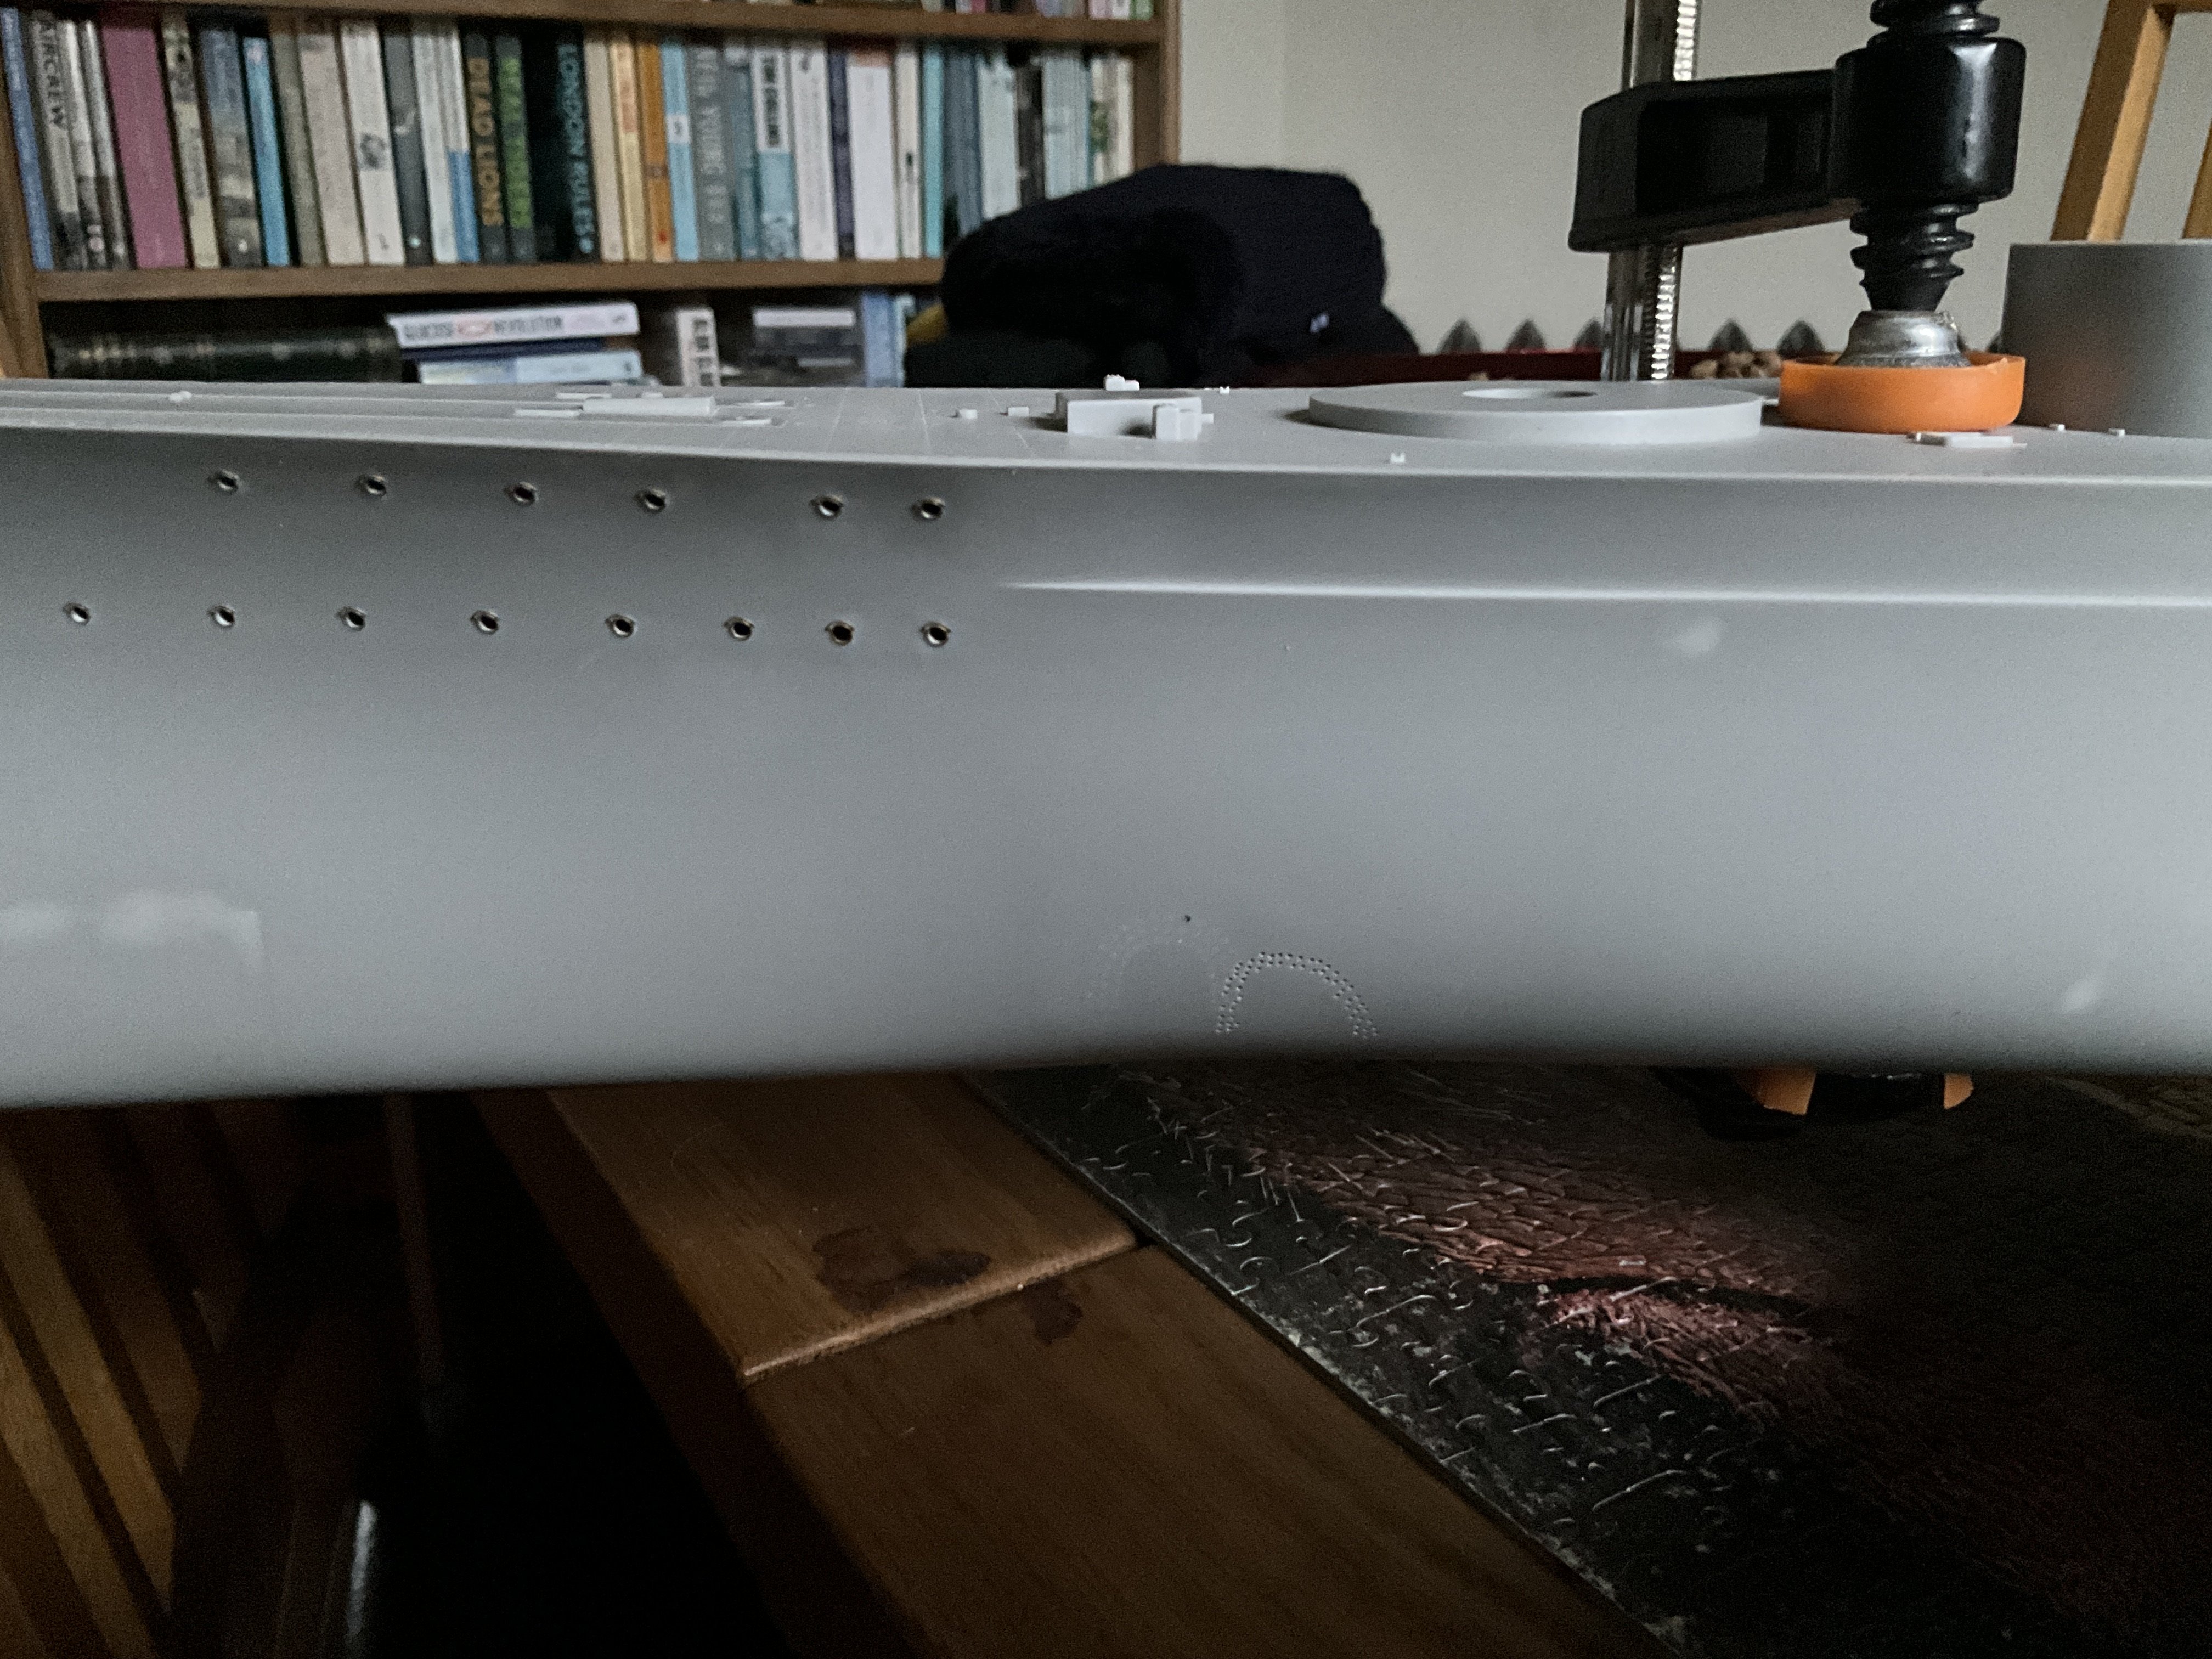
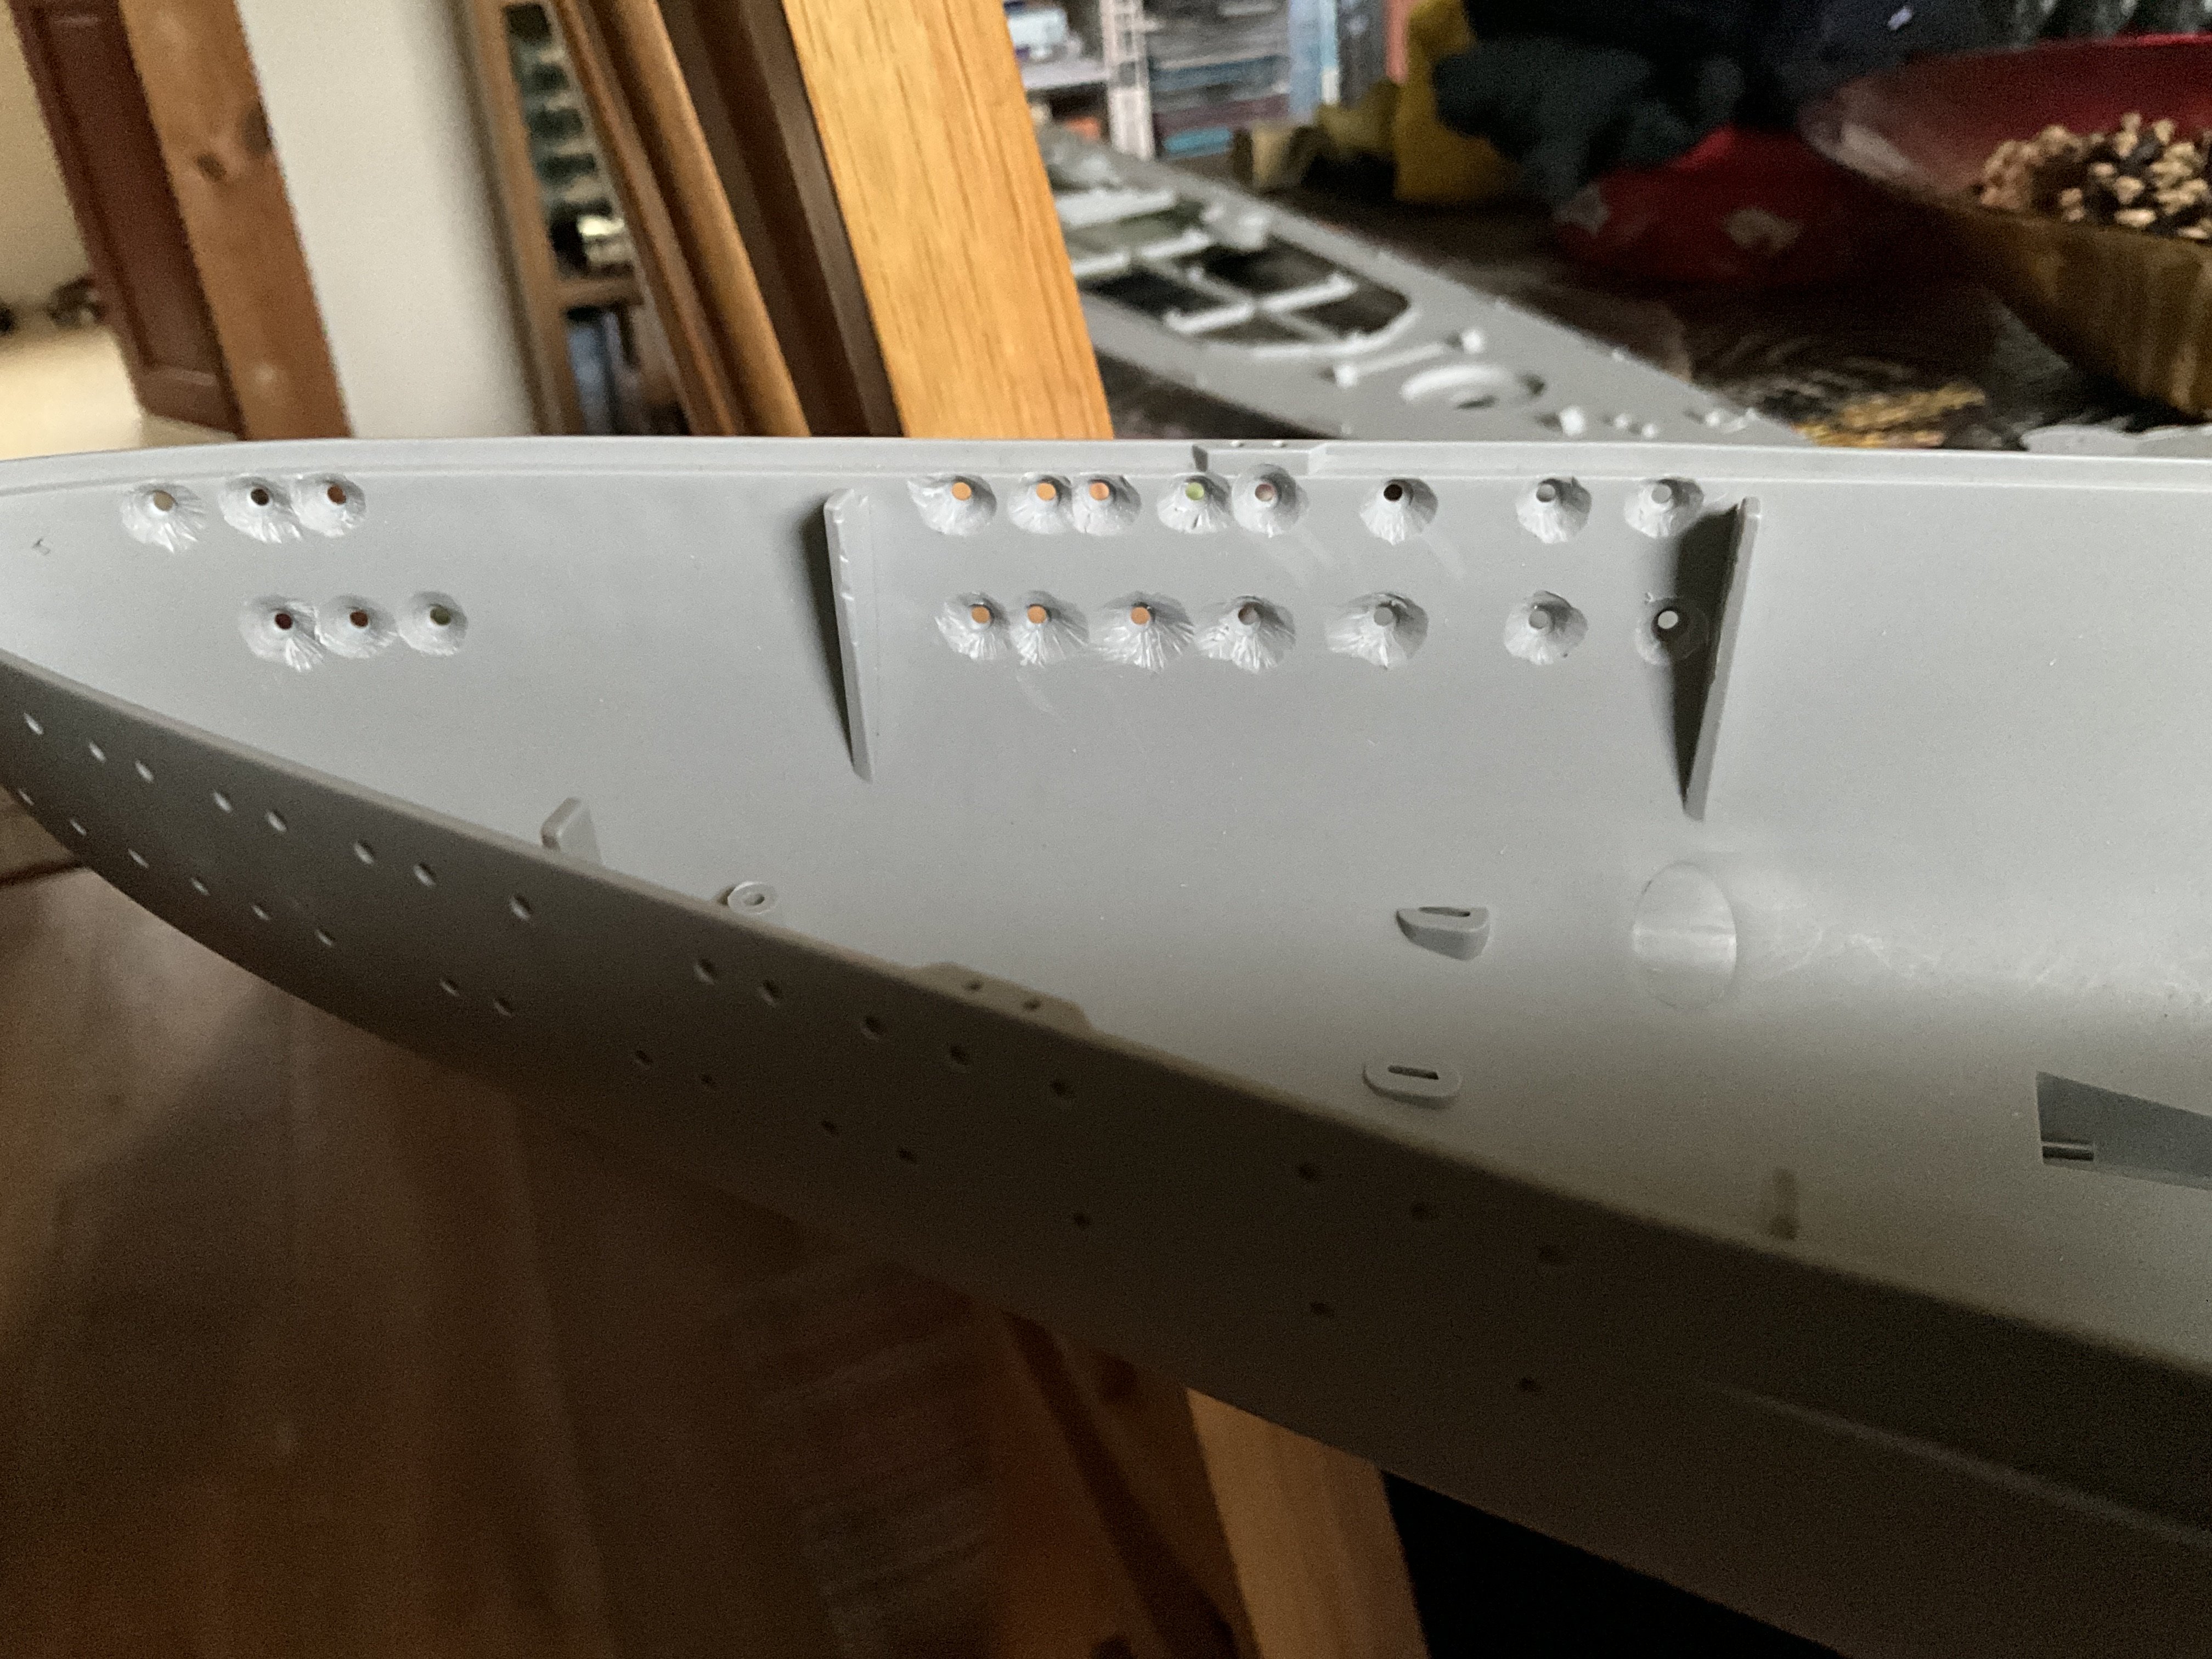
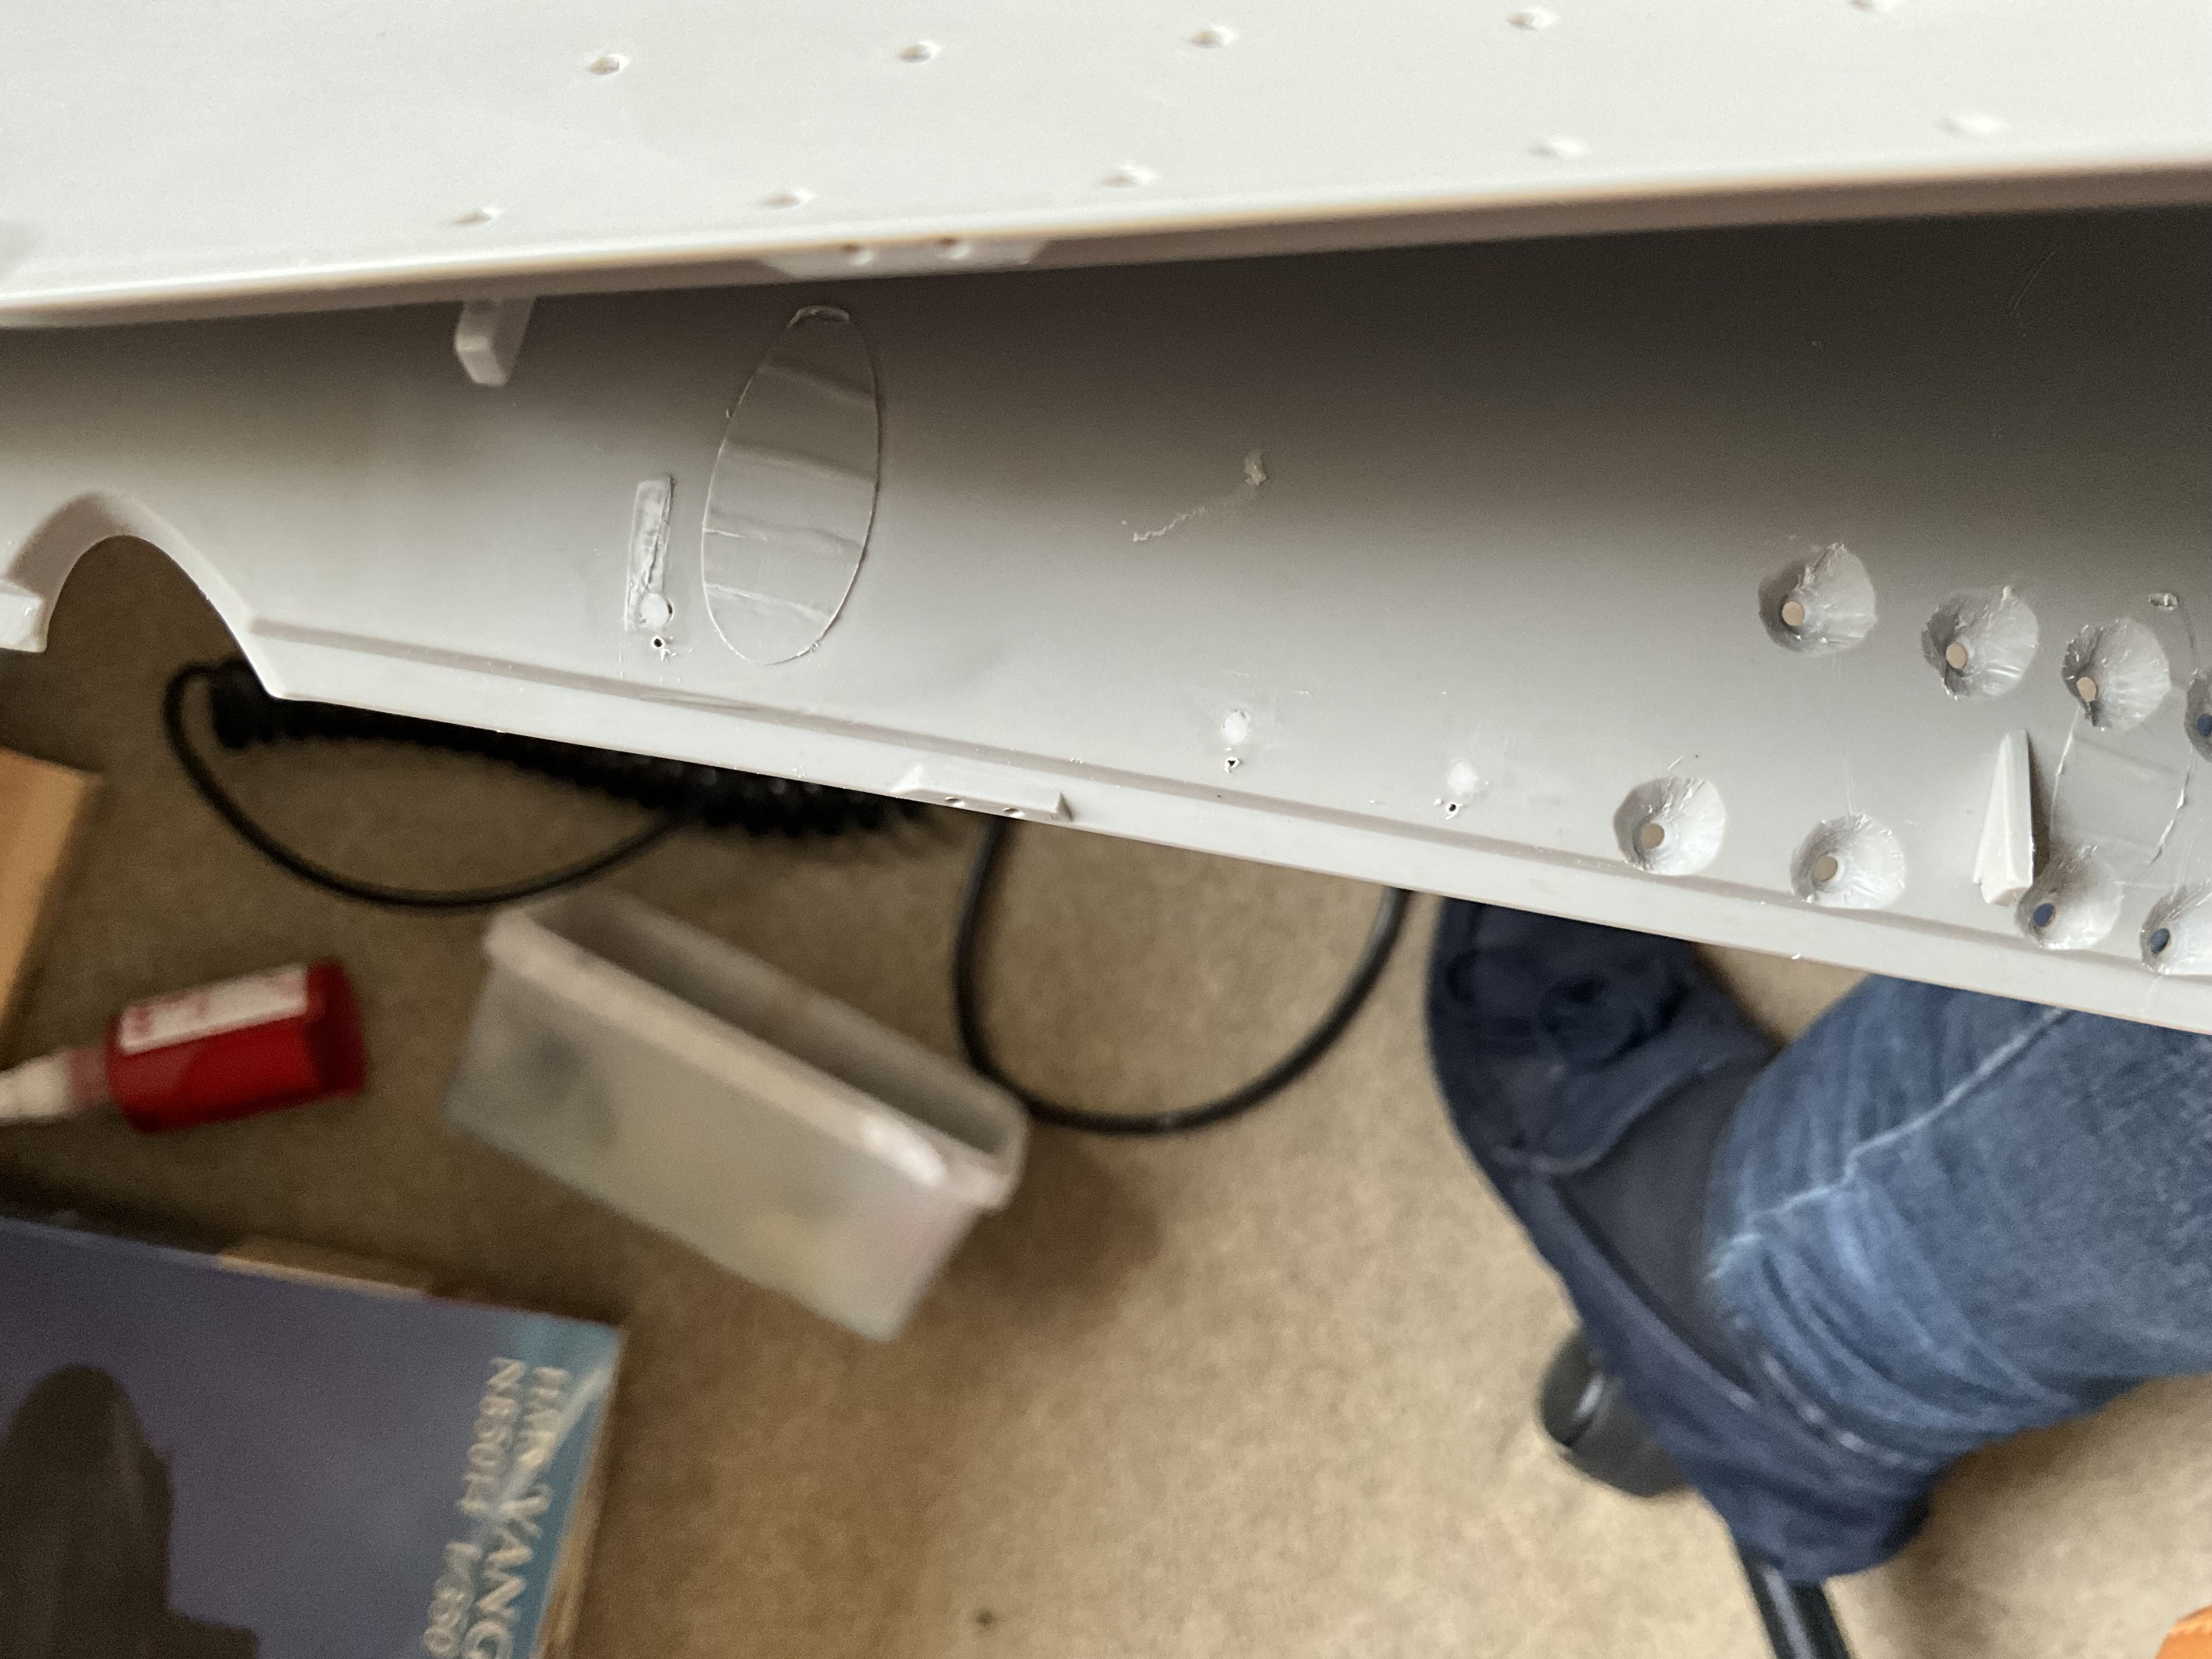
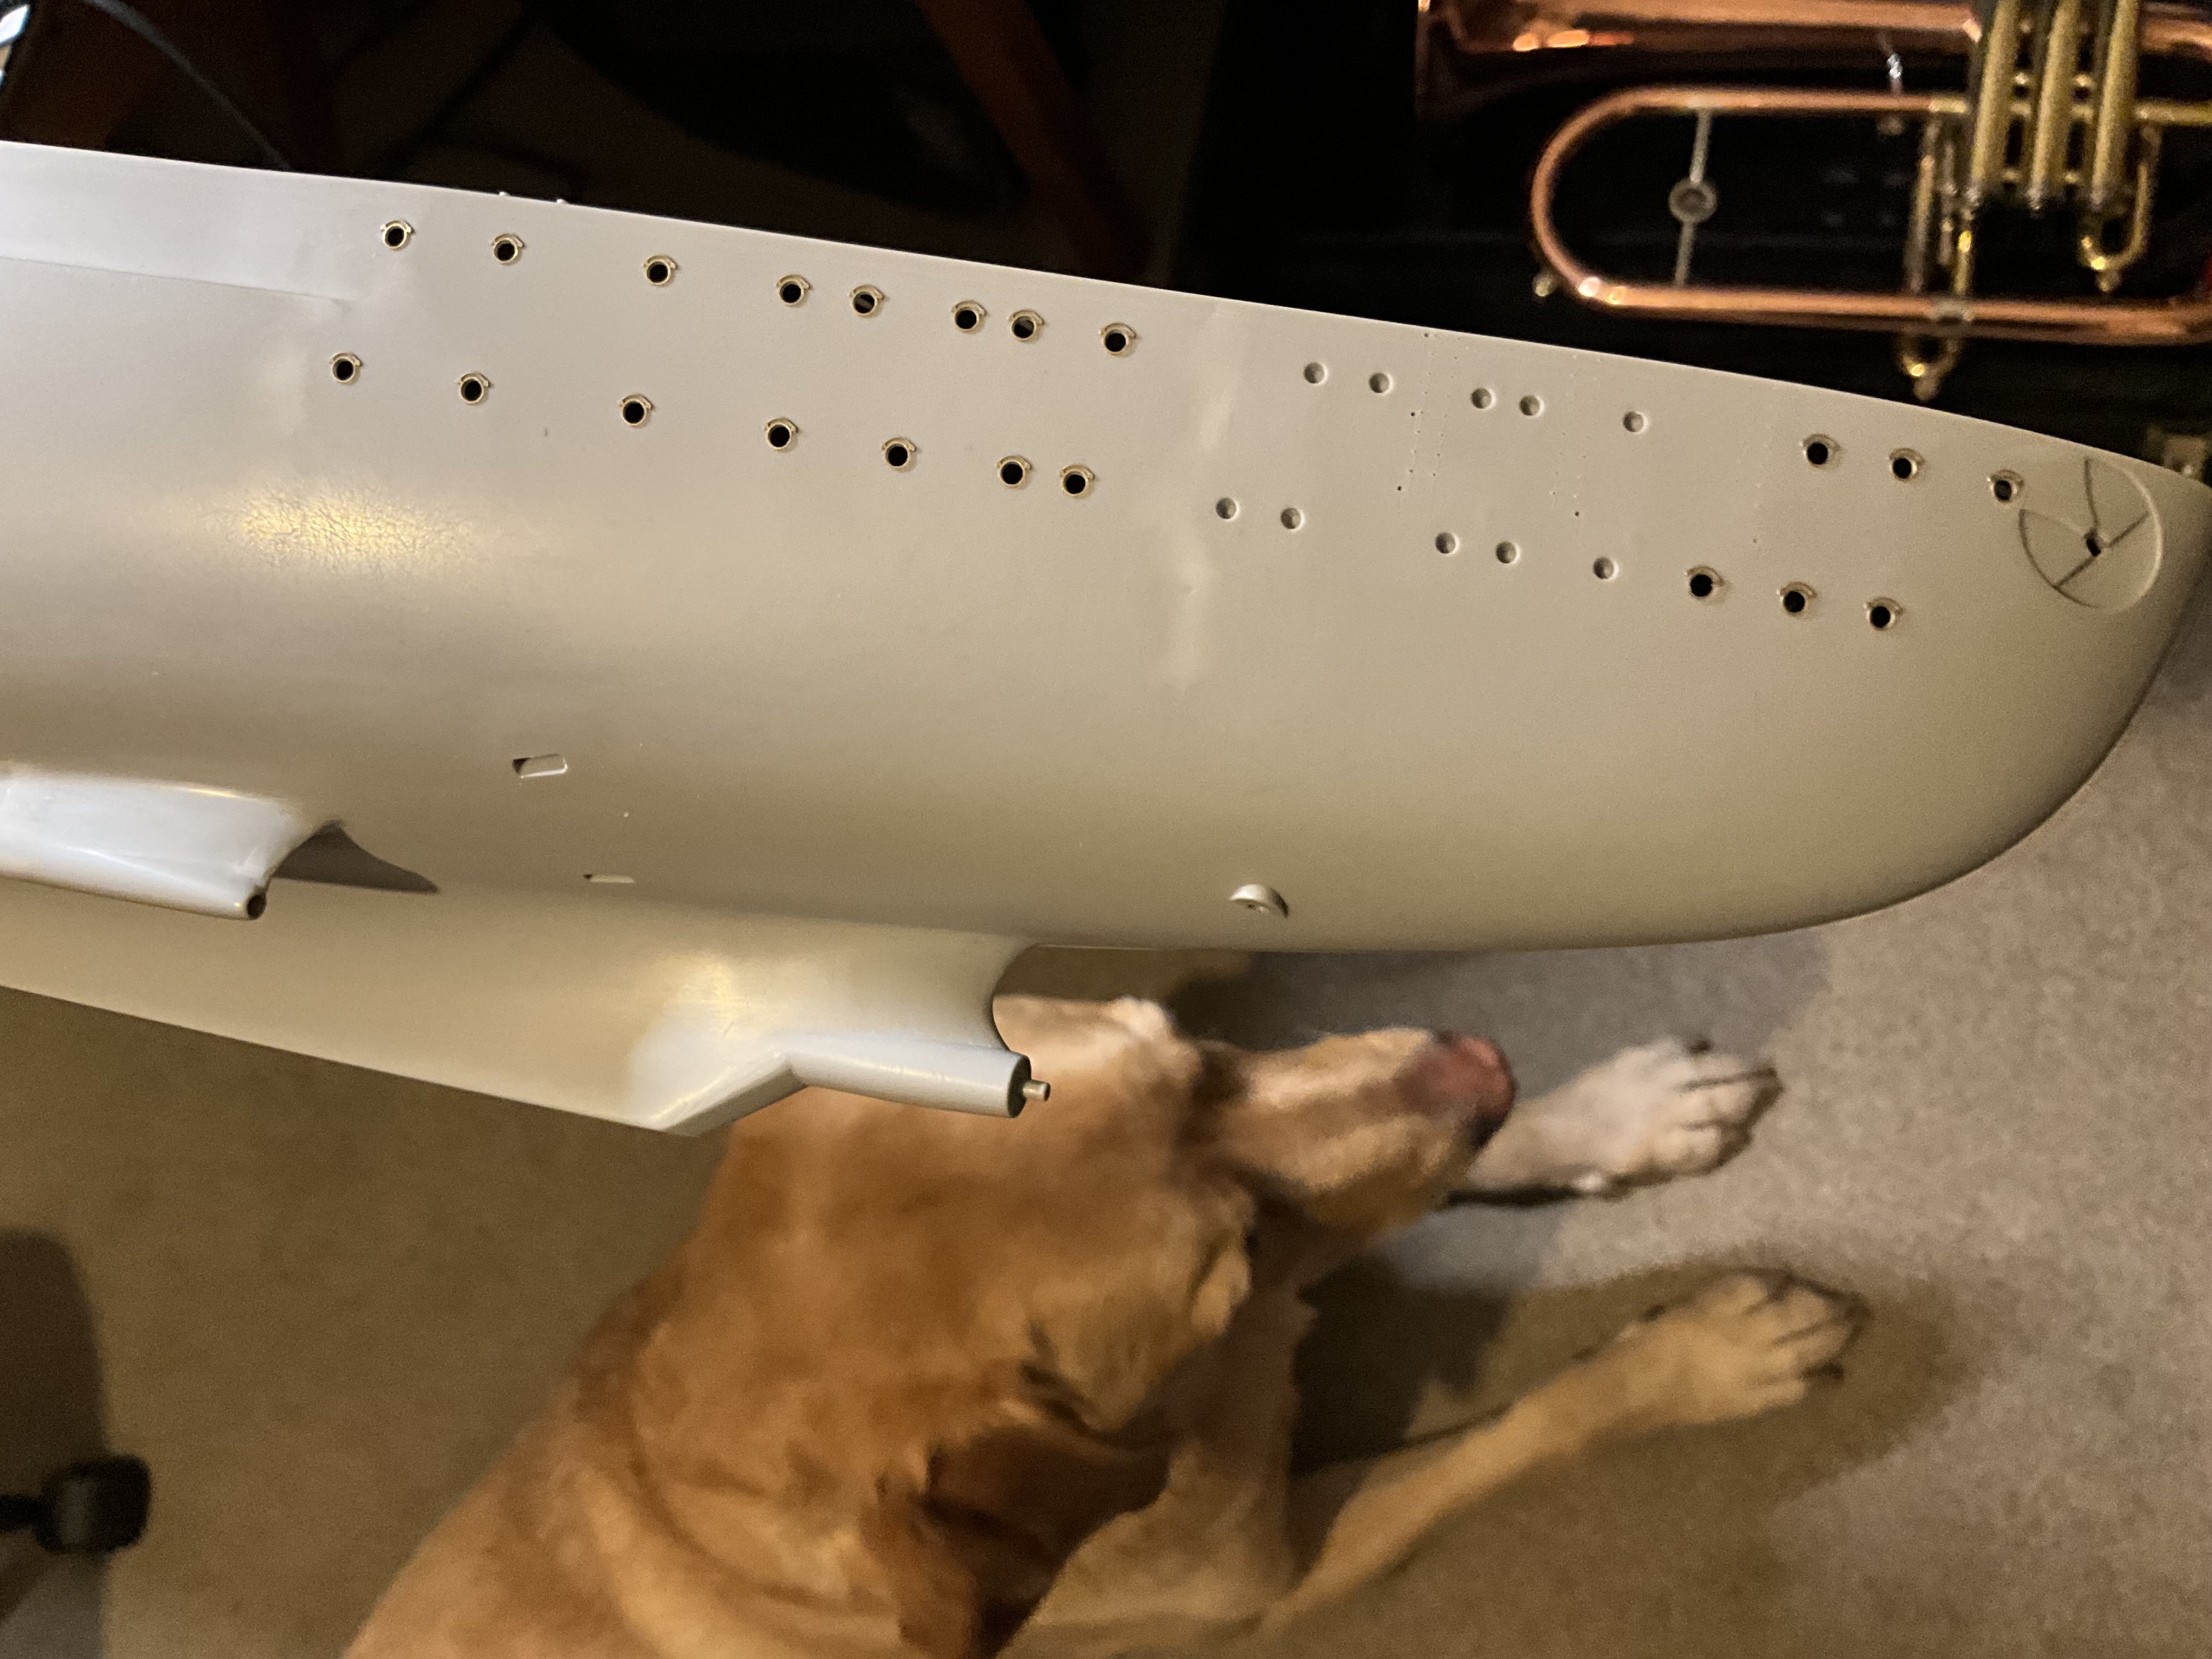
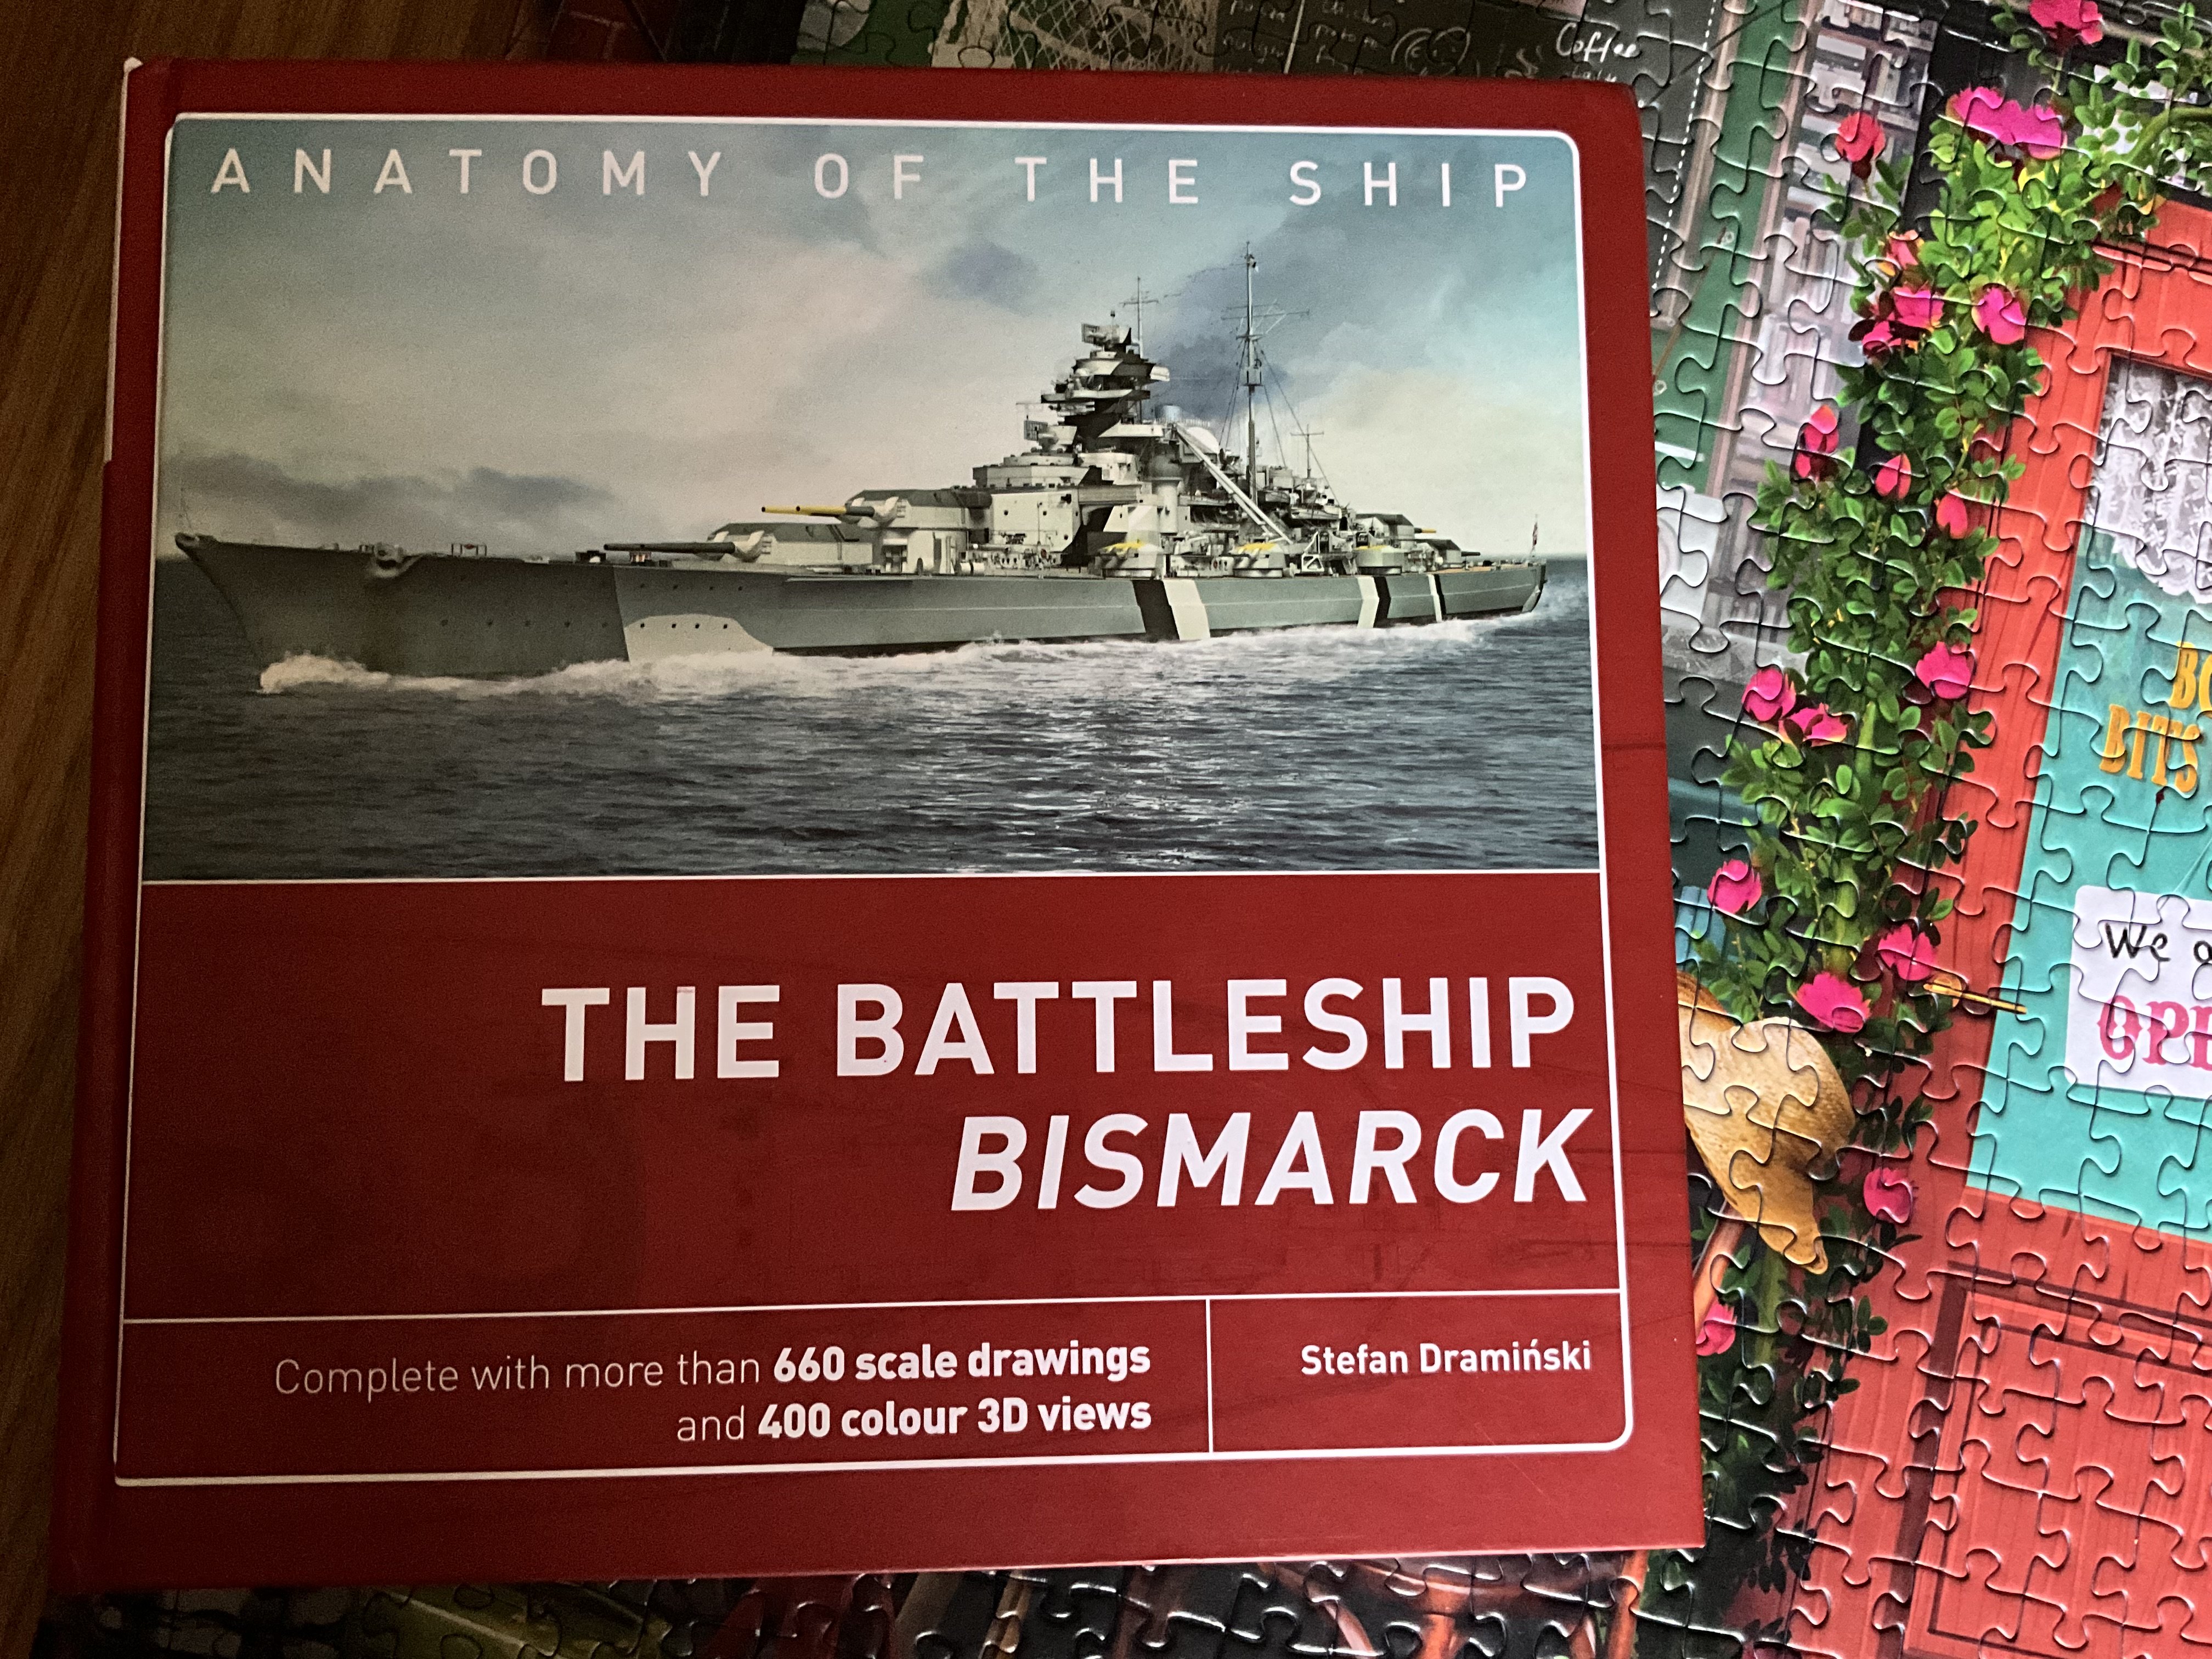
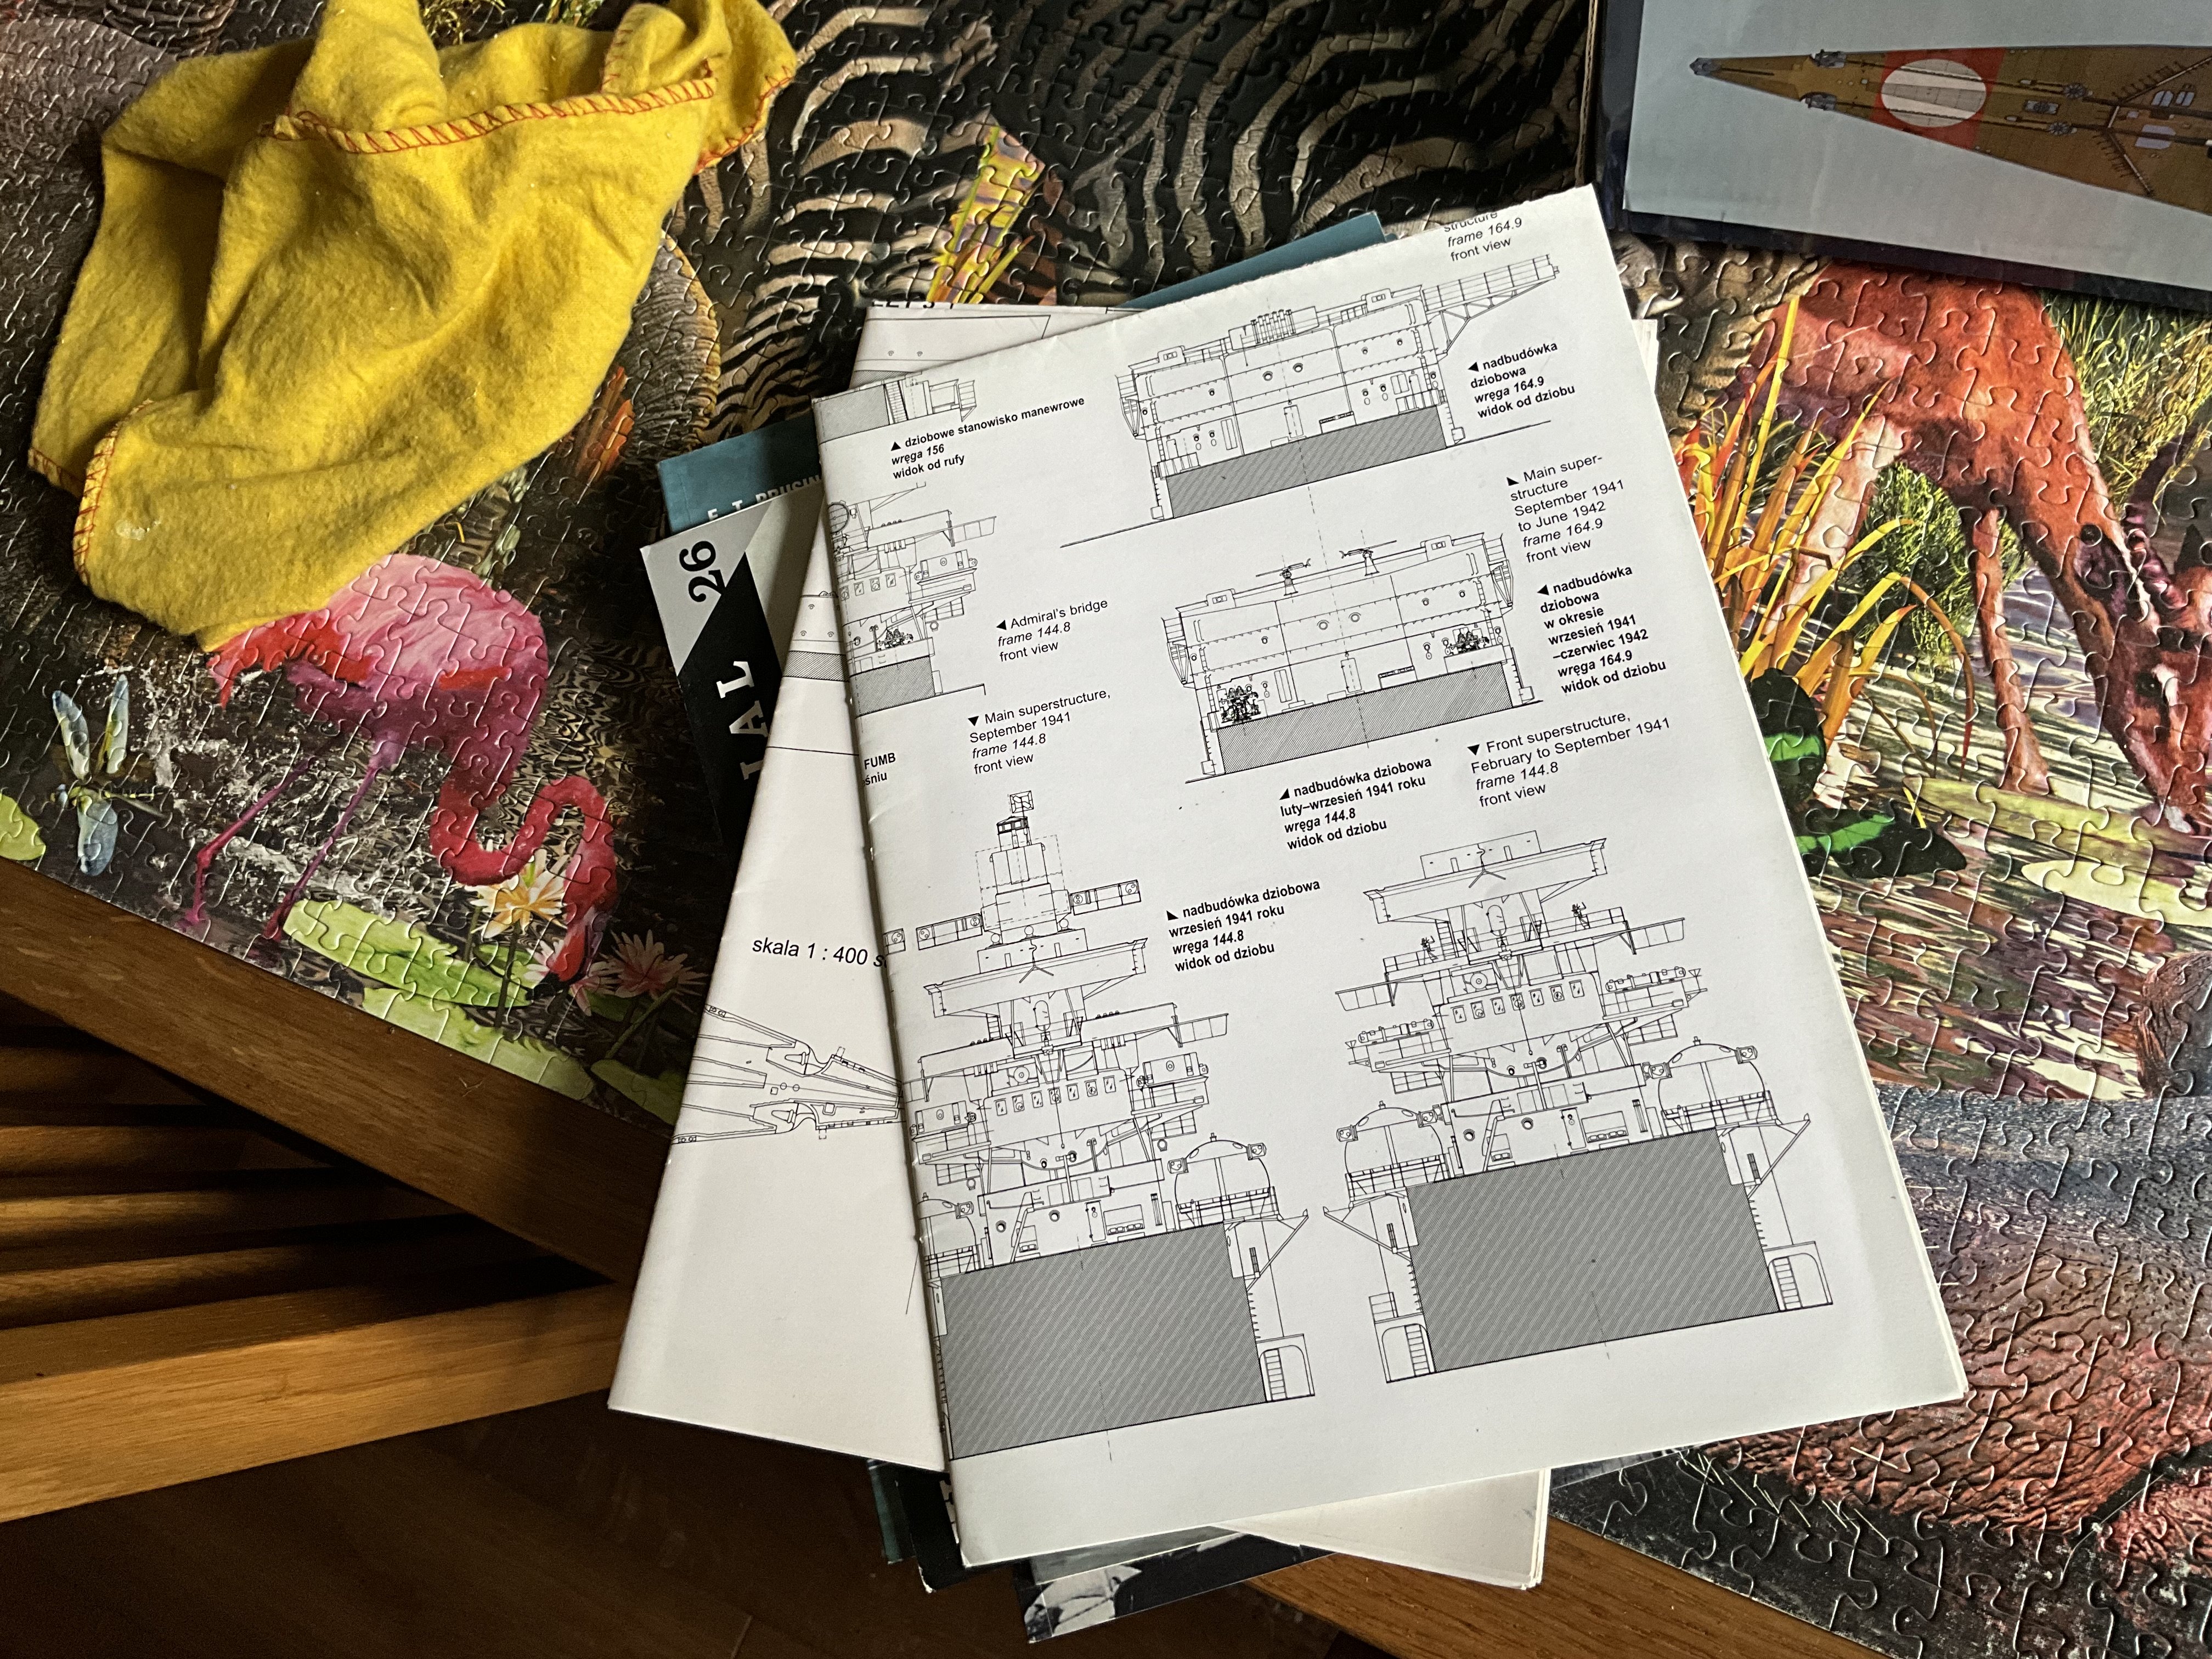
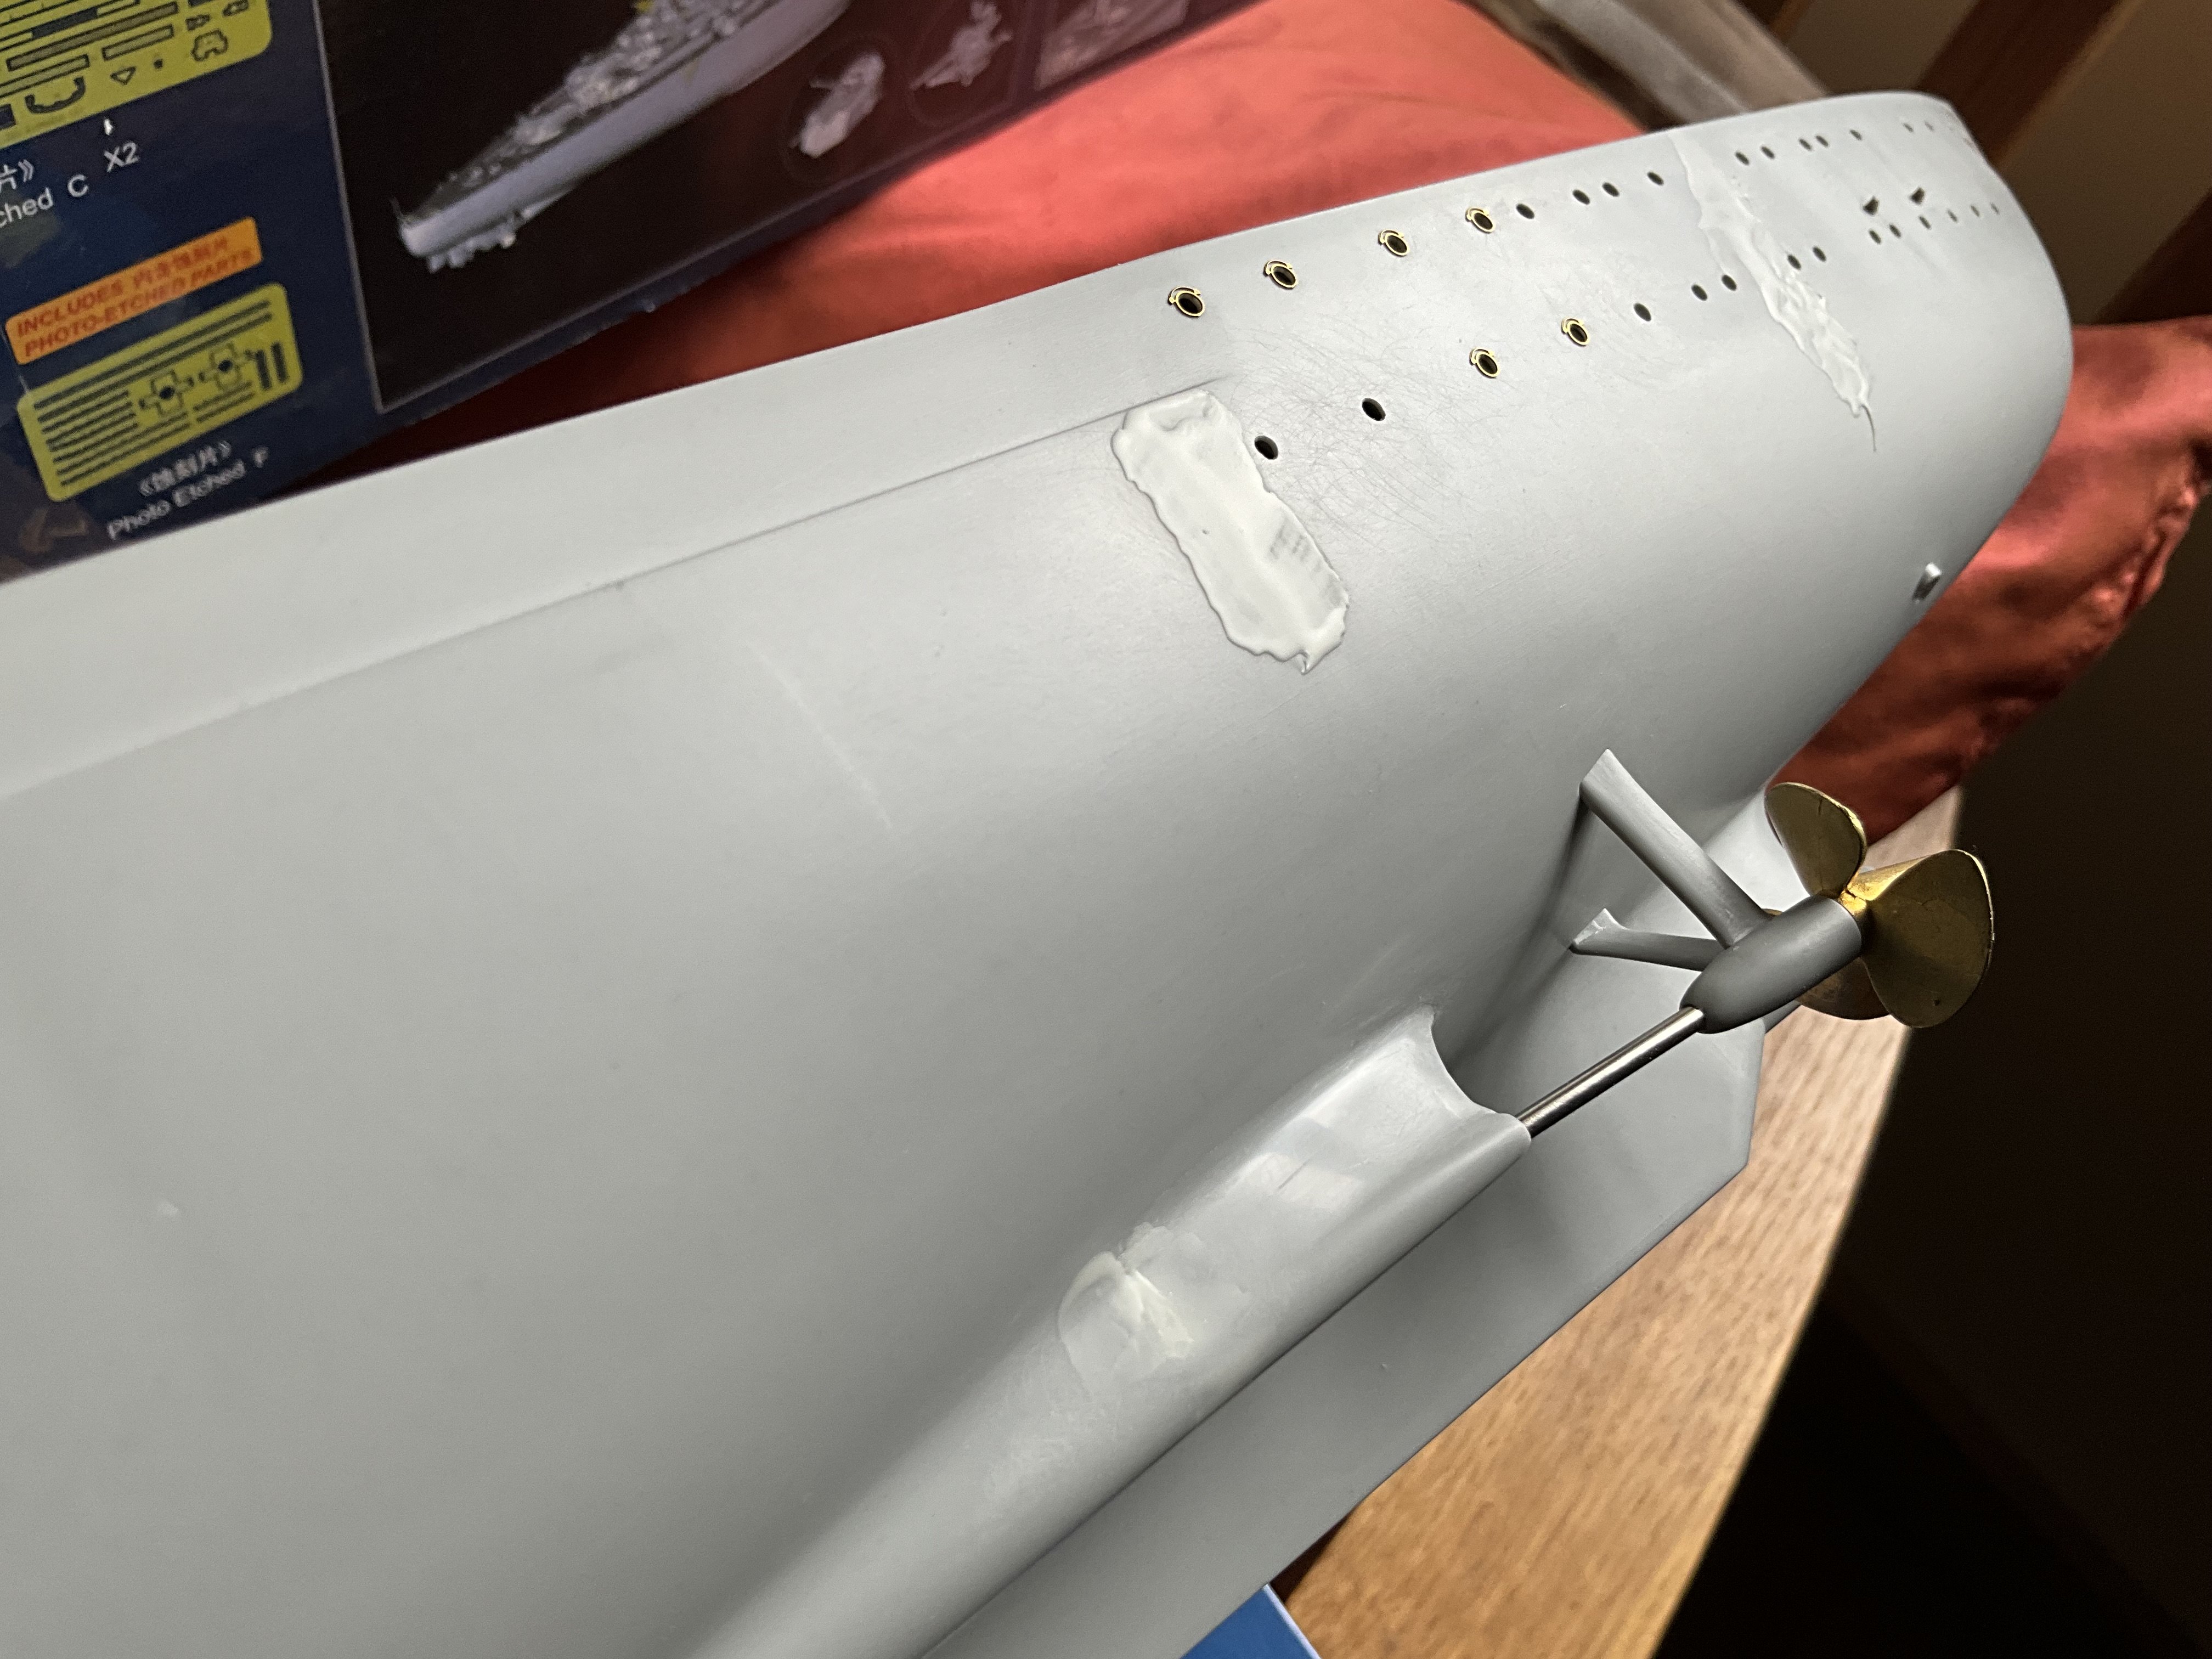
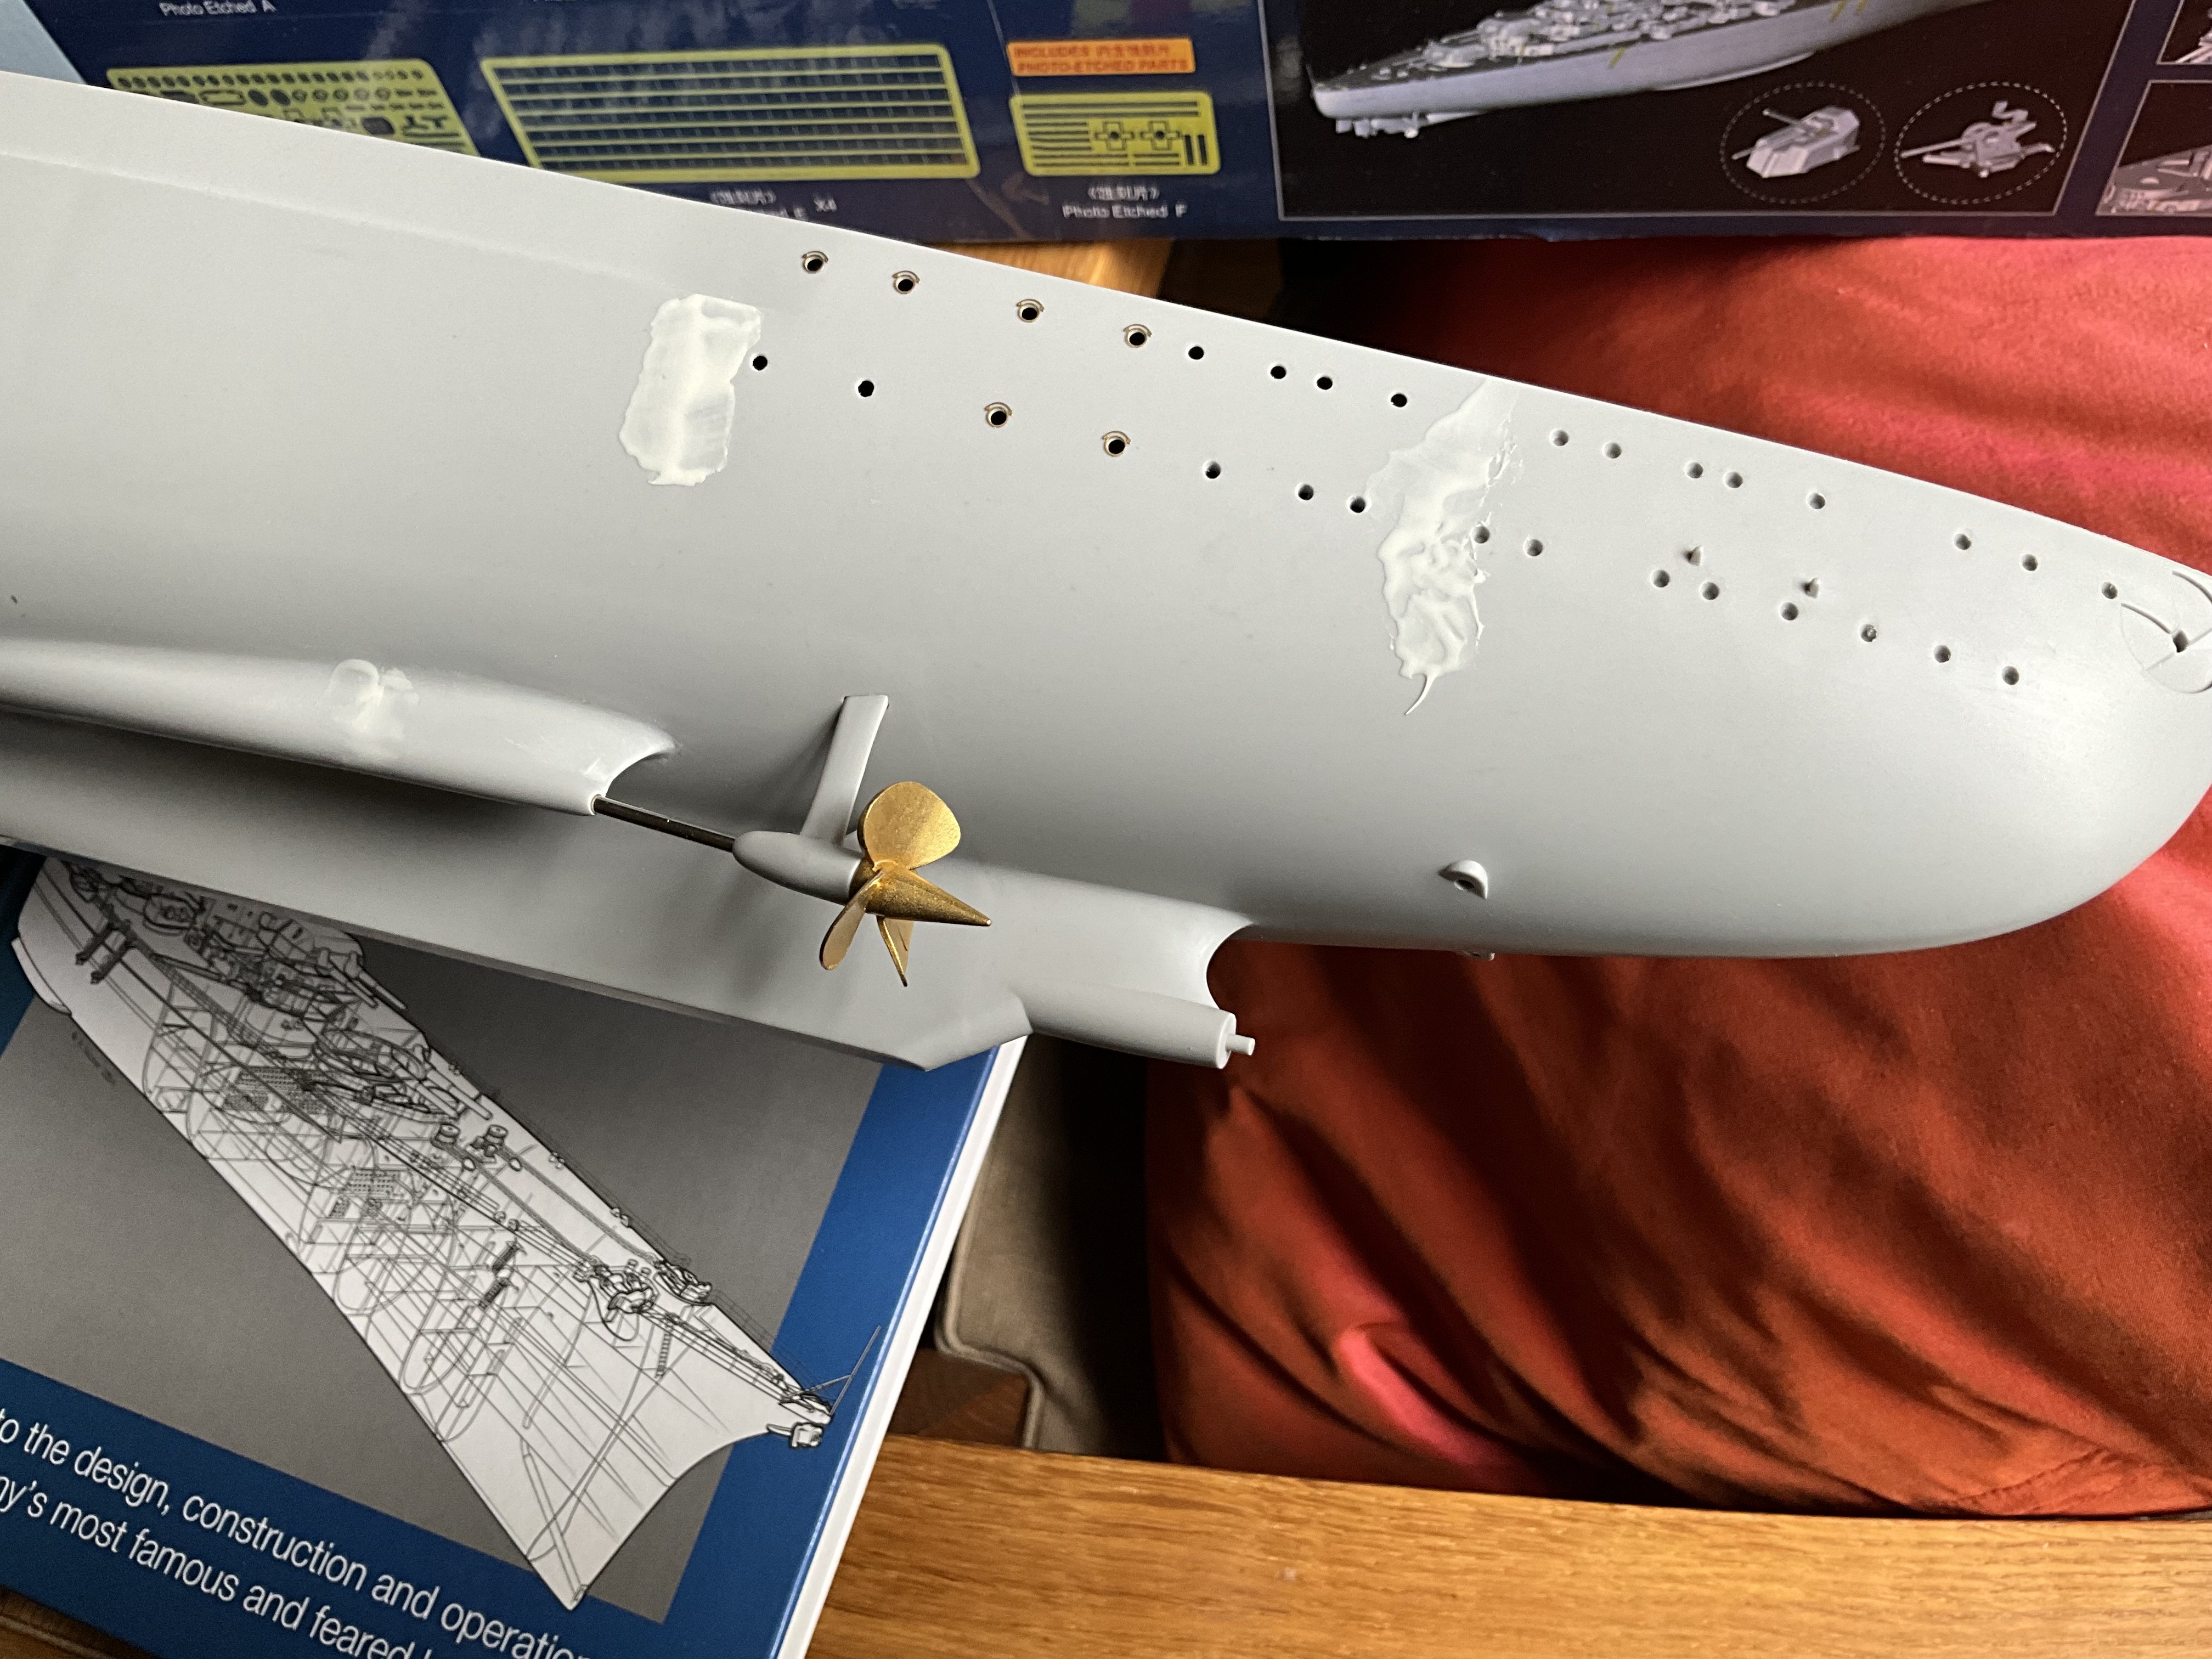
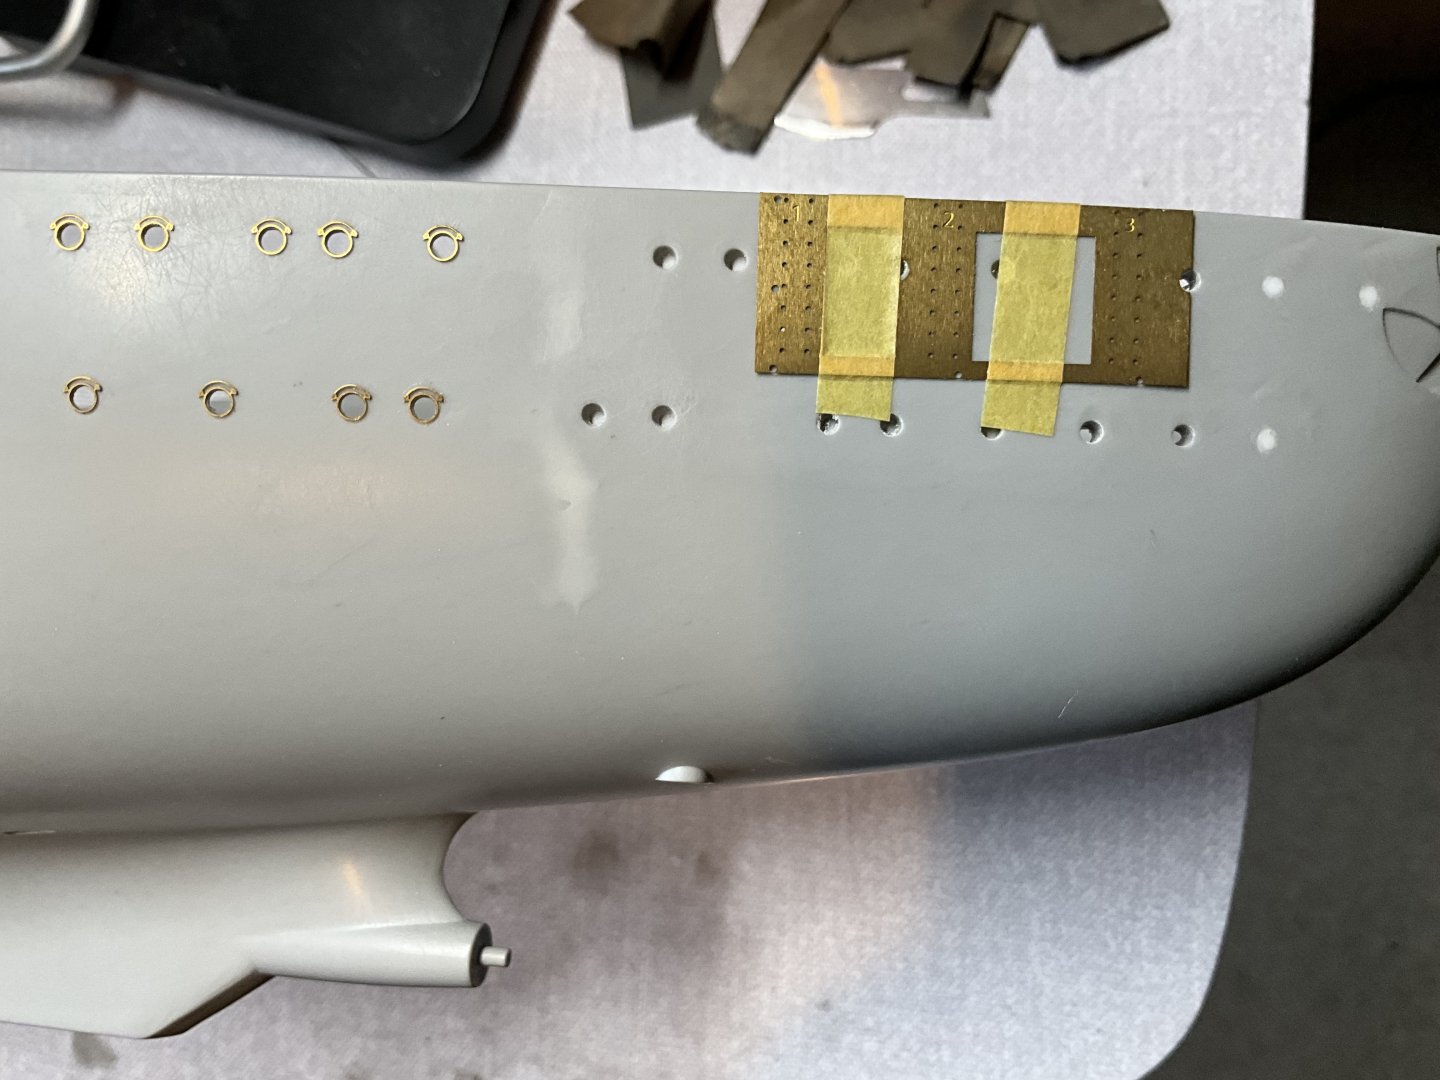
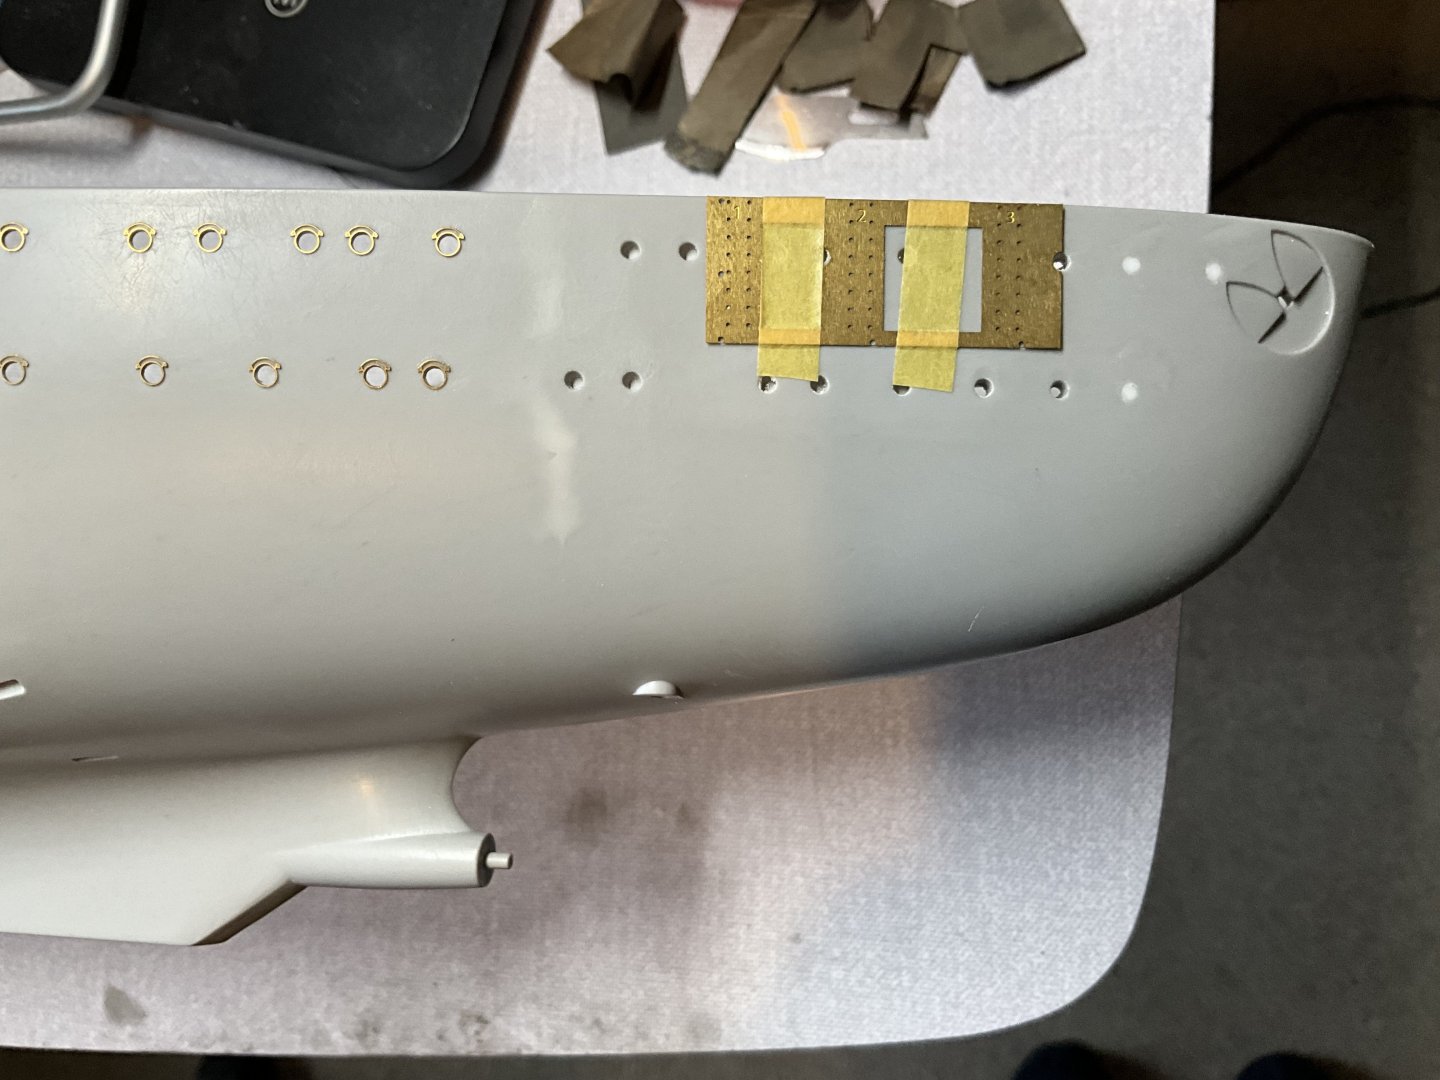
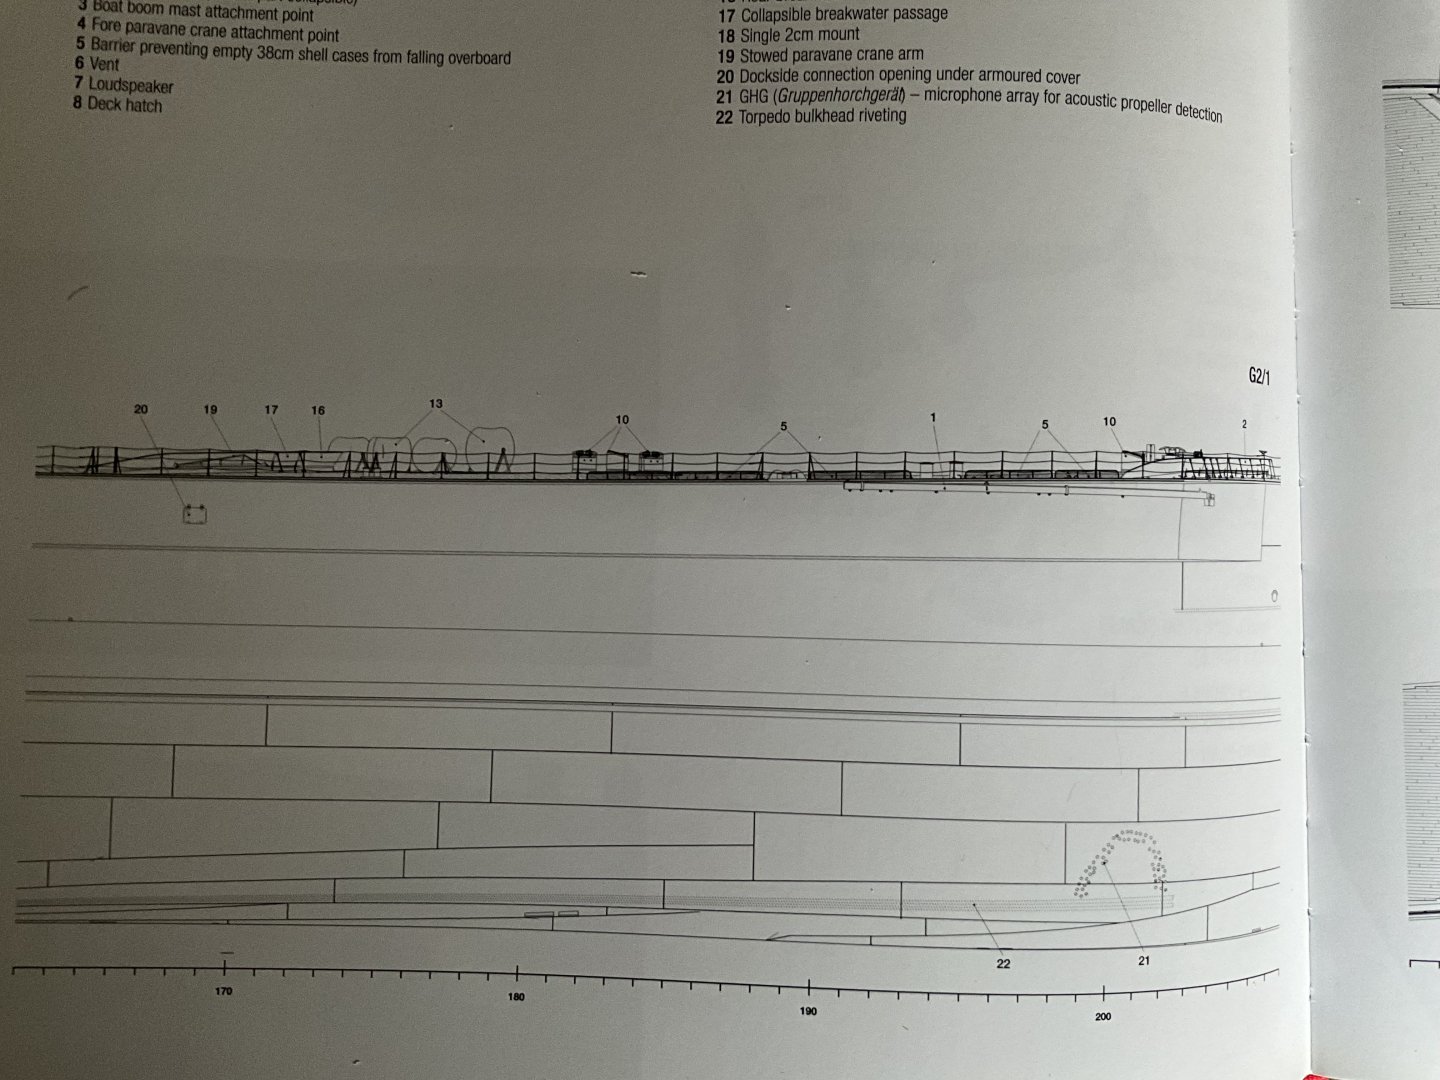
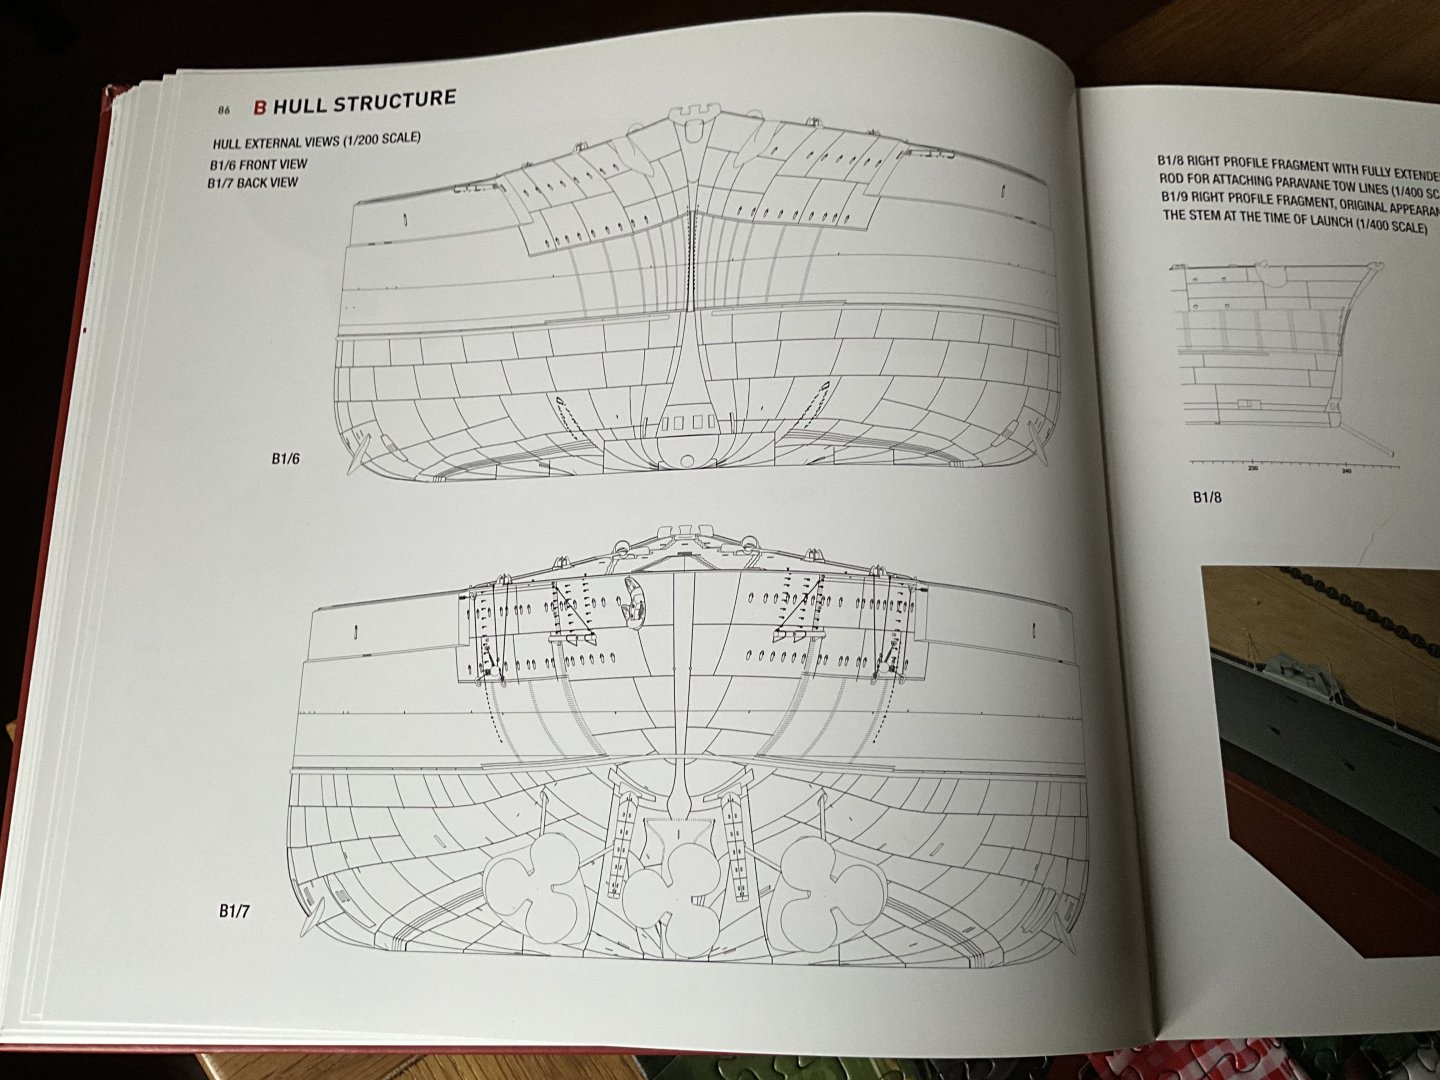
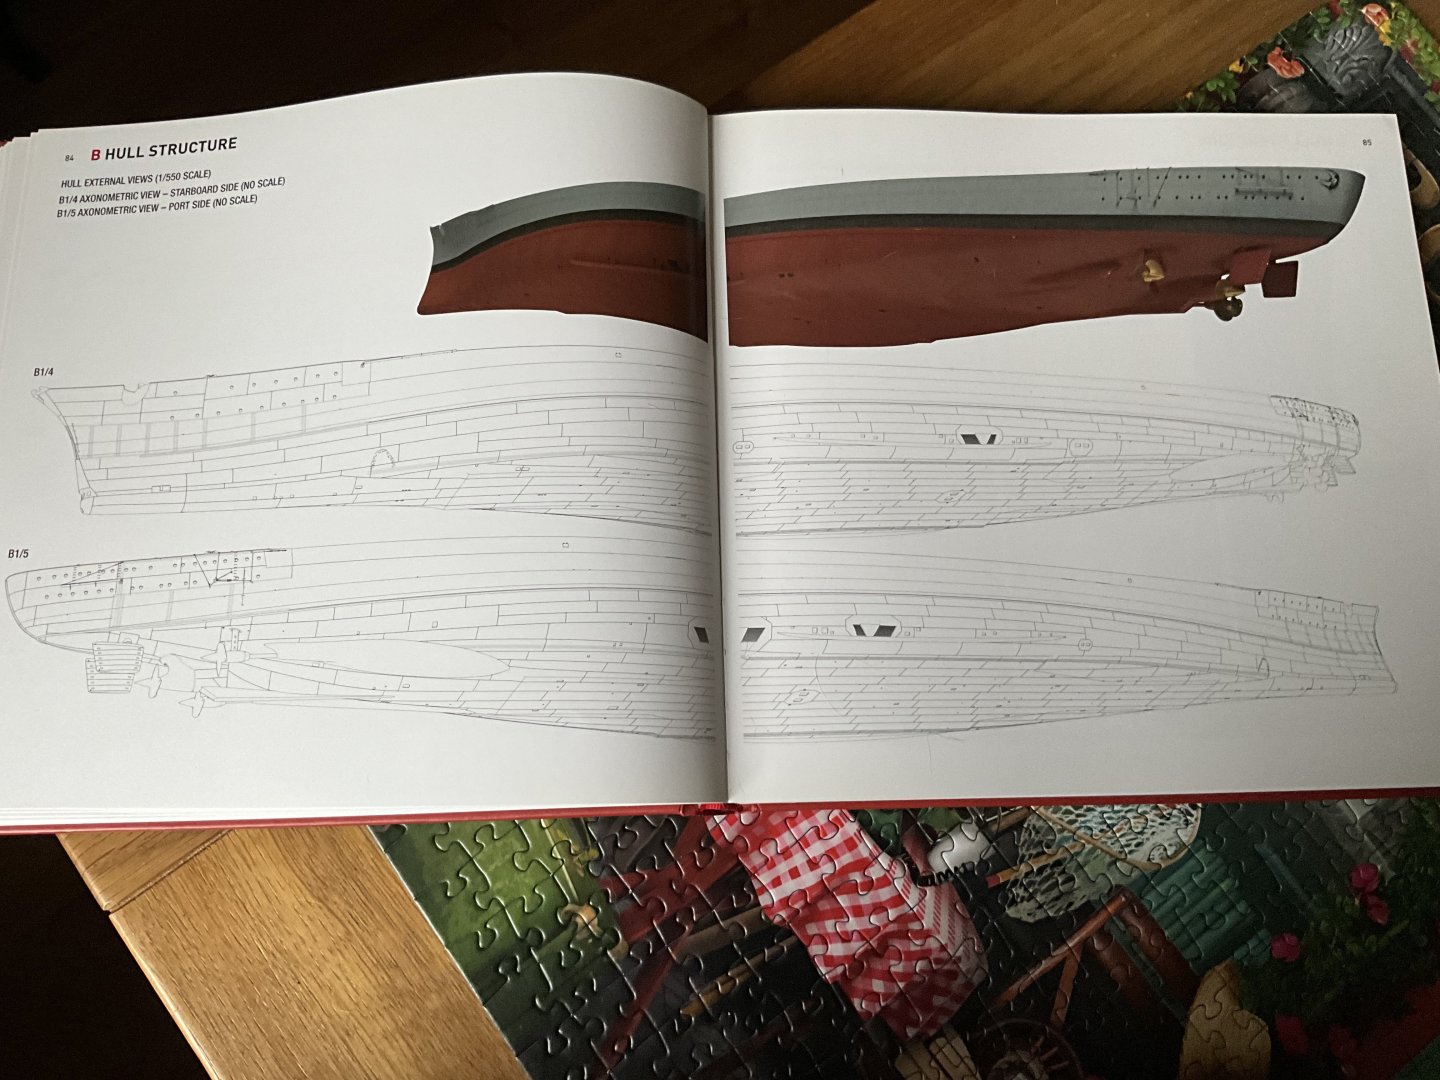
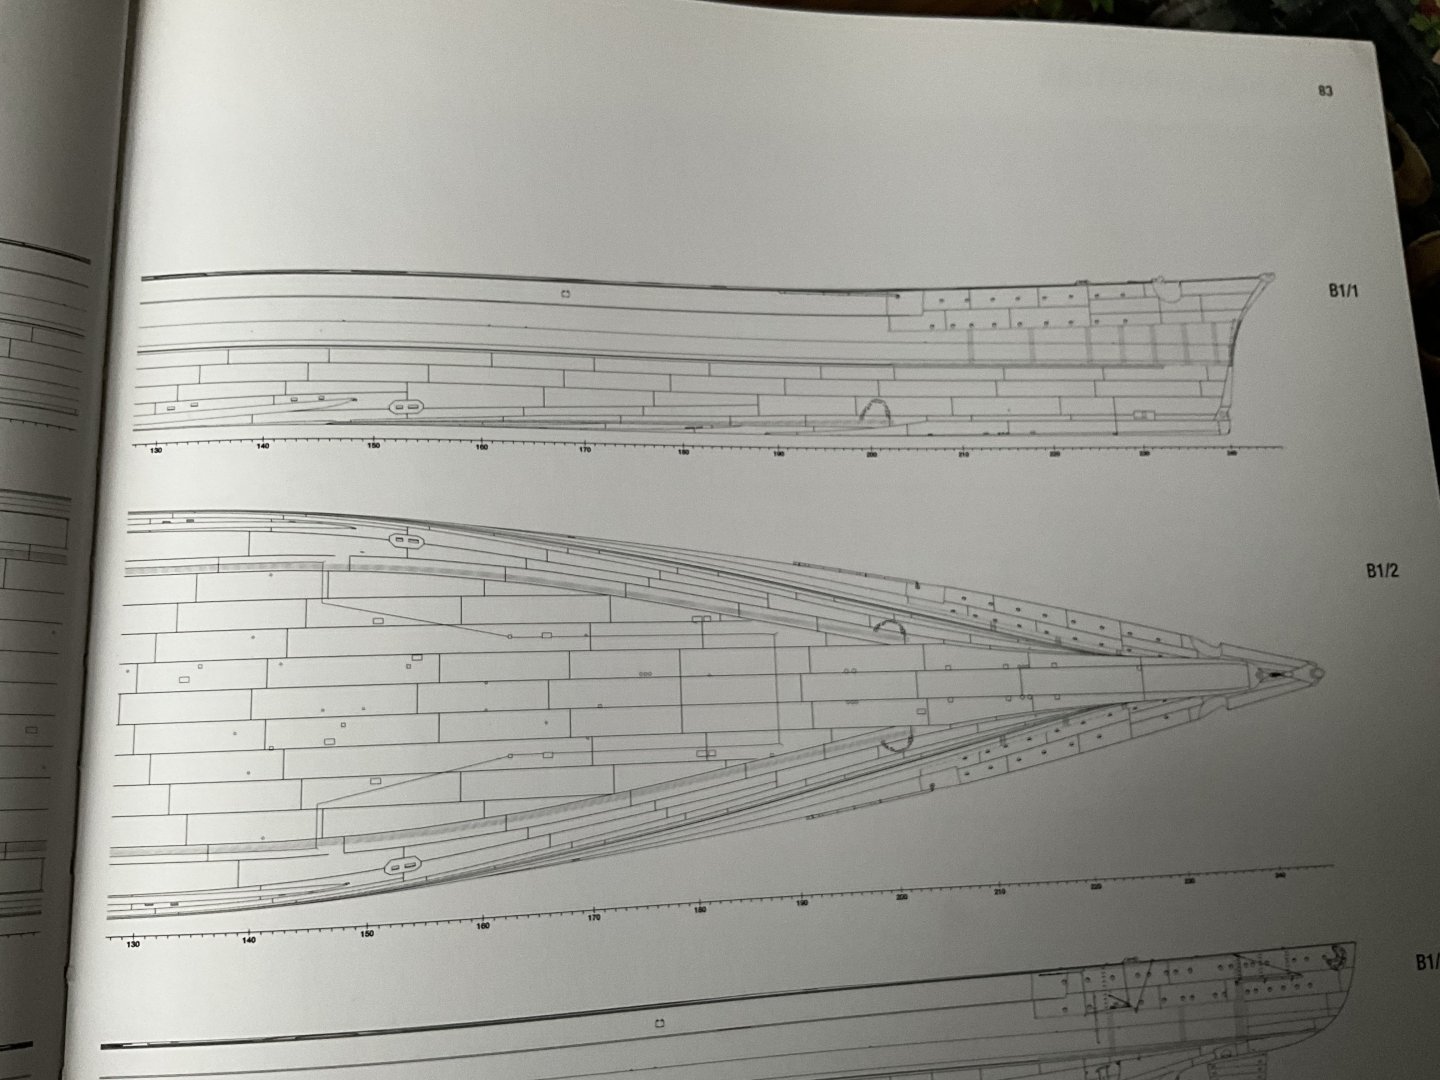
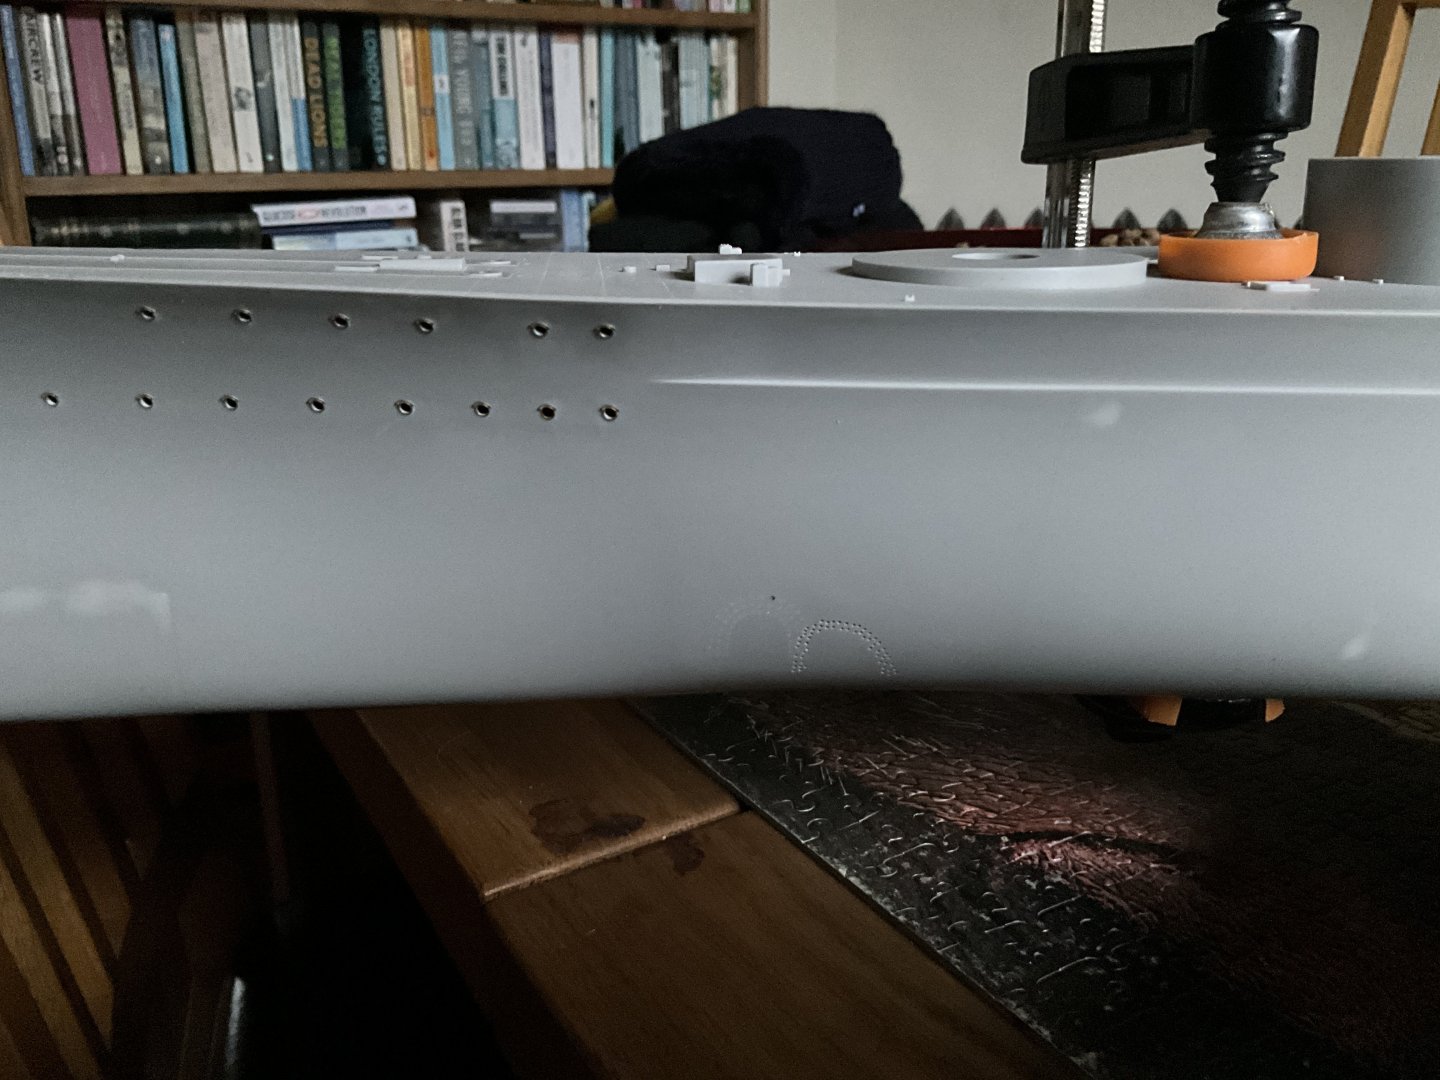
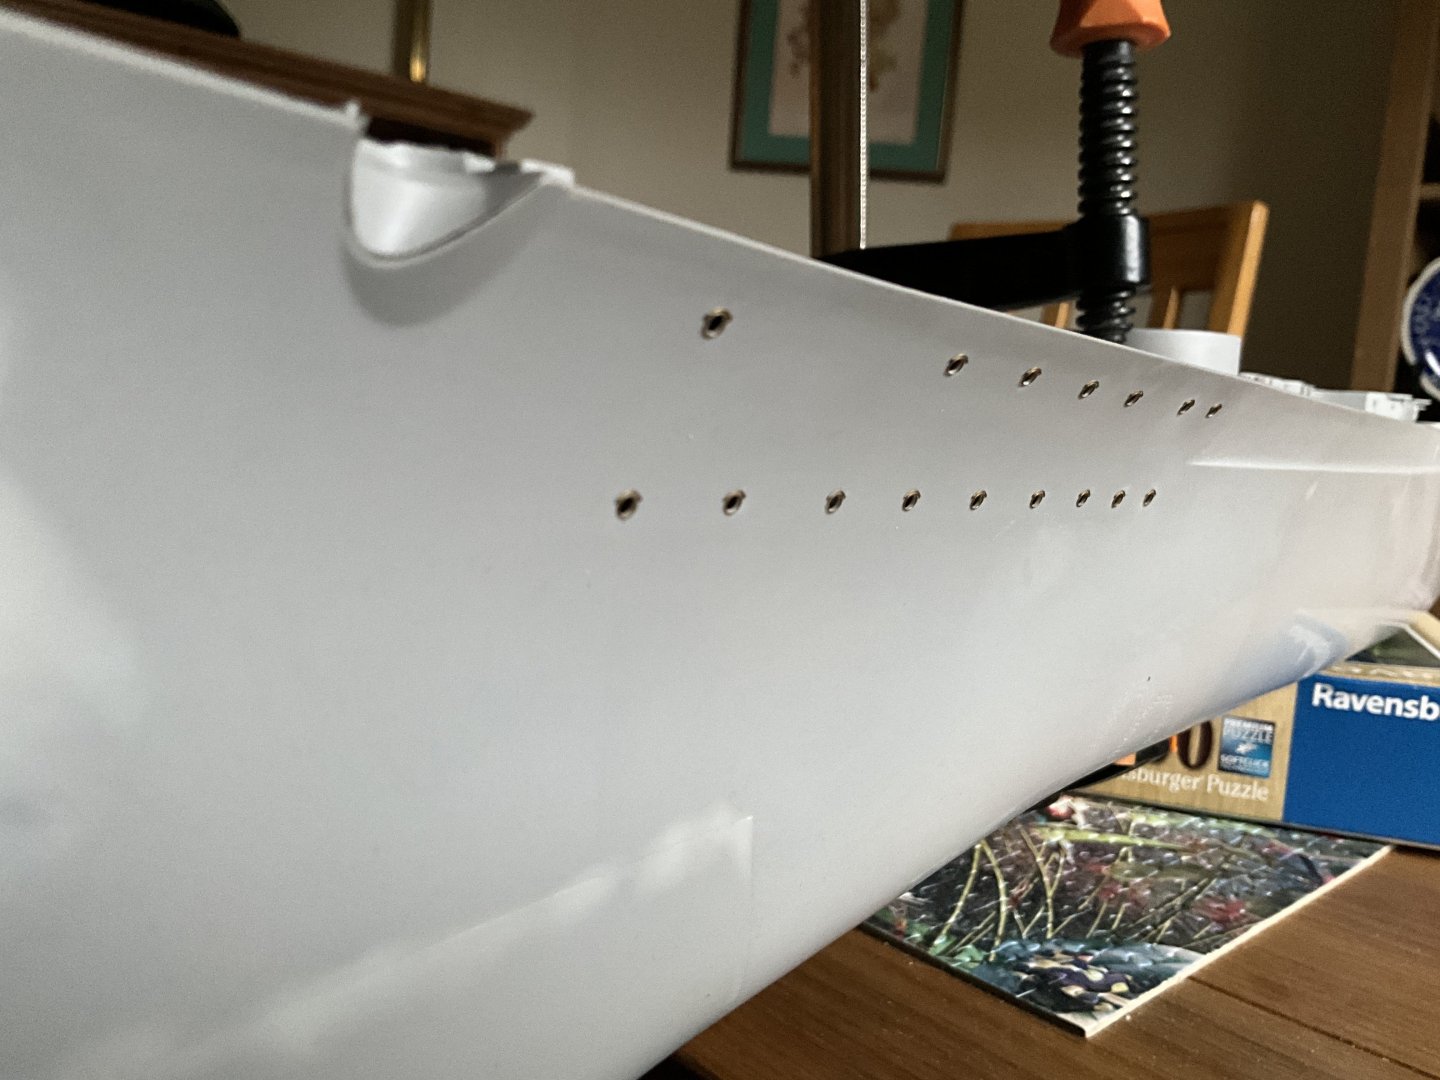
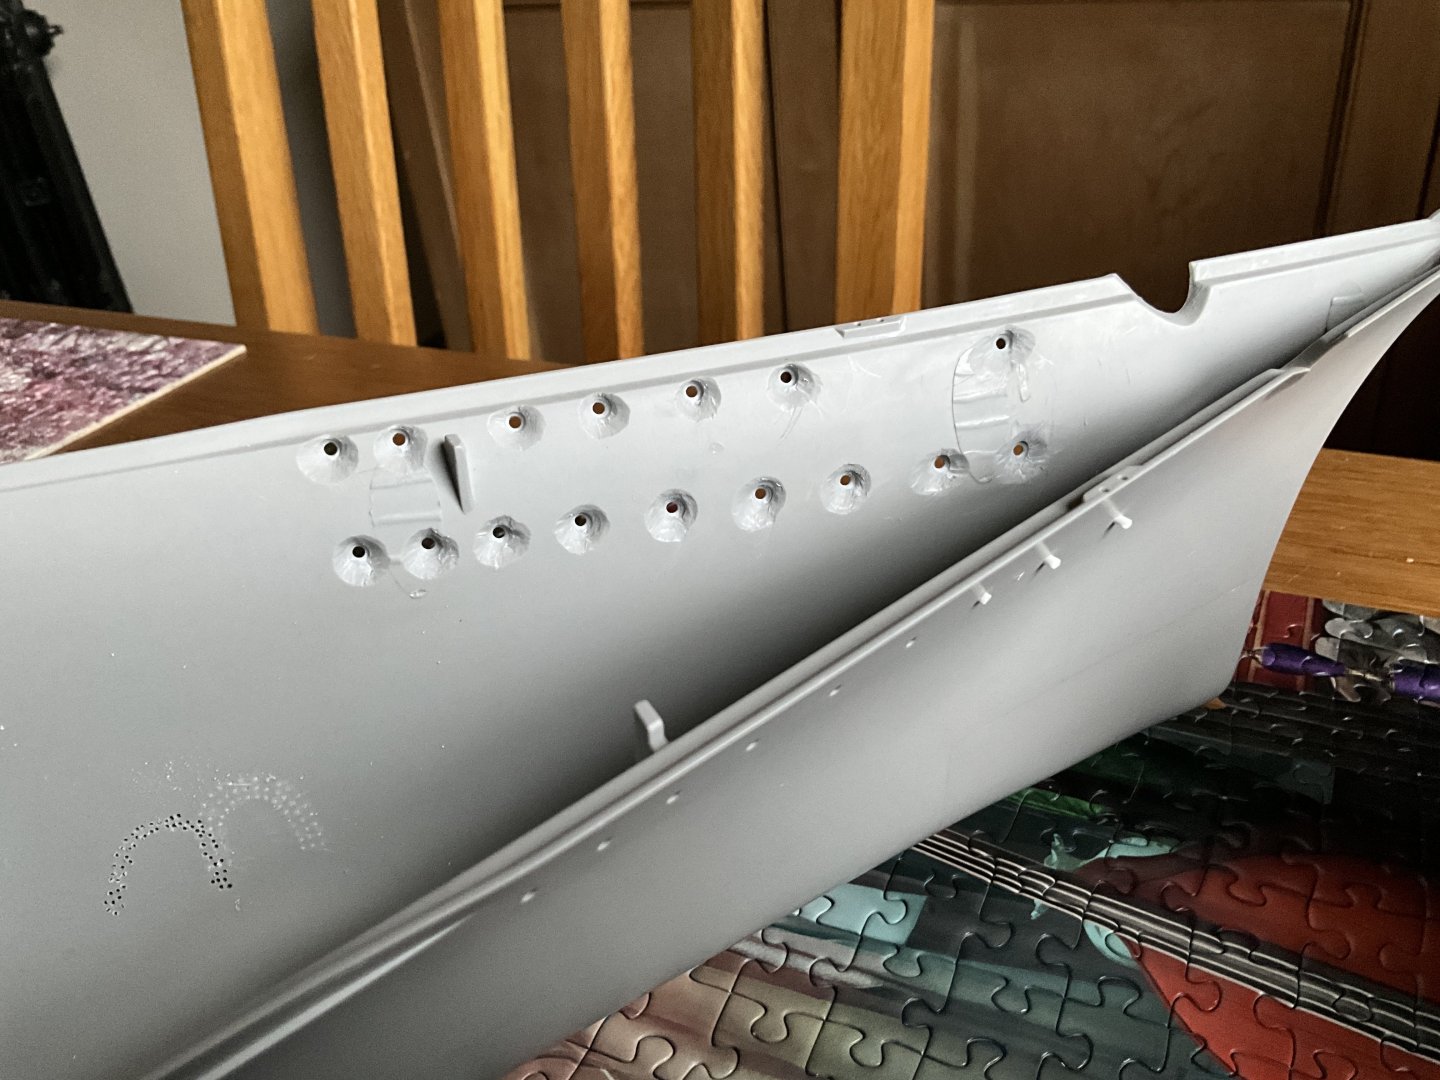
Another part achieved was the hull detailing forward below waterline, looked like lots of simulated holes on hull in a horseshoe shape possibly a scuttling point l thought, drilled these through the hull just to define them a little better, they weren’t hundred percent like drawing in the book but l didn’t fancy try to replicate this, thought l was doing fine just drilling it out, first mistake 🙄 whilst fitting jig for boom ladders at Stern discovered there was a jig for this, Pontos went to the bother of correcting and making this but not to telling you in their instructions about it 😳 Am looking at all those holes in side of my boat that ain’t right 🤪 out with plastic rod and plugged them all. Discovered they were in wrong position anyway, so altered it all to suit drawing, same scale as well so just measured it like for like, little bit doctoring then more drilling. Turns out these are for sonar microphones, nothing to do with scuttling point, a well learning all the time 👍


-
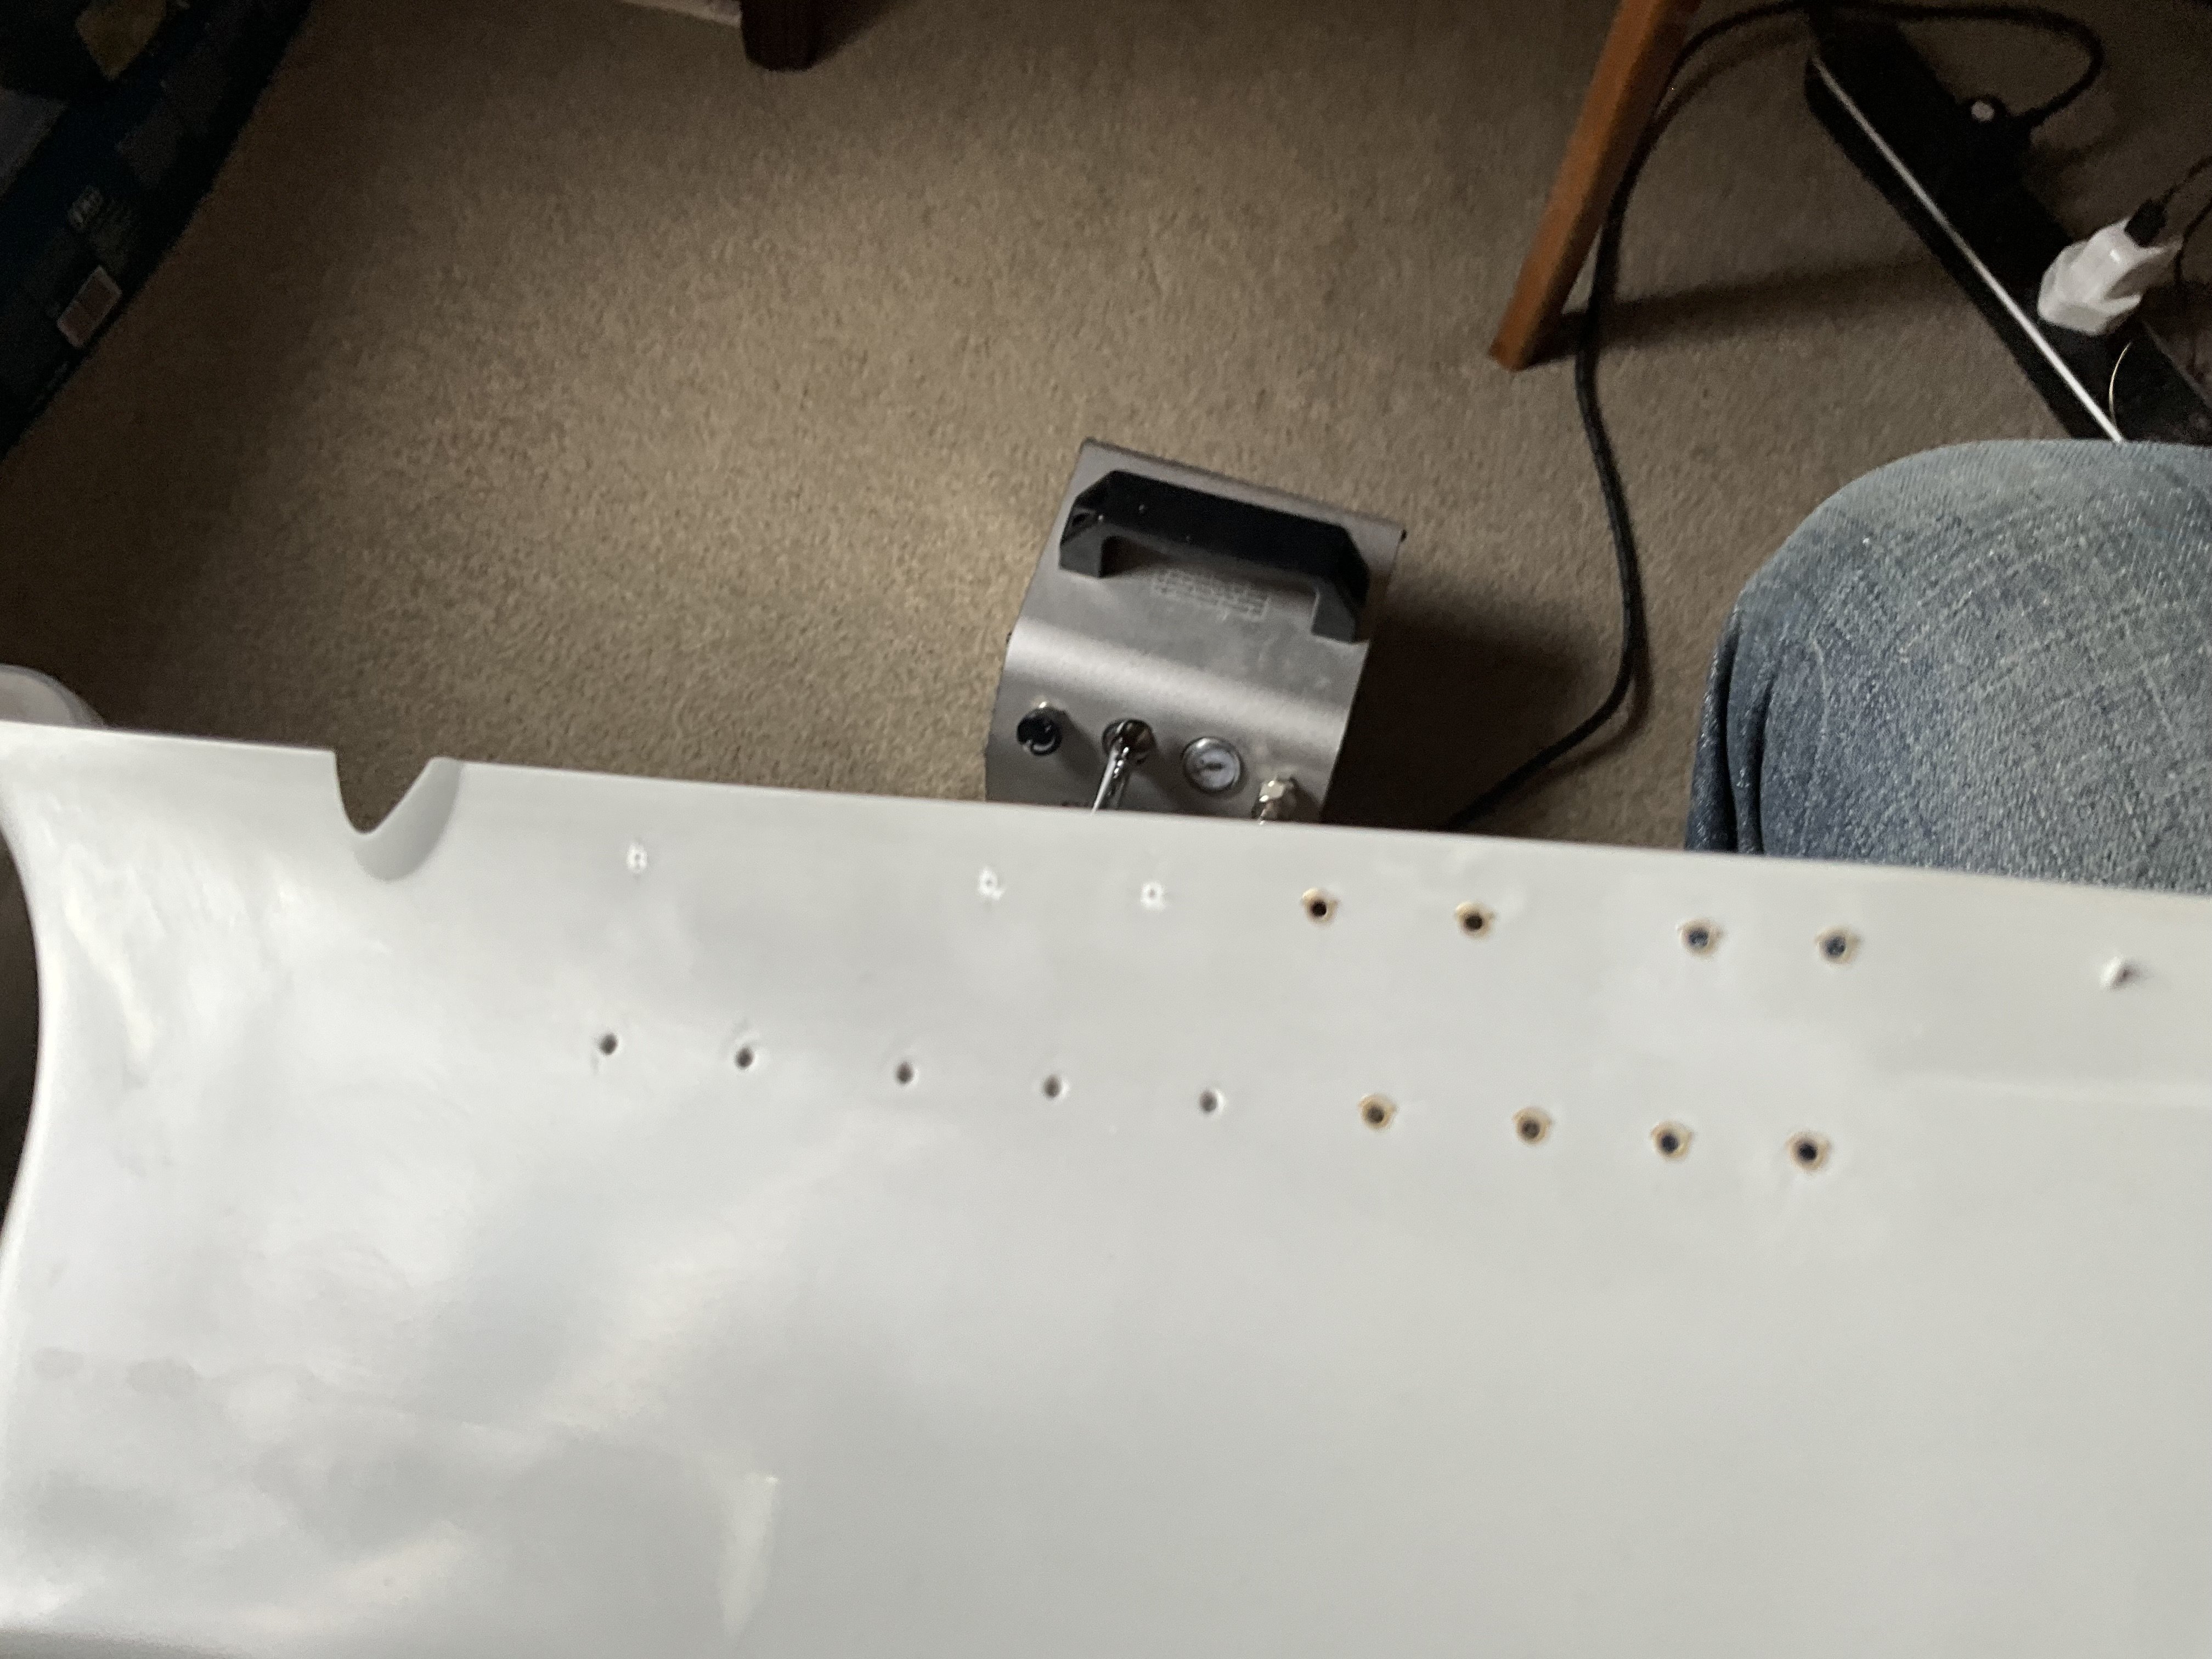
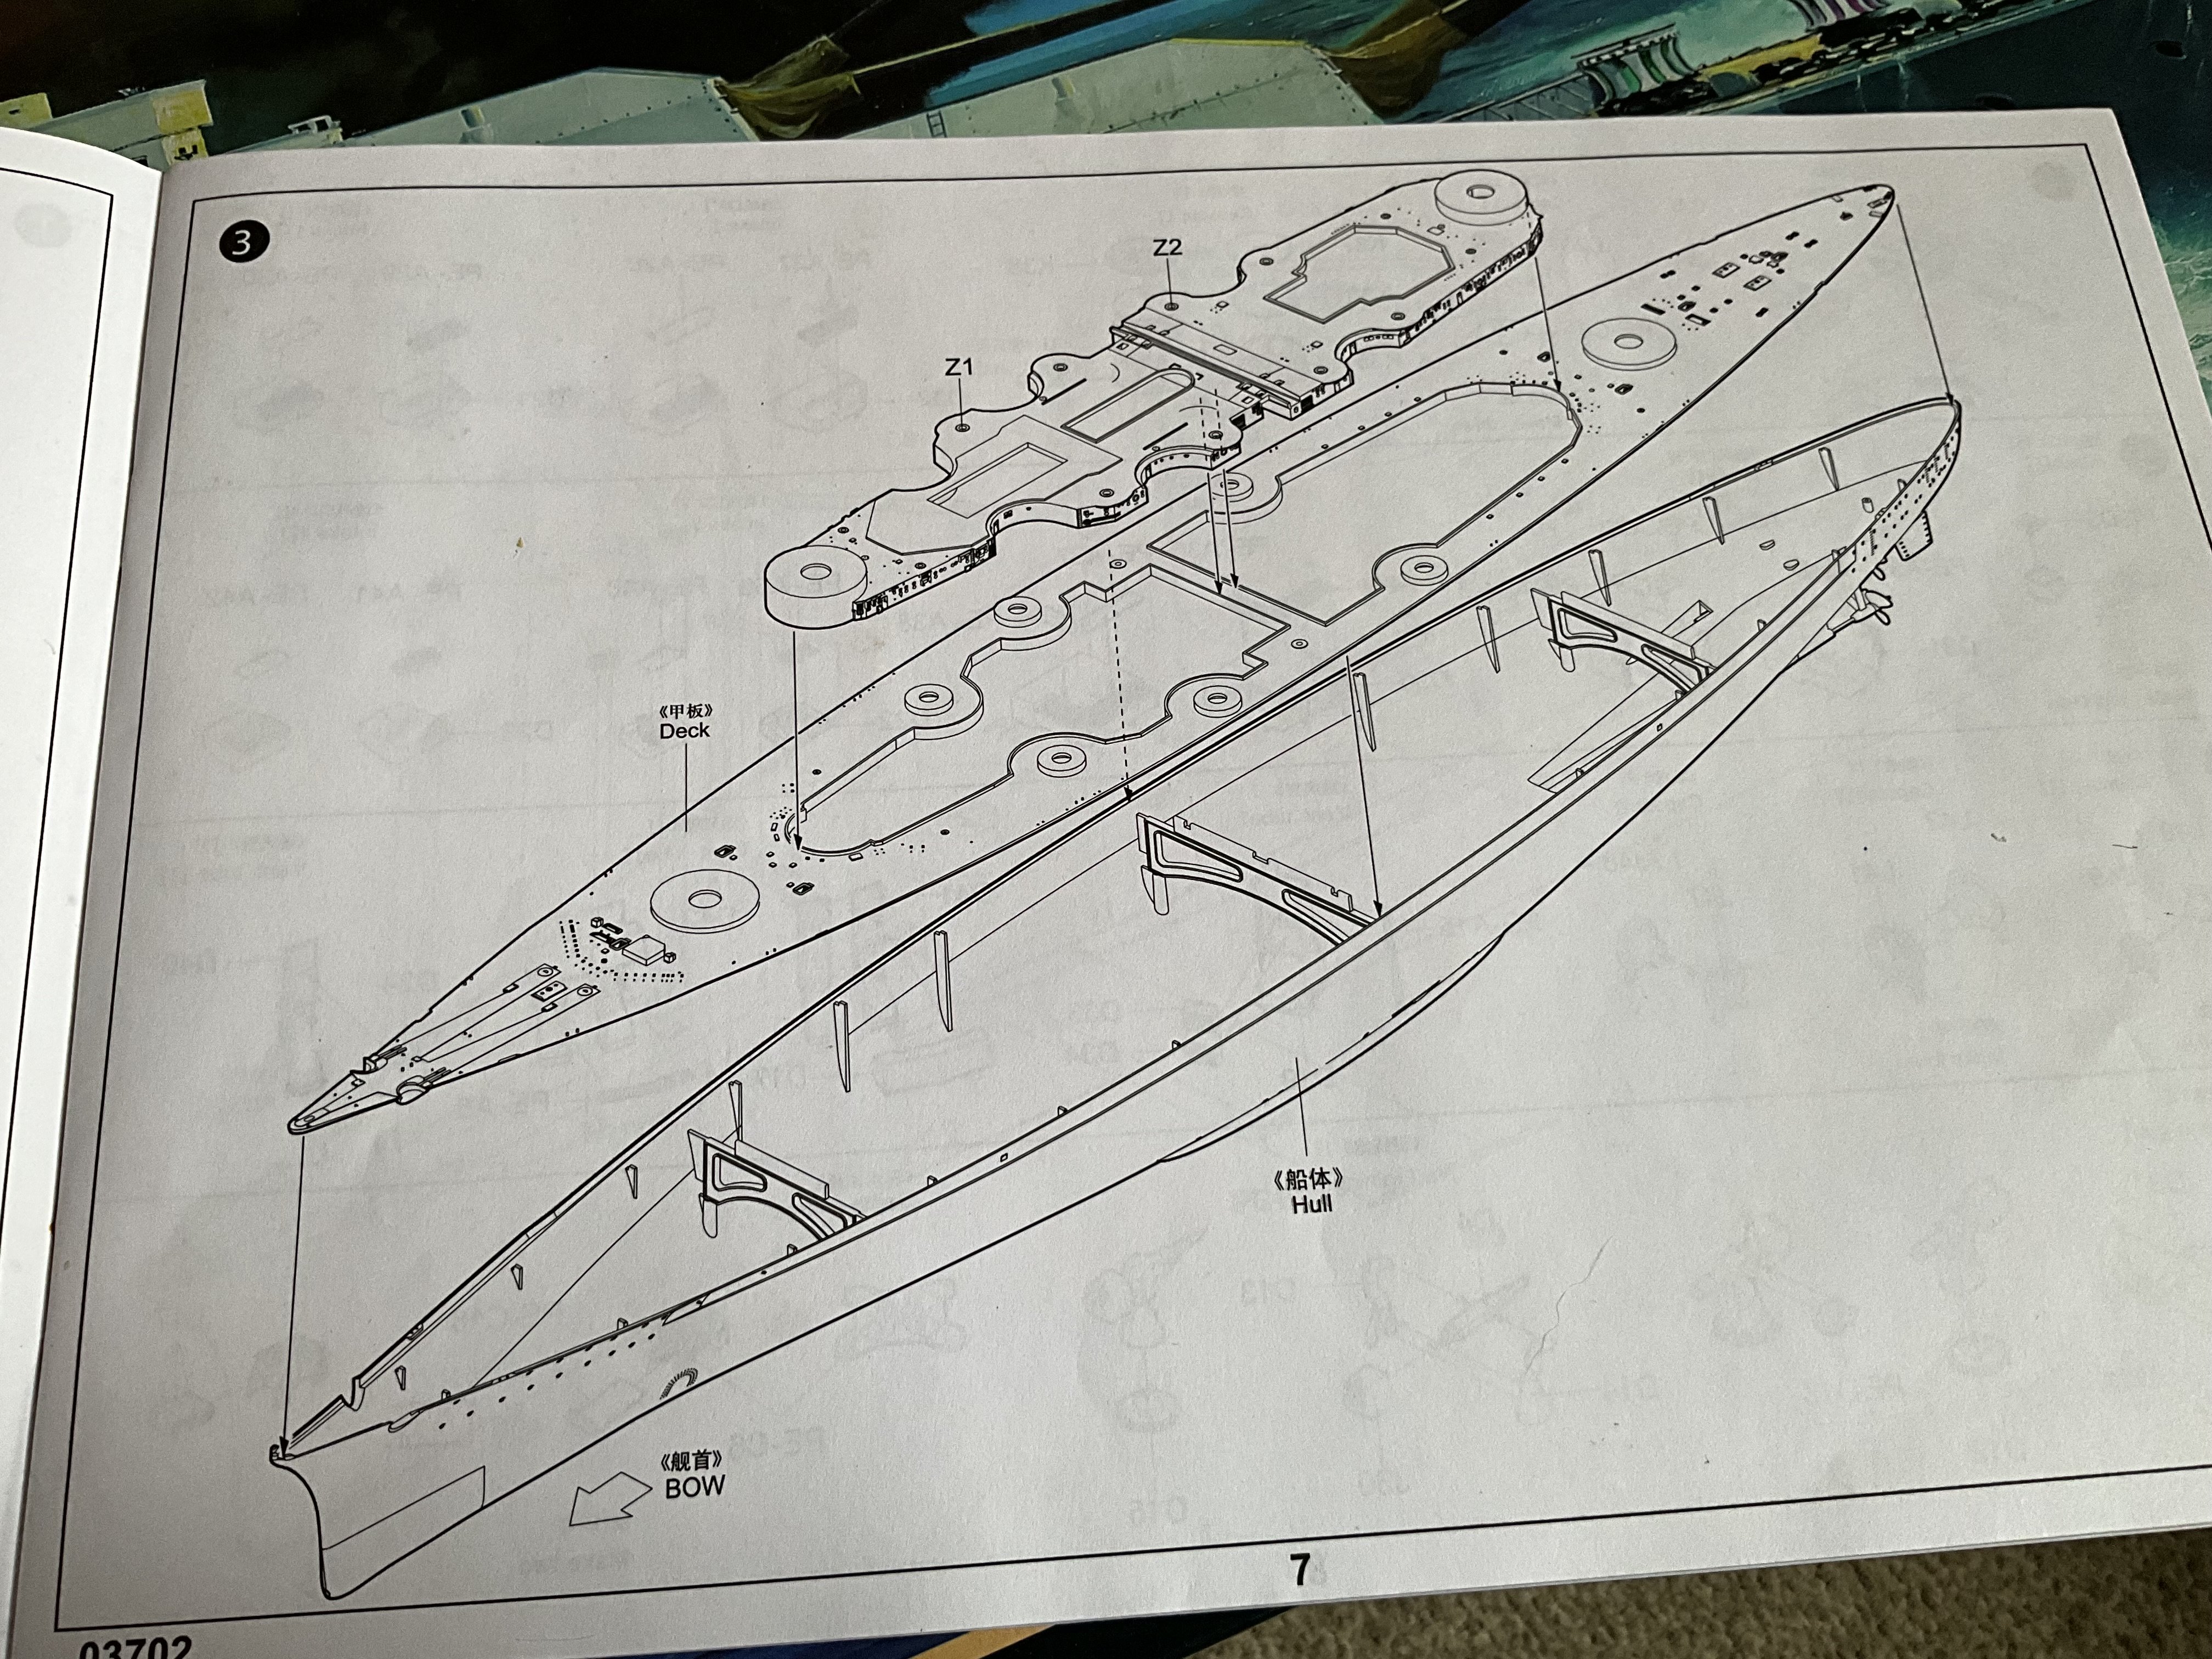
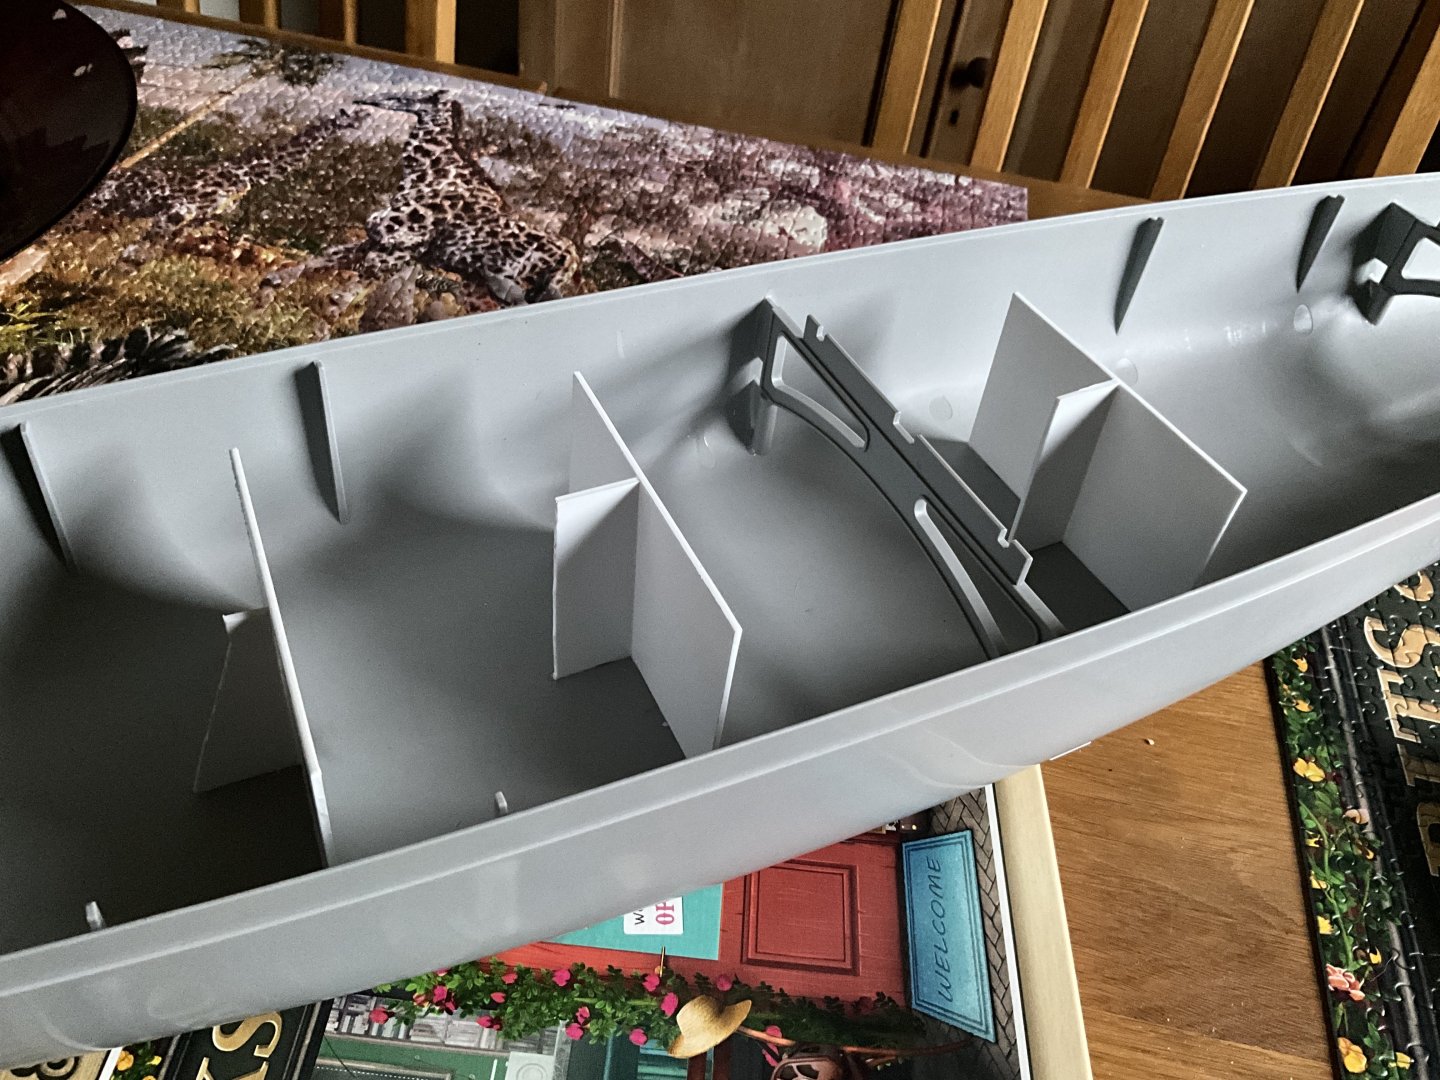
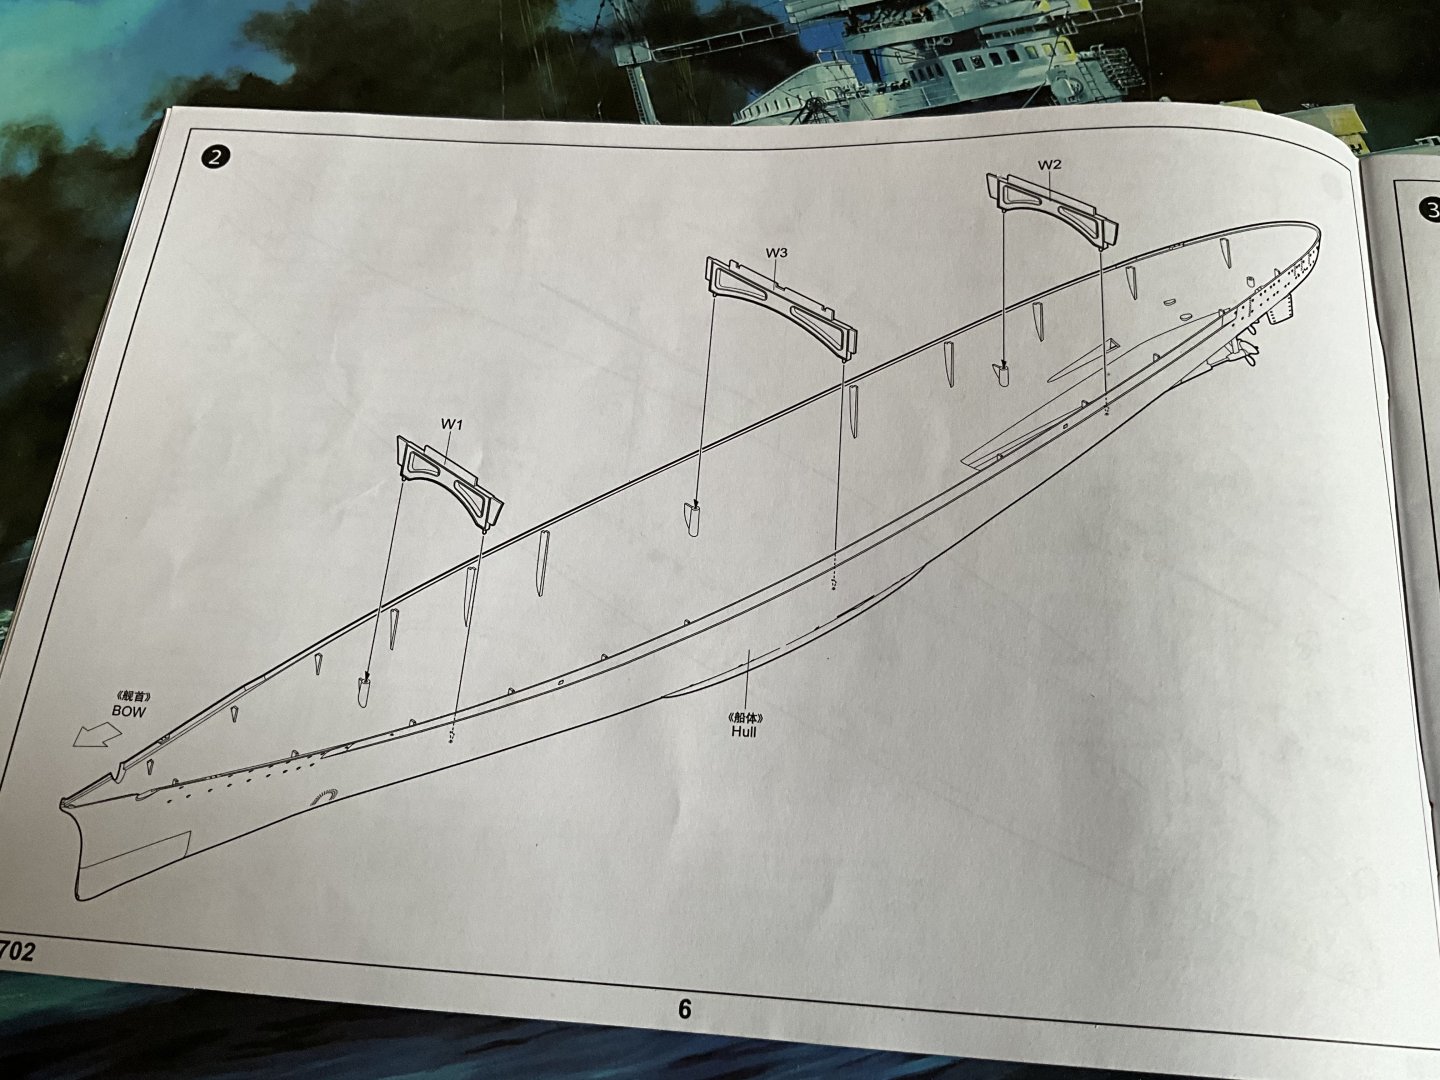
Looks like butchery on inside, but guess what, nobody sees it 😂 Other thing to take note of is when fitting the three hull bracers inside to stiffen up the hull be careful, l found the deck didn’t quite fit at Bow, tad tight, so l broke the joint to side of hull on the forward brace, re glued it and fitted deck in place using a clamp letting the glue dry whilst deck held in position with clamp. Sorted, worked a treat, also put some bracers in to support deck at three points as l felt it benefited from this.


-
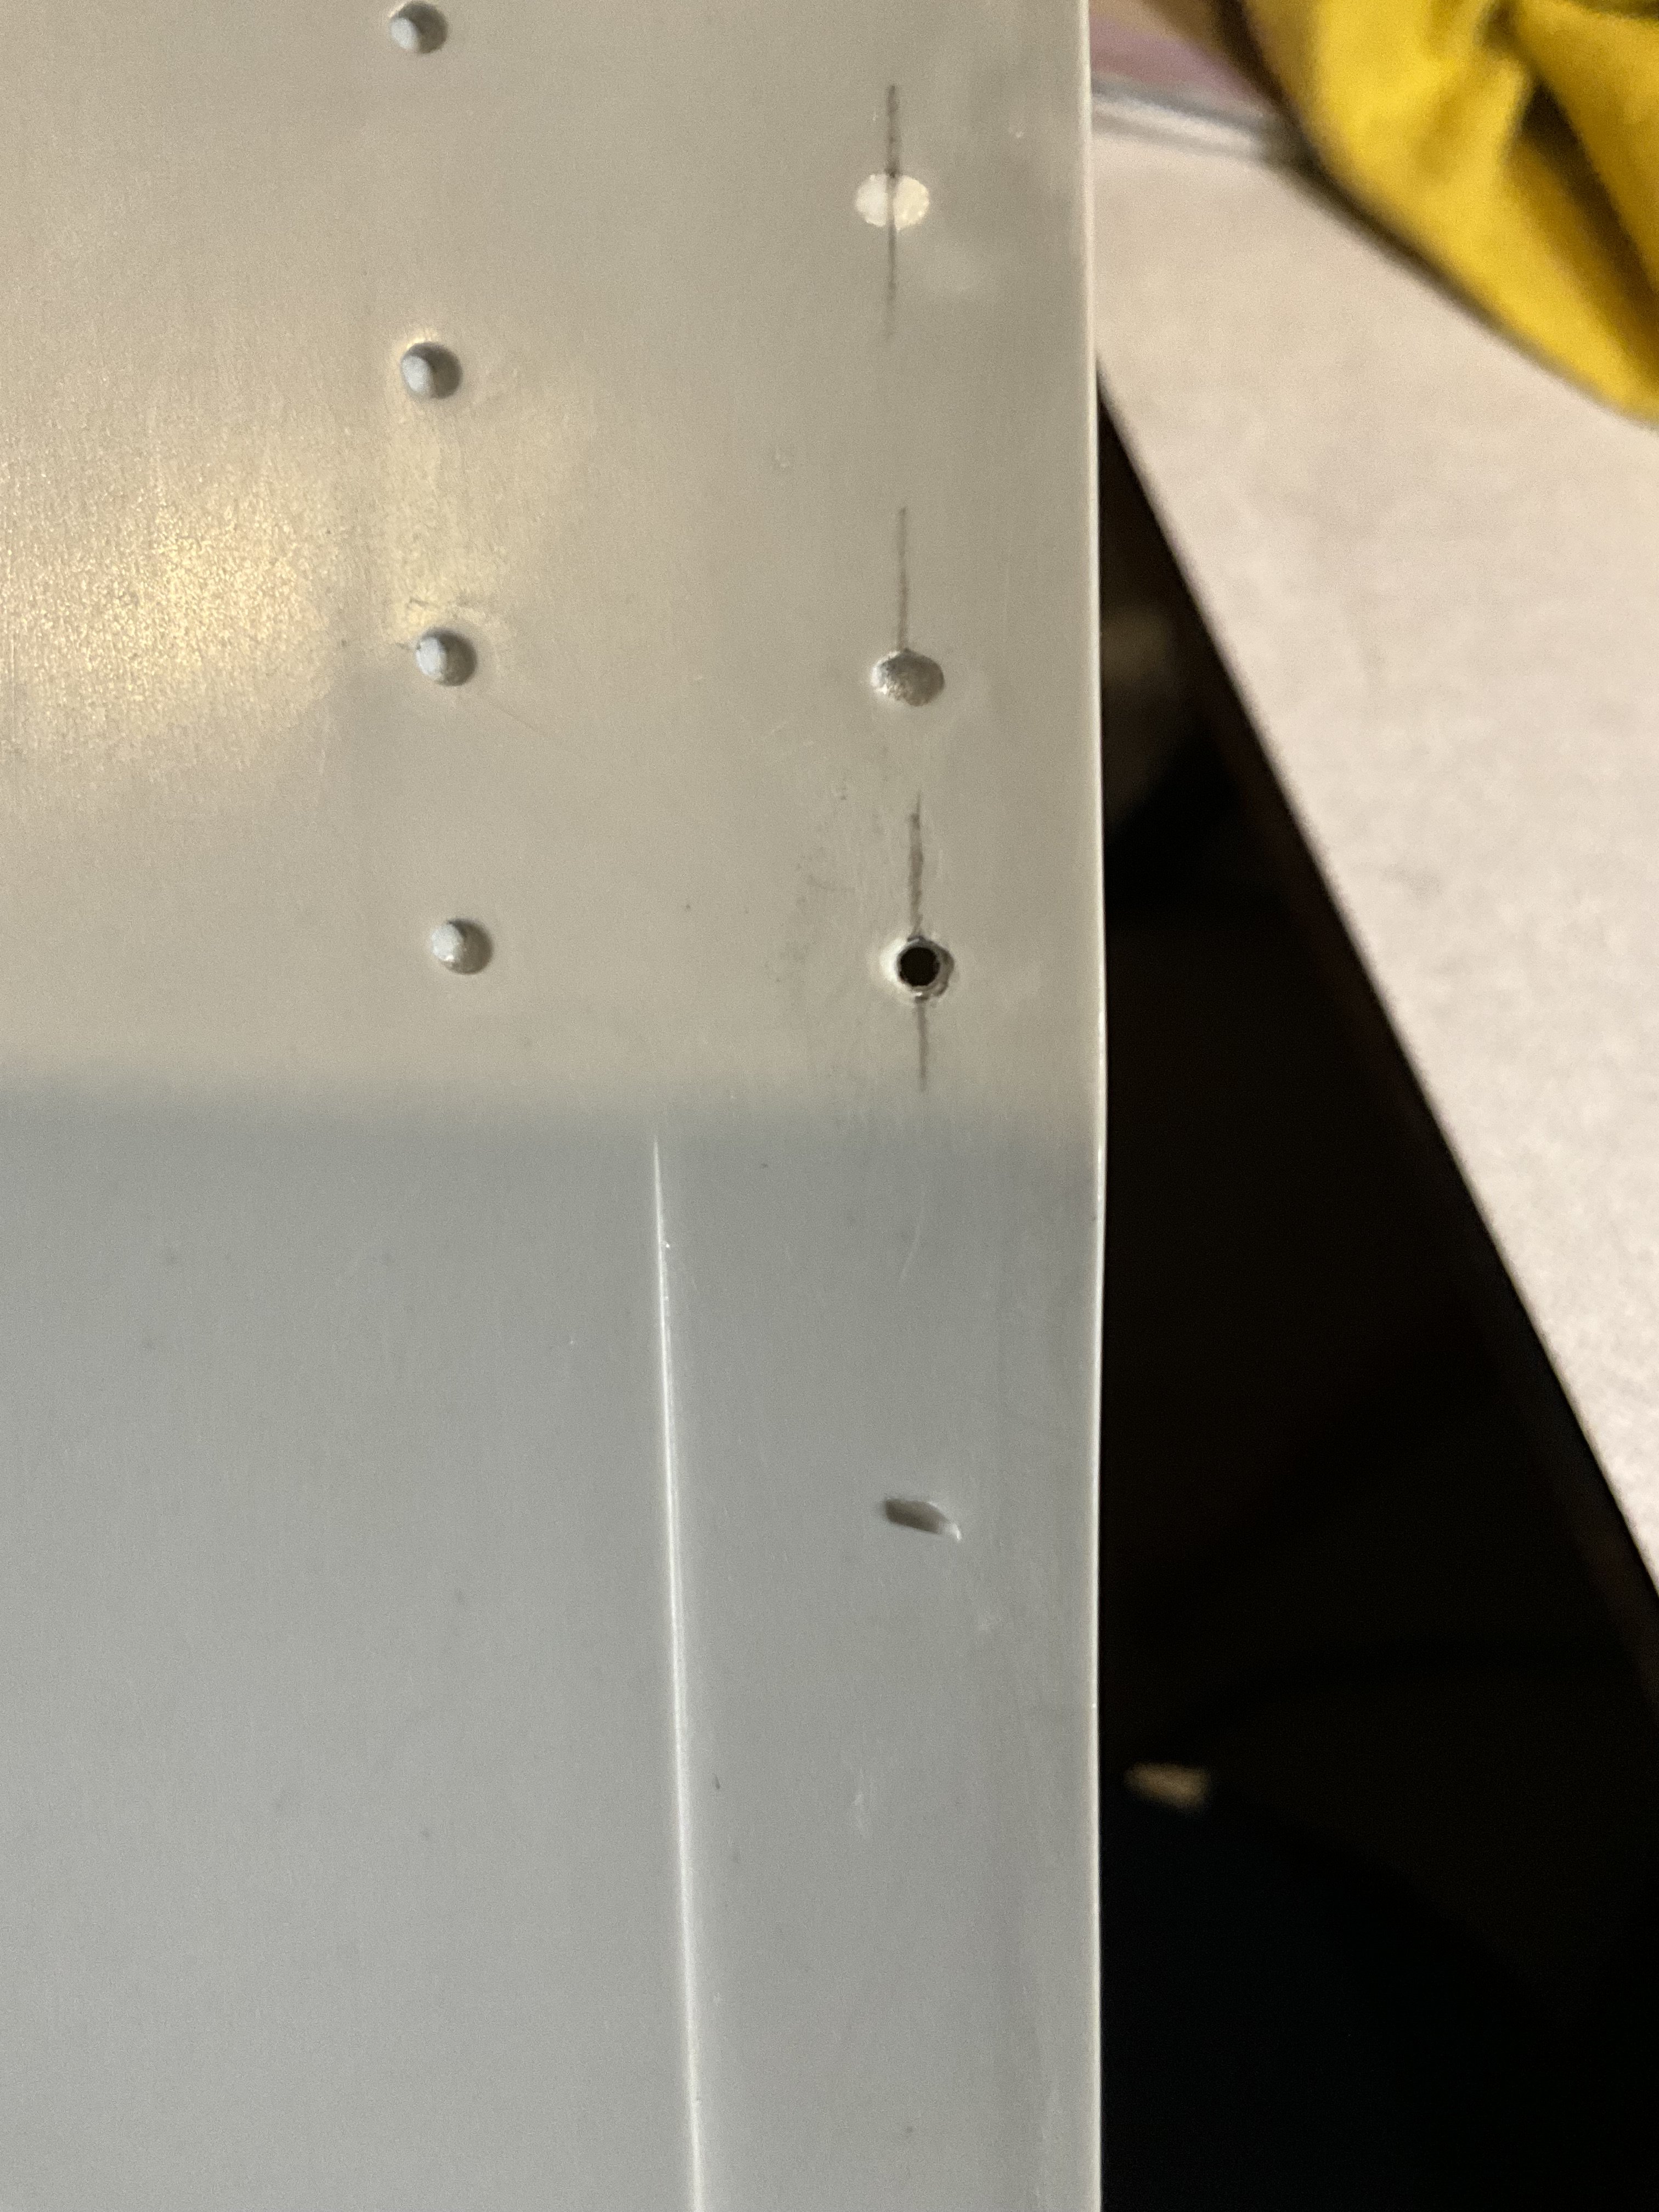
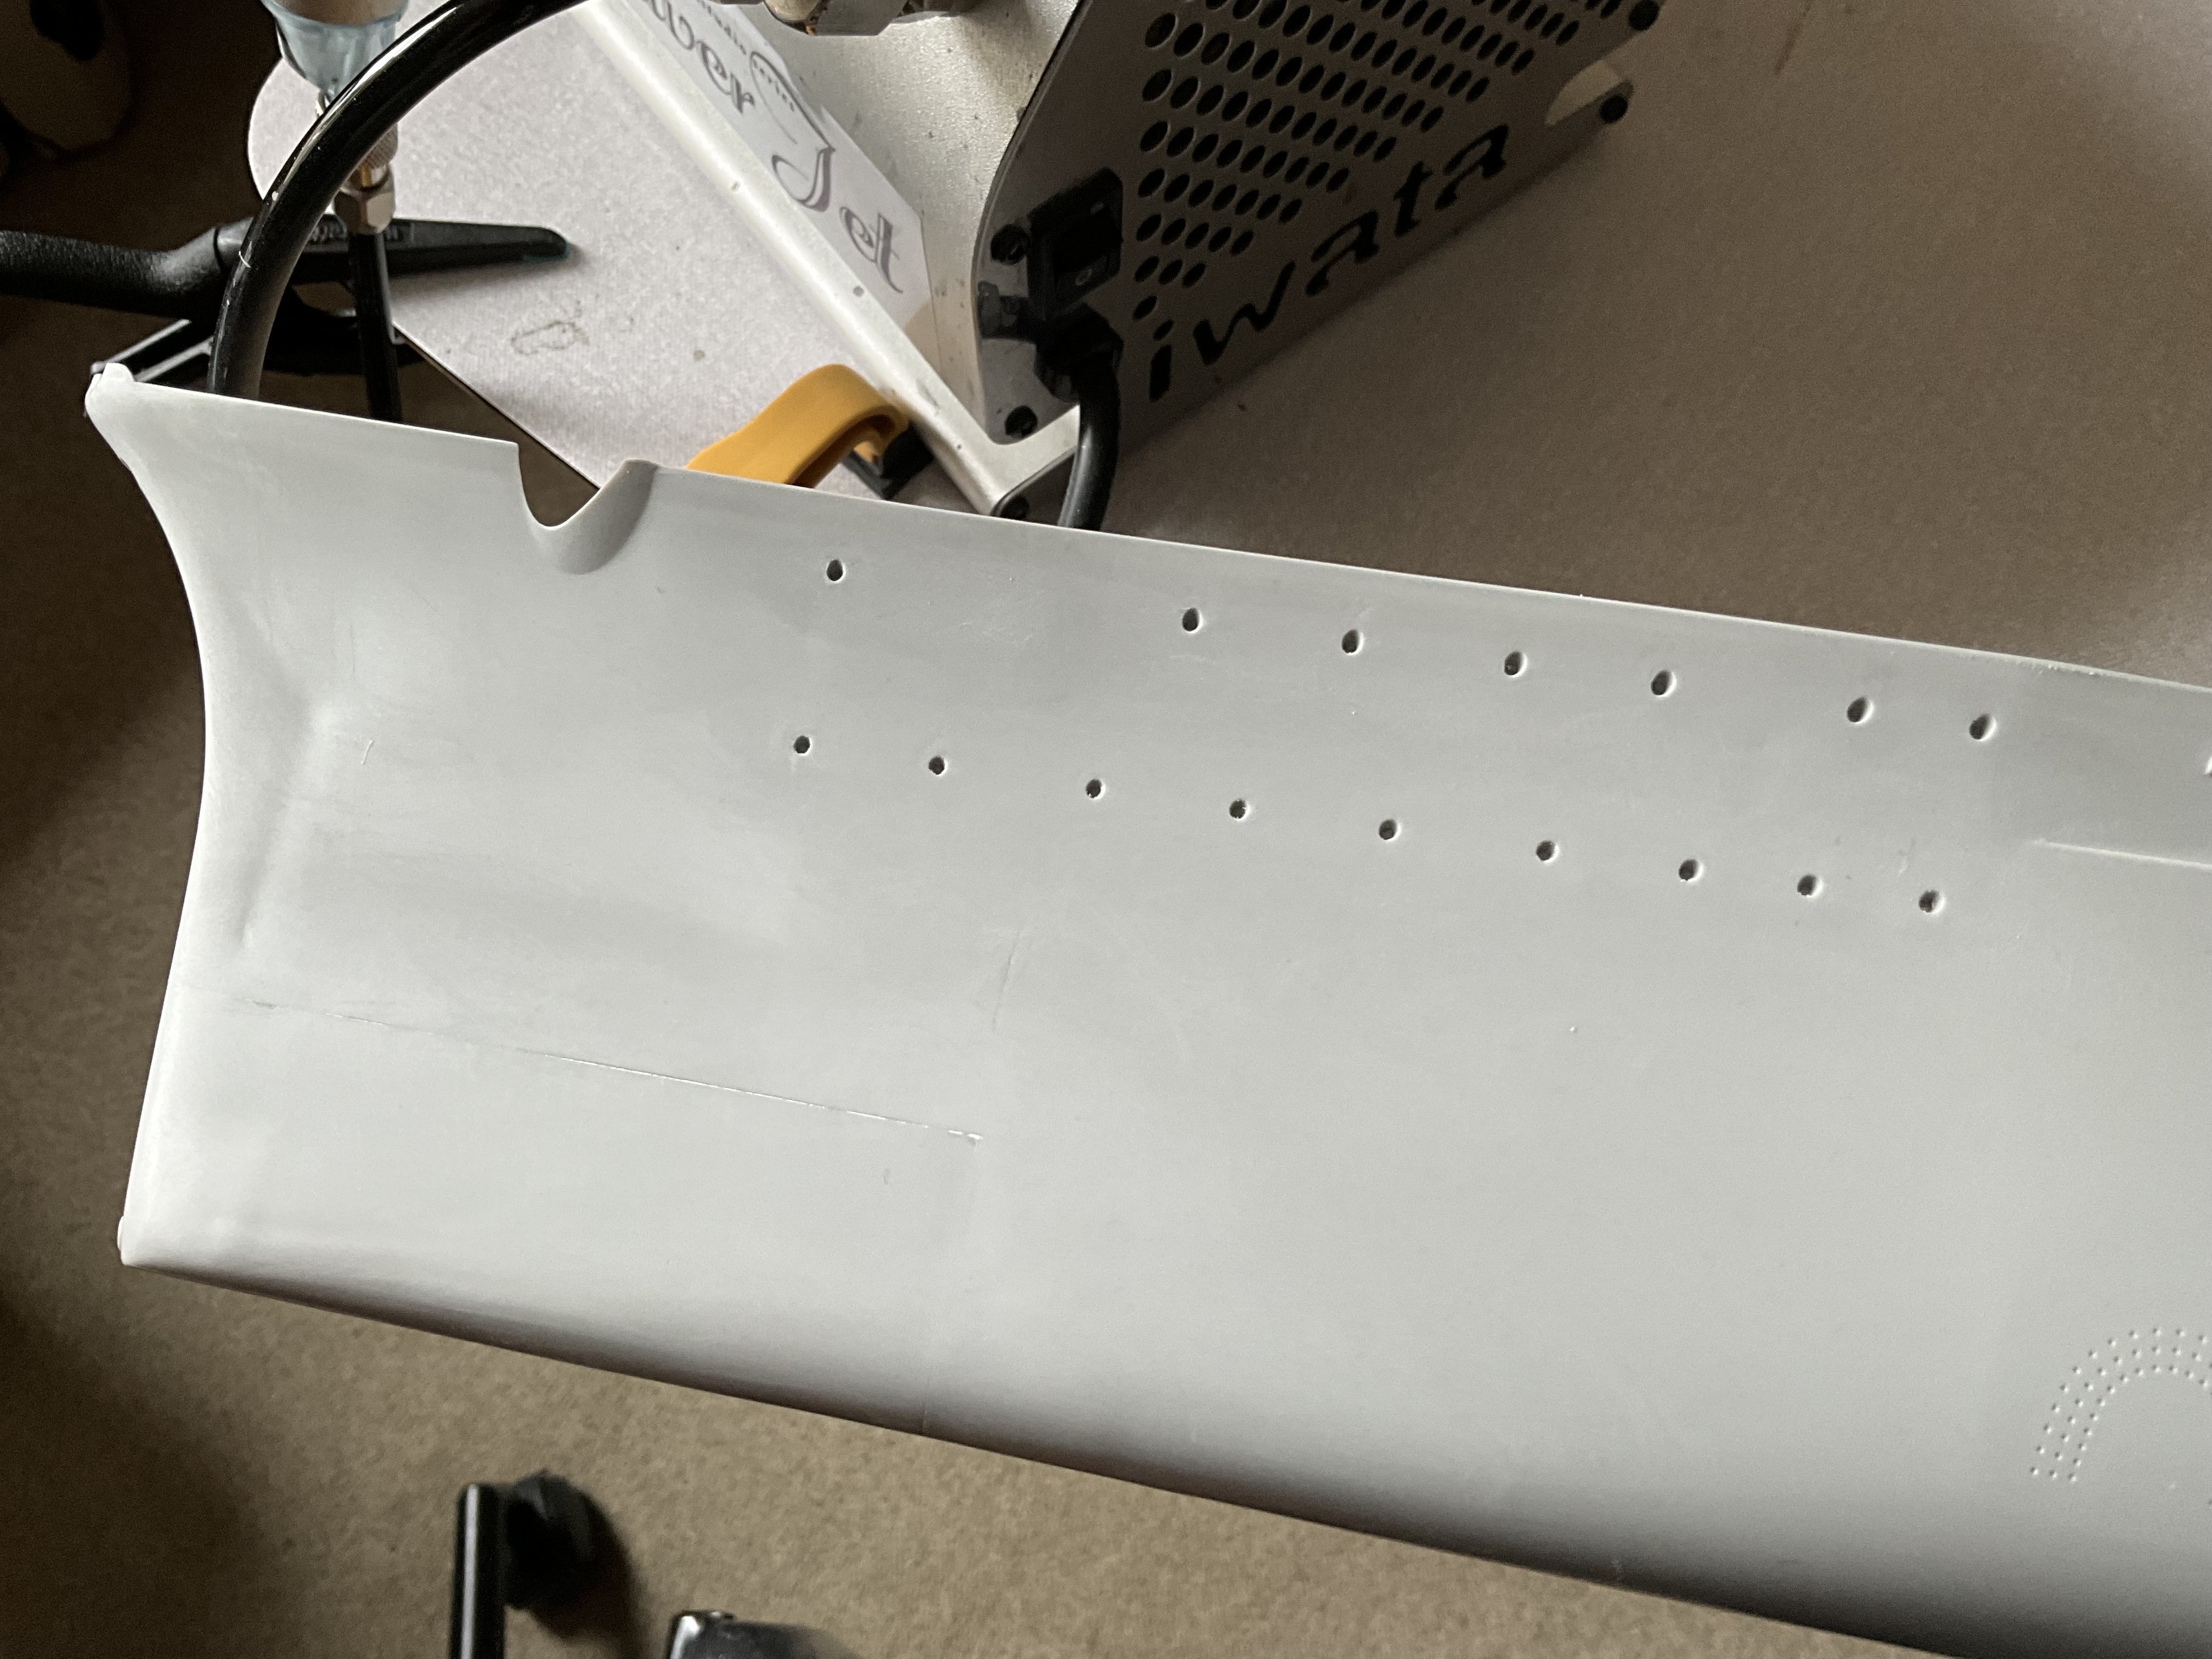
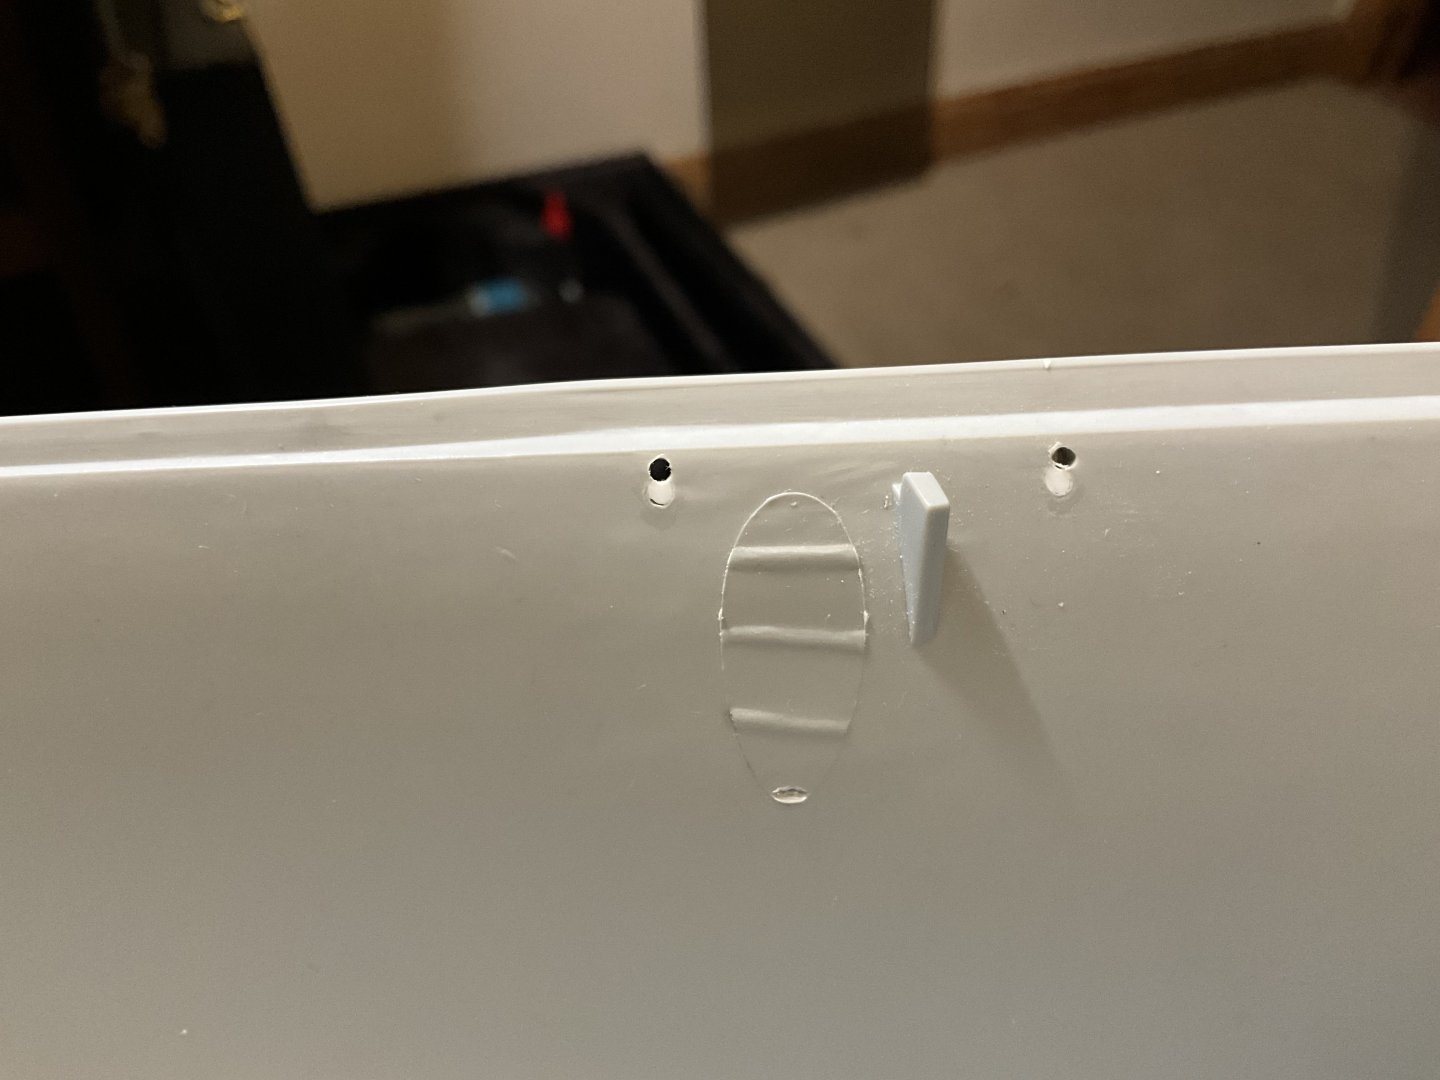
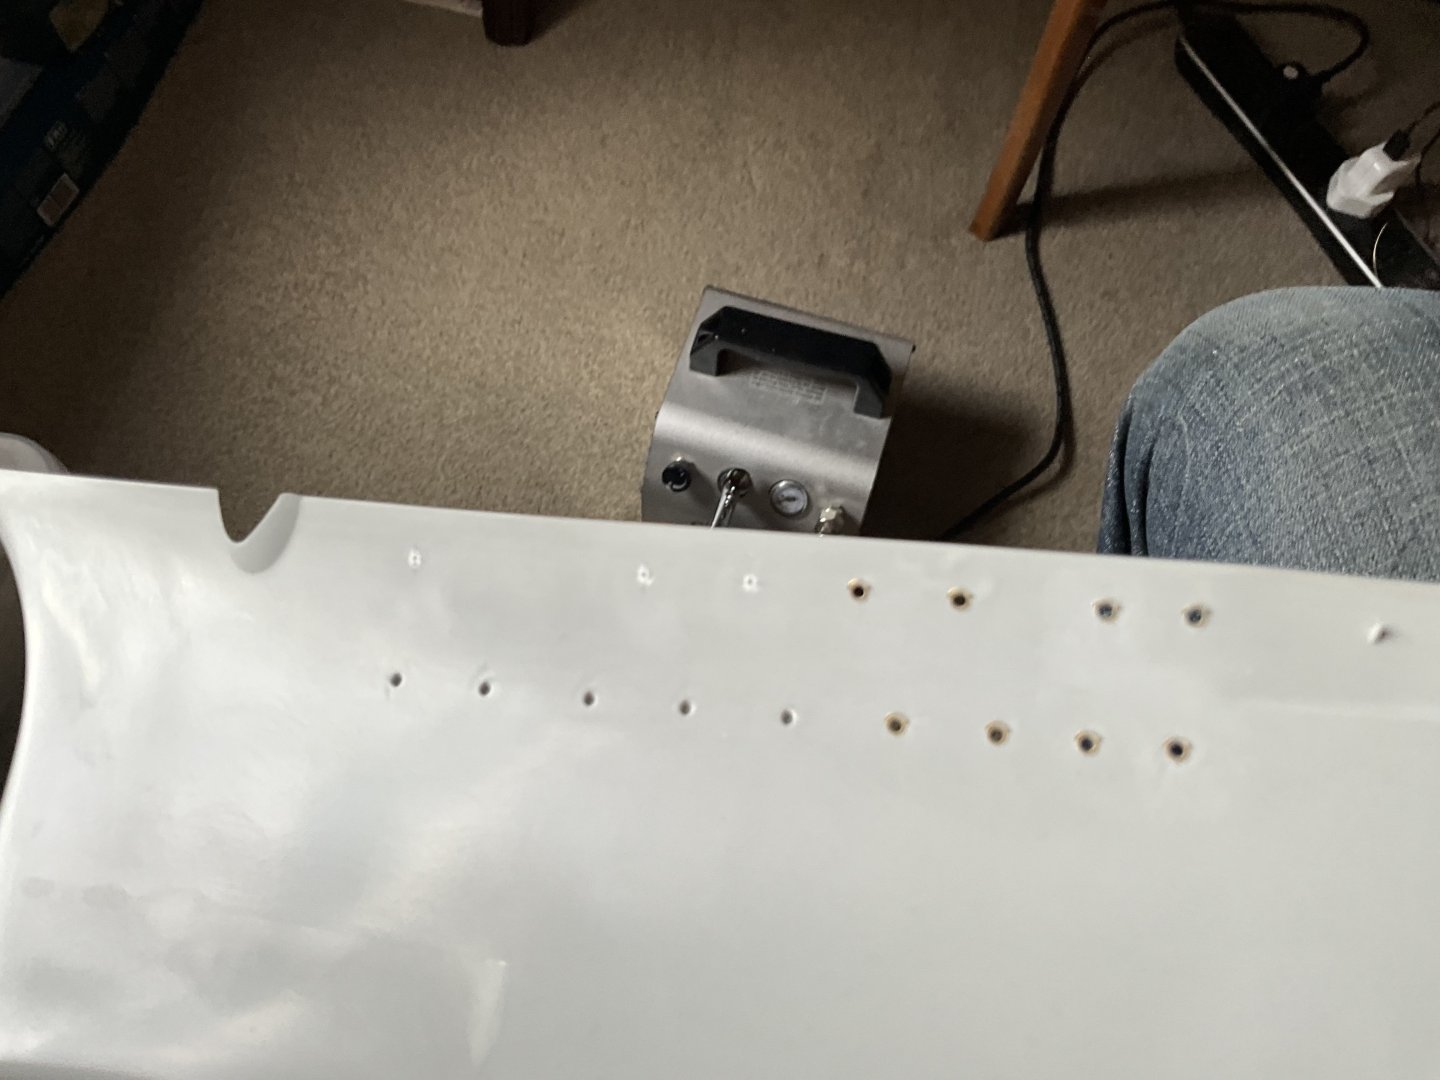
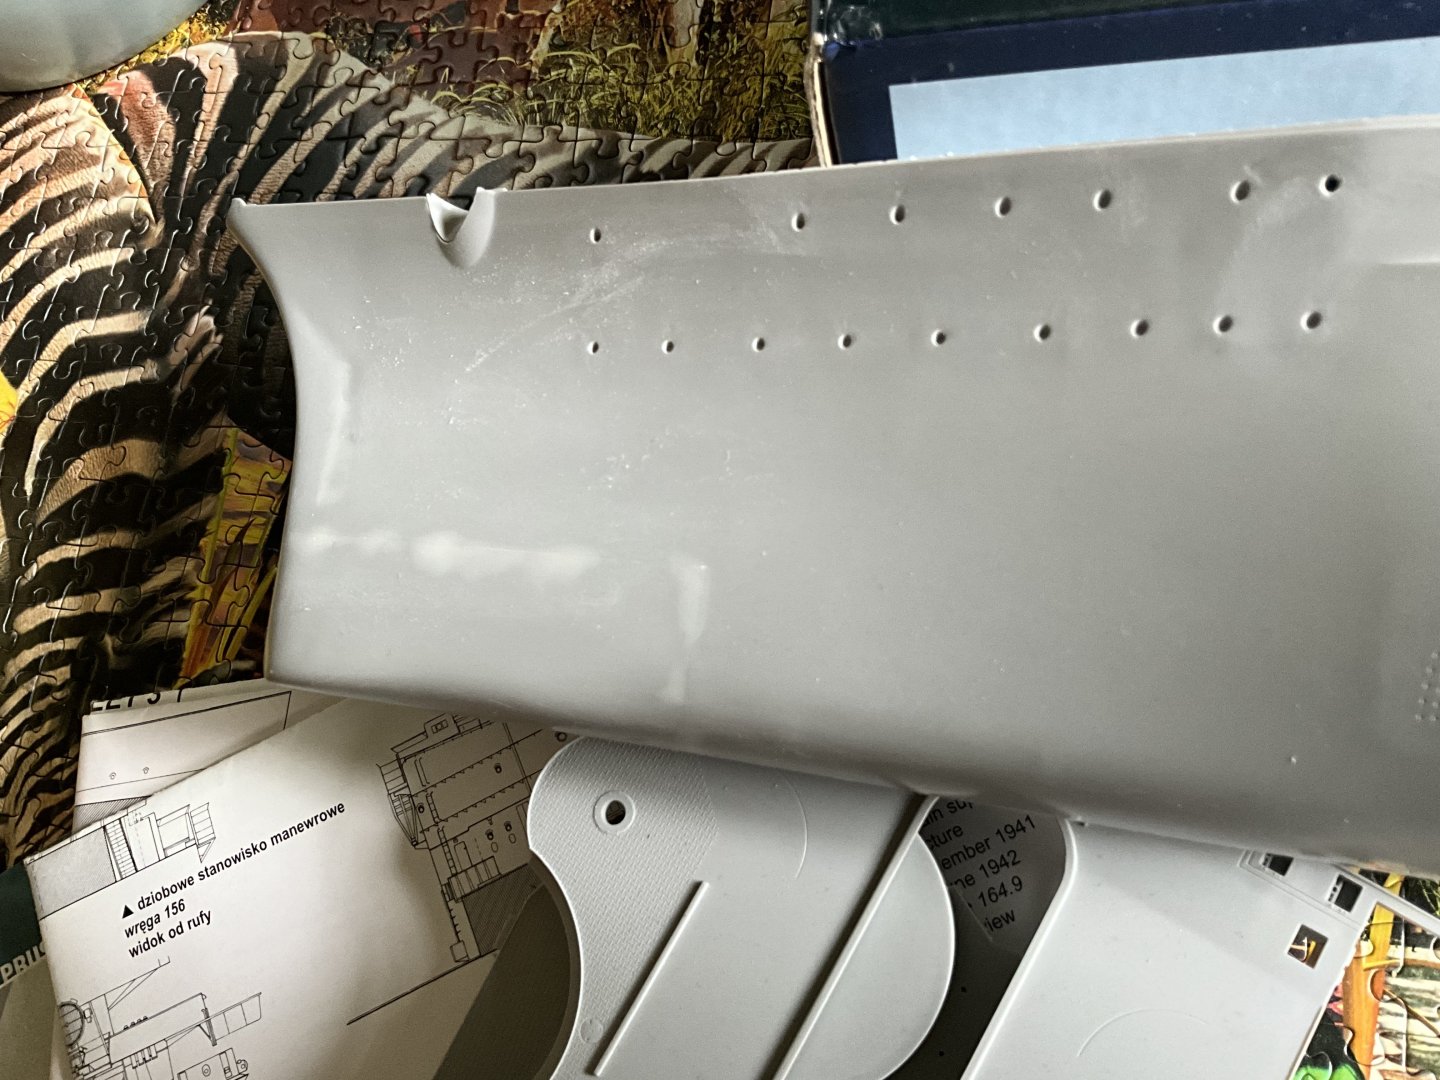
Problem is the portholes are all drilled at 90 degrees on a vertical and horizontal plane so you have to drill through and plug all these with suitable dia styrene stock, then trim flush to hull, then you have to drill a pilot hole, say 0.5 at 90 degrees to the hull plate at each porthole as the contour changes, you have to do this to get a true plane through the hull which varies in thickness throughout its form. You can see where my small pilot hole is in comparison to the plastic rod plugging up the original hole, this small pilot hole is the true drilling plain for countersinking the portholes from the inside. Seems a lot of work but works a treat 🤛


-
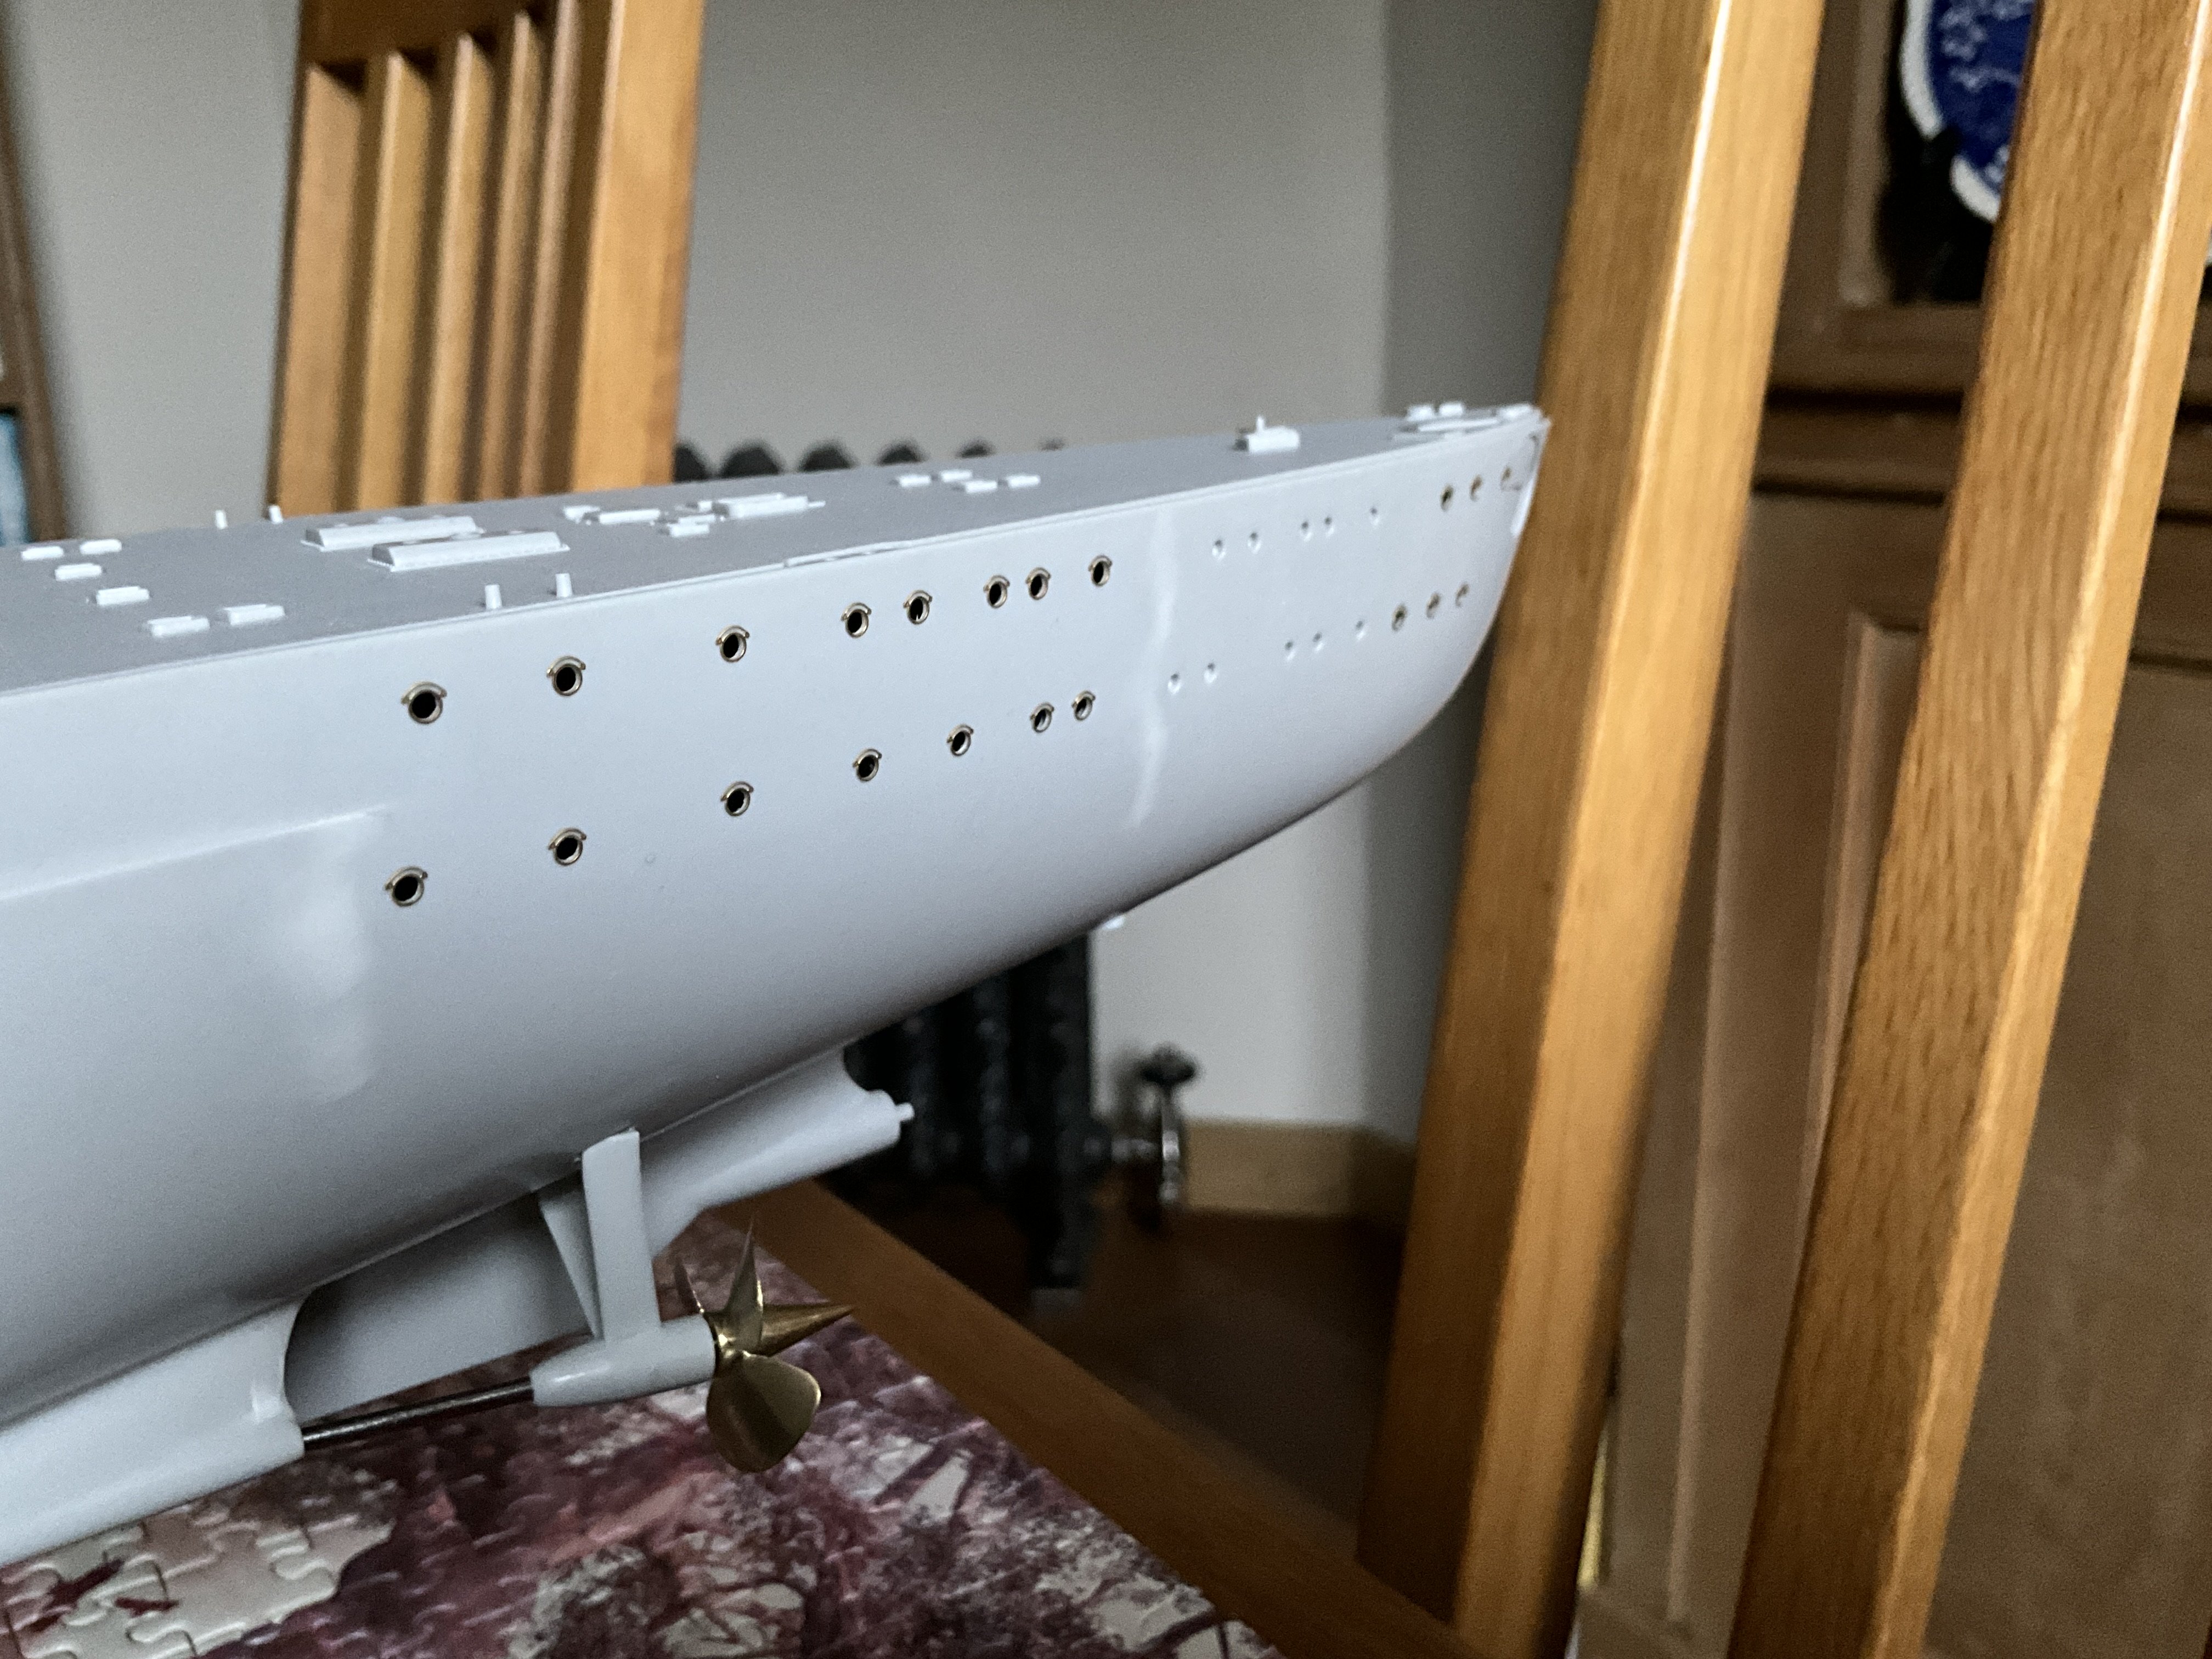
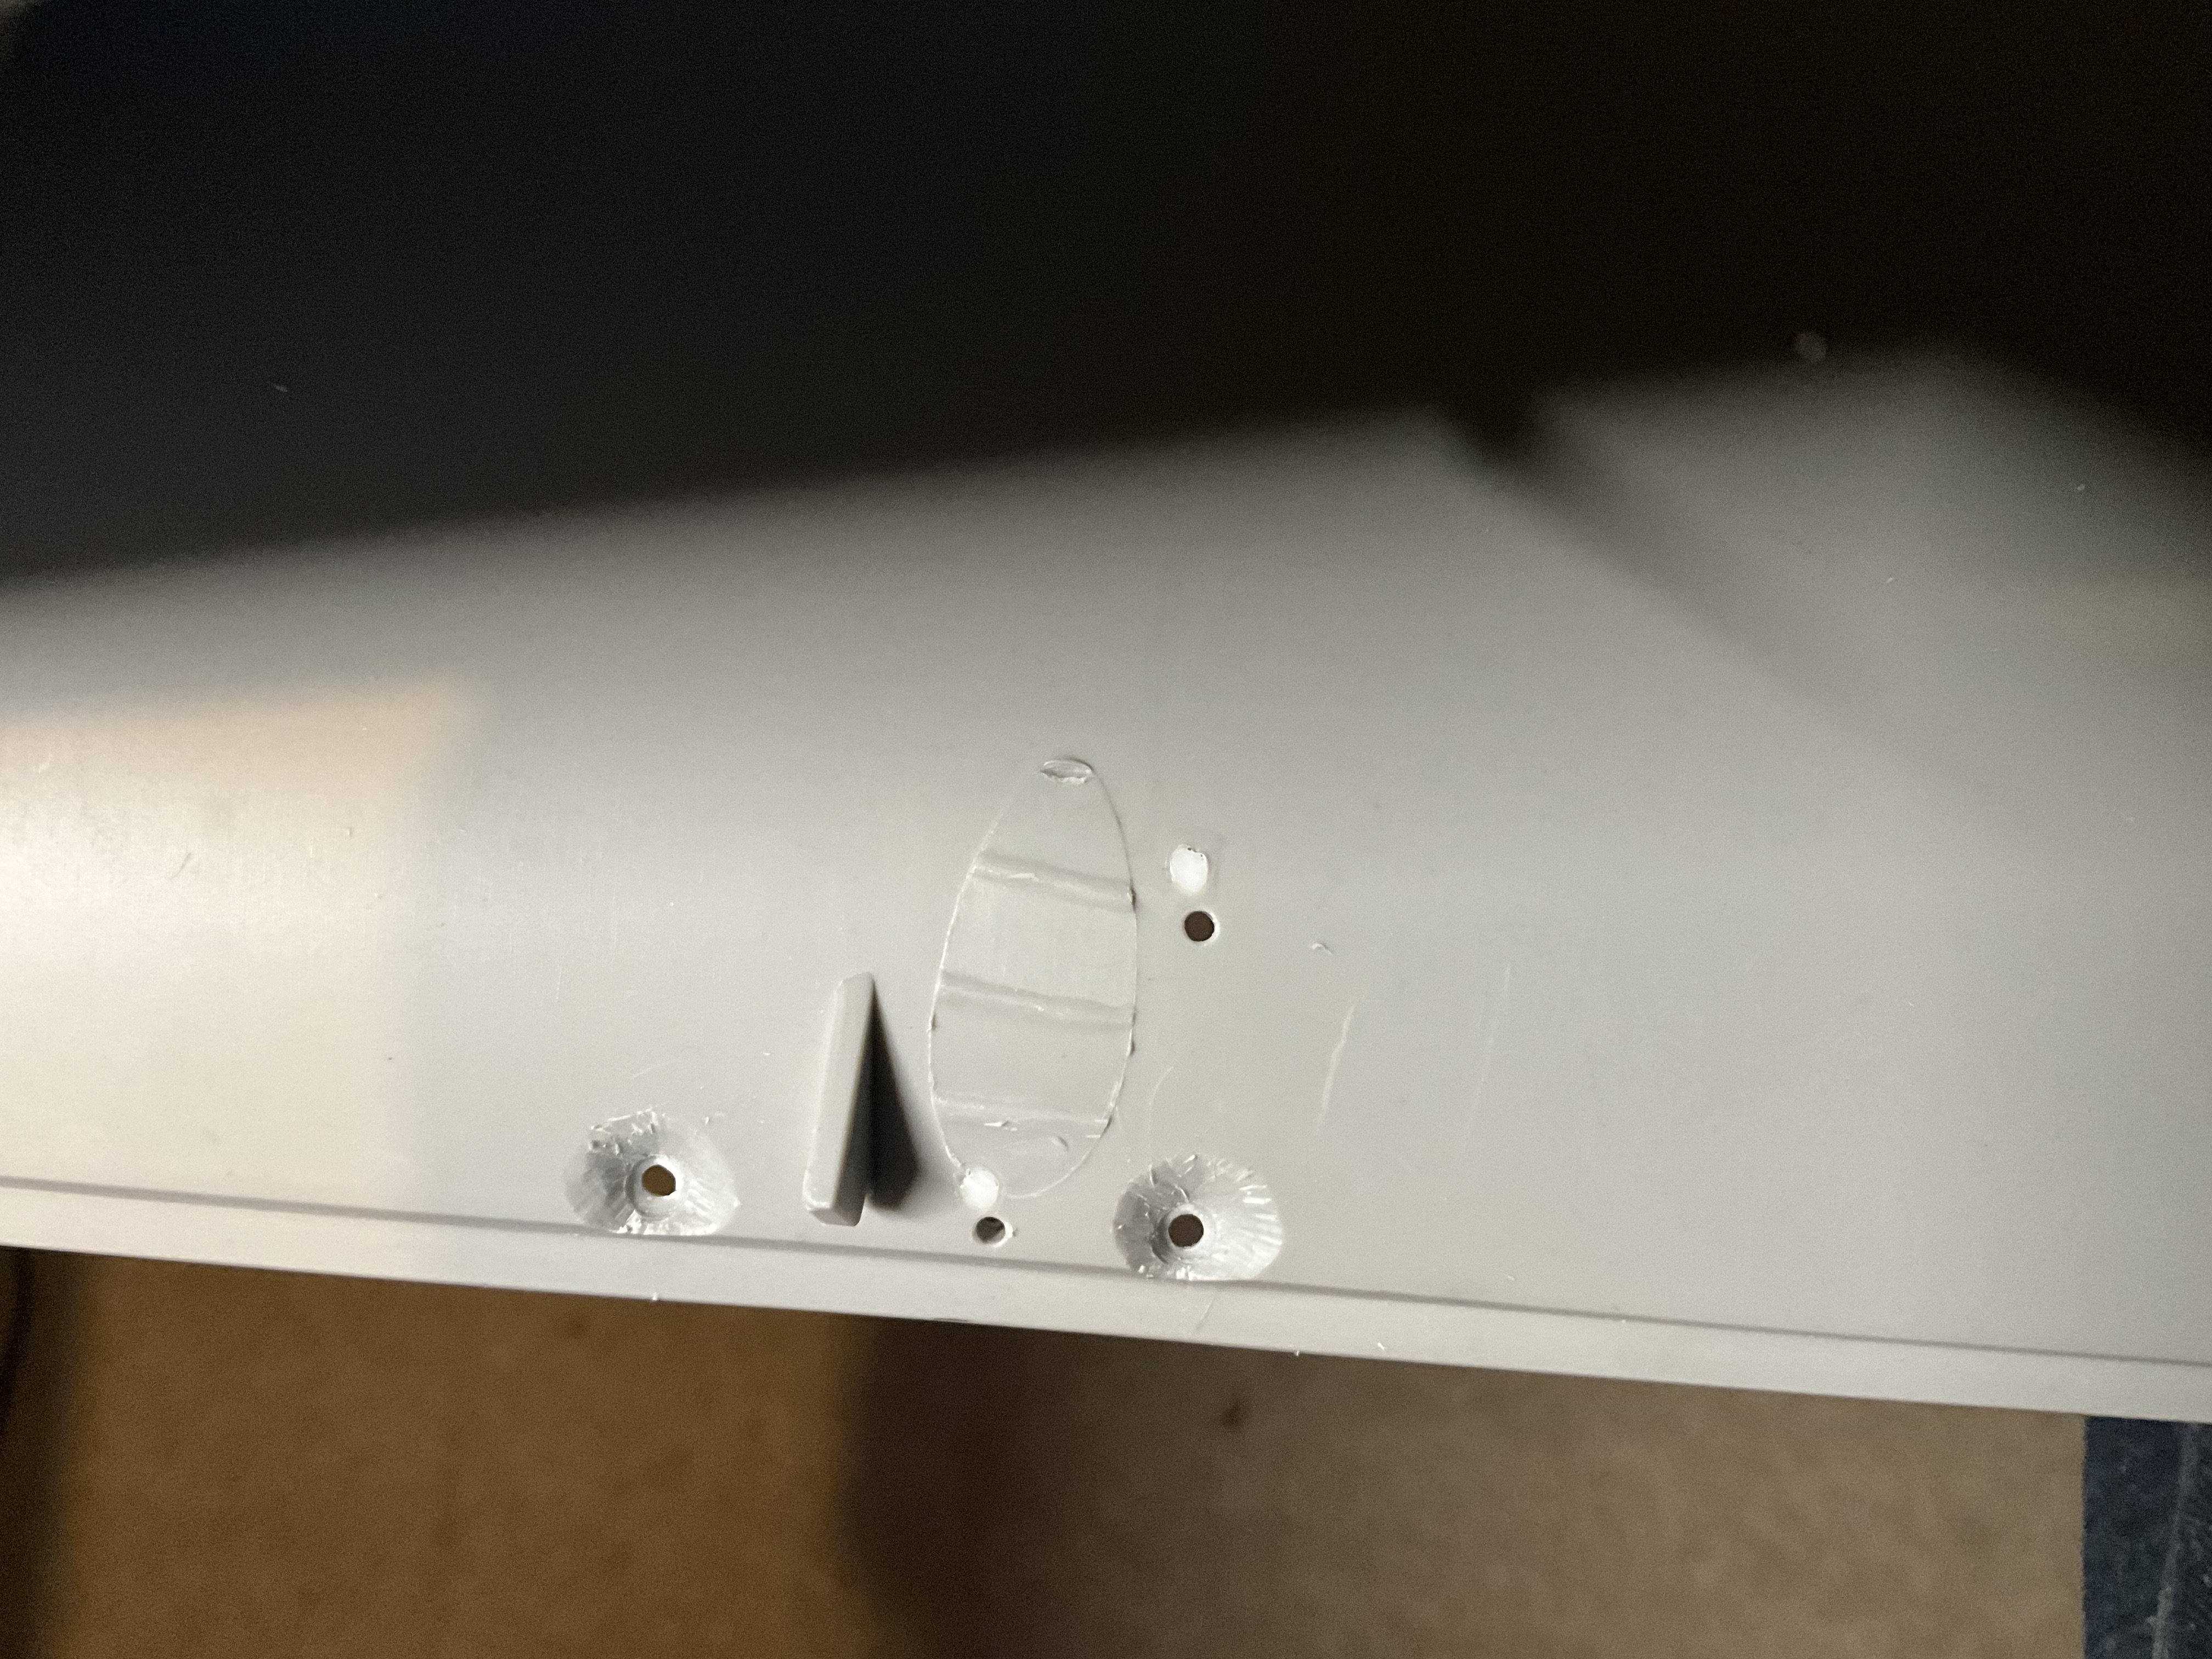
Used Mr White Putty R for the flaws in hull, seems to work fine, just take precautions when using it, does carry a lot of health warnings so be sensible, other part on hull I’ve been doing is the portholes drilling out and countersinking on the inside of hull, it’s a bit more tricky at the extreme Bow and Stern, end up having to cut various drill bits down in length, like 20mm long 😂 trying to get these fat fingers into this space and countersink the holes is a real pain 😂 end of fingers are all hacked up, shall put photos up and you’ll see the difference though.


-
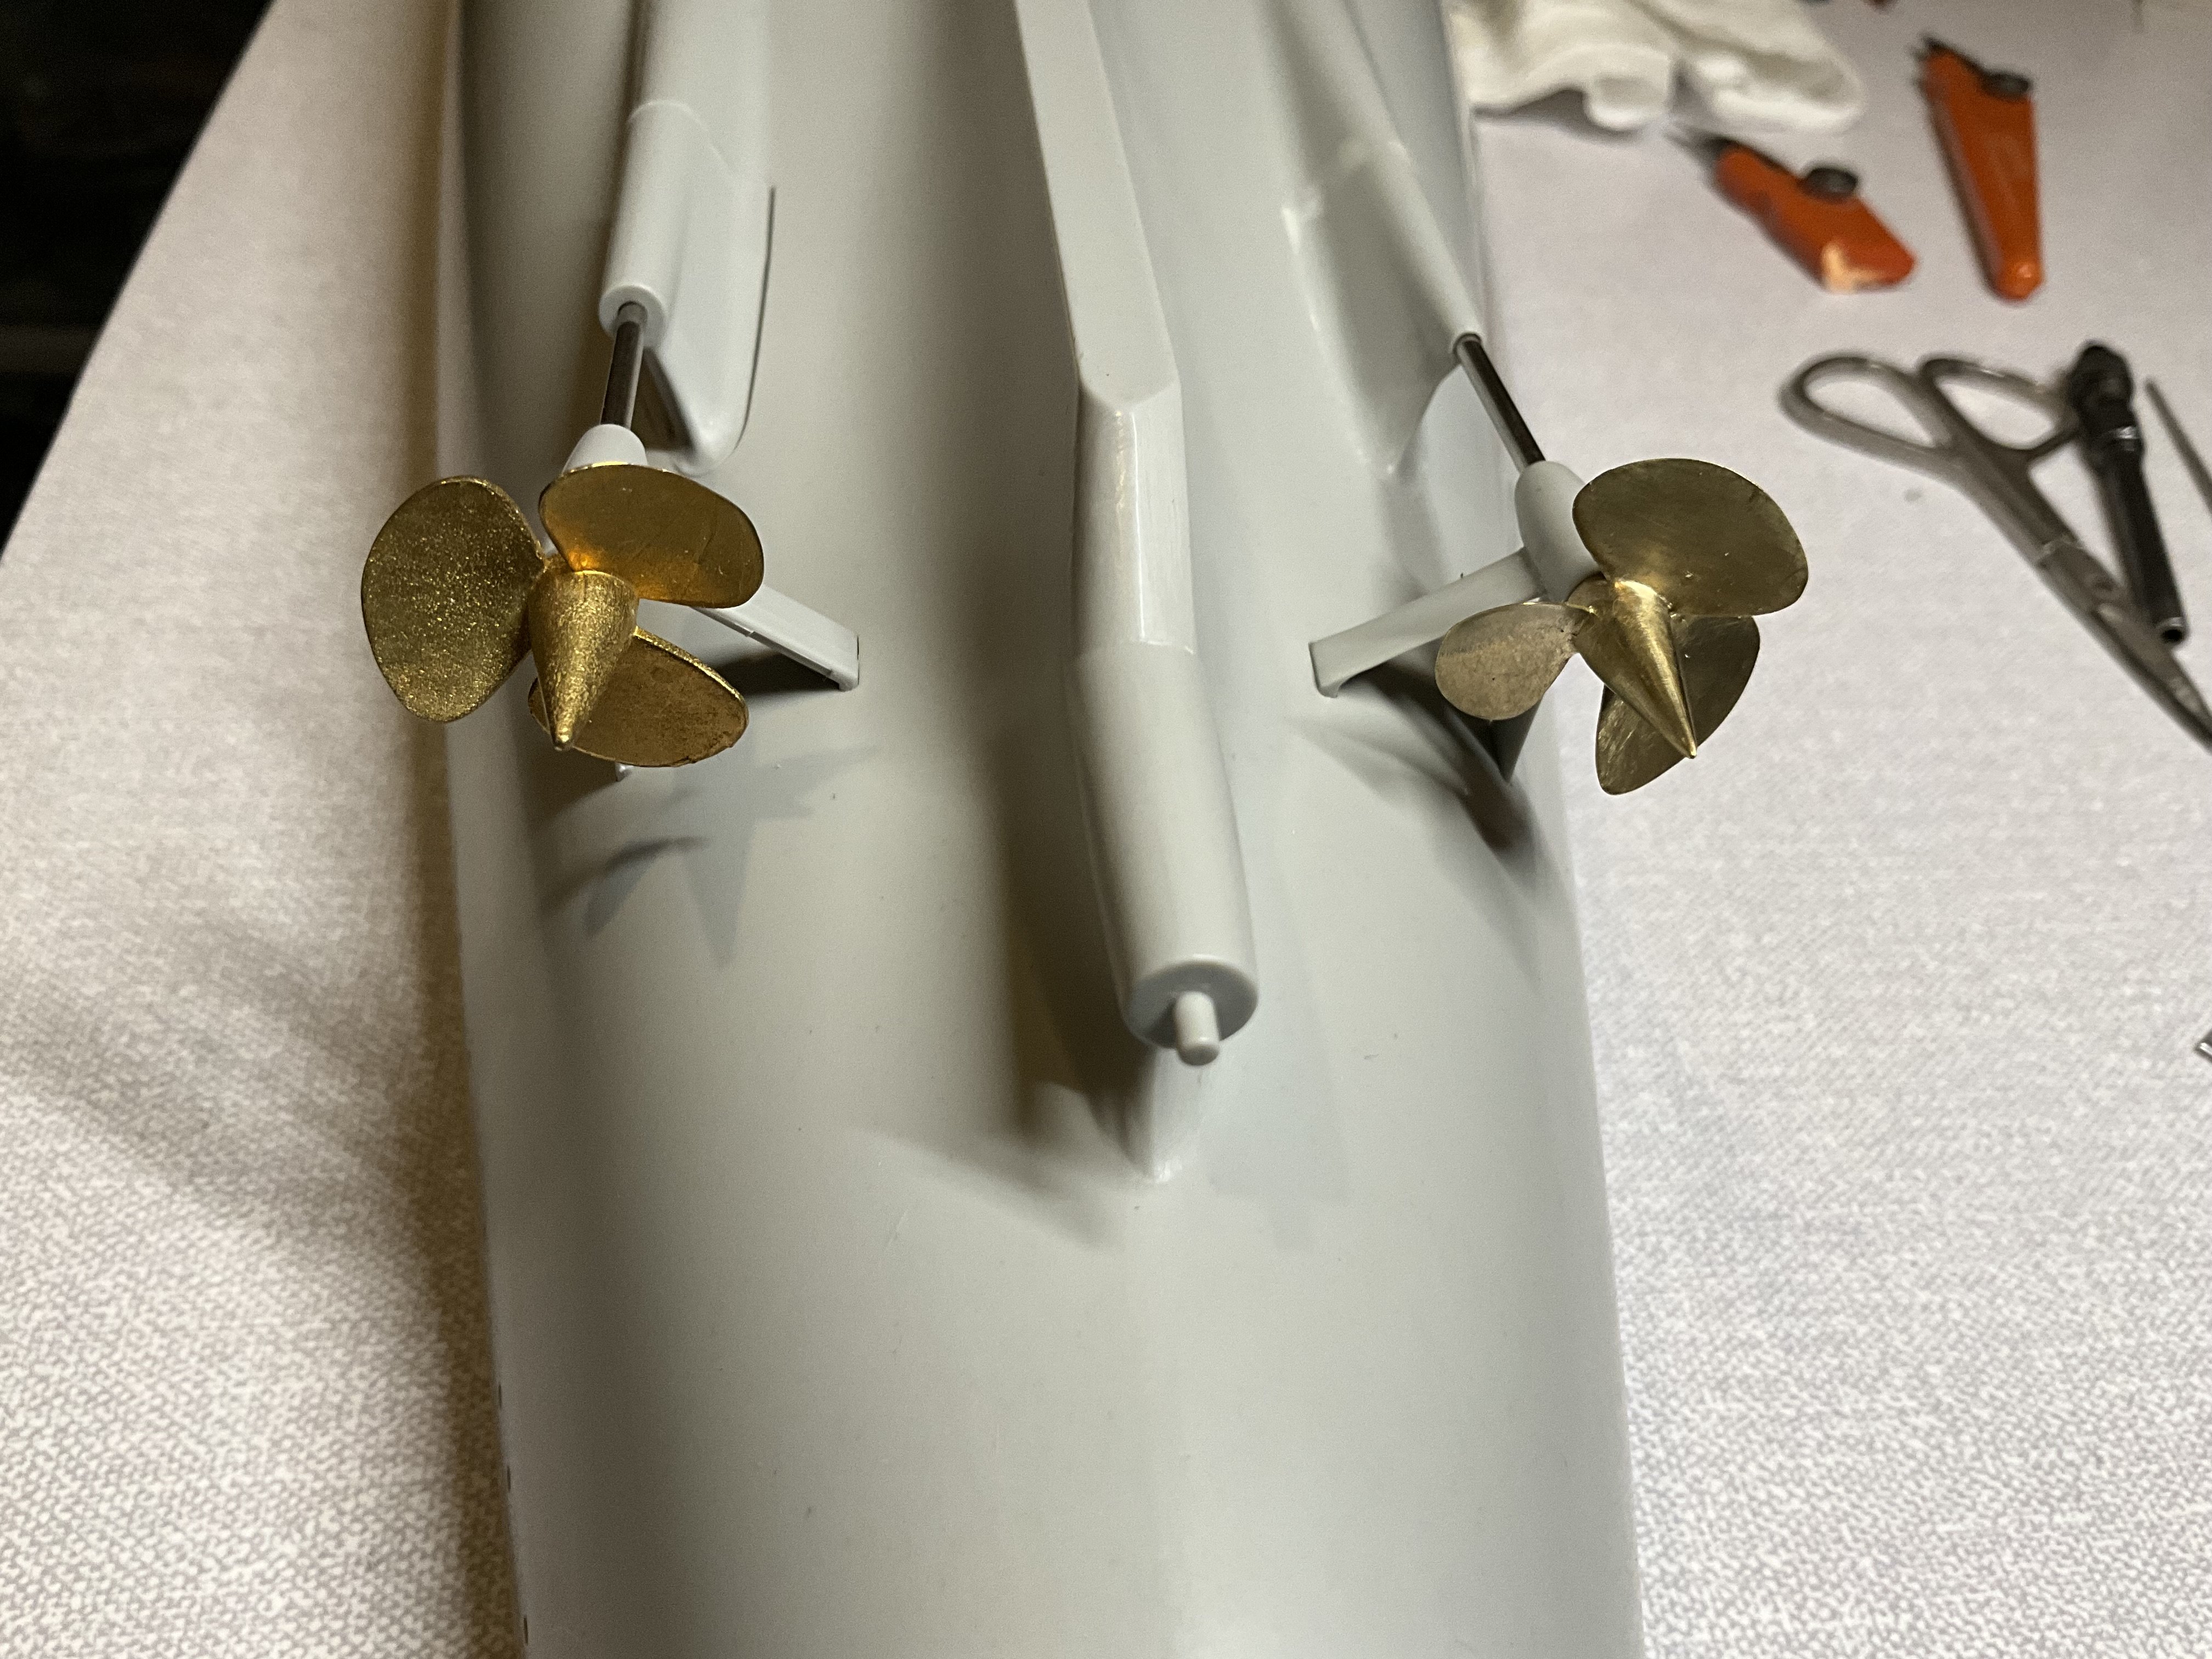
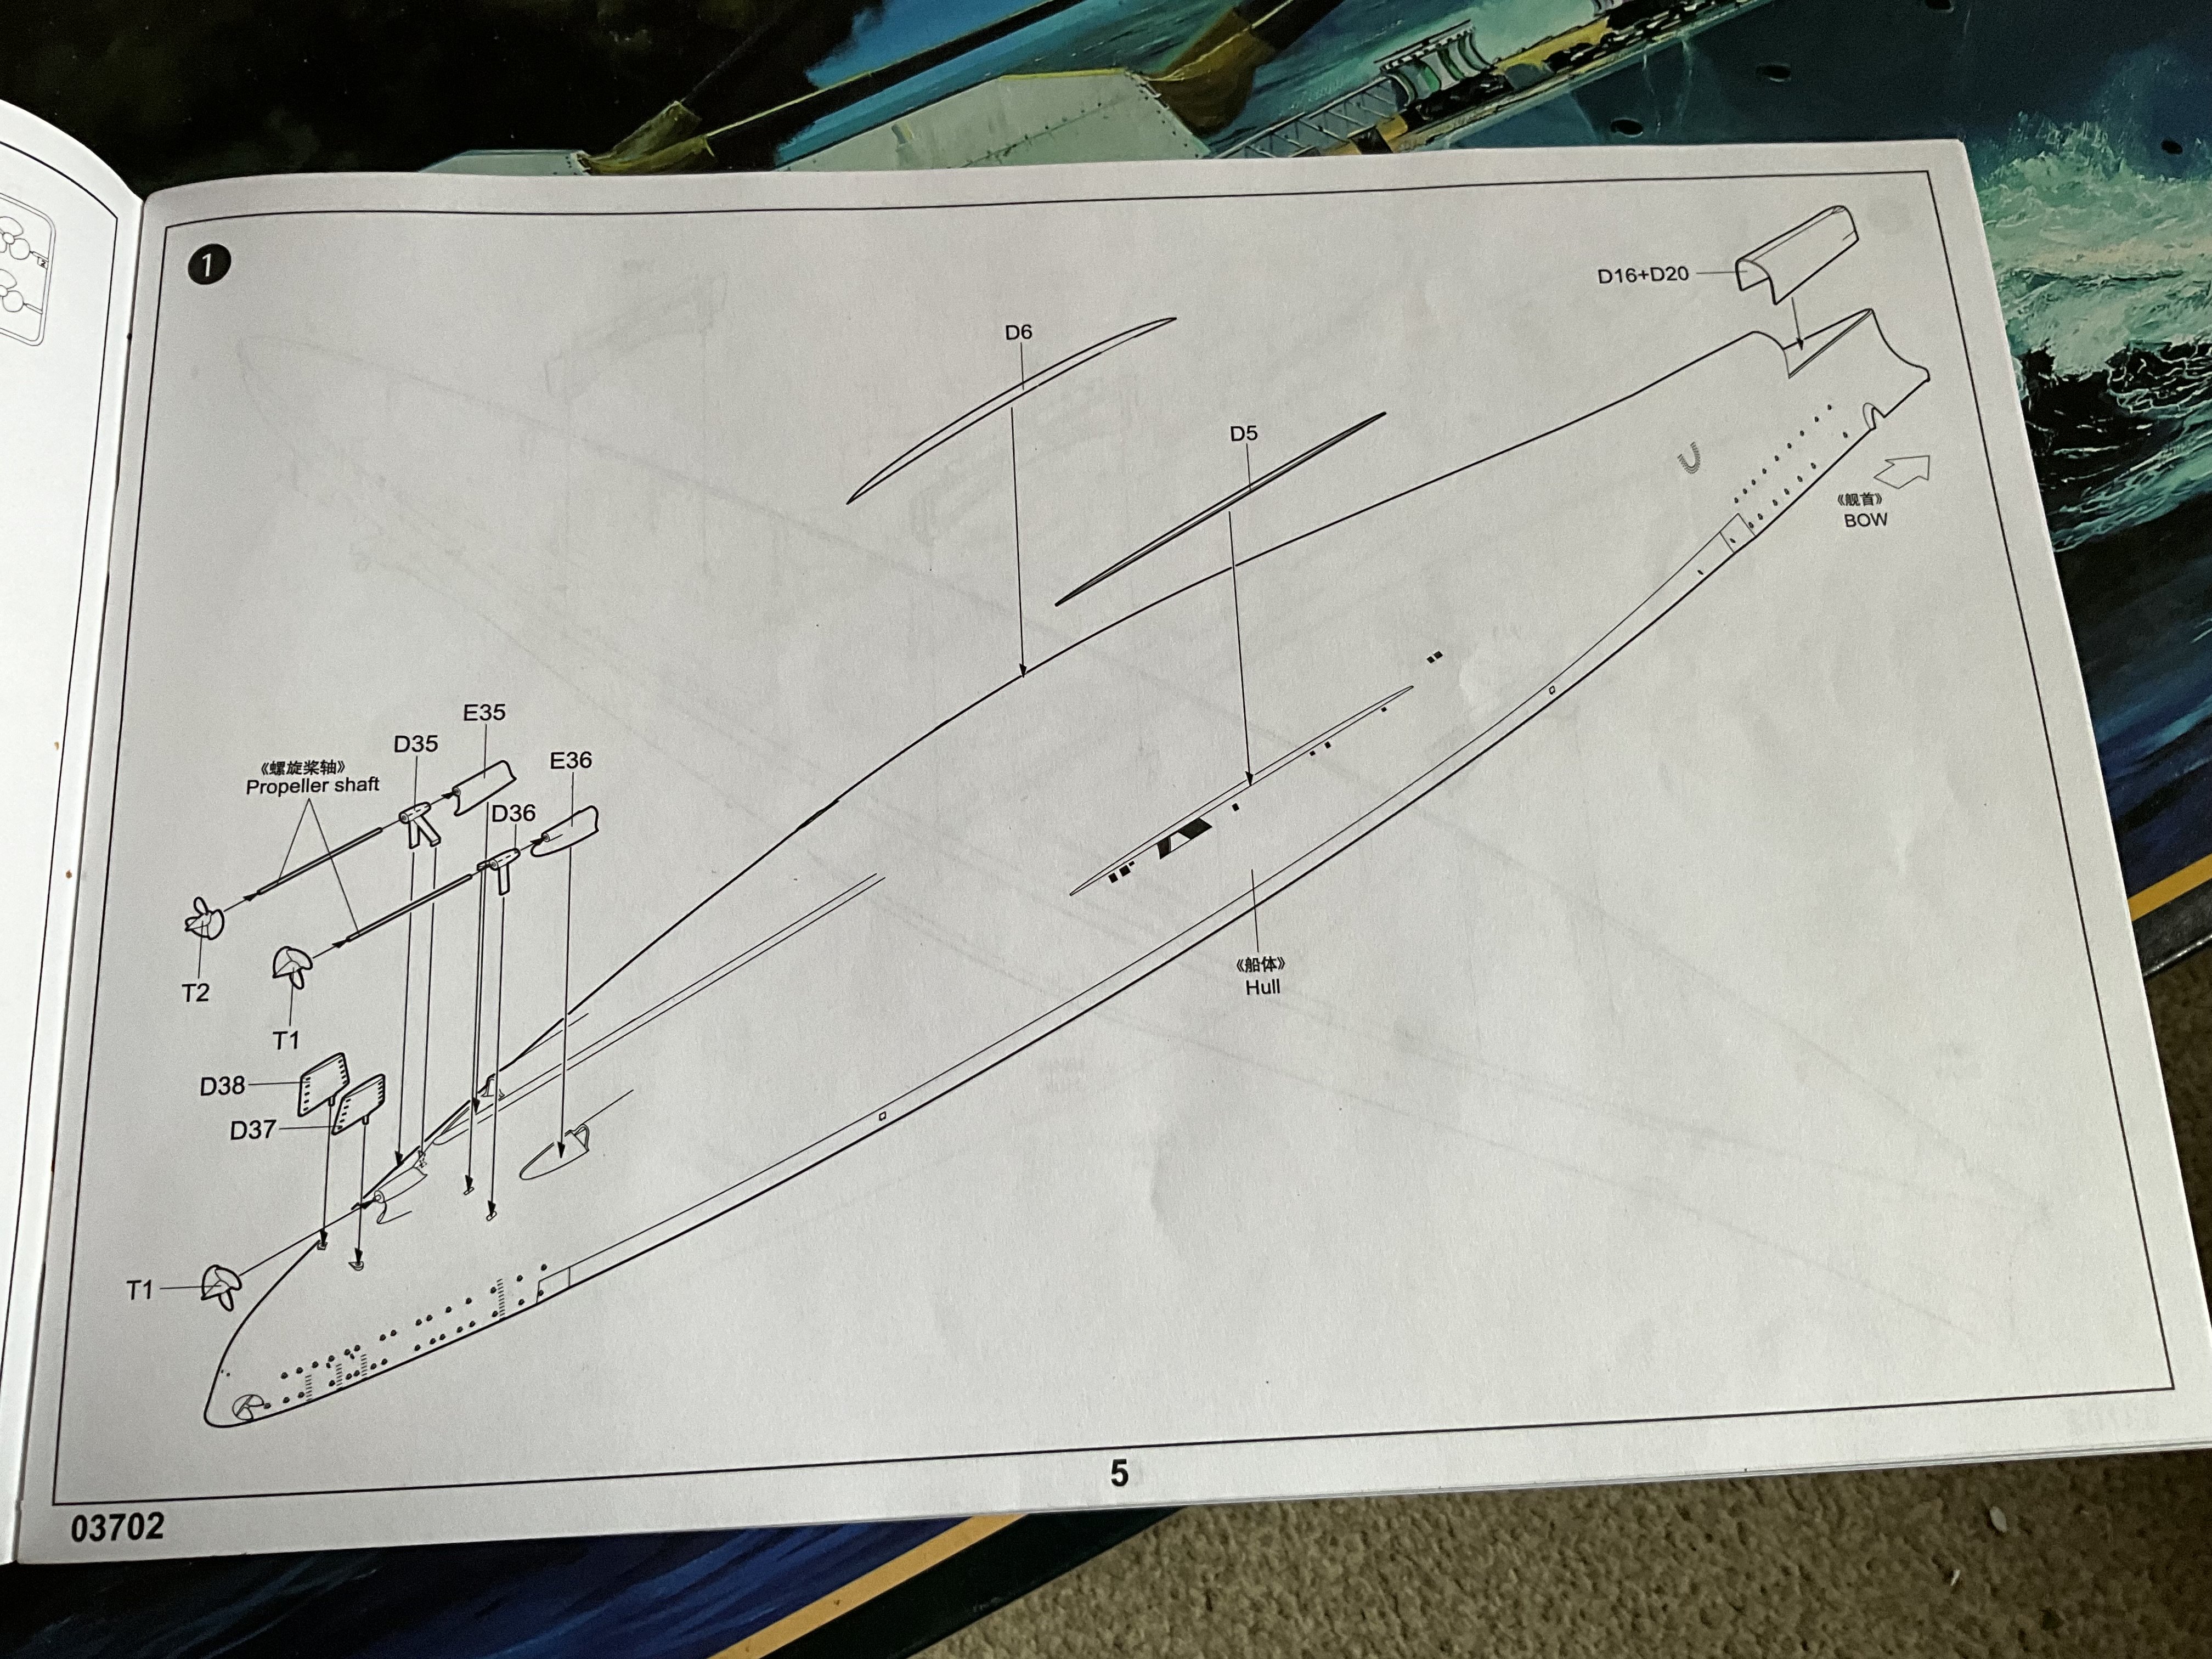
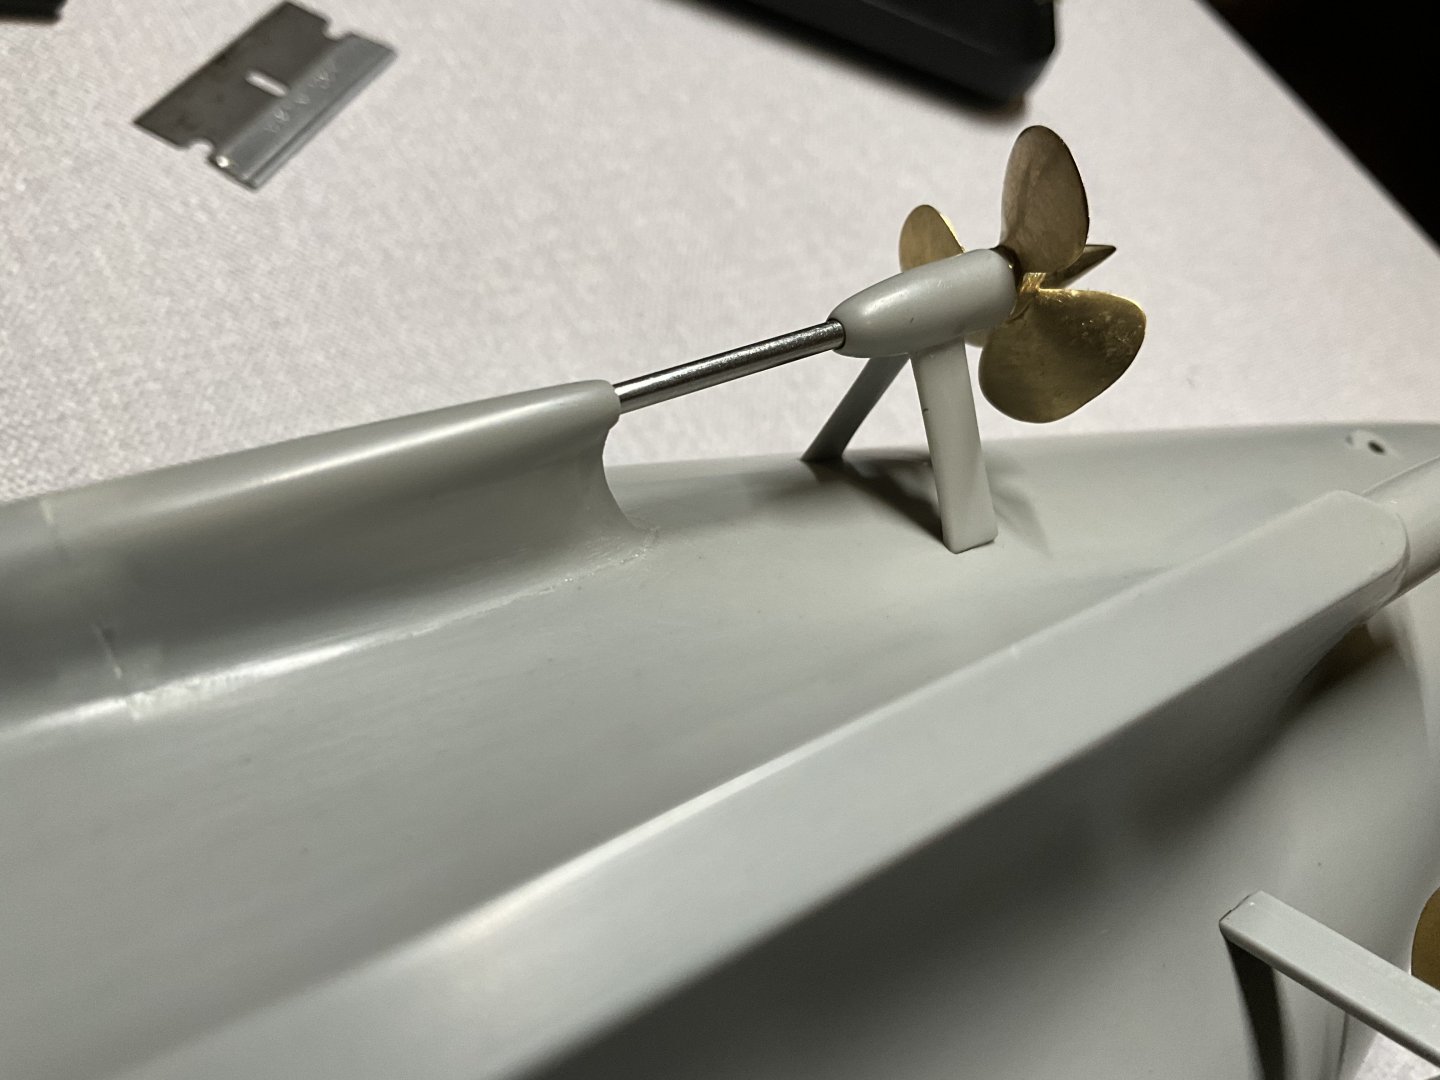
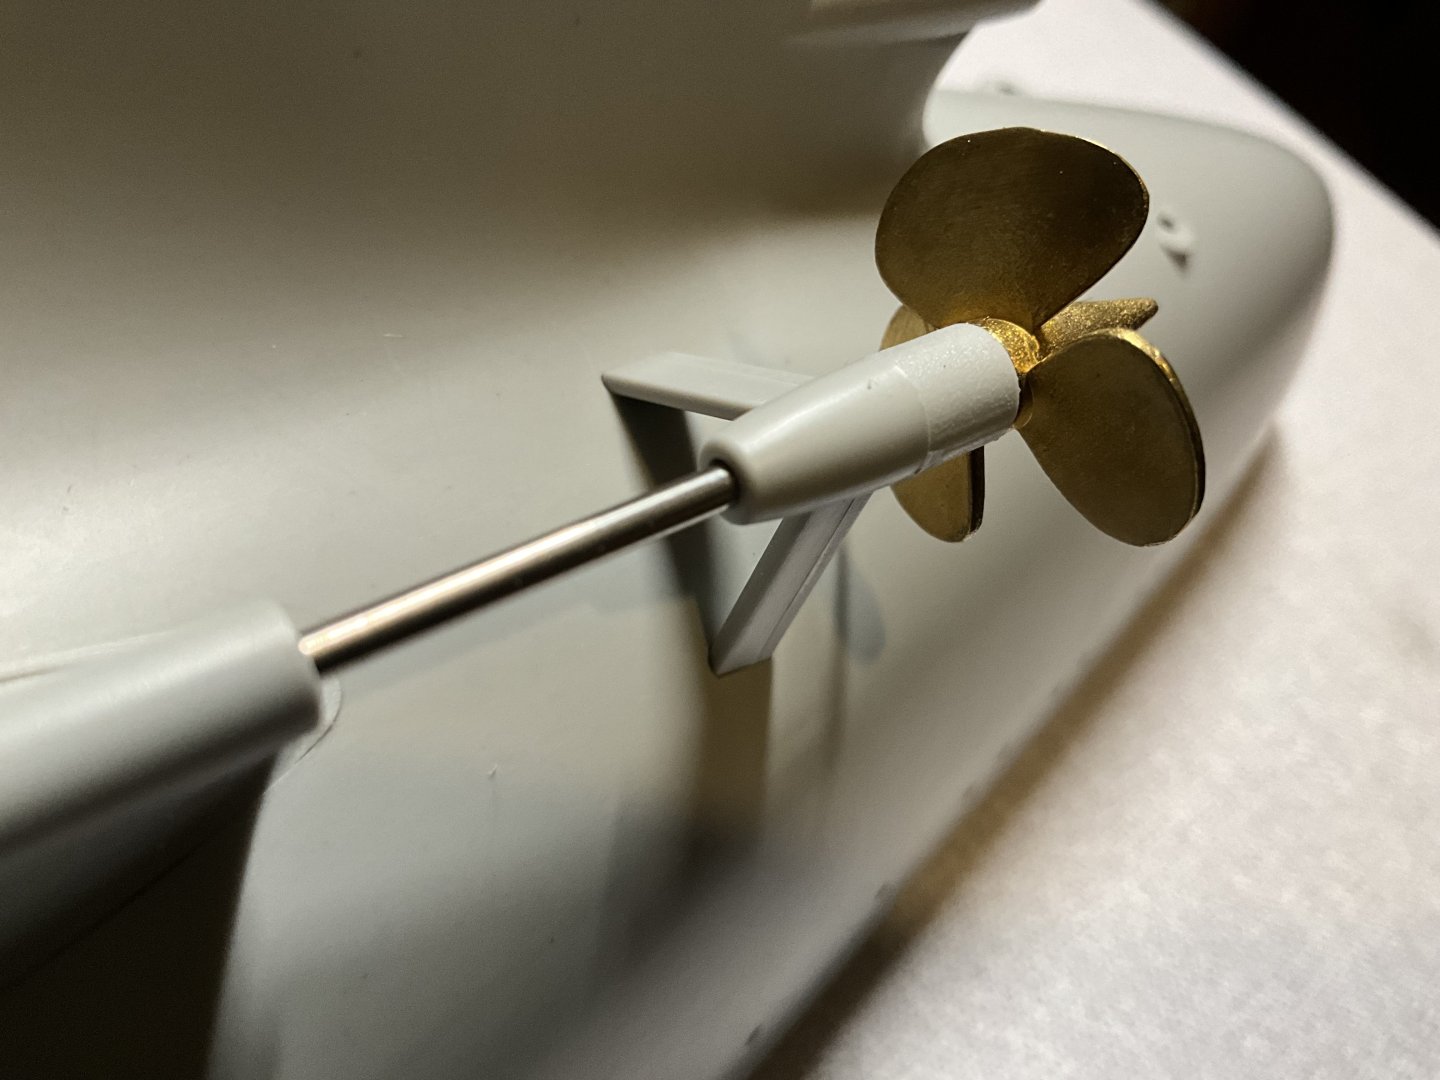
Sorry for the slow progress guys, making update just now 👍 Opted to use G Factor propeller’s over Pontos ones, just the G Factor ones slide right onto the metal shafts on kit so made it an easy starting point. Started on Portside of hull first, this prop and the middle prop rotate in anticlockwise direction for forward motion, turns out to be my first stumbling point, G Factor have their set the other way around, having the Starboard and middle props turning Clockwise for forward motion, just have to use one of the Pontos propellers after all. Spent a bit of time grinding down the Portside prop with a small burr, followed with fine sanding sticks then wet and dry emery paper, took a good few hours but worth the effort I think, shall put up couple of photos comparing finished one with the Starboard side one still to start. 👍

-
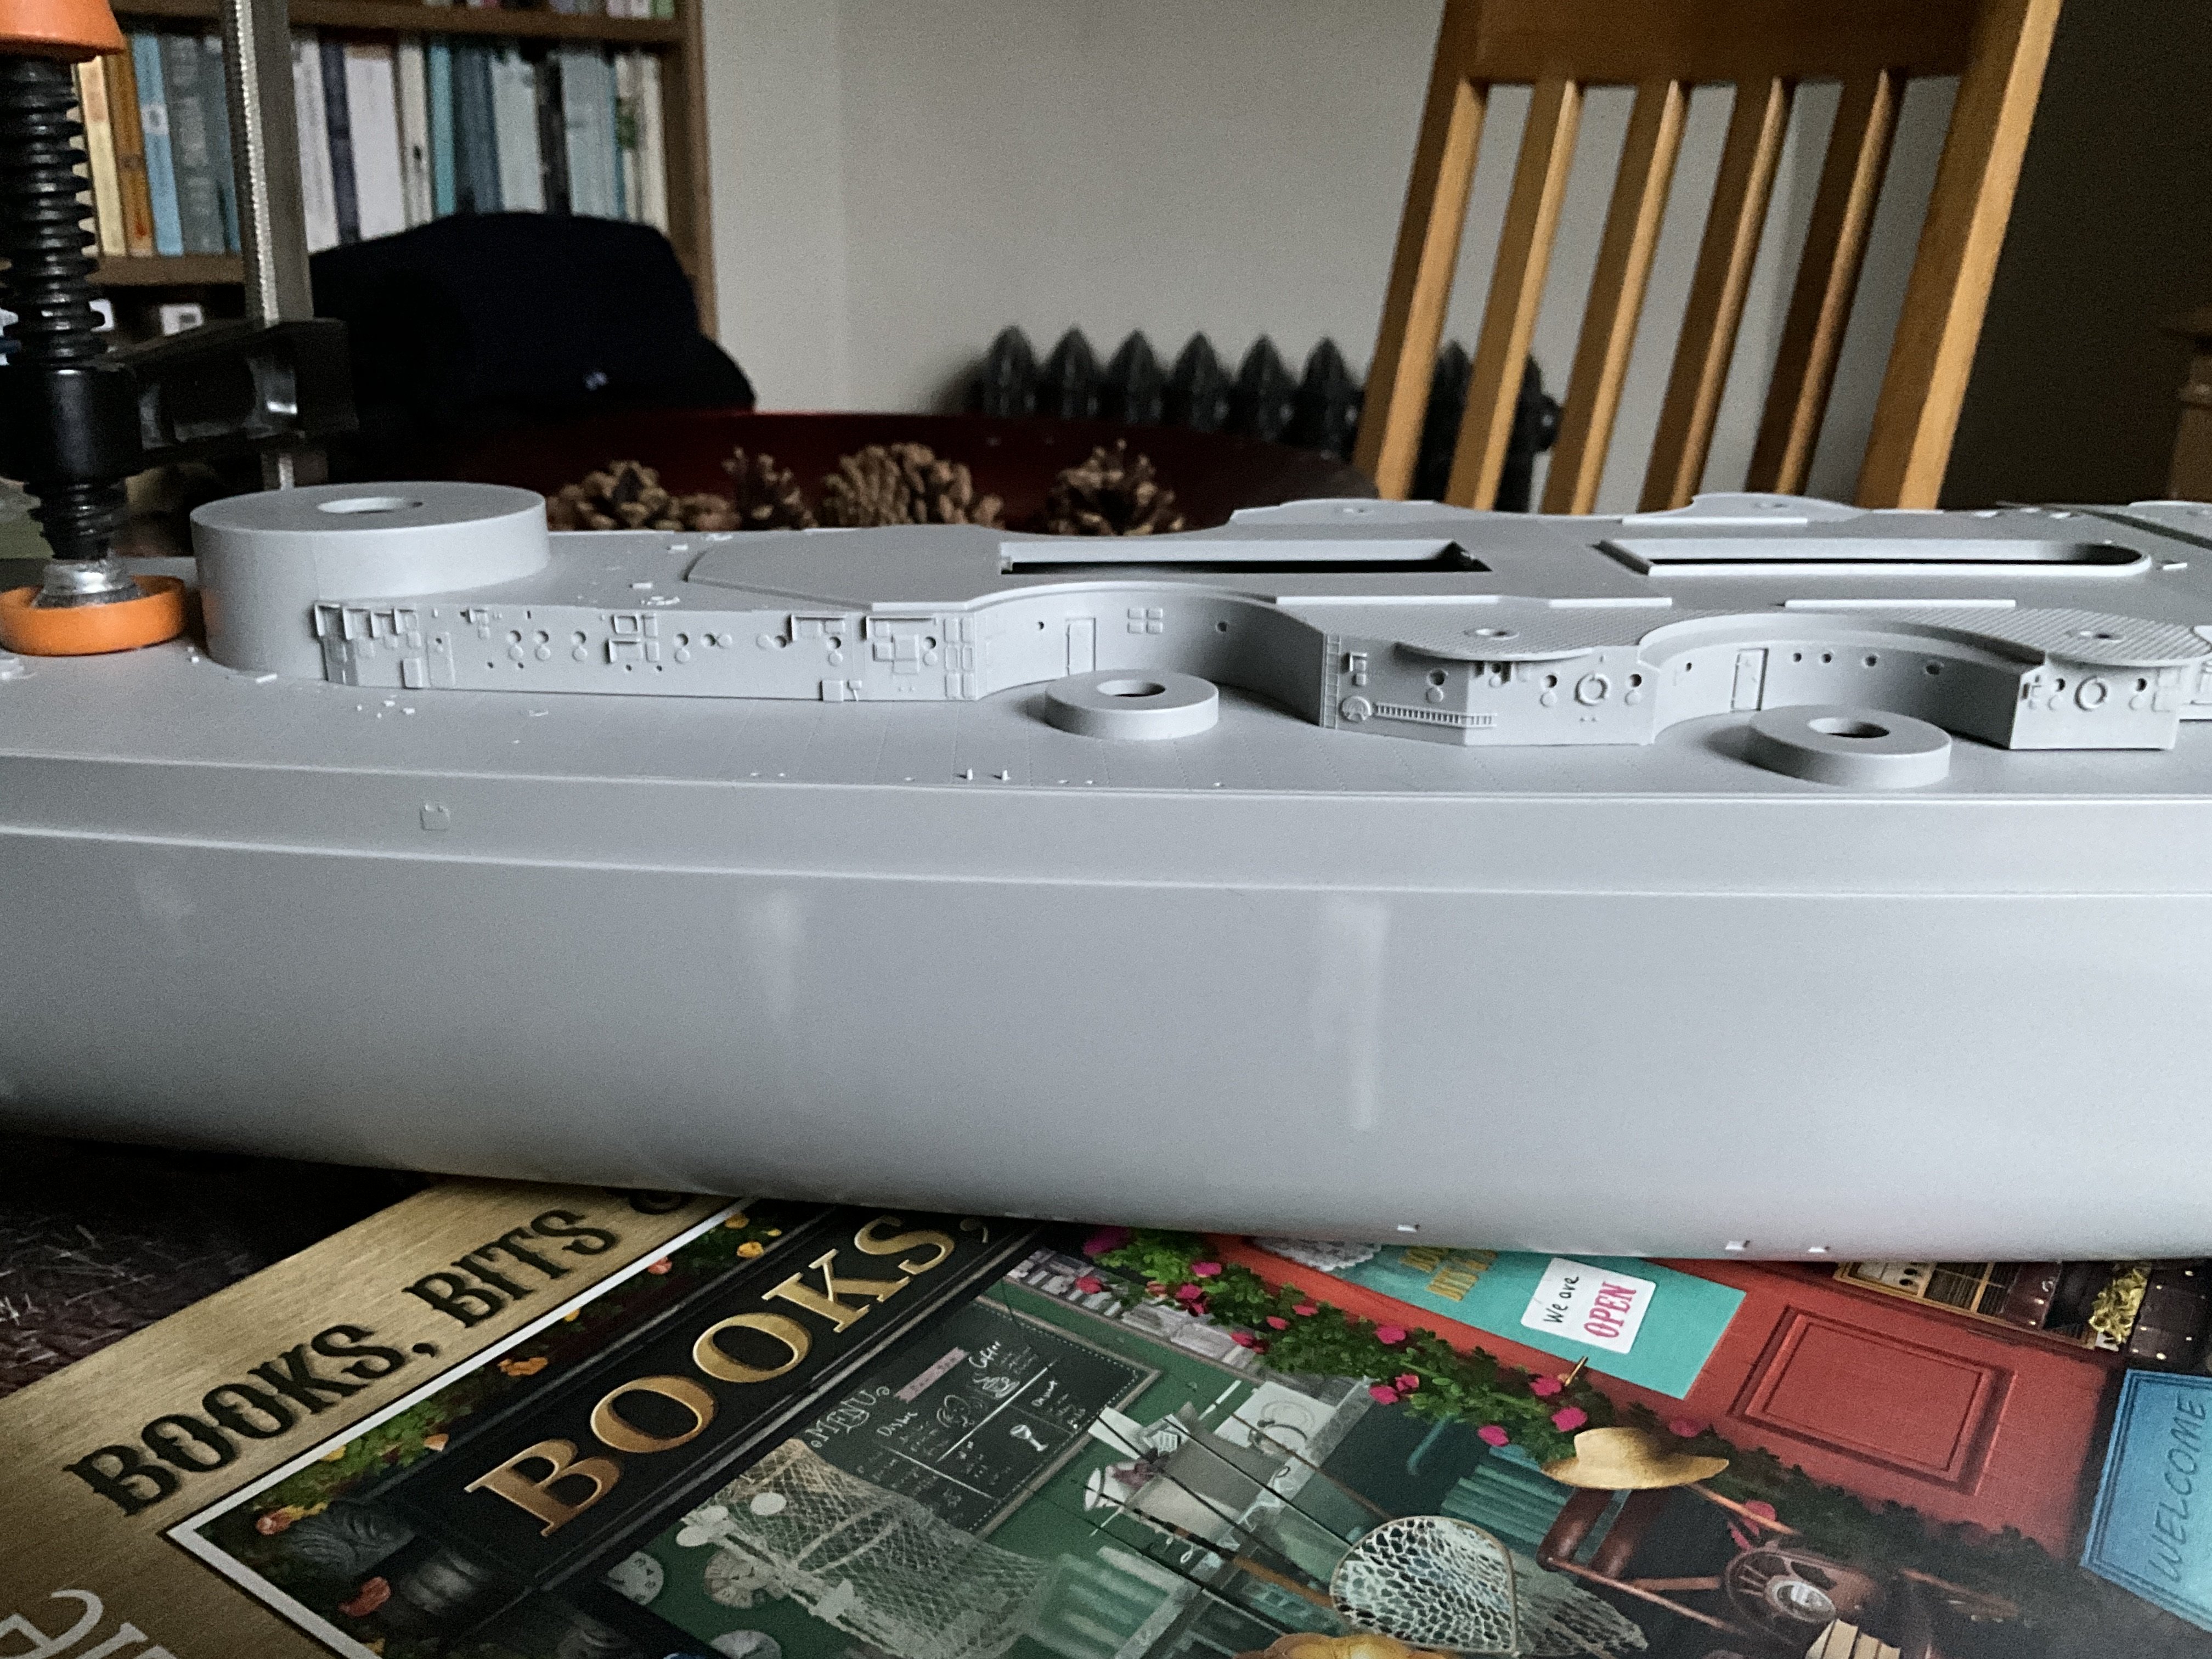
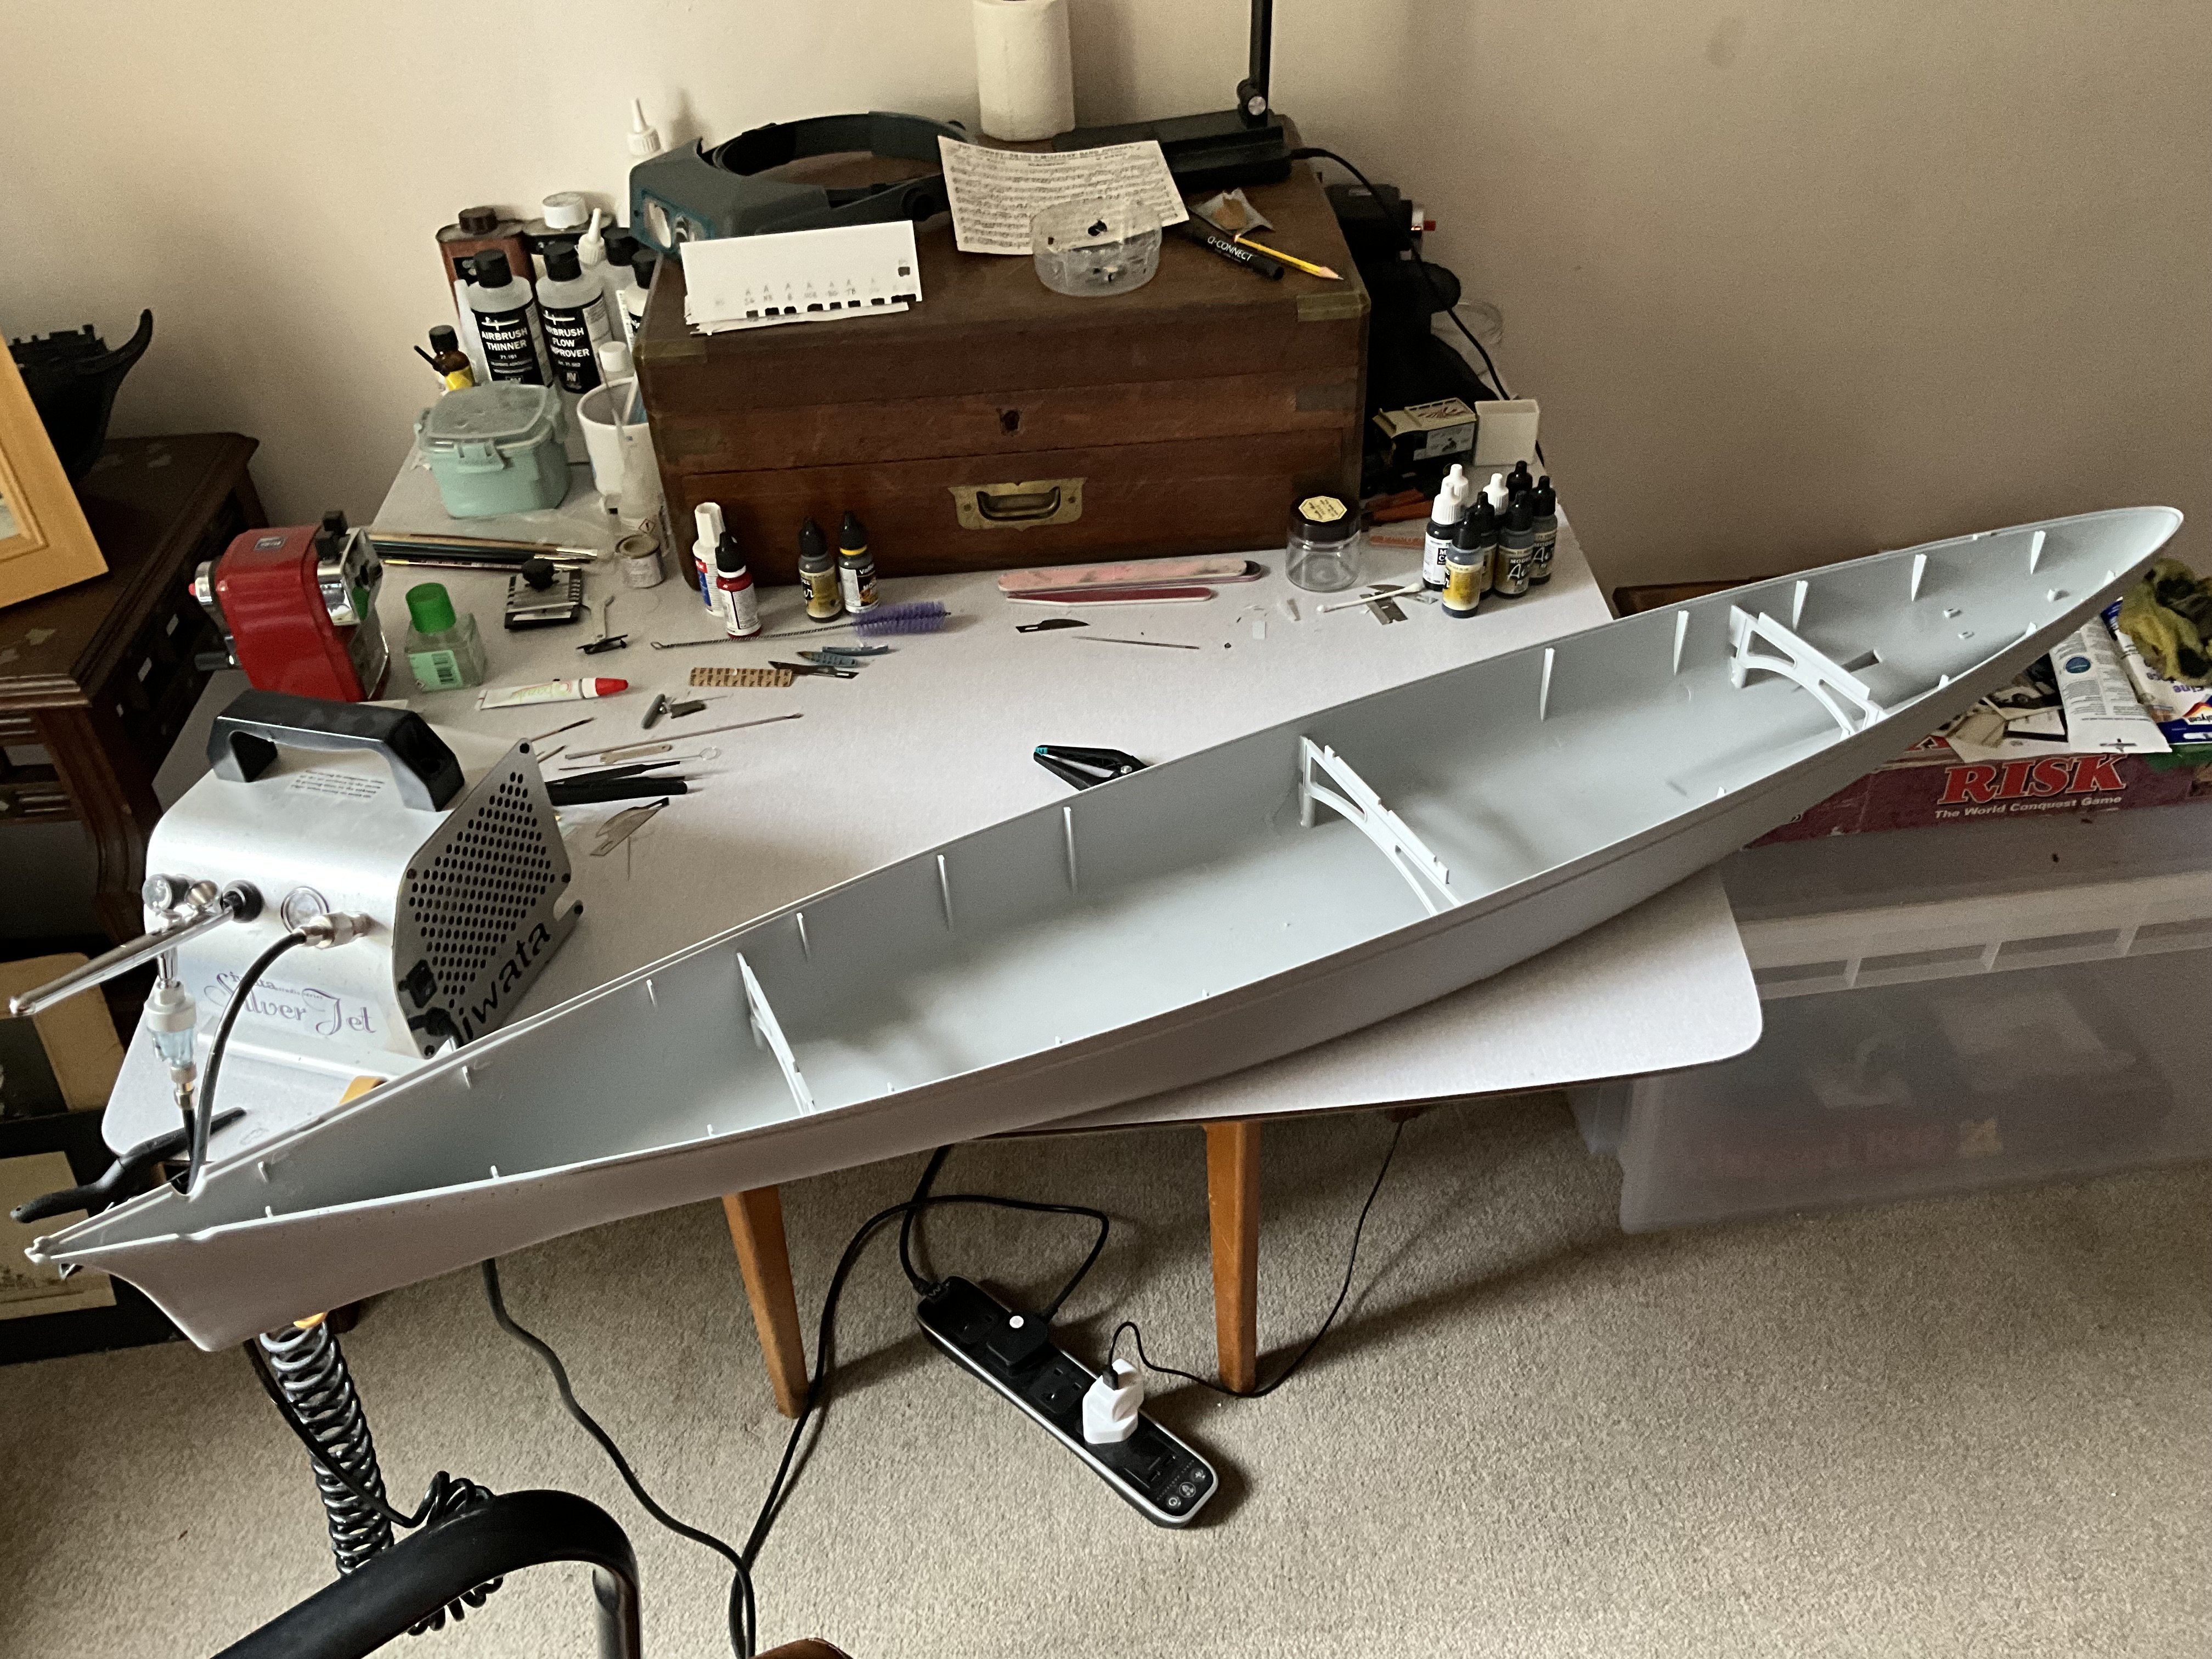
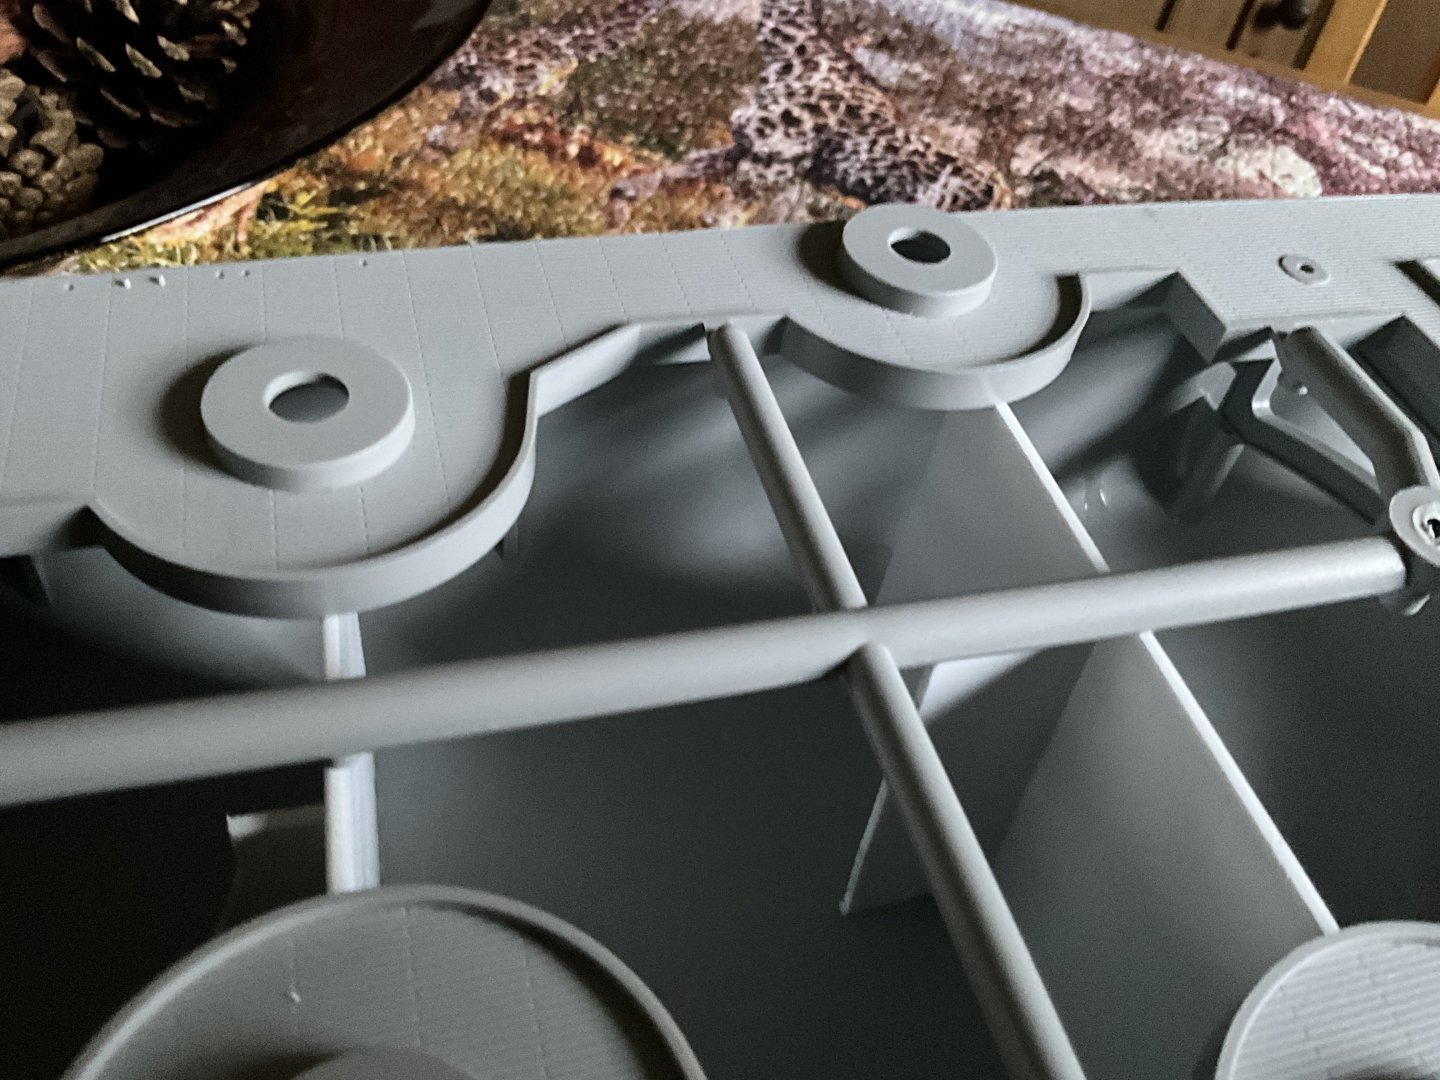
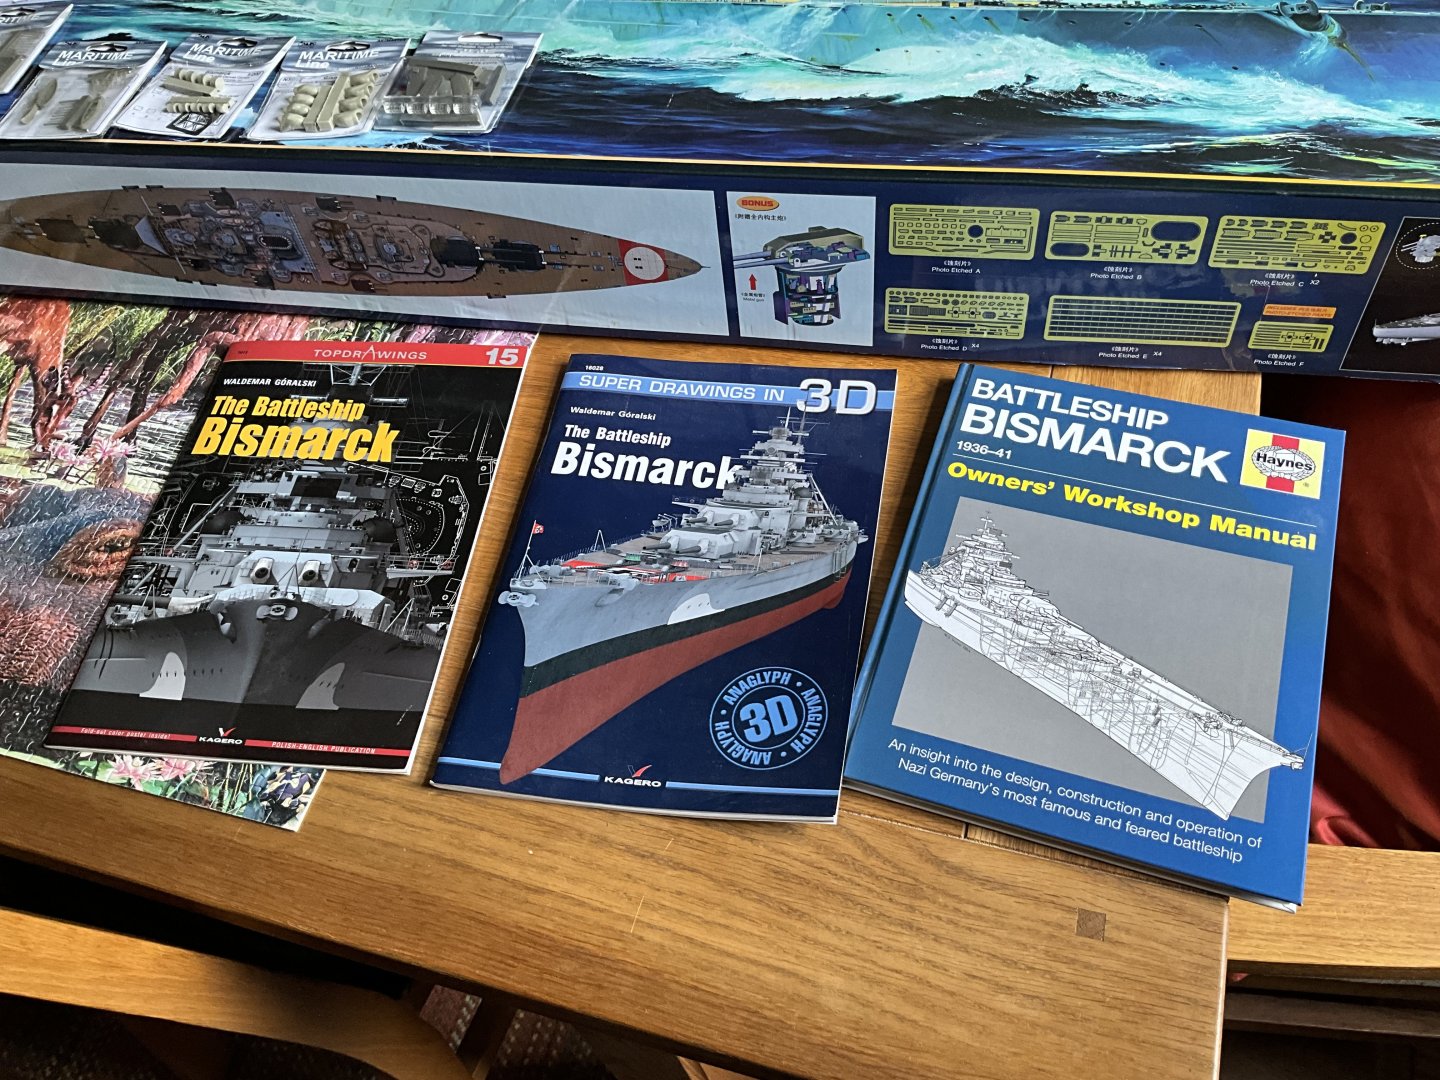
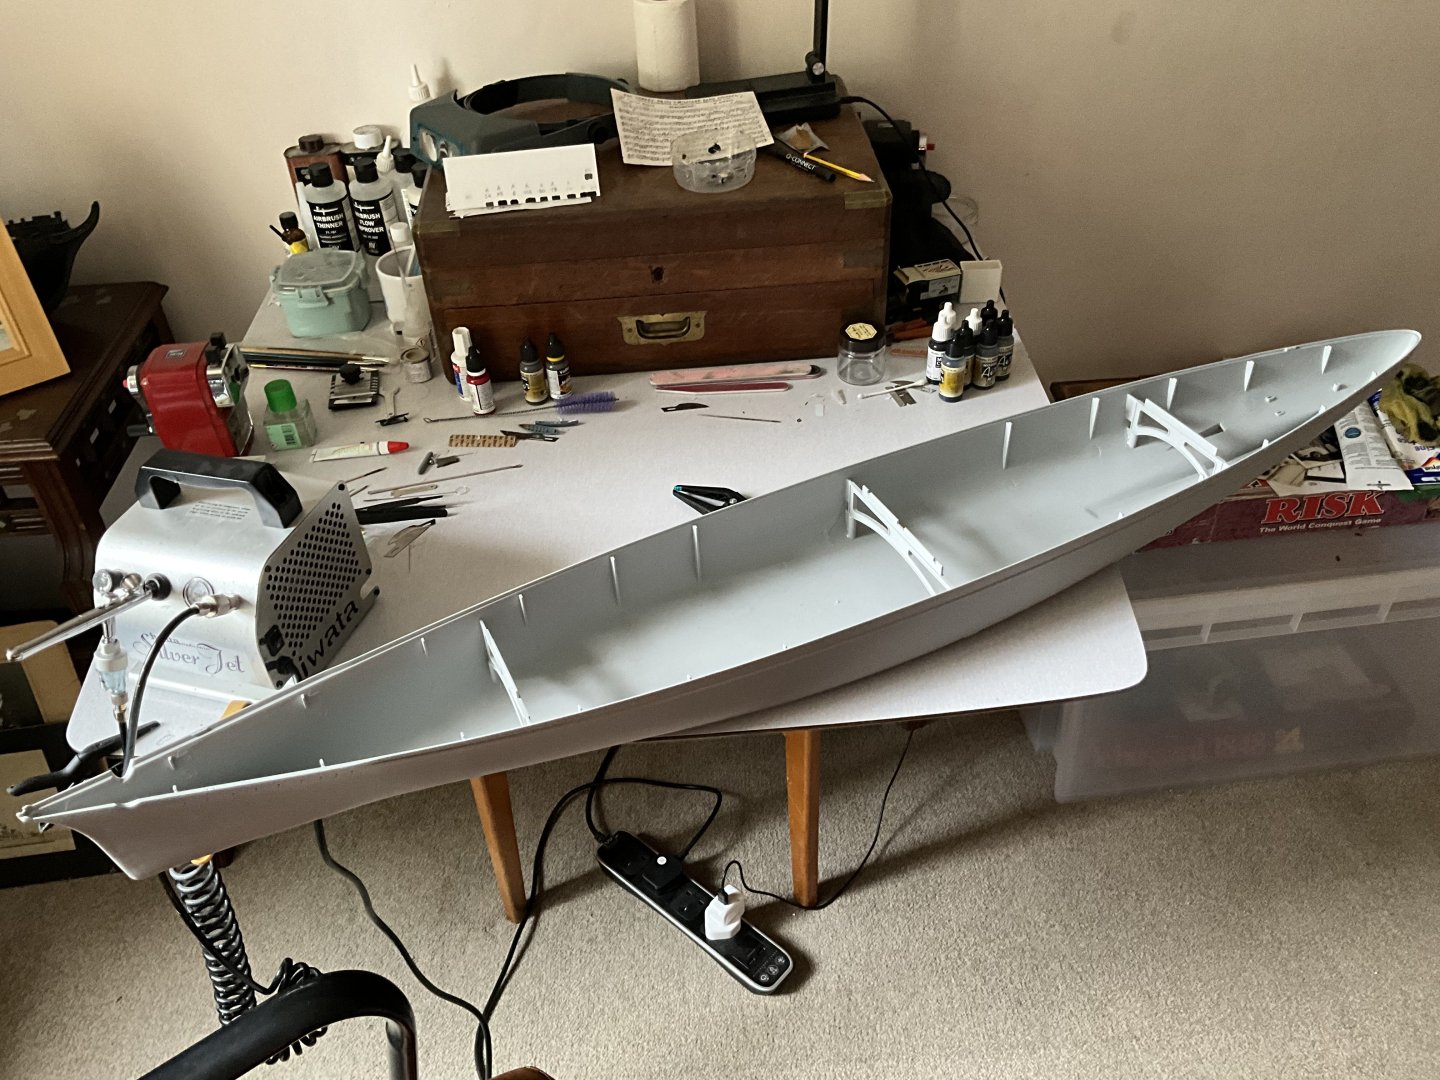
Hello guys, good to be back into modelling after short break, hope everyone are well. Did say this would be my next build and here we are, dug this out of the attic, wouldn’t think you could lose this 🙄 eventually found it. Looking at dates l purchased the Pontos detail sets this has been up the attic for over ten years, how time flies. This is certainly going to be different from my last build ( Mikasa 1/200 ) loads of photos and references on this one as apposed to very little on Mikasa, almost relaxing 👍 shall put up some photos of starting point next. Basically starting with hull and main deck, this constitutes Months of work for me, almost straight forward, just slightly larger. Started by dressing up hull, lots off filling and rubbing down, drilling out port holes and contouring A Frames and propeller shaft housings using photos as references, this is ongoing and where I am at presently, as usual don’t hold your breath waiting on progress, you know me by now. 😂


- 61 replies
-
- 10
-
-
Fantastic job on this, it’s certainly a labour intensive model, great to see others solutions to this model. 🤛👍
- 193 replies
-
- 3
-
-
-
- Russo-Japanese War
- Mikasa
- (and 2 more)
-
Brilliant job Herby, love it. Mind watch out for position of 6 inch guns on main deck, think they need moved outward 2 to 3mm to let the guns sit more in middle of housing, l didn’t do this but would if l were to do it again, the gun should be able to run parallel to side of bridge superstructure, you’ll see what l mean when you investigate it. 👍Shall try to follow this and enjoy, pressures of me now. 😂
- 143 replies
-
- 2
-
-
- Mikasa
- Merit International
- (and 1 more)
-
That’s a coincidence madtatt, my next planned build is the 1/200 Trumpeter Bismarck, for my youngest Son Rory, think l shall be much more in my comfort zone with this, as a child this was always my favourite looking battleship and still is, bit like how l always liked the Tiger Tank IV, bought myself an Airfix Spitfire 1/24 scale a the show so shall be tinkering with this at same time, might be a couple of months down the road though, need a rest, wife says 😂 Best for you on your build, l shall always remember this as a difficult challenge but a rewarding one, again thanks very much. 🤛
-
Thanks very much Herby, glad the build log is helpful to you, sometimes not very good with the way l wright or word things, not the sharpest cookie in the world but always liked working with my hands, always going back and fixing grammar and spelling mistakes 🙄 Trophies, think someone was smiling down on me there. 😊
-
Thanks Tim, hope you revisit your own build and repair whatever damage she had. Definitely worth finishing 👍Hope my Son can look at this for many years after l am pushing up the daisies. 😂
-
Thank you ccoyle the whole model has progressed through each part of build log, constantly having little ideas, some from looking at old photos and some from visiting the Mikasa museum, some from artistic license, the final part with the raised waterline was always in my head, the three quarter effect stems from deciding to display torpedo net extended, anyone deciding on this for their build, would recommend fitting this last as it’s so very easy to knock and damage it am speaking from experience, l damaged it at least three times, very frustrating, only just finished making it a bit better now, never as good as my first attempt though, trying to keep those guy wires straight is a mission for sure. Can safely say won’t be doing another one, that’s me got that out of my system for good 😂 Regarding awards, that was just so incredibly, never experienced anything like this before but shall always remember humbly the experience. Thanks again ccoyle. 🤛
-
Thanks madtatt so glad l got to the end, had a lot of kind remarks at the show, so was a great lift to the spirits. Hope you enjoy your own build and that some of my information is helpful to you. Don’t see this model as a quick build, it’s labour intensive 😂 Thanks for your support madtatt 🤛 and all the best with your build 👍
-
Thanks Canute, it was a long slog for sure, it’s only when you look back at start of build log you realise just how much work goes into something like this, you do forget this as the years roll on, it was a bit stressful near the end in giving myself a deadline, especially when lm so slow, night before show is cutting it fine, in fact didn’t get all the men finished, doing that now, think the Son shall like it. Awards were a very big surprise for me, never had an experience like that, shall always remember this. Again thanks for your support appreciated 🤛
-
Thanks CDW, it was your build log that initially got me into this, you’ve cost me three years and four months of my life 😂 listening to Jacqueline shouting upstairs, your supposed to be enjoying it, it’s your hobby 😂 Really clad it’s finished now though, looking forward to starting something fresh. Again thanks for your nice comments, means a lot coming from the builder that inspired me in first place, l showed your build log to Jacqueline a few times during your build and she gave me that sceptical look as if to say, you’re going to try and build that 👀 fair thought though l hadn’t completed anything in over forty years, am quite encouraged now😂 🤛
-
Thanks Yves, have appreciated all your support throughout this build log. Hope this engorges people to have a go at this model, her looks have grown on me as time has past, initially it was all the marvellous detailing by previous builders that encouraged me into this build, first thoughts on her was from the side didn’t have much difference between forward and aft profile but have grown to like it’s appearance. Again thanks for all your nice comments. 🤛