SkiBee
-
Posts
251 -
Joined
-
Last visited
Content Type
Profiles
Forums
Gallery
Events
Everything posted by SkiBee
-
Welcome, you will find all the help and information you will want and need on this site, if you don't just put a question out there and people will answer. Others build logs will be of great value and fill in all the holes in the instructions, better yet with pictures of the build. I started with something more complex than the Model Shipways trio but stopped and built those 3. I have never regrated that.
-
 Great build, it does justice for replicating the Turtle Ship. I was able to take an up-close walk around and inside the full-scale replica at the ROK Naval Academy. I've also seen the replica at the National War Memorial in Seoul. You do great justice to them. As another commentor stated, the inside was very cramped, I would say more than the USS Constitution. I was given a brass model of one on my departure from Korea, I lived there for 6 years. I love your photo of General (Admiral) Yi Sun-Sin, reading his history is well worth it.
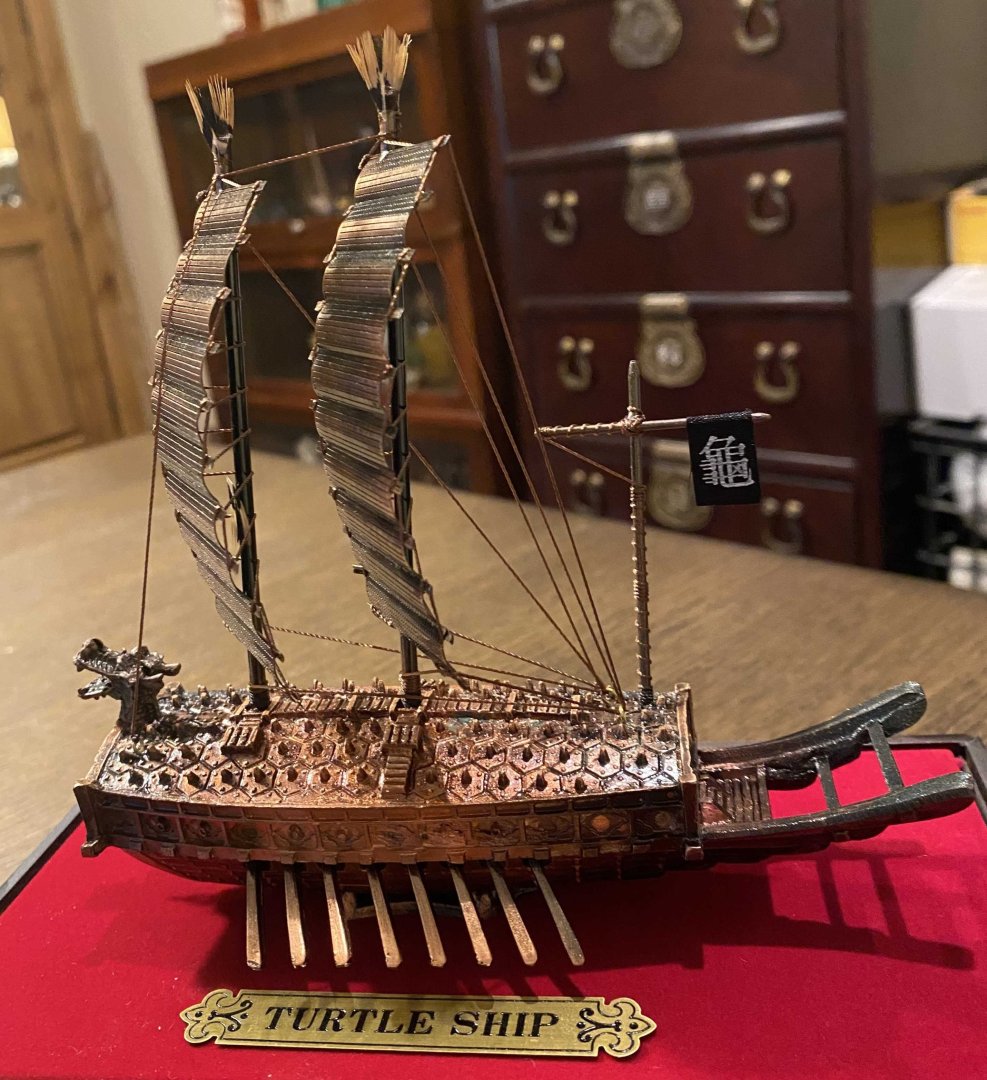
- 97 replies
-
- 1
-

-
- Turtle Ship;
- Korean Turtle War Ship
- (and 1 more)
-
Welcome @WWR4 I tried years ago to get into wood ship modeling, but my first one was very frustrating, and I finally gave up on it. A few years ago, when I retired, I thought I would try it again. Thankfully I started like you did with the GB Dory, then moved on to the other two Model Shipways Shipwright learning trio, the Norwegian Sailing Pram and the Muscongus Bay Lobster Smack. I learned a lot from these that have given me the confidance and skills to try more difficult models. I hope you enjoy building these model ships. There will be times you want to quit as you build more complicated ships, but take a break and then resume. Have fun. SkiBee
-
Getting Started: From Dollhouses to the USS Constitution
SkiBee replied to Jasennord's topic in New member Introductions
@Jasennord welcome and you will learn a lot and gain skills that will help in your future builds. -
The latest to begin the Model Shipways 3 kit set
SkiBee replied to Taken Aback's topic in New member Introductions
@Taken Aback you will learn a lot and gain great experience in these 3 ships. I had built the MS 18th Century Long boat first and had a lot of problems that would have been prevented if I had built the MS Shipwright series first. Good luck and welcome, you will enjoy this hobby. -
Bob I'm in the middle of building the AVS too. I have found that I get a lot of great information from @CiscoH AVS build log, I have found him very responsive to messages via this web site. He is ahead of me in the build, since I have taken a break from the build. Also, I've found great detail instructions from Luck St Shipyards, https://lauckstreetshipyard.com/ the instructions do cost but I have found them indispensable. Also, I'm also building the MS Phantom, but it is on hold while I focus on the AVS. Please do post some pictures of your Phantom.
-
I normally prime the area to be painted with a few light coats Tamiya or Rust-Oleum 2X flat or matt spray primer before using acrylic paint with little to no fuzz. I have also used Minwax® Pre-Stain Wood Conditioner prior to painting but mostly prior to staining.
-
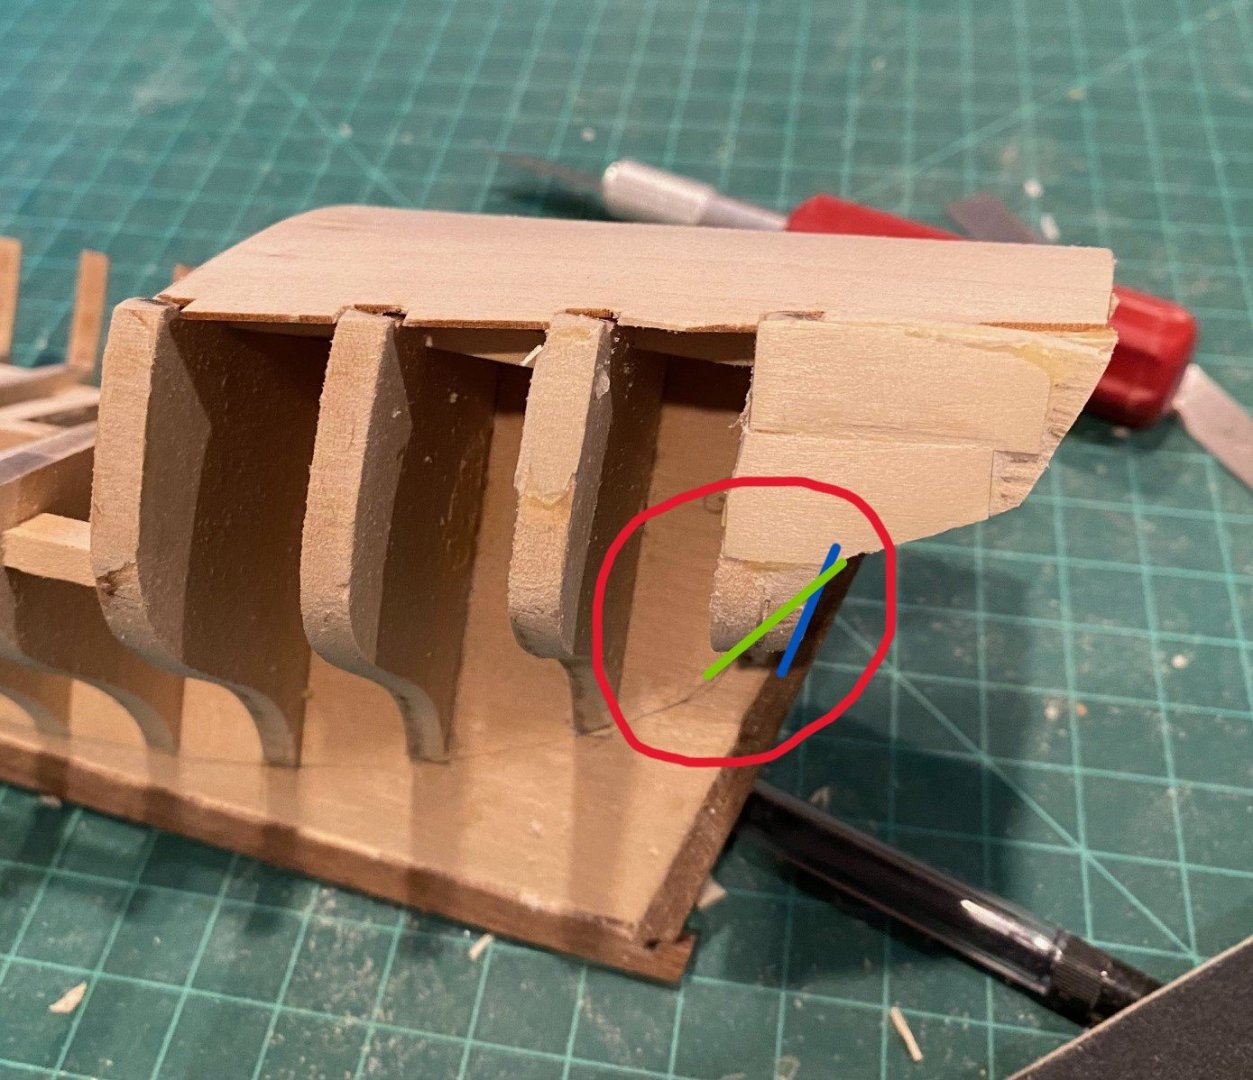
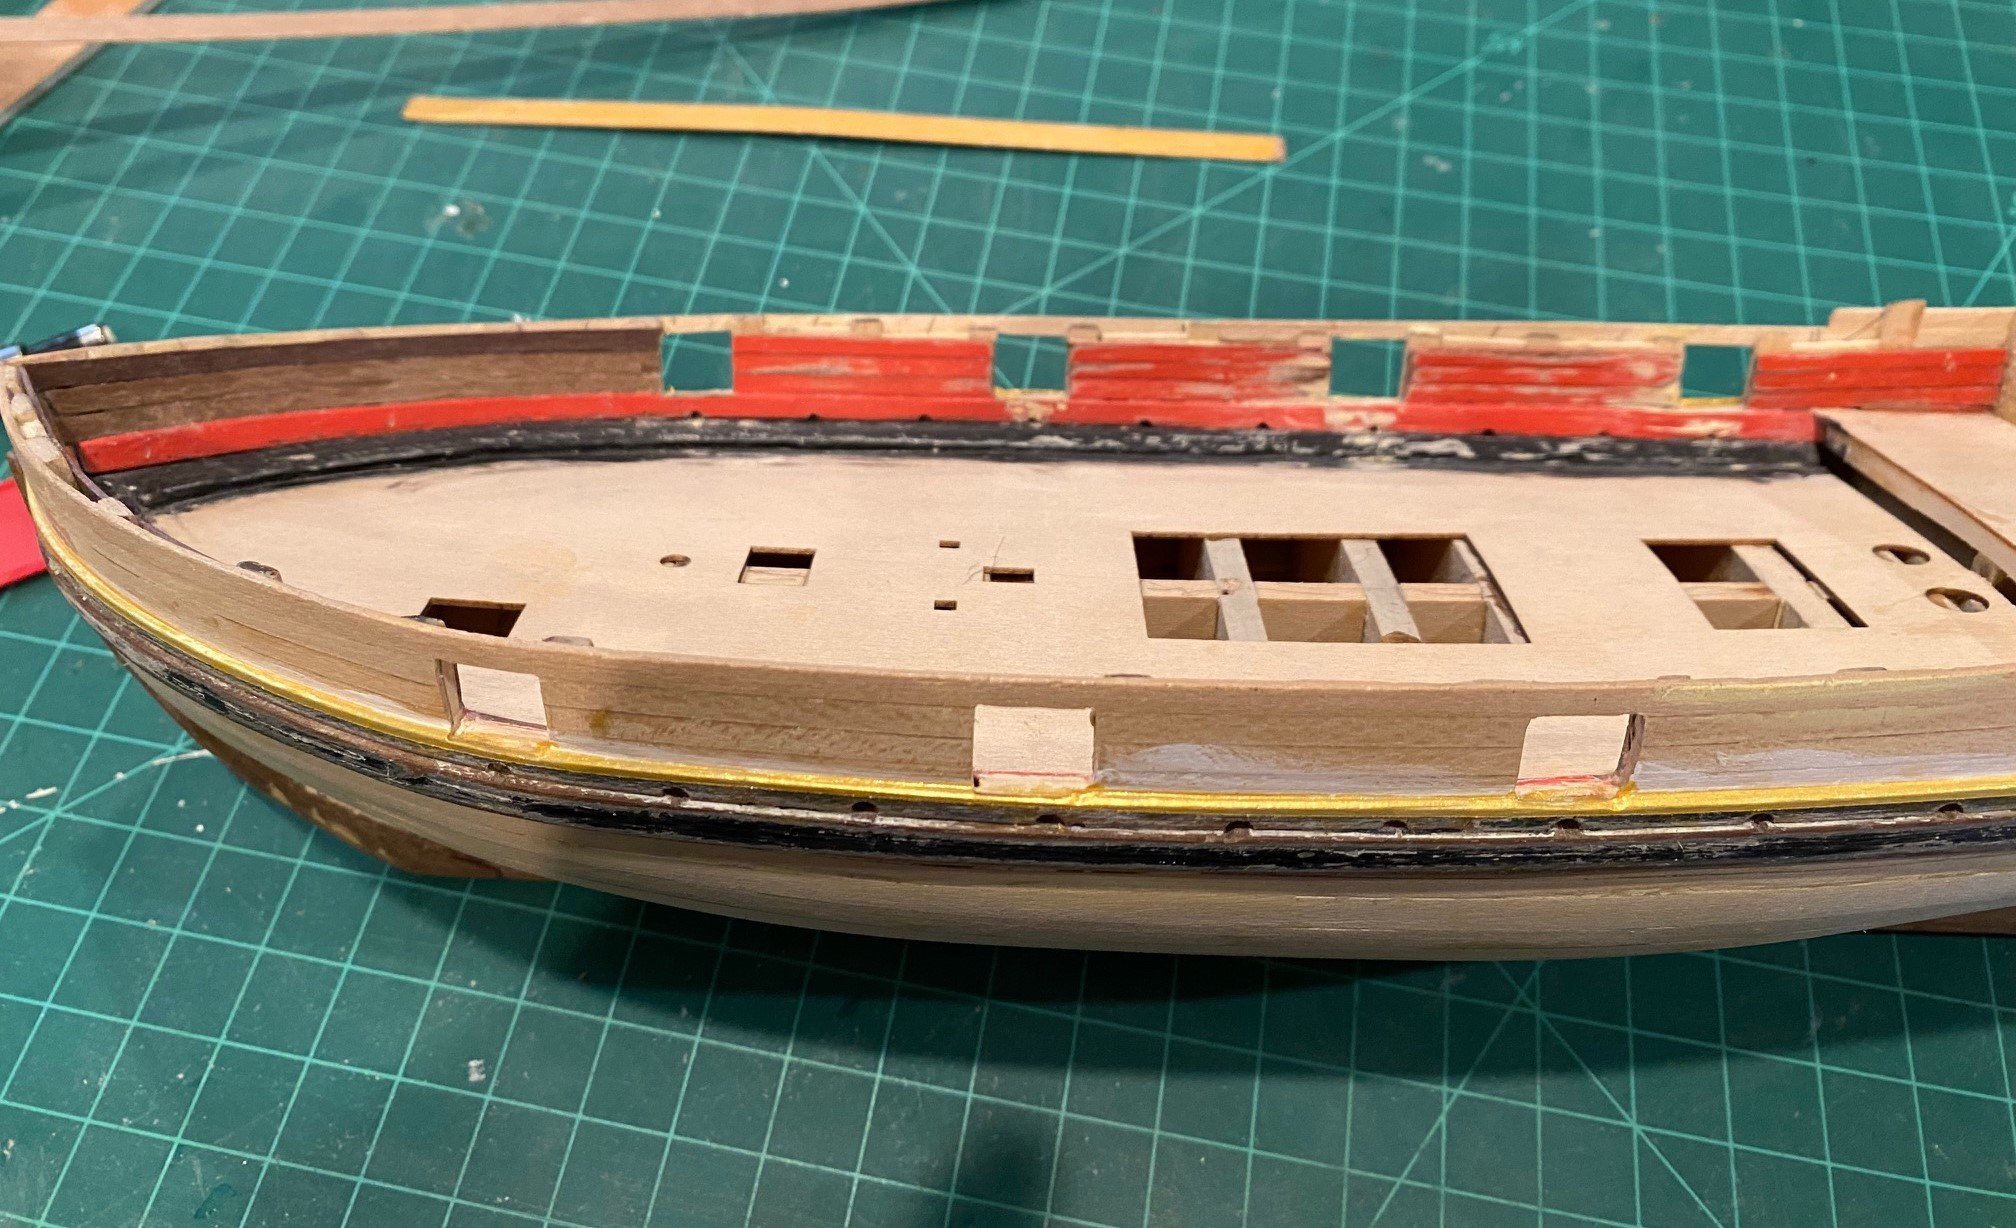
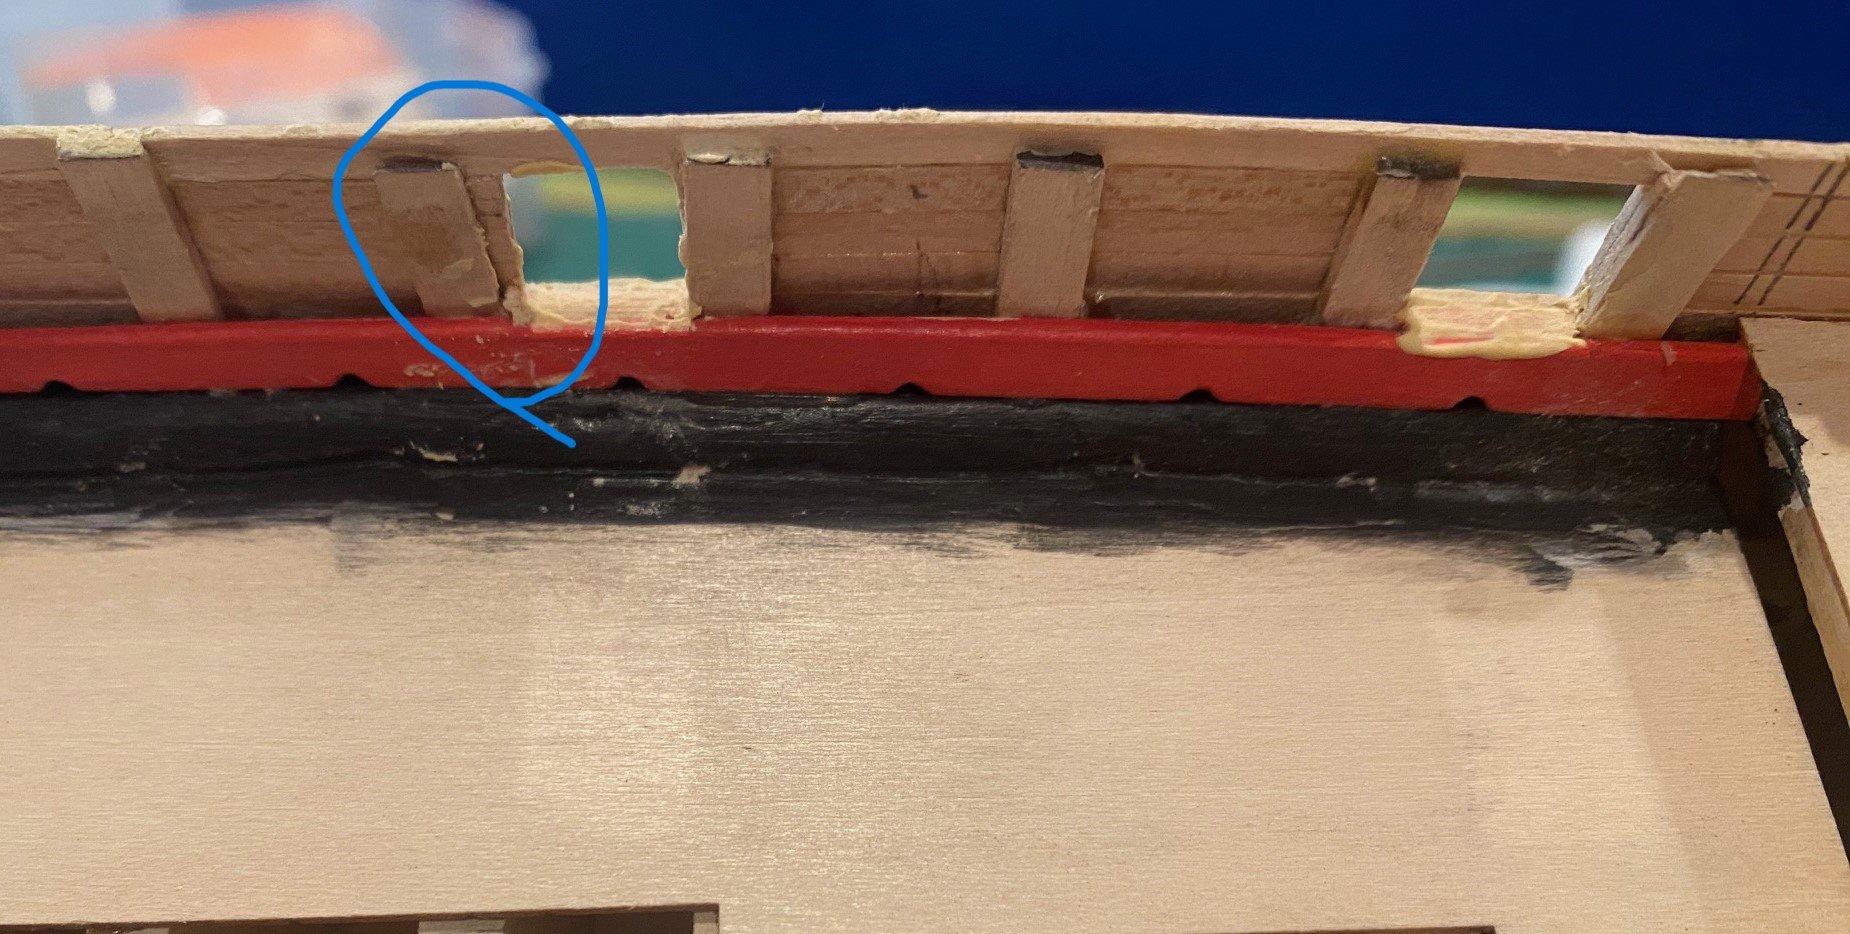
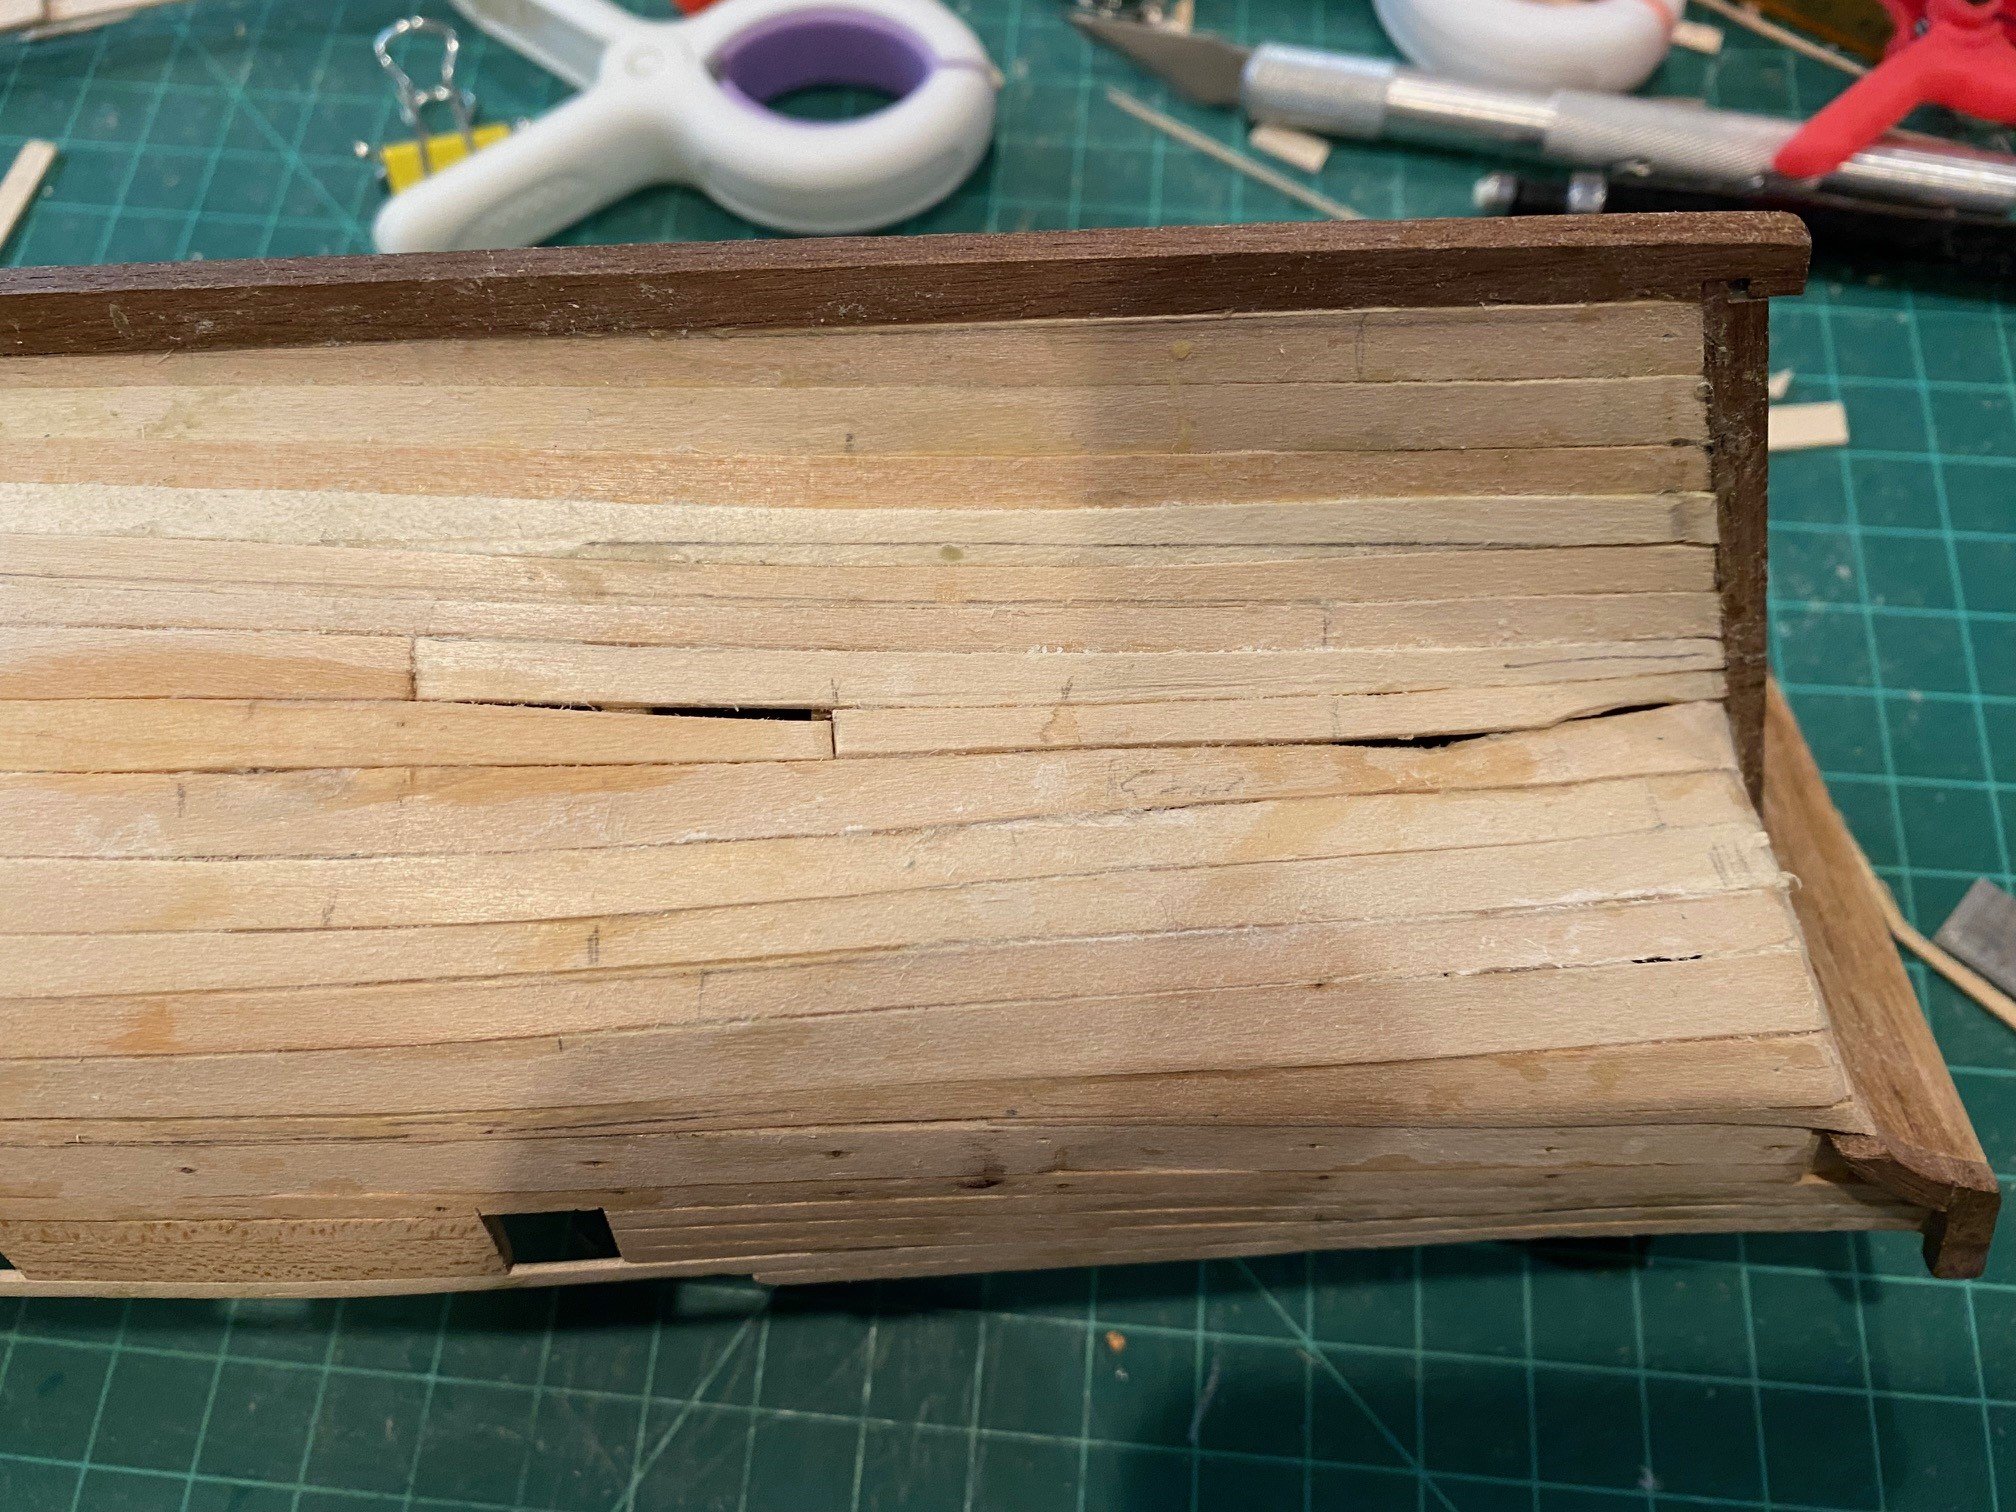
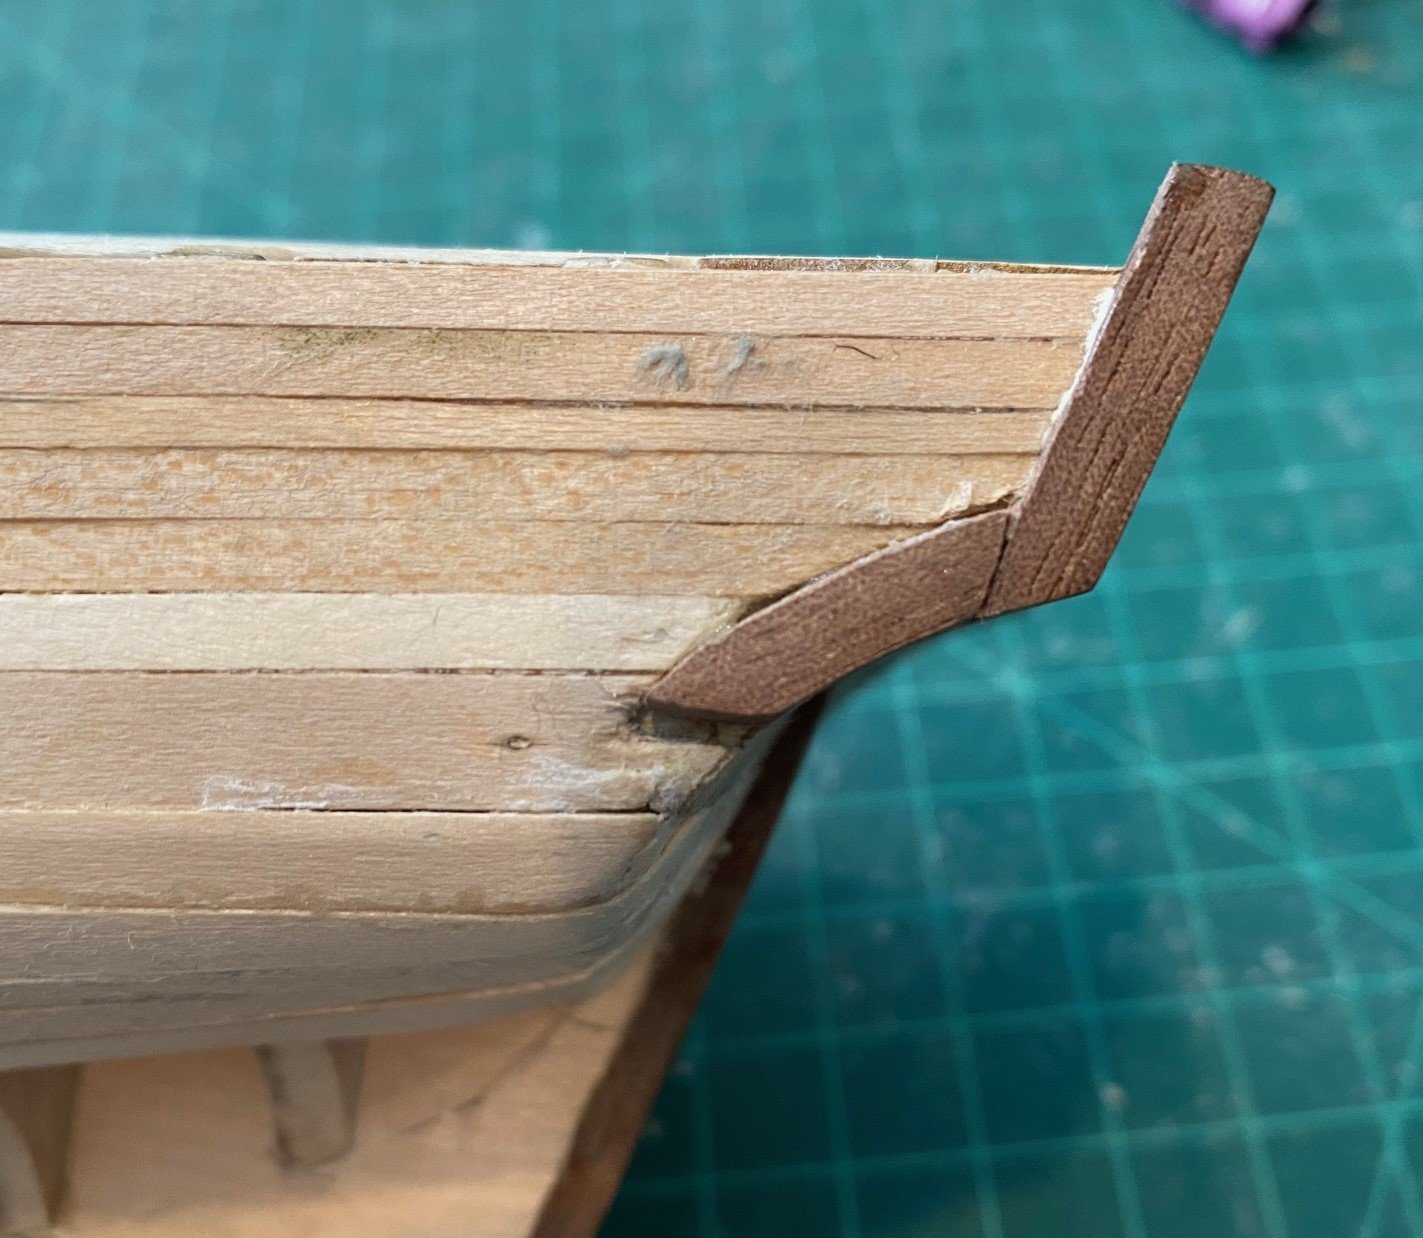
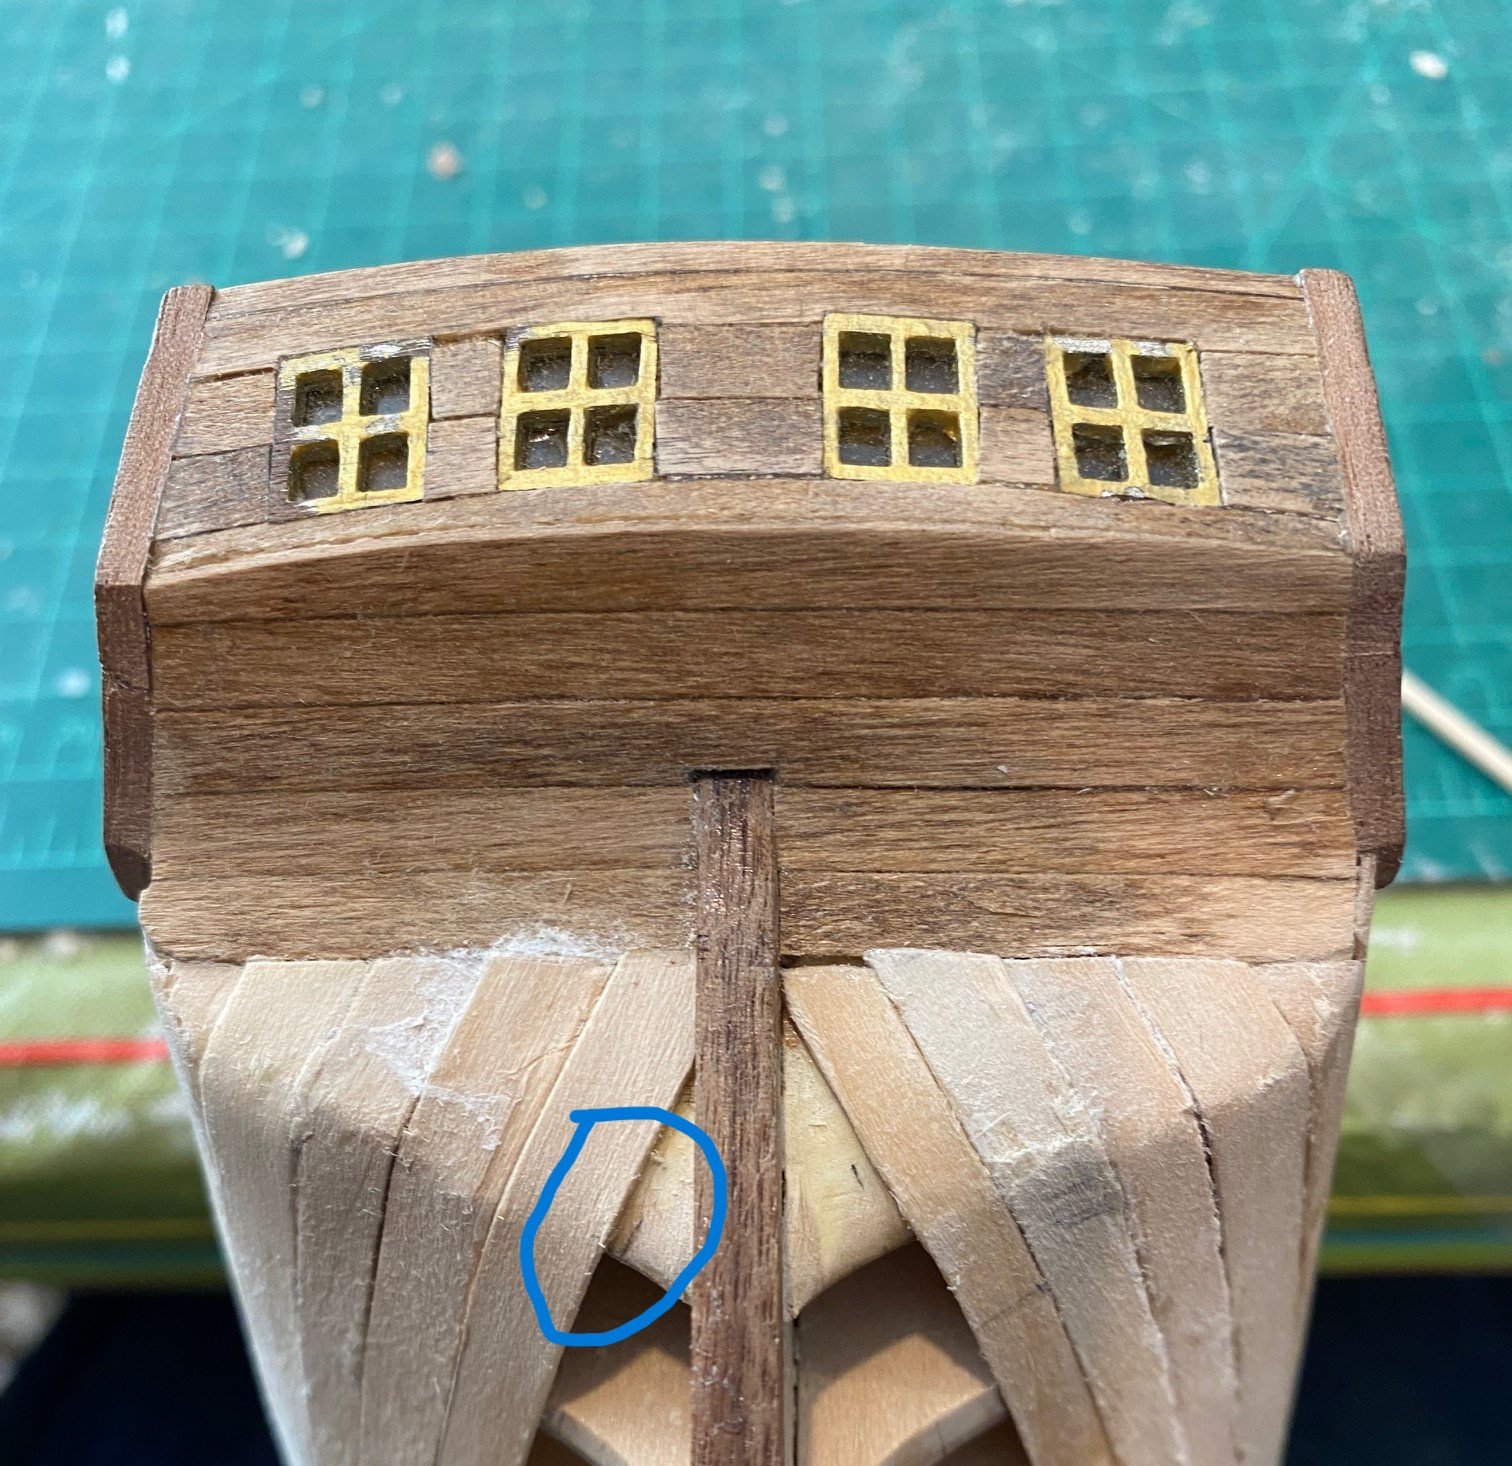
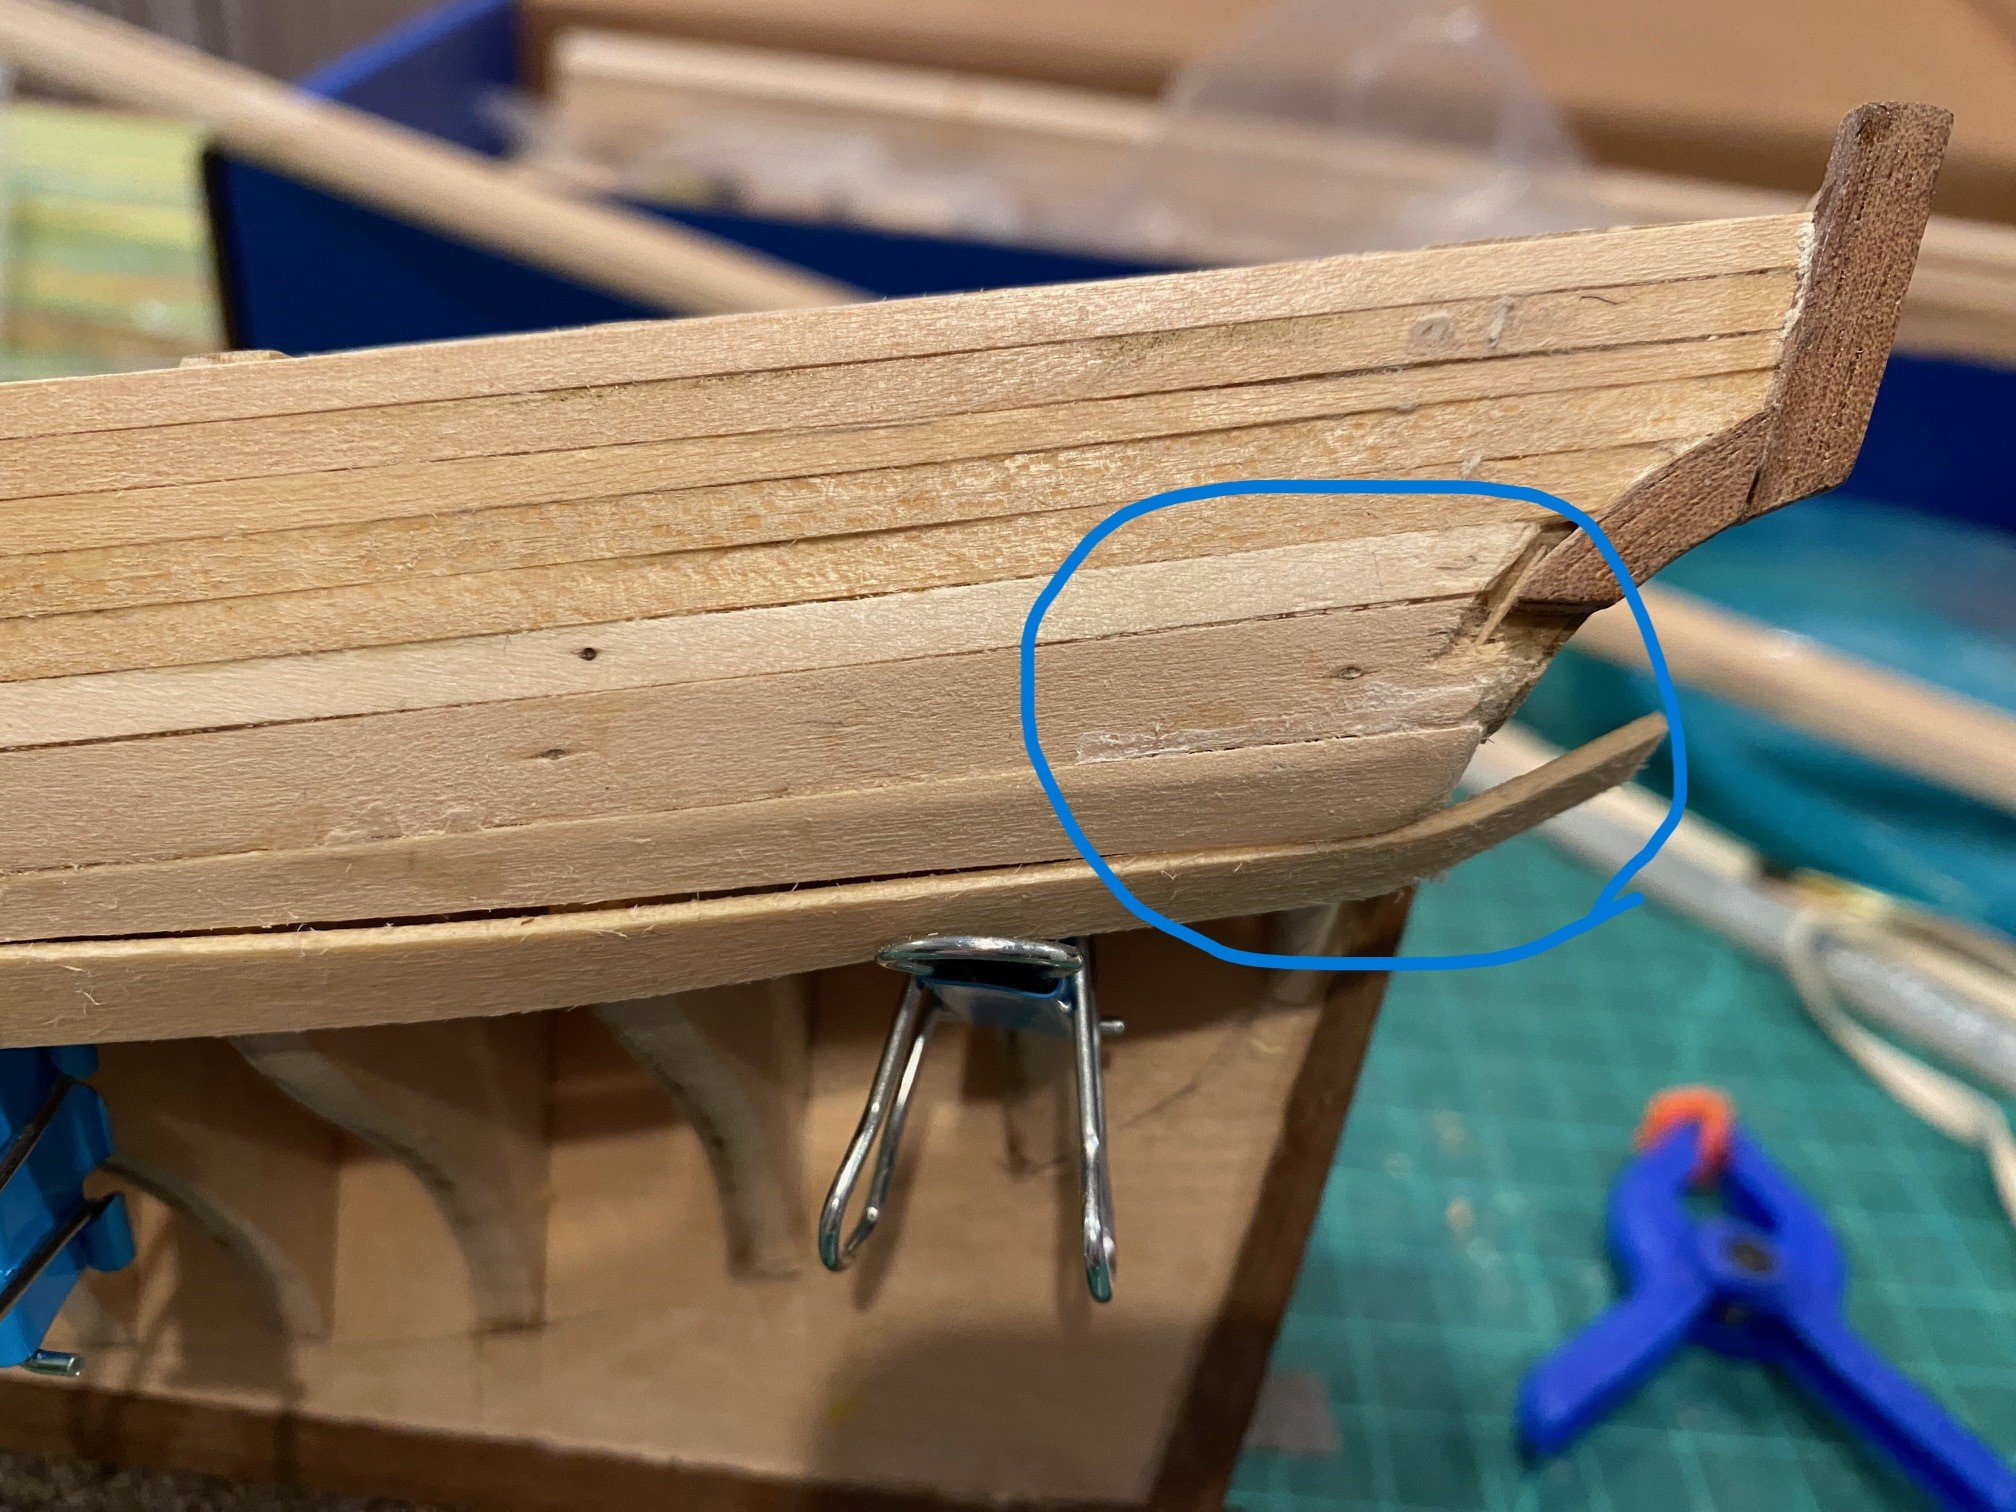
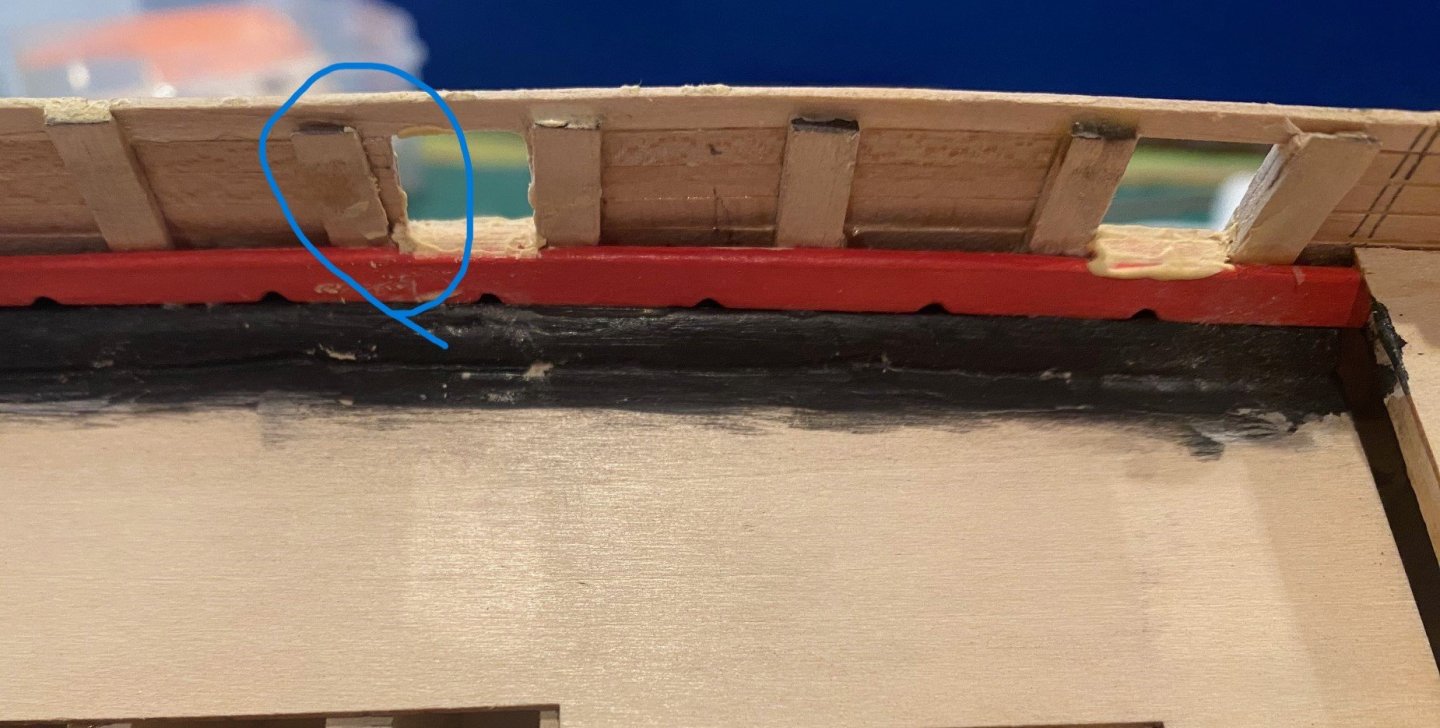
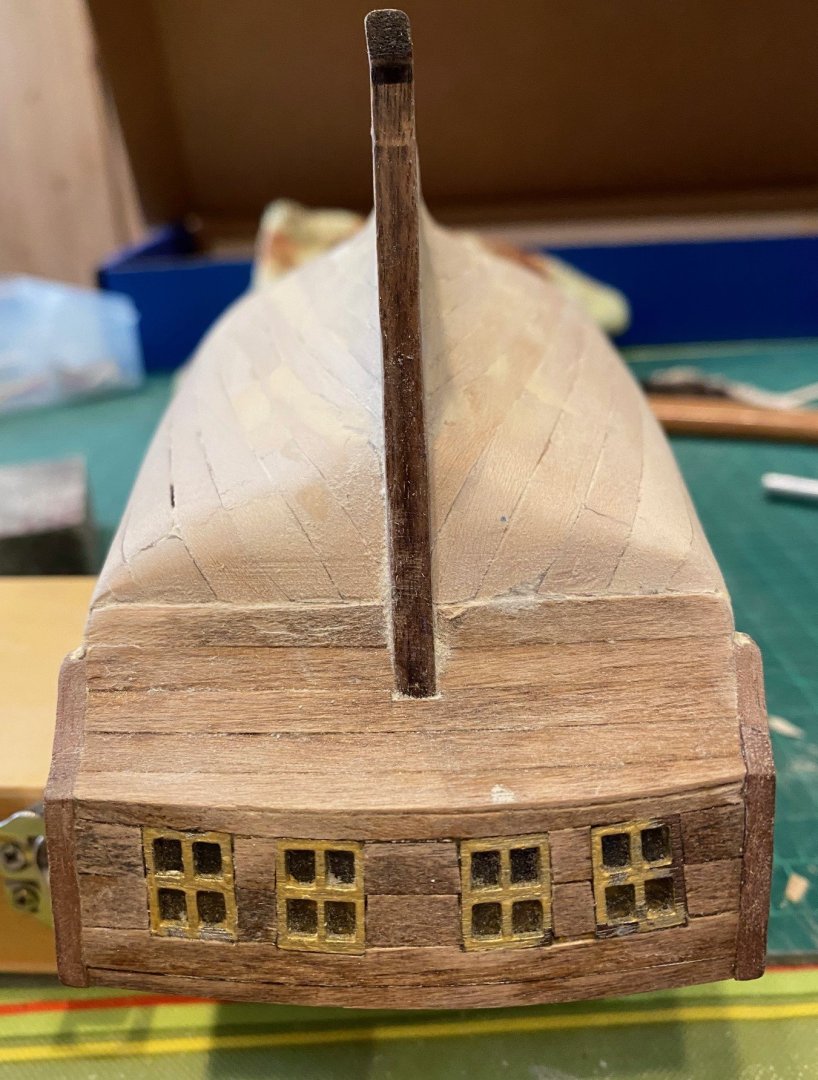
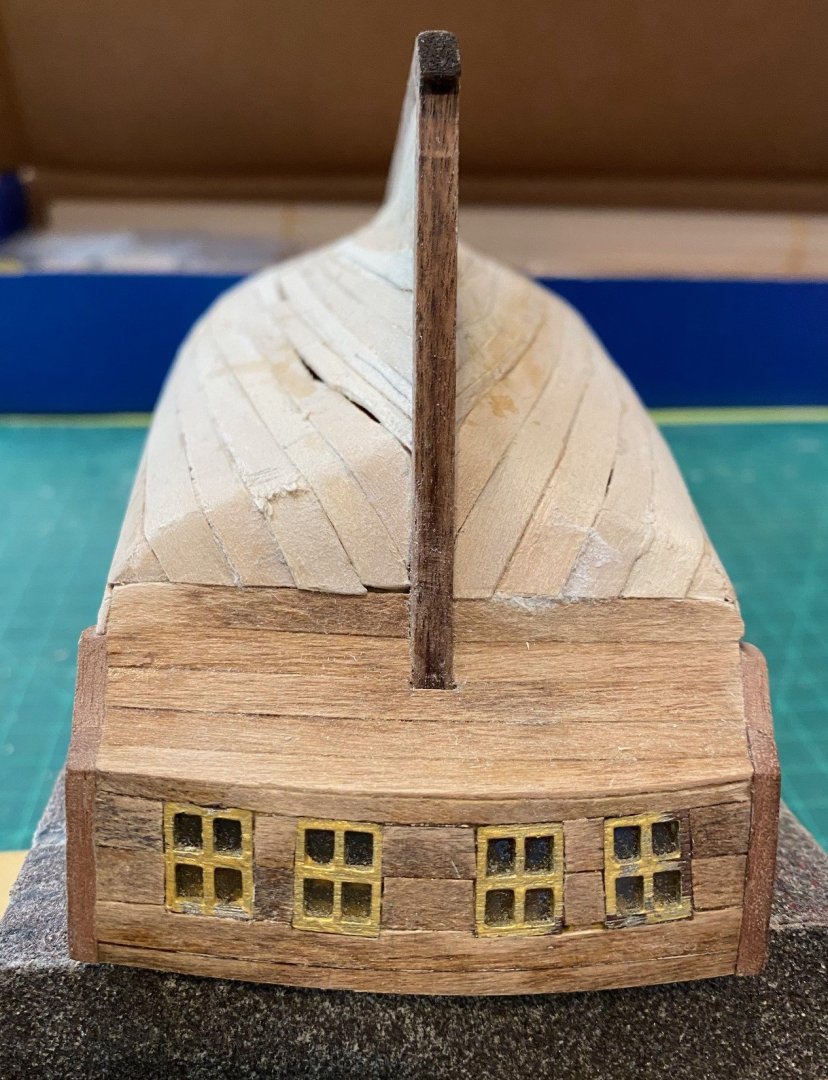
Added the aft deck bulkhead planking and finished the interior and exterior painting. Not the happiest with the finish of the interior, hopefully whey I get everything installed it won’t’ be as noticeable. I ended up with a gap at the fantail and aft ceiling plank, see circled pic below. I’m going to wait until after I plank the decks to see if I need to fix. Now on to the lower planking, a lot of reading of build logs, especially CISCOs, and R Lunt’s practicum from Luck Shipyard; as well as determining the layout and marking up the hull.


-
@ERS Rich Thanks for the idea to use a chisel and the other suggestions. Keep the suggestions coming, I do appreciate the input.
-
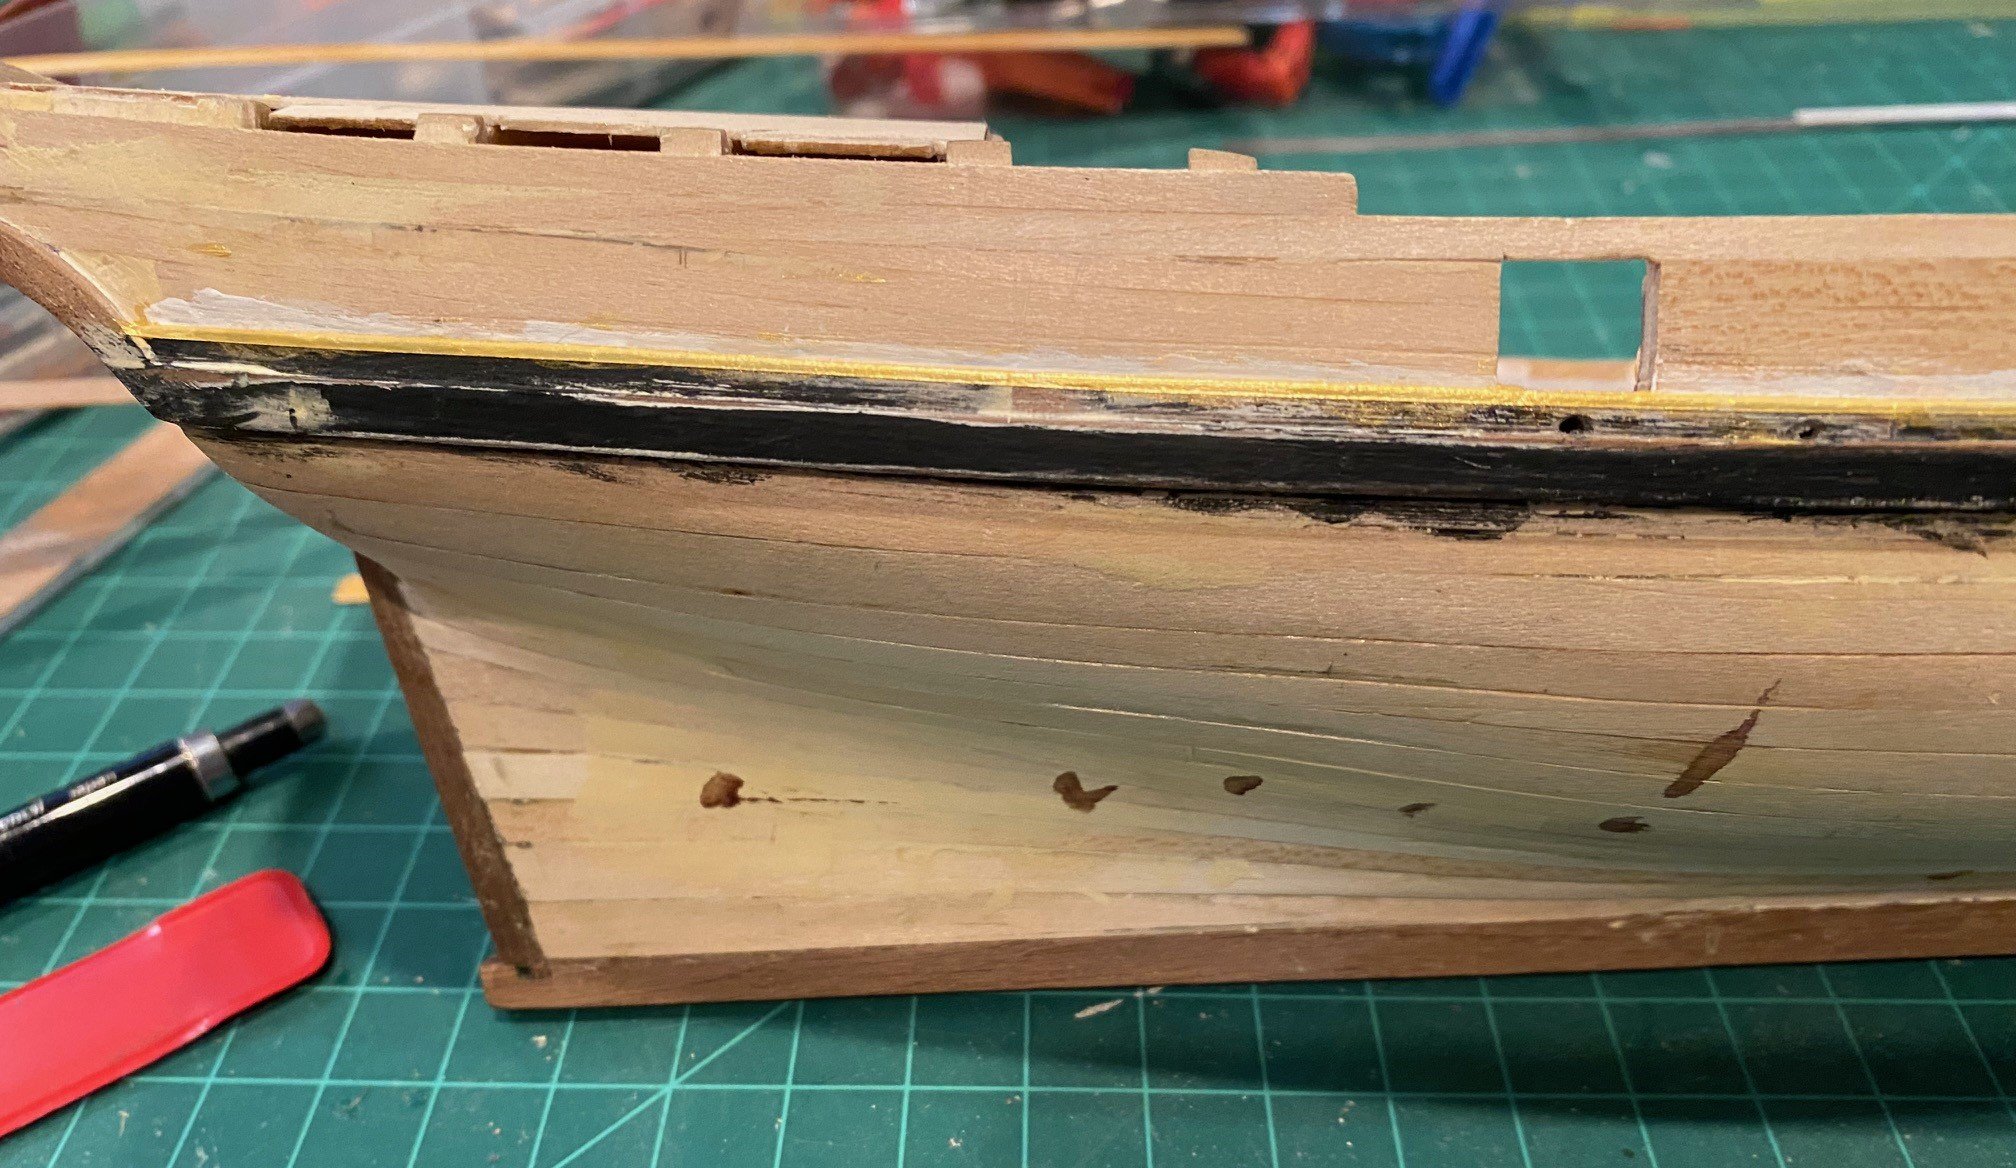
Painted the upper exterior. Not satisfied with the way the walnut finished so I did use wood filler to somewhat smooth out the surface. I don’t know if I’m doing something wrong but the walnut splinters as you cut it.

-
Hello! New to the forum, happy to be here :)
SkiBee replied to BuckyBoo's topic in New member Introductions
@BuckyBoo welcome. This is a great web site to learn about and ask for help on everything that is model ship building. Also, please update your build on your own build log, you get a lot of great help by doing that. -
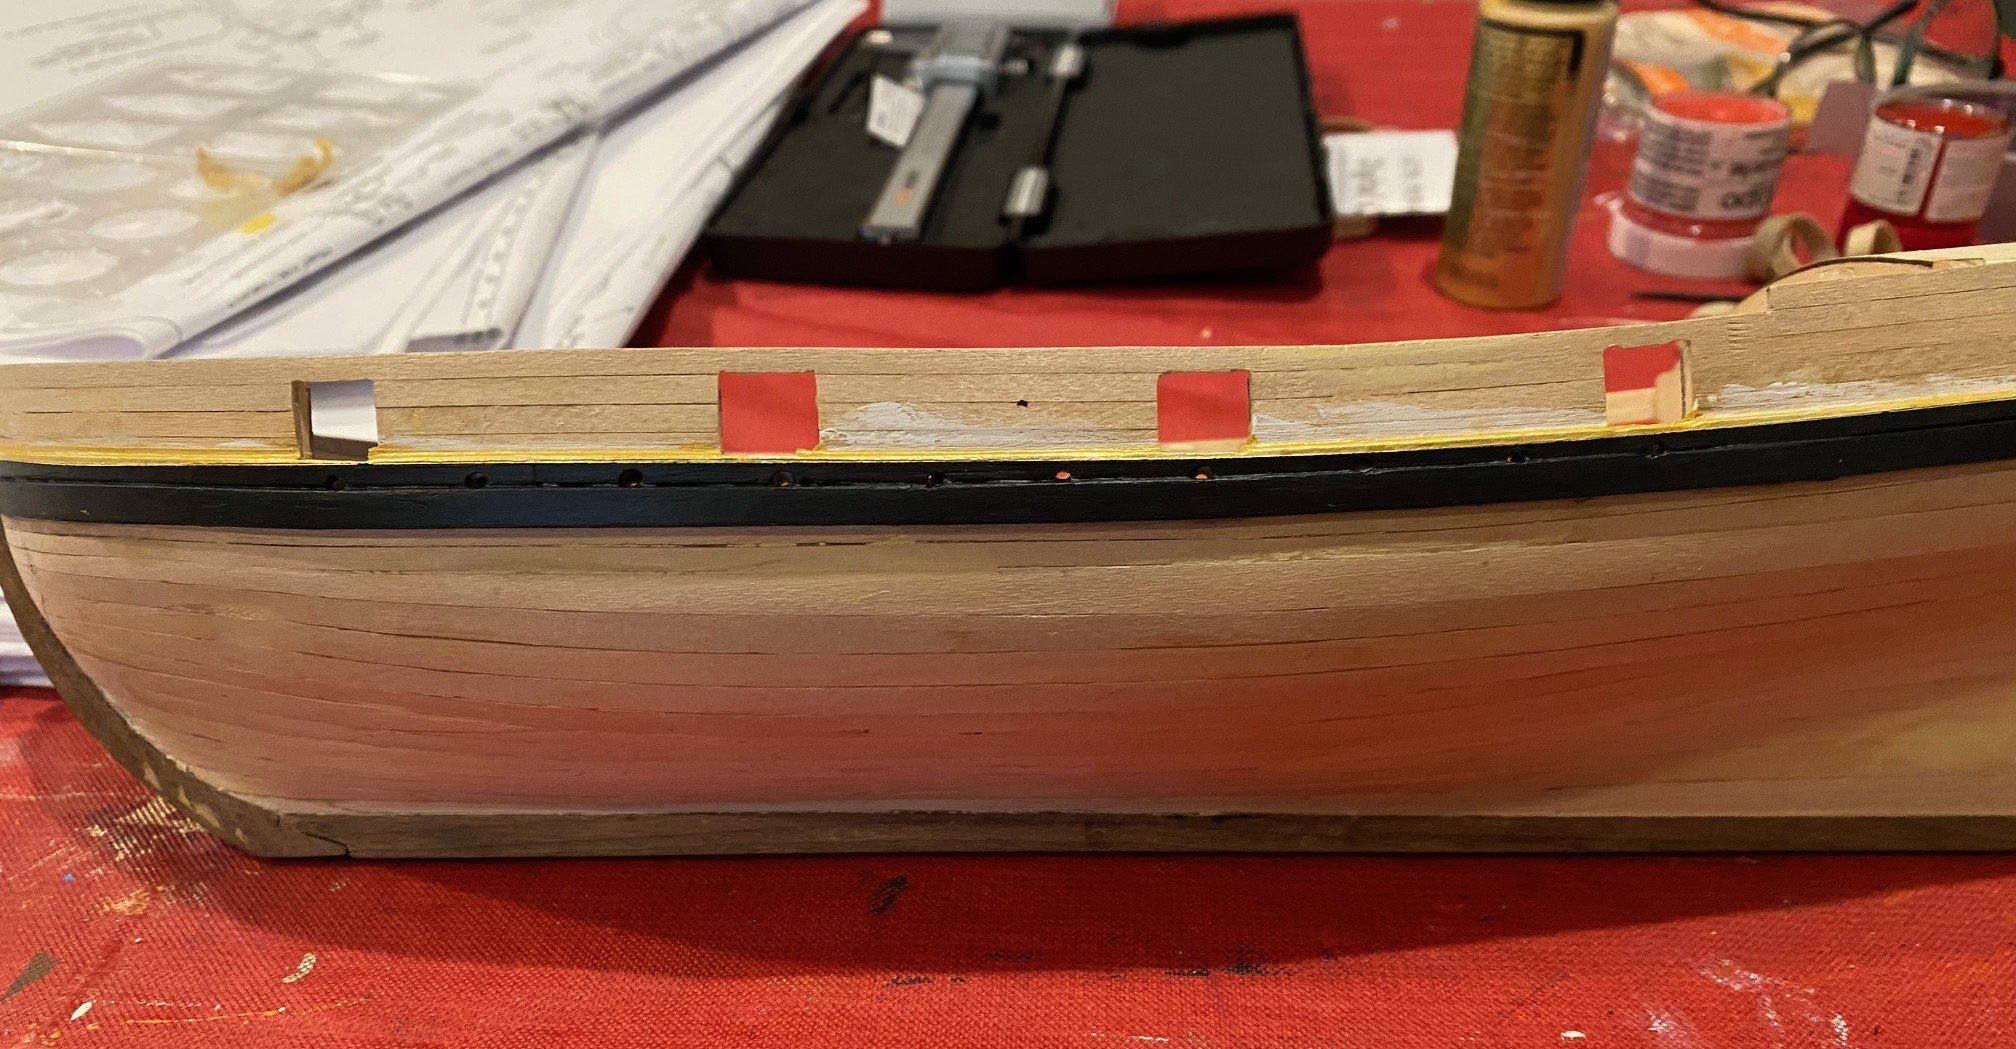
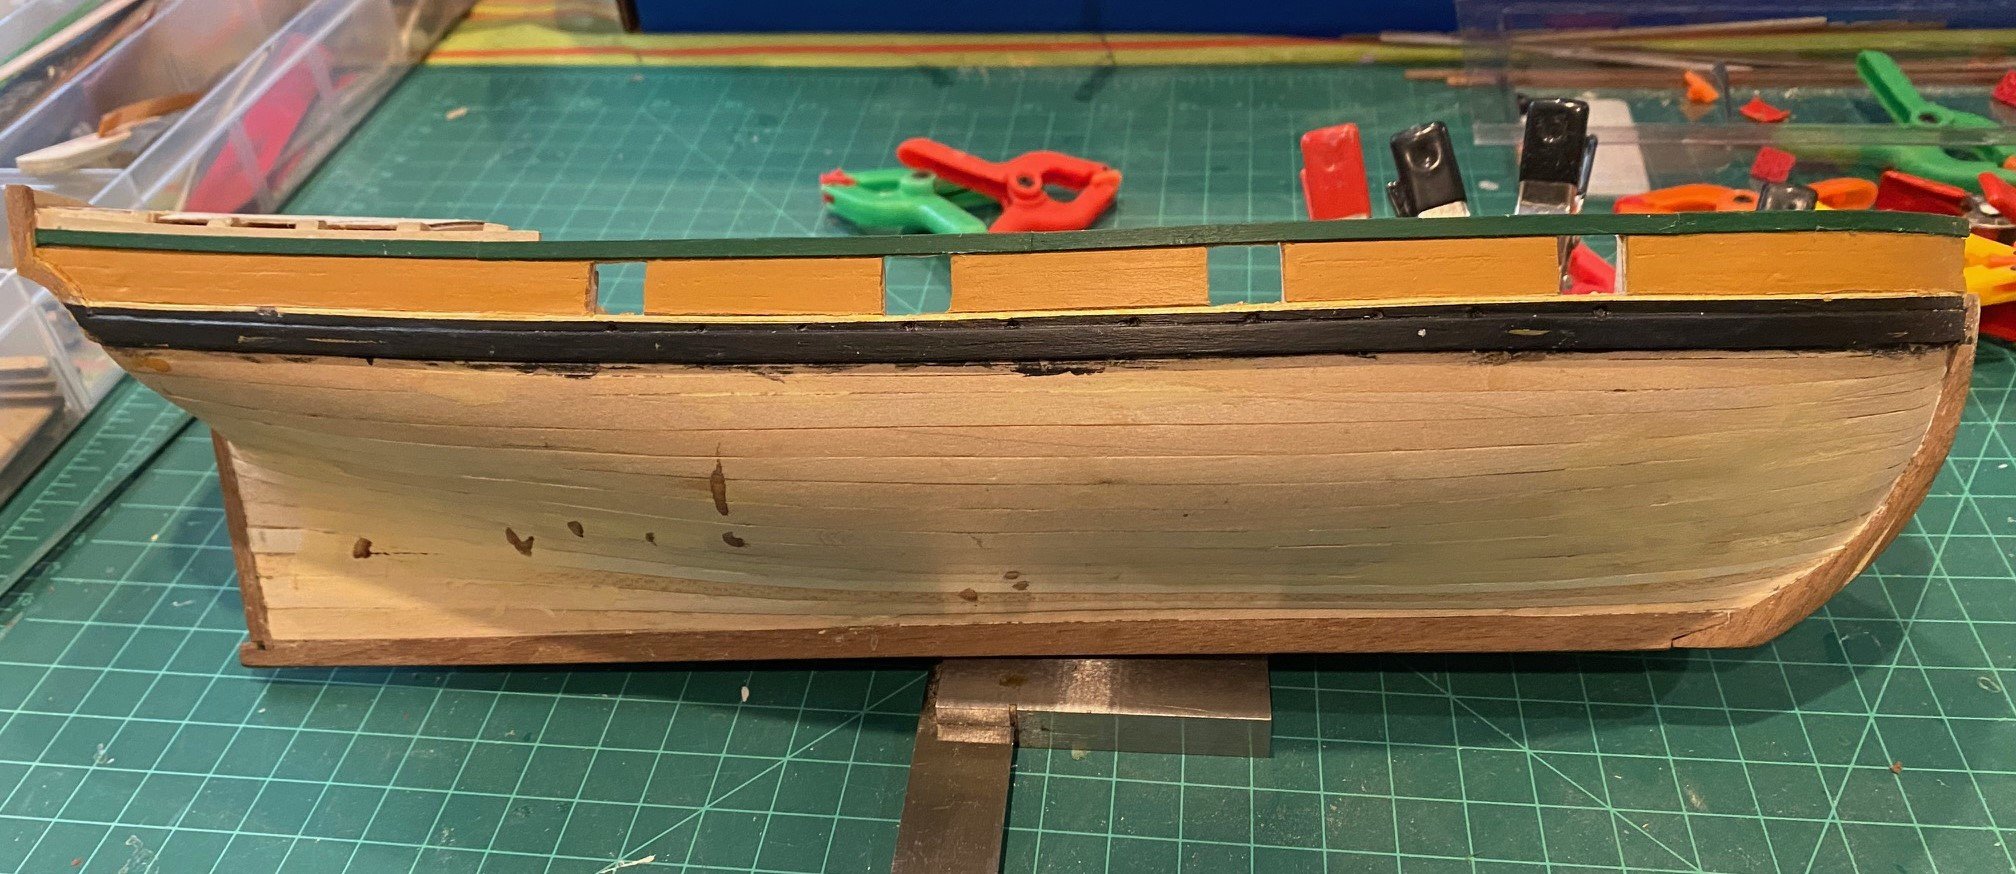
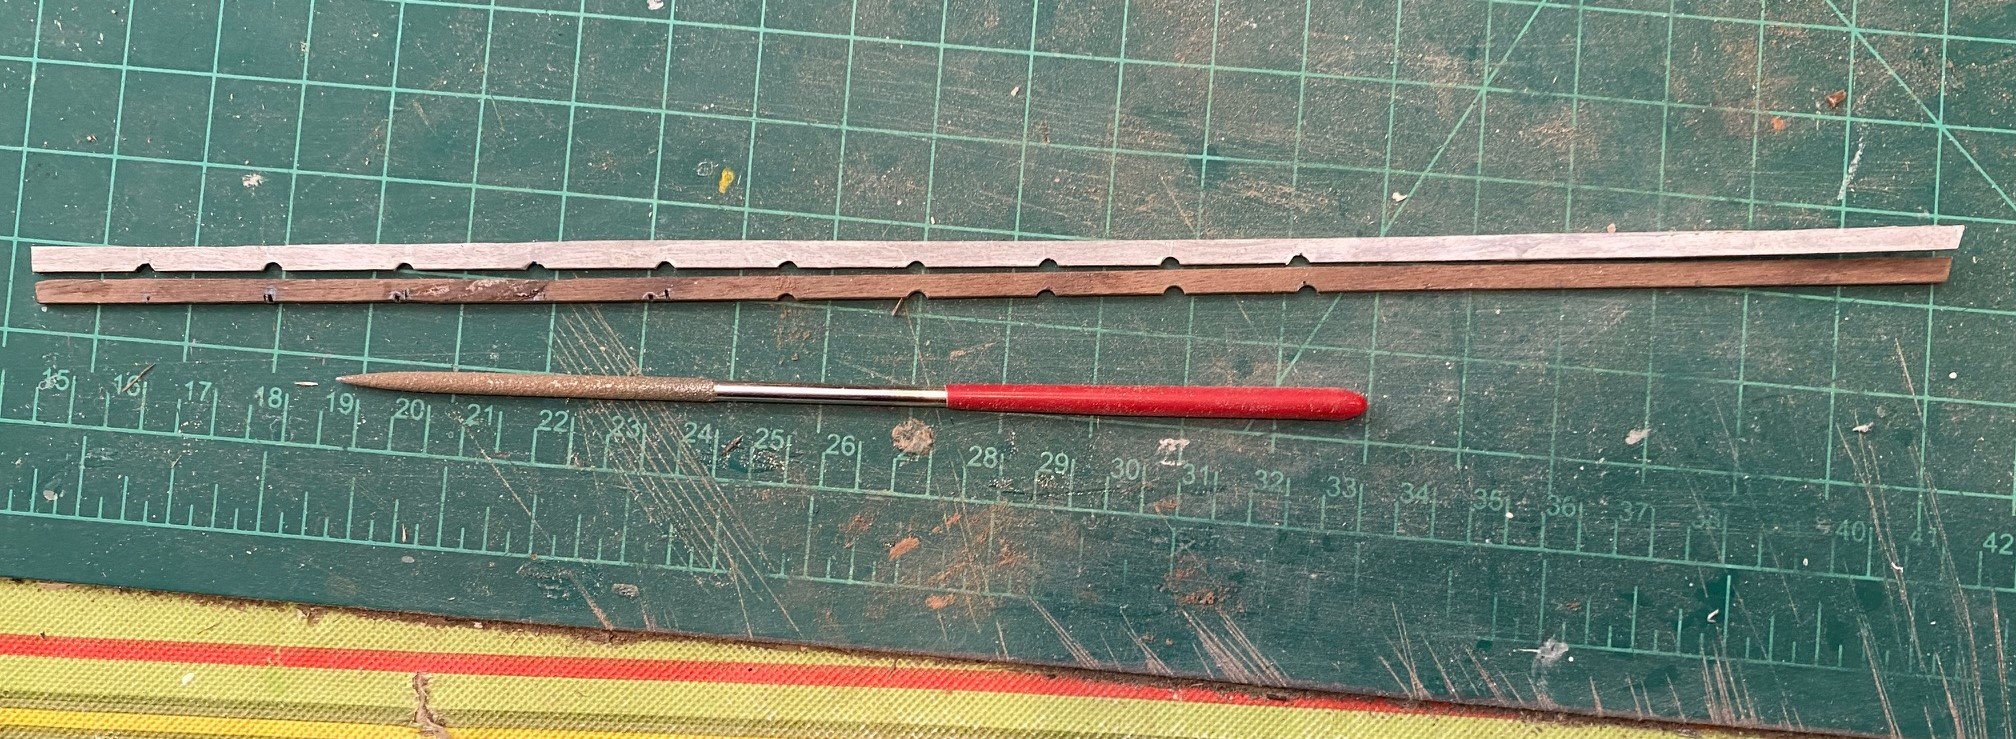
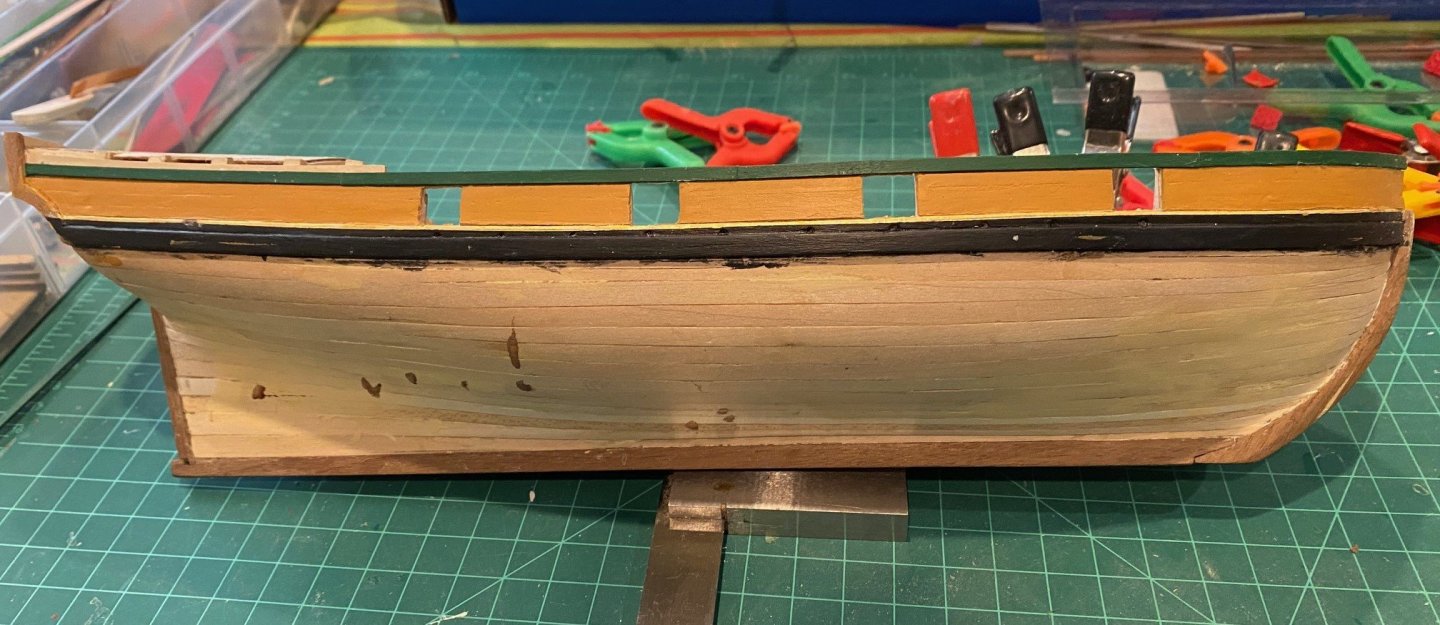
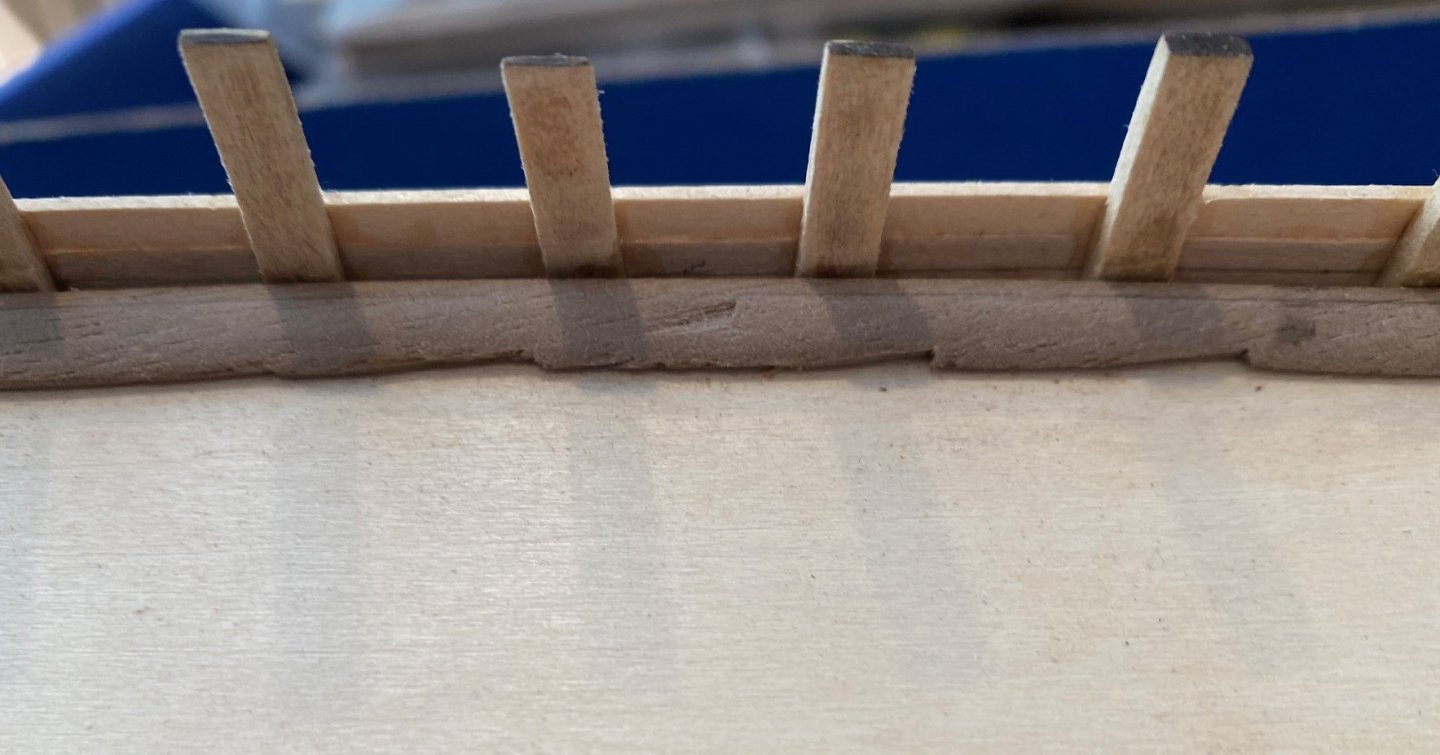
NOTE: I strongly recommend that if you don’t have a micrometer to buy one now. One of my biggest problems on this build was determining the thickness of the very thin planks. It was hard to use a rule to distinguish between 1/32-inch plank and 3/64-inch planks, as there is only 1/64 between them. Sometimes hard to distinguish even a 1/16 in plank from them. I’m afraid I used some 1/32 in the wrong place. Save yourself some trouble later on, buy one now. NOTE: I should have drilled a small pilot hole through the spirketting scuppers so you can align the black strake suppers to match the elevation of the spirketting scuppers. The scuppers pilot holes will also provide an upper alignment line for the wales plank. Installed the wales and black strake planks, after I filled the scuppers in the black strake. There was a about a 1/16-inch difference in some areas between the scuppers on the spirketting and black strake planks, I don’t think it will matter much unless someone looks real closely. Then painted the top of the black strake gold. Even though you normally paint dark colors after the lighter colors, I wish I would have painted the black first as it bled through the masking tape a little and now, I have to go back and fix that.


-
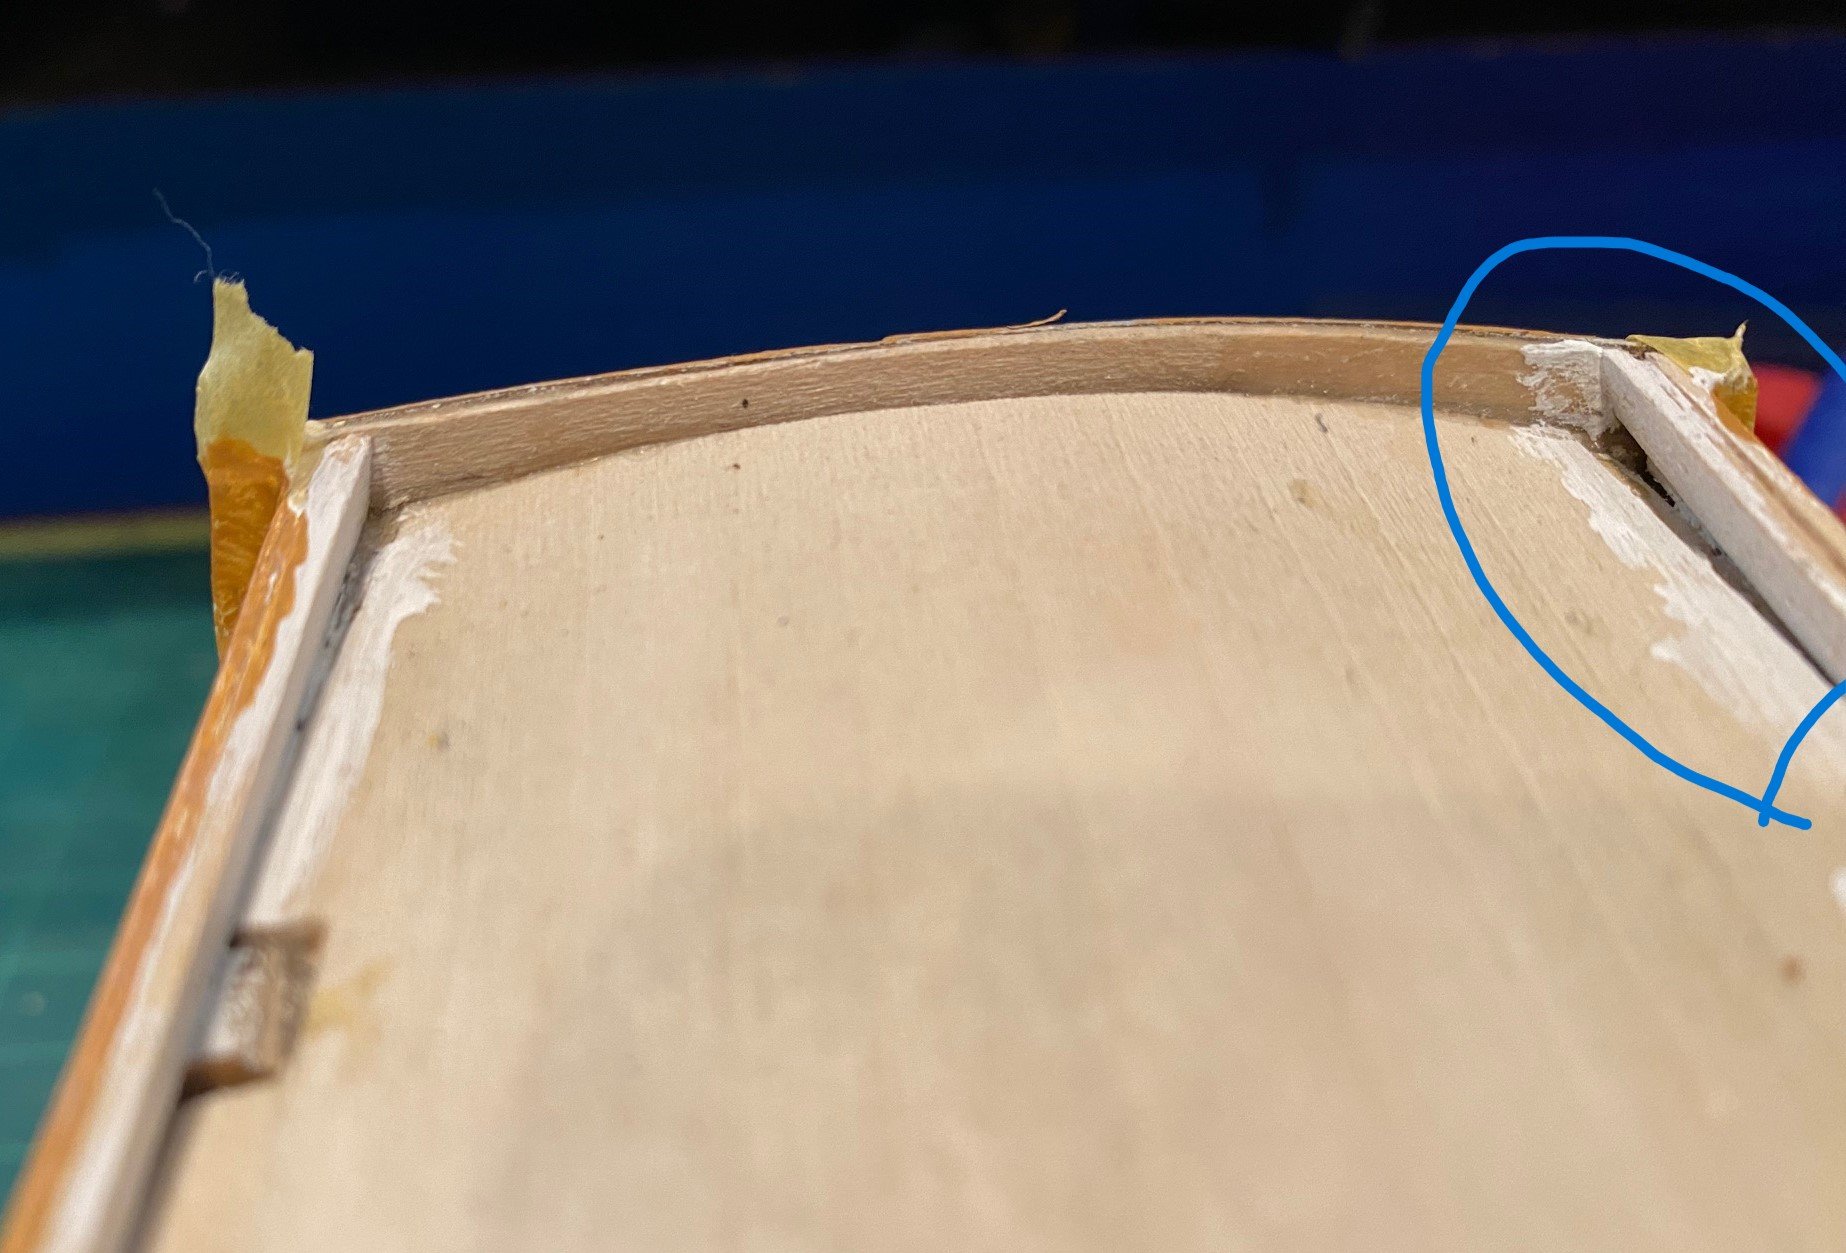
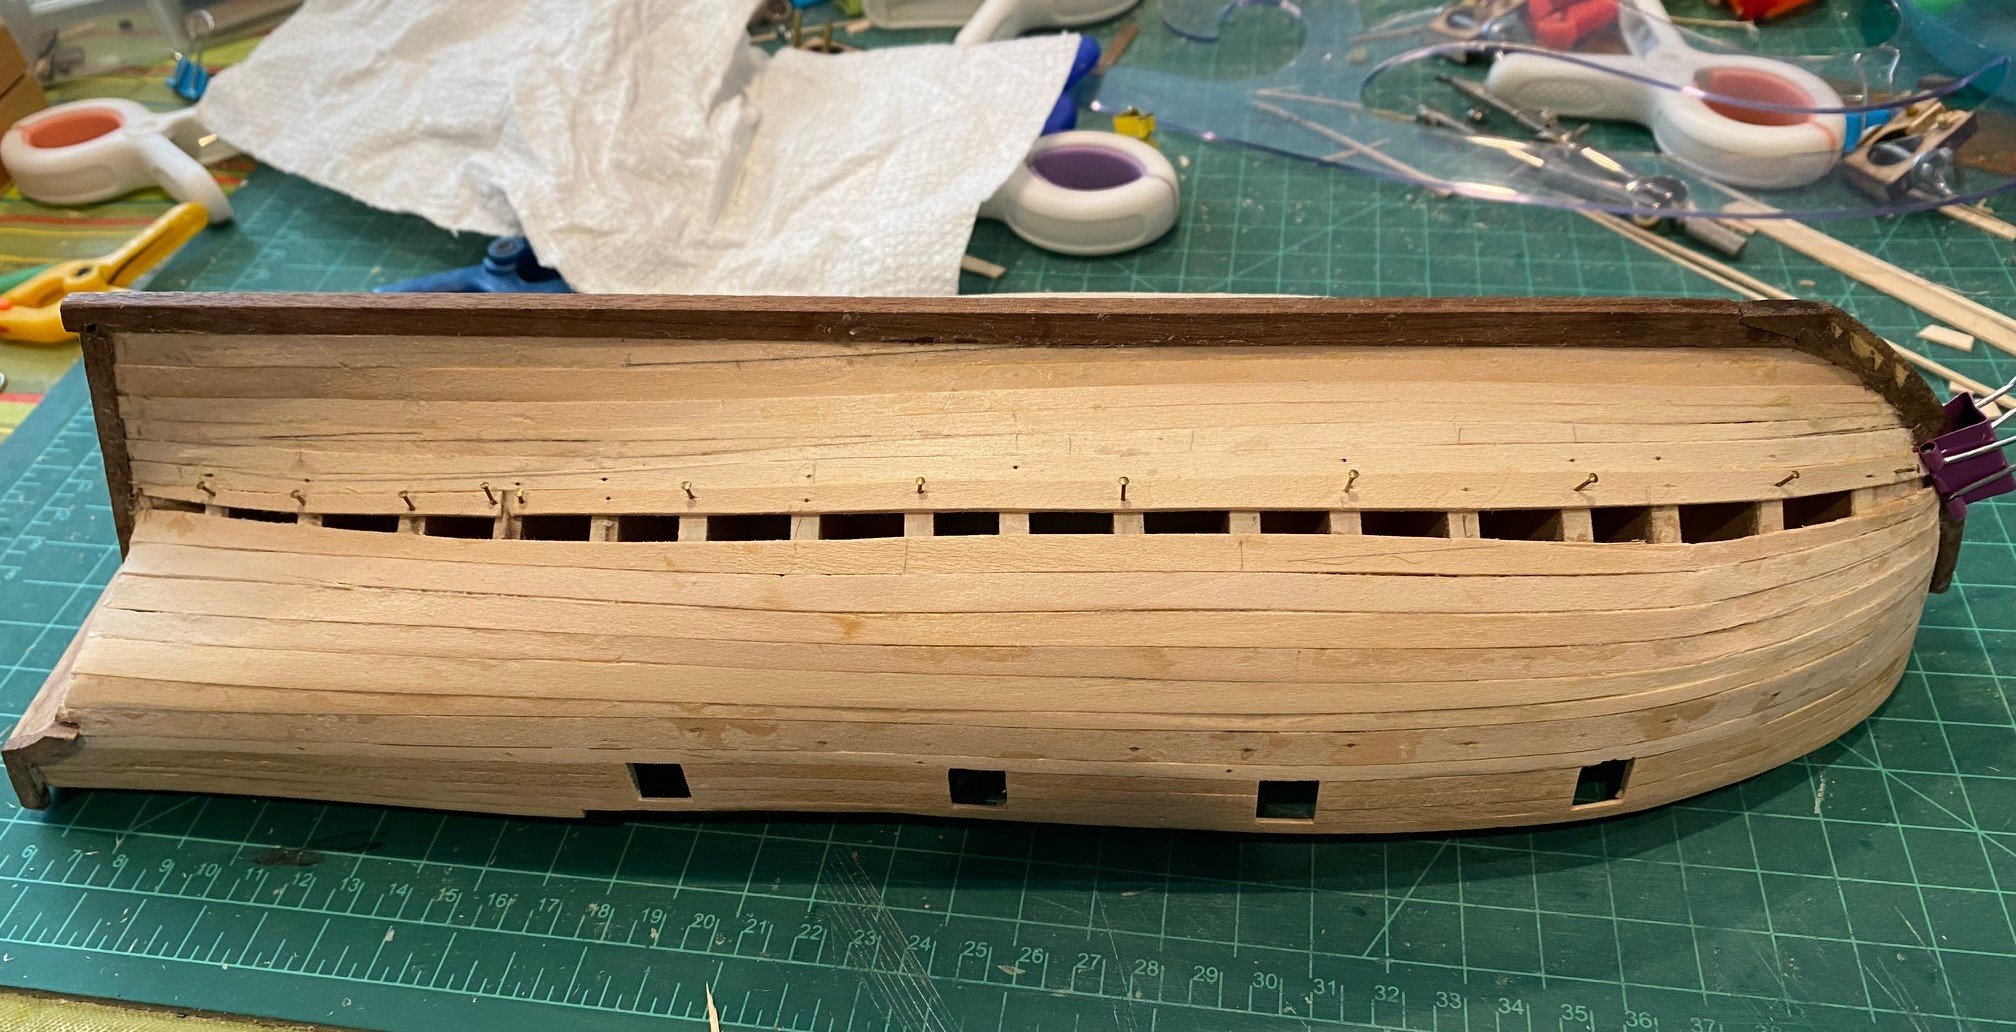
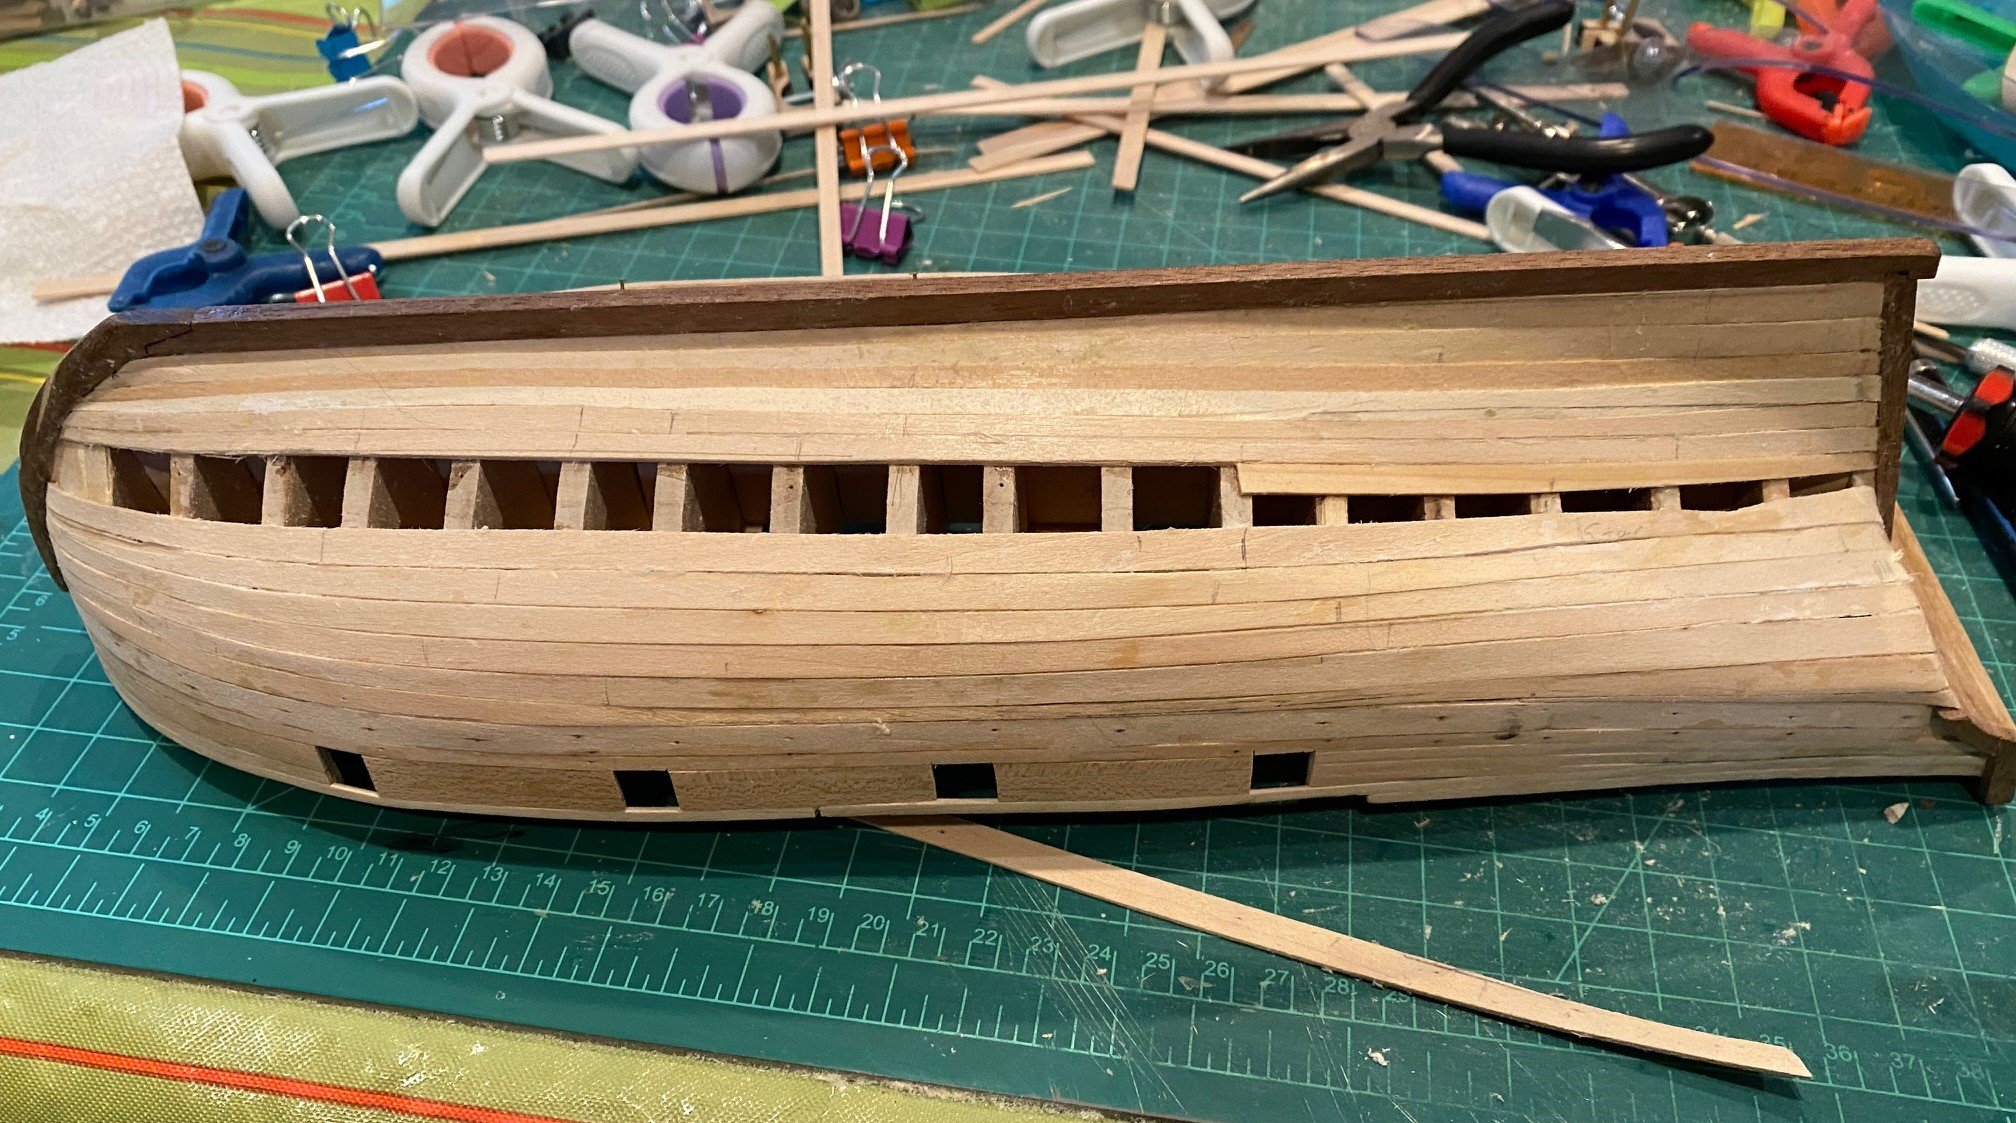
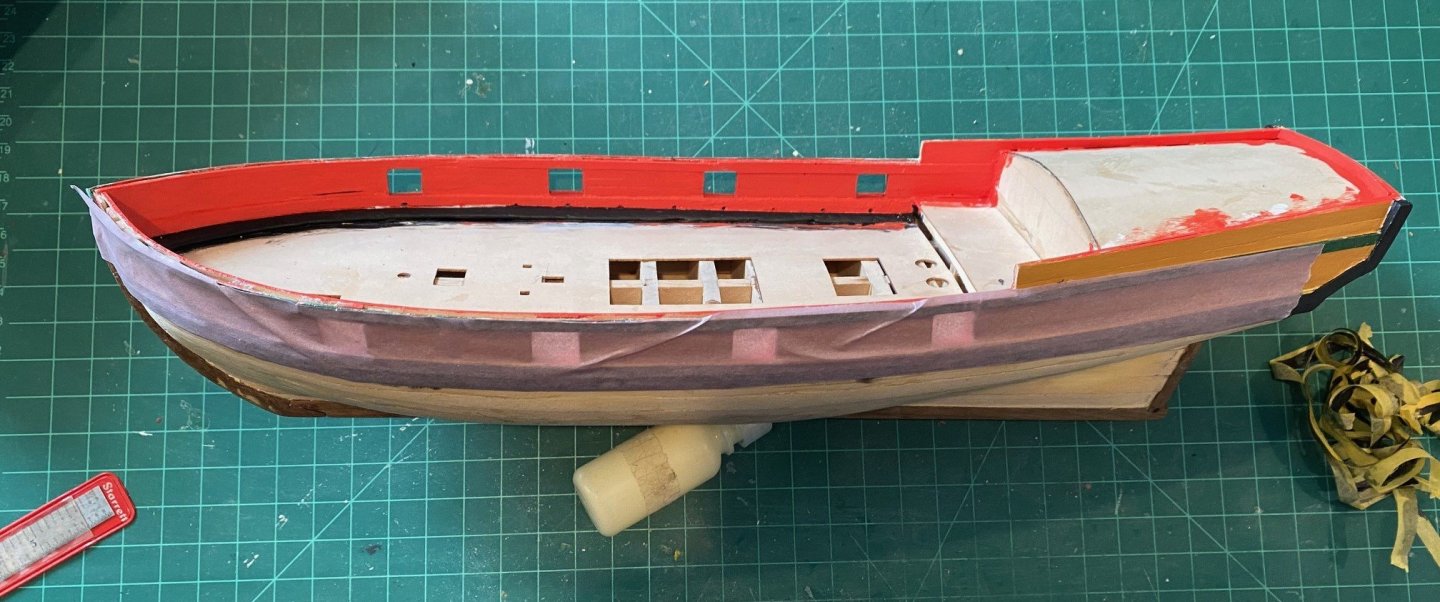
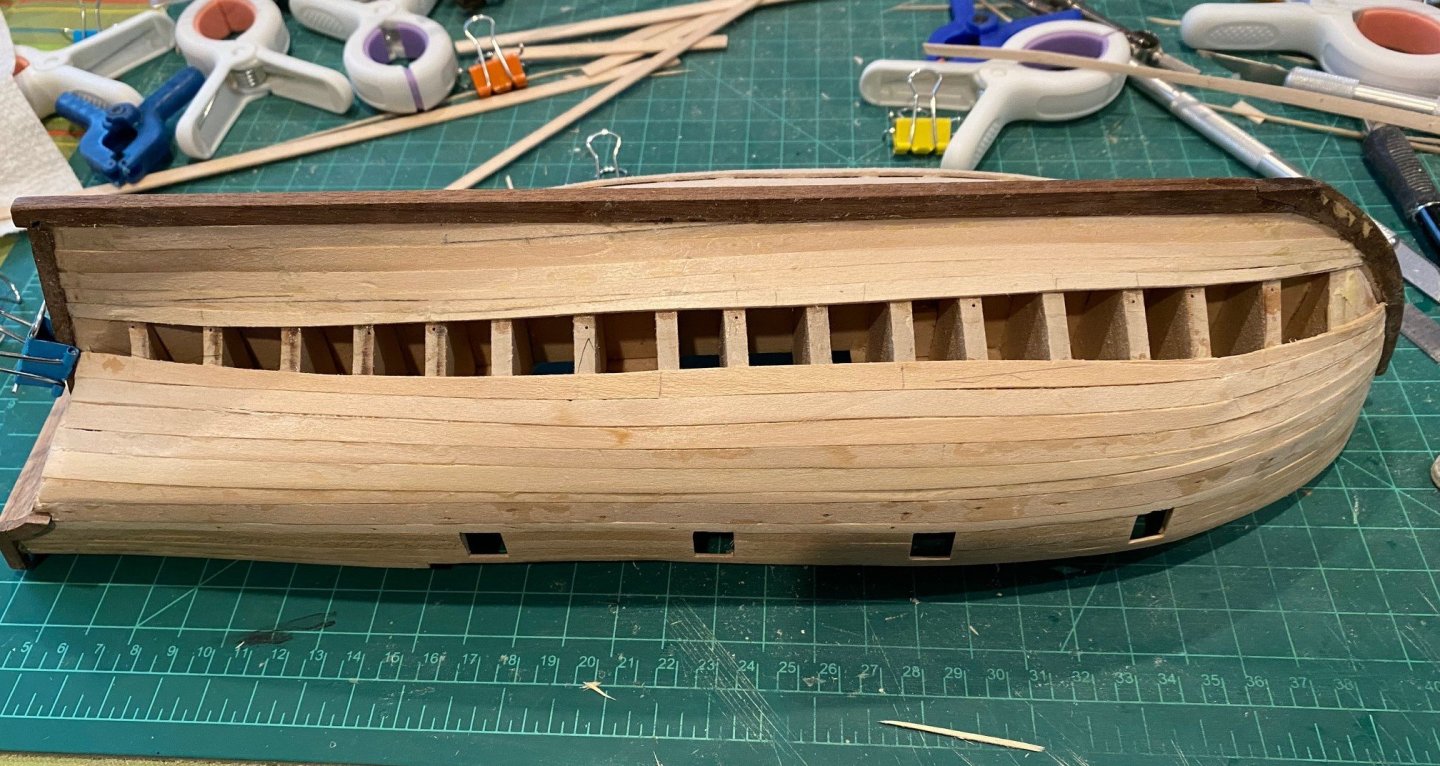
Installed the inner bulwark planks. When I trimmed the planks around the gunports, the walnut splinted a lot, should have cut them to fit better when installing them so I would just have to sand them around the gunport When I went to install the upper plank, noticed that on the port side there was a area mid-ship that was not covered by the plank. Not sure if I should cut the area out or add a sliver of plank to fill in the gap. But I’m going to wait until I install the upper external planks to see if there is a problem there. When you look at that area without the plank, you can see an upward bulge compared to the starboard side. Suggestions welcomed. Port Side Starboard Side
-
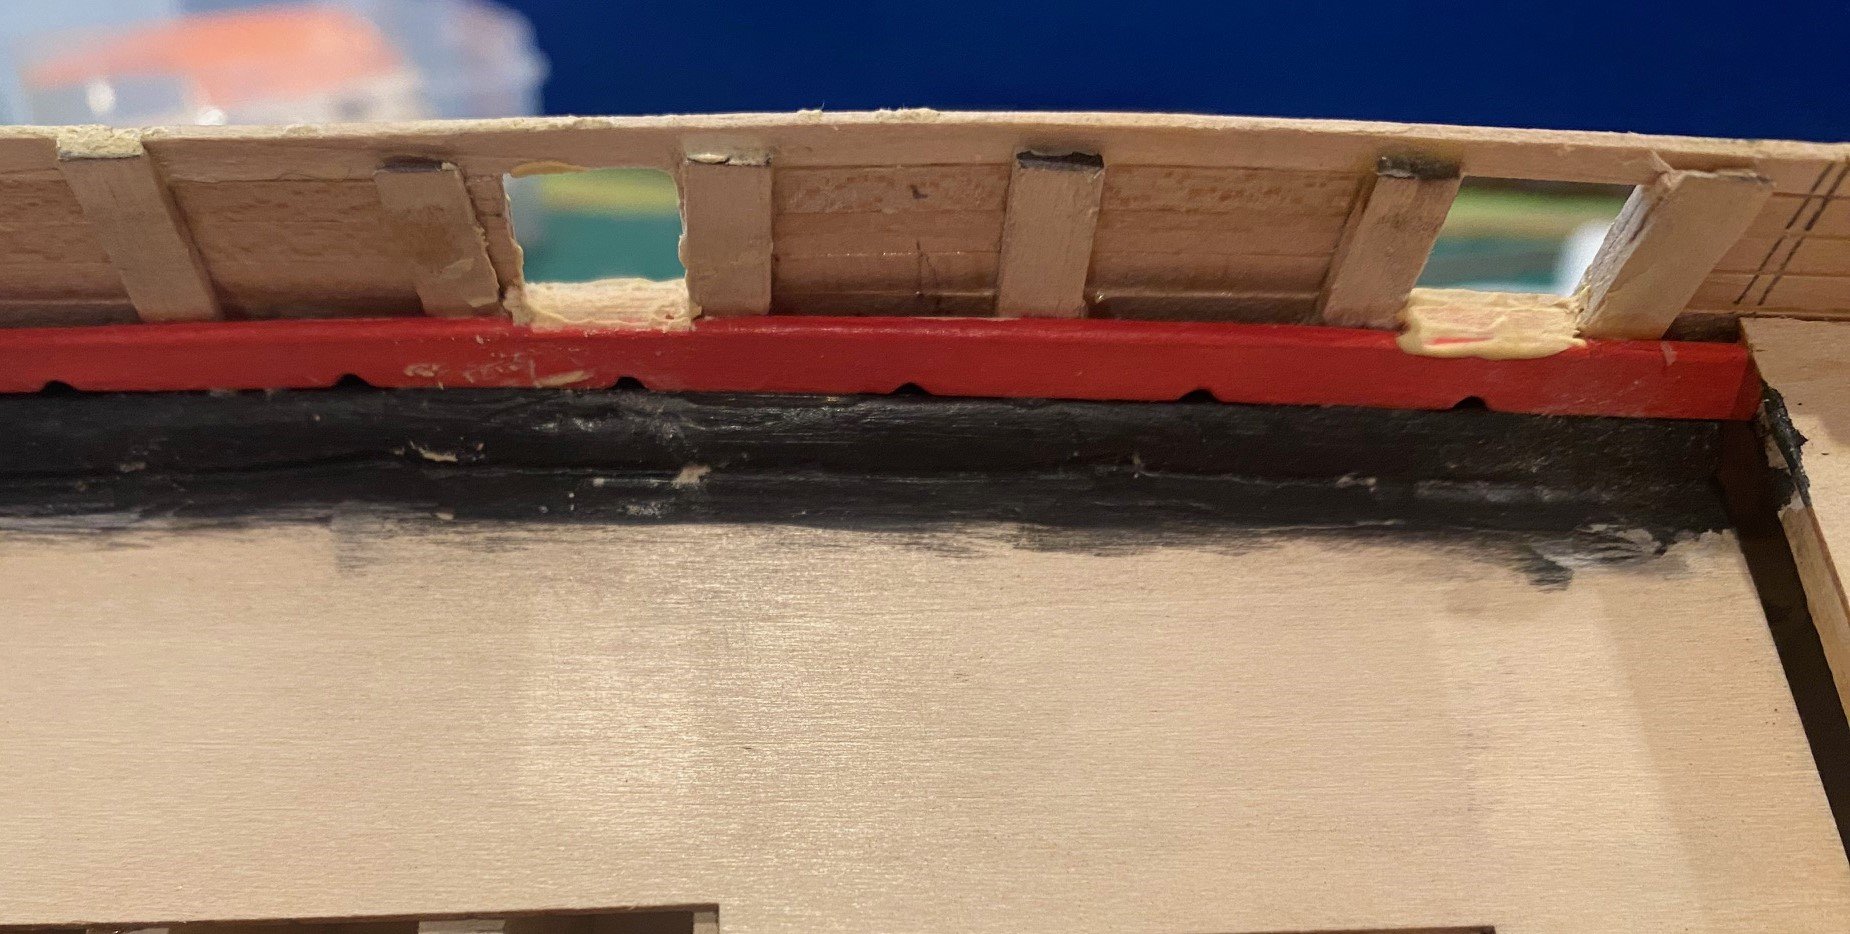
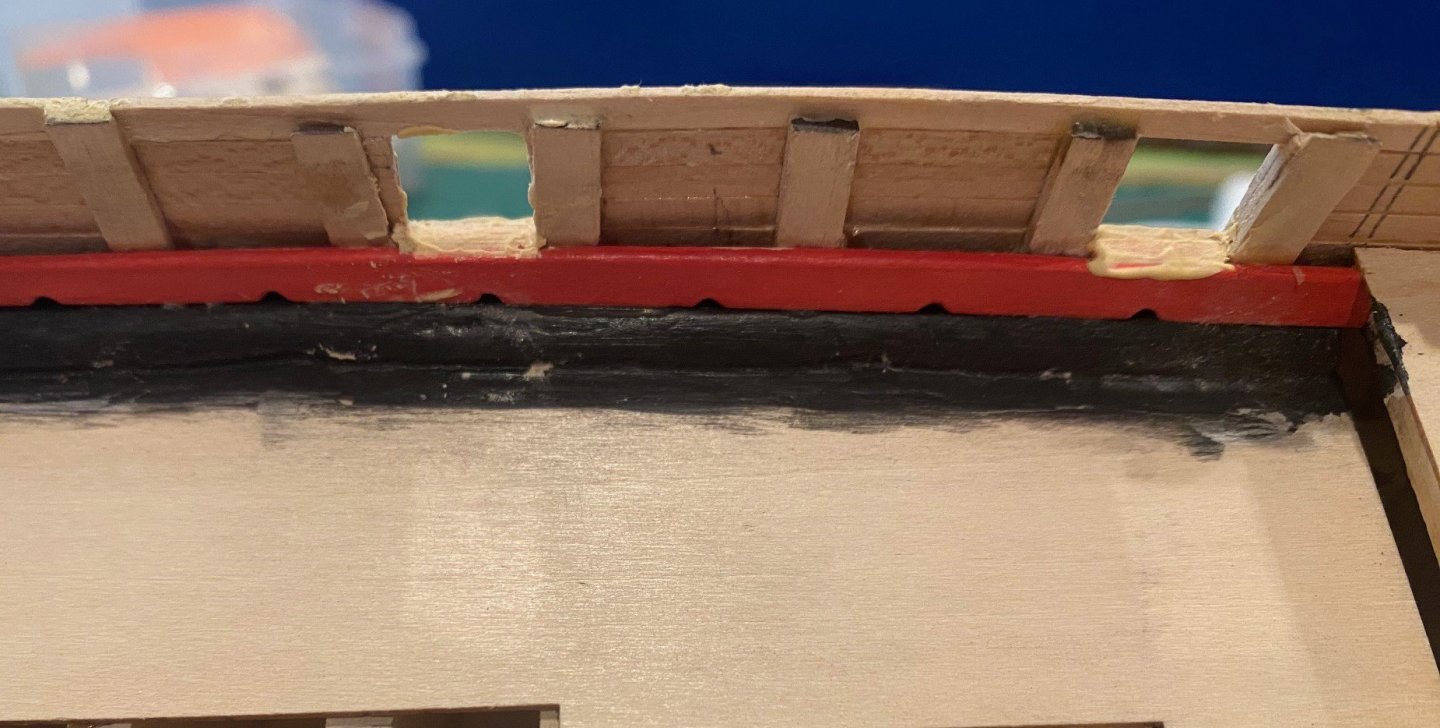
NOTE: you need to make sure you measure twice cut once. Also, the walnut is really hard to cut length wise with a knife and plane due to the strong grain wanting to drag you off line when your using your xacto, or end up with chunks. I wasted a fair amount of walnut planks with splitting, braking and such, to the point I had to use multiple pieces to get the length I wanted without wasting wood. I decided to do the internal planking before I did the Wales plank. Started to prep the Spirketting Plank, I picked the wrong walnut plank, to thick, to thin. Then I used the right planks and cut them down to 1/8” per the practicum. However, I found that doing that I ended up with a spirketting plank below the gun ports. The right height for my one plank was 3/16” or slightly under that and the other a little wider than the 1/8 inch. So, recommend checking the space between your final waterway and the bottom of your gun ports before you cut anything. I used a 3/16” round file to make the scuppers to the required dimension. The other problem I noticed was my bulkhead extensions were not the same thickness, especially by the waterway. So, I tried to reduce the thick ones and I’m not sure I’m going to need to shim the thin ones. This became very noticeable when I glued the spirketting plank in, it was at a slight angle instead of vertical. I painted the waterway flat black, and the spirketting plank a flat red. I painted a scrap piece of walnut with the kit’s bulkhead red and a Tamiya flat red to see which one I liked. The flat red was redder than the bulkhead red, but I decided to try the bulkhead red since I can topcoat with the flat red later. I did use white primer on both the waterway and spirketting plank which gave a truer color to the final coats of color. I installed the lower sills on the gunports, had to use a little putty to fill in some small gaps. Also, I noticed that some of the gunports have a gap between the gunport and bulwark extensions. This would leave a noticeable gap in the finished model. So, I’m going to have to fill them like the gunport sills.

-
Jig for planing planks?
SkiBee replied to Pitts2112's topic in Building, Framing, Planking and plating a ships hull and deck
I to use a Xacto and steel rule, but I do draw a line first witch gives a little indent, then I use the back edge of the Xacto to deepen the indent once or twice then cut. I'm going to try the sandpaper on the rule since it seems to slip a lot. -
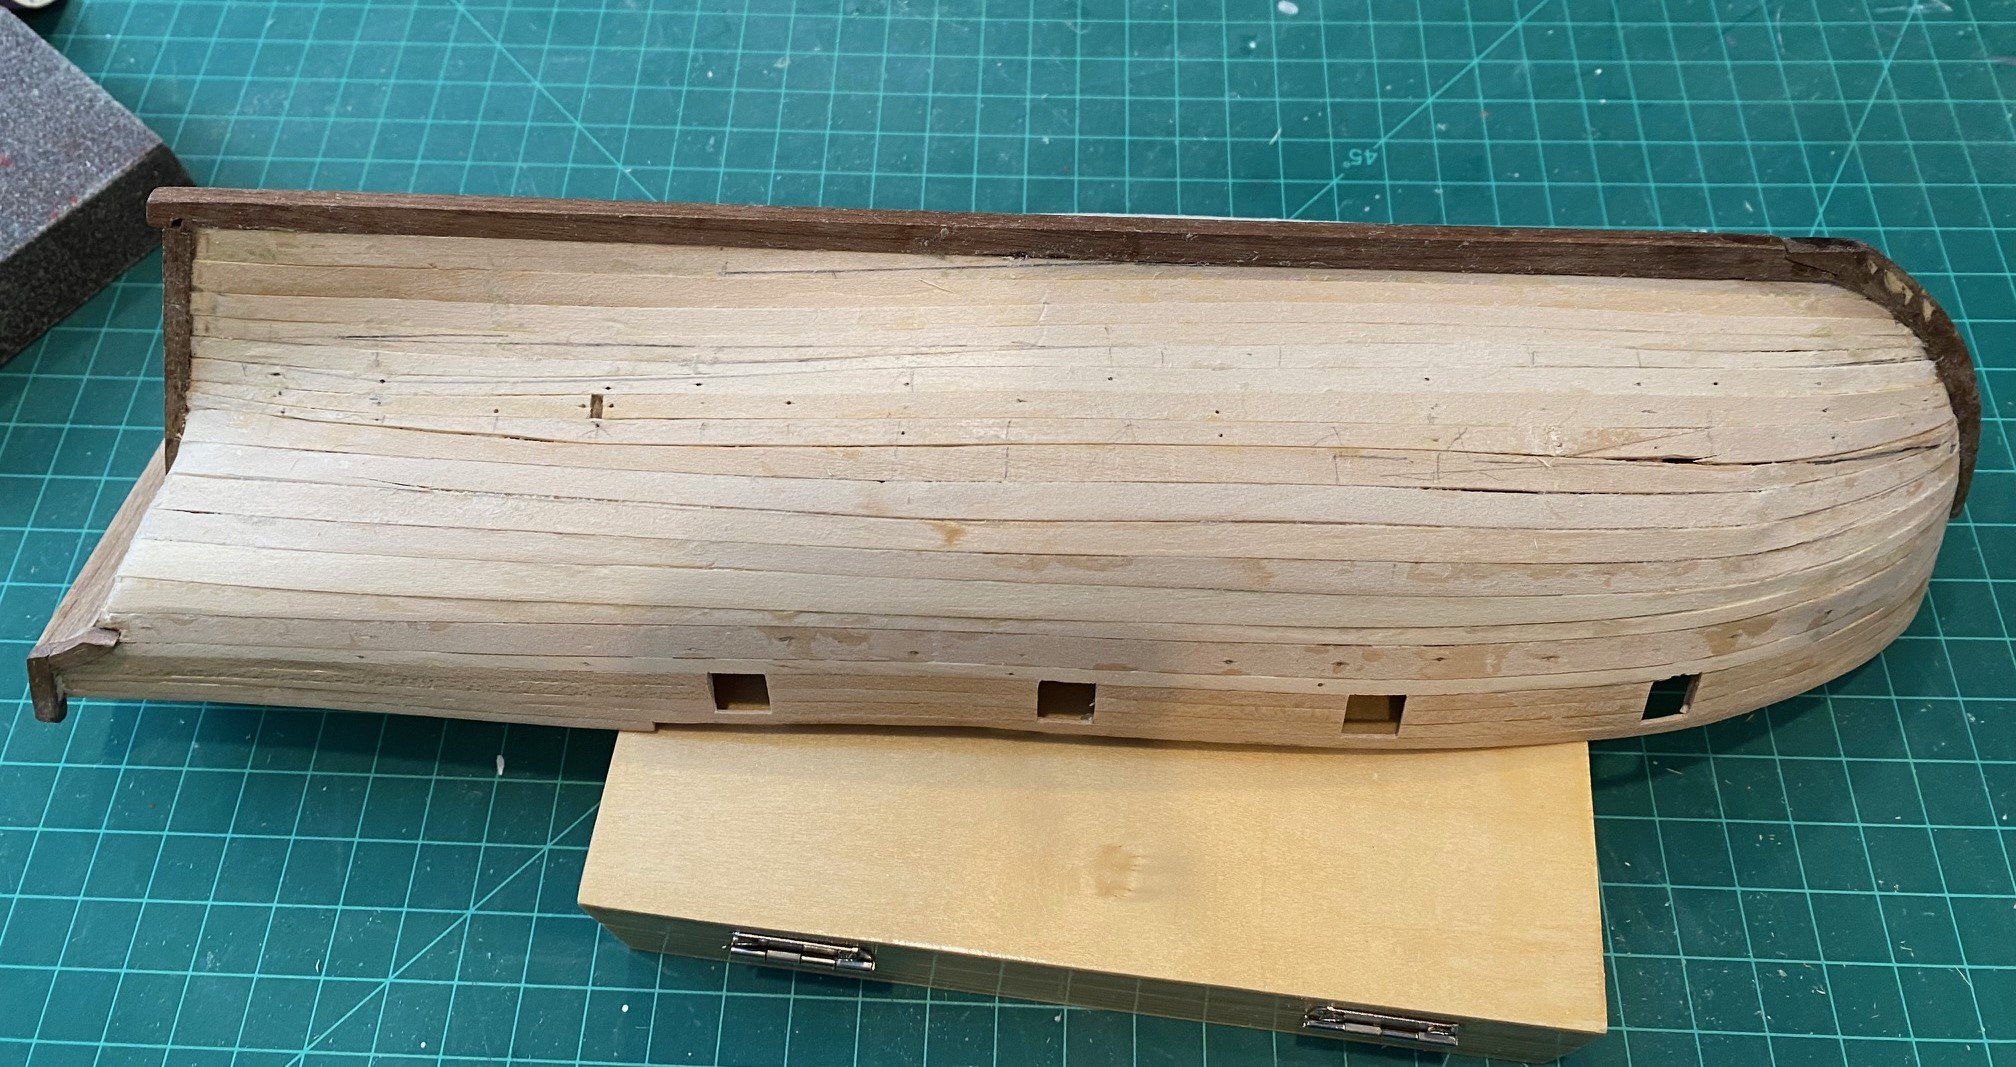
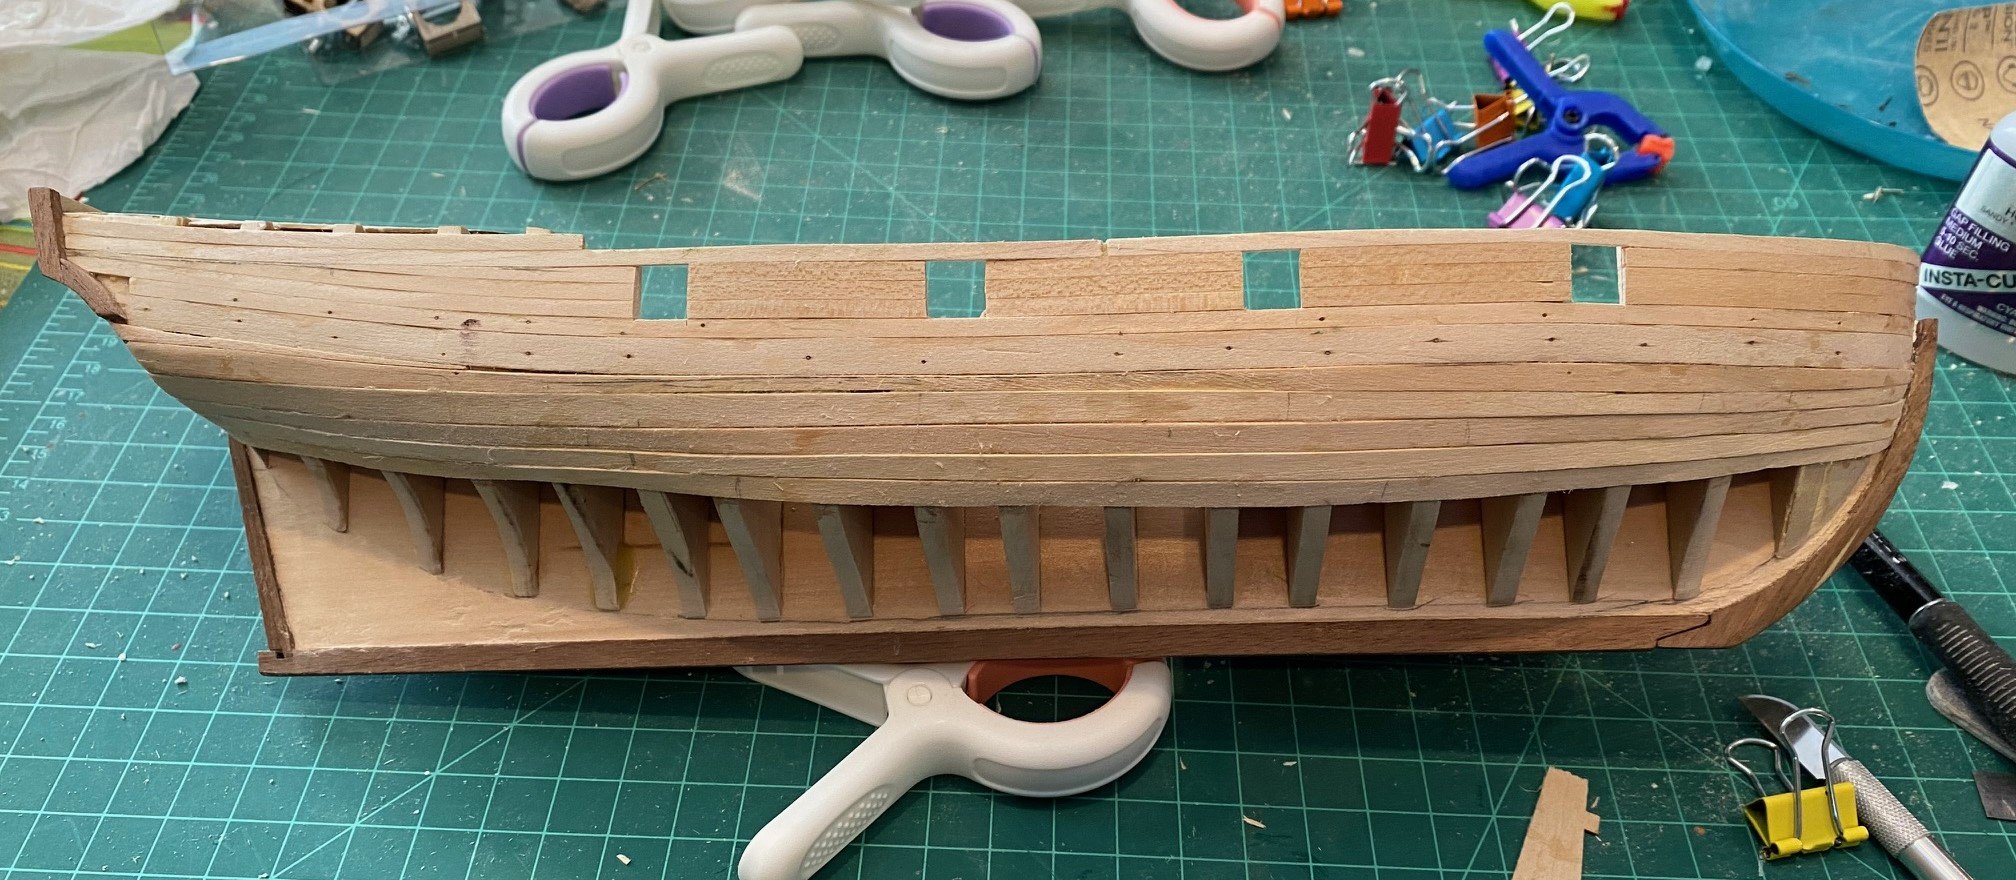
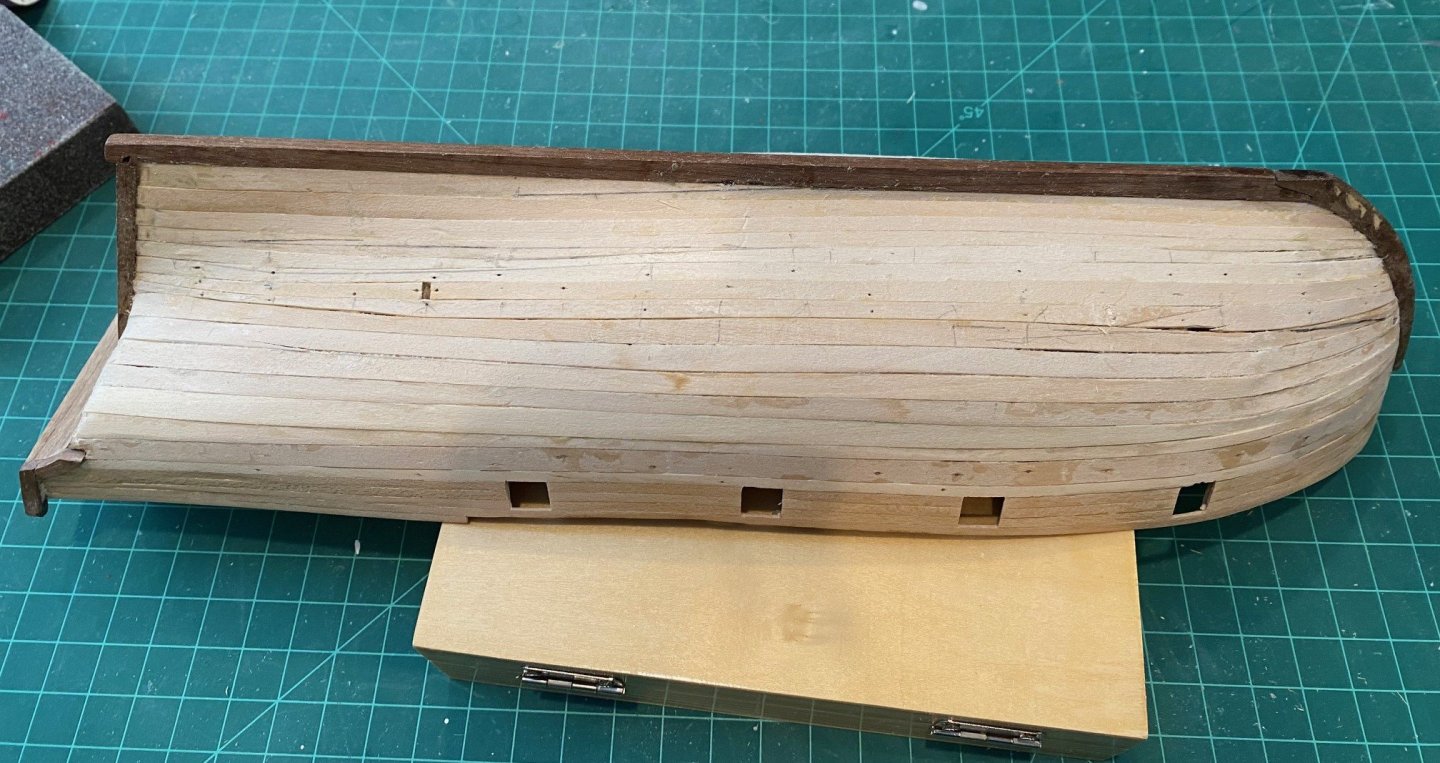
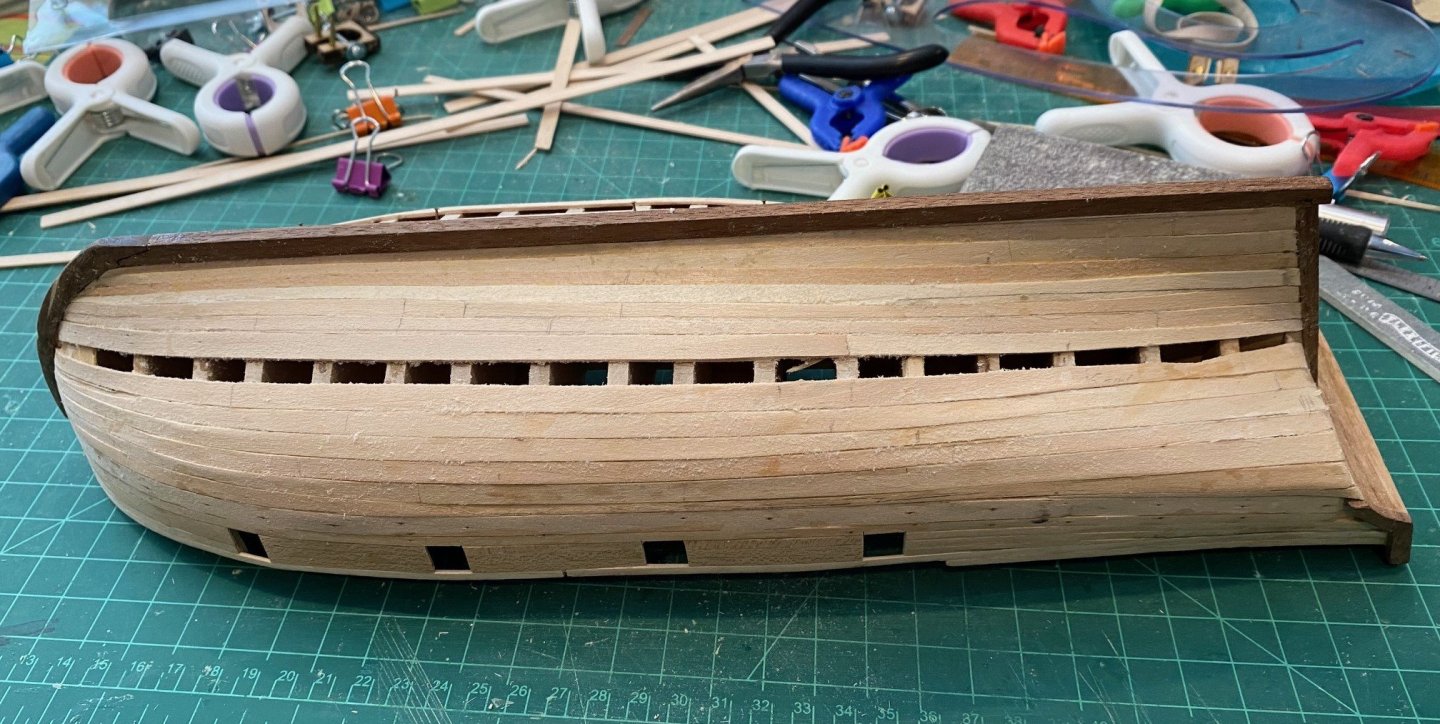
FINISHED with the first layer of exterior hull planking, filled and sanded smooth as needed. On to Ch 3 of R. Hunt’s practicum from Luck Street Shipyards and a whole lot of help from CiscoH build log.

-
Welcome, I enjoy both plastic and wood models as well. I started on the unarmed Long Boat; it was a great learning experience. However, halfway through I changed and started the Model Expo 3 boat shipwright series. I think this was a good idea for me as it gave me more knowledge before I returned to the Long Boat. Great start and hang in there during tough times.
- 33 replies
-
- 5
-
-
- Model Shipways
- 18th Century Armed Longboat
- (and 1 more)
-
I decided to make the two remaining planks about even in width as I could. I used the larger ¼ in plank for the fwd half and the smaller 3/16 in plank for the aft end on both planks. Otherwise, I would have used one full length plank for the one run and the second plank would not have been a full run. Glued the last two planks on the Port side. A few gaps, bumps and depressions to fill and sand out, along with smoothing out the first layer of planks.

-
Welcome! I restarted my wood ship building with the Trio also. I learned a lot and good practice for bigger challenges in the future. Make sure you start a build log for each ship you build; you will get a lot of help. Also, ask questions, I always get great info and advice. Have Fun
-
Down to the last 2 planks, started on the starboard side, you can see that I have a couple of wavy edges to deal with, especially at he aft. I used a larger ¼ in plank for the aft part and a 3/16 “ plank for the fwd part of the plank. I determined that this would provide allow me not to have to use 3 planks or cut down one to very thin in places, I split the remaining space into two and this was the result. As I added the last plank, I made a slight miss cut under the fwd gun port, resulting in a small gap between planks but putty will take care of that. Also, you can see at the aft there was one plank I had pressed to hard on and it set up as a depression of that plank. I couldn’t make up the space without taking the plank off and installing a new plank. Again, putty is my friend and will fill this divot and the small depression gap just fwd of it. Next the port side.


-
New to the Wooden Ship Assembly/Build Community
SkiBee replied to rturcic72's topic in New member Introductions
Welcome CDR, it is hard to retire after a good career, I know, I was a 40-year mustang. You are a braver man than I to start with the constitution, I started a lot slower, for me I think it worked better. BLUF: If you aren't enjoying your build, take some time off. 1. The key recommendation is to take your time and enjoy, even if you have to walk away from time to time. 2. Only you will be able to identify any mistake you make, everyone else will think it looks great (putty solves many problems). 3. Build logs do contain a lot of information and helpful recommendations. 4. Don't be afraid to ask a question in your log or message someone with a question. I am currently building the Armed Virgina Sloop, I have found one build log that really helps me, and I ask the author a lot of questions. 5. I also found that the practicums from Luck Street Shipyards ( https://syrenshipmodelcompany.com ) extremely helpful, a bit pricy but worth it. Fair Winds and Following Seas -
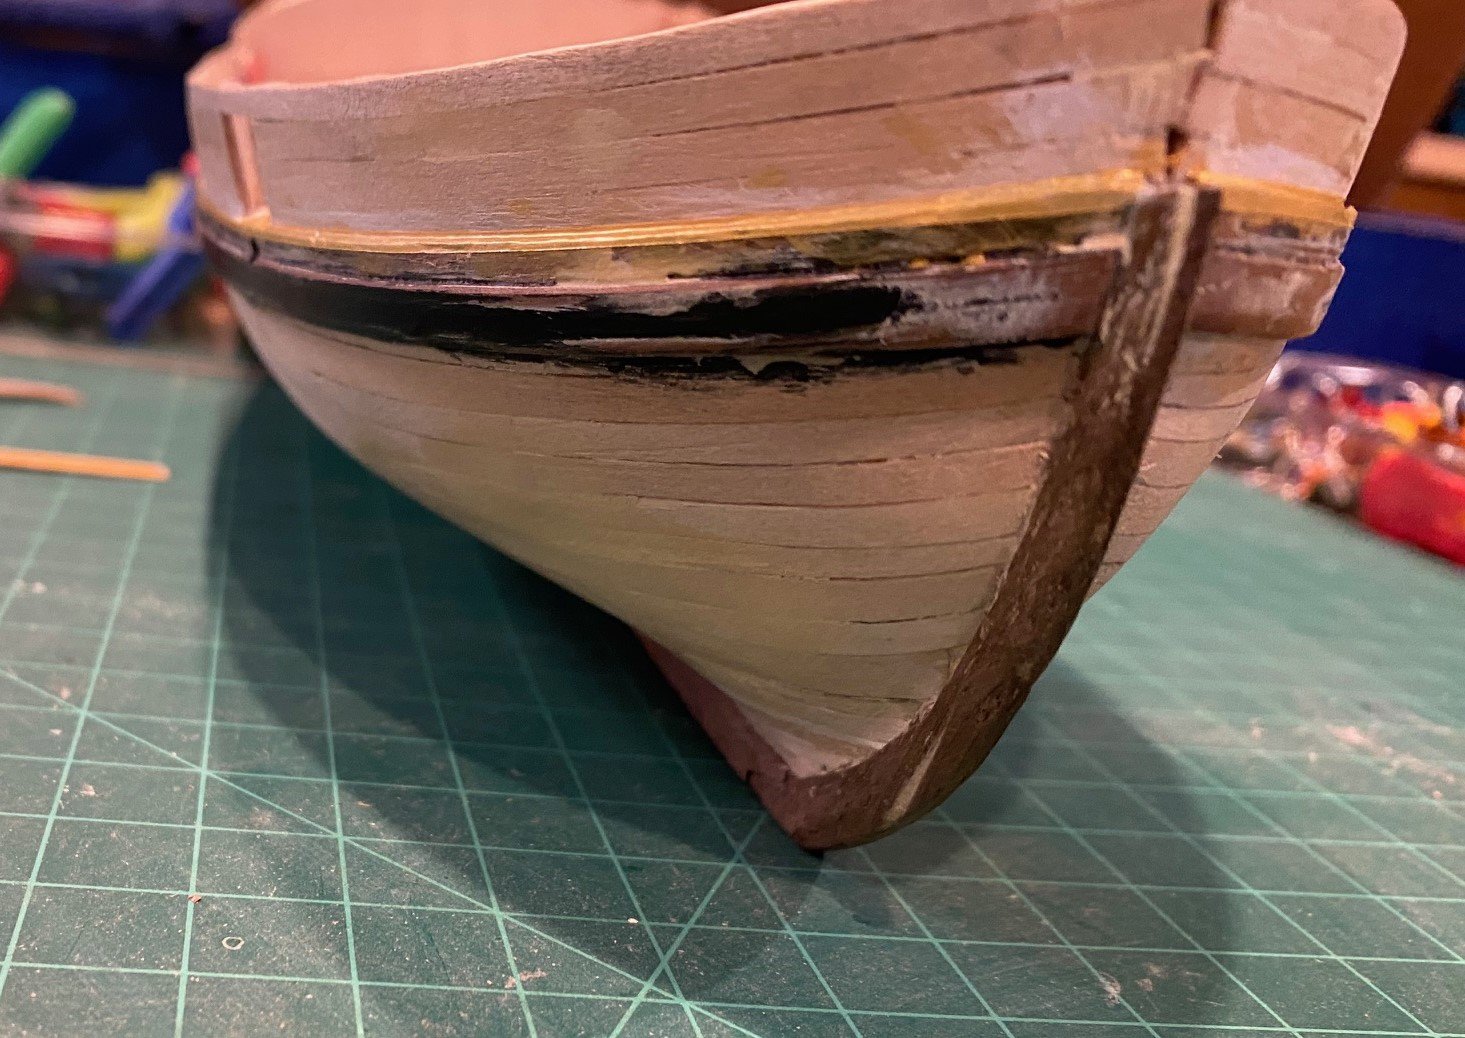
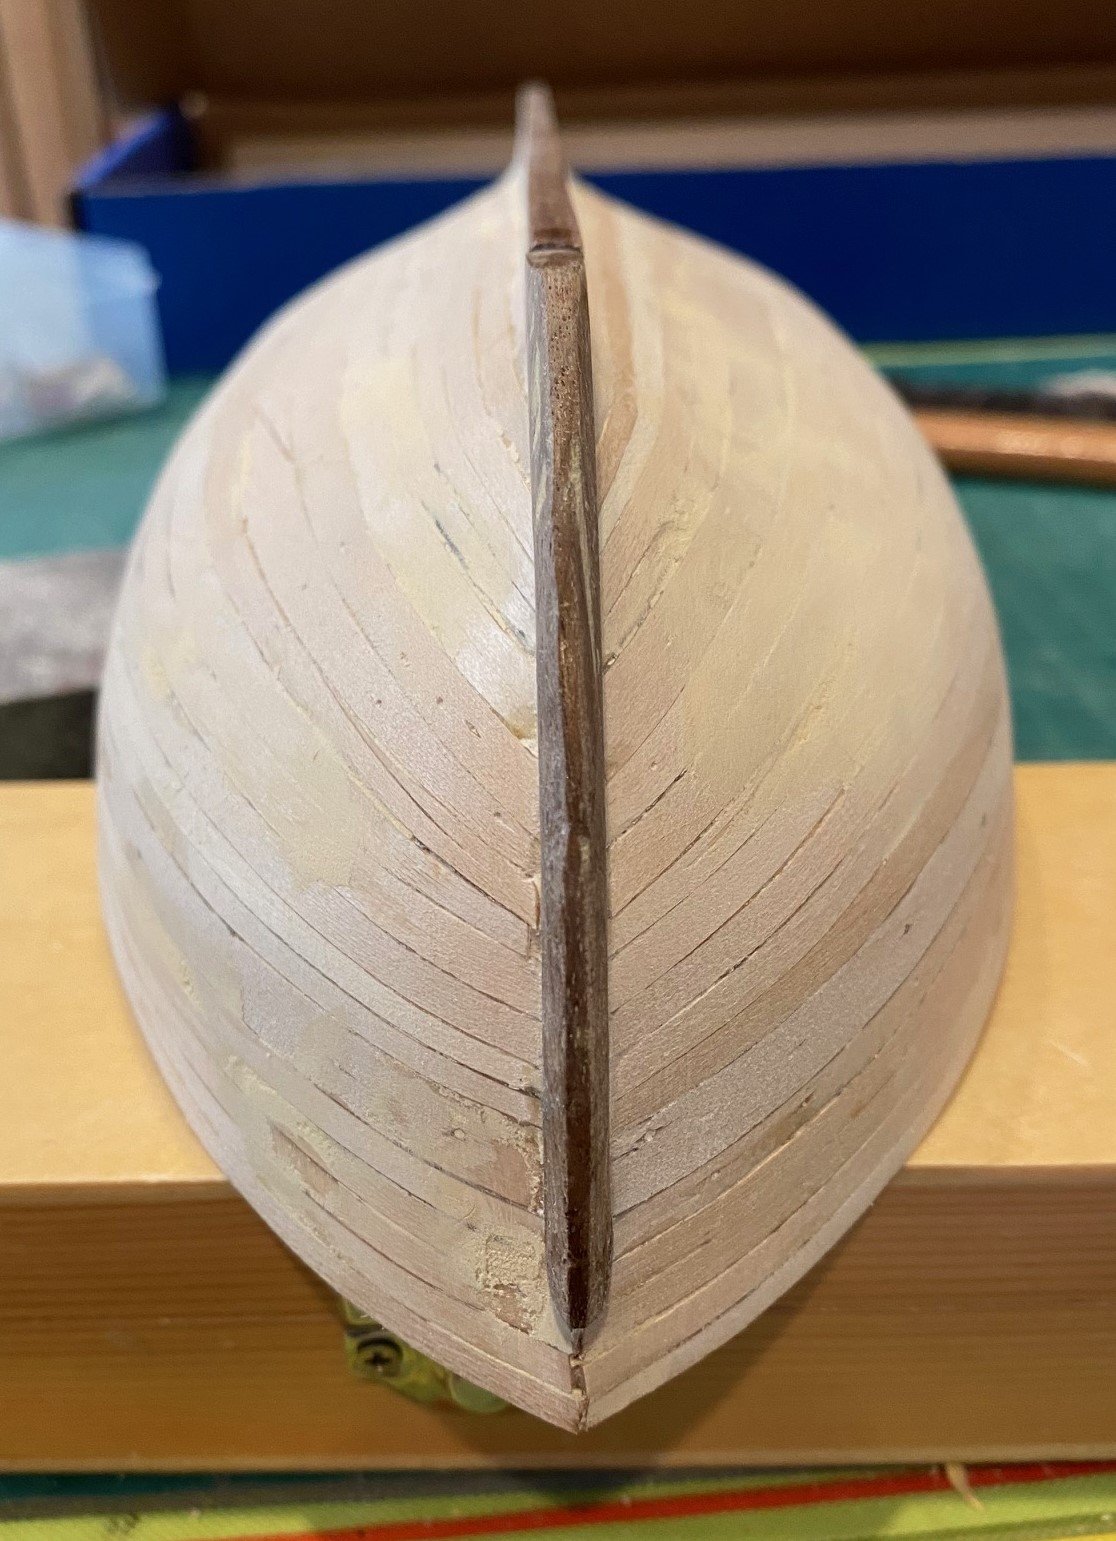
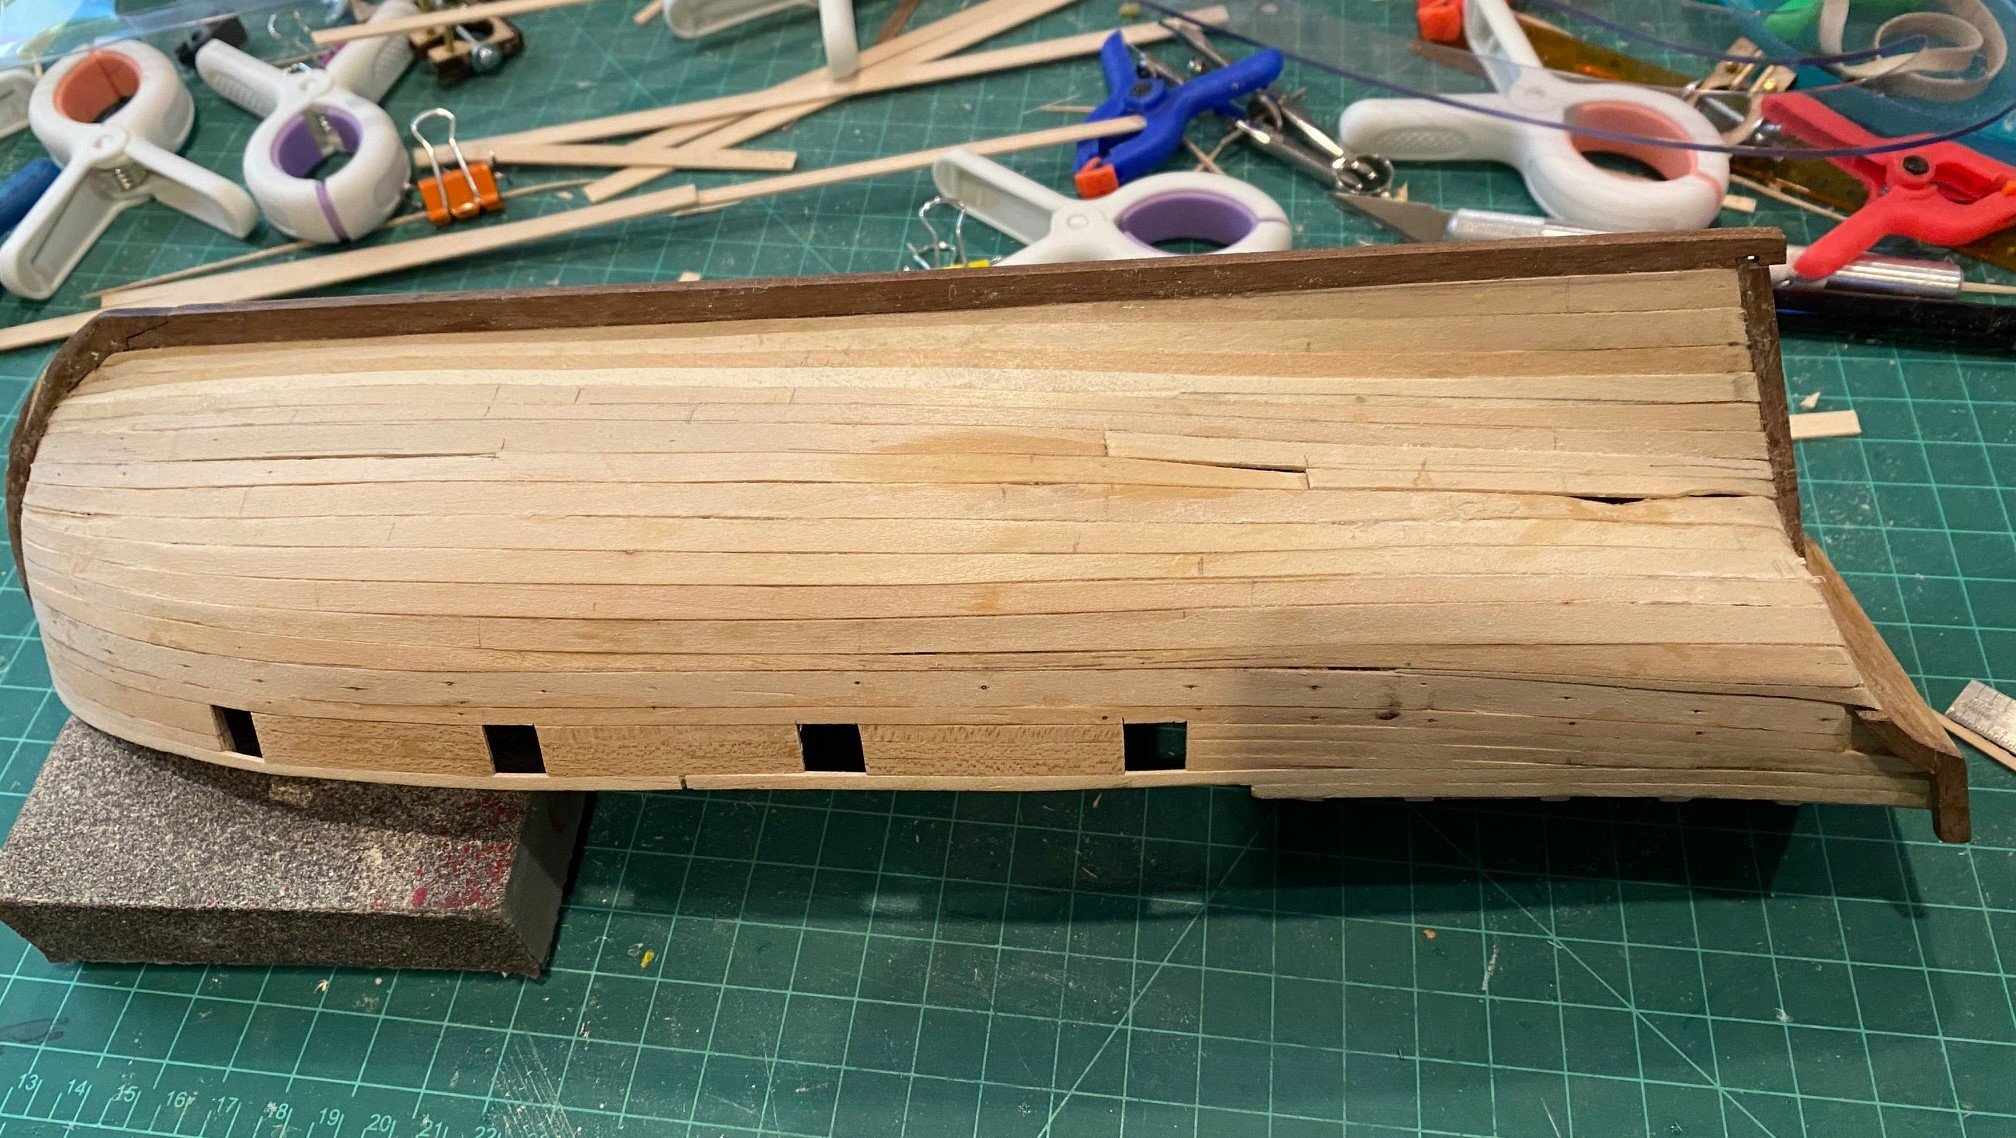
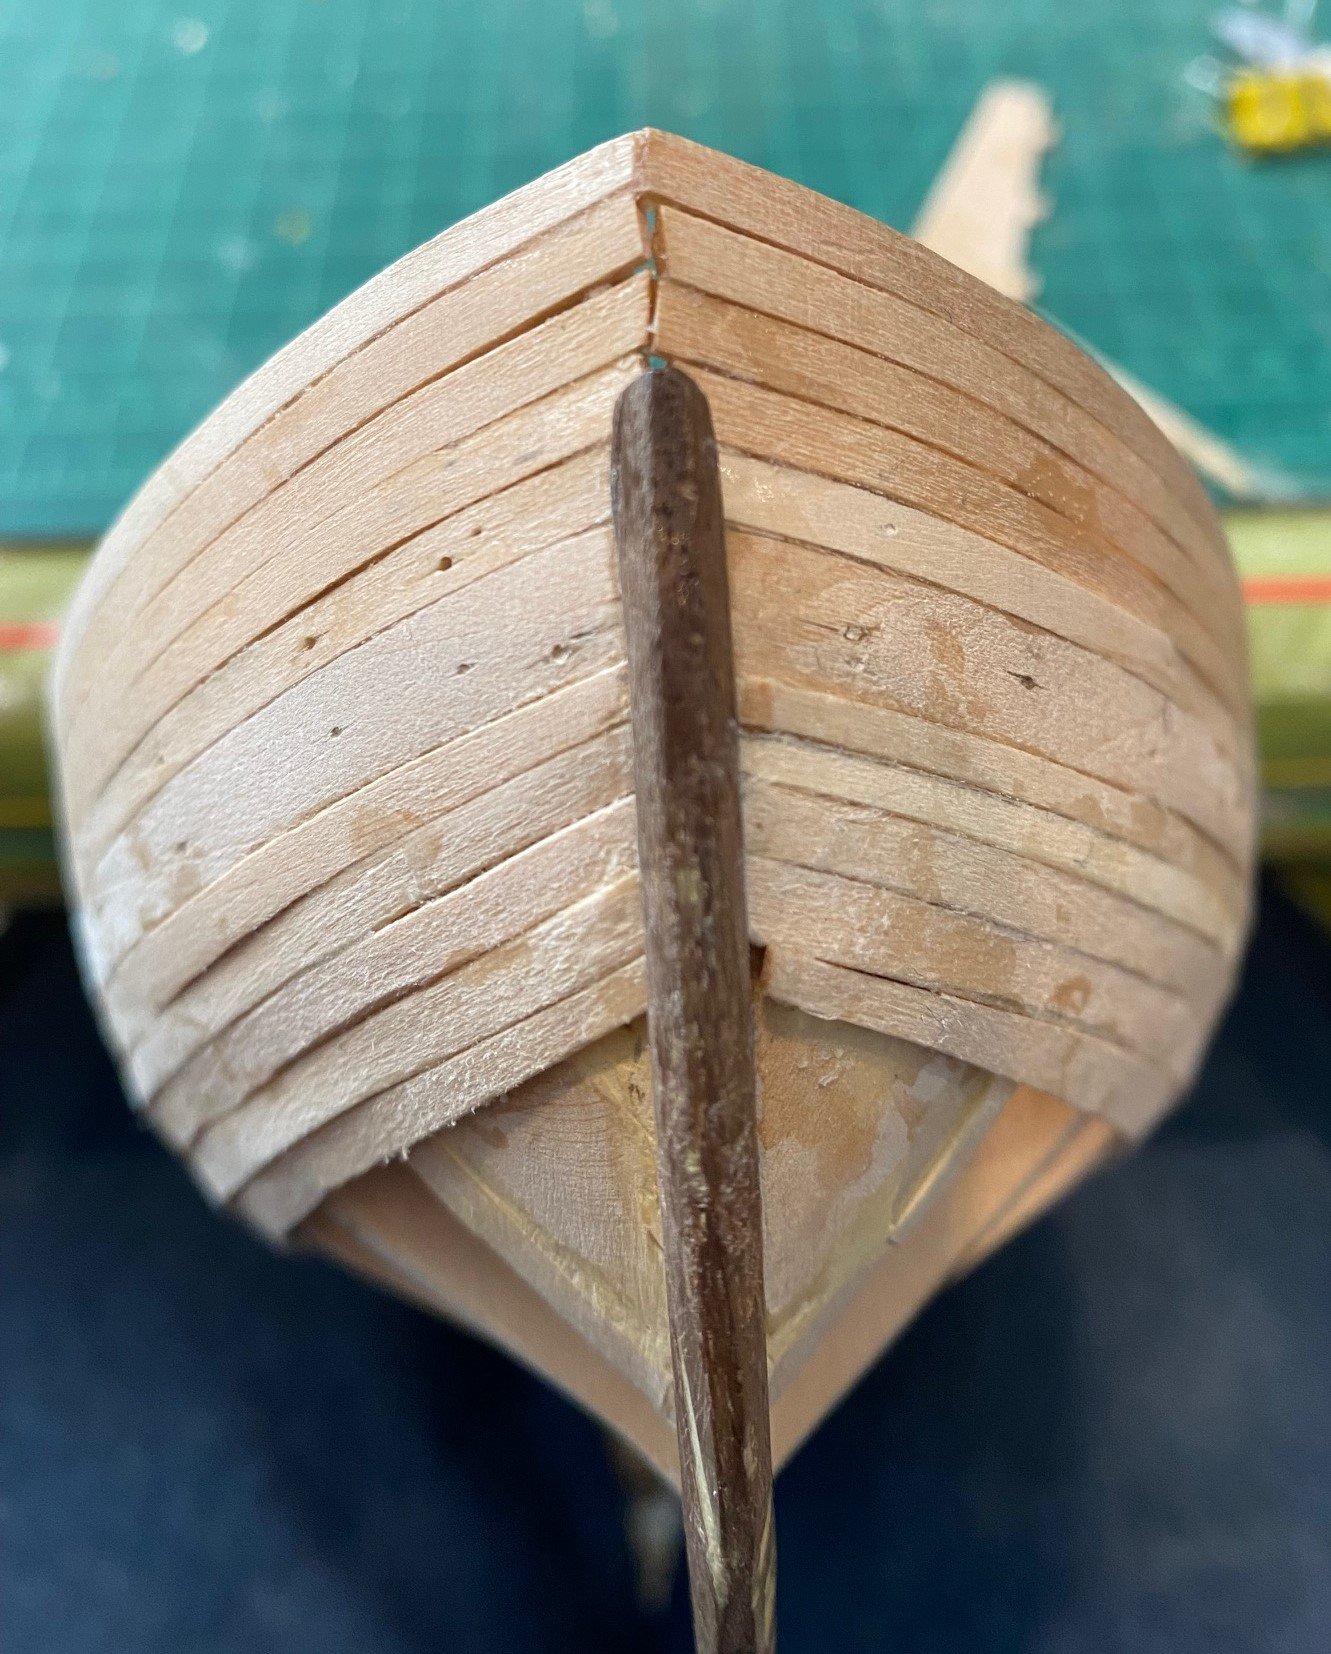
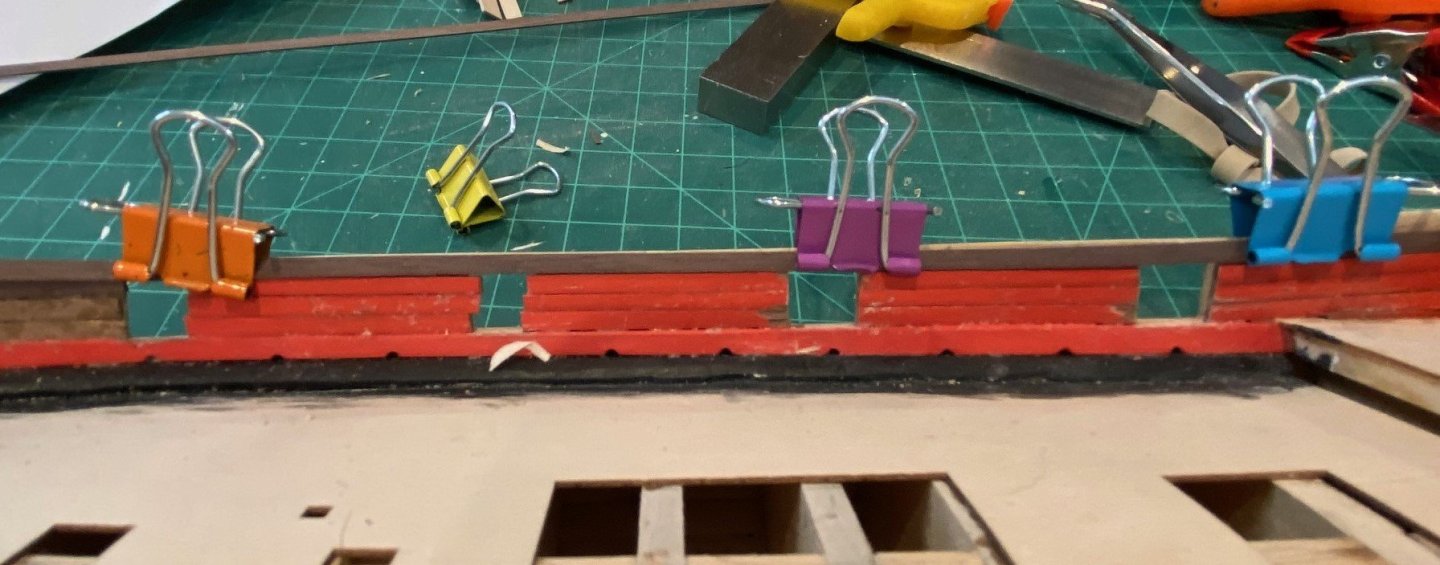
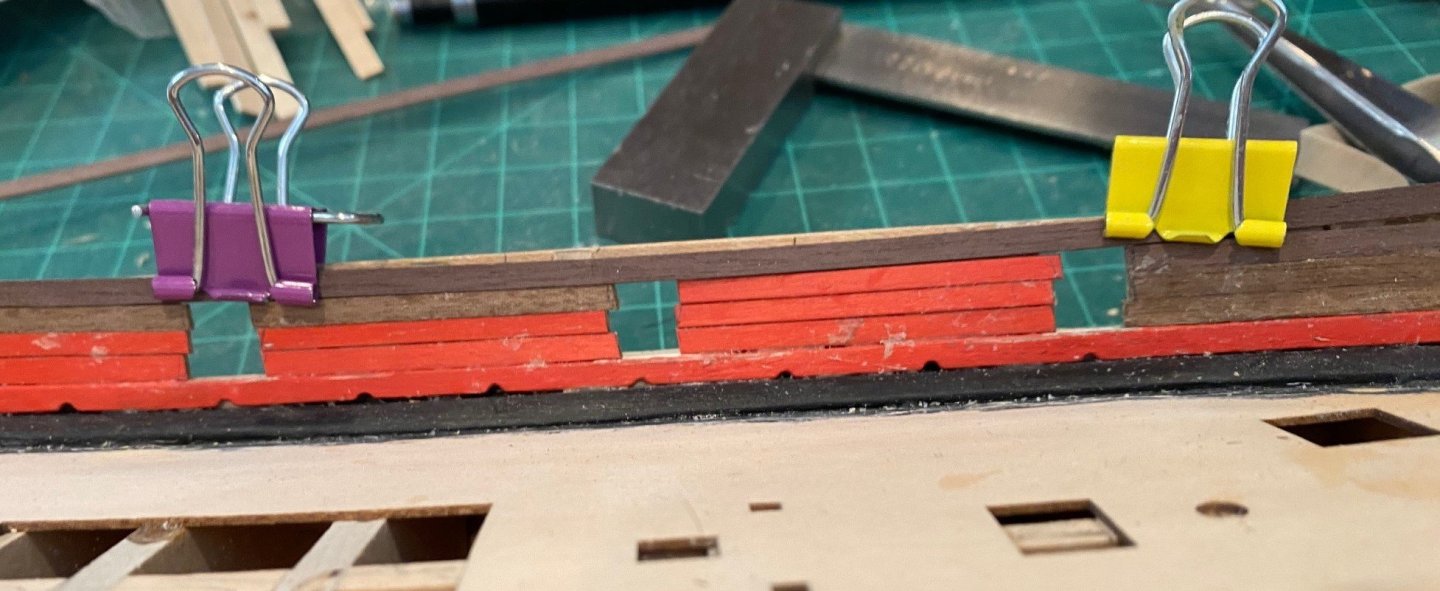
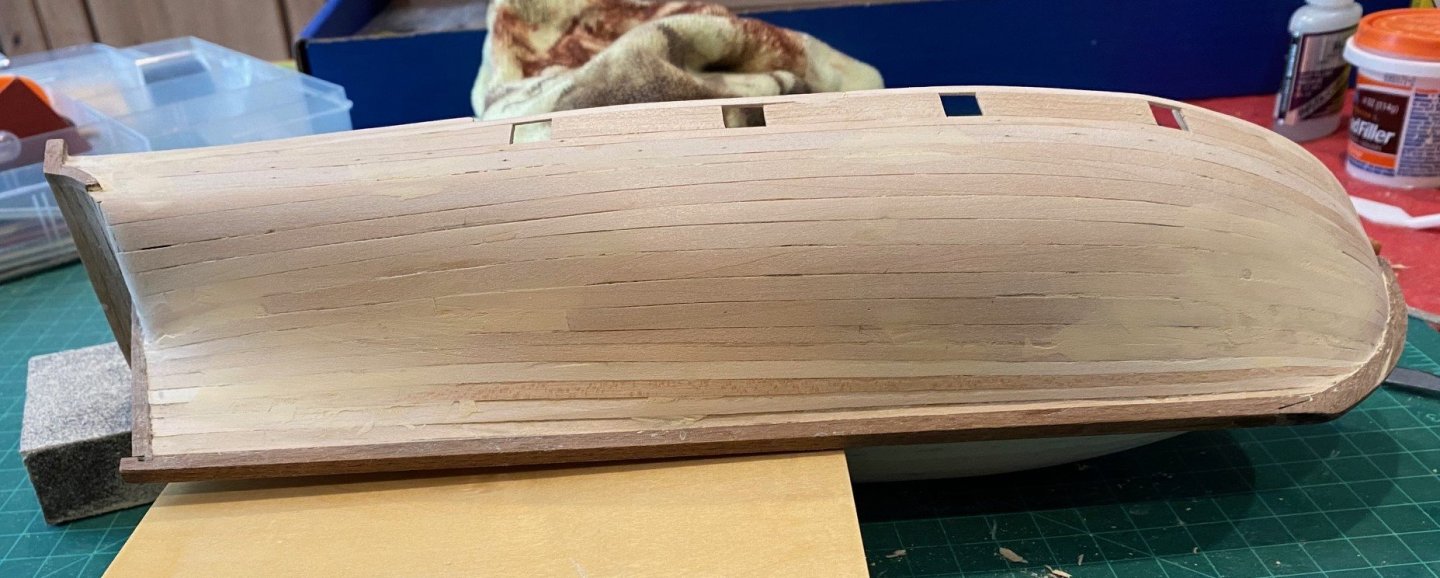
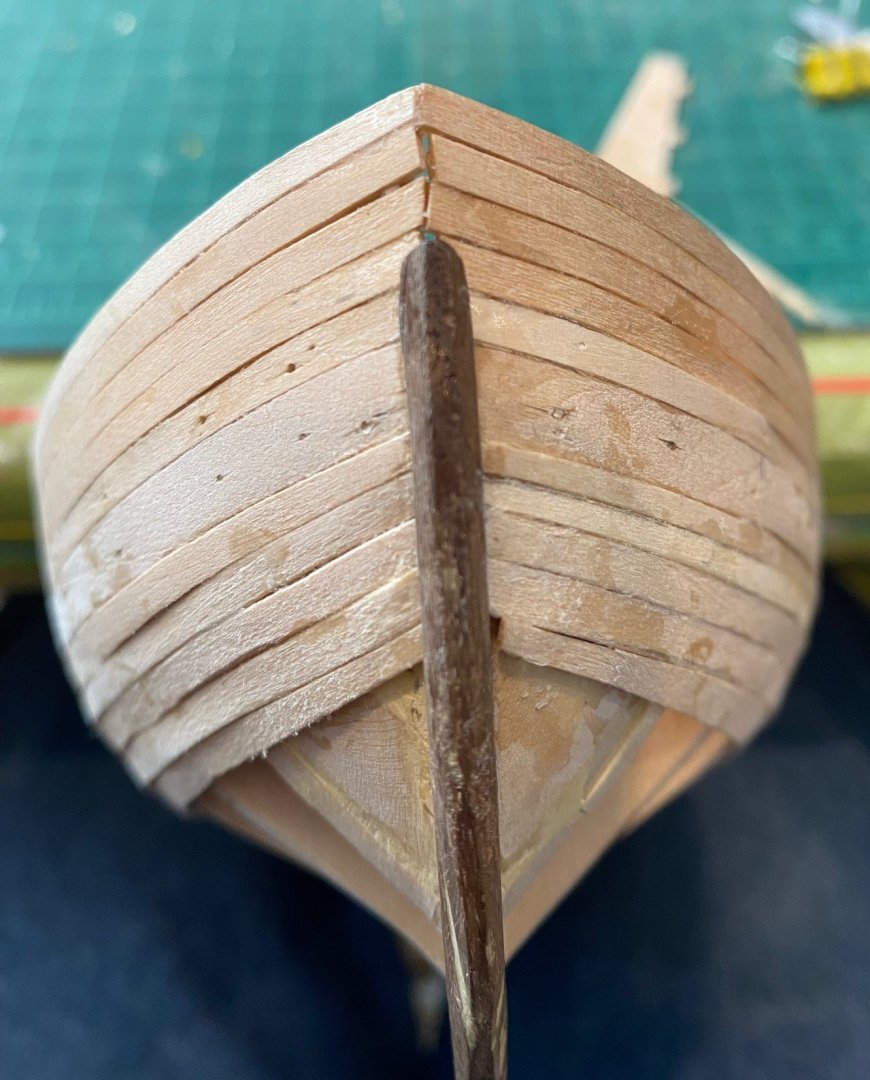
Completed the install of the 4 planks at the bottom of the hull. The double bends in the planks, both fwd and aft were a little difficult but soaking them for a couple of hours helped. The other challenging thing was getting the right amount of taper and where a mid-ship to start the taper. You can see that when I was done, the port and starboard sides were not symmetrical. I can make up the difference as I finish planking.


-
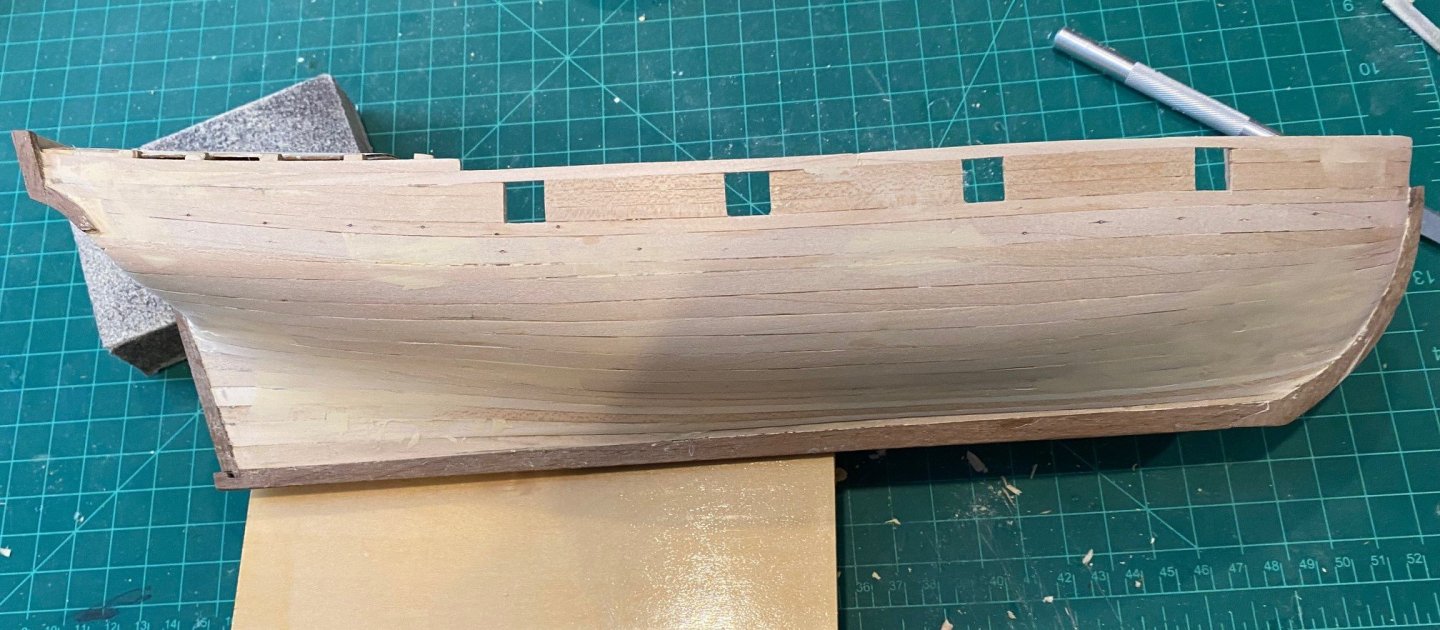
I finished the first five roles of planks under the wale plank. Some gaps, weird bends and cracks at the counter bend, nothing that filler and sanding won’t take care of. I’m ok with the product, more importantly I learned a lot. Also, redid the port finish arch piece to make it a little longer to better match the starboard one. I wasn’t paying attention to the how well the plank was adhering to the curve of the counter filler, did not pay attention to the two bends of the plank at the bend: the bend up to the transom but also a twist curve at the bend. Once I noticed it, I glued it down better at the curve.


-
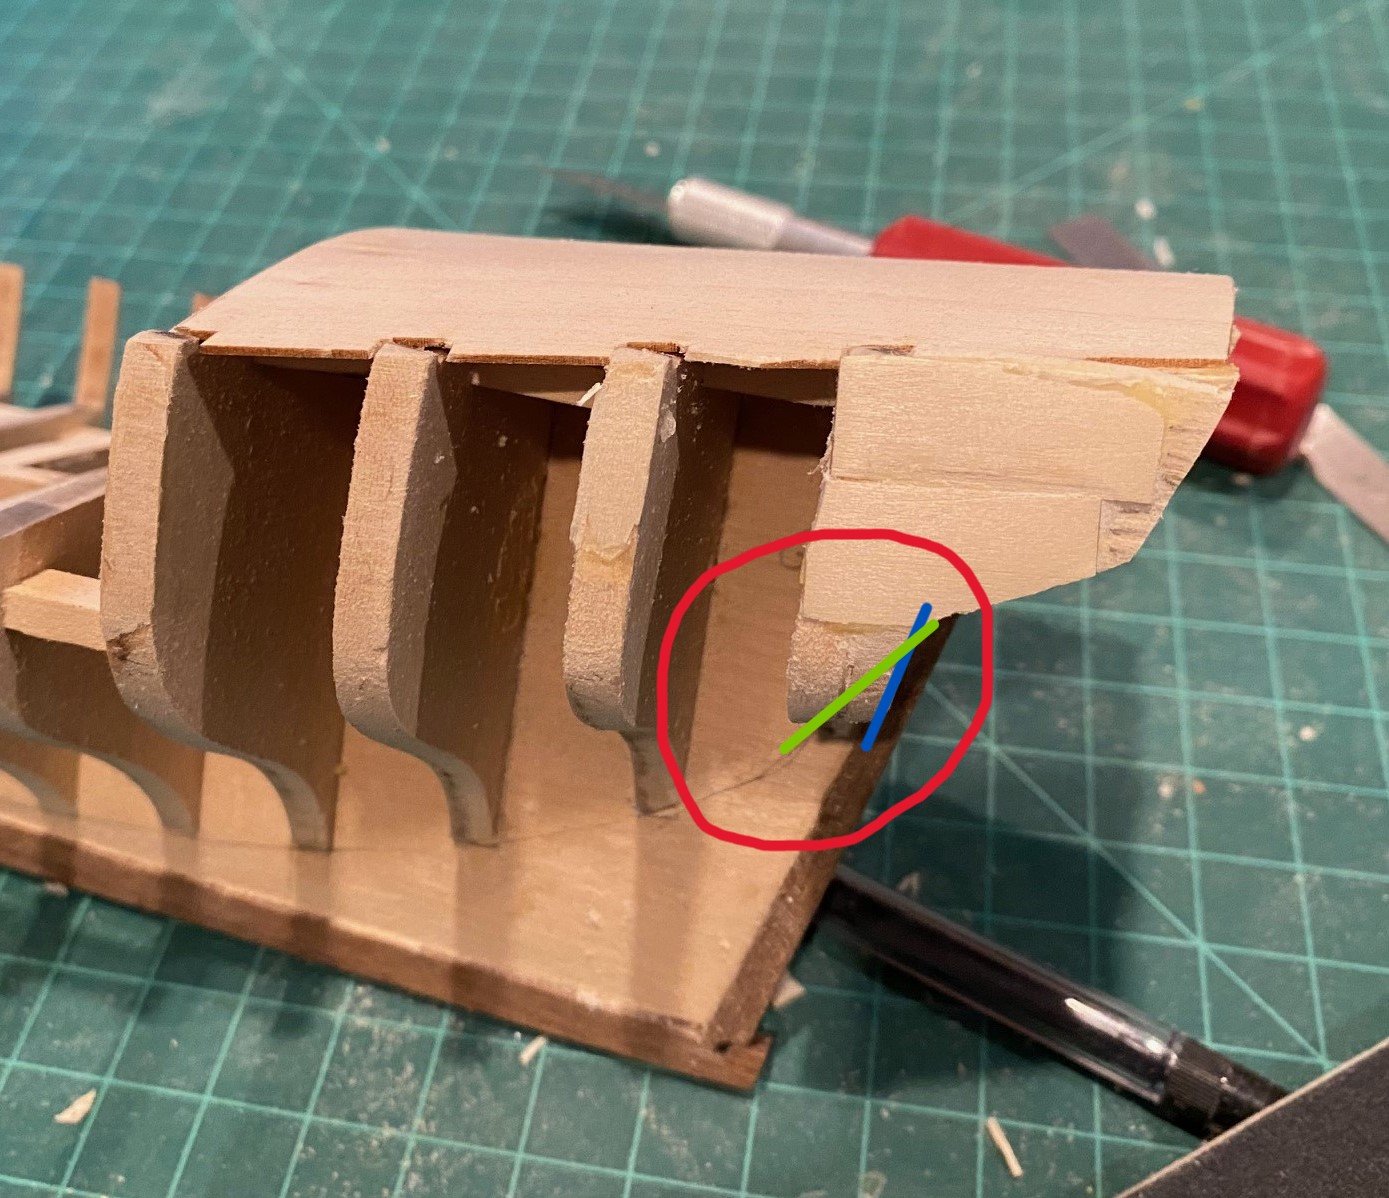
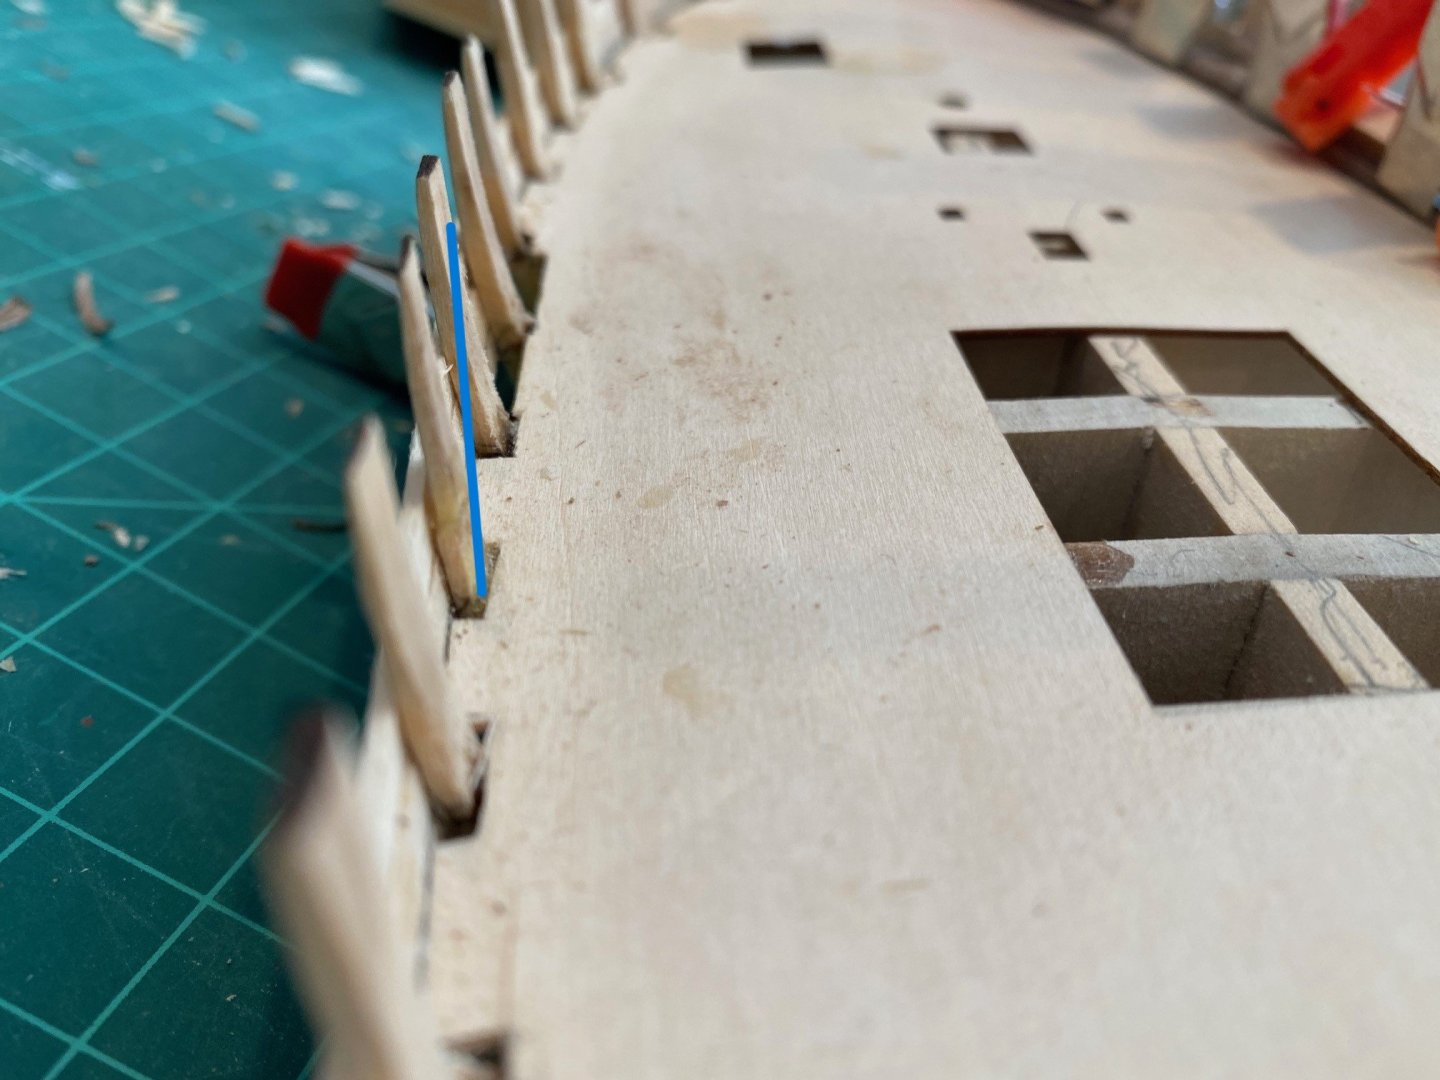
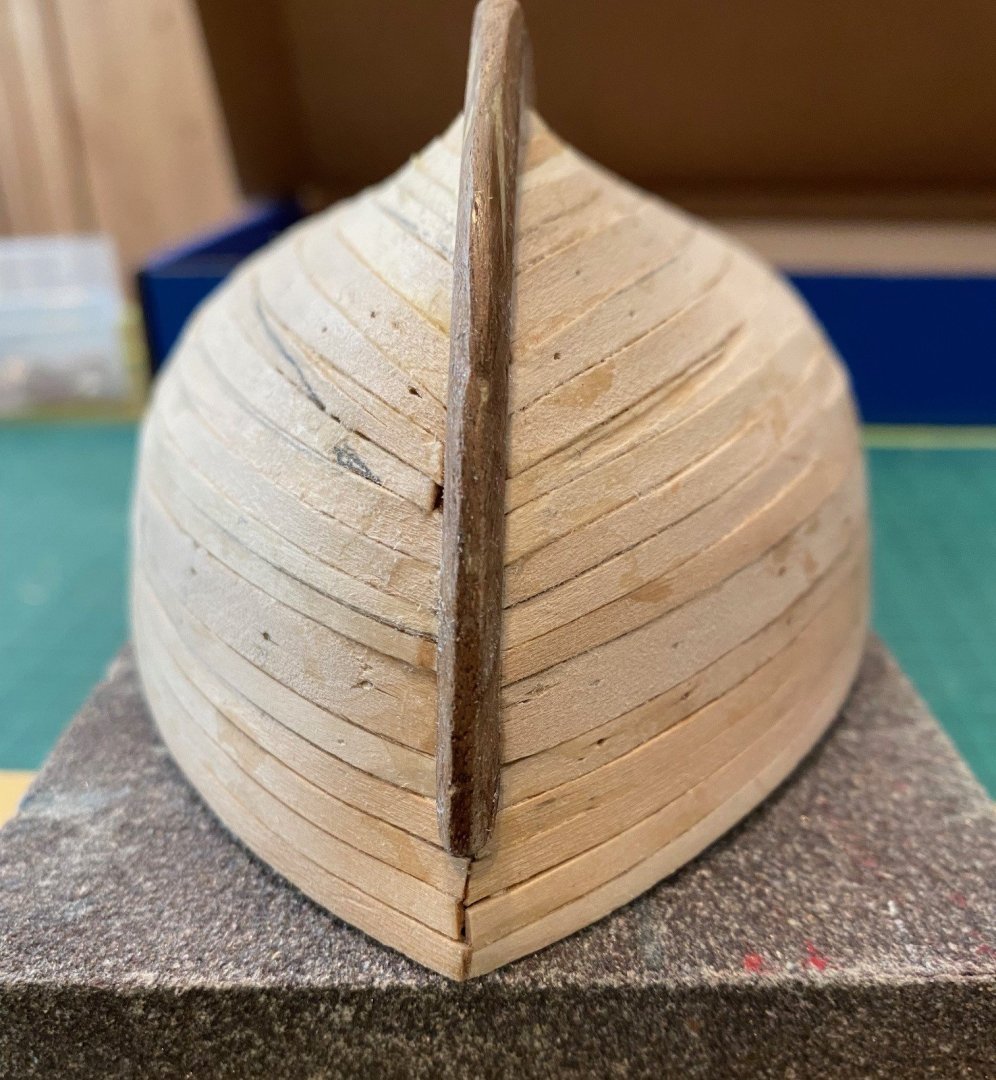
NOTE: I would consider sanding a little more taper in the counter piece, (green line vs the red line) to allow less bend in the planks that bend up the counter. If I would have read the practicum and CiscoH’s post on the aft end bend of the planks, I would have known about sanding the counter filler more to lessen the sharpness of the bend. Also, one of the comments that @mikiek made to CiscoH's post was to lessen the sharpness of the bend. Not only would this reduce the cracking at the bend but make the center side of the plank easier to glue down to the filler.