


JKC27
-
Posts
298 -
Joined
-
Last visited
Content Type
Profiles
Forums
Gallery
Events
Posts posted by JKC27
-
-
-
BECC makes depth markings in all sorts of scales, variations....... I have ordered and used their depth markings for my big laker models. Might be worth checking out....
-
3 hours ago, wefalck said:
Well, people tend to confuse 'scale' with 'size'. It doesn't really matter at what scale you are working, the size of features, both small and large can matter ...
Obviously, the thicker the material, the more difficult it is to cut it with a scalpel. On the other hand, with thin material, it is more difficult to correct cuts by filing or sanding. If you are working at 1/200 scale a sheet of 0.02" (=0.5 mm) thickness would translate to walls o 4" (= 100 mm) thickness, which would be quite formidable, even if in wood. So chosing thinner material will make your life easier from a cutting point of view.
Perhaps you should reconsider your construction technique. I assume that you use the styrene sheet as structural material, i.e. you are building a hollow structure? Unless you want to show some interior details, it may be a good idea to build a structure from wood or thicker styrene and clad this with 0.01" styrene sheet into which you can cut the window etc. openings.
For me the reason to use styrene sheet would be mainly that it looks more like steel when painted, than most efforts of filling and sanding wood.
When laying out the styrene for cutting, I would use a sharp scriber to mark the window openings. The scribed lines form a guide for the scalpel cut, even if you use a ruler. Make an incision in the corners first from both sides in order achieve crisp corners.
Thank you......... I have really been starting to think that making hollow decks could be wasting time on my builds. You are correct though - styrene does a really good job representing steel. I have been experimenting with running micro LED lights to the p & s lights and top of the masts, etc. and it looks really nice with one positioned inside the bridge, but I am sure I could make the lighting work either way if I do more builds with the LEDs.
re: your comments on scale - for me, I don't care about wall thickness at scale vs real world, nobody would ever care or even notice, it's just finding the right material especially for the top deck where there are essentially windows surrounding that deck of course.
-
The scale I use is 1/192 or 1/200, and these are ships that are generally 740ft or slightly shorter in the real word, so parts tend to get quite small. Even the windows. My first build I tried using vinyl that was cut into small squares, but again......it is hard to replicate the sizes and make everything looks "square".
I've yet to find a punch set with the correct size/shape as well, or I'd consider using that.
-
As the ships I model are the large ships that service the Great Lakes, these are all steel construction. No big deal on the hull - it's a wood model of a steel ship, so that's not an issue.
When it comes to building the various decks (most are now all at the rear of the ship, while some older ships have both fore and aft) I have used card stock with pretty good success, but prefer using styrene sheets cut to the proper sizes to build the walls of each deck, then stack them together accordingly.
My frustration with using either material is cutting out the windows.... I've been using a #11 exacto, but even with drawing out the proper lines, etc. it can be a real test of patience to cut the windows out and have all the edges like right. Card stock gets a little flimsy pretty quick, styrene I find can bend inwards a bit, but you can also make the cut too large with both mediums. I've been using .020 styrene. I know the thicker you go, that harder it would be to cut, but there might be a better way for me to perfect this part of my skill set.......
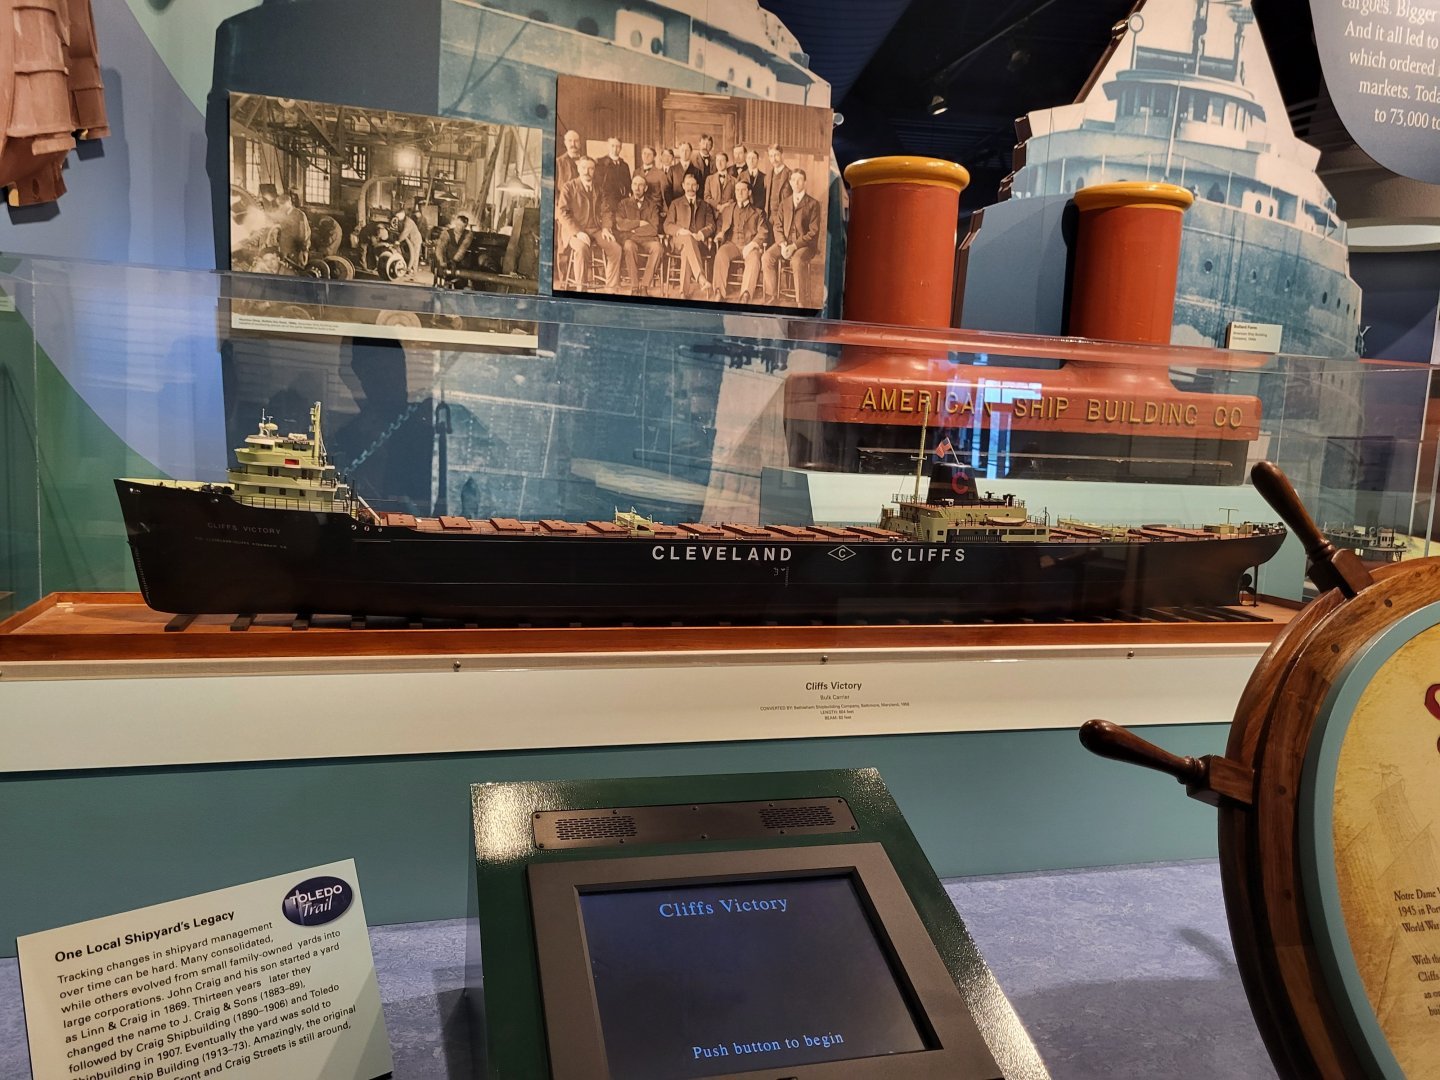
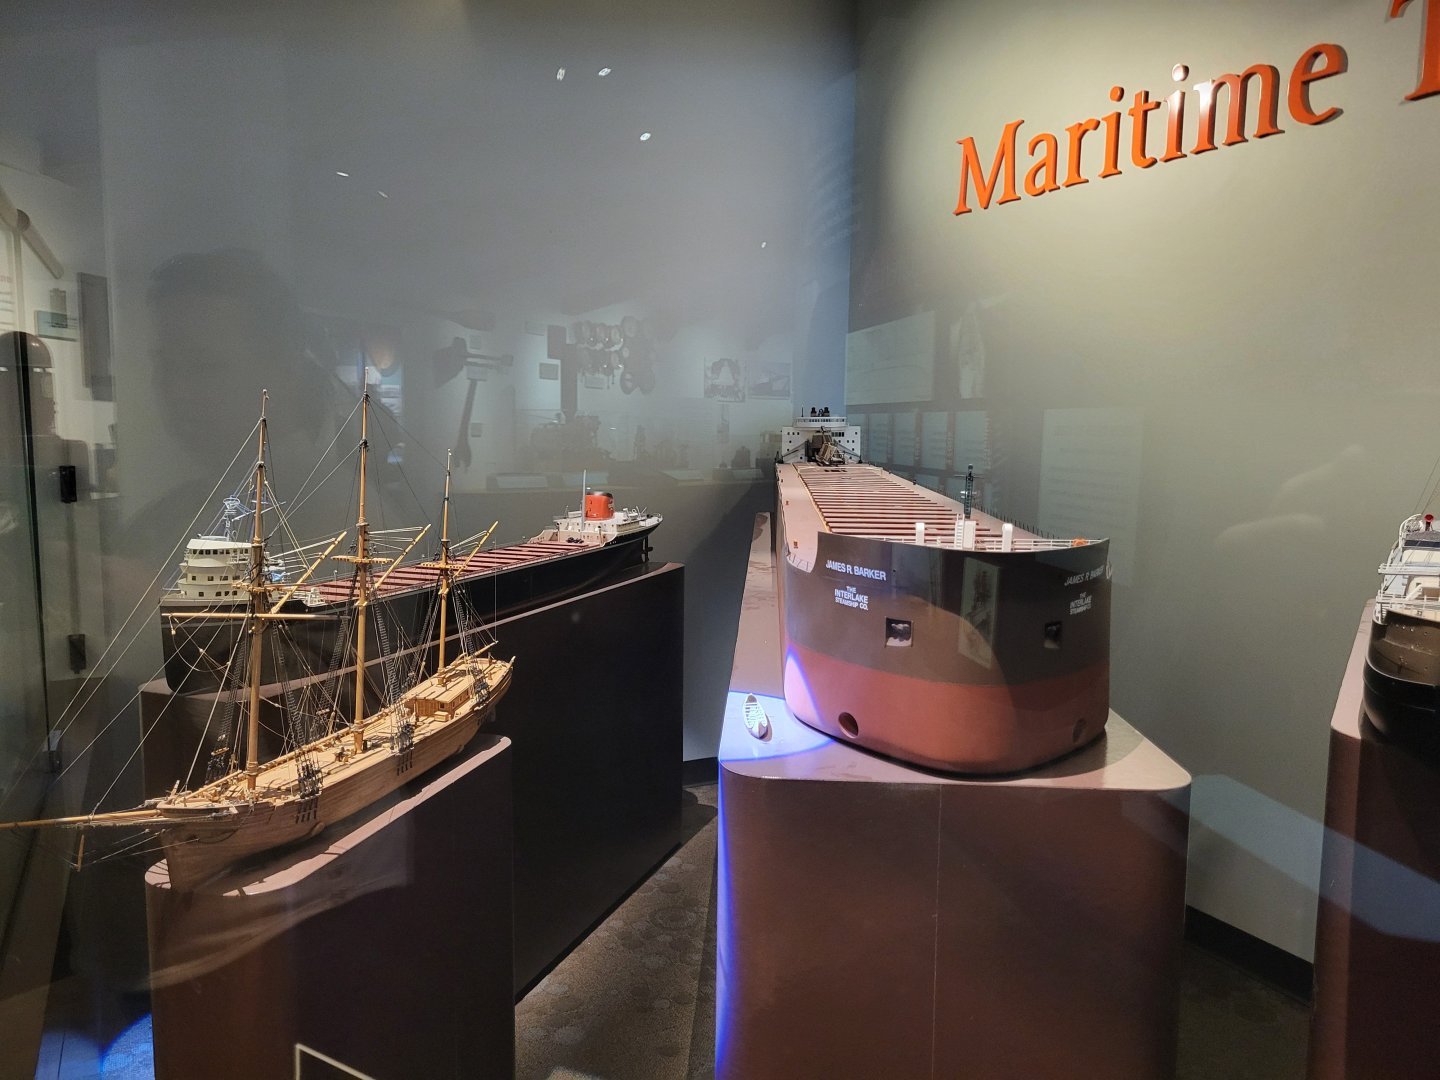
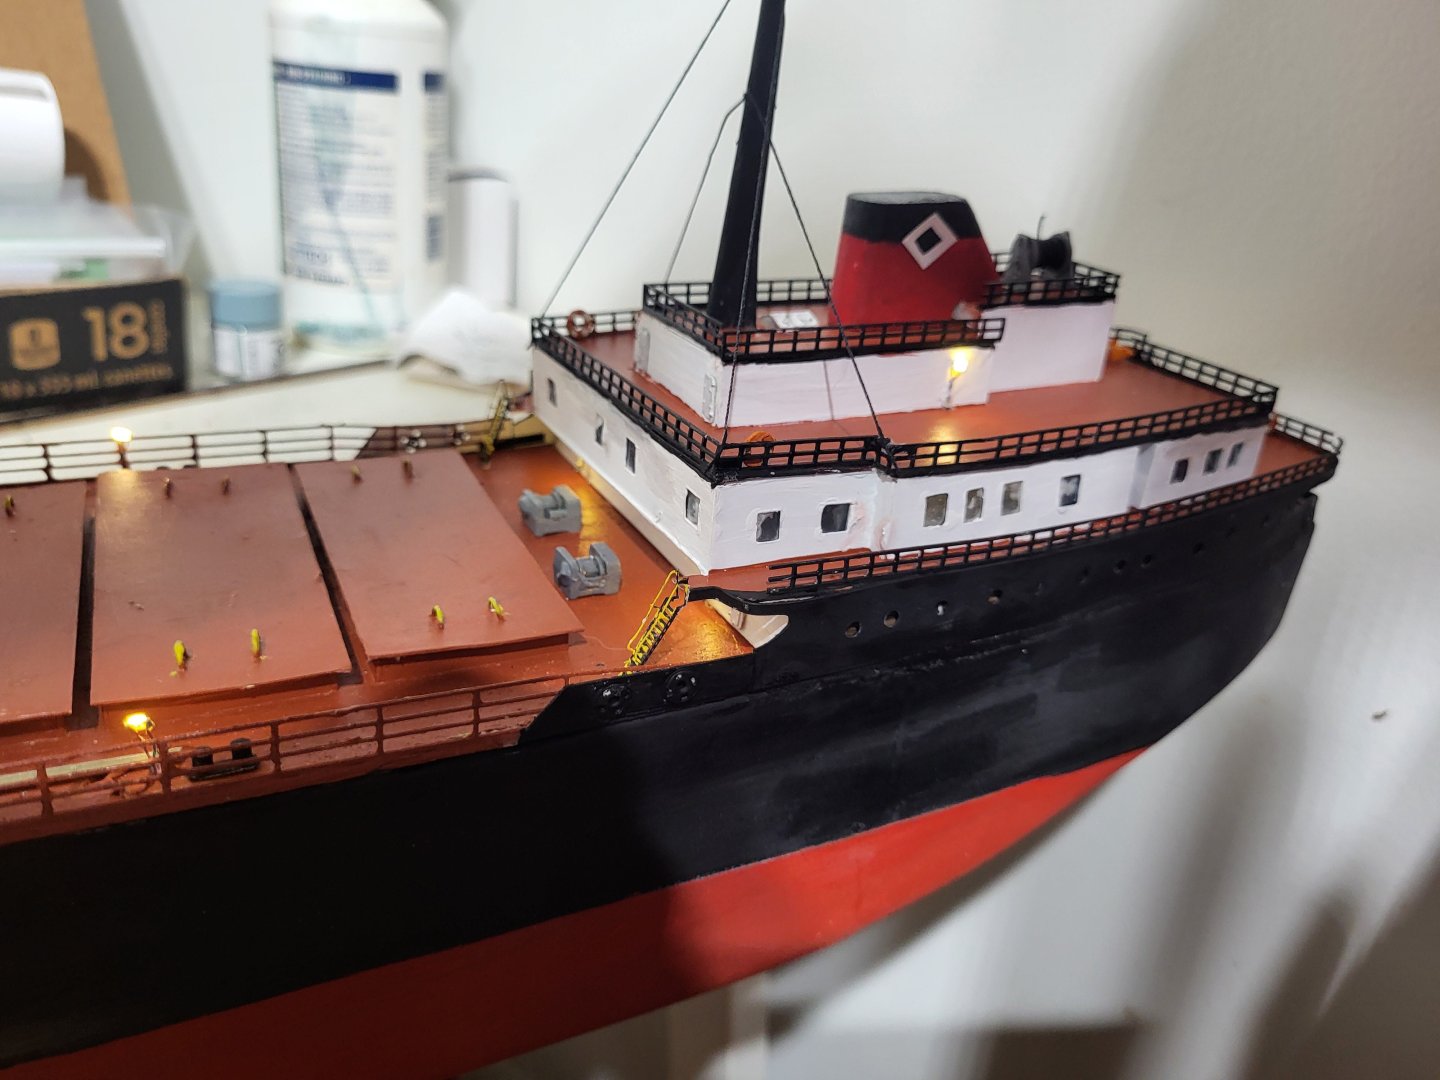
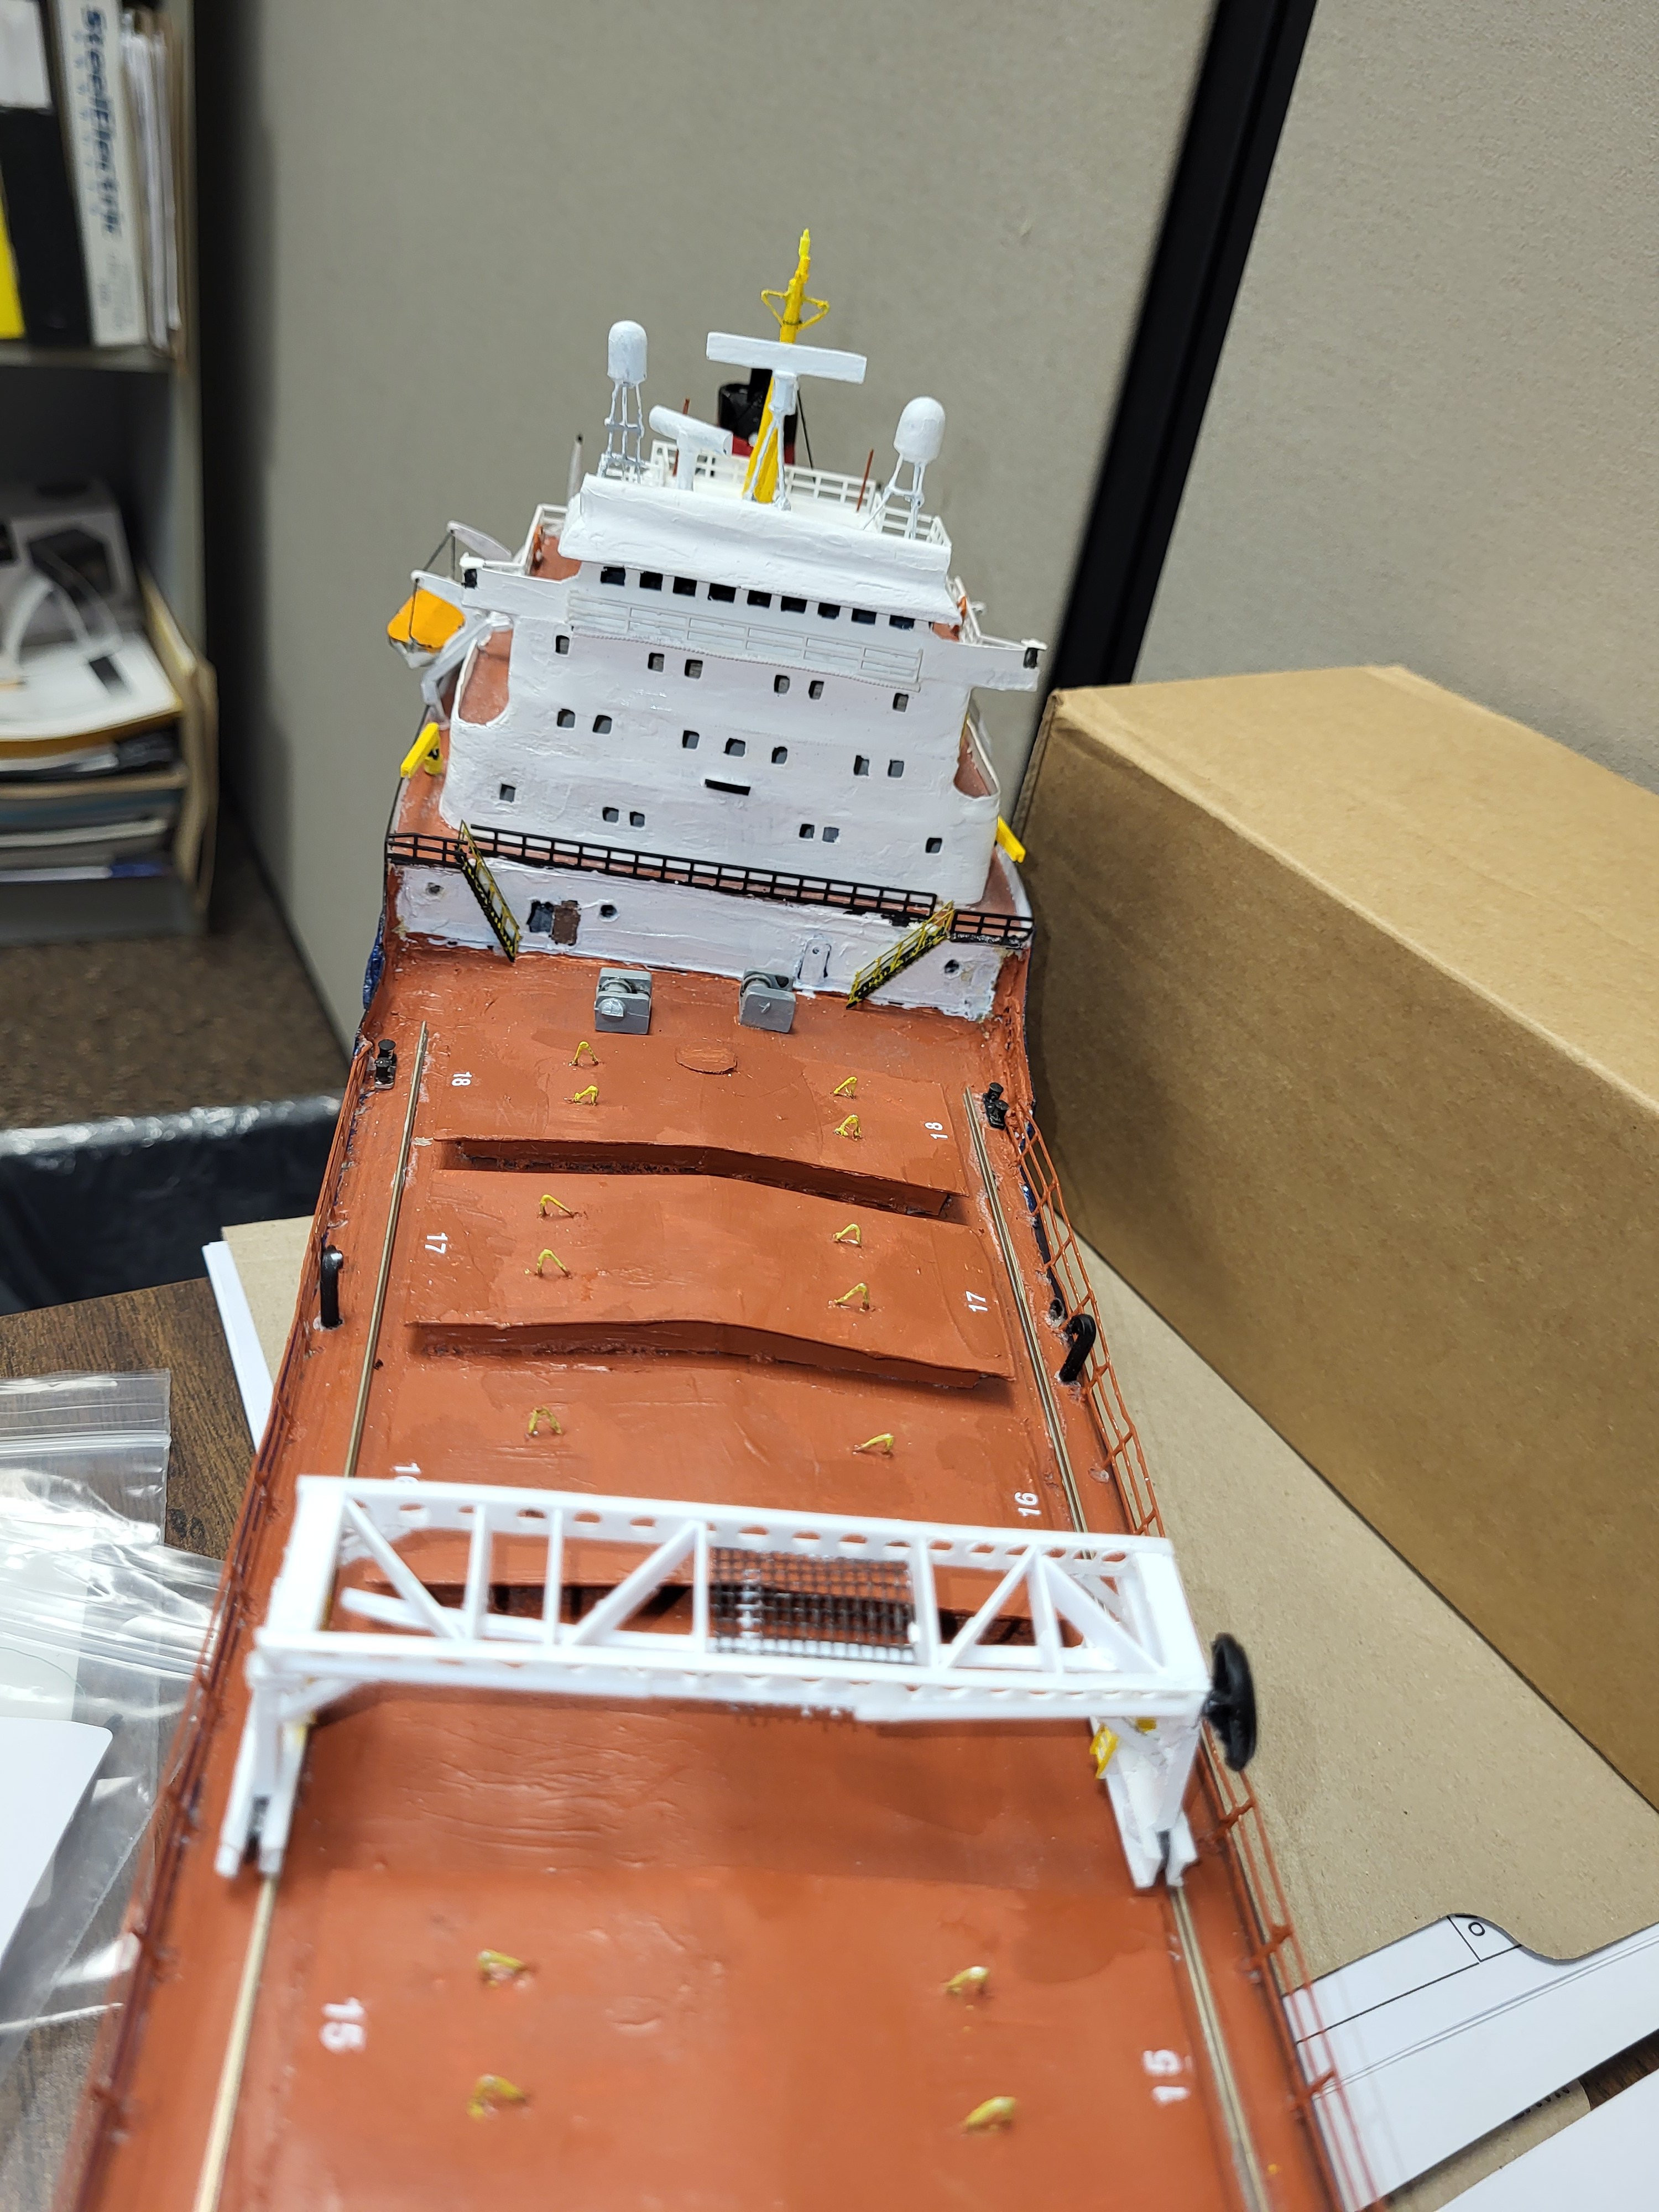
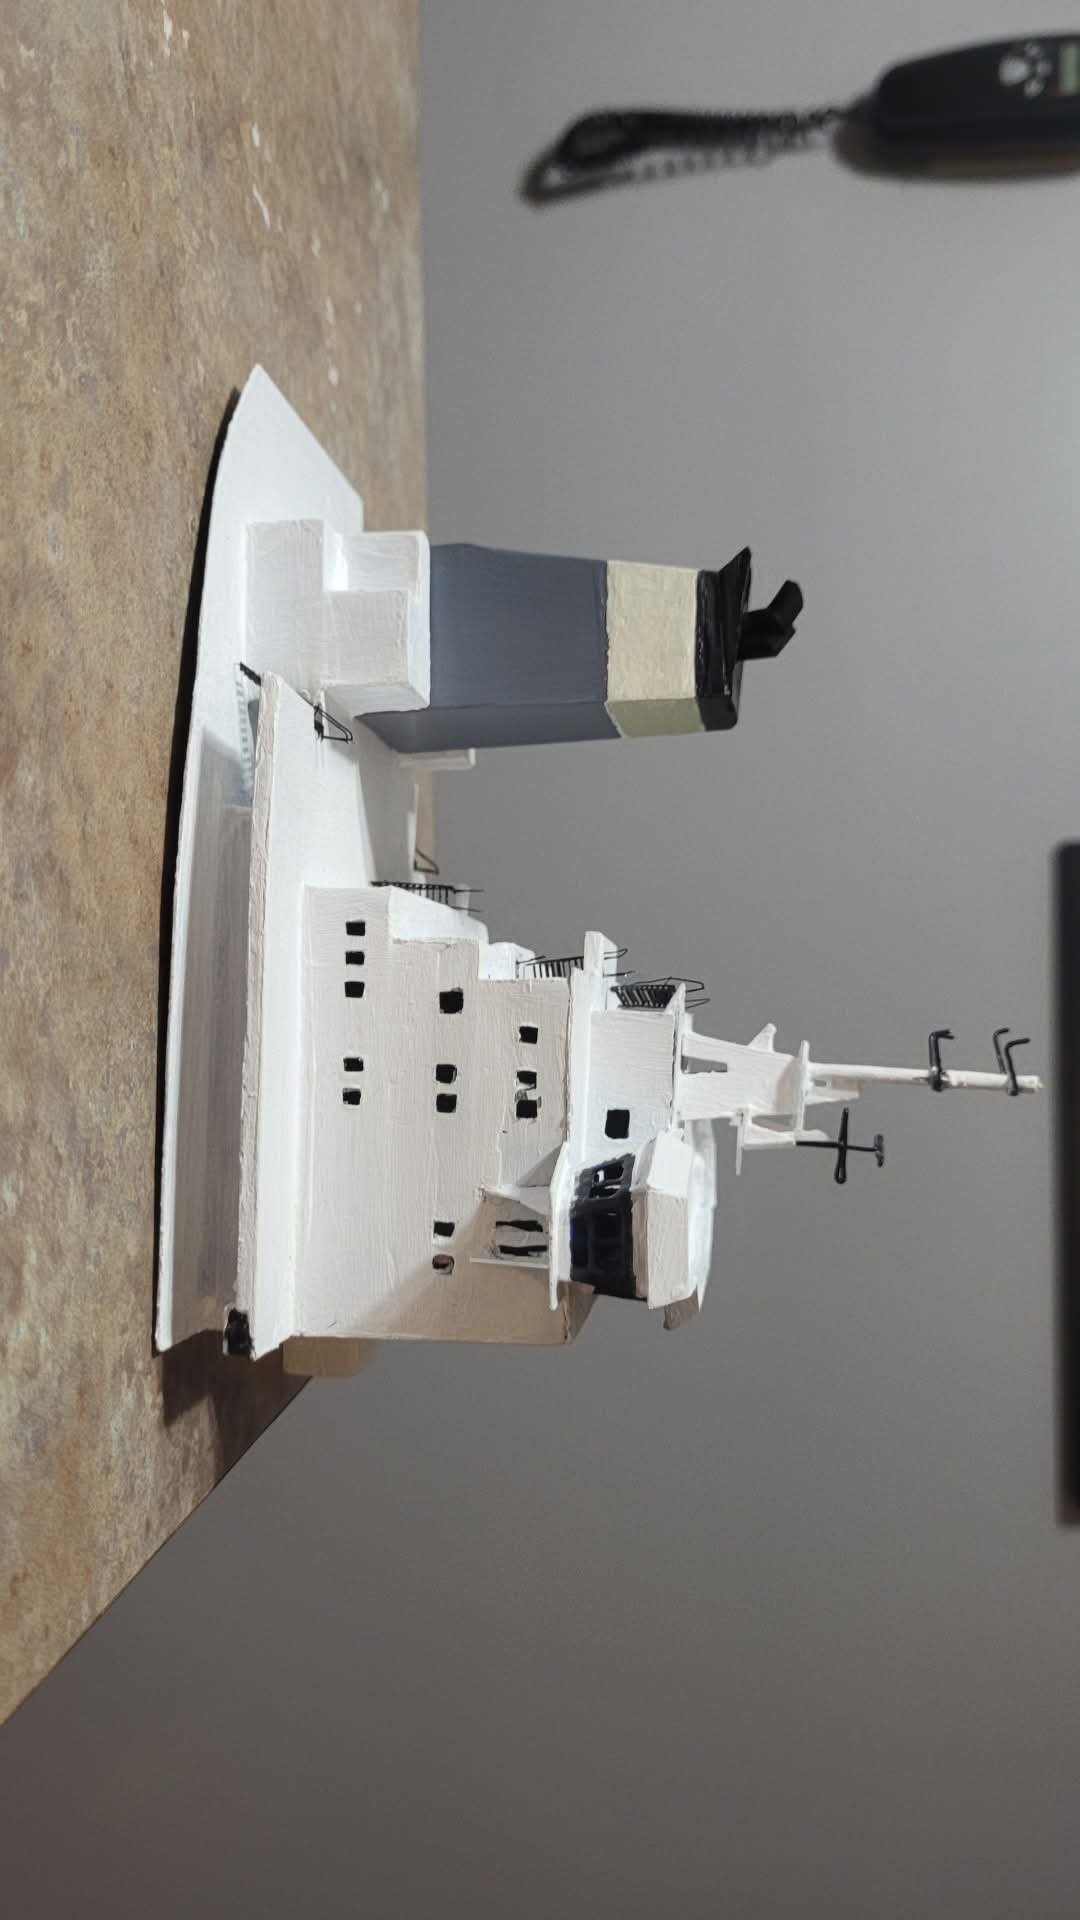
Any thoughts or suggestions would be appreciated! See attached pics to see what the cream of the crop looks like..... this is what I strive for, as I only have been at this for about 5 years now, and it's only when I have time after work, or on weekends when I have time between other things in life like errands, housework, spending time with my wife, etc.....
First 2 pics are in the museum in Toledo, OH - the next couple are some of my recent builds - both were card stock. Last one, my current build is styrene.


-
I use any of the different wood fillers in a tube mostly that are available. I find LePage's in a tube works good, as does the Elmer's version. One product I have conflicting thoughts on is the bigger tub where the wood filler has a more sandy texture and I find for filling any gaps in my models it just doesn't work as good.
To add: For any styrene parts that I am doing (which is most of my various decks, as I build modern ships), filling in any gaps, I use the Tamiya putty that comes in a small tube - it has a strong odour, and hardens nice, but I am not sure how it would work with wood at all. It is designed to be used with plastic.
-
Love the handrails....... I find 1:200 are just way to small and fragile. I build at 1/192 or 1/200 for the lake freighters and am always looking for good handrail options, as these big ships have handrails down the length of the entire ship pretty much, and a 730 ft ship, even at 1/192 has A LOT of railings to deal with, plus those around the various decks. Using the 1:200 are almost a waste of time/money for me as they crush so easily, and are so thin.
How fragile are these 1:150? I have been using the HO scale (1/87) PE from Bluejacket and they are pretty good - very rigid, easy to ship, and they work well despite being a little large.
-
-
-
Hoping someone on here might be able to help me.
I have a part for my current build that I was able to obtain from someone for Blender. I haven't got the foggiest idea how to use it, and was hoping someone would be willing to modify it for me so it matches what I need. I have a guy locally here who can do the printing, but need to modify a few things on the structure of this before it is printed.
I have the file I can provide as well as reference photos for what I need.
Thanks in advance!
-
As I build in 1/192 or 1/200 (if metric plans) I know the my fittings, etc. are going to be small for the most part.
My builds are great lakes freighters - generally a 740ft ship, so the model is quite large at just under 4ft in length. I have been able to use fittings (winches, radars, etc.) that are close enough to the real deal as there no companies that make fittings for great lakes ships as it's such a niche market (I assume).
Where I am running into problems is the handrails.......most of the spar deck is just a cambered stretch with hatches and hundreds of feet of handrail...the 1/200 scale PE brass handrails I have tried to used twice are just way too fine to work with. For the spar deck handrails I am just using HO scale PE brass ones which look just fine. The problem is there are handrails around every deck of course on the real ship, but the HO ones are just way big for these sections. The 1/200 again.....just way to fragile to use. I have found alternatives, but I would like to figure out the proper way to use the 1/200 ones.
For those who have used these, you surely know what I am talking about. I got them cleaned, primed, painted - no problem. But to cut them off the sheet they come on and try to bend them around the appropriate corners - they just deform way to easily.....it's almost like using fine brass thread...they are so small.
What I have been using is ABS 1/200 fencing. Height is OK, and they look is not bad, but it's difficult, if not impossible, to bend if there is a curve to the area where the handrails should be.
Any suggestions?????
- thibaultron, mtaylor and Keith Black
-
 3
3
-
@poleprince I feel your frustration. I build great lakes freighters, and as you said the deck features (winches, hatches, etc.) are different than those you find on military ships (which are quite readily available) so I am forced to scratch build, buy similar fittings (Bluejacket Shipcrafters is where I get a lot of my fittings), or resort to 3D printing. There are some things out there on sites like CGTrader, and I think you can find people who will do custom work for you. I recently had my bridge deck 3D printed by a local company here in Windsor, Ontario and it worked out really good. As for photo etch parts...good luck there really isn't anything out there that aren't military, as you said, it's such a niche market (merchant ships). I have used the stairs from Tom's Modelworks that has a variety of different scale PE that you might find useful.
FWIW I build in 1/16" - 1ft scale (1/192) or 1:200 - as those are what the plans that I have acquired are all in or are easily to scale to (some are 1/8" - 1ft). Keeping in mind..the ships I am modeling are mostly 730 ft long or close to that.
-
I'll have to make my way up to Kingston one of these days.....probably a good 6 hour drive for me.
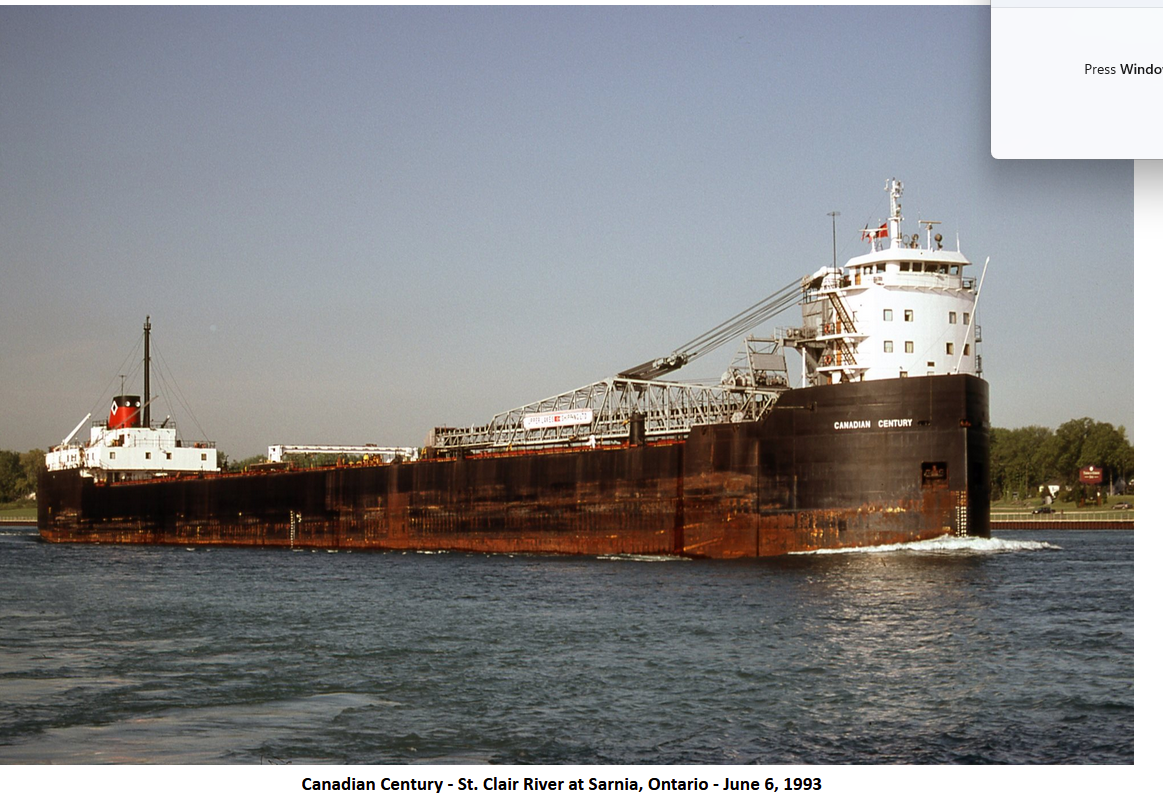
I actually enjoy the model showing the towing of this boat - I was able catch some good pictures of the actual tow on the Detroit River on it's way to Kingston last summer.
- thibaultron, Diver and mtaylor
-
3
-
On 6/12/2024 at 9:18 AM, realworkingsailor said:
As a hobbyist and a former Great Lakes mariner, I’ve made use of their services on a few occasions. I found it to be a great way to order stuff up from the US, and save a ton of $$ on postage (and sometimes other… uh…. fees 😉).
Andy
I've heard, but not sure if true, that sometimes they'd have pizzas ordered from Windsor and delivery by the Westcott - we are pretty well known for having amazing pizza!
I missed that they were having this celebration - would be an easy trip across the border - probably spend more time crossing the bridge or tunnel and waiting in line at customs than actual travel time.
-
Interesting history of this mail/supply boat. Should be noted, they do not operate in the winter season (January - March). Also....the man interviewed in this story (Sam Buchanan) is an amazing great lakes model builder - many of his builds reside in different great lakes museums.
https://www.cbc.ca/news/canada/windsor/westcott-150-years-1.7230731
- CiscoH, Canute, thibaultron and 3 others
-
6
-
Hello, and welcome fellow canuck!
- Keith Black and mtaylor
-
2
-
Thought this may be of some interest to many on here:
- Paul Le Wol, mtaylor, thibaultron and 1 other
-
3
-
 1
1
-
-
I tried tinkering with TinkerCad - seems OK. I'll have to look at Blender.
Back in my mold design days (my area is a leading automotive, auto parts, mold making city) we used CadKey I believe, then were sent for training on (at the time) a high end 3D modelling software called Unigraphics. This is 25 years ago now, so my skills are non-existant (I left the industry in 2000), so I'd be starting from ground zero.
I'd love to get into the CAD programs again, as I know you can import .pdf and maybe other type of files and use these to create 3D printable files, and also design fittings to be 3D printed for my models.
I believe some of the .pdf blueprints I have may be able to be imported to certain programs, and then you can isolate a certain area and maybe create a 3D part/deck/etc..........I could be wrong on this.
- mtaylor and Scottish Guy
-
2
-
I will ask about yellow cedar as well, when I hit my local wood shop. This shop's old owners stocked basswood blocks, but the new owners only carried really rough cut 1x6, which is fine to stack together anyway. Basswood cuts with such fine dust it is quite messy, but easy to work with.
It seems like I will stick with the wood hulls going forward, especially considering the size of my models (1/192 scale of a 740 ft ship is a large model). Plus, my woodworking skills will improve along with my shipbuilding.
")
-
16 hours ago, Roger Pellett said:
Great Lakes vessels in bulk cargo trades are long, narrow, and shallow draft. Designers, therefore, are hard pressed to provide adequate structure to stiffen the hulls. Even so some ships flex uncomfortably in rough water.
The model that John wants to build will exhibit the same problems without internal structure. A light plastic shell without such reinforcement will behave like a wet noodle.
The simplest approach is a wooden hull. Since these Seaway sized vessels are 90% parallel mid body this can be a hollow open topped box with deck beams and deck added to the carved hull later. The bow and stern can be laminated and designed to fit the ends of the box. The bilge radius is easily shaped with a router and the bow and stern shaped by conventional carving techniques.
These ships are built with all butt welded seams. Plating is flush with perhaps 1/8” external reinforcement of welded seams (about .01” at 1:96 scale). Lapped plates or heavy weld lines are therefore incorrect on a model. Proper finishing to eliminate wood grain will produce a true to scale model.
Roger
That was another concern I thought about. I thought of maybe adding some stabilizing framing (which would not be seen in the model). I like to toss new ideas around, and push myself to the next level. Unfortunately I do not have cross sections or lines drawings with the drawings that I am using for this build.
Looks like it will be a hollow wood hull with mostly solid bow and stern shaped to the correct shapes. Going hollow will allow for the addition of deck lighting and running the wiring for the lights fore and aft. Hopefully my local wood shop that I got my basswood from before, still carries it (new owners), otherwise will have to find another option.
As you said Roger, modern lake freighters are basically just a hollow rectangle for most of their length.
-
5 hours ago, allanyed said:
Hi John,
For the plug, have you considered styrofoam as an alternative to wood then heat and form styrene around the plug? For the area such as at the stern it may be easier to make that area of the plug out of wood to withstand heavier bending. MAYBE this video will give you some ideas. https://www.youtube.com/watch?v=AxP3vtQxVtw for the shaping of the styrene sheets. There is at least one MSW member that has made beautiful hulls for "steel" ships using alternative materials. Hope he sees your post and responds.
Allan
I actually picked up a couple bricks of hard styrofoam (XPS expanded polystyrene) from a local Michael's - called CraftFOM https://www.floracraft.com/products/floracraft-foam-xps/
really light weight, looks easy to carve/shape - not sure how you'd adhere styrene or cardstock to it without it melting though. I haven't played around with these yet. The only reason I haven't is the concept of trying to make it a smooth surface to look like a steel hull......adhering styrene sheets to it with the proper glue would melt it (I am pretty sure at least).
-
30 minutes ago, Javelin said:
I wouldn't try to connect styrene to wood. Due to the different expansion coefficients it's likely to crack at the seams.
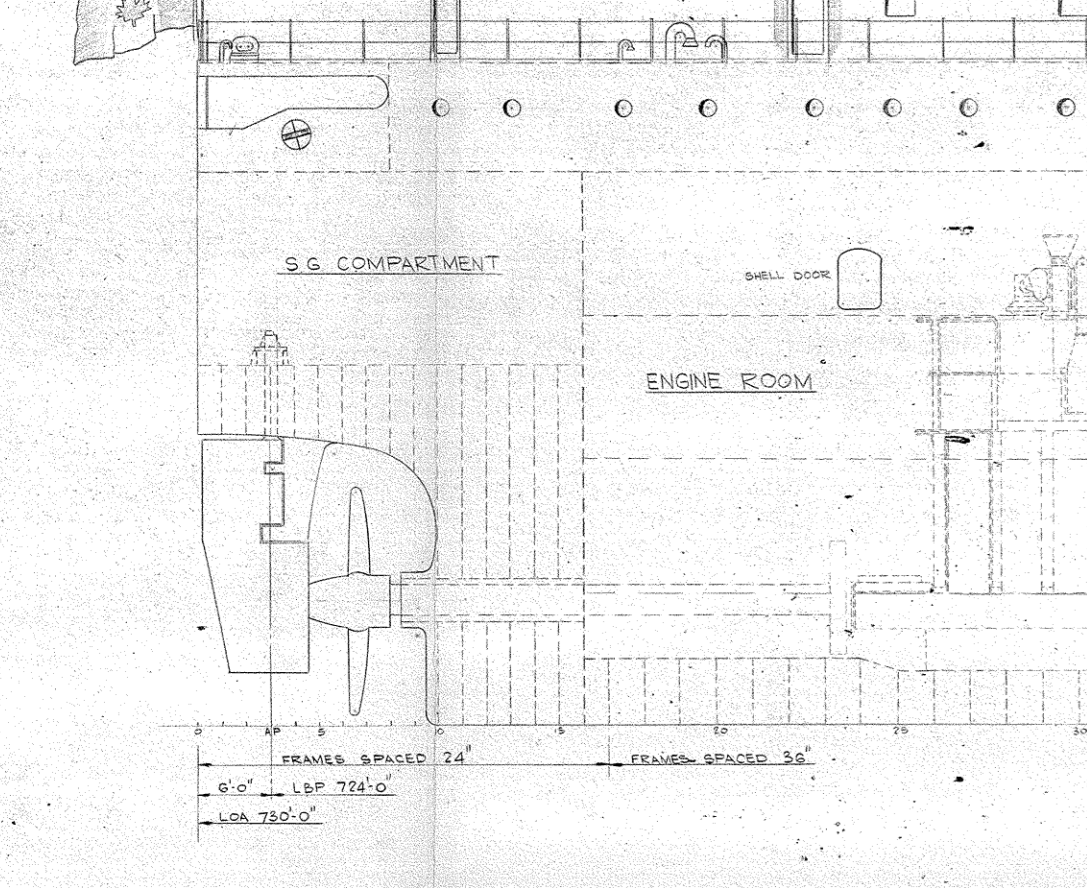
It's not fully clear to me what the shape of this vessel is from the plan, I'm assuming a twin prop -twin rudder configuration?
If you want to go full styrene, I guess making styrene strips (=planks) over styrene frames will be the easiest way in such an area. Afterwards you can fill the gaps with filler and sand smooth.
For the stern itself I'd make a false stern/last frame to end the planks on, then level all planks there and put the full stern plate behind that.
Although I'm mainly a styrene builder, I must admit for such a size model, I'd prefer wood. Styrene becomes very brittle and if you're making such a large detailed model, it might as well last for a while...
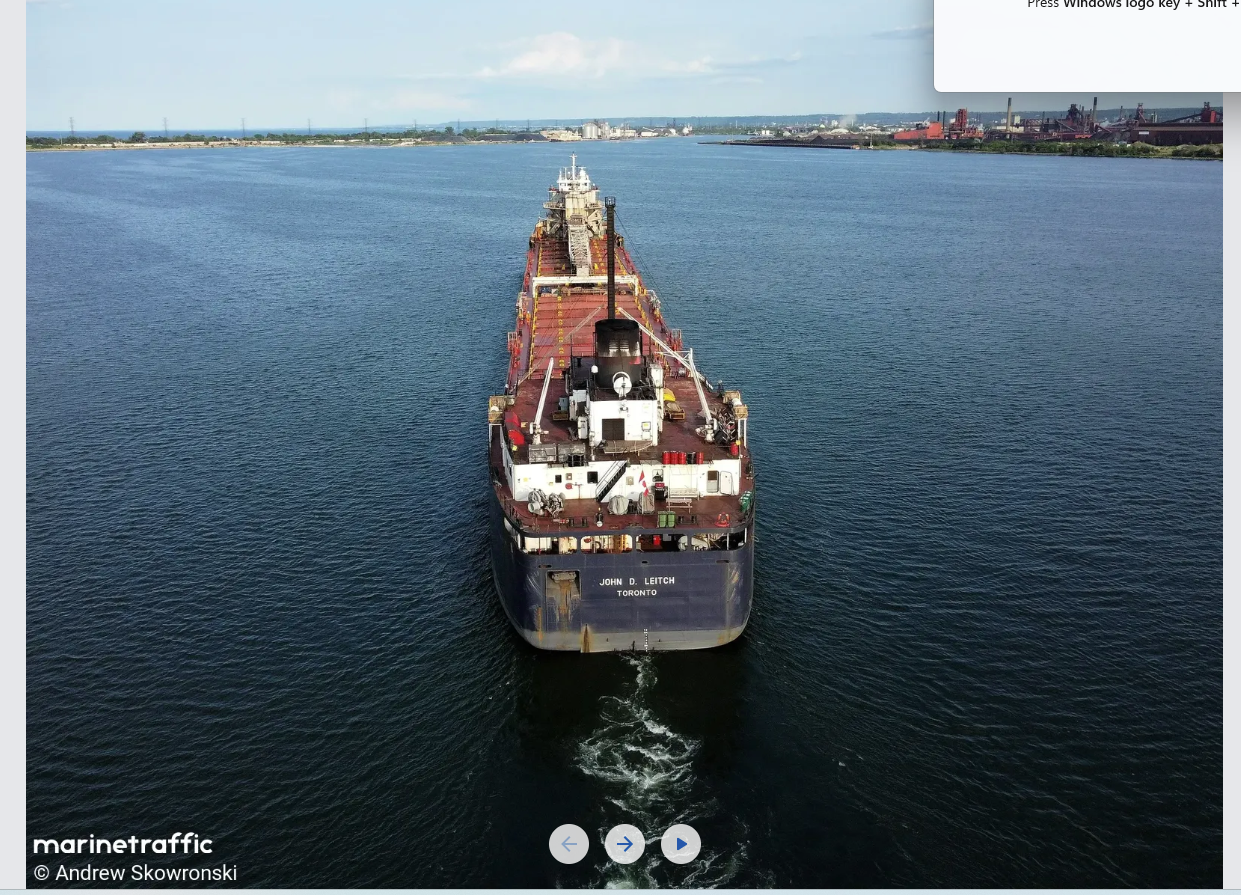
It's a single prop, 2 rudders. here are couple other pics I grabbed from the 'net.... Hard to see, but this is what she looks like. I really can't see a way of making the rudder/prop area with styrene.

- Scottish Guy and mtaylor
-
2
-
Sorry that I didn't post my last completed build and it's progress, or my latest that I am working on, but they are also great lakes freighters.
My 2 builds (Algoma Strongfield - which has a build log on here) and it's fleetmate (Tim S Dool - no build log as mentioned above) were built from scratch at 1:200 and 1:192 scale respectively using basswood for their hulls. I like working with it as it's easy to shape and readily available, but a little pricey in my area. These are large ships, thus large models.
As I evolve as a modeller, I am always thinking of different ways to make my builds easier, etc. A model with a solid basswood hull that is almost 48" long is heavy. For my next/current build I have been working on building the pilot house, accomodations, etc..... actually building an unloading boom too which is turning out good (I will post pics for this build and make a log - I promise!). I plan to add led lights on the masts, cabins, and maybe deck if all works out. This has led me to consider doing a hollow hull. Doing so with basswood or balsa (even if for just the sides) is simple enough, and would the stern as a solid block. Leaving the solid block would allow for me to shape area where the propeller would attach, and rudders. However......I thought it be rather simple to do the hull out of styrene sheets, easy to weld together, but......how would I go about that back end area (pic included in this post) with styrene? I am thinking that wouldn't be possible......maybe somehow attach a carved wood back end to hollow styrene hull?????
Thoughts/suggestions???
- mtaylor, Paul Le Wol and Scottish Guy
-
3


Decals for draft markings
in Painting, finishing and weathering products and techniques
Posted
I don't mind Woodland Scenics dry rub for maybe putting the name of the ship but I cant imagine doing depth markings...that would be a test of patience I am not interested in tackling.