


JKC27
-
Posts
264 -
Joined
-
Last visited
Content Type
Profiles
Forums
Gallery
Events
Posts posted by JKC27
-
-
Welcome to MSW, from the deep south (Windsor)
- mtaylor and Keith Black
-
 2
2
-
Welcome aboard!
Chris said it best above......... I would say point 3 is, in my opinion, the most important. Find something that you are interested, and happy searching! Do you want to do a sailing ship.....a warship....sailboat....cargo ship....etc., then what era?
There are a ton of resources on here, plus online as well.
-
Roger,
Saw this on the daily boatnerd Today in Great Lakes History today:
https://boatnerd.com/today-in-great-lakes-history-april-27-2/
Today is the anniversary of the sinking of the Benjamin Noble in 1914.
- mtaylor, FriedClams, Keith Black and 1 other
-
4
-
31 minutes ago, Paul Le Wol said:
We stopped by to see SS Keewatin just after her arrival at Port McNicoll. She looked so sad and tired. I didn’t realize that they had done so much work on her. This is great news. Thanks for posting this.
I subscribe to the Kingston marine museum's newsletter and heard about it late last year, plus I visit boatnerd.com daily to keep up on the latest freighter news, and they also are very good at updating other related news stories around the lakes. I was hoping the timing would work out to be able to get down to the waterfront after work, and it worked out good - plus the weather was nice too. Seems like my luck usually has something like this happening and the ship goes by at 3AM.
")
- Canute, mtaylor and realworkingsailor
-
3
-
-
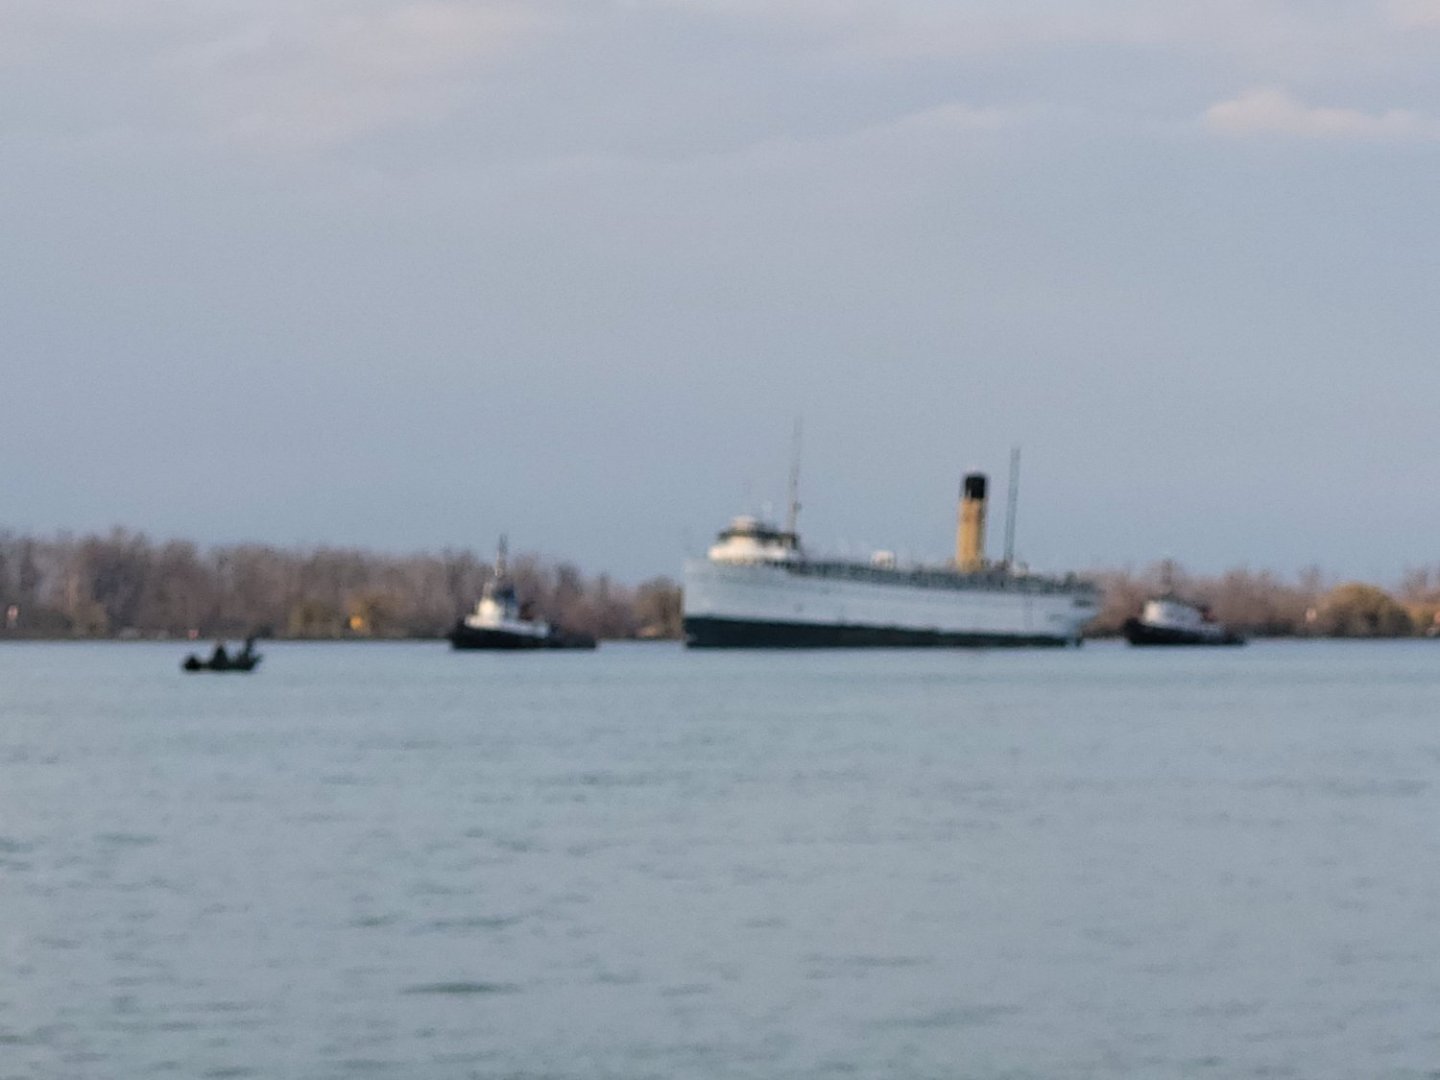
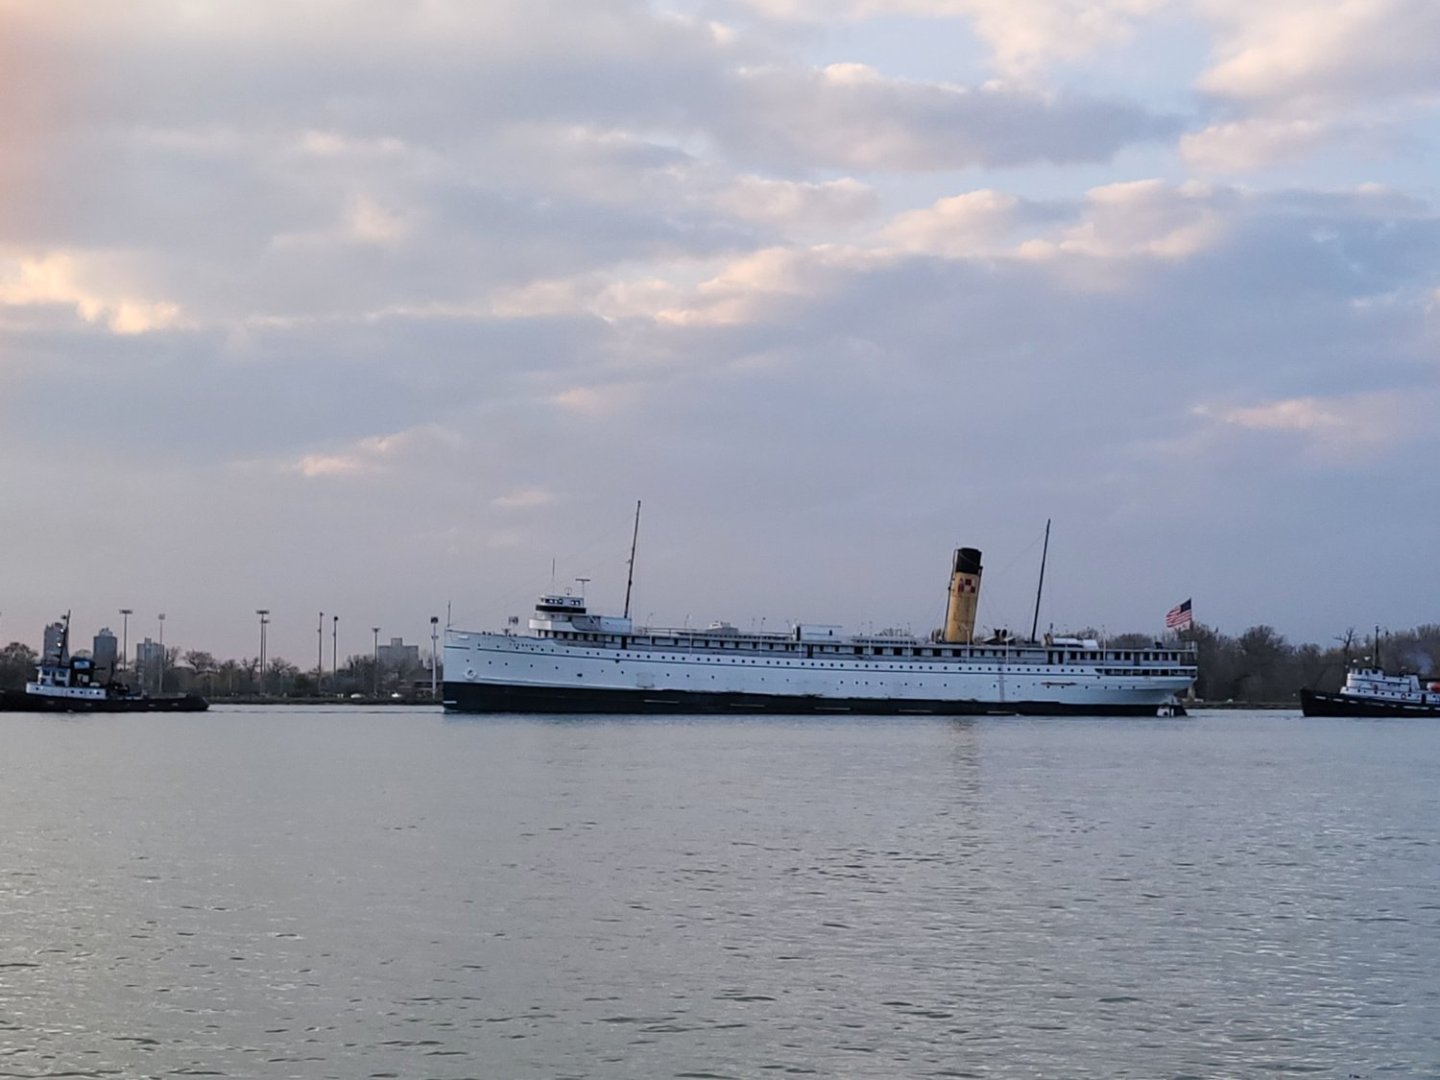
Here are some pics and a short video I got just before sunset. There were a few people there taking pics as well. Got to love apps like marinetraffic.


- bridgman, Canute, Harvey Golden and 4 others
-
7
-
-
Some Great Lakes related news that might be of interest to everyone on here......
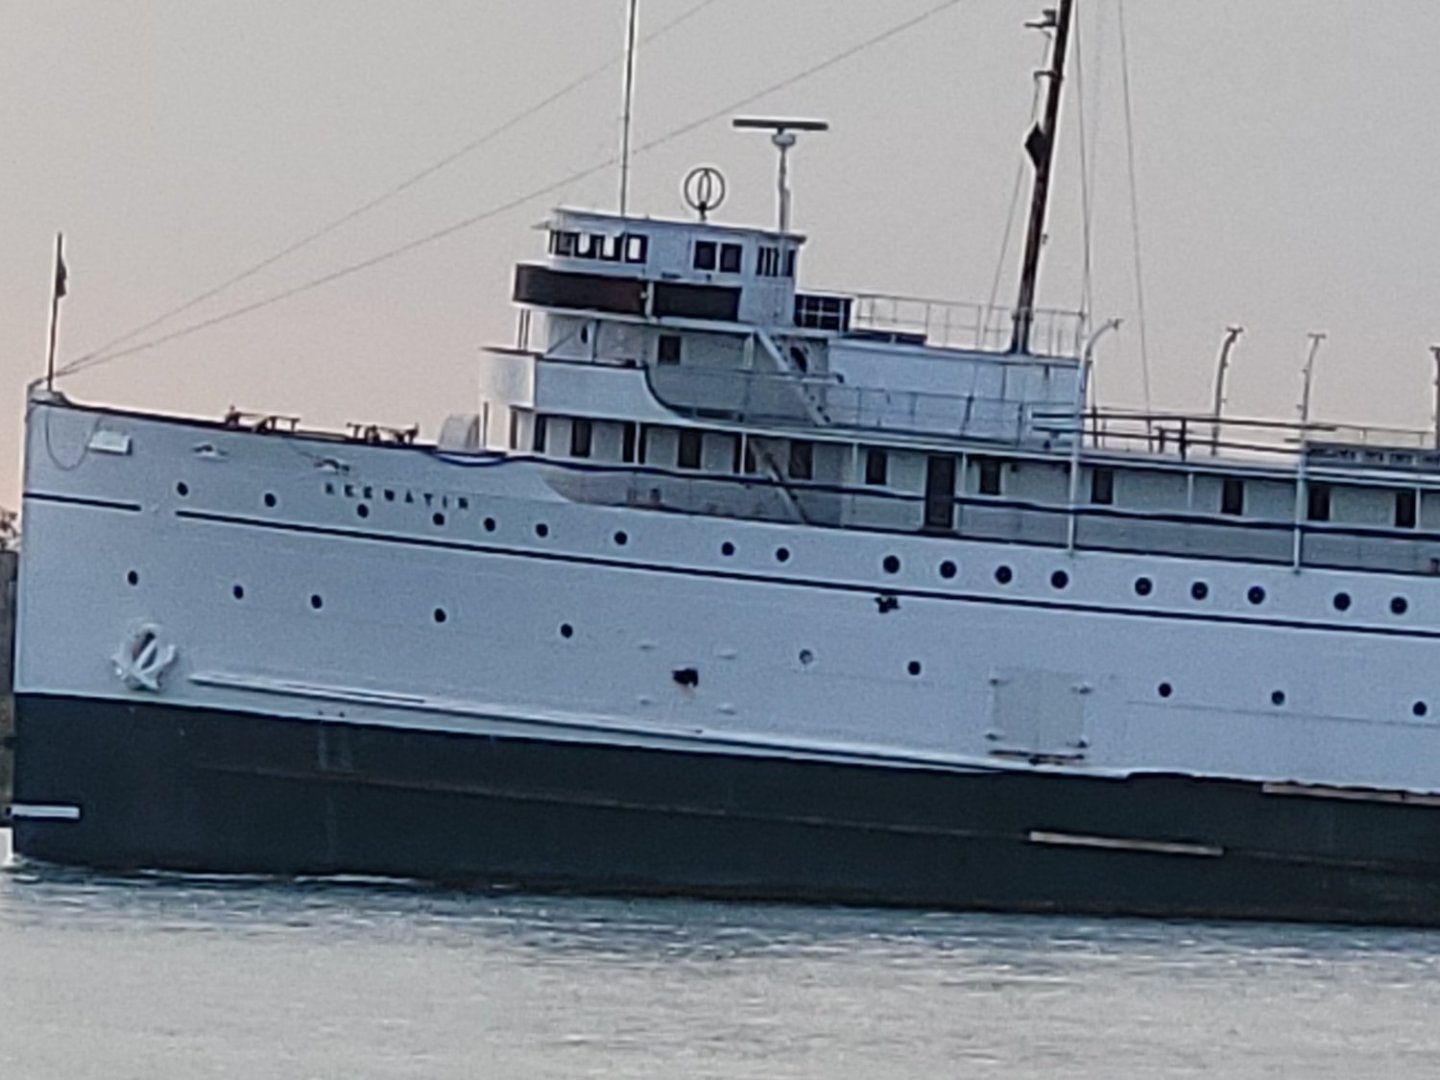
SS Keewatin is a passenger steamer that used to haul people and cargo across Lake Superior from Fort William (current day Thunder Bay) and a small port town in Georgian Bay on Lake Huron, called Port McNicoll. This route lasted until the mid 1960s once the Trans Canada Highway was completed, essentially eliminating the need for this service, and also basically killing the town as most ship jobs left, as well as not needing the rail jobs that at one time terminated here to be transferred to ship.
Built by Fairfield Shipbuilding in Govan, Scotland - launched July 6, 1907 - maiden voyage Sept 14, 1907 - in service Oct 7, 1908 until Nov 29, 1965
Original owner - Canadian Pacific Steamship Company
Port of Registry - Montreal
Length: 336'7" (102.6m)
Beam: 43'8" (13.3m)
Draught: 23'7" (7.2m)
Tonnage: 3856 GRT
Installed power: 3000 hp
Propulsion: Quadruple expansion steam engine - 4 coil fired boilers - single screw prop - max speed 16 knots
Capacity: 288 passengers
Crew: 86
Keewatin ran until 1965 and then bounced around different owners serving as a museum on Lake Michigan, and then finally going back to it's home port of Port McNicoll in 2012. It was to be used as a museum and even centre. In it's time back at Port McNicoll it was even used as a set for maritime related movies, documentaries including Titanic, and Lusitania and others. Late 2020 saw plans for the owners to donate SS Keewatin to the Marine Museum of the Great Lakes in Kingston, ON, and this was made official this winter (2022-23).
The tow to Kingston started this week, and sailed by not for from my house yesterday afternoon.
Here is a link to the Marine Museum of the Great Lakes page on SS Keewatin: https://marmuseum.ca/ss-keewatin
Pics I got yesterday to come....the park I took these from is 3 blocks from my house, so as you can gather from my interest area and other posts, the ships that ply the Great Lakes (from all over the world) as been a part of my life.
- Paul Le Wol, bridgman, ccoyle and 1 other
-
4
-
-
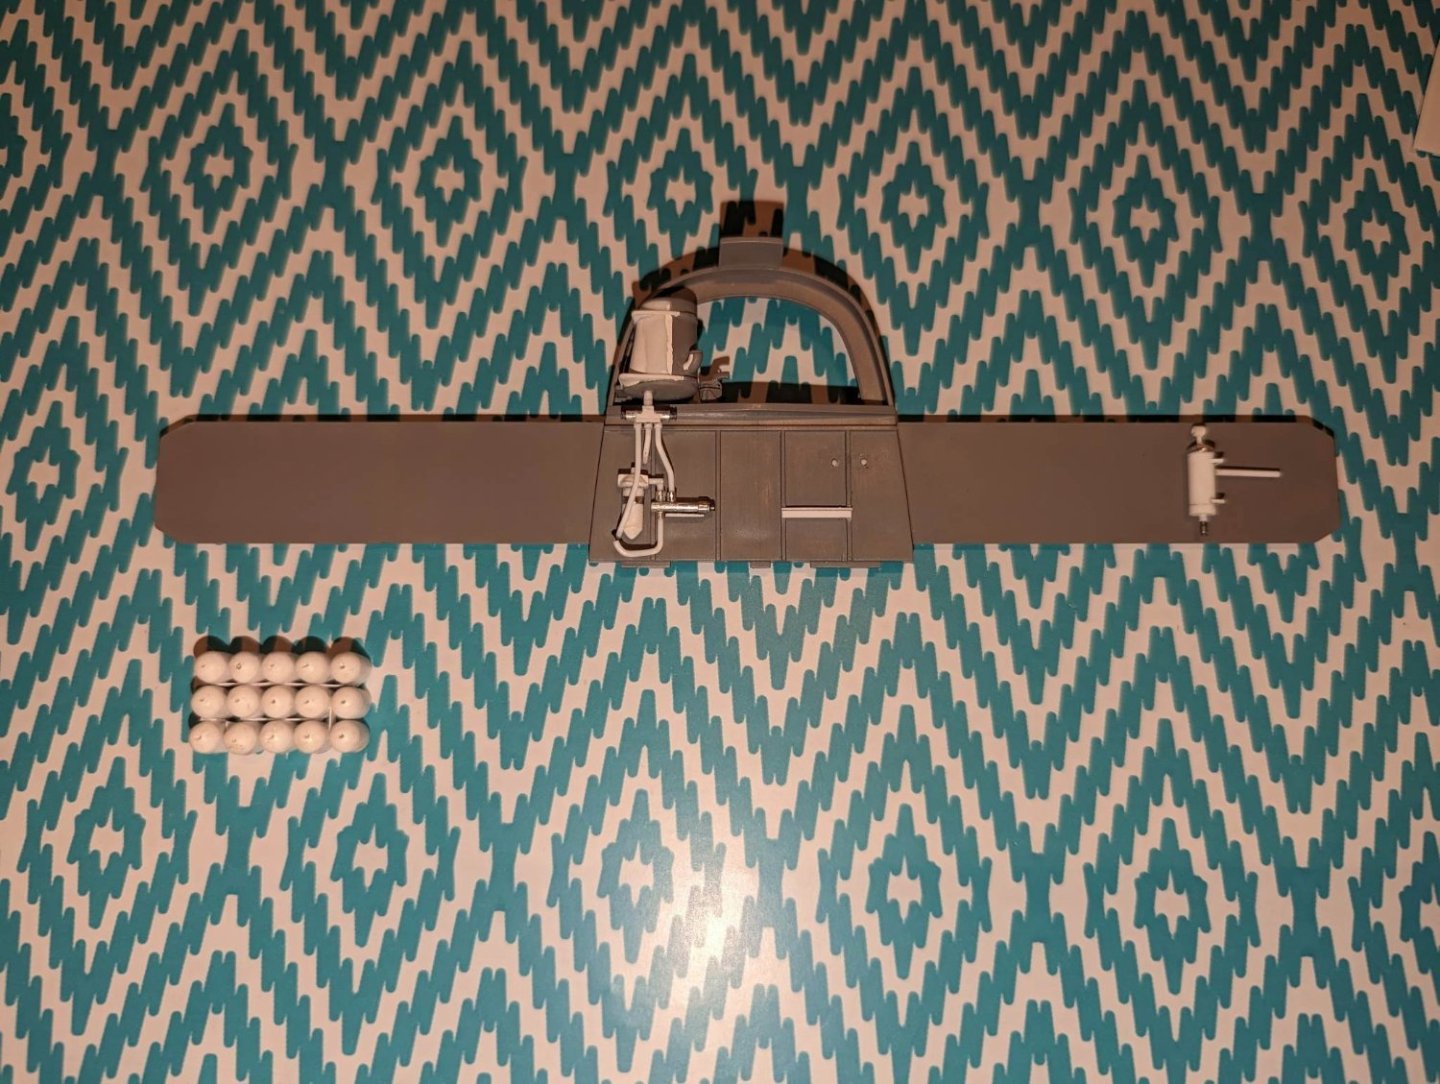
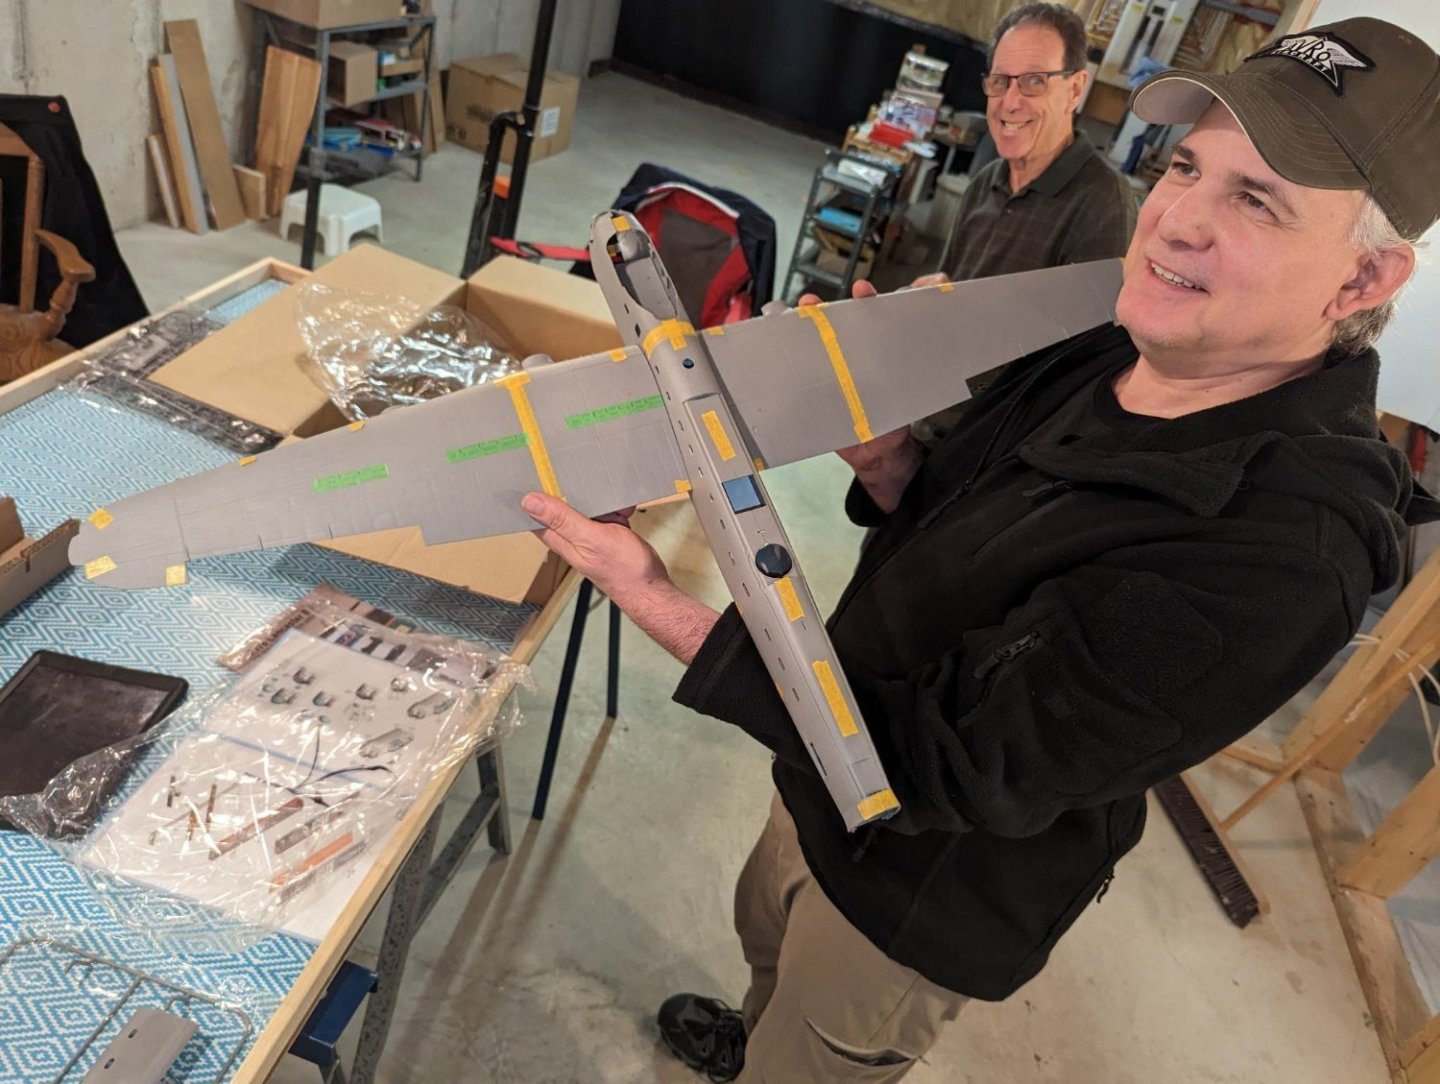
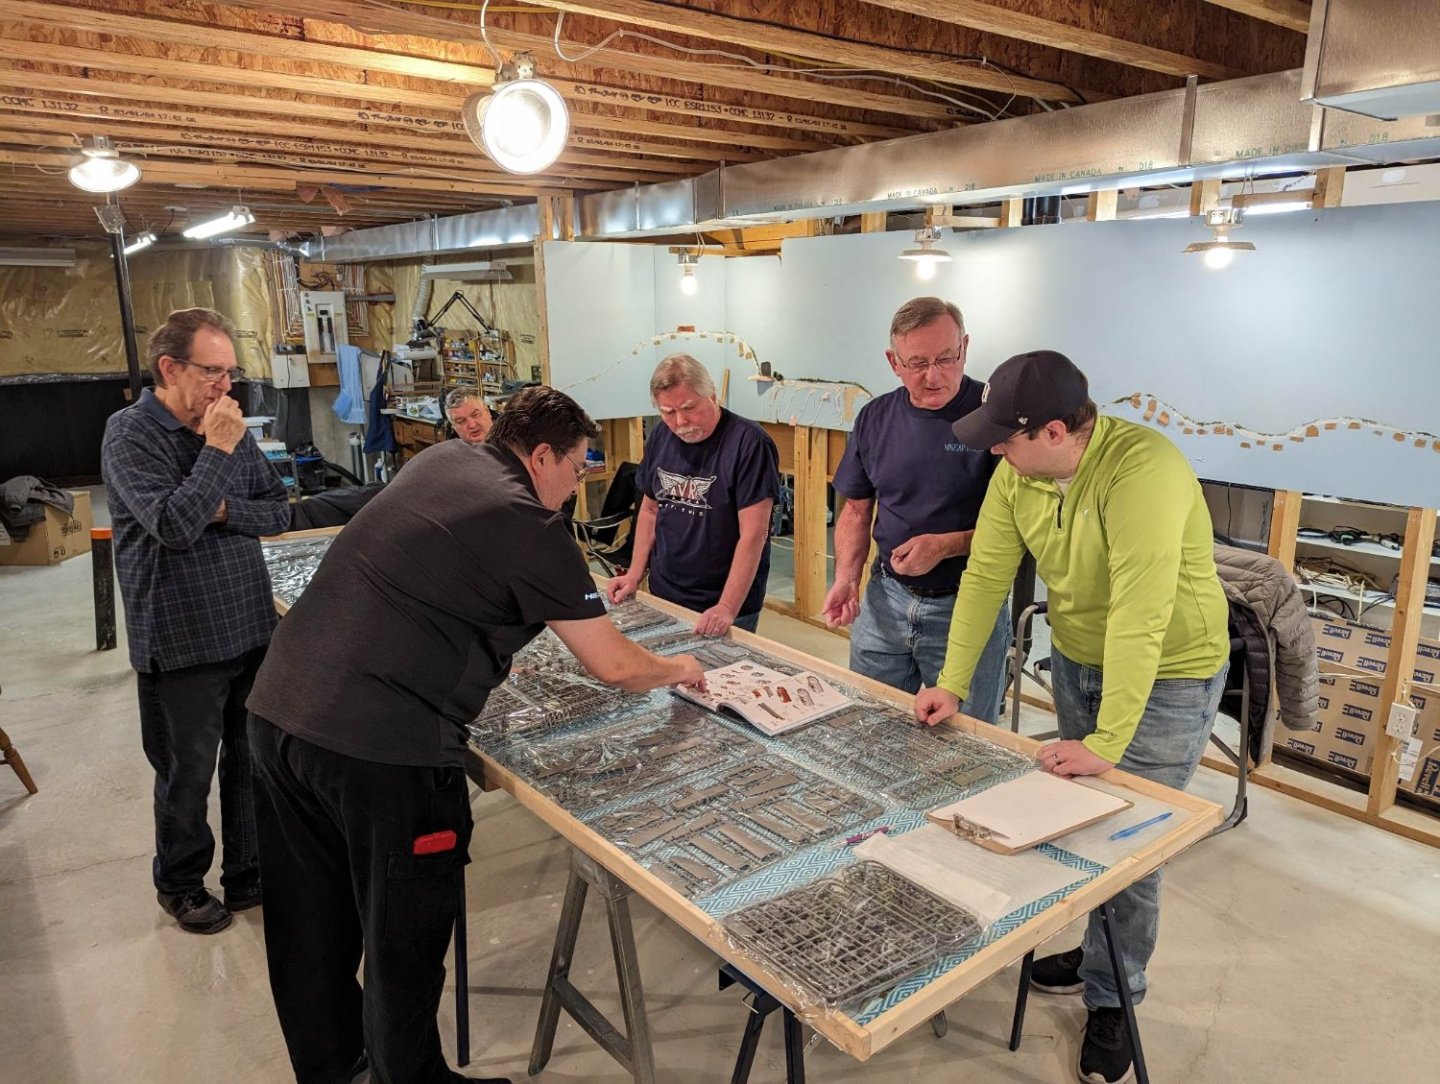
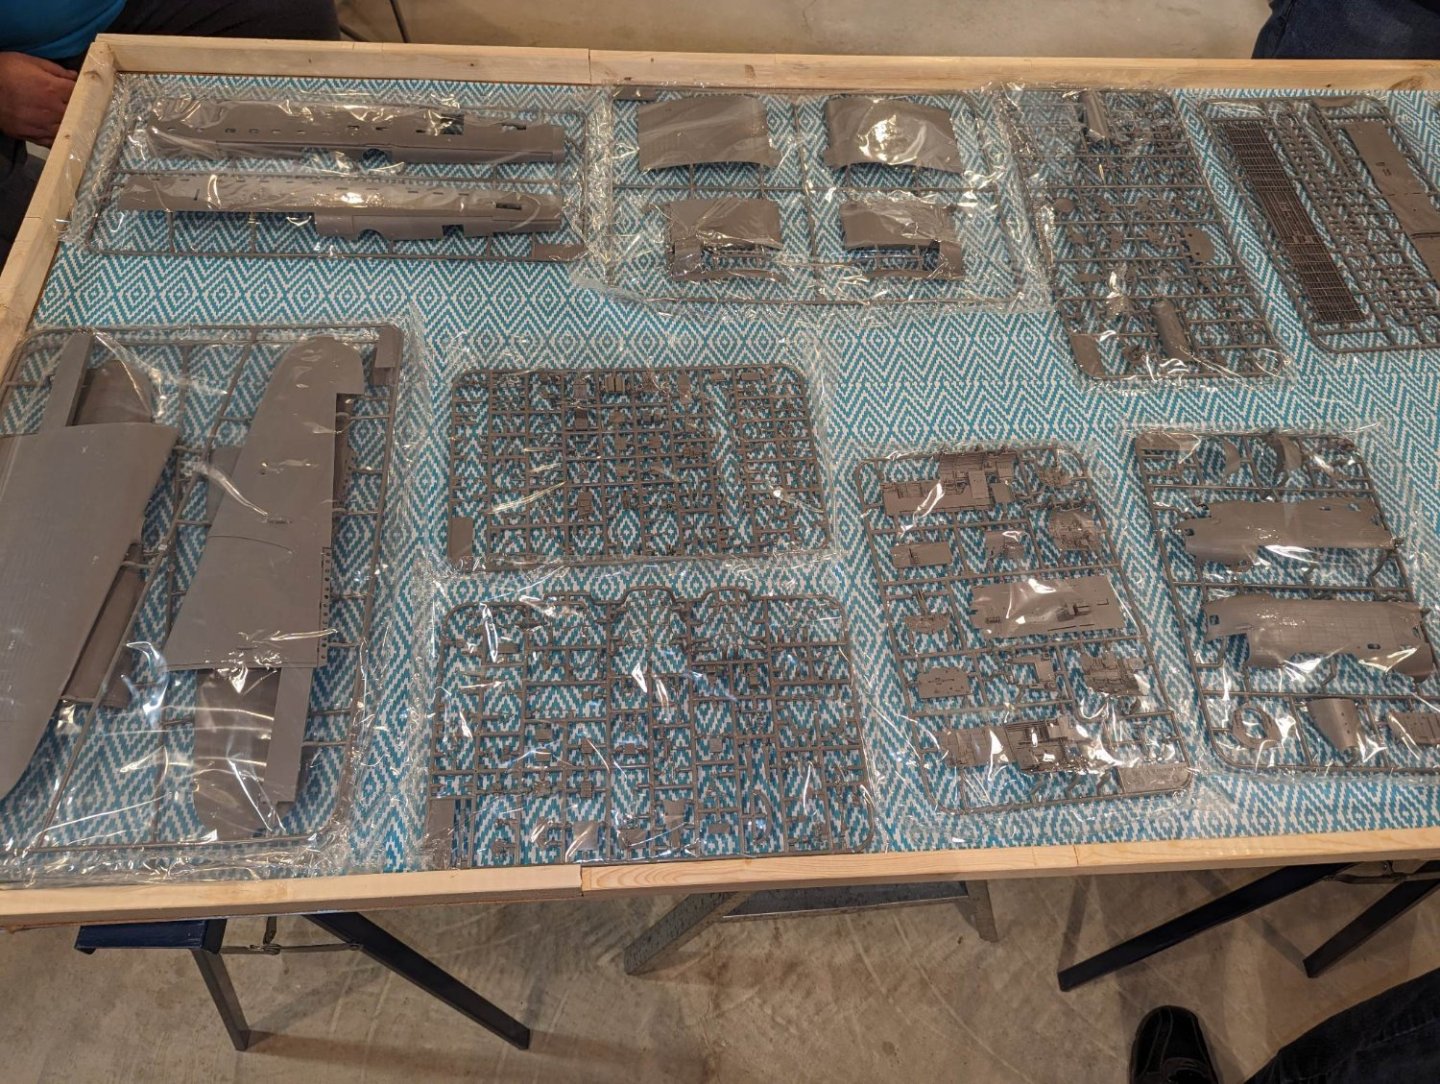
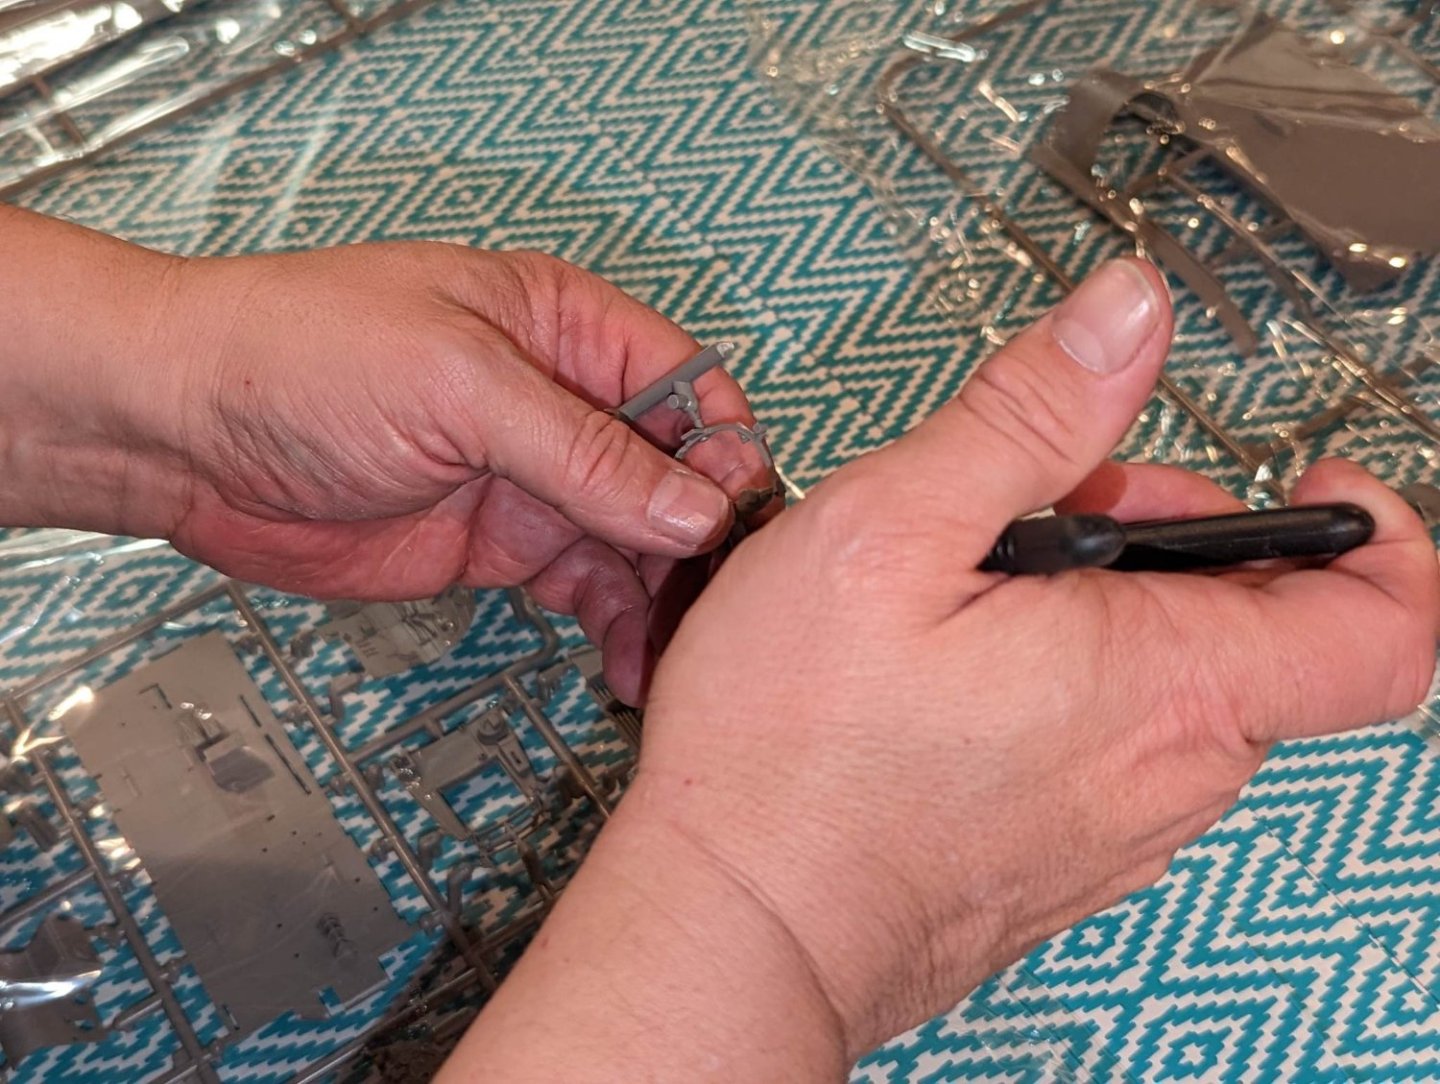
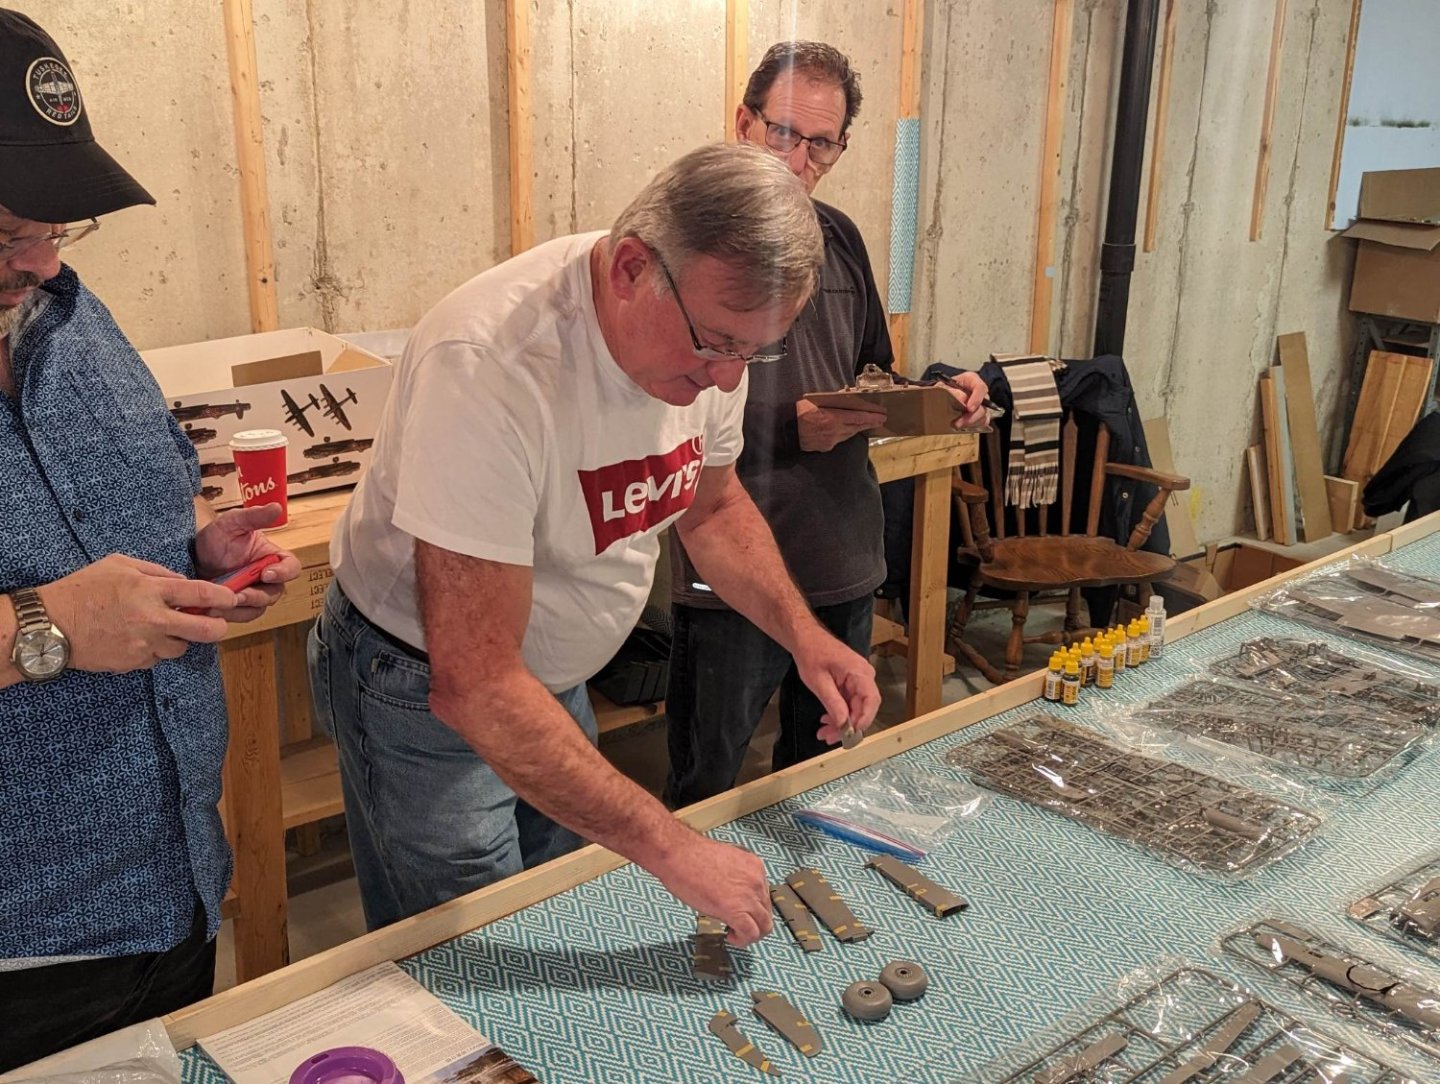
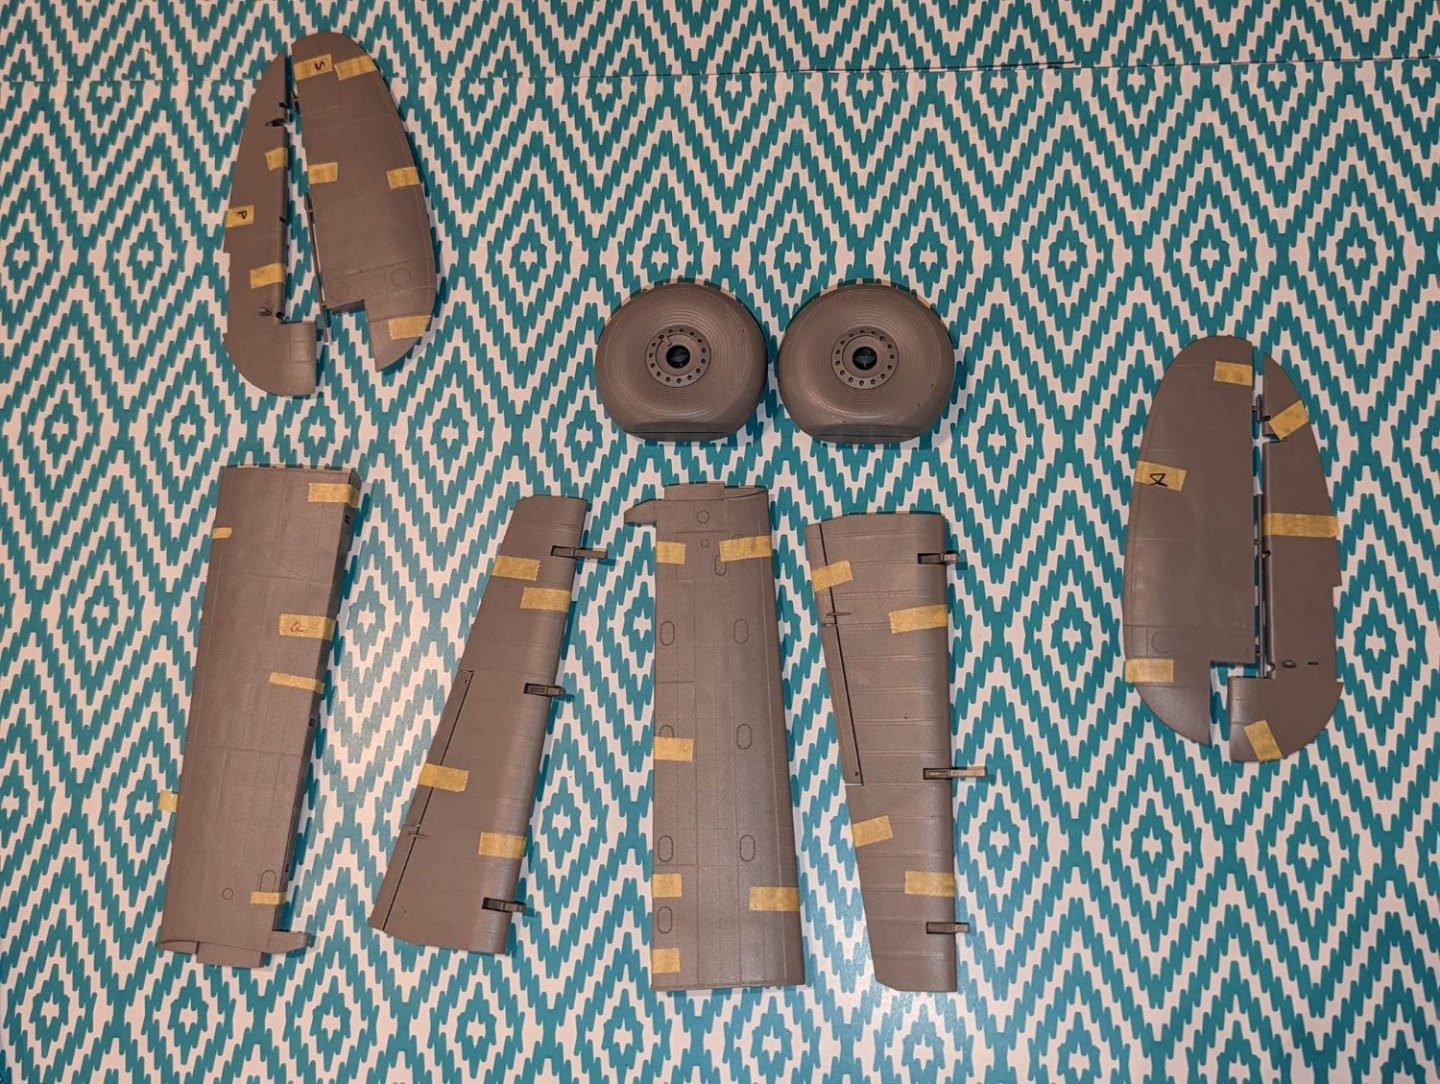
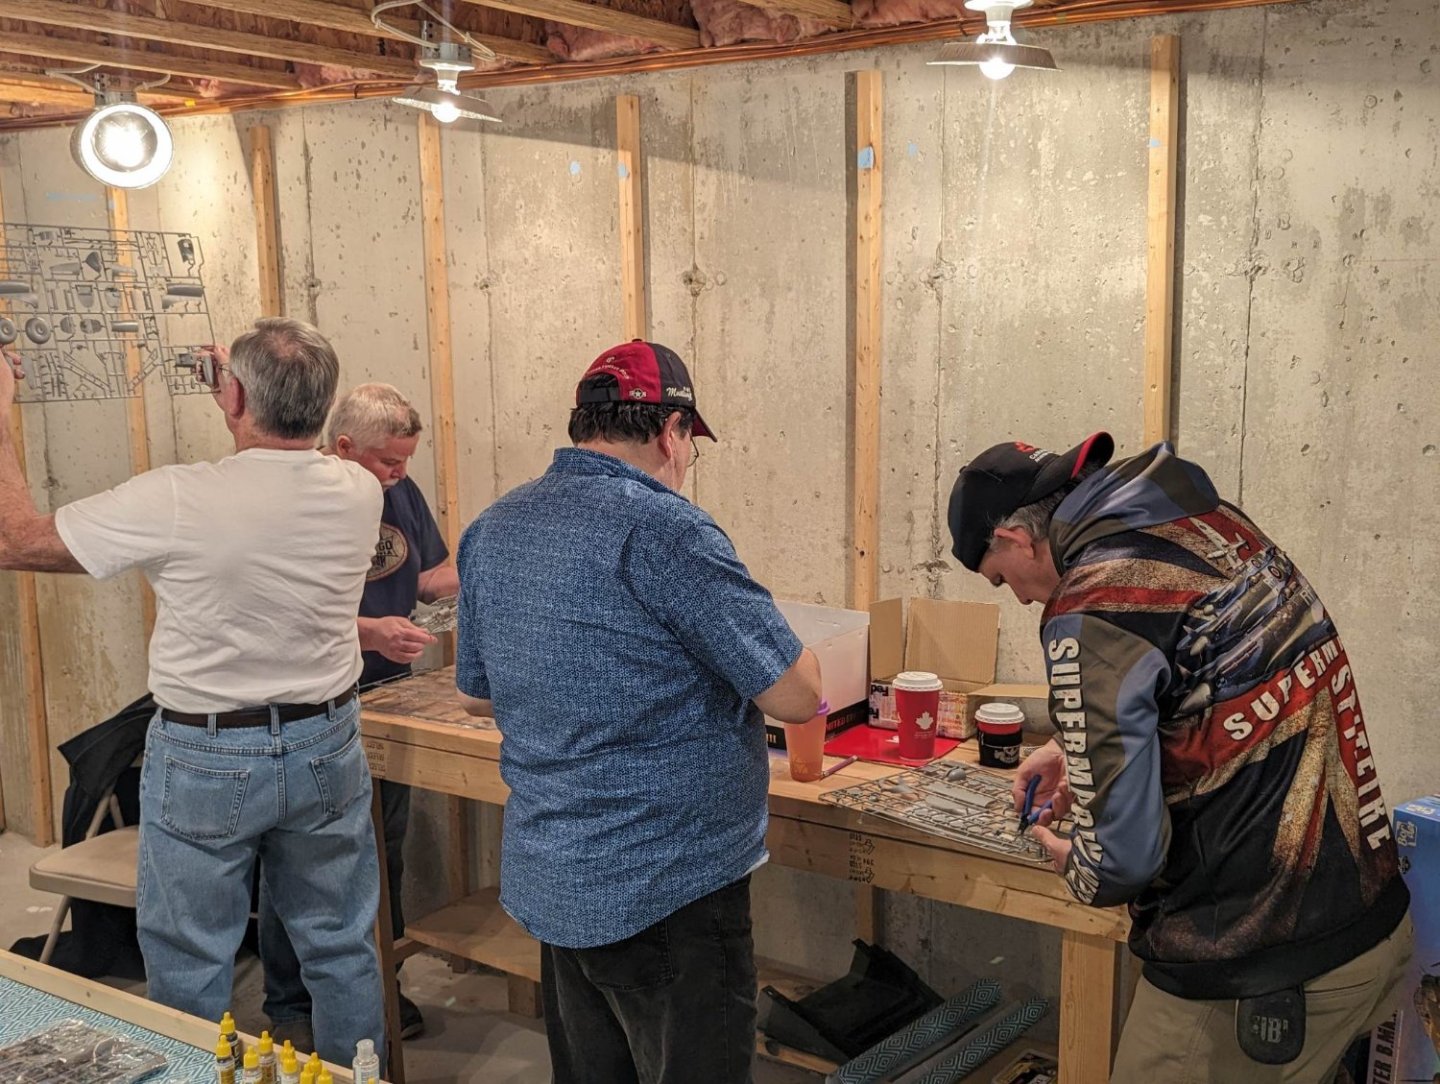
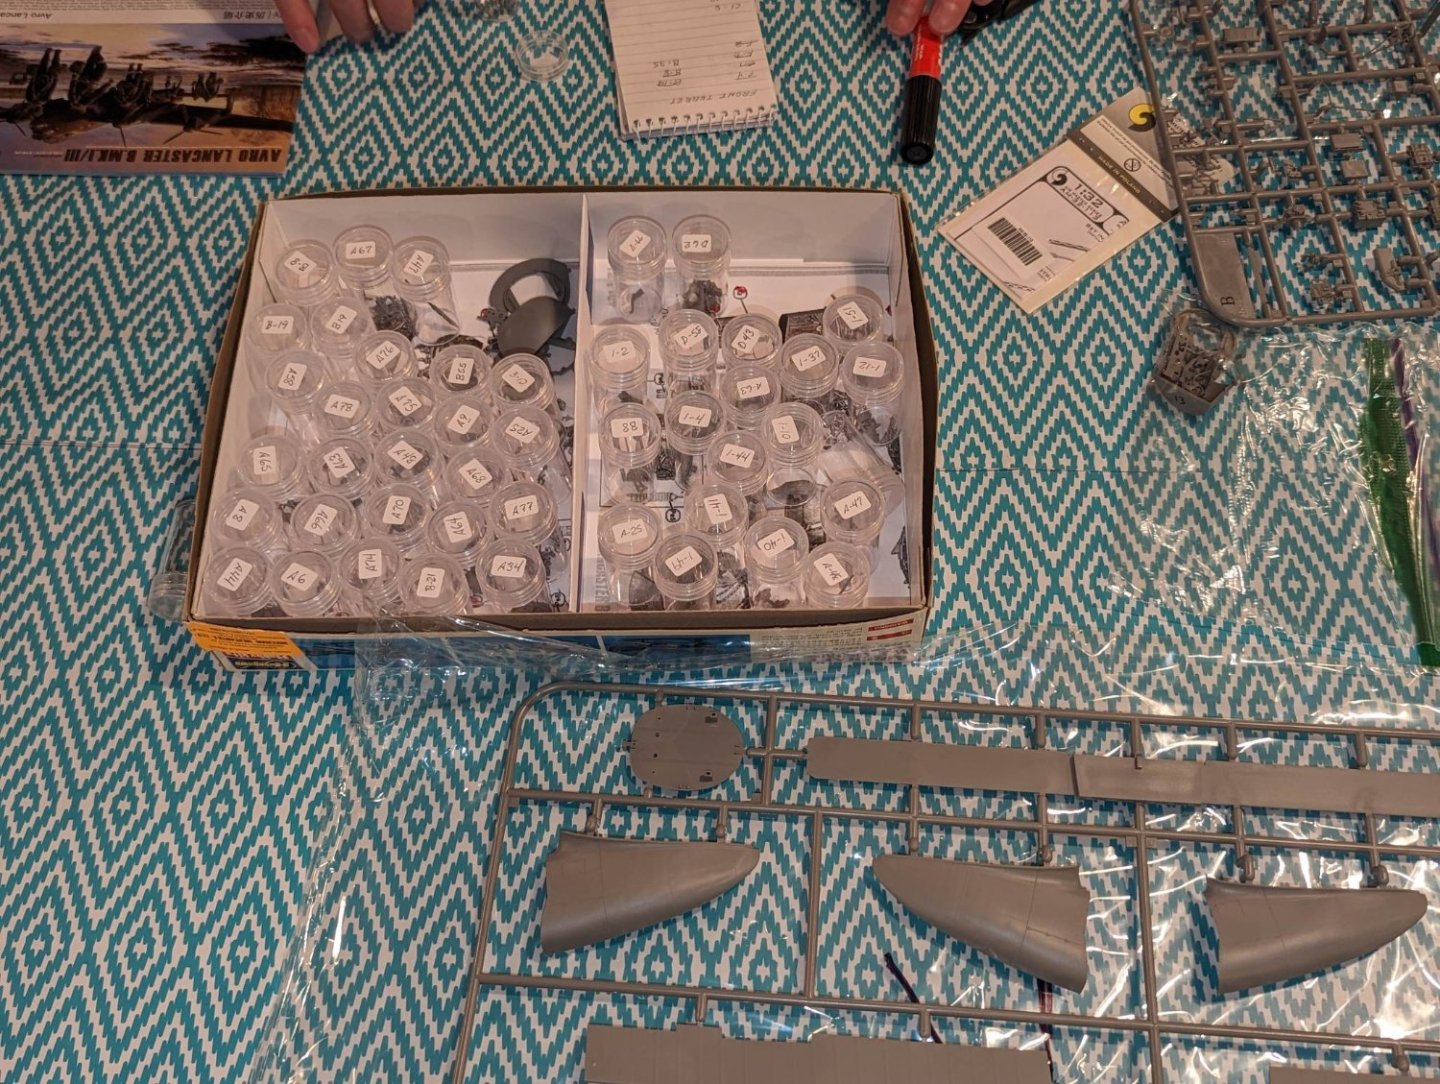
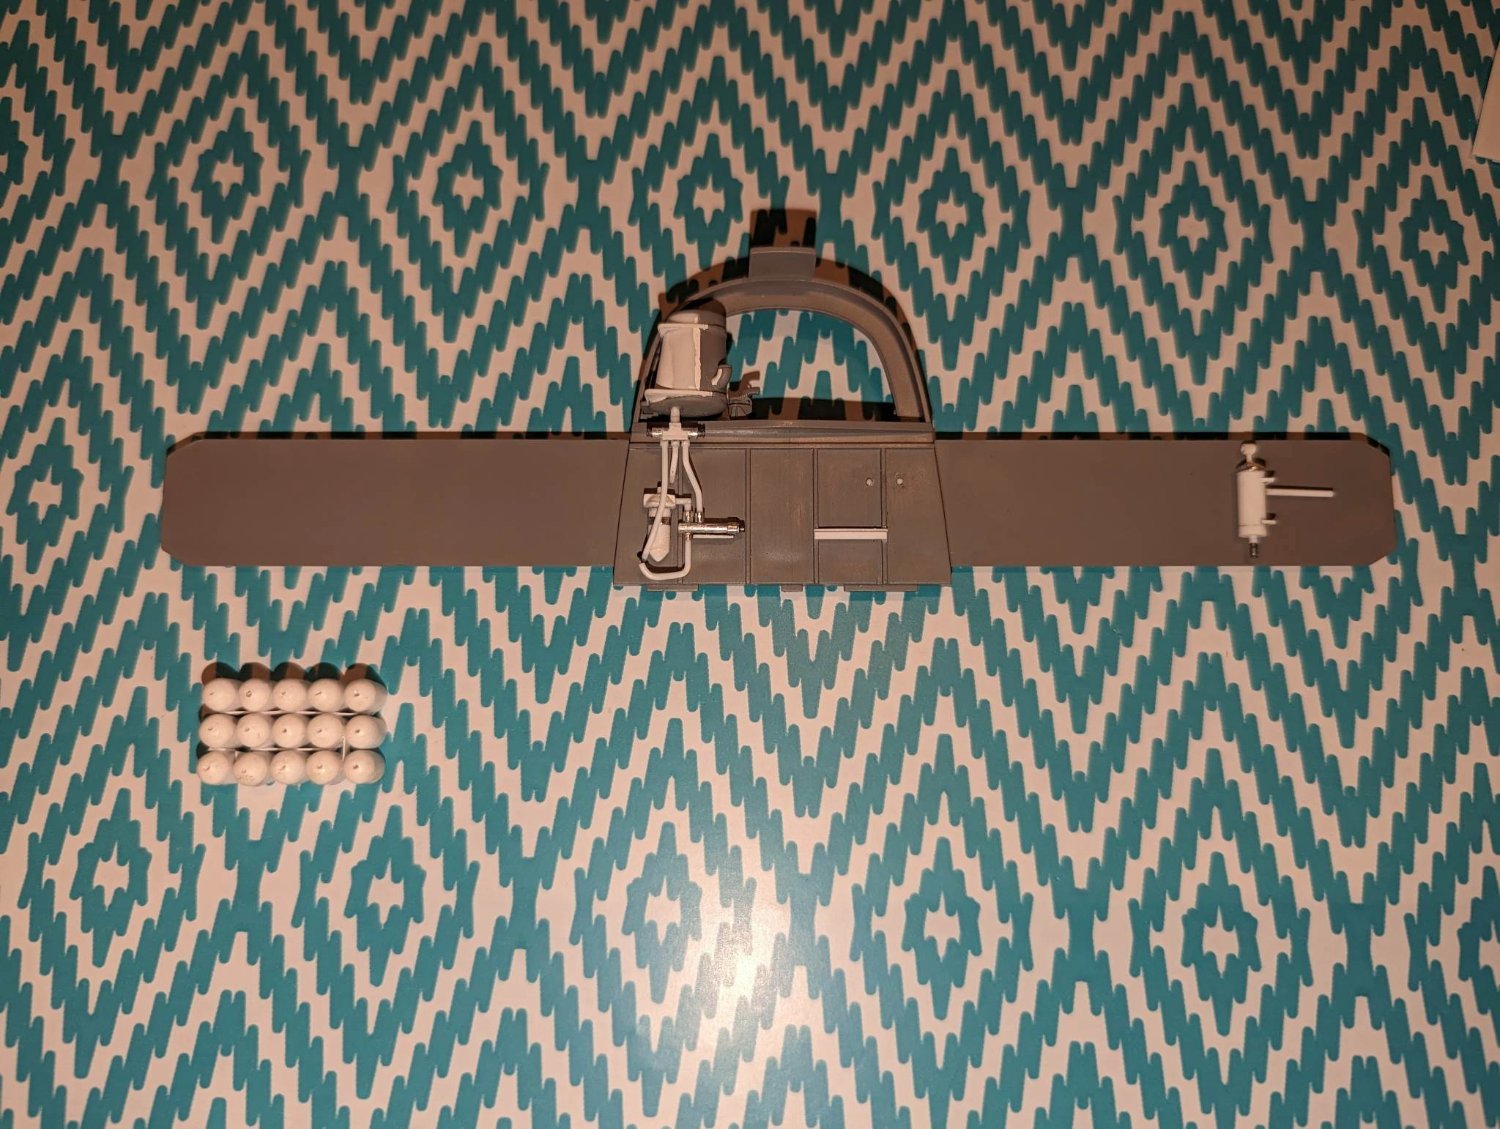
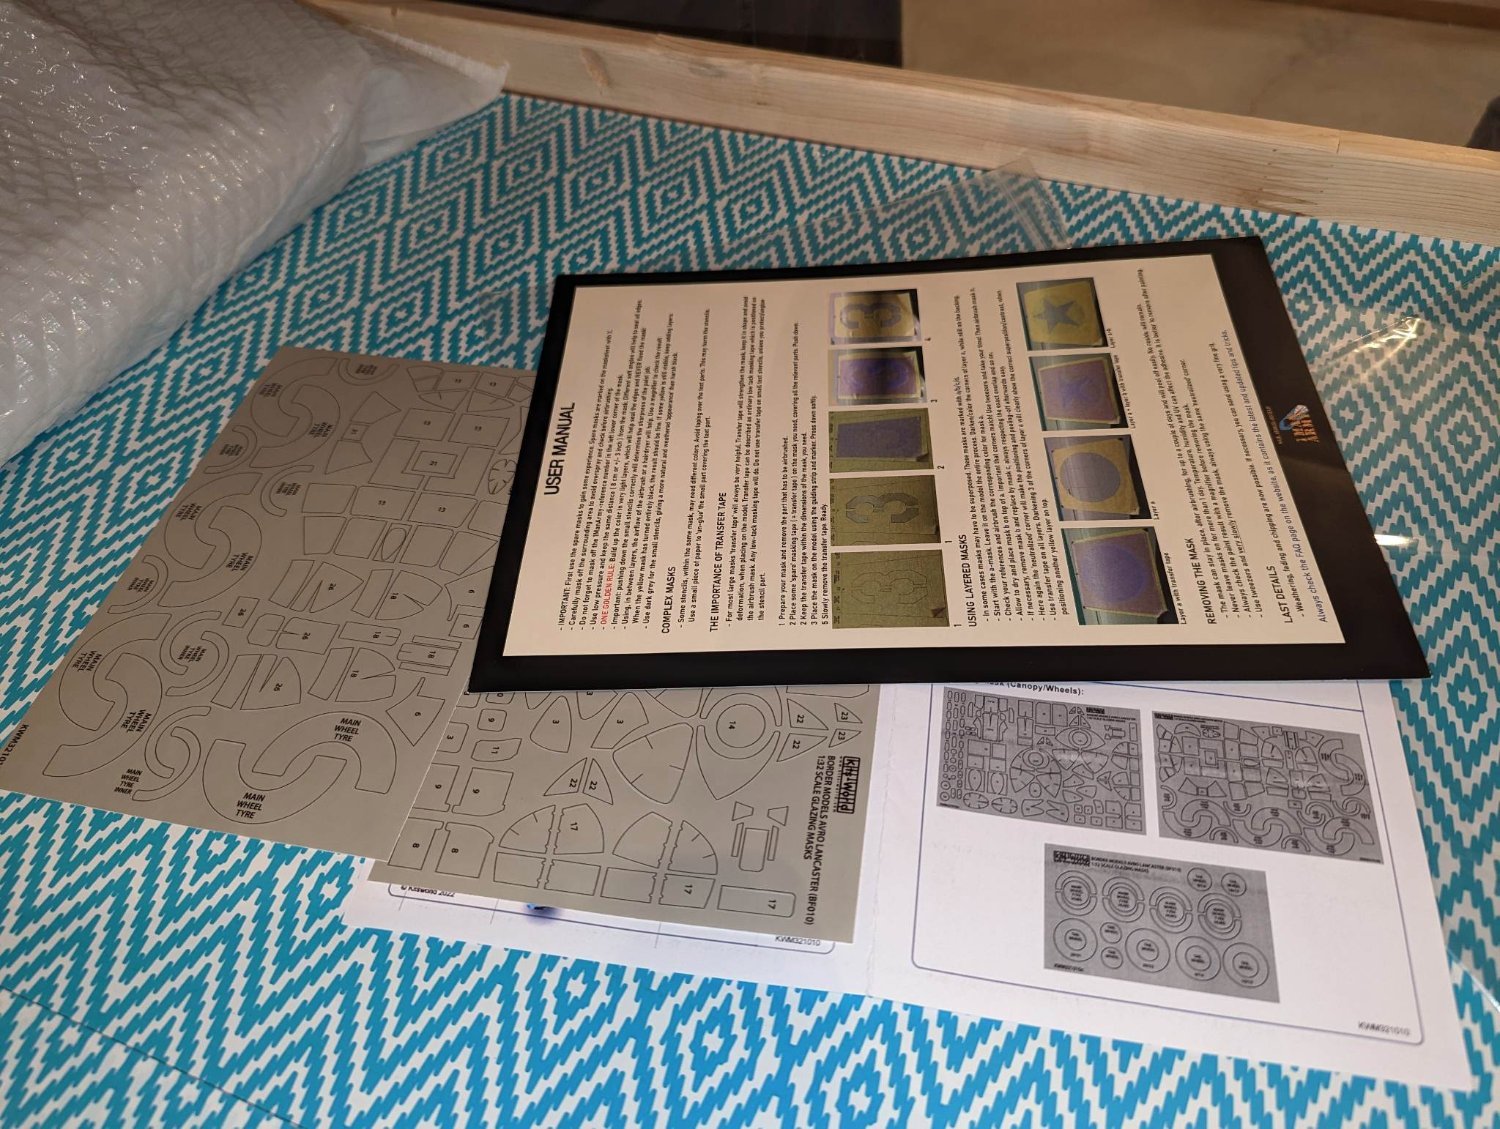
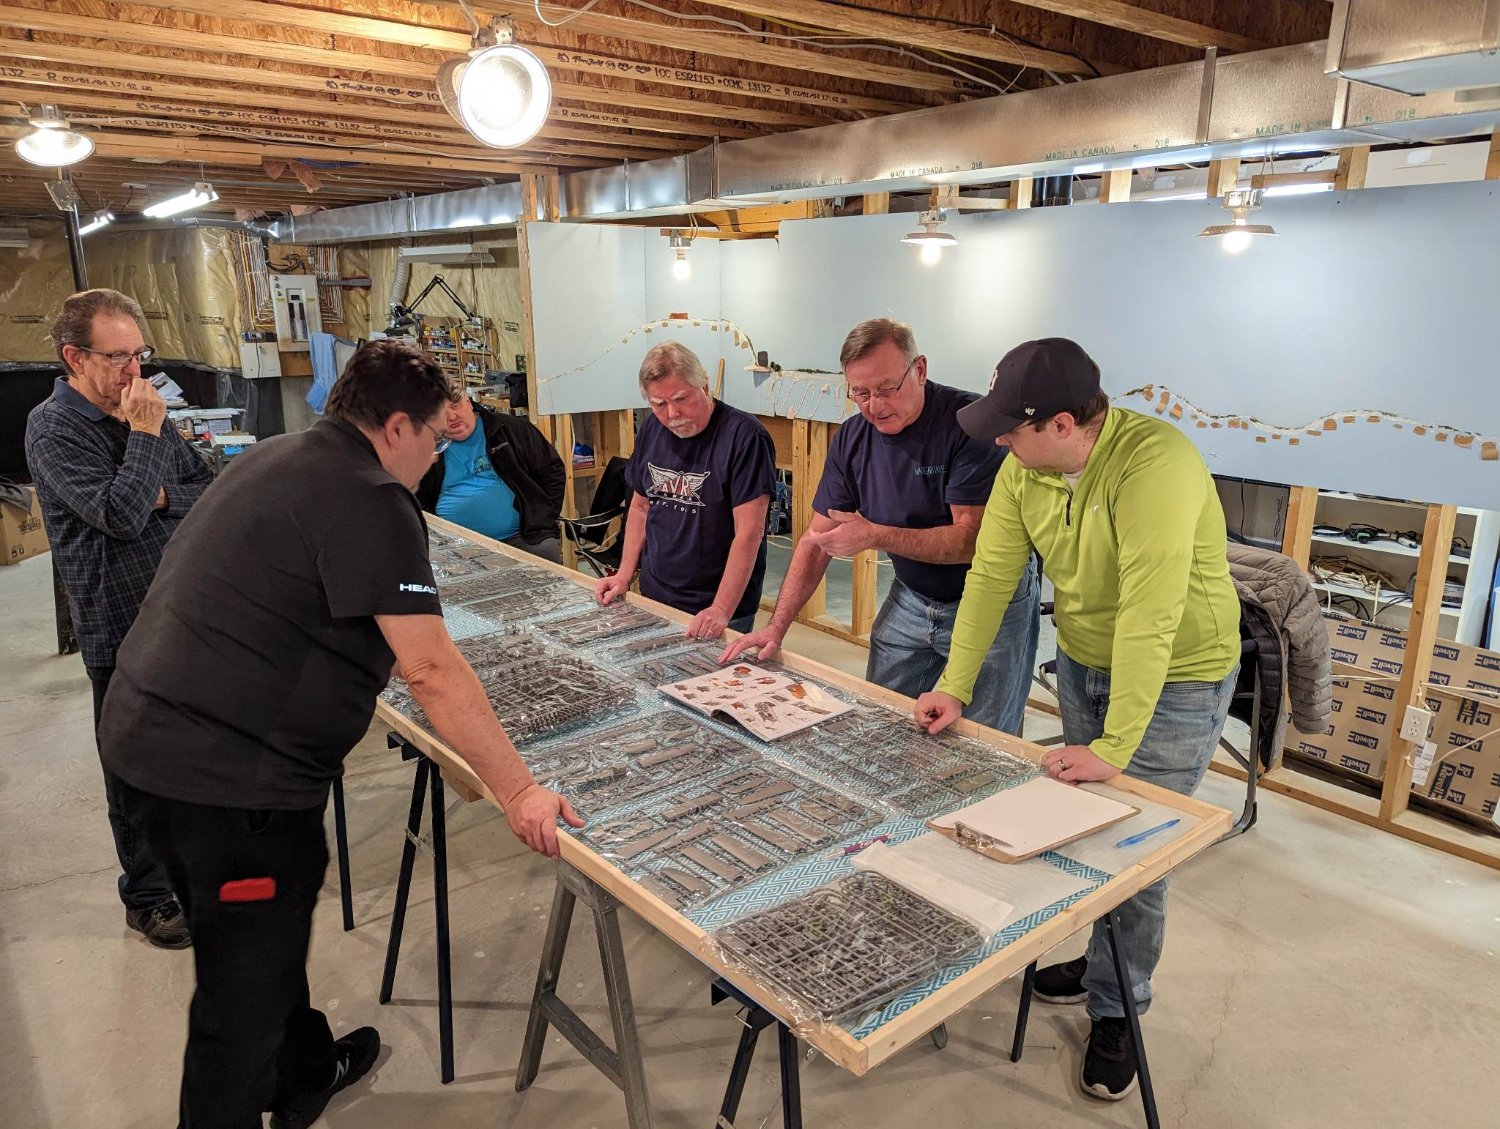
Here are the latest pics from the group build. I was unable to attend the last club meeting, but was able to have one of the members send me these so I can post them here.
There are just miscellaneous parts that are all being worked on individually by the club members, as well as some of the masks that are being used. The last pic, as well as 3rd last, really show how big this model is going to be.


- Paul Le Wol, hof00, Diver and 13 others
-
16
-
-
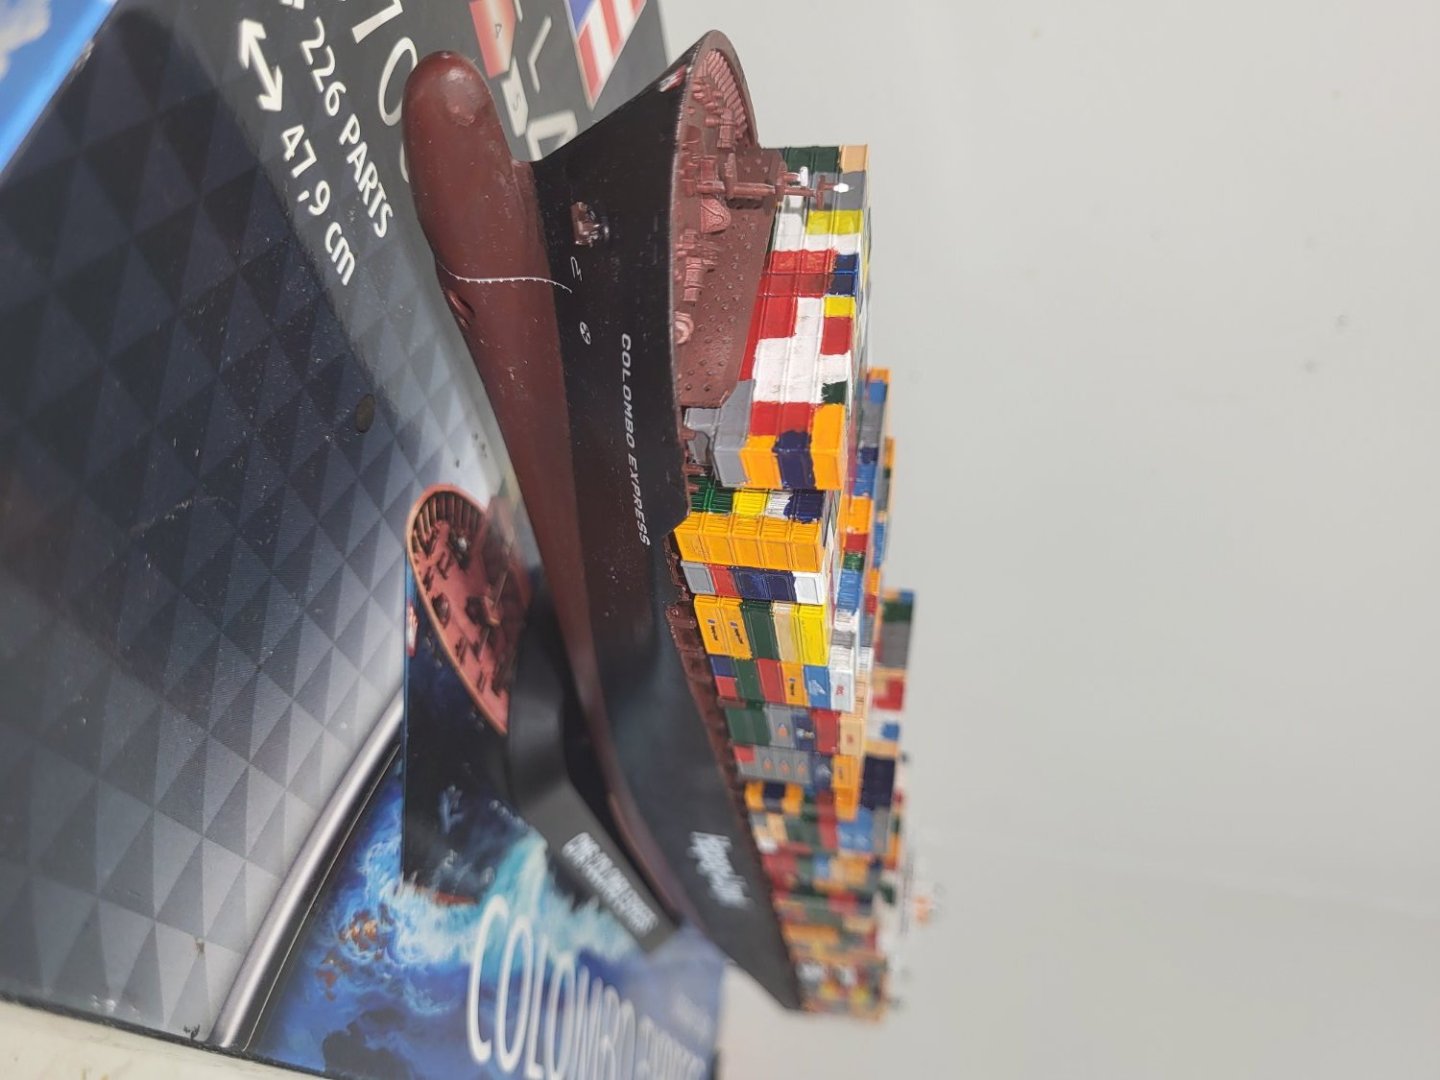
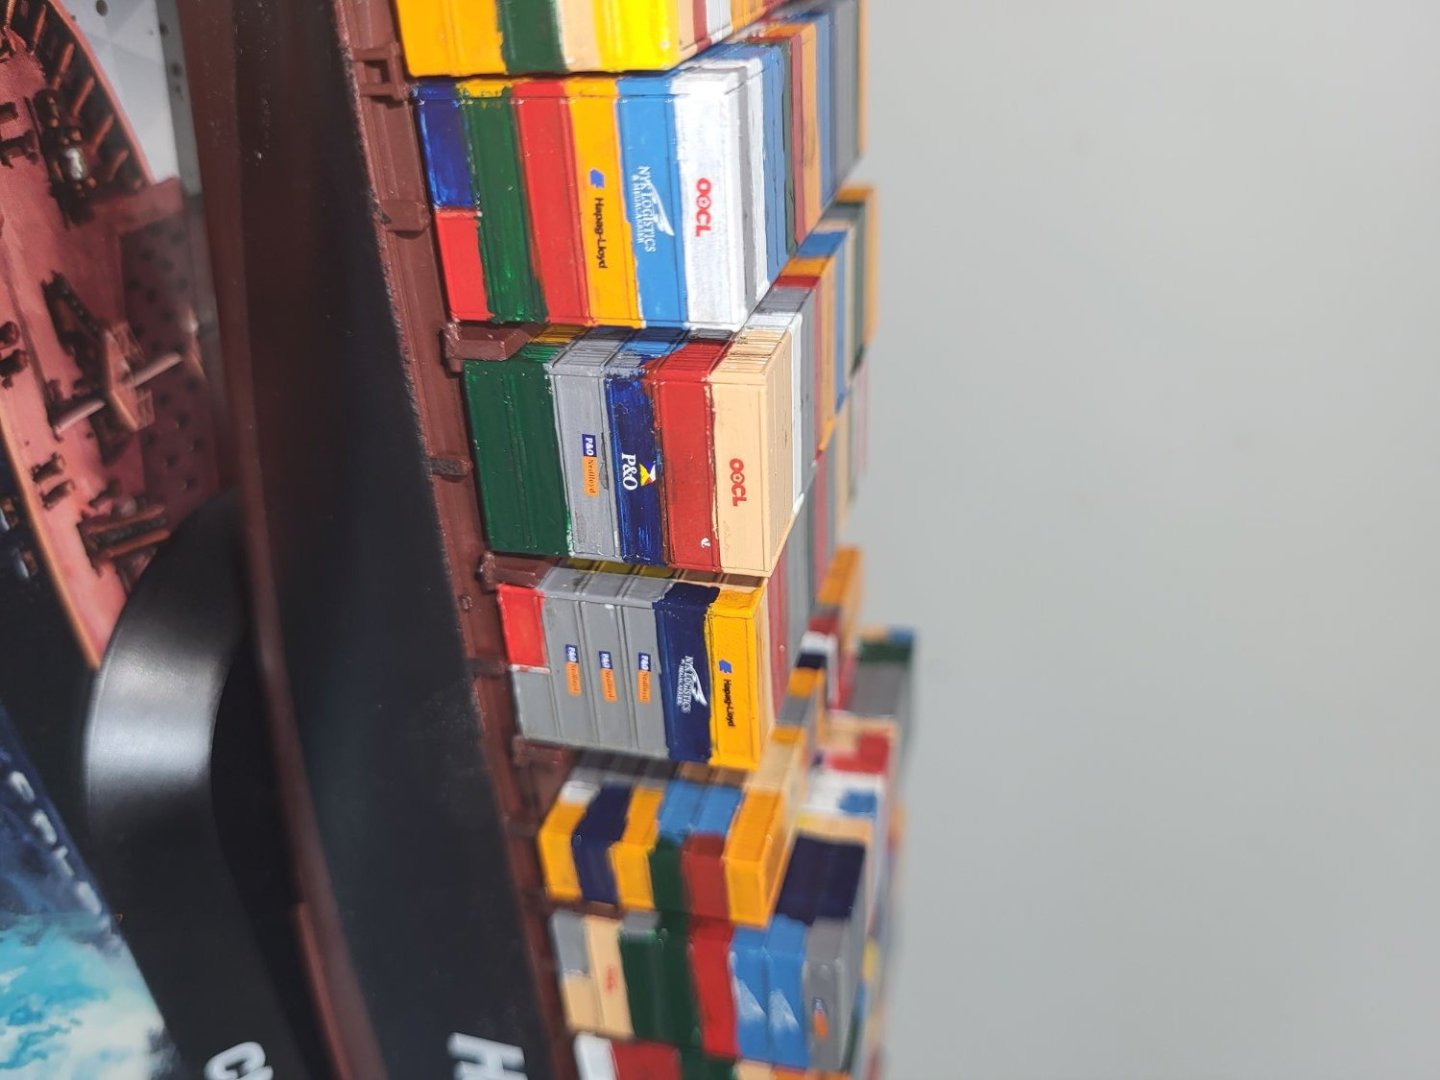
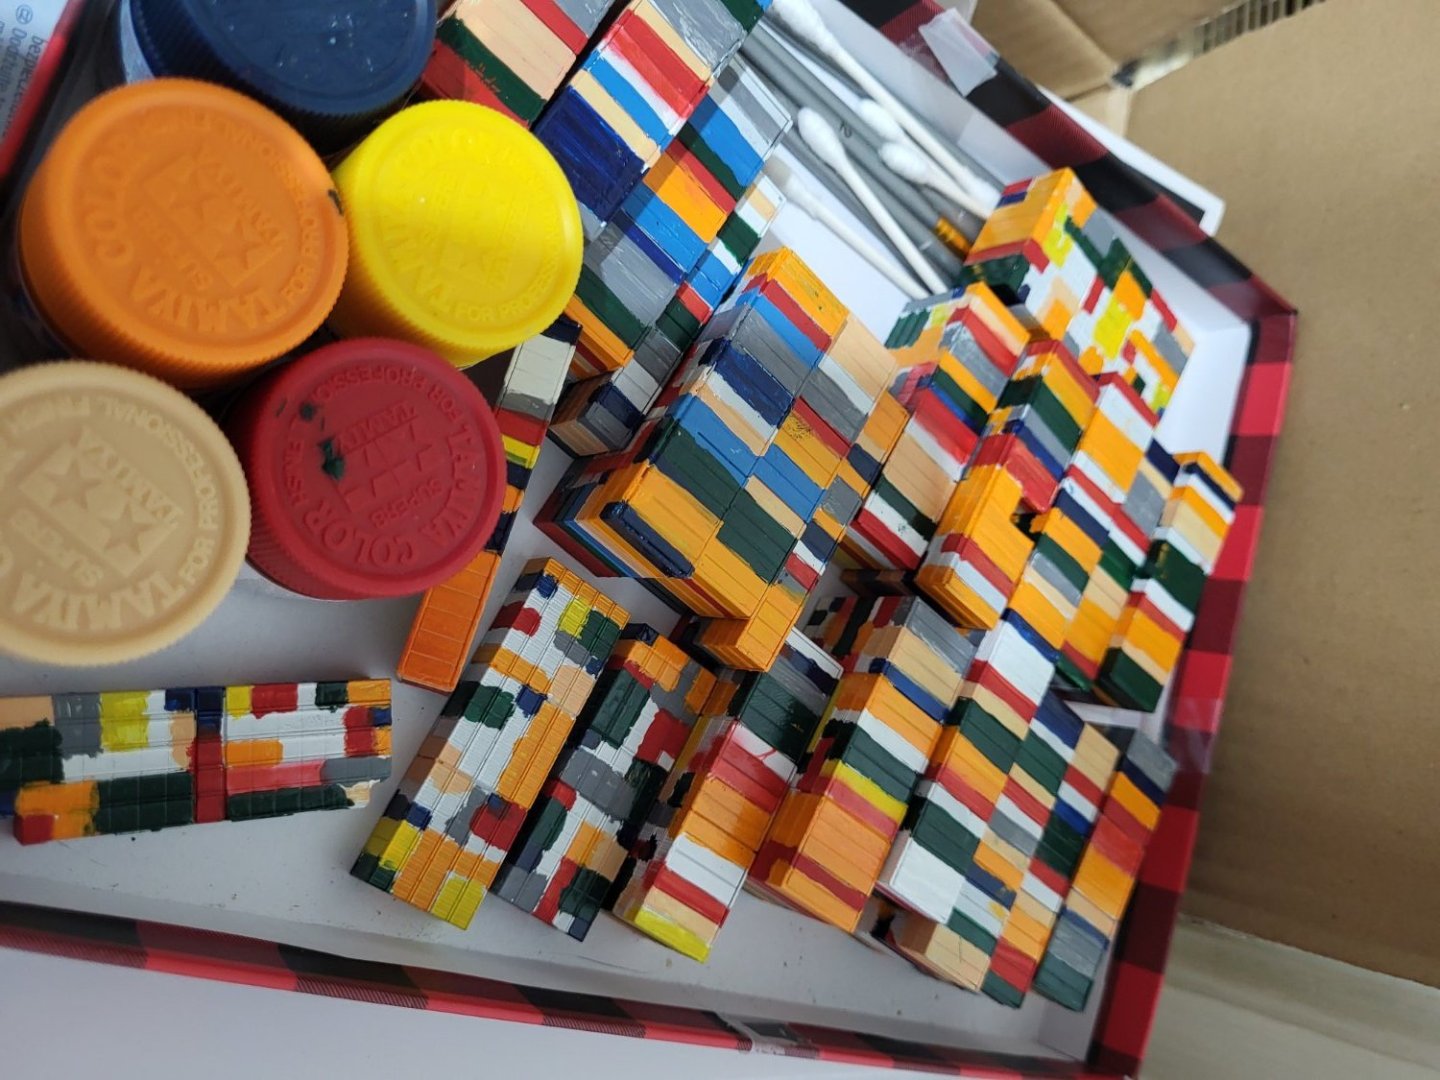
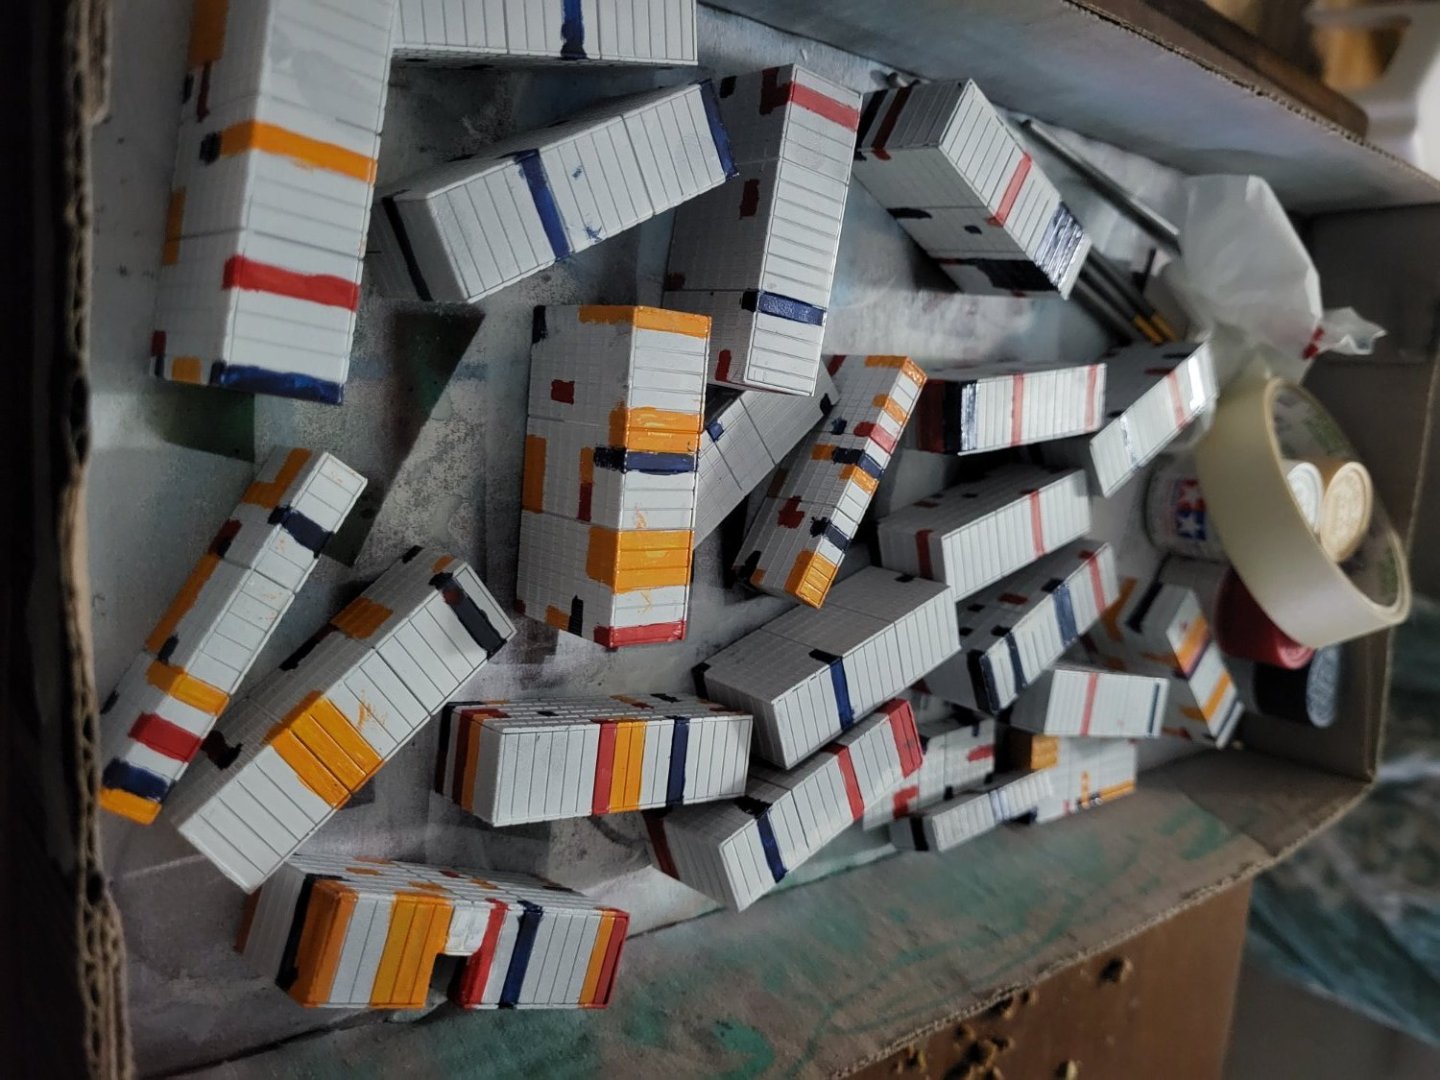
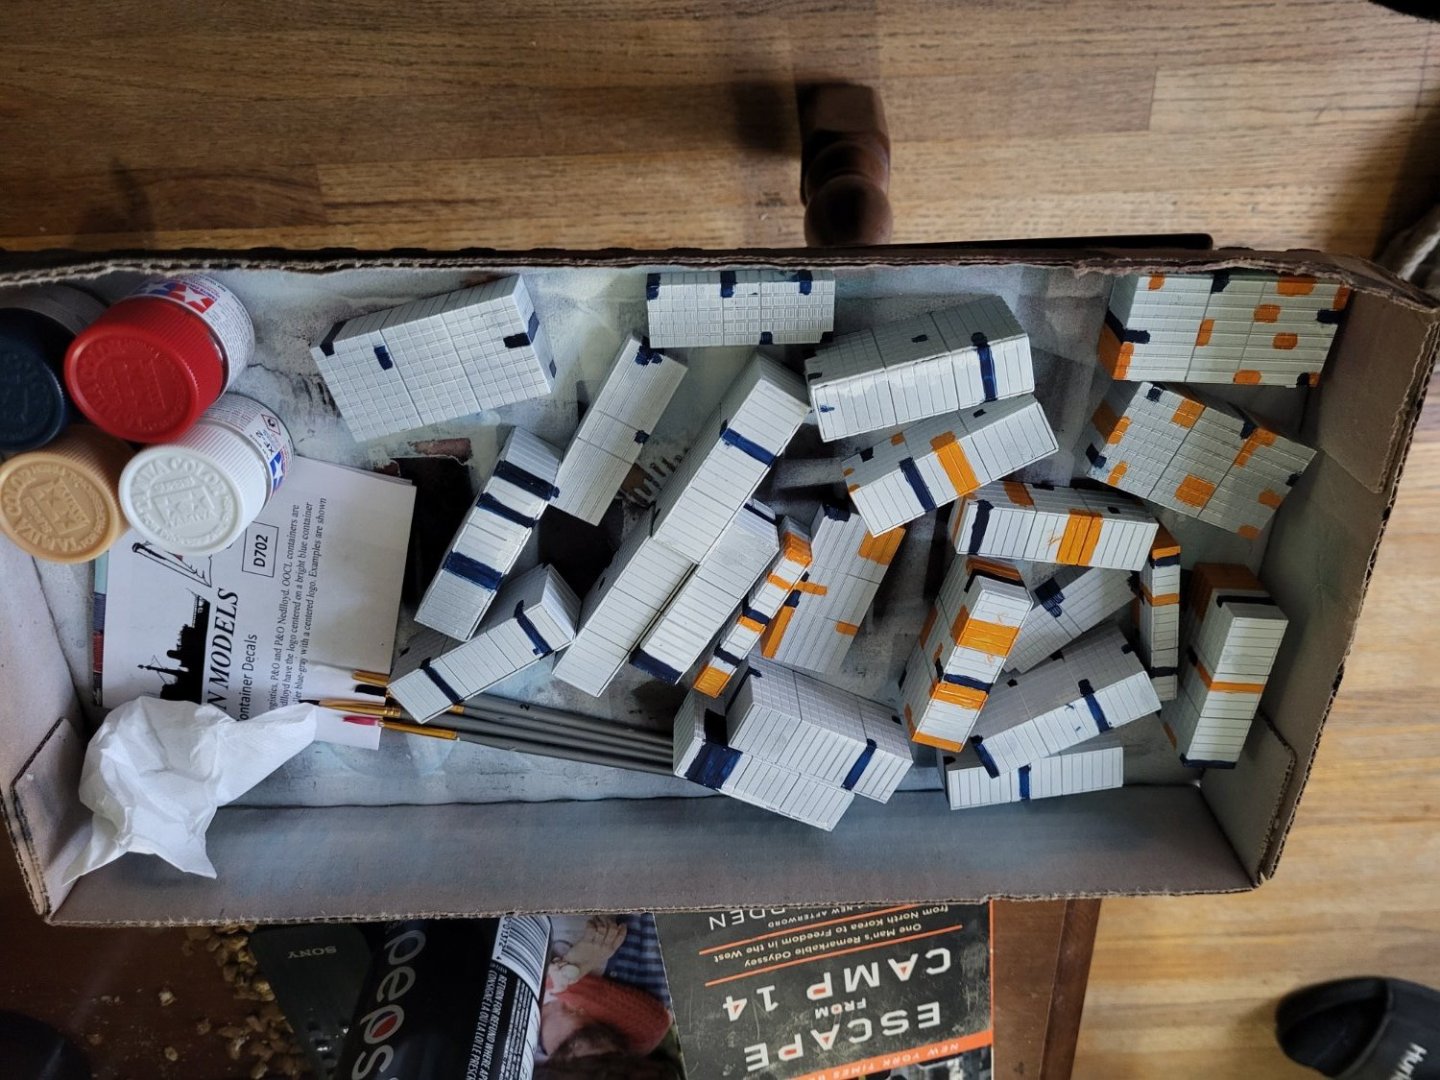
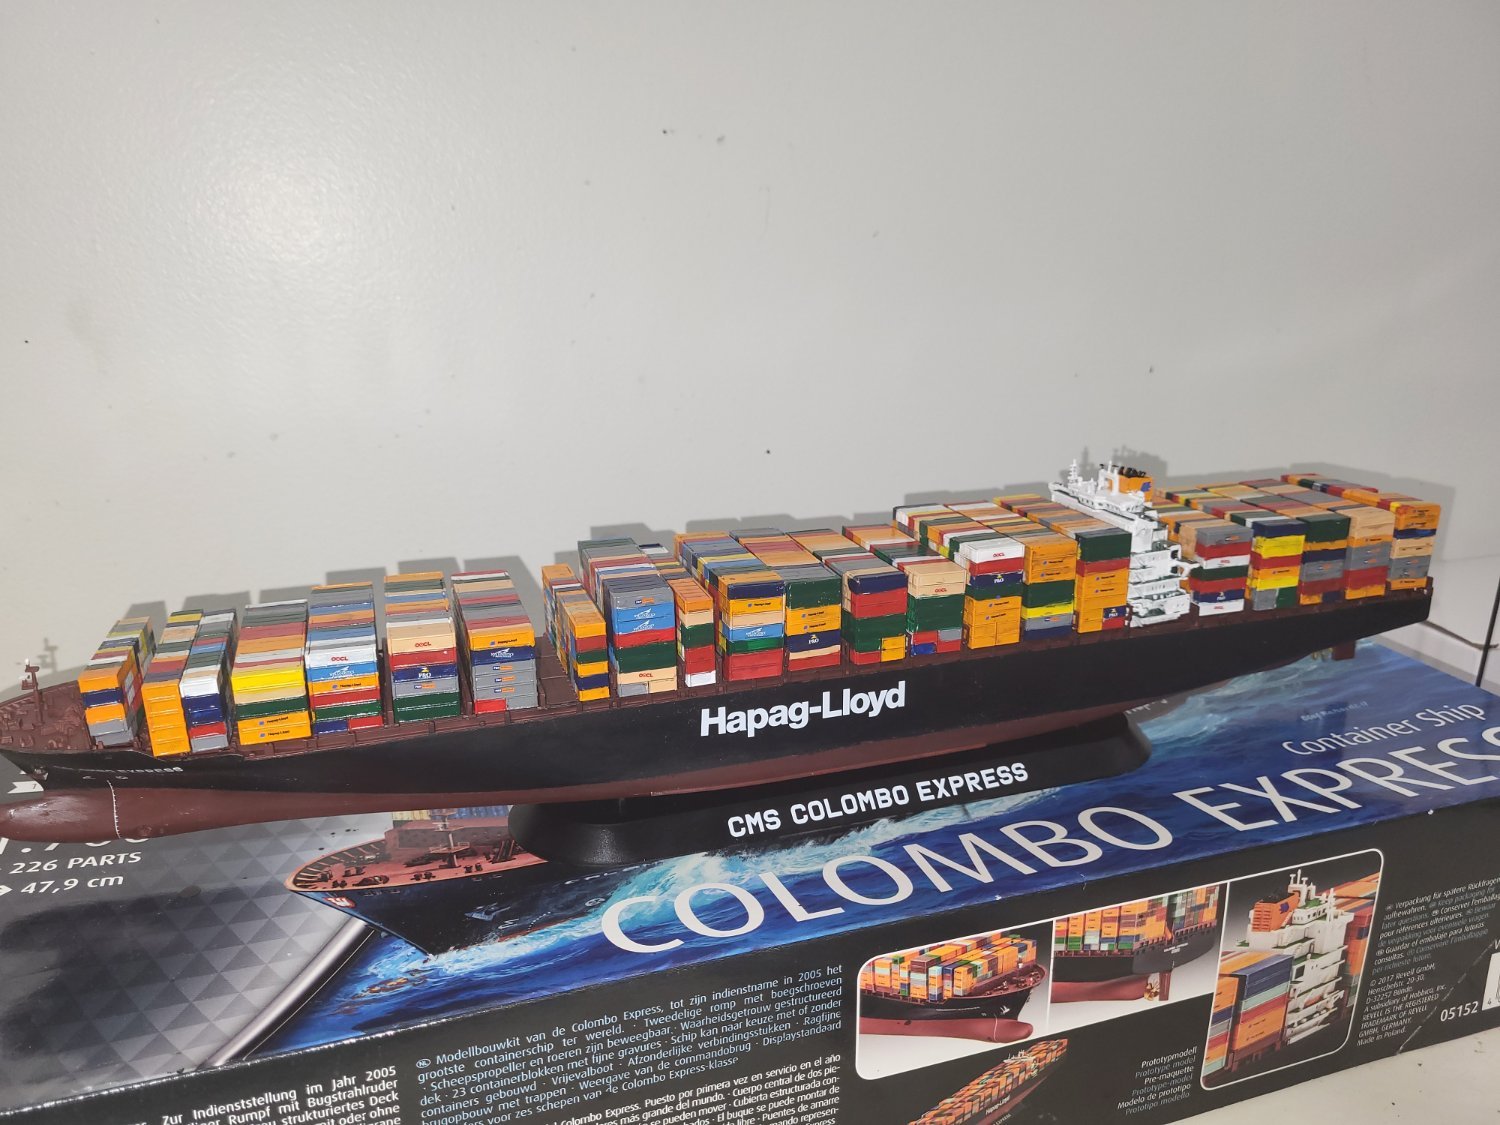
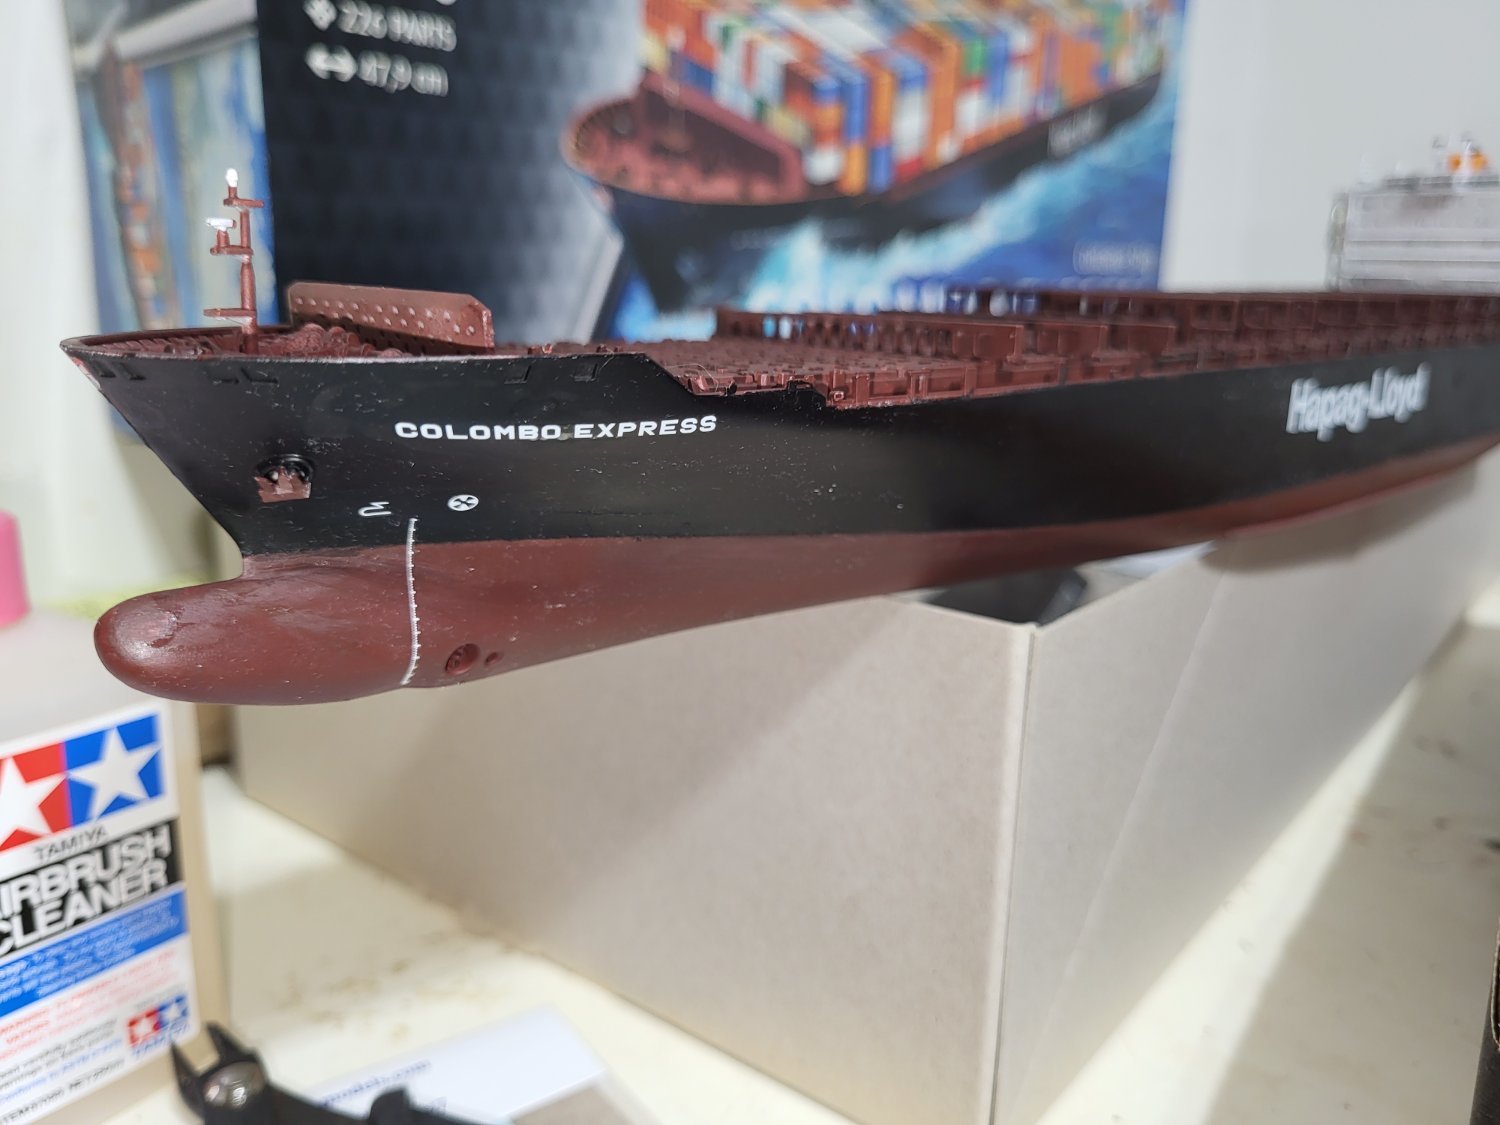
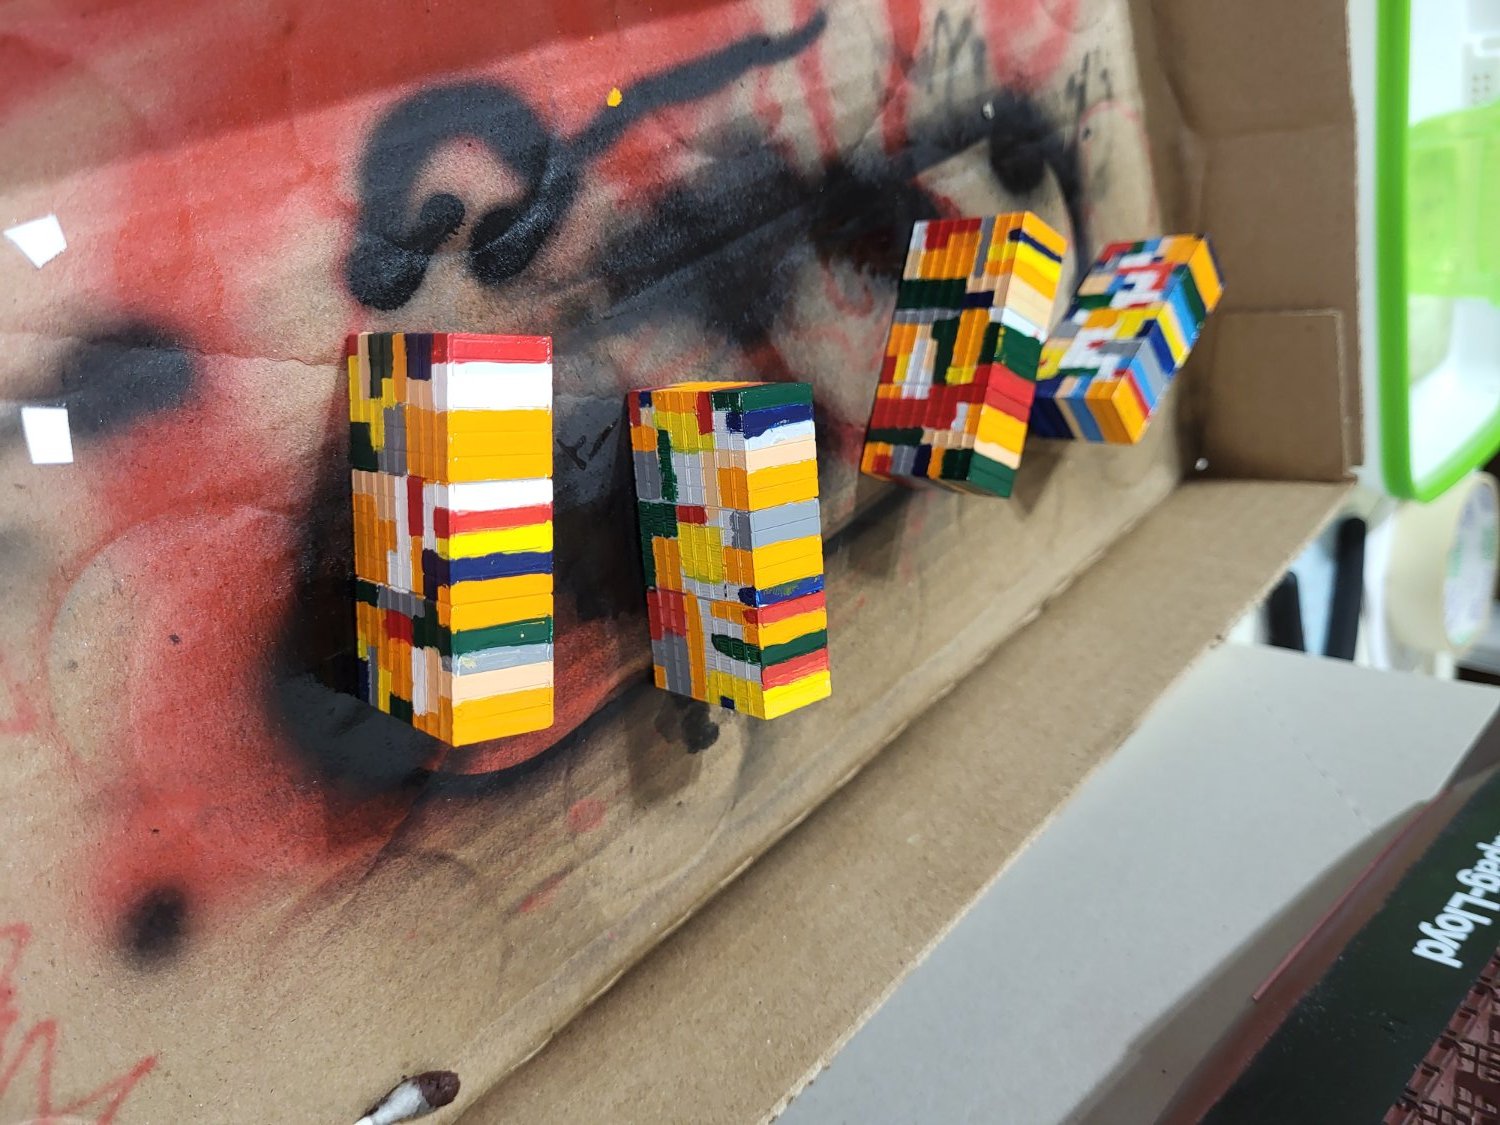
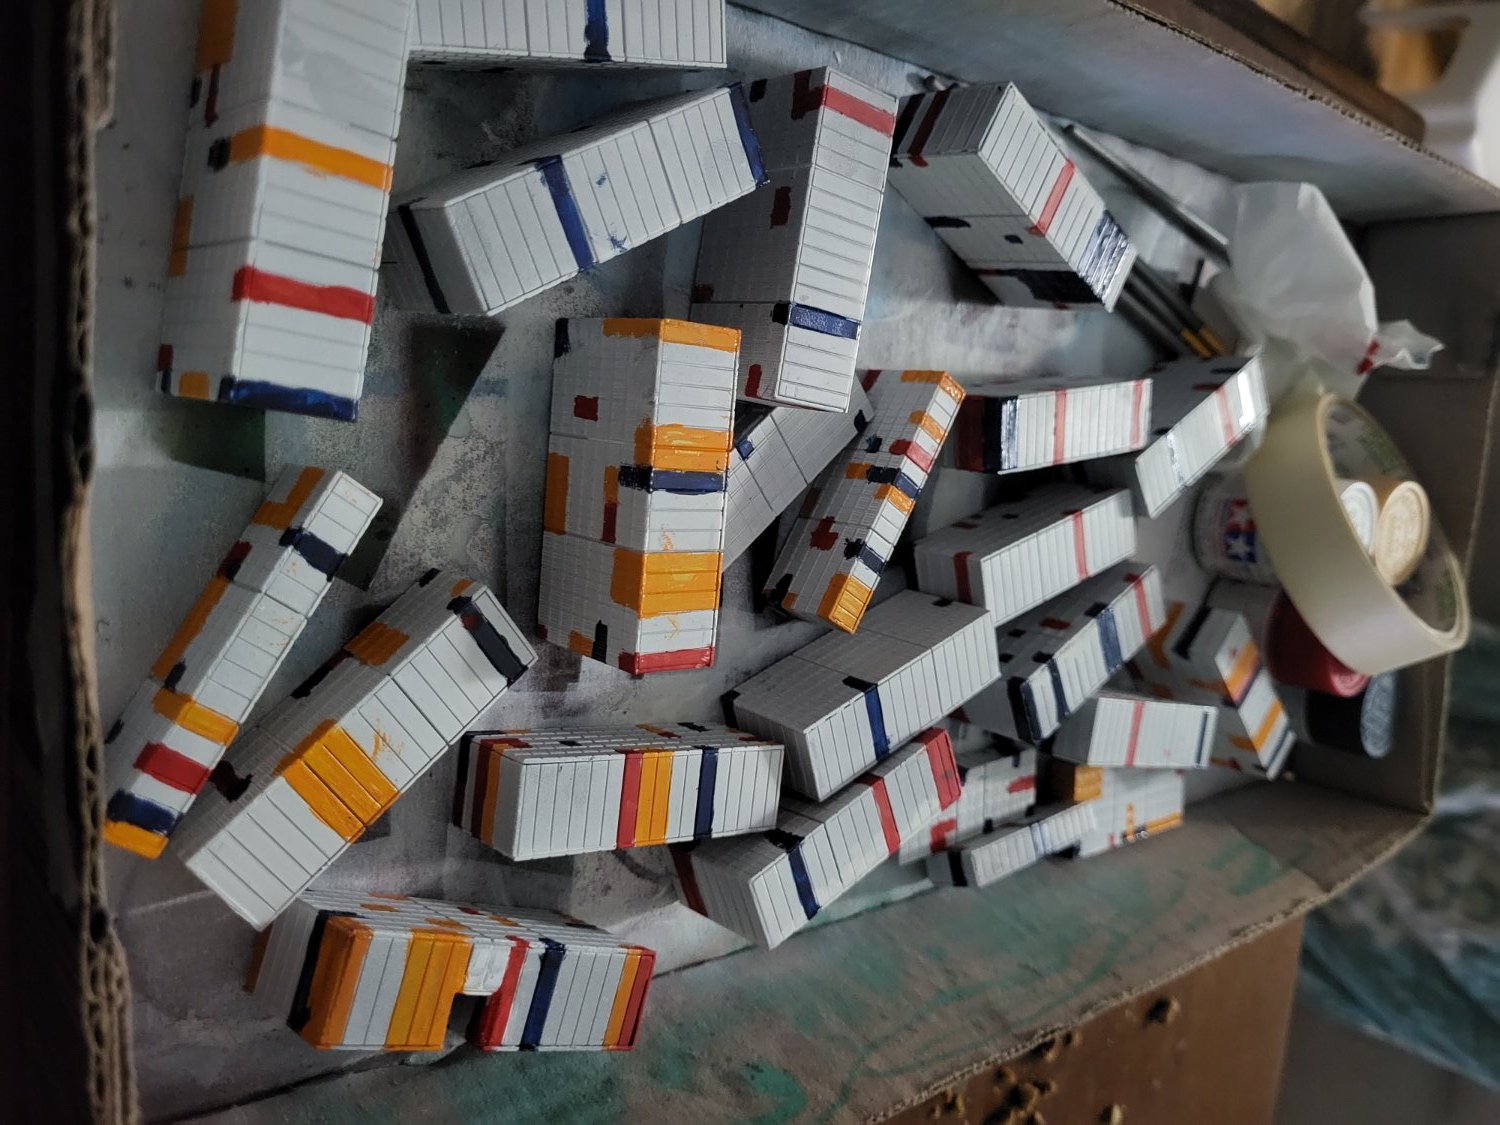
Well..after the tedious task of painting the containers I have taken the next steps of putting decals on the containers. I used some from the kits and others are aftermarket.
It appears that a section of containers has gone missing on me...I'll blame rough seas.
I also experimented with Tamiya panel liner to help accentuate the different containers....you can tell how thick the paint went on by using this.
Overall I enjoyed building this kit aside from painting the containers. At such a small scale it made some areas challenging but I'd do it again.
On to the next one...what shall it be.

-
-
Getting down to the fine details like decals..touching up containers....


- Harvey Golden, mtaylor, hof00 and 1 other
-
4
-
On 3/23/2023 at 2:34 PM, realworkingsailor said:
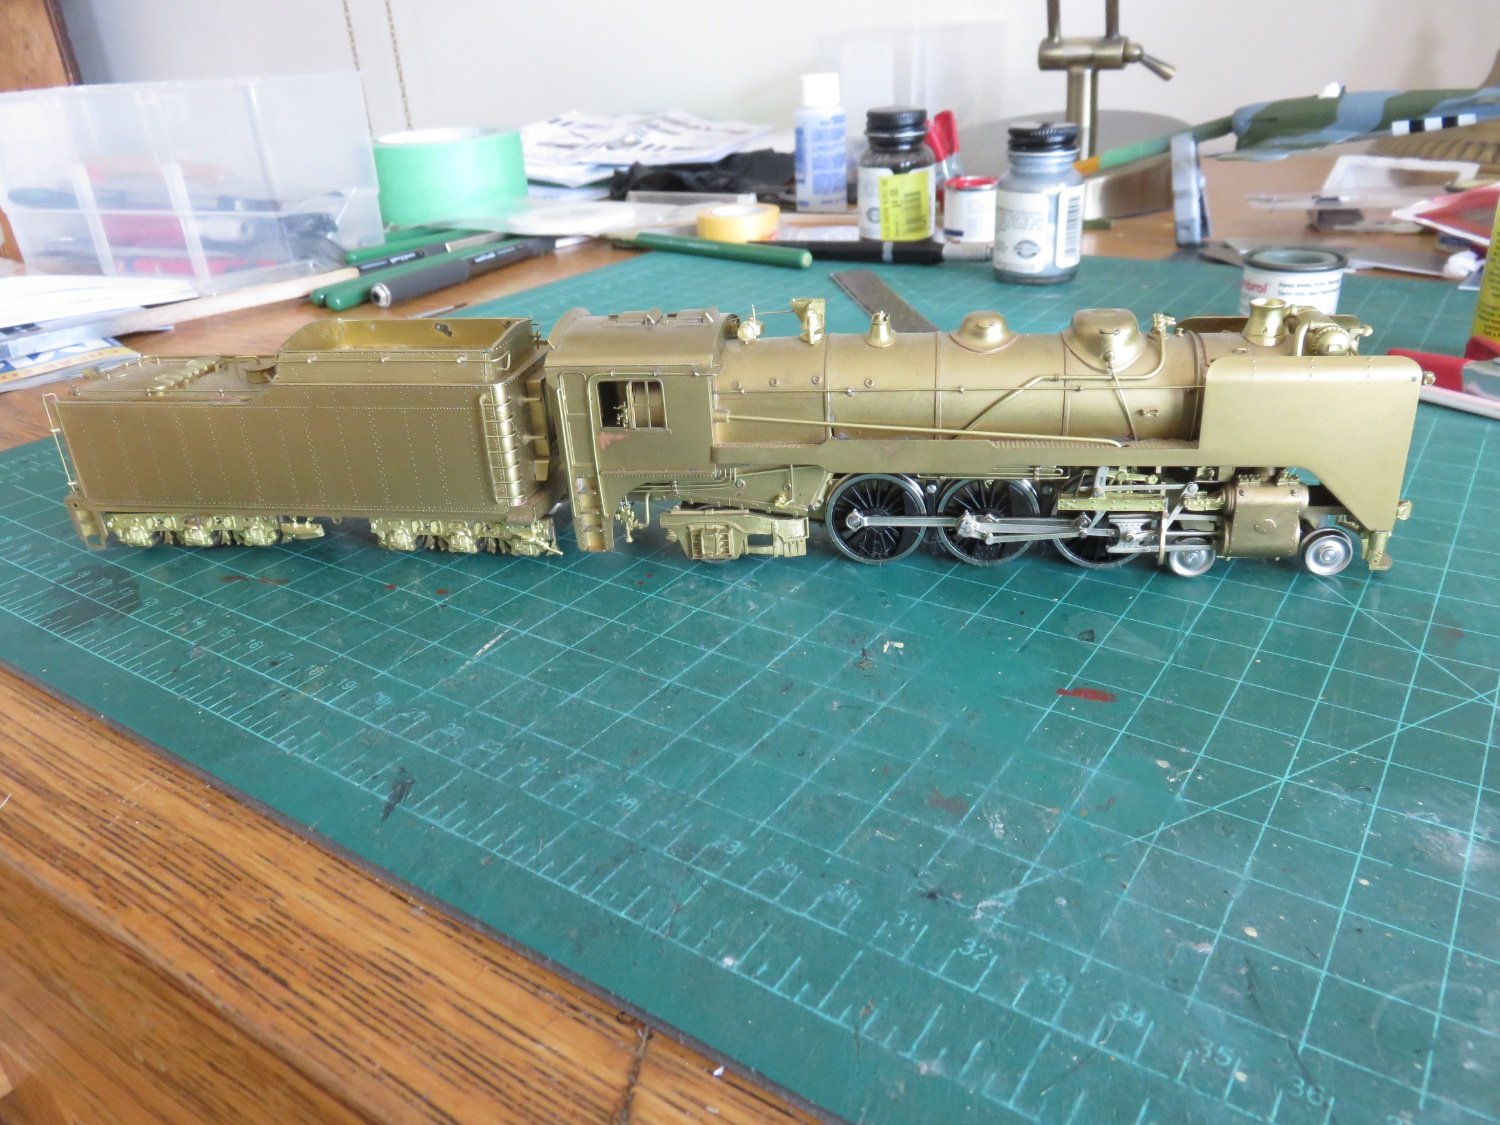
If I may, one of my other hobbies is collecting brass model locomotives, so I may be able to provide some insight. Pretty much all brass model trains available are hand assembled, even commercially made ones. Generally the production runs are very small (a few hundred units of a given type), so the industry does not lend itself to expensive tooling and mechanization. The only fundamental difference between a brass locomotive kit (or scratch build), and a "factory" assembled model is the box it comes in.

Pretty much all of the solder joints are located in areas that are largely invisible, so that a causal observer wouldn't see them. (There is a little tarnish and staining on this model as its previous owner suffered a house fire and the model was subject to the liberal application of water that fire departments are rightfully well known for), it's otherwise in good mechanical condition. The model was built by Samhongsa in Korea and imported by Van Hobbies (who had a working relationship with Pacific Fast Mail).
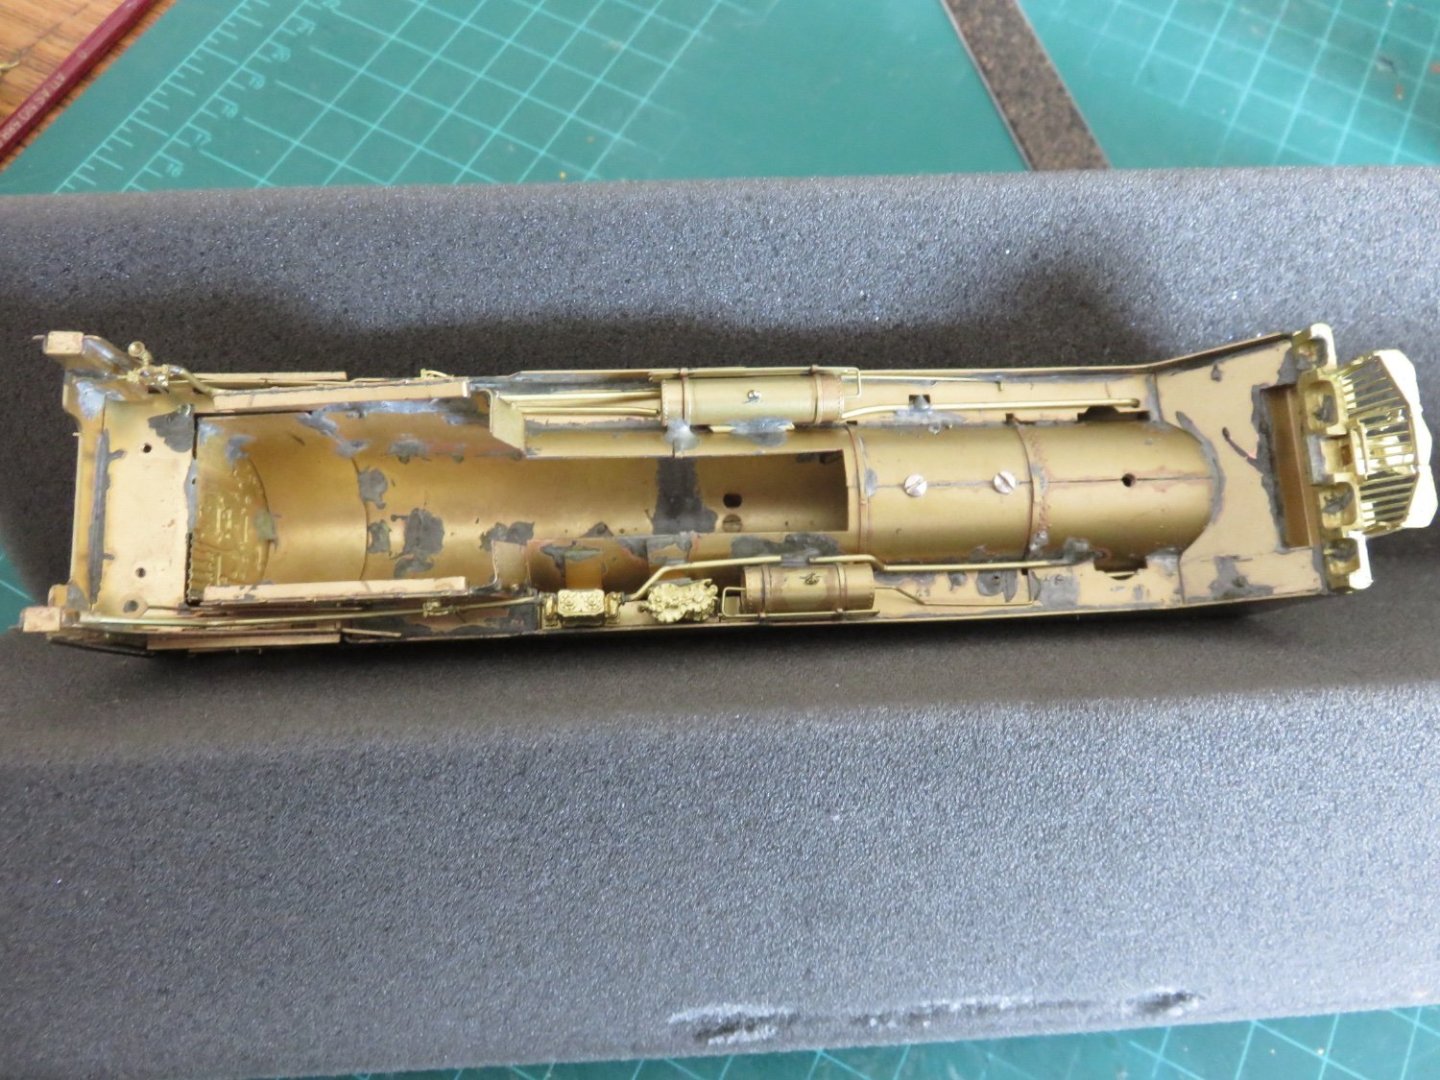
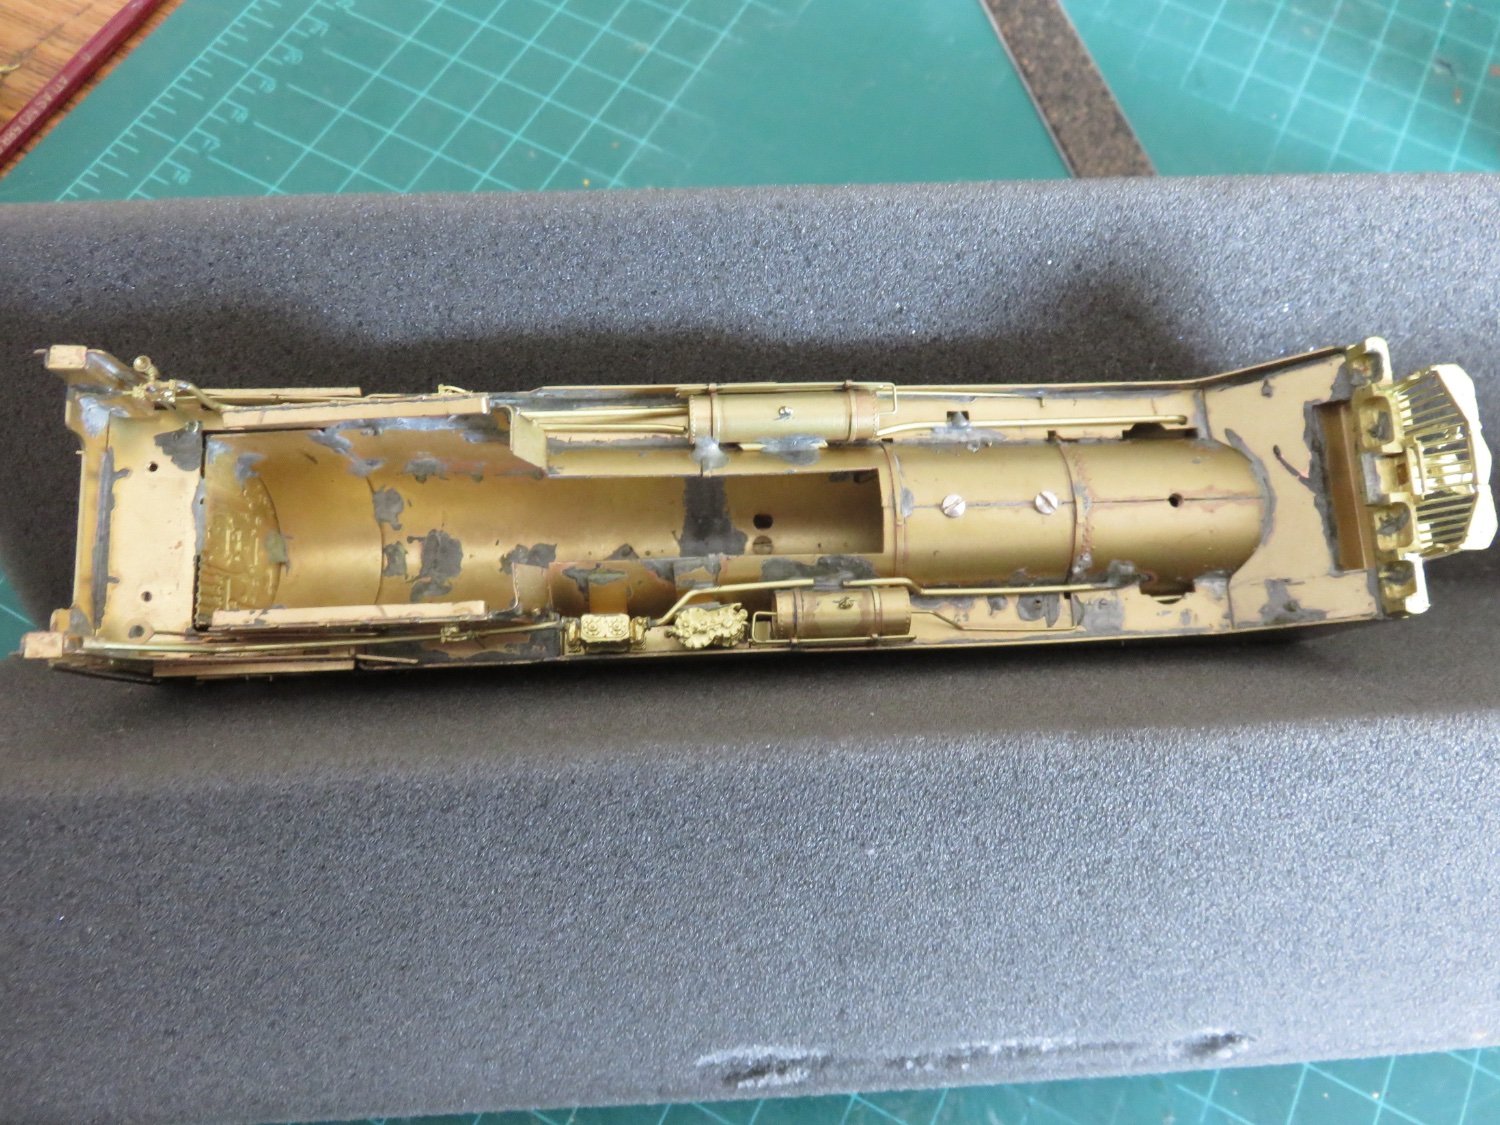
After removing the three screws that hold the shell to the frame, you can see the underside, and interior is quite mottled with solder joints.

Adding to an earlier post about soldering multiple details, in most brass train models, multiple different solders are used with different melt temperatures. Starting with the highest temperature solder and working down to the lowest (although it's worth noting that in the above model, none of the solder will melt with your typical OTC hardware store soldering iron. To perform any repairs, generally a resistance soldering iron is needed, at the very least.
Andy
Not to hijack this thread, but I recently visited a fellow Great Lakes freighter model builder here, and in showing me his paper model collection, he also showed me his brass locomotive collection........they are very impressive - he has them in a display case and it was really beautiful to look at.
- mtaylor, Canute, Keith Black and 1 other
-
4
-
-
Welcome to Model Ship World Andrew!
- mtaylor and Keith Black
-
2
-
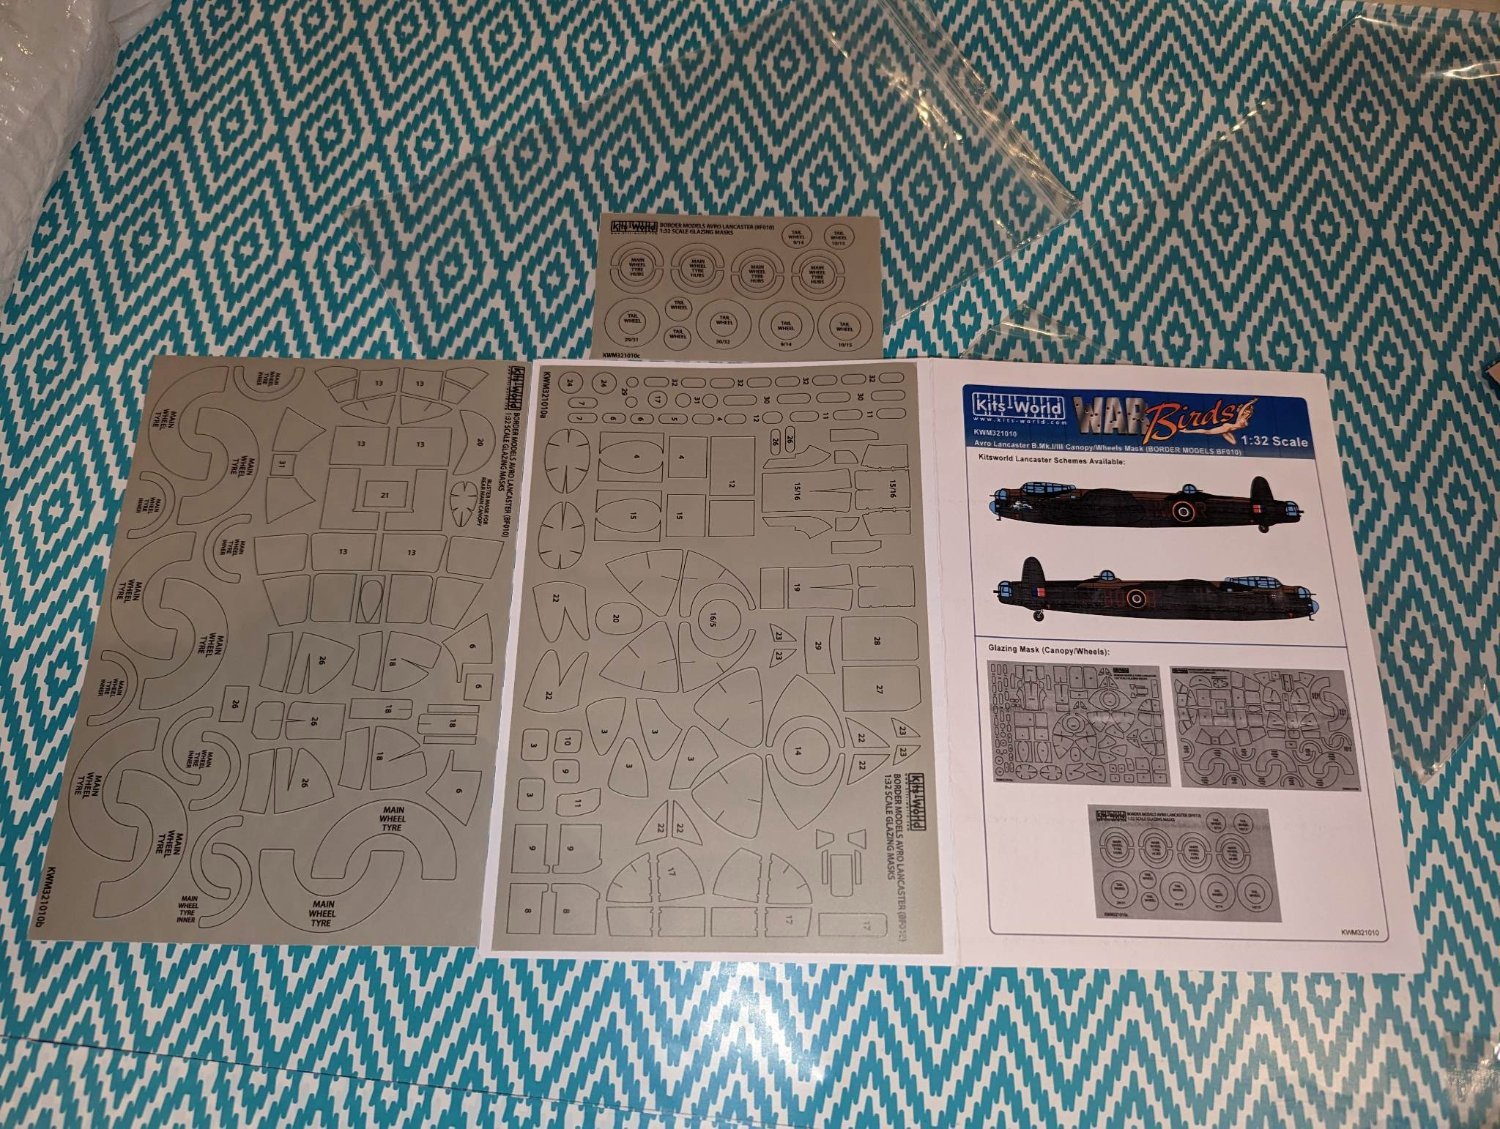
This plane is called "Bad Penny". This Lancaster was ABC equipped (Airborne Cigar radio jamming).
Here is a snippet from our club newsletter:
While transmissions from A.B.C. (Airborne Cigar radio jamming) equipped Lancasters like the Bad Penny protected the rest of the planes in the bomber stream, it simultaneously made 101 Squadron’s Lancasters highly vulnerable to attack. A German night fighter could home in on an A.B.C. transmission and track it back to its source. The enemy could also visually identify A.B.C. equipped Lancasters. Their three, very distinctive seven foot tall transmission masts made them easily recognizable, and after realizing their significance, Luffwaffe pilots began targeting these 101 bombers first.
Flying a mission in an A.B.C. equipped Lancaster quickly became one of the most dangerous things an airman could do.Flying a mission in an A.B.C. equipped Lancaster quickly became one of the most dangerous things an airman could do. Squadron’s tactical significance to prosecuting Bomber Command’s air-war, was one of the reasons why 101’s Lancasters would be some of the first bombers fitted with duck .50 caliber machine guns in their rear turrets’ this upgrade would replace the standard four 303 caliber machine guns in most Lancasters at the time. The kit came with brass barrels to replace the poorly detailed plastic barrels of the model’s eight 303s. Unfortunately these brass barrels came incomplete, without their cooling jackets. To remedy this, the Scale Model Club purchased new, highly detailed 303 and .50 caliber barrels for the build.Work has now begun on the Bad Penny model’s three Fraser Nash turrets. One of our builders is working on the bomber’s mid-upper turret. It was an FN50 with two 303 machine guns.Up front, the bomber’s nose turret was an FN5A, and was also equipped with two 303 machine guns. The rear turret the kit came with is an FN120, with four 303 machine guns. This turret will be modified and converted into an FN82, which was equipped with two .50 caliber machine guns.

- GrandpaPhil, yvesvidal, mtaylor and 9 others
-
12
-
Did I mention how tedious the containers are....
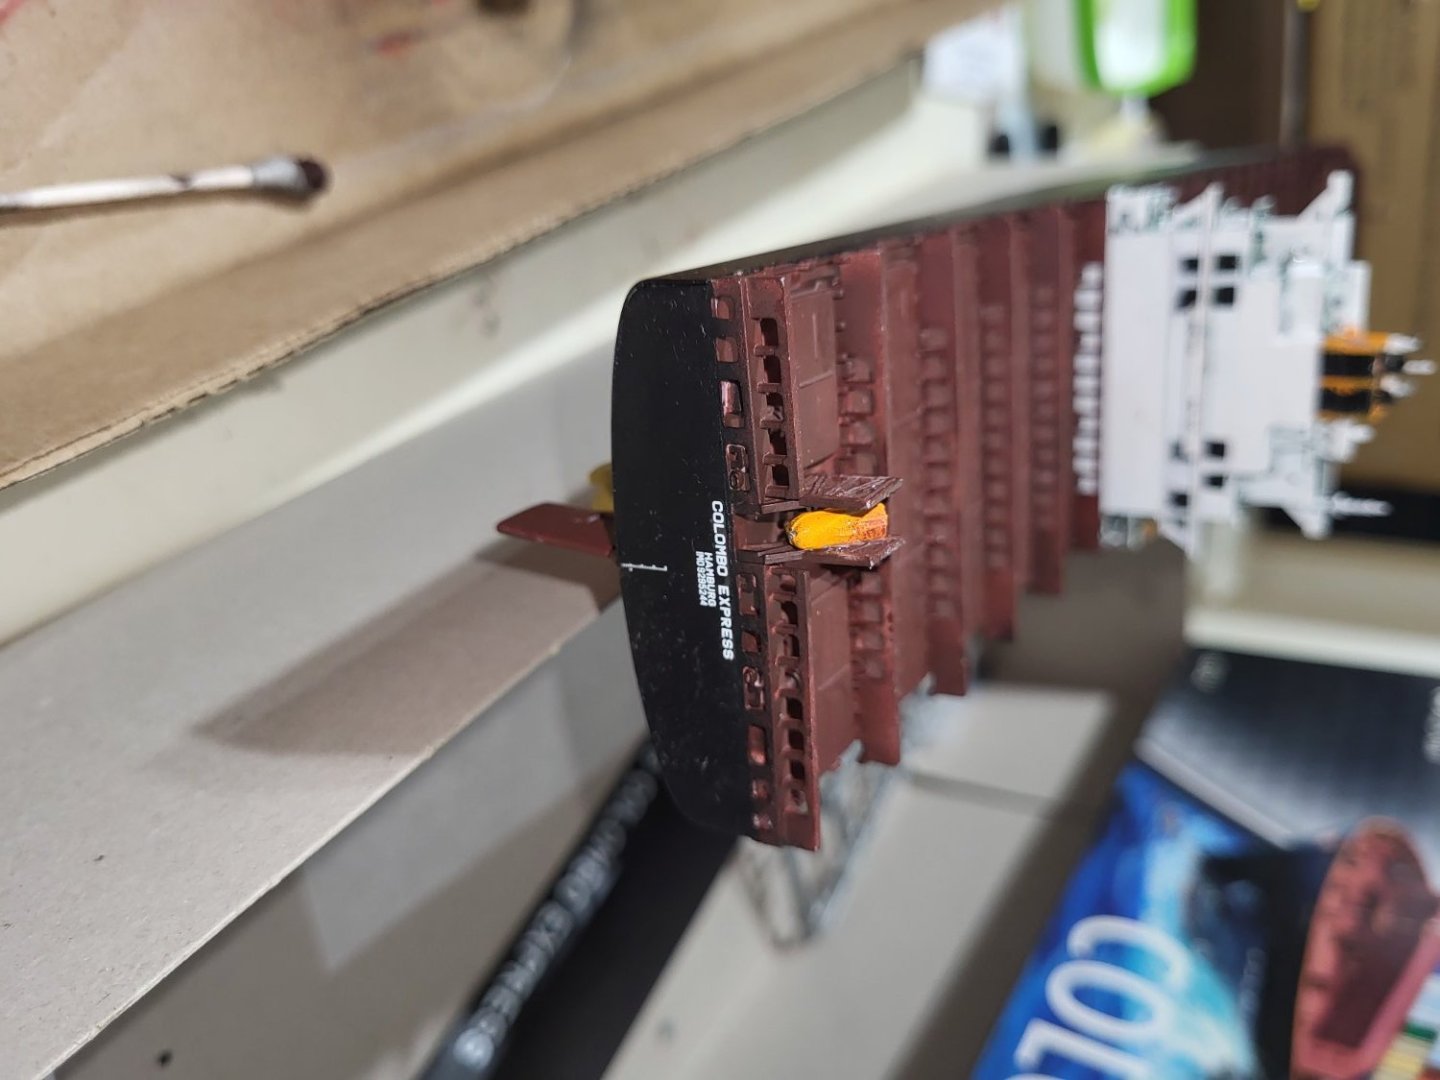
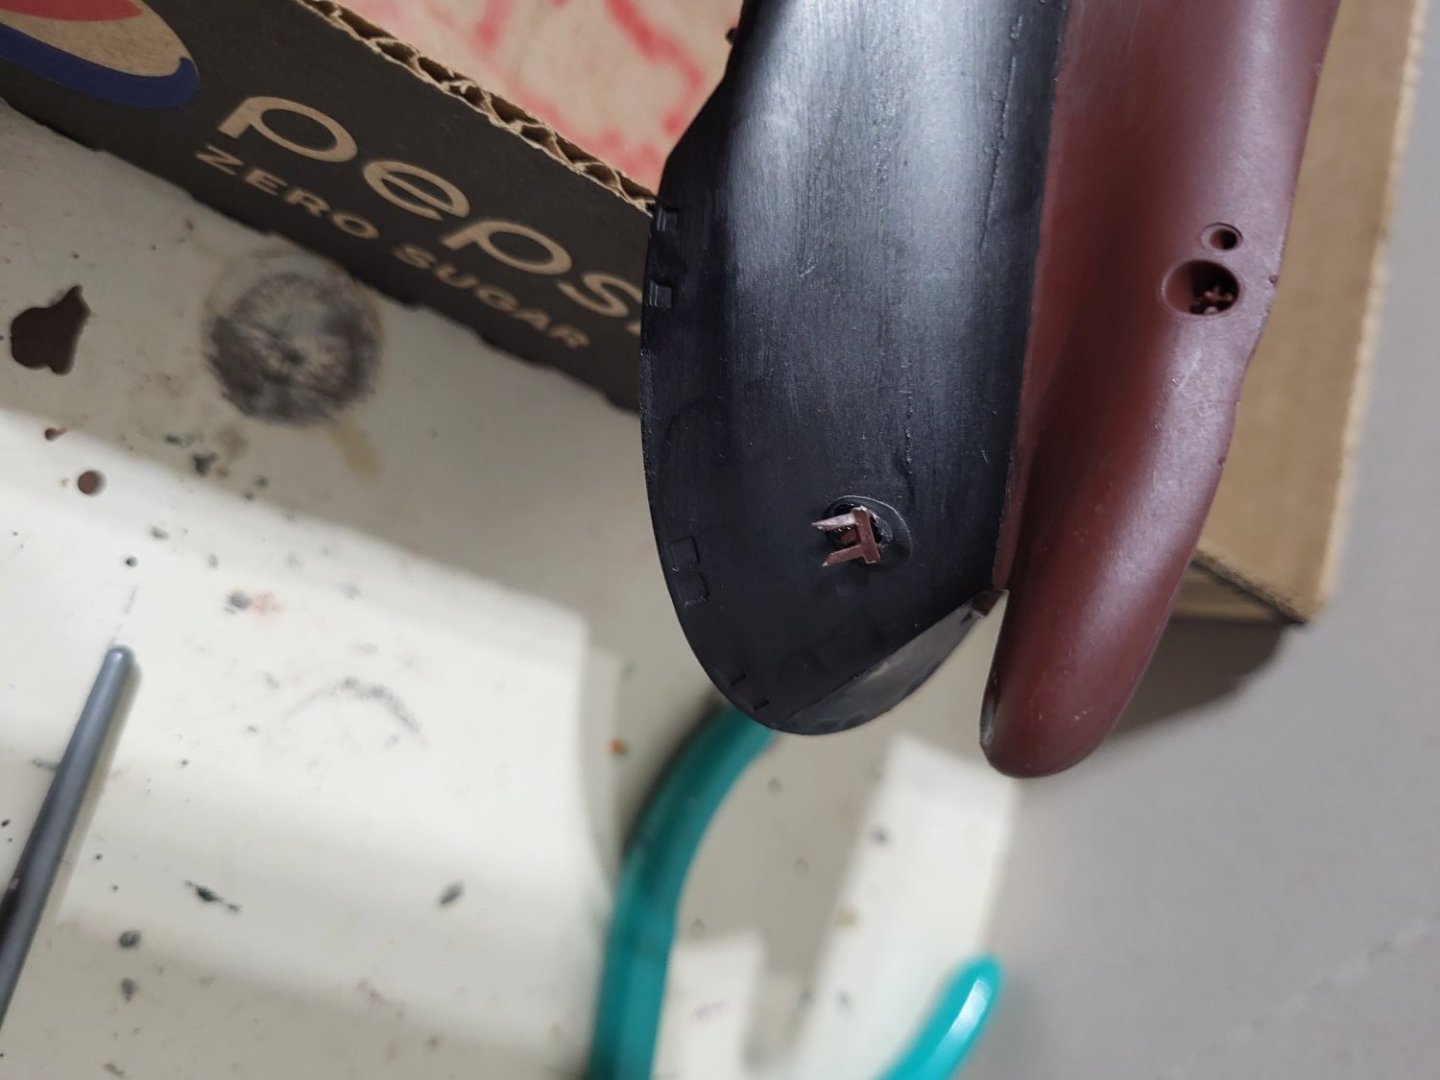
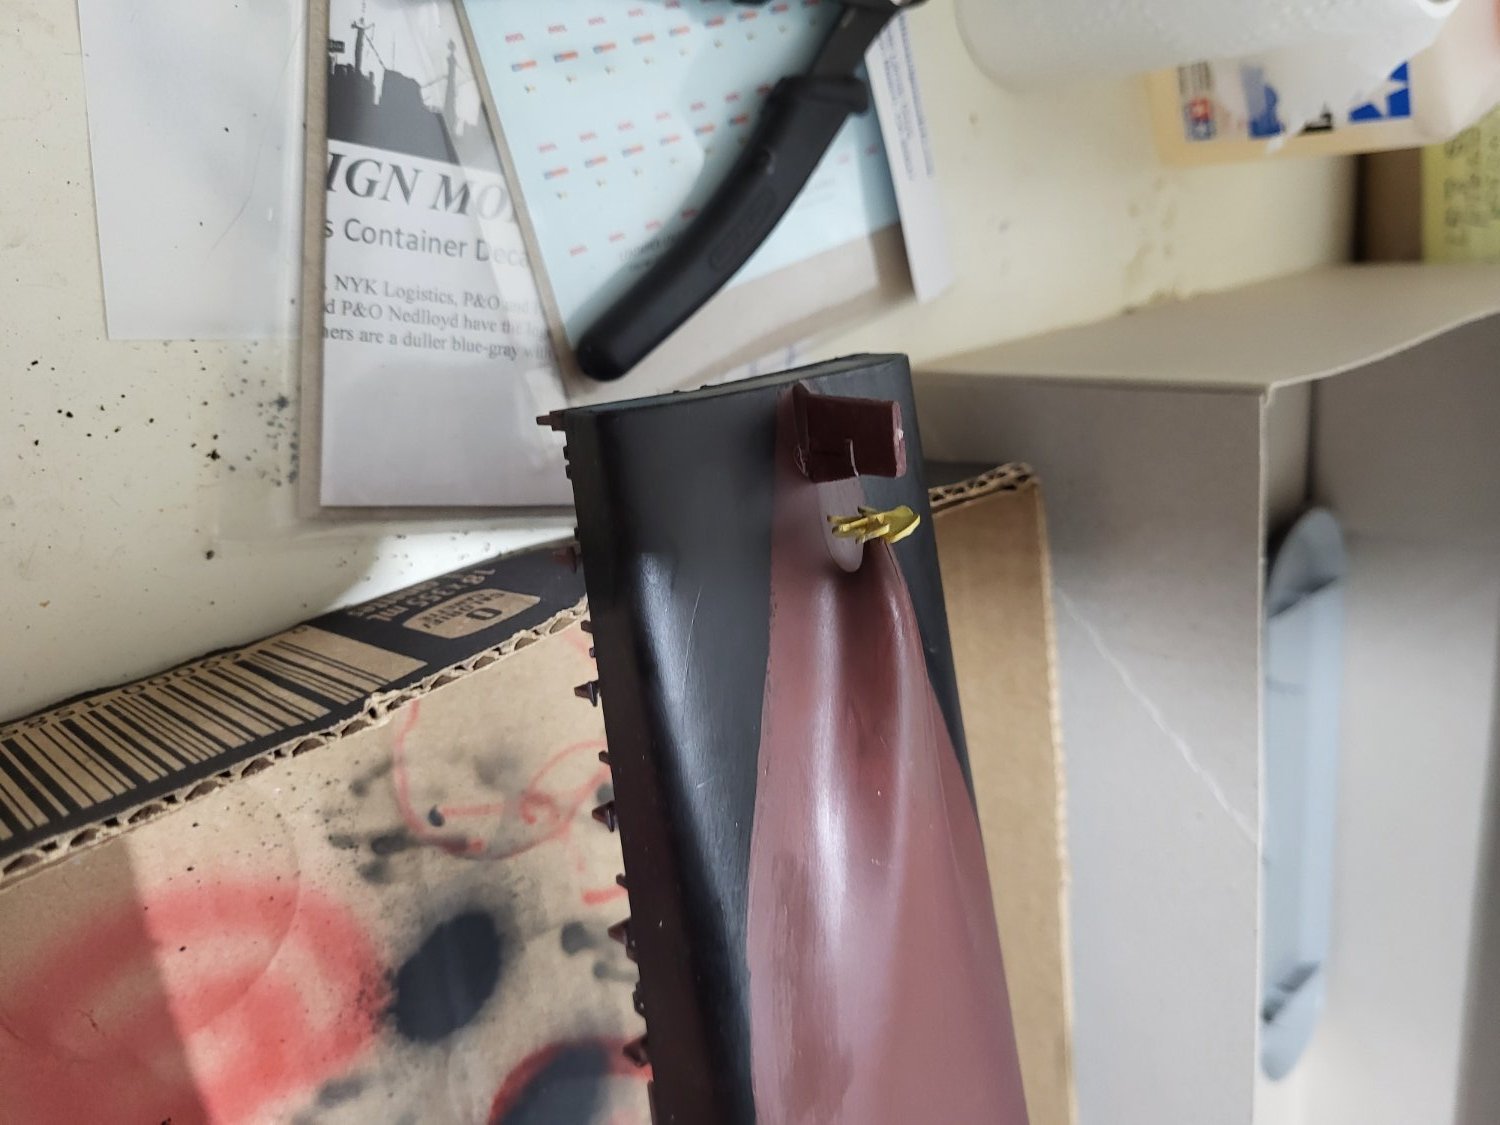
They're coming along very slowly. I have installed the anchors and rudde and prop as well as touched up the paint on the hull.

-
Did I mention how tedious it is painting the containers........this is going to take long to do than the entire ship and building of the containers
-
So...painting the containers is a tedious process to say the least...
- Prowler901, realworkingsailor, hof00 and 1 other
-
4
-
4 hours ago, yvesvidal said:
What a project !!! First the kit is massive and complex. It is a great idea to have multiple people build the kit and to distribute the workload of assembling such a beast.
However, I think it is going to make things more complicated overall (in the long run) and will require regular meetings and close management of the various subtasks.
This is a very exciting project and combined with the restoration of the real thing, it will provide plenty of motivation and energy for the various participants.
Yves
This is exactly what is happening. It will be impressive once complete!
- JeffT, Jack12477, Edwardkenway and 5 others
-
8
-
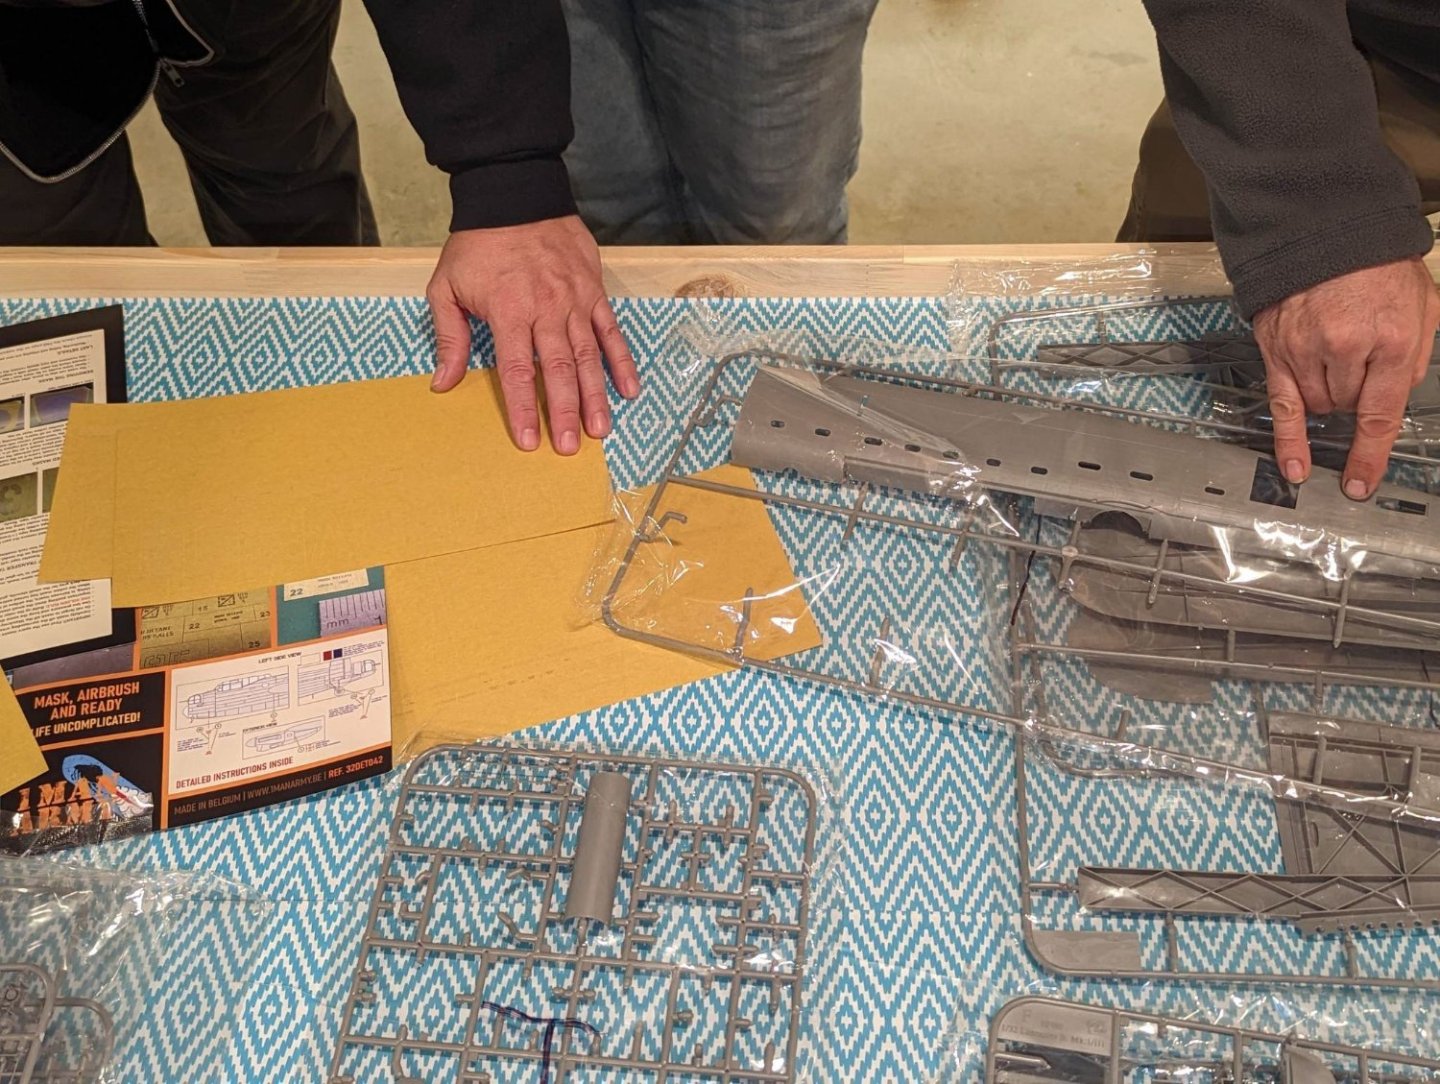
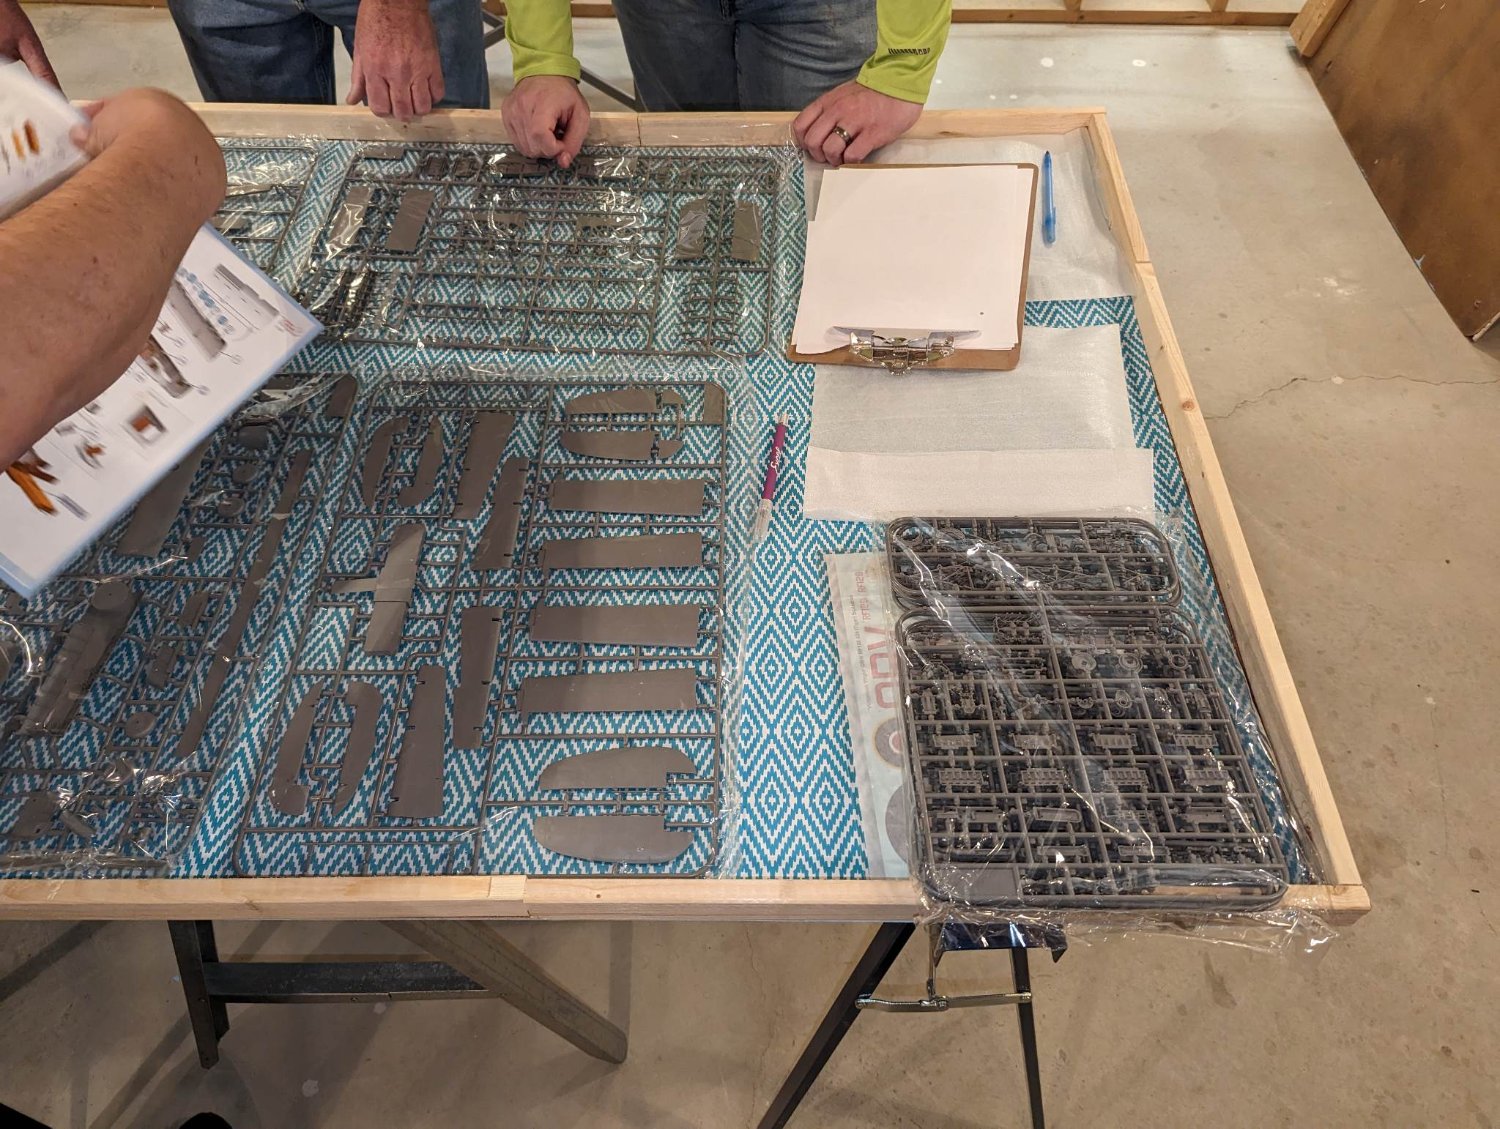
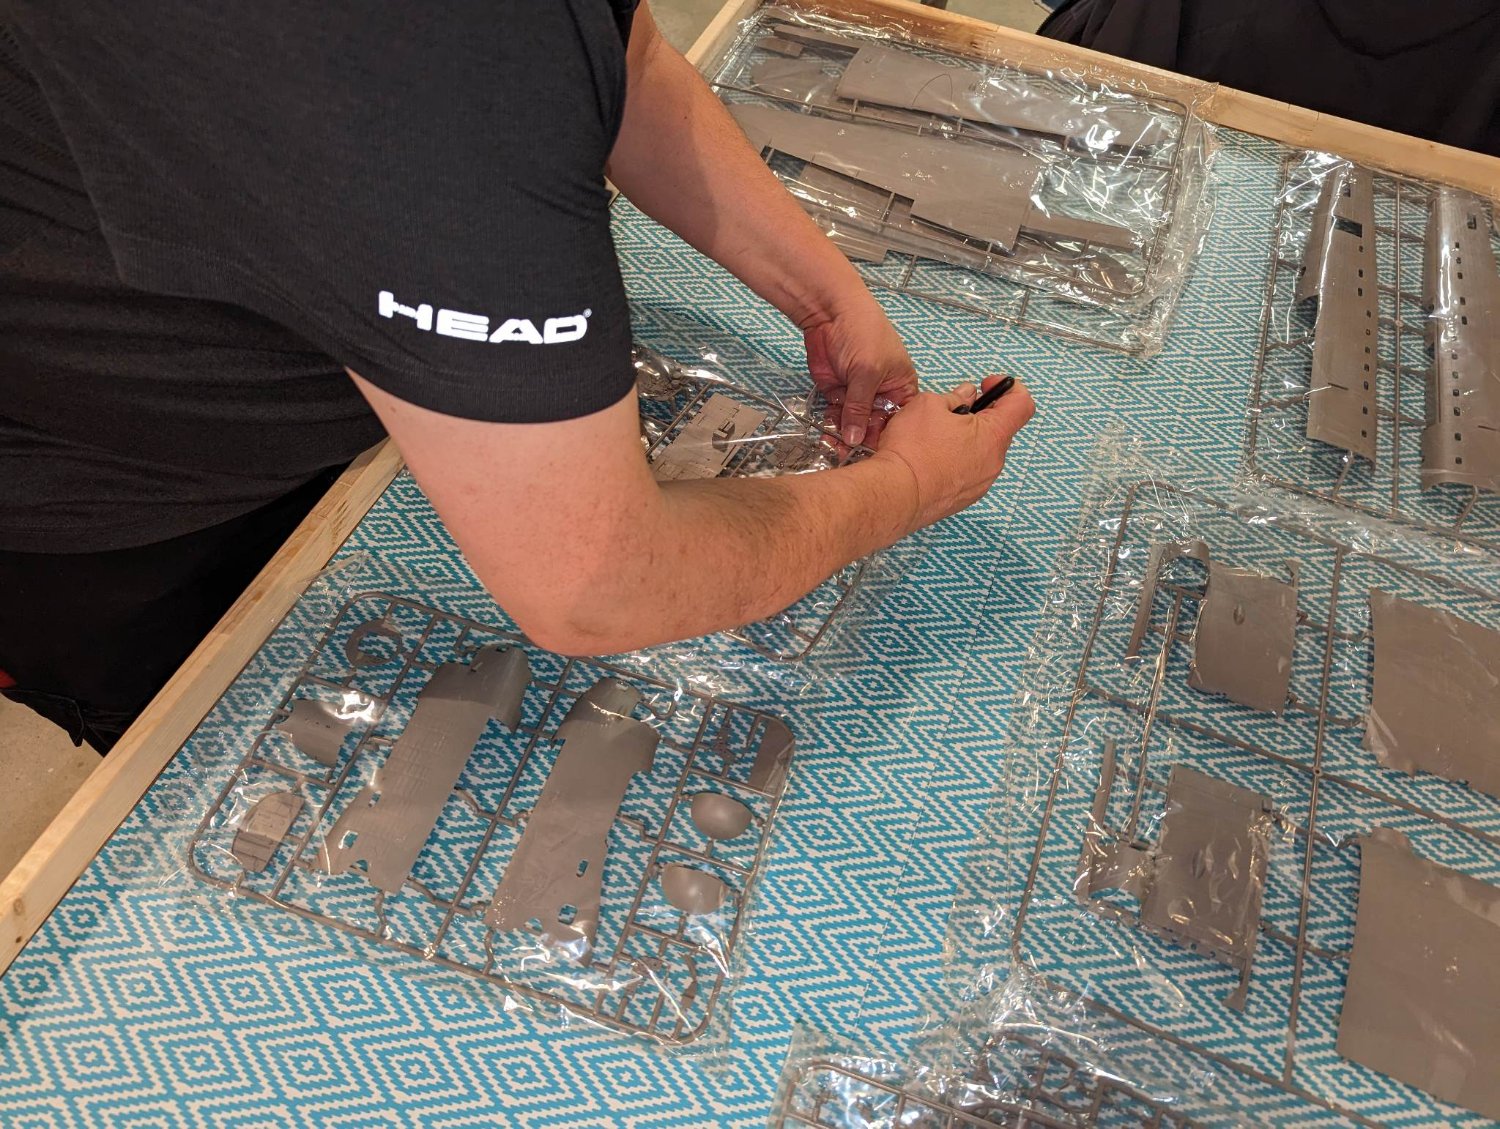
The following pics show the first two buld meetings as well as the first cutting of the parts off the sprue. Getting organized and laying everything out. We have ordered extra PE parts and decals that will make this buld the only of its kind.
The first thing I noticed when we opened the kit at the one club meeting aside from the size of the box was the detail on same of the parts like the wings and fuselage. You can see the details of all the ribs, etc. under the skin....amazing.
This will be painted to represent the one at the museum.


-
4 minutes ago, realworkingsailor said:
Looking forward to seeing your club Lanc build!As to the RAF/RCAF, all it takes is a little research, (and maybe a little luck). There’s a good selection of aftermarket options (like decals), that can easily alter a stock British (or American) airplane into a Canadian one.
But manufacturers are not totally deaf either, for instance Airfix’s new 1/48 Avro Anson comes from the factory with Canadian markings (among others).
Andy
Just started a thread on the Lanc - will post some pics tonight or in the next day or so.
Here's hoping someone (likely Kinetic) comes out with a qualify Avro Arrow kit - they just released the Tutor trainer (Snowbirds) kit.


Making wood look like steel
in Wood discussion...Where to use it? Where to get it? What types are best? How to Finish it?
Posted
Been having some PC issues, and time (not enough of it) issues......")
I am working on another great lakes freighter. I am again using basswood for the hull, and it is coming along nicely. I am getting to the filling in any gouges, gaps, etc on the hull stage. Sanding and filling with wood filler. This time around, when I paint, I want my hull to have a much smoother appearance so the grains of the wood are not visible, giving it a look of steel (smooth). My other laker build (Algoma Strongfield) turned out pretty good, but upon close inspection it still looks like painted wood - could be the clear coat I used???
Any suggestions, tips....?